


glbarlow
-
Posts
3,807 -
Joined
-
Last visited
Content Type
Profiles
Forums
Gallery
Events
Posts posted by glbarlow
-
-
Quarter Galleries & Completing Framing
Moving on to the quarter gallery and finishing up framing work.
It’s great to have the templates Chuck provides as part of the plans. A skilled person (not me) could probably build the whole model with nothing more than the plans. I make good use of them checking, comparing and using measurements transferred to the model as I build it. I make enough mistakes without guessing at stuff, though I probably get carried away with it.

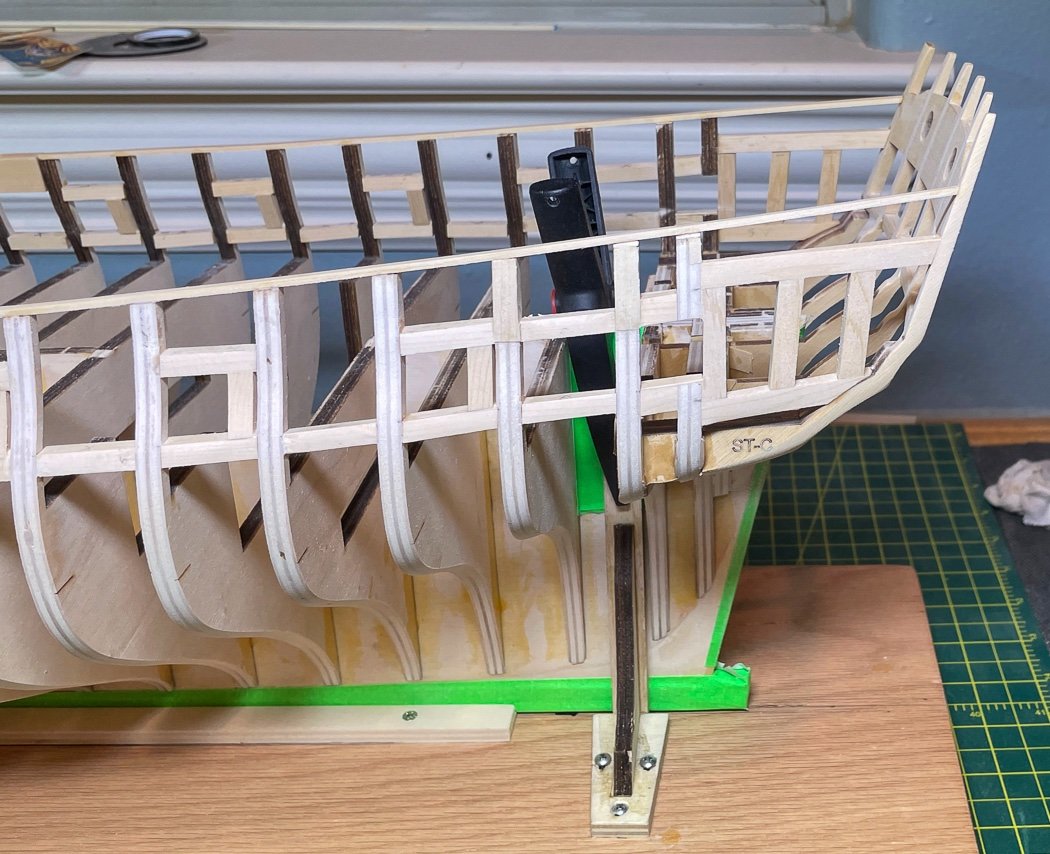
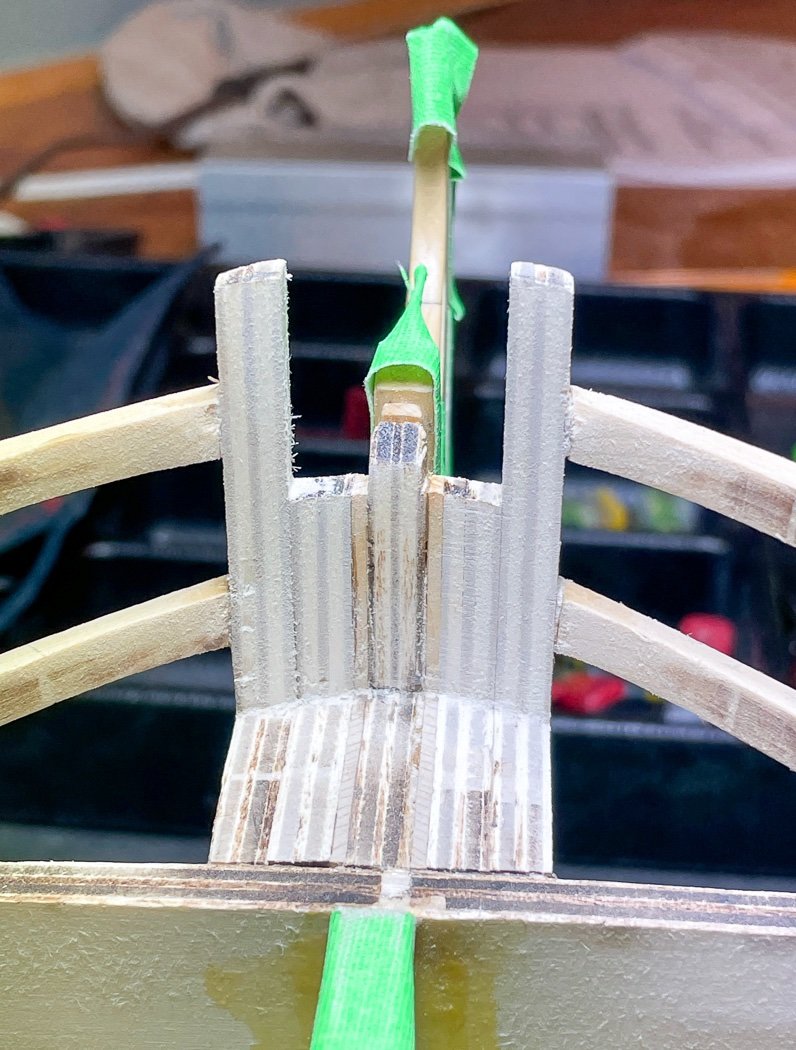
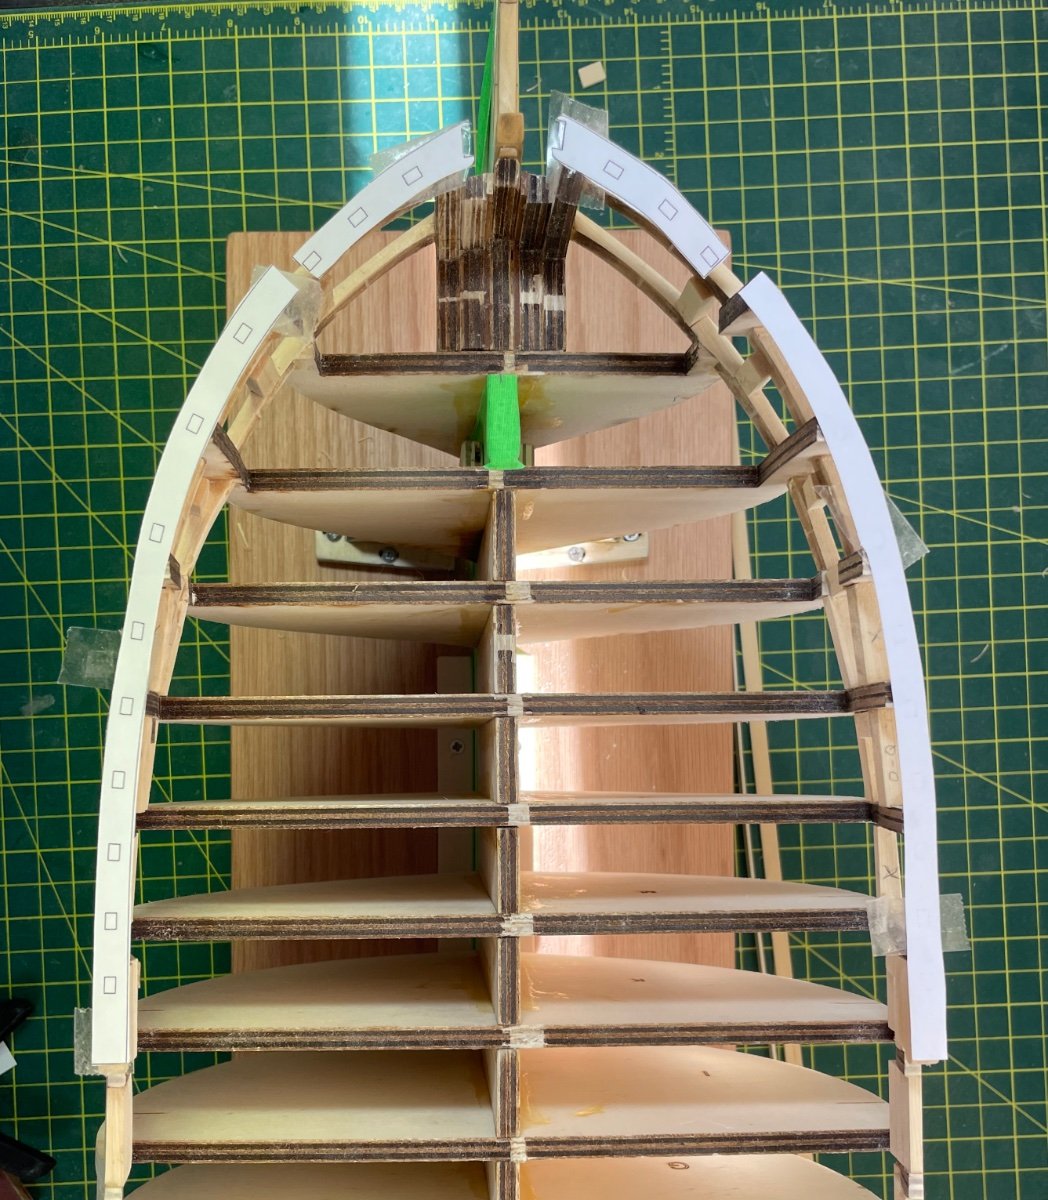
Although pretty straightforward the gallery framing still has multiple angles to content with, once more the Byrnes sander does its thing, between the tilting table and mitre gauge I get what I need. I cut close to length required and let the sander do the rest (well, after I sort out what angles are required, there may have been some wasted wood involved.

Belt and suspenders I suppose, still its nice to have a little affirmation using this cut-out of the template (measured against the bottom of the frames, my wood is thicker) to confirm it’s all the right fit. Chuck makes a point of not changing the angle of the transom in the process of this framing, my cut-out confirms I haven’t.
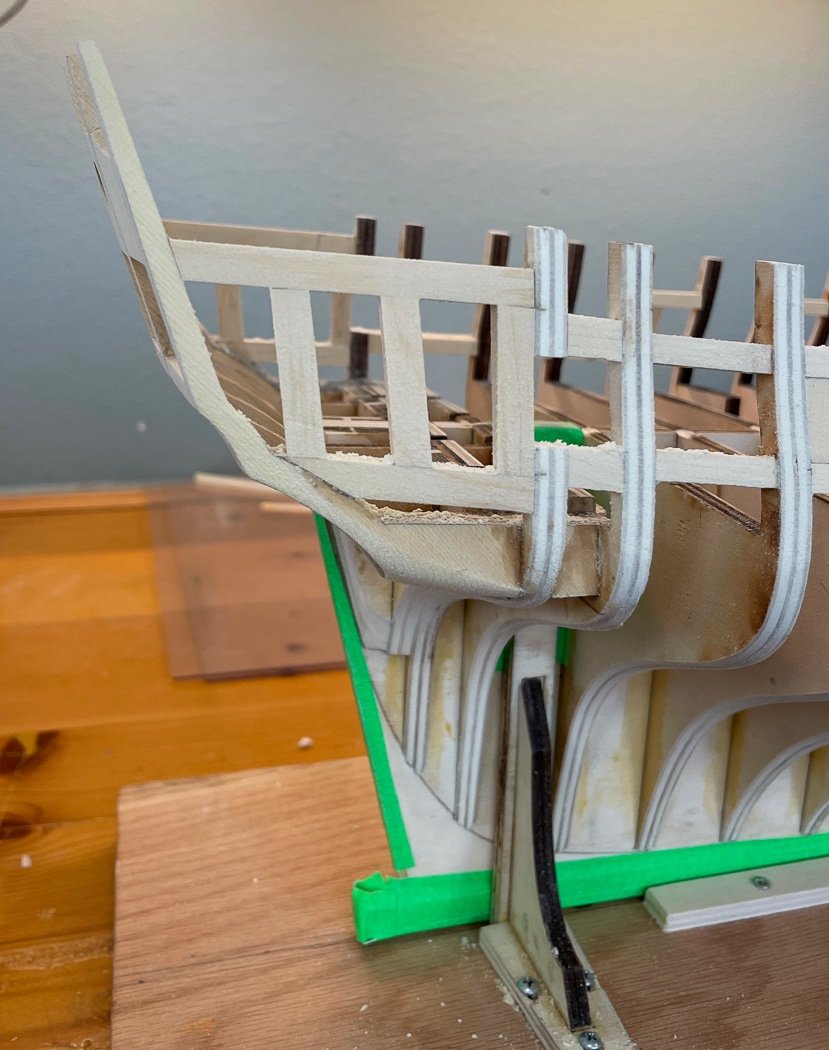
After fairing it starts to look like the stern of a great ship (I squared up that port after seeing the photo).
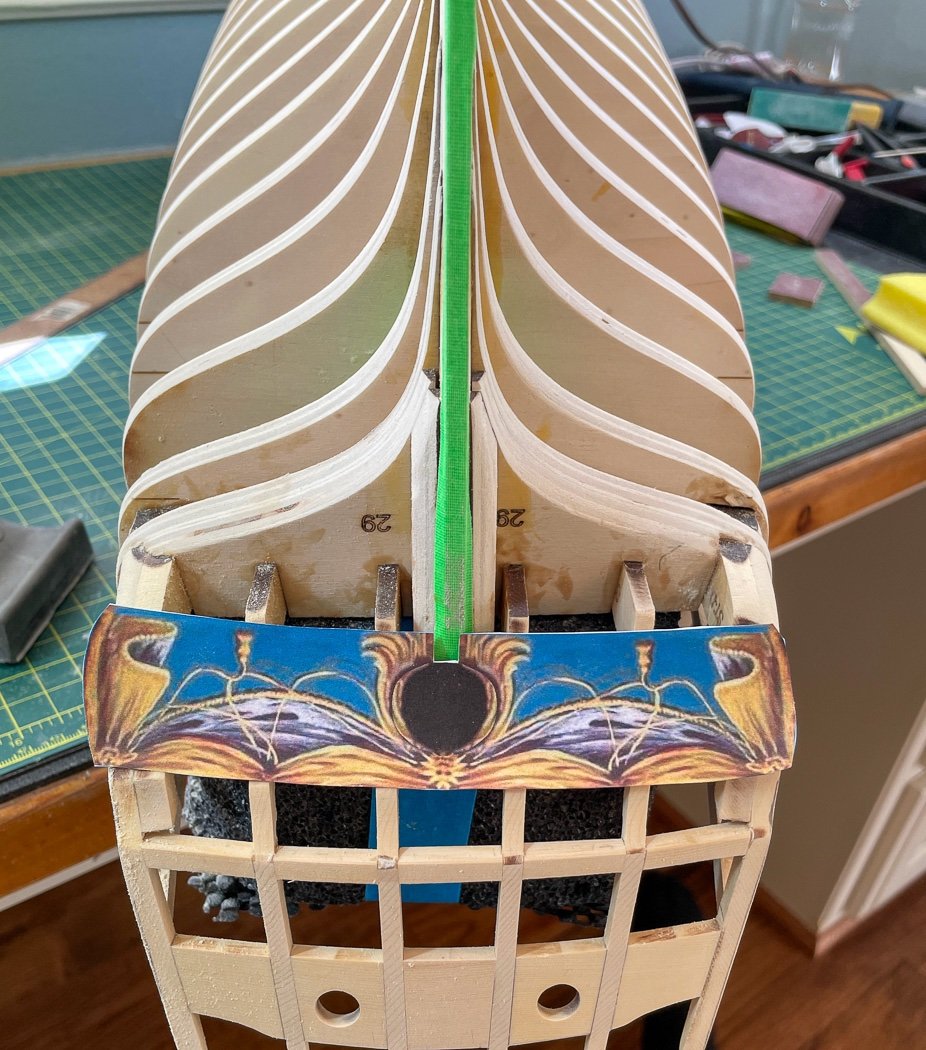
I’ll admit I got a little lost in sorting our fairing the stern, thanks Chuck for talking me off the cliff. I looked at a lot of logs and for the most part they all seemed a little different, then it dawned on me, they’re all a little different. I think I’m pretty close now and unlike I sometimes do, I managed to stop sanding before I sanded too much, maybe. You can see the pencil marks I applied from marking the dotted lines from the stern frames template. Not an exact fit to the printed counter decoration, but reasonably close. I can adjust more if needed when I install the counter in chapter 2. Time to move on.
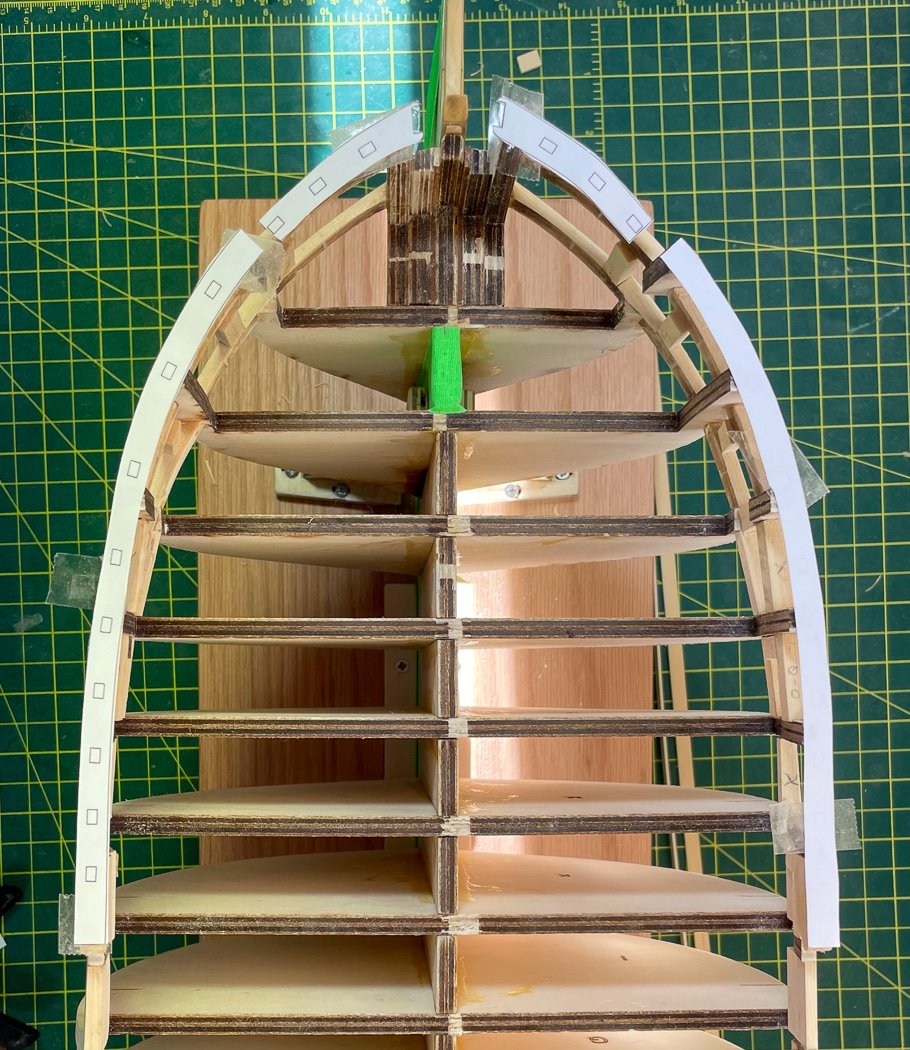
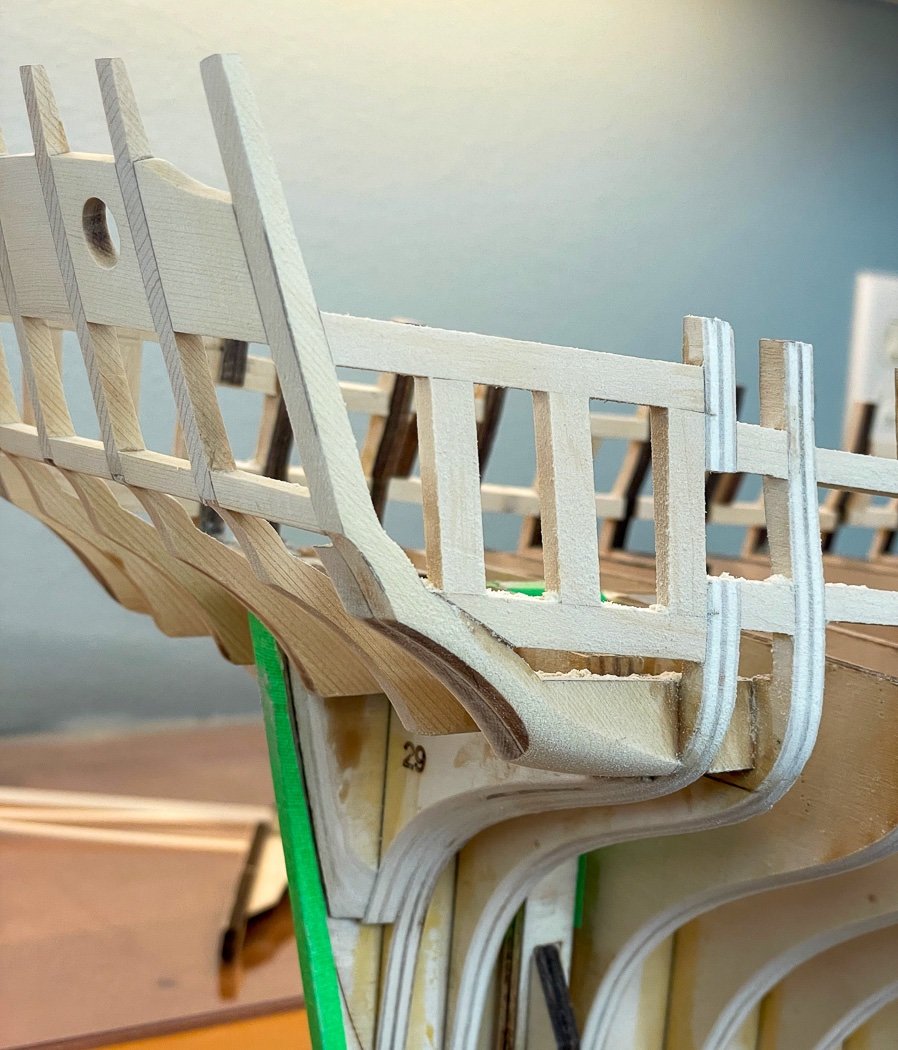
Thanks to Chuck (as always) for the good timing for me on the Chapter 10 forecastle cap rail templates. I was able to confirm my bow is the close to the right curve. I do this a lot, I buy chapter parts ahead of when I need them so I can look ahead to confirm something I’m doing now will be the right fit for something added later. More of that positive affirmation stuff .
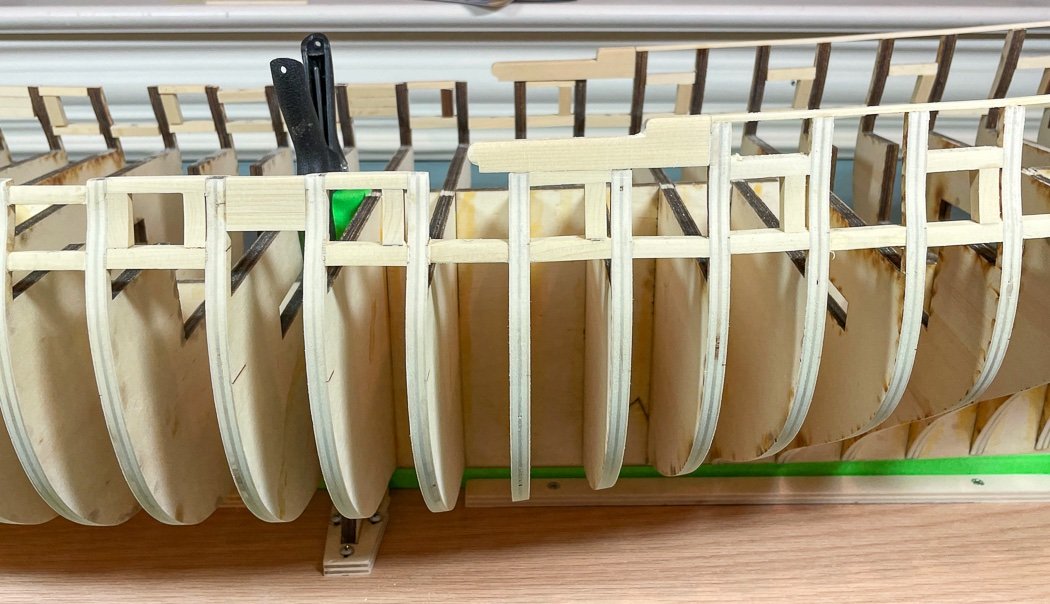
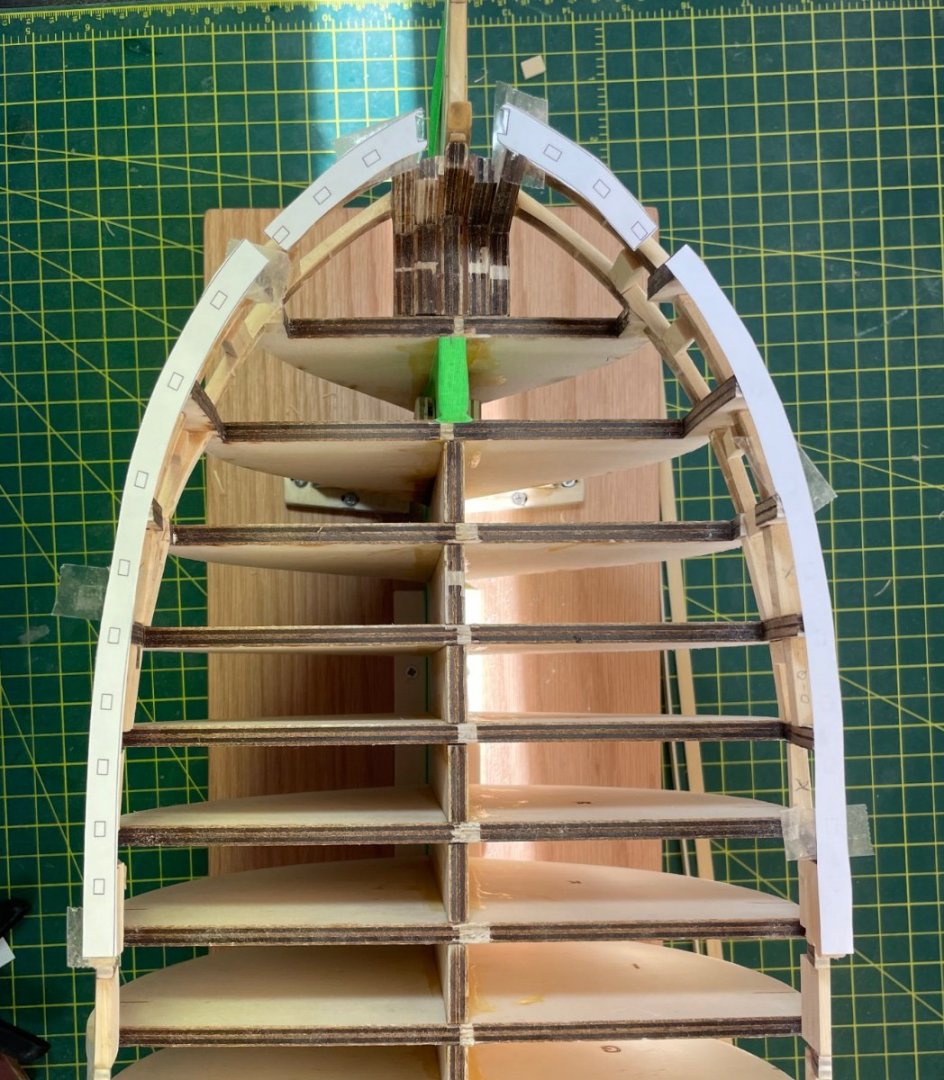
Added the hance pieces and the strip along the quarter deck and the fairing across the top of the frames required to do so. The sheer now stands out.
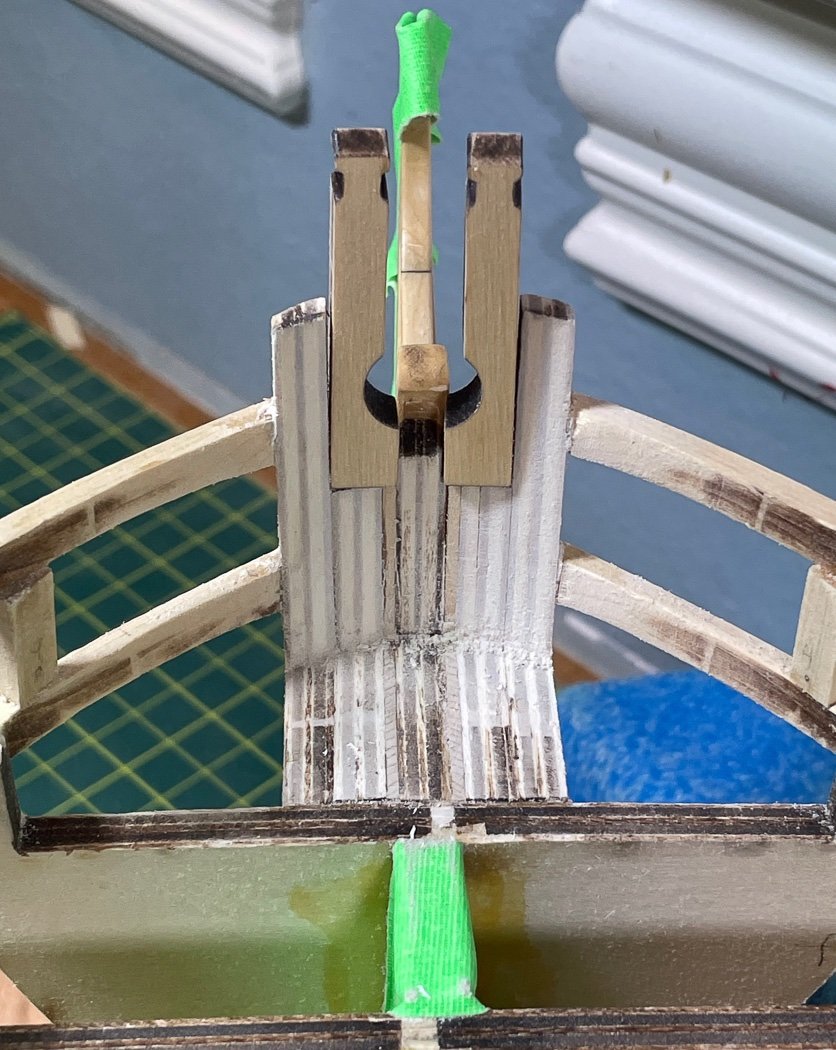
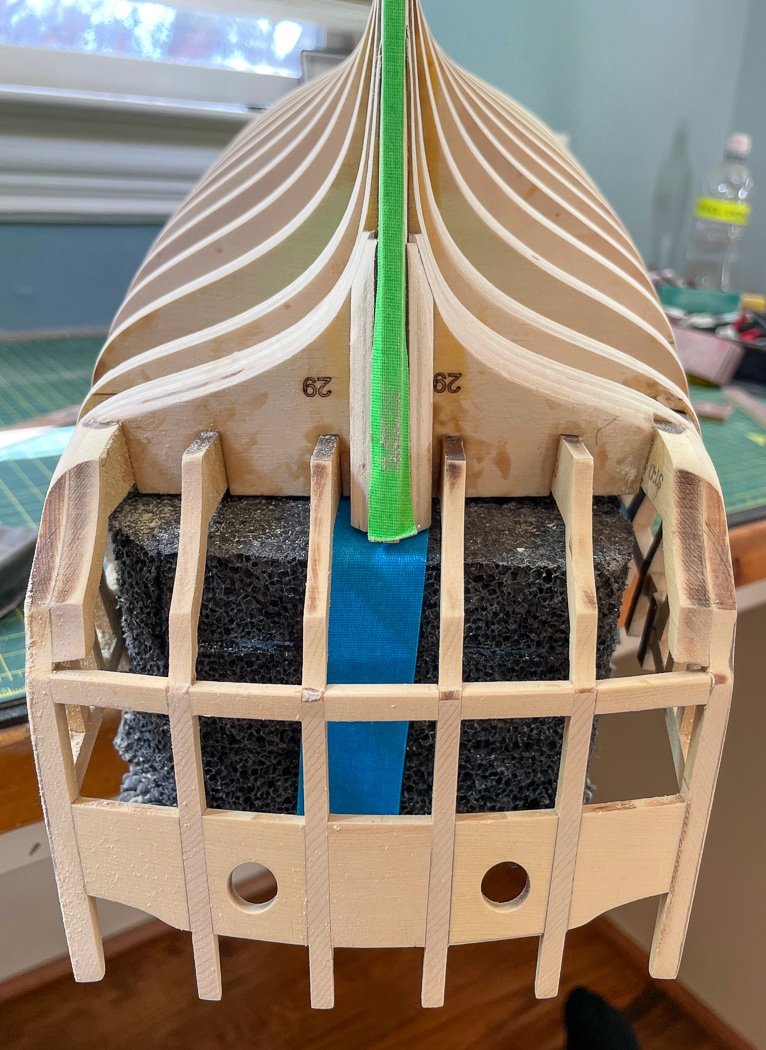
Then it was time for one of those hold your breath moments, using the Dremel to bring the bow area down to 5/32 in preparation for the bollard timbers and not blow up the bow in the process. I got close as I dared with the Dremel then finished it up with my chisels, files, and sanding tools. Now if I can carve the timbers right before I run out of blanks I can finish chapter 1.
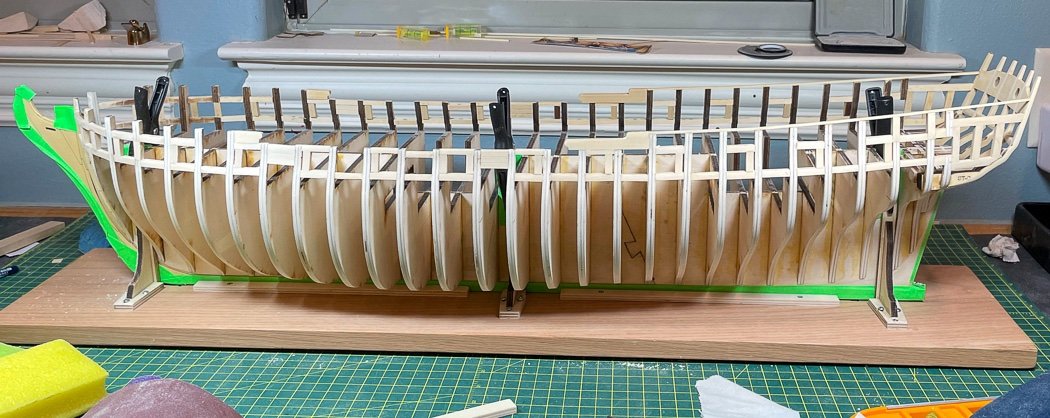
Ever closer to looking like a ship. Thanks for stopping by, your likes and comments are always appreciated.
-
No help on tree nails. Your frames are looking great. Turning the mill into a spindle sander is paying off. I remember assembling all those frames for my Fair American, it is a lot of hard work.
-
Excellent, thank you Mike. It’s now in my reference file.
-
I’d suggest reviewing BE’s Alert build log. My Cheerful might be of help. My boom crutches were scratched and a huge undertaking. BE’s Alert is likely more helpful. He too has a Cheerful log.
-
You can check my sequence on my Cheerful build. As I recall I planked the deck, then planked the bulwarks (inner hull?). I added spirketting and a waterway to cover any gaps. I painted the first level off the ship but that was largely wasted since I sanded the bulwarks and had to paint it again anyway.
The transom work is thoughtful, we’ll done. The ports most likely weren’t used for guns so their height is not relevant to that.
- Obormotov and Thukydides
-
 2
2
-
To his point☝🏻 you’d benefit from better fairing,especially the first bulkhead at the bow and you could add some balsa filler there as well
Like we’re all saying: the challenge of fixing things that went wrong is half the fun.
-
Where were you when I built four boats for Vanguard, it was the 2nd least favorite thing on that model, a very distant second to copper plating it. 😂🤣
- hollowneck, chris watton, mtaylor and 3 others
-
5
-
 1
1
-
You can get there from here. It’s wood, wood can be managed
- Thukydides, Keith Black and allanyed
-
3
-
So. Does the aft end of the template start at the bulkhead M or the aft end of the hance piece?
-
Sorry, I agree with everyone.
I took off and replaced whole sections of my singled planked Cheerful, in one case 3 times. As I look at it each day now I’m so glad I did.
There is truth to just get the first planking done, but you have to be closer to right than you are. We’ve all been here. The ones that started over are happy, the ones that didn’t …….
- Thukydides, Keith Black, AJohnson and 1 other
-
4
-
I have to agree you should remove those two planks and fit replacements. Following the heat bend down to curve up methods should result in a tighter fit. San the gunport pattern down at the curve to meet the plank.
- Thukydides and CiscoH
-
2
-
-
17 minutes ago, westwood said:
struggled with stern framing.
Thanks. I’ve graduated to struggling with stern fairing 😊😏
- FrankWouts and AlleyCat
-
2
-
-
I’m a big fan of my Ibex finger plane, it works great for masts and rabbets alike.
I’m not sure the rudder can pivot with the way you have the boot. I’m betting BE’s Pegasus log provides a good example boot.
- hollowneck and mtaylor
-
2
-
Nice work on capturing the angle. The open doors will be interesting to see. Your Cheerful is really coming together, I enjoy seeing the effect of the different wood.
- FriedClams, Saburo, JpR62 and 1 other
-
4
-
-
Really nice work, well done!
-
Welcome aboard, very nice start.
-
1 hour ago, FrankWouts said:
nice curvature in that stern framing!
Thanks Frank, your log helped bring that to my attention, so thanks for that.
- FrankWouts and AlleyCat
-
2
-
20 hours ago, scrubbyj427 said:
Well on your way.
Thank you, it’s a long road, but at least I’m now on it😊
17 hours ago, Rustyj said:meticulous work pays off
Thanks Rusty. If I can just stay out of my own way and not obsess about small millimeter discrepancies …
14 hours ago, VTHokiEE said:need some neon tape
Thank you. It’s gaffer tape, it’s thick enough to protect and leaves no residue when removed. The neon colors is a fun bonus 😊
- FrankWouts, WalrusGuy, Saburo and 2 others
-
5
-
19 hours ago, Trussben said:
need to sand the outside of the outermost frames thinner,
Thank you for the heads up, I was intentionally waiting until I had the qg framing based on seeing some had over-sanded the counter. I’m very good at over-sanding 😆
- Saburo, AlleyCat and FrankWouts
-
3
-
Total gimmick and totally unnecessary. You’re guilty of overthinking it again. You can simply sand the bevel onto the inside top edge of the plank. You don’t need to get overly detailed with this, especially if the plank is properly tapered and shaped
- DelF, Ryland Craze, Gregory and 4 others
-
7
-
I forget comments are put at the end…. I was admiring your stern, you showed some of the tools you used to make the scraper for it, it was that one I was asking about. I’ve not made anything with that much depth and tiered so well.
HMS Winchelsea 1764 by westwood - 1:48
in Member Build logs for the HMS Winchelsea
Posted
Nice work! Where did you get those pins?