Elia
-
Posts
539 -
Joined
-
Last visited
Content Type
Profiles
Forums
Gallery
Events
Everything posted by Elia
-
 Hi Nils, and thank you. I can’t believe I put this log in MSW almost 11 years ago. Once our kids became active hobbies like this collected some dust. I’ve begun on it again, backtracking a little bit, fixing a few things I wasn’t happy with. Maybe more to come, here in the month(s) ahead. Elia
 -
Seeking input on case refinishing
Elia replied to Elia's topic in Painting, finishing and weathering products and techniques
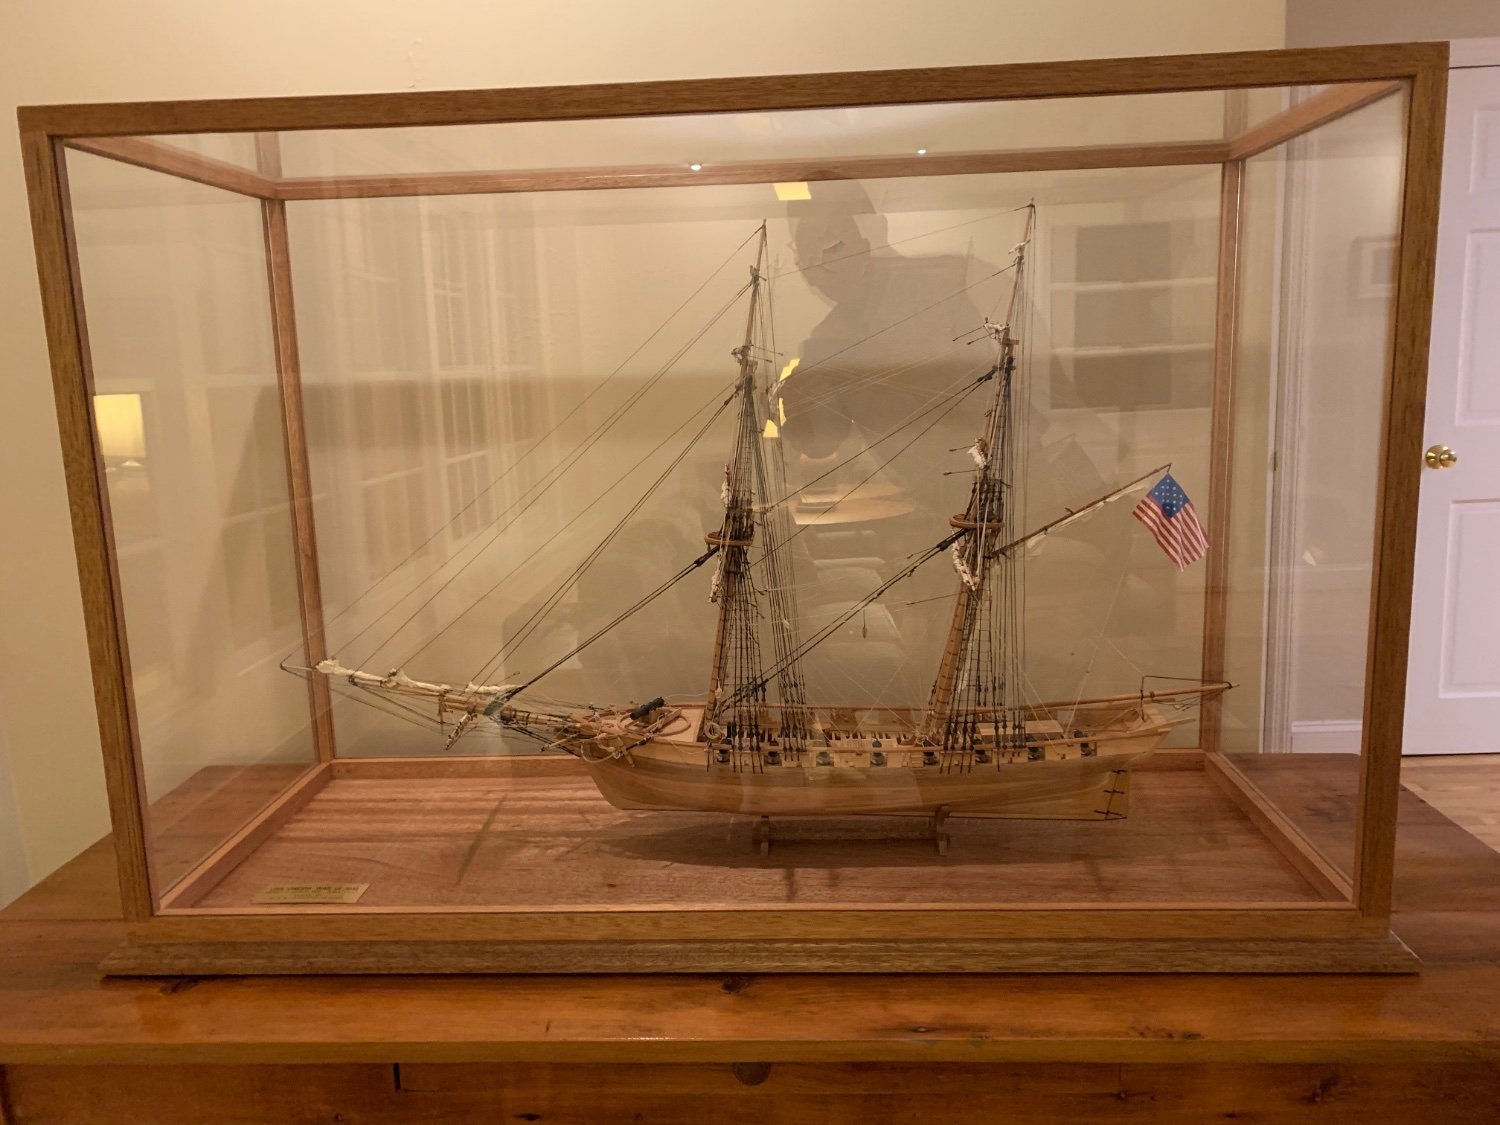
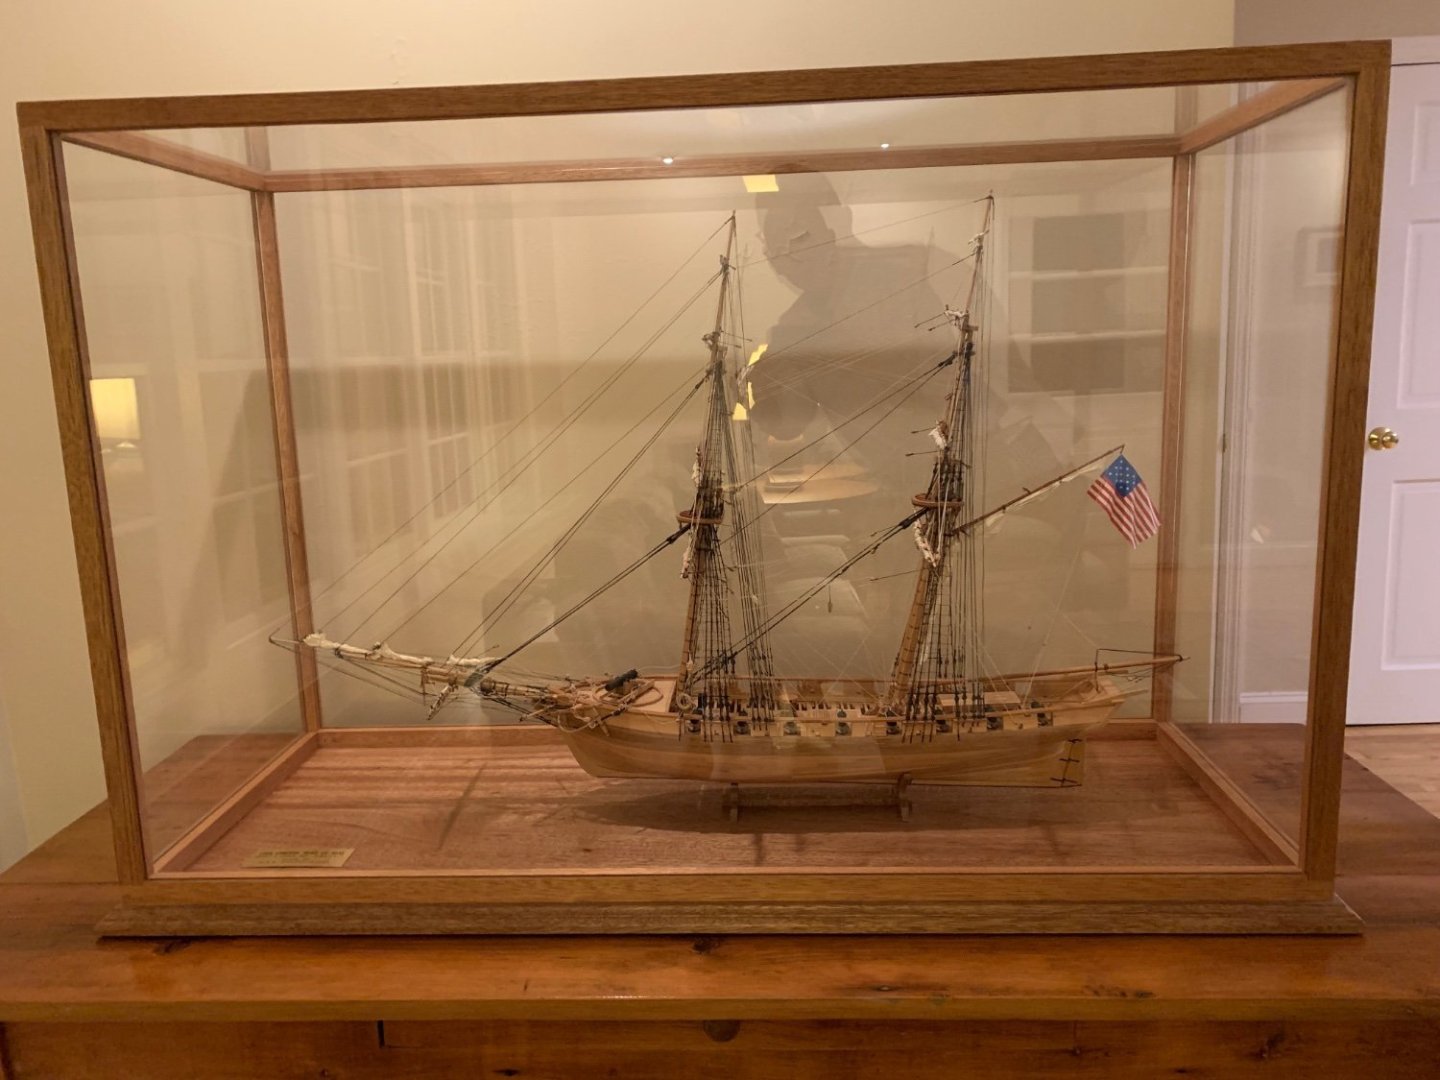
Roger, Thanks for the additional information. John, The mirror floor is different and sharp. That does impart an airy feel, and I’ll bet it provides reflected light onto the lower hull and planking, usual in the shadows. The planked floor is clever and different too. In my ‘case’ I’m not sure that would help solve my issue of the planked hull being overwhelmed by the large wooden case. Thanks for those! Elia -
Seeking input on case refinishing
Elia replied to Elia's topic in Painting, finishing and weathering products and techniques
Roger, The case of mine shown is a type of mahogany. It’s fairly grainy. I believe it is finished with just a coat or two matt or satin urethane (it’s been 14 years since I made it and I don’t recall). I really like your case’s stain color. I am fascinated by the technique. The chemicals evaporate, becoming a mixed gas in the closed chamber, and somehow muddle etch the copper sheet? Were the chemical evenly spread on the cloth or blotted here and there? The muddled effect, maybe a bad way to describe it, looks great. Do you recall how long it took? Thanks, Elia -
Seeking input on case refinishing
Elia replied to Elia's topic in Painting, finishing and weathering products and techniques
Roger, Oh that is quite nice! It works well with the frame wood tone (stain?). Elia -
Seeking input on case refinishing
Elia replied to Elia's topic in Painting, finishing and weathering products and techniques
John, That is very attractive and sets the light colored model off well. My case is pretty large, and I have a concern of a very dark case frame being too much of an eyesore for the size of the room it’s in. I see this endeavor as trying to make the case not complete with the model (in tones and grain), though also not be too visually grabbing or jarring within the room. A balancing act as it were. Thanks, Elia -
Seeking input on case refinishing
Elia replied to Elia's topic in Painting, finishing and weathering products and techniques
druxey, I’m afraid my rendition of faux marble finishing might be distracting from the model, though not in a good way. It would most certainly be cheaper than the real stuff! Thank you, Elia -
Seeking input on case refinishing
Elia replied to Elia's topic in Painting, finishing and weathering products and techniques
Jaager, Now that could be quite nice. Have you seen something like that done in a case before? I imagine it certainly would add some heft to the base of the case. Thank you, Elia -
Seeking input on case refinishing
Elia replied to Elia's topic in Painting, finishing and weathering products and techniques
Paul, It is distracting, isn’t it? I like the idea of adding a dark ‘floor’ to the case. Thst helps visually isolate the model from the case. Thank you, Elia -
Seeking input on case refinishing
Elia replied to Elia's topic in Painting, finishing and weathering products and techniques
Gary, Thanks for the quick visuals! That helps a lot! The green felt, or at least that example, tells me that that option may be too visually distracting to me. I like the dark ‘floor’ example you’ve shown. I also like the gravel example, recognizing that the stuff I’ve seen from model railroading is pretty small compared to the quick overlay you’ve provided. These are quite helpful. Thank you! Elia -
Seeking input on case refinishing
Elia replied to Elia's topic in Painting, finishing and weathering products and techniques
Jim, Those are some nice cases! The second one is ornate. You second post linking to the inlays and strips helped me understand how that might be done. Very nice. My thoughts were initially along the lines of applying an additional finish to the case, either to lighten it some, or to darken it. Something to differentiate the case color from the ship wood tones. I can deconstruct it as it’s held together by screws, with only the top panel being fully glued together (if I recall correctly). I like the idea of a darker ‘floor’ inside the case, either as a solid color, or maybe a secondary insert. Thank you for the ideas, Elia -
Shipwrights, A brig model I gave as a gift many years ago has returned to me. From the moment I put the brig into the case I wasn’t happy with the pairing. I find the wood and details of the model compete, and are somewhat overshadowed, by the vastness of the case’s wood. I’m looking for your thoughts on changes to the finish of the case. I’m also considering putting a different finish inside the case on the surface beneath the ship. Maybe railroad train simulated gravel, or maybe something like green felt. Thanks in advance, Elia
-
Jim, It is good to see your modeling again. I remember your Latham build well, including this seine boat and the dory . Wonderful work. Elia
- 4 replies
-
- 2
-

-
- purse seine net
- Fishing Schooner
- (and 1 more)
-
Boy - I think I missed the boat on this. Recently I have been looking into Speedwell and the two volumes with plans. Having three of the Swan Class books I sense that the size and complexity of that class might be a bit of a slight stretch as a first POF attempt. Speedwell appears yo me a little better sized for my skills. But now I don't think I'll be able to purchase the two volumes. Can any of you confirm if Sea Watch Books are now closed for business? If this is the case is there anywhere else I can purchase these volumes (along with a few others I hadn't purchased)? Elia
-
Patrick, Amazing work! The layering and nesting of tiny, fine details requires lots of time to enjoy and comprehend. I spent quite some time catching up on this thread and little jewel of a model over the weekend. Beautiful work. Cheers, Elia
-
Outstanding Frank. That winder mechanism, the support frame, and the blocks are terrific. Cheers, Elia
-
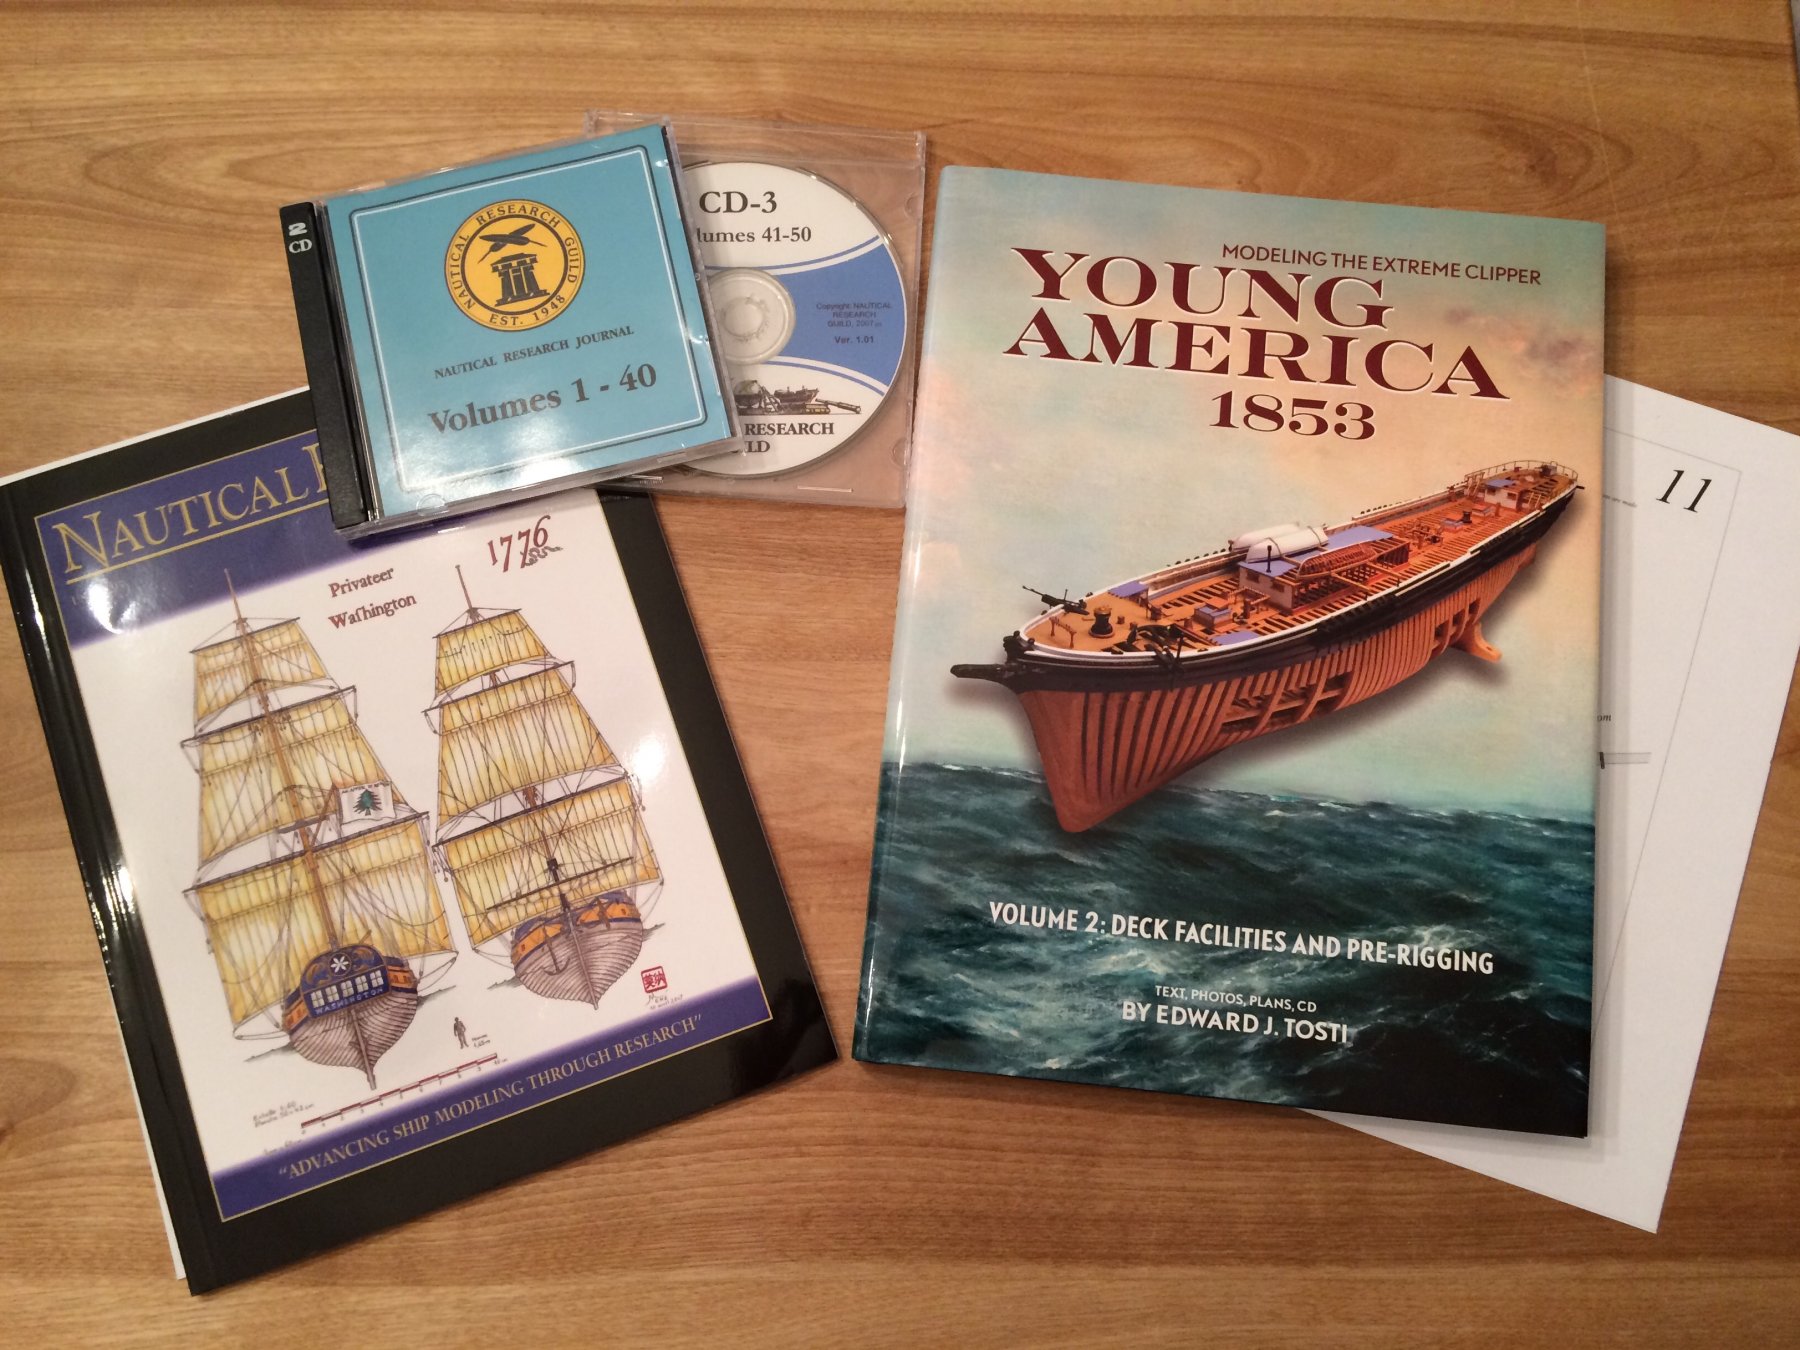
Hi Lawrence, Thanks for dropping in. Now that spring is here and my basement isn't uncomfortably cold I will get back to finishing those blocks. I purchased essentially all but the very smallest blocks for my schooner from Siren Ship as the build up blocks. The very smallest blocks required were smaller than the smallest size Chuck offers. For those Chuck tried to create some custom small blocks but couldn't get them work out, so I purchased some if his standard blocks for those smallest sizes. The blocks look surprisingly realistic for a built up internally iron stropped type. The only 'limiting' aspect I had to accept was that the blocks are available in fewer block sizes than the range specified for the actual ship. Not too big of an issue for me. Those books of Ed T's on his clipper model Young America are as impressive as his build. I've got both books and await the next one on rigging. Just last night I dropped them off with my dad - for his perusal and enjoyment - while he recovers from a medical set back. He really loves clipper ships so I'll bet he spends hours wading into the books and plans. Honestly, I can't consider something like Young America for years (more than a decade) ... my family consumes far too much time and its only once the kids are through college that I would have the time to devote to such a massive undertaking. All I want is to keep making progress, as slow as it is, on my Arethusa. Cheers, Elia
-
Russ, I've had a free moment to pop in and check into your lugger's progress - and I've thoroughly enjoyed seeing your hull and deck furniture develop. The hull painting really emphasizes to me the sweet hull lines. The deck planking looks sharp, as do the hatch and deck house. Cheers, Elia
- 420 replies
-
- 4
-
-
- shrimpboat
- lugger
- (and 2 more)
-
Rusty, Cheerful is looking very sharp! The deck furniture and rudder look great as does your emerging masts. Cheers, Elia
-
Frank That's a great looking little yawl. The keel jig looks like it worked well. With the seemingly closely spaced frames were there any issues keeping them vertical during gluing? The little yawl looks great with its grey interior and matching white and red exterior. Cheers, Elia
-
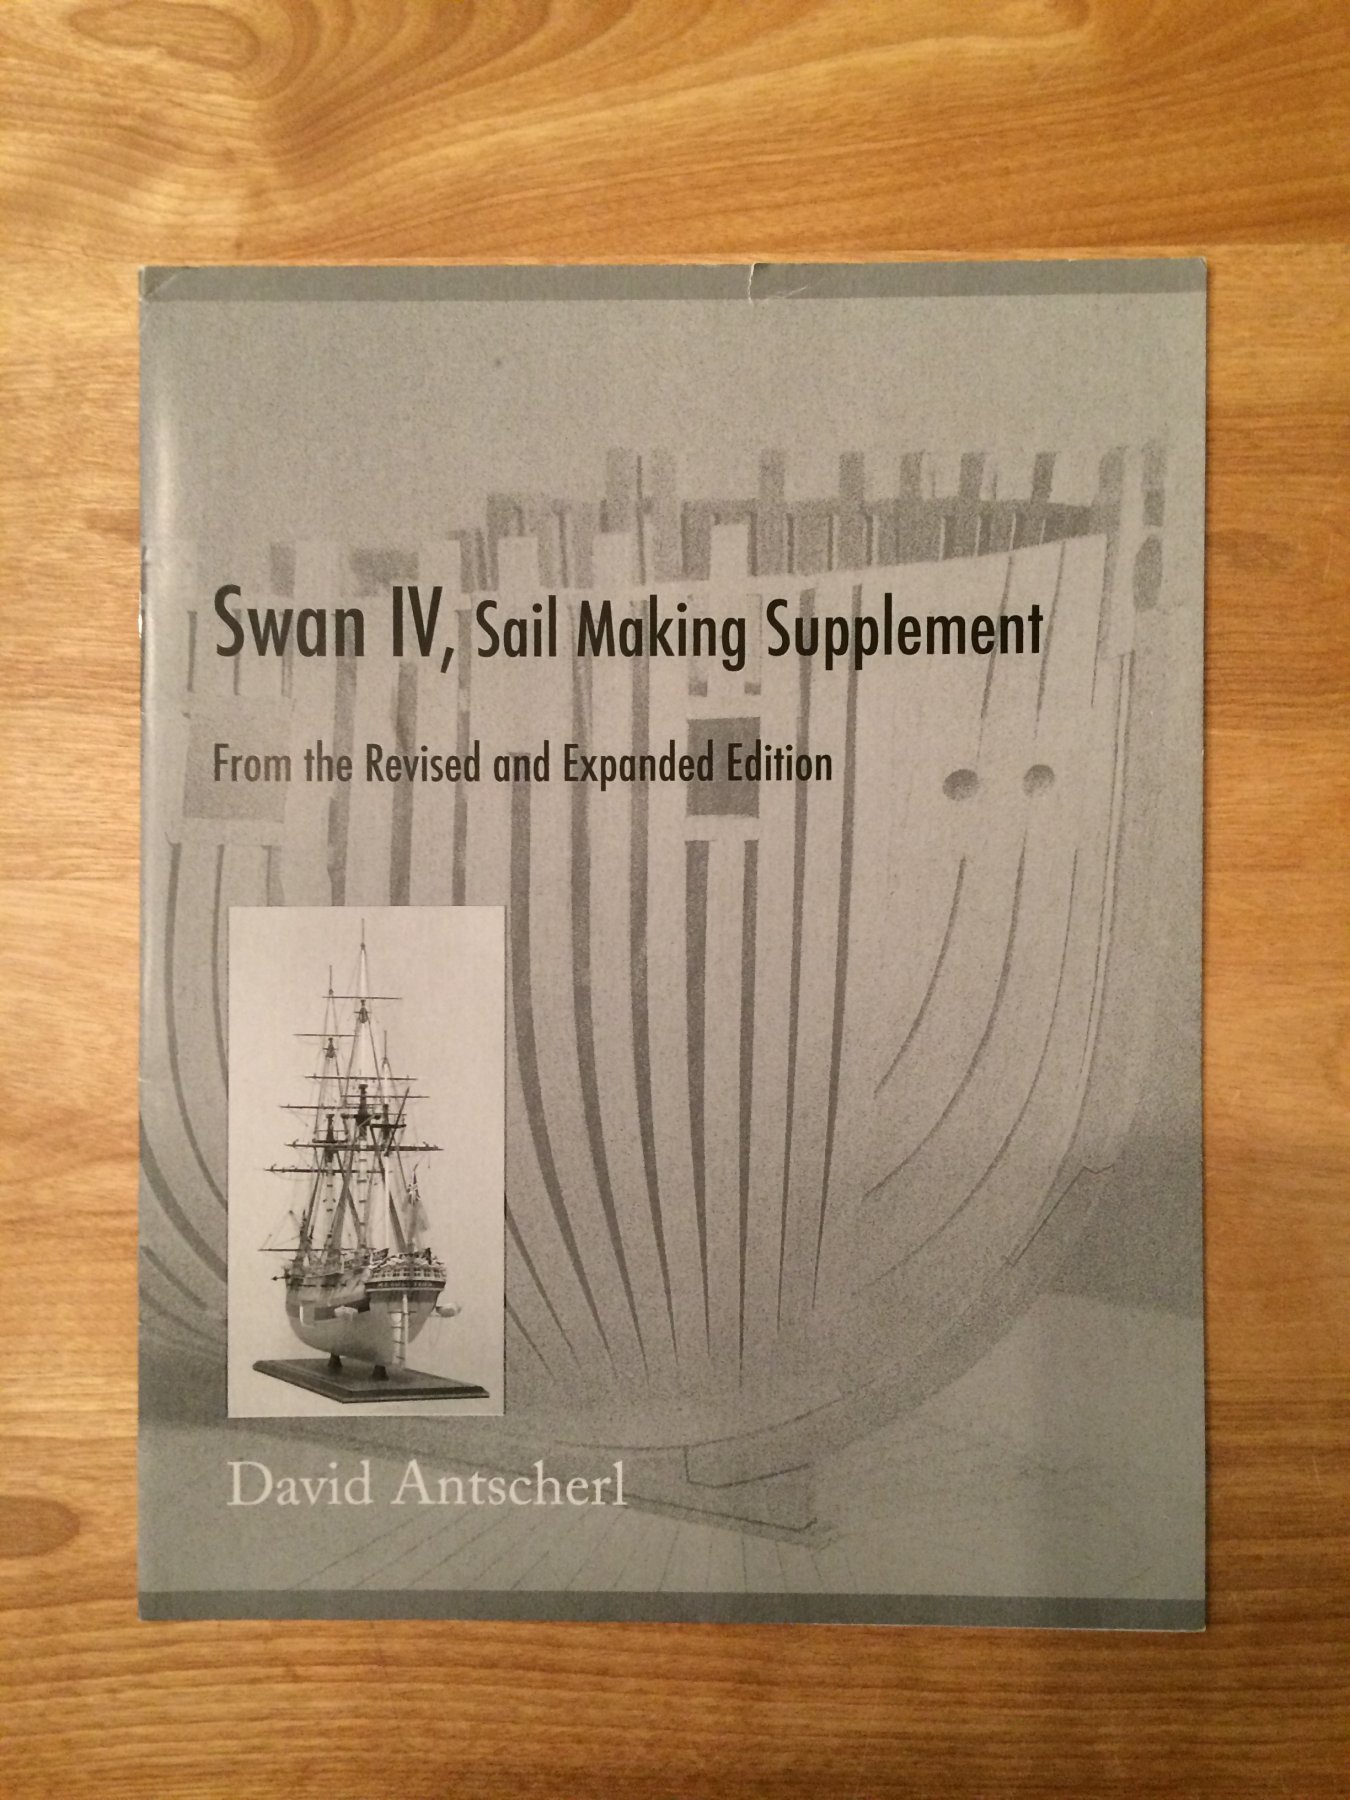
This paper back supplement to volume IV of the The Fully Framed Model Swan series is a little gem. For those who may not see themselves building the Swan ship, but are looking for a well thought out approach to scale sails which can be displayed deployed or furled, you owe it to yourself to pick up a copy of this booklet. David presents his approach, including a multi-part jig, in clear and logical steps. The example sail he presents is square rigged sail for Swan, though one can easily employ his approach for triangular or other configurations. I plan on using this approach on my schooner's sails - none of which are square. David uses what I will refer to as mixed media as a means of achieving his scale sails, with the basic sail material being silk span. His results are impressive, and his process appears to me that one, with a little practice, can achieve a surprisingly realistic set of scale sails. My experience with silk span sails in the past was mixed - owing to the materials and process I had read of and employed on my Oneida brig. While my sails would furl, I couldn't keep bolt ropes attached, I had difficulty with cringes, etc. I had used a PVA glue/water/acrylic paint applied to the sail, and PVA glue for all of the attached strips and ropes. [writer's note - do not follow my aforementioned materials - they will lead you to frustrating times]. David's set of materials and approach allows for clear panel lines, tablings, grommets, cringles, and reefing points. He shows how sails present light as both front and back lit, and his approach yields a very realistic semi-transparent panels and overlaps. At the end of the supplement he provides guidance on bending the sail to a yard, reeving details, and then how to furl the sails. Highly recommended! Elia Gianopulos

-
Ed Outstanding and delicate copper work. I am very impressed by all of your copper work and these are no exception. They are such thin, narrow details. I appreciate your showing the 'blank' first step strip adjacent completed spreader bar component as I had wondered how you made the integrated cleats. I have no doubt I would bend and damage those spreaders in less than a day. Cheers, Elia
- 3,596 replies
-
- 5
-
-
- young america
- clipper
- (and 1 more)
-
Grant, Wow! What a stunning runabout. The time, approaches, and attention to detail you've put in have really paid off - this is such a beautiful model! Cheers, Elia
- 339 replies
-
- 3
-
-
- dumas
- Chris-Craft
- (and 3 more)
-
Frank, So very nice work on the jig for the ladder and its execution. Kathryn is looking sharper than ever. Thanks again for the meet-up with GuntherMT and shop talk a couple of weeks back - it was real treat to be able to meet the two of you and talk wooden ship modeling. I'm just about settled back at home now and getting some modeling stuff re-started. Cheers, Elia