Freddy Andrew
-
Posts
33 -
Joined
-
Last visited
Recent Profile Visitors
439 profile views


-
 catopower reacted to a post in a topic:
Norske Love by Freddy Andrew - Billing Boats - 1:75 - The Eternal Build
catopower reacted to a post in a topic:
Norske Love by Freddy Andrew - Billing Boats - 1:75 - The Eternal Build
-
catopower reacted to a post in a topic:
Norske Love by Freddy Andrew - Billing Boats - 1:75 - The Eternal Build
-
GrandpaPhil reacted to a post in a topic:
Norske Love by Freddy Andrew - Billing Boats - 1:75 - The Eternal Build
-
GrandpaPhil reacted to a post in a topic:
Norske Love by Freddy Andrew - Billing Boats - 1:75 - The Eternal Build
-
GrandpaPhil reacted to a post in a topic:
Norske Love by Freddy Andrew - Billing Boats - 1:75 - The Eternal Build
-
GrandpaPhil reacted to a post in a topic:
Norske Love by Freddy Andrew - Billing Boats - 1:75 - The Eternal Build
-
etubino reacted to a post in a topic:
Norske Love by Freddy Andrew - Billing Boats - 1:75 - The Eternal Build
-
 Hi Peter, Great work and a fantastic little boat. Have enjoyed your log. Freddy Andrew.
 -
Hi Peter, Looks like to progressing on a great build. It looks like its going to be a very nice boat and I look forward to following the next stages. Best regards, Freddy Andrew.
-
Hi Peter, As I am the undisputed slowest model builder on the planet, it would be good if you got started on the Norsle Love so that we can learn from each other. I see that you are currently building the Zeeschouw (a Billings Boat of which I have no knowledge, so I will visit your site to learn about it. Best regards, Freddy Andrew.
-
Hello Håkan, Thanks for your continuing encouragement. Much appreciated.
-
Brigg Fair reacted to a post in a topic:
Norske Love by Freddy Andrew - Billing Boats - 1:75 - The Eternal Build
-
Wintergreen reacted to a post in a topic:
Norske Love by Freddy Andrew - Billing Boats - 1:75 - The Eternal Build
-
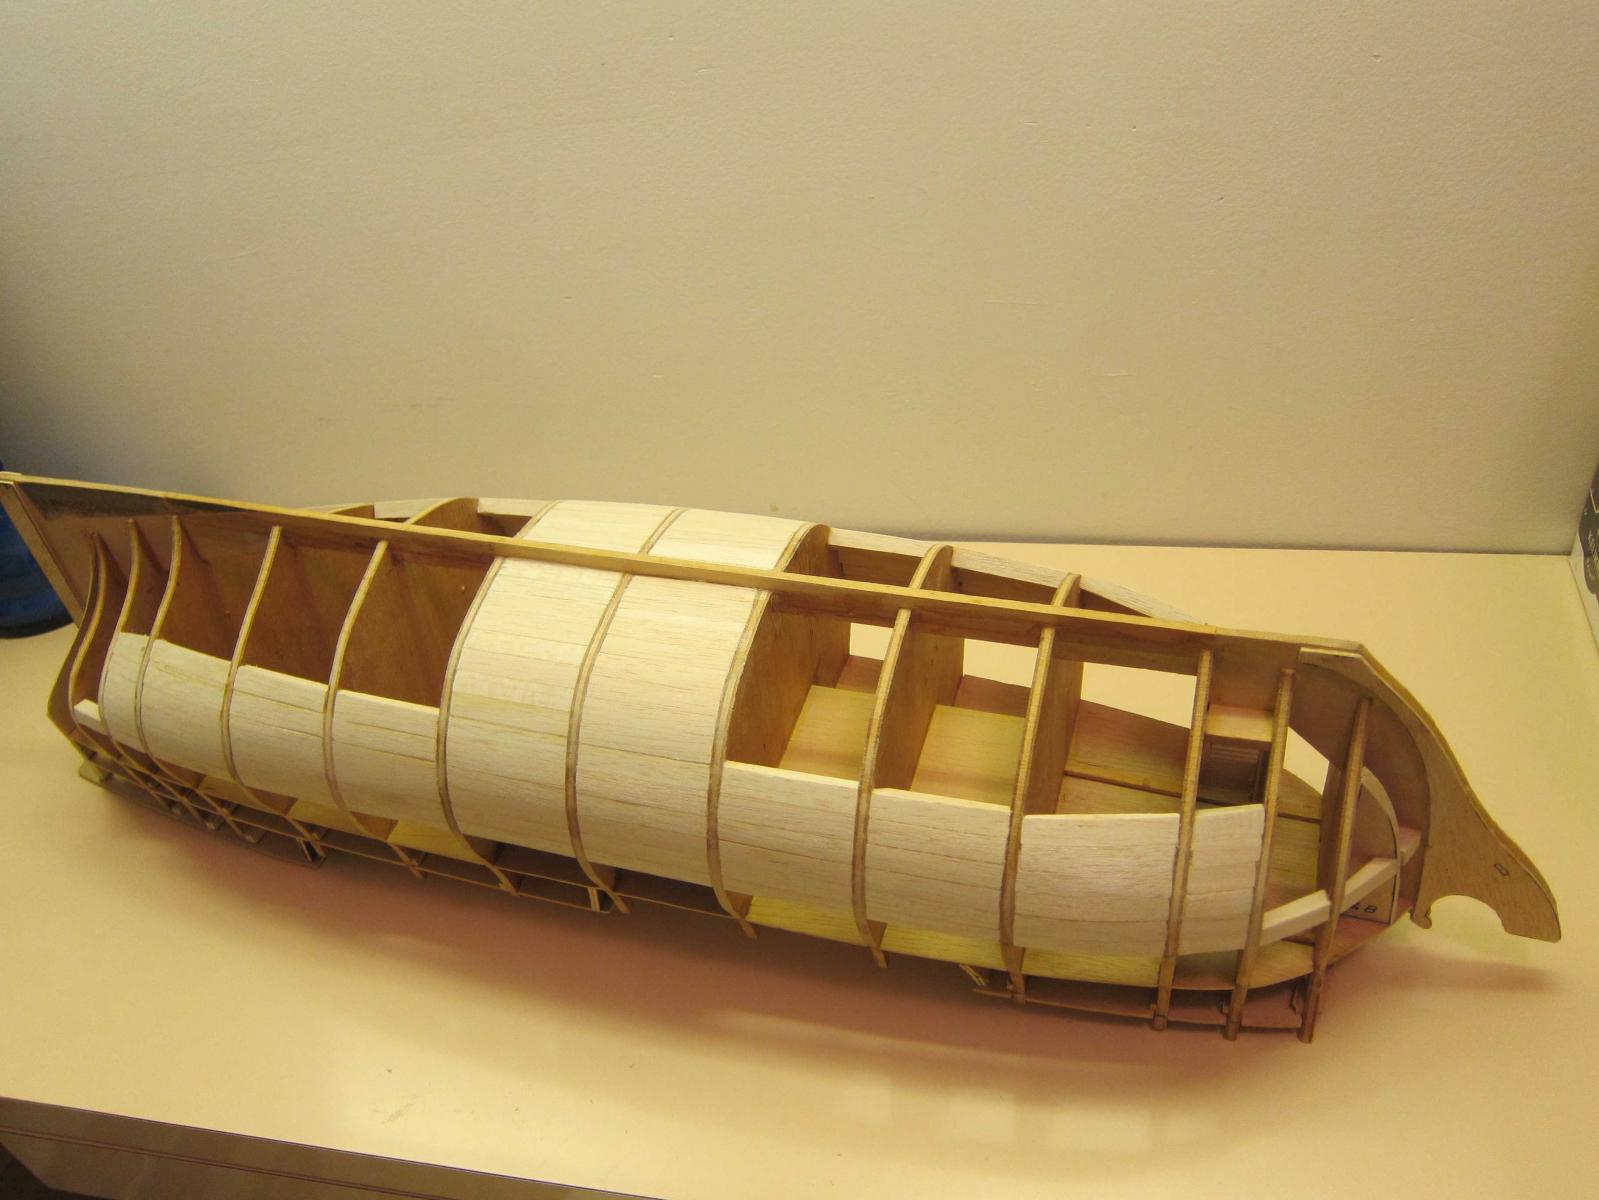
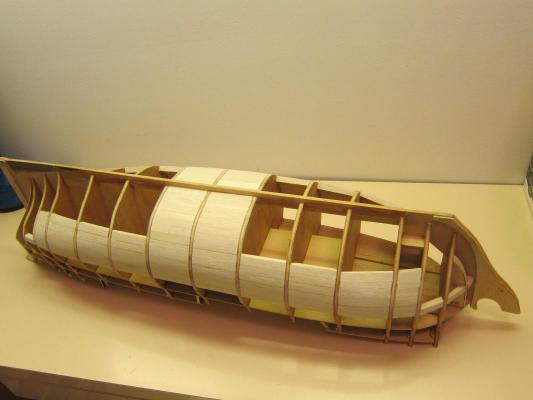
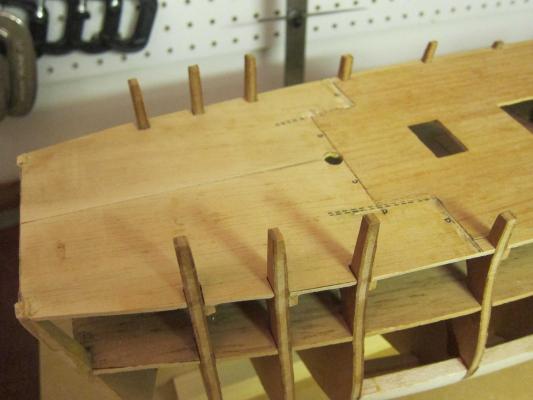
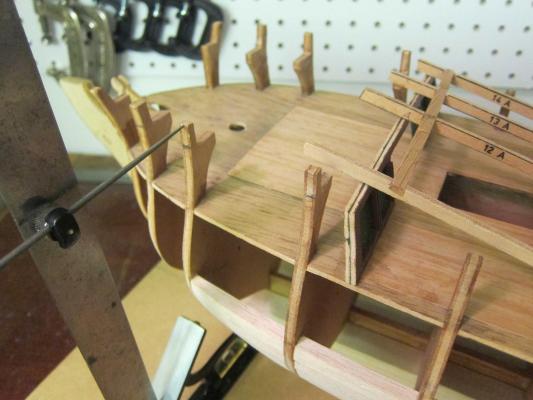
Progress has been slow, other pressing commitments and two weeks spent in Venezuela. Over some years with the model in storage, the stern part of the keel was warped, not badly but an irritation nevertheless. Used the primitive caveman's approach - hot water, steam and controlled violence. Continued on with the infill between the bulwarks, until material ran out. This work is boring, but after double planking The Bounty, I prefer this method as it provides a solid surface allowing the planking to be marked out. While waiting to get more infill material from the craft shop, I started on the windows/gallery structure at the stern. The minimal information/instructions provided by Billings Boats seemed to indicate that the lower support structure should be assembled to the hull before planking, with the remaining components attached after planking is completed. The curvature of the supports was not shown and so a test fit of the lower support and window was used to determine this. It appears that with the most recent issues of this kit that Billings has eliminated the curvature of the supports and windows. Following a dry test of the remaining components, it became clear that the window/gallery structure would overshoot the stern upper deck by about 5 mm. Probably not good. Closer examination of the section drawings reveals that the window and support material supplied is twice the thickness shown on the drawings. Also true of the deck material, but less important. So now I will carefully remove the assembled lower support and reduce all the gallery support components to the required thickness. Having looked at photos of several completed Norske Love models, I have found one (Tall Ship Models) that has a higher and more raked upper stern deck, that might have resulted from using thicker material. All other photos indicate that the thickness shown on the Billings drawings was used. Now have sufficient material to finish infilling the hull up to the stage where the lower deck gun placements must be completed.


-
Hi Bill, I would like to add my best wishes along with those just expressed by Anja. Regards, Andrew
-
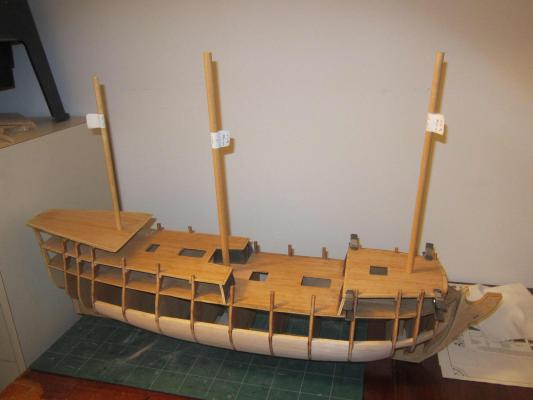
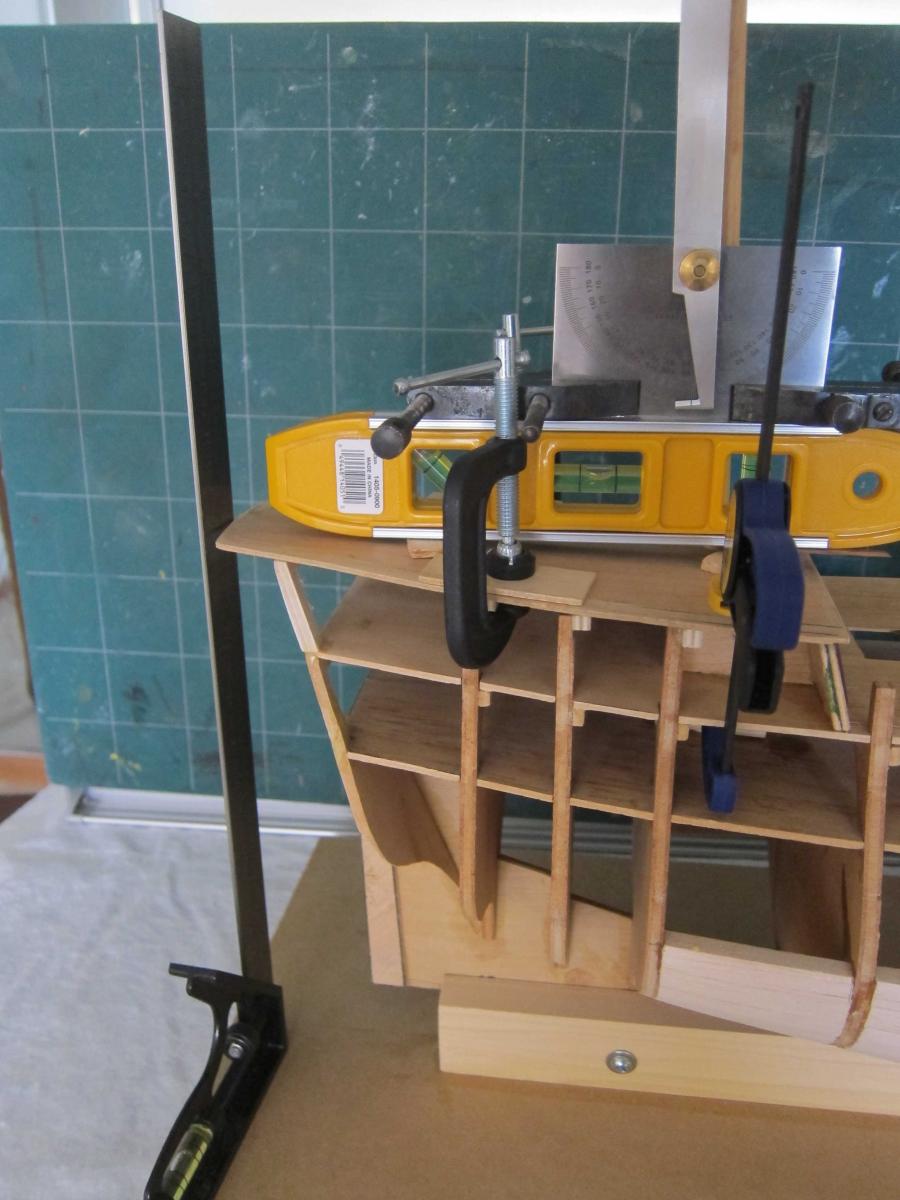
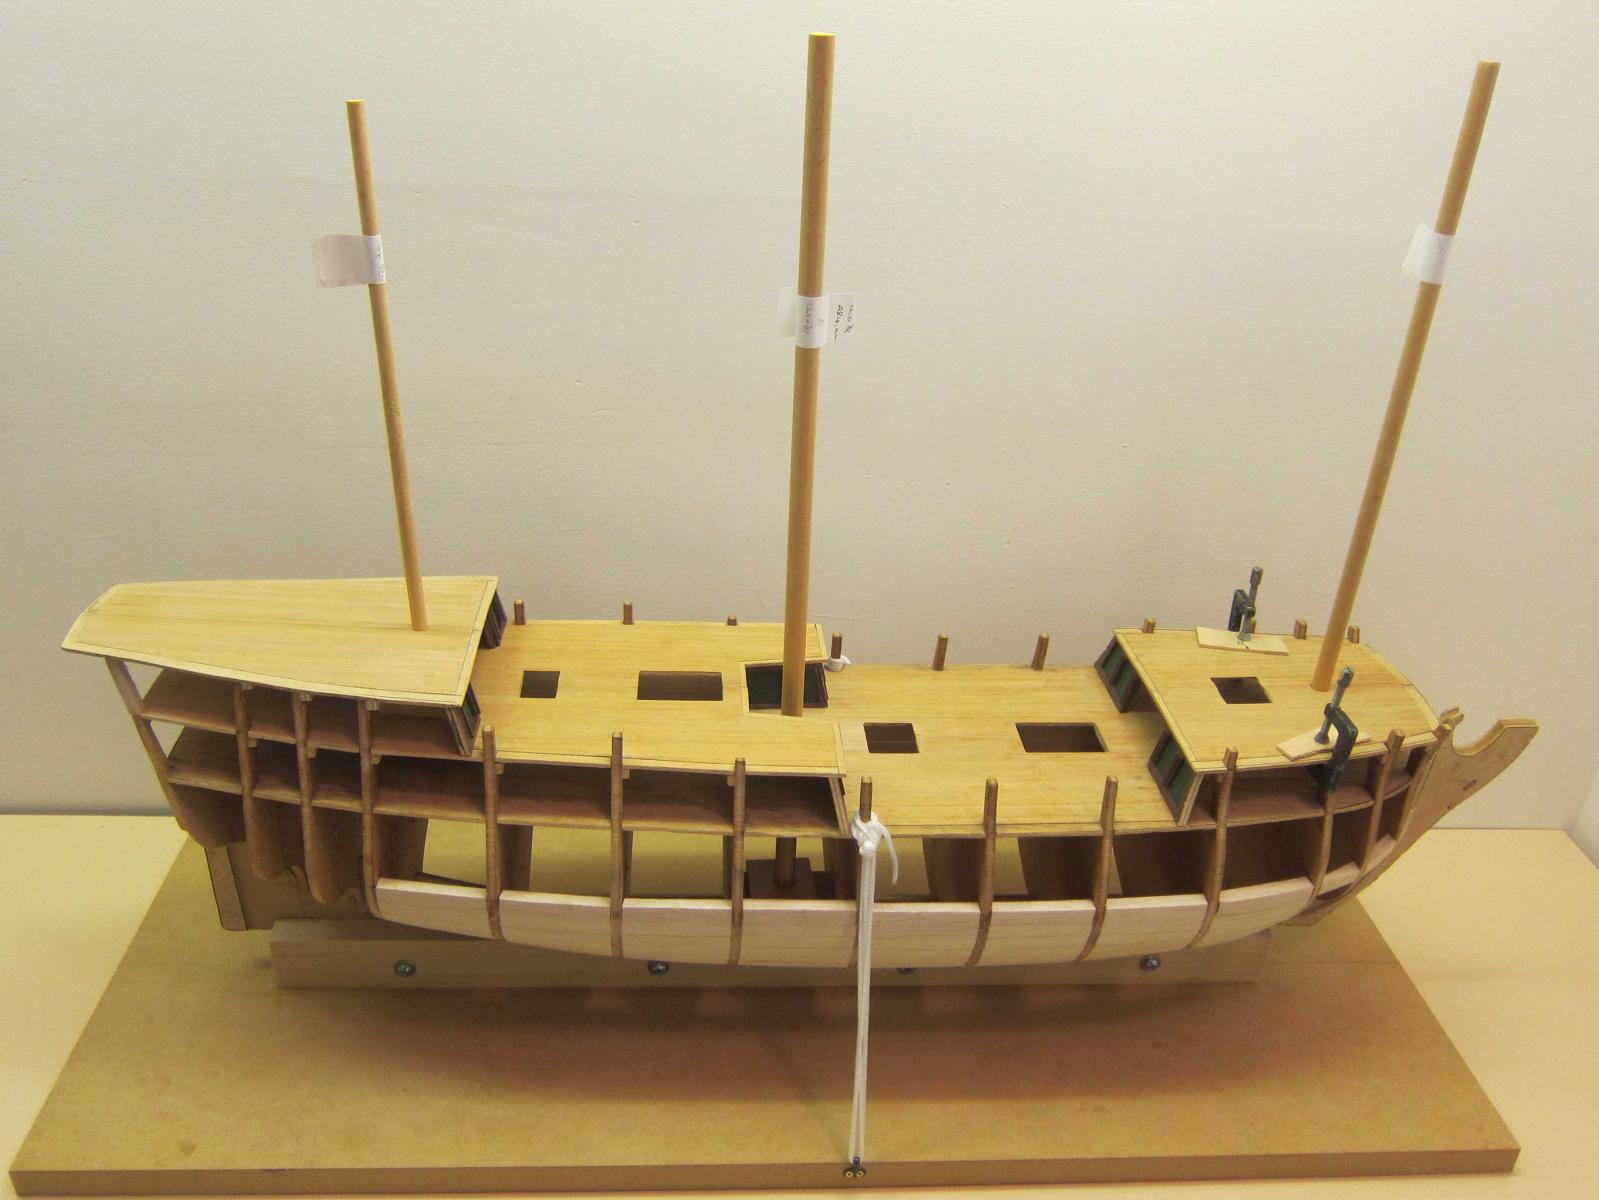
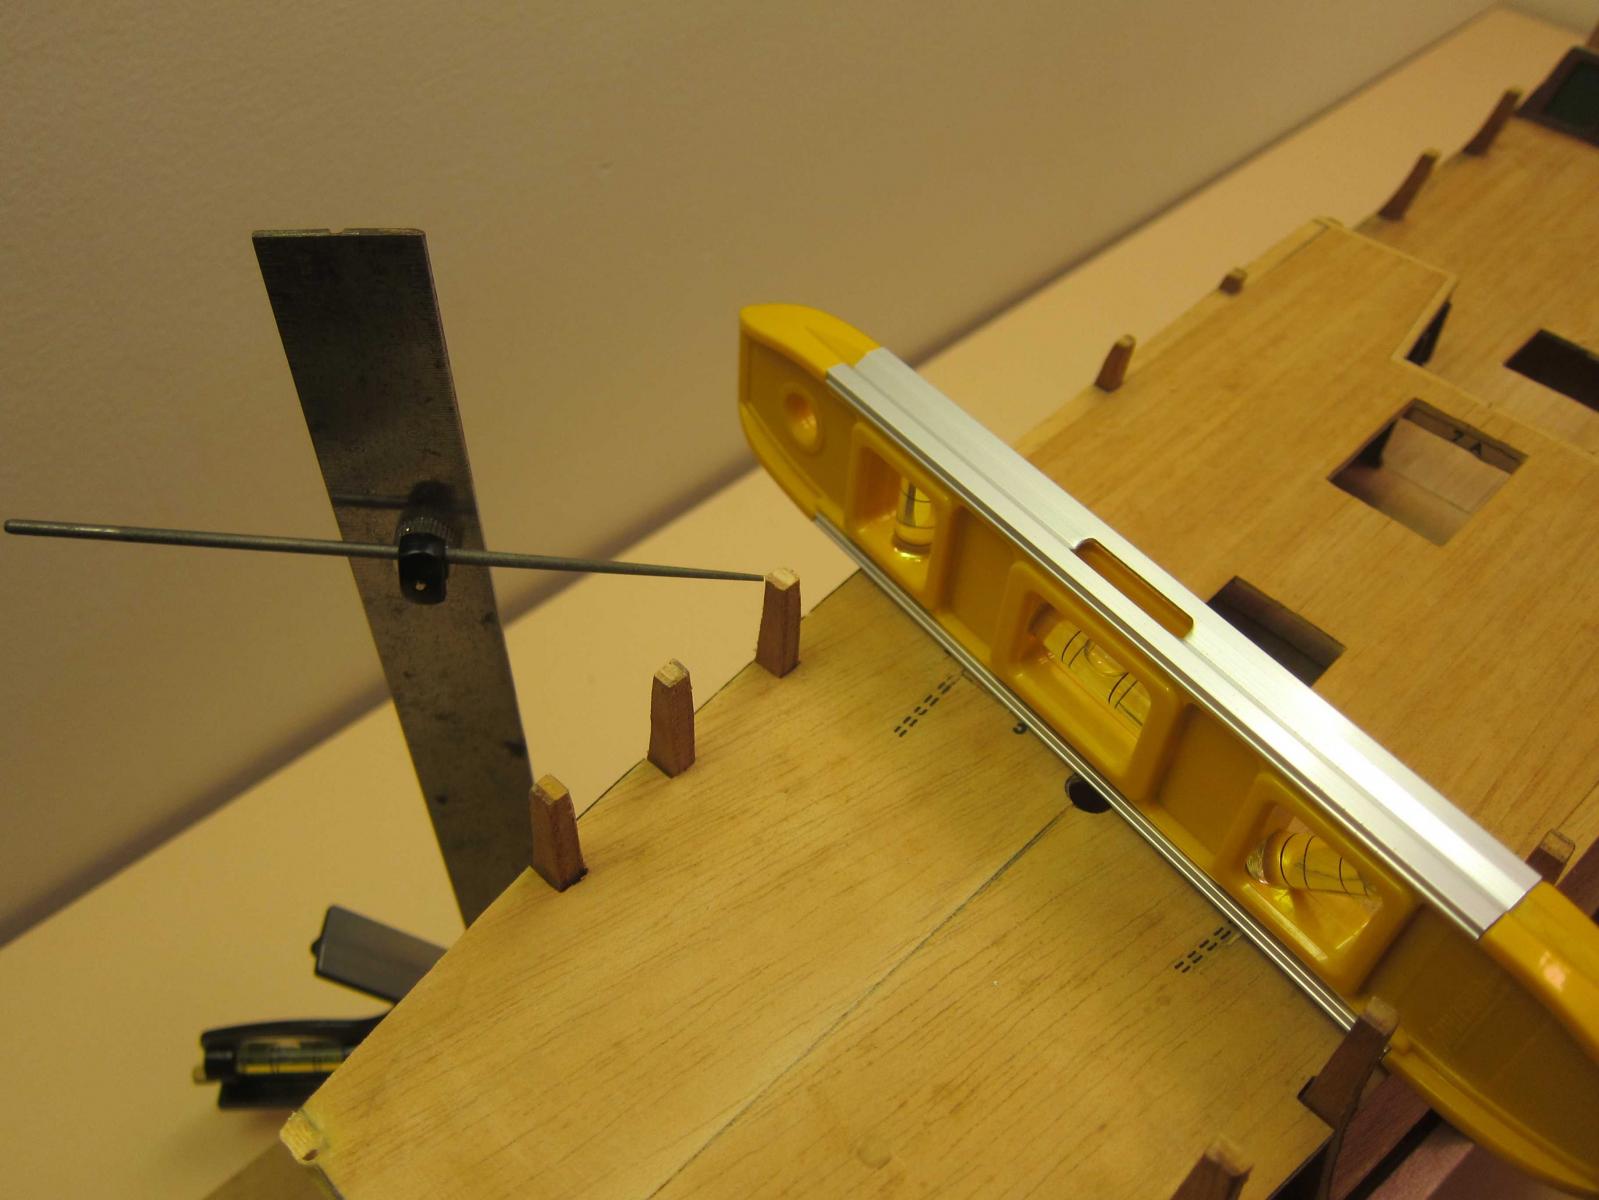
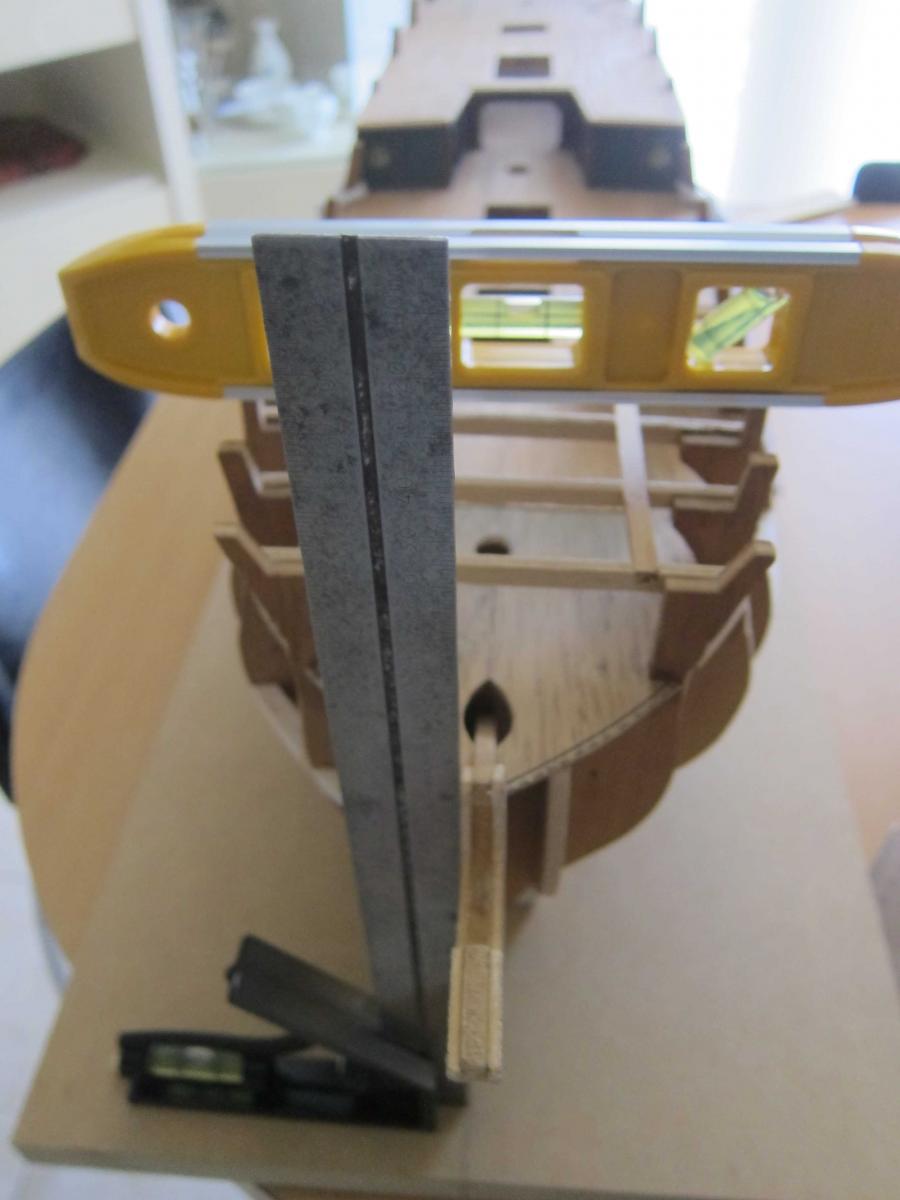
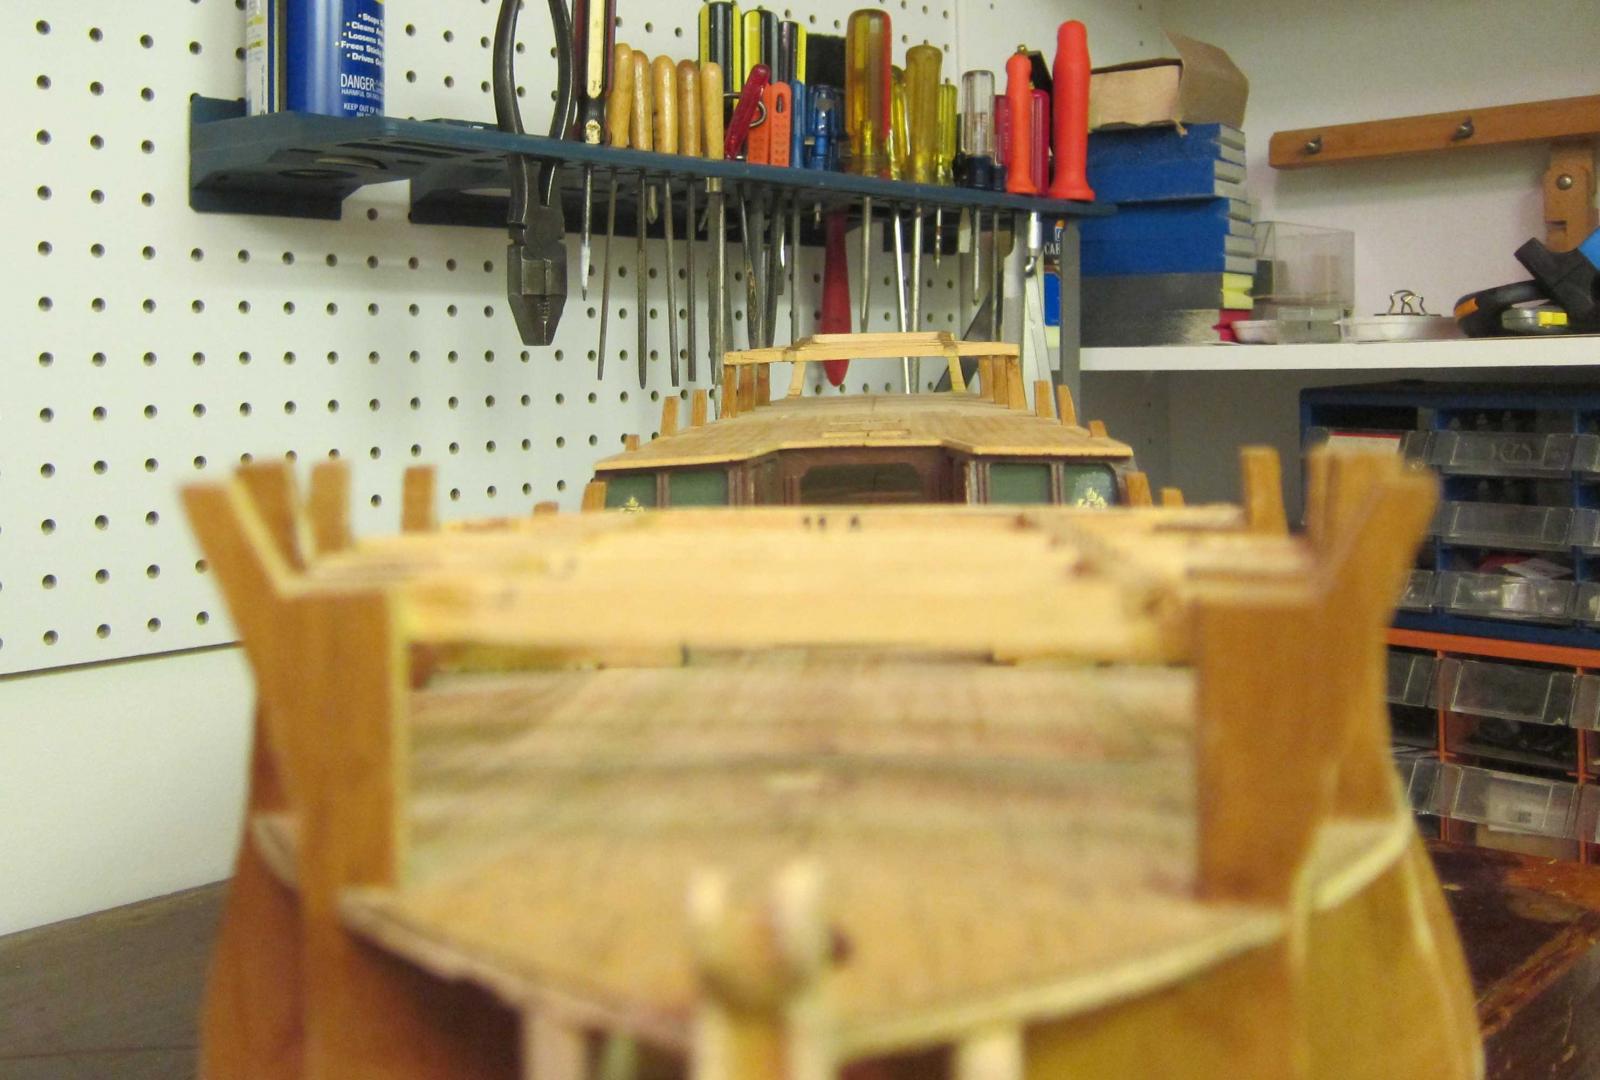
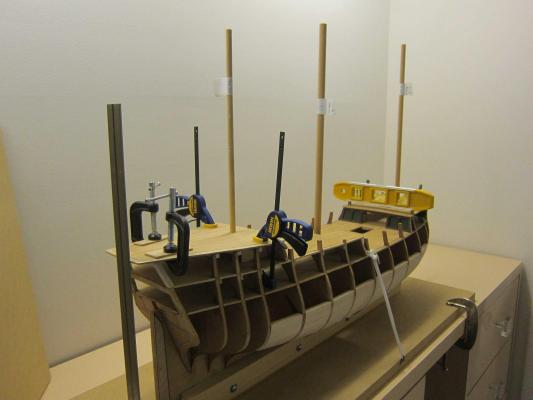
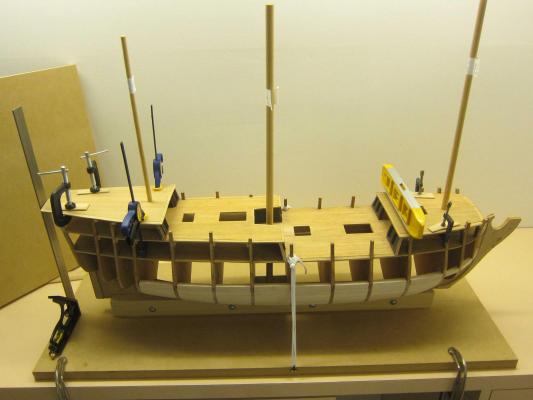
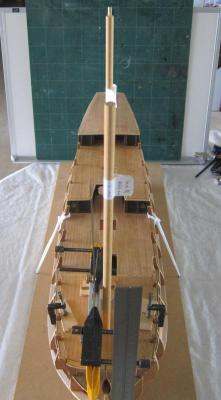
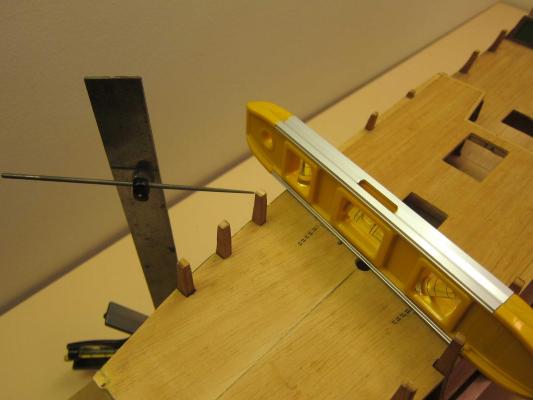
Setting the mast rake and vertical alignment. The model base board (and model keel) were set level on the work bench using T-square and spirit level. The mizzen rake was set to 2 degrees aft as per the Billing's Boats drawings. This was obtained by setting a protractor to 88 degrees and placing it on a level set horizontal through the use of packing pieces on the deck. The mast vertical alignment was set with the T-square set on the model base board. The mast retaining base was glued into place with the mast left unglued so as to be detachable: The main mast was aligned to the vertical and the rake set at 1 degree aft. The fore deck and foremast were also set and aligned with the mast rake 1 degree forward: A check was made on the vertical alignment of the masts as shown in the next picture: All three masts have now been provisionally aligned vertically and their rakes set: The masts will be removed and the infilling of the lower hull can now proceed. After that the gun turrets will be constructed before infilling the remainder of the hull.
-
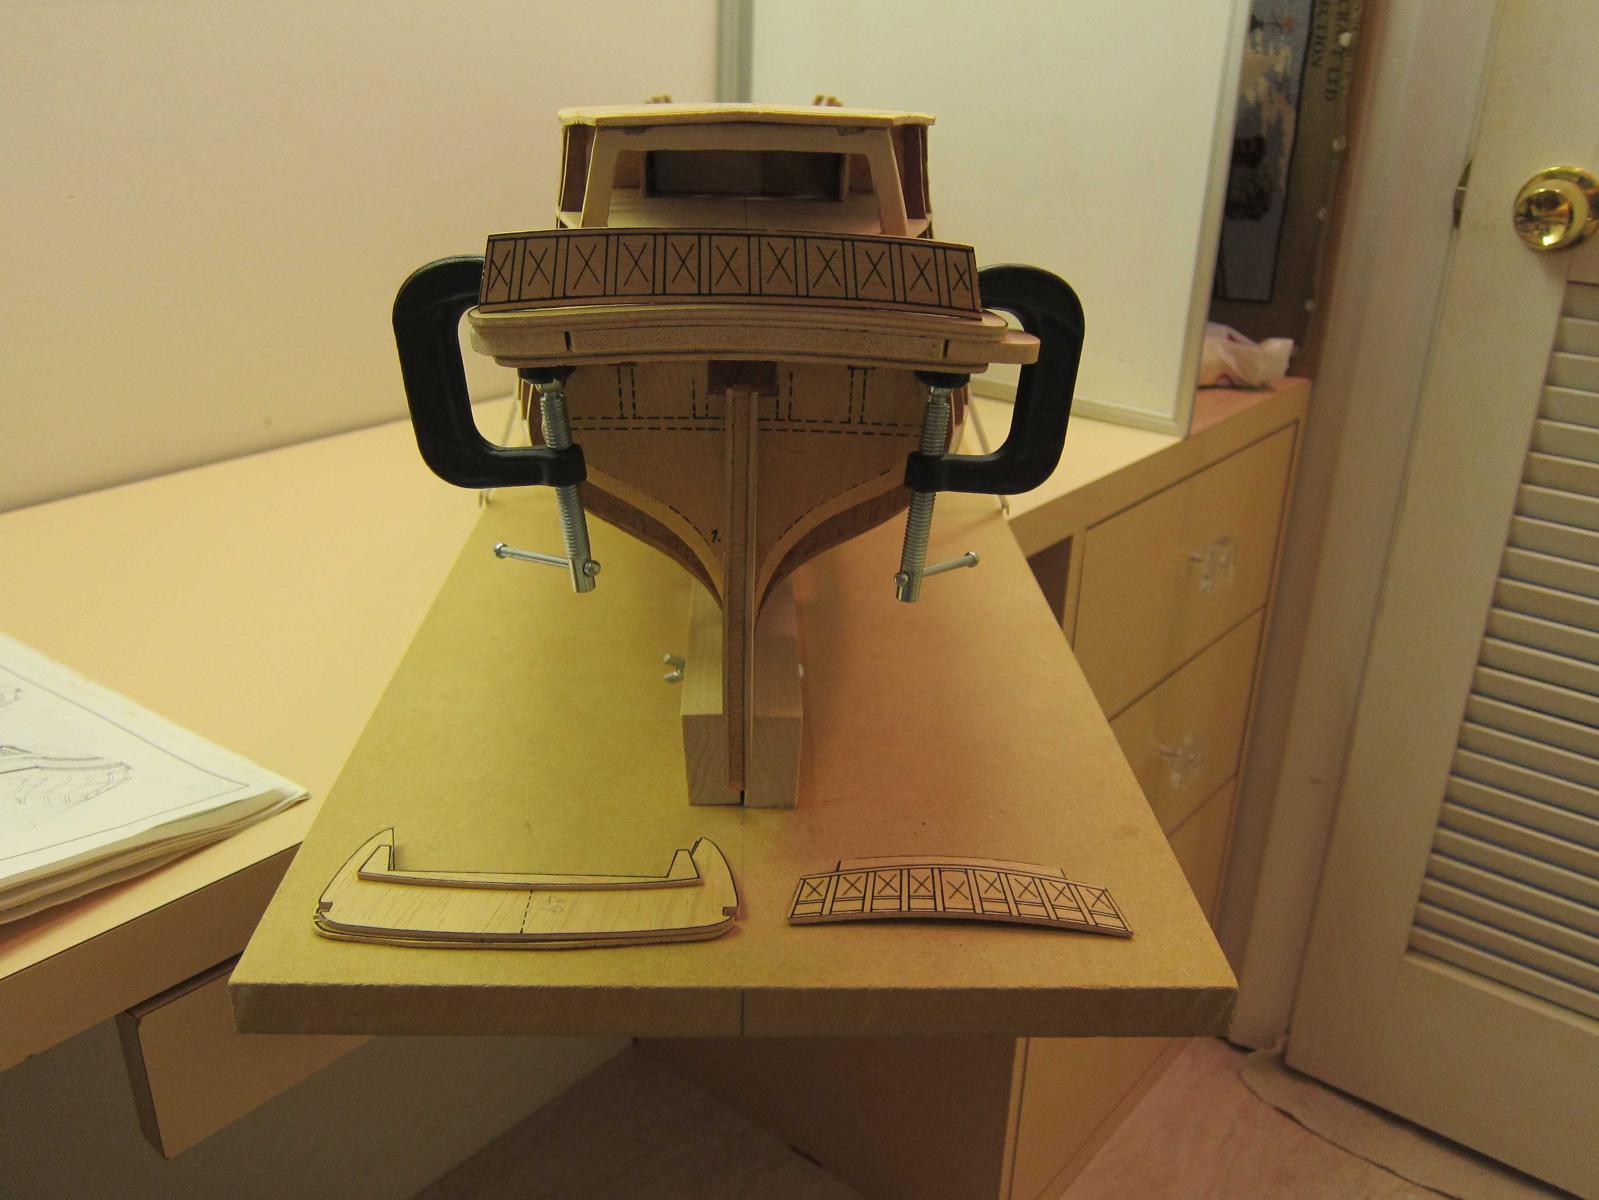
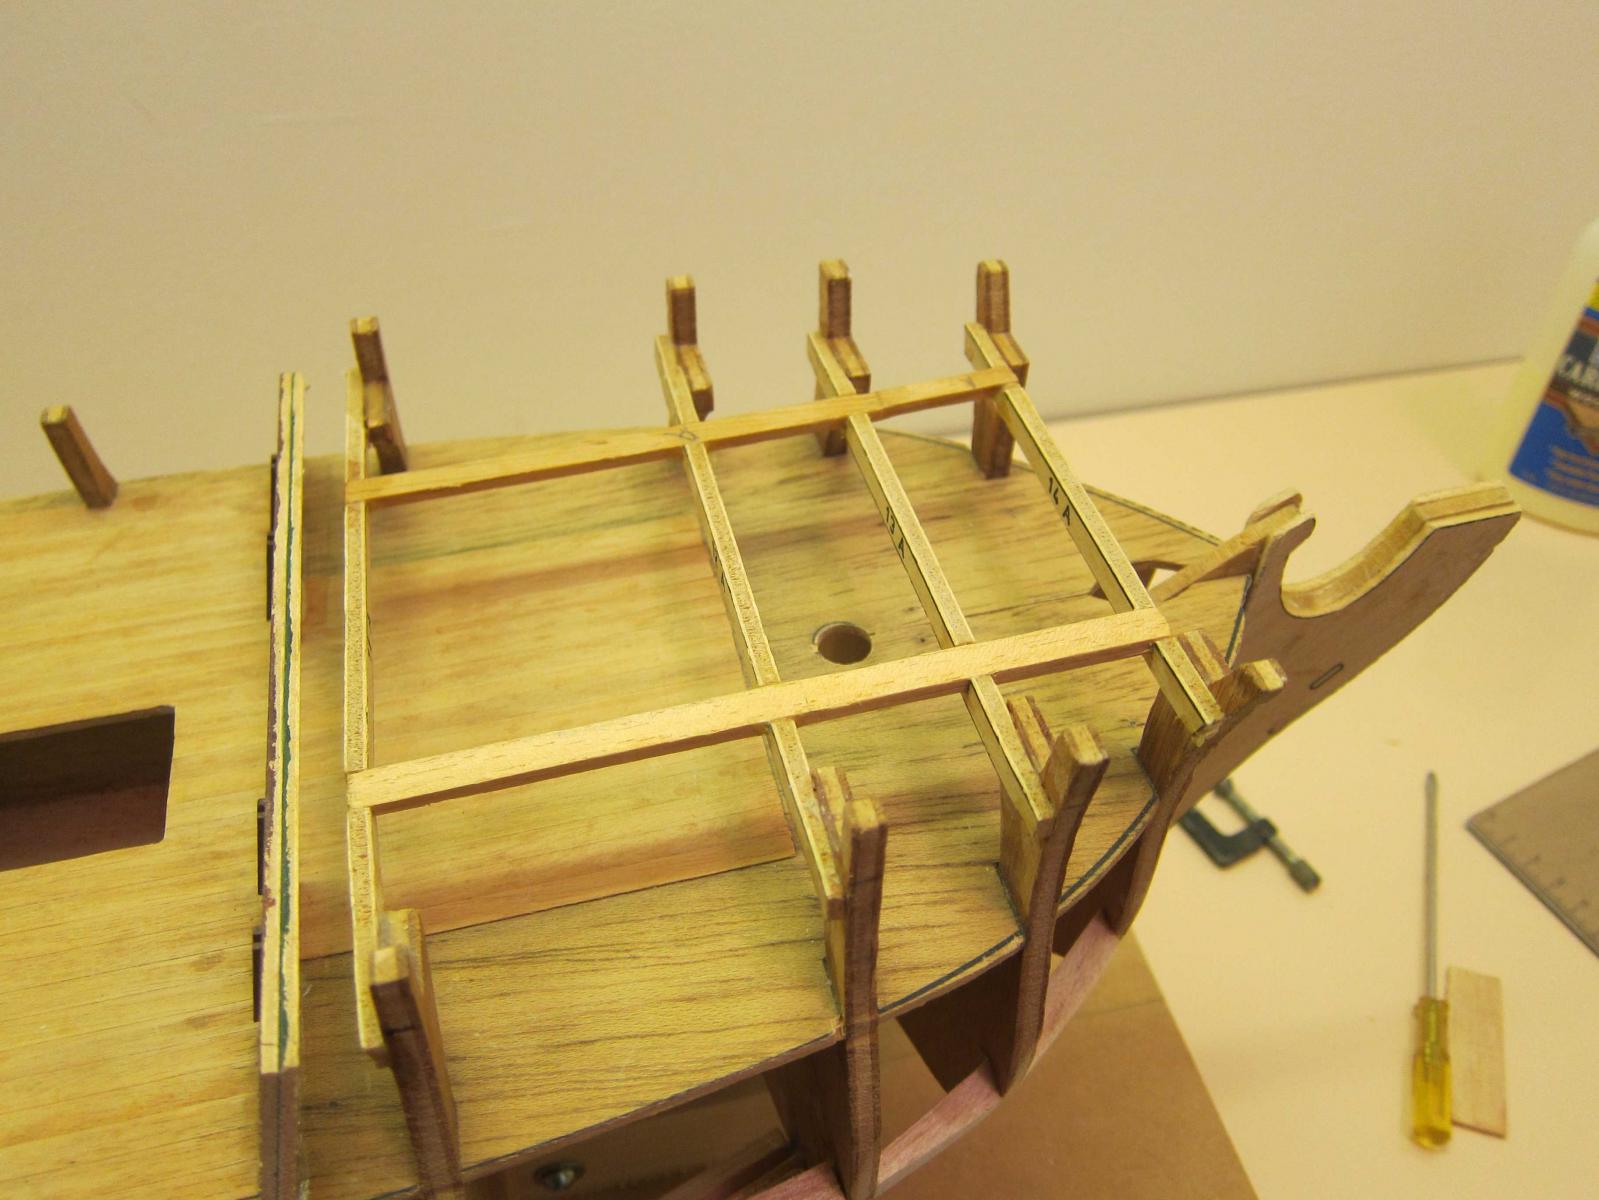
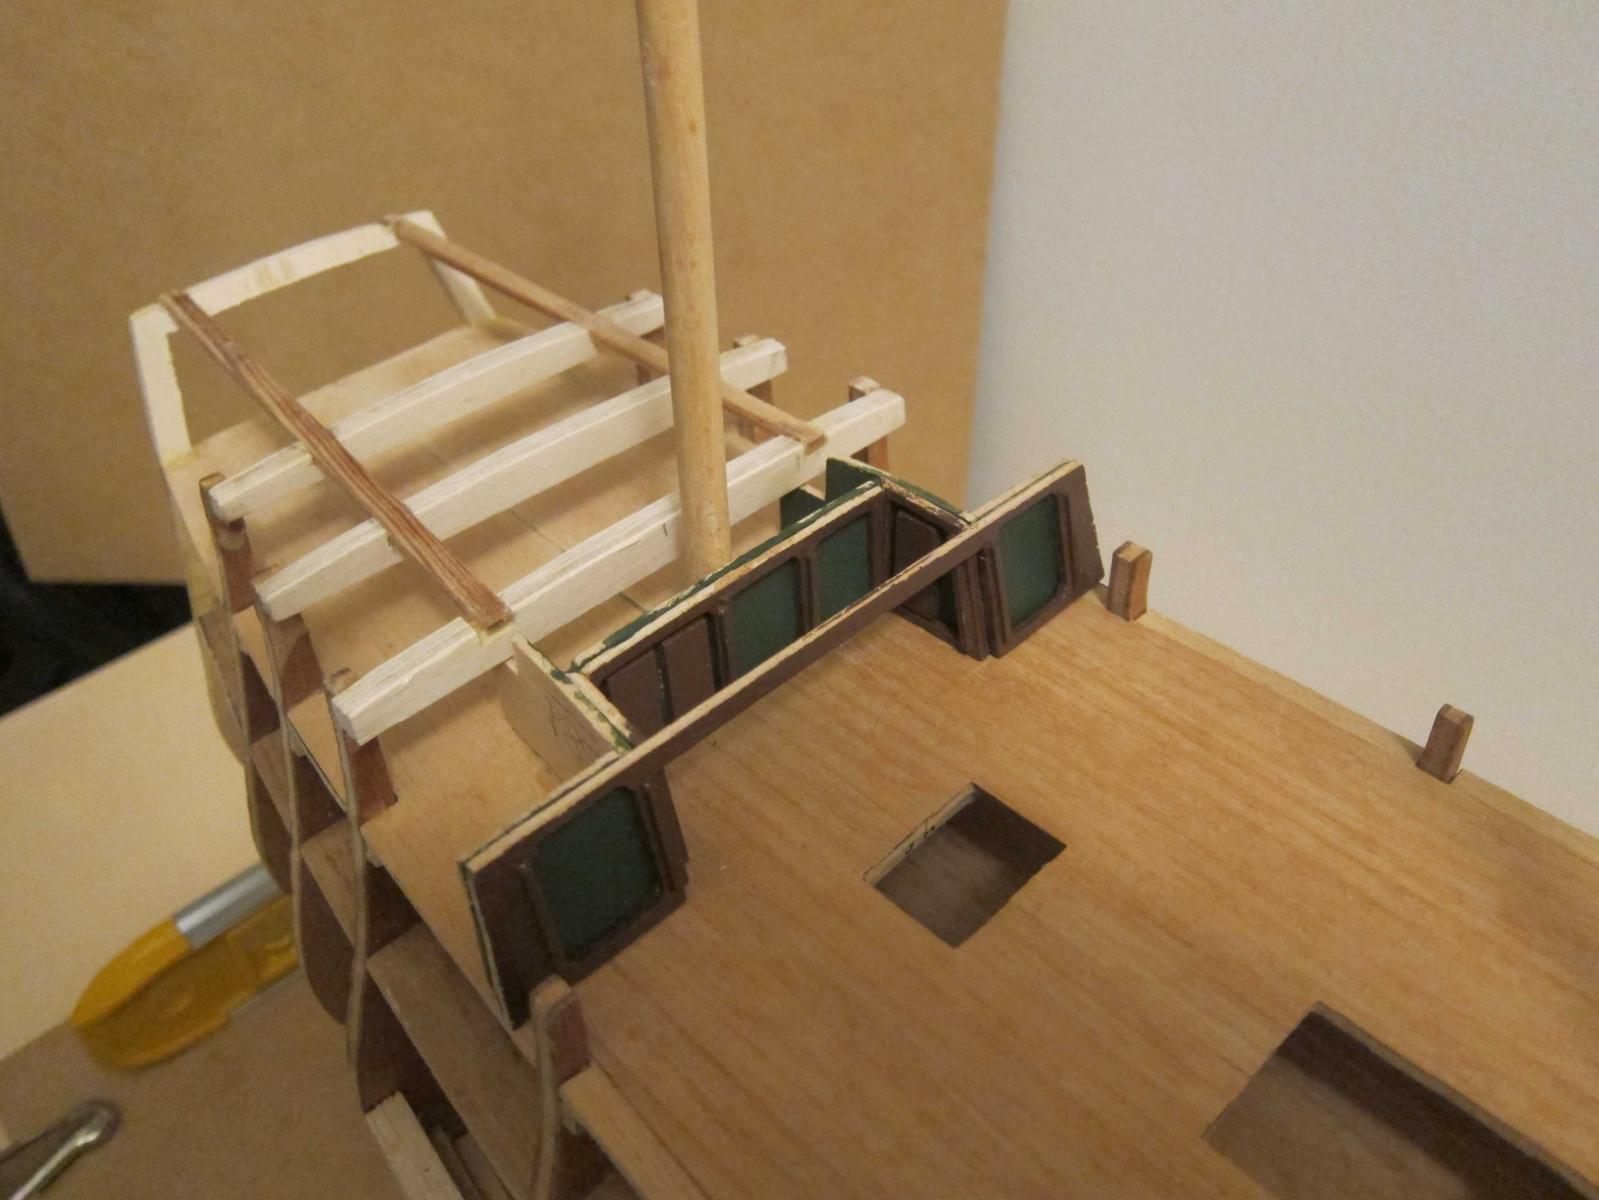
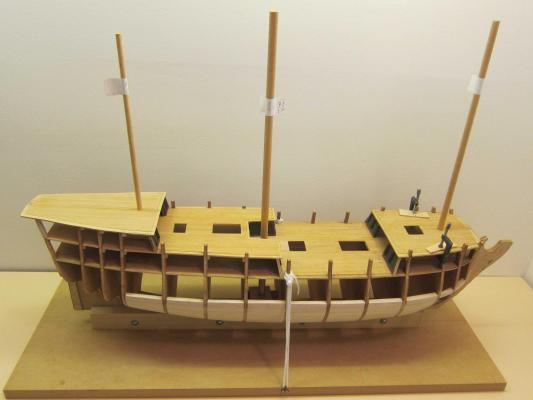
Because of deck alignment errors mentioned earlier, both the fore and upper aft deck supports had to be rebuilt. Here the aft upper deck supports have been removed: The locations of the deck support beams were checked and adjusted by measuring heights and then confirming levels: The fore deck support structure was carefully disassembled and then rebuilt onto the corresponding bulkheads: The upper aft deck longitudinal supports were reused, but the cross beams and the top of the last aft bulkhead had to be made from new material: As mentioned in an earlier post the aft deck entrance structure was disassembled to accommodate the mizzen mast: The rebuilt entrance now has sufficient clearance for the mizzen: This work concludes the correction of earlier defects and I hope that no further rework will be necessary.


-
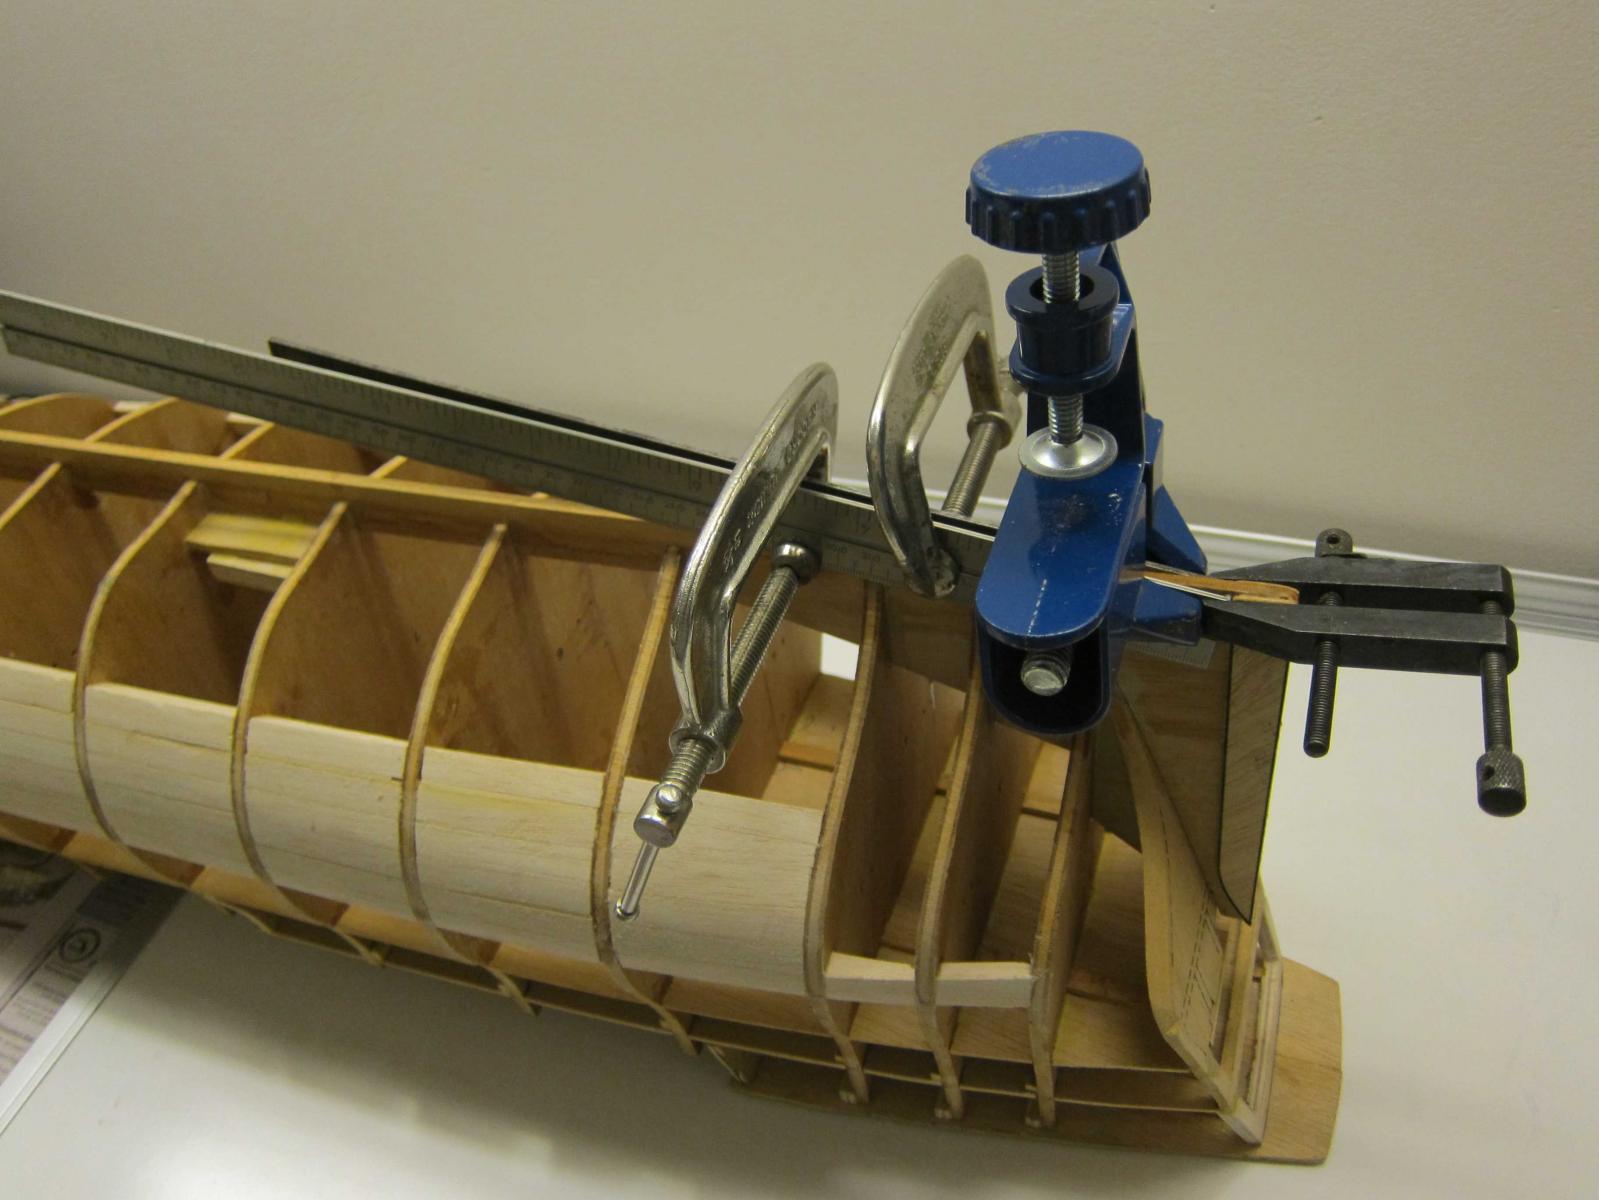
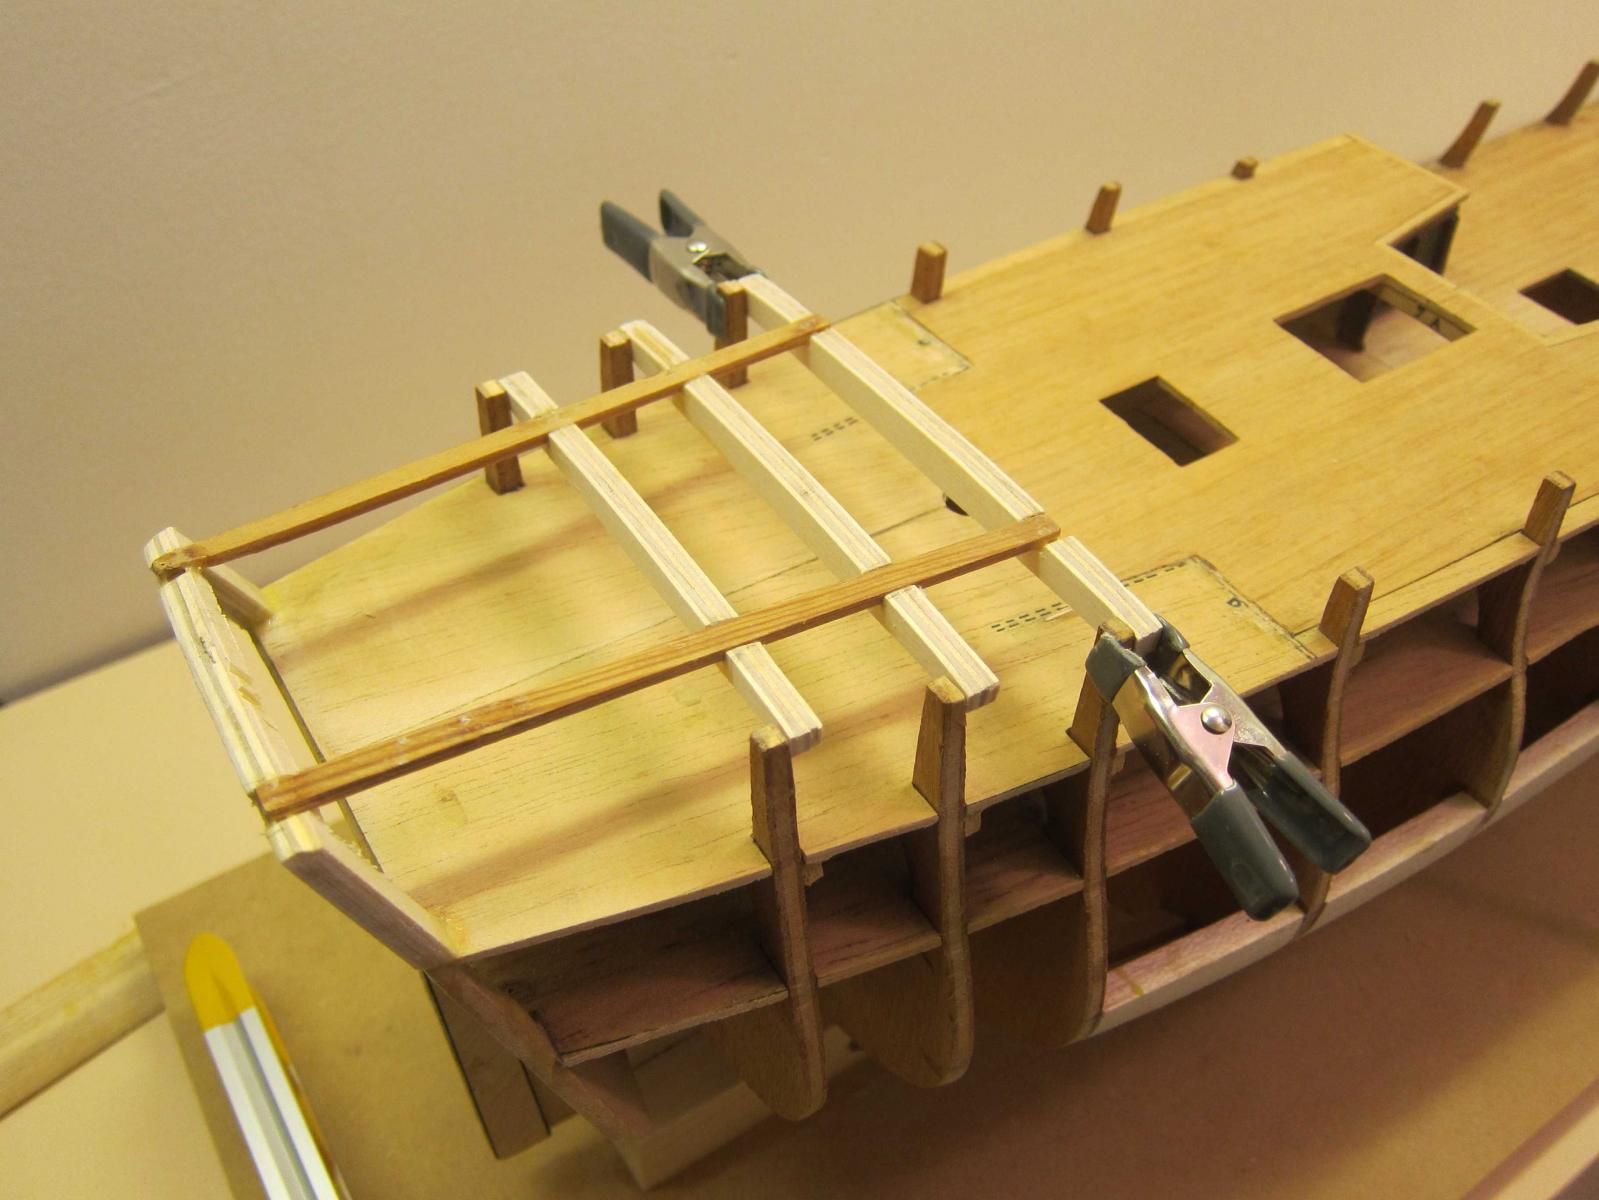
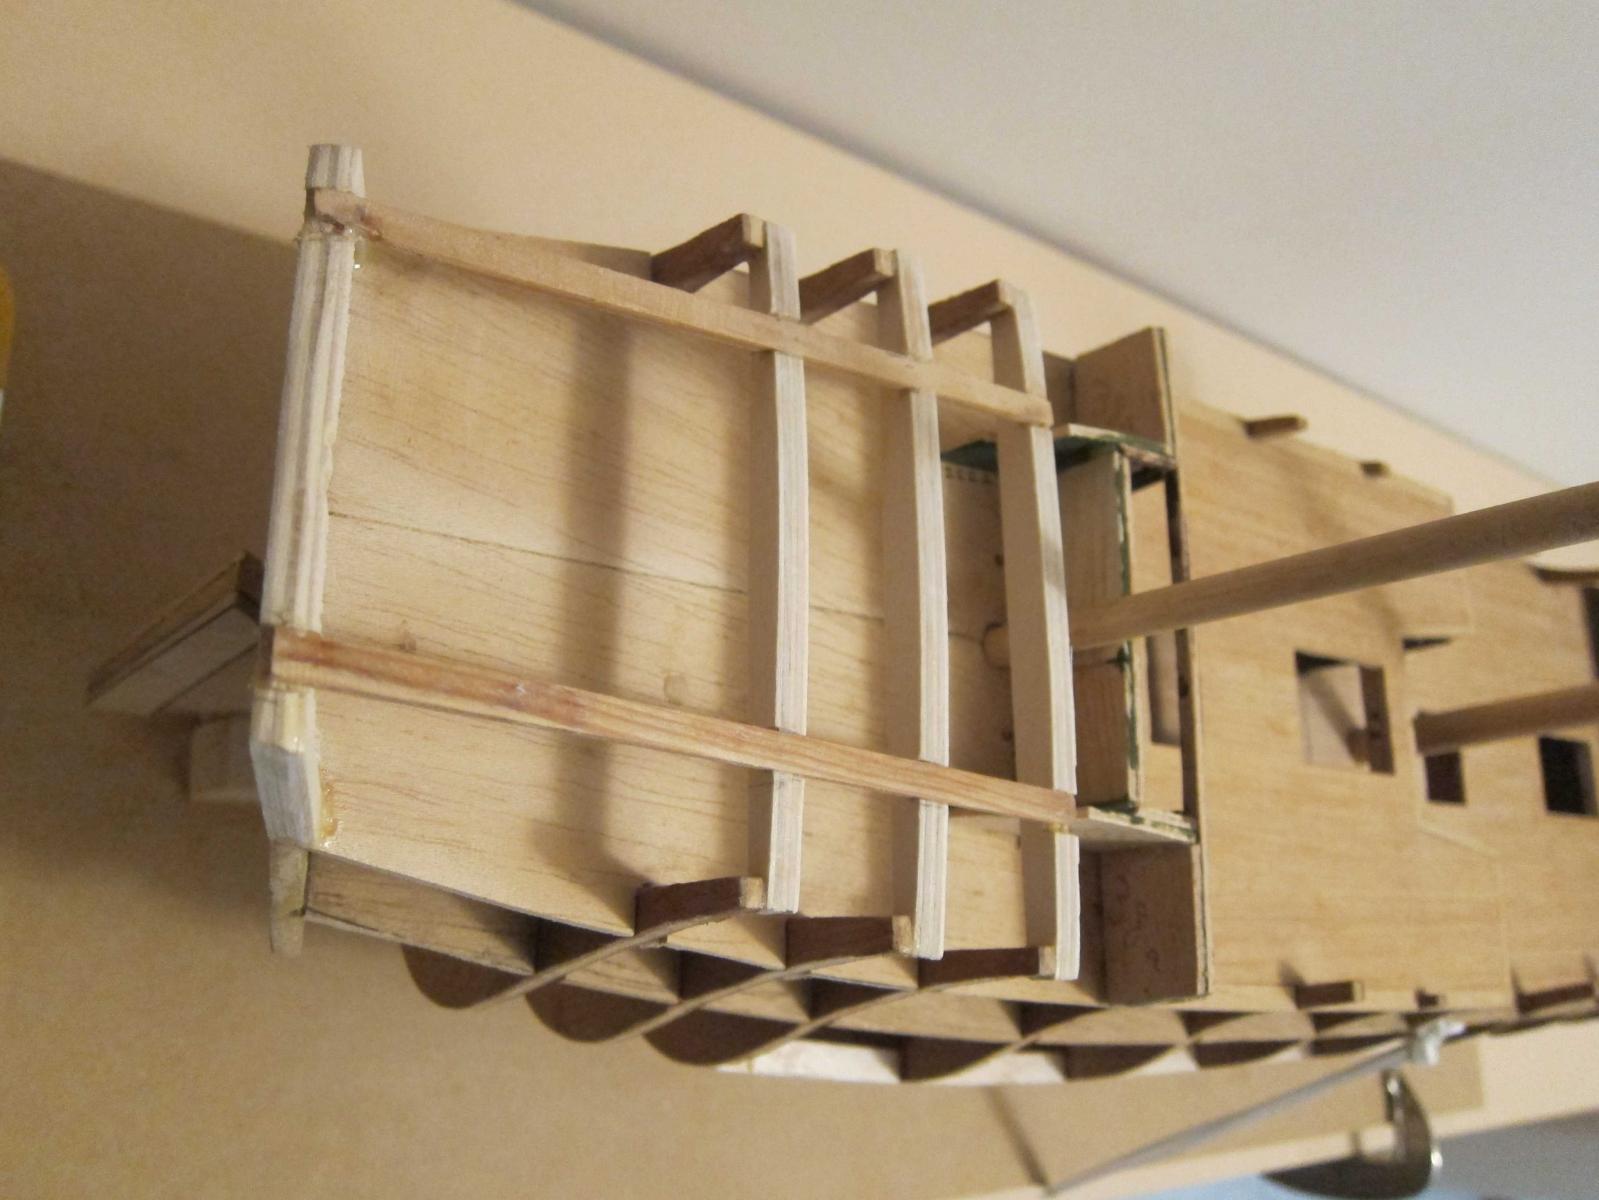
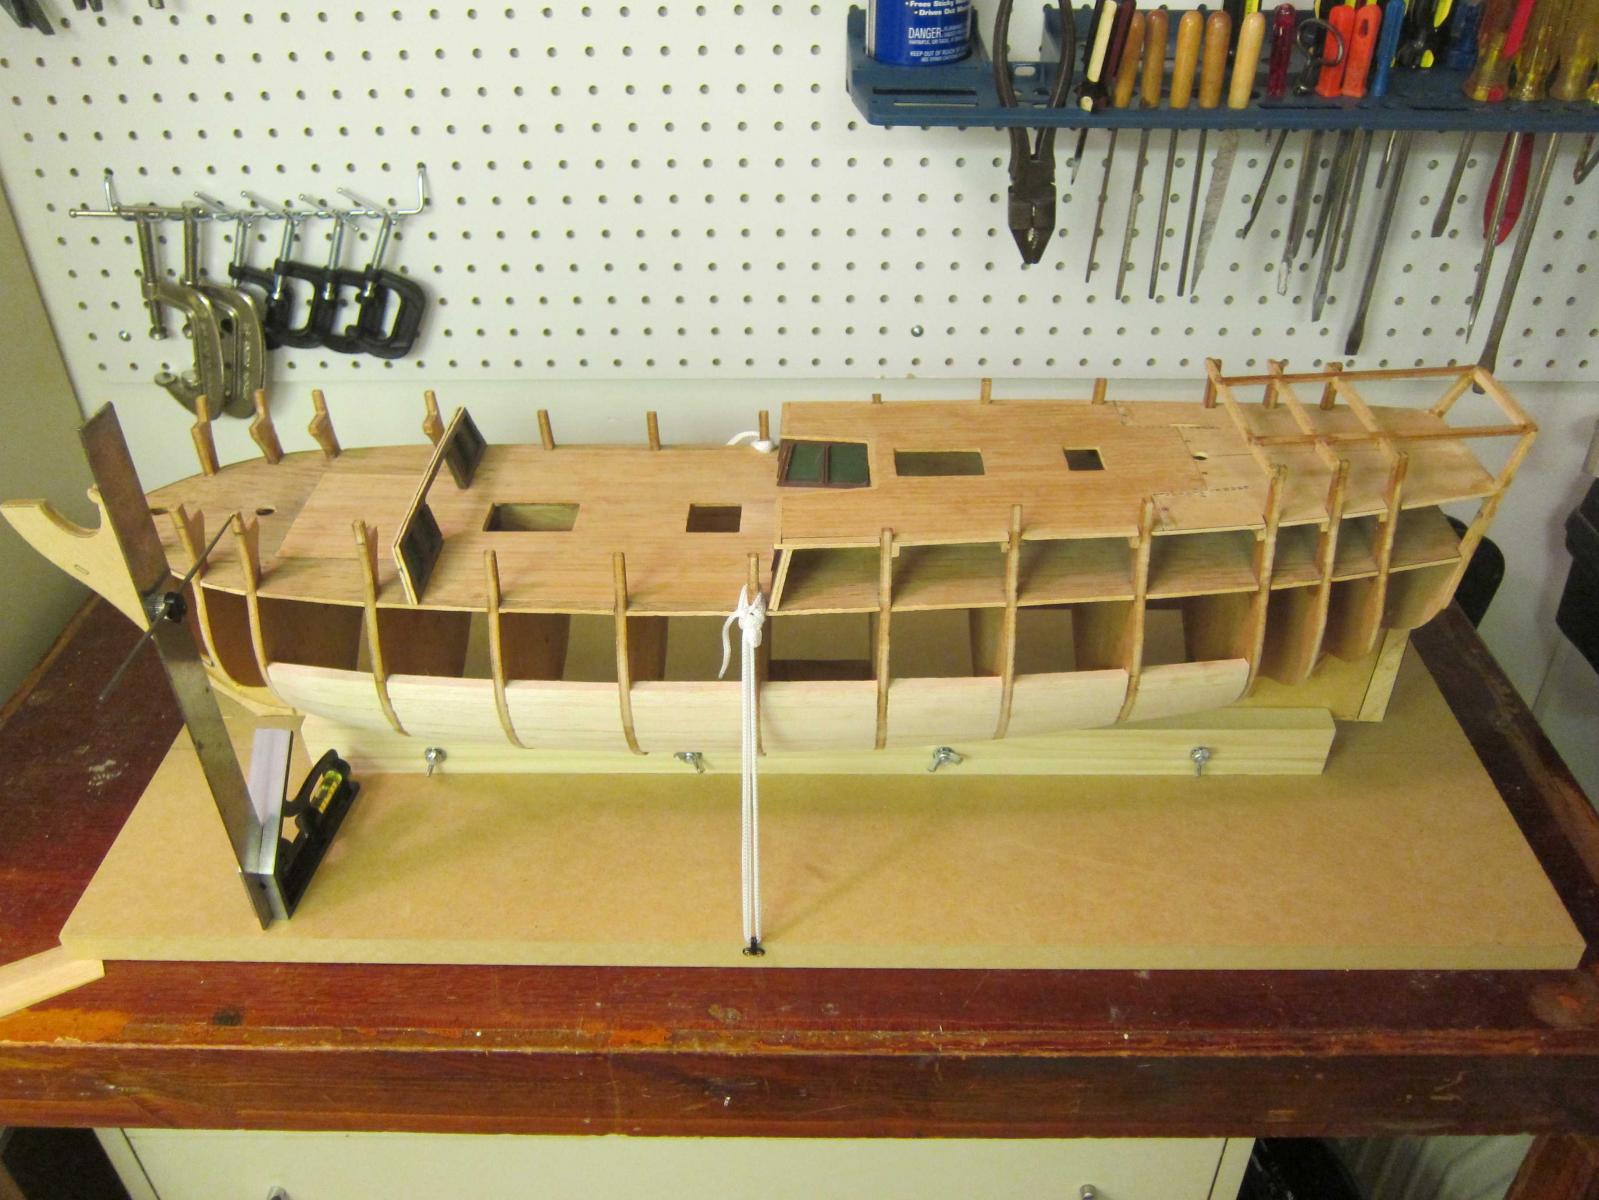
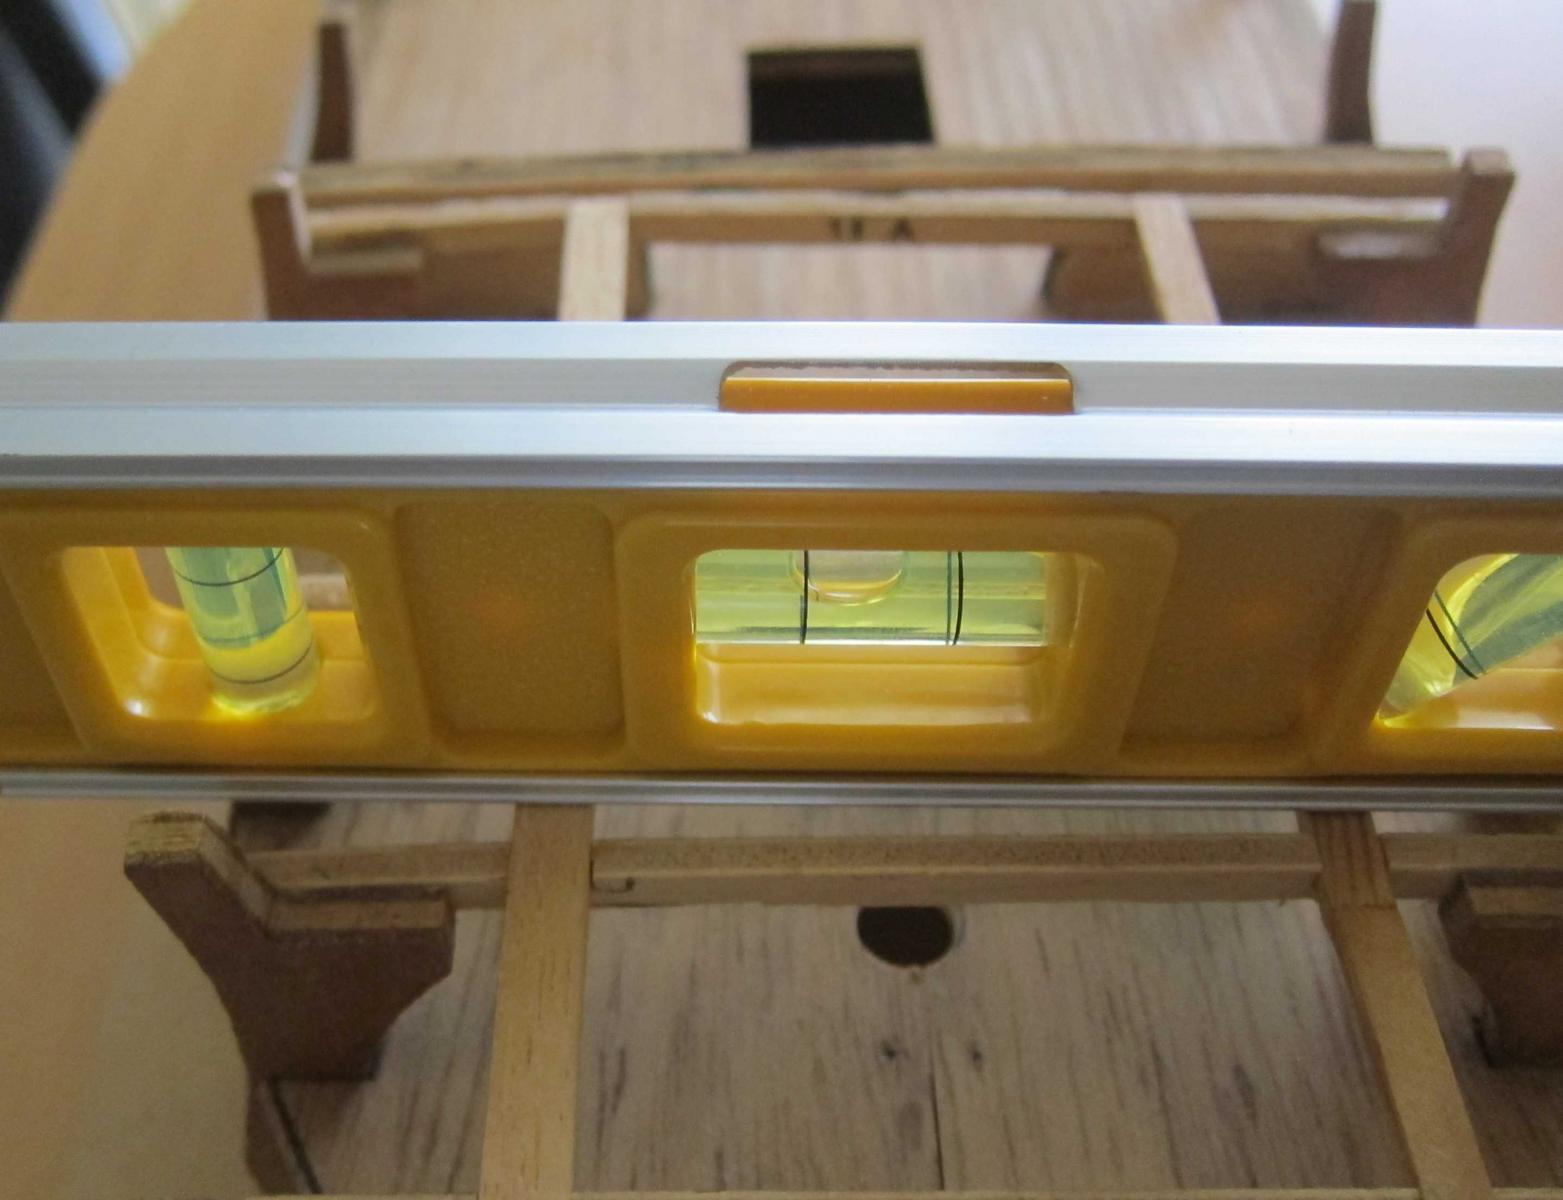
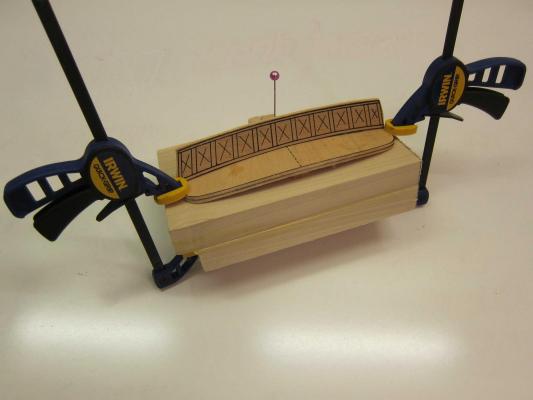
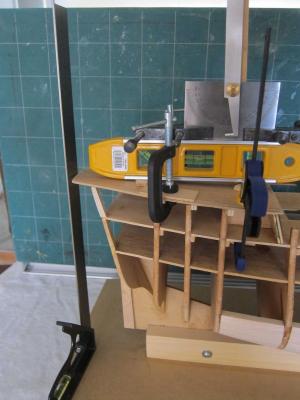
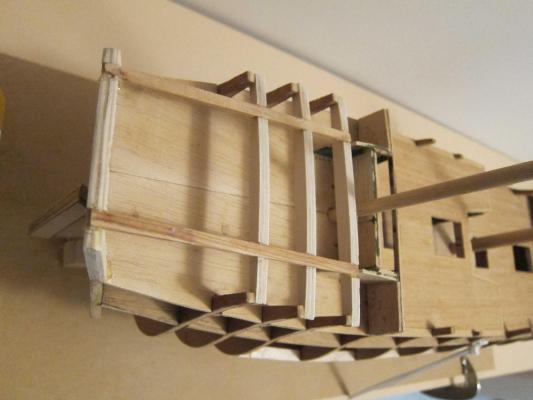
Another step backwards......... Working on the mast alignment revealed that the upper fore deck appeared to be misaligned with the main deck and the aft decks. Following examples in Mastini's "Ship Modeling Simplified", I built a mounting board for the boat; my old arrangement was not stable and the model changed position easily. The boat is now restrained by two cords at the sides, with the keel vertical. Where my work bench is not absolutely level, a wedge is used to level the mounting board. Hopefully this arrangement will permit more solid progress. The square level shows that the keel is vertical and a level across the ends of one bulkhead shows good alignment. However, the upper fore deck support beams are not level. This work was done over thirty years ago, so charge this to youthful impatience. The following picture shows the misalignment of most of the support beams. Temporarily attaching the deck further emphasizes the error. Having seen the work of so many talented builders on this site, this clearly cannot stand. So nothing for it but to remove the offending support structure and redo. The model is now ready for new cross beams and lengthwise supports to be fabricated and fitted. This time it will be done right! The stern end of the keel has become warped with time, but I plan to carefully file one side and glue extra material on the other as needed. I have not yet dared to measure the upper aft deck alignment but visually it looks okay. Then it will be back to setting the provisional mast alignments.


-
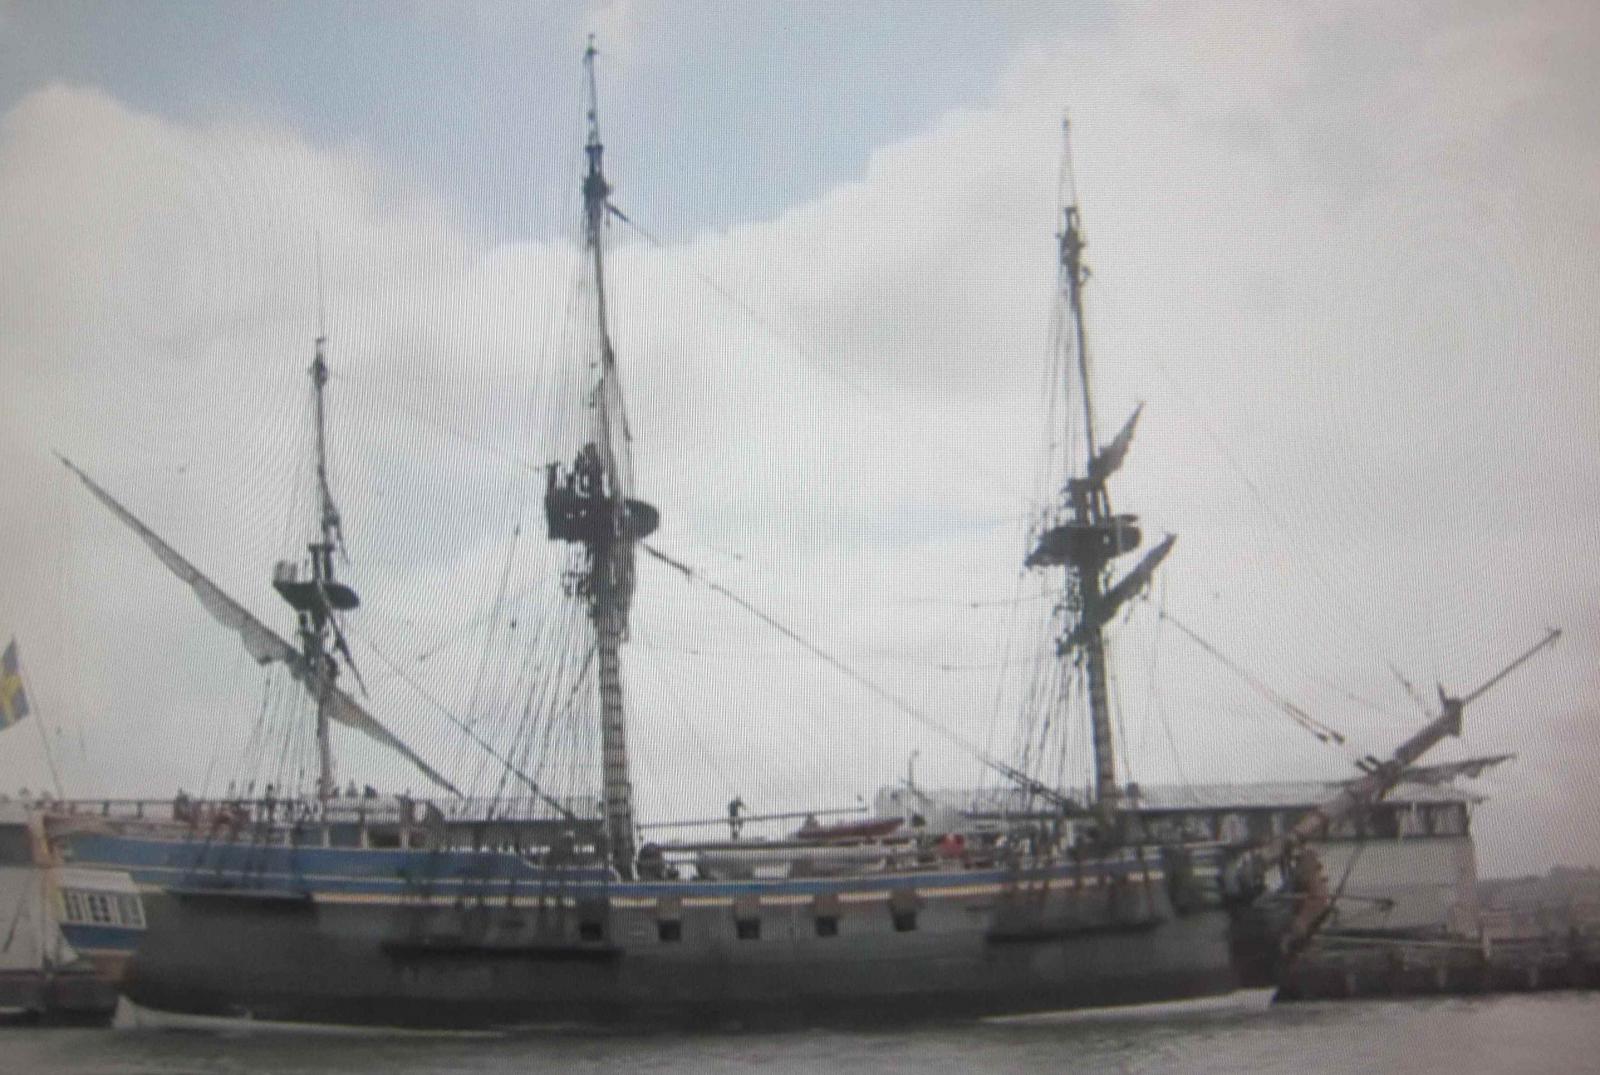
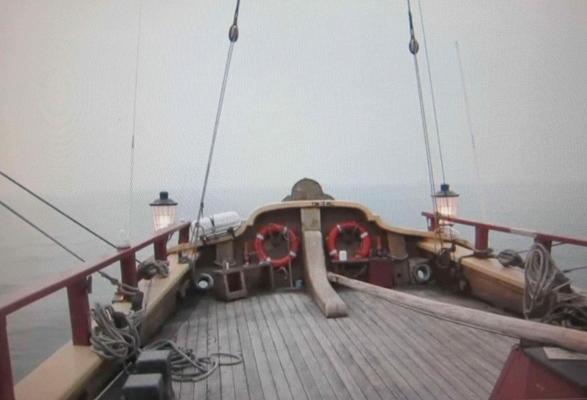
Hello Håkan, Thanks for the video link which I found very informative. A also found an 18 minute U-Tube movie taken on the Gotheborg by Den Helder with very good resolution. Reviewing these videos I took some pictures and these are my tentative conclusions: Assuming that Danish and Swedish ships were similarly constructed in that period, I will stain the lower hull with the same color specified by Billings. Concerning the deck, the following are pictures of the deck when dry. If I can find a very light stain (much lighter than I have), then I will use it, followed by a clear matte varnish. If not then the clear varnish will have to do. It was interesting to see from the videos how the deck appears when wet. Thank to you and to everyone who has helped me with this issue. Warm regards, Andrew.


-
Hello Brian, When I purchased the Bllings kits I was disappointed with the fittings (addressed in an earlier post) and concerned about two other issues: the hull has only one layer of planking (resolved by infilling between the bulkhead frames) and there is no deck planking provided in the kit (or kit listing). The wood used to plank my model was purchased for me by a friend in Norway and the material is unknown to me. Too late this time round, but I will certainly look out for holly or boxwood on my next Billings Boats build (Wasa). Thanks for the tip.
-
Hi Richard, Thanks for that info. I would still like to get close to the right deck appearance without spending too much time watching it age! Hoping that you will continue to share my enjoyment of the build as it progresses, and also to prvide guidance when needed, kind regards Andrew.
-
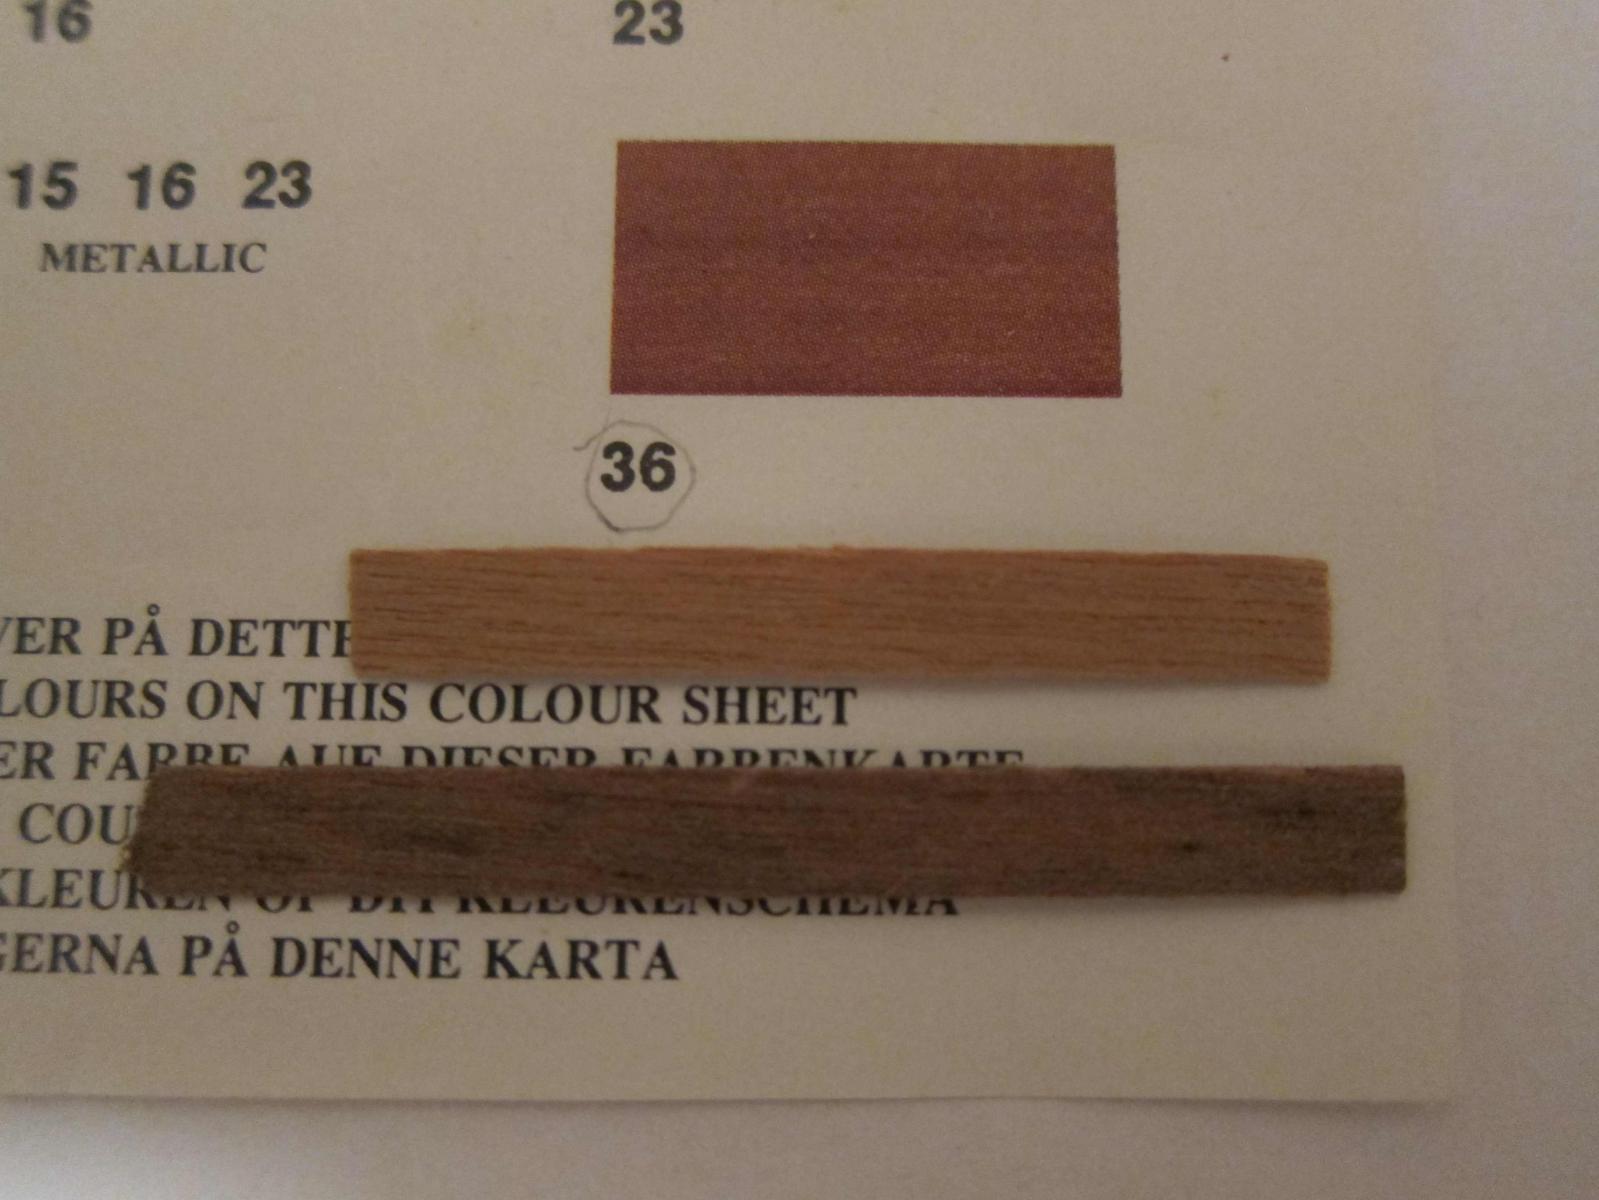
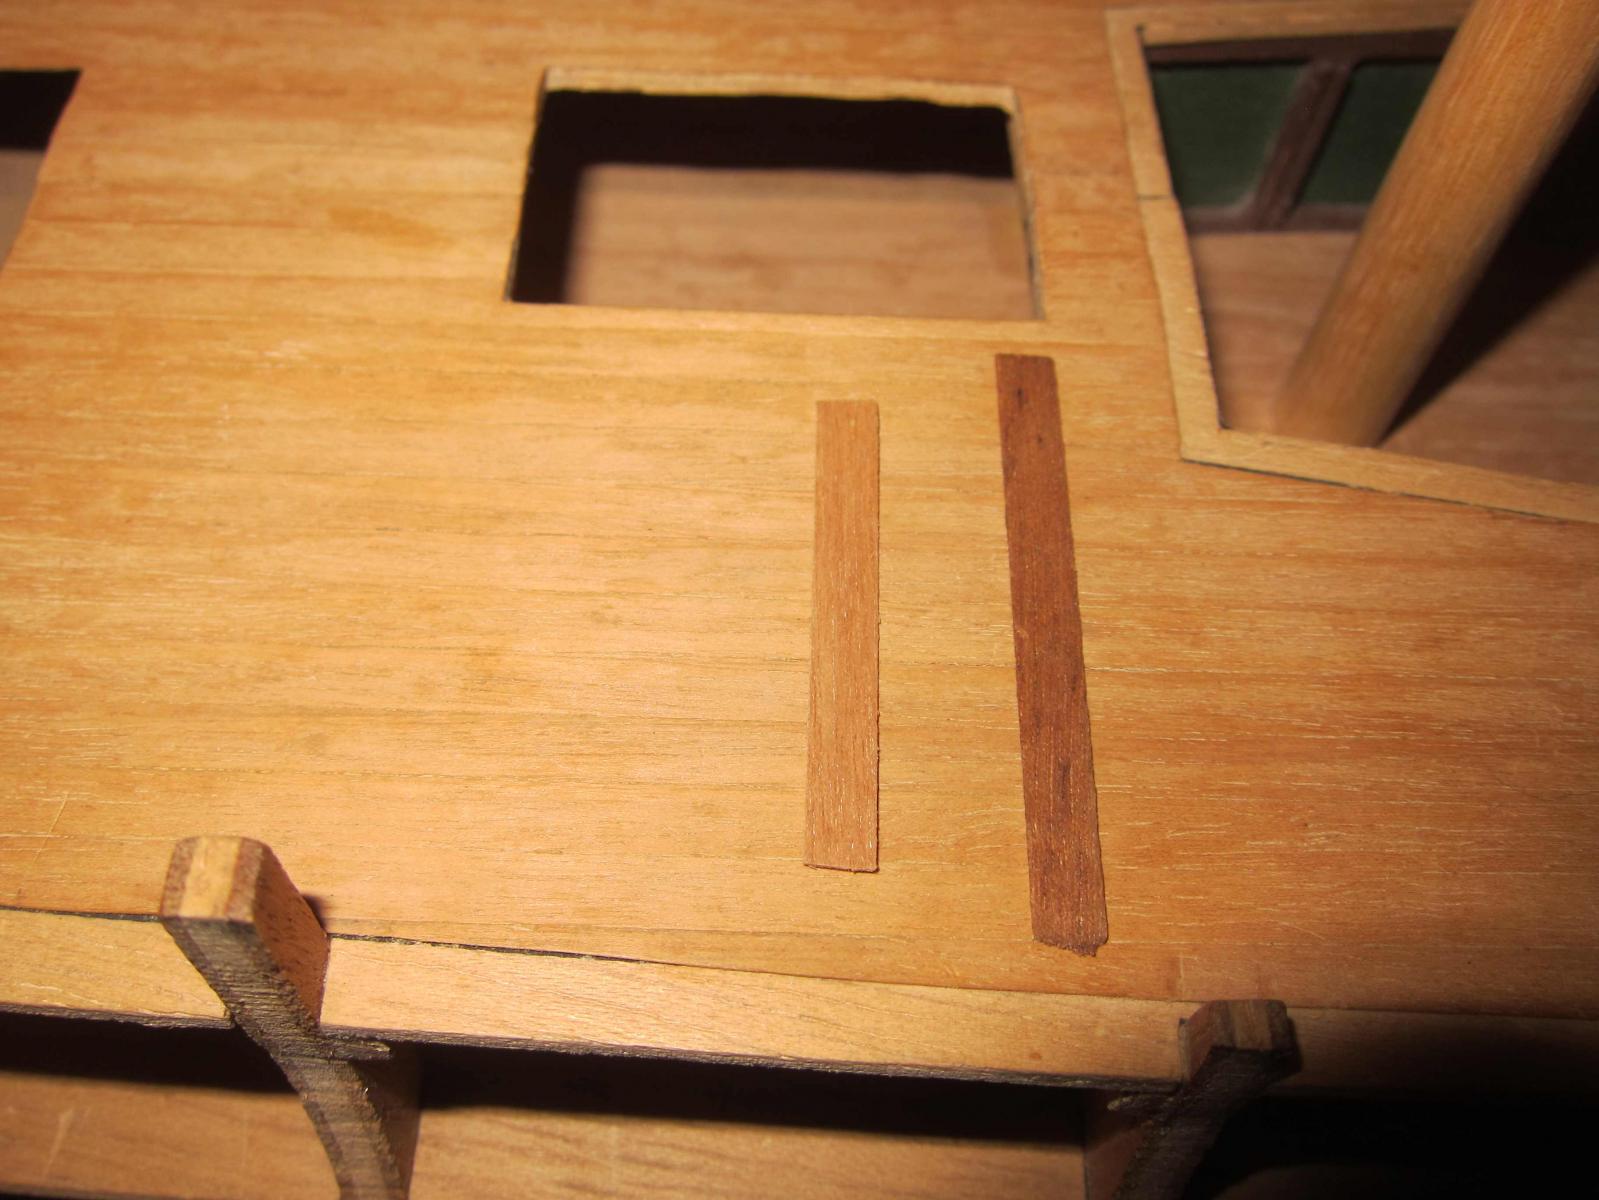
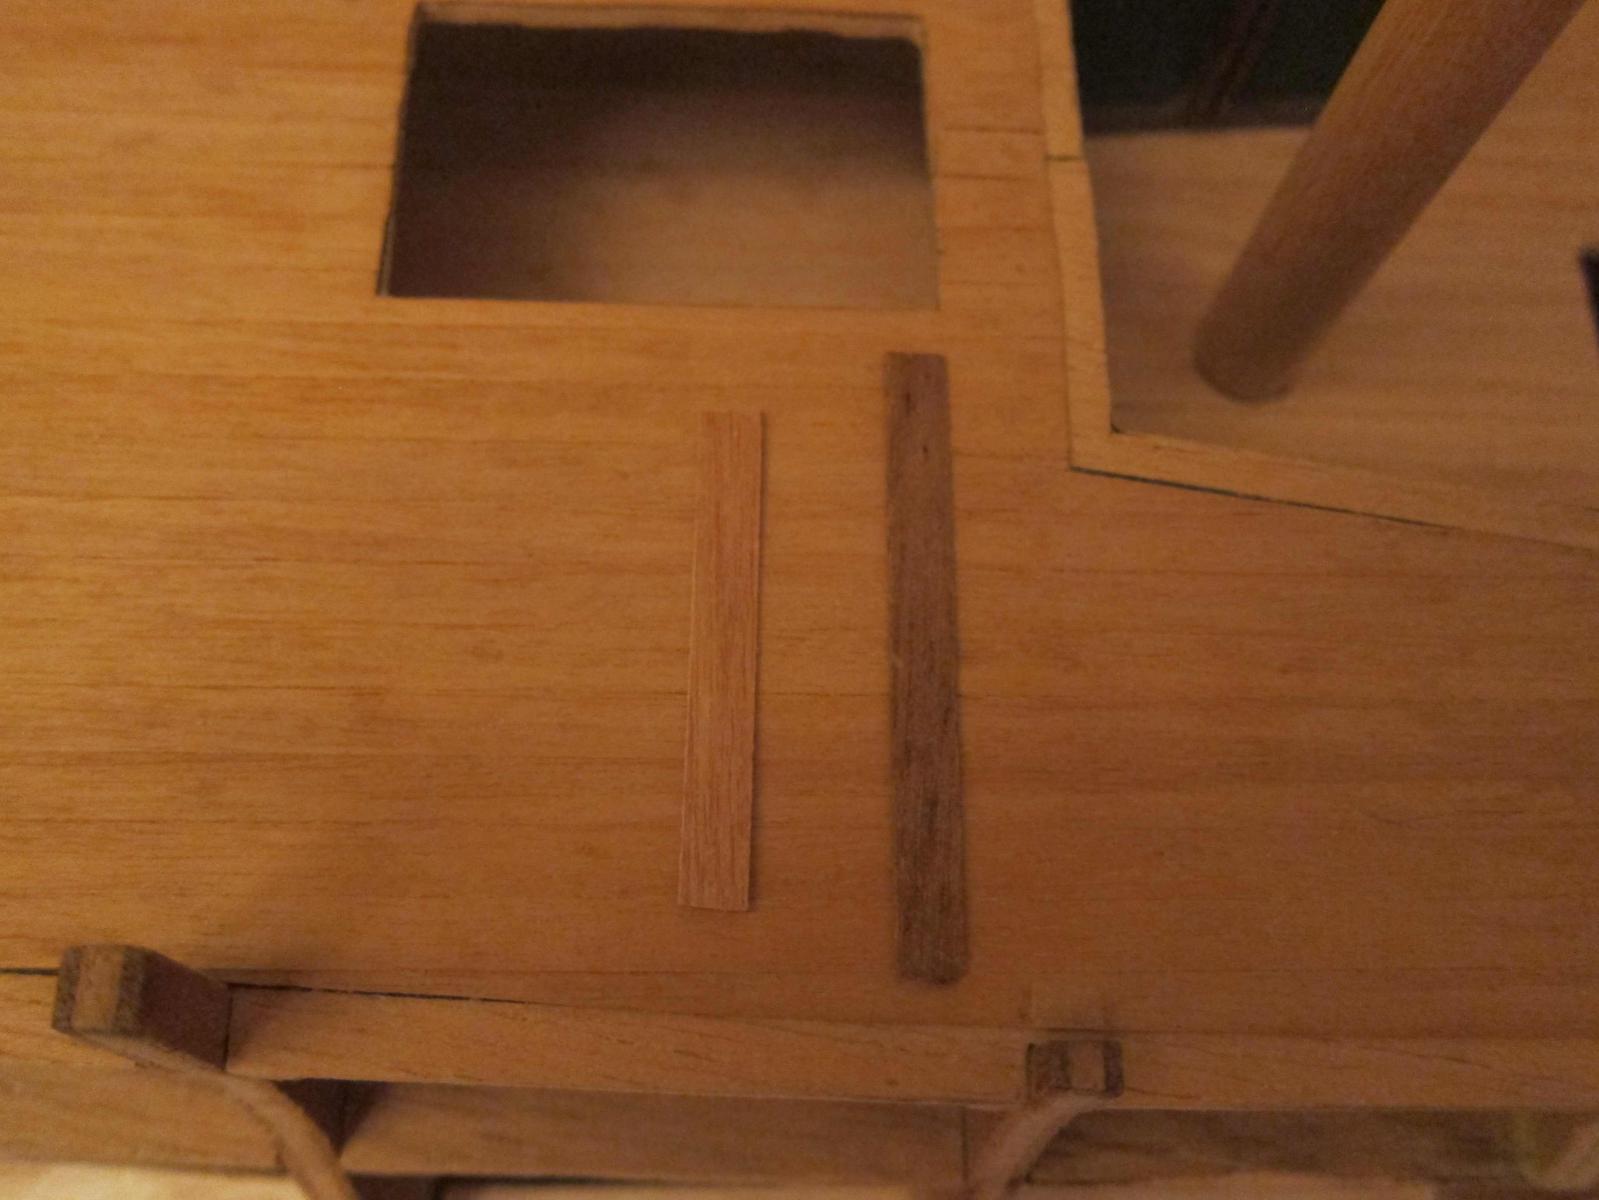
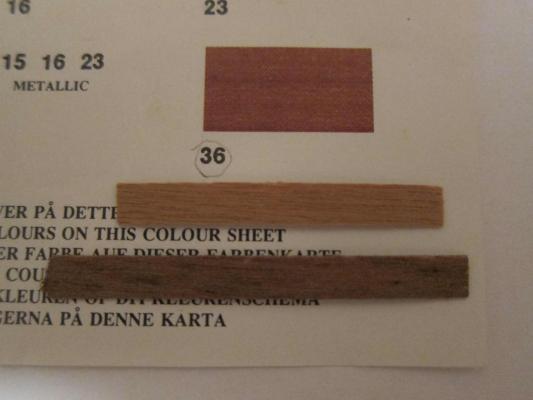
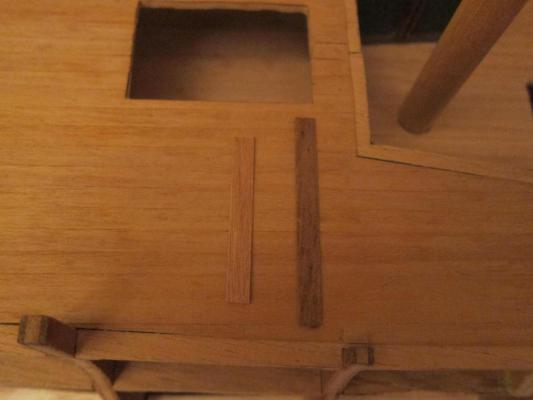
Hello Håkan, Thanks for your helpful observation. My major concern about the decking is with regard to the finish. The decking and upper hull color recommended by Billings (No 36 - Mahogany) is shown in the following picture, together with samples of an unsanded plank and a plank stained Golden Oak. This appears to be rather dark and similar to the finish of my Bounty hull (see earlier post). The following two pictures show the two samples on the model deck, the first with flash, the second taken with natural lighting. My inclination is to leave the decking unstained as per earlier comments received from BassicBill, and finish the planking with a clear matt varnish. I would appreciate your opinion and recommendation. Take care, cheers, Andrew.

-
JerseyCity Frankie reacted to a post in a topic:
sail and rigging help
-
JerseyCity Frankie - Thank you for recommending Milton Roth's book on August 8th. I have just received it and am learning a lot from it. Very comprehensive and practical book: great recommendation.
-
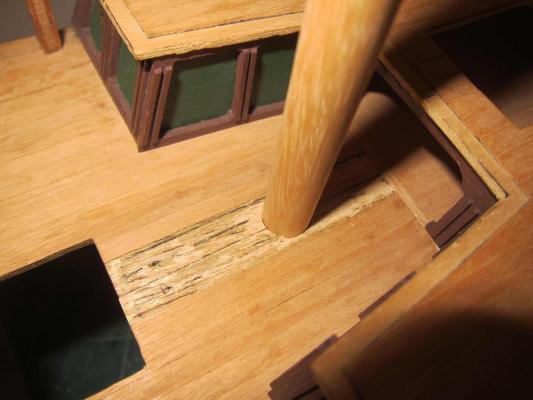
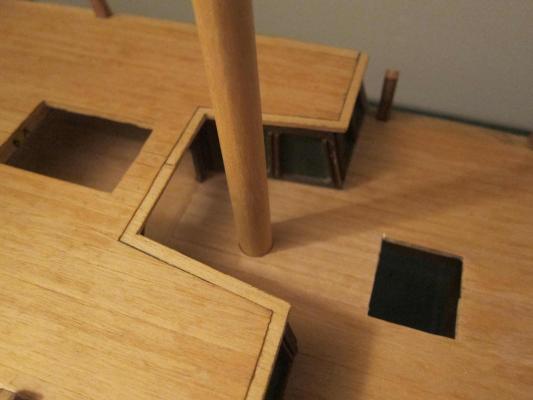
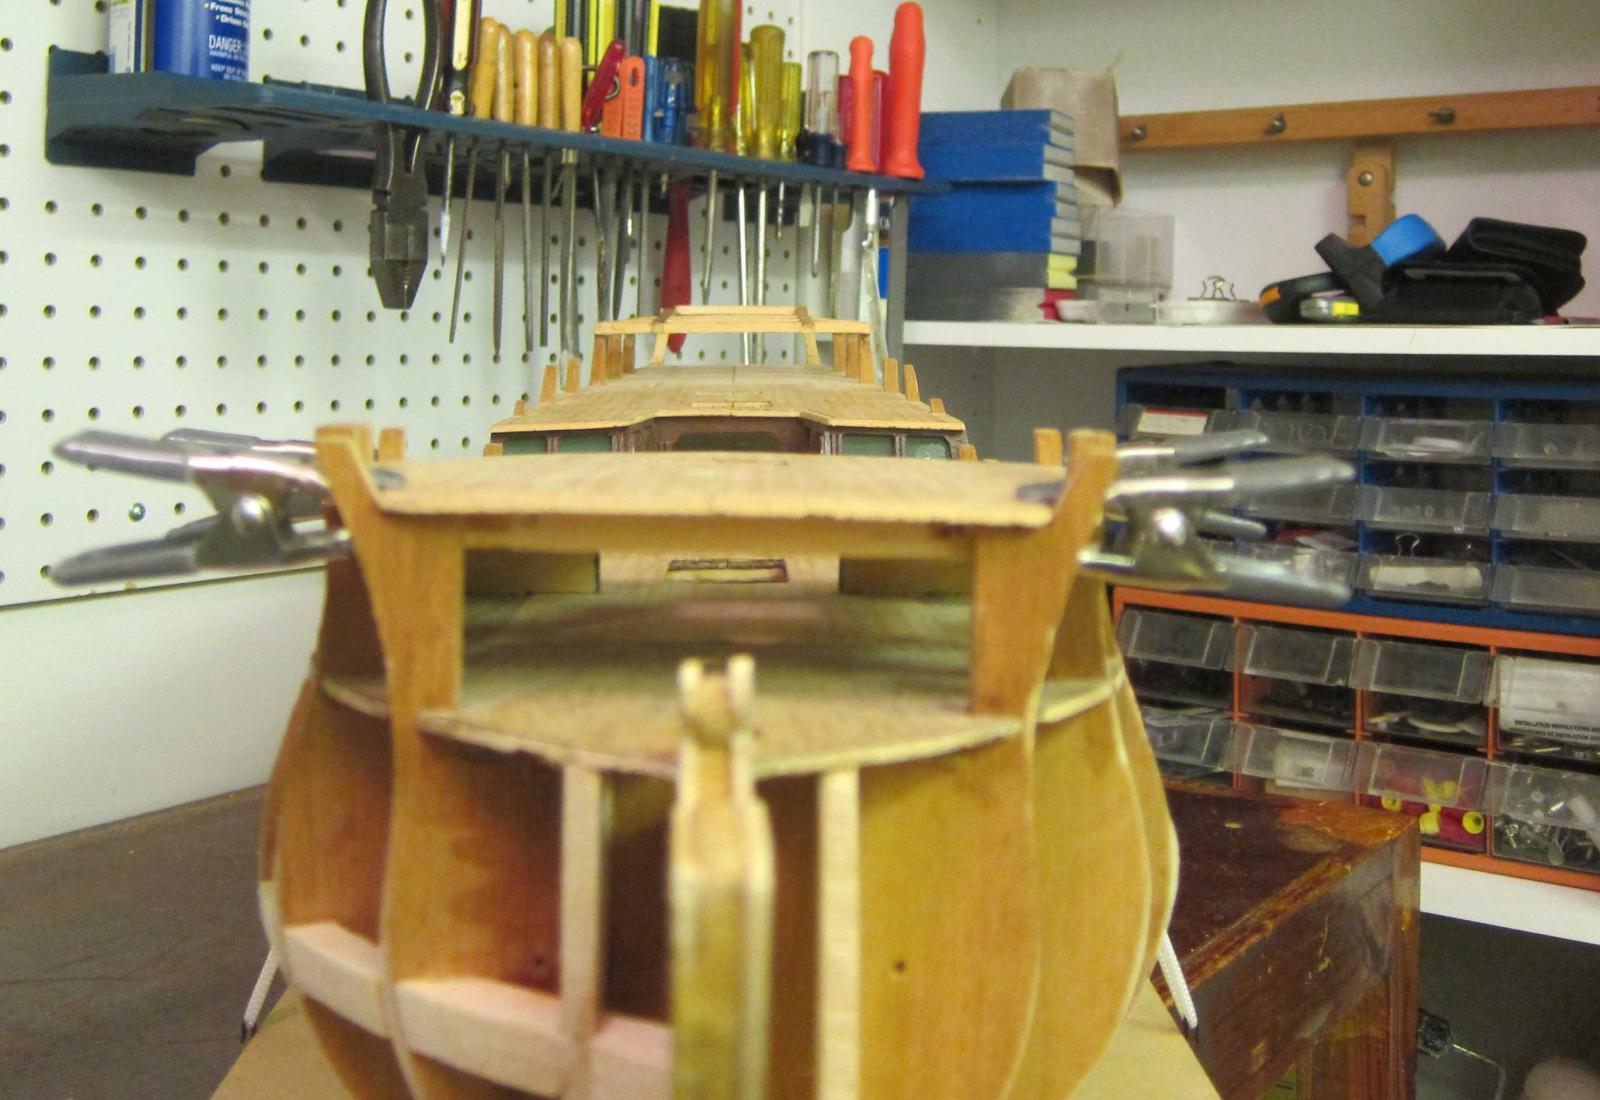
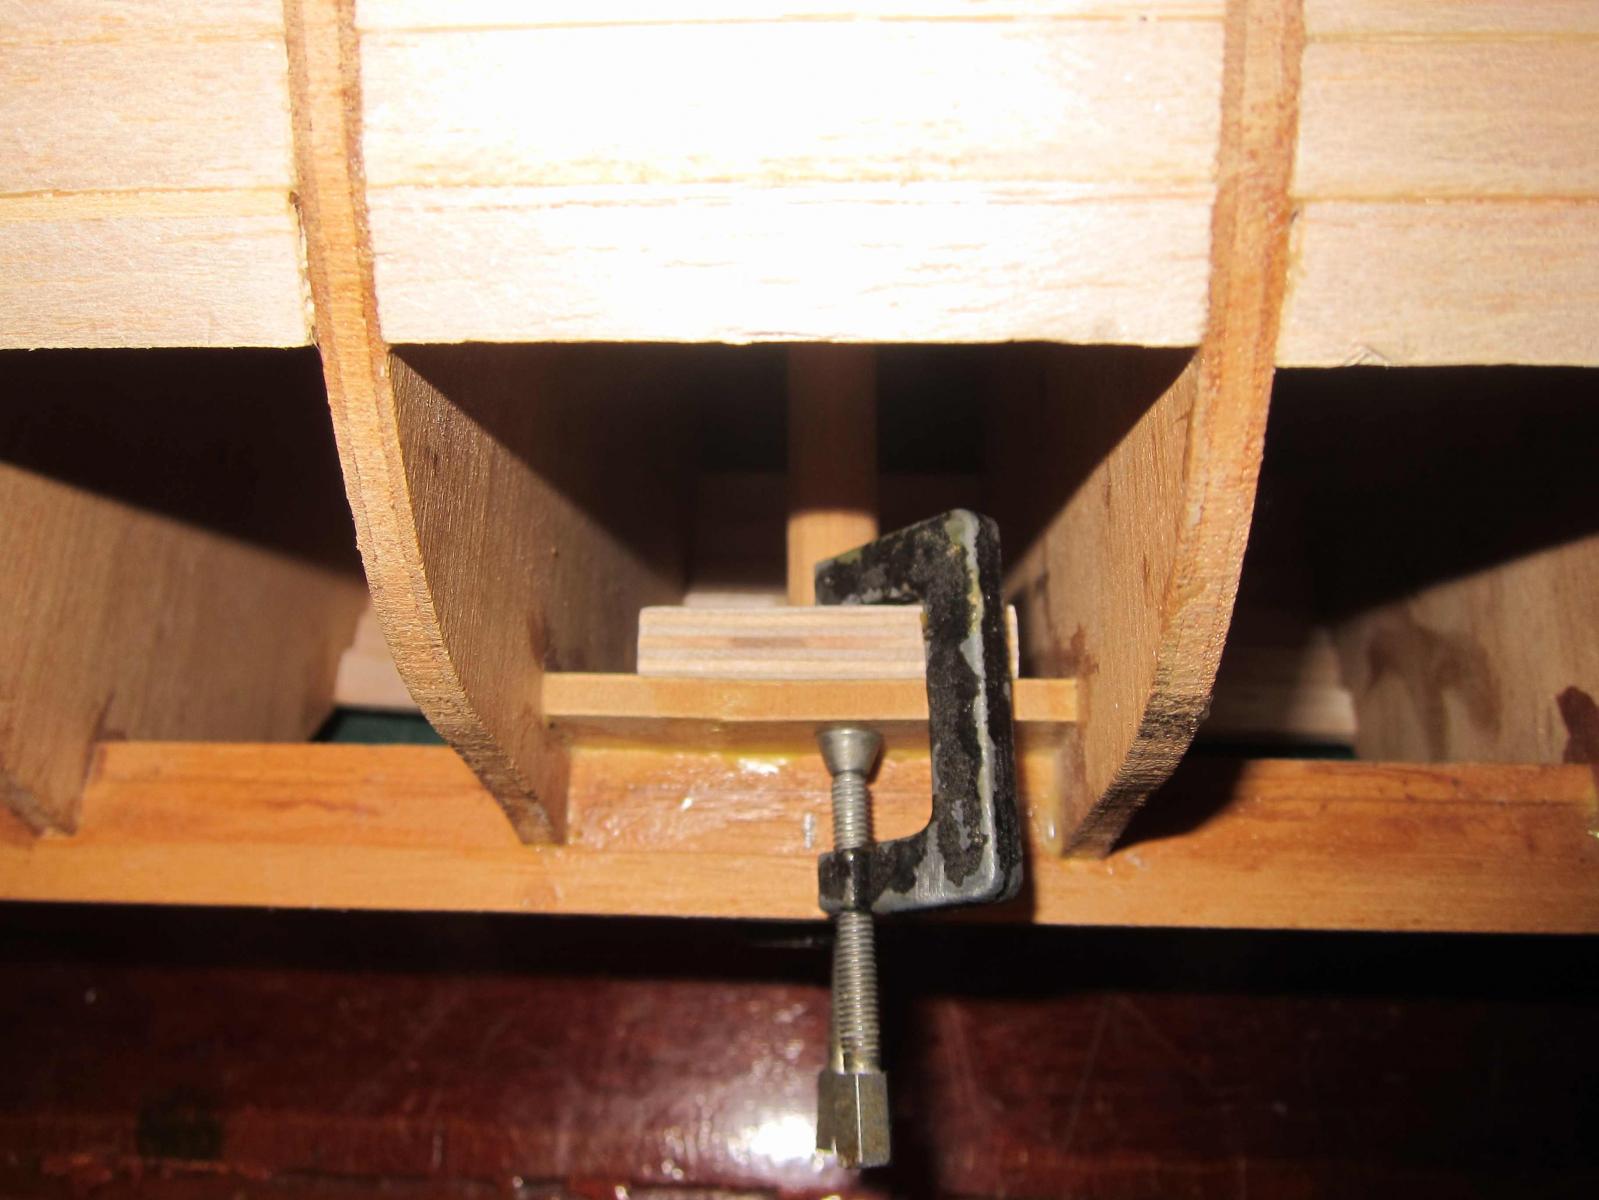
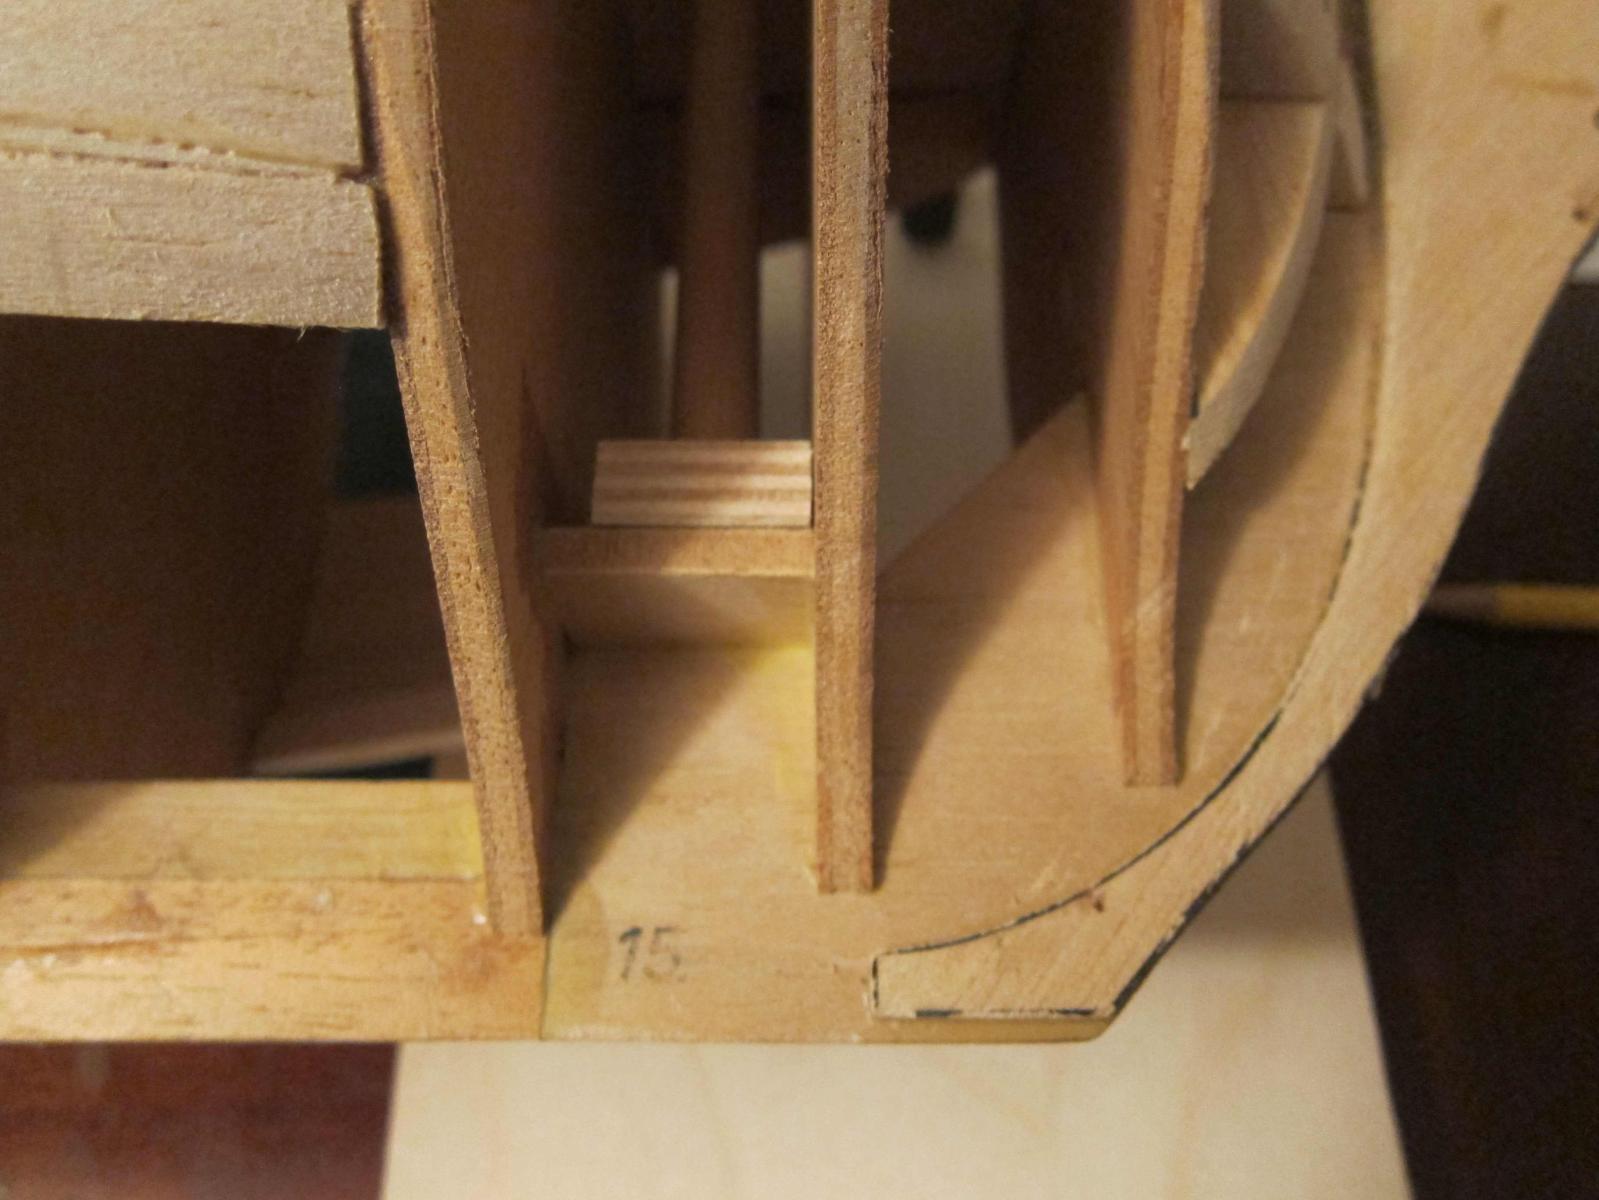
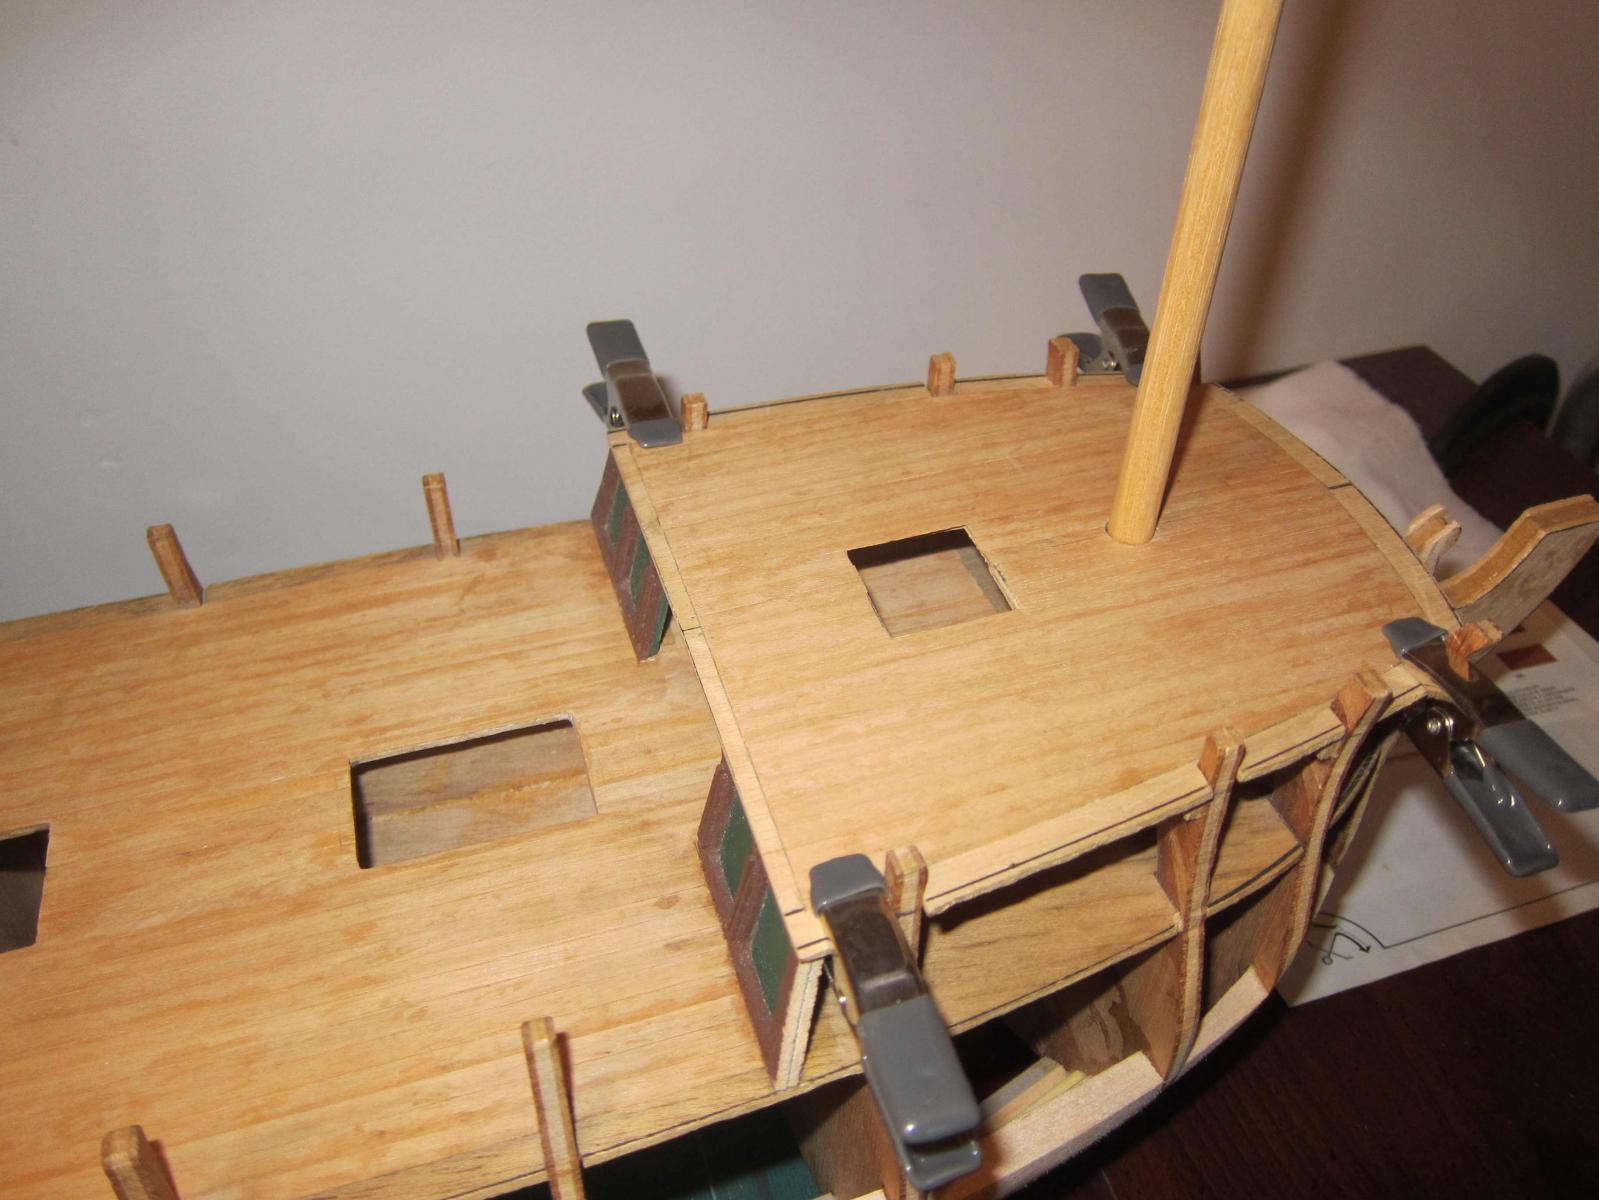
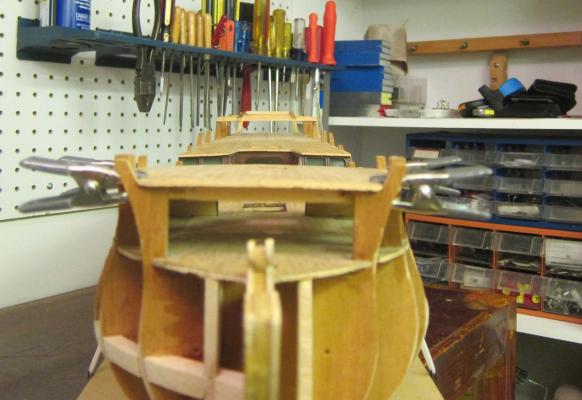
Locating the masts - took a step backward when opening the deck to take the main mast. The result was damage to the planking around the area of the main mast, which had to be cut out and replaced. I should have set the mast holes in the decks to their correct diameters before laying the planks. I will do that on the next build. Having viewed several forum articles I had already decided to not glue the masts to the hull and to rely on the standing/stay rigging to hold the masts in their correct locations. To provide a relatively firm base for working on the rigging when the masts are fitted to the hull while still allowing final alignment though the standing rigging, I made three plywood mounting blocks drilled to mast diameter clearance. These are shown following: So far, the blocks have allowed for provisional vertical alignment of the masts (port/starboard), but the rakes have not yet been set. Once the overall alignment is firmed up, the blocks (not the masts) will be glued on the mast steps (or lower deck in the case of the mizzen). I want to finish this provisional alignment before closing up the lower hull (below the level of the guns). Viewing several of the forums I found a reference to Ship Modelling from Stem to Stern (by Milton Roth) - thanks to JerseyCity Frankie for that. I have just received the book along with two others: Ship Modeling Simplified (by Frank Mastini) and The Ship Model Builder's Assistant (by Charles G. Davis). I will gain as much as possible from these books before proceeding further with the mast location and the construction of gun ports for the lower deck.