channell
-
Posts
234 -
Joined
-
Last visited
Content Type
Profiles
Forums
Gallery
Events
Everything posted by channell
-
 I wonder why Bismarck is so famous even now myself. She (yes Bismarck is a she, still not letting 'effing Nazis change nautical tradition! ) was a really attractive and impressive looking ship but she wasn't the unstoppable technological terror she was made out to be and is certainly more legend than reality these days. Maybe because the wreck has been explored and is recognizable, not a pile of twisted metal on the seabed like virtually every other large warship sunk in battle? Because of what she did to the Hood? Because Bismarck has moved into the realm of pop-culture? I don't know but honestly I'm glad the story of the Bismarck is still alive in this cancel-culture obsessed world. Real men fought and died for crazy things and the story of Bismarck (and WW2 itself for that matter) holds many important lessons to learn for today and future generations. For me, this kit has it's own meaning... I've been trying to do this model off and on since November of 2012 and it was only my second big battleship attempt since coming back to scale models as an adult after the Arizona. My "model career" online really began with this kit and it's only the second kit I attempted to go crazy on detail-wise. Even though I suck at actually finishing these things (only have the Nelson under my belt for 1/200 ships) I think I've come a long way in my abilities and it's fun for me to go back to the beginning of this thread vs where I am now and see how I've progressed. It's more than just a hobby to build the Bismarck for me anyway... it's a oddysey, an obsession... something I just *have* to do "because it's there" . Might even get a bit misty-eyed when it's done in another 10 years or so!
 -
Not anymore but I put a couple pics on post #43 of this thread. Personally, I'd love to see a 1/200 King George V or HMS Vanguard... if we can get Neslon and Rodney, why not? Some smaller 1/200 ships would also be nice to add to the fleet.
-
I love the flawlessly clean look of your build so far... well done sir!
- 19 replies
-
- 4
-

-
- schnellboot type 38
- italeri
- (and 2 more)
-
I wish I had a magic pill or something that would restore my enthusiasm for working on these monsters when I get burned out on them... they make awesome models, especially when you throw the aftermarket stuff at them. They can get so overwhelming easy though! I did the Nelson, have a Rodney in the stash too. The world needs more models of the "Pair 'o Boots"... just really unusual and cool ships!
-
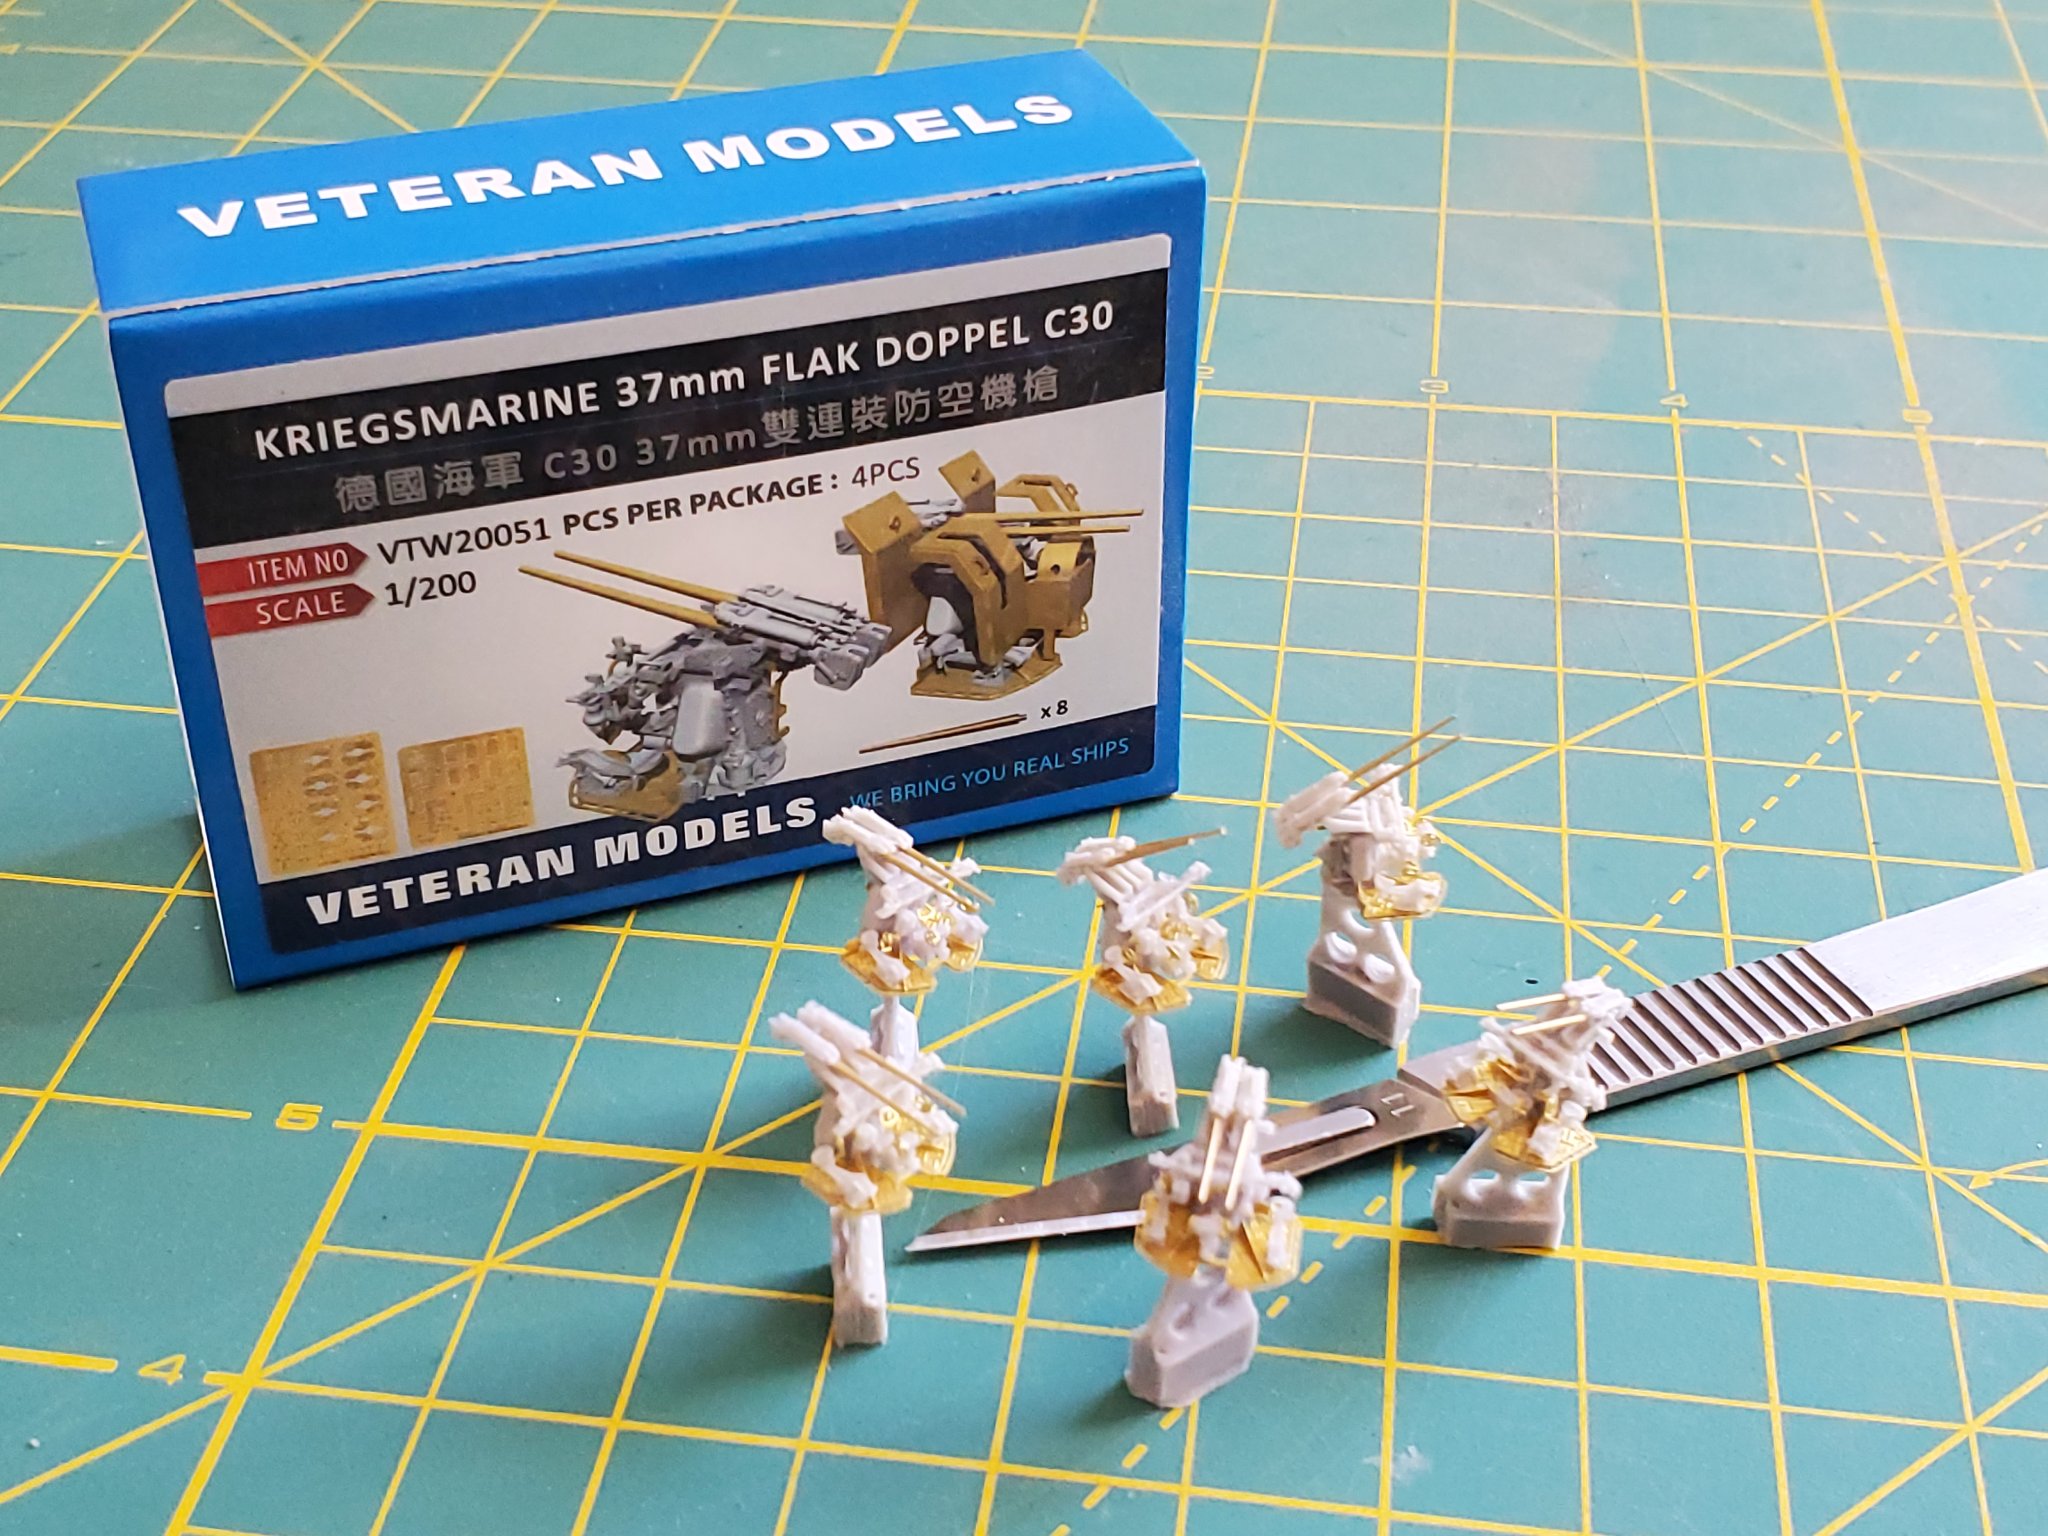
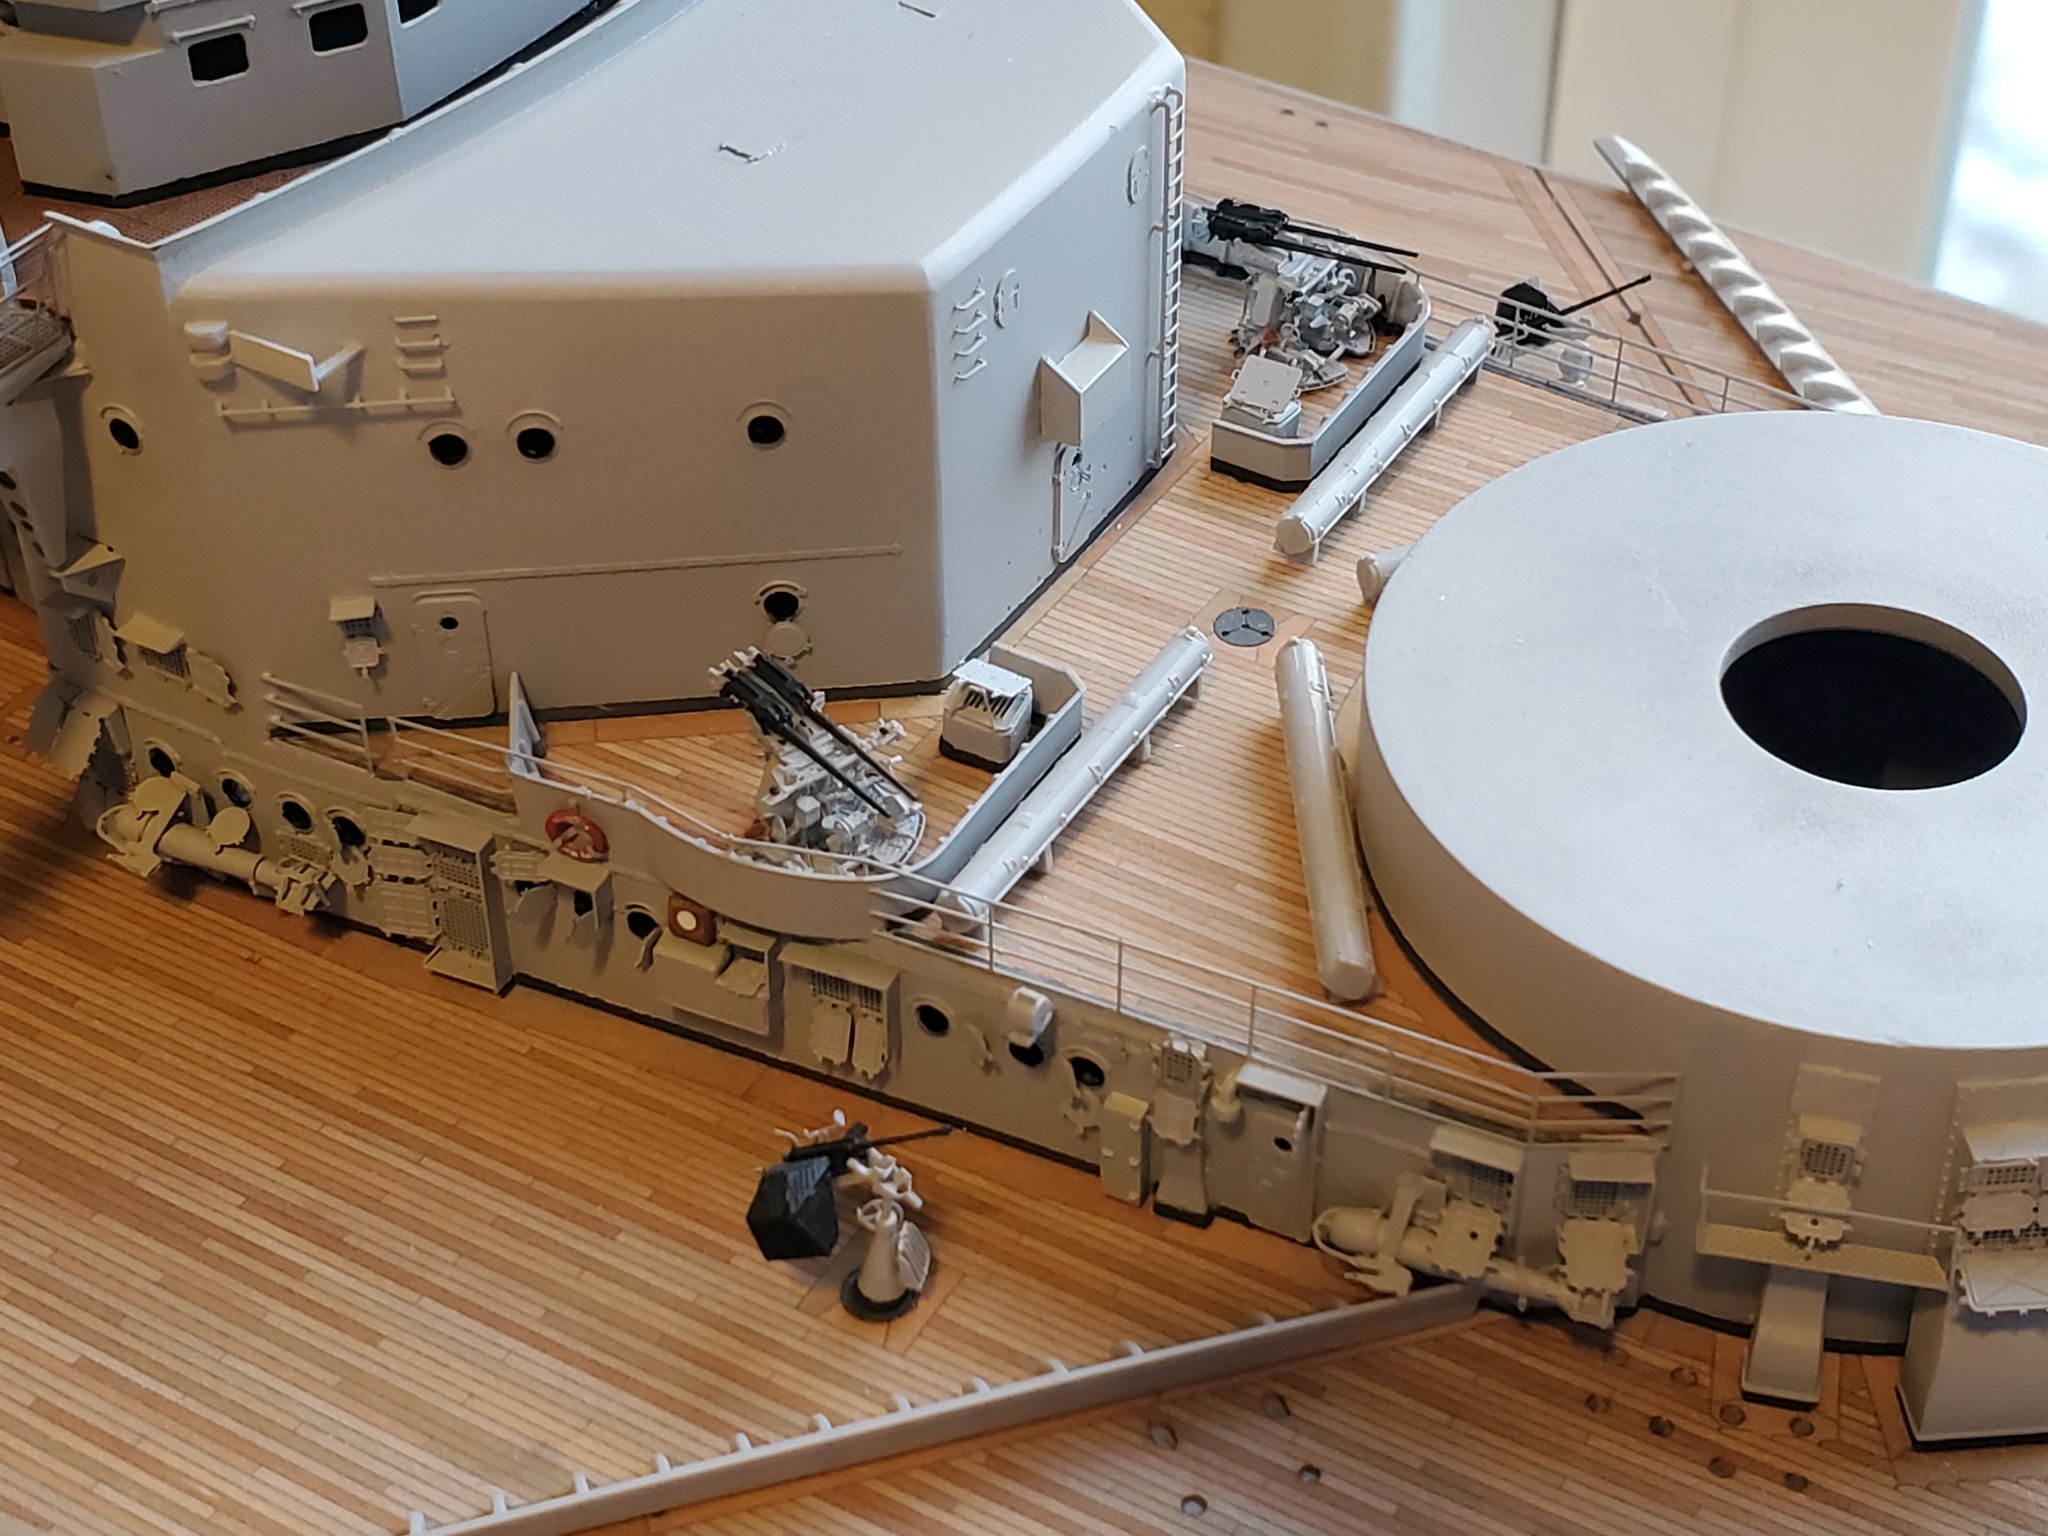
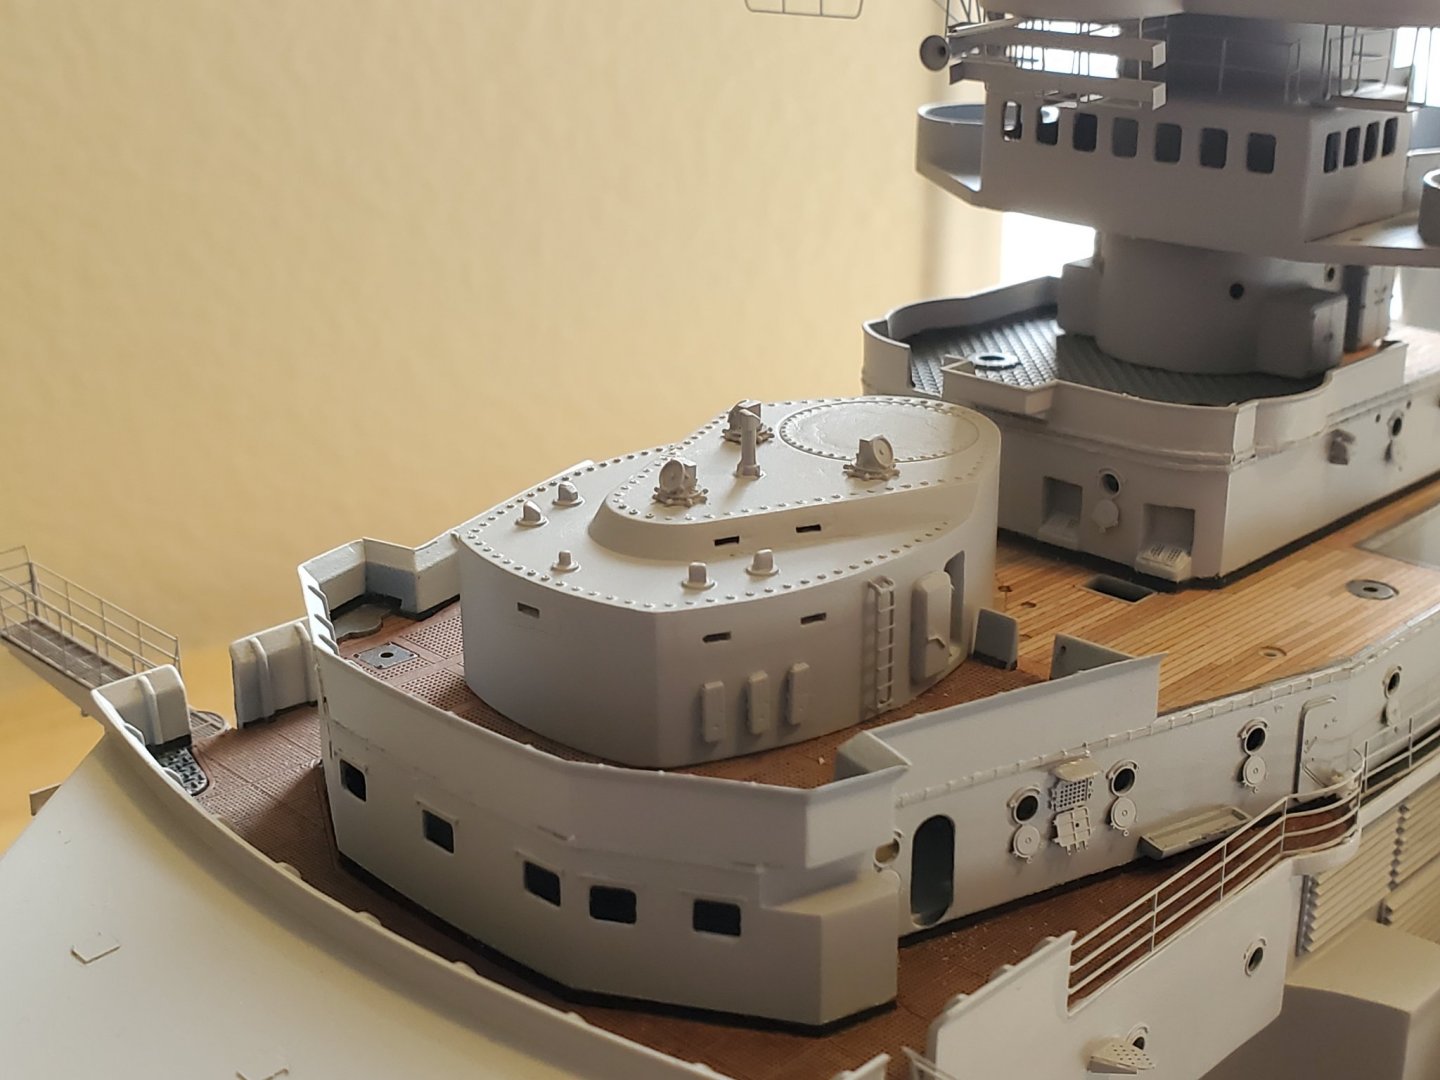
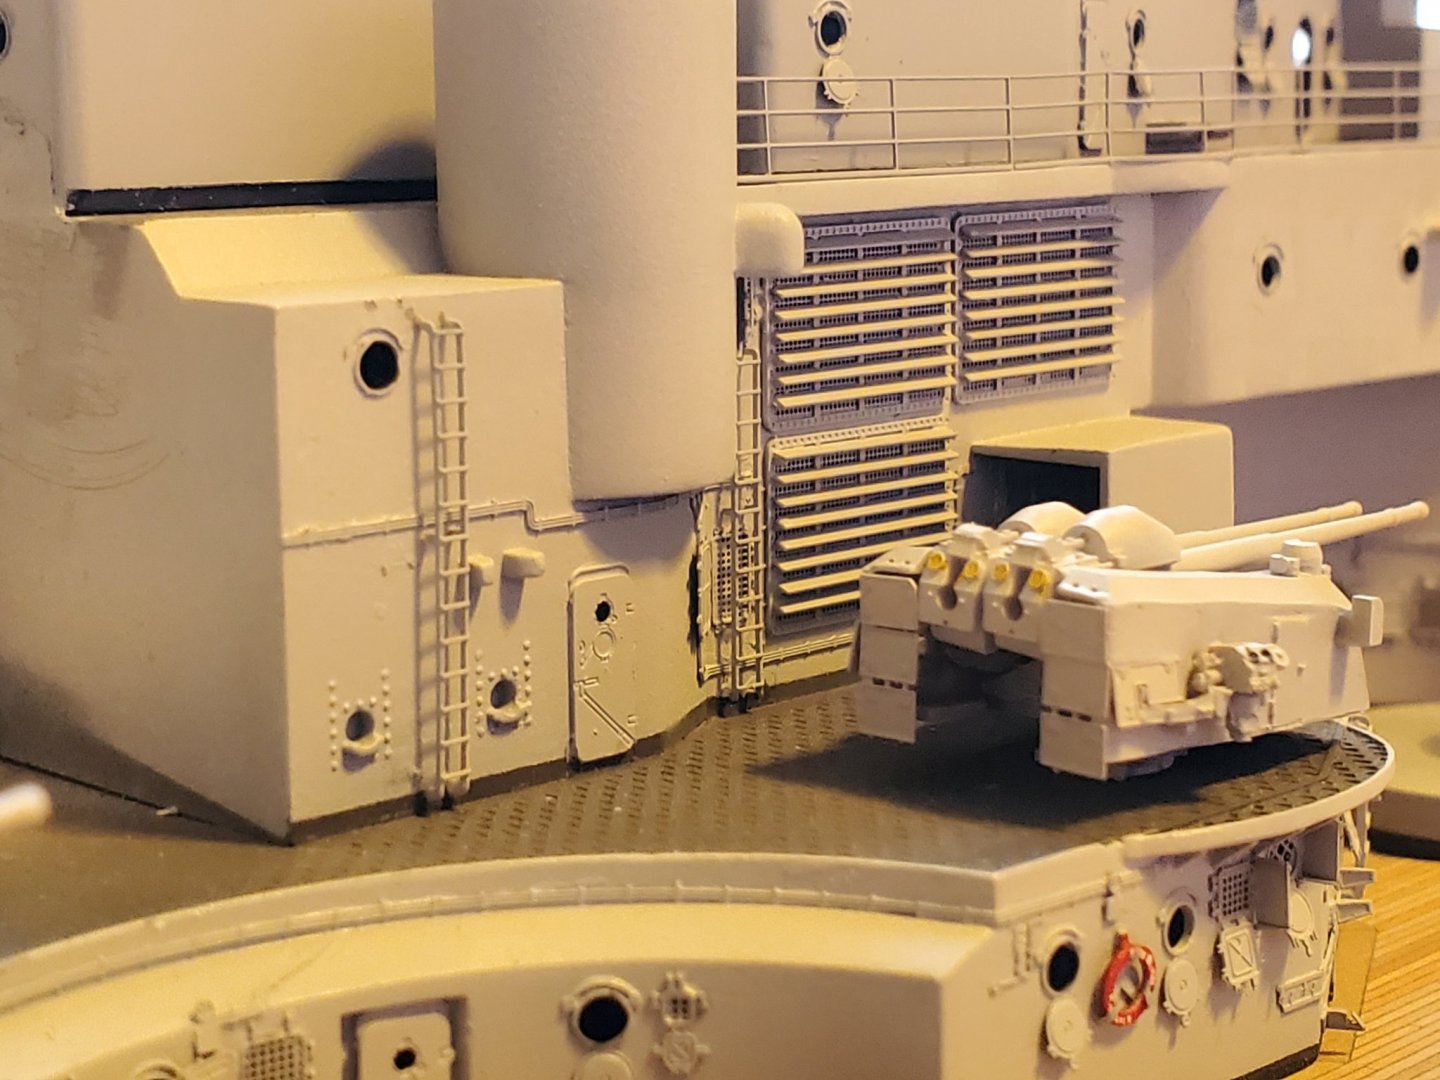
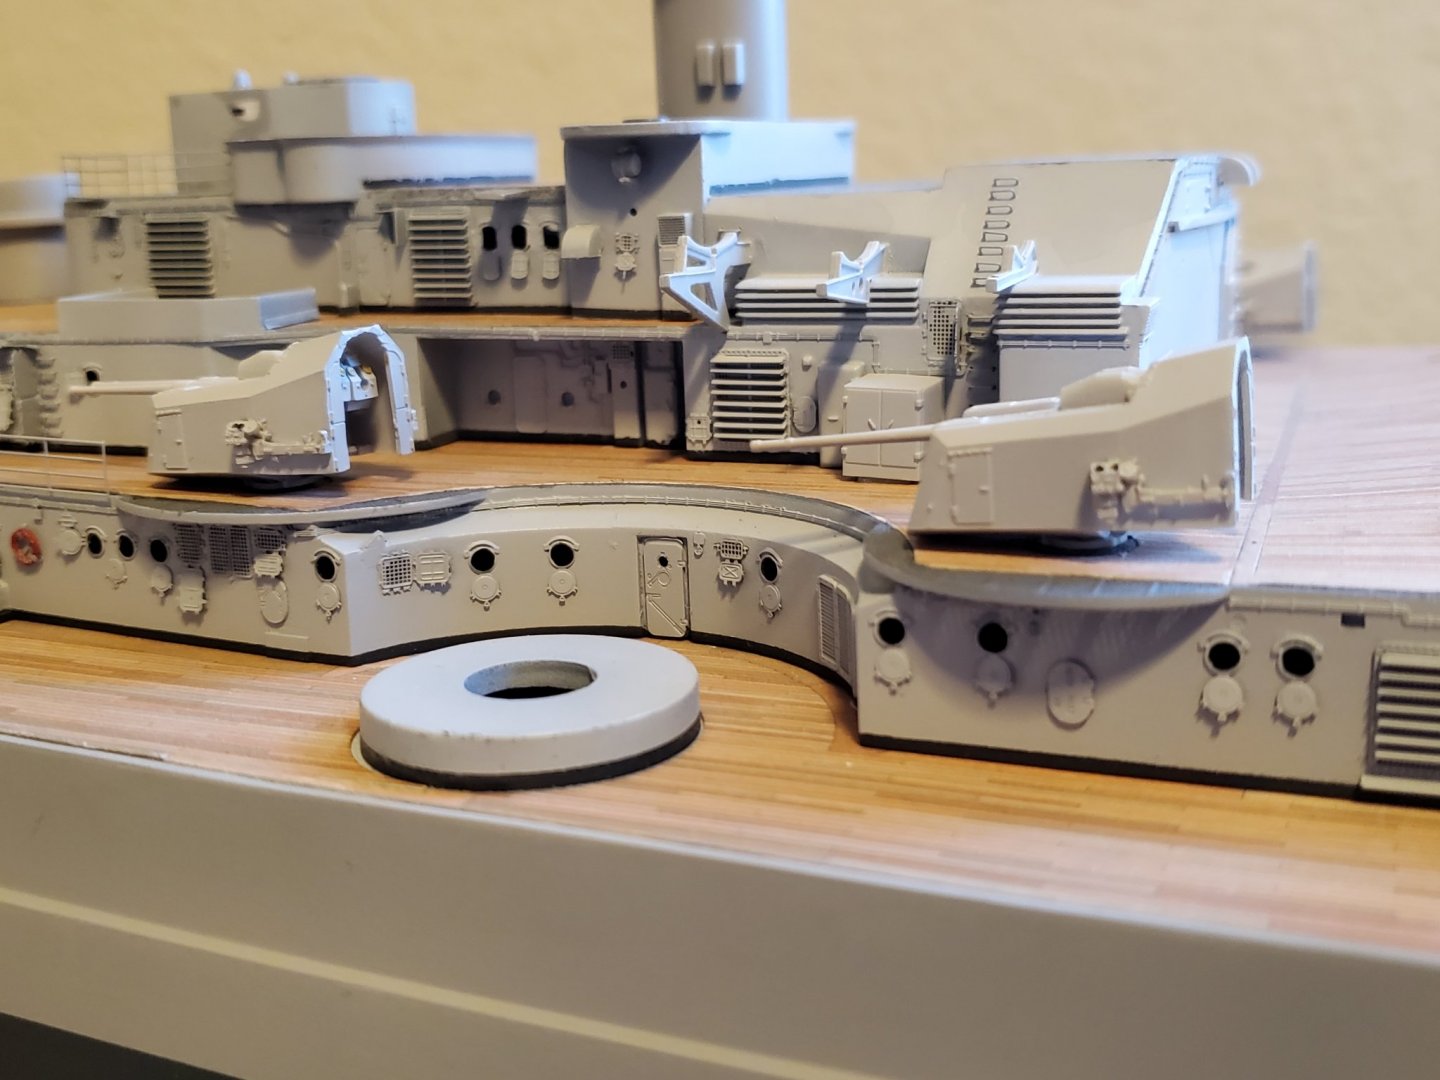
Made some good progress over the weekend... got the conning tower set up complete with scratched out open "safe doors" (something I wanted to do after seeing it on the wreck) as well as getting quite a bit done on the Admiral's Bridge. Still tons of detail to go on the Admiral's bridge but at least the main modifications are done. I also had to throw in an eye candy shot of those Veteran Model Flak guns... so cool looking!


- 265 replies
-
- 11
-
-
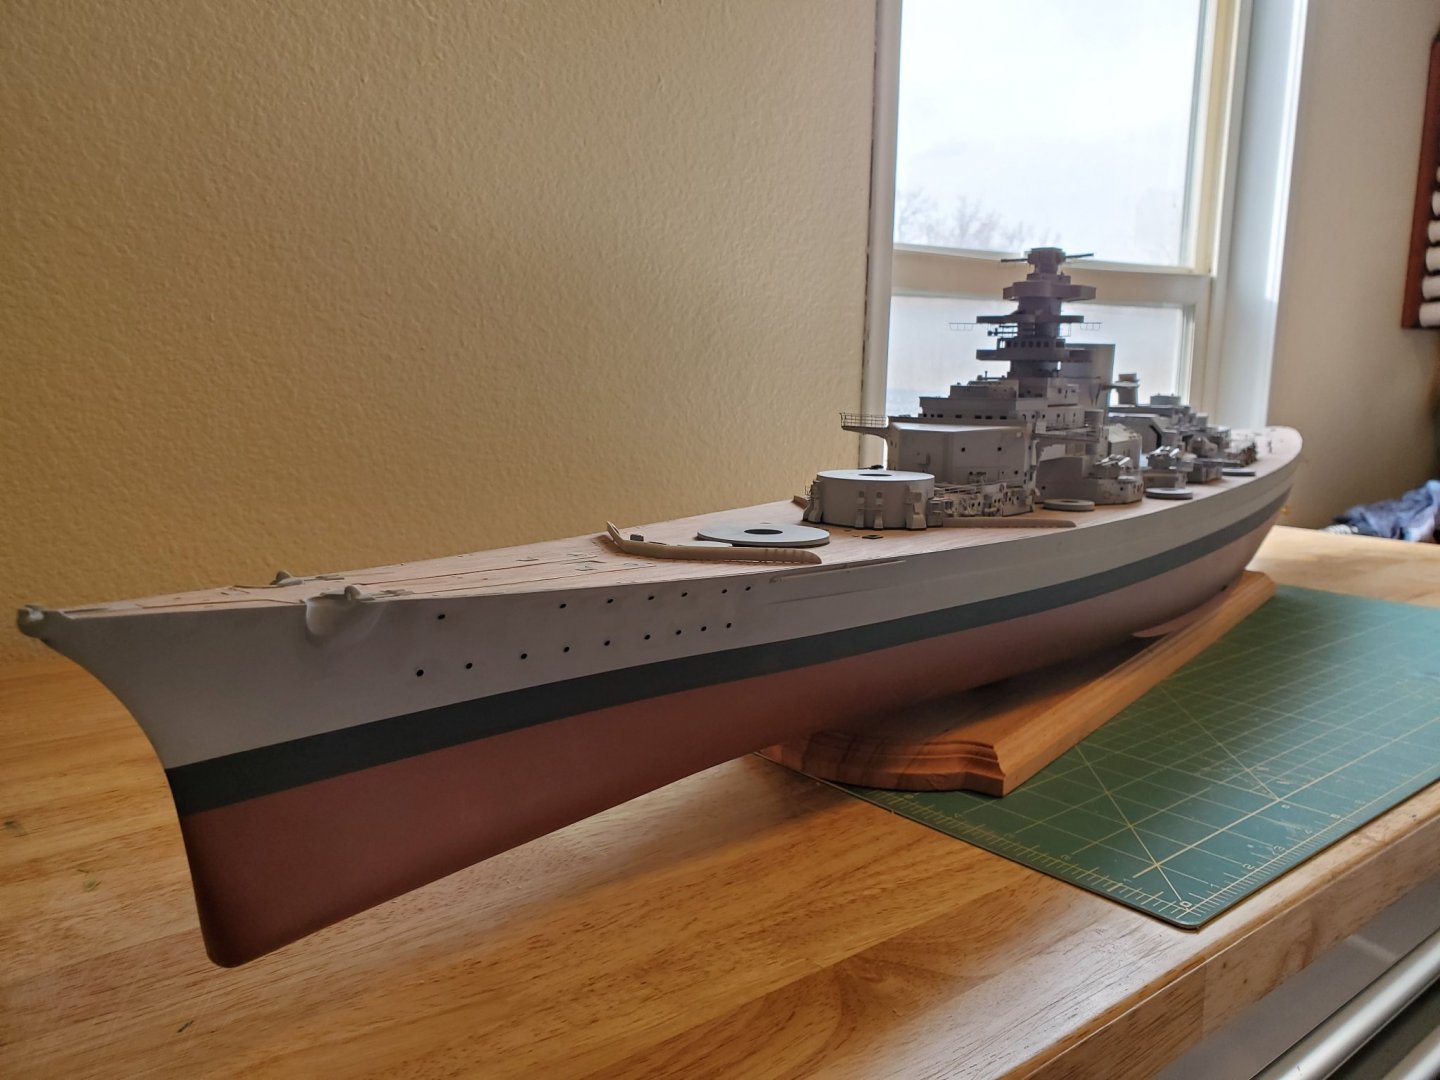
Thanks everyone! Working on this thing has been (and continues to be) an odyssey, that's for sure. No way I'm adding up how much I paid for all the stuff in this thread... I think it might drive me to tears. At least it's all paid for, provided I don't buy anything else for it (which seems unlikely) .
-
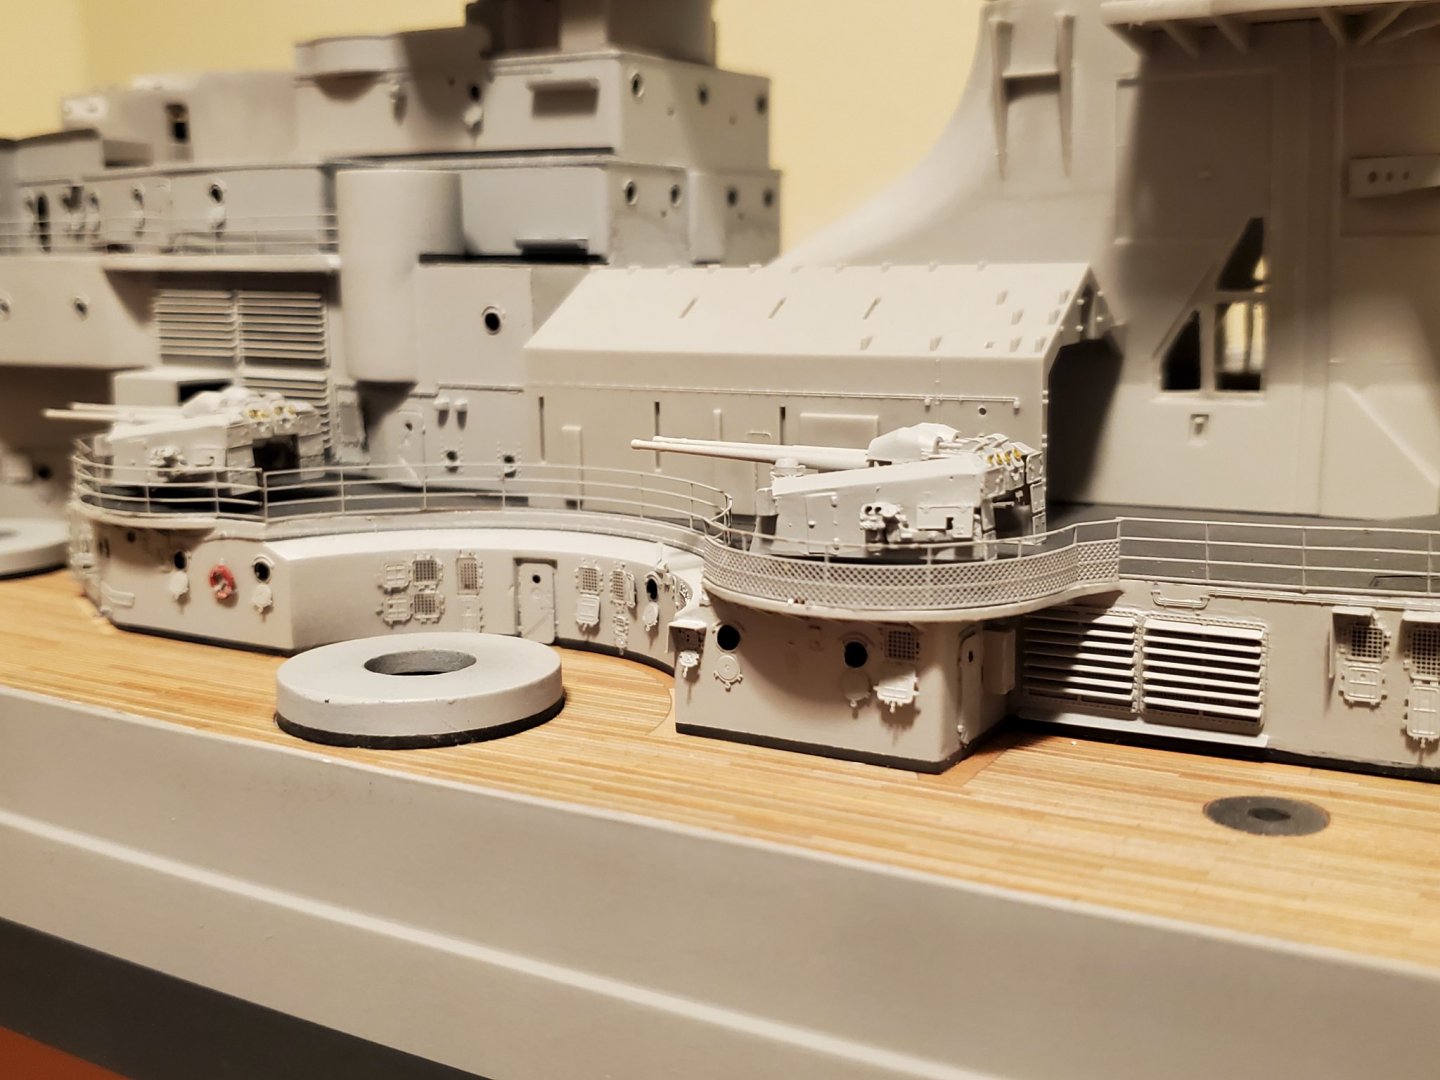
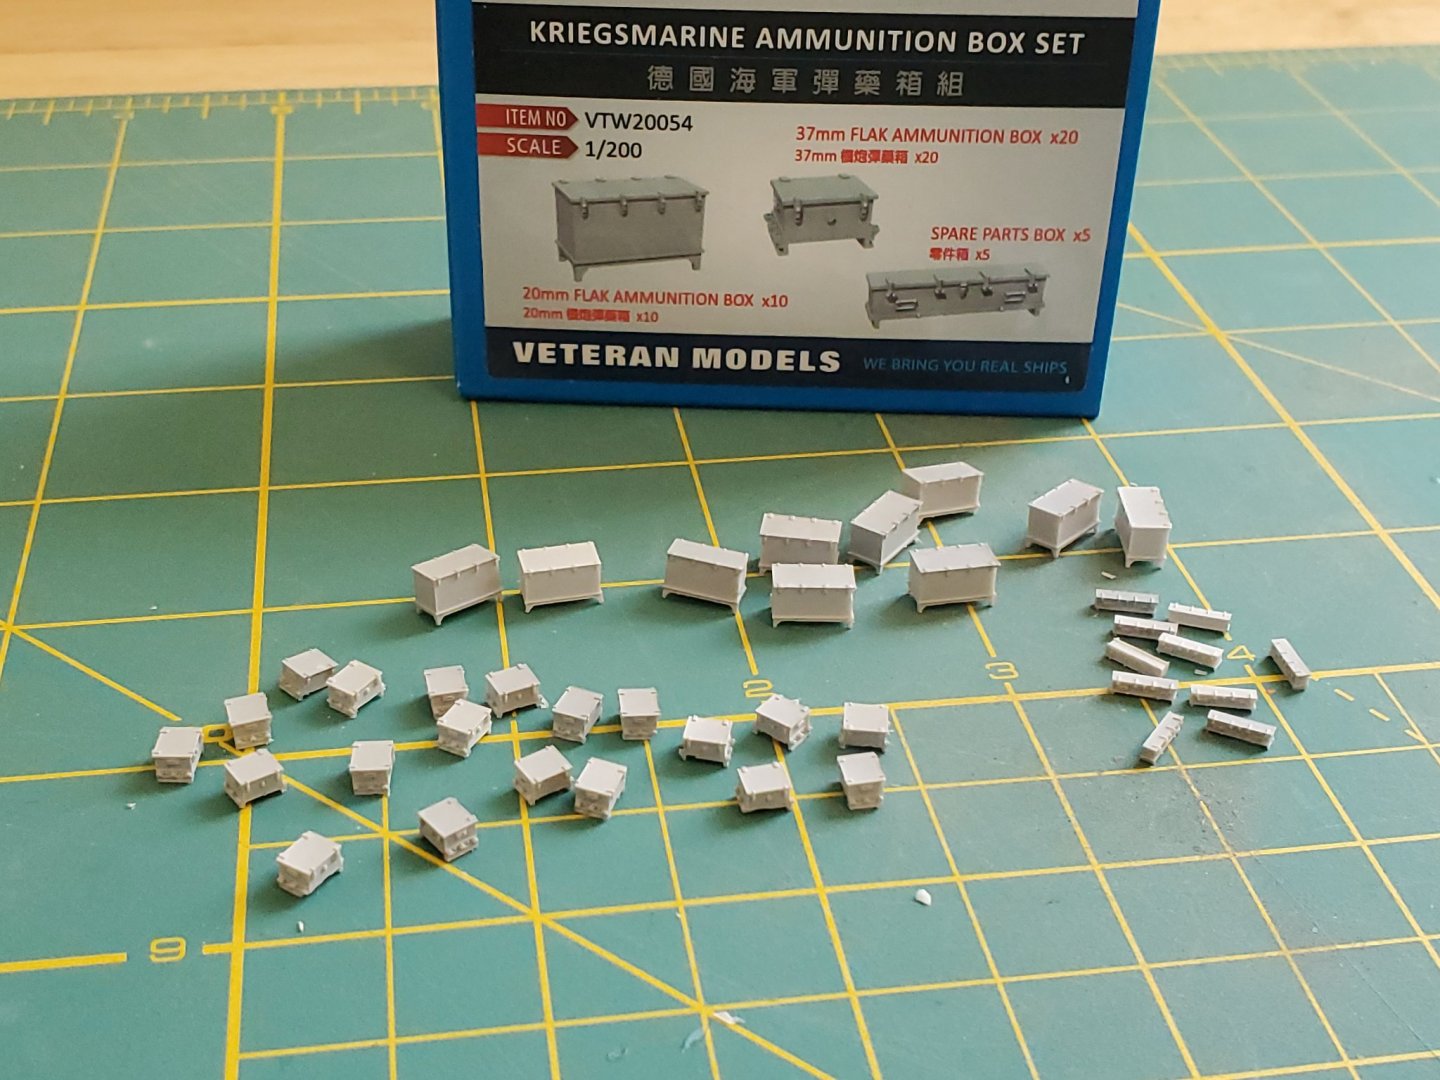
Thanks all! been on a rampage these past few days on Bismarck... got the flak guns installed, railings up on level 2 of the superstructure and marathoned 6 more tiny Veteran Models AA guns. Damn those things are a nightmare. Also got some Veteran Models ammo boxes cleaned up, painted and ready to go.

- 265 replies
-
- 13
-
-
Sorry guys, not sure why the pics aren't working for me, guess I forgot how after all this time...


-
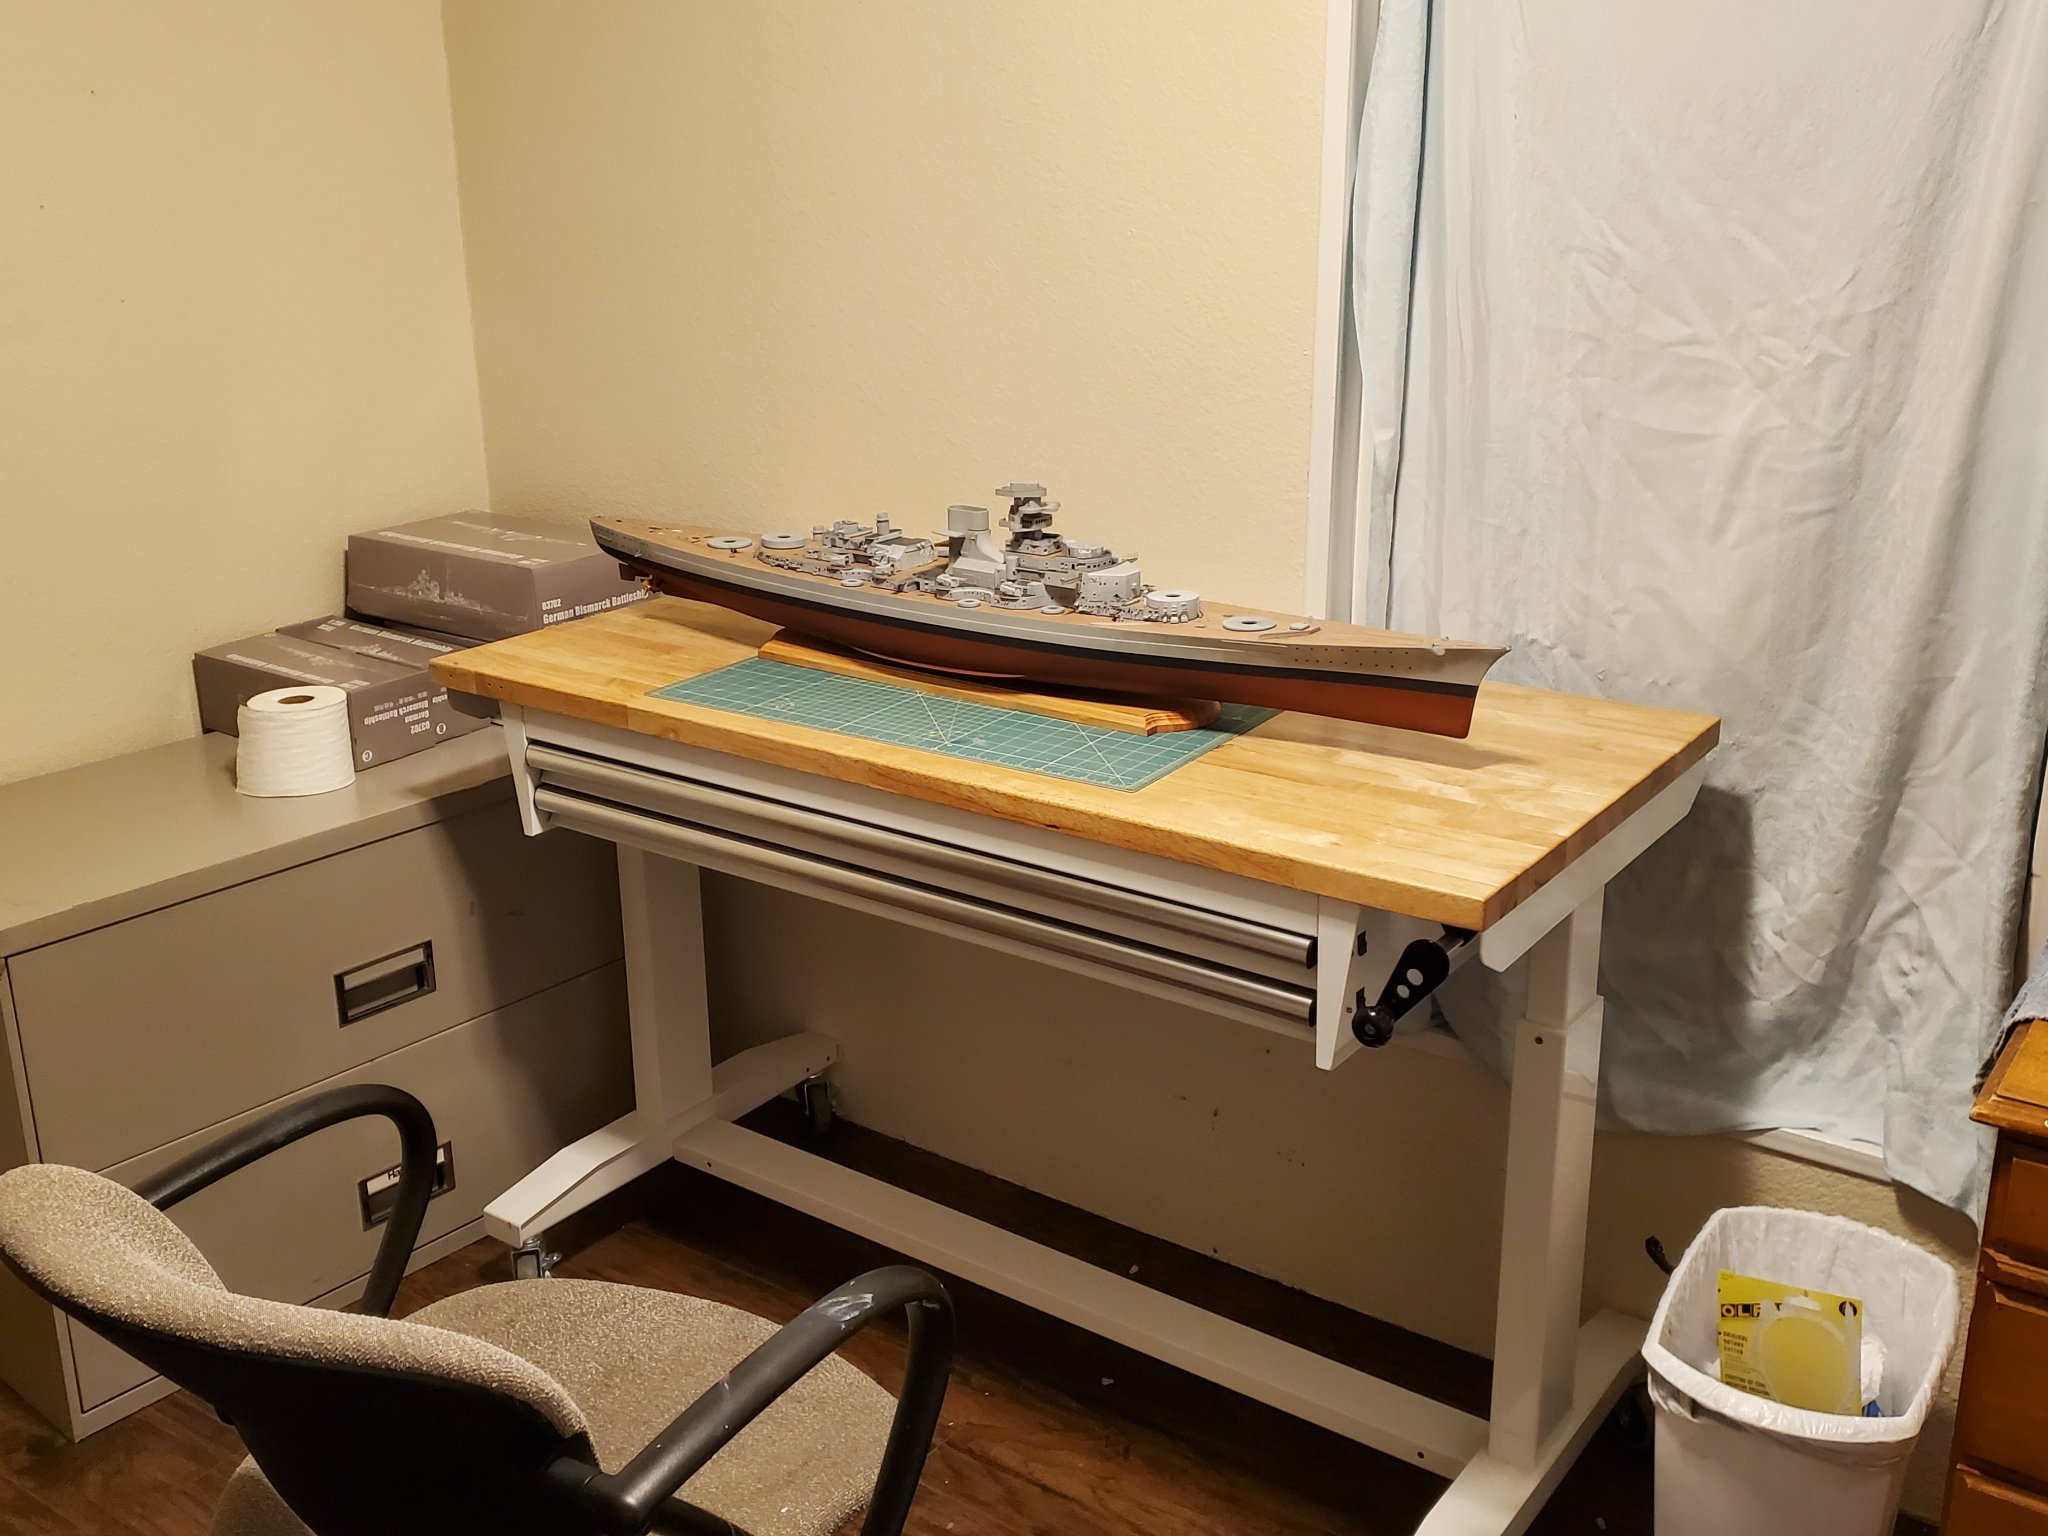
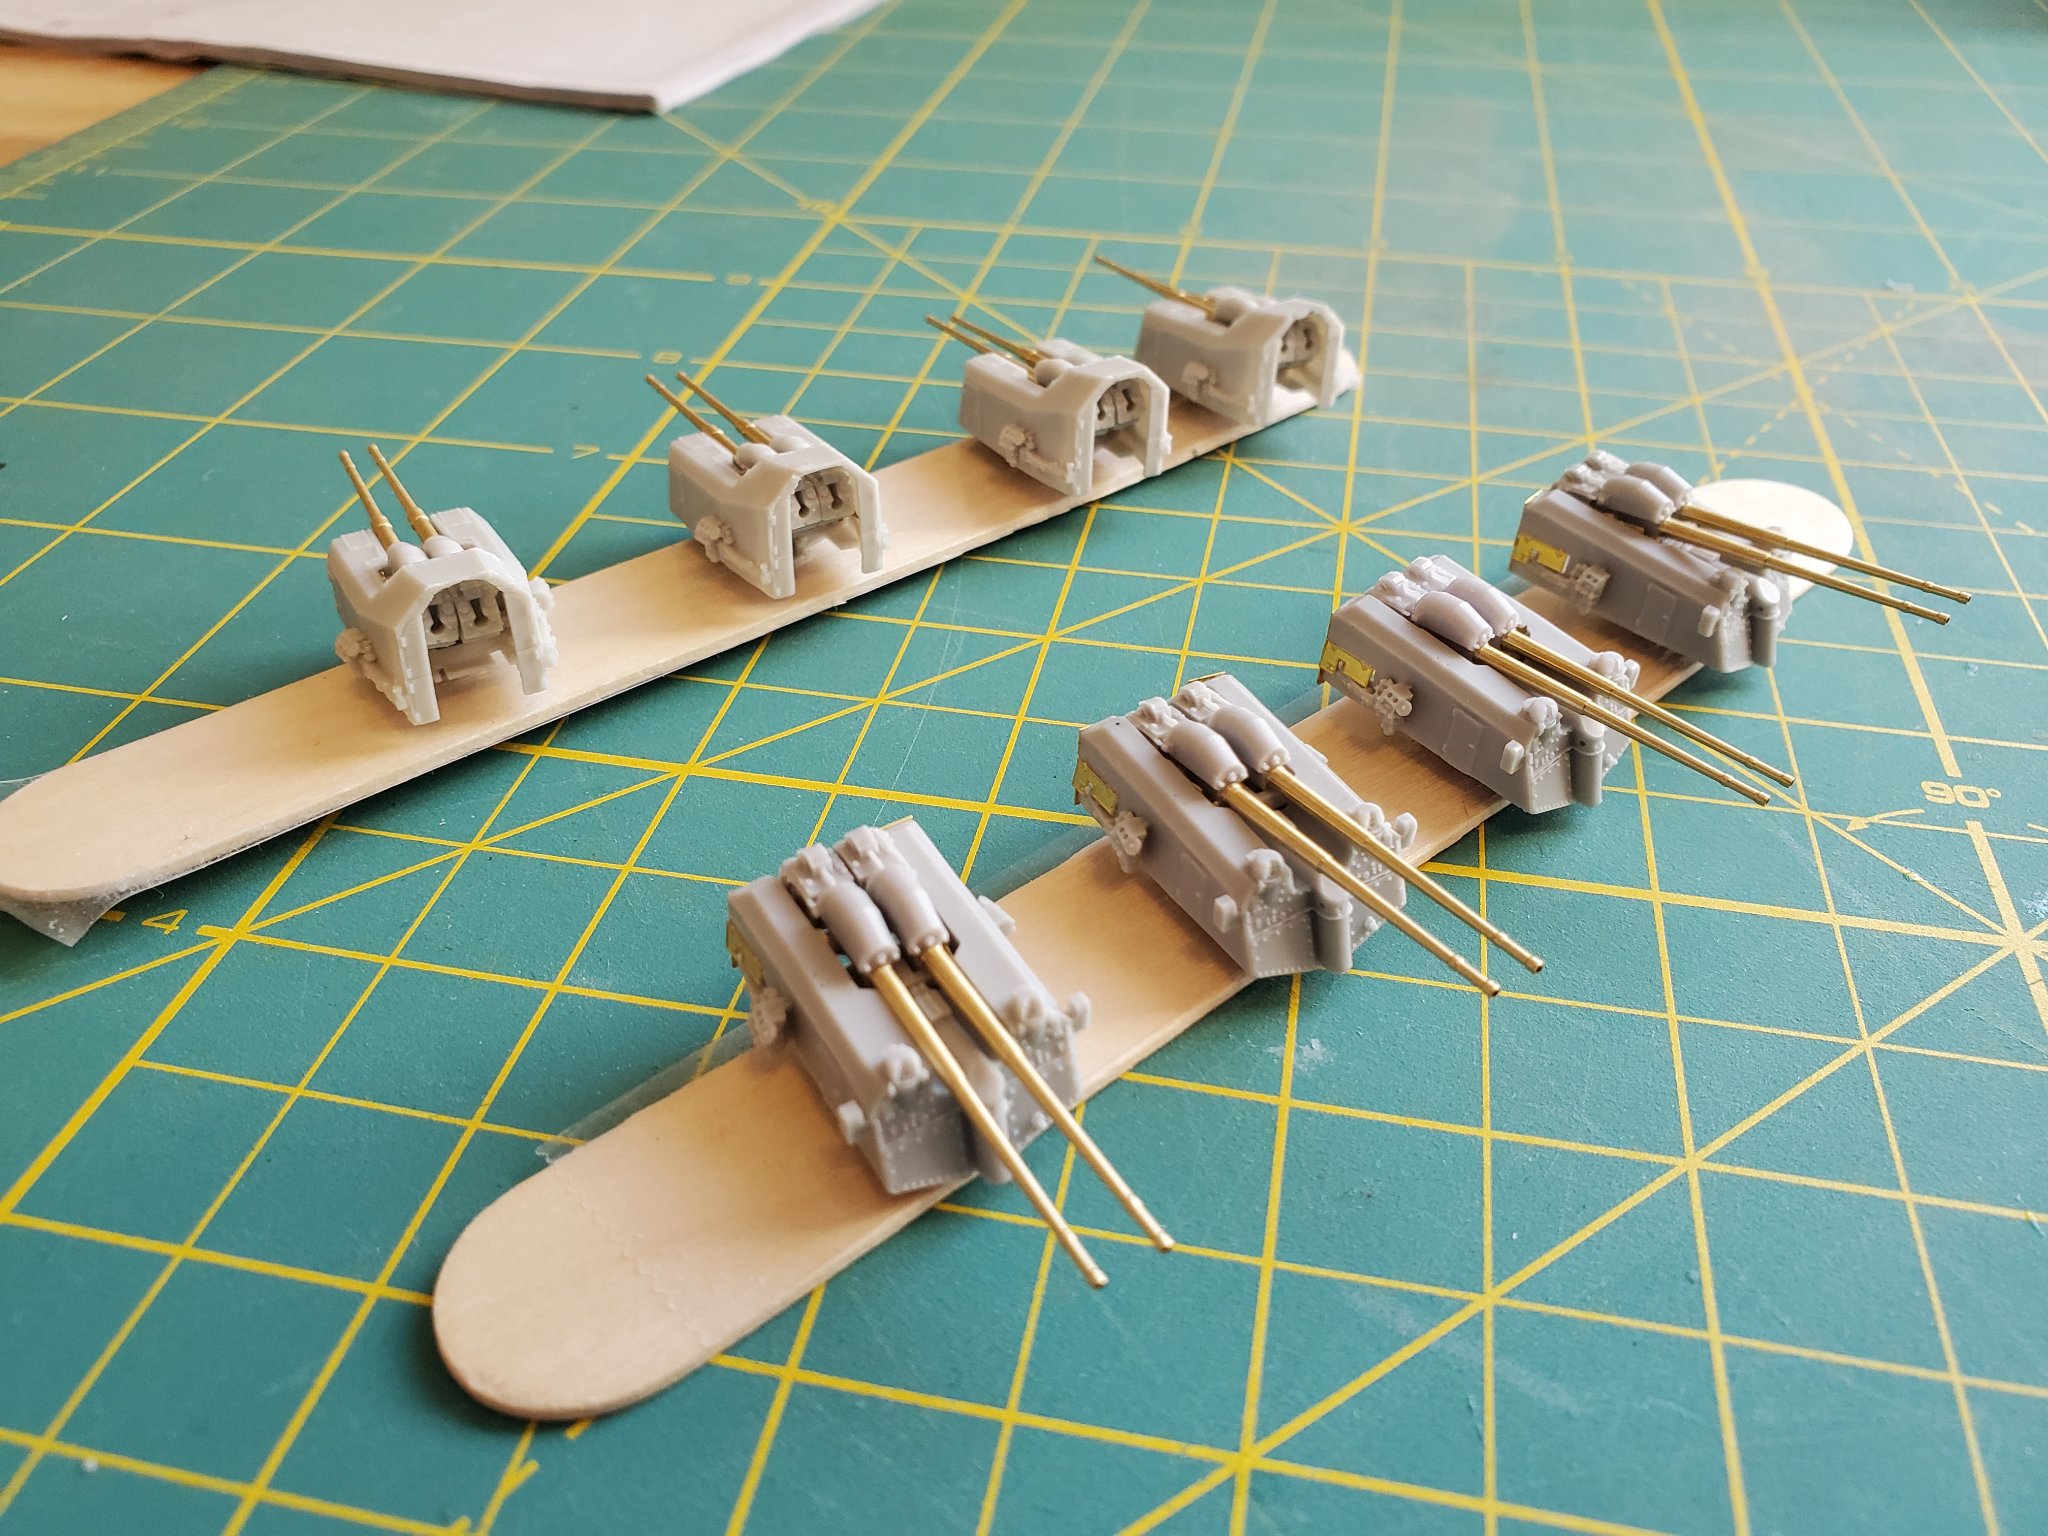
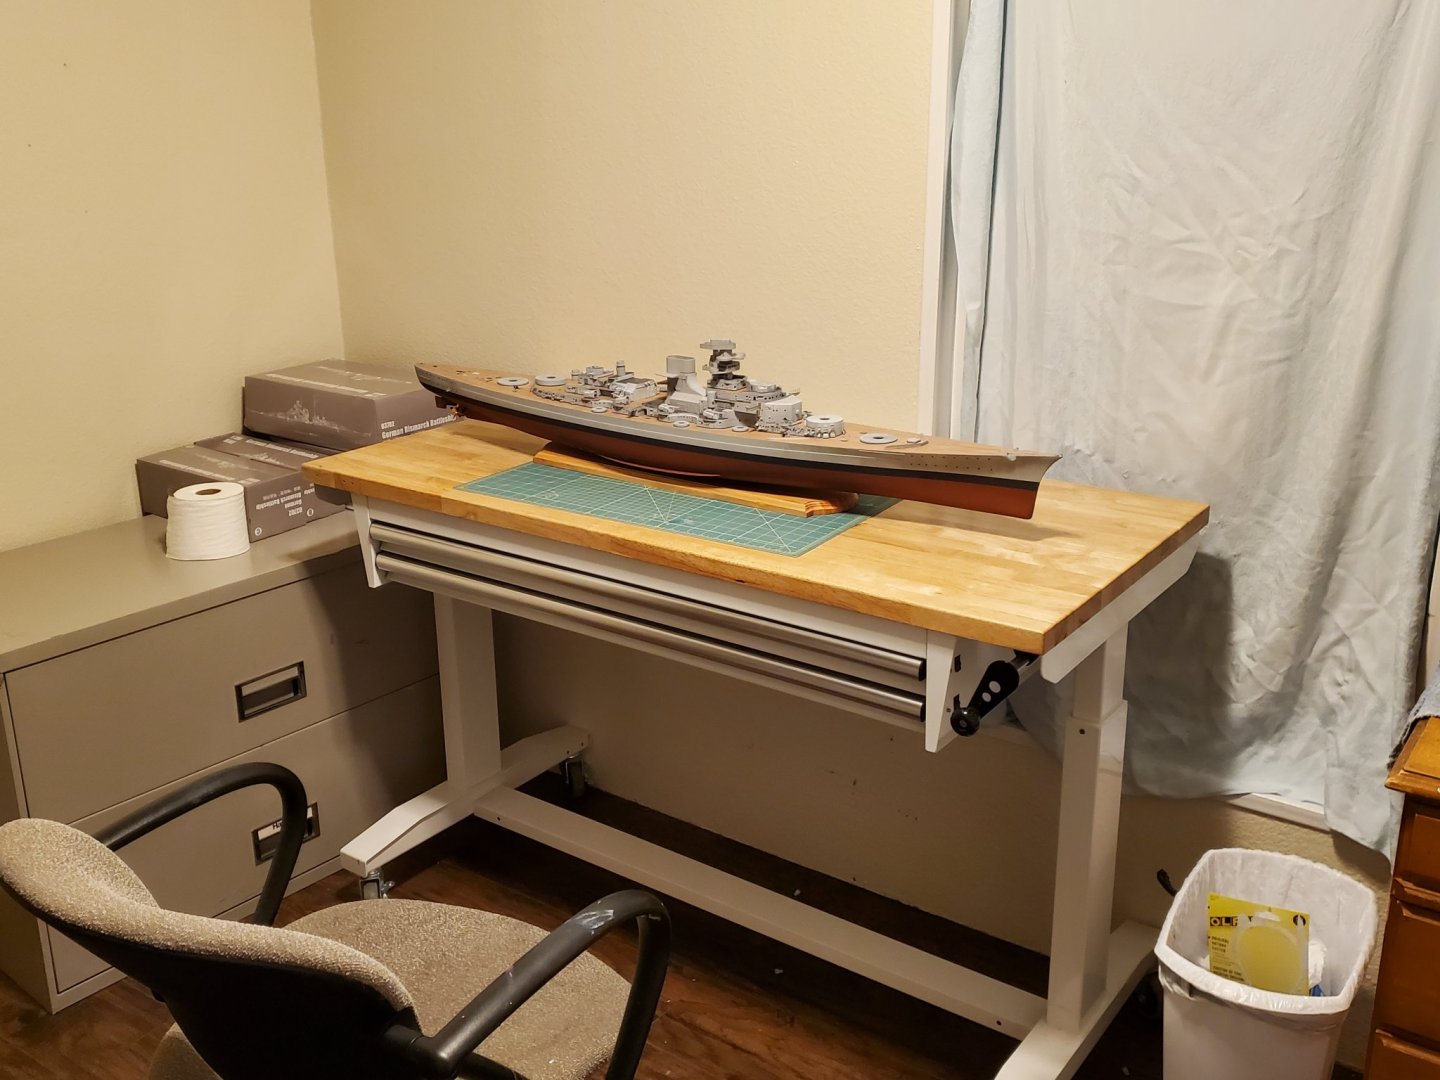
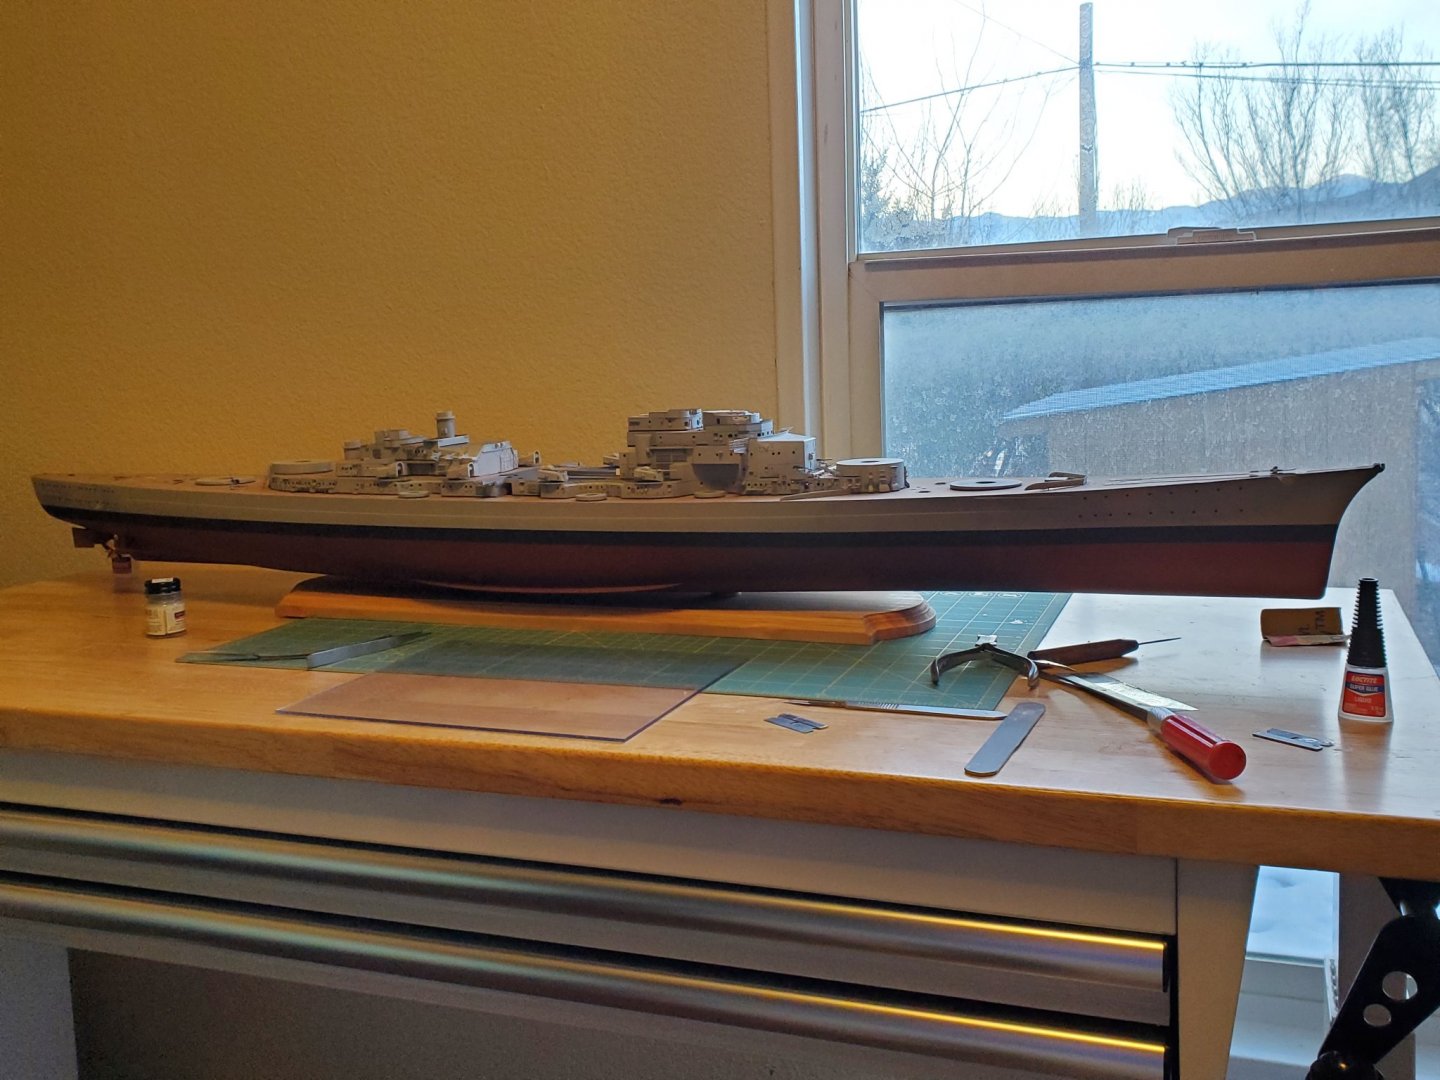
Hey everyone... long time, no see. I got burned out again and took a couple years break, I figure since this thread had dragged on so long I might as well. Anyway, my other hobby is getting boring now so I'm back to working on Bissy; thought y'all might be interested in seeing what's going on. [img]https://i.imgur.com/hz8BPdy.jpg[/img] Picking up pretty much where I left off last time but in a new hobby room; this weekend I mostly worked on guns: [img]https://i.imgur.com/Dz22dtD.jpg[/img] finished up the small deck area (minus some firehose rolls) [img]https://i.imgur.com/lNxuRCy.jpg[/img] Replacing the kit Flak guns with these awesome Veteran models versions, each one is it's own little kit as usual. [img]https://i.imgur.com/u6Gcv3o.jpg[/img] After assembly and ready for paint [img]https://i.imgur.com/QST7AKc.jpg[/img] [img]https://i.imgur.com/MHuZmRN.jpg[/img] A preview things to come... [img]https://i.imgur.com/LIs1Rhx.jpg[/img] ...and back in the box for safekeeping before they finally get installed. Thanks for looking!
-
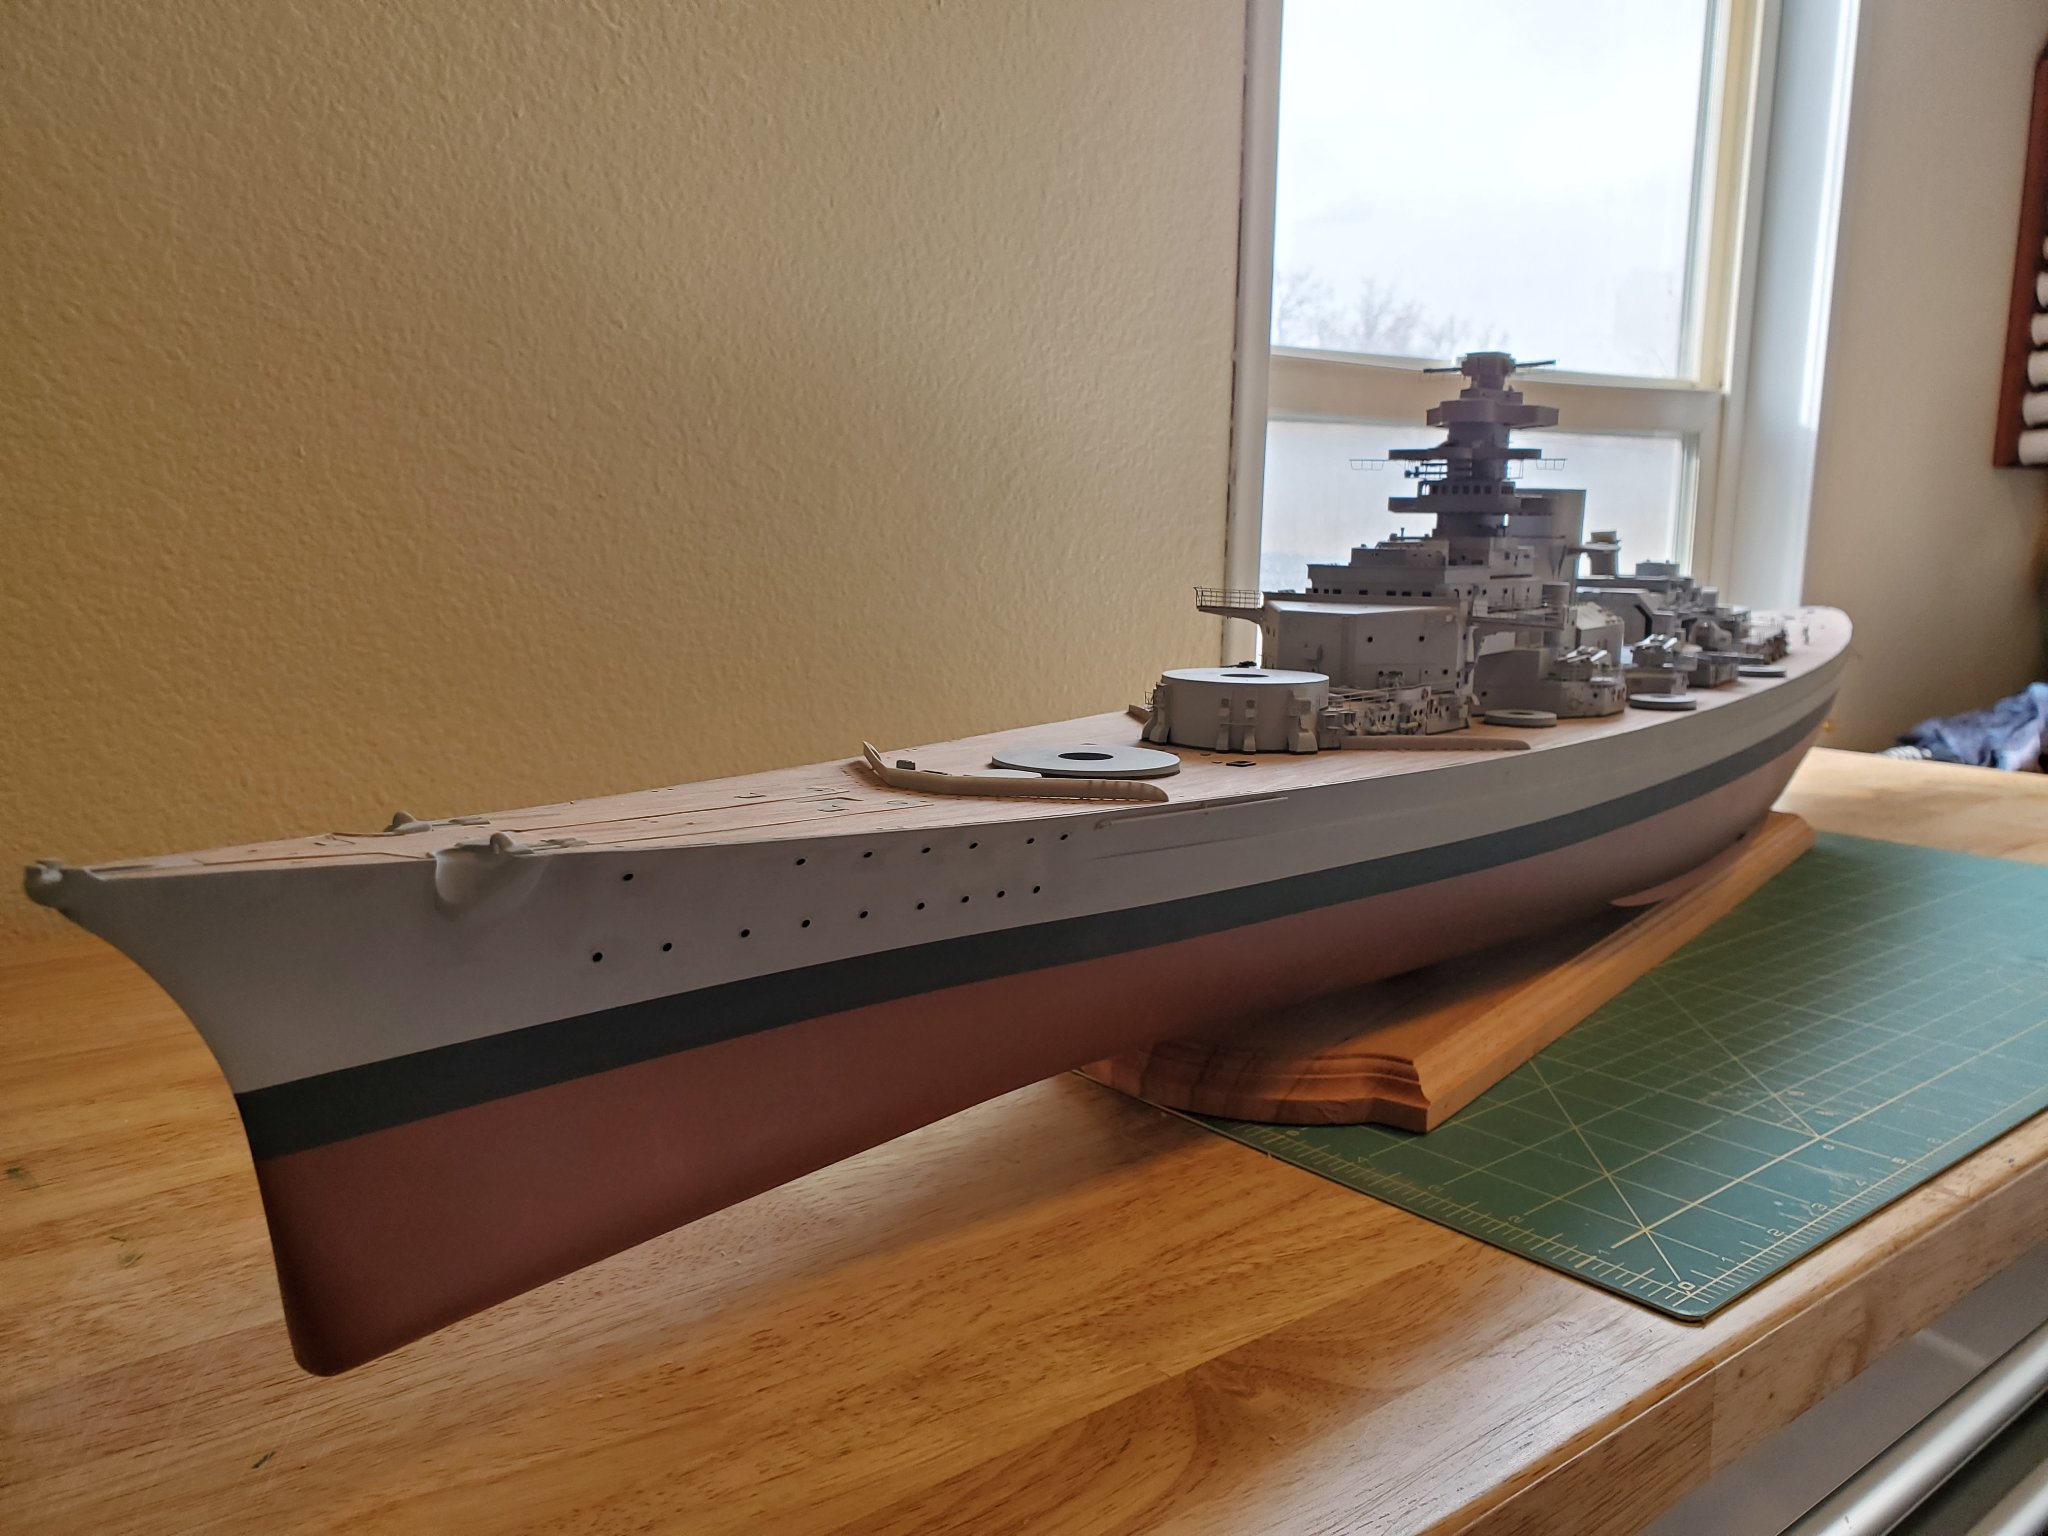
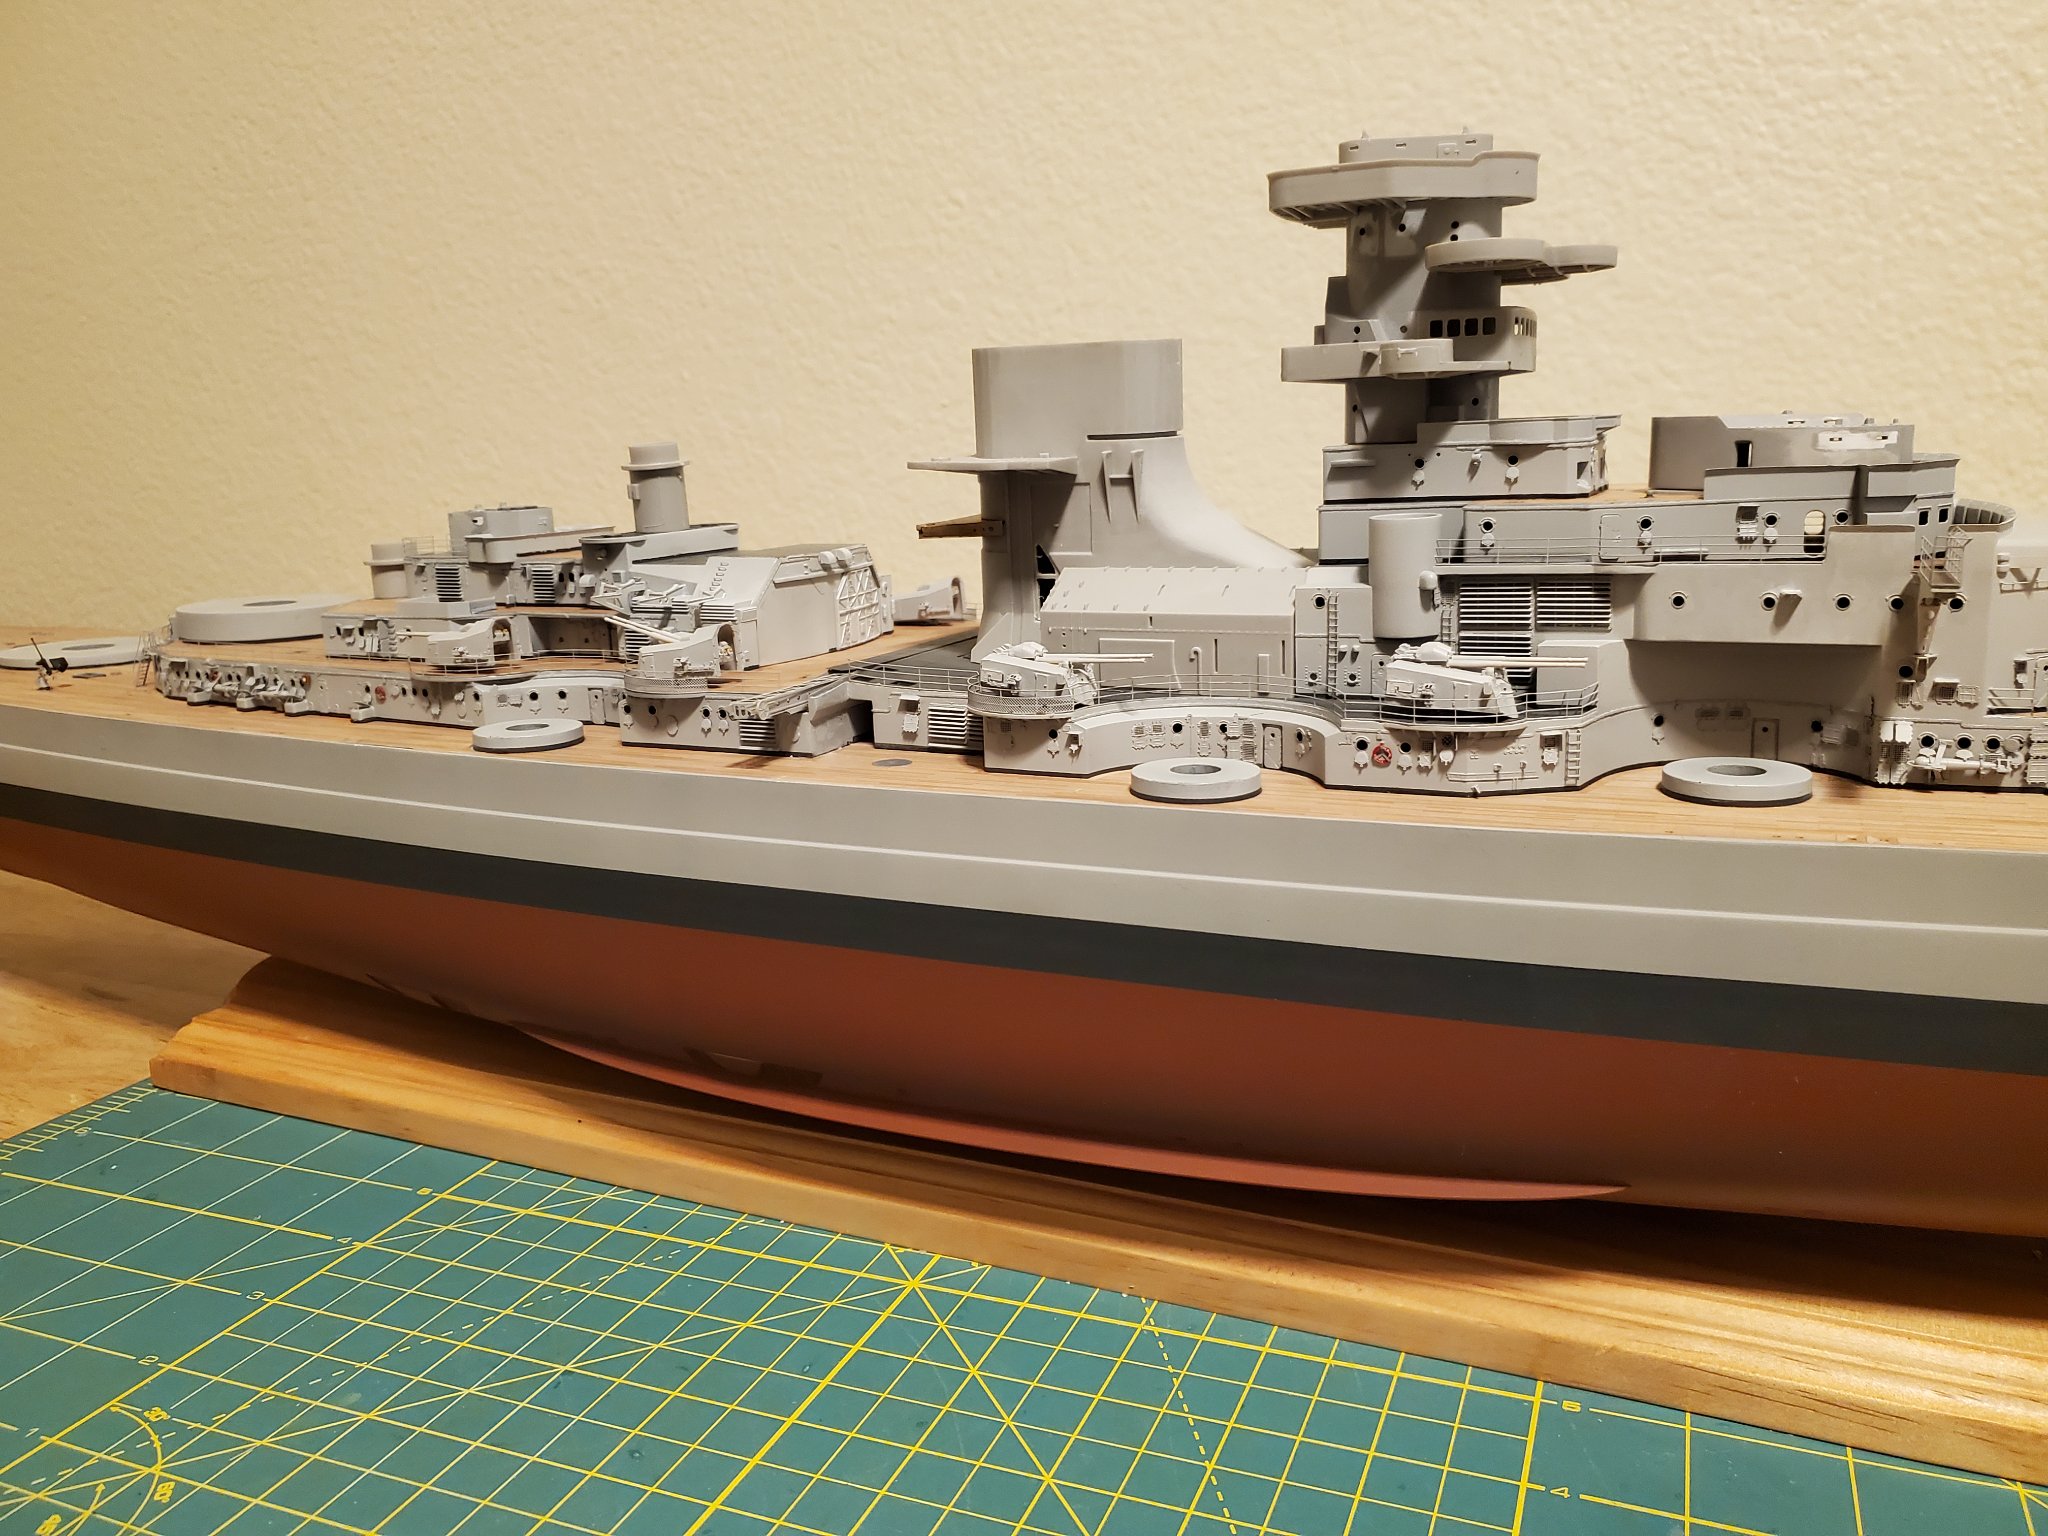
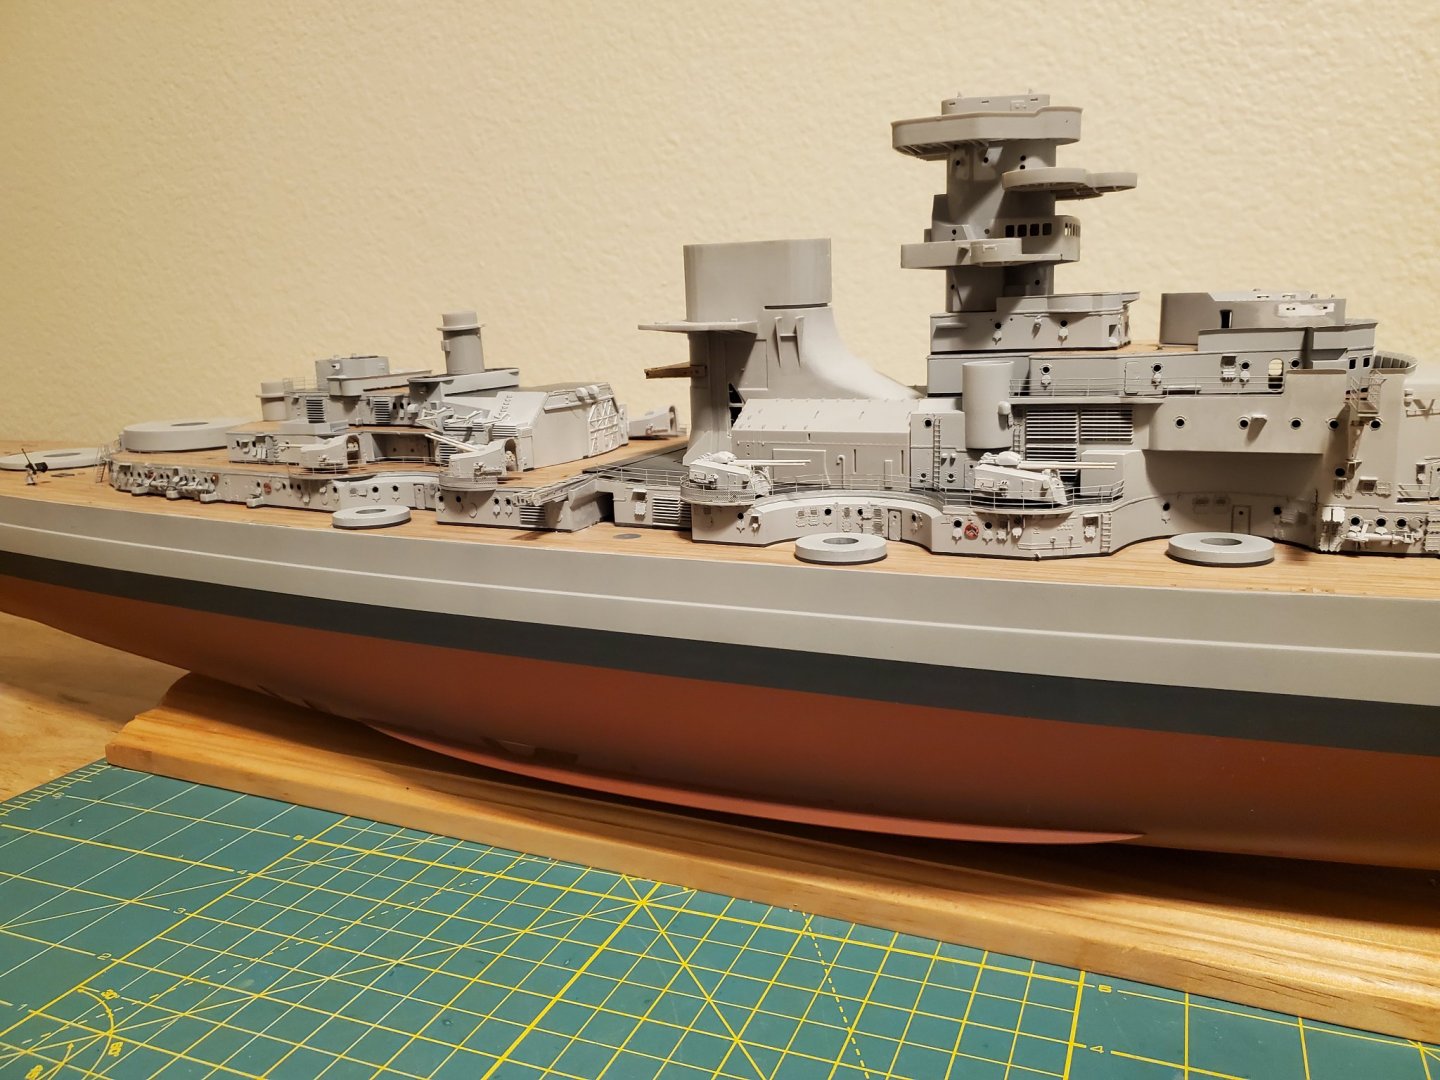
Made some more progress this weekend, got the rear superstructure PE all done and painted: Something I did that I don't see many other Bismarck builders do is paint the roof of the main hangar in dark grey (the same color as most all steel deck areas of the ship). I decided to do it because you can see it was painted likewise on the actual wreck... makes sense as this area would be walked around on to access the smaller boats that will eventually take residence here. I also put a huge amount of tedious work in on the many PE vents here; they were a bear to complete but look good. Here's the scariest one before installation: Anyway, there will be some touch-up to do still on this section but the next project is going to be the funnel and forward hangars. After that I'll return to do the smaller details such as the guns, railings/stairs and storage boxes that litter the superstructure.
- 265 replies
-
- 19
-
-
Thanks! I appreciate all the interest and feedback on this build... It's a huge project and I can use all the positive reinforcement I can get!
-
I thought those little access hatches looked strange sticking out too but with paint on 'em they disappear nicely into the surrounding structure. Nice work!
-
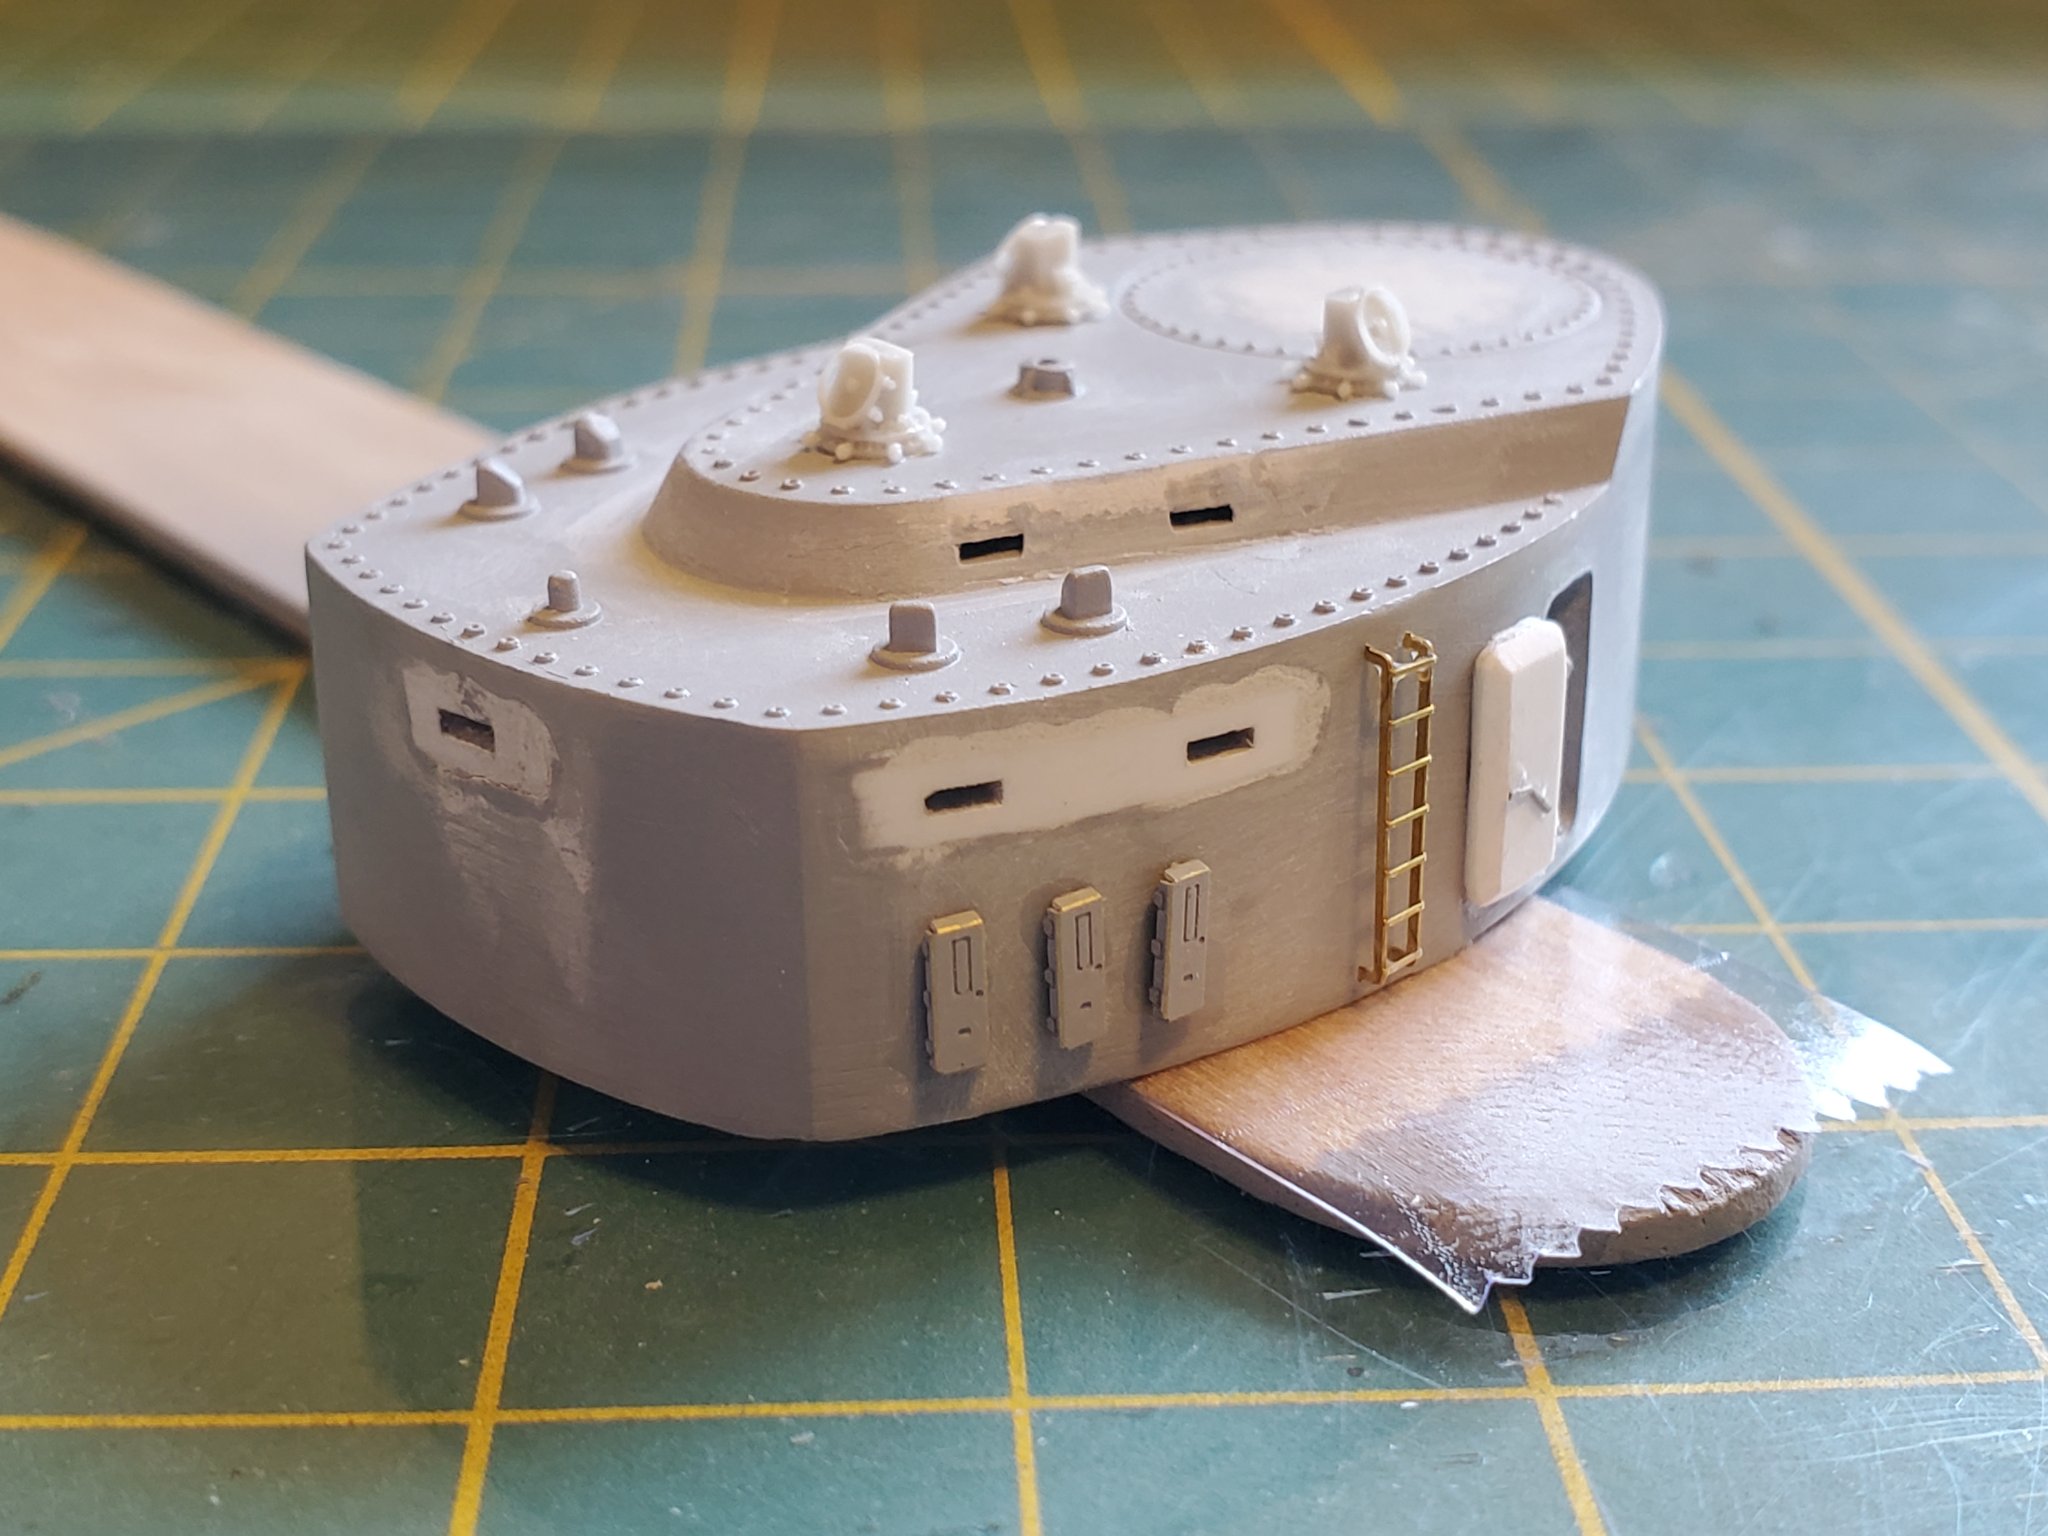
Another quick update... I'm focusing attention on the aft upper superstructure lately. Some might question the practice of scraping off perfectly good molded detail only to replace it with tiny brass bits but I assure you, I am not insane. OK, OK... maybe just a little bit. Anyway, all the decks are installed and masked, tiny holes are drilled for bar steps and the photetch is going on. Tedious work as like the main superstructure level, there is A LOT of it. There's some debate on whether the aft section of the upper deck here was metal or planking; I decided to join the metal camp. Two flak guns would later be placed here but near as I can tell they weren't installed yet for my build's timeframe so I'm leaving them out.
- 265 replies
-
- 14
-
-
... and some more progress: I'm jumping back and forth between the main control tower and the aft upper superstructure; on the tower I replaced the portholes with smaller ones (to better match the real ship) and and am working on getting the pieces ready for PE: On the aft superstructure I finished cleanup and got the deck installed: Unfortunately like the rest of this deck, fit sucks and the deck was printed wrong, leaving it a little lopsided and the edges a mess: There's nothing I can do about the bad printing but (like the rest of the deck) I mitigated the poor fit by lining the deck with styrene strip. I'm glad to be almost done with Scaledecks... such a cool idea but it was poorly executed and in hindsight I probably should have got my money back or asked for a replacement that wasn't messed up. Anyway, other than the little top layer, this piece is ready for photo etch.
- 265 replies
-
- 13
-
-
Hi again everyone... did a quick youtube vid with some more progress: Moving at a glacial pace but still moving! I ended up repainting the bridge section as it appeared to be off on color compared to the rest of the superstructure and the black "baseboard" paint was a bit sloppier than I liked; I also had to repaint the "wooden" grates on the deck around and above the bridge as I could not get the colors to match between the two (I only painted the lower grating at first). Don't know if I was stiffed a PE fret or somehow lost it but it turns out I don't have the fret that has the upper grate and most of the hose reels so I substituted in the grate from the Eduard set that I still had from my first build. Luckily I have hose reels from the KA set so I don't need to chase down a replacement fret. Anyway, I'm expecting more free time to come into my life over the next few months and am trying to get myself psyched to make some good progress.
-
This thread isn't dead yet... despite going since 2013 without a finished Bissy to show for it. 😅 I've noticed I tend to do the most work on my ships from September to January so maybe I'll make some good progress in the next few months... then again, who knows? I'm not gonna try to force it, just take my time and let the build take it's course. This is a hobby after all! Anyway, some new progress to report; I assembled the aircraft catapults and did a bunch of small touch-up work. I'm generally leaning towards abandoning the instruction order (which would have me working on the forward/aft decks) and working on the lower levels of the superstructure and upwards from there. Anyway, I'll post more progress when I have more to show!
- 265 replies
-
- 15
-
-
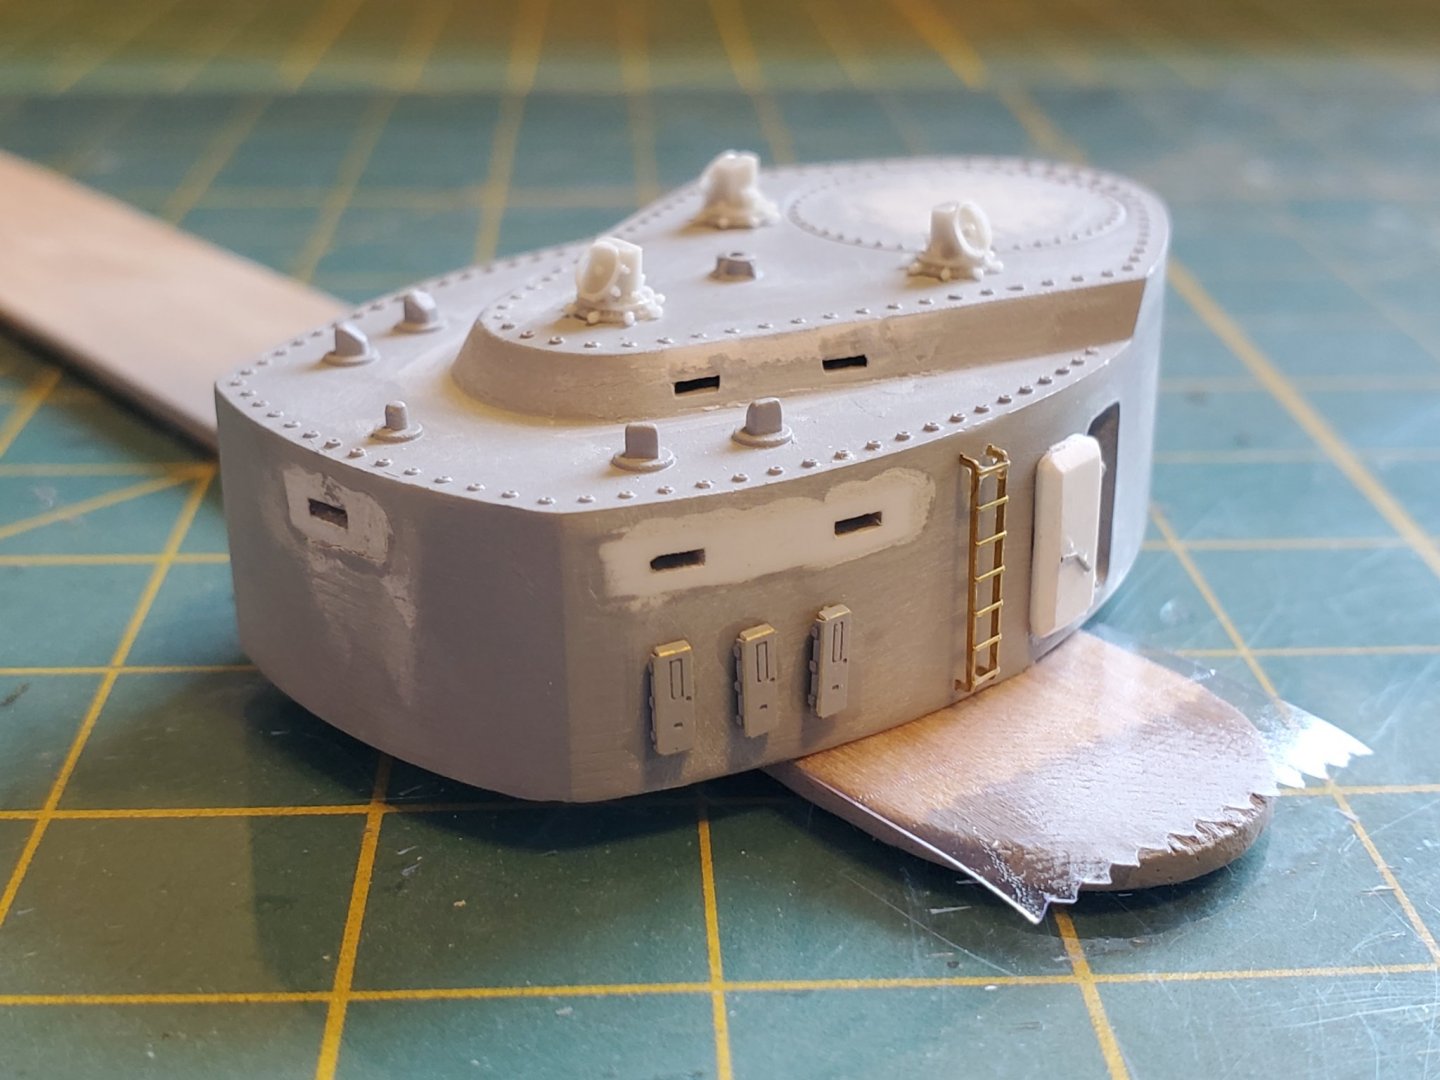
Not much time in my world for the Bismarck lately but slow progress is still being made: I was going to use the conning tower off my old kit but I ended up reworking the new one instead... I want to show the the conning tower with the thick "bank vault" doors open and they just didn't work out all that well on the old one. I also got the PE and paint on the bridge and next layer up as I work my toward the top of the forward superstructure "wedding cake" Since I had the airbrush out also I hit the couple of the Veteran Models AA guns I had previously built... these things are the definition of detail insanity!
- 265 replies
-
- 19
-
-
I'm not drilling them at all; I use various globe/egg-shaped cutting bits with the dremmel. I get an even thickness by holding the pieces in front of a light... after a certain depth is achieved, the thinner the plastic the more light comes through it and you can use that to judge how deep you are cutting. With a little bit of practice, it becomes fairly simple to thin the bulkhead from behind enough to open the windows/portholes and get a very thin/even "frame".
-
Those are the kit molded windows ground out from behind... I grind out all the plastic minus the "frame" while being careful to not melt the plastic or go all the way through to the exterior bulkhead. Makes for neat looking open windows and you don't have to sand the edges at all.
-
I'm back to work on my Bismarck, making some progress on prepping the forward superstructure parts for PE.