


CaptainSteve
-
Posts
1,857 -
Joined
-
Last visited
Content Type
Profiles
Forums
Gallery
Events
Everything posted by CaptainSteve
-
 As posted earlier, I have searched for some pics to show me the detail in long-boats of this era. Builds by Chuck and some others on MSW were exactly what I needed. Going off the kit plans, it would probably be theoretically possible to upscale them and build a completely sea-worthy, functioning long-boat !! I am a little concerned, however, as to exactly how much detail I can add - bearing in mind that these boats are 1/76 scale. I have no problem with installing floor-boards, thwarts, benches, keel, mast-step and masts/spars - these I consider to be crucial. And the blocks and cleats to enable rigging to the davits will also be necessary. Even the various sundry items (casks, ropes, oars, buckets, boat-hooks) will be done, as I feel these create a "lived-in" look. My problem at this point is with the thwart knees, stern knees, apron as well as (and in particular) the internal frames. I seem to be experiencing real difficulty trying to get my head around scratch-building those with 1/32" strips !!! Perhaps I just need to go back to work for the week, thus re-invigorating my desire to work on my model !!
 -
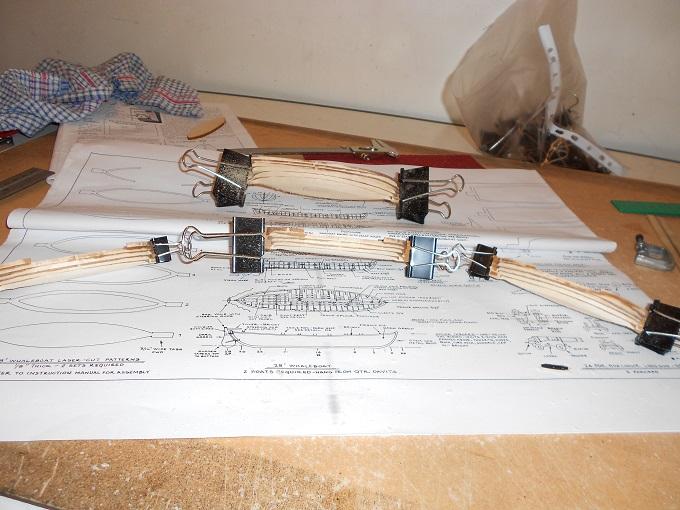
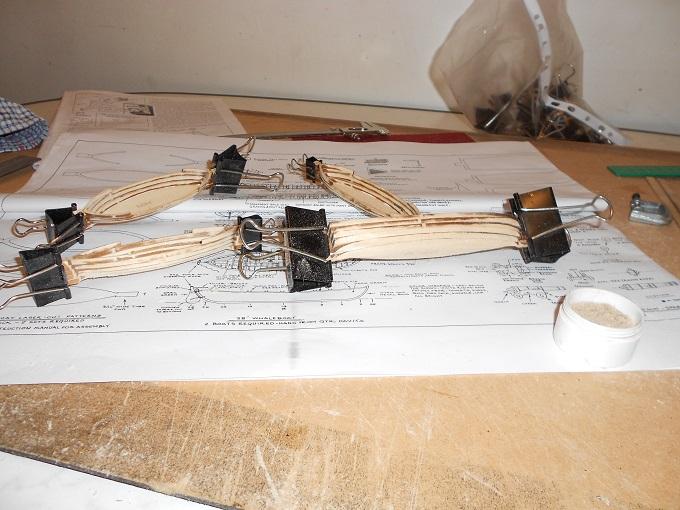
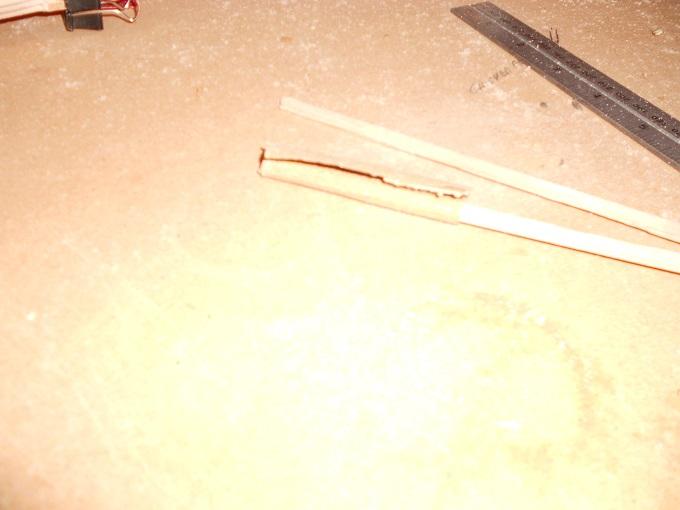
One of the many trials sent to test us ship-modellers is the problem of how to bend planks effectively. In my pre-MSW days, I soaked the wood for a week or so, and then bent them gently over a soldering iron fixed to my vise. This method worked reasonably well, although there was a high fail-rate with planks that cracked (wood too dry/too much pressure), split (wood too wet), or burnt (iron too hot). Fortunately, my two previous projects were both double-planked kits !! This time around, after reading a number of suggestions in the MSW forums, I decided to try the hair-curling iron method. I particularly like the clip it has which will greatly reduce the number of times I burn my fingers. The strips for the keels on the ship's boats are very thin (1/16"), so it remains to be seen how effective this method is when it comes time to do the hull-planking. Some "crimping" did result, but again, this may have to do with the very small size. Nothing that a little sawdust-filler and light sanding won't fix ...
-
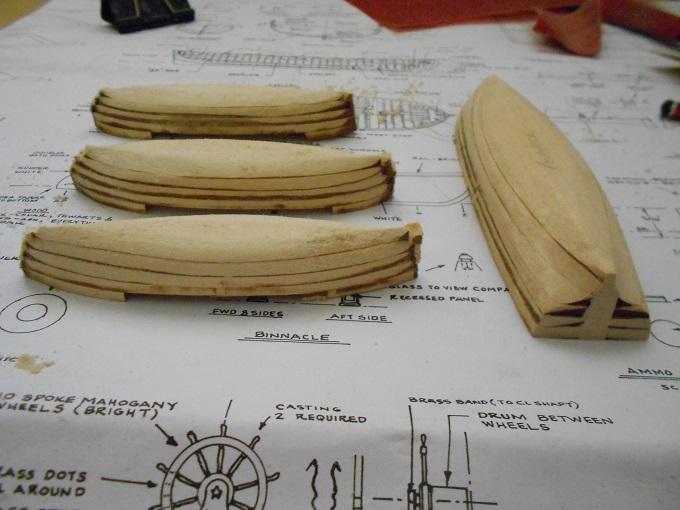
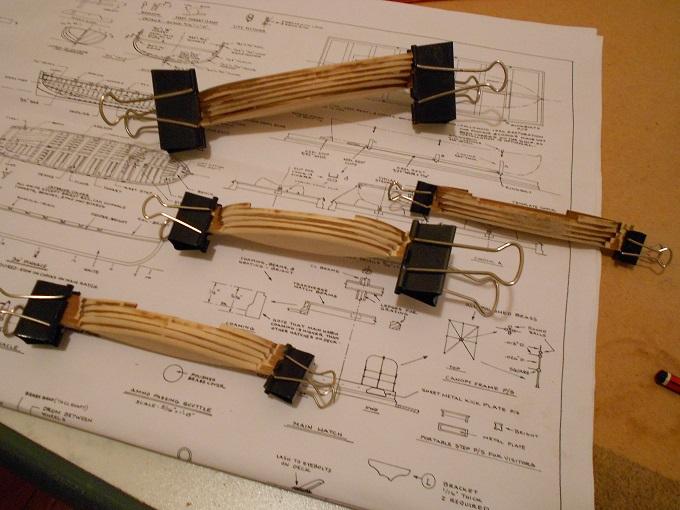
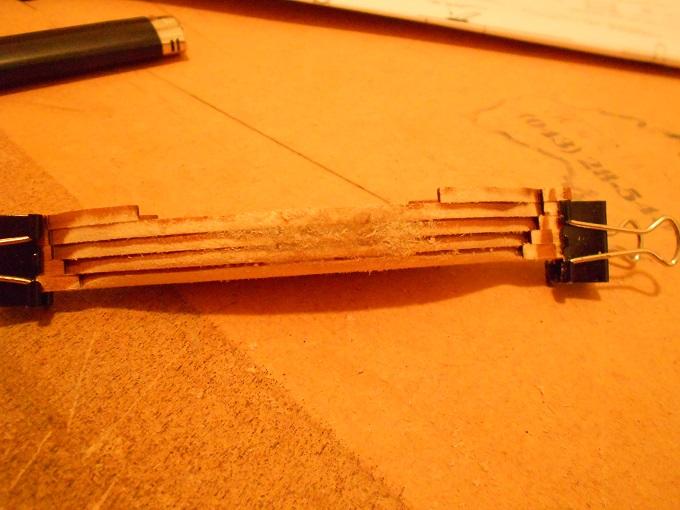
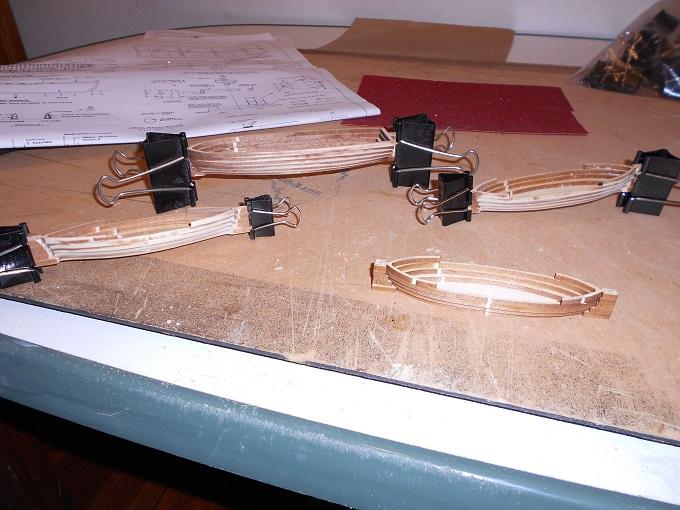
Another early morning at the shipwright's table and now all four boats are mostly shaped to my satisfaction. At the last minute, I realised that the two whaleboats (front of pic) don't actually have a straight stern-post - the stern is curved almost exactly like the stems on these two boats. So they were hit with the toy one more time. There are four thin strips soaking in water. They will become the keels ...
-
Thanks Jeff. Glad that I can give something back. I had to do something to keep my modelling addiction under control, Harv !!
-
Furled , unfurled or no sails -Preference
CaptainSteve replied to Canada Steve's topic in Masting, rigging and sails
How about rigged with servo motors and an IC board to set the rigging/sails so that the ship can be displayed in numerous operational stages. I guess this would requuire some serious collaboration between the nautical historians and the tech-heads .... -
Furled , unfurled or no sails -Preference
CaptainSteve replied to Canada Steve's topic in Masting, rigging and sails
My last build was the OCCRE Apostol Felipe and I chose to do her with full, unfurled sails. Feel free to check out my bathtub below for a look. Having said that, I really do like the furled or semi-unfurled look and plan to use it on my current (post MSW discovery) build ... -
I am looking to do a similiar window configuration with my Connie, also. I really liked the look of her before that master tactician, Isaac Hull, took out the stern windows ... JUST so he could win a battle against overwhelming odds !!
-
More sanding/shaping with the new toy last night. The pinnace has been shaped almost to my satisfaction. Need to finish off the other three lifeboats now ...
-
Bring it on, Anthony !! I've only recently started building the Connie, as well. And MSW has proven to be a font of helpful information. Put up some photos and watch the help roll in .....
-
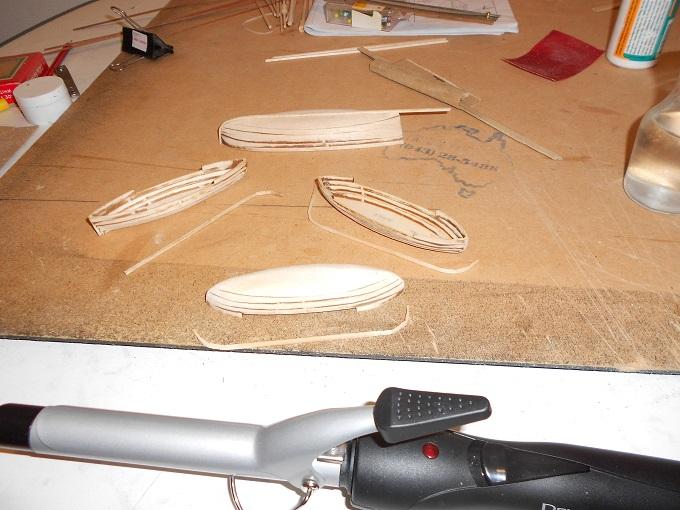
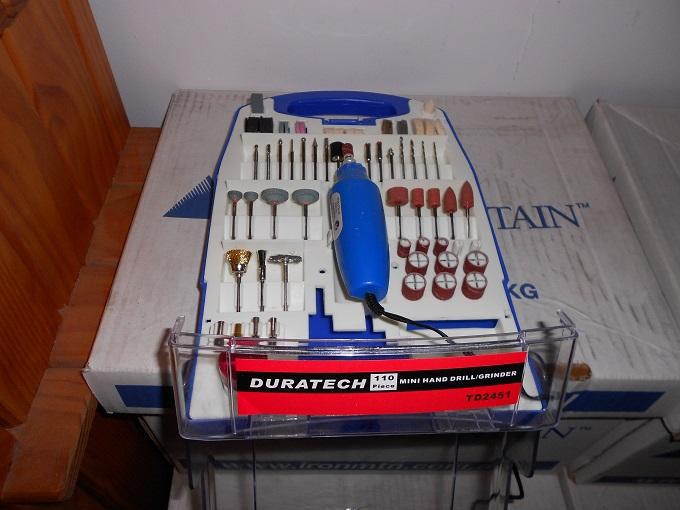
Until now, I have never been a big fan of power-tools combined with ship-building. I have always been terrified of making a tiny slip which would irreparably damage my hard work. However, in just two hours with this little toy - essentially an engraving tool with an assortment of sanding/grinding bits - I've managed to shape out the hulls of all four ship's boats !!! Call me a convert !!
-
Went for a visit to my favourite hobby shop today ... $100 later and, as well as paints, some paintbrushes, a few new razor knives and a few various sizes of styrene stripping (Yes, MrRiddoch), I've got myself a new toy !!!
-
Thanks Harv. I see your build is coming along nicely. I'm taking baby-steps for the time being as I cannot set-up a more permanent work-station until approx halfway thru the year - still have one more "residential adjustment" to be made. So, for now, I plan to work on the small stuff - ship's boats; coamings; carronades; false gun-decks; degree in Electronics Engineering (for the LED candles). That should kill a few months of spare time. Long live the FakeCaptainsClub !!
-
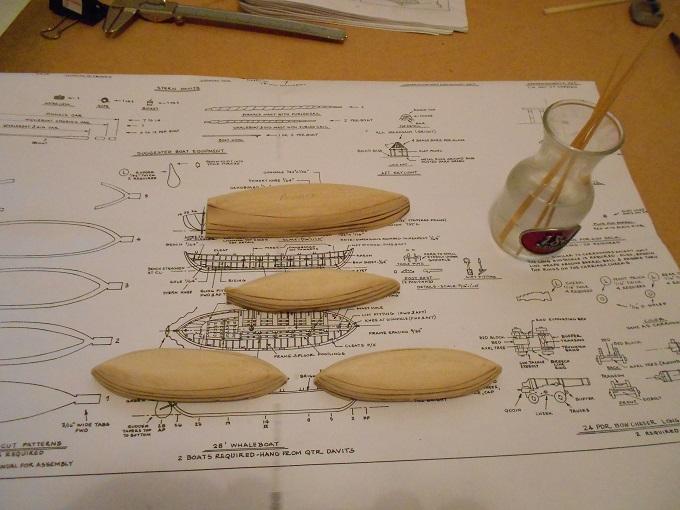
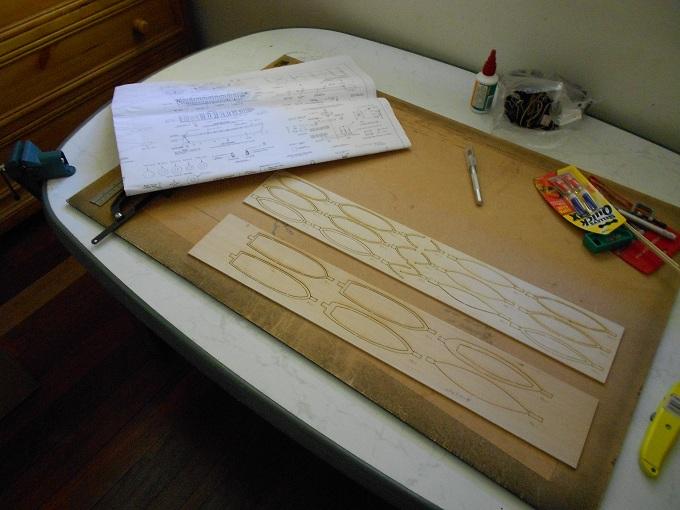
Whilst I find the quality of my MS kit to be better than excellent, and the plans are highly detailed, I do think that a photo-book would be helpful to those of us (ie: Me!!) who are not trained engineers. Looking thru MSW for some inspirational pictures which would show me (in colour) the detail for my ship's boats, I found these builds by our Fearless Leader: 18th Century English Longboat 18th Century Pinnace Thanks heaps for these, Chuck. They will prove to be an invaluable aid as I continue to work on this section.
-
Incidentally, the circuitry for my LED flasher unit arrived today. (DAMN!! But that was quick!!! 5 to 6 weeks, my a$$) Now, I just have to begin and complete a degree in electronics before I can unnerstand it !!

-
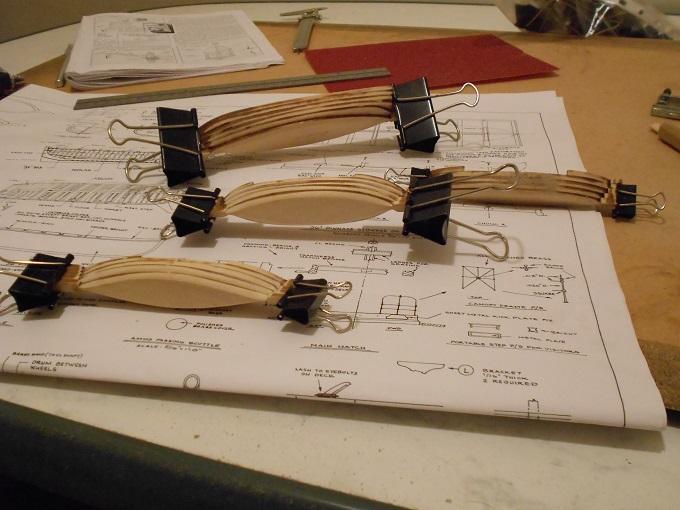
.... a little more sanding and no-one will ever know. (With the possible exception of YOU !!!) The only thing that bothers me now is the flat bottoms ....
-
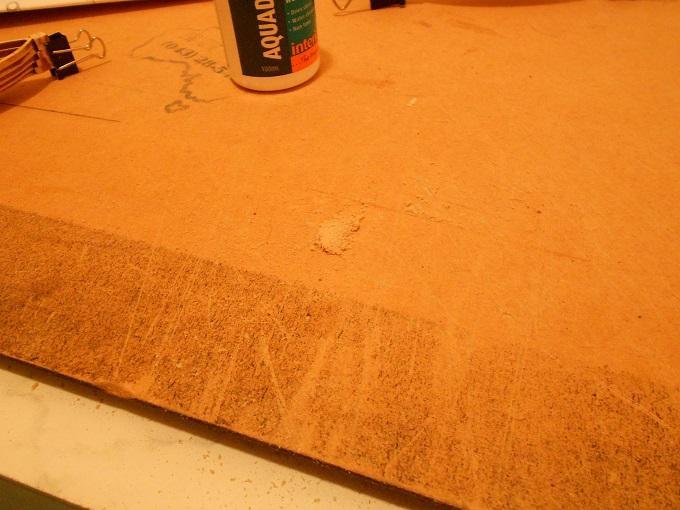
... to a thin coat of PVA glue spread onto the section of hull that has been sanded a little too vigorously ...
-
Add a little saw-dust ....
-
To the right in the last pic is my sanding tool. It's just two pieces of plank with the sandpaper coiled around them ...
-
Still working on sanding the life-boat hulls ...


-
Hey Pete, I am just starting on building the ship's boats for my USS Constitution and would seriously love to see your build to help me with the details. So, please, upload some pics.
-
Chuck, I just wanted to say "Thanks" for the pics. I've just begun work on the ship's boats for my Connie, and logged on tonight hoping to find some photographs to help me. Whilst the MS plans are excellent, they do lack without actual build pictures. Your long-boat builds have helped me visualise the whole thing much better. PS: Would it be OK for me to link to this build from my MSW build log ??
- 49 replies
-
- 1
-

-
- pinnace
- syren ship model
- (and 1 more)
-
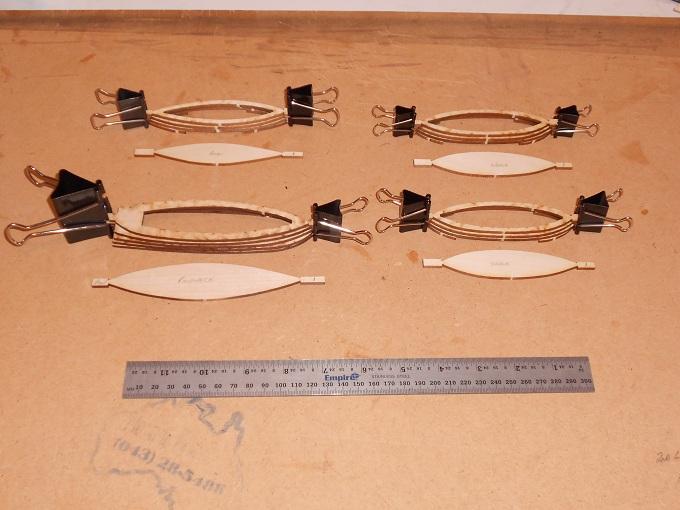
I have left the bottom piece (#1) off each boat for now as the instructions suggest it will be easier to shape the hulls before attaching them.
-
Semi-settled into new address. Got sick of unpacking and so have set up a temporary work-space. I'll be working on some of the smaller parts for a while, as I do not wish to start putting the keel-pieces together until I can establish a proper "dry-dock". I know I said I would work on the false-gundecks and coamings, but have instead made a start on the ship's boats.
-
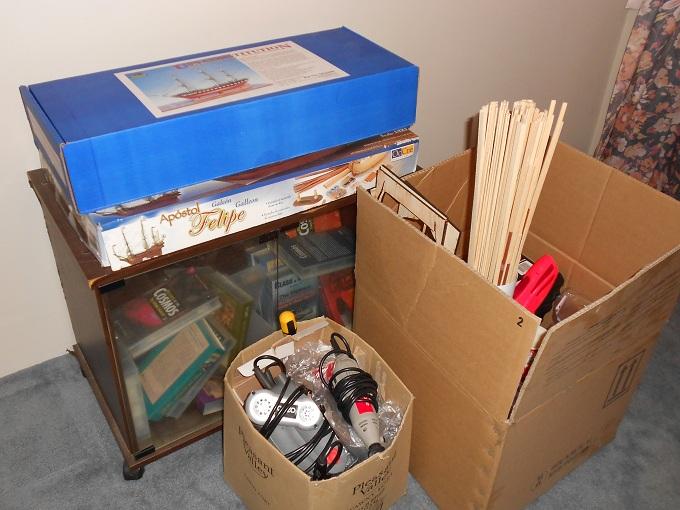
This is what my work-room boils down to ... ready for moving house. (The big, pink thing is not a special ship-building tool .... that's my water-pistol)

-
Regrettfully, this build will be on hold for a short period of one or two weeks. I'm moving house and so everything is back in the box for the time being. However, I'm gunna be using the extra free time to re-read thru the plans, the practicums, and all the glorious highly detailed and informative build-logs here on MSW. You guys are one of my main reference sources !! Might even get my hands on some Connie reference books. Anatomy of the Ship looks good. Any recommendations ??? Also, I've ordered the circuitry for the LED candles. If anyone is interested, I'm getting something called a Flicker3 DC. Mine is coming from a supplier in New York called North Country Radio (www.northcountryradio.com/Flicker.htm). Cost $32.95 USD + shipping.