BillB
-
Posts
22 -
Joined
-
Last visited


-
 Mike Collier reacted to a post in a topic:
Shrimp Trawler by BillB - Wye River Models - 1:24
Mike Collier reacted to a post in a topic:
Shrimp Trawler by BillB - Wye River Models - 1:24
-
 BobG reacted to a post in a topic:
Shrimp Trawler by BillB - Wye River Models - 1:24
BobG reacted to a post in a topic:
Shrimp Trawler by BillB - Wye River Models - 1:24
-
robert952 reacted to a post in a topic:
Shrimp Trawler by BillB - Wye River Models - 1:24
-
Prowler901 reacted to a post in a topic:
Shrimp Trawler by BillB - Wye River Models - 1:24
-
Dave_E reacted to a post in a topic:
Shrimp Trawler by BillB - Wye River Models - 1:24
-
pwog reacted to a post in a topic:
Shrimp Trawler by BillB - Wye River Models - 1:24
-
Harvey Golden reacted to a post in a topic:
Shrimp Trawler by BillB - Wye River Models - 1:24
-
Ryland Craze reacted to a post in a topic:
Shrimp Trawler by BillB - Wye River Models - 1:24
-
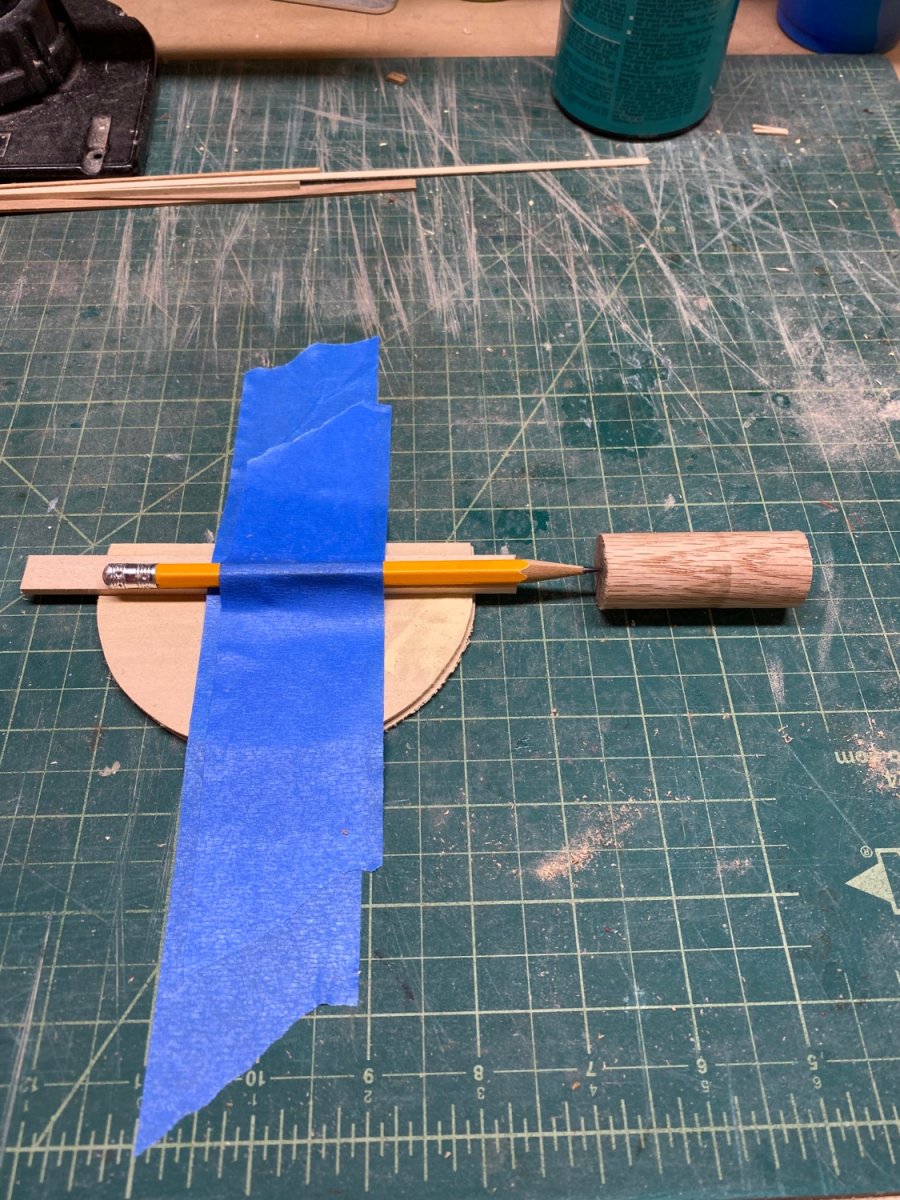
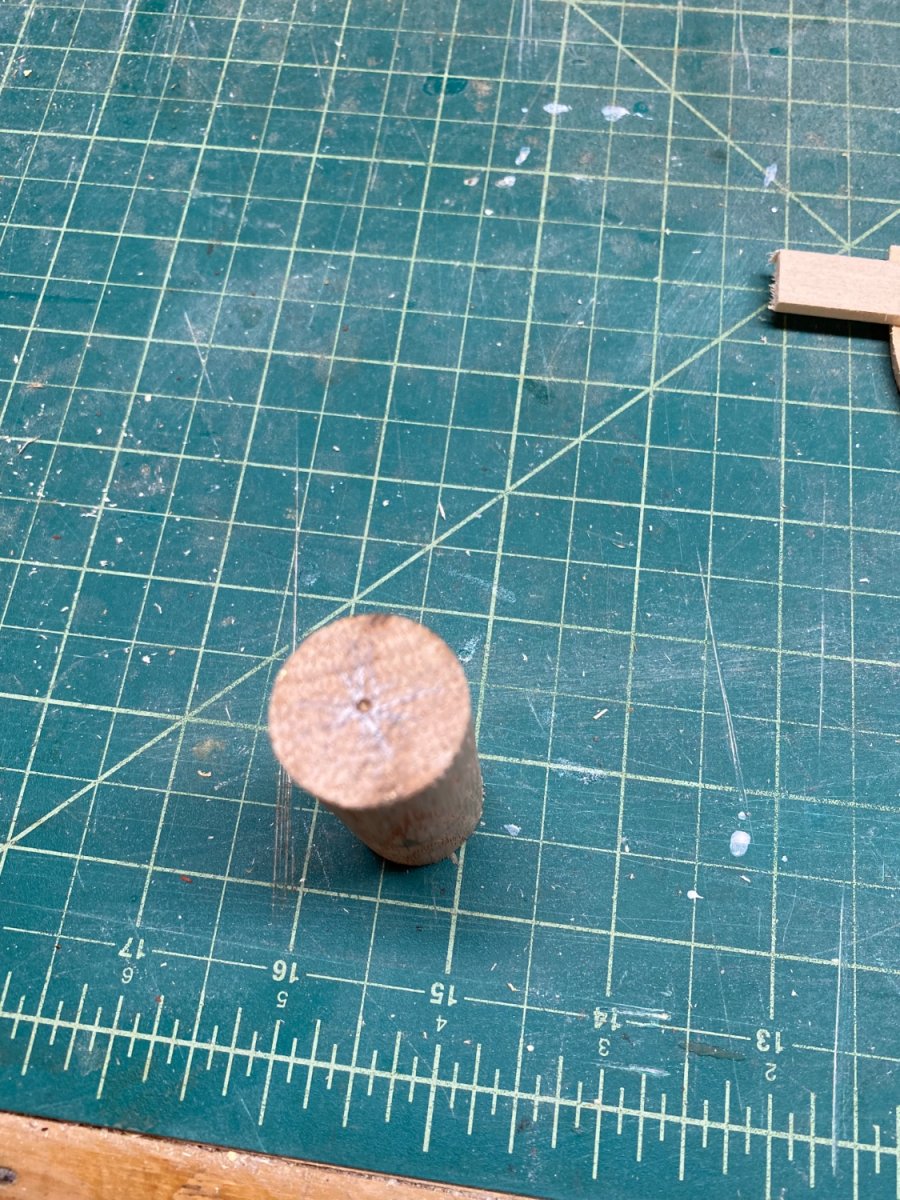
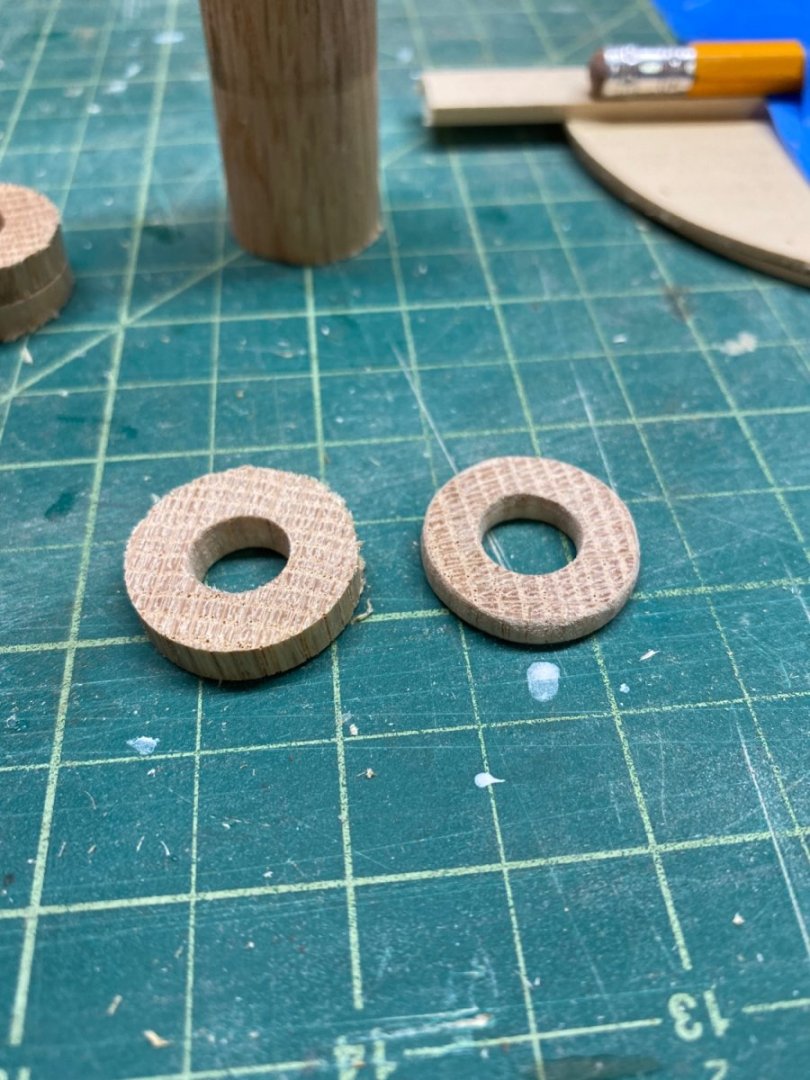
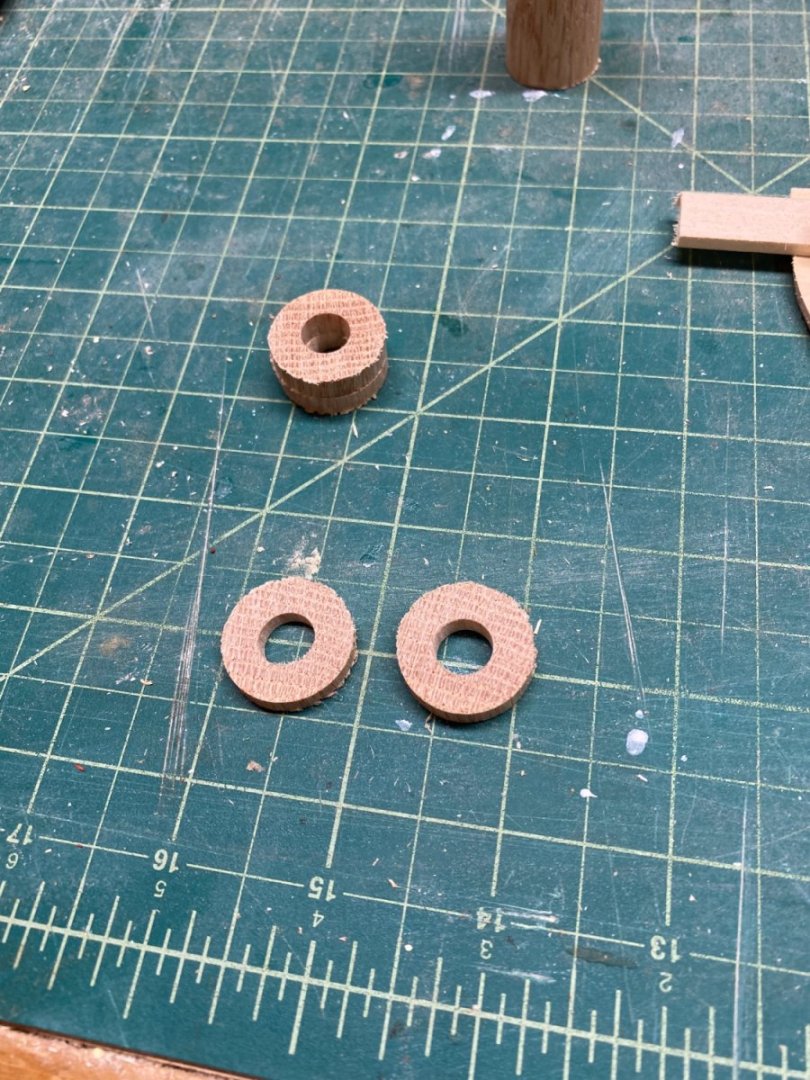
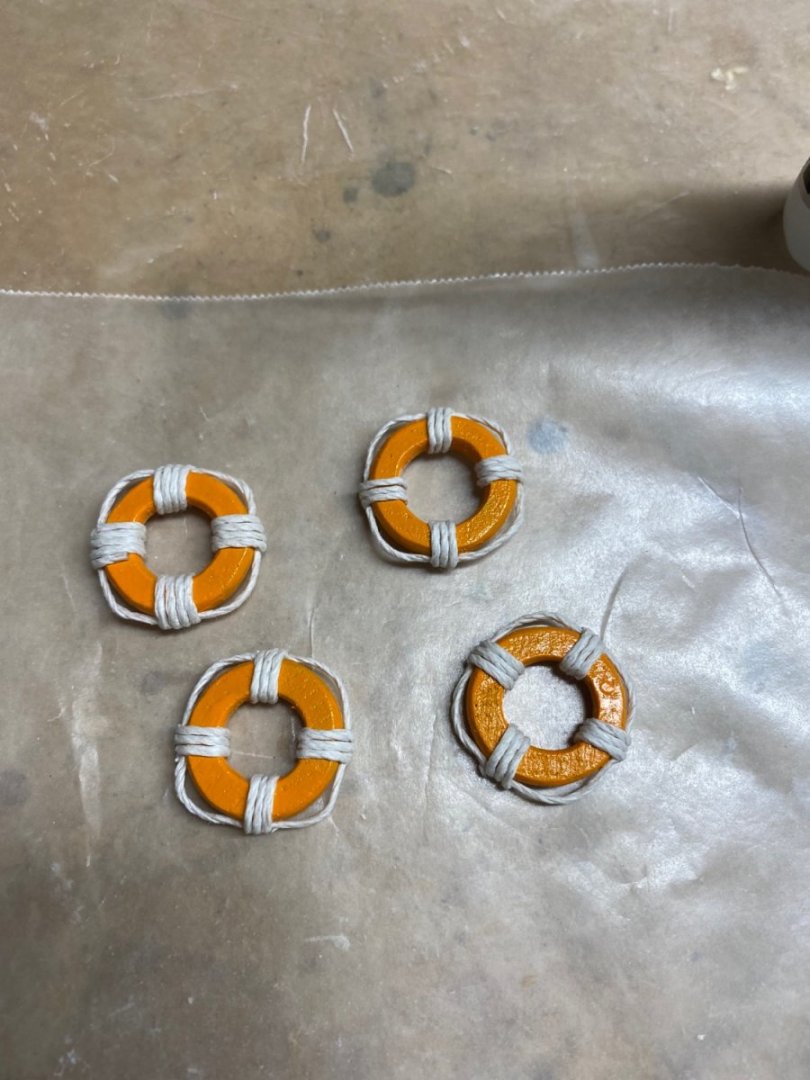
Life Rings: I have put the hull aside for now to turn my attention to the accessories and the cabin. I'm hoping to have some nice accessories built to detail the boat. I'm starting with the Life Rings. After a little internet searching I found life rings come in various sizes. 20" and 30" seem to be common. Since this boat is kinda sorta 1/2" scale (1/24 ish) I figure a 1 inch hardwood dowel would give me a 24" ring. That works for me. I cut the dowel into a manageable piece and tried to hand drill a hole in the center. I could never get it close to the center, after many fails I started to investigate how to find the true center of the dowel. I came across this method of using a stationary pencil, and rotate the dowel to mark the center: This worked well, here is the end result of my markings with I then center punched to prep for the drill press: I then braced the dowel in a X-Y table on my drill press to drill the center hole. I used several sized bits to get me to a center hole size I was happy with. After that I cut the dowel into slices on my band saw. Here you can see some of the rough slices: I then hand sanded the slices into smooth rings until I was happy with the shape. The ring on the right is close to the final product: Then it was just a matter of priming and painting the rings. I hand painted the rings orange, followed by attaching rope with CA glue. In the picture below you can see I wrapped the rope sections four times on the upper left ring. I didn't like that, it looked to heavy with rope in my opinion. I settled with wrapping the rope 3 times for each section, it does look better. It might even be possible to use a small decal to print the name of the boat on the life rings later down the road. I am going to start the cabin next. Since I have zero plans at this point I will be winging it based on pictures off the internet, and what seems to looks good as I build it.


-
schooner reacted to a post in a topic:
Shrimp Trawler by BillB - Wye River Models - 1:24
-
Prowler901 reacted to a post in a topic:
Shrimp Trawler by BillB - Wye River Models - 1:24
-
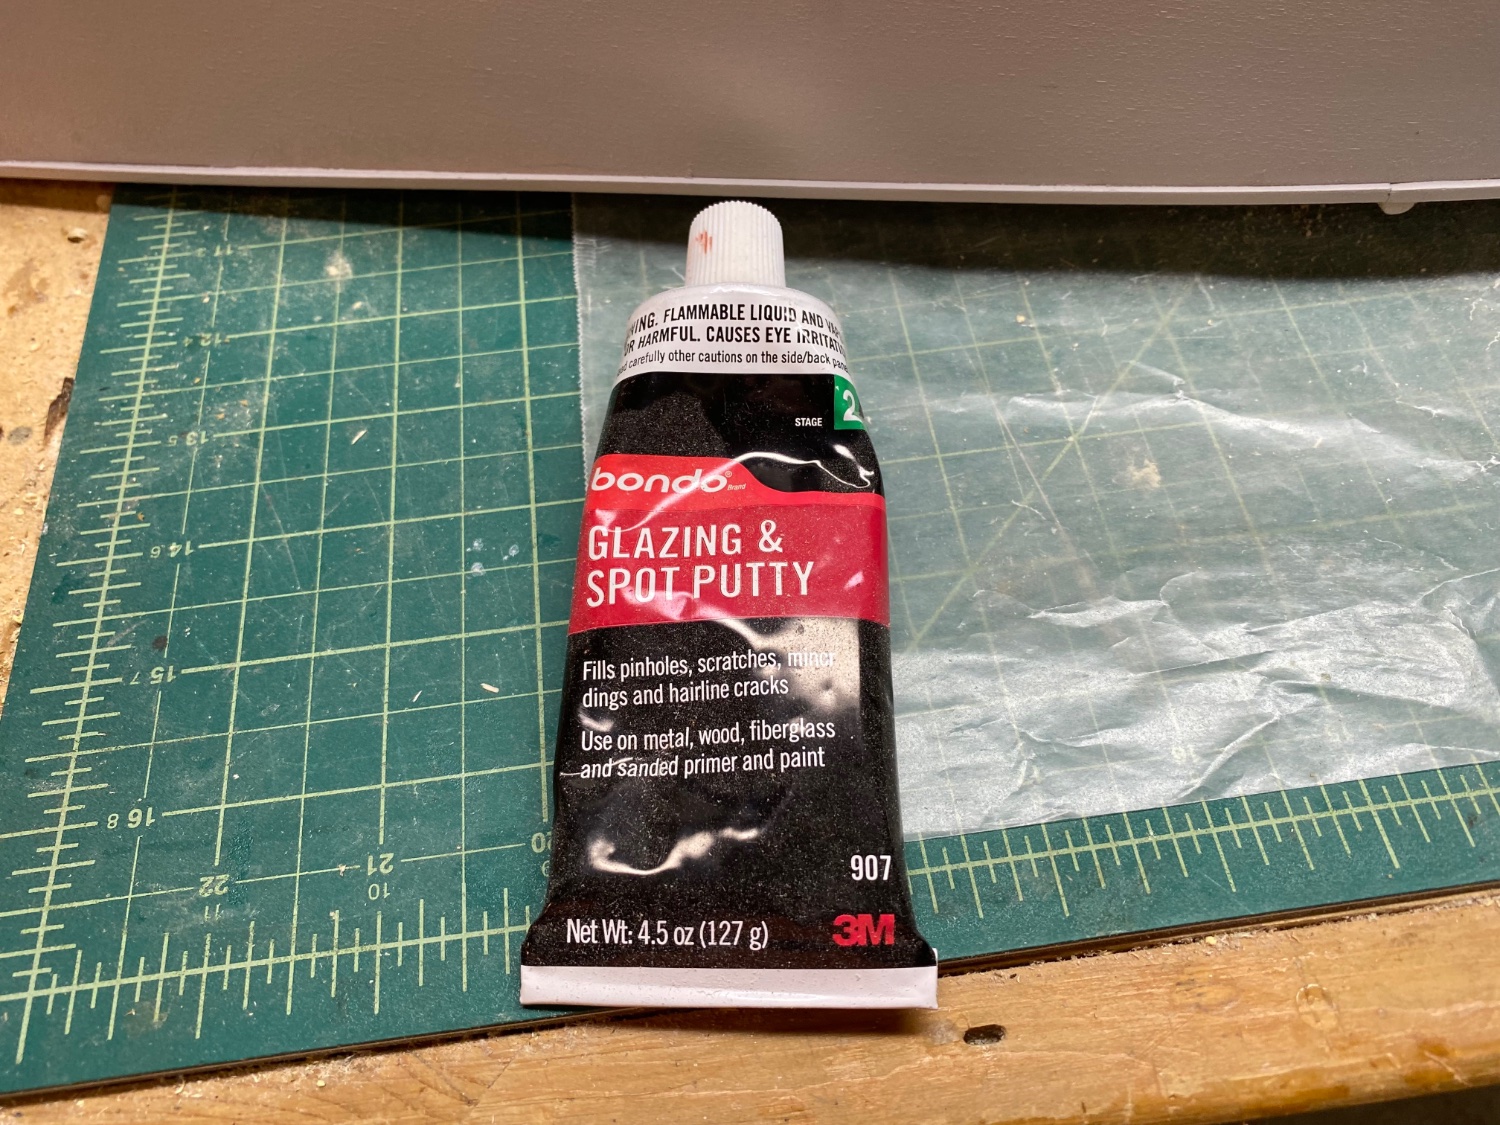
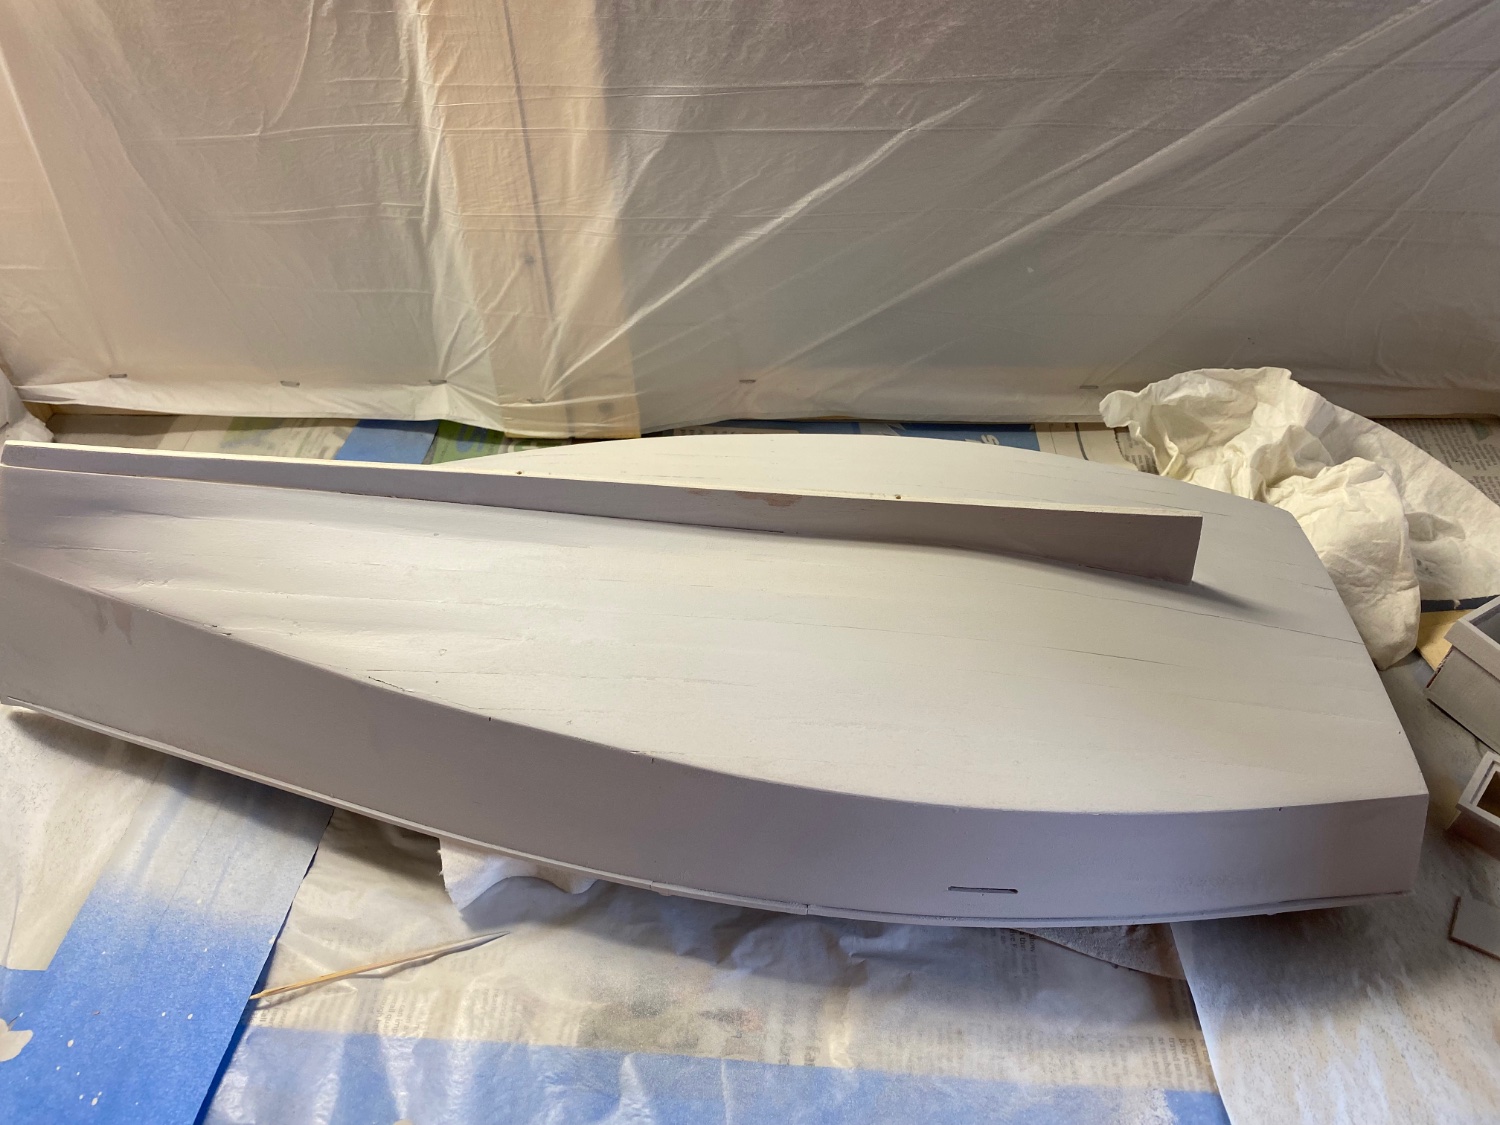
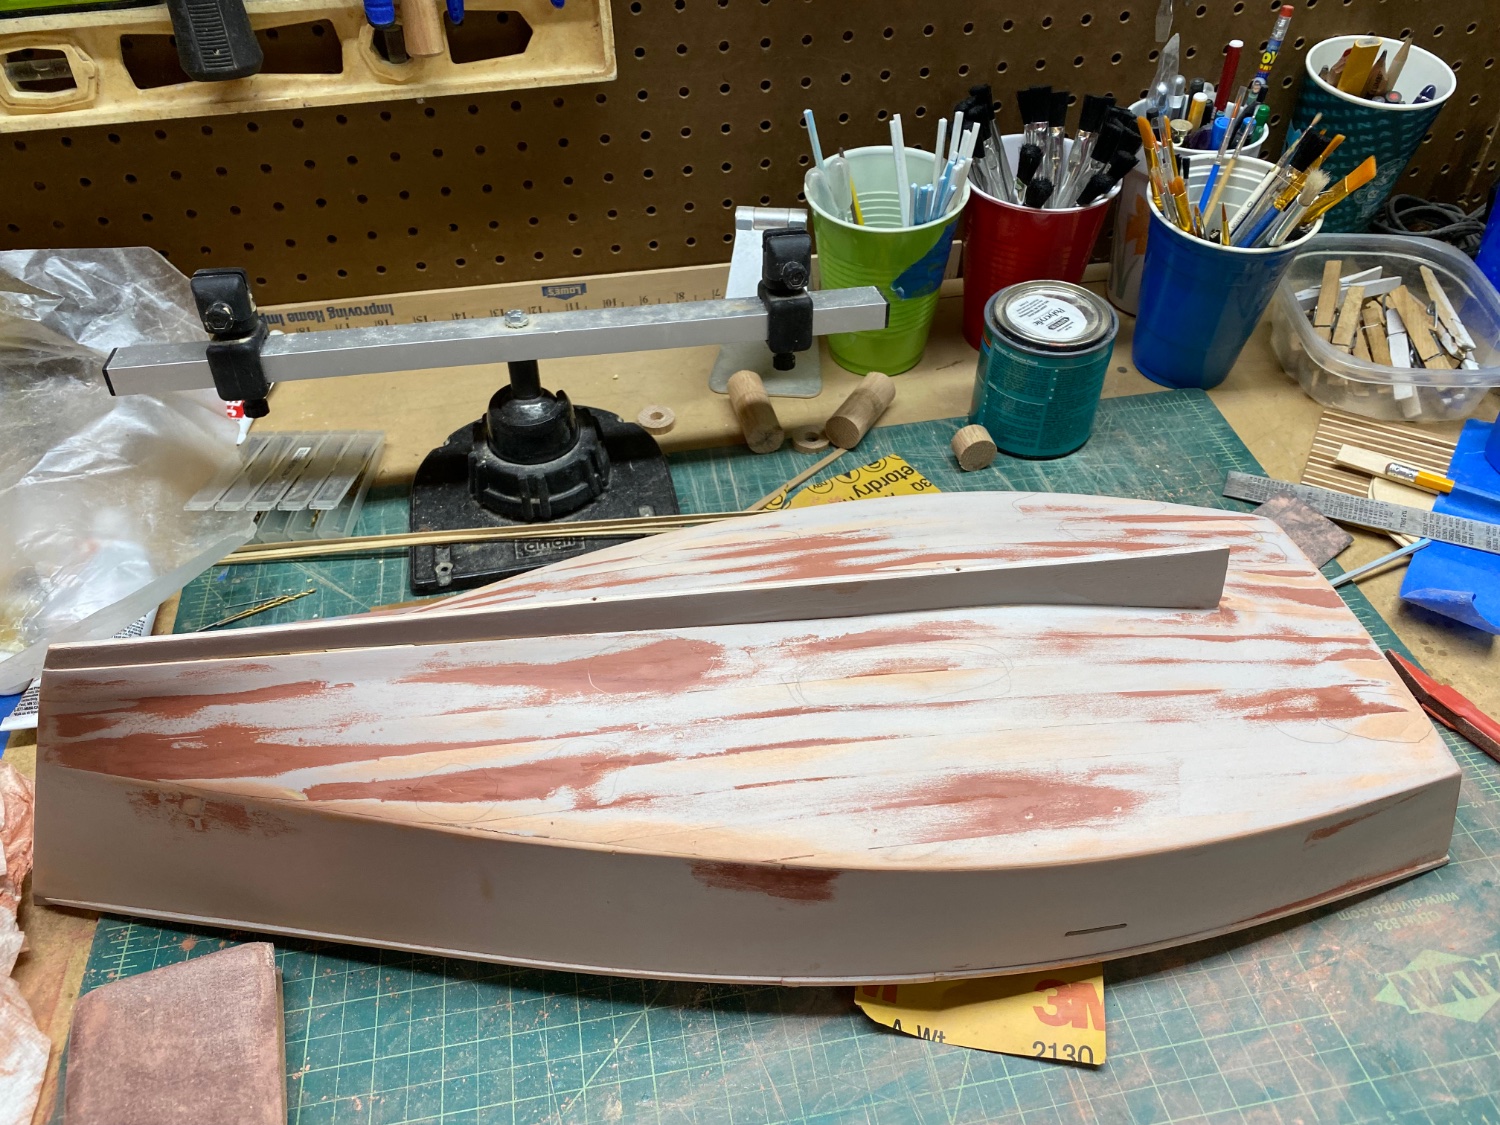
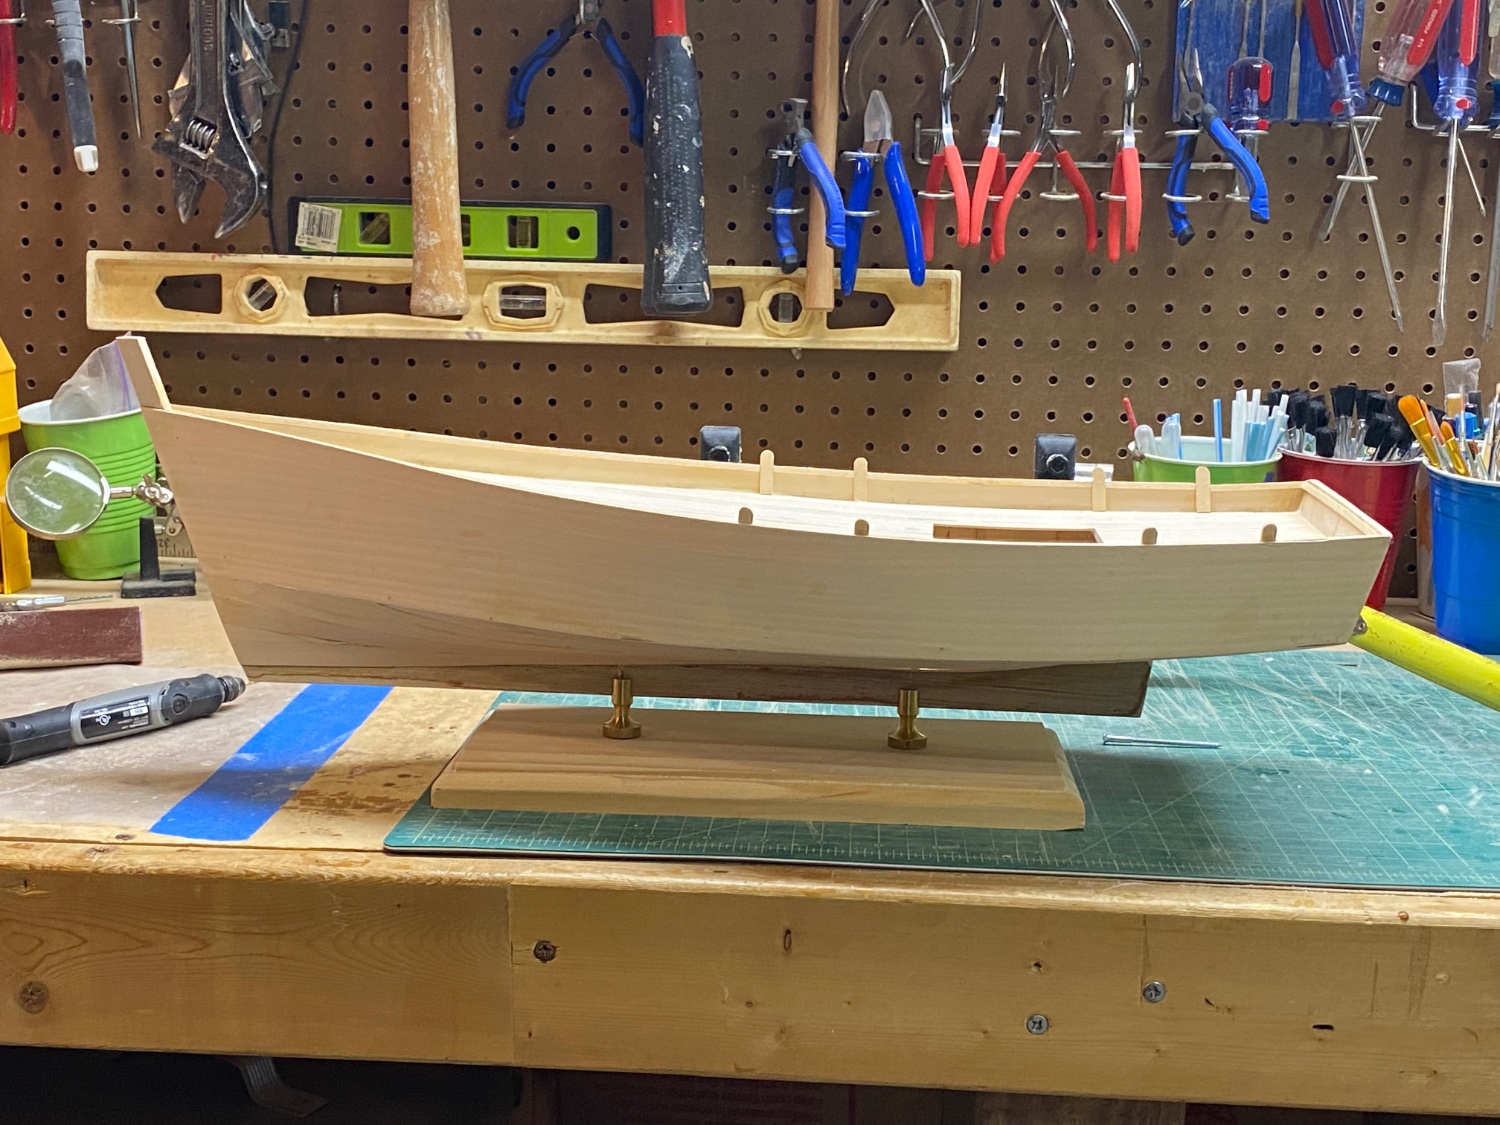
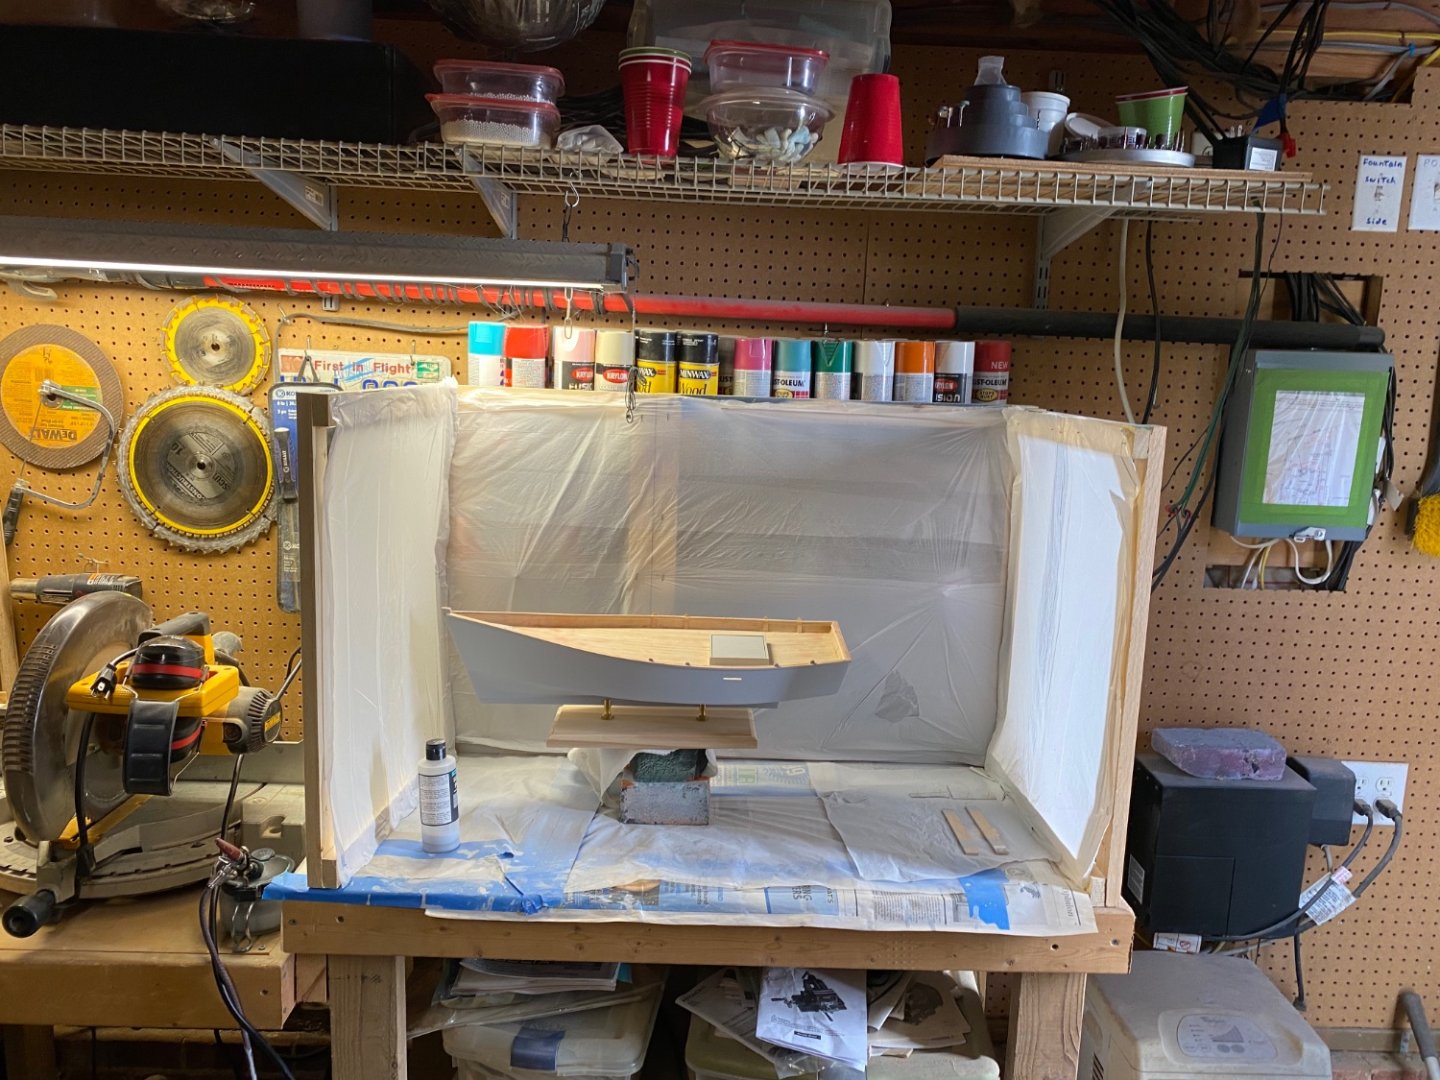
This post I'll outline my sanding, filling, and priming the hull. While the hull will be smooth, when I work on the deck I want that fairly rough. I want the planks to show somewhat, so no filling. On the hull I actually over sanded, almost paper thin in spots. I consider that a rookie mistake, but I did it again. I'm one of those people that doesn't know when to stop sanding, I could sand the entire boat into a pile of dust if you let me. While the raw wood hull looked OK, I knew when I primed the hull every imperfection will shine through for all to see. I do most of my painting by airbrush now. So I built a portable spray booth that I can use on my workbench. Here is the boat after sanding, and the first coat of primer. Yikes! You can see the peaks and valleys, cracks, etc. time to get out my best friend Bondo. Here is my tube of Bondo, I do use wood filler some, but I do like Bondo since its easy to apply, dry and sand. If I remember correctly I bought it off Amazon. Here is just one application of bondo filler, and sanding. I think I did this three or four times over the course of a week. Patience is a virtue I hear. You can see I sanded straight through to raw wood again. Here we are after several coats of primer, filler, and sanding. Much better. I'm on the fence if I will attempt more coats. I still have other parts such as the rudder to work on as well. And when I add the actual layers of paint I think things will look pretty good. For you eagled eyed viewers, you will notice the rings off to the right of the boat. Those are future life rings to accessorize the boat, I'll cover that separately. Here is a shot of my spray booth, scrape wood frame and painters plastic stapled to the frame. The compressor is out of view, but sits on the floor under the miter saw on the left. This works for me, I can easily move the booth to storage when not in use and regain workbench space for other projects. I will put the hull up at this point and start on other parts of the boat. Actual painting of the hull will happen when I have the cabin etc. built and I can be more efficient painting multiple parts. I'm not a big fan of cleaning the airbrush every time I paint, so the less painting sessions the better.


-
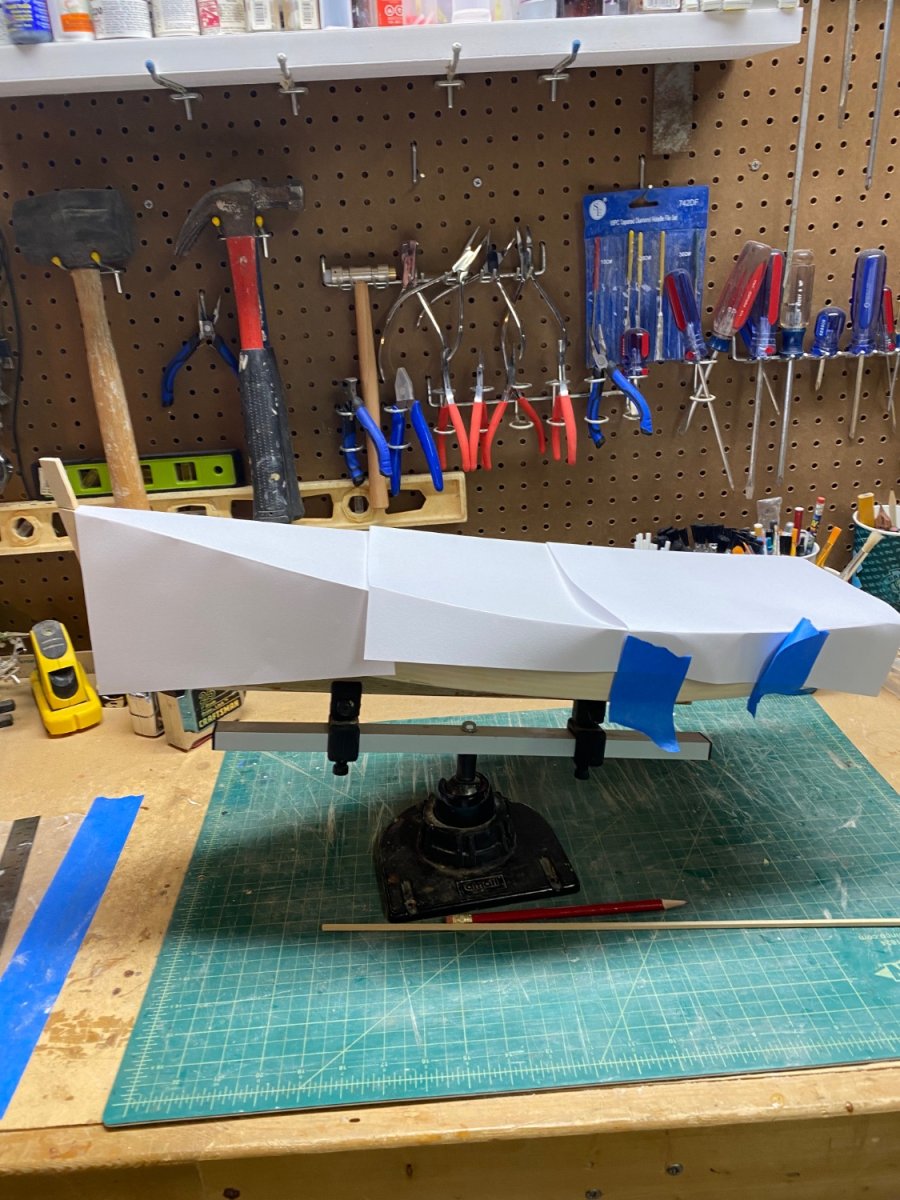
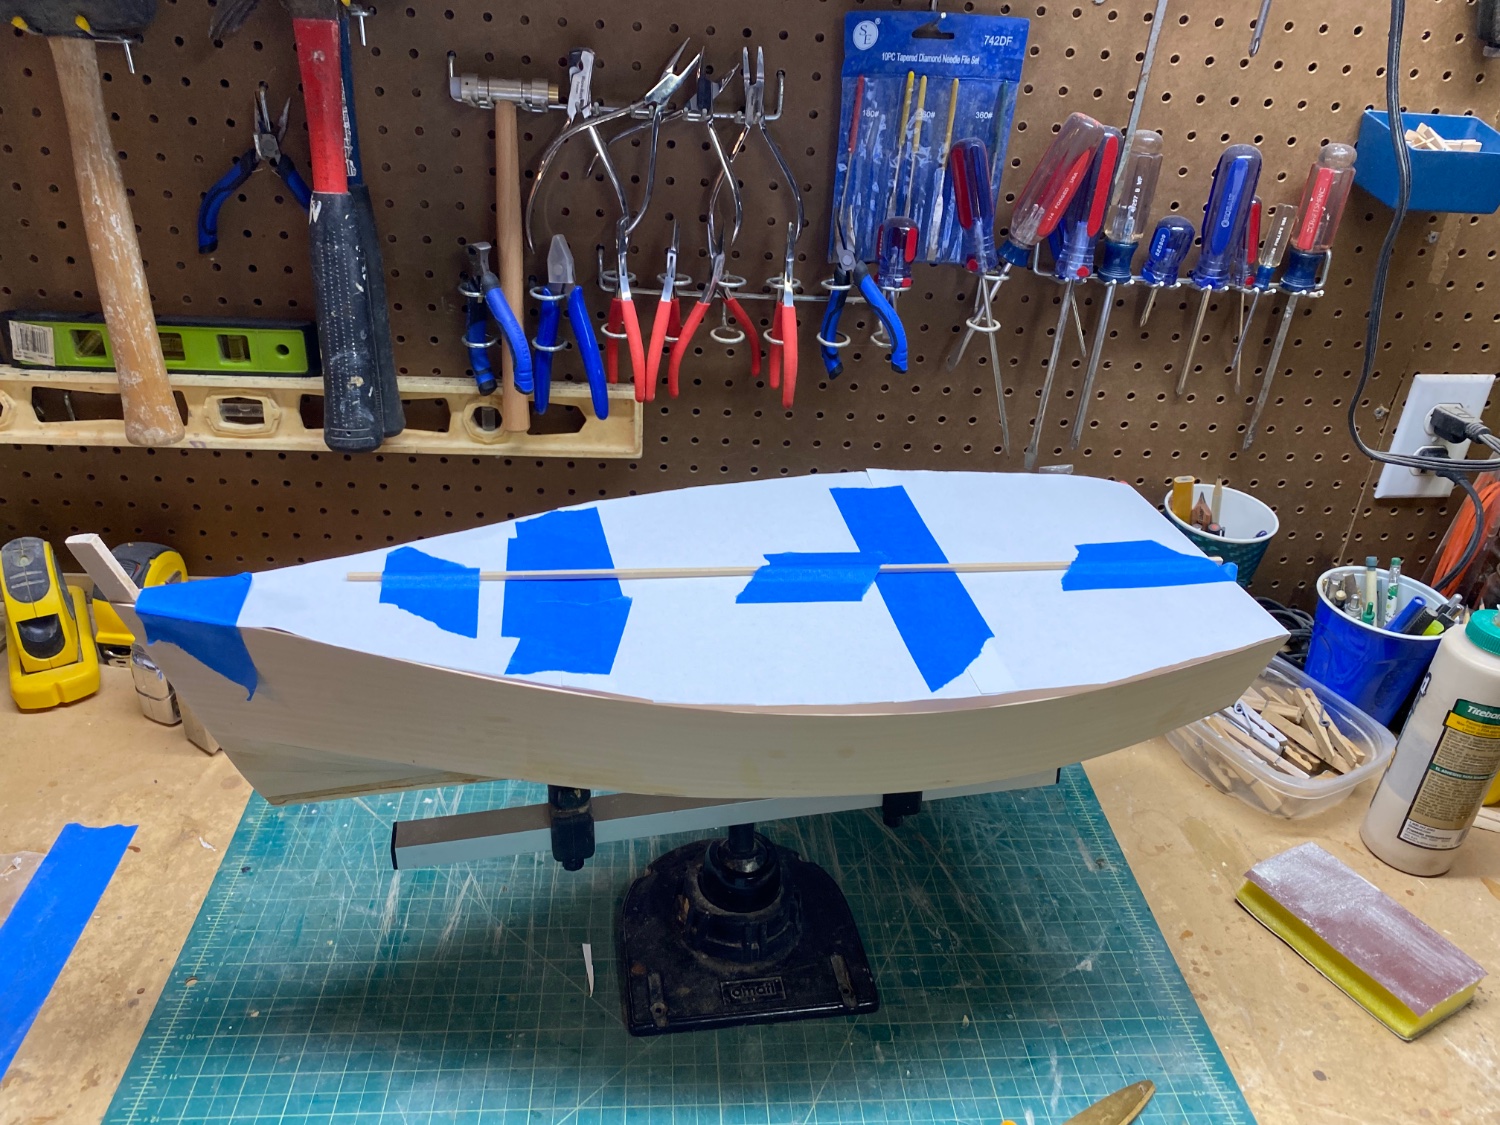
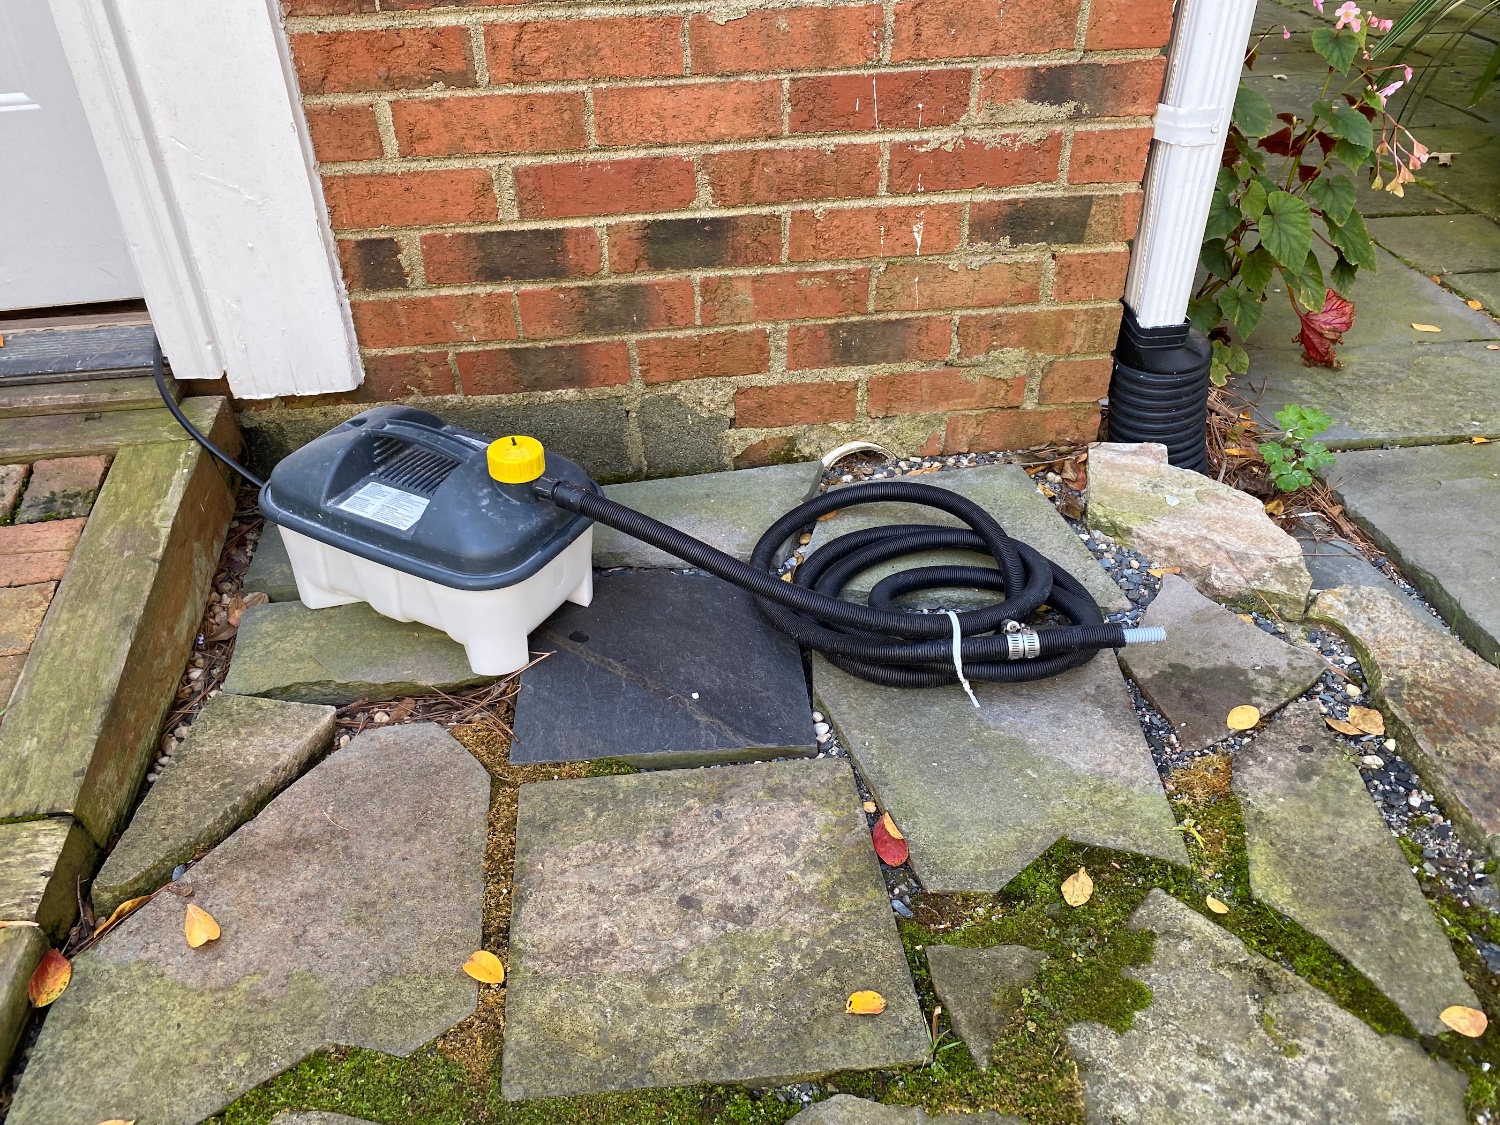
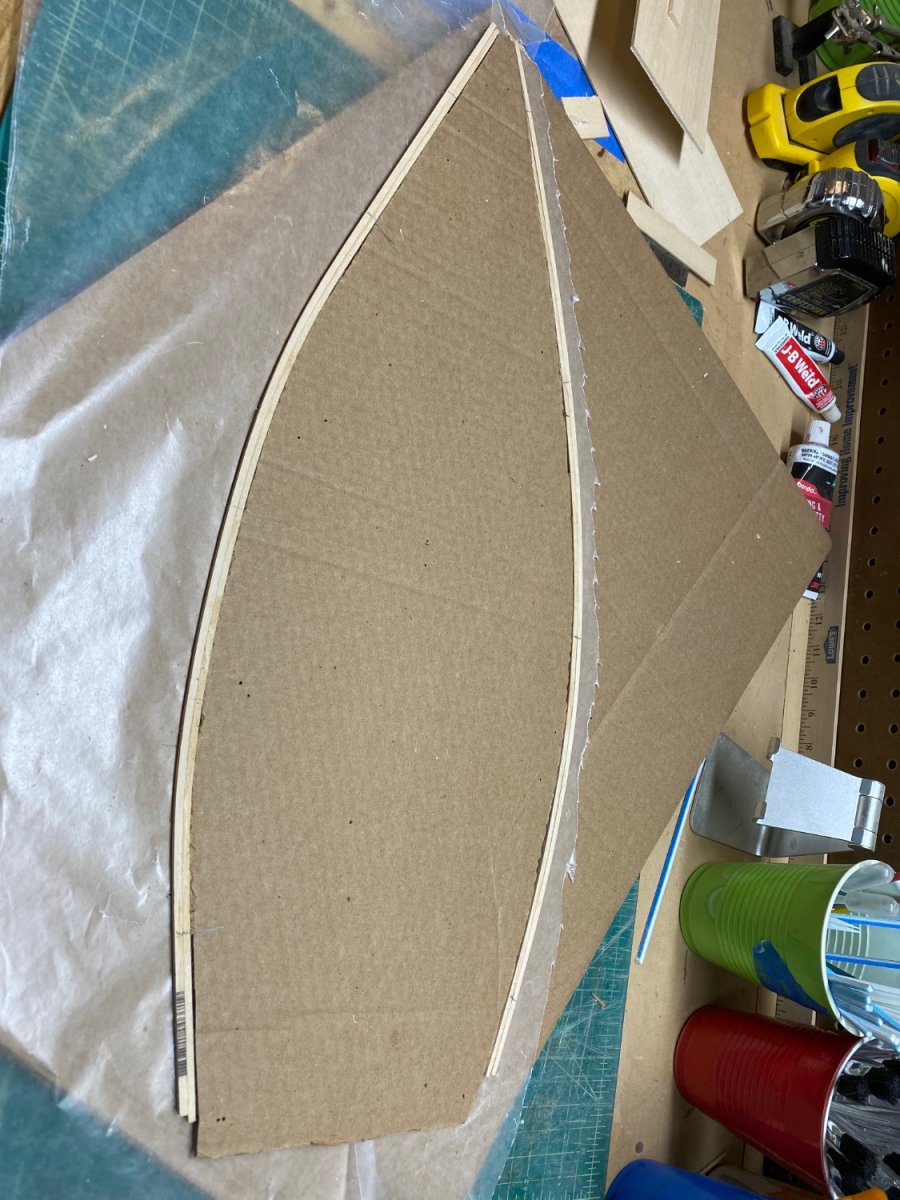
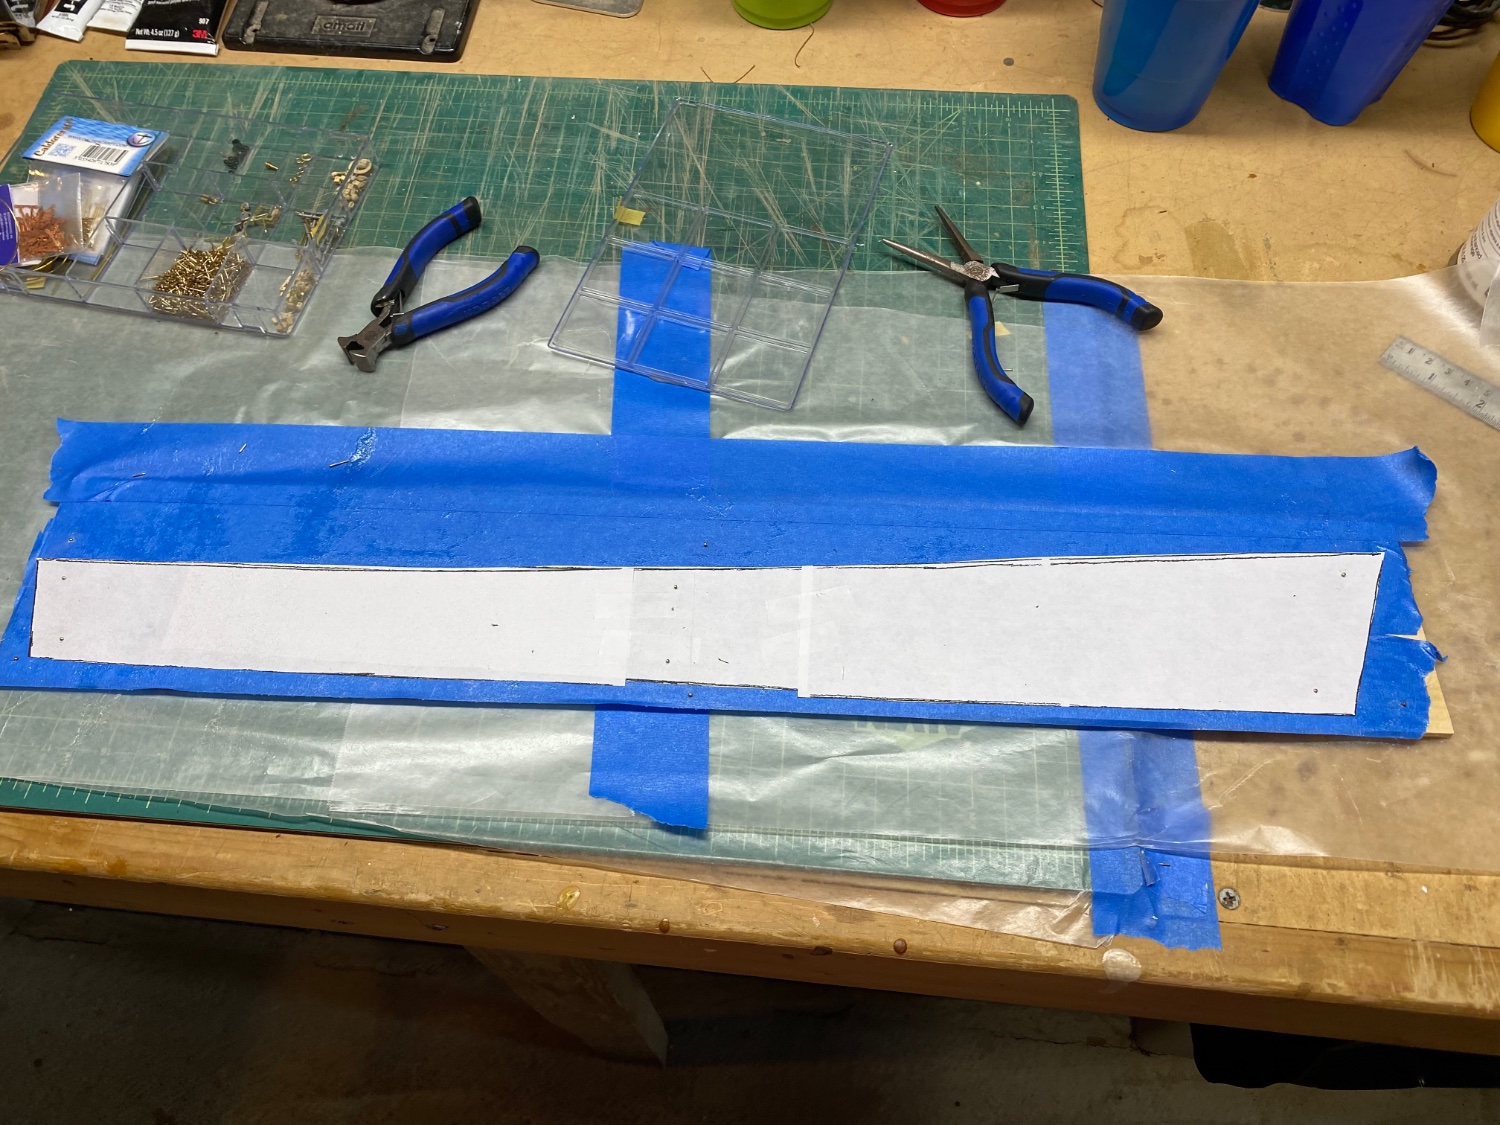
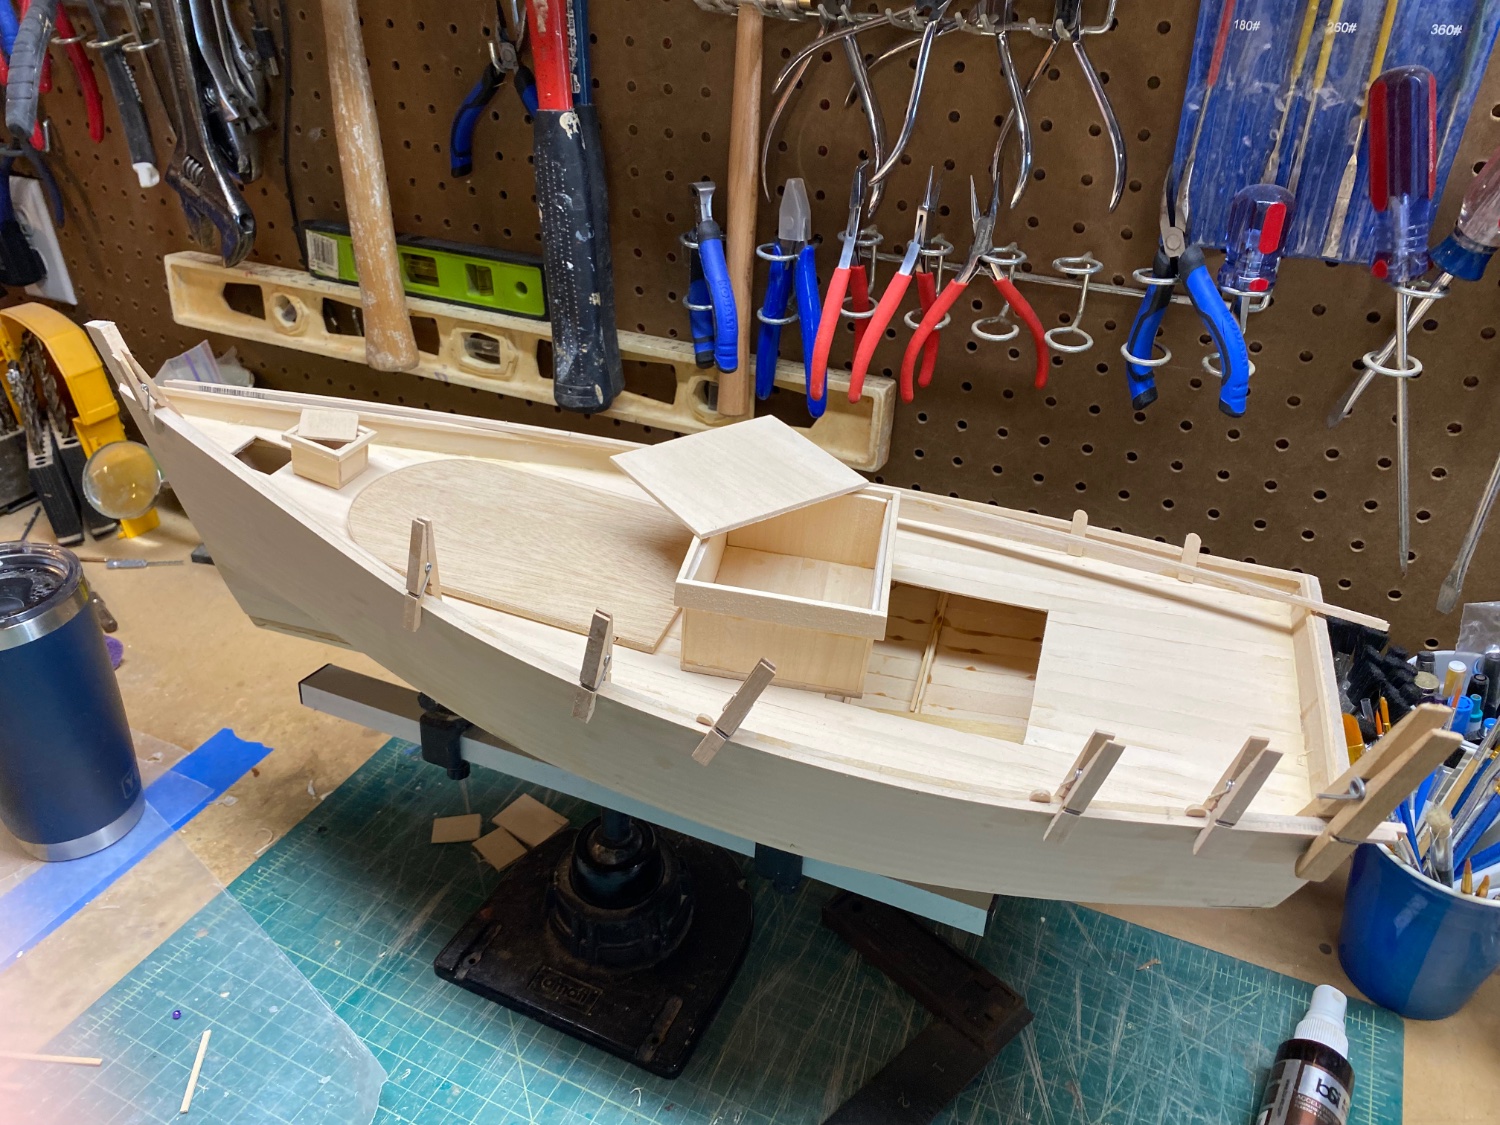
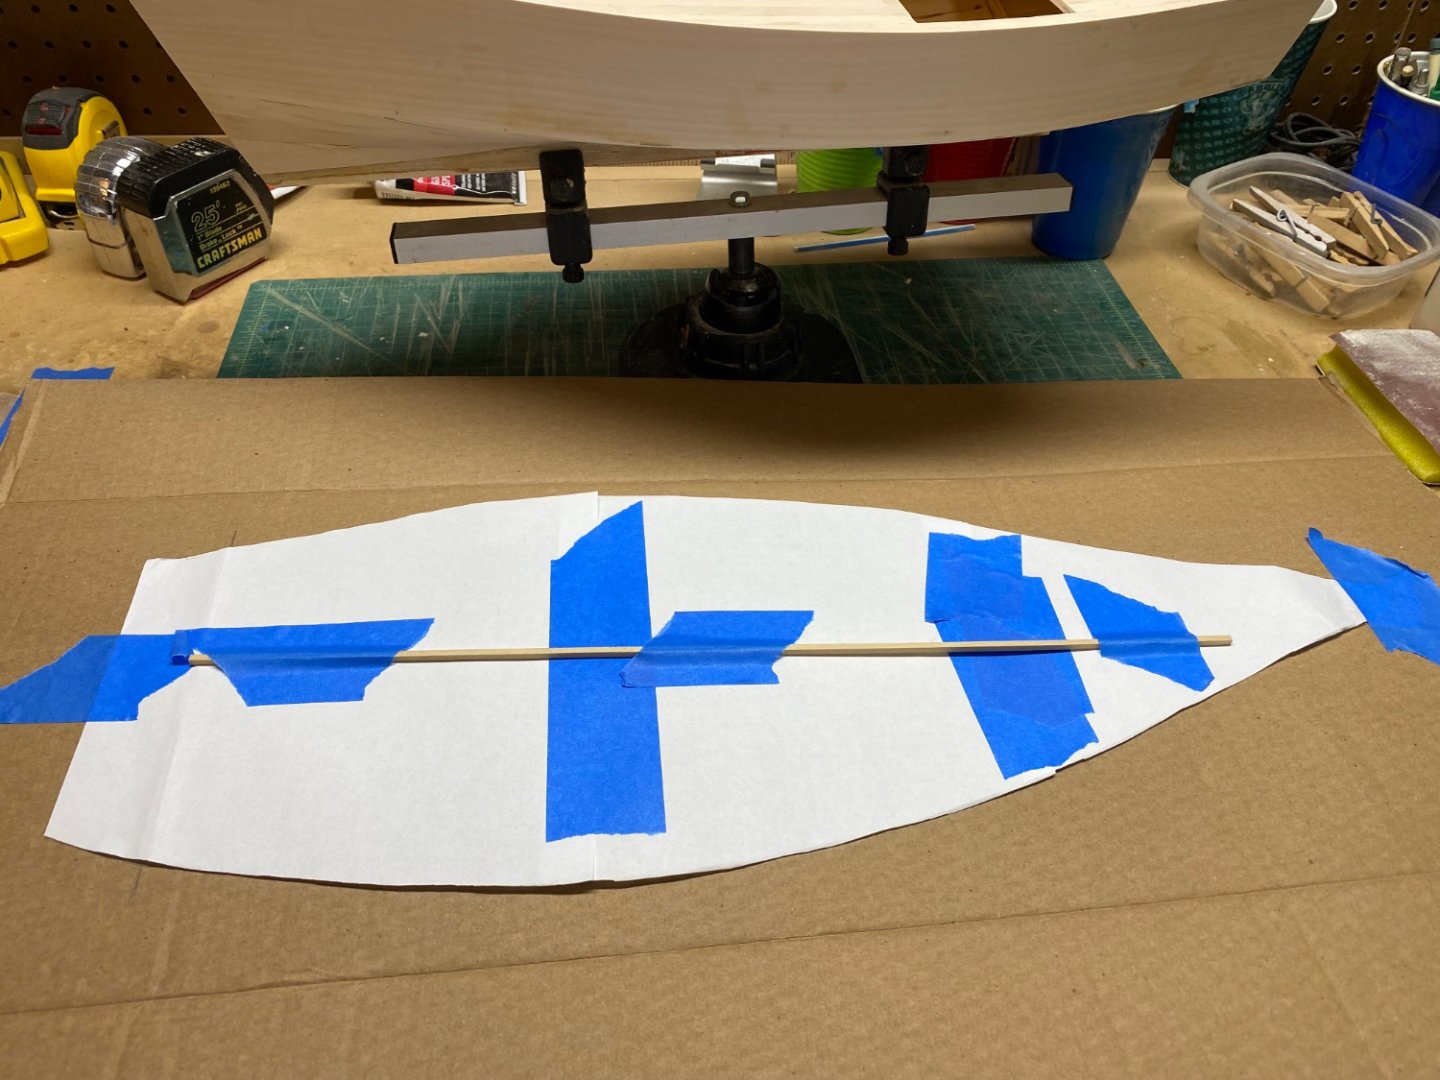
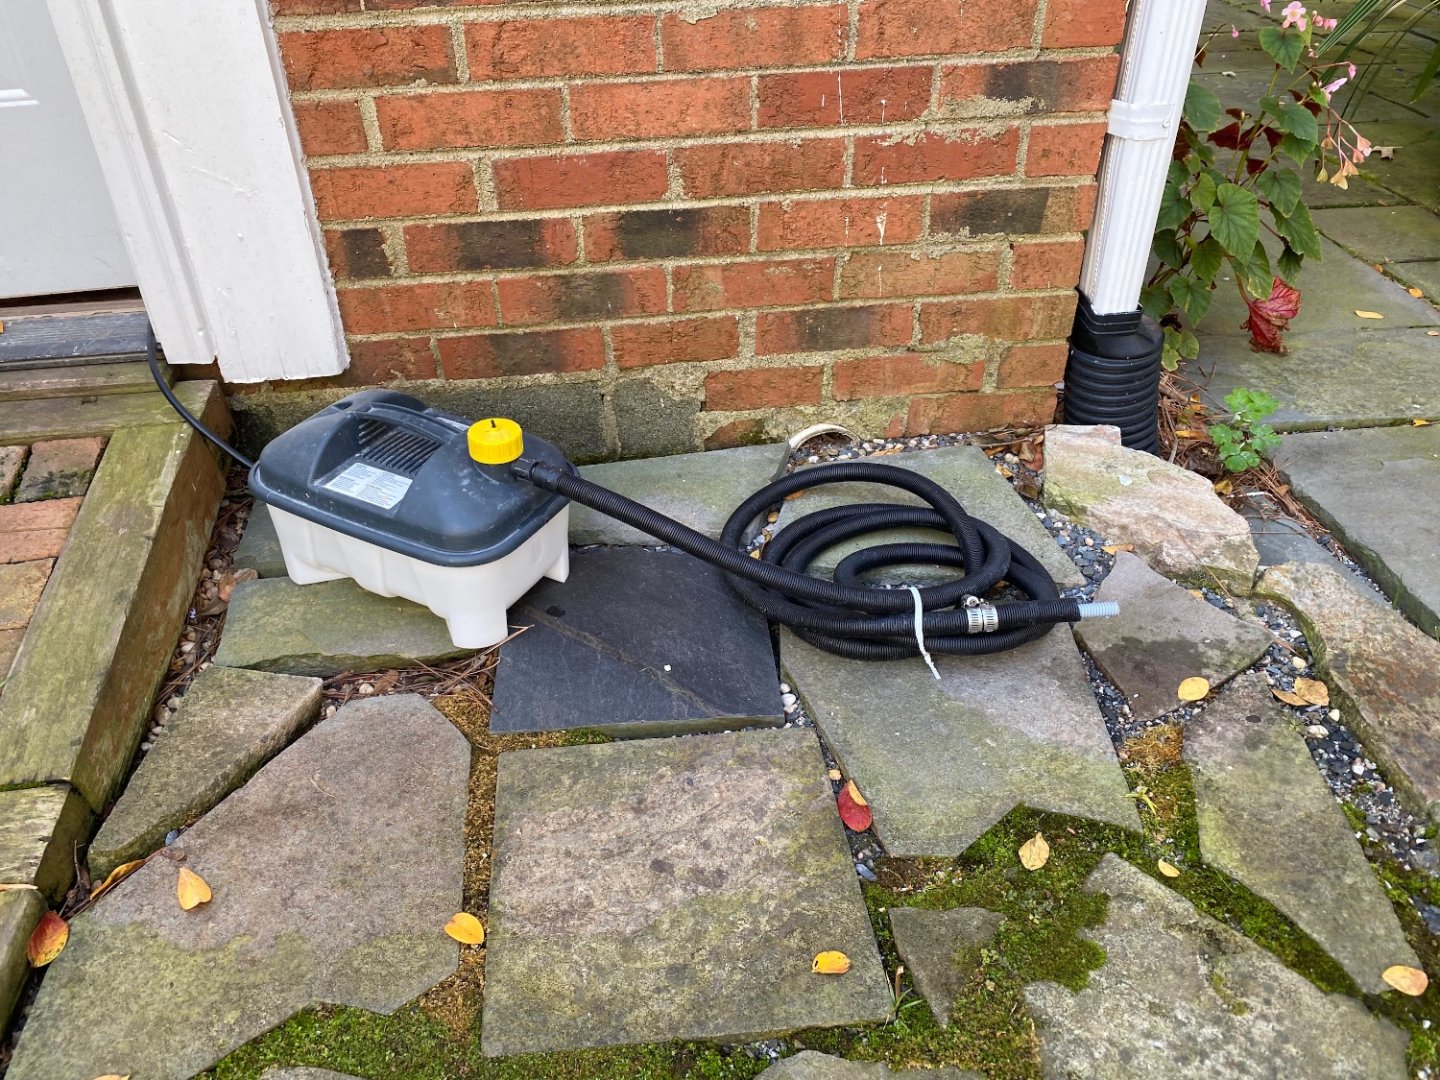
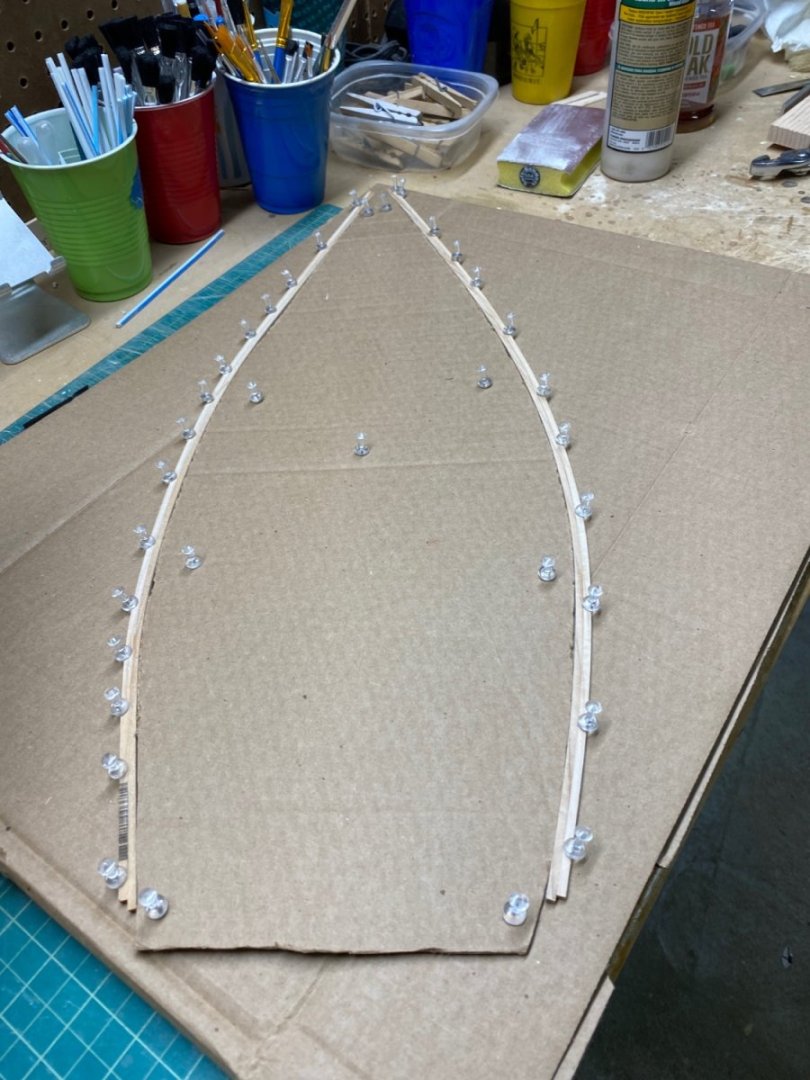
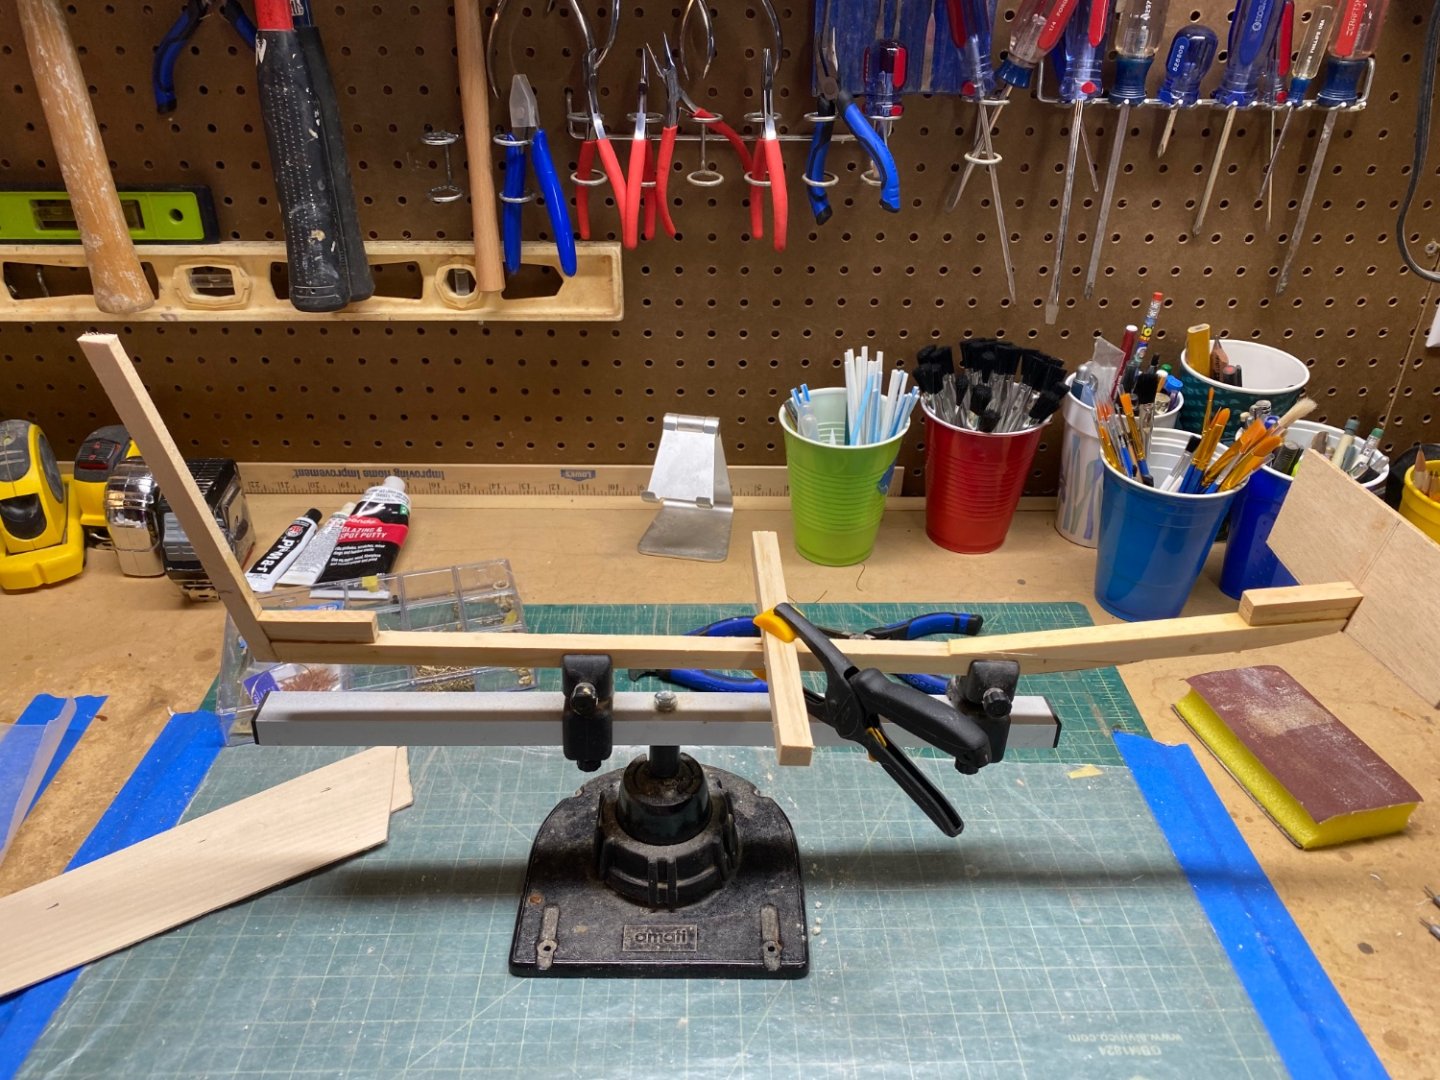
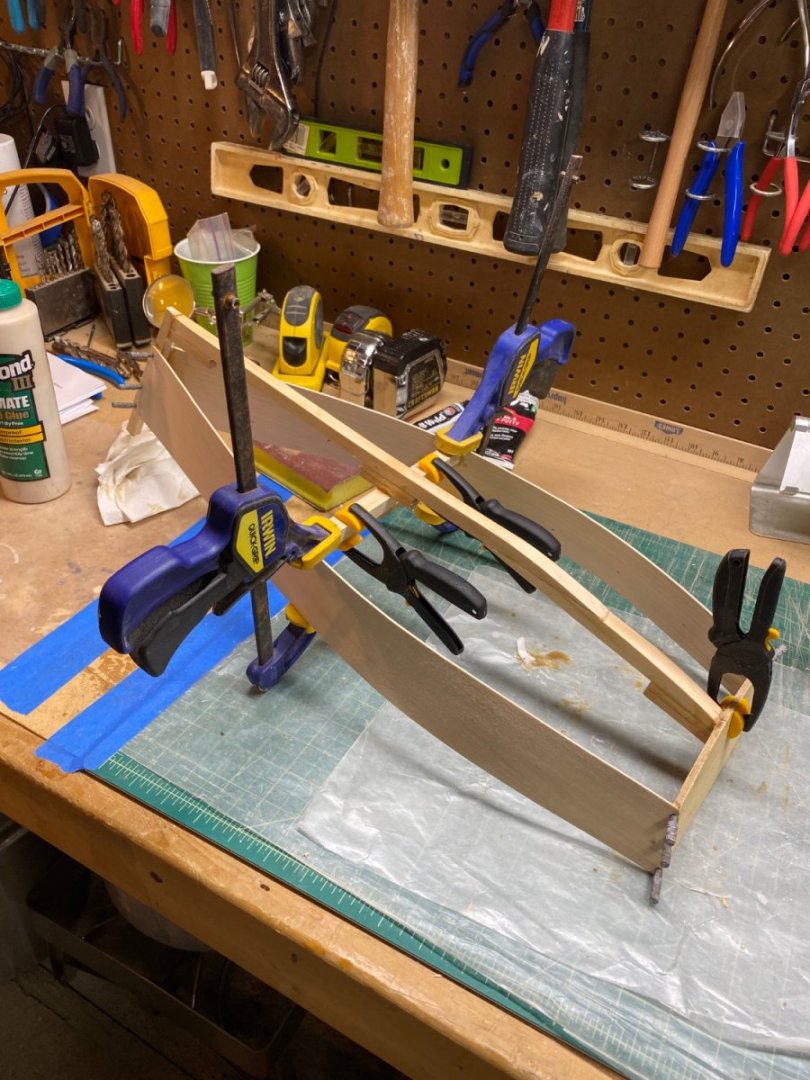
Today I will post how I did the cap rails. These are always a challenge for me. How do you bend wood, glue it, and keep everything in place? I borrowed every idea from other logs on this site. My first step was to create a paper template of the actual shape of the rails using paper that I wrapped and creased around the top of the hull. I then cut along the crease to create the paper template. I taped the wood strip to help keep the template flat. I then used the paper template to cut out a cardboard template that will be used to help shape the wood. my next step was to steam the wood for easy bending. I'm using very thin strips that easily bend on their own, but I need them to hold their bent shape for easy glueing to the hull. I read about this great idea of using a wallpaper steamer. Over the years I have soaked wood strips in the bath tub, then I moved on and soaked them in ammonia. But the wallpaper steamer is my new favorite (available at your local DIY store and fairly cheap). I can steam the wood strips for an hour and be ready to move on. I first attached the steamer hose to a pvc pipe to hold the wood strips. I ended up melting the pvc! I plan to build a wood box to hold the wood strips and connect the steamer hose to the box. But for now I just stick the wood strips into the steamer hose and it works for small quantities of wood strips. I do my steaming outside of my workshop just as a precaution. Here is a my current setup in action, the wood strips are inside that black/grey tube: Next I shape and pin the wood to my cardboard template. You can see I'm using multiple strips to make up the rail. I let the strips fully dry overnight so they hold their shape. I then glue the strips together with wood glue and pin them back on the template until the glue drys. You can see here they hold their shape without any assistance. Now I can easily glue them to the hull with some simple clamps and rubber bands. Next post I will be sanding, priming, and filling the hull to get a smooth finish. Basically fix as many imperfections as I can. There will be many.


-
Thanks Mike, I have noticed that other logs of Wye River Models use different planking techniques. I did follow the instructions on this one. I still like the more traditional plank on frame technique. I just think it is more substantial with plenty of surface area for solid glueing. What I have is effectively and empty shell with very little interior support. That is why I went with the wood glue and not CA, hopefully to increase the strength of the bonds.
-
Thanks Chris!
-
Sorry for the last picture, it's out of sequence, and I can't figure out how to delete it. This is my first build log. Also can someone help explain the concept of multiple pages? I see them on other logs, but I have no idea if they are automatic or if it's something I need to do. Thanks.
-
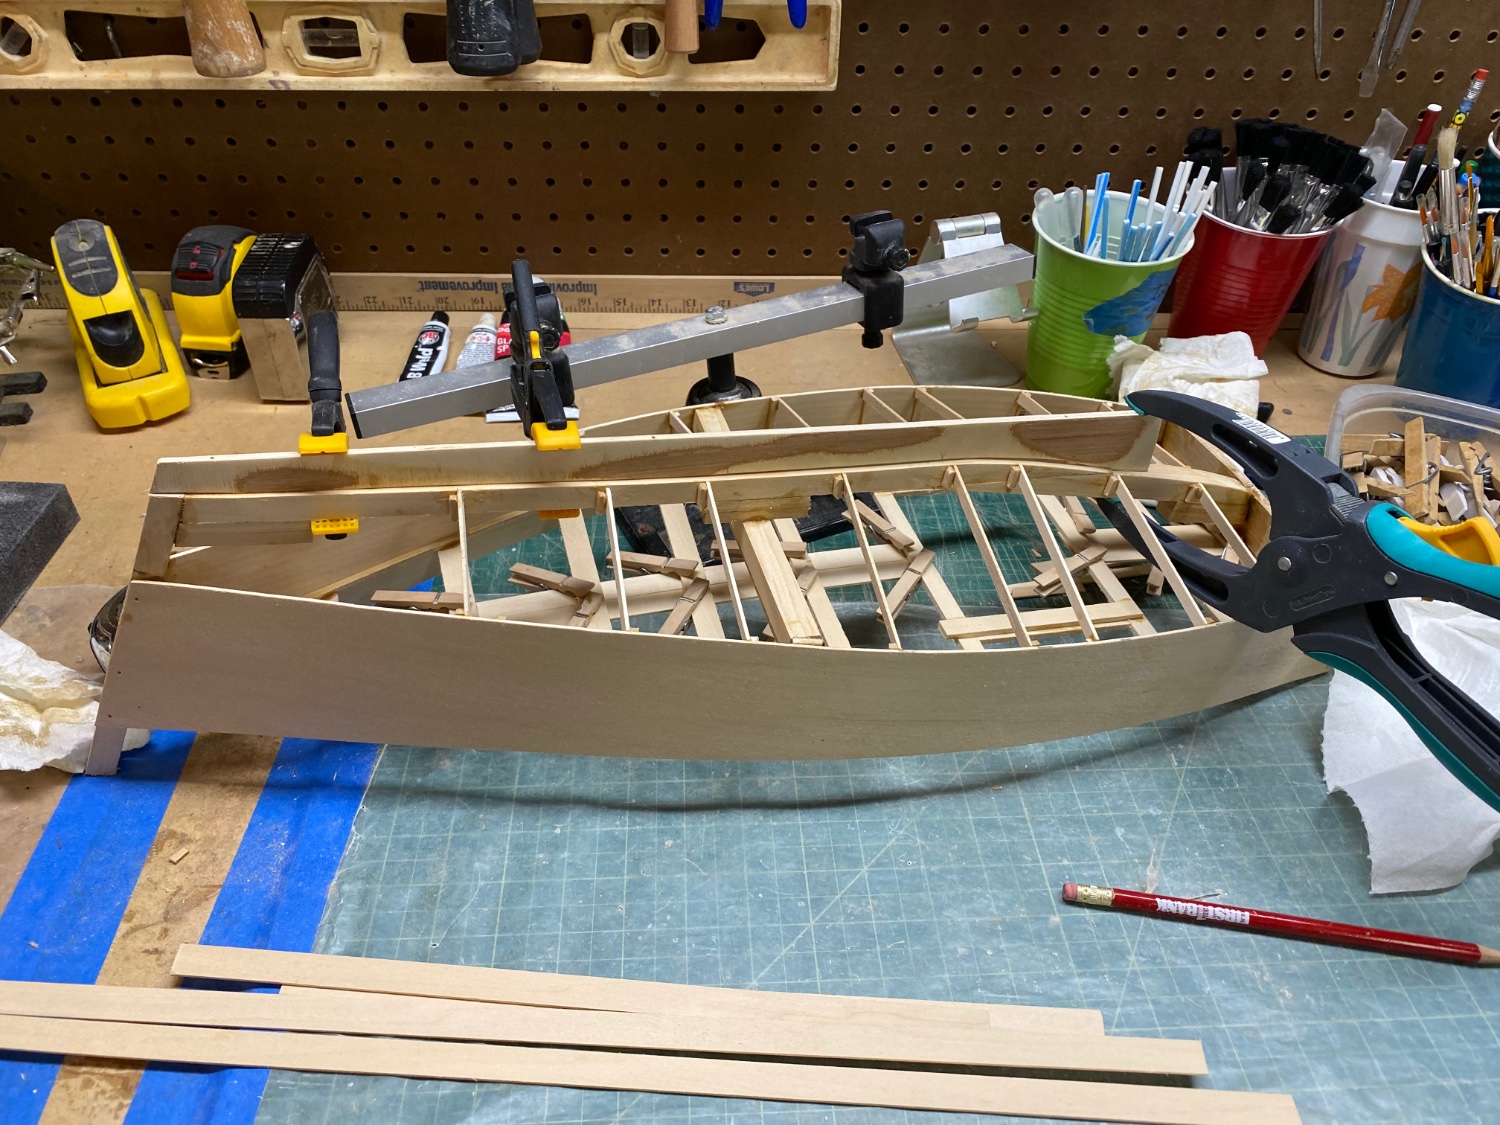
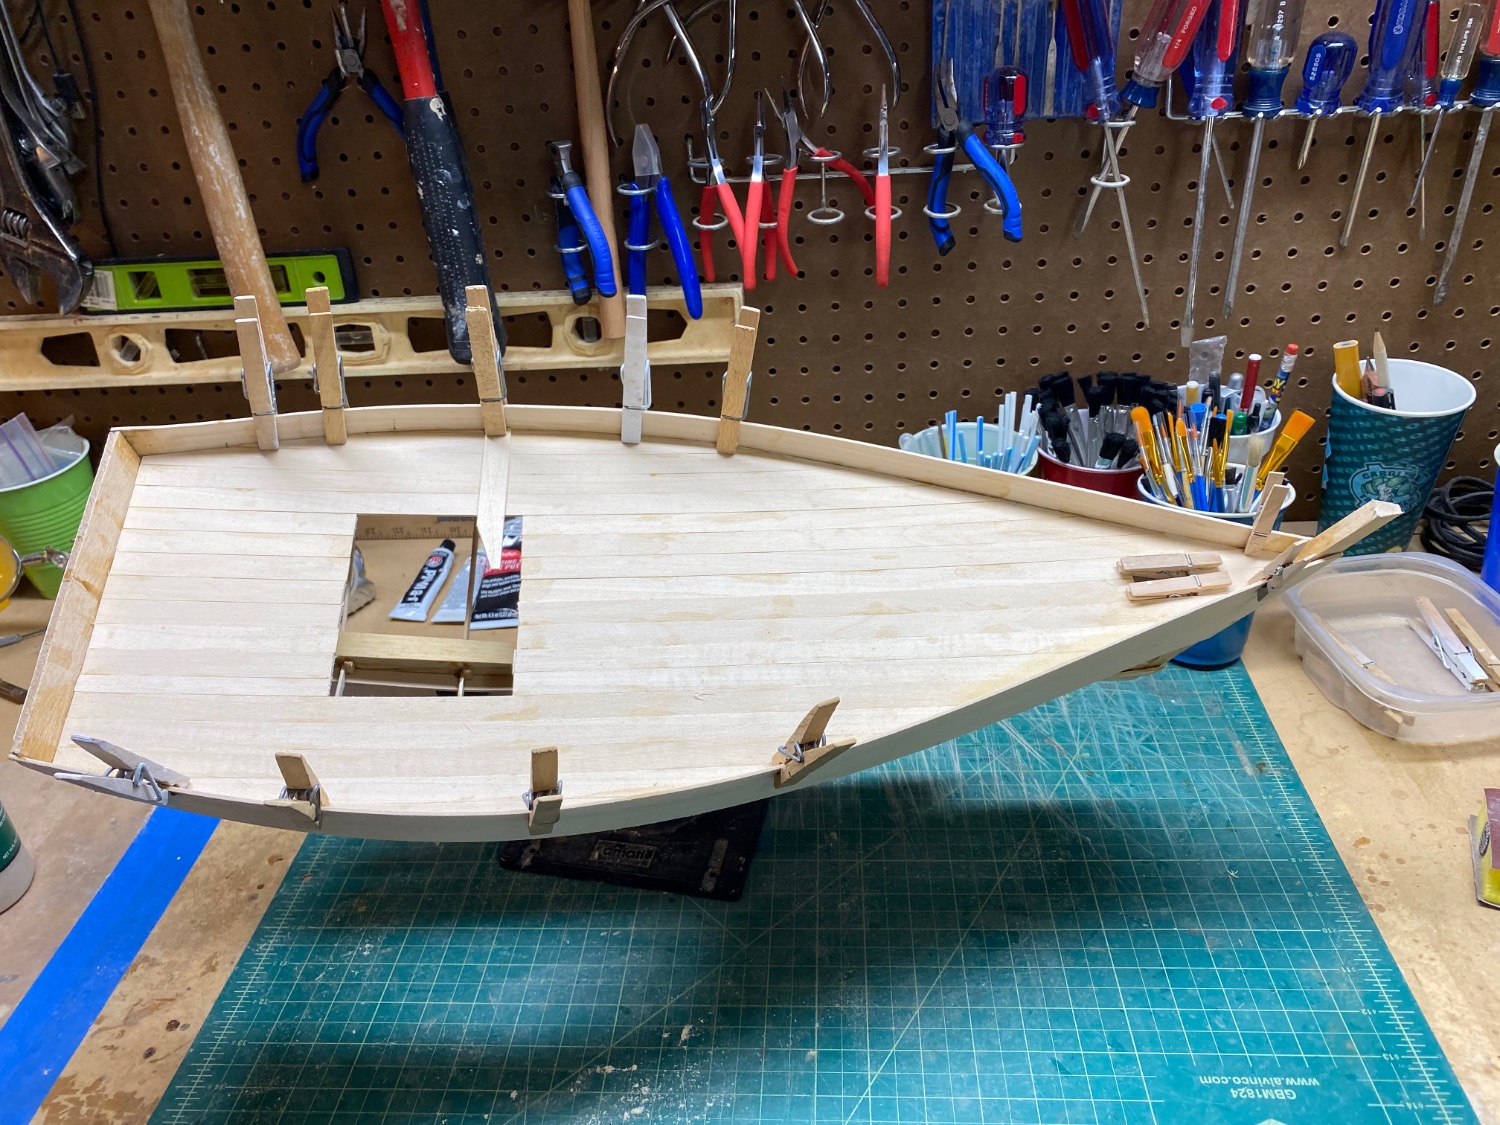
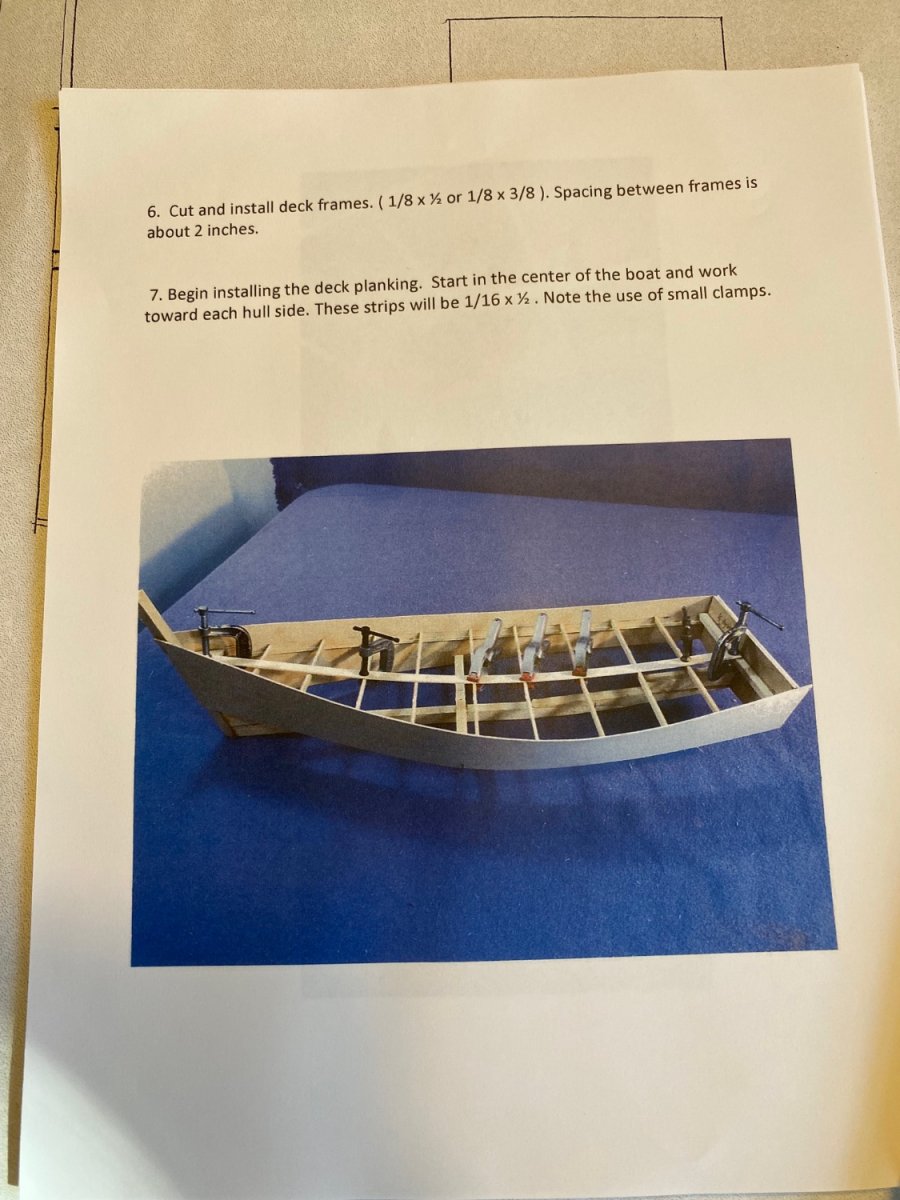
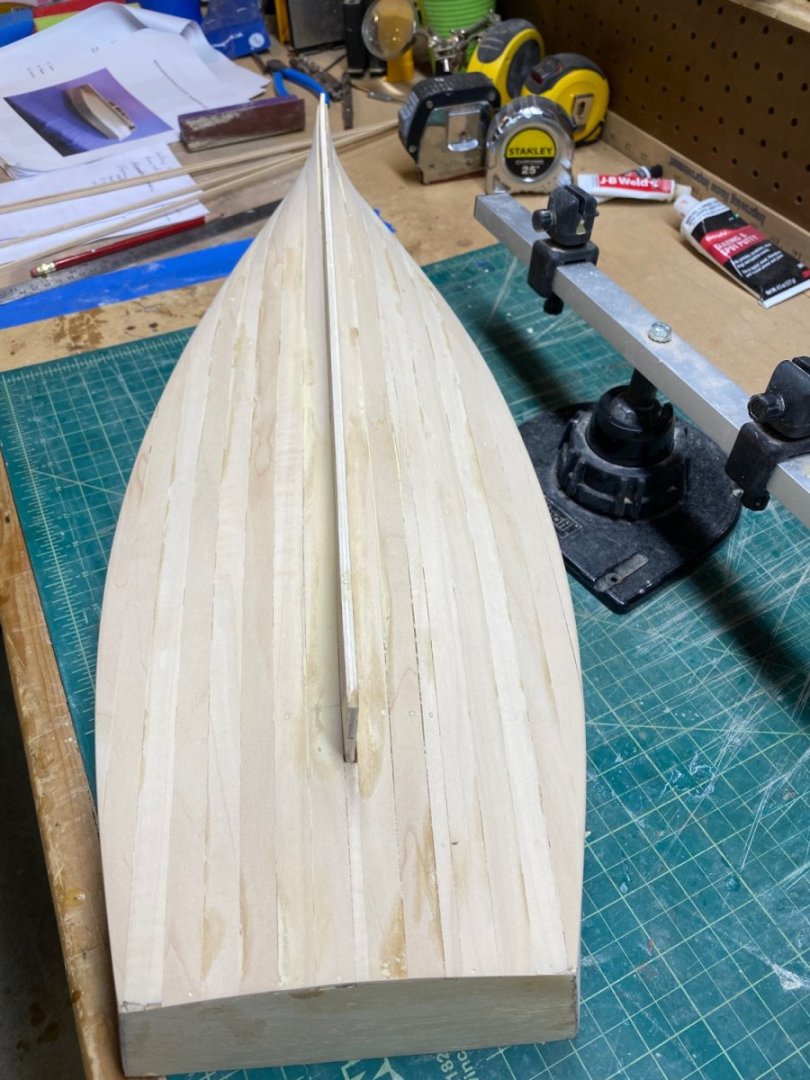
I'm starting the the hull at this point. I'm using the dimensions of the first page of plans as a base. The second page didn't seem to match up so I made an executive decision and ran with it. Following the plans and instructions I built the keelson and transom as the base of the hull. I added the middle hull support that will help shape the hull. I also used my templates to cut out the sides of the boat that match the plans. I have never built a boat in this style of build, it's always been the traditional plank on frame for the entire hull. Here I have the sides glued to begin the shape of the hull. I'm using standard wood glue for all my hull work, not CA. The bottom of the hull is framed out, then planked. You will see here I add the keel which I cut out stock, I ended up glueing the Keel to the keelson and adding pins for added strength. I think I used the wrong wood for the frames (to thin), I'll beef them up later. You can also see I started the deck framing as well. Here I start the planking on the bottom of the hull. You can see I beefed up my frames with more wood for better surface area for glueing. Nothing special about the planking, I didn't need to steam the planks, and it will be all sanded and primed multiple times. Here is the completed planking on the hull. Not bad if you don't look too close. I also planked the deck, not many pictures but it was very straight forward with wide planks from the kit. You will notice I added a hold in the rear since it seems to be on the plans, I add a small hold up front for good measure. maybe for the anchor chain? Remember outside following the plan for the hull, I'm totally winging this build. I am trying to think ahead with this build, so at this stage I decide to outfit the base and pedestals before any painting. The base was provided with the kit, it nice so I will use it. The pedestals I had, so my keel thickness was planned to fit the pedestals. It looks like a boat! I went ahead and built the holds from scrap so I can just pop them in. I didn't plan any holes on the deck from the main mast. Lucky for me I have access to the inside of the boat via the hold to add blocking for the mast later. Whew! The cabin layout came with the kit, If I use it there would be no way to open the doors on the cabin. Another sizing issue to figure out later My next post I'll detail how I built the cap rails. They are always a challenge for me.


-
Mike, Lucky for me I have many toys in my workshop (with the notable exception of the Byrnes table saw and his other goodies, sigh). I like to use my band saw for cutting the parts, but the scroll saw might be better for smaller parts. I'm with you on the Wye River models, I'm happy right now, its my first baby step into the stratch build world IMO.
-
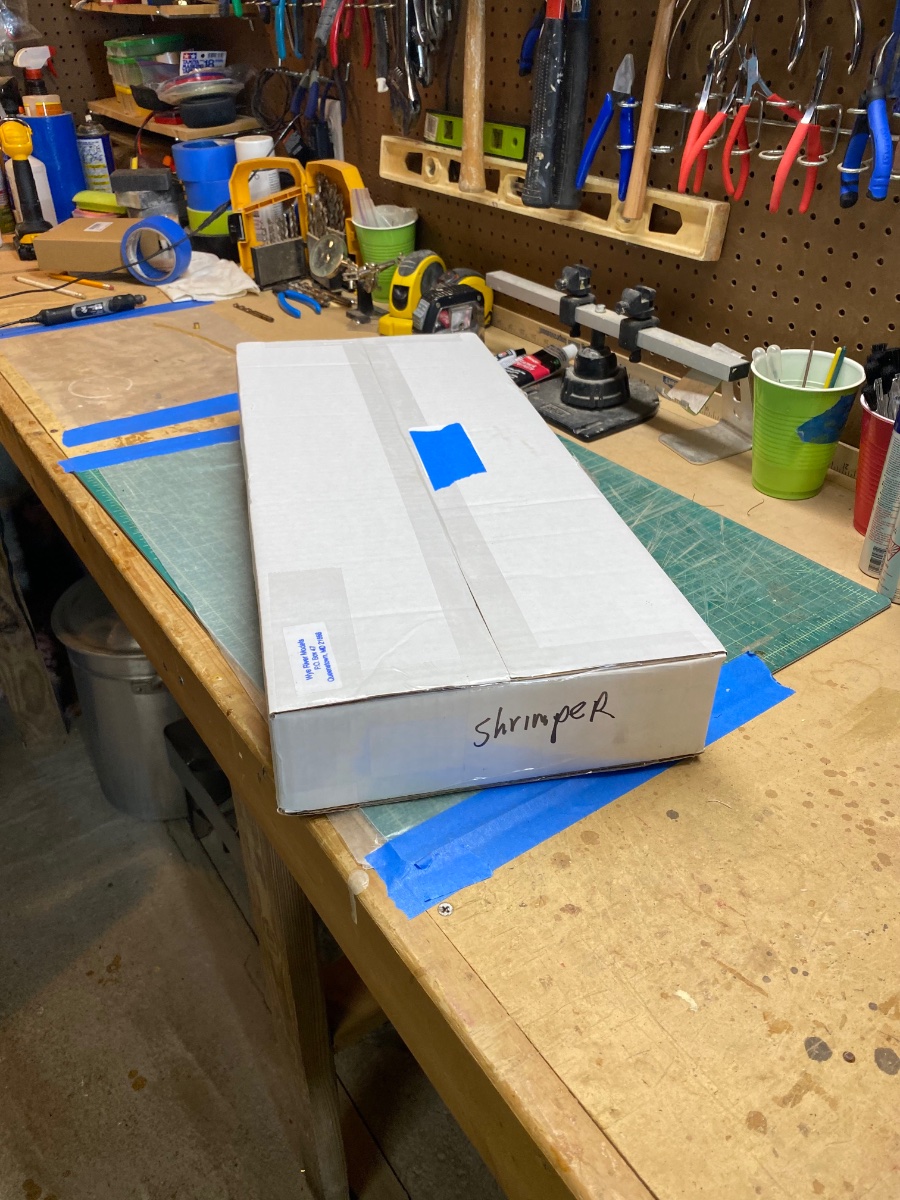
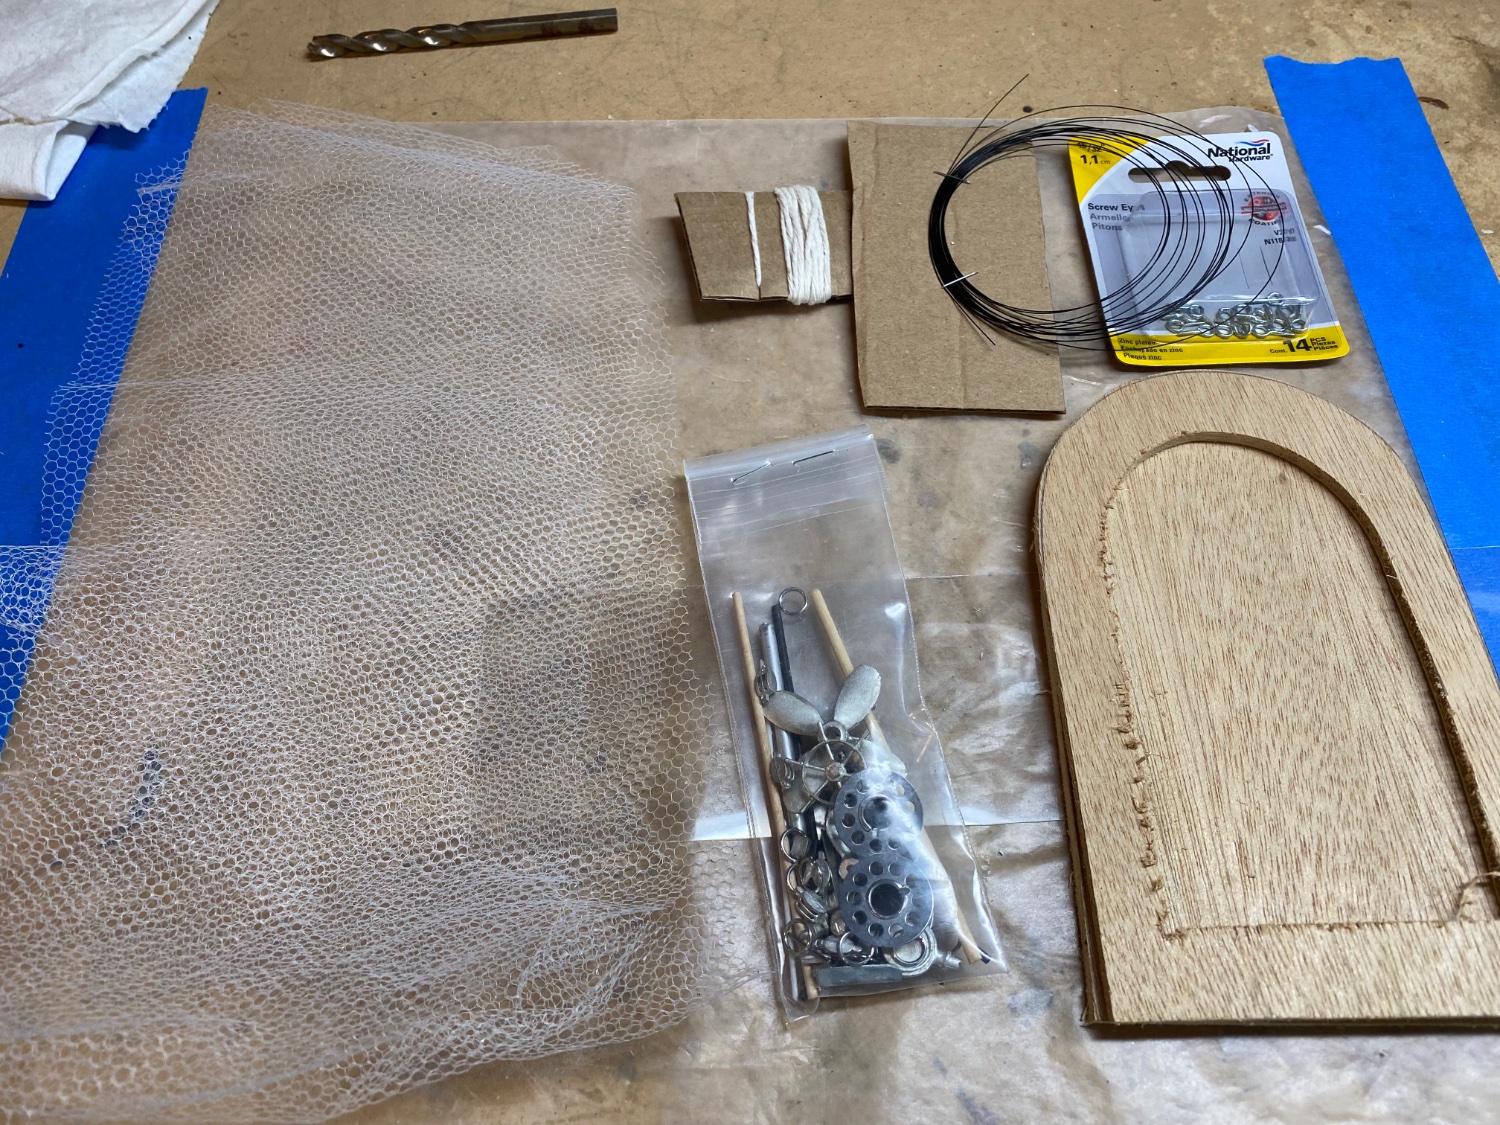
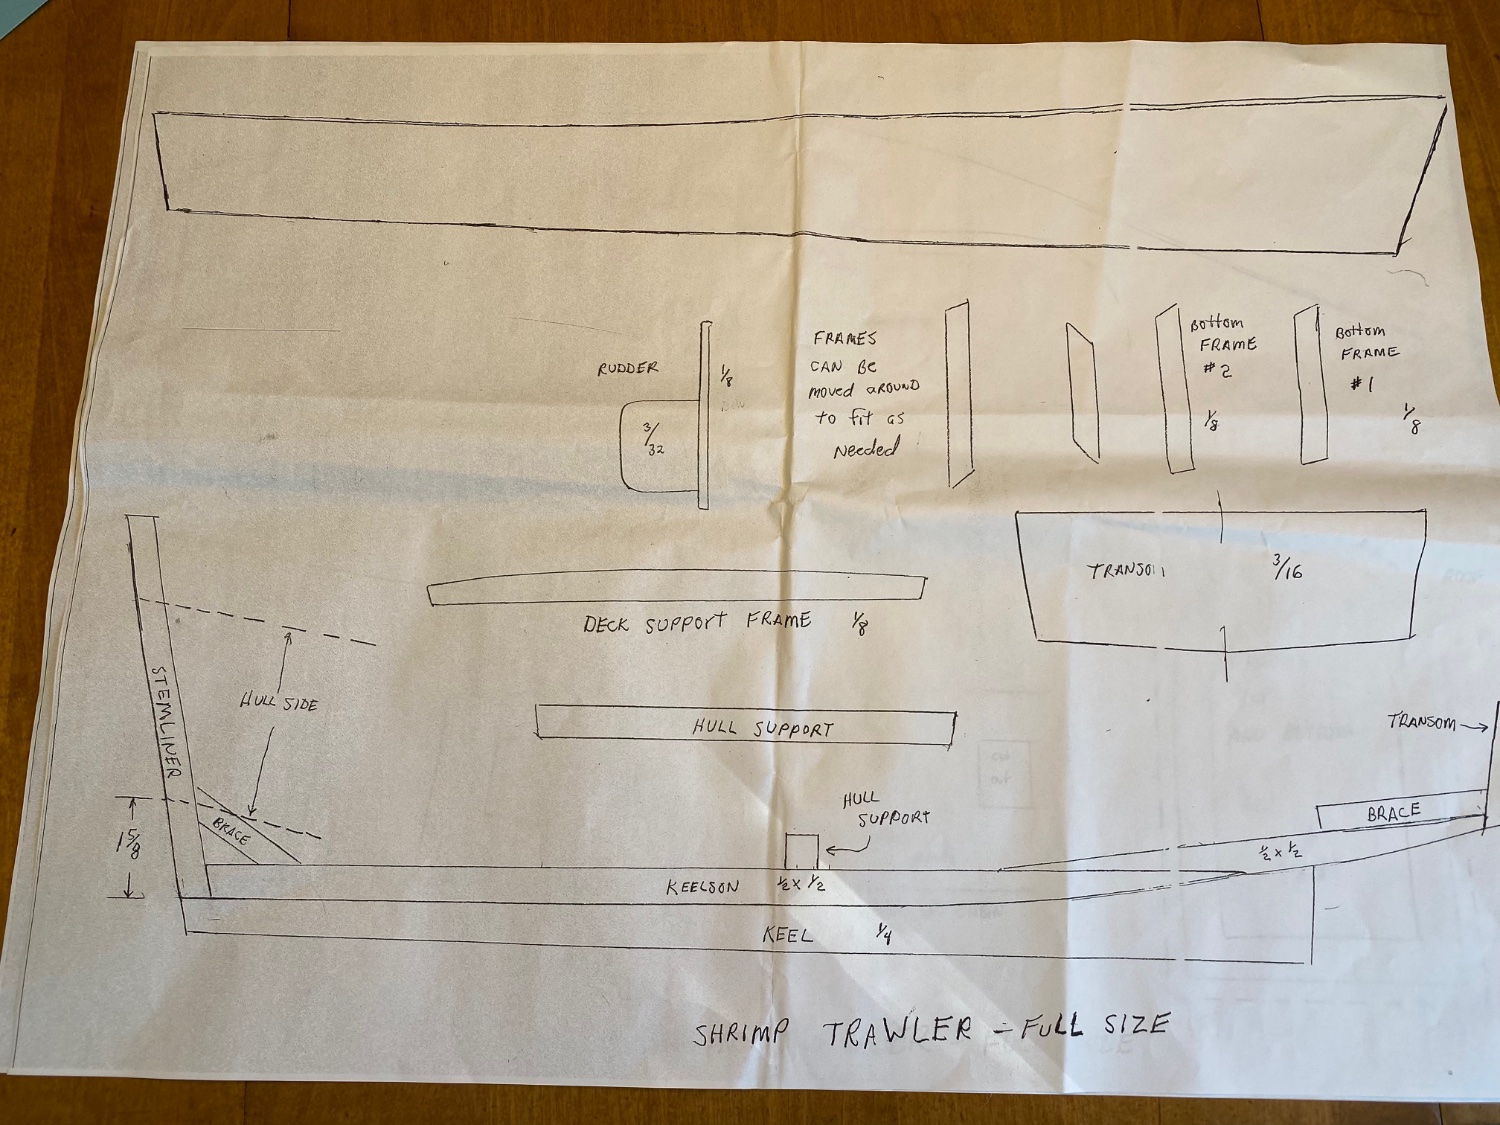
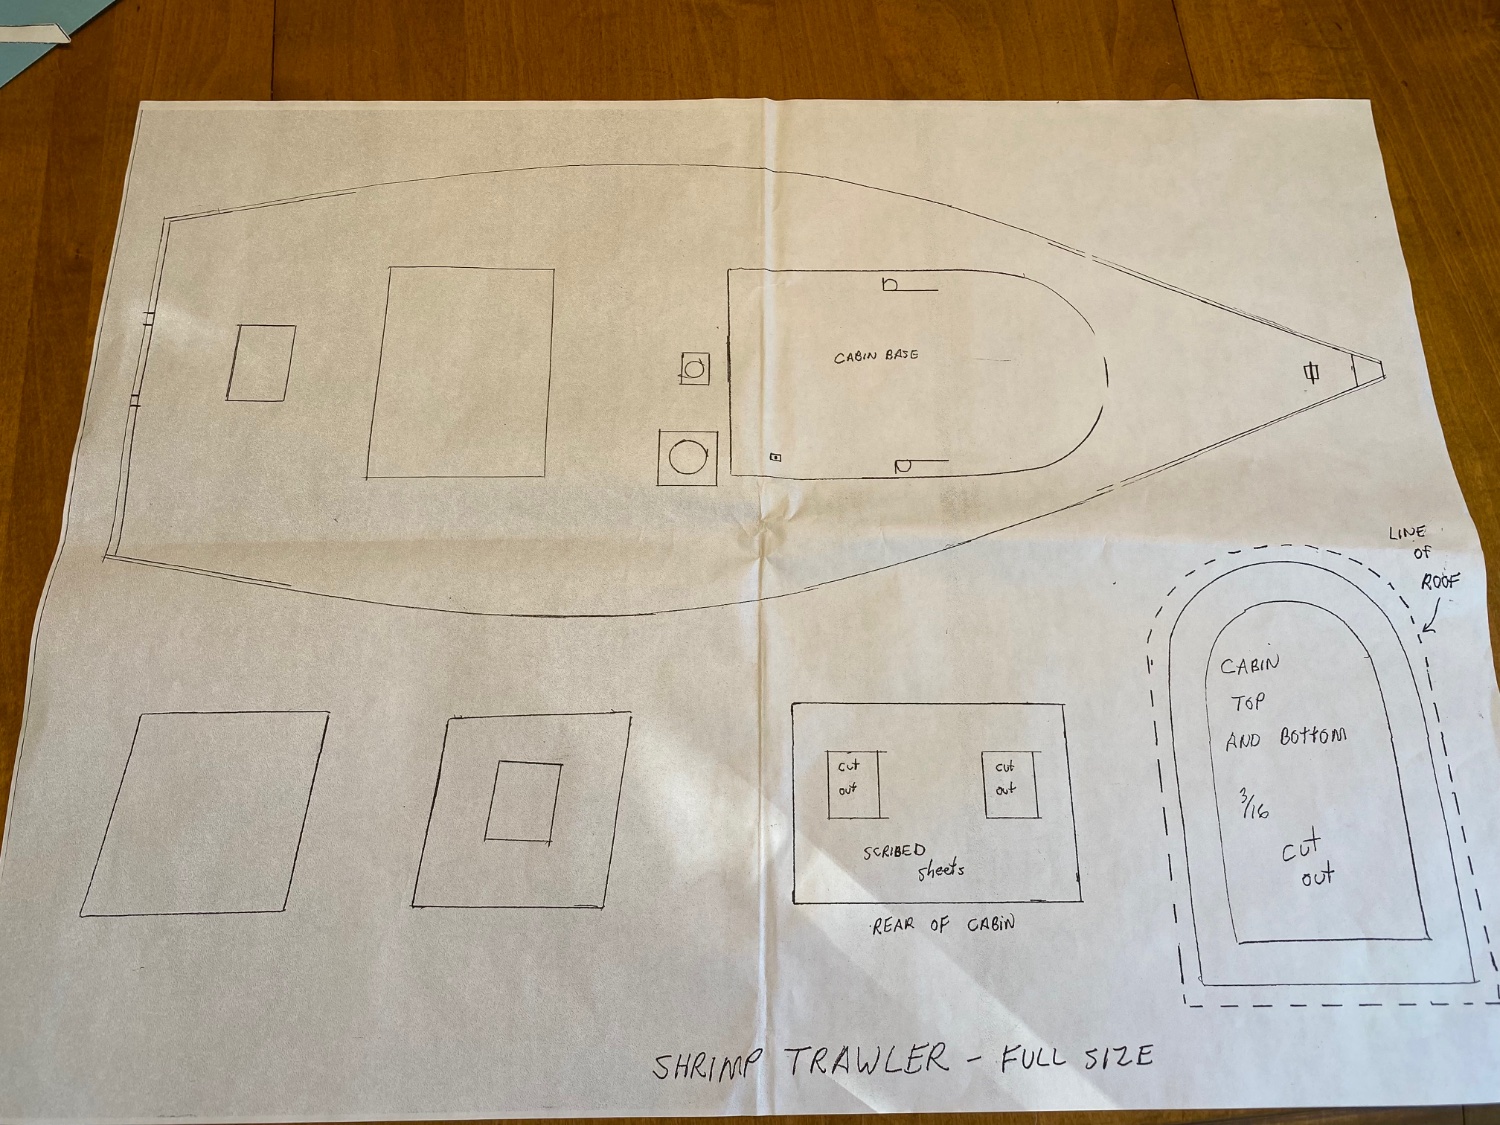
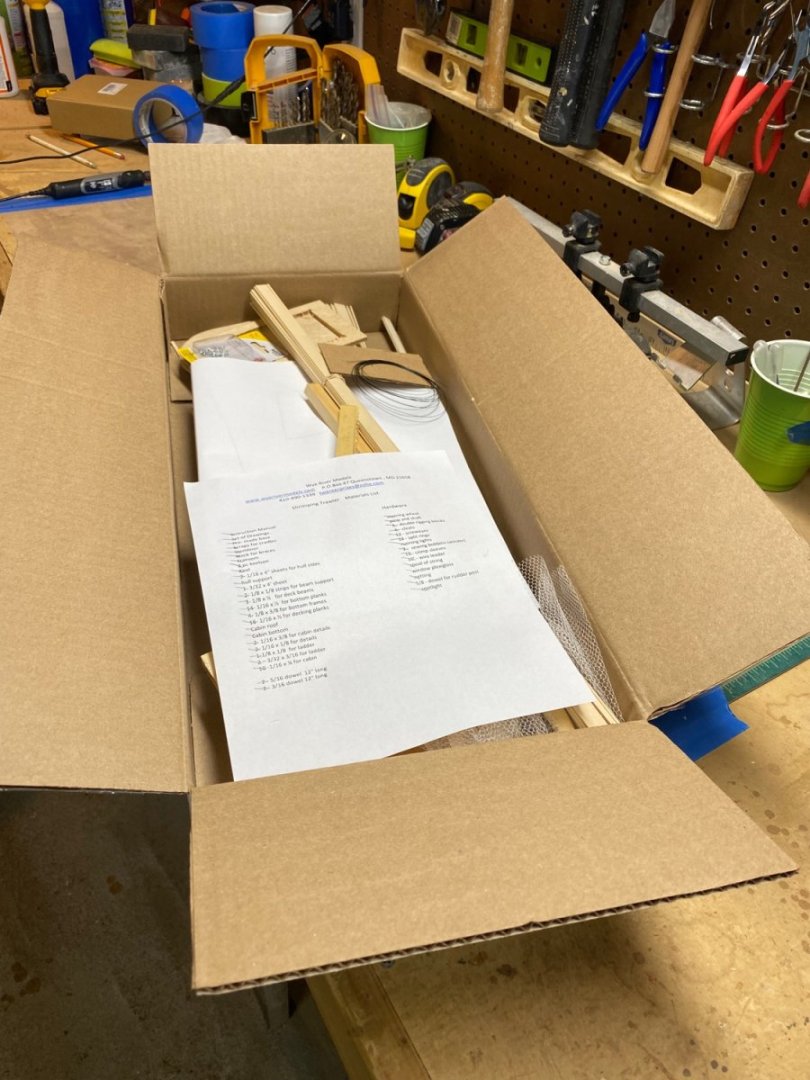
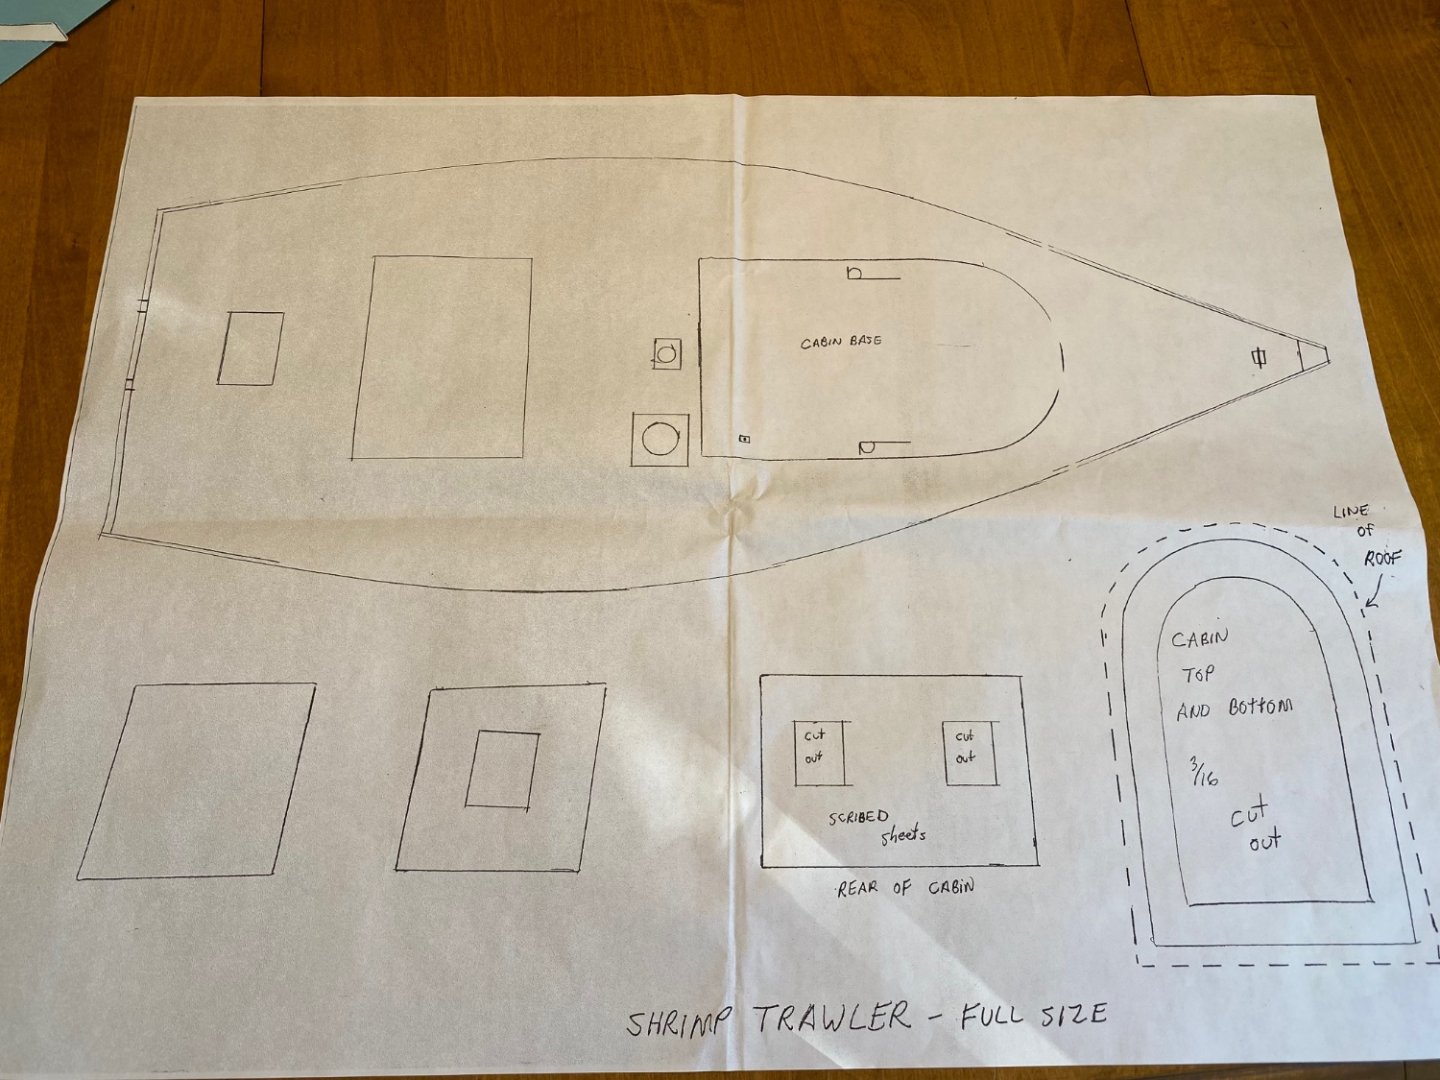
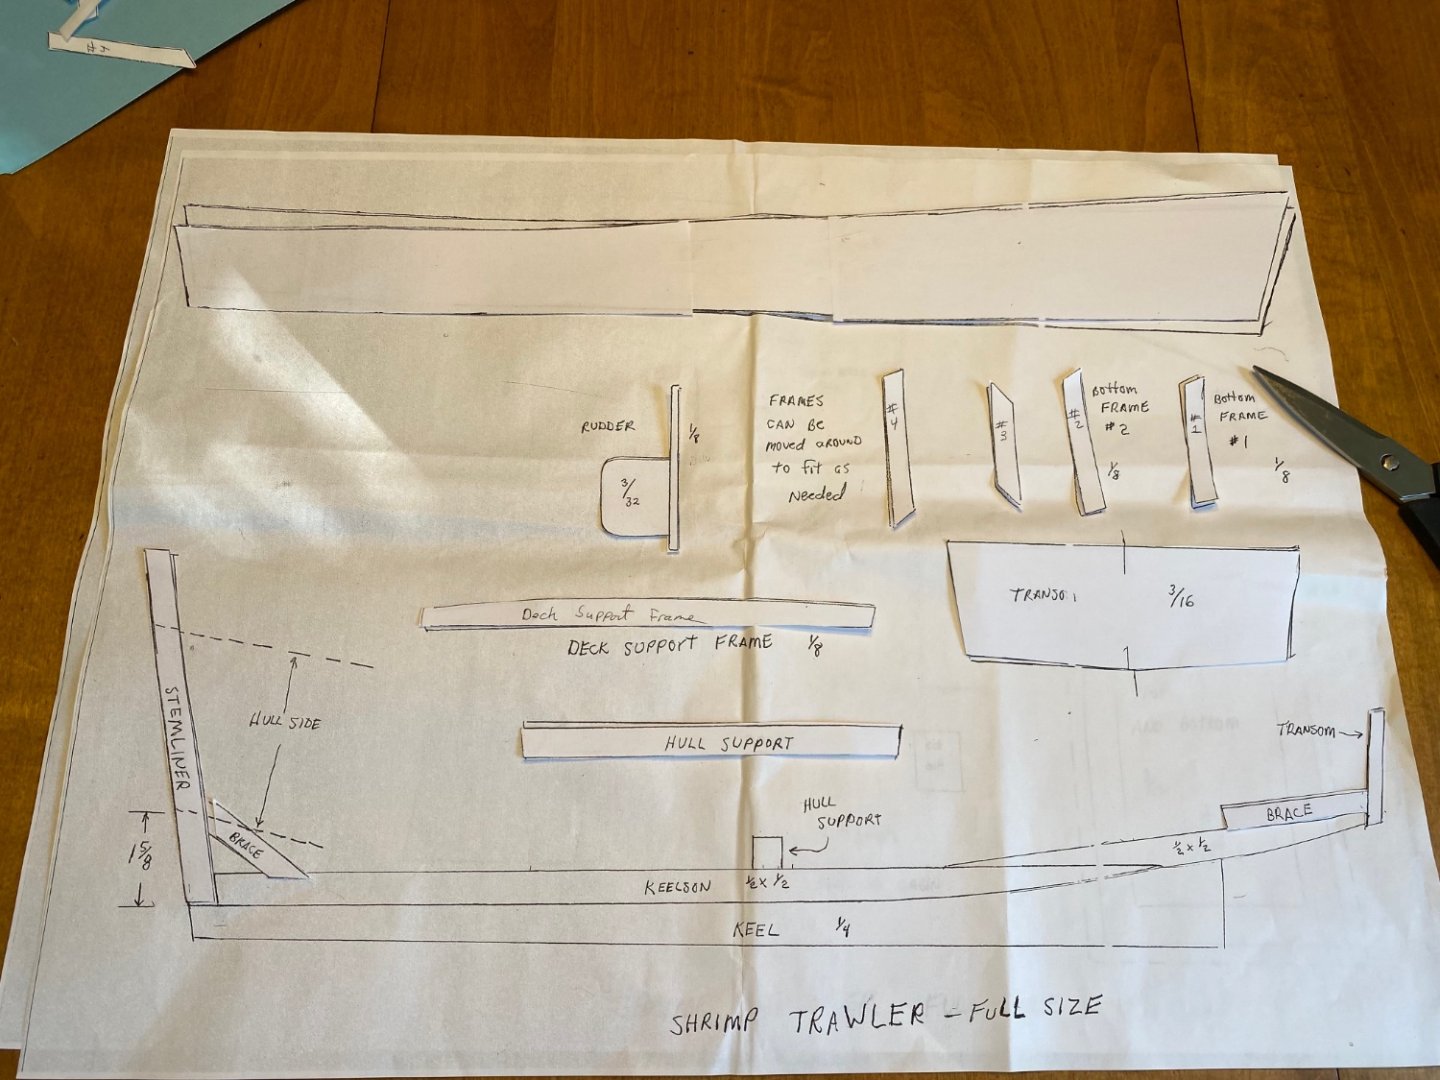
I'm starting my first build log on this site with the Shrimp Trawler from Wye River Models. This will be my 5th boat build since starting this hobby. I have been interested in building work boats from the eastern US. I selected Wye River models since their product line seemed to be mostly work boats from the eastern US. At first they looked pretty good to me and the price was good. I think I payed $150 for the Shrimp Trawler kit. Reviews I have read seem mixed for their kits, but with some experience under my belt I was not concerned if I had to improvise along the way. I actually bought two kits from them so I have some kits on the shelf for future builds. The second kit I bought was a Round Stern workboat. On with the build. Here is the picture of the box on my work bench. Just a plain box with hand lettering. This is a small family run company I understand, I'm OK with that. As I open the box the contents include a parts list, instructions, 2 plan sheets, wood strips, dowels, some rough cut wood, a bag of parts, etc. There are no laser cut parts. All the wood seems hand cut or standard dowels and wood strips. The instructions are very basic with almost no detail. They are enough to guide you to build the hull, but that is basically it. I also started to notice that the detail of the boat is not close to what I want, it seems very simplistic. That will not cut for me, I will want to add much more detail as I go. I'm willing to wing it, this seems to be more on the scratch build side of things (my first) then a step by step kit. Here is a sample page from the instructions: Next is to look at the plans. They are hand drawn, and the two pages don't seem to match up in size. No where could I find the scale of the kit. I ended up emailing the company and received a very fast response saying they are approx. 1/2 inch scale. So that is 1/24 scale in my book. Here are the plans: I'm going to be making a lot of assumptions as I go with this kit. I decided to take the time and copy the plans so I can cut out templates of the pieces, I assume I will be crafting almost every piece. That's the intro. Next post I will start on the frame of the hull and get this party started. First impressions tell me this is not for a Newbee or someone who wants/needs step by step instructions. Is it worth the money I paid? So far my answer is yes. The wood supplied, and enough instructions to build a hull is hopefully all I need to to have fun with it and get creative from there.


-
Mike, If your not aware, check out The Model Boatyard website. John Earl documented his build of the Crab Scraper. I love his detail work. His scratch built accessories are amazing. I’ve been reading all his work boat builds for ideas on building accessories for my Wye River models. Life rings, fire extinguishers, captain chairs, baskets, you name it, he has done some very creative work. Bill
- 23 replies
-
- 2
-
-
- Smith Island Crab Scraper
- Wye River Models
- (and 1 more)
-
Thanks for starting this log. I just bought two Wye River kits. The Round Stern and the Shrimp Trawler. I wanted to build some coastal Carolina work boats. These seem to be nice looking models when finished and close to what I wanted to build. I hope to start my very first log on this site with the Shrimp Trawler in the next few weeks (when the weather turns cooler here in North Carolina). I’m not concerned with any short supplies or weak instructions, it’s part of the challenge in this hobby IMO. I also have a full supply of wood and brass to cover most anything. Good Luck! I’ll follow along.
- 23 replies
-
- 2
-
-
- Smith Island Crab Scraper
- Wye River Models
- (and 1 more)
-
Thanks everybody for responding! Turns out I have a 10 inch Delta press in the shop that I never considered for this fine work. Given the recommendations (which I agree with) I'll avoid the Dremel solutions. I ordered a Pin Vise attachment from Amazon, and bought a cross slide vise (X Y capability) from Northern Tool. I've already tested the cross slide vise and it works pretty well out of the box. I plan to clean it up and tighten it up as well. I was able to center drill a 10mm brass rod using a center punch and the cross slide vise to make a search light for my next project. It worked out well. When the pin vise arrives I try the ultimate test of micro drilling 3mm brass. I'm confident I can make it work. This saves me the big bucks so I can save for the Byrnes table saw, and a mini lathe. Bill
- 9 replies
-
- 7
-
-
- Vanda-Lay Industries
- Drill Press
- (and 2 more)
-
I'm in the market to upgrade my workshop. I have several kit boats under my belt, and being retired I am spending more time in the workshop. I'm currently finishing up on the Pen Duick and eyeing a Shrimp boat next. I have been using a Dremel drill press to drill small holes in 1/8 or 1/16 brass strips. I have not been happy with the results. The drill bit can bounce around on the brass, and there is too much play with the unit when I switch it on which causes me to try to realign the work piece after the power is on. I solved some of these issues by using a on/off foot pedal, and using tape on top of the brass to help steady the drill bit on contact. But I'm still itching for an upgrade. I do not have an XY table, and I have never used a Mill or a Lathe (yet). I do see myself wanting to try Mill/Lathe capabilities sometime in the future as I grow my skills in modeling. I have been looking in to Vanda-Lay industries tools for the Dremel as an option. I could get their Acra Mill Plus with all the attachments for around $450 + tax and shipping. This would give me a Mill, Drill Press, and Lathe. As well as XY and Z control. Or I could start with the Drill Press Plus with Vice, and Drill Press table for around $215. But I wouldn't have XY precision (I'm not sure I need that), and no Mill or Lathe. Their products look good, but they are based on a Dremel which may be an issue with precision, but it could be good enough for an average modeler. I'm OK spending up to $500, but not interested in getting up in the $1000+ high end micro tools. The boss would not approve. I could start with the drill setup now and ask Santa for a Mill or Lathe down the road. Does anybody have a recommendation? I have also considered the Micro Mark 3 speed Drill Press for $300 when I add the XY table, Proxxon TBM 115 for around $315 with a XY table, or the Proxxon MF70 Mill at $400 which include XY I think. I also could go cheap with a Euro Tool DRL300 from Amazon for $115. I suspect some will say get the Proxxon Mill for $400, but to date I only use a drill and the mill looks awkward for mostly drilling. Thanks for your thoughts, Bill
- 9 replies
-
- 4
-
-
- Vanda-Lay Industries
- Drill Press
- (and 2 more)
-
BillB reacted to a post in a topic:
HMS Snake by Beef Wellington - FINISHED - Caldercraft - Scale 1: 64 - First wooden ship build
-
BillB reacted to a post in a topic:
Rattlesnake by JSGerson - FINISHED - Mamoli - 1:64 - Using Robert Hunt’s practicum
-
Dan, Thank you for your time and advice. I ordered the Rattlesnake today. I'm going to give it a go. She is a good looking boat. Your research is great, I'll be following your build for ideas. Thanks again, Bill
-
I have a question for you. I'm interested in building the Queen Anne's Revenge as a kit bash. I am using the News and Observer poster, and web pictures as a guide. The ships I'm considering as a base are: Hermione La Fayette, Hms Unicorn, La Candelaria, La Gioire, or even Sirene. Just wondering if you have any suggestions. As a French frigate the Hermione is my top choice right now. Thanks, Bill