PAnderson
-
Posts
117 -
Joined
-
Last visited
Content Type
Profiles
Forums
Gallery
Events
Everything posted by PAnderson
-
Quality building jig
PAnderson replied to PAnderson's topic in Building, Framing, Planking and plating a ships hull and deck
Hello Matt. It was 5 o'clock in the morning, sitting at the table drinking my first cup of coffee. This picture weighed at least 15 pounds and had glass in it. The noise that early in the morning made up for 5 cups of joe. I sat there looking at the outcome for a good 15 minutes. I mean, all 3 ships simply exploded. The bounty launch took a direct hit, the rest when they hit the floor with the rest of the carnage, LOL. These were my first ones ever. -
Quality building jig
PAnderson replied to PAnderson's topic in Building, Framing, Planking and plating a ships hull and deck
Thanks for this Bolin, I will look in to this from Billings. As for building my own? Yes, that's possible. I have access to a full machine shop. I was going to design something based off of 2 38" long pieces of 45MM aluminum extrusion. -
Hello everyone. I'm glad to be back after a few years absence. The 3 builds that I had done met a very bad ending. I had them on my mantle and a heavy picture hanging above decided that people were giving more attention to the boats than to it and decided to jump off the wall and crush my builds. Seriously though, true story. My 3 beautiful builds met a complete, unrepairable end. The best was the Bounty longboat and she was crushed beyond hope. So now, I am on to the USF Confederacy and I was hoping to find a quality building jig. I saw the Model Zone Building Slip but cannot find one anywhere. Can someone point me to a decent building jig? Something I can use for the bulkheads and the planking, like a rotisserie kind of deal. Anything of quality will help. I don't mind spending a few dollars. Regards, Paul
-
All the saws you will ever need. http://www.japanwoodworker.com/category/ht117-01/hand-saws.aspx
-
TurboCAD PC vs Mac
PAnderson replied to Maury S's topic in CAD and 3D Modelling/Drafting Plans with Software
The speed of your computer won't as great a deciding factor as will the amount of memory you have. And possibly your graphics card. Paul -
As one of the newer members her, I did not know Augie. He did comment on my Longboat build way back when I first started it. But this is one of the reasons I like it here so much. Hats off to you Bug, for taking on this project for Augie and his wife. It truly shows the respect that people here have for their brethren in this fine hobby. Bug, I am sure you will do her justice if for no other reason than a kind, parting gesture for Augie. I believe he is appreciating this. Paul
- 2,191 replies
-
- 16
-

-
- confederacy
- Model Shipways
- (and 1 more)
-
White Paint Issues
PAnderson replied to rynmss's topic in Painting, finishing and weathering products and techniques
White is the worst paint color to get good coverage without 3 or more coats. Something we need to live with. I bought Model Expo paints for my HMS Bounty Launch. They are terribly thin. Might go through an airbrush well, though. To me, Tamiya has really good paint. I always prime with, of all things, Kilz for wood and plastic. Acrylic compatible, thins with water, although I don't thin mine generally because it fills wood pores better without thinning. -
Gerald, what a wonderful project. As a machinist/tool maker for almost 40 years, I can attest to the hard work and dedication involved in just preparing all of the tools and jigs involved. A lot of forethought obviously went into this project. Your work is truly amazing. I will follow this closely. Paul
- 281 replies
-
- 2
-
-
- tanker
- sailingship
- (and 1 more)
-
Thanks CaptainSteve. Jealous? Of this newbie? I've seen your work, beautiful stuff. I partly used your build log for this build. I'm the jealous one. Paul
-
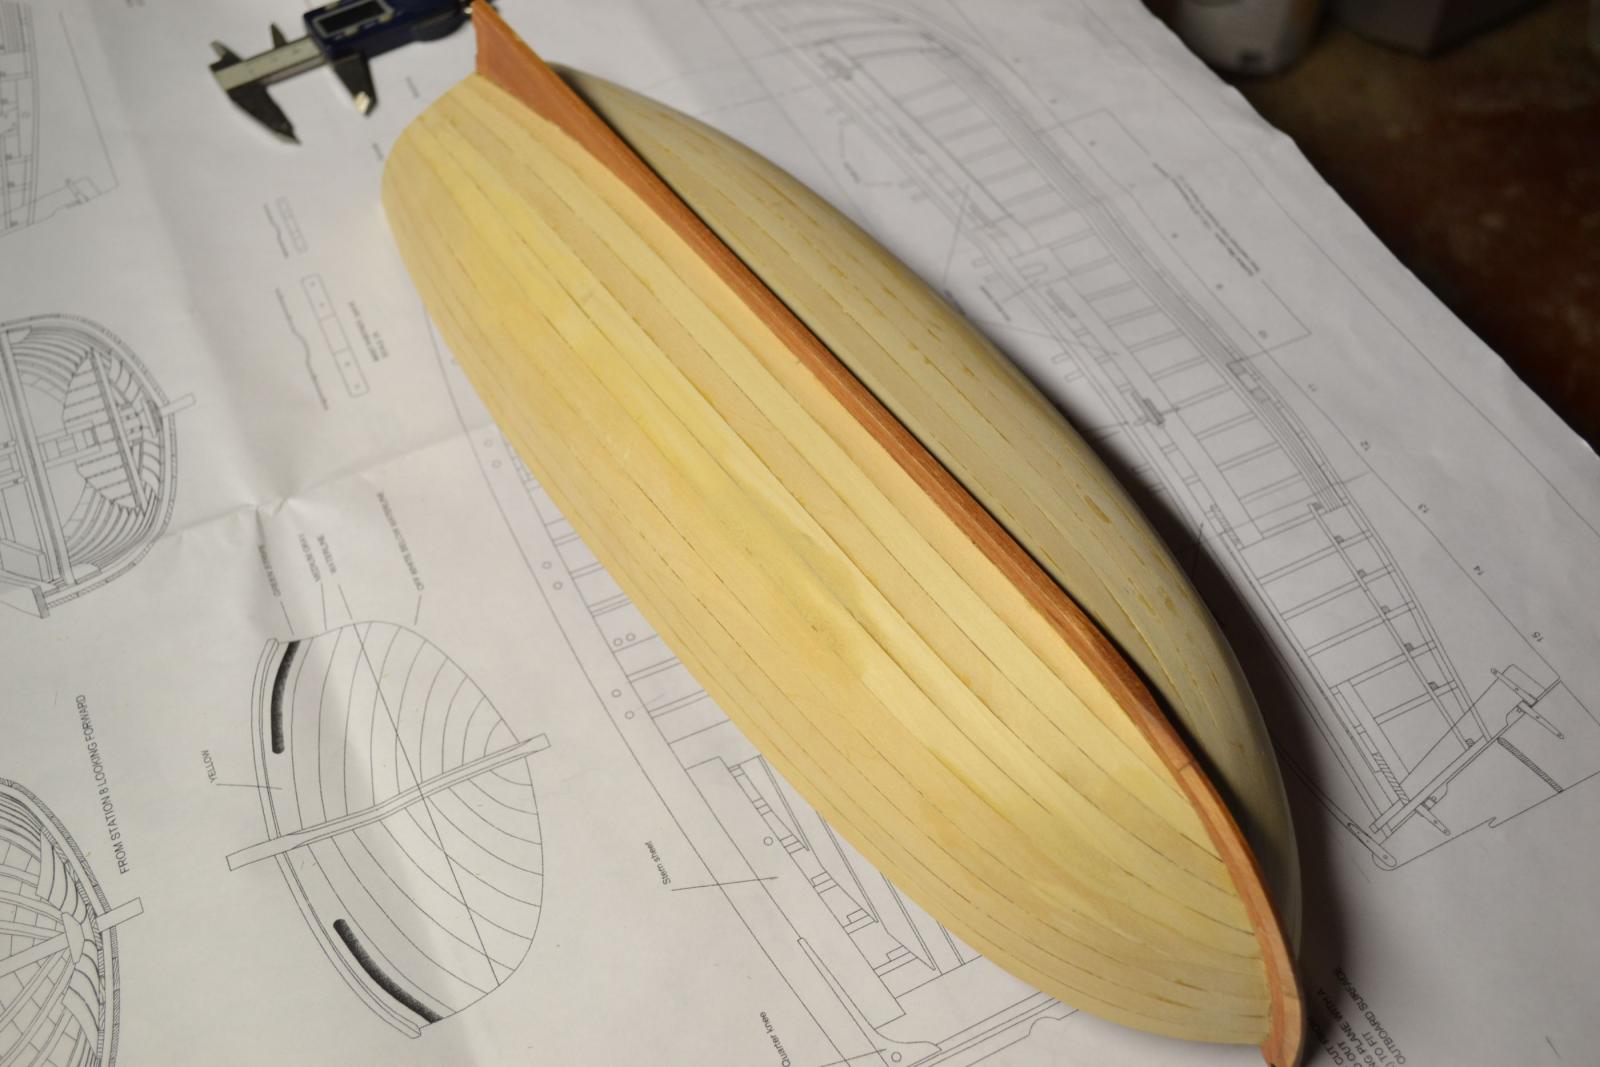
Thanks Cathead and Brian. Bryan?Do me a favor please, and yourself. Just an experiment. Measure your hull across the sheer planks between frames 8 &9 Before you pop the hull off the mold. Measure again after you pop it off. If the size does NOT change, then I think you should try overbending the tween frames so they sit proper before gluing. I think the stress of bending them into place forces the sides of the hull out. Could save you some work. Oh, and Brian, you can catch up when I have to make my tools. Paul
-
Thanks for the likes Gentlemen. The more I do to this boat, the more I like it. I started it because I dearly needed the experience for the bigger one to come, whatever that may be. Paul
-
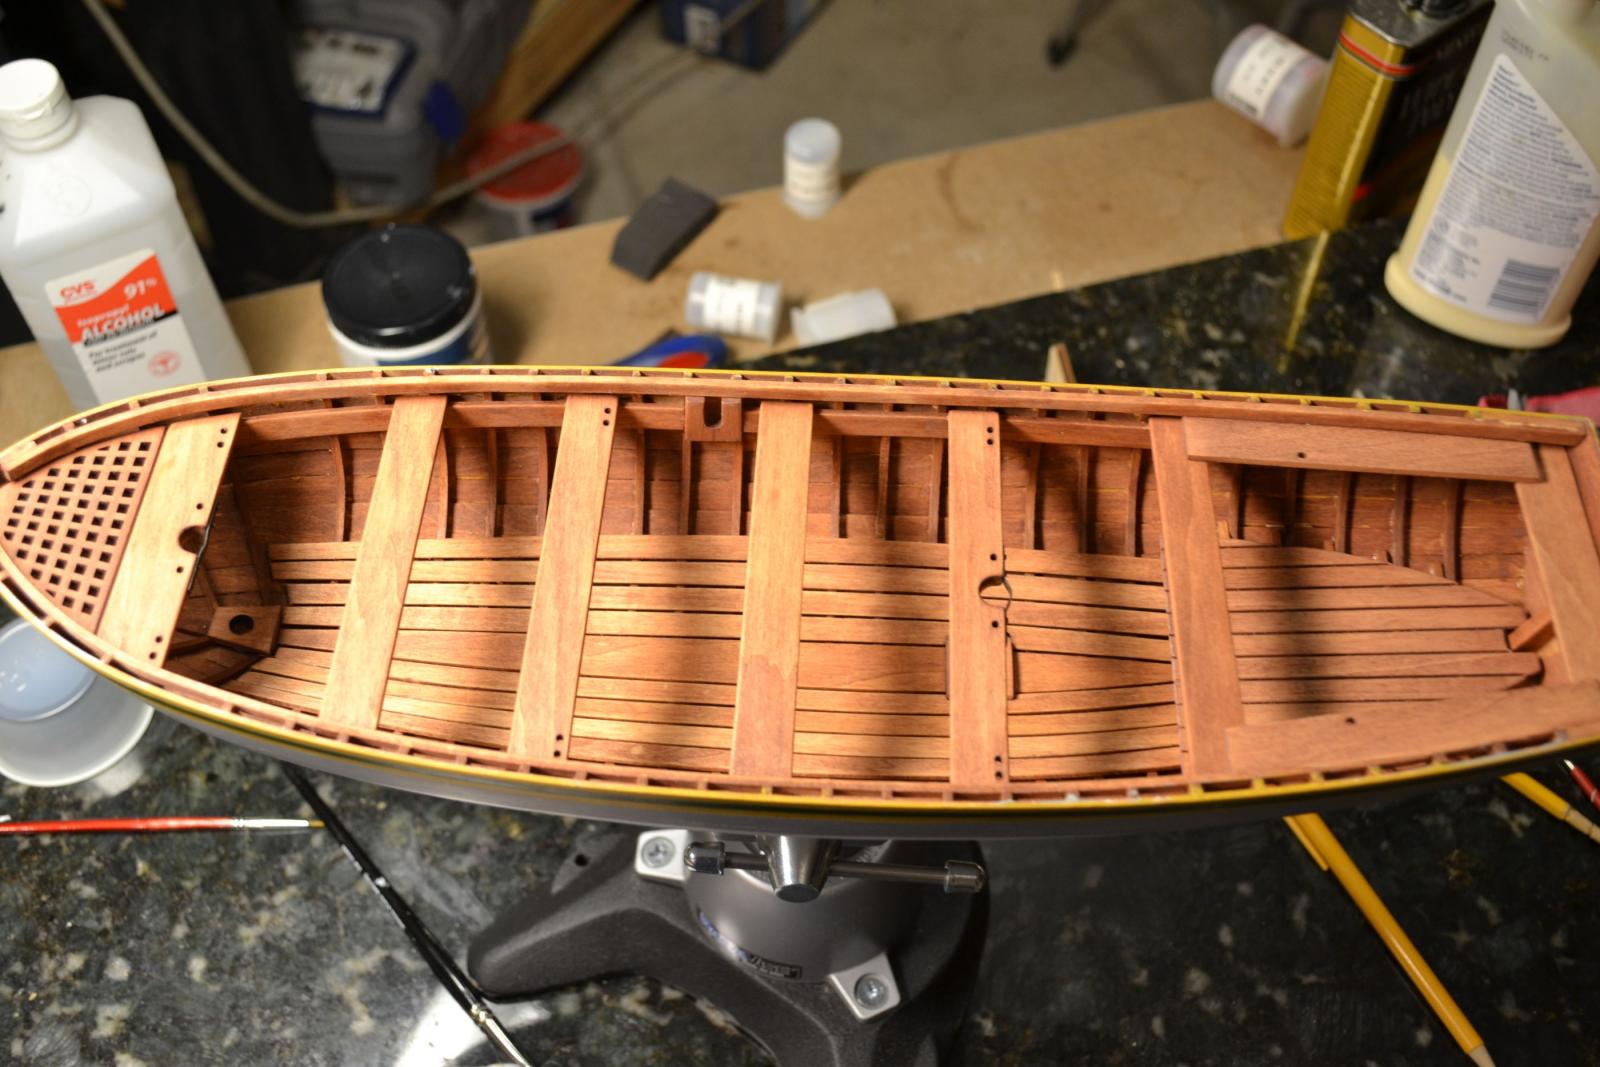
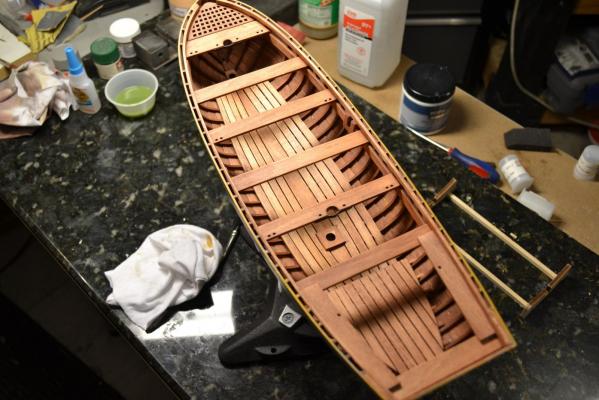
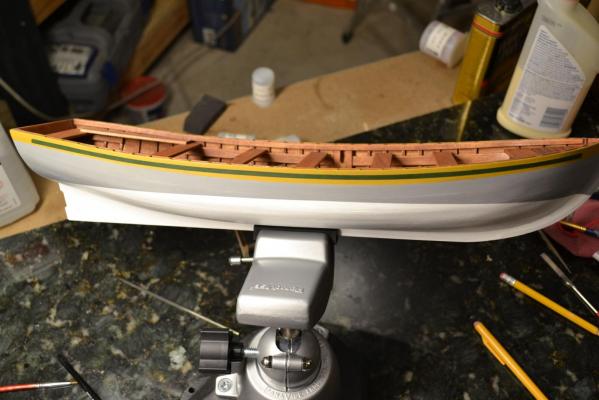
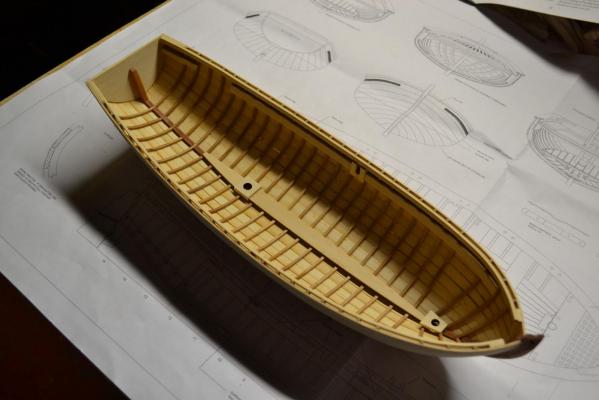
Here is my latest update. While battling a raging chest cold, I was not able to do a lot over the last two weeks but I am now better and have spent some time in the "wecco", as my admiral calls my shop. Spanish for "cave". After much hand wringing about squeezing the hull to accommodate the thwarts, I did it and all is well. I knew it would work since others had to do the same thing, it did not feel natural but hey, what do I know, I'm just a newbie. Also, the curve of the bow seemed too wide because thwart 1 and the bow grate seemed very loose but it was going to take a lot of force to bring that in so I left it alone. The 1st thwart and grate ended up fitting OK after all and test fitting the gunnels showed it will just fit. So, here she is after staining the insides with cherry stain and painting the outside of the hull. I am really liking the way she is turning out. Much more work to go though. The gunnel is made up but needs staining before install. I hope you all like her. Paul


-
Permission to come aboard, sir. I'll swab the decks for the privilege of watching this from the beginning. I have this kit but want to get a couple more under my belt before I start her someday.
-
My understanding is the Surprise and Victory are reboxed but the fitting and castings are upgraded to ones they make themselves. The D5100 locomotive, the Akagi and the 1/16 Zero and Bf109 all have castings that are absolutely gorgeous. Crisp, clean and very well detailed. Paul
-
You really want denatured alcohol, %99. Rubbing alcohol is not the same thing. Pharmacies have it. Edit: Isopropyl is good too. I went back and reread Ian's post. Rubbing alcohol is too weak.
-
Craig, the deck is indeed self adhesive. And very strong. If you let too much come in contact, you will have a heck of a time getting it up again. I think that is what happened to mine. The alignment is so precise around deck features that a small mis alignment is bad. I never tried doing it the way you describe. I'll have to think about that when I redo mine. My deck, and yours too probably, comes in three pieces. I suppose you can cut the larger pieces into more manageable pieces. Once it's down, it all falls into place great. Paul
-
Hey Craig, the Pontos set is well thought out. Don't be afraid of it. Plan and check against the photos and the Trumpeter instructions.. Folding is key, you only get one chance. But they fold into beautiful works of art. There were many times I said I can't do anymore. But once you start, you are hooked. Things like ladders and stairs and railings simply can't be put in place after the super structure is glued on the deck. That's where you must make the choice of whether to just use the plastic parts. Those are also pretty good. Paul
-
Certainly not to scare you off but you are in for one heck of a wild ride. I am currently building the 1/200 USS Missouri. The hull is painted up to the deck. My first attempt at the wood deck failed. It went all bubbly on me, probably from the few attempts to lay it down and get it aligned. But the Pontos set is wonderful if you are a glutton for punishment like I am. http://modelshipworld.com/index.php/topic/12396-uss-missouri-1200-by-panderson-trumpeter-plastic/. I am building this in sub assemblies from the deck up. I have another wood deck because the first had to be stripped up. I read that if you lightly brush water on the sticky backside before laying down, this gives you some time to move it around before it sets. I think thoroughly cleaning the deck with mineral spirits or alcohol will help. As you will see, I am doing most of the photo etch before all the sub assemblies get attached to the deck and super structure. I will do as much as possible then it will be spray primed then painted. I also have the 20 Veteran Models Bofors guns to do also. I'm lucky, she is going to be painted Haze Grey from the deck up as she was in Tokyo Bay for the signing ceremony. If I may, I will pull up a chair and watch your work. Paul
-
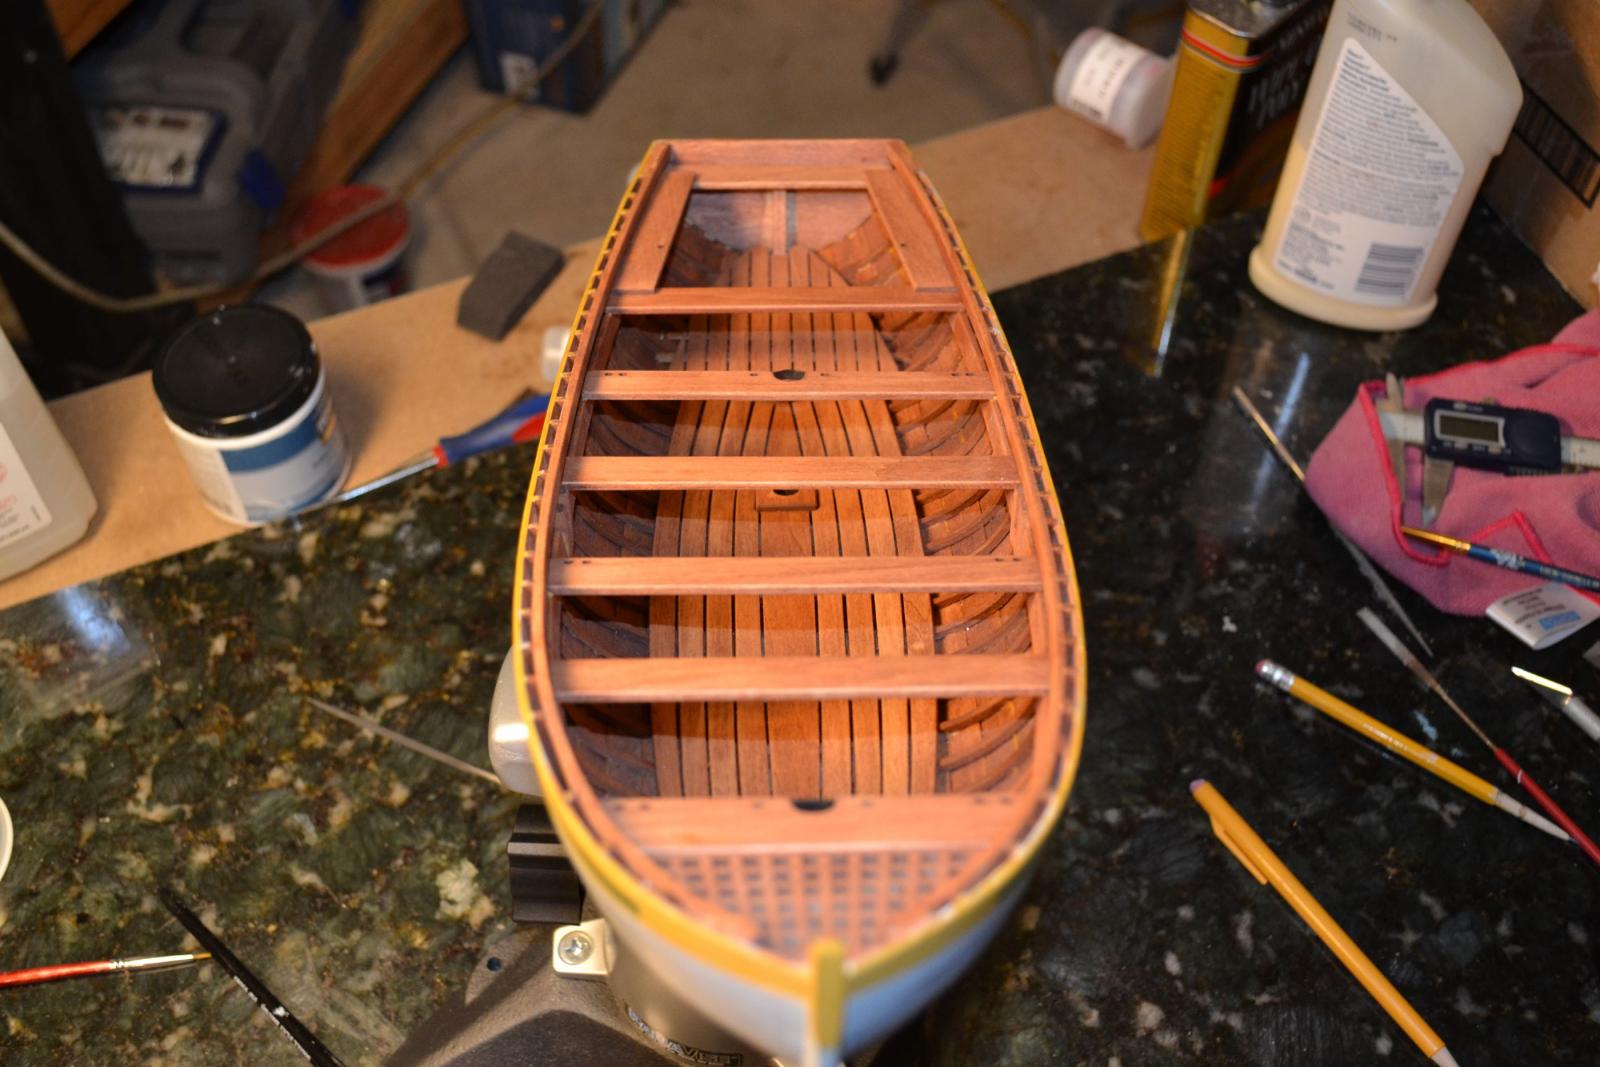
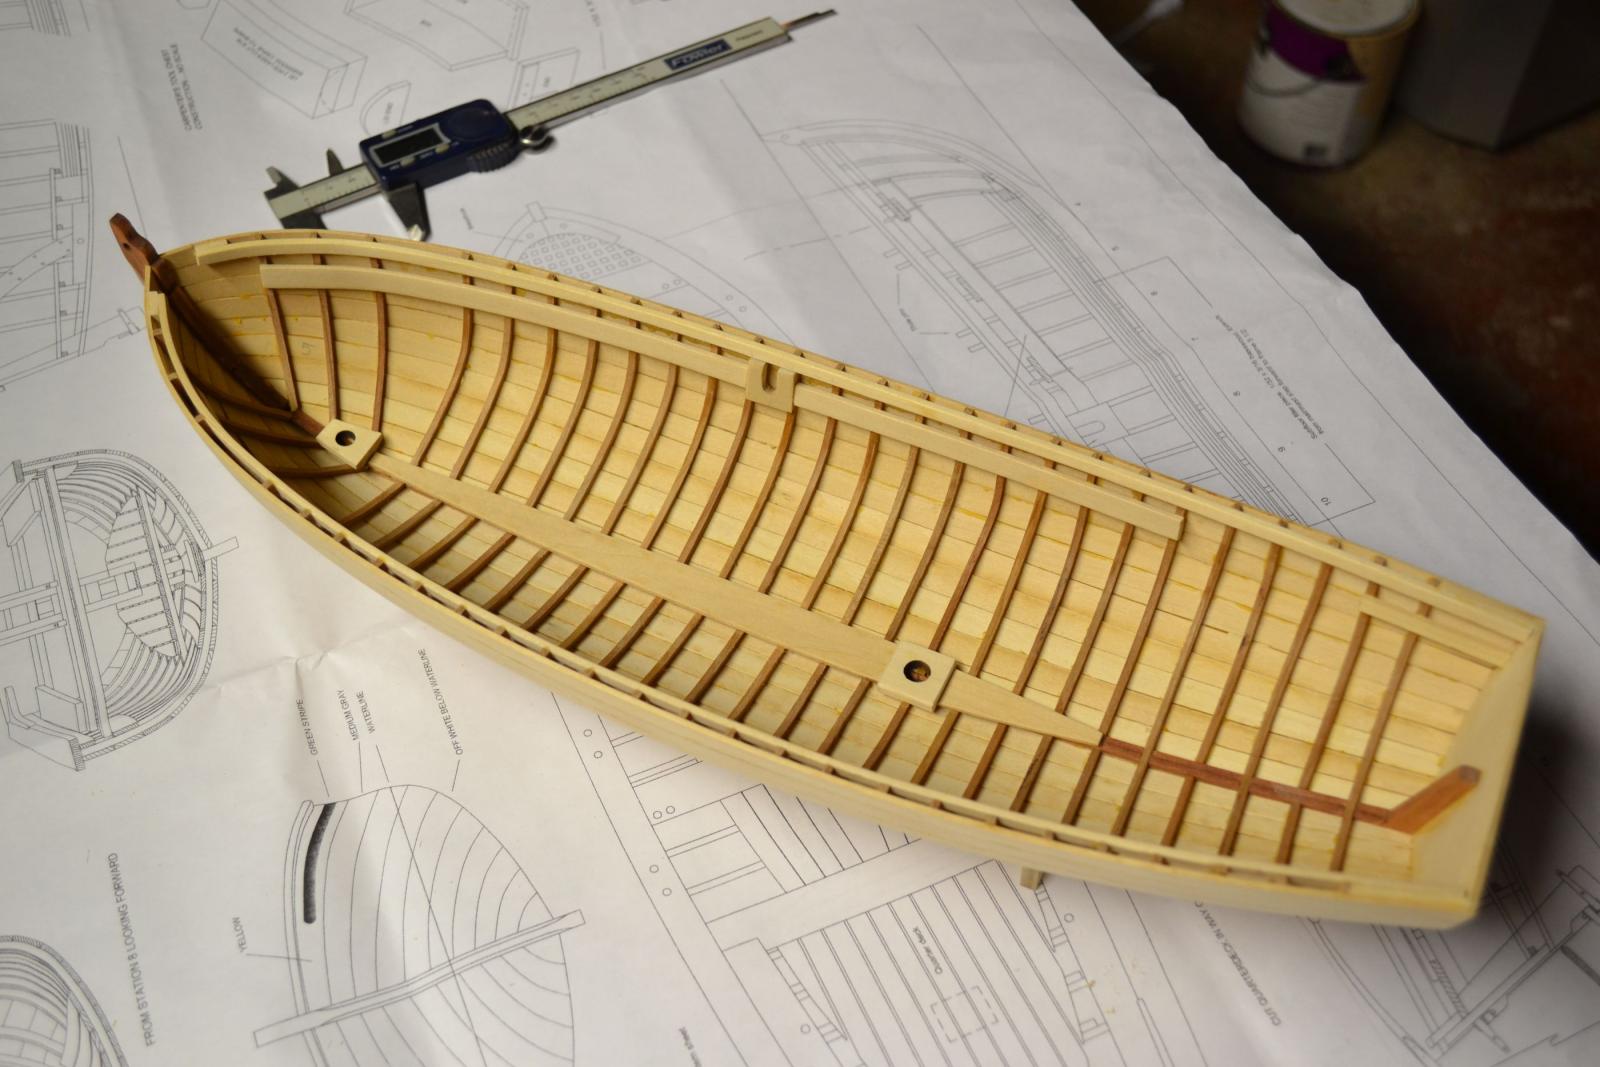
Hello again everyone. Progress is being made on my Bounty Launch. Sheer clamps are in as are the thwart risers and thee first, center floor board. Should I add the other floor boards before I have to squeeze the hull to add the thwarts? Will the floor boards make it more difficult to squeeze the hull? Of course, before all of that, I think I will stain the interior, prime the outside and then paint the outside. Unless there is a good reason to wait for painting? The outside of the hull has been lightly filled, all gaps were filled.. It has also been finish sanded. Here she is as she sits right now. Paul


-
Dreaded short thwart problem on Bounty Launch kit
PAnderson replied to PAnderson's topic in Wood ship model kits
Thanks Keith. I checked my hull before and after Popping it off the hull. No measurable spring. I don't know about others but mine sprung from the tween frames. Makes sense too. Bending them to the hull, they still have a lot of residual stress built up. It's good to know that the thwarts will hold the shape. Did the sheer clamp and the thwart riser make it more difficult to squeeze the hull back into shape? Paul -
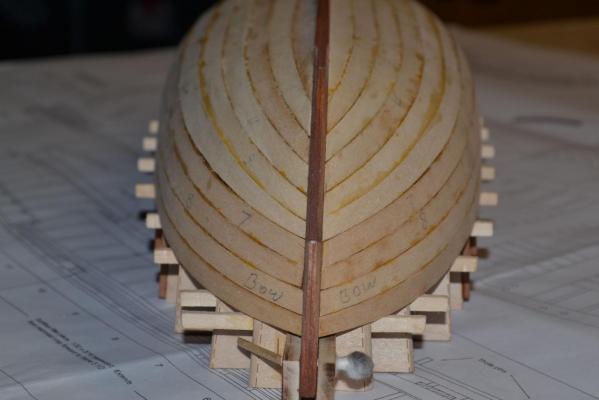
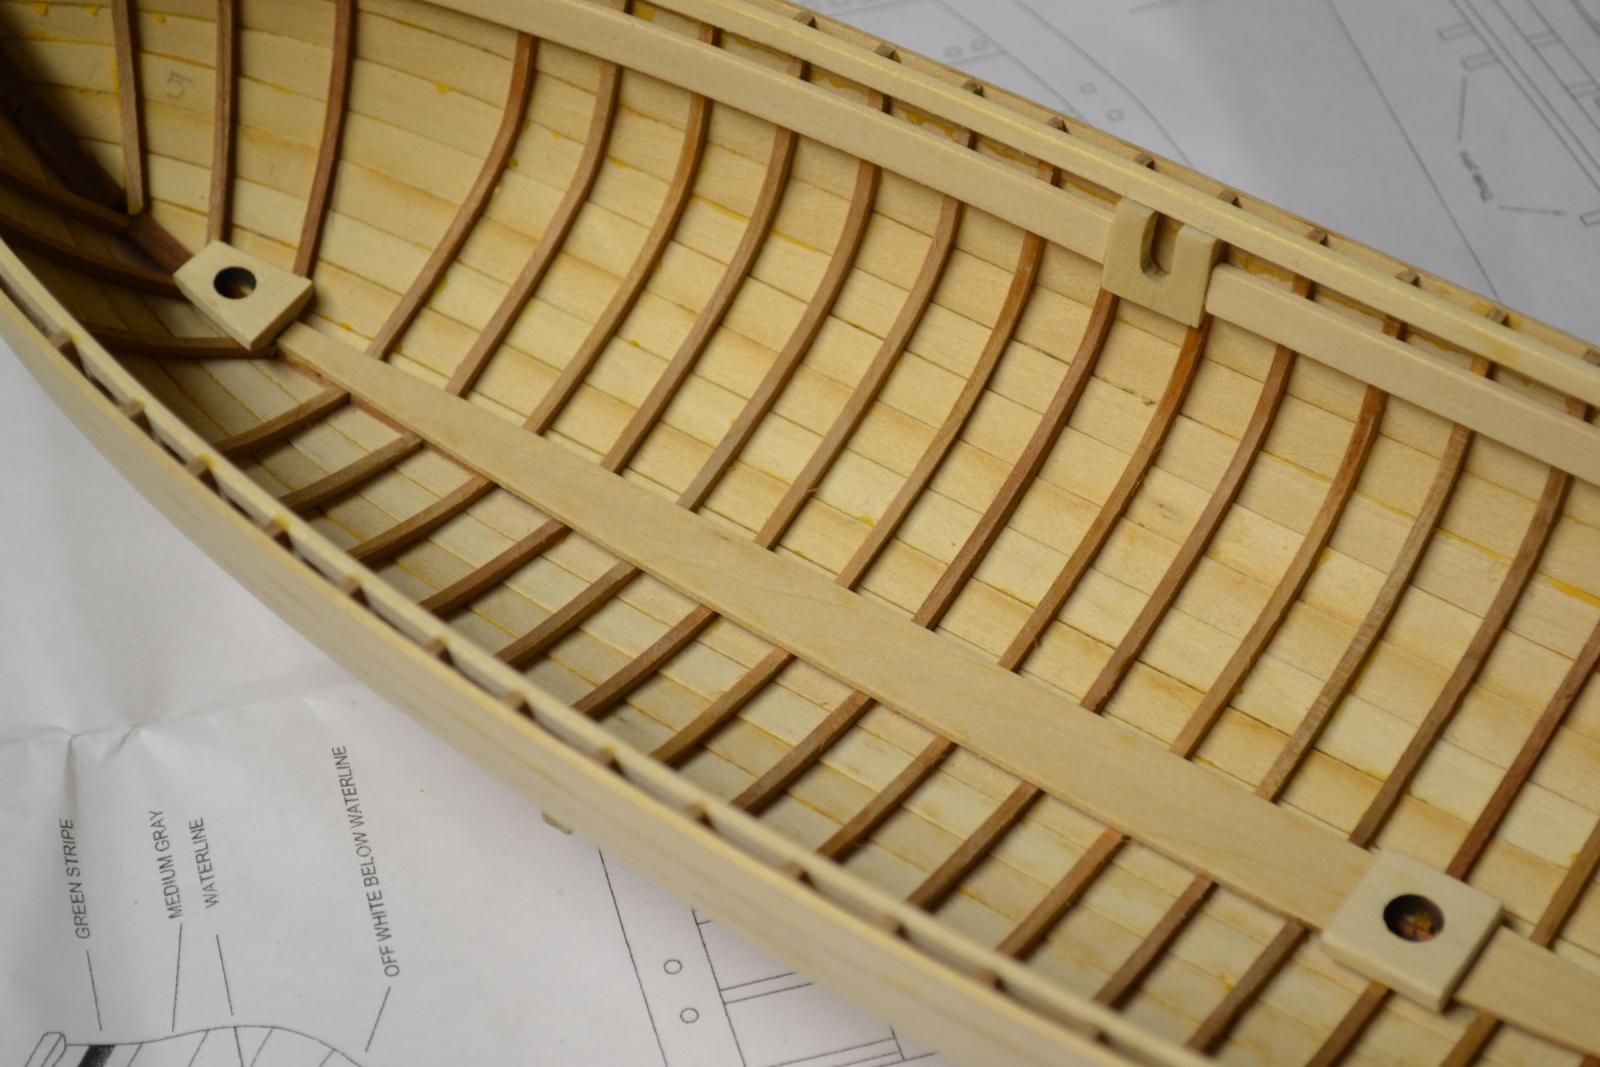
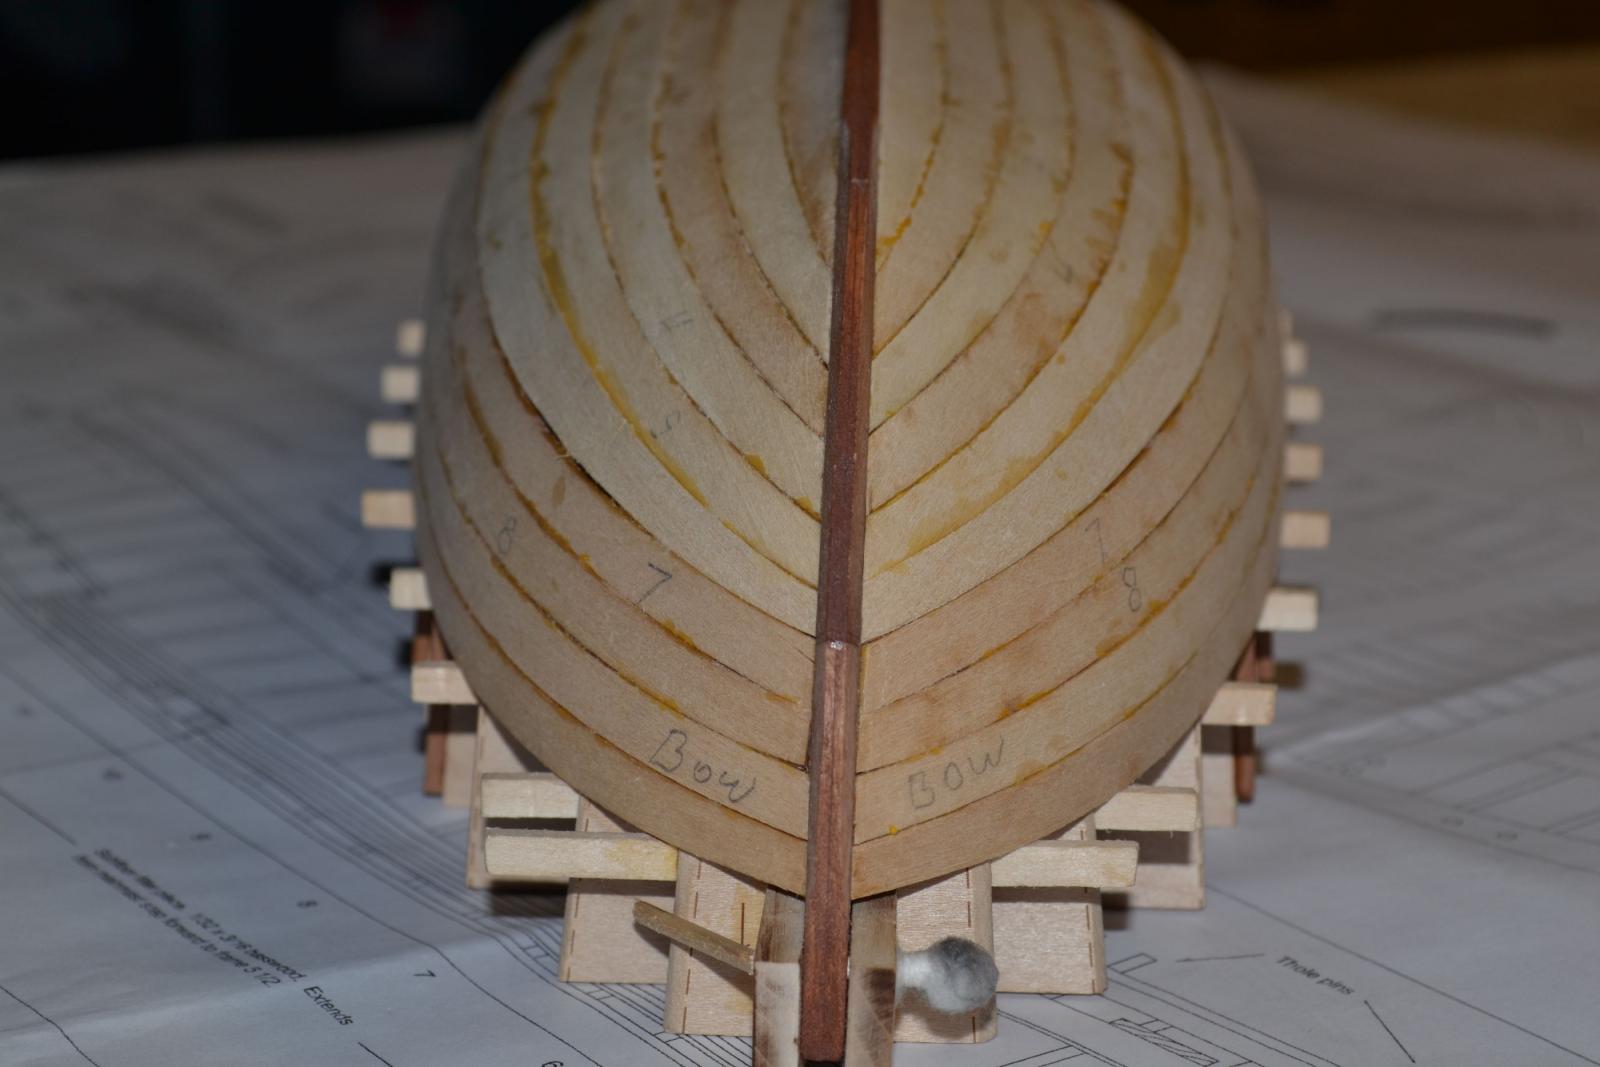
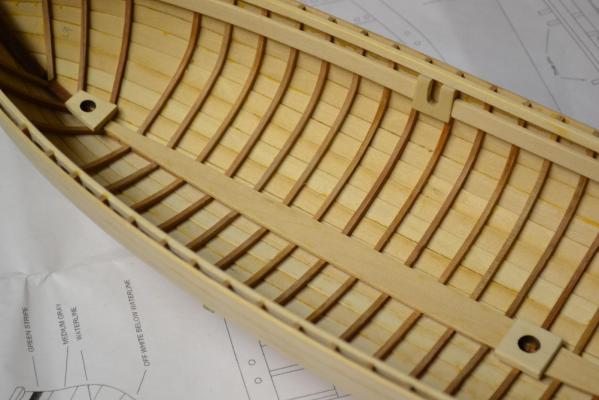
It's too late for me now but I hope I caught this soon enough to help others. I am building this kit now and discovered the possible reason this is happening. I added the frames to the mold and did all of the other work. I popped the hull off of the mold and measured the width of the hull and compared it to the plans. Almost 133 MM on the plans (frames 8 & 9) and I measured 132.8 MM on my hull. Cool, I am not going to have the problem that I have been reading about with the short thwarts. NOT TO BE!!! After I fit the tween frames, letting them dry, gluing them, I thought all was well. After I removed the clamps I measured again across the hull. Lo and behold, the hull had spread almost 4 MM. Like I said, too late for me now. But at least I now know and have a chance to remedy this properly as I proceed. Not sure how to do this though. For future builders, I think over bending the tween frames to take out the stress and having them fit in a more relaxed manner is the solution to this problem. I hope this helps someone in the future. Paul
-
I have an issue and need some help. I removed the boat from the mold today. Everything went fine, pics later. I had read on other logs about the the width of the boat being too wide for the thwarts and the boat had to be squeezed while the thwarts were added. I found out why this does this. I measured the width across stations 8 & 9 and the hull matched the plans within a half a MM. I then added the tween frames, let them dry, then glued them into position. After this I measured across stations 8 & 9 again and saw that the width grew by about 4 MM or so. I am saying this for future members builds as much as for finding a solution right now. It seems that the stress of the bent between frames caused this. I think the between frames should be over bent a little to avoid this. Do I wait until after the sheer clamps are in place and the thwarts are added to squeeze the hull into shape. Will the thwarts hold the hull shape permanently after doing this? I see what needs to be done, I just don't know how to go about doing this. Paul
-
Thanks Cathead. You said in your log "Now we see the launch with gaps filled, seams chiseled, and the entire hull sanded down to 150 grit." What do you mean by "seams chiseled". Did you actually go back and chisel out the seams between planks so it actually look liked a planked boat? If you did, how deep did you open the seams? Paul
-
Thanks Brian. The planks I think were well cut and in a perfect world would fit perfectly with minimal sanding. Not knowing any better, I decided not to sand after the garboard and plank #2 except to take off the burn real lightly. I mean real lightly. As it turned out, they were off almost 2 MM. Oh well, this is how we learn. I think also I did not fair the bulkheads enough overall and then did not fair the cherry frames any more than I thought I should since the instructions said it wasn't really needed. That's a judgement call I guess. Thanks again, Brian Paul
-
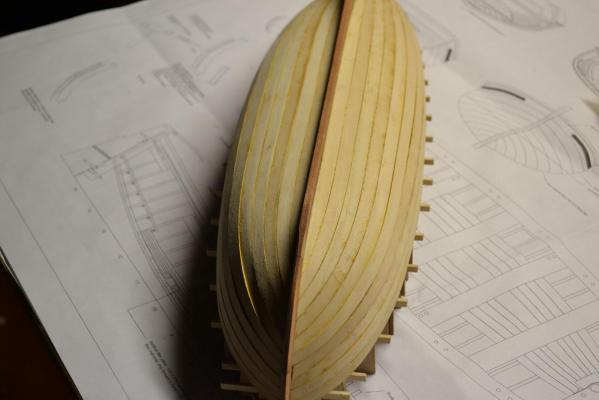
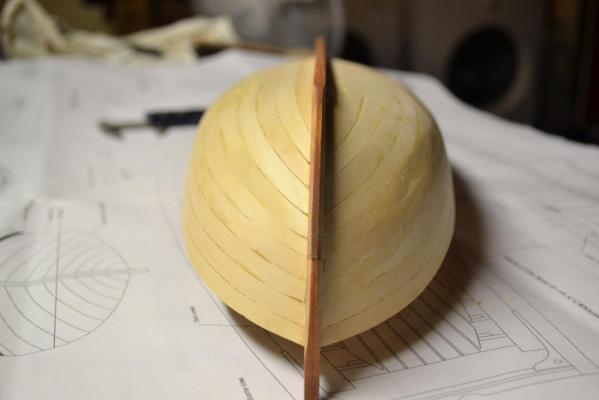
Next came the planking. I actually thought having ready made planks was going to be a cakewalk. Yeah right! Smebody slap me now, LOL. One thing I am learning real fast is to slowwwwww down. I guess I am used to plastic parts fitting the first time. So, it all went well I guess except that I realized that there is no room for sanding the edges of the planks even though the instructions say there is. I sanded the garboard and that fit well. The next plank I sanded did not line up with the reference lines on the frames. I do understand no kit is going to just fall together despite the designers hard work. That and my inexperience added up to the planks continuously not lining up with the reference lines except at the bow and stern. In the middle of the hull they quit lining up. But I plugged along because the instructions said there was extra material on the shutter planks. Low and behold, I had to make new shutter planks because the kit planks were too small when I got to that point. Well, I needed the practice so I made new ones. The planking is done! Despite my best efforts to sabotage myself. To get two, I had to make 5 attempts. Here is the finished hull before rough sanding. There are 2 or 3 gaps that will need filling. Not bad I guess. Also, I have no idea why I stained the keel since the outside of the hull is being painted. I also want to add that I would have asked for a little more advice but I did not know what I needed to ask. Forgive me. I think I need to just plug along and learn a few things so that in the future I at least have an idea what kinds of questions to ask. Please, if anyone has any critiques or ideas, feel free to chime in. Next will be sanding and then breaking this thing free from the mold. I have enough frames for the in between frames but had to order more cherry to replace ones I broke and make sure I have enough to finish this build. Many thanks, Paul