Artificer
-
Posts
34 -
Joined
-
Last visited
Recent Profile Visitors
837 profile views


-
 GrandpaPhil reacted to a post in a topic:
HMS Victory by Artificer - Caldercraft
GrandpaPhil reacted to a post in a topic:
HMS Victory by Artificer - Caldercraft
-
GrandpaPhil reacted to a post in a topic:
HMS Victory by Artificer - Caldercraft
-
nagrod reacted to a post in a topic:
My Serving Jig
-
Jeronimo reacted to a post in a topic:
CHALOUPE ARMÉE EN GUERRE 1834 by Jeronimo - FINISHED
-
Jeronimo reacted to a post in a topic:
CHALOUPE ARMÉE EN GUERRE 1834 by Jeronimo - FINISHED
-
maso reacted to a post in a topic:
My Serving Jig
-
Q A's Revenge reacted to a post in a topic:
My Serving Jig
-
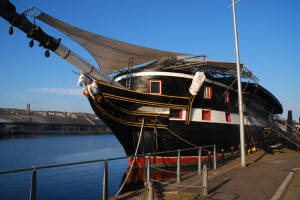
 Chris As you mentioned the Leda Class frigates I have another suggestion. How about HMS Trincomalee, she is berthed in Hartlepool and has been fully restored so there must be plenty of information available. Dave
 -
Chris How about the 46 gun HMS Unicorn (launched 1824)? The ship is currently berthed in Dundee and so research should be easy, the only downside being that she was never fitted out with masts but information is available. I was thinking about scratch building at 1/48th but a kit would be a better option. Dave
-
David Try 'The Model Dockyard' they have them is stock. Here is a link http://www.model-dockyard.com/acatalog/Caldercraft_Period_Eyepins.html Dave
-
Anja Thank you for the greeting, it's been a nice quiet day so far I may go out for a couple of beers later. Due to my workload it's been a while since I last posted but I should be back working on Victory shortly. Dave
-
tegias reacted to a post in a topic:
HMS Victory by Artificer - Caldercraft
-
David I'm glad it is all working out with regards to the channels, chainplates, profiles and gunport lids. She is starting to look really sweet, nice job Dave
-
Rob Yes, I am using Admiralty paints, however I found the drying time had a lot to do with the temperature. The drying time is greatly accelerated when it is hotter. To be honest I was a little disappointed with the dull black used on the sides, it has too much sheen for my liking and each coat seems to add to the shine. I know this paint is touted as being nearer to eggshell than flat black but it's still too much for me personally. The yellow ochre was fine and even after a number of coats remains flat. In general I think the paints are good but I may try Vallejo model acrylics on my next build, they are getting favourable write ups by other on this forum. Dave
-
David With regards to the deadeye strops, the lugs on the strops are suppose to locate in the cut-outs for the channels and not the underside of the channel. To aid this I drilled a small hole (0.5mm) in to the corner of the cut-out, this helped in locating the lugs and ensured that they hold fast under tension. When assembled each strop was secured with a drop of CA and the 1.5mm * 1.5mm walnut strip which runs along the edge of the channel. If you take at look at my log you will see the channels and hopefully all will become clear. Hope this helps Regards Dave
-
Can anyone recommend a miniature hand plane?
Artificer replied to Bettina's topic in Modeling tools and Workshop Equipment
Bettina I personally use a bronze No.102 low angle block plane, it's solid, fits in the hand well and is a pleasure to use, it certainly makes the task of tapering masts a lot easier. Dave -
Can anyone recommend a miniature hand plane?
Artificer replied to Bettina's topic in Modeling tools and Workshop Equipment
Bettina I have to agree with Robert on this one, I use a Lie-Neilsen 102 low angle block plane and can highly recommend them, they are very high quality. They can be bought in the UK, try the Axminster's website they stock them, be warned they are not cheap, the current price of the 102 block plane is about £100-£110. The tagline used by Lie-Neilsen is that they are 'Makers of Heirloom Quality Tools' and they aren't kidding. Dave -
What is your favorite hand tool(s)??
Artificer replied to Modeler12's topic in Modeling tools and Workshop Equipment
Seeing all these favourite tools could we construct the ultimate toolbox from the information? When it comes to my favourite hand tools I have two, My Lie-Nielsen 102 block plane and the Chopper II both are a godsend when at the hull building stage. Dave -
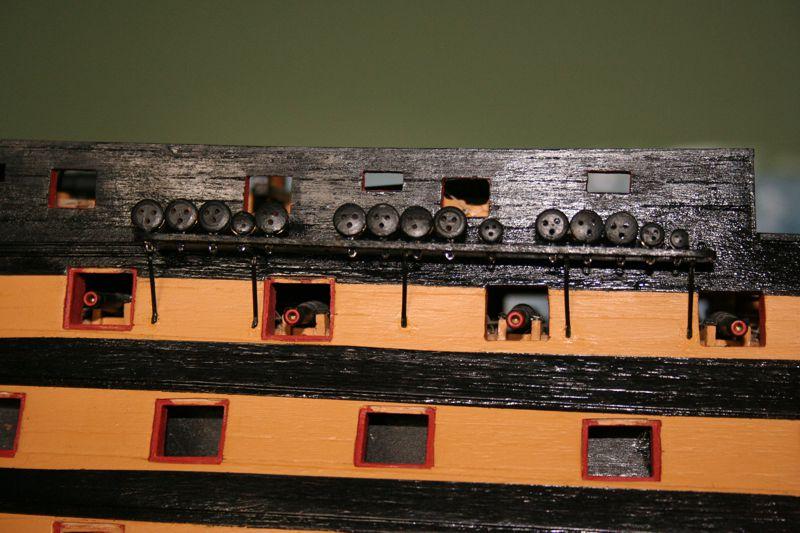
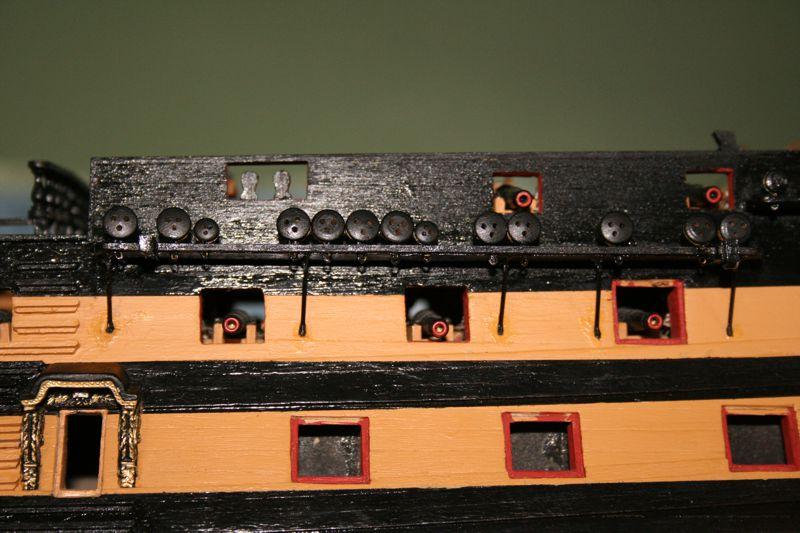
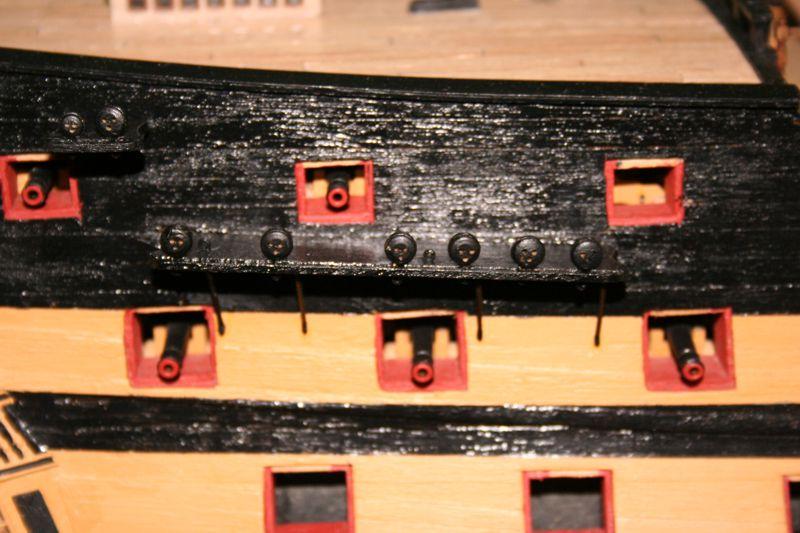
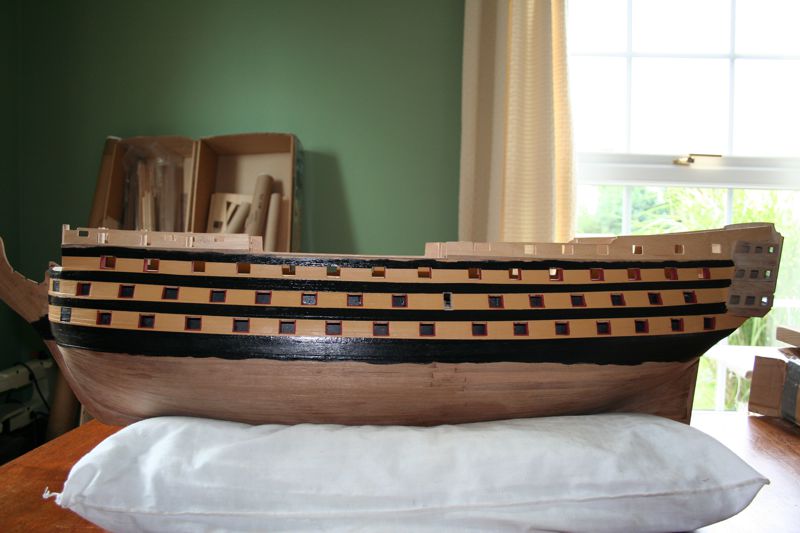
Rob It's been so long since I was at that stage that I had to dig out a couple of photo's to remind me. I did paint the sides before completing the second planking. With regards to the gunport linings, I did these out of the suggested sequence and set them before any second planking was started. This made the planking and wales a bit more onerous but it did ensure that the linings were set back the required 1mm. Because the linings were in place I painted these before the hull, the photo's should be self explanitory. Dave
-
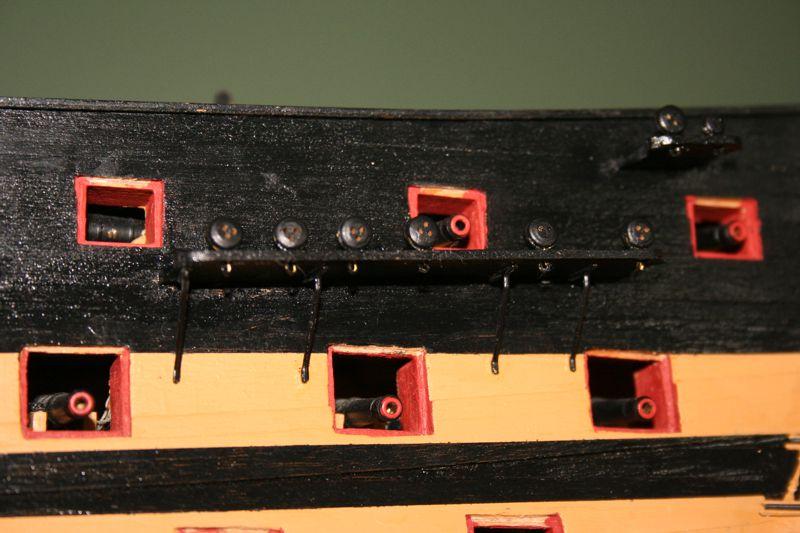
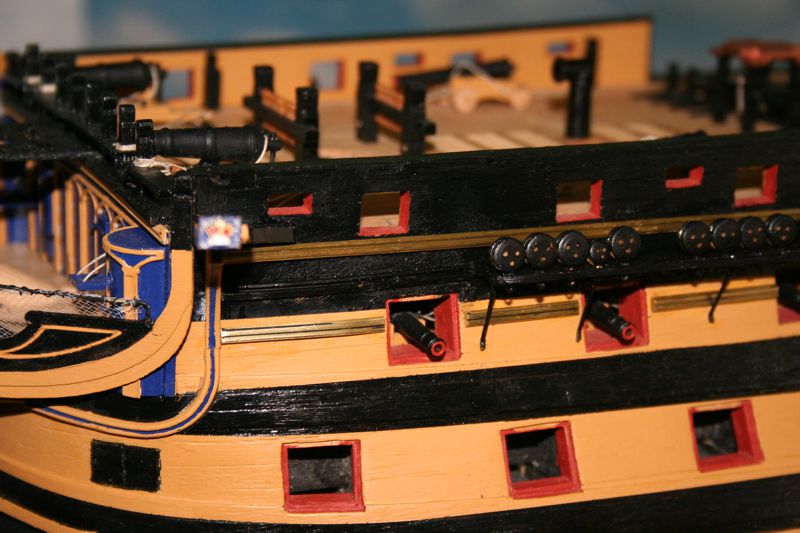
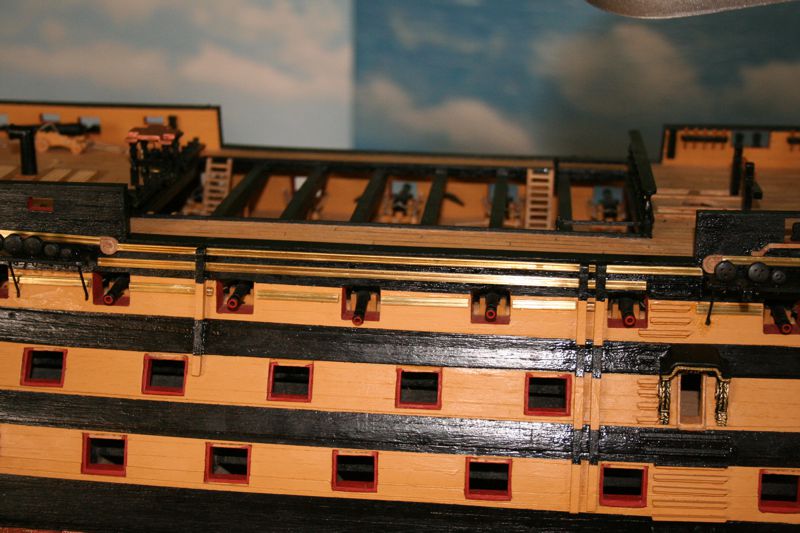
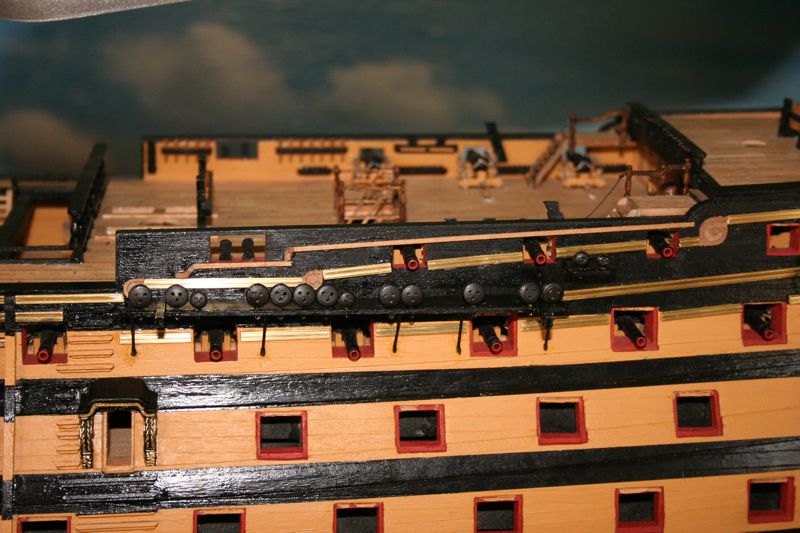
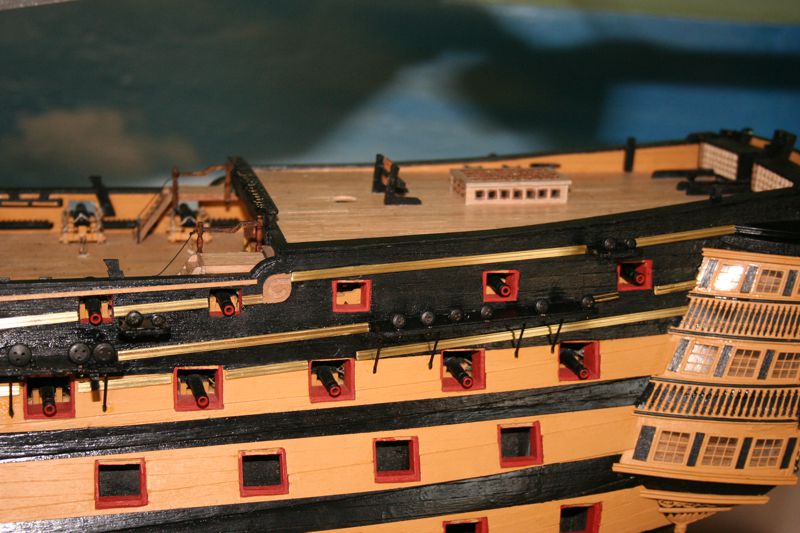
David Hopefully all will go well with your channels and you don't damage any of the gunport lids. Here is the next installment, I've now attached the brass profile rails to the port side, it was fairly painless and nothing previously attached got in the way. After cutting and fitting the rails and before they were glued I scrubbed them with 'Scotchbrite' and washing up liquid and then just prior to gluing wiped them off with IPA (Isopropyl Alcohol not the beer) this ensured to joint was dry and grease free. Now for the starboard side rails.
-
Hank Very nice jig I particularly like the travelling bobbin idea, I will see what I can do with regards to these on my jig. Jim I wish I had a 'bits box' like yours it would have saved a few bob. Your jig looks very good and should serve you well (no pun intended). Pat What can I say, that serving jig is the Rolls Royce of serving jigs, can I borrow your friend? As I stated at the beginning of this thread I am looking at powering my jig and hopefully put in speed control but I've some way to go to match your machine. It has been very interesting to see other jigs and I'm definitely going to develop my basic set-up. Dave
-
Shipyard sid reacted to a post in a topic:
HMS Victory by Shipyard sid - FINISHED - Caldercraft
-
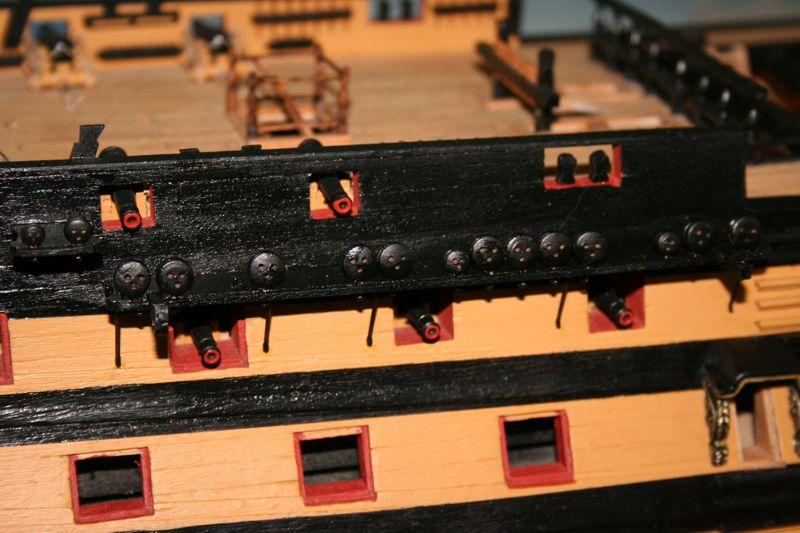
David You have made a really good job of the gun port lids but I have a question. Why are you attaching the gun port lids now? I note from your log that you have yet to attach the channels, chain plates and brass profile strip to the hull, won't the lids get in the way of these and as they are delicate may get damaged. I am doing the channels and profile strip at present and intend to leave the gun port lids until its absolutely neccessary. Dave
- 439 replies
-
- 1
-
-
- victory
- caldercraft
- (and 1 more)
-
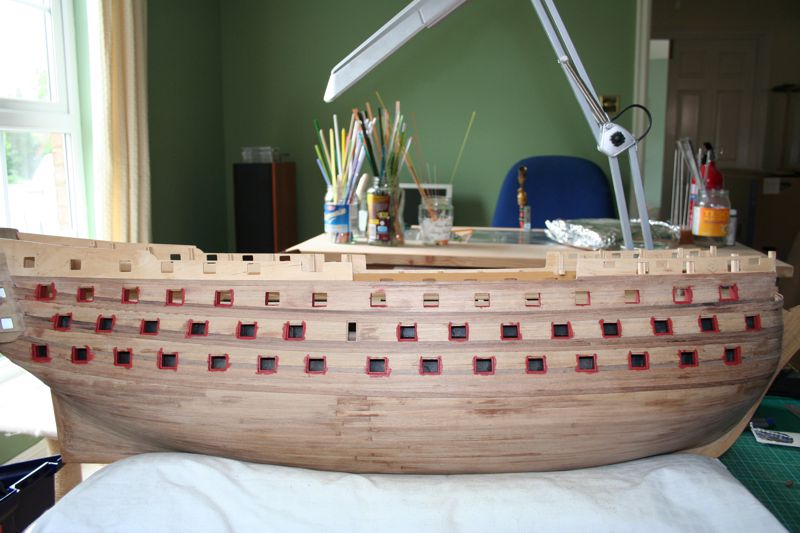
Here is the next update on my current build. I have completed the channels and these are shown in the photo's. At this point I am going to break out of the suggested build sequence and will now attach the profile brass strips on to the hull. My reasoning being that at least two of the chainplates will be positioned on top of the brass profile and this would be difficult without the profile being in place. Dave