mike
-
Posts
24 -
Joined
-
Last visited
Content Type
Profiles
Forums
Gallery
Events
Everything posted by mike
-
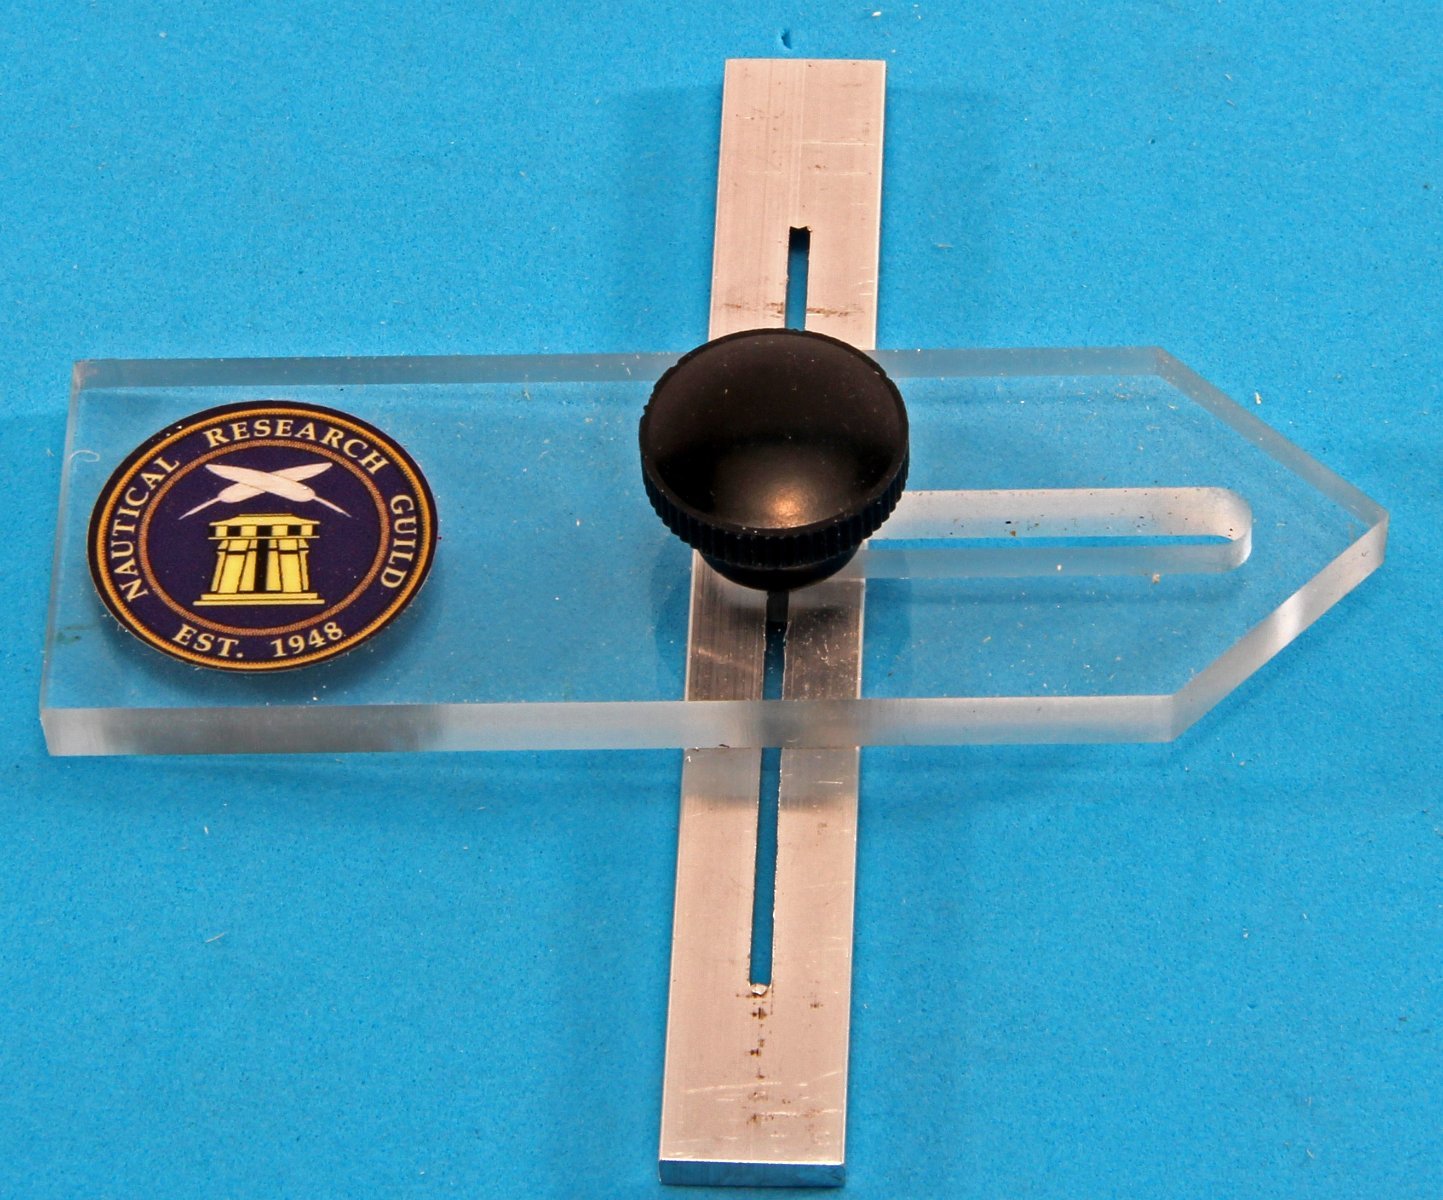
 REVIEW OF NRG THIN STRIP SAW JIG I recently received from the Nautical Research Guild one of their new Thin Strip Saw Jigs. This item is available on the NRG website in the store. The jig was designed by Kurt Van Dahm. Kurt has written many articles and given many talks on the use and safety of tabletop table saws and this jig is a byproduct of that knowledge. The jig is designed to be used on the Byrnes or Preac tabletop table saws or any saw with a miter gauge groove of 1/2 inch by at least 1/8 inch deep. The purpose of the jig is to allow the user to make wood strips of identical dimension. The write up in the store claims that the jig can be used to “Easily cut thin wood strips with identical widths without any additional measuring after the first strip.”, I found it to do more than that. Depending on whether your base stock thickness represents the width or thickness of your finished strip, you can cut repetitive strips to a finished width or thickness. As an example if my base stock is 1/4 inch thick, I can cut strips that are 1/4 x 1/16 or 1/4 x 3/8. I tested the jig on my Byrnes saw with several saw blades. I made cuts using the standard carbide tipped 4 inch 24 tooth .054 kerf blade and slitting blades of 4 inch 296 tooth .040 kerf and 3 inch 291 tooth .020 kerf. I also used several types of scrap wood I had around the shop to make test cuts. Castello boxwood, holly and bass wood all cut as they would normally with all of the blades. To achieve the best results match your blade to the thickness of your base stock and type of wood. I found setting up the jig to be very simple. Place the aluminum base in the miter gauge slot and with the hand knob loose, set the tip of the plexiglass guide to the distance from the edge of the blade to get the desired thickness of cut. On slitting saw blades this is easy since there is no tooth offset. When using a carbide tipped blade or any blade with offset teeth, you must measure to the tooth that is offset toward the jig. Snug up the knob. Slide the jig so the plexiglass tip is on the material feed side of the blade and tighten the knob further which will expand the aluminum base locking the jig in place. Place your material against the tip of the jig and slide the fence against the material. Make your cut. For the next strip simply move the fence to hold the wood against the tip of the jig and make your cut. As with any precision cut a test sample should be made to proof your set up. Also please observe all safety rules especially the use of a push stick. Another must is that your material right and left edges must be parallel. I found that the jig was capable of making cuts from 1 3/16 inch down to next to nothing. I made cuts of .007 inch using all 3 blades and the 3 materials with thicknesses of .150 to 1/4 inch. At .007 inch the resulting strip tended to curl, probably caused by heat as it was being cut. With the two thinner blades the bass wood tended to be a little fuzzy on the edges but cleaned up nicely with a little sanding. All strips were extremely consistent in dimension. All in all this is a very useful tool at an affordable price that anyone who likes to cut there own wood to size should have. Mike Lonnecker San Diego, CA
- 3 replies
-
- 14
-

-
Chuck Not finished. Or I missed it. You still need to build a case. A nice model like that should be protected, I think. See ya tonight. Mike
-
Pete Look forward to seeing you. I want to here about your latest "build". Let me know ahead when you will be in town. Mike
-
Chuck I still say, as I said Sat night, that ye was robbed. Very nice model. Mike
-
Thanks for the kind words guys. Learner- Not sure if I will bring Fly to SMA meeting in Jan. Just depends if I get enough done to have something new to show. Hope to see ya at the Dec meeting though. Mike
- 55 replies
-
- 1
-
-
- 18th century longboat
- model shipways
- (and 1 more)
-
Looks good Bob. Especially sitting on the drift wood. Your on the home stretch. Can't wait to see it finished. Mike
-
Chuckles Yes it is balsa and served in the Caribian as a Pirate ship. But I don't know where the head is. Bob and David. Thanks for the incouragement. Will consider a build log, but am pretty far along and there are lots of Swan class builds going that are much more complete and way better than mine. This is only my third model and I have made lots of mistakes that I would be embaressed to show. Mike
-
Bill The dustcover is 13.5 x 12 x 4 inches. This gives aprox 1 inch clearance fore, aft and above with 2 inches uunder the model for pedistals etc. Mike
-
Thanks Chuck and David. Now that the longboat is finished I can get back to my FLY

- 55 replies
-
- 5
-
-
- 18th century longboat
- model shipways
- (and 1 more)
-
All Thanks for the kind words. Chuck The piece of maple is 3/4 in thick which I was afraid would make the display look bottom heavy. So I used 1/2 in high molding of contrasting color to hide the extra height. I cut a rabbit for the dustcover, but reallized after, that it could be deleted if one wanted. The dust cover could just sit on top of the molding over the base, making for a fairly simple base design. Glad you like it. Mike
-
Thanks evryone !! Mike
-
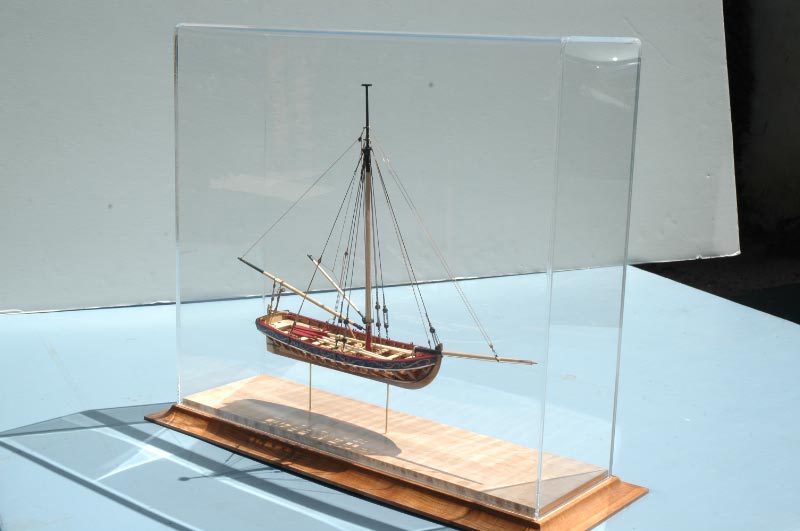
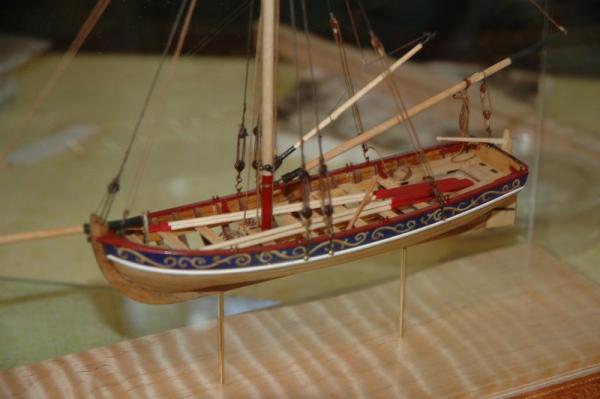
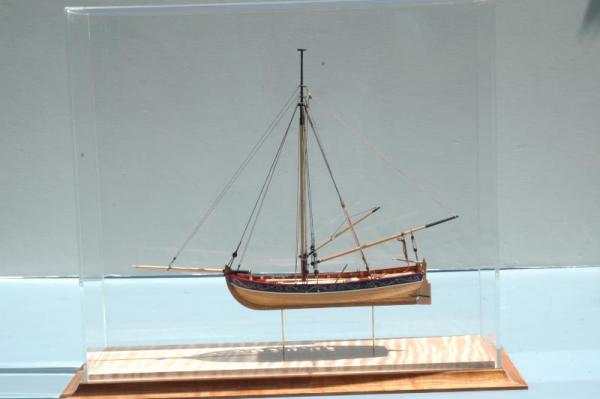
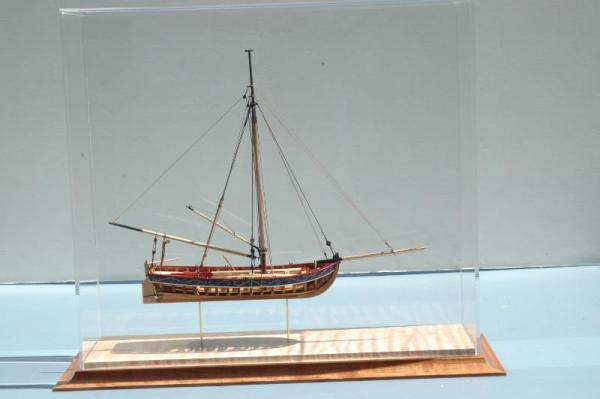
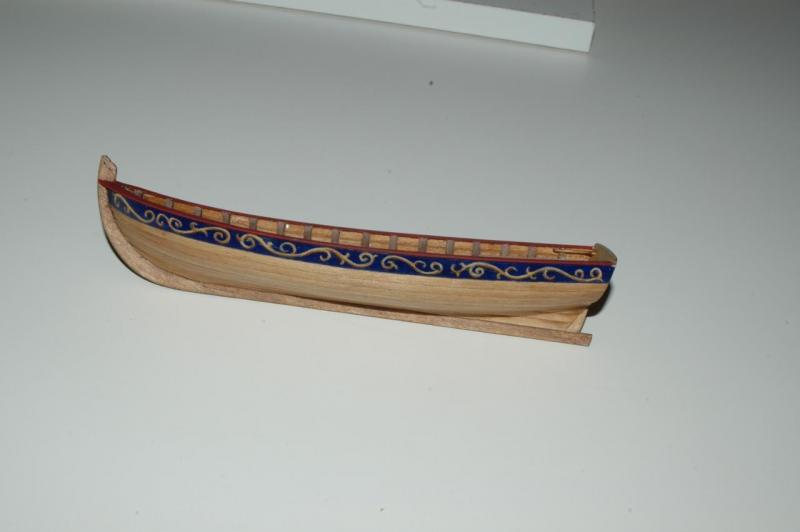
I have completed my longboat. The rigging went quickly following the kit instructions. I did however expand the number of blocks and rigging sizes to try and give more contrast to the different sizes. I used Warner Woods blocks in 3 sizes-- 2.5, 3 and 3.5 mm. I used DMC cotton line dyed with alcohol based stains for the rigging line. Line sizes were .008, .010, .012, .015 and .021 inch. The base is made of curly maple with cheery trim. The dust cover was purchased at a custom plastic house. Our group purchased 8 of them to keep the cost down. It is 1/8 inch thick plexiglass. I enjoyed building this model and look forward to doing more of Chuck P's excellently designed kits. Mike

- 55 replies
-
- 5
-
-
- 18th century longboat
- model shipways
- (and 1 more)
-
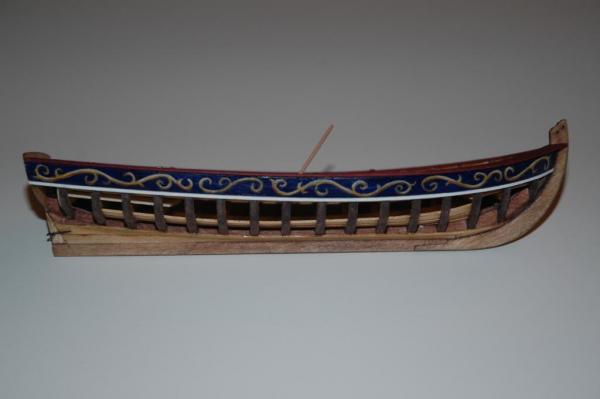
The longboat is back from the paint shop, where the stern decorating was completed.. I have completed making of all the parts and will start the rigging. I intend to follow the example of the contemporary longboat posted by Chuck P. with the rigging attached to the hull with hooks for easy removal. Mike

- 55 replies
-
- 1
-
-
- 18th century longboat
- model shipways
- (and 1 more)
-
Thanks for the comments guys. To capture the parts I advance the saw blade very slowly. As it nears the end of the cut the part will start to raise up. I stop the blade at that point and then turn the saw by hand to finish the cut. There is always a burr, but a stroke across some sandpaper gets rid of it. I still seam to loose a bunch of them. The hull is back in the paint shop for decoration of the stern. Photos when complete. Mike
- 55 replies
-
- 1
-
-
- 18th century longboat
- model shipways
- (and 1 more)
-
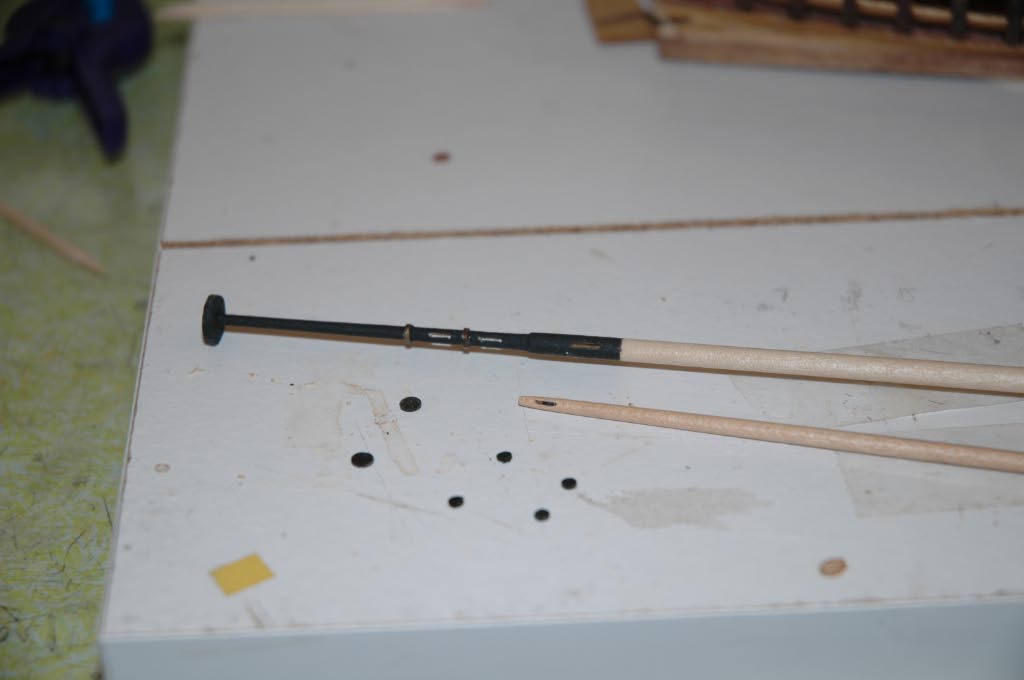
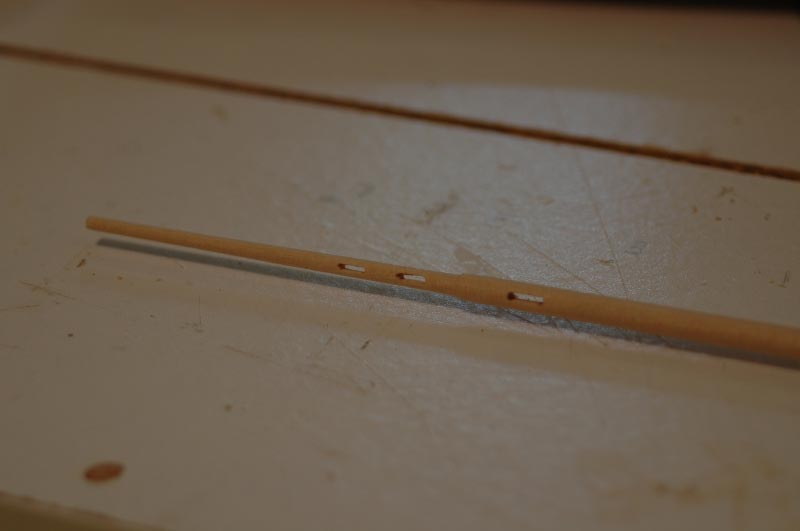
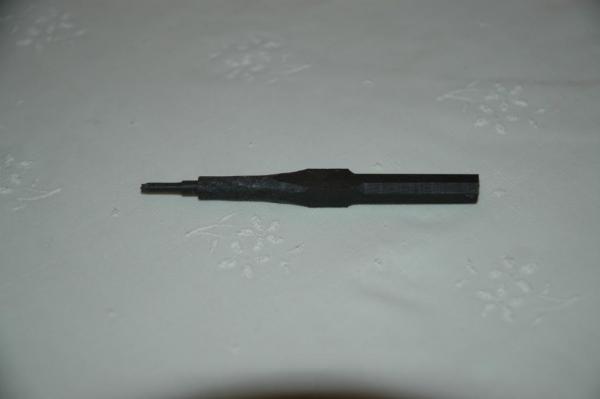
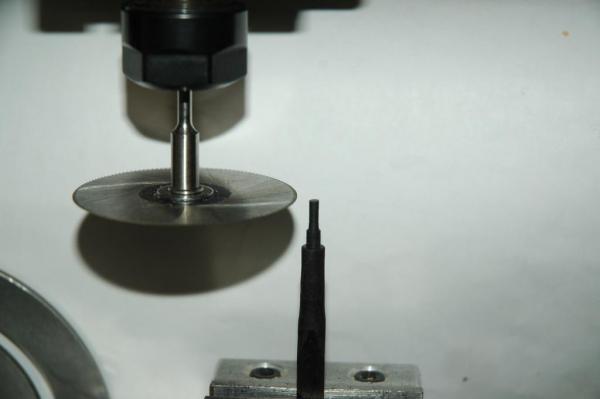
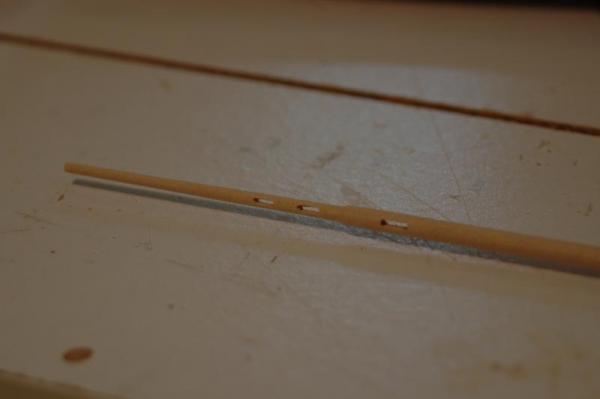
I have completed the sheaves for the mast and bow sprit. The mast required two small ones, .080 dia x .020 thich, and one large one, .125 dia x.020 thick. The bow sprit only one of the small ones. I made these of ebony. A square blank was rounded on one end to fit the chuck of the lathe. The free end was then turned in two steps to the required diameters, leaving a short square section for clamping in the vice later. Since I only needed two diameters I did them at one time to save setups. The blank was then clamped in the mill vice and using a saw blade in the mill arbor the table is advanced to cut off the sheaves. Using the vertical feed any thickness can be cut. The hardest part of this operation is capturing the sheave before the floor monster gets it. The followinf photos should help show the process.The bow sprit in the photo has a sheave installed. Mike


-
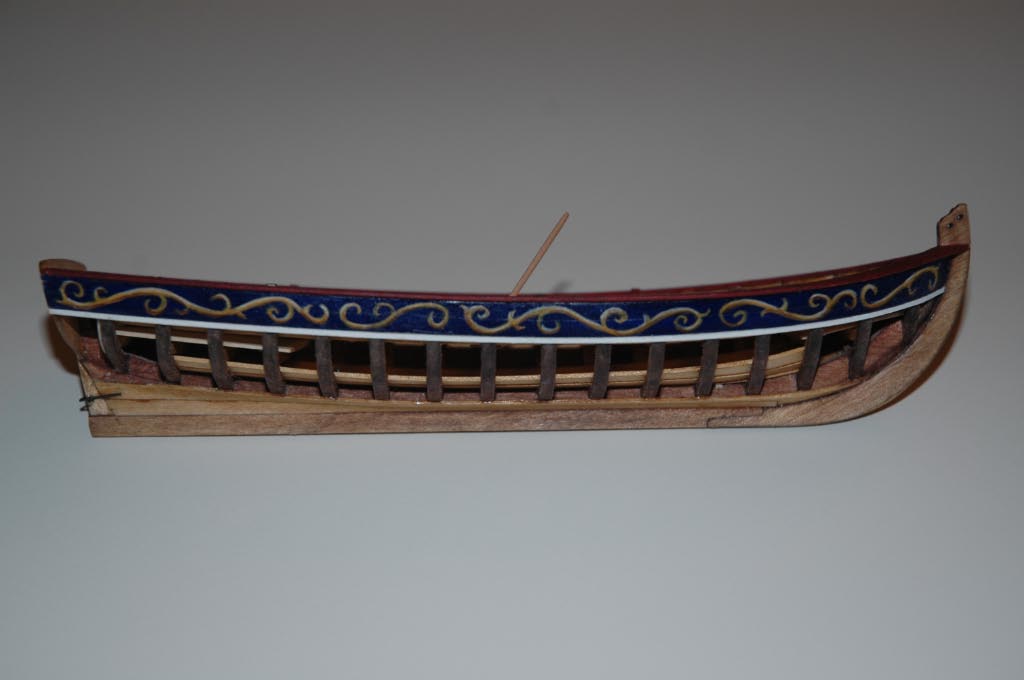
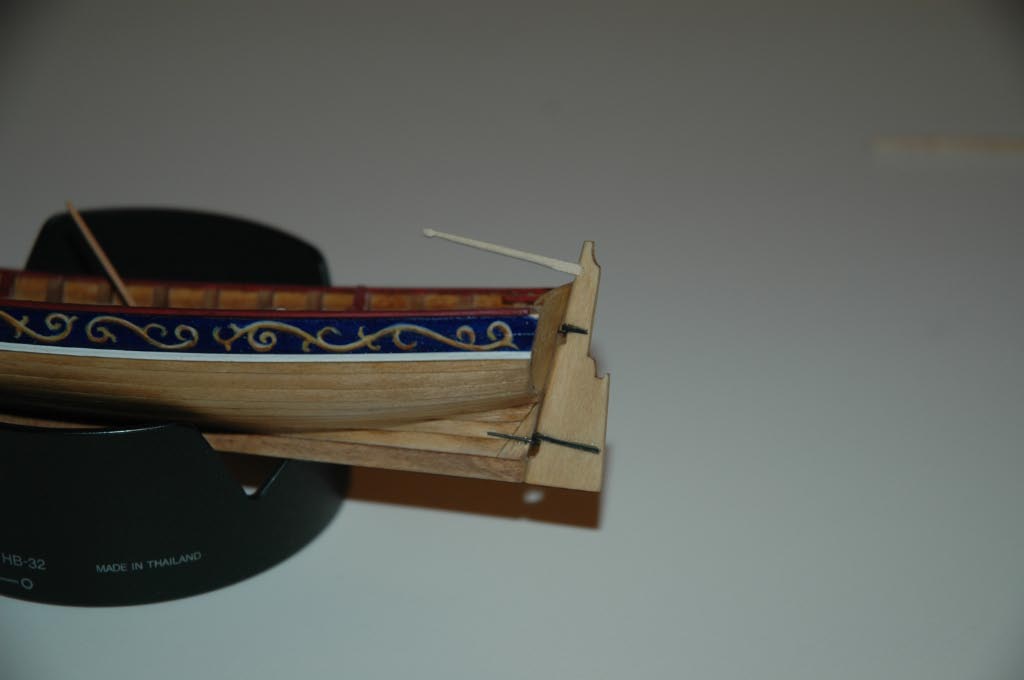
Rudder finished sans paint. I am not sure yet how I want to decorate the stern and rudder. Here are some shots of the model as it stands now. Mike


-
OK! OK! I,m working on the longboat. Added white rails under friezes,restained seats to accentuate molding and am working on the rudder. No time for pics now-off to SDSMG meeting. Will have rudder finished tommorrow and then will post photos. Mike
-
Chuck I will turn the sheaves for the long boat. I have some Lignim Vitae that I have been wanting to try. Failing that I will go back to boxwood, which has worked well in the past. To make them I turn a up a dowel in the proper diameter. I put the dowel vertically in the vise of the mill. The sheaves are then cut off using a dremel saw blade in the mill chuck. I can move the saw blade down a known amount and cut off very thin sheaves as required. Mike
-
Yes I use the blackening solution from Bluejacket. It seems to blacken the silver solder as well as the brass. Mike
-
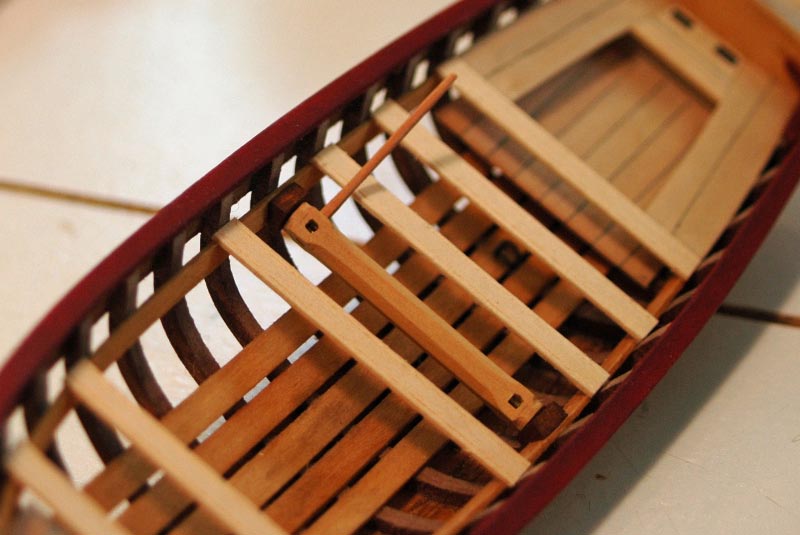
Have finally made some progress on my longboat build. The windless has been completed and installed. To this point I have used kit materials for the build, but decided to use boxwood for the windless barrel. I think I got much sharper edges with the boxwood. The rails that mount the windless are not vertical , so I added mounting pads to the rails. I have seen this feature in photos of contemporary drawings and models. The handle is made from a piece of 3/64 inch square pear. Next the mast was made so the final seat with mast support hardware could be completed. I wanted to install real sheavs in the mast so the three slots were cut. The mast was then tapered to final size. The next photo is of the mast with the block support bands installed. The bands were created of kit brass strip. The strip was annealed and formed arround the mast. The ends were silver soldered together and the hole fof attaching the block drilled. They were then epoxied in place. The final seat with mast support hardware was completed and installed. The seats will be colored with some very dilute golden oak stain to help accent the scribed lines. Mike


- 55 replies
-
- 2
-
-
- 18th century longboat
- model shipways
- (and 1 more)
-
Thanks, Chuck and Cap Steve. Mike
-
Wayne Thanks David This is Model Shipways kit of the 18th Century Longboat in 1:48 scale, that our group (San Diego Shipmodelers Guild) chose as the subject of our community build. We have several under construction (maybe 10). Mike
-
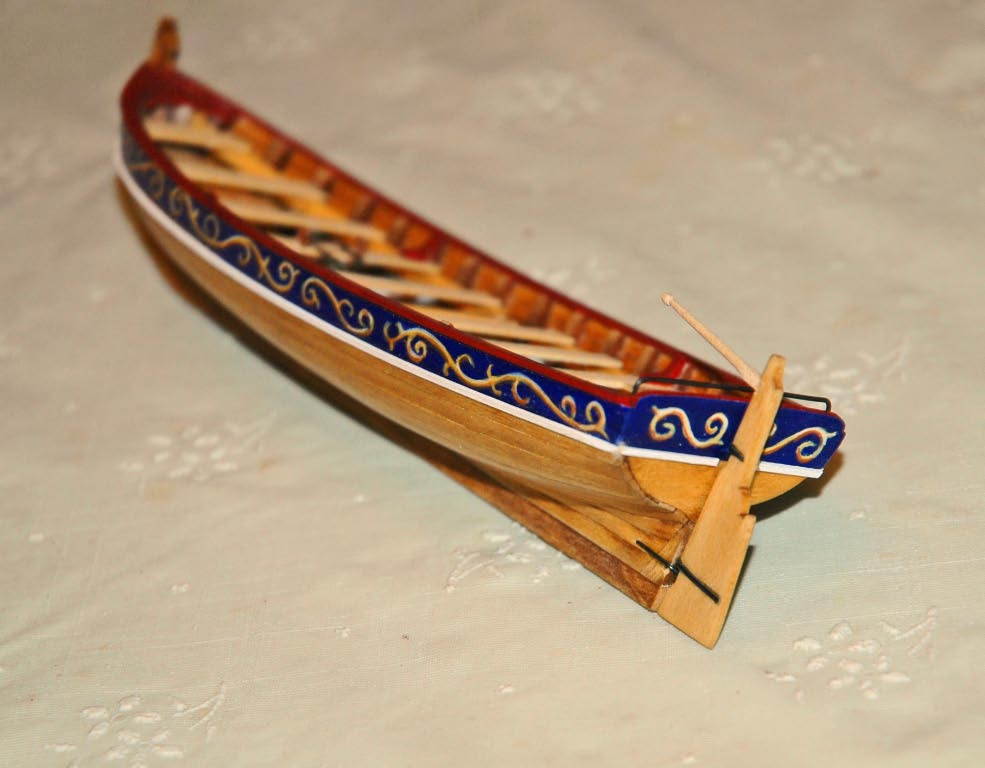
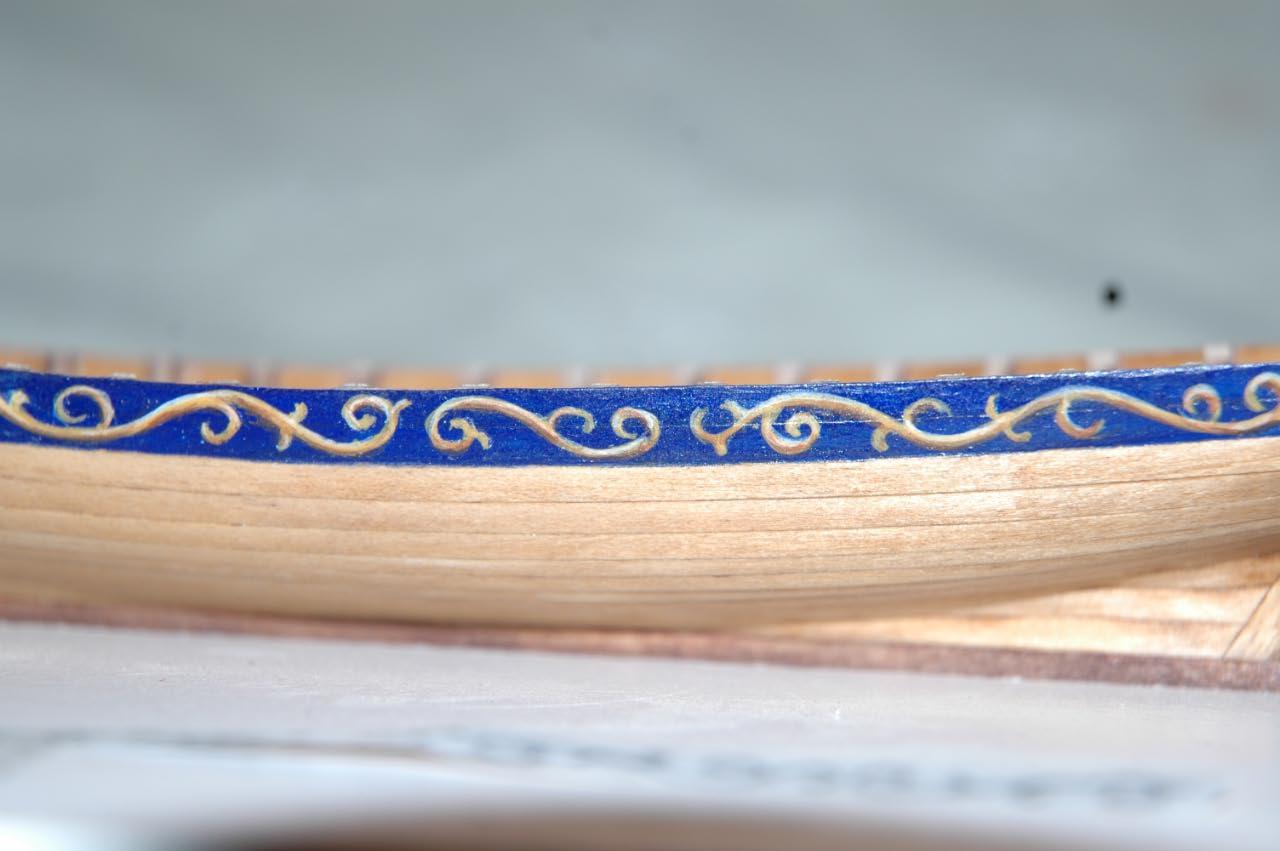
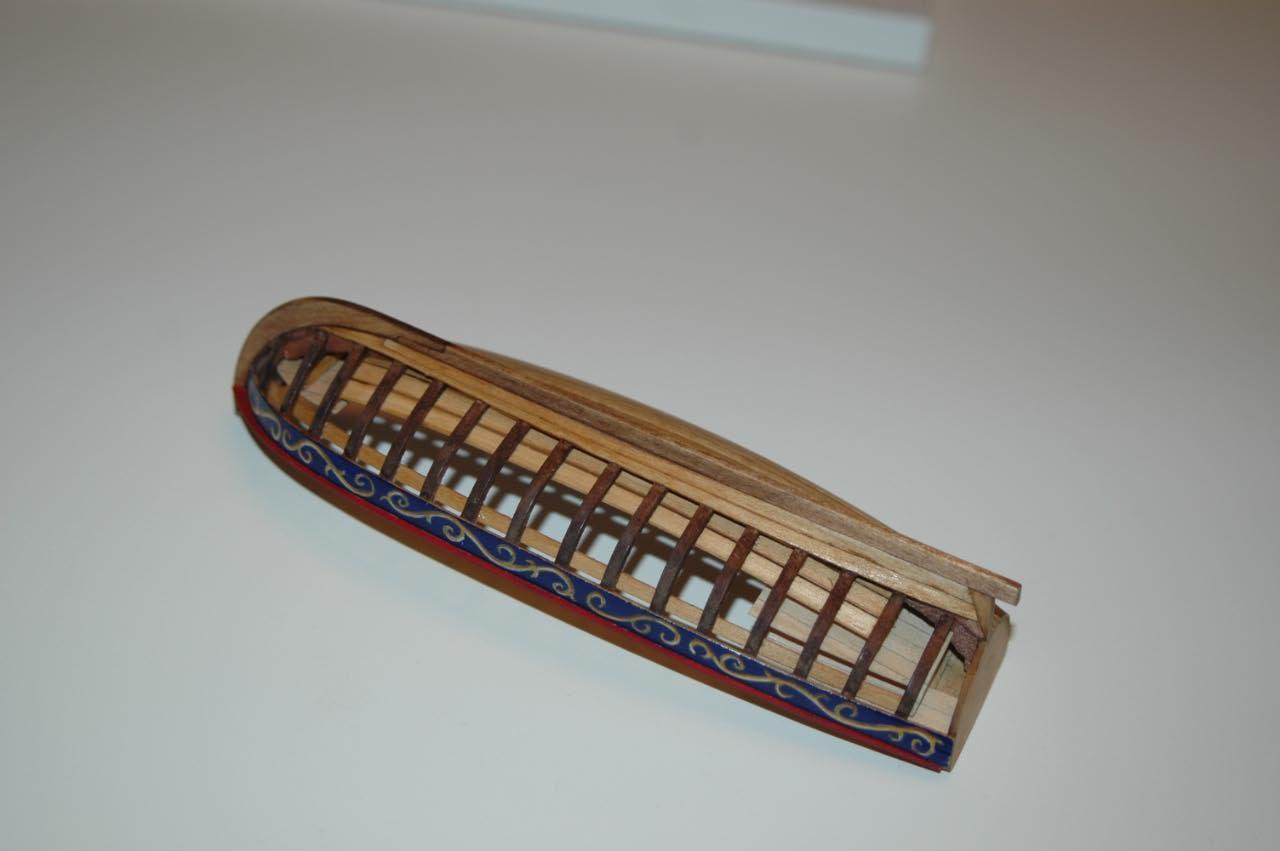
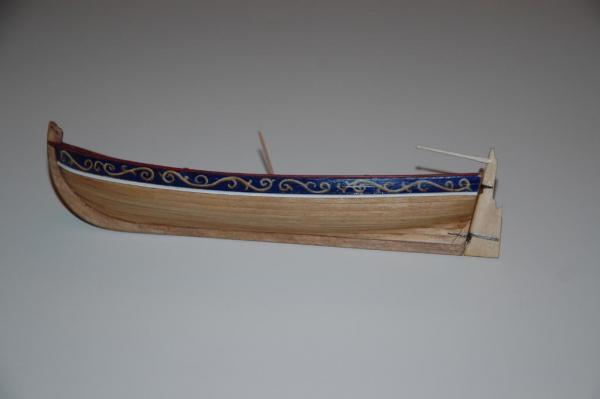
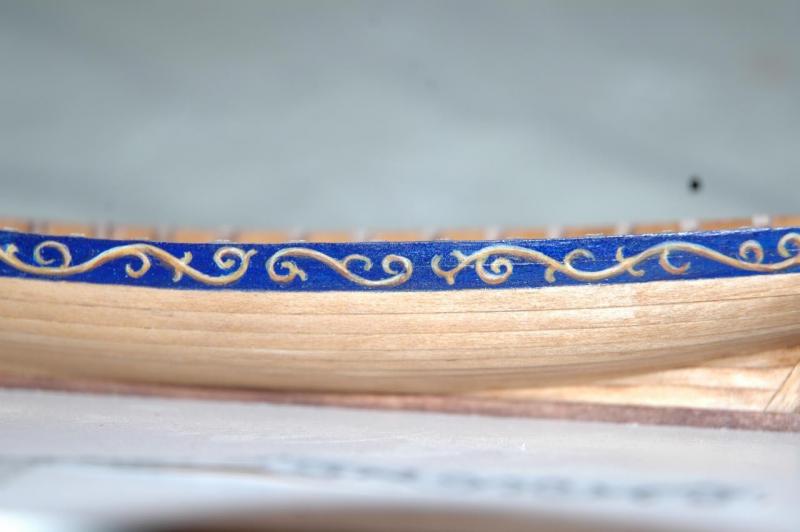
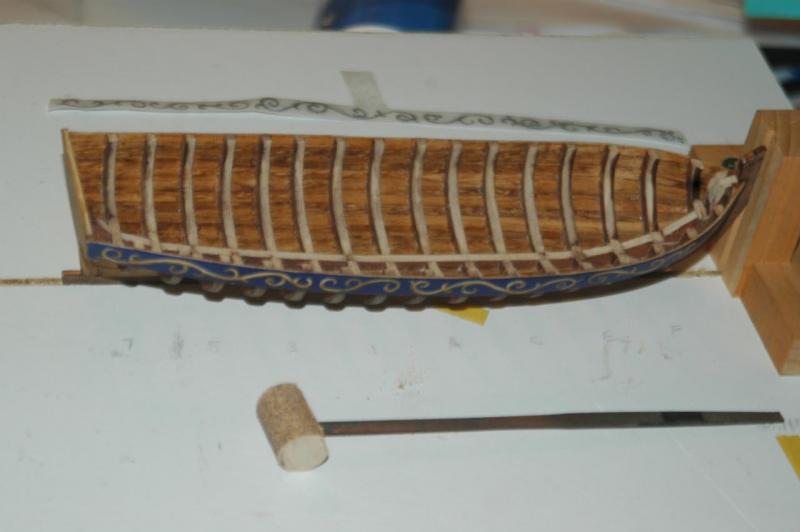
The following photos will bring my build up to date. One other deviation from the kit was painting on the friezes instead of using the printed ones. My wife did the painting. Mike

- 55 replies
-
- 1
-
-
- 18th century longboat
- model shipways
- (and 1 more)
-
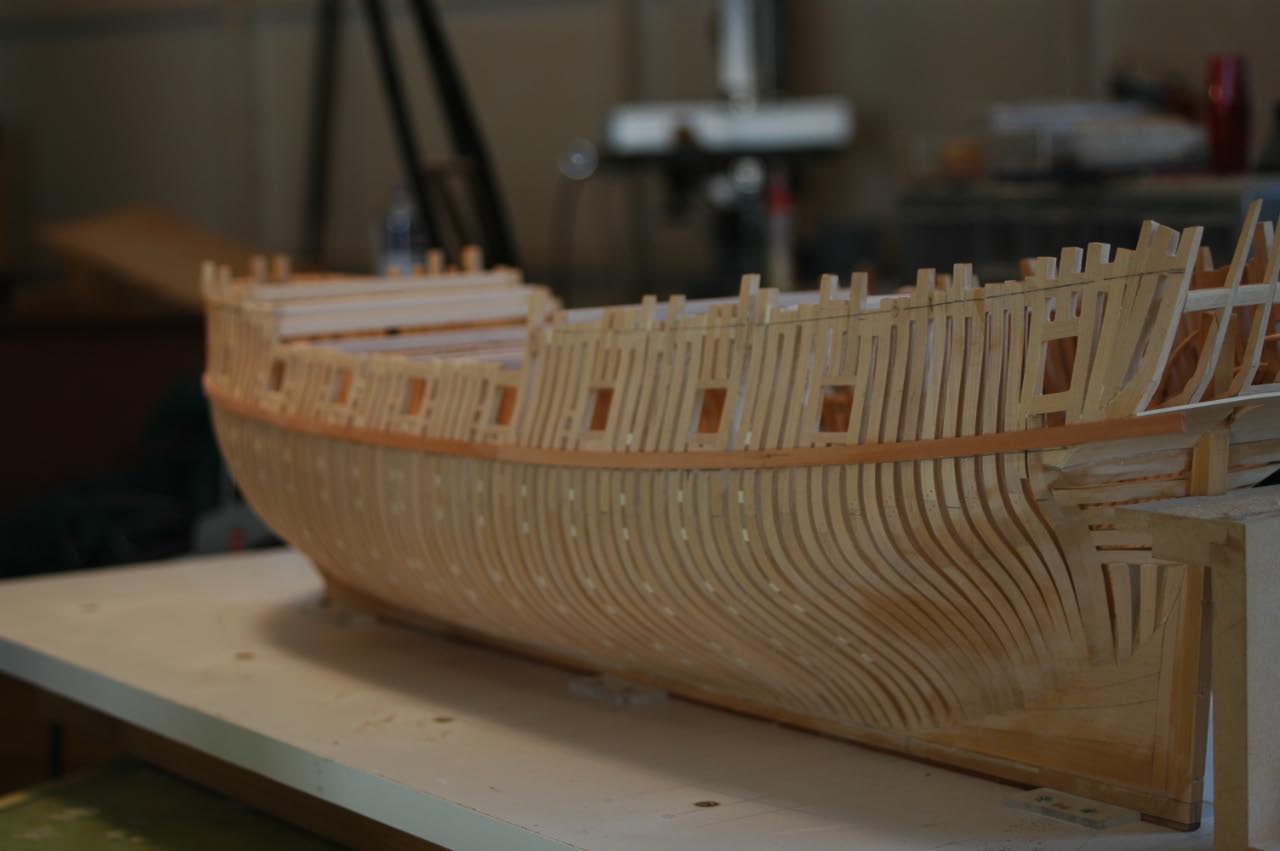
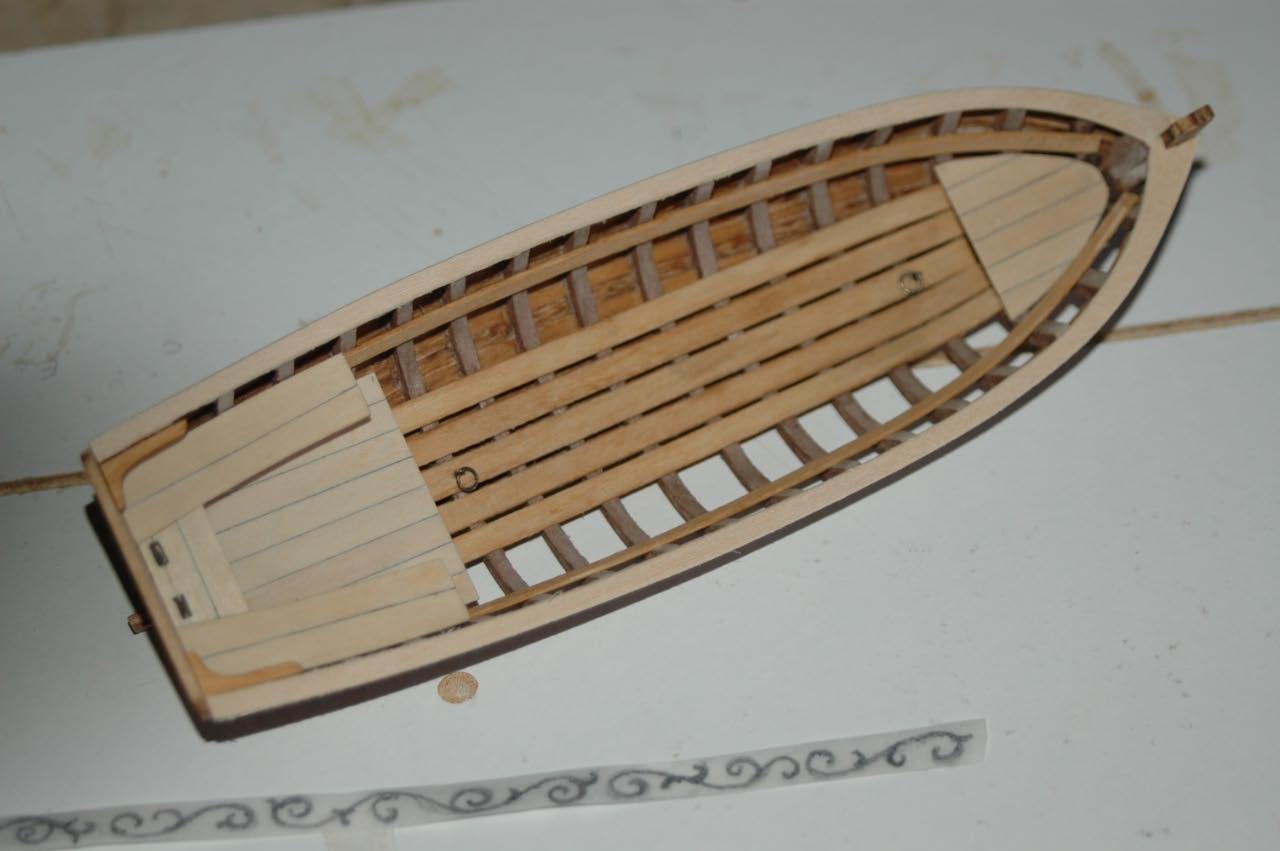
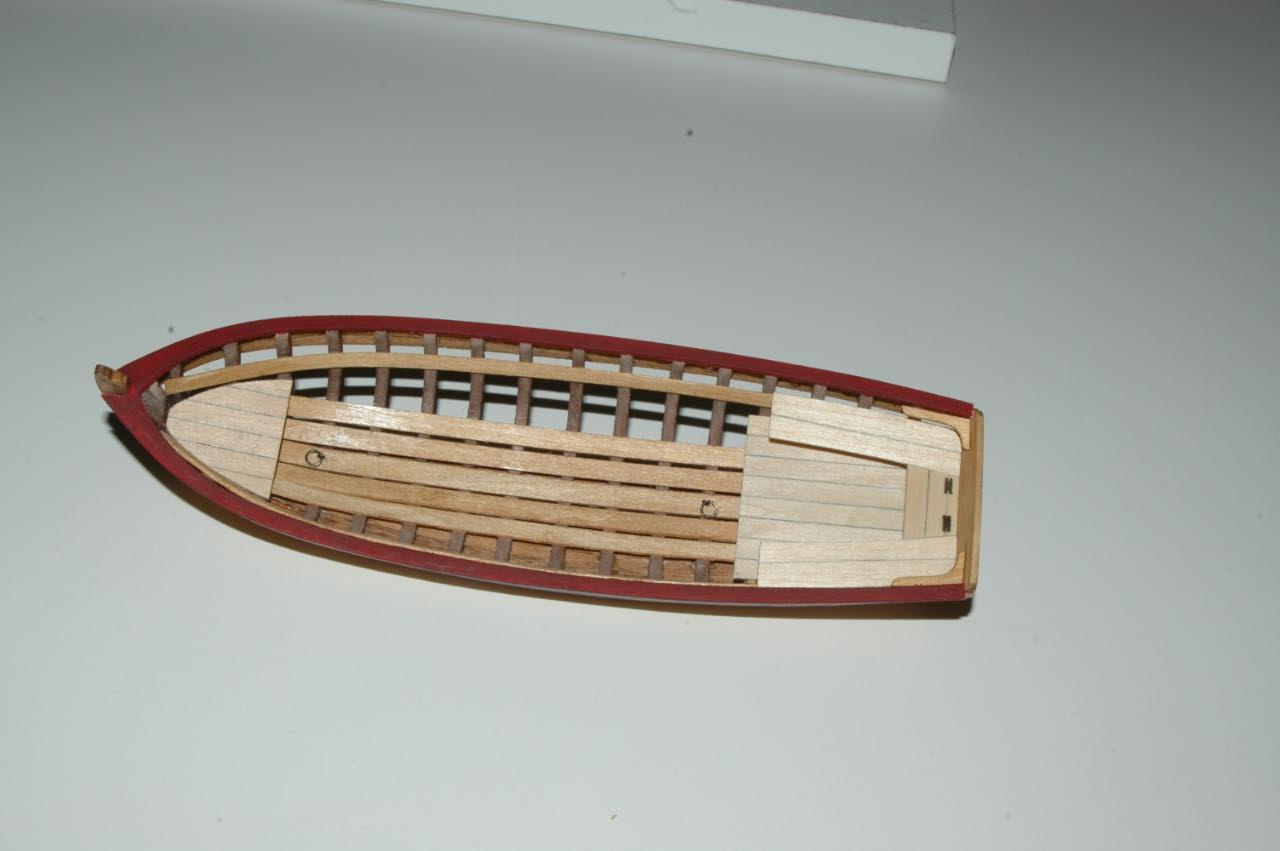
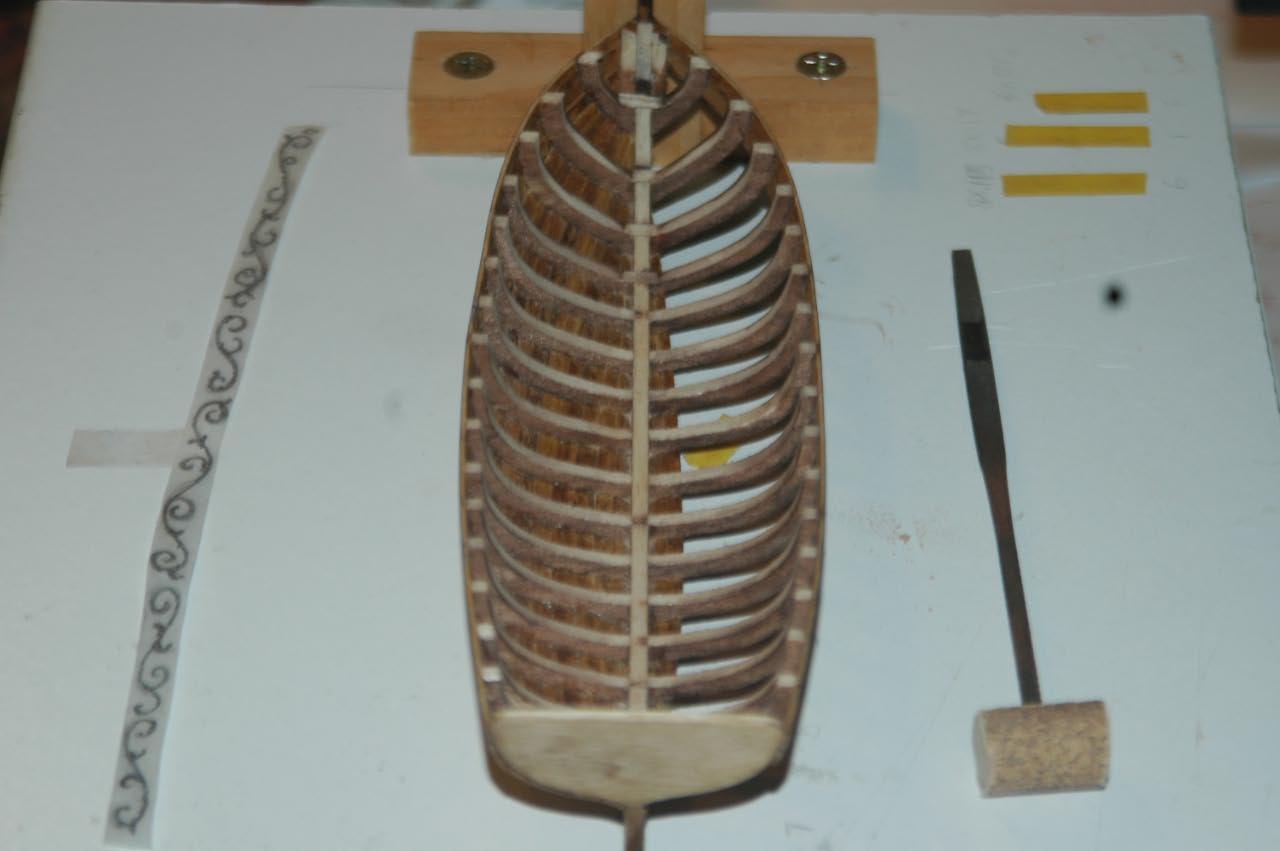
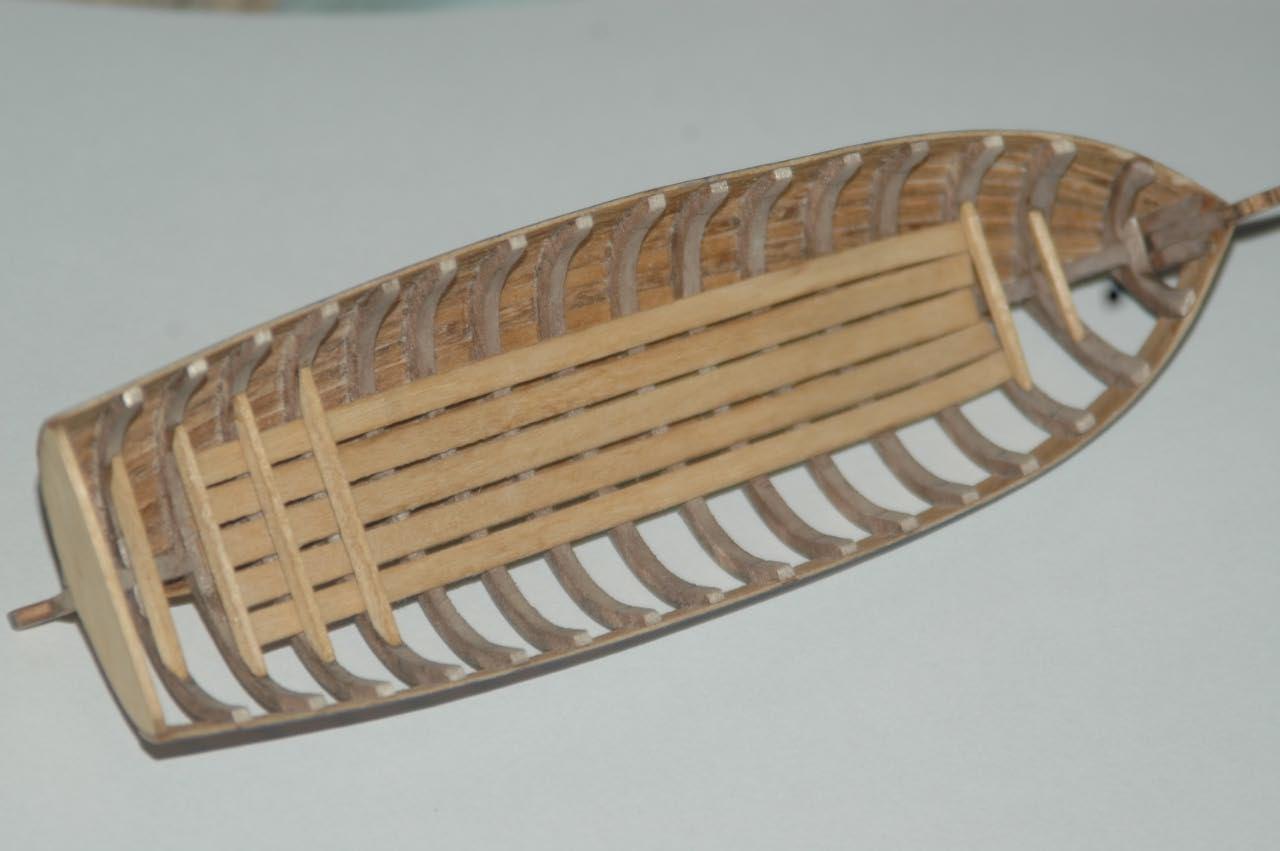
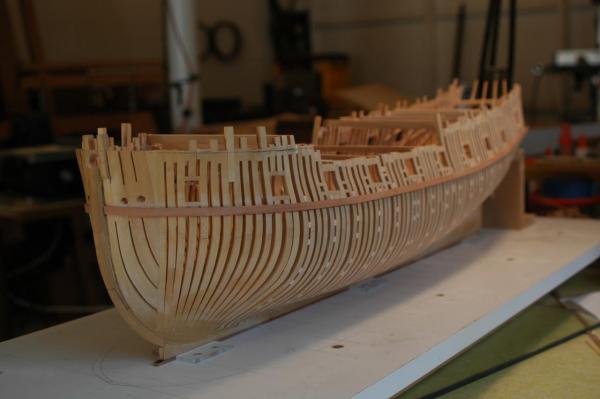
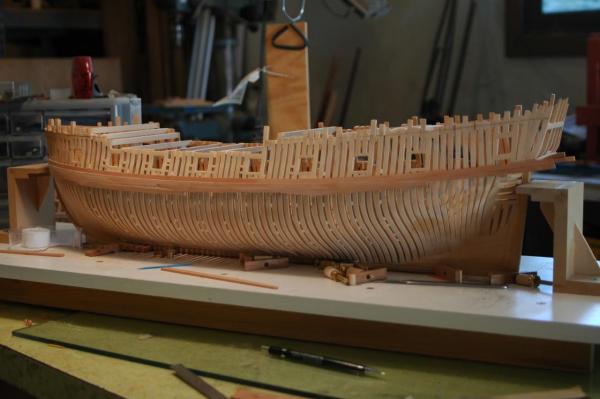
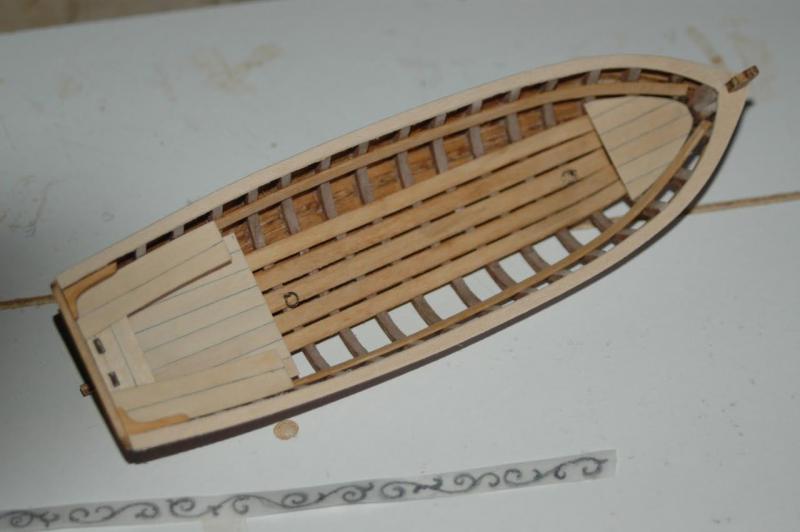
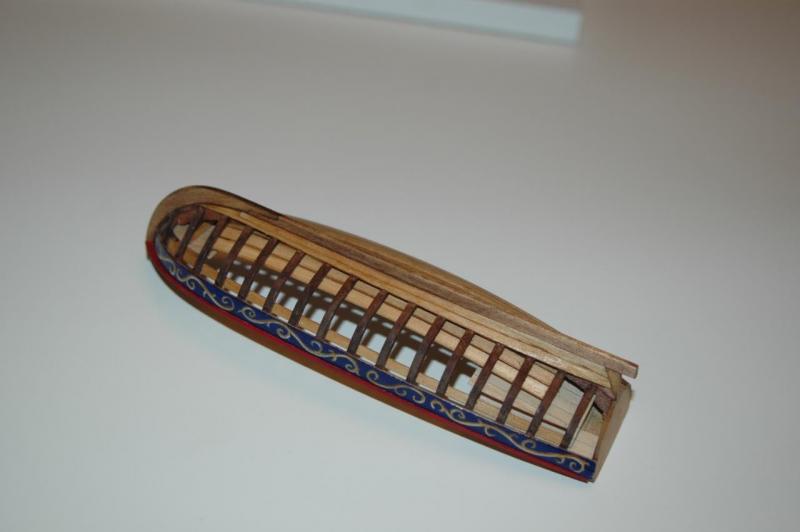
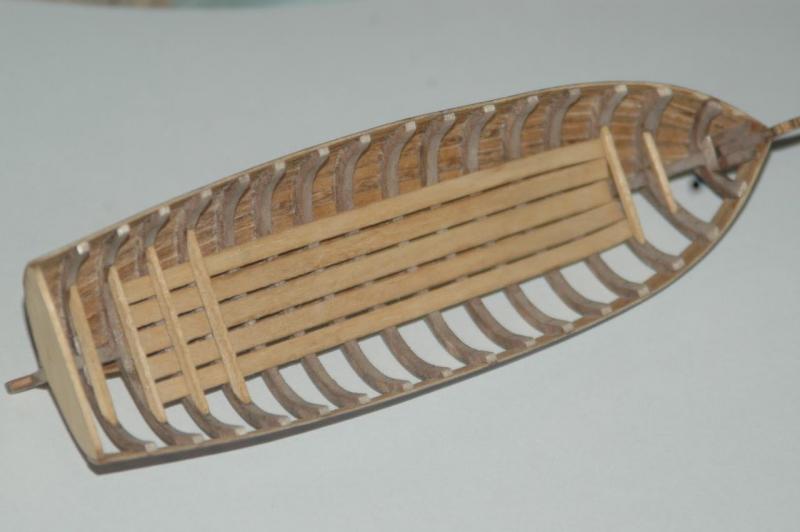
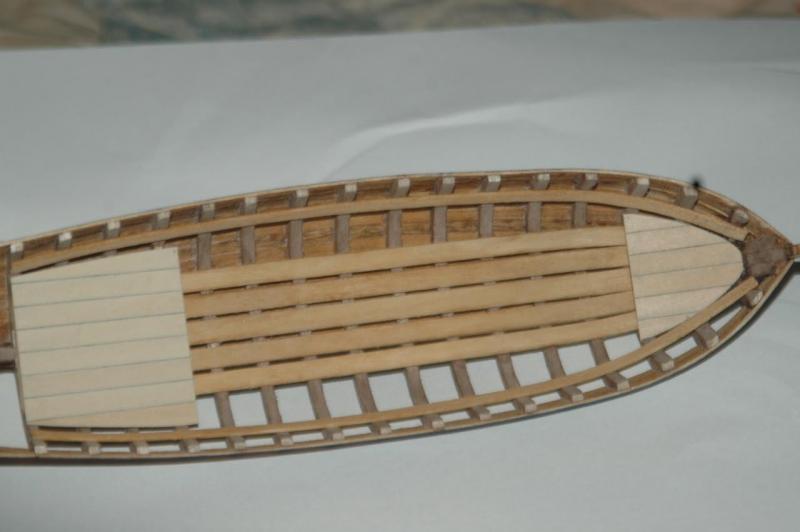
I am a member of the San Diego Shipmoddelers Guild community build. I am behind in posting my progress so will post photos to try and catch up with minimum dialog. I have followed the kit instructions and used kit materials up to this point with a couple of changes. One thing I did before planking was to stack all the planking material face to face and tack glue the ends together. This gave me a block that I could feed through my thickness sander. When seperated this gave me planking material of equal width and with nice square edges. One of my deviations was to leave off some of the planking on one side to show off the frames. I made a special tool for sanding the inside of the frames. It consisted of a section of dowel with sandpapper glued to it and a handle added. The length of the dowel was just wideer than tghe distance between frames.

- 55 replies
-
- 1
-
-
- 18th century longboat
- model shipways
- (and 1 more)