markfrommelt
-
Posts
21 -
Joined
-
Last visited
Content Type
Profiles
Forums
Gallery
Events
Everything posted by markfrommelt
-
 Just an update that I have resumed work on my Syren, now that things have settled down after the holidays. Stay tuned for more progress updates in the coming days.
 -
rtropp - I laid mine plank by plank over the bulkheads. BTW - I haven't given up on my build log folks, It's just that my summers are consumed with building and flying RC planes and helicopters. I'll be back on the Syren project soon (summer are too short in New England!!!)
-
Ben, I'm not sure, I haven't really decided. I guess it'll darken either way eventually. I'm going on vacation for a few days, I'll decide when I get back!
-
Thanks Augie. I'll give the acetone a go too...I used my wife nail polish remover, only to discover it was non-acetone and didn't work at all!!
-
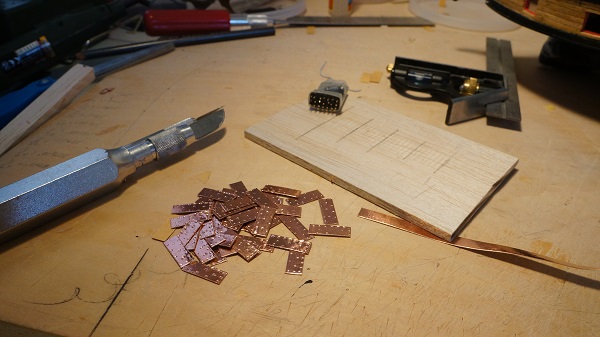
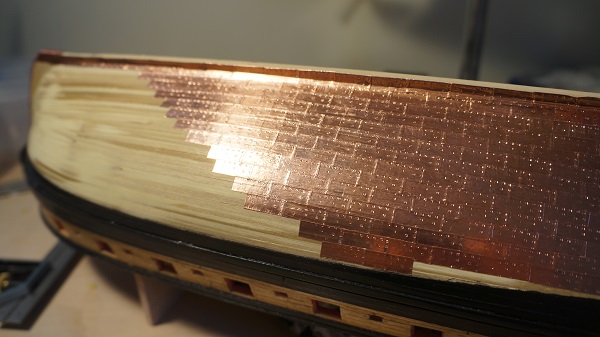
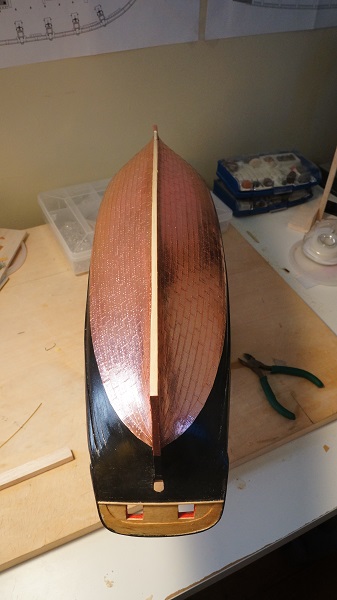
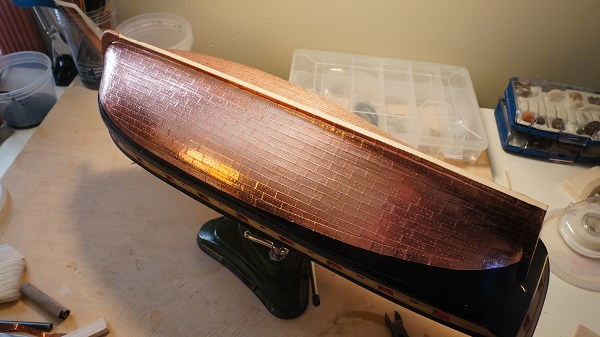
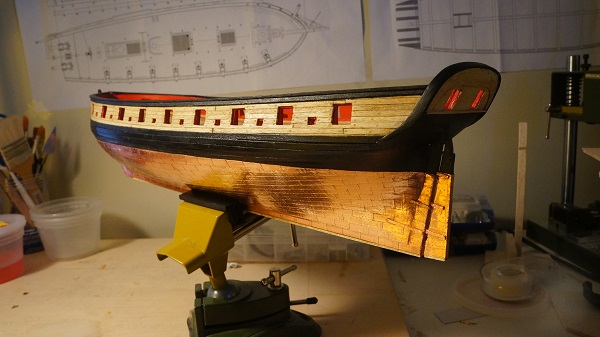
Part 8. Copper Plates/Rudder Copper plating went fairly well. I know there is a copper plating schematic included in the practicum that shows a more complex plating pattern, I'm not sure how many builders follow that, I know I didn't. The hardest part of coppering is actually keeping the copper plates clean!! I used a fairly rudimentary method of stamping and cutting the plates. I found an old rc reciever and cut some of the connection pins down to match the pattern suggested. To do the port side I cut them down again. I then stamped 4 at a time until I got tired of stamping and then cut them to size using an exacto. The most time consuming part, however, was removing the backing from the plates before attaching. Once the plates were attached I burnished them with a piece of balsa. Drilling the hole in the transom for the rudder was scary, but went fine, as did the painting, staining and plating of the rudder itself. I cut down some nails and glued them to the pintles, covered with copper plating and glued them to the rudder. I made a bit of a mess glueing the gidgeons onto the hull. There's quite a bit of CA on the surrounding copper. I'm probably going to attemp a cleanup with some laquer thinner. If anyone has another suggestion for cleanup I'd welcome it. I was able to use white vinegar to remove my initial fingerprints from the copper.
-
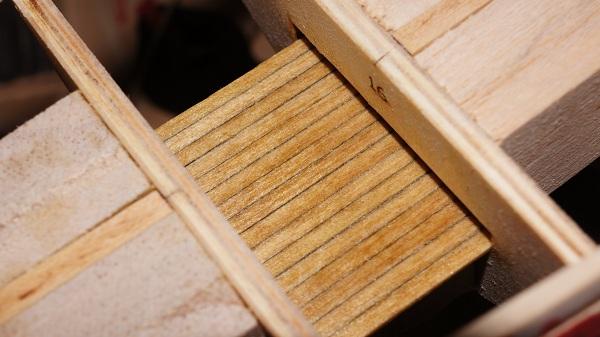
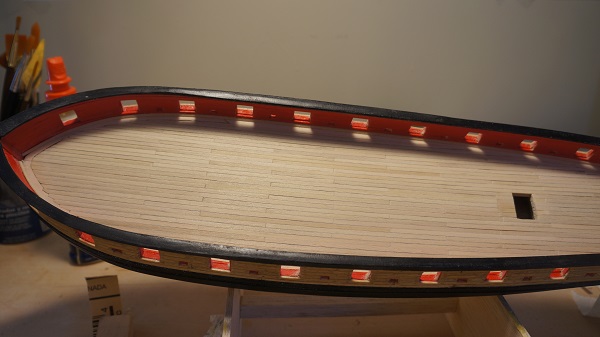
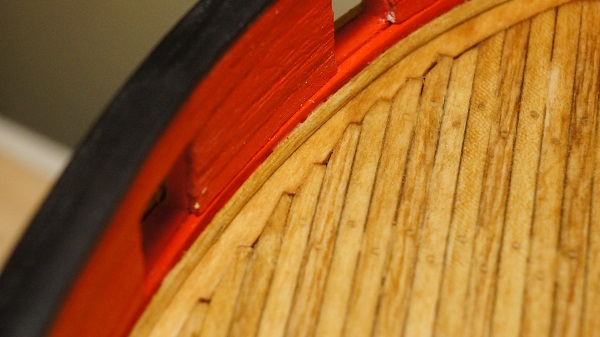
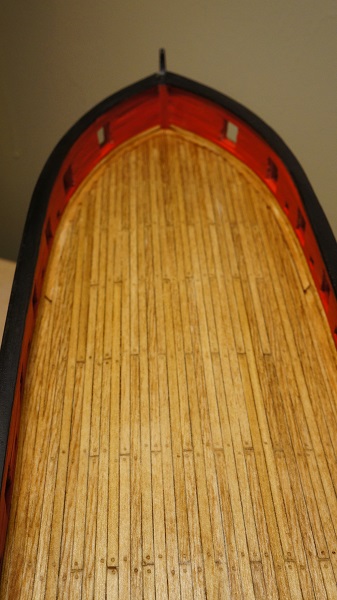
Part 7. The Deck. Doing the deck was one of the less stressful part of the build so far. While I have seen some Syren logs where the shipwright tapered the deck planks towards the rear, I chose not to go that route for simplification's sake. I also did joggle the planks into the margin strip, which wasn't too difficult, although my end result could have been a tad tidier. Once the deck was complete I treenailed it in the same manner as I did outer bulwarks planks and stained in the same manner as well. I used a slighly smaller bit to drill the treenail holes and as I result my treenaling looks less defined on the deck. (the treenailing actually looks more pronounced in photos than in person)
-
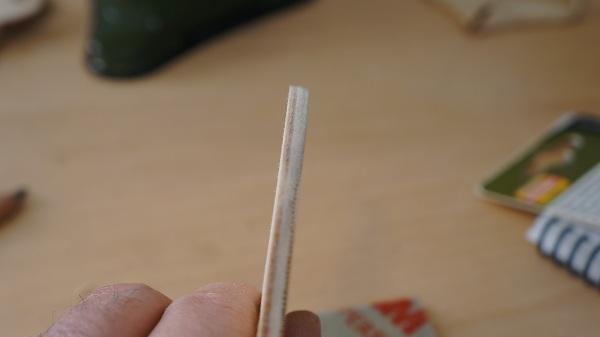
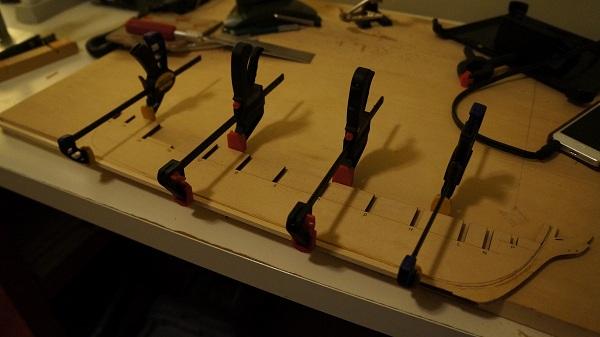
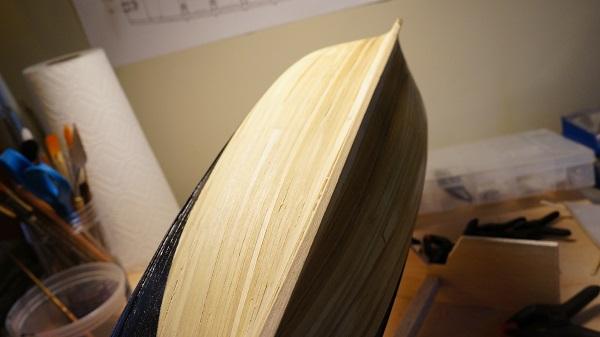
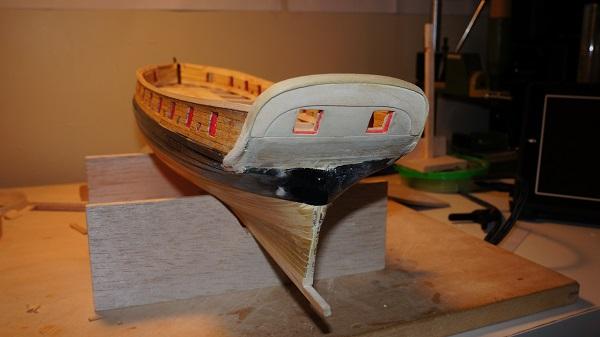
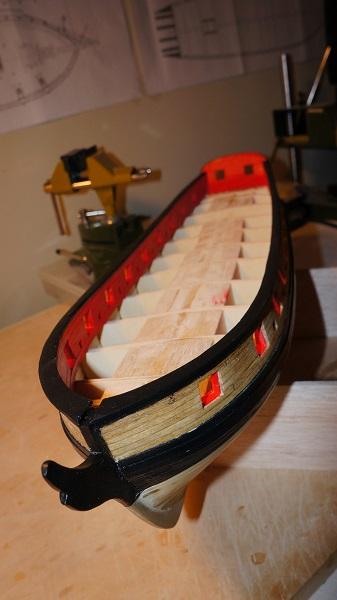
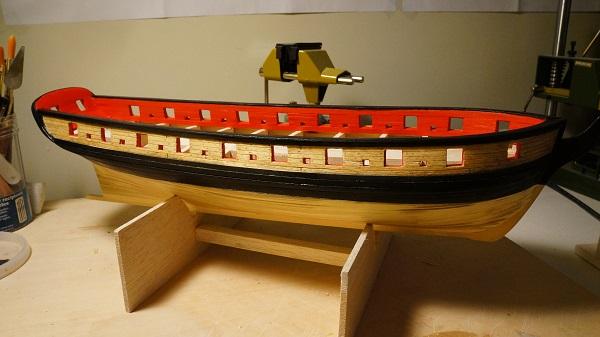
Parts 5b and 6 . Planking the Hull. Finishing the Stern and Inboard Planking. Ok, so I got my hull planked..it was not pretty. But I went into it knowing that I would be covering it with copper, so I my goal was getting a smooth hull. With the help of lot of filler I think I accomplished that goal. The first thing I did was add the second layer of wales. This should have been straight forward however the 5/32 X 1/32" strips required per the practicum were not included with the kit. After contacting Model Expo I was informed that these were not to be provied with the kit. (I'm not sure why this is, but I'll add this to my list of extra parts needed at the beginning of my log.) After a quick trip to Northeast Scale Lumber this was remedied. Once I had the parts the second layer of wales and sheer strake were easily completed. Things go interesting once the plaking began. I took the approprate measurement and did the required calculations to figure out how much I needed my planks to taper at the bow. The number were right in line with what they were supposed to be so I had at it. A couple of things I took from this... If tapering planks by hand with a sanding block, taper a few planks at once. It keeps the planks from rolling on thier sides while sanding and it saves time. After some practice I was able to taper planks using my micro belt sander. Measure carefully and take your time. I got careless with my measurments and I payed the price towards the end when I ran out of room for planks at the bow. I found it was much easier to use CA glue for planking. I also used fixer on the CA for the stern where the extreme bends make things more difficult to keep in place while glue is setting. It took a few single plank inserts to get this done. Once the hull was planked I applied copious amounts of filler and sanded the bejesus out of the hull until smooth. Whew!!! I think the shape came out pretty nice over all even though you couldn't stain the hull. I once I transfered the waterline to the hull I gave it a few coats of Golden's Carbon Black. Because I'm using acrylic paint I am also using a water based finish coat of Minwax Polycrylic. I like the look overall, but be warned the clear satin may be a bit too glossy for some. I did finally get my lasercut transom from Model Expo, which allowed me to finish the stern. No real issues here to report. Fairly straight forward. Be sure to sand the stern down to at least 3/32 as per the practicum. I was a little over and it became an issue when installing the cap rail. After the stern was complete I began planking the inboard bulwarks. Again this is just like planking the outer bulwarks, no real suprises. Once the inner planking was complete I gave the inboard a couple coats of red, some Polycrylic to finish and got to work on the cap rail. I visited my friends at Northeast Scale Lumber again to grab a 1/16" thick sheet of basswood for this. I was able to get the outer curve of the bulwarks by tracing the as per the practicum and to get the inner curve I used a french curve. After carefully cutting out on side I used it as a template for the other...making sure of course the hull was symmetrical enough to do so. This was only necessary for the first 3rd of the rail. The remainder was completed with a 3/16 strip. Although I'm not sure I wouldn't use a 1/4 inch strip if I had to do it again, since you need to add a 1/16 x 1/16 strip to the outer edge later anyway. Next Up is the Deck Planking.
-
Really like these cross section builds, yours looks great!
-
Looking good so far!!
-
This looks great. Thank you for going through the effort of reposting, your log is really a great resource for those of us who are also building a Syren.
-
Man, this is looks really nice. Everything is so precise. I really appreciate you re-posting this as it's a great resource and motivation for the rest of us Syren builders.
-
Yes I got you now, thank you sir!! I was thinking the sheer strake would help me even things out, and now i know how!
-
Thanks Chuck, so should I sand the extension tops down to be level with the top planks?
-
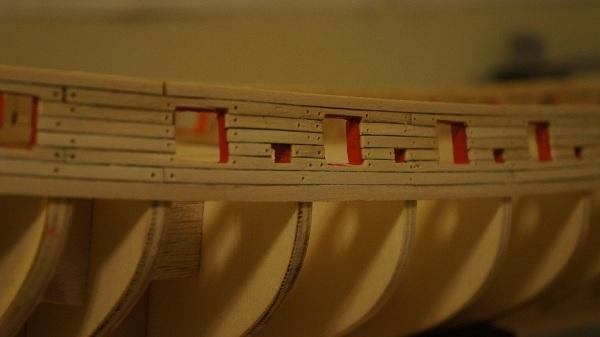
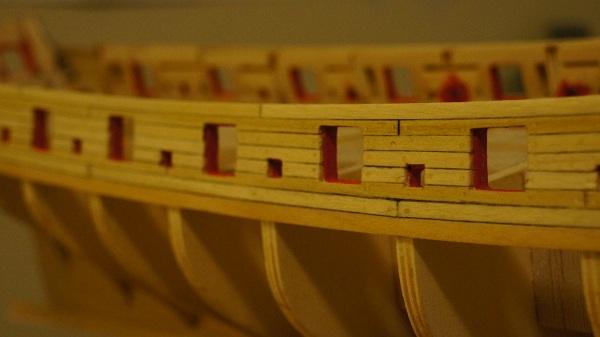
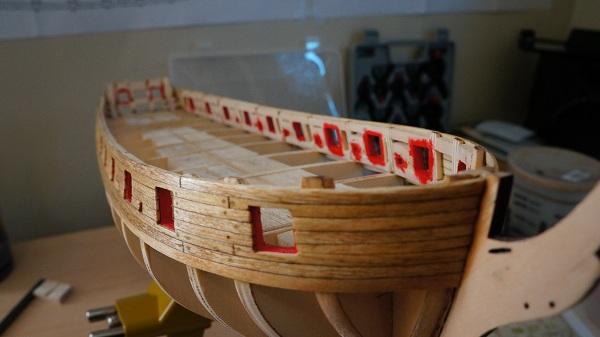
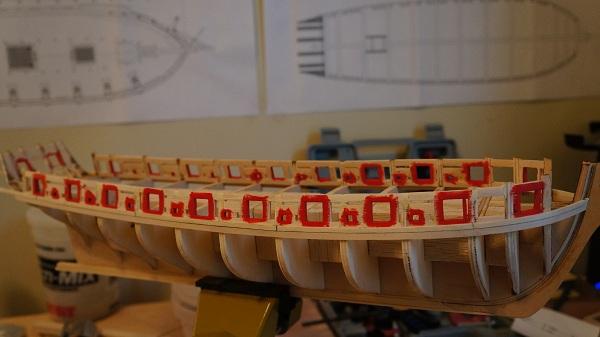
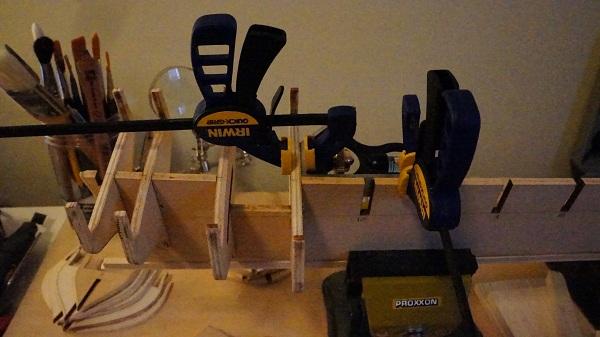
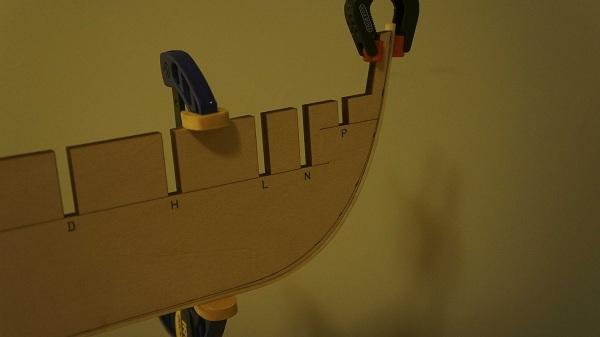
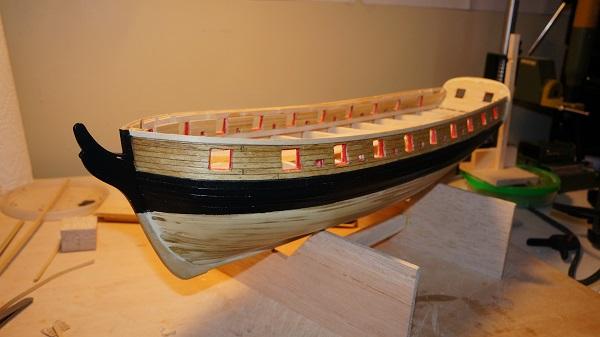
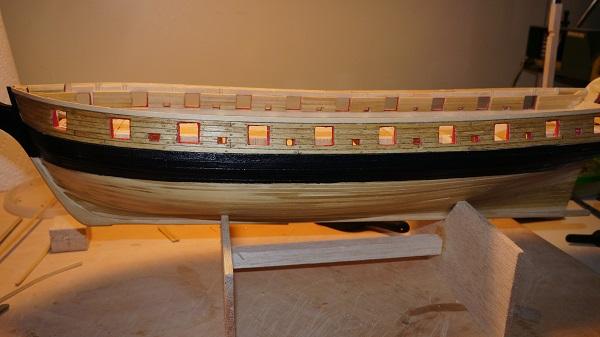
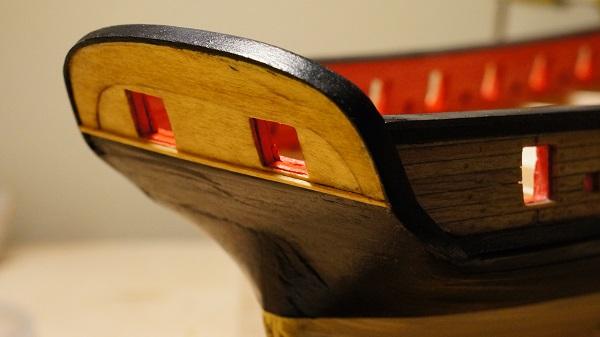
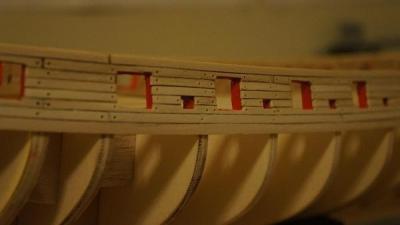
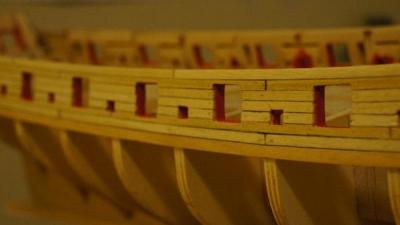
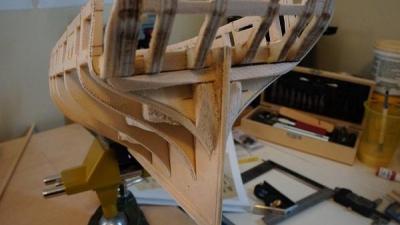
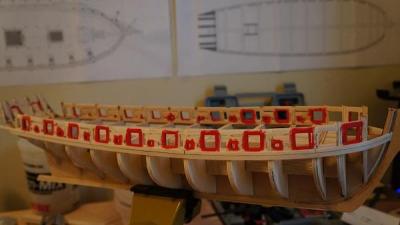
Part 5a. Planking Above the Wales Started by preforming the upper whale using a jig. I decided to do both sides at the same time so I pre-formed both the starboard and port wale before proceeding. Using the reference line created by the batten earlier I made sure to glue each wale to the bulkheads so that they followed a smooth curve from stem to stern. Planks 2 and 6 were the toughest. It was here that I had to notch out the clearance for the ports, while maintaining an additional 1/32 " of clearance. Plank 2 was the one that would pretty much set the tone for this aspect of the planking. I took my time and treated each plank as a separate project (as suggested). My results were mixed. While I did get better as time went on the end result was a little un-even. Not every port is precise as I would have liked and the clearance "lip" of 1/32 is closer to 1/16 in many places. But overall, given my understanding of how the build proceeds it should be fine. Around the 6th plank I ran into another more serious issue. While I was planking both sides at the same time I failed to notice that at the bow the top of the third plank was sitting much higher on the starboard side than on the port side. I almost looked like I had an addtional row of planking done on starboard. To remedy this I had to remove the 3-5 plank on the starboard side and sand down the lower edge of plank 3. (This can be seen in the pics.) after doing this things come out pretty evenly (but not perfect). The reason for this became clear later after plank 7...I seemed to have a more pronounced downward swoop in planks from the stem to bulkhead 3 on the starboard side compared to port. Additionally after completing the 7th plank I noticed that I still have bulkheads clearing the planking fore and aft. Not sure how to preceed here. Should I add another row of planking to make up for the clearance, or do I just sand the bulkheads down level with plank 7????? After the planks were complete I tree nailed and stained using the same process and mix as in part 2 of my log. Be carefull if using the wood fill method of tree nailing as I did. Use only a small amount of fill directly in the hole. If you use to much you will have a heck of a time sanding it out completely. Also may have used a slightly larger bit than needed ...but overall I'm satisfied with the look. Looks like I'm in a holding pattern for a bit as my lasercut sheet containing the transom was not included in the kit...waiting for the part!


-
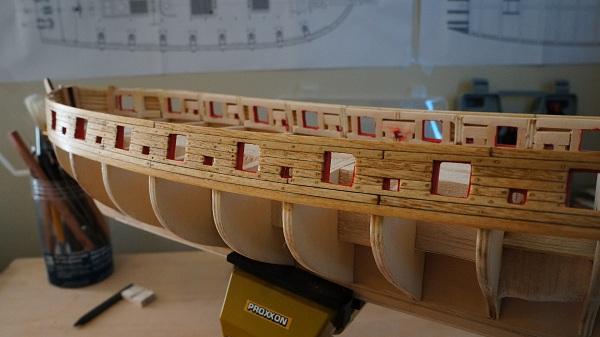
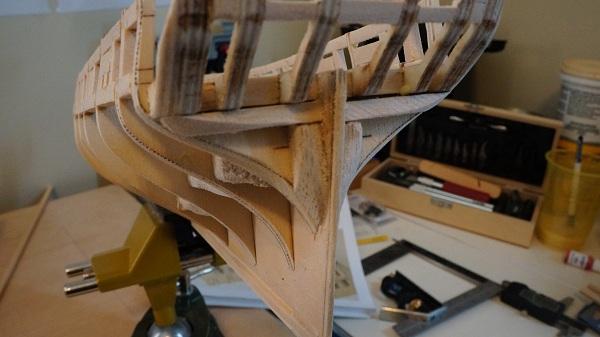
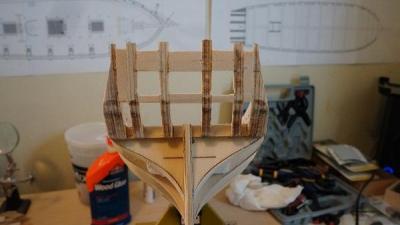
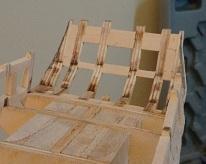
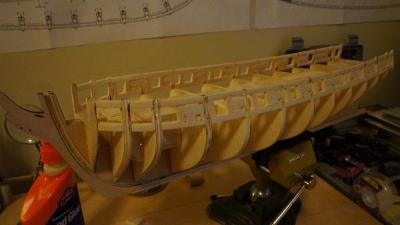
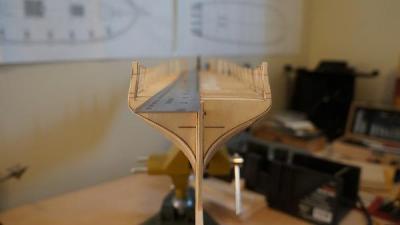
Part 4. Stern framing. This was pretty easy thought step 4. At step five I ran into a little bit of an issue. While trying to establish the correct sill height. If I followed the template to mark my sill tops, but based on my cannon mockup they would have been too high for the cannons to clear. I wasn't sure if I was positioning the template correctly or where the discrepancy came from. In the end I decided to trust the cannon mockup more and move my sills down to accomidate. You can see in the top picture the difference between the middle sill and the two outer gunport sills. Lintels and fillers (including the filler between the B and C posts) were glued into place next. Take you time with Step 7. Using a planking strip to mark the outer stern shape proved a little tricky, but all in all it worked out fine. I roughed out the outer edge with a rotary tool and then completed by hand. I used some balsa scrap to make the stern filler block. Sanding them to shape was something you'll just have to feel your way through. I'm still not sure I sanded the fillers that lay horizontally enough. I figure that will become clear later on. We start planking next!!
-
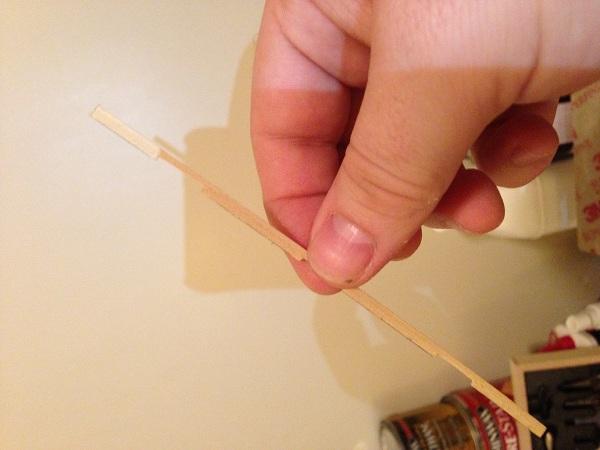
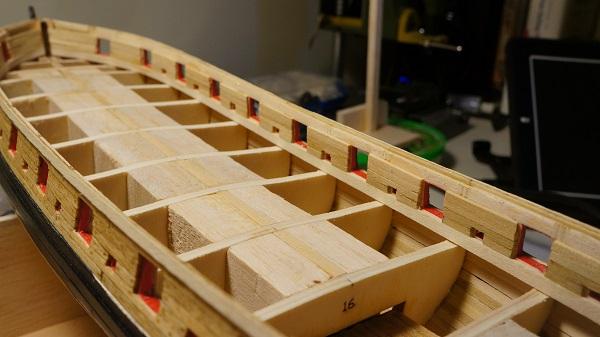
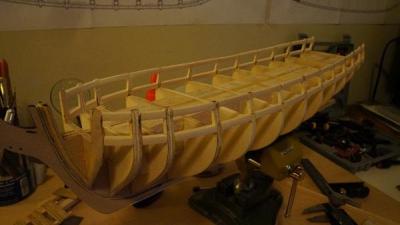
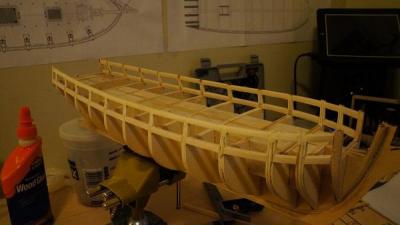
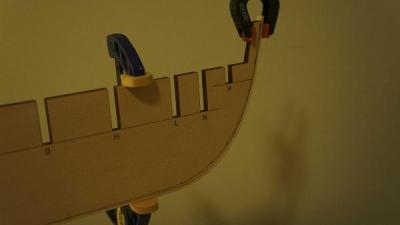
Part III: Gunport and Sweep Framing. Began by cutting out the template and taping it to the hull per intructions, and as per the instructions I fastened a temporary batten to the hull to establish the top of my gun port sills. This was a little tricky. #1 I the brass nails I had tended to split the batten lengthwise, as did the push pins I had. #2 Since there are no real measurements provided and the lines provided should only be considered guidelines I was a little tentative as a newby to know if I was doing it right. (In hindsight I'm still not sure I did as we'll see in the planking section of my build log). Once the line was established I began framing. The yellow frames were done first. Sanding the outboard side of the bulwarks was far less fiddly than doing the inboard. So take your time here and be patient. I was also concious of the fact that I would be sanding the bulwarks extensively during the phase and to take care not to thin the bulwarks too much, especially taking care not too overly sand the outboard side. I did make somewhat of an error here, on the starboard while sanding the bottom sills side I accidentally sanded the slight outward curve of the upper bulkhead completely off. I wasn't sure how this would effect my model down the road...so here's what I did to remedy the problem. 1. I glued the (upper sills) lintels as as normal. 2. I applied wood filler to the areas between the lintels (this is the area where I sanded too much material away). 3. I sanded to starboard lintels as normal, but not completely. I waited to finish the port side, so I could match the two. In the end this seemed to do the trick. The rest of the framing went fine. I did the green the red then the blue port. If I were to do it again I would use an 1/8 X 1/8 strip to use as a temp guide to frame the sweeps around as I've seen other builders do. I would also say, be careful when you have to cut away portions of the bulkheads, I did endup breaking my framing on one side while cutting bulkhead 20. Glue fixed it. After the final sanding to shape I painted the ports with....Golden's Naphthol Red Light, which will be my red for the ship. (looks a little darker in person) Next up...Stern framing.

-
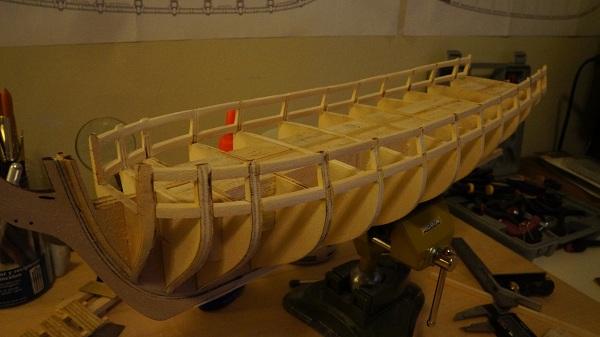
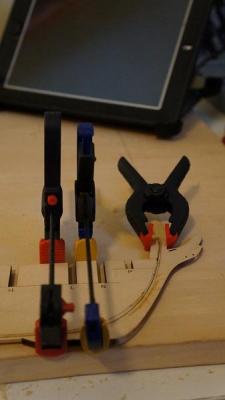
Part 2. Bulkheads and Bulkhead fillers... I took eack of the bulkeads gave them an initial sand to remove a good amount of the laser burns around the edges. At this point I also beveled the fore and aft bulkheads using the dotted lines as a guide, making sure not to bevel completely to the line in order to have some wiggle room for fine tuning later. Once the bulkhead were given their initial bevel it was time to glued them in place. This was done one bulkhead at a time using a square to ensure the bulkheads were true to the former. Once this was complete the bulkhead fillers were cut from balsa scrap and glue into place, it was important to make sure the bulkhead former remained straight during this process. I repeatedly checked using a straght edge and my eyes sighting down the length of the hull. Once this was complete it was time to put the lower deck in place. That meant is was time to choose a finish for the ship. I purchased the following products for this project. Minwax Natural Stain 209, Minwax Golden Oak 210B and Minwax Weathered Oak 270. I also purchased Minwax Pre-Stain Conditioner (Oil Based), Winwax Polyurethane (Satin) and Watco Wipe on Poly (Satin) I tested diffrent stain combinations and finish techniques on some deckinging mockups until I came up with a finish I liked. After reading build logs and discussion on this forum as well a some woodworking forums this is the process that worked best for me: . 1. Sand deck till smooth, wipe clean. 2. Apply quick coat of Wipe on Poly, let dry. 3. Apply two coats of Pre-Staind conditioner. Let Dry and sand with 320 grit in between coats. 4. No more that two hours after second coat of Pre-Stain, apply first coat of 50/50 Natural/Golden Oak mix, let sit for 30 mins and wipe. 5. Let dry for at least 2 more hours and sand with 320 Grit. Wipe clean and apply second coat of stain. Let sit for 30 mins and wipe. Let Dry overnight. 6. Apply two coats of Minwax polyurethane. Let dry and sand with 320 grit in between coats. Lastly I faired the hull, sanding as if it was a solid hull. This was more difficult on the inner bulwark area than on the outside of the hull. I used a planking strip to check for good contact with the bulkhead edges and a no bulges or dips the length of the strip.

-
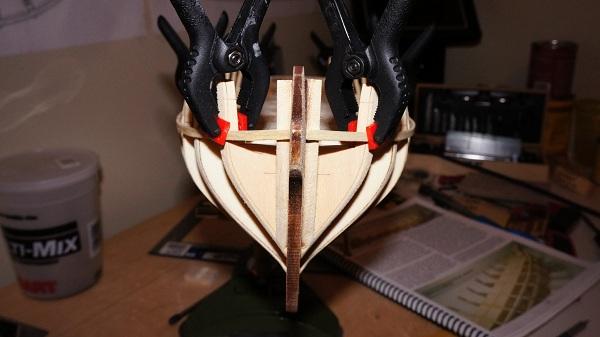
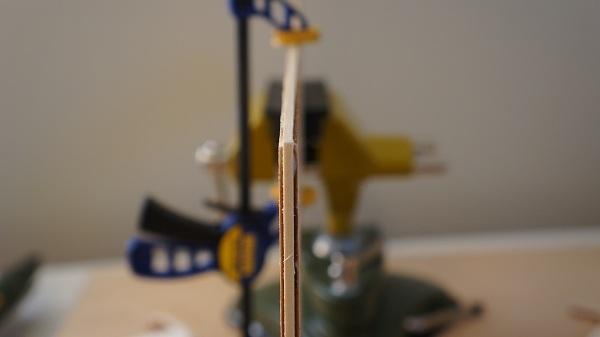
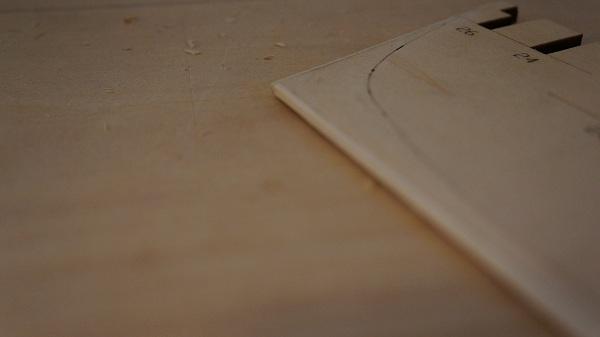
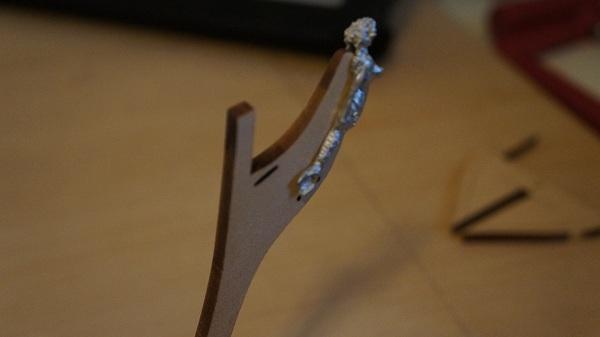
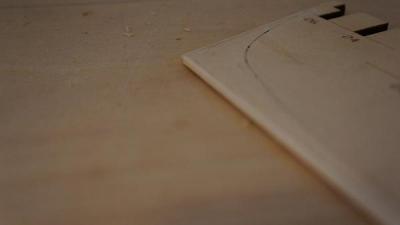
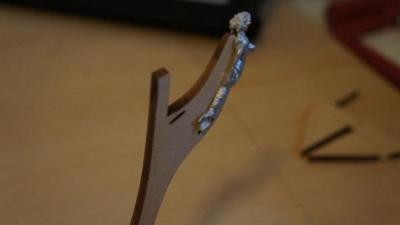
After doing a quick inventory of the kit everything looked to be included (I later notcied I was mssing the lasercut sheet that includes the transom, I have since sent an email to model-expo, no response yet). I cut out the bulkhead former and the bulkeads and tested their fit to each other. After locating a 3/32' X 1/16" strip I allowed it to soak for ten minutes and a pre-formed it to the bulkead former. When the rabbit strip was dried it was glued to the keel. I included a picture of how it looked after glueing. After the glue dried it was time to carve the bearding line. This was a little stressful because you only get one bulkhead former. But I just took my time, using a combination of an X-acto with chisel blabe and a Proxxon micro sander and I think it came out OK. Once this was done I sanded to Stem Knee. I located the figurehead in the kit and used it to judge how much of a taper was required. With the stem knee complete it was time to glue the keel to the rabbit. Next up Bulkheads and Bulkhead fillers.

-
Hi every one and welcome to my Modelshipways USS Syren Kit build log. (This is a re-post of my original log posted last week and may differ somwhat from that original posting) I purchased this kit from Piel Craftsmen of Newburyport, MA. Bill over there is great to deal with and the purchase experience was a pleasure. This will be my first attempt at modeling a model ship. While the Syren is a pretty complex ship for a beginner, I felt that the excellent practicum included with the kit by Chuck would be a great help and make the kit approachable for even a beginner as long as I take my time. (Which I am finding difficult, because as I progress I become more an more anxious to feel the satisfaction that comes with successfully completing each step). As you view my build log I encourange anyone to chime in when they see something I could be doing better or just to provide some freindly advice. A word of advice of my own...write your log in another word processing program (like Word or Text Editor) and cut and paste it into the forum's editor when you're done...this will save you a ton of extra work in the event that you lose connectivity mid-post or experience a page expire/timeout. Also you'll have a record of your work in the event there's ever an issue with the site. EDIT: I thought it might be a good idea to list some of the tools I found essential to the build as I encounter them here: 1. A good vise with a suction base and swivel head. 2. A Mitre Box. (I used X-acto's mitre box. but for cutting the fillers and larger pieces a large on may be useful) 3. Calipers!! I used a digital set on I got on Amazon cheap. 4. Good metal straight edge (large and small) 5. Clamps (of all types and sizes, can't have enough) 6. Good brushes of all sizes. I use a synthetic for applying wood glue as well. Just soak in apple cider vinegar between uses to keep clean. 7. A small square with a level bulb. Empire Level E255 is what I use. 8. Graduated cups for mixing stains at measured ratios (so you can repeat the look). Harware stores have them in the paint section. 9. Good set of needle files. I use an X-acto 73610 set that has several small files with different cross-sections (Flat, Rounded, Square etc) 10. A good rotary tool. I have a Dremel and a Smaller Proxxon. Use the smaller one more. 11. A small micro or pen sander, I use a Proxxon 28594 here and it has save TONS of time. The paper wears out quick though. 12. A good sanding block 13. Sandpaper: 80, 110 and 320 grits at a minimum. 14. Wood Filler. I use Zar Neutral. Wood not included with kit 15. 5/32 x 1/32 wood strips (at least 2 for upper whales) 16/ 12 x 6 x 1/16 Basswood sheet for bulwark rails. 17. Balsa for bulkhead filler blocks. Thanks for reading.... Next Up....Bulkhead Former, Rabbit and Keel.