


The Gimps Chimp
-
Posts
159 -
Joined
-
Last visited
Content Type
Profiles
Forums
Gallery
Events
Everything posted by The Gimps Chimp
-
 Looks like you could do with more filler. Be careful you don't sand too much and break through the wood. Chimp
 -
I would say that's looking good! When it comes to sanding just be careful and don't be too aggressive. Chimp
-
I think the one I would try and follow is this one: http://modelshipworldforum.com/resources/Framing_and_Planking/plankingprojectbeginners.pdf To be honest, if you mess up the first planking it's not too much of an issue, as long as you can fill and sand to a smooth finish. However, it would make sense to try and master the skill if you can. The second planking in this kit is very thin and forgiving so as long as you can cut it to shape, it will fit and look okay. Again it would be better to try and master the skill but I think with this kit you can't go far wrong. Chimp.
-
How about mixing a new colour from those you have? When I did mine I went with a dark blue/green. I think I should have gone a little lighter though. Chimp
-
Build is looking good. Looking forward to following your progress Chimp
-
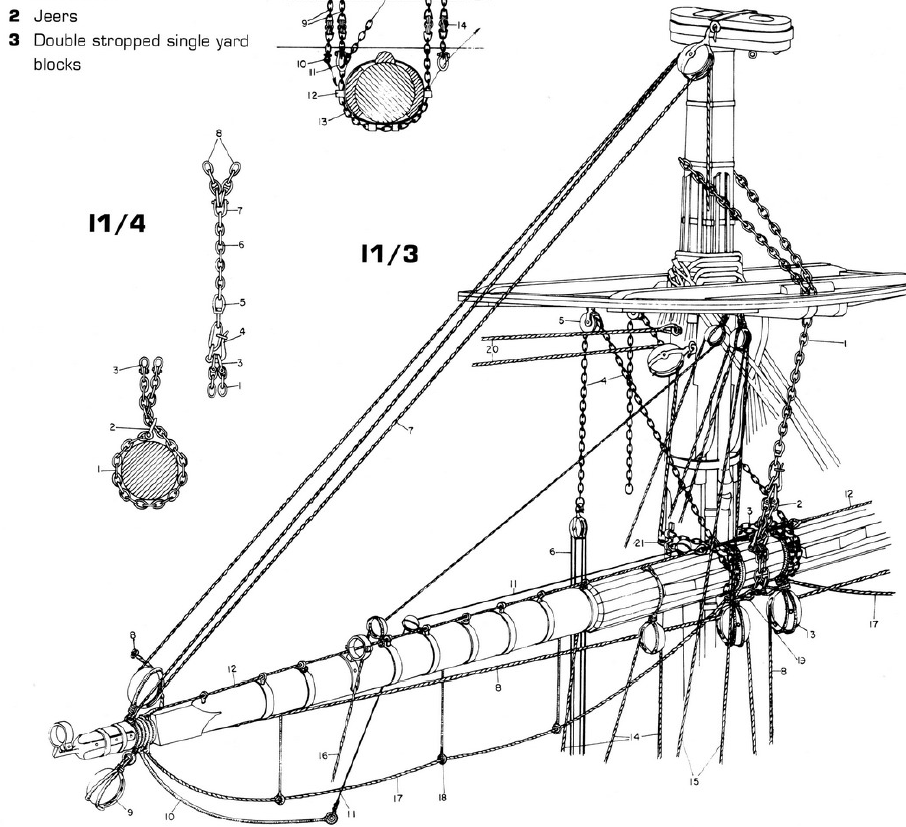
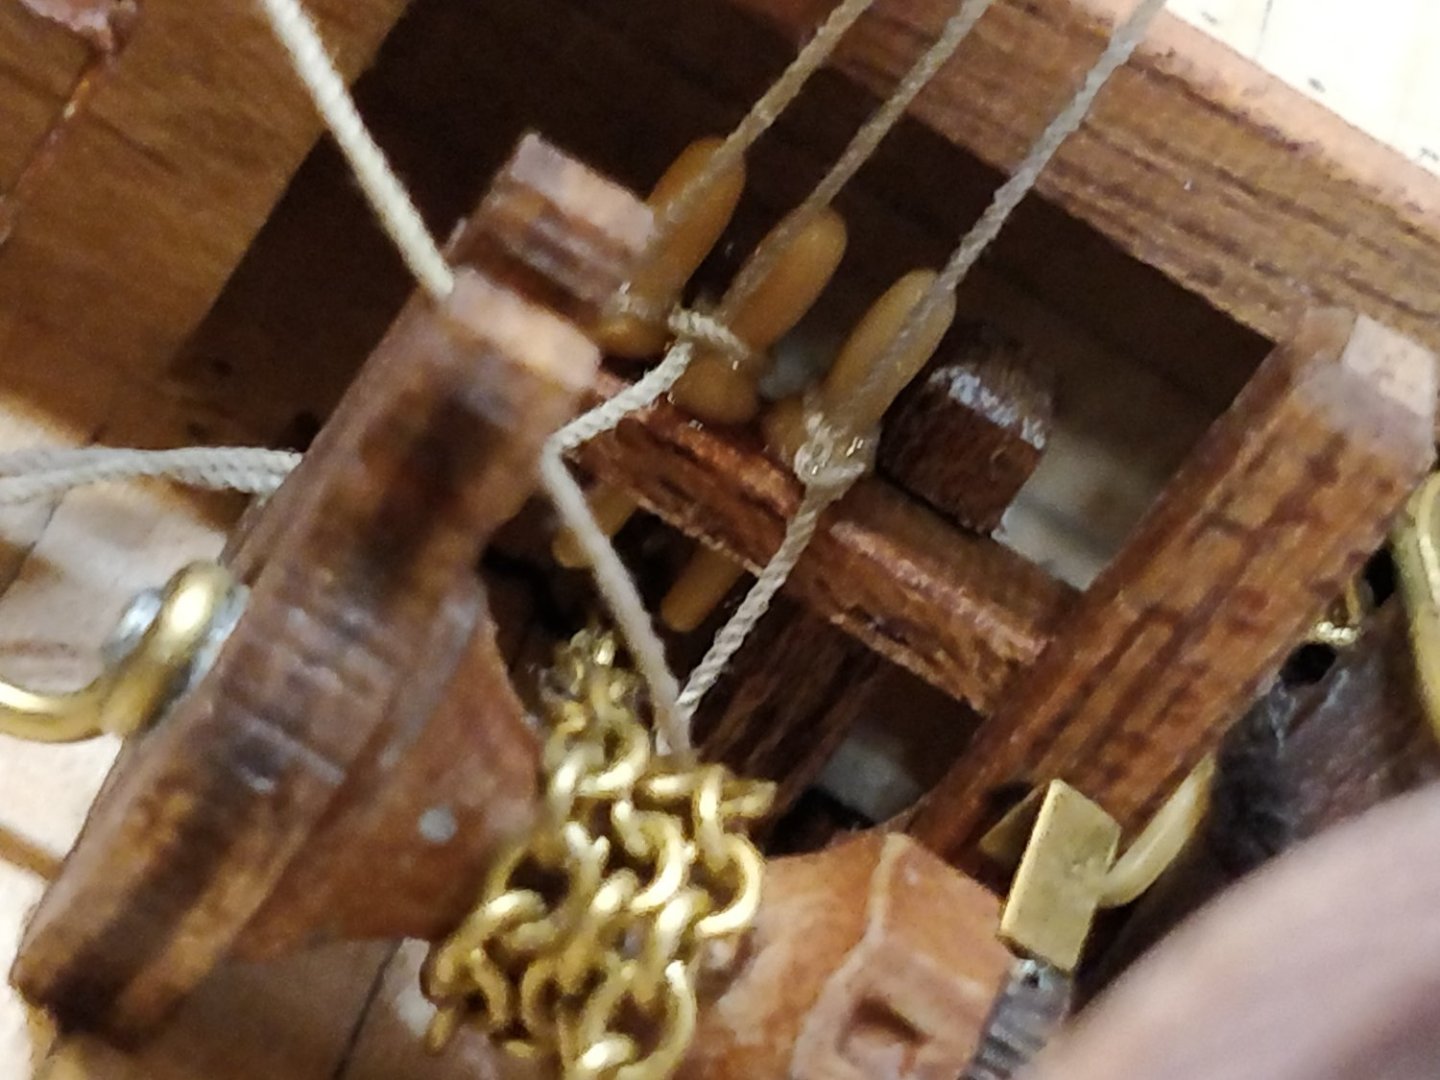
Hi Stauf, This is a difficult one to answer as everyone will have a different opinion. All models will differ from the actual ship they portray to some degree. Looking at the model from a distance I would say it's a reasonable representation of the real ship. The closer you get and the more detail you study it becomes clear there are inaccuracies. Some of these will be down to cost and some will be down to practicalities of modelling. One of the first items you come across in the build are the brass etched doors, which look okay but some people choose to make them more accurately from wood. The deck parts again are generally okay but maybe don't have the precision of detail. As already mentioned, the rigging of the cannons is massively oversimplified. Again these issues can be rectified during the build if you wish. I think the most inaccurate area are the masts and rigging which have again been over simplified. To be honest I can see why that is. Looking at the AOTS the rigging is very complex and I for one wouldn't have been able to finish the build if it was accurately modelled. In the AOTS there are many chains used whereas in the kit rope is used for everything. Here is a good example from my build: I'm not sure giving the accuracy of the model a percentage is meaningful but if pushed I would give it 90% to 95%. You also need to think about the marketing aspects of the supplier. I would say these kits are not at the high end of quality and are intended mainly for people to make and have an impressive model to display. If you want high accuracy you can spend the time and improve the 'Out of the box' product, or maybe even scratch build. I for one, used the kit as a learning experience and was happy that many aspects had been simplified, otherwise I would never have finished it. Having completed my build I was motivated to improve the quality of my workmanship on my next build. Had it been unfinished I wouldn't have considered tackling another ship. Chimp
-
Hi JFMJr, Not sure I fully understand your question when you say the brass wire is a poor fit. I presume you are referring to the 1.5mm brass pin (H5) which acts as a hinge pin for the rudder to rotate. When I fitted mine I crimped the metal band a little so the wire was a close fit. I also added a drop of CA to ensure it remained in place and didn't drop out. I'm struggling to see why/how it could be a poor fit. I guess you could make these pins from wood but I think that would be much harder and I can't see why or how they would be a better fit. If you are referring to fixing the metal band to the rudder then this is done using the metal pins (A). Chimp
-
Good to see you decided to start a build log. Looking at what you've done so far you shouldn't have too many problems with completing this build. I'm sure you'll get plenty of advice and support from everyone here. Regarding the nails, I don't think you'll need them from here. Looking forward to the rest of the build Chimp
-
Hi Sparkov, looking forward to seeing your progress Chimp
- 11 replies
-
- 2
-

-
- victory
- billing boats
- (and 1 more)
-
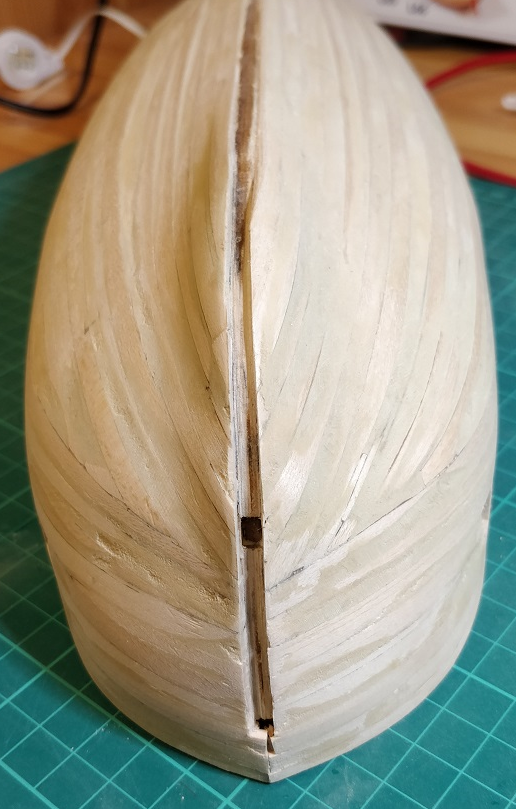
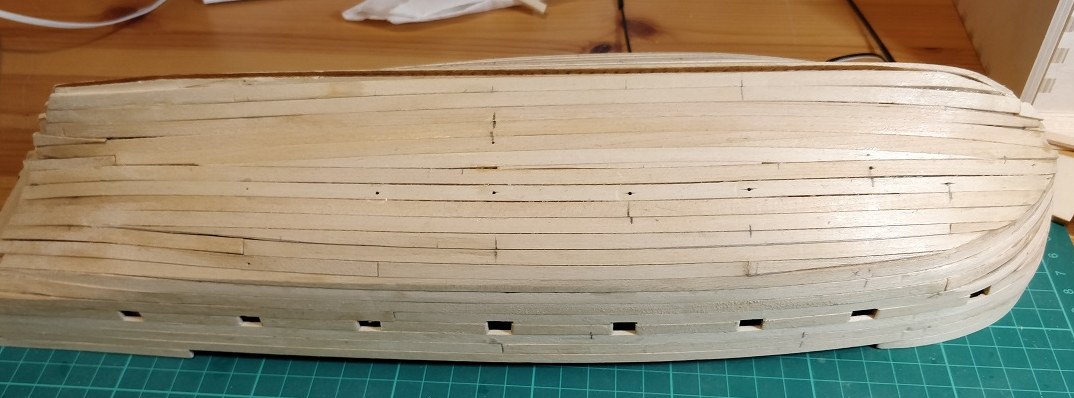
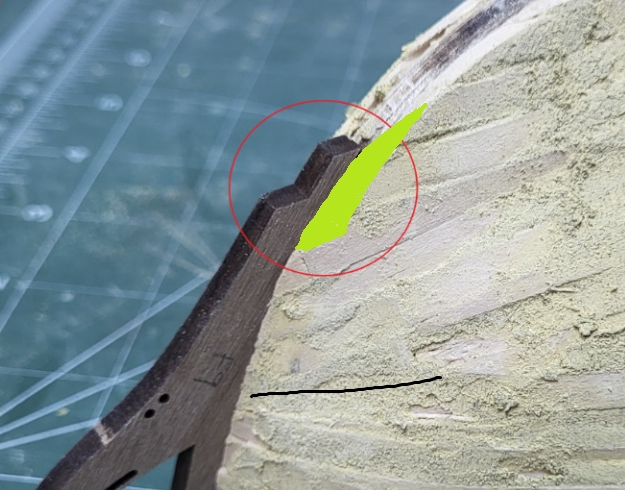
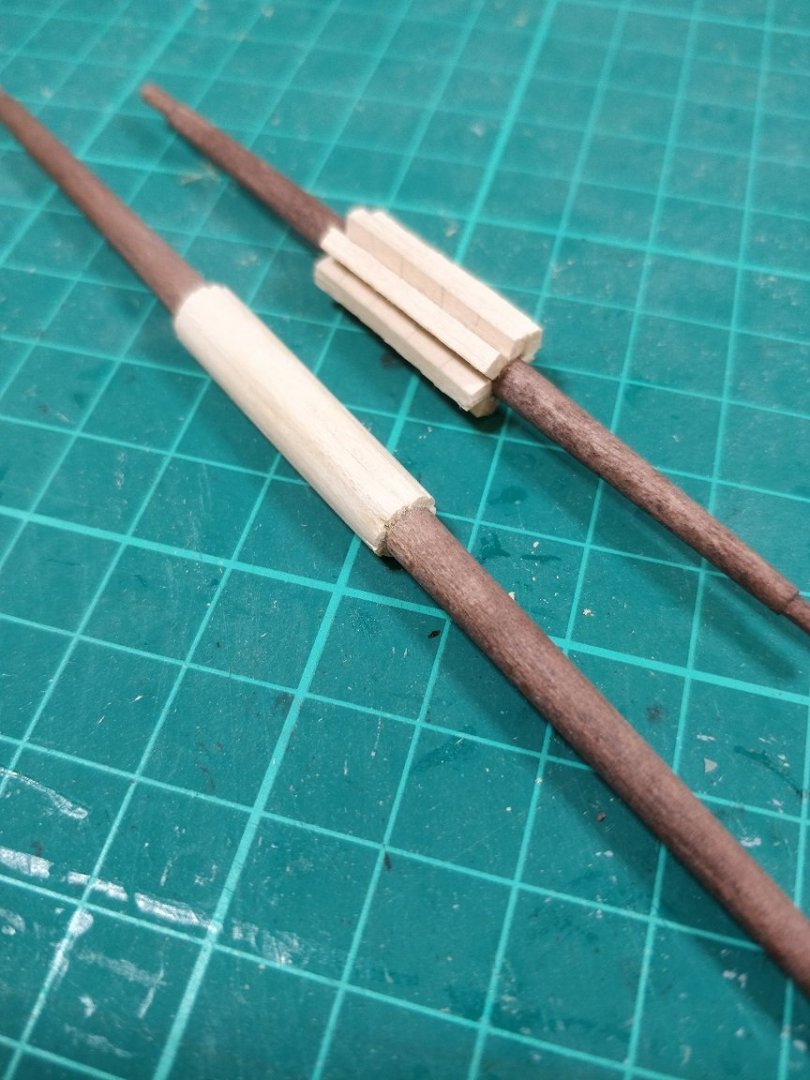
Hi Capella, Looking back at my build it looks like the keel was recessed at the bow but was then level (or even slightly proud) along the bottom. See photos: To be honest, I don't think it really matters as long as the keel is firmly attached to the false keel and the second planking is fitted up to it. The important issue is that the hull is smooth along it's length. So where I said about extending the first planking or using filler where it steps (where you circled), this needs to be smooth. You could build up the shorter planks with wood or filler, just a single piece of scrap wood is required: Or you could smooth down the longer planks to match the shorter ones. It doesn't really matter which way you choose Remember, the first planking is just a base for the second planking. It doesn't need to look nice but it's shape and profile is important. Chimp
-
Hi Capella, when I fitted my keel I can remember it was recessed into the planking at the bow. Looking at where you've circled the photo above you may need to extend the first planking a little (or use filler). Chimp
-
Hi Capella, It's great to see you back working on the Beagle. Your photos in your last post look very similar to my build. At this point I was worried that it didn't look very good and was concerned as to how well the second planking would sit and how it would look. As it turned out I had nothing to worry about, once it's filled and sanded it's all good. Just be careful when sanding you don't go too far and sand through to the inside . Patrick B has some useful advice above and I too had the intention of doing the second planking 'properly' However, I ended up not following any advice and just did my own thing and it ended up looking okay. This is a link to that stage in my build log: Have a look at posts #55 and #61 My intension is that on my next build (HMS Granado) I'll do the second planking 'properly' and follow the technique detailed in this document: plankingprojectbeginners.pdf Looking forward to seeing your build progress Chimp
-
Hi Tom, I'm sure that cradle will serve you well for this and future builds. I would love to take credit for the design of the cradle but have to admit I got the idea from the late Hubert Sicard and his website "Wooden Ship Modelling for Dummies". Chimp
- 98 replies
-
- 2
-
-

-
- Endurance
- Shackleton
- (and 1 more)
-
Here are some notes and thoughts about my build and the OcCre Beagle kit. After I had finished my previous kit HMS Ballahoo (Caldercraft), which was my first ship build, I started looking around at what to build next. To some extent I was overwhelmed by the choice available on the market. It therefore needed to be narrowed down to something which was within my capabilities. Despite feeling very confident after completing Ballahoo I was conscious that I didn't want to make too big a leap forward and over-stretch myself. Therefore, I restricted myself to looking within a certain price range, which was still toward the lower end (max £150/$185). I considered many kits but eventually settled on the Beagle for a number of reasons. First of all HMS Beagle was a very historically significant ship and this would be a good way of finding out more about her. OcCre appeared to offer good value for money as a supplier and there were also good resources to help the build, OcCre's 130 videos of the entire build plus the AOTS book. After ordering and receiving the kit I checked the parts and discovered the flags were missing. I contacted OcCre about this and they immediately dispatched the missing parts without any issue. This would indicate that their after-sales service is very good. Unfortunately, after I received the missing parts I found the original parts within the kit placed under other parts. The build has taken me nearly 3 years to complete so I'm not a fast builder, but as someone rightly commented "It's not a race". Generally, the quality of the kit is good/reasonable. Along the way I have had some issues with the kit, luckily nothing major. The main issue was the instructions on how to mount the fore channels, which supports the dead eyes for the fore mast. The instructions show the channels mounted the wrong way around (3 dead eyes followed by 2 as opposed to 2 followed by 3). Luckily this has been picked up in other build logs so I was alerted to it before I also made the mistake. It would be good if OcCre would amend their instructions or maybe just add an addendum note in the kit. The kit material quality and quantity were generally fine. Timber for first and second planking, I had enough to build two models. Other timber and some brass wire I would have run short of if I hadn't been very careful. My biggest gripe was the supplied thread for the rigging. In my opinion I would say it was hopeless and I refused to use it. The thread was 'hairy' and in my opinion would ruin the model. In a way this was a blessing for me as I then acquired a ropewalk and made my own rope using Gutermann thread, which was far superior. This will now carry forward onto future models. I've not been aware of others complaining about the supplied thread so it might be that I had a particularly bad batch or maybe OcCre have improved their supply. (or maybe I'm just too fussy). The instructions for the kit were frustrating at times as there are multiple A3 sheets covering different areas, part identification, hull assembly, mast assembly, and rigging. I don't have much space where I build my models and I always had problems finding the right page on the right set of instructions and ended up have to flick between different sheets time and time again. Then I would jump over to the video instructions on YouTube and check with the AOTS for the Beagle. There did seem to be much cross referencing between different parts of the instructions. By the time I had finished the build I knew where the different information was and it became a lot easier. I know it sounds like a minor point and a failing on my part but when you're struggling with a particular part of the build the last thing you want is to be sent on a wild goose chase to find a piece of information. I would say the scaling of some parts and accuracy of others (e.g. belaying pins, mast metalwork) may not be as accurately modelled as they could be but I guess this is a compromise for many reasons. In hindsight I don't think I should have chosen the Beagle as my second build mainly because there is a lot of rigging, being a three masted ship and this was something which could have been too overwhelming. Luckily my attitude of "As I had paid for it then I was going to build it" saw me through. I'm sure this amount of rigging wouldn't be a problem for others. Generally, I was happy with the kit and how the build progressed. Yes, the kit quality could have been better but it's very good value for money. I've used the build as a learning process to try and improve my skills and in some way, not having perfect parts has made me think about how things could be improved. The supplied thread/rope and my adventure into making my own rope is a good case in point. My final comment is about this build log. At first I was very apprehensive about writing a build log, thinking that my skills weren't good enough to showcase and it would be embarrassing to demonstrate my lack of skill. Clearly I had no need to worry as nobody is judgmental here and everyone is immensely supportive and encouraging, which is a great motivator. It's also good to get other peoples opinions which broadens your outlook and future approach to issues and can often trigger further research into subjects. I would fully encourage anyone starting out in this hobby to start a build log, you will find it so rewarding. I will definitely be writing a build log for my next build. And finally, to anyone who has bothered to read this far, many thanks for your help and support during the build and I hope to see you on the next one . Best regards Chimp
- 144 replies
-
- 13
-
-
Hi Cathead, It was good to have you along for the whole journey . Many thanks for your interest, 'likes', kind words and encouragement along the way. Hope to have you along on my next one . Chimp
-
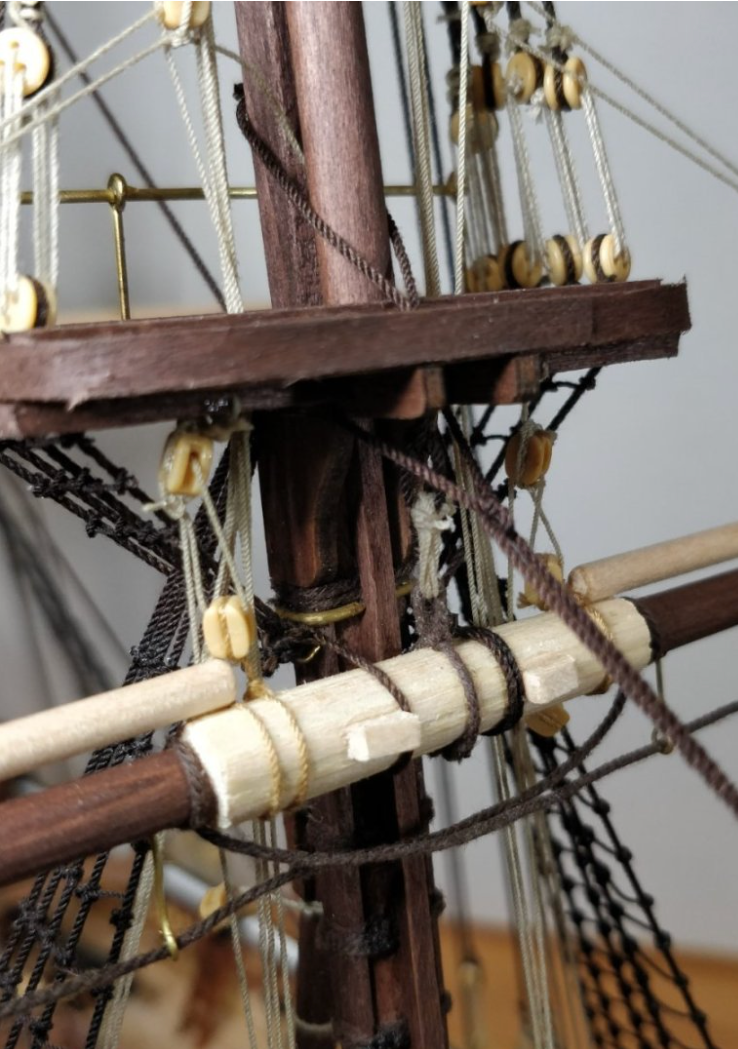
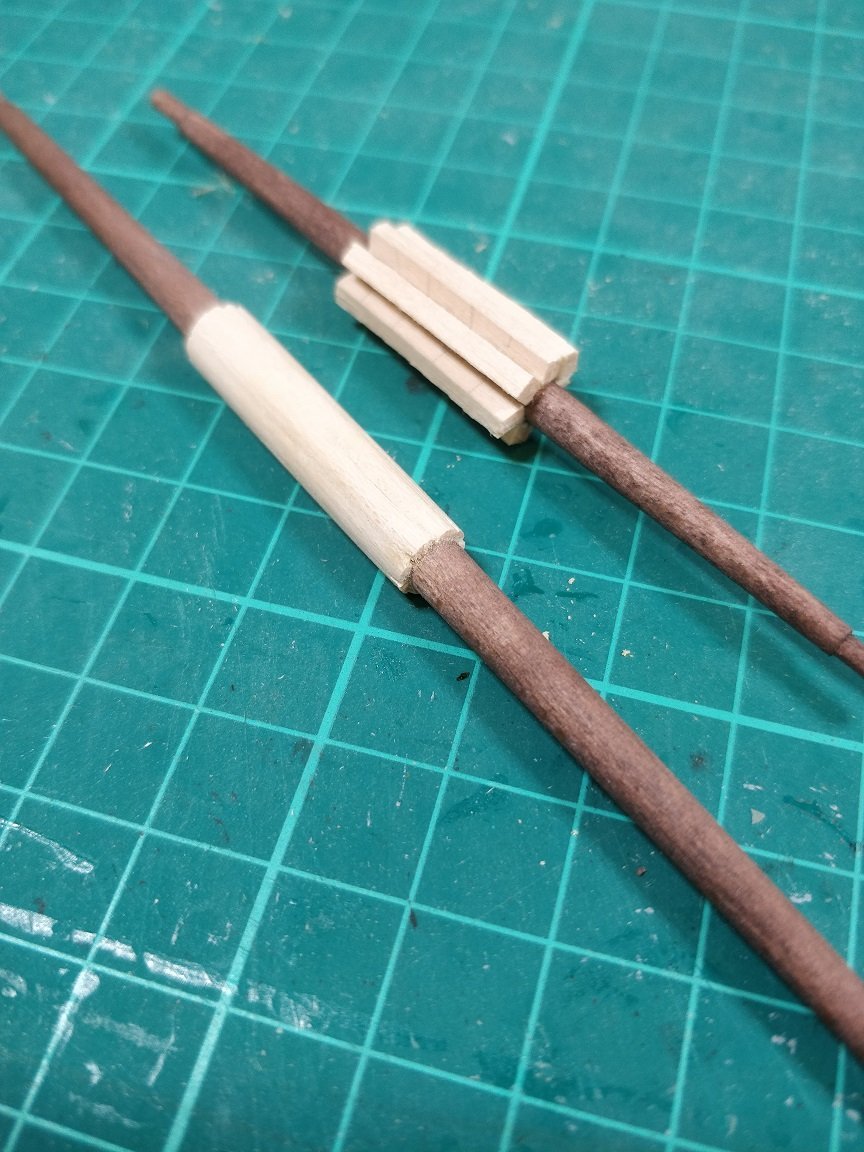
Hi SHJ, Many thanks for your comments. There are many things with which I'm not 100% at ease with on the model and think I could have done better, had I put in more effort. However, this has been a learning curve for me and I've gained an enormous amount of knowledge and experience (and pleasure) from the build. Given the quality of the kit, and my inexperience at this hobby, I understand why it's not up to the standard of many ships on this forum, but I'm fine with that. If nothing else it gives me something to aspire to. You're correct when you say you think the thickened sling section on the mast is too 'fat'. The OcCre instructions indicate using 1mm x 3mm lime wood for this. However, during my build I was running short of that for some reason and used 5mm x 2.3mm from what was surplus from the first planking. This was then cut in half, so 2.5mm x 2.3mm. This then made it way too 'fat' and I shaved it down to what I thought looked about right (to the instructions). Looking into it following your comment I realise maybe I should have taken it down further to maybe 0.5mm. The studding sail booms are made from supplied 3mm lime wood dowel. The rings are made from supplied 1mm diameter brass rod. Again, looking further into it you're correct in what you say and these might be oversize. I guess OcCre want to limit the variety of supplied material to keep the cost of their kits down. Regarding the placement of the studding sail booms it appears I didn't follow the instructions. They should be placed 45deg forward of the yard (although not very clear in the instructions). According to the instructions the stirrups for the foot ropes should descend 5.5mm from the yard. On my model I made them 8.5mm, not because I thought that was better but it just happened that way. Again looking further into it, it would appear to me from pictures I've found that 8.5mm x 65 (scale) = 0.552m (21.75 inches) maybe a little short?. I would be interested in what others think. With regards to the deadeyes, unfortunately on this kit the supplied deadeyes were plastic, so not that easy to colour. I believe OcCre now supply wooden deadeyes for this model. Looking into the points you've raised has encouraged me to do further research, albeit to late for this model, but will be useful for my next build . Once again thanks for your comments. Chimp

.jpg.3f2314e7162579ae08a2a6ae2eef9a3d.jpg)
-
Thanks very much for the 'Likes' and kind comments everyone. They are very much appreciated . I feel that now I've finished the Beagle I should sum up my experience of building the kit, which may be useful to others thinking of building this kit. I'll gather my thoughts and post something in the coming days. It's taken nearly two years for me to build so I guess I might have a lot to say! Chimp
-
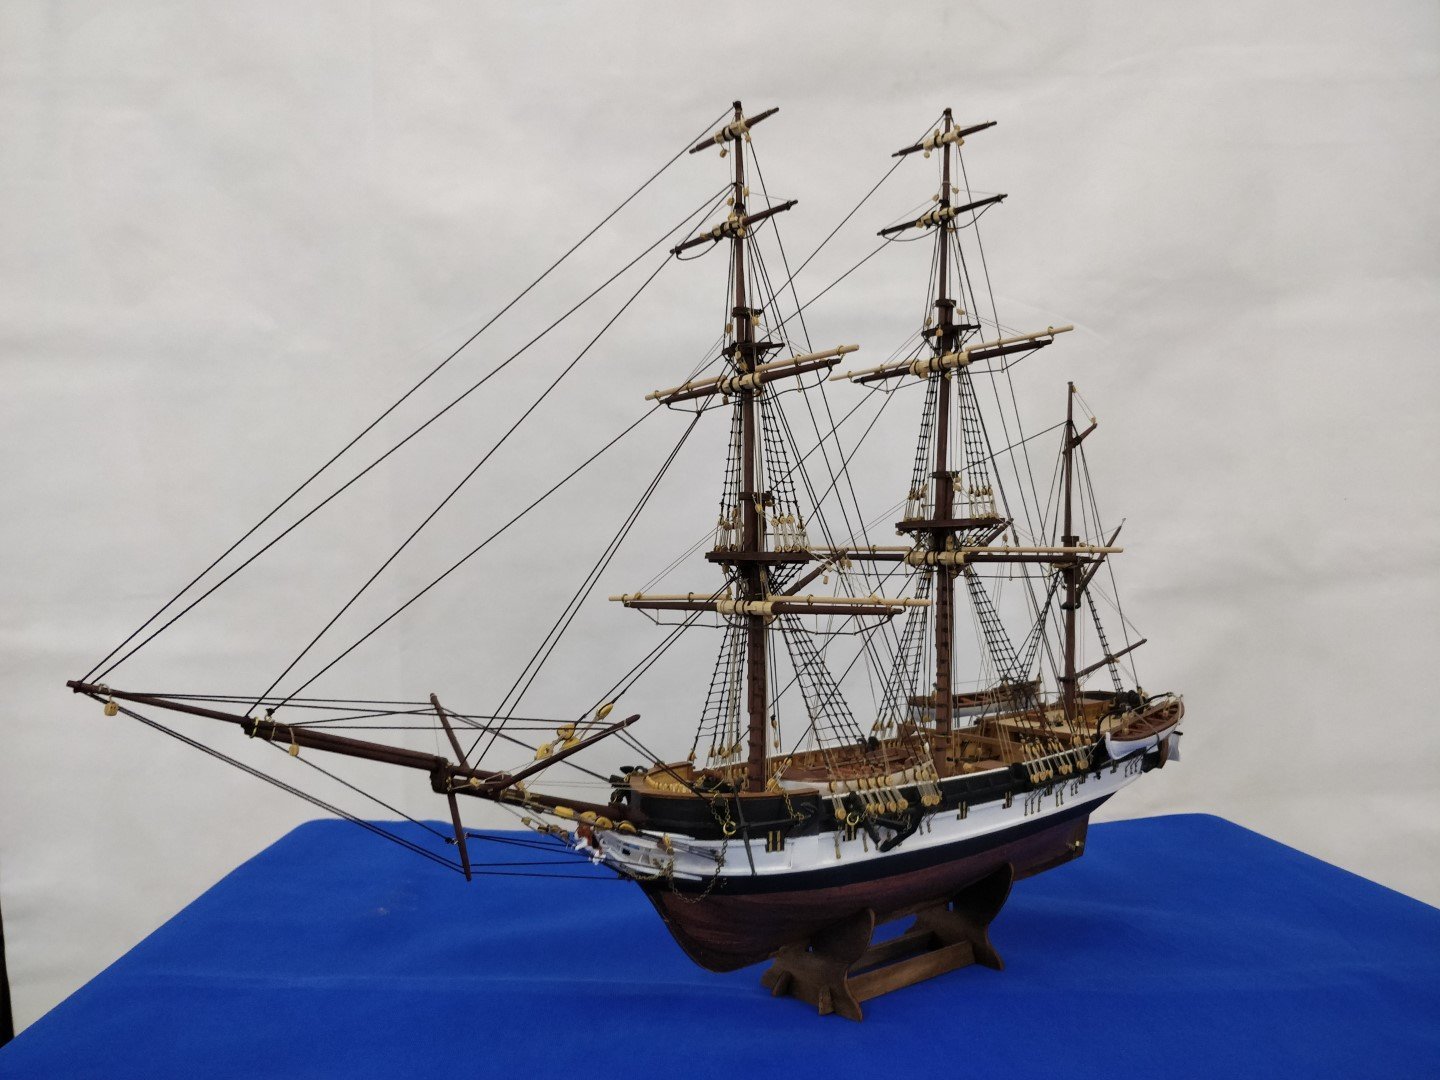
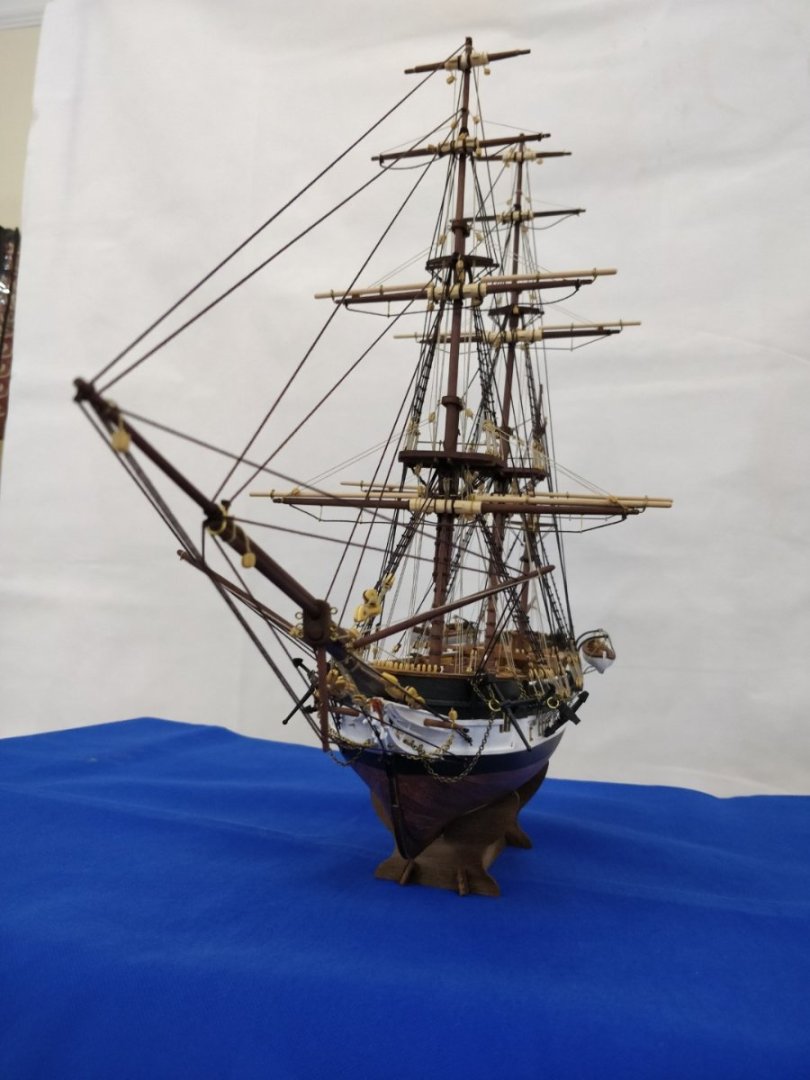
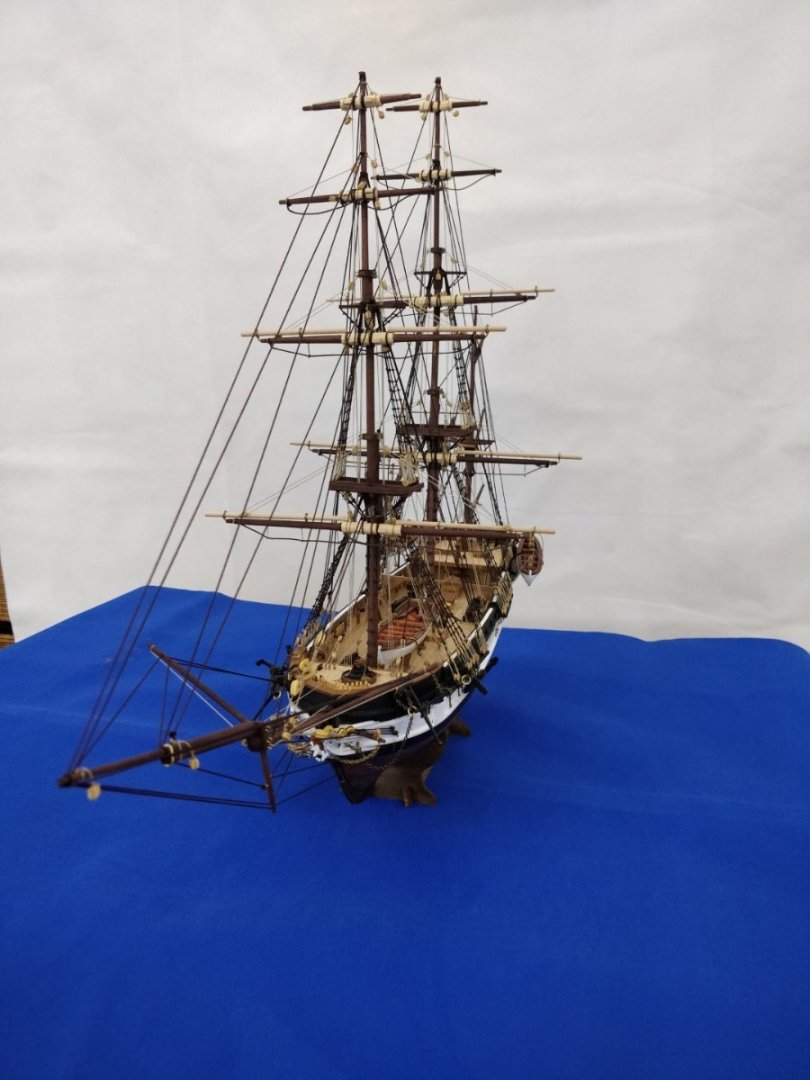
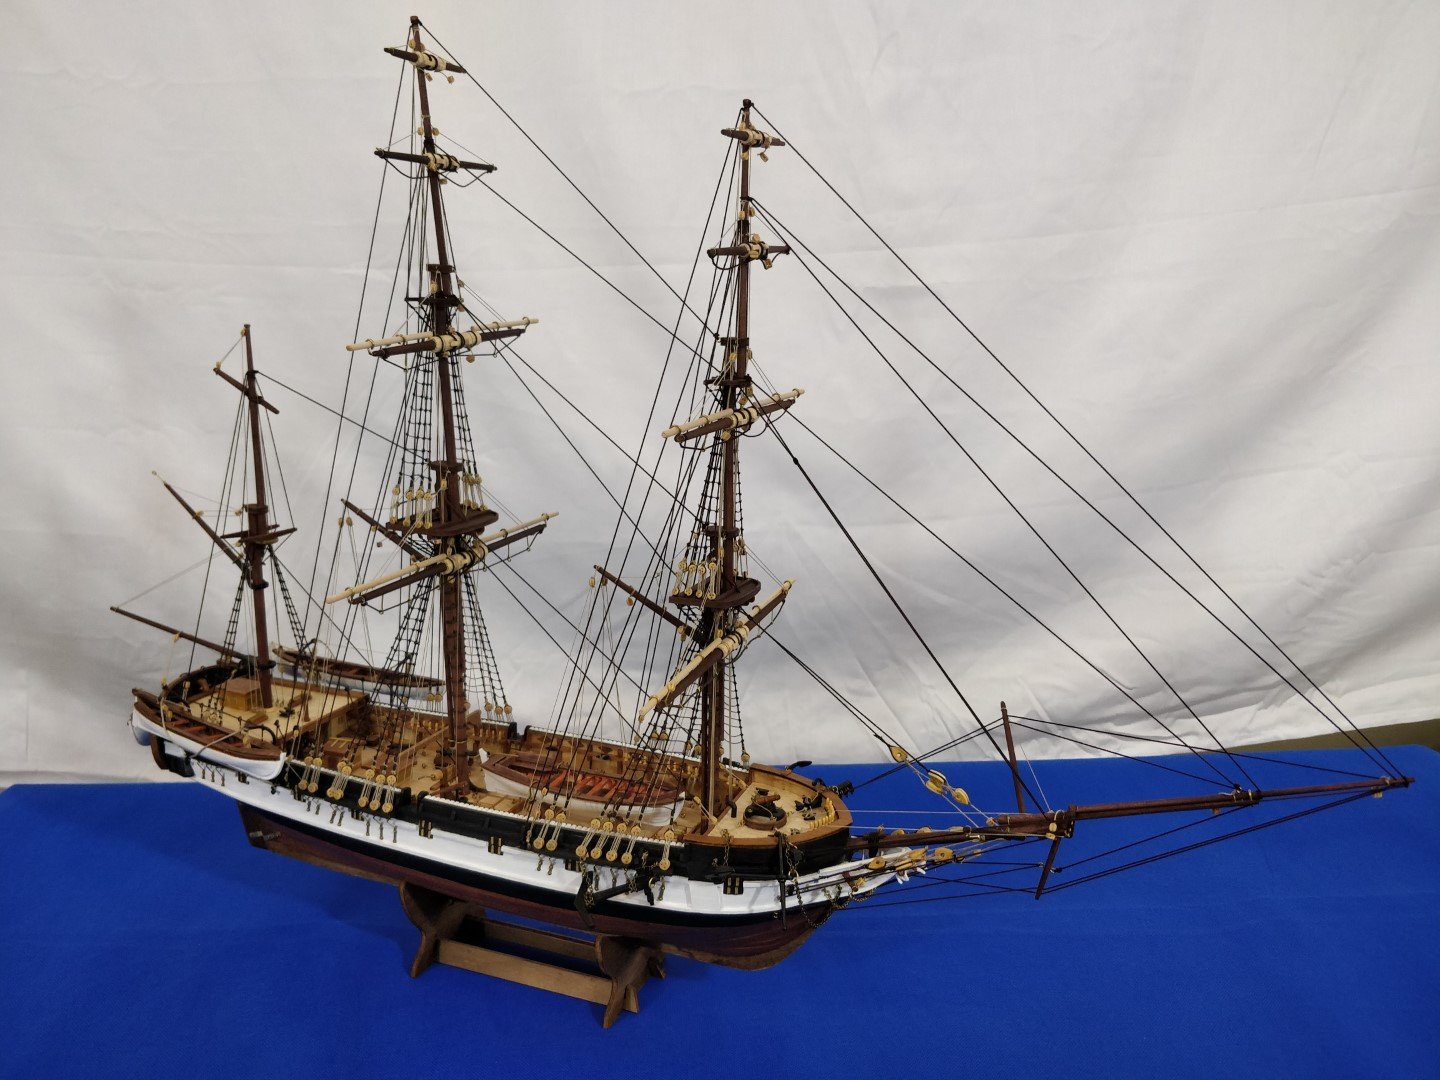
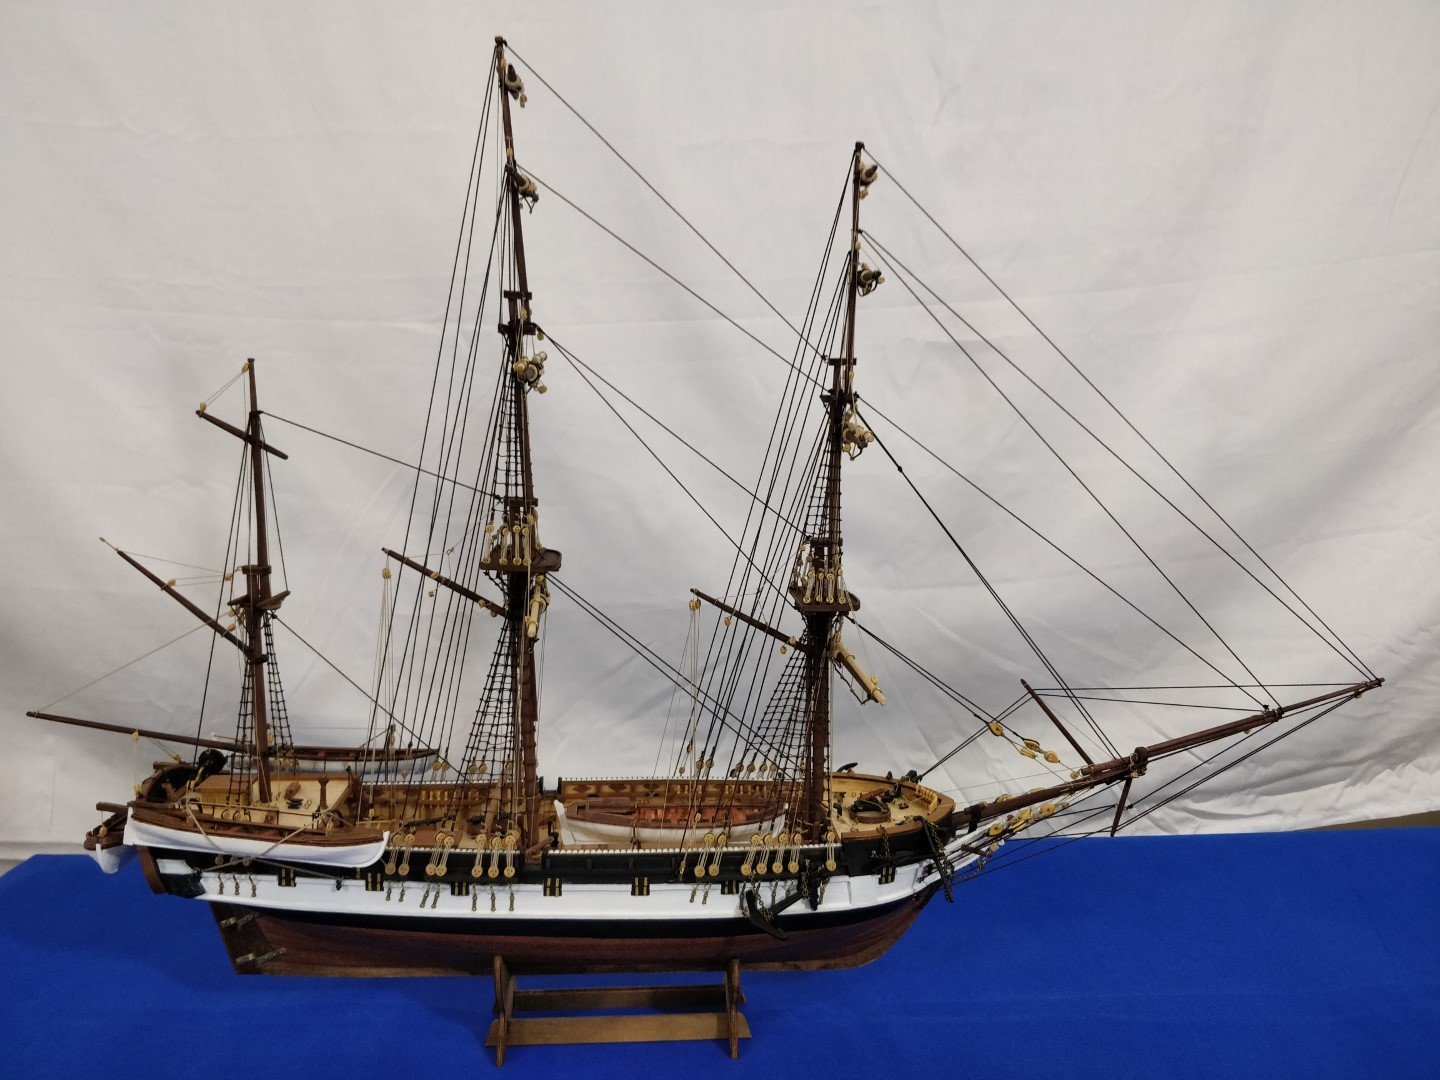
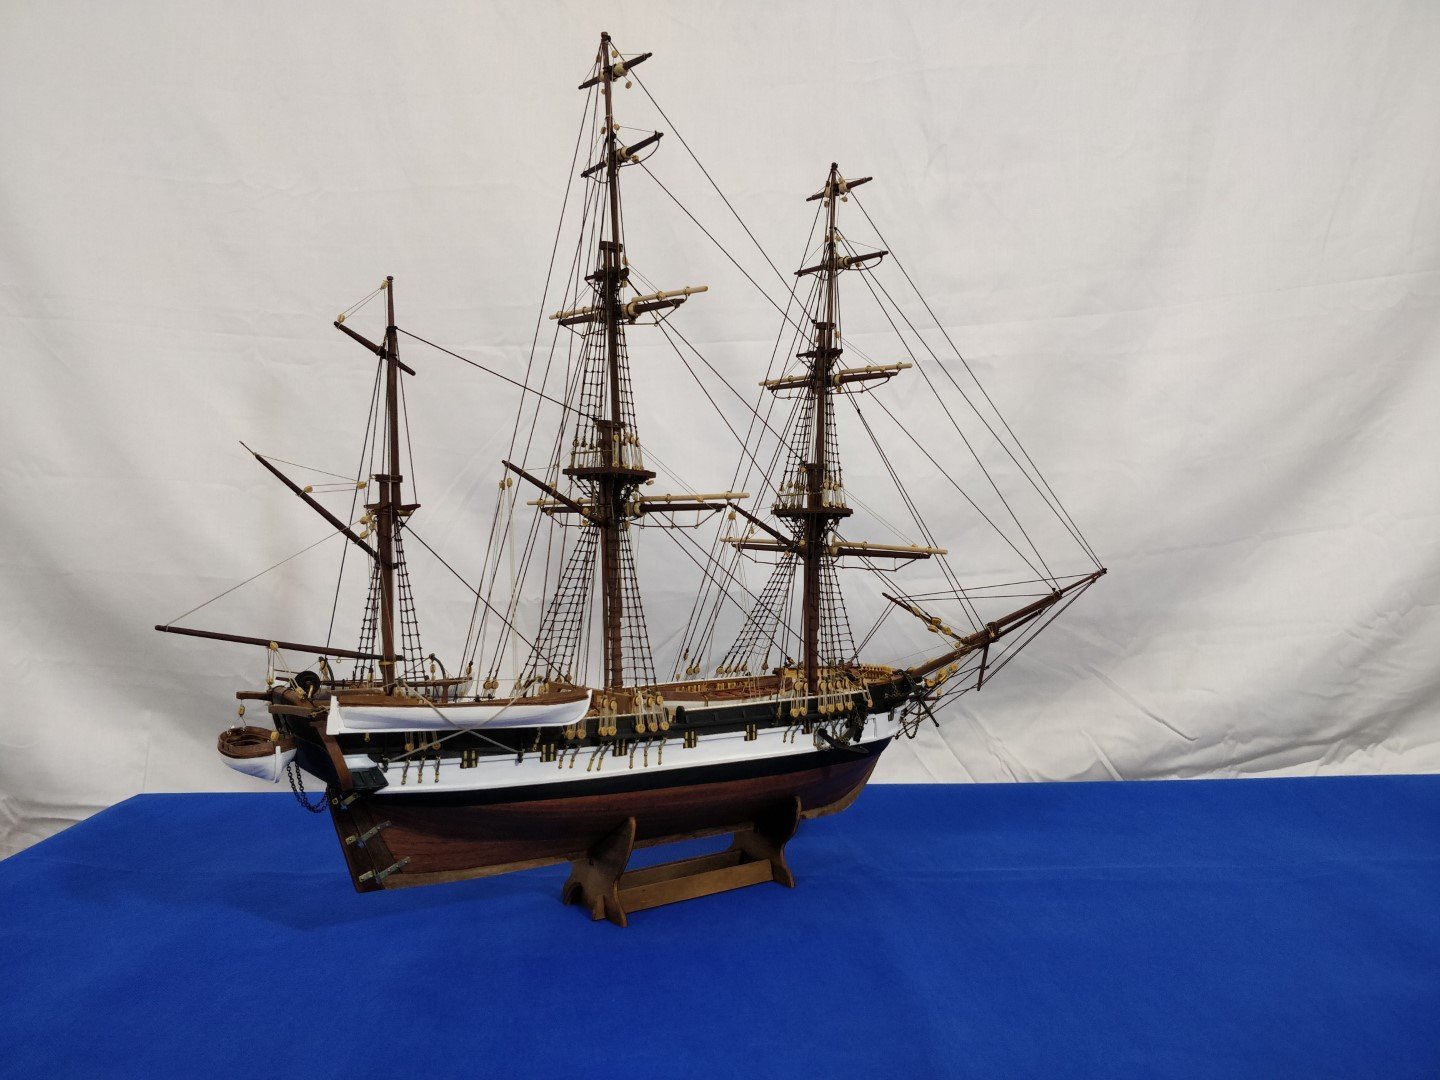
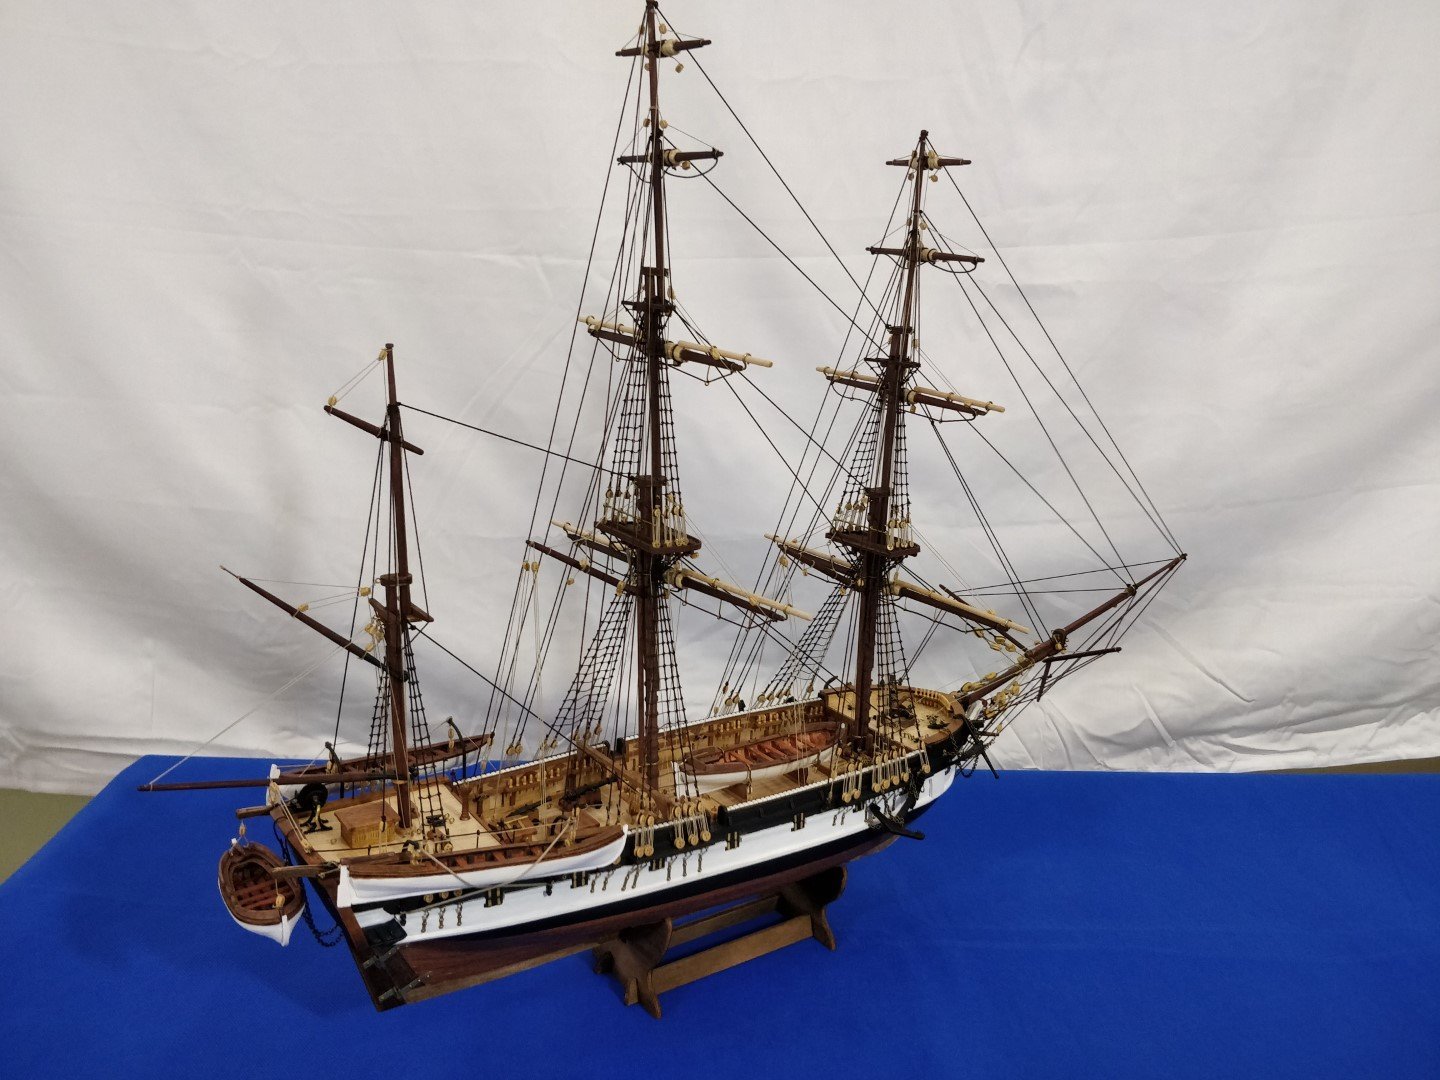
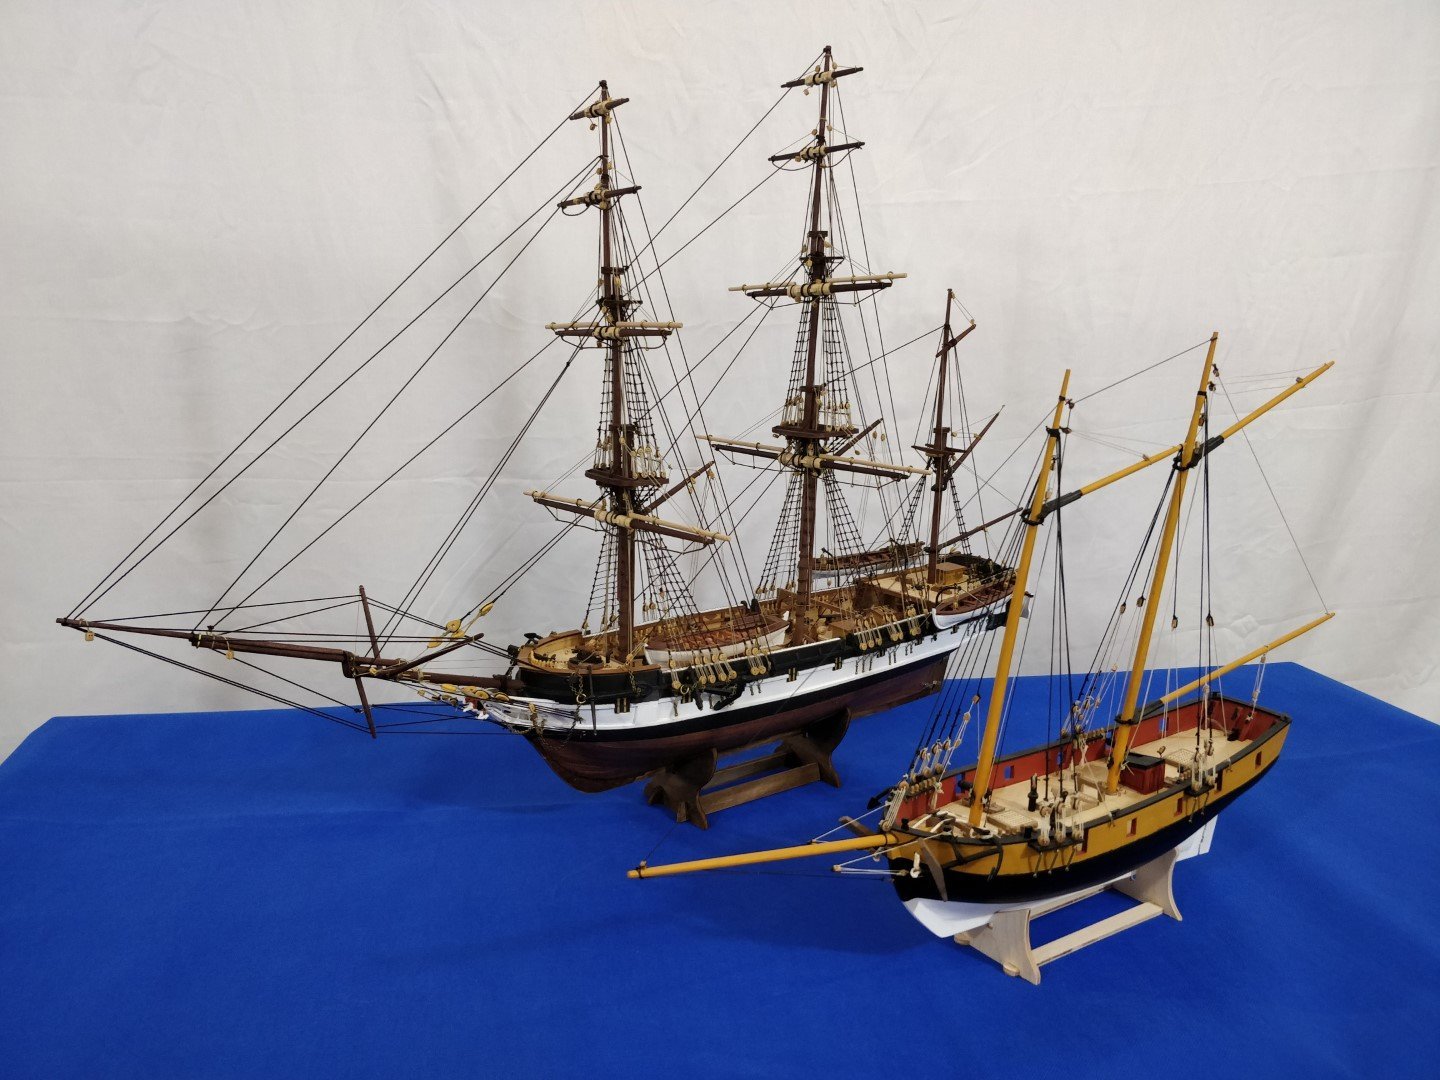
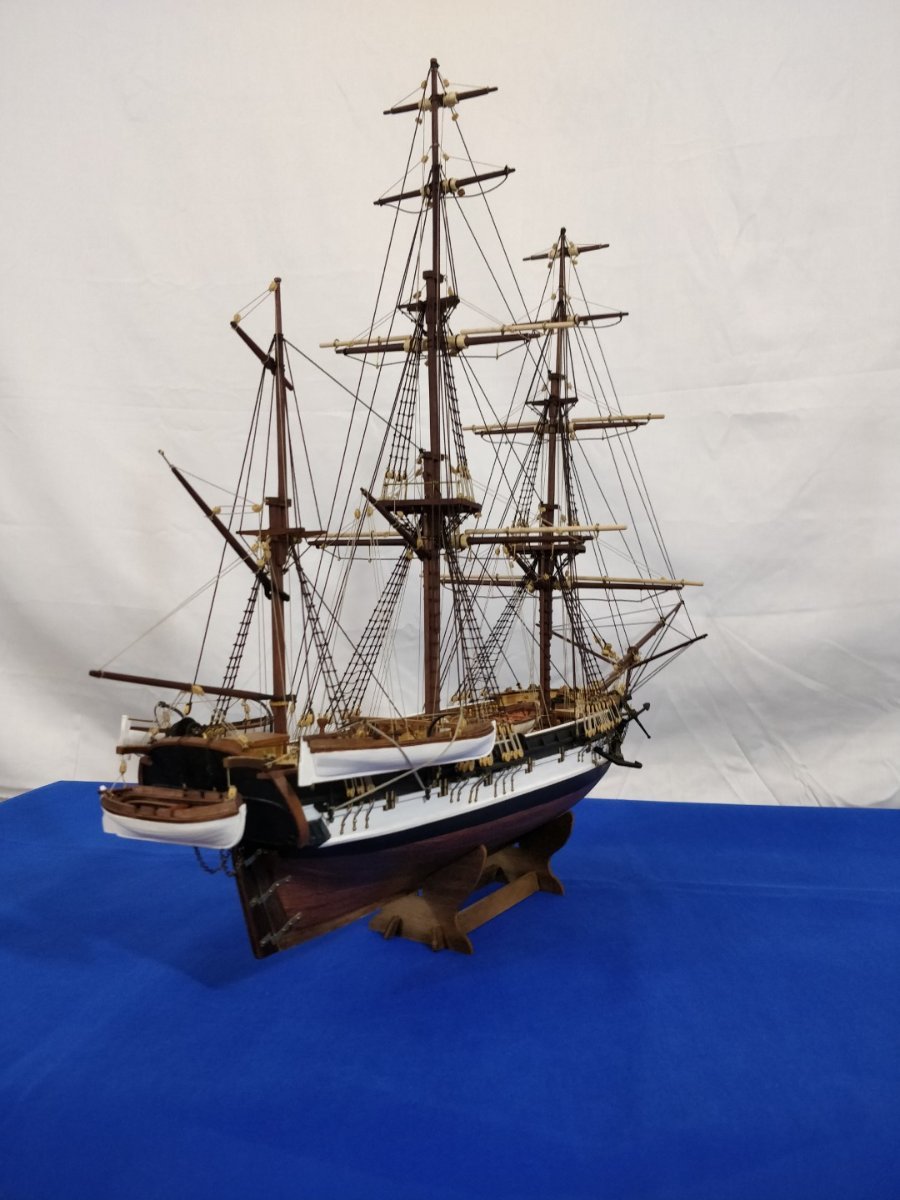
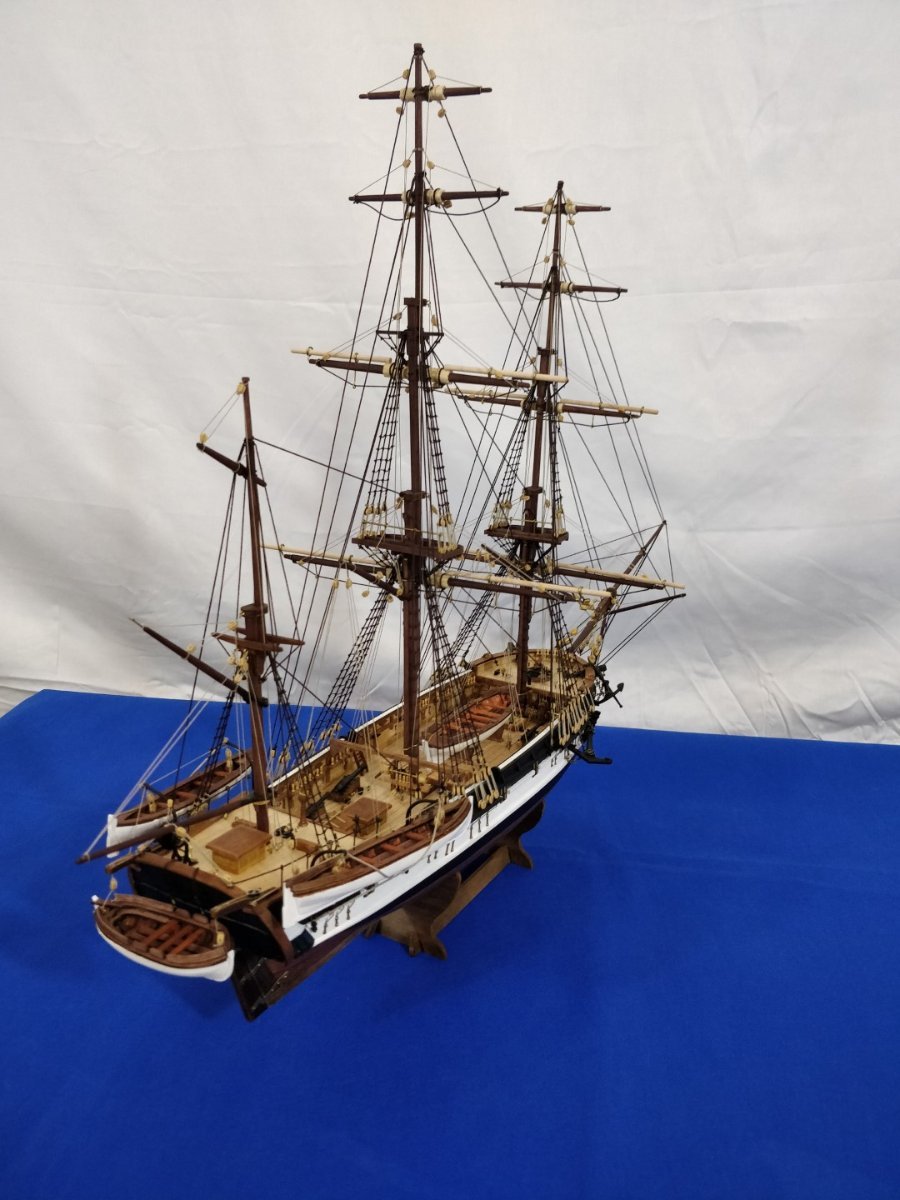
SHE'S FINISHED!!! Finally, after many, many months of work (on and off) she's finished. Here are some photos of the finished article (apologies for the number of photos). And finally one of her alongside my first ship HMS Ballahoo. Now I need to clear my workspace before embarking on my next ship, HMS Granado. A kit which I've owned for some time now but haven't wanted to start until the Beagle was finished. Well, that time is now! Many thanks to all that have followed this log, left comments, given advice, pointed out errors etc, etc... Hope it's been of use. Hope to see you on the next one (hopefully coming soon). Chimp


- 144 replies
-
- 19
-
-

-
In the last few weeks I've made great progress with the rigging. All three masts now have their yards rigged and are fixed in place. I must admit tying off the lower section of the foremast was very difficult as access was near impossible now all the deck fittings are fitted. The belaying pins under the forecastle by the winch were particularly difficult to get to and I ended up tying them off to the top of the pin and not looping underneath but it was the only way I could get them to attach. Apologies for the quality of the photo but it's on max zoom. Other parts of the rigging went well and were more pleasing to accomplish. Tying off to the belaying pins on the side of the deck was so much easier! At one point I came back to the model to continue work and discovered the rigging at the top of the mizzen mast was all slack. Which after all this effort was somewhat disheartening, to say the least. I thought I would have to strip it off and refit it all. I couldn't understand what had happened. It was then under closer inspection that I discovered that the joint of the fore topmast and topgallant mast had failed at the topmast trees and cap. It might have been better to pin these joints rather than relying on a glued joint. This was fixed by clamping the topgallant mast just above the cap and driving a wedge between the two to force them apart and back into position whilst some new CA glue was applied. When dried the clamp was removed and fortunately it worked. Now I just need to fit the davits, boats and anchors and I'm done! I'm not going to be fitting the sails to this model. It shouldn't be too long now before it's finished Chimp
.thumb.jpg.7a0d1d855115a367dd35415bee9b66fc.jpg)
.thumb.jpg.94aaadcf5d523a160ed8b682d3a218be.jpg)
.thumb.jpg.5e9c4c8eef028420626957fa42ae52ce.jpg)
.thumb.jpg.8d3739e330296621f1e83c85354f3a9c.jpg)
.thumb.jpg.e9a7a4cc51d49b76f67501b03a60a3d3.jpg)
.thumb.jpg.8fc7029ee7e7bc5f1bad182f33f1ff54.jpg)
.thumb.jpg.3520ae6c262db6bce17d3b0c53eaed78.jpg)
.thumb.jpg.bf082d593c55a20a9663435111fb9968.jpg)
.thumb.jpg.e427182a7839a51d8a73eed377ec7ec2.jpg)
-
Hello from the Thames Valley, UK
The Gimps Chimp replied to Pitan's topic in New member Introductions
Hi Robert, welcome to MSW. I've just had a quick look at the 'Captain John Smith's Shallop'. It looks like the perfect first kit. I agree with Graham, start a build log and you'll be able to seek advice and opinions whenever you need it. Good luck! Chimp (Bristol) -
Hi Rob, Good to see you back working on the Beagle. I too have extended periods away from the hobby as life sometimes gets in the way My thoughts on the bulkhead filler would be to fit the fillers in the forward two bulkhead spaces at the bow and the rear most space at the stern. I don't think the others will help you much. Having said that, if you have them cut it won't hurt to fit them now. I struggled a little when I did my first planking and wish I had fitted fillers. The first result wasn't pretty but with wood filler and sanding it came out okay. After the second planking was fitted you would never know what mess lay beneath it. Looking forward to seeing your progress! Chimp
-
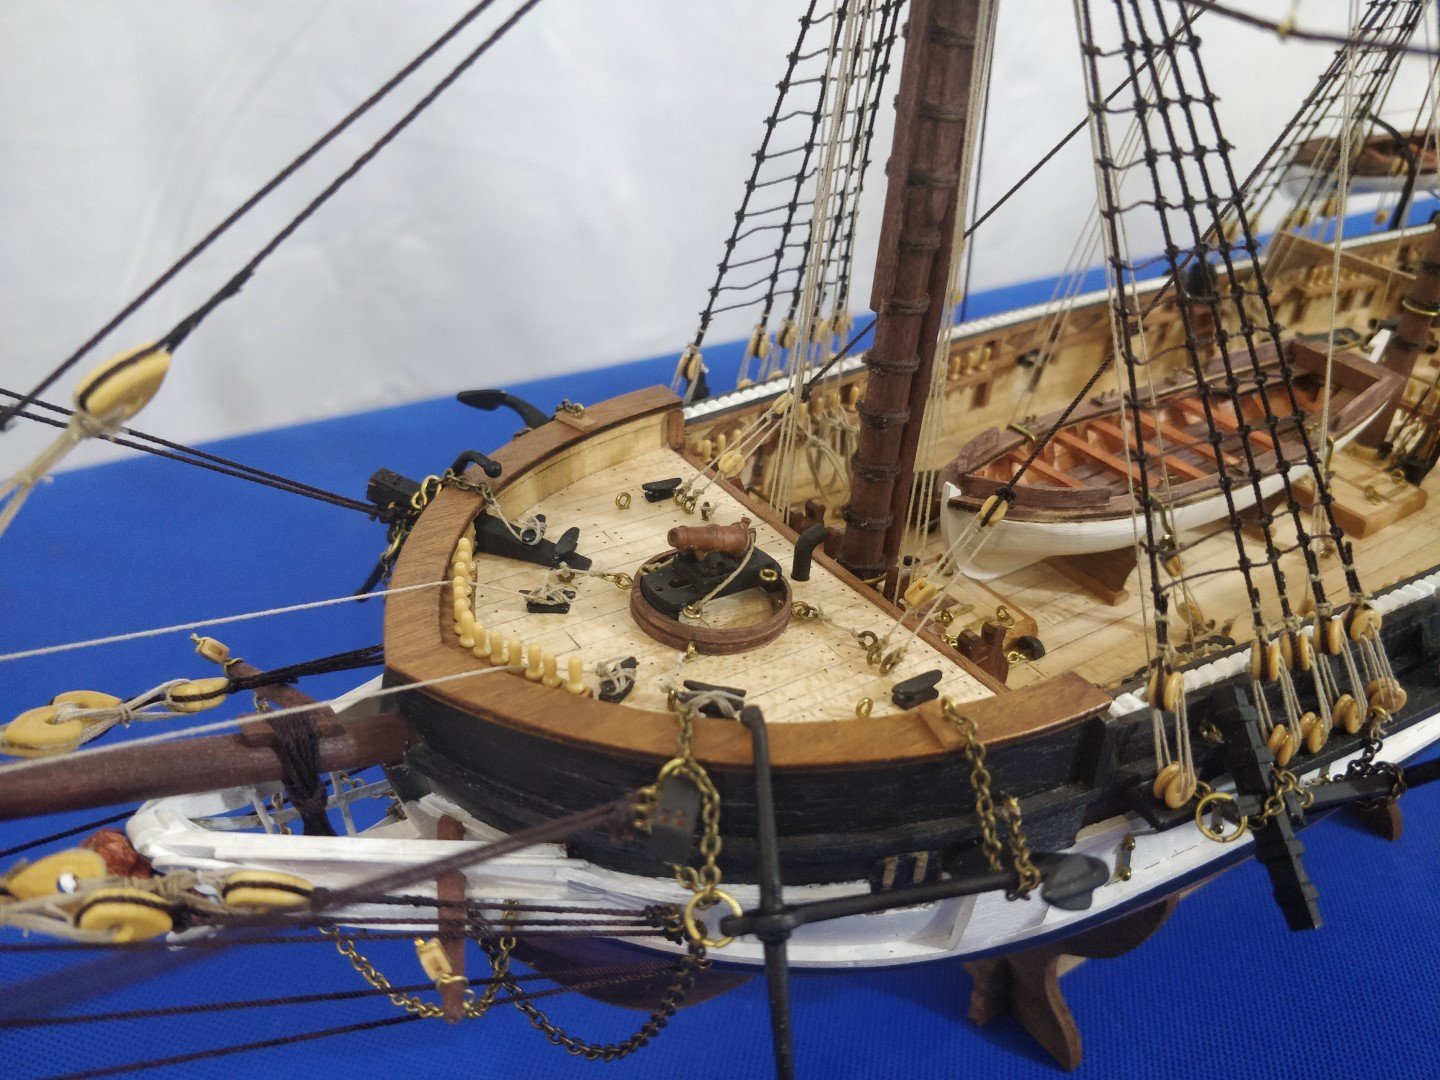
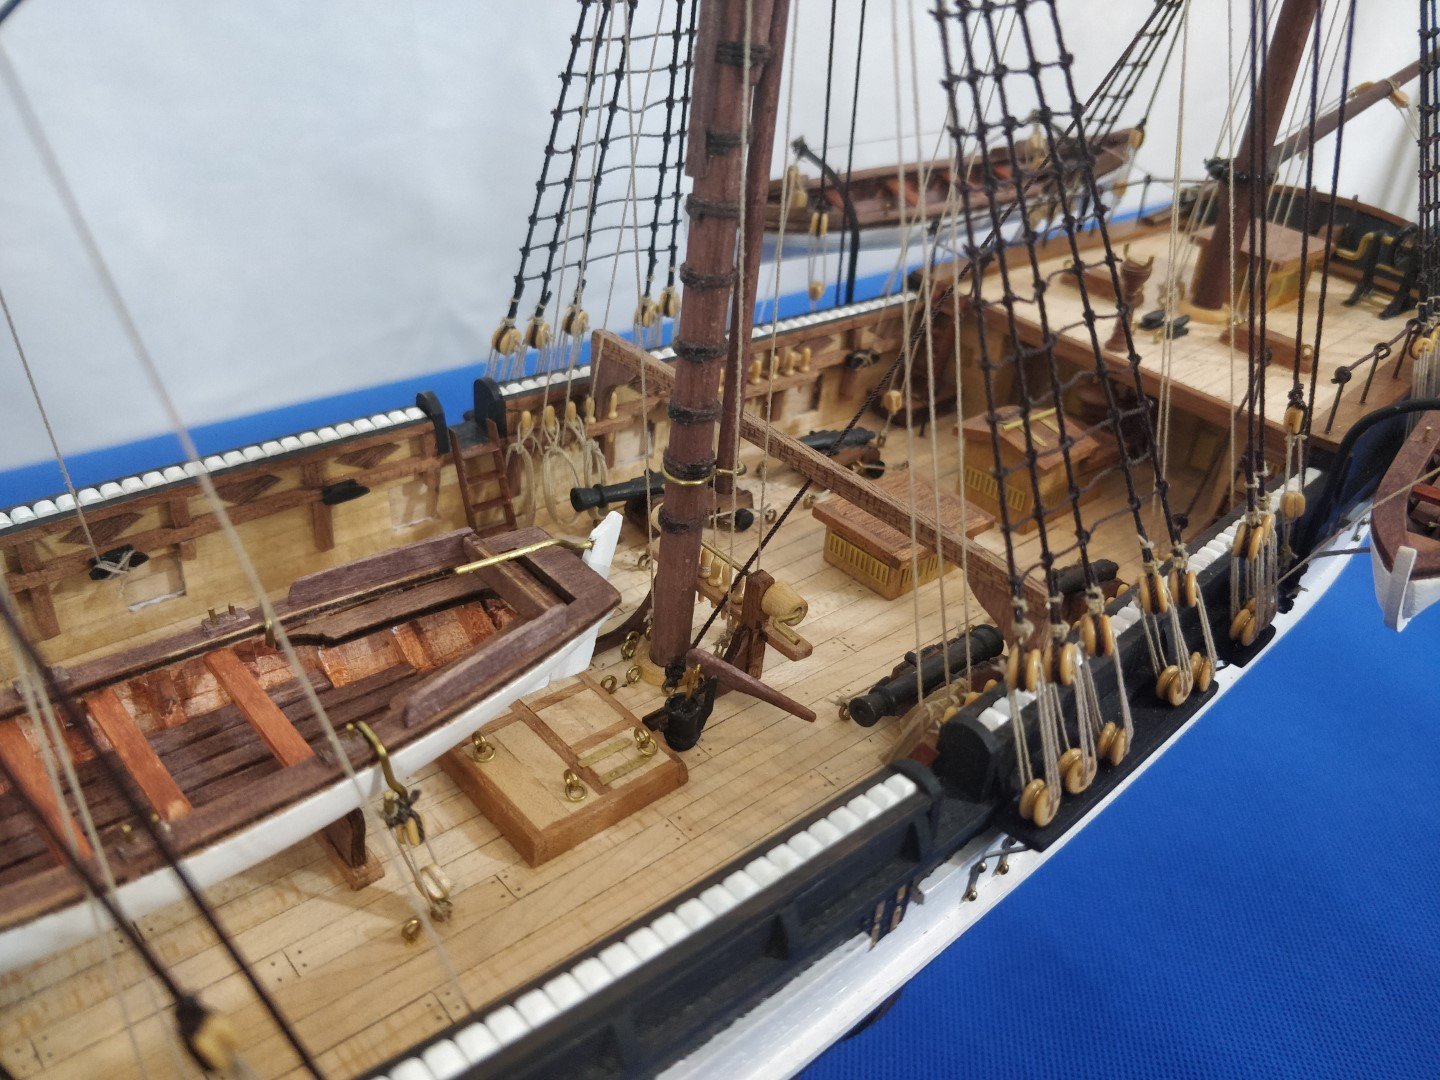
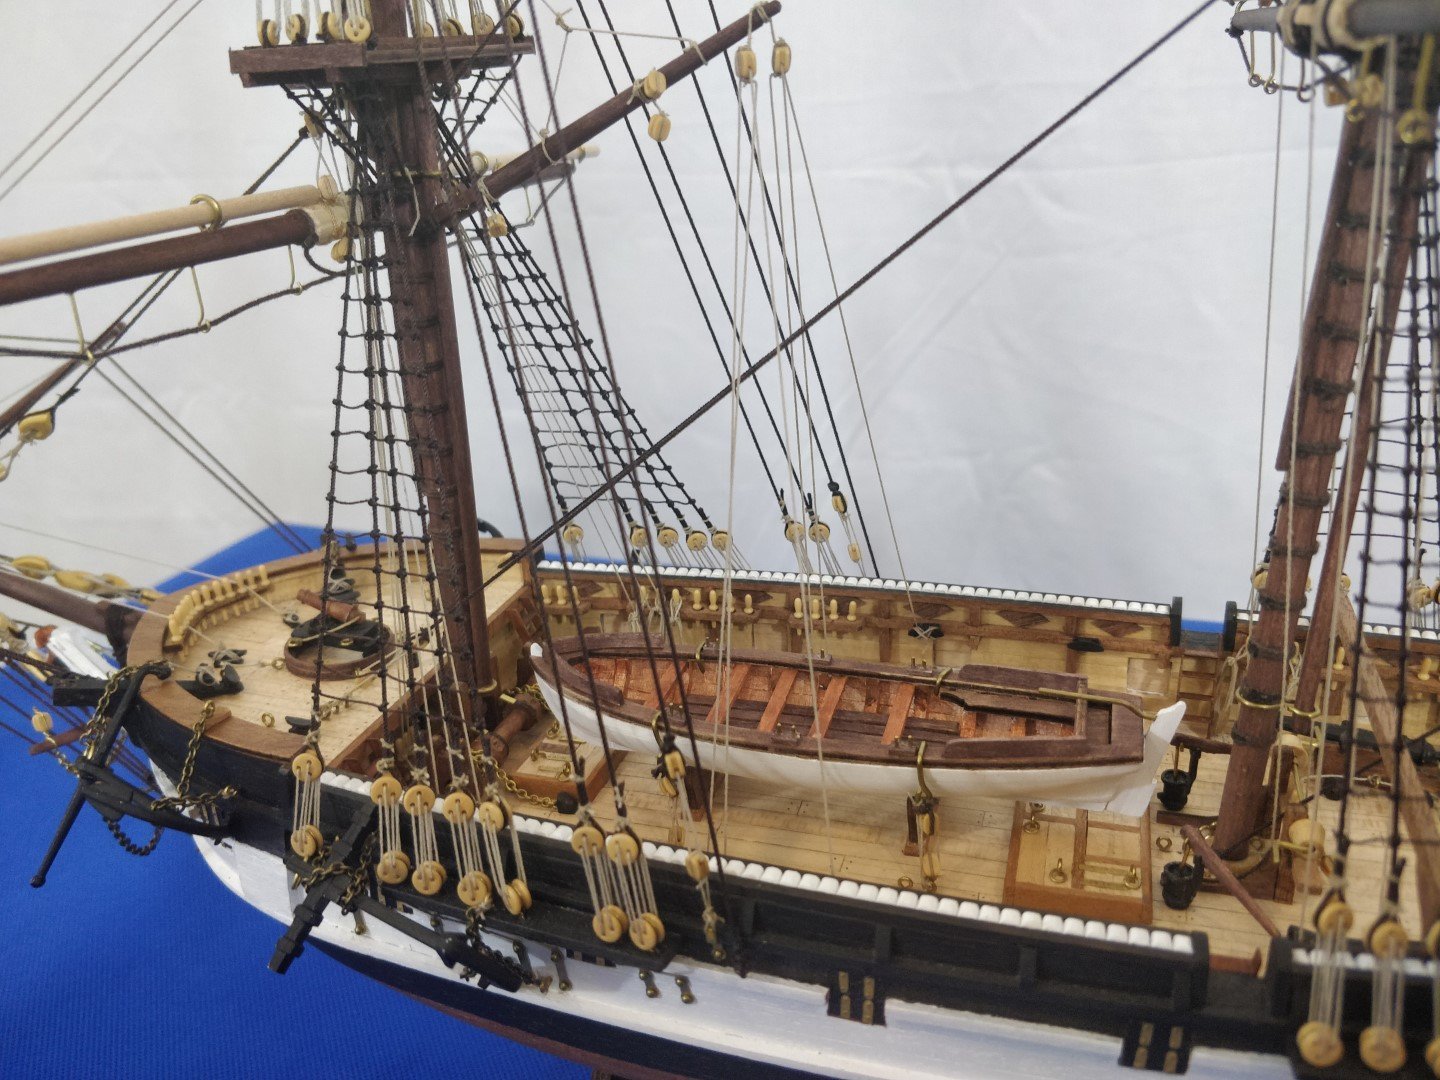
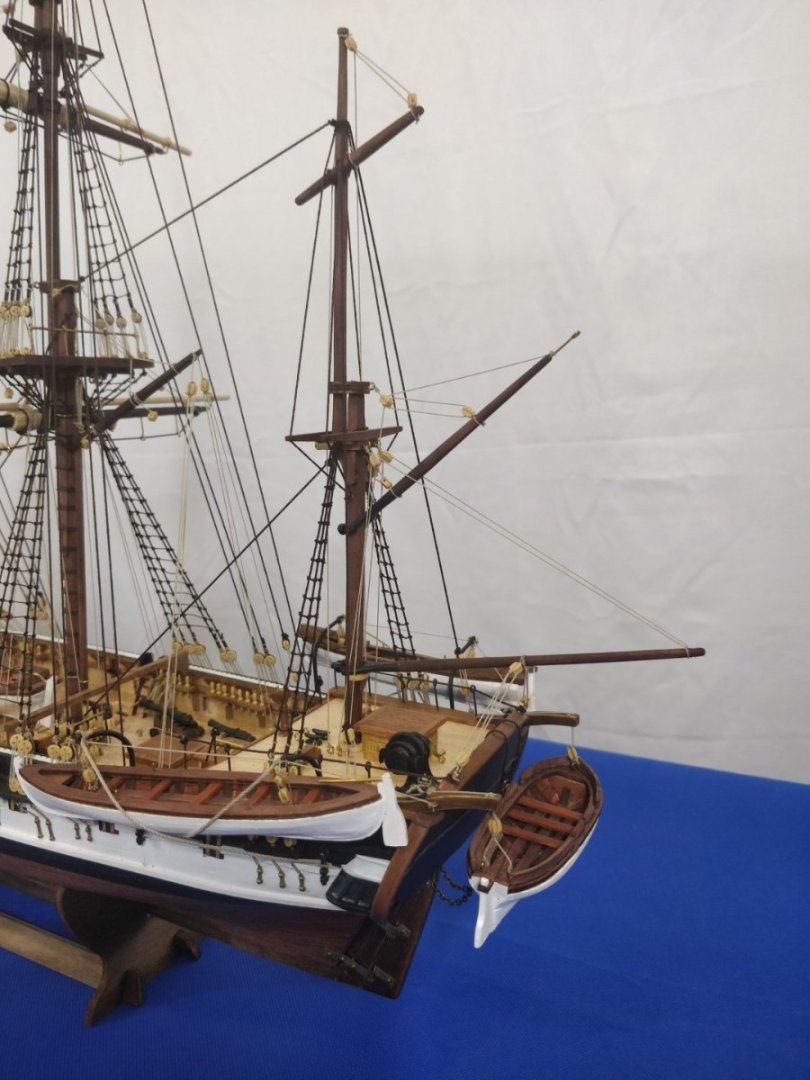
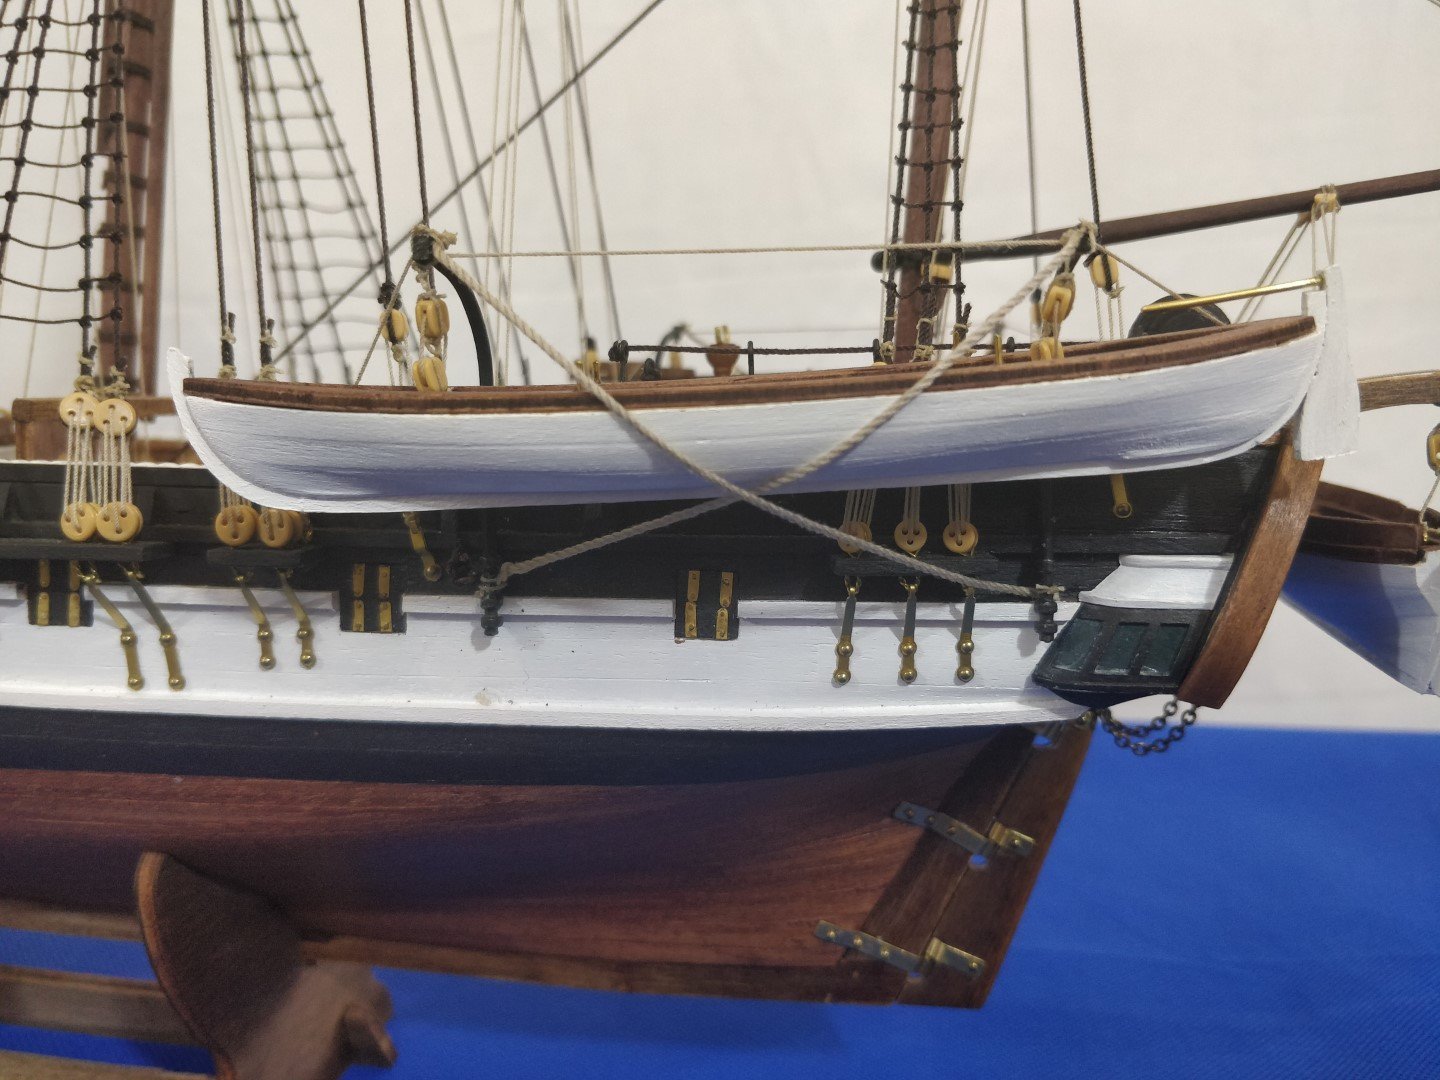
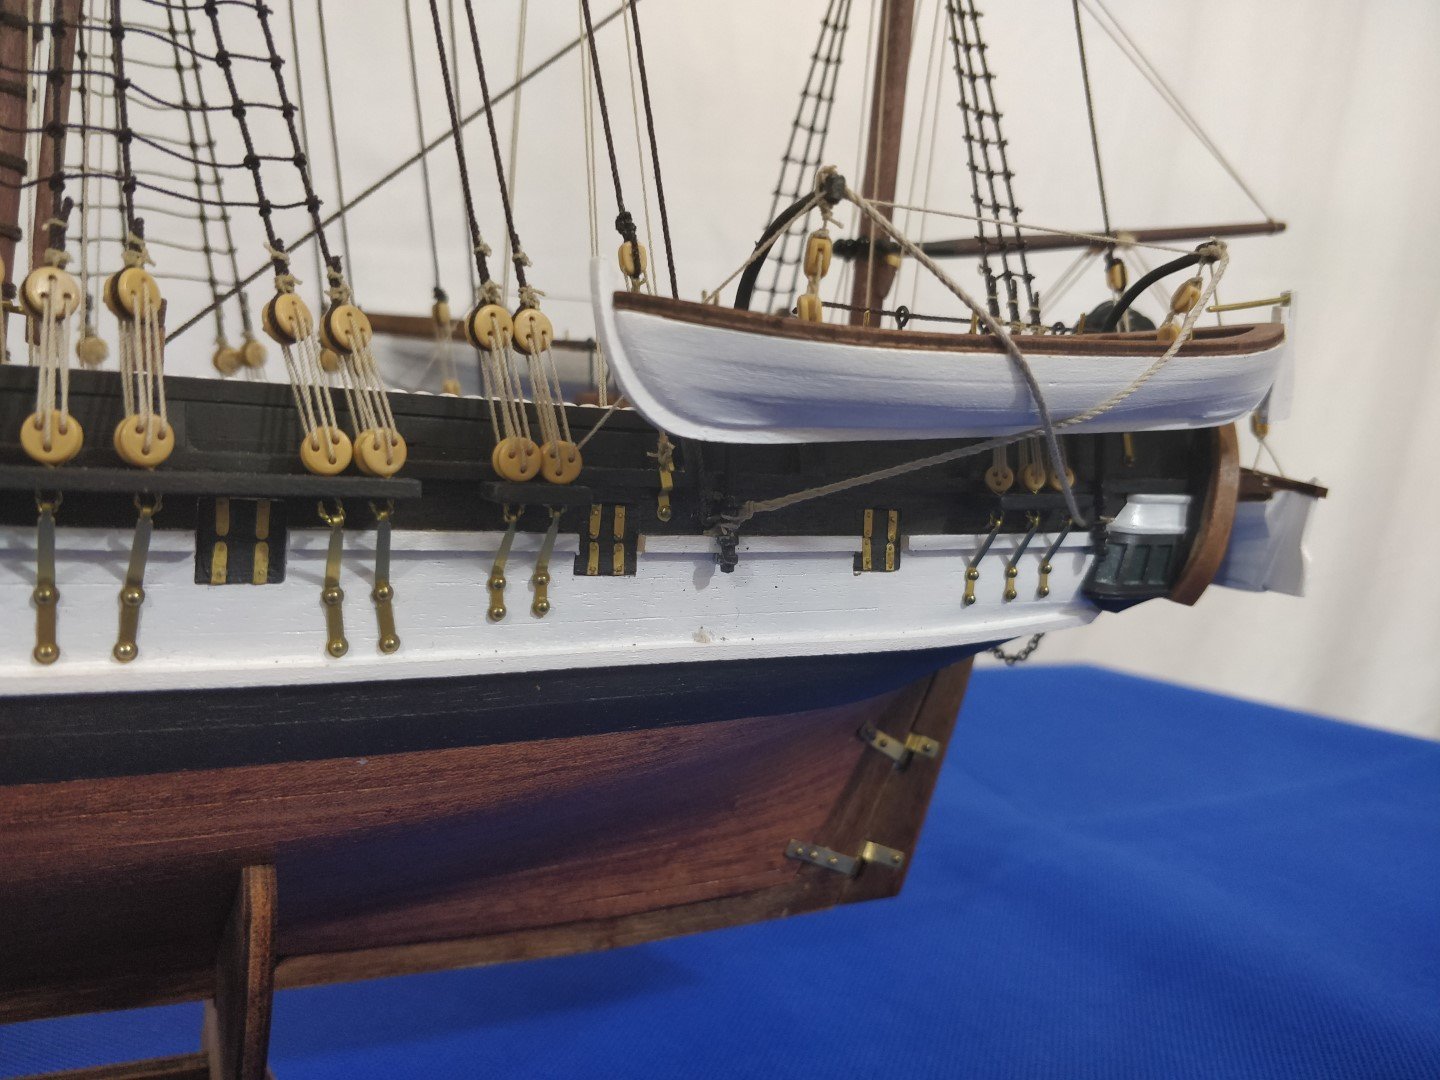
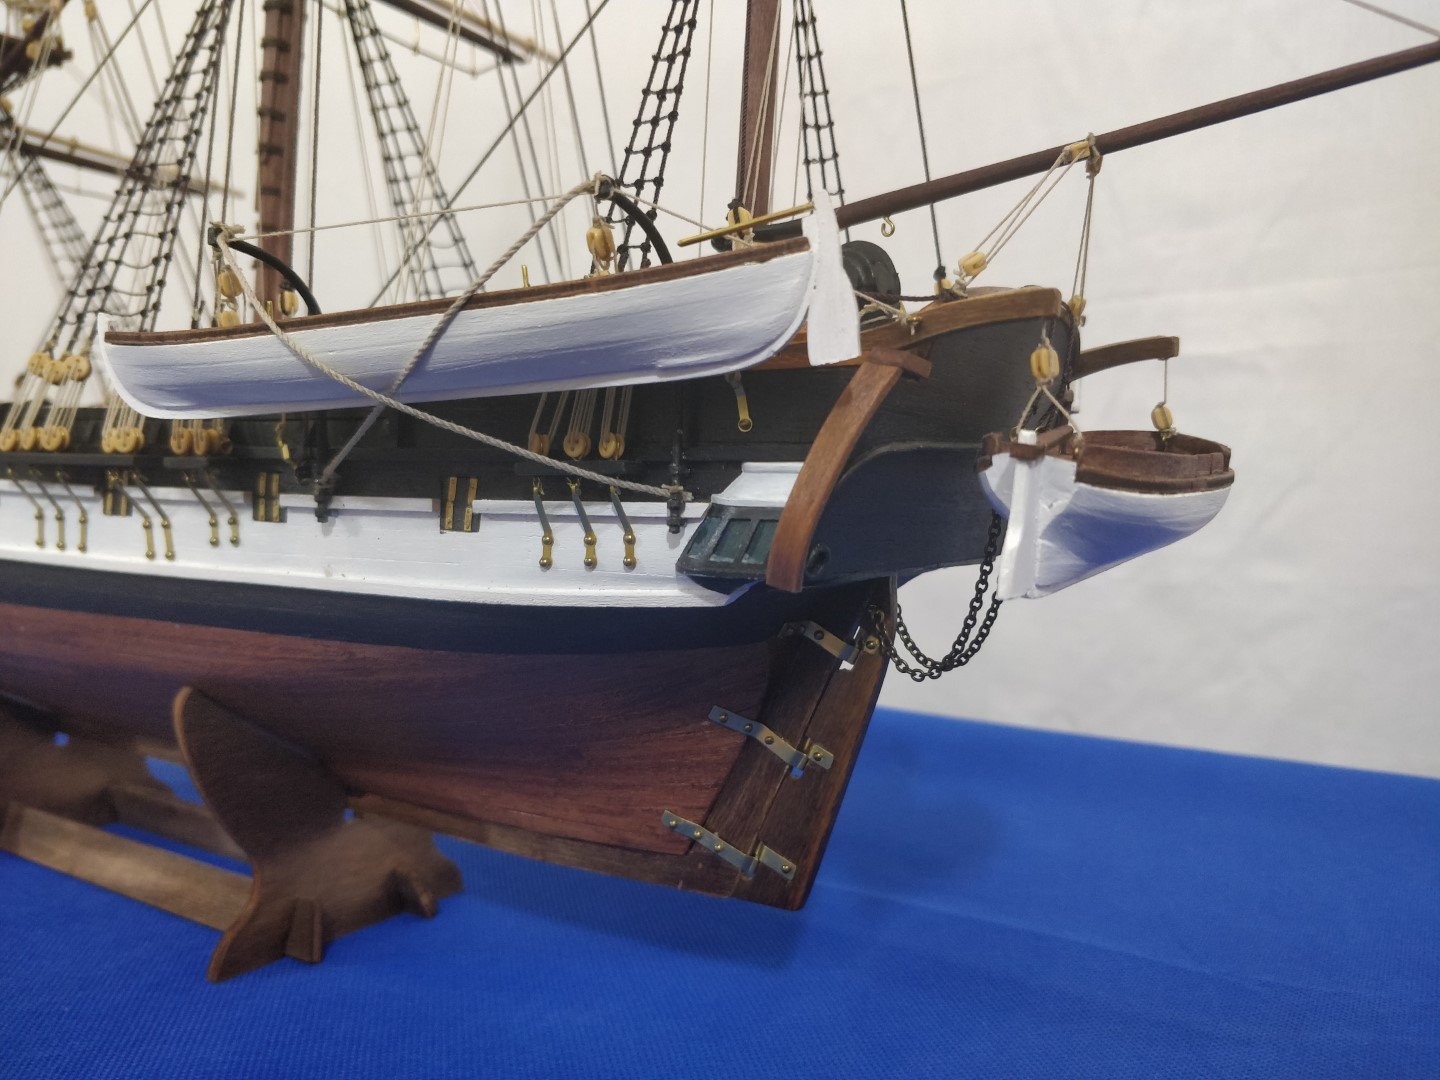
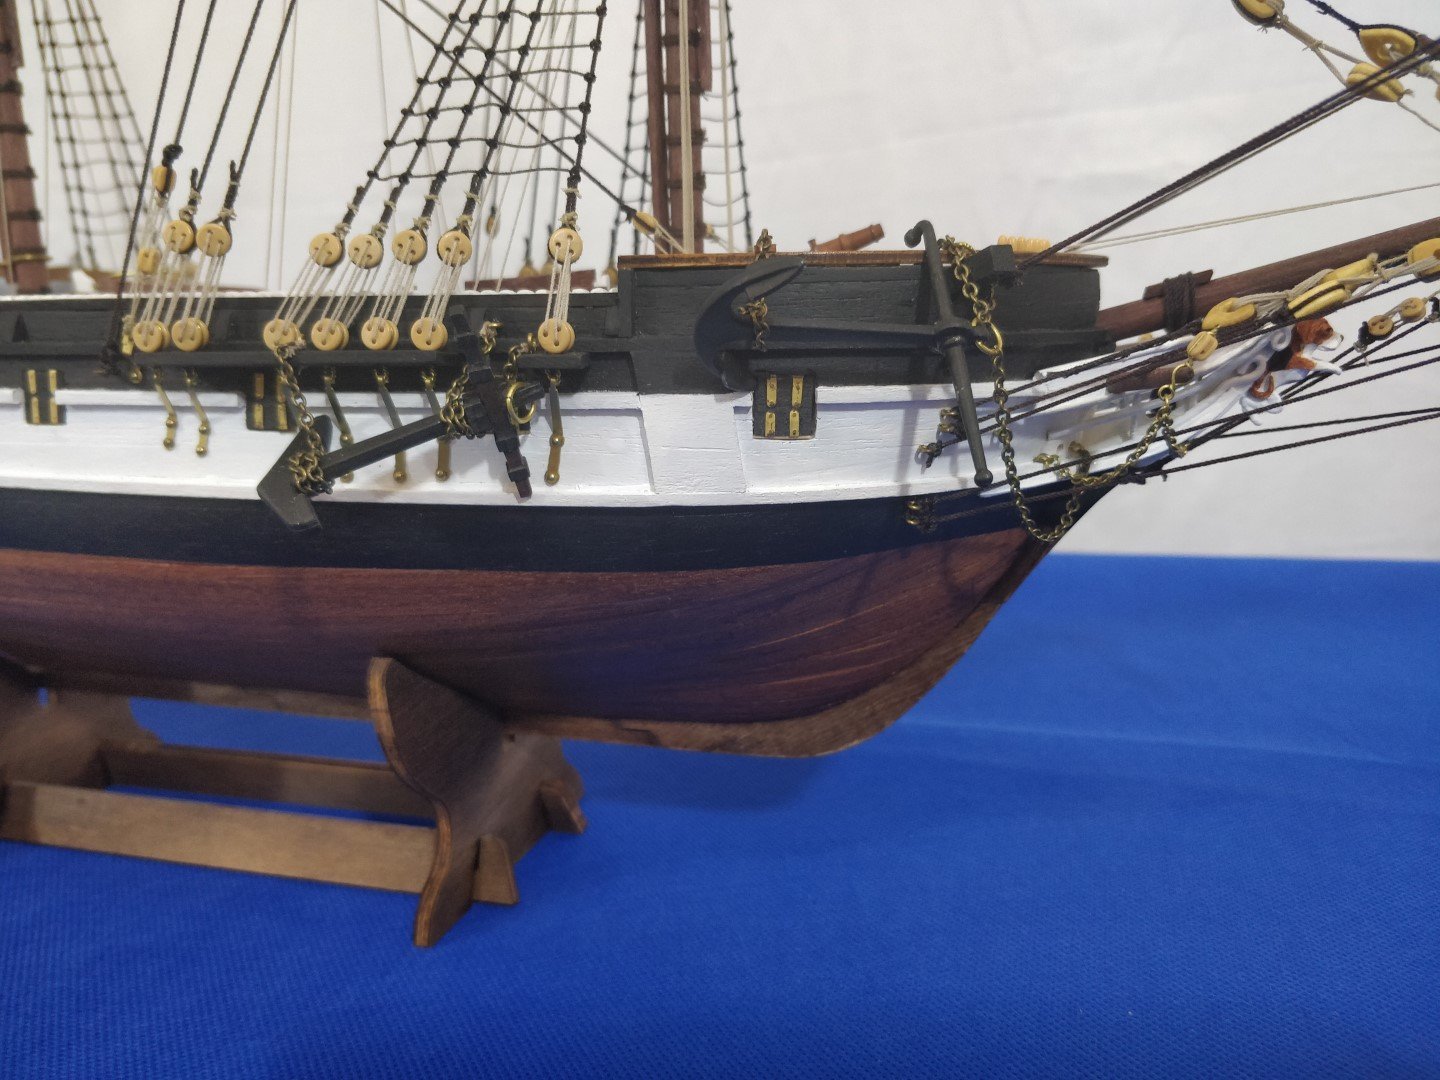
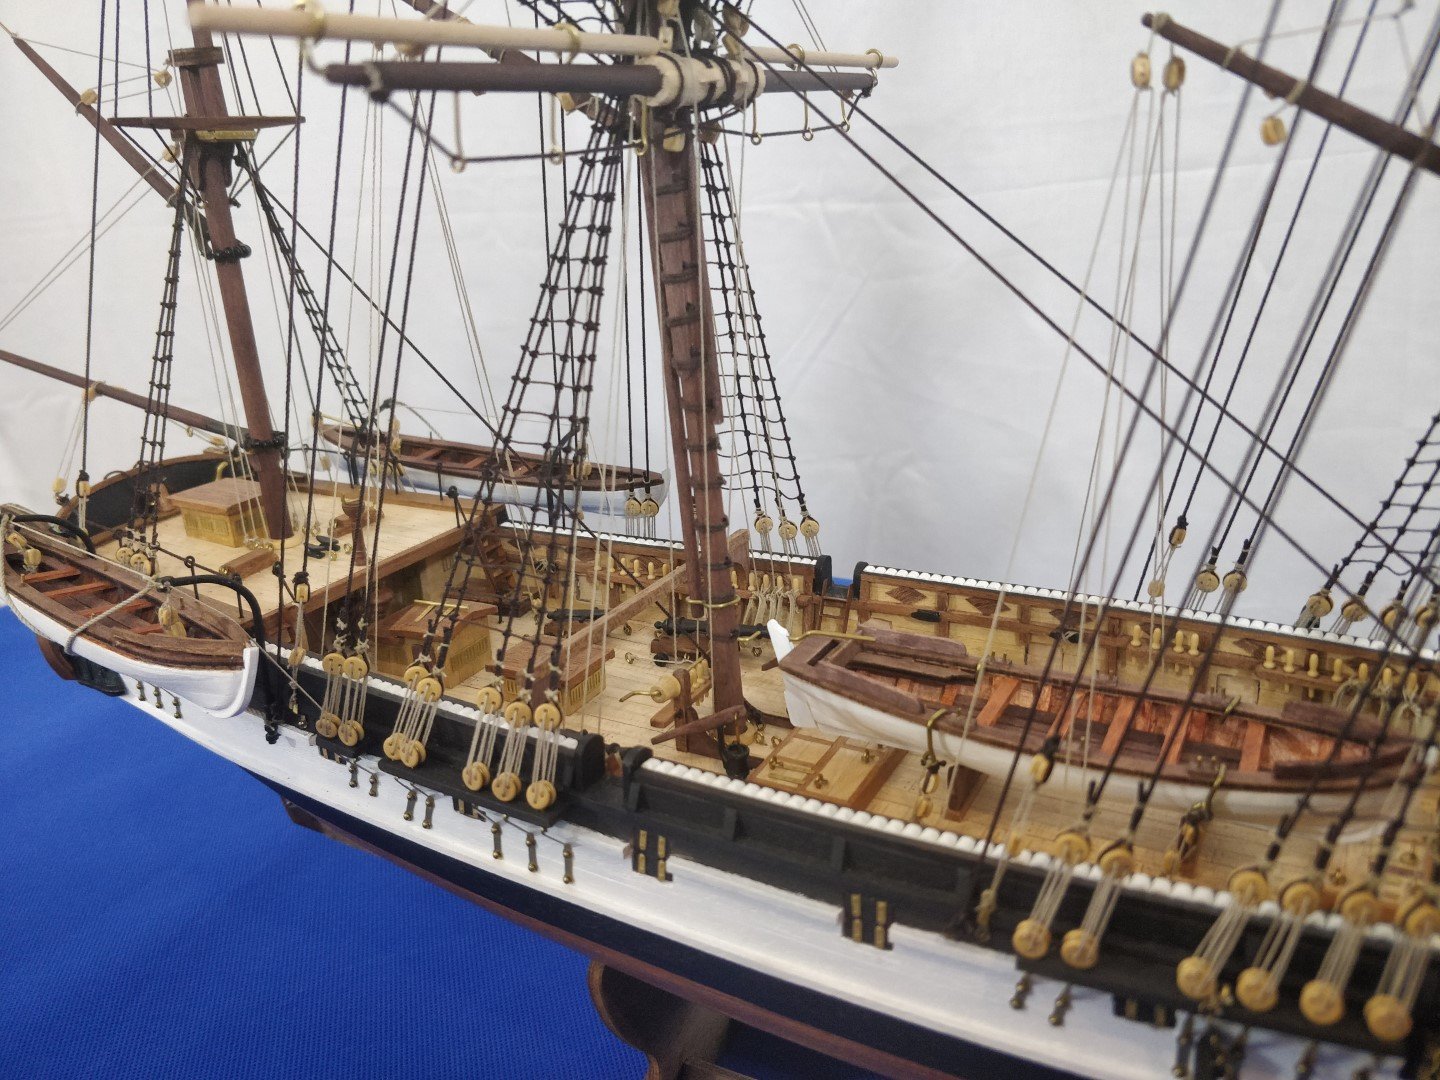
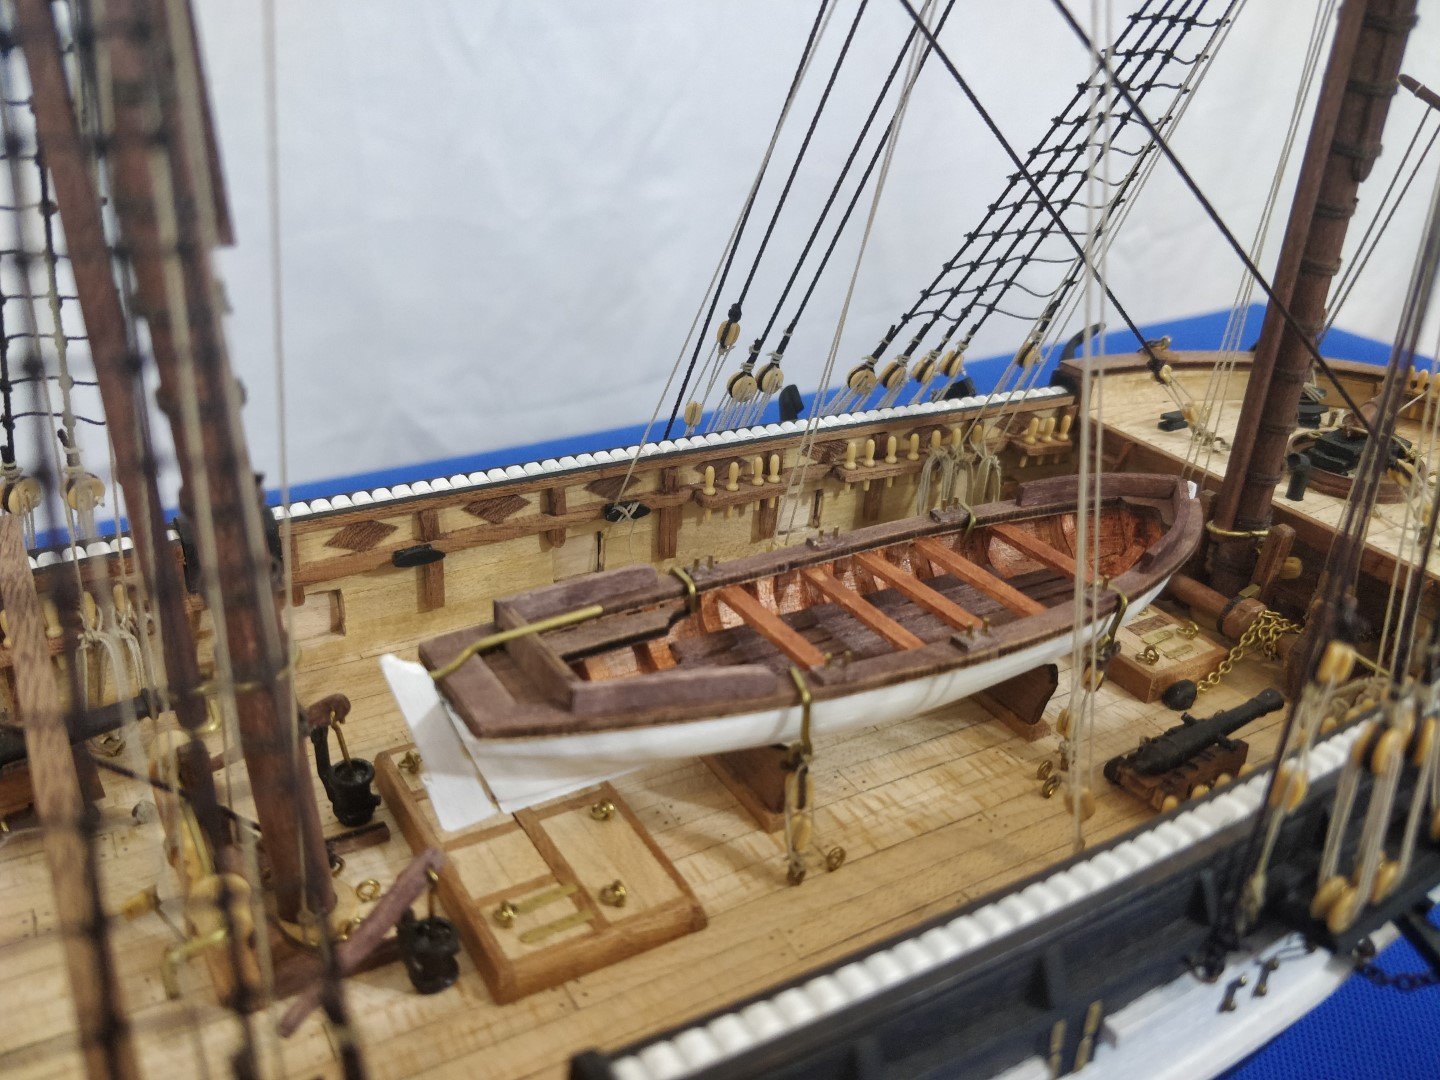
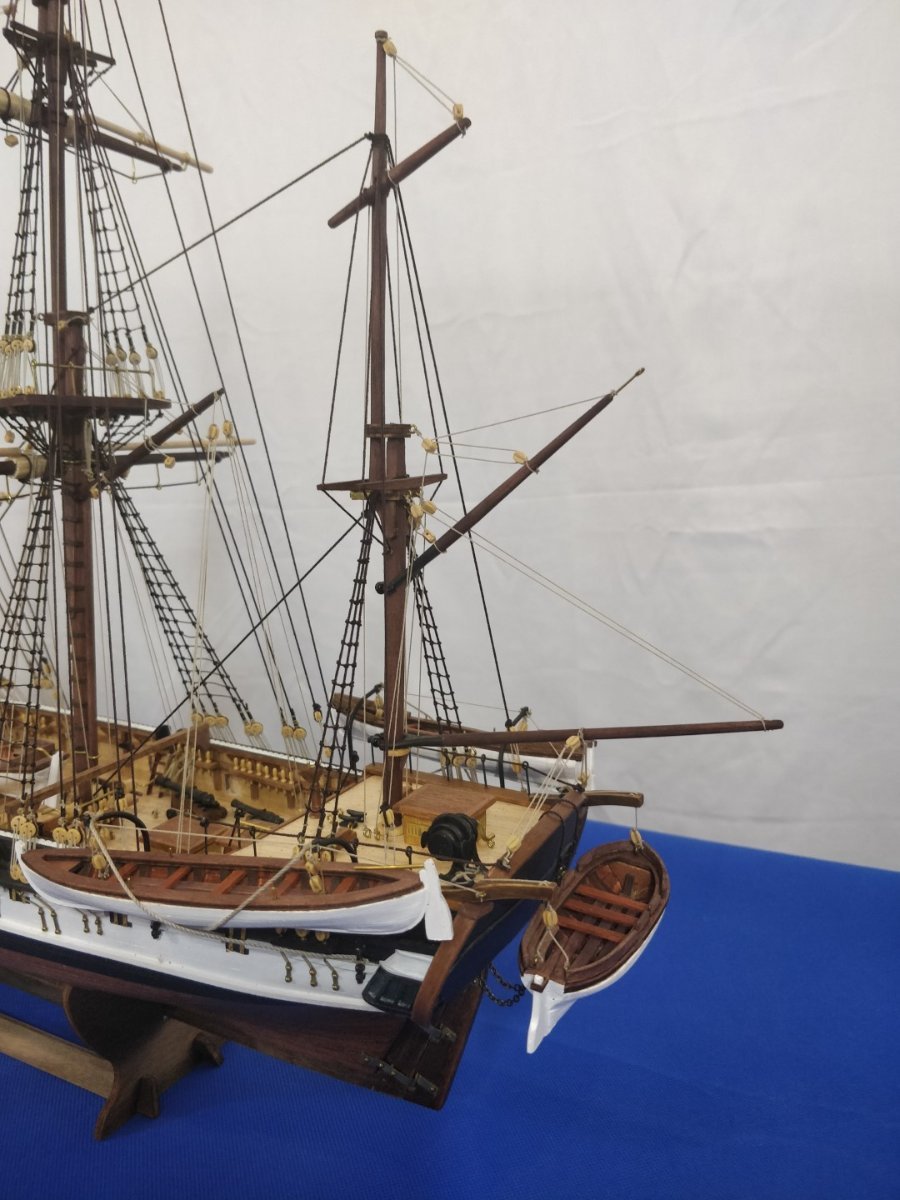
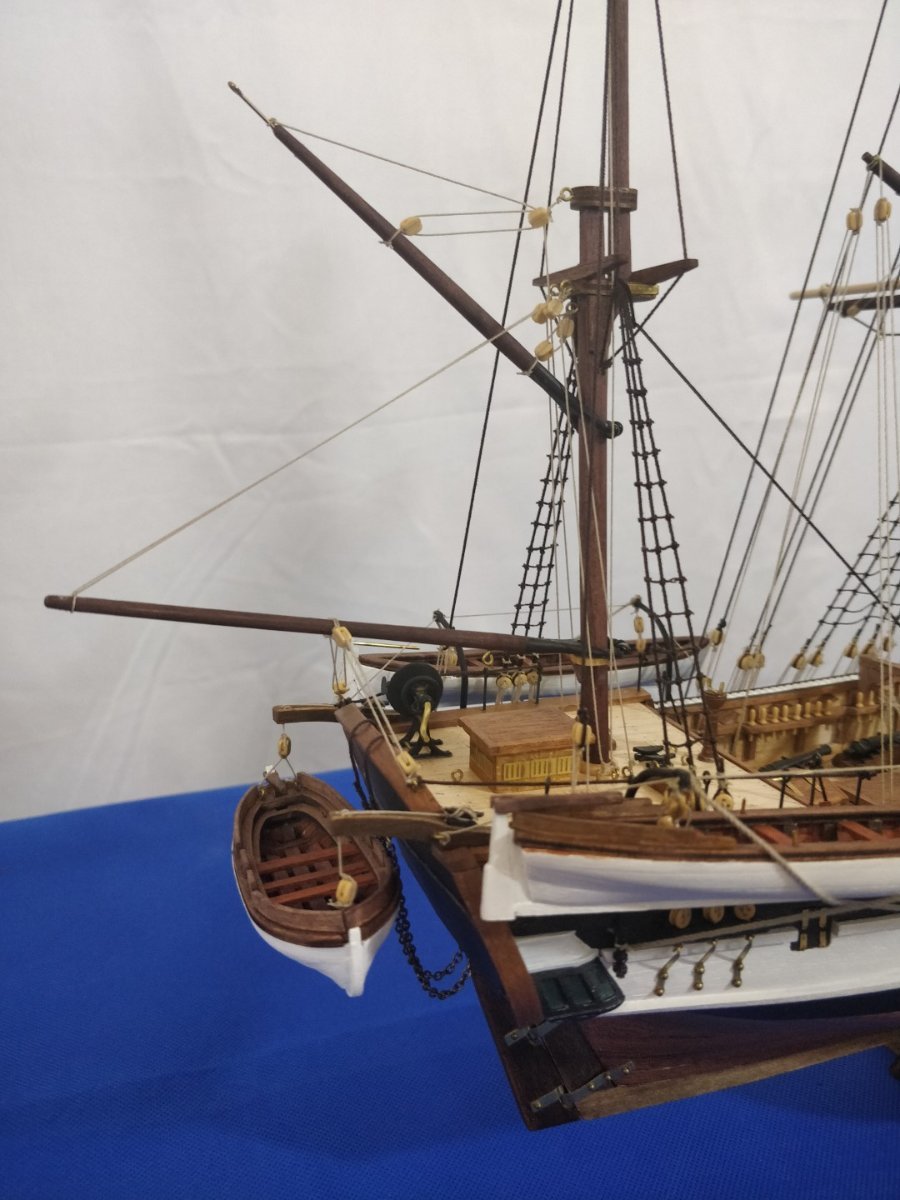
It's been a couple of weeks since my last update. Progress is still being made, albeit slow but steady. The remaining three small boats have now been finished and are ready to fit. Some of the minor details may differ from the manufacturers plans but I don't think it's significant and I'm happy with the way they look Rudder chains fitted The remaining deck fittings have all been fitted: The bowsprit has been fully rigged and the ship's mascot fitted. I decided to paint it like a real beagle as I feel the ships crew would have done that. Obviously I'm open to comments to the contrary And one additional big step is that the yards have now all been fitted. This is a significant step and is very visual, so it now looks close to being finished. My next step is to concentrate on finishing the rigging. Access into the deck for tying off the rigging is now very compromised and I'm starting to question if I'm up to it. I've just purchased some long tweezers so I'm happy to give it a go and see how I get on. What's the worst that can happen? No, maybe I shouldn't have thoughts like that... Looking forward to posting the next update. Chimp
.thumb.jpg.758868e2efb73d2ef960025902db7517.jpg)
.jpg.ca2f3caf9c5c45f3a9fd89ceda7d0ca4.jpg)
.jpg.2f0e9403a9ab56fb656bb93e2e3b3a39.jpg)
.jpg.c1fa2ed13dbd627b3c03a10980a3734b.jpg)
.jpg.acbc07f8c904ce29b1d1603d1e8085d9.jpg)
.jpg.7ba1929ca586809d575f9e5bfcca4bda.jpg)
.jpg.7c7a068cf8be7a79c886d4faa49f816d.jpg)
.thumb.jpg.06c6cfea7144771a20dd0ff6e0d476ad.jpg)
.thumb.jpg.5c9530f43183b58166870dc7eaafae98.jpg)
.thumb.jpg.80e745b9fe926c67801d978f16212f5f.jpg)
-
Hi Patrick, Your build is coming along well and is looking great. Regarding kit materials I've found them to be variable. The timber for the first and second planking I had enough to build two kits. As you say, the brass wire is limited. The 0.7mm brass eyelet (part B ) was in short supply so I got some brass wire from Amazon for a couple of pounds and made my own. There are a couple of instances where you have to open up the eyelet to join it to chain and I found the one's supplied with my kit weren't malleable enough and would snap. The one's I made from wire were fine. Regards, Chimp
-
Here I am, "back in the saddle" (again). It's been several months since my last post. This has been due to me taking a break from the build due to other work and the fact that I had got a little frustrated with the rigging instructions. However, I'm back now and intend to see it through to the end as I have another ship ready to start which I've promised myself I won't start it until this one is finished. I say finished but I've already decided I won't be fitting the sails as I don't like the quality of the supplied sails and feel when fitted they hide much of the detail of the rest of the ship. I had considered trying my hand at making sails from tissue paper but think this might be a task for a smaller ship in the future. My previous task on this model had been to fit the masts and complete much of the standing rigging. Strangely I really enjoyed tying the ratlines and think they really add much to the look of the model. My next task was to complete the yards. I had previously made the yards for the foremast but that was over a year ago so I had to try and remember the process. Once I got started it all felt rather familiar. With the yards for the main mast now completed, my next task will be to fight with the instructions again and get them and the foremast yards fitted to the two masts. Now I'm back in the swing of working on the model I'm determined to see it through this time Chimp
.thumb.jpg.d917bb3e2c13c14a06db88b332316571.jpg)
.thumb.jpg.cd12b1b10fd49ead5f721a65fe8d93cf.jpg)
.thumb.jpg.d54aeb2216a350e4f3b09e586ee85574.jpg)
.thumb.jpg.969f1b618e69b253f6382fbc32031106.jpg)
-
Hi Patrick, Your build is looking fantastic, keep it up! Regarding the number of holes, I think you're absolutely right. Looking at the AotS for the Beagle it only shows two ropes, one each side. The forward one is the fore topmast stay and the rear one is the fore topmast preventer stay. Looking the Occre's own assembly video it shows only two holes and not the four shown in the instructions. Unfortunately this doesn't surprise me as I've found their instructions to be riddled with errors and inconsistencies. However, some might say this is a good thing as it forces us to research things further..... No, it's just frustrating. I was just trying to find something positive to end on Regards Chimp


.jpg.9808ef75100cbed18c90ed3b0ee739c1.jpg)
.jpg.a9d8a67129db371985828b1a57d5ec57.jpg)
.jpg.881eef8e2459c48f04a4c4e3b43f8066.jpg)
.jpg.0ad227e6de1ed5c63359e24f554fbb5c.jpg)
.jpg.8aa52578a9a9b42393e976eff938a634.jpg)
.jpg.c7f2ad2d8f41bb0c93a7e5d012cfc2fe.jpg)
.jpg.44a2bd79924ccd90621caee198ae6587.jpg)
.jpg.db4cba54427ec2372a682942261b971f.jpg)
.jpg.4ade4529b0f7a8fef894bd85671a4956.jpg)
.jpg.e8e55bd4918928fb400c65510e1ff6c4.jpg)
.jpg.073e87c815d21ffeee88d07898261998.jpg)
.jpg.e07f46b717c5faff7fb5affe2a5bdd32.jpg)
.jpg.3aa0abda5ab04b1283787fbdc322f2b4.jpg)
.jpg.d1635f33e88b0590c77e761588fae1a4.jpg)
.jpg.6b85f08aa88e4a45e895c4ec058f6d4c.jpg)
.jpg.a5fc8142471f00074e79121504750579.jpg)
.jpg.152761cb3cbbac04921d25f82074919b.jpg)