-
Posts
20 -
Joined
-
Last visited
Content Type
Profiles
Forums
Gallery
Events
Everything posted by Cap'n Jack
-
Gil. I have missed my train stop. I have read this post from the beginning and I am speechless. Your craftsmanship and depth of underpinning knowledge leave me blown away. As for the precision your ship demonstrates - wow. If I can achieve a fraction of what you do I will be a very happy modeller. You're a one off fella - and I would love to see something of this standard in my mess!
- 753 replies
-
- finished
- caldercraft
-
(and 1 more)
Tagged with:
-
So, I had a brain fart. Trying to get the hull as smooth as possible so that the outer planking goes on as easily and neatly as possible. I decided - as this is a learning thing right - to try two methods of filling the minor gaps that existed between the planks, often resultant from the ears (is that even the right term!) Any how - I filed the port side gaps with minimal filler and starboard got, you guessed it, caked on. Once sanded though the results were similar so I think that the better method was minimal approach - lesson learned!
-
Popeye - top tips about the rounding of the bulwark and stern contours. I am using a block and have been quite conscious of those areas! Jonny - you're too kind!! I've started using filler to create the smooth hull that I've been told to aim for - you'll see soon, I'm sure, the volume of filler that I need! Craig - thanks for the direction. I'll check the forum posts on bearding line (quote as I don't know what one is!). And I'll also have a look at the rudder attachments to figure the future challenges! Cheers all. I'm off for an evening of light sanding!!
-
Has it really been 2 months? I've spent a while sanding the hull and working the planks to try for a smoother line - I've also tried to remove the problems at the Bow. Hull is now covered in a 3:1 PVA/ water mix to try and firm up some of the planking a give the 2nd layer more chance of a cleaner finish. Picture to follow.
-
Jerry, She is breathtaking. You have done the immortal memory proud Sir. I only hope to emulate. BZ.
- 900 replies
-
- victory
- caldercraft
-
(and 1 more)
Tagged with:
-
Fellow new guy - hello! I'm also building the President though not to the same attention to detail as you! I like the idea of replacing the cannons and looking for the other "attributes" that you mention but for me I'm going to learn doing this model: the techniques and methods to be used and then look to find a better kit for the second effort! Mantua isn't renowned for its kits and had I read the forum that existed before, I wouldn't have started with one! My kit had dried out wood and I had to ring to distributor for instructions. That said the planking has proven fun - I've just coated the outer layer with a PVA/water combo to firm up the inner hull prior to applying the outer hull. Given the free time that I have I'd think that you'll be a little quicker than I but ill look forward to keeping n eye on your progress! Good luck.
-
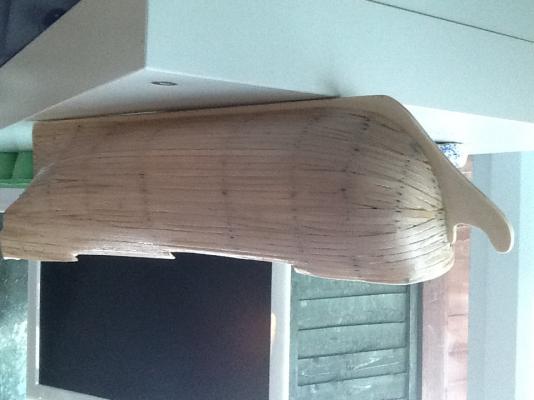
So here the trail dries up. I have had a computer rebuild and my images appear to have been lost - the log from this site were also lost. So I'm now here. The hull first layer is complete. I learned that when glueing strips it is best to run a strip of glue along the full length - it adds so much strength to the hull. There are a few cracks and weakness' here and there. I intend (and have already) to fill some of the larger holes left as I have NO idea how else to deal with them. I am then going to use a waterede down PVA glue to work in between the planks and firm up the inner hull before looking at sanding down to remove the ears (where they exist). I will post a question but here goes for anyone looking at this build. How "sheer" does the hull need to be to get a good finish with the second layer? Perfect?? Nearly perfect. 0.5mm thickness doesnt buy much tolerance and I'd rather not rush!! Cheers for looking folks.
-
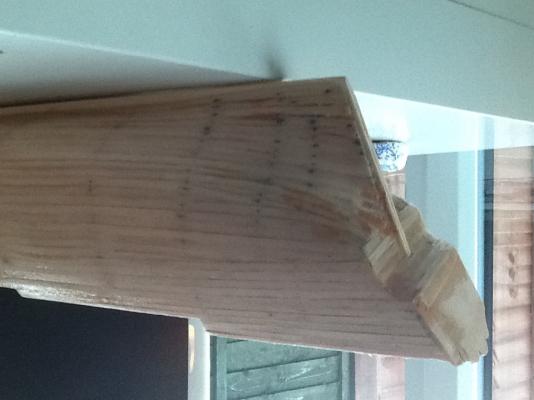
The building of the hull took ages - I couldnt get to grips with the falring edges of the planks and the need to cut in etc. The biggest single challenge was the bow - seen here. I elected to bend the wood in situ - having put it through a bending tool having left it in very hot water for a few minutes to soften - and hold it in place.
-
Hi Craig, I too am a beginner and am building this "design" of a frigate. You're right - PRESIDENT never sailed in this guise but as a starter kit I think that this ship offers enough challenges. From me - I think you've done a great job and there are lots of pointers for me to glean information from - that said - if you encoutnered any specific challenges that you think I should know of please let me know!!! Cheers Simon
About us
Modelshipworld - Advancing Ship Modeling through Research
SSL Secured
Your security is important for us so this Website is SSL-Secured
NRG Mailing Address
Nautical Research Guild
237 South Lincoln Street
Westmont IL, 60559-1917
Model Ship World ® and the MSW logo are Registered Trademarks, and belong to the Nautical Research Guild (United States Patent and Trademark Office: No. 6,929,264 & No. 6,929,274, registered Dec. 20, 2022)
Helpful Links
About the NRG
If you enjoy building ship models that are historically accurate as well as beautiful, then The Nautical Research Guild (NRG) is just right for you.
The Guild is a non-profit educational organization whose mission is to “Advance Ship Modeling Through Research”. We provide support to our members in their efforts to raise the quality of their model ships.
The Nautical Research Guild has published our world-renowned quarterly magazine, The Nautical Research Journal, since 1955. The pages of the Journal are full of articles by accomplished ship modelers who show you how they create those exquisite details on their models, and by maritime historians who show you the correct details to build. The Journal is available in both print and digital editions. Go to the NRG web site (www.thenrg.org) to download a complimentary digital copy of the Journal. The NRG also publishes plan sets, books and compilations of back issues of the Journal and the former Ships in Scale and Model Ship Builder magazines.


