


RMC
-
Posts
933 -
Joined
-
Last visited
Content Type
Profiles
Forums
Gallery
Events
Posts posted by RMC
-
-
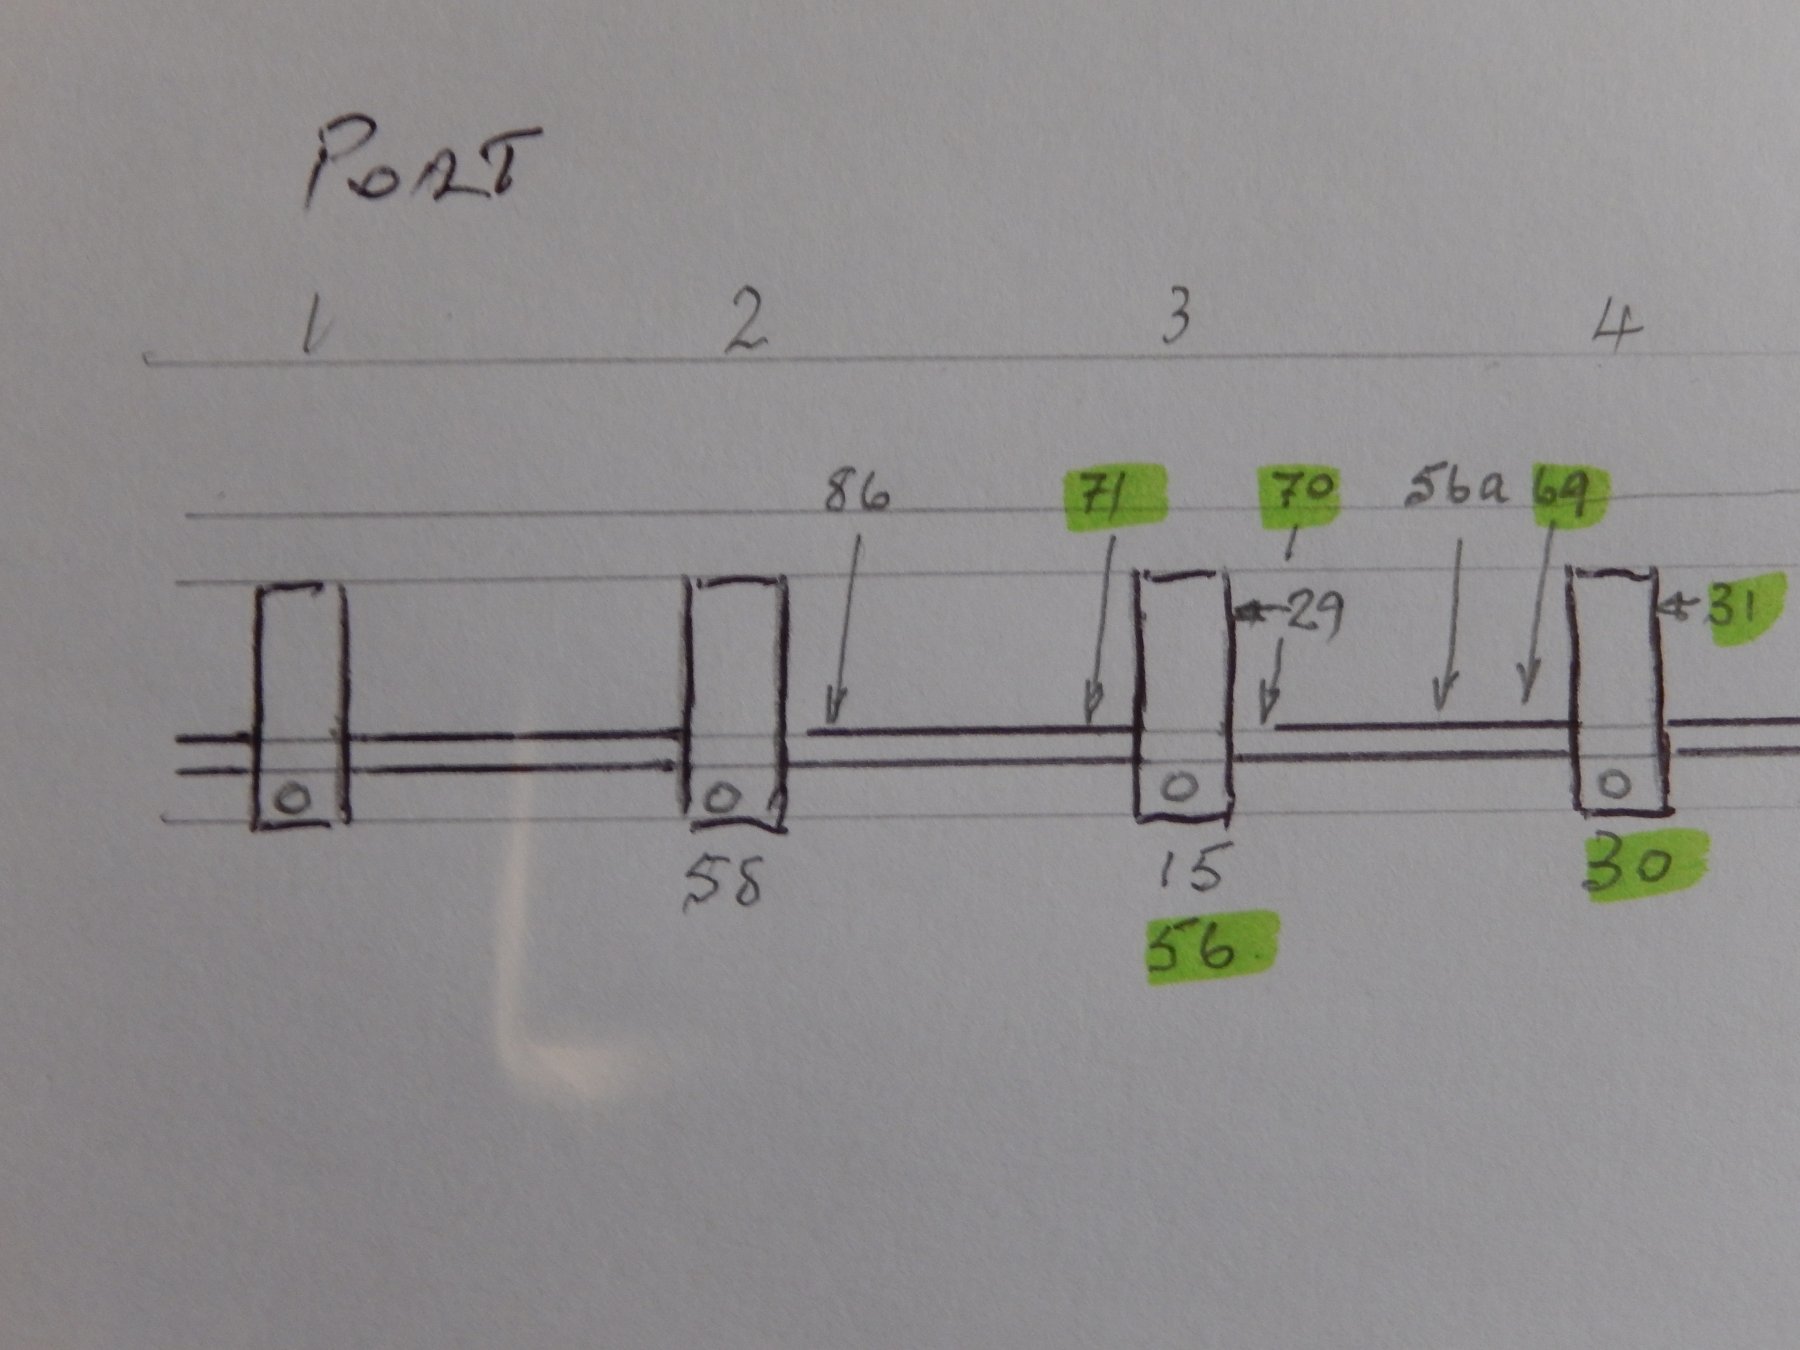
Here is an amended plan of the belaying points on the timberhead. Computer problems have delayed things.
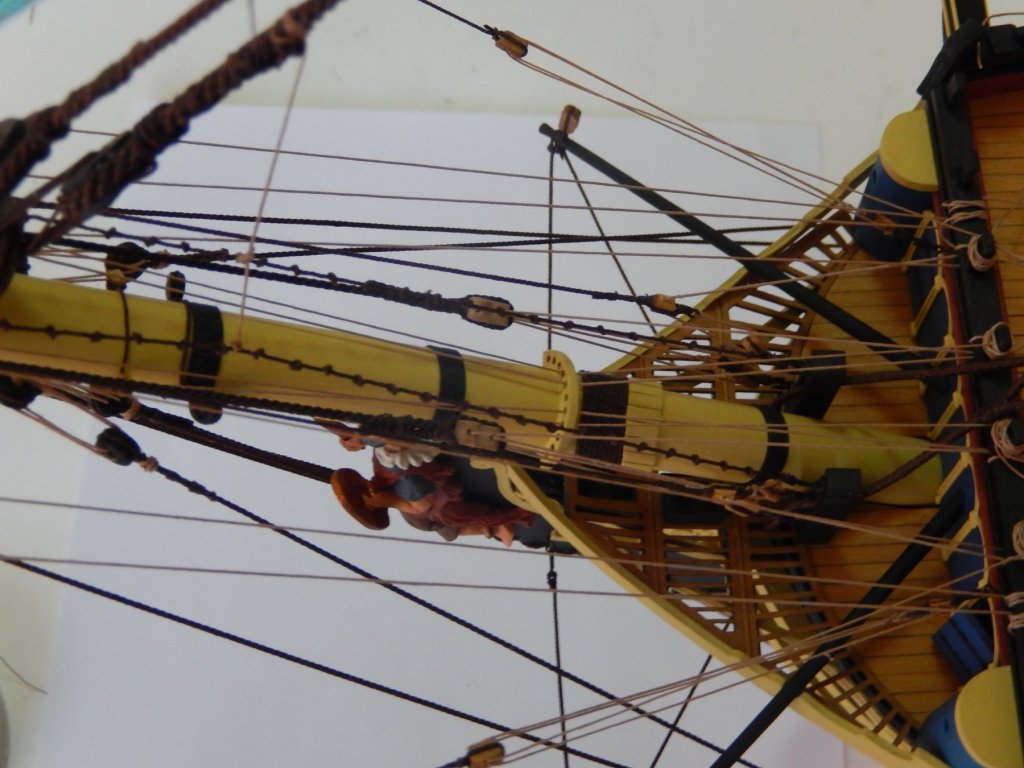
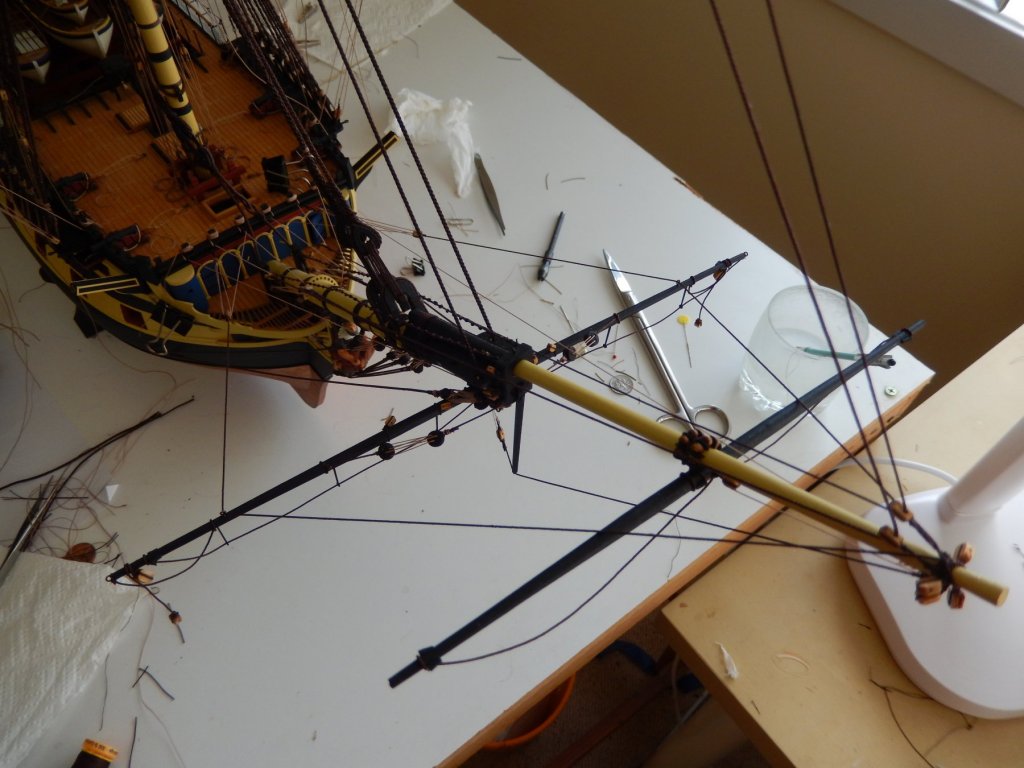
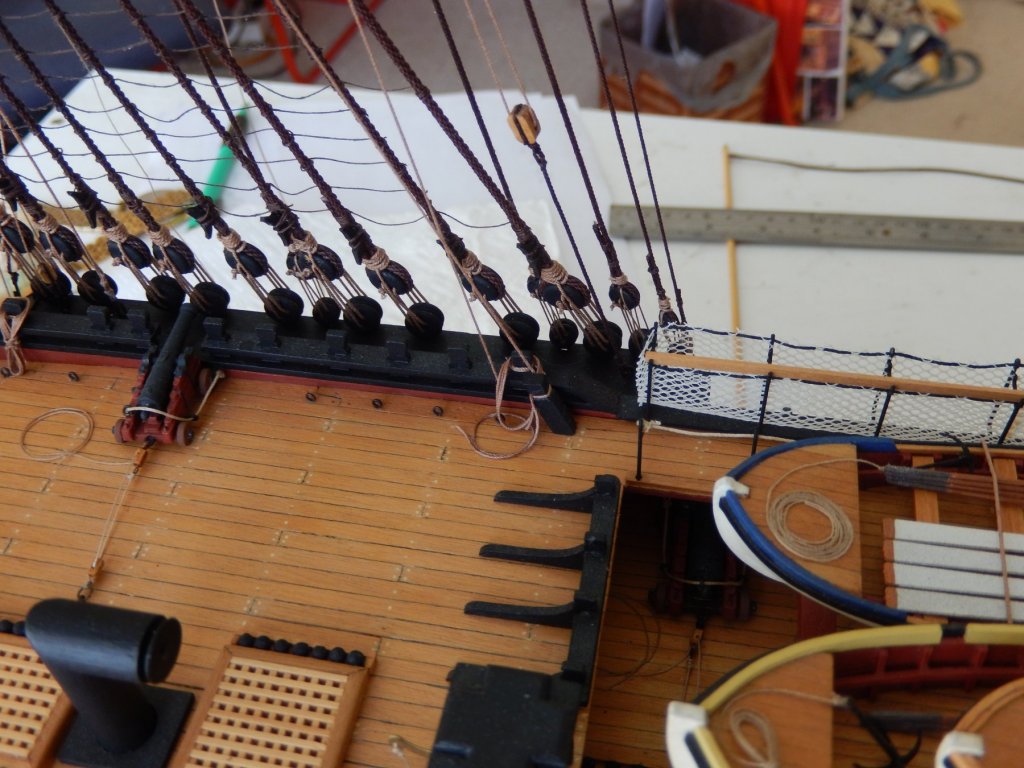
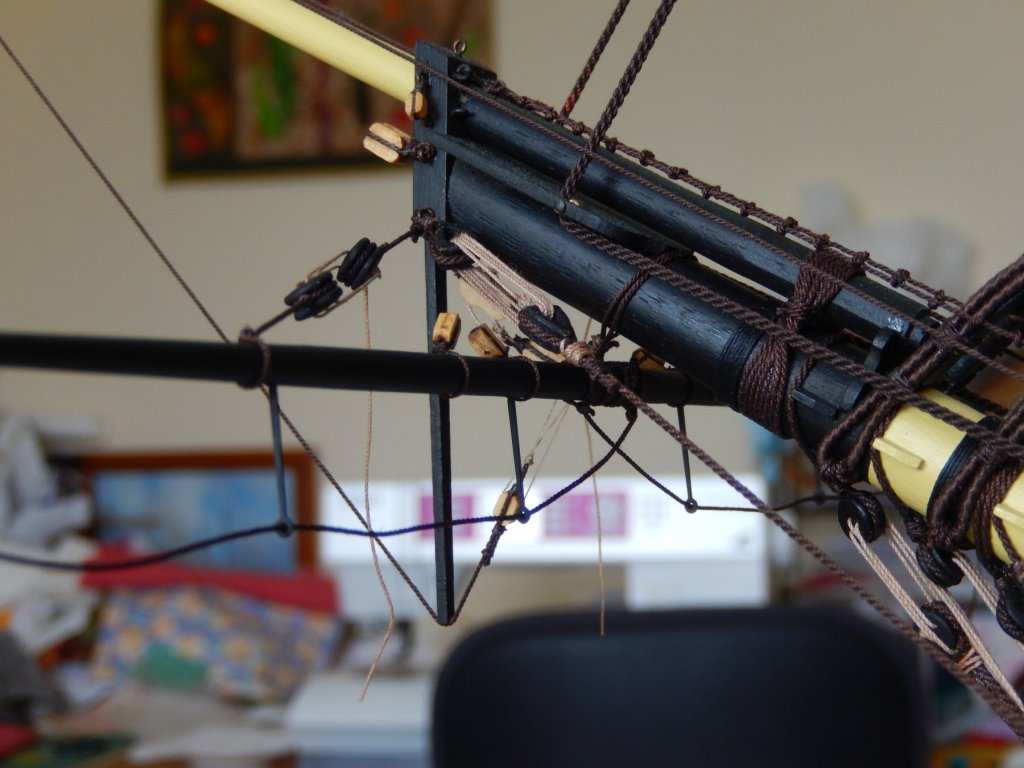
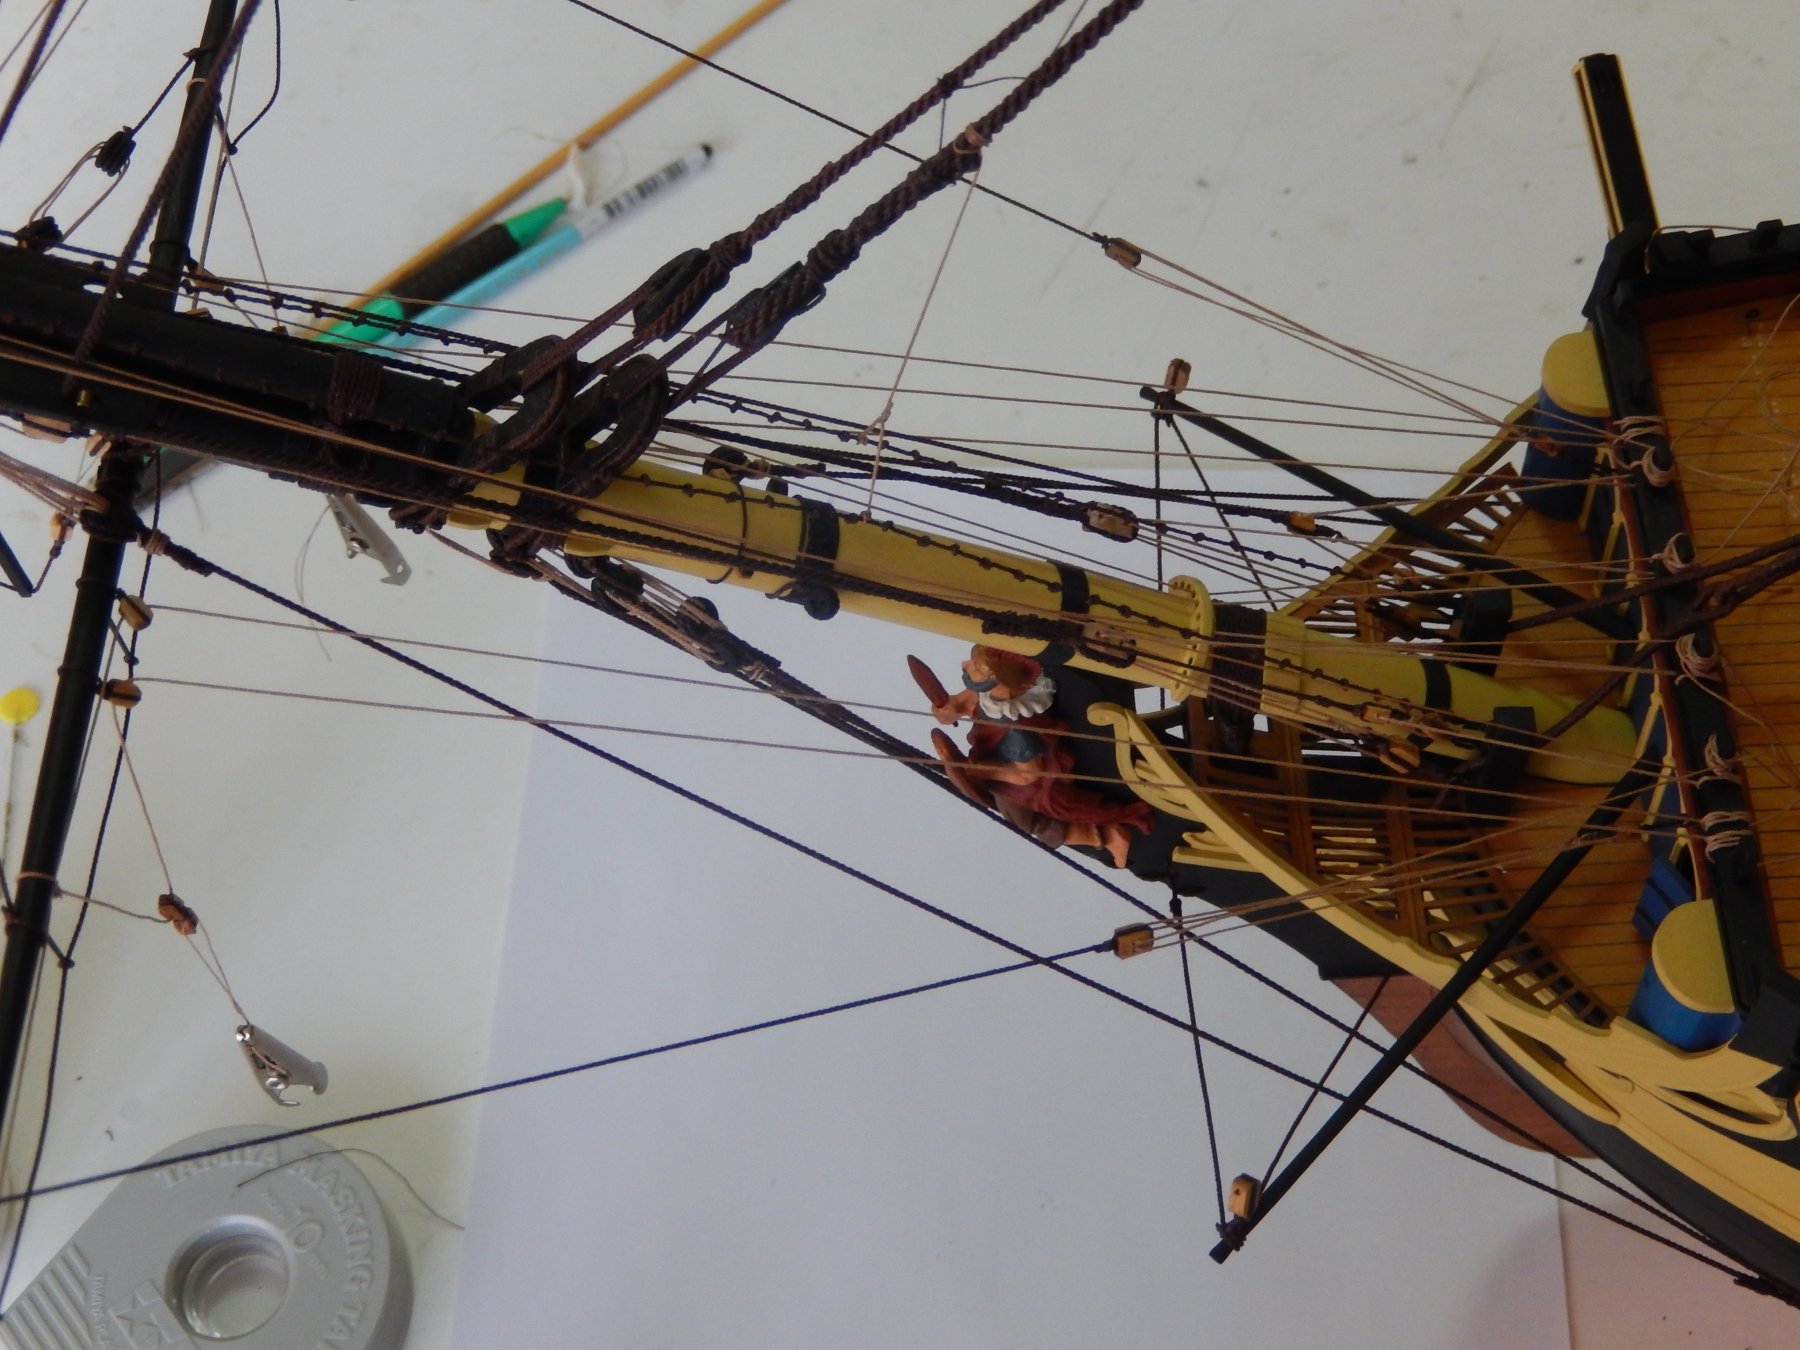
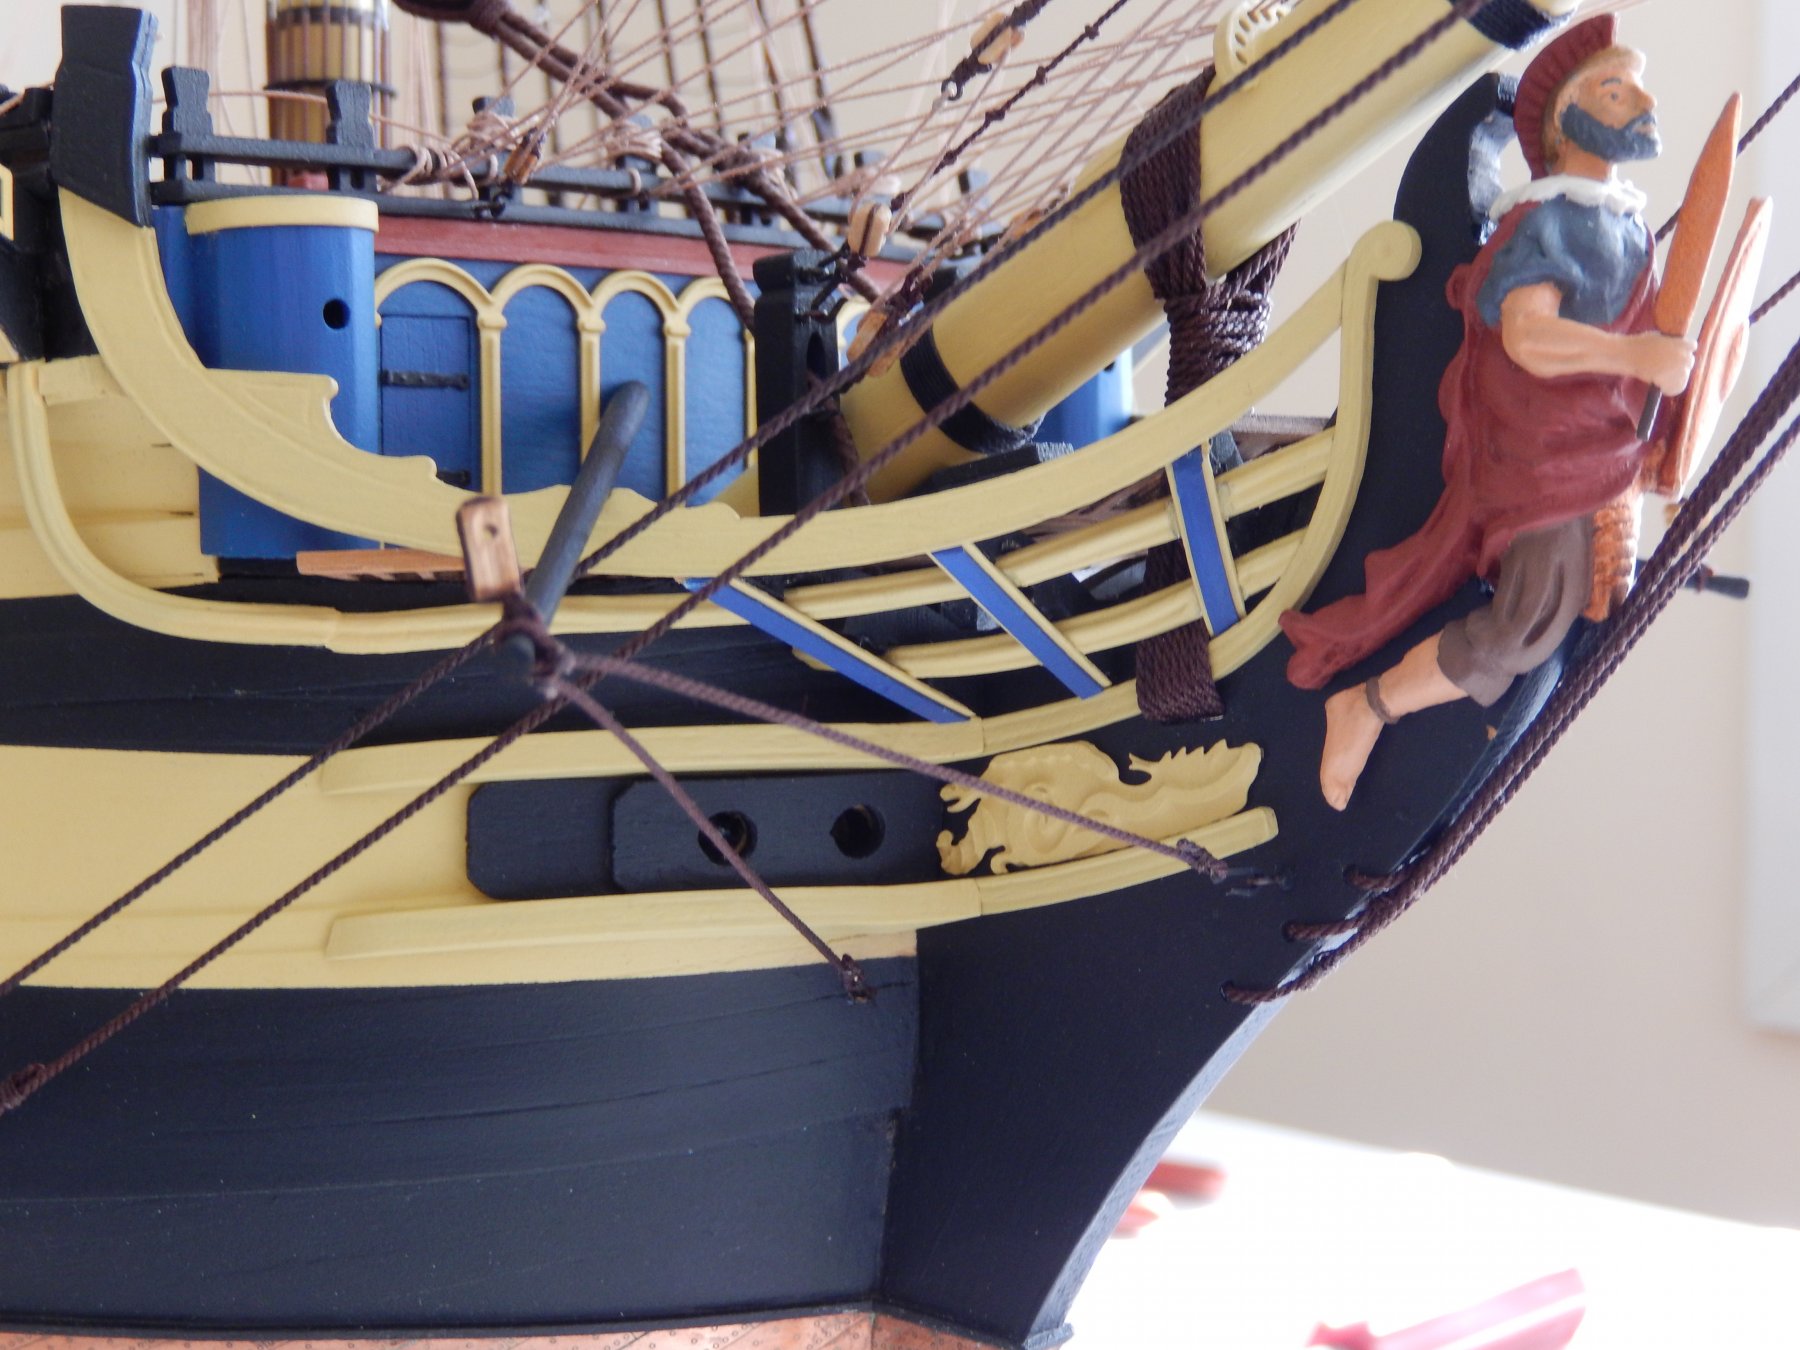
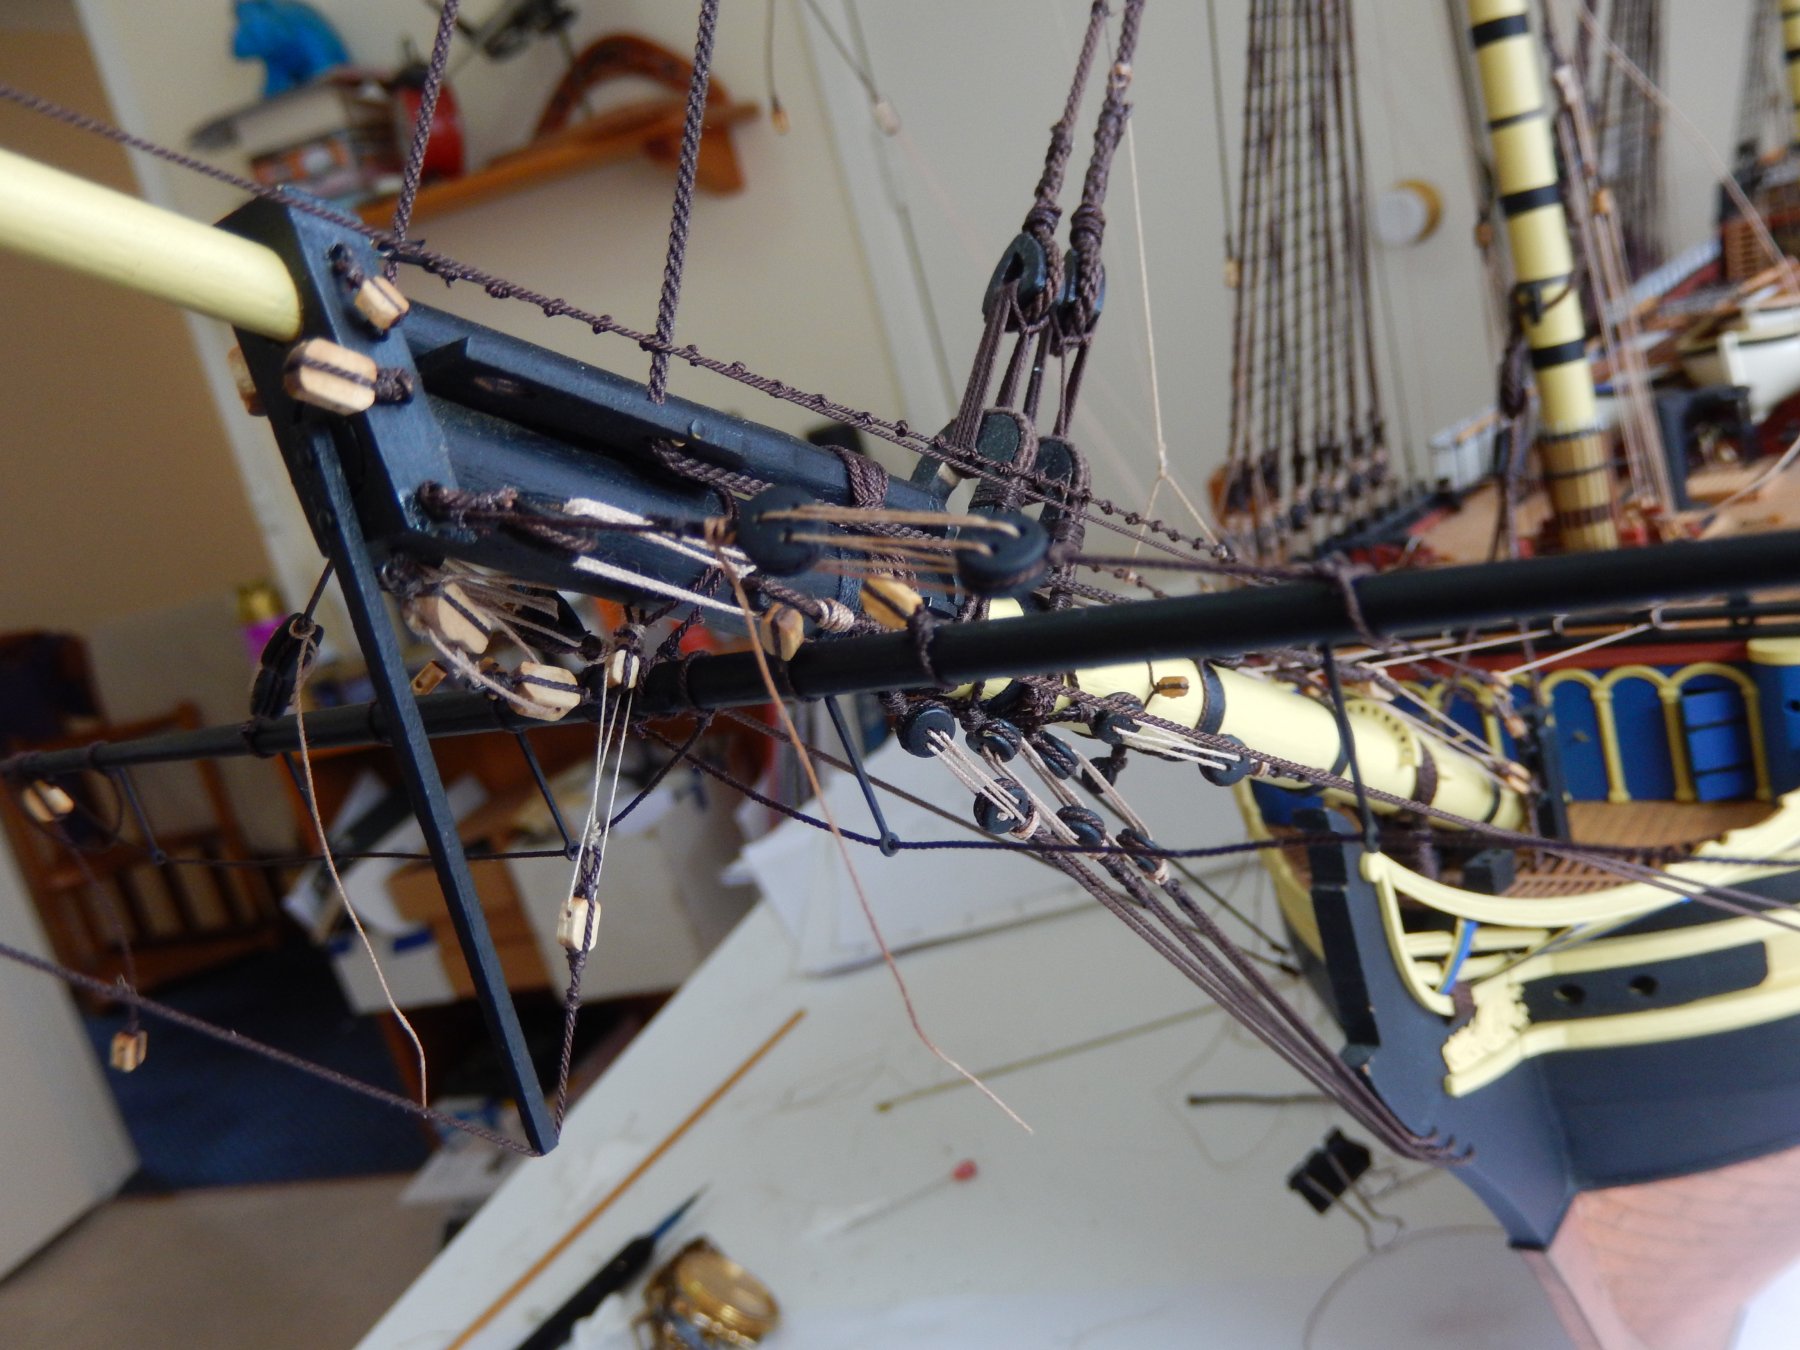
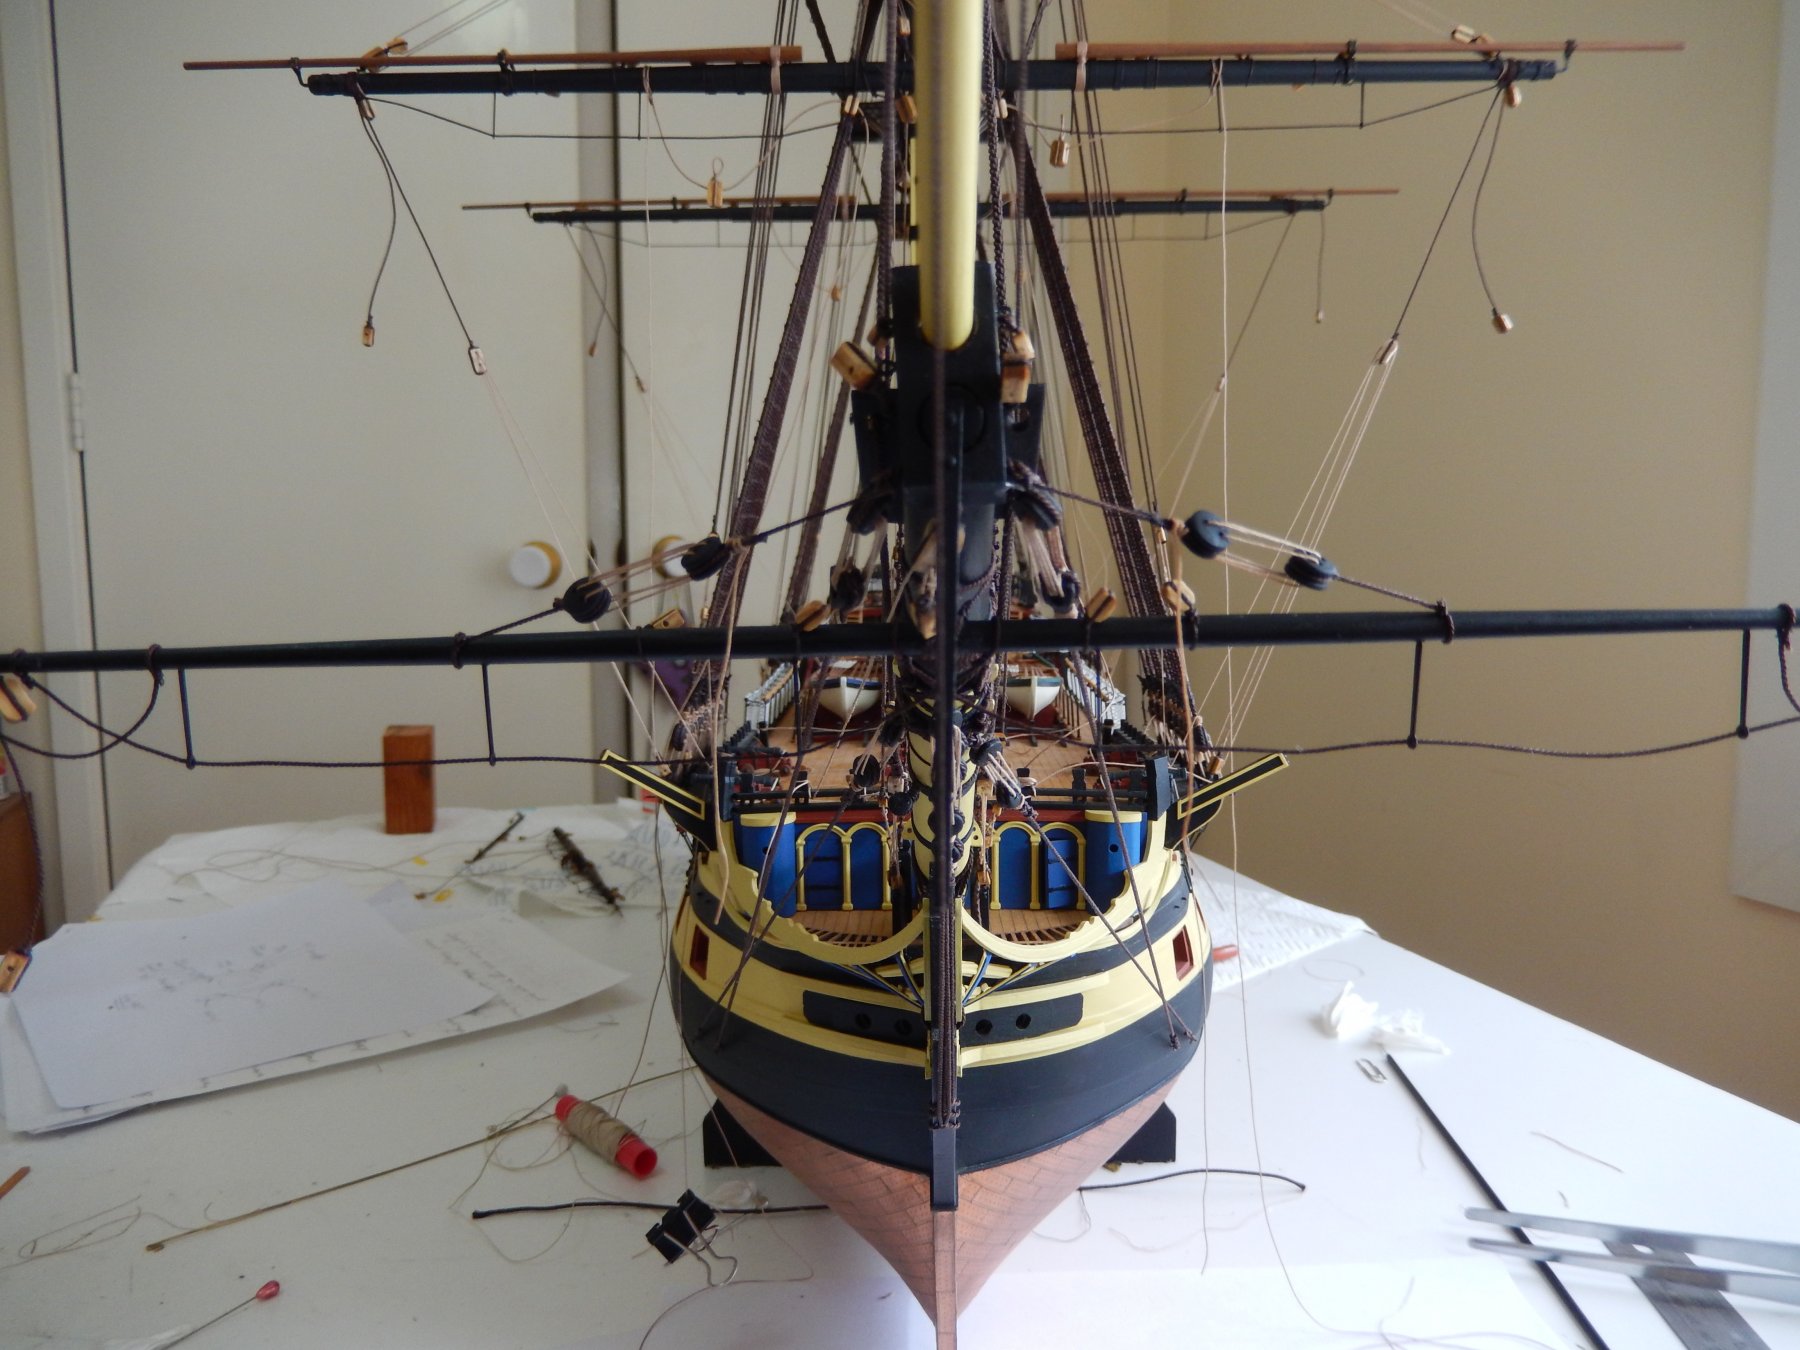
Just to give some idea of the complexity of all this rigging, this is how things stand so far in rigging the bowsprit and related bits and pieces. Just how the sailors dealt with all of this and the skills they must have needed is quite extraordinary. My more immediate problem is how the make the belaying of all these lines look civilised.

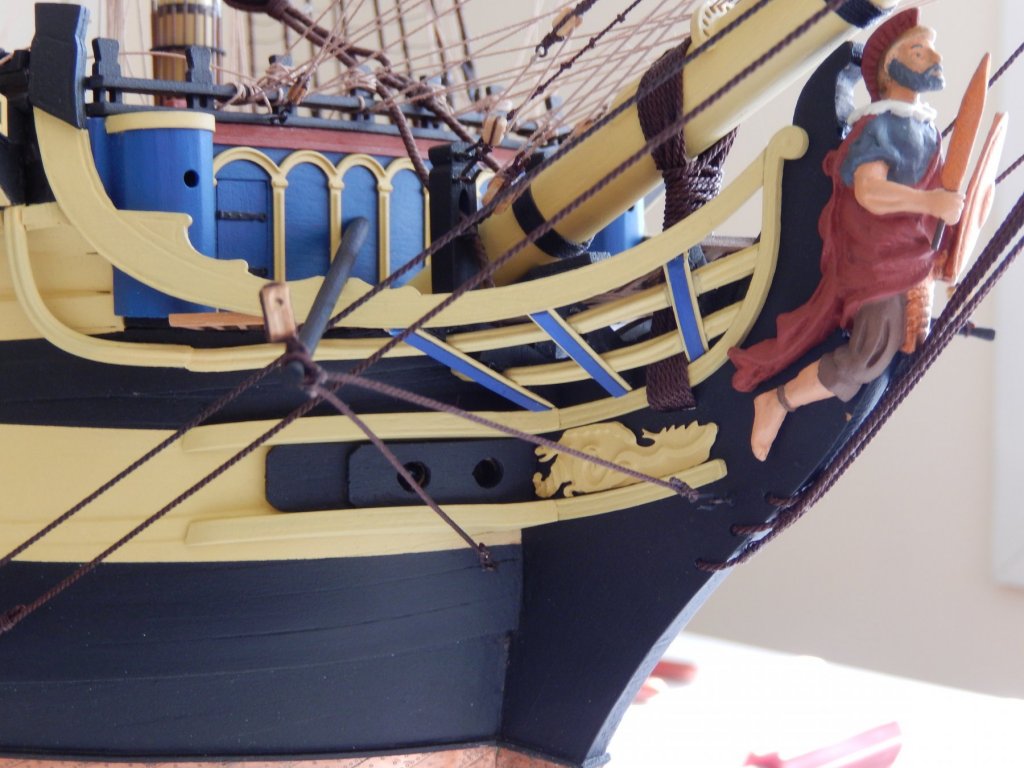
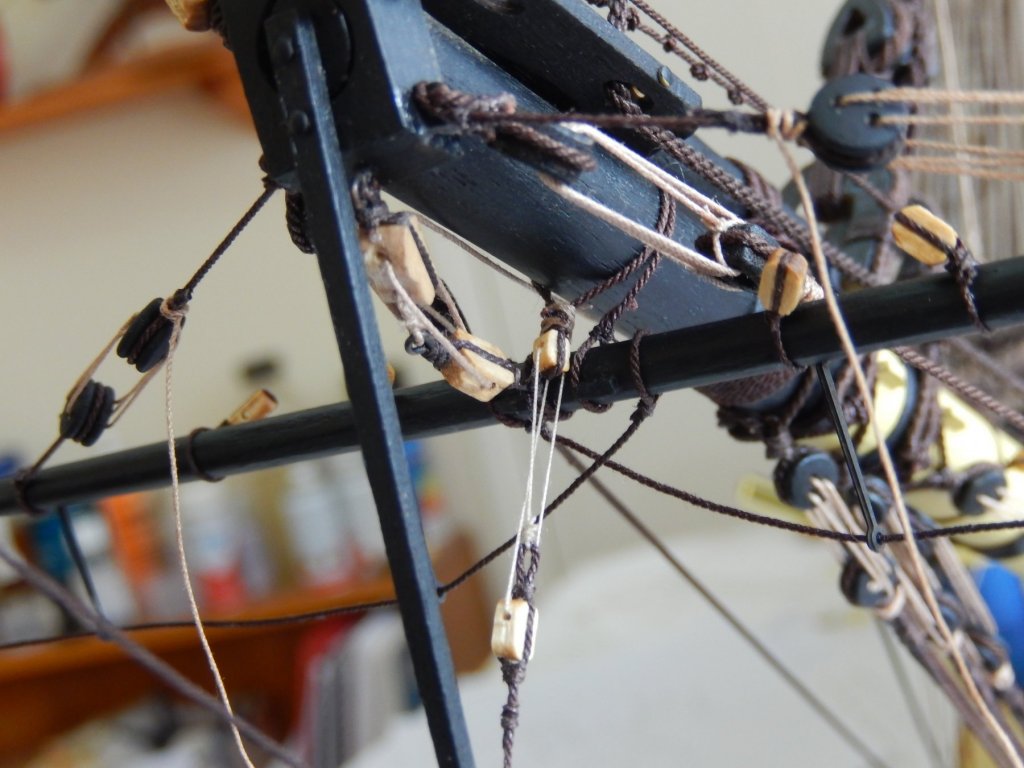
The following photo shows one of the boomkins. It's not clear to me how the supporting lines are to be attached to the hull, nor how the tension on the lines could be adjusted, if at all. I chose to use hooks for the eyelets on the hull (though I suspect this is not strictly correct) and simply tied off the two lines at the end of the boomskins.
- Mirabell61, AON, Beef Wellington and 9 others
-
 12
12
-
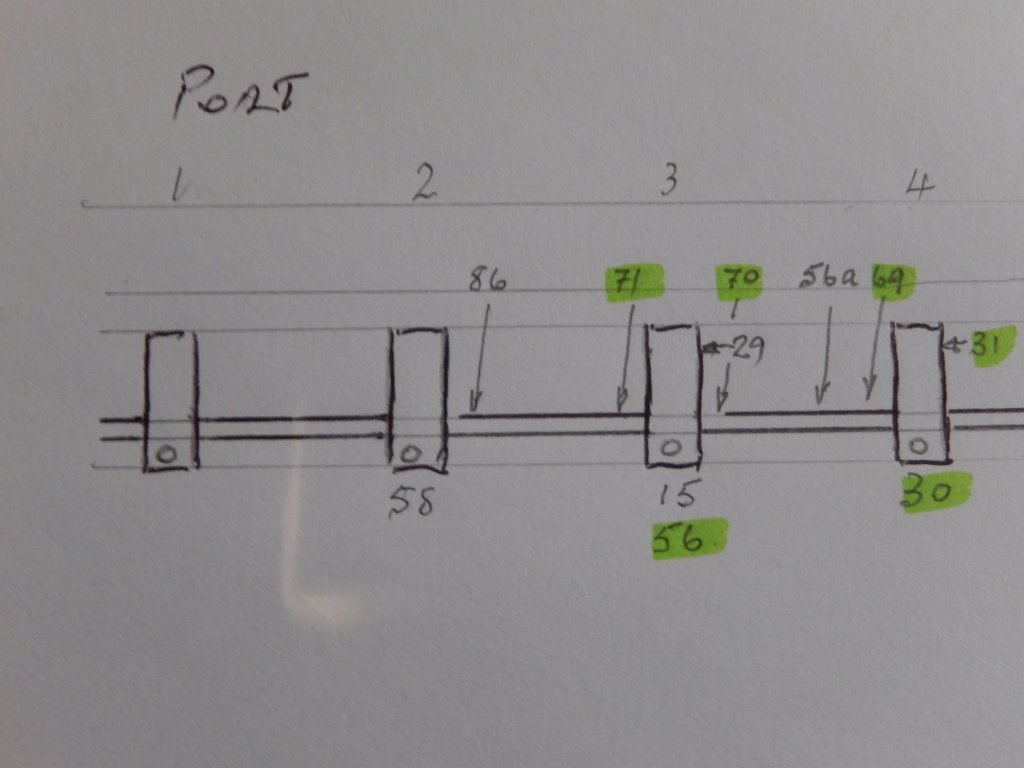
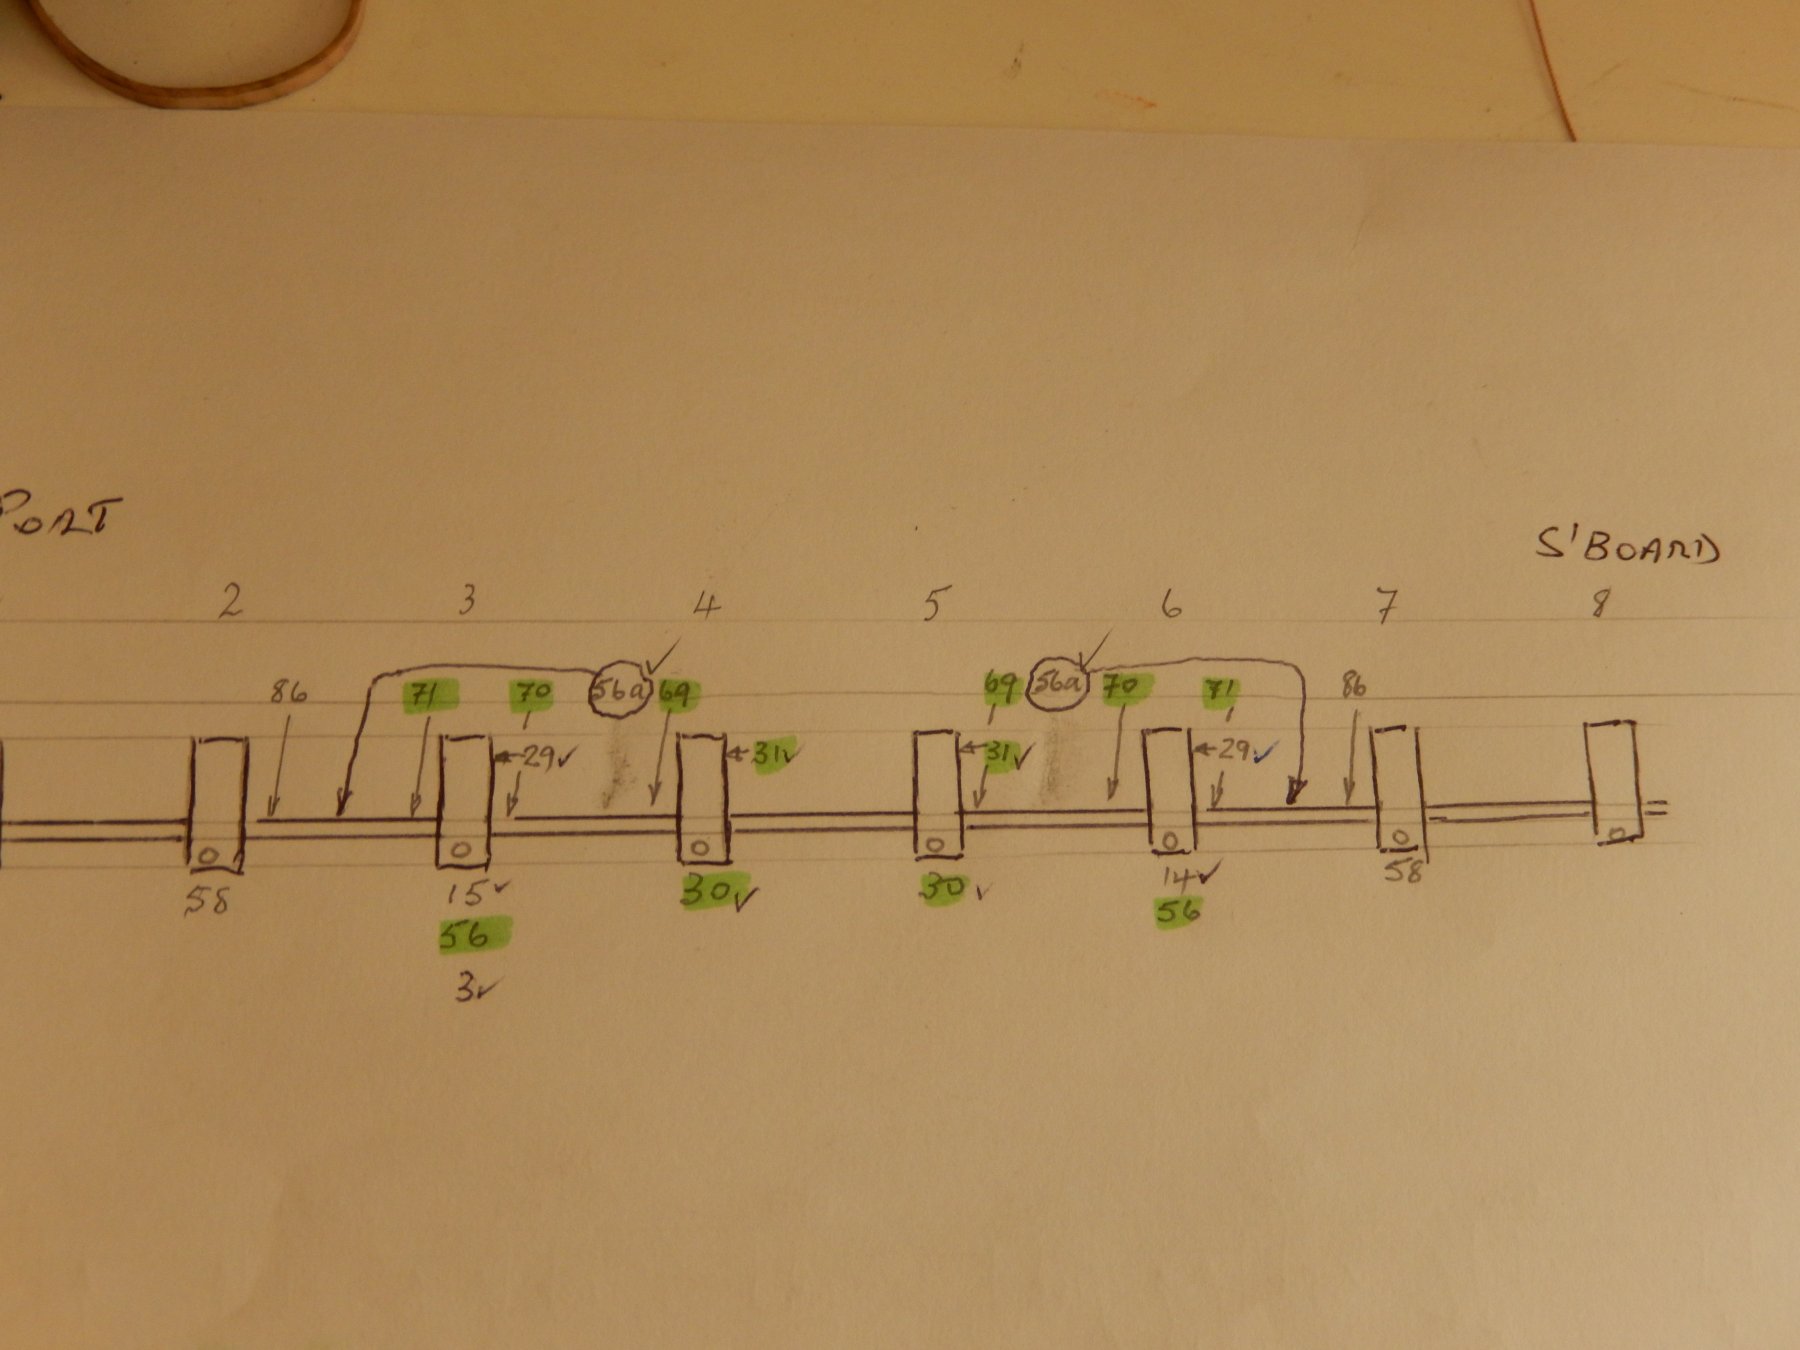
After all this, there is an error . I am away at the moment, but from memory 56a should be between the 2nd and third timberhead. I will post an amendment when I return on Monday (SYdney time).
-
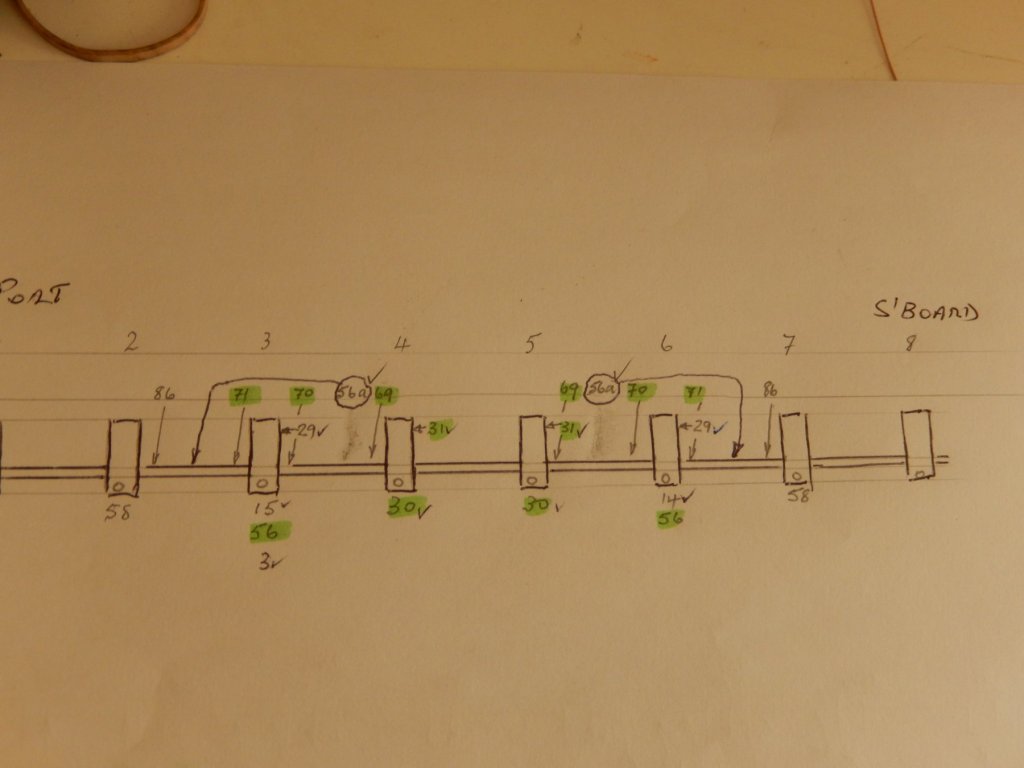
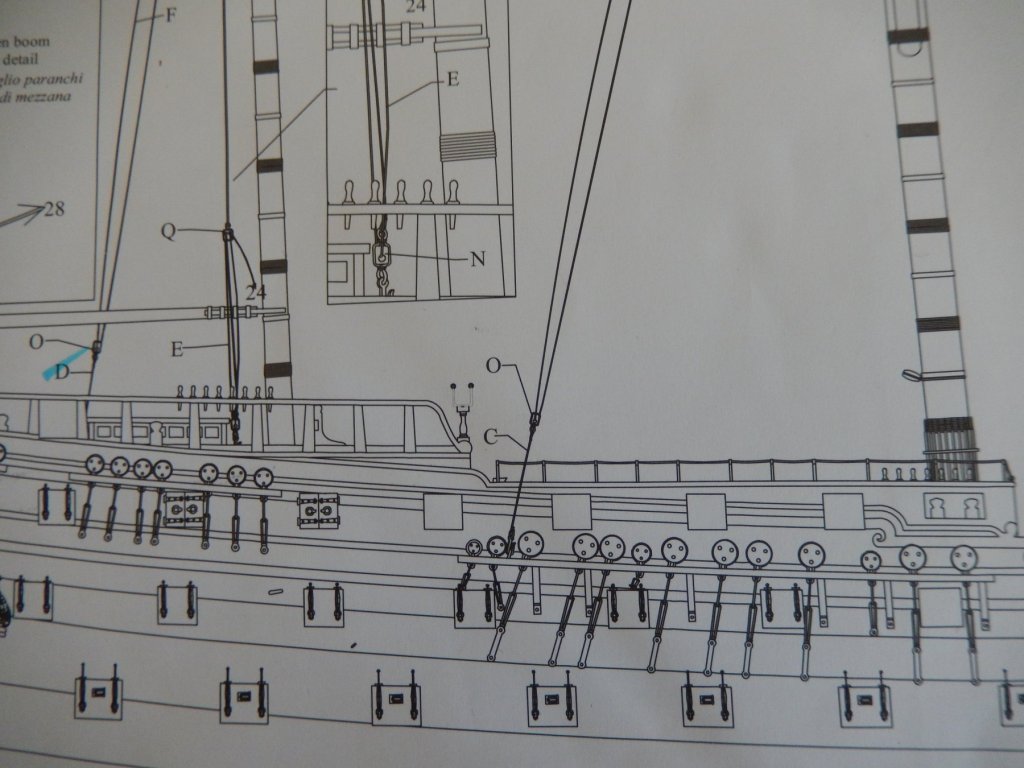
Some thing I should have done a long time ago: put together the positions specified for the lines to be made off to the timberheads. The specifications are spread across three plans, and it turns out that there is a total of 22 lines to be belayed. Crowded is an understatement. I will have to now untie a number of lines I had 'finally' tied off.
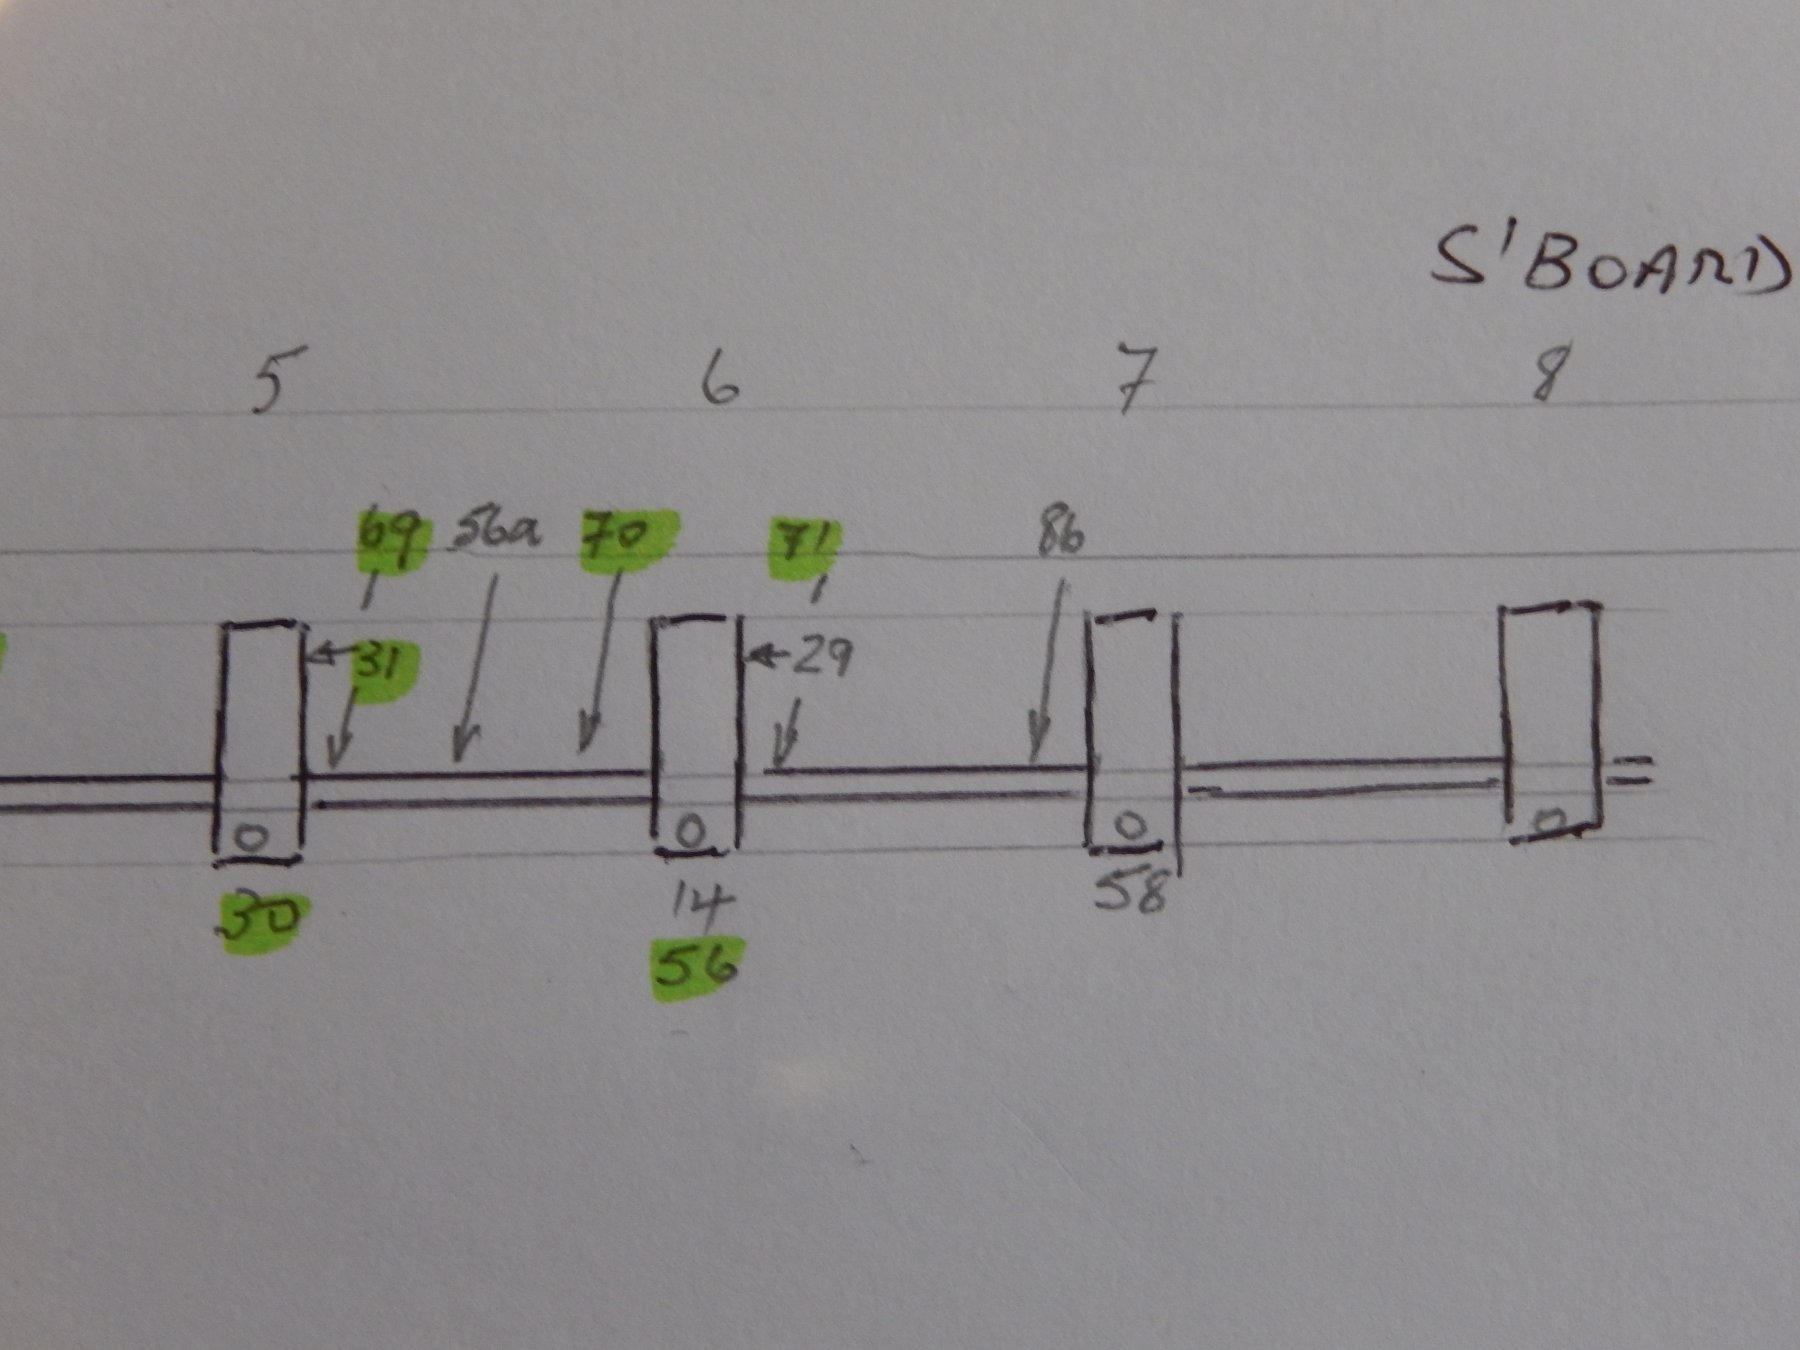
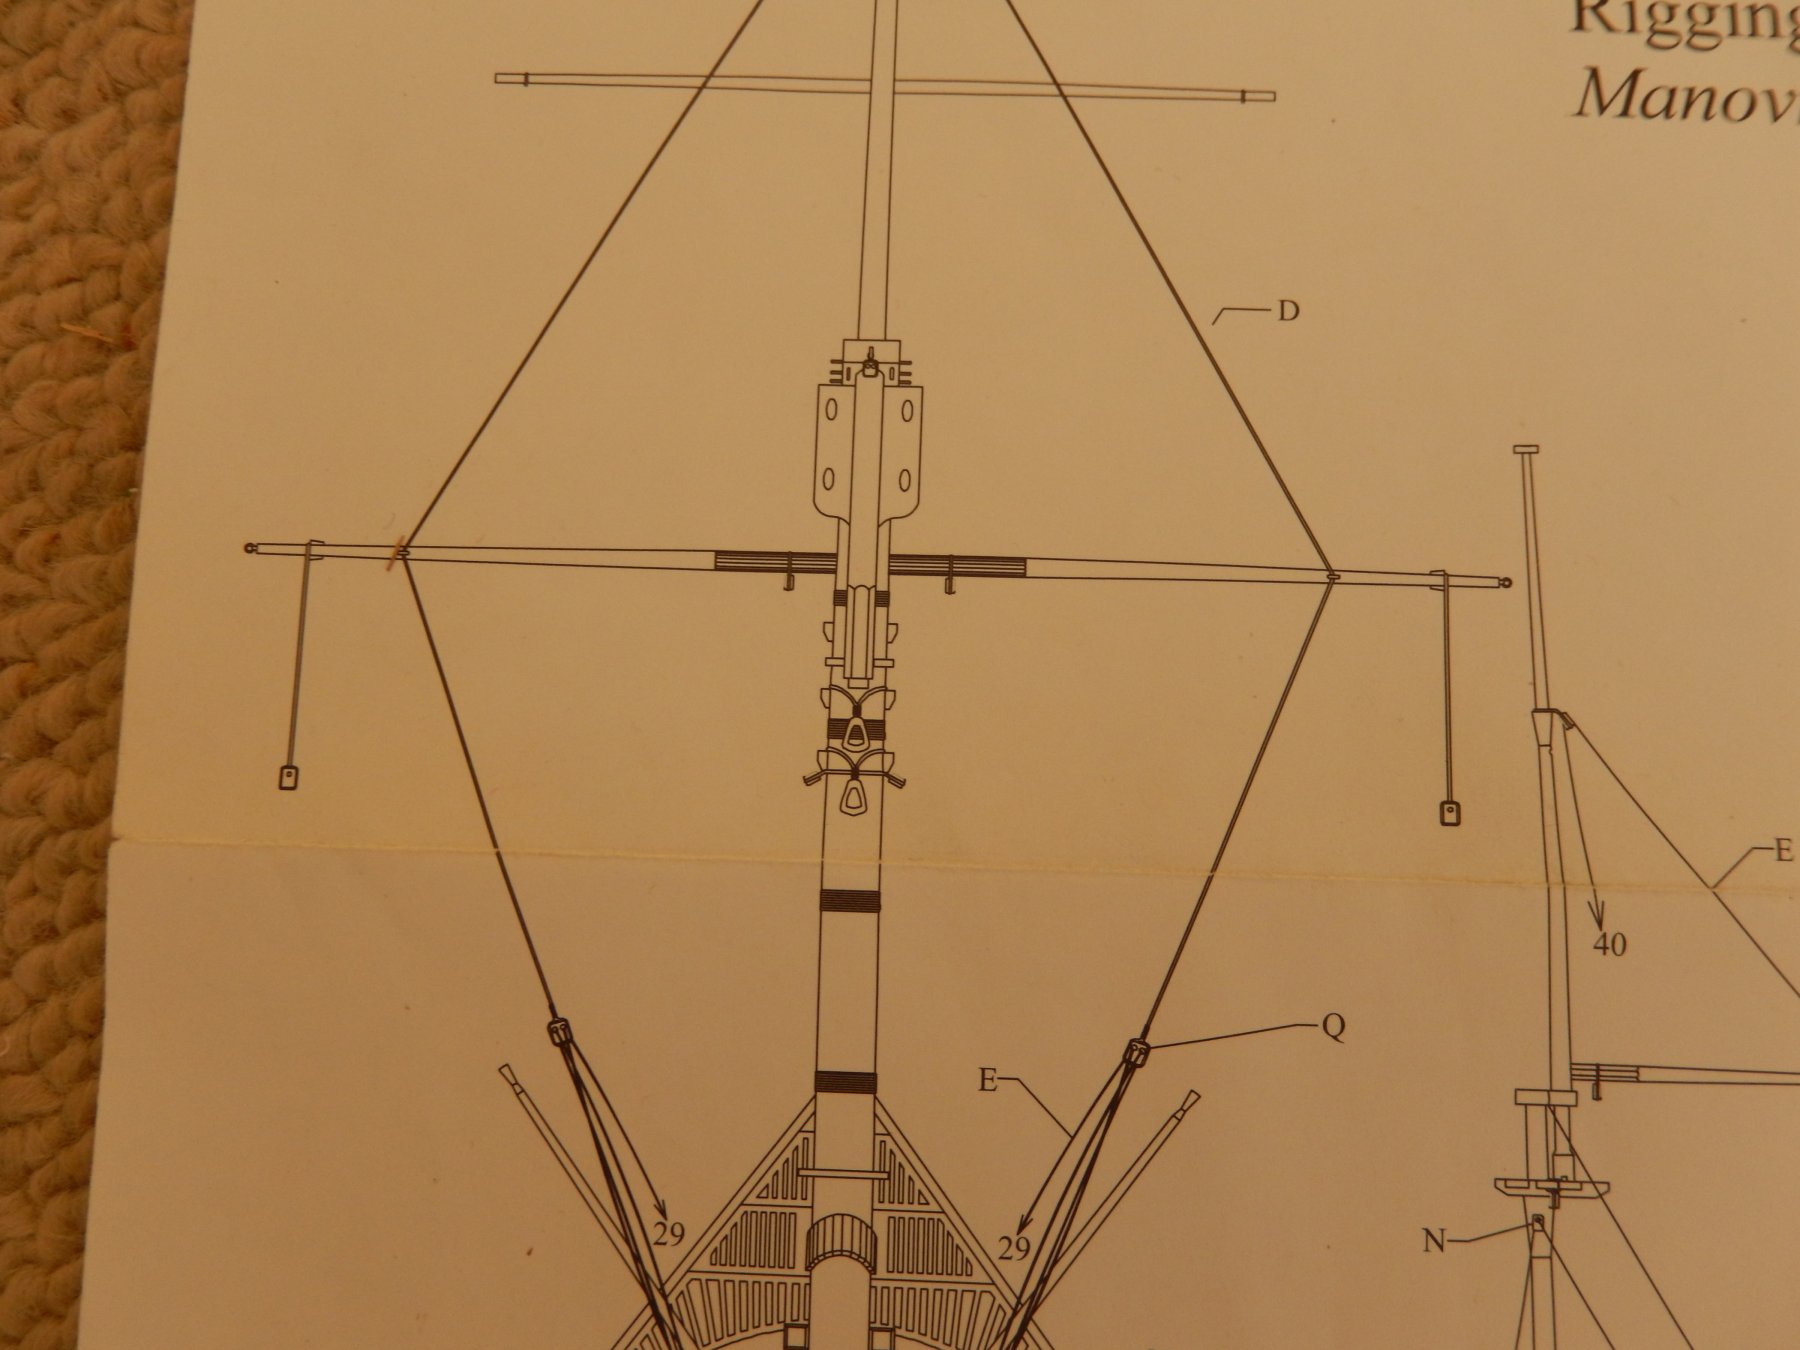
In the following drawing I have tried to indicate where each line is supposed to go. The timberheads are numbered 1 to 8 from port the starboard. The numbers indicate the lines and where they are positioned. Those below the line and near the 'holes' go through those holes in the respective timberheads. Those with the numbers pointing to the top of the timberheads (eg, 29) are, I assume are to be tied there. The lines above those are apparently tied to the horizontal timber where the arrows are pointed. The lines highlighted in green go through the fairlead.

The following shows it all a little more clearly.

-
Thanks Tim. I thought that maybe the likely cause. Sydney weather has been all over the place this year.
-
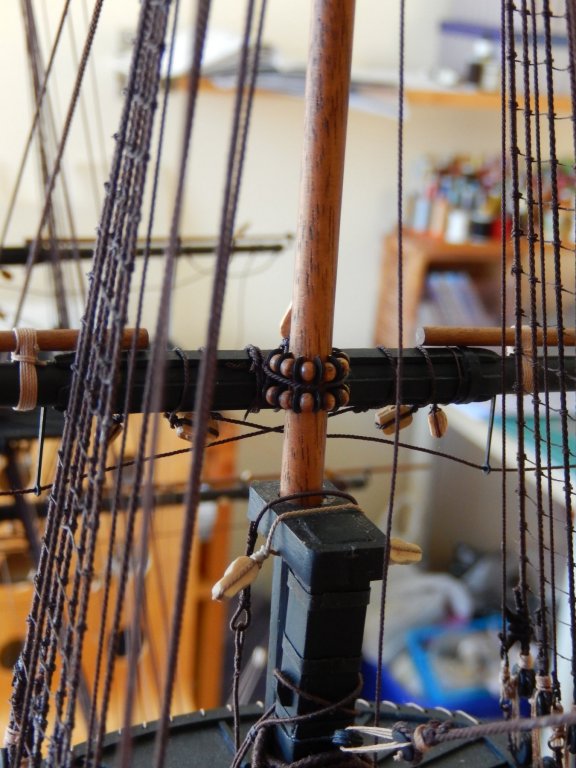
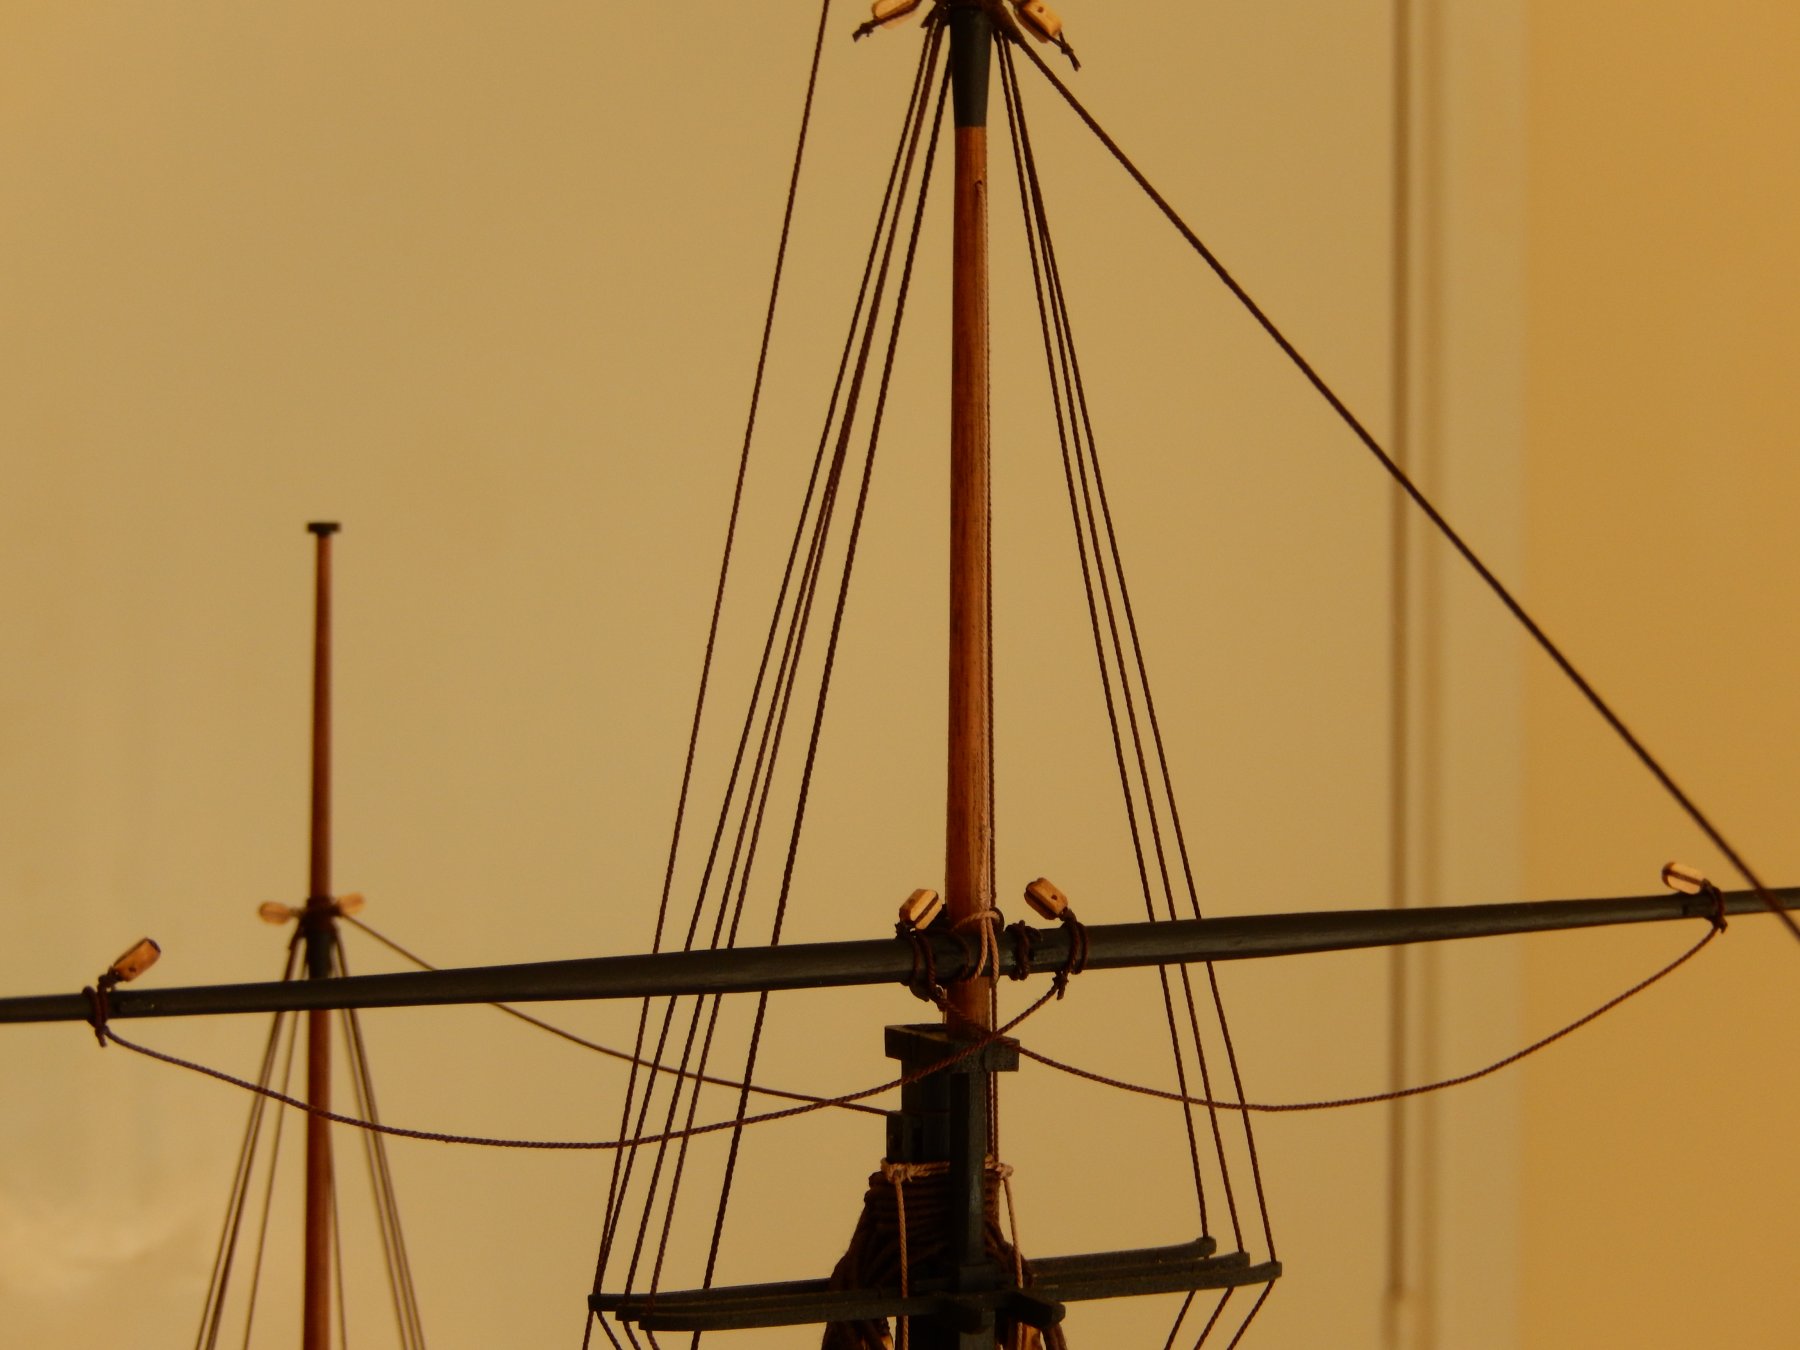
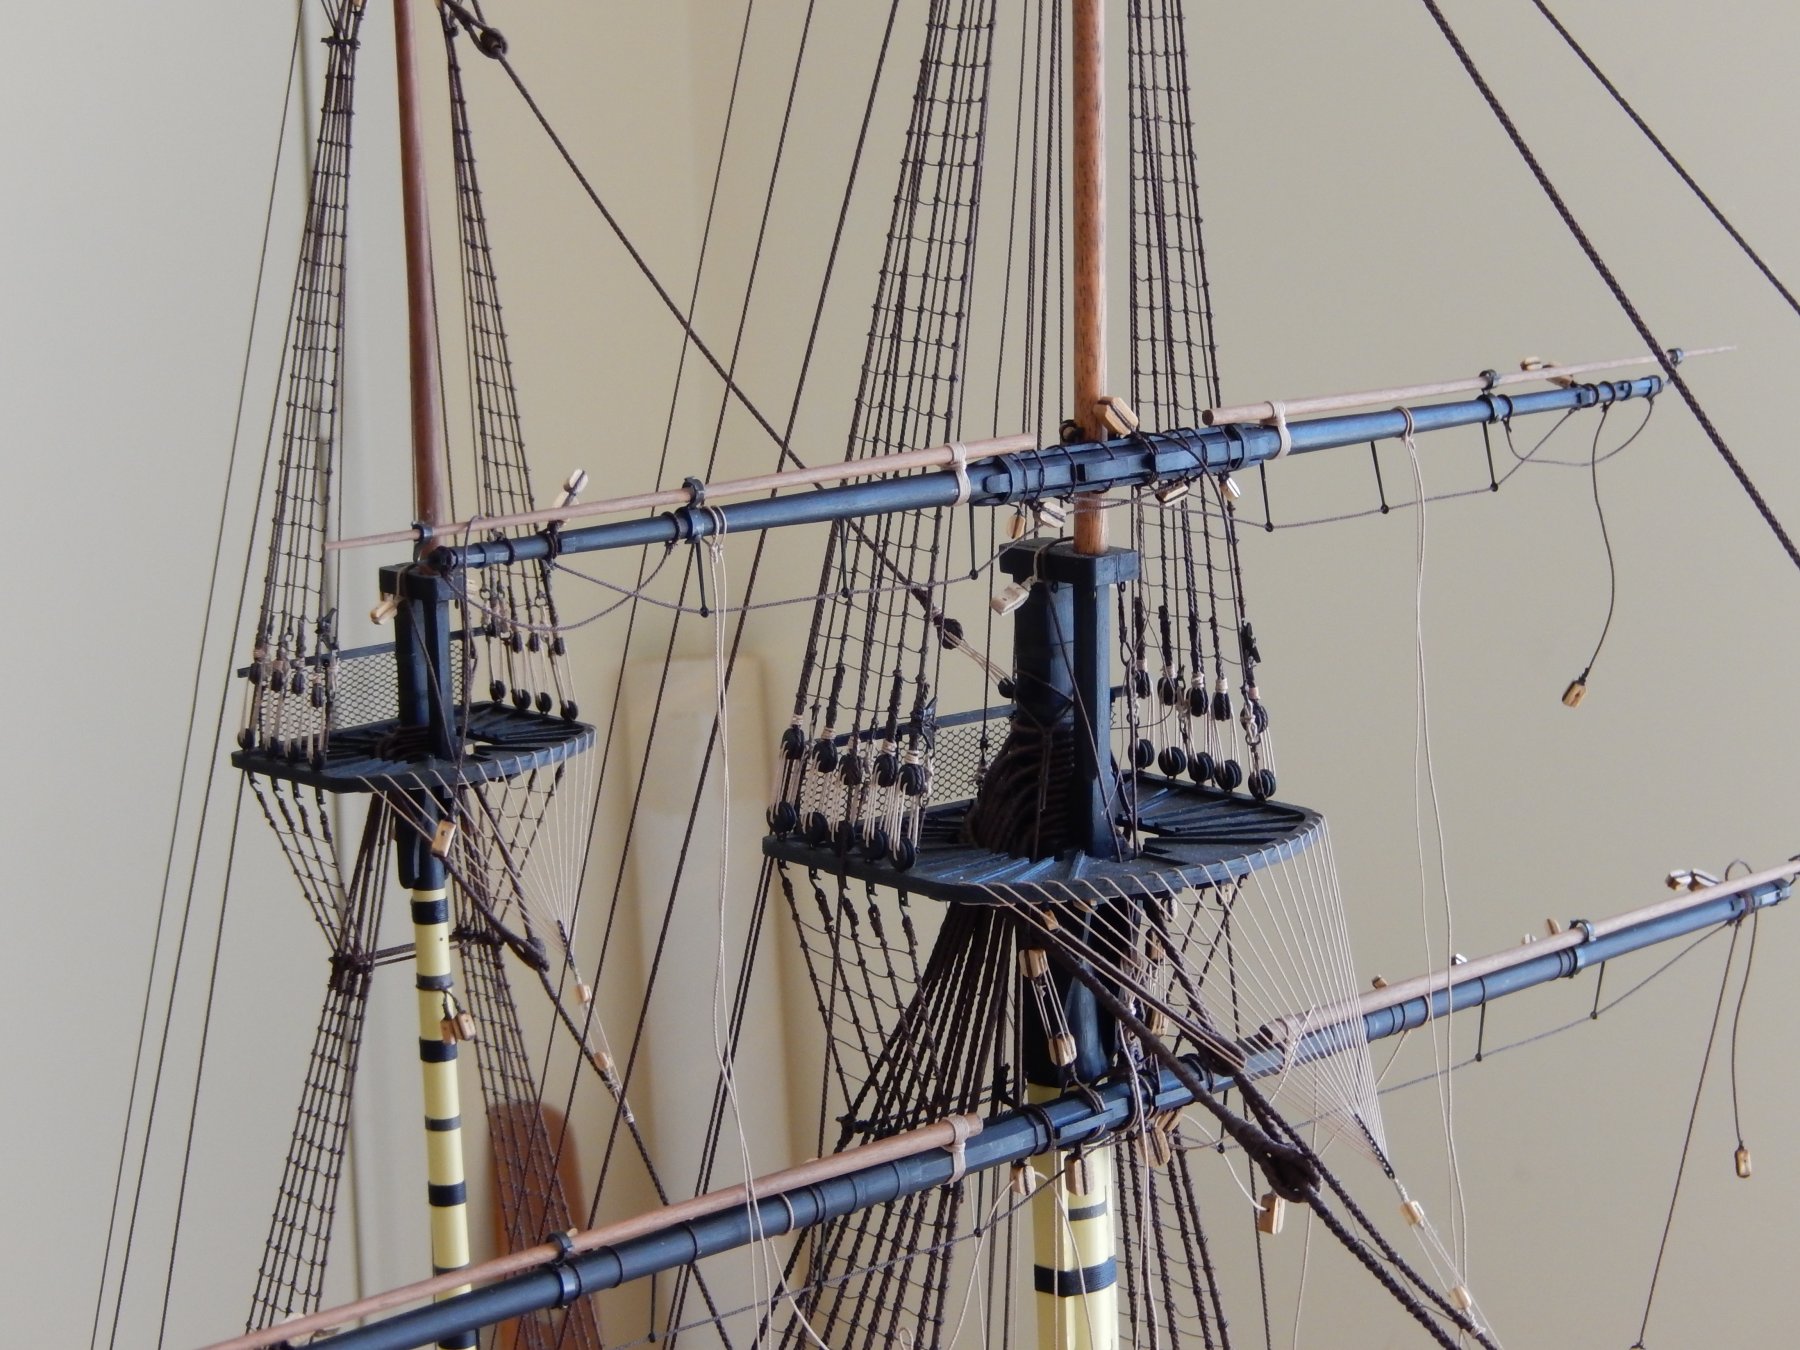
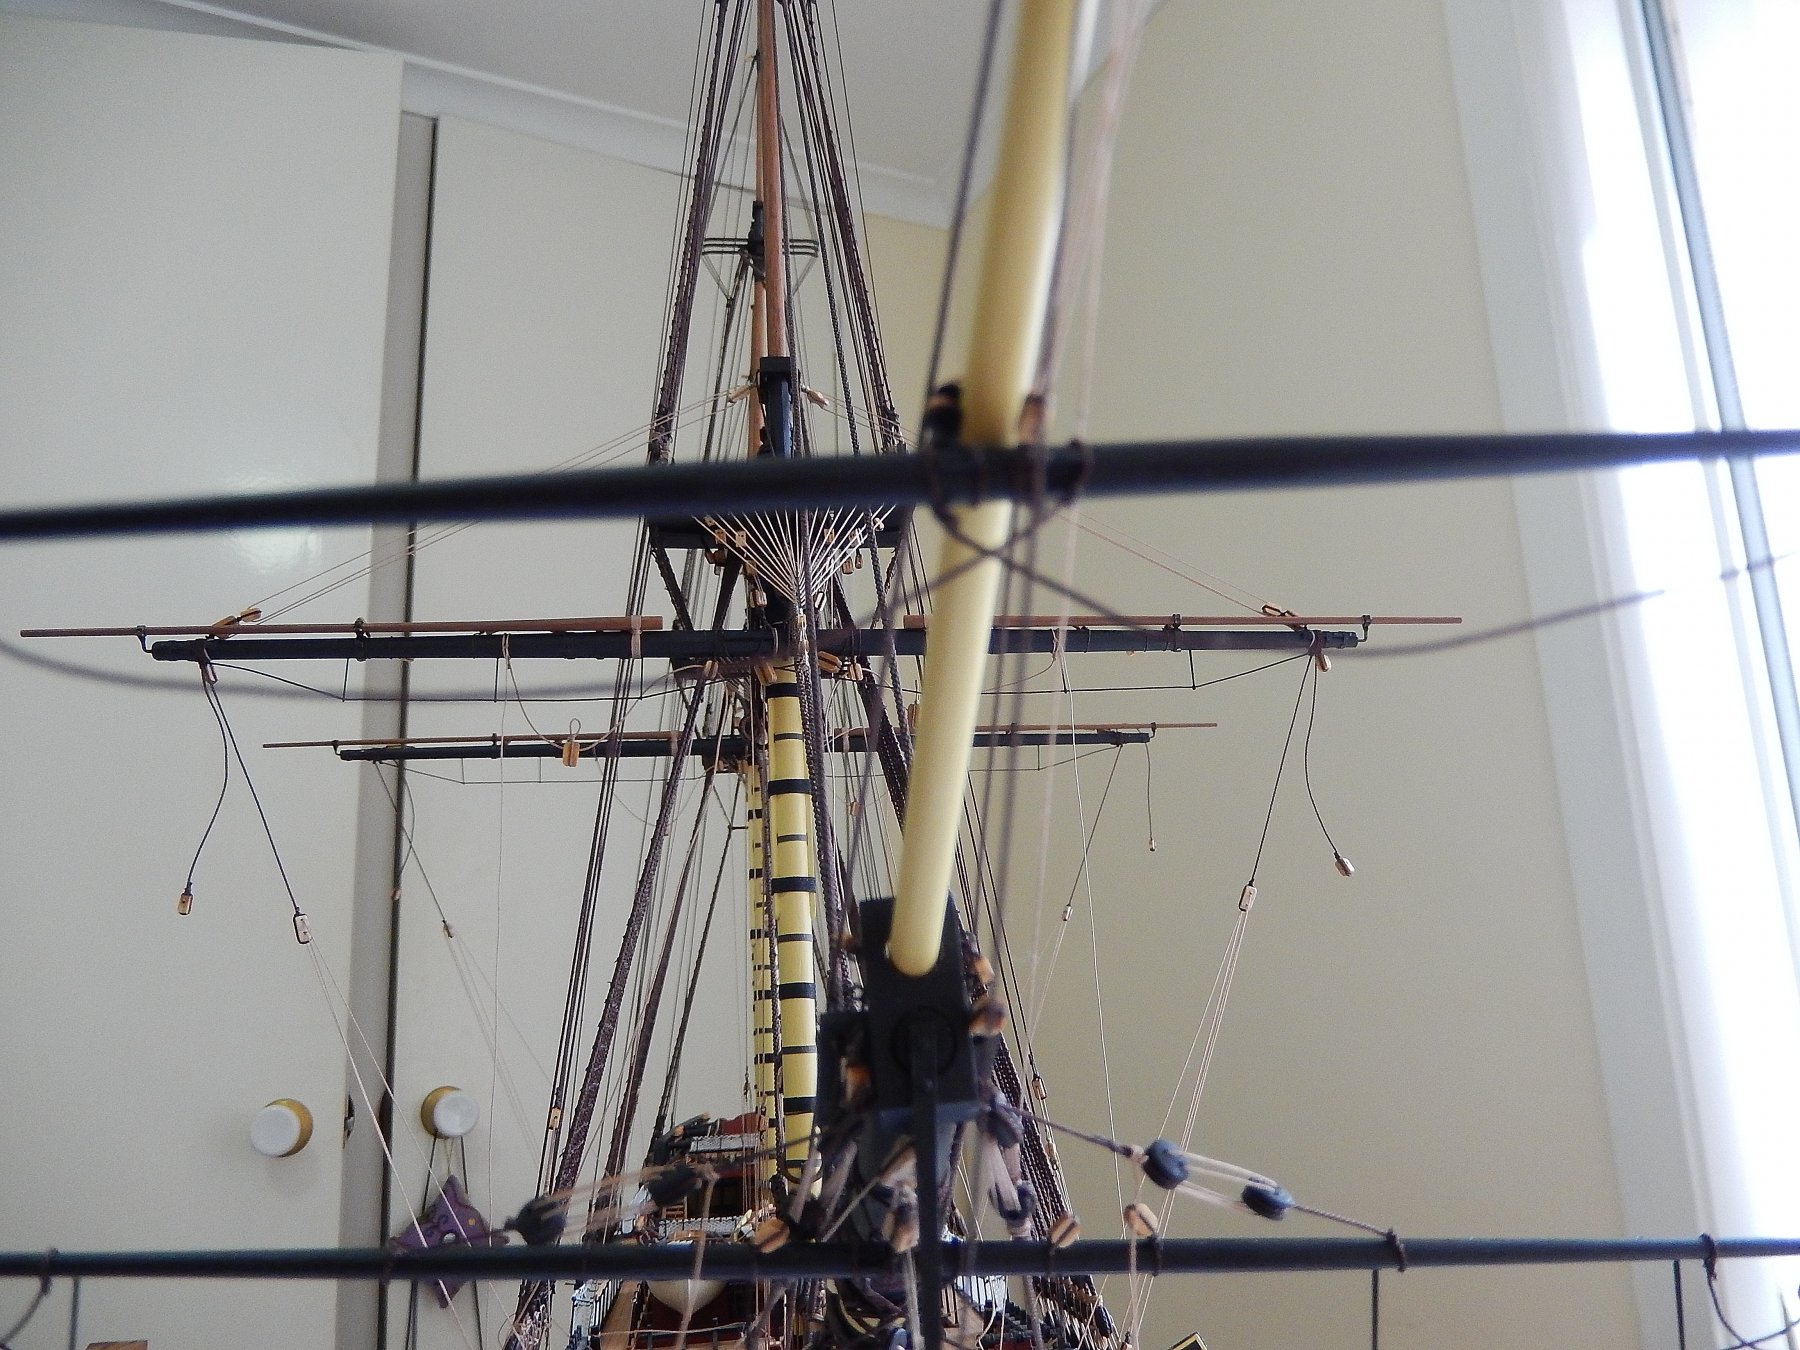
Having been suitably chastened by my own goal, further progress has been made. The mizzen topgallant yard is now on and the lifts are done for the top yards, though none have been finally made off. This leaves the driver boom and gaff still to do.
Here is the mizzen topgallant yard. There is a slight droop in the mizzen and main topgallant stays. This is a bit of a mystery. Some days it's there, others it's not. I will wait until the rigging is almost complete and if necessary, tighten up a couple of backstays which will fix the problem.
The lifts are still to be done for the topgallant yards, but without them they line up fairly well.
Alan: driving on the wrong side of the road - have you sat in the passenger seat and reached for the steering wheel? You get some very strange looks.

- mort stoll, Tim Curtis and CDW
-
3
-
AaaaaagH! you're right.
 Mea culpa. I plead some small mitigation - in every other technical drawing I've seen, the plan is on the bottom, the elevations on the top.
-
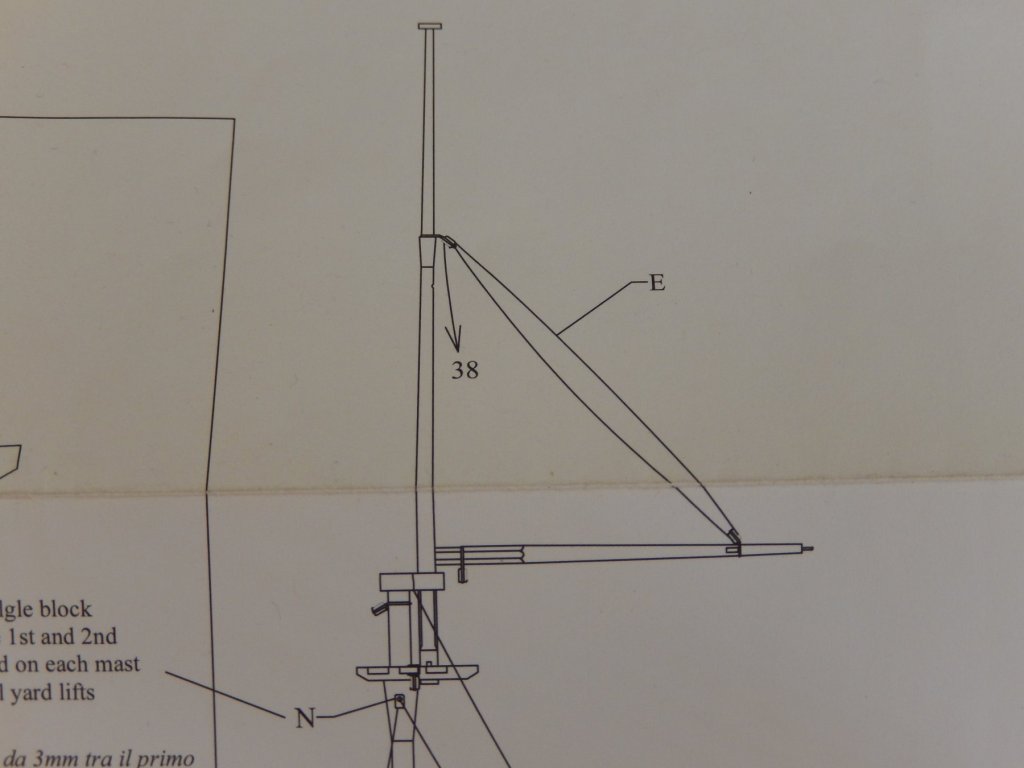
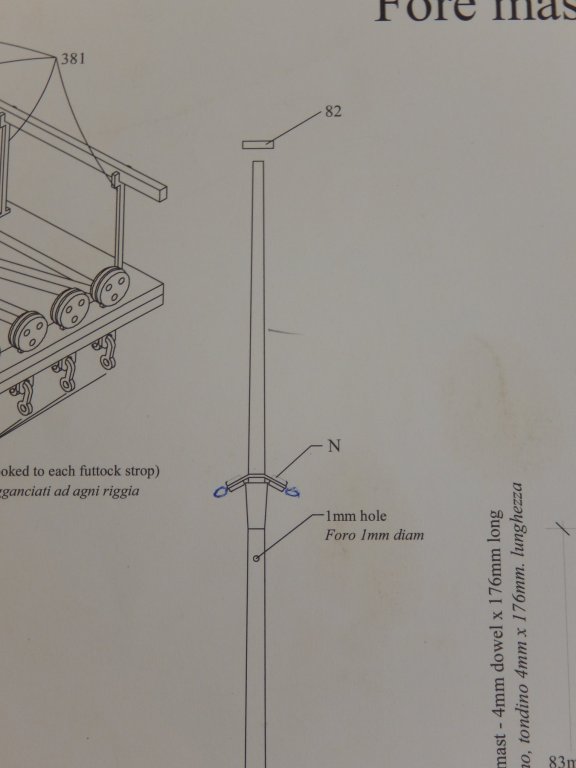
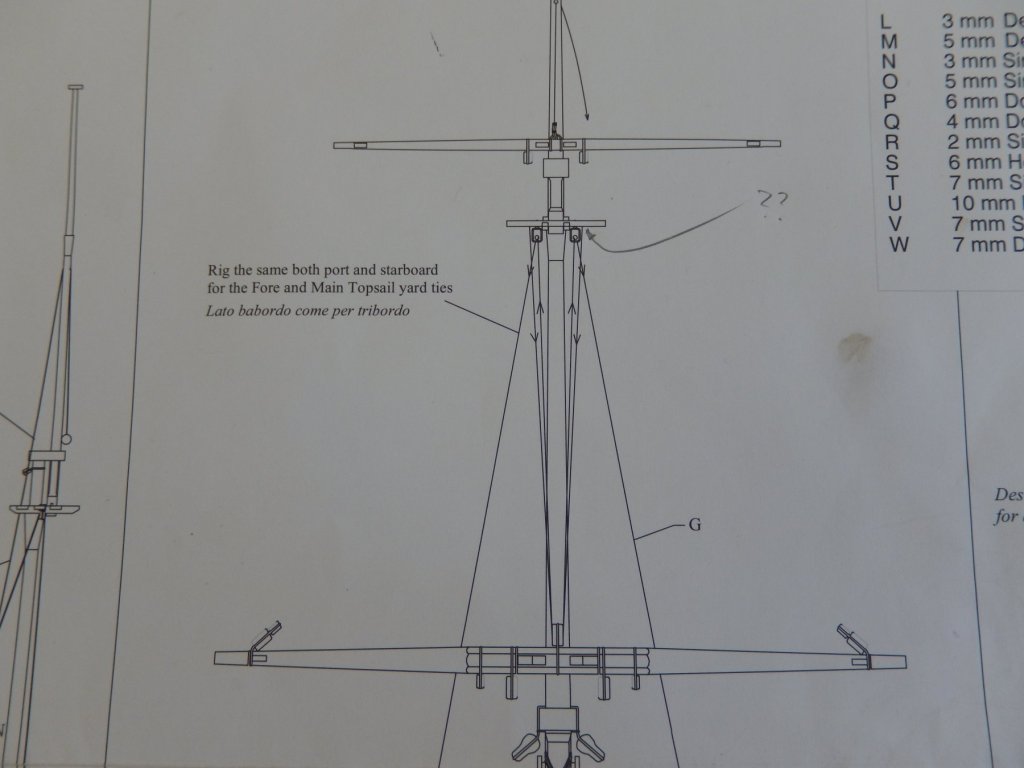
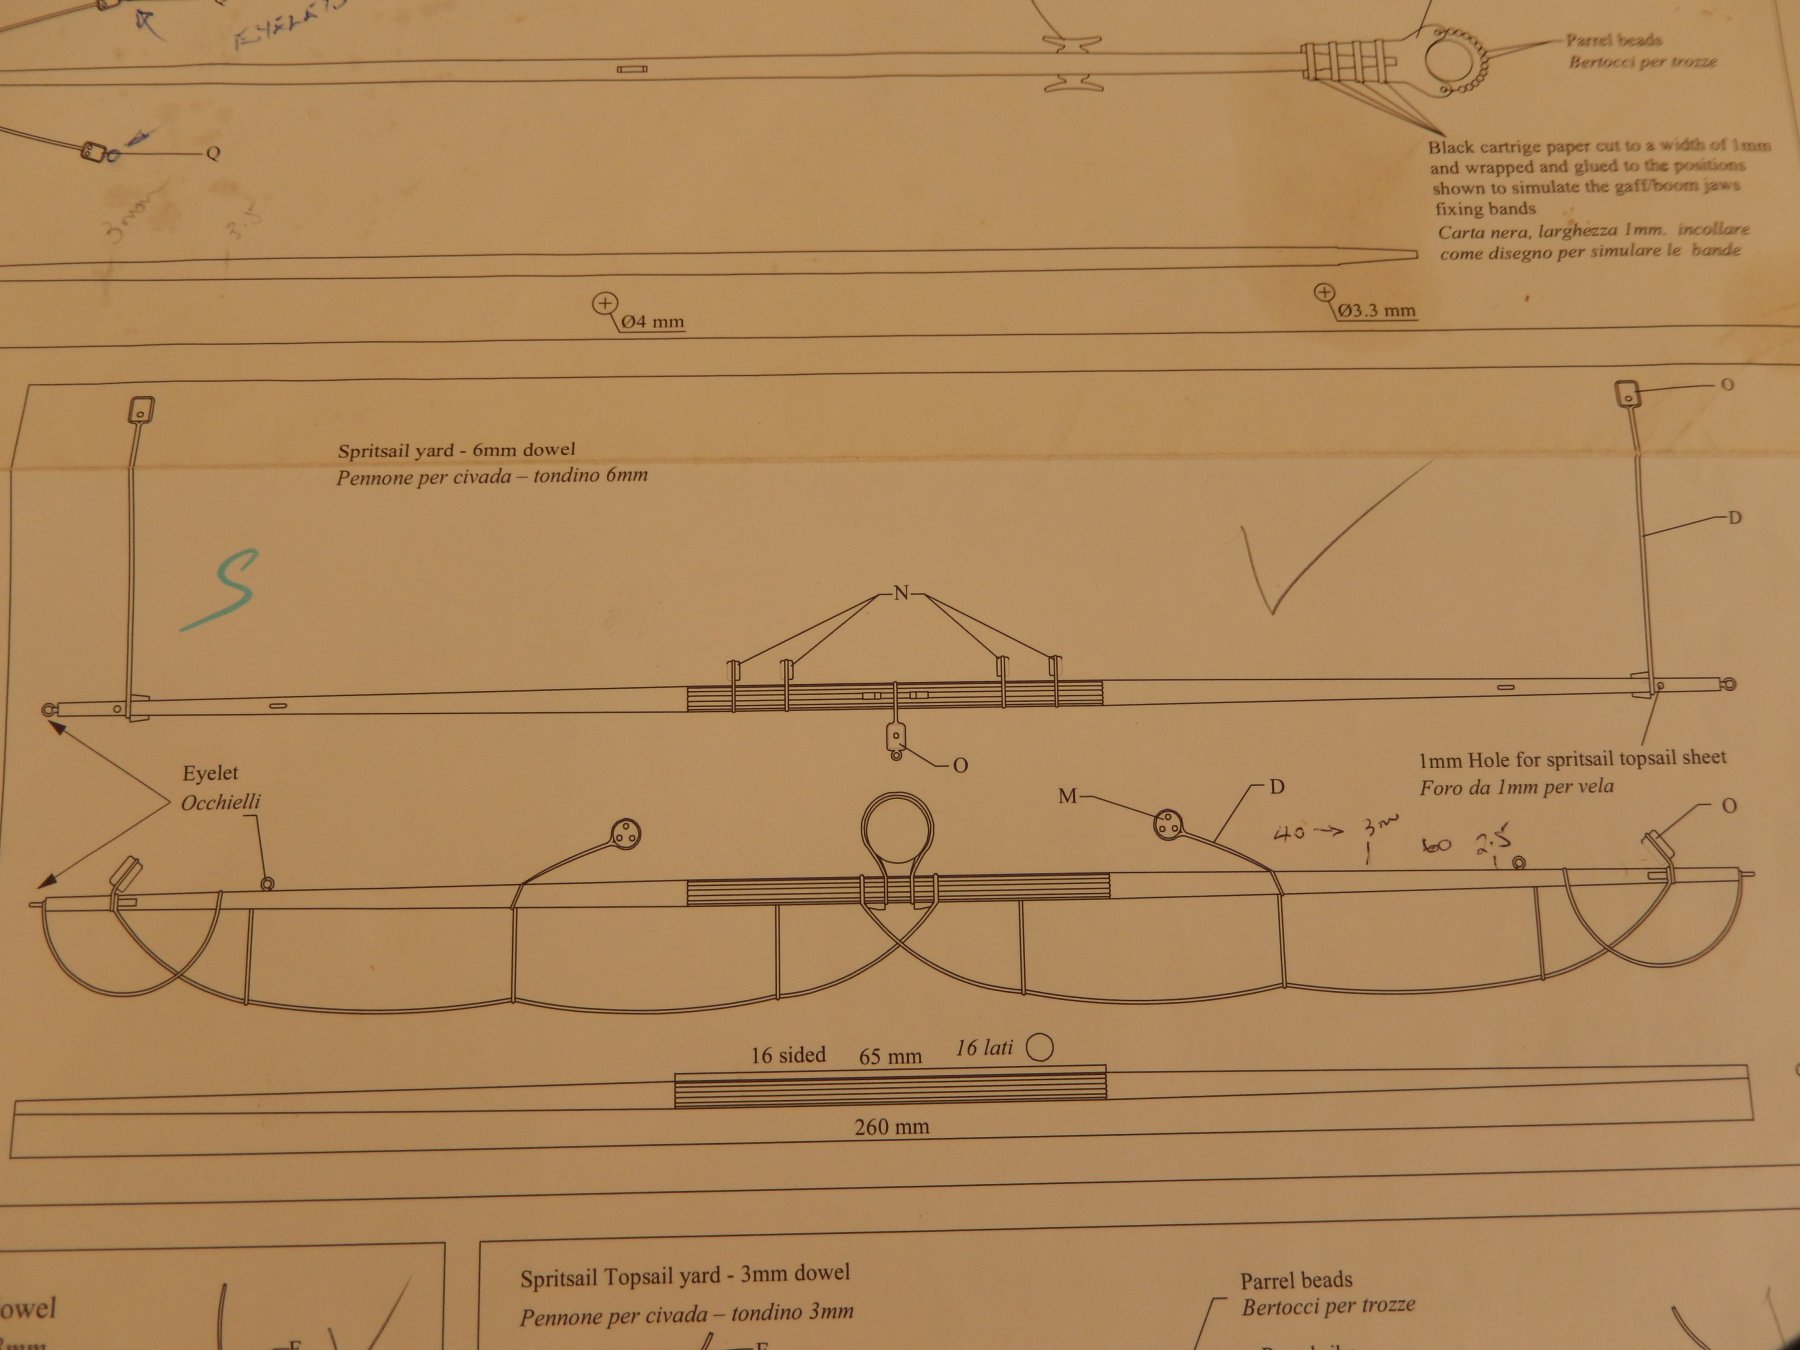
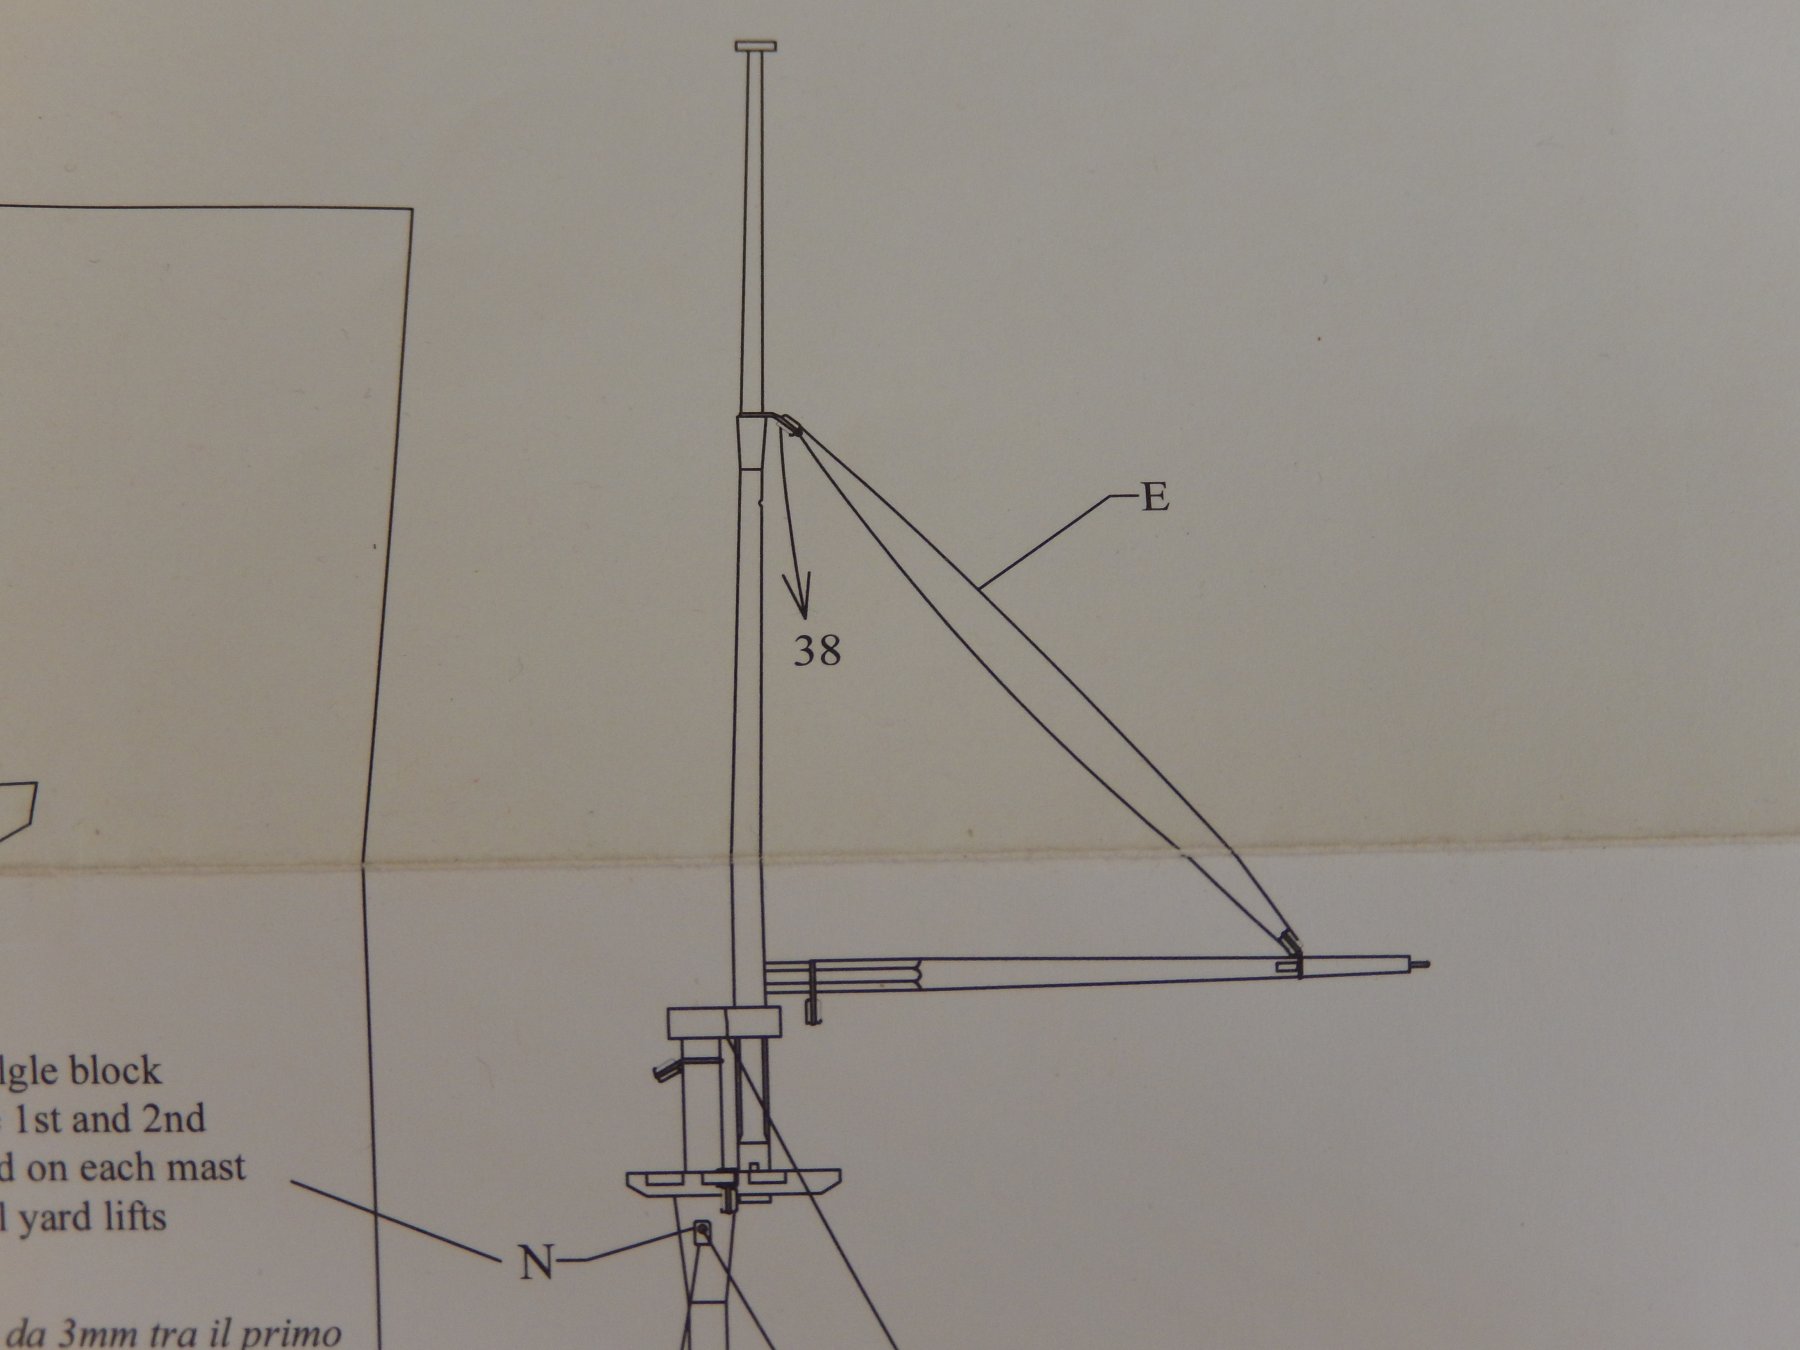
Have a look at the plan gain Arthur - in my view the bottom drawin.. It shows a cross section of the mast (ie: from above) and the two little gizmos (I don't know the term) which would contain the parrel are (in plan) horizontal. The foot ropes are then shown as projecting horizontally towards the front. If you then look at the elevation (the top) the two little gizmos are facing you (the mast would be vertically behind them) and the eyelets are facing you - ie: towards the front. The two sets of gizmos on the ends of the yard also seem out of place. They should be vertical on what I think is the plan (the lower drawing) and horizontal on the upper drawing. It seems to me the two drawings are a confused missmash of plan and elevation.
-
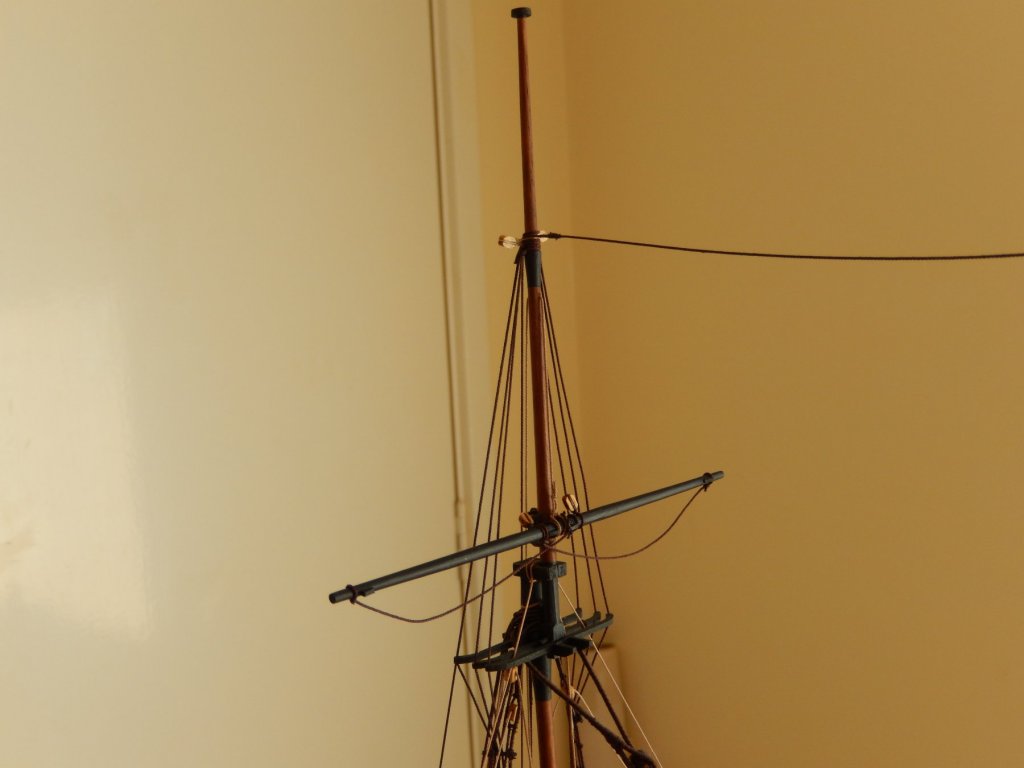
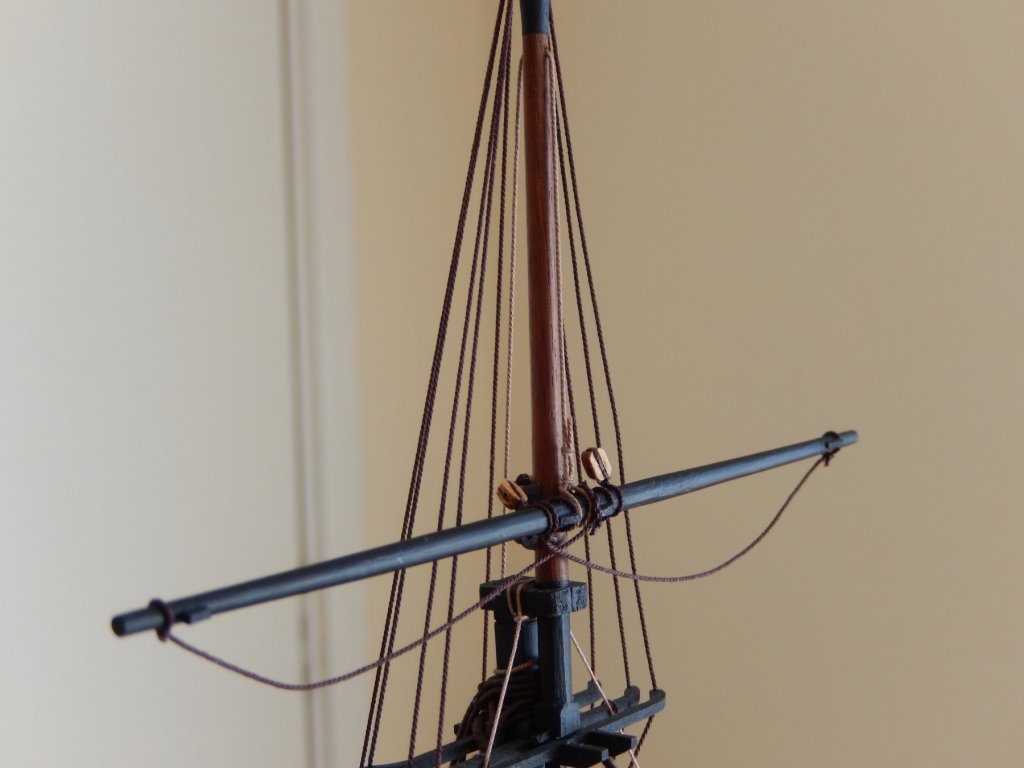
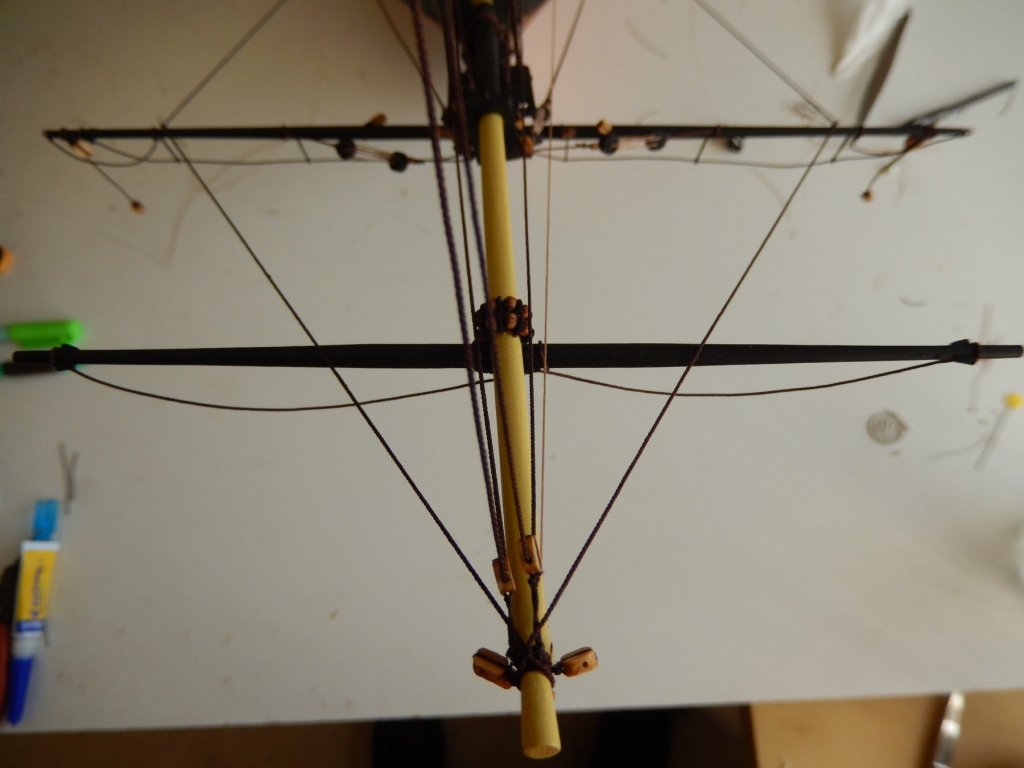
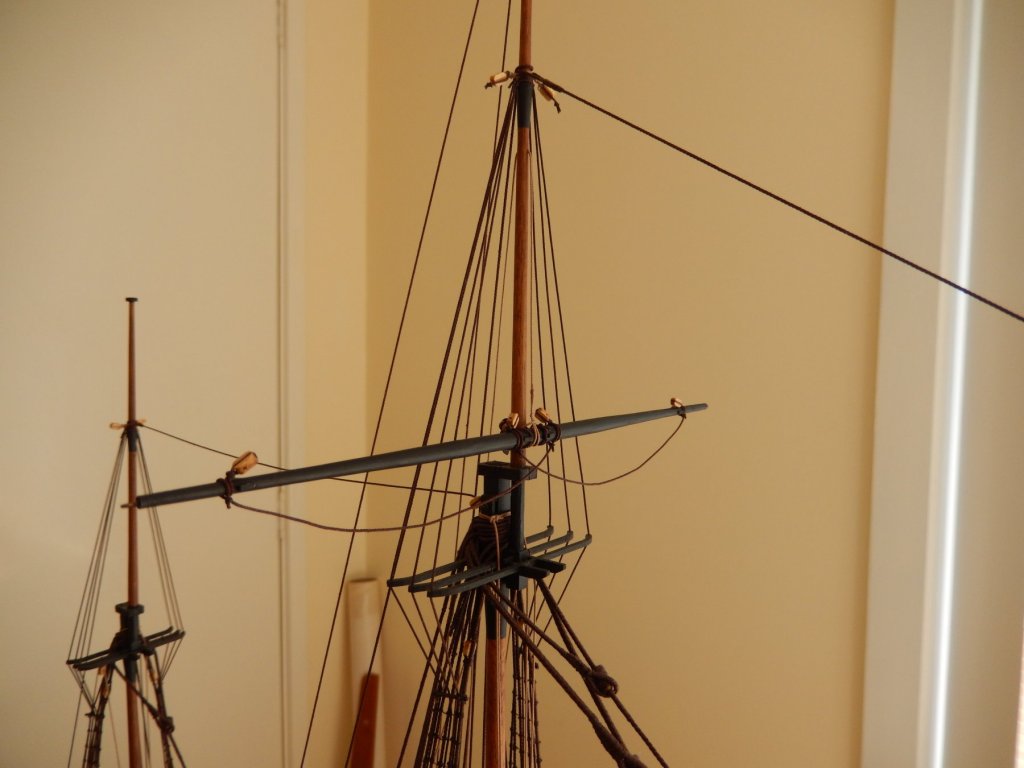
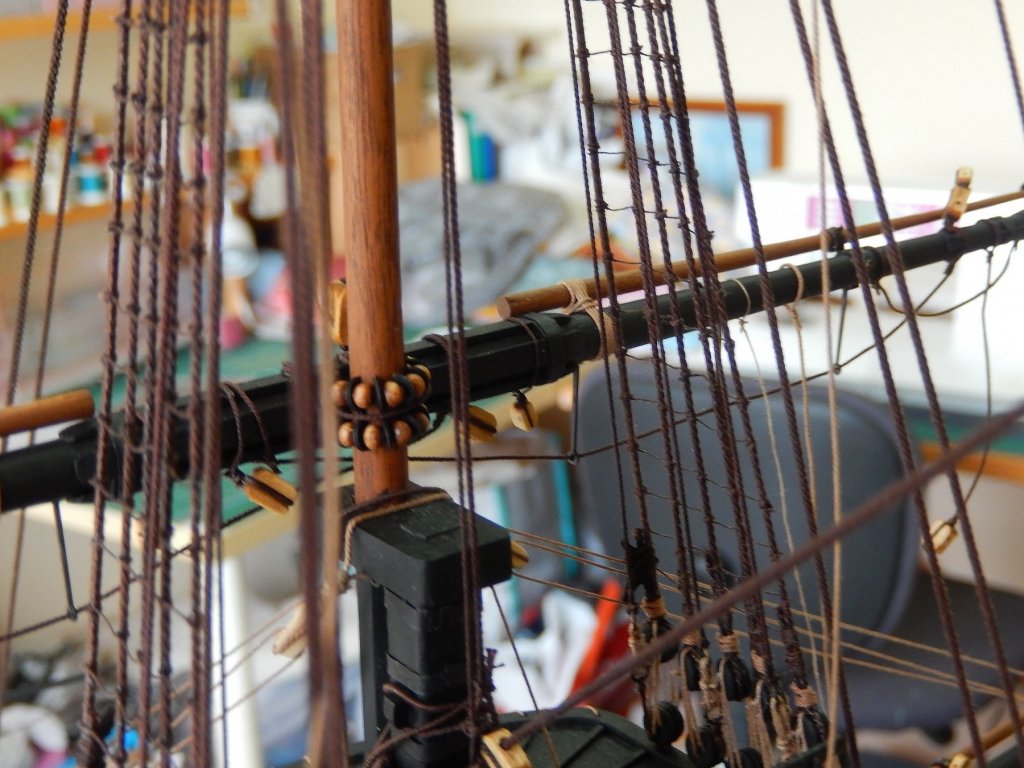
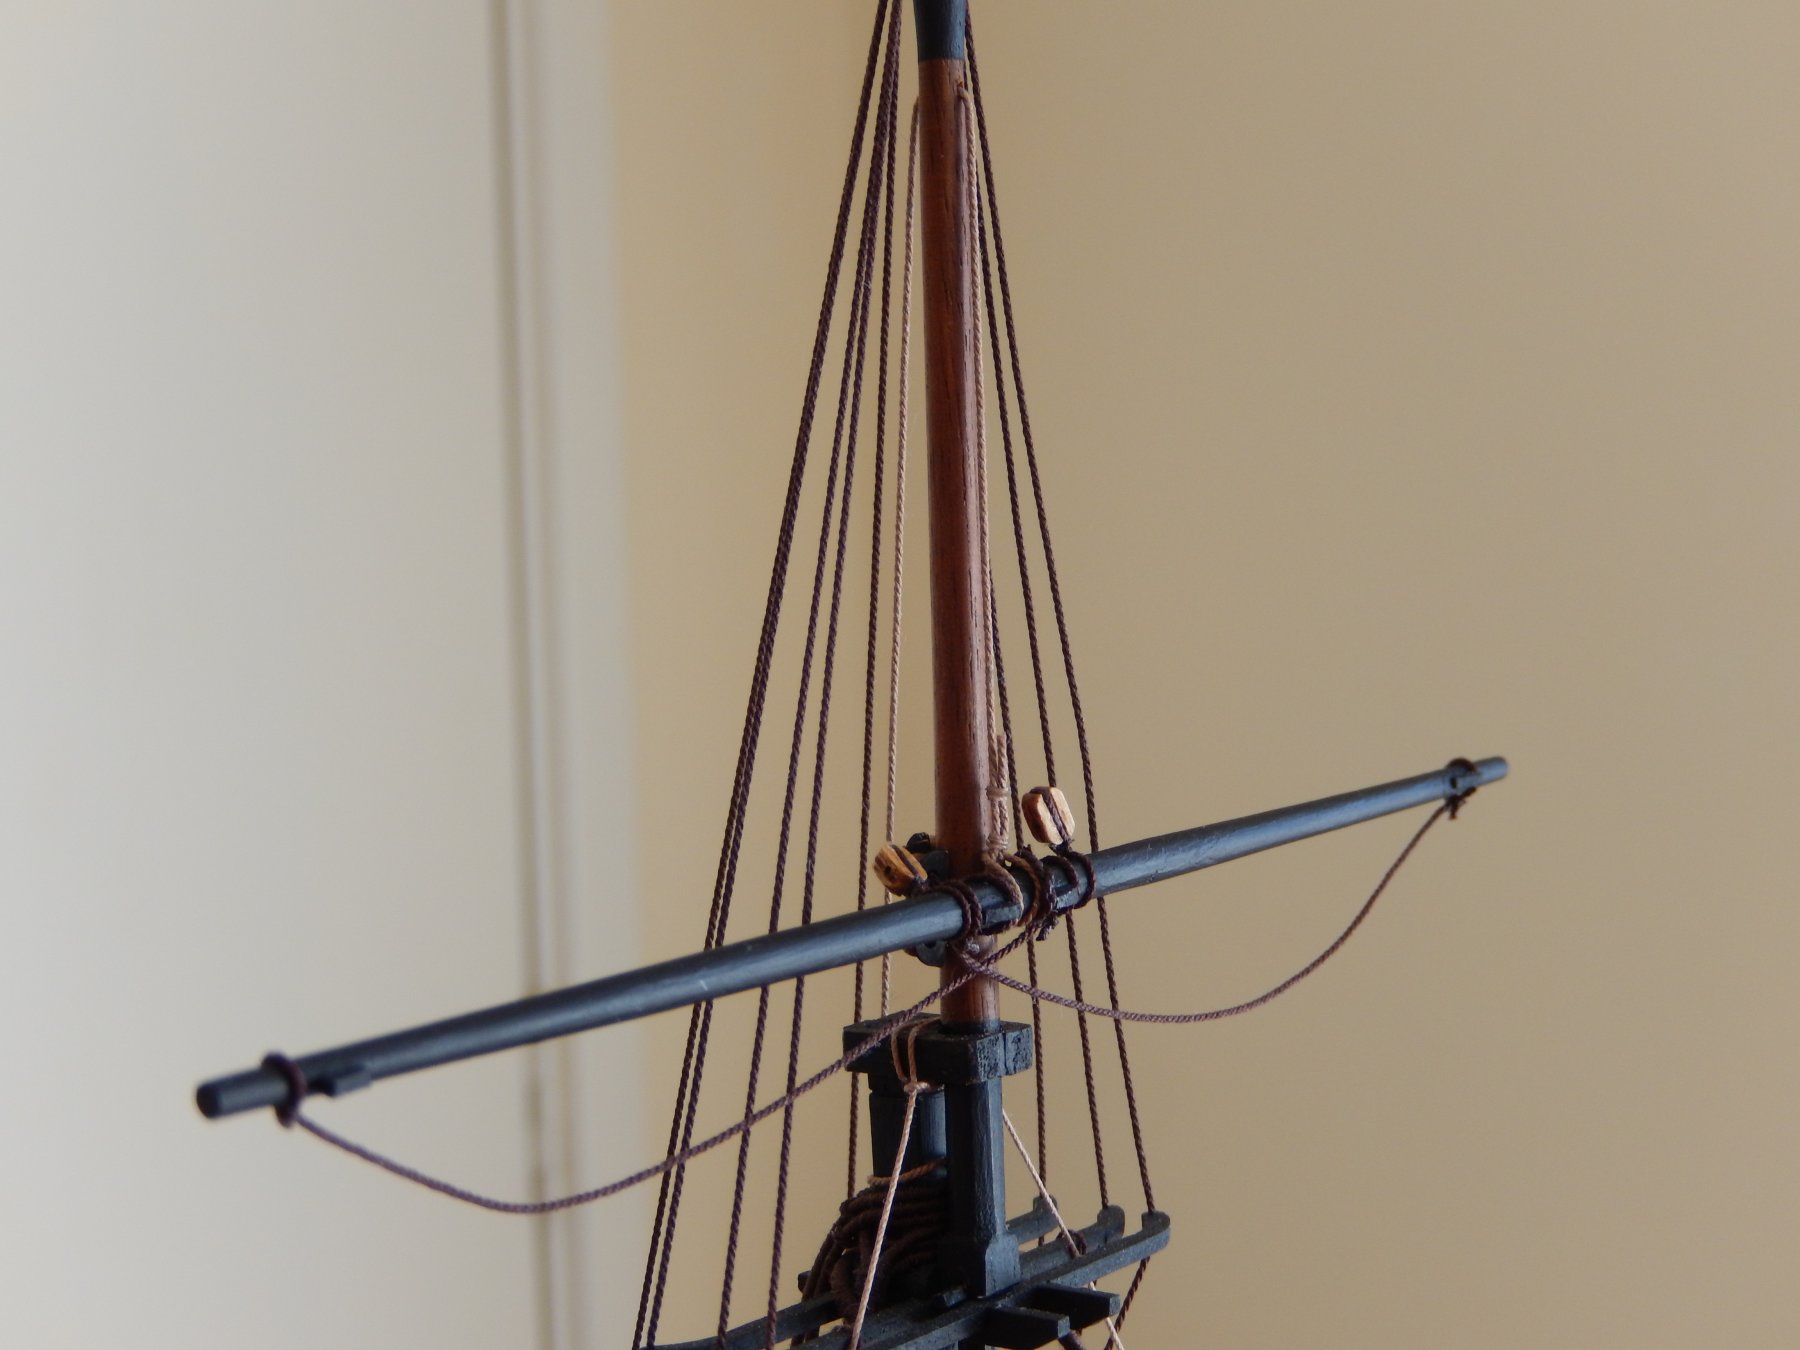
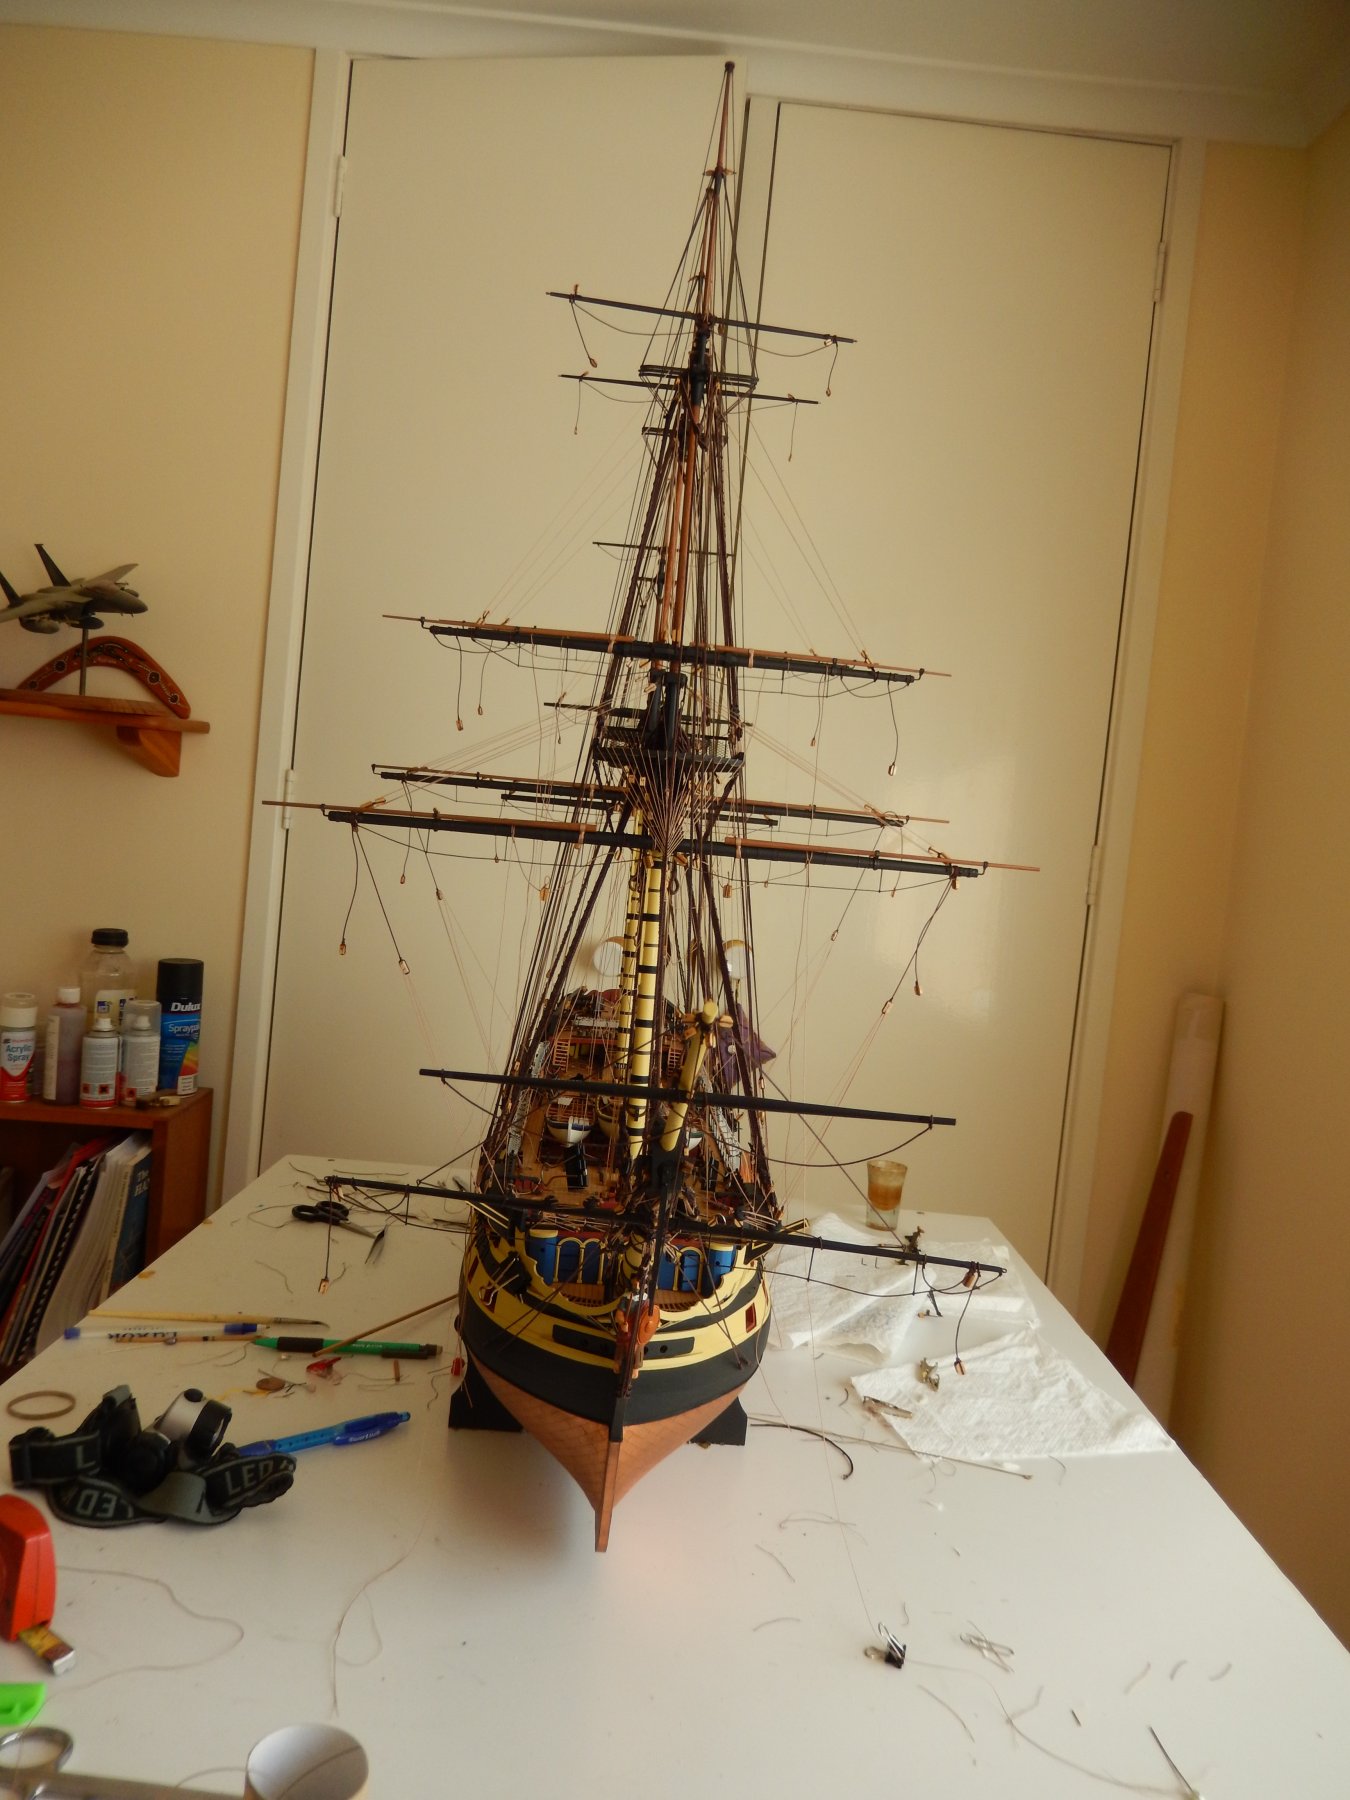
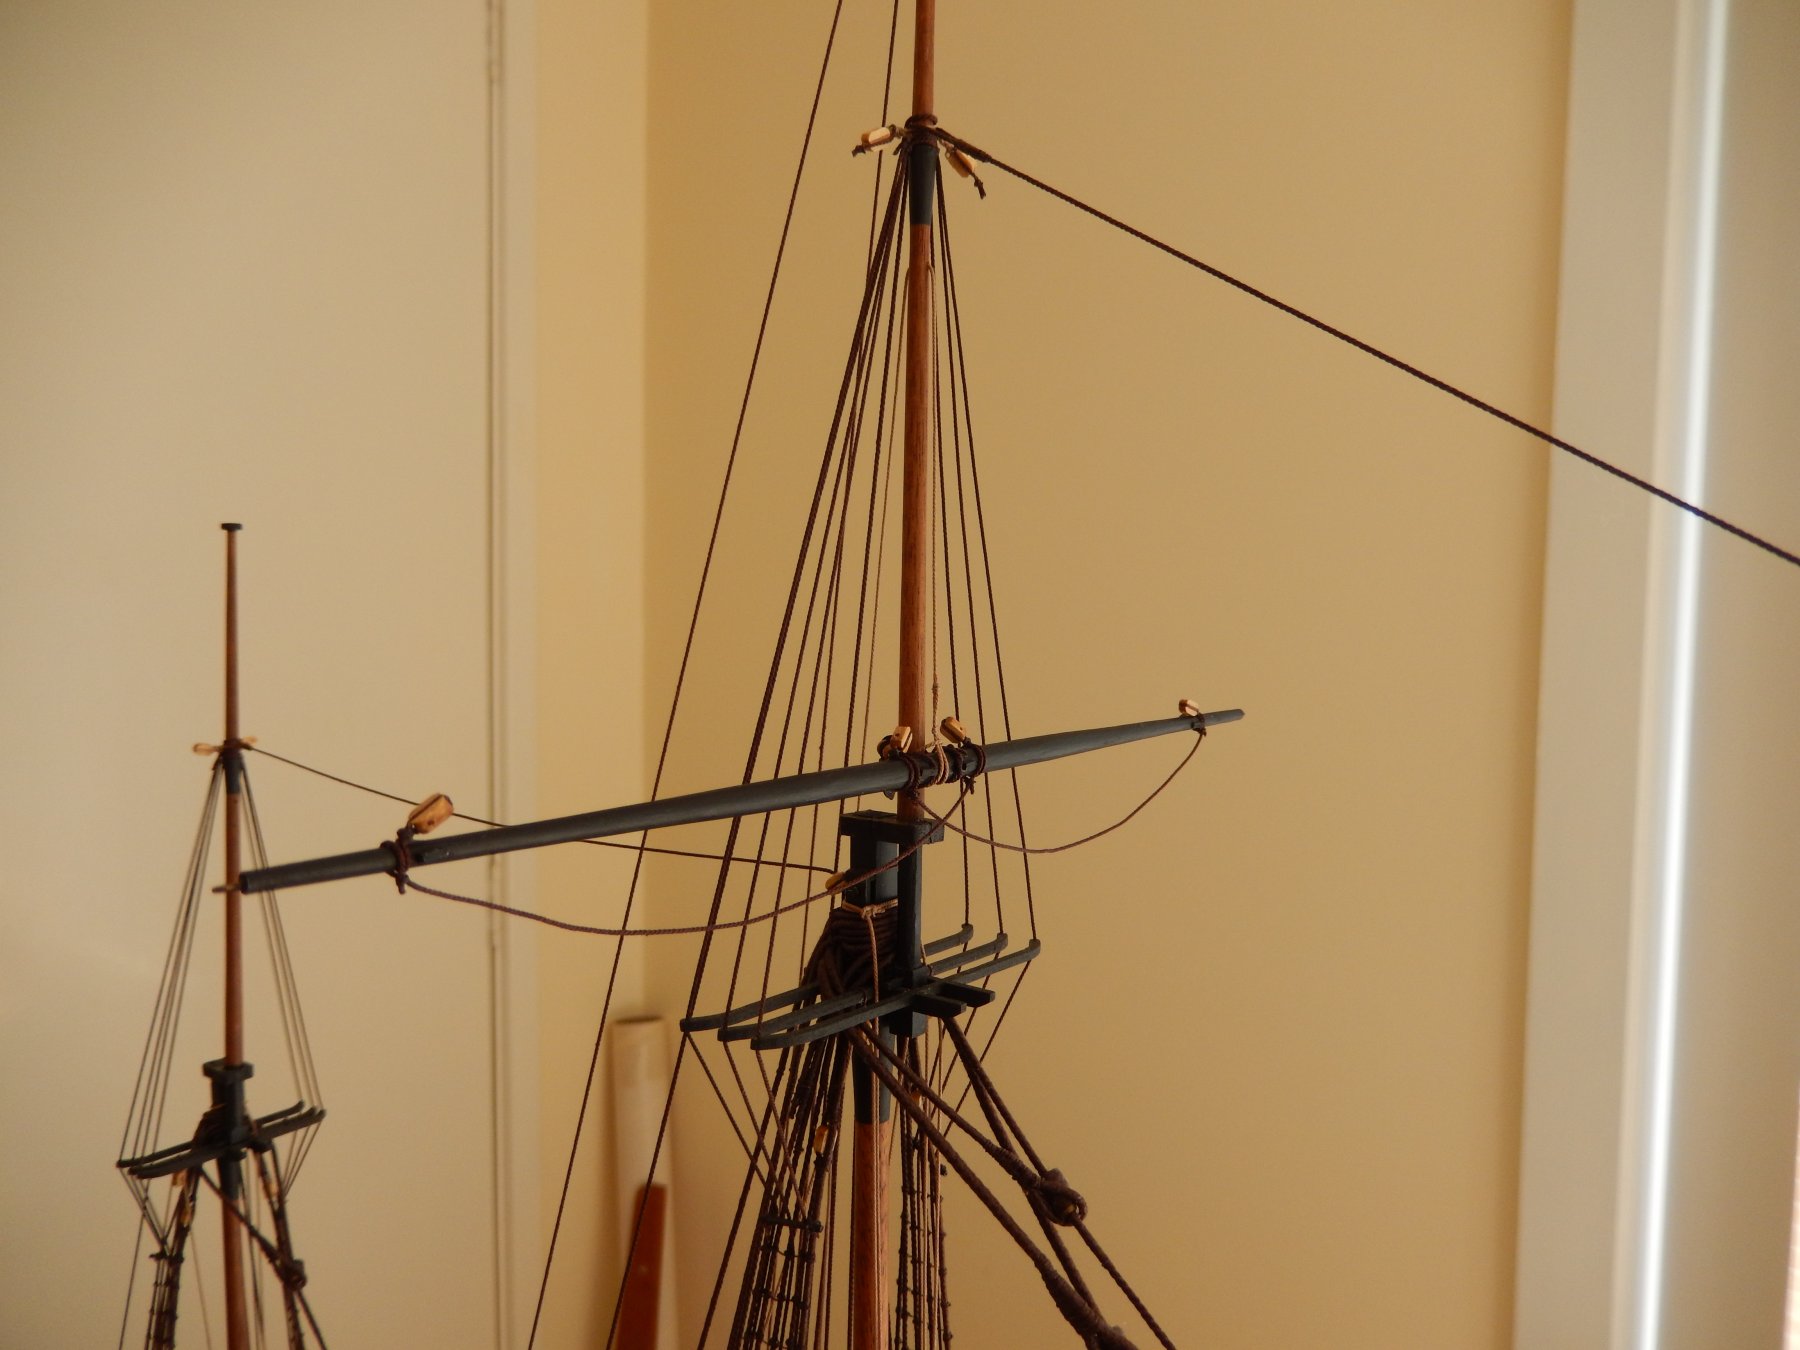
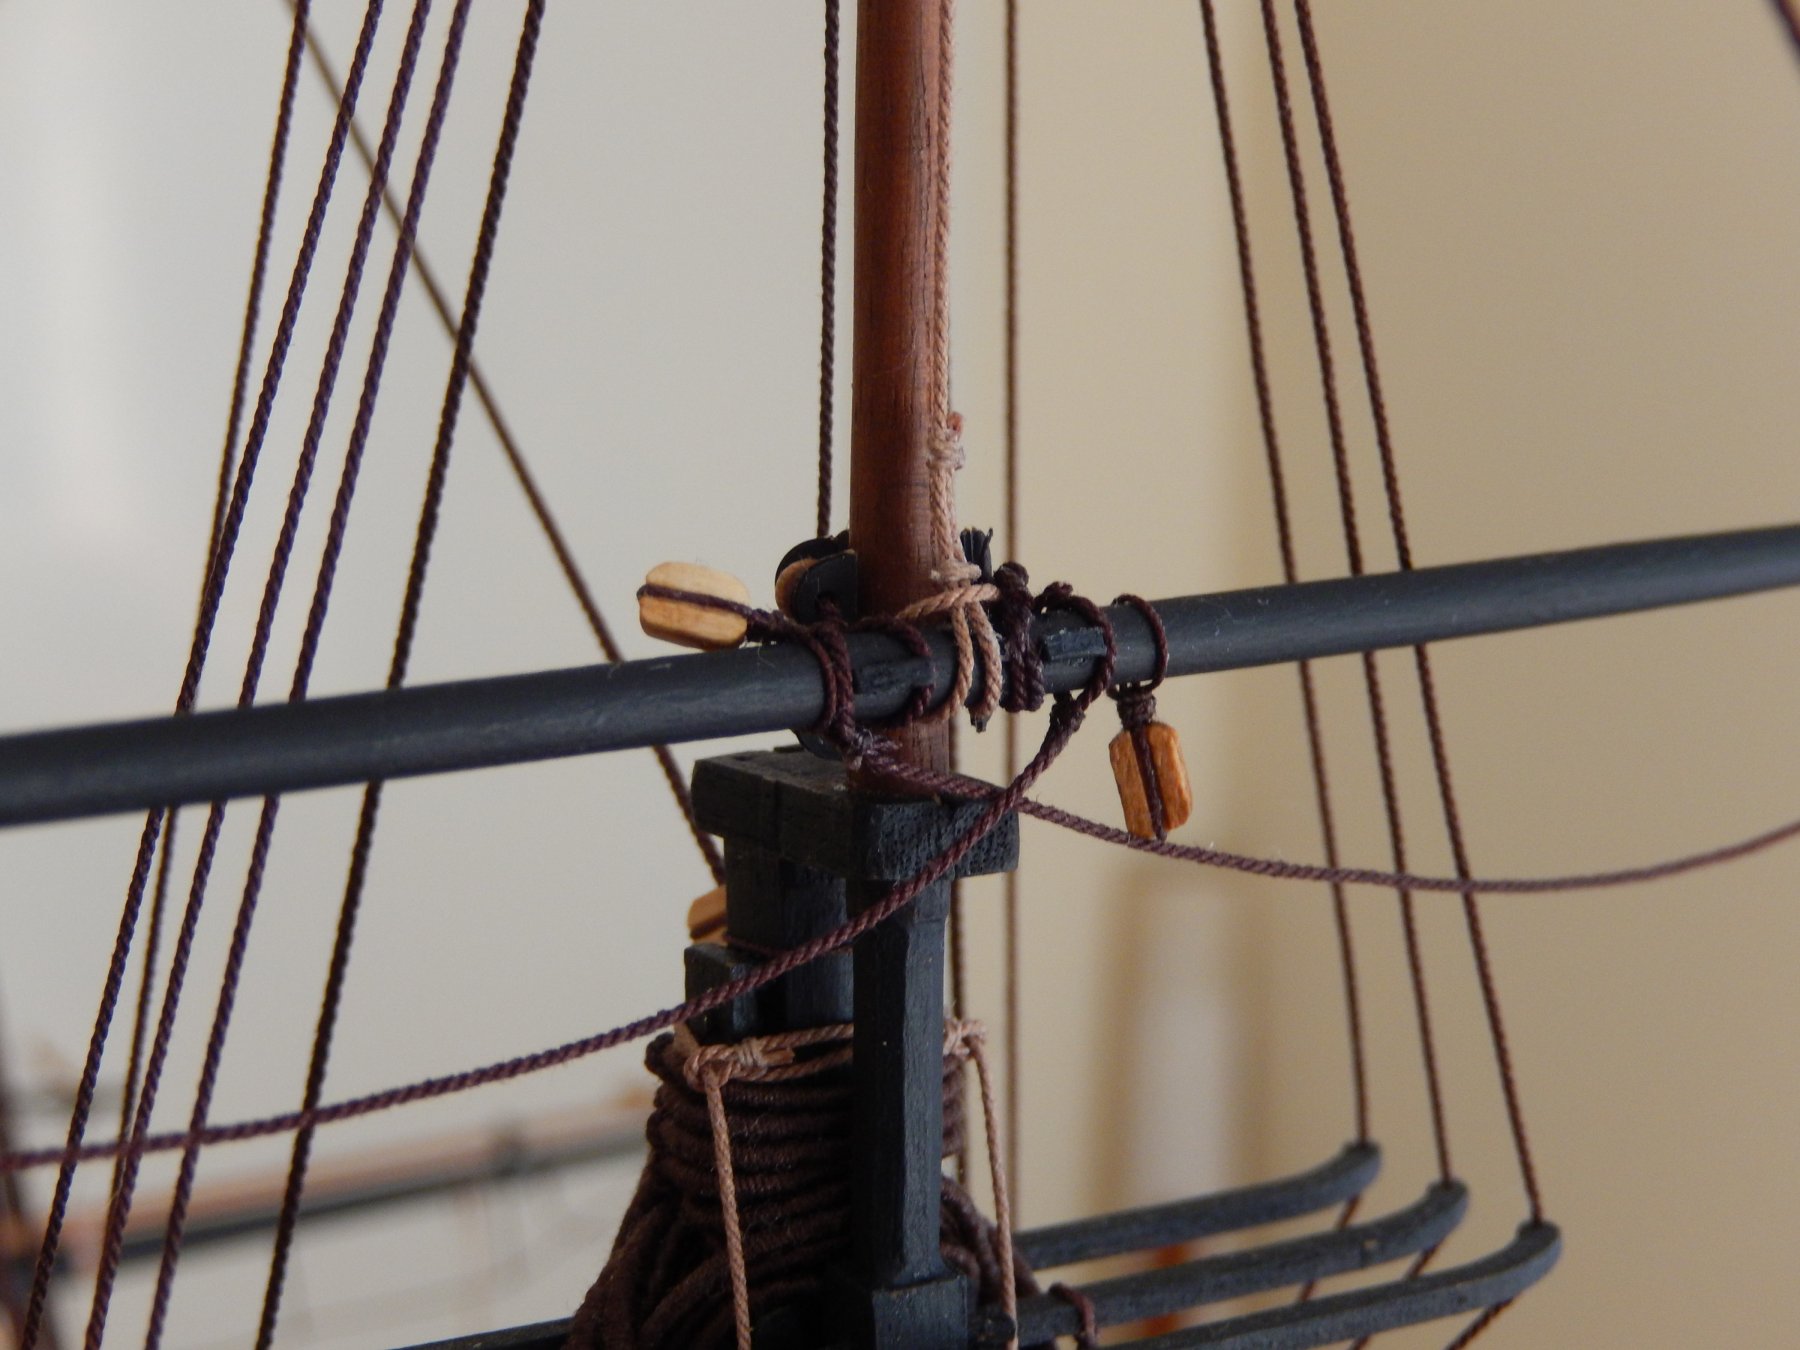
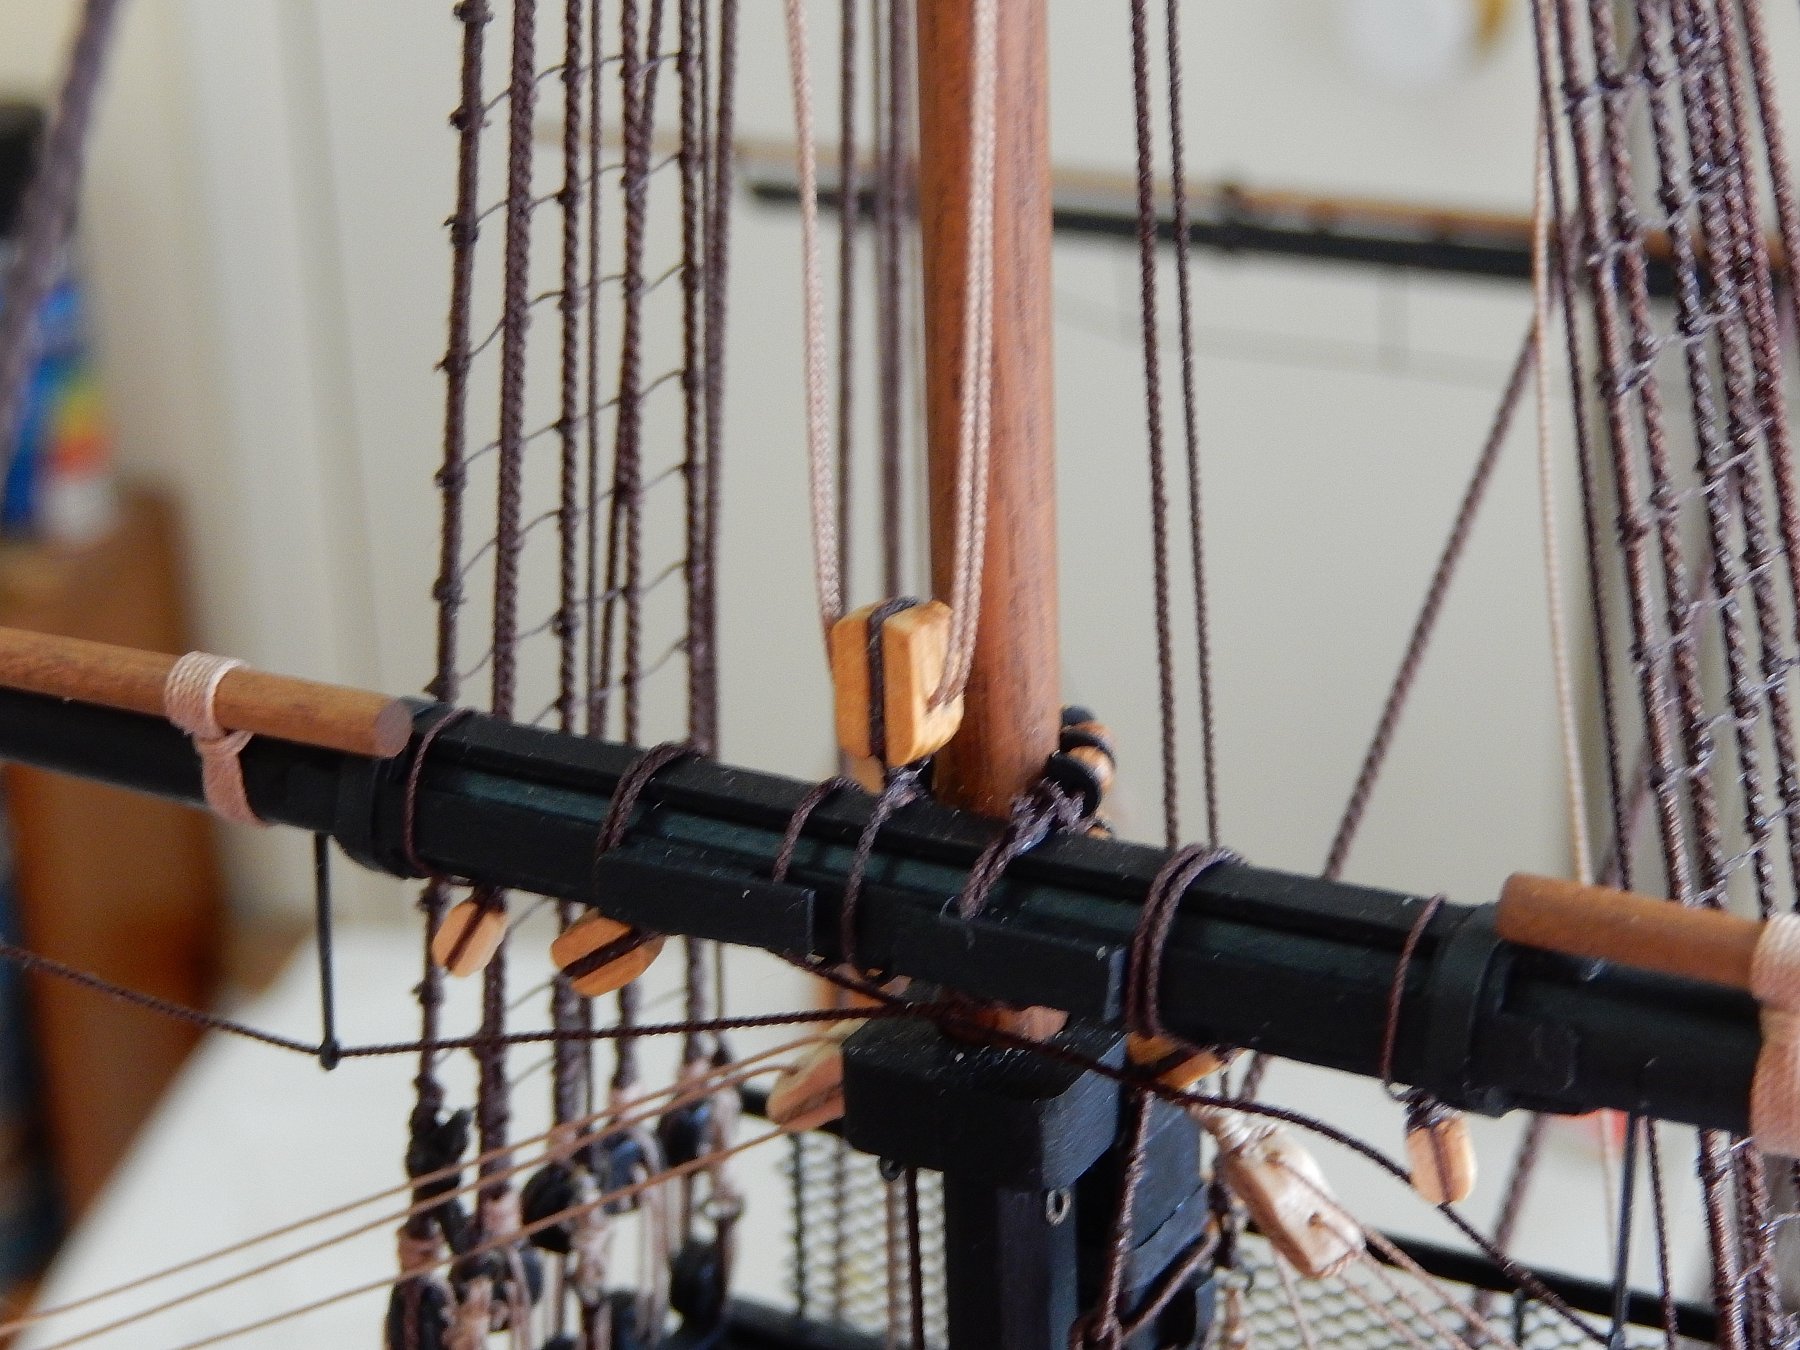
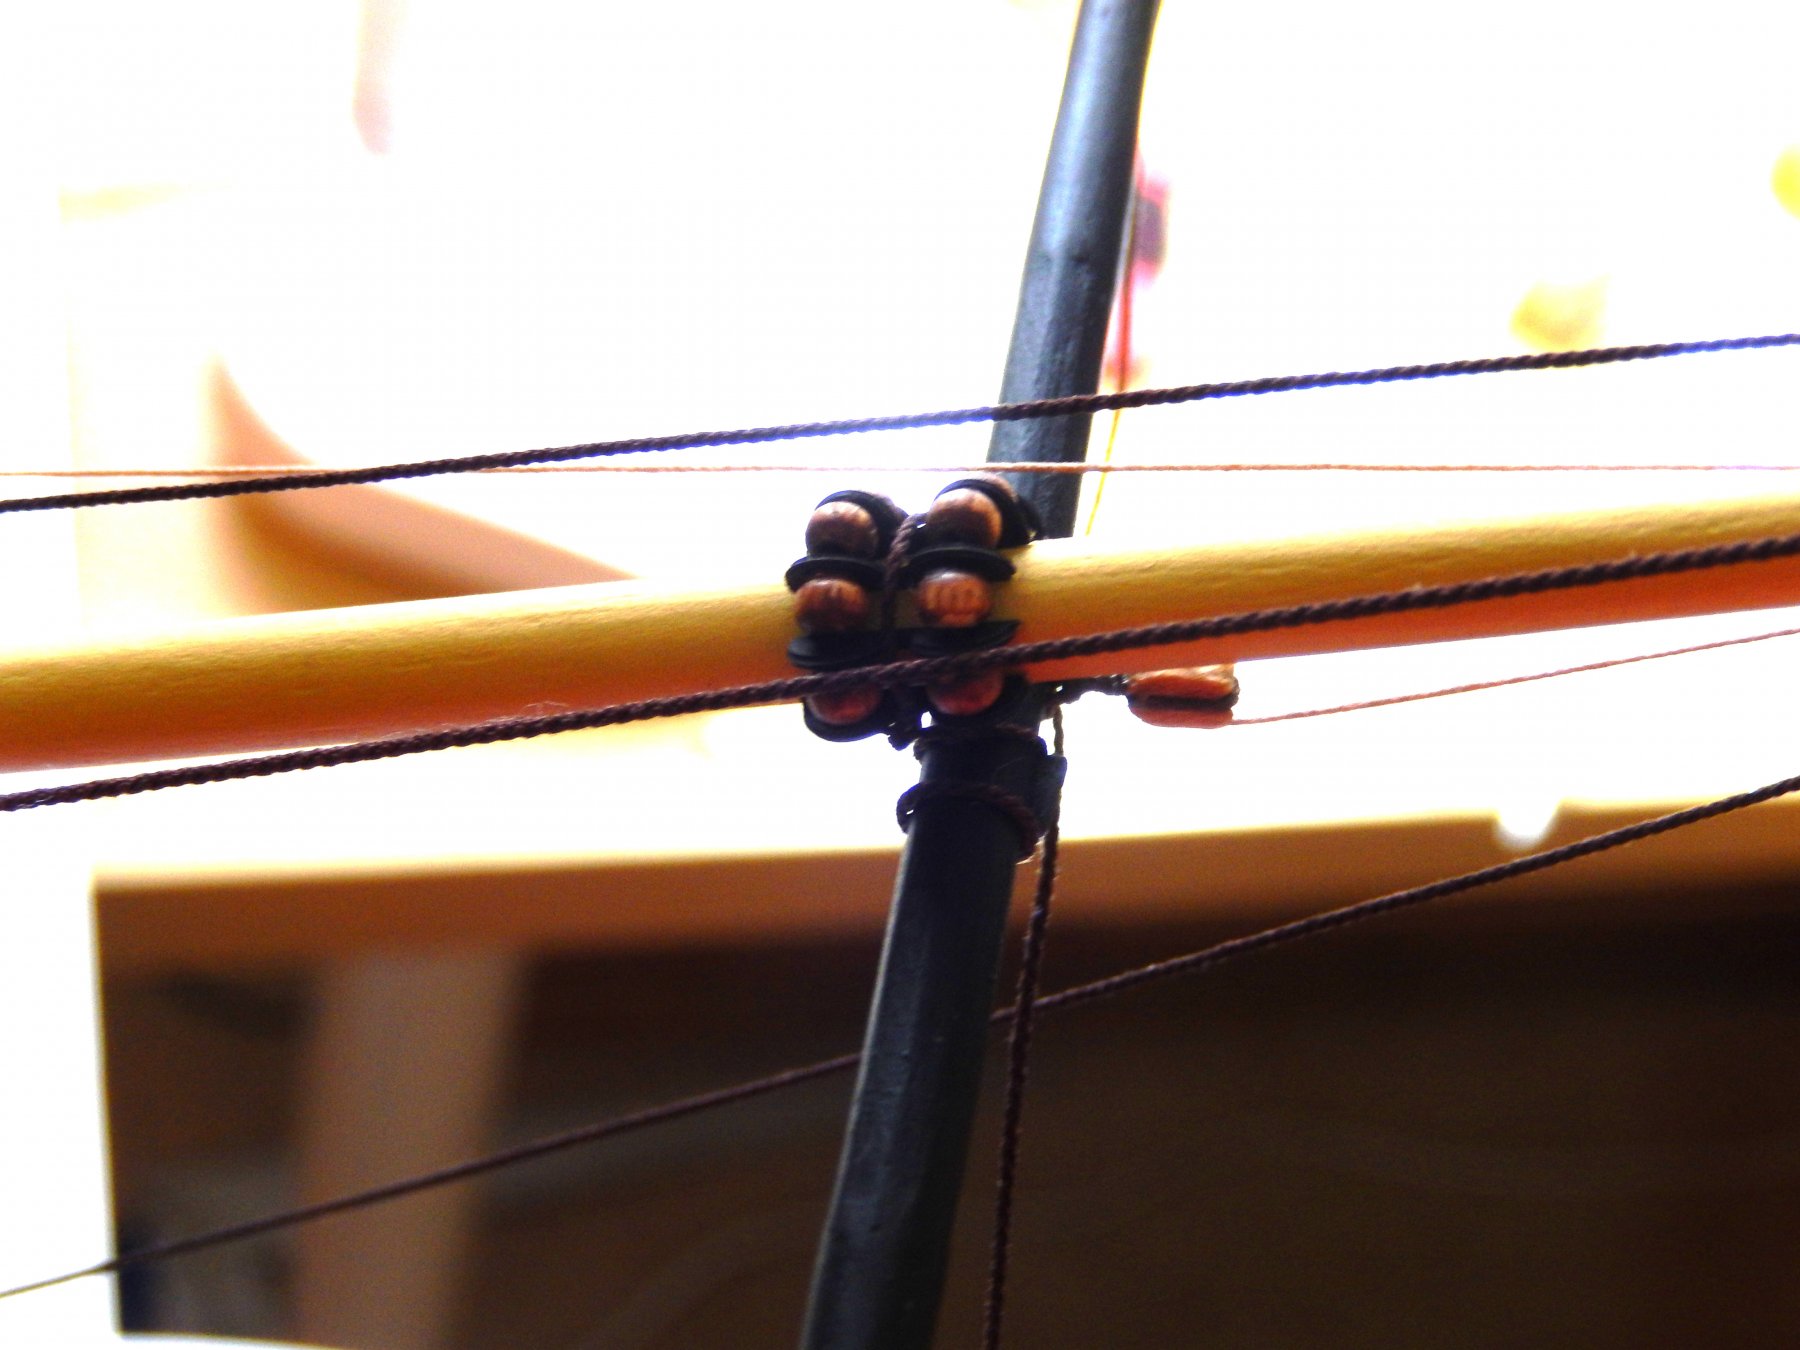
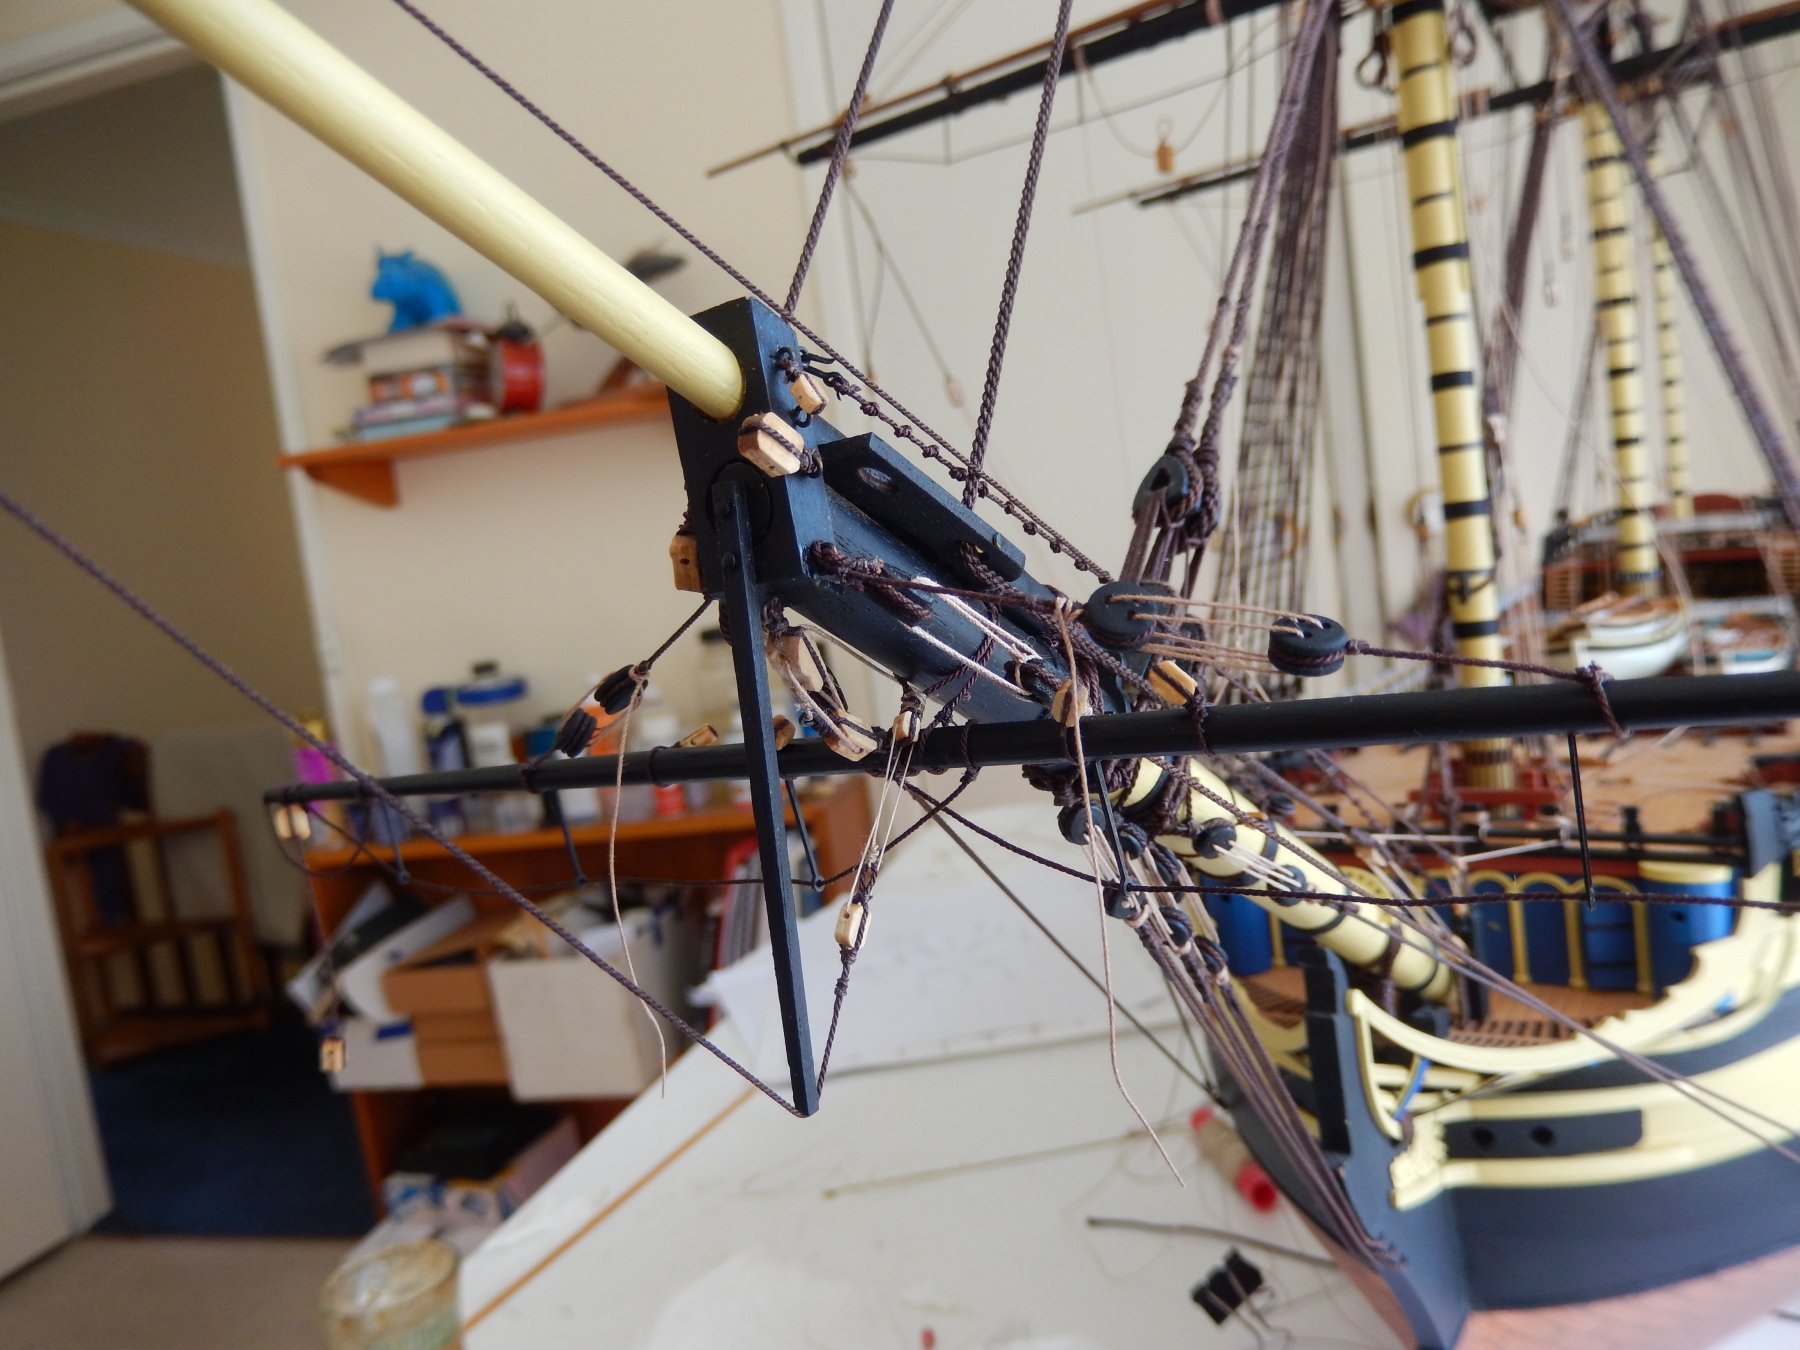
The spritsail yard is the source of my latest whinge about the plan
 . There a couple of others on the horizon, but first things first. Here is the yard shown. The eyelets are shown at the back of the yard (in plan), and in the front in the elevation (which I missed). I went ahead with the former.

Now of course this isn't exactly the end of the world, but it turns out that with the eyelets at the back of the yard the lines going through them foul the spritsail topsail yard. Later (plan 10)the eyelets are shown on top of the yard. Taking the eyelets out and repositioning them in situ was rather fraught. It did make an improvement but there is still a slight foul.

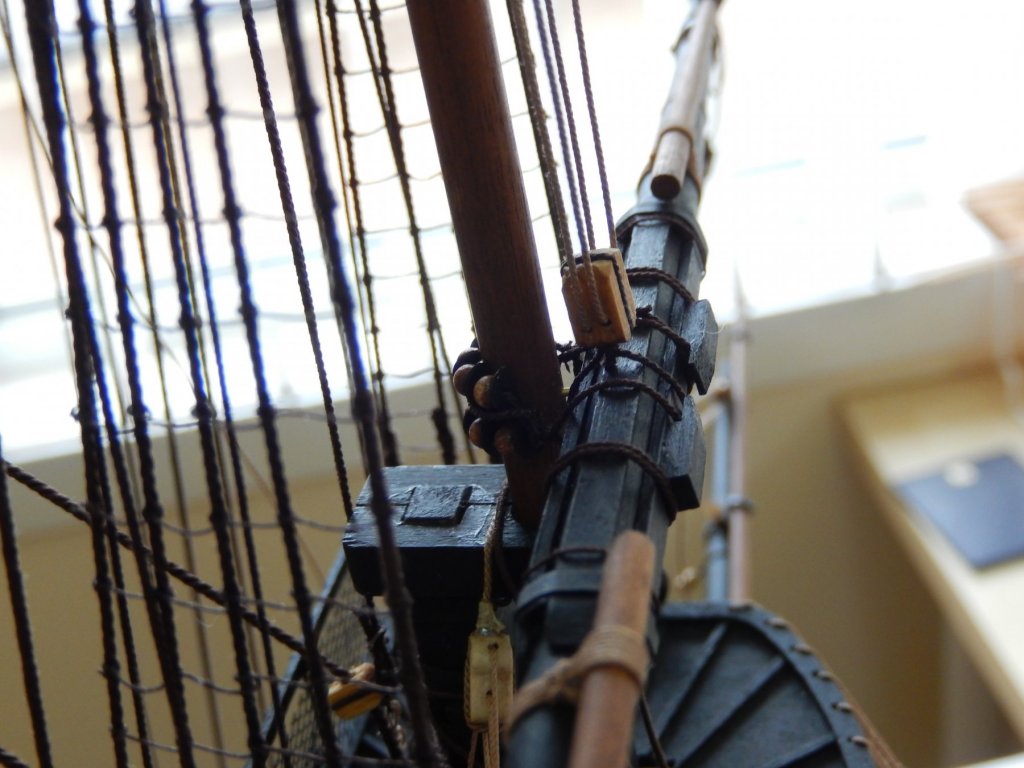
This is how it has turned out.
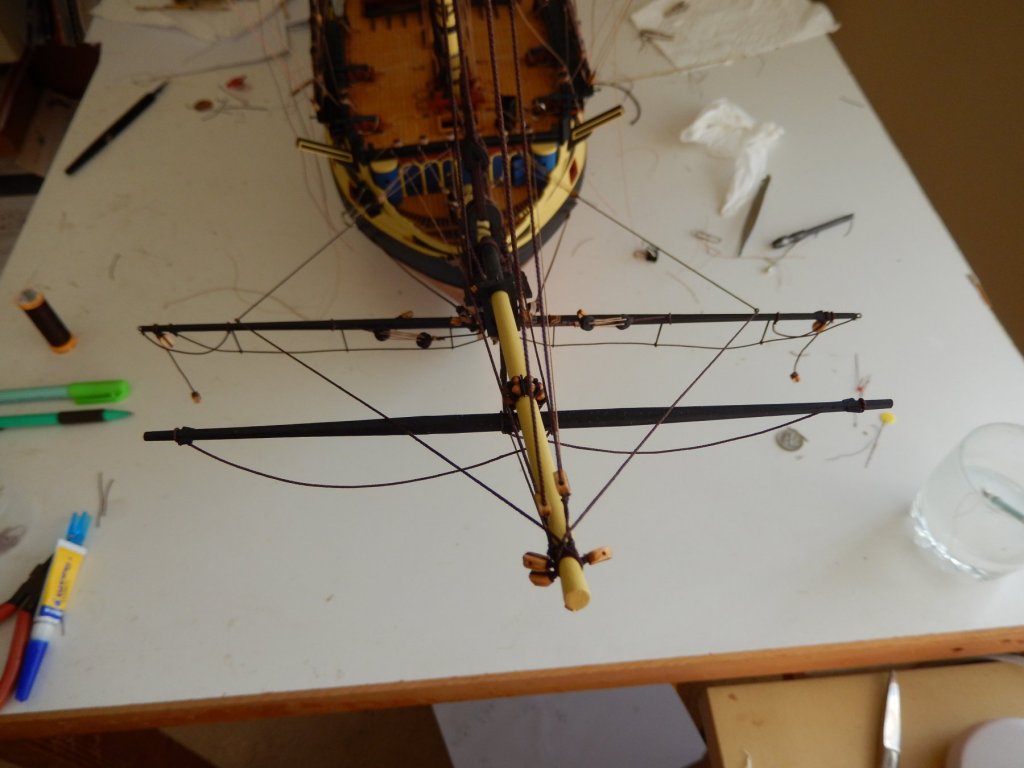
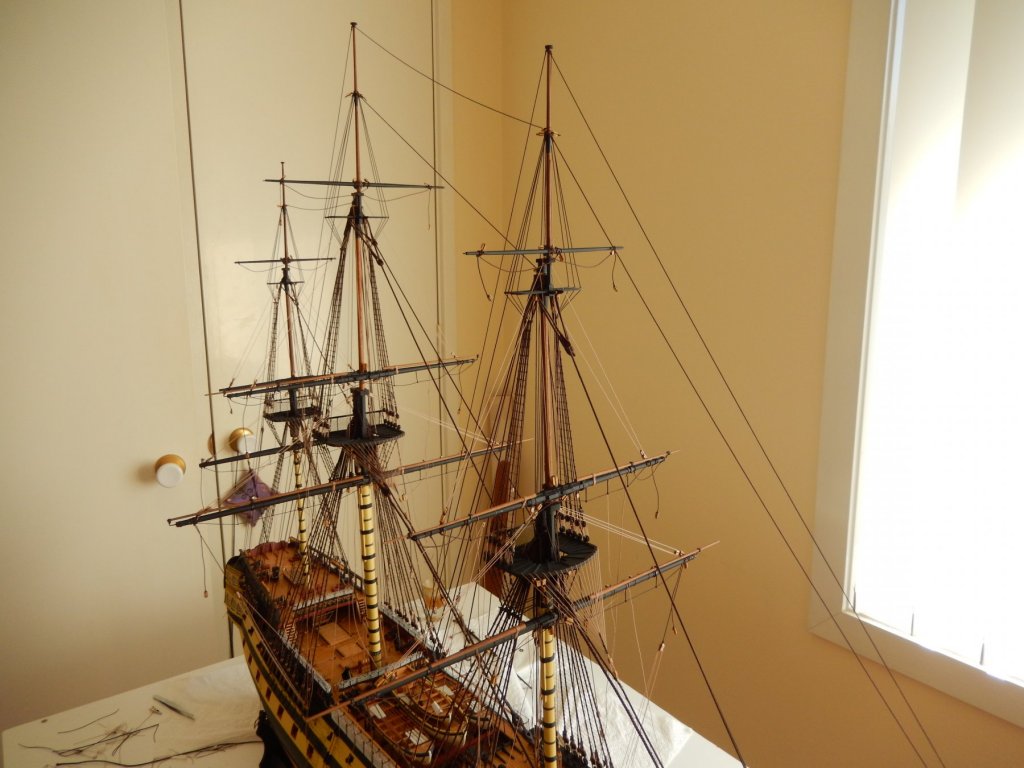
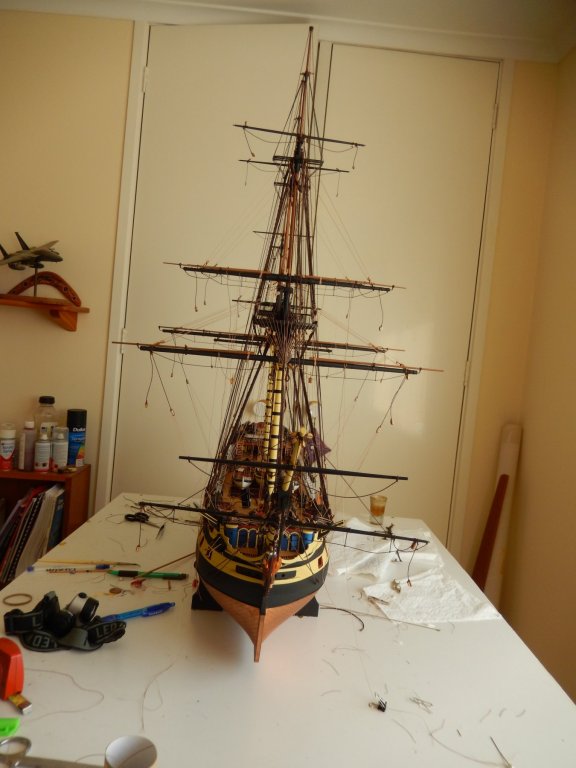
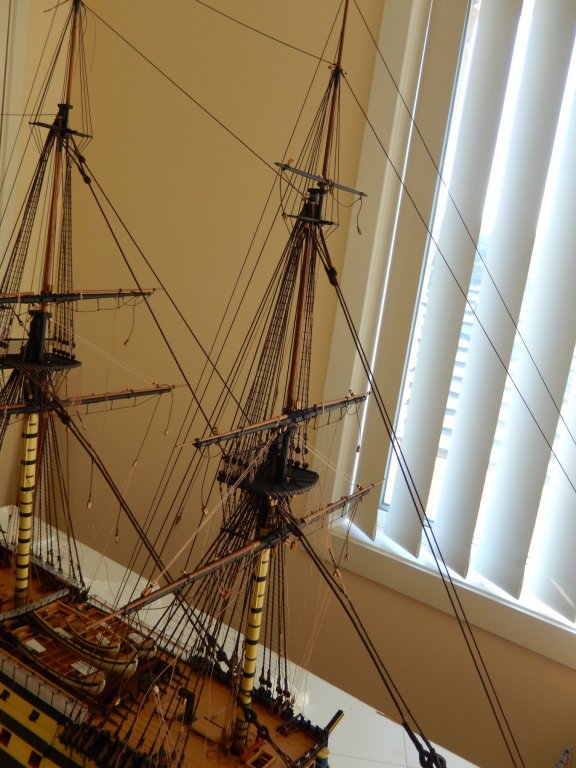
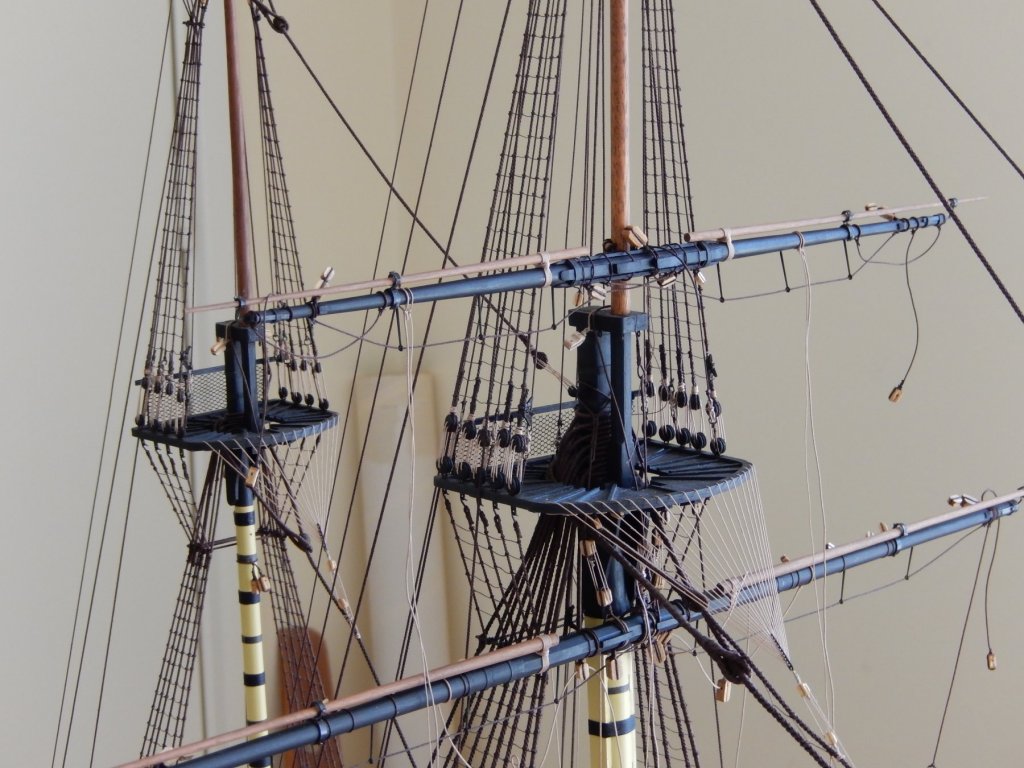
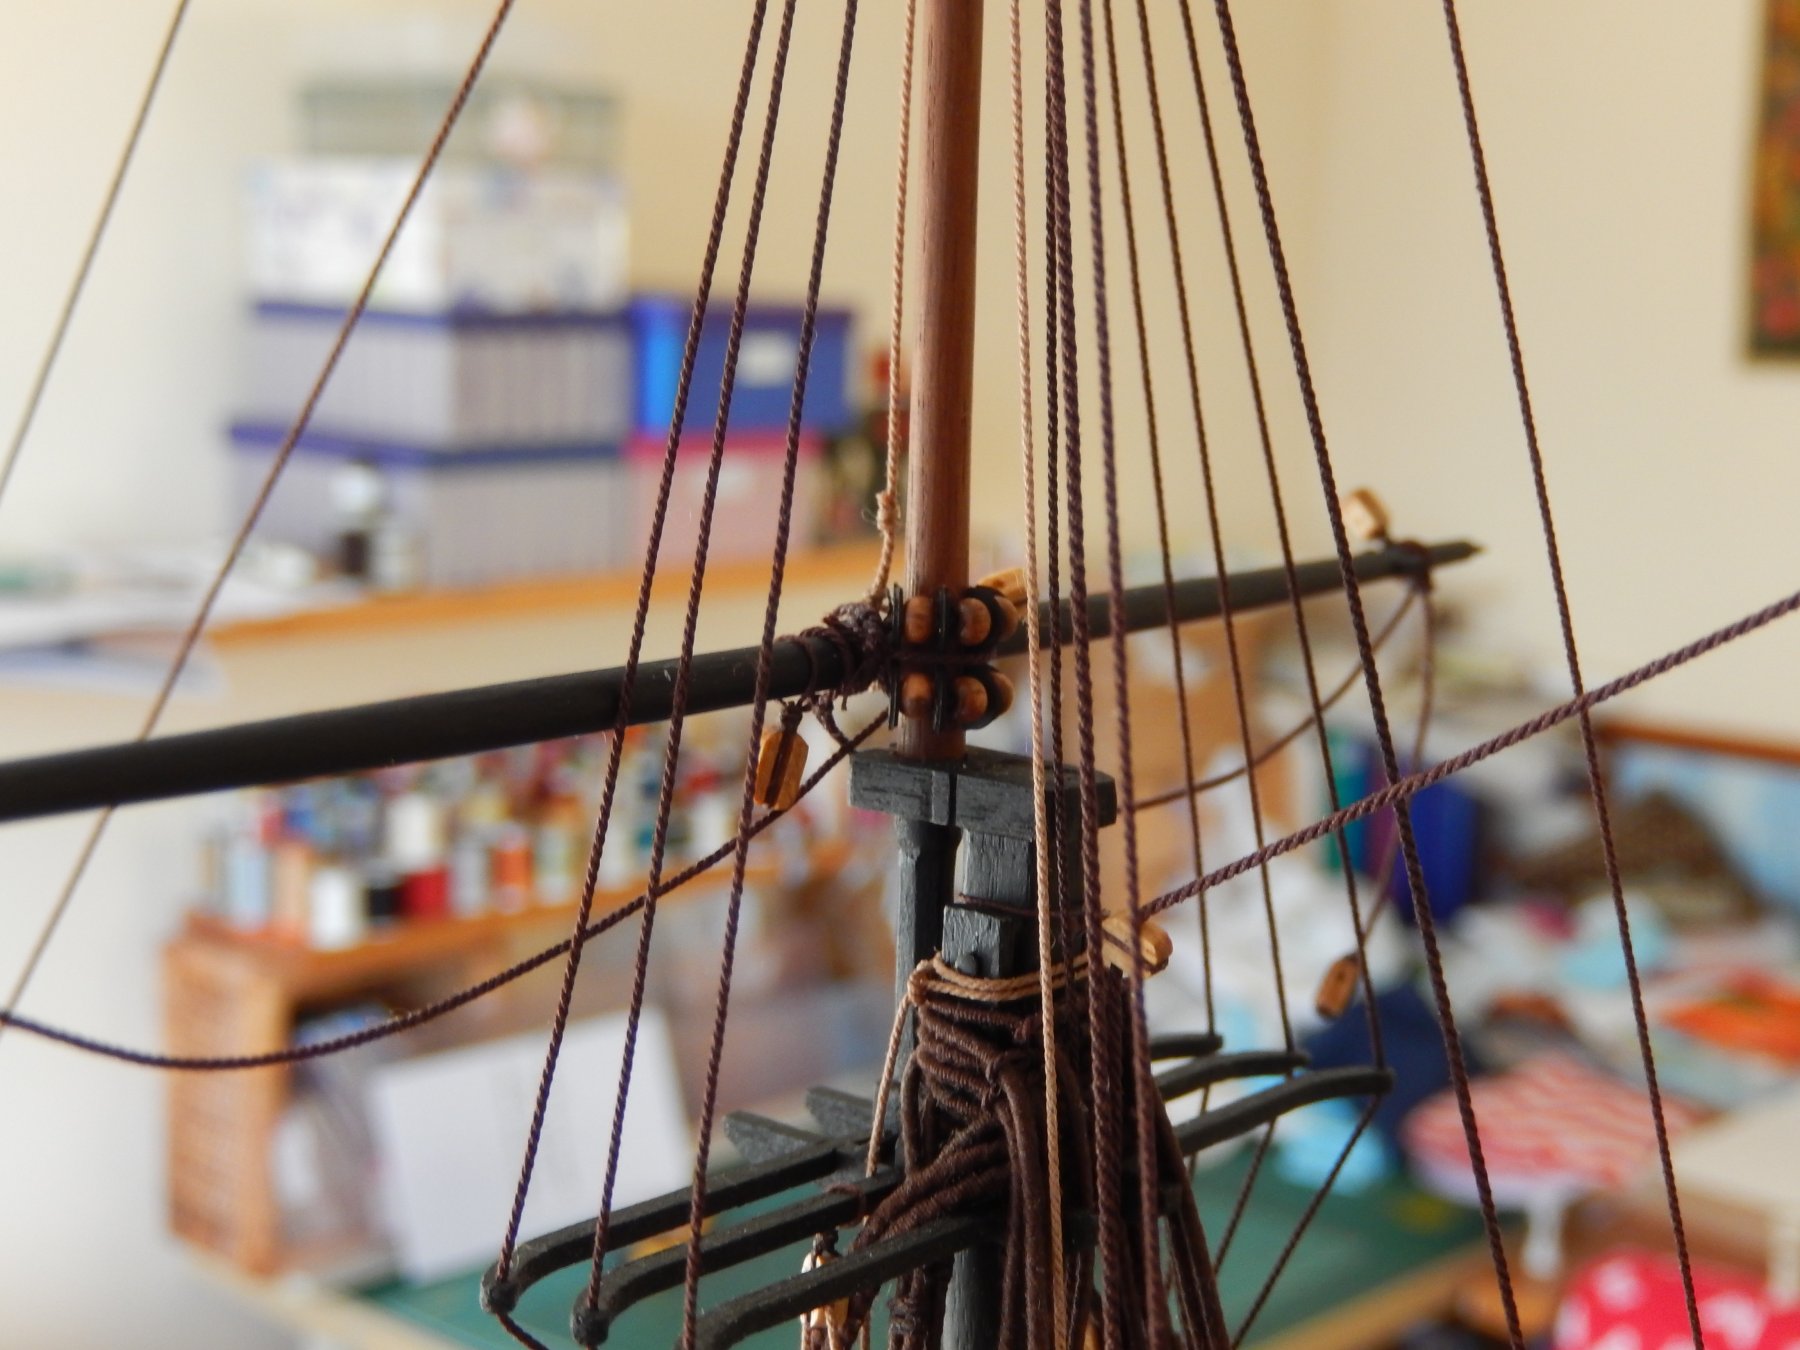
This give some idea of the complexity of the rigging. There are quite a few more lines that are apparently made off to the timberhead. Just how they will all fit is a bit of a mystery at the moment. With hindsight, I probably wouldn't have finally tied off any of the lines until I knew where everything went.
Finally, the main topgallant yard is now on.

PS. Jose. I counted my remaining parrel beads and there seem to be enough to finish.
")
- AON, Angarfather, coxswain and 6 others
-
9
-
The fore topgallant is now mounted and the topgallant for the main will be done in the next day or so. I am inclined to finish as much of the rigging for the fore and main yards as I can , leaving the rigging for mizzen yards - the driver boom and the driver gaff until last. Looking at the mizzen, it looks as if, with all the bits and pieces sticking out, it is best to leave as long as possible to postpone possible damage. Advice is invited.
Here is the fore topgallant yard.


- mort stoll, CDW, coxswain and 3 others
-
6
-
And of course the answer is the same. The cheque's in the mail.
-
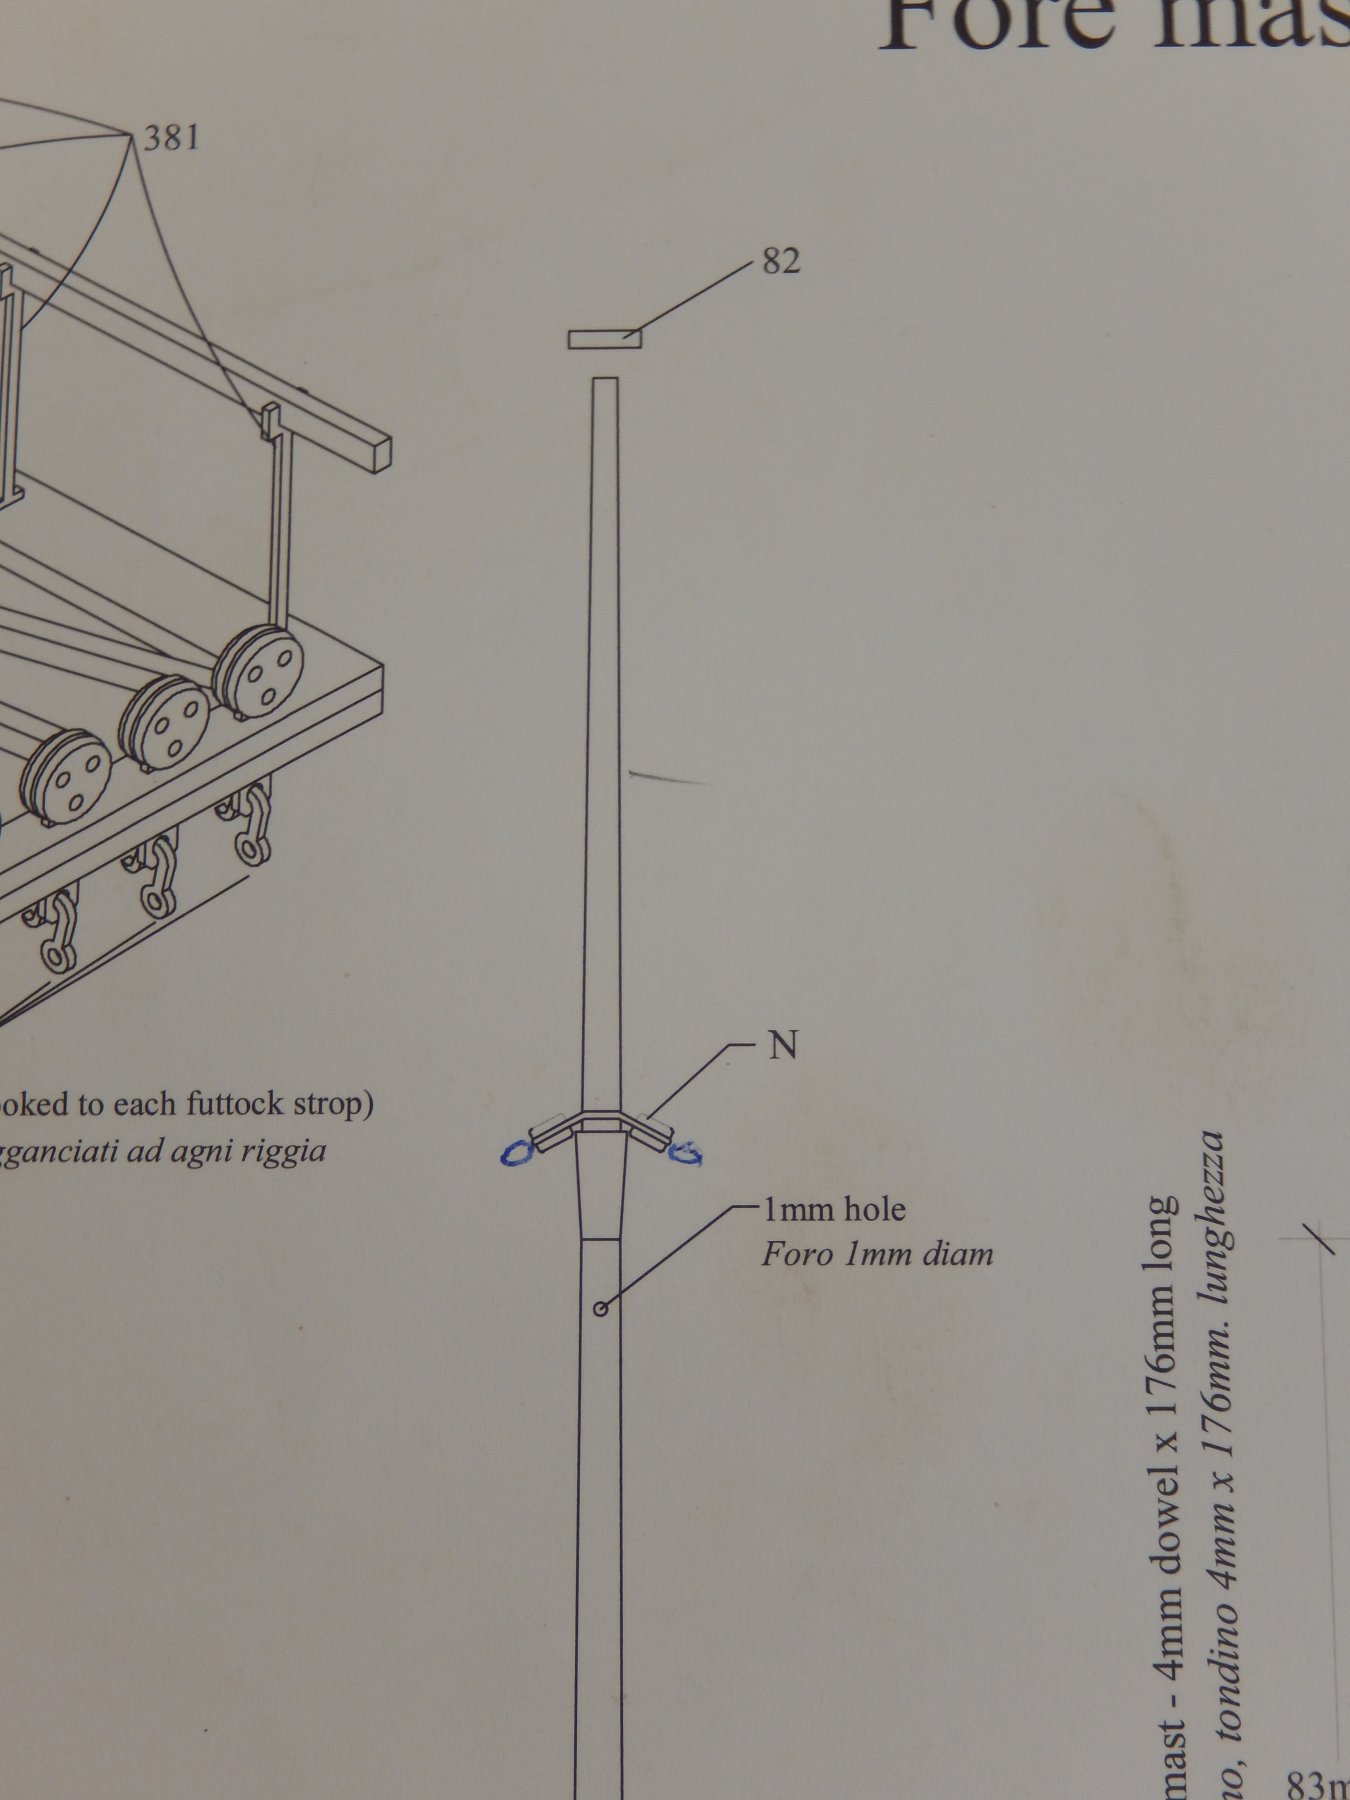
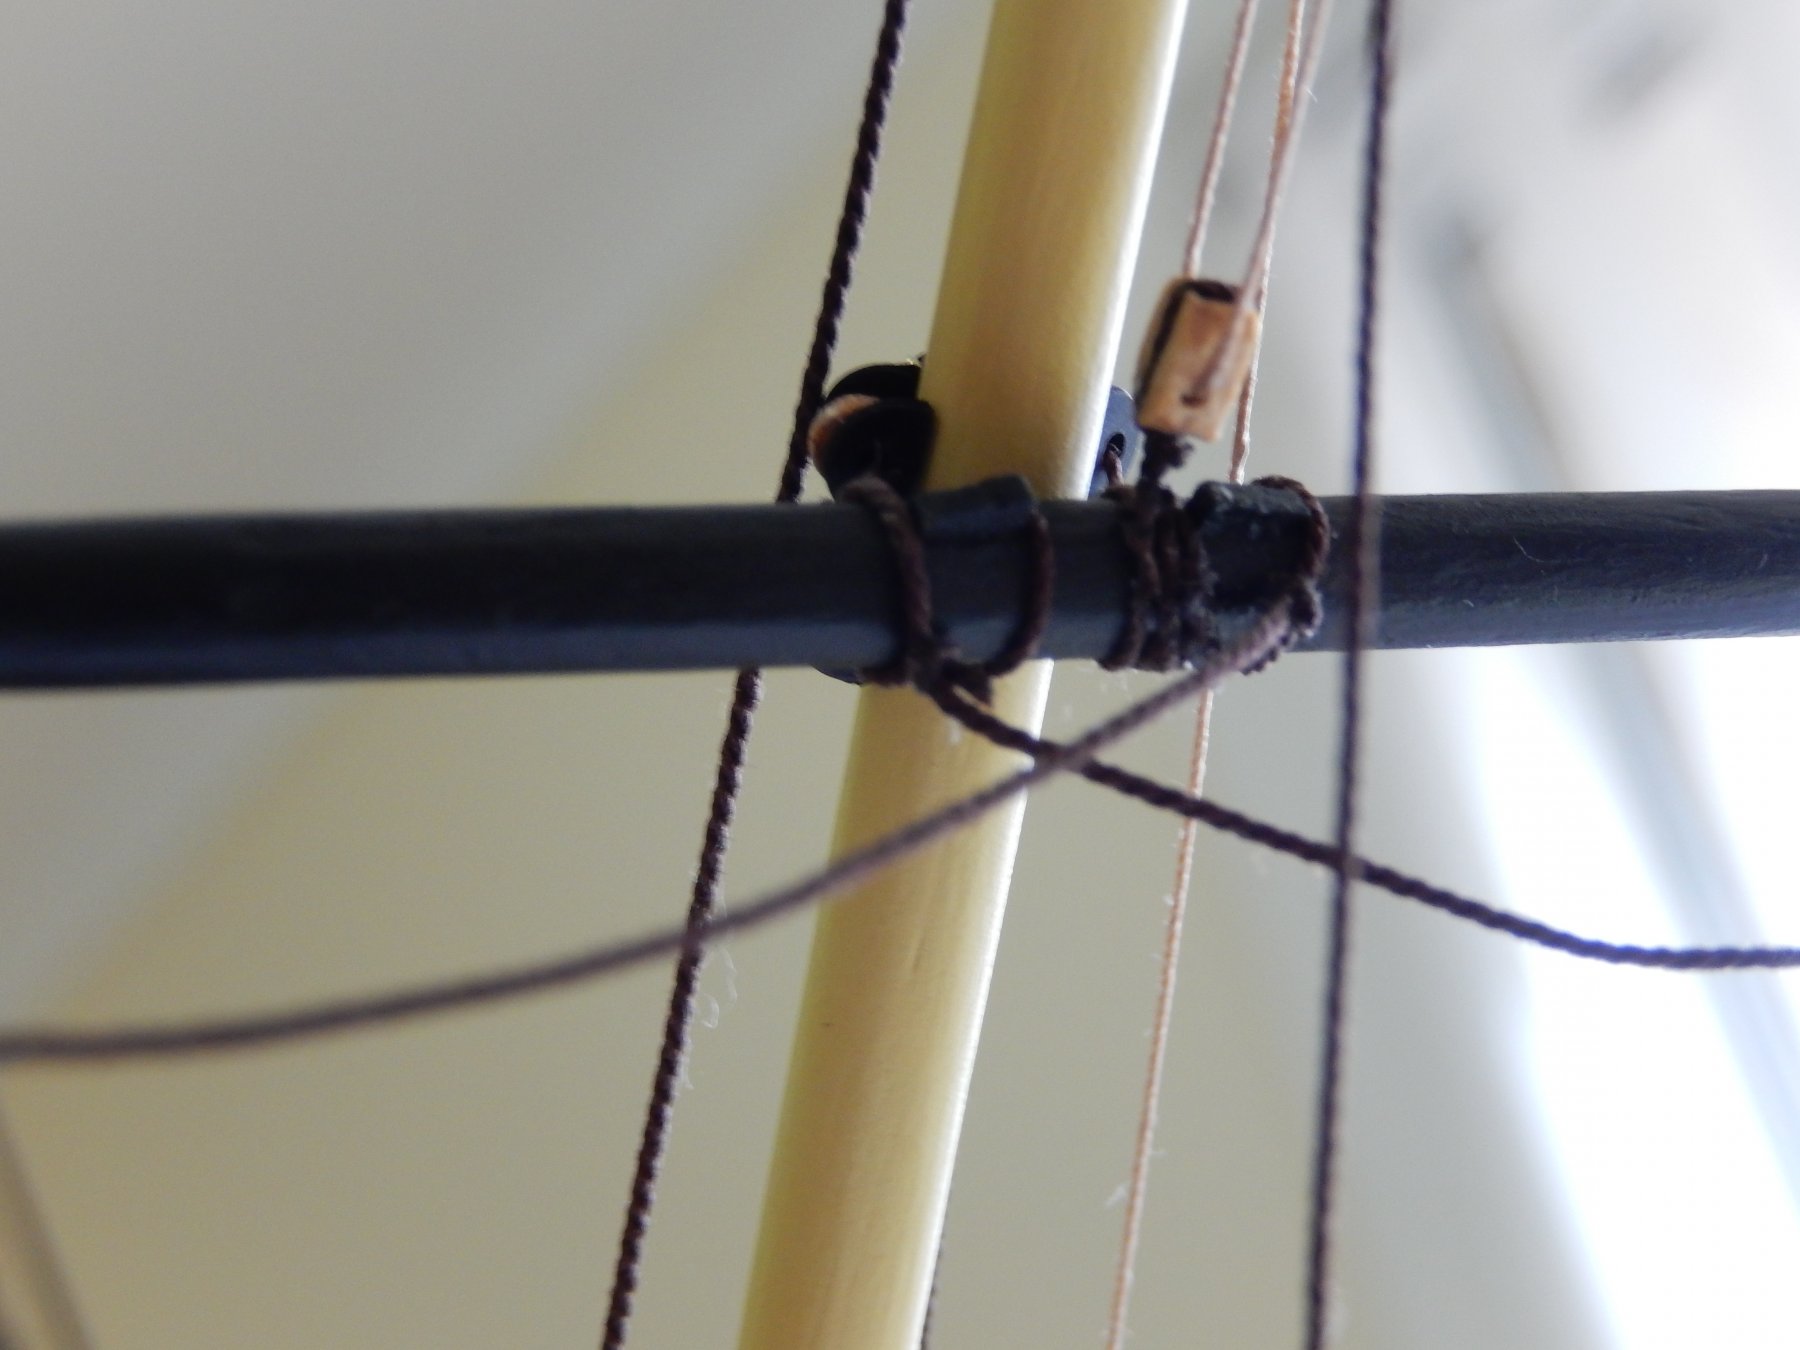
I have just discovered another oversight in the plans. The lifts for the fore and main topgallant yards (not the mizzen) originate from the blocks shown below (Plan 10).
Unfortunately the plan (5) shows no provision for the necessary eyes to tie off the line.
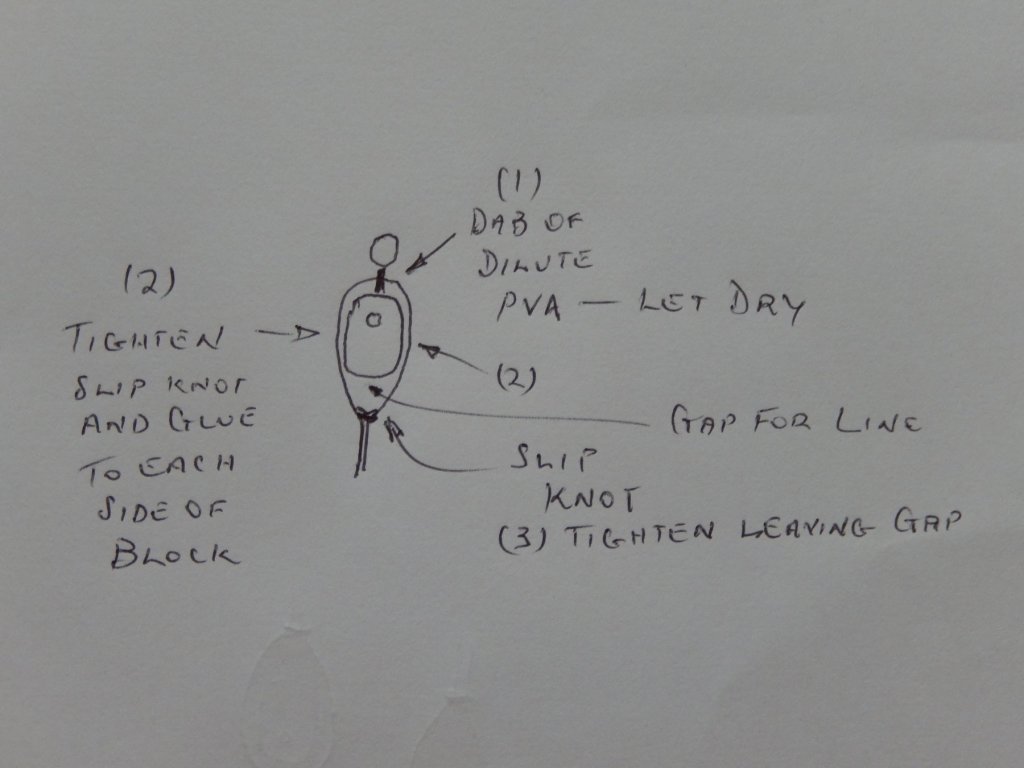
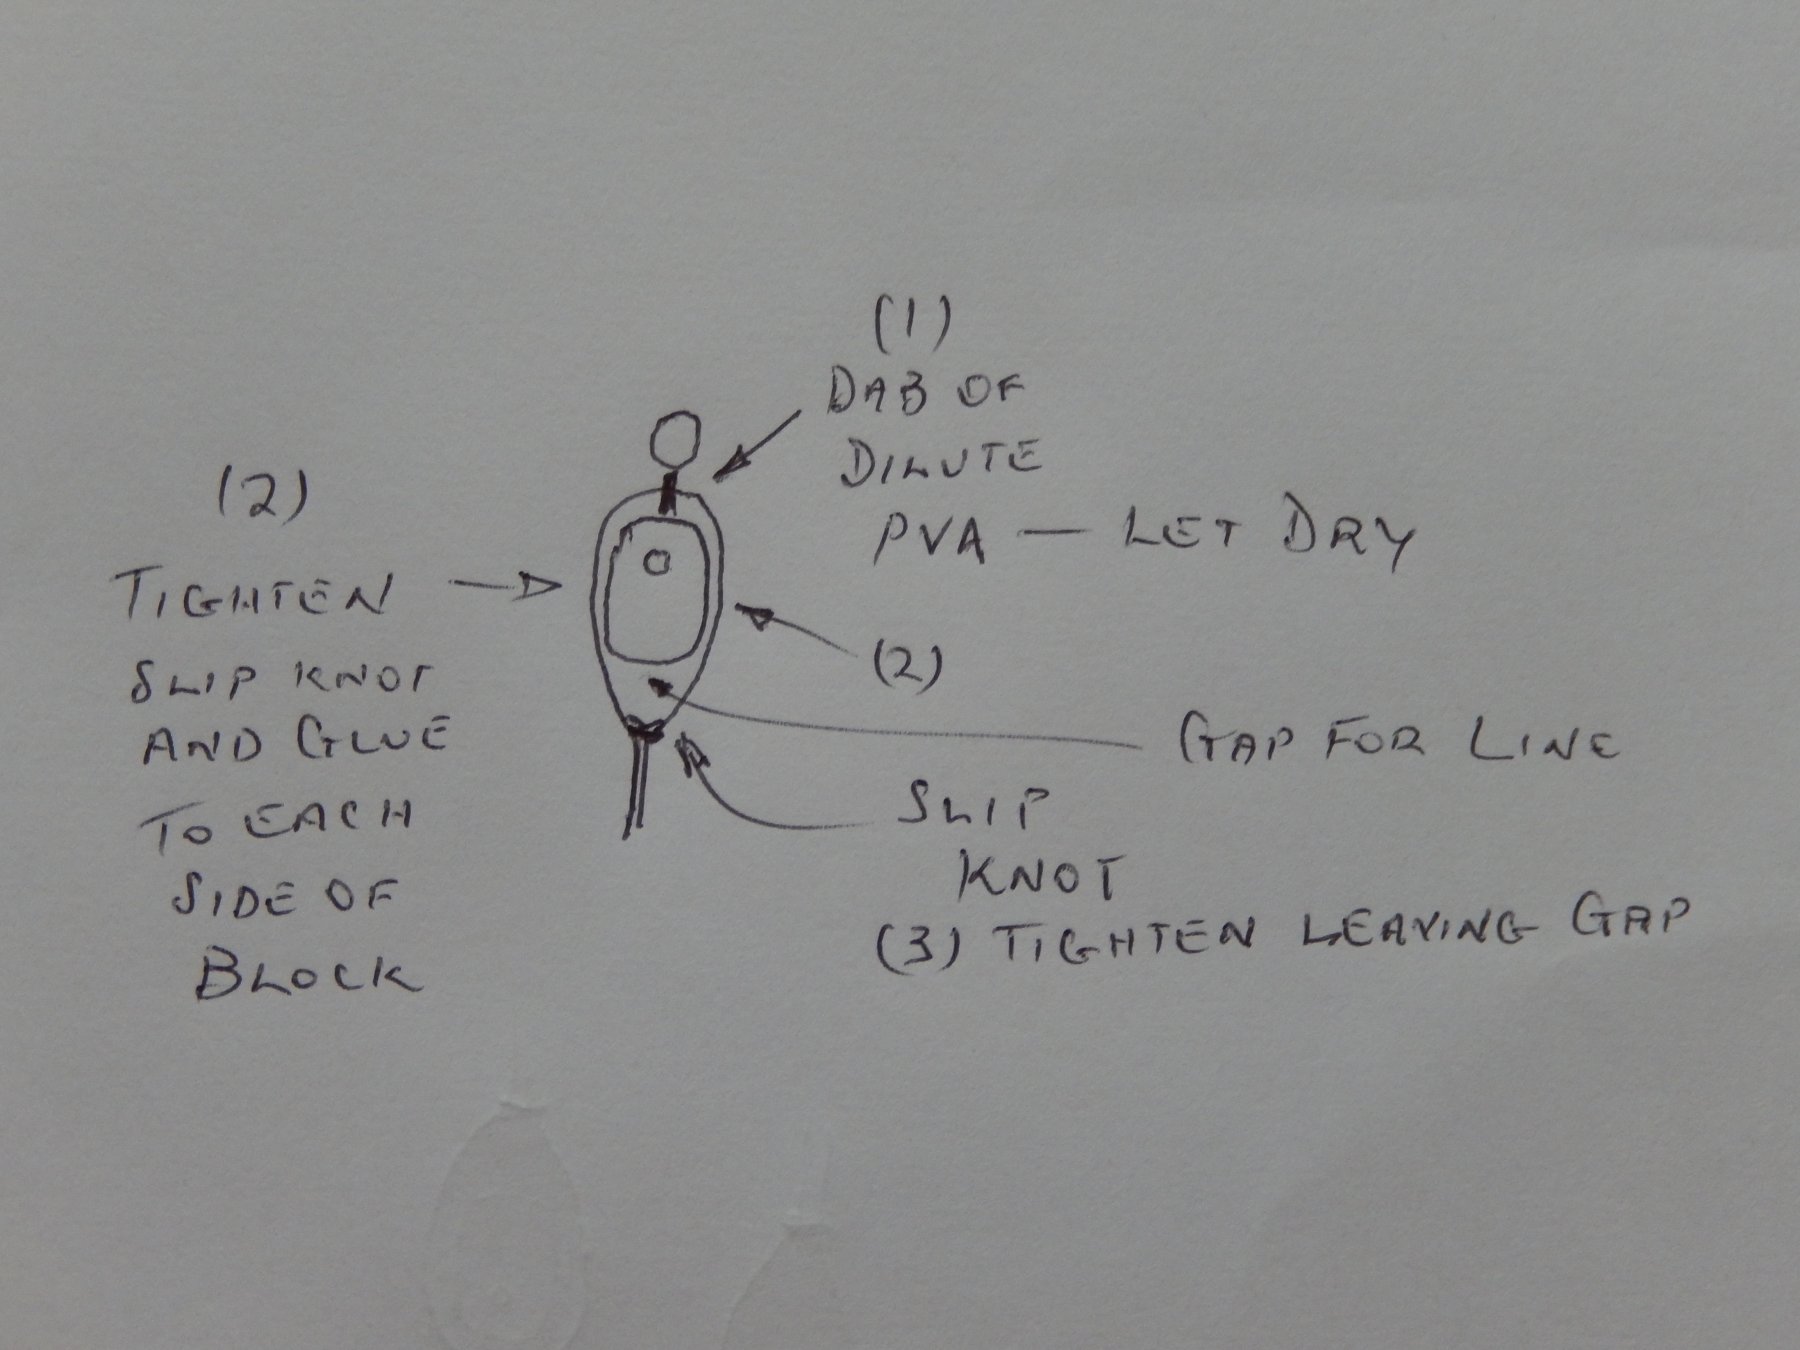
These blocks were attached (without the eyes) to the masts ages ago, and when it came to doing the lifts today this came as a rather unpleasant surprise. The obvious thing to do is to simply replace them. Unfortunately that is far from simple, and the likelihood of disaster is very high indeed. I tried a couple of things without too much success at the risk of a heart attack, so I had a look at Arthur's log to see if he had had the same problem. Of course he had, and had a solution. Tie a slip knot around the blocks. It would never have occurred to me.
I don't know quite how he did it, but the following rather primitive drawing is an attempt to show my method and it appears to have worked.
- VACorsair and mort stoll
-
2
-
There are certainly some idiosyncracies (sp?) in the new site Arthur. You've cleared up one of them for me. Just at the moment I'm having trouble printing photos. The photo is distorted and superimposed over text.
-
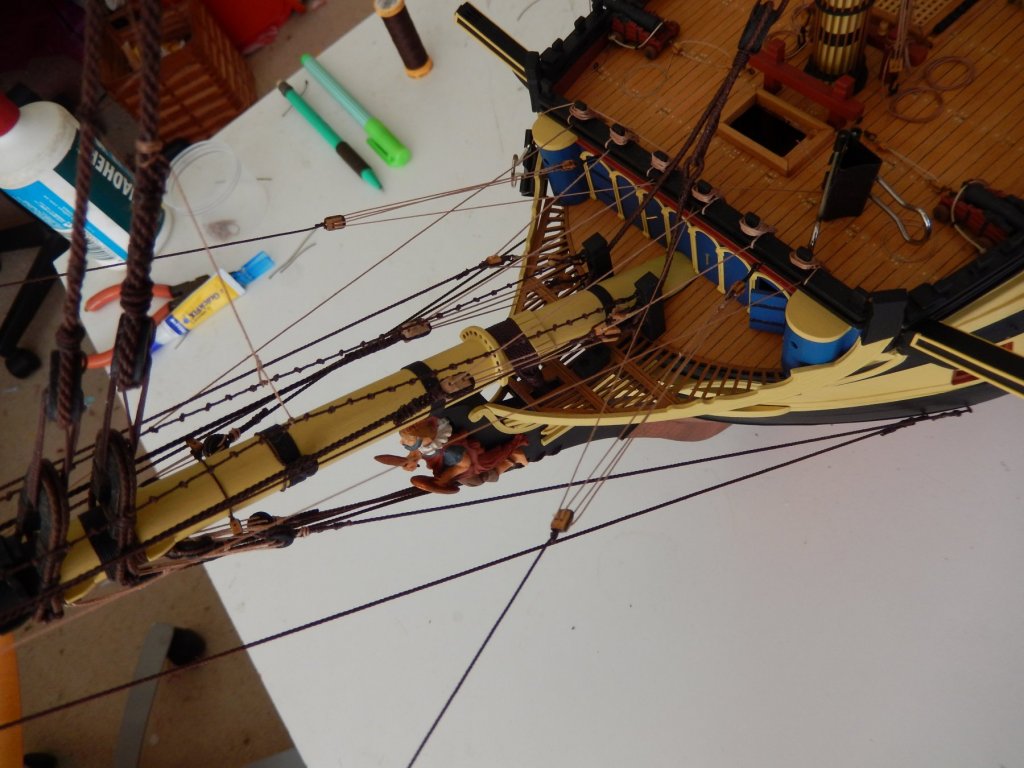
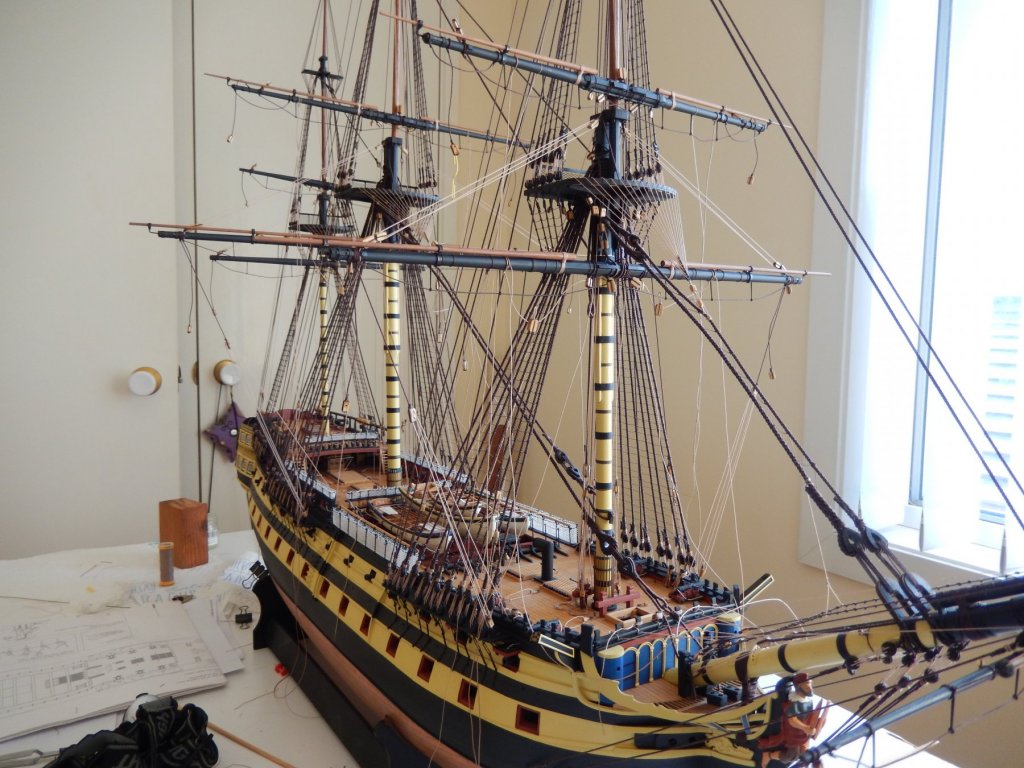
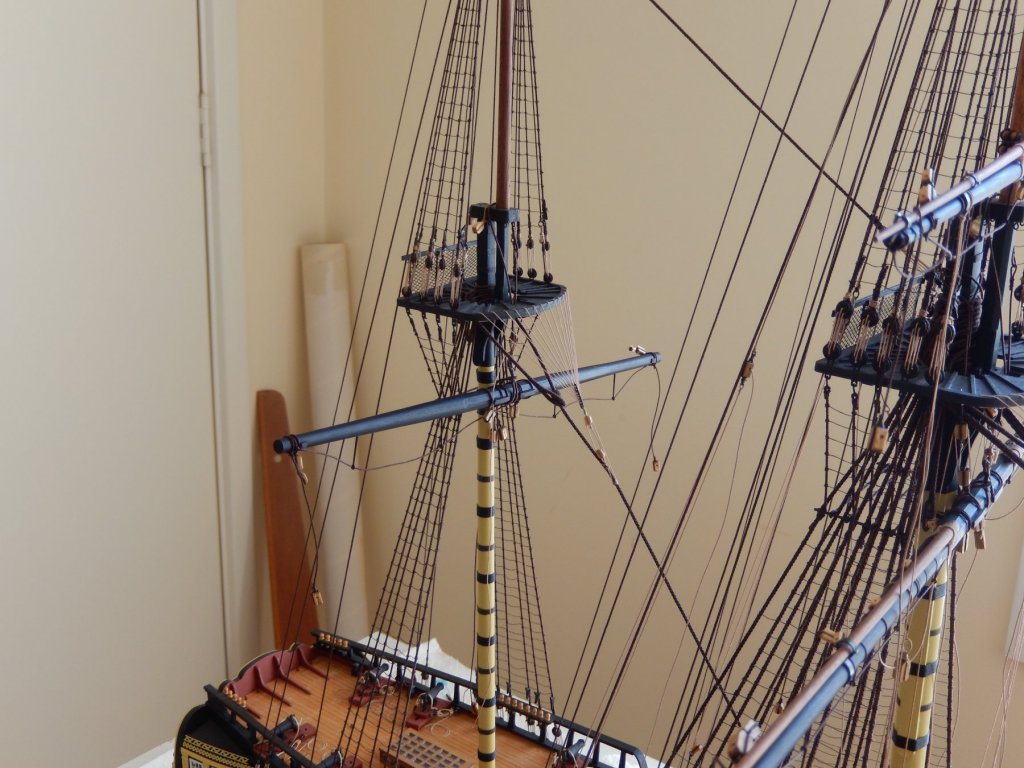
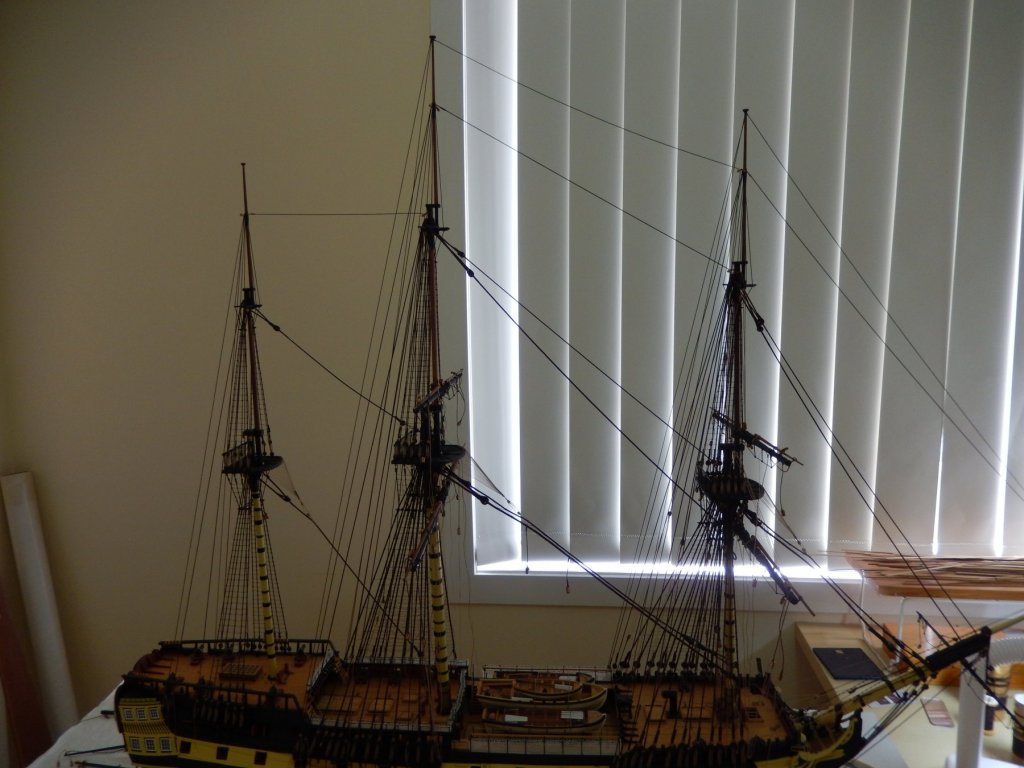
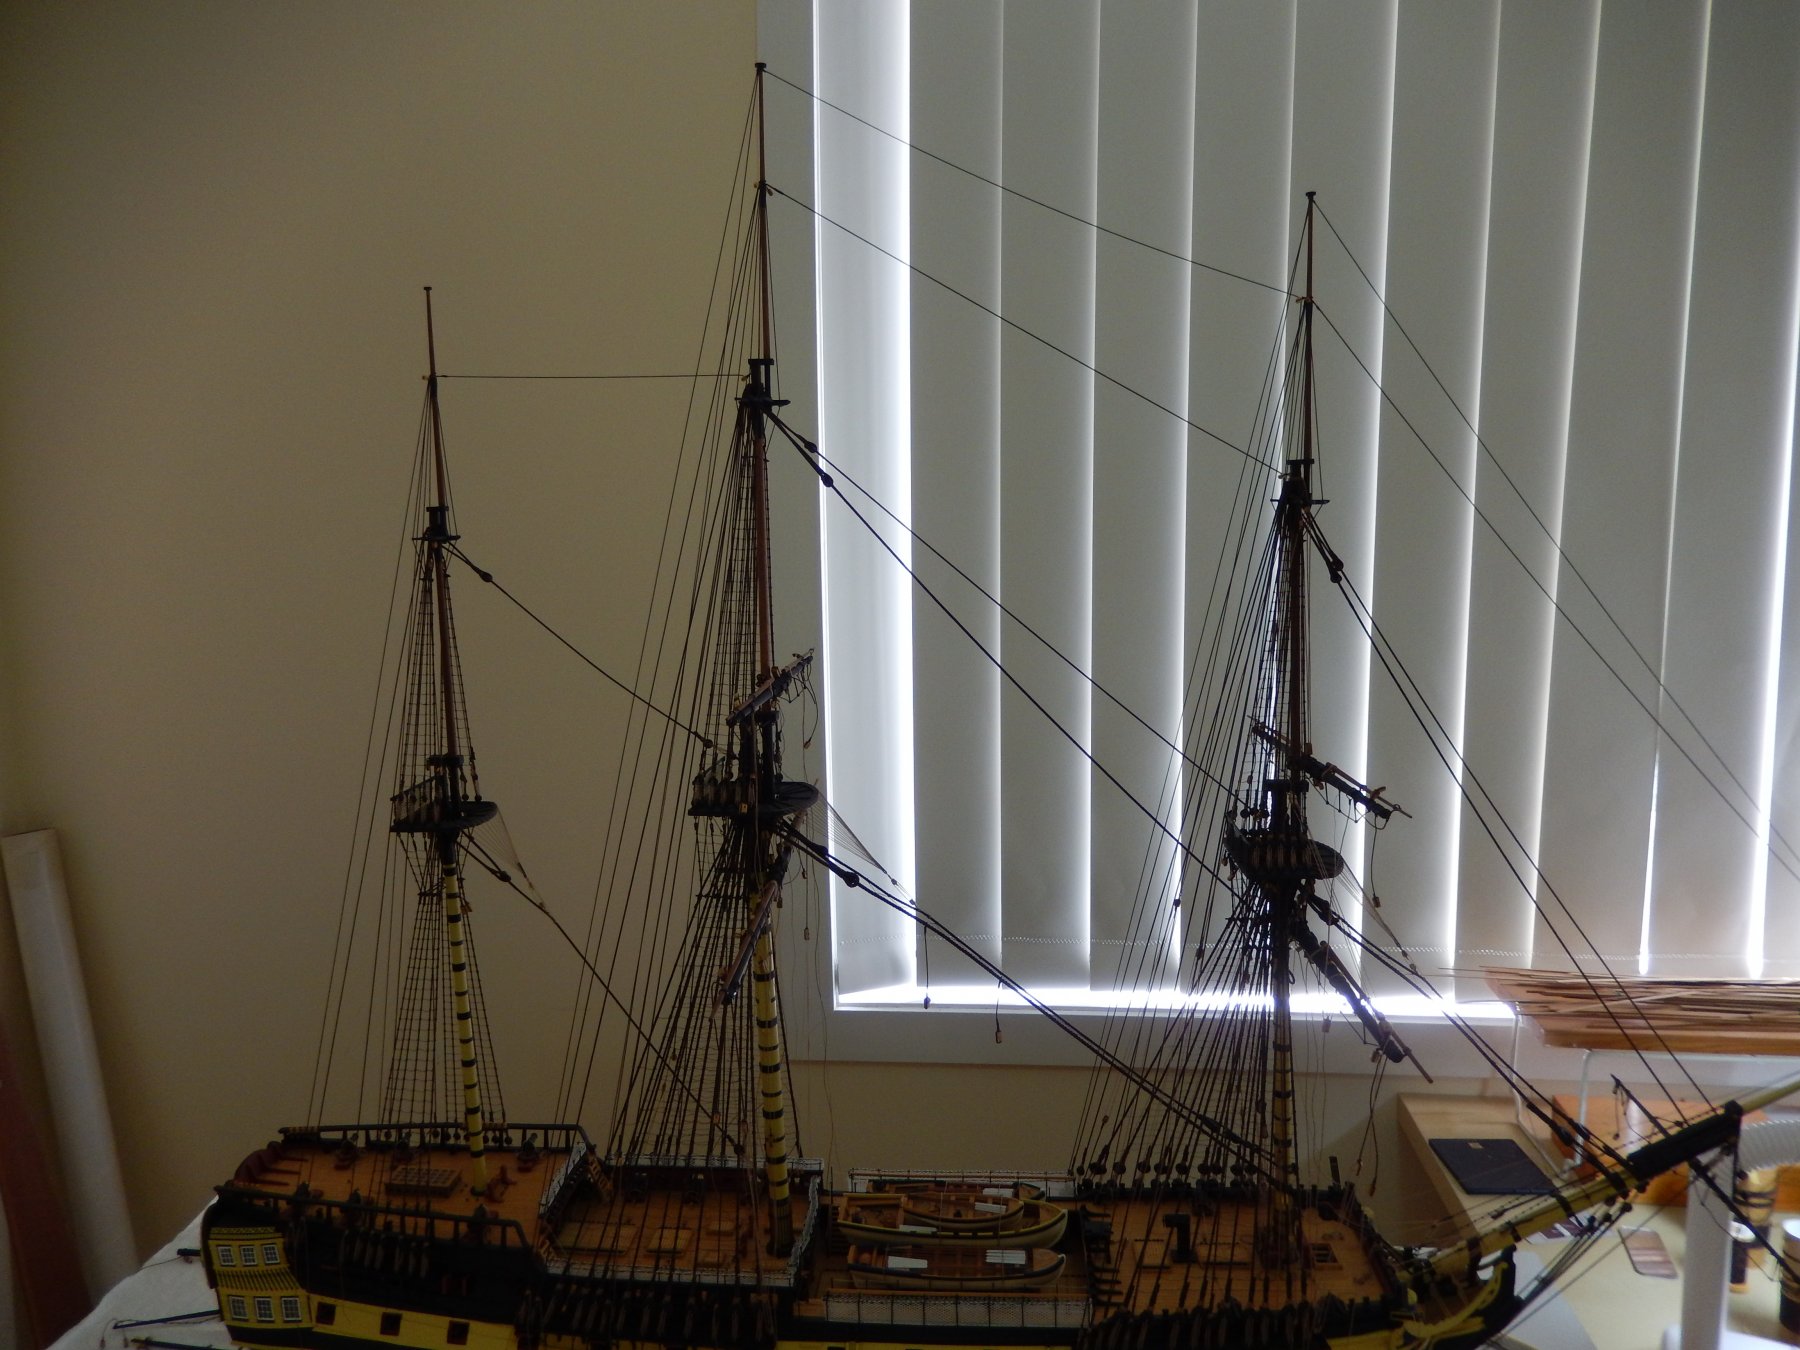
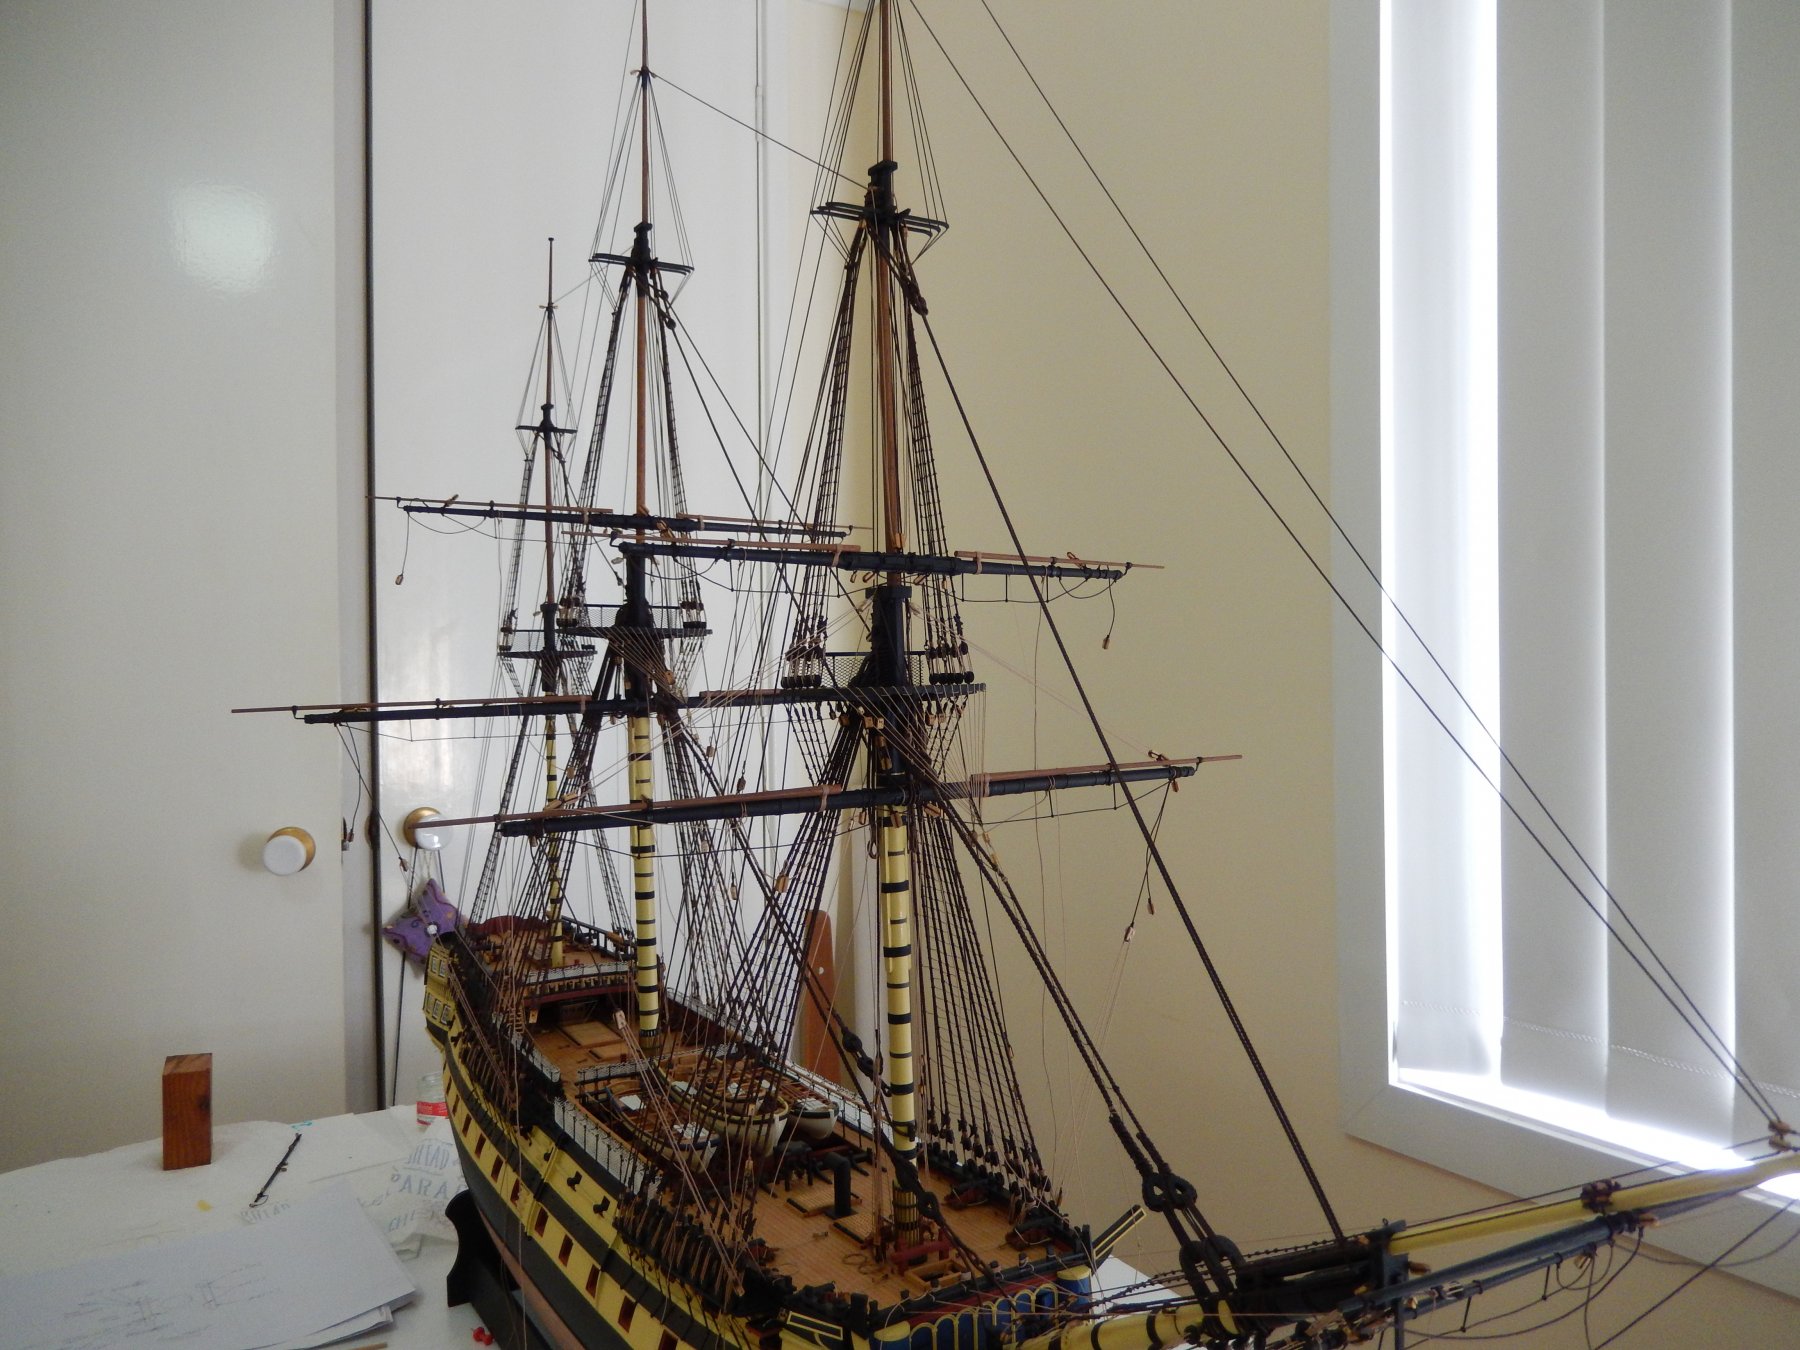
The yards are slowly being attached. The Easter break with a three- and a four-year old pair of anarchists tended to slow things a little. This is how things look at the moment.

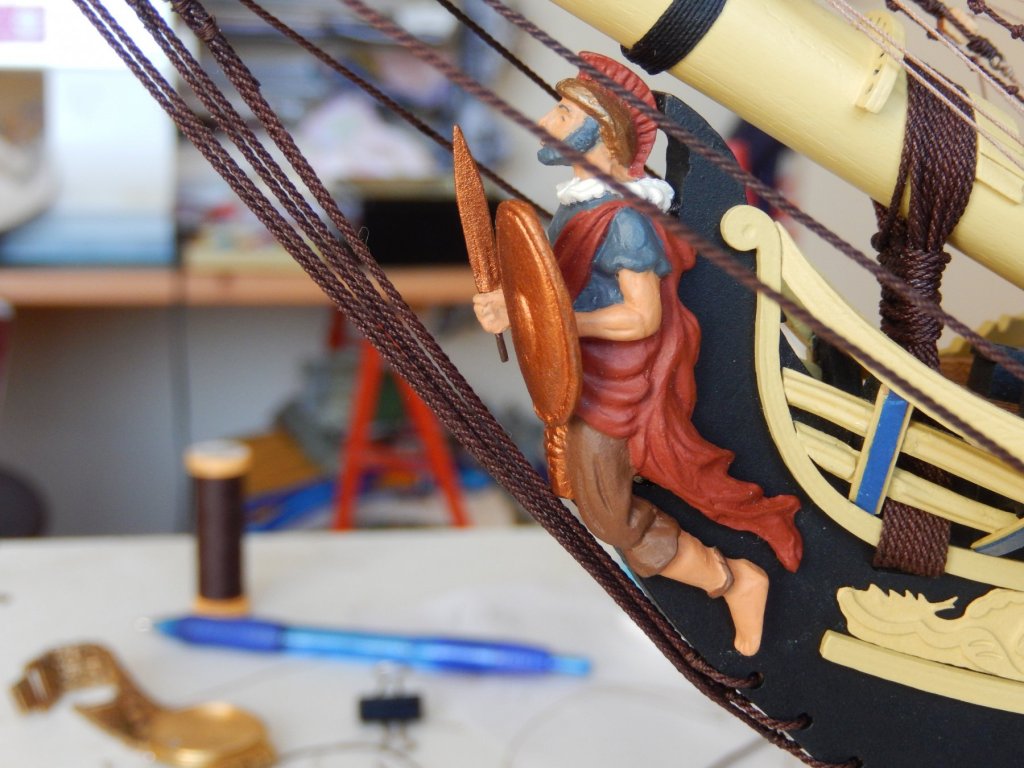
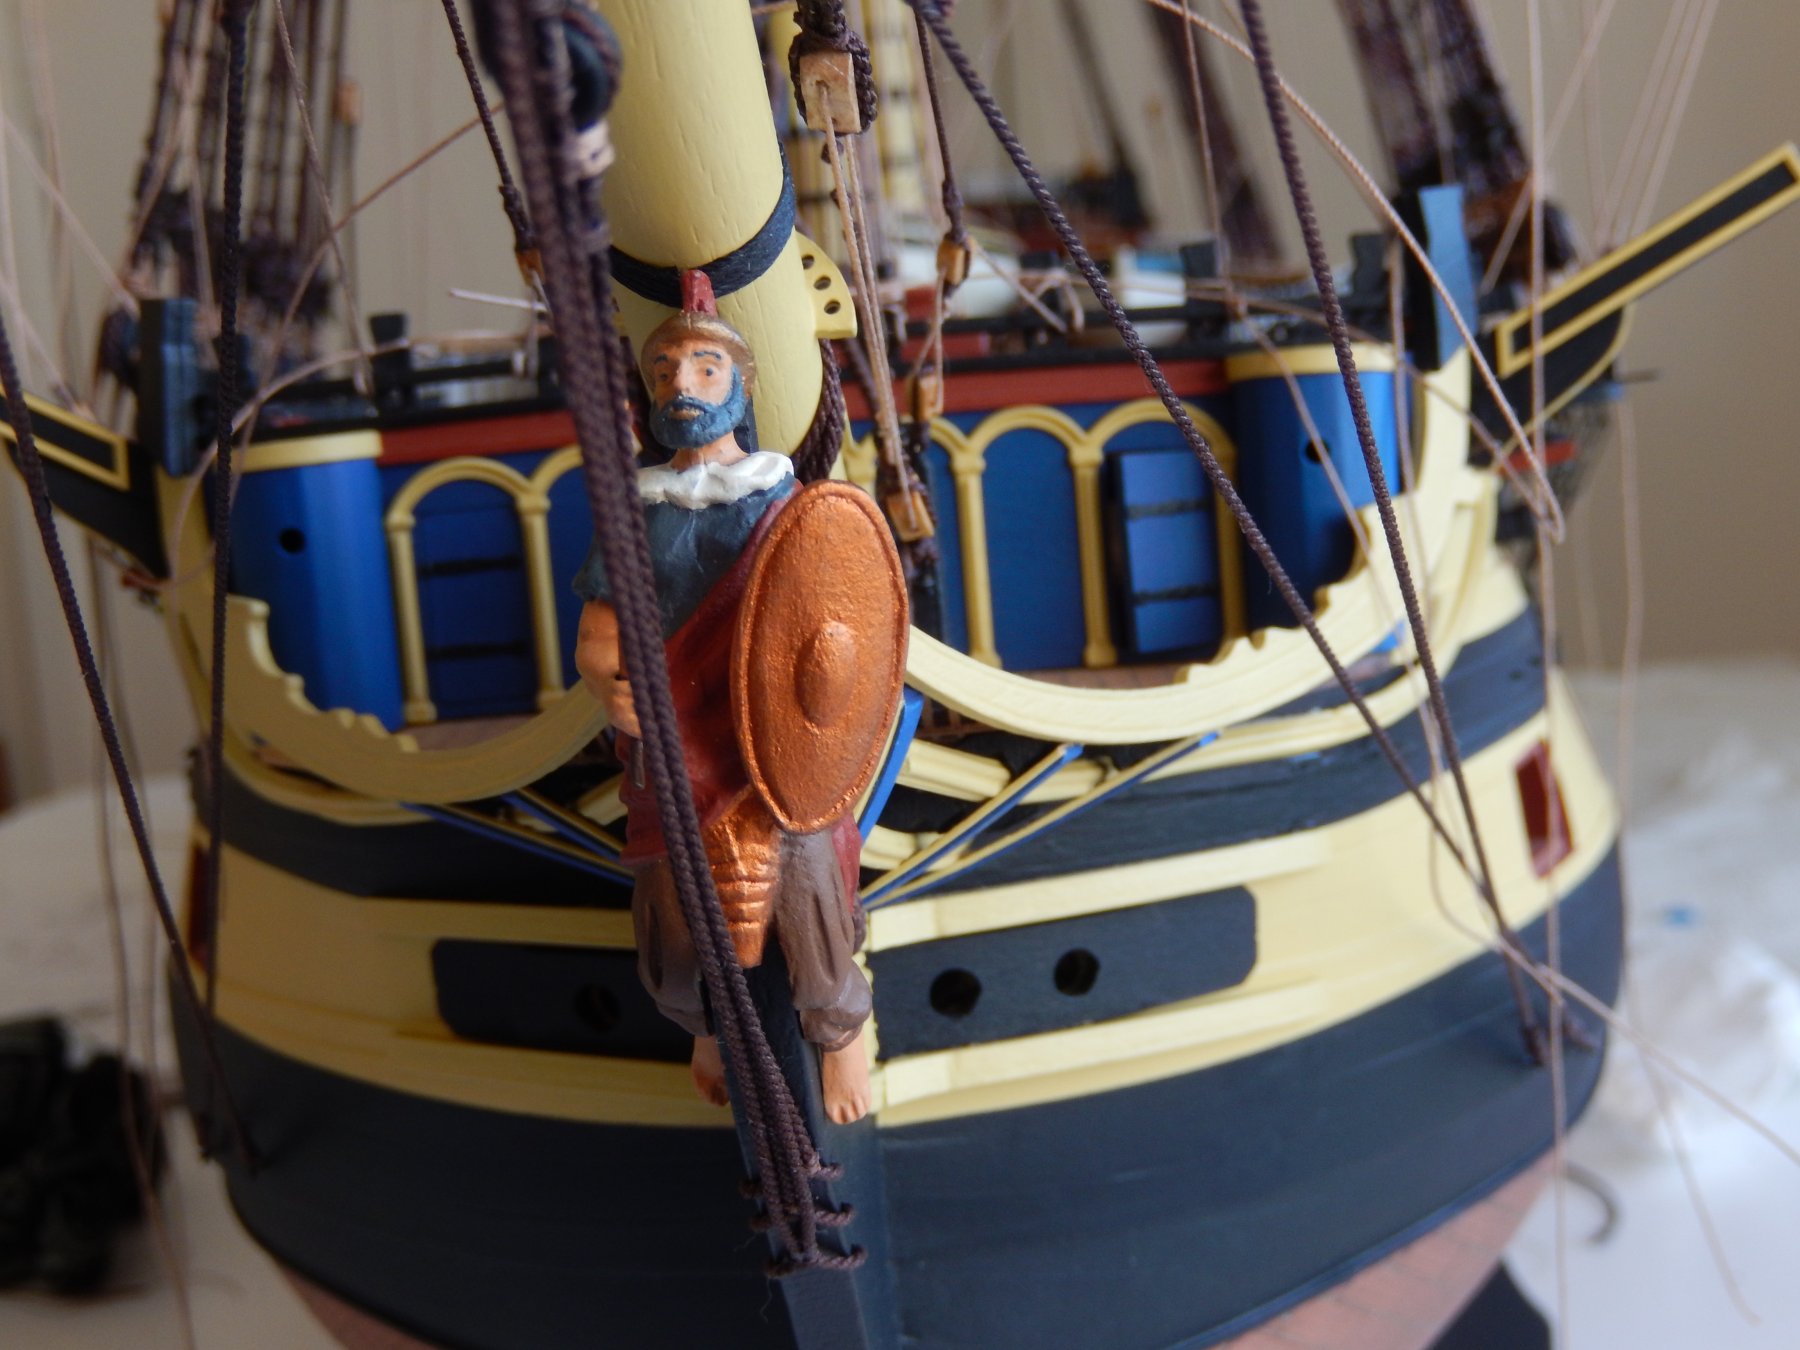
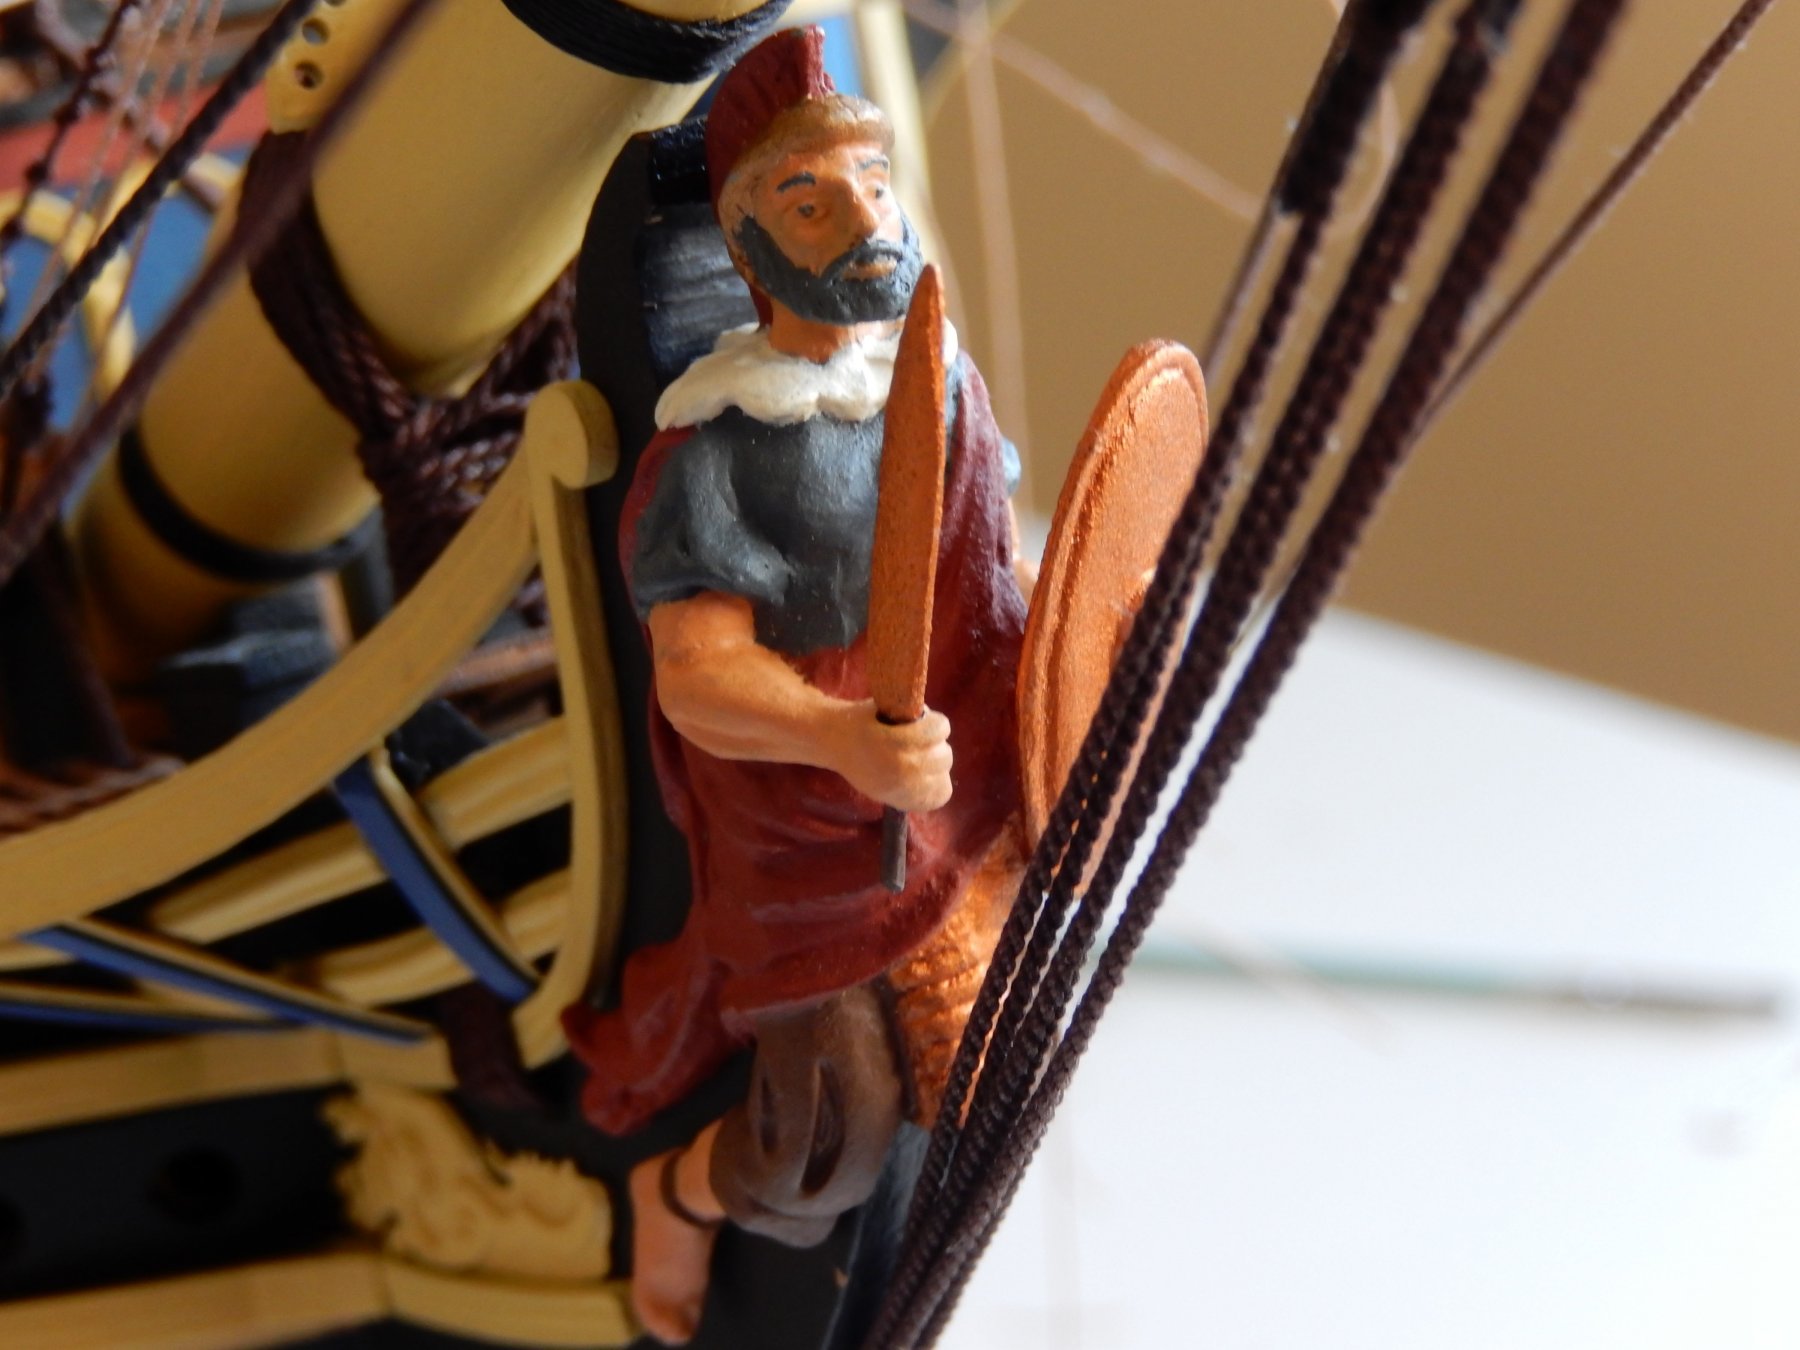
It finally occurred to me that I had forgotten the figurehead and with the various lines around him, he was a little awkward to get on. He does look rather uncomfortable, which, given where he has to sit, is hardly surprising.


-
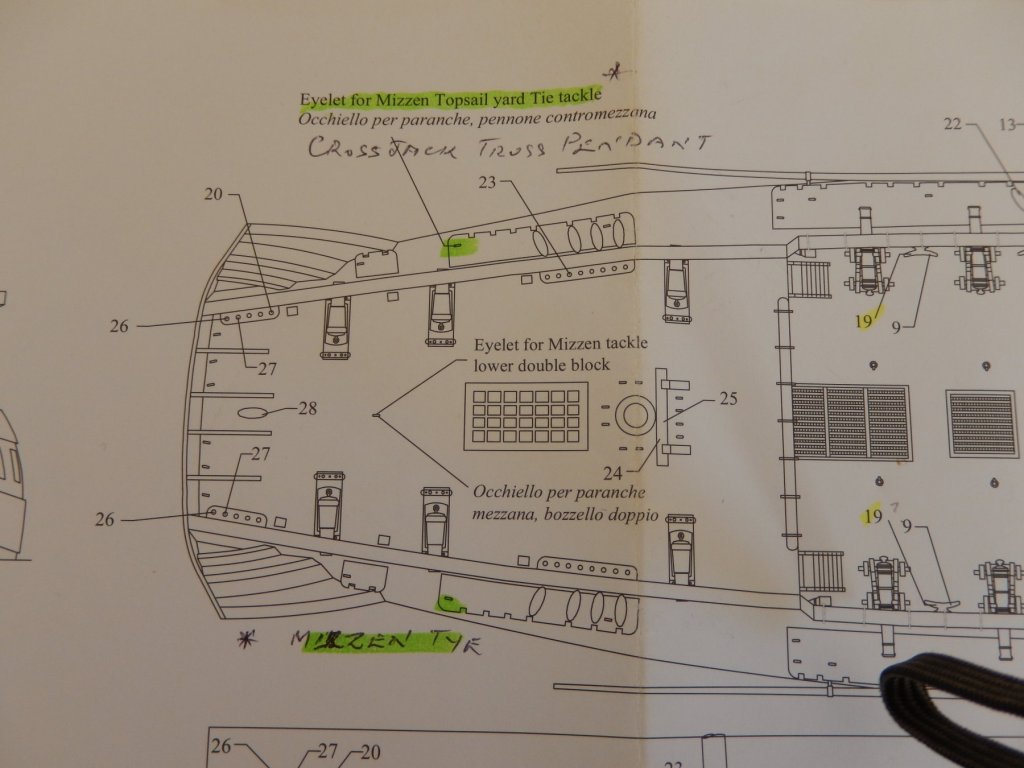
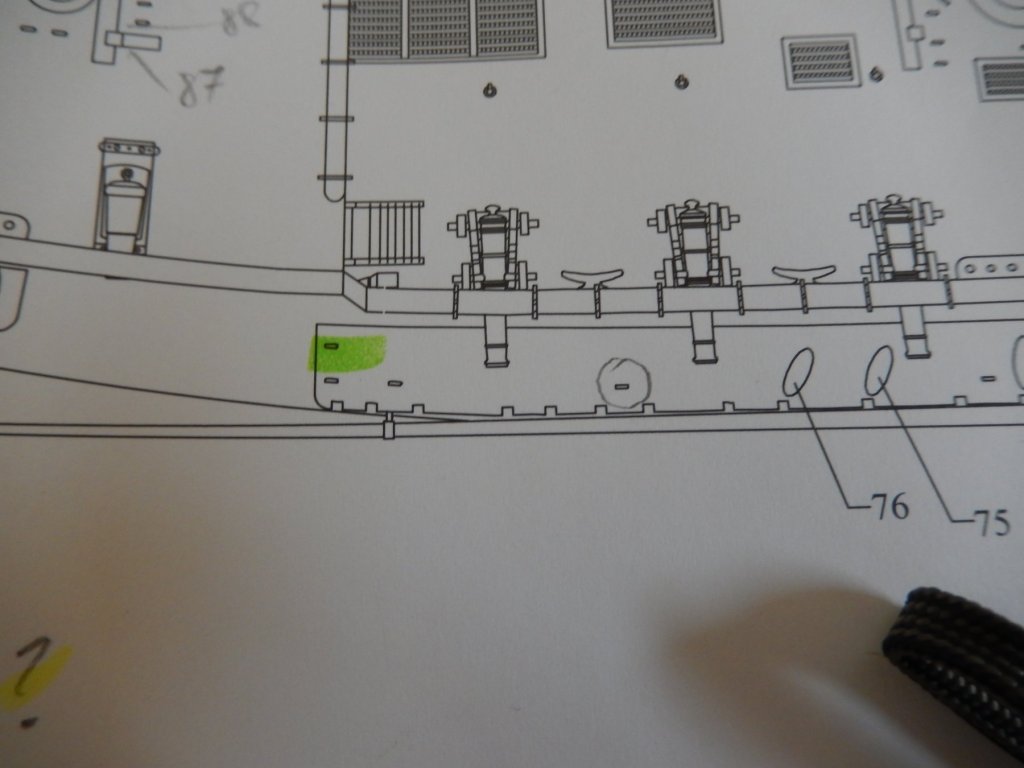
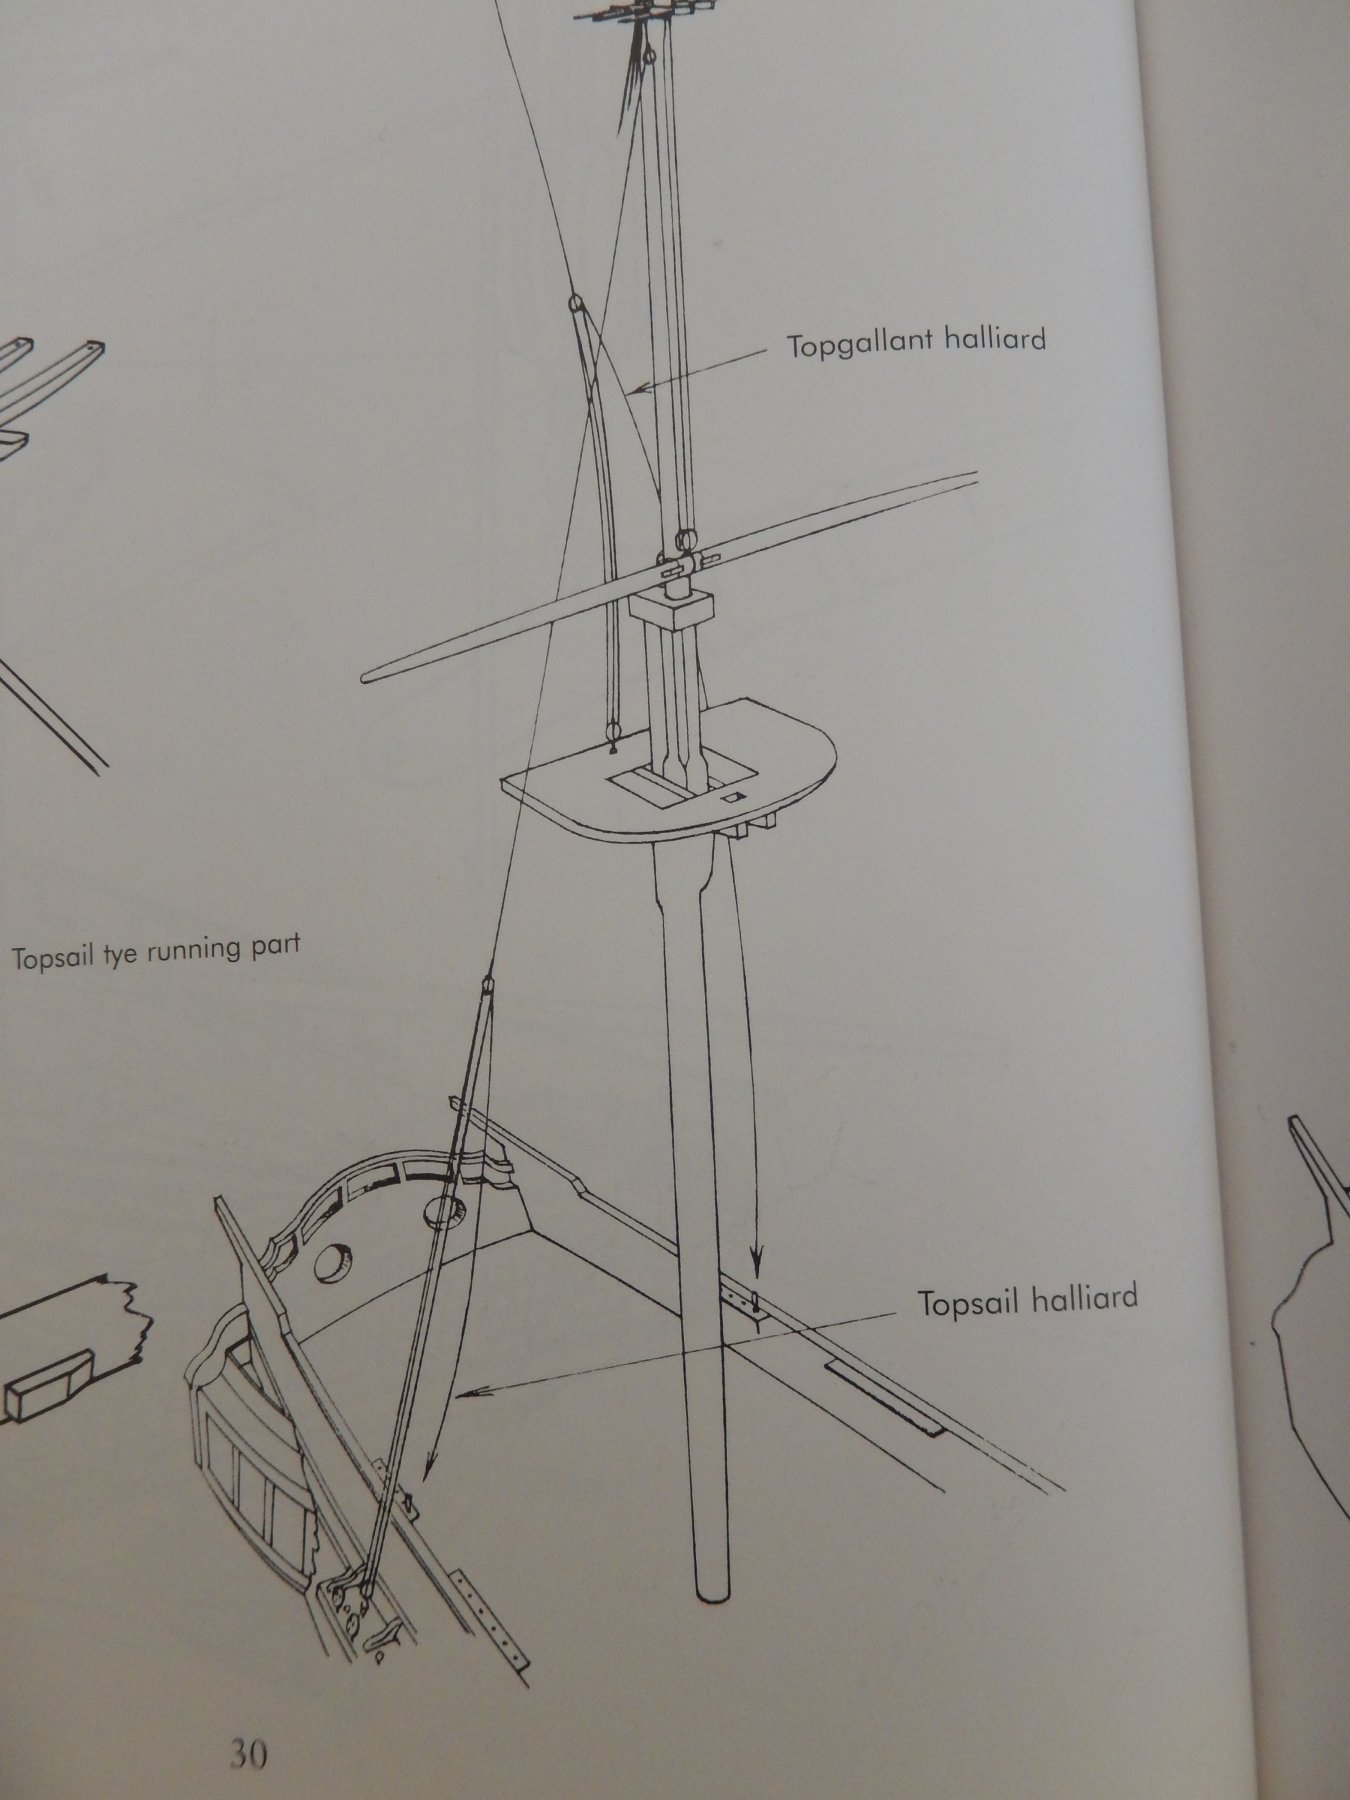
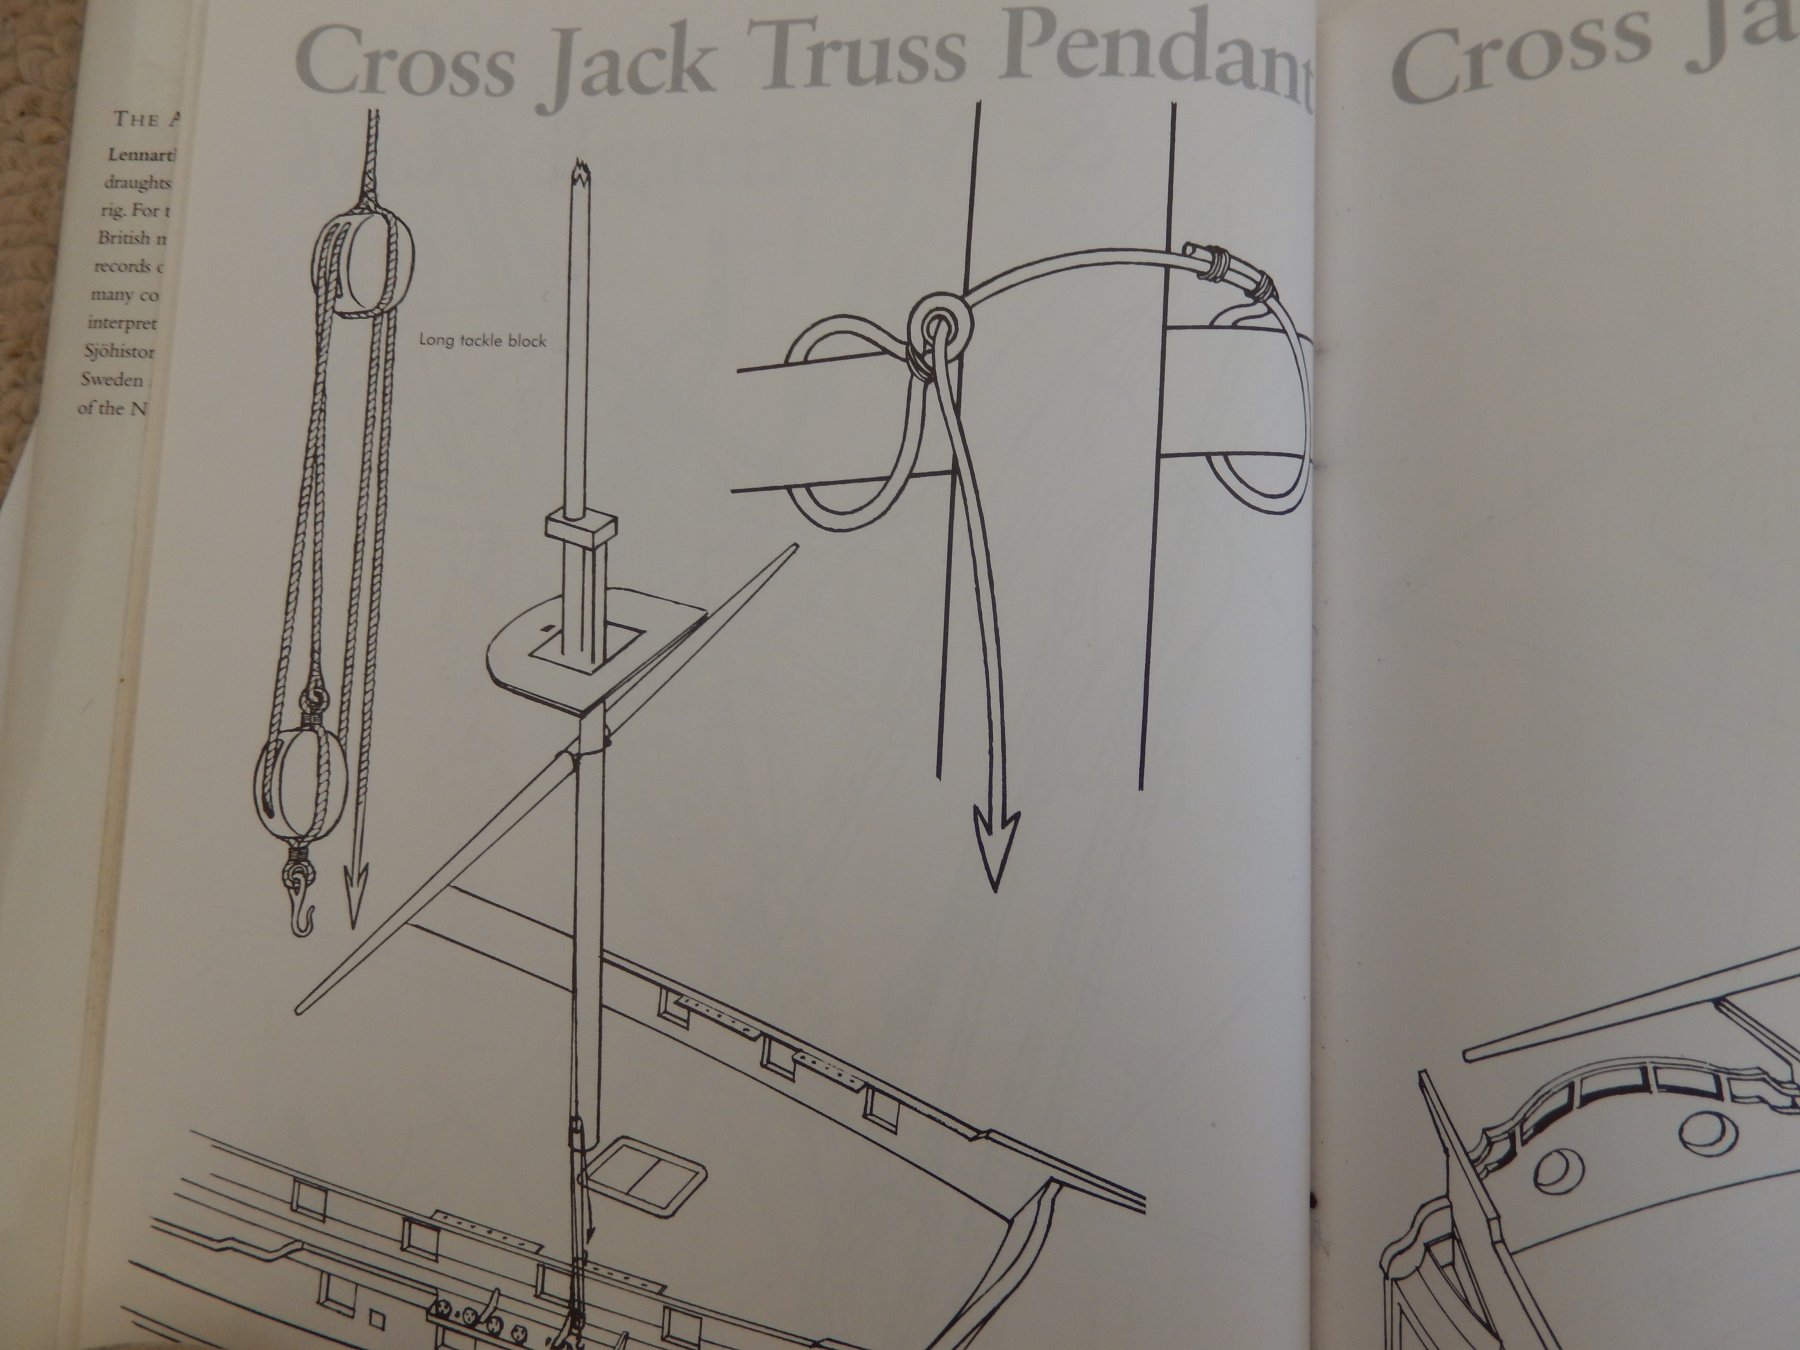
The crossjack is now on. Just to make life interesting, the plans show both a thimble for a sling (plan 6) and a block (plan 9). I had already provided for the sling (as does Petersson) so I went with that. Adding further interest is the question of where to fix the lines for the truss pendant (I never was able to find where the tackle from the block is supposed to go) and the yard tie. Again, following Petersson I will use the eyelet for the yard tie for the truss pendant - the upper eyelet marked in green - and the tie will go on the lower eyelet. As far as I can see, the latter is not used elsewhere.
Here are Petersson's illustrations.
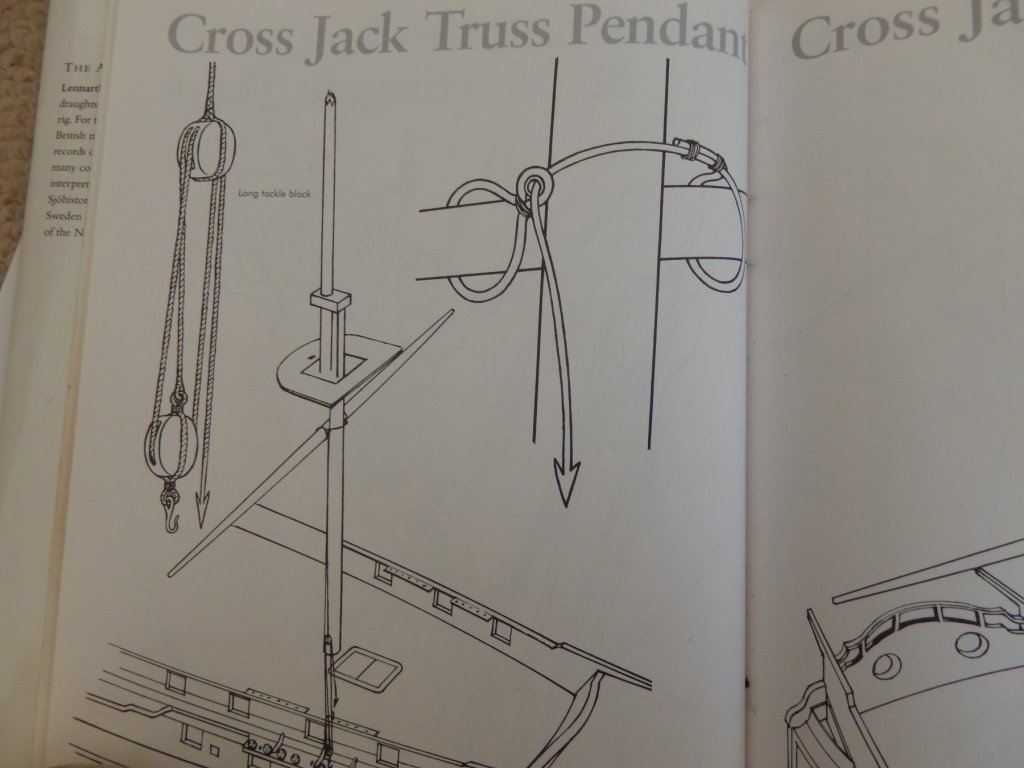
How it looks - there are a few stray bits of thread to trim .....

-
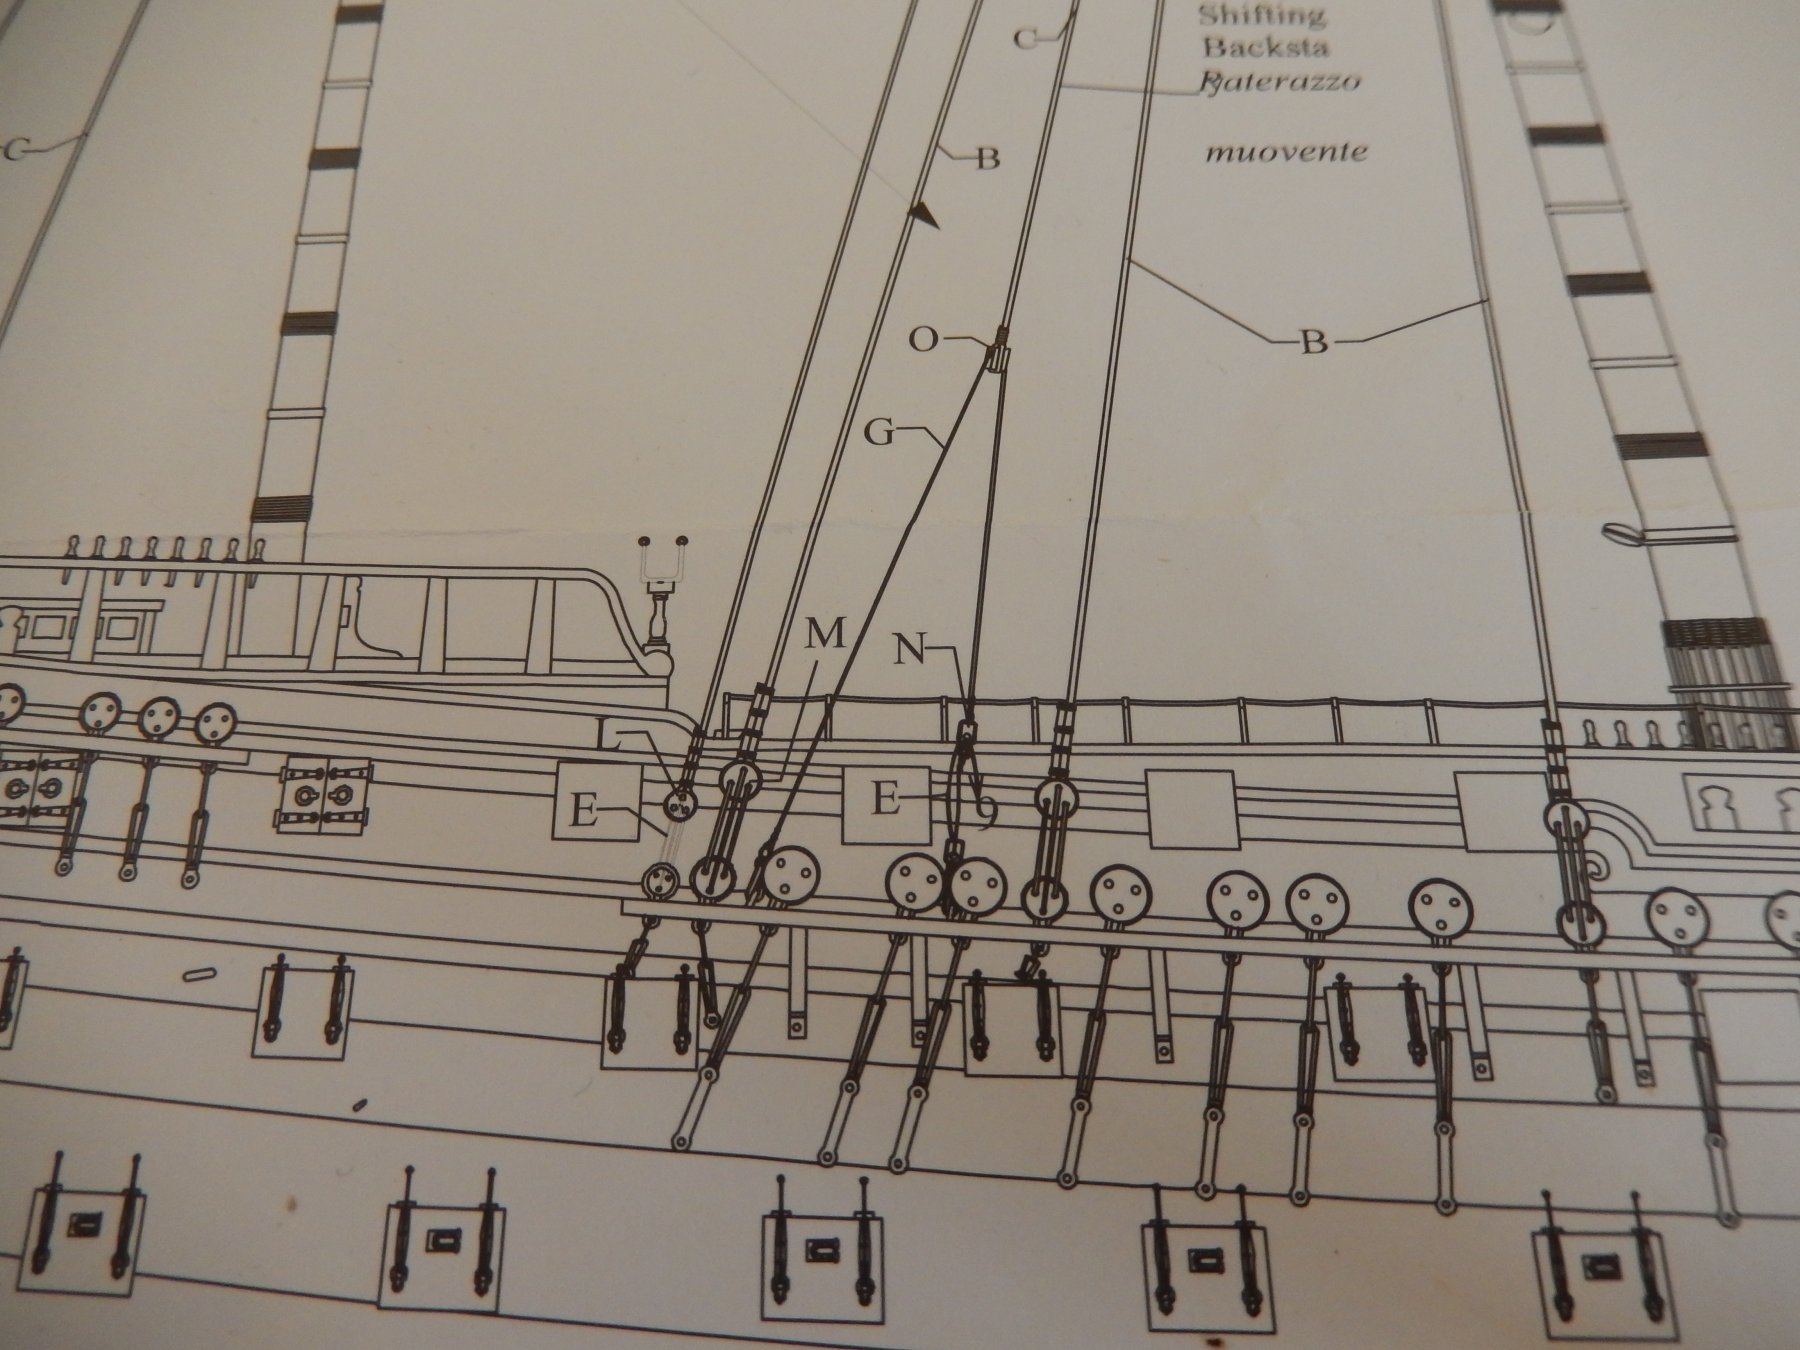
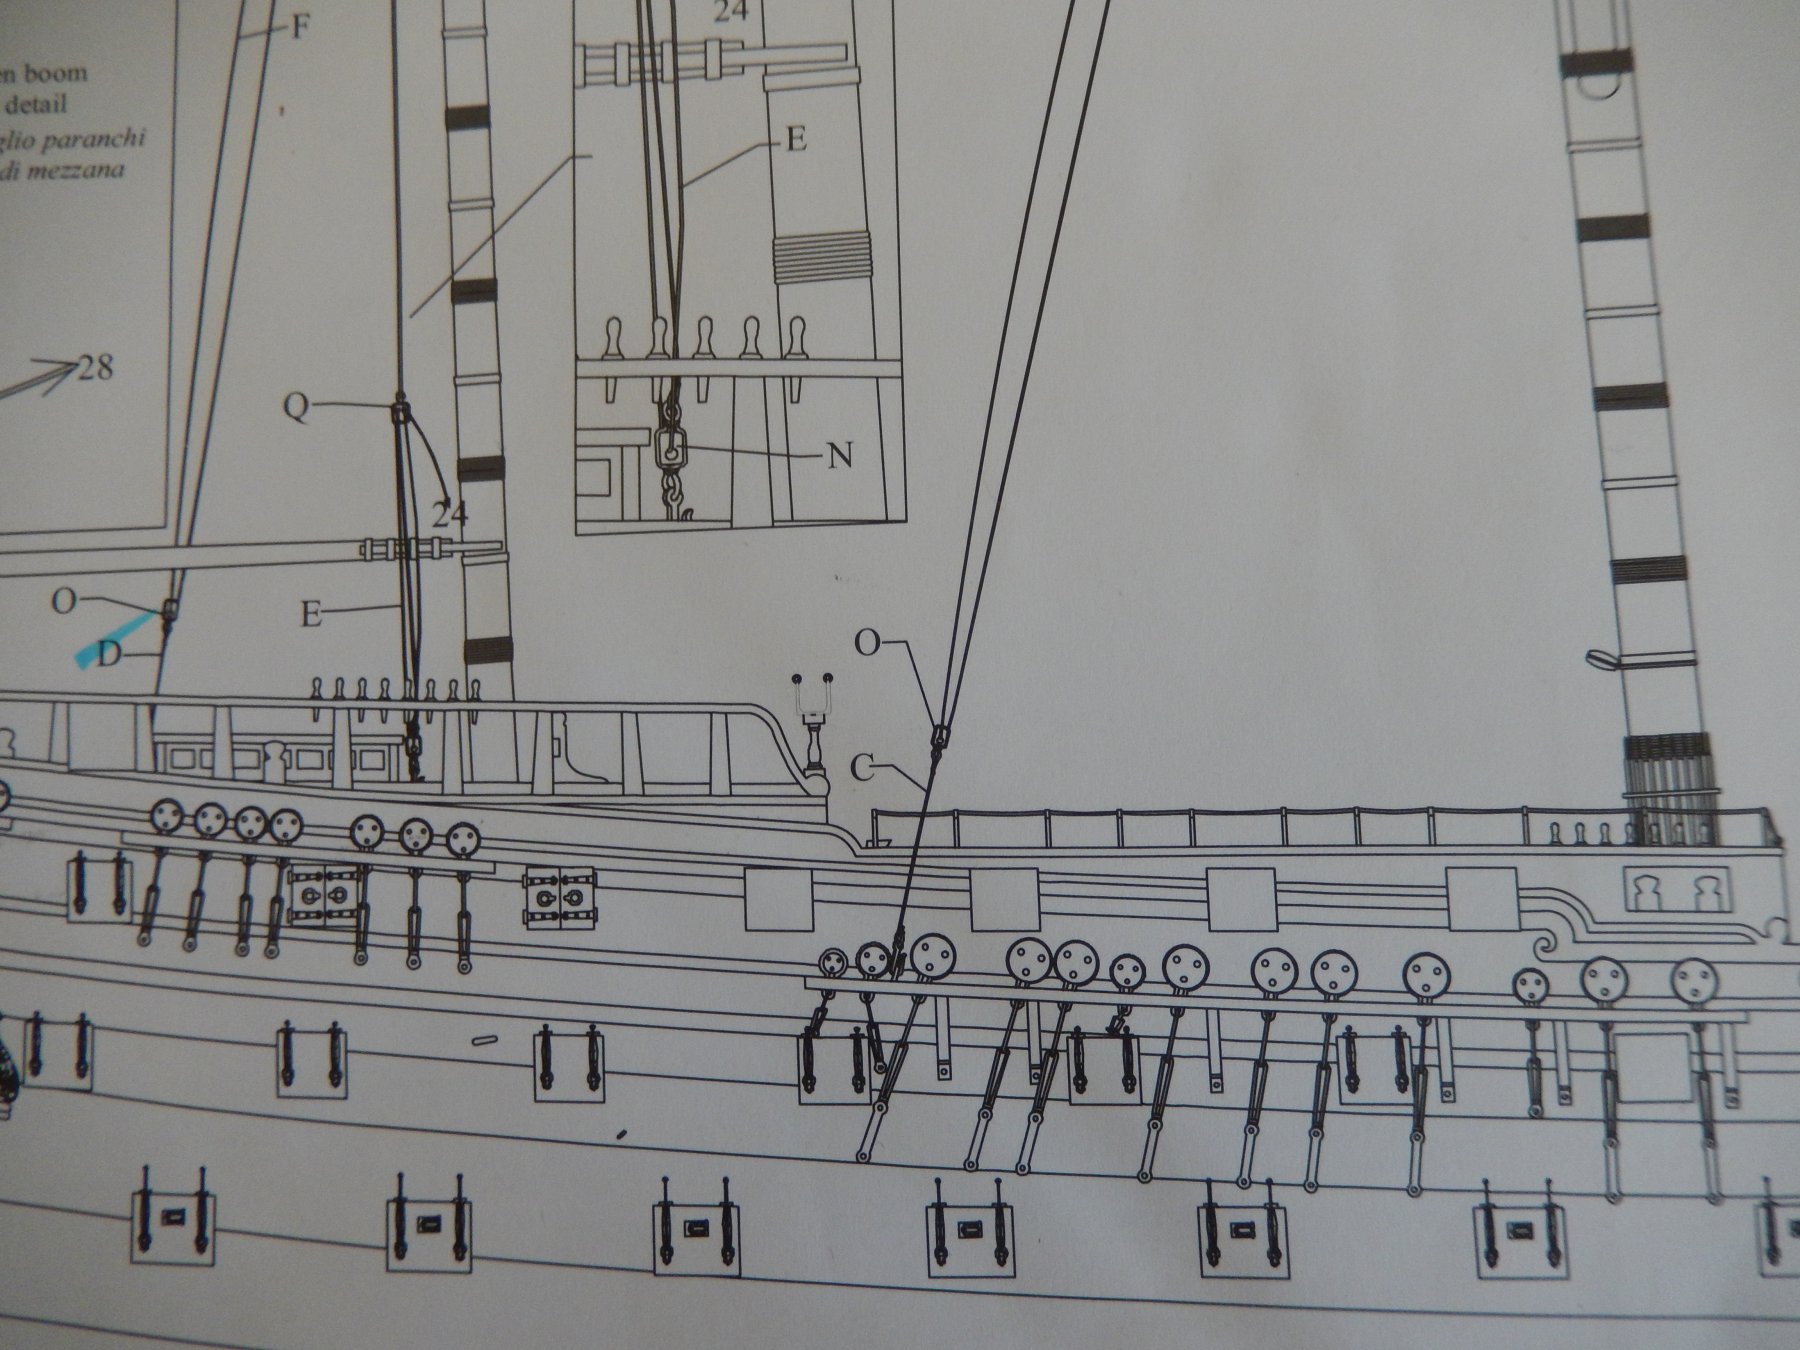
The main topsail yard tye (tie?) is now a problem - or more accurately - plan 9 is a problem. The plan shows both the shifting backstay and the yard tye hooked on to the same eyelet.
Here is the back stay....
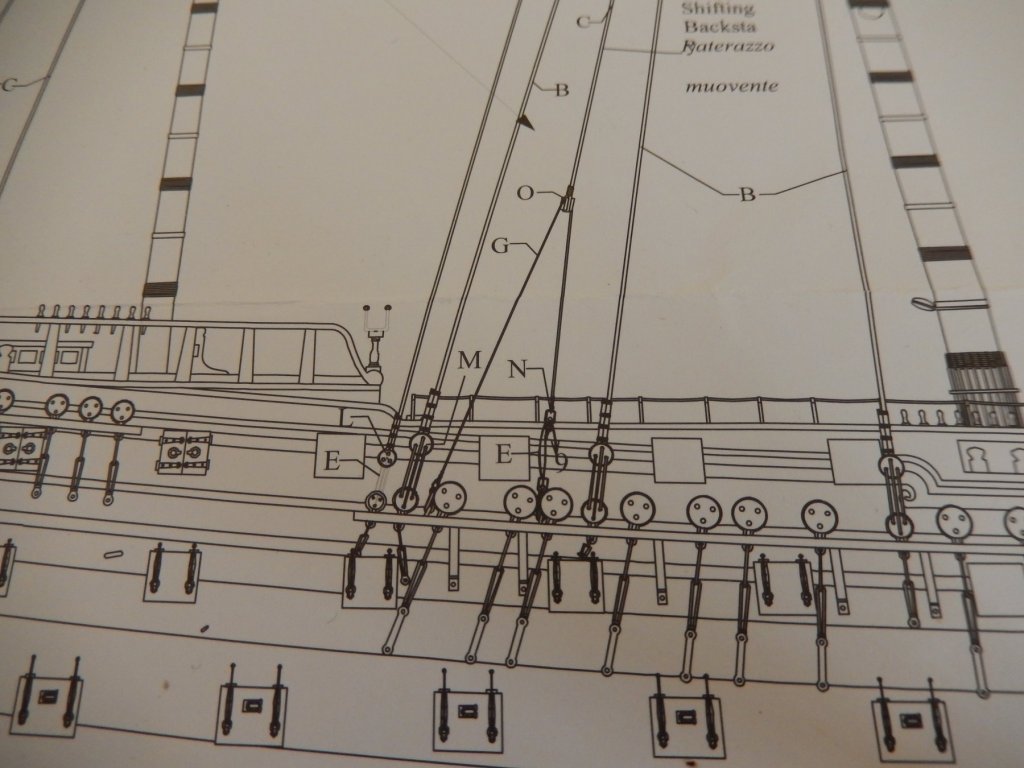
and here is the yard tye.
My eyelets on the channel are correctly positioned according to the plans
. The eyelet circled has been used for the back stay. The eyelet marked in green does not have any use that I can find elsewhere on any of the plans, so I propose to anchor the tye to this. Has anyone else come across this problem, and if so how did you deal with it?
- AON, VACorsair, Mirabell61 and 2 others
-
5
-
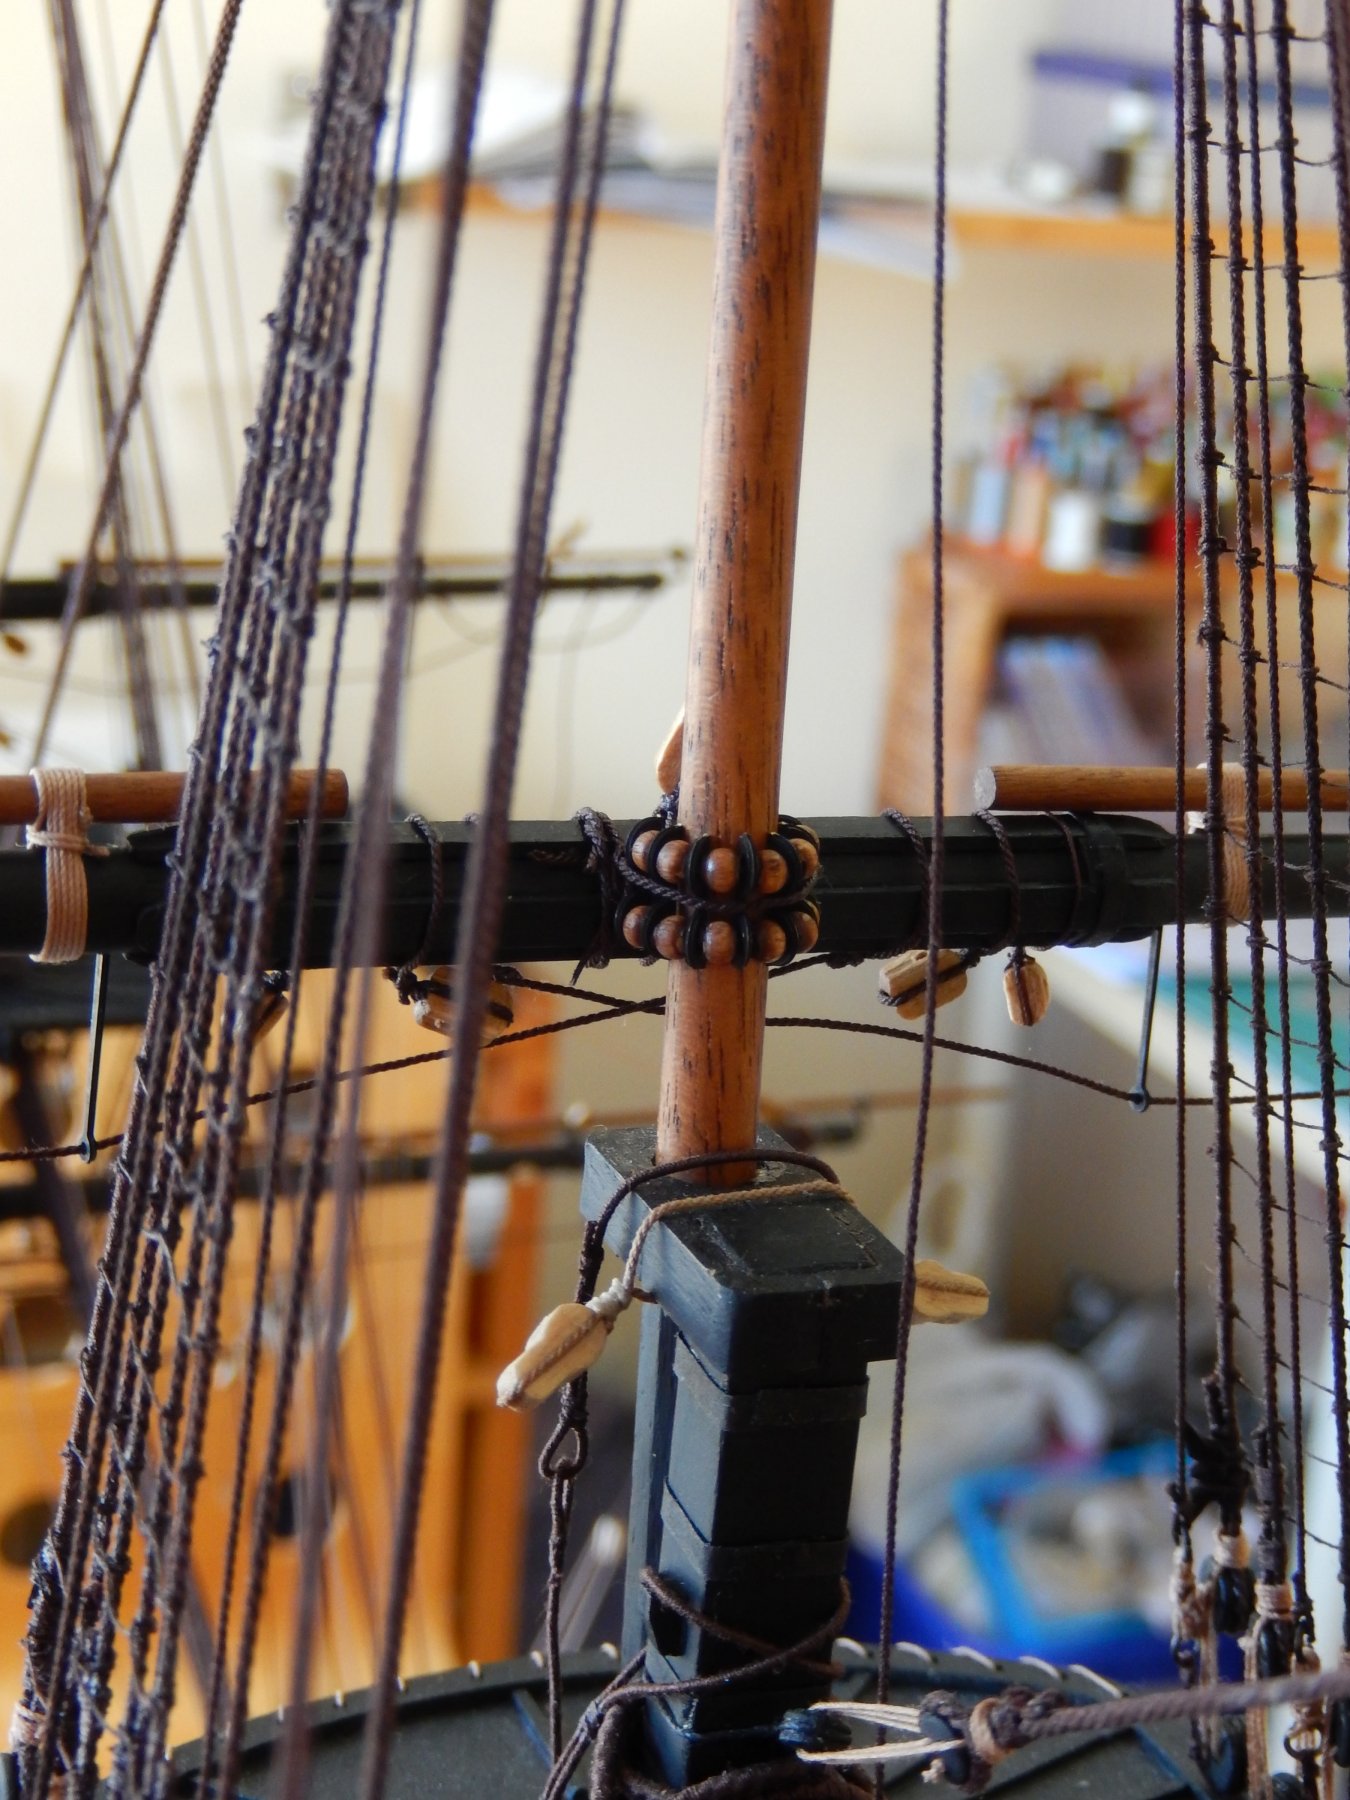
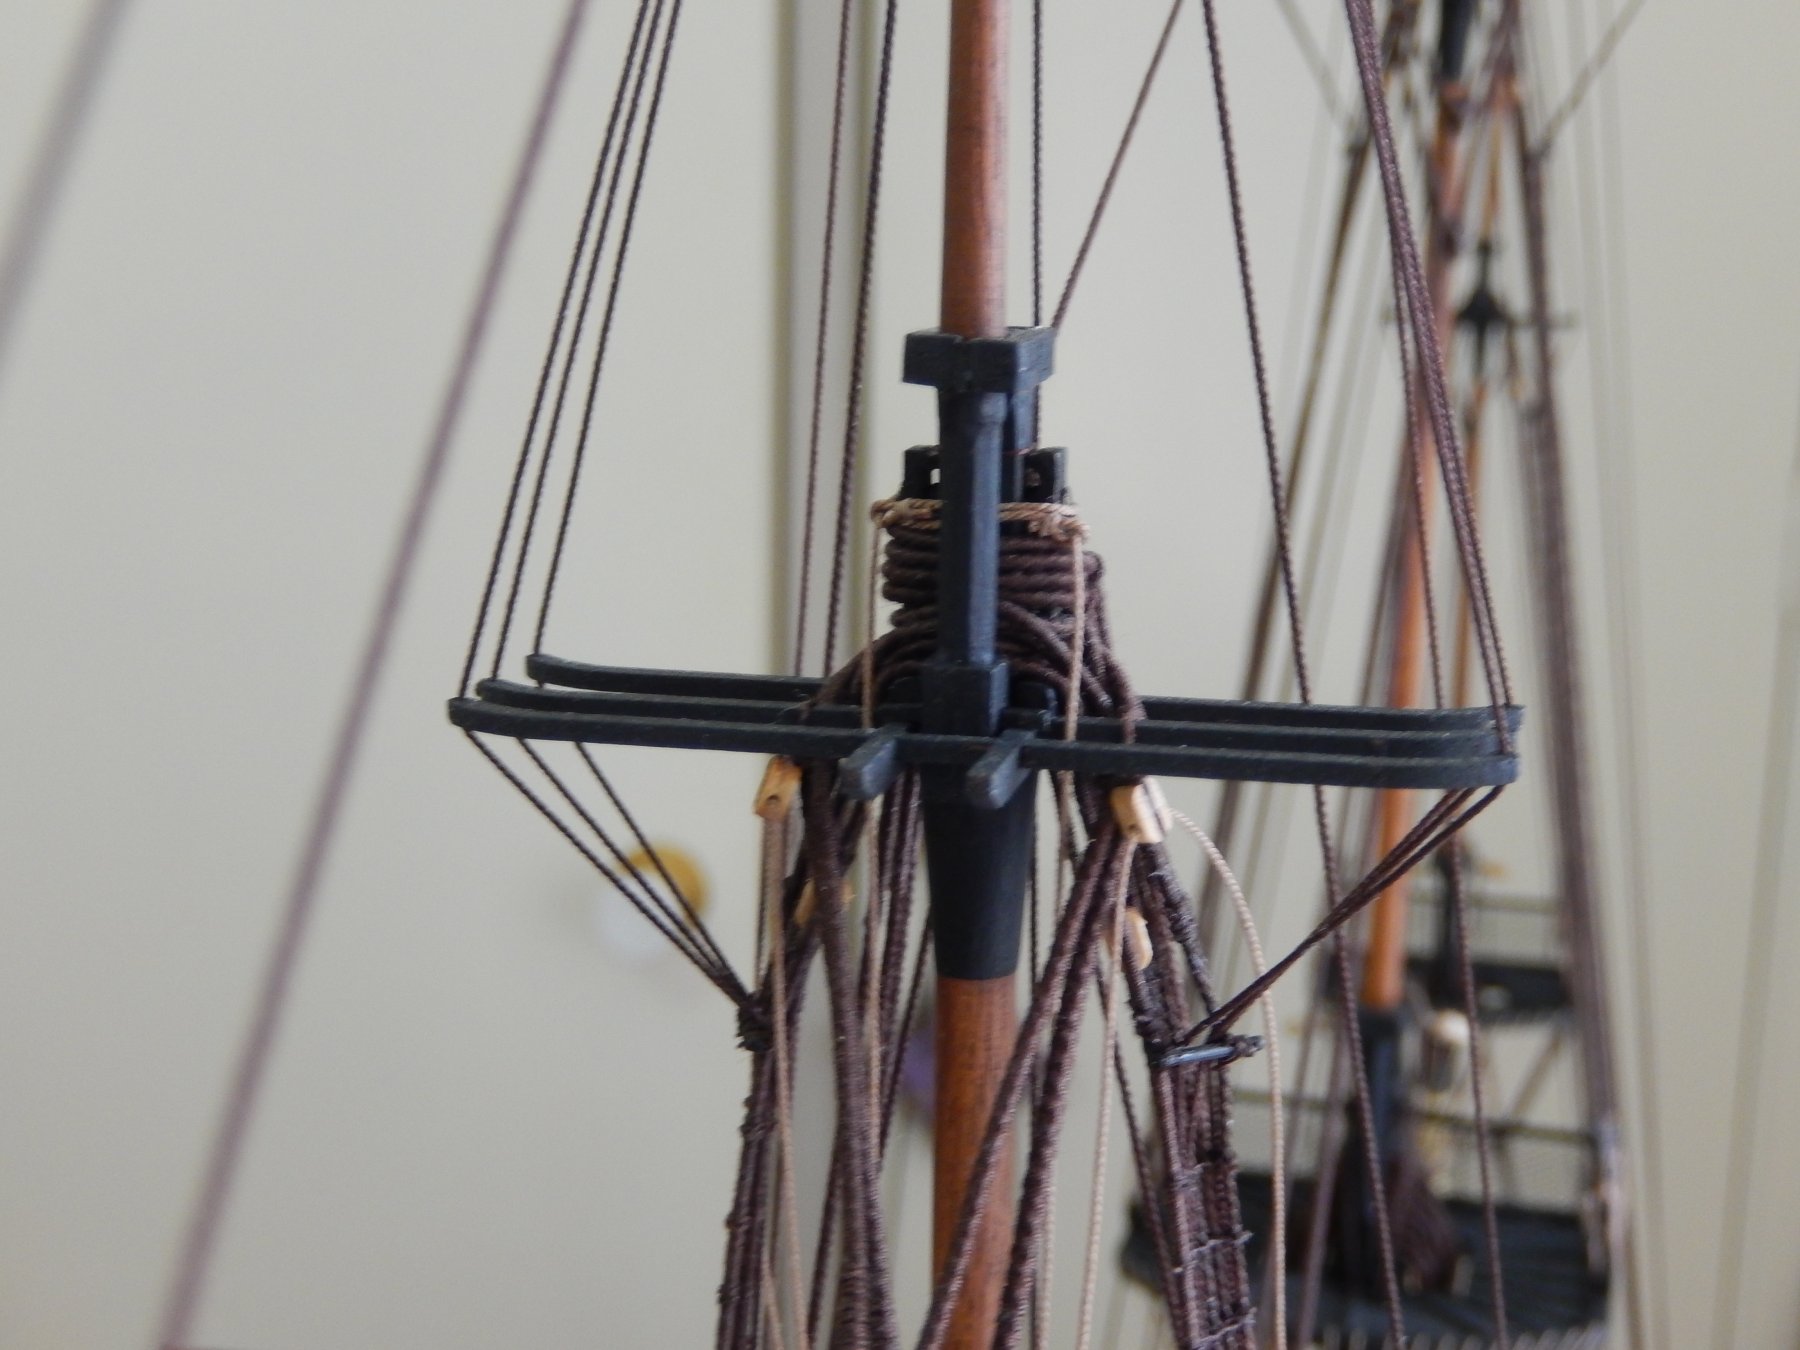
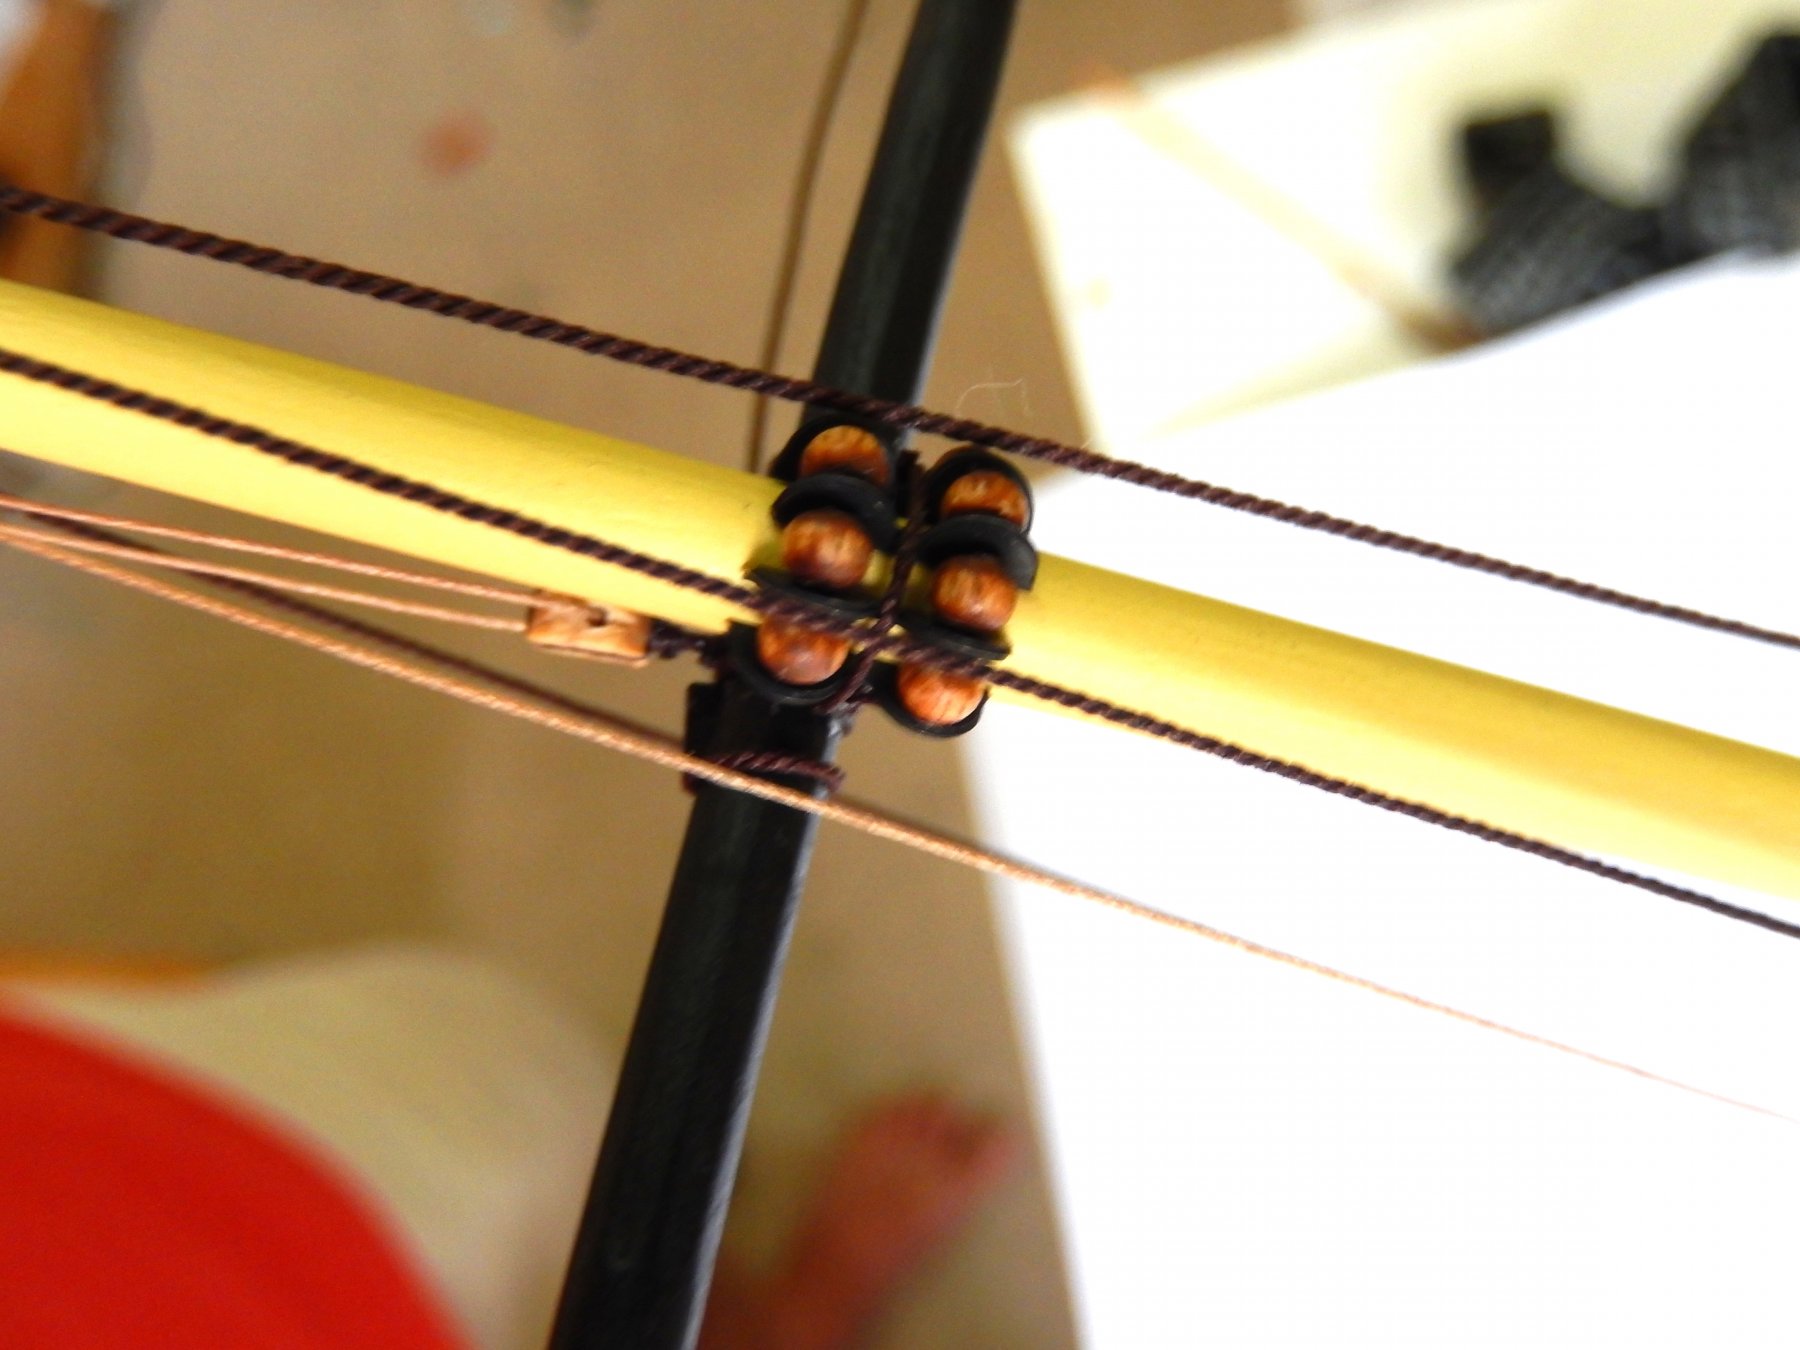
The main topsail yard is now on. The method of constructing the parral (pat. pending) works quite well. This is how things look at the moment.
Here is the parral for the main topsail...
and how things look overall ...

I've been doing a bit of tidying up - finally making off some of the lines draped around the deck. Doing rope coils often awkward and shown below is about the only way I could think of in this instance to coil the thread. Well at least it's tidy.
- Ondras71, Mirabell61, kier and 6 others
-
9
-
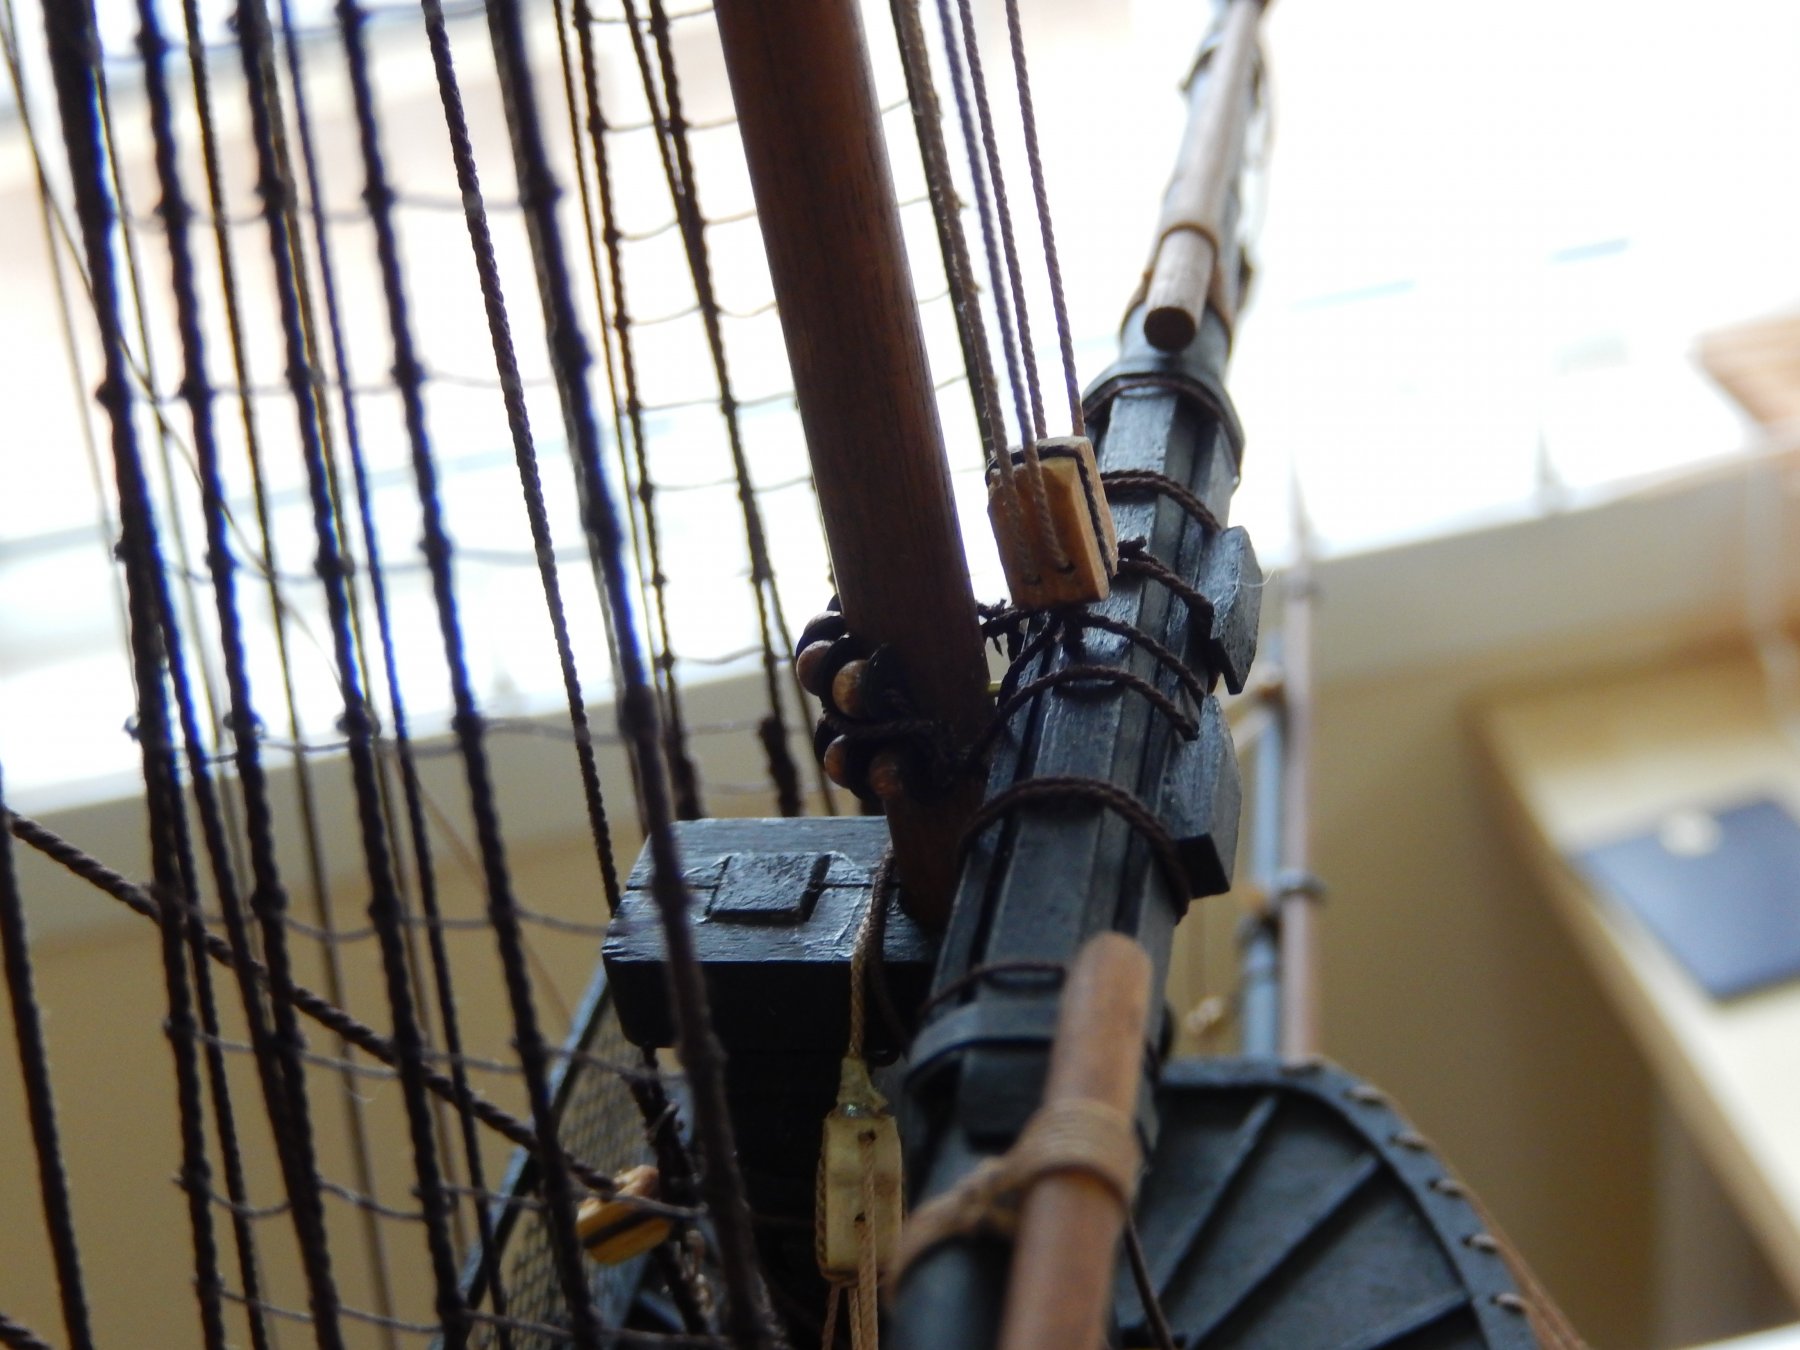
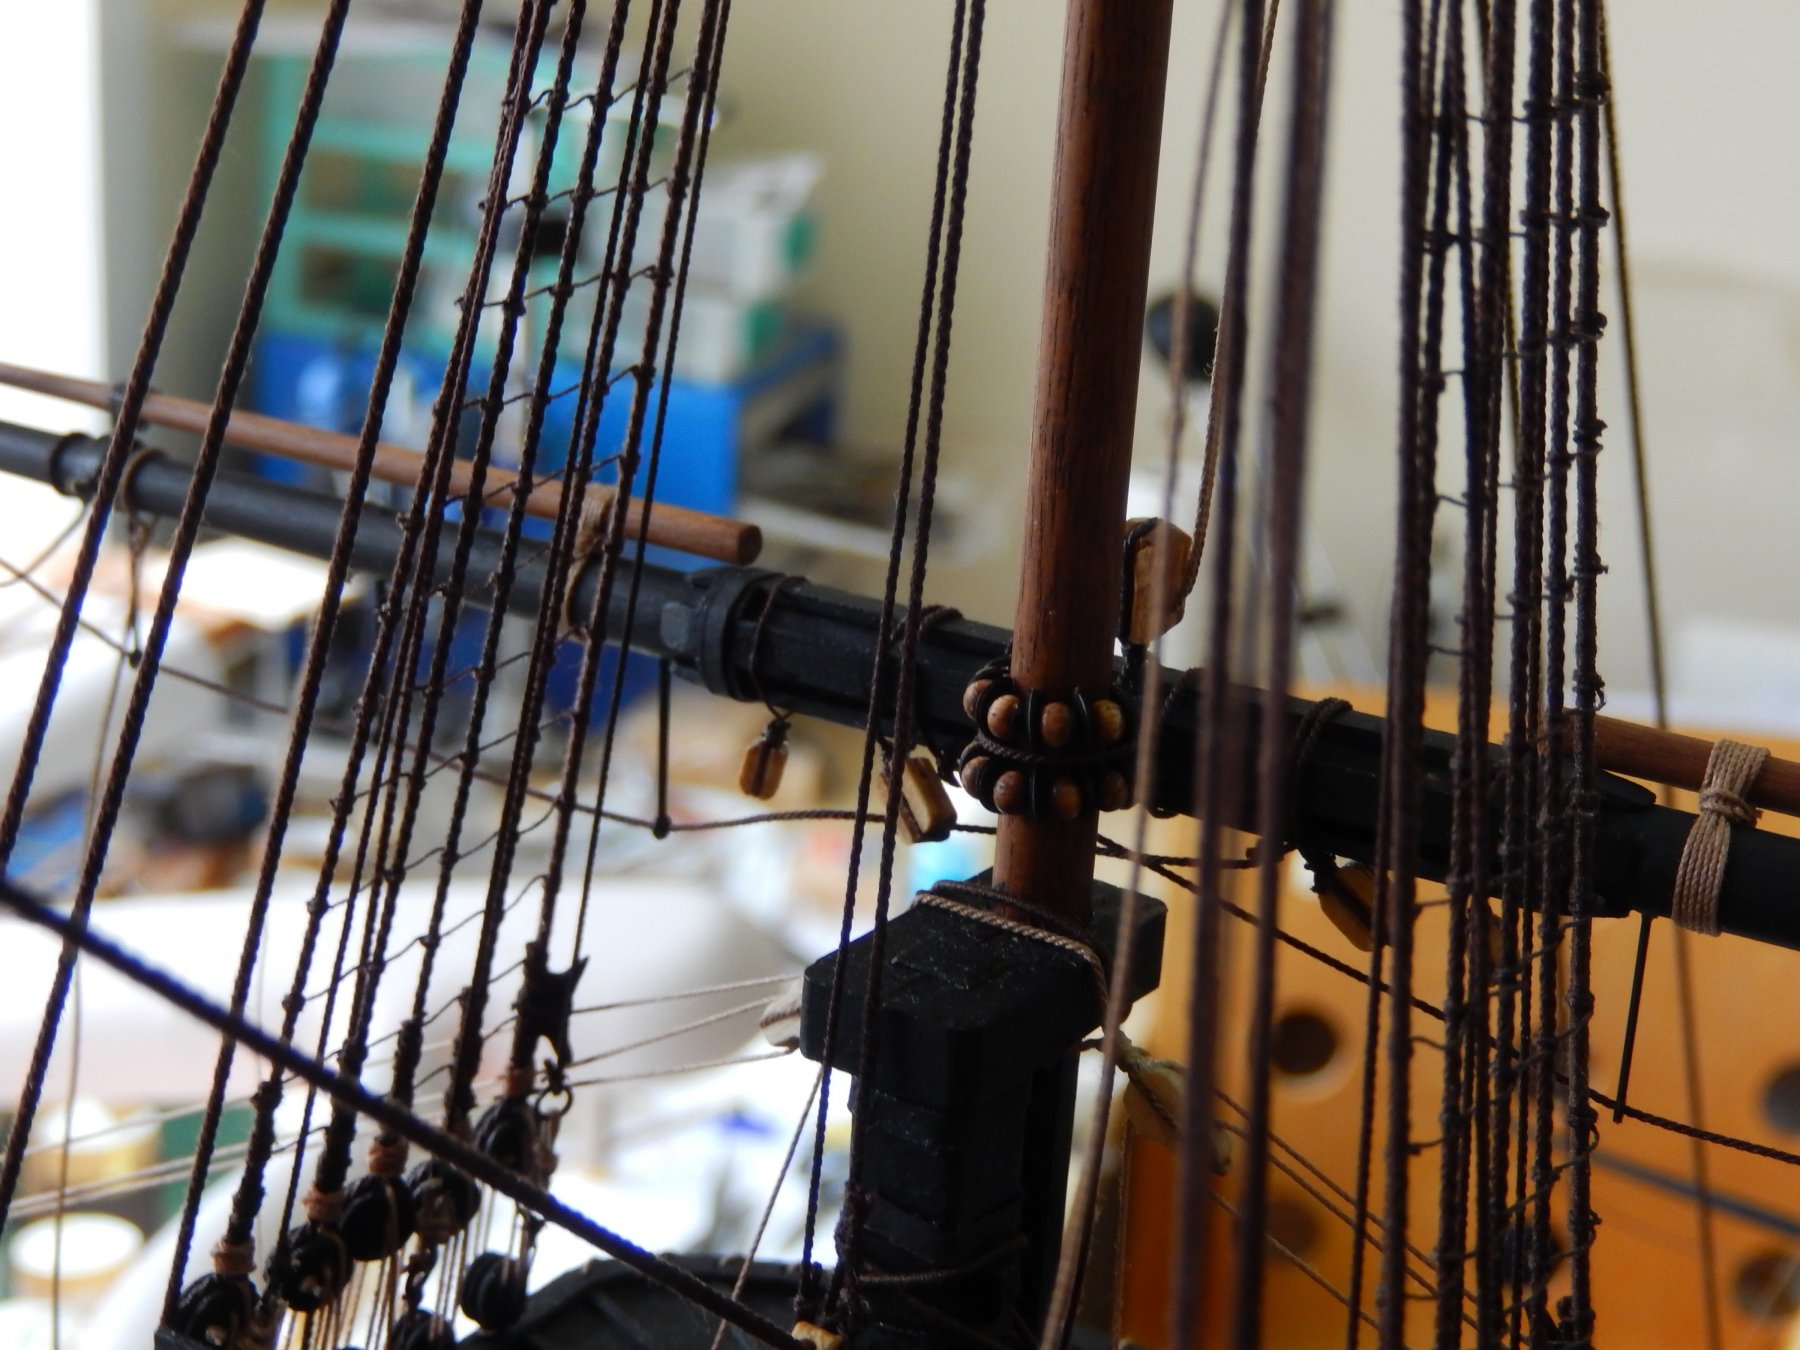
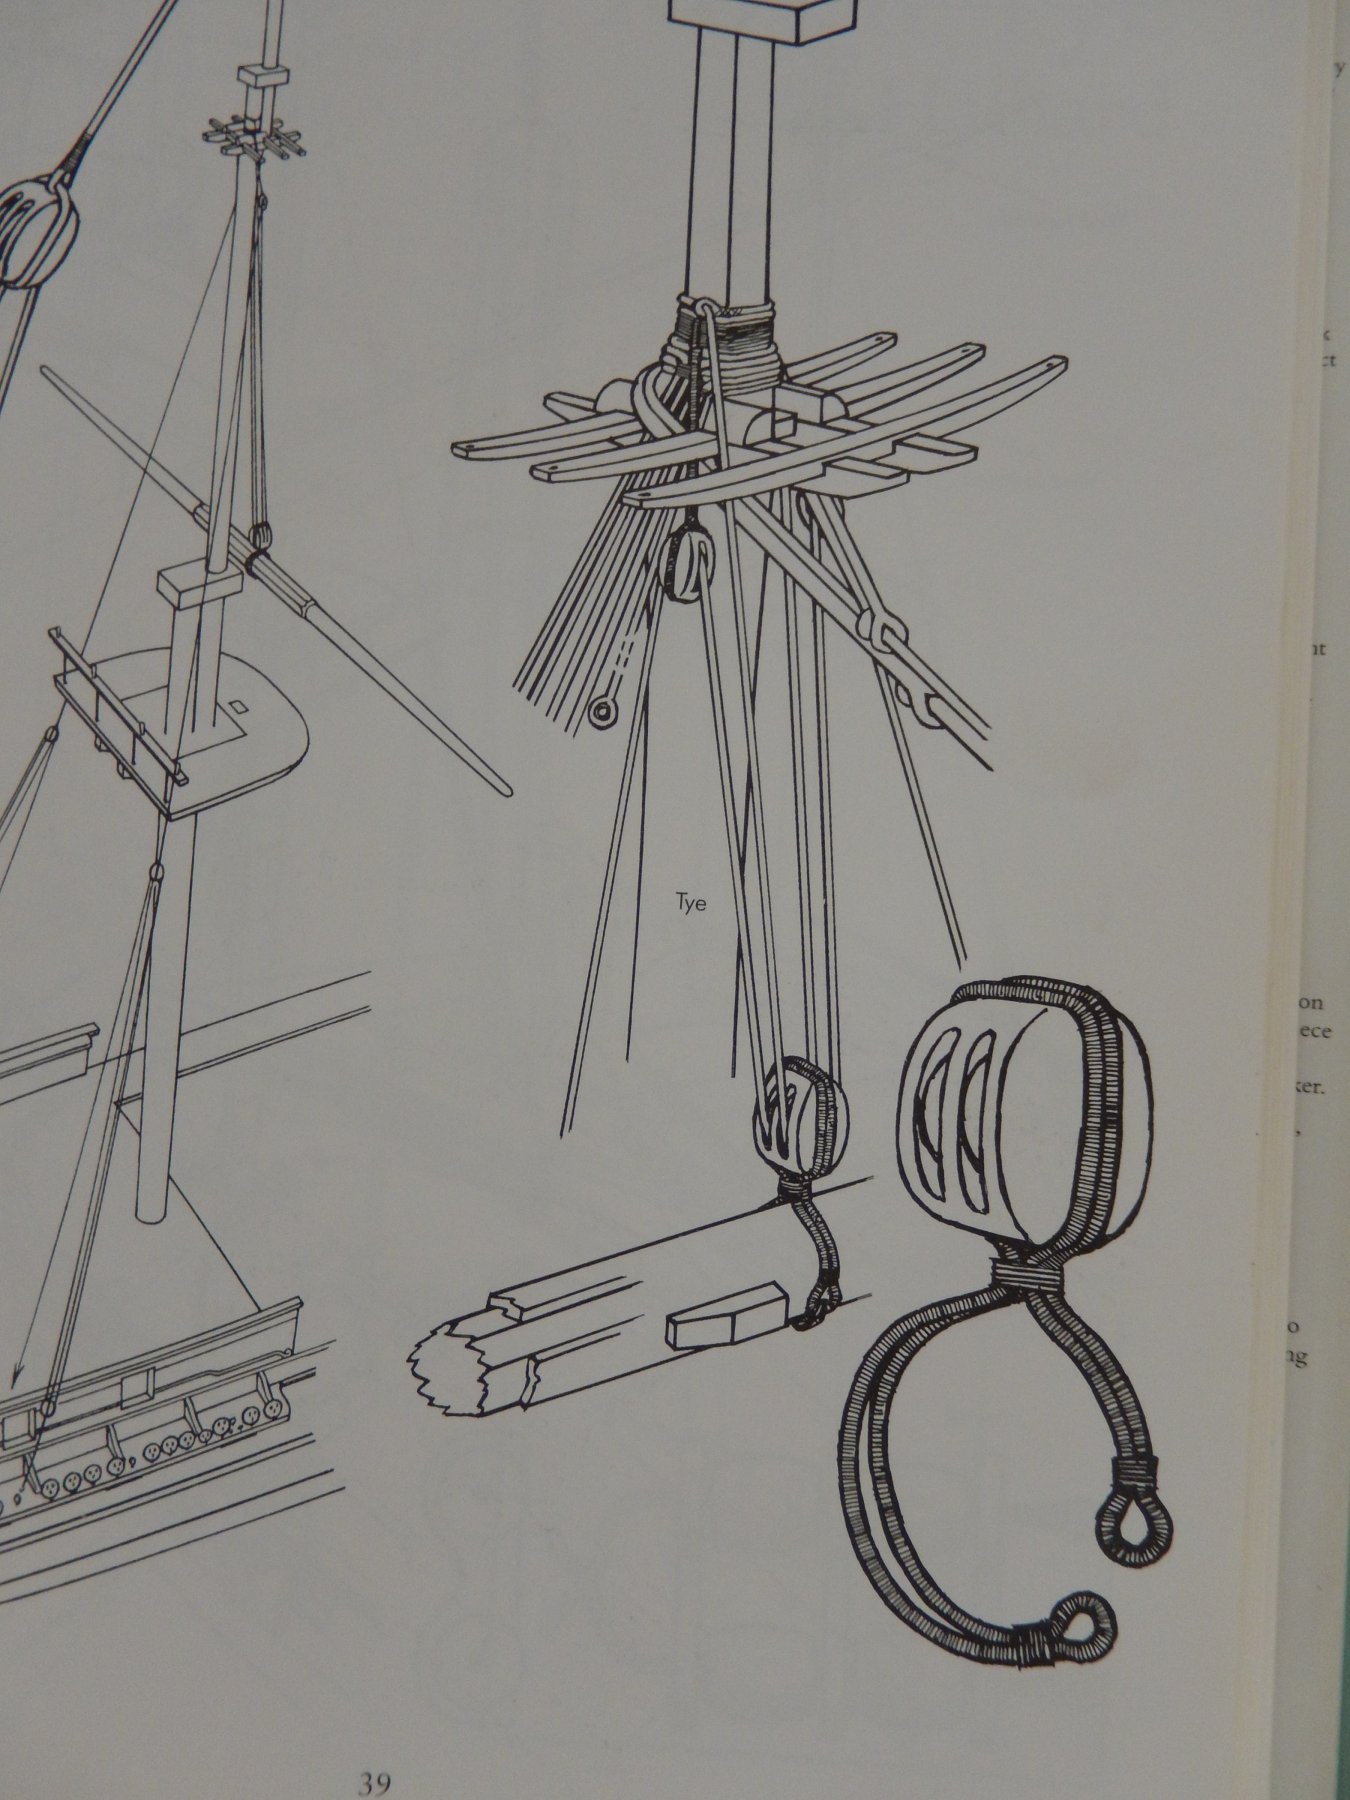
The foretopsail yard is now mounted and with it the dreaded parrals. The yard tye is more or less done - a block is still to be attached to the line. The tye has been done according to Petersson which is very close to the method described by Anton for the New Endeavour.
Here are the parrals ...

and here are the tyes.


and thank you Nils for your encouragement.
-
Thanks Anton for taking the time to reply. A drawing would be good, but I think I have the idea.
A minute later. Just received your drawing - thanks very much.
-
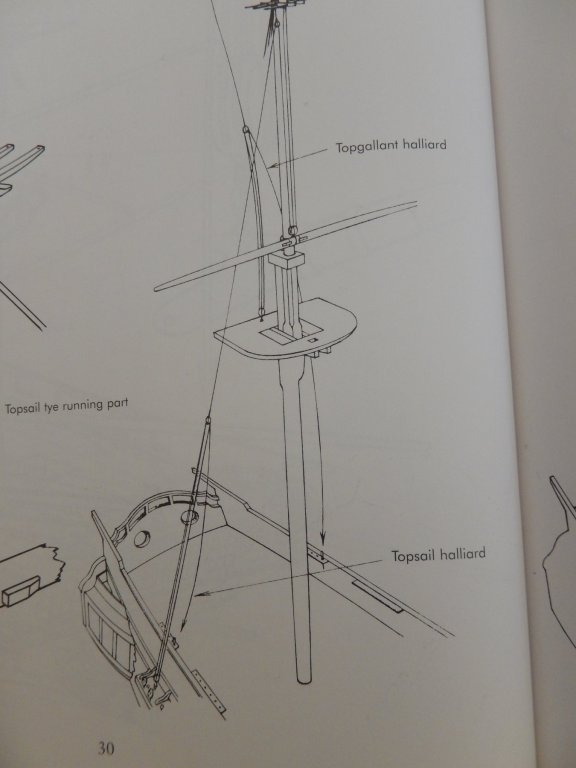
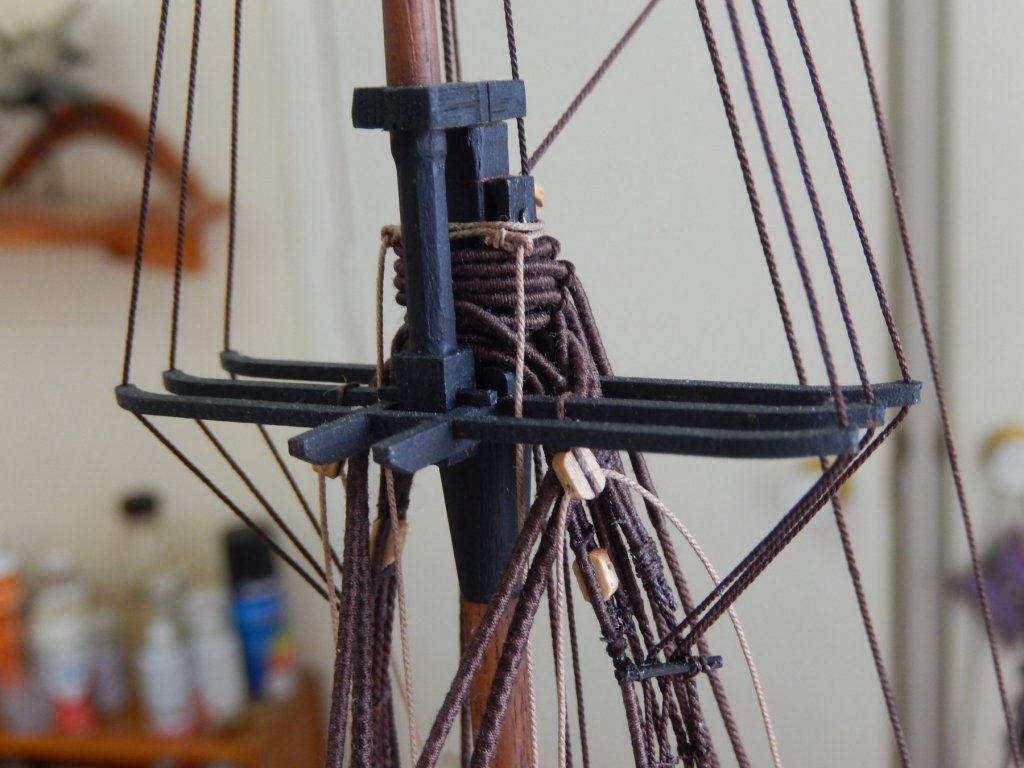
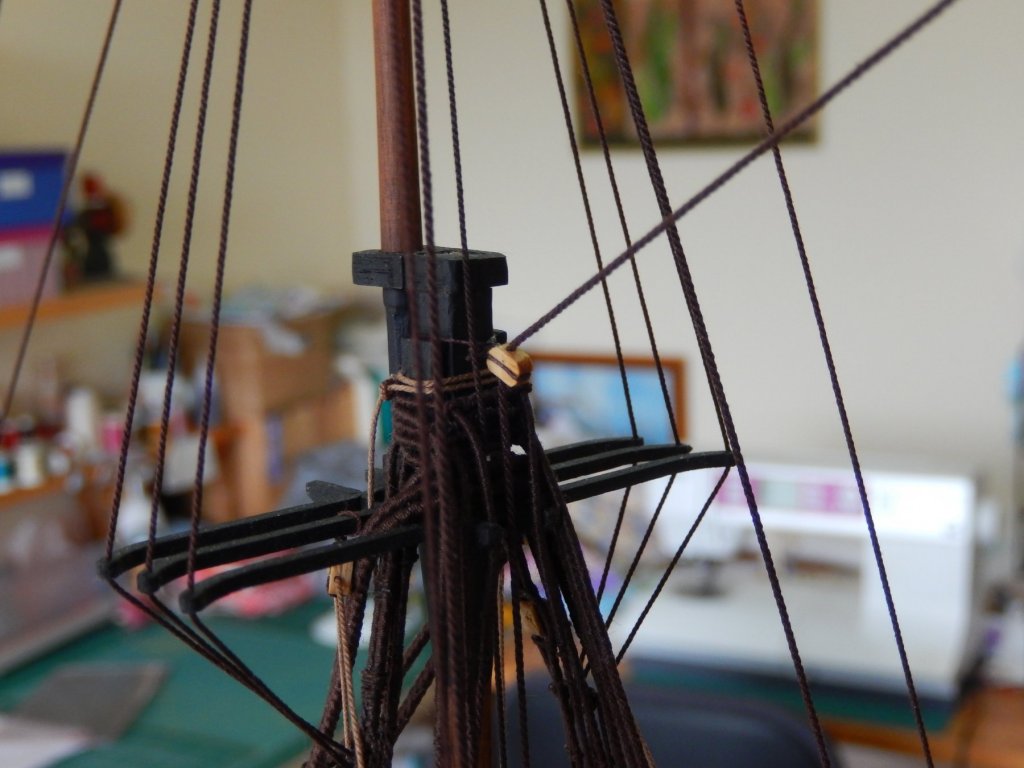
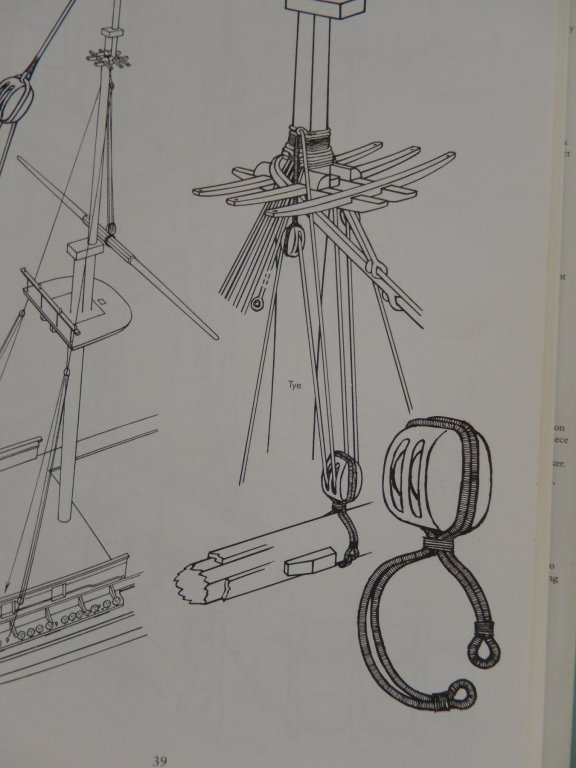
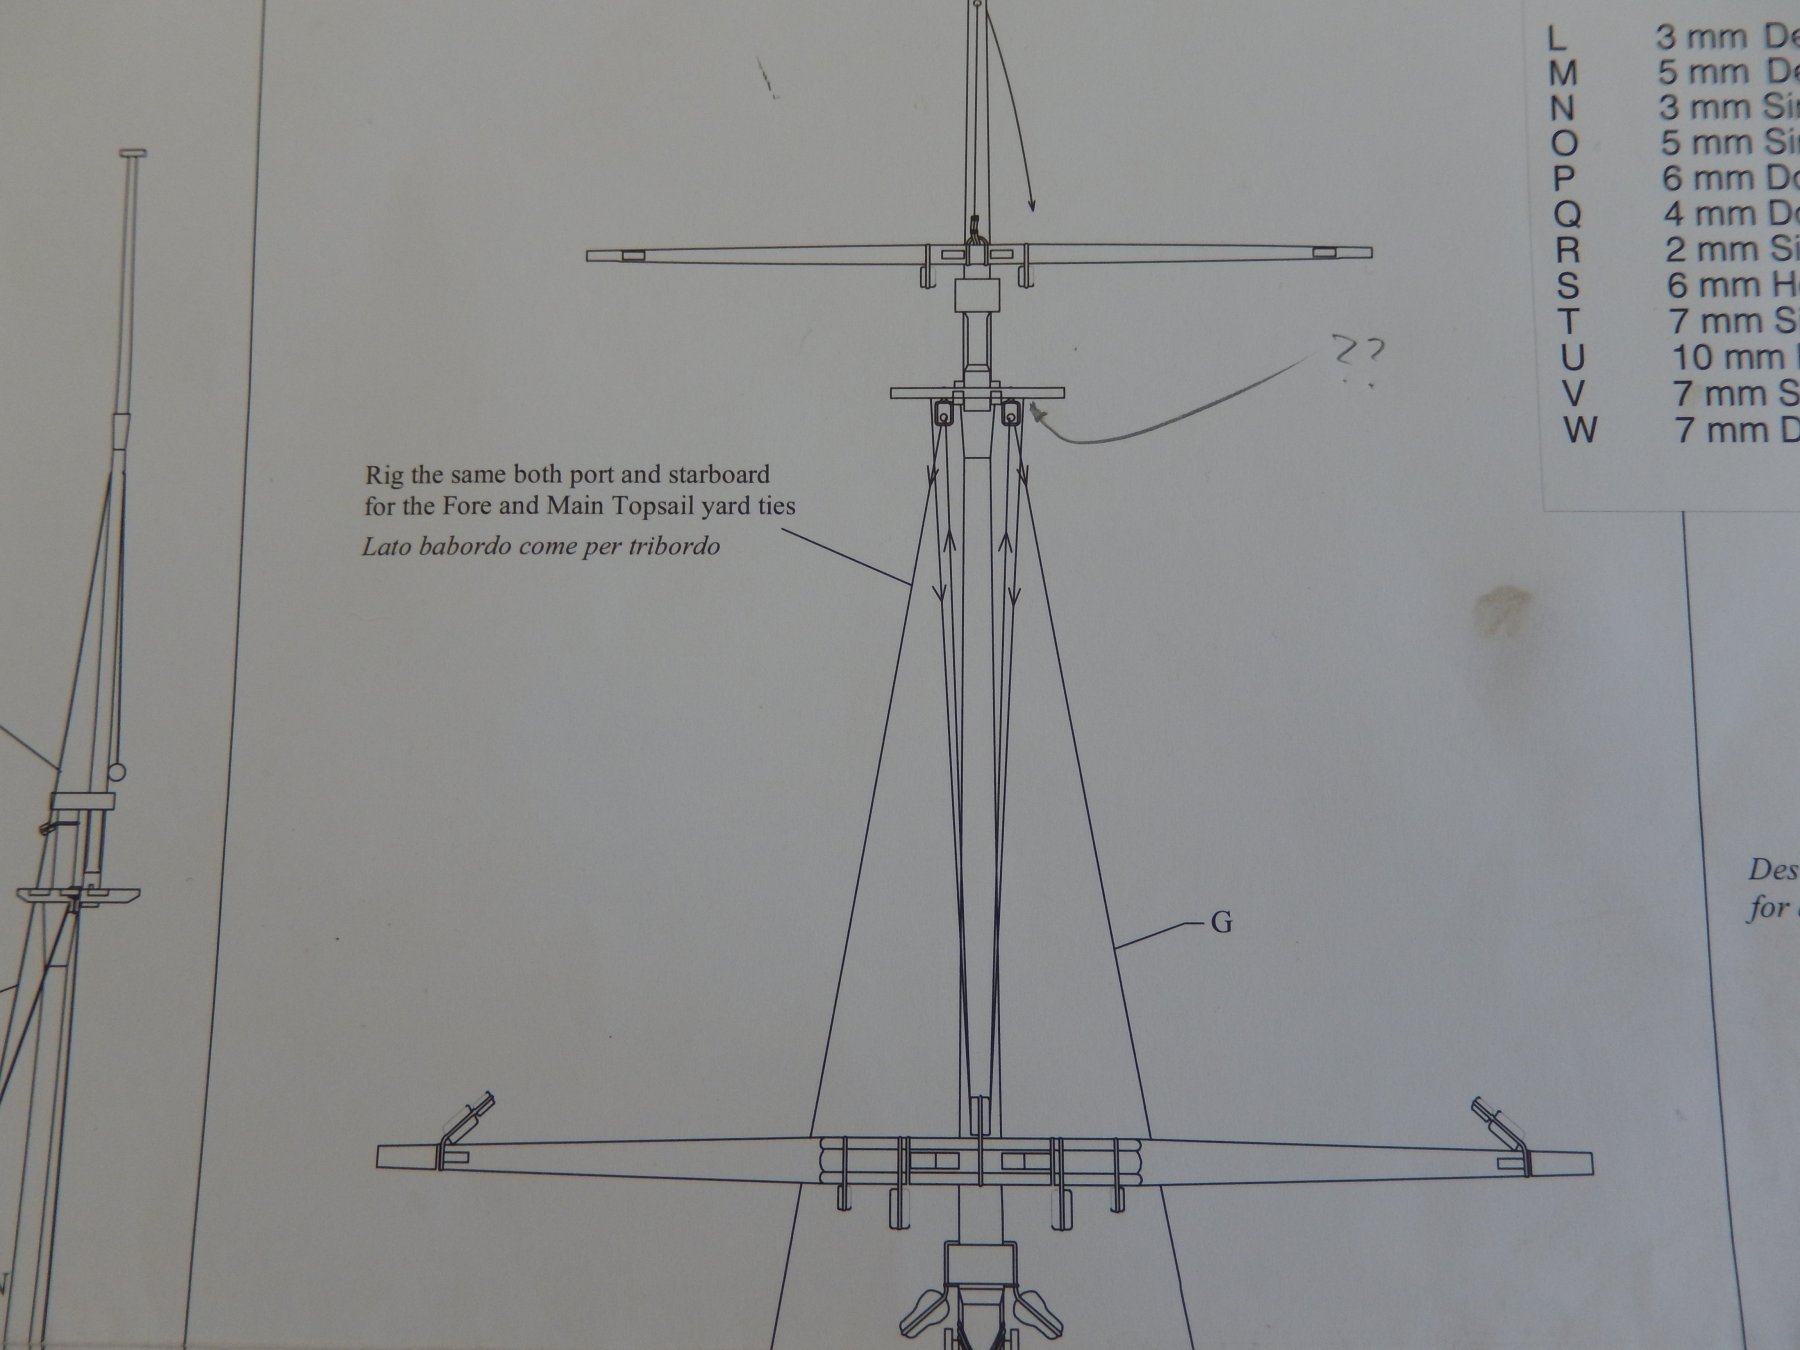
The fore and main topsail yard tyes (ties?) are now causing angst - from where do they originate? The illustration on plan 9 shows them apparently springing somehow from the cross trees.
Petersson shows the line made off to a sling of some sort around the mast above the cross trees. This appears to be the solution but the space available is constrained by the topmast sheaves (I should have put them 2 or 3 mm higher than is shown on the plan (5)). While this is not the end of the world, it is a bit of a pain.
The question is whether the Petersson solution the correct one (or at least the most acceptable is the circumstances) or is there some other - correct - method that is not shown?
Advice would be gratefully received.
-
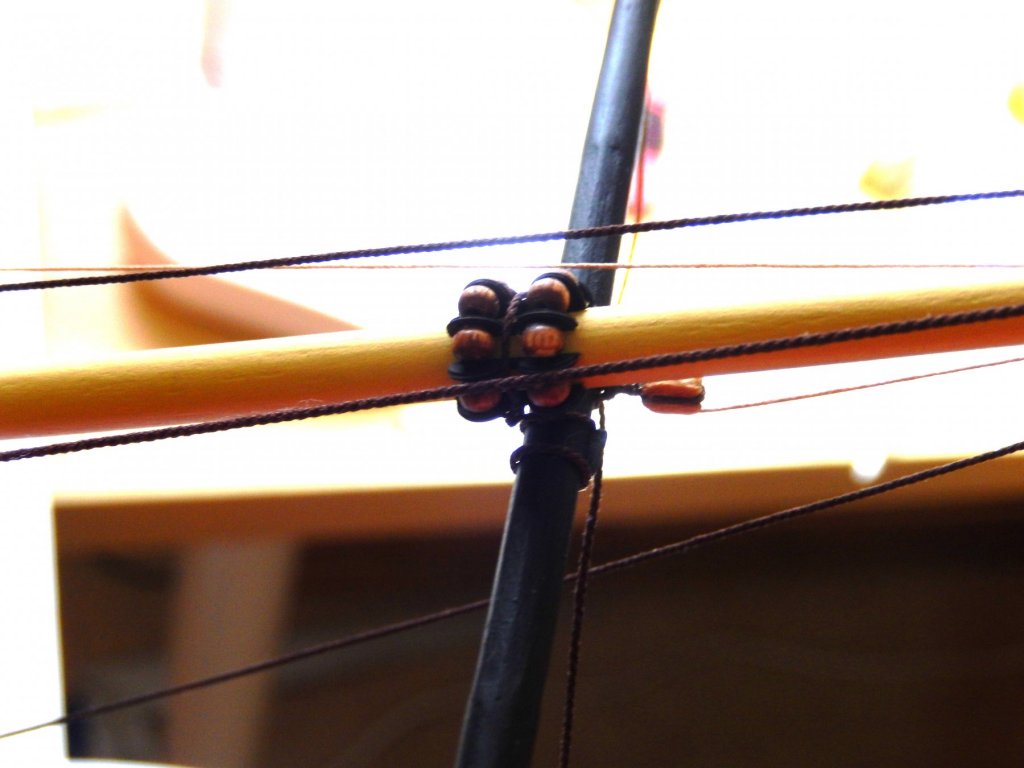
I would make a small change to the positioning of the eye - making it over both the threads just after the knot joining the two threads near the yard.
-
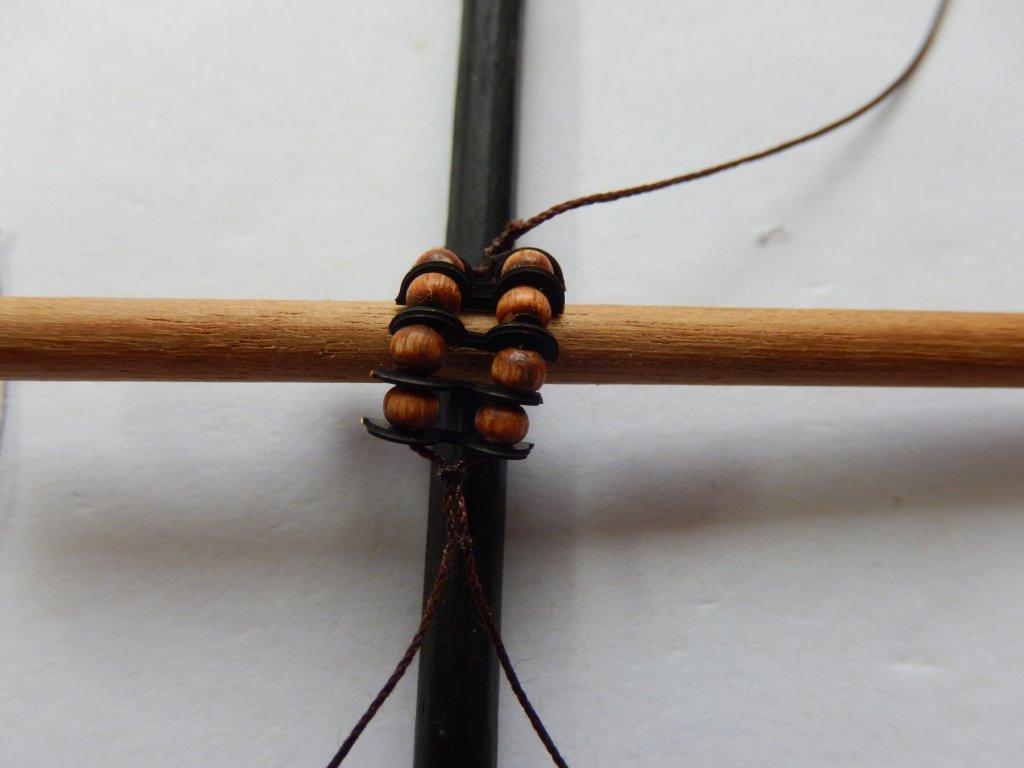
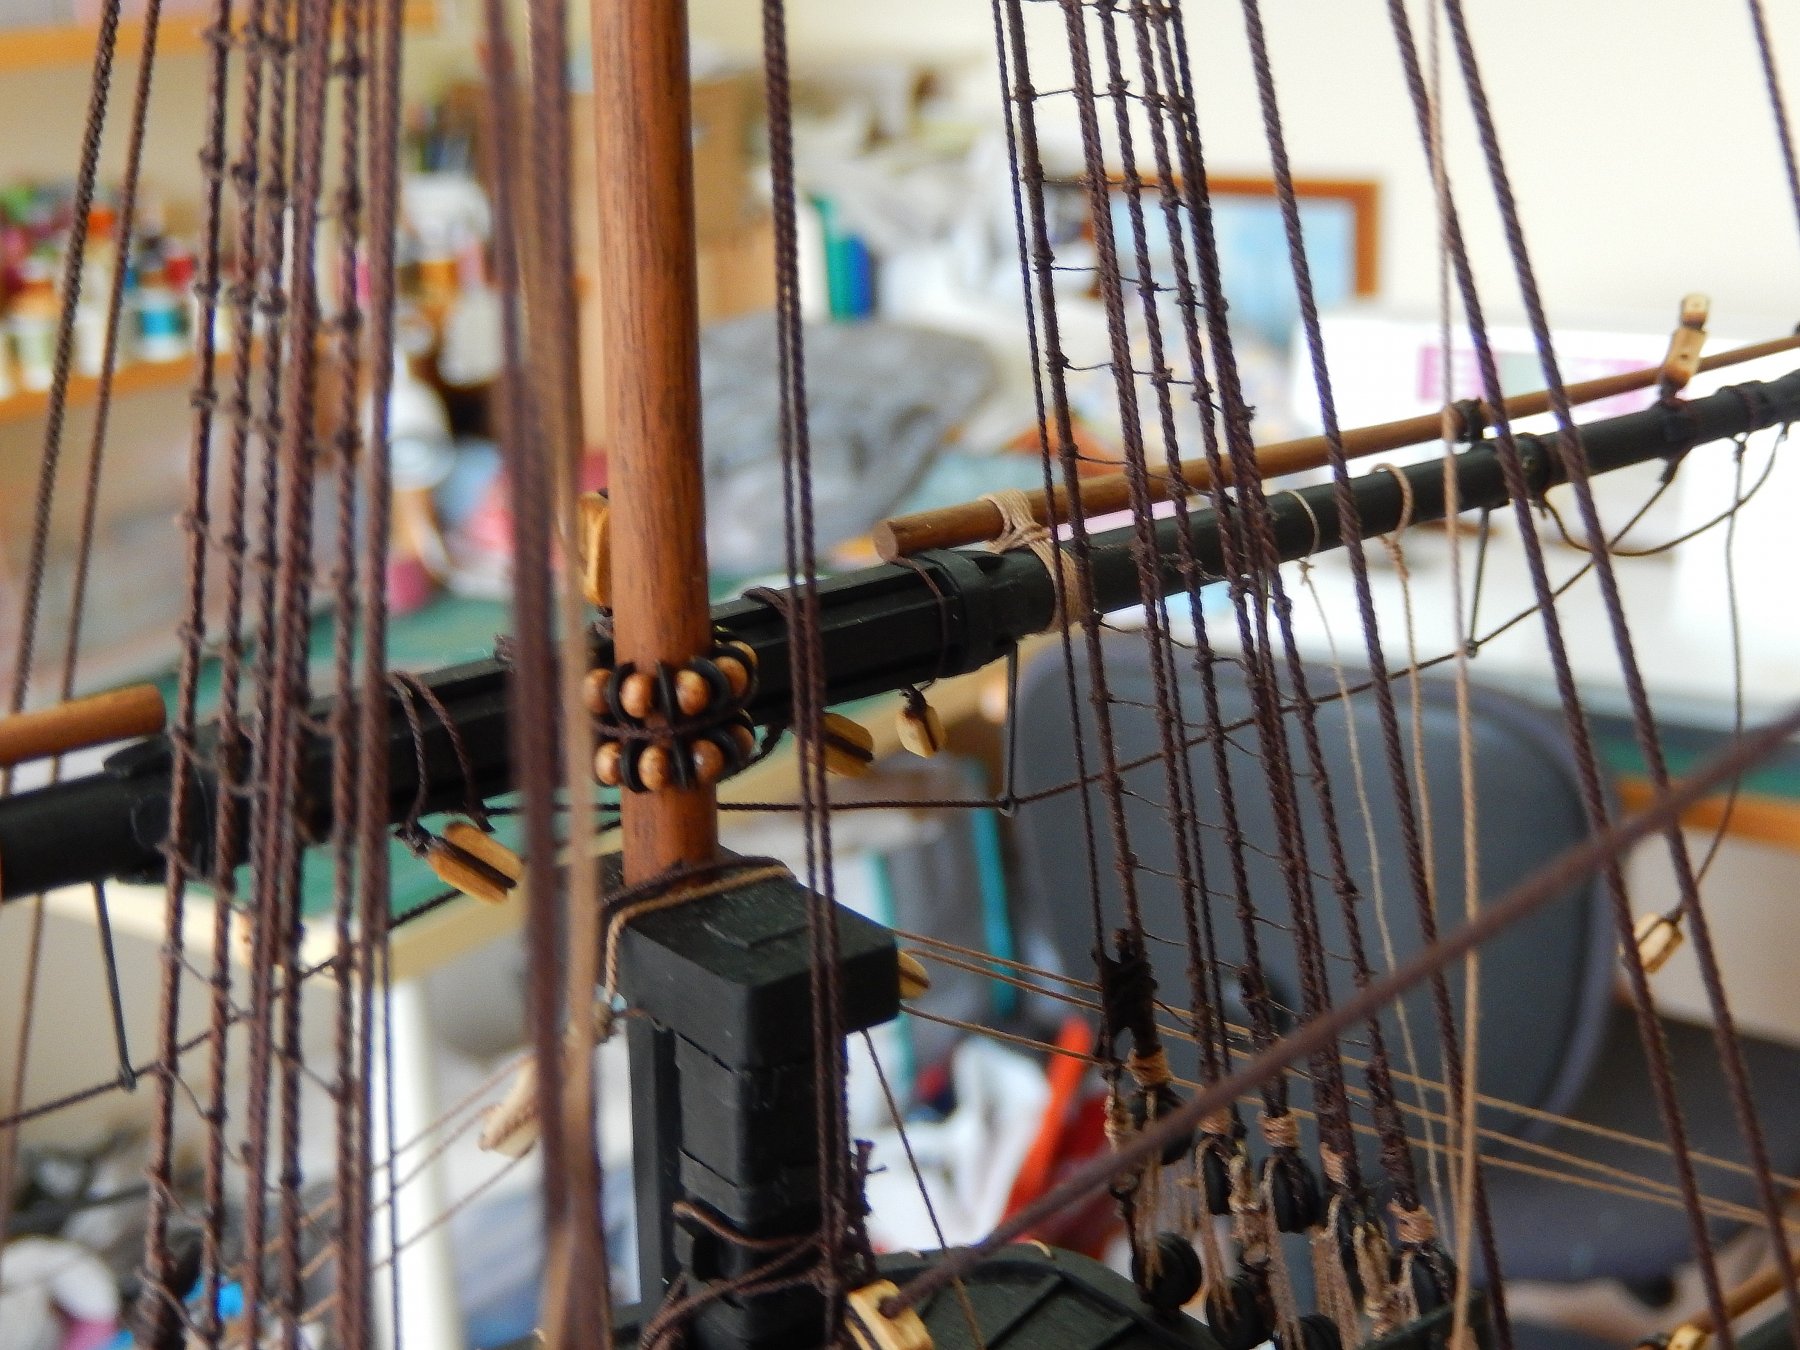
The spritsail topsail yard is finally on. My cunning plan ended up like Baldrick's (in Backadder for those who may remember). I'm afraid I couldn't face the whole thing again so I cheated - and best of all, it worked. I hope this shows the method. The thread that passes over the middle of the ribs is shown here. An eye made on one end of a separate piece of thread .One of the threads passing though the ribs and trucks is passed through it and passed over the ribs. It was eventually tied off on the yard. The method enables everything to be done off the model except for the final tying off a couple of knots on the yard to finally attach it.

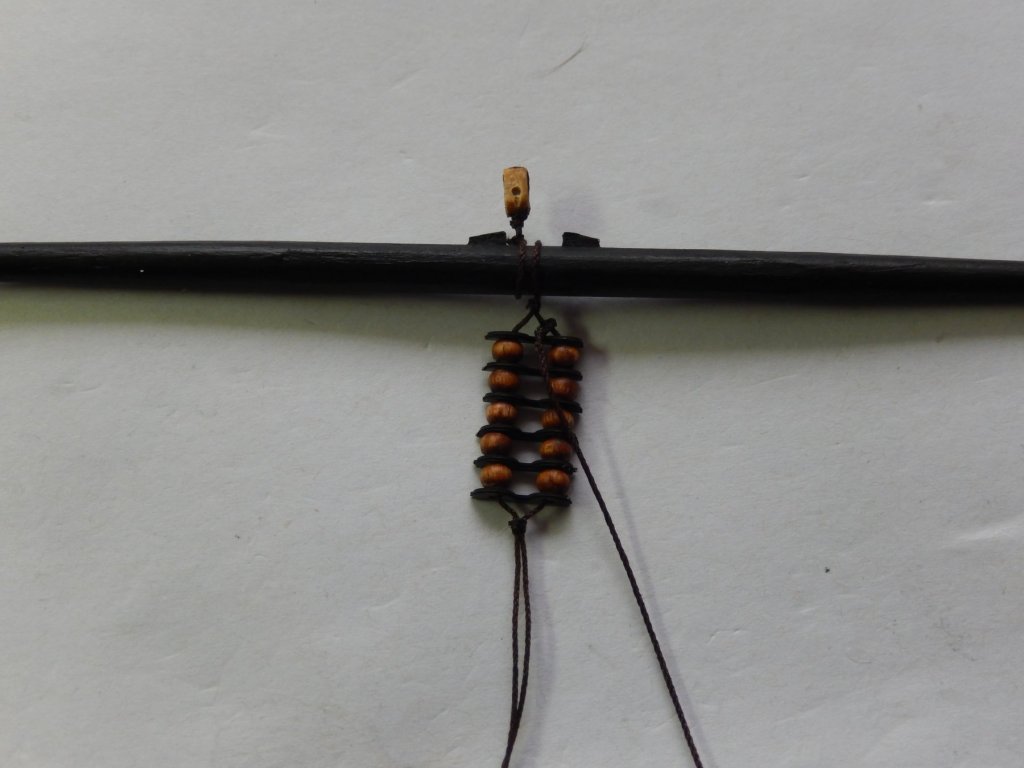
A trial run -

Now the big trick is to get a tolerant spouse to hold the yard while you tie it on. Good luck with that. If humans were fully evolved we would have an extra hand to hold things while the other two did the work.
The following photos are not in the order I would have chosen. I have discovered that it apparently isn't possible to insert text below a photo if a line space has not already been provided.


-
Thanks roadking. With the prospect of trying to repair the knot on the spritsail topsail yard parral, a little encouragement is needed. The wretched thing took a full morning to do
.
-
Yes, there are a few odd things in the new format Arthur. For example, in searching for 'vanguard' (content) it goes to the very first posts, then you must go to the next step in finding which post and where you would like to go in it. The intermediate step I find a little annoying. As well, in the search option, I now have a list of about 15 search items that I can't get rid of. Still, there are worse things going on in the world.
No doubt you see here I'm still into avoidance. In fact I have put on the spritsail topsail yard - parral and all - but I stuffed up the very last knot and may have to re-do the whole thing. However I have a cunning plan ....
-
Thanks Jose. I decided while considering the dreaded parrals, to mount the spritsail yard (I think this is known as avoidance
). The yard provide quite a bit of difficulty. Gravity is always working against you. With a few more payments to the swear jar, the wretched thing is finally on and has turned out acceptably. While all of that was going on, the blocks for the two upper forestays came away from the jib boom. I did not rejoice, particularly as it was caused by some rather inferior knot-tying earlier in my knot-tying career. It took four attempts to obtain an acceptable result. In the process I discovered a mistake in my rigging which at least I was able to correct - so at least something good came out it.
Here is some of the detail. I may have gone a bit overboard with the photos, but the thing is rather complicated and very crowded. These pictures may help some other poor souls who are yet to get to this stage.


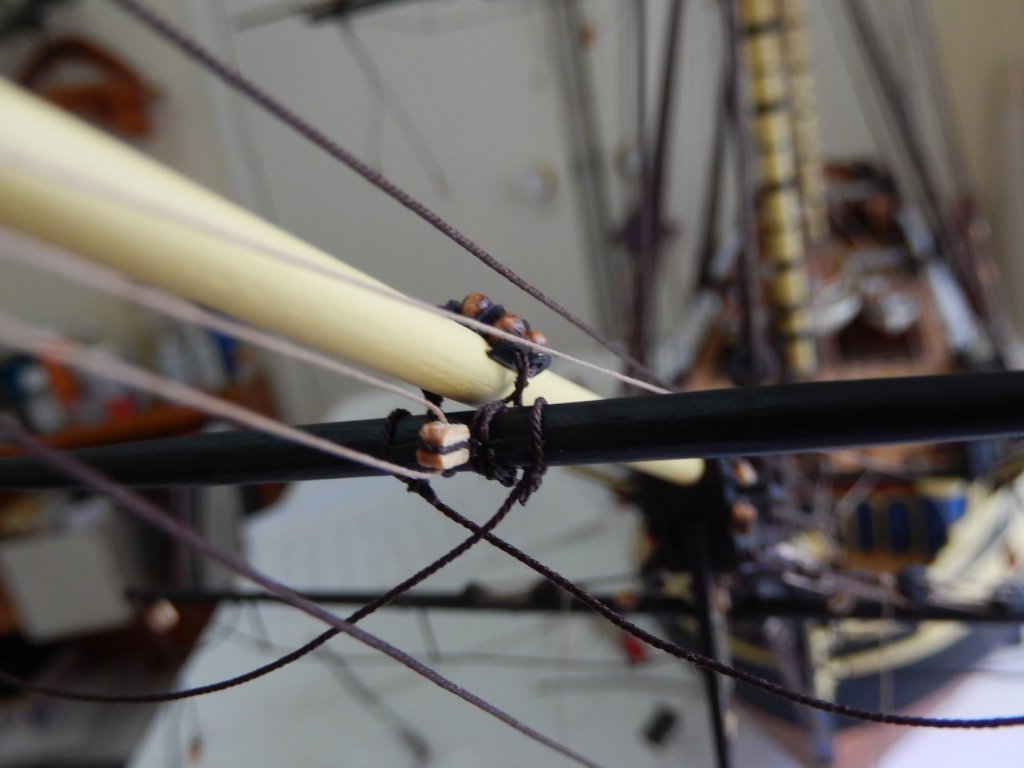
How it looks - with lots of things still to be tied off.

- shipcarpenter, Mirabell61, coxswain and 6 others
-
9


HMS Vanguard by RMC - FINISHED - Amati/Victory Models - scale 1:72
in - Kit build logs for subjects built from 1751 - 1800
Posted
Thanks Jason (if I remember correctly") ). It's almost 10pm here so I'll look at your suggestion tomorrow. Incidentally, your post (above) and the email I received differ - the email has your suggestion for the rigging (which sounds like an excellent idea) and the post doesn't. Is there a reason that you know of?
). It's almost 10pm here so I'll look at your suggestion tomorrow. Incidentally, your post (above) and the email I received differ - the email has your suggestion for the rigging (which sounds like an excellent idea) and the post doesn't. Is there a reason that you know of?