


RMC
-
Posts
933 -
Joined
-
Last visited
Content Type
Profiles
Forums
Gallery
Events
Posts posted by RMC
-
-
Thanks Arthur. I'm just about to try your method having exhausted mine. My swear box is already full - I now have enough to buy a house, new car and a block of flats. Blood pressure tablets? already taken, but maybe a back-up or two may be wise ....
-
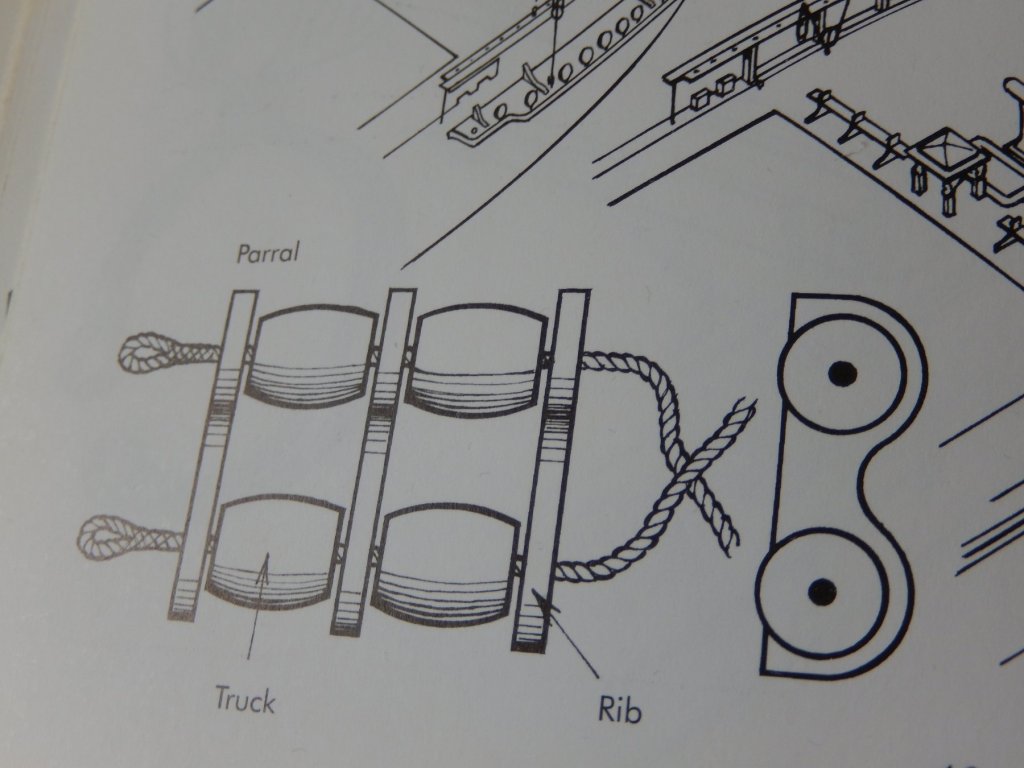
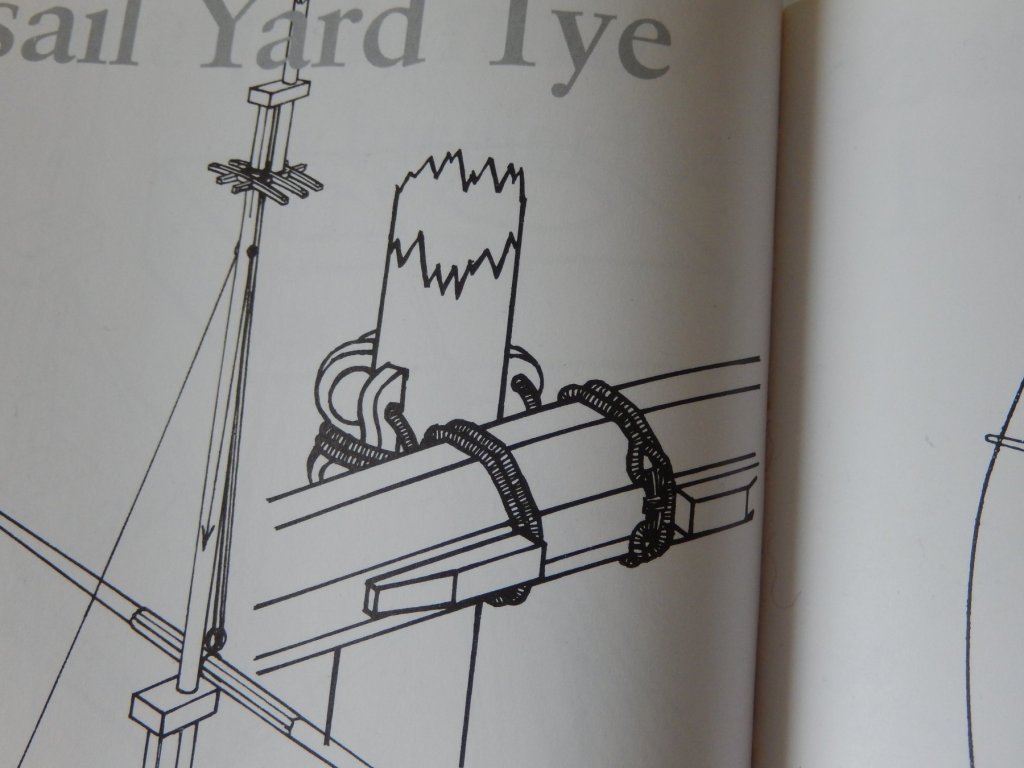
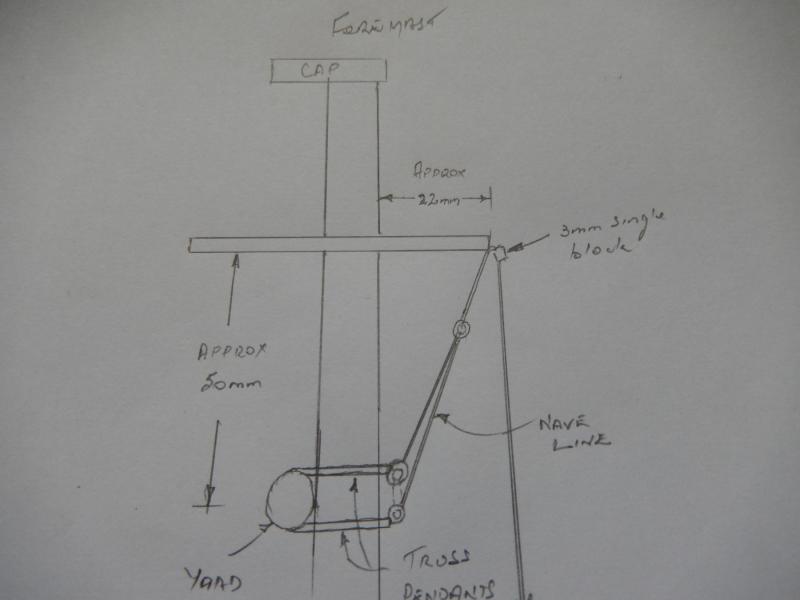
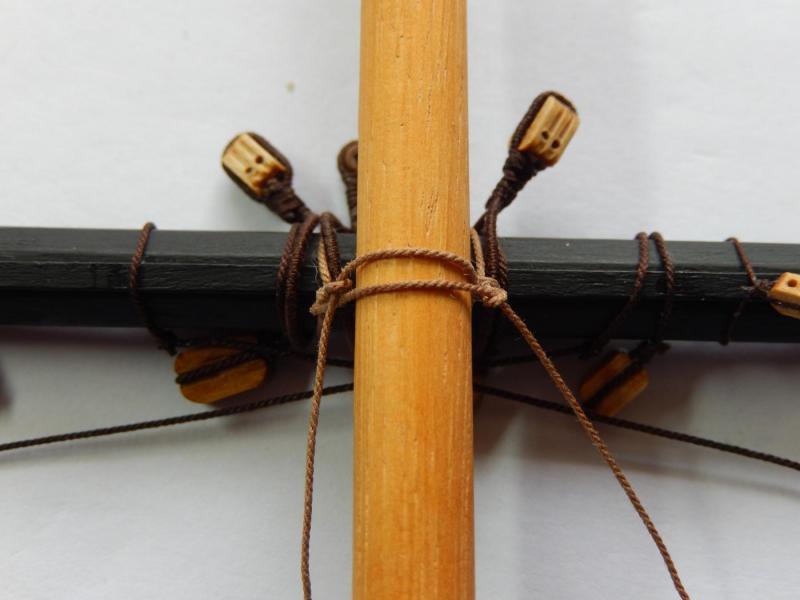
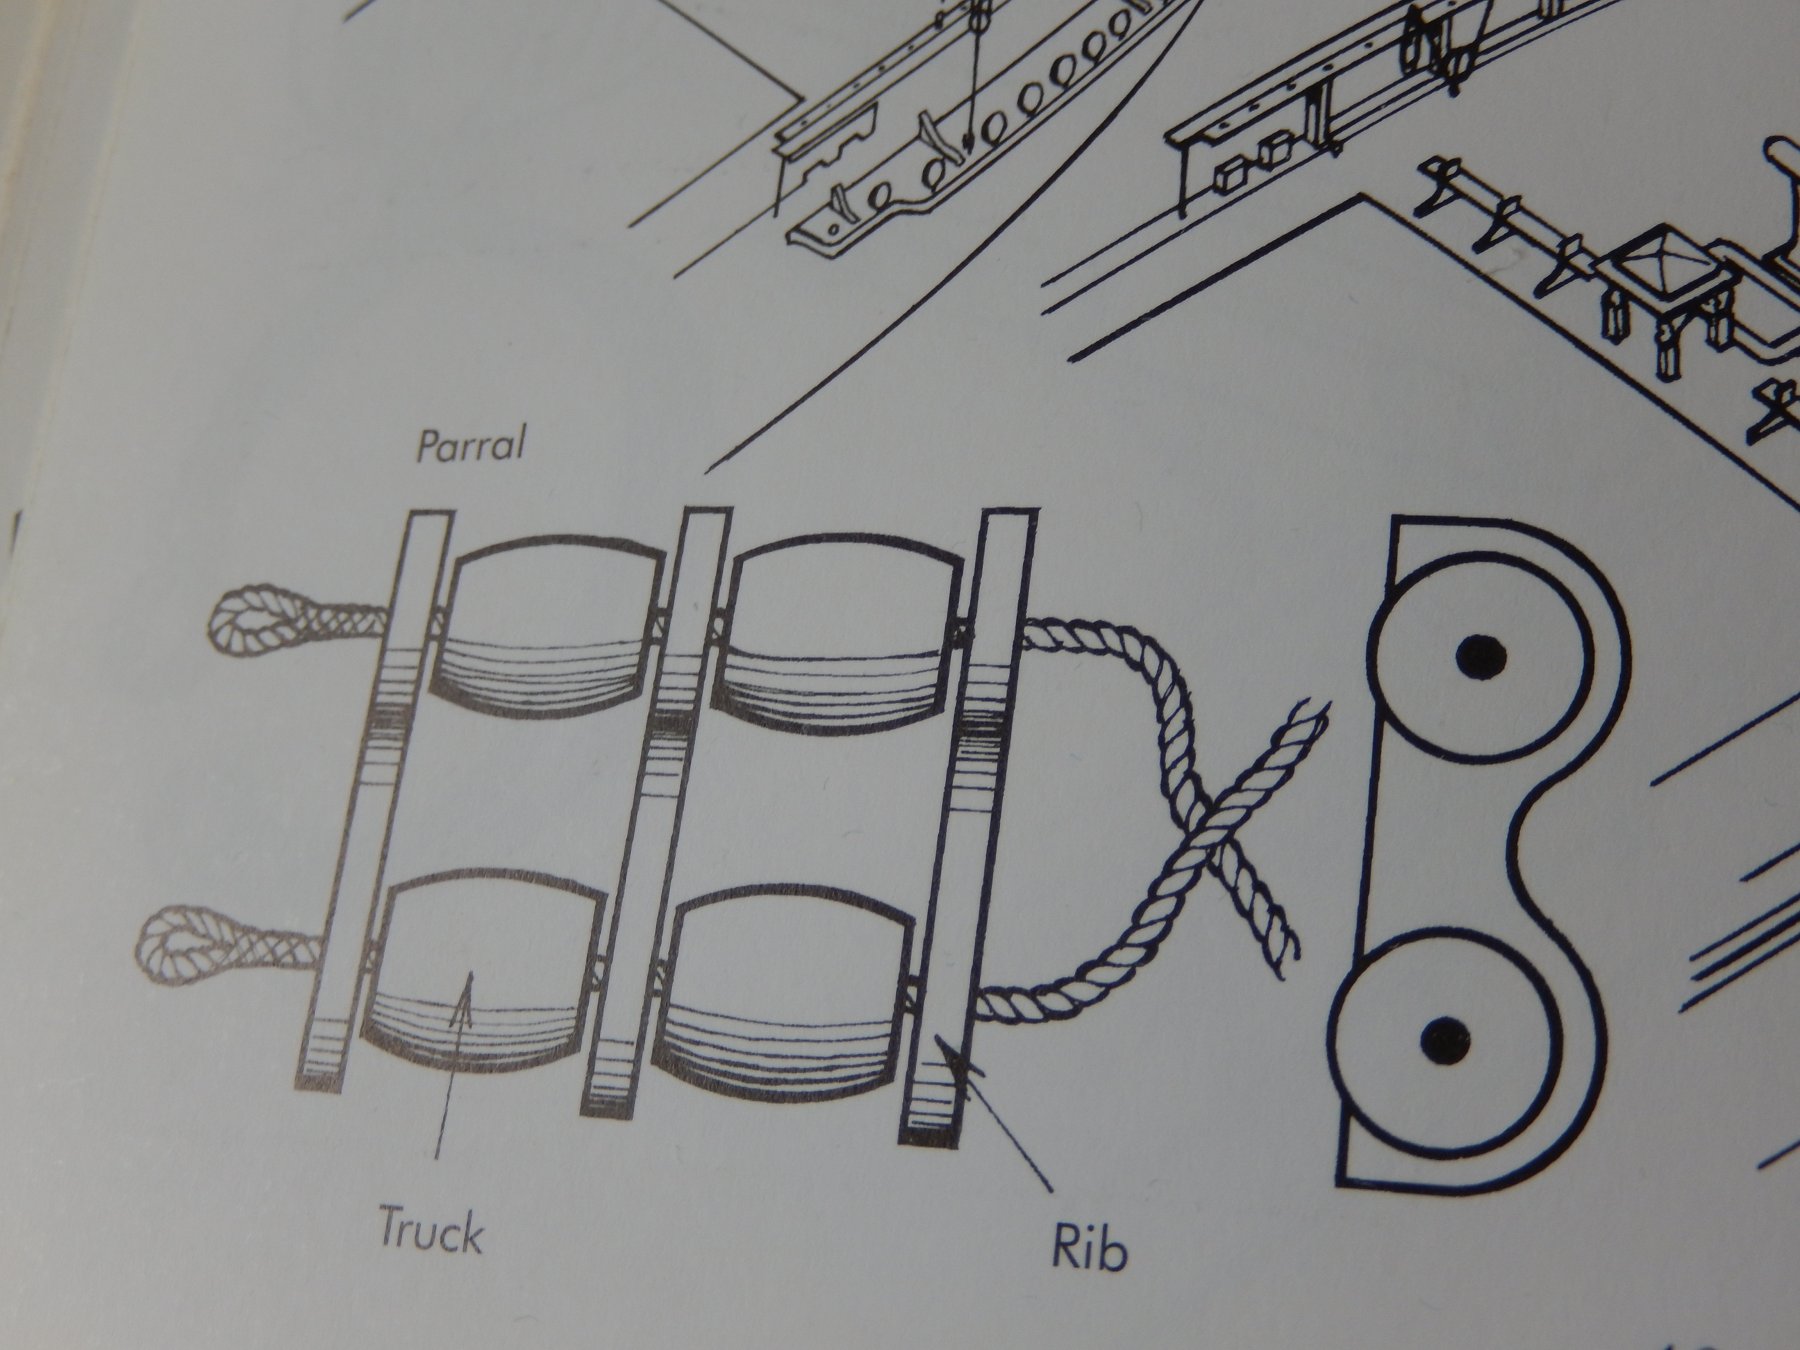
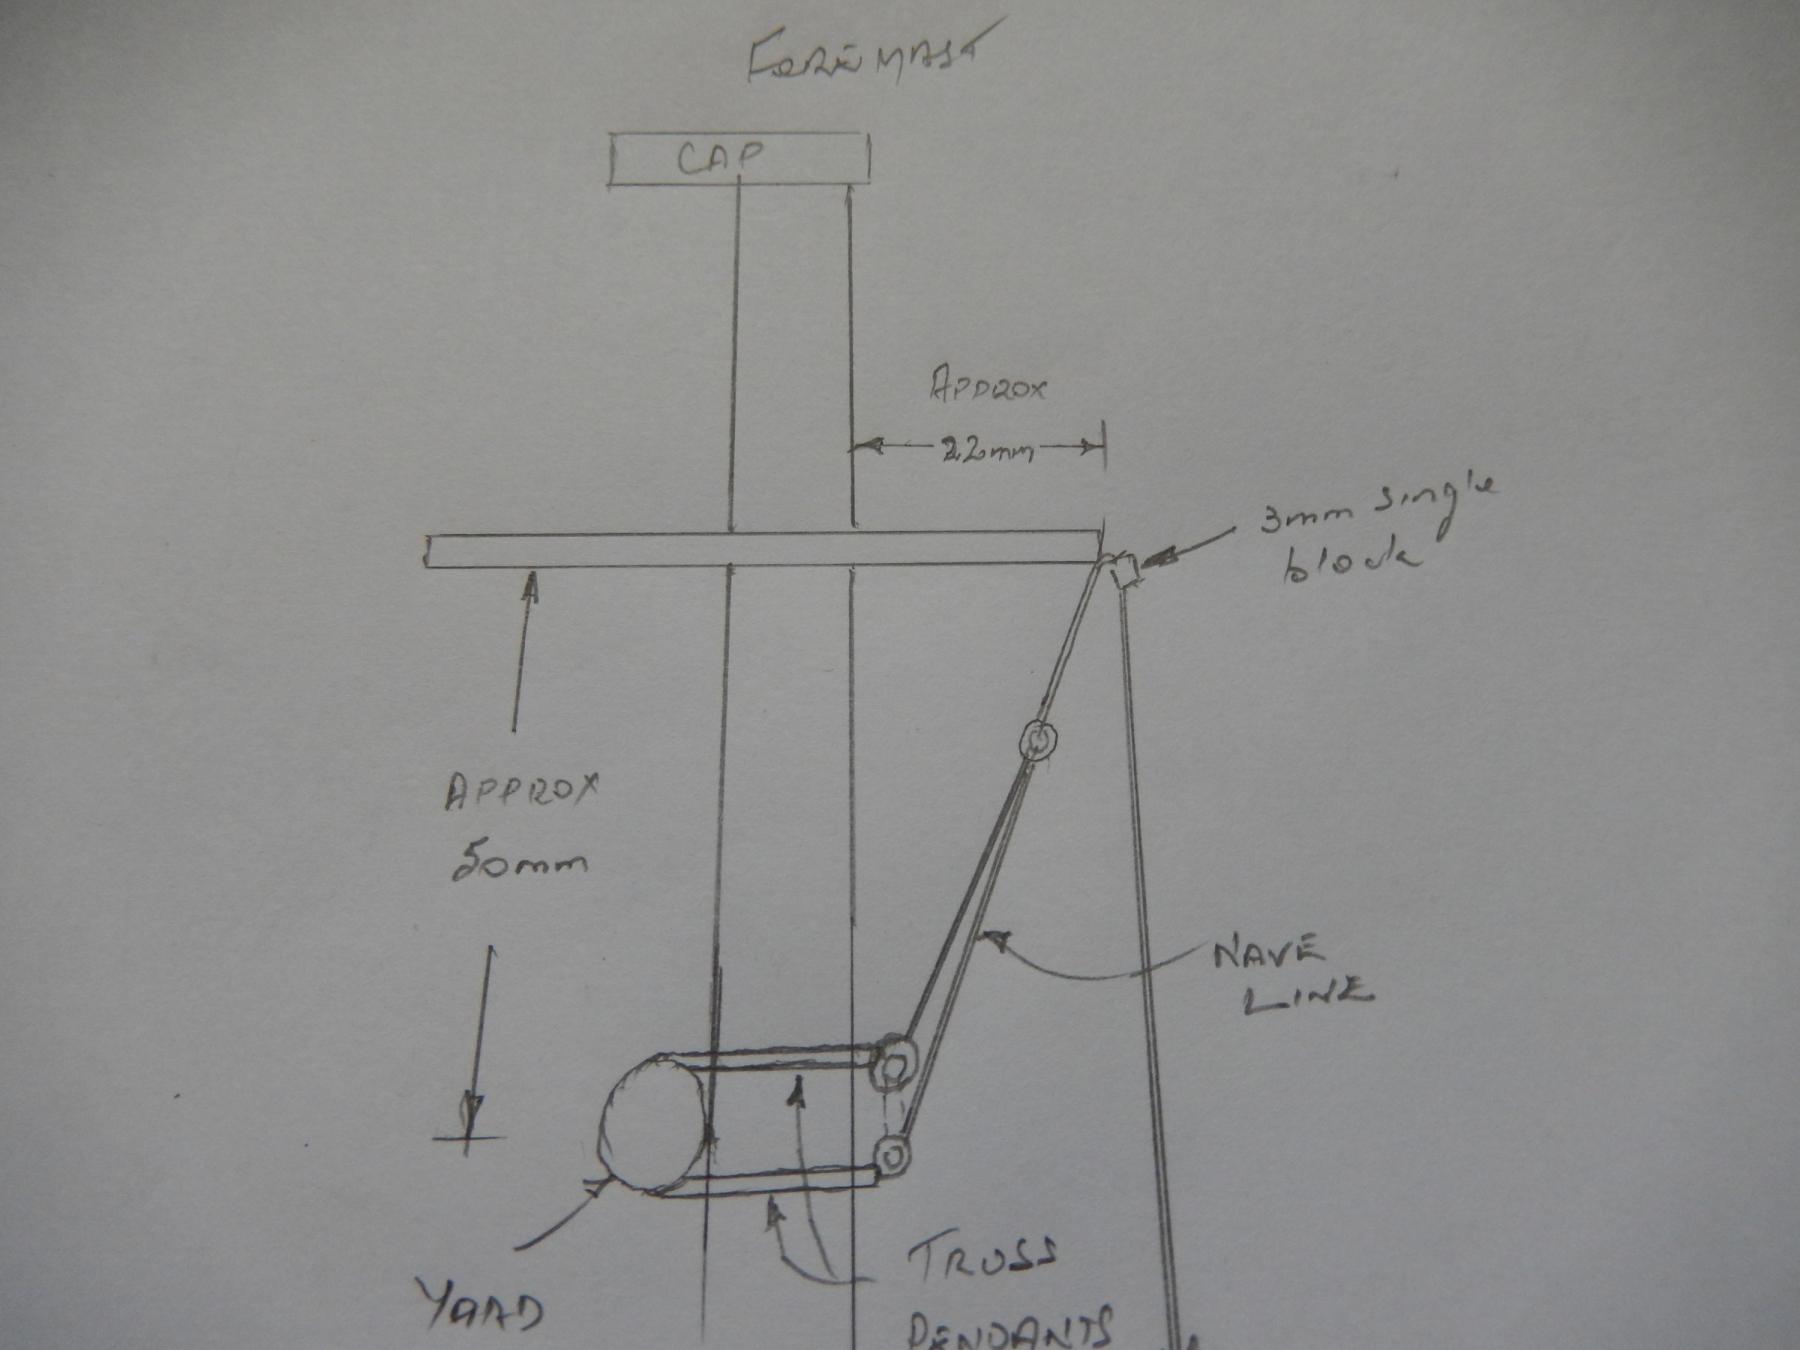
Thanks for the encouragement Jose. I have been doing my best to forget about belaying lines for the time being. Unfortunately I chose to put up the fore top yard which requires a parral to attach to the mast. I looked to Petersson for the method of mounting the parral as well as a few build logs. Alas, I am no wiser. In particular the illustrations in Petersson are essentially useless - at least to me. Here they are.
So far, so good ....

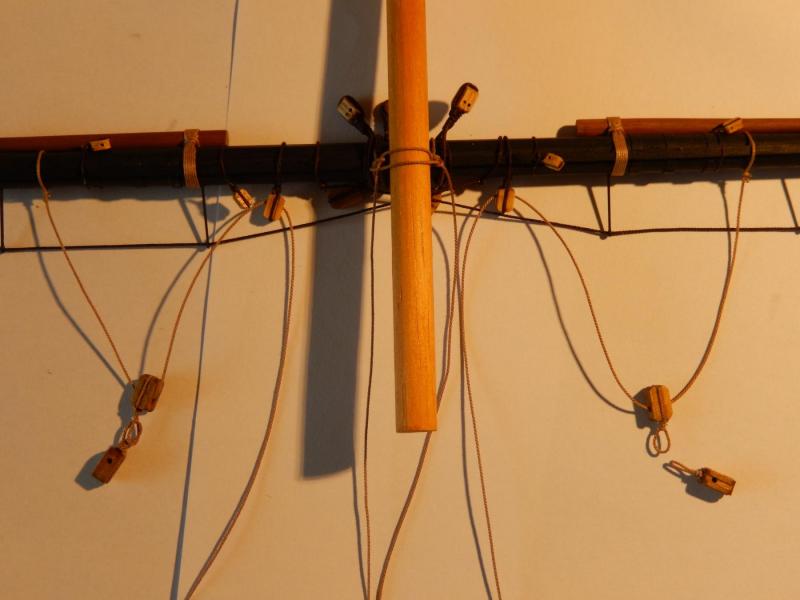
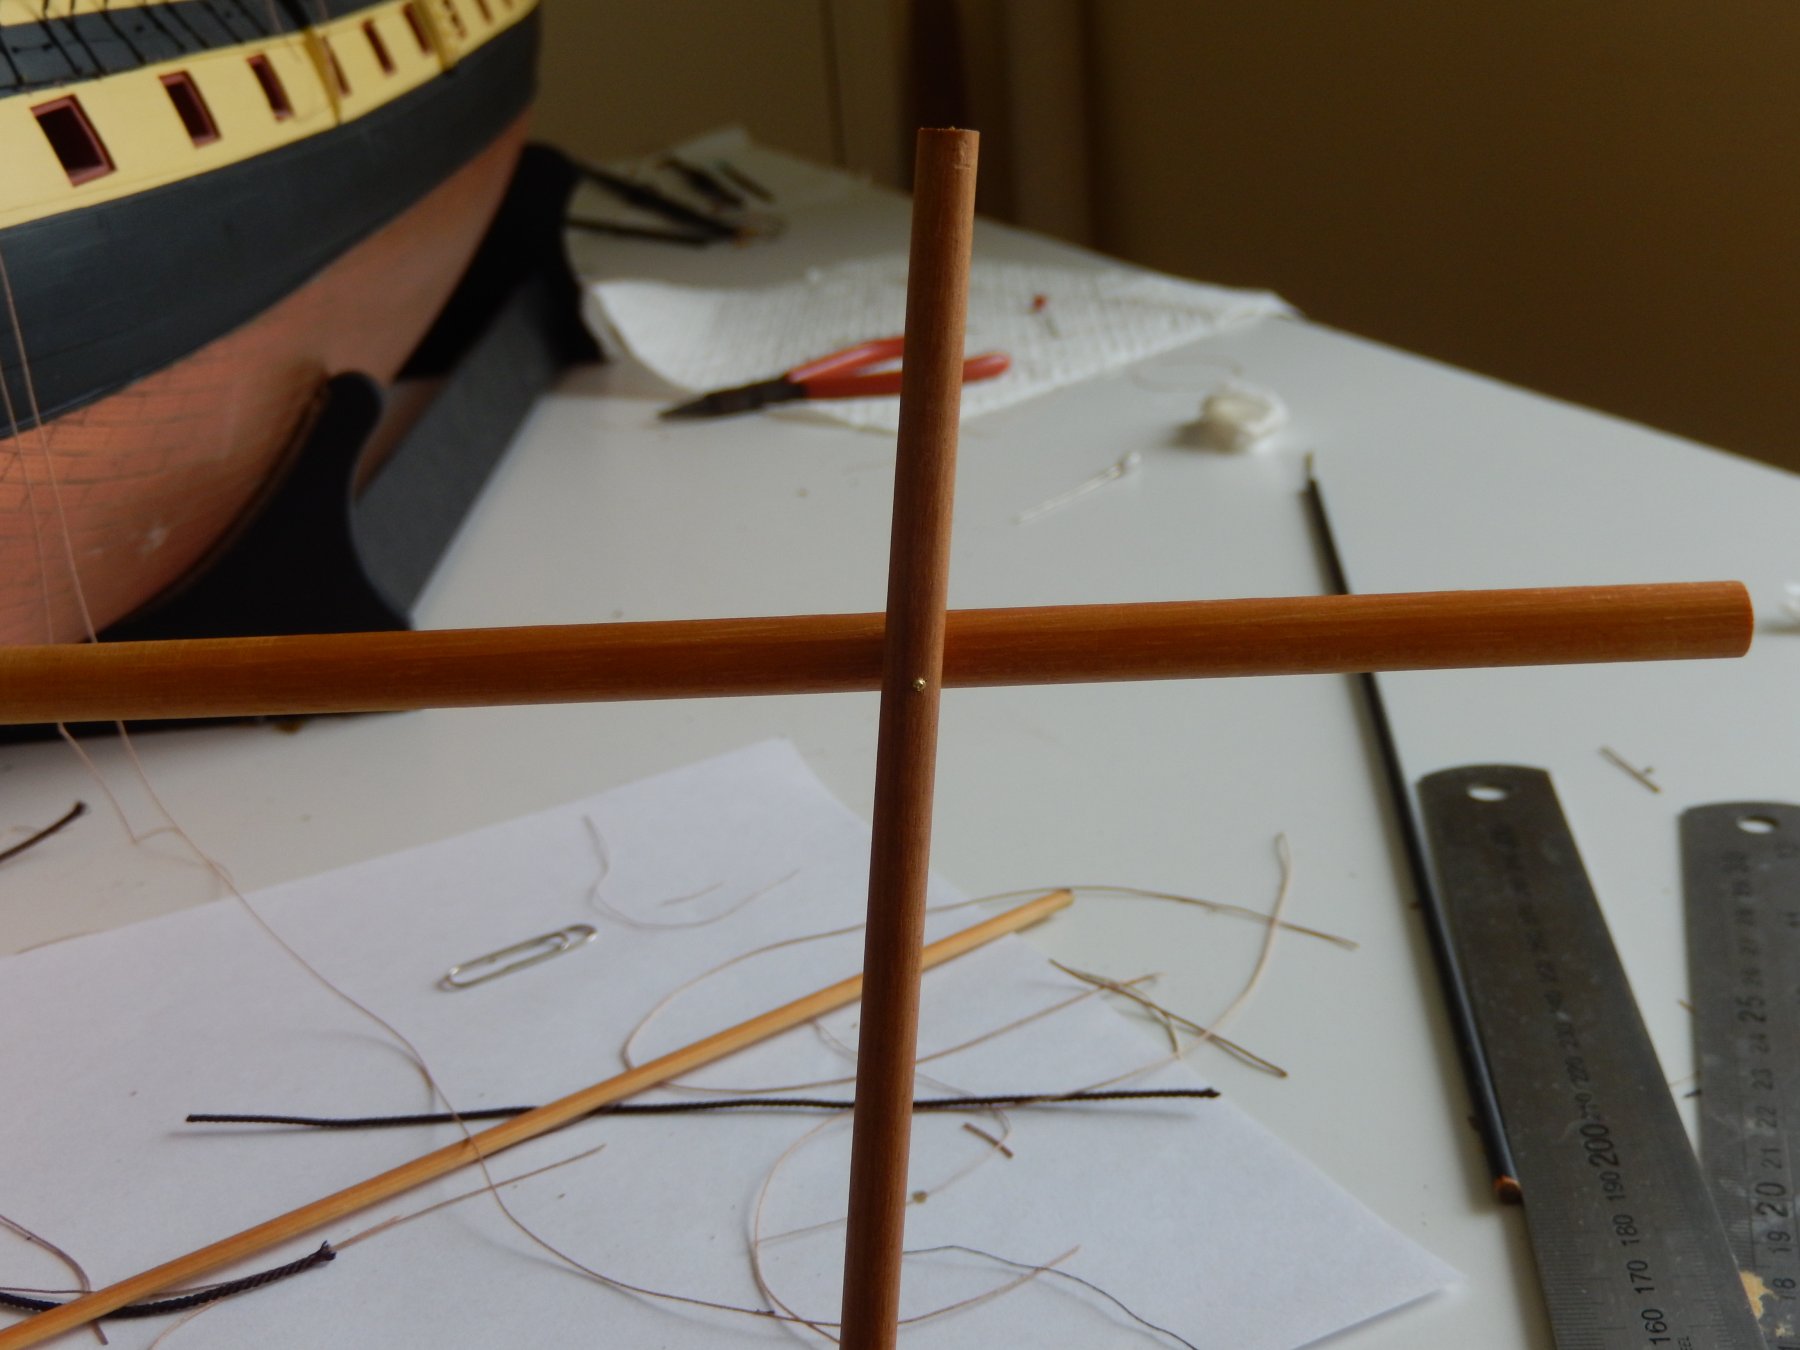
I used a dummy mast and yard to see how the thing may work.

And here is how it is supposed to end up, though how is a mystery to me. Help would be gratefully received.
- Beef Wellington, WackoWolf, coxswain and 1 other
-
 4
4
-
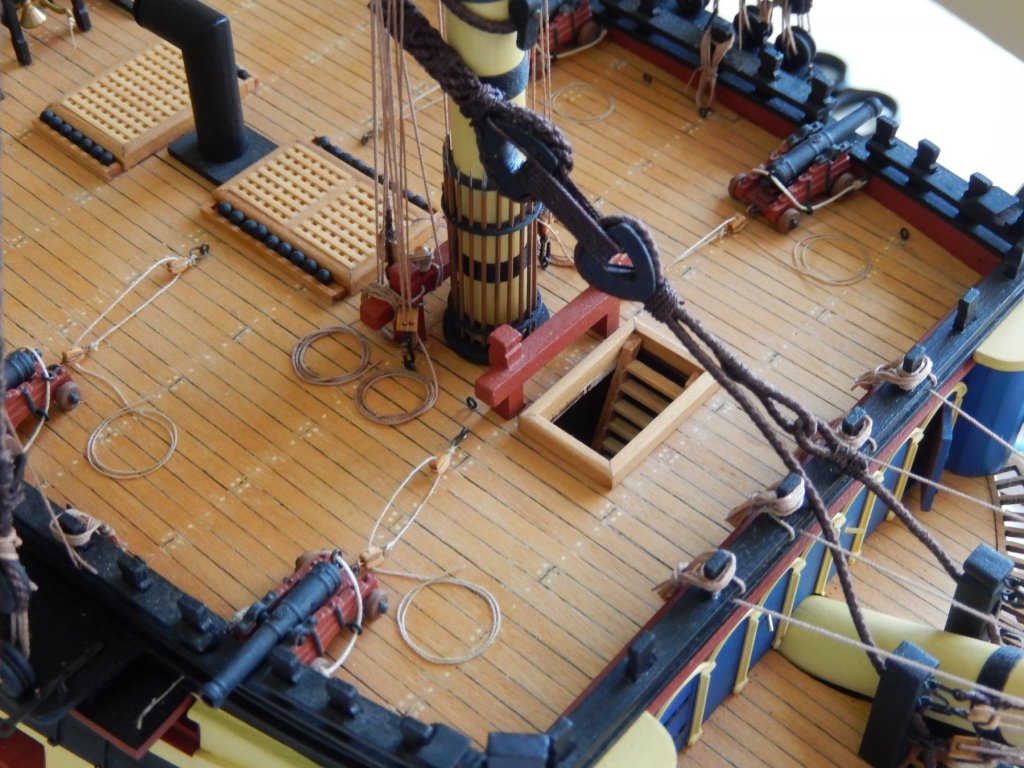
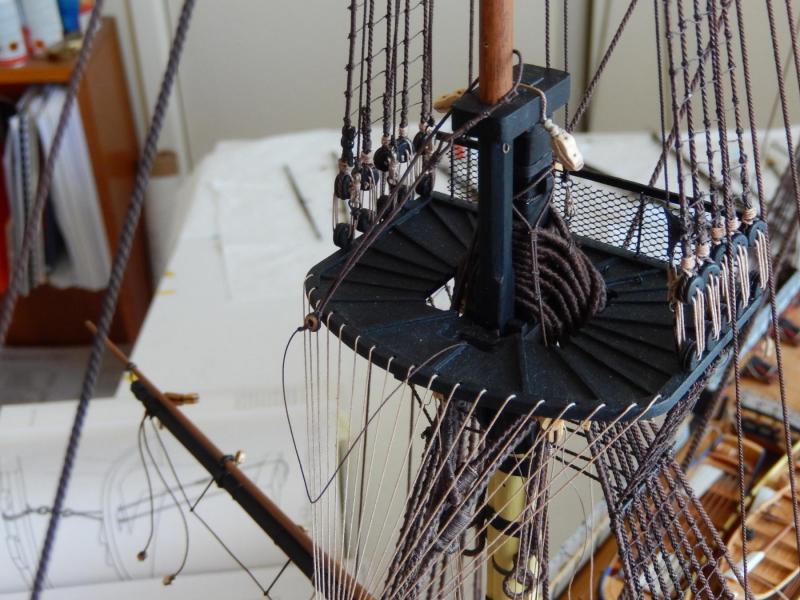
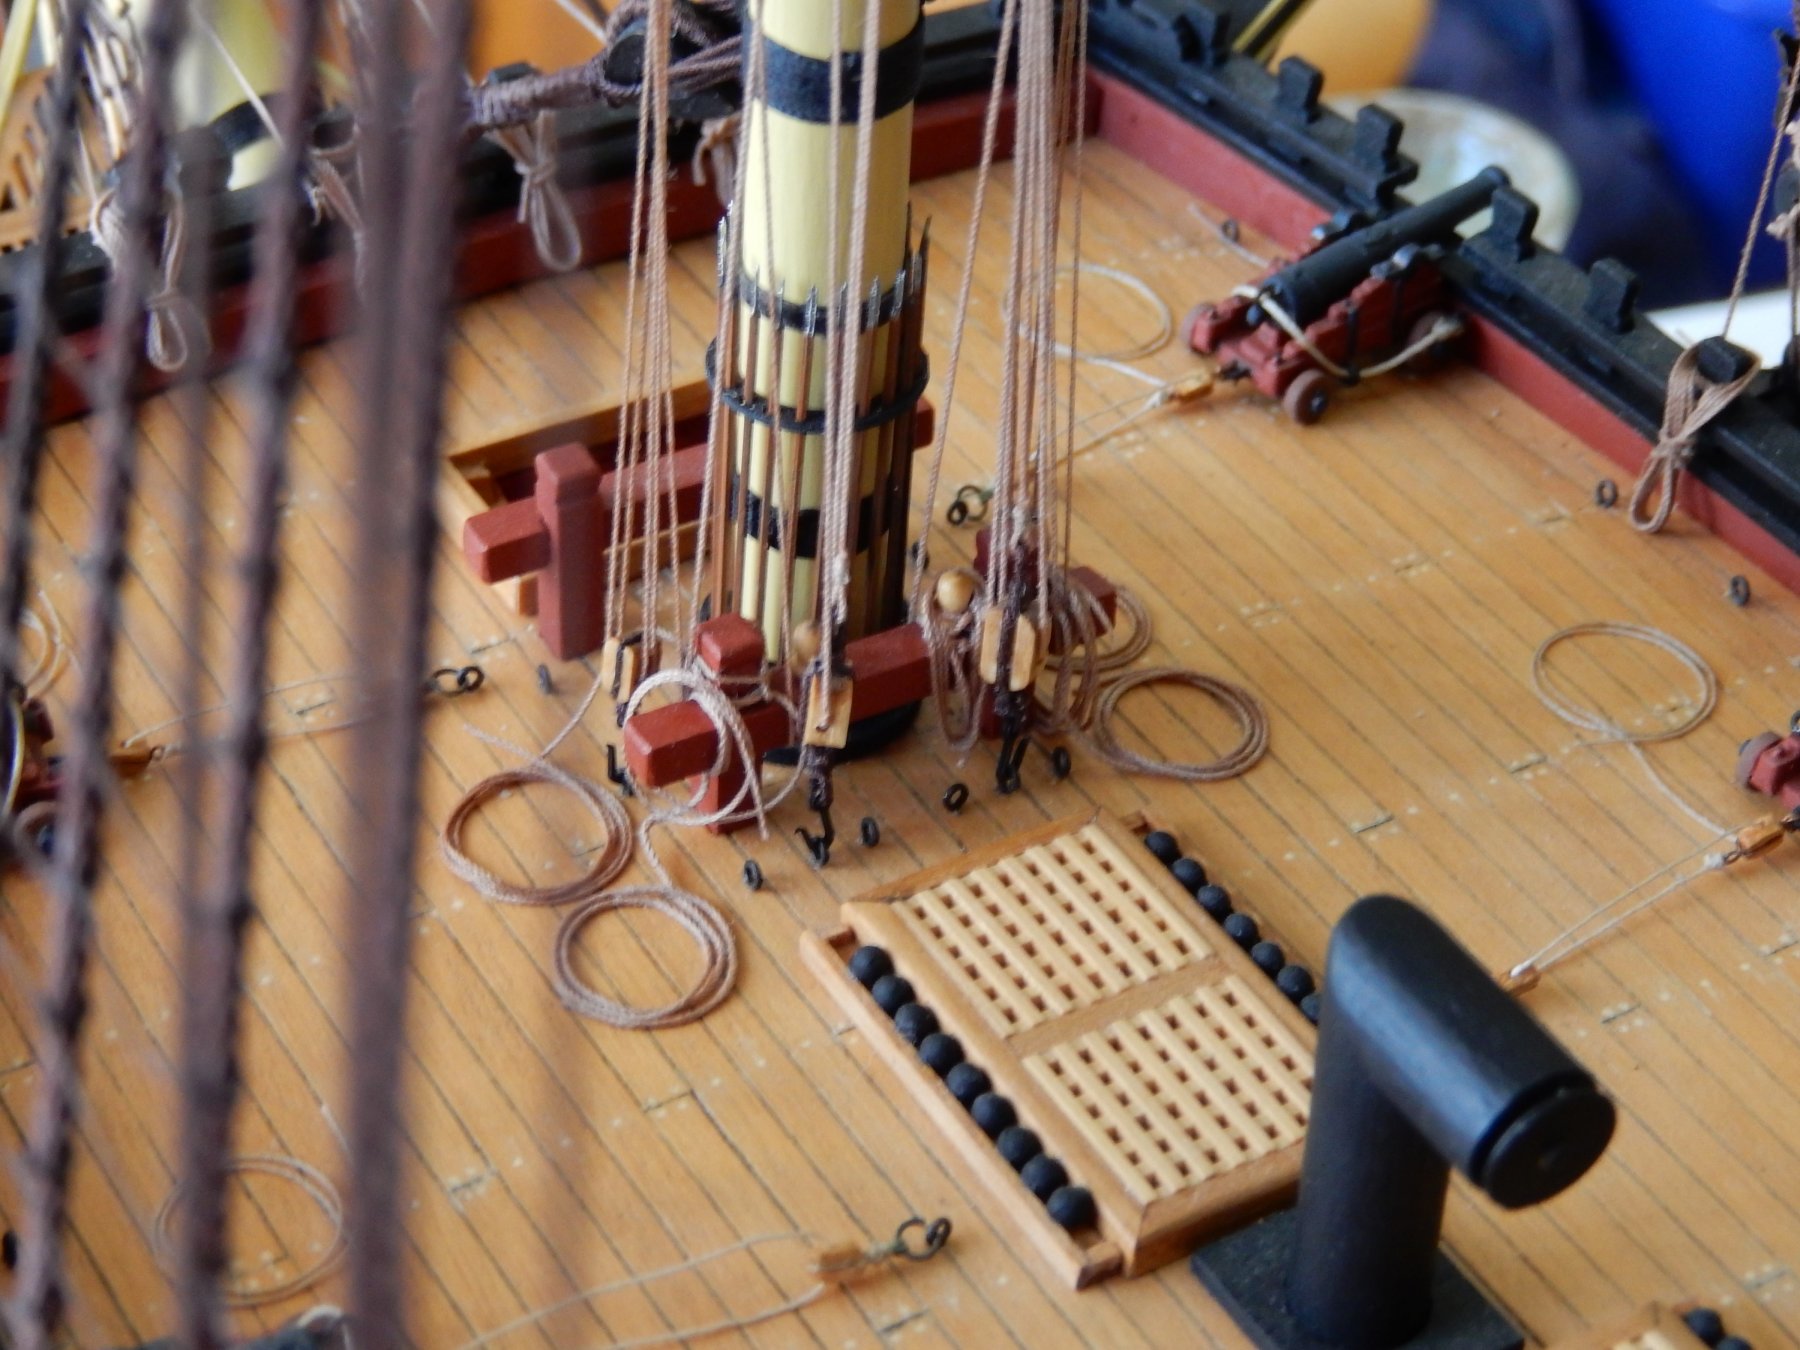
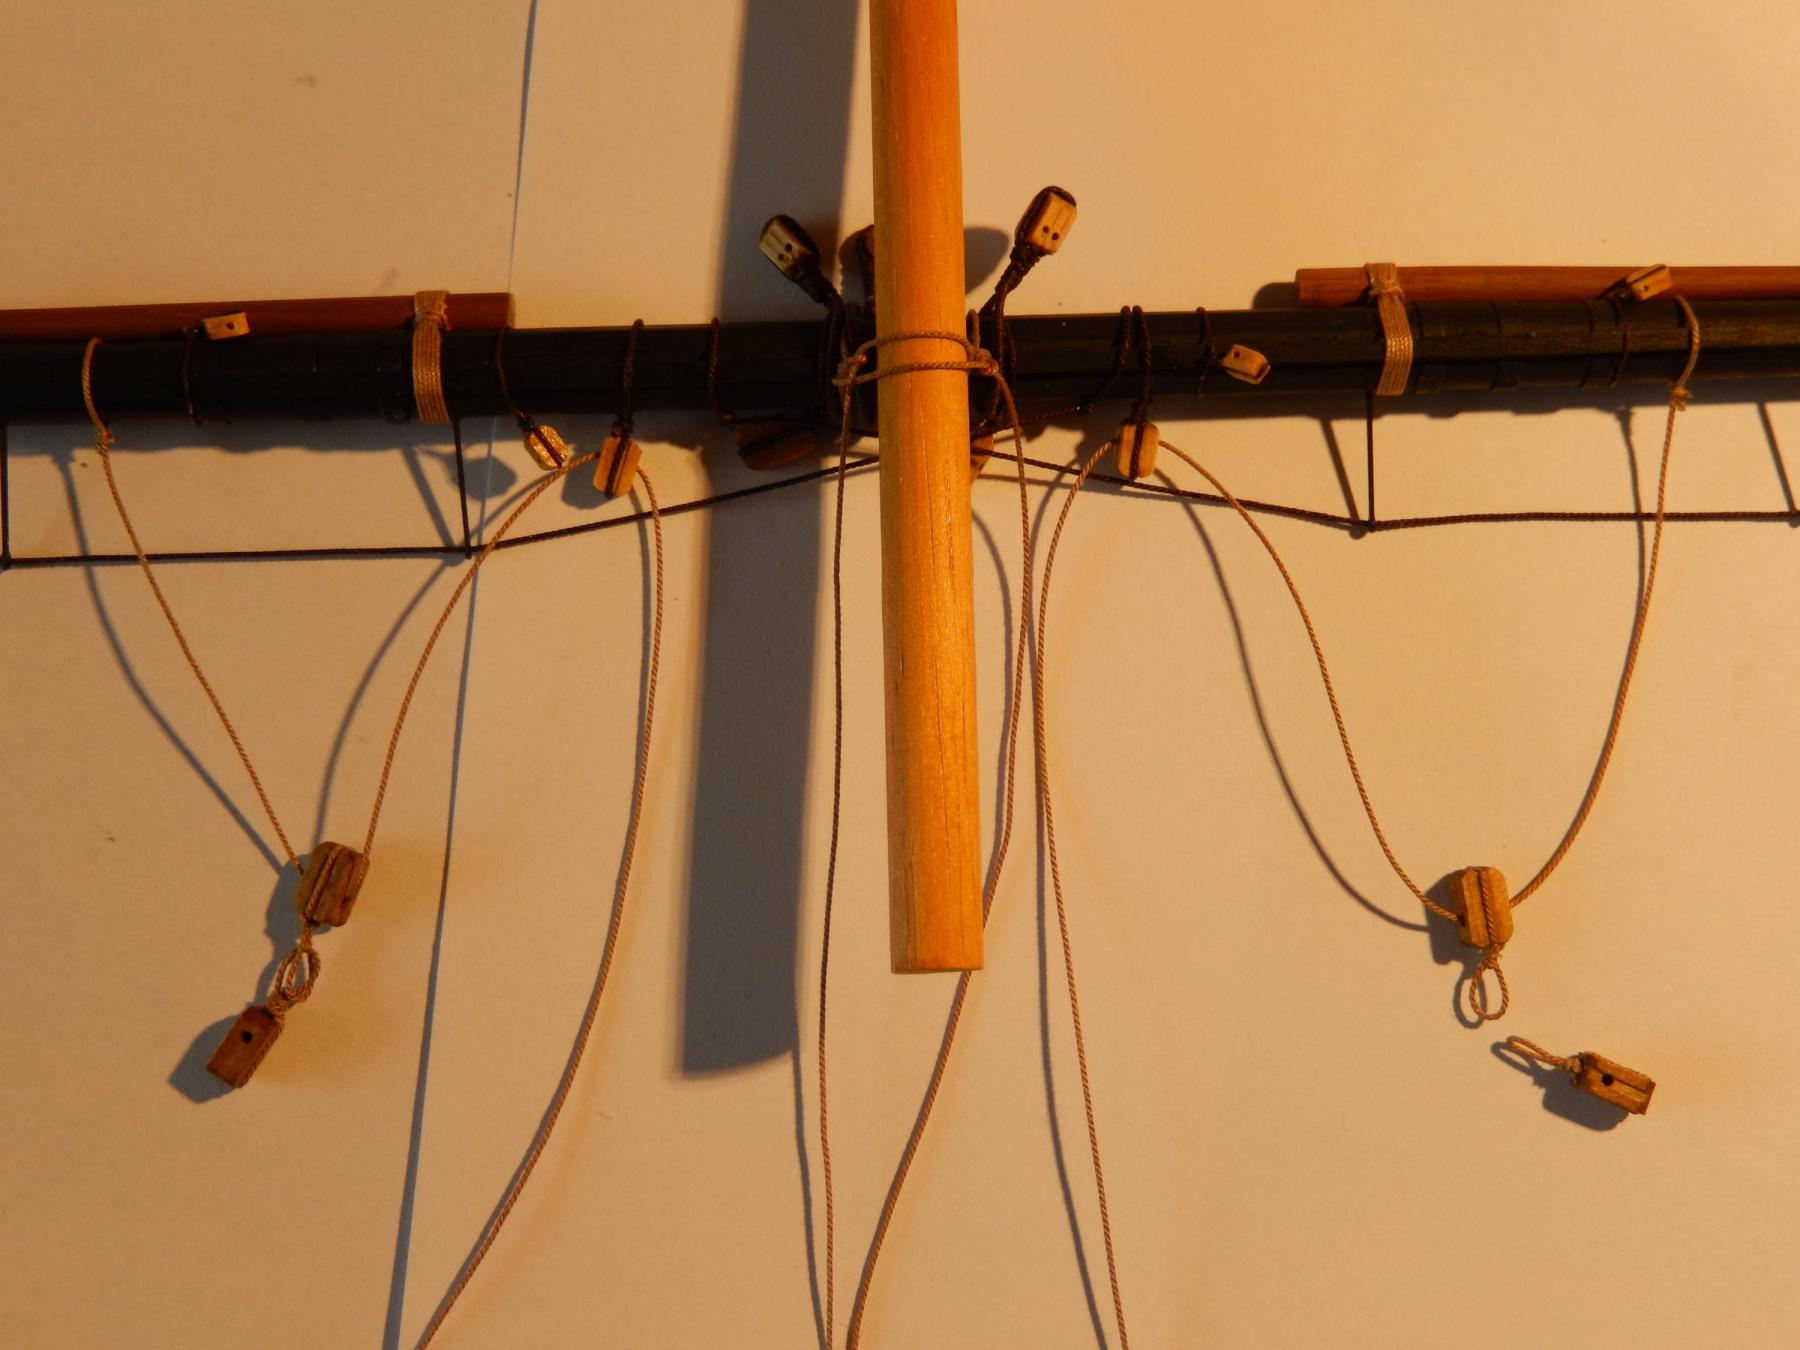
The main yard is now on, the truss pendants and the jeers are belayed, though not finally tied off. In the diagram in my previous post, the nave line was omitted - that makes seventeen lines to be tied off somehow. I had more than enough fun
 belaying the five lines so far done. At this stage I don't know whether to finally tie off these lines now and make up their respective rope coils. With another dozen lines to fit it, won't be possible to coil them all.
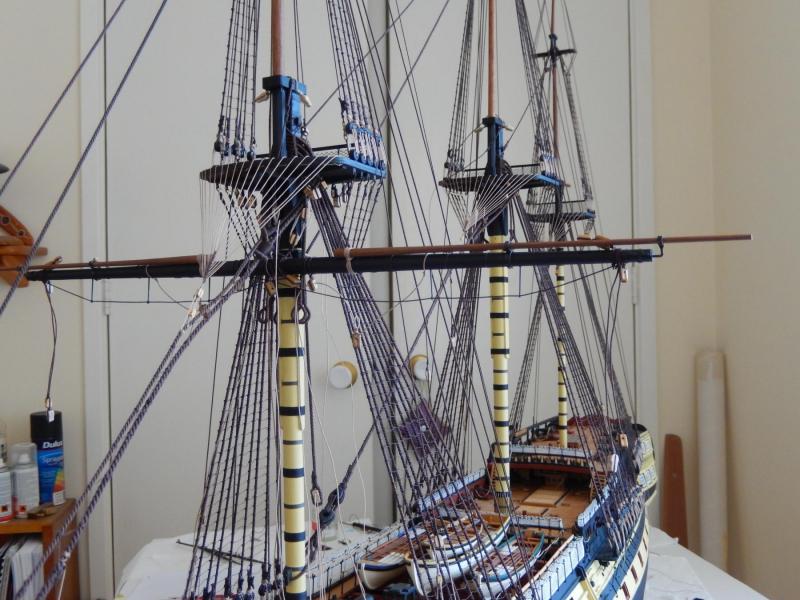
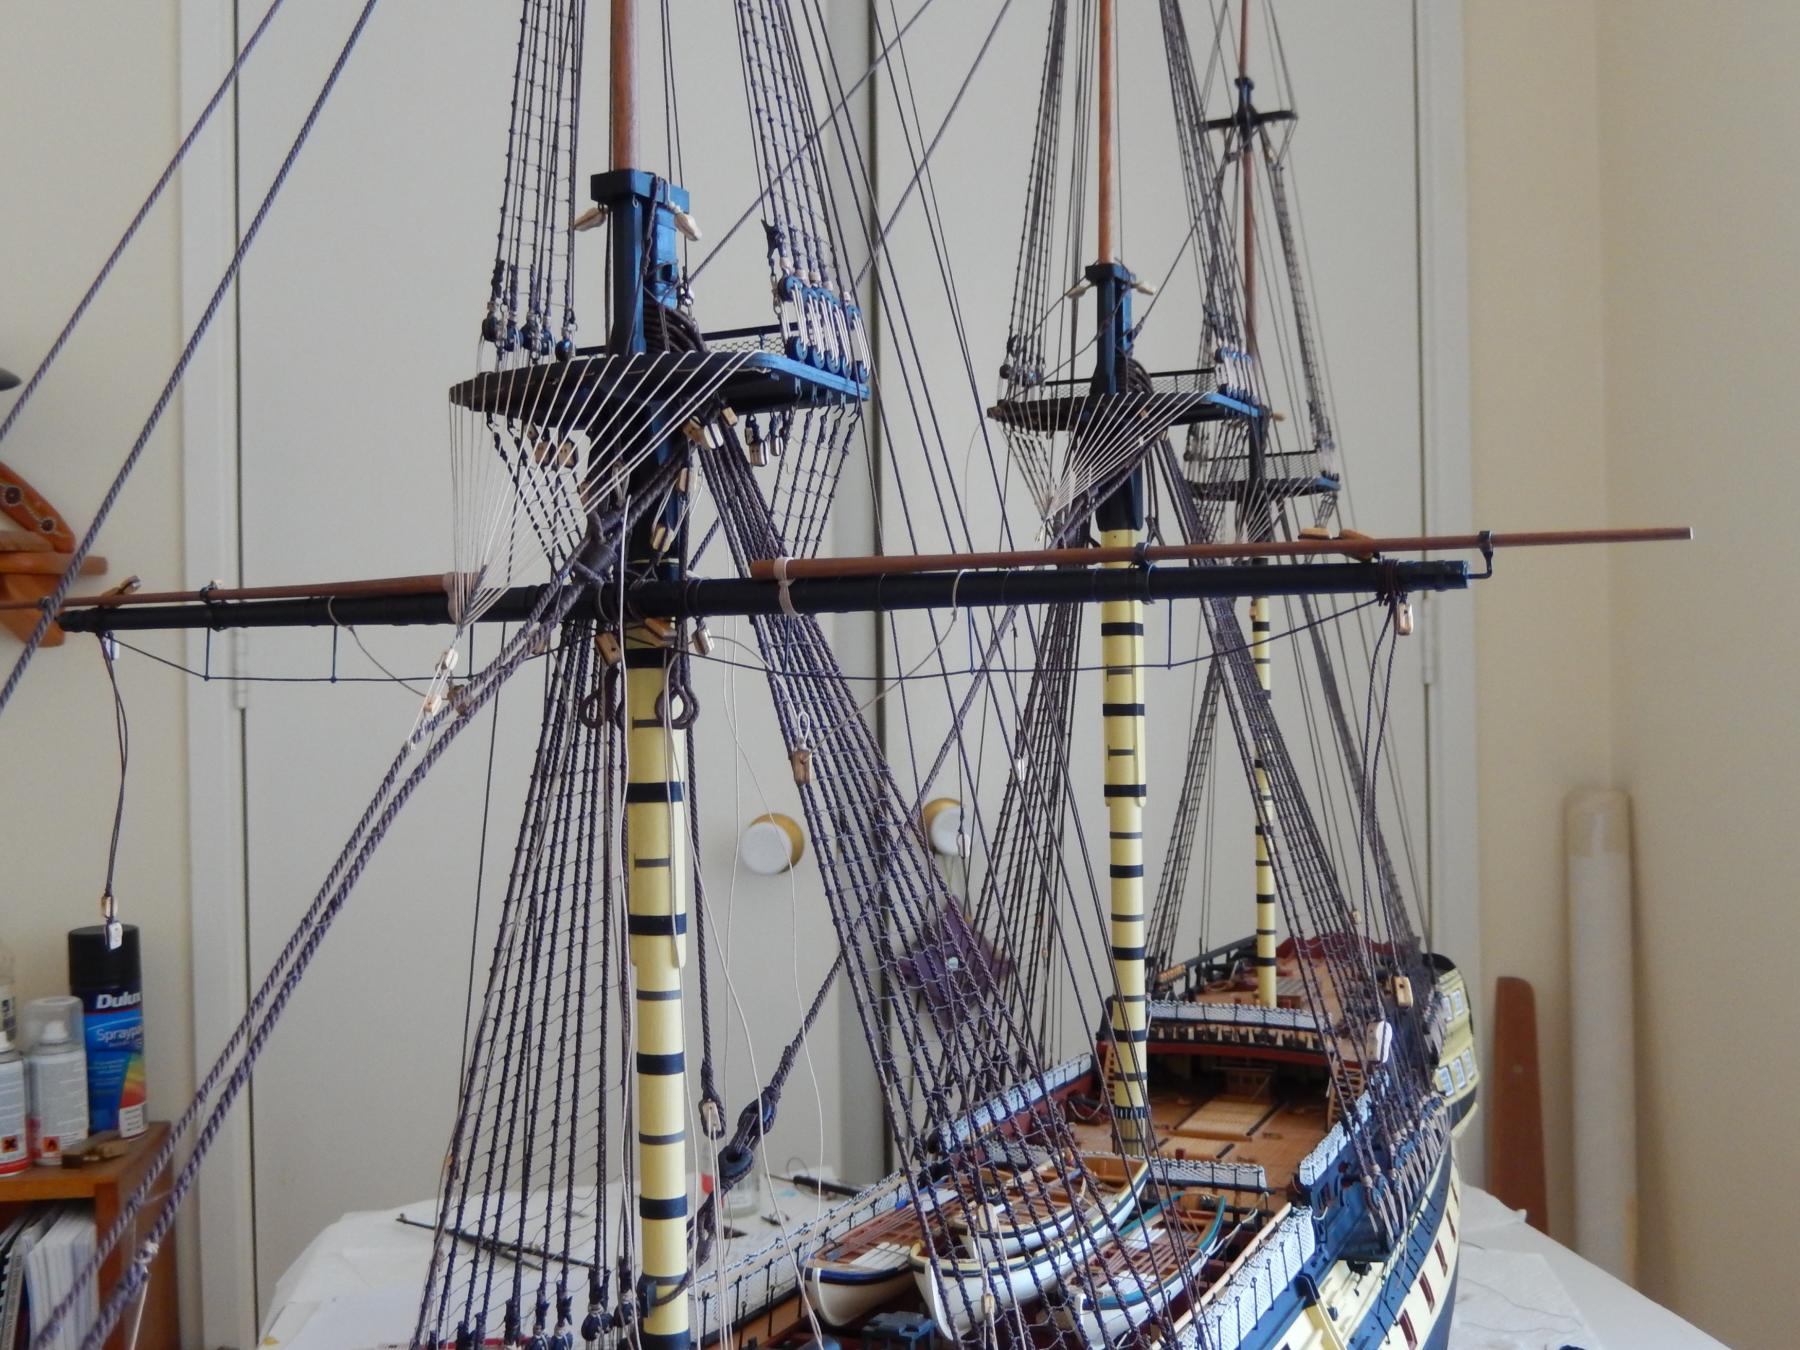
Here is how things stand at the moment.
The photo of the nave line is quite poor I'm afraid.
The fore and main yards are reasonably lined up. Adjustments can be made if necessary.

At the moment there seem to be lines going all over the place.


- kier, WackoWolf, mort stoll and 5 others
-
8
-
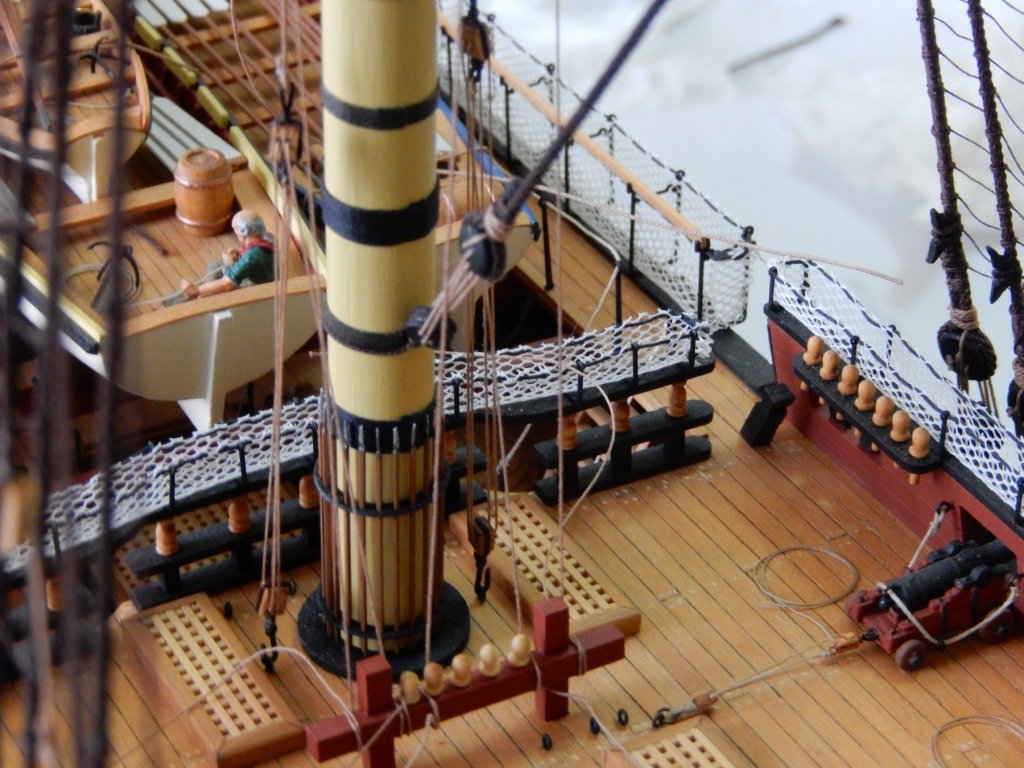
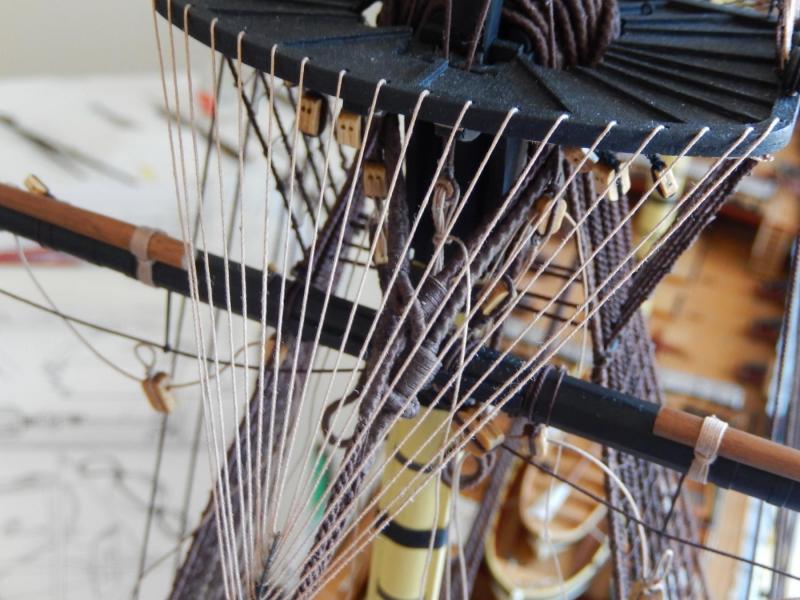
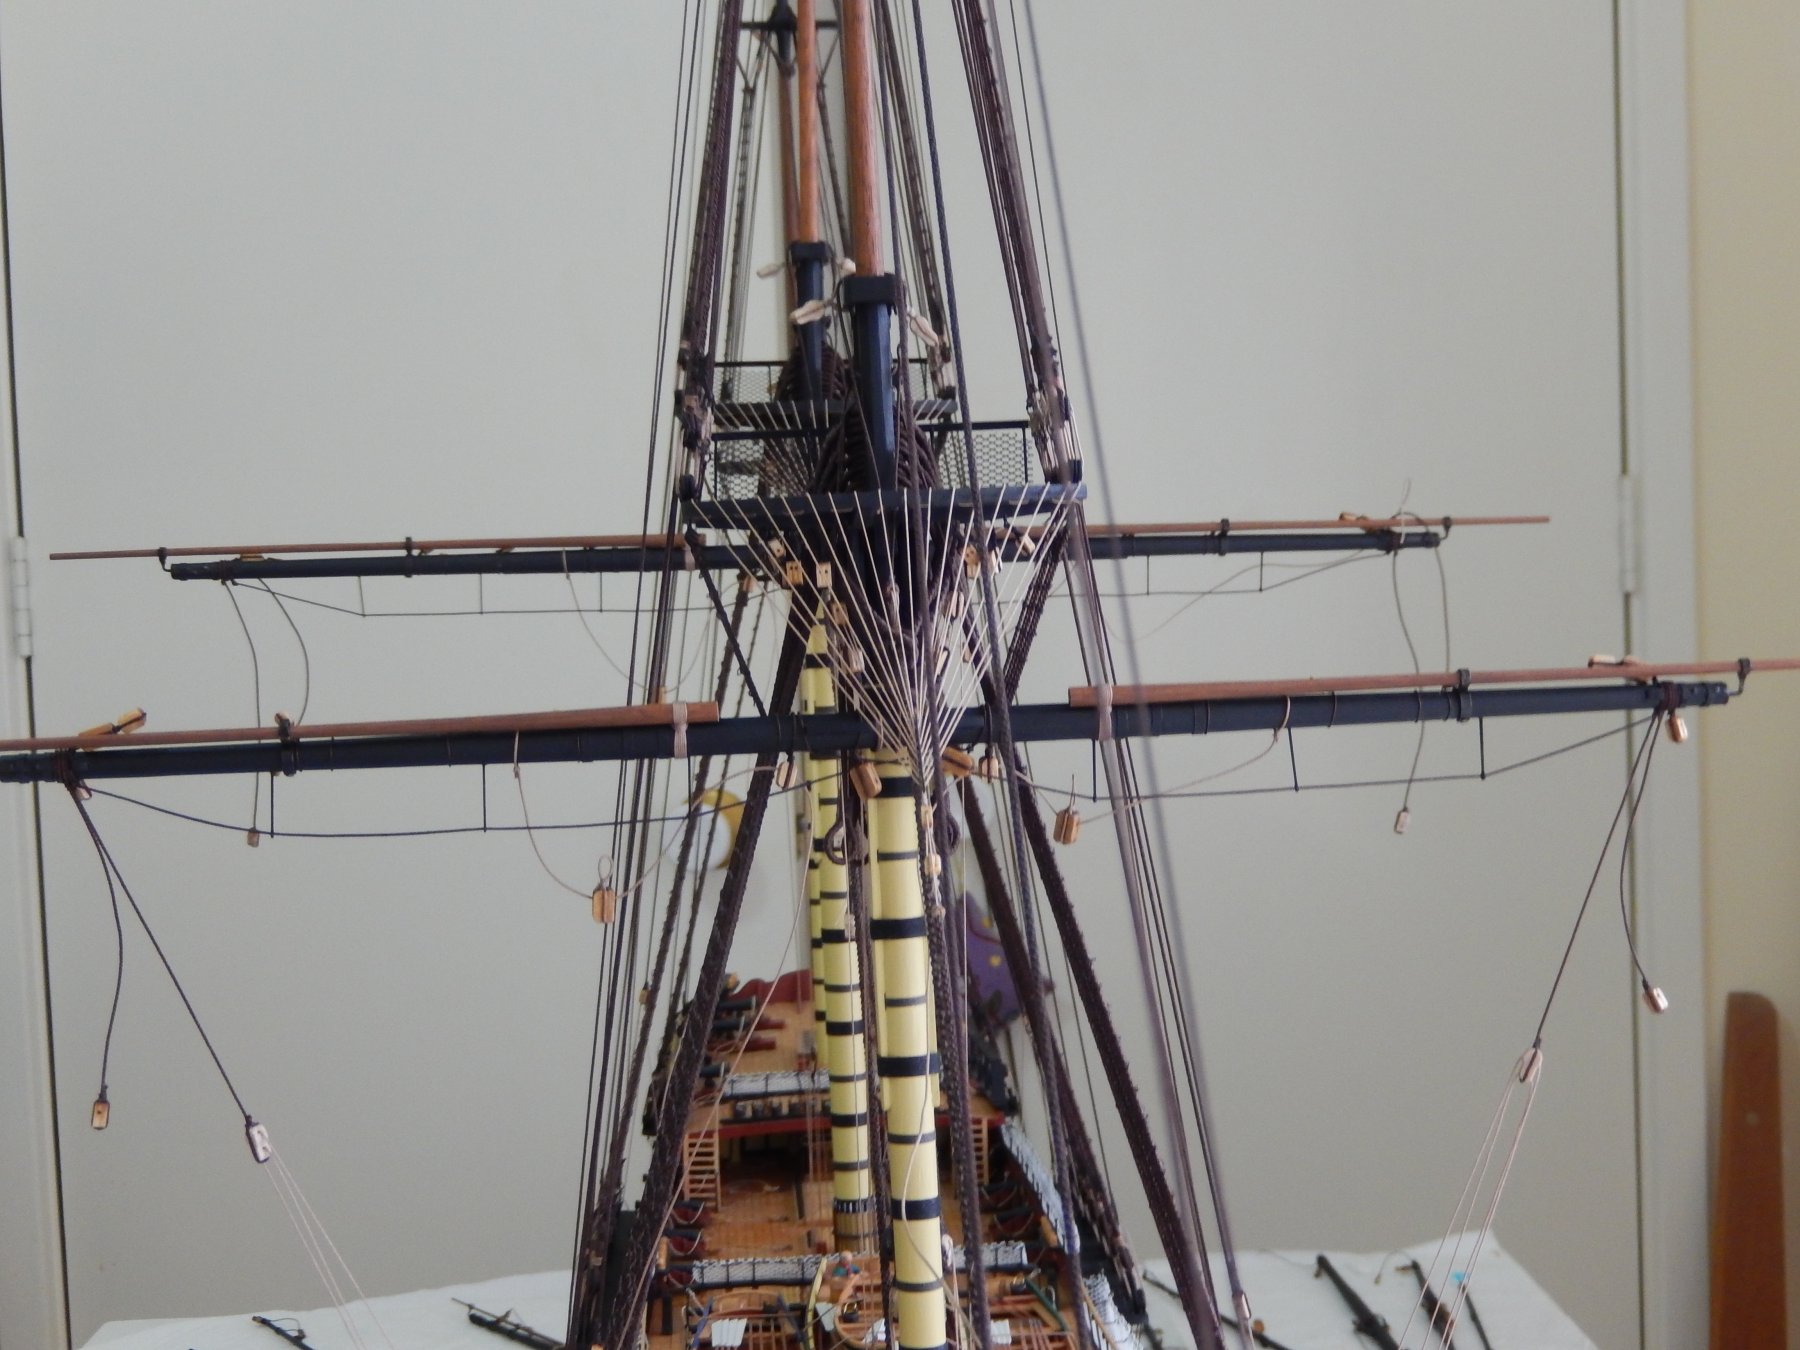
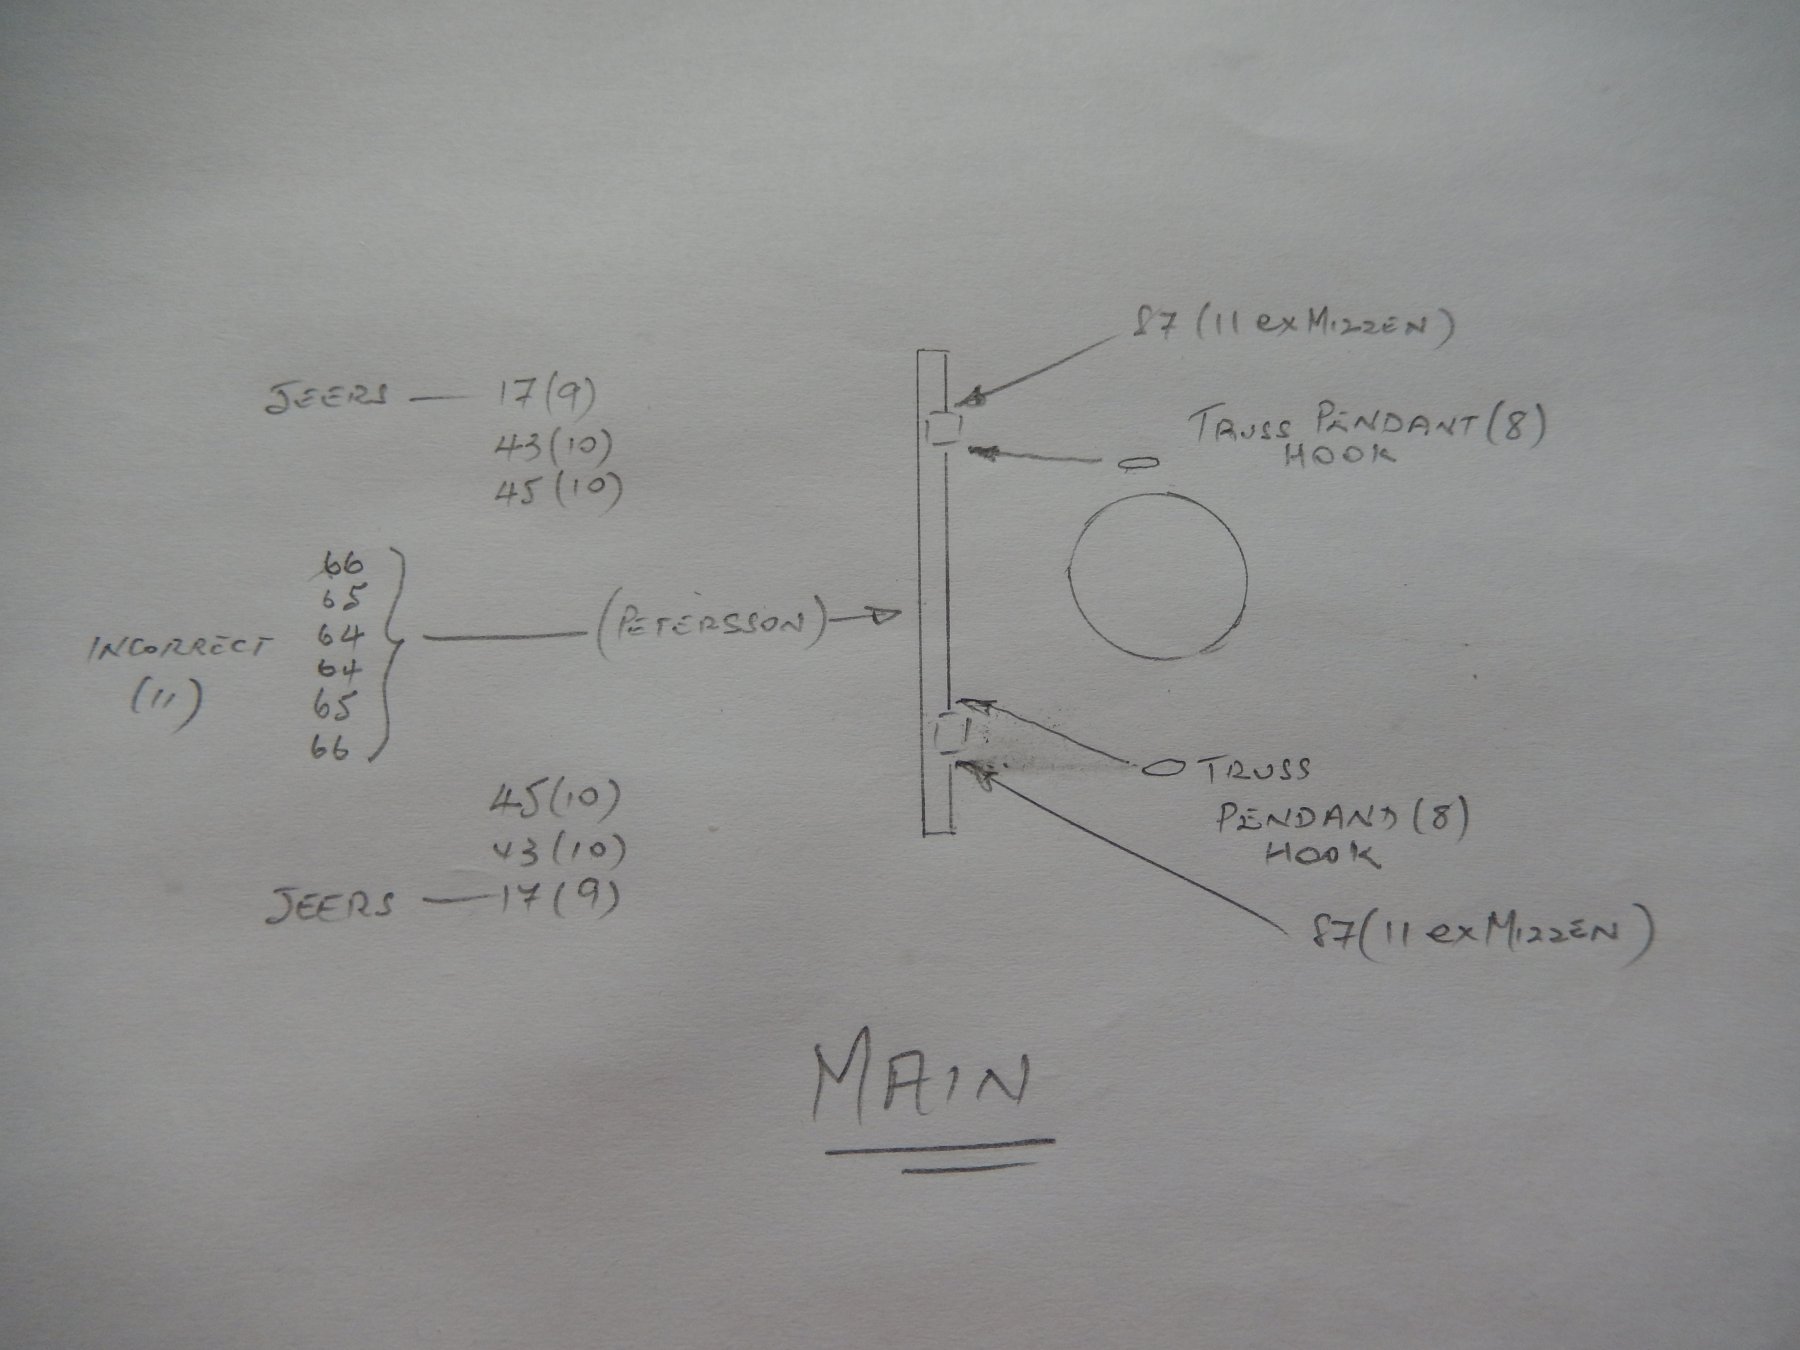
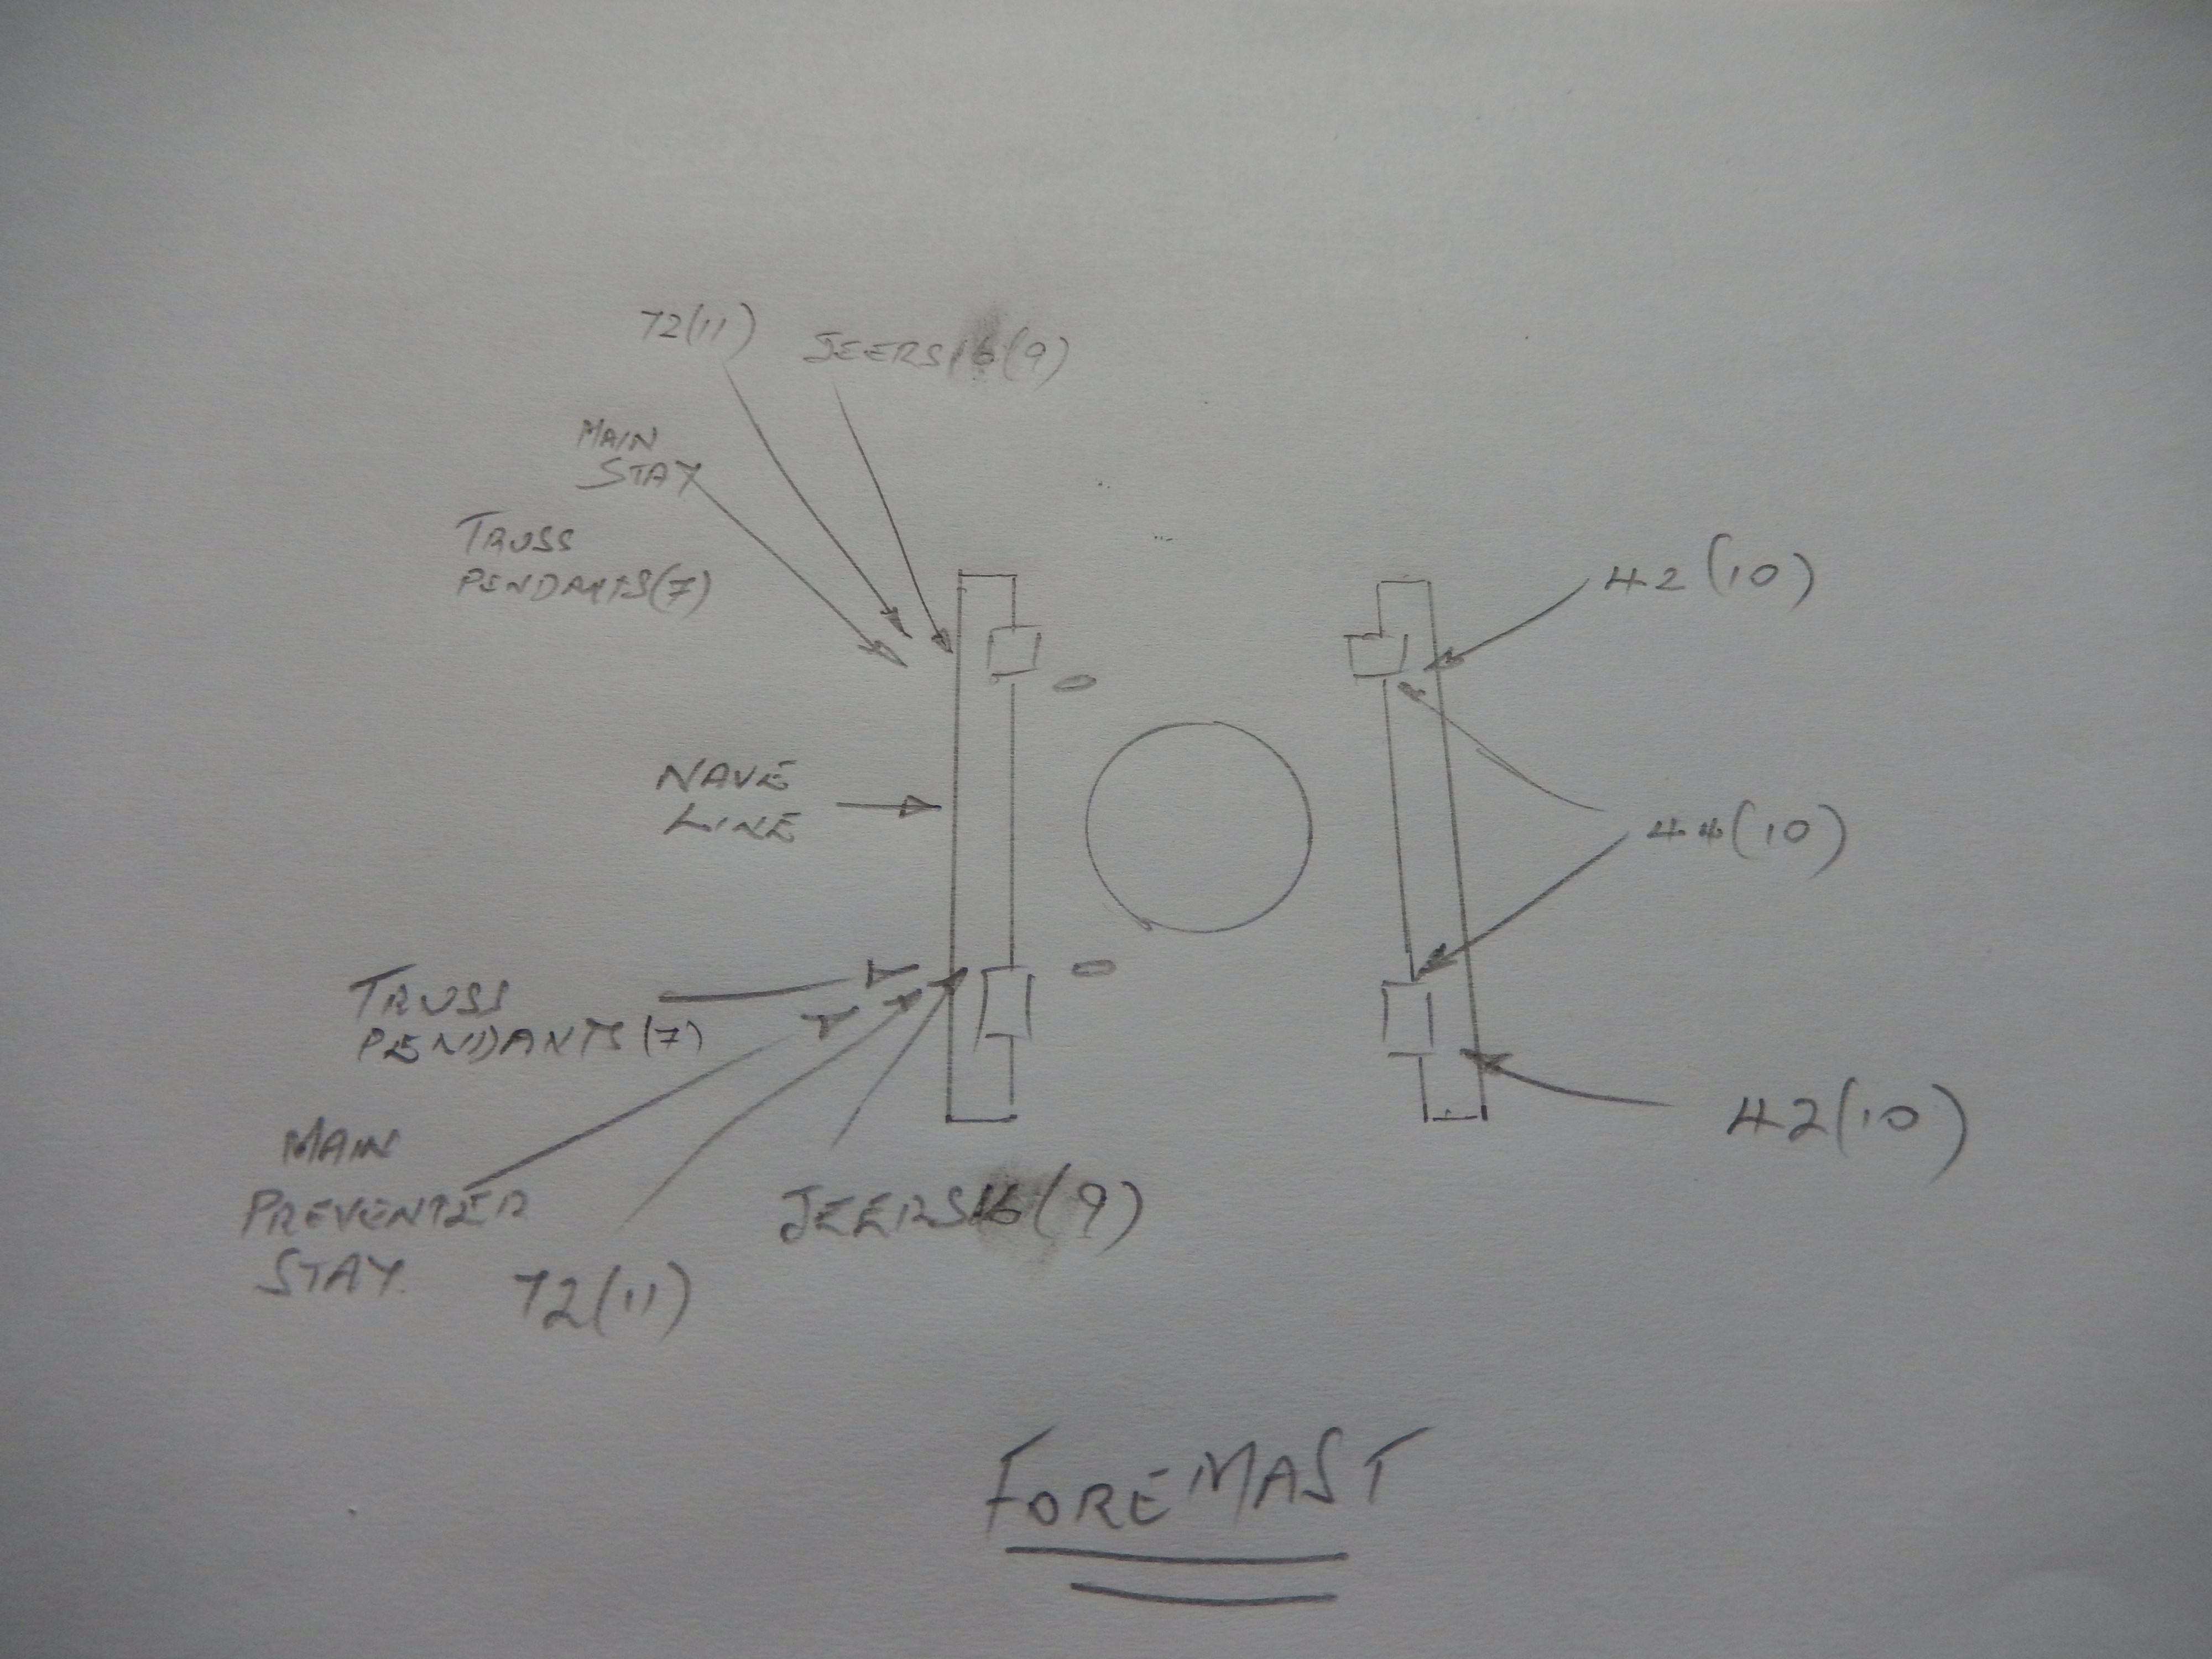
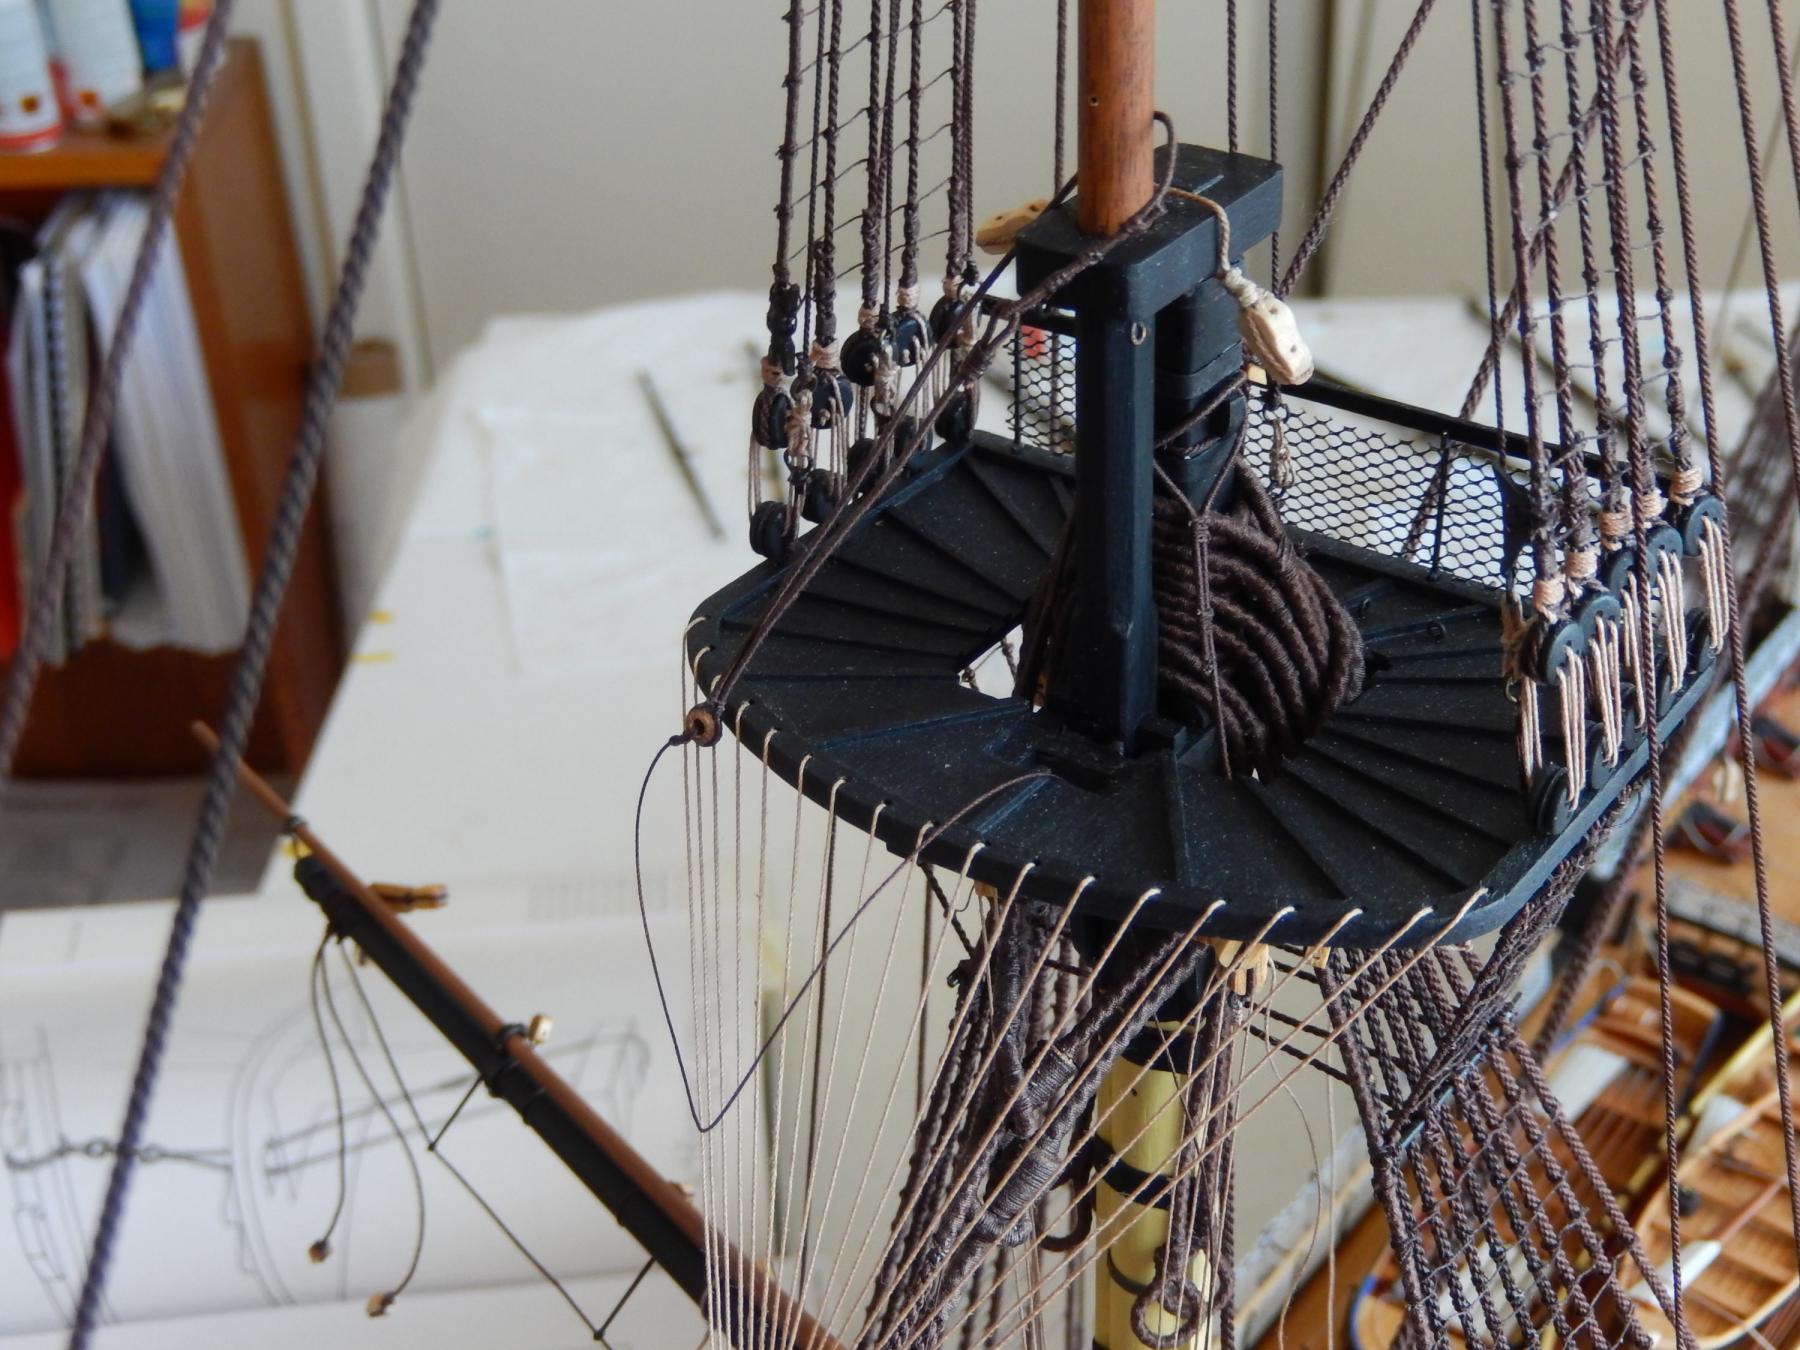
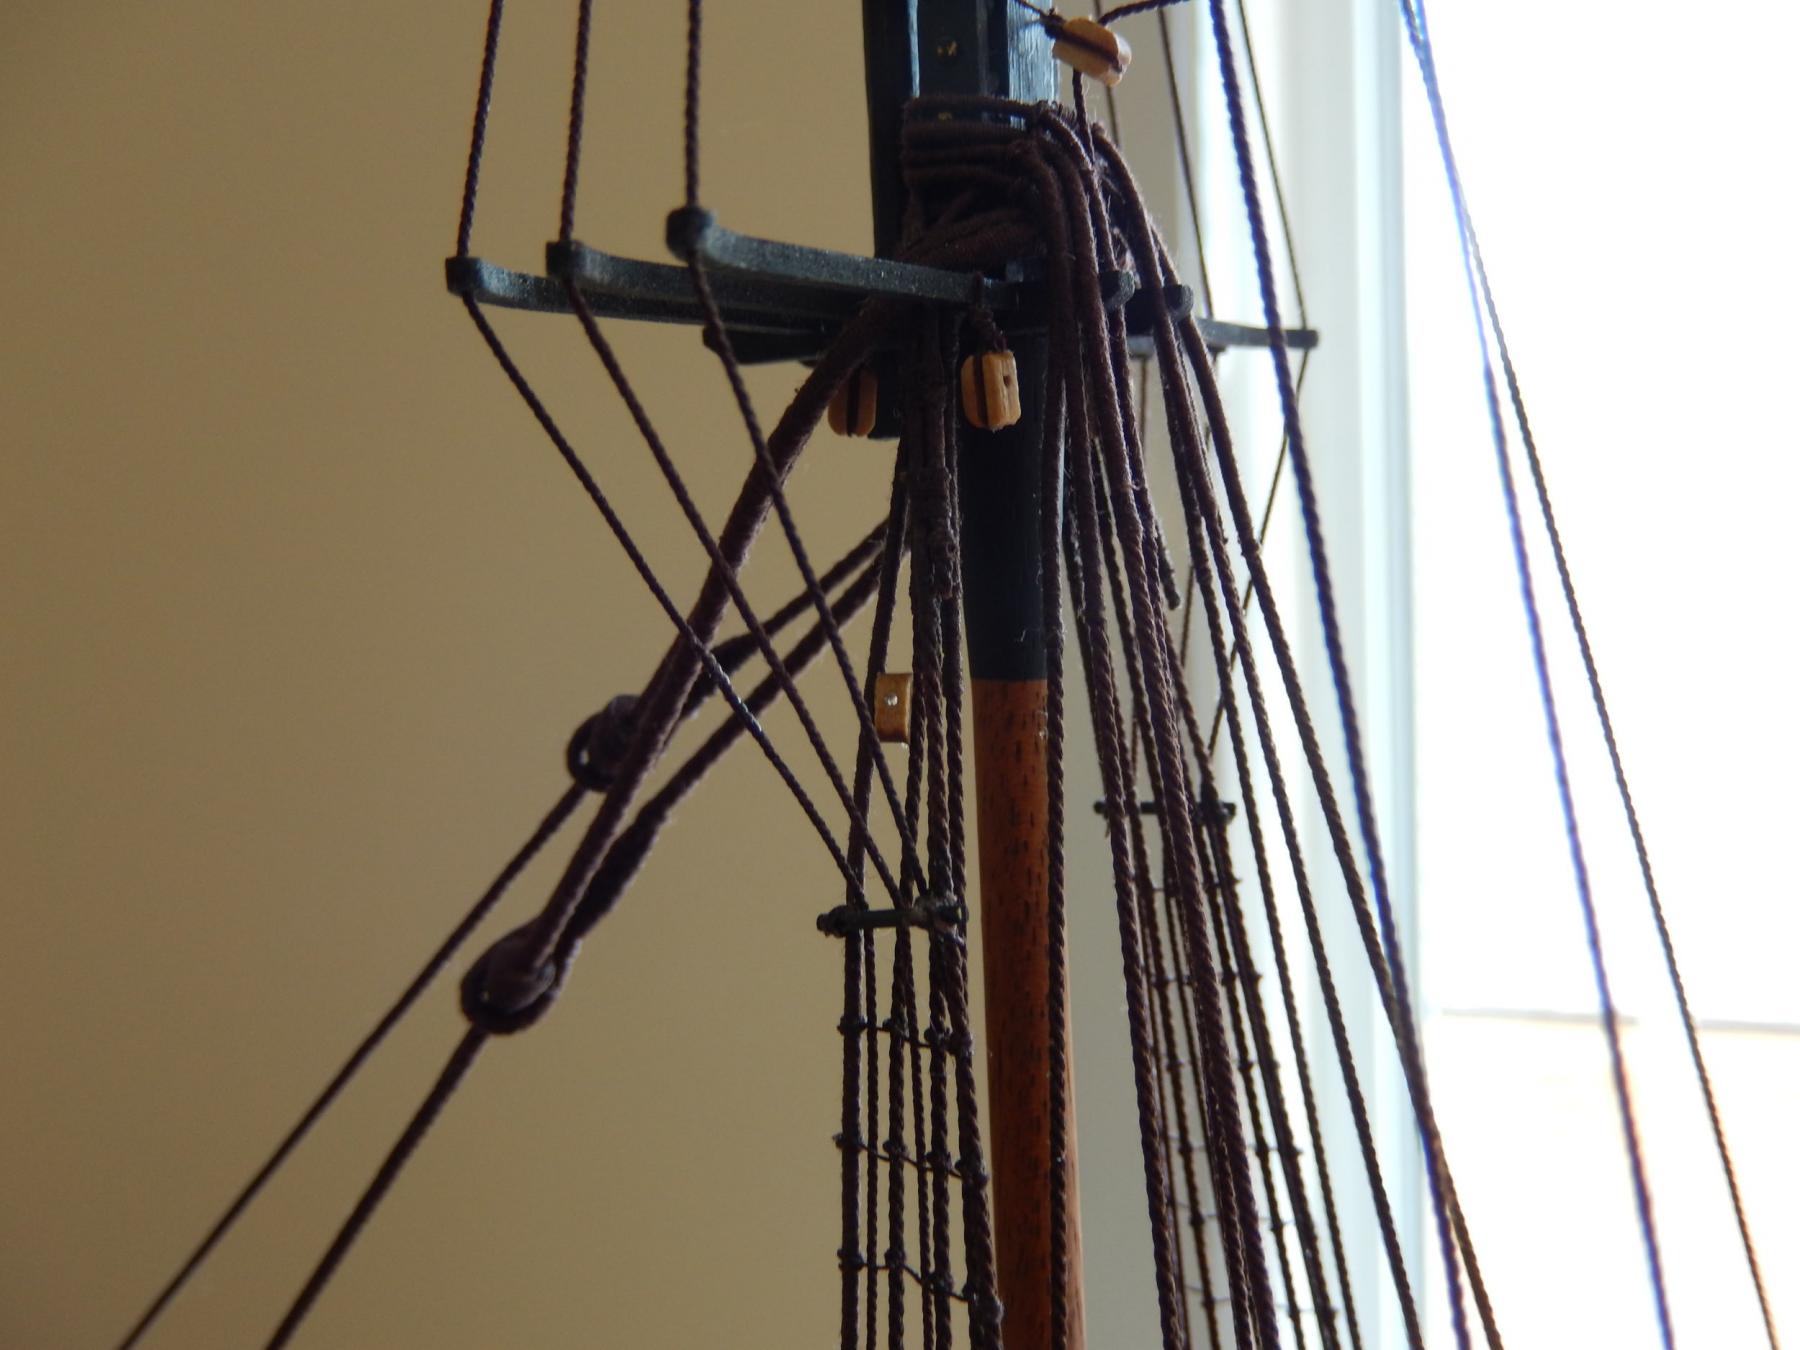
 It's time to hoist the main yard. Looking at the number of lines that must be tied off around the bitts is rather daunting - by my count, sixteen.
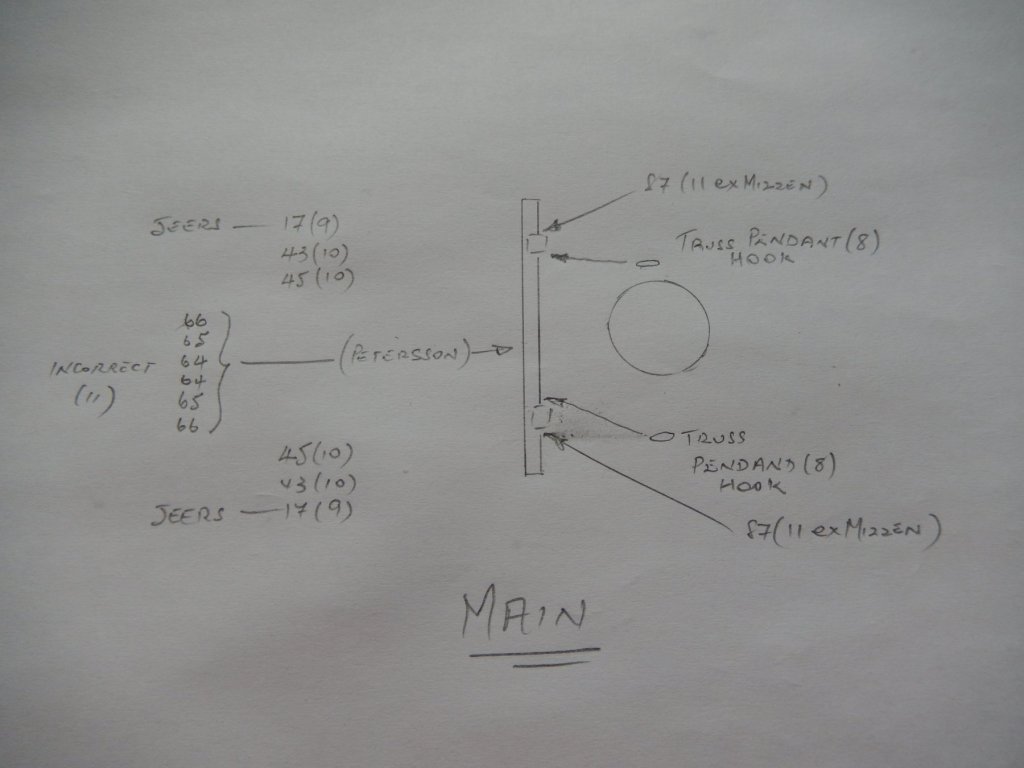
(I see I still haven't quite got the hang of the new system.) The above photo shows the number of the various lines and the plan number in parenthesis. The lines shown here as incorrect are found on plan 11 to be belayed to the poop deck rail. To do this is, I think, to invite disaster. I have chosen to use Petersson's method. If anyone has something to add (or preferably to subtract), please let me know.
-
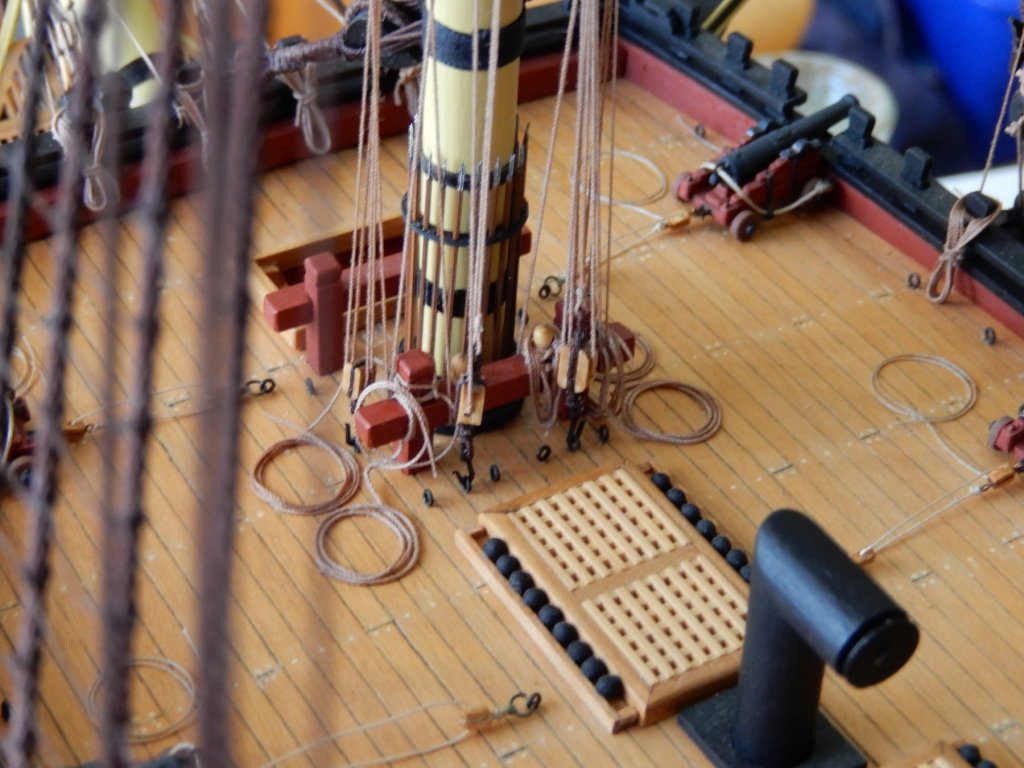
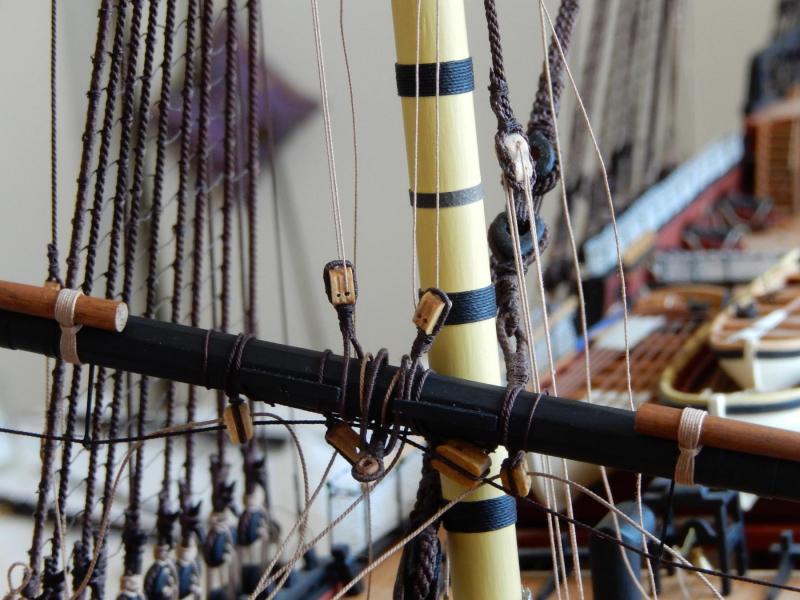
I have finally tied off most of the lines to the fore bitts. They came out reasonably well (though not nearly as well as Jose's).
This is how they came out.
Now I'm not sure of the next step - do all of the yards on the foremast? or the lower yards on each mast? Advice is very welcome.
The following photo isn't as clear as it could be, and I have made a minor adjustment to the lines since it was taken.

-
Jose - what wonderful work. I hope your 18 FEb party went well . As I type this - a glass of wine to you!

-
Thanks Roadking. A bit of encouragement is always welcome.
JOSE - a photo of your bitts would be very helpful.
I am now off for a week to play some moderately bad golf on some beautiful courses on the far south coast of New South Wales. The rigging can go hang itself in themeantime.
")
-
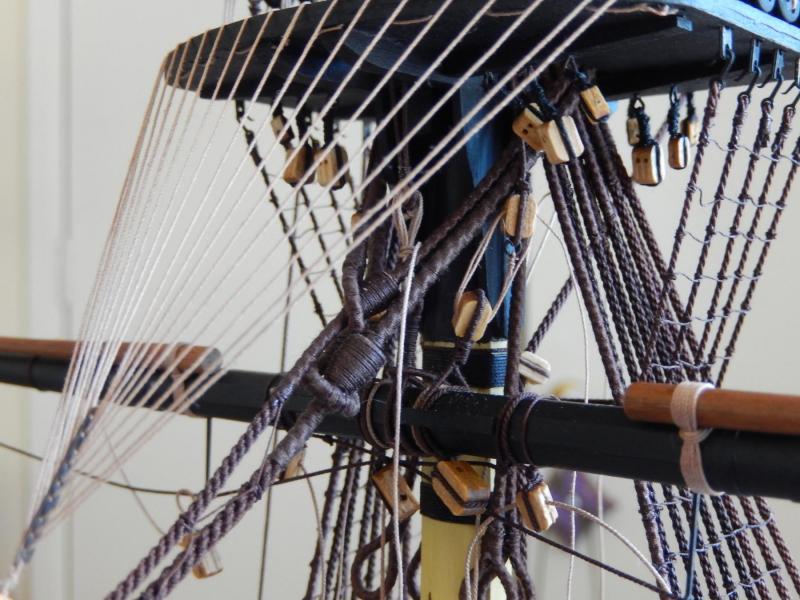
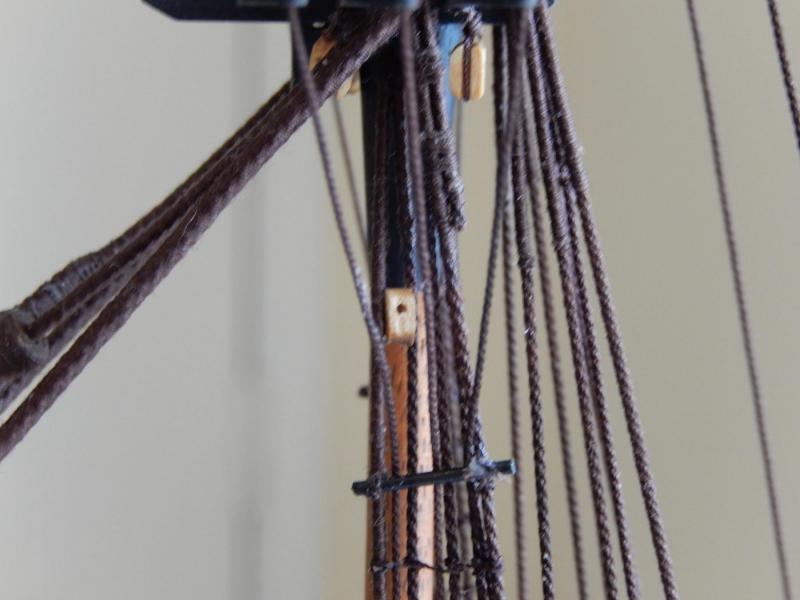
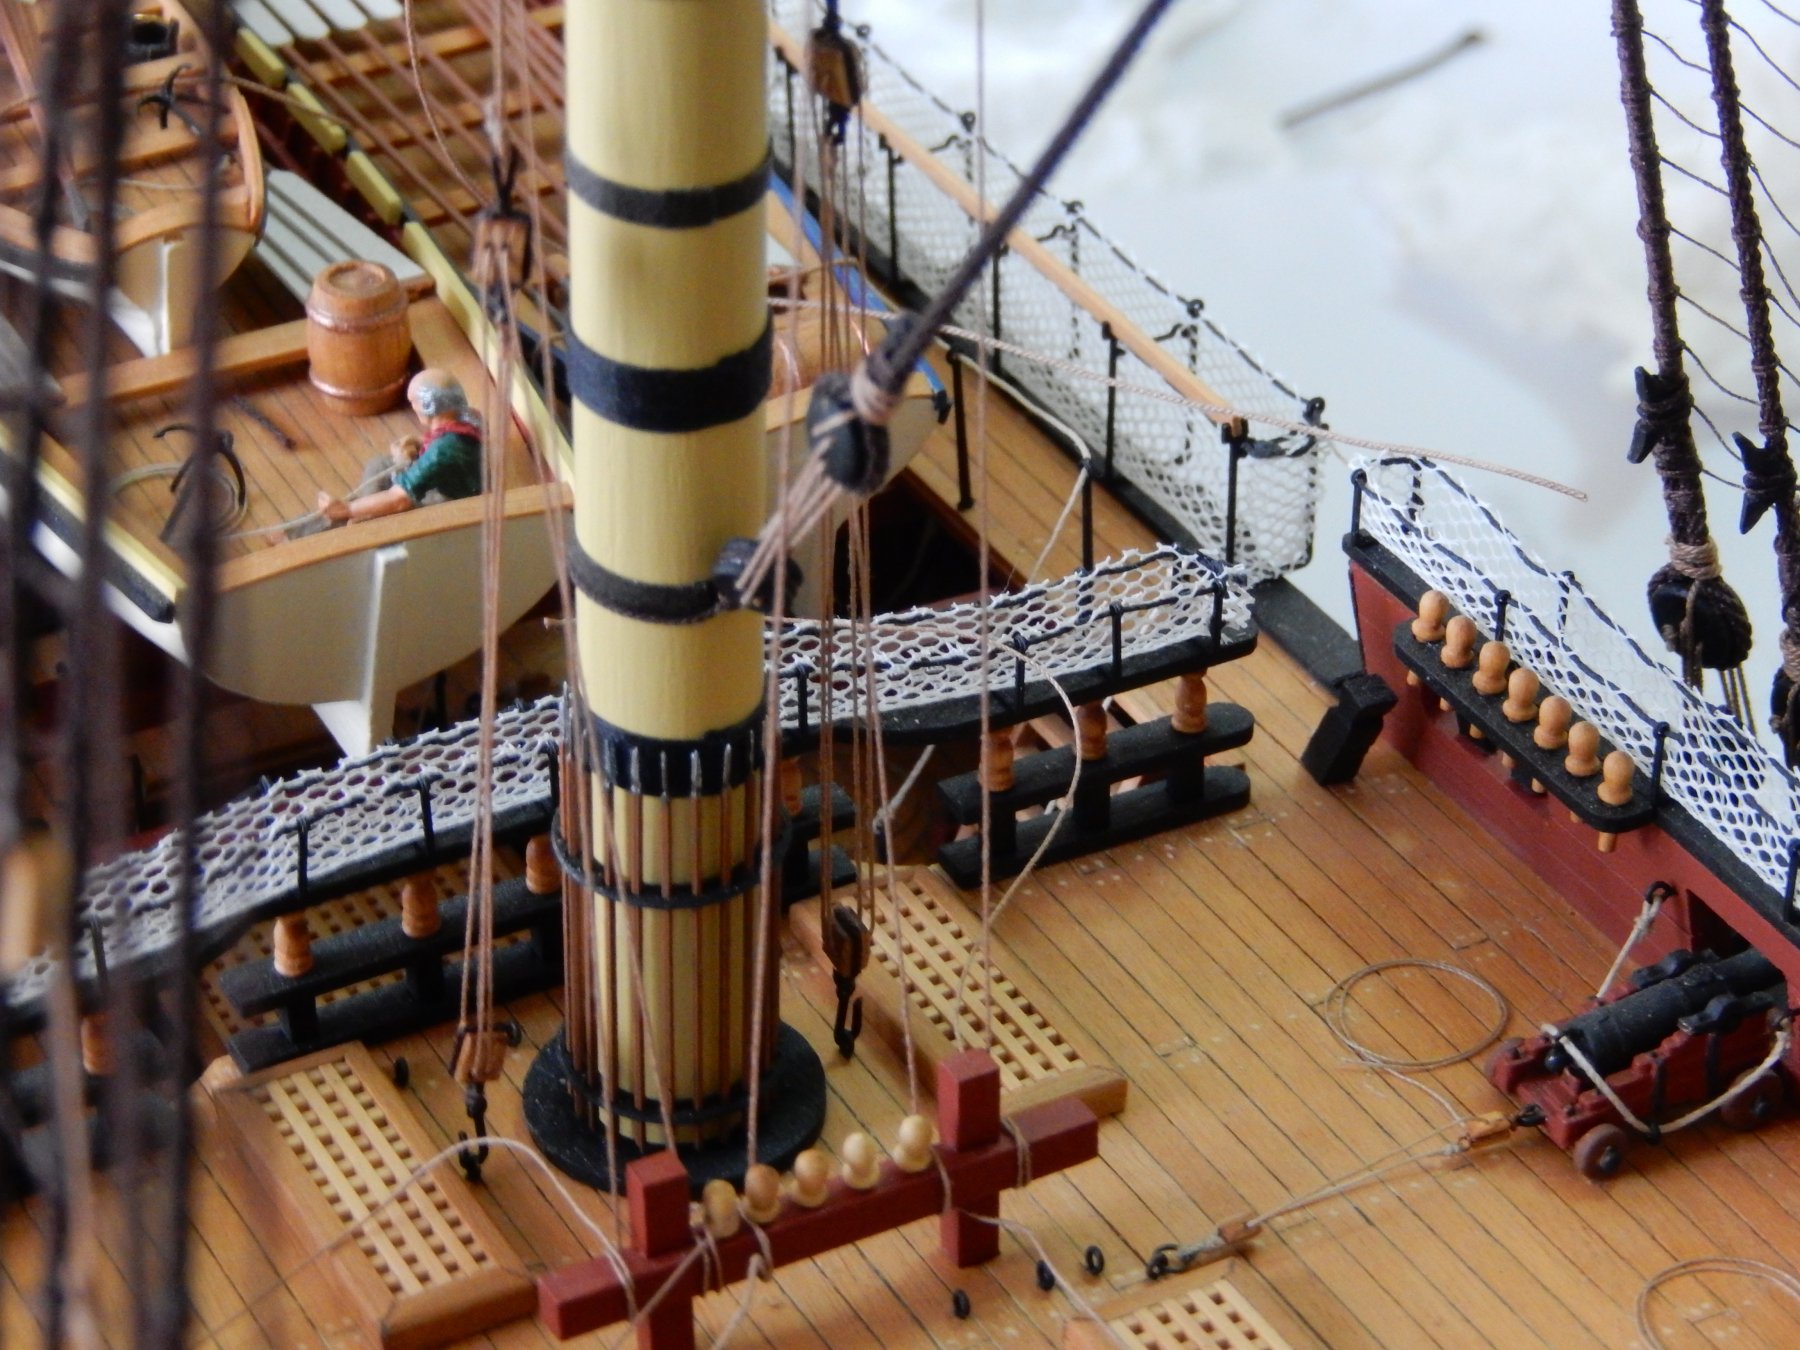
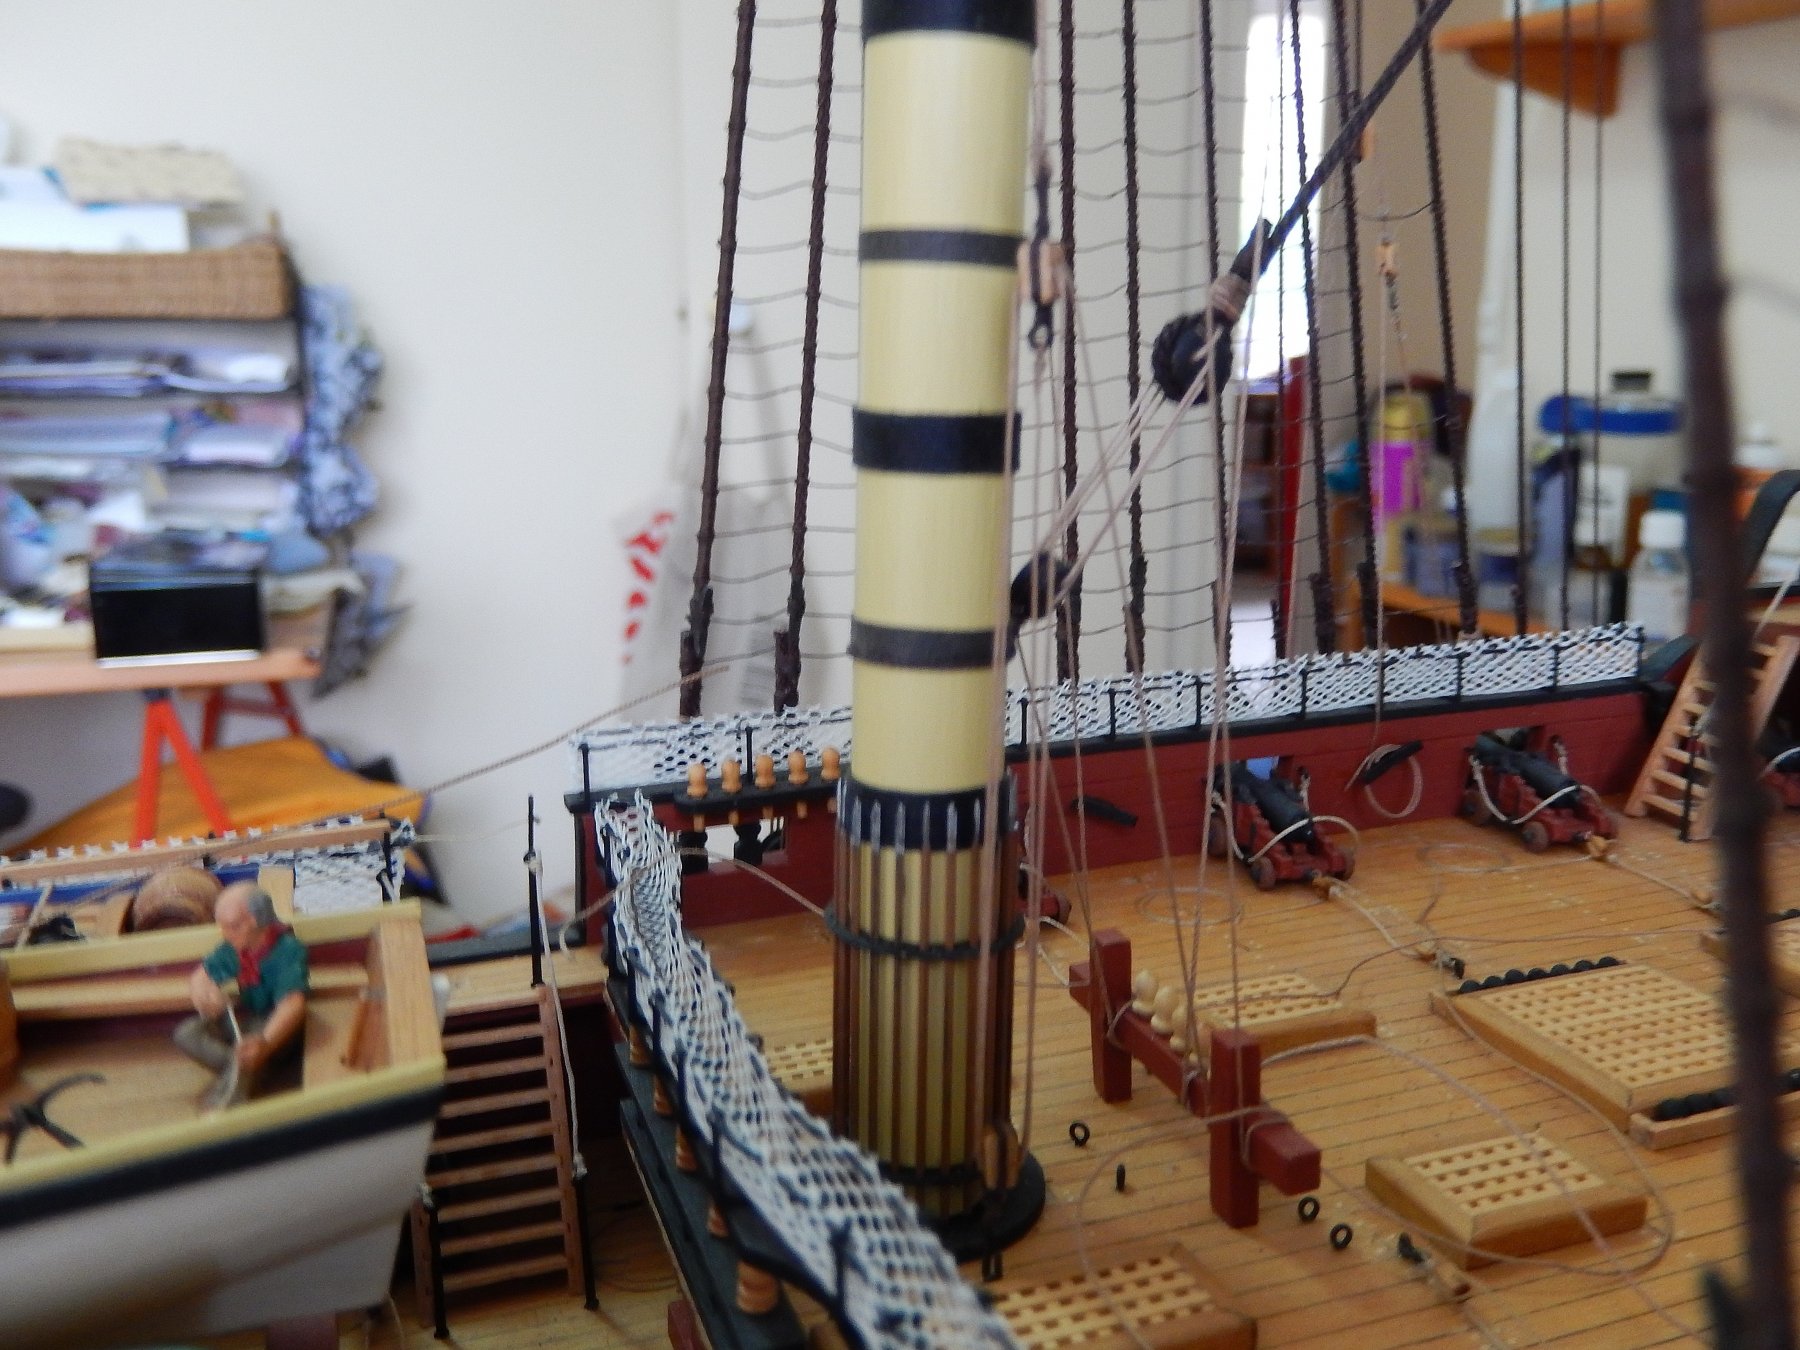
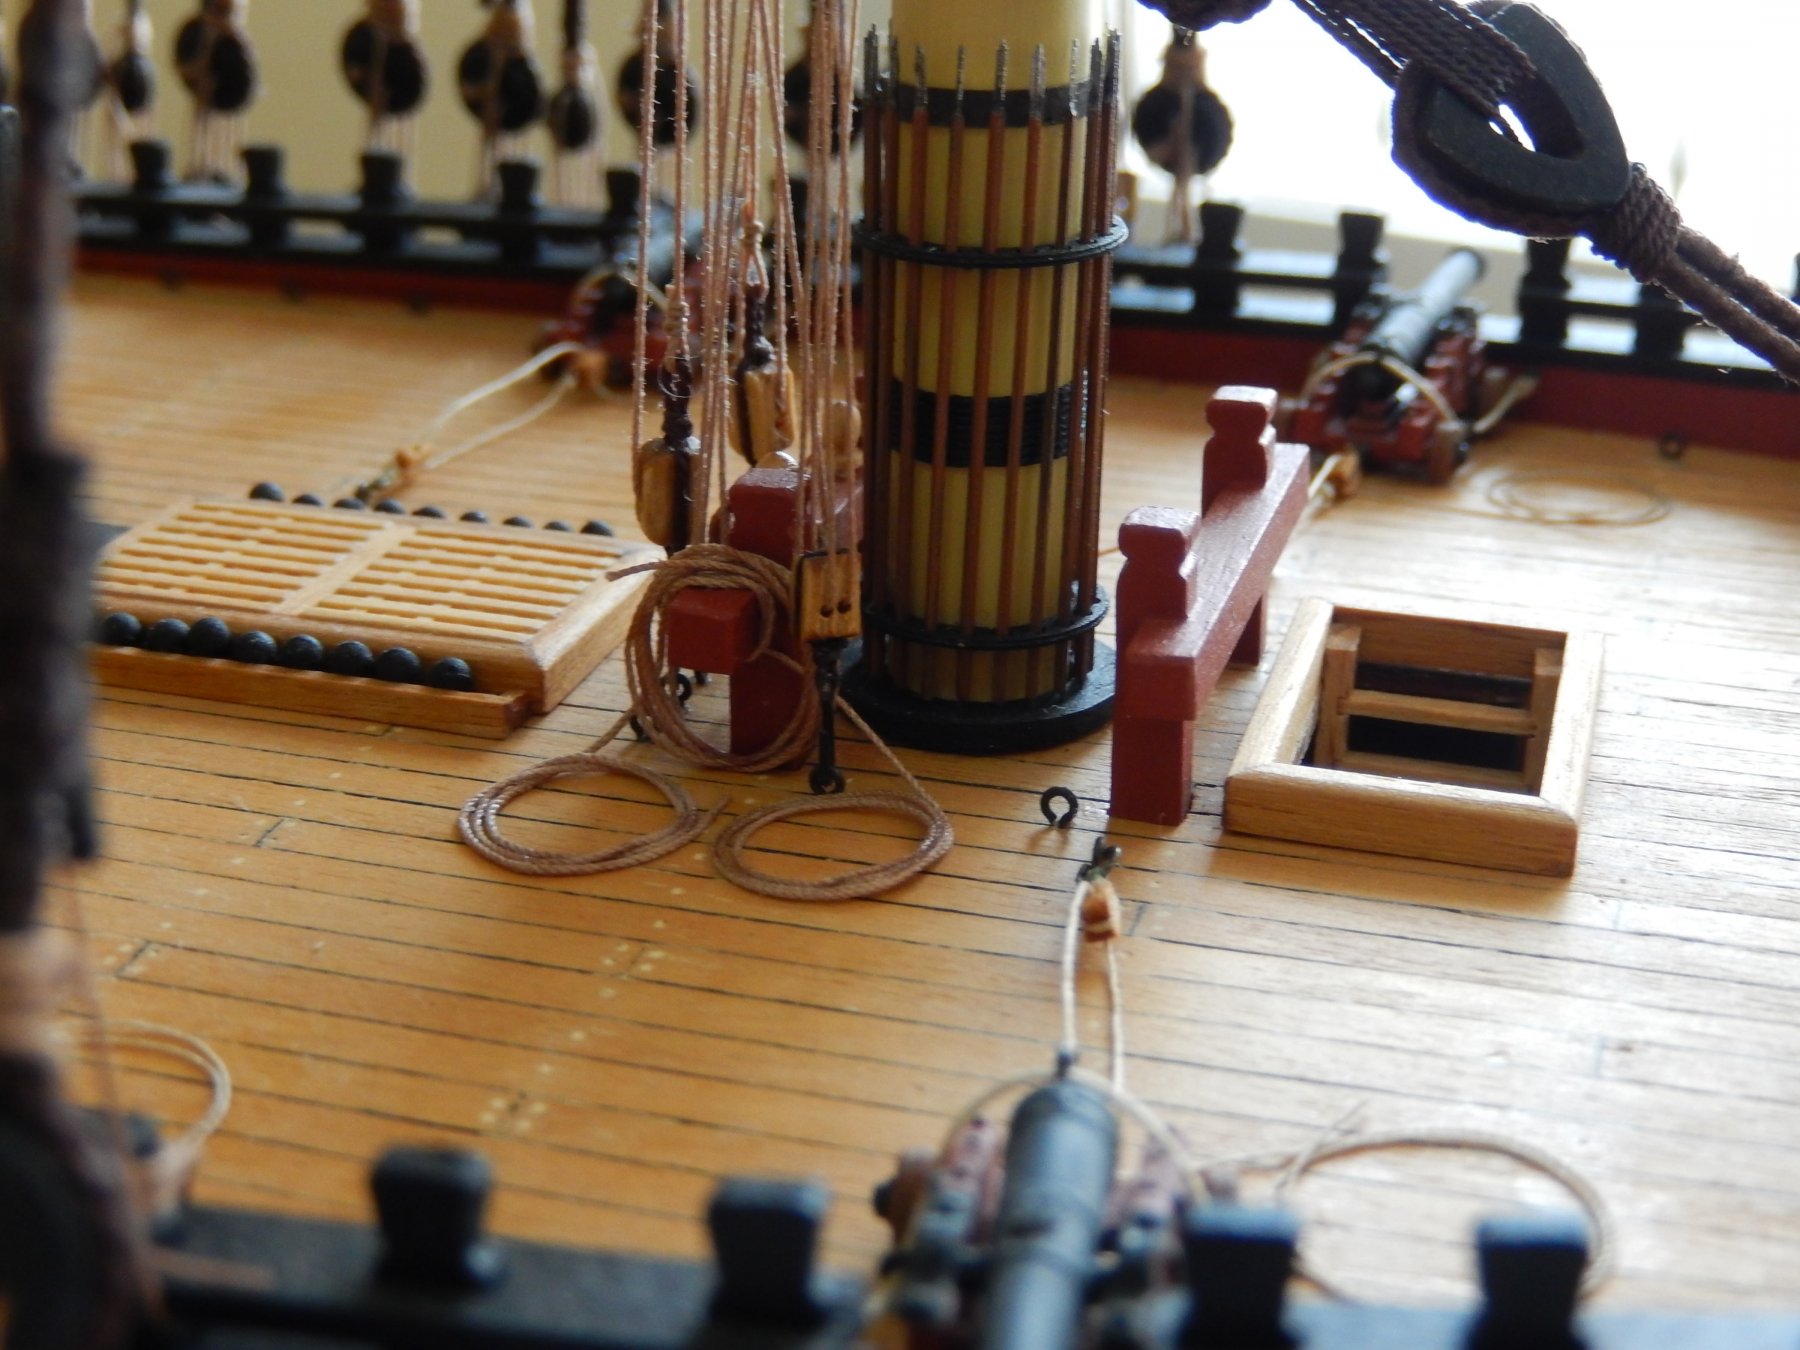
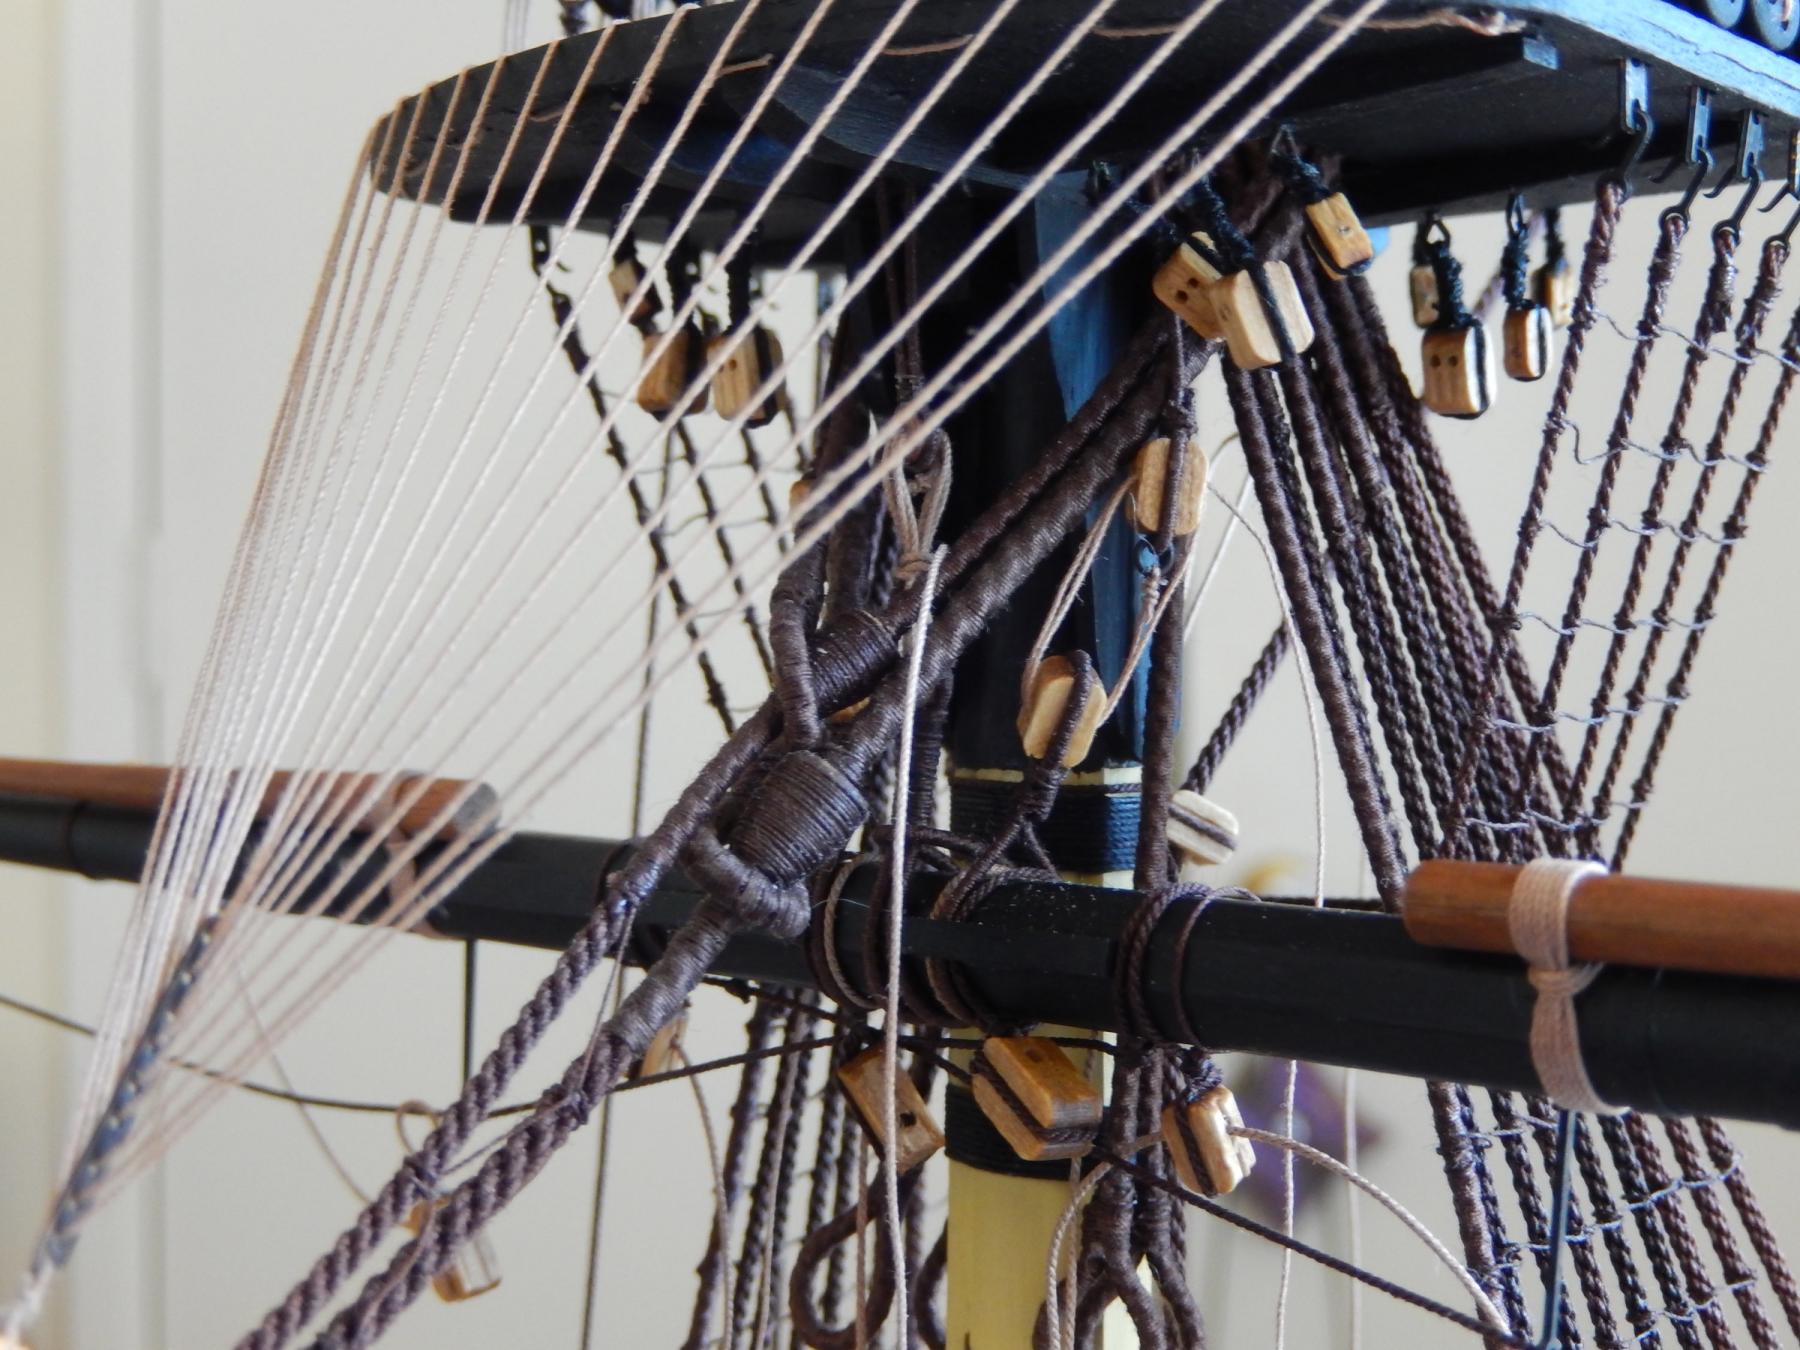
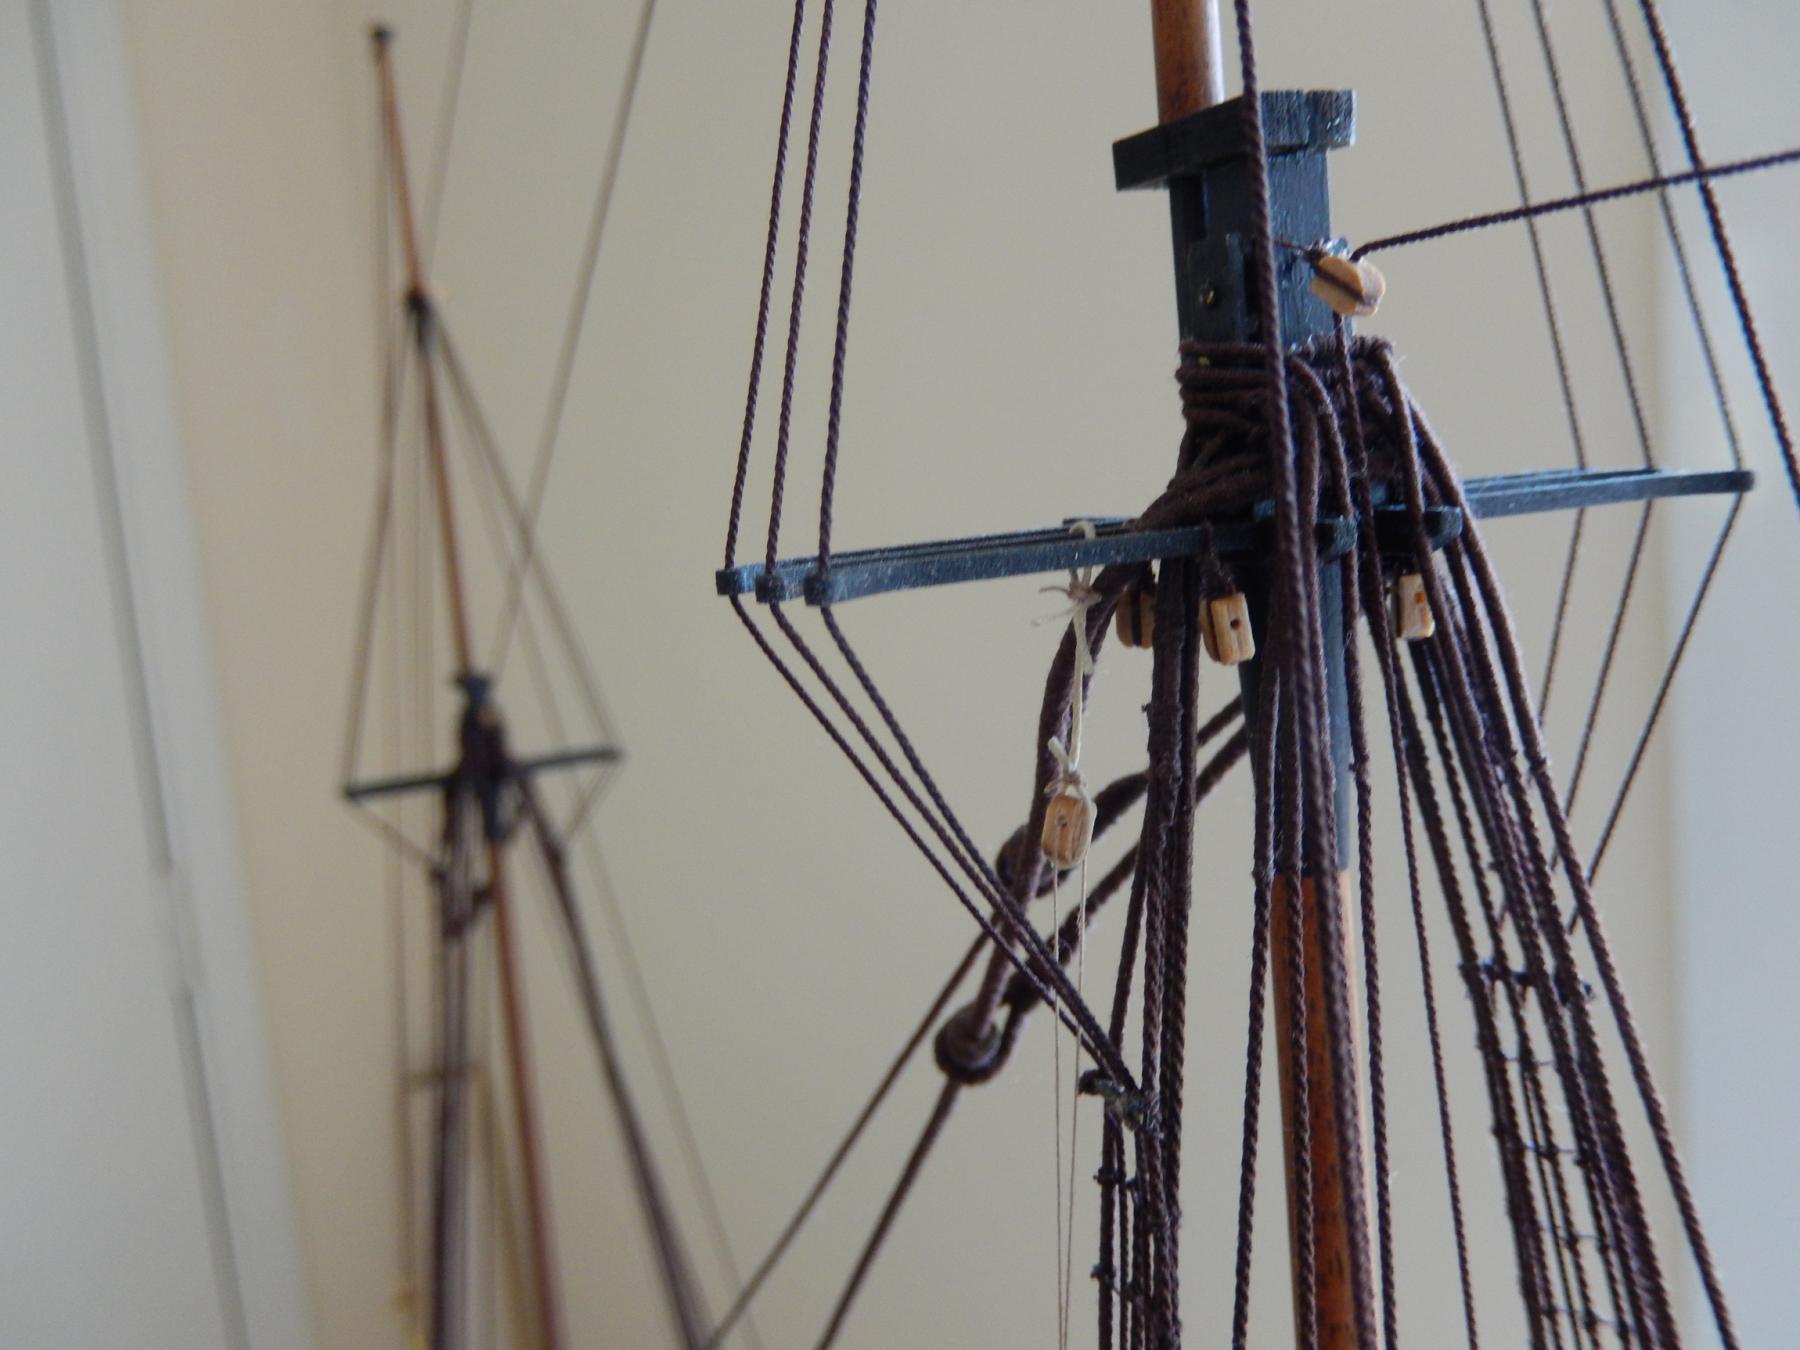
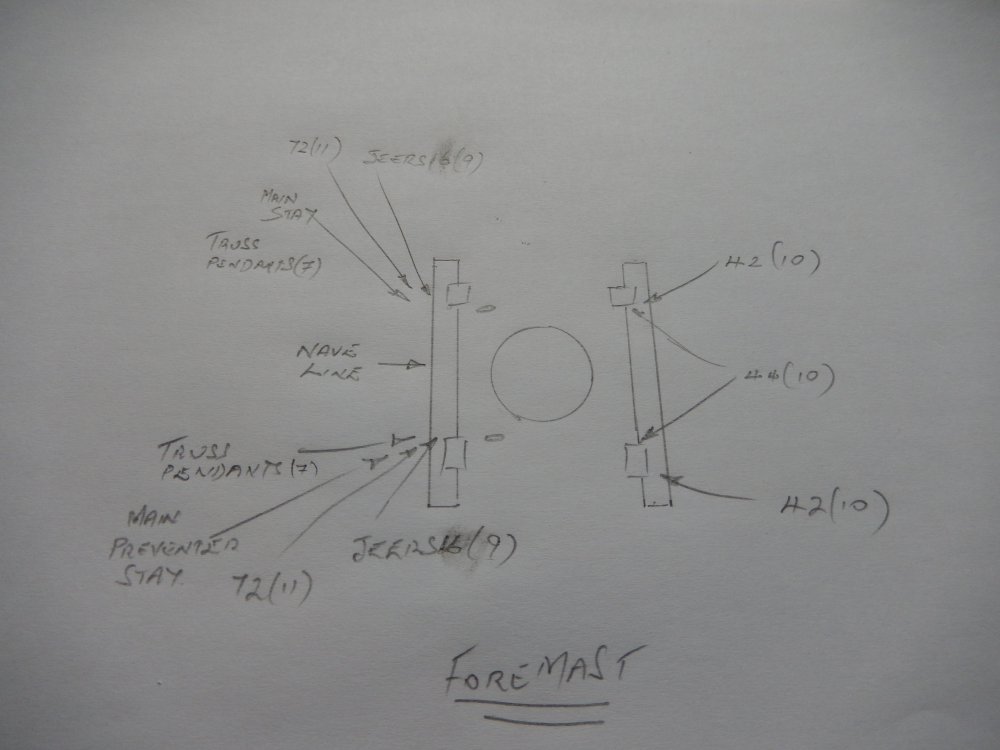 I am now belaying some of the rigging to the bitts at the foot of the foremast. I have done and undone various lines a number of times. It occurred to me that there is a problem if the various lines are belayed piecemeal without an idea of just how many lines have to be done, and in what order it is best to do them. In the case of the foremast bitts, they are very crowded indeed. The belaying points shown in the plans are spread over 4 sheets.
The following drawing gives an idea of just how crowded they are, and, I hope, how best to plan the belaying. The belaying points are shown numbered, and the plan numbers are shown in parenthesis. This may help some other poor souls who share my frustration.

-
I wish now that I had used his blocks. I don't think they were available when I started. His thread is certainly better than the kit thread - not all that expensive, but the postage to Oz is a bit fierce.
-
-
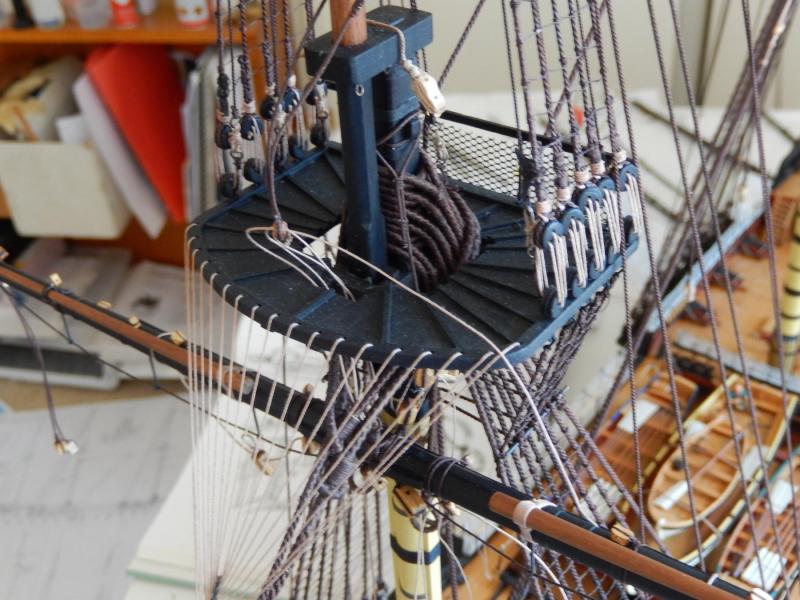
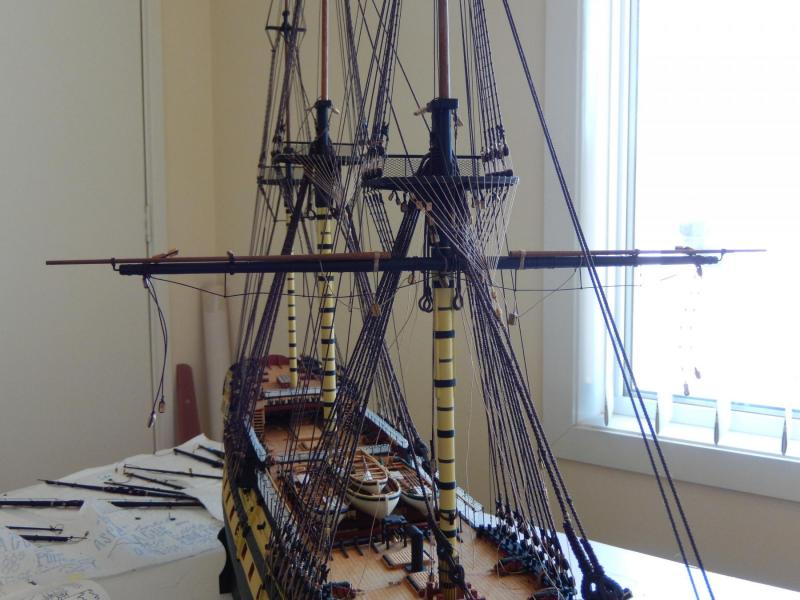
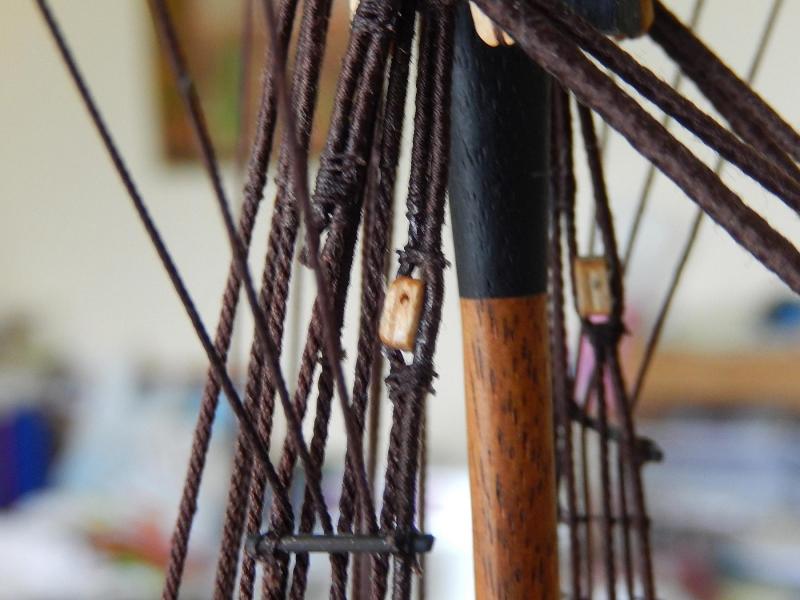
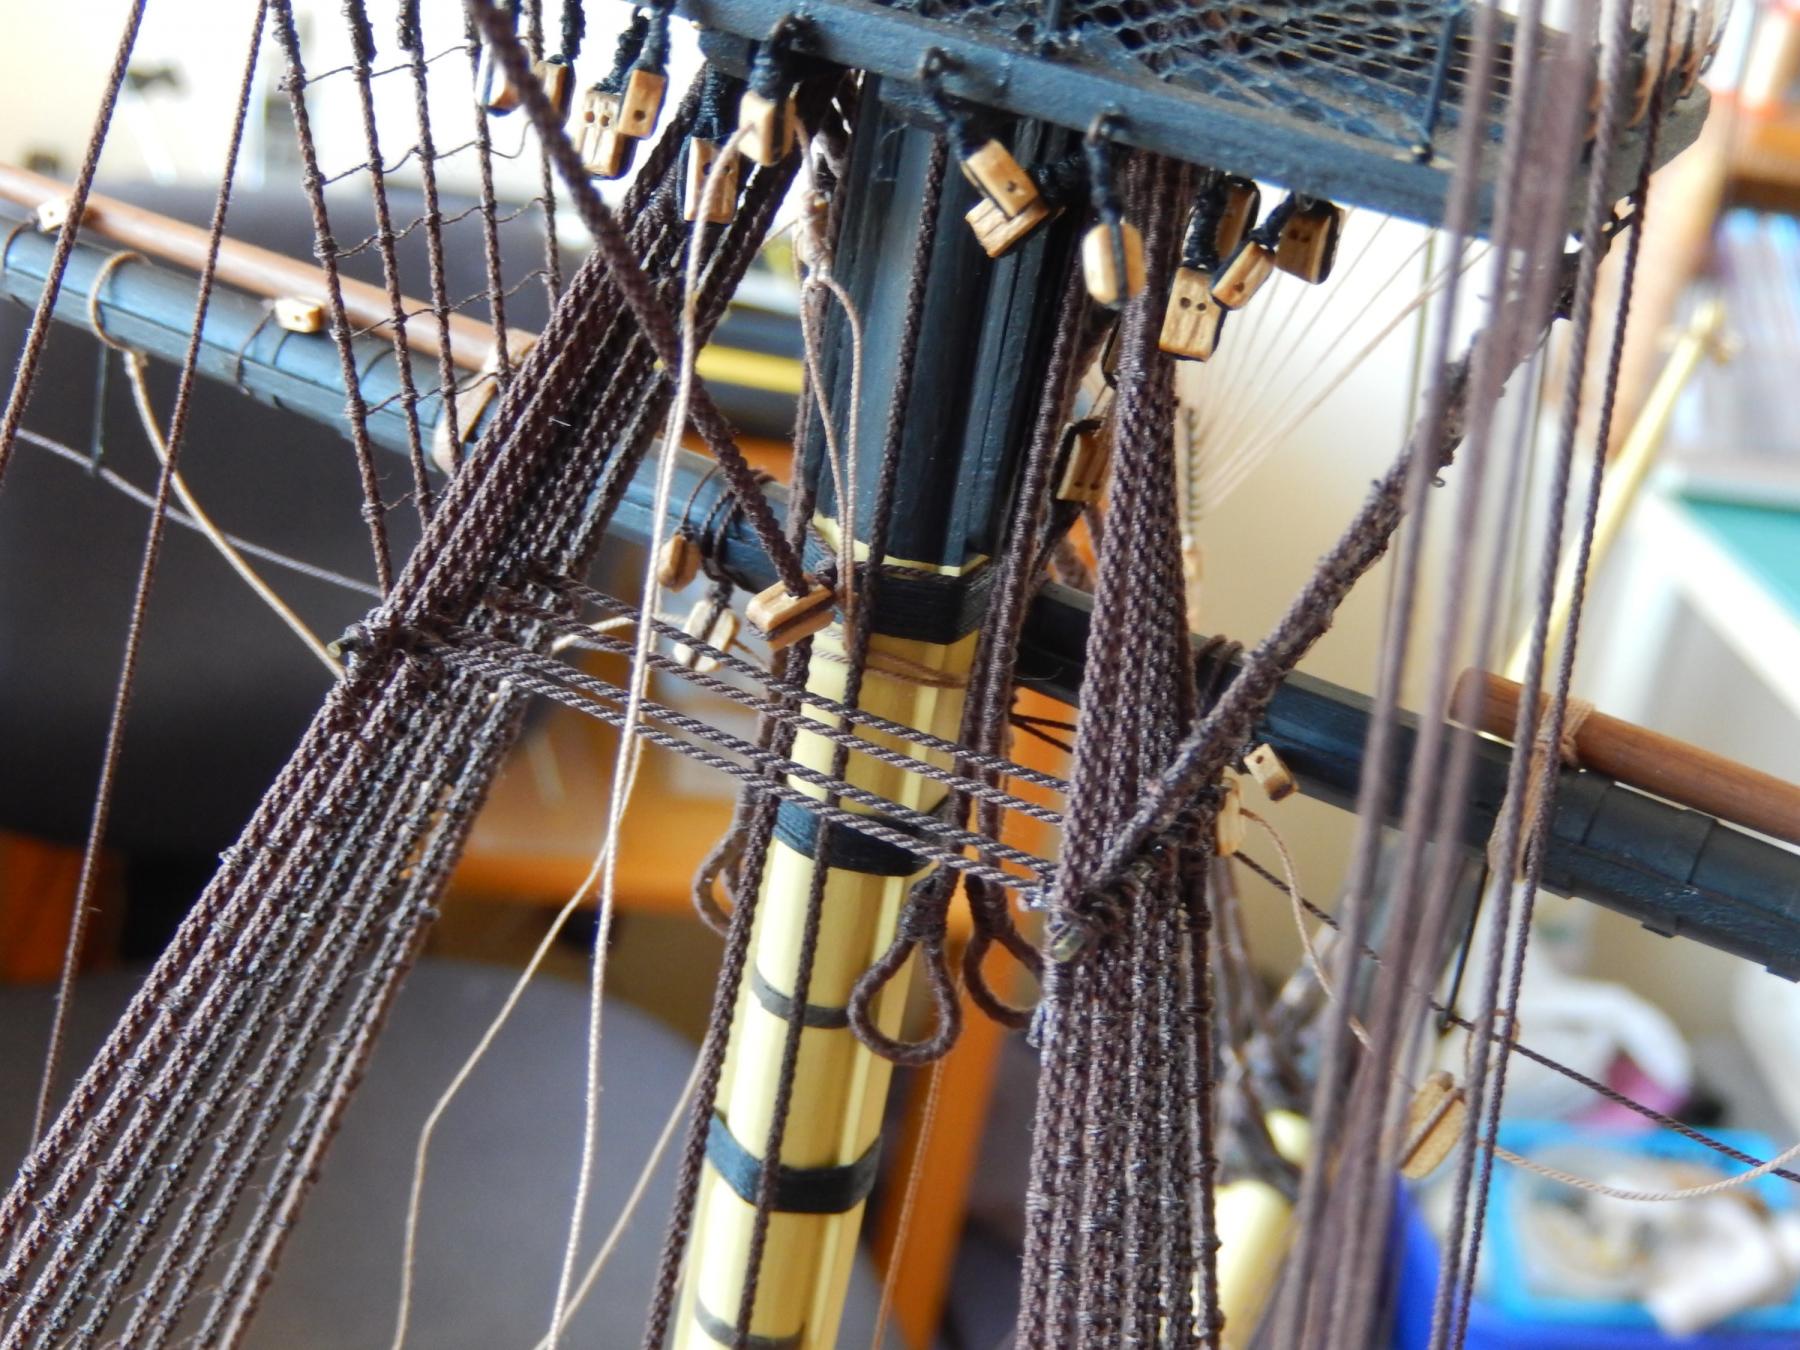
The foreyard has finally been hoisted. It was a rather fraught process. The jeers, sling, truss pendants and nave line are all done, though nothing has been finally tied off yet. At least I learned a lesson when some of the stays became slack in the hot weather.
Here are the jeers in prgress. I found it best to gradually raise the yard by about 10mm then tighten the lines to the blocks then repeat the process until the yard was at the correct height. It took quite some time.
Here is the start ....
...and about halfway up.

Rigging the sling was a bit fiddly. I lifted the sling to give easier access, tied the thread to the upper thimble, then down to the lower thimble, then repeated the process (make sure the thread is long).
(I changed the 'tarred' thread for natural)
Finished, though not tied off.
Here is the nave line. I'm not sure the result was worth all the trouble, though I am glad now that it's there. All the rigging surrounding it made the whole thing a rather fraught process.


This what the yard now looks like -since taking these photos I have made the footropes to hang properly.
-
Thanks Jason. In the last couple of weeks or so, it's been one step forward, two steps back.
-
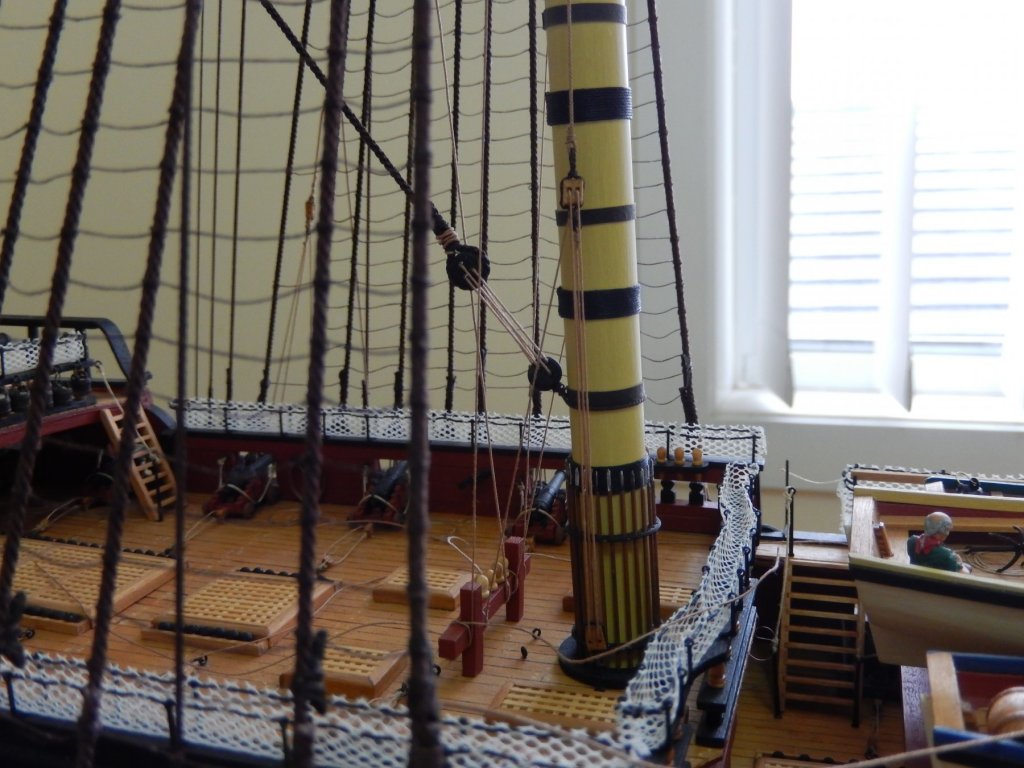
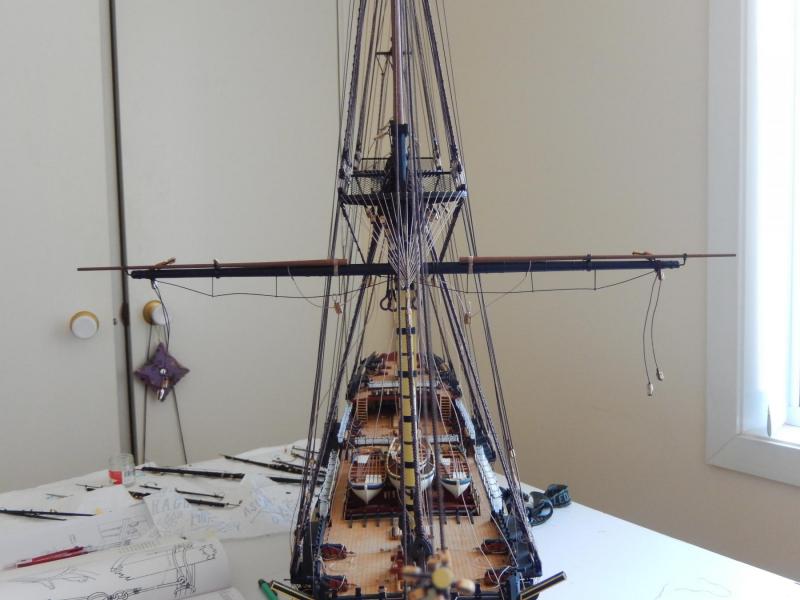
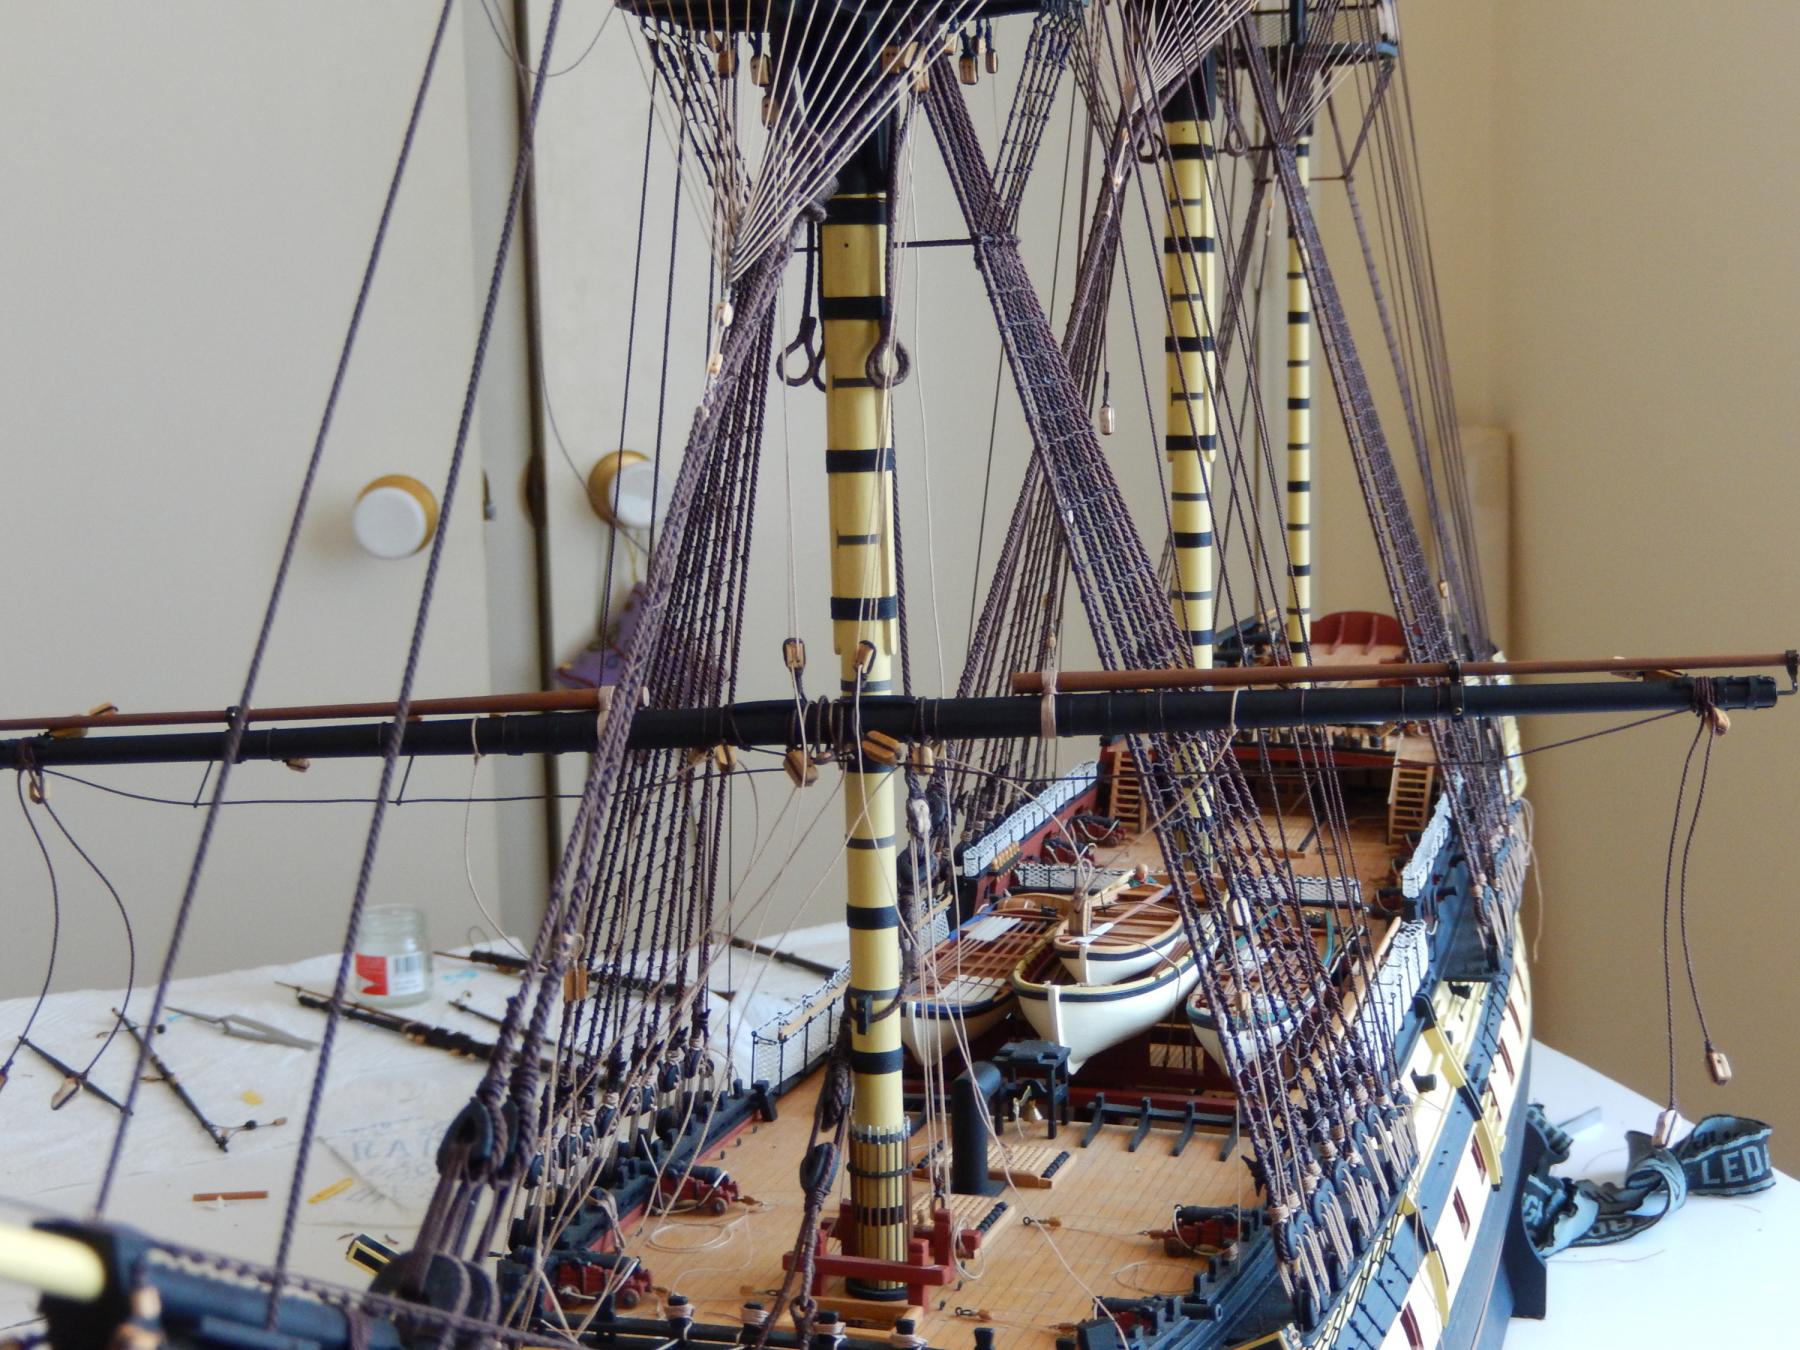
The royal backstays are now fitted, and after the hot weather, most of the stays have been re-tensioned. Fortunately I had not finally made off the culprits, so that rather than being a small disaster, it was just a bit of a pain.
Here is he model with the standing rigging complete (I hope)

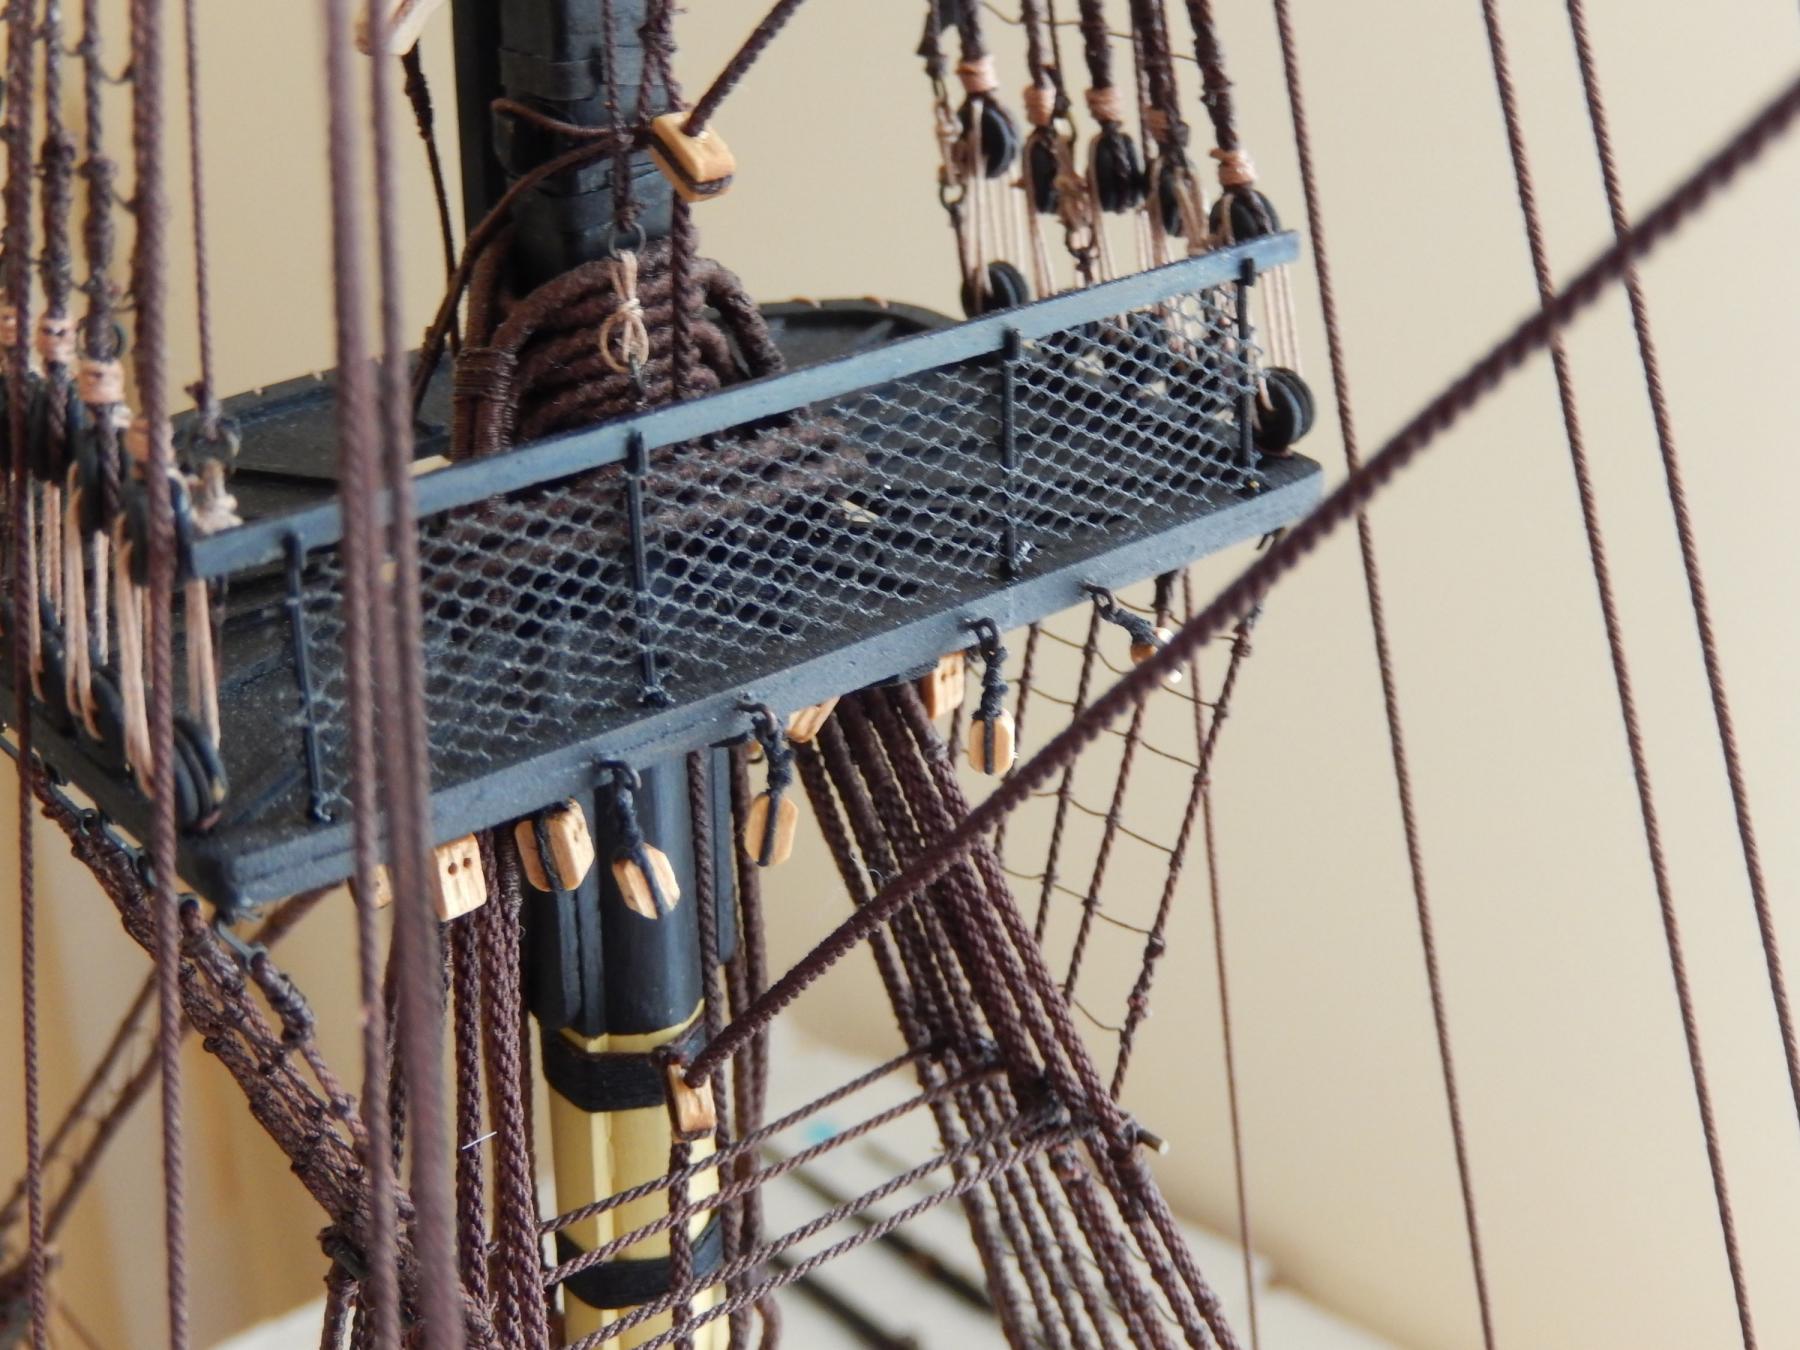
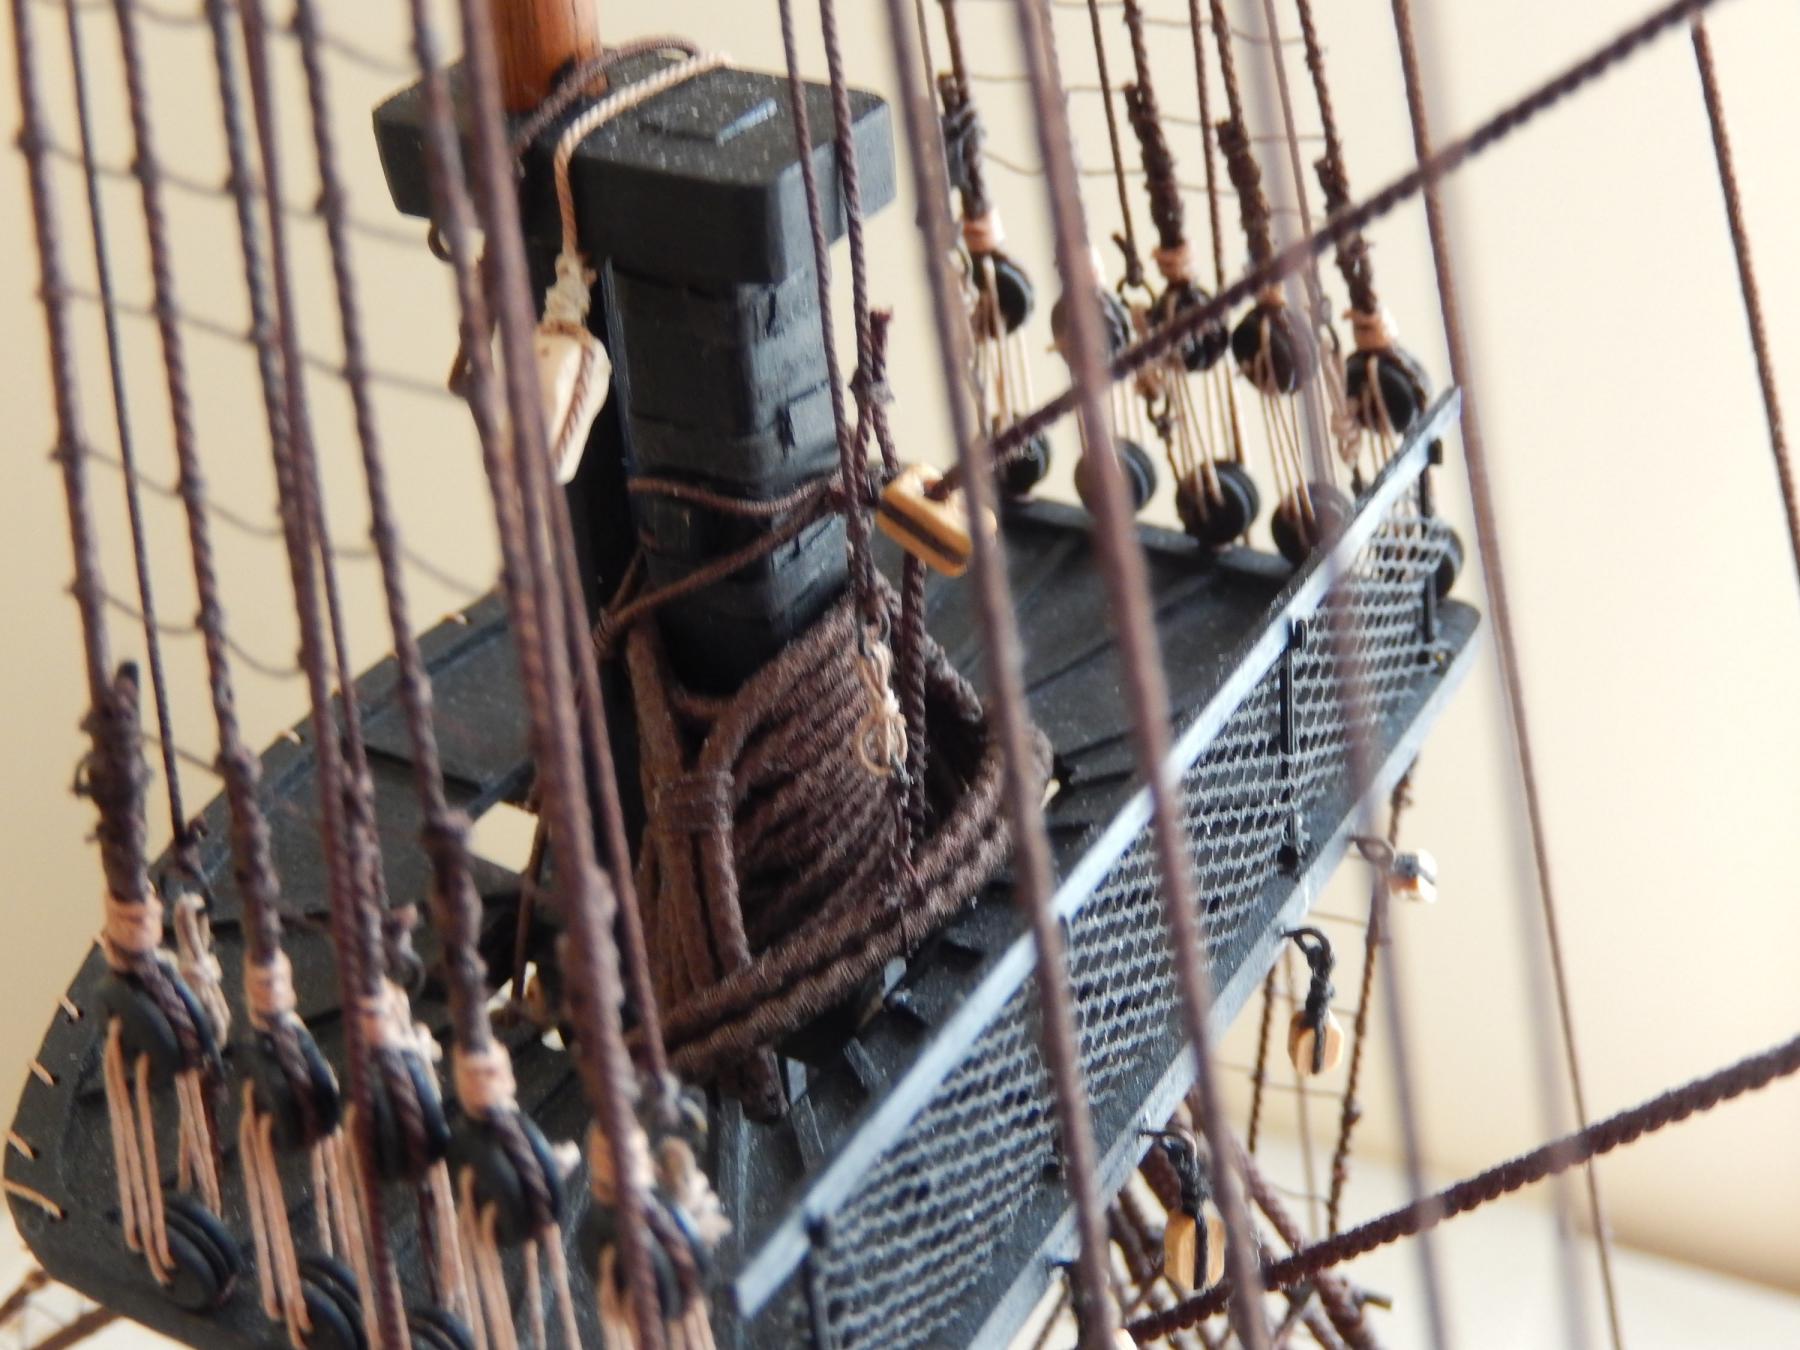
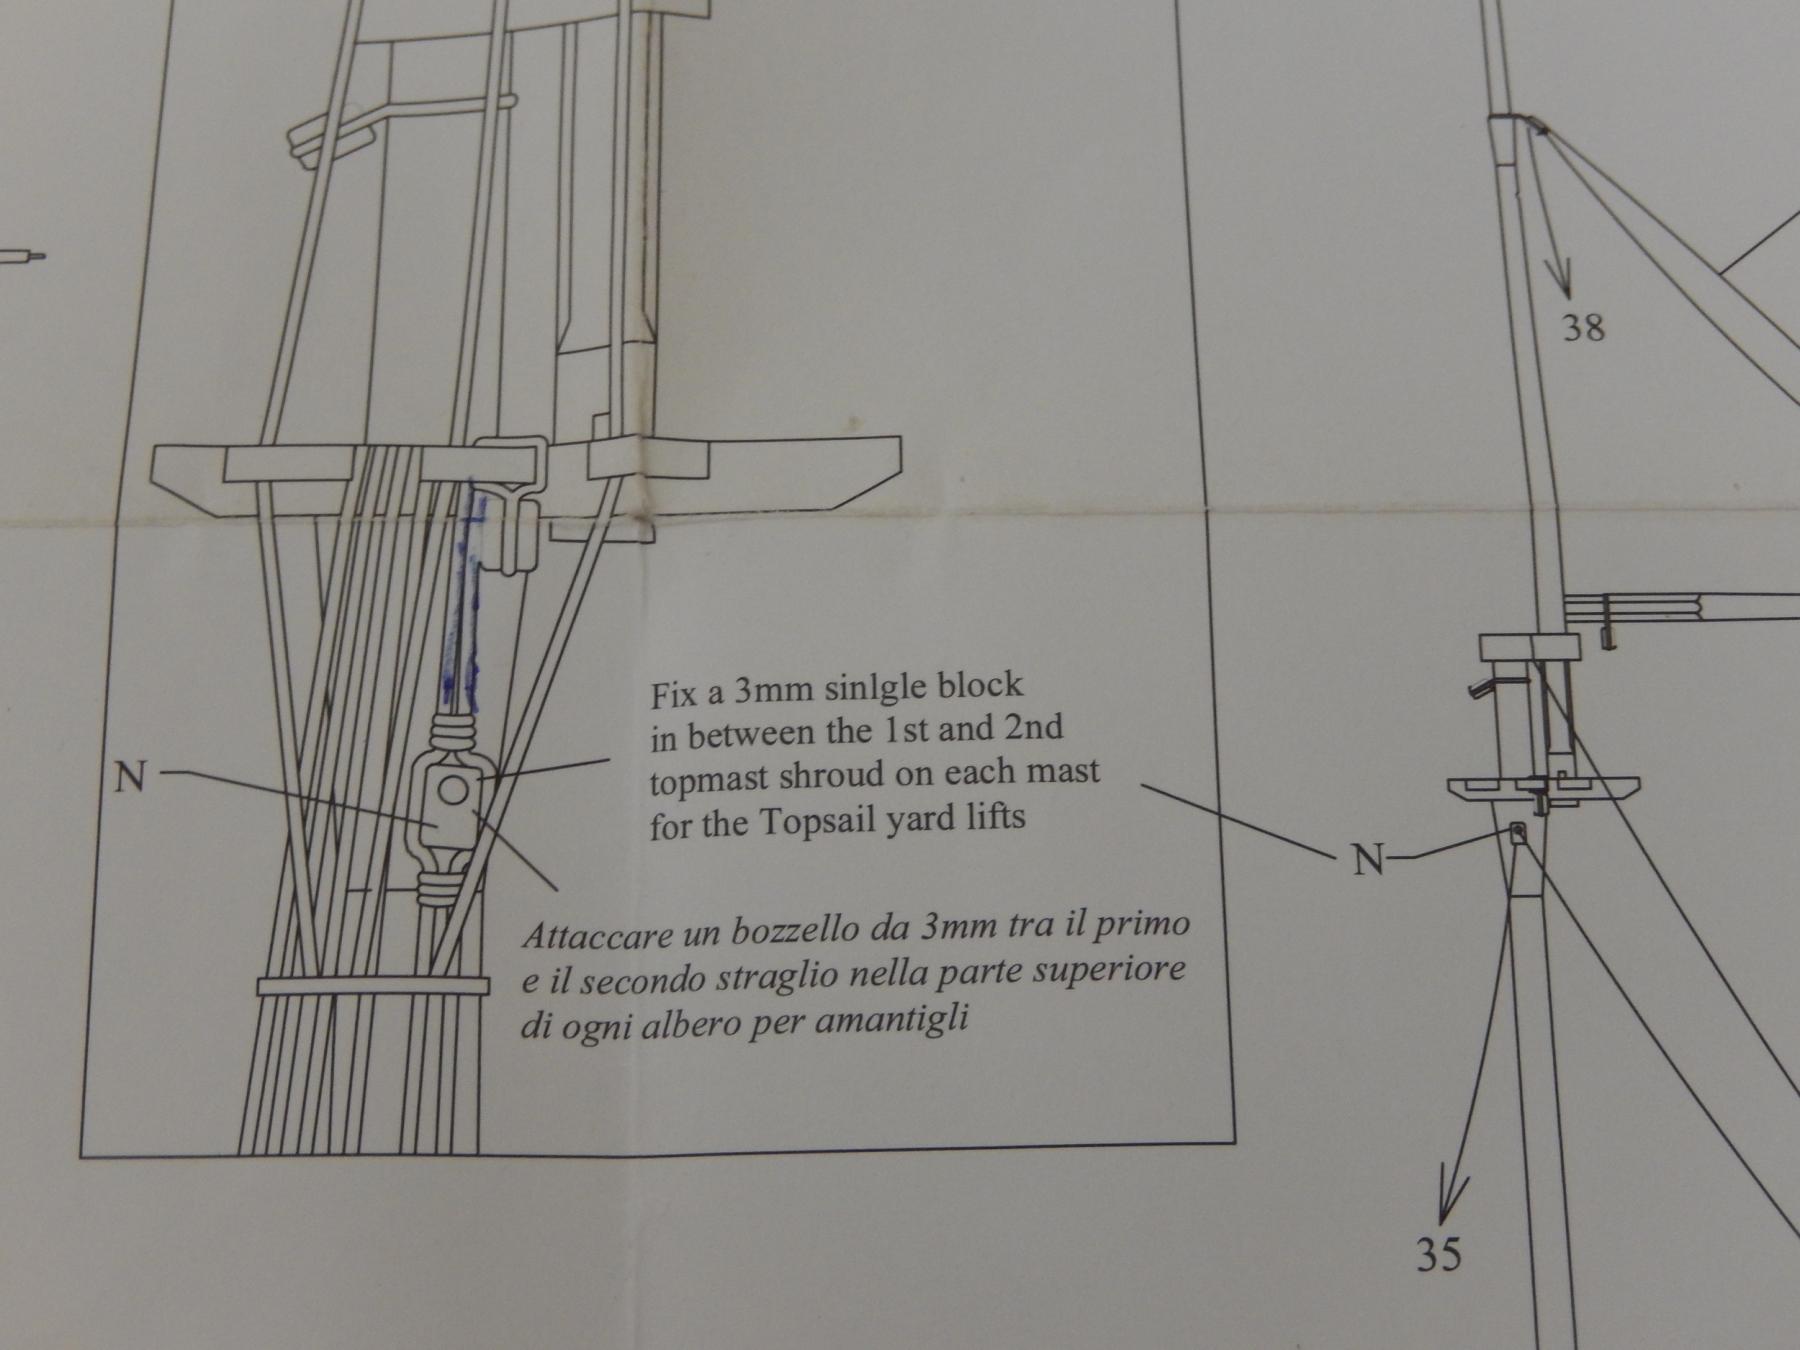
Fixing the blocks for the topsail yard lifts proved to be quite difficult. With so many lines it was hard to see where he thread was going and, moreover, there is little space to move. I found the fore and the mizzen quite difficult indeed. As well, that the shrouds had been served made them comparatively inflexible. The result has been just adequate despite a number of attempts. At least the lifts themselves should cover some of the shortcomings. Here is a sample.
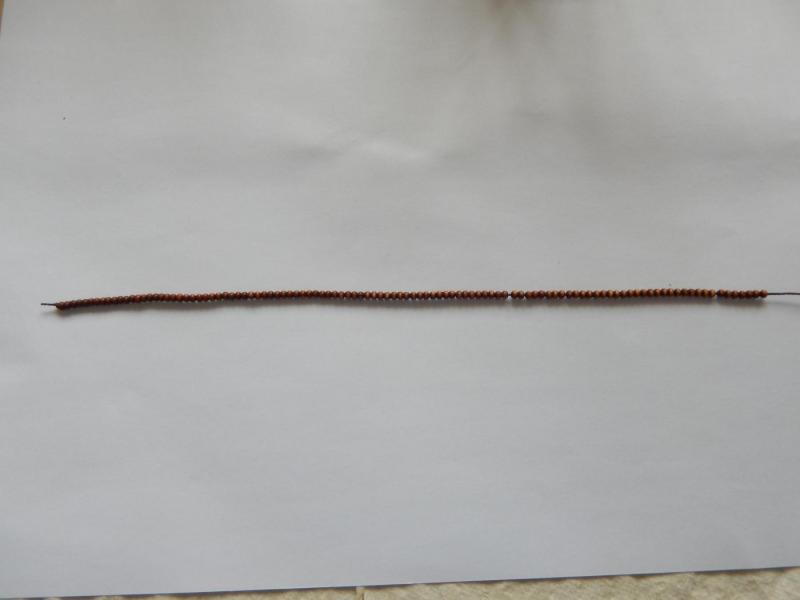
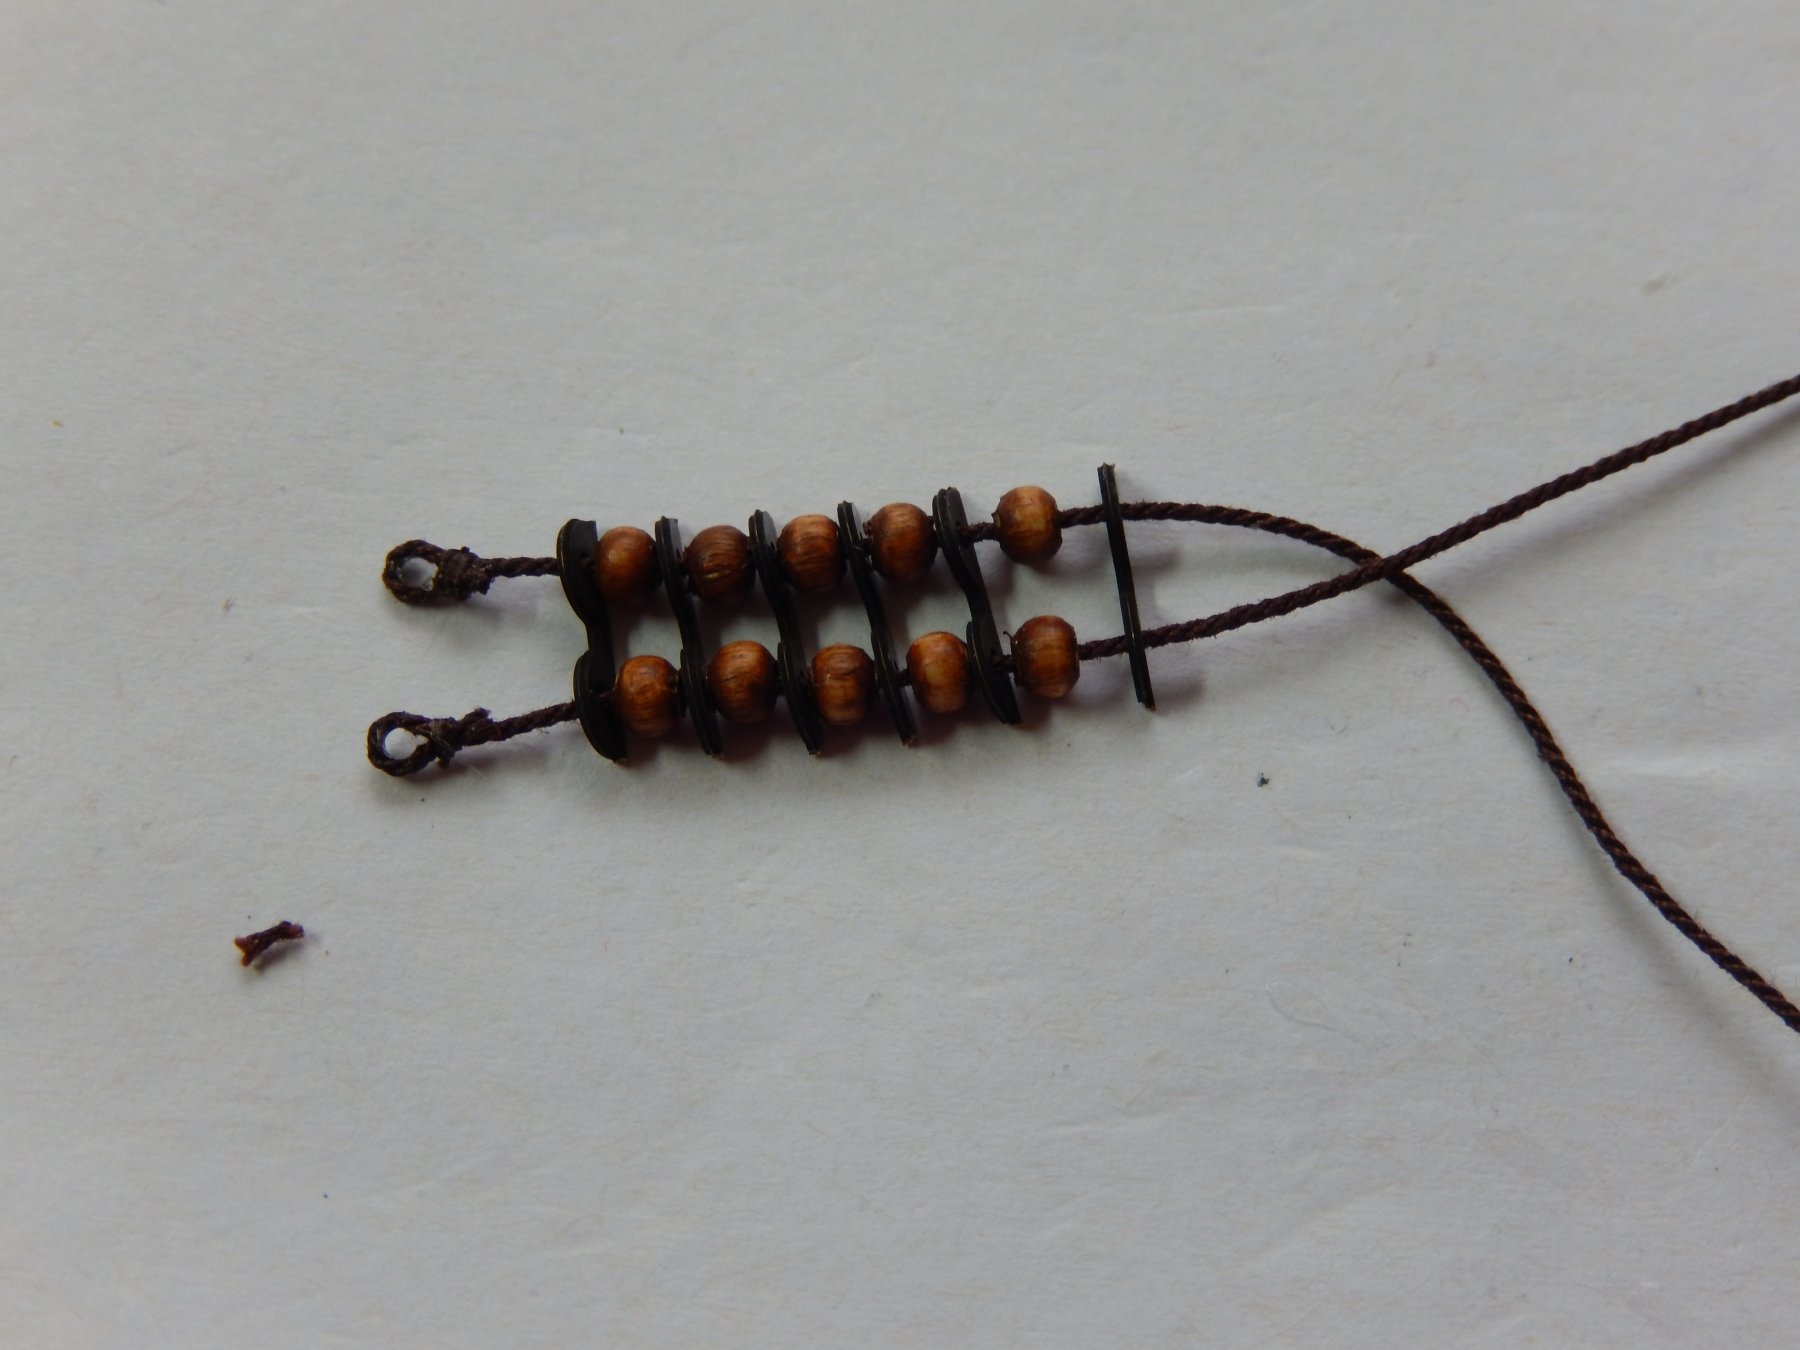
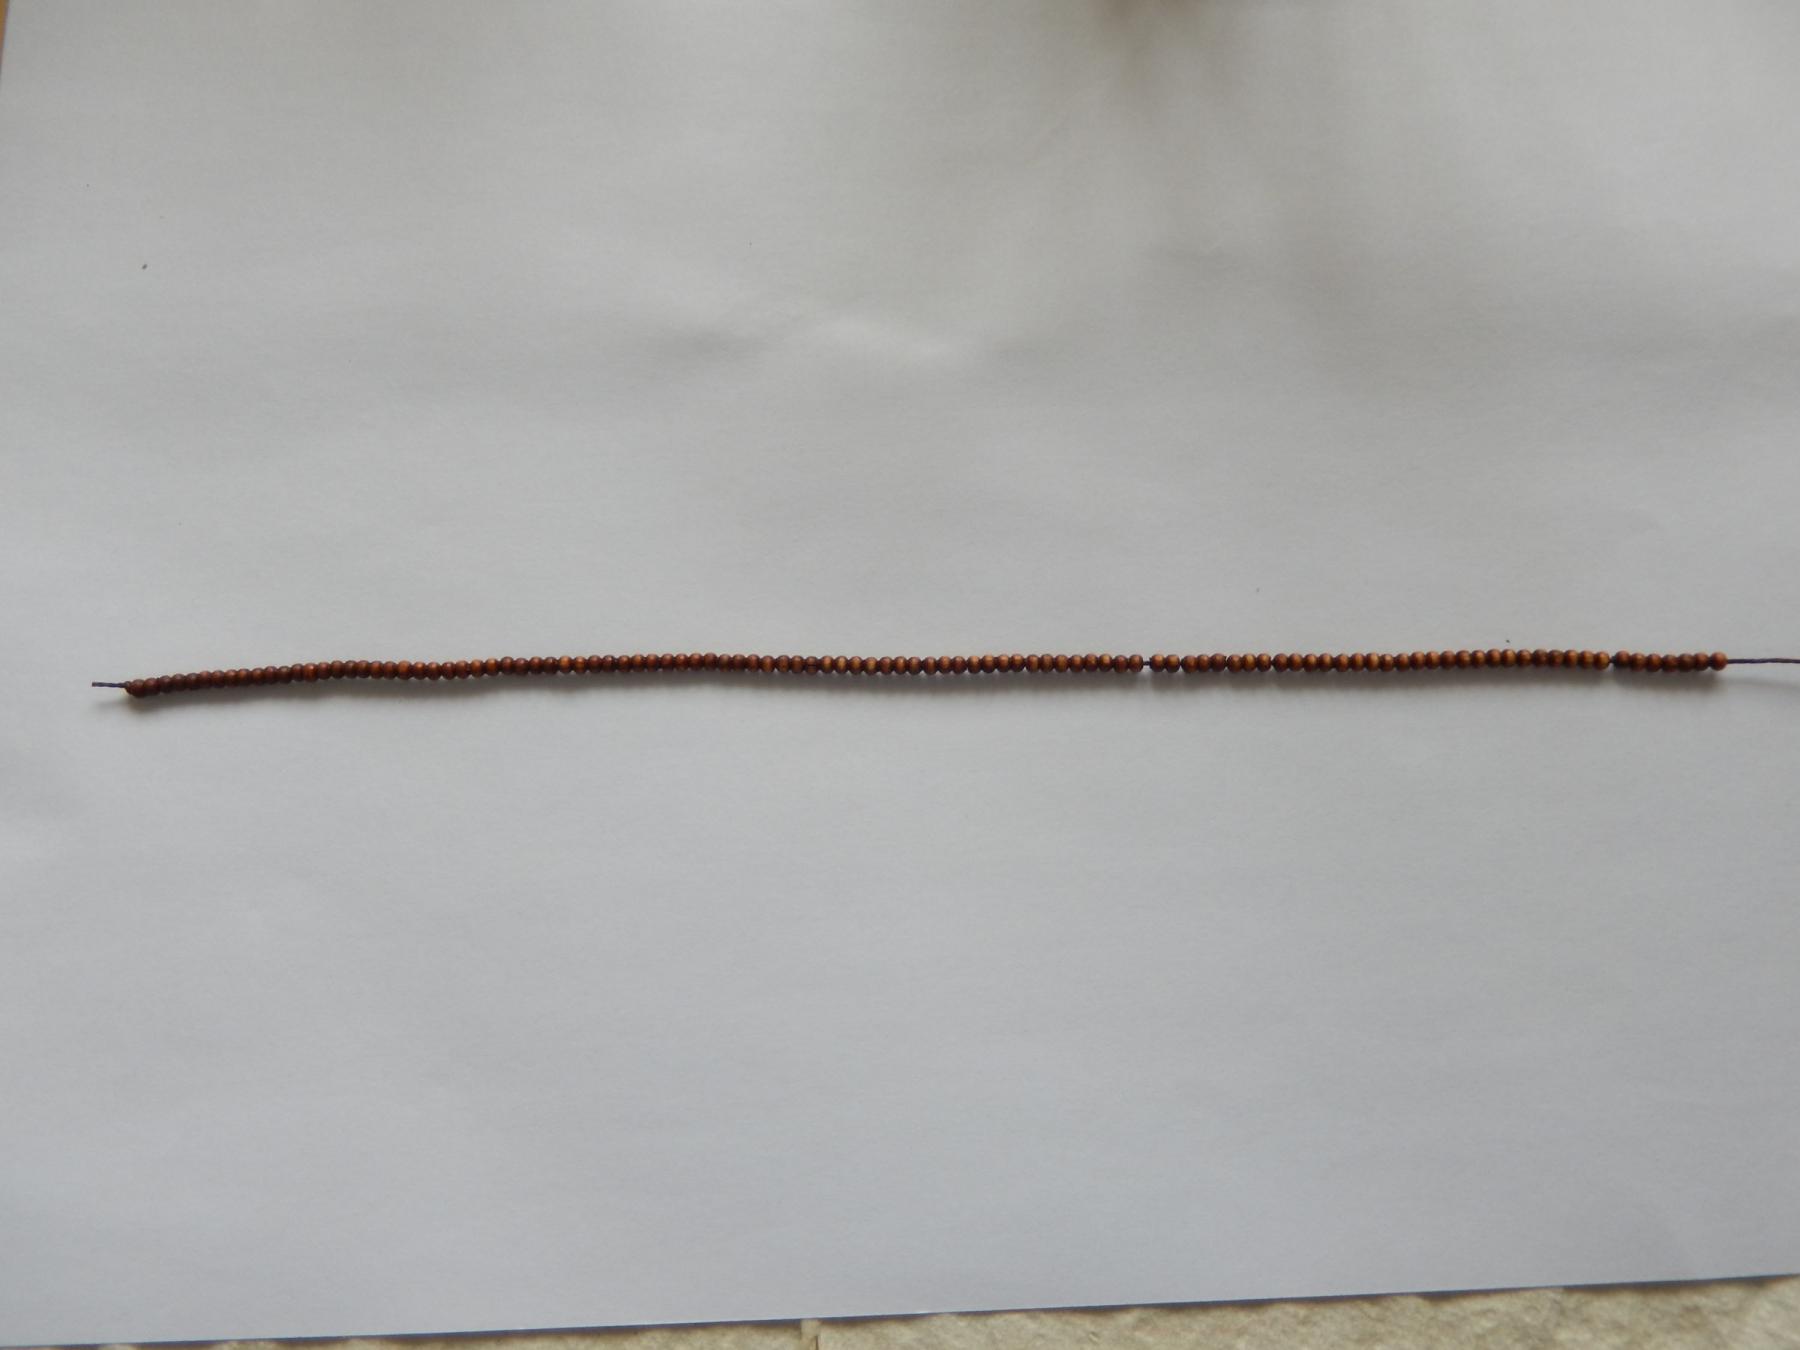
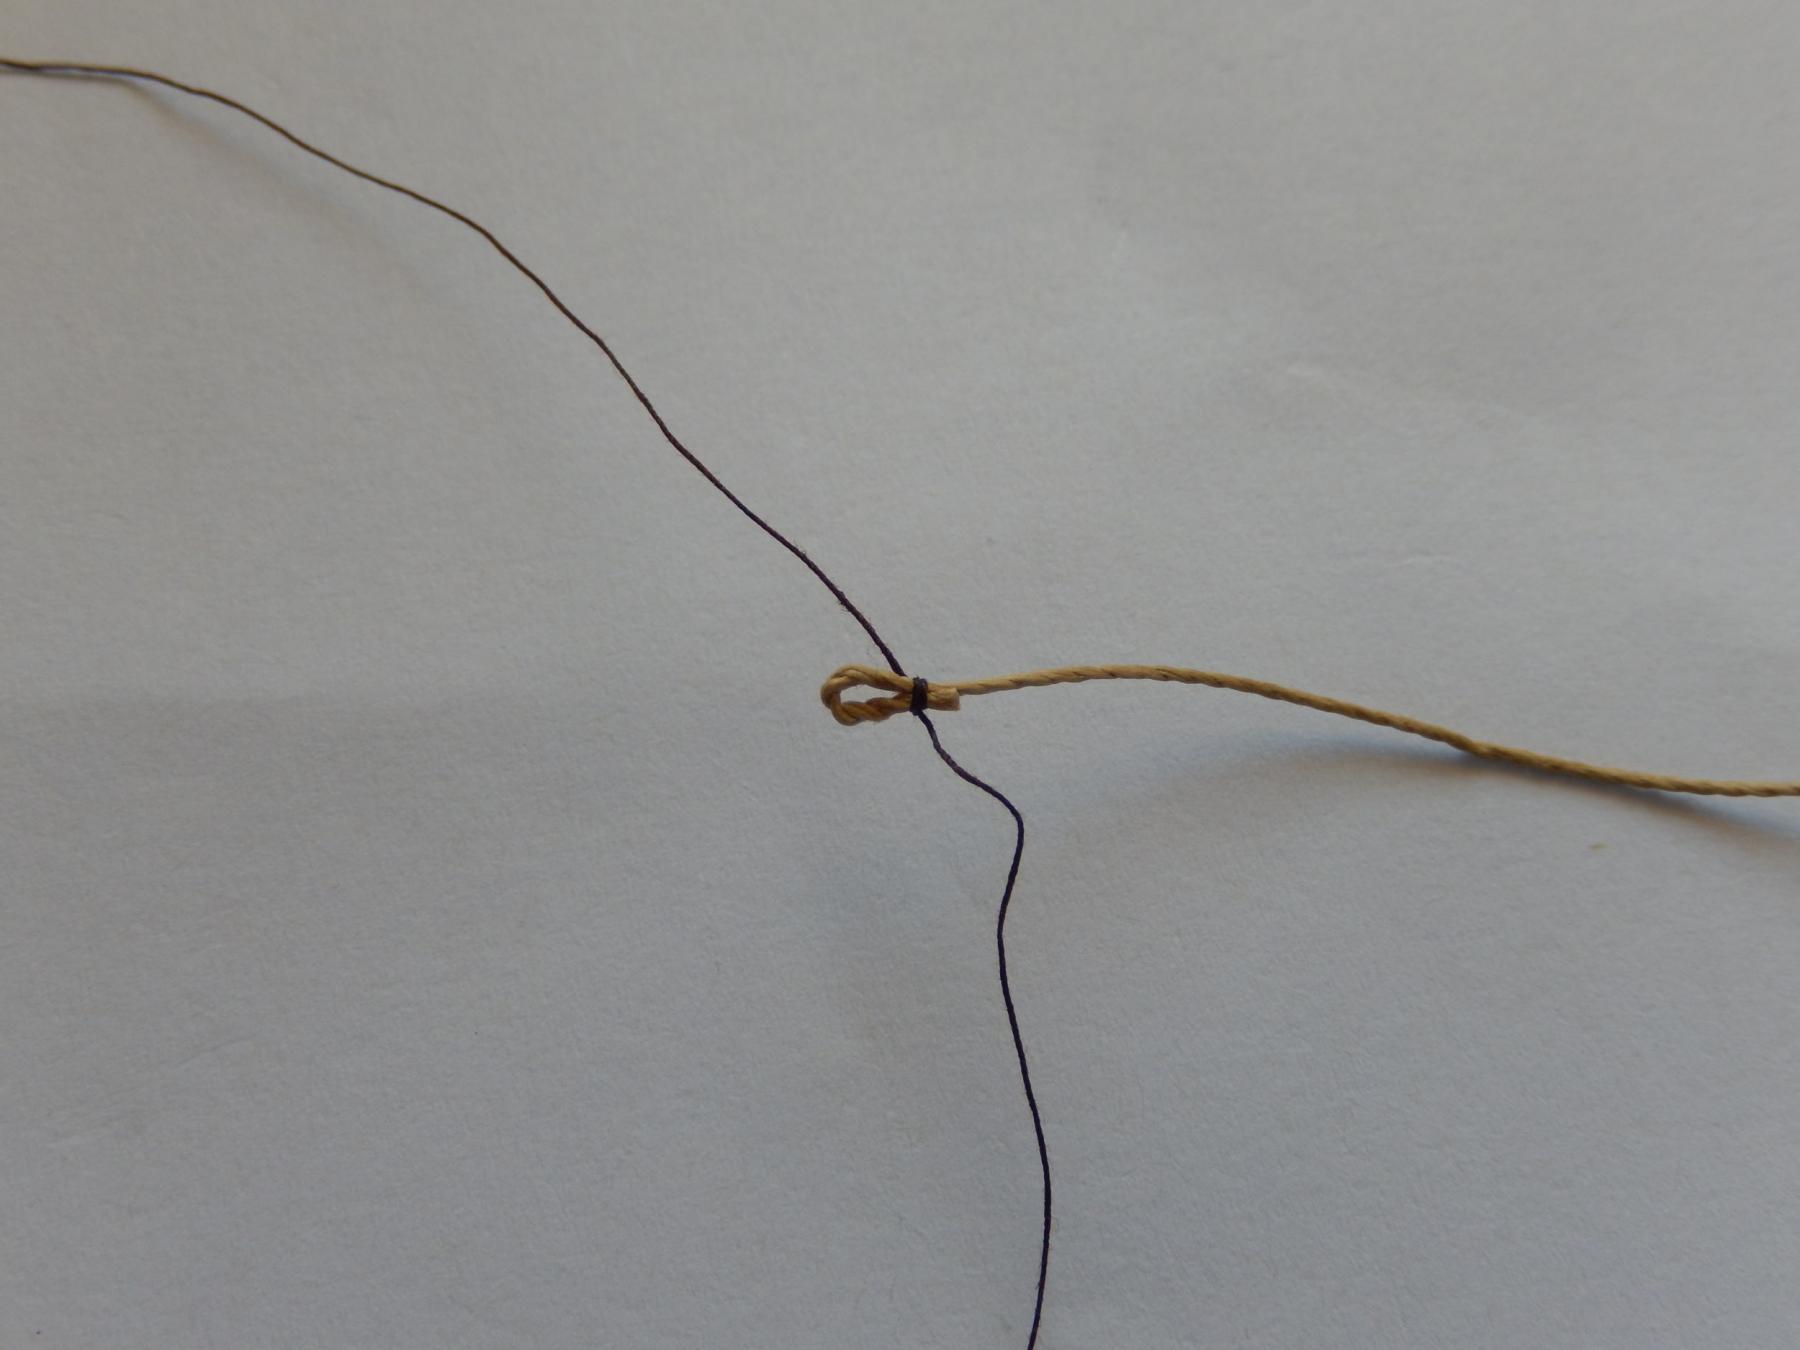
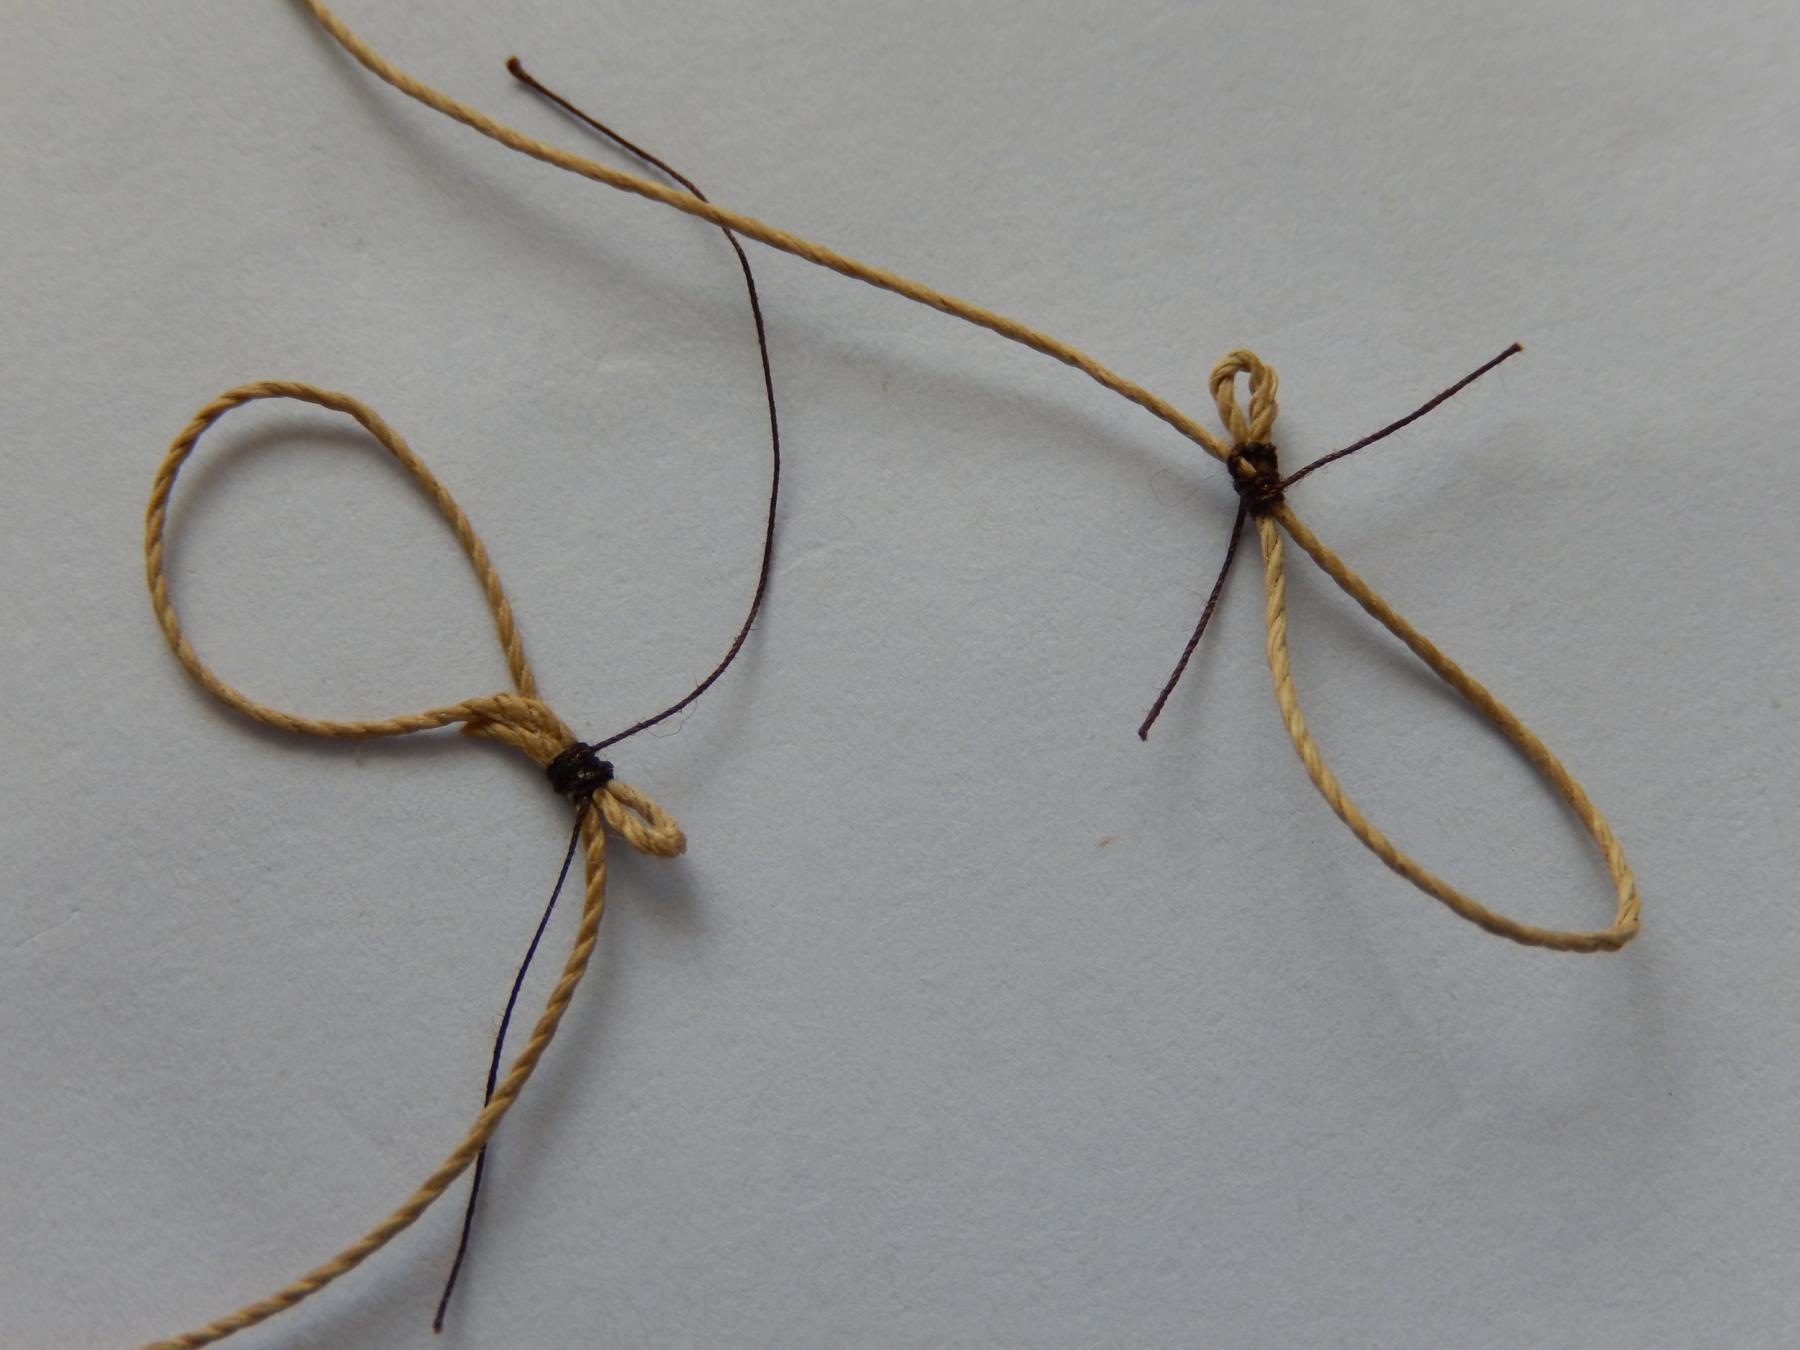
Finally in order to keep some semblance of sanity between the gnashing of teeth, I followed Arthur's lead and stained the parral beads. They are simply threaded onto a piece of thread and dipped two or three times into a tin of poly urethane stain I happened to have.
All of this has given me an excuse to procrastinate in putting up the yards. No excuses now.

-
Arthur: if you look at the official temperature taken in Sydney, it comes from Observatory Hill, close to the harbour where it was about 39 deg C today. It's close to the coolest place in the city. We live on the Georges River, about 10 km inland and the shade temperature was 45 deg C at 14.00. Some of our western suburbs today had 47 deg C. It's the hottest summer since records began about 160 odd years ago. And It's NOT doing MY rigging ANY GOOD AT ALL.
-
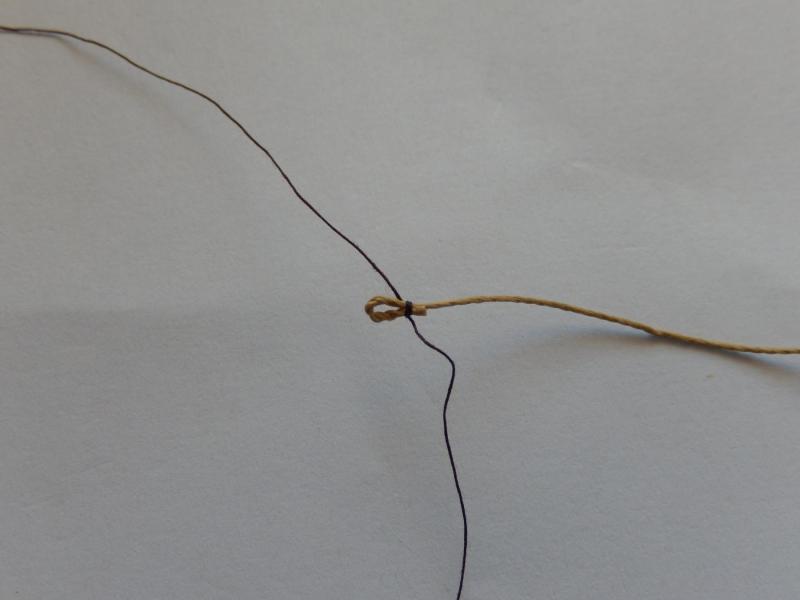
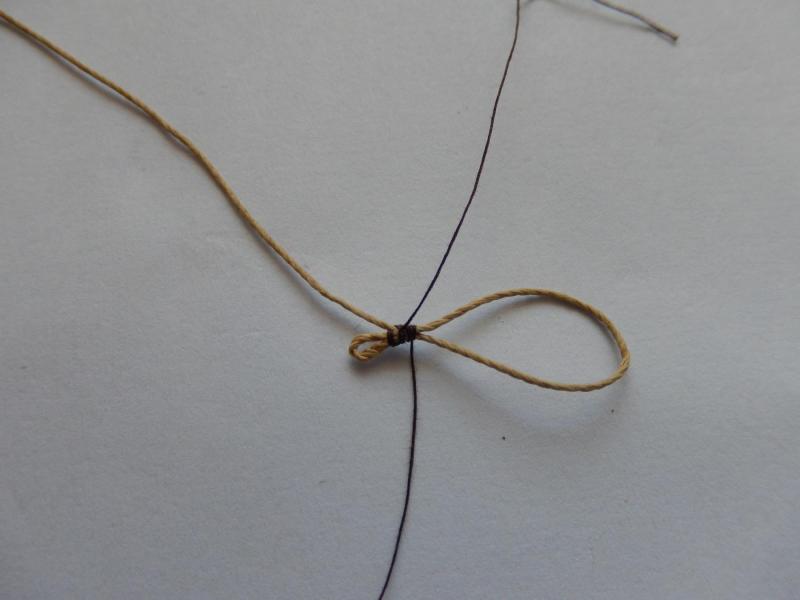
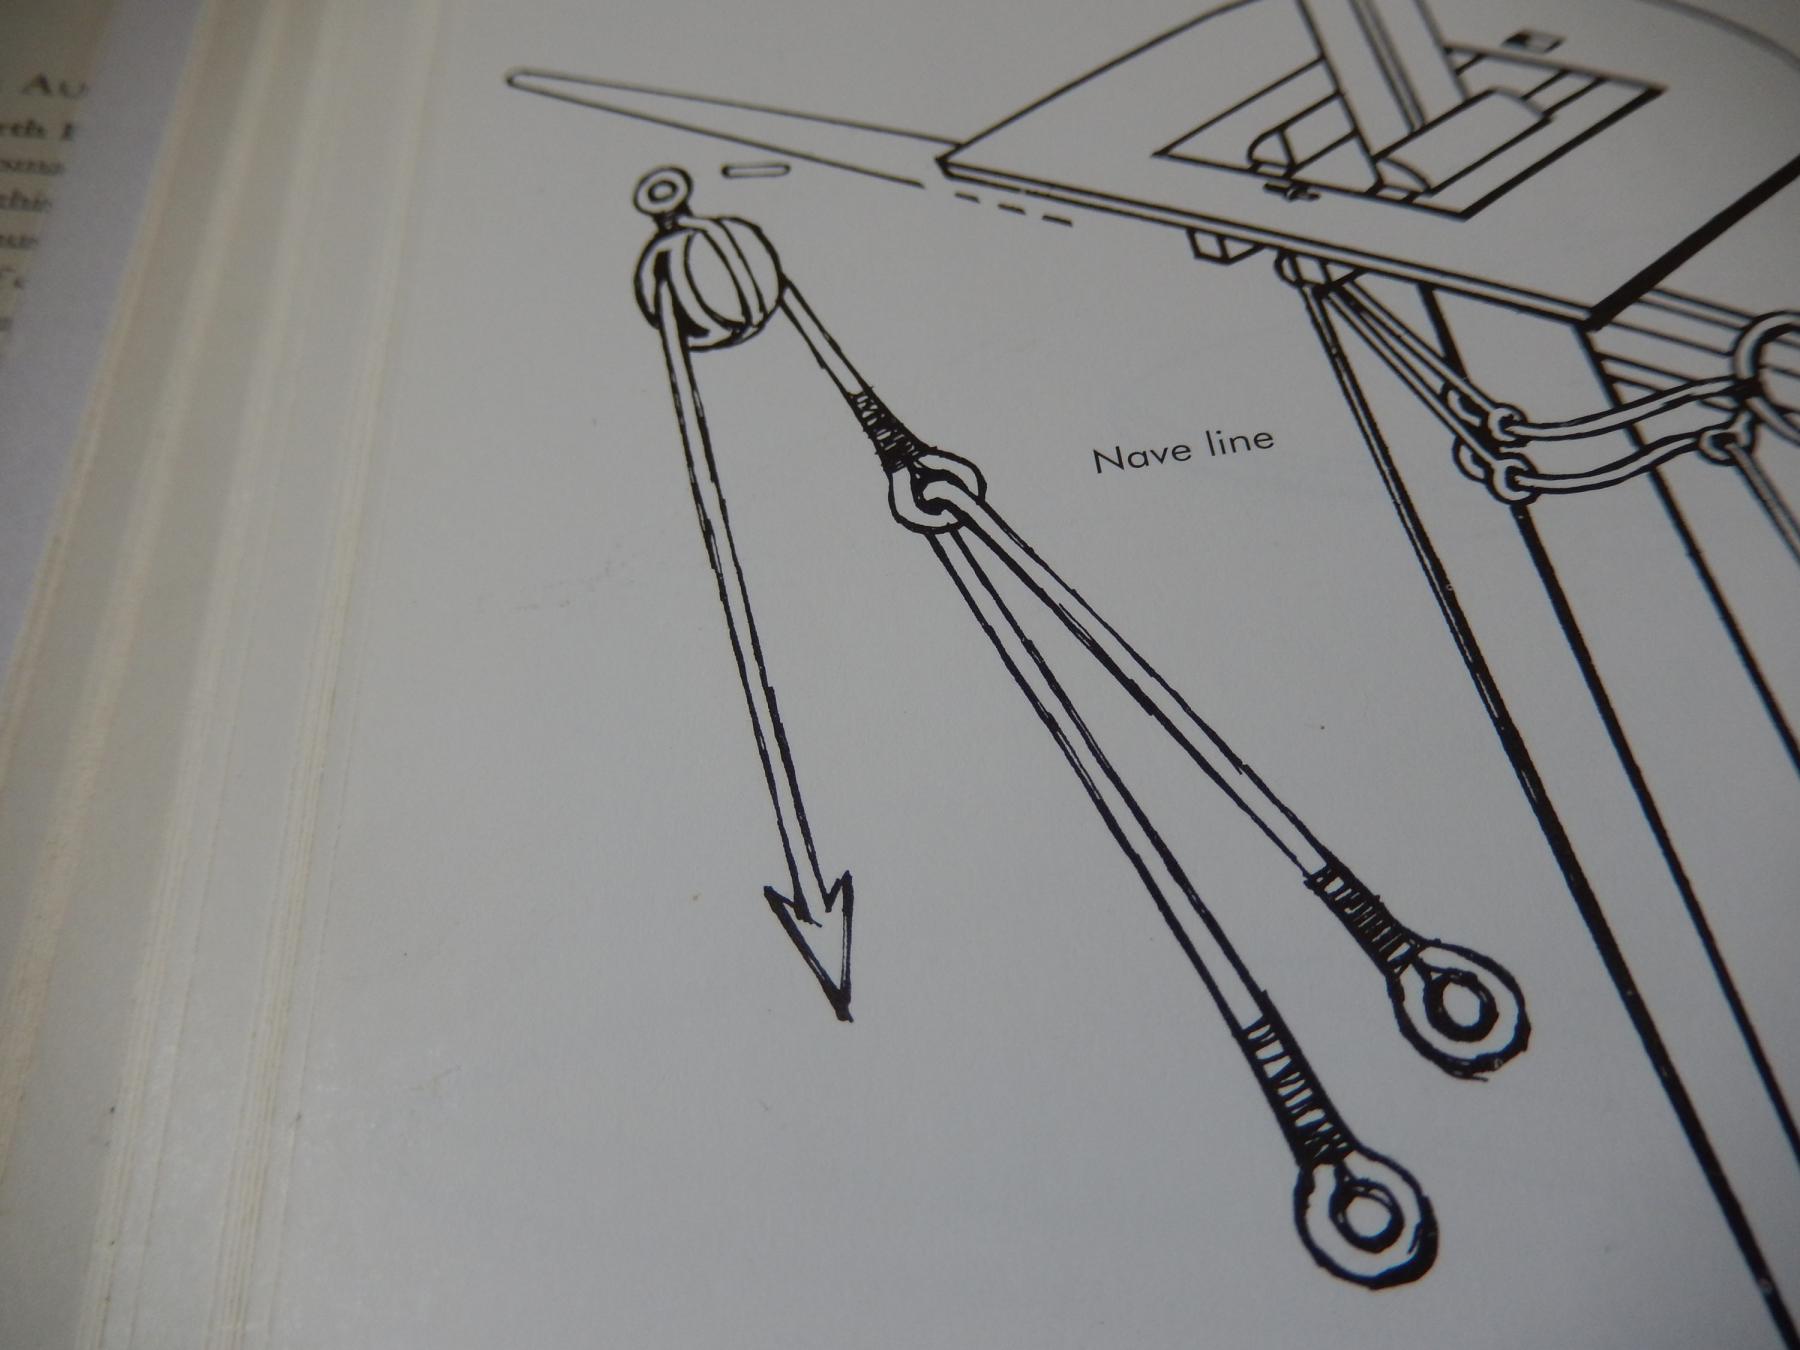
I have now put together a nave line. It is attached to a new block in the centre of the rear of the top awaiting the mounting of the foreyard - suggested by Arthur and Jose. I have some misgivings (it's not very accessible), but it's worth a try.

Incidentally, some of the standing rigging has suddenly become slack (a couple of the back stays and a couple of the shrouds). Fortunately I had not finally tied off the culprits and was able to tighten them up without too much trouble. I am wondering now whether the extraordinarily hot weather we have experienced this summer (and particularly this week) is to blame. My work room is not air conditioned . Yesterday the temperature at my house in the southern suburbs of Sydney was 45 deg C 110 +deg F). Today it's even hotter.
Has anyone else experienced this in hot weather?
-
Thanks for the help Jose. On the 18th of Feb. have a drink on me (the cheque's in the mail
). You have done an outstanding job. -
Arthur: is this what you have done?
If so, for the fore yard it must be close to fouling the rigging lines for the main topmast stay and preventer stay. You can see the two lines in the second-last of my photos in my previous log.
It looks as if the procedure would easier to apply to the main yard as there is no similar rigging in the way - though there is no mention of truss pendants for the main yard in Petersson.

Unfortunately my cap cannot be removed. A pity, as I am sure it would make rigging the jeers and slings much easier.
The cross-jack: is there a prize for guessing not plan (6)? I doubt very much that I would have thought to look at Petersson.
-
Arthur: I hope I have corrected the truss pendants. I have attached to them to the fore yard along with some other rigging which should be easier off the model than on.(?)
(If anyone has suggestions regarding anything else that may be rigged before the yards are mounted or if there are problems with the way I have done it so far, I would be very pleased to hear them.)
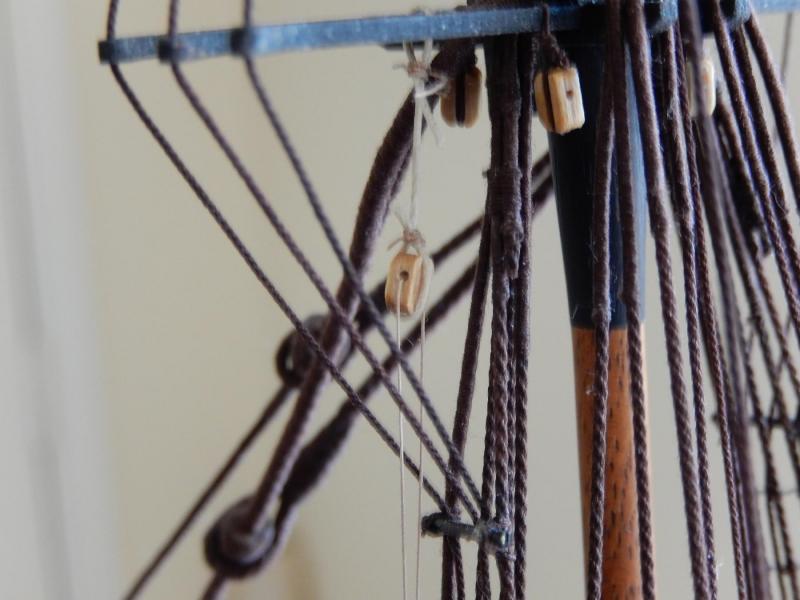
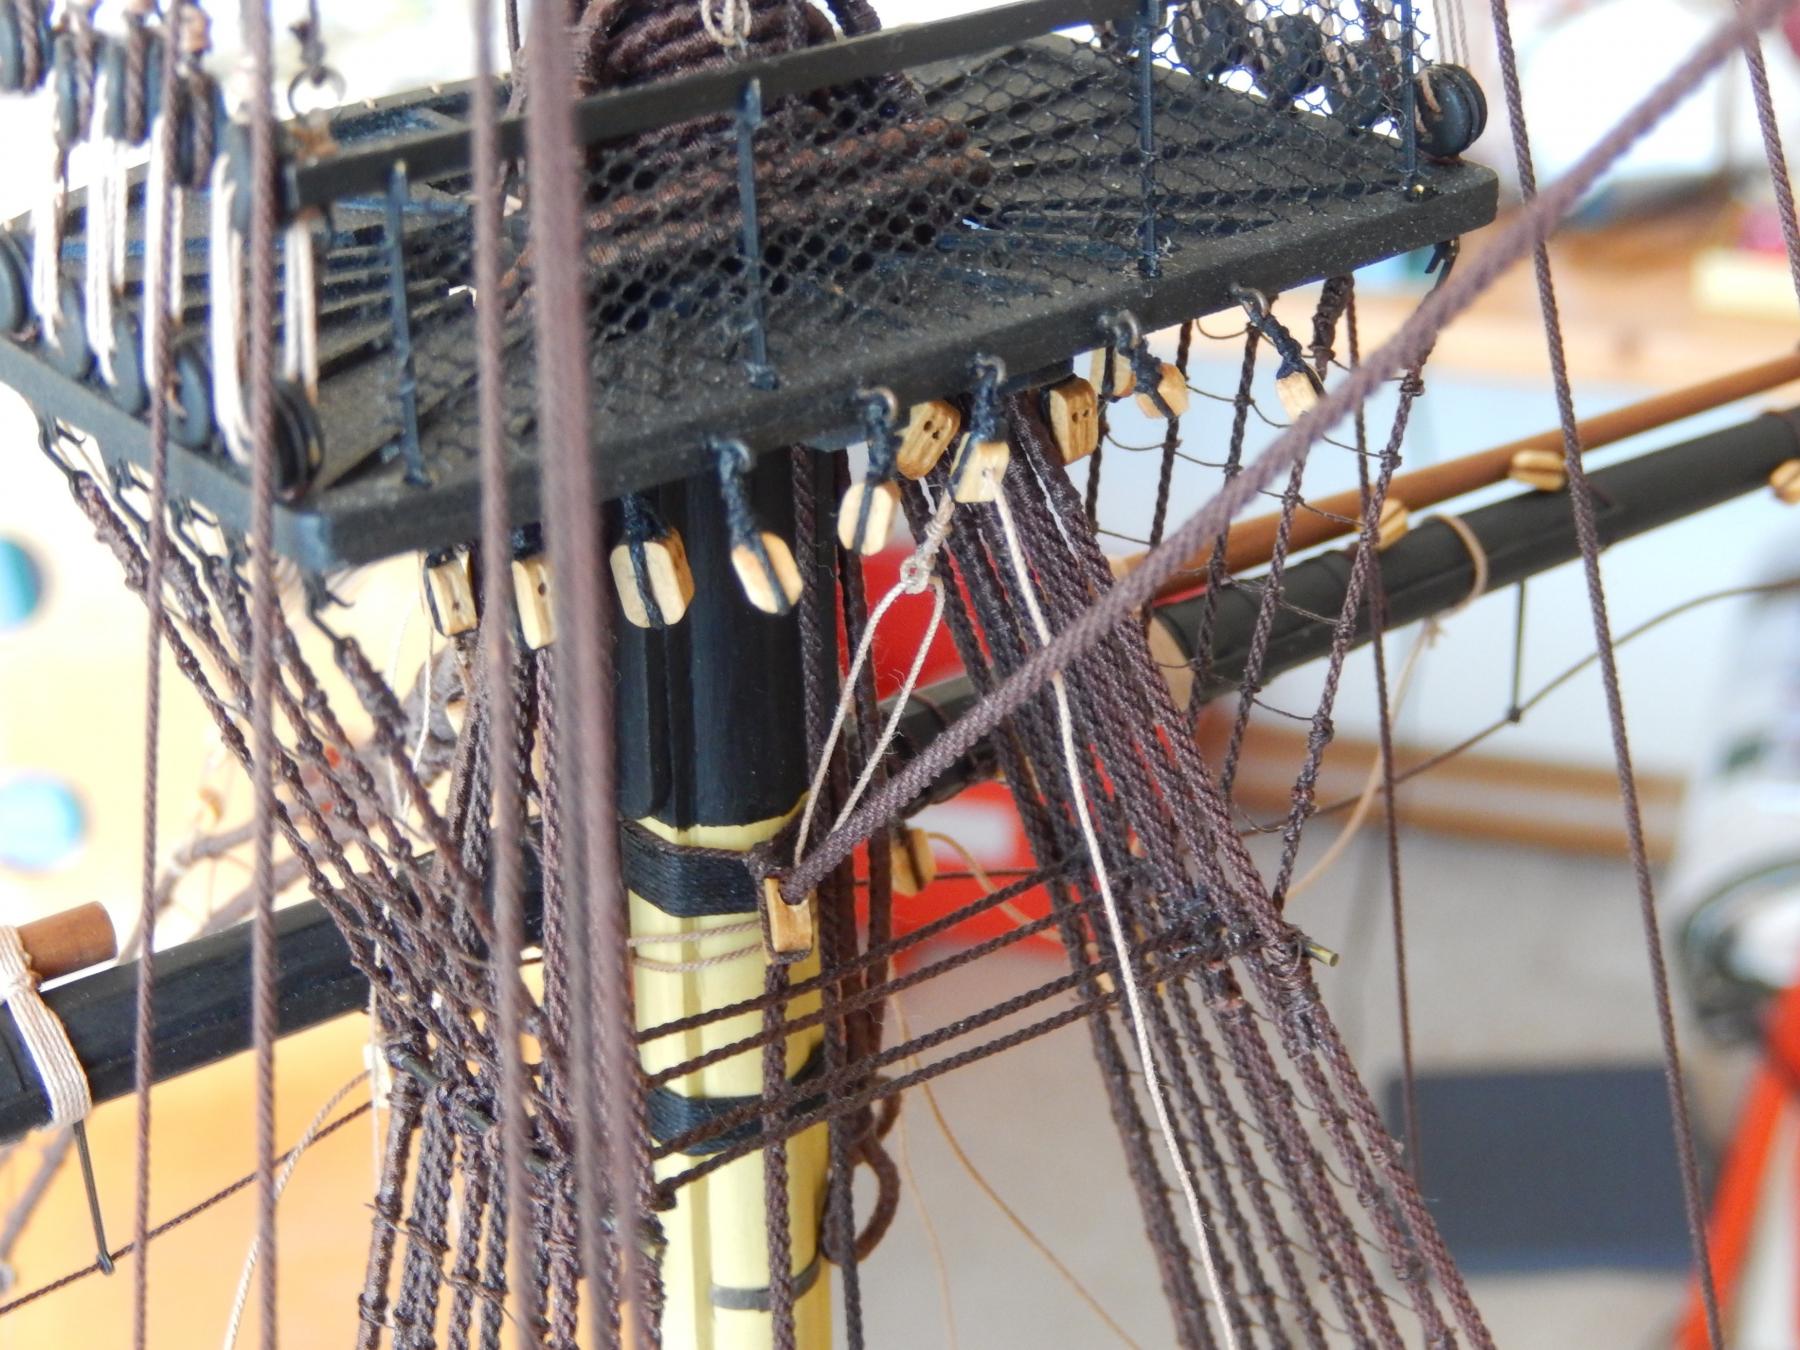
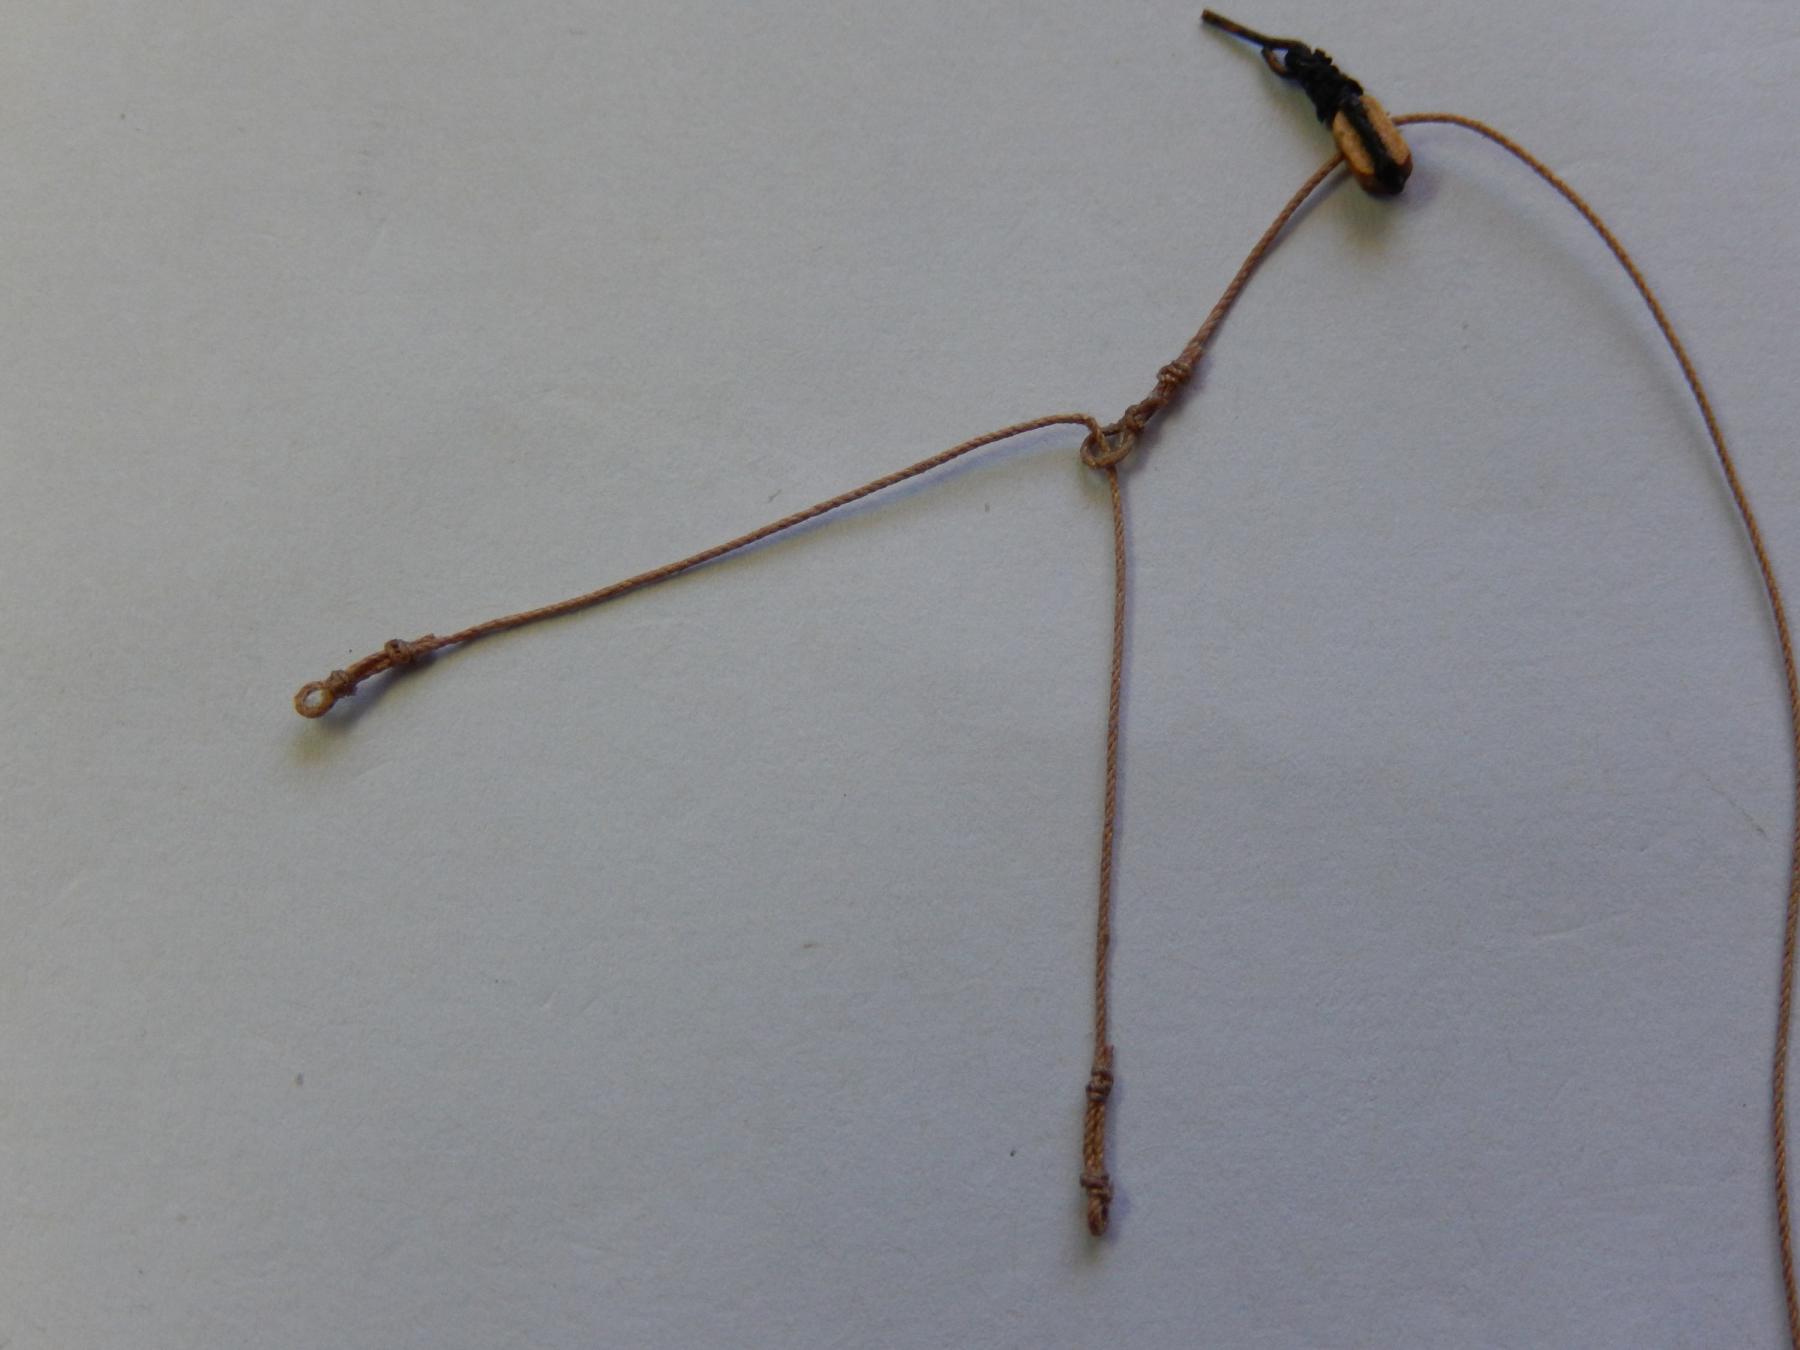
The nave line is a problem.
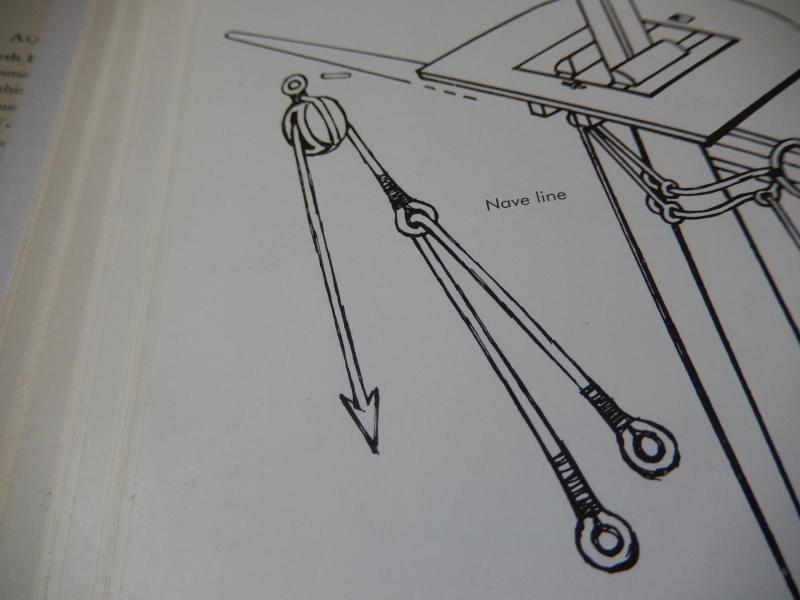
As you can see the block is supposed to be attached to the top near the mast and presumably dropped through the hole.
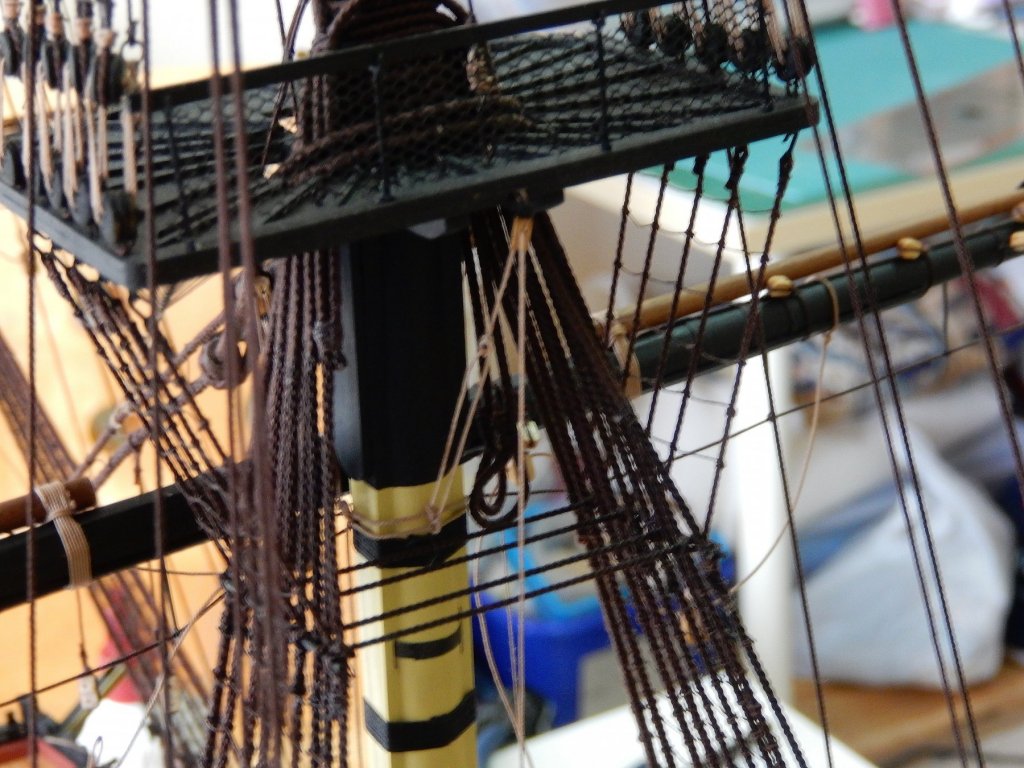
There is simply no way I can do this or anything close to it at this stage of construction. This is what the foretop looks like. (I see I need to tidy up a couple of the loops.)


If there is an alternative to the Petersson illustration I'll certainly try it, but at this stage it looks as if the nave line will have to be omitted. If so please don't tell anyone.
Jose: sorry I haven't got back to you yet- I have mainly been doing battle with my new computer. It's far, far ahead on points.
- WackoWolf and mort stoll
-
2
-
I now have a new computer with windows 10. I was quite attached to my old steam-driven machine. I will try to post some photos of progress, such as it is, and hope they come out - and now it seems they did.
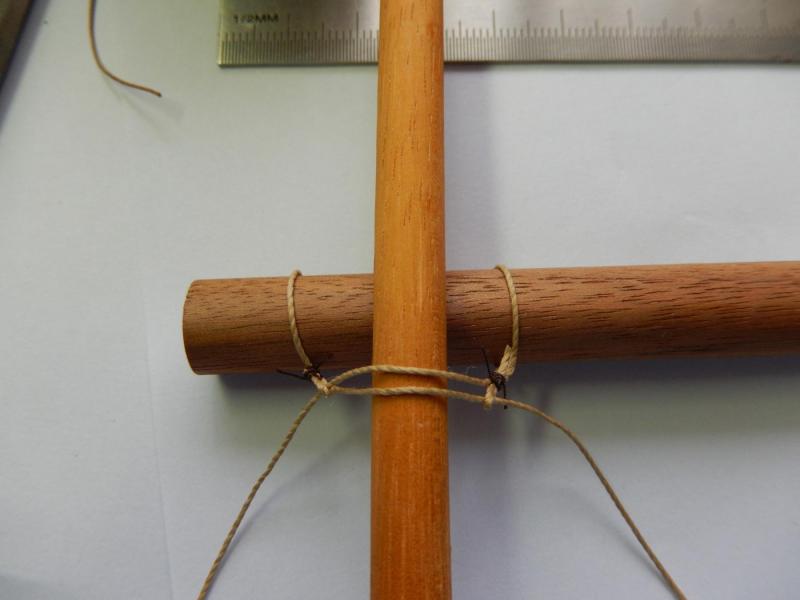
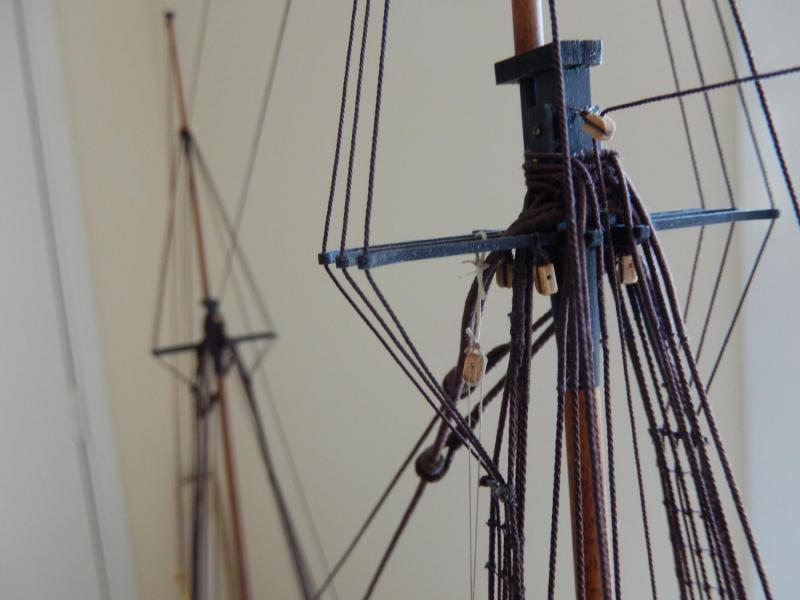
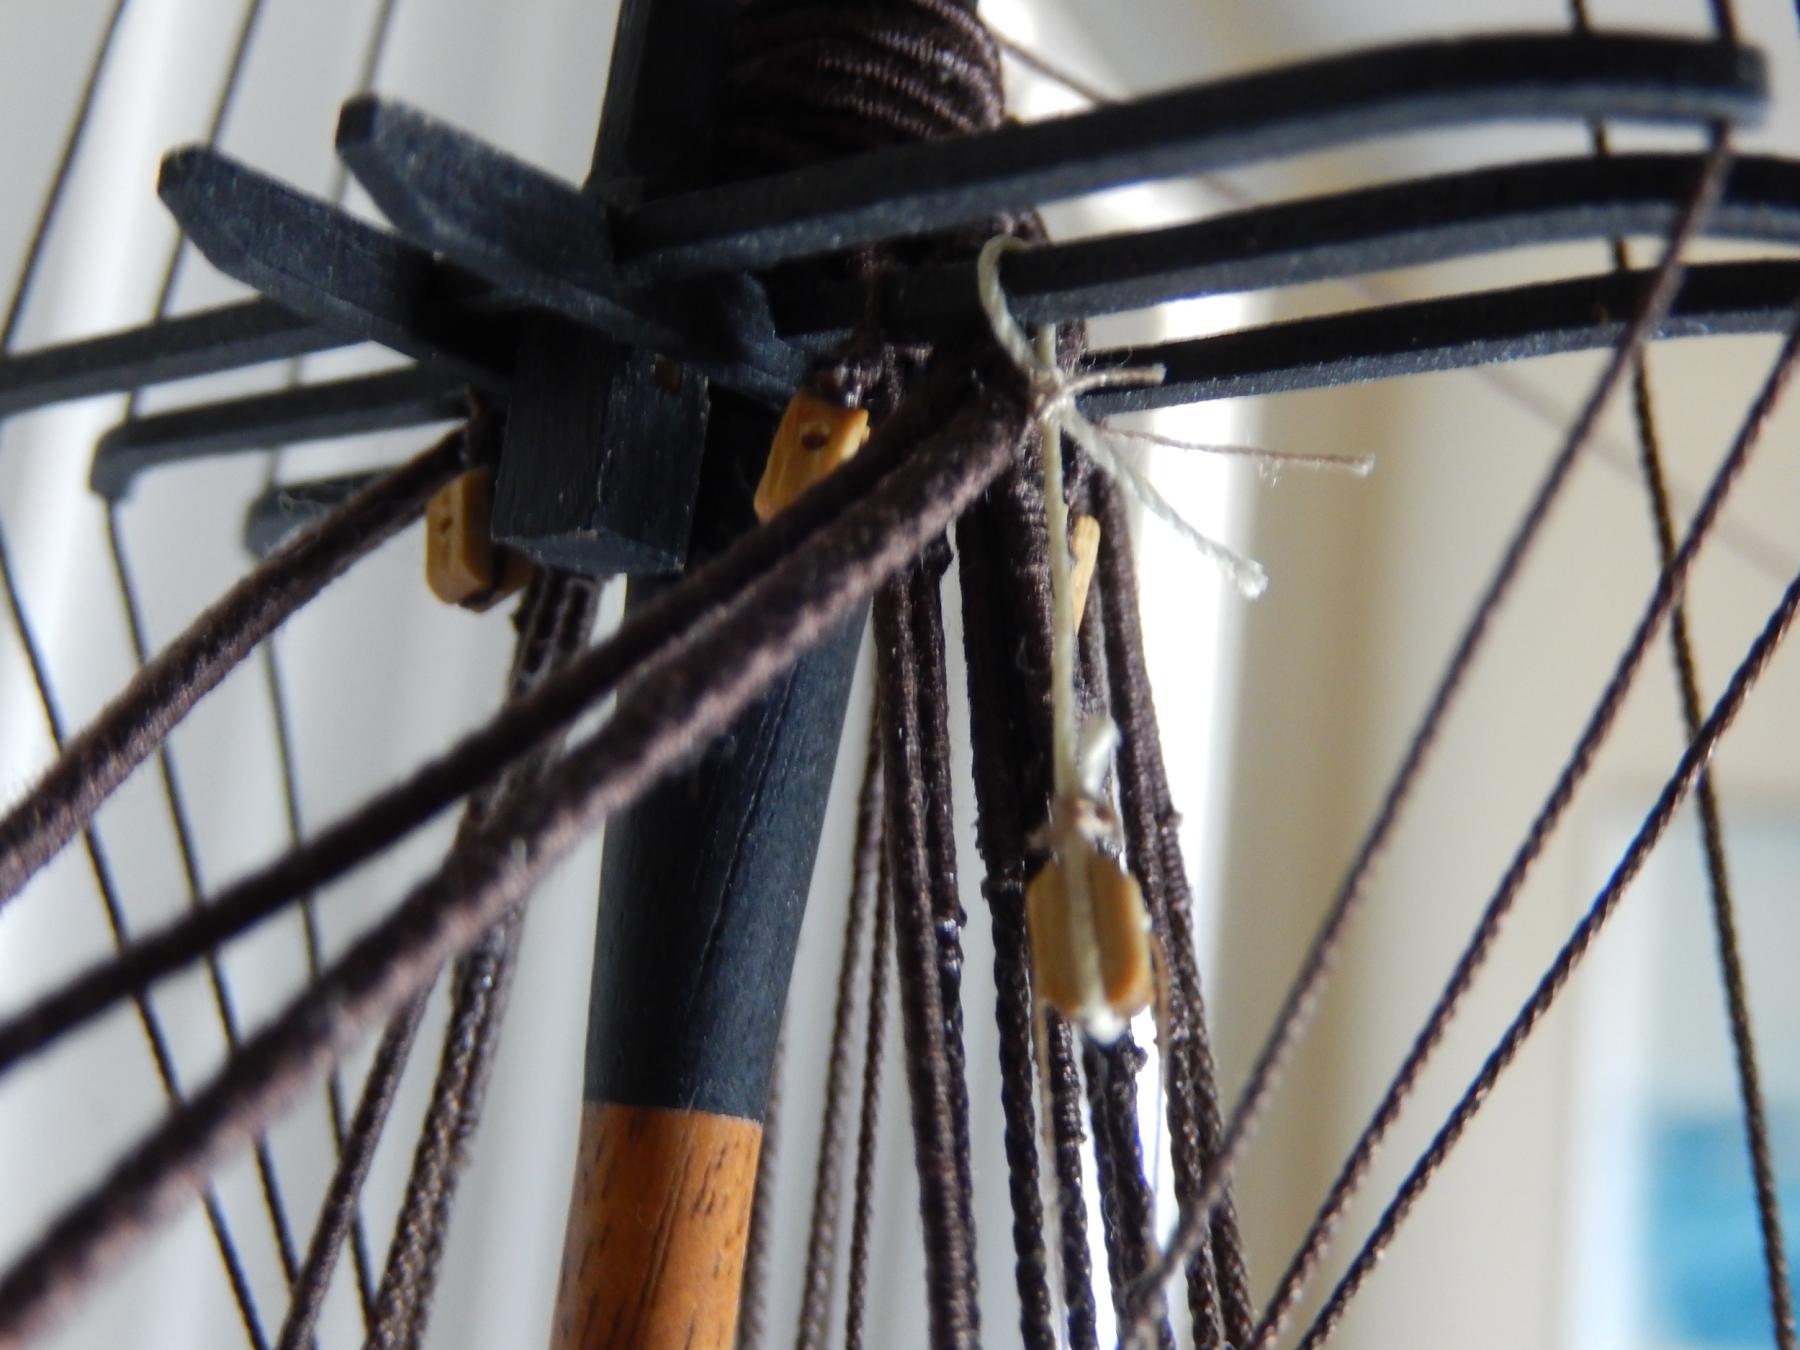
I'm hoping that this is about the correct positioning of the blocks between the first and second shrouds. The following show the block simply (PVA) glued (not yet seized) between the shrouds on the main mast. There is very little room indeed between the shrouds on the fore and mizzen masts, so that may prove to be interesting.

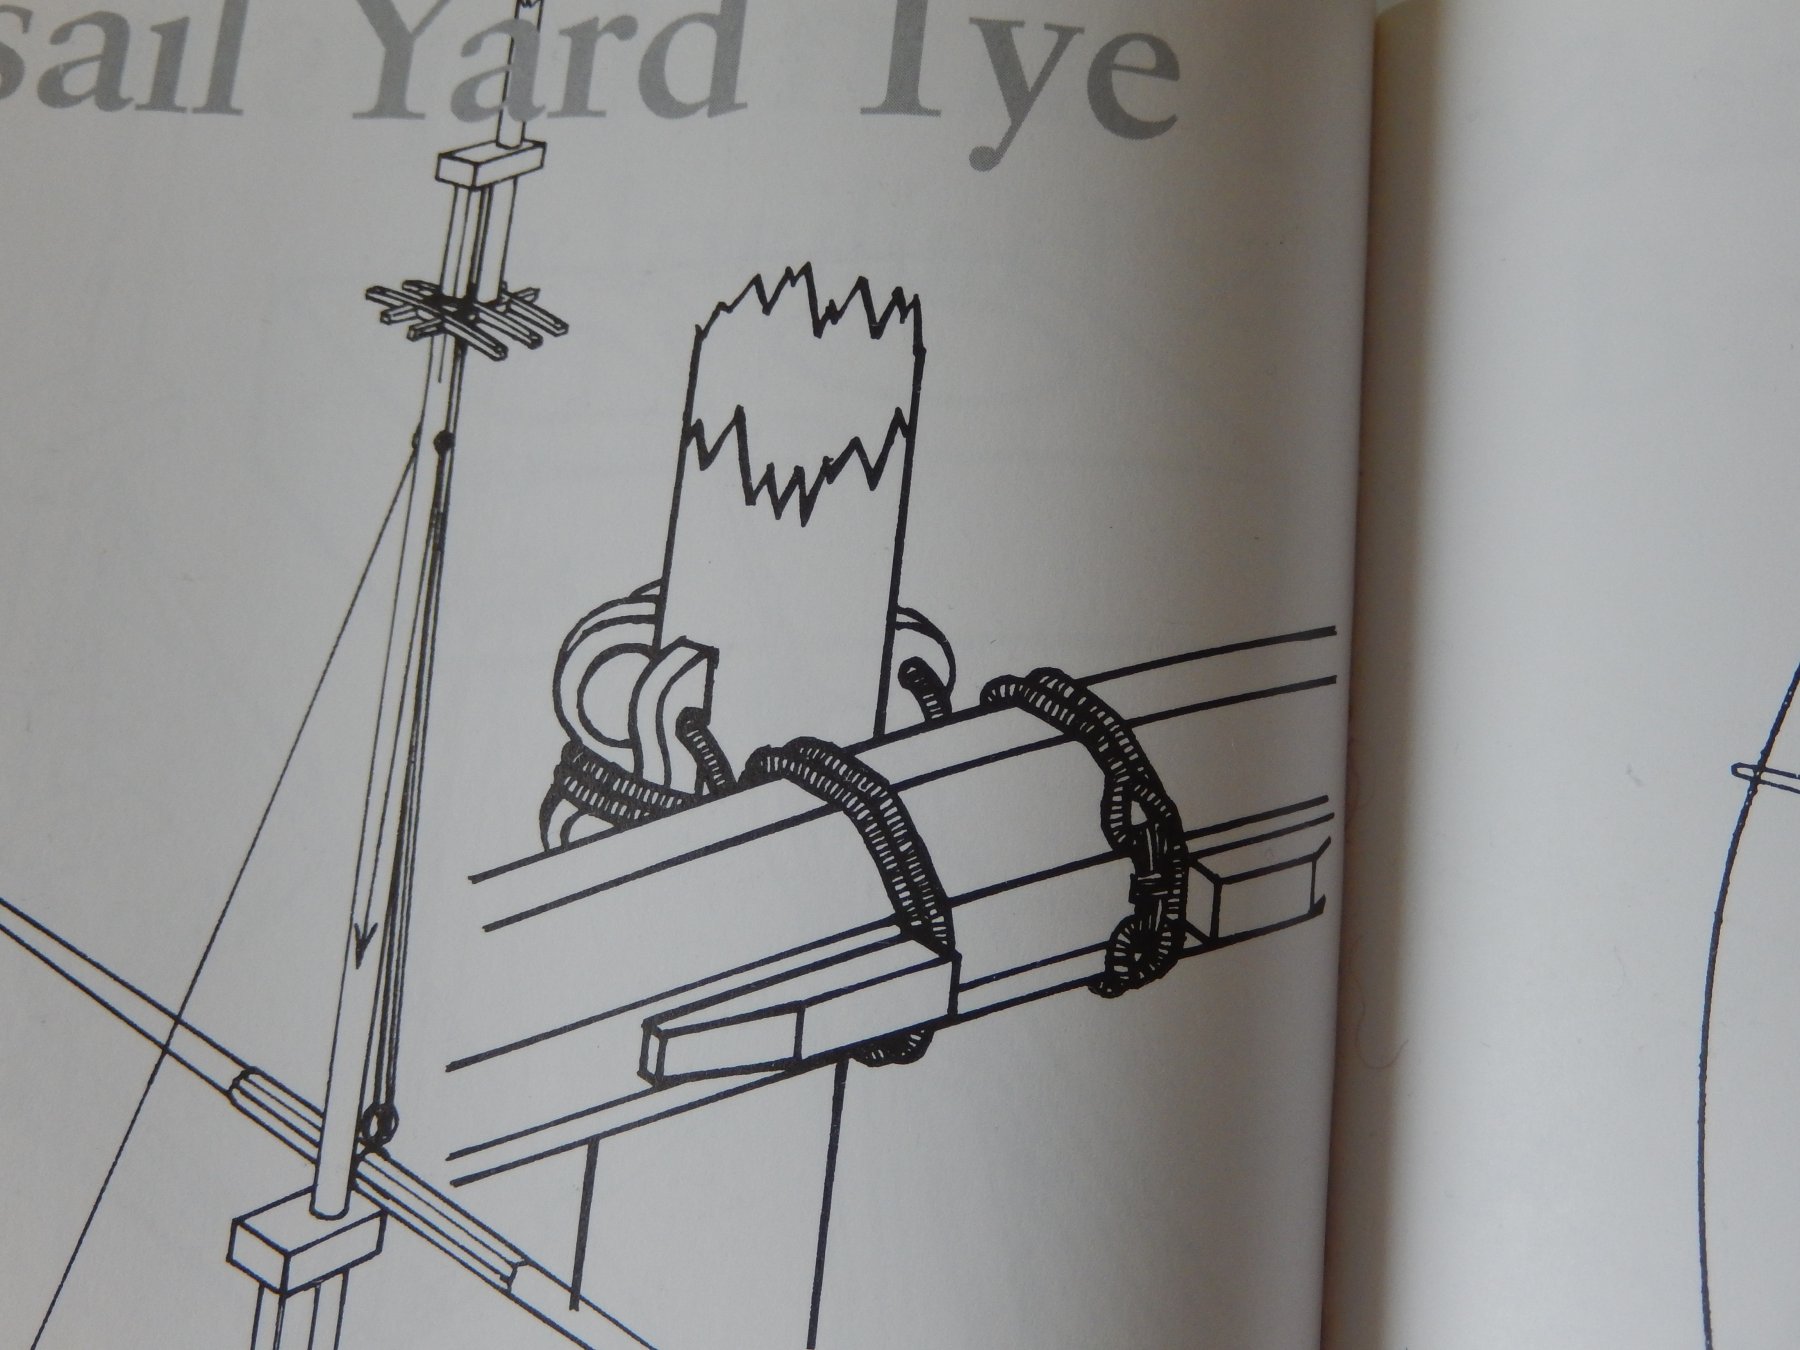
A number of the yards are attached to the masts using truss pendants. After looking at the illustration in Petersson rather blankly for some time (the plan was not worth a sausage) I hope this is what is meant. The following is an experiment.

Comments/corrections are welcome
- mort stoll and russ
-
2
-
My computer crashed (terminally)on sunday. I hope to be back with some progress next week.
-
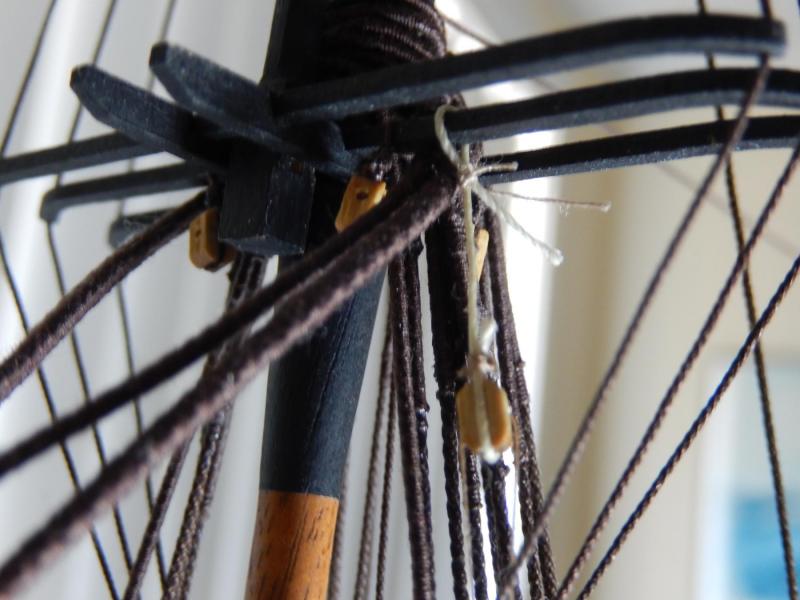
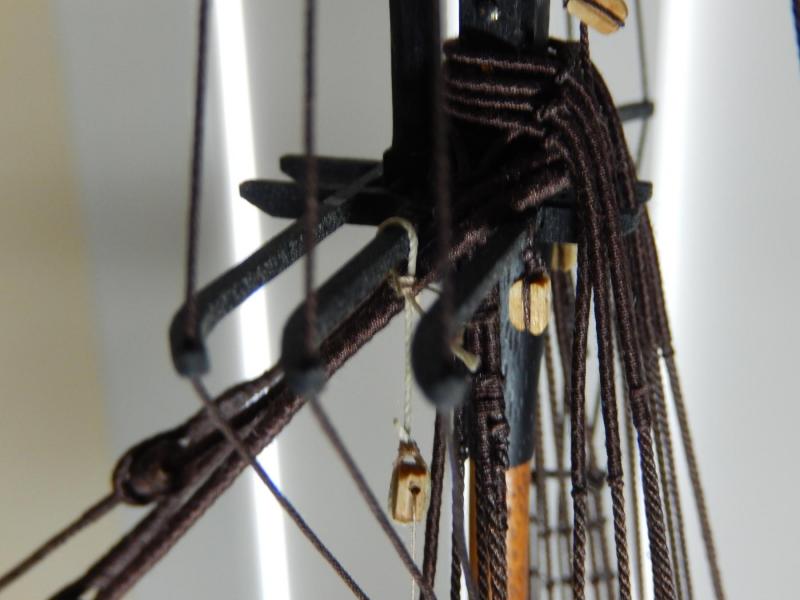
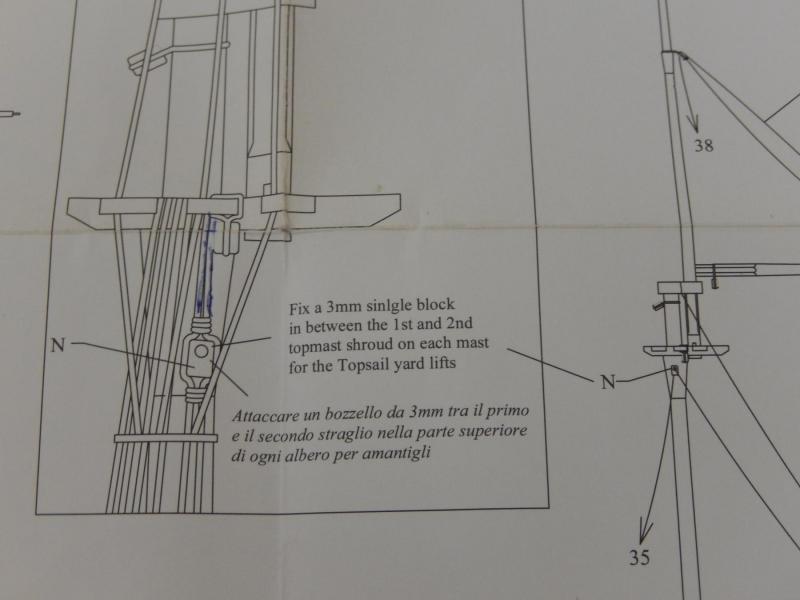
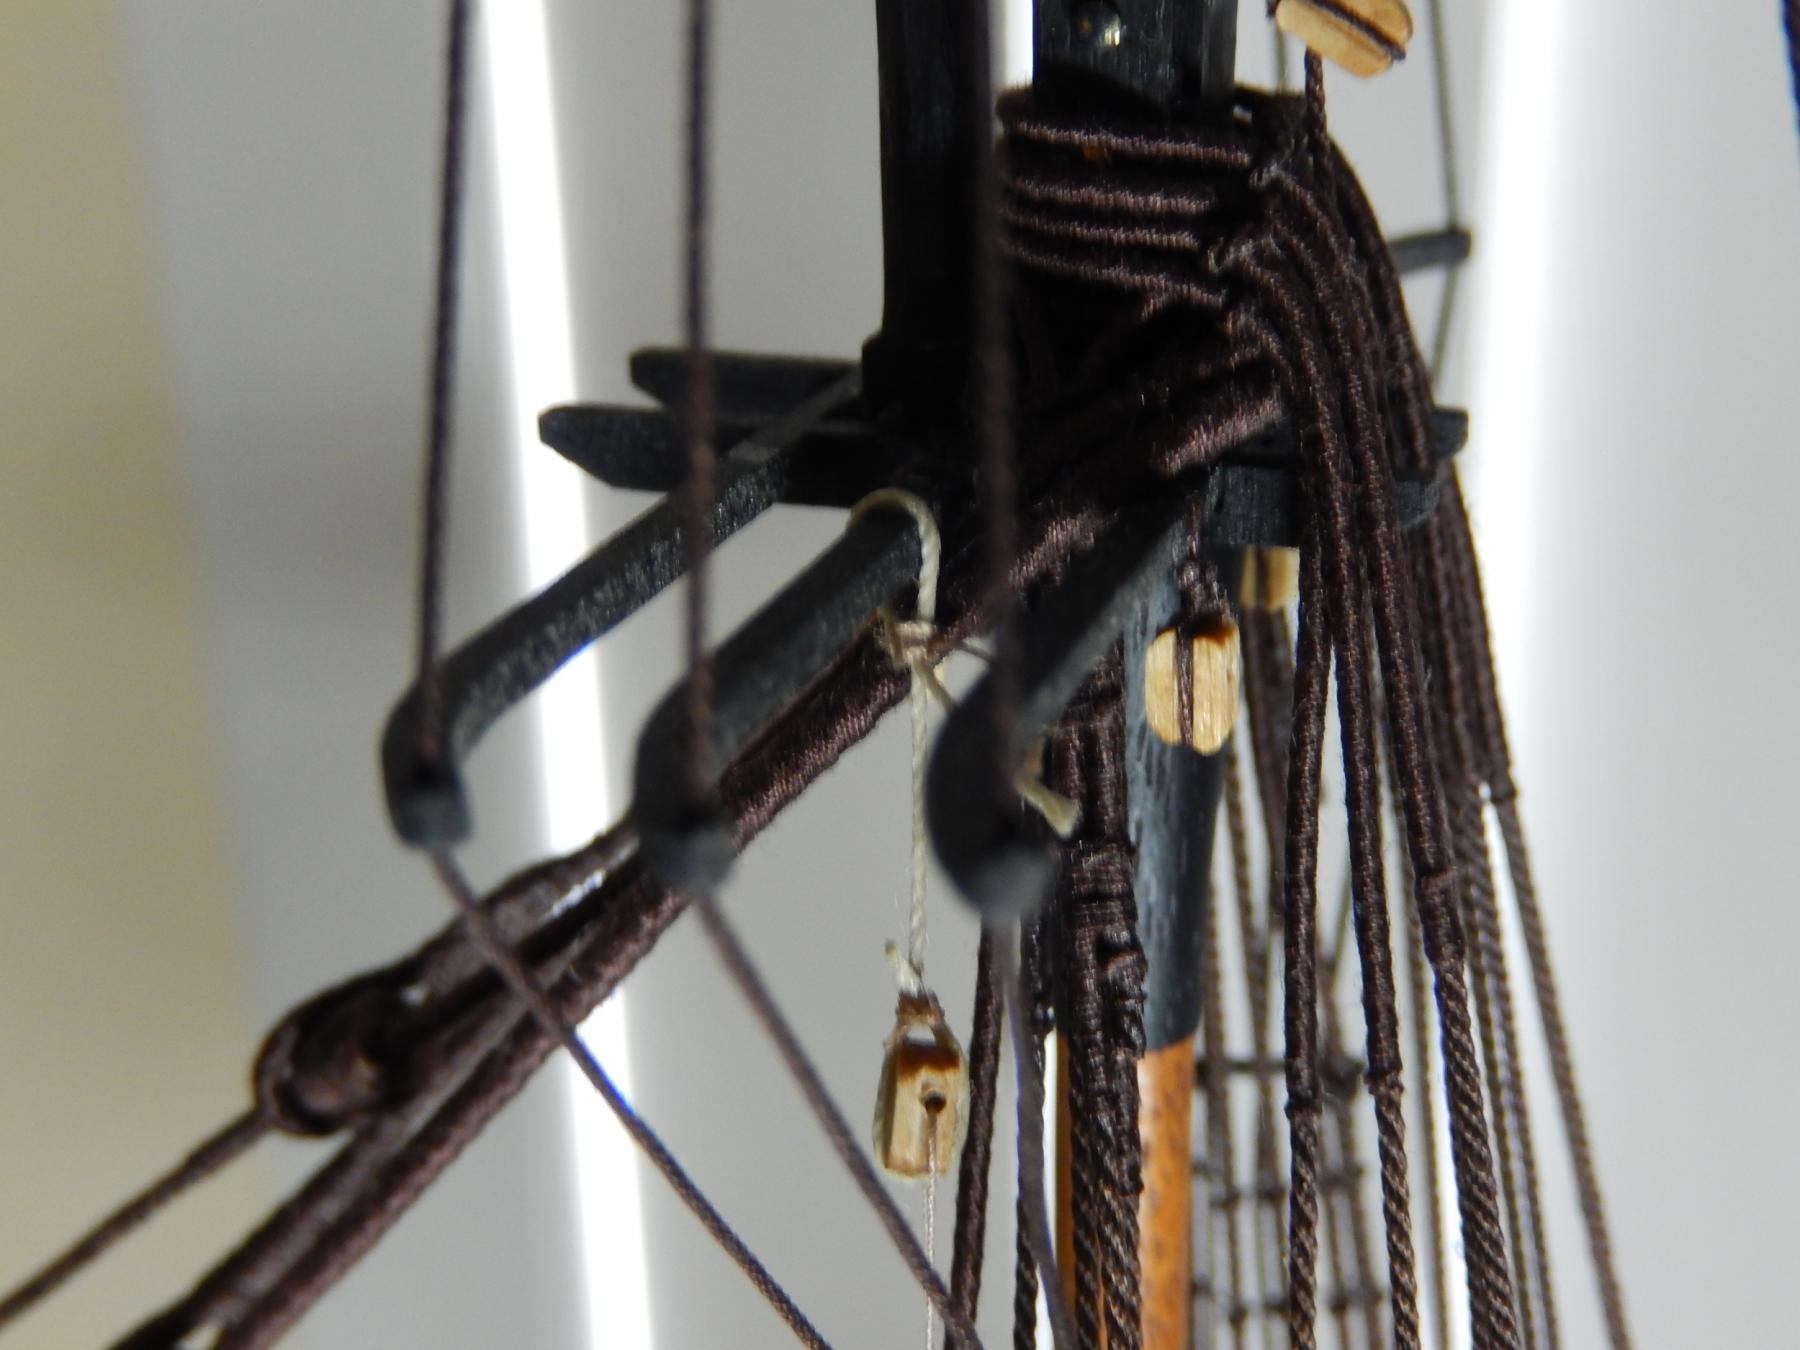
Thank you both for taking the time to help. At this stage my fundamental question is how do I attach the 3mm blocks for the lifts? I found it difficult to see just how you had done it. I have mounted a dummy to illustrate what seems at this stage of construction the only way possible. I would appreciate your reactions.
As you may see, I have simply tied the block to the middle cross-member of the cross tree, which enables the lift to go between the first and second shrouds. It doesn't seem very elegant, but it should work I hope. Is there a better solution?
- kier, John Allen and WackoWolf
-
3
-
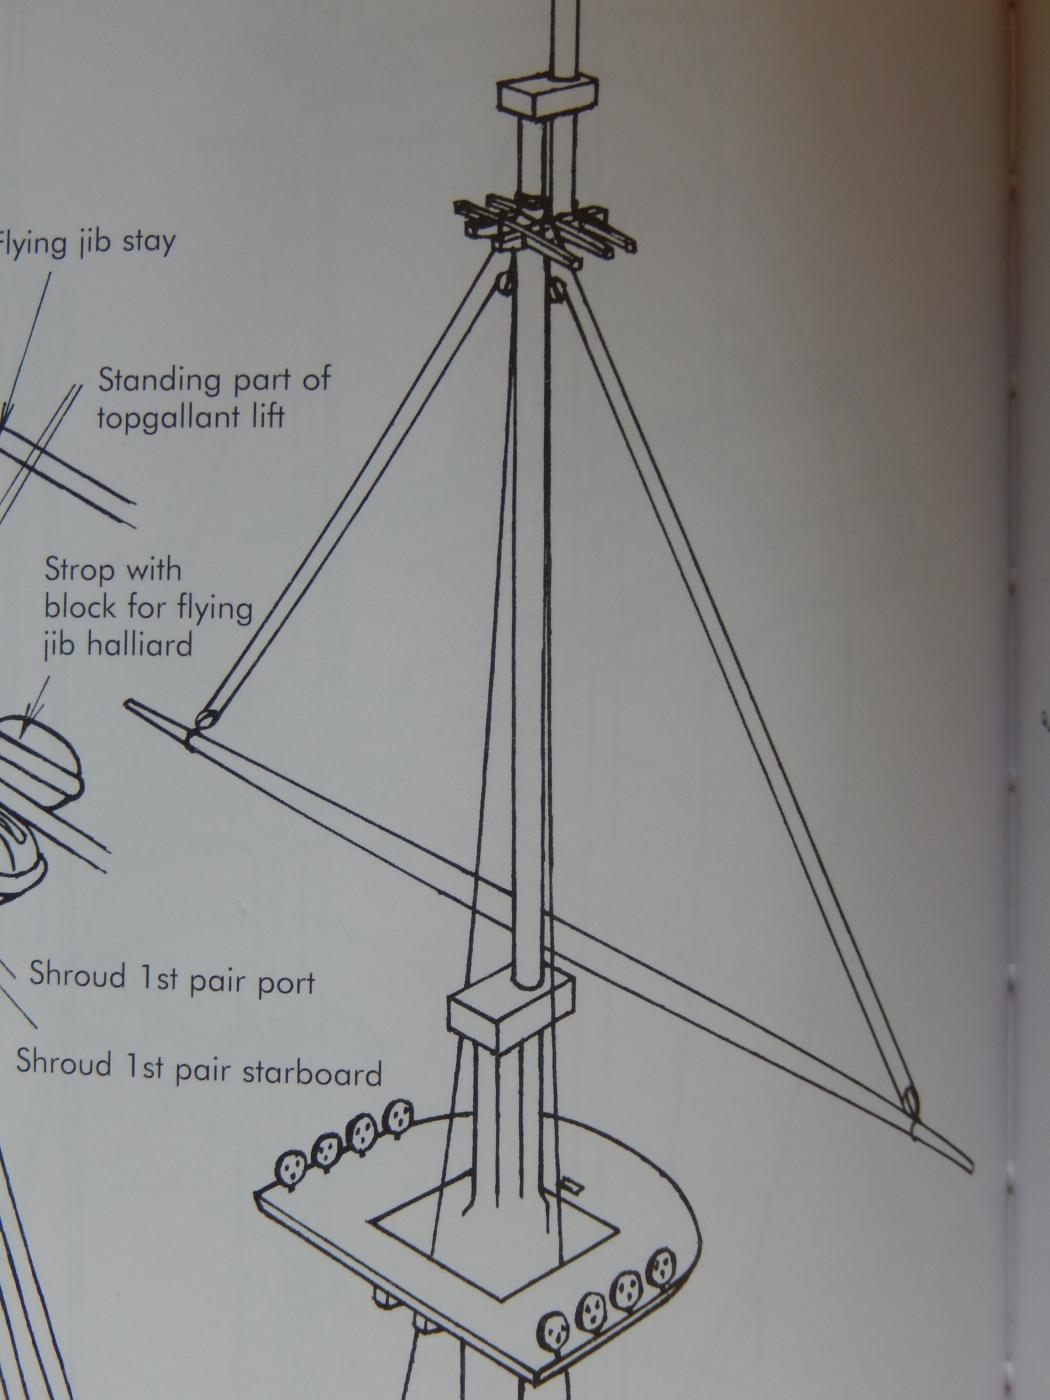
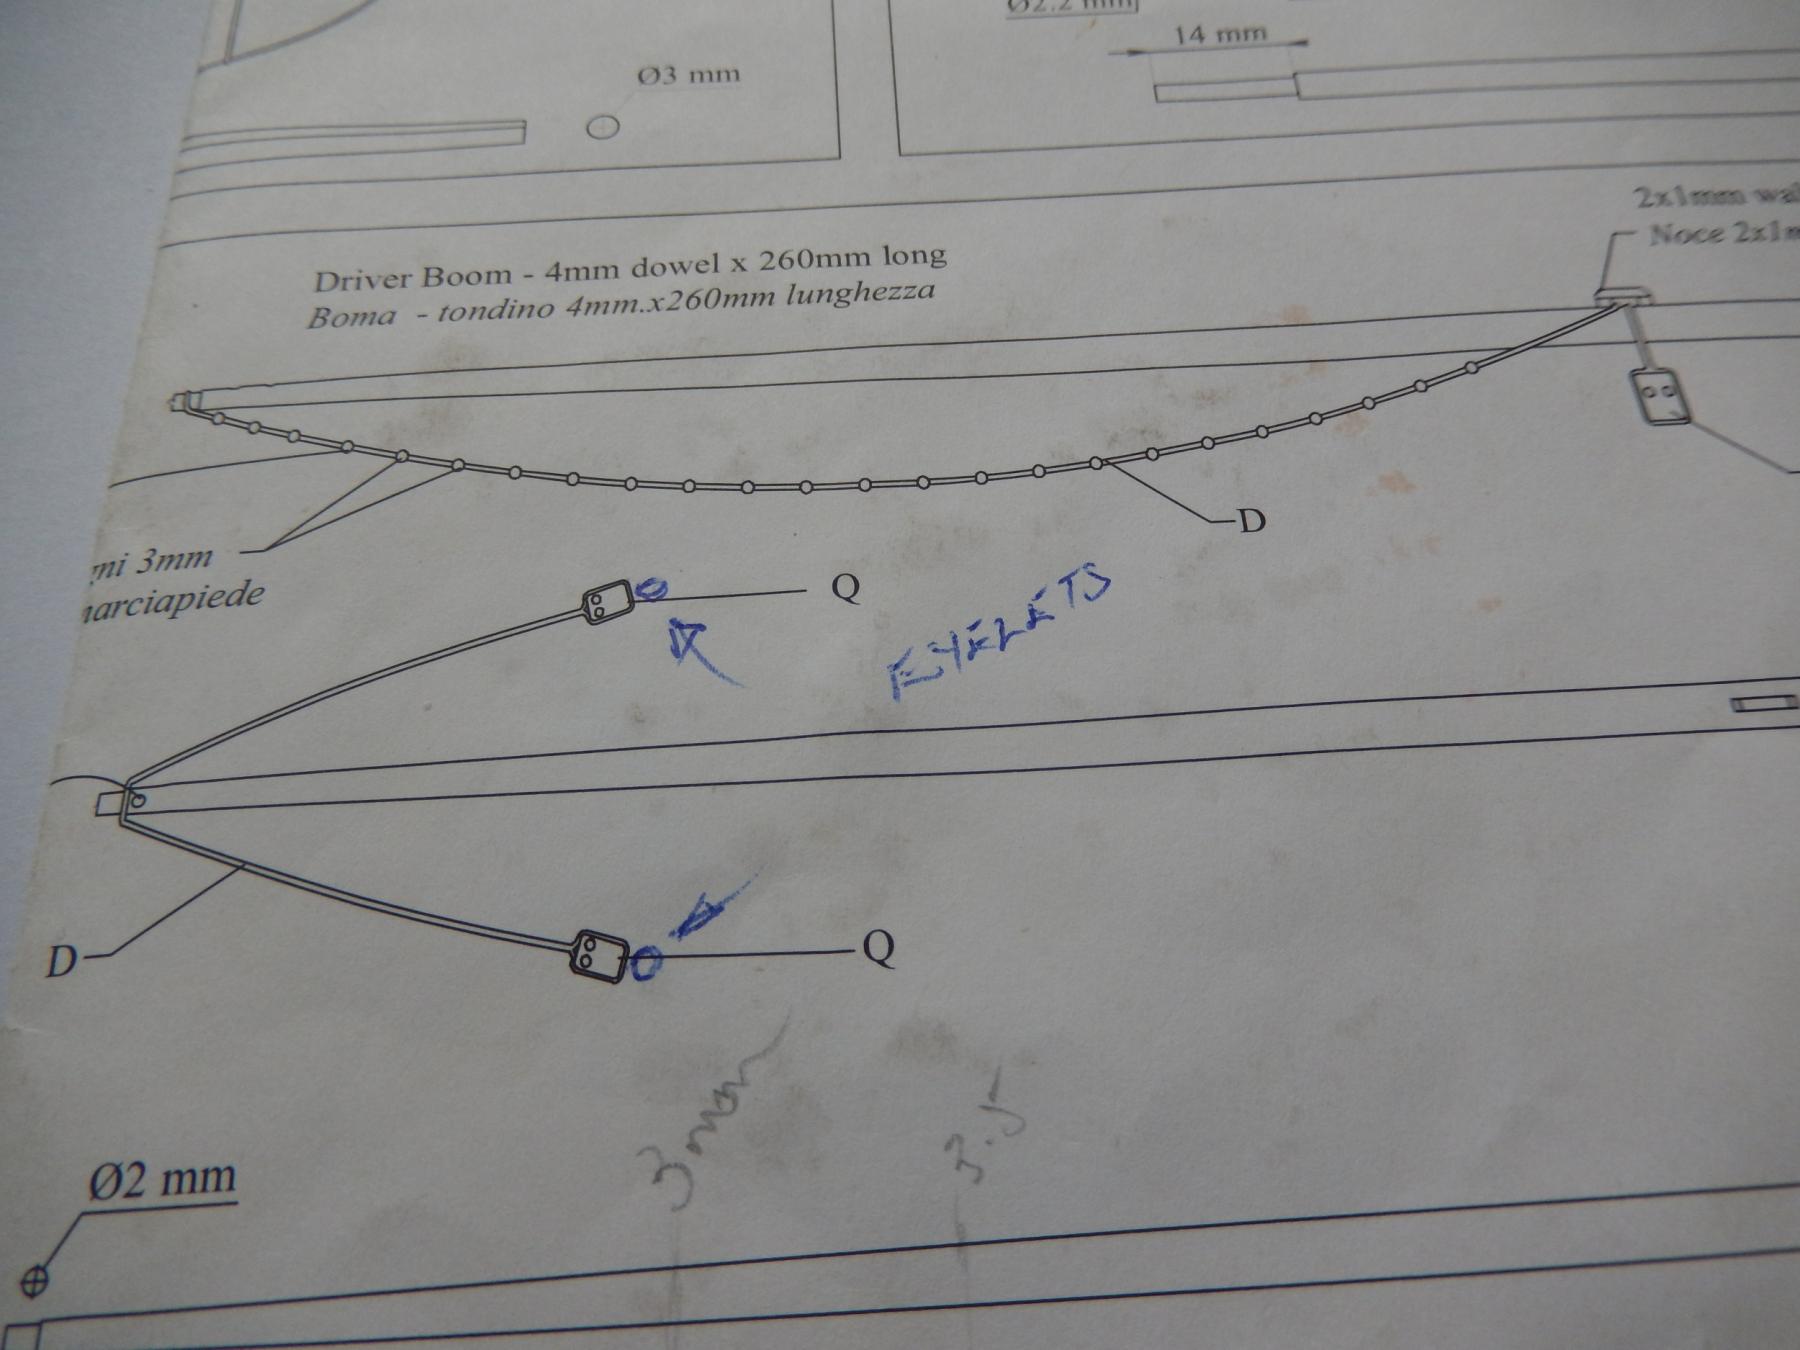
Arthur/Jose: I am just about to start mounting the yards. I have come across what appears to be an inconvenient (for me at least) afterthought which has surfaced on Plan 10. (see photo).
This is how it appears in Petersson.
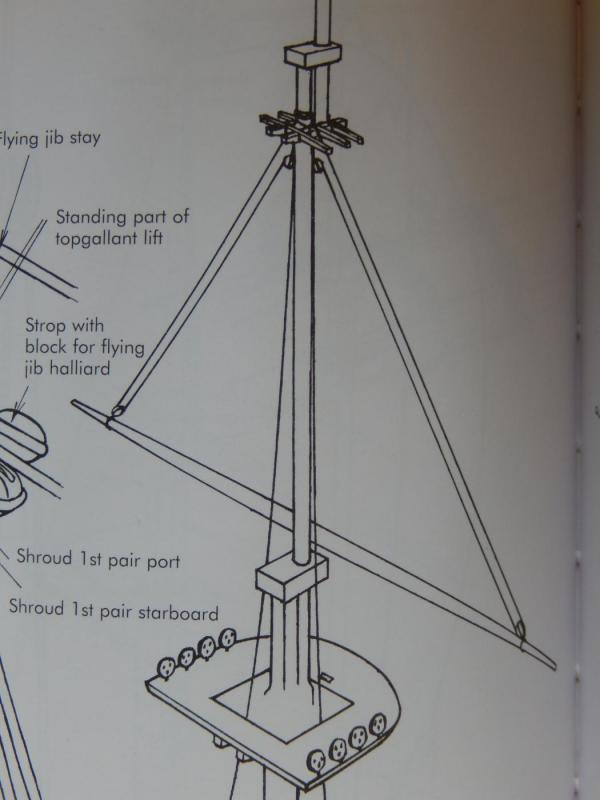
In one of your earlier posts Jose (replied to by Arthur), you wrote words to the effect that:
'2 x mm blocks for the topgallant yard lifts had to be rigged for the standing part of the lines - not shown on the block rigging drawing for the topgallant masts'.
Were you referring to my current problem? If so, how did you deal with it? Do you have a photo?
-
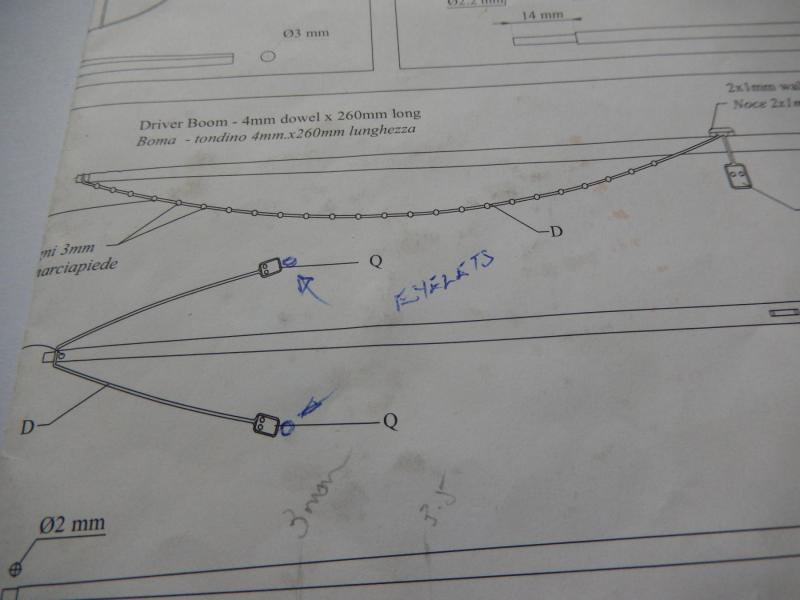
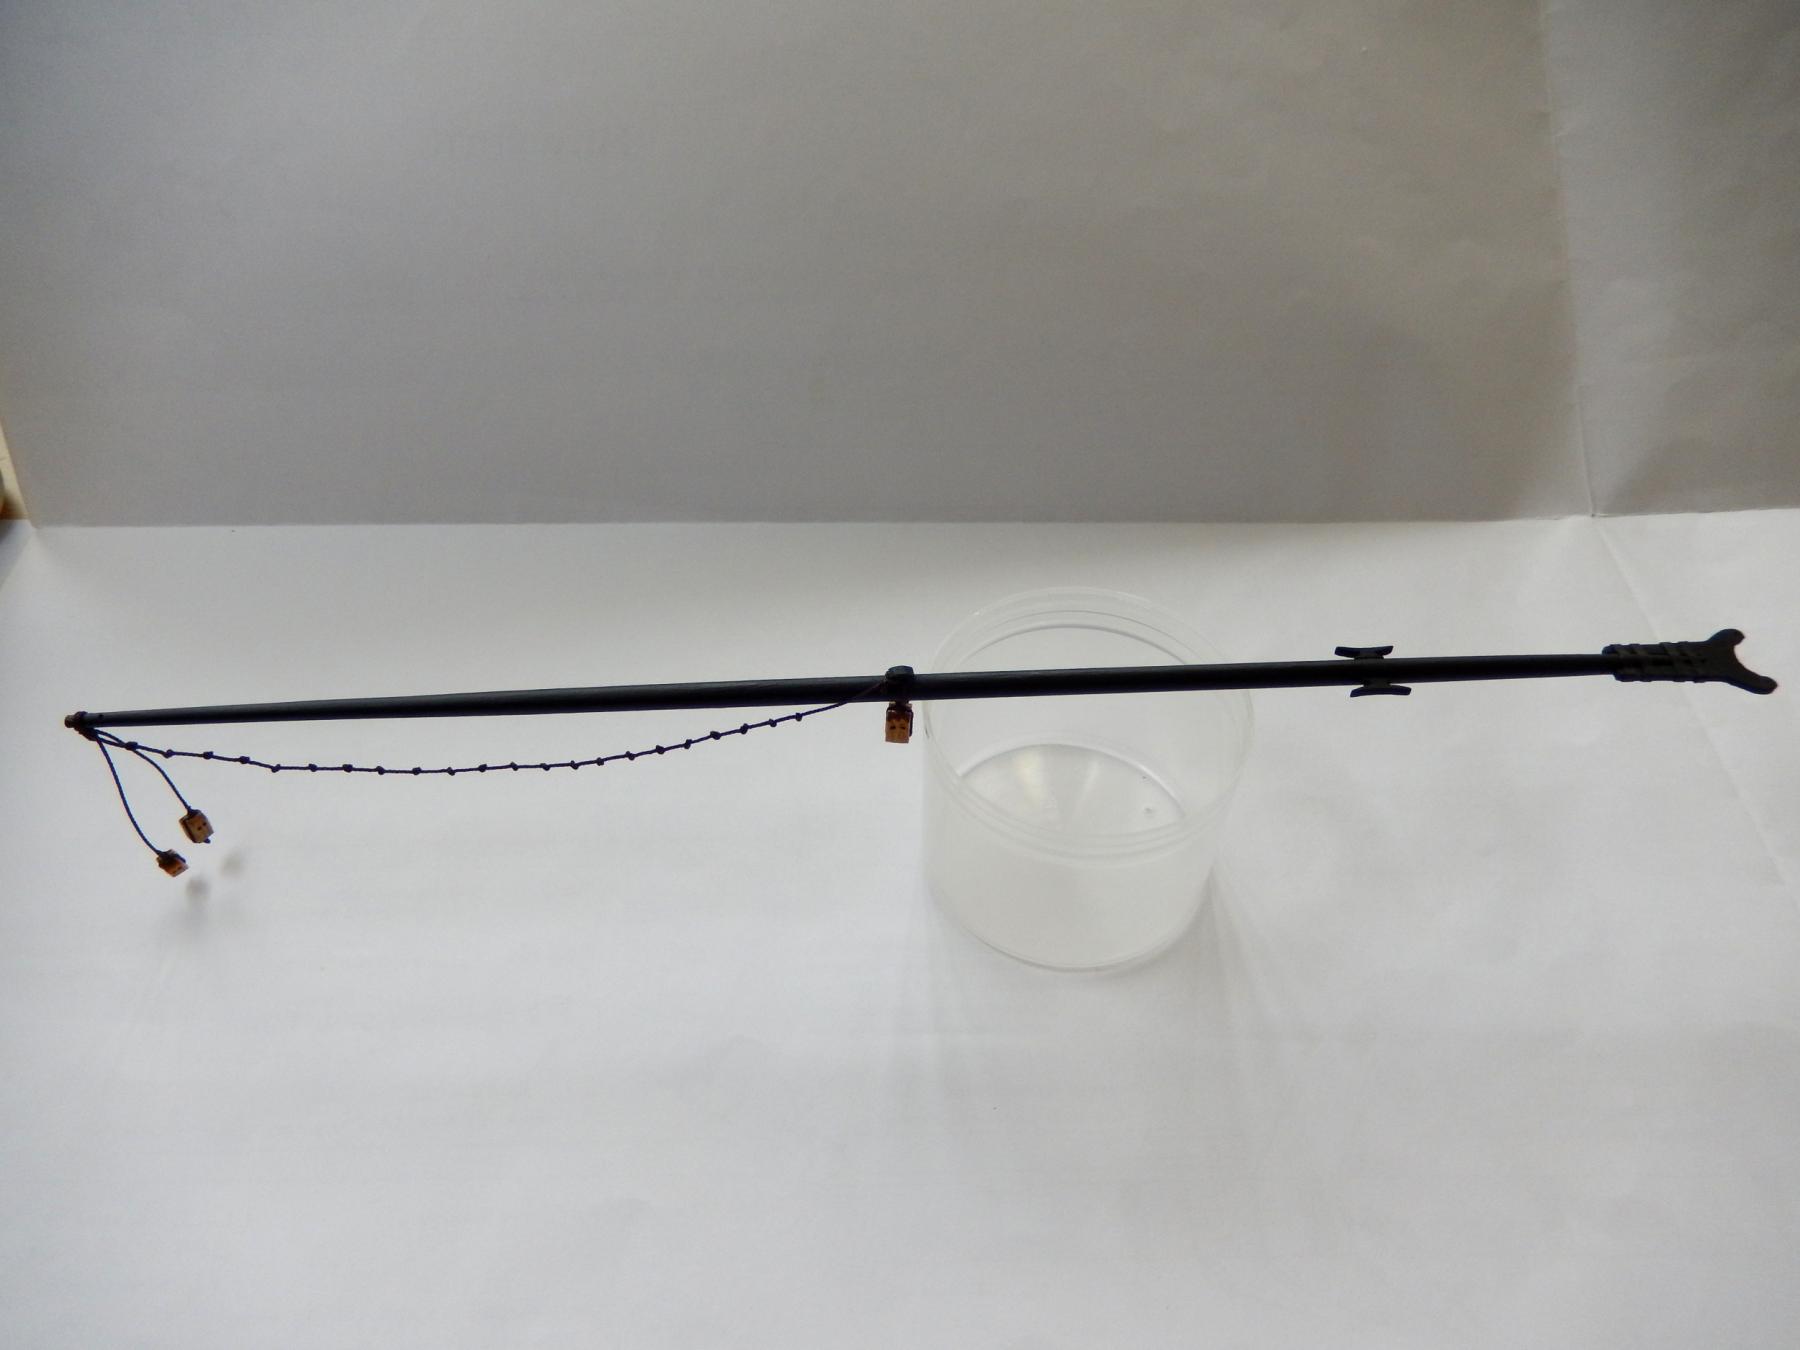
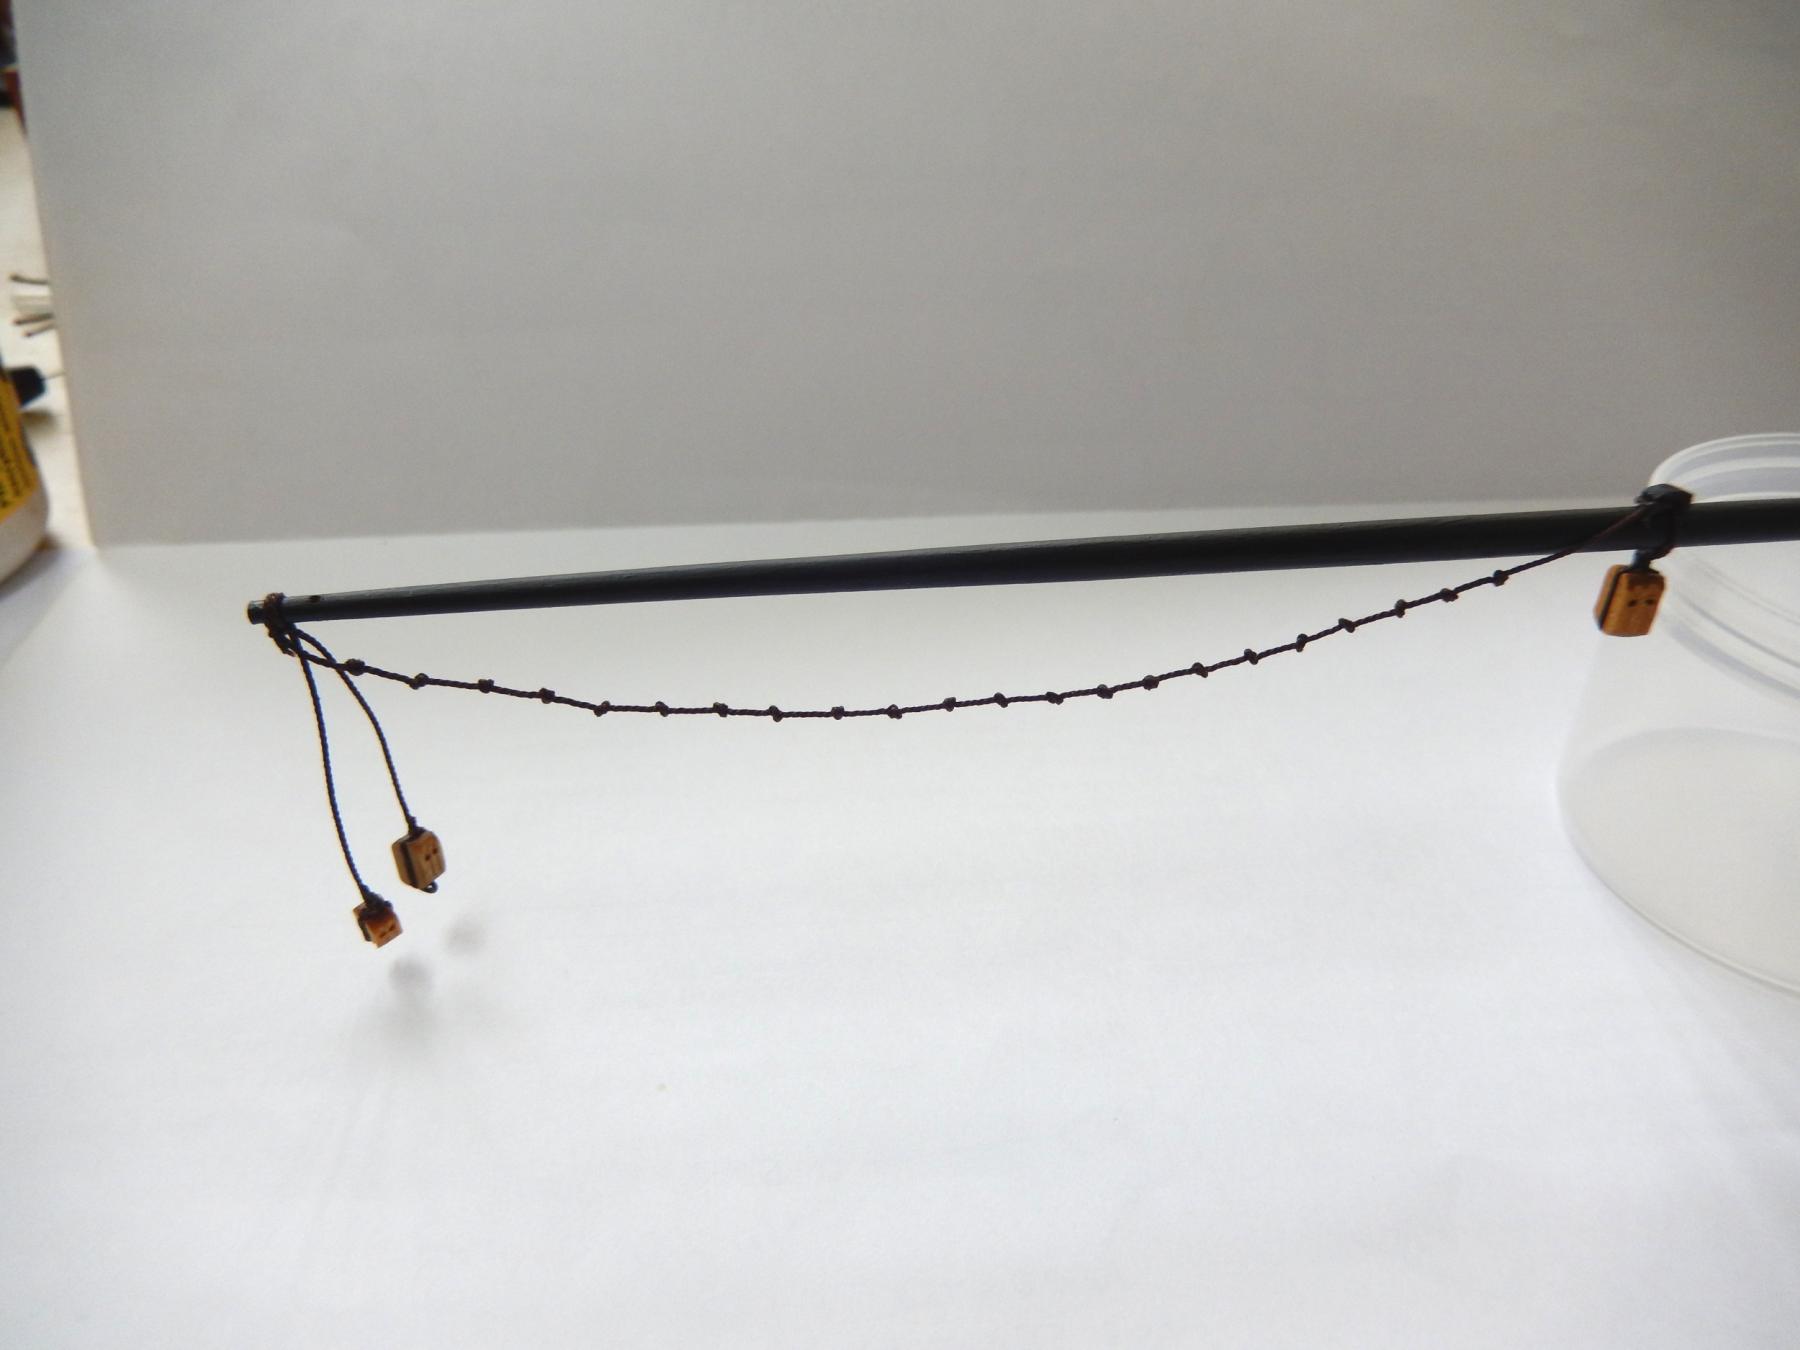
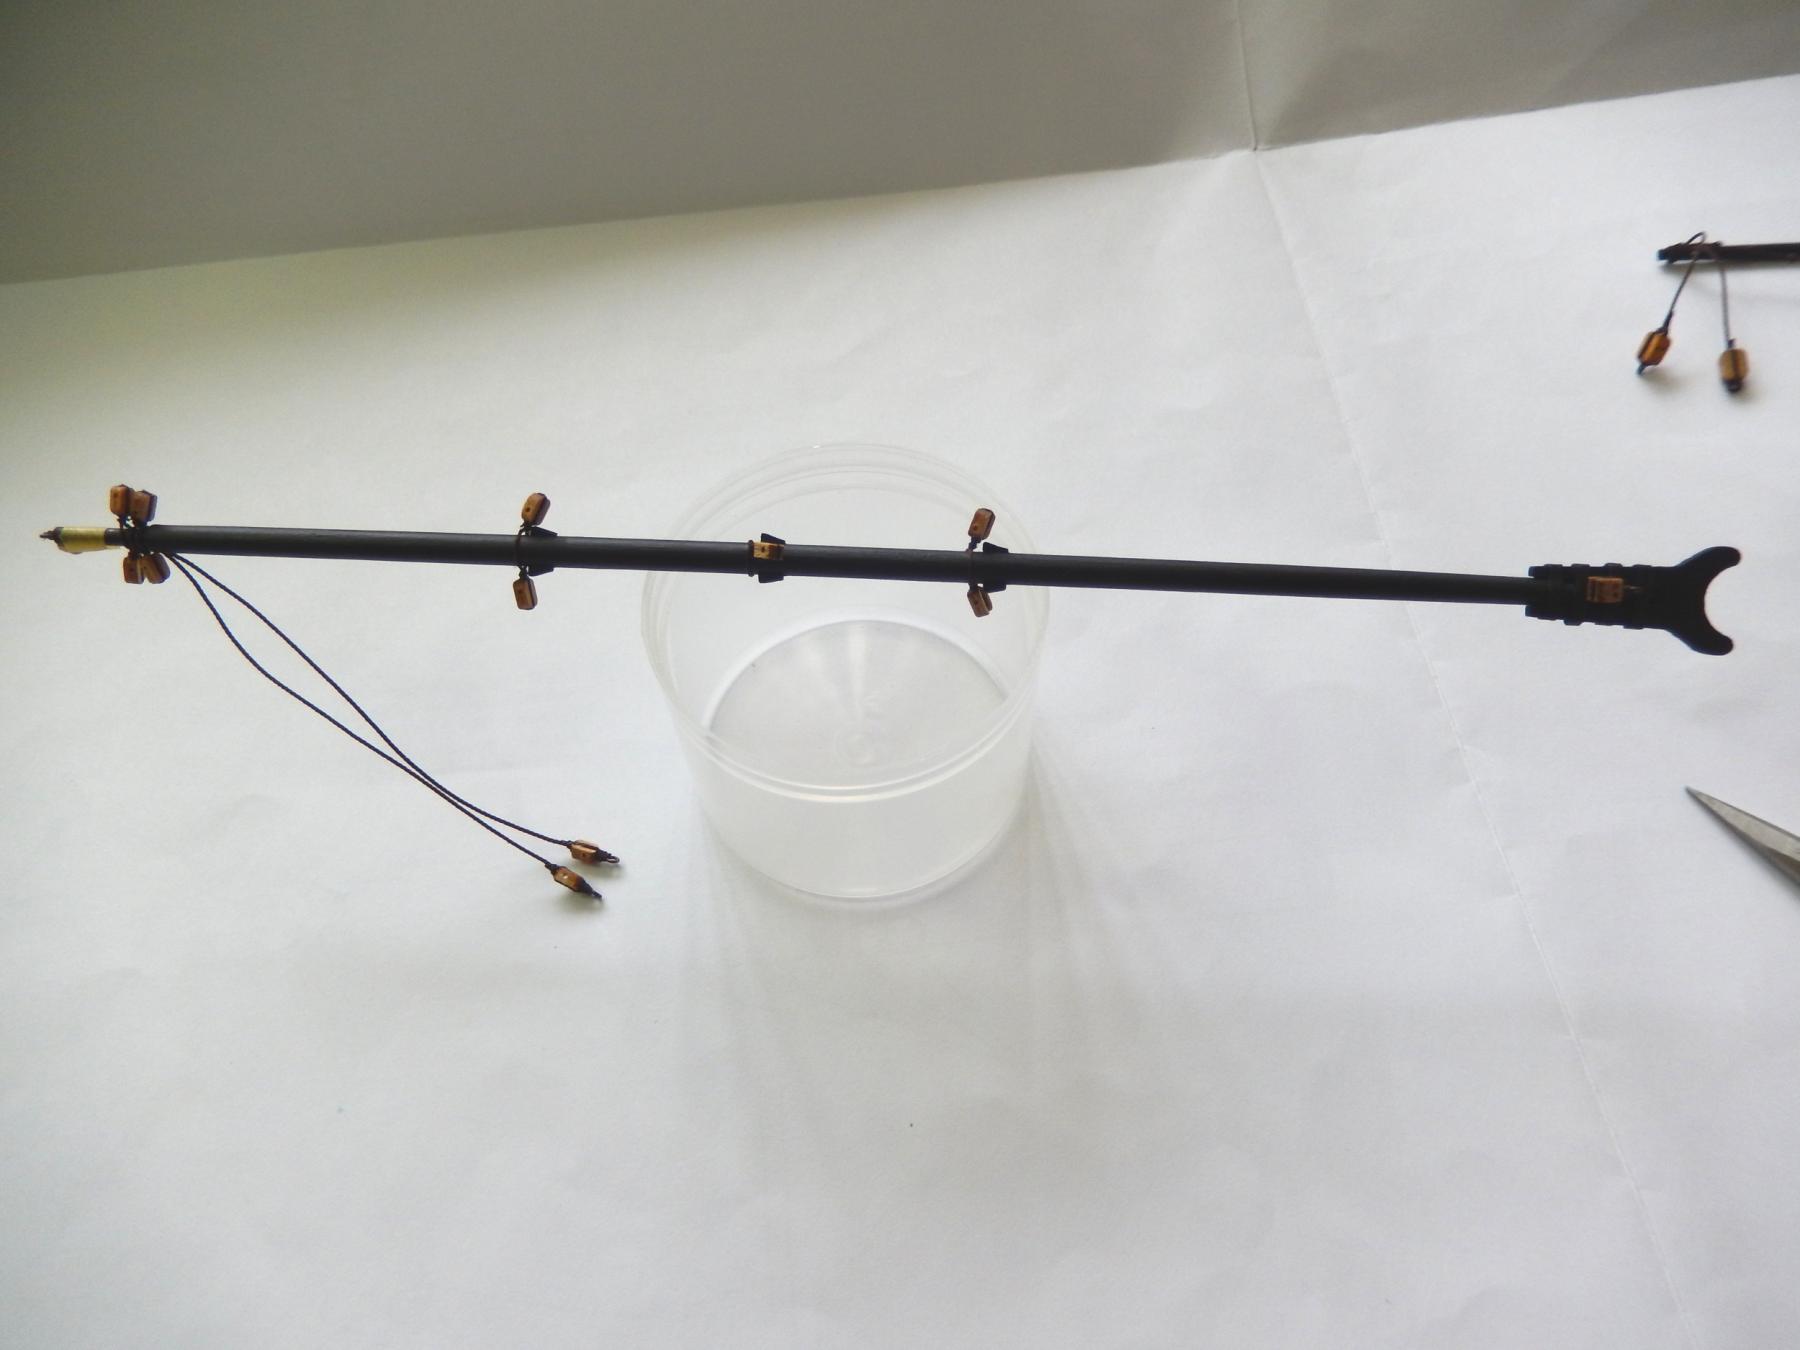
The driver boom and gaff are finally complete. They took far longer than expected. As well there is a minor omission on the plan which was a bit of a nuisance.
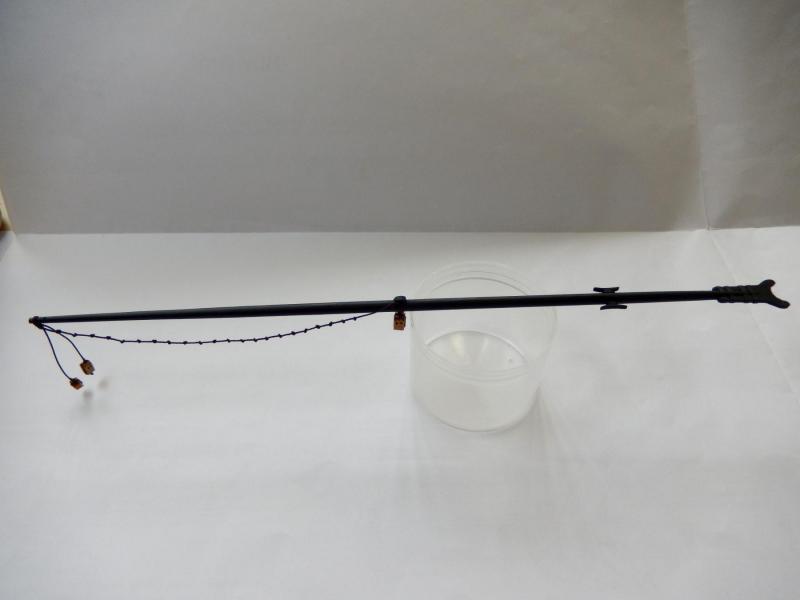
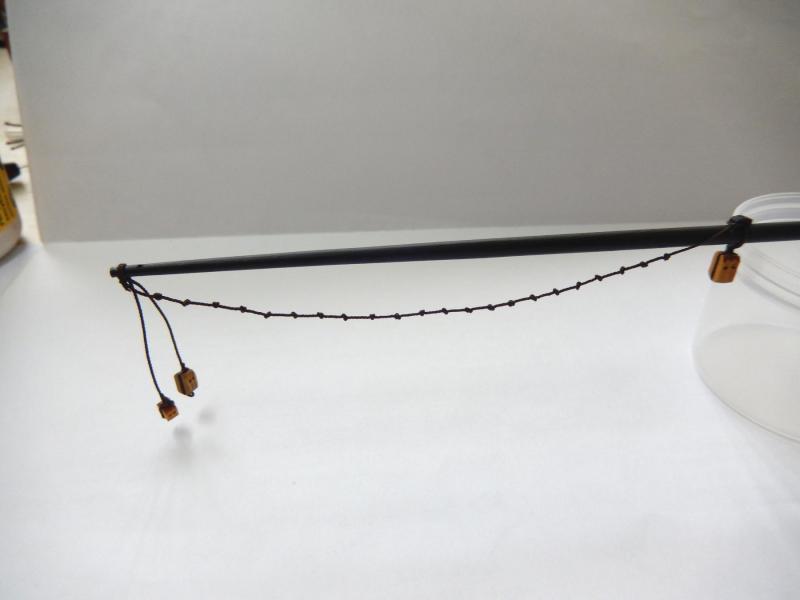
The yellow tape on the end is there temporarily to prevent the blocks coming off.

Of course I discovered my lack of eyelets a little later than I would have liked.
-
The odds on this are pretty long I imagine. I may even buy a lottery ticket on the off-chance.


HMS Vanguard by RMC - FINISHED - Amati/Victory Models - scale 1:72
in - Kit build logs for subjects built from 1751 - 1800
Posted
Valter - thanks for the kind comment - but as far as the 'chip' is concerned, I'm afraid you have the wrong man.
Hi Koen - thank you too for the kind comment.