RadMan
-
Posts
79 -
Joined
-
Last visited
Content Type
Profiles
Forums
Gallery
Events
Everything posted by RadMan
-
 I have the same issue on my Constitution. The two sides just don't perfectly match to our exacting standards.
 -
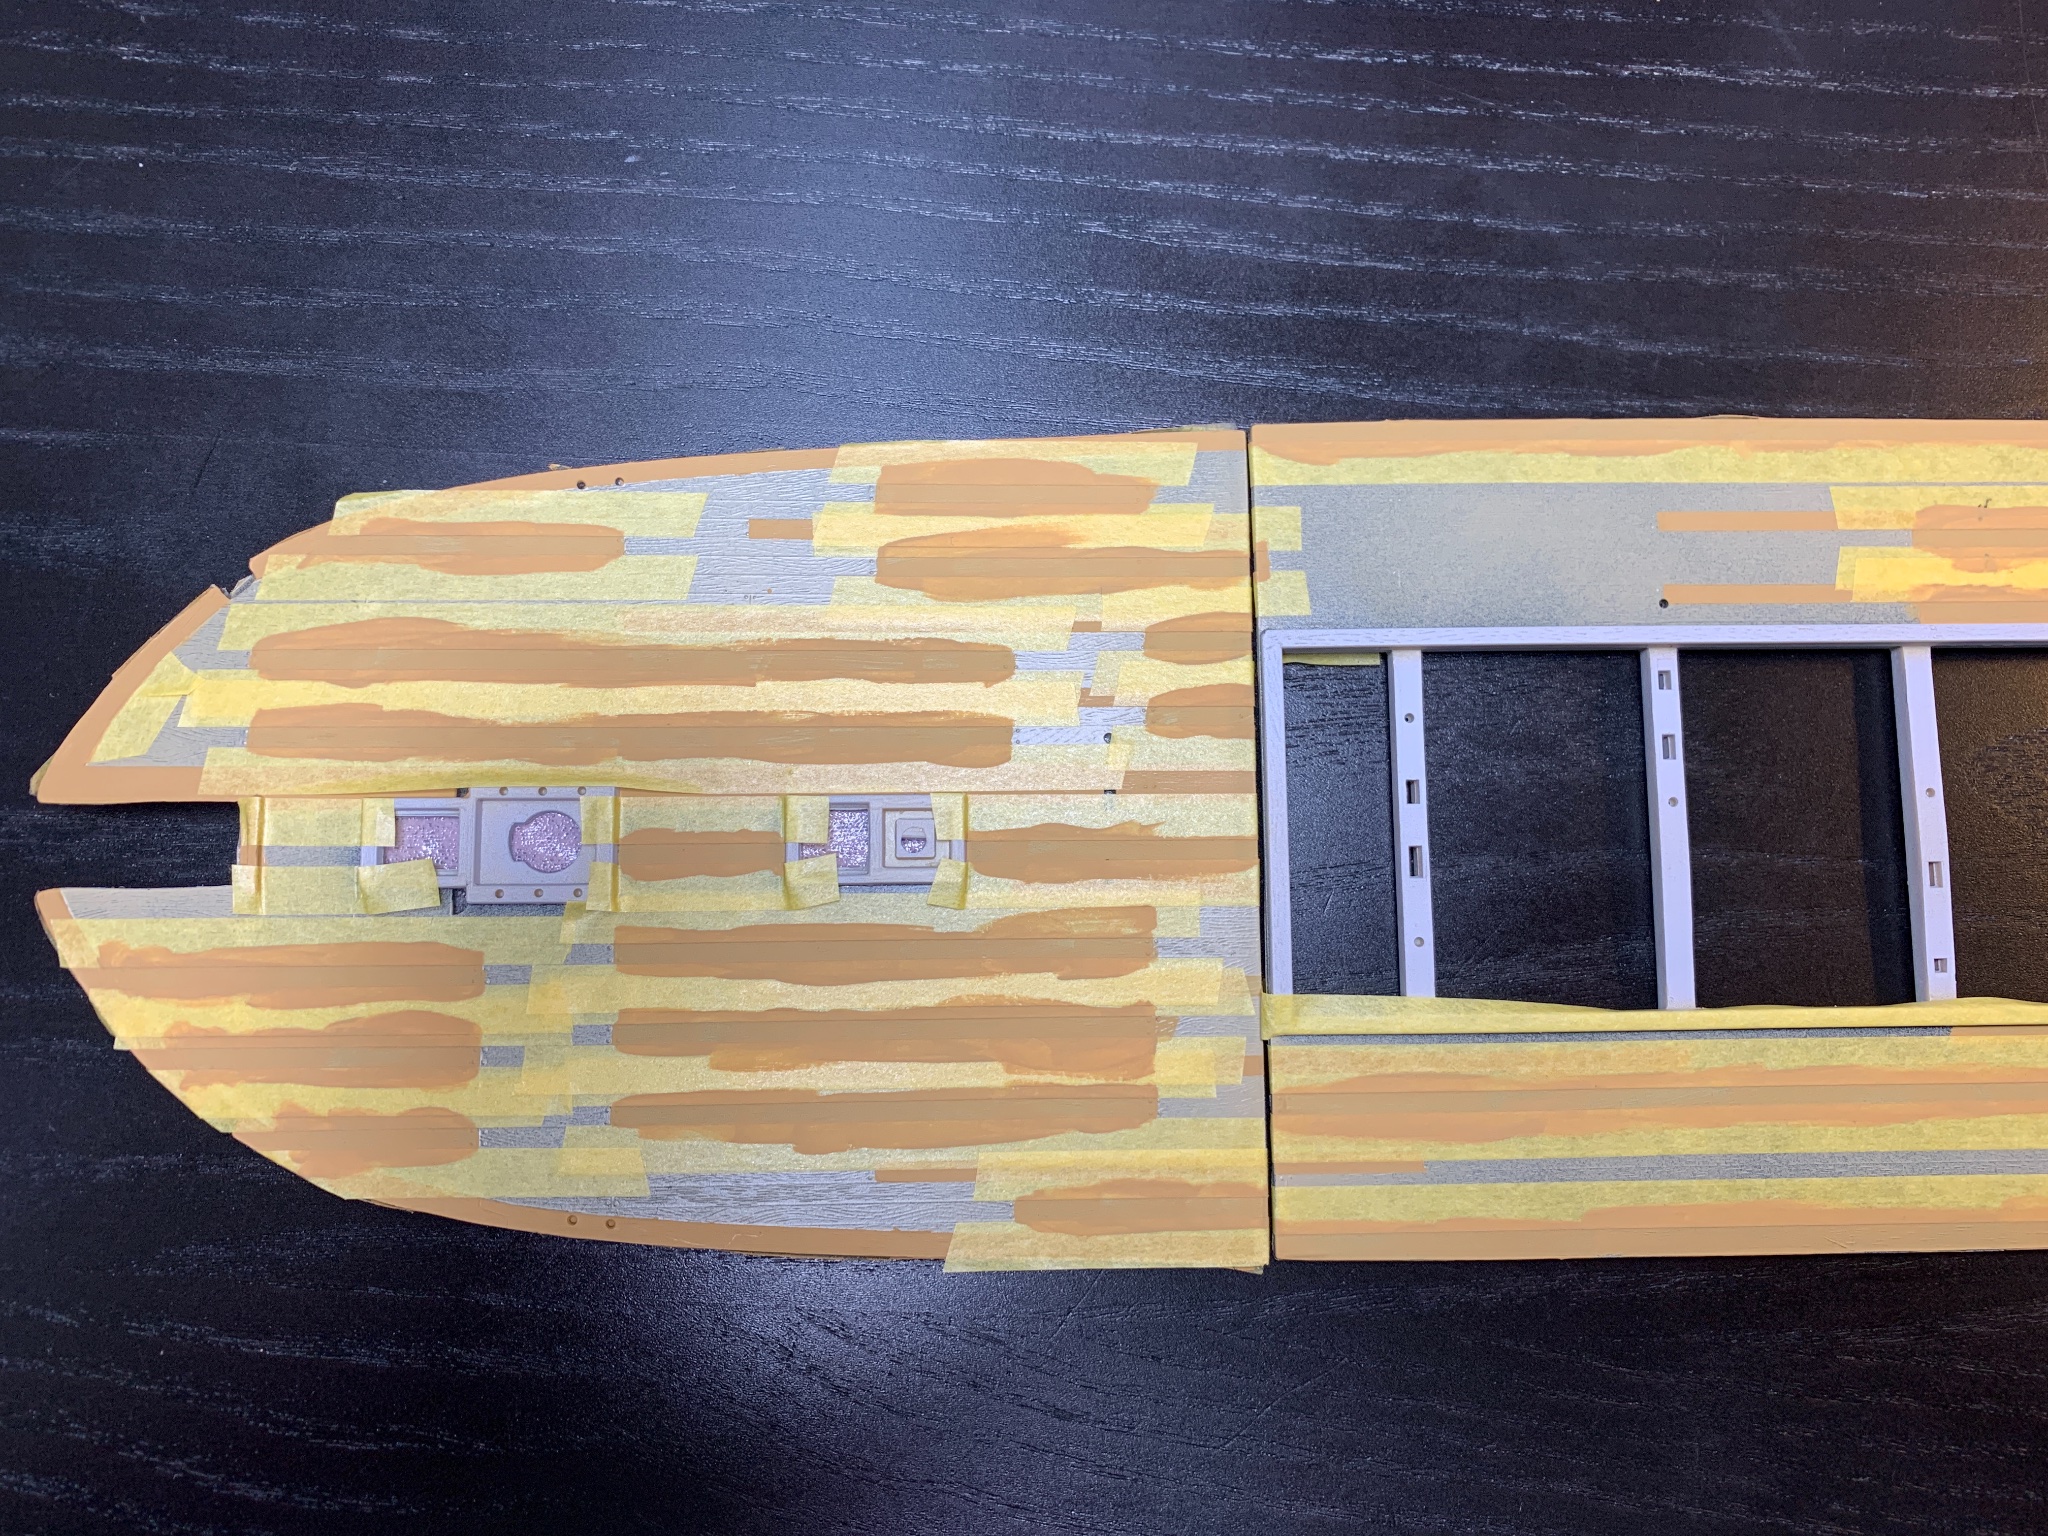
Next on to the decks. I plan to use the same method as others here. Deck is sprayed with black paint, then I sprayed a light coat of tan, next the individual deck boards will painted randomly with one of three shades of tan (tan; tan with a drop of black paint; tan with a drop of white or brown paint). Once that is done, I will scored the deck to bring out the black underneath. I know others have done this painting by hand, but I am just a bit to shaky, so I will tape it off. Brings back nightmares for taping the hull but there isn't much curvature so seems much easier. Perhaps won't take me seven years.

- 79 replies
-
- 4
-

-
- constitution
- revell
- (and 1 more)
-
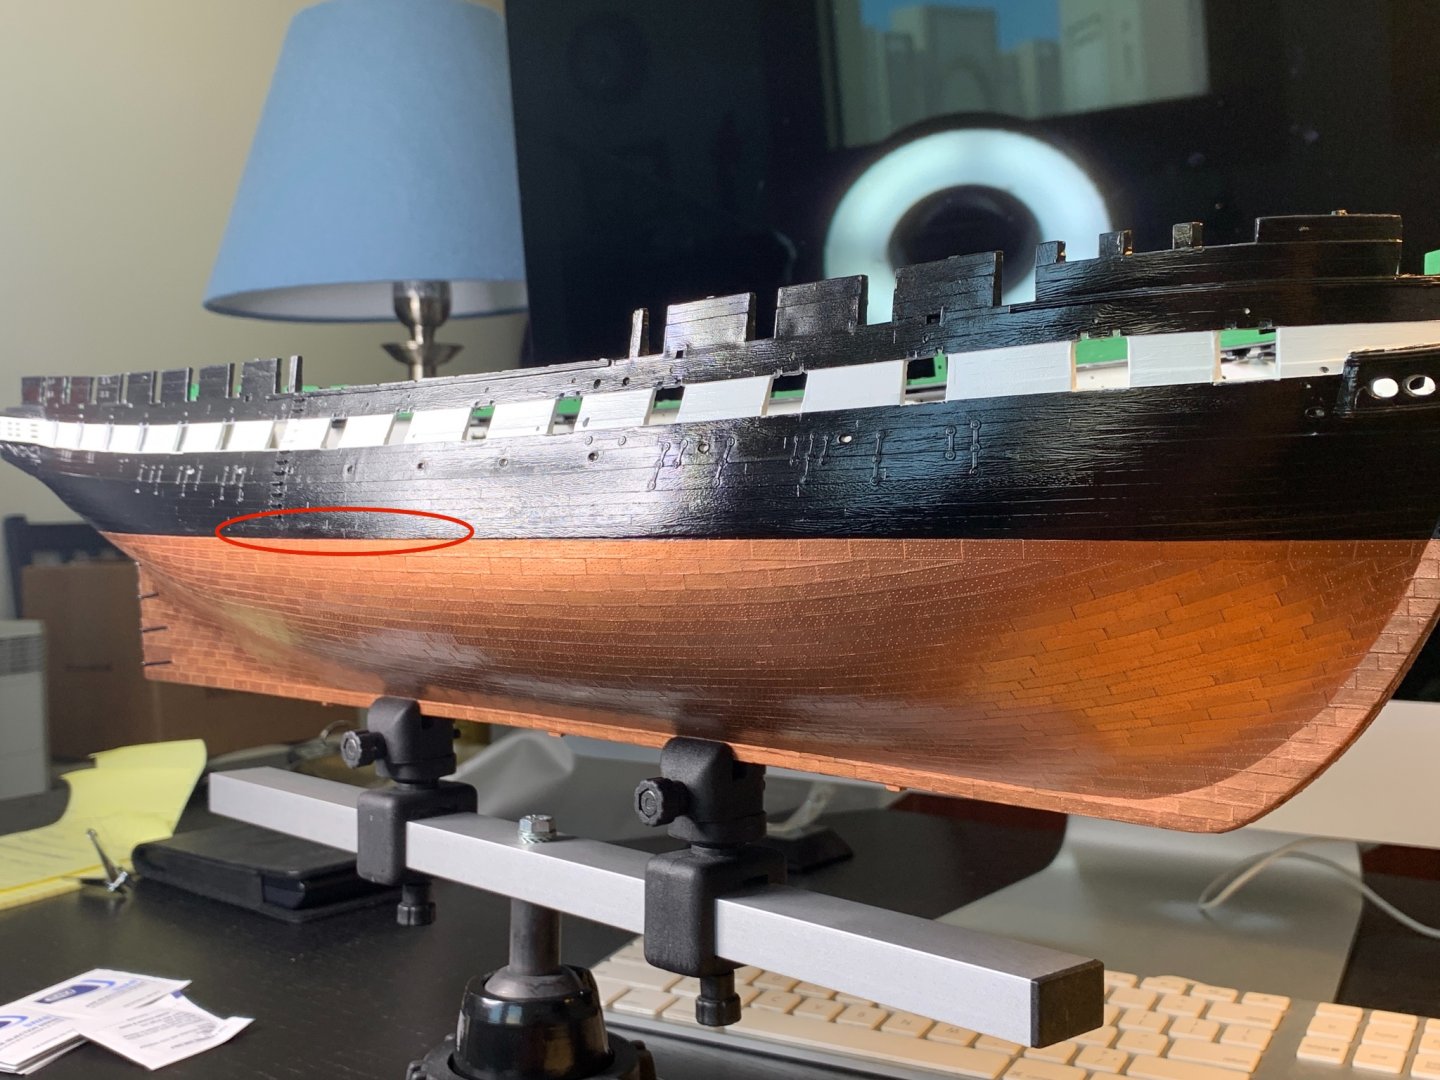
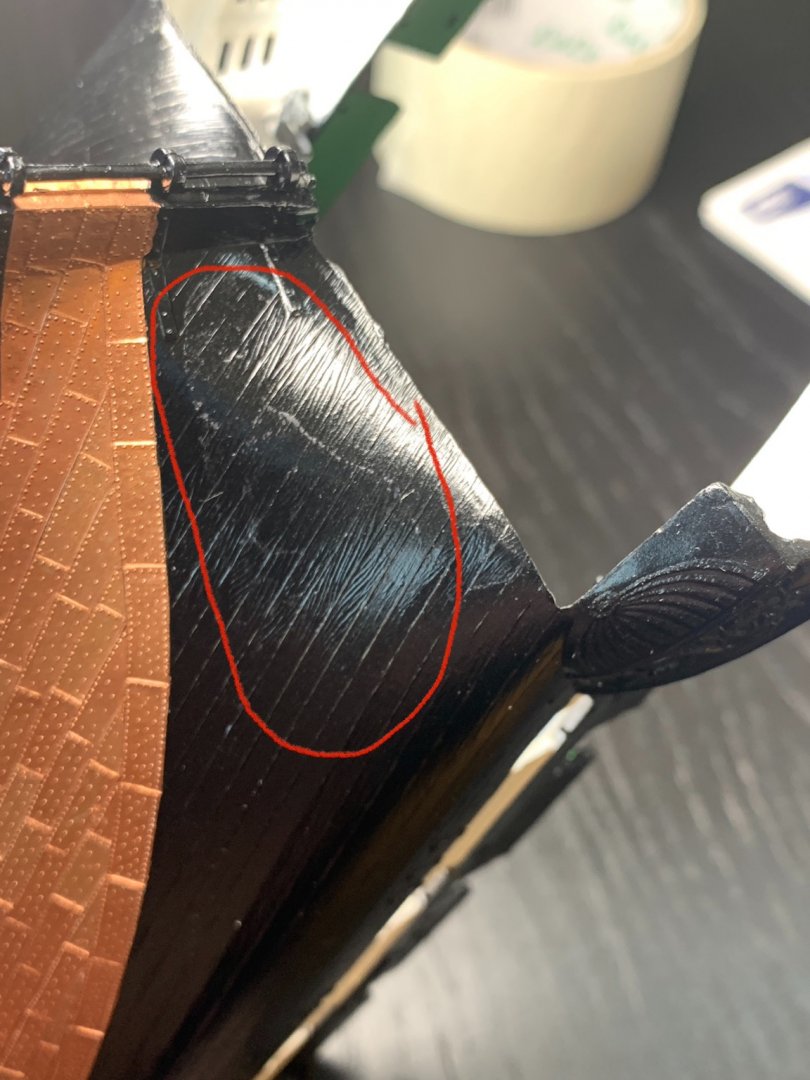
Well, one big problem I had was removing all the tape from the ship after laying around mothballed for 7-years. You can see the pink tape in the previous photos. I have some very bad tape residue to remove. I got it all off except in one place by the stern. The tape residue on the side I was able to get off but the residue on the stern just won't come out. I tried removing residue with new tape, dish soap and rag, olive oil, and finally windex. The combination of using new tape and then windex for the hard spots worked best.
- 79 replies
-
- 3
-
-
- constitution
- revell
- (and 1 more)
-
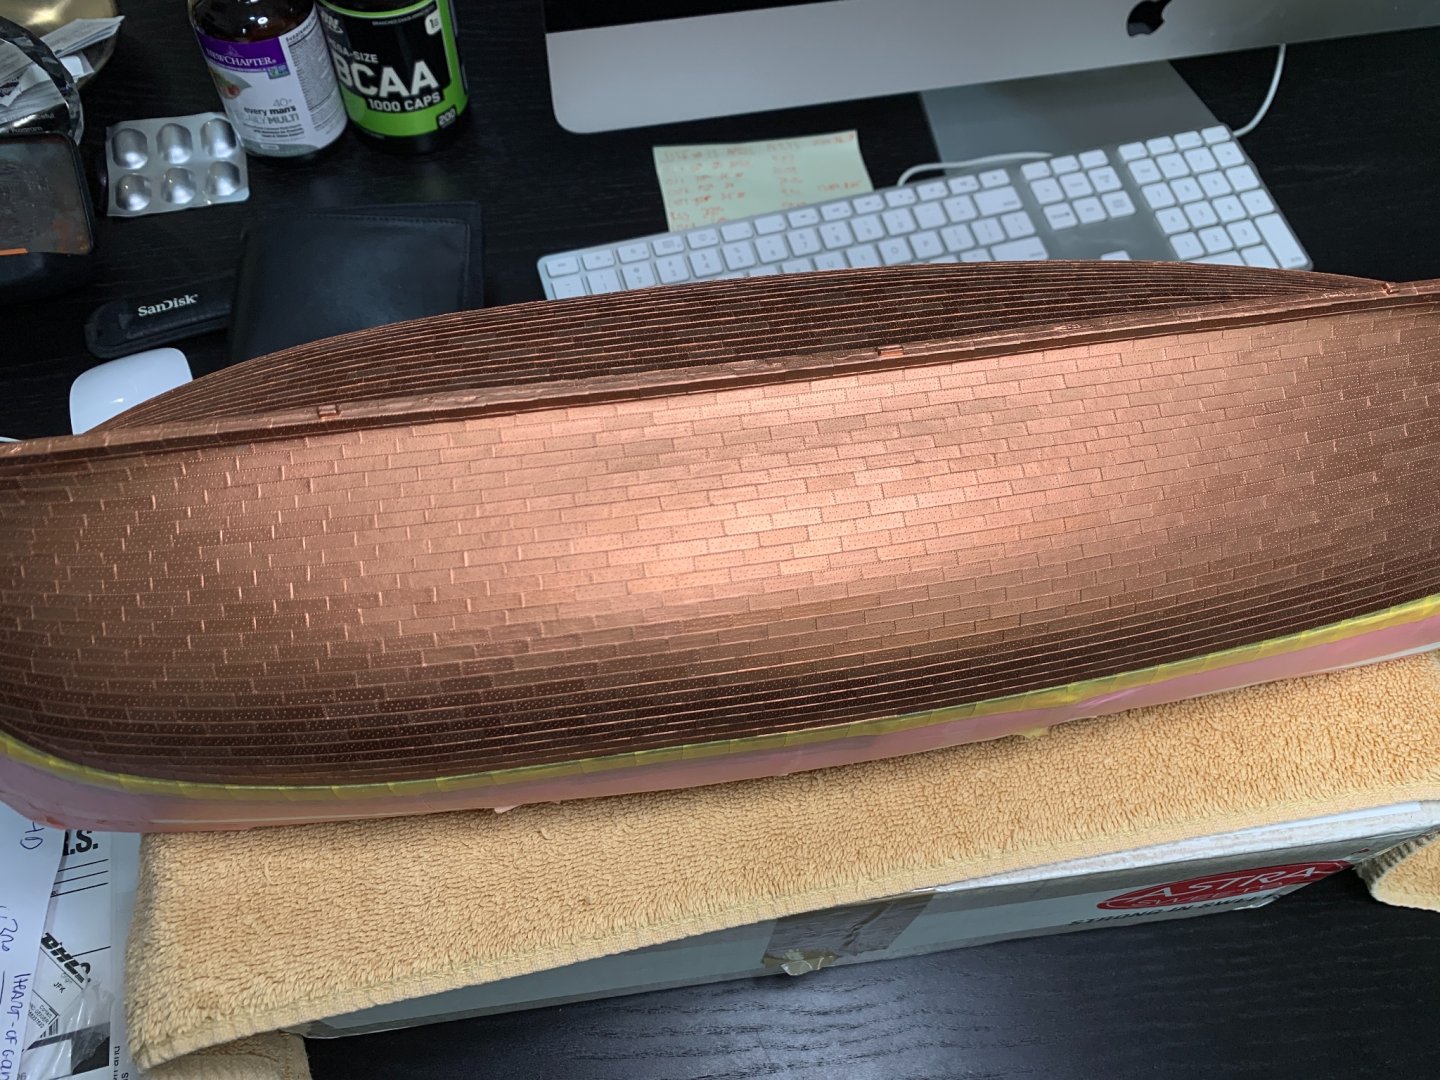
Well, after a 7-year break I have resumed work on Constitution...LOL, yes its true look at the dates in this log. I think my idea to shade the hull varying shades of copper was interesting in principal, but the shear enormity of the task and the relative little difference it makes overall was wasted effort. In any case I finally finished the hull. The photos are using light in a way to accentuate the difference in plate color, however, when looked at normally it is difficult to see much variation at all.
- 79 replies
-
- 2
-
-
- constitution
- revell
- (and 1 more)
-
mulwee, sorry to hear you also have 32.5 cannons, though, I now must admit that I have found the other 1/2 cannon.... I have no idea where it was in the kit but must have come loose and then got caught on some other black piece in the kit...trust me, I looked hard and never saw it. In any case, lambsbk came to my rescue by sending me some nice replacement cannons. As a side note, I am still working on the ship but have spent some months away from home and just now really getting back on it.
- 79 replies
-
- 1
-
-
- constitution
- revell
- (and 1 more)
-
I agree with all the comments regarding balance between the amount of detail and amount of time spent on the detail. So far, I have been spending lots of hours on the smallest details. The gun deck in particular is a bit of a dilemma. I will probably spent many hours doing the "AndyMech" method of deck detailing which nobody will be able to see...I have thought more than once that I could probably just put it in "as-is" and nobody would even notice (of course I won't do that). The way I am justifying the gun deck detailing is that it will be my practice for the spar deck which will be much more visable. Relating to the photo, I haven't done it yet, but when I do, I will let you know how. The detail will vary depending upon your printer and type of paper used. Also, you mentioned a "bit mapped" photo...don't start with a bit map, use tiff or jpeg. I may experiment a bit this weekend on it.
- 135 replies
-
- 1
-
-
- Constitution
- Revell
- (and 1 more)
-
Dave, nice job. I expected the exterior hull to look much worse after the drill-thru and putty. You really have to zoom the photos to even see the putty. Maybe I'll do it... I am just so enamored with my spray paint job on my exterior(LOL)... well, I will decide when I get to this step. I have some time. I am 60% done with the hull paint and still have the decks to do, so it will be a while before I must decide. However, I am really impressed with the detail for this part of the build, and I think I will try something similar.
-
I really like the detail on the copper hull plating... it's probably the best wash technique I have seen. It almost looks like a dry brushing of black paint. I would be interested to know more on the technique you used.
-
Hey Verne, I just found your blog. It looks like things are coming together nicely. I am enjoying all the true-to-life history of construction that I have learned since joining this forum. Though it makes perfect sense that the knees are made from the bottom of the tree and roots, I would have never guessed that. People really knew what they were doing back then when it came to building ships...I wonder today if we could even find trees mature enough to make the build. In any case, i will be following your progress. Welcome to MSW.
-
I would be interested to see some photos of the exterior hull where you did the patch with the modeler's putty.
-
Thanks for the info! I feel a little better now that I don't have to deal with the curvature, however, there is still the issue of warpage. I have two ideas, the first is to run hot water of the pieces and gently bend back to the intended shape, or the second would be just to ignore it and let the glue take care of it when I cement the spar deck down (though this won't help with my warped gun deck bow piece because according to the Revell directions, you don't glue this anyway). For the gun deck, I thought about just cementing some type of block or spacer to keep the bow piece from floating up (the warpage seemed to pull the bow up too high when I dry fitted it). Dave, and Force9, thanks for the clarification on the camber.
- 79 replies
-
- 1
-
-
- constitution
- revell
- (and 1 more)
-
I like the idea of the barrels for deck clutter, did you fabricate the barrels or purchase them somewhere? If purchased, from where?
-
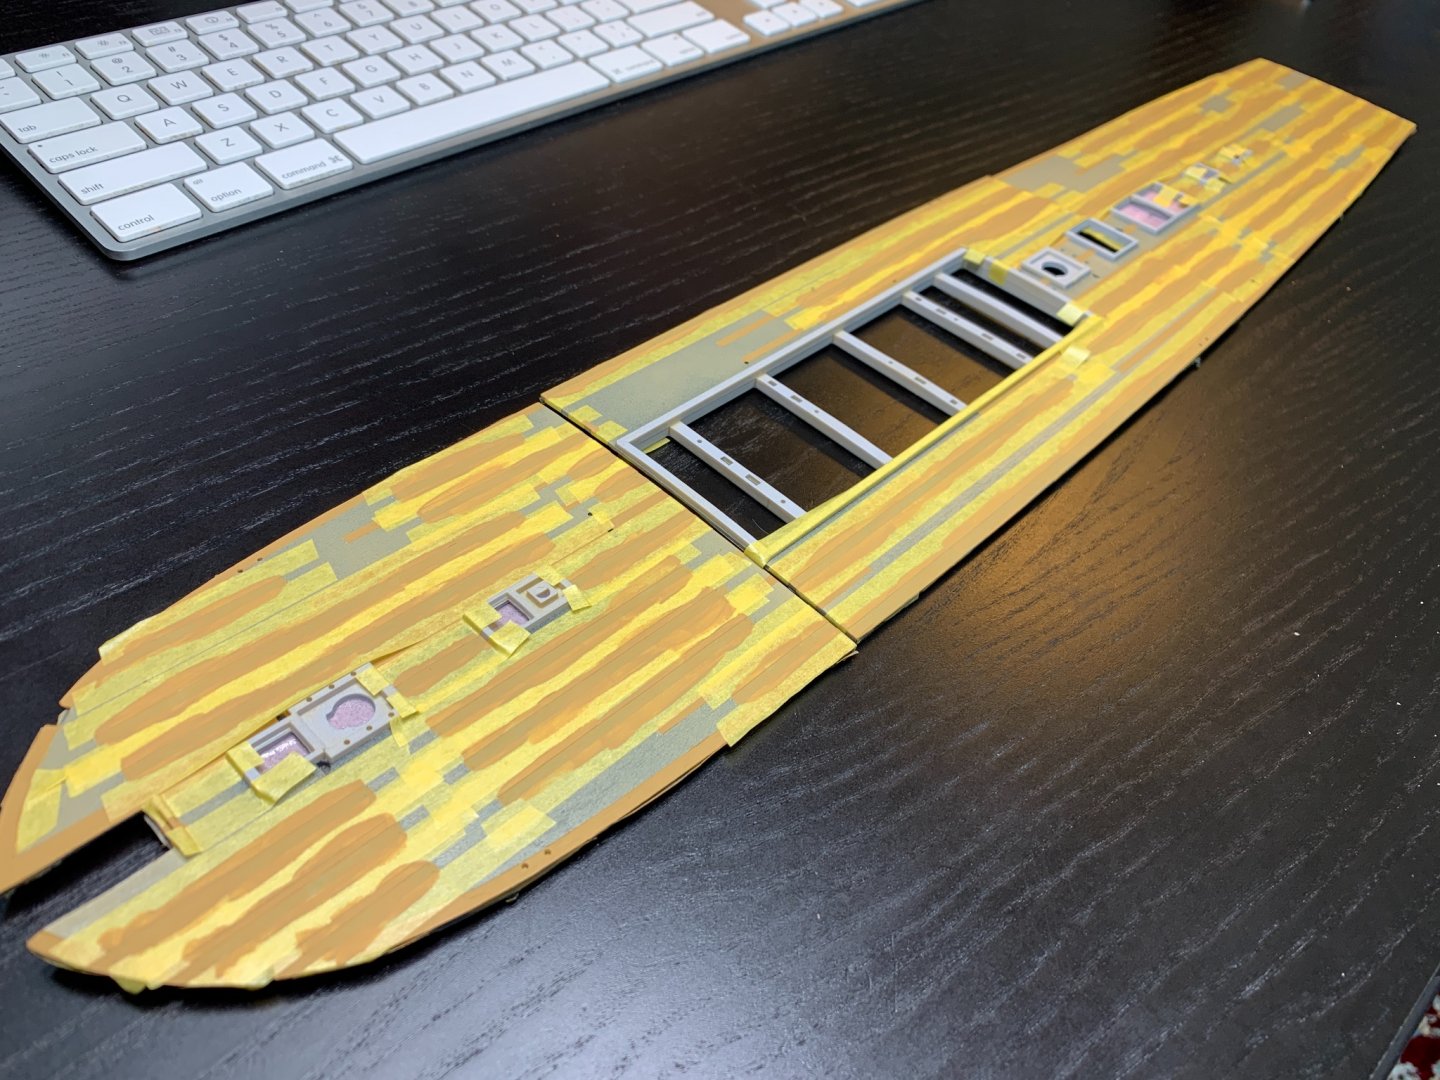
ARGH! THE DECKS ARE WARPED! Regarding the Spar deck. I started to prep the Spar deck for eventual painting (btw..I am still only 40% done on the hull plates). I noticed that the Spar deck pieces are warped and/or have a curvature to them. I realize that they shouldn't have any warpage, but the curvature almost looks intended. I also had some issues with the bow piece of the gun deck. If anyone knows a good way to straighten these decks, I would appreciate your wisdom. Here is a photo of the warped aft Spar deck: Below is a photo of the Spar bow piece with a slight curvature to it. All the Spar deck pieces have this curvature which is why I am asking if they should be flat or not.
- 79 replies
-
- 1
-
-
- constitution
- revell
- (and 1 more)
-
I am enjoying the progress on your gun lashings. I am also not happy with the Revell attachments for the breeching to the bulwark. In fact, when I was first trimming plastic for the hull, I almost trimmed them off as injection marks. They are suppose to have a small crack in the post where you insert the line, but most of mine are completely fused due to bad injection quality. I don't know how you were able to safety drill into the hull and mount eyebolts. The bulwark is maybe 1-2 mm thick, and I think it would be really easy to drill through the hull and if the hole wasn't deep enough, the eye bolts wouldn't stay firmly fastened. So, great work! I am considering doing this now. I just need to make my shopping list of things to get. Did you say you had a source for where to buy small brass eyebolts? Also, are you painting the underside of the spar deck (ceiling to the gun deck) white??
-
Dave, a great idea for prepping the deck for gluing, especially the jig, I would never have thought of that. In the back of my mind I've been wondering how I would glue the cannons to the deck after putting primer, black, and tan deck paint on... there is no plastic for the glue to stick. It is an excellent idea, I might just buy myself a dremel when I take a vacation in the states in Nov.
-
Hmmmmm, that is exactly what I am using. Revell color and a No. 3 flat brush.
-
Thank you all for the kind encouragement, it's what keeps me going!
- 79 replies
-
- 1
-
-
- constitution
- revell
- (and 1 more)
-
Smart idea to paint the hull halves before cementing them. I have quite a few ideas of how I would do things differently from the instructions now (of course it's too late for any of these ideas to matter). I also really like the copper color on your hull. Can I ask specifically what you used??? I am hand painting my copper hull and its a huge pain....
-
I think it's a great idea to mount your ship on some real wood. I never liked the mounts included with the kit, they look cheap somehow.
-
I've been away a couple of months and just now catching up with your build. WOW! excellent progress and quality workmanship! I really like the extra detail you are adding to the deck.
- 601 replies
-
- 1
-
-
- constitution
- revell
- (and 1 more)
-
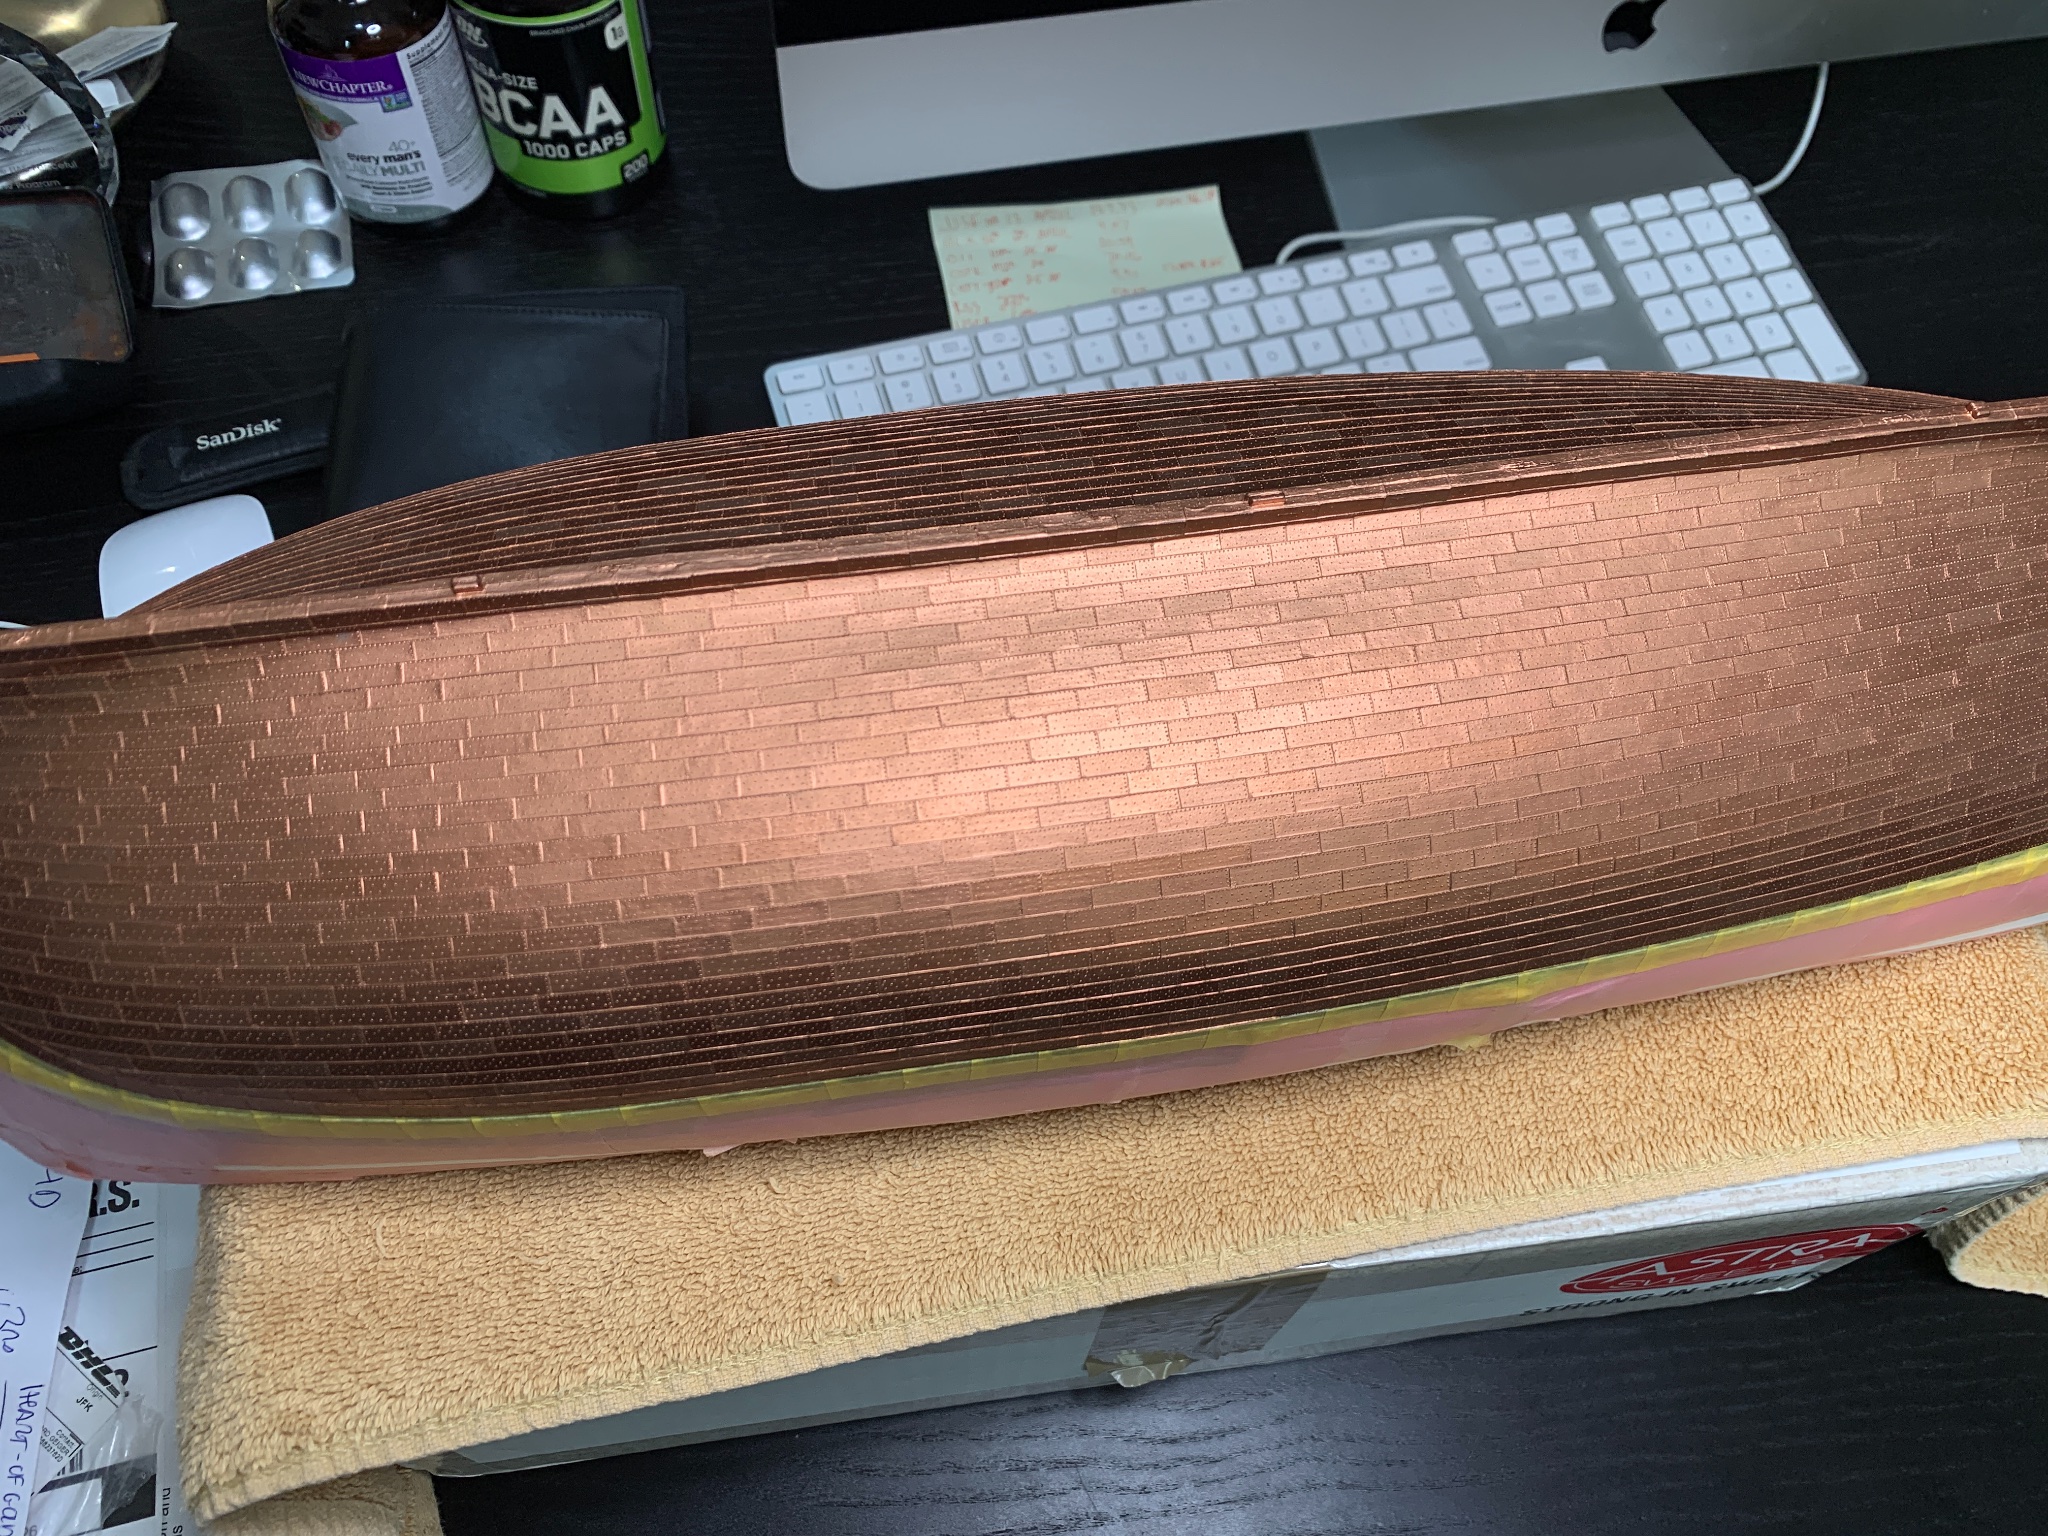
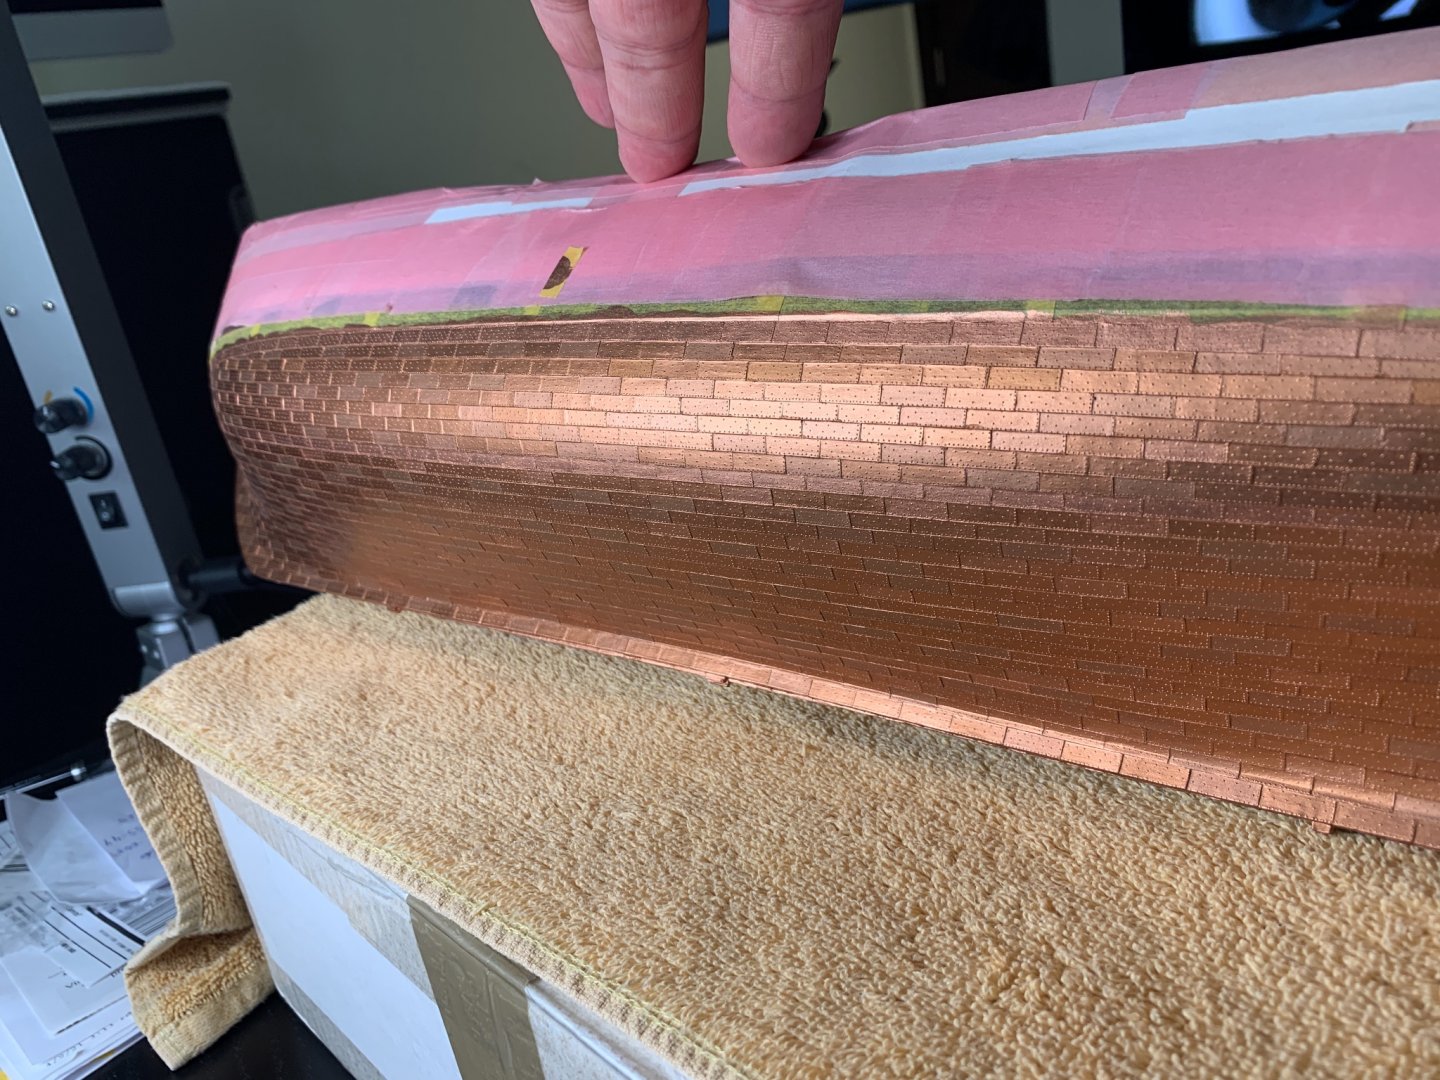
Below, I hand painted the layout-coat of "random" clean-copper plates. I also experimented with shades of off-copper. Sailcat is correct that the shading is critical, because adding too much green paint caused the copper to lose its metallic shine... and once the shine is lost, the contrast it too great. You can see a few of the "experimental" plates where the shine is completely gone. It will be a very delicate balance for me to get it just right. Next step is tape off the plates to get good clean lines for the remaining two coats of copper and off-copper color. I am amassing an enormous ball of Tamiya 6mm tape....it is a work of art in itself. I am also no longer planning to tape off individual plates... per lambsbk advice, it's just too time consuming.
- 79 replies
-
- 3
-
-
- constitution
- revell
- (and 1 more)
-
THE ASSISTANT: I have a new assitant to help me with the model. Although his painting skills are on par with mine, he really isn't getting any work done, and in fact, takes a lot of my free time. Although after a two month hiatus, things are getting back into a routine and I have some time to work on my build again. Lambsbk, Popeye, Sailcat, Patrickmil and others: I appreciate all of your advice and am trying to follow it as much as possible. I am still working on the copper hull plates. I continue to tape, paint three coats, untape, and then start all over again on the next row of plates. I wonder if this will take forever. Sailcat/Lambsbk, your skills at applying the various washes are impressive, but I am really nervous about doing anything like that. I can imagine in one 30 minute "wash" session I could screw everything up and have to start painting from scratch. I just can't take the chance.....yet. My plan in to continue the hand painting and shading of the copper plates. I have mixed one batch of off-copper and use that as the main off-color coat. I also mix some on the fly to add different hues. If after all this, it looks like crap, I will either just paint everything clean copper, or take the plunge with a wash.
- 79 replies
-
- 1
-
-
- constitution
- revell
- (and 1 more)
-
Patrick, your build looks awesome. Nice batch of beer as well! Nothing like a nice cold one to steady my hand when I am painting!!!
-
Patrick, that is exactly how I envisioned it!! That the variation in color could be due to the manufacturing process back then or grain, how the plates were stored, etc. Dave, thanks for the advice. I have been doing that a bit on the other half of the hull, but then tried vertical taping as well. But you are right, the little bit of vertical taping adds a lot more time. An additional problem is that I must double or triple coat everything to get good coverage. So vertical taping is OUT. Thank you all for your support!! I am feeling more motivated to keep going.
- 79 replies
-
- 1
-
-
- constitution
- revell
- (and 1 more)
-
Thanks Popeye! I wasn't really going for a weathered effect because it is beyond my skill level at the moment. I was trying to create some variation in color of the plates (something that might appear as normal variation in color of the real copper) in order to emphasize them. I just didn't want a homogeneous look. However, its becoming a real PIA and I am leaning towards abandoning this effort.
- 79 replies
-
- 1
-
-
- constitution
- revell
- (and 1 more)