-
Posts
202 -
Joined
-
Last visited
Content Type
Profiles
Forums
Gallery
Events
Posts posted by DavidG
-
-
Hello Peter, good luck for your search for the manual. It may sound silly at first... but if you have the plans and still feel the need to a pictorical manual, look thorugh a manual of a different ship from the website of Artesania Latina or Occre. These type of kits have very similar design, and you may get answers to building sequence, planking tips etc, even it's a different ship. Hope you find what you are looking for, though.
- clearway and Keith Black
-
 2
2
-
Amati sells such blades like this one, but have a look around as there are different types of them.
But this plastic tool is not designed to cut such thick strip as the 4x4. For that one you will need a saw. The use of this is to make repeated cuts by the same length or same angle, like cutting deck planks from thin strip (after adding a stop to the tray).
If you can't cut the strip by a handheld knife, neither this tool will do.
- Toolmaker, mtaylor, Roger Pellett and 4 others
-
 7
7
-
you may give it a good sanding, fill the gaps and add a further, thin 3rd layer of planking as an option.
- modeller_masa and mtaylor
-
 2
2
-
if you look for kits, the new Artesania Latina Victory section is probably the best one on the market now.
- mtaylor, Artesania Latina and Canute
-
 3
3
-
you may have a look on the Artesania Latina Hermione kit for a second build here https://artesanialatina.net/en/ships-advanced/484-wooden-model-ship-kit-hermione-la-fayette-frigate-8421426325171.html?mot_tcid=e87a7115-6a0e-4f2d-91d3-dbc3fbc2526a. It's a newer design than the Occre one, and definitely fulfils the need for detailed instructions. Still uses plywood parts a lot, but for the price it seems to be a decent offering.
-
Quote
My theory to pick out the name didn't work. Sure I can rescue it though
It wasn't a bad idea but.. Before painting, one-two layers of gloss varnish would prevent the paint soaking into the surrounding wood. Then you can brush paint the letters, wiping off the excess in the process, finally finishing off with flat varnish.
- AJohnson and BrochBoating
-
 1
1
-
 1
1
-
I have one of these. It's made of plastic and not self-centering, the jaws must be adjusted one by one by plastic screws. I didn't find much use of it.
- Canute, mtaylor and thibaultron
-
 3
3
-
on the Occre facebook page, people post pictures of their numbered Victory kits. Someone posted one with #249 on it. The kit must be a good seller, confirming they are on the top of the marketing game.
- mtaylor, Canute, Rik Thistle and 1 other
-
 4
4
-
Look fore Evergreen styrene strips in model stores. Most model train stores carry it.
Alternatively, you can order AK strips from Spotmodel, which is just as good : https://www.spotmodel.com/product_info.php?products_id=57771
-
in addition to the good tips above, you may consider scratch building it from various strips, I would even consider styrene. There are no difficult shapes here, and the decorative trim can be made from brass wire or modified eyebolts. The panes can be built up from segments, glued to a transparent background, or maybe take some overscale kit gratings, and sand it thin.
-
-
On 7/12/2023 at 10:18 PM, Lastcore said:
If you have any suggestions for cheap cases, I am all ears.

probably the cheapest option to make it yourself with premade profiles and plexiglas:
https://occre.com/en/collections/peanas-modelismo-naval
-
Hi Evan,
good luck for your bottom plating. I did it on mine, it took me a month, but enjoyed the process, despite most of it will be hidden.
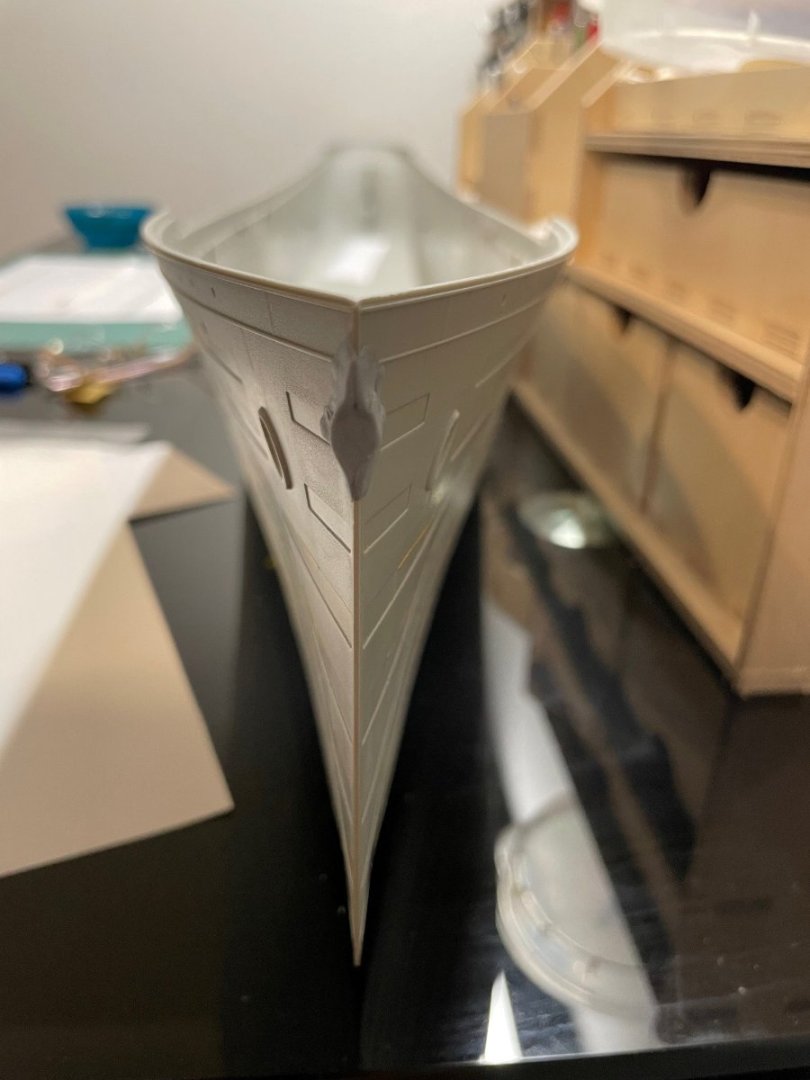
There seems to be three sources for the layout; the mentioned planking expansion, a scaled underbody view and the Woody kit. Note, all 3 are different patterns. The styrene kit is probably the less hassle, and fits well to the kit hull, however quite expensive. I investigated the planking expansion drawing as well, but it requires to re-draw it from scratch to the hull, which I didn't feel ready to do. So ended up using the bottom template from facebook, which neither fits very well to the existing plating of the kit, but by omitting some plates, can be tweaked to an acceptable result. There are around 500 plates to cut individually. Here is how it looks:
The kit has some partial plate detail in the bow area, where I had to adjust what to include and what not. But after a coat of primer (which I sprayed yesterday) it looks acceptable.
I look forward to see your approach.
best,
David
-
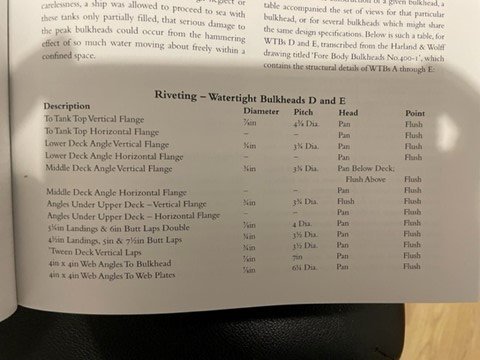
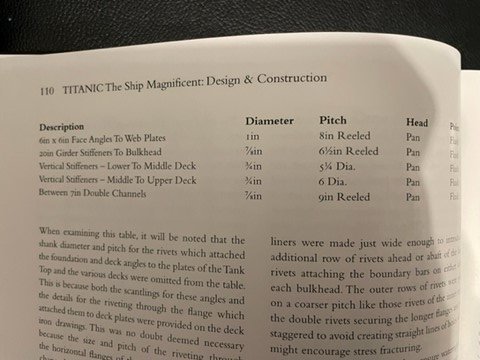
you are good to go with scale 1 inch rivets. they will be very small if done in scale.
here are the reference sizes.
good luck for the build.
- thibaultron and mtaylor
-
 2
2
-
You may have a look on Amati gun barrels, they have 27mm ones pretty cheap
- mtaylor and thibaultron
-
 2
2
-
Hi Bill97,
having built an Occre model, I can say, they have the most important aspect well designed - hulls are in proper shape, precisely cut and come together well. The apparent cost benefit diminishes though when it comes to fitting out - if you want a properly scaled model (which I assume you do, as this is where plastic models shine) you will either scratch build a lot or buy upgrade parts. When you review the online manuals, look for chain plates, eyebolts, rigging thread, mast/yard fittings, gun barrels etc to have your judgement.
I think both the AL and Caldercraft ones produce fine models, for my taste the AL one uses excessive amounts of plywood, but the Endeavour is a colorful ship so less of a concern.
What you should consider though, it's hard to find a more difficult hull shape for a start than your choice. For this reason double planking is highly recommended. The AL kit is single planked by design, and of course nothing keeps you from double planking it should you wish, the included 2mm thick strips are on the difficult side to work with. For this reason I would vote for the Caldercraft model.
Regarding the tools, you should not worry too much, kits can be built with basic tools. You can certainly use your airbrush, however wood is much more forgiving than plastic and brushes work usually just as good.
Maybe you need something to turn your masts and yards - before owning a lathe, like many others I did it with a power drill. There are several tips on the forum how to do that.
-
13 hours ago, Force9 said:
I'm still pondering the risk/reward for reshaping the bow hawse hole as another example. It might not be worth it if I have a misshaped blob on the bow if I mess it up. And I'm not sure it is worth the effort to cut everything away and insert a 3D print replacement with all the shaping and putty that would still be needed.
I had the same thoughts re the hawse pipe. I don't consider the option of buying printed parts, but as it is depicted on the kit just hurts my eye,.
I plan to build it up with putty, and show it covered. Here is a rough mock-up using only blue-tac, but this is the way I'm going for.
I'm doing bottom plating for a while now, and move to other parts when finished with this.
- Canute, Force9 and Hubac's Historian
-
 3
3
-
Hello Evan,
thanks for setting up this log. As I started to work on this kit myself, I came across a lot of resources all over the internet - but it was still missing the 'traditional build log' format which I like to follow the most.
You a put a lot of research to your model, which I'm sure will result a magnificent model.
Looking to your reference picture of the stern post, the kit is pretty rough where the shaft exits the hull. Maybe some epoxy putty could help to build up the shaft, and make the tranisiton less direct - something I may try when the time comes.
best,
David
-
-
good luck for your build!
would you mind to share, where did you source the LEDs on your second picture (the ones with the transparent covers, not the SMDs)?
thank you
-
an experienced modeler reaches better results in the fraction of time it takes for the less experienced one. there are lot of techniques involved in ship modelling we use - how to properly bend wood, cut straight corners, how to paint, copper a hull, turn spars, level the shrouds, tie ratlines, keep a logical building sequence, find proper sources for research, etc. If all these skills have to be developed on a large model, it may take too much time leading to loss of interest. It is also likely, the outcome will not reach the level of required perfection which is demotivating.
When I built plastic models, I usually had some goal with the respective kit, like paint it using an airbrush. For the next one, do the decals right. Next one - prepare the gloss finish. Then use aftermarket parts, and so on.
For wood ships, anyone taking a multi-year big project, should be reasonably confident with the basics of planking and understand how rigging works - the build process is long enough, even without learning basic skills.
This gradual approach worked for me - first ship - a nice try. For the second, I built a reasonable out of the box model and understood what is involved. For third one, I enhanced the kit and properly researched the rigging part. The previous experience pays off, which makes progress, which is in turn, provides motivation.
-
try to browse the scalemates database, there are several ocean liner kits out there, while I know very little of them.
Passenger ships (Ships) | Scalemates
-
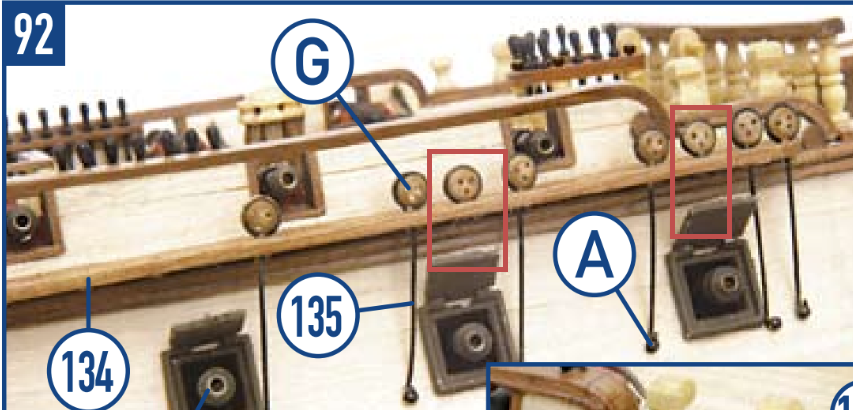
Ross, it is very nice and clean work you do with the Diana. I definitely agree with your plan to make the chain plates right - the kit design really falls short in this area. The omission of proper links by simple wire is easier to address by making your own or use aftermarket parts. The bigger problem is, the arrangement of the gun ports prevent setting the proper angle for them (they should follow the line of the respective shrouds and backstays).
Occre bypasses this by the omission of the problematic links (see below). If you want to make this right, do some planning before second planking, temporarily fit the channels and dummy mast rods, check the run of the shroud lines and adjust for your liking. Apart from the chainplates, there are countless other possibilities to improve the accuracy of the model. My build log may show some ideas (like the chain plate issue in post #31), but I'm also happy to follow your log and share my experience.
-
great find, it was my first "proper" wooden ship build. the flexible strip will be used for railings around the mast tops and the head.
it was a pleasure to build this kit, if I did it again, I would only replace the beech strips used for the inner bulwark frames, which were pretty brittle and difficult to cut clean.
the part list is organized by the order of building, which I found a great feature.
good luck for your build!

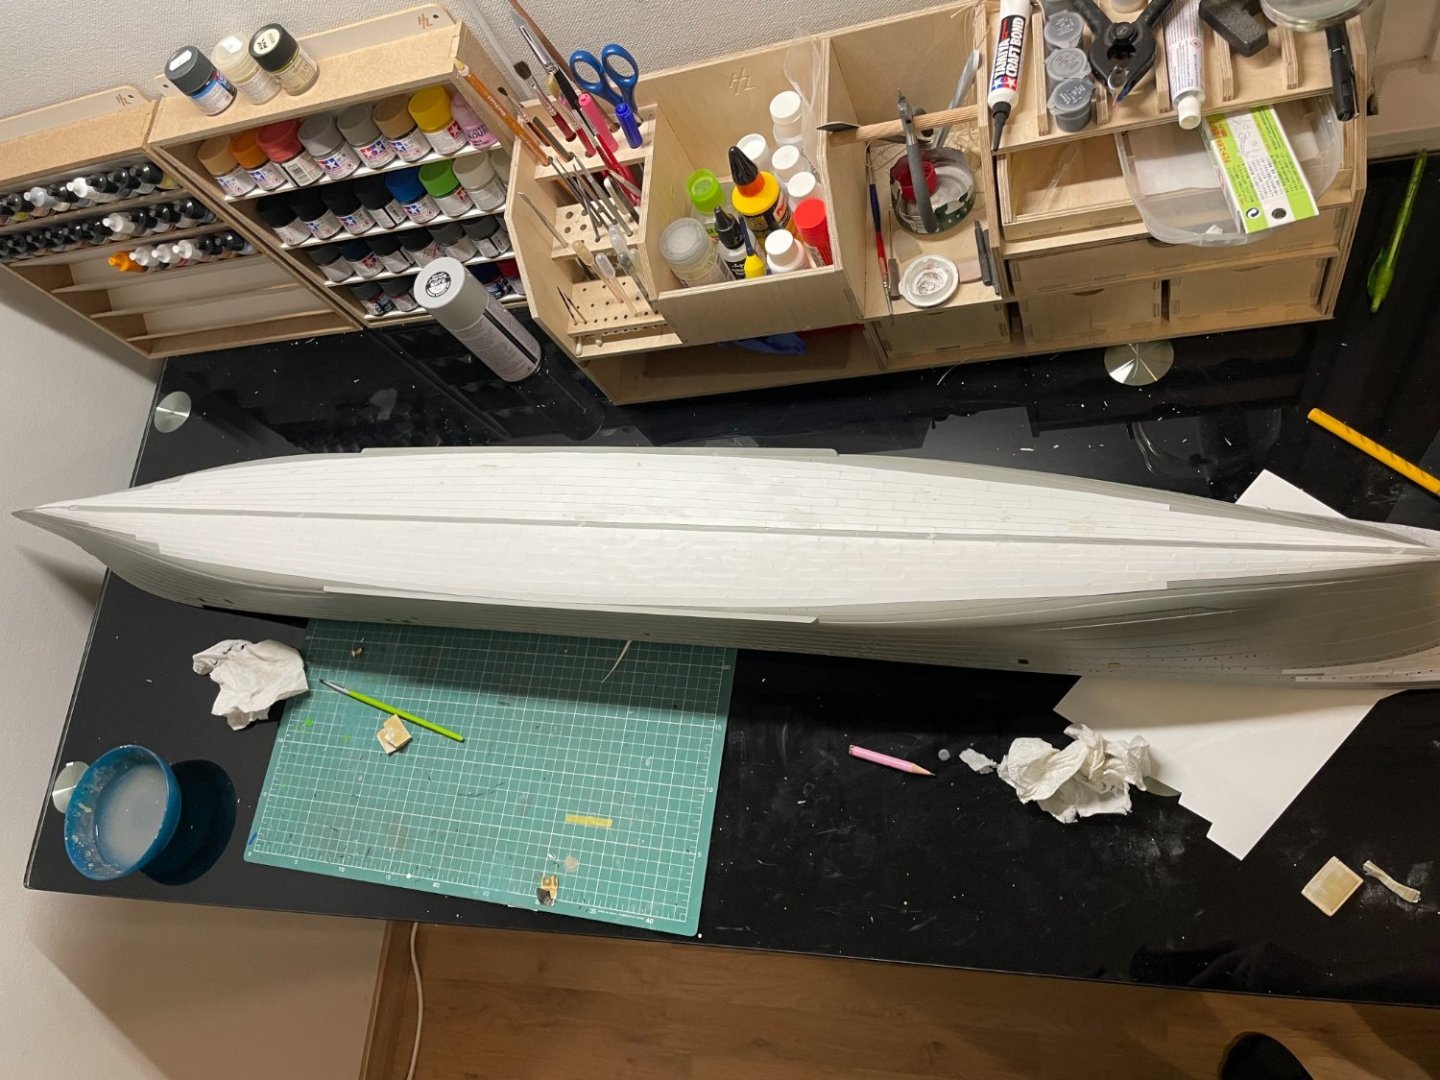

Another OcCre "Save The Date" Release - April 28, 2024
in Traders, Dealers, Buying or Selling anything? - Discuss New Products and Ship Model Goodies here as well!!
Posted
They annonced a French ship to be released earlier this year. Probably this is going to be the Soleil Royal, previously sold as partwork.