ziled68
-
Posts
158 -
Joined
-
Last visited
Content Type
Profiles
Forums
Gallery
Events
Everything posted by ziled68
-
 Hola Cariña, It has been too long since you've posted anything and I have missed your passion. I am glad that you are settling down again in order to continue working on your model and hopefully finish her (it seems you are closer to it now). I hope to see more updates and remember to take care of yourself. In the event you want ideas for working with your sails you may want to take a look at these videos for inspiration. Tu amigo, Raymond.
 -
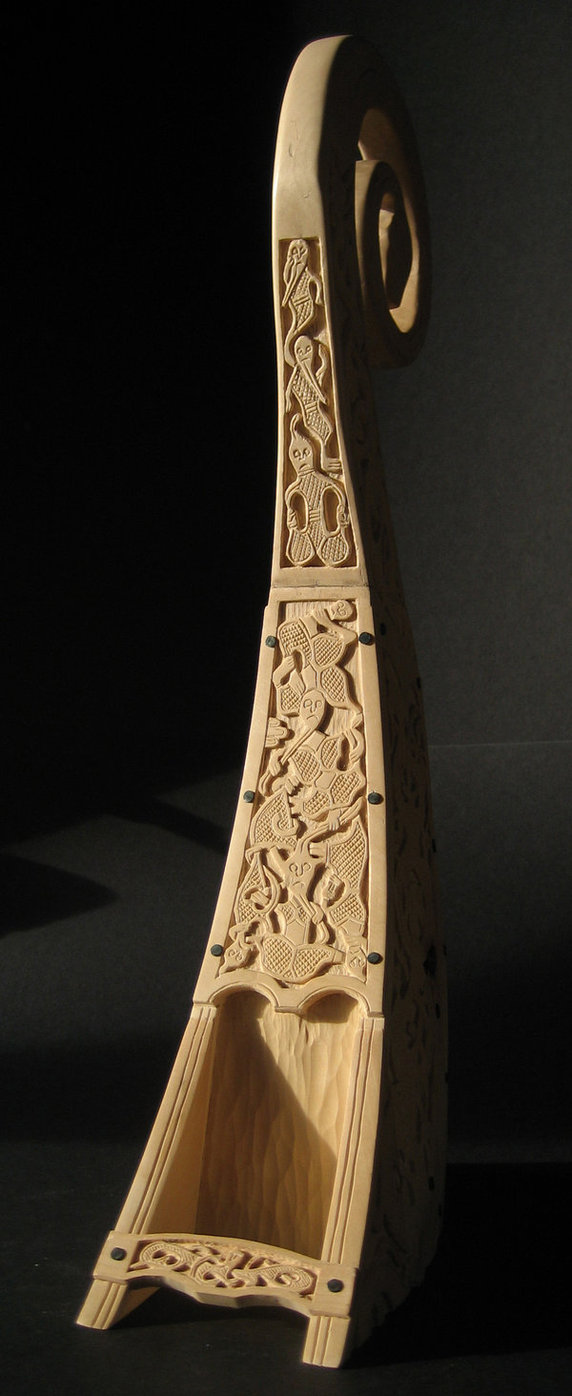
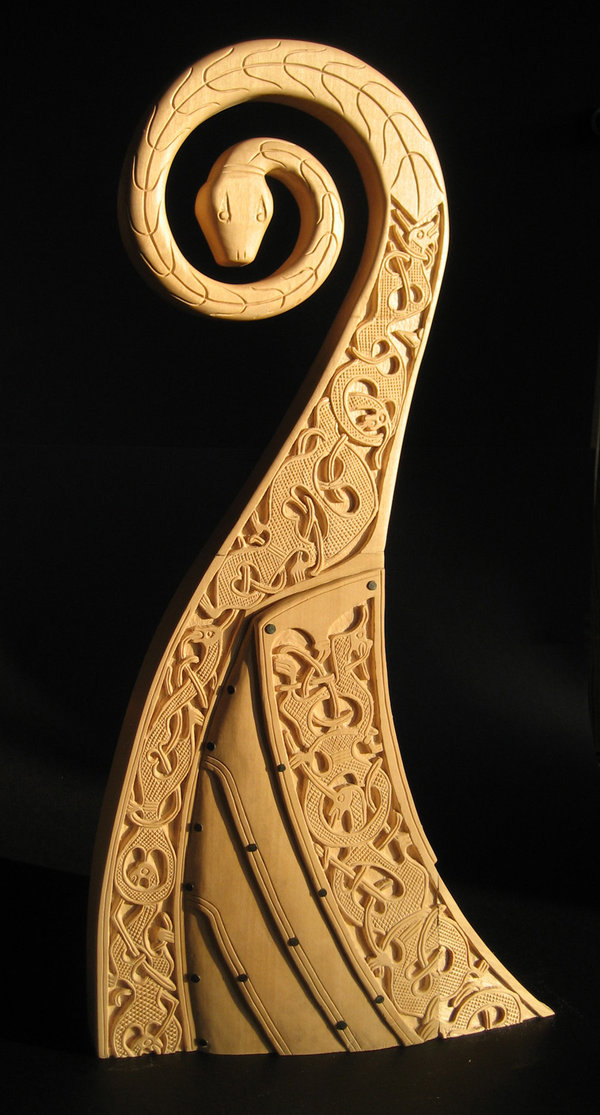
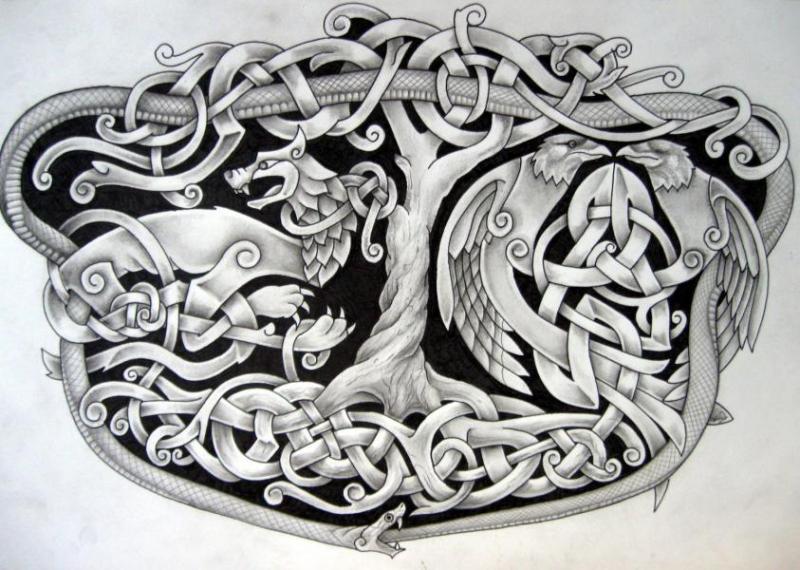
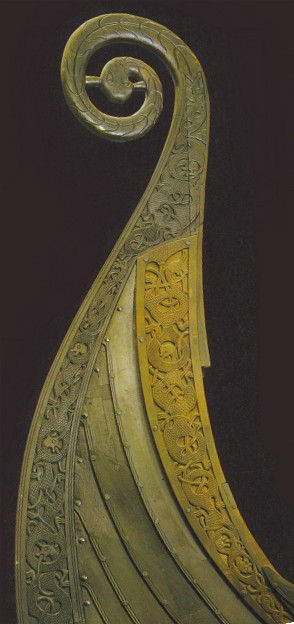
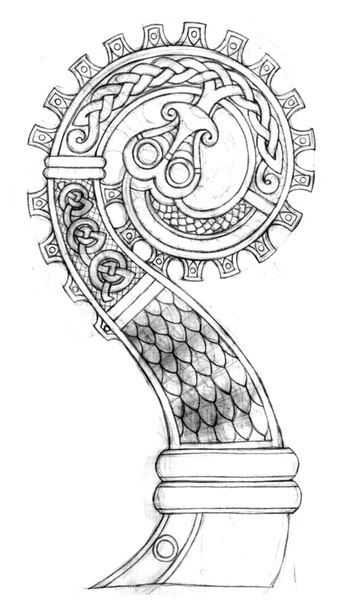
Hey Chuck, I am so glad that you've actually started this basic tutorial on carving. The concepts and ideas that you are implementing in your discussion is rather straight forward and easily understood. Starting the first cut to have a clean stopping point for the inevitable shave insures that you don't overshoot the mark. Now I know that what I want to say next may be a little off but I believe it shares the same concept. Traditional Celtic Viking tattoo designs show where one knot work goes beneath another via shadows. The line that goes above is clear and sharp while the line beneath has shadows to represent depth. Attached you will see a photo that serves a dual purpose. It will show neat lines and shadowed depth areas while at the same time give people ideas for Viking longboat carving. Ray
- 46 replies
-
- 14
-

-
Chris, What can I say but, Outstanding!!!!! Your attention, and care to details have made this little beauty a joy to look at. There are many aspects/procedures that you have used on your build that I wish to incorporate in future builds. Many thanks in advance to the assistance you've provided by simply posting your progress. Ray
- 144 replies
-
- 3
-
-
- boat
- bermuda boat
- (and 2 more)
-
Some criteria for starting a new group project
ziled68 replied to Chuck's topic in Group Projects on Model Ship World
Thanks Daves, I figured it would be a great small/side project that would give the modeler new skills in this hobby. Jack's Oseberg Viking Ship is a great looking model and I think this type of project would be a great supplemental model/piece to add along side of her. -
Some criteria for starting a new group project
ziled68 replied to Chuck's topic in Group Projects on Model Ship World
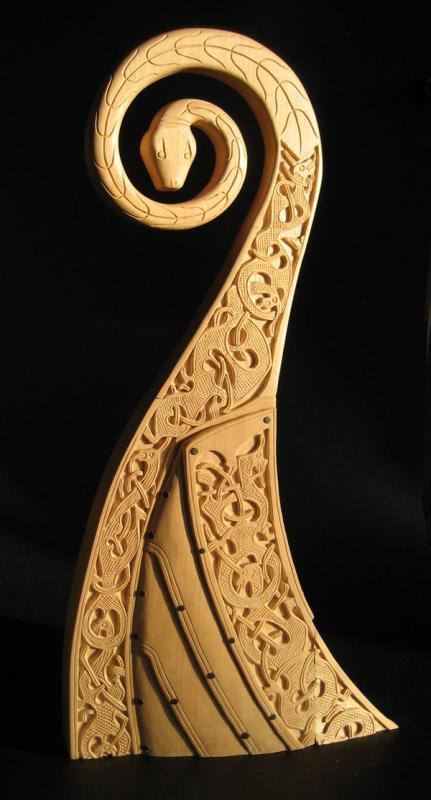
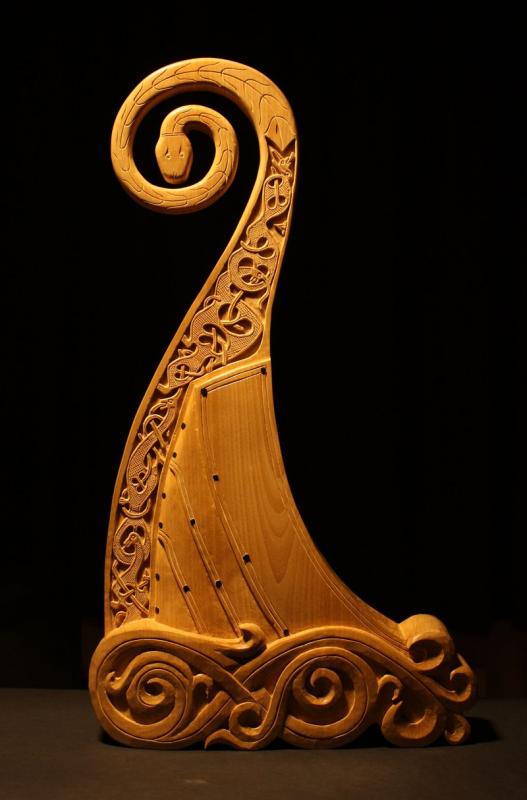
Hello Everyone, I like the concept that Chuck is trying to get started in regards to group projects, be they small or large. One idea that I've been mulling over in my mind would be a group projected dedicated to carvings of Viking longboat prows. I've come across many pictures on the internet and it has stirred my imagination into incorporating it as a side project. Now the prow can be as large as one would want to tackle it. One must ensure that they do show updates and what carving techniques they are using. While at a larger scale, it will give people the opportunity to start practicing their carving techniques in the event they may want to try their hands at a carved ship's figurehead. Attached are a few photos of what I am talking about in the event it stirs curiosity in fellow ship builders.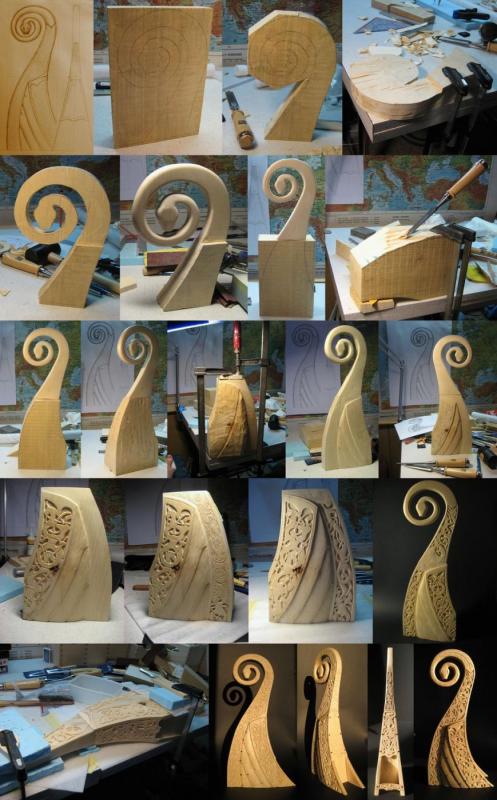


- 29 replies
-
- 14
-
-
Hey Gabe, I was starting to worry you'd given up. Everything looks super and the level of detail you're incorporating into your build is outstanding. Can't wait to see more. Ray
- 104 replies
-
- 3
-
-
- HMS Triton
- Scratch build
- (and 3 more)
-
Hey Tony, No worries Buddy. The download area of the Triton can be intimidating at first and some items can be overlooked. Hang in there and keep modeling away. You're doing a great job, Ray.
-
Hey Tony, I'm glad that you've been busy with this little beauty. I've enjoyed working on this cross section and I hope that you'll enjoy it too. Attached you will see one of the Triton drawings which you'll be able to find on the full build section of downloads. Take your time and review everything before choosing what you want to do on your build. I look forward to seeing more progress on your build, Ray. MidshipCrossSection@48-1.pdf
-
Bravo Gimo, I just now saw the procedure you used to blacken your ship's guns. Excellent work. Ray
-
Hello Gabe, I'm glad you didn't give up on your Micro Triton. Your choice of timber and your level of care at these delicate pieces is rather impressive. I look forward to more of your updates. Ray
- 104 replies
-
- 1
-
-
- HMS Triton
- Scratch build
- (and 3 more)
-
Hello Dan, I hope everything is fine on the home front. Sir, I must say that I've just finished going over your log and am totally in awe at your level of expertise. Your narratives are truly easy to follow along and I hope that one day I may reach a fraction of your skills. Once again, "Kudos" on a job well done. Ray
-
Chris, You are officially my hero. That was an excellent come back from what would have been thought a total disaster. It has happened to me before and it really scared me to think I would have to start everything all over again. Great job Buddy. Ray
- 144 replies
-
- 1
-
-
- boat
- bermuda boat
- (and 2 more)
-
Chris, I am glad summer is over so that you can get back to your Corsair. I am gald that you corrected that little mistake on the transom. Like you, if I make a mistake I try to correct it because if I don't, it will be the first place I look at whenever I look at the model. The fact that you are using belts to evenly distribute your planks on the Corsair will make it a very attractive model. I hope to see more progress. Ray
- 144 replies
-
- 1
-
-
- boat
- bermuda boat
- (and 2 more)
-
Hola Daniel, Bravo Maestro!!! Your model is looking fantastic!!! I am in the process now to build a 1:64 scale POF model of the USF Essex and will work on the lower bulkheads in a similar fasion as you are. Many thanks for the inspiration you are giving me. Tu Amigo, Raymond
-
Hola Mija, Sometimes you have to get the planks to cooperate with when they don't want to. What I find useful is a fabric steamer. Place the planks on the fabric steamer for a few minutes and gently bend the planks with your fingers before putting them on the frames. I hope this helps. Raymond
-
Hola Mija, I see that you are now starting another project so good for you. I was able to get plans for a Viking Longboat that I plan to build from scratch. I will follow your posts from start to finish eagerly. Tu Amigo, Raymond
-
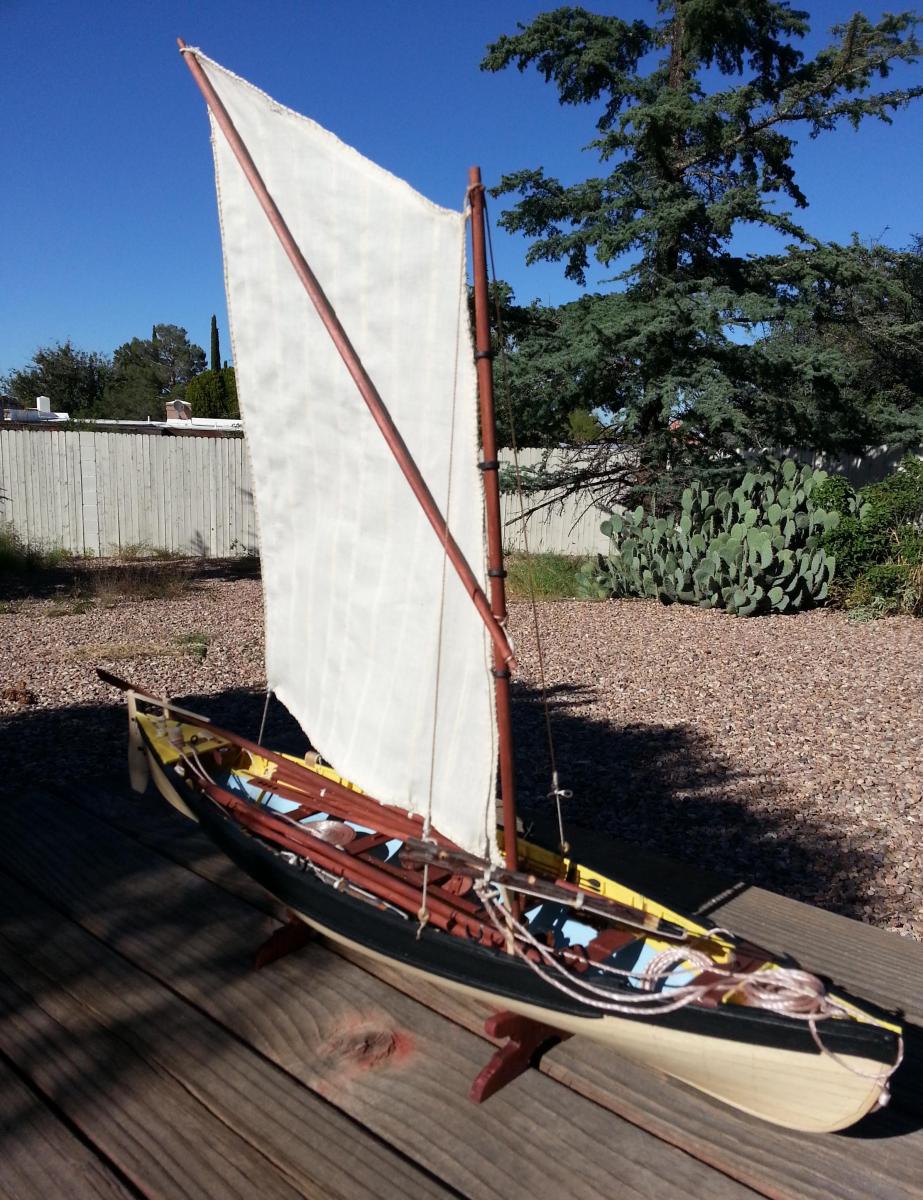
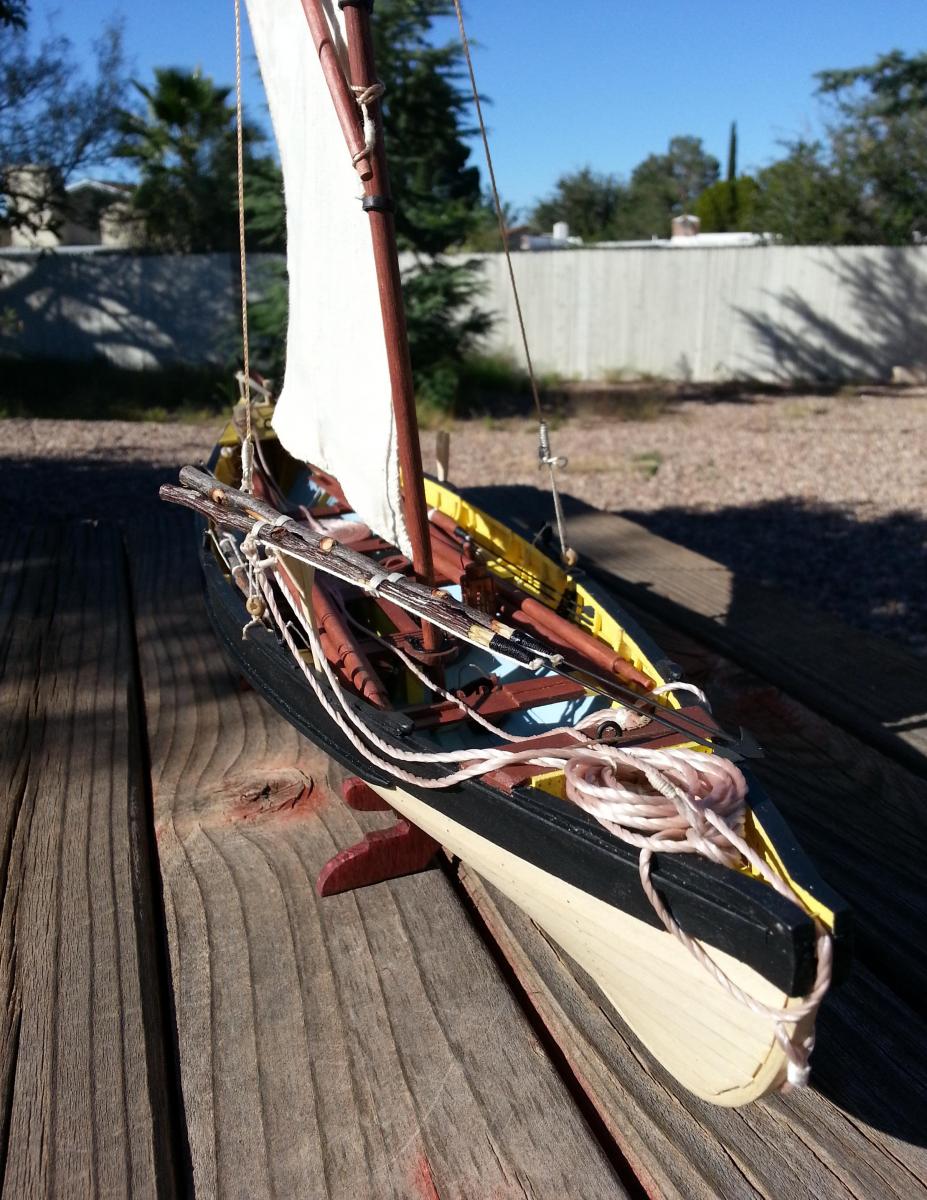
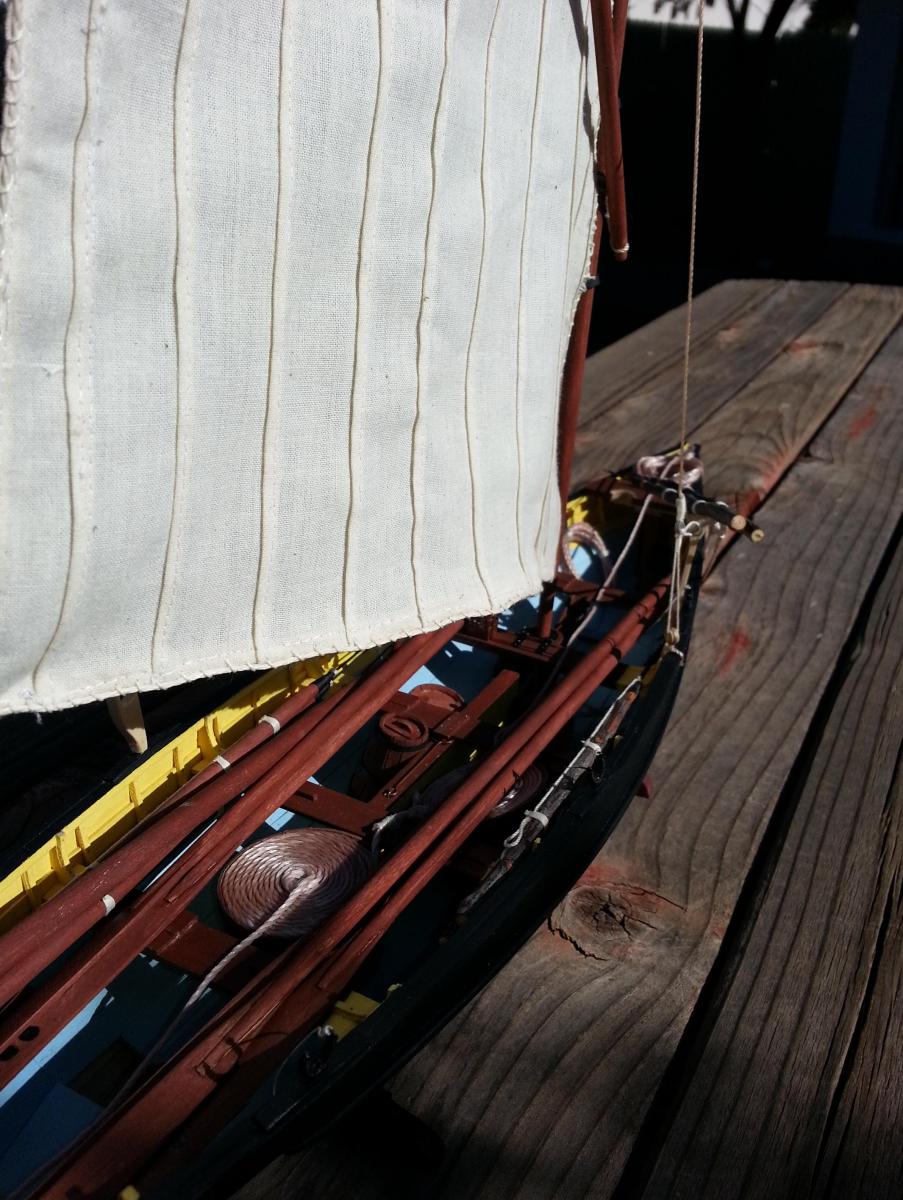
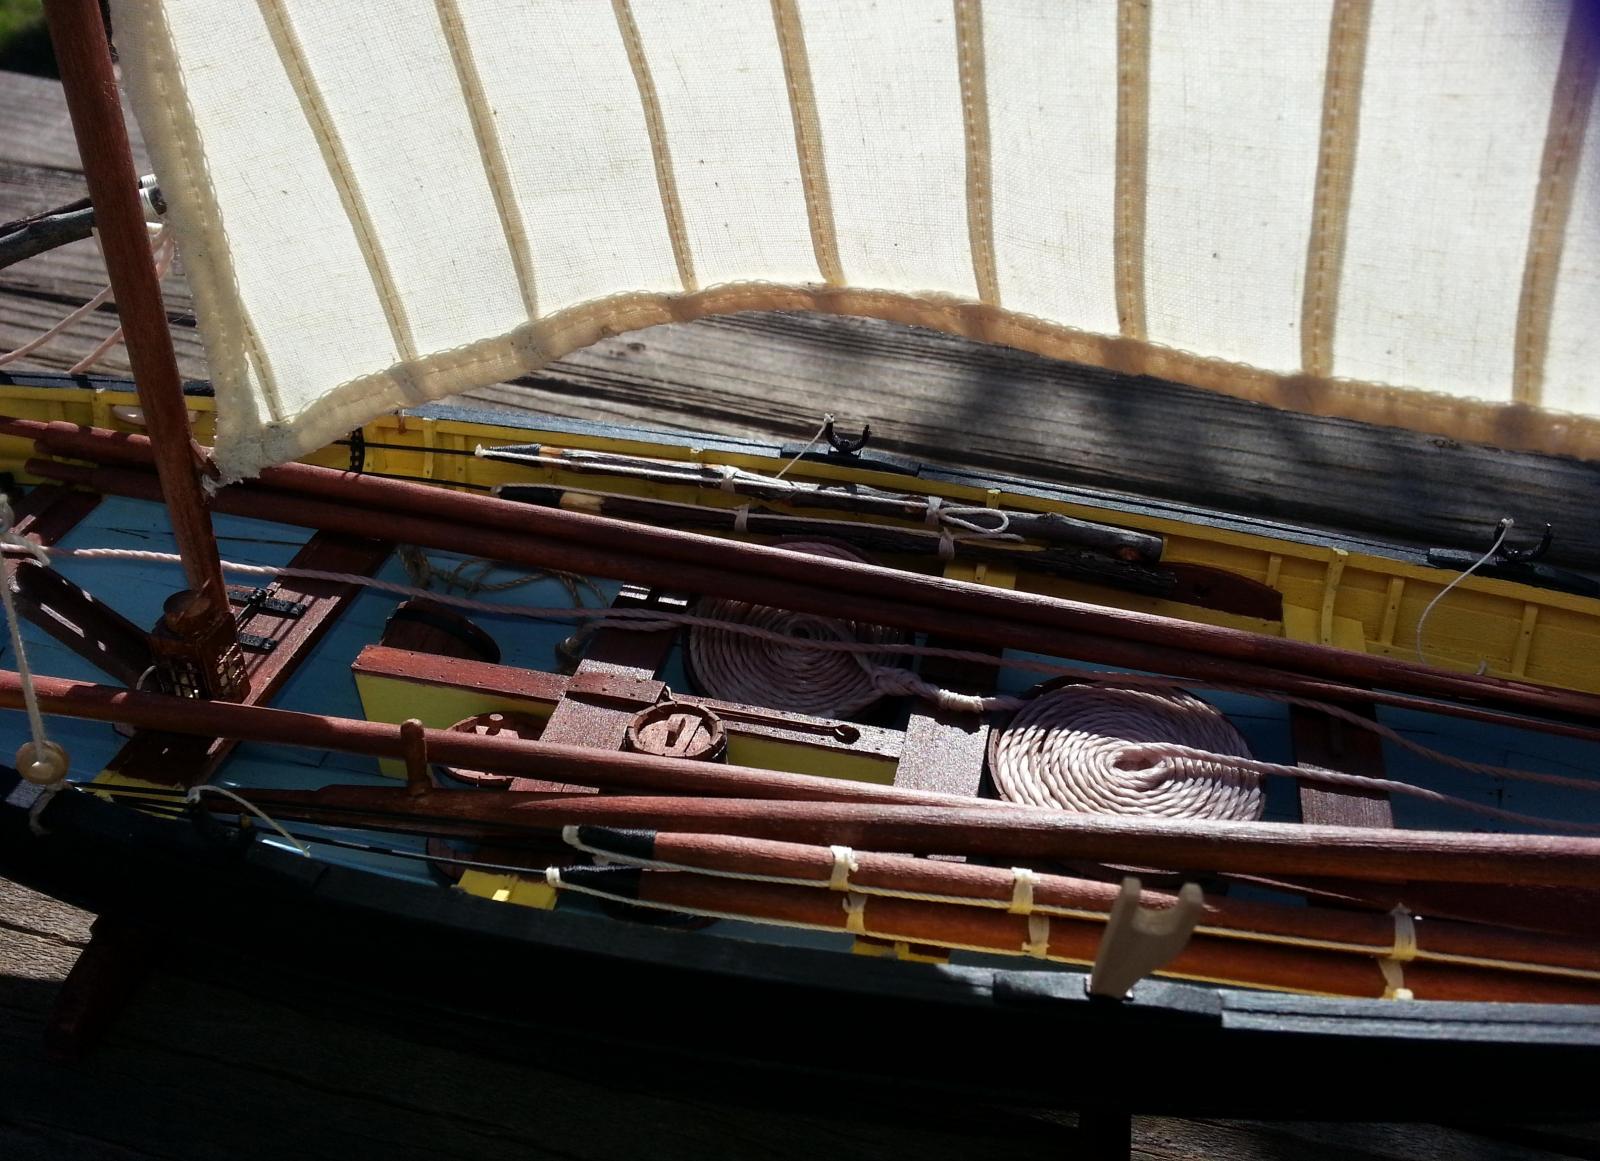
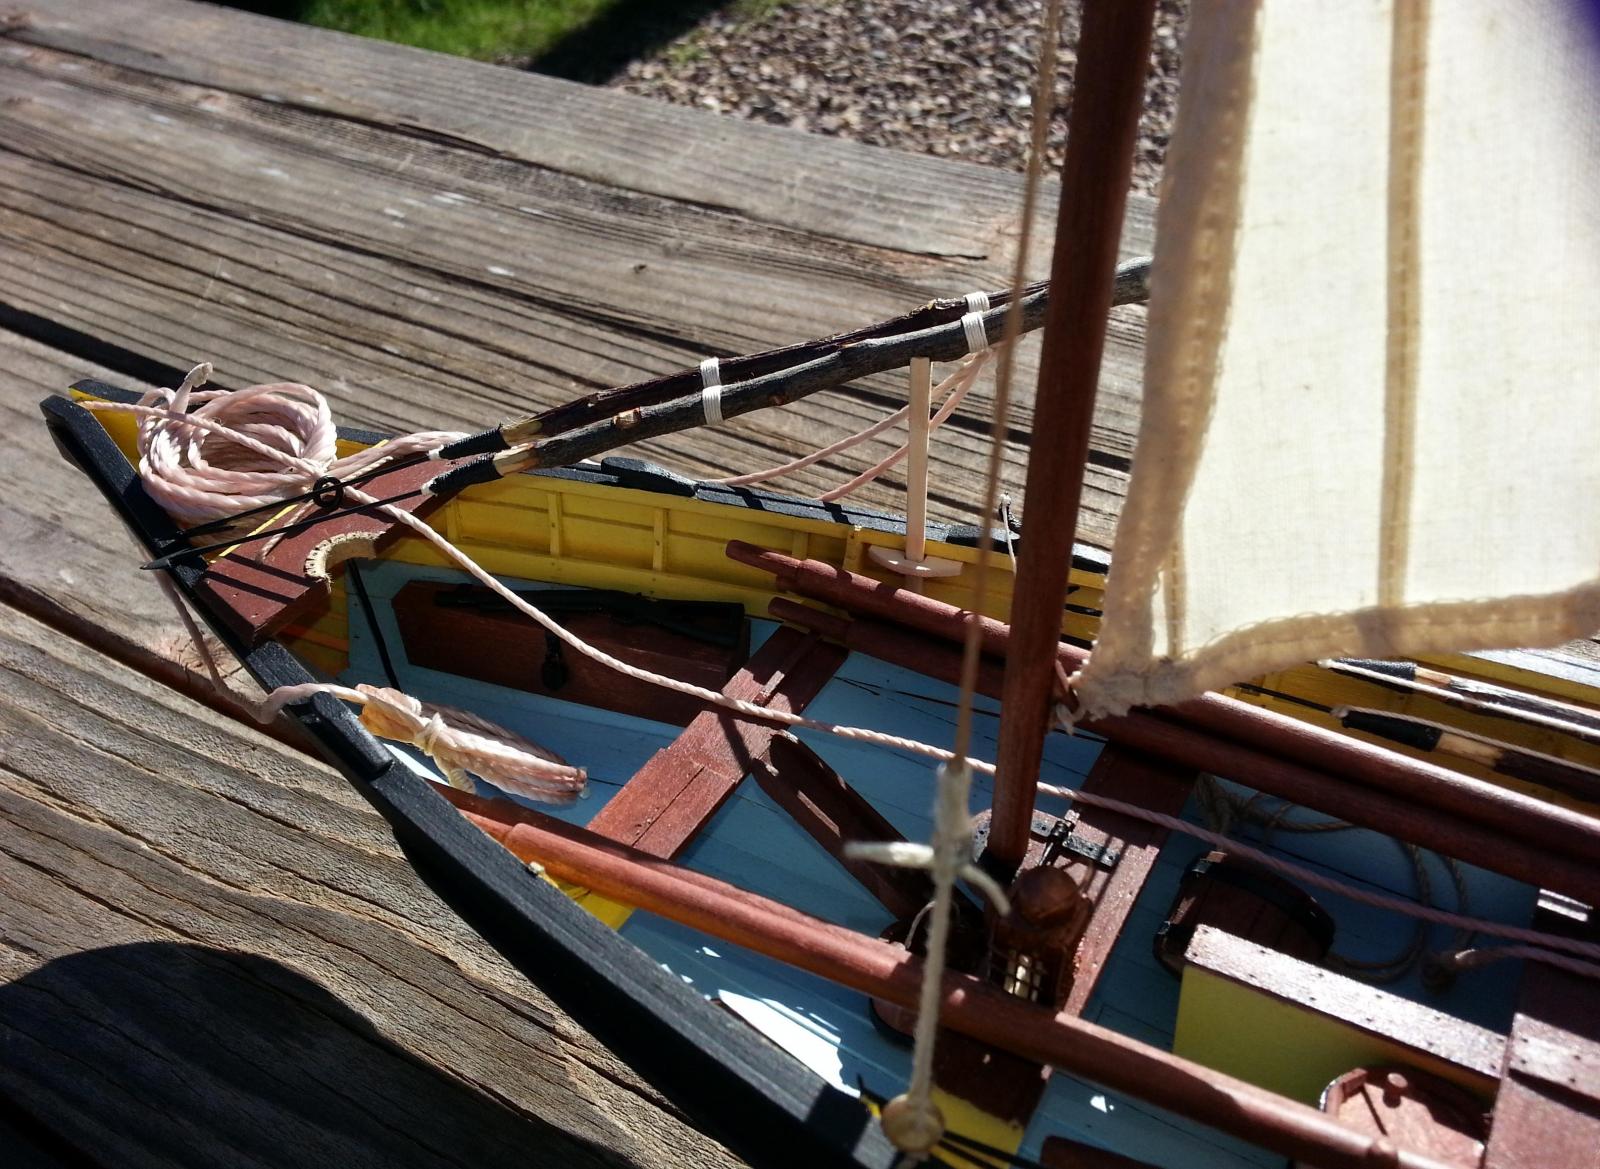
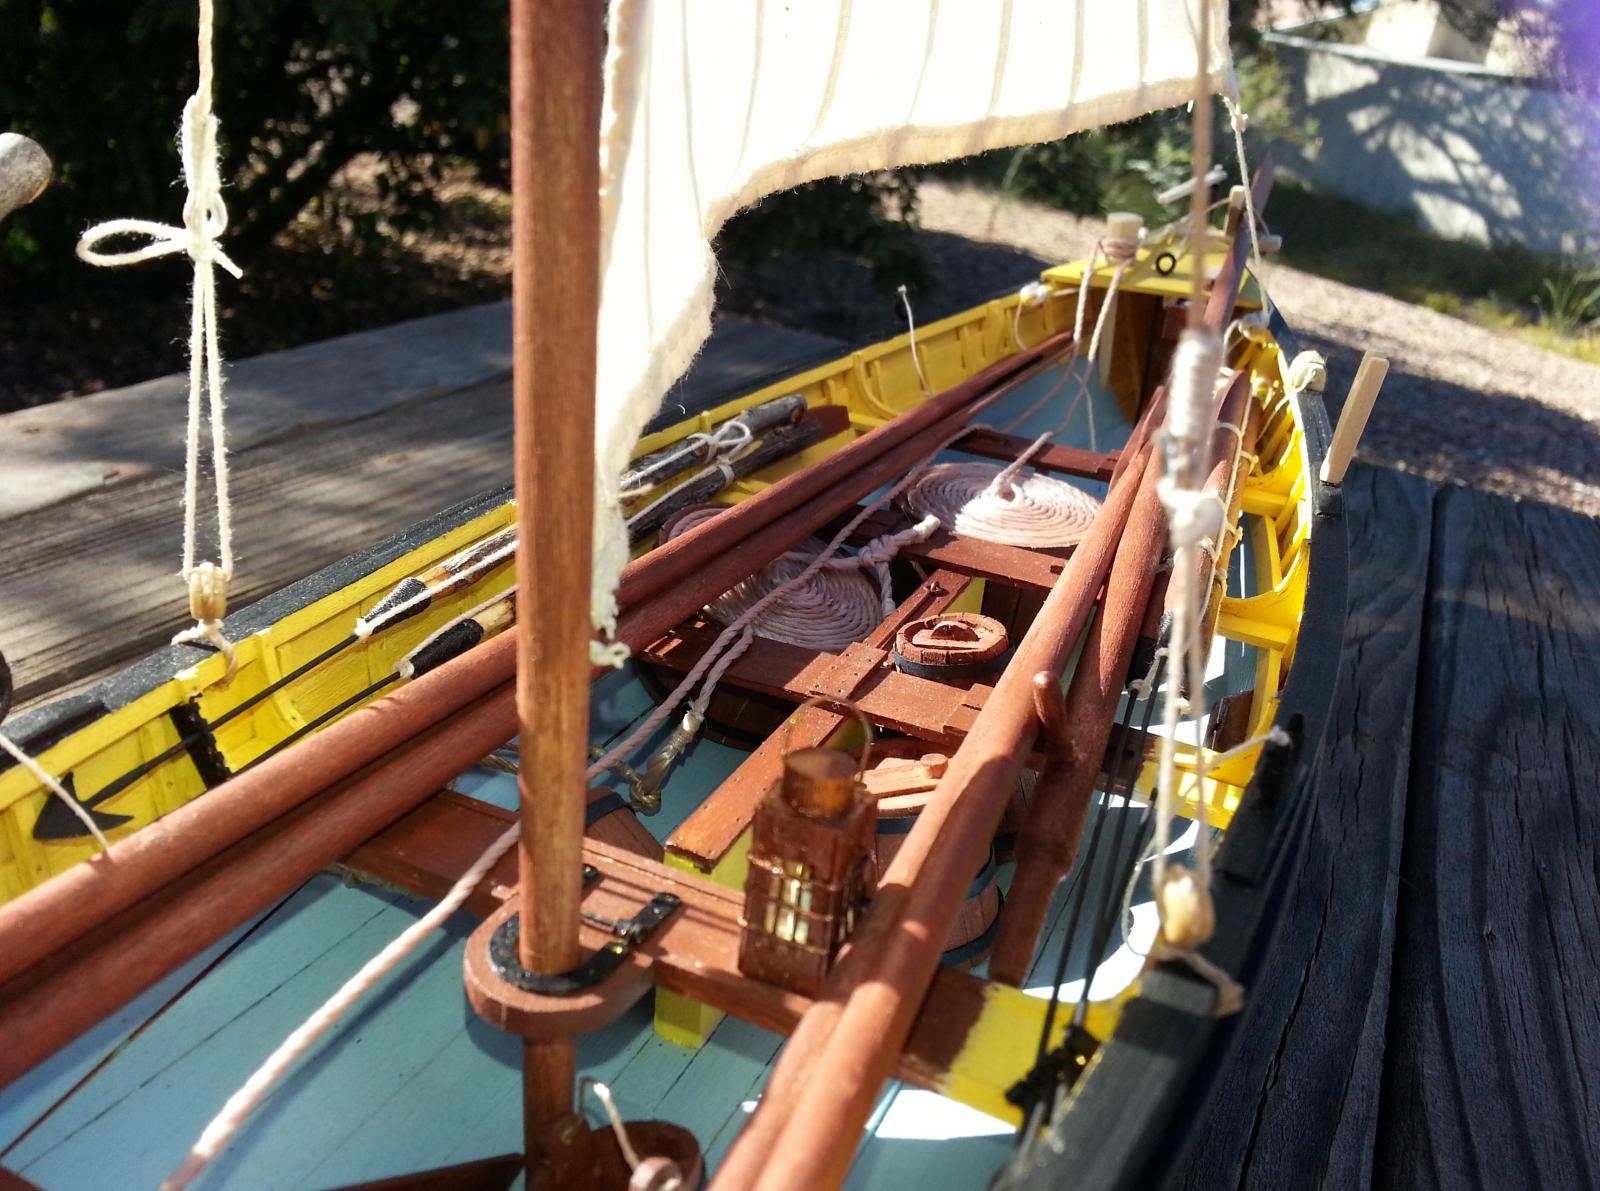
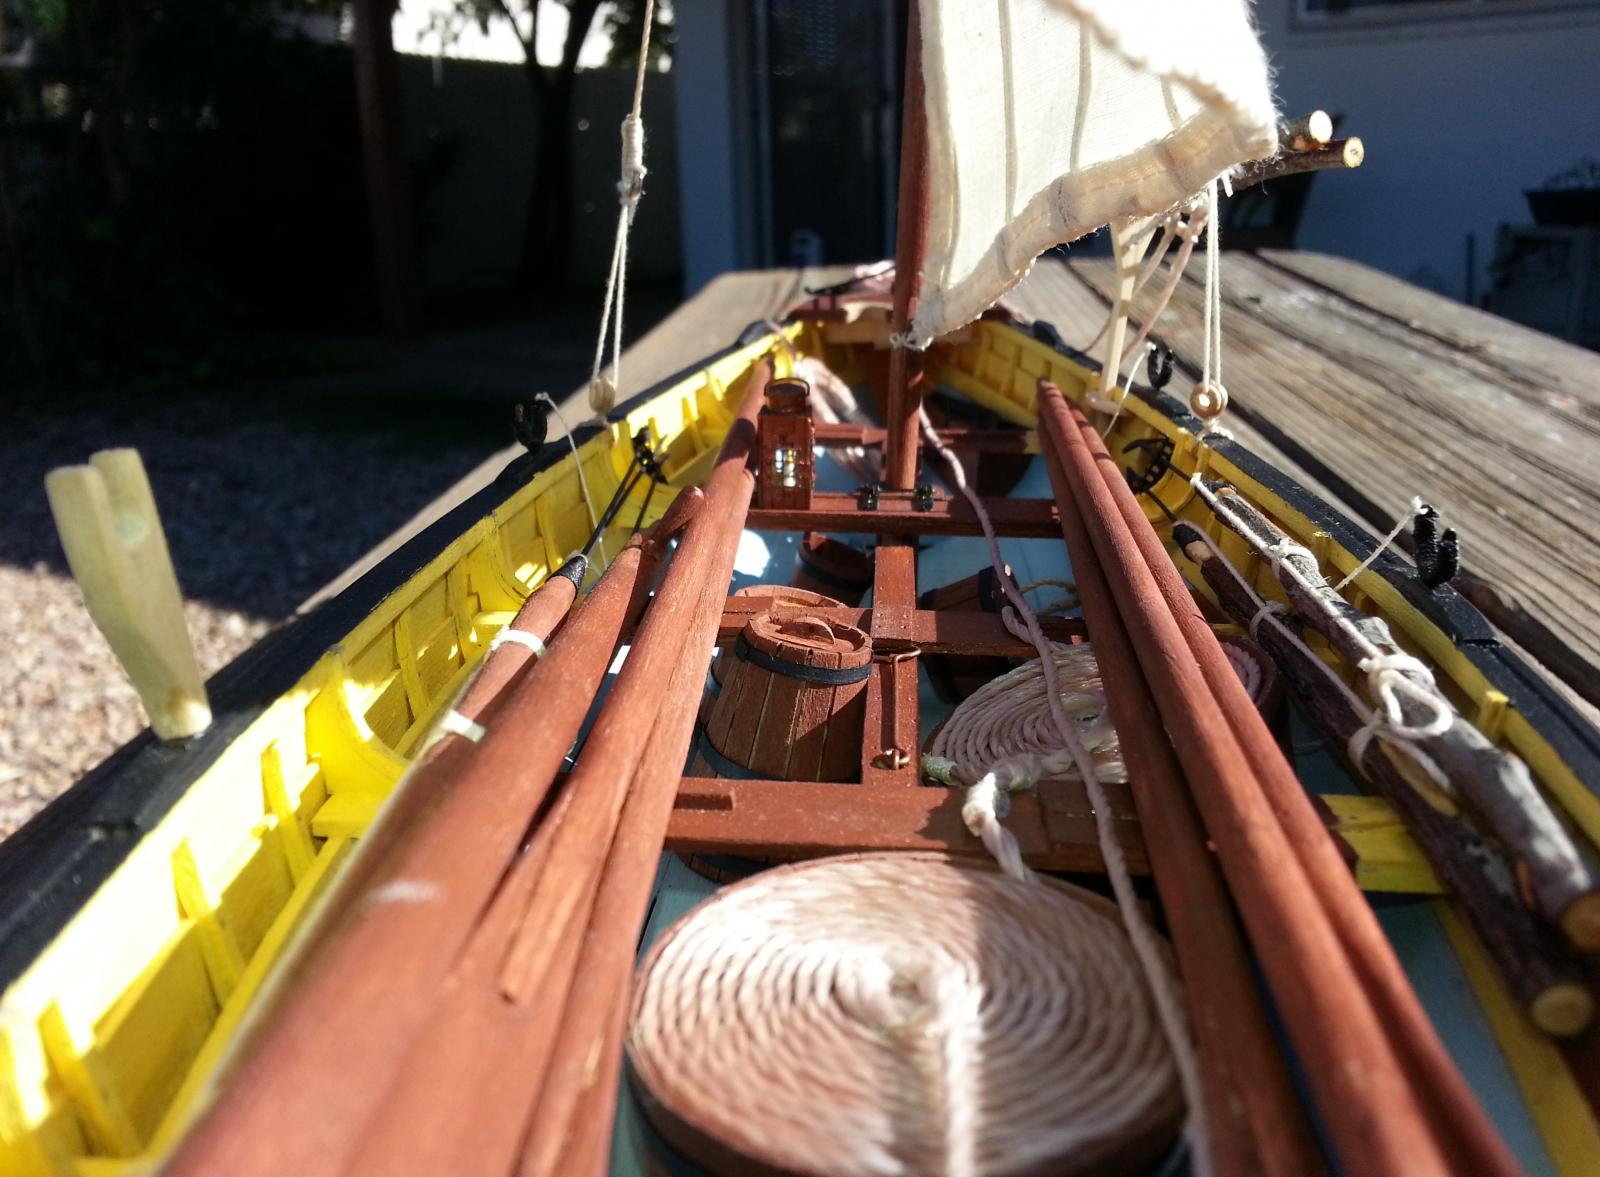
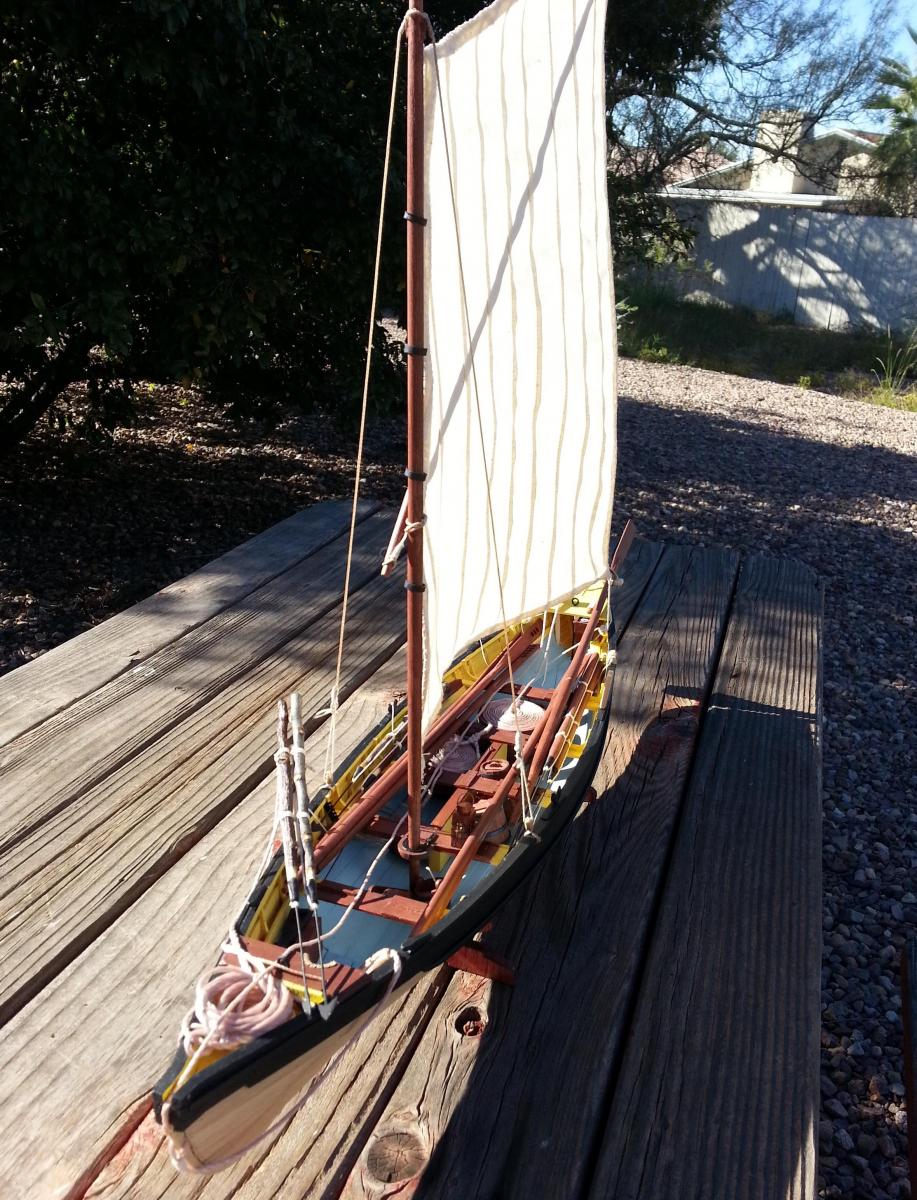
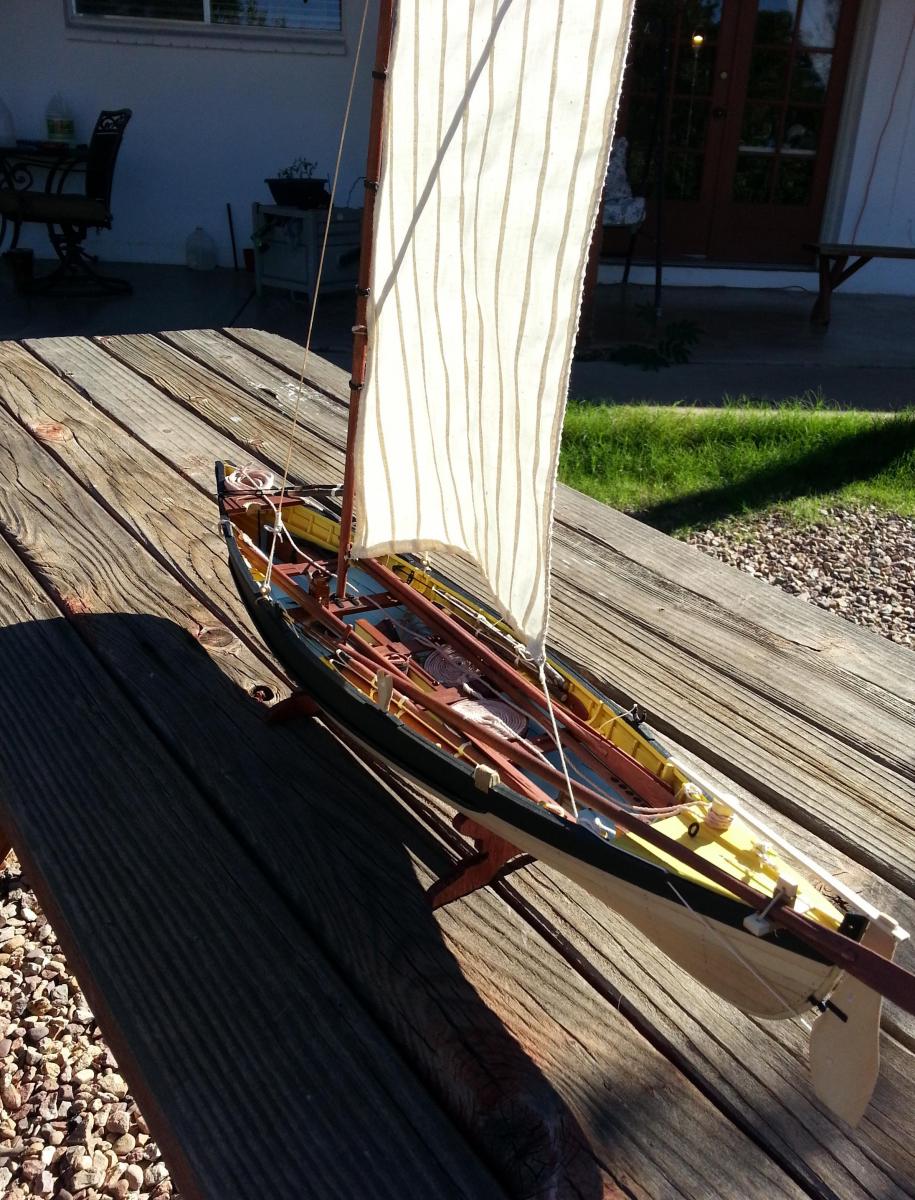
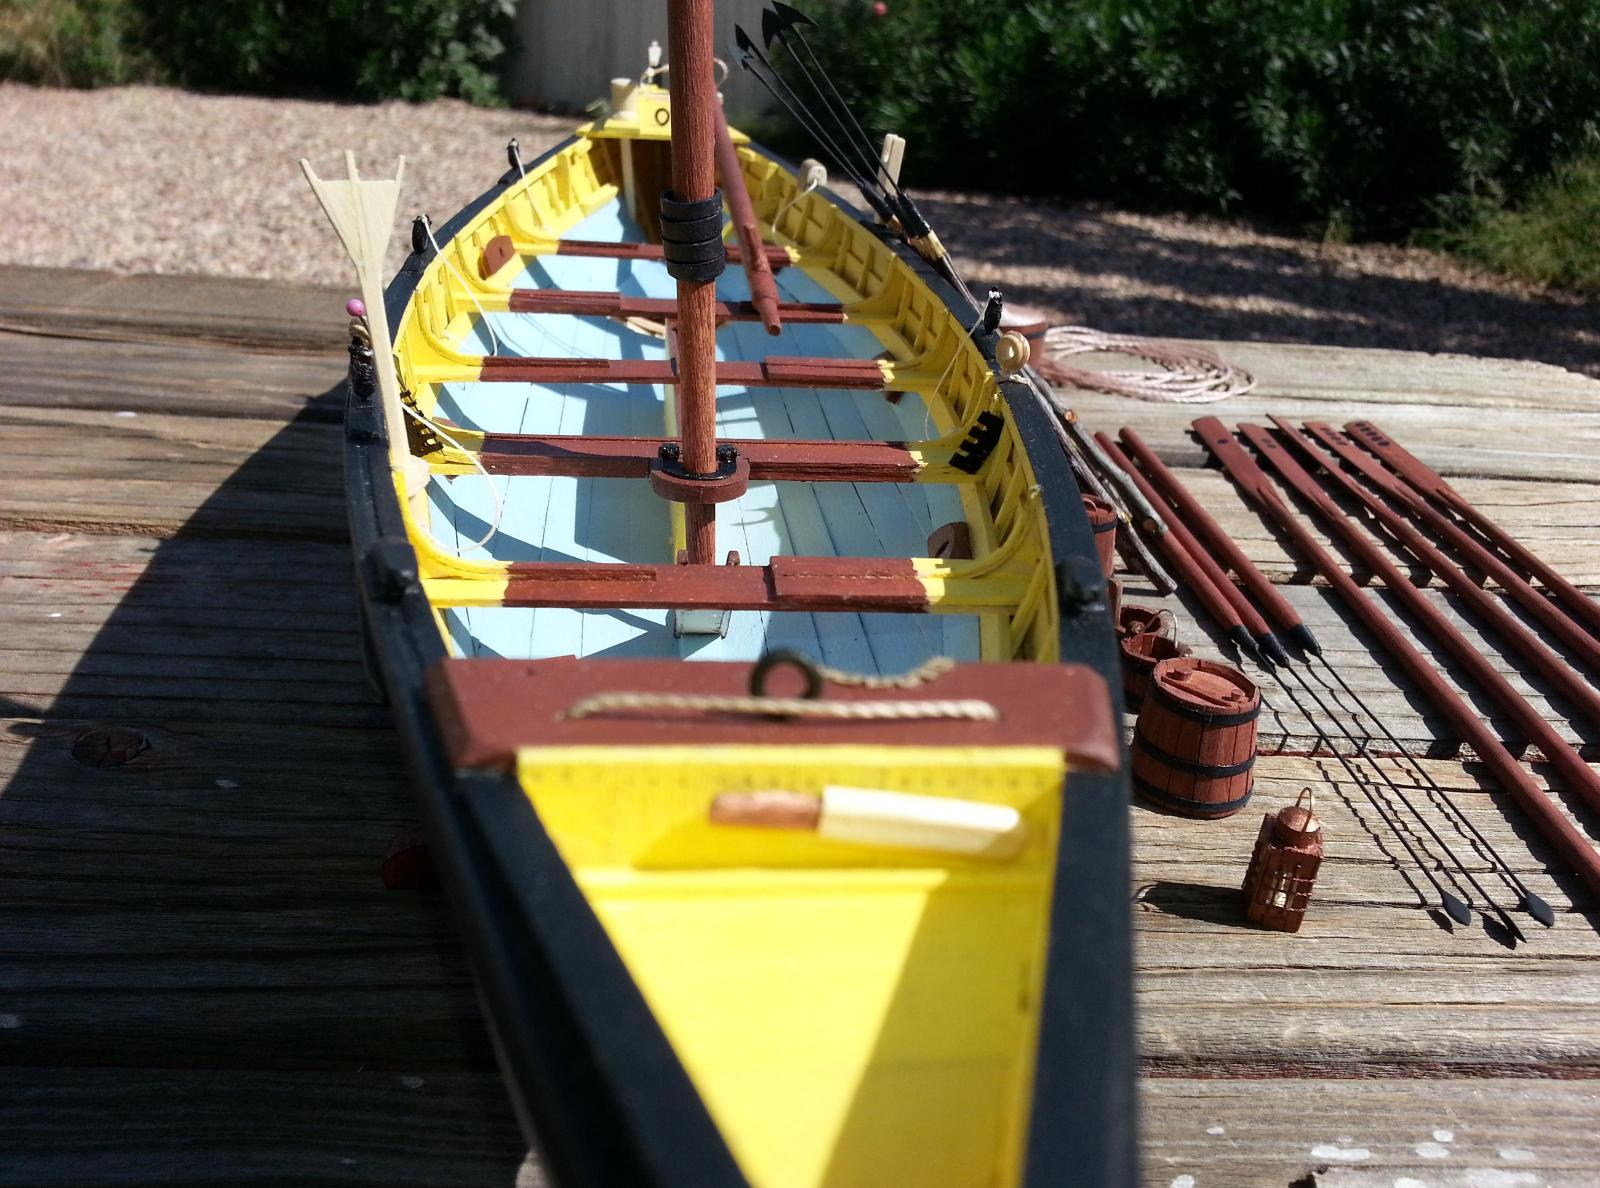
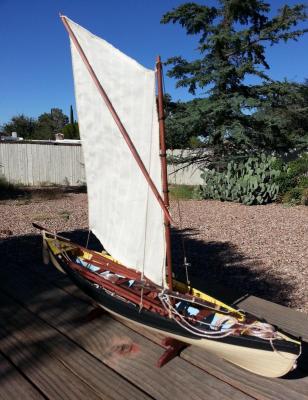
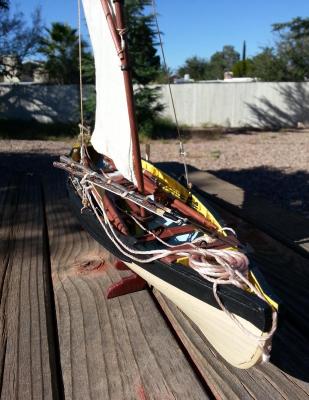
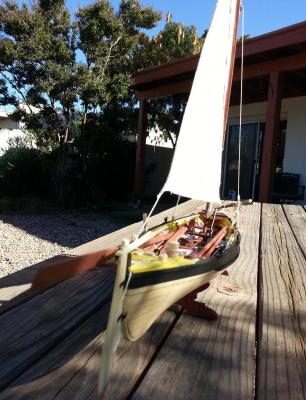
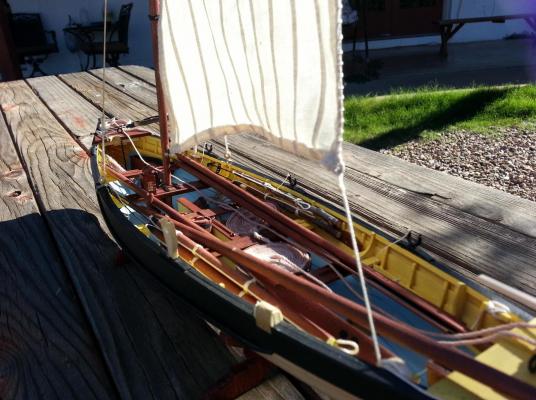
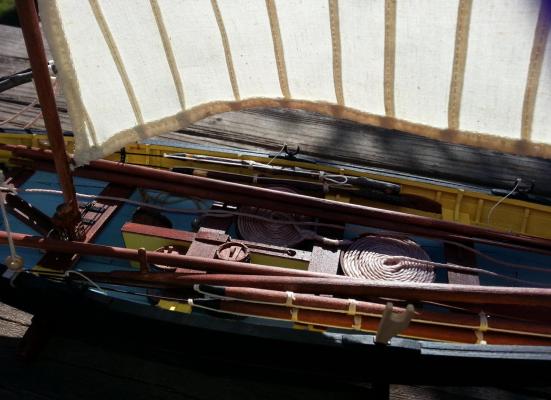
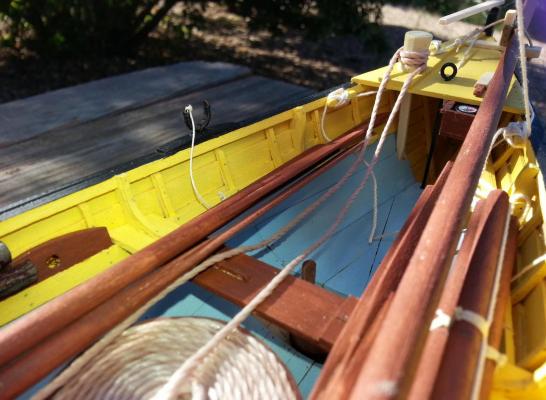
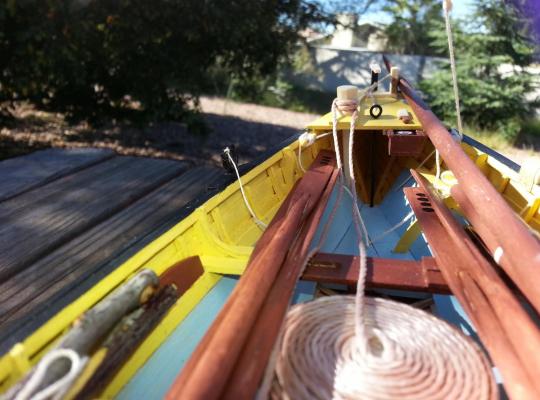
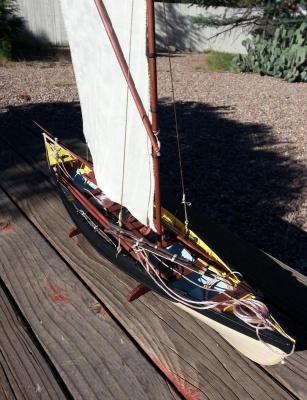
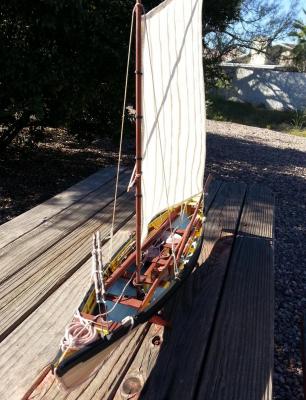
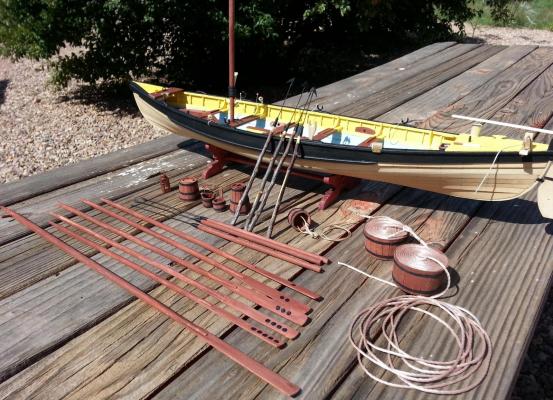
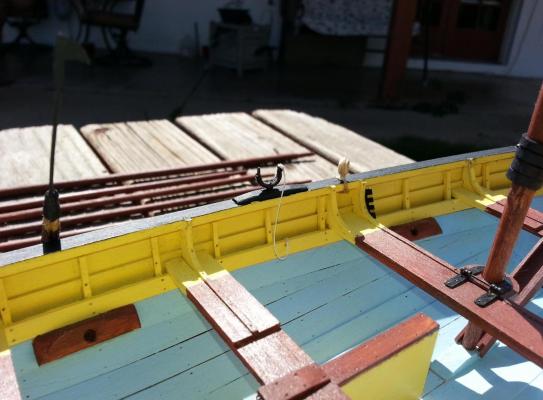
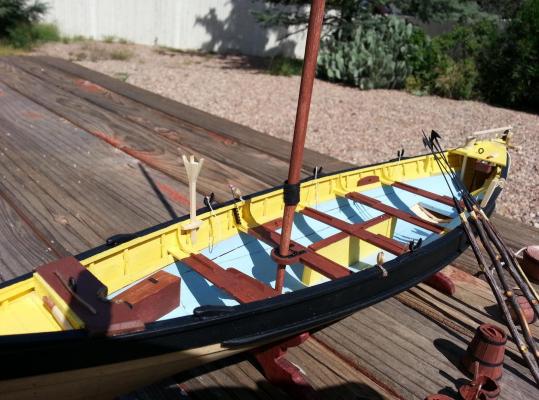
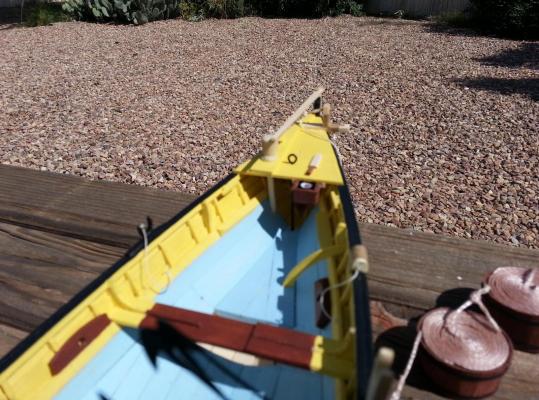
Hello everyone, Well I've finally crossed the finish line and have completed my whaleboat. On my previous post you've all noticed that the majority of the items were complete with the exception of the sail and the final dress up of everything stowed on board. The following pictures will show you the how she came out. Thanks to all those who've looked in on my build and I hope that a few of you will take on this build.


- 31 replies
-
- 5
-
-
- new bedford whaleboat
- model shipways
- (and 1 more)
-
Thank you Randy, I believe that sometimes a person should go through the process of starting from the beginning and work on simple projects such as this whaleboat. I know that many people like the elaborate works of full ships and wind up neglecting simple things like a ship's boat but If a person masters the simple things, than when it comes time for something truly amazing there will be no issues. Ray
- 31 replies
-
- 2
-
-
- new bedford whaleboat
- model shipways
- (and 1 more)
-
Tim, Thanks for your kind words. I would highly recommend you take the kit down and start working on her. She is a rather simple build and quite enjoyable due to the fact that she is not of the normal build as many others on this site. What I find most interesting is to step out into the unknown and work on projects that not many people try to tackle. I believe it makes for a better challenge. Looking forward to your build, Ray.
-
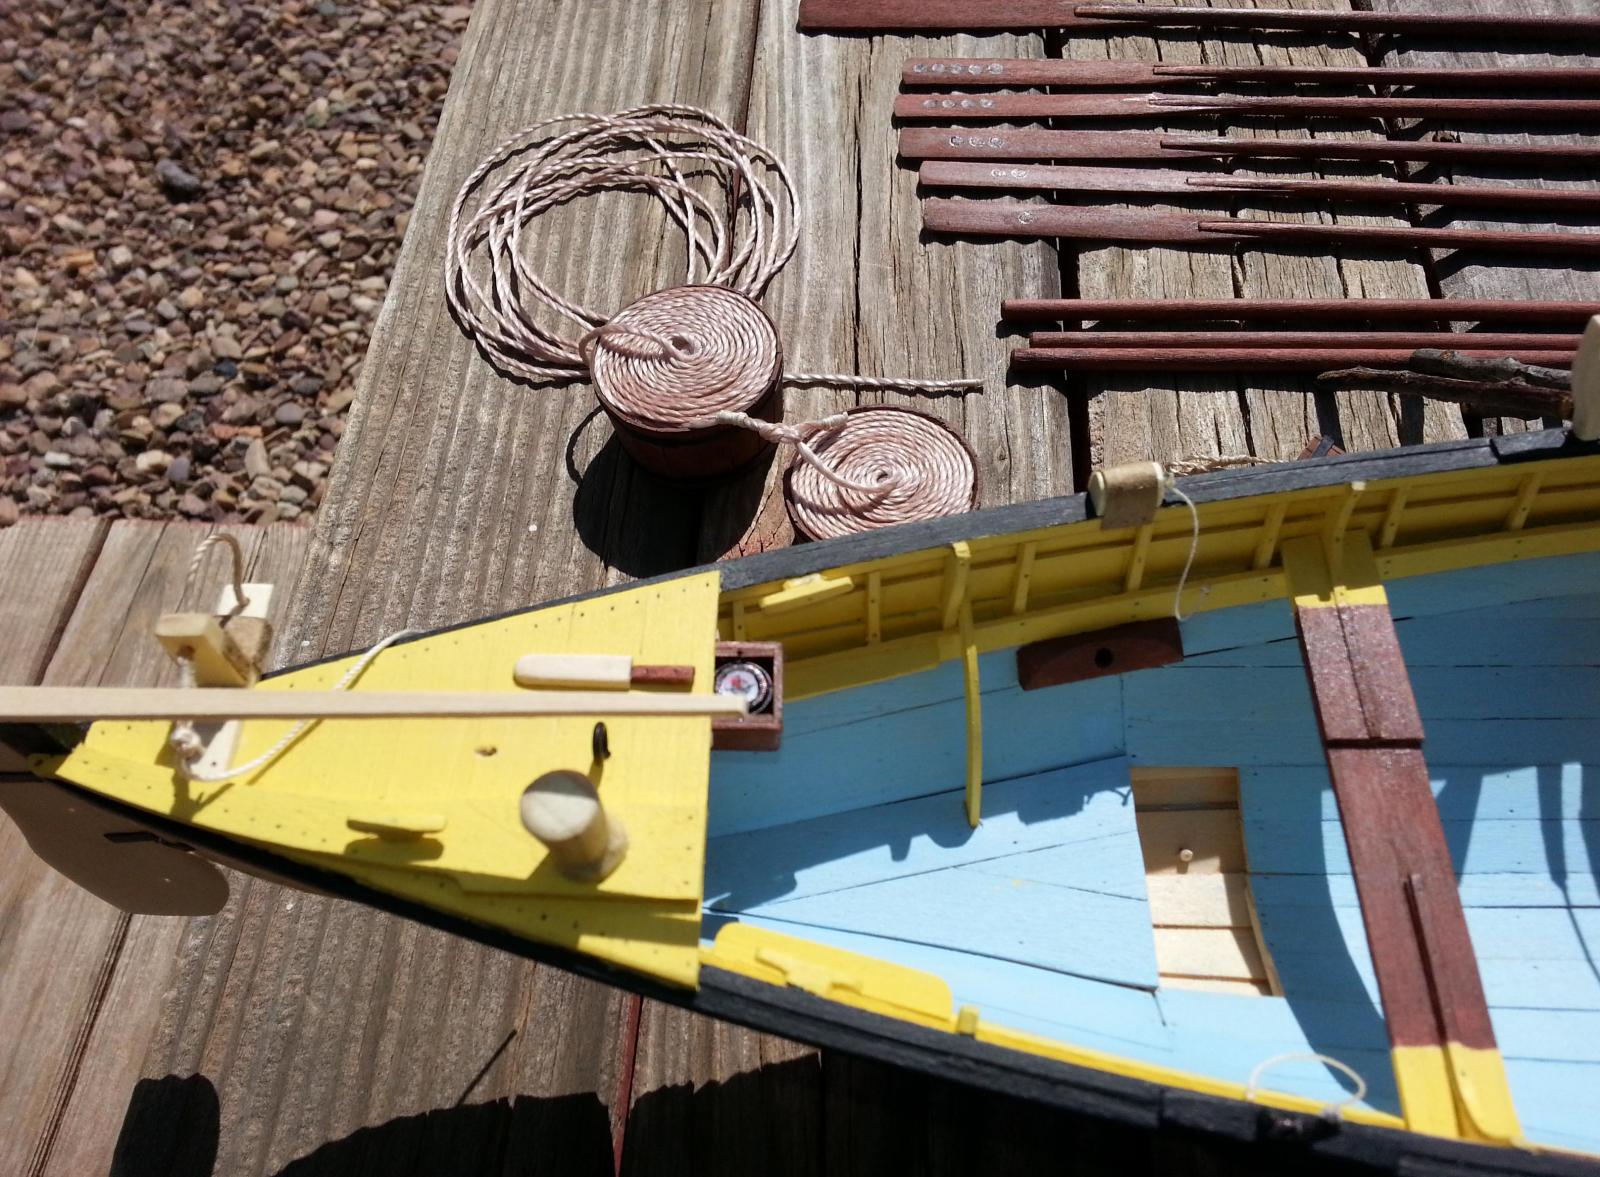
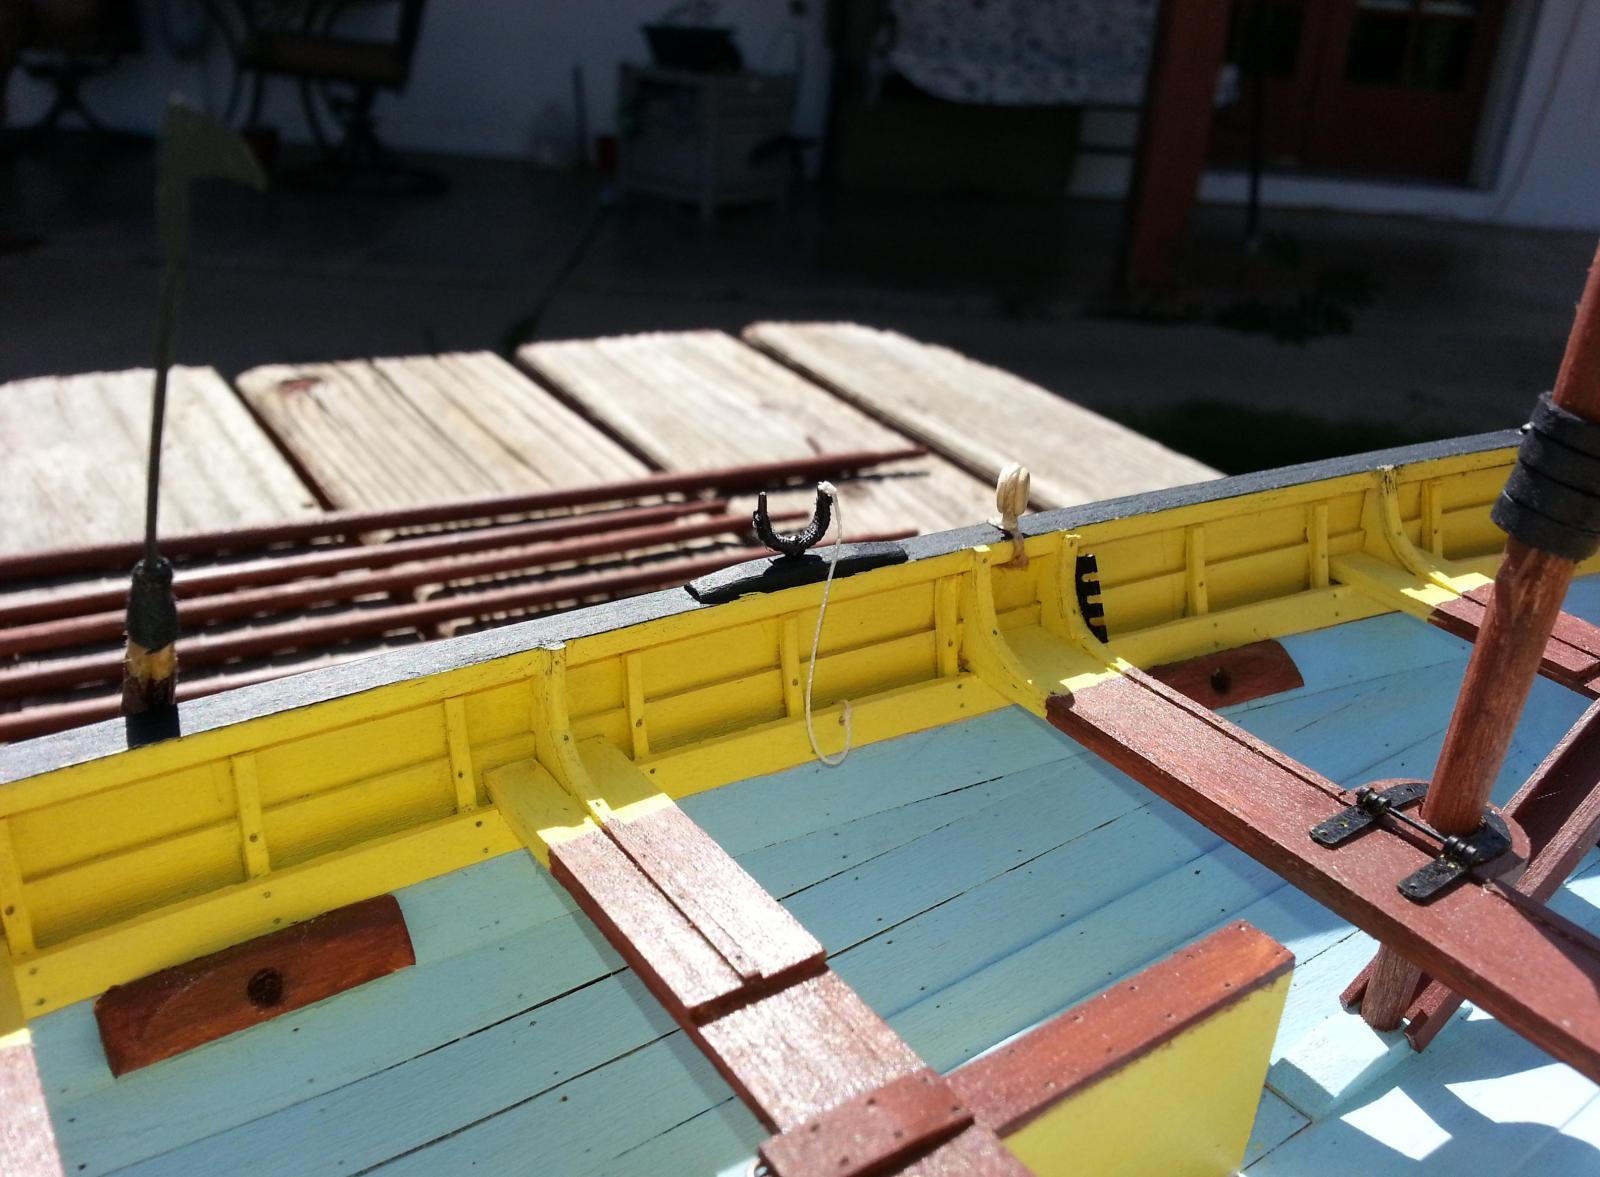
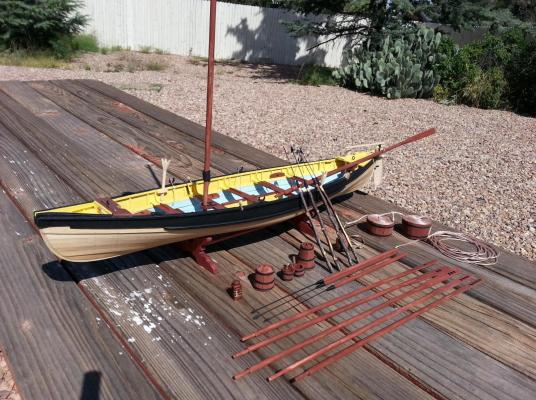
Hello everyone, Yes it’s been a while since my last post due to the fact that the majority of the main construction of my whaleboat has been knocked out of the ball-park. Now is the time to actually go through the ordeal of constructing the whalecraft and minor details. The minor details were oar locks, steering oar rest, compass box, waist and stern tubs, lantern keg, lantern, water keg, piggin, bucket, and coopered drogue. I’ve also tweaked the mast and oars to include the steering oar and tiller. These items are small and a person can easily finish them without realizing it. I should point out that there were a few items that I did not follow religiously from the guide. The guide book states that you can add the hoops to the buckets, etc… made from copper which I did not. What I used was 1/16 wide strips of card stock that I painted black with a sharpie and am happy at how they came out. The guide book also points out the details for the mast as follows, “mast hoops are usually a permanent feature of the mast and so should be present. After the hoops are on, add the wooden cleat for the spritsail tack”. Keep in mind that I stressing the important fact that the hoops go on before you place the cleat. My hoops are not made from copper but rather from a piece paper. What I did was wrap a piece of wax paper a few turns around a dowel of similar dimension in order to get spacing between the dowel and the soon to be made hoops. I then glued a strip of paper about 4 inches wide around the wax paper and let it dry overnight. Once dry, I slid the paper off of the dowel, cut it down to the size I needed and finally took a sharpie to it. The finished result looks quite convincing as the photos below will show. I still have a few more items that need to be made before I can finally dress up my whaleboat and call it good.


- 31 replies
-
- 6
-
-
- new bedford whaleboat
- model shipways
- (and 1 more)
-
Hola Mija, Beautiful execution of the lighting. Pretty soon you will start building POF models after your next two kits. I can't wait for you to get there. Raymond
-
Thanks for the kudos Tim. I will make all the needed items on my build but am unsure if the mast and sail will be rigged. More that likely I will stow the equipment on the whaleboat as if it were getting ready to be hoisted out of the water. Ray
-
Hey Chauncey, I really appreciate your input and giving me ideas as to wear to go from here. Like you, I prefer to scratch build then go off of the supplies found in kits. Well as to the nails provided in the kit, let's just say that my tool box does not contain the smaller diameter drill bits needed in this hobby. I plan on purchasing a set of dental drill bits in the near future.
-
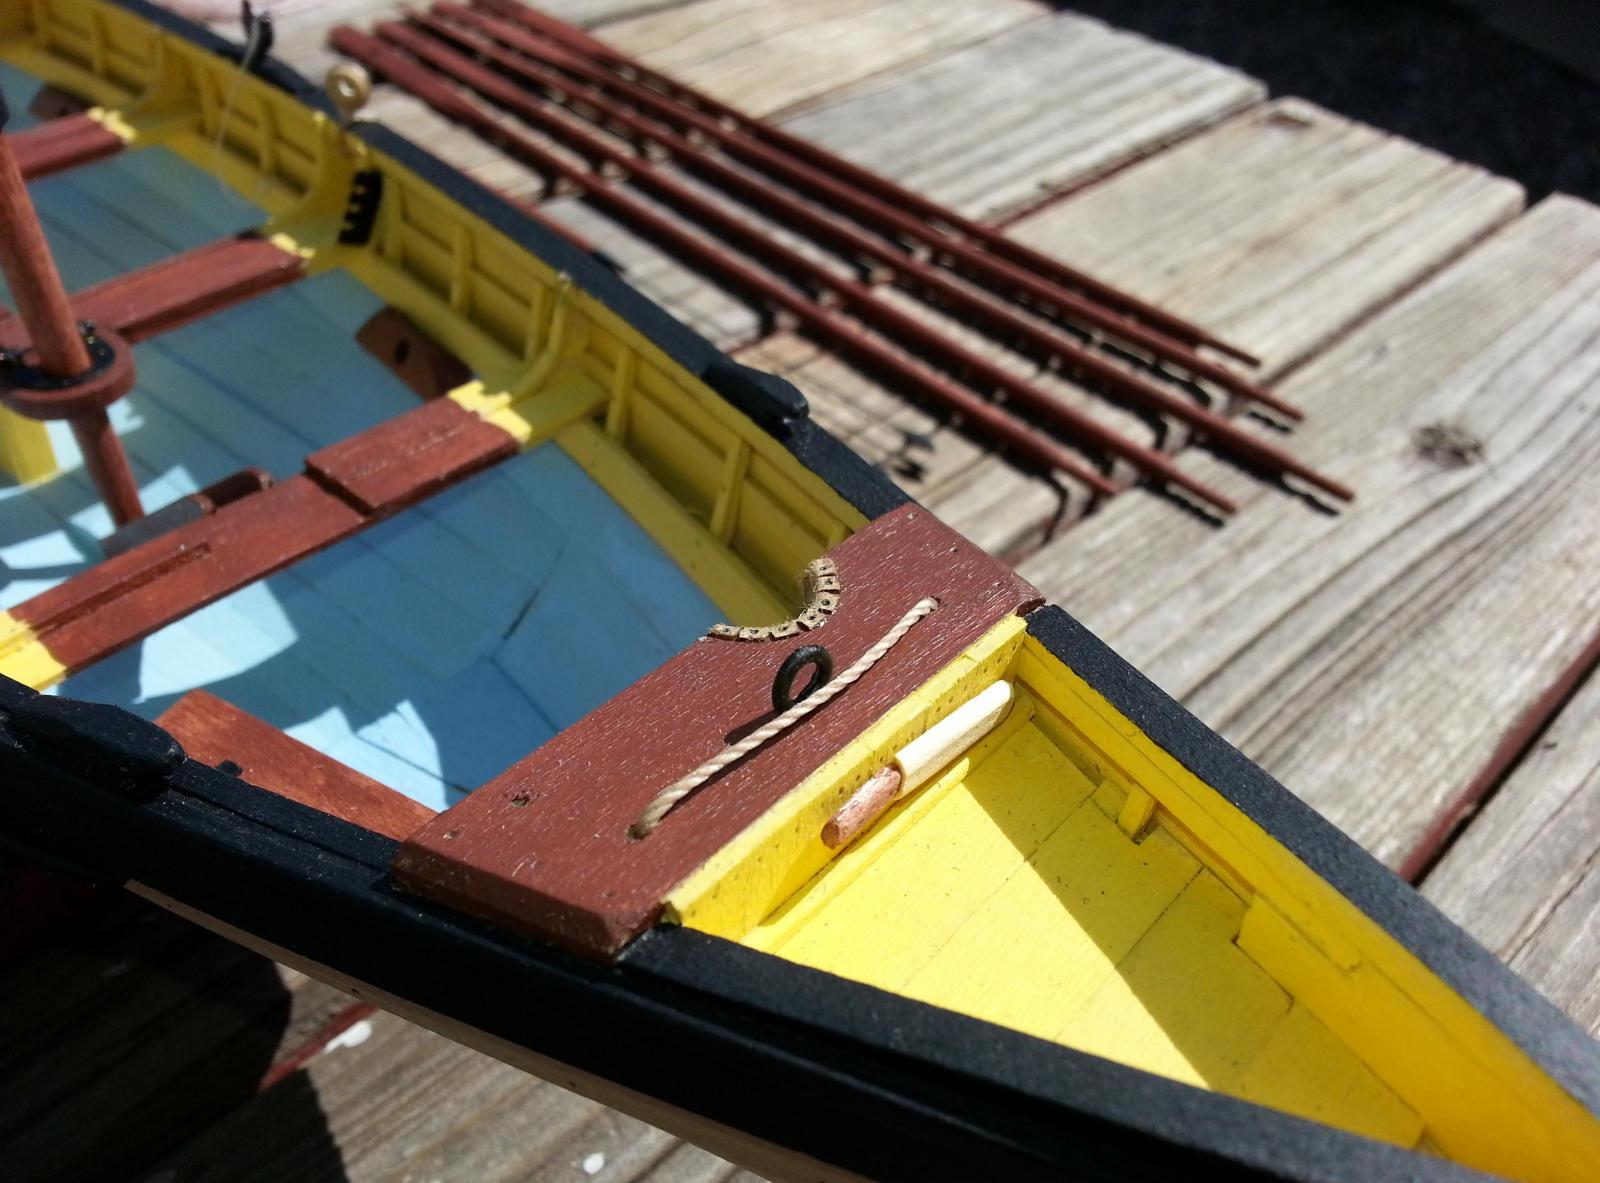
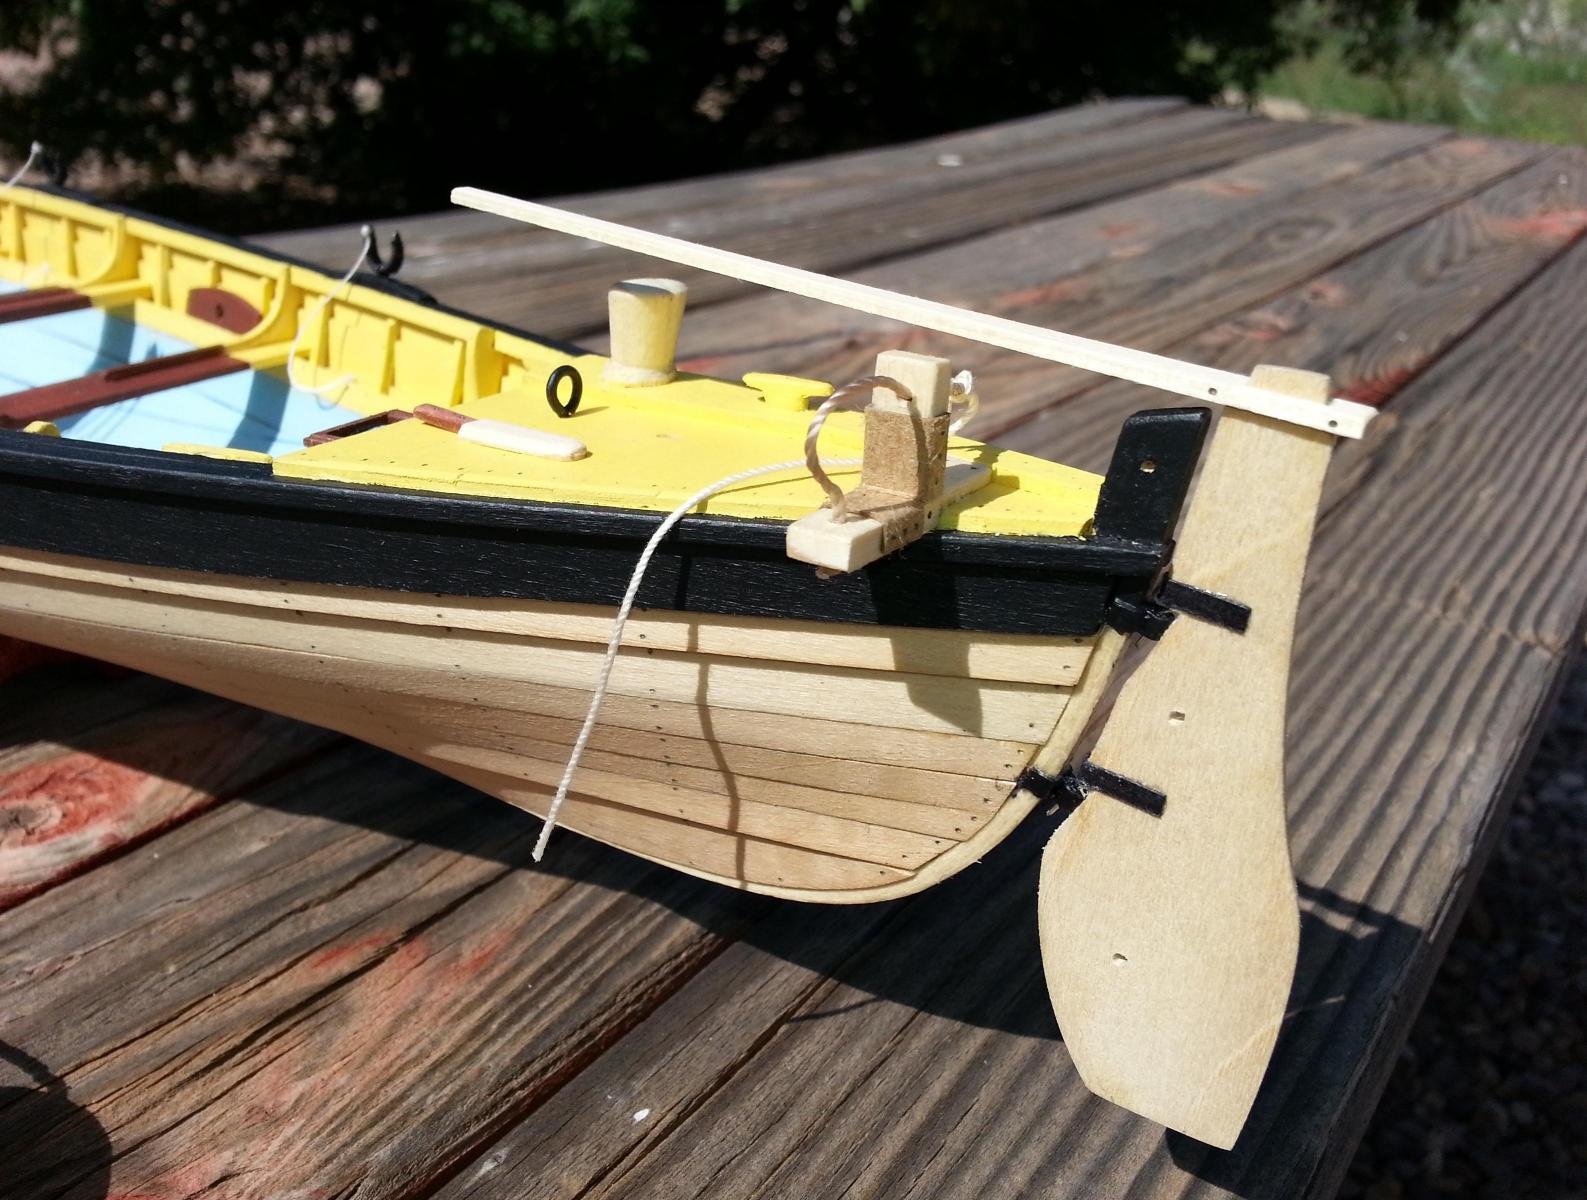
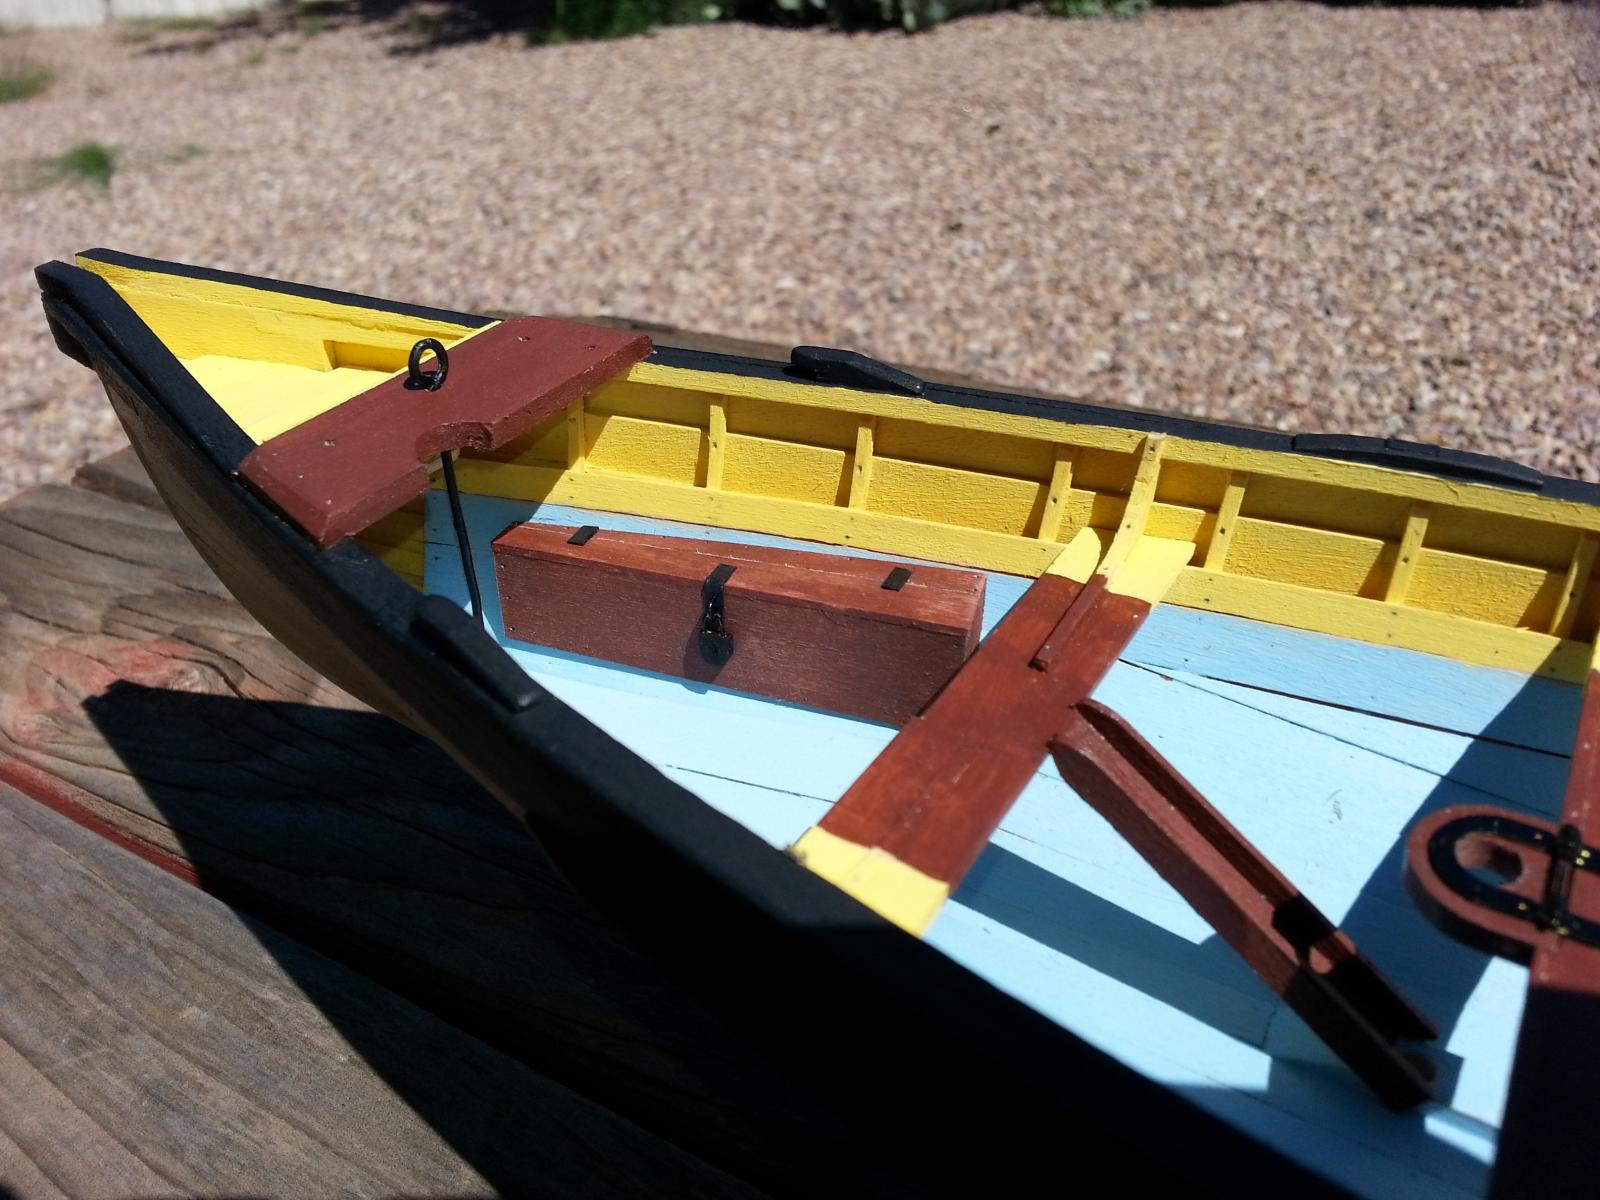
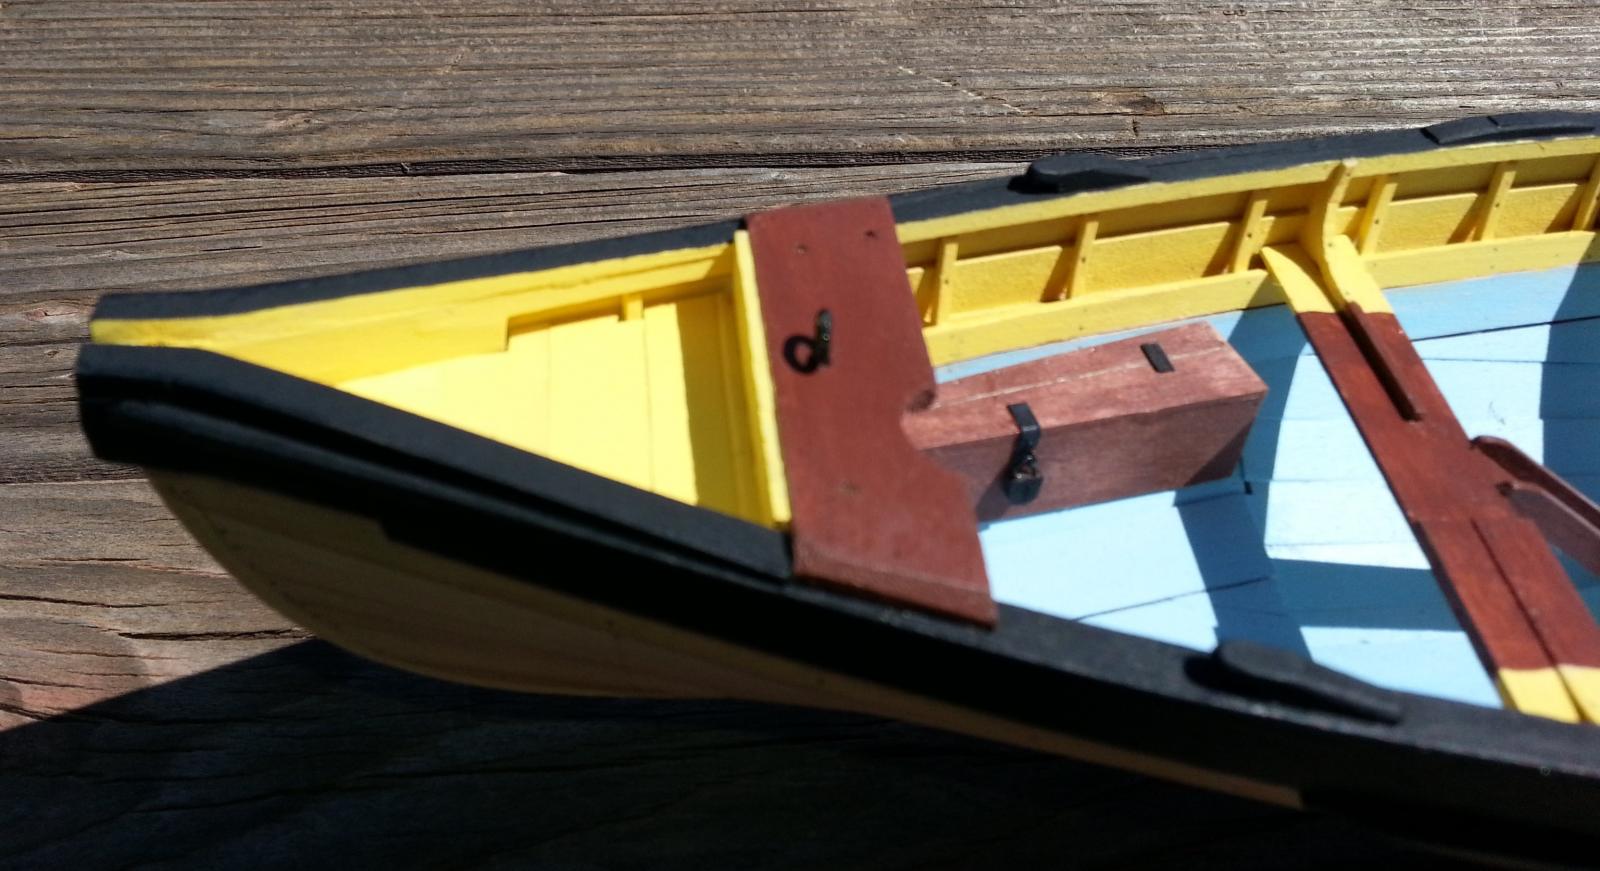
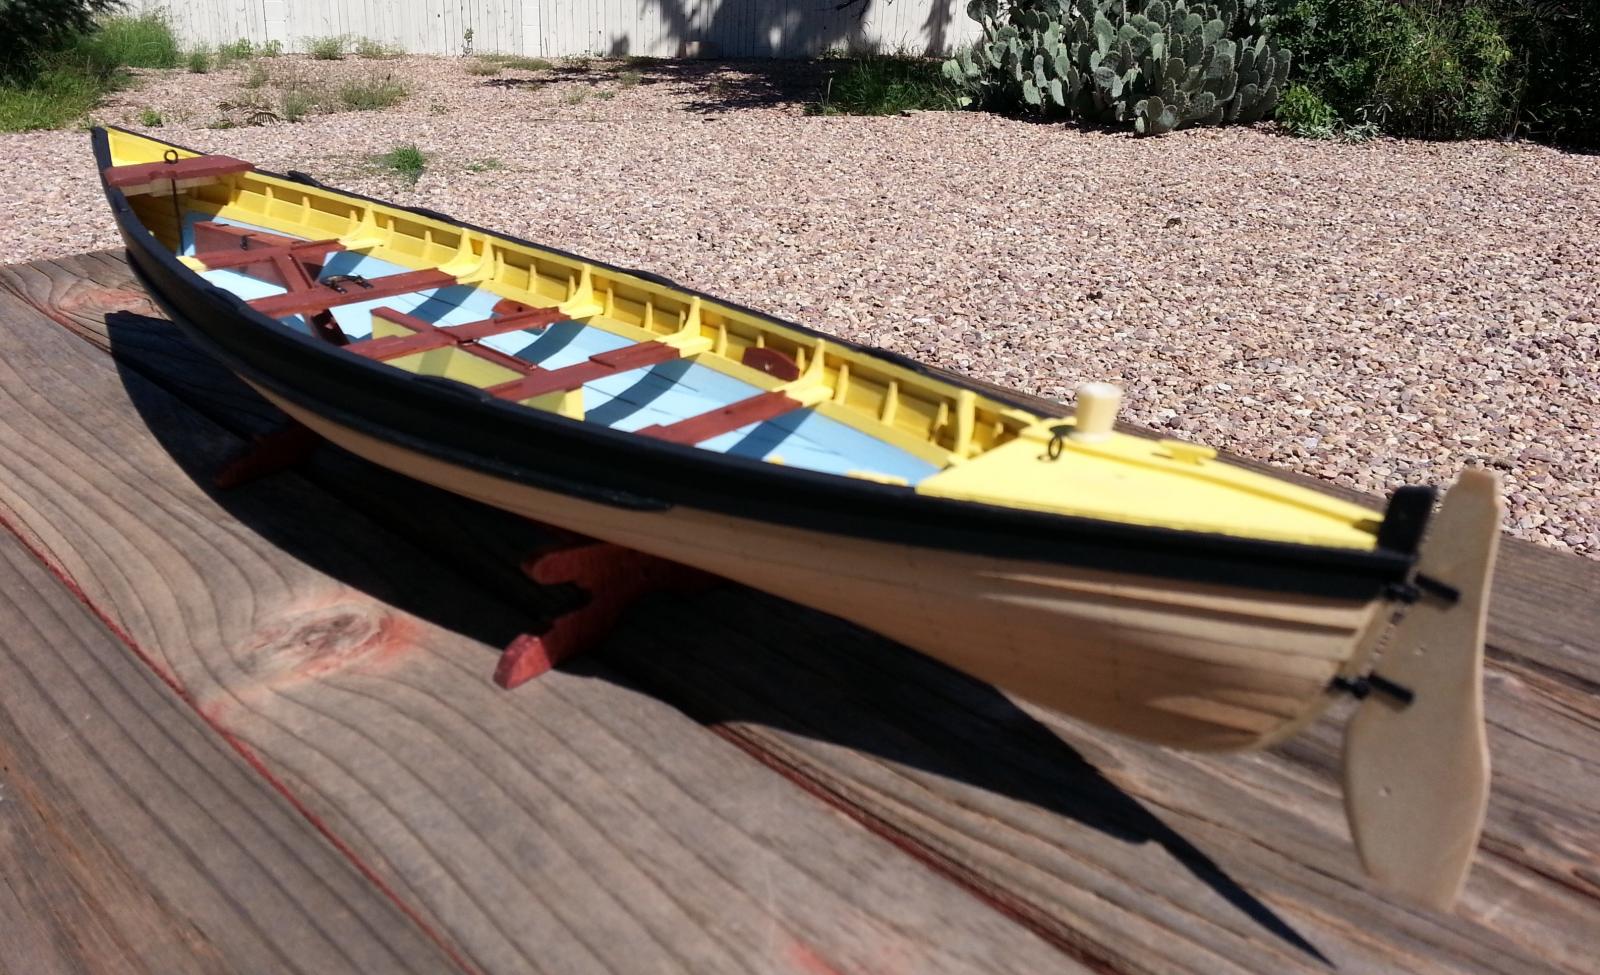
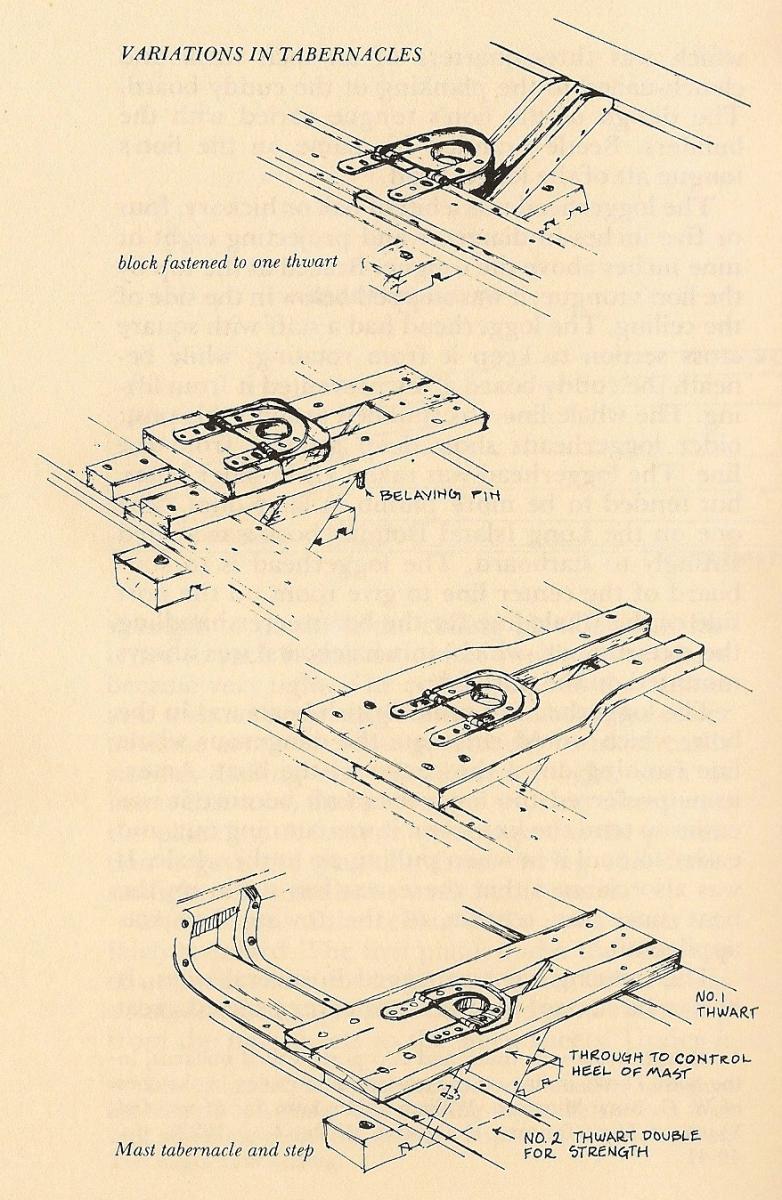
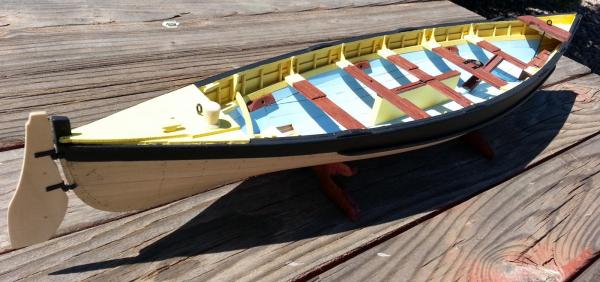
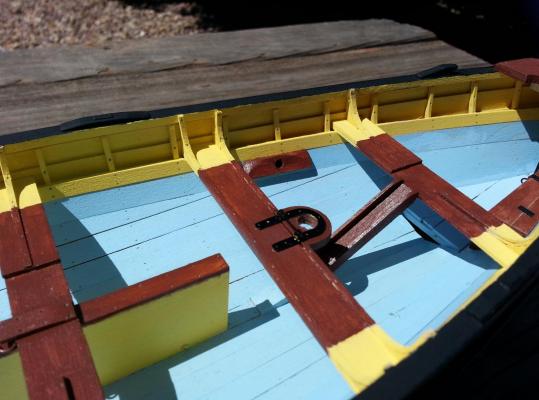
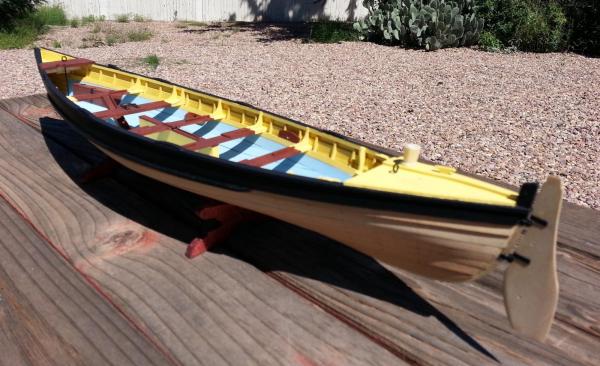
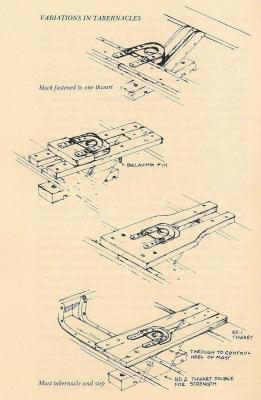
Hello Everyone, The latest update to my whaleboat is the addition of the whale gun box which was optional but decided to add it on. Also, I added the rudder and the tabernacle which was not part of the original plans. Lester, who has actually worked on the Charles W Morgan, was kind enough to send me lots of information on whaleboats. One such detail that I enjoyed was the tabernacle which seemed an ideal concept in aiding whalers to safely seat the mast into its step without getting their fingers crushed. I also went ahead and painted the gunwales and rubbing pieces black. I originally planned on painting the hull white but decided to leave it unpainted because I actually like the bare wood. If you’ve seen my previous builds, you can tell I fancy this aspect. Attached you will see photos showing you how she looks and I’ve also added the variations of tabernacles in the event someone would like to add it to their whaleboat.


- 31 replies
-
- 6
-
-
- new bedford whaleboat
- model shipways
- (and 1 more)
-
Hello Tim, Thanks for looking in on my log. I too like the color scheme and I was inspired by a whaleboat that someone ordered to be made following his color scheme. If you look at my log entry dated 8 September, you will see the first three photos I am refering to. Ray