jrozhon
-
Posts
49 -
Joined
-
Last visited


-
 Knocklouder reacted to a post in a topic:
Astrolabe by jrozhon - Mantua - Scale 1:50
Knocklouder reacted to a post in a topic:
Astrolabe by jrozhon - Mantua - Scale 1:50
-
Knocklouder reacted to a post in a topic:
Astrolabe by jrozhon - Mantua - Scale 1:50
-
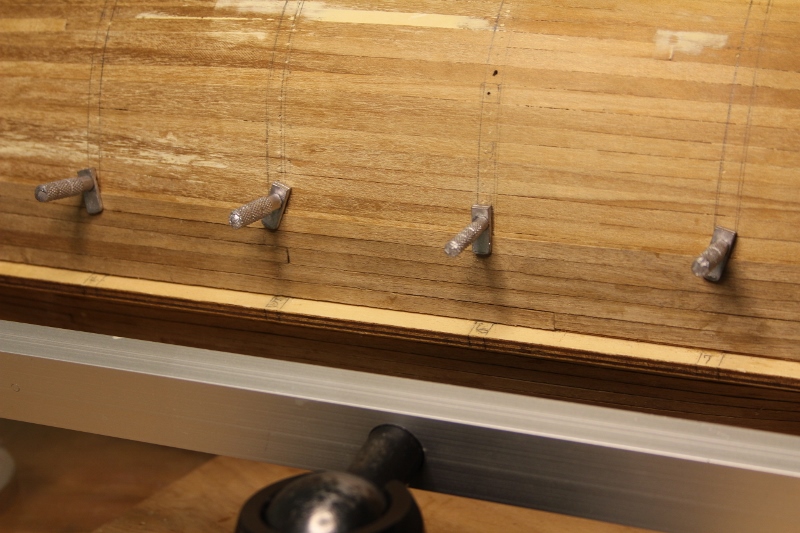
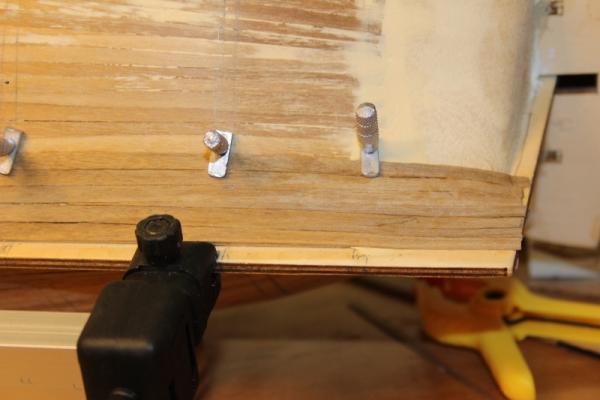
Well I finally got my guns assembled, blackened, carriages painted, and the breeching ropes installed. I used the Birchwood Casey Brass Black and it worked quite well. To make the finish more durable I sprayed everything with a clear flat acrylic top coat. Even then I need to do some touch up with flat black paint. I used AEW's design for the breeching ropes. I seized a small section of line to the center of the breeching that fit around the cascablel. I used Hurbert Sicard method of zip seizing as described in his web site. All I did differently was to use a larger drill bite to construct the seizing then you slide them over the doubled line and glue. Now, I don't know what to do next, the gun port doors, of the side and train tackle. I guess it really does not matter
-
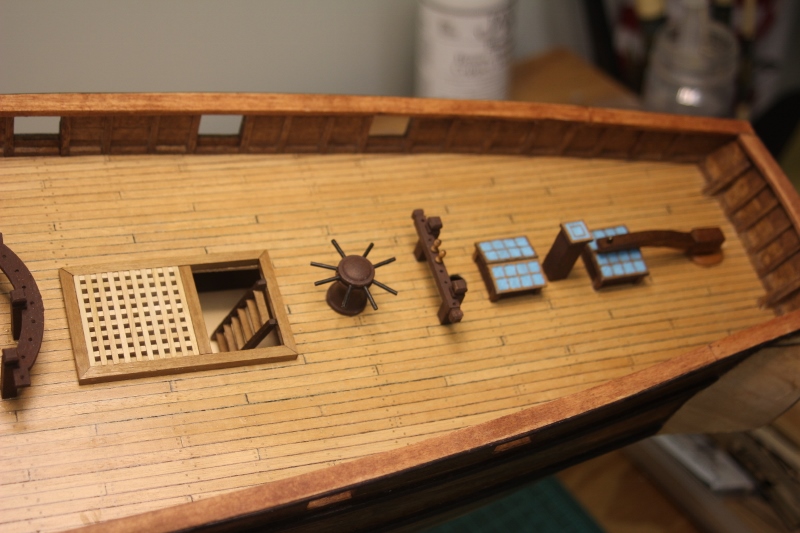
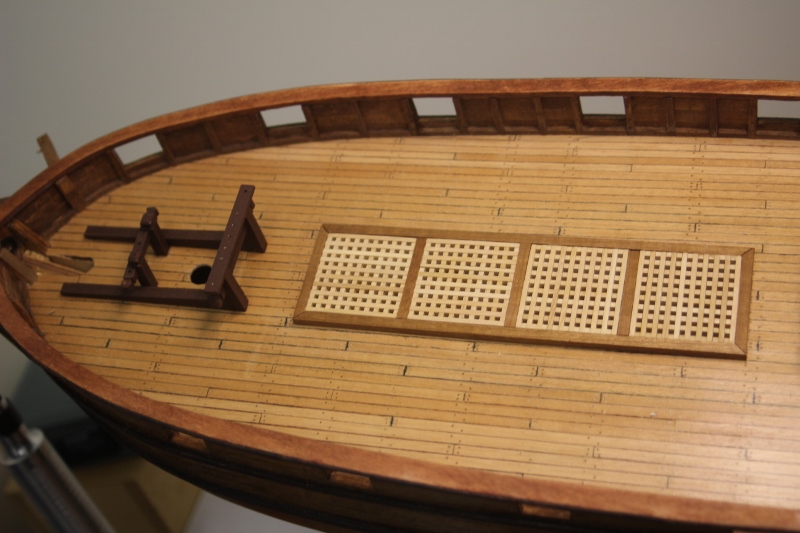
Well, it's been a long time and it seems the powers to be changed the forum again. Hunting season was good and now it is over so I can work on my model. I finished my deck furniture and installed the pin rails and planked and drilled my channels and installed them as well. I then turned to the gun carriages. The ones that came with the kit were not very good. They were made of plywood and had bad looking wheels and axles, so I got some from Syren. They are a different scale, but were designed for a barrel length of 1 23/32 in. long and my barrels were 1 26/32 in. so they look good and are well made out of boxwood. The only problem I had with them is the axles are square and one must round them. I tried sanding and filing them but it took forever and the 1.6mm size would break very easily. I solved the problem by using my draw plate and my foredom flex drive. The key is that one of the short flat sides of the axle must face one of the three jaws to be centered properly. Then, run it at medium speed and start with a large hole and use progressively smaller holes. My finished size was 2.4mm and I think it looks a lot better than the 1.6.These carriages are tapered being smaller in front than the back. The only way I could assemble them was to make a jig to hold the axles and the brackets. Then add the transom and small strip is placed on top of the rear axle. Then add the bottom and the quoin, drill out the wheels and you are done. They give you a piece of wood 3/32x3/32 to fashion the quoin handle. Good luck! I bought some belaying pins 6mm long and they worked very well. See the following pictures.
.jpg.db93e4a7247f1bee029c2d543506f0a4.jpg)
.jpg.95fa97bc3fd541d033538123d356466c.jpg)
(2).jpg.7c6cc3a06a4838c529c4f210381c2dc3.jpg)
.jpg.475458841ff3c2f8e1b7c26e02b9d1a9.jpg)
.jpg.724f310bba81e807affc62f16cd989aa.jpg)
.jpg.adb0900c7b10762faba76c252da04c6c.jpg)
.jpg.a5f7e8e12e24be31d807ca432c1919f9.jpg)
.jpg.f0a8f9cb4c0271af4b7fc7b4f4b419d9.jpg)
.jpg.6b1b538f4fdd864b22e6012e9a372aea.jpg)
.jpg.1f6020ea9af0cde5d9e91a50c5b075f3.jpg)
.jpg.855a82ef171703b7e500b2a2c4adf4c7.jpg)
(2).jpg.c6e50c78dd989aea7bbff632f03806a3.jpg)
.jpg.0ef9734405875bdf02307571a7221372.jpg)
.jpg.ae6b08c532dd5c589313fc4900609b7a.jpg)
-
cristikc reacted to a post in a topic:
Astrolabe by jrozhon - Mantua - Scale 1:50
-
maggsl_01 reacted to a post in a topic:
Astrolabe by jrozhon - Mantua - Scale 1:50
-
hexnut reacted to a post in a topic:
Astrolabe by jrozhon - Mantua - Scale 1:50
-
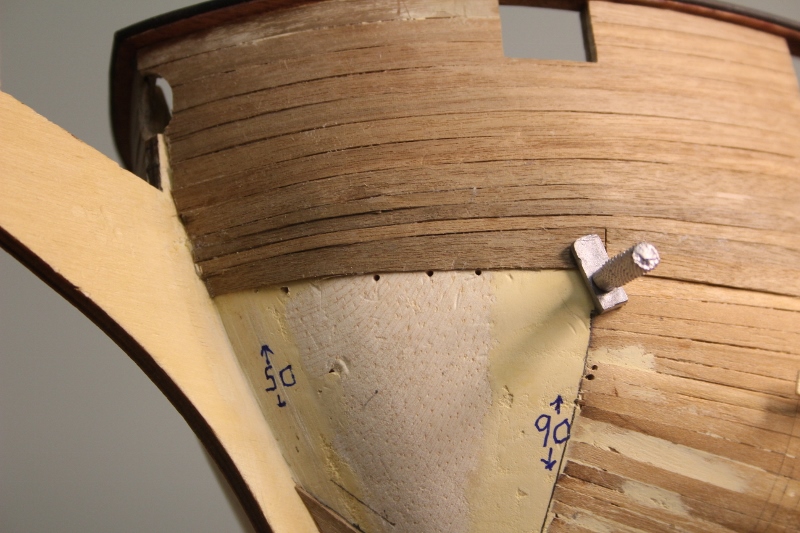
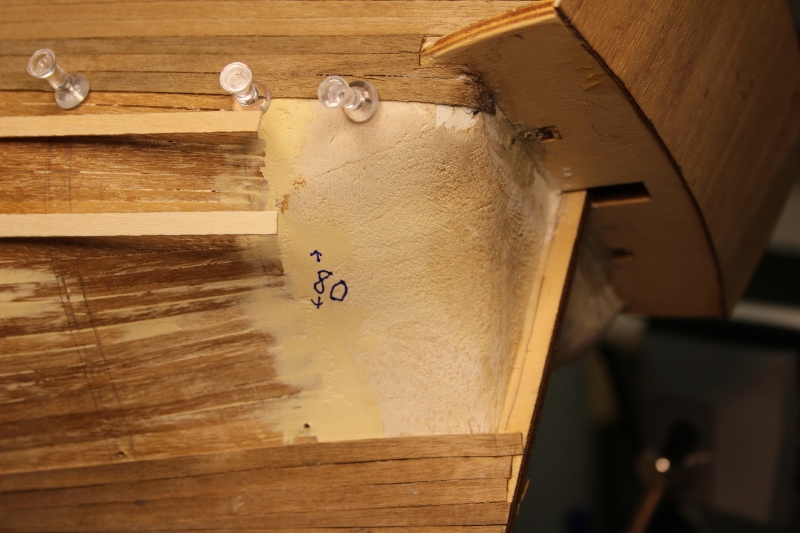
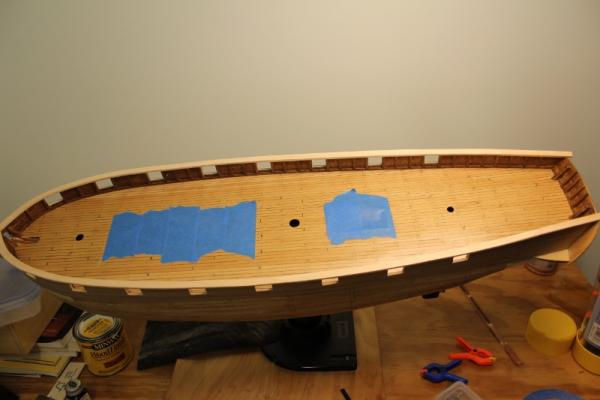
I got some work done on my model. To finish this project is going to take a long time but I knew that fact when I started. What I did not know was this "kit" is a box of building material with very few parts prefabricated. I did not know that I would have to make so many parts. I think that's what makes the project a challenge. I finished my deck furniture and installed the rudder. Again, I had to make three hinges the stern post was too wide after being planked. My next challenge is the blacking some brass parts. My problem is that the finish easily comes off after it is dry. I am going to try a clear coat, but that will be difficult on very small parts.


-
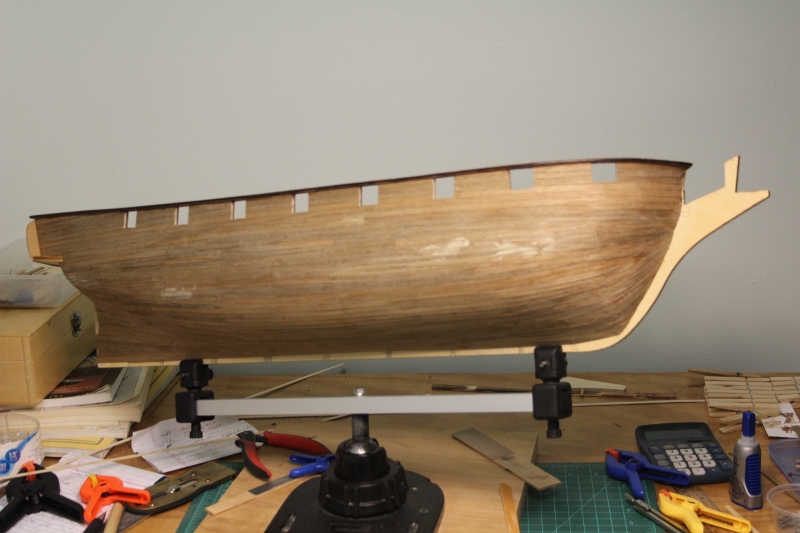
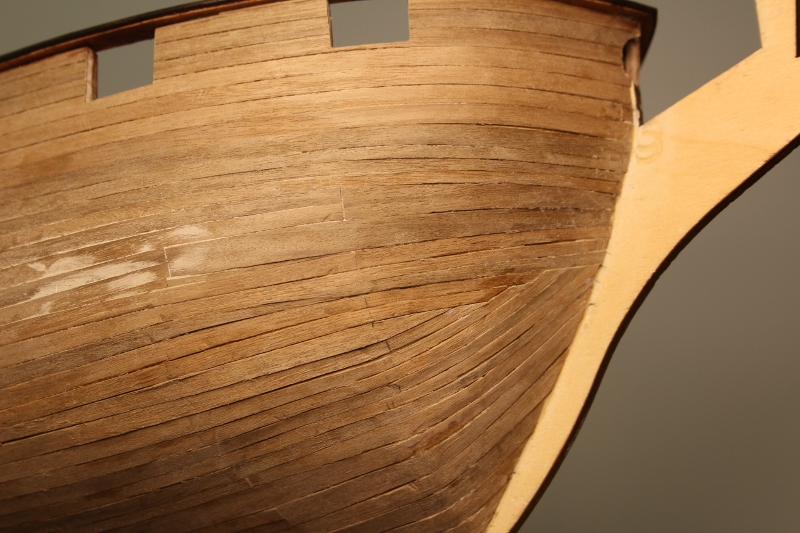
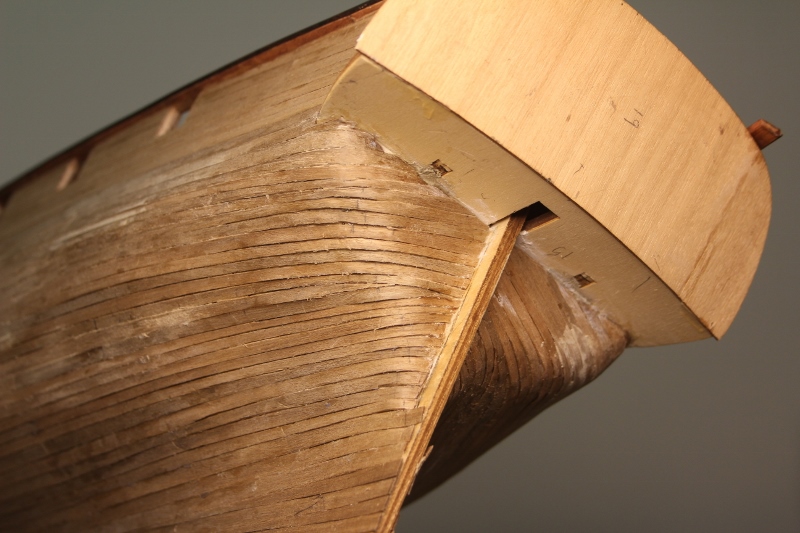
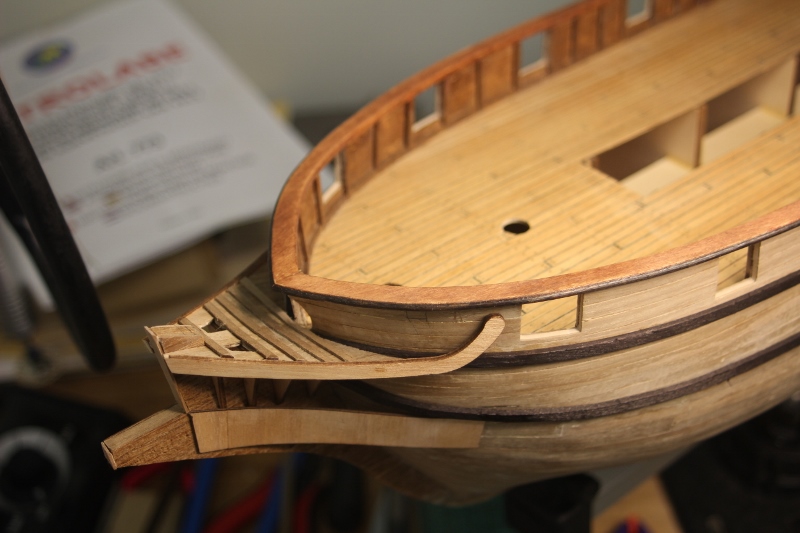
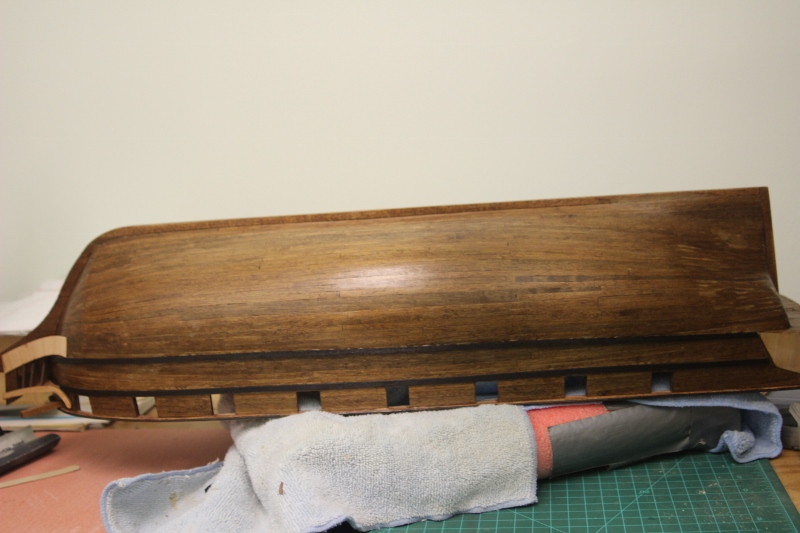
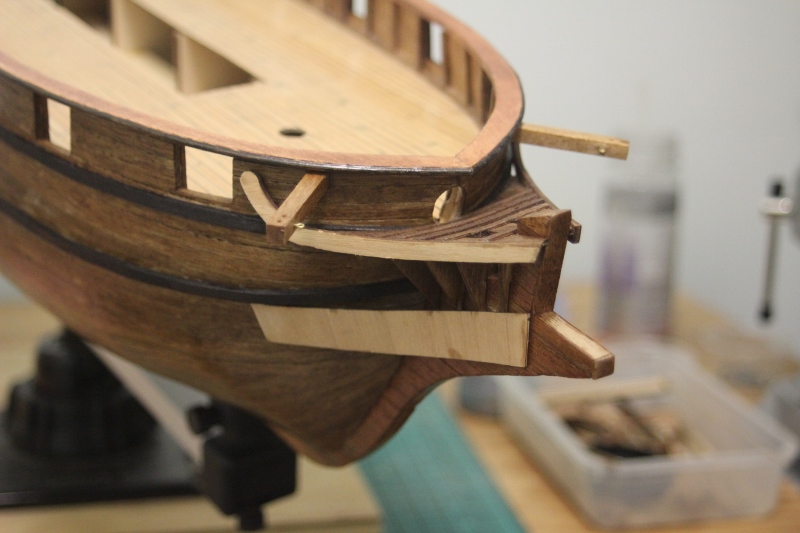
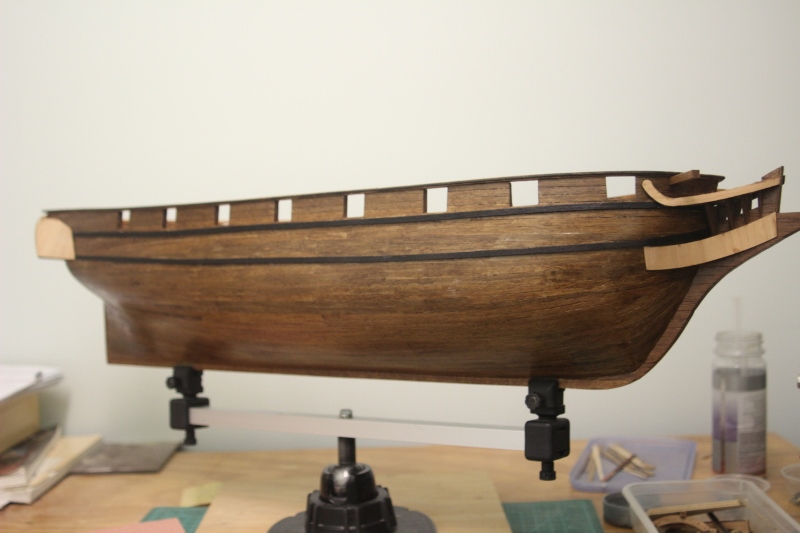
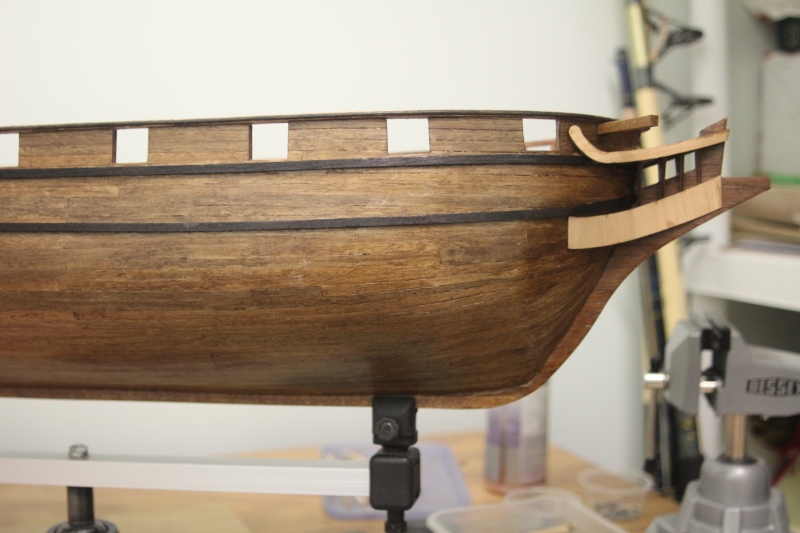
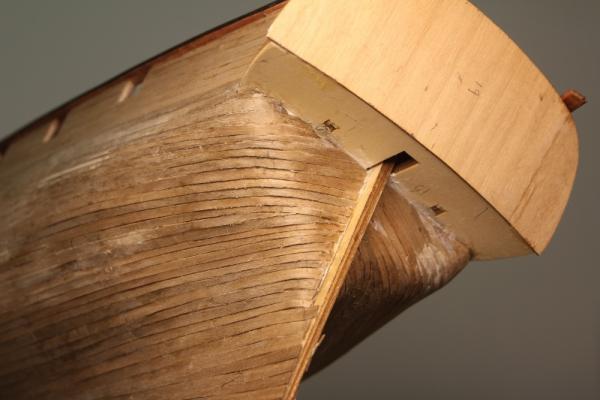
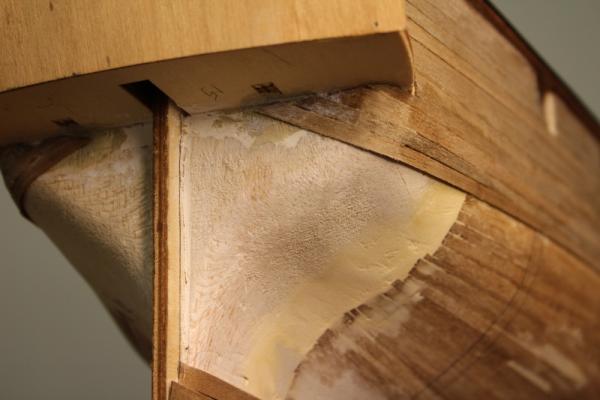
I finally was able to get some work done on my model. I am so glad to be finished with the planking. That took a long time. I then spent some time filling in and sanding and trying to correct some imperfections. Then I installed the wales. These were difficult to bend because they were 2mm thick so I cut some small kerfs in the back toward the bow which make bending much easier. I also finished the beak which took some time since everything had to be fitted around the wales and the bow sprit. Fitting the gallery pieces was even more difficult because I had to bend the plywood parts in three different plains. I but two coats of stain on the hull and sanded it between the coats and one coat of satin clear finish. I think it came out quite well considering all the problems I had with the planking. I am now turning my addition to the deck furniture.
-
maggsl_01 reacted to a post in a topic:
Astrolabe by jrozhon - Mantua - Scale 1:50
-
It 's been some time since my last post and I finally finished the second planking of my vessel. My inexperience in ship modeling real shows in the planking, I tried using the drop planks but , again I was quickly running out of room at the bow and stern So, I went back to the 5mm planks and kept installing until I was out of space at the bow so I had to use a herringbone pattern to complete the job. I should not have run so many planks without some taper at the bow and stern. By the time I realized the results, it was too late to correct the error. I feel that after I sand and finish the planking the vessel will look OK but I would not want sail on her. Thanks for your help I am glad to be able to do some other task other than planking.


-
Well I got back from my 30 day trip to China and Southeast Asia and recovered from the jet lag, and got some work done on my model. I still am not sure about using drop planks, so I decided to try and see what happens. While I was gone, I ordered some.5mm x 8mm planking material from Cornwall Models in England. I decided to start using drop planks from number one bulkhead to the bow. I still believe I will need to use stealers at the stern. I added two more planks on the port side and stopped them at the first bulkhead. I then added the drop plank and tapered it to a little less than 4mm at the bow. There are 3 more planks in this belt and then I will start on the starboard side. If Y'all have any other ideas I would love to hear from you. Thanks again.


-
maggsl_01 reacted to a post in a topic:
Astrolabe by jrozhon - Mantua - Scale 1:50
-
shipcarpenter reacted to a post in a topic:
Astrolabe by jrozhon - Mantua - Scale 1:50
-
I have added 5 additional planks to the top of both sides of the vessel. I think my mistake was as a result of the first planking. I was given to understand that the first five planks from below the deck line, and from the keel were to be installed without tapering and to let them run unrestrained which was not a problem because they did not run all the way to the bow and stern. I used the same method on the second planking from below the bulwarks and up from the keel resulting in lack of space at the bow and stern. I think I will be all right at the stern but the bow is going to be a tight fit. I was going to use drop planks but I am using 5mm planks which are not wide enough to cover two planks at bulkhead 2 and 3. My question is, would it be acceptable to buy say 7mm planks to use for the drop planks, or would it look better with the narrow planks at the bow?

-
maggsl_01 reacted to a post in a topic:
Astrolabe by jrozhon - Mantua - Scale 1:50
-
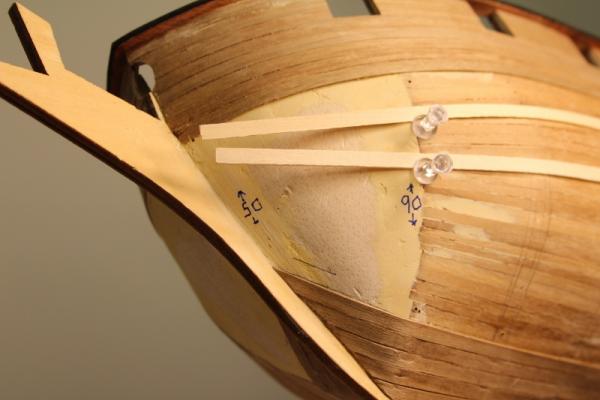
I think the beginner here has a real problem and I don't have any idea what would be the best solution. I added two more stakes at the top of the port side hull. Based on the information I have gleaned from the forum and other sources, these planks have not been tapered. They have laid very straight with out any side bending. I put another batten strip on the vessel and it shows that I am running out of space at the bow. I have 125mm at amidships which will take 25 5mm stakes to cover. At the bow I have 50mm and at no.10 bulkhead, aft of the bow I have 80mm. At the stern I have 101mm along the gallery floor and the stem post and 90mm at bulkhead 1 just forward of the stem. At the bow the stakes will have to be 2mm to fit and that is to narrow. At bulkhead 10 the stakes will be 3.2mm which is OK but narrow . At the stern the stakes will be 4.04mm which is OK but at bulkhead 1 the stakes will be 3.6mm which means that the stakes will narrow the widen again. The only idea I have is to use drop planks at the bow on all remaining stakes starting at bulkhead 9 or 10 and use stealers at the stern. Please give me a hand here, I am sure some of you experienced modelers have run into this before. Thank you in advance for your help!

-
maggsl_01 reacted to a post in a topic:
Astrolabe by jrozhon - Mantua - Scale 1:50
-
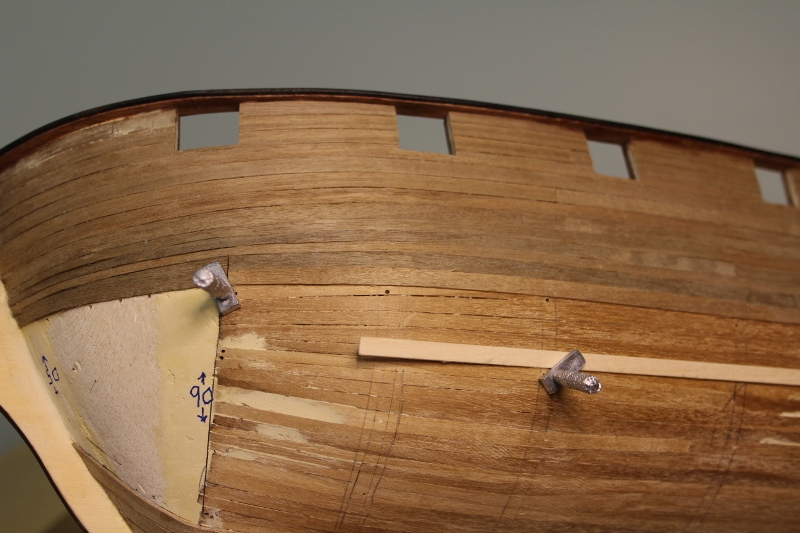
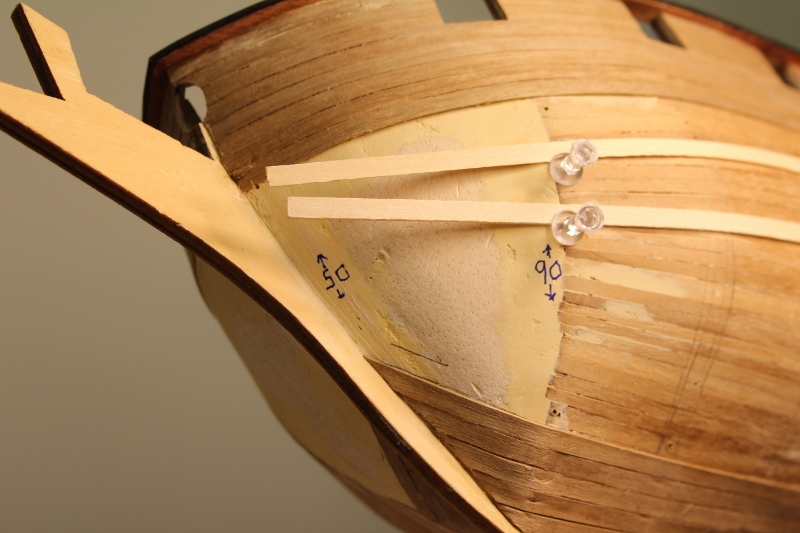
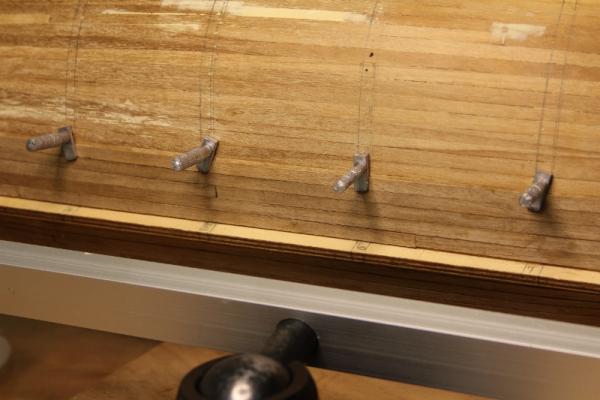
I have gotten back to work and I have installed 5 stakes of the second planking at the keel on both the starboard and port sides. I bought some of those metal clamps for the hull planking and I was surprised at how well they work. I had to file them down to the thickness of my material, but after that, they worked. I did not have to drill very many holes since there were holes available from the first planking. Now I have to add five more to the top of the hull and I guess I will just have to come up with a way to plank the stern. If I can get these 5 installed I believe I will be able to complete the planking

-
you are absolutely right but I don't know how to change the title?
-
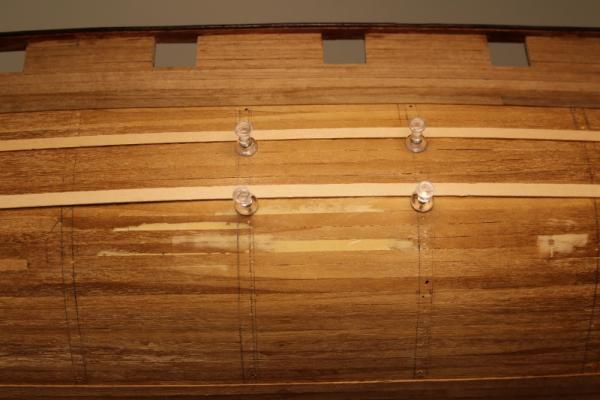
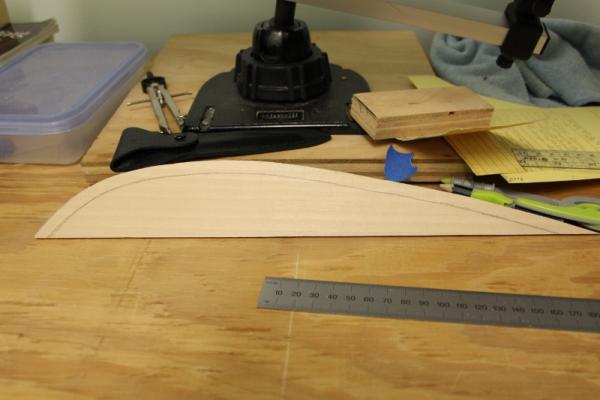
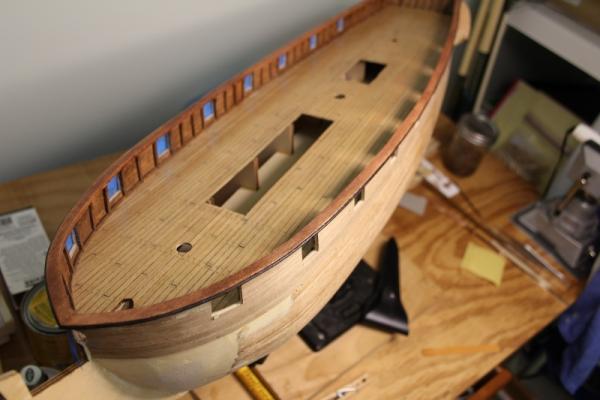
Well I got back to work and started on my cap rail. My first task was to make a card template from the port and starboard sides of the vessel which was transferred to some 3mm x 2 inch bass wood and I cut it out on my scroll saw. I bought this saw from Harbor Fright Tool Co. for $70.00 and I was really surprised as to how well it works considering the price. Also, It is variable speed. Then I was just a matter of sanding and gluing it to the top of the timberheads. I bought some 2mm half round molding, painted it flat black and glued it to the outside edge of the cap rail. Gluing it was a real challenge and no matter how many times I used a wet rag to wipe off the excess glue I still got some light spots when I stained the rail. Even so, it looks pretty good. Now it's back to the second planking. I still do not have a good way of clamping the stakes until the glue dries. I am going to try push pins to start with and go from there. Again thanks for all y'alls support and help.


-
some pictures.


-
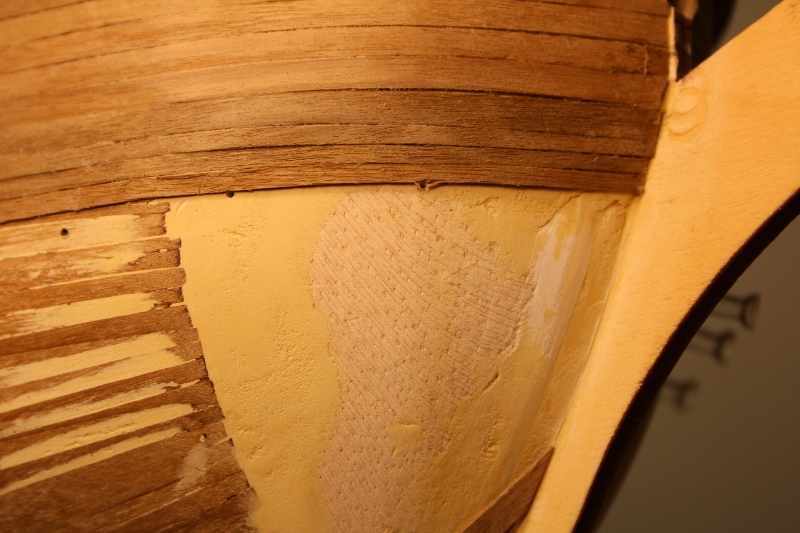
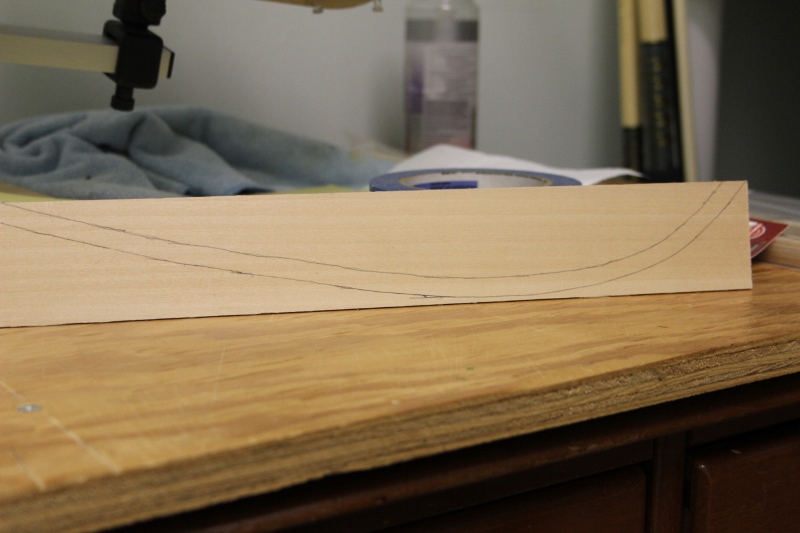
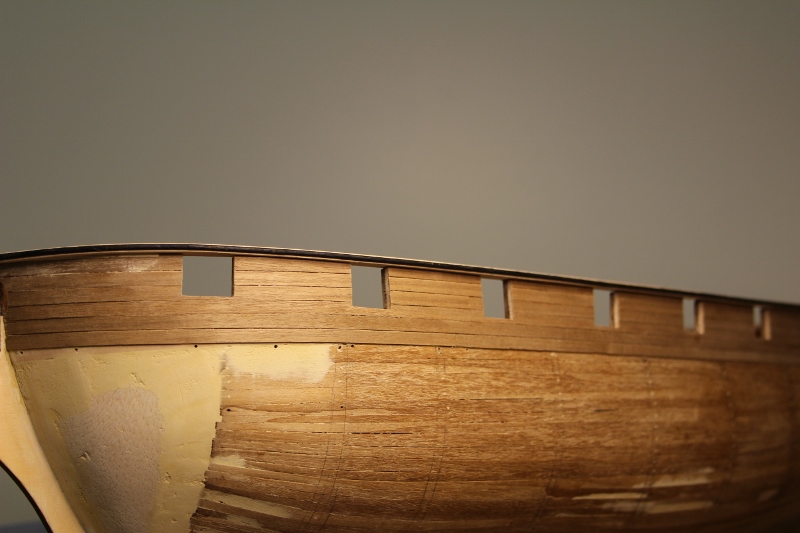
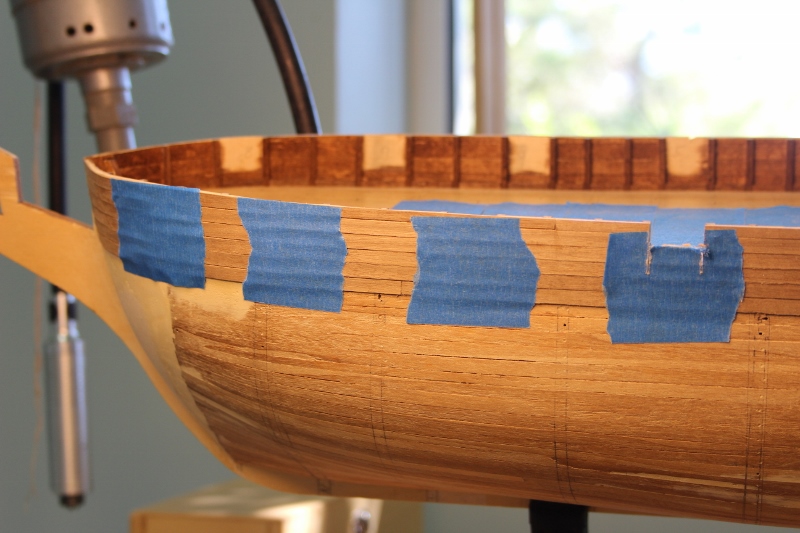
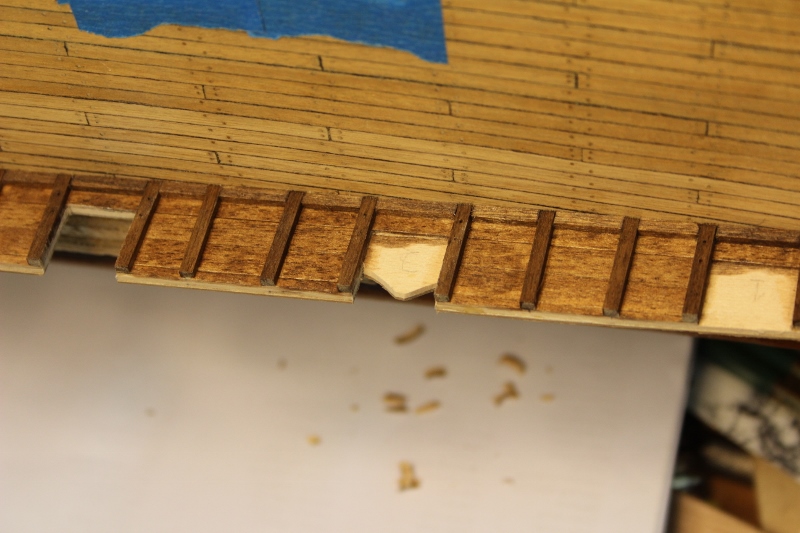
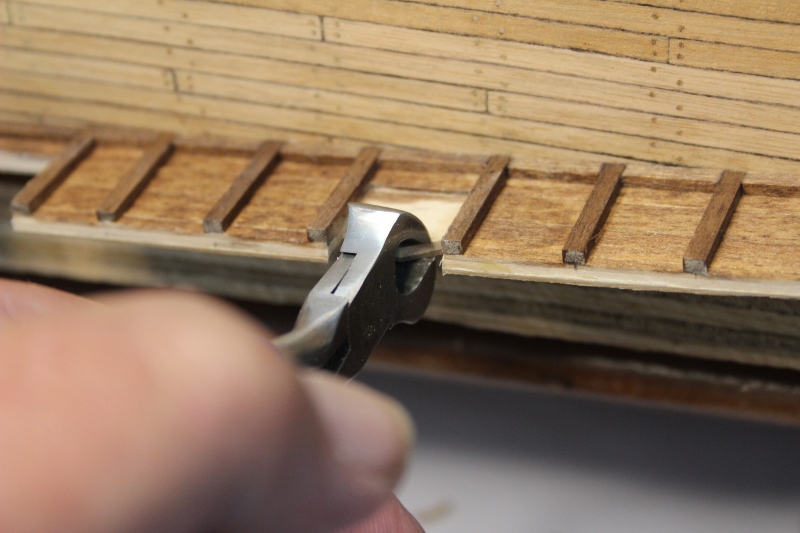
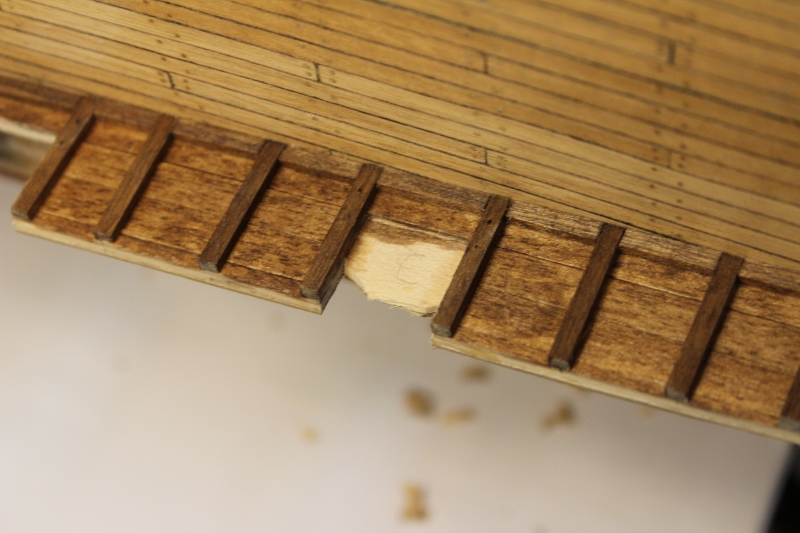
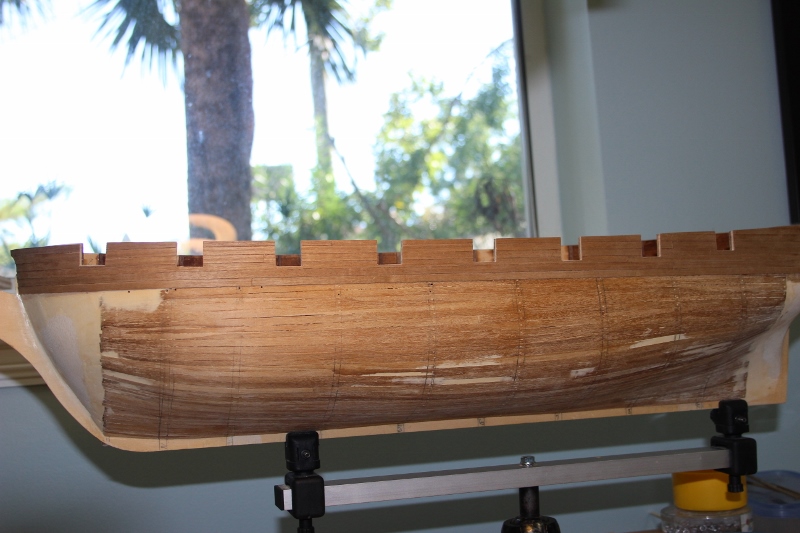
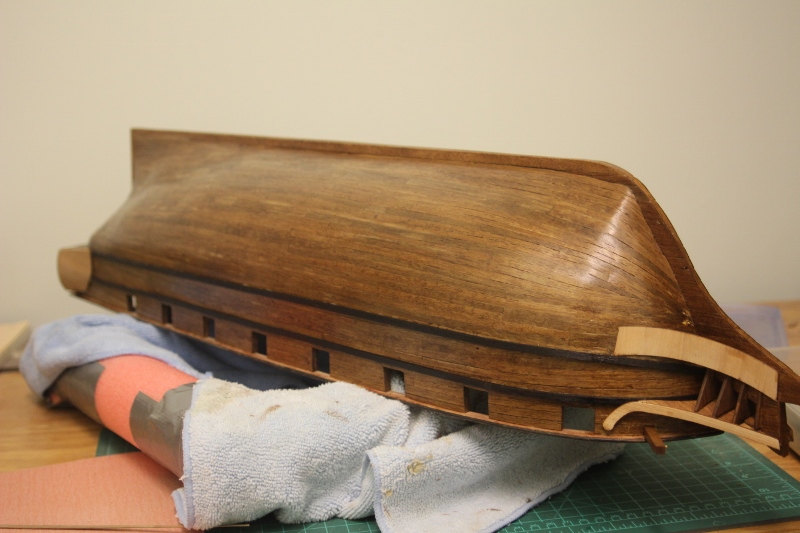
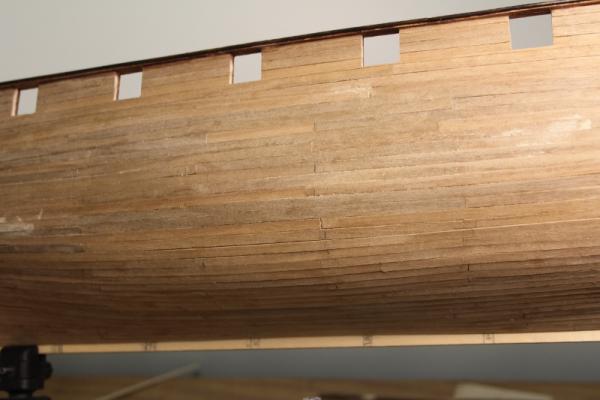
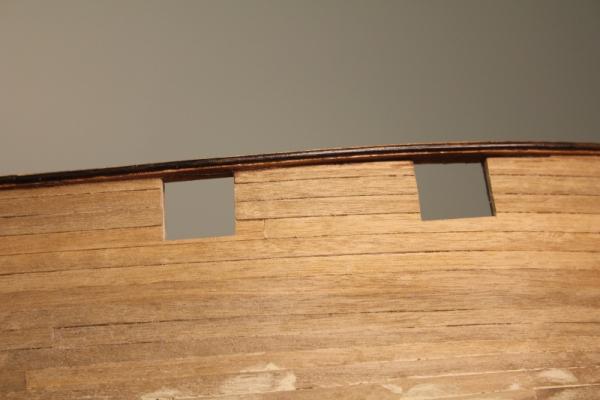
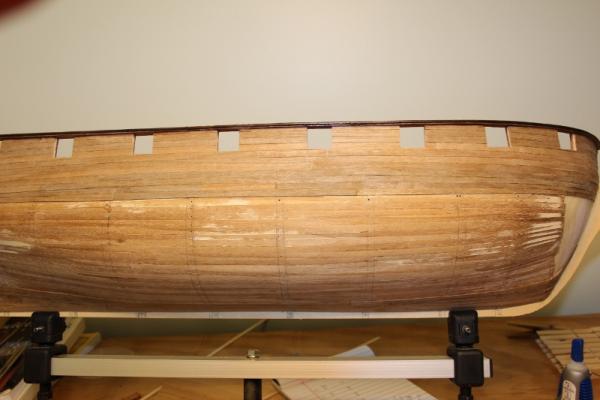
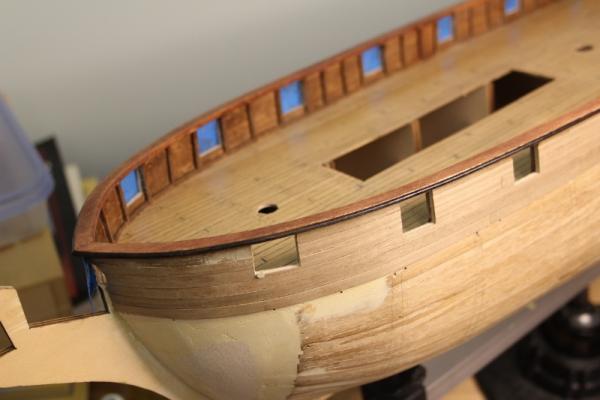
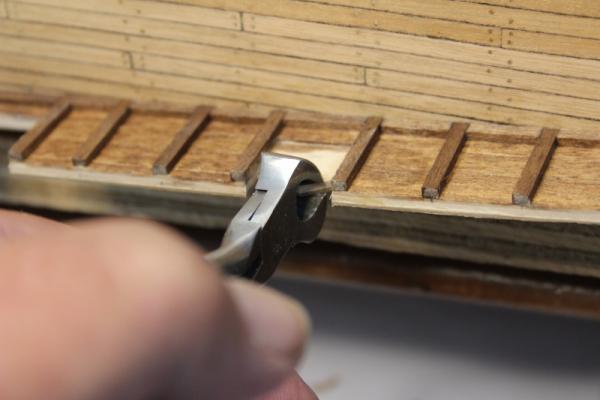
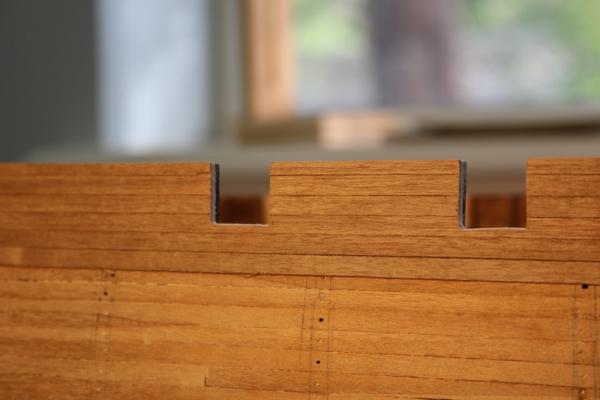
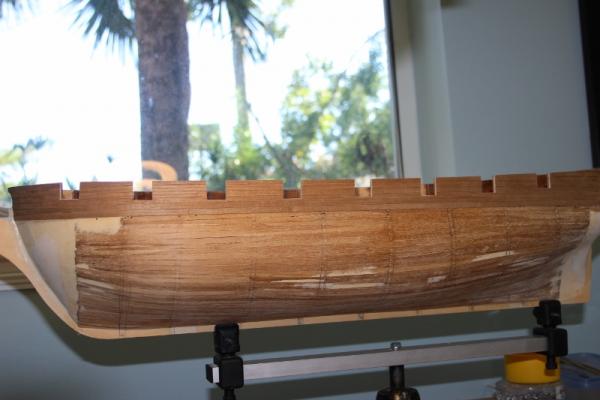
Well I finally got move into my condo and as a result I lost my big studio and am now confined to a closet. I am sure that many a find model were built in a closet. I finished the port side second planking (fist 6 stakes) and now I am going to cut out the gun ports. The tools are simple a saw, knife, end snips and a homemade sander. Before I started cutting, I taped the outside of the openings to avoid splintering, the timberheads protected the inside. I then cut about half way down the gun port on both sides with the saw and cut out the wood from the center to the edge with a hobby knife and removed the center with the end snips. I continued to the bottom of the port and squared them with the sanding strip. This is the procedure I used for all 16 gun ports. My next challenge is going to construct the top rail.. The directions with the model call for a lamented rail made from 7 walnut strips taped to the side of the vessel to form the curve then rip cut down the middle to make the port and starboard sides. I am going to try and make one from solid pieces of bass wood stained. I am going to need some luck!! Again, thanks for all the kind words of encouragement, support and help.
-
the two layers of planking is not my idea. I got it from Hubert Sicard web site wooden ship modeling for dummies. He shows you the entire procedure There is a one time charge to join the web site. I have been using it for several years. I was like you I wanted to use two layers of planking so I could correct any errors on the first planking. The web address is shipmodeling.ca. Good luck jeff
.jpg.1fe1283bcc2604a09e28842706b6dfb9.jpg)
.jpg.c3501044697eda0e30b33cbd1a82ed6b.jpg)
.jpg.119e78291d4dd5b30fb39e485f3efa21.jpg)
.jpg.03ad36fa0b120de67756798e9b4f7c5c.jpg)
.jpg.ebbfb48ff0b362656ae3575c0e129d51.jpg)