malmoerik
Members-
Posts
81 -
Joined
-
Last visited
Profile Information
-
Gender
Not Telling
-
Location
Zurich, Switzerland
Recent Profile Visitors
-
 Macika reacted to a post in a topic:
HMY Britannia 1893 by malmoerik - Mamoli - Scale 1: 64
-
 Macika reacted to a post in a topic:
HMY Britannia 1893 by malmoerik - Mamoli - Scale 1: 64
-
 Macika reacted to a post in a topic:
HMY Britannia 1893 by malmoerik - Mamoli - Scale 1: 64
-
 Macika reacted to a post in a topic:
HMY Britannia 1893 by malmoerik - Mamoli - Scale 1: 64
-
 Costas0778 reacted to a post in a topic:
HMY Britannia 1893 by malmoerik - Mamoli - Scale 1: 64
-
 Nirvana reacted to a post in a topic:
J Boat Endeavour by fnkershner - Amati - 1:35
-
Hi LMDAVE How are the sails coming along? When I built my Endeavour I ended up removing the sails in the end, didn't think they looked nice. But on the Britannia I'm building now I'll definitely have sails. The cloth delivered with that kit was thinner and smoother than that delivered with the Endeavour, plus they aren't printed, something I think you commented that you didn't like. Do you have any other hints when it comes to sails? Did you soak them in wallpaper glue to make them a bit stiff? Erik
-
 malmoerik reacted to a post in a topic:
Endeavour by LMDAVE - FINISHED - Amati - 1:80 - J-Class Yacht
-
 malmoerik reacted to a post in a topic:
HMY Britannia 1893 by malmoerik - Mamoli - Scale 1: 64
-
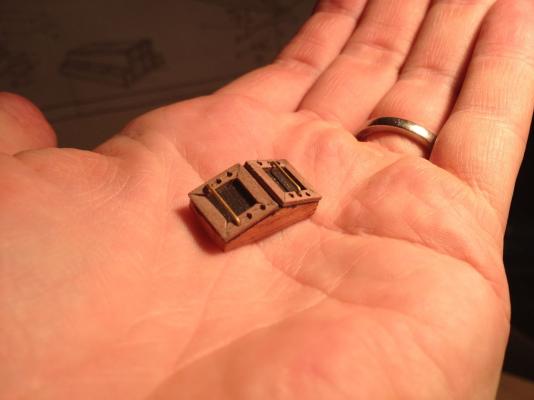
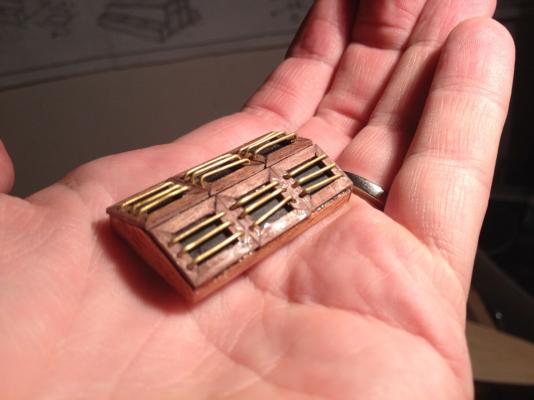
Hi Osaler1 Thanks. It's been a lot of work, I haven't posted any pictures in ages. Getting the brass bars straight on the houses almost had me give the whole thing up. I ended up re-building them from scratch, slightly bigger than according to the plans. And this time I didn't drill any holes for the brass bars because I couldn't manage to get them at equal distances, neither in the X not in the Y dimension so to speak. Instead I just dipped the brass bars in super glue and put them in place using a pair of tweezers. Maybe you're better at it?! I have now started with the mast, it's gonna big a big ship once ready, have you checked out the no 8 plan which is 1:1 of the whole ship?! Cheers Erik
-
 GuntherMT reacted to a post in a topic:
HMY Britannia 1893 by malmoerik - Mamoli - Scale 1: 64
-
 GuntherMT reacted to a post in a topic:
HMY Britannia 1893 by malmoerik - Mamoli - Scale 1: 64
-
 GuntherMT reacted to a post in a topic:
HMY Britannia 1893 by malmoerik - Mamoli - Scale 1: 64
-
 malmoerik reacted to a post in a topic:
KA-6 Australia II (1983) By Pete48 - SMALL 3/16" = 1' - 0 "
-
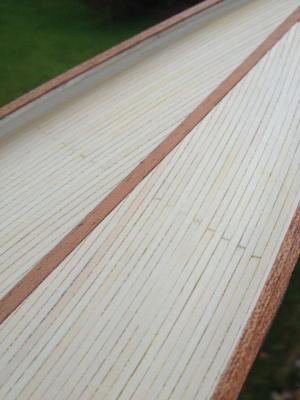
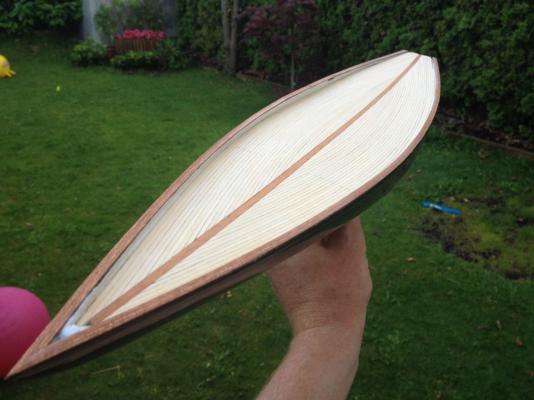
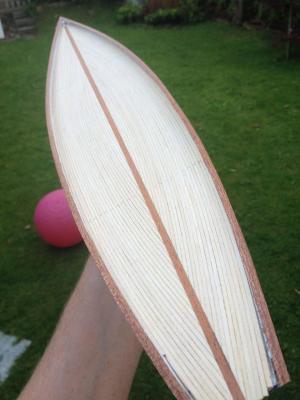
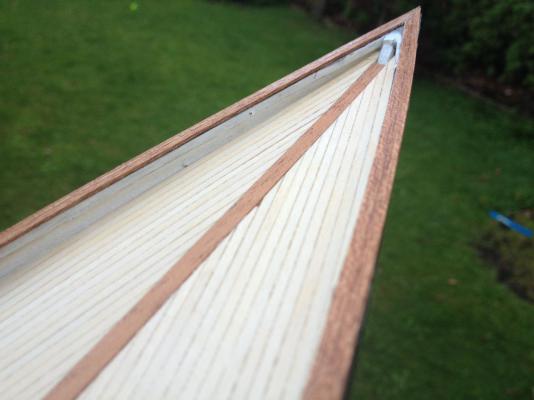
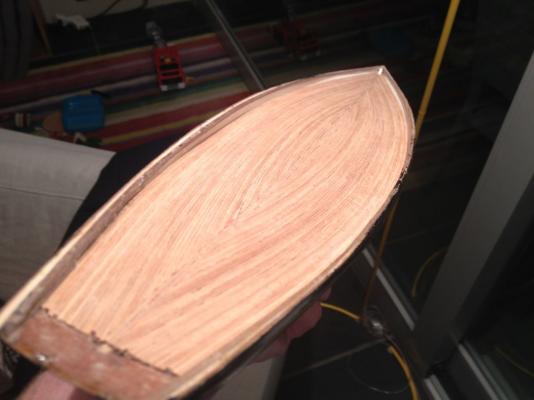
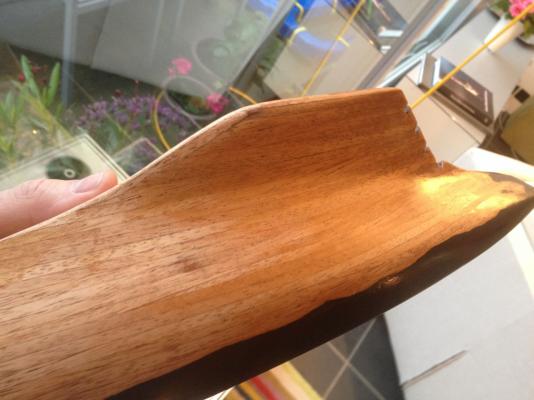
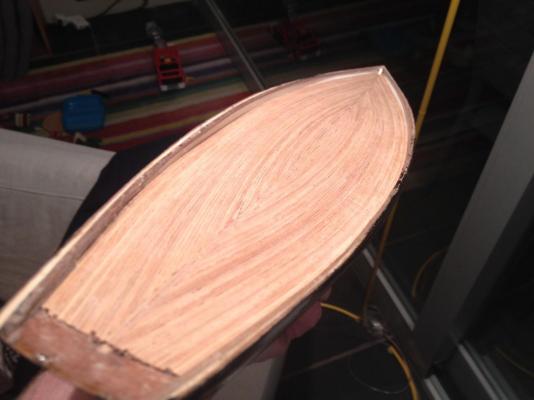
Deck is ready, third and final try! The first deck, pictures in earlier posts, didn't look good because I wasn't careful enough. Gaps between the planks, joins with king plank not perfect etc. The second deck was of walnut wood and looked awful because the wood came from different batches (no pictures) and I threw it away. But now I'm happy - at last. I coated it with sanding filler by the way.
-
Great work on planking that keel Floyd, I'm impressed! I saw Floyd mentioning a darker king plank. I did exactly that and it came out great (imho). And just like Floyd I also painted the hull first and when done mounted the deck.
-
 malmoerik reacted to a post in a topic:
Bounty Launch by KeithW - FINISHED - Model Shipways - SMALL - kitbashed
-
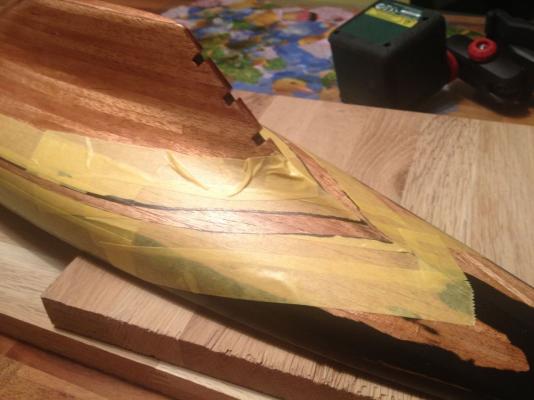
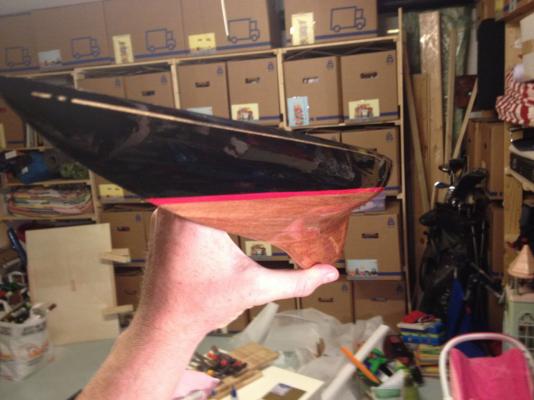
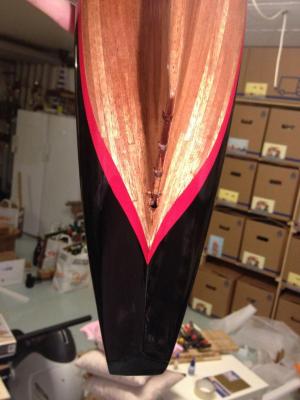
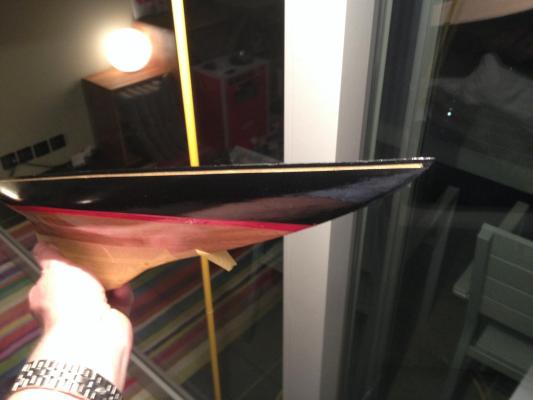
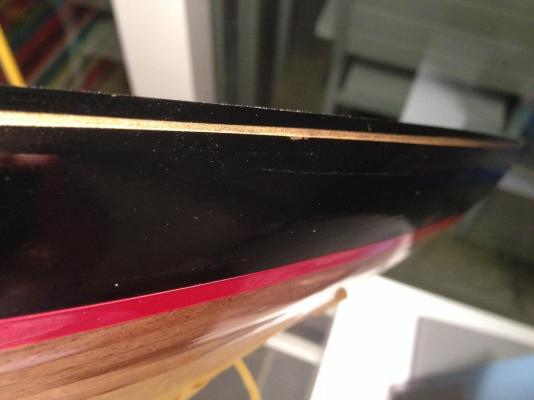
@Keith: I painted the waterline next to the black area, not on top, thus avoiding a contour. Then I wet-sanded and applied a few layers of varnish. Gently stirring the varnish instead of shaking it, using a rather soft brush and applying the varnish with few strokes was my methodology. I over-diluted the black paint and the red one didn't cover properly so it's not perfect... One more thing. Sharp edges (between the hull sides or at the aft) gives a realistic impression. I therefore painted one side at the time, masking the other. Painting all at once makes everything soft and rounded. @Mike: not sure yet. I won't put masking tape directly on the paint though.
-
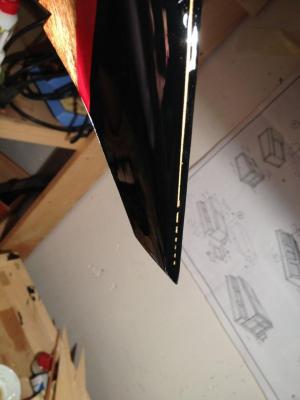
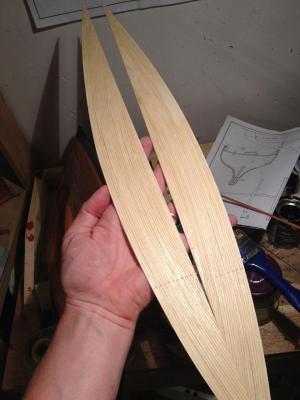
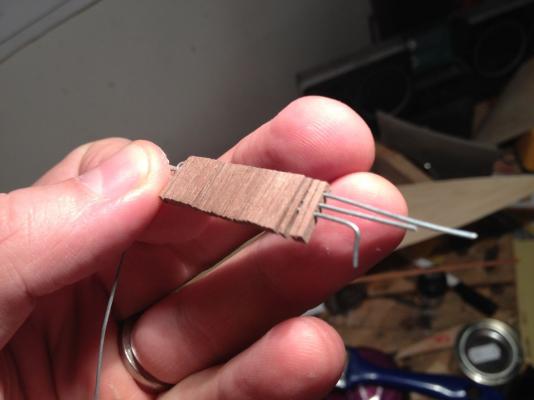
In the last picture I posted the hull was painted and looked ready. I wasn't happy with the result. There was a contour along the waterline, the golden line along the deck was too thick and the finish wasn't great. Now it's as good as it gets with me handling the brushes. I used a laser to mark the contour of the waterline at the aft. It looks weird but when viewed from the side it's perfect. I'm building the a new deck that I will mount on top of the old one, with a 4mm mahogany King's plank in the middle. I built another deck out of walnut but the planks had so different colours that I threw it away. The small houses are a bit tricky. First it's the frames that are joined at 45 degree angels. Get one plank slightly too long and it looks awful. Drill one hole slightly off center and it looks awful. I decided to manufacture the pieces in one batch so that they are identical (by drilling through 30 planks at once). Seems to have worked, will start over soon. By the way, sorry for poor quality of the pictures.
-
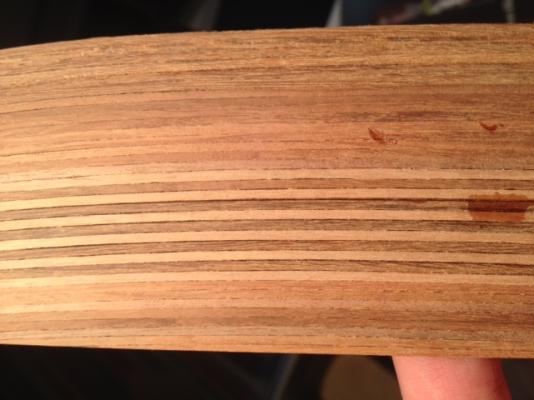
Thanks for feedback. The dimensions and finish were also very different, some planks were at least 1.5 if not 2mm wide compared to the 1mm I ordered. So clearly the wood came from a few different batches. I did get in touch with the supplier and suggested that maybe they could knock off the 8 (or was it 9) EUR from next order as a gesture. I got an arrogant answer back so that made it simple, next time I'll just order my stuff elsewhere (I was actually about to order sails worth around EUR100). I just can't understand how stupid sales people are sometimes. If a customer complains, then you apologize (a few times for effect). Simple as that. And you offer a free coffee if you work in a restaurant. TaDa, happy customer that will return!
-
Hi I just ordered a batch of walnut wood and found that the variations in colour were were quite radical. All the planks in the attached picture are supposed to be walnut, varying in colour from redish, greyish and brownish to very bright, almost white. I understand that colour may vary if the wood is from different batches but I didn't expect it to vary this much. What do you say? Cheers
-
Be careful with epoxy, I covered my whole hull with it (good intentions, poorly thought-through!) and it was impossible to sand. When you apply pressure it gets warm and then it's like chewing gum. I ended up planking it from scratch again...
- 80 replies
-
- Americas Cup
- Endeavour
-
(and 1 more)
Tagged with:
-
 malmoerik reacted to a post in a topic:
21ft English Pinnace by Mike Y - FINISHED - Model Shipways - 1:24
-
 malmoerik reacted to a post in a topic:
21ft English Pinnace by Mike Y - FINISHED - Model Shipways - 1:24
-
Hi guys, thanks for your advice. Regarding the deck, I'll try out both your tips. If nothing else for practice. If it doesn't turn out good enough I'll just order new planks and build the deck separately and mount it afterwards. That way I'll build two "half-moons" and will for sure be able to sand a straight line. Painting the hull is definitely more work. I thought I did wet-sand down the varnished hull before applying paint (grade 800), and it _was_ smooth as silk until I painted it. My dad told me he used some kind of sticky cloth that absorbed all grains of dust, like waxing a lady's leg if you see what I mean... Cheers
-
 malmoerik reacted to a post in a topic:
HMY Britannia 1893 by malmoerik - Mamoli - Scale 1: 64
-
 malmoerik reacted to a post in a topic:
HMY Britannia 1893 by malmoerik - Mamoli - Scale 1: 64
-
Thanks Keith. Eventually it will look nice with a red waterline and a thin gold line on black background. Right now it doesn't. Need to figure out how to achieve that ultra glossy finish. All clues are welcome. Regarding the deck, also a bit disappointed. I do have quite a few gaps. Maybe I'll try out some filler? It would also be good if I somehow managed to remove the two center planks and sand down to make room for four planks. The reason being that the joins are not so exact.
-
 malmoerik reacted to a post in a topic:
HMY Britannia 1893 by malmoerik - Mamoli - Scale 1: 64
About us
Modelshipworld - Advancing Ship Modeling through Research
SSL Secured
Your security is important for us so this Website is SSL-Secured
NRG Mailing Address
Nautical Research Guild
237 South Lincoln Street
Westmont IL, 60559-1917
Model Ship World ® and the MSW logo are Registered Trademarks, and belong to the Nautical Research Guild (United States Patent and Trademark Office: No. 6,929,264 & No. 6,929,274, registered Dec. 20, 2022)
Helpful Links
About the NRG
If you enjoy building ship models that are historically accurate as well as beautiful, then The Nautical Research Guild (NRG) is just right for you.
The Guild is a non-profit educational organization whose mission is to “Advance Ship Modeling Through Research”. We provide support to our members in their efforts to raise the quality of their model ships.
The Nautical Research Guild has published our world-renowned quarterly magazine, The Nautical Research Journal, since 1955. The pages of the Journal are full of articles by accomplished ship modelers who show you how they create those exquisite details on their models, and by maritime historians who show you the correct details to build. The Journal is available in both print and digital editions. Go to the NRG web site (www.thenrg.org) to download a complimentary digital copy of the Journal. The NRG also publishes plan sets, books and compilations of back issues of the Journal and the former Ships in Scale and Model Ship Builder magazines.


