Jack Panzeca
-
Posts
233 -
Joined
-
Last visited
Content Type
Profiles
Forums
Gallery
Events
Everything posted by Jack Panzeca
-
 Hi Phil, Thanks for the complements. I started out with the kit and as my confidence grew I started thinking I could do better. I used the other Oseberg builds (especially Von Kossa's) to help me through. I really enjoyed the build and got a great deal of satisfaction from building the scratch portions. The support and the advice from this forum and the wonderful folks on it was great. Good luck on yours. Maybe one day I will add deck furniture and people to the Admiral's Oseberg. Thanks again, Jack
 -
Hi Vivian, Happy to know you are well. Your Oseberg is looking great. I have been away for a while myself, I got busy with consulting work. Look forward to your updates.
-
Hi Dan, I don't remember burn marks so they must not have been very severe. I would have sanded them off if they were noticeable. The stain tests that I did are on page 7 of my log, I ended up using Minwax Aged Oak. I hope that this helps, please let me know if you have any more questions. Also, you should check out: Oseberg ship by Von_Kossa - Billing Boats - Scale 1:25, 800 A.D (First wooden ship build) also on this forum. It was a great help to me. The location of my log is in the signature block. If I can help in any way please let me know.
-
Hi Ausura, Sorry to be so late with my reply. I have not been checking in as frequently as I should. This is probably too late to be of any help but here it is anyway. I ran into the same problem. The bow pieces taper both toward the top and front. I use a scalpel and sandpaper. I could not photograph it for you because I covered all the end faces with veneer. Pages 2,3 & 4 of my log may be of some help and be sure to check out "Oseberg ship by Von_Kossa - Billing Boats - Scale 1:25, 800 A.D (First wooden ship build)". It was a great help to me when I started. I also split the back off the scroll work as it got closer to the top so that it would lay flat, look at the finished head on picture (page 13) and you will see that the bow tapers from about ¼ inch to ⅛ at the top of the scroll. Good luck with your build and please let me know if I can help. I promise to pay more attention.
-
Hi Vivian, Glad that you are back. I hope that you are well.
-
Hi Ryland, Thanks for checking in. I have not been in the shipyard since April. This is not what I had in mind for retirement. I have been on the road since May working on two different independent cinema complexes. I have only been home a few weekends since May and this will keep up until February. The good news is that I am doing what I love to do and the job site activity is really good for me, it is a lot more exercise than walking from the Byrnes saw to the Byrnes sander. I really miss the shipbuilding process and look forward to getting back into the swing of things. Grant and Mobbsie are doing beautiful work and their logs are the best possible guide and inspiration I could have. I was sorry to miss the NRG conference but there was no way to escape from what I am doing. I will try to follow along more frequently until we hit panic phase again in December. I hope that all is well with you and the rest of the MSW community. Talk to you soon,
- 60 replies
-
- 9
-

-
- granado
- bomb ketch
- (and 1 more)
-
Beautiful work Mobbsie! I can't wait to get back to work on mine. I am a complete failure as a retired person. Work sure gets in the way of my hobbies. Another 6 weeks before I get back to work on my build, I will never catch up now but I love following in your footsteps. You and Grant sure make this easy for the rest of us. Thanks,
- 255 replies
-
- 3
-
-
- granado
- bomb ketch
- (and 2 more)
-
Hi Grant, Beautiful work as usual. I like being in the following position. You make the best cheat sheet ever. Holiday today in the USA so I got a chance to catch up on MSW posts.
- 456 replies
-
- 2
-
-
- finished
- cross section
- (and 2 more)
-
Hi Guys, Thanks Carl, Grant, Greg and mobbsie as well as the "Likes". Well, once again real life is getting in the way of my model building. I used to build multiplex cinemas before I retired and I have had a consulting gig looming for a while. It has been encroaching on my shipyard time to some extent but lately it has taken on a life of it's own. I have not done any work on the Bomb Vessel since my last update. I have been in the shipyard but my workbench has been converted into a desk. It is covered with paper instead of sawdust, very sad. I have been prepping for a 6 to 8 week job site stay to finish off a small cinema in a small town in Oklahoma. I was the consultant for the original design several years ago and it makes sense that I should come back for the finish (shorter learning curve). I start next Sunday and I hope to get home on future Sundays but I am not counting on it. The good news is that it will help extend the retirement money and I have been thrilled to realize that I still remember how to do this. The job site exercise will be good for me too. I will still check in to MSW from the hotel room, watching with envy as Grant and mobbsie continue to get even further ahead. Grant is right about the benefit of have their roadmap to follow when I do get to work on mine again. Talk to you soon. I'll be back! (Terminator2)
- 60 replies
-
- 5
-
-
- granado
- bomb ketch
- (and 1 more)
-
Just brilliant Grant, Your precision is something that I can only dream about. Glad to see you back in action.
- 456 replies
-
- 2
-
-
- finished
- cross section
- (and 2 more)
-
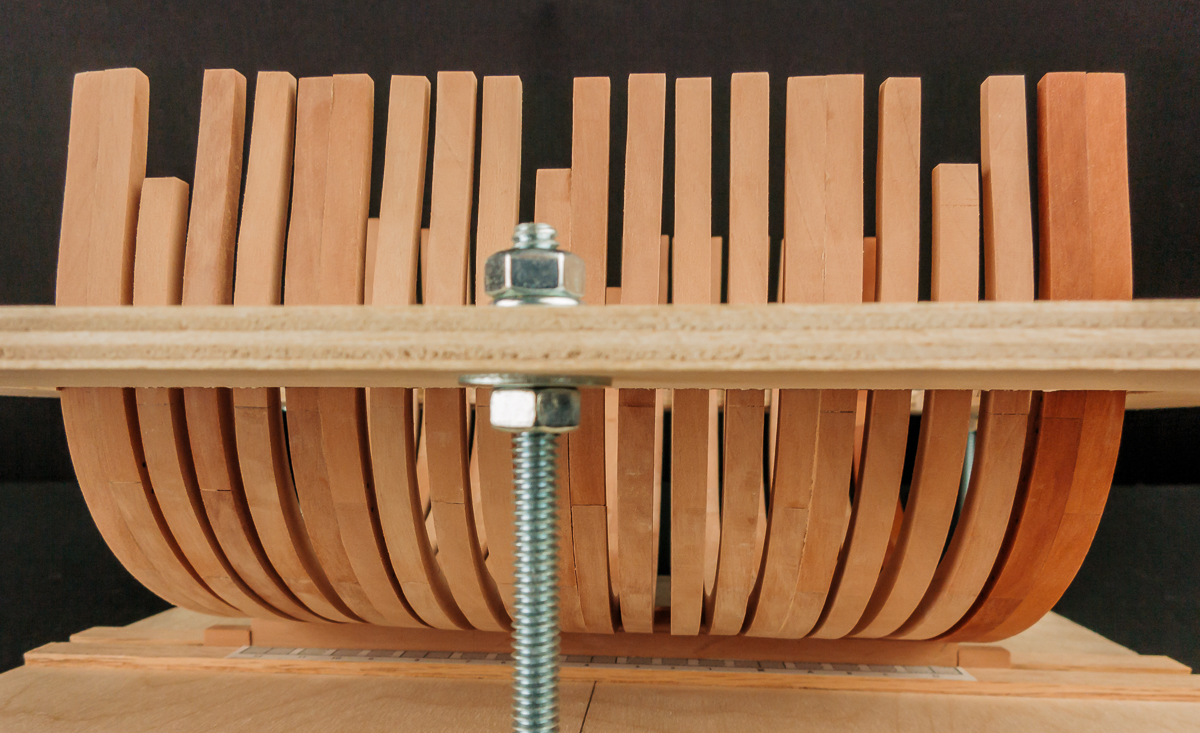
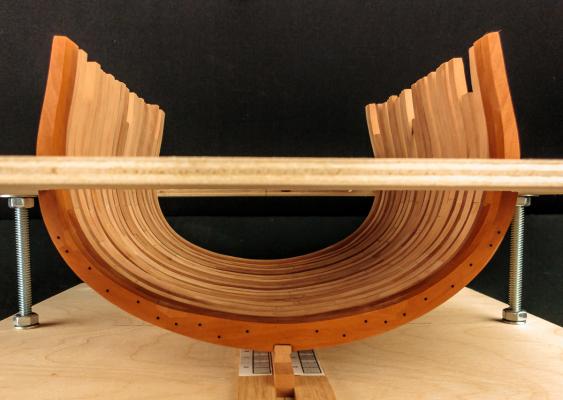
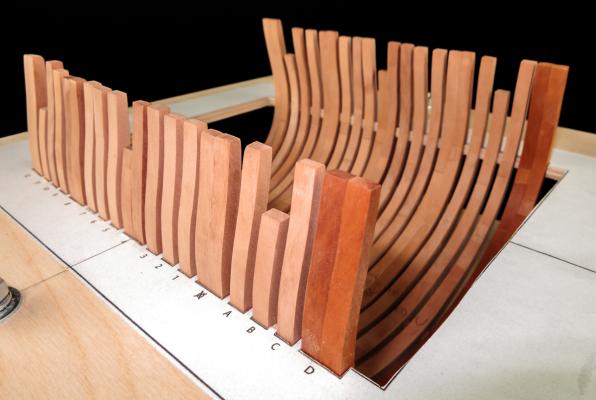
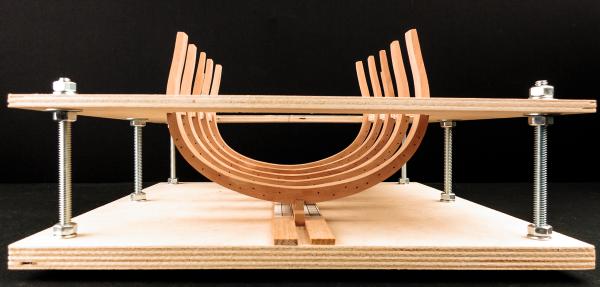
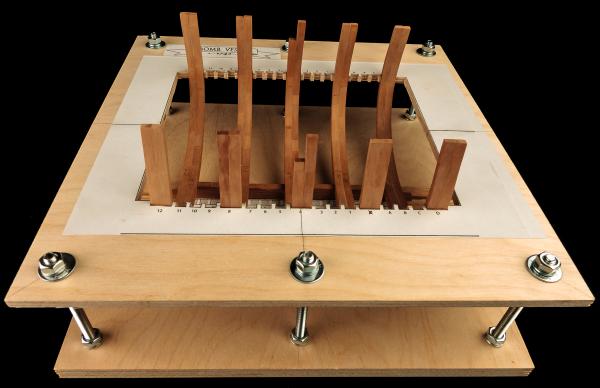
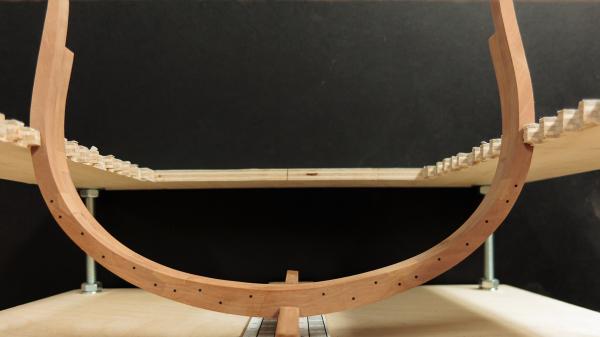
Time for another update. Unfortunately, my pace has slowed due to a consulting gig that has been looming for a while and has finally kicked in. I hate it when real life gets in the way of my hobbies. The frames are completed. At least they are made, there is still a lot of work to do to call them "complete" and glue them into their permanent home. It is a shame that when I finally get them figured out there are no more of them to do. They are fitted loosely and the first double frame has a coat of Wipe-On Poly. The rest are very raw with a lot of sanding left to do. The next step is to do the frame cutouts for the gun-ports, sweeps, etc. Grant: I hope that you are doing well, I will still never catch up! Good luck on your recovery. Thanks for looking in and thanks to all the "likes", always appreciated.


- 60 replies
-
- 11
-
-
- granado
- bomb ketch
- (and 1 more)
-
Hi Vivian, How are you? Thanks for checking in. Hi Gentlegiant, Sorry that I have taken so long to answer. I just forgot. Anyway, the wood list for the Granado was prepared by gjdale and it is an amazing and massive piece of work. We have chosen to "Paint with Wood" so the wood types for each part of the model are critical. I do not think that I should passing his efforts around but if you visit his log or send a PM he should be able to help.
- 60 replies
-
- 1
-
-
- granado
- bomb ketch
- (and 1 more)
-
Hey Grant, Happy that all went well. I have had both knees replaced in the past and it really makes life better. Enjoy the drugs, physical therapy will be here soon enough. Get Well Soon!
- 456 replies
-
- 1
-
-
- finished
- cross section
- (and 2 more)
-
Great Work, Mobbsie, terrific update. It looks great. I hope that your side projects slow you down. I am still making frames. Beautiful work.
- 255 replies
-
- 1
-
-
- granado
- bomb ketch
- (and 2 more)
-
Hey Carl, Grant, mobbsie and Greg, Thanks for the kind words and encouragement. I really am enjoying the process. Grant, I do most of the cutting in the morning and assembly in the afternoon. The Admiral requires a little attention in the evening. That keeps my shipyard privileges in place. mobbsie, don't worry I will make those scratches go away. I certainly could not see them with the naked eye. I did not know that they were there until I enlarged the photo. Greg, full speed ahead for me is dead slow for Grant and mobbsie. Thanks to the "Likes" and thanks to all for looking.
- 60 replies
-
- 2
-
-
- granado
- bomb ketch
- (and 1 more)
-
Thanks Grant, When exactly do you sleep? You are an equal hemispheric communicator. Well, good morning down there, I think.
- 60 replies
-
- 1
-
-
- granado
- bomb ketch
- (and 1 more)
-
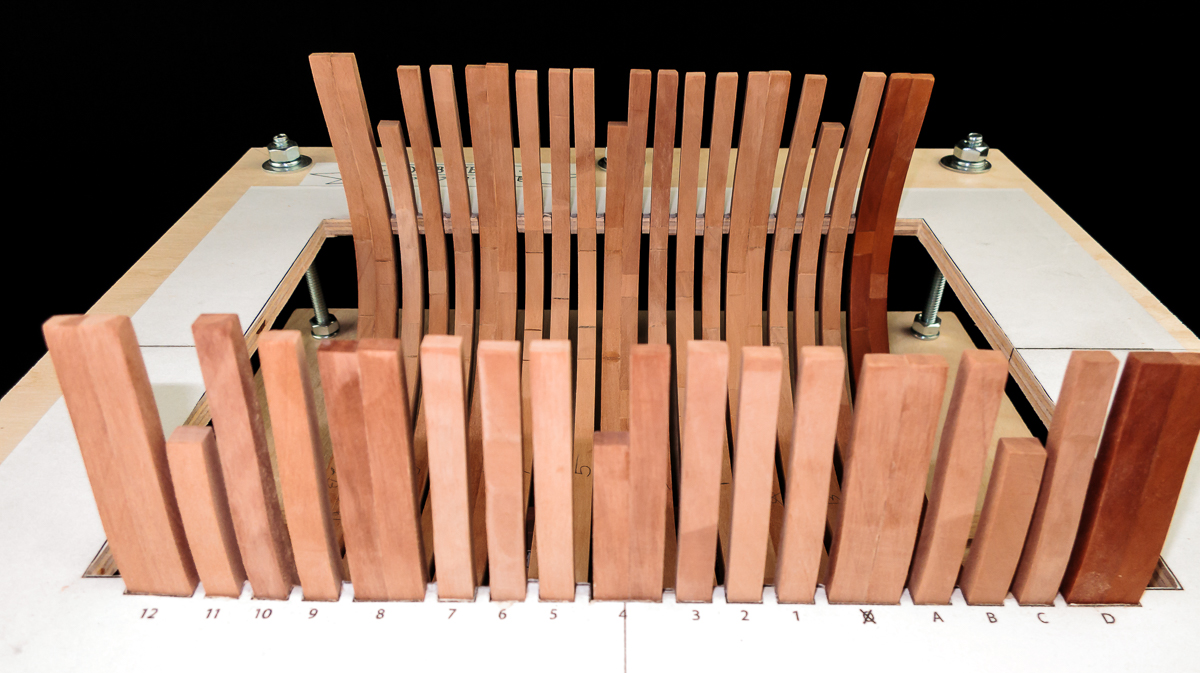
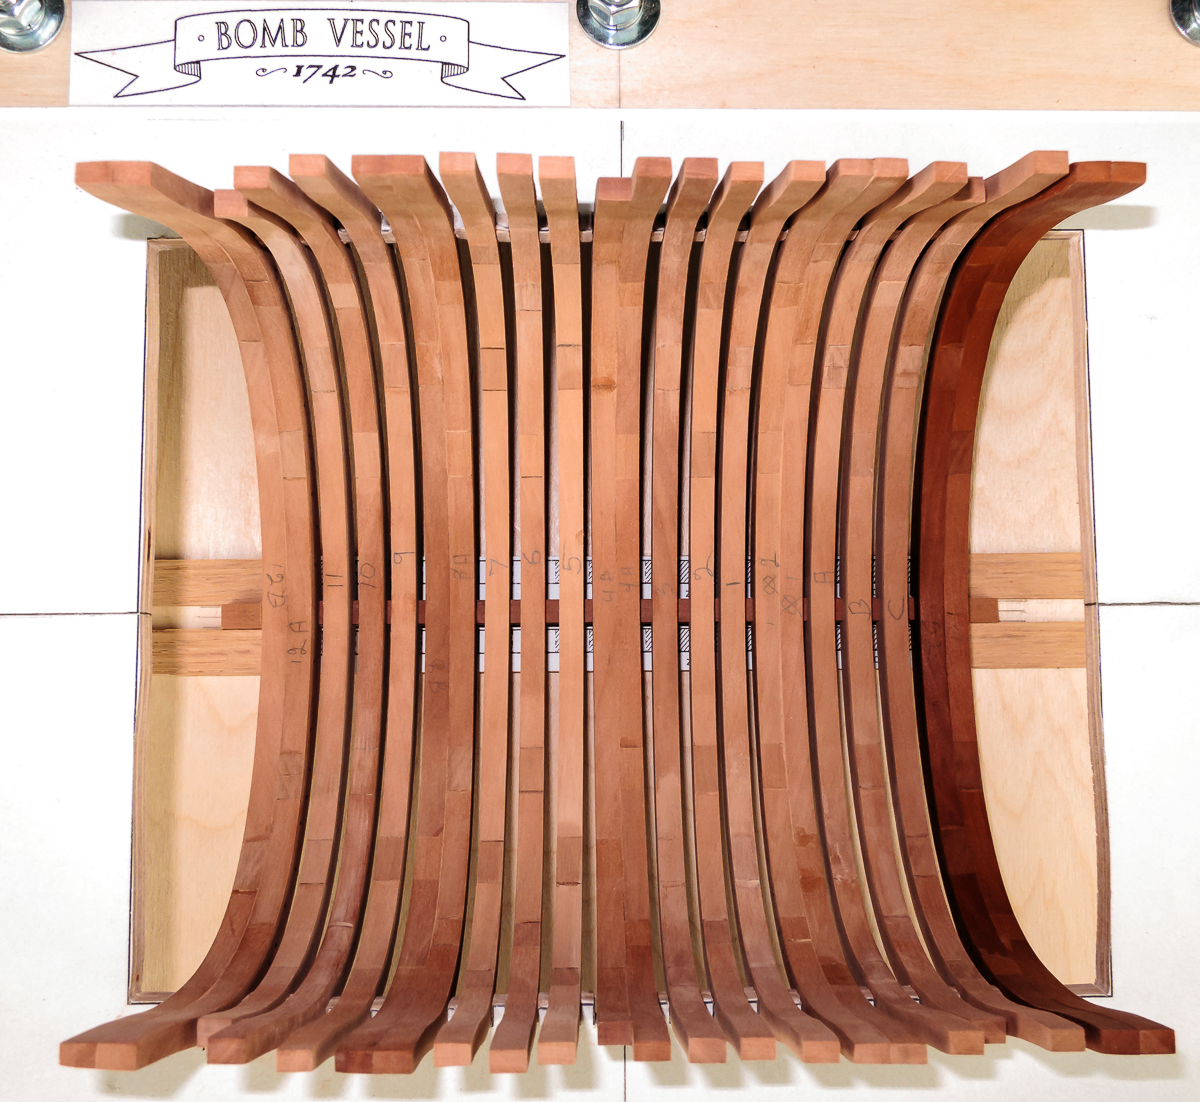
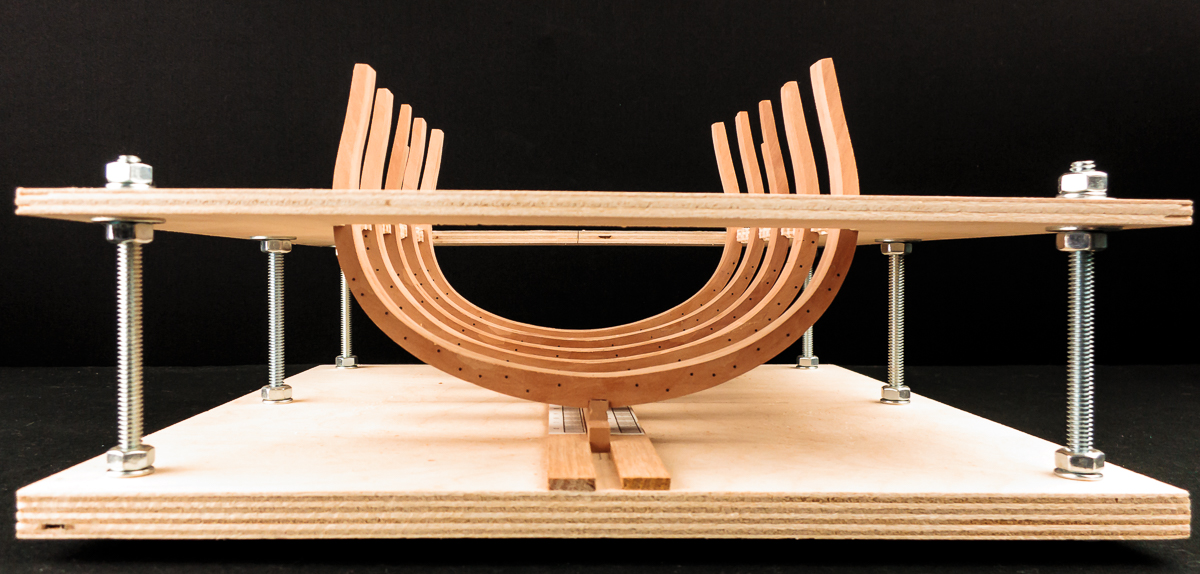
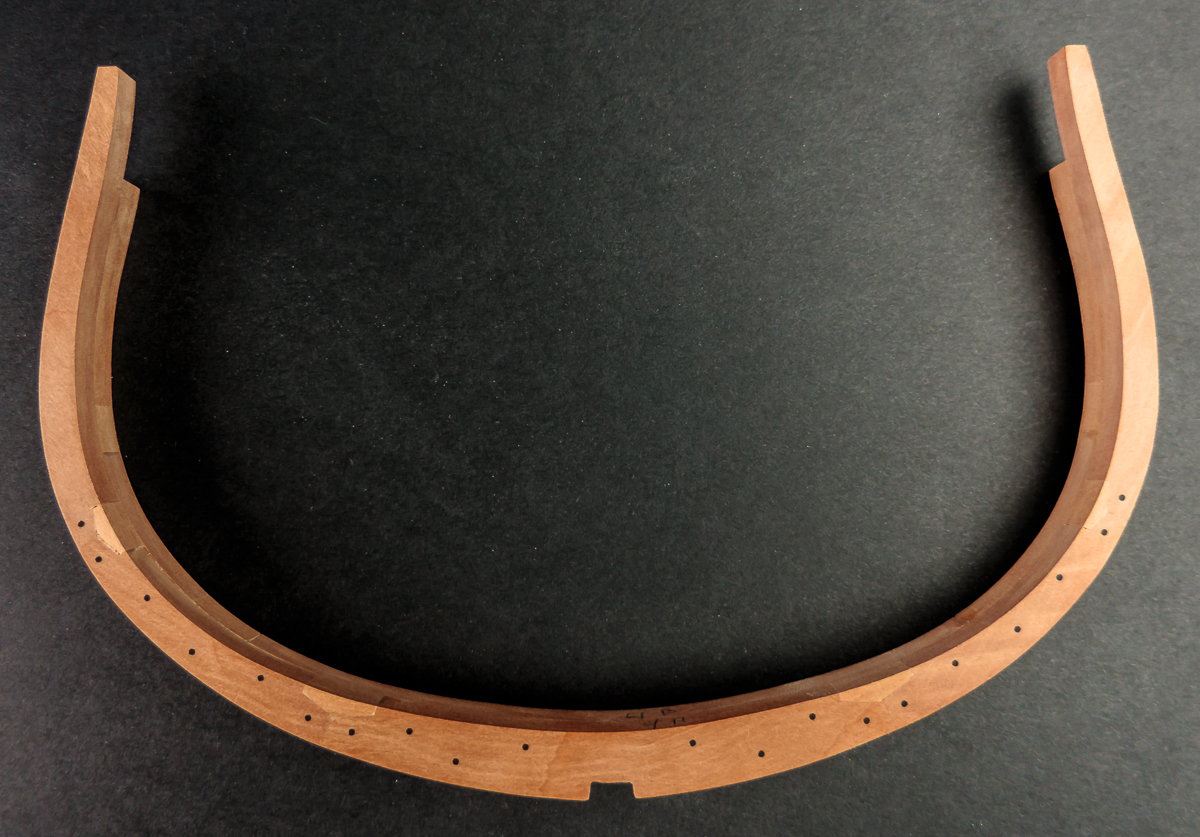
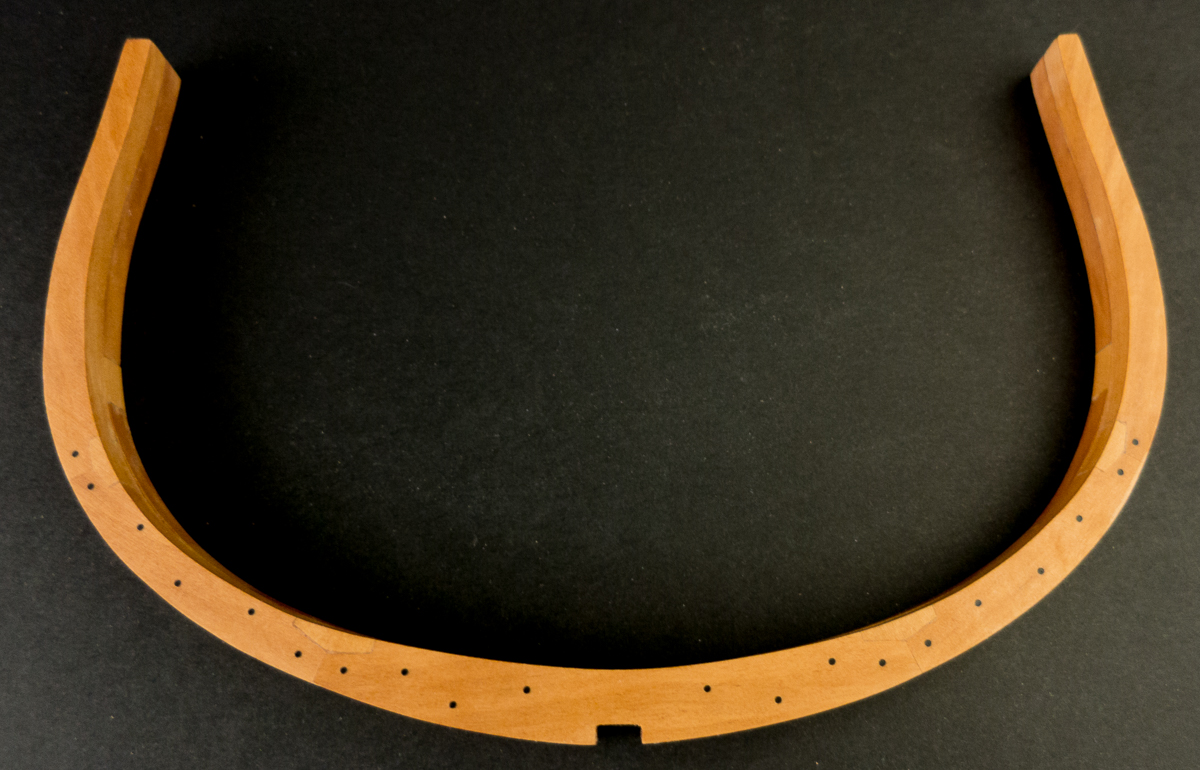
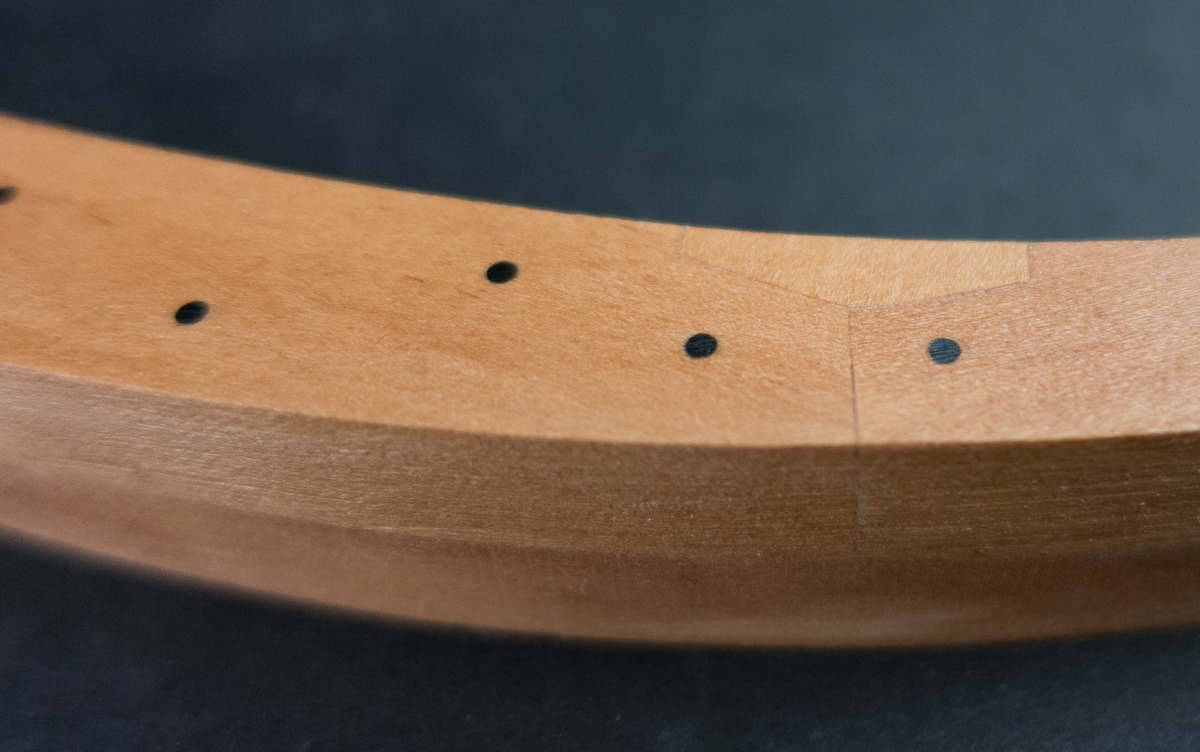
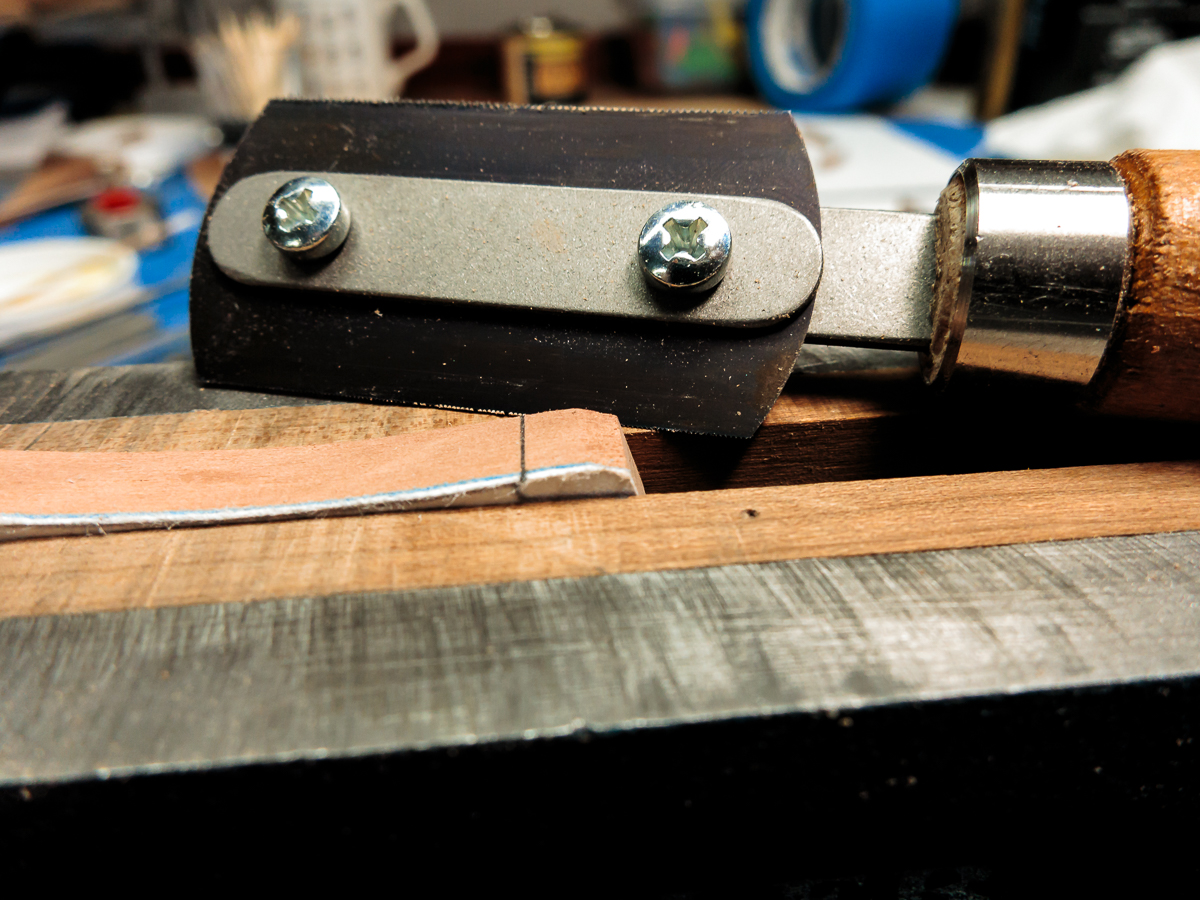
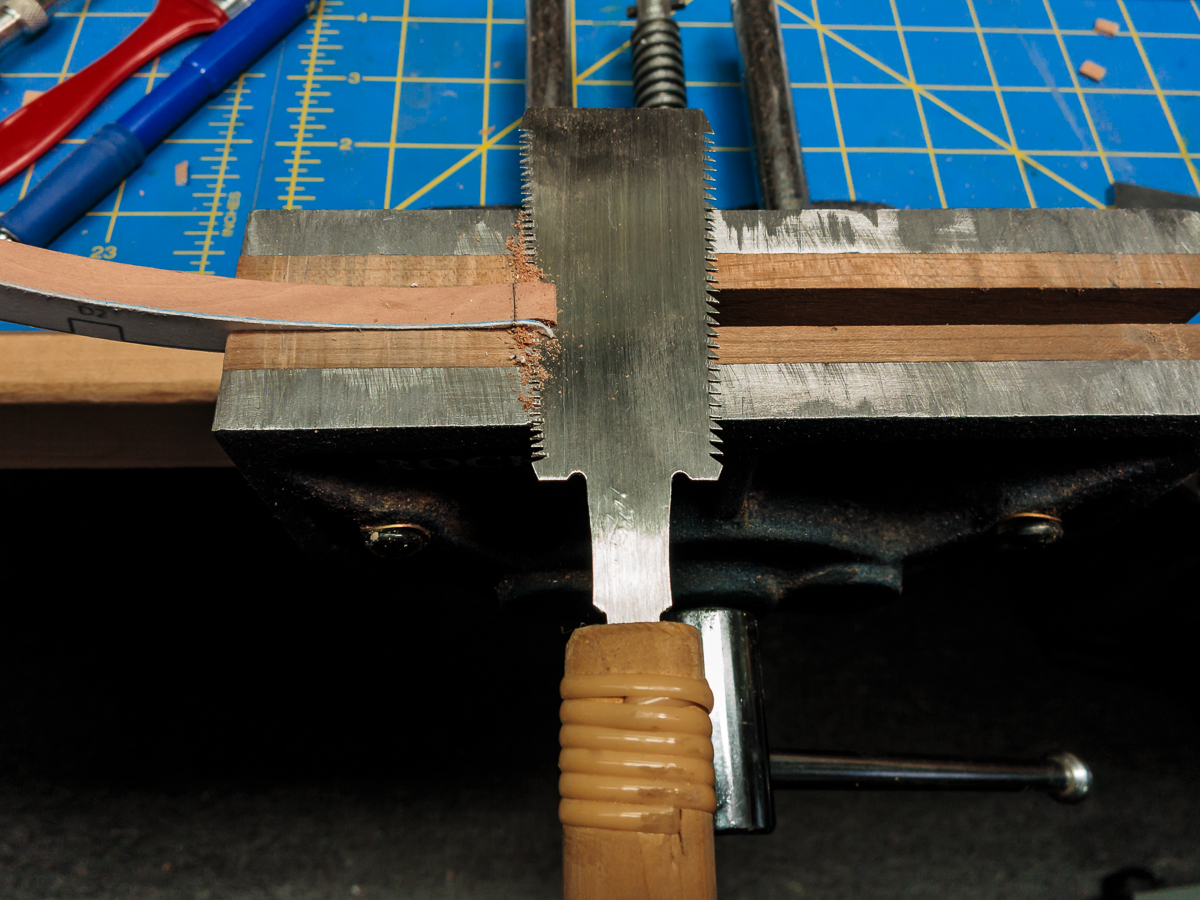
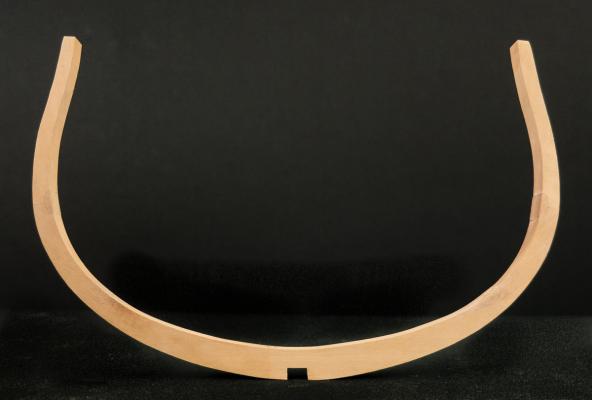
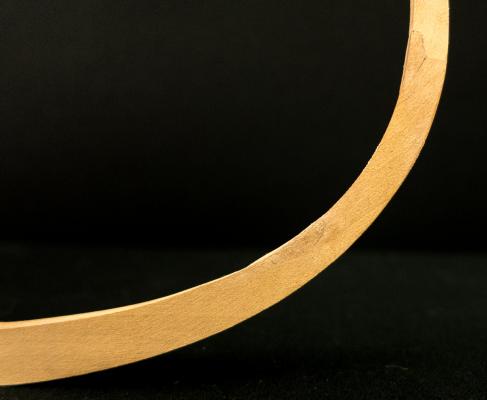
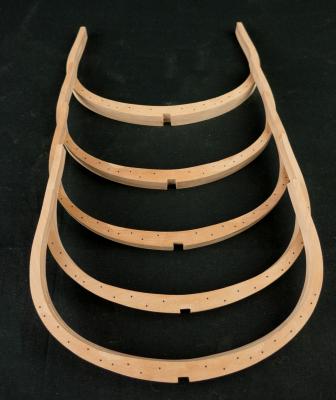
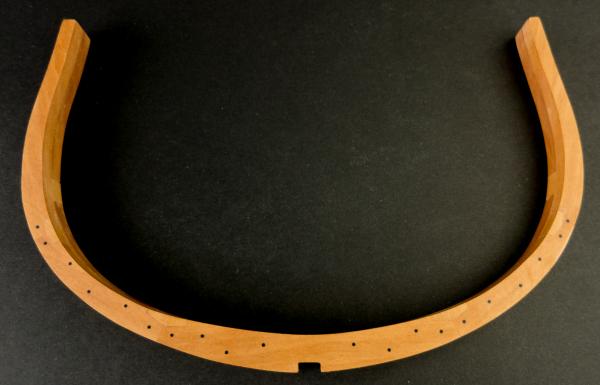
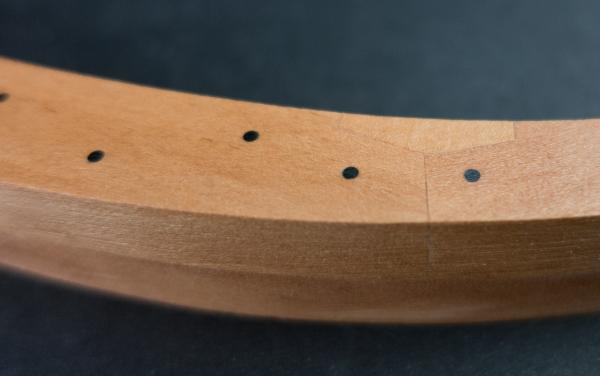
Well, I have reached a milestone of sorts so I thought it was time for an update. The five double frames are complete. They took a long time to finish but by the end I had a good system down and the scarphs and chocks had gotten easier and more consistent. The single frames should go much faster. But who is in a hurry, this is a hobby after all. I used a variation of the mobbsie/Grant method for the scarphs. The razor saw was used to cut the side line and a tiny Ryoba that I bought in Japan decades ago to cut the long side. With the futtock in the vice the saw lays really flat and it is simple to cut to the razor saw line. Then a quick dressing with a file and it is done. The five double frames. This is one of the middle frames. The D frame, which is the front end of the model, has a coat of Wipe On Polly just to see how it will look. The contrast with the ebony bolts is nice. If you click on this macro photo to enlarge it you can actually see the sandpaper scratches in the ebony bolts. 180 grit was used. Photography stuff fascinates me. Only rough sanding has been done, the plan is to do all the finish work at once when the single frames are complete as well. I do not plan to attach anything until she is a lot further along. Thanks to all those who follow and the "Likes". Special thanks to Grant and mobbsie for all their help. I have been practicing on my Sherline lathe so that I can get get good enough to turn the cannon and mortar out of ebony when the time comes. Thanks for looking.


- 60 replies
-
- 14
-
-
- granado
- bomb ketch
- (and 1 more)
-
Hi Dee Dee, She is looking good. The little bits are time consuming but really rewarding when you finish. I saw Chuck give a demonstration of his rope making technique at the last NRG convention in St. Louis. I thought "why is he giving us his secrets, he sells this stuff". It was about half way through the demo that I figured out the psychology. By that time I was certain that I never wanted to make rope myself. The serving machine makes sense but, at least for me, the rope machine is not in the cards. By the way, I used Syren Ship Model Company's rope on my Oseberg build and it is stunningly terrific. Another reason for not making my own rope is that I do not think that I could equal the quality. Great work, Dee Dee - almost done.
-
Hey Mobbsie, She is looking great. The treenails look terrific and the poly really makes it all jump. If this is you slowing down I am in real trouble. If you find the front and back ends let me know!!
- 255 replies
-
- 2
-
-
- granado
- bomb ketch
- (and 2 more)
-
Hi Grant, Holy S**t that is gorgeous!!! Great choices and better execution. The last couple of photos really show the excellence.
- 456 replies
-
- 2
-
-
- finished
- cross section
- (and 2 more)
-
Hi Mike, Thanks for the link. That is exactly what I was looking for, even the correct size. When I did not find anything at the time I got the idea of using ebony. I had so much fun cutting the 1/32 by 1/32 square dowels and using a draw plate to get them down to .032 inch round dowels that I am happy that it worked out this way. Ebony is tough on the saw blades and the dust is a pain but my original problem was that I could not keep the Liver of Sulphur off the Swiss pear. The ebony was not a problem. It would smudge a little when first cut off but then a quick pass through the thickness sander and all is well. Your Cromwell is looking great.
- 884 replies
-
- 6
-
-
- hahn
- oliver cromwell
- (and 1 more)
-
Hey Mike, She looks great. I really like the black paper caulk lines. Where did you find the monofilament? Fishing stores around here have a very limited selection if any at all. Great work, love the frames.
- 884 replies
-
- 2
-
-
- hahn
- oliver cromwell
- (and 1 more)
-
Hey Grant, Great idea on the spales. Also, there is no end to the uses of the Byrnes tools, they are the best modeling investment I have made. To treenail or not to treenail? I had so much fun making the ebony bolts that I will probably treenail the inside as well. Really nice work Grant. Talk to you soon.
- 456 replies
-
- 2
-
-
- finished
- cross section
- (and 2 more)