Cannon Fodder
-
Posts
147 -
Joined
-
Last visited
Content Type
Profiles
Forums
Gallery
Events
Everything posted by Cannon Fodder
-
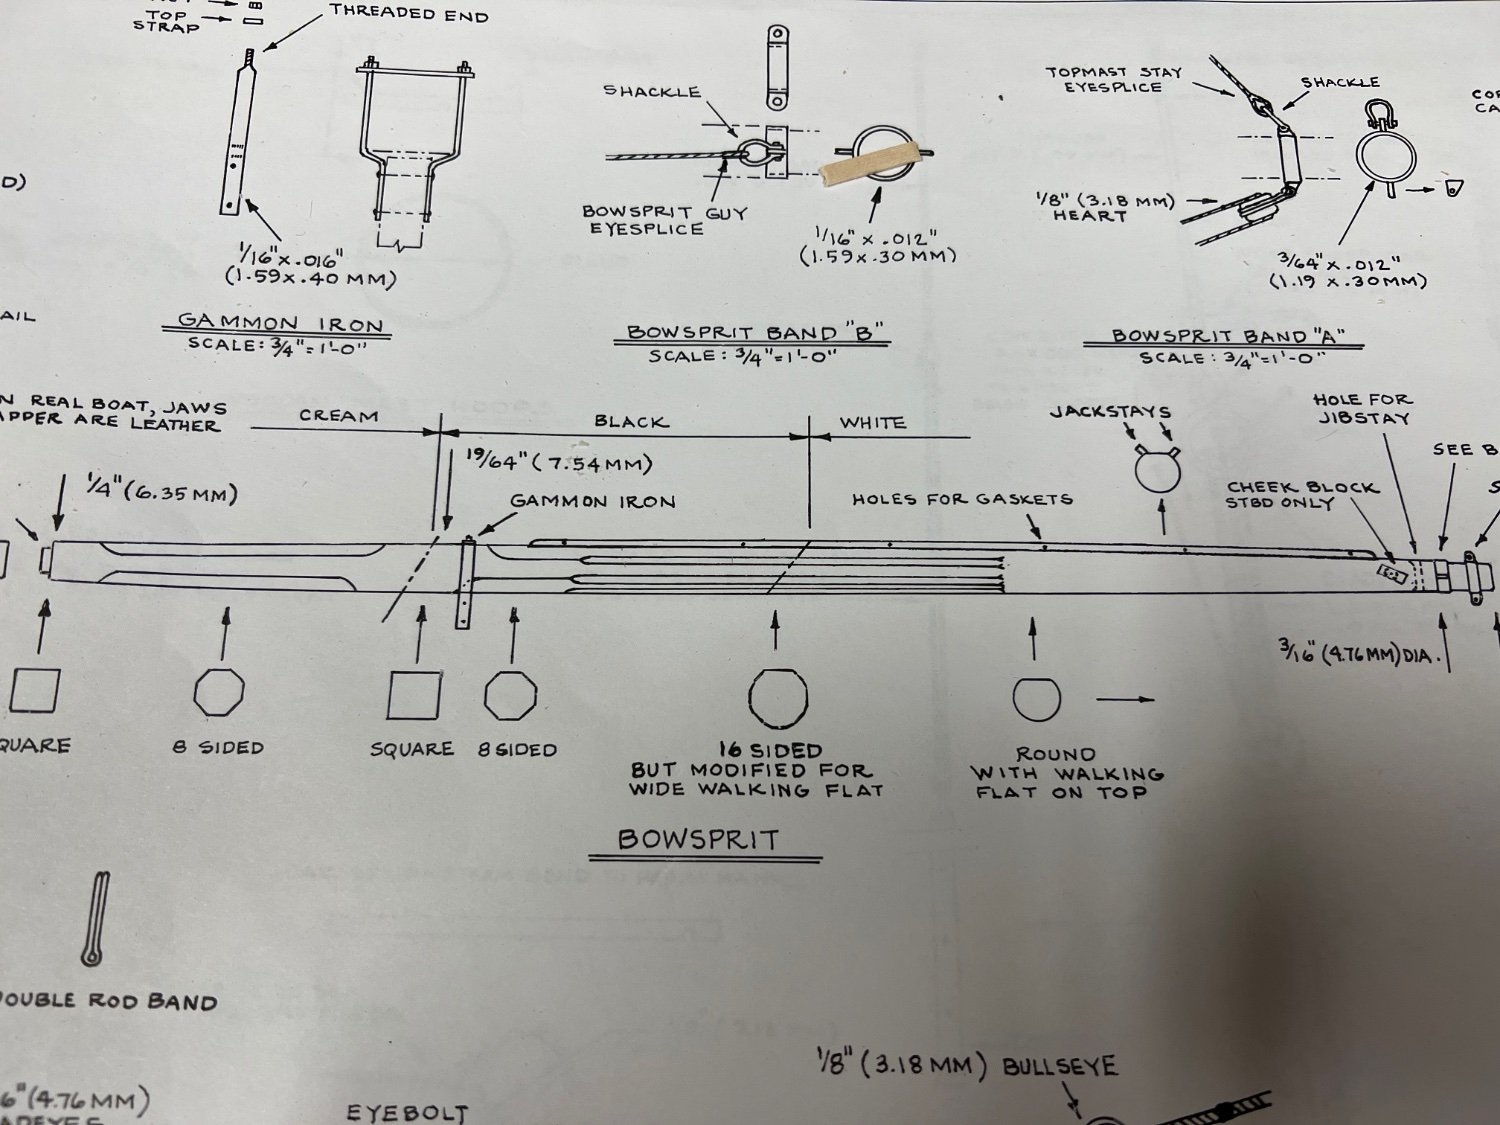
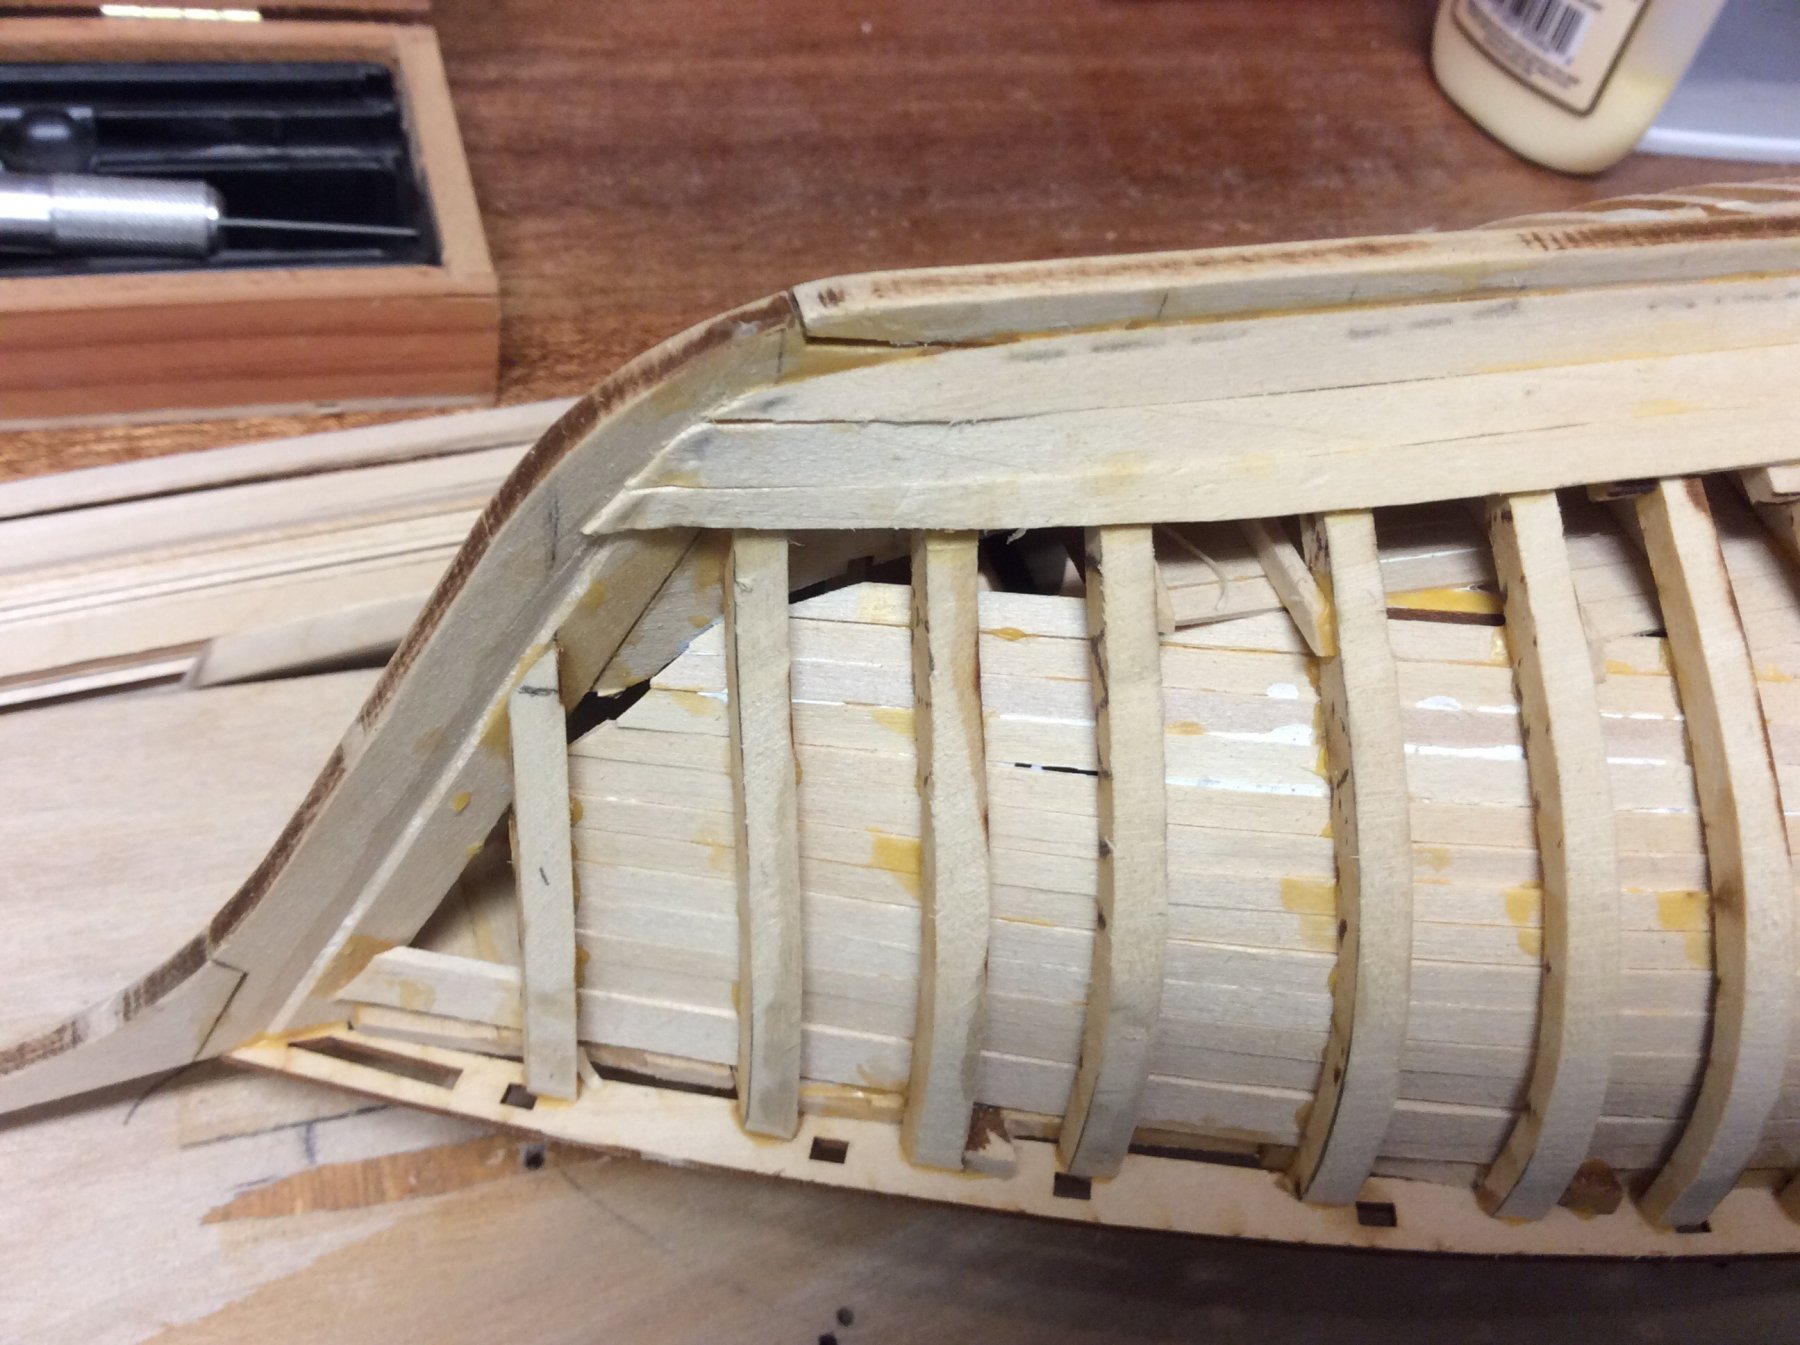
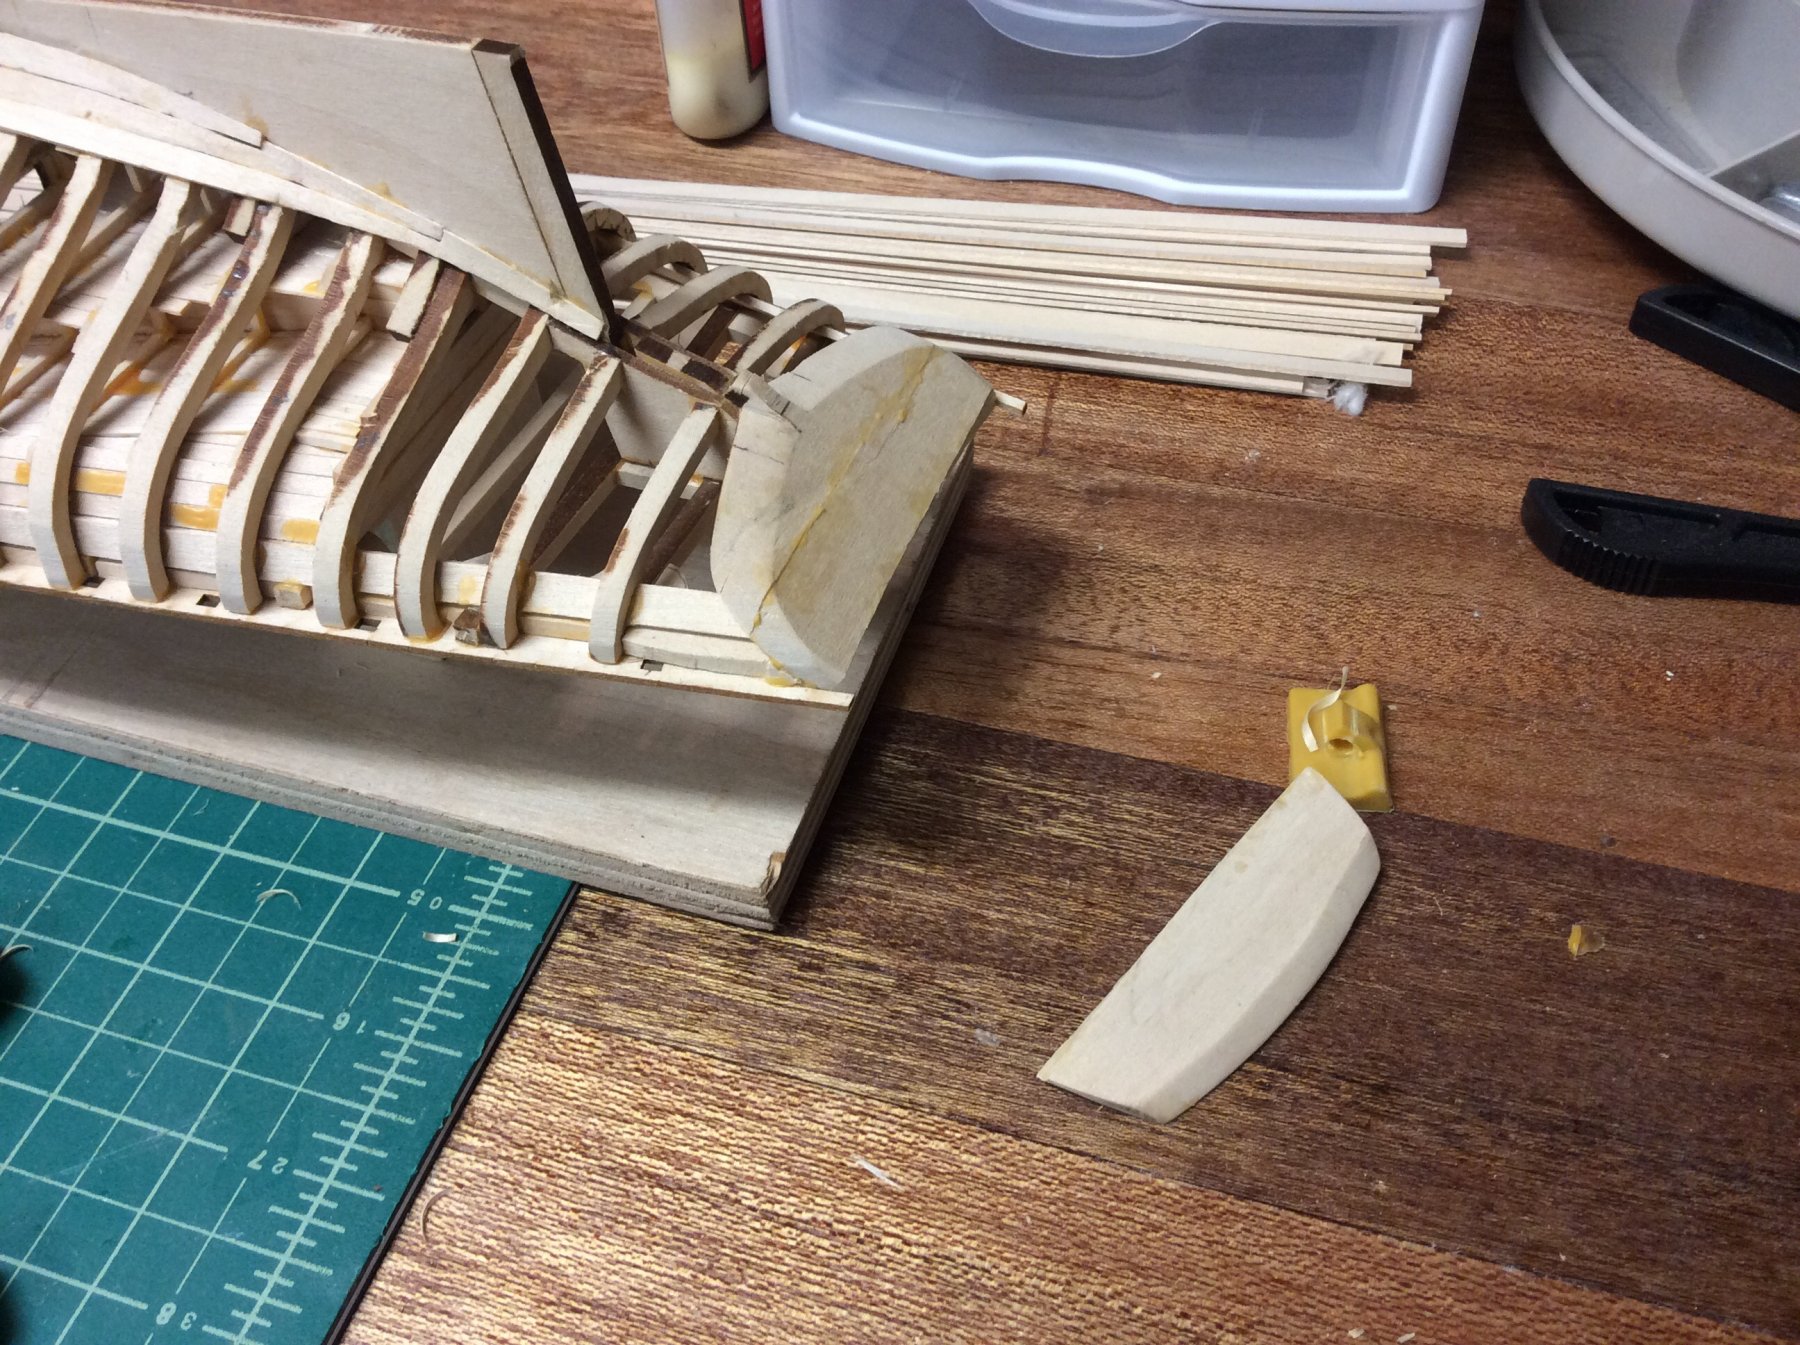
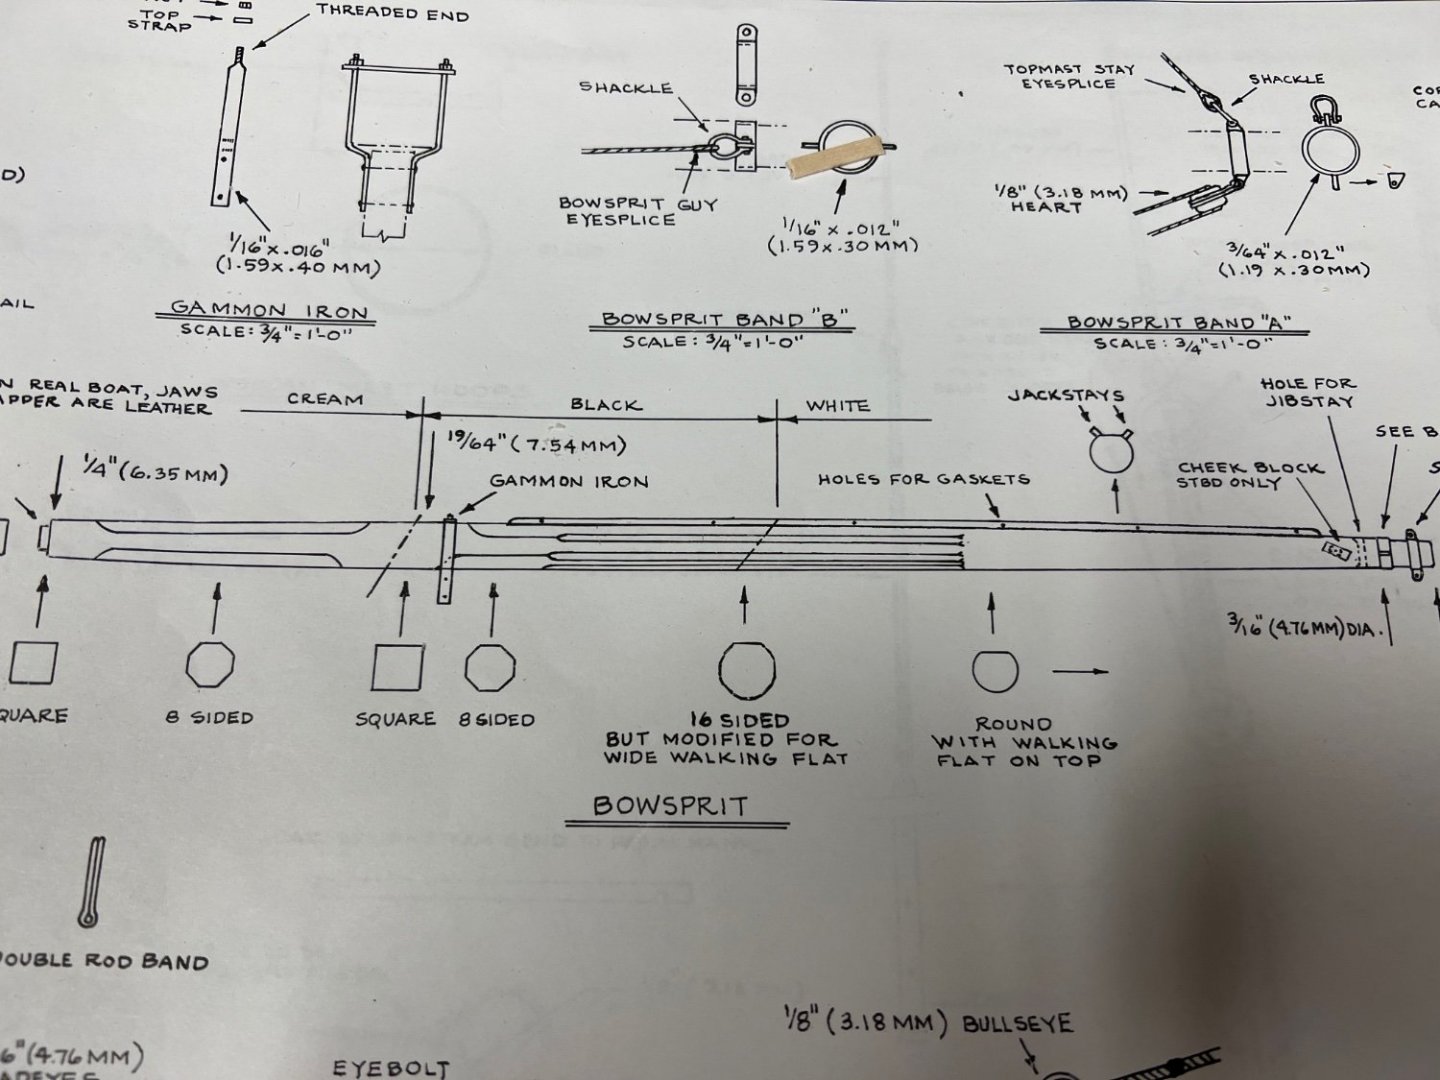
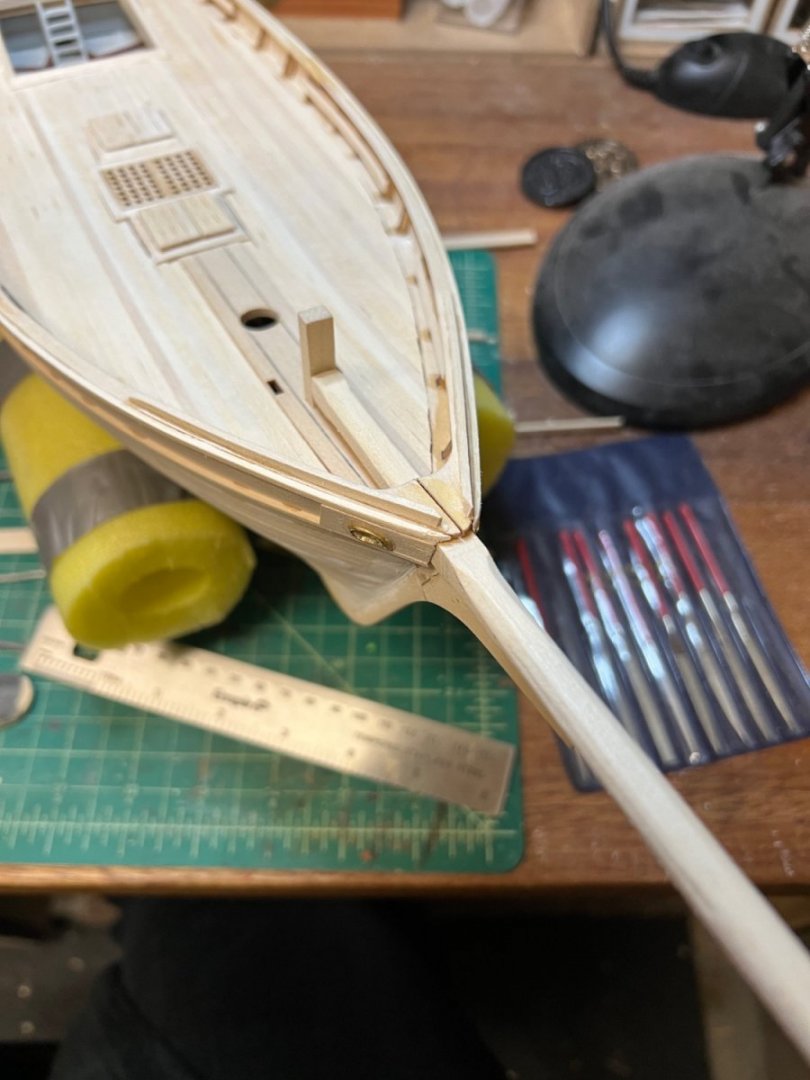
The bowsprit is proving complicated and slow going. Also just disappointed in the ability of the wood the hold any sort of crisp carving. 16 sided section just looks round. Needs more tapering to the tip, had started at the tenon and was carving outwards. Maybe with all the garnish it won’t look so bad.
-
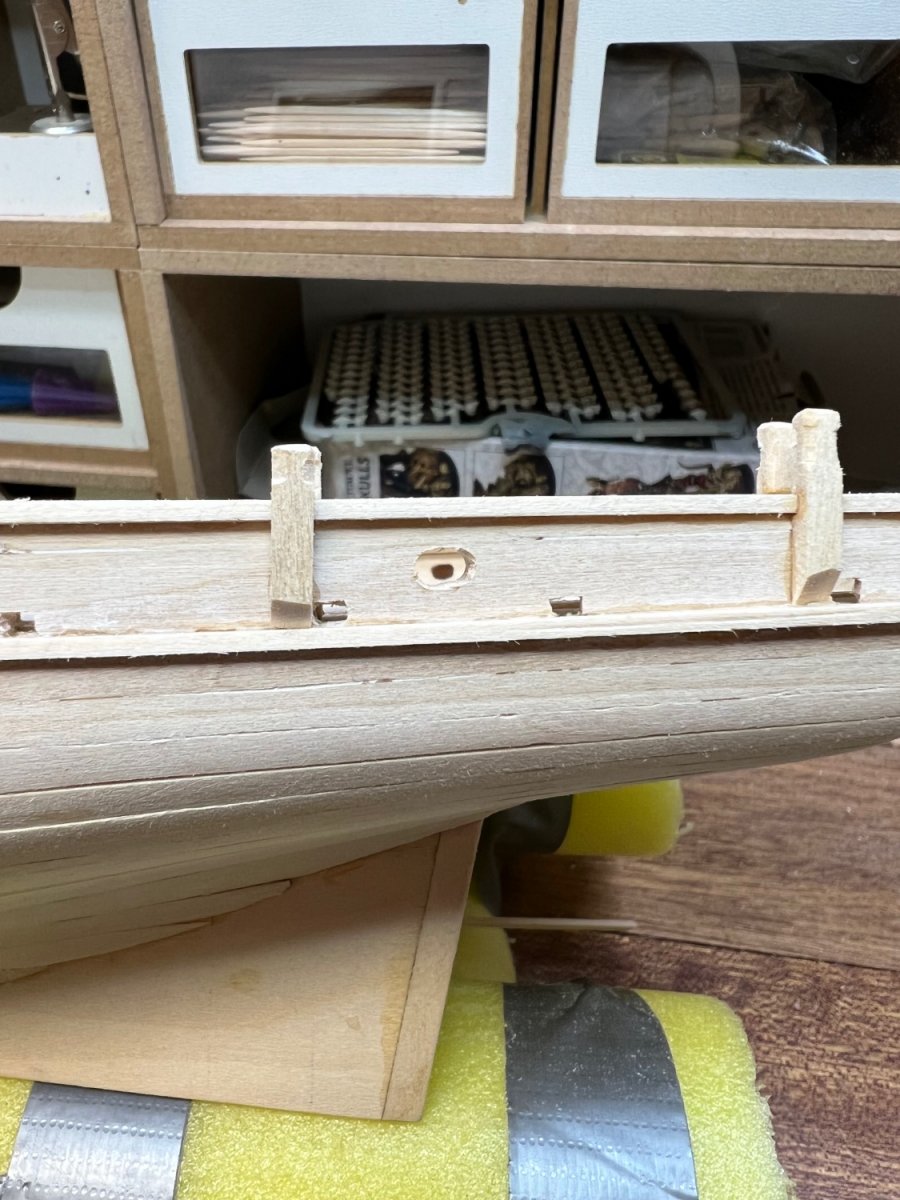
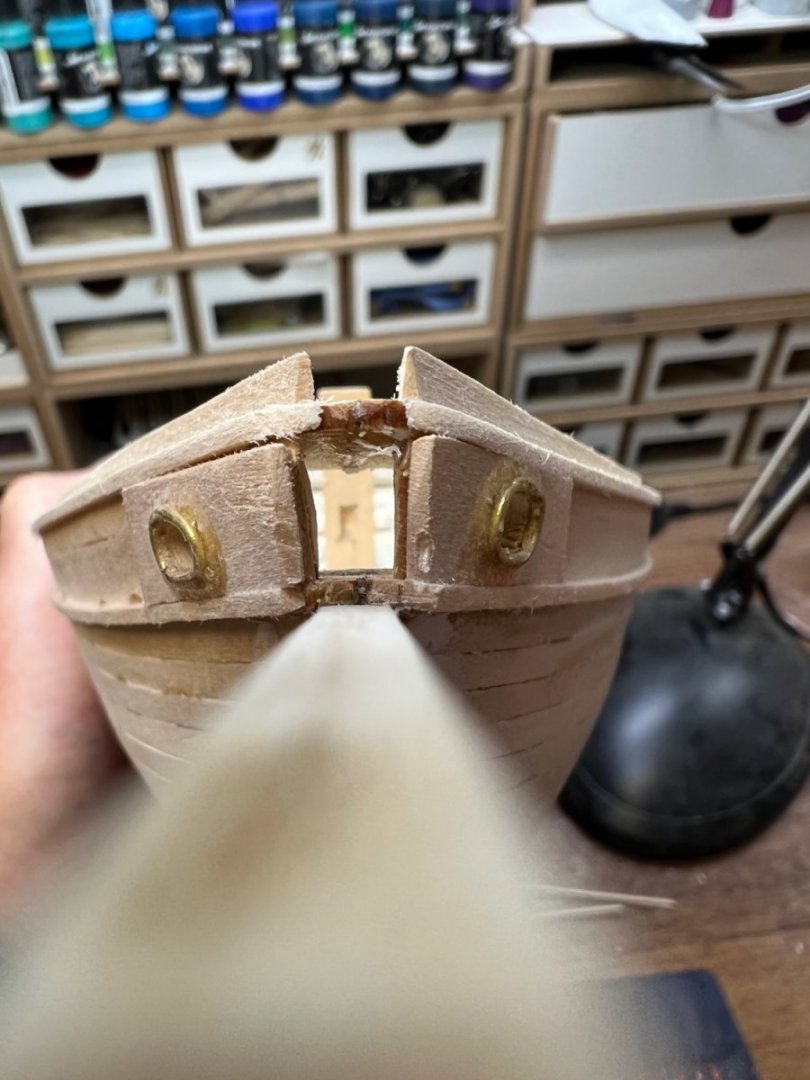
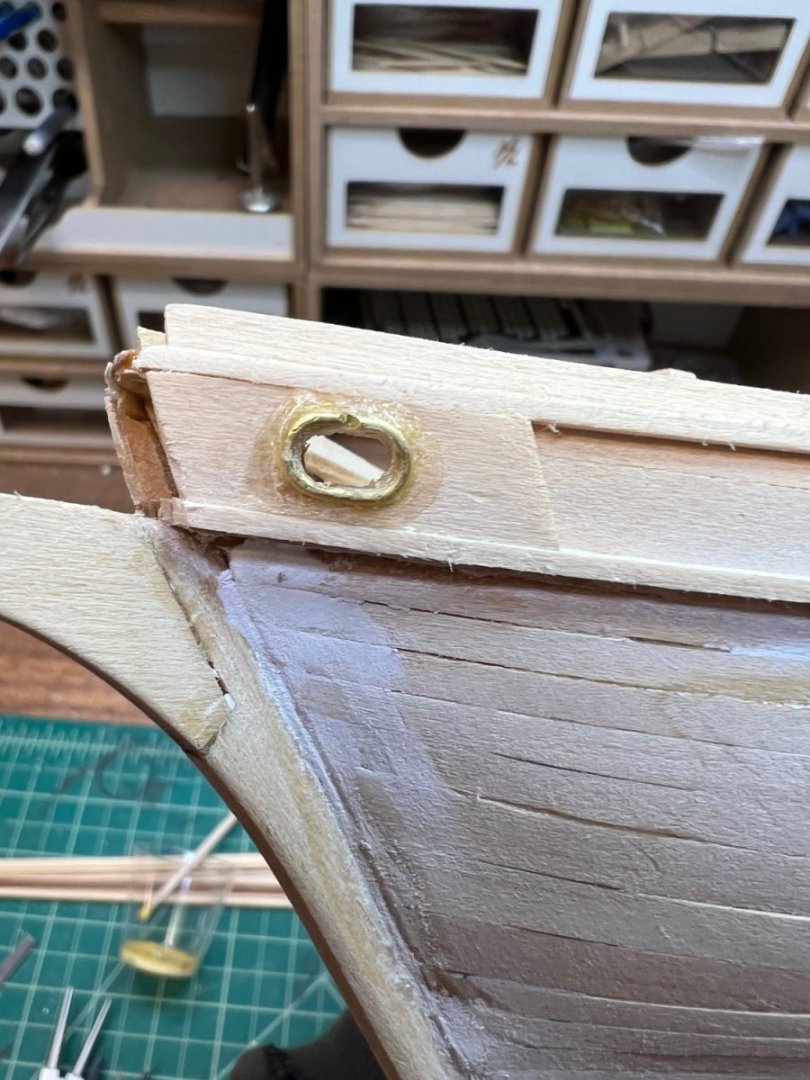
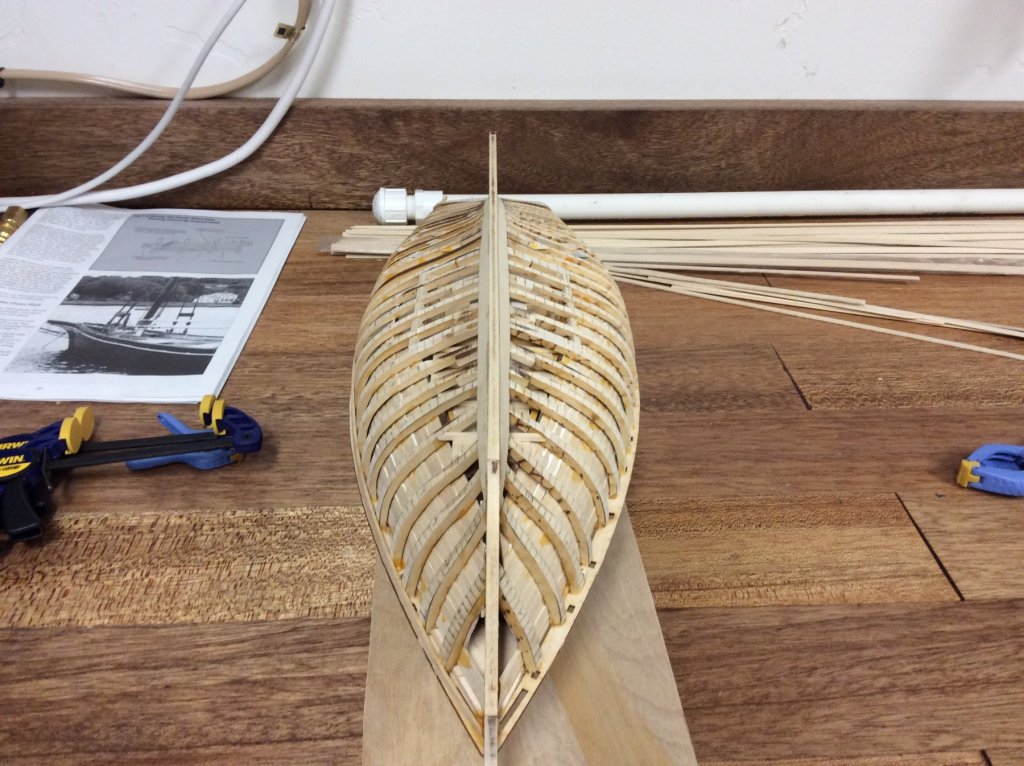
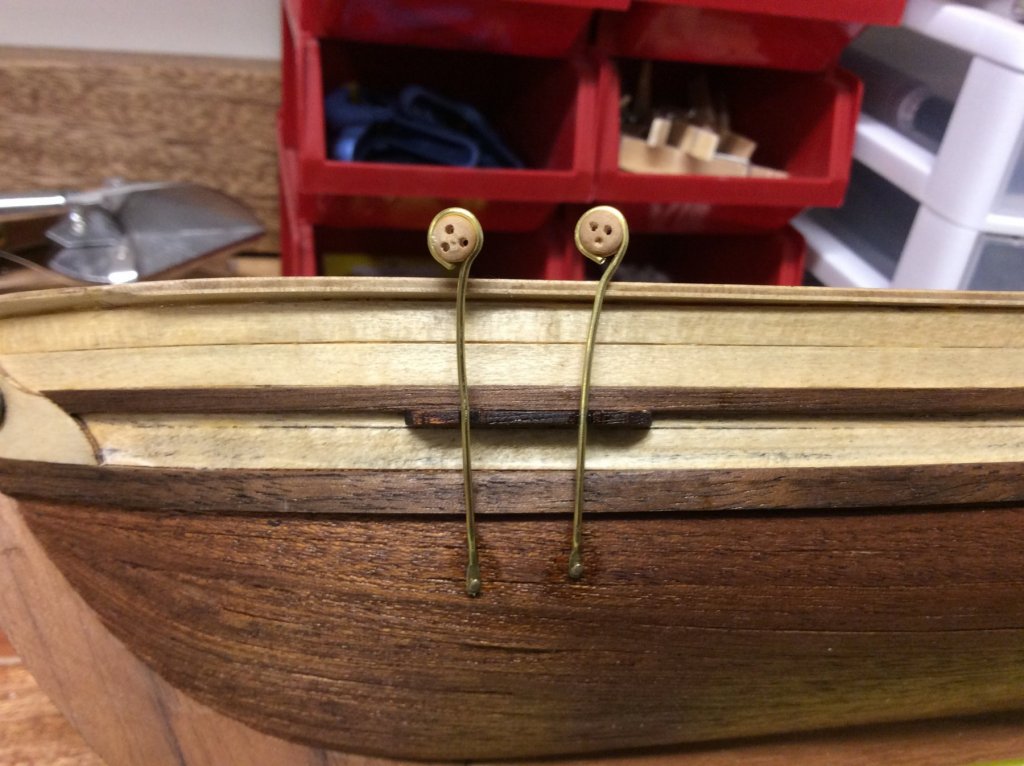
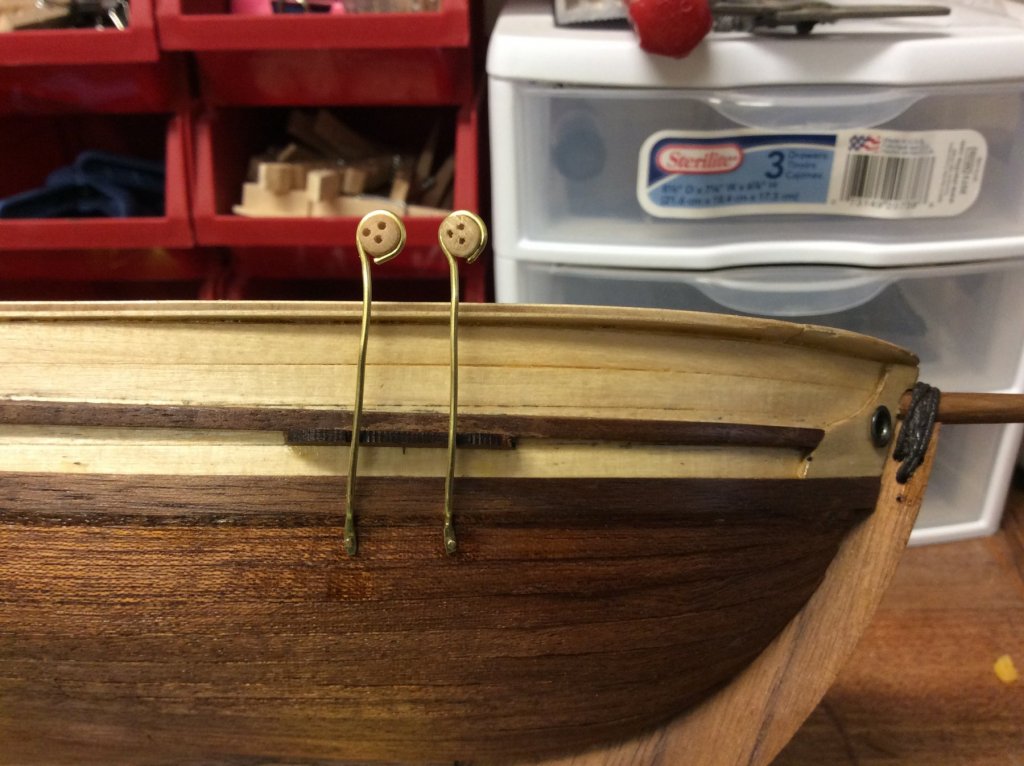
Drilling holes in your model is nerve racking. Mistakes were made. I am hoping my paint job covers some of this up. symmetry is a problem the entire ship has, no less this part. Recovered a bit with a dremel and the wire. Just gonna absorb the learning and move on.


-
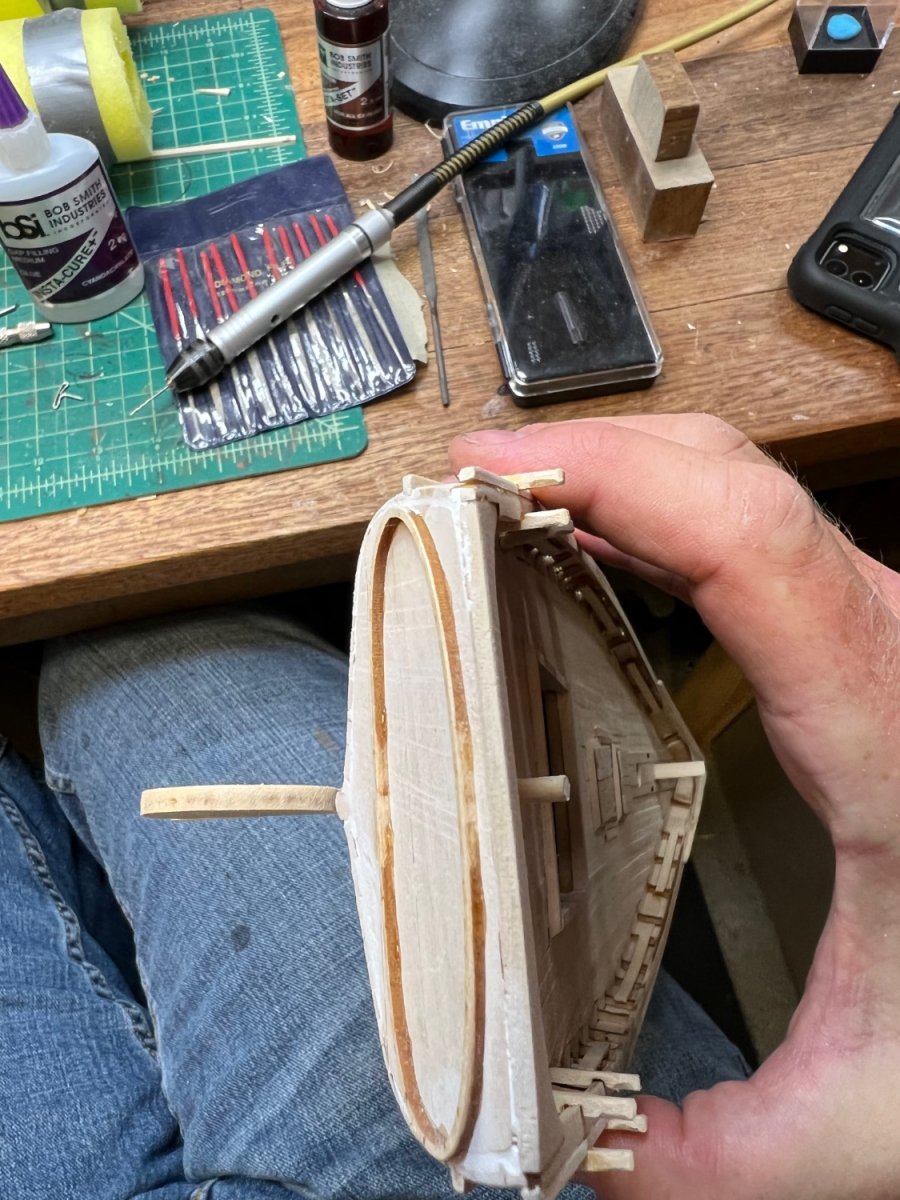
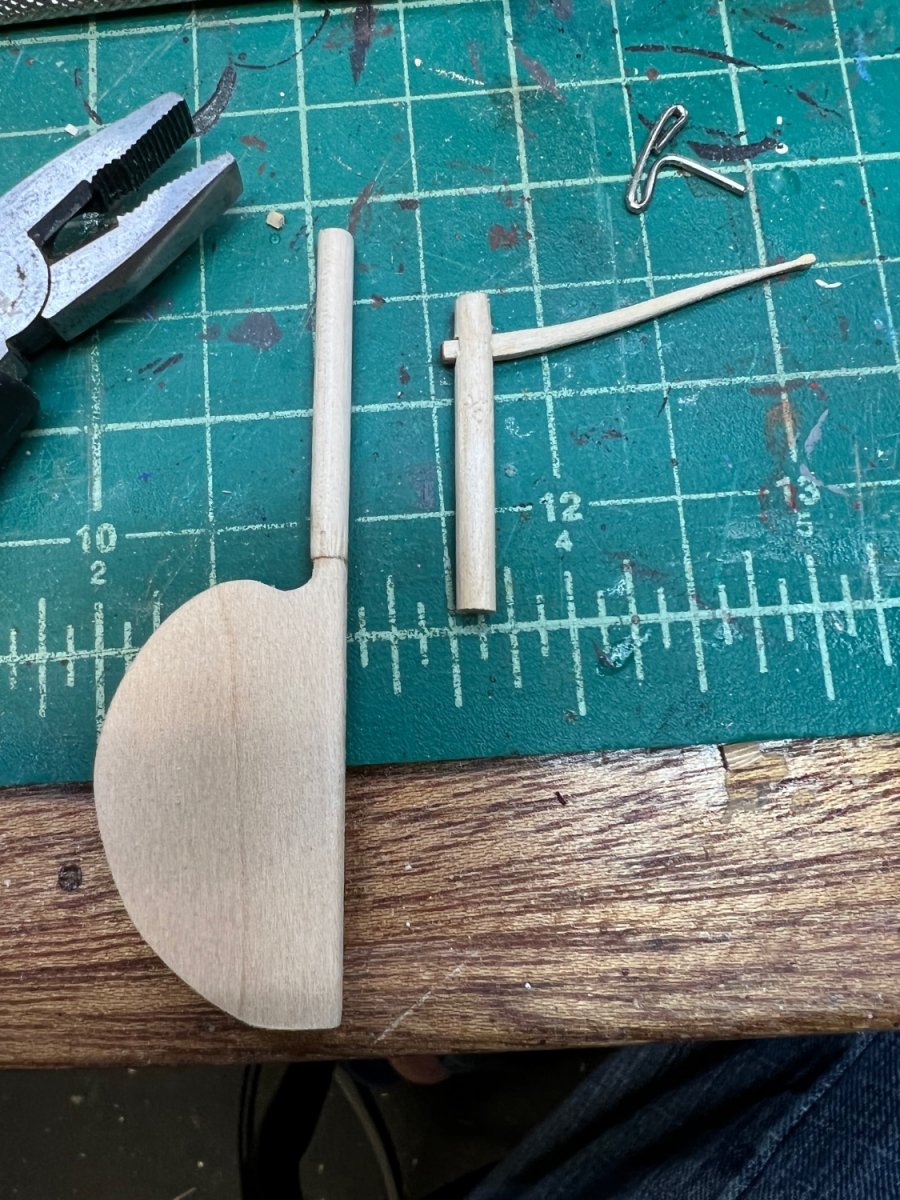
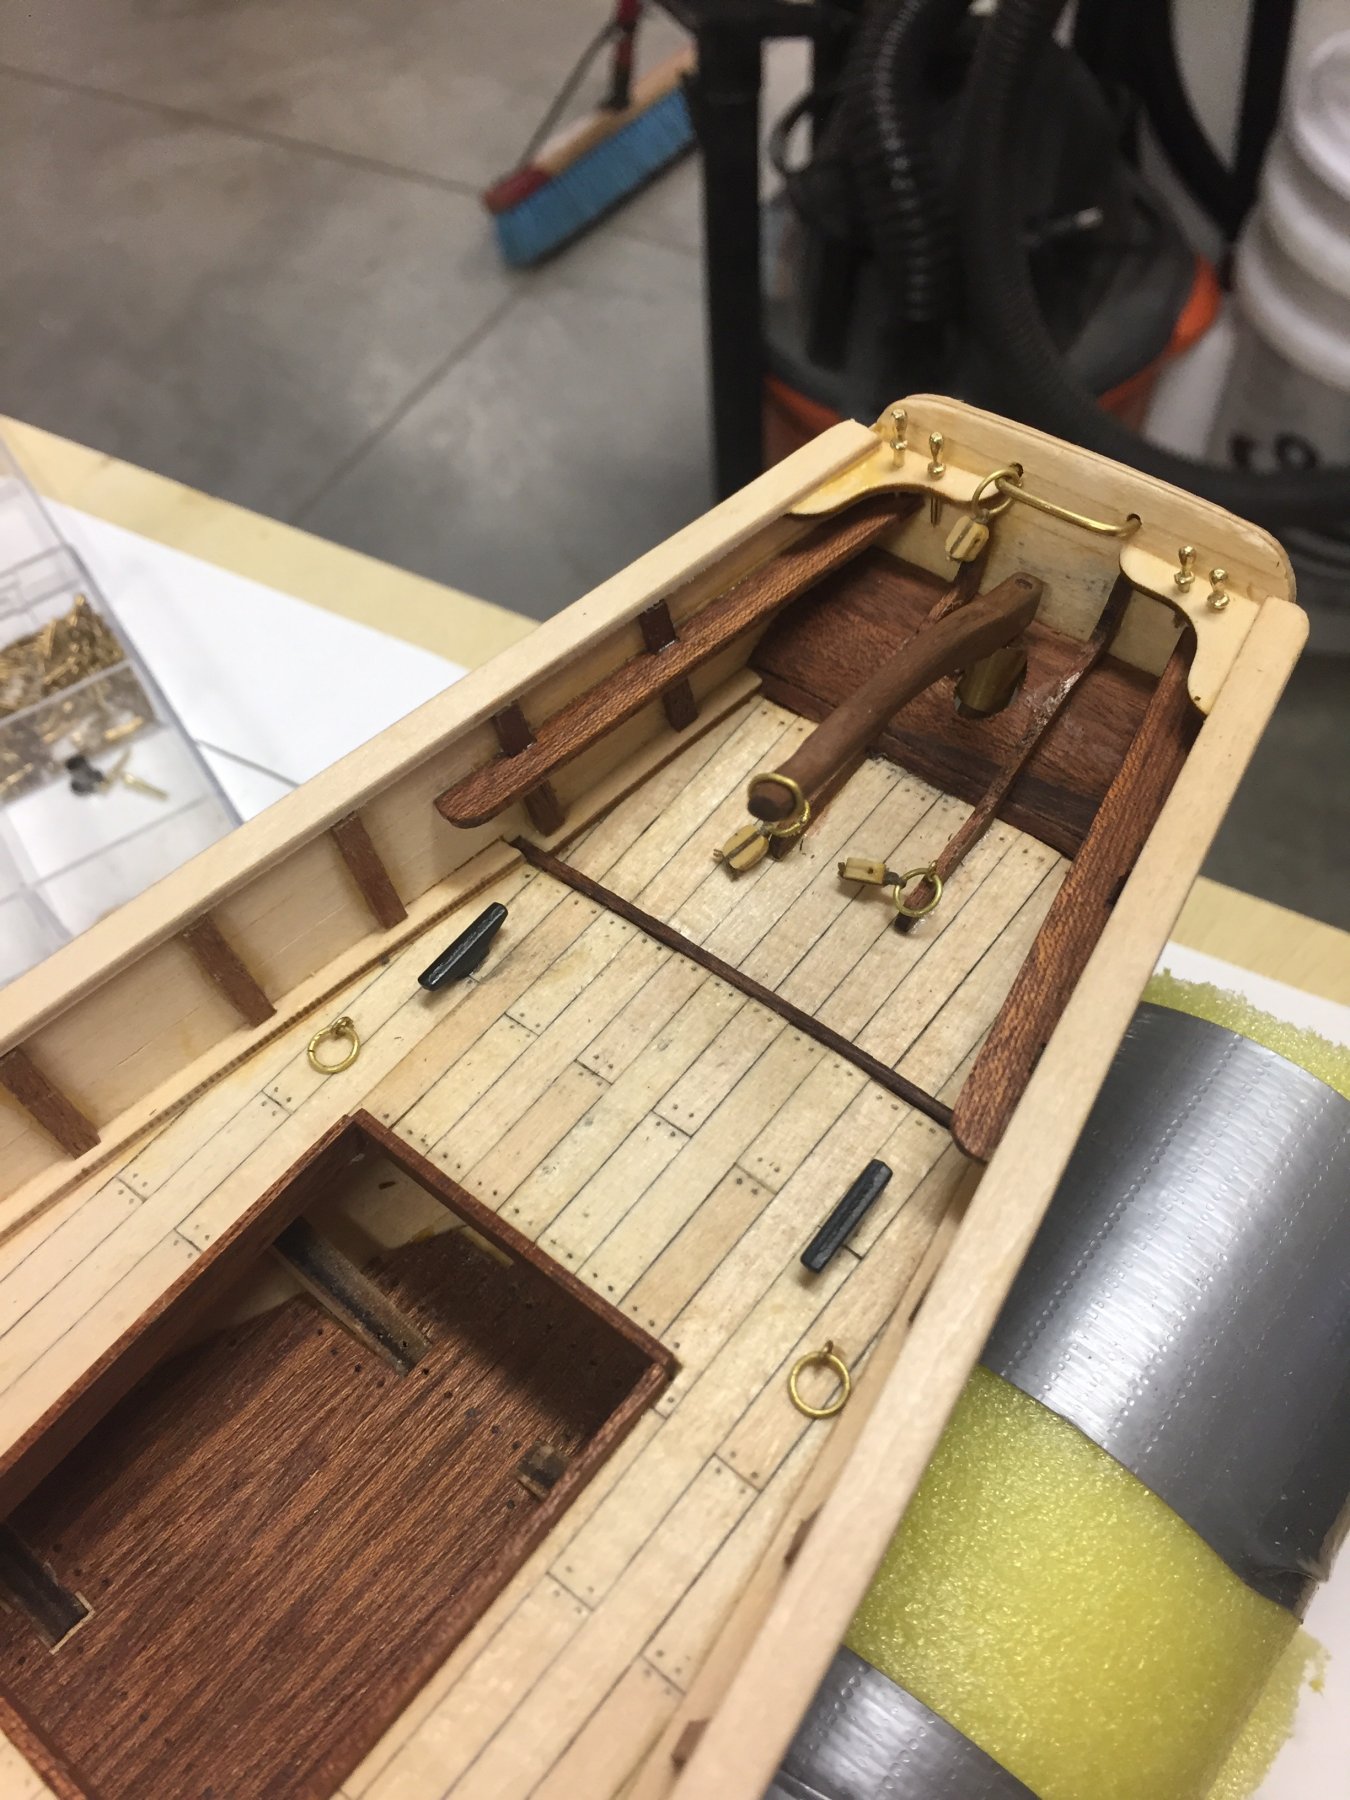
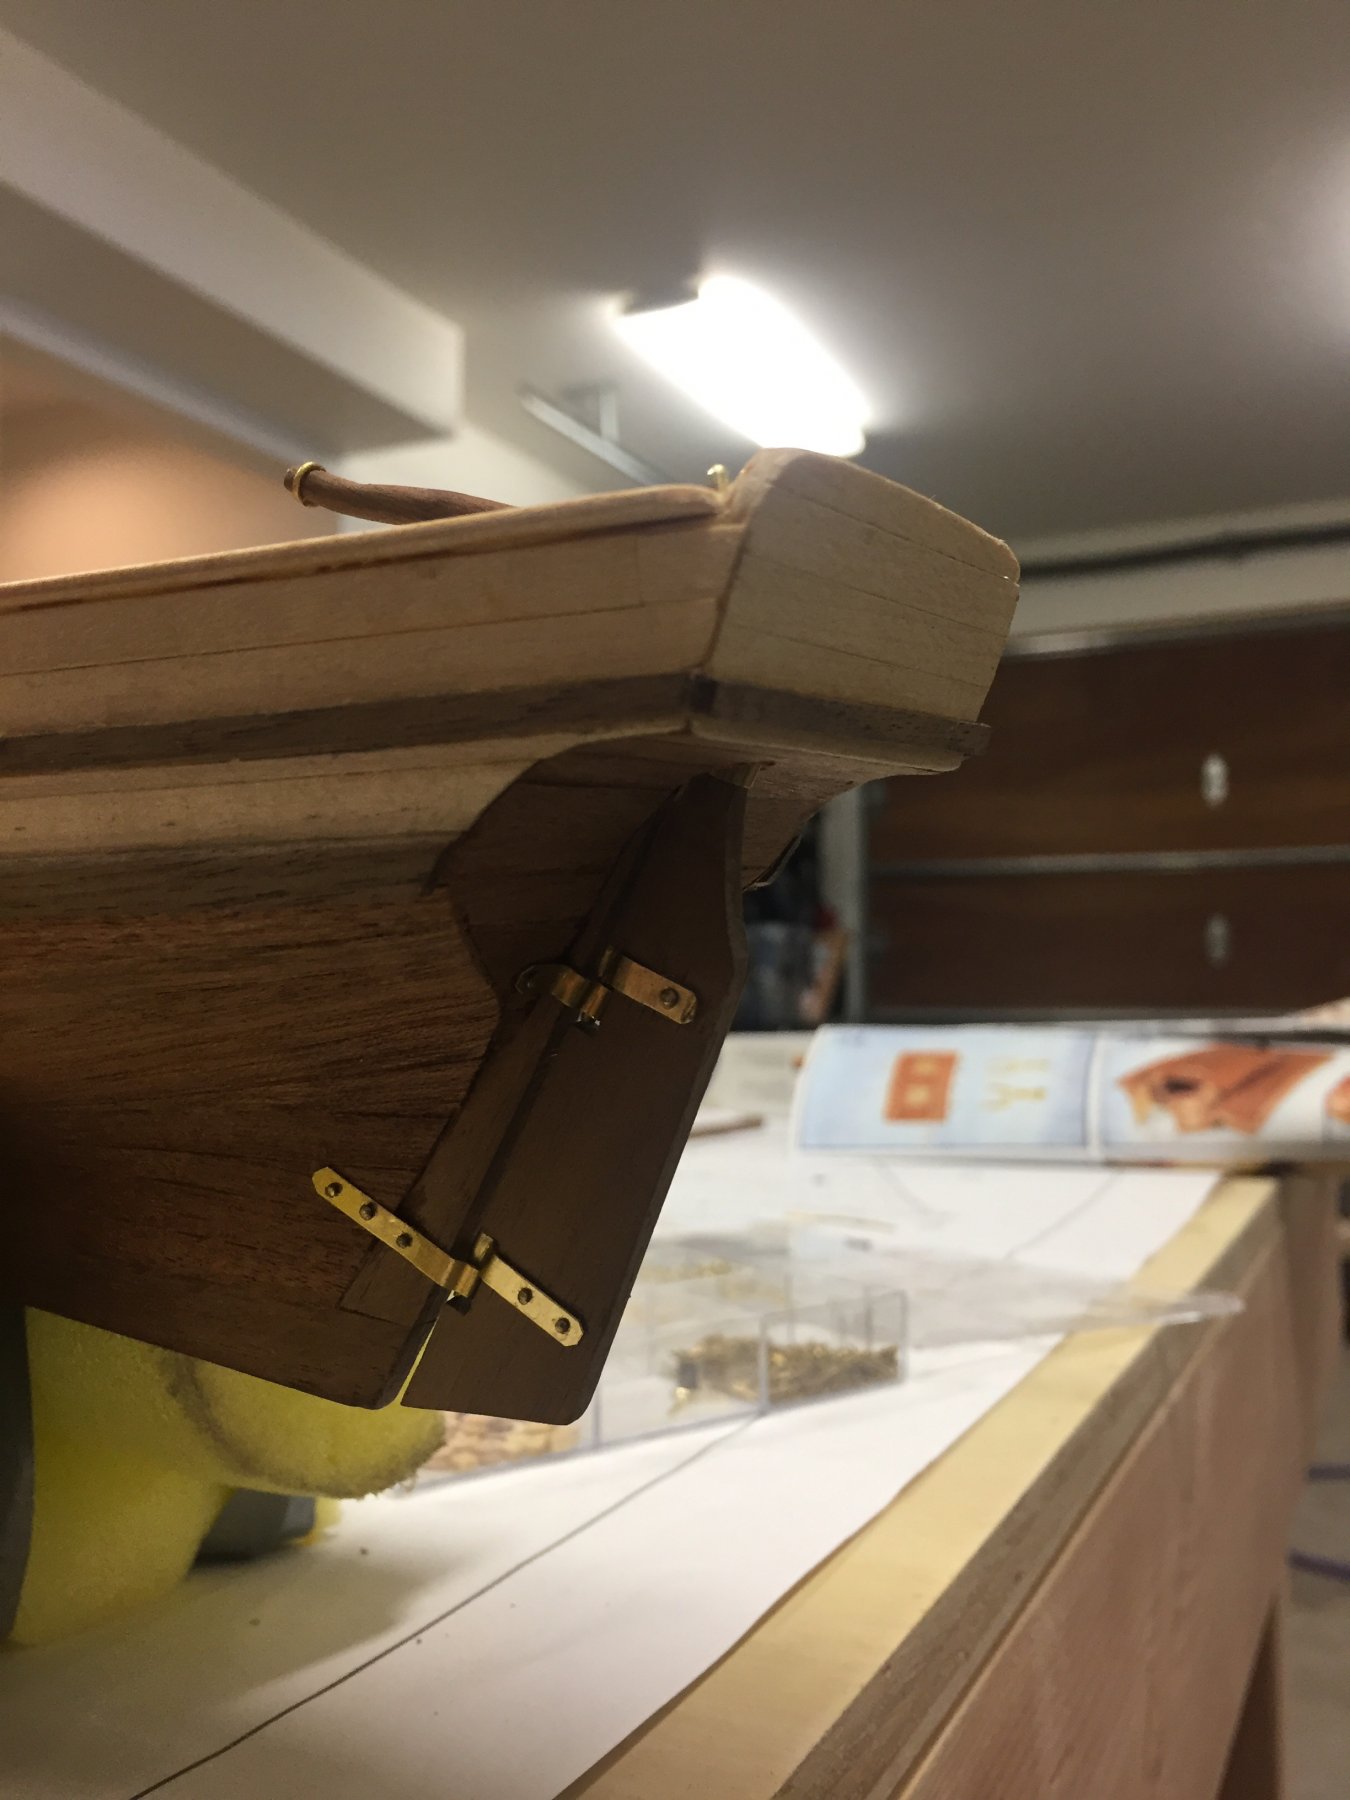
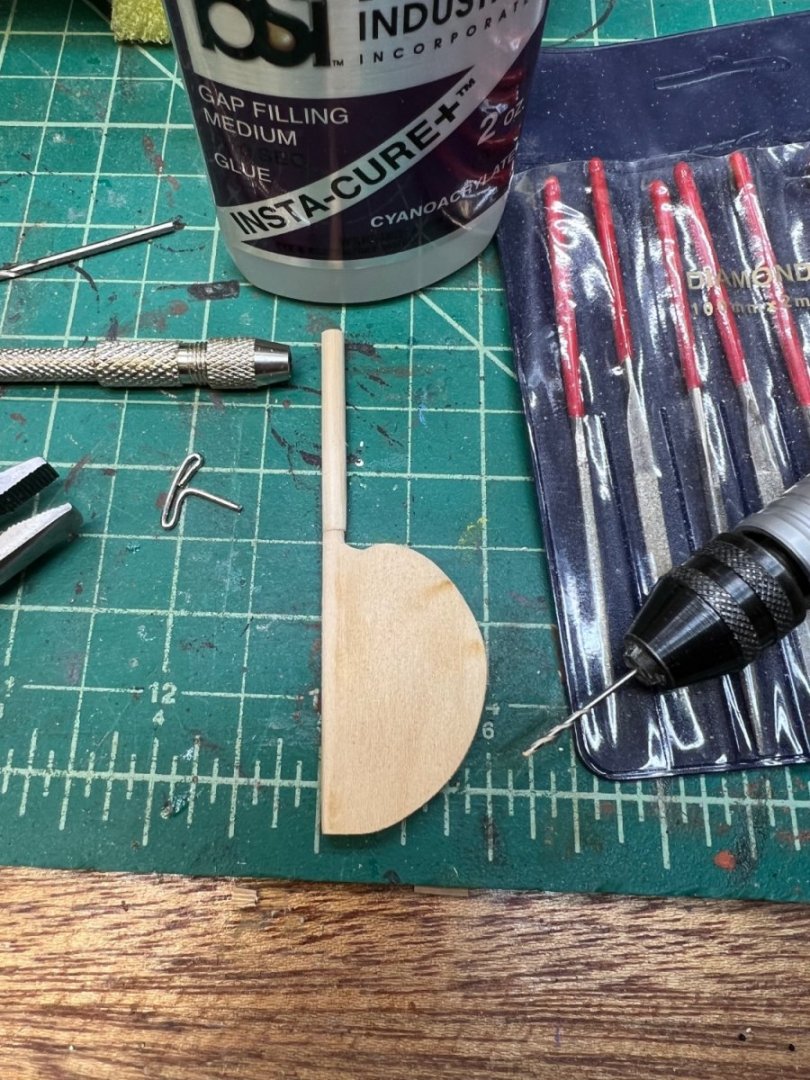
Big success this morning. Shaping rudder, pinning rudder to dowel straight so that is fits and can turn, I now need to redo the mortise for the tiller, I mis-measured the dowel length needed to reach the rudder piece. (plans vs real model discrepancy)


-
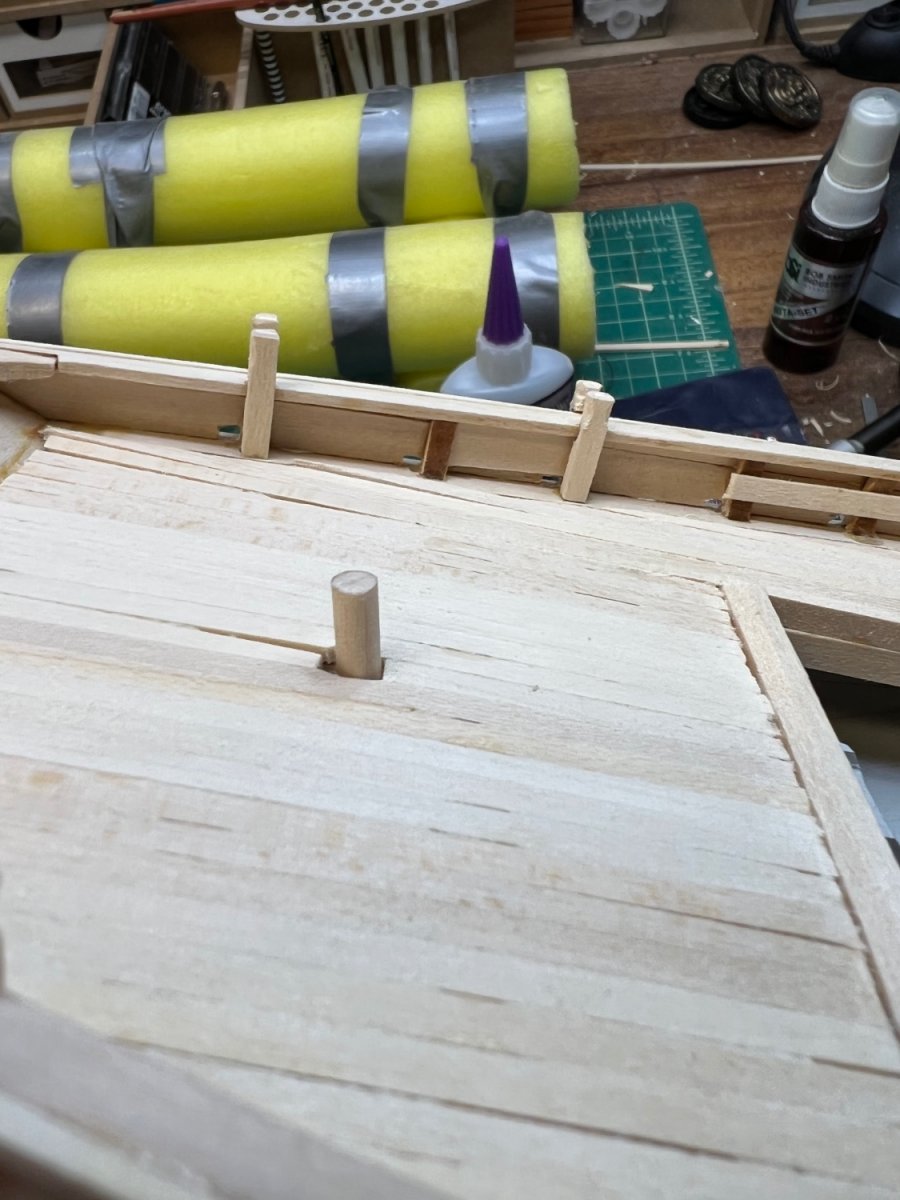
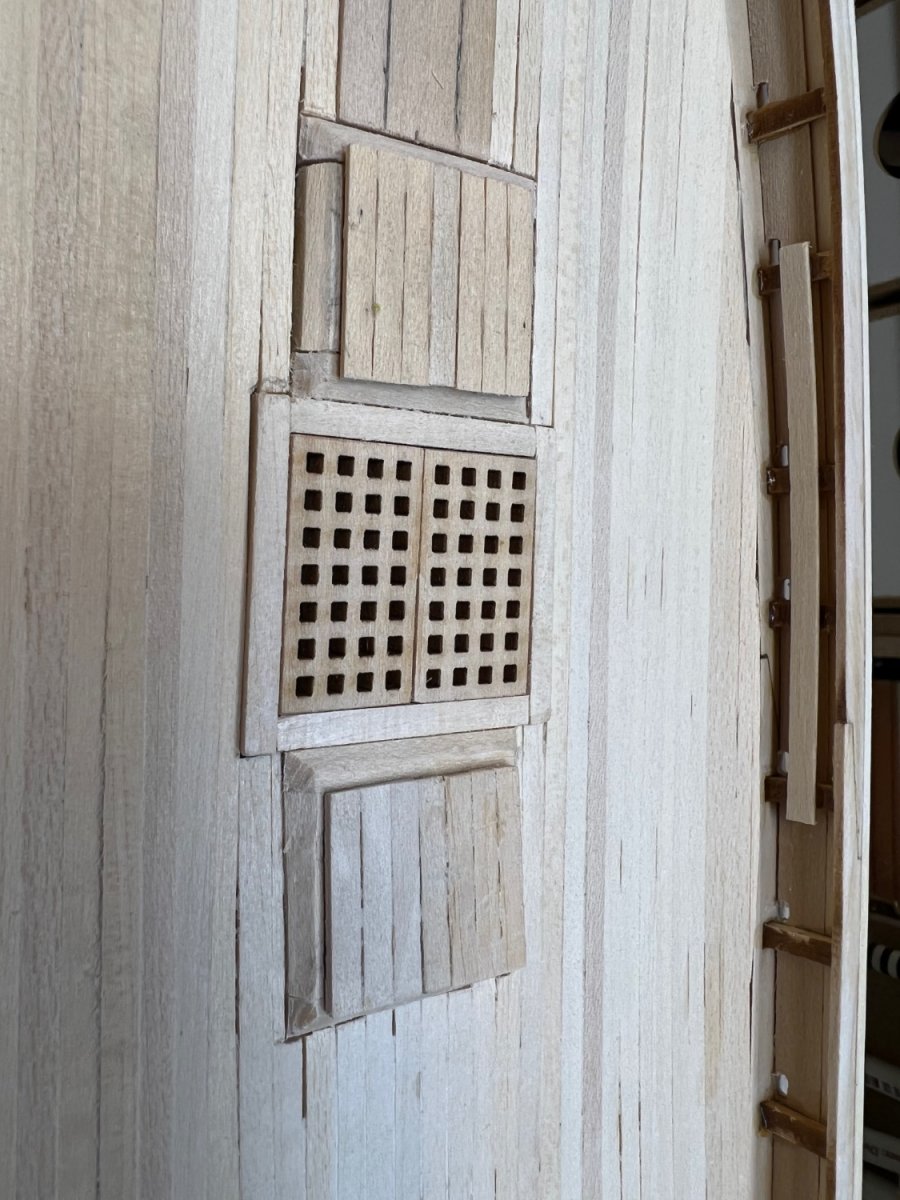
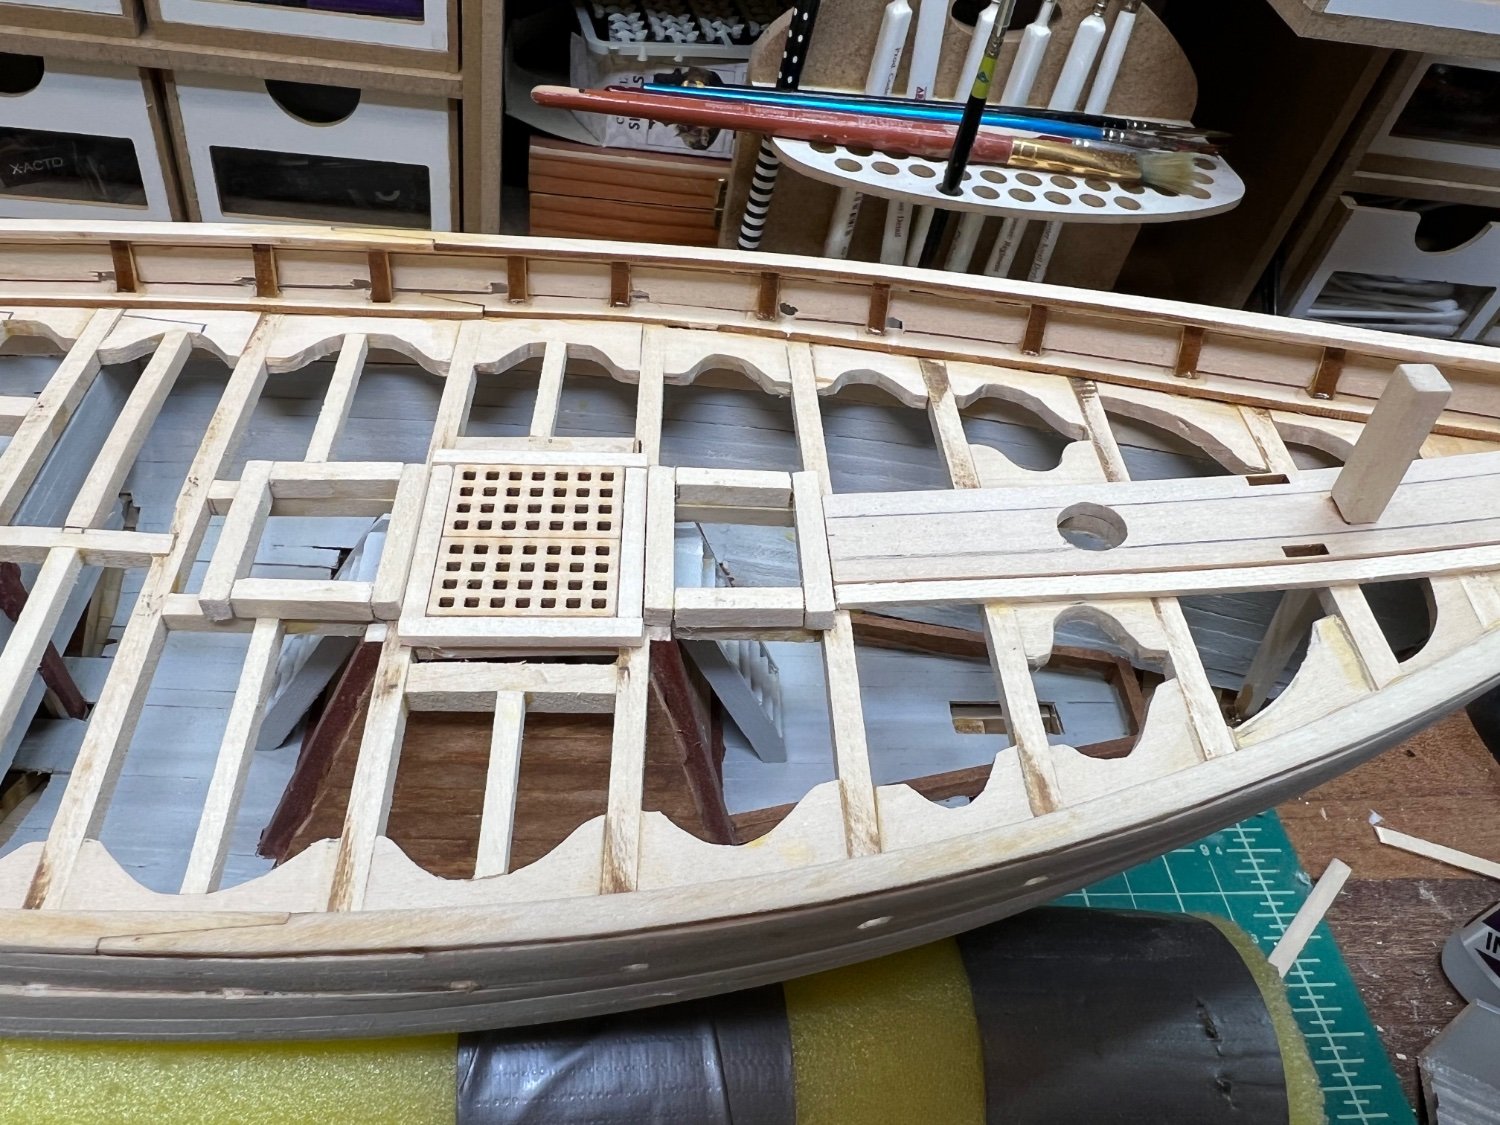
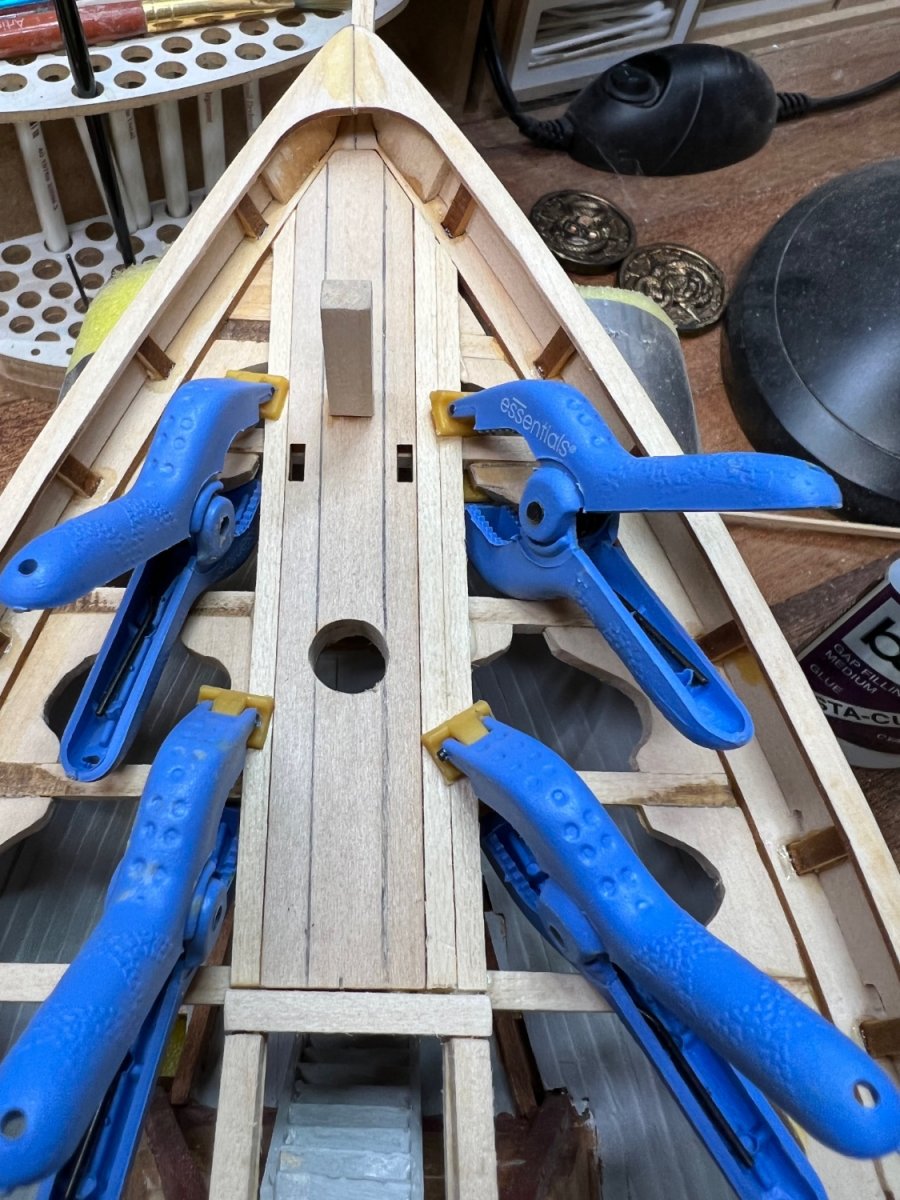
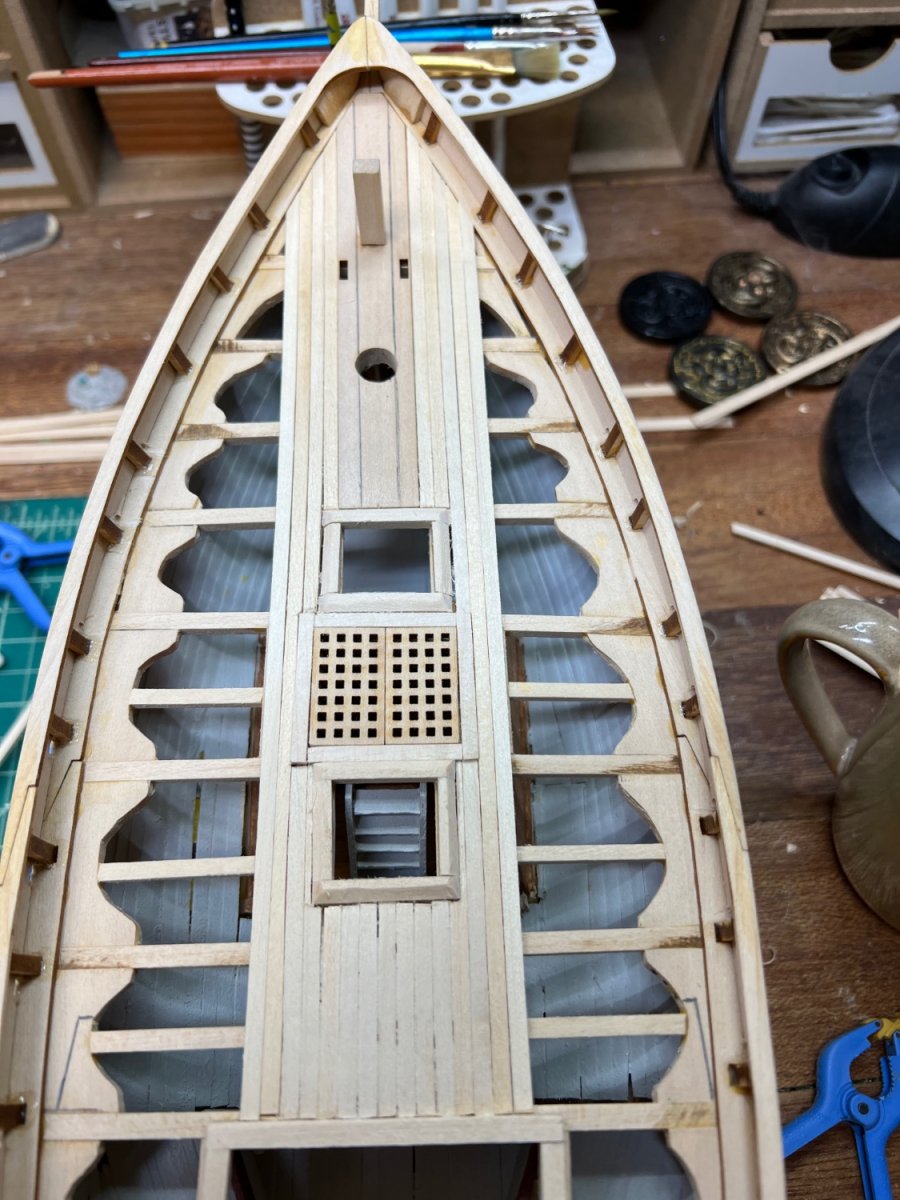
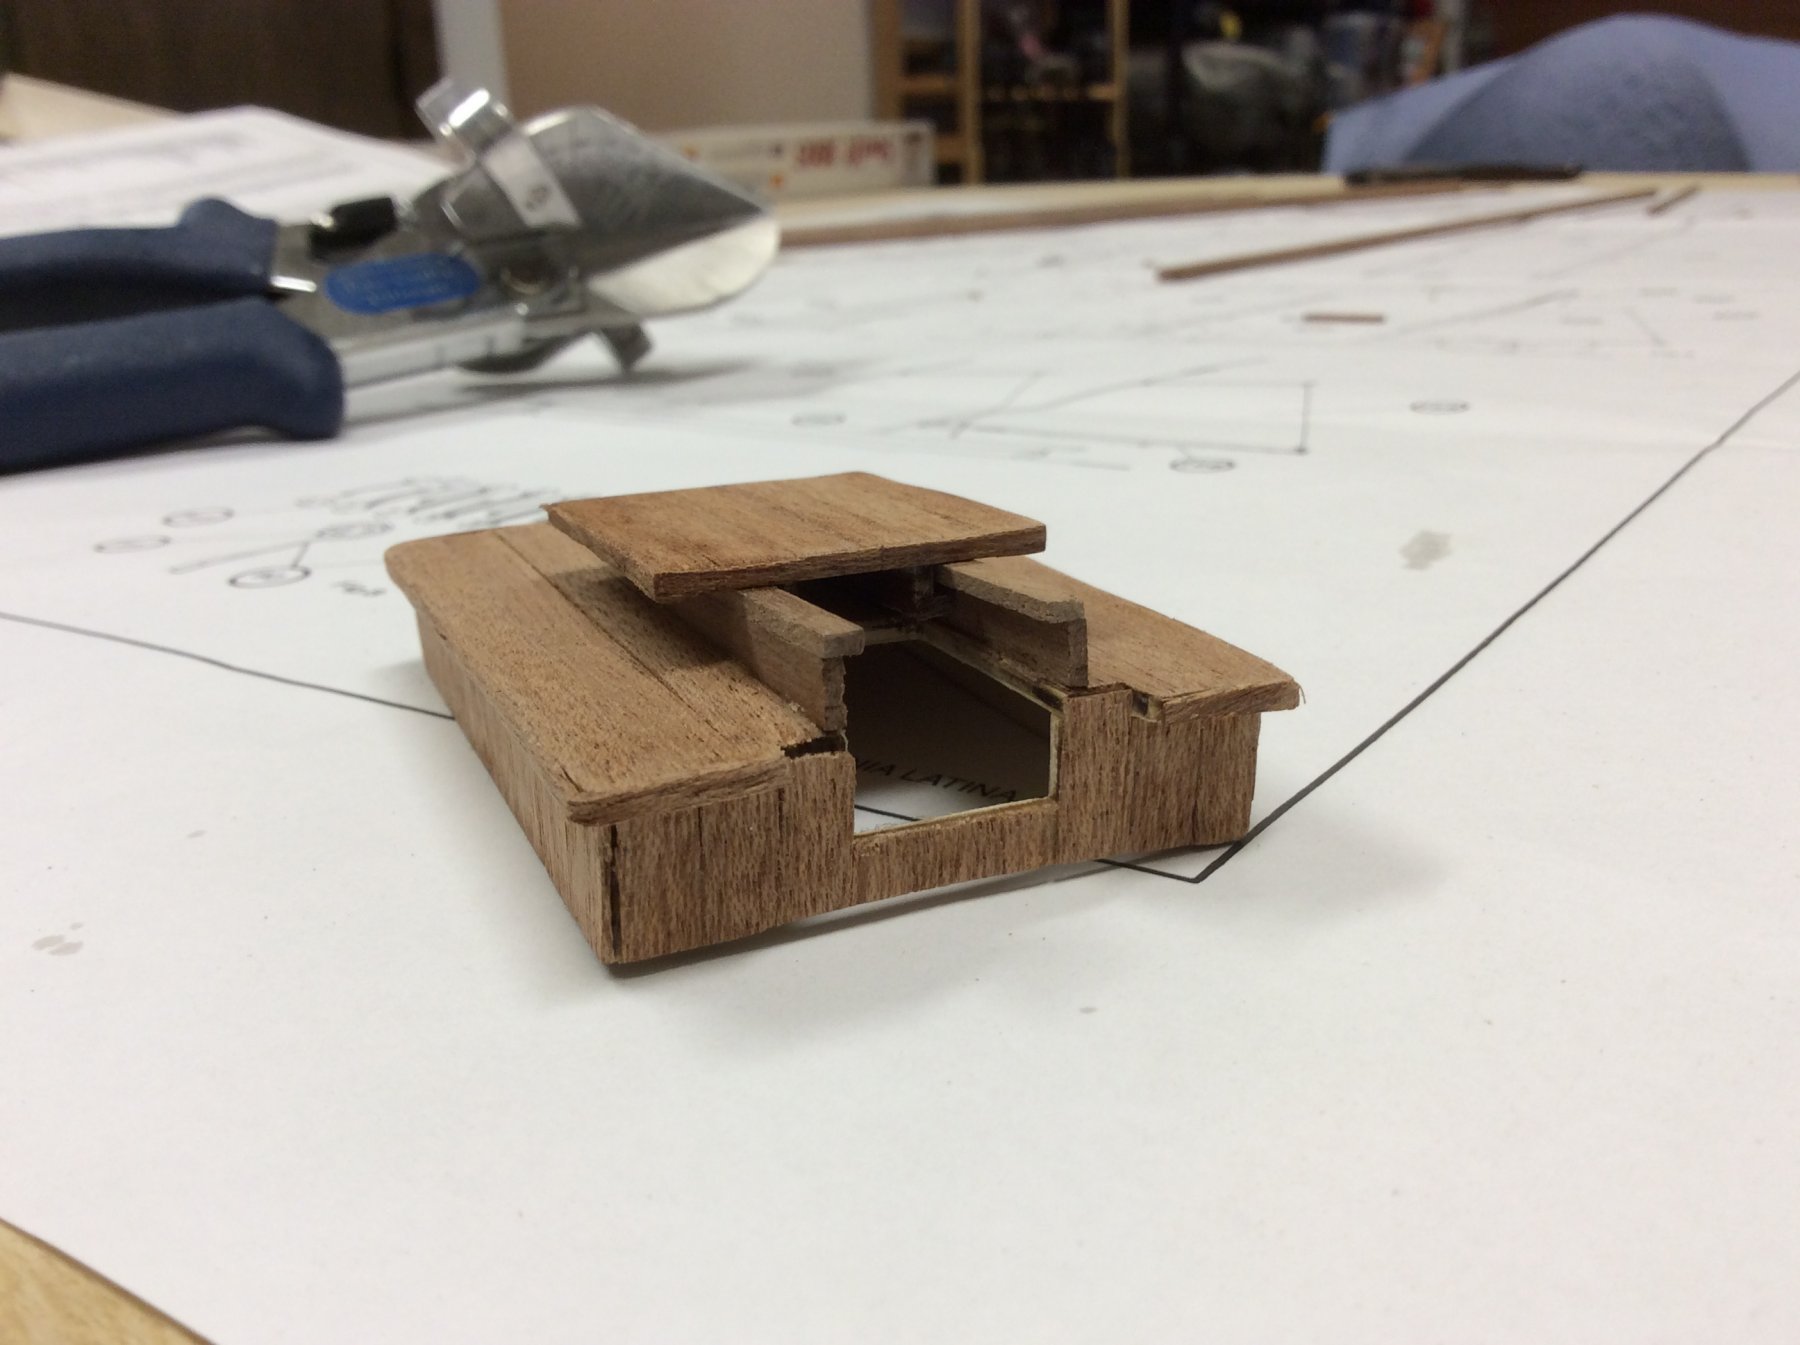
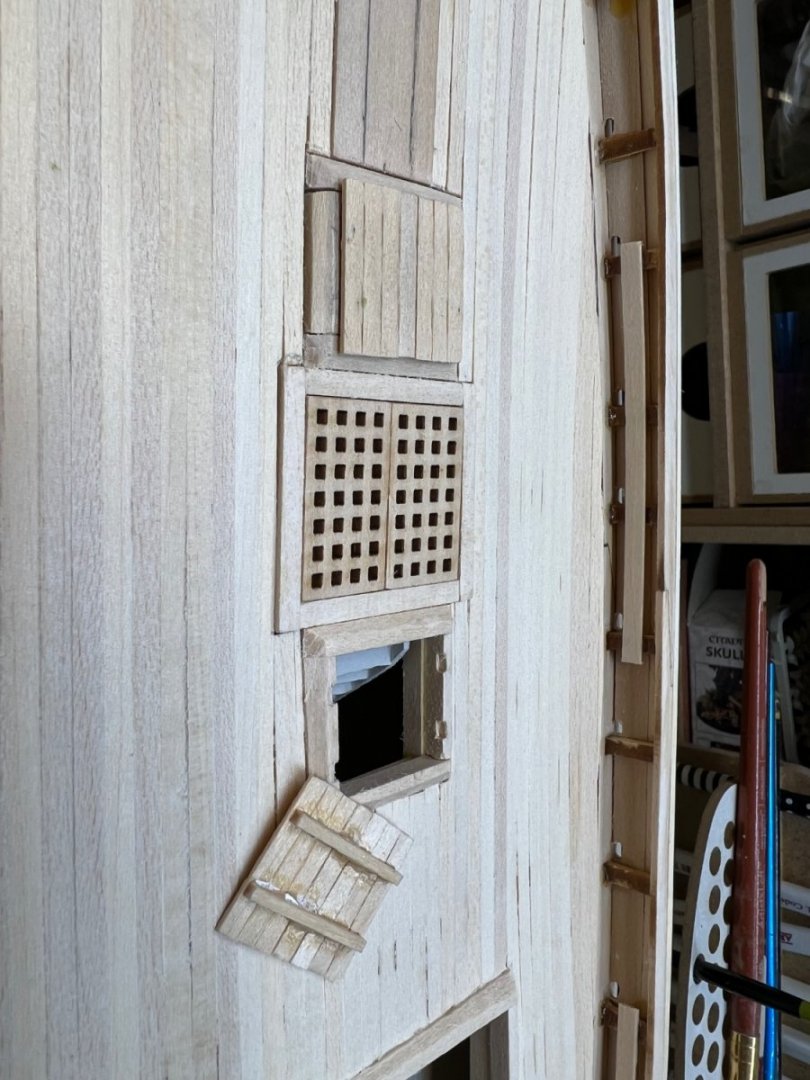
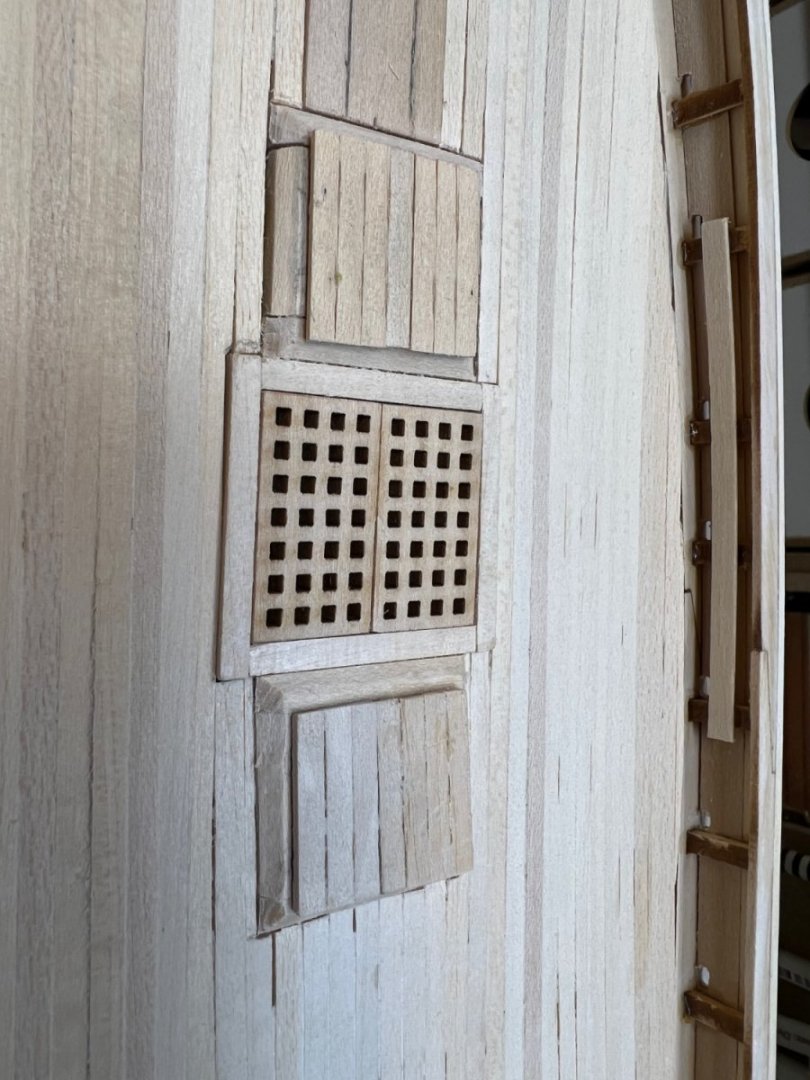
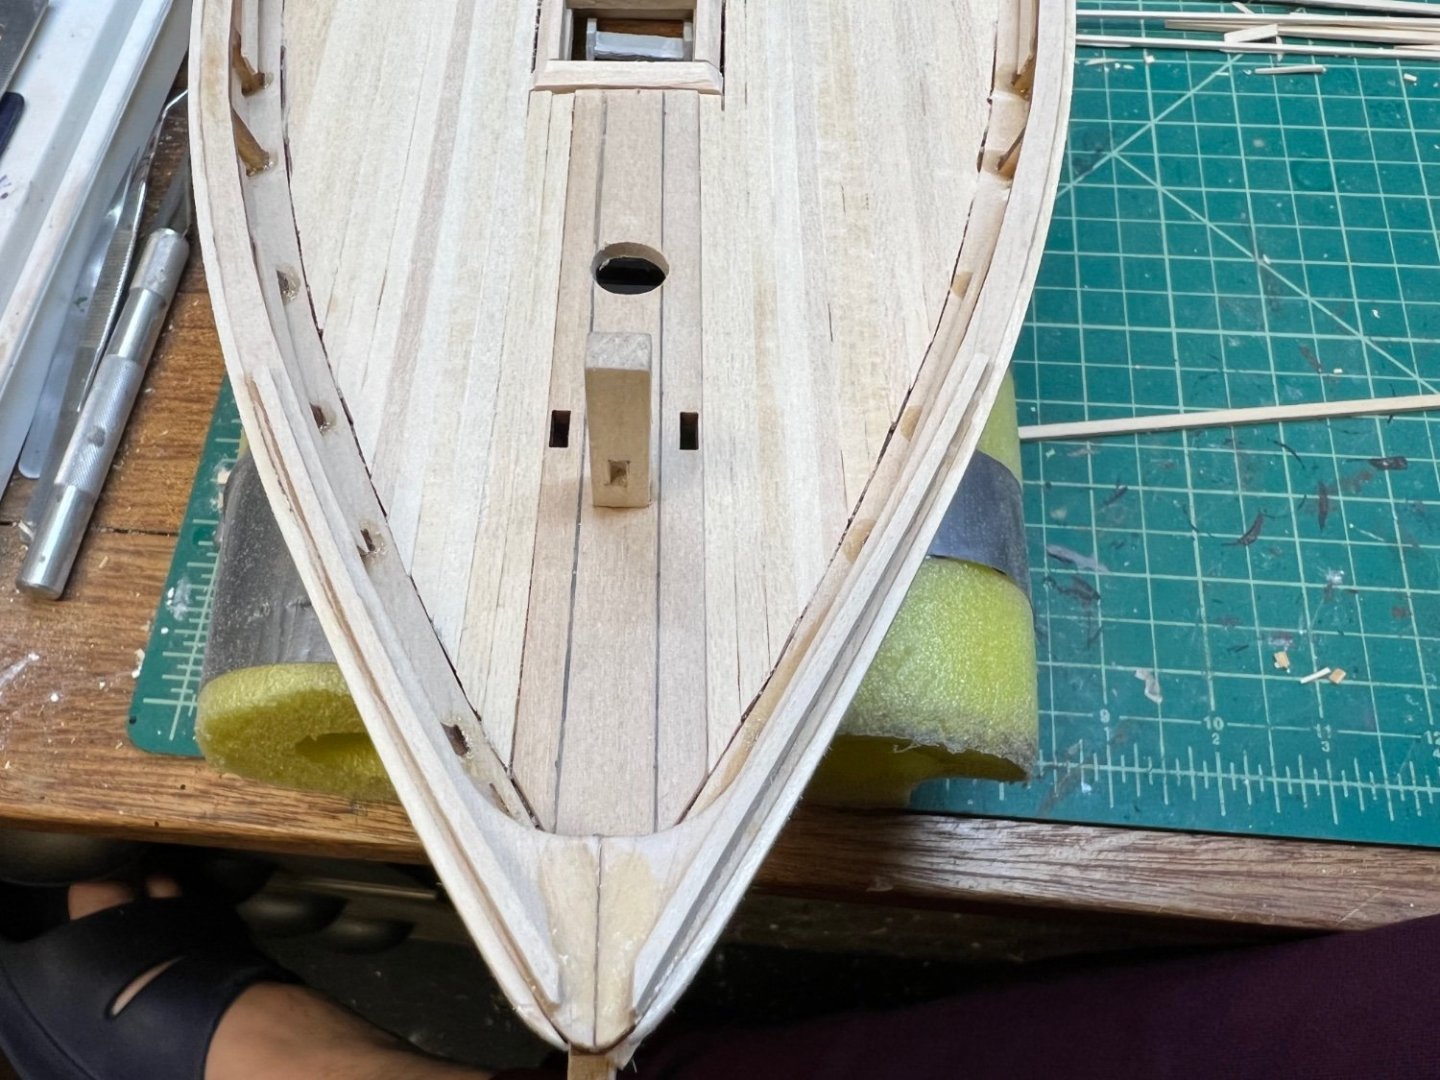
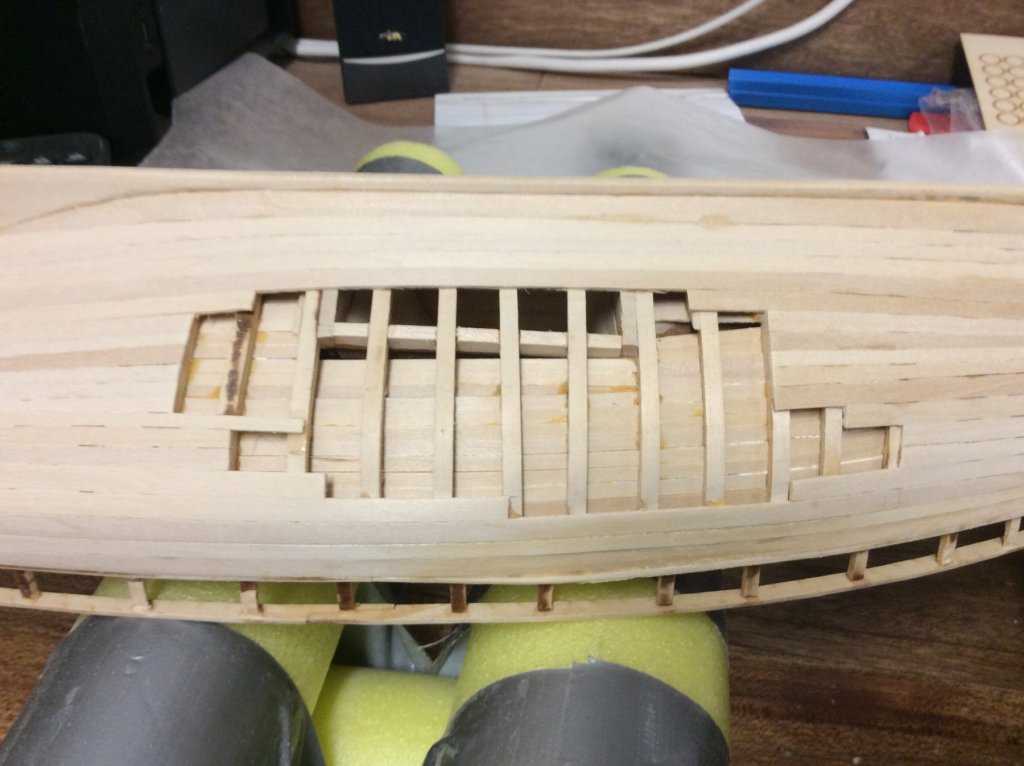
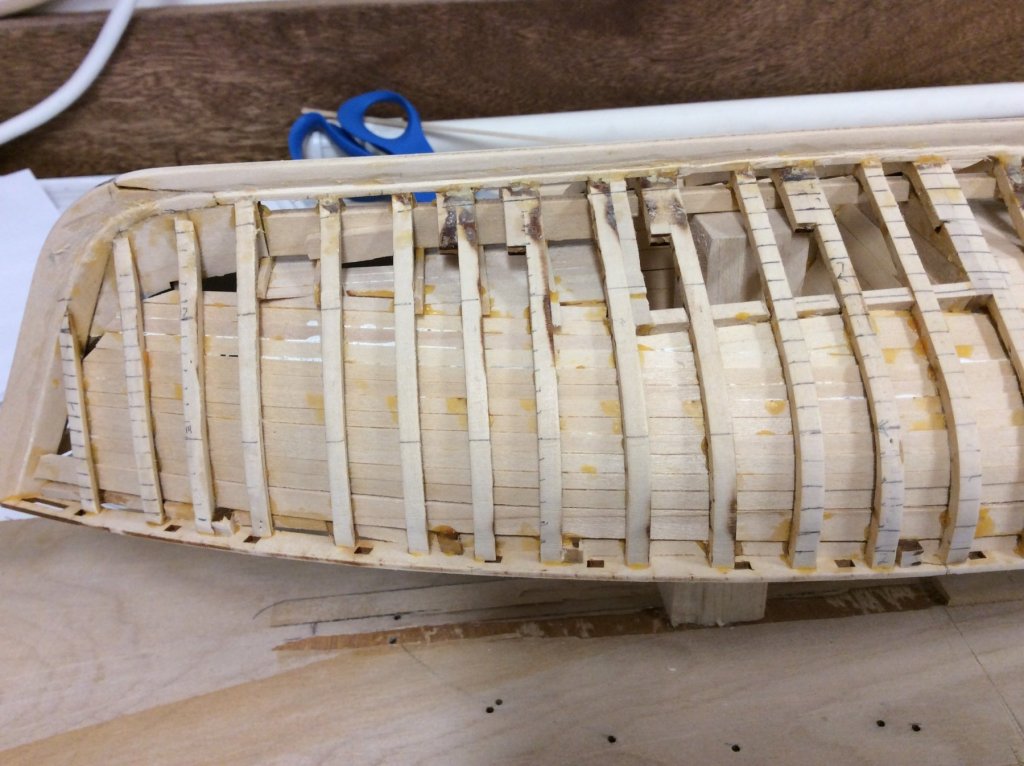
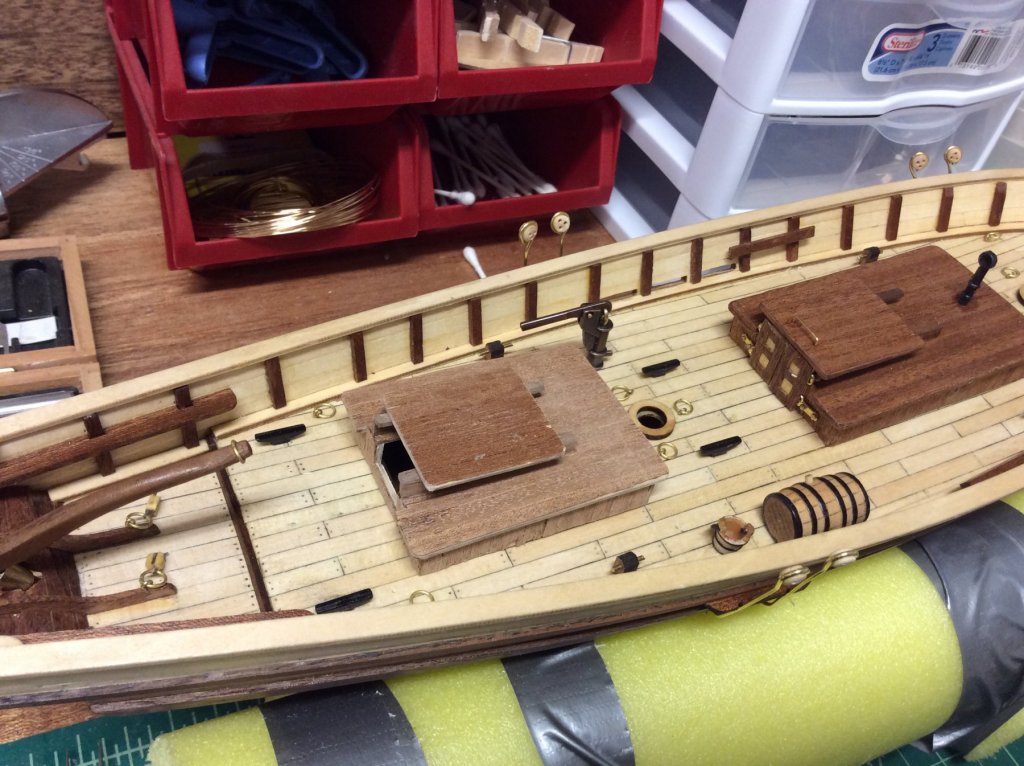
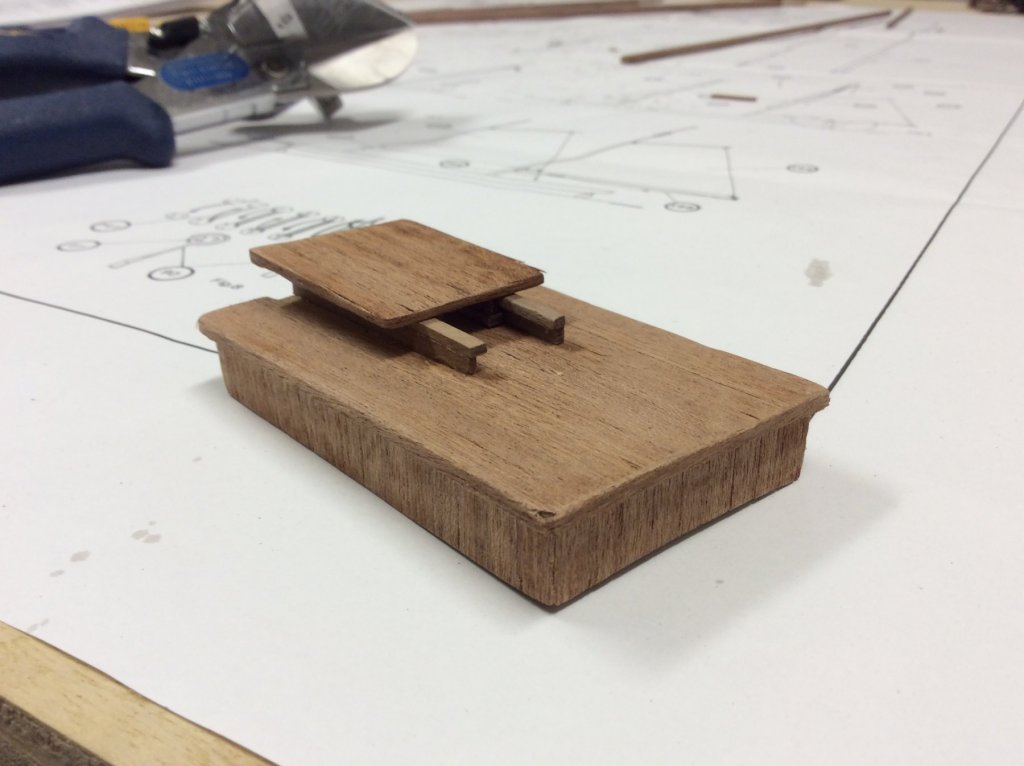
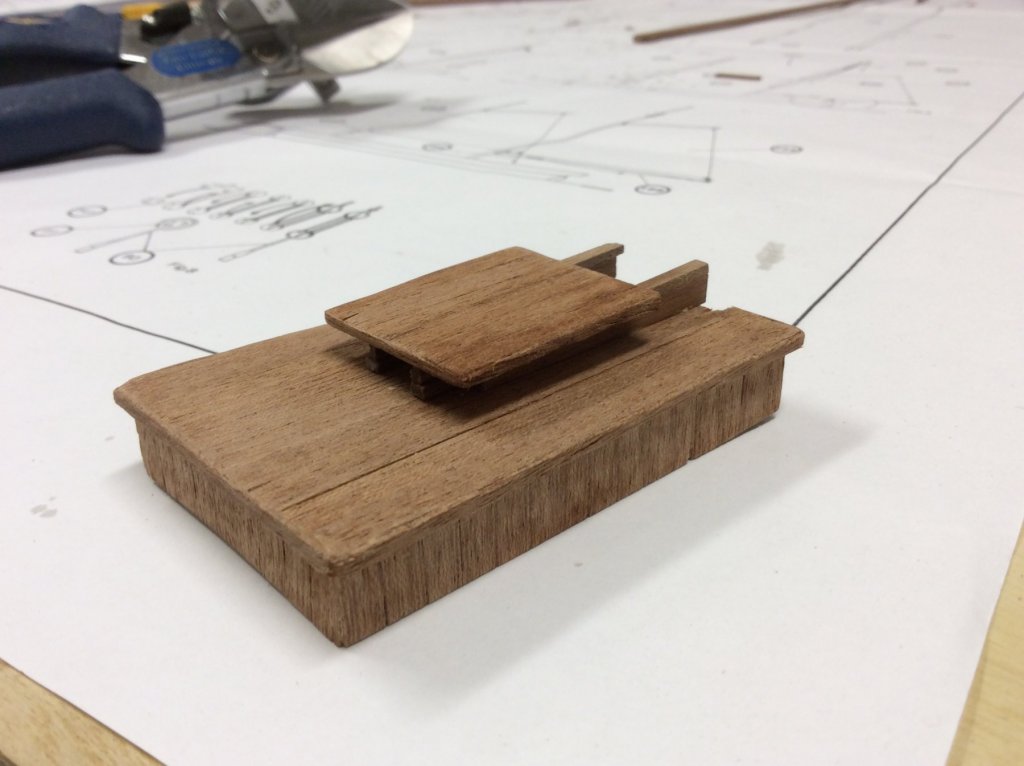
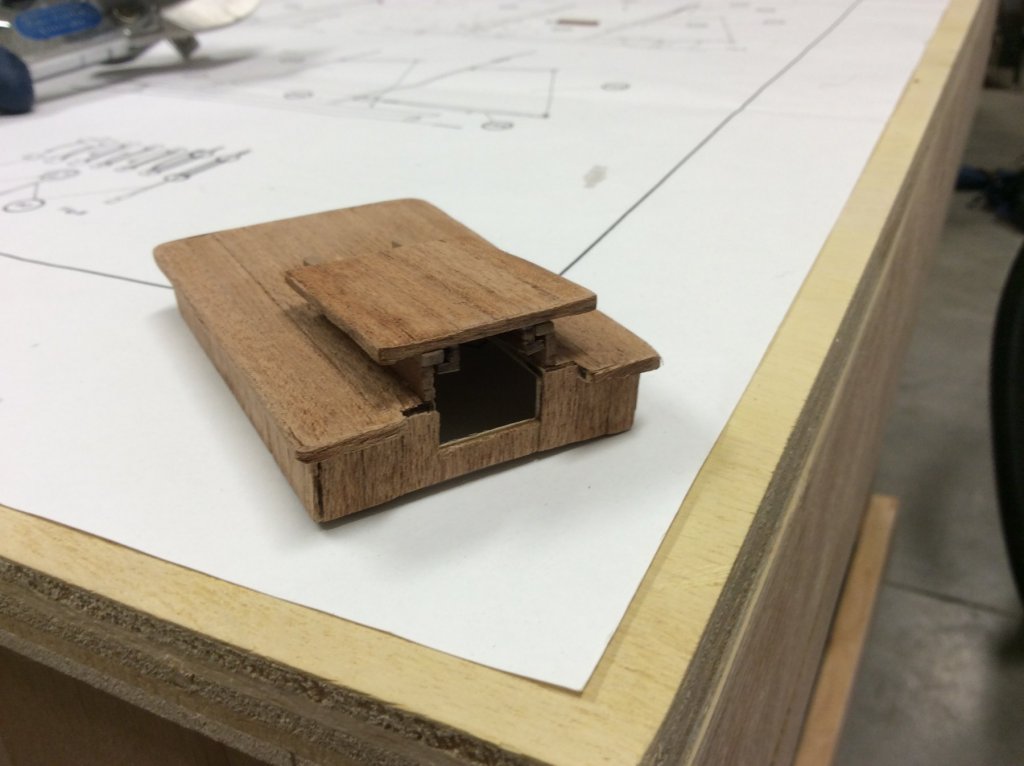
Productive hour on the wet well hatches. Very committing carving of the notches. Measure twice carve once!
-
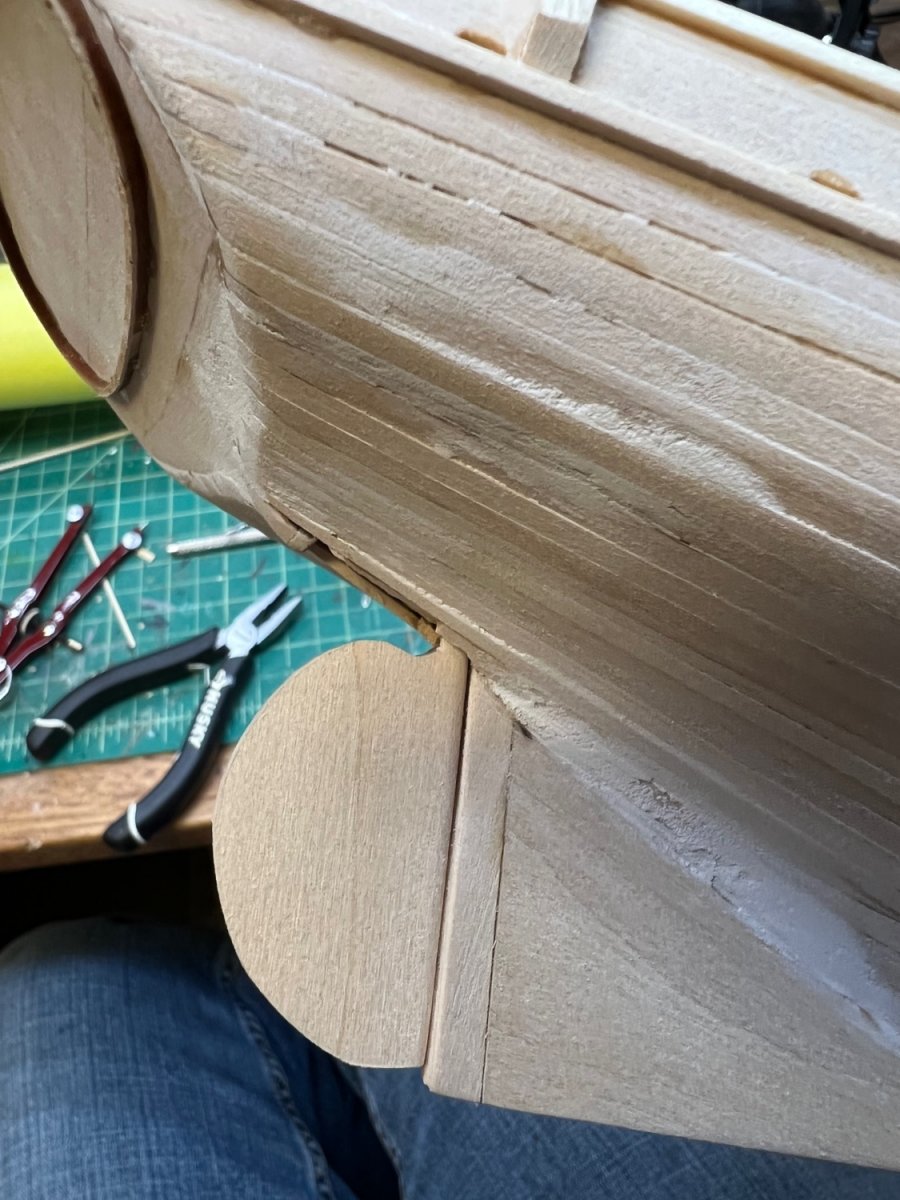
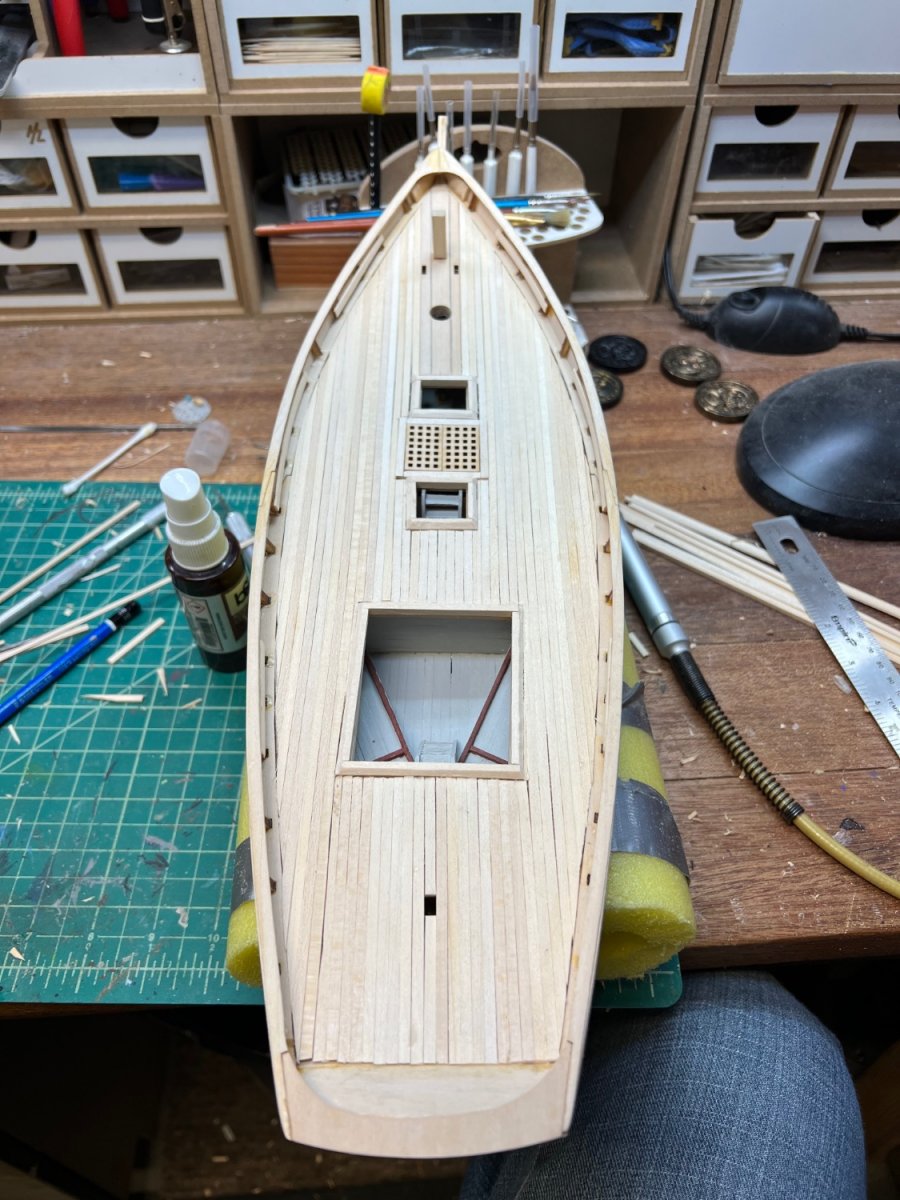
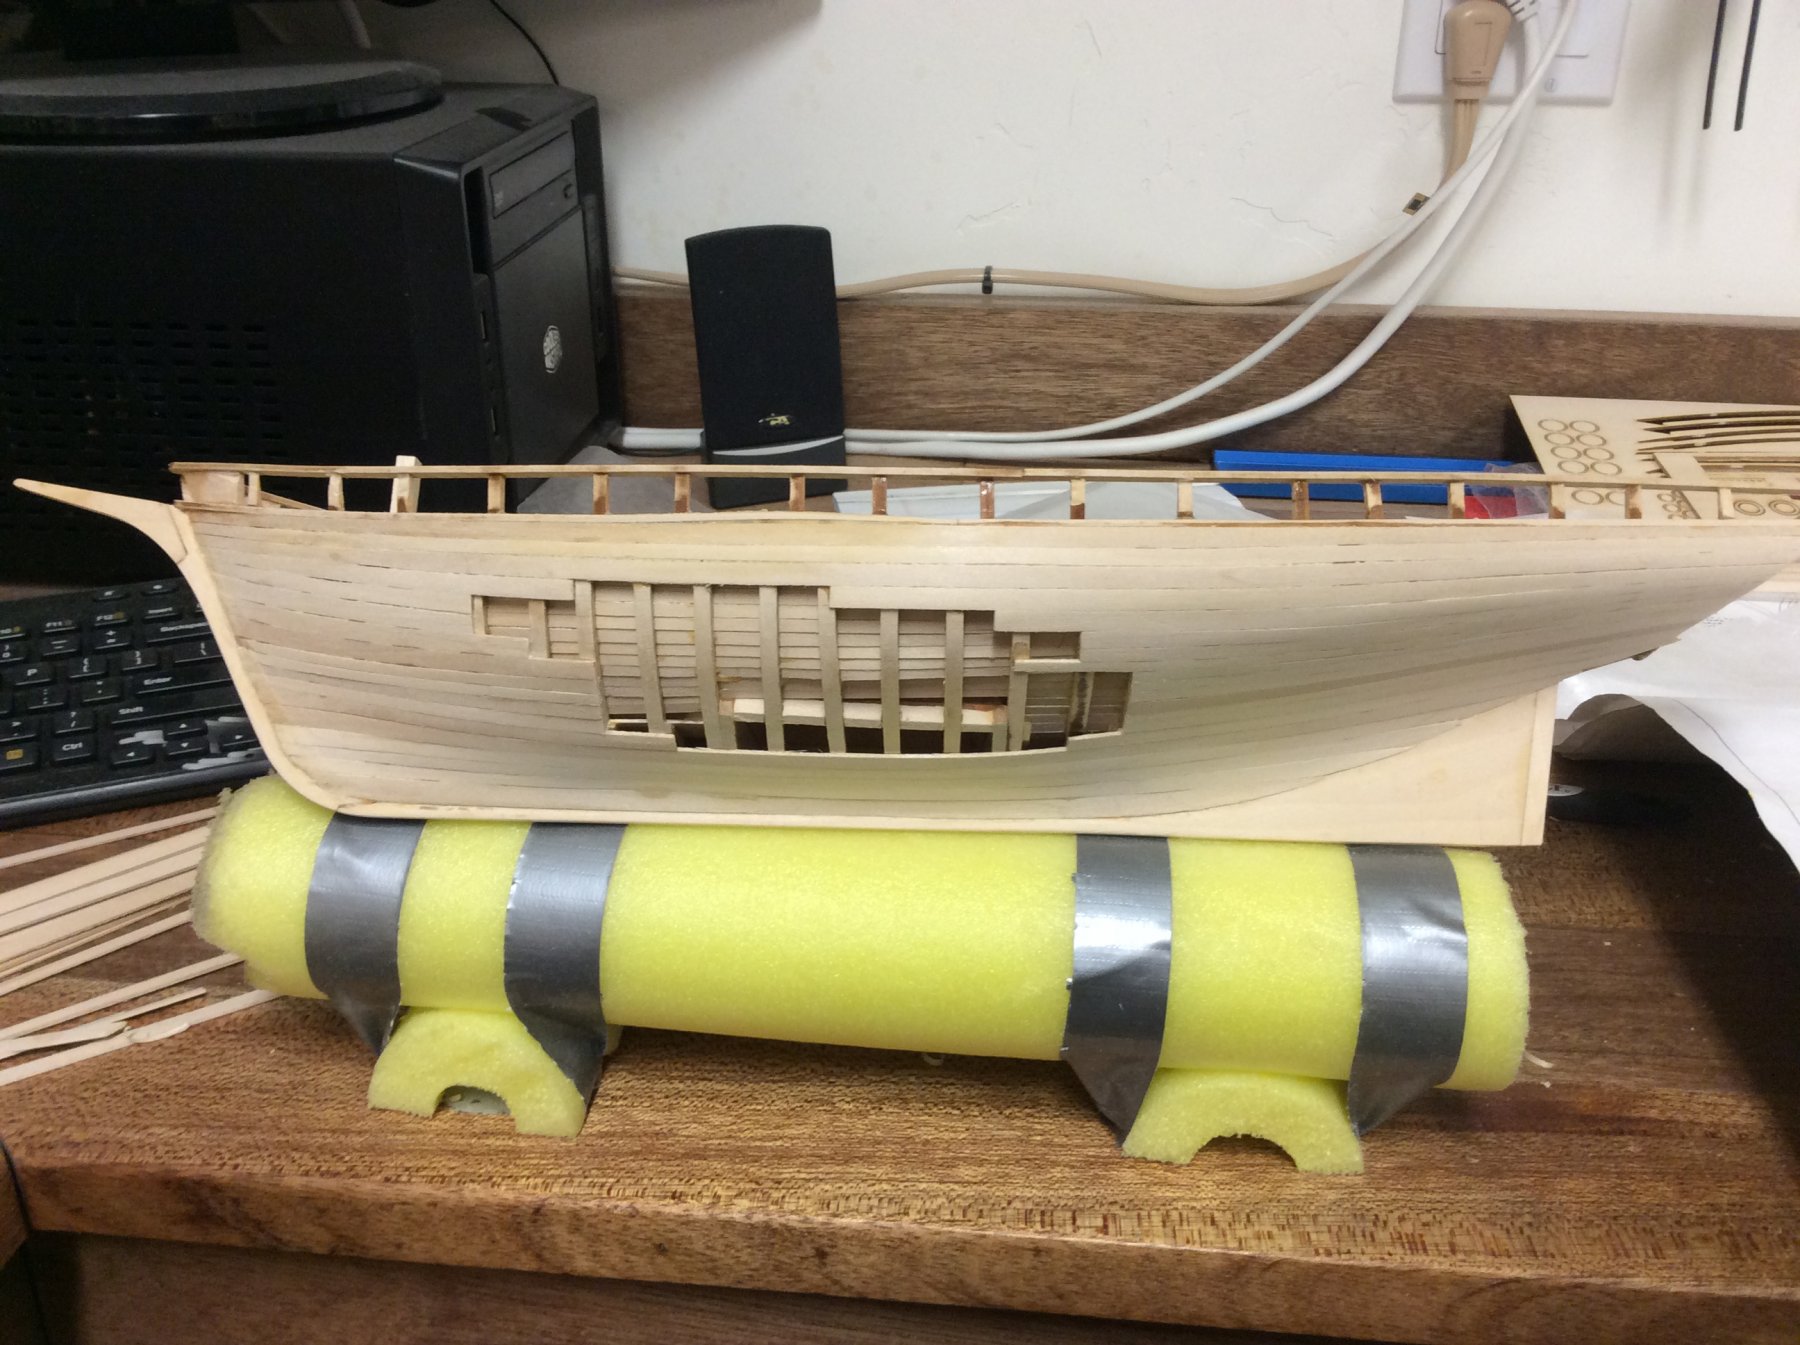
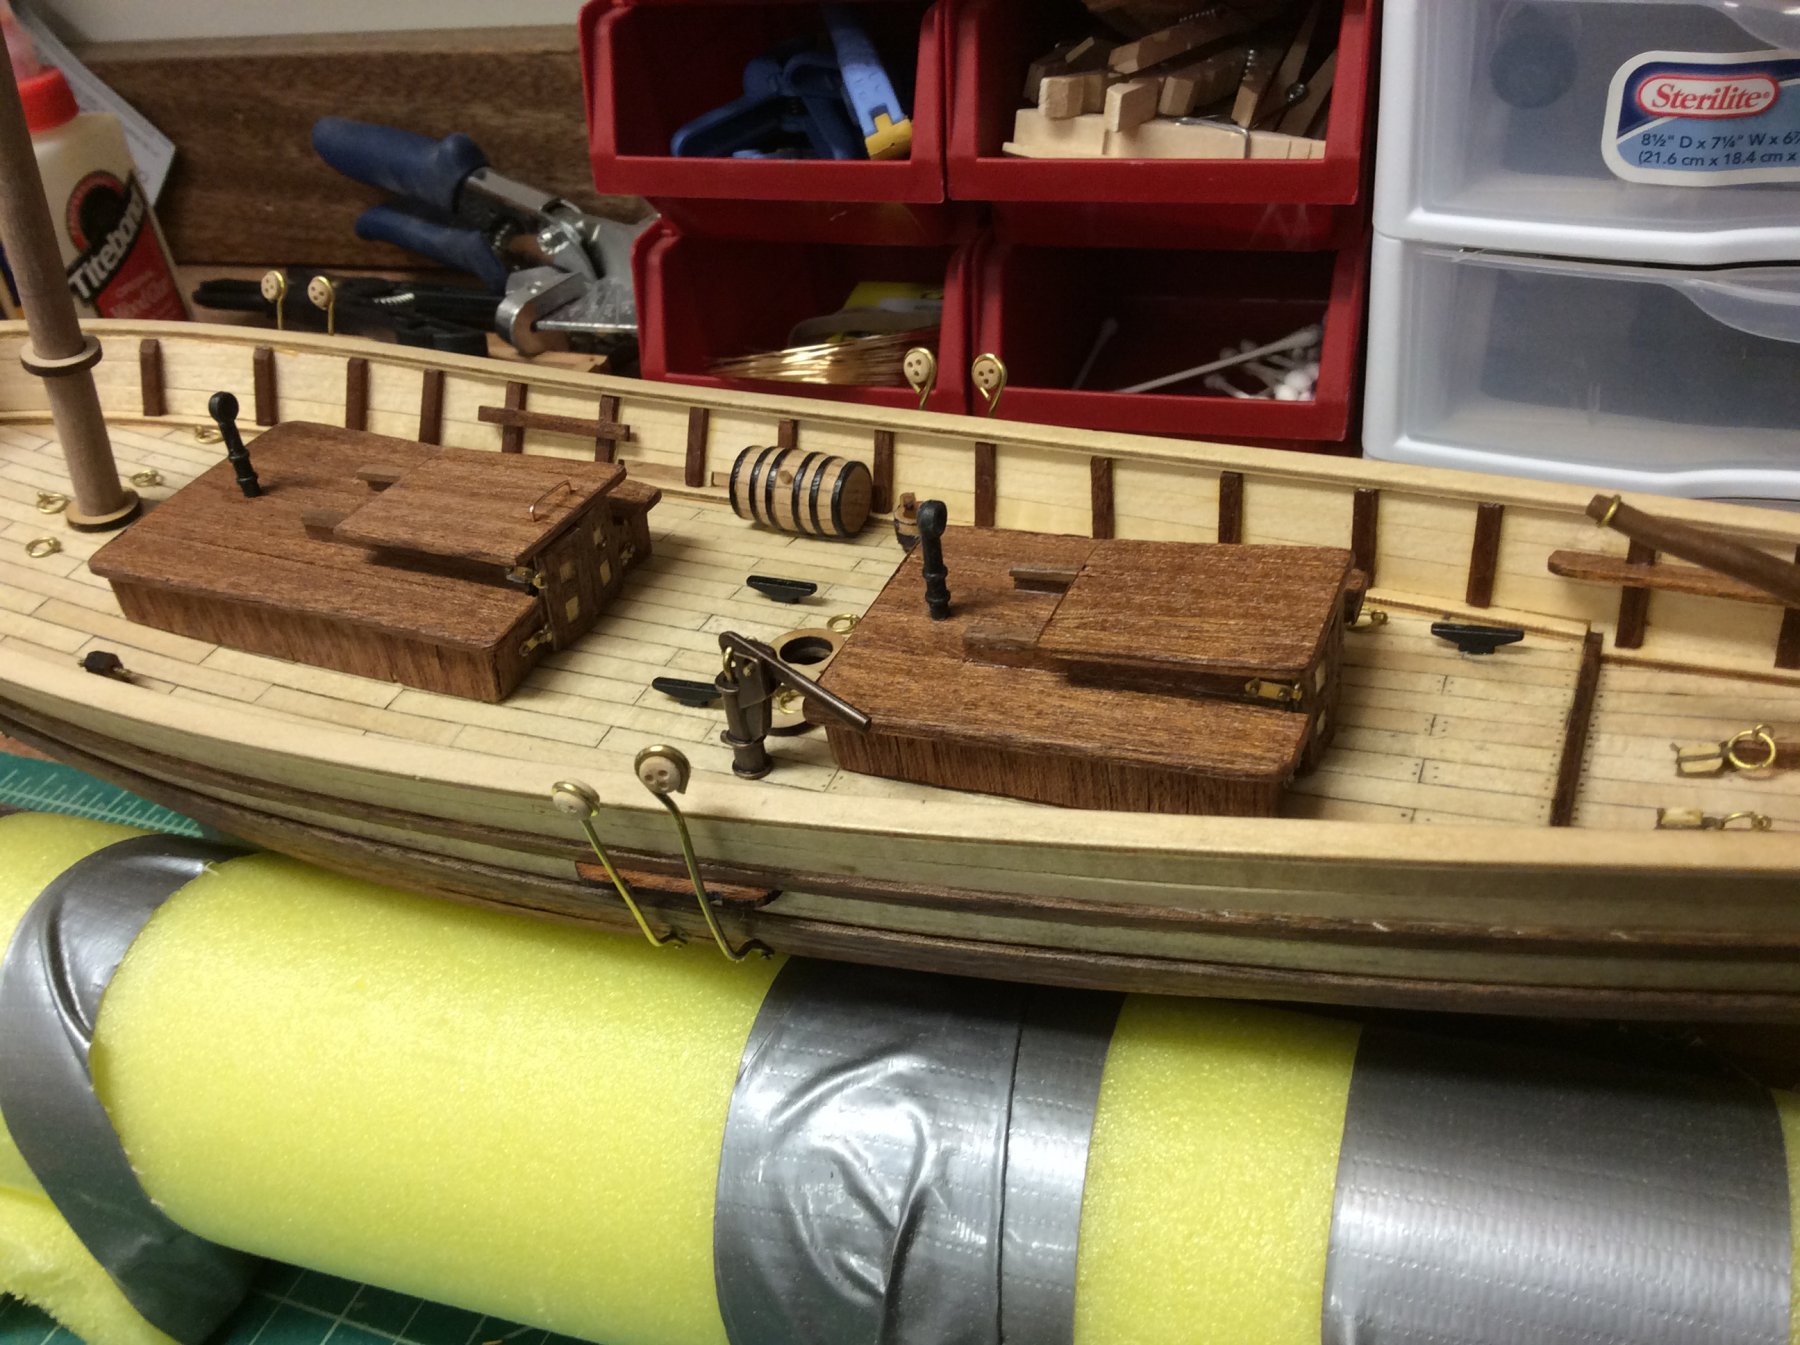
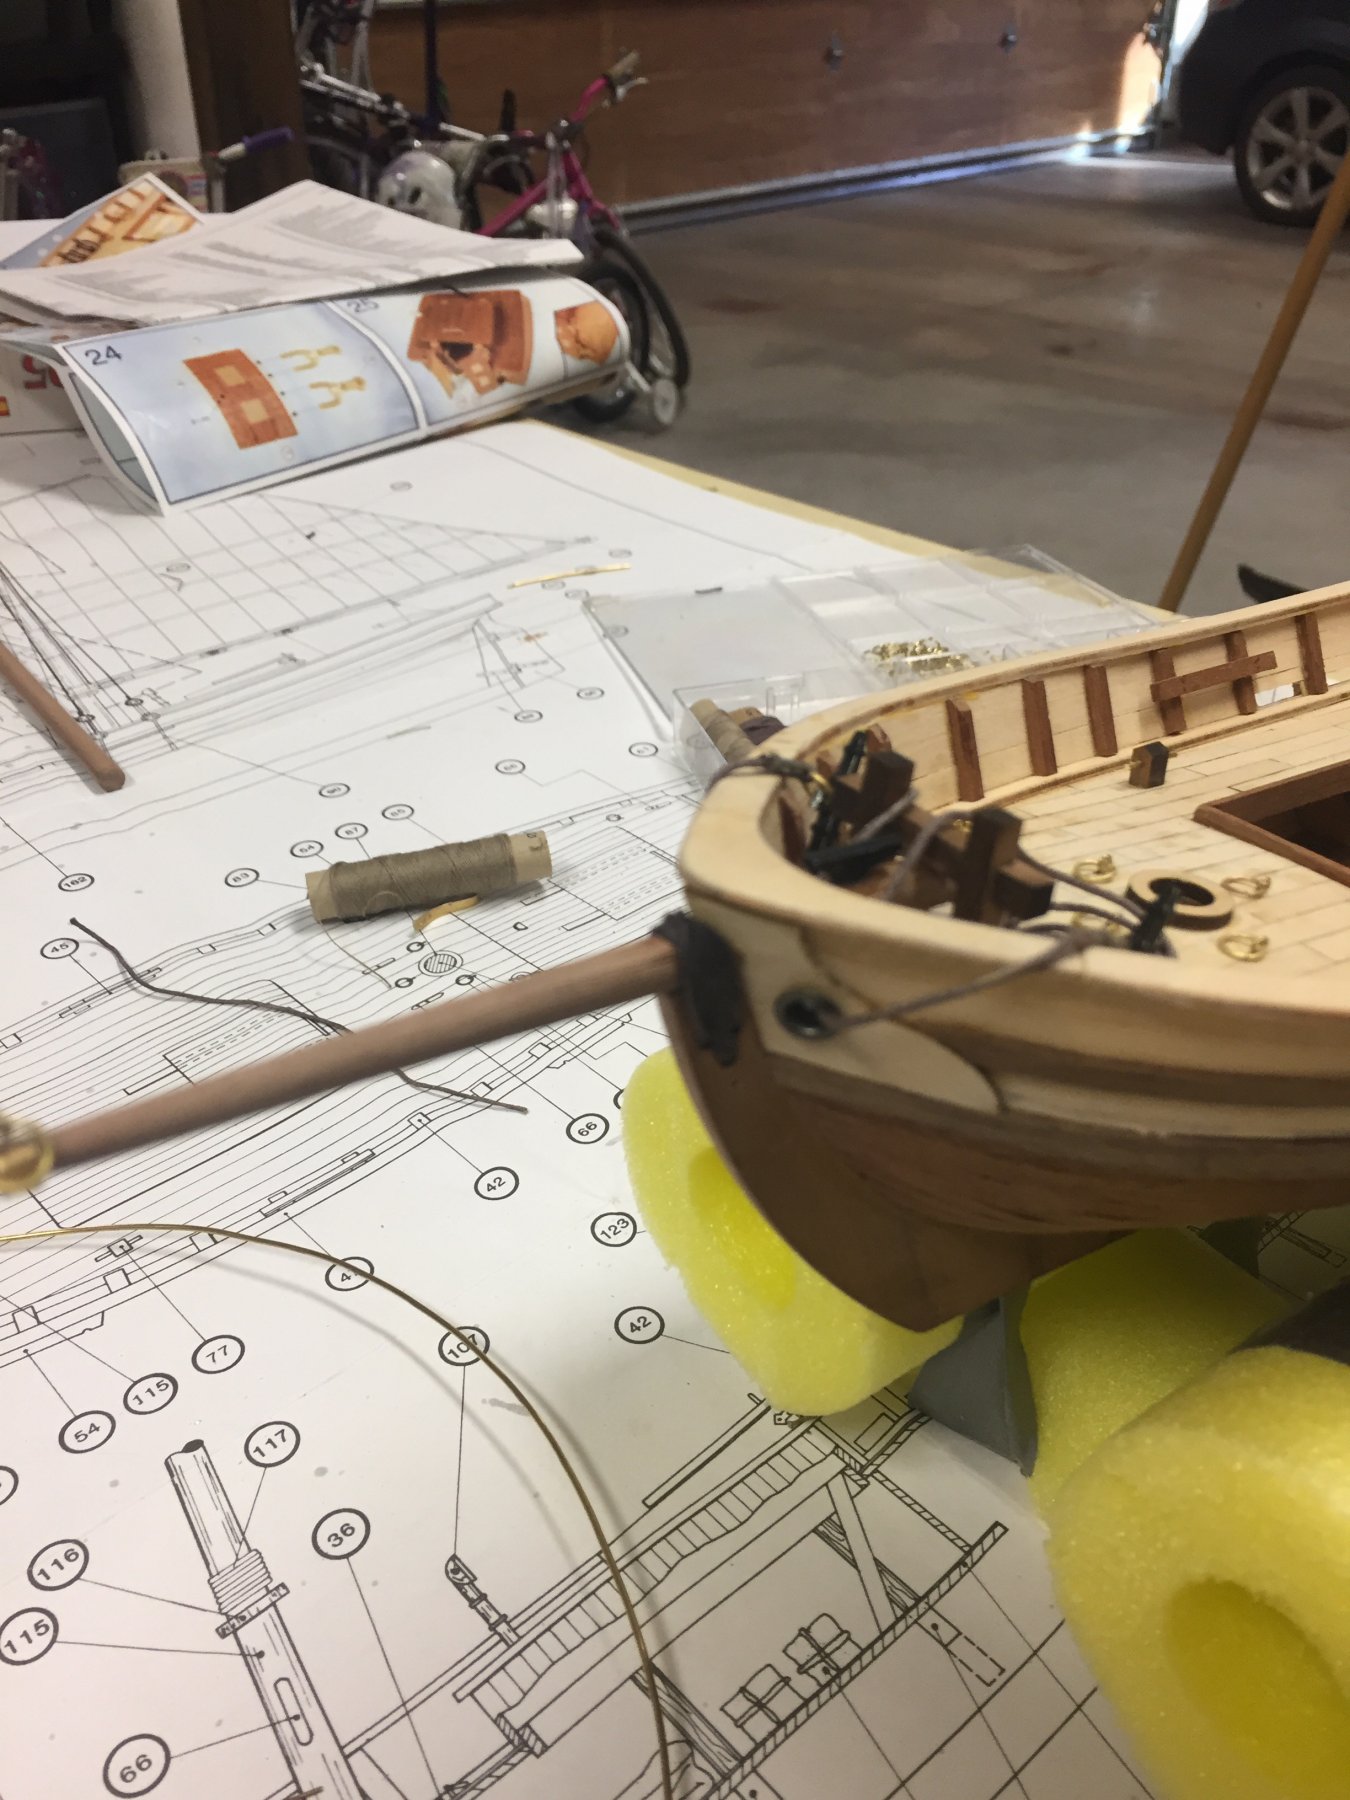
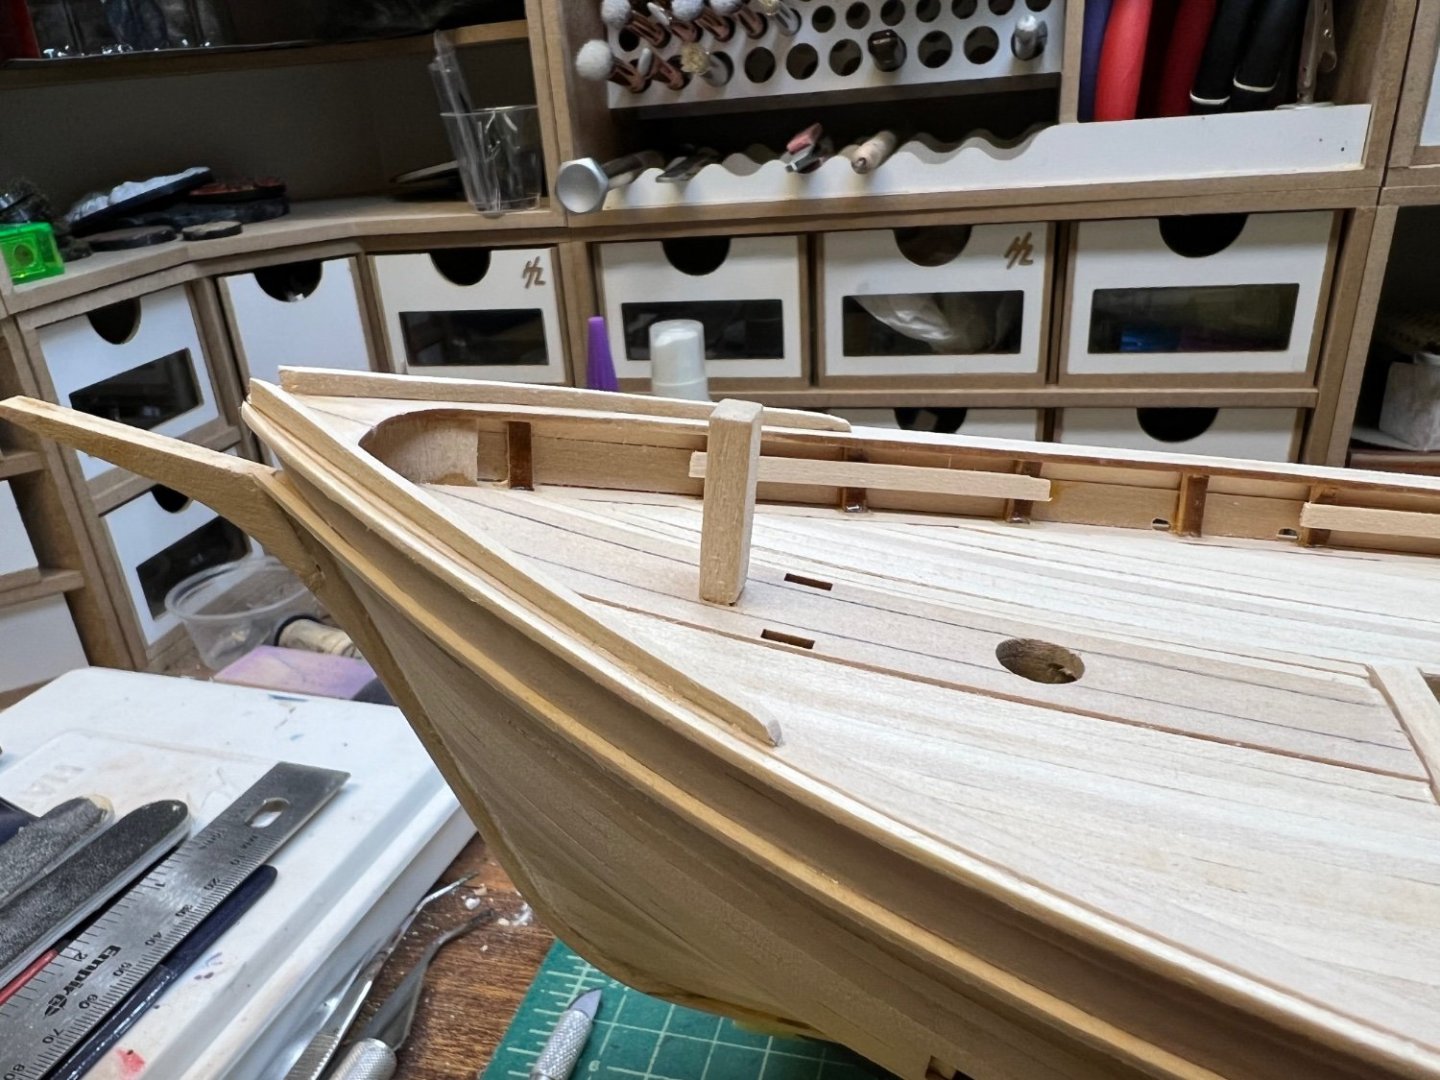
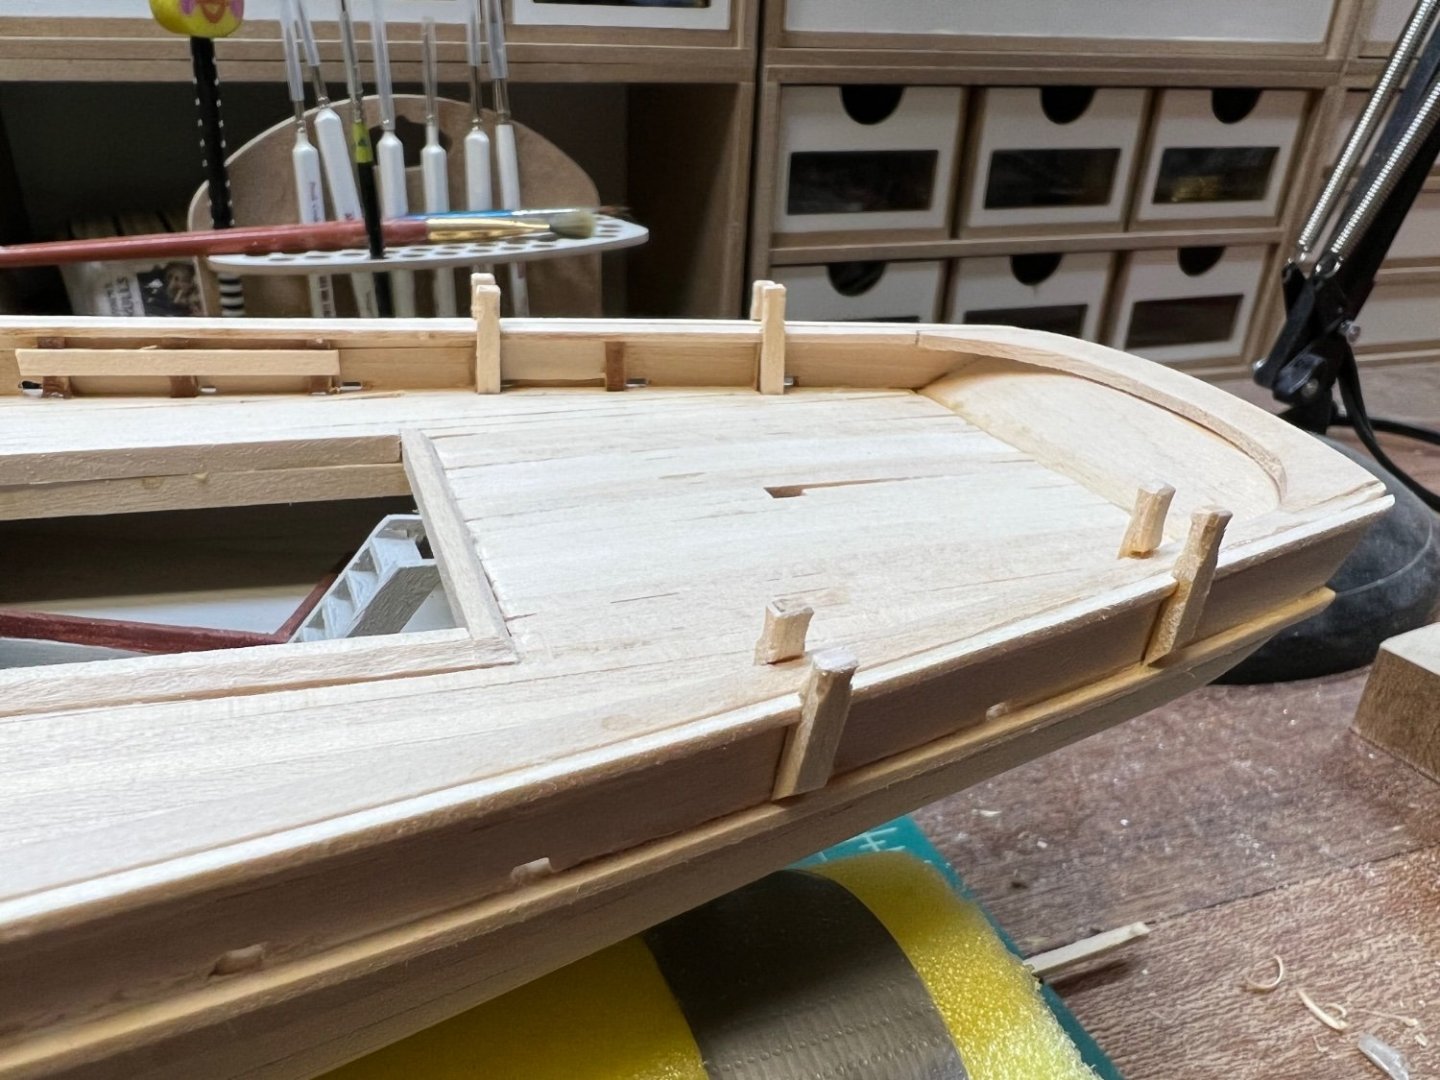
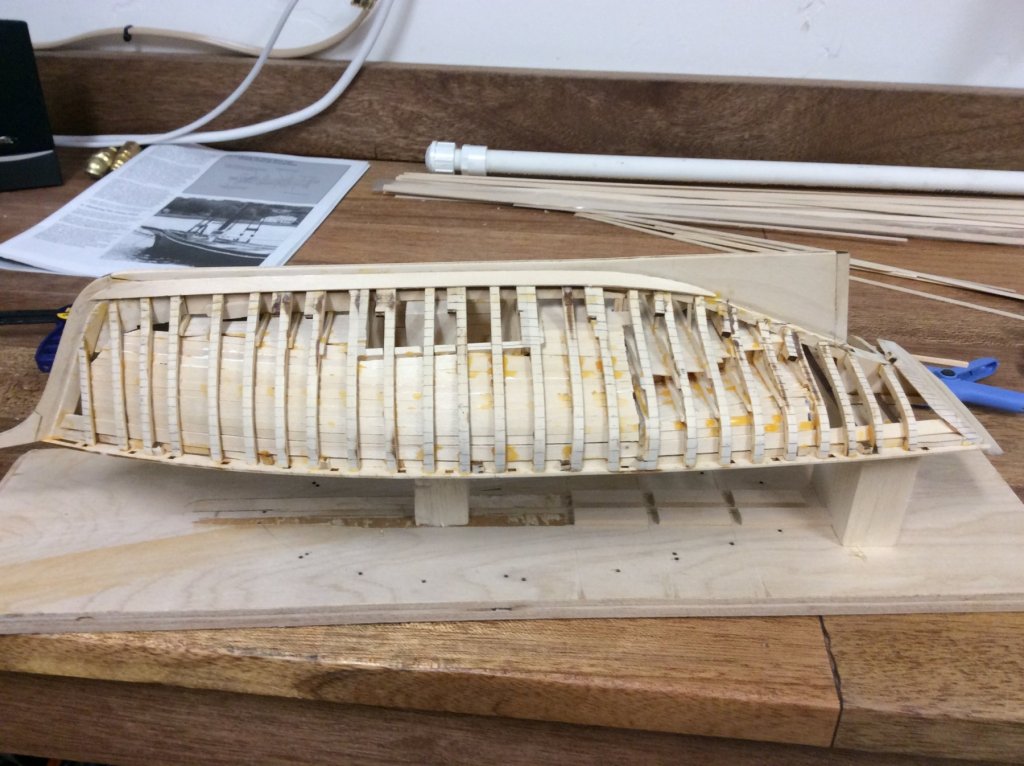
Buffalo rails and mooring bits. You can also tell I beefed up my cap rail as I had sanded it flush. Same for the covering board. Working through the last of sheet two details. Rudder and tiller next.

-
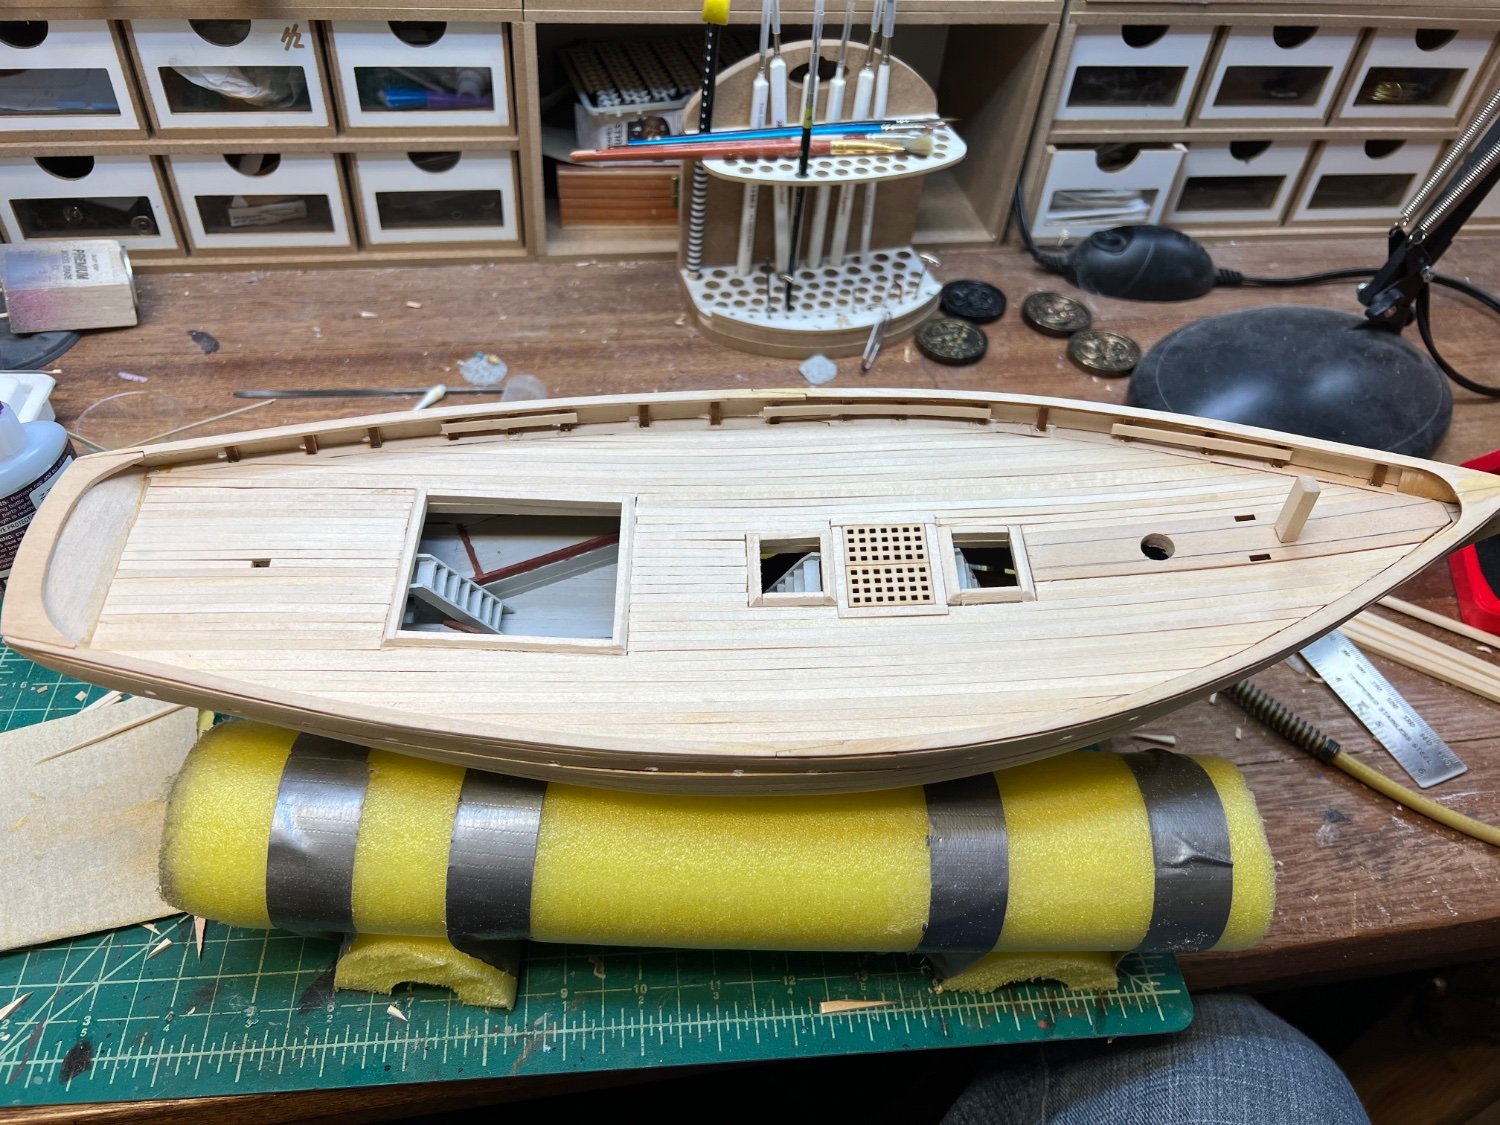
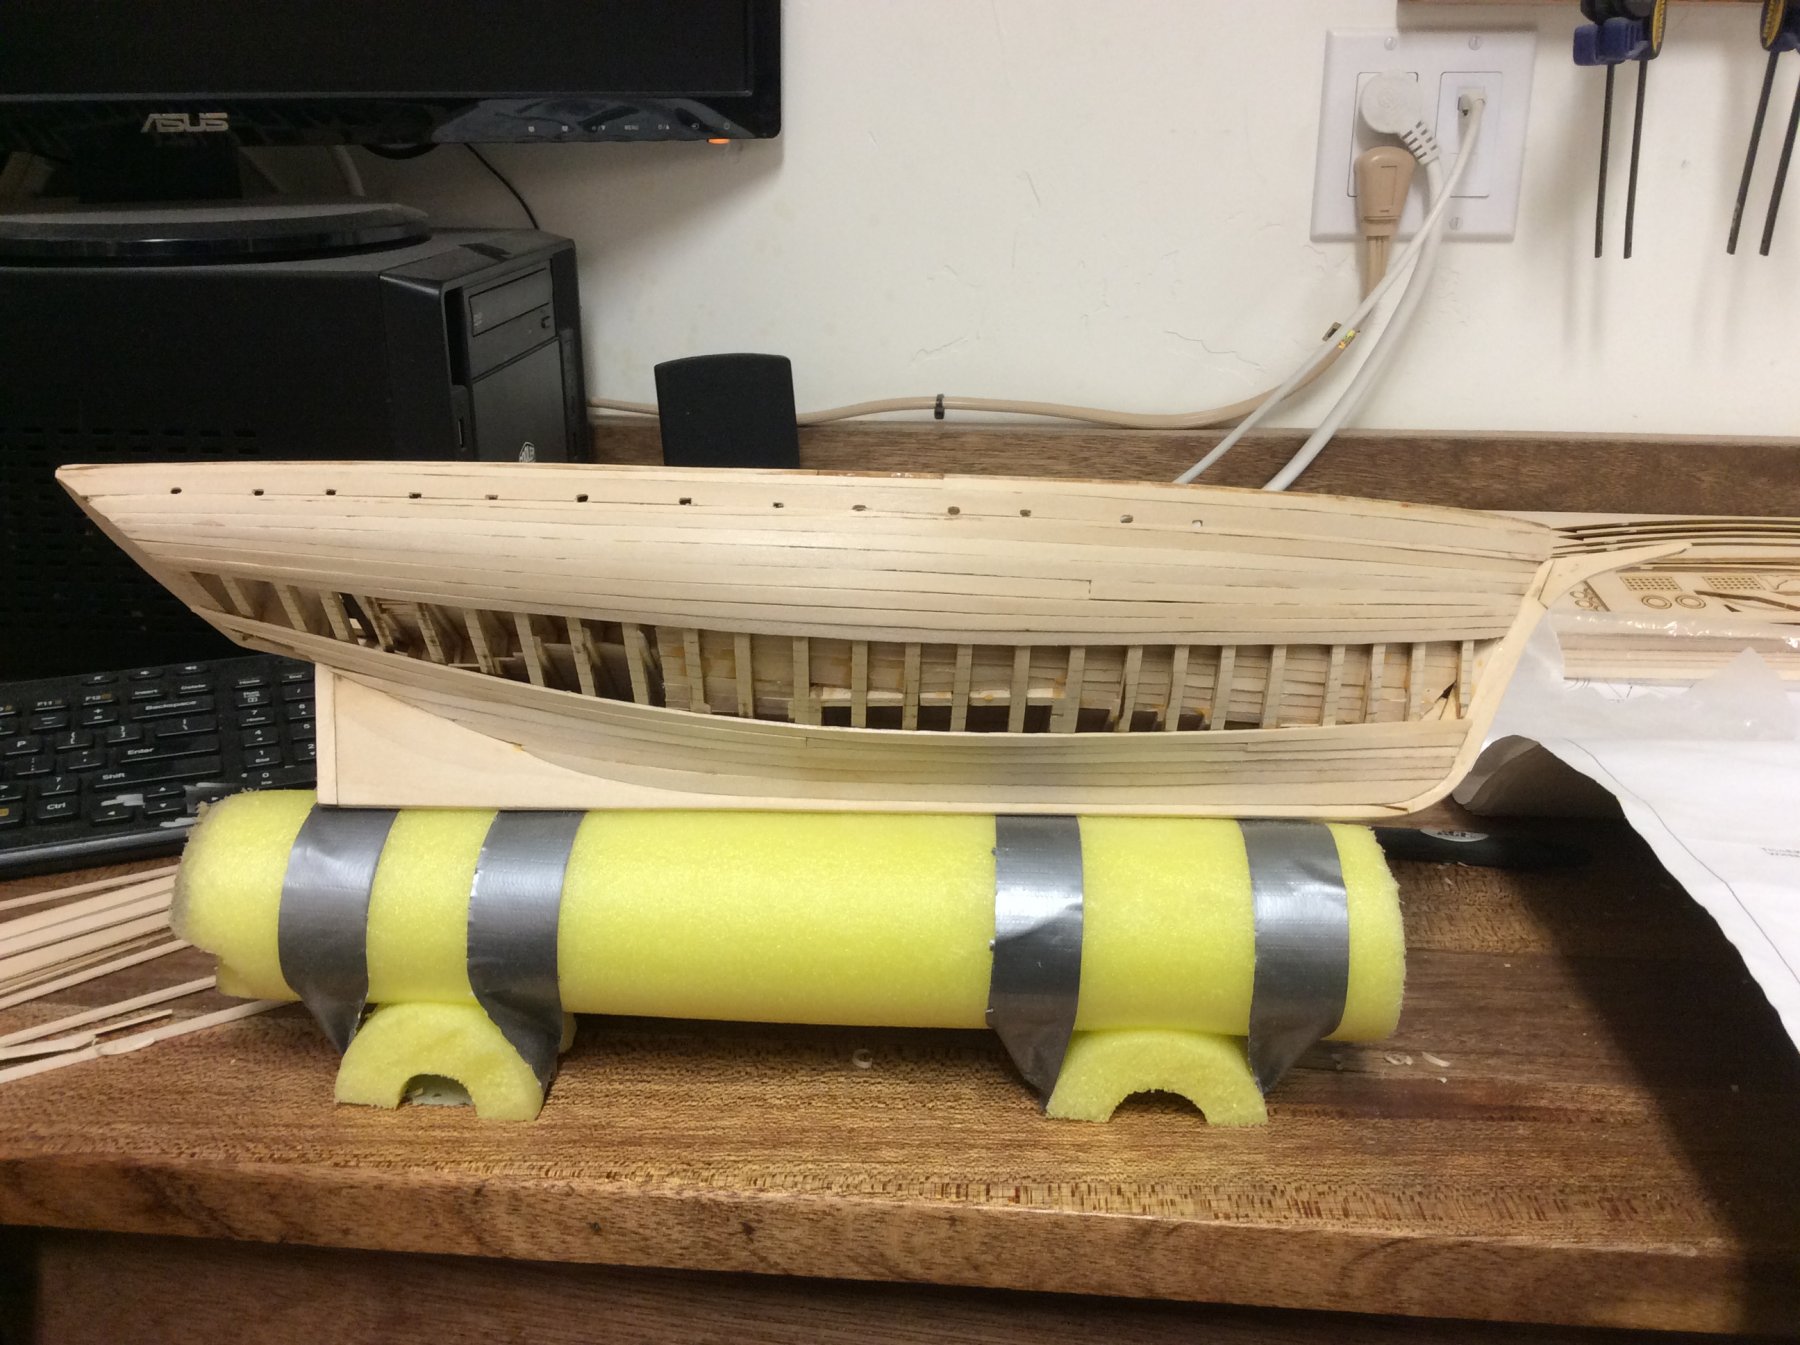
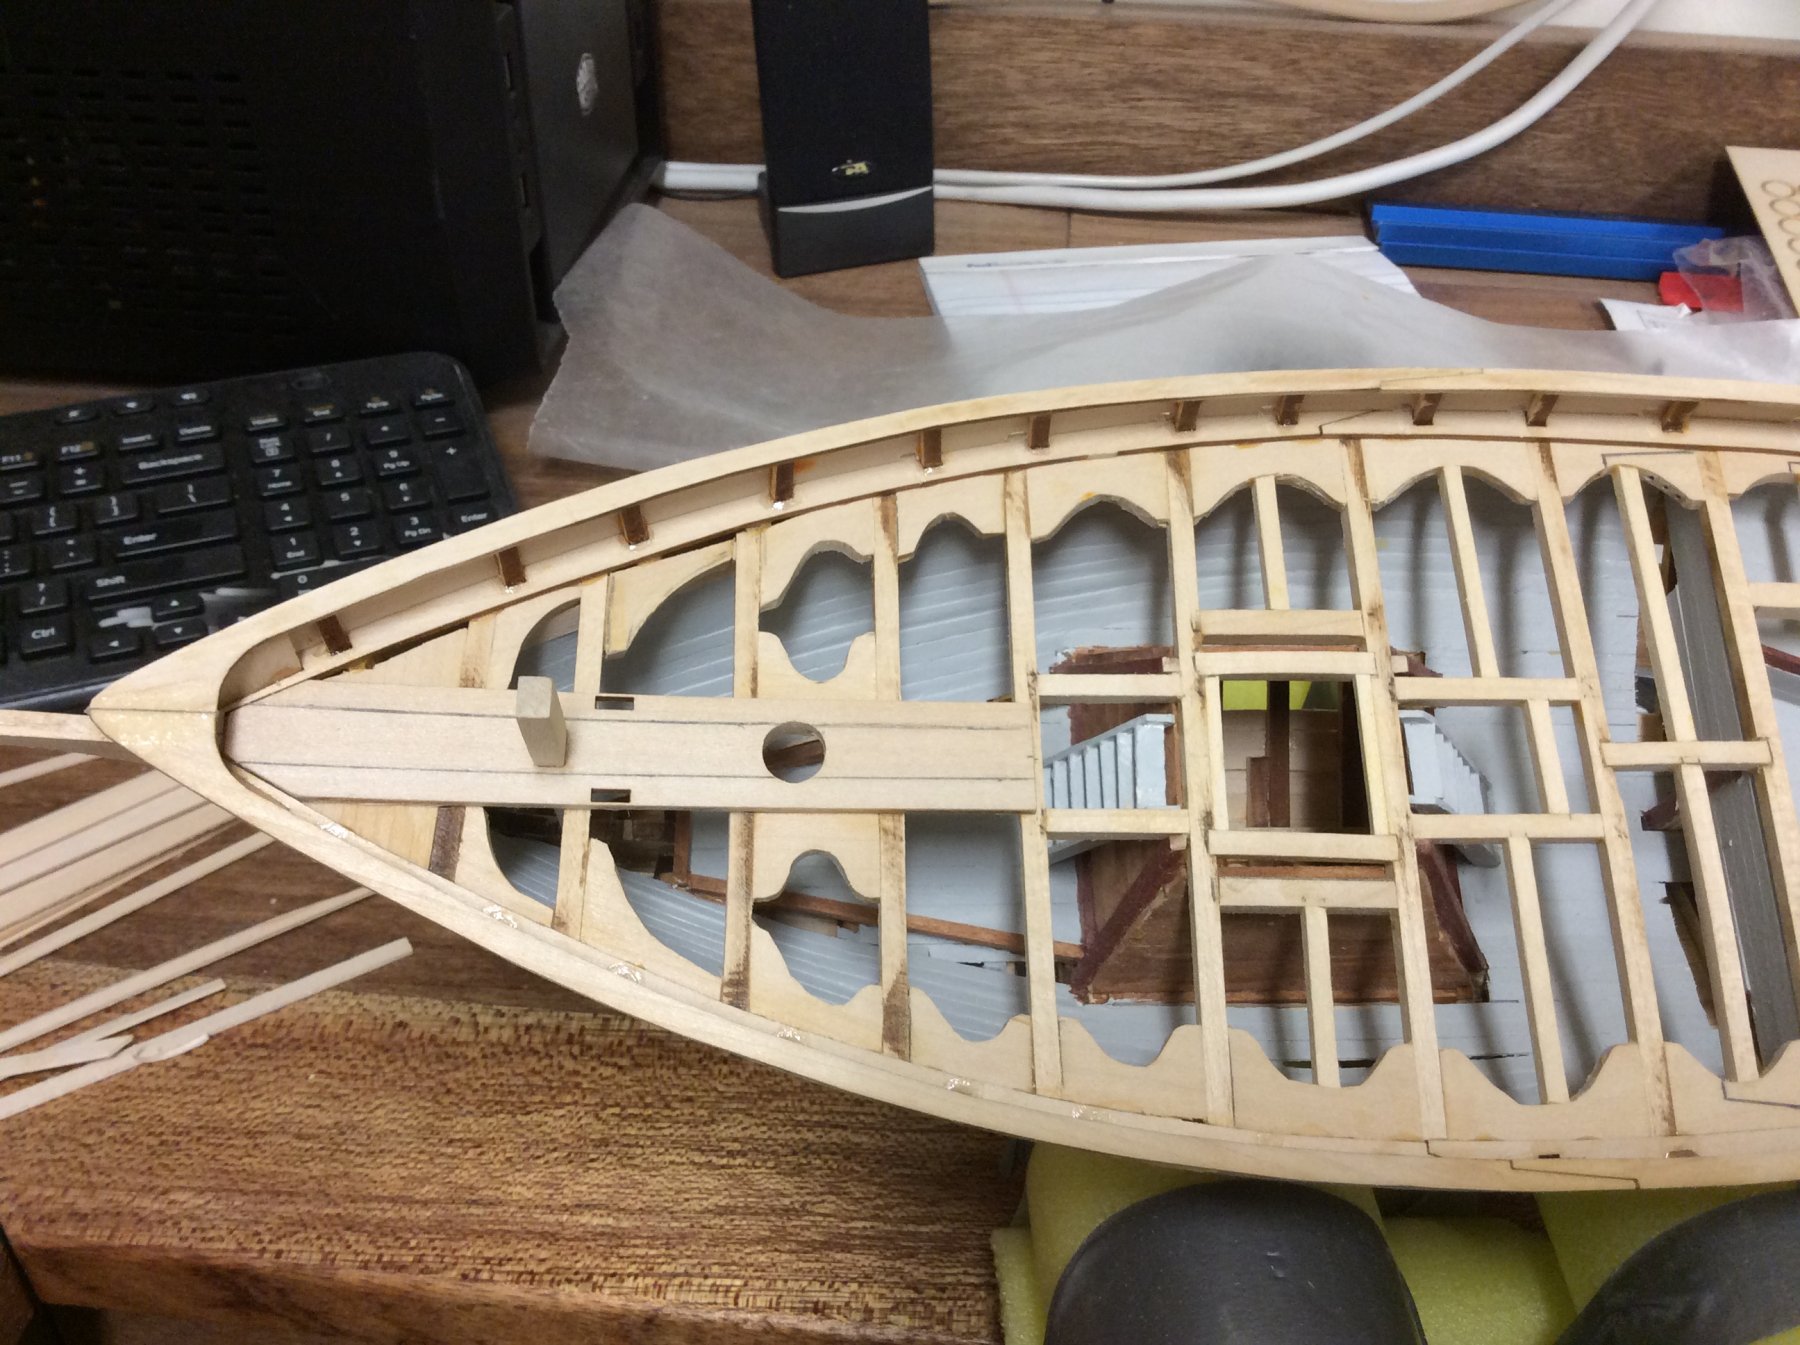
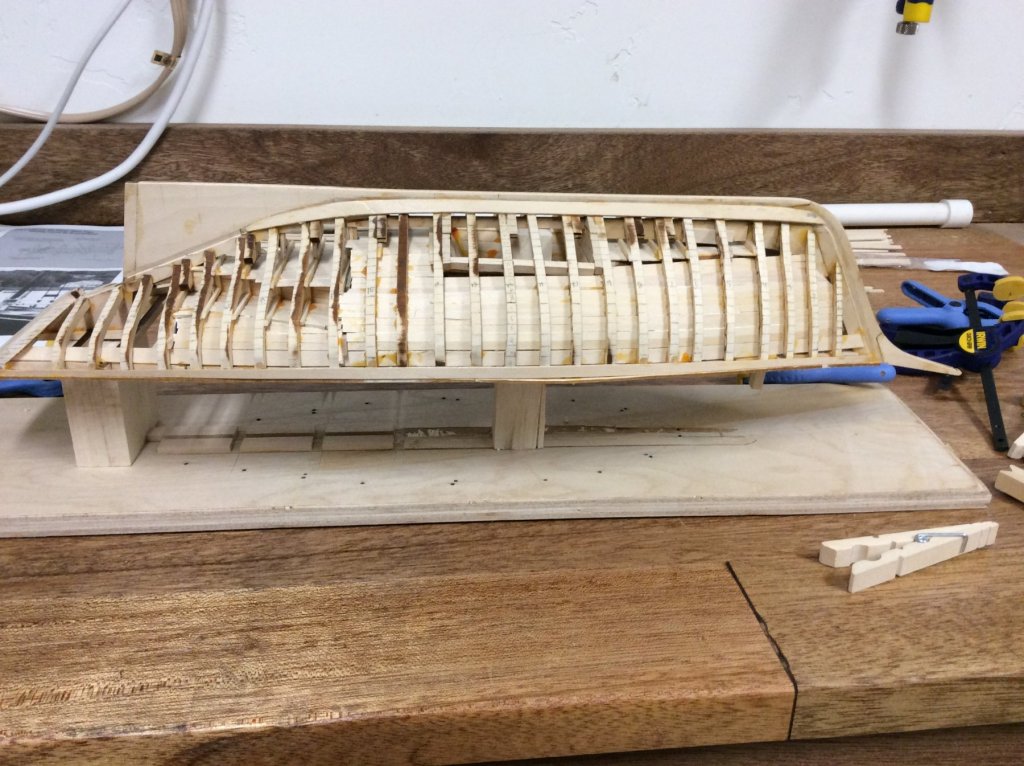
Finished planking deck and hull! Go me!!!


-
This build has been brought up from the bottom of the sea back to the dry dock. More content to follow.
-
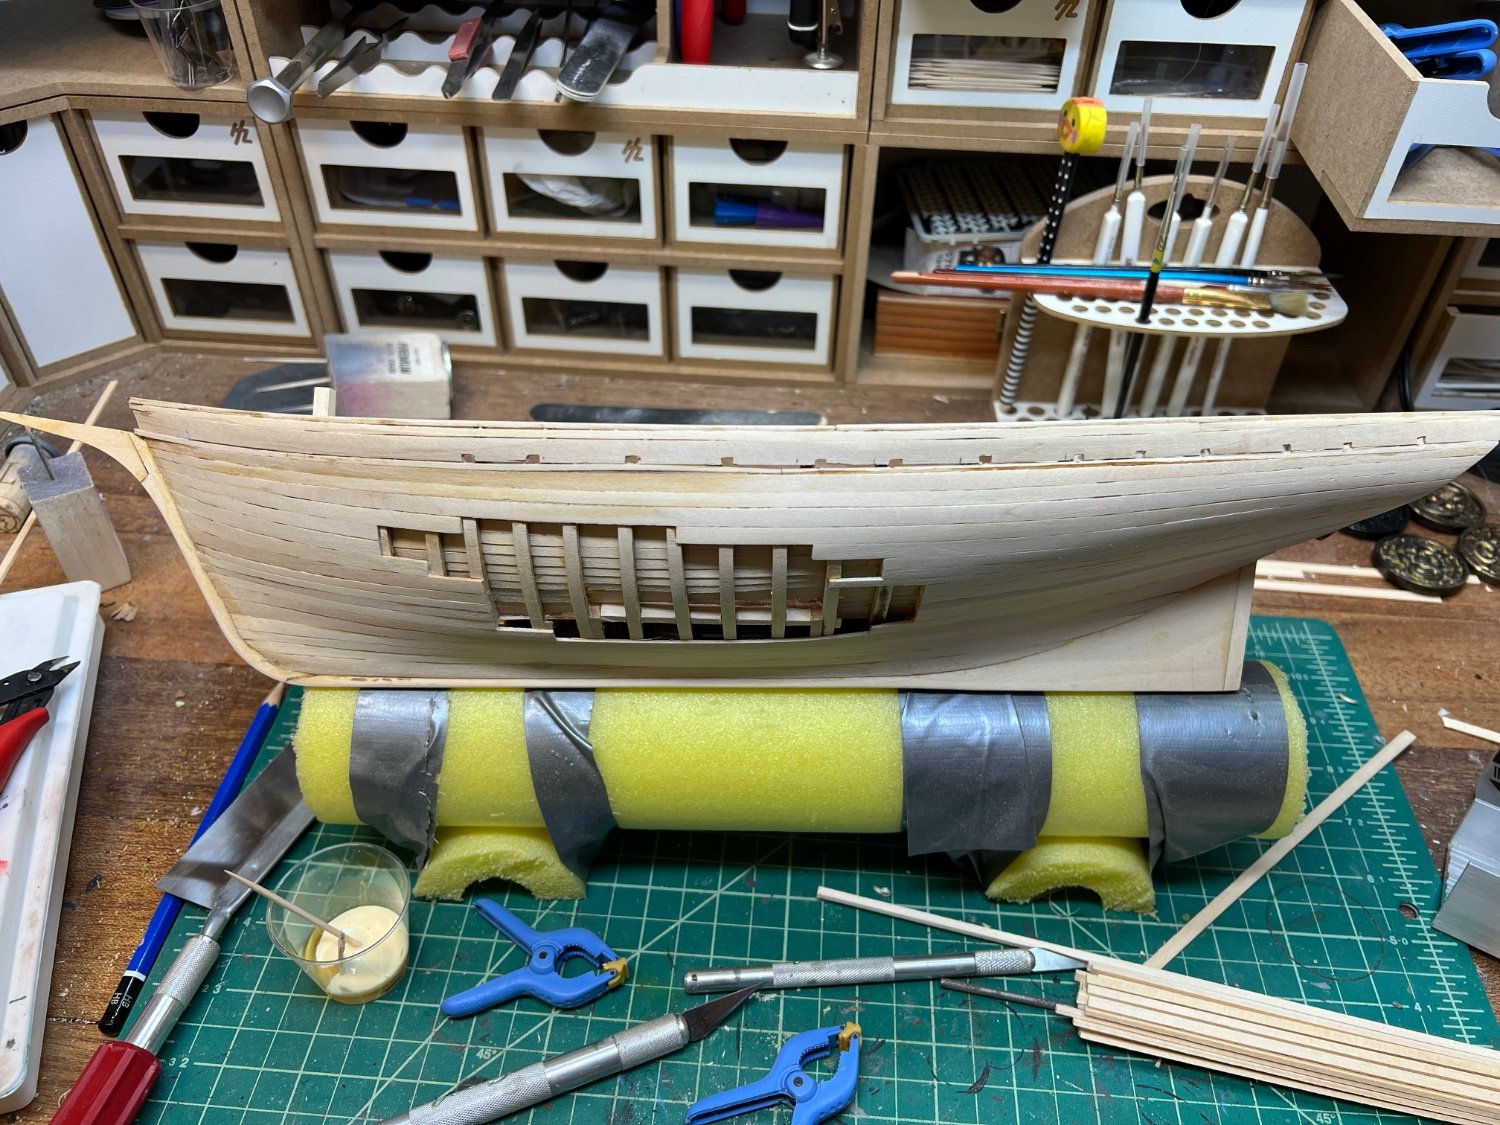
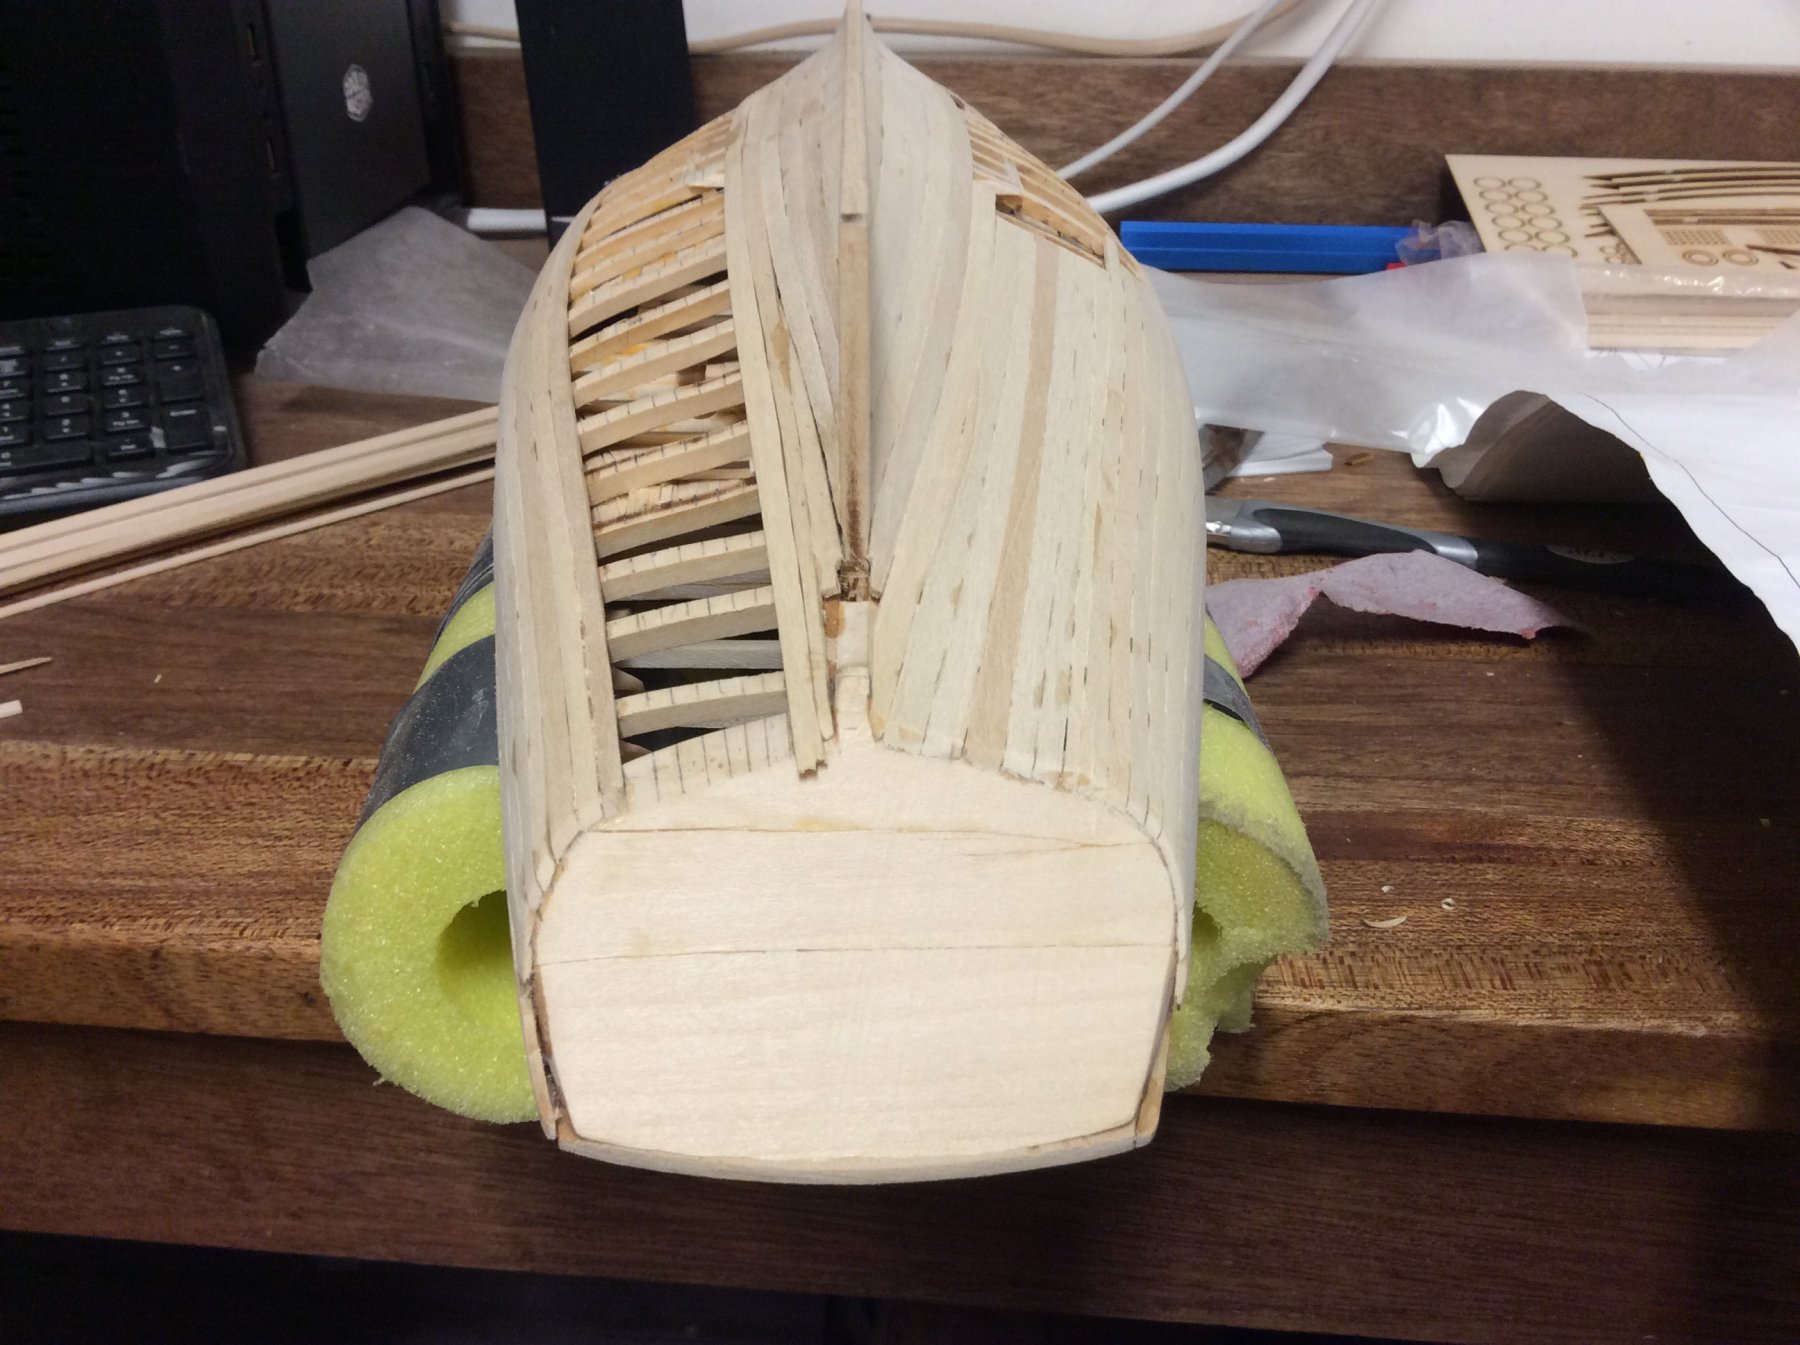
Planking a hole in the side of a boat... challenging. Sticking to my planking plan was a real challenge. Much more use of CA glue this time around for me. Still learning how not to glue my fingers to the boat. I am learning to work through my short comings on it and enjoy it. Was frustrated there for was while. Better now and going with the flow. This side much more even and with the “plan.” The bow junction where the plank meets the keel, still a challenge for me. Fingers get stuck here alot(CA). Garage cabinets that are still partially doorless are to blame for some of the hiatus, a maternity leave I covered as well at work. At least now my 7 and 8.5 yo daughters are respecting the shipyard. fixed transom still evident. Here’s the hole. Lots of pics, just cause. I am glad to be working on it some.


-
Progress has been slow like molasses in Alaska in mid-winter, I'll post a few pics soon.
-
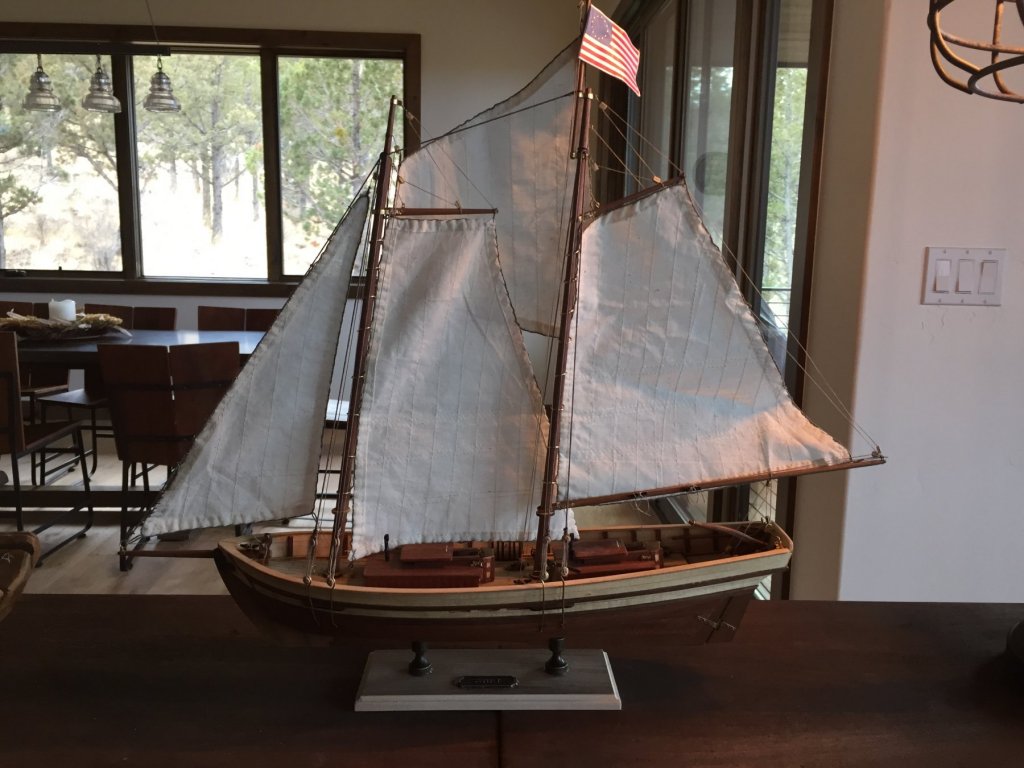
I powered through to the end. The rigging being pretty simple with pretty good instructions as well. Officially finished nearly 4 years in the making.
- 84 replies
-
- 4
-

-
- swift
- artesania latina
- (and 1 more)
-
I'll definitely follow along. There are very few of us building this particular model right now. I am only currently planking it right now.
-
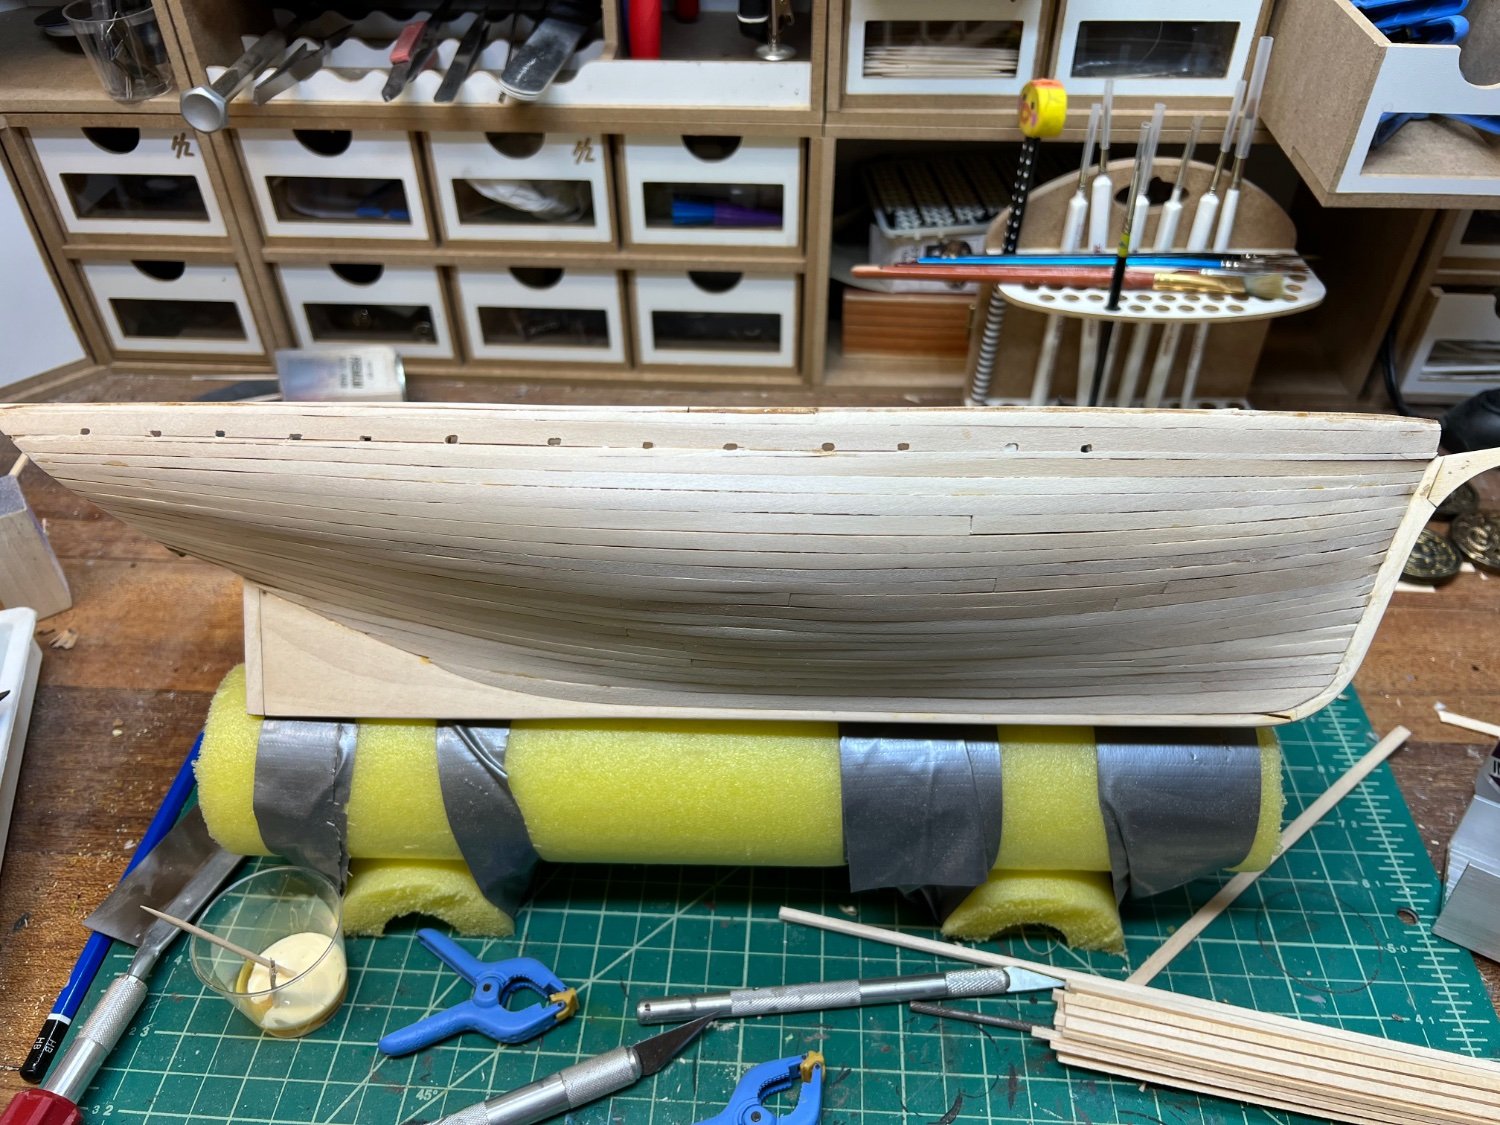
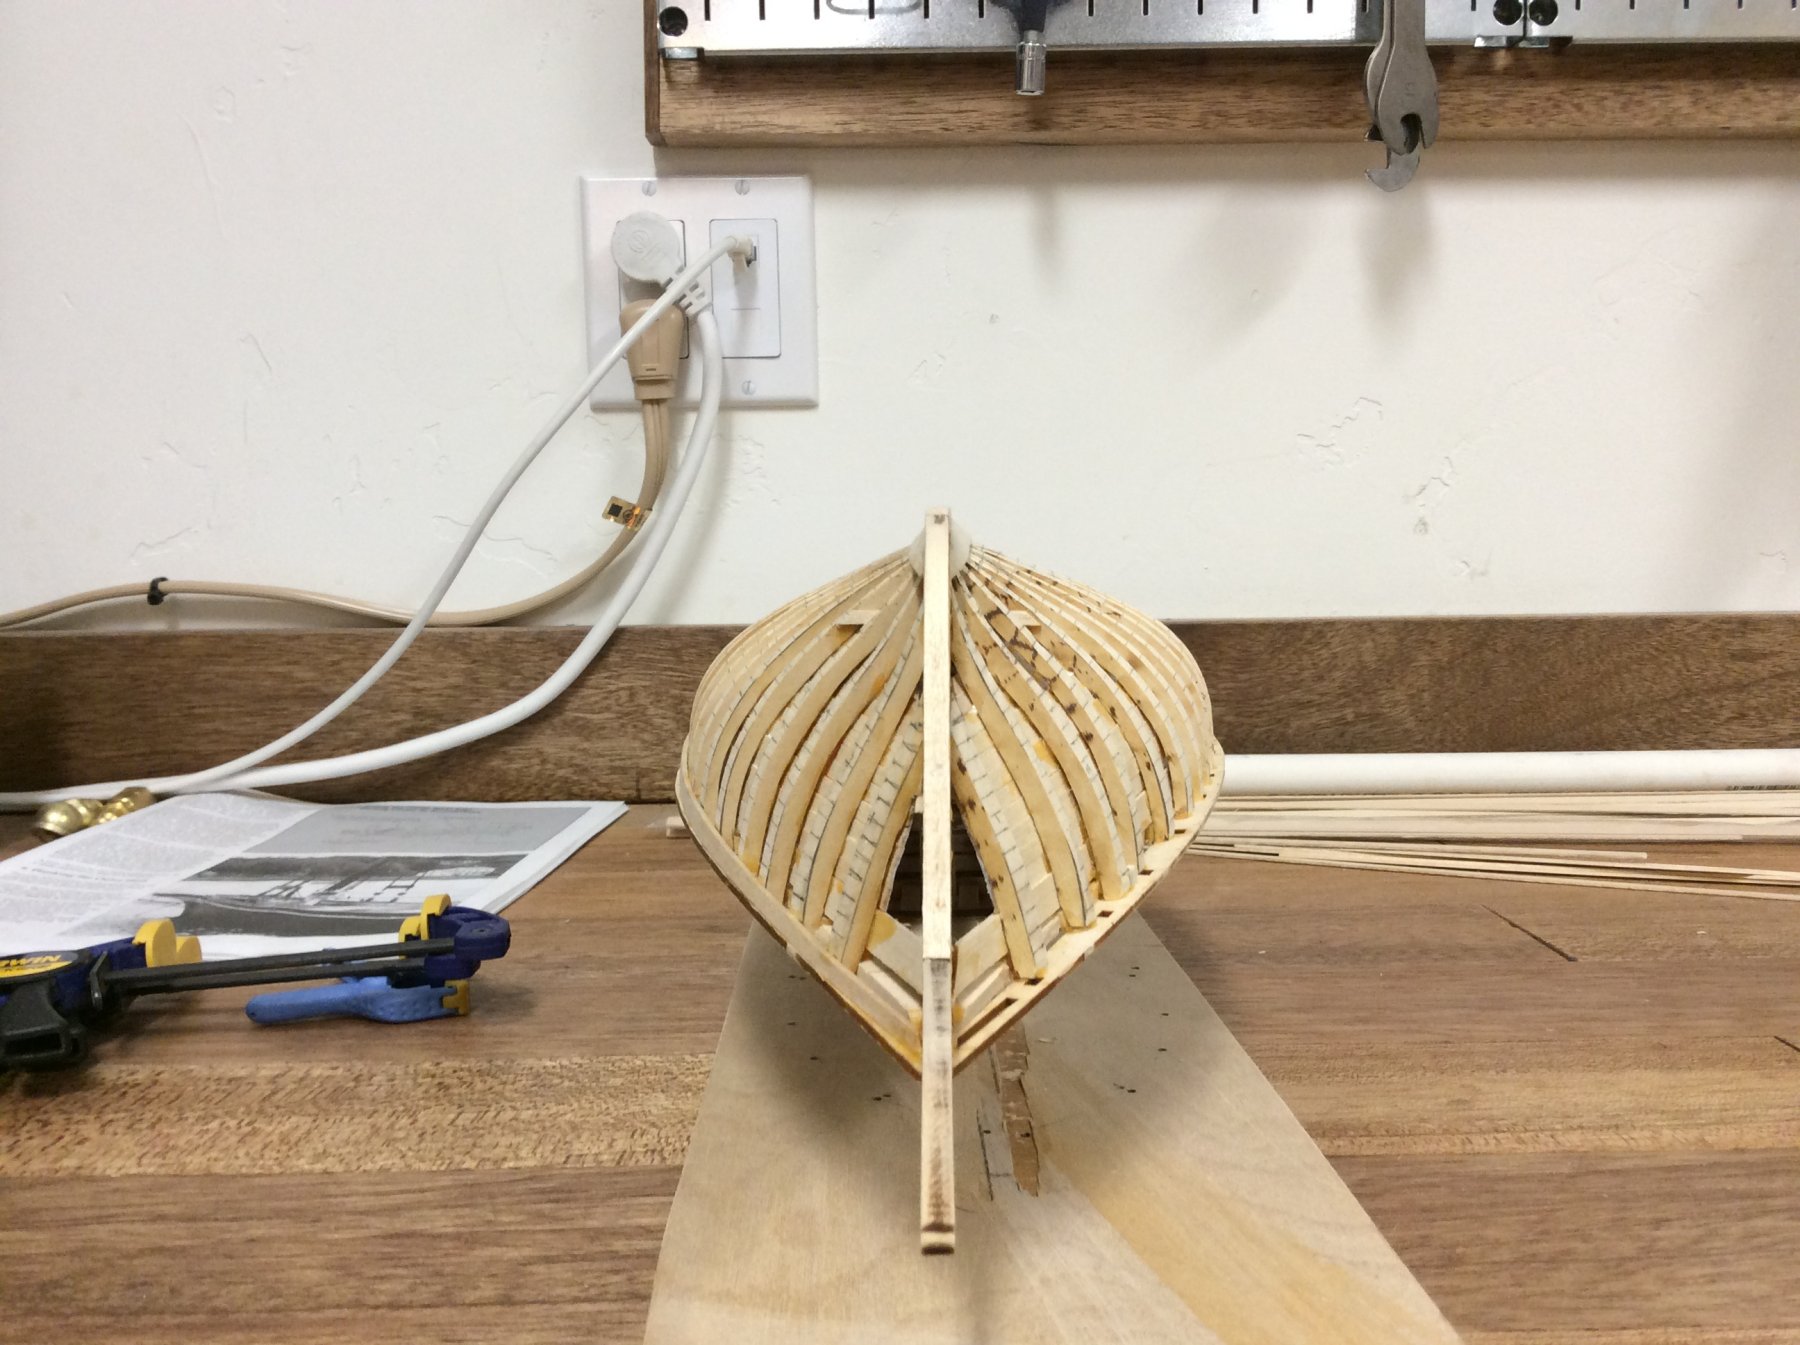
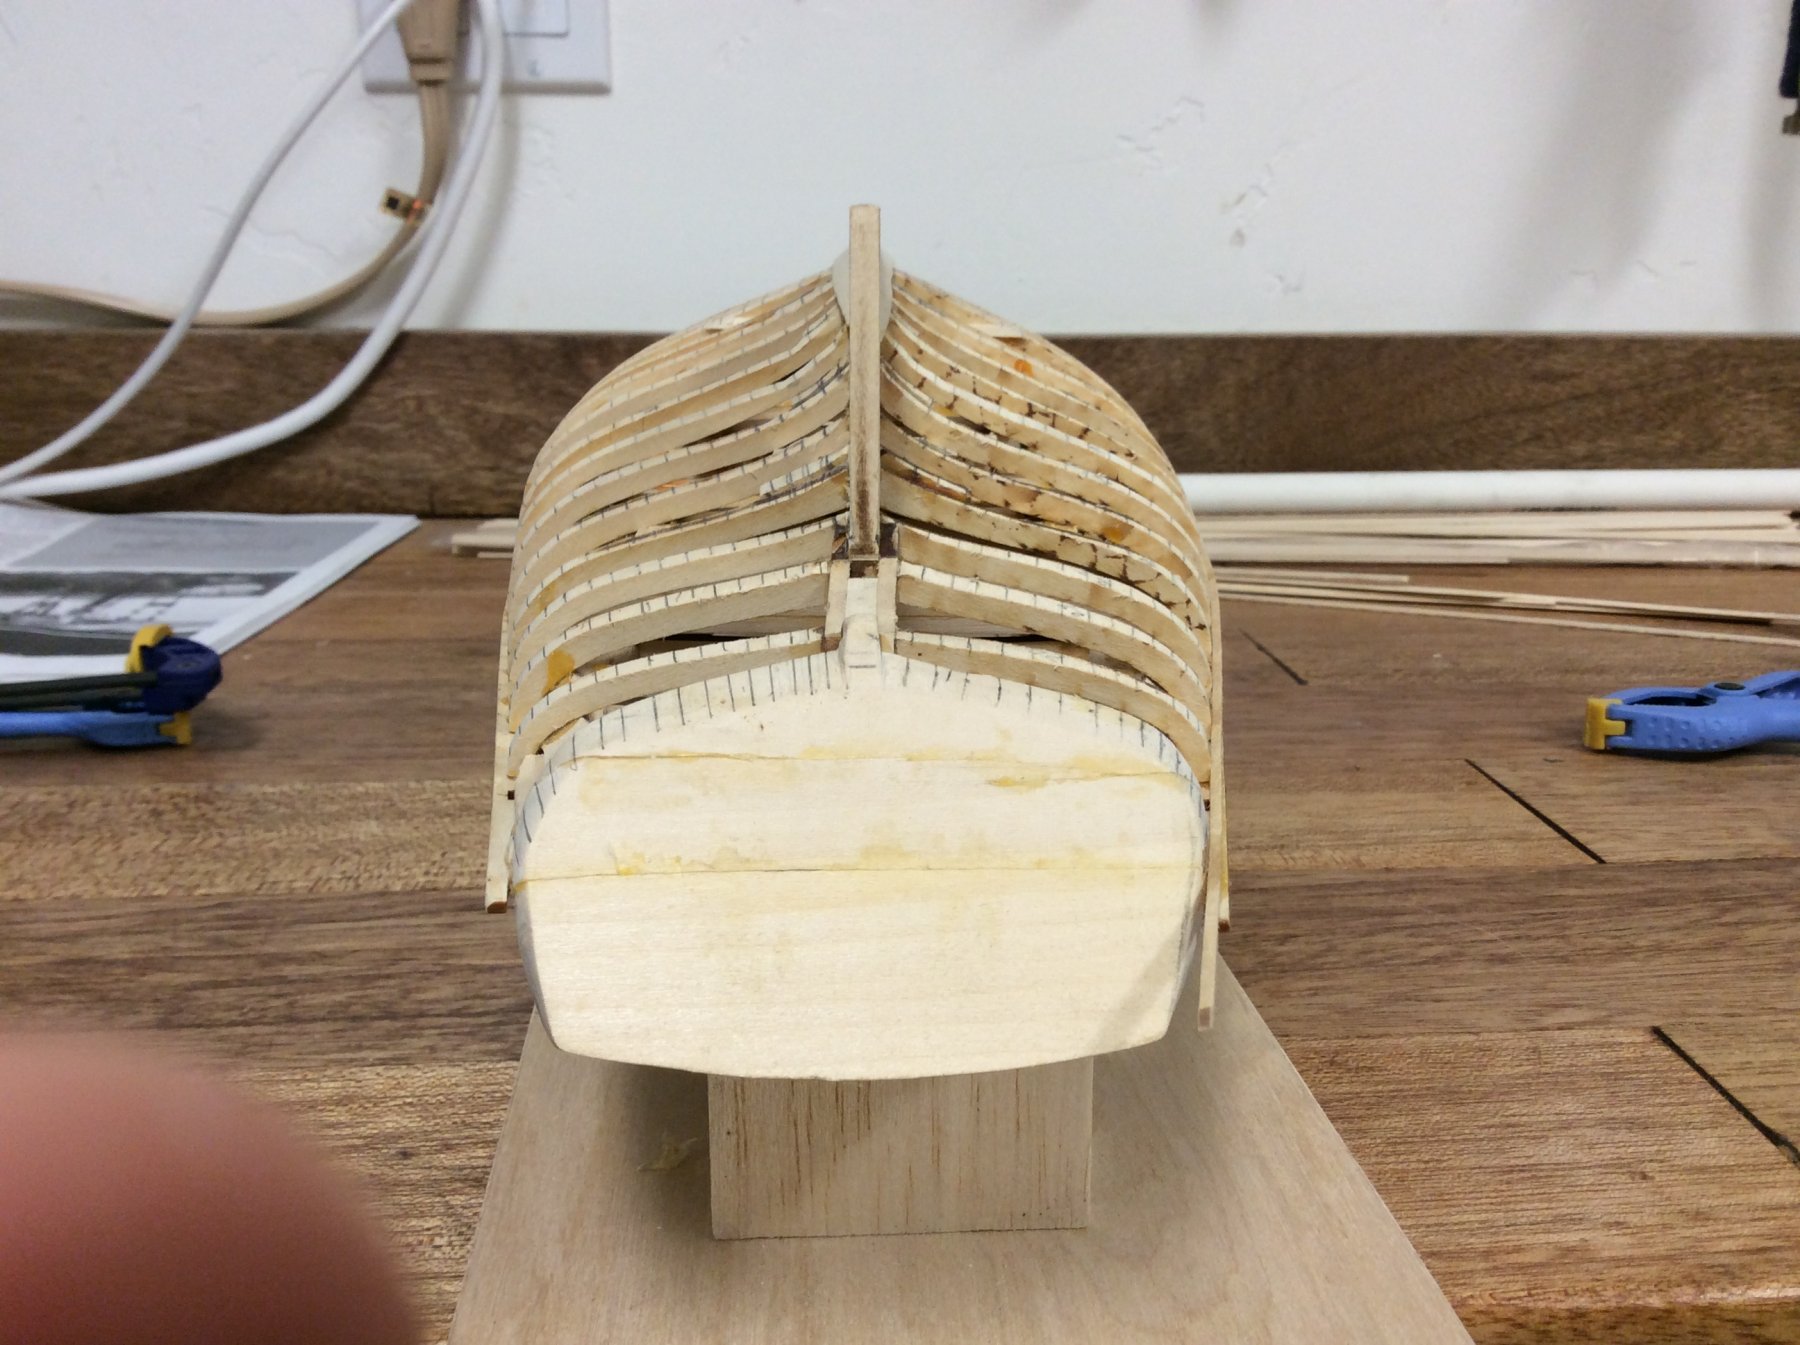
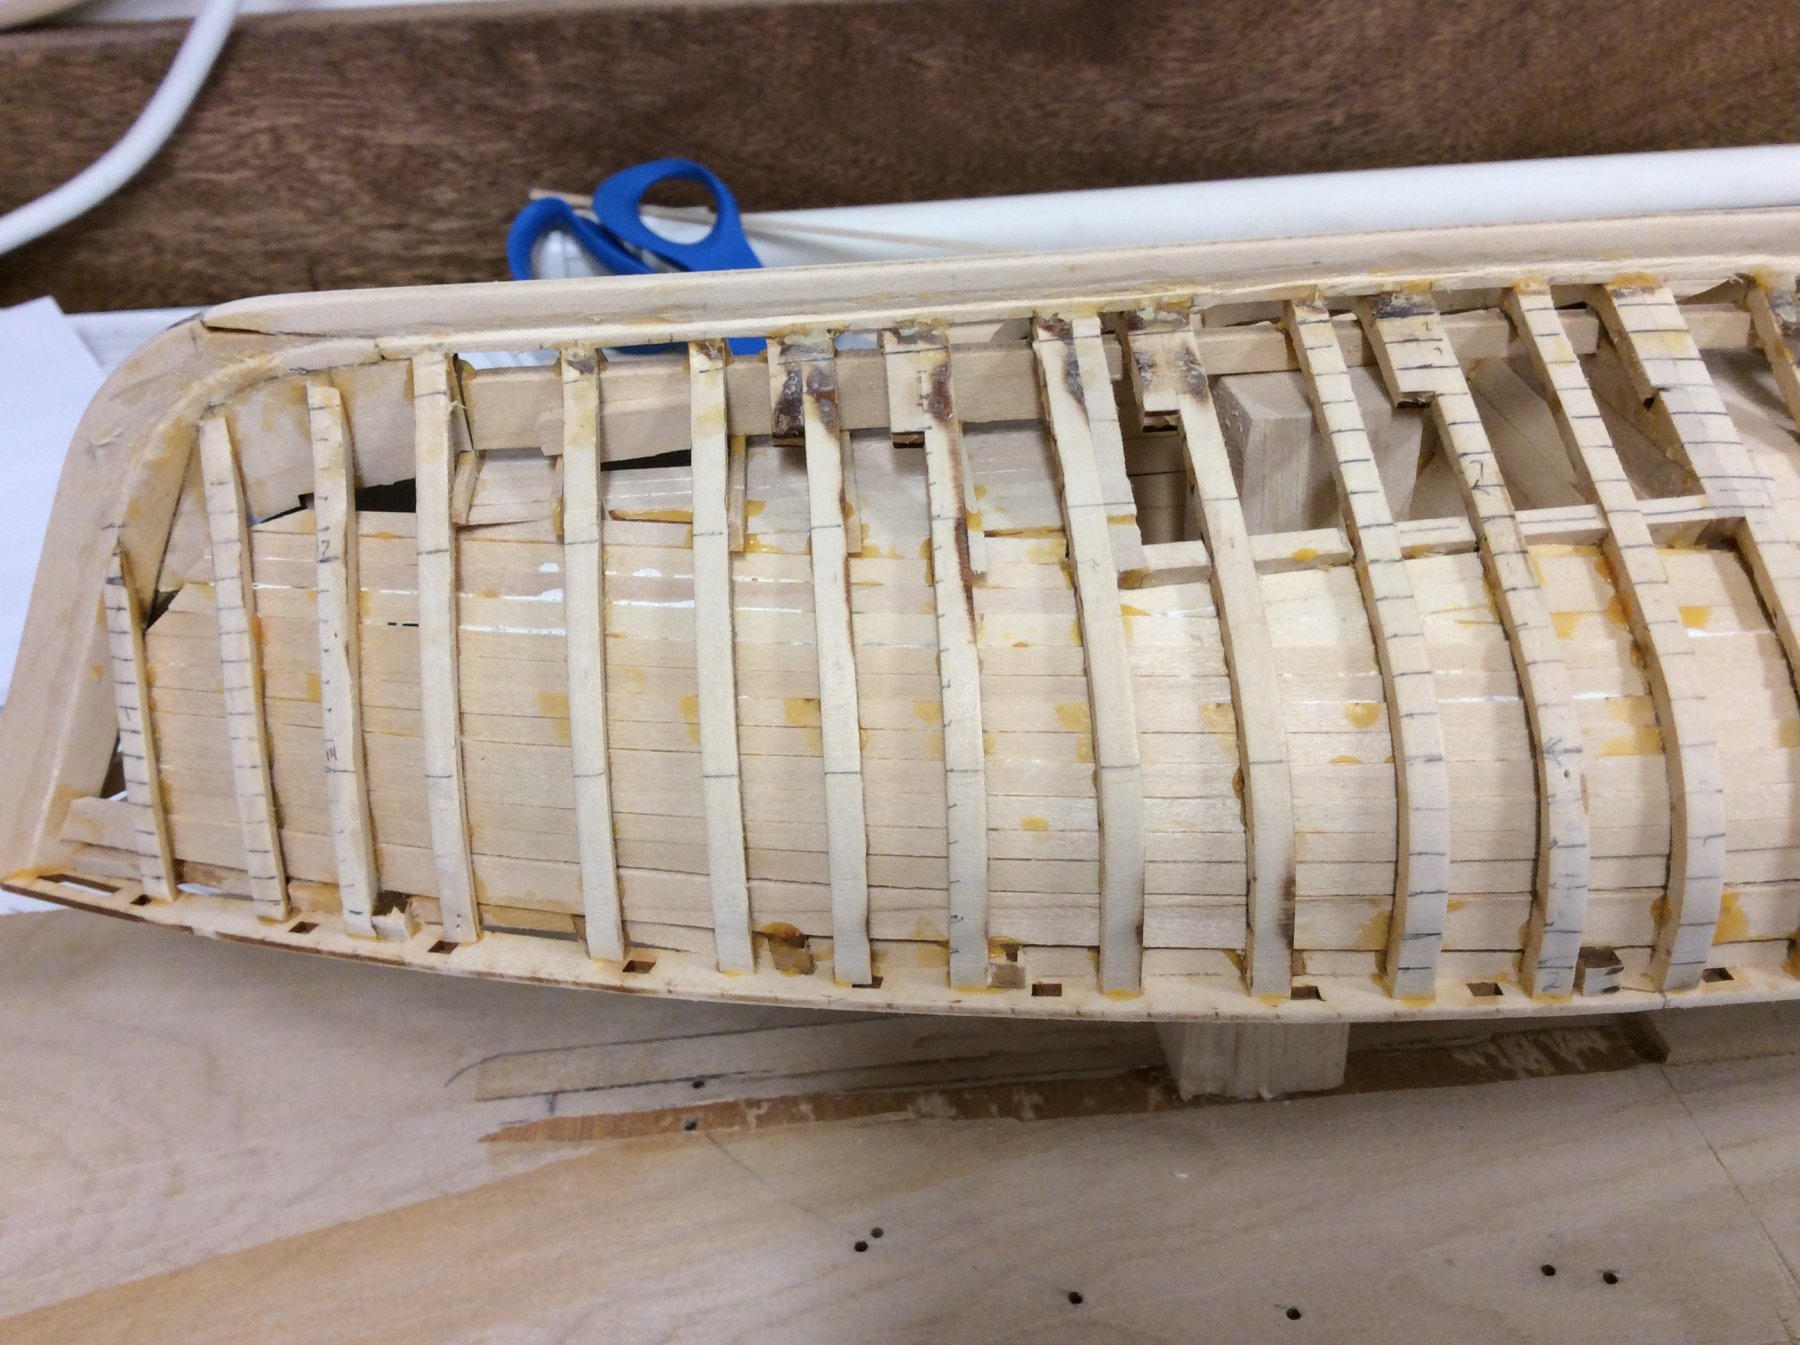
The hull lined out completely. Garboard strakes in place. Plus one...the imperfections of the hull now stand out. Also I repaired the transom. and of course the lining on the transom looks terrible, now that I take a picture. Hmmm...I like the look of the starboard better. I'm going to plow ahead with my plan to plank symmetrically, one strake on each side.


-
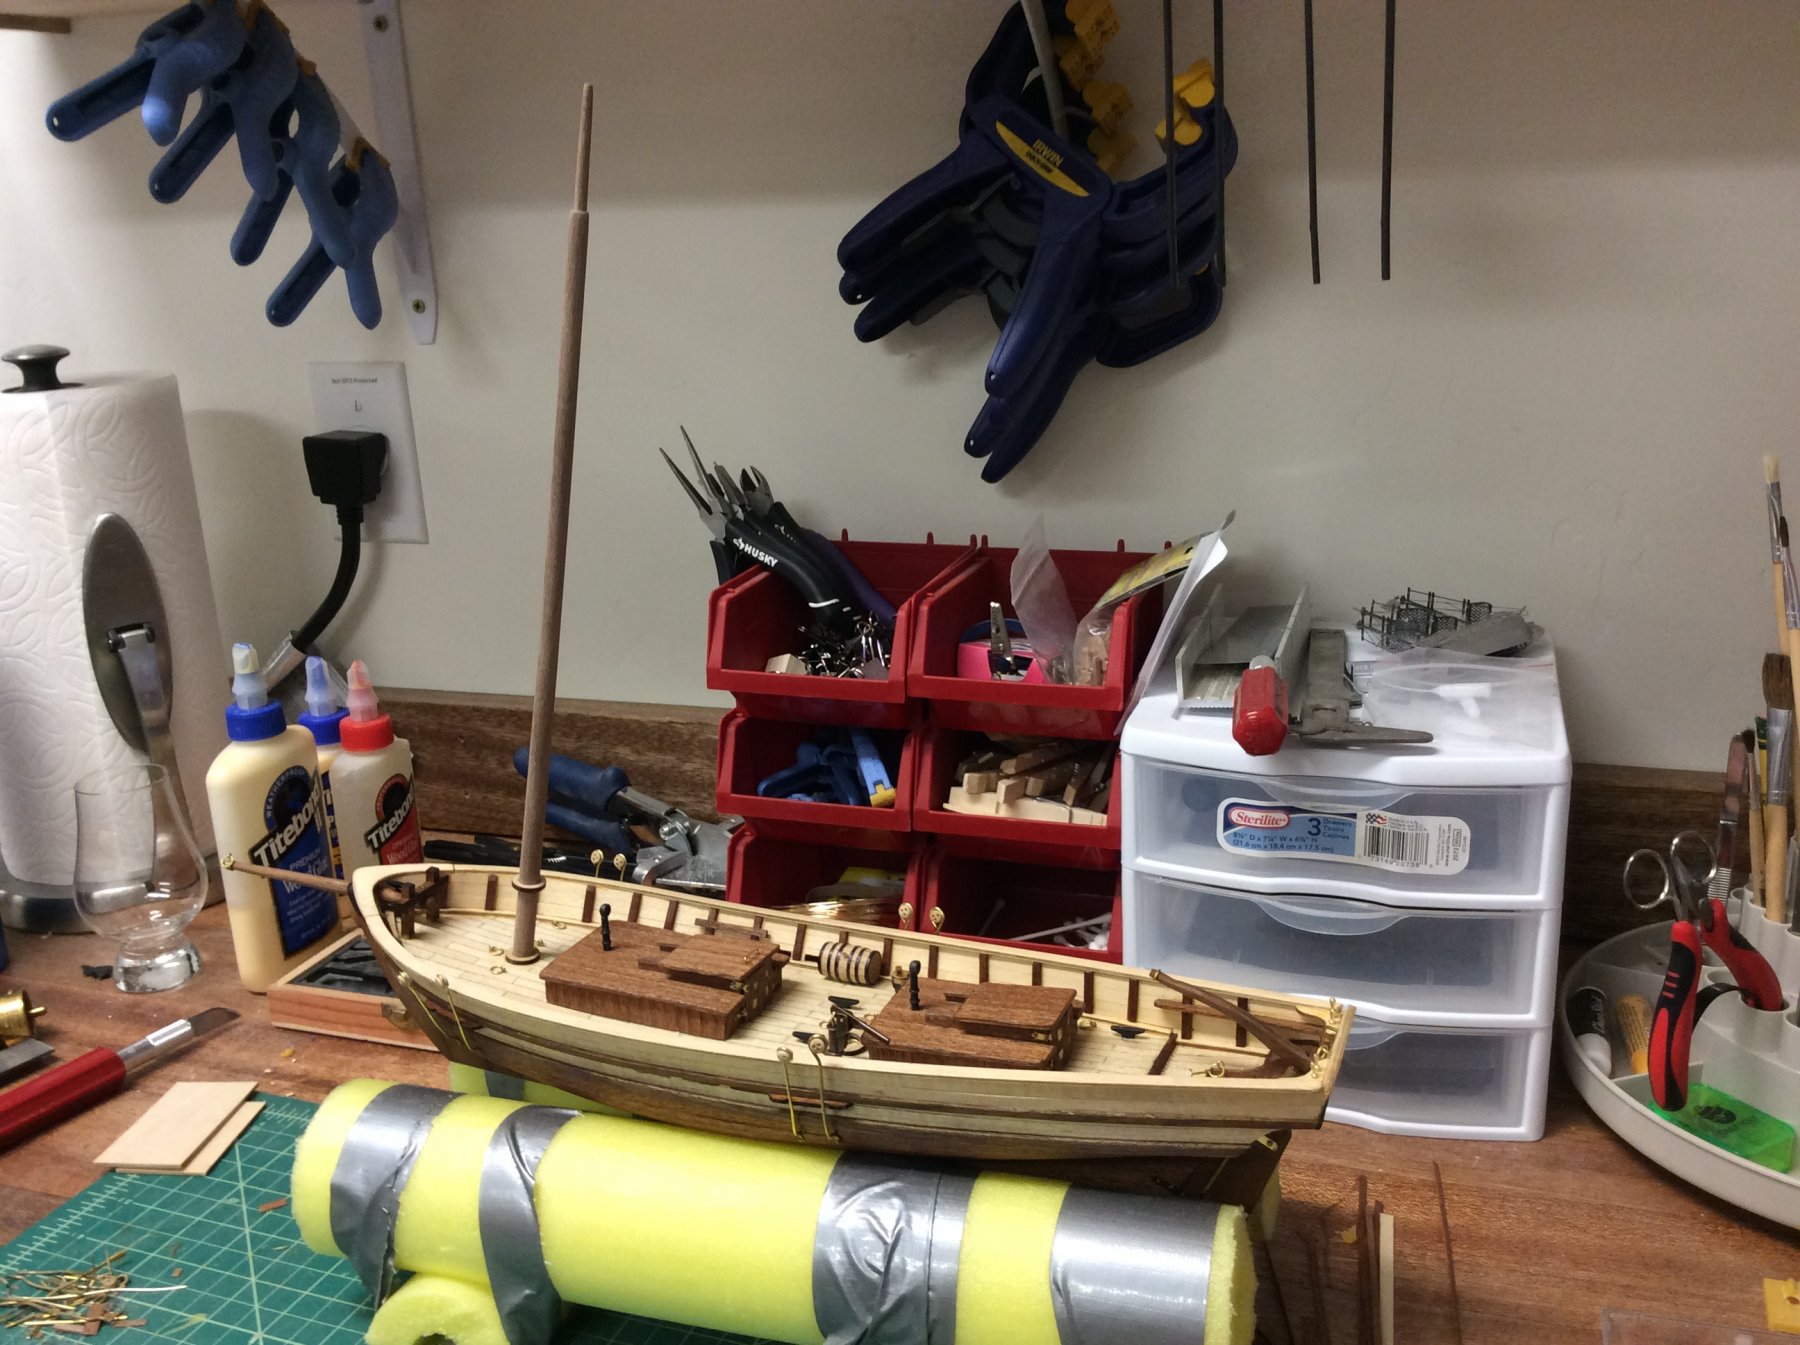
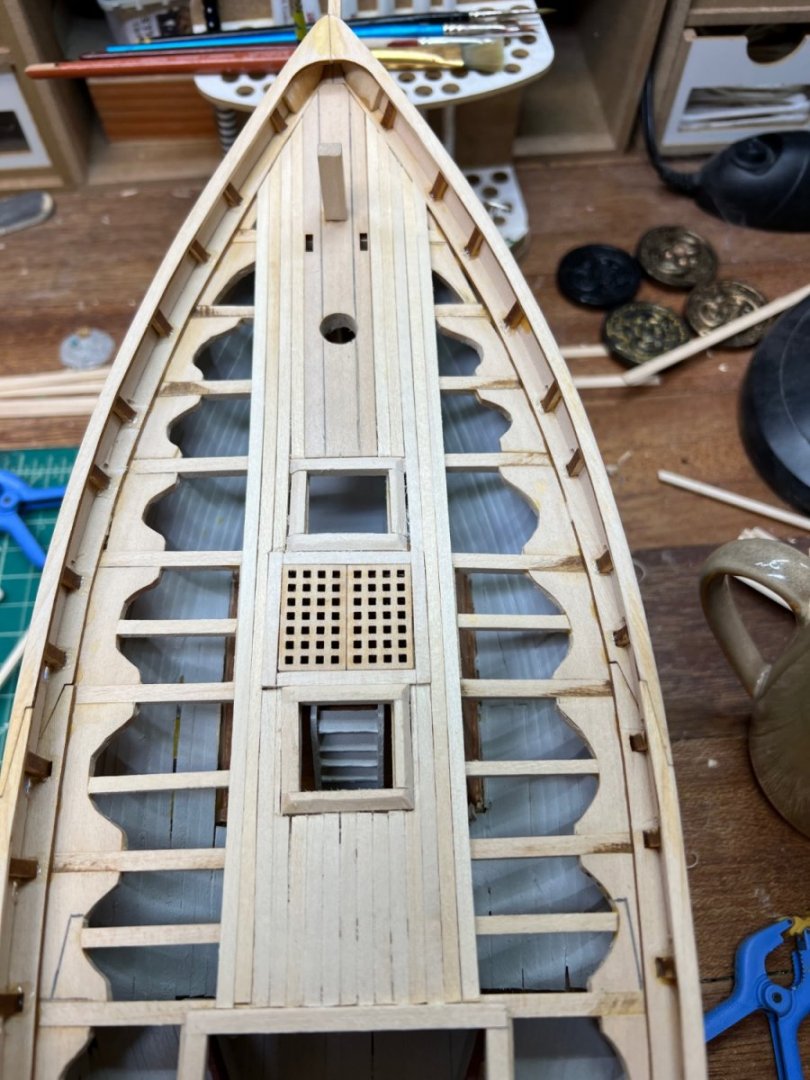
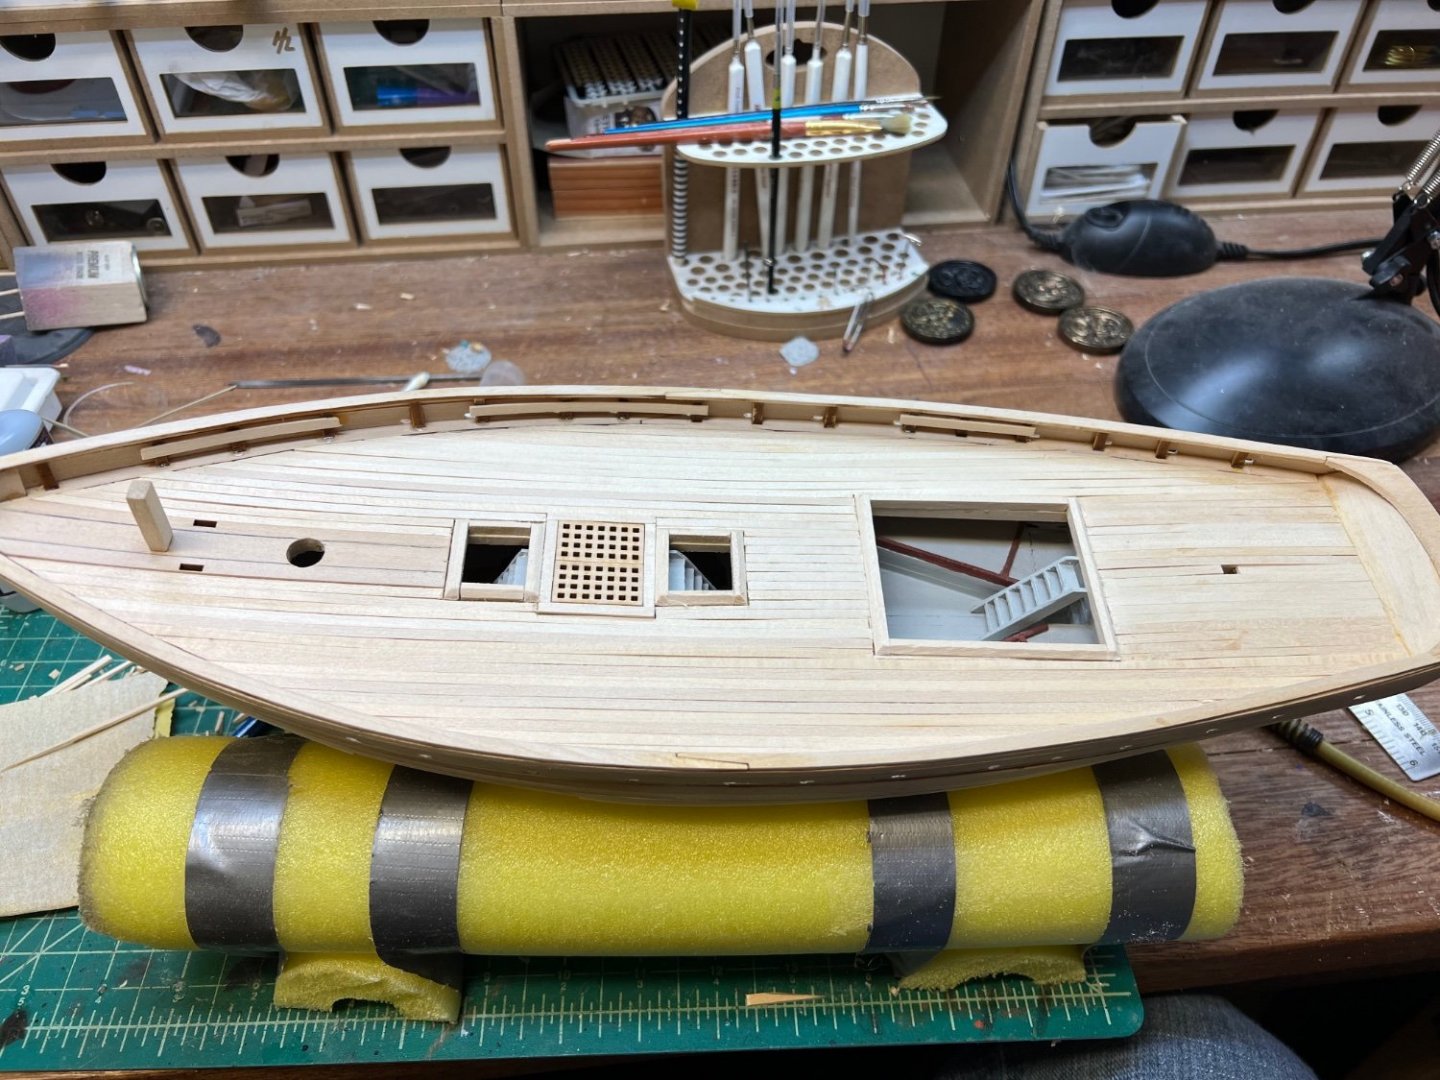
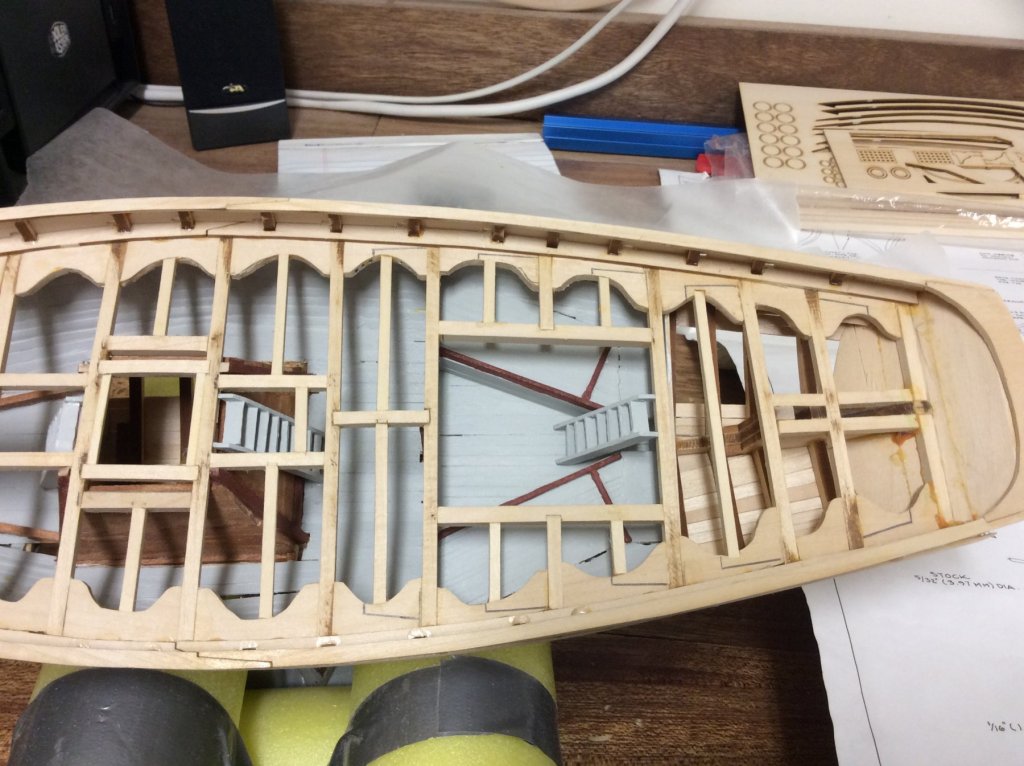
I have dry fitted the foremast. Finished the aft cabin mostly. Door handles were too much for me. They are actually functional! Lots of CA all over my fingers.


- 84 replies
-
- 3
-
-
- swift
- artesania latina
- (and 1 more)
-
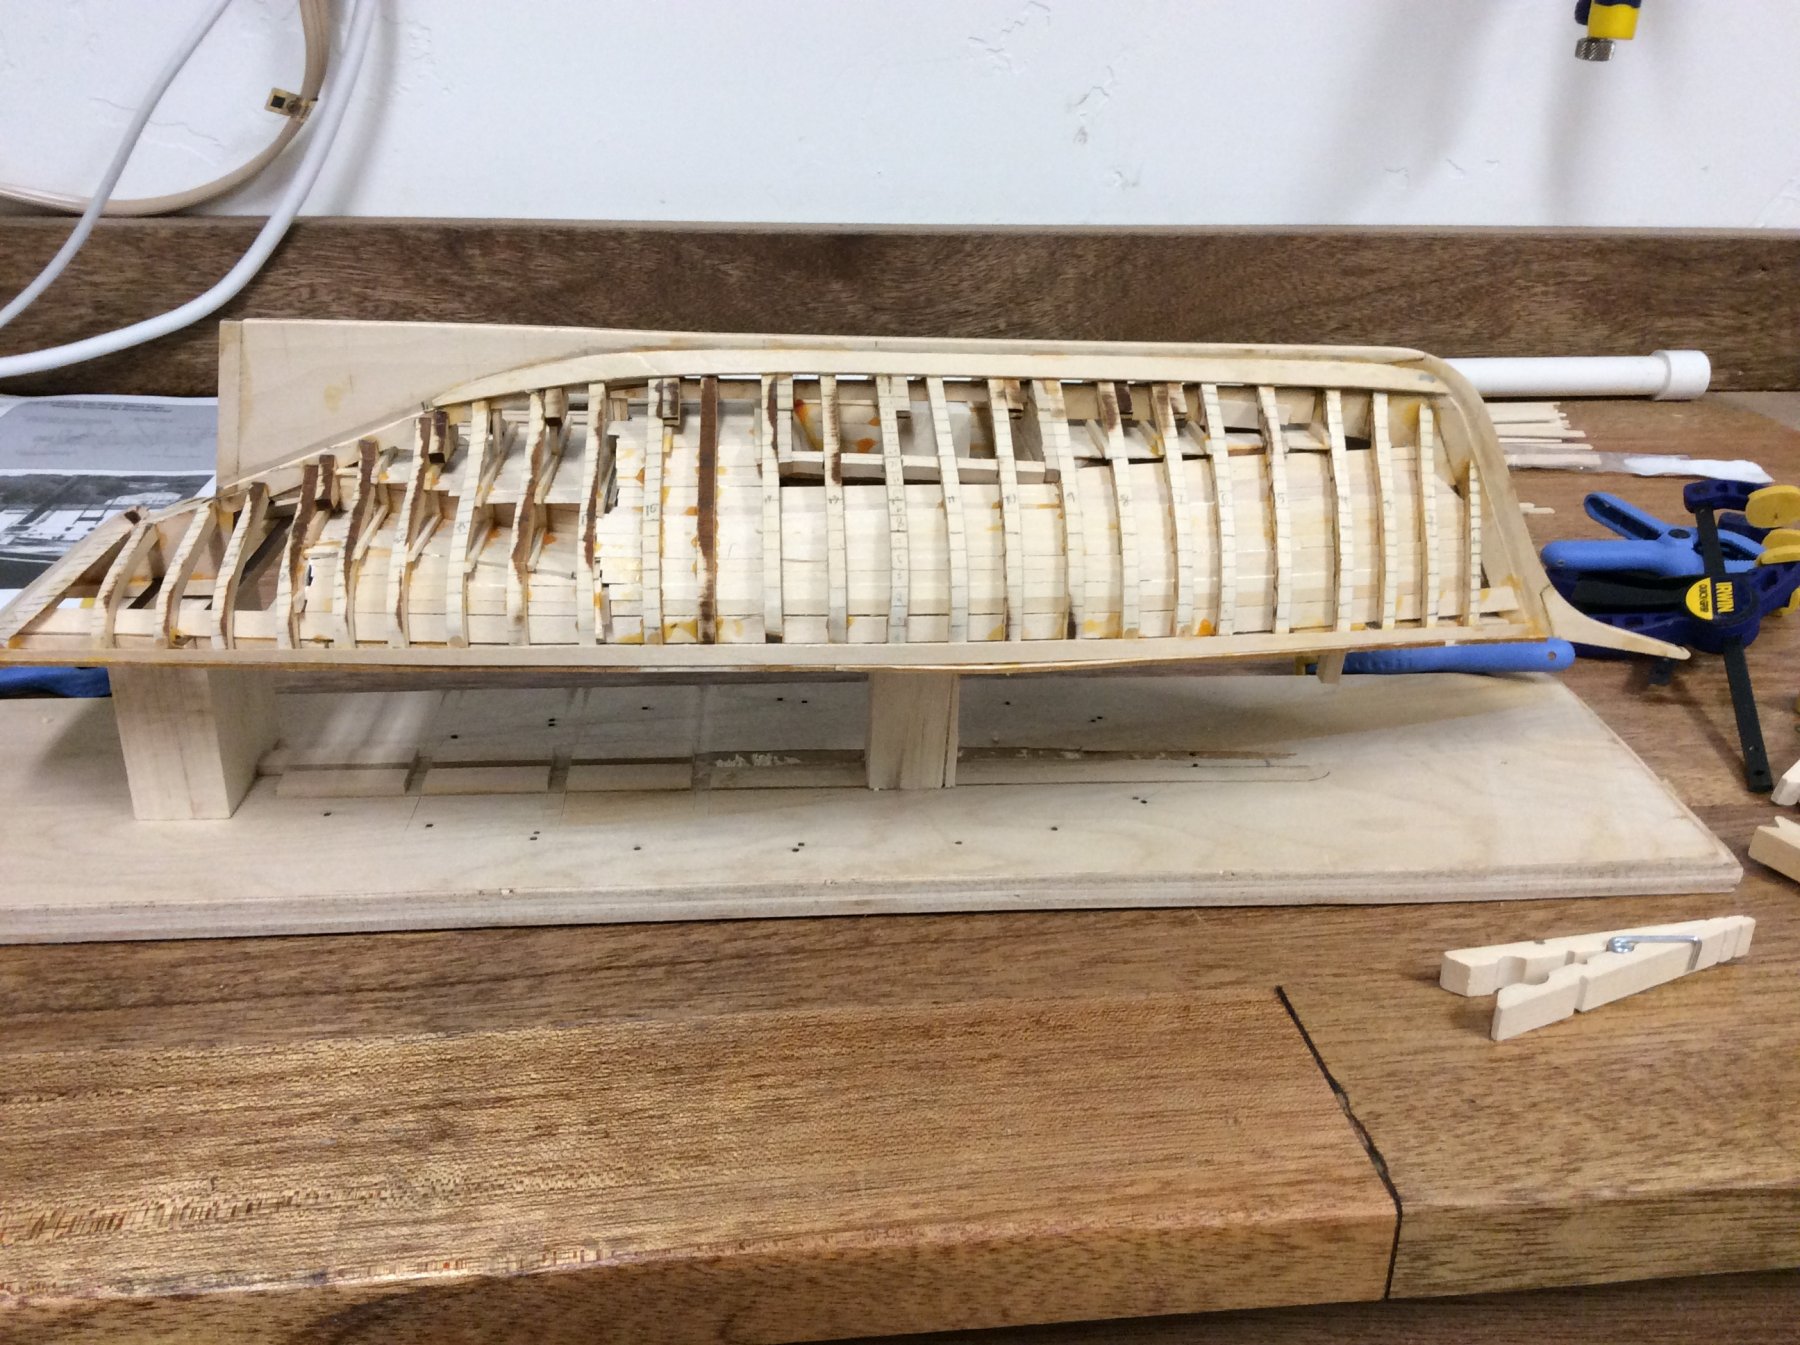
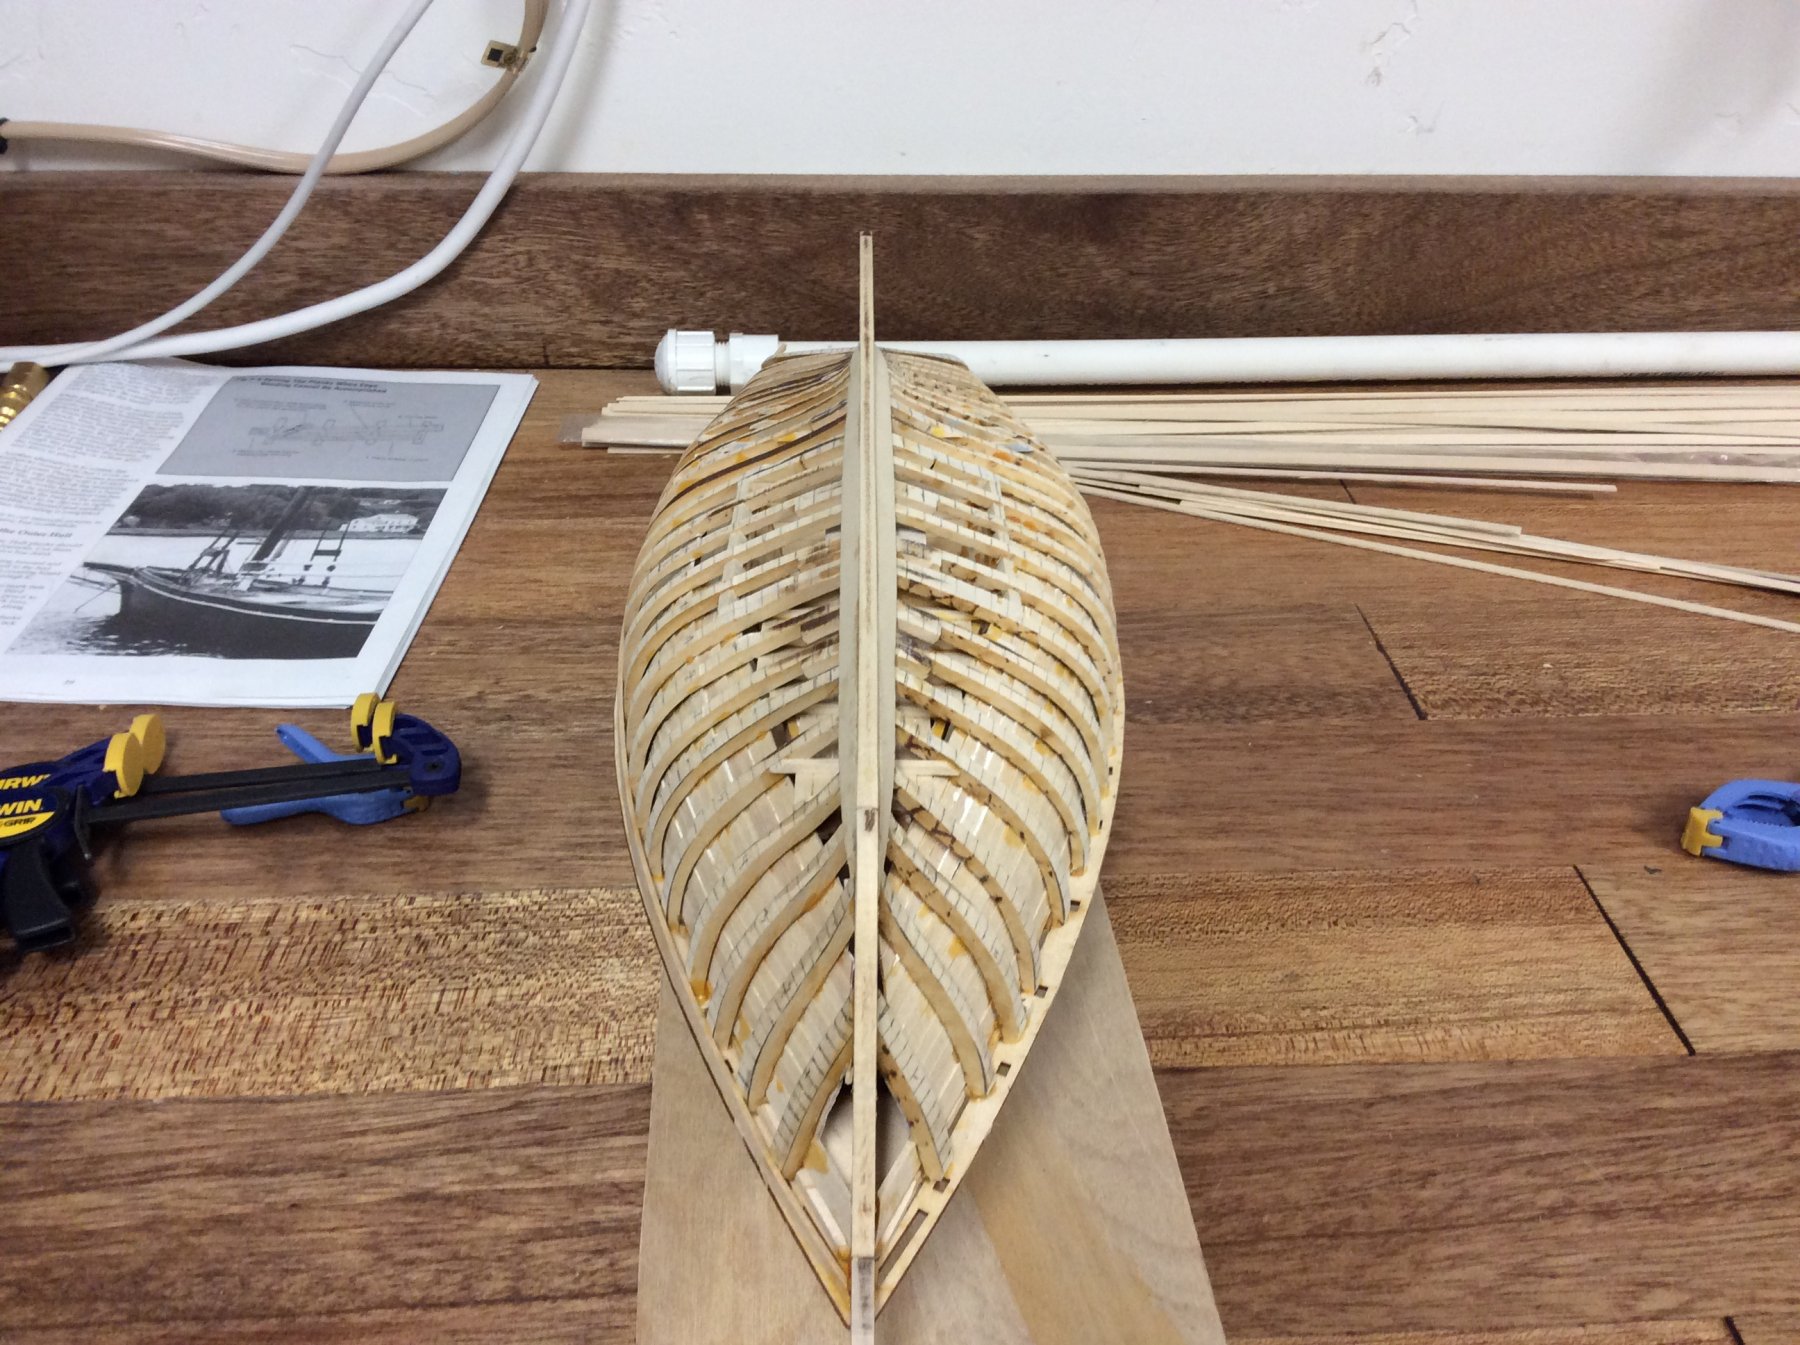
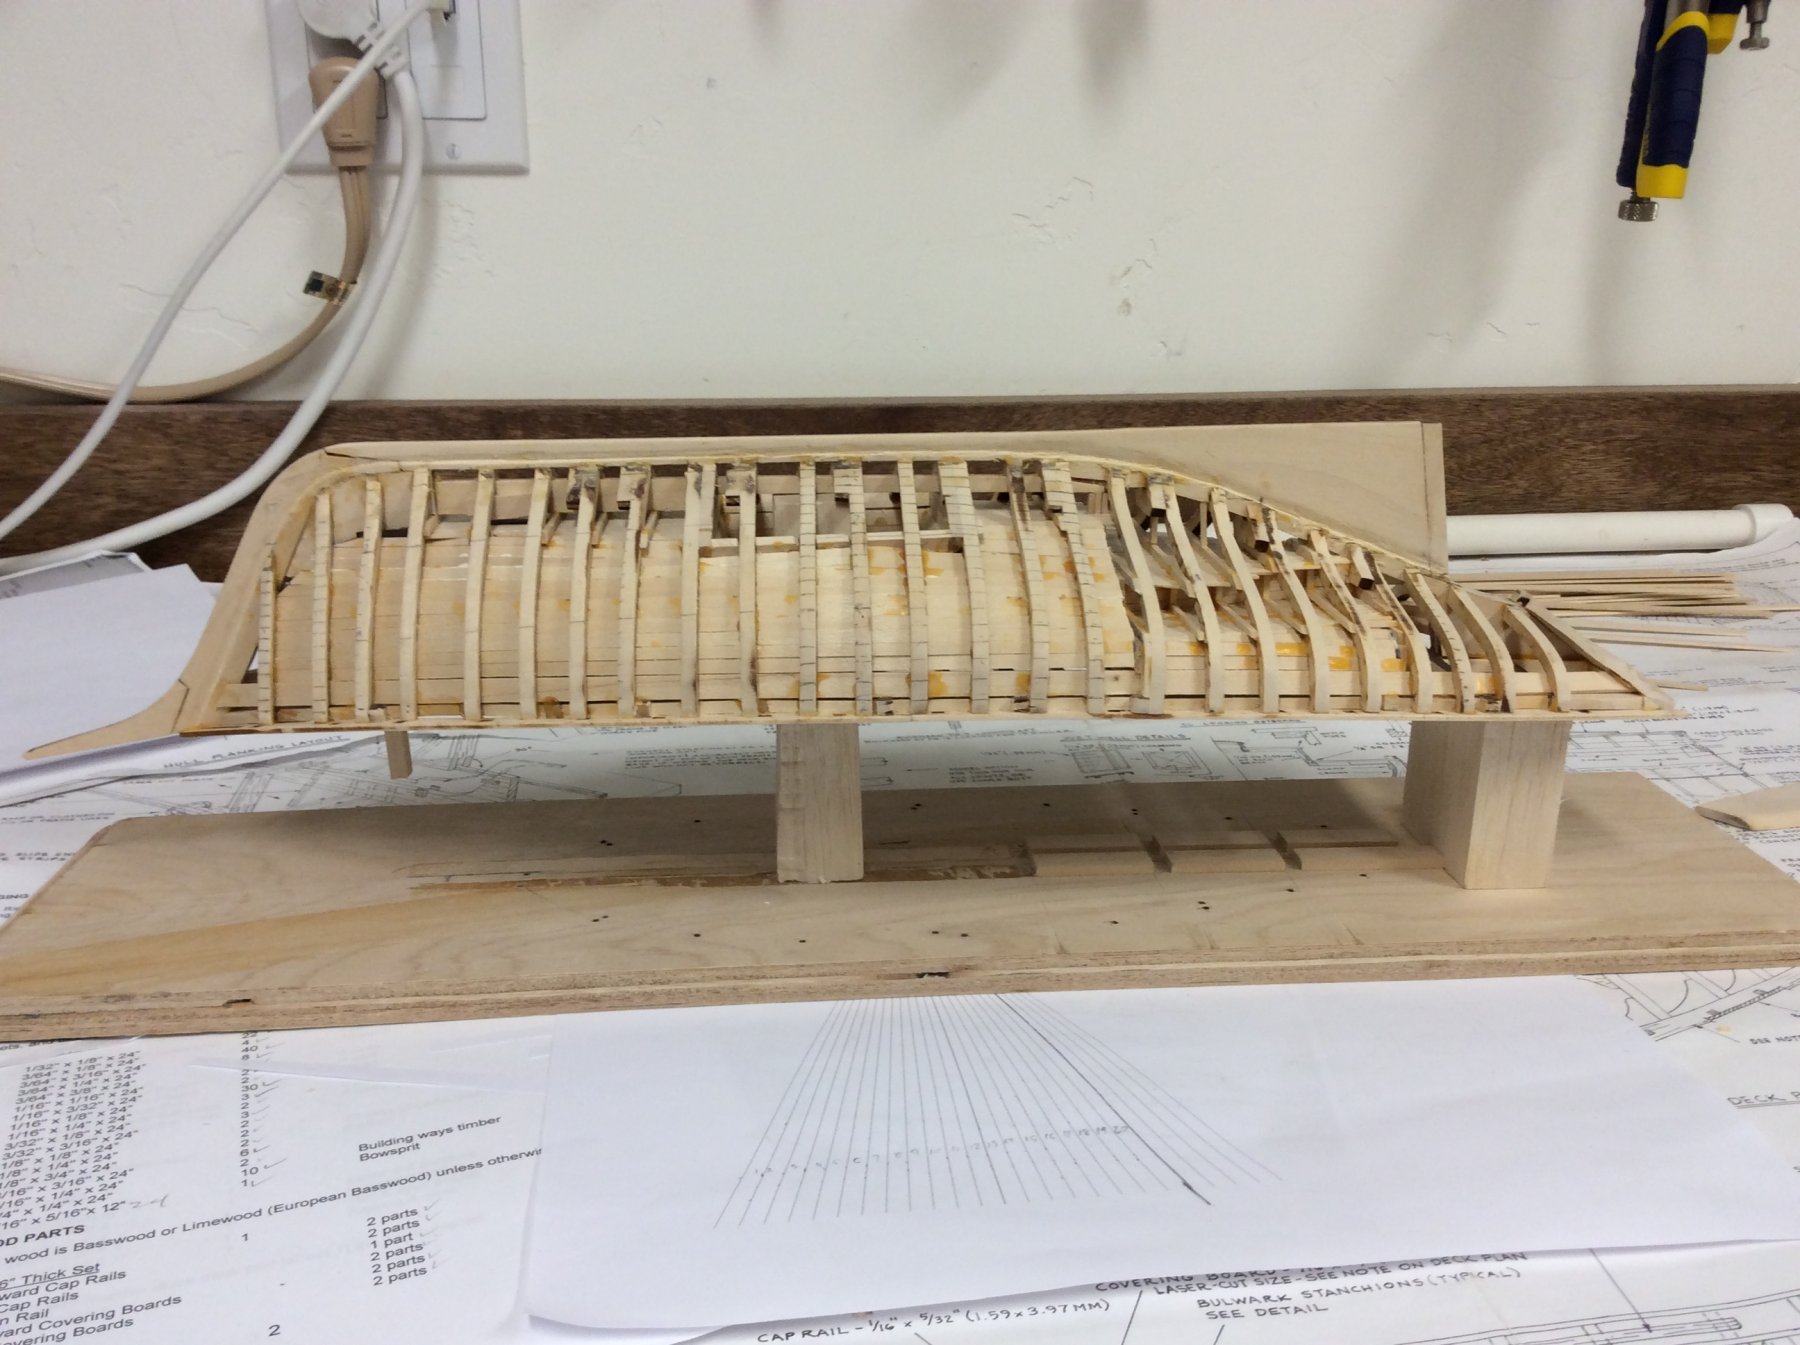
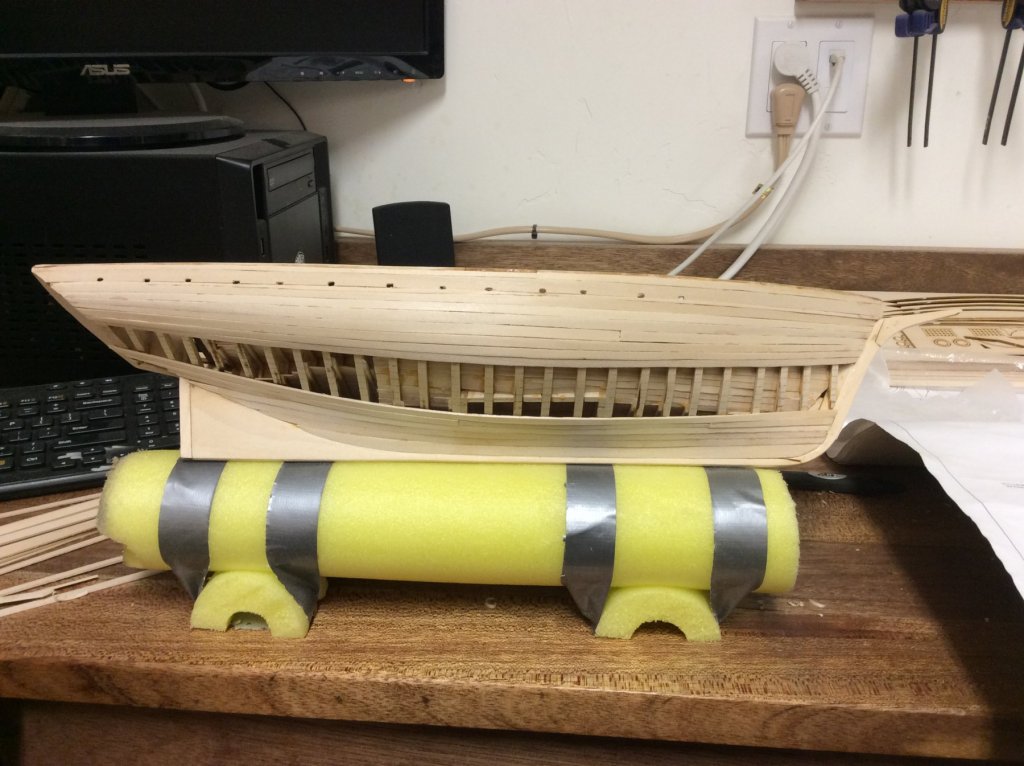
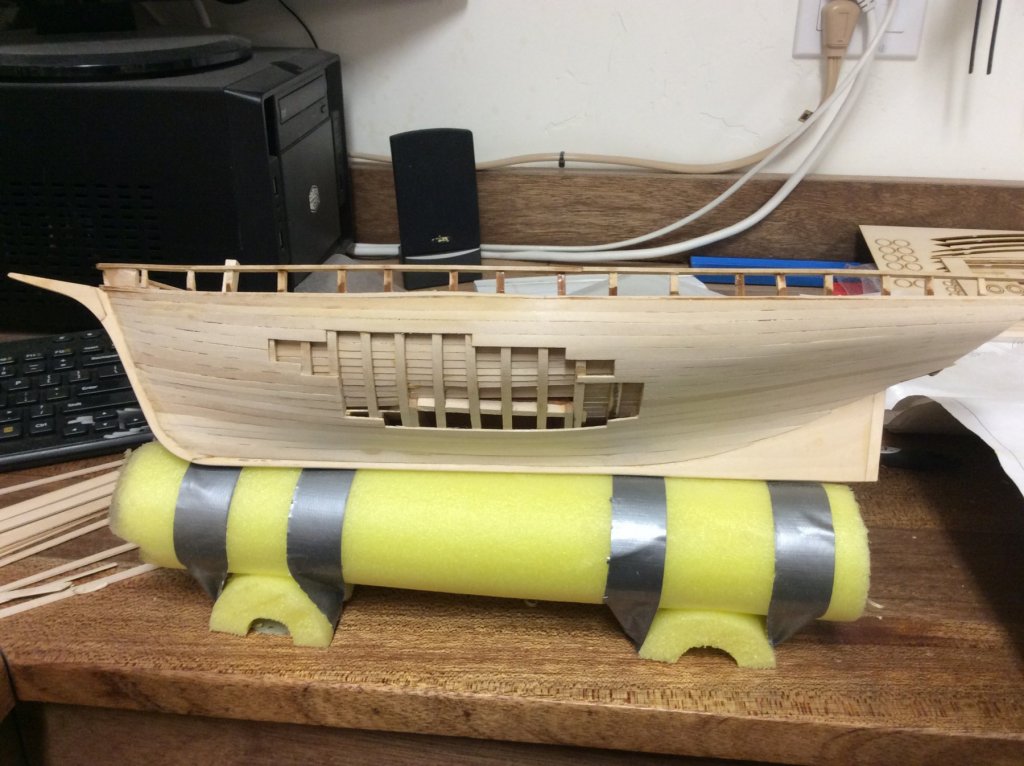
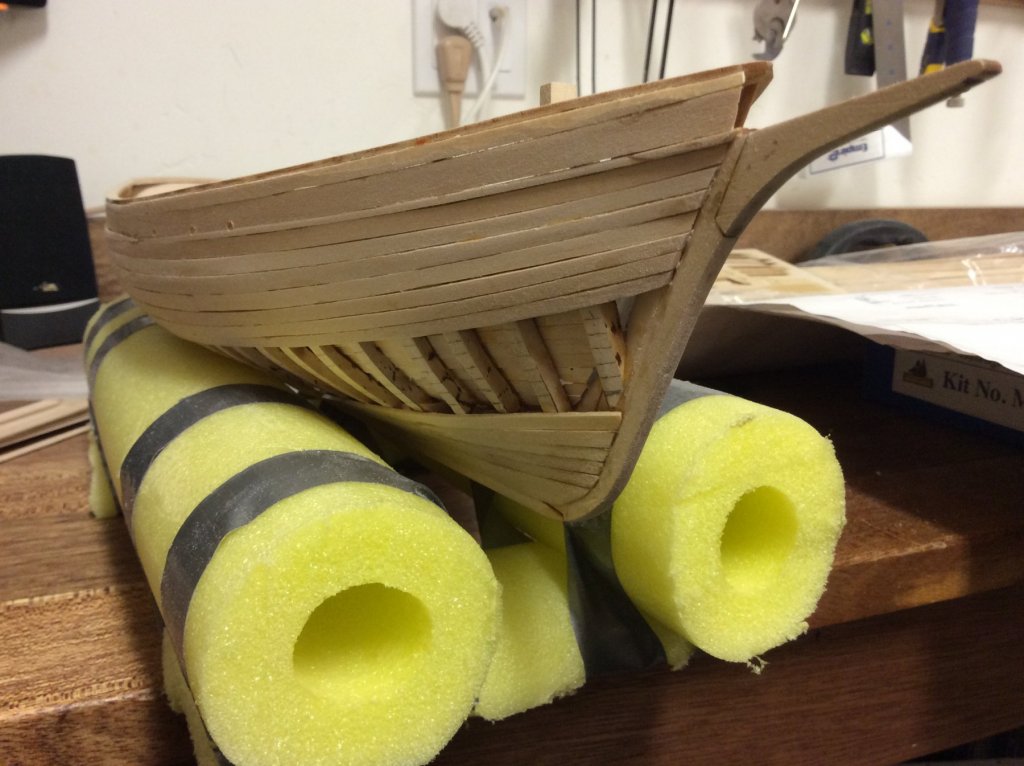
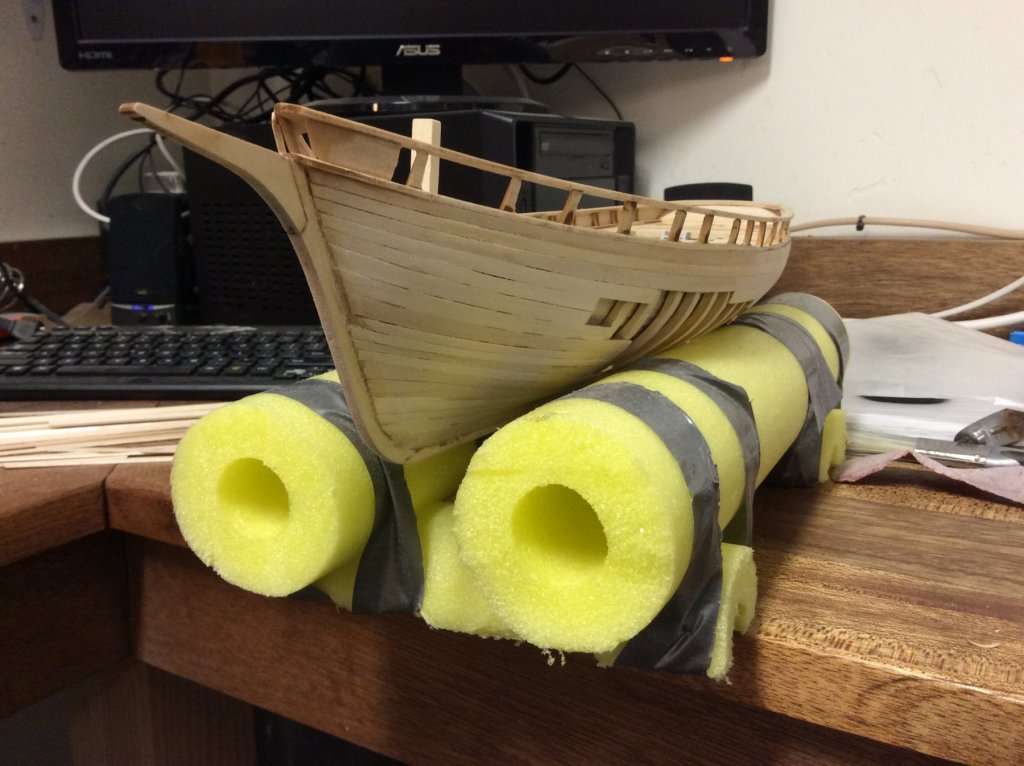
I have a new and improved jig to hold the model as I plank I was worried about the bow breaking. I am continuing to line out my hull. I had placed three planks but ripped them off when I got possessed by Chuck. I am fearful of the transition from lined out hull to actual planking. It seems that every strake will need thinning along the entire length, Ihave twenty strokes at midship at frame number 12. The plans do give detailed planking drawings.


-
Ugh, spend about 30 seconds bending the tiniest hinge ever then spend 5 minutes looking for it on the floor.
-
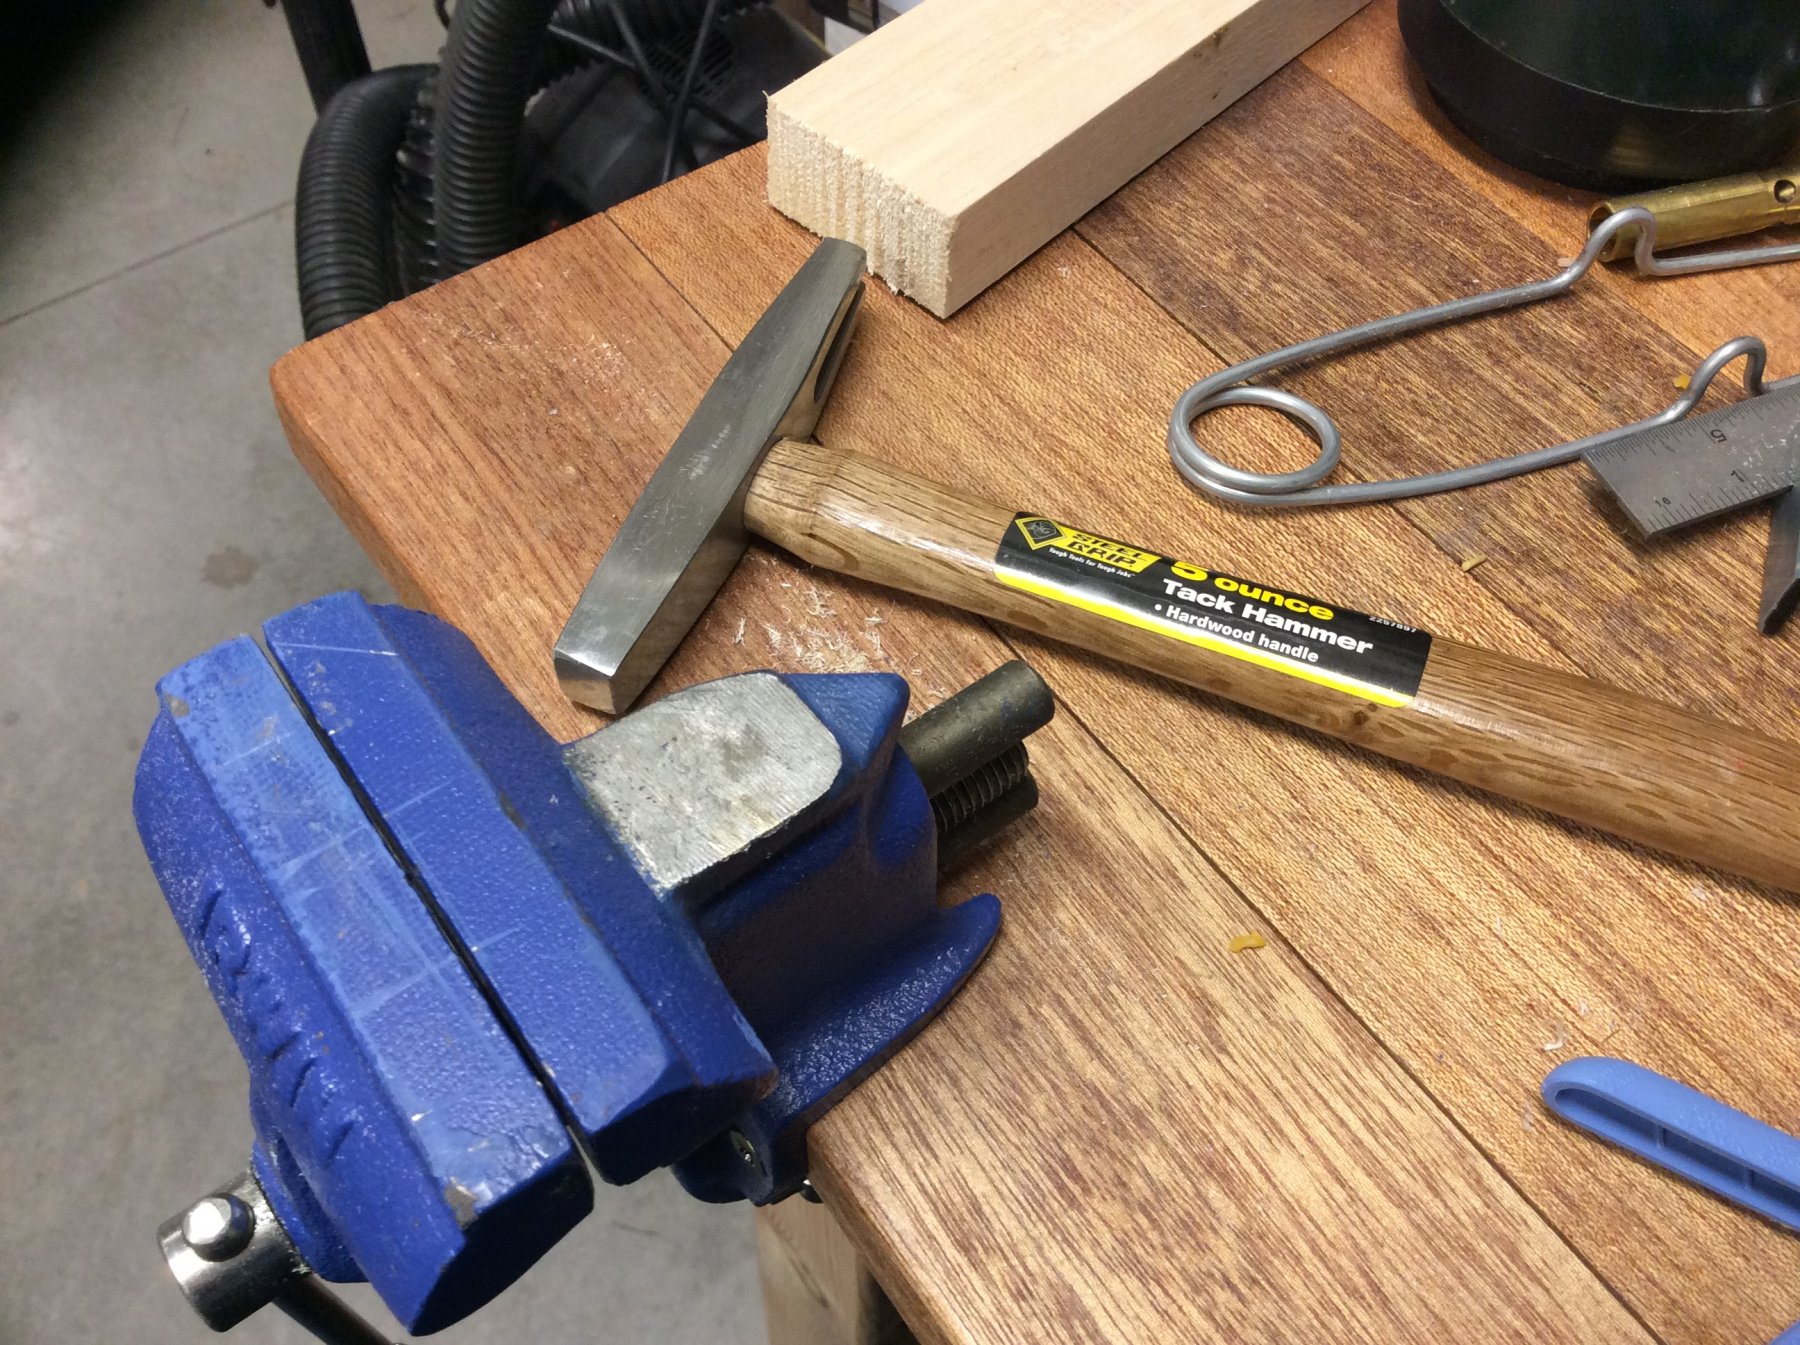
A little hammer and anvil turned out best result. I found those chainplates? To be the hardest part of this build so far. Here's a photo update. Those cabins were way more involved than I anticipated. I have one done and am working on the other.


- 84 replies
-
- 1
-
-
- swift
- artesania latina
- (and 1 more)
-
I am channeling Chuck P. tonight and lining off my hull.

-
Just confirming, that looked like a Cheerful hull in the videos...?
-
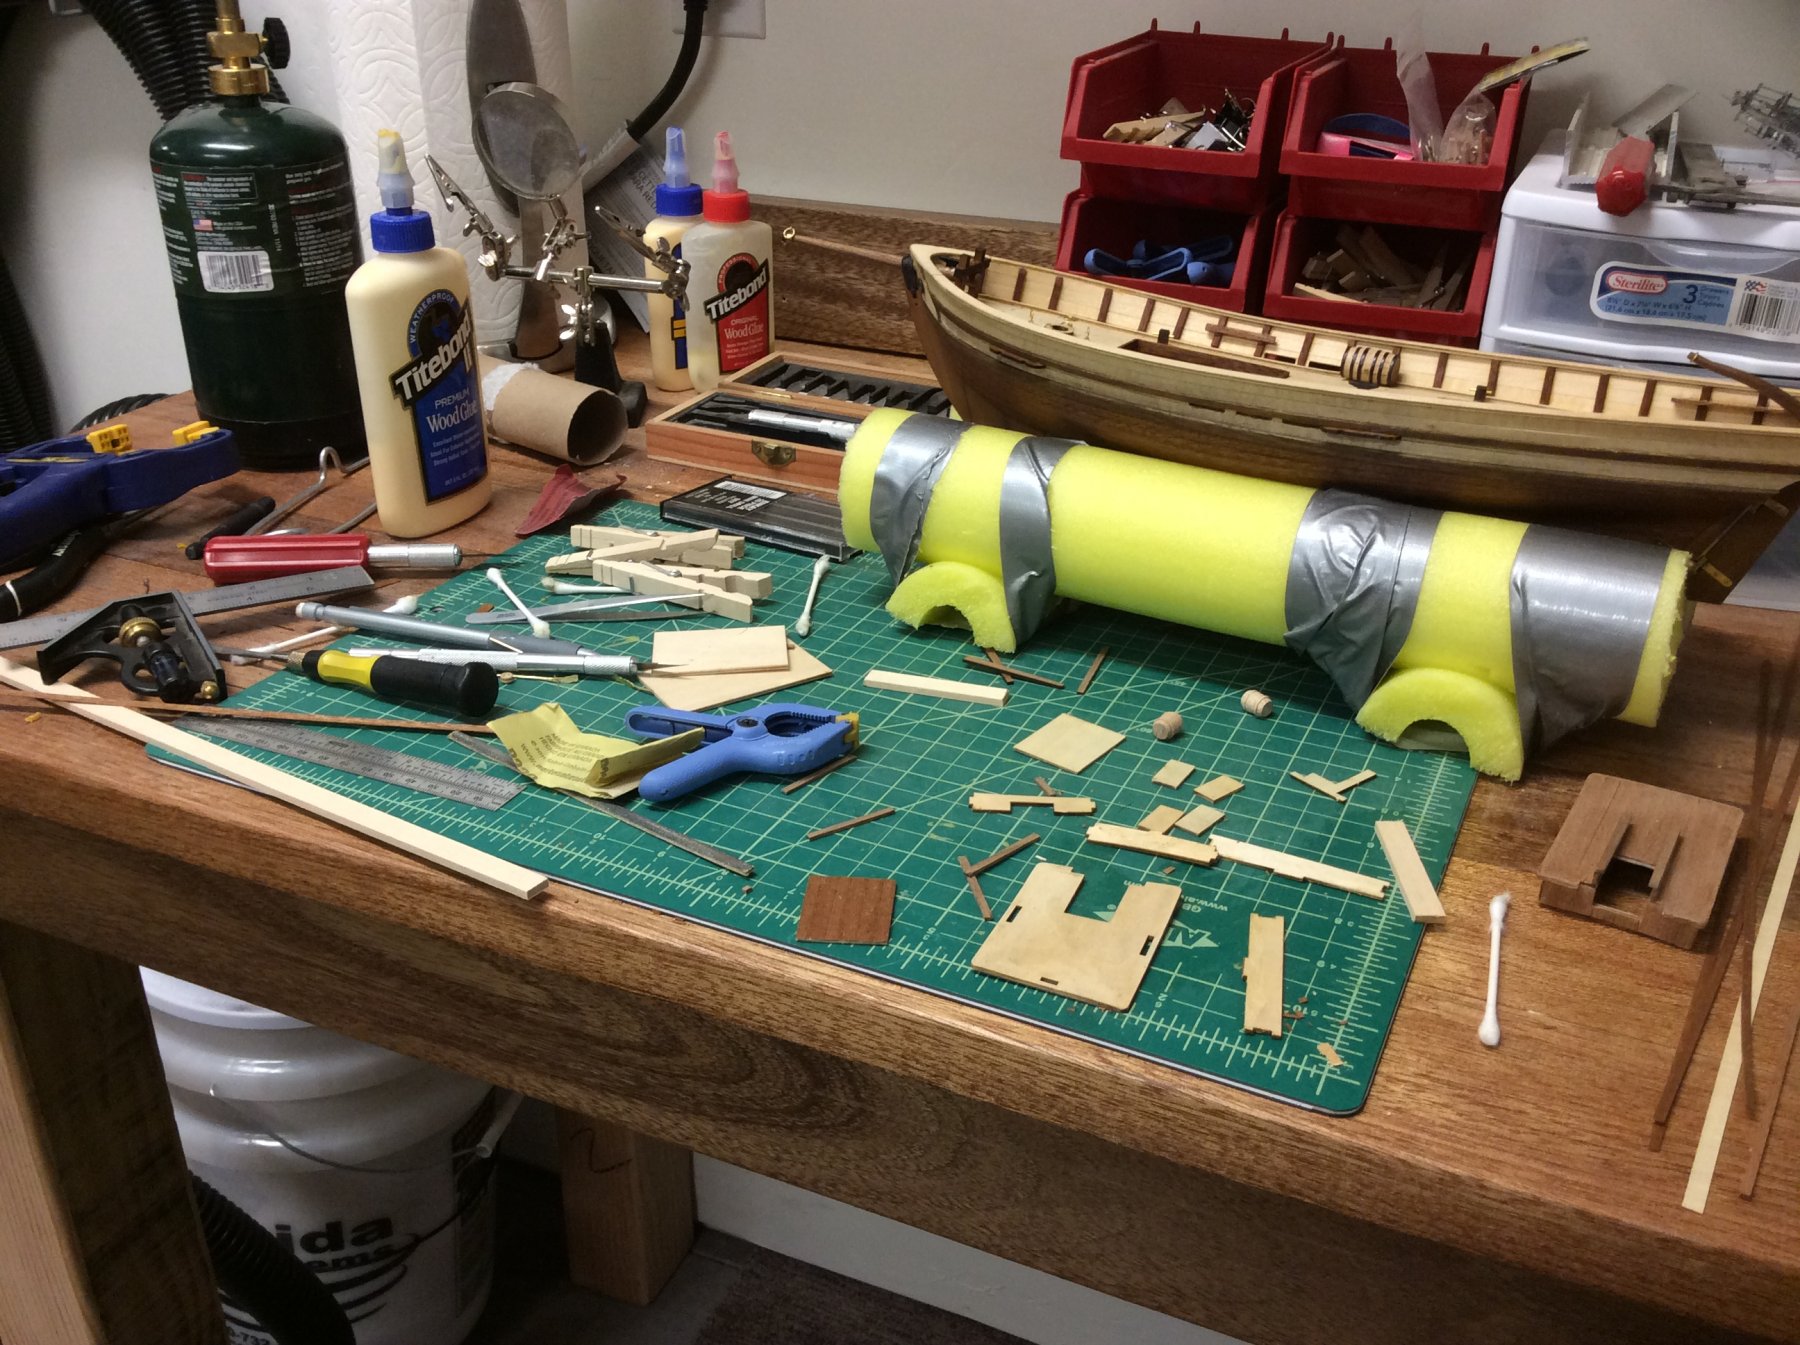
More pics. I am messy by the way.


-
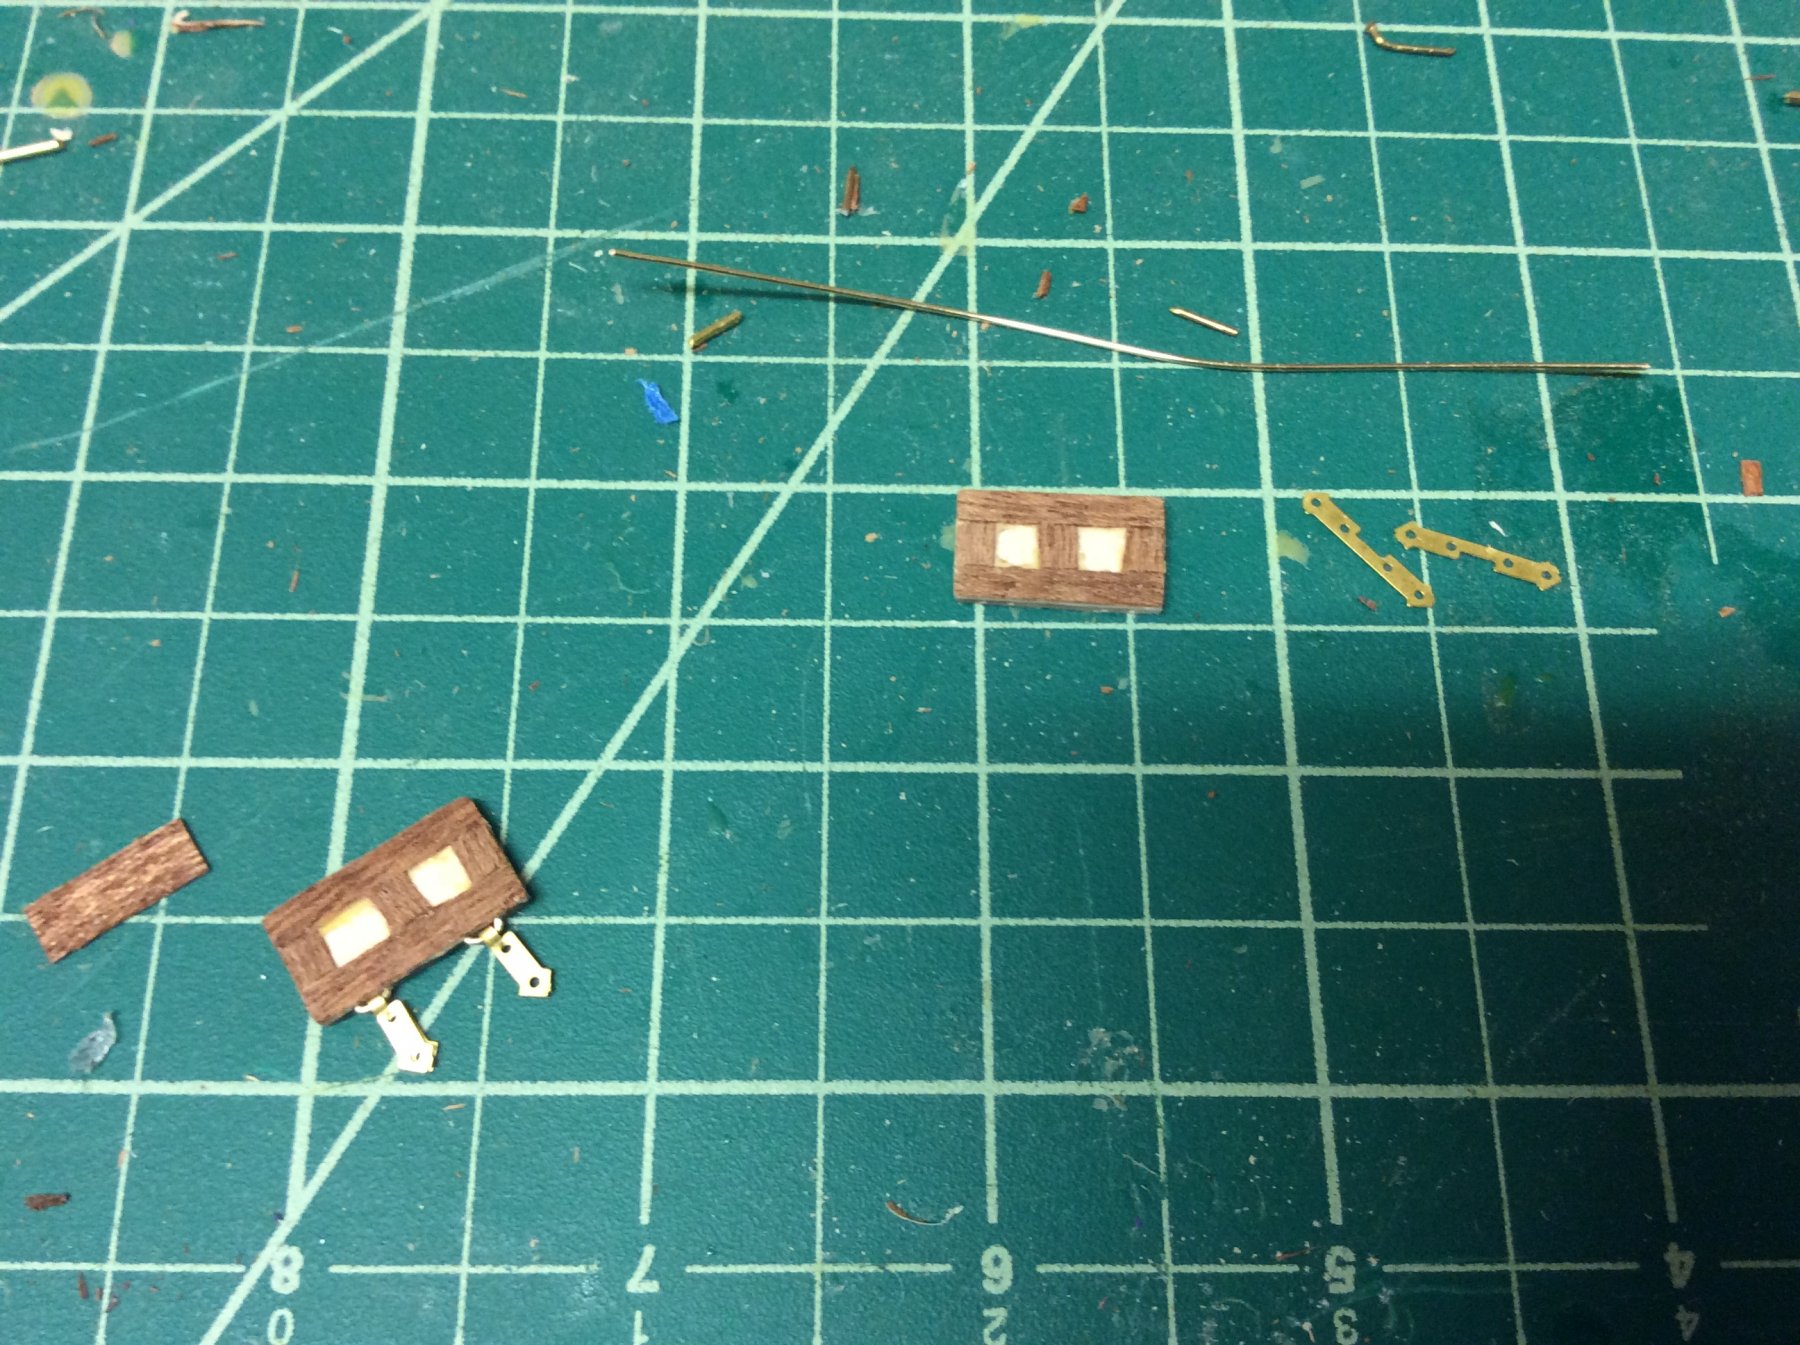
I've been working on the cabins between getting frustrated with working with brass. I've never done anything like this. I am super impressed with myself. I did not think that veneer would wrap around the edge like it did.

- 84 replies
-
- 1
-
-
- swift
- artesania latina
- (and 1 more)
-
Searching on the site I found that if you heat brass up, even if it cools down it will be softer, looks like I need a torch of some sort. Also found I might be making an order with micro mark for some appropriate metal working tools. Gotta love new tools!
-
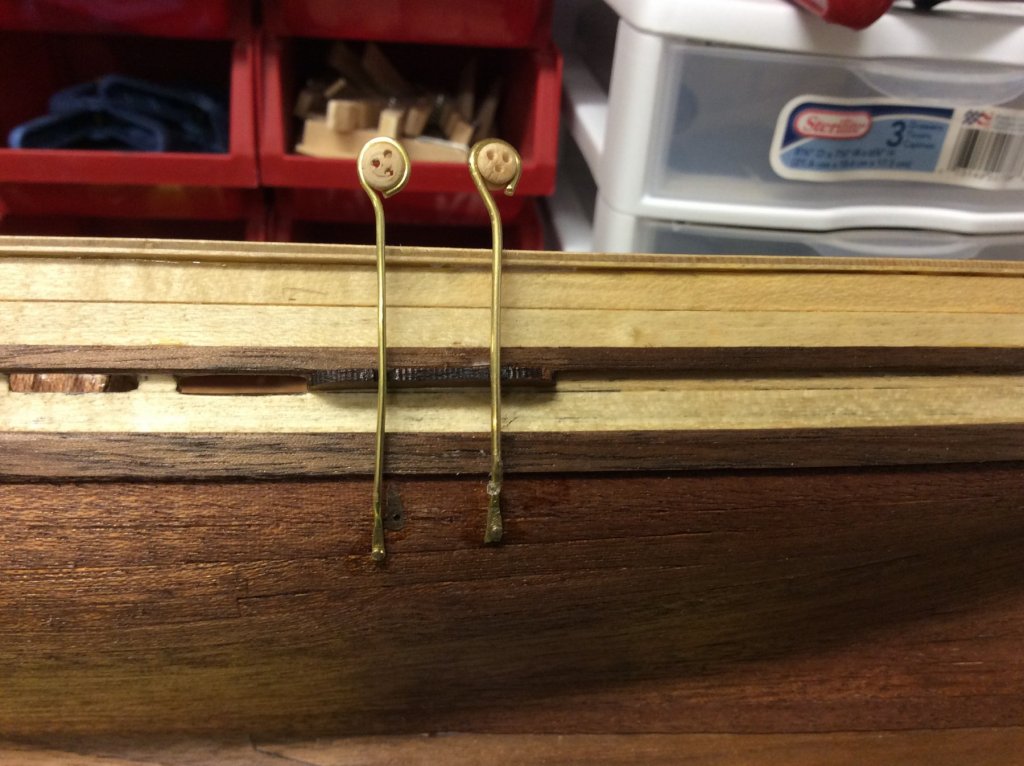
I might need large vice grips, was able to flatten in but then it snapped off, and like you said kinda chewed up...
- 84 replies
-
- 1
-
-
- swift
- artesania latina
- (and 1 more)
-
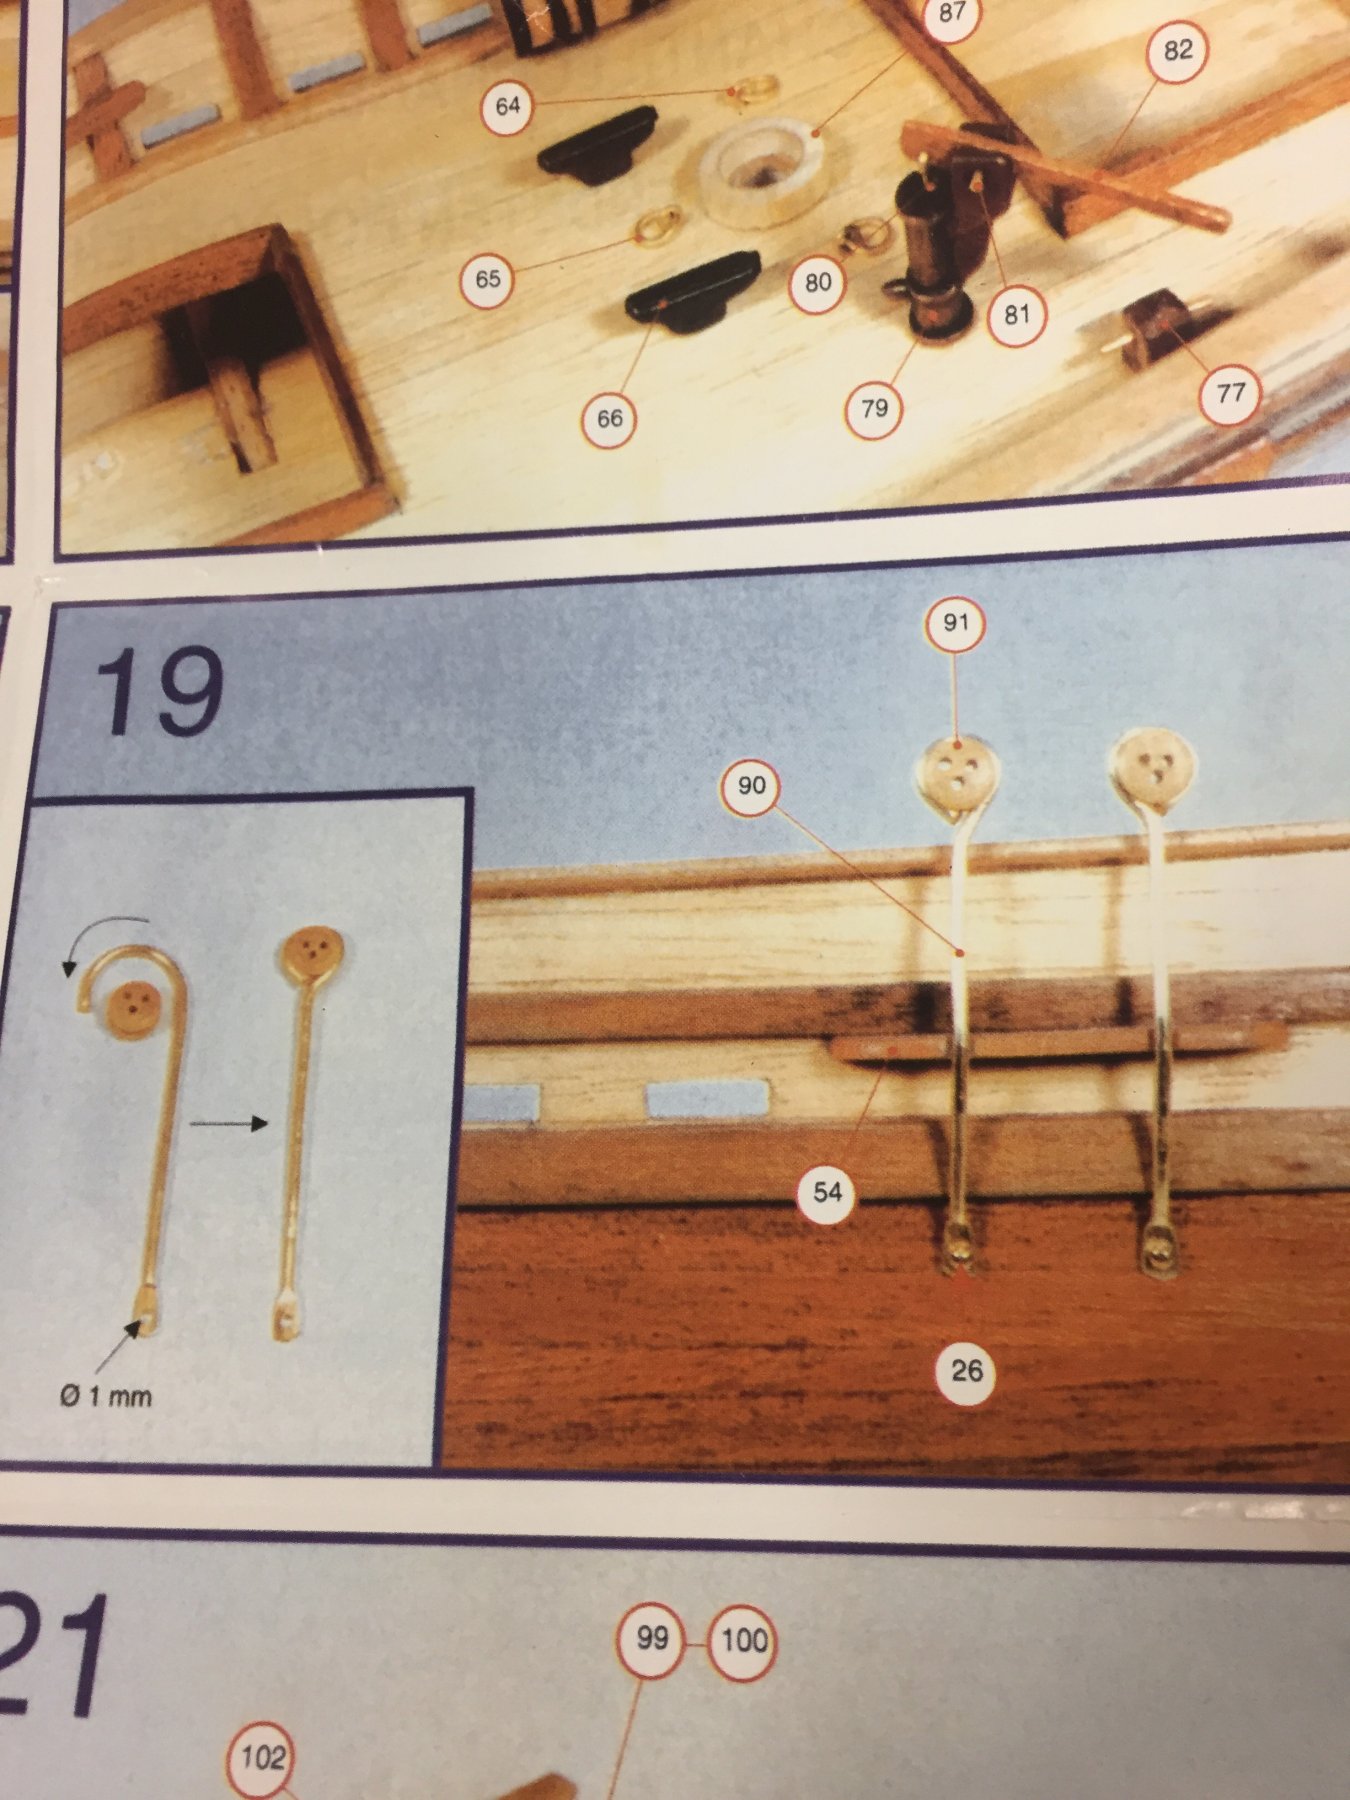
Question for you swift builders out there watching, any ideas on how to flatten the end if the piece of copper wire used for the chain plates of the main and foremast? I am then to drill a 1mm hole in it. Swashing in my vice only gets me so far....
-
Planking! And look at a bit of the damage. I am loathe to remake the transom piece I'll just glue it together when I get to that section of planking.