Kamil
-
Posts
40 -
Joined
-
Last visited
Content Type
Profiles
Forums
Gallery
Events
Everything posted by Kamil
-
Hi guys. Glad you like it . But going back to the longboat, this is what OcCre writes me back: So, I know my English is not perfect, but the way they are writing is make me confused . I just don't understand the fraze: I need some advice more dudeen not contact OcCre" - any of you guys now what that mean? But at least they will try to fix it in next kits .
-
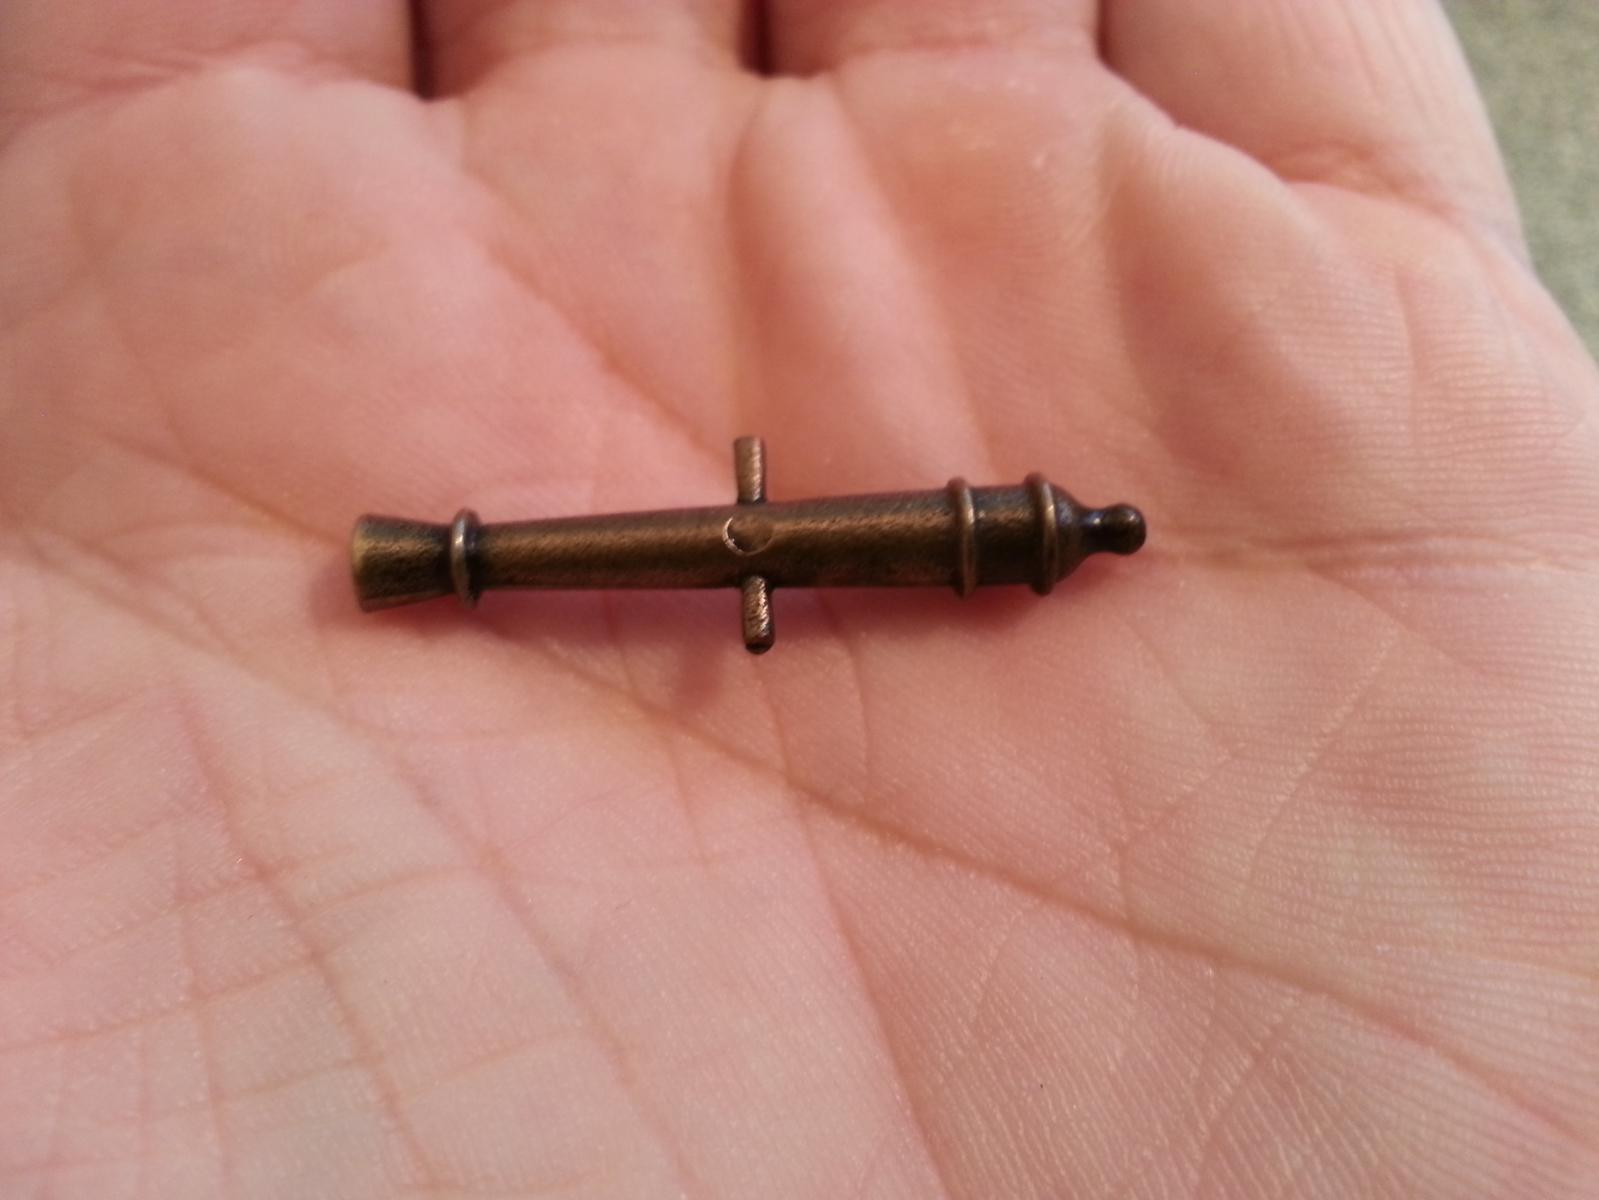
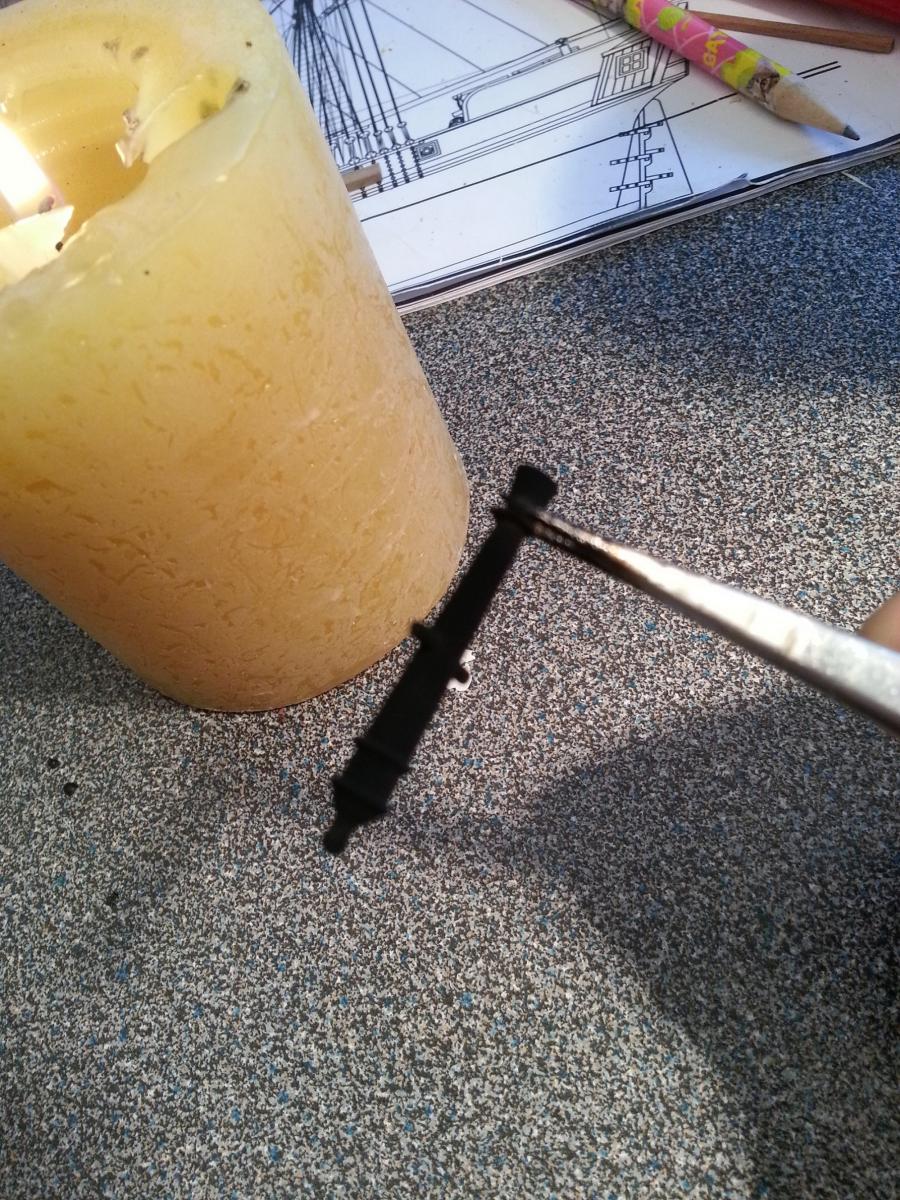
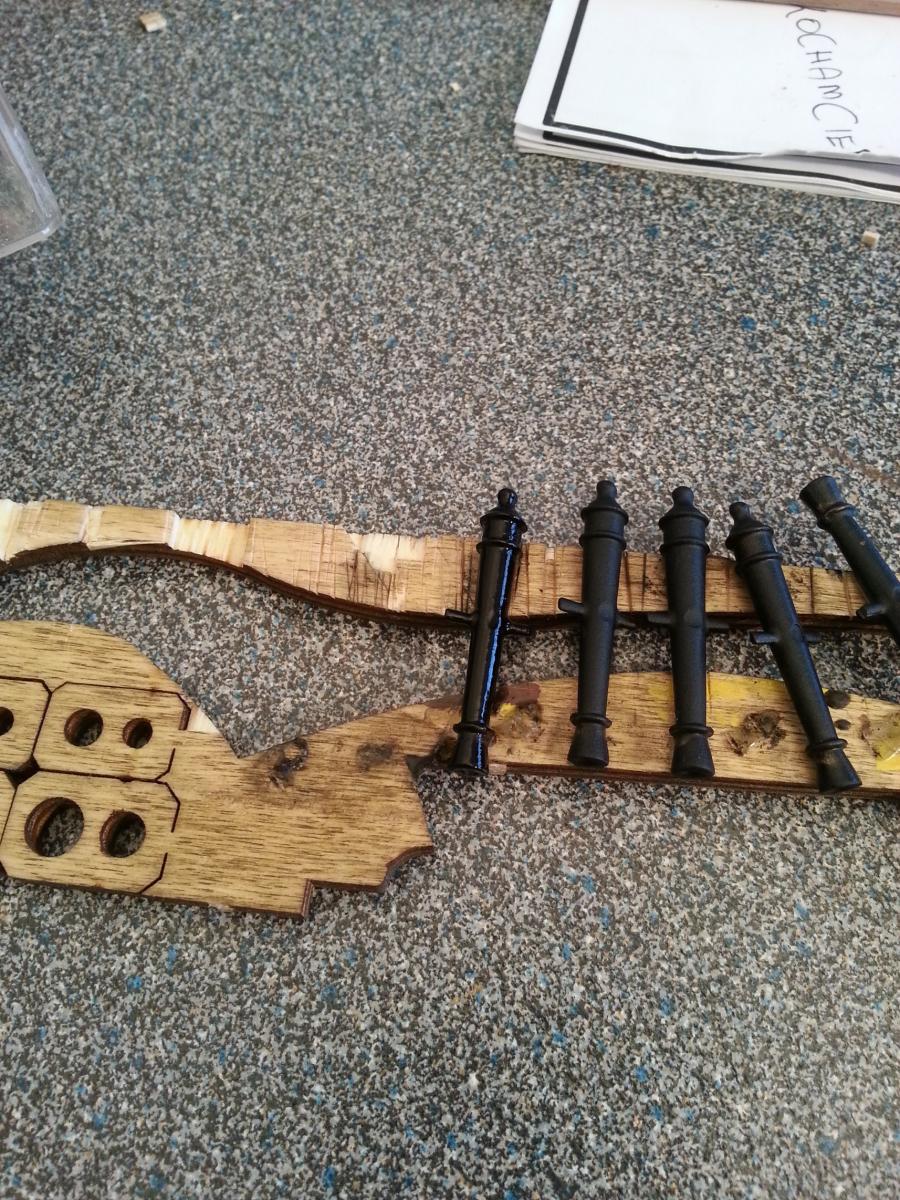
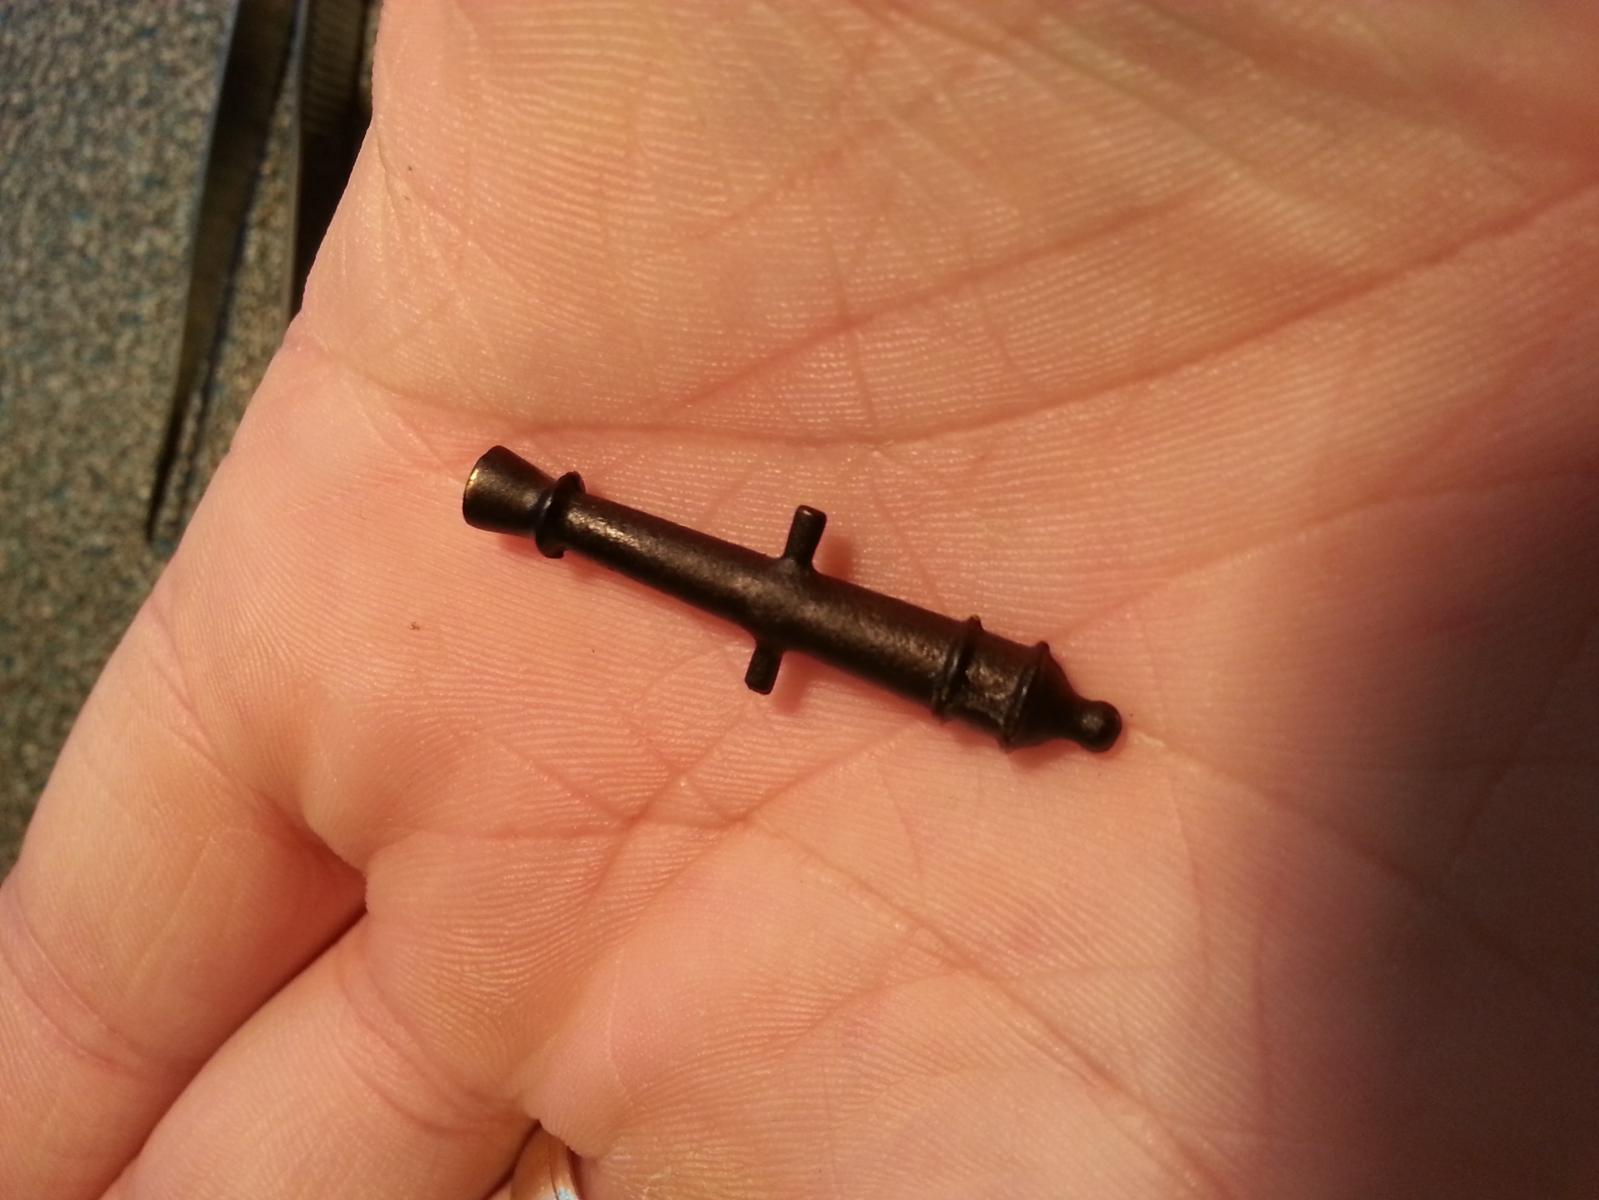
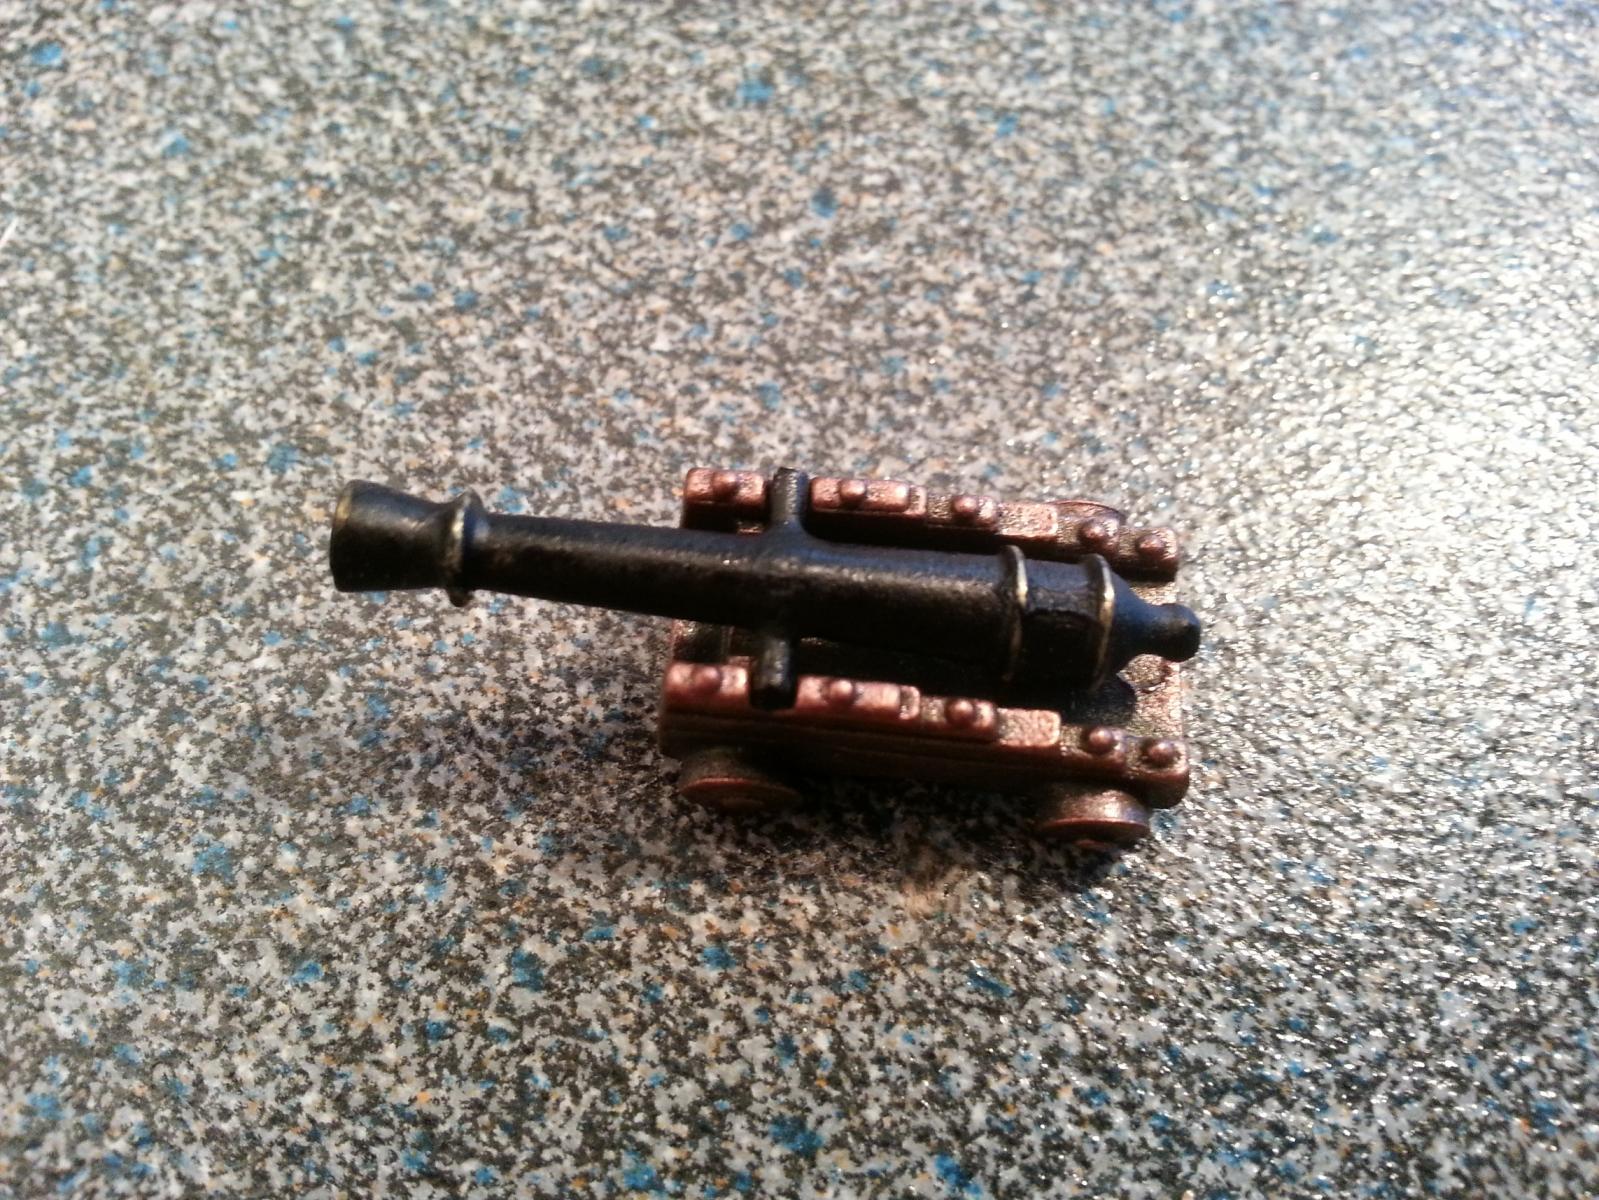
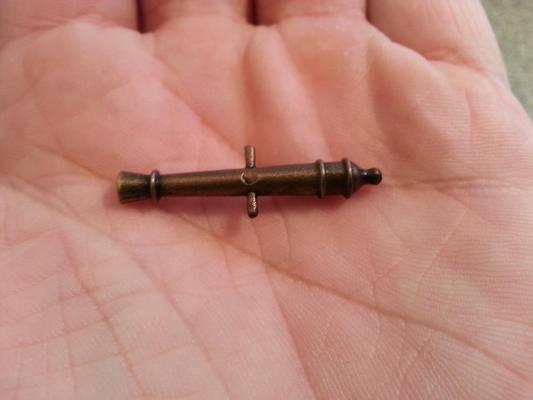
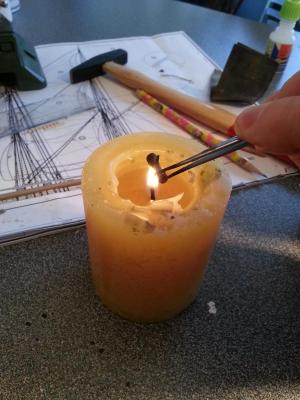
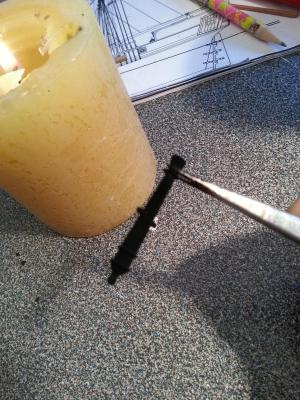
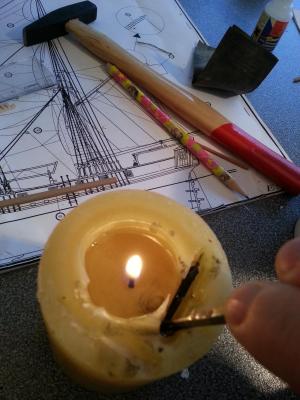
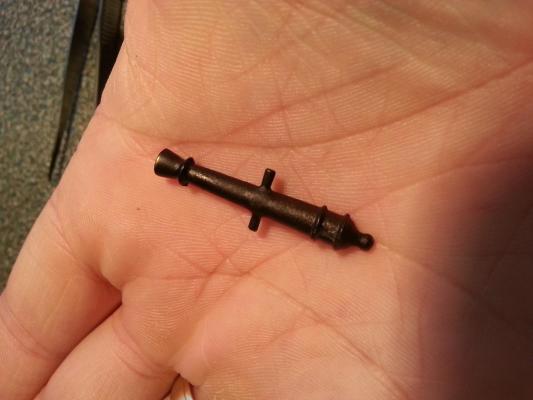
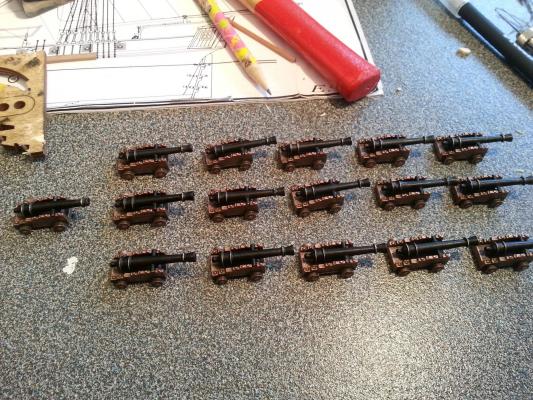
Hi all. Here is my progress with the canons . I think its quite unusual but it fits my expectations. Was thinking how I can make the canons black without using paint. Then I remembered that as a kinds we use to make thinks black (sticks, metal arts) in an open flame. Because I cannot make campfire in home I used candle. Problem is that the black cote is not permanent and as soon as you touch it it going off. So the solution was a wax from the candle. After that the coating is quite hard enough for it . I decided to leave the wax to cool down it self, because you can get and nice and natural look of the surface, I tried to cool it down in a cold water but then you are getting a glossy look with is not fitting to the canons. Here are the pictures and results.


-
Hi Pawel. I`m trying to do my best with the ship . Unfortunetly I will not work at here this weekend because I`m having beta test od The Elder Scrolls Online-it`s a game i`m waiting now for... 10 years and finally they decided to realise it . So I will wait with build after the weekend . \ For the long boat i think I will do it my own ones, just like I did with the board for Corsair.
-
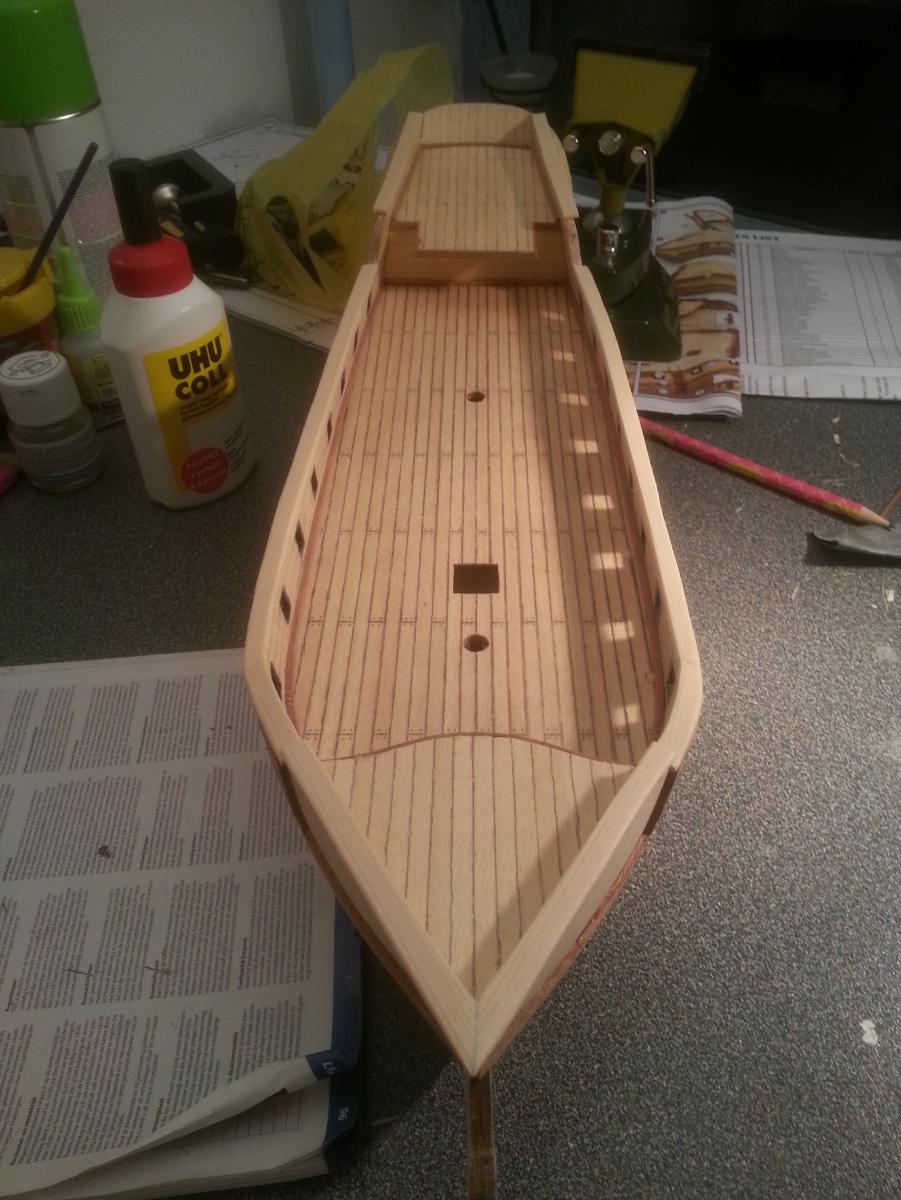
Welcome all. Well here is some more pictures of my progress. I`m slowly adding more and more details . Also have a problem with a boat for my ship. The boards (railings) are precut from the plywood and they don't fitt to each other.... Think I will write to OcCre about that :/.
-
Hi David. I just read your post and seen that you have a problem with gaps. There is an easy solution (thanks to Sjors again ). Put to the gap an glue (normal glue for wood) and than sand over it (the glue must be fresh still). What you will get is that the dust will stay on glue so the gap will not be visible anymore. I did it for my self and it works perfect . Only think is that be careful to not overdose glue and try to keep the wooden planks clean from it. The reason is that glue will sink to the wood and by putting varnish on planks you will see little difference in the structure so be careful! (I fix my problem by sanding those places but its a hell out of work). Good luck hope I help a bit.
-
Hi David. I sanded the hull (second layer) by hand. its saver and more accurate . I use a Dremel for a small work (like shaping small parts of wood before placing at correct place) etc I found it really useful .
-
Hi Pawel.It`s nice that you like it . About the cannons i`m not sure. They are already "painted" by OcCre, some kind of "old" golden kolor i think, will post the picture when i`m back from work . What`s the name of the blackening substance? It will be easier to find it (and maybe I can buy it in Holland) and also you have tried so i`m sure its good. About the tips, you are welcome and also dont hesitate to ask for more .
-
Witam! Well you are doing awesome job here . She looks nice with those "old" look . And the work with the ropes and sails-damn.... I`m doing my first build and its all before me . Keep a good job, will love to follow further (think i take this popcorn my wife did for me ).
-
Hi Jack. Hope you dont mind if i took the chair (and popcorn) and look over your build ? Its very intresting build (way different then the other vassels we mostly building here), its only few of those Viking ships on the forum if you will compere to the amount of the 17-18 century ships. Its nice to see you here and hope i can learn something from you .
-
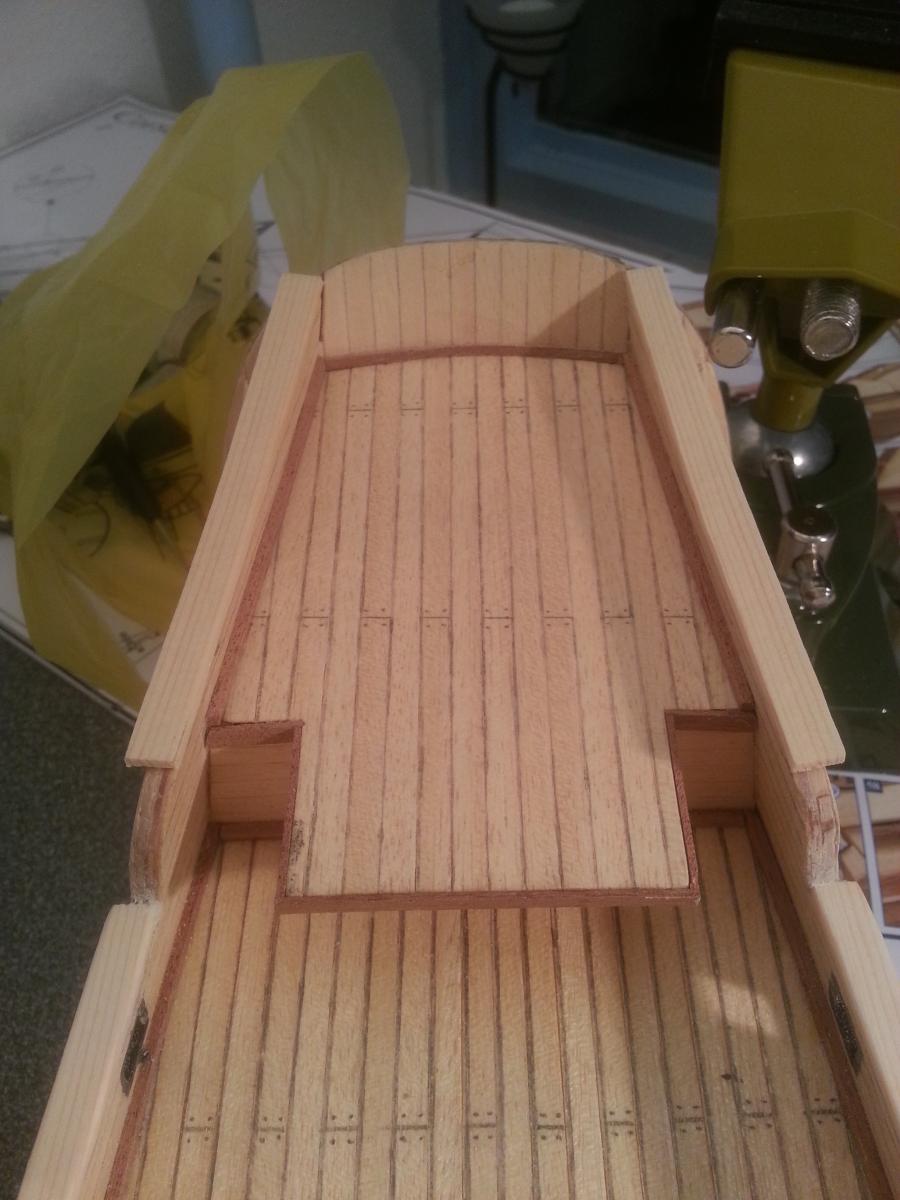
Welcome all. @mobbsie Thank you for your post. Especially after you edited your post i get the point what you meant . @David I also kind like the dubbel cathead they look "strong-massive" But unfortunately i choose option 'B'. The reason is that I looked further in instructions (pictures) and later i need to add just in front a forecastle deck some kind of pillar (forget the name already), so i check the dimensions of this piece and its 20mm high, where my deck was only 10mm above the main deck. (so David it can be useful for you later ) Now everything looks like it should. Plus i had busy day today and make some extras


-
Well Sjors, now I`m definitely need to visit you . And by that i mean you need to teach me how to do those ratlines (especially that in a month I`m planning to be at a stage of doing ratlines for my build). Wish you good luck and keep that tempo .
- 1,873 replies
-
- 1
-

-
- occre
- san ildefonso
- (and 1 more)
-
Hi Richard. Well i`m following your log and only from those pictures you posted since now I just cannot get wait to see it fully completed . Wish you good luck and a LOT of patience.
-
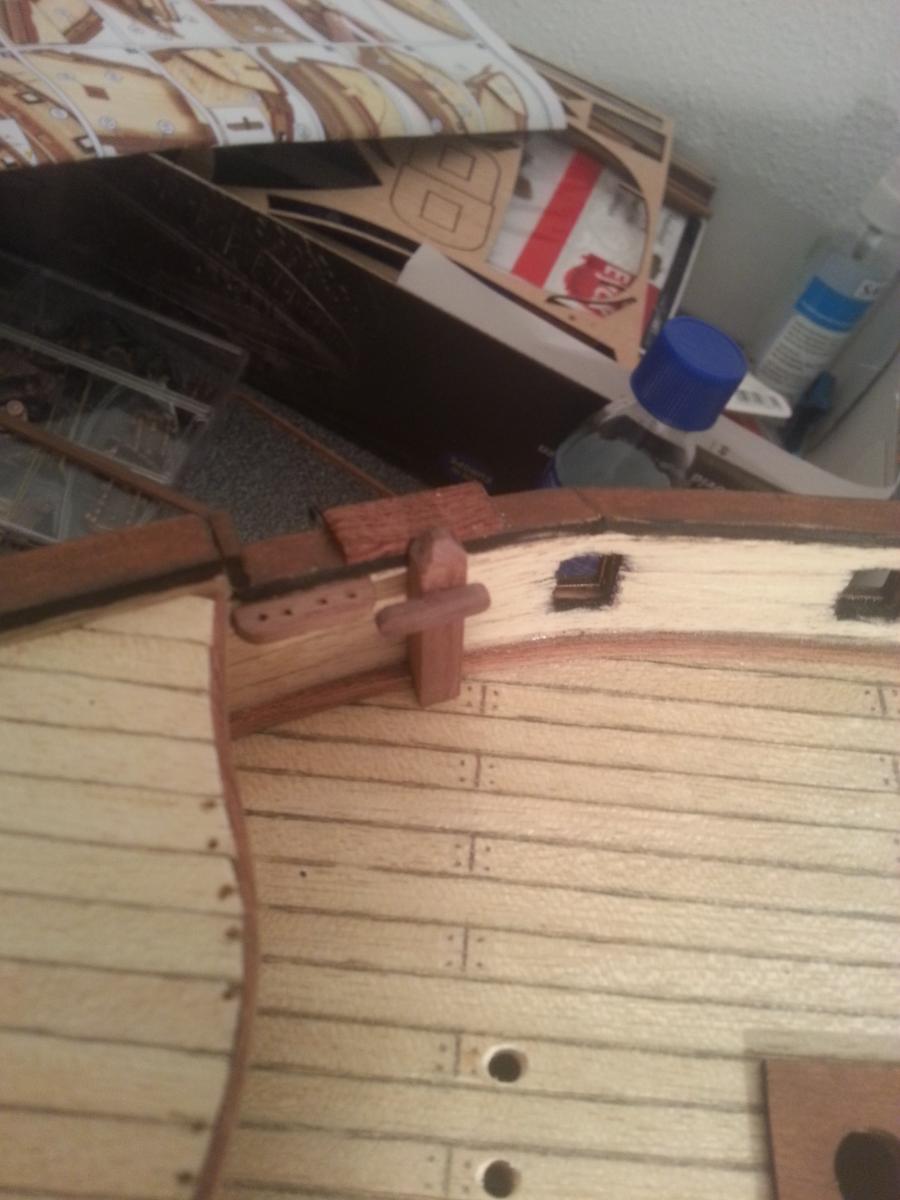
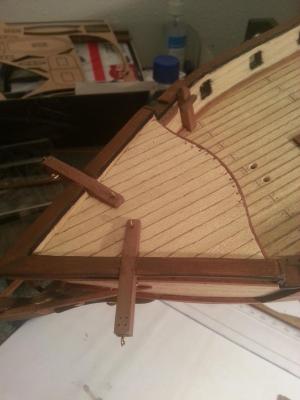
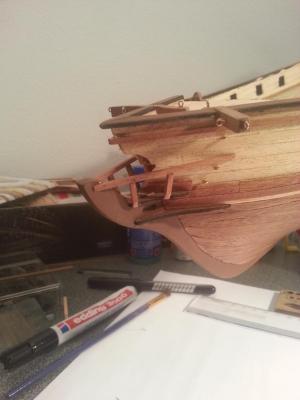
Yes. I glued the forecastle too low. On the pictures its not saying clear enough how high or where to place it and here are the results. So first I will try to dry fit the deck higher and if its now gonna be good for me I still can put the deck back and put something under the catheads.
-
Hi Sjors. Thanks for measurement this will help. About the height i know that they need to be leveled with the railings but also it need to touch the forecastle deck. So the conclusion is that my deck is too low about 4-5 mm. So I think the best option is to put it higher.... Bit afraid that will give me much of extra work. Will see today...
-
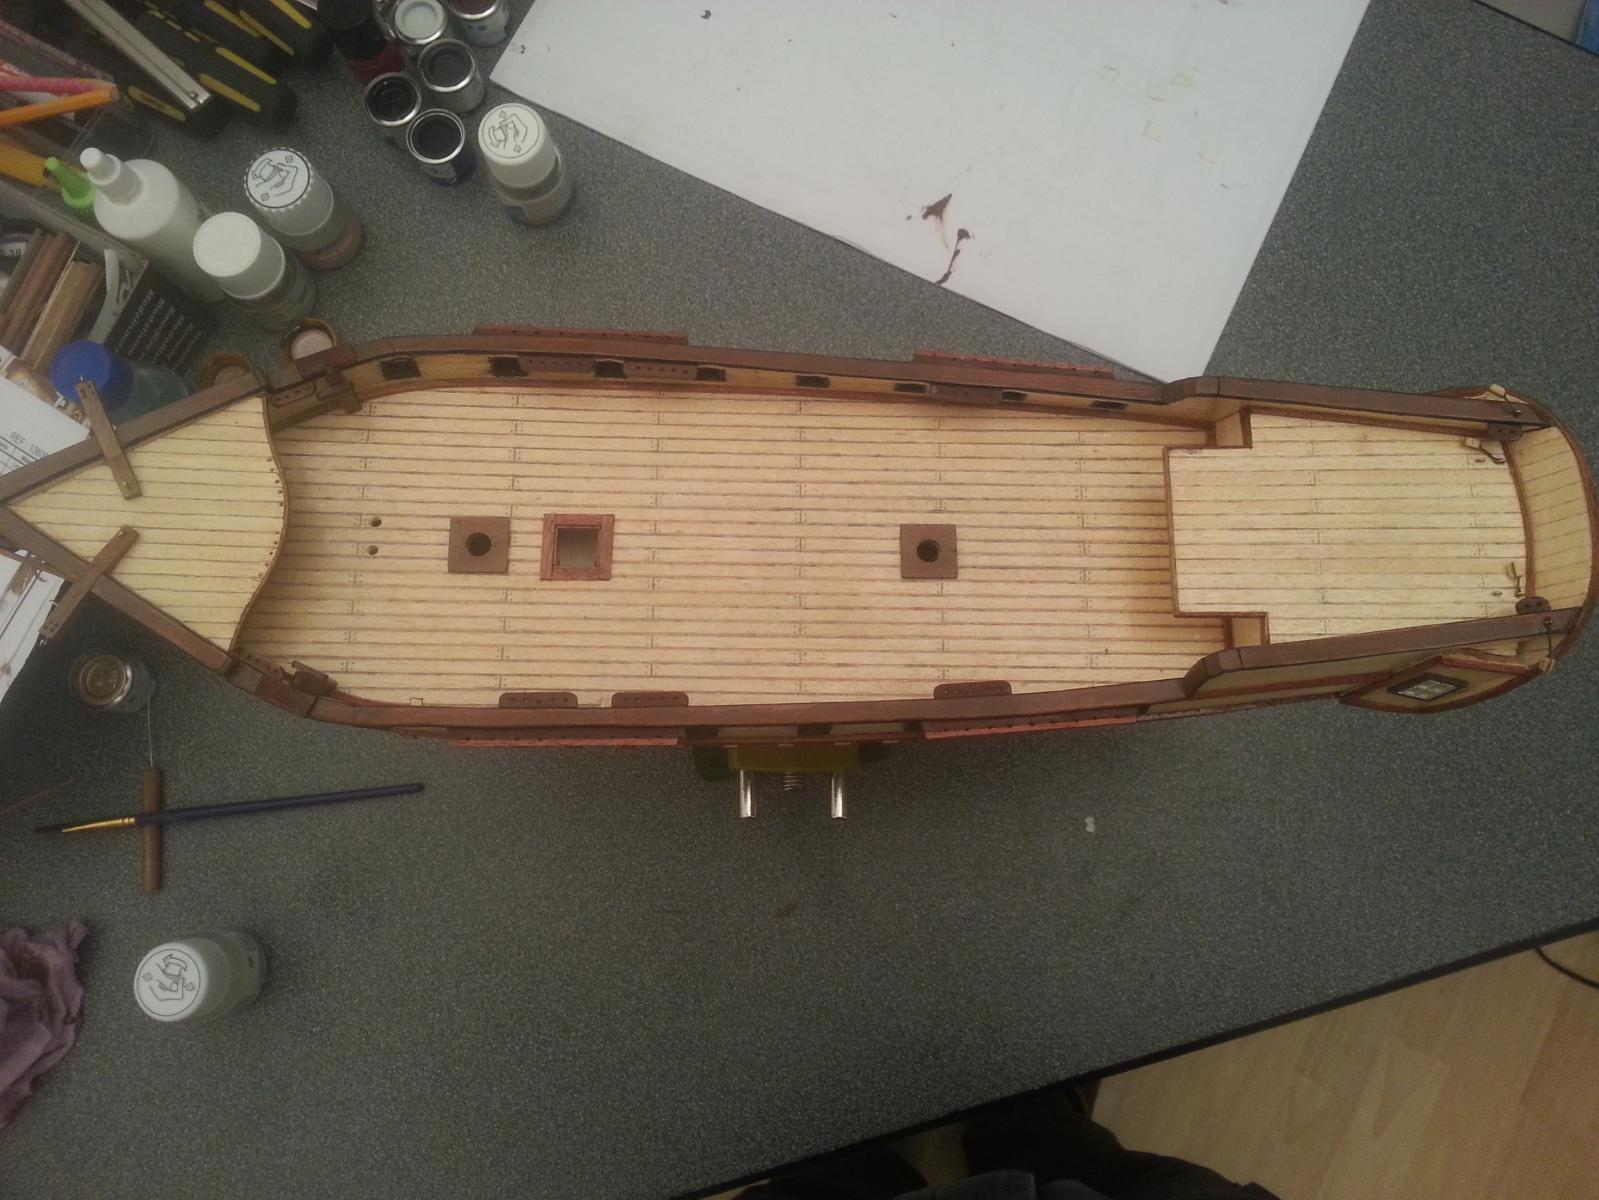
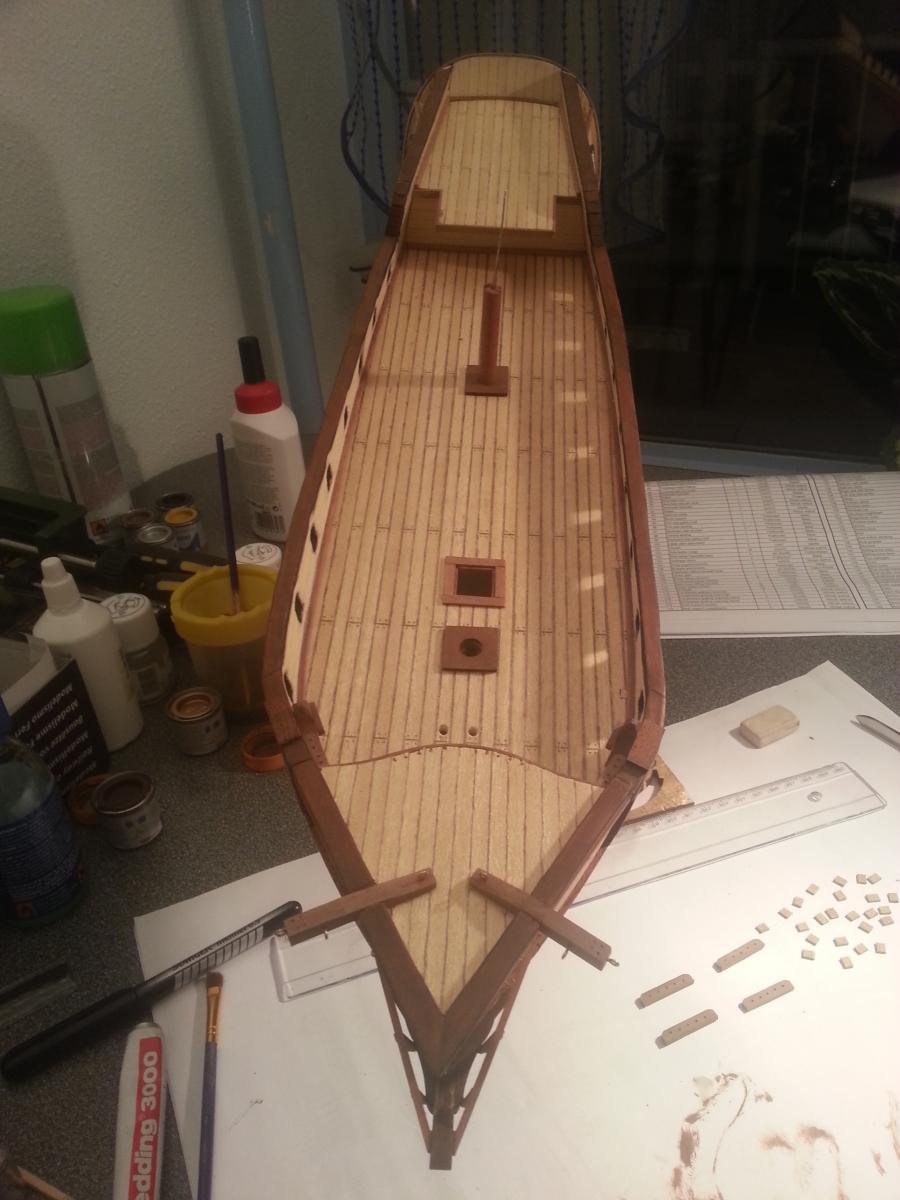
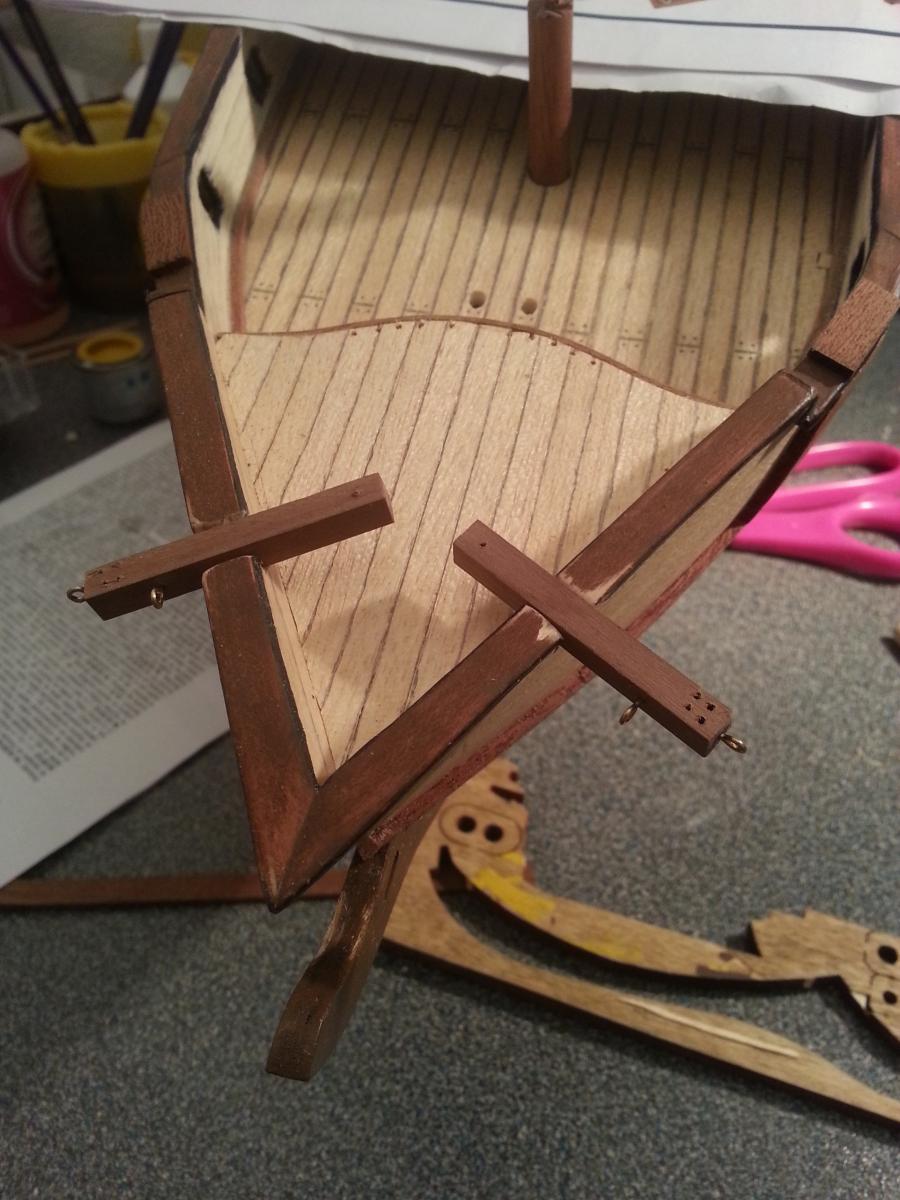
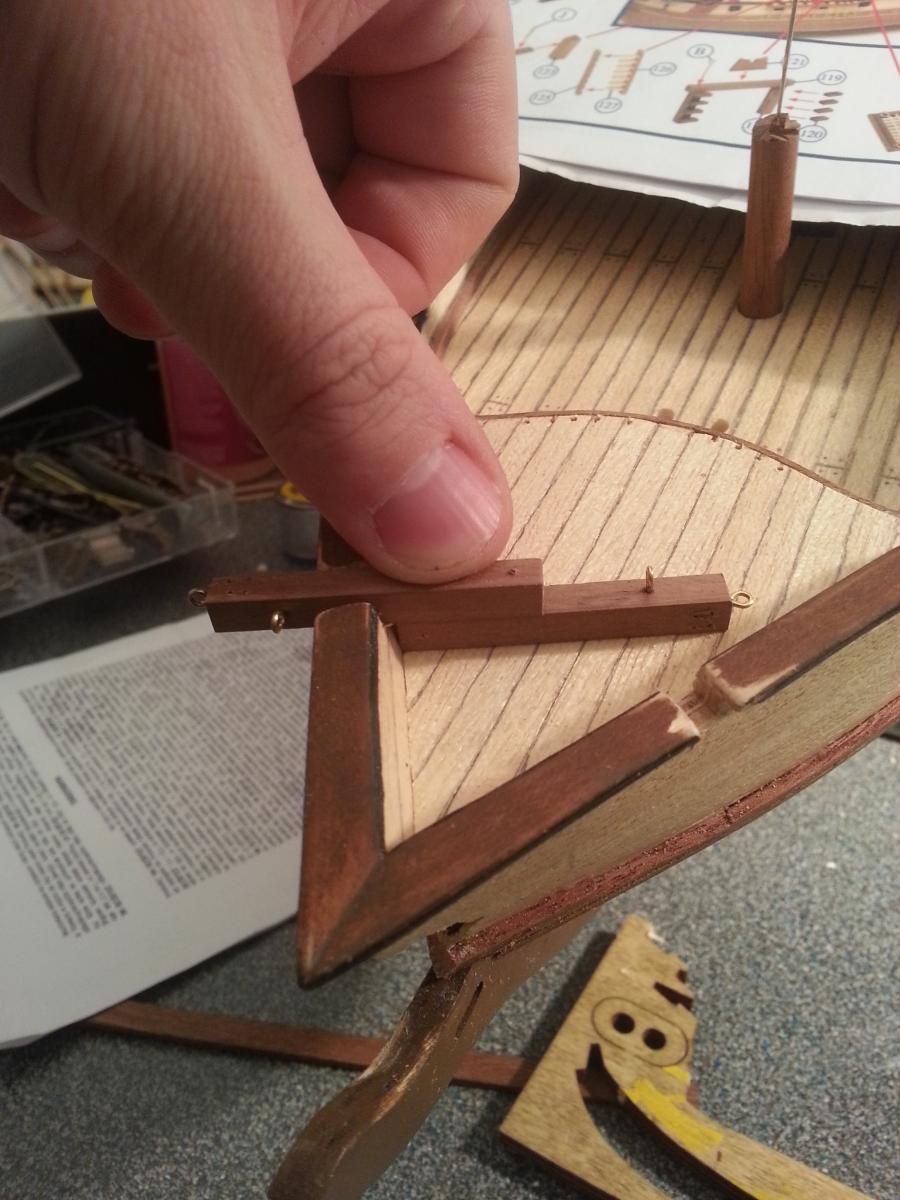
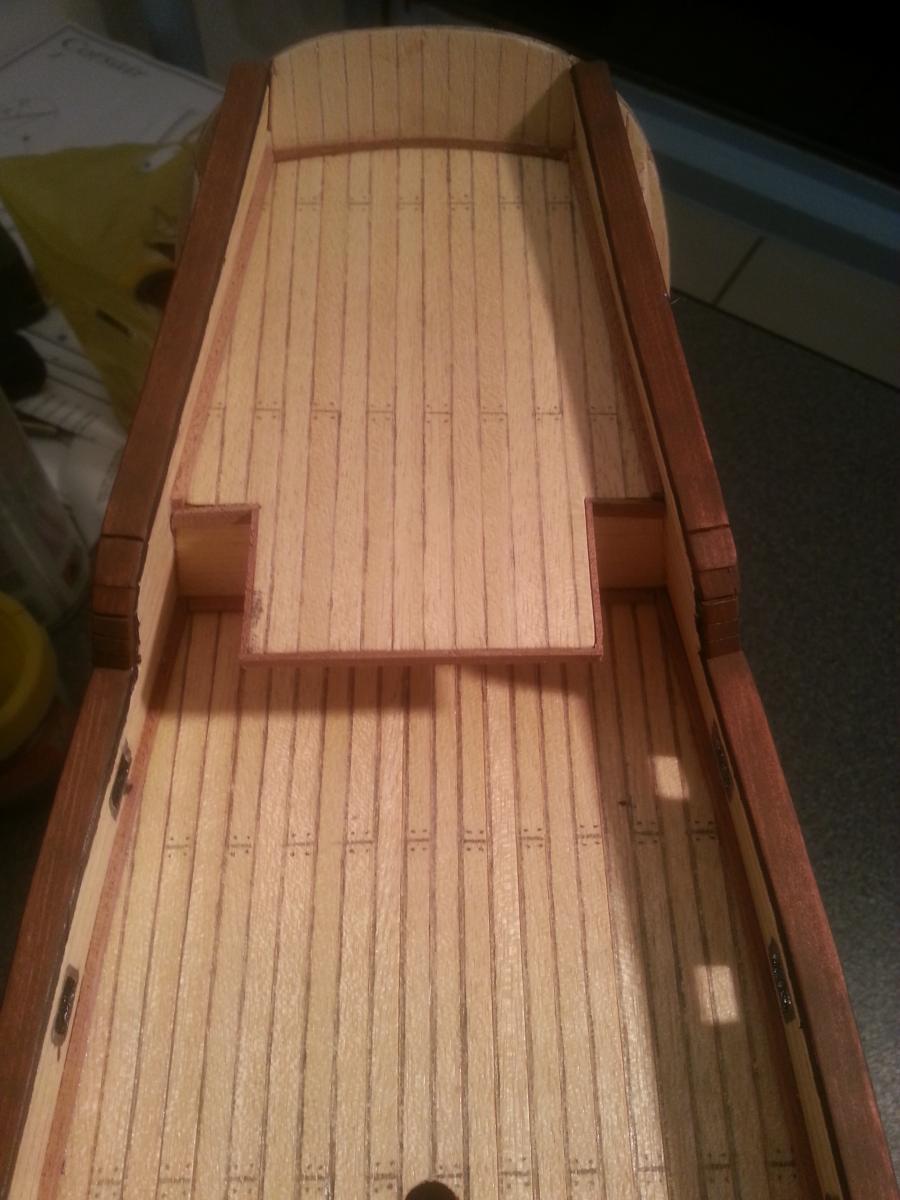
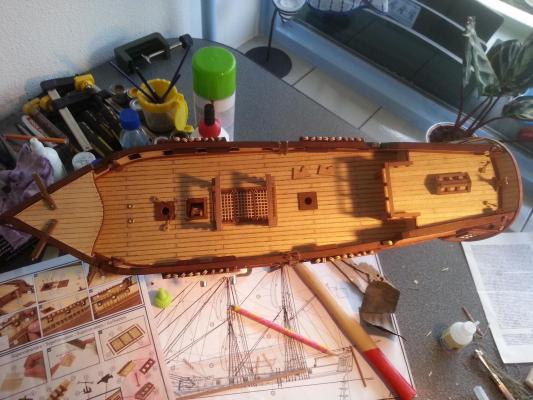
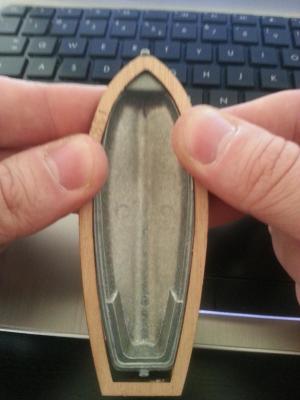
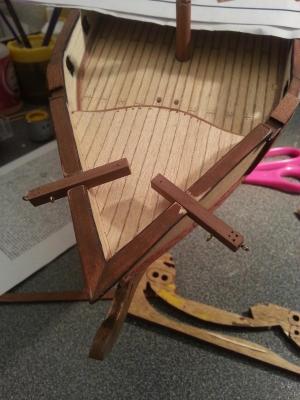
Welcome again. Here are some more progress. The rudder blade is finish . Was hell to do it . Lot of measuring, correcting etc. But after one hour i made it . On place the side windows, and the frames for canons windows. Also just finished a cat davits. Was a bit problem because i need to do them by my self and instruction didn't say any specification on it, how big the holes, where to make a place for it on the deck. But here are the results . And I need your advice guys. In instruction it says that those "cats" need to be exactly on this same level as deck, as you can see on the pictures it doesn't. So: a) should I leave it like that Remove forecastle deck and put it higher c) like i show on the 2 picture there is just enough place to put another wood under it. With option will be the best? I`m thinking about option "b" but I`m afraid that the planks will not fit exactly to the bulwarks anymore.
-
And about the color of the boards was qiute easy. I have a paint from Humbrol nr 160. I took a bit and add solvent . I get very liquid paint because i wanted to get this color looking as much as possible to natural one. (i love the color of dark wood ).
-
Hi Mobbsie! Well looks like I need to do more quarters in my ship, because more and more people following this log (that's nice off course). Hmm scrapping? I read somewhere about that, that's its giving nice wood structure and sanding can ruin it. Will try. Need to ask Sjors where i can buy something to do it, because i assume i need a special tool for that? So welcome aboard and enjoy .
-
Hi David. The second planking looks good! But just like Sjors told me on my log don't put those planks with force on the place. let them go they own way, believe me it much more easier. What kind of glue you are using? If a typical glue for wood (most of the time its a white color) watch out to don't put him too much other wise it will come out and stay on planks (just like on my build it was disaster with putting a varnish on it. I`ve solve the problem but it was a LOT of sanding and you don't want to go there), or right after setting the planks clean it with a bit wet material (like piece of cloth). And good luck with the rest i will gladly follow your next steps .
-
Hi David . Welcome aboard! Yeee... lets say I cannot stay away from my ship longer than a week . And this week was pretty busy with building. And not everybody have time to sit few hours by his ship (just like you I think ). I`ve you have a question just ask, will try to help you my best. So welcome and enjoy.
-
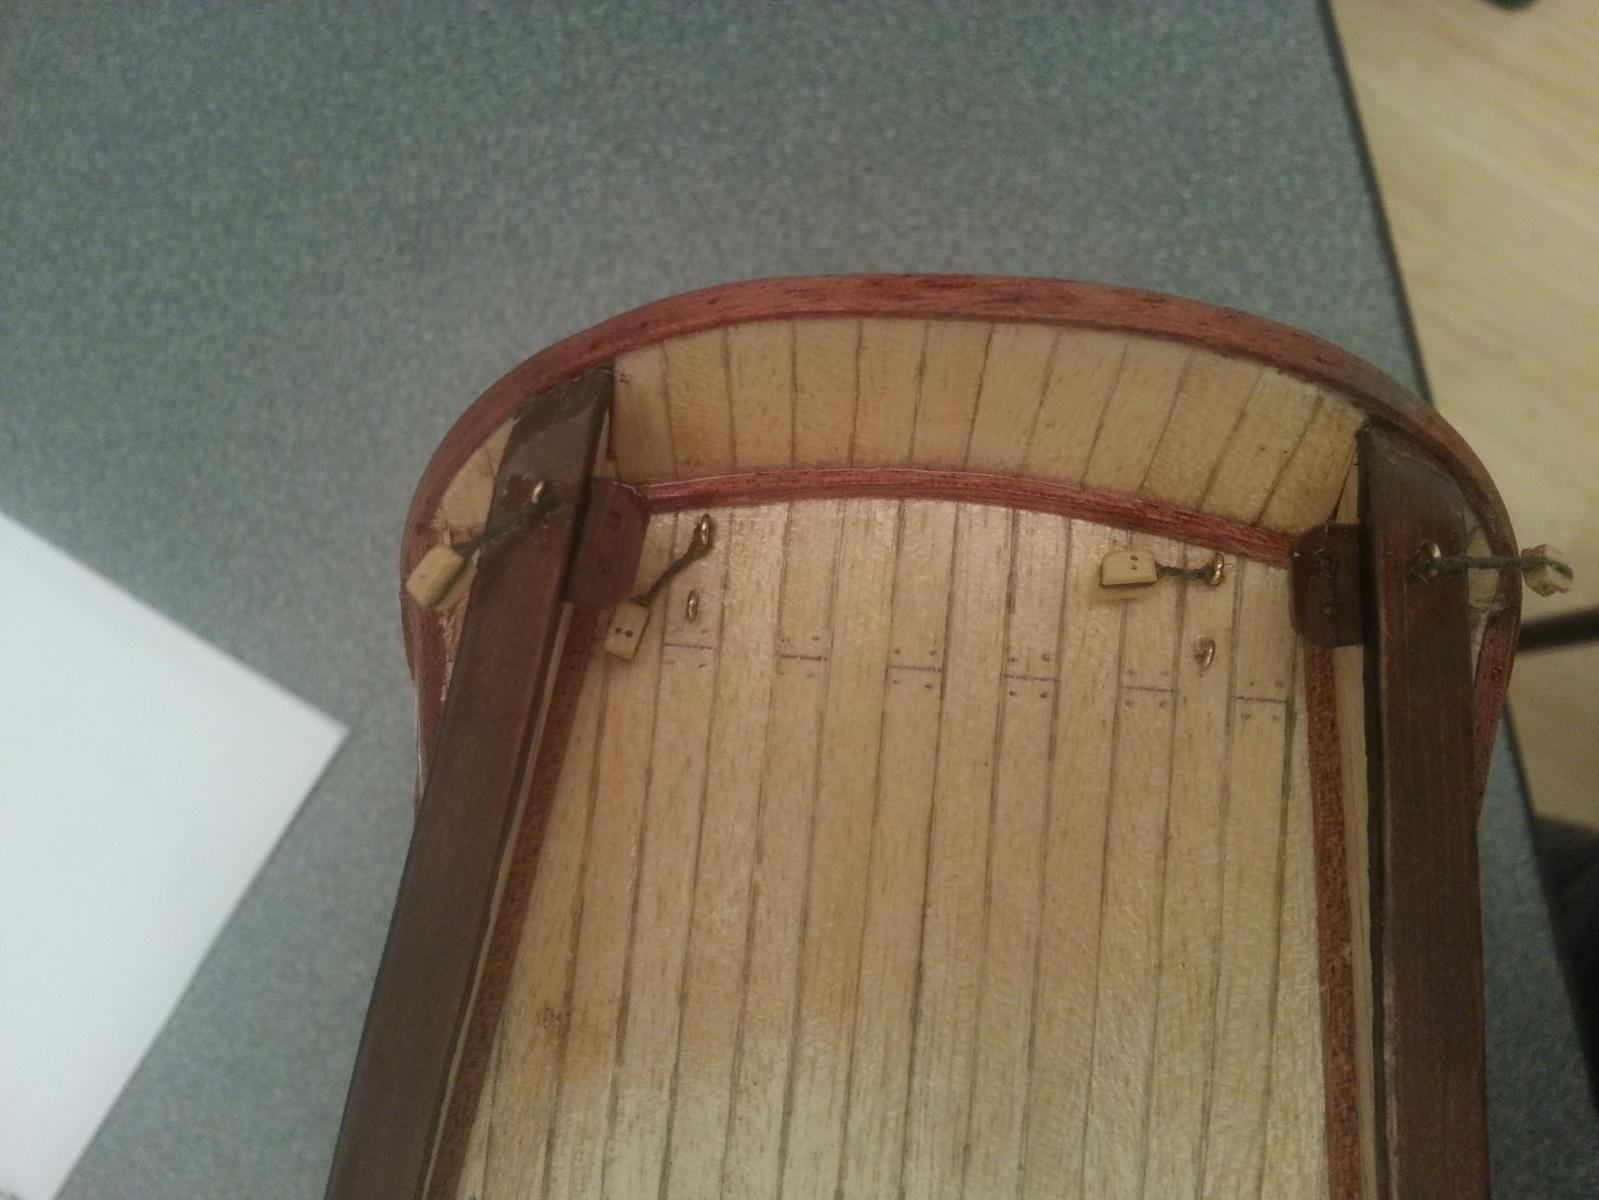
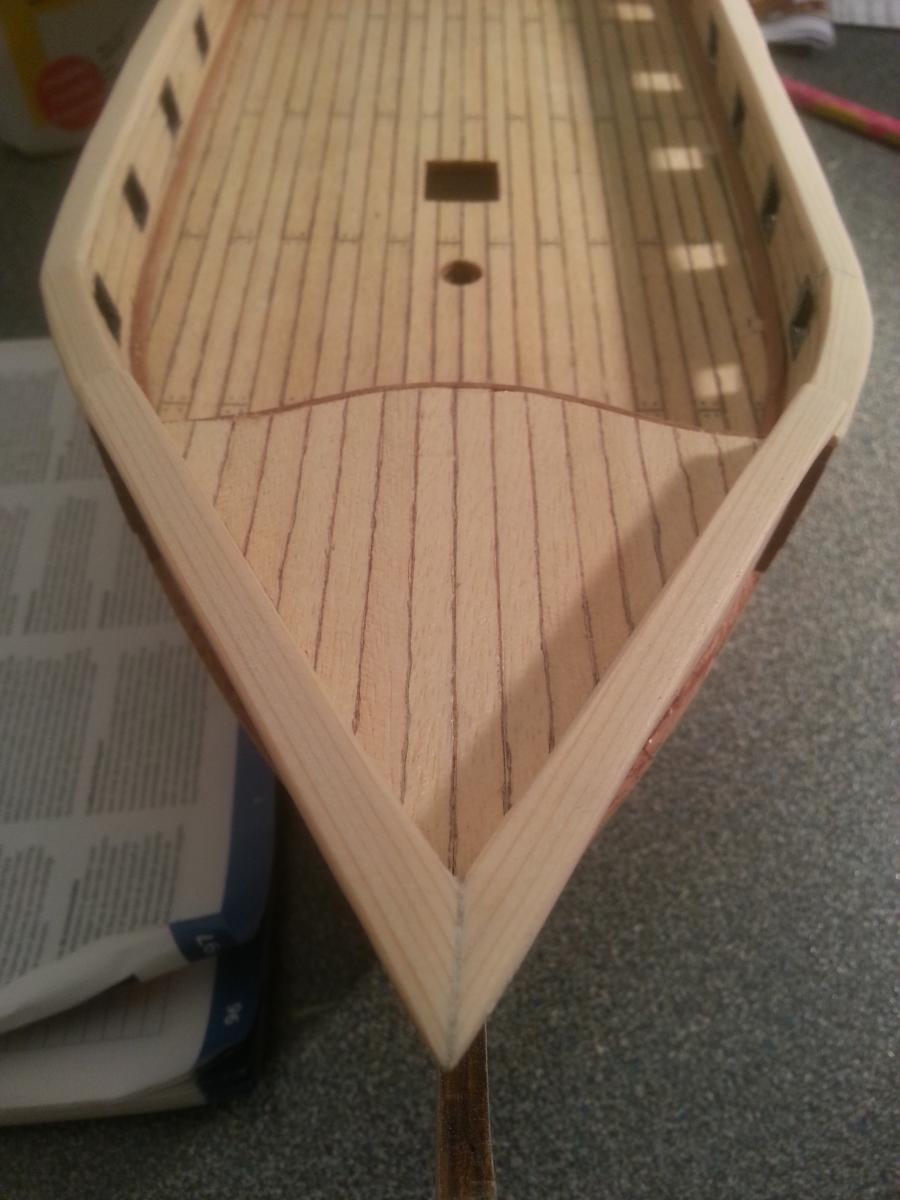
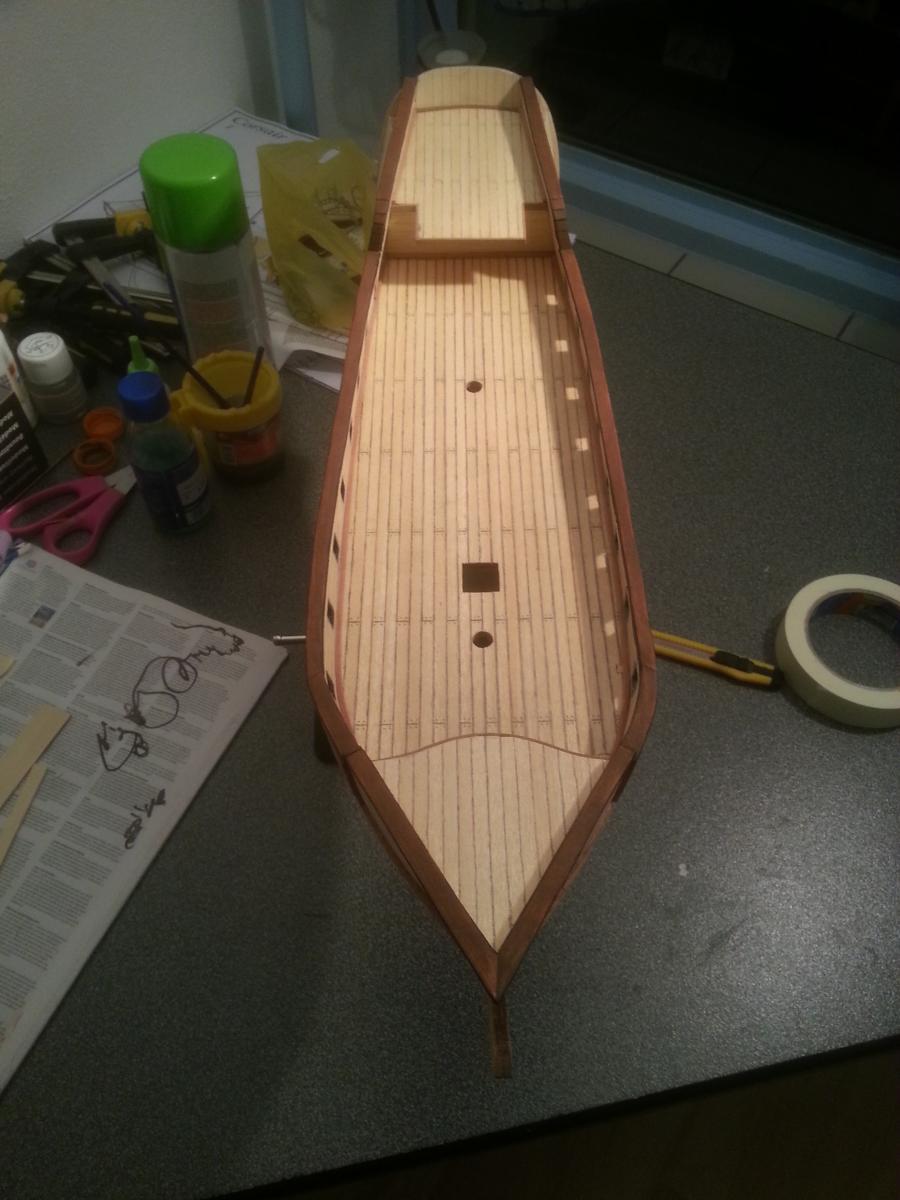
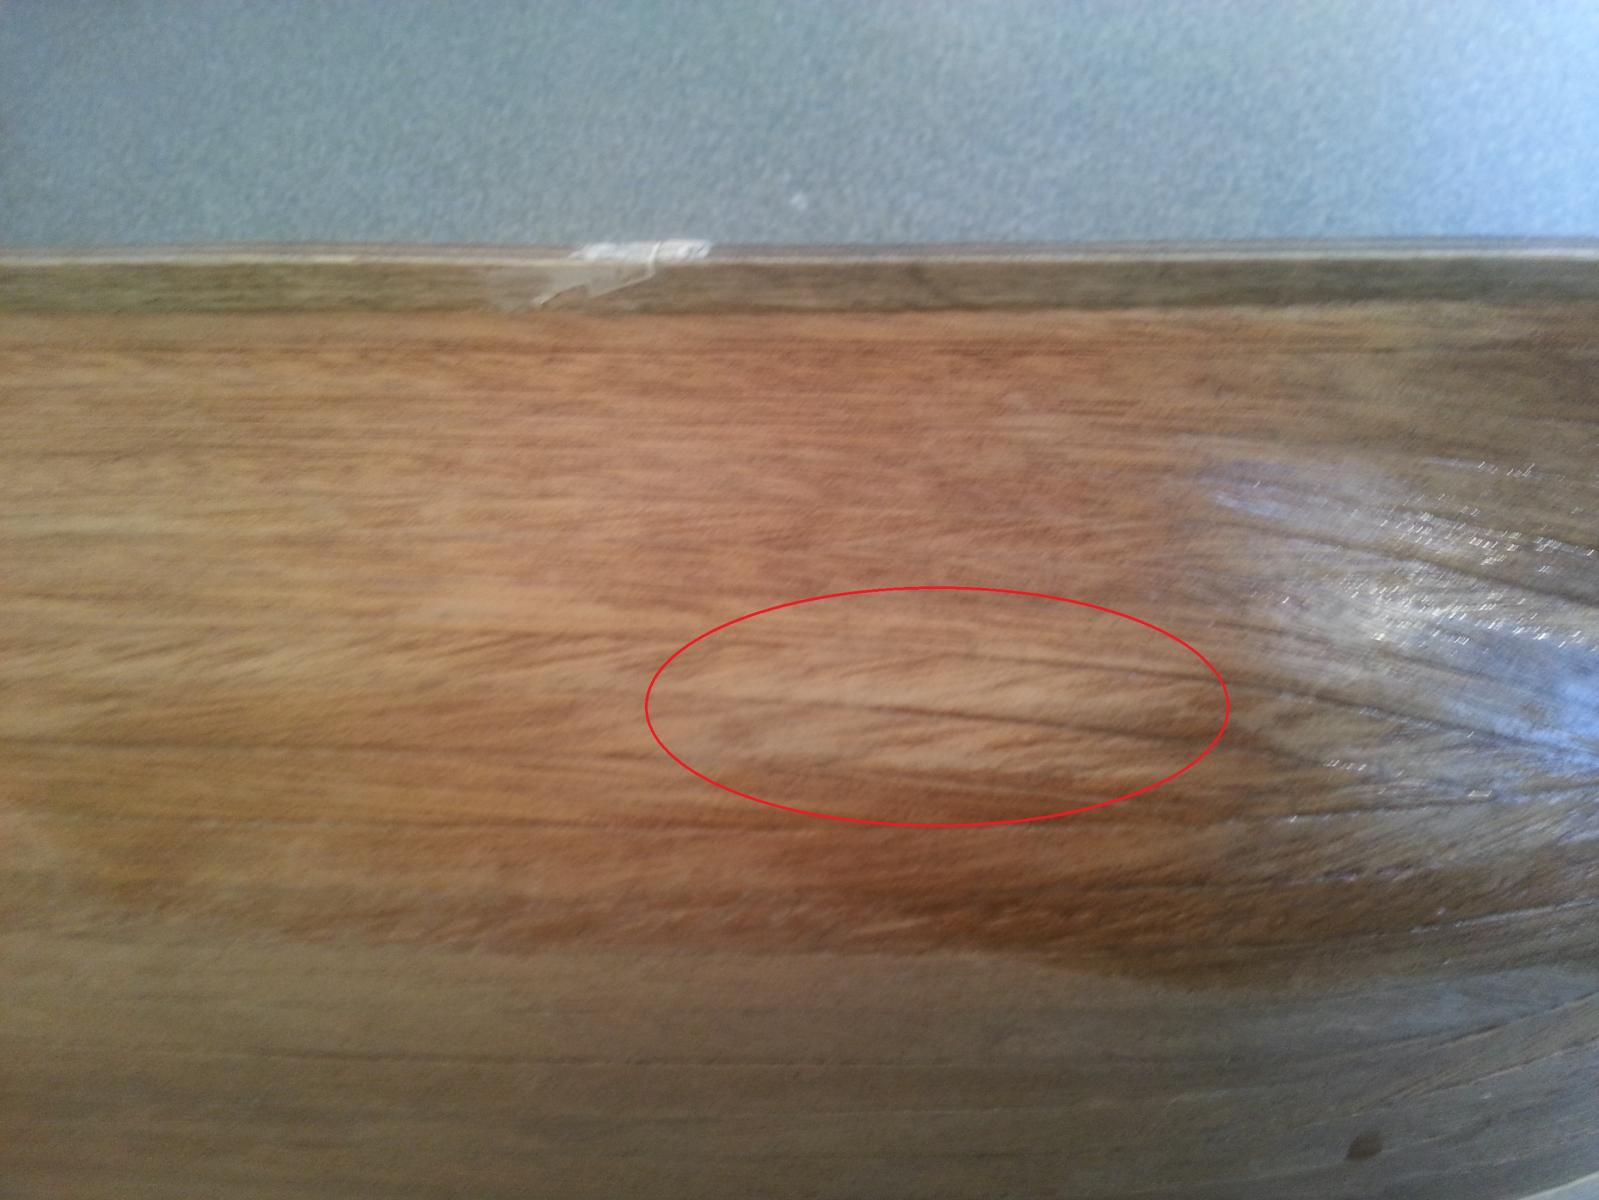
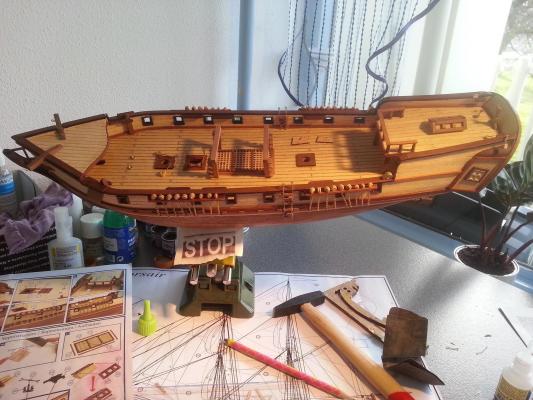
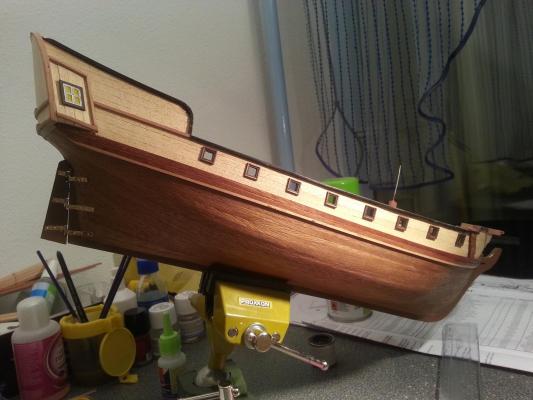
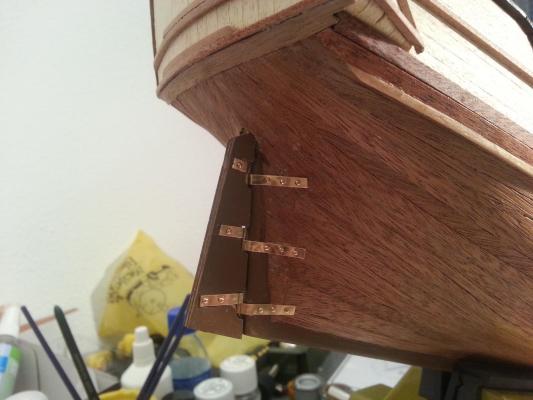
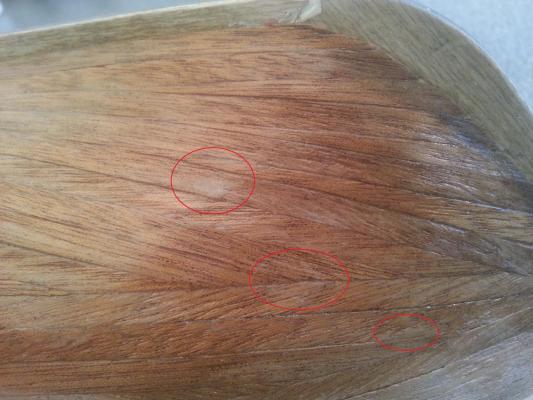
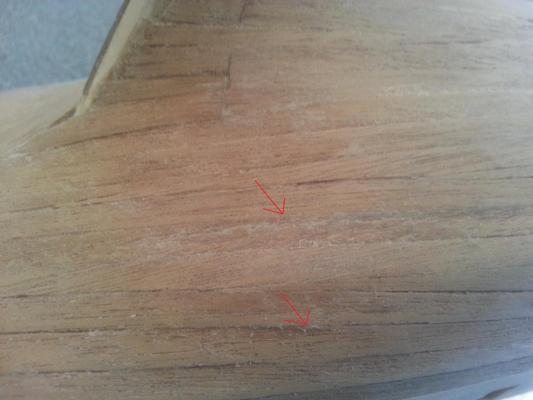
Hi Sjors. Thank you for your idea for the stern, it get me some idea how to do it by my self (will see how it will look when its on a ship and not in my mind ). The spots on the hull (this from glue) are looking REALLY terrible. You don't see it so good on the pictures but in live its the first think you will see. The glue is stopping varnish to go into the wood so the color is not poping up . For the boards (railing) i throw away the plywood and decided to do it by myself. I've buy nice wide plank and shape, sand and paint it. the measurements are this same as original. Here are the results (its mat now, still need to put varnish on it):


-
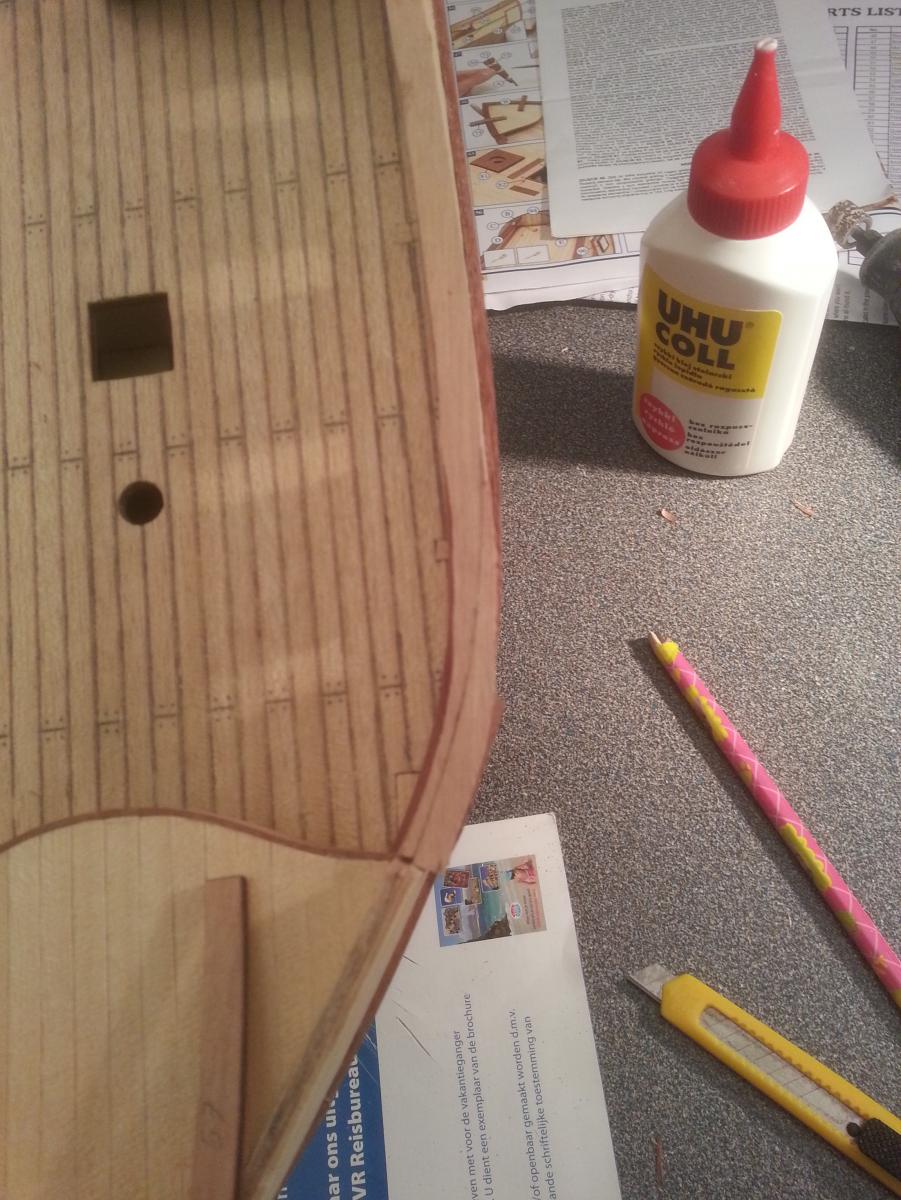
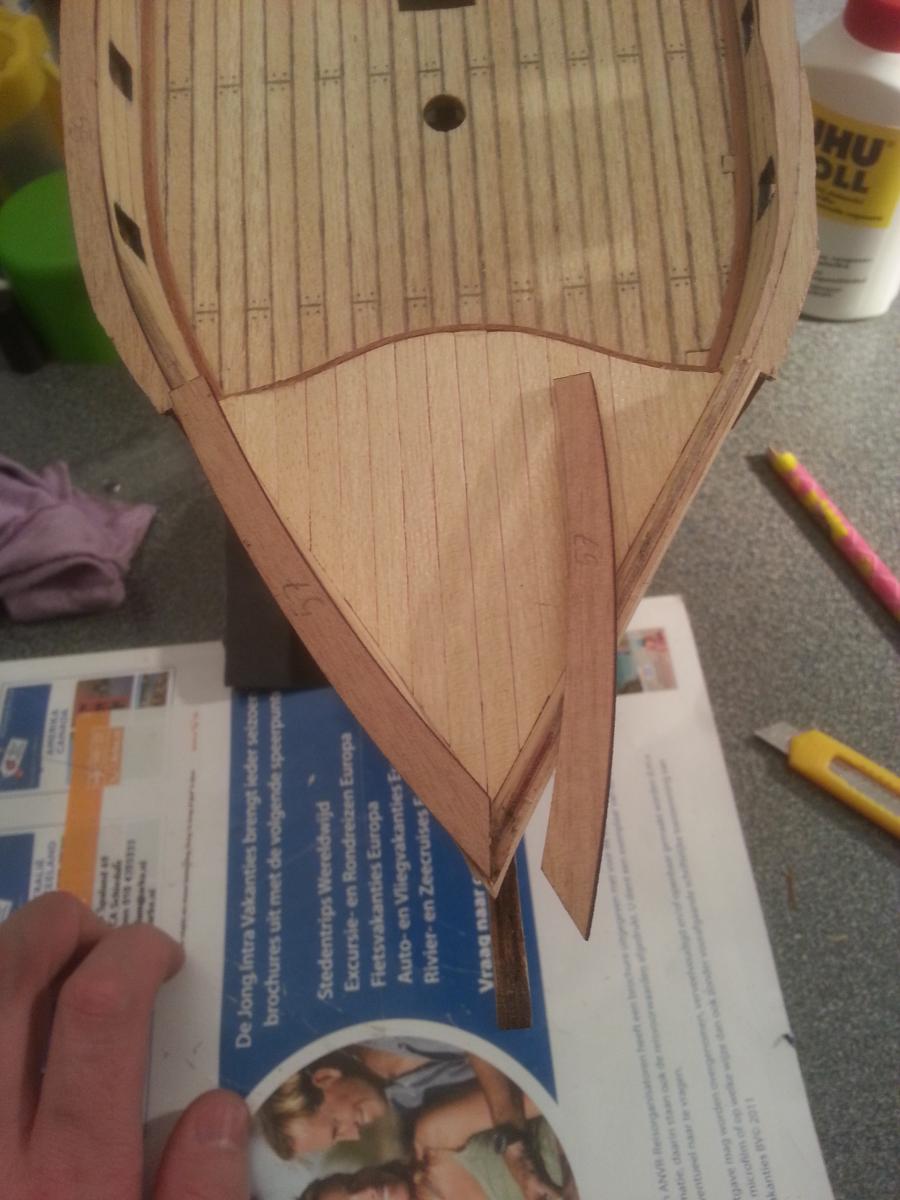
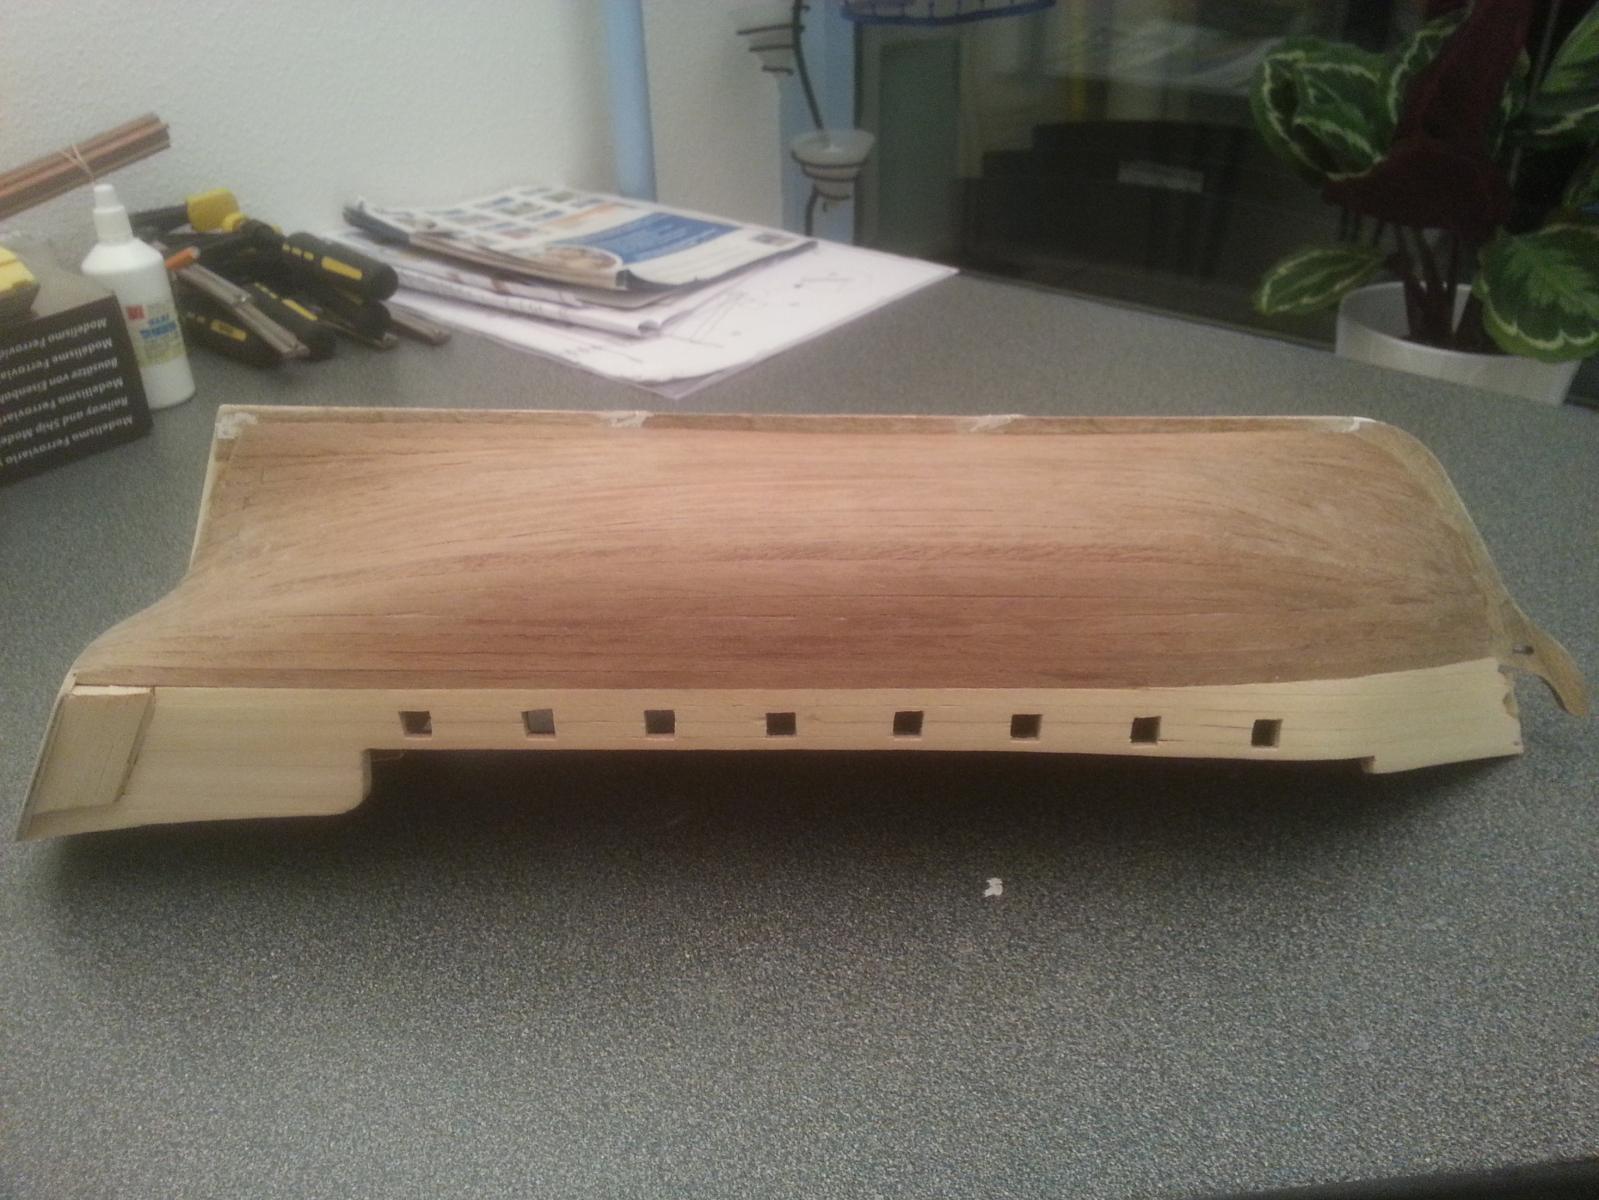
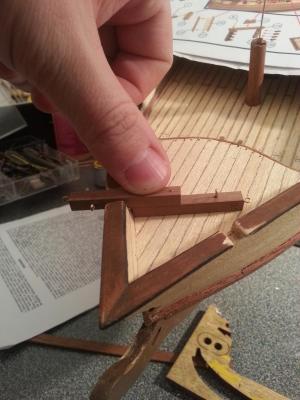
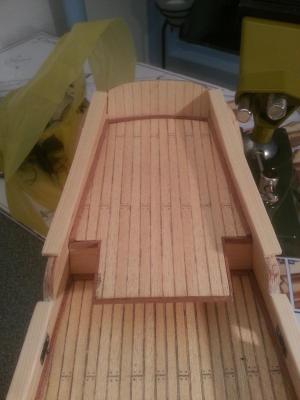
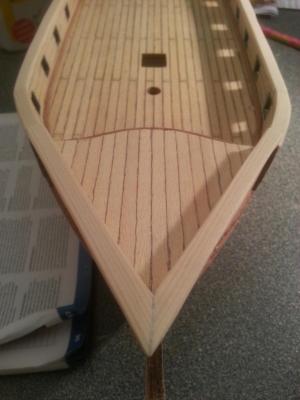
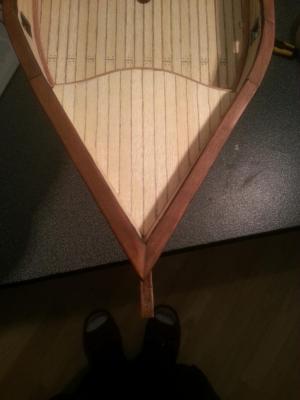
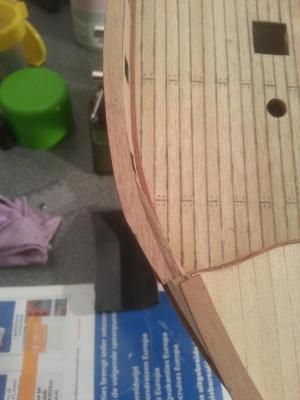
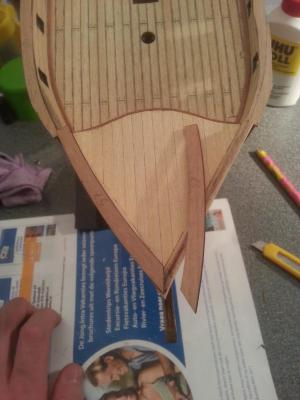
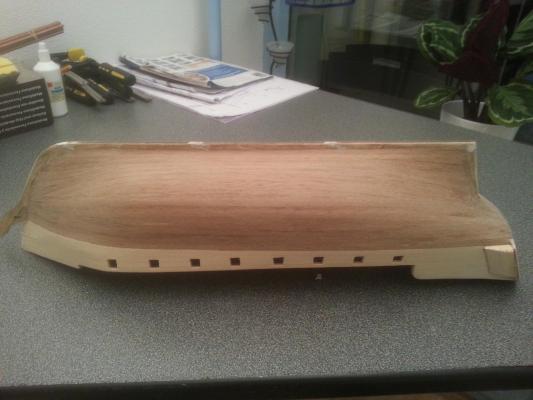
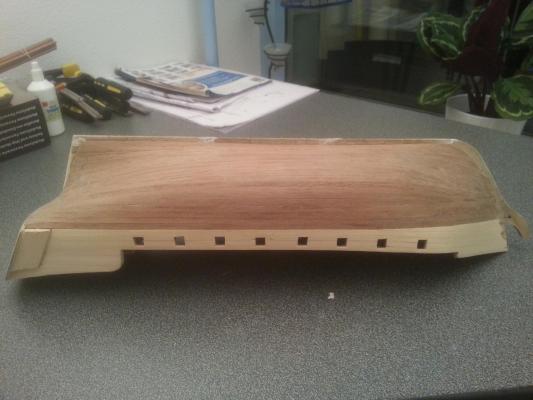
So here we go again . Now I need to glue Bow, stern and forecastle limber boards with you can see at the pictures doesn't really fit (its a precut from plywood) because by lines of the ship seems to be more strait than the boards. Tried to solve the problem (on pictures its still not finish, still need to work on sanding to shape it). But my most concern is in instruction and also at Sjors and Garward build log of Corsair the boards (railings) have this nice color with my as you can see doesn't. Did you guys painted it after or it was like that? About the glue on planks-I`m still working on that.

-
Hi Sjors. Thank you for advice . Any tip how i can do it? add some more plank at the end? Sanding will make it even worst now. And I have a major problem now and really need help. I try to put some varnish on the hull (satin cote from humbrol) and here is my problem. After sanding i still have some place where the glue (white one specially for wood) is still on the planks and even sanding does not really help. There are also some places where the varnish cannot get into the wood because glue is there and I will need to sand off the entire plank the get it rid of there. Any advice on that? should i wet/soak the planks so the glue will get soft again? Here are some pictures, and in live it looks way worst .

-
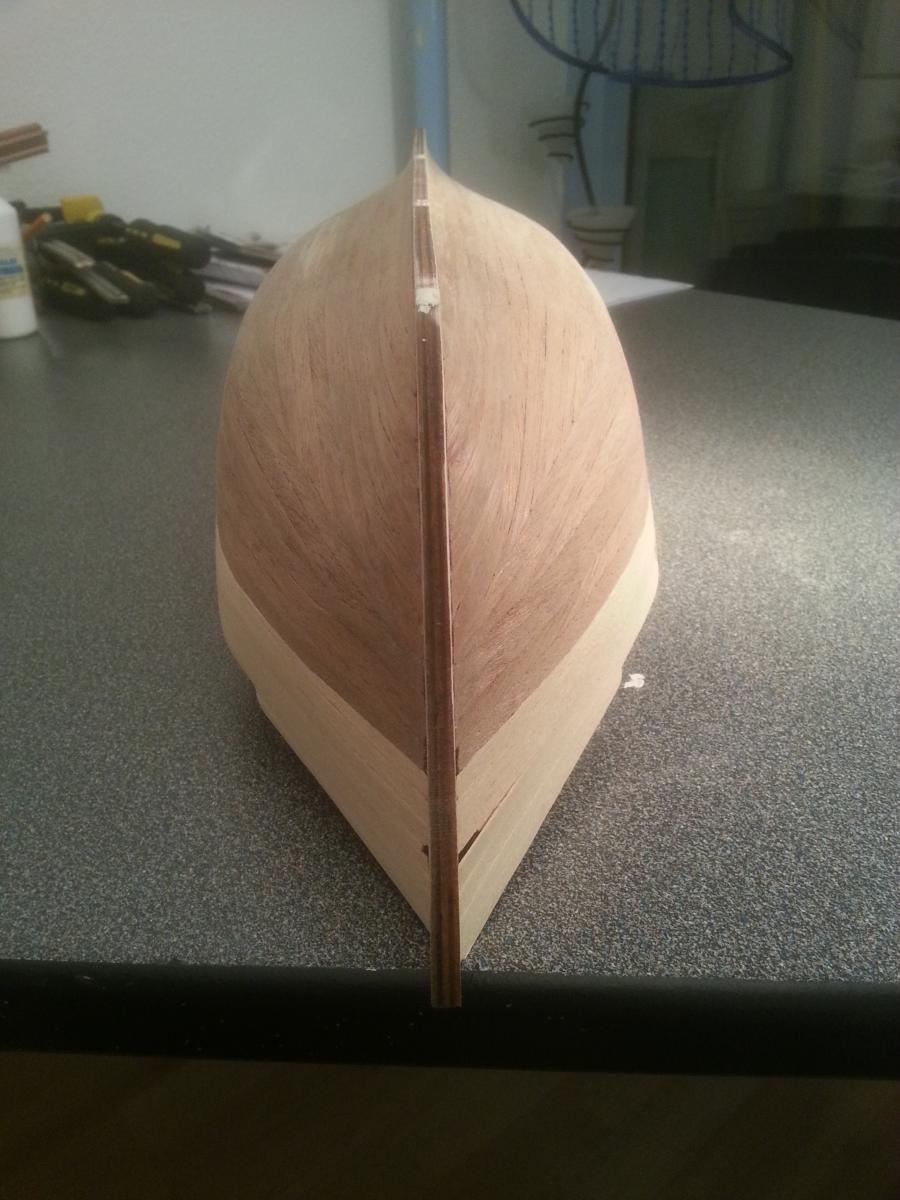
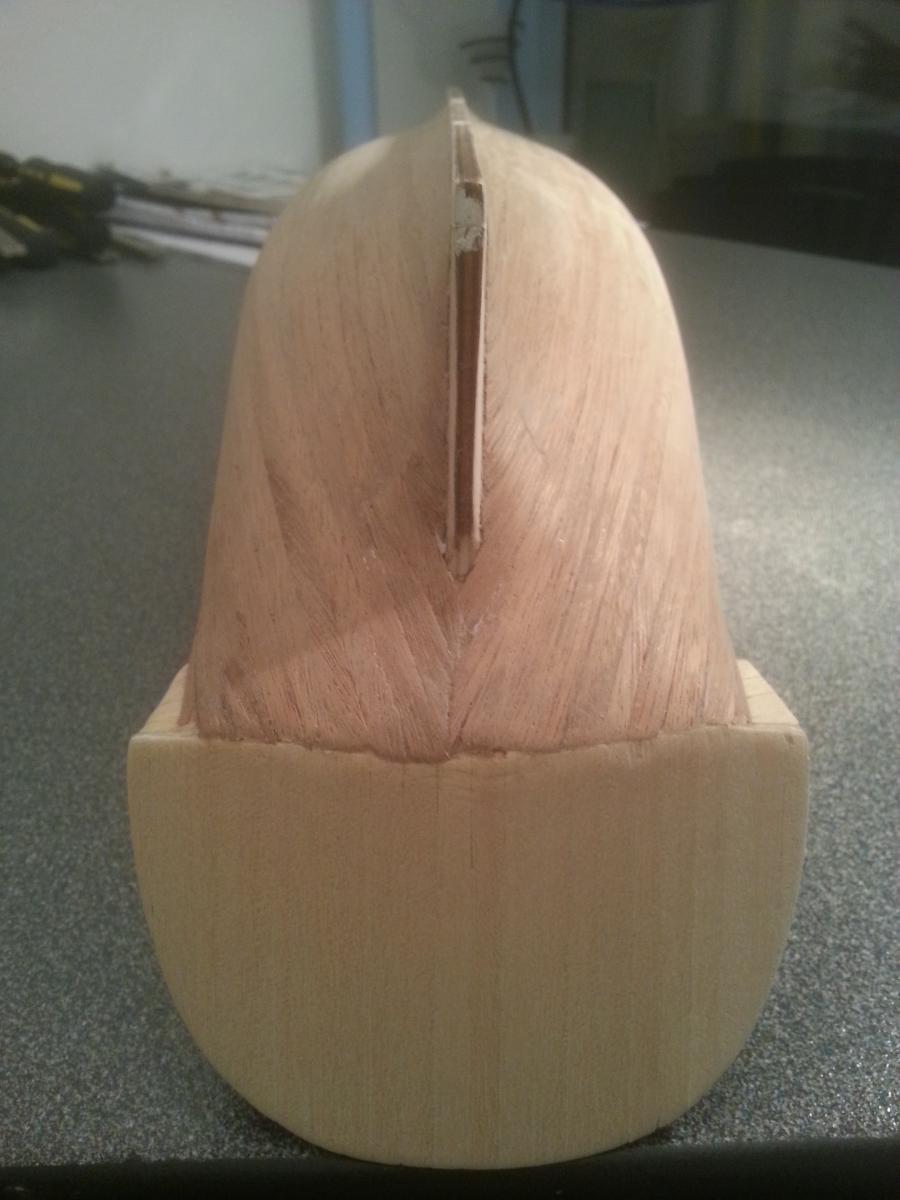
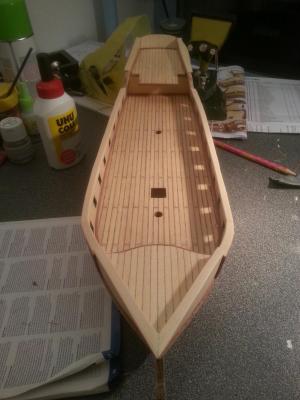
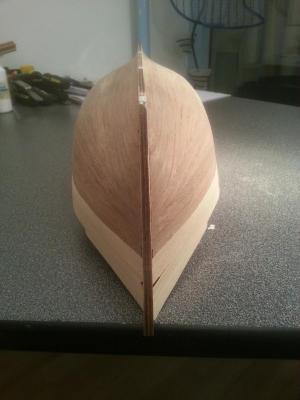
So hull is (FINALLY ) closed and sanded. I`m putting pictures so you guys (and lady ) can see and maybe tell me what I need to correct before going further. Enjoy and I`m waiting for your opinion.

-
So will do as Sherry, taking a chair and have an eye on your build. Hope in a future I will not have such a problem, I have enough grey hairs in my age already . Good luck with fixing and hope there will be no more problems with the build!