Navis Factorem
-
Posts
240 -
Joined
-
Last visited
1 Follower

Recent Profile Visitors
1,490 profile views


-
 oakheart reacted to a post in a topic:
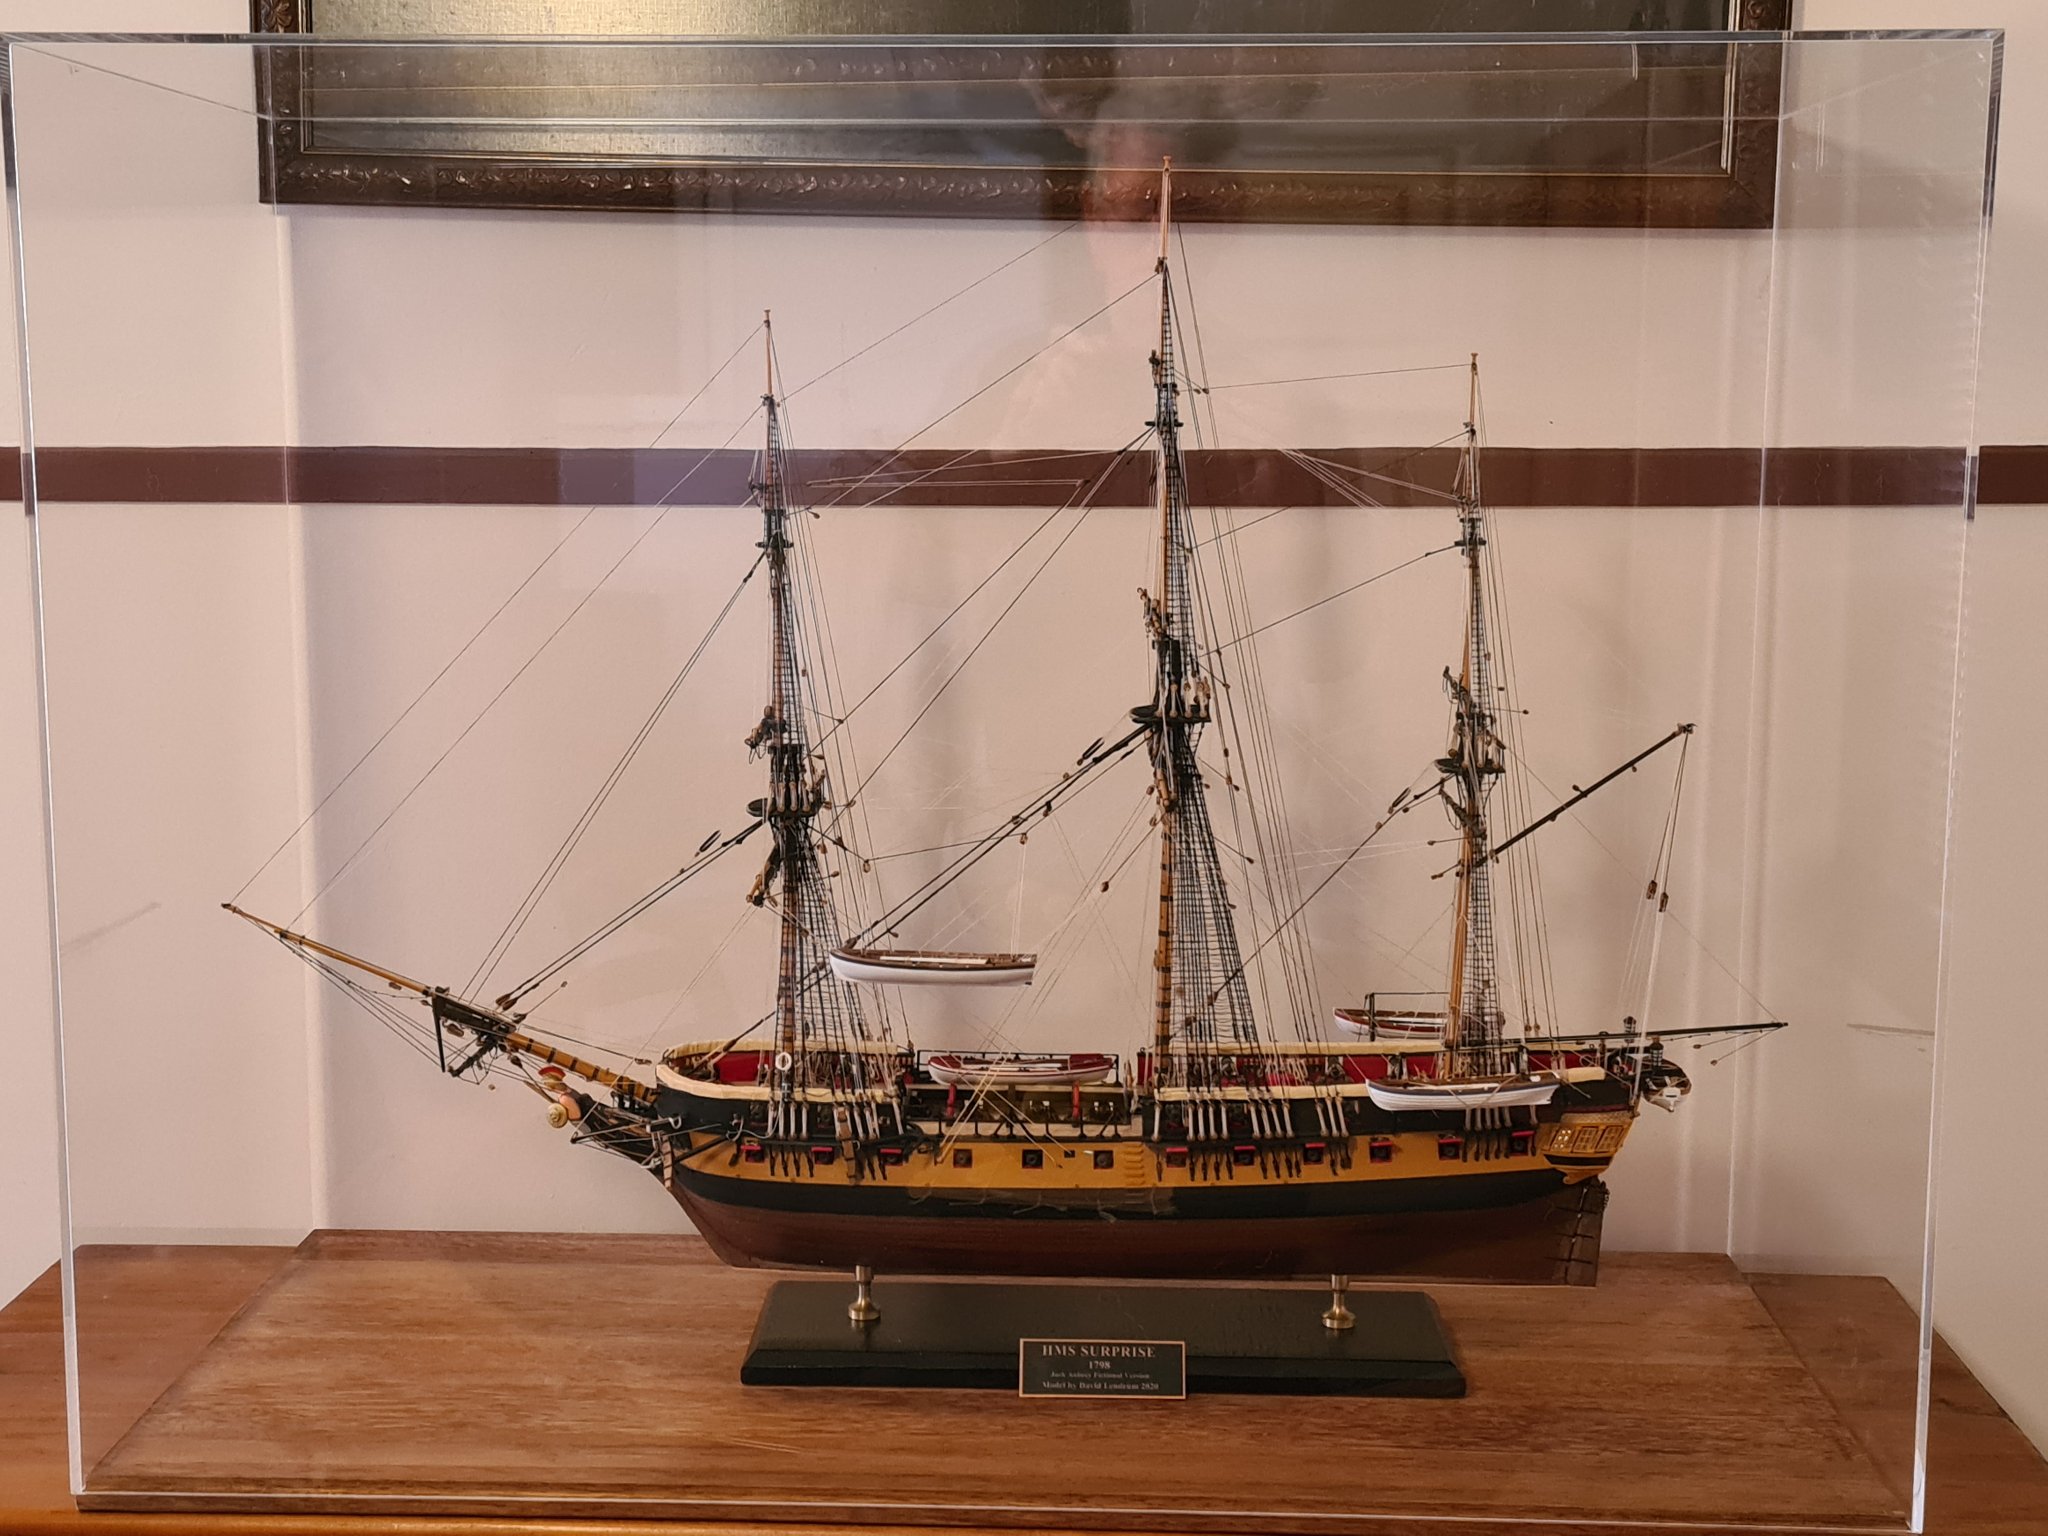
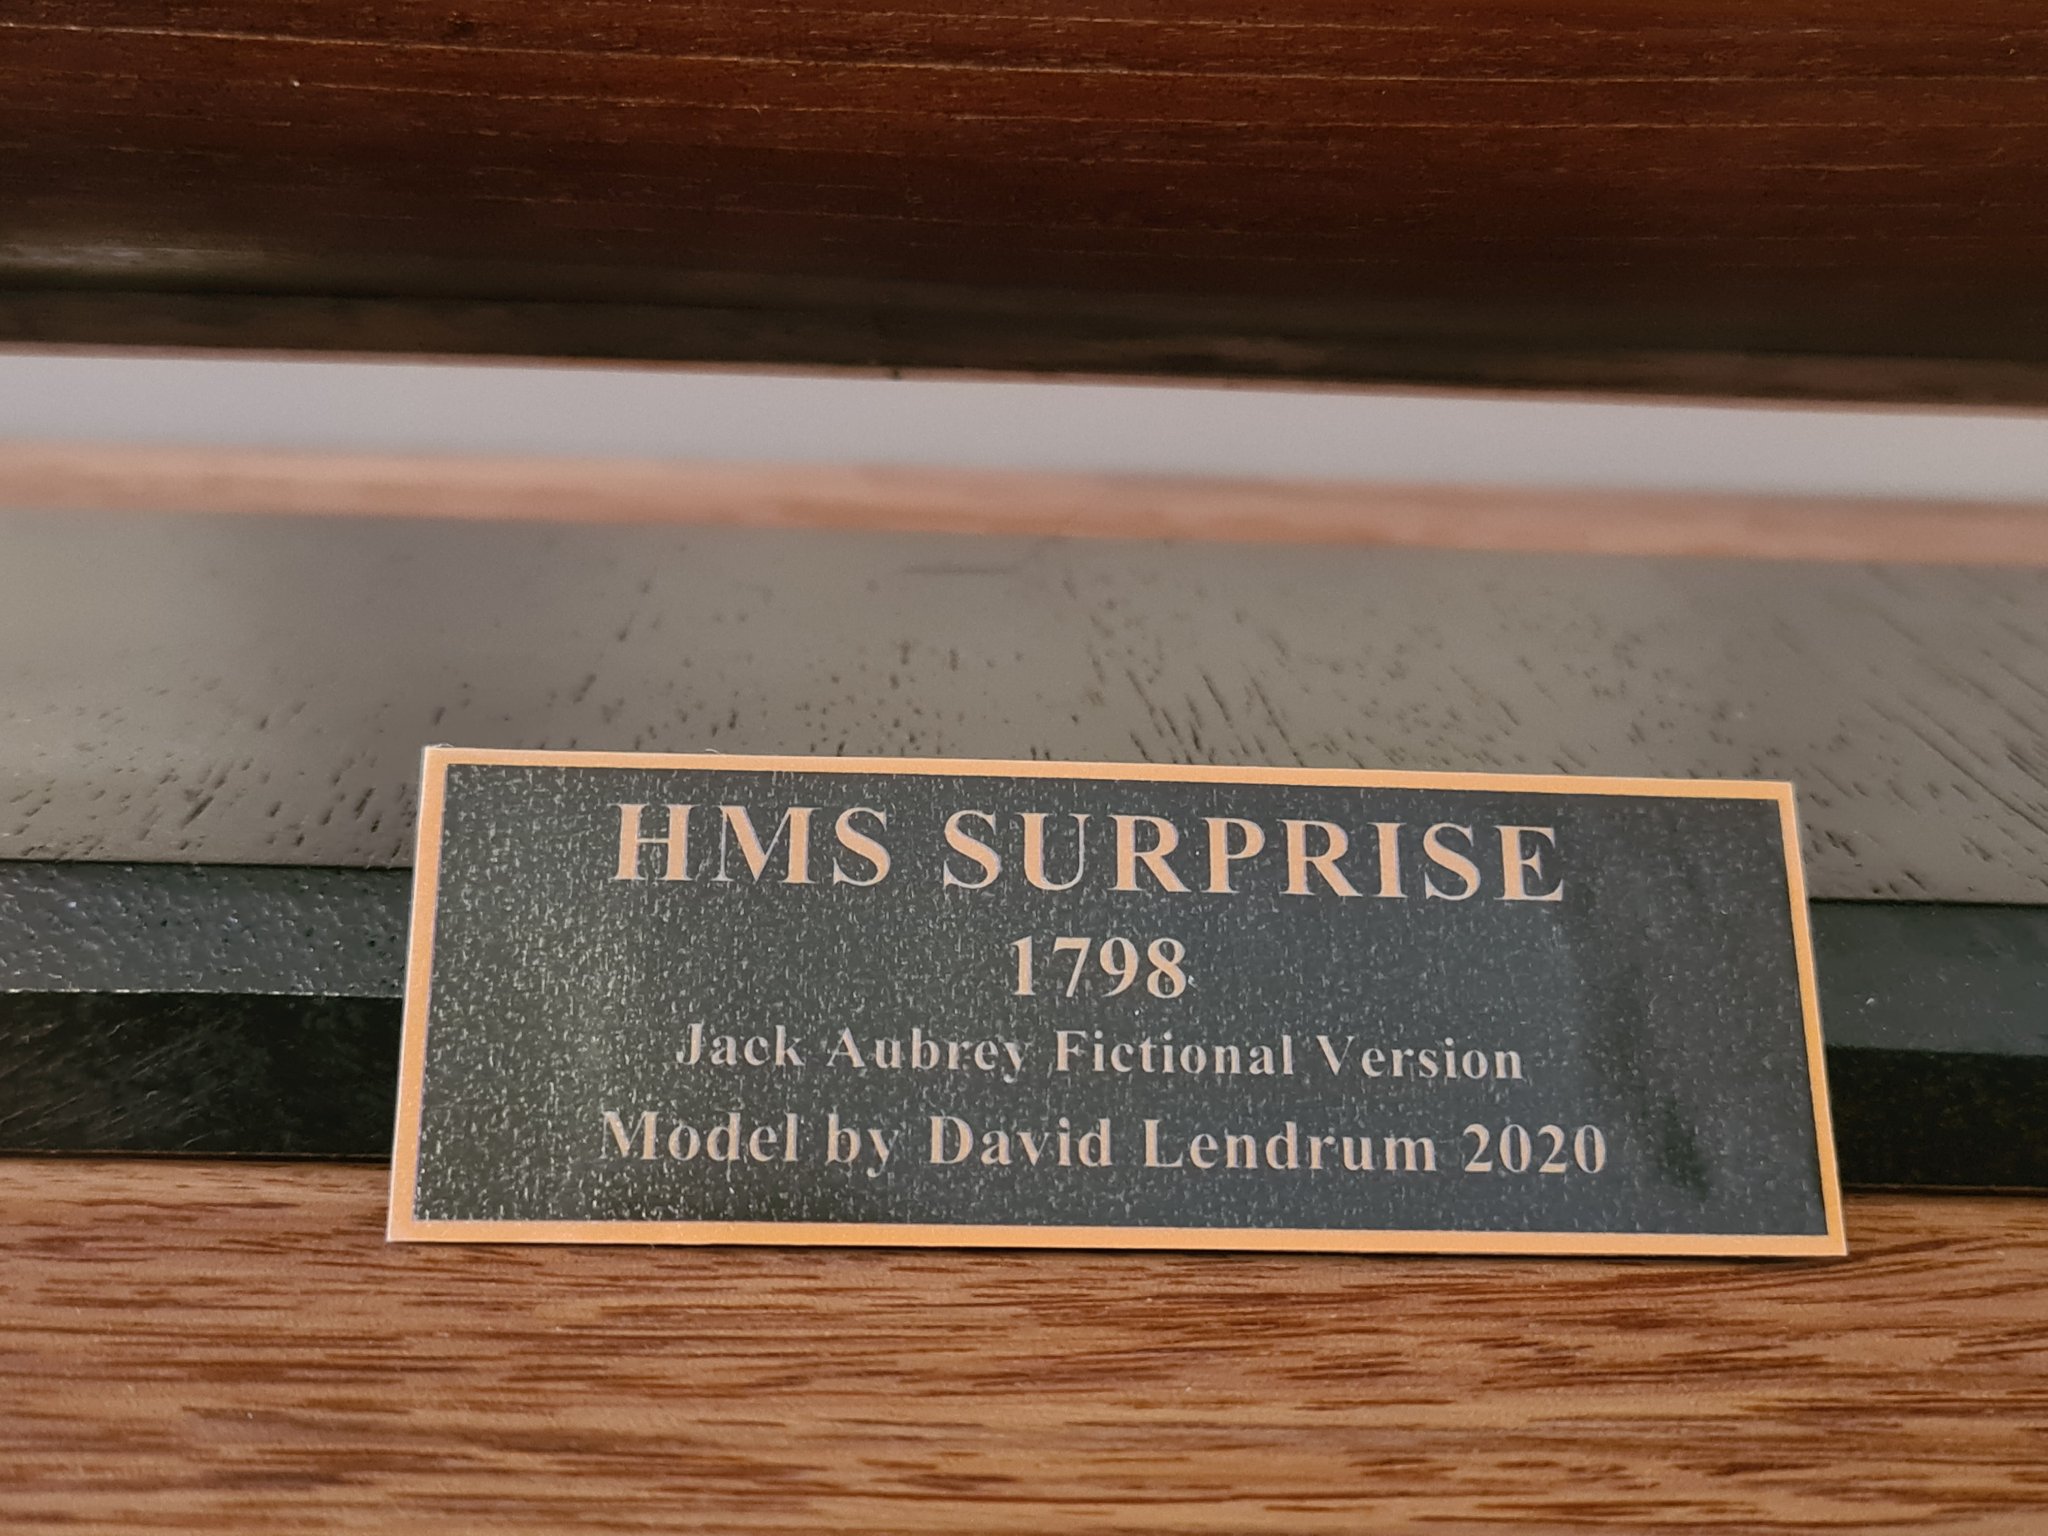
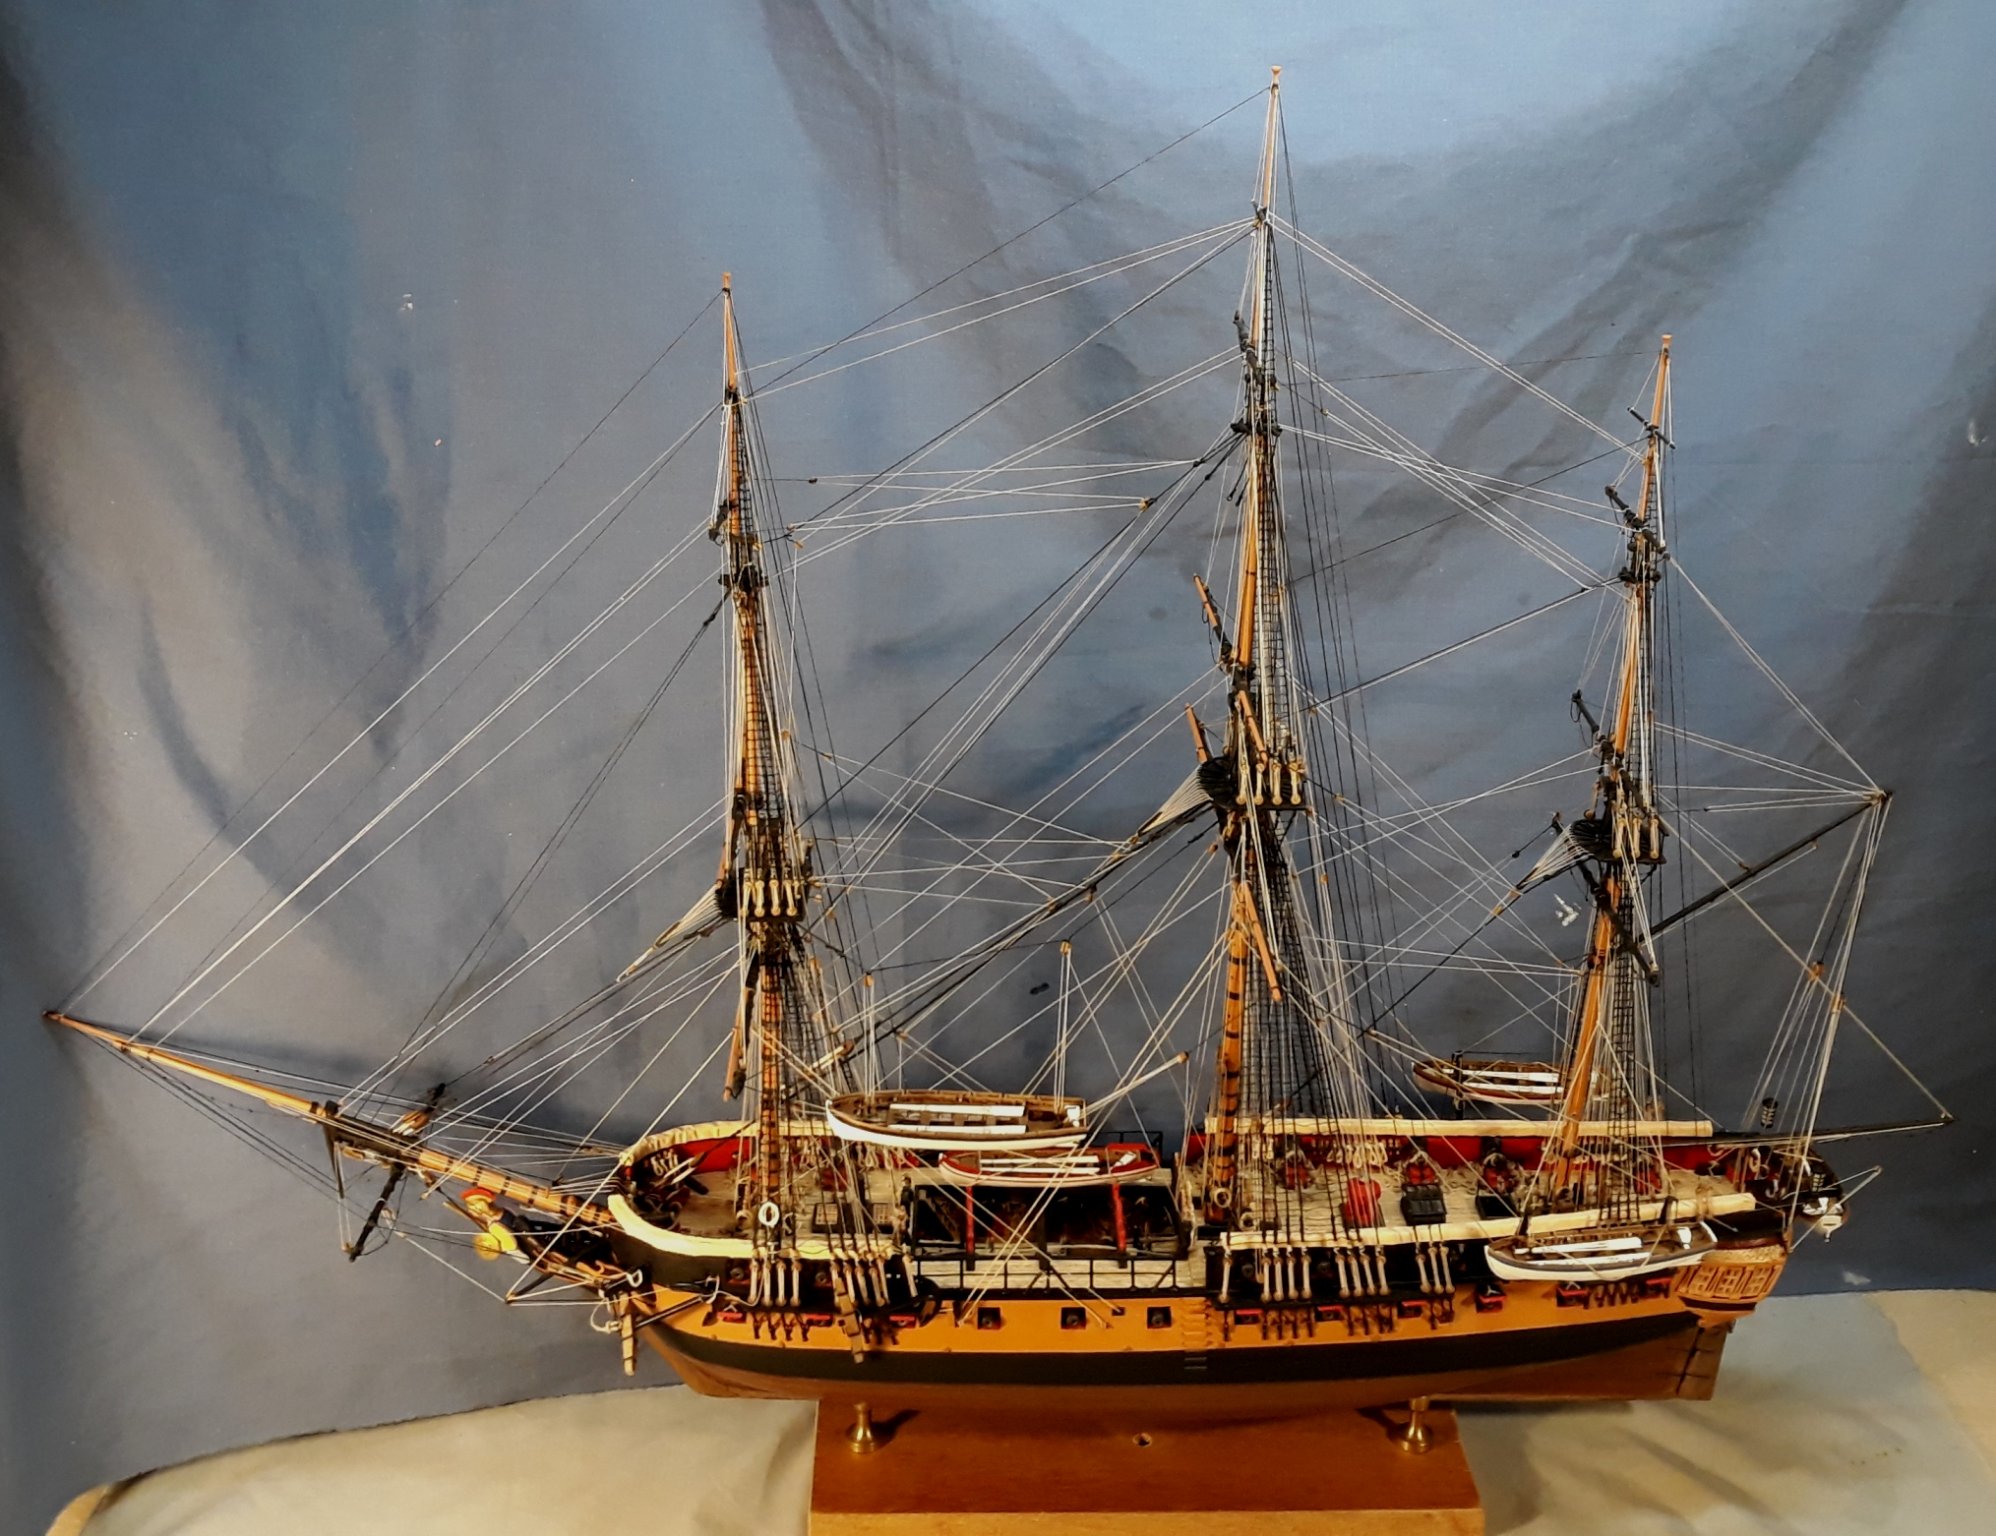
HMS Surprise by Navis Factorem - FINISHED - 1:75
oakheart reacted to a post in a topic:
HMS Surprise by Navis Factorem - FINISHED - 1:75
-
klimi reacted to a post in a topic:
HMS Bellona by Navis Factorem - 1:75
-
klimi reacted to a post in a topic:
HMS Surprise by Navis Factorem - FINISHED - 1:75
-
robdurant reacted to a post in a topic:
HMS Bellona by Navis Factorem - 1:75
-
Justin P. reacted to a post in a topic:
Beavers Prize 1777 by Mike Y - 1:48 - POF - Hahn style
-
GrandpaPhil reacted to a post in a topic:
HMS Surprise by Navis Factorem - FINISHED - 1:75
-
mtaylor reacted to a post in a topic:
HMS Bellona by Navis Factorem - 1:75
-
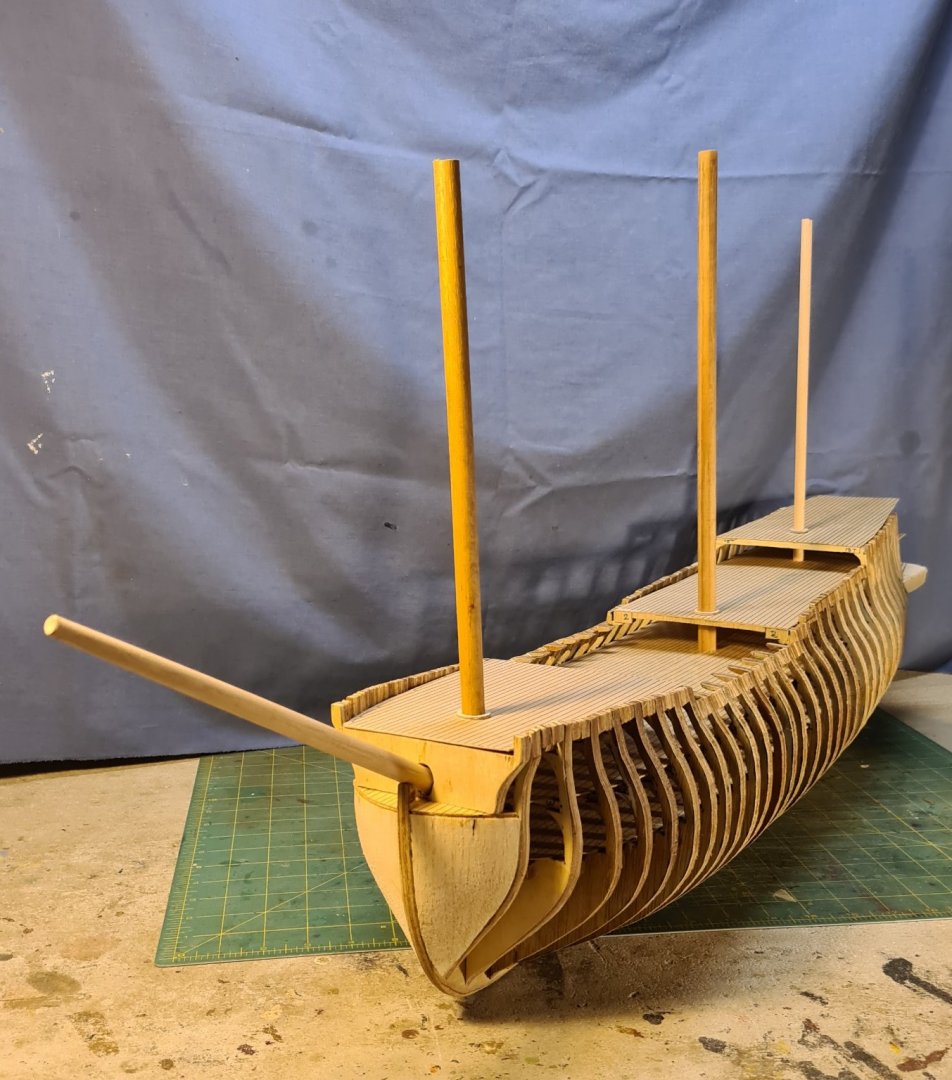
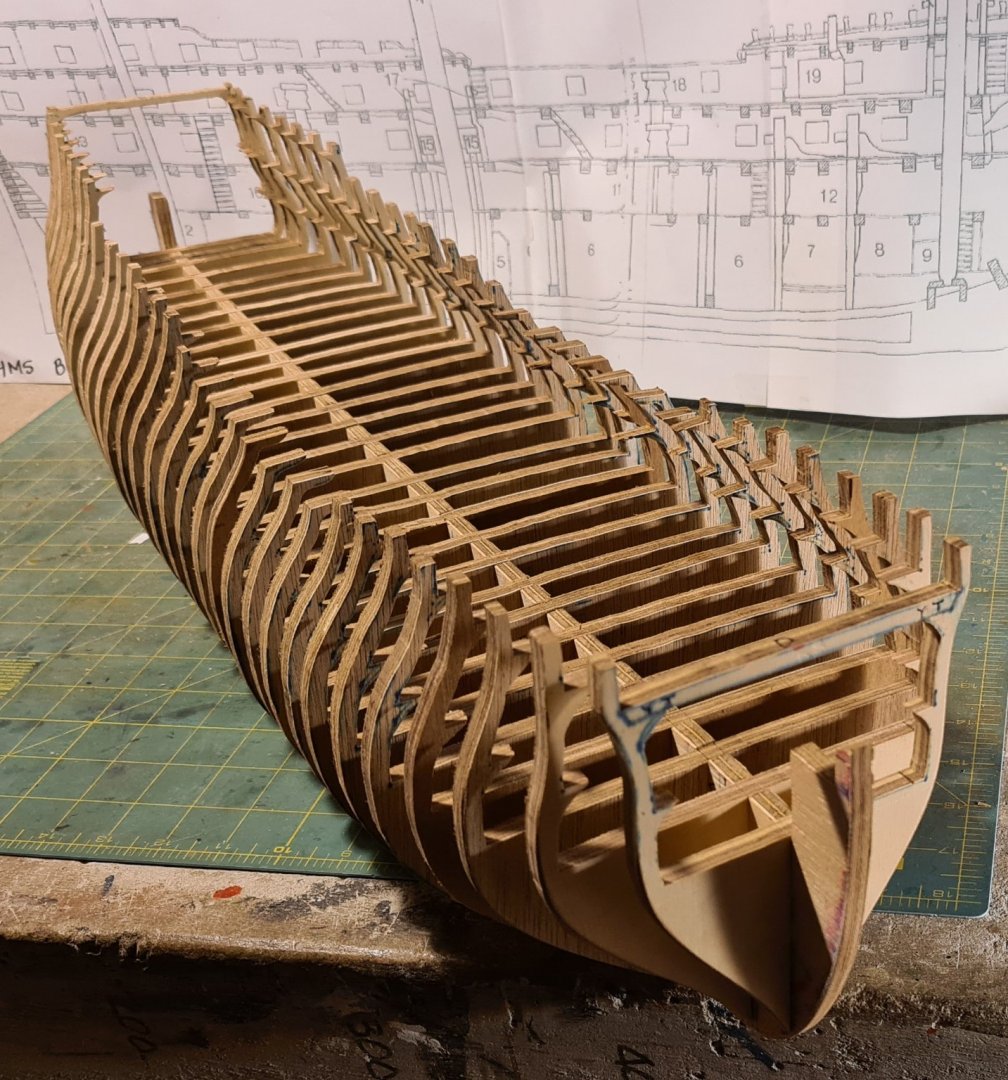
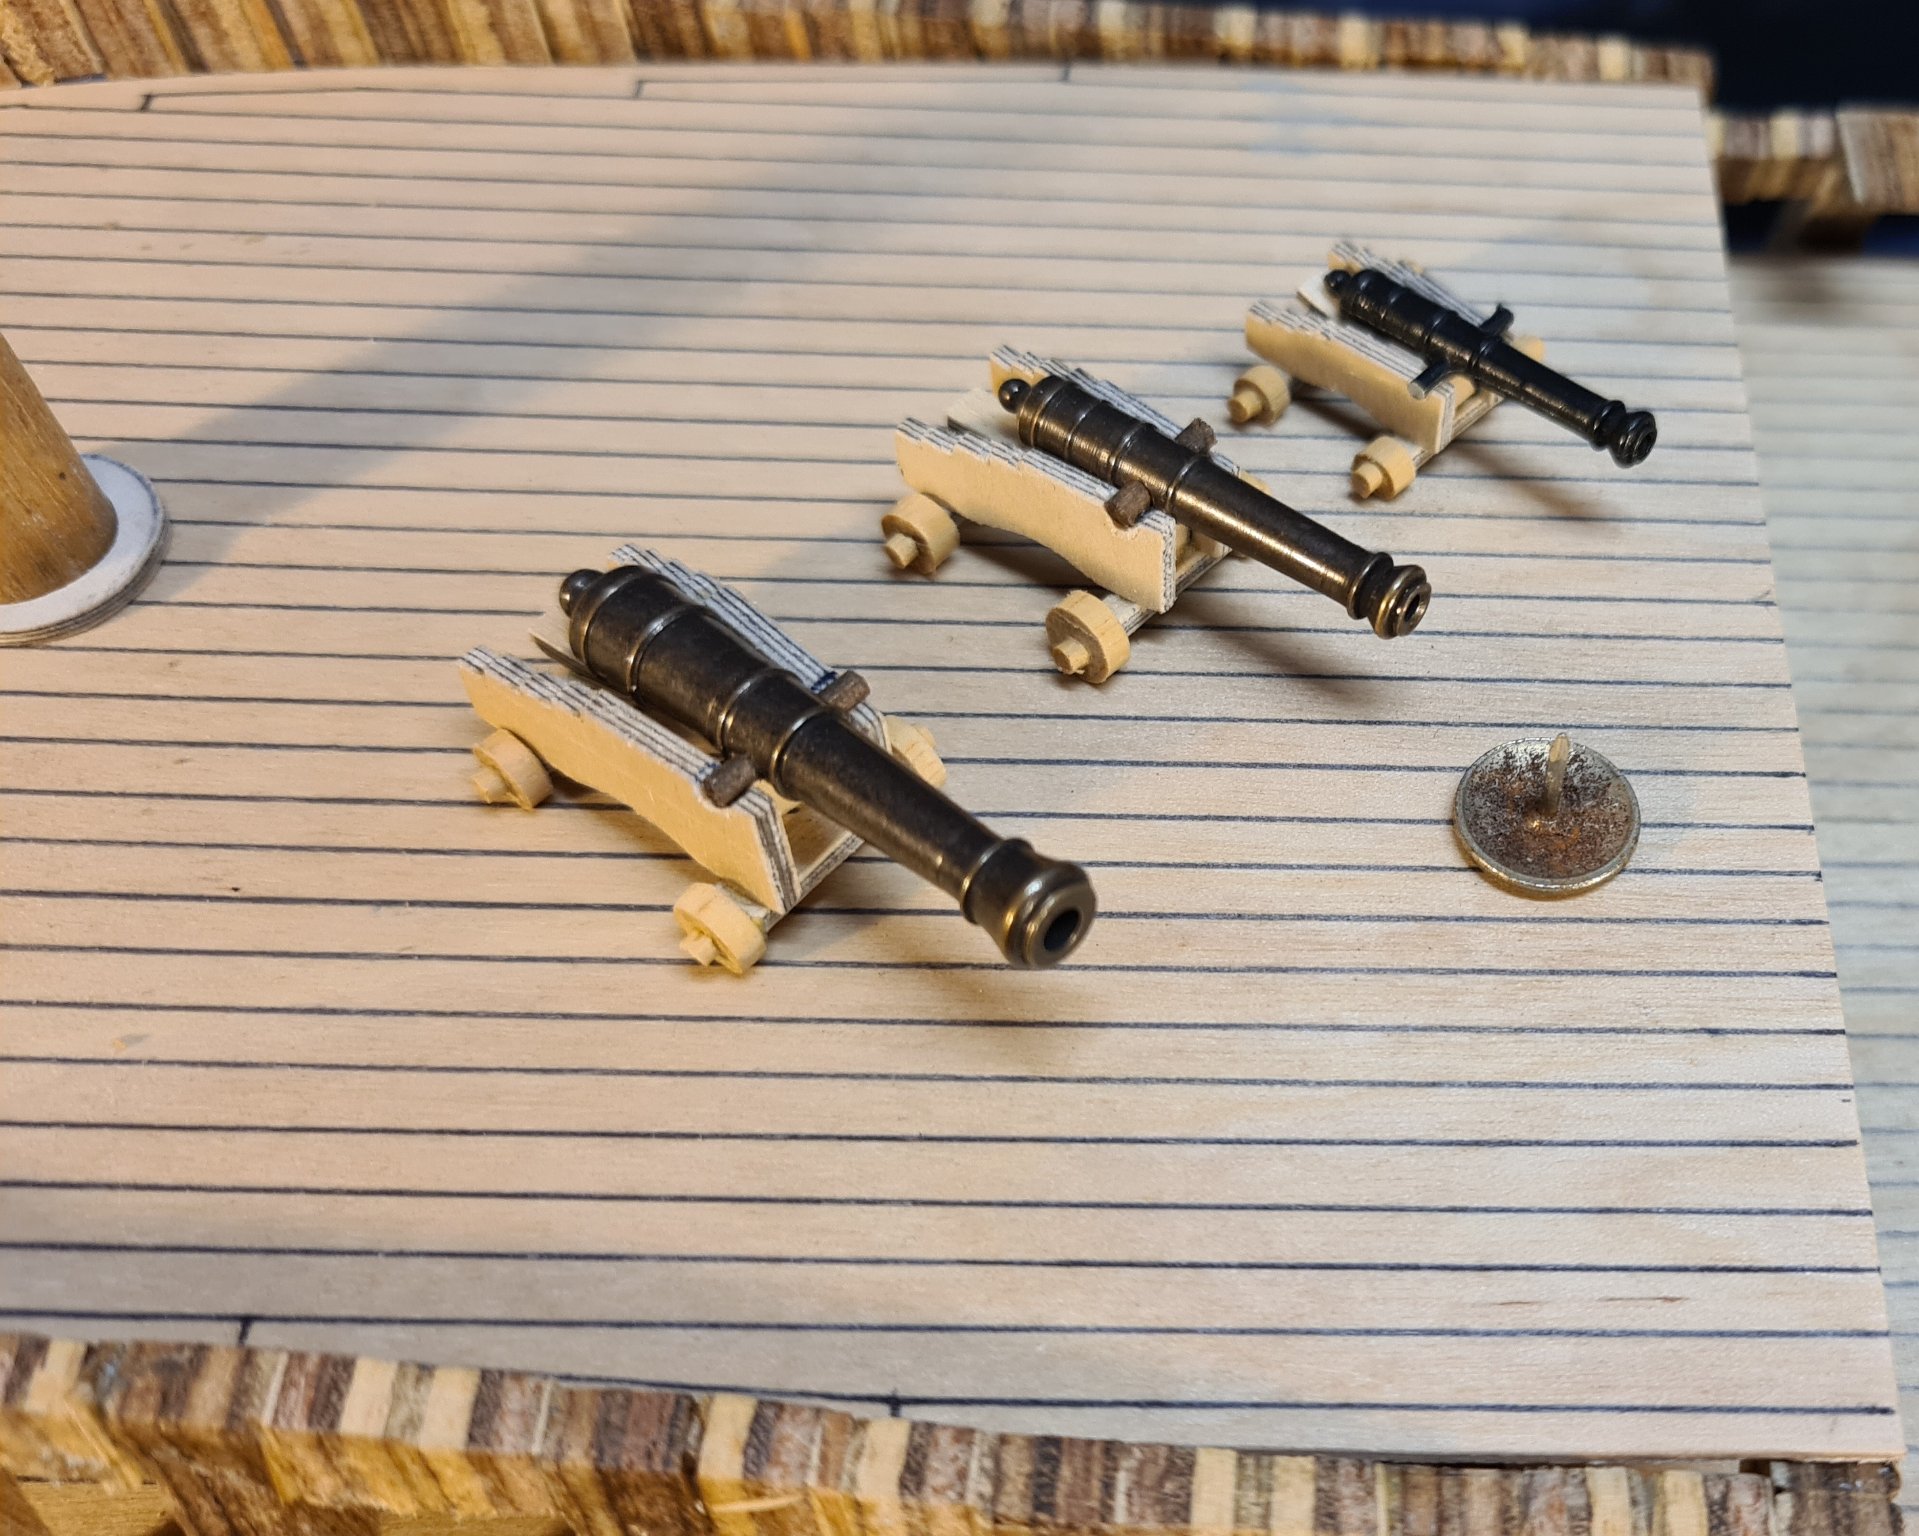
Construction of the decks is progressing with all decks shaped and, except the gun deck which is fixed in place, dry fitted. All the upper decks are removeable so I can continue to work on the fitouts including all guns to all decks. The lowest sections of the masts and bowsprit have been dry fitted. I have bought the the gun barrels from my local materials supplier, making gun barrels is way beyond my skill level. I have fabricated a set of prototype gun carriages, both to confirm they can be made reasonably accurately and easily, and so I can fit them to the decks where they will be installed so I can ensure the gun carriage design and gun port locations end up with the gun barrels centred in the ports when the barrels are horizontal. I bought some sheets of high quality plywood in 0.5, 1.0 and 2.0 mm thicknesses and the gun carriages are made from the 2 mm ply. This is lovely material to work with and my scroll saw cuts accurately enough to do the detail on the carriages. The next step will be to frame the gun ports before any hull planking starts. Fortunately most of the gun ports are located between the ribs so this process should not be too difficult. I have started to try and figure out how the stern structure works. On Bellona it is quite 3 dimensional with a recessed open gallery and lots of intricate carvings. I can only work on this area for a certain amount of time, too long focusing and I get brain fade and have revert to something a bit simpler. Cheers and happy new year to all and keep well. David.


-
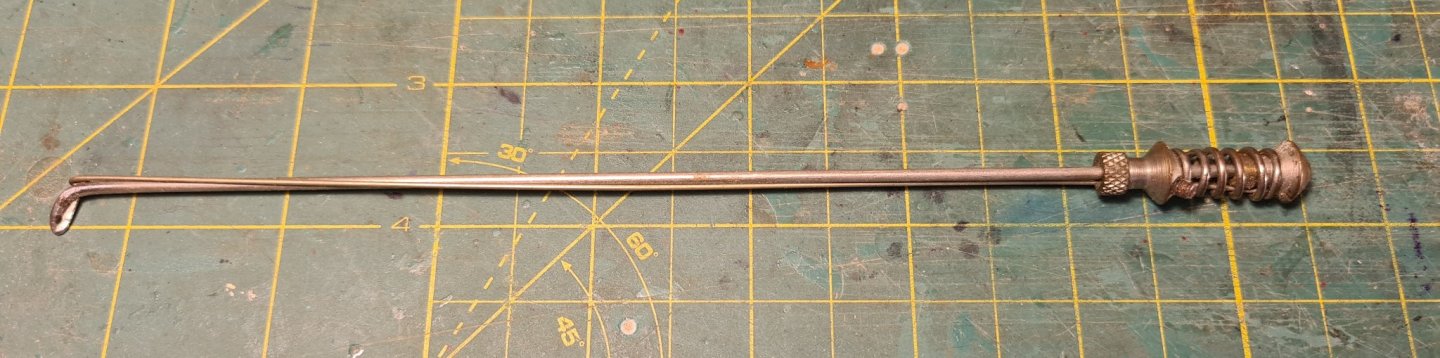
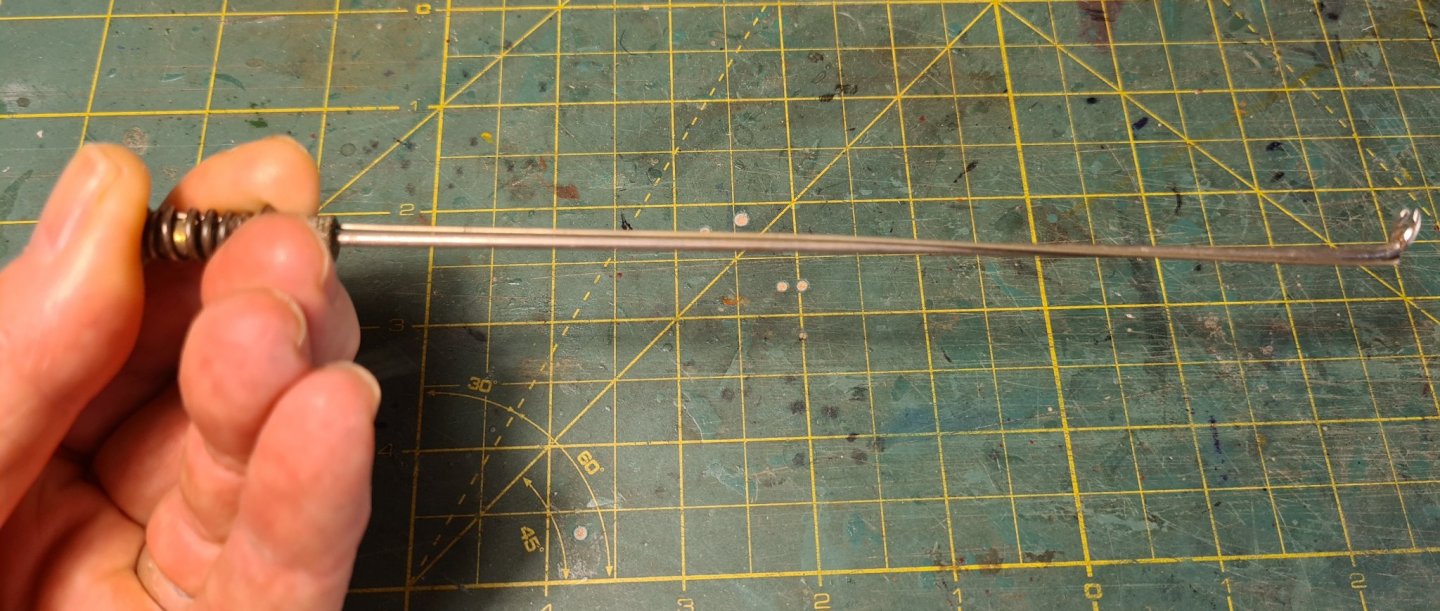
A friend gave me this wonderful little gripping tool that was made by her father when he was into model ship building many decades ago. She estimates it was probably made in the 1940s or 50s. I have used it a few times for getting into those hard to access corners and I expect I will find it very helpful.
-
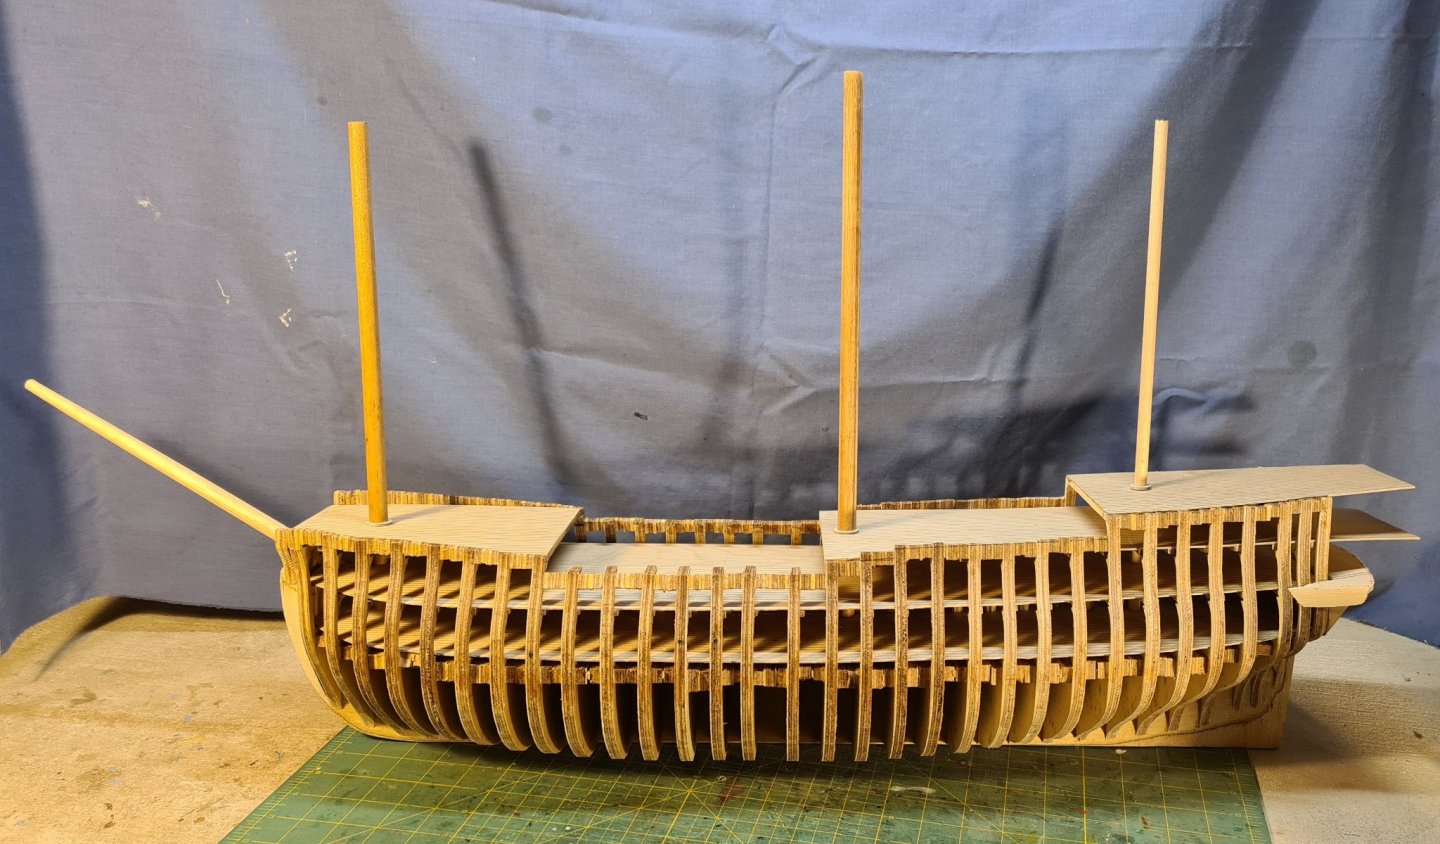
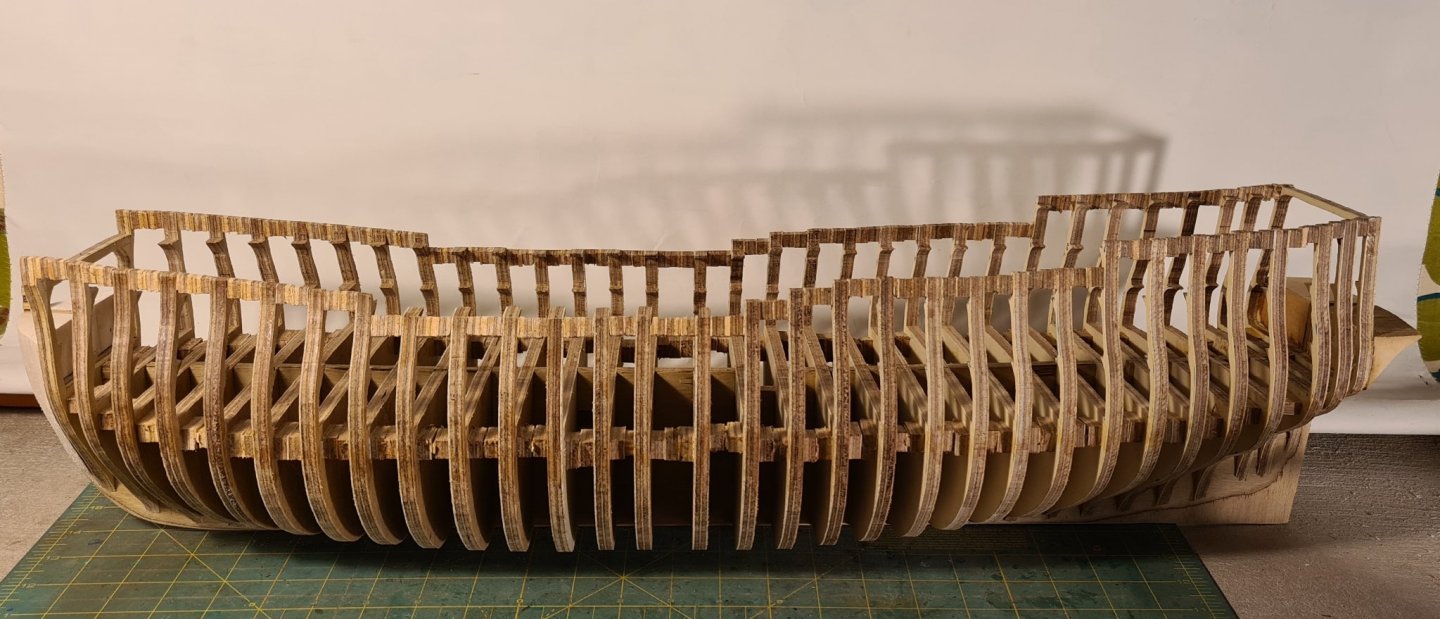
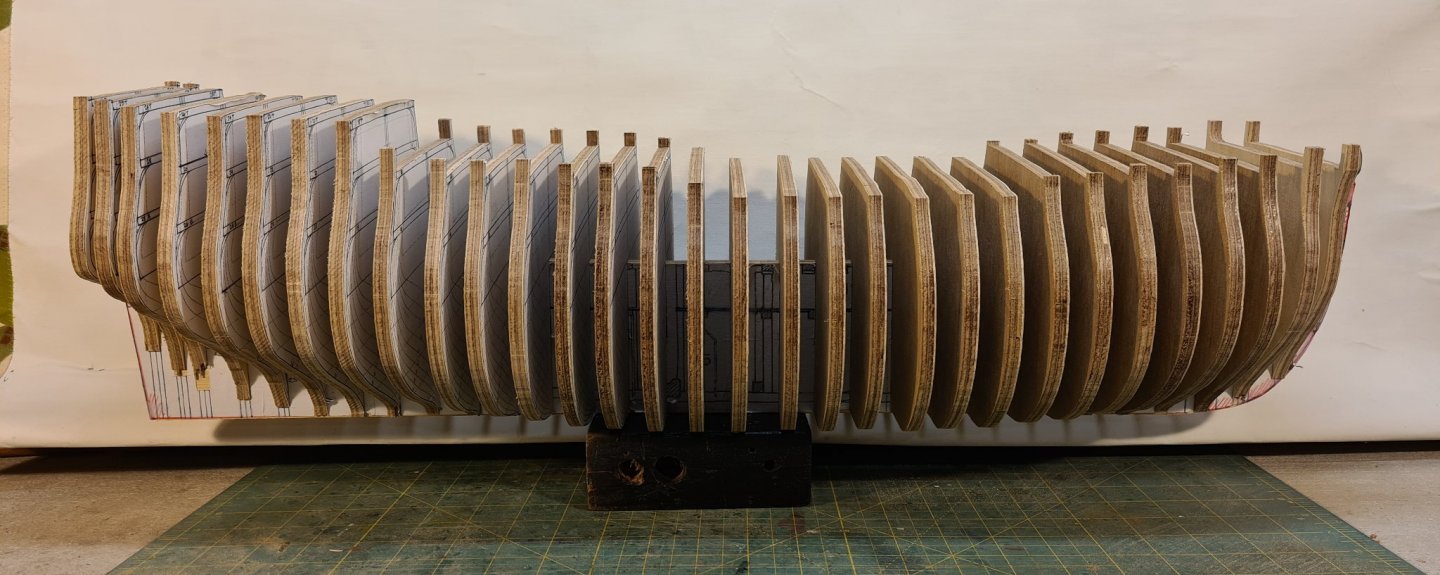
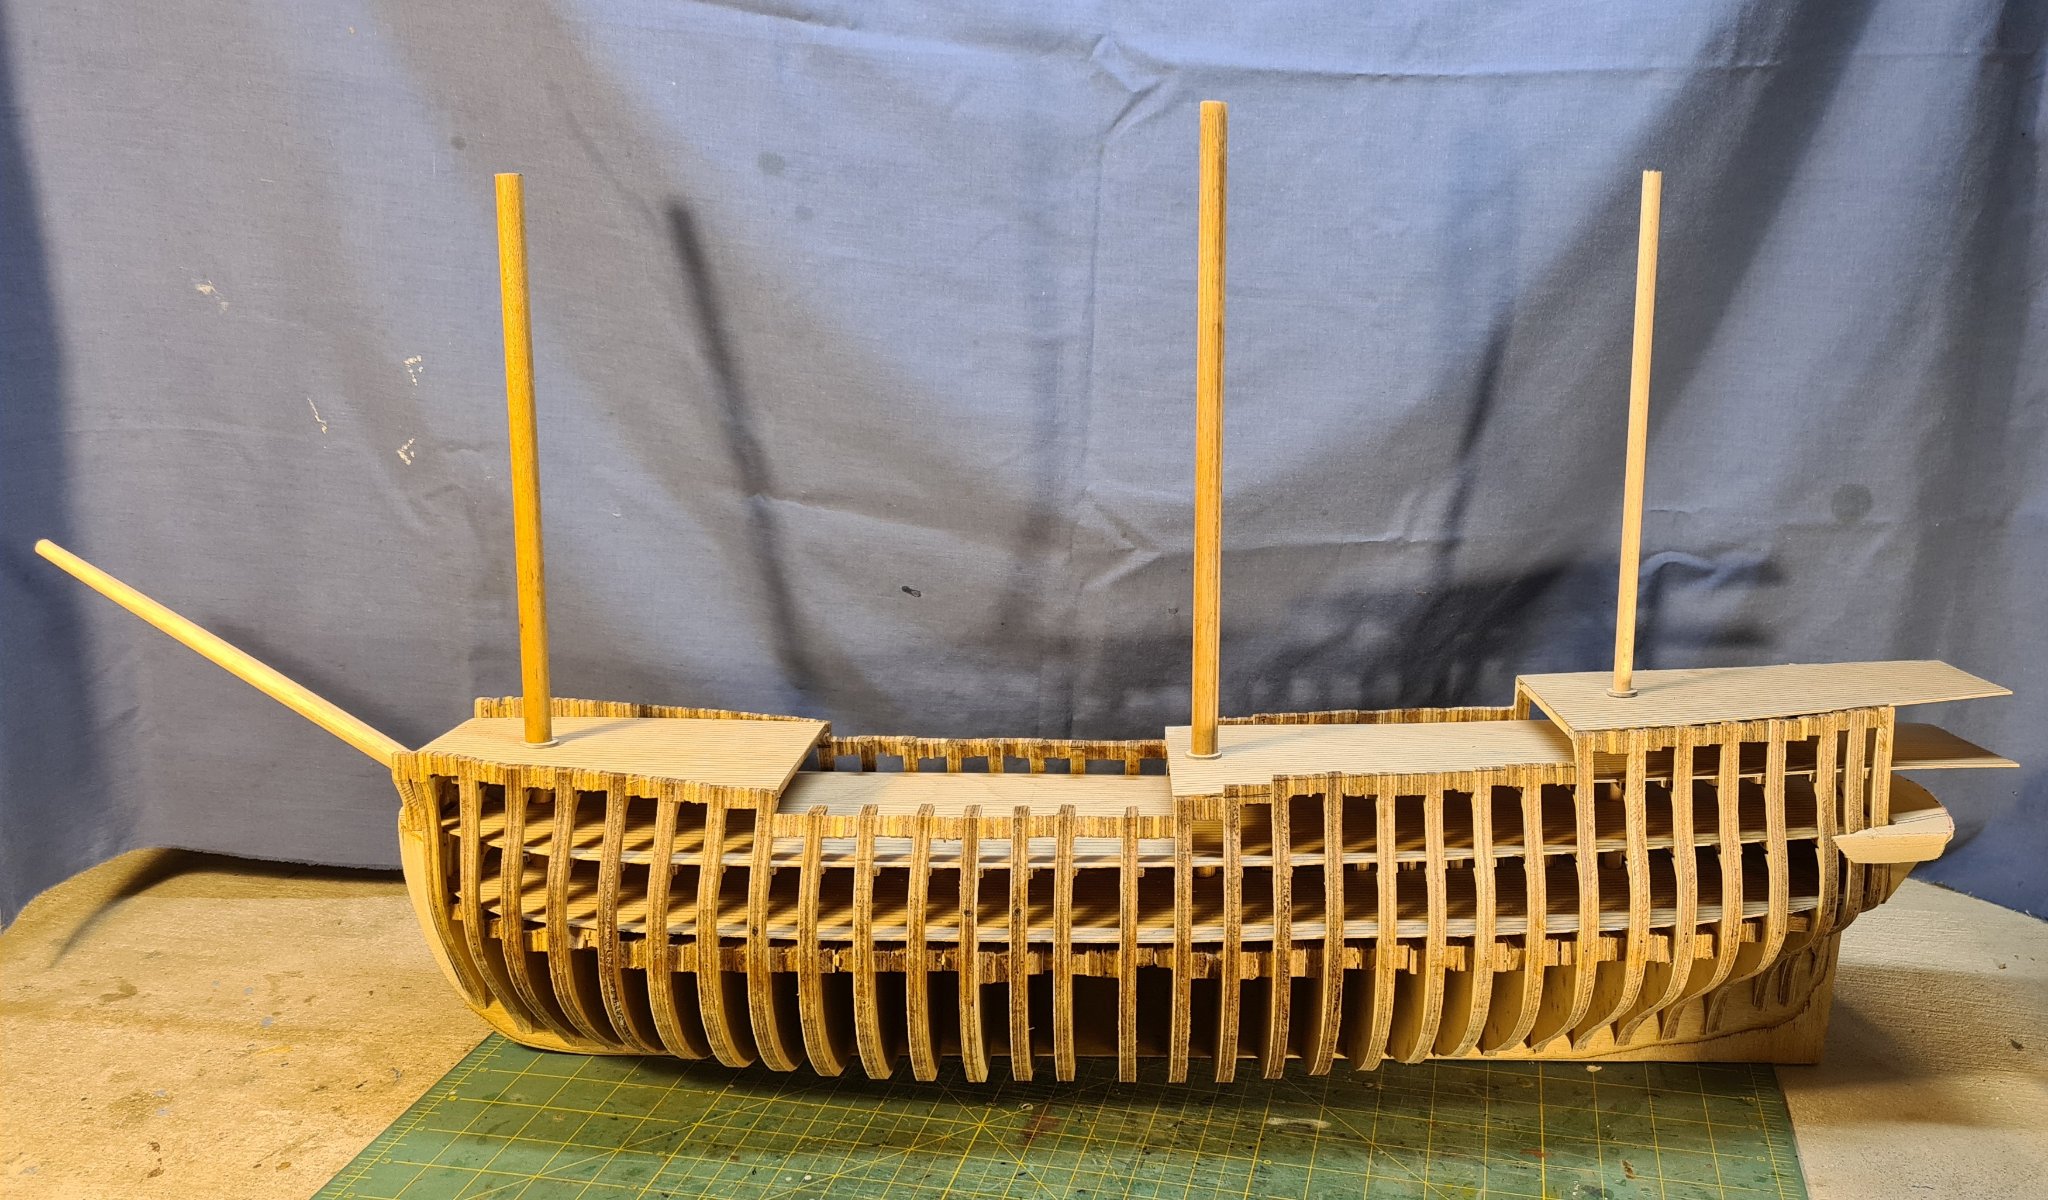
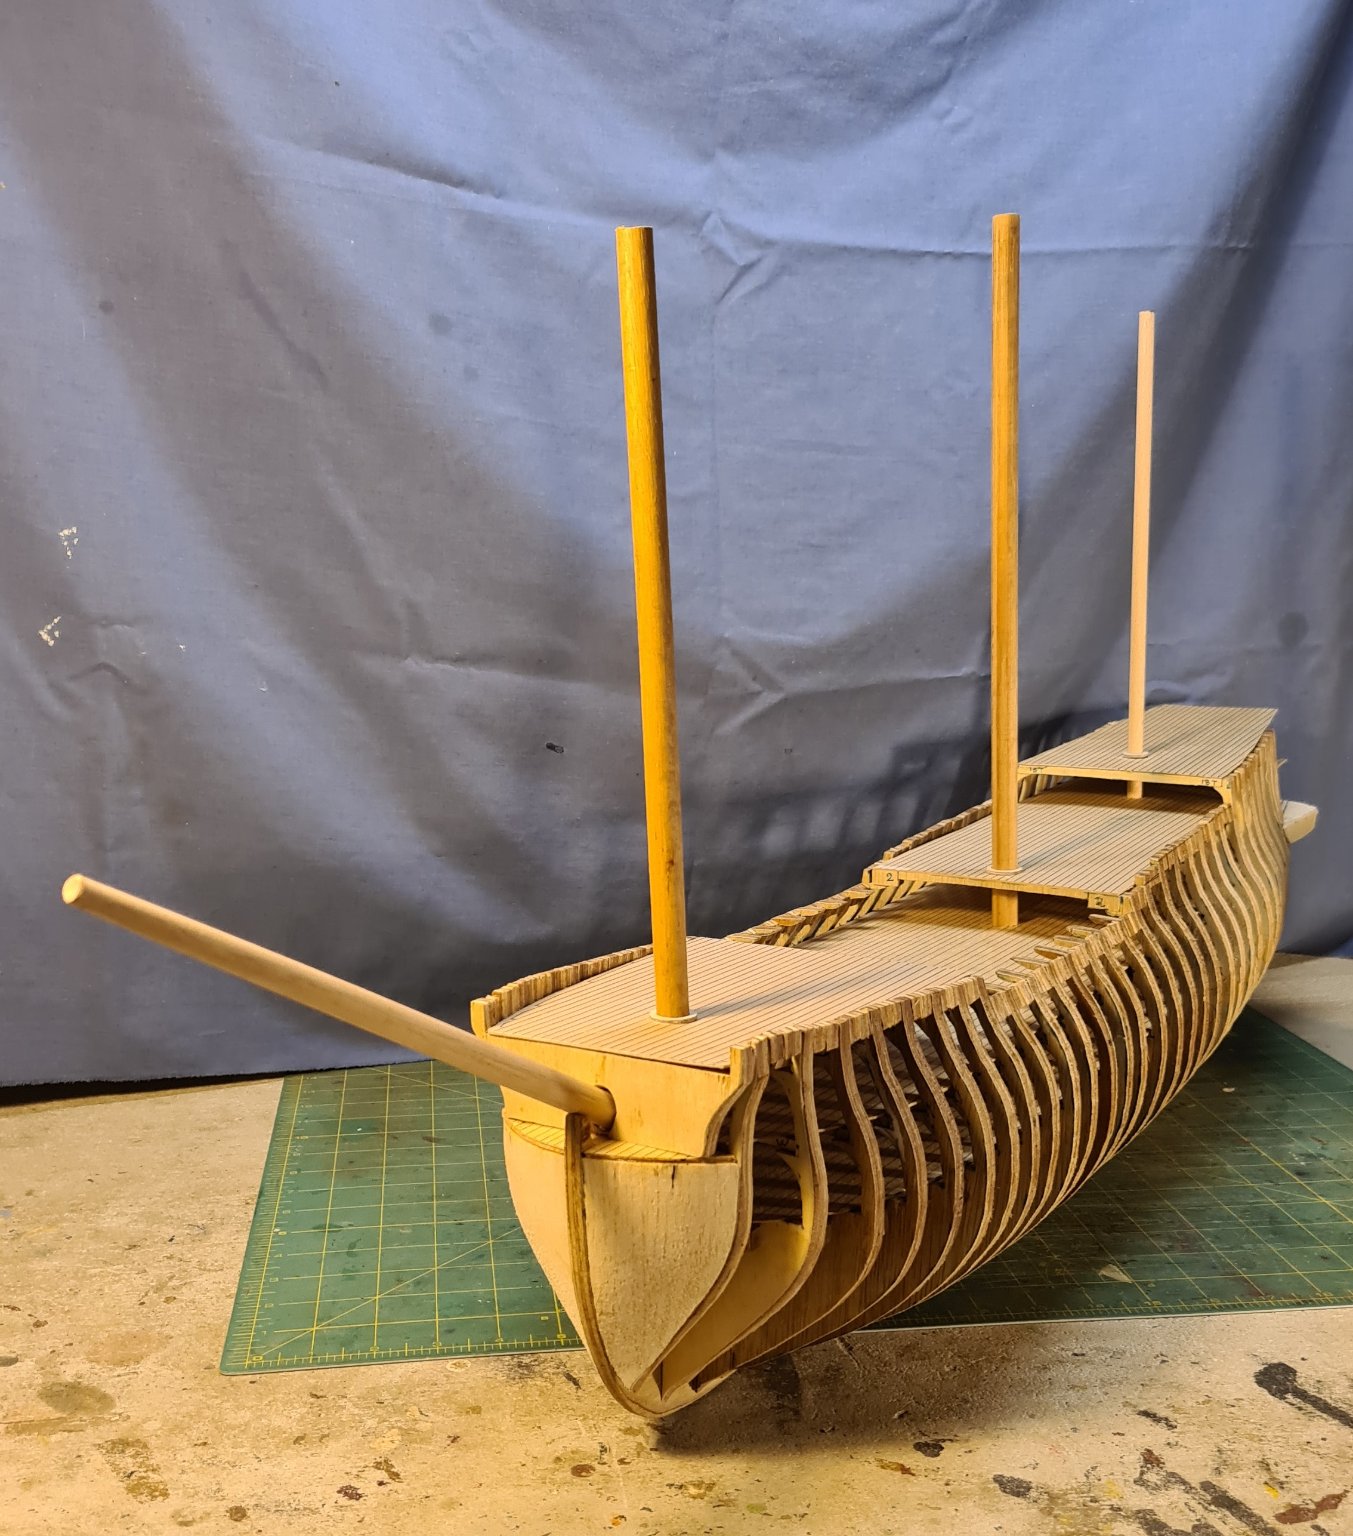
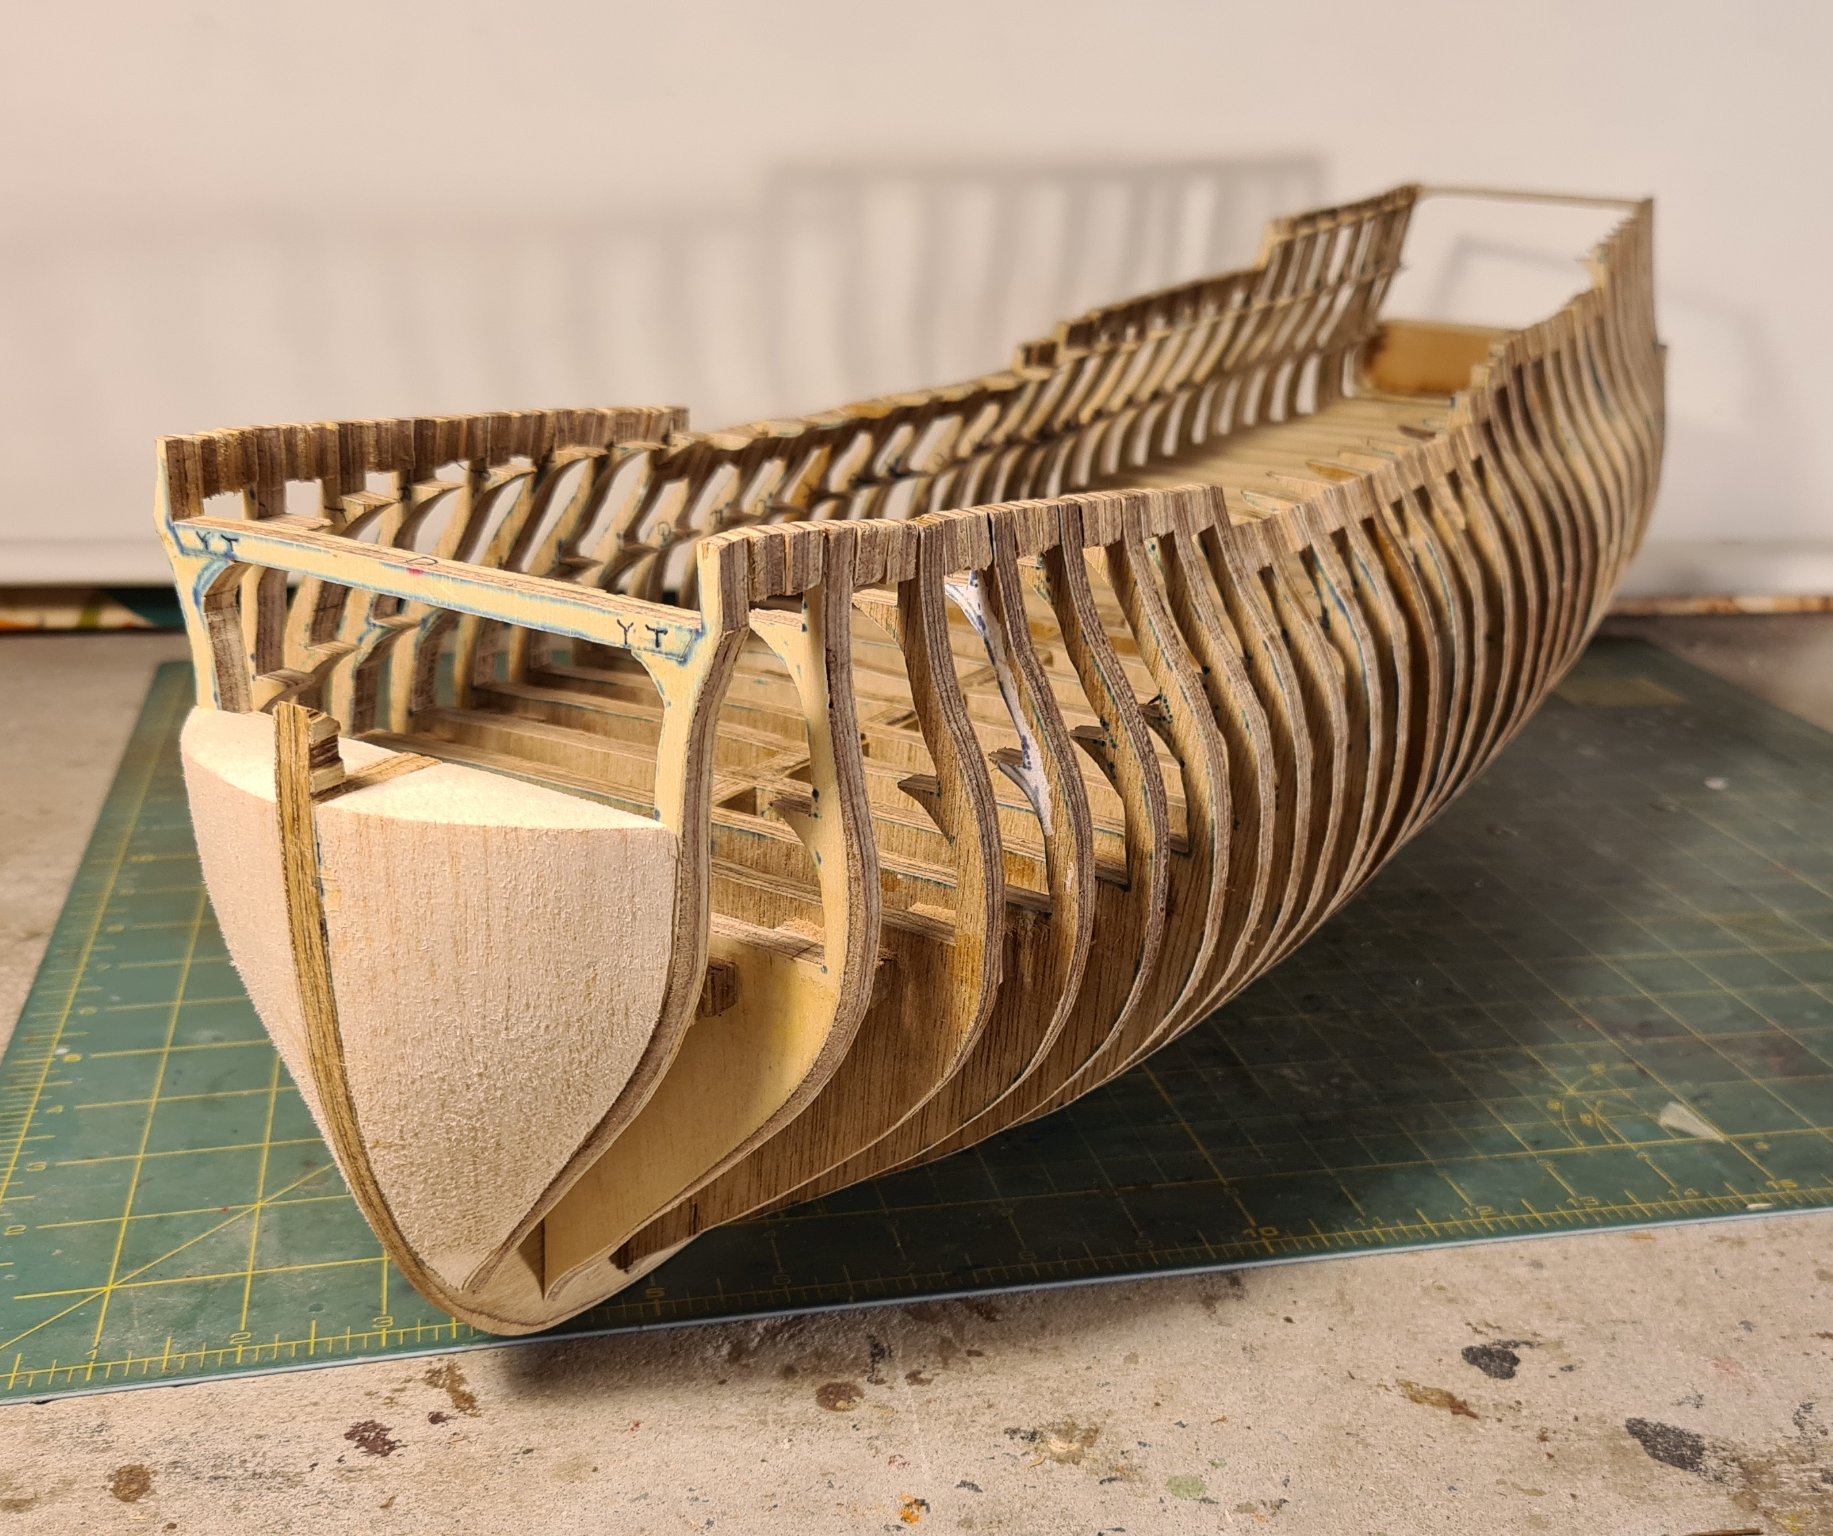
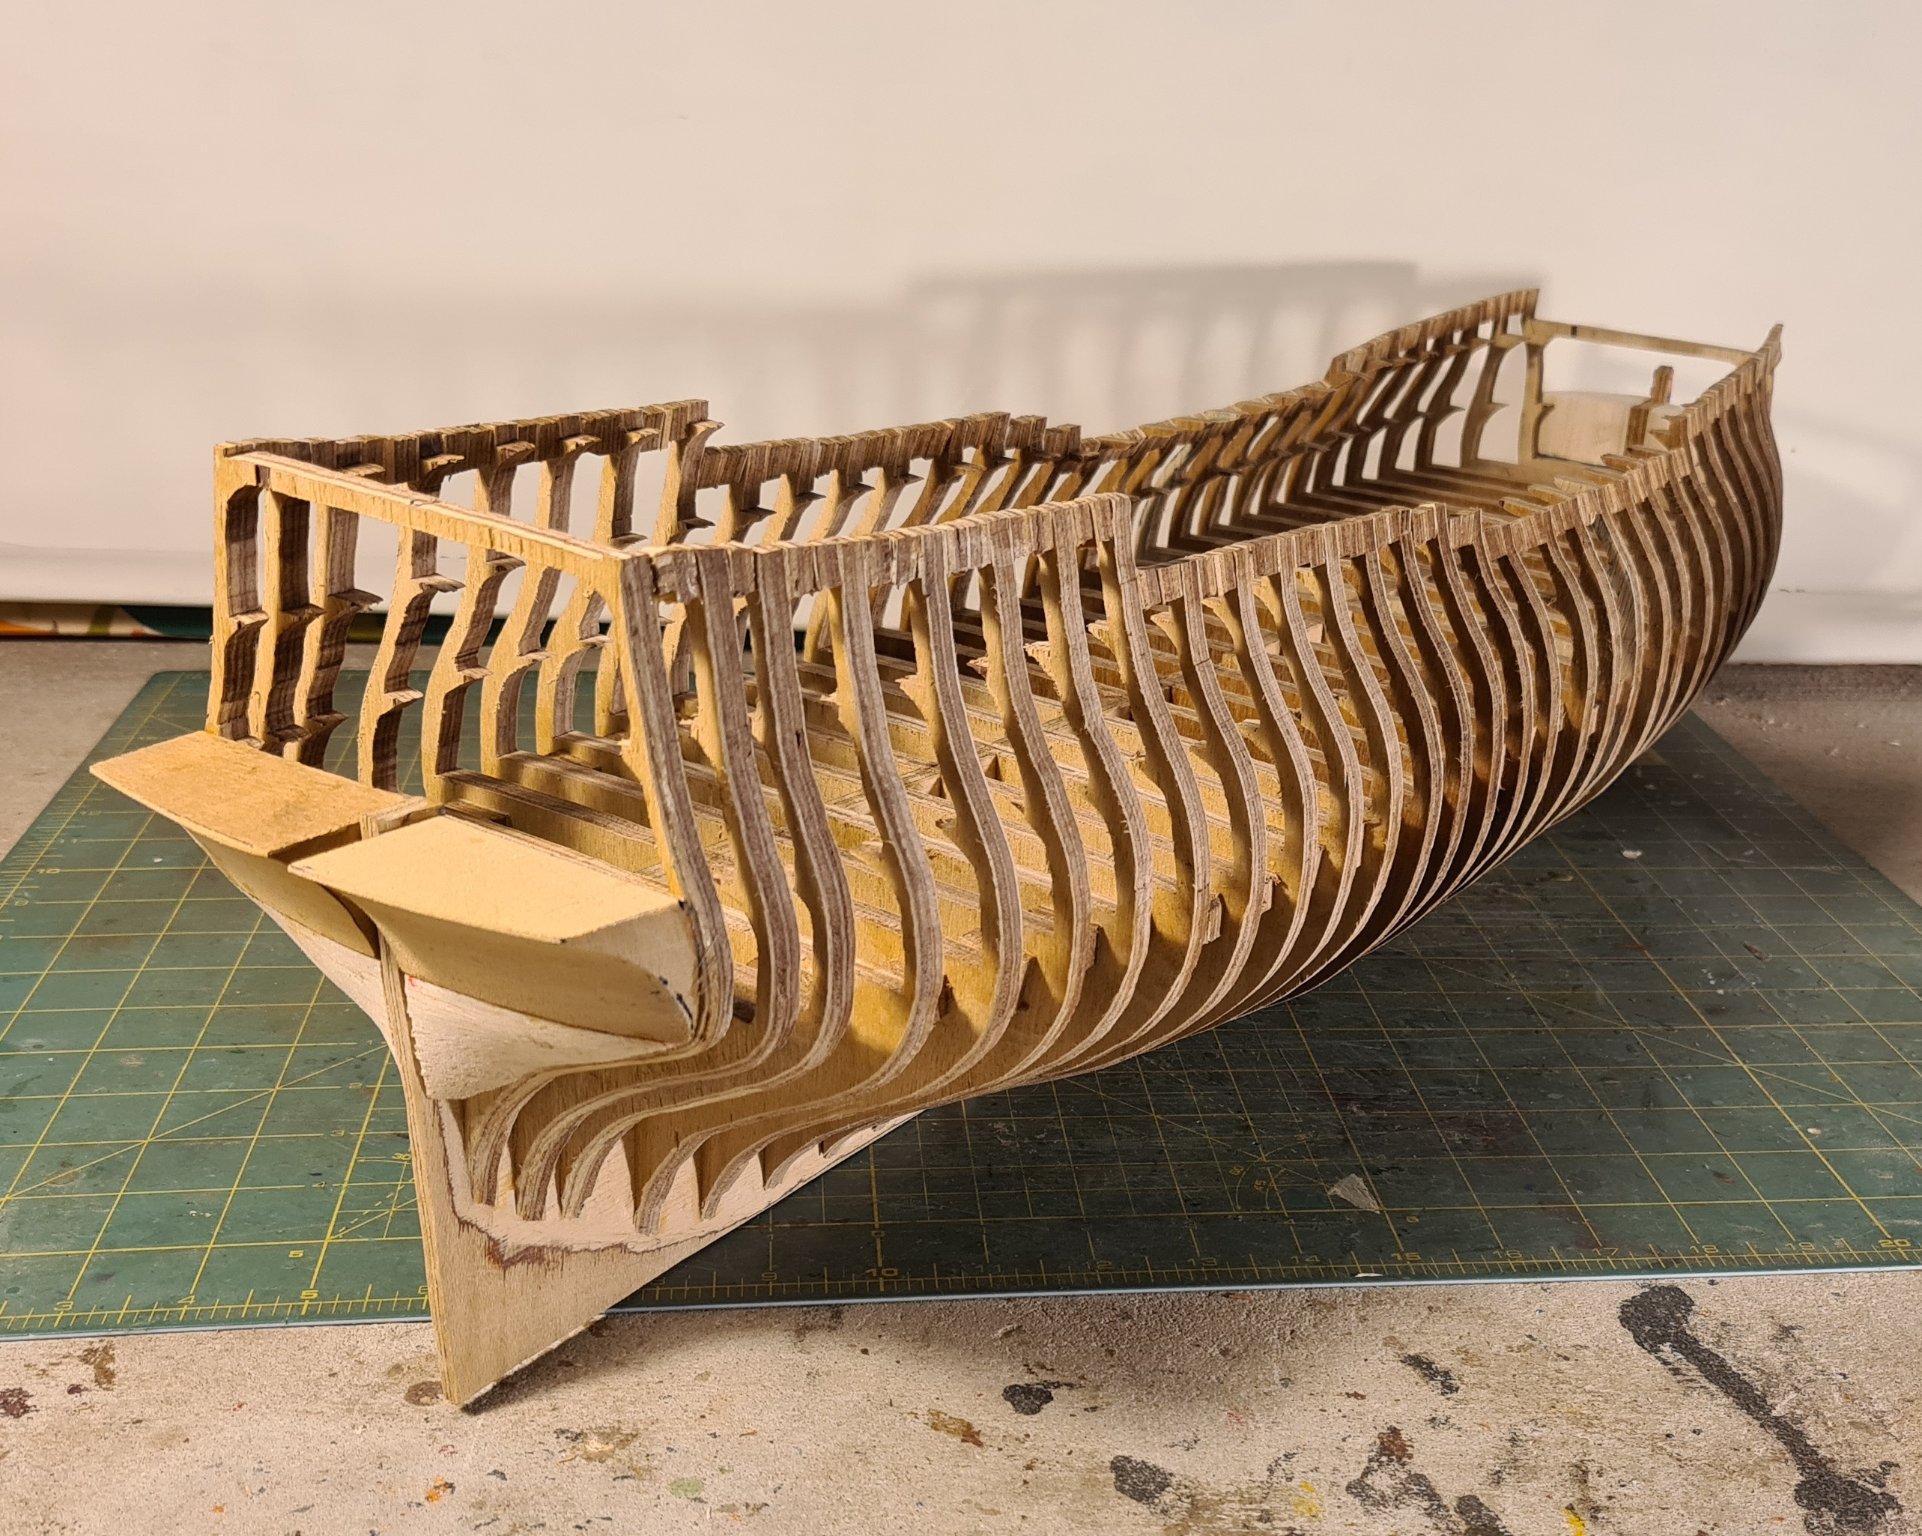
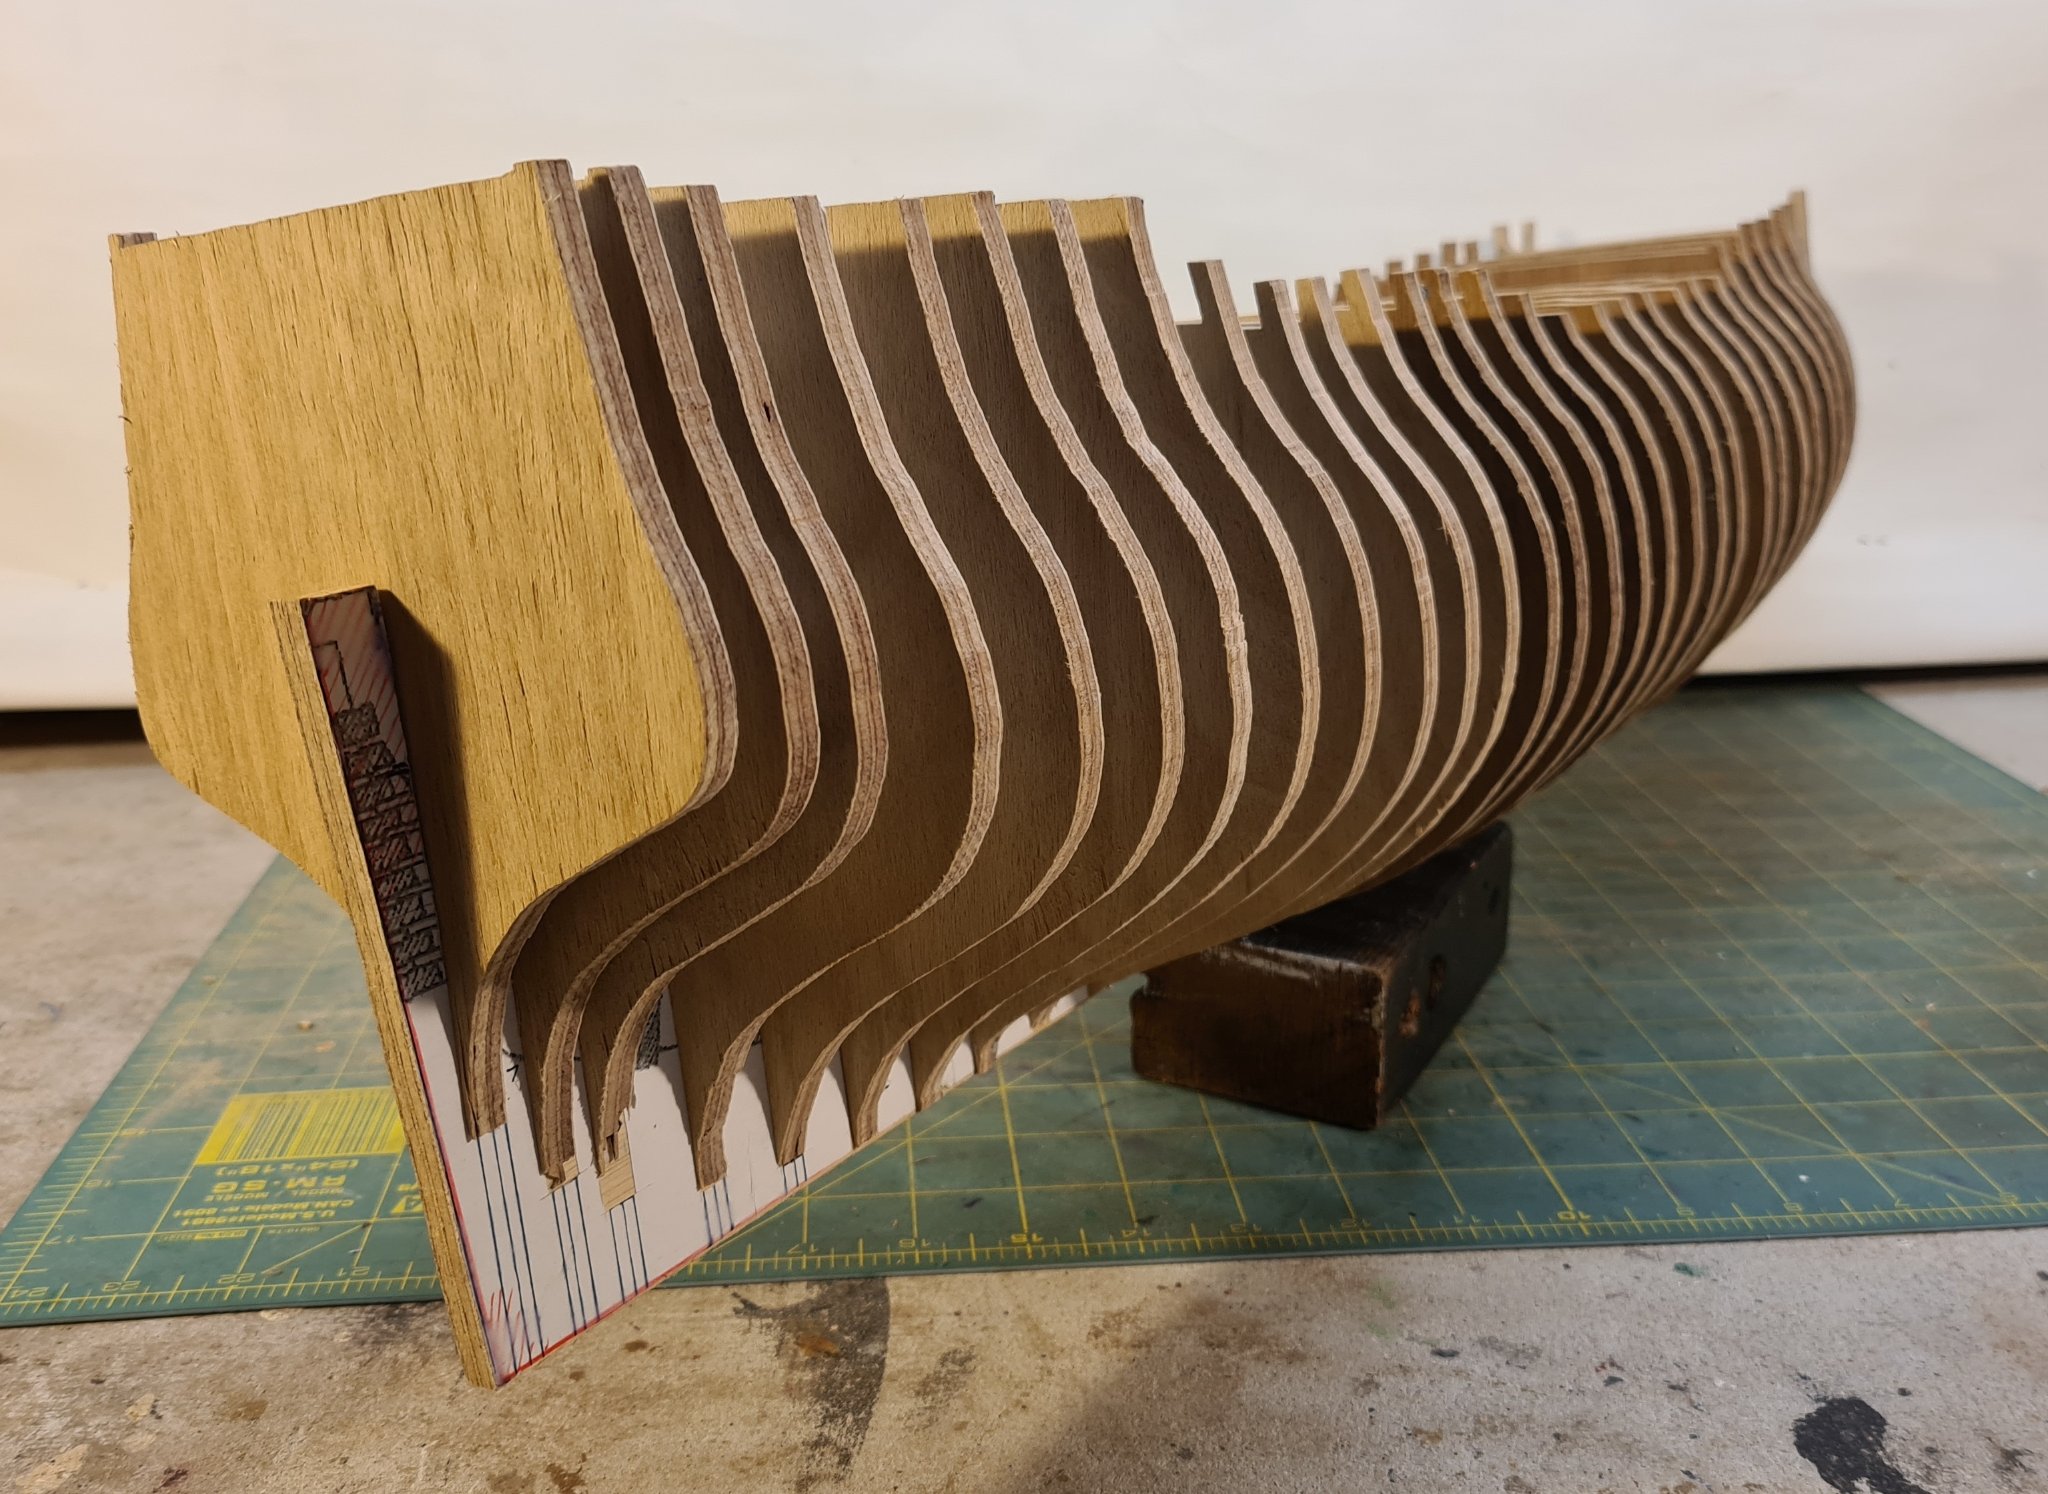
The next stage of the hull construction is complete. Spacers have been inserted between the ribs to increase rigidity and to take out the false keel misalignment. Bow and stern shaping has been started as has truing up and fairing the ribs and false keel. I am going to build the decks next before I start any hull planking as I think this will be easier as I can access the deck sides for clamping.


-
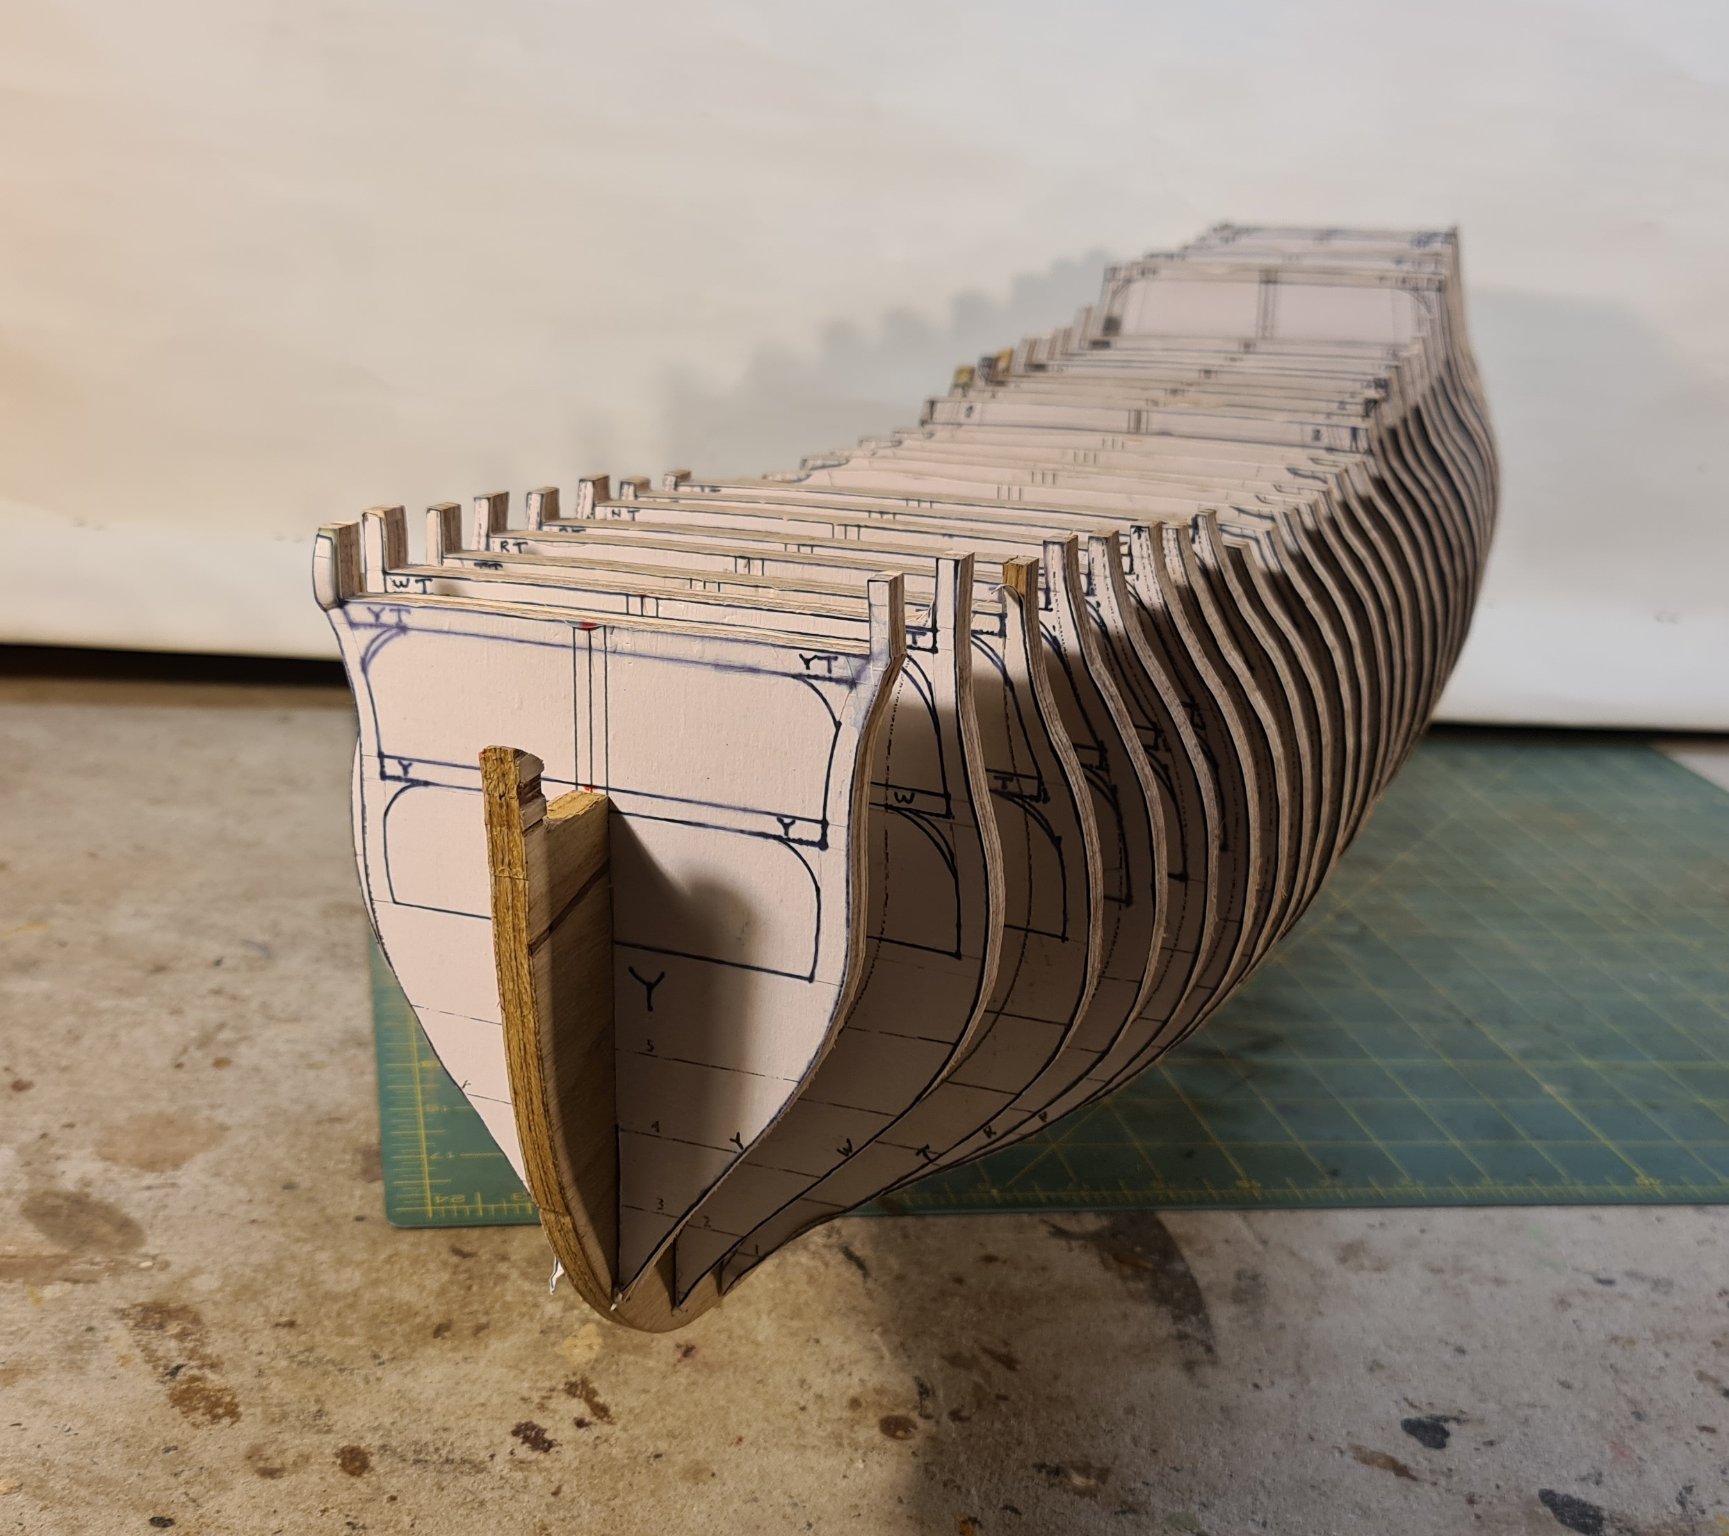
The scroll saw has been working overtime and the second stage of frame construction has been completed. The frames need spacers to improve rigidity and to take out the gentle curve in the false keel. Once that is done I will have a ribbed frame that I can start planking and a set of beams that I can build the decks on once I have done a bit of tidying up to improve the general alignment. I need to work out how to frame up the stern. I have left a central support on the deck beams as I will have to split the upper deck at least to get it into position. The forecastle, quarter deck and poop may go in in on piece, not sure. Cheers, David.


-
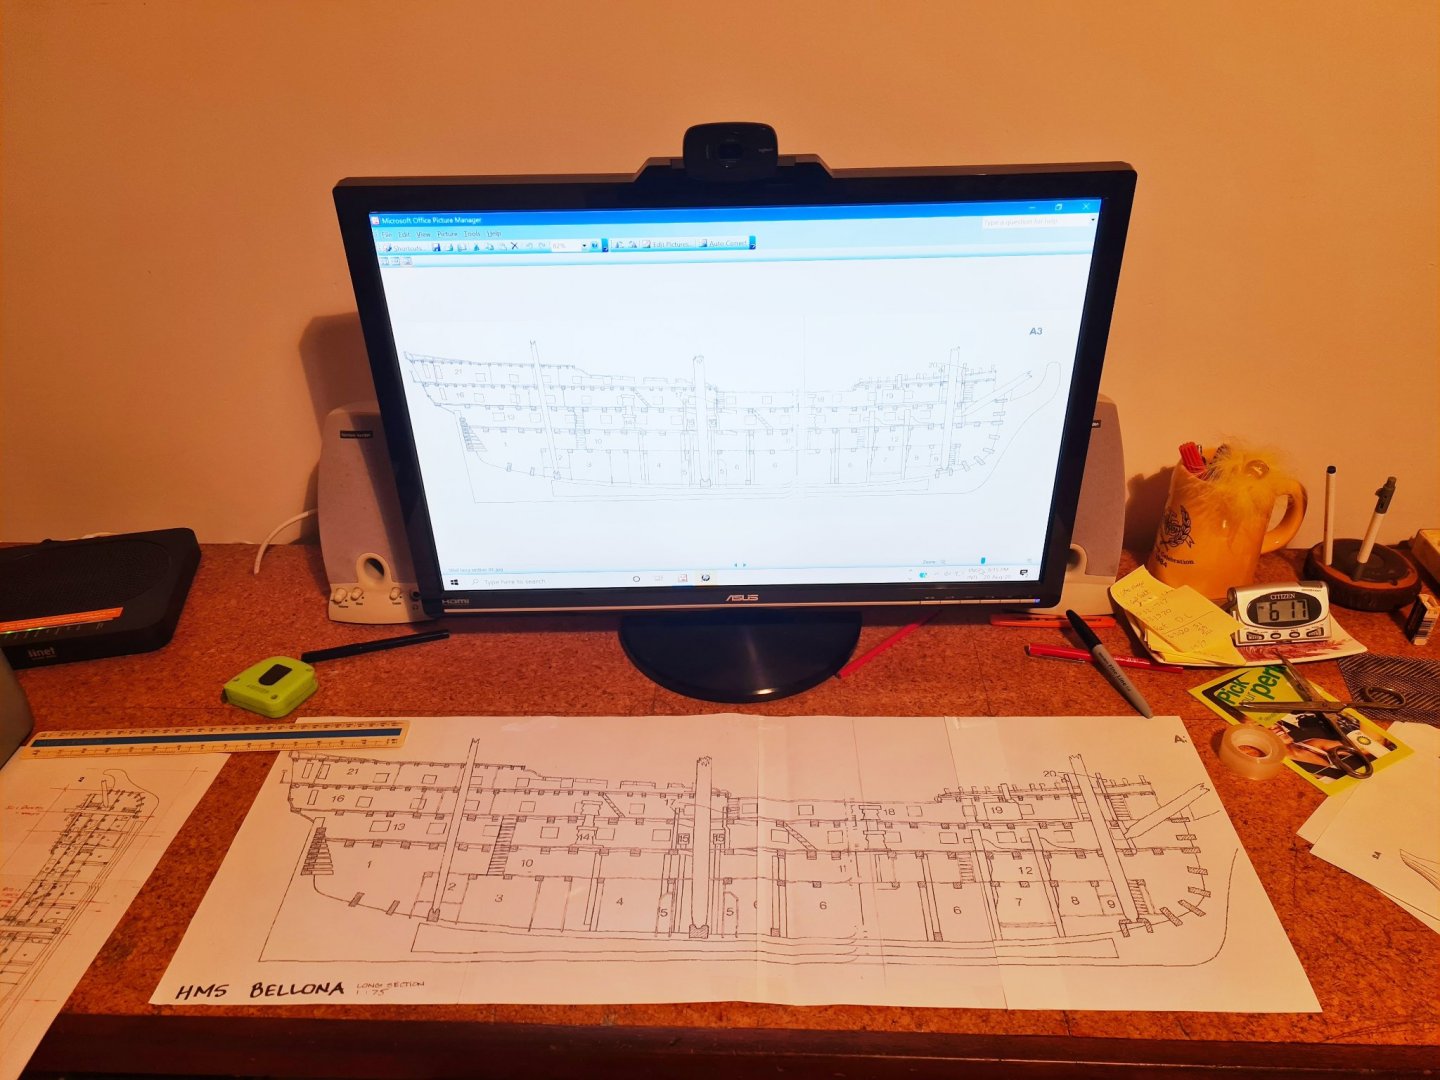
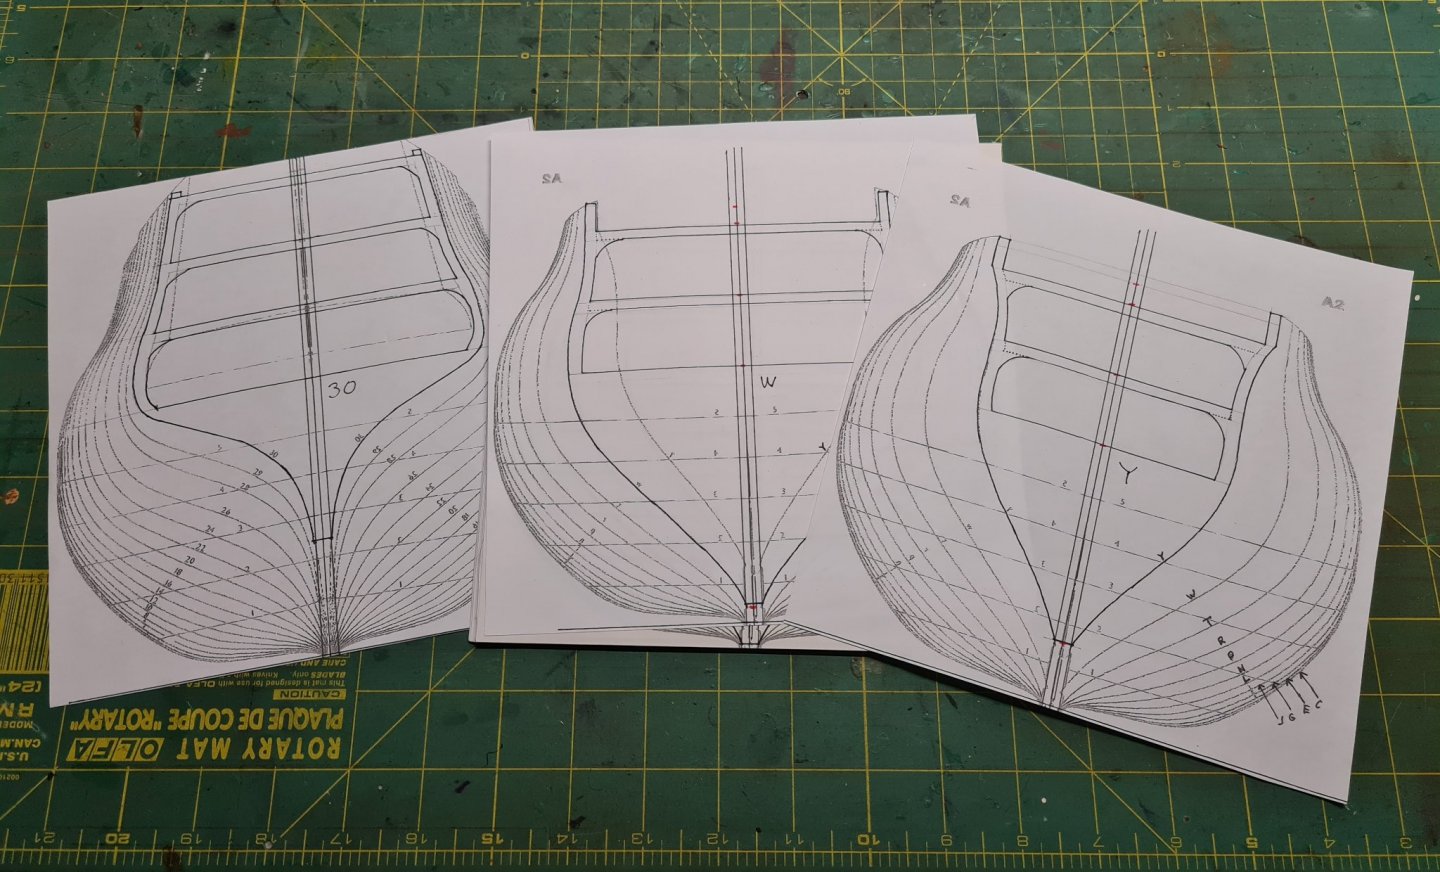
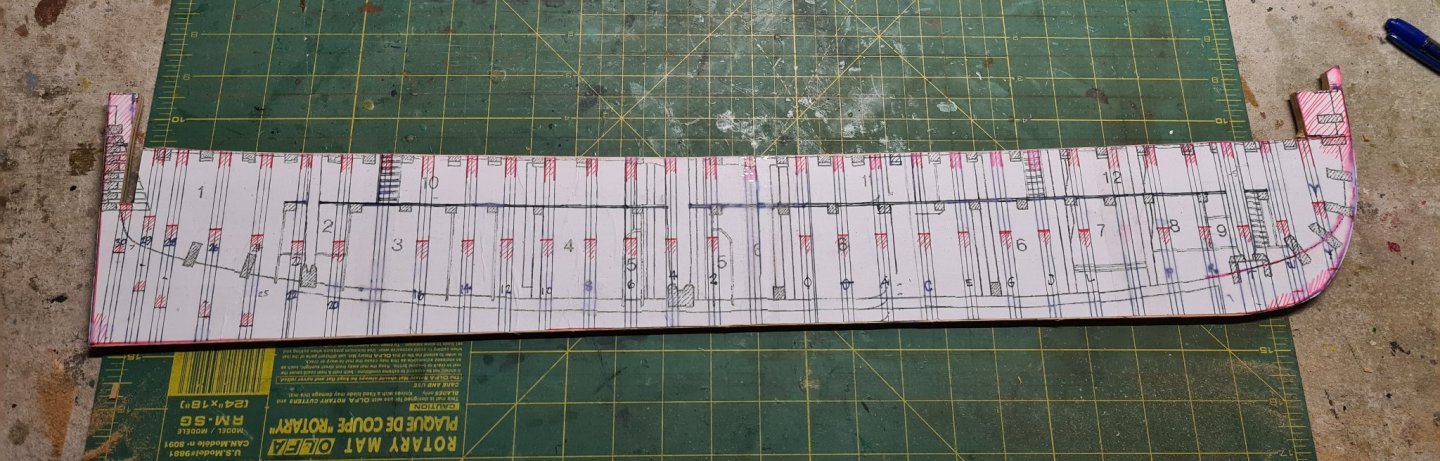
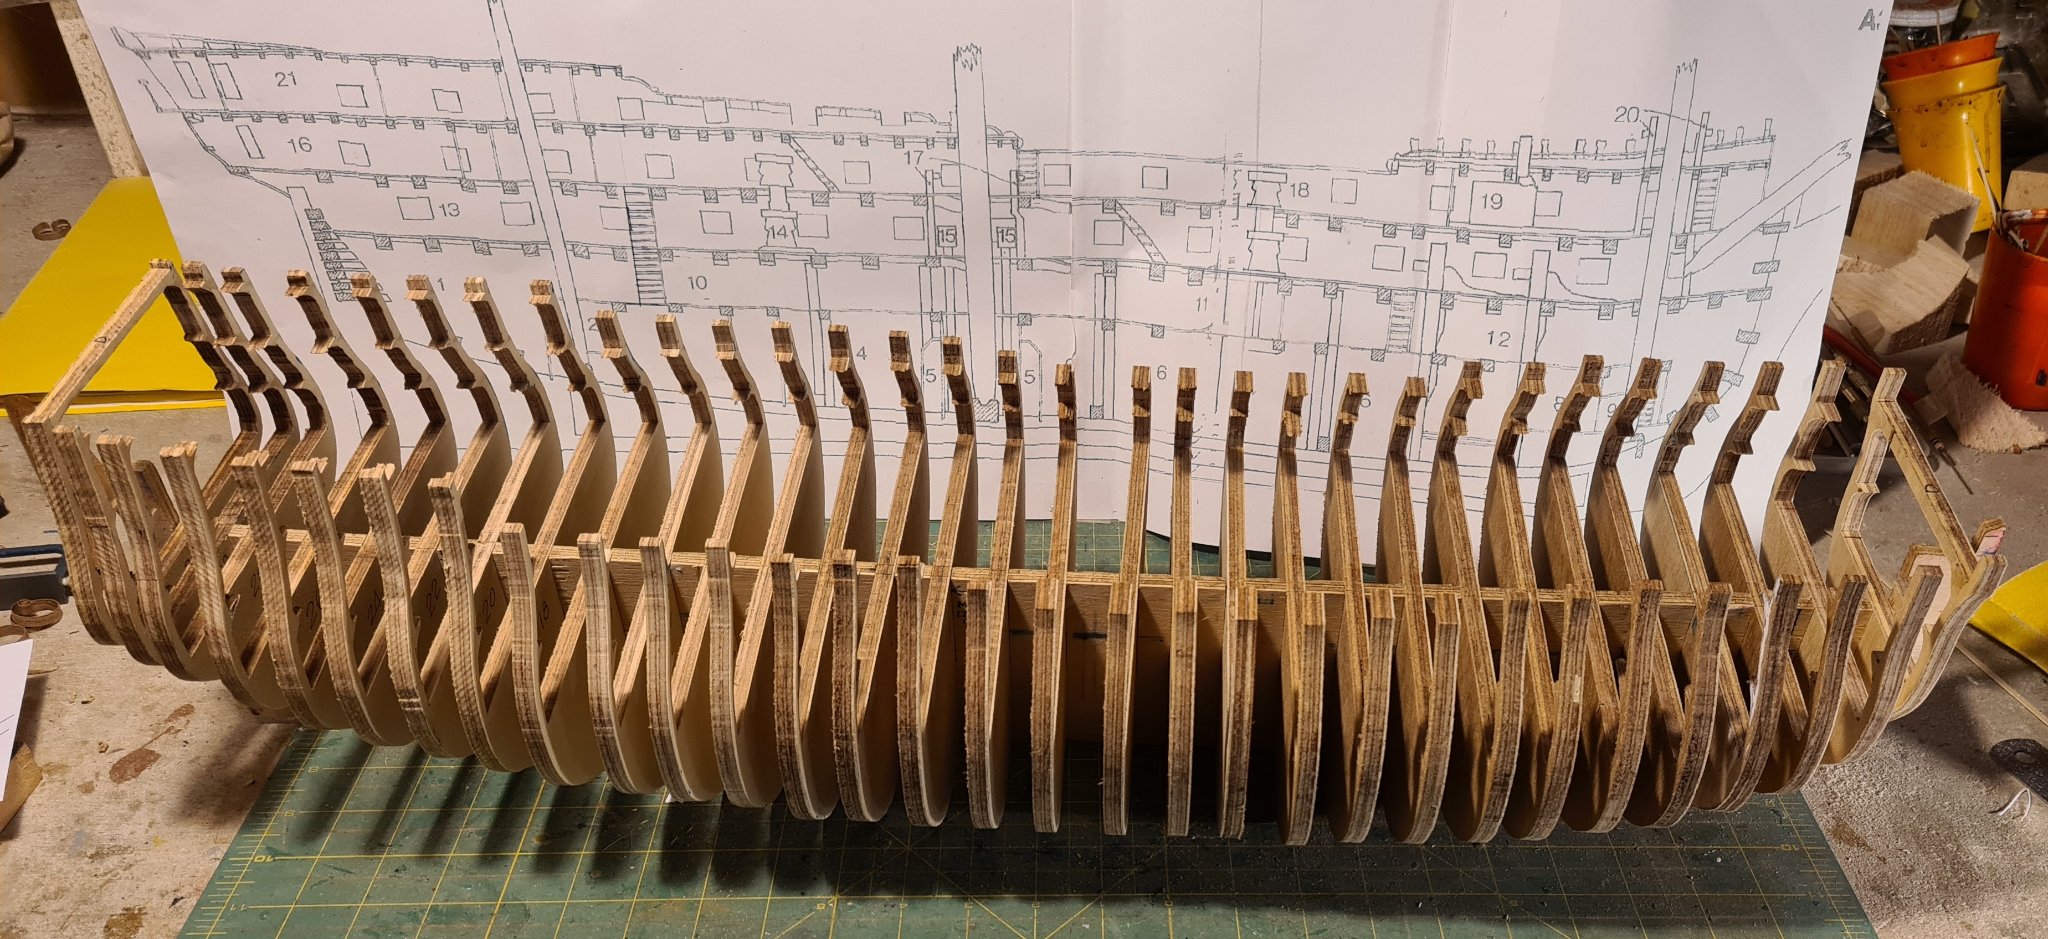
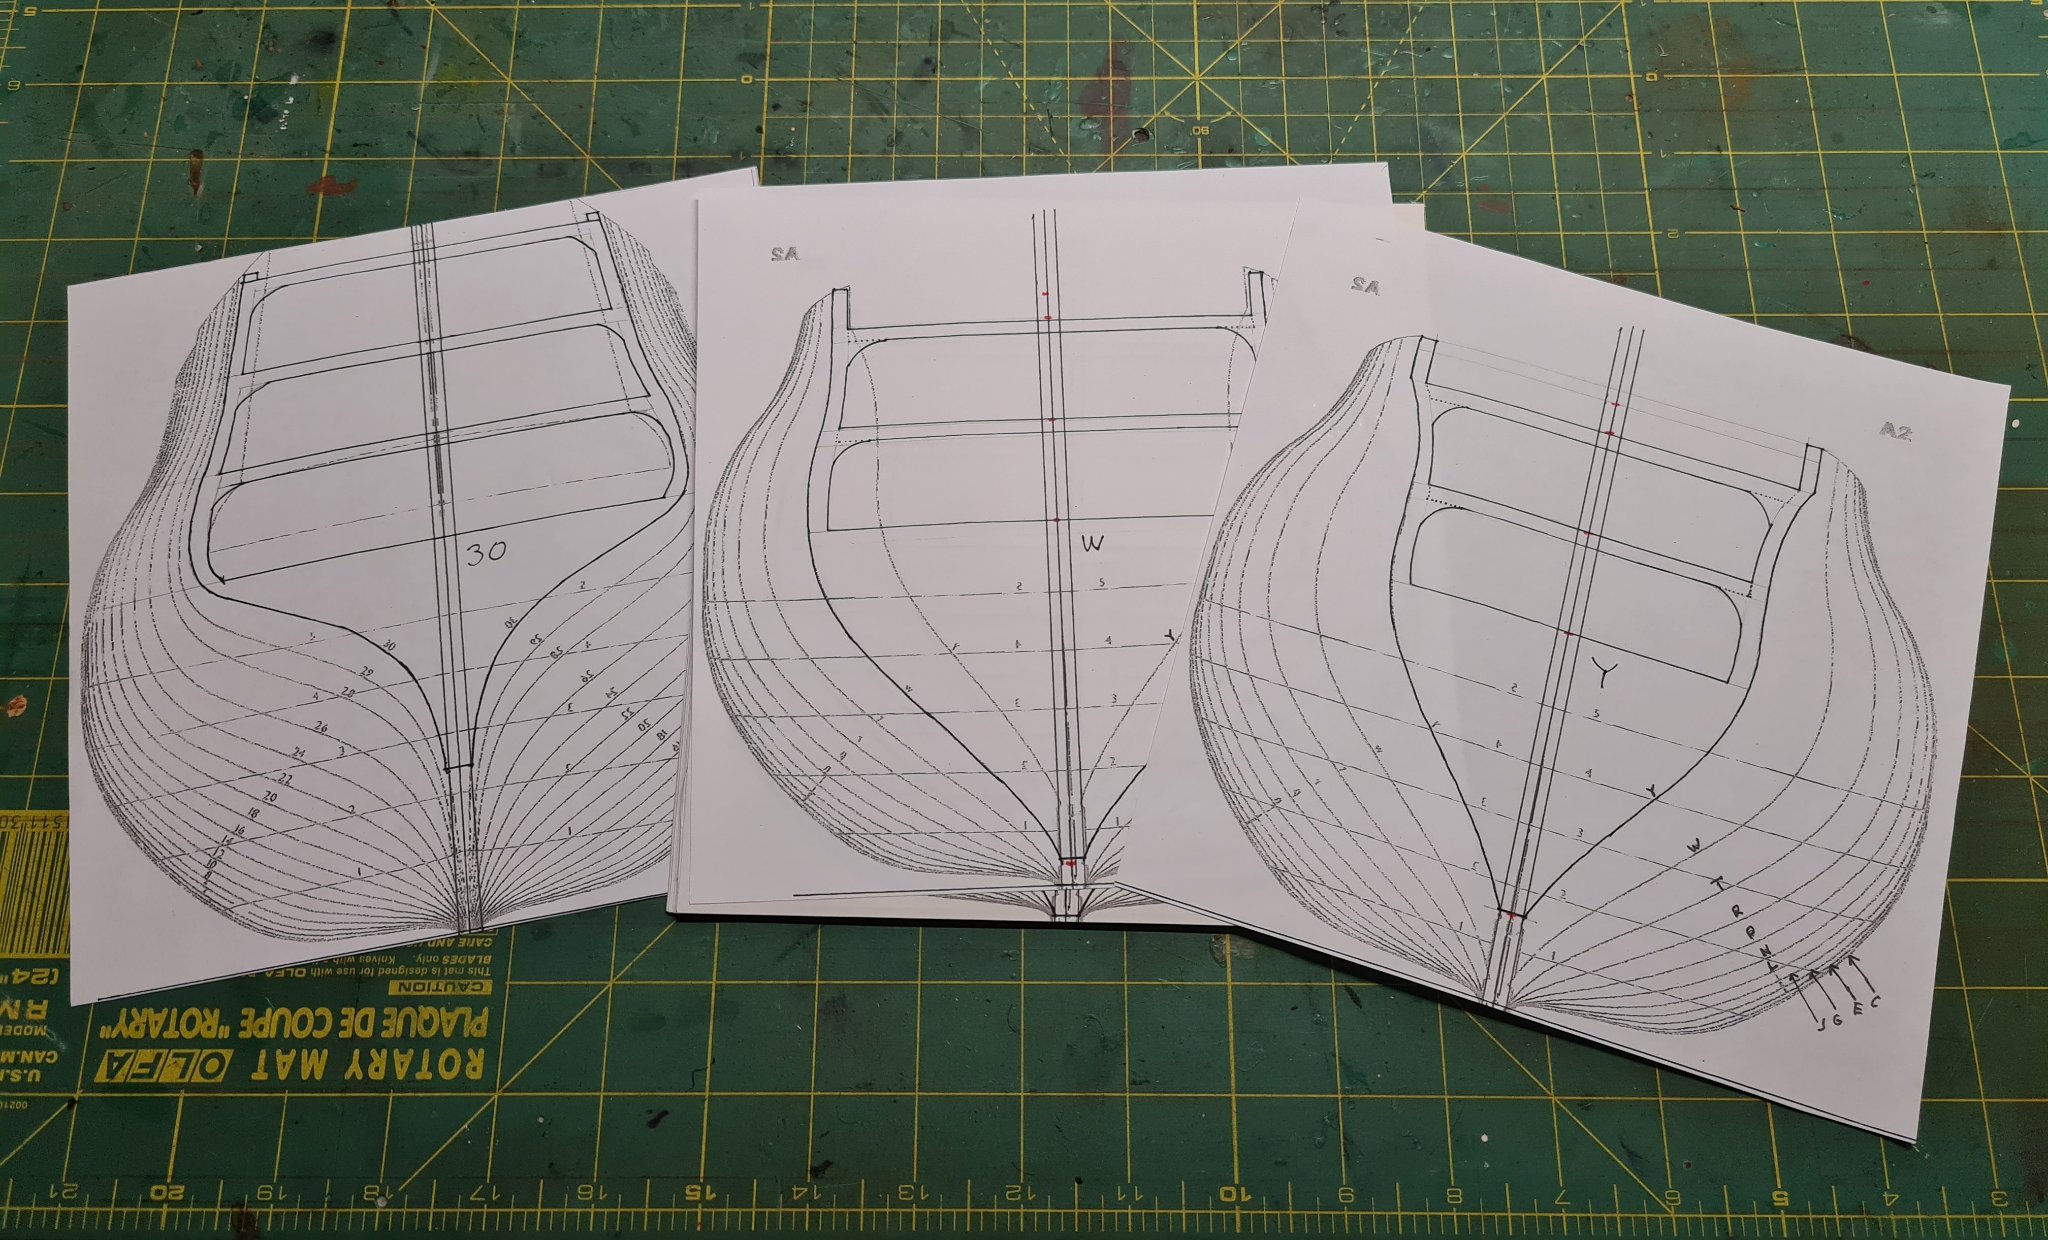
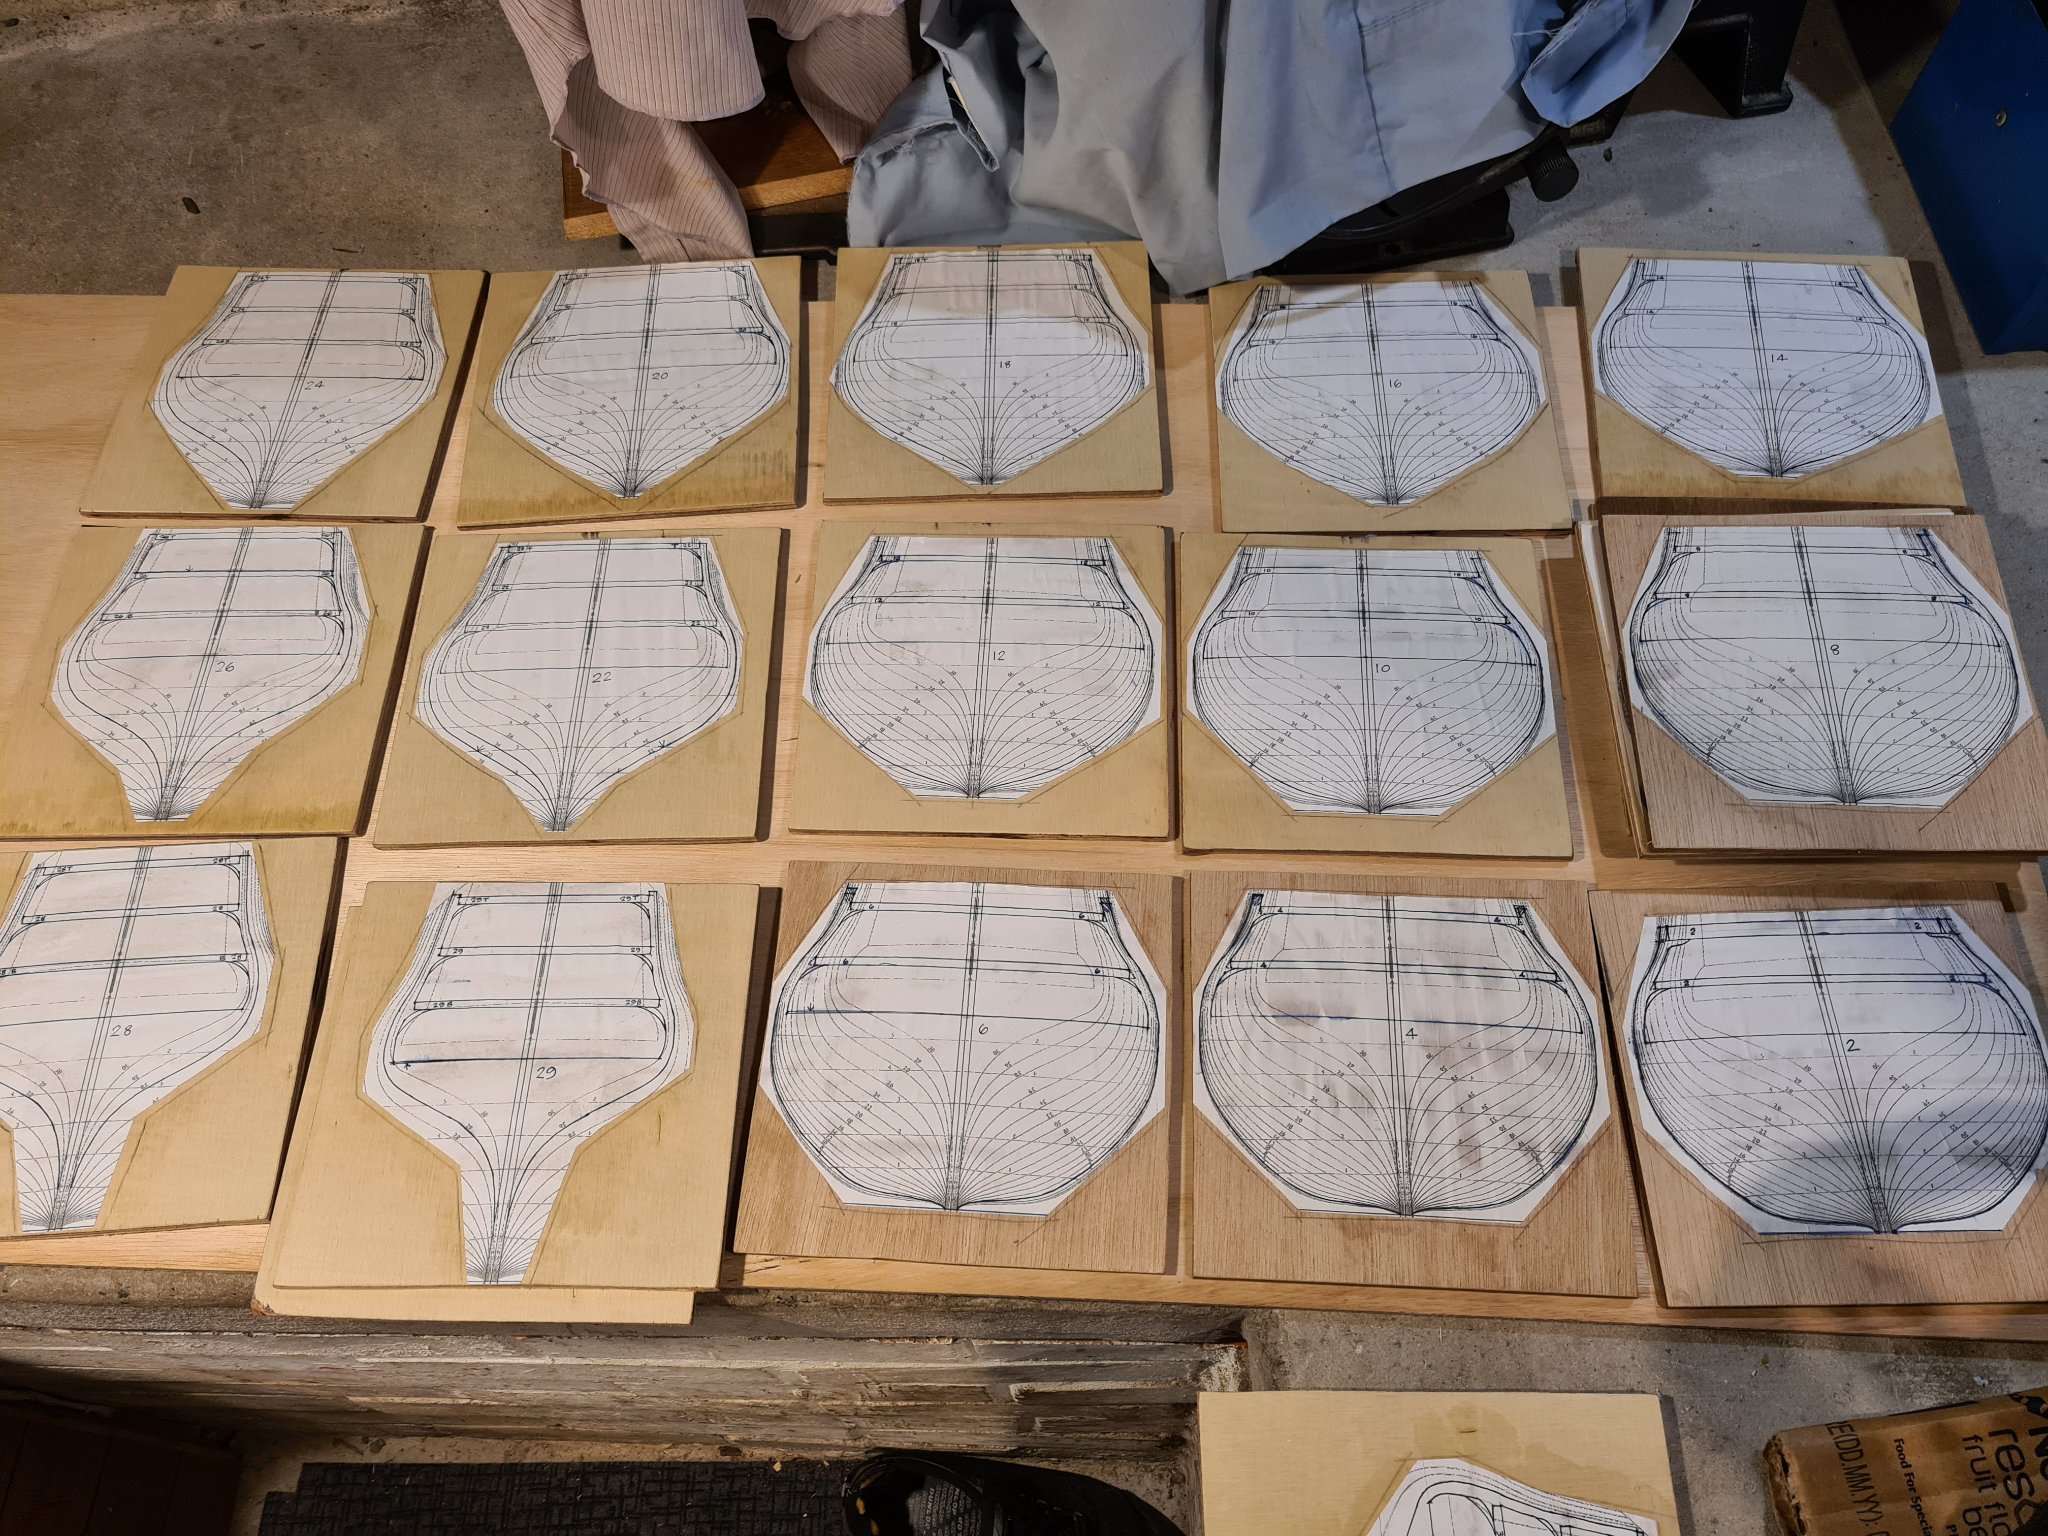
The scanner and printer have been working overtime and I have produced profile and a false keel drawings for fixing to 6mm marine ply to create the basic hull construction. There are 31 frames which means that the hull is about 1/3 solid which is a much greater density of frames when compared with commercial kits that use the same basic method. I will be infilling between the frames with the same ply so the hull will be fairly sturdy and able to withstand the rigours of fairing and planking. Just by chance the voids between the frames are mainly 2 thicknesses of ply wide so this process should not be hugely time consuming. Part of the cut outs to create the deck voids will be the beams that the decks are fixed to so I end up with the correct cross falls and bow to stern deck shape. The scroll saw has been very busy! The frames are a tight friction fit to the false keel so I can work on the overall structure without gluing the frames in position.


-
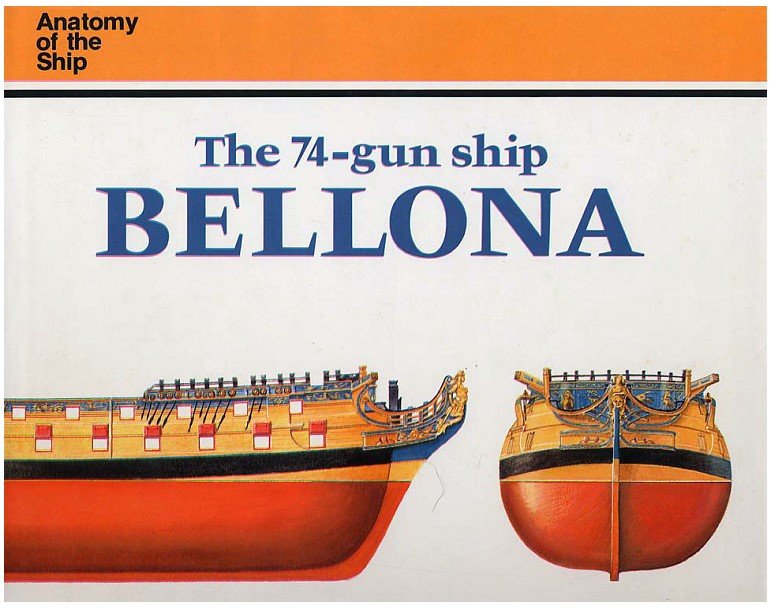
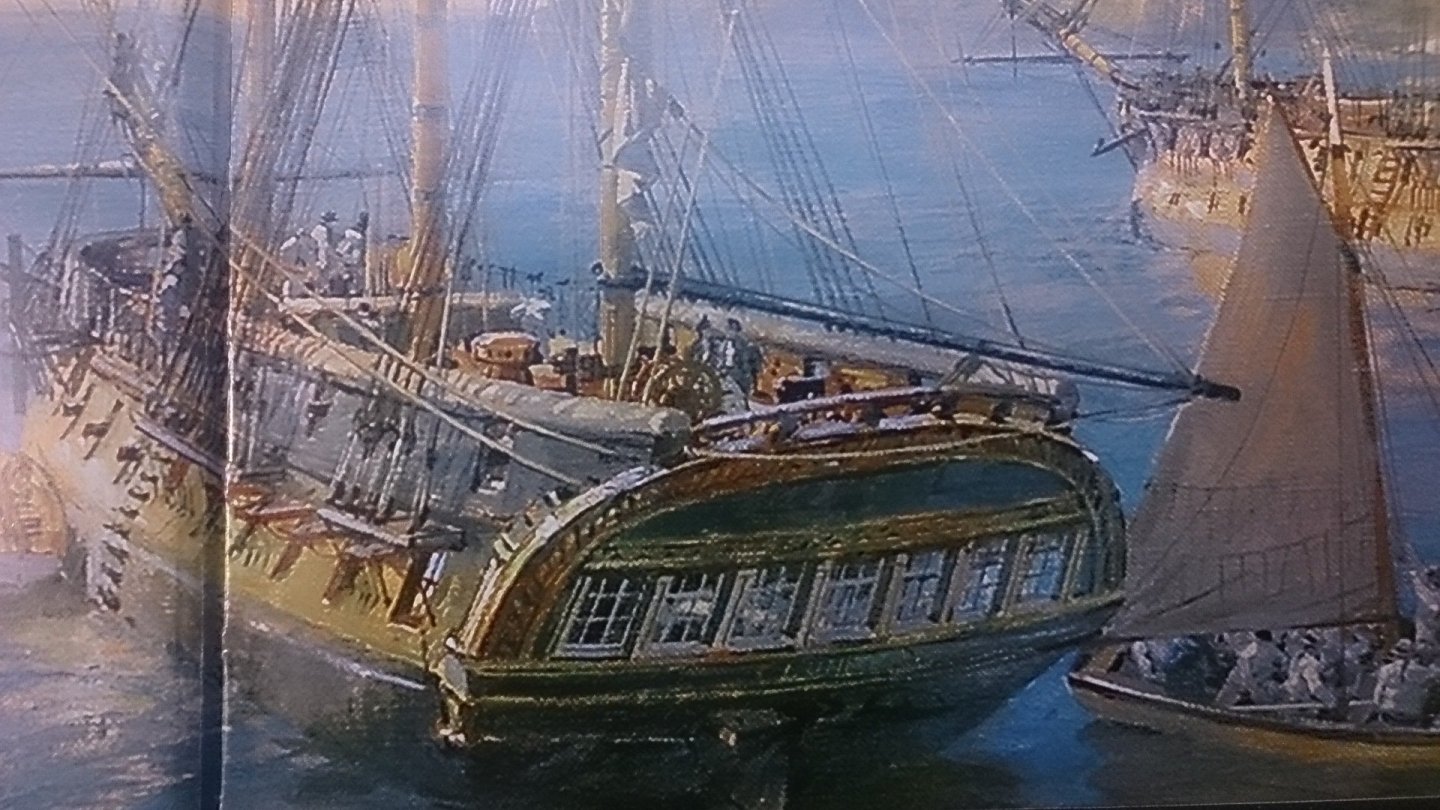
After completing HMS Surprise I have been contemplating what to build next. I am definitely hooked on Napoleonic War era ships and am a great fan of Patrick O'Brian's Aubrey Maturin book series so another ship from this source seemed like a good idea, so HMS Bellona it is. A bit more research revealed that, as Bellona was built in 1760, it is quite decorated and has a complex hull shape with defined forecastle, quarterdeck and poop, so a bit of a challenge there. The complexity of the stern decorations mean that I will definitely have to improve my wood carving skills. Here we go! I have acquired "The Anatomy of the Ship The 74 gun ship Bellona" by Brian Lavery in both hard copy and pdf so this will be the basic resource. The internet has also provided lots of images.
-
The final step for display has now started, a case. When I completed my first build, the Port Jackson Schooner, the ship was placed on a shelf. A few months later I noticed that some additional rigging had appeared, a small spide, which we in Australia call a daddy-long-legs, had set up residence and found the rig a perfect base for it's web! About time for a display case. I used a length of shelving as a base and I rebatted the edges to half depth and width to flush fit a 4mm perspex cover. The joints are mitred and clear adhesive makes them almost invisible. I think this is a much better solution than a glass case, lighter and much safer. My Bounty build was finished with a similar case and now Surprise will get the same treatment. Perspex cases aren't cheap but considering the time and effort put int the project I believe it is a good investment which results in dust free, and importantly, spider free models. Cheers, David.
-
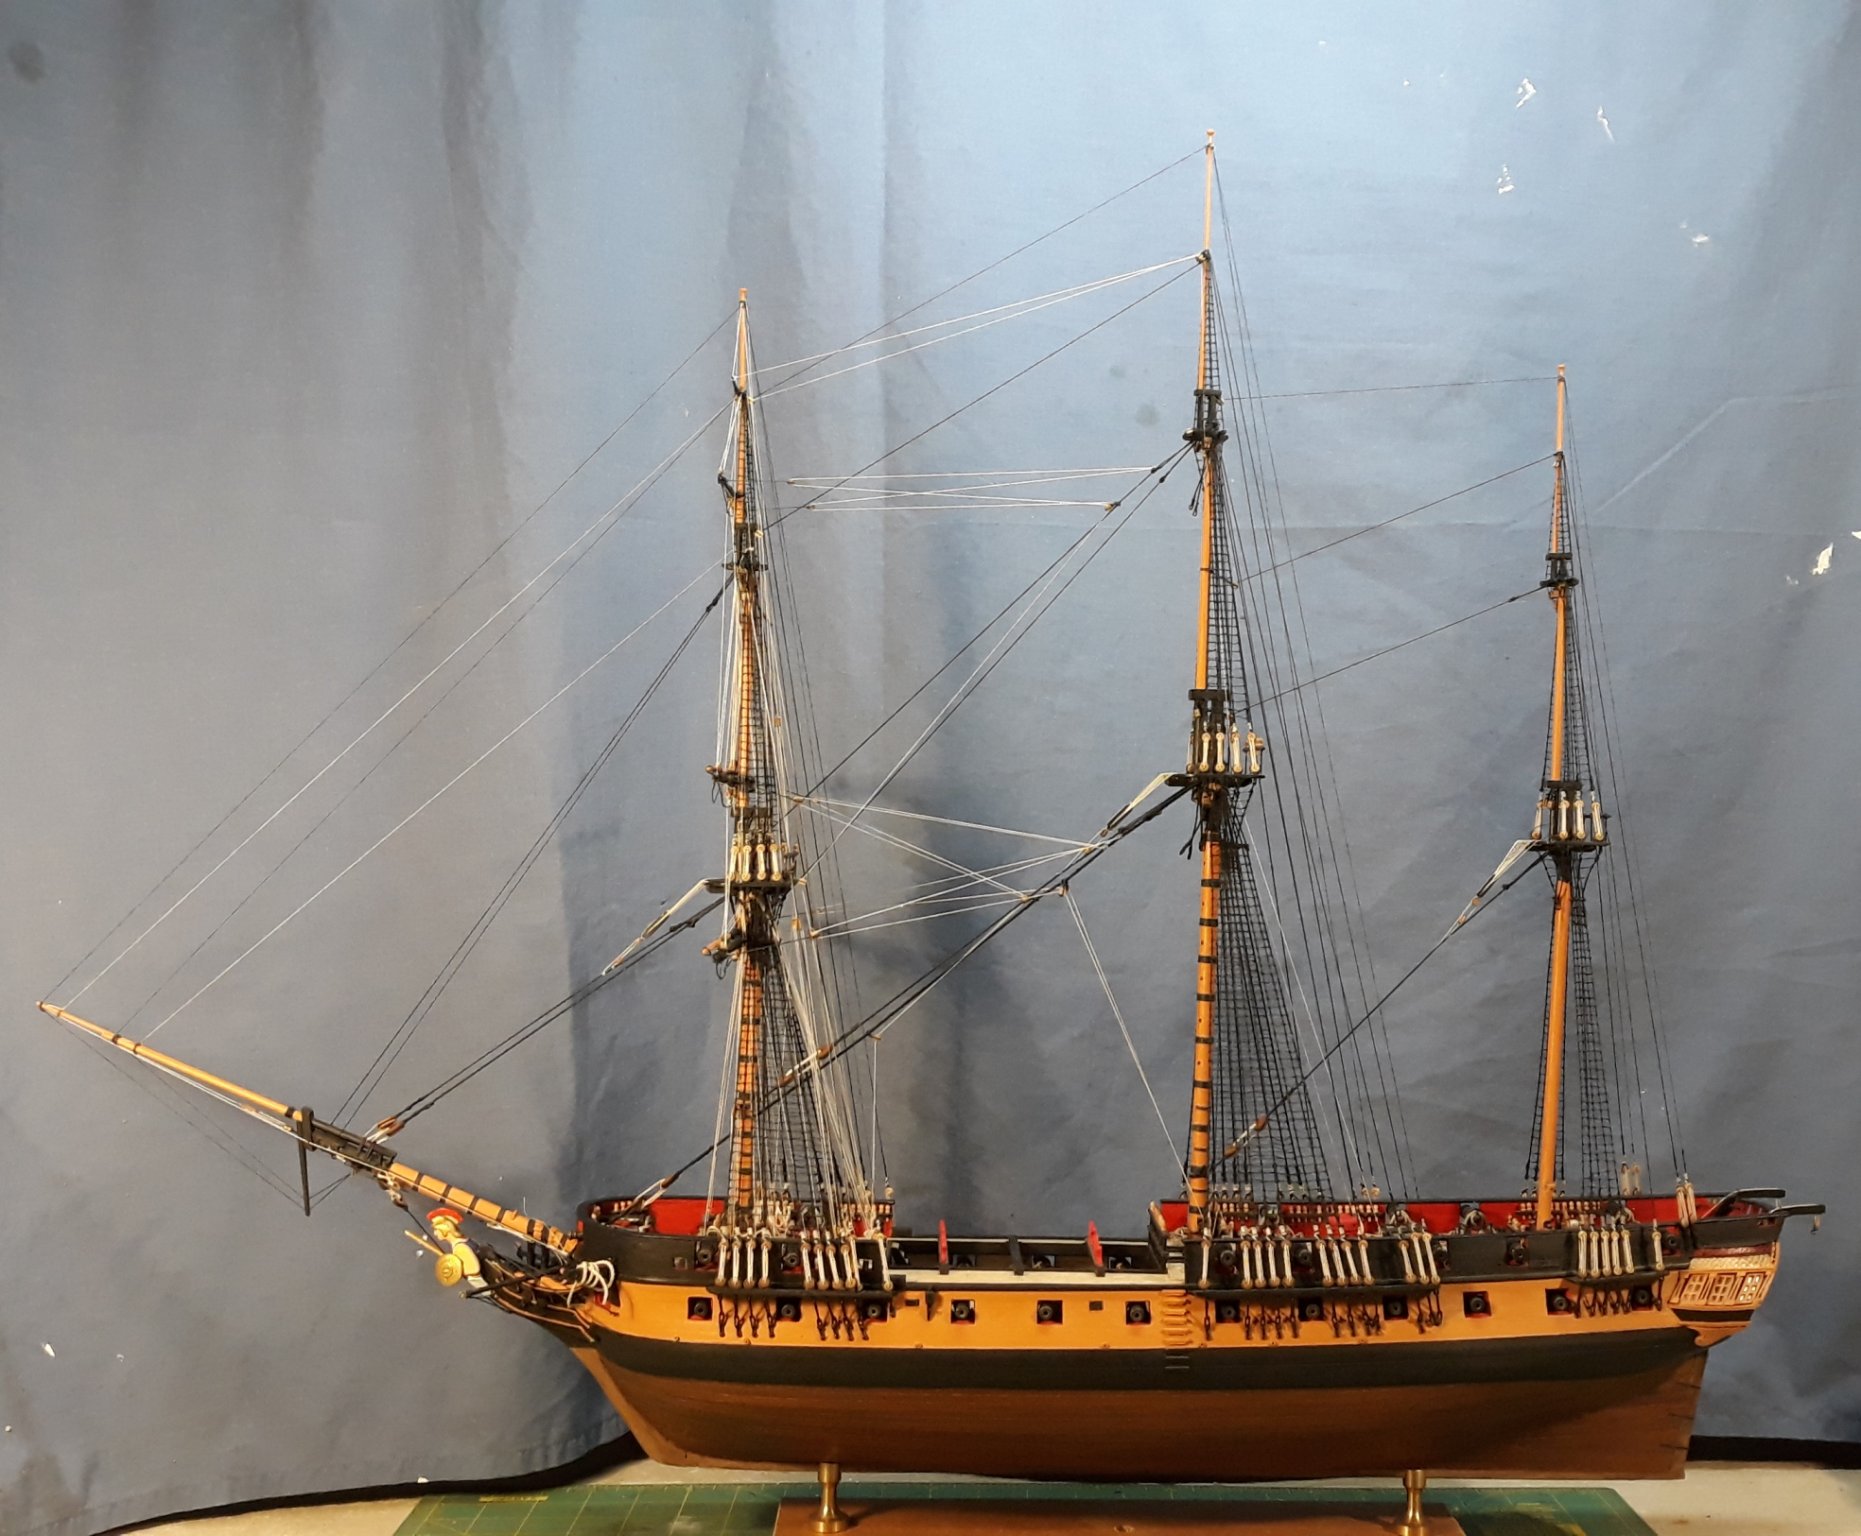
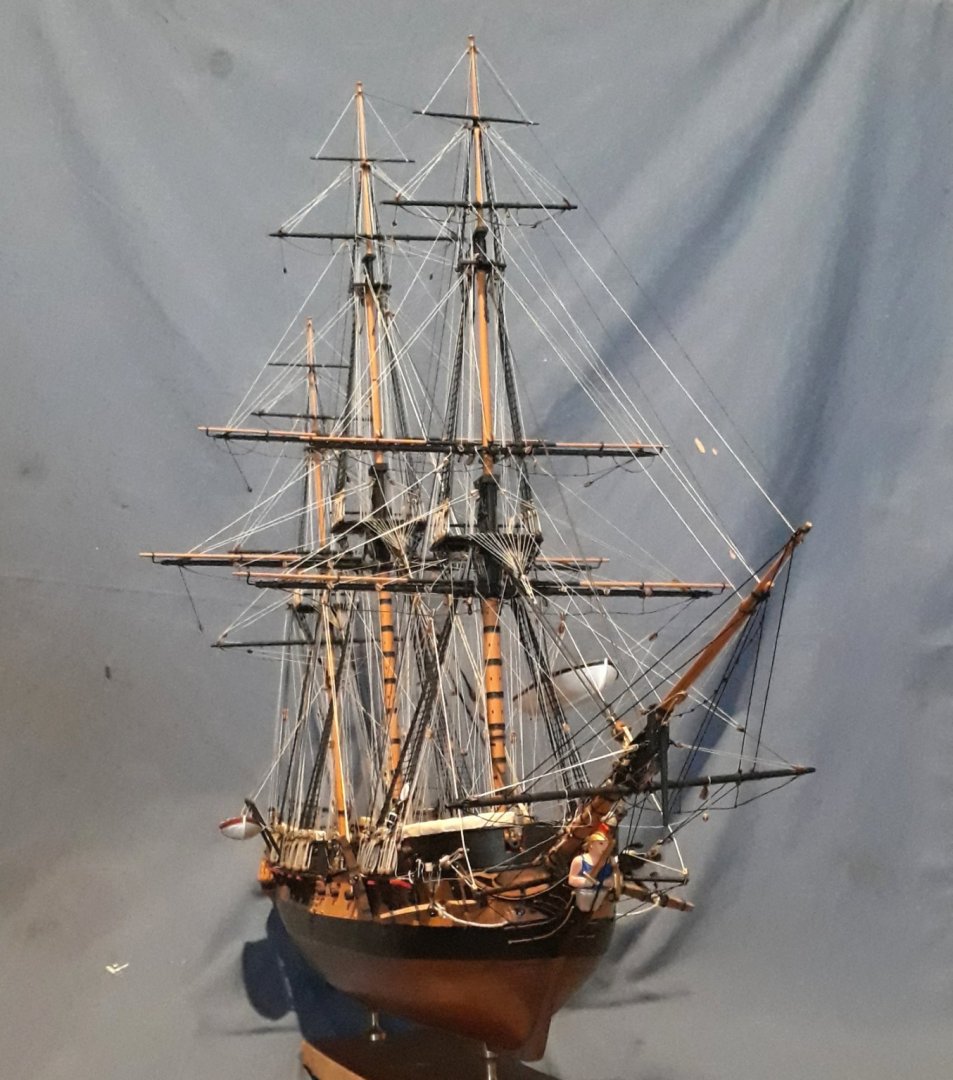
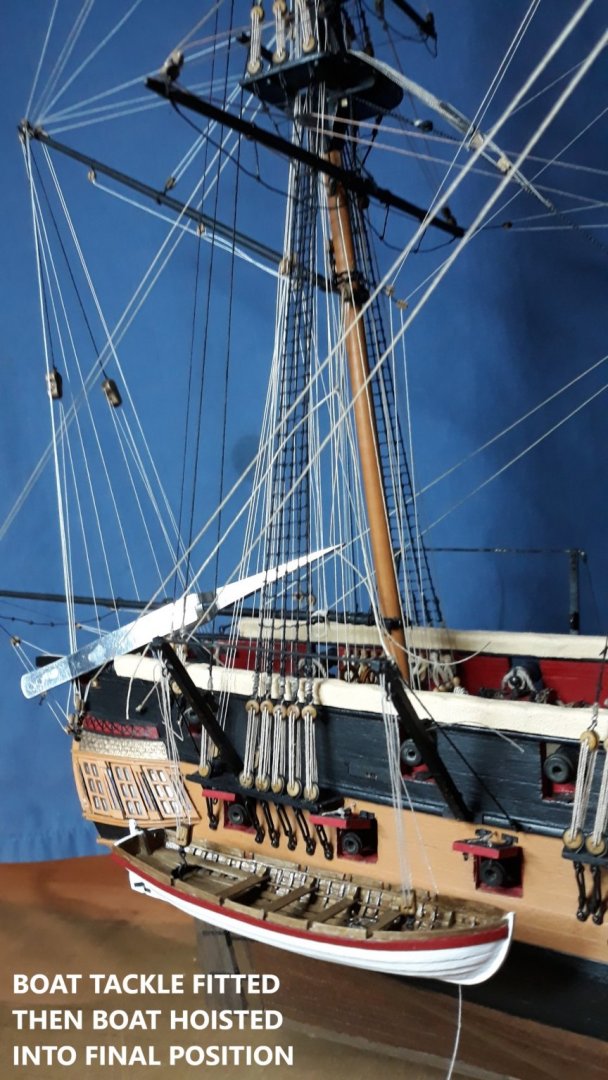
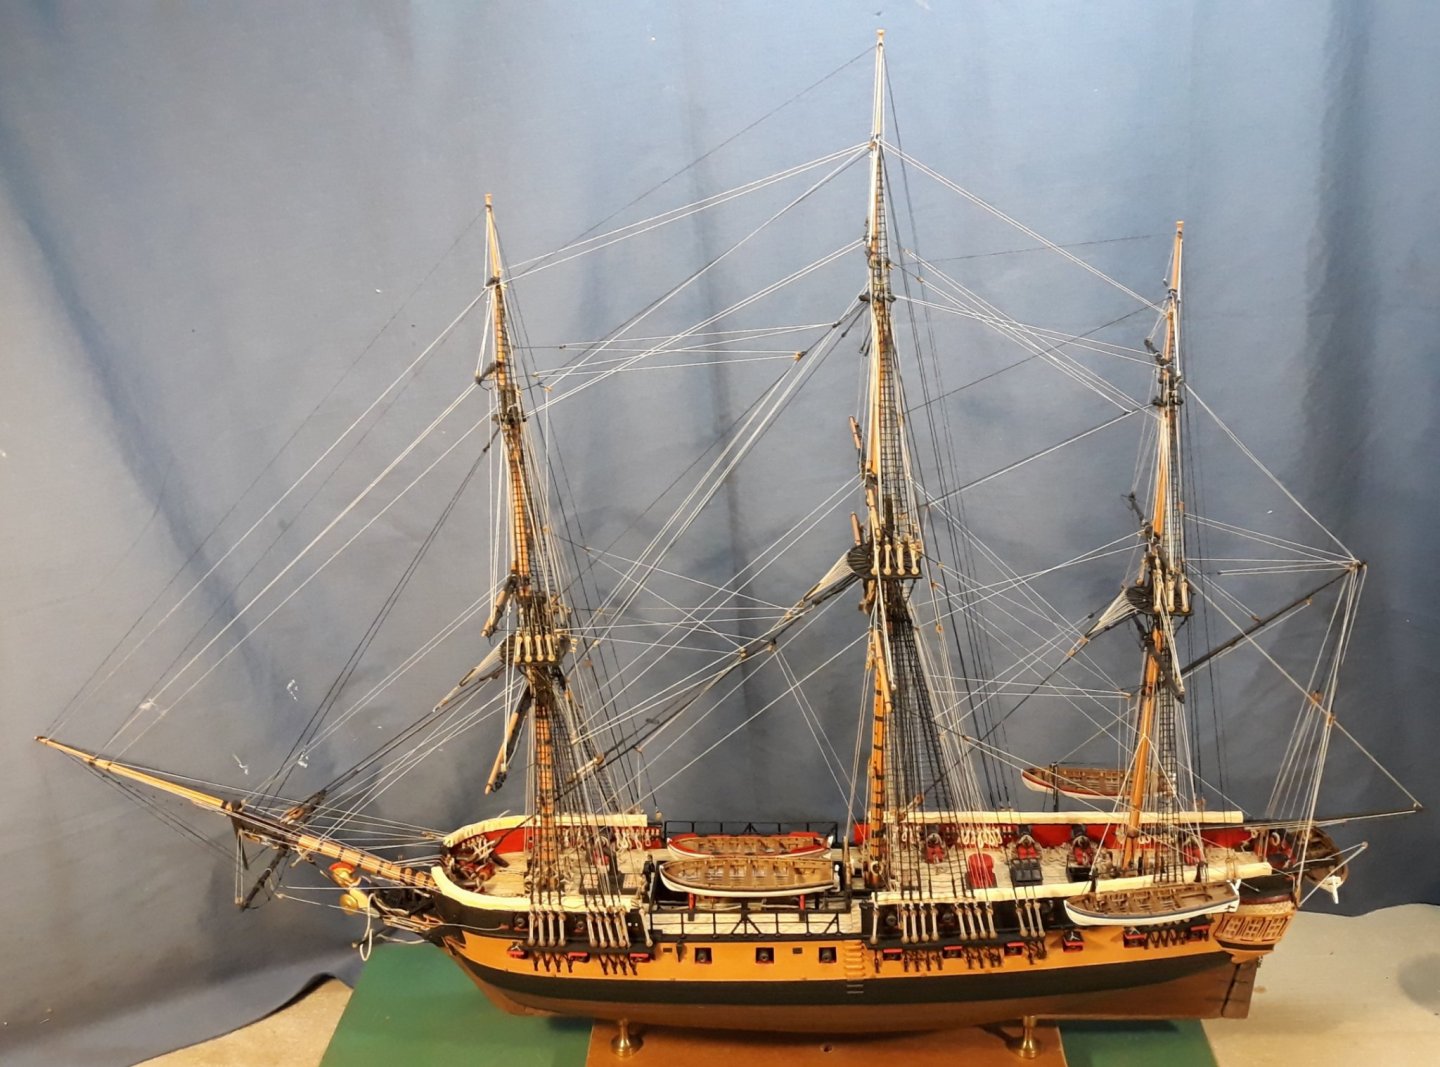
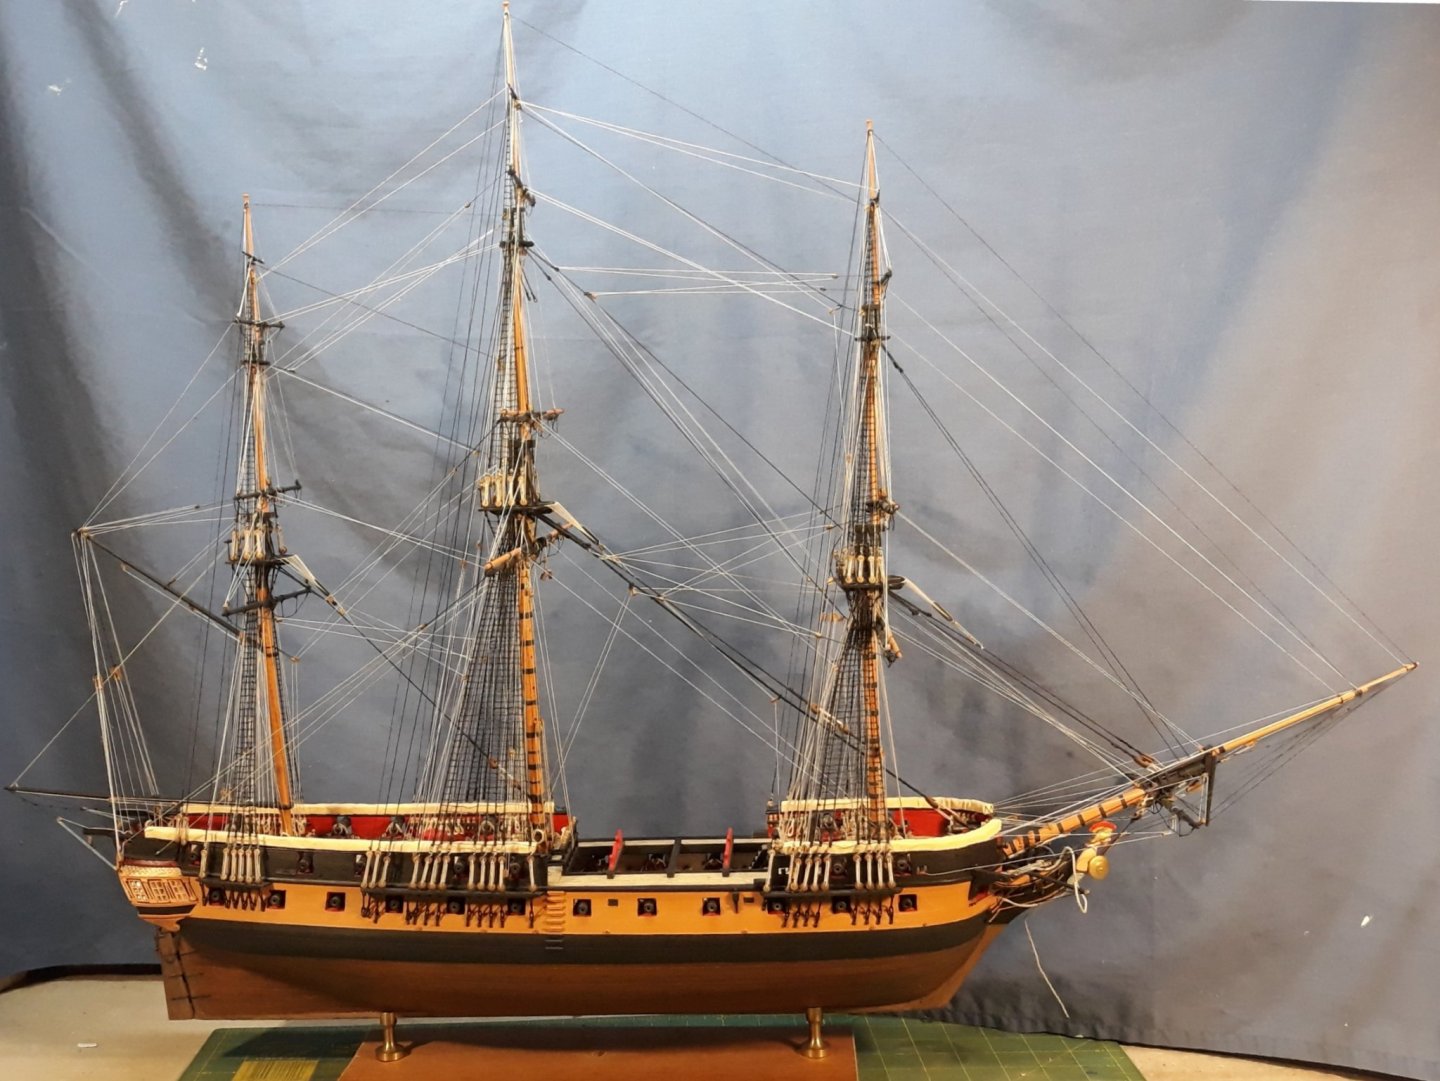
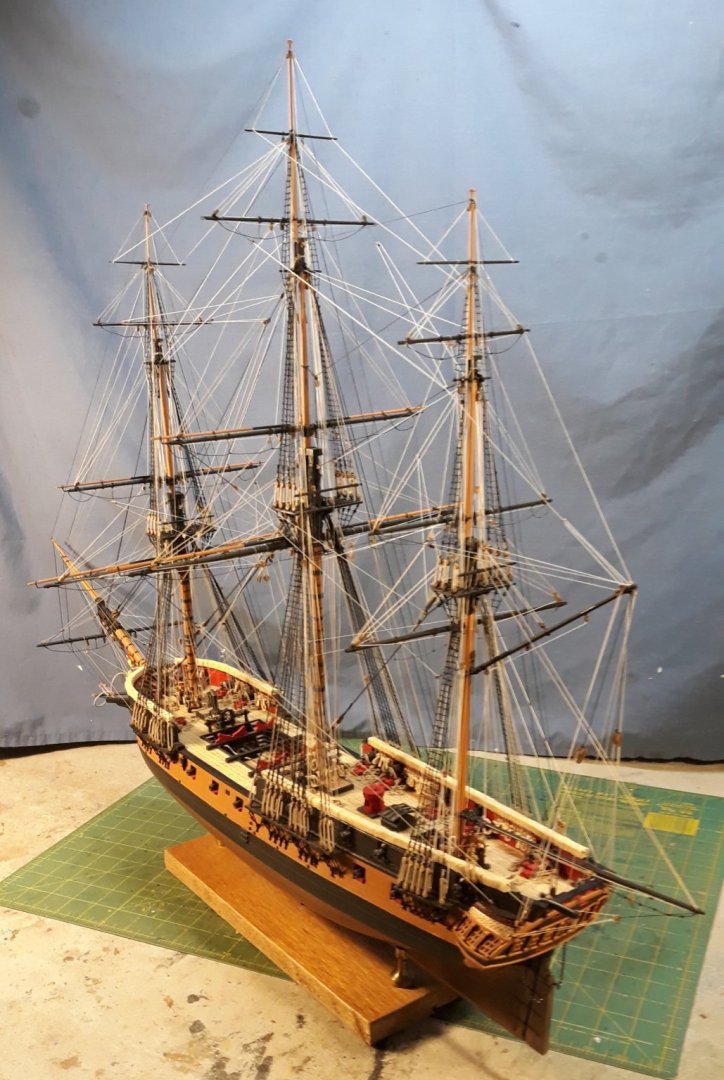
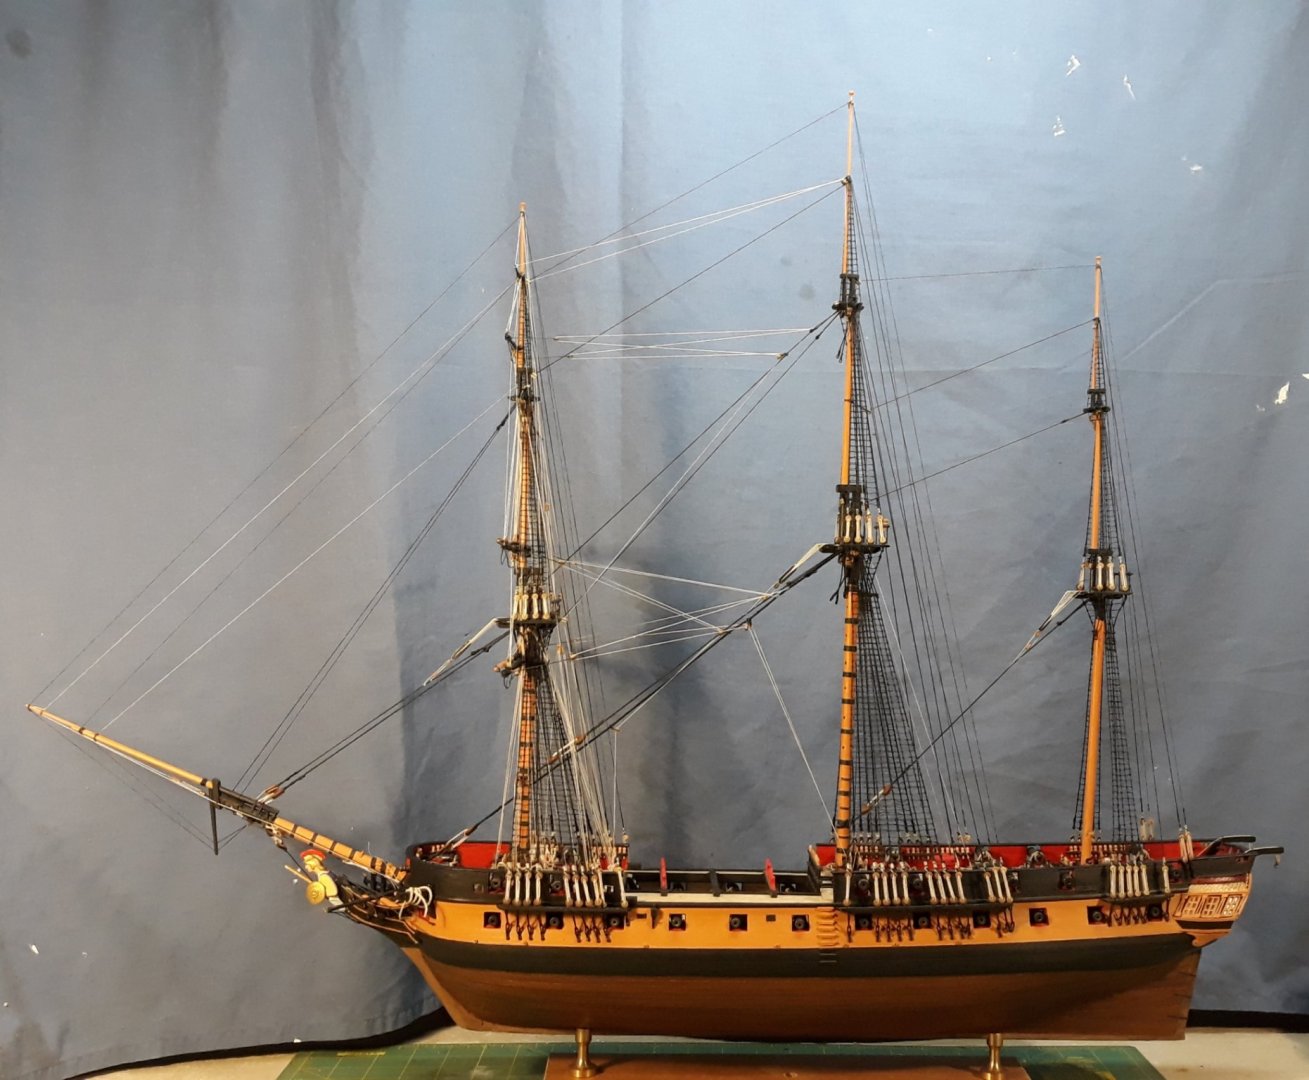
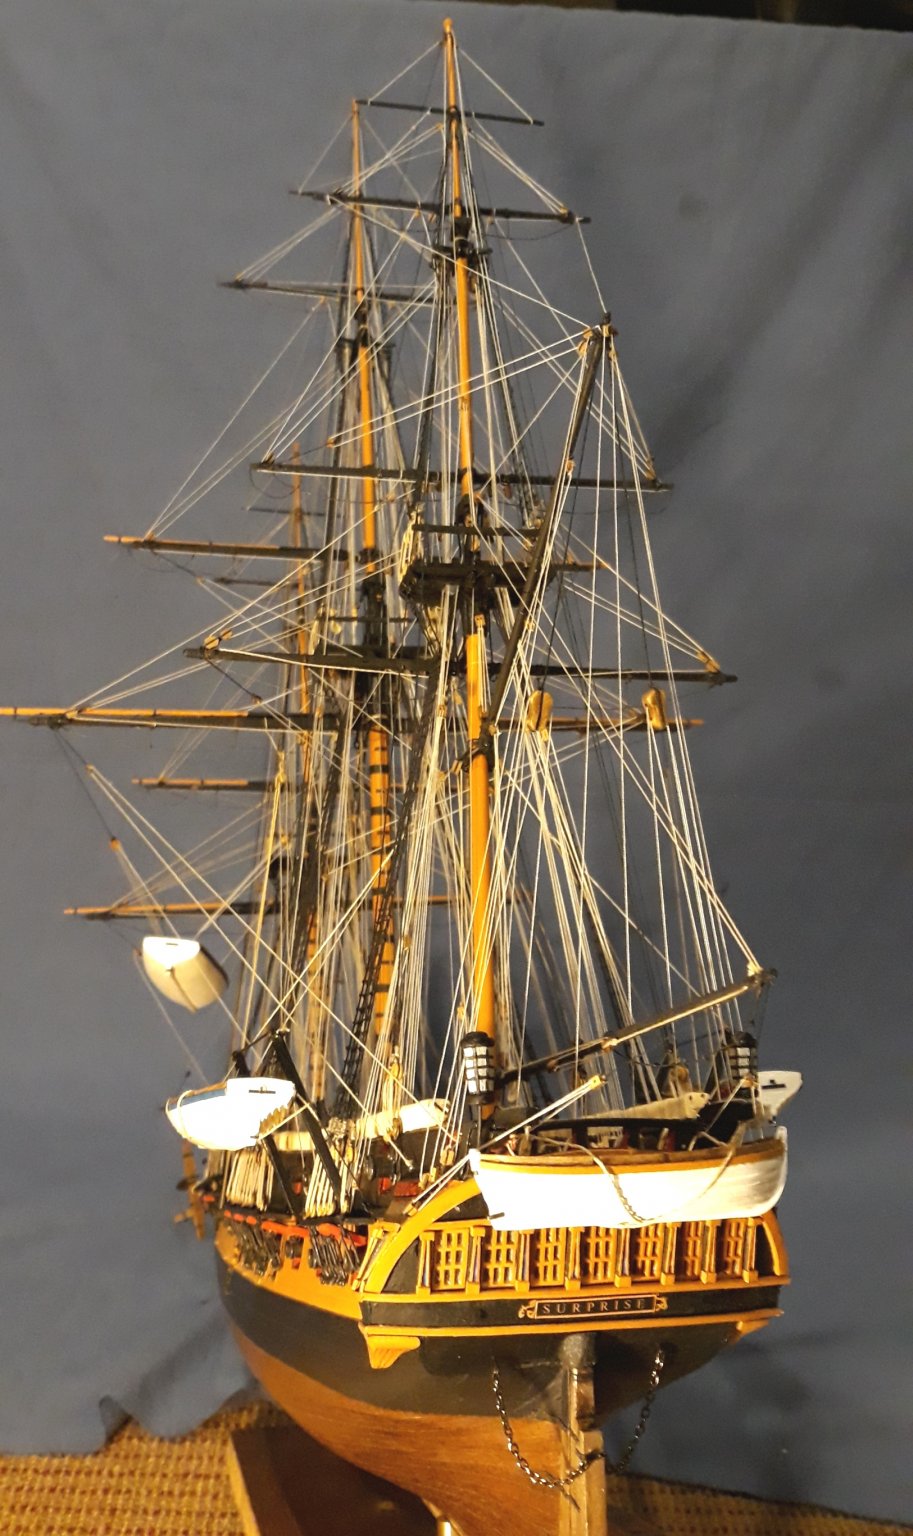
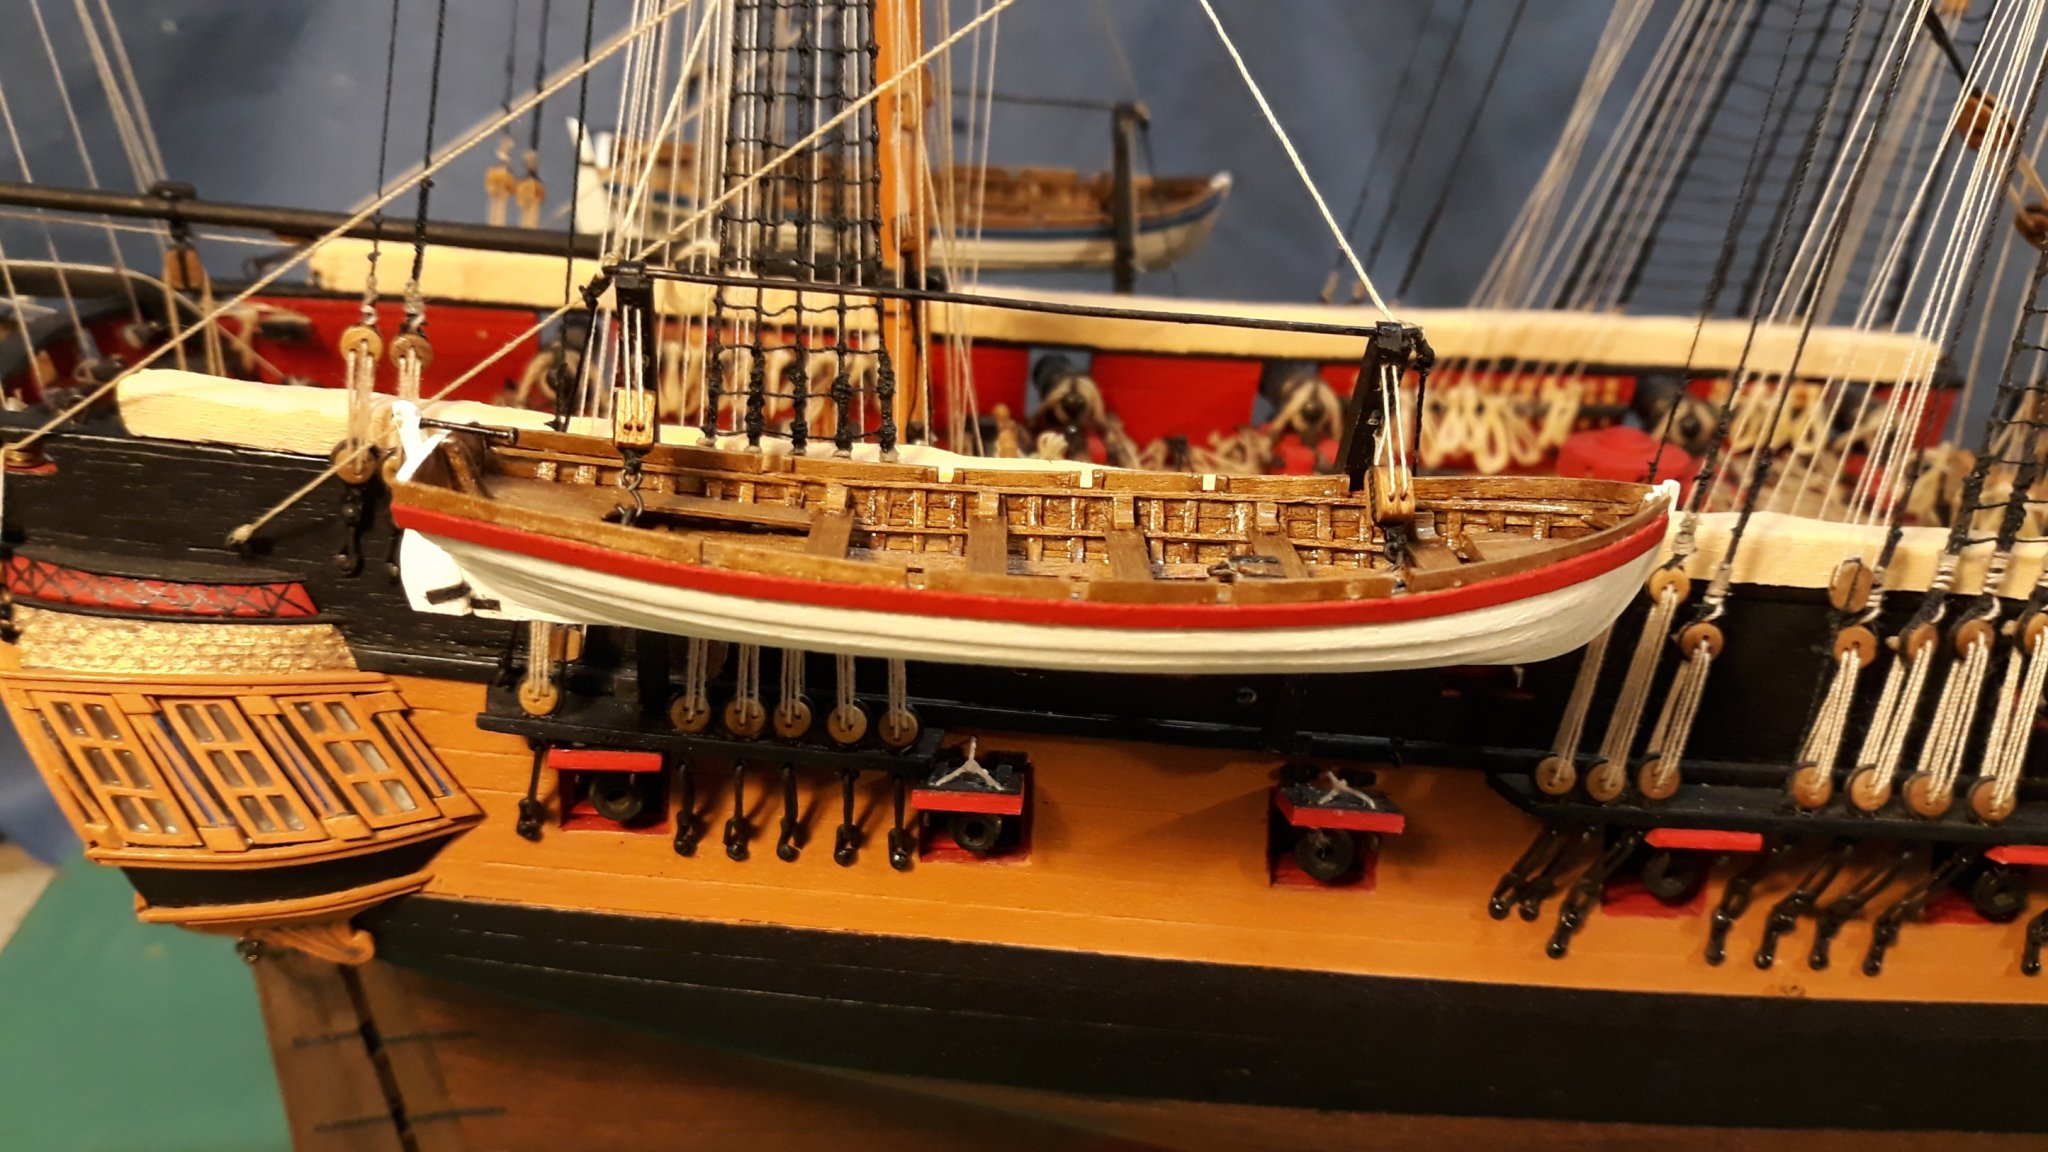
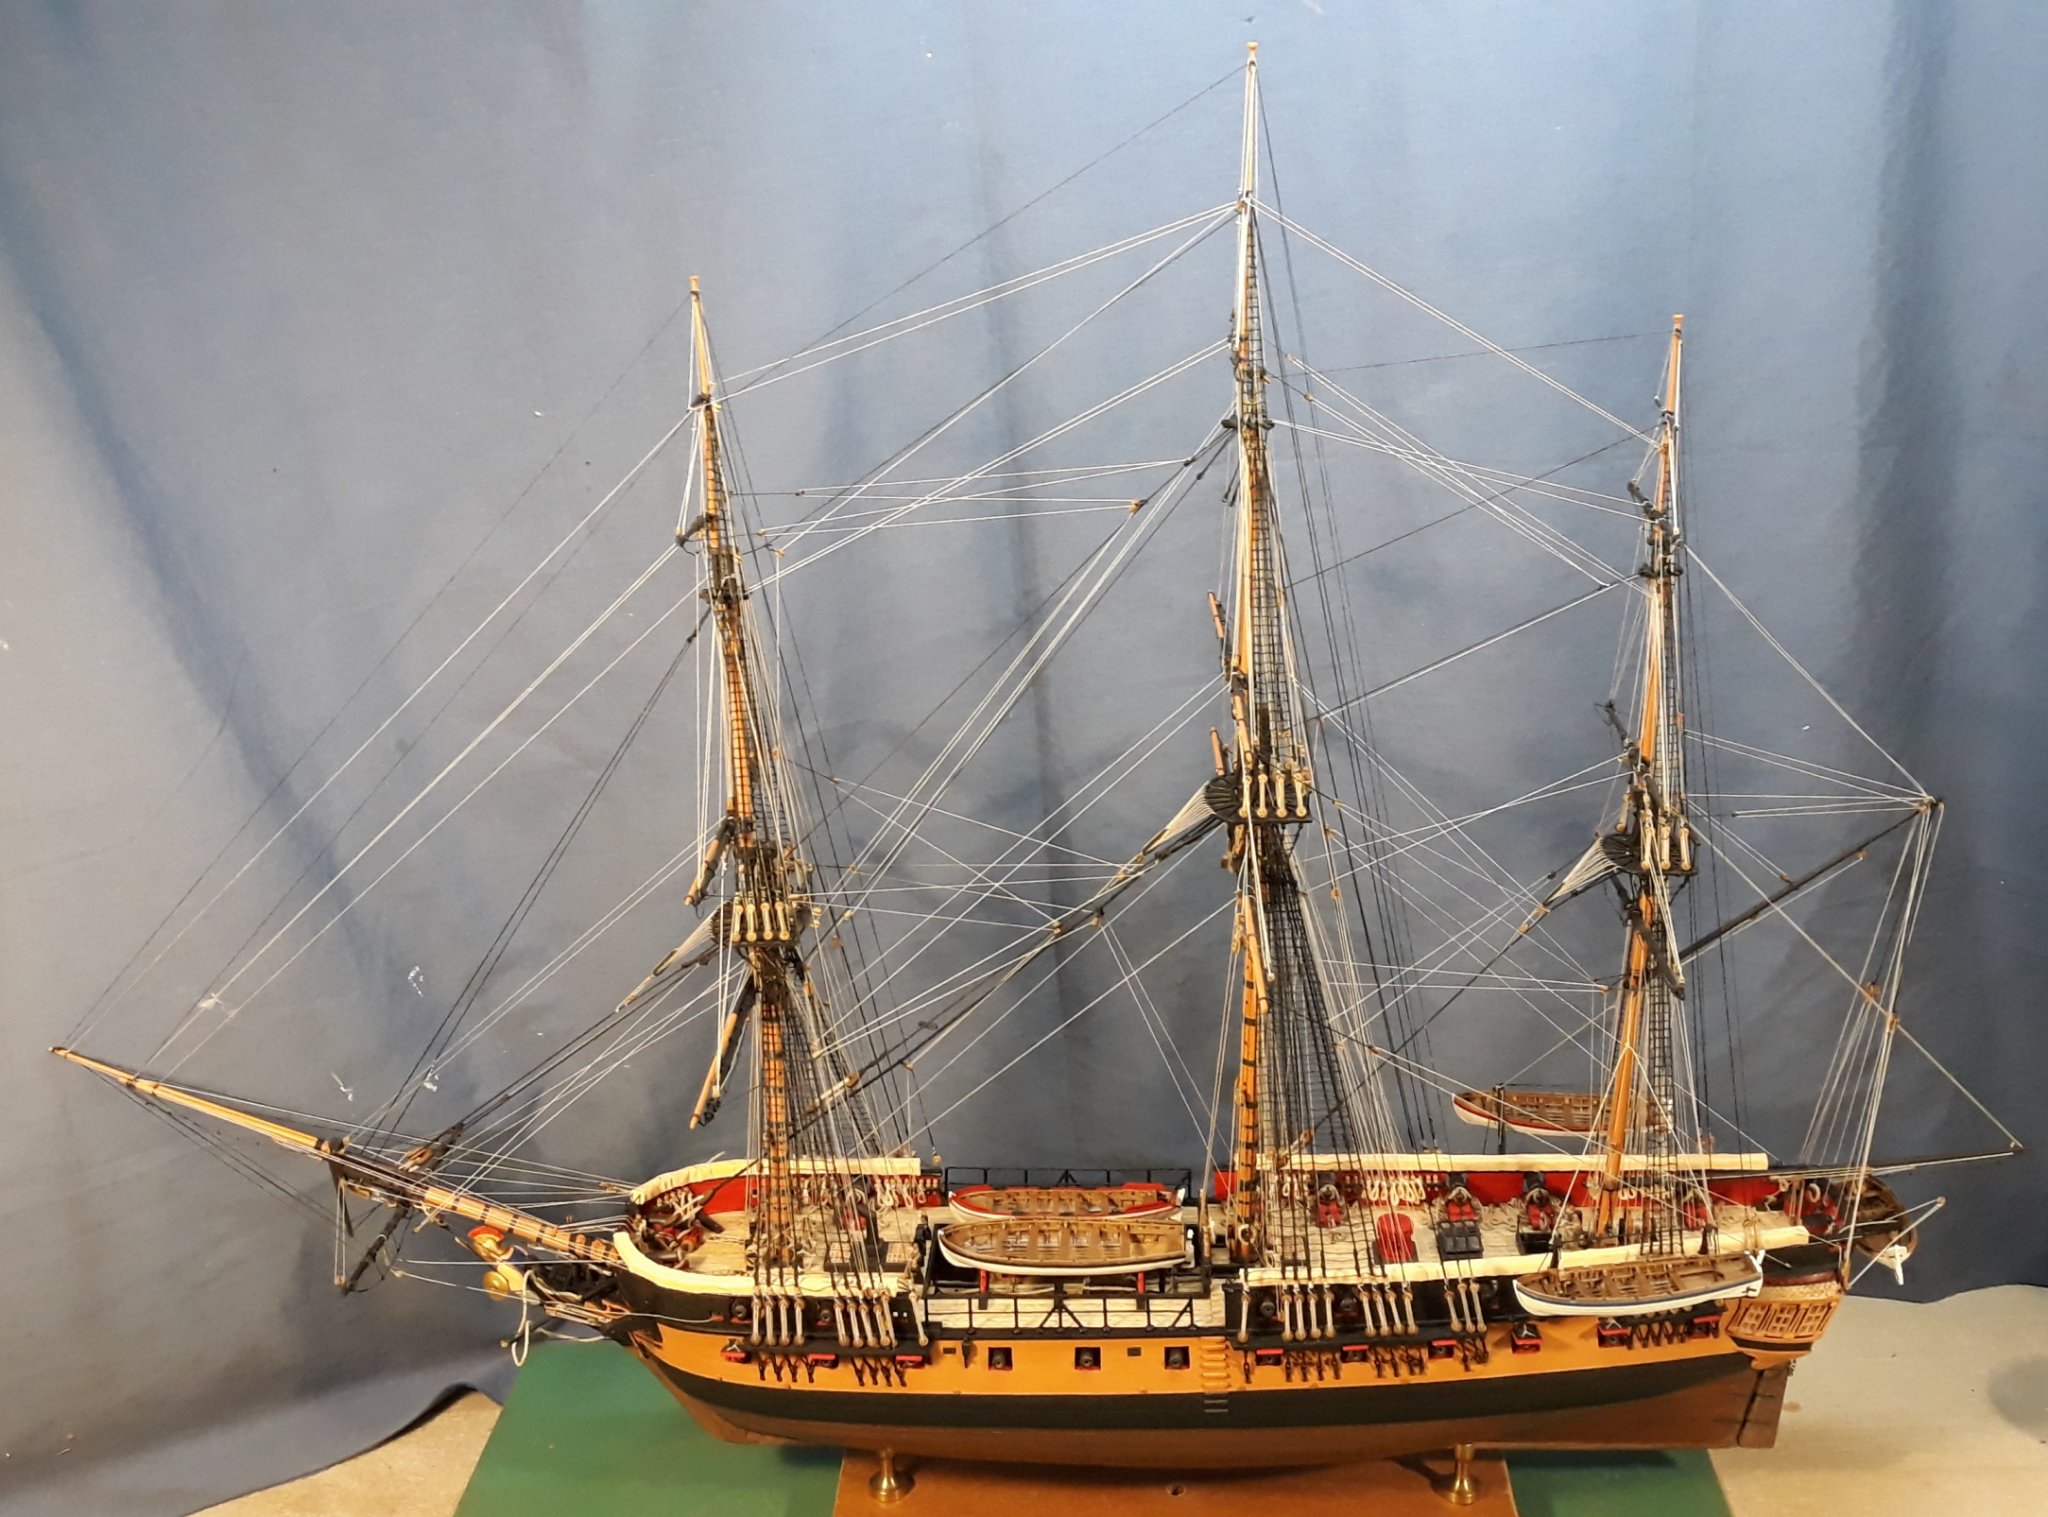
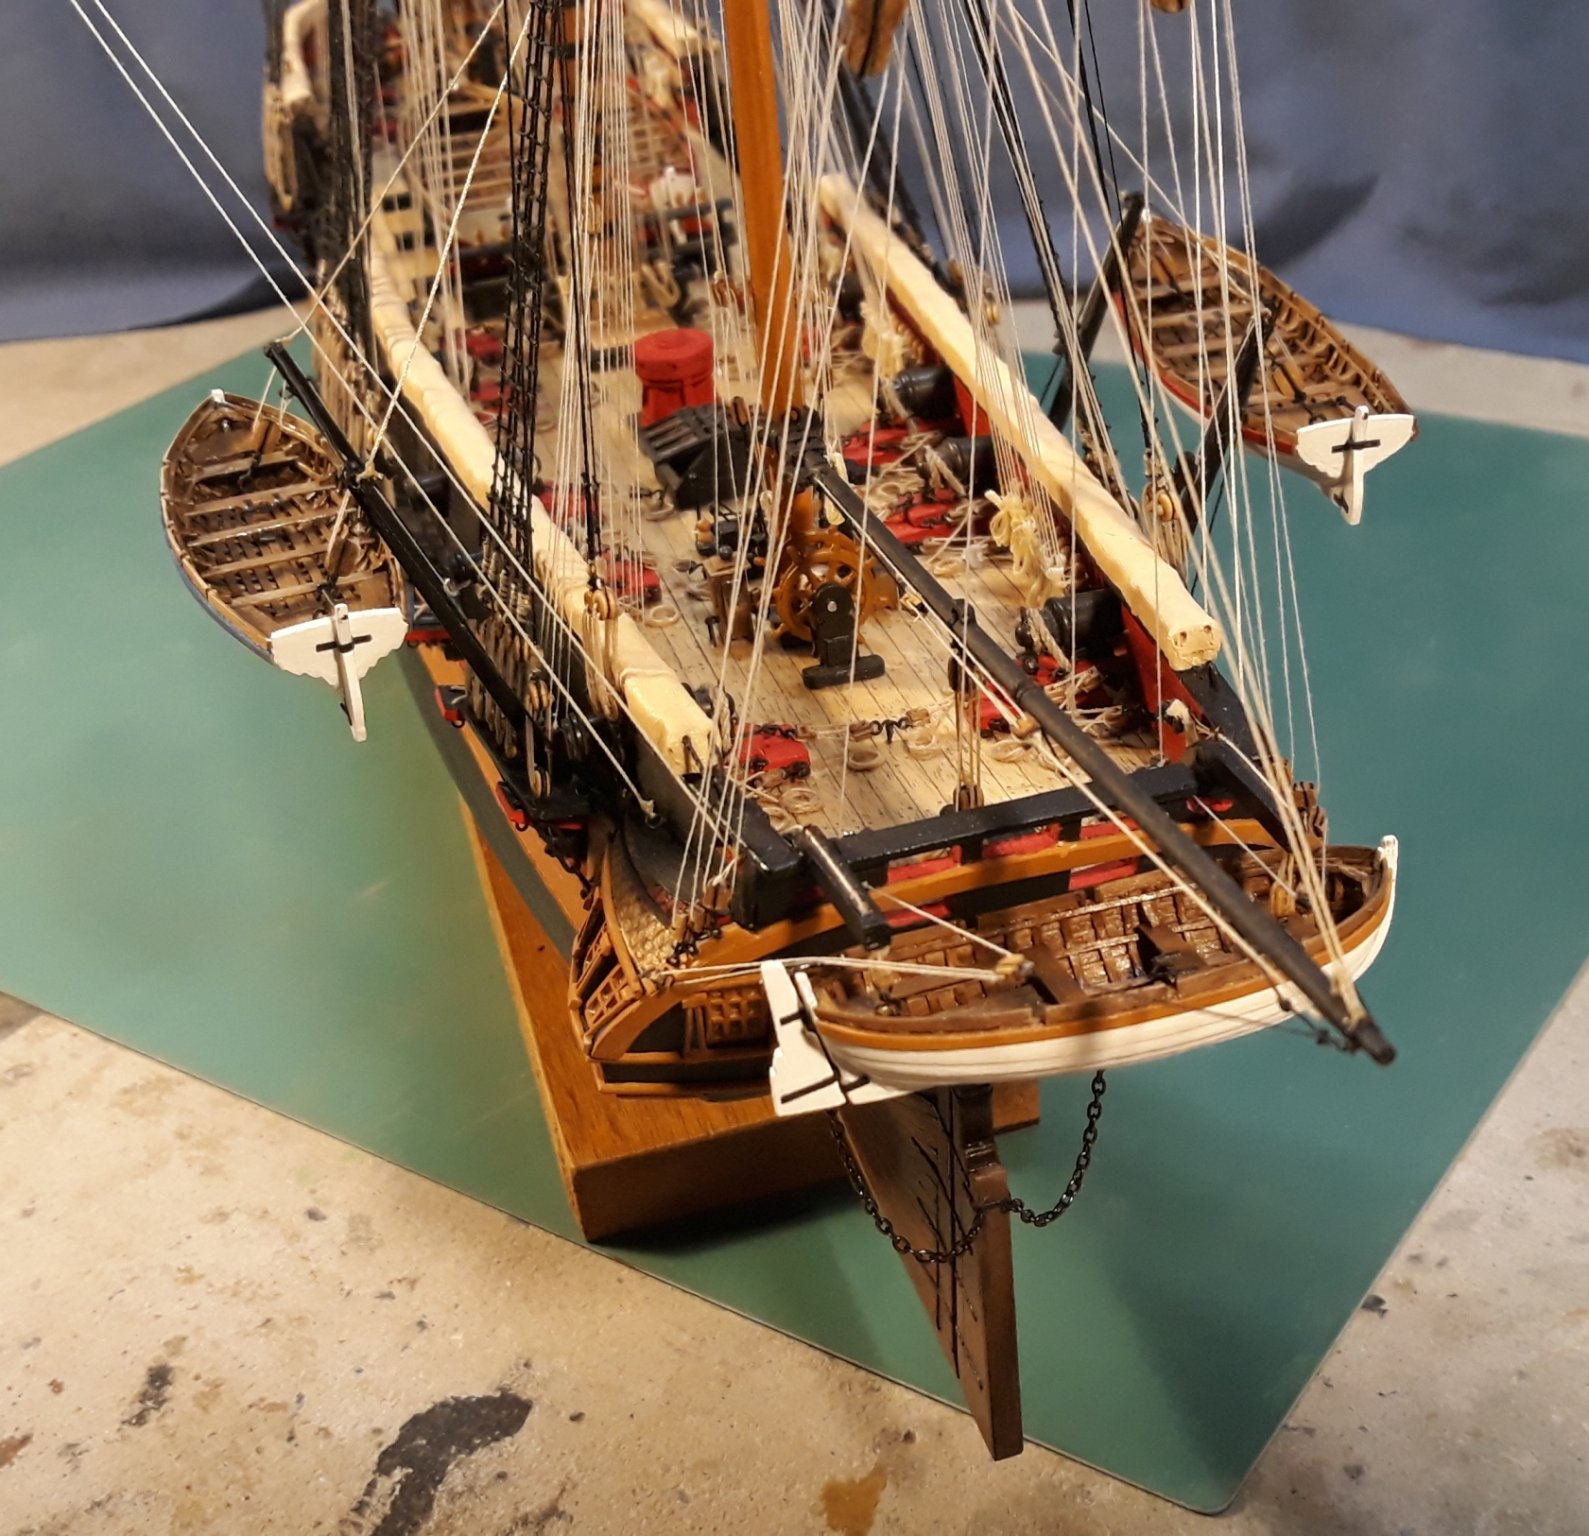
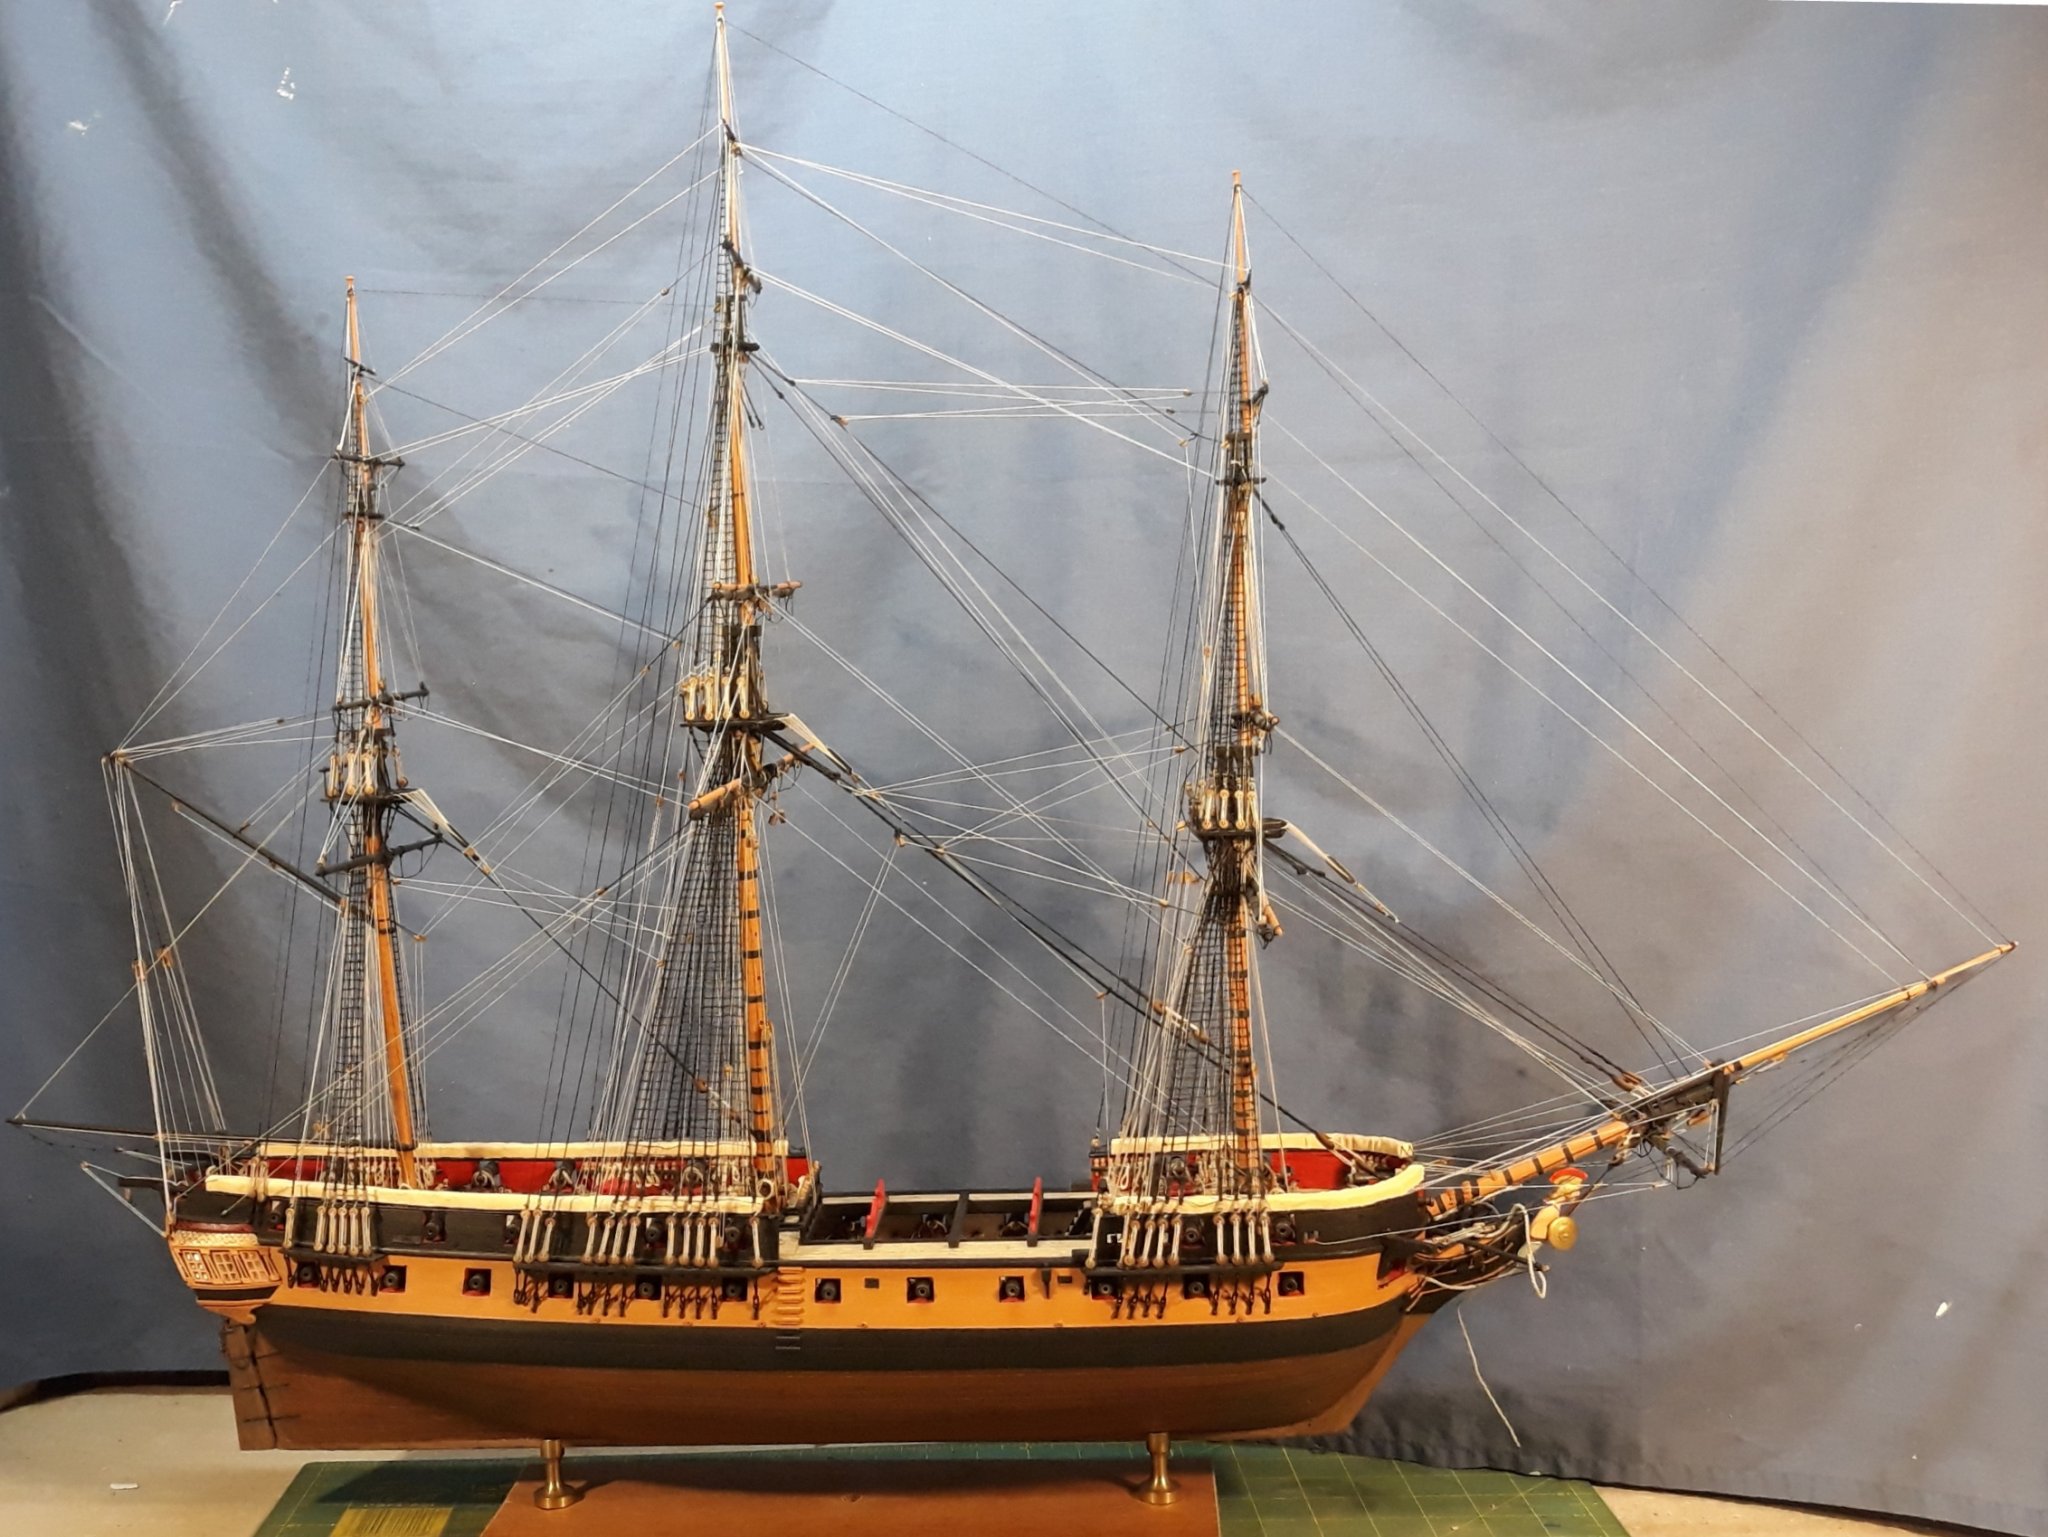
A real milestone this time, FINISHED! After I had placed the launch and pinnace at the waist I realised that the detail below could not be seen so I decided to show the launch in the process of being hoisted. Getting the tackle lengths and angles was pretty fiddly but I think the final solution looks good. I did make up 2 stern lanterns fitted to the sides. Cheers, David.


- 256 replies
-
- 21
-
-
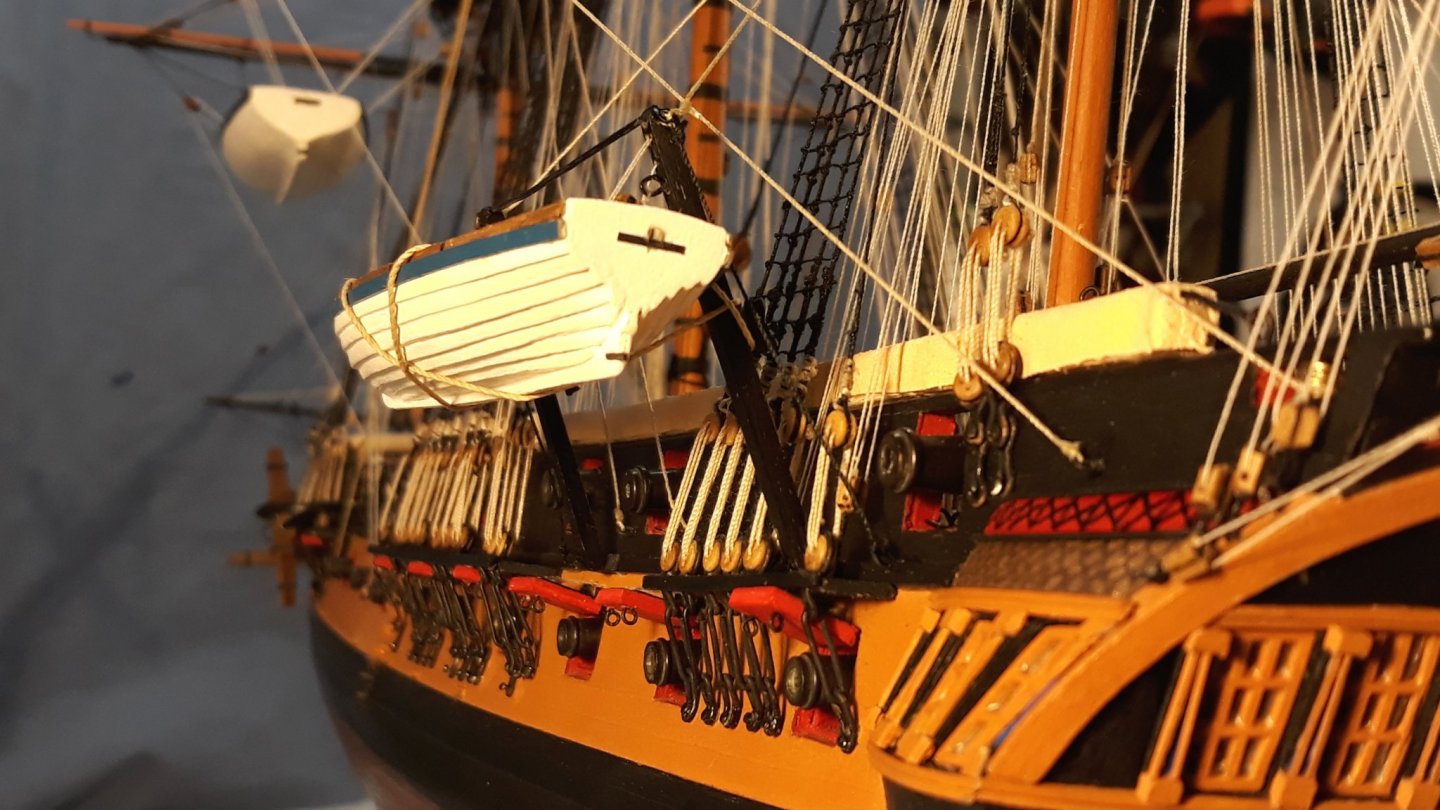
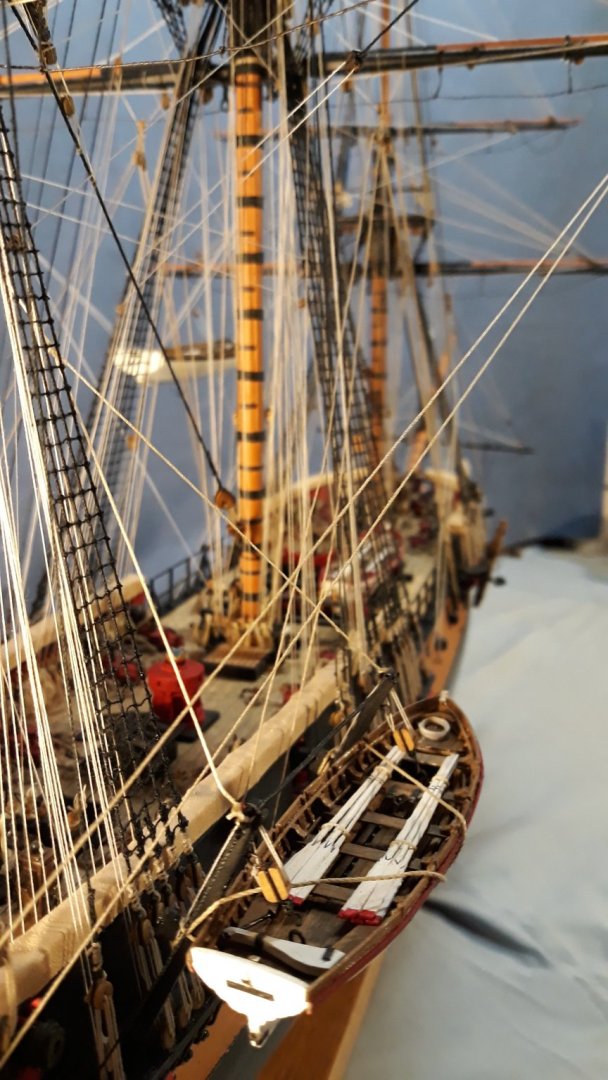
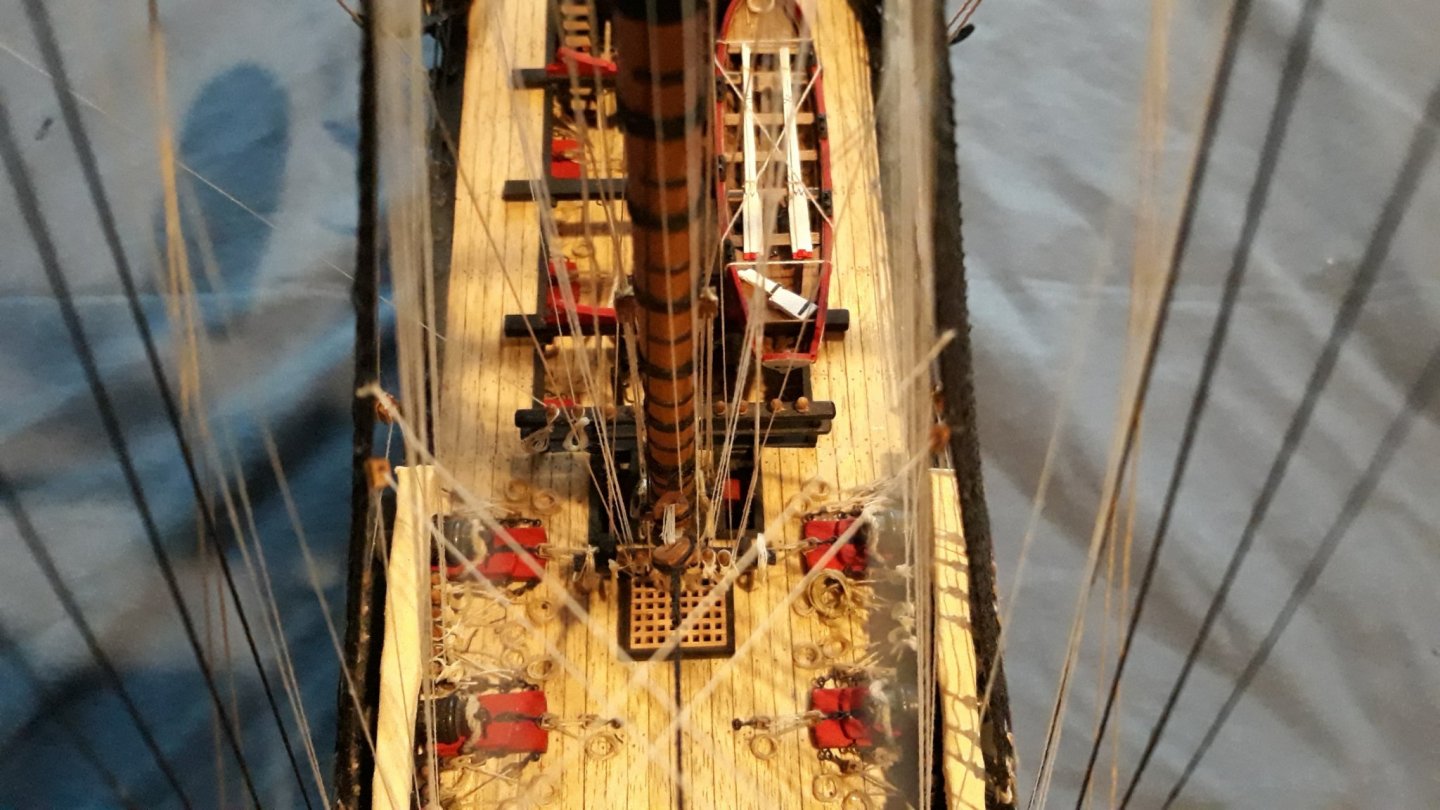
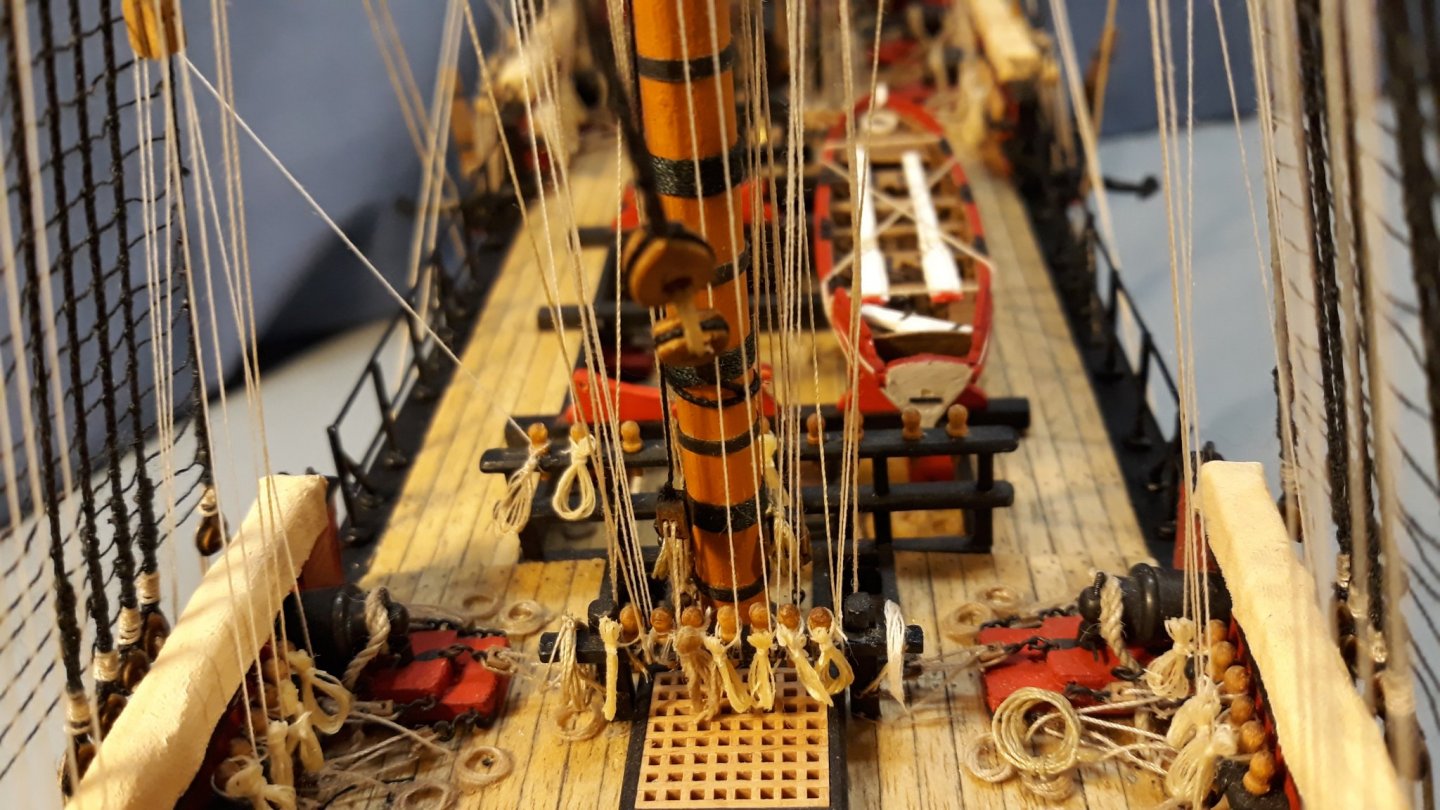
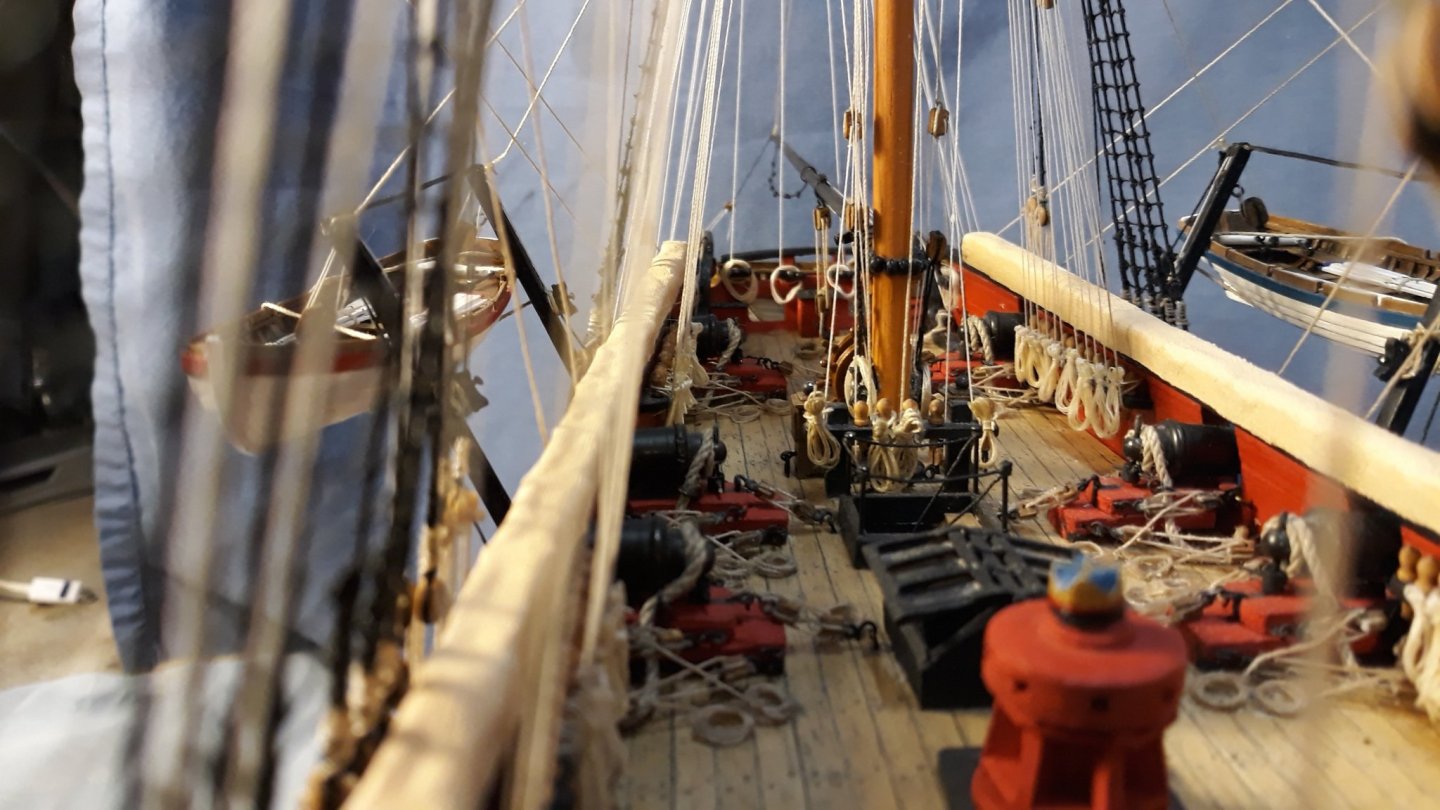
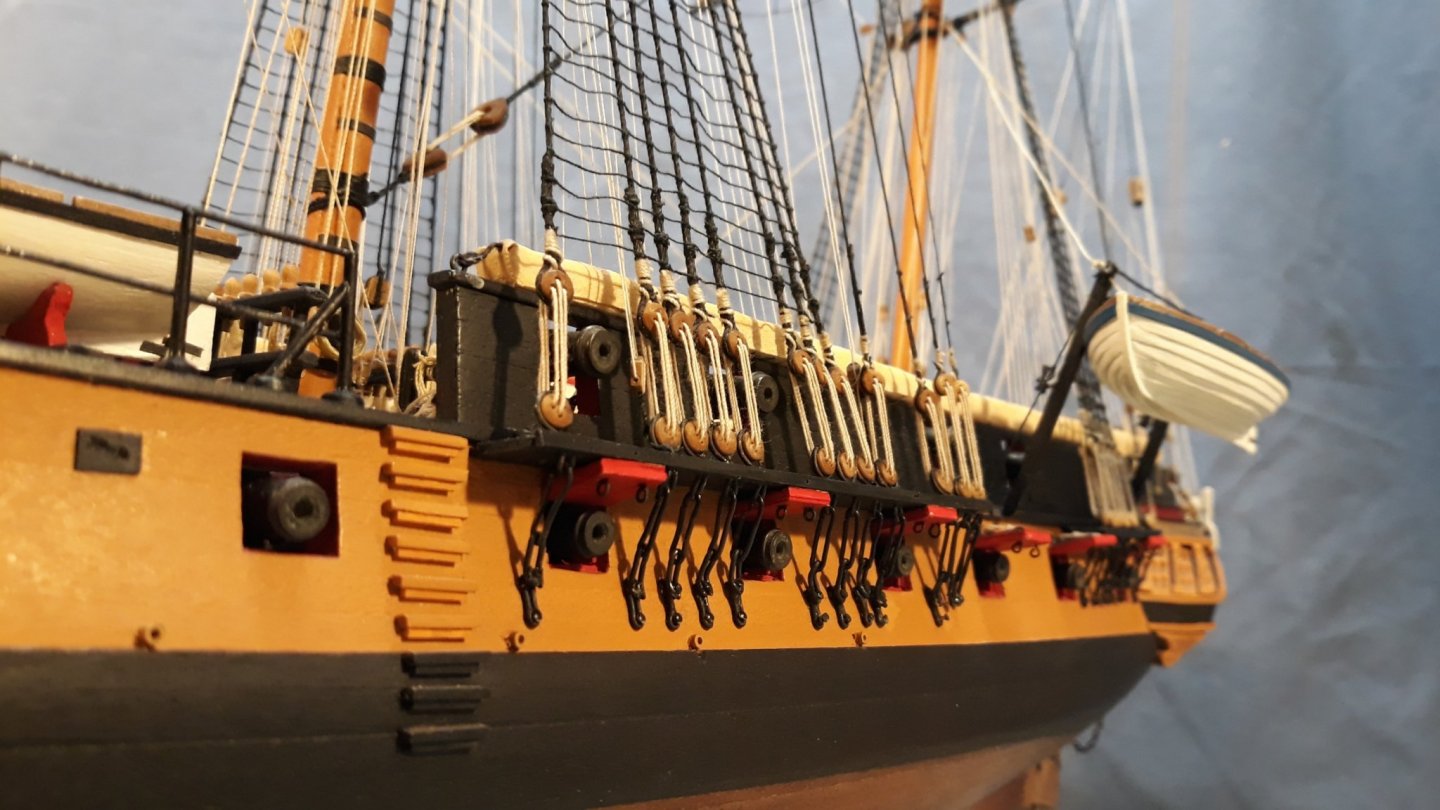
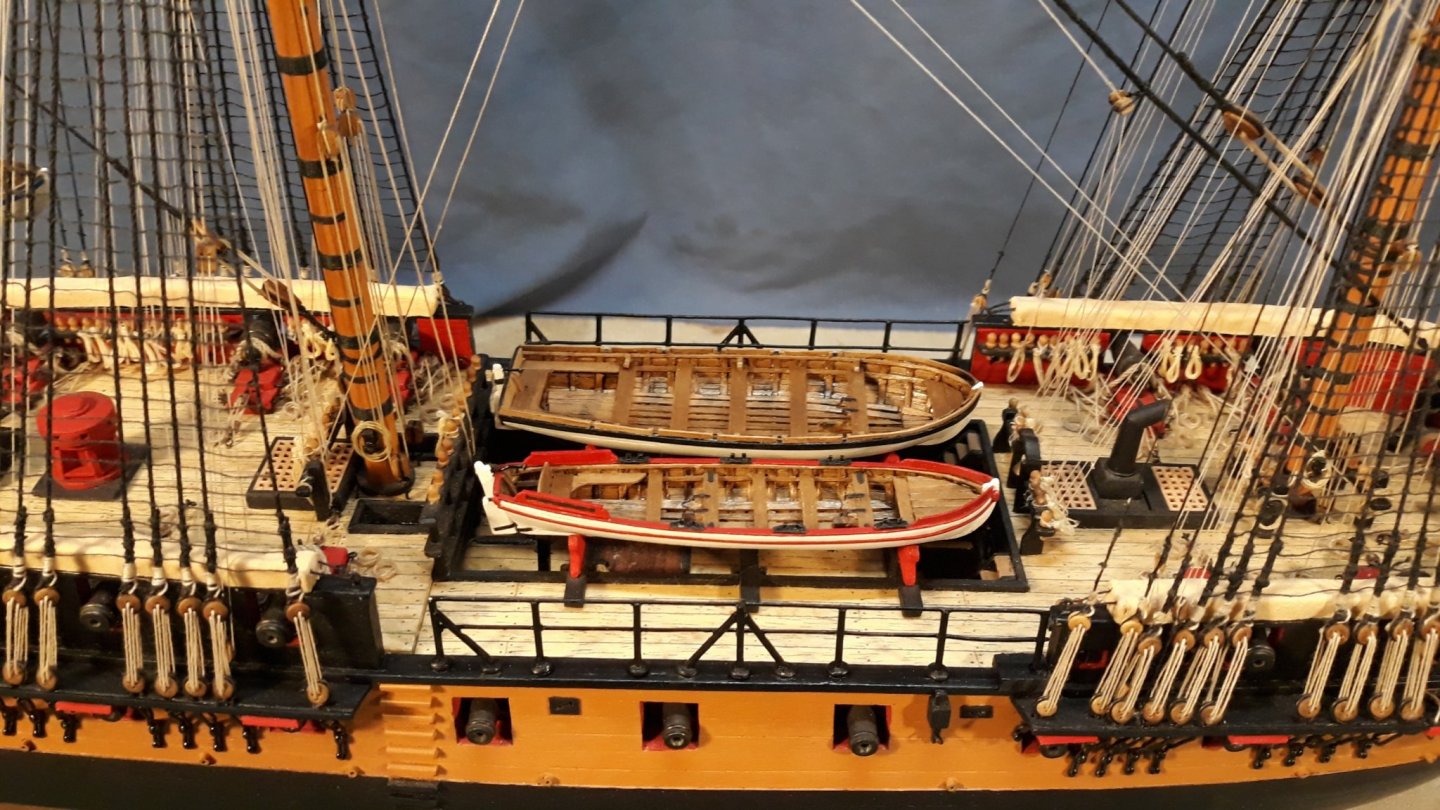
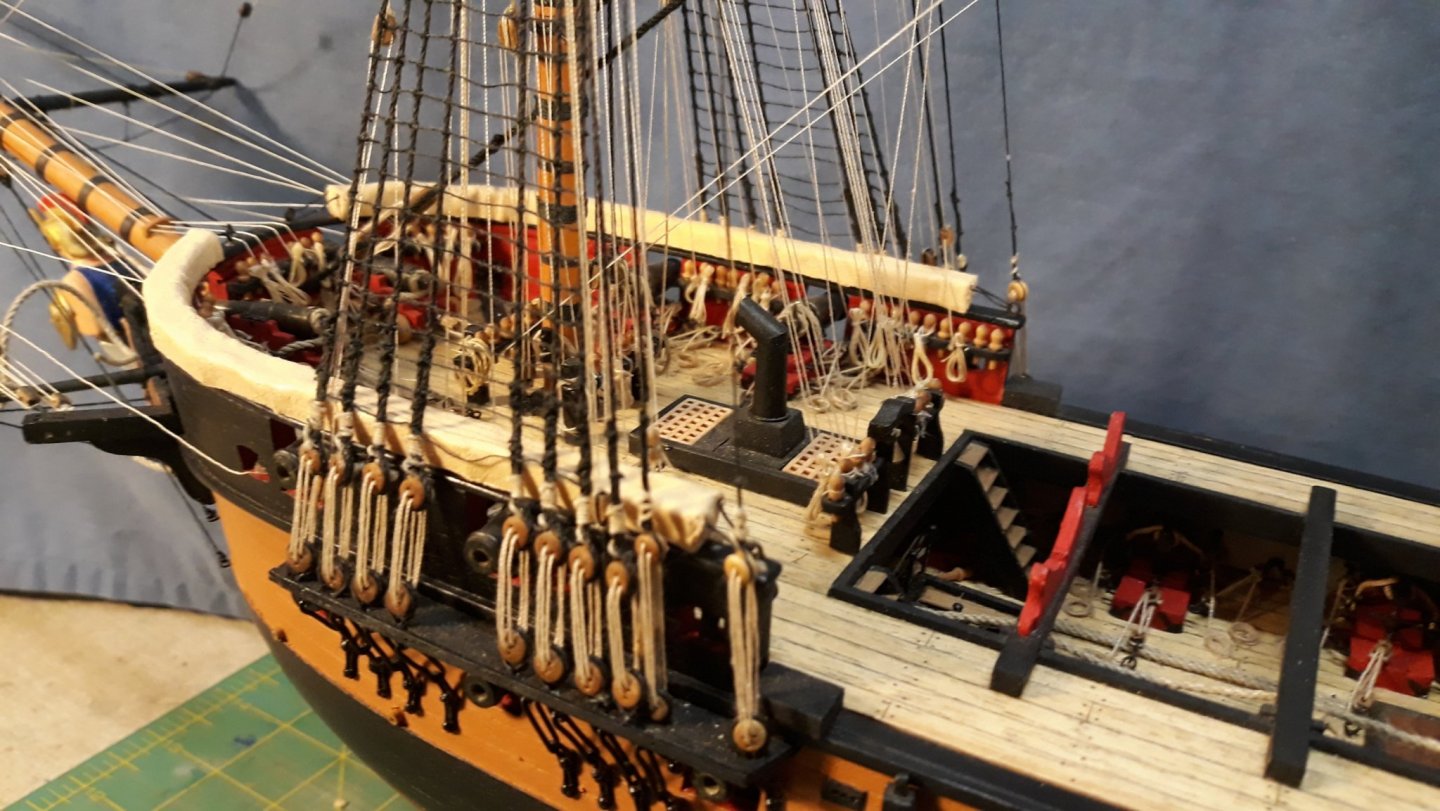
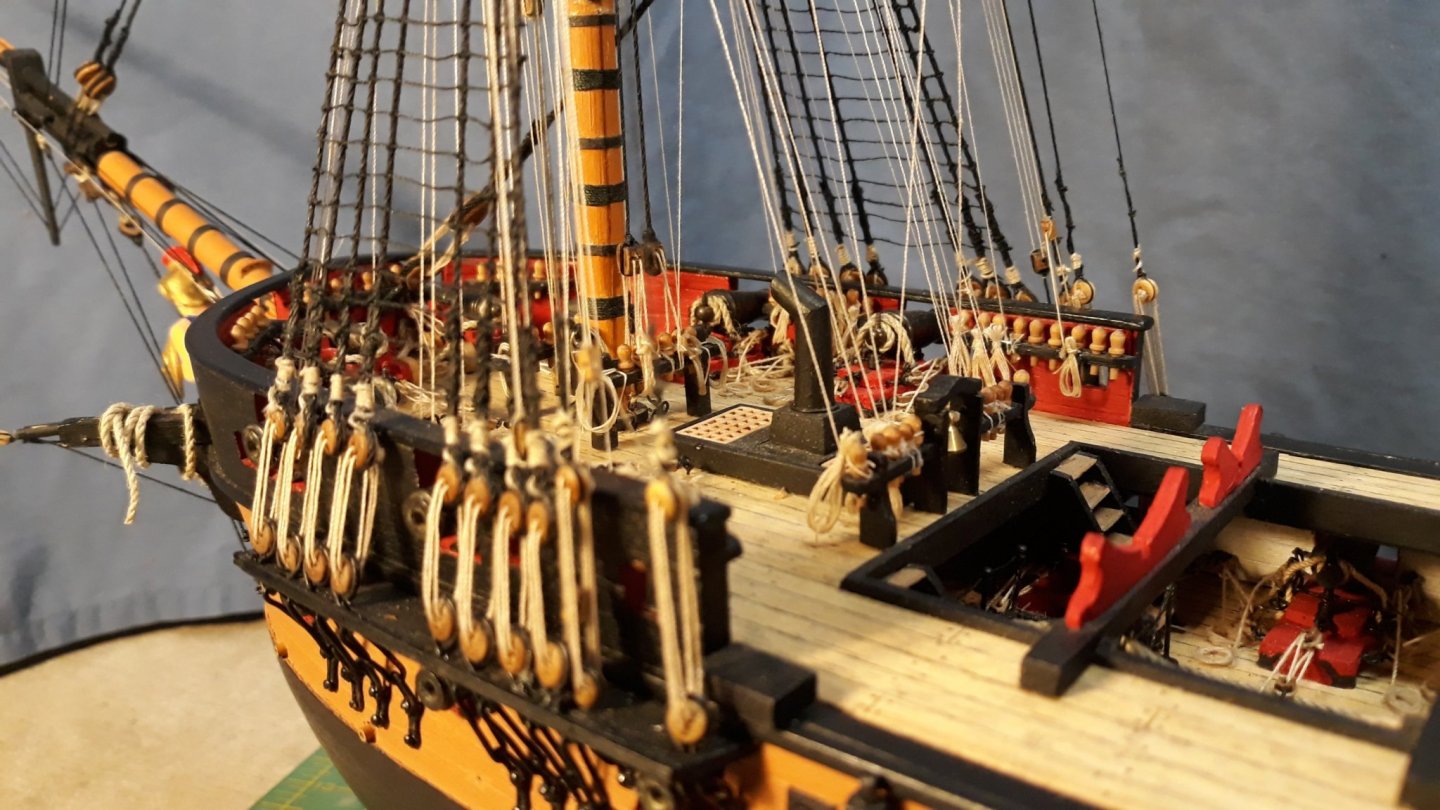
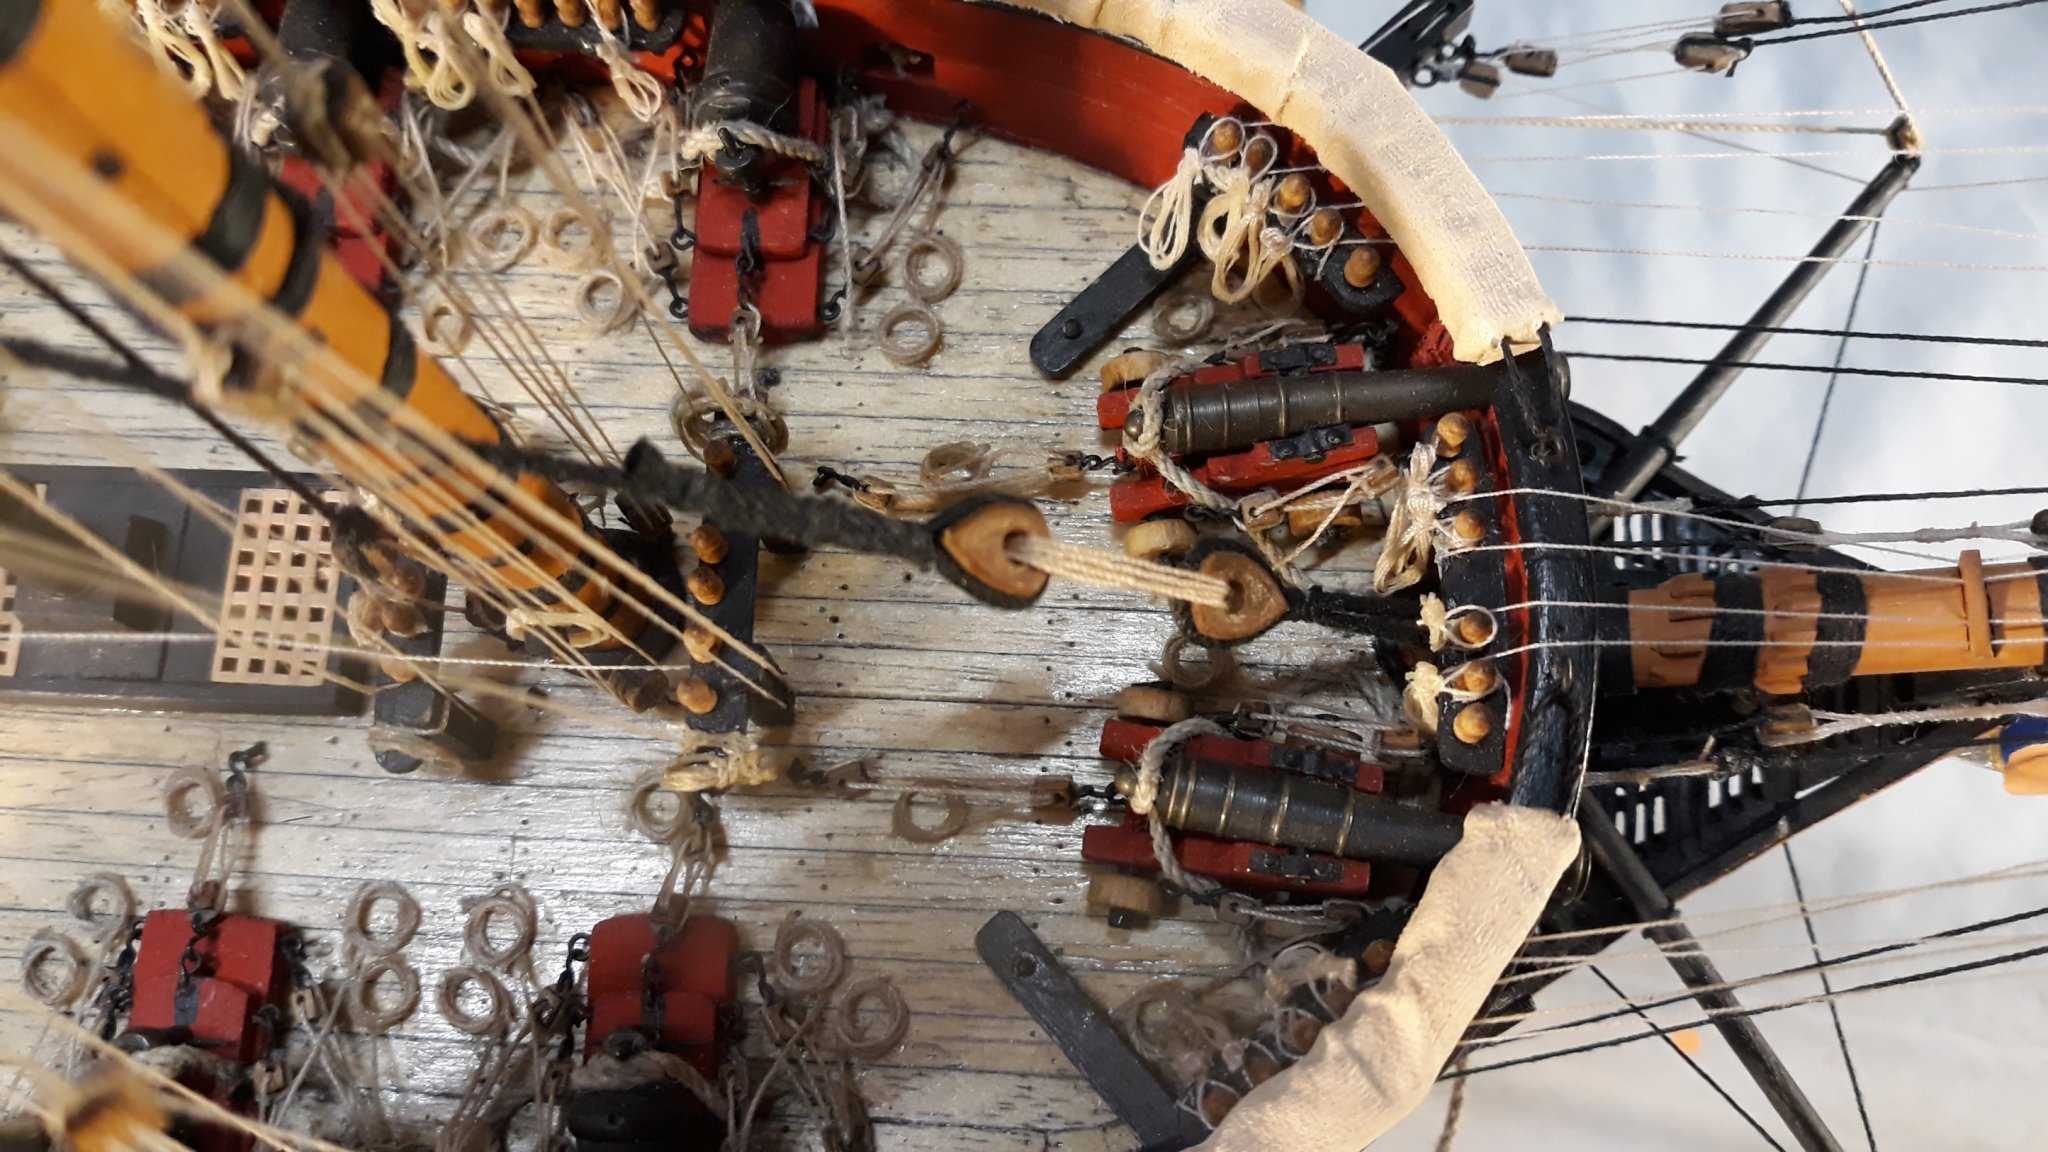
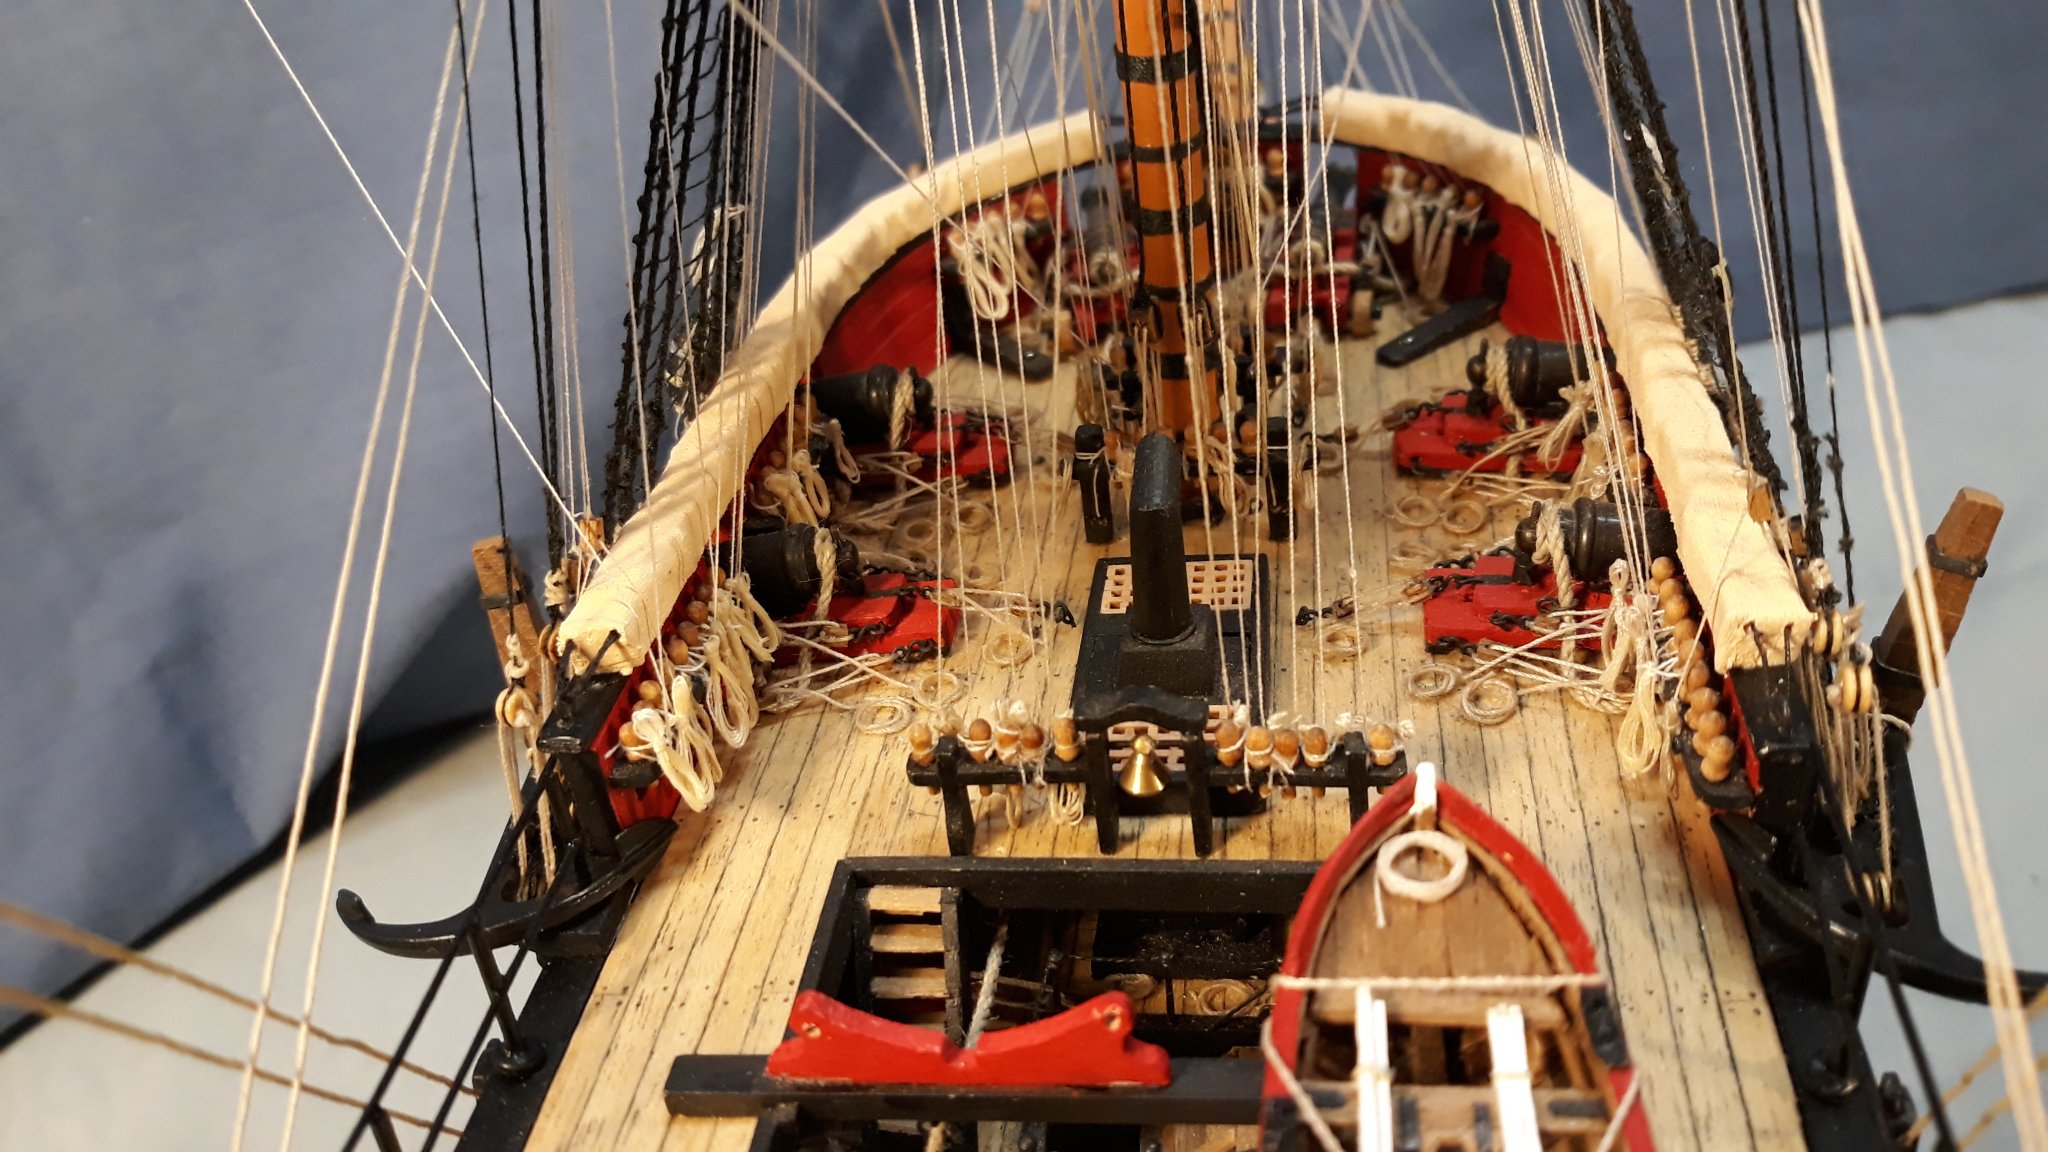
I have achieved a significant milestone in the fitout, I have installed the quarter davits so finally all the ship's boats can be put in place. Also, the gangway railings and gun port lids are complete. Again, there were plenty of alternatives for these details but they were clearly shown on the Admiralty drawings in Lavery and Hunt's great book so confusion was avoided. The only odd thing about this drawing is the two piece gun port lids. This is the only place I have seen this detail and I have installed single piece lids. To complete the ships boats the oars need to be made. The rudders will be removed and stored inside the boats and the boats will be lashed into position as one of the last things to do. Next the anchors and the parts of the running rig that I have left to last and some small items. I'm not too sure what to do about the stern lanterns, they seem to be fitted and removed as needed, sometimes a single central lantern, some time two or even three across the stern. I can't find any in premade kit form and they look very fiddly to make. Cheers, David.


- 256 replies
-
- 14
-
-
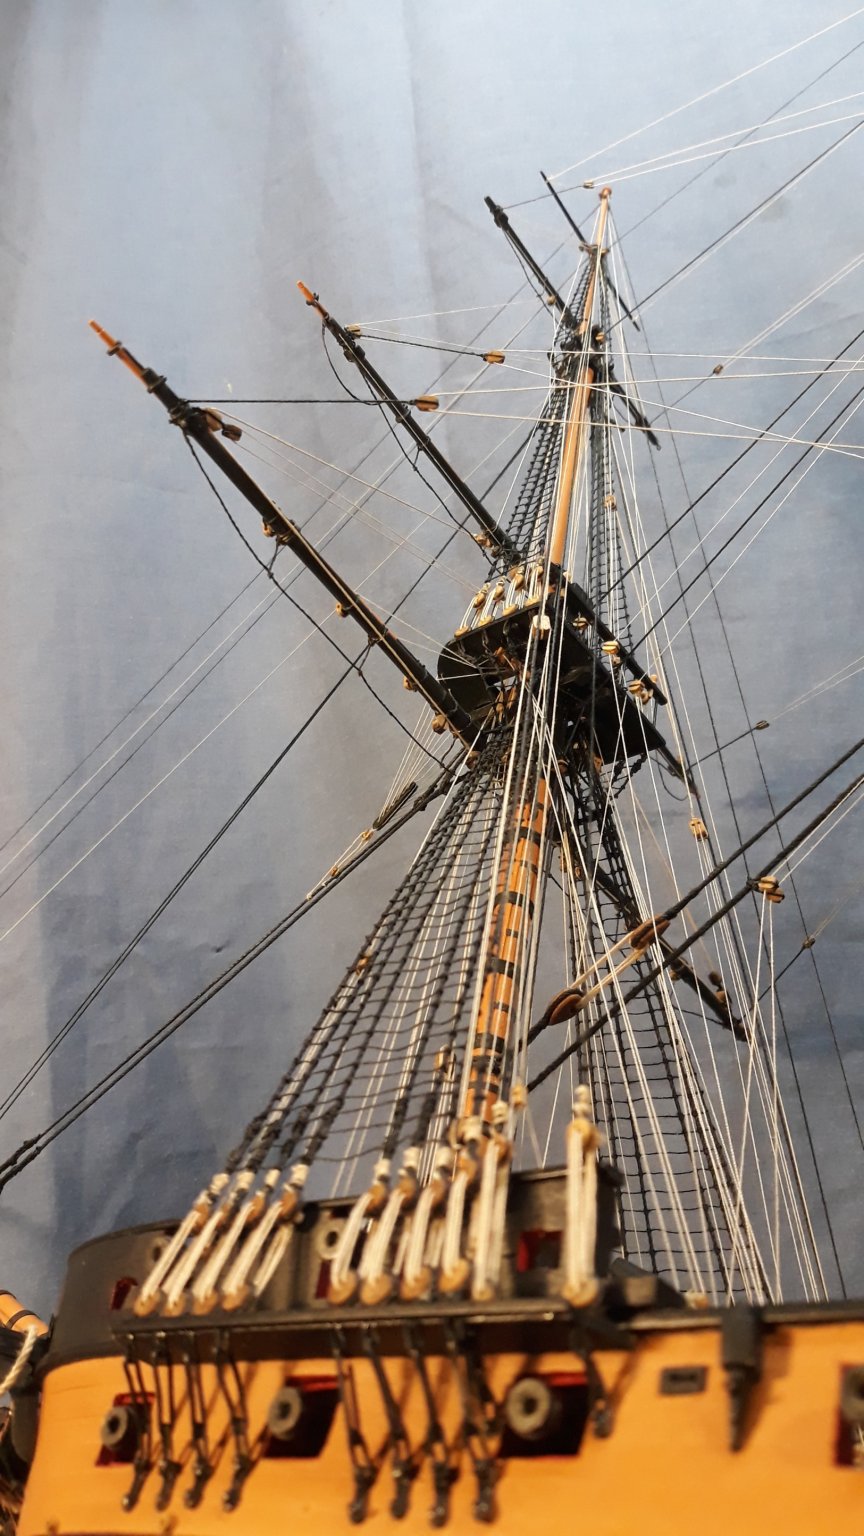
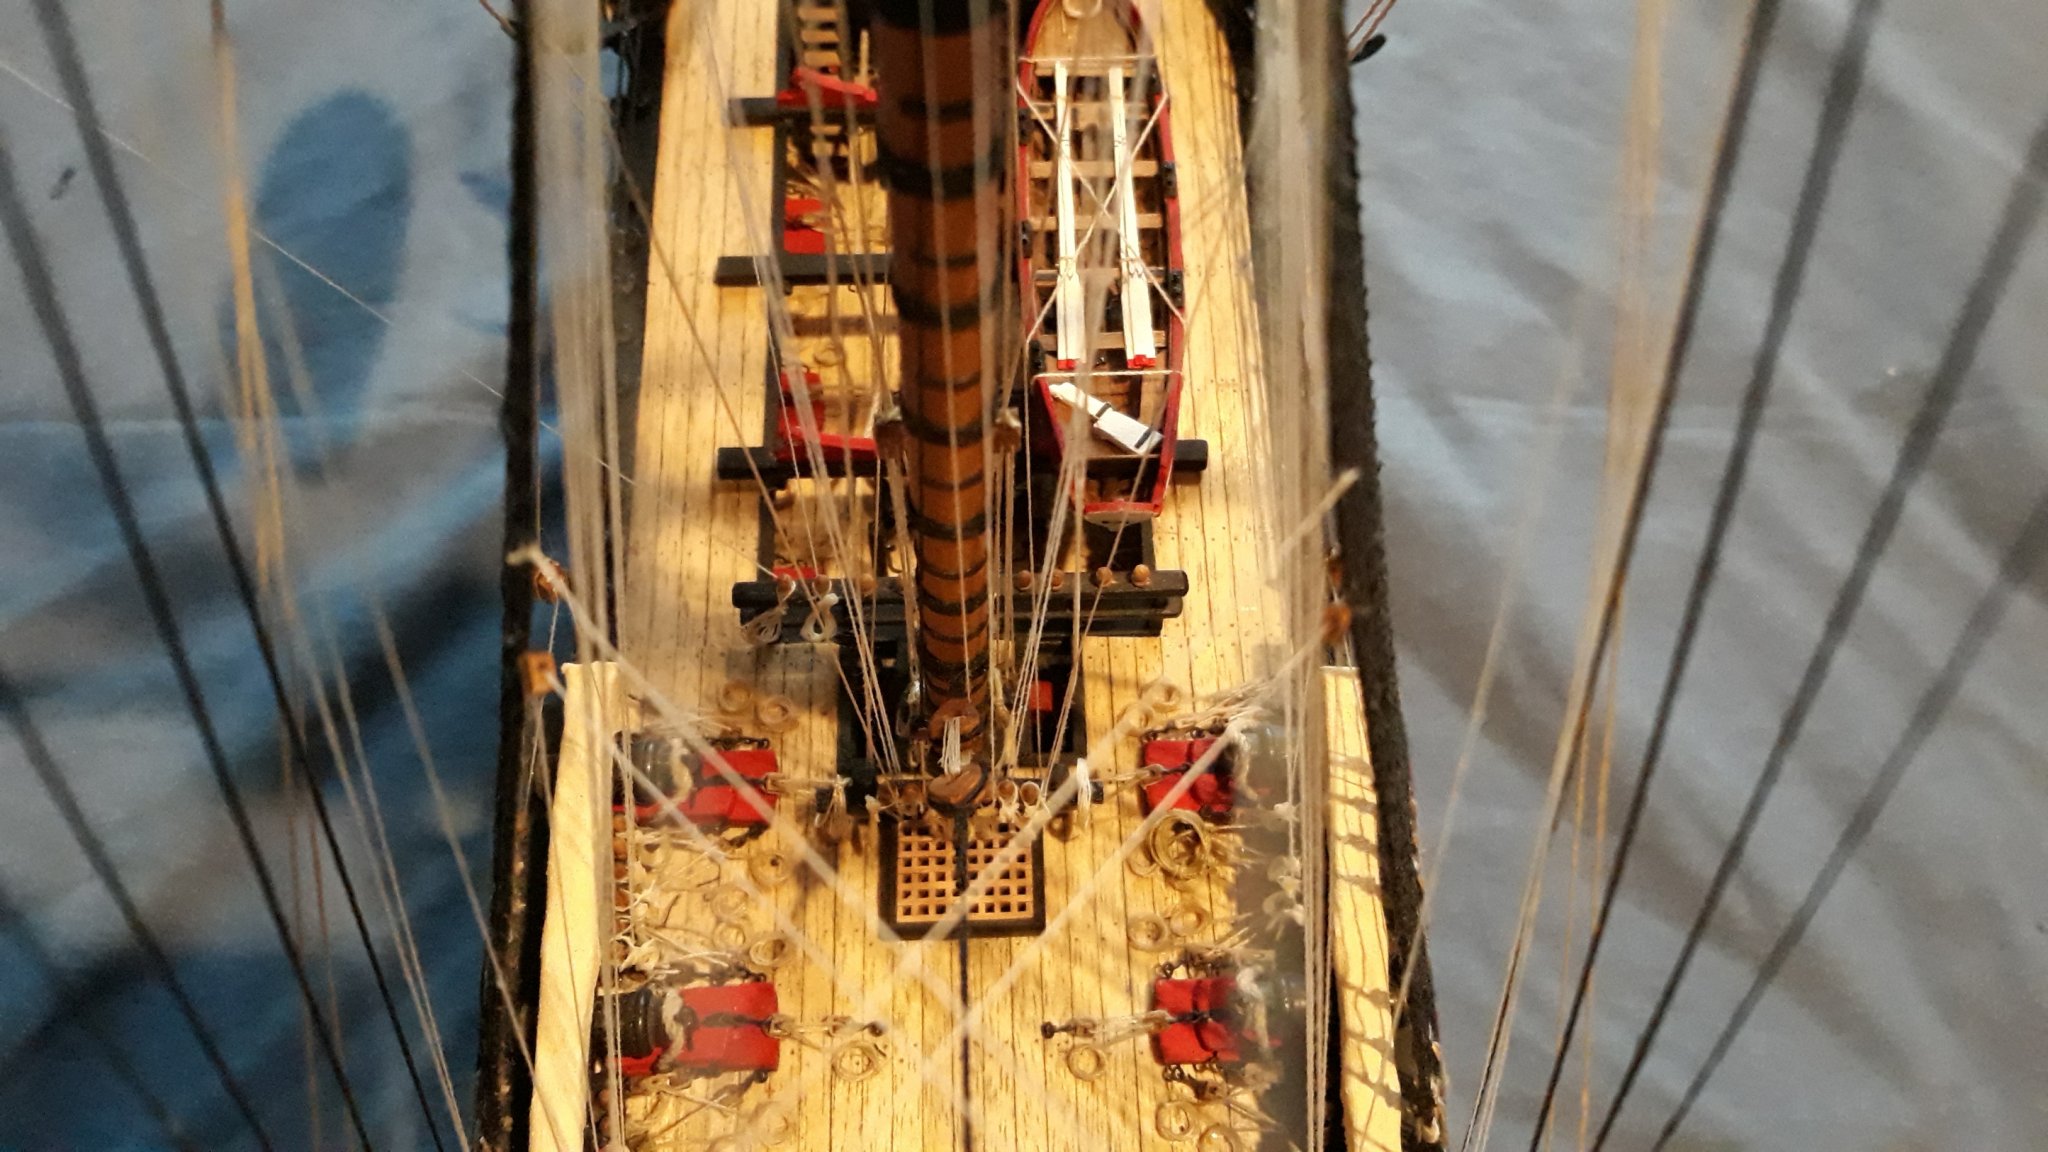
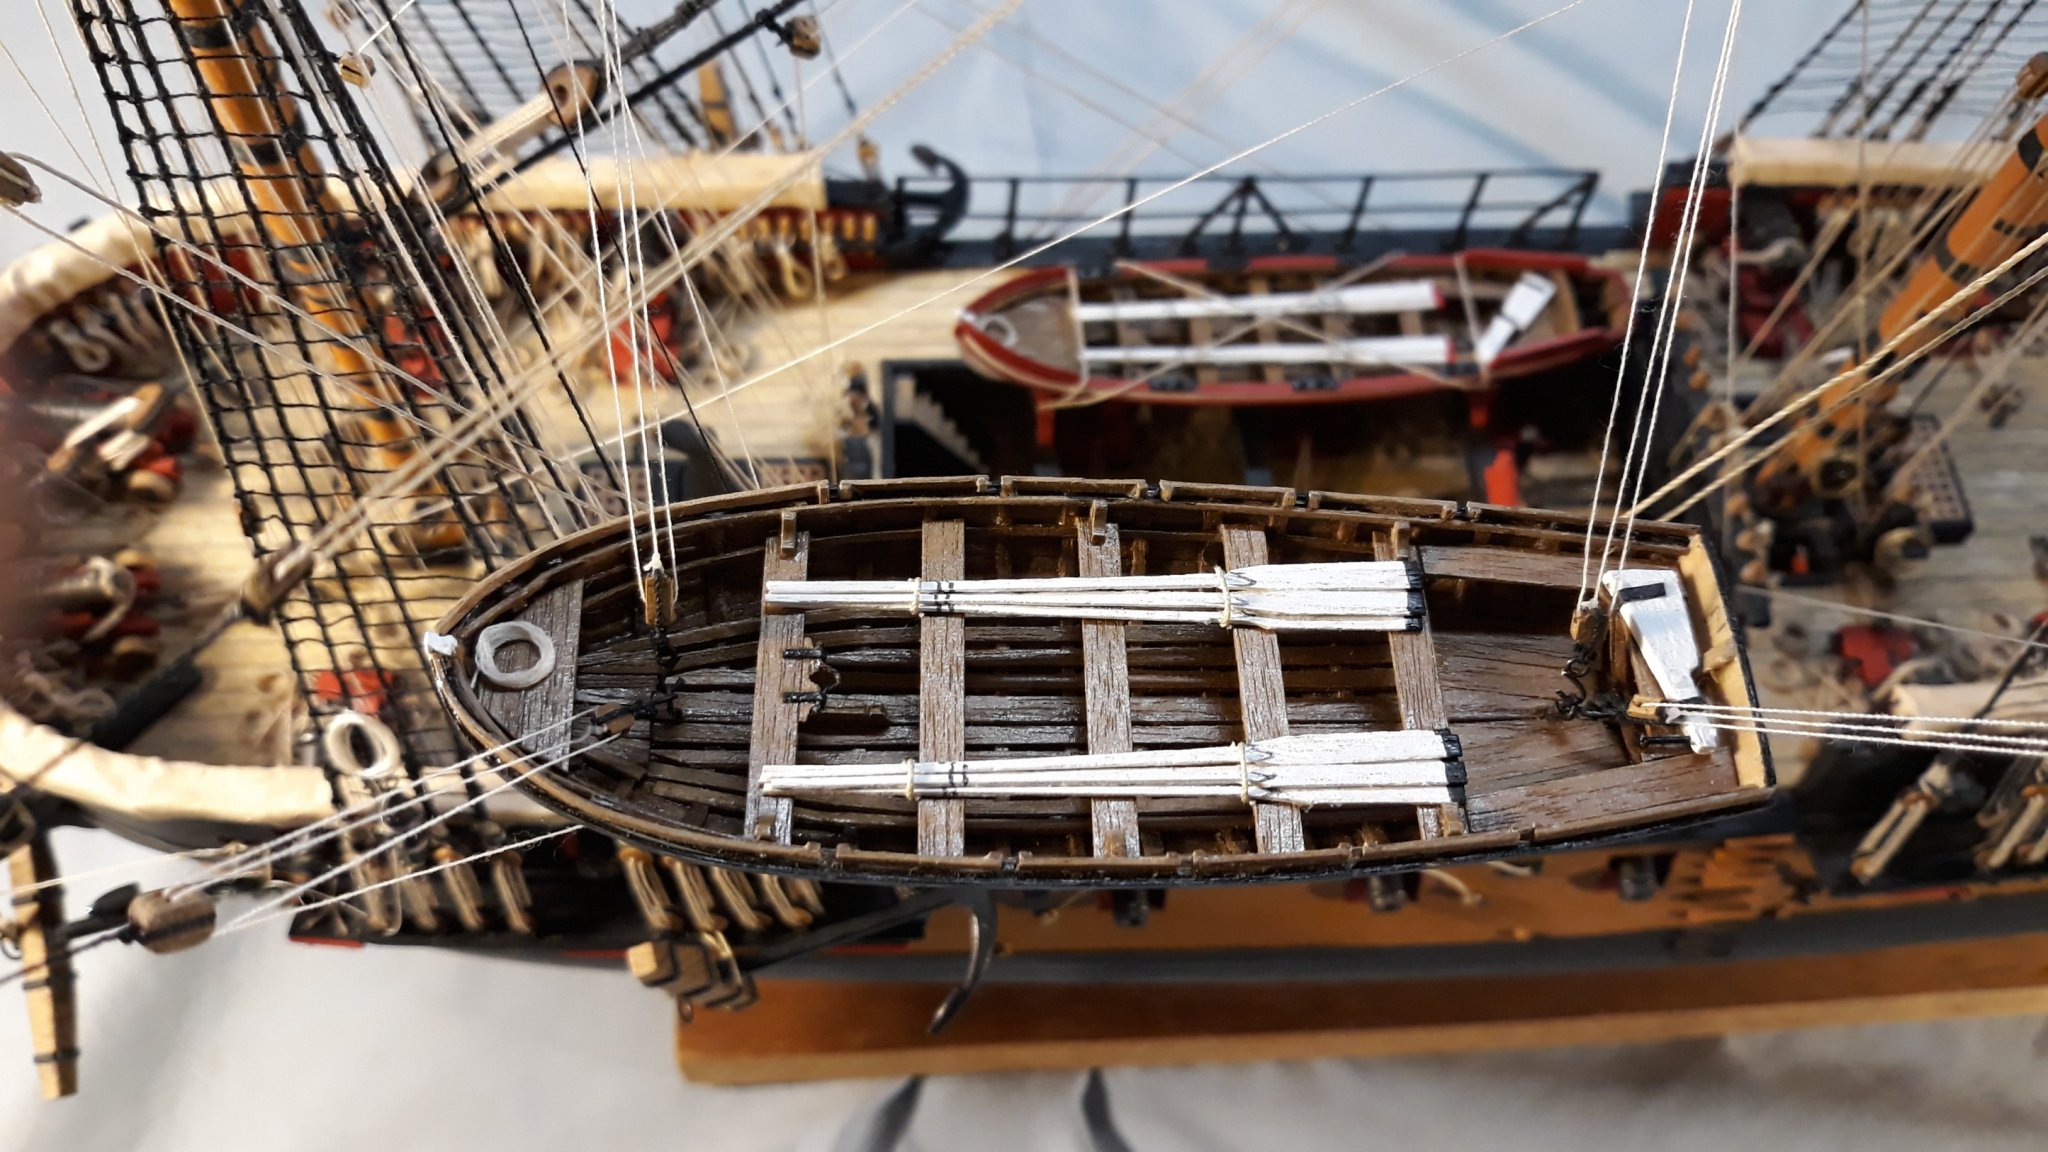
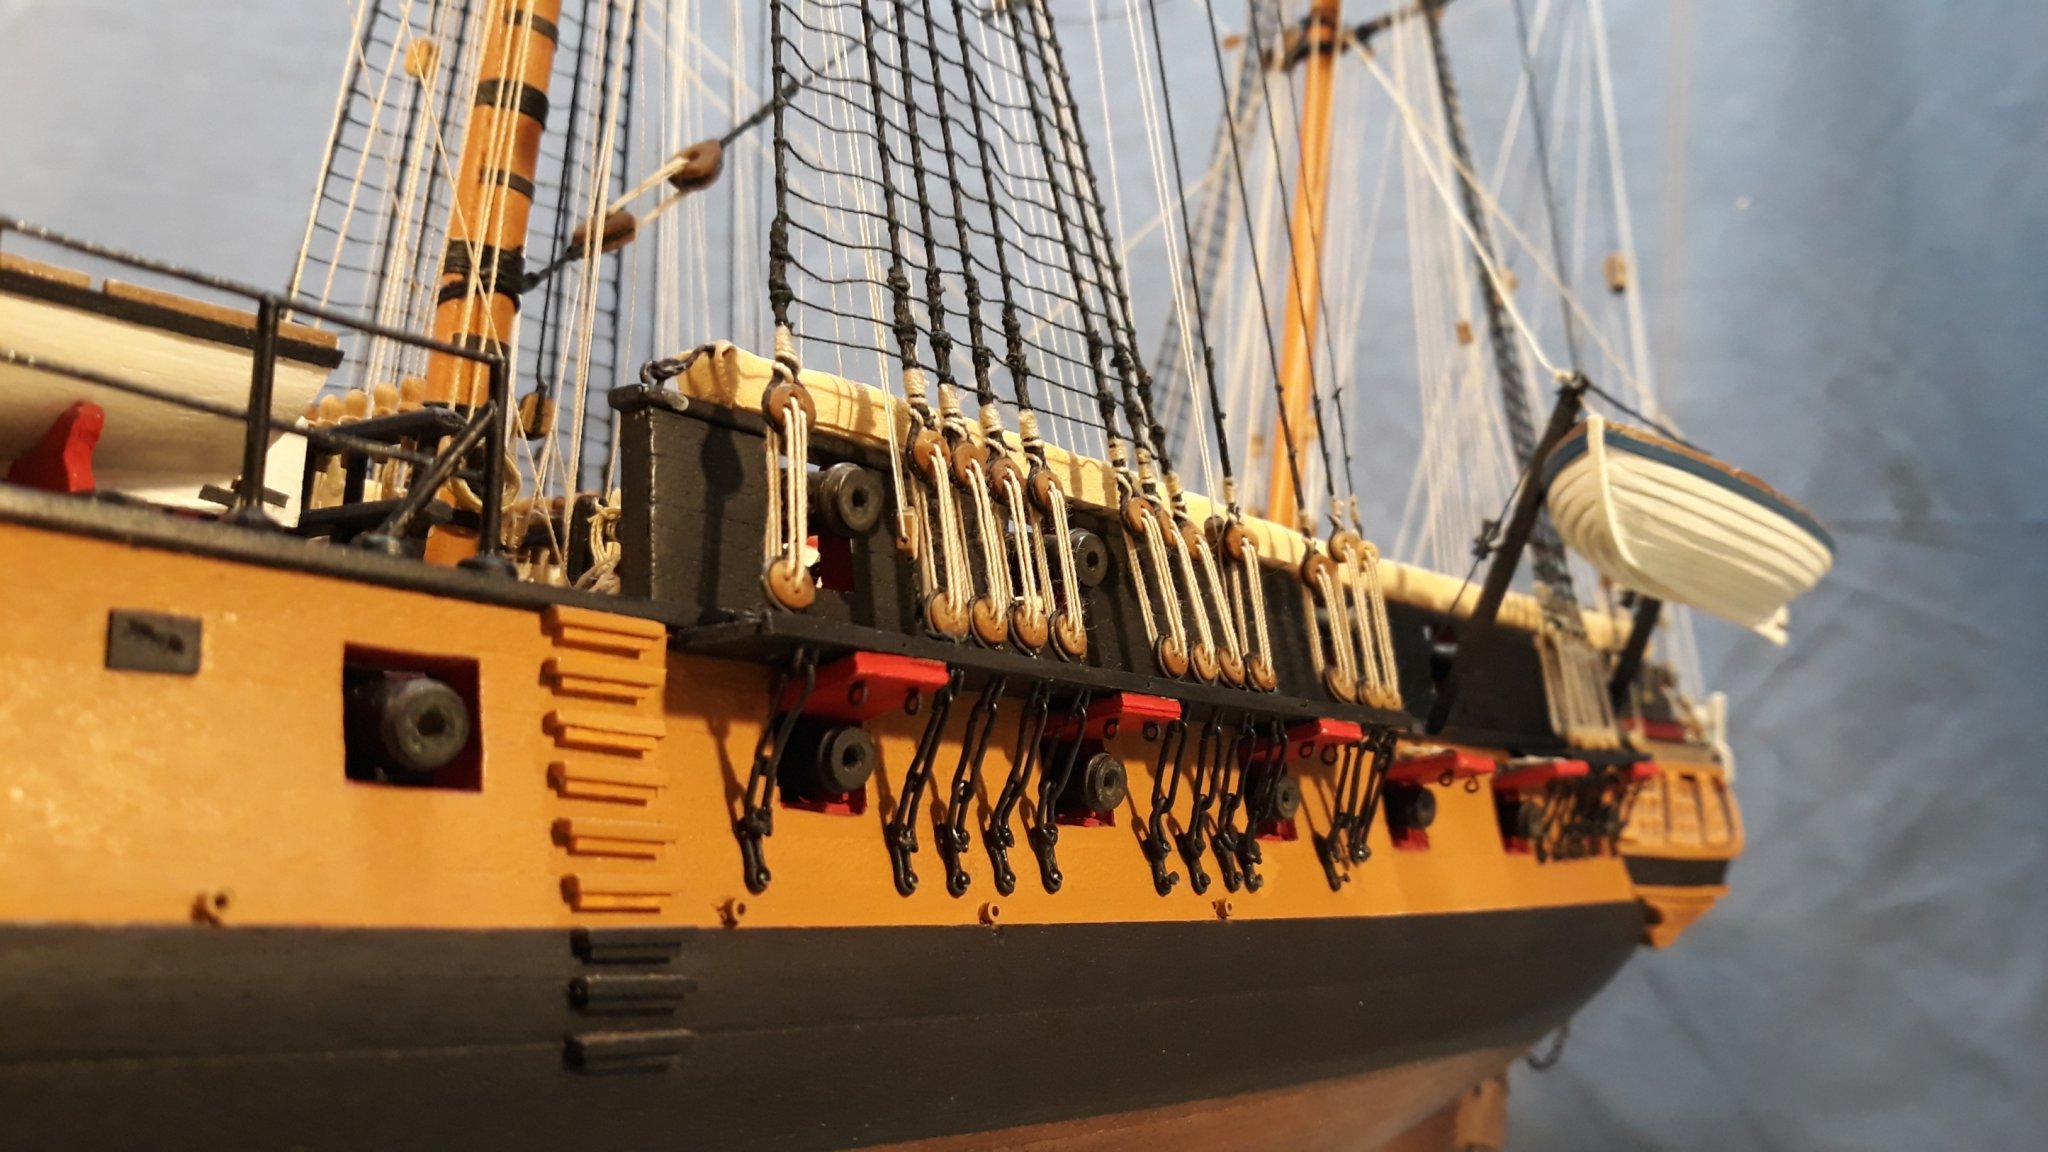
Now that the rig is almost complete ( I am leaving some of the lower level bits to complete later as they would make it hard to work on deck fittings) more of the details can be added. Something I had to consider long and hard was what to do about the hammock storage on the bulwarks. I have noticed that some models don't include these. I can understand why, whether to show the frames and netting without hammocks, or to show what I think they might look like with hammocks and covers is a vexing question. From my understanding the routine for British men of war of this period was that they greeted each dawn at full readiness in case an enemy ship had appeared during the night and a battle might occur. Also a normal part of the daily routine was for the hammocks to be rolled up and put in the nettings with covers over the lot. I considered building the netting cranes and netting until I tried to fabricate the cranes and discovered making up the number required out of brass wire was a difficult job and, for me, impossible to make look convincing. The netting was a whole other problem which I decided I could do without. That left making up hammocks and the covers as an option. Fortunately my current read, one of Dudley Pope's Ramage books, described that the hammocks were enclosed in covers which must have covered the cranes and netting. I realized including this detail was going to be a pretty drastic step as these covers ar going to be a very strong element in the overall appearance of the model. I had the sails left over from my Bounty build so had fabric which I considered could make acceptable covers. I searched through various sources looking for images of the cranes, netting and covers. The size, shape and extent of the covers varied considerably so it was one of those situations where I considered what looks most convincing and thinking about the function determined what I would build. These are images of hammock covers and what I built:
-
Fitting of yards and running rigging is going well, all the sticks are now fitted and the majority of the rig complete. I can now start on some more detail bits like the hammock netting and brackets, I haven't quite worked out how to do these yet, brass wire and I will need to try a bit of soldering. Gun port lids, cutter davits, and lots of rope coils all need to be done. In these trying times of social distancing a good hobby comes into it's own. Keep well. Cheers, David.
.thumb.jpg.93da3cf4aa3e30c854346c04a7af26bf.jpg)

- 256 replies
-
- 12
-
-
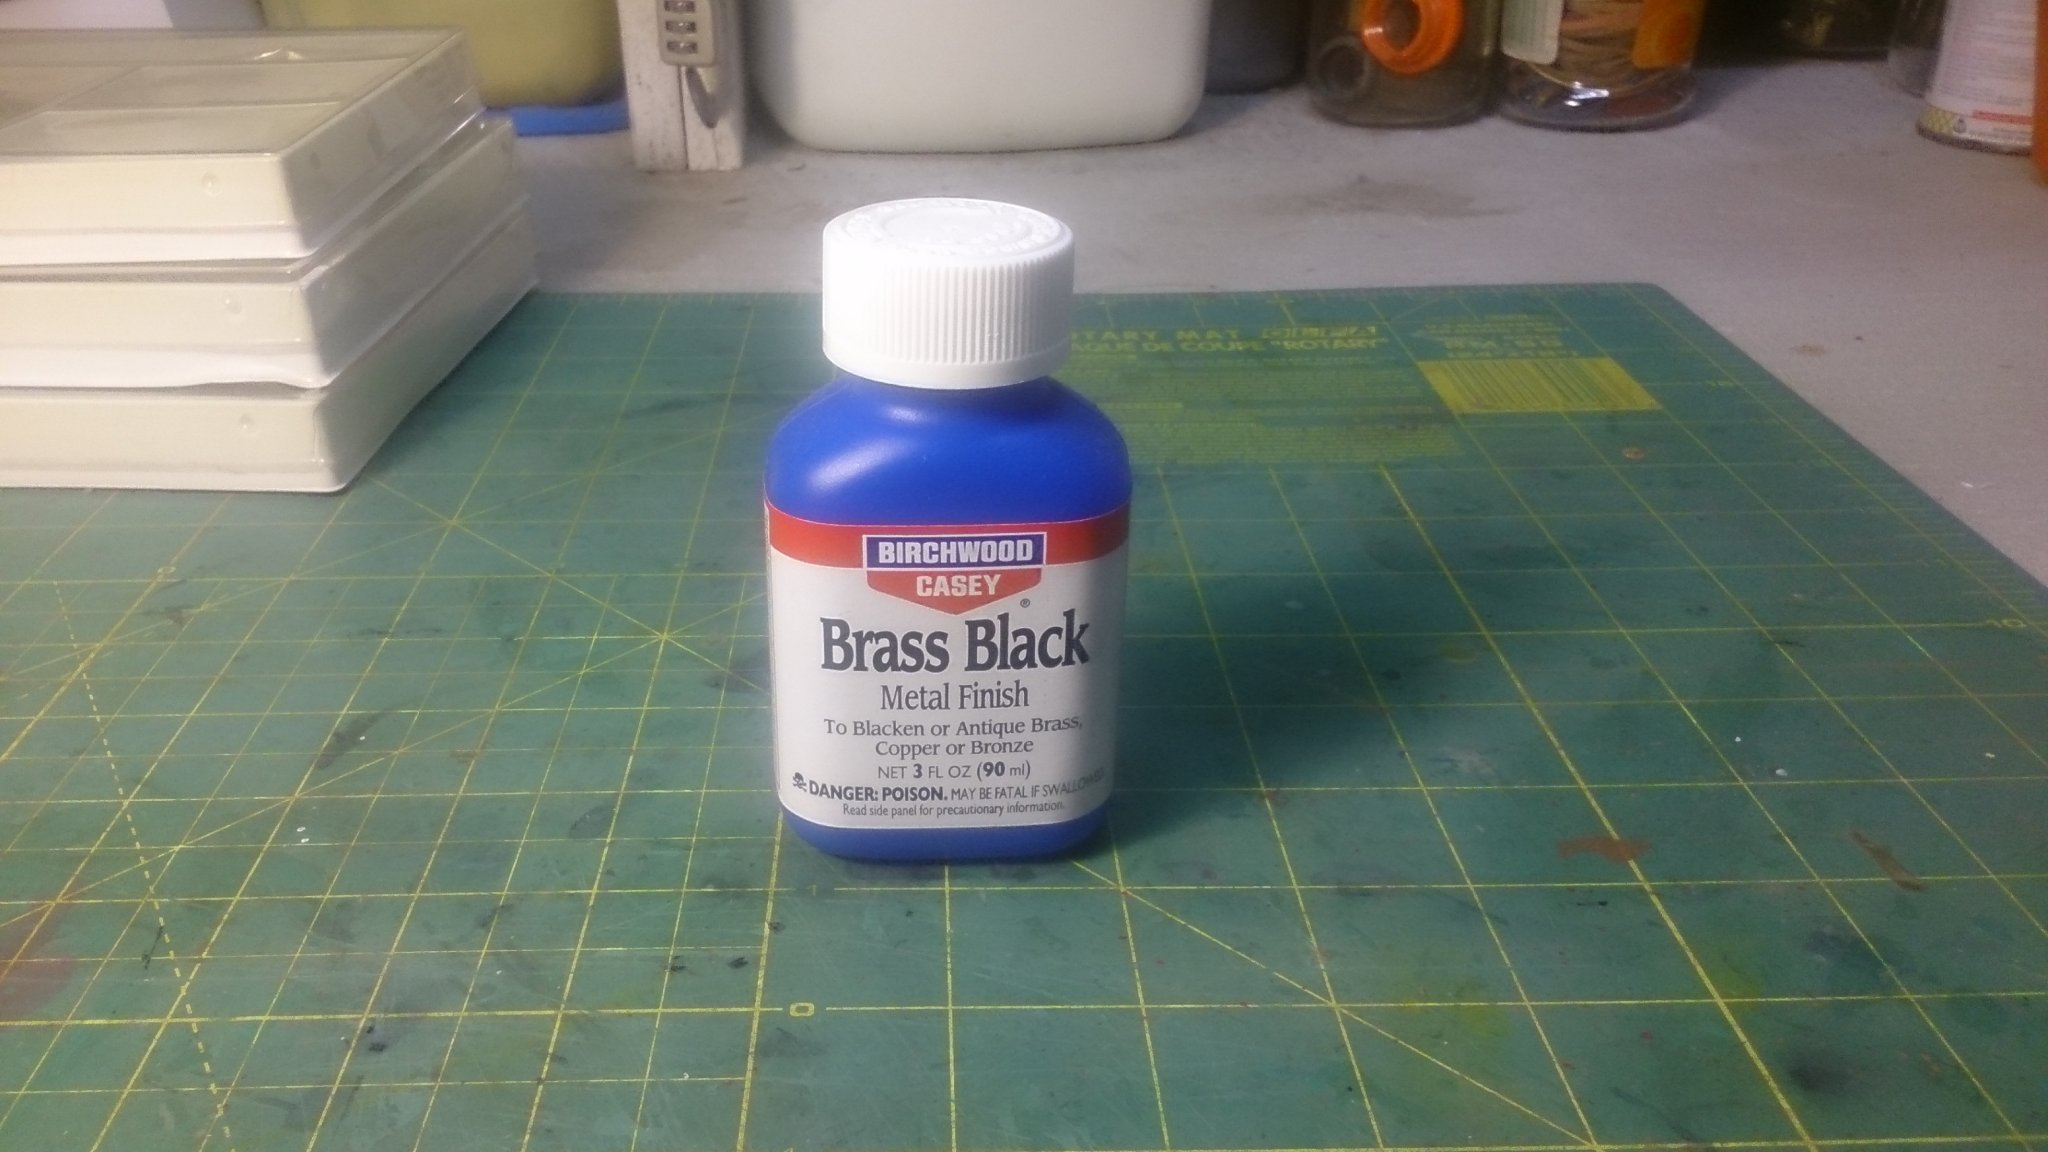
I use chemical blackening for much of the brasswork. The product is Birchwood Casey Brass Black Metal Finish which I bought from a local gun shop.

-
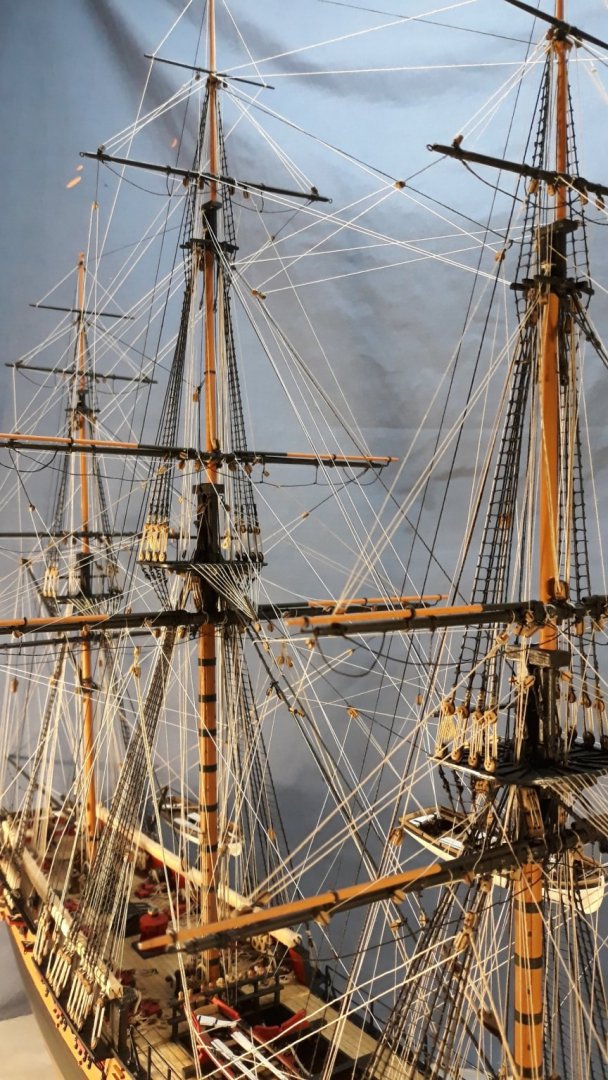
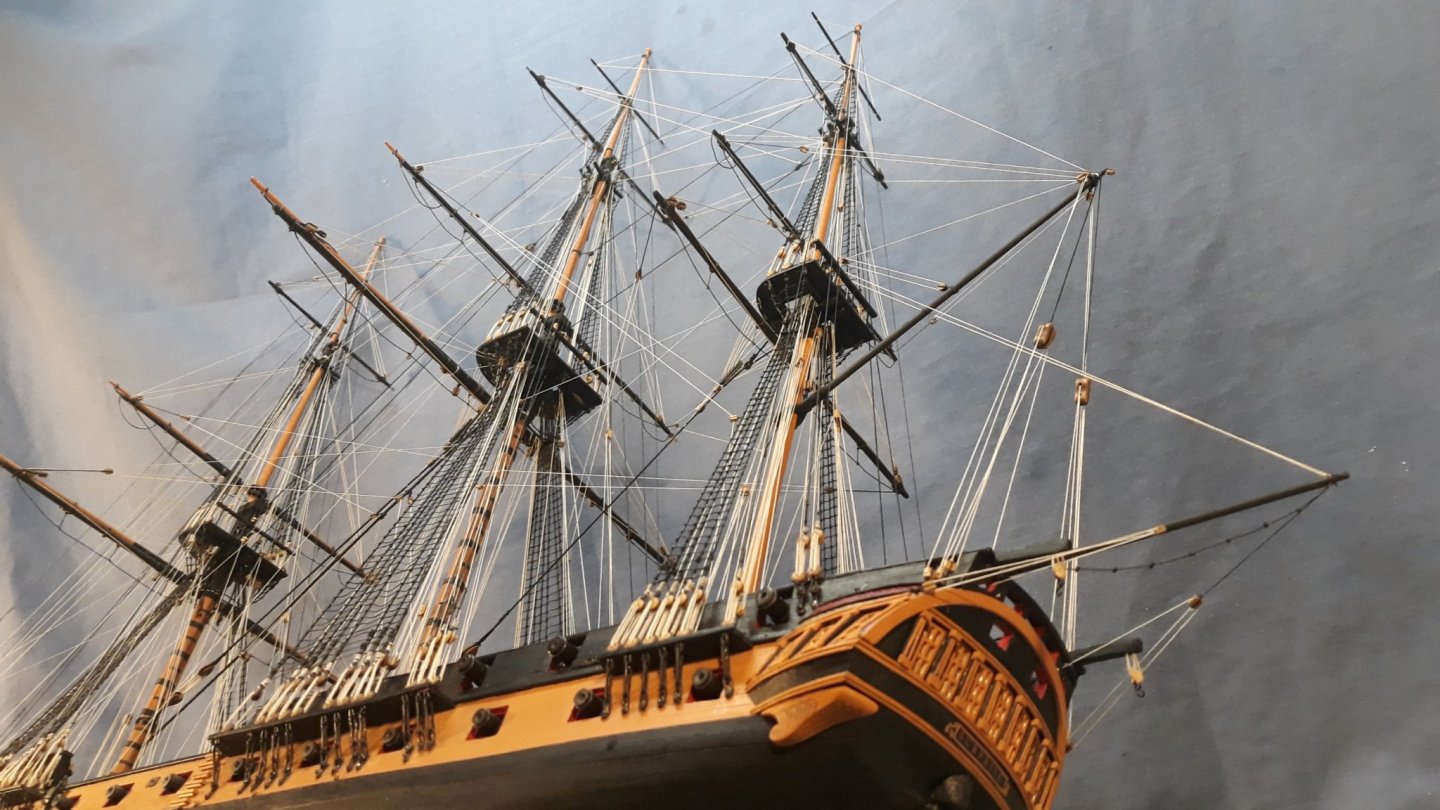
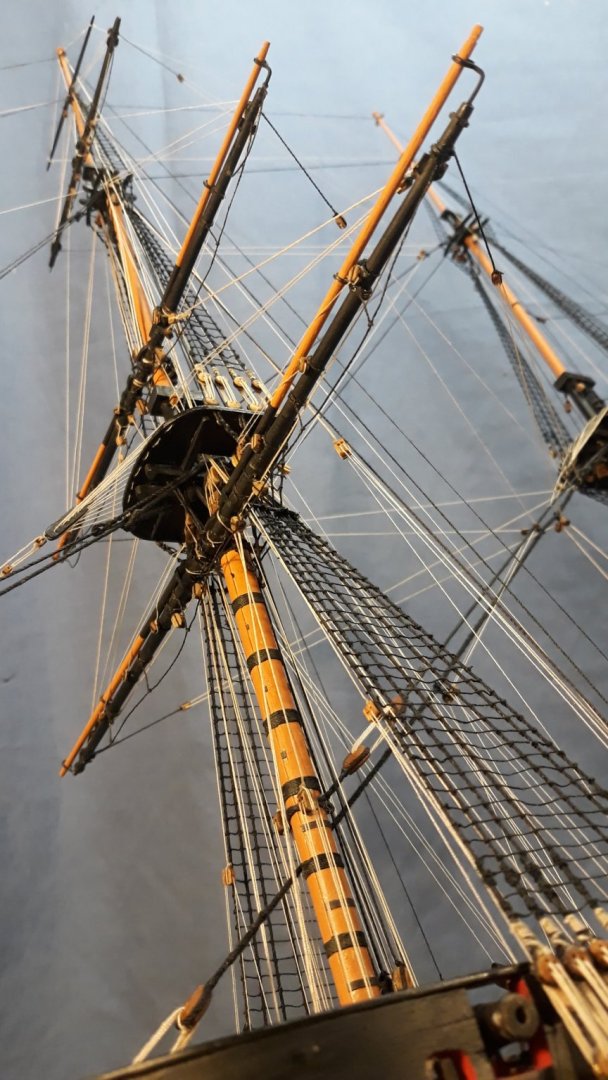
Rigging update. The foremast running rigging is almost complete, now for the mainmast. As more of the lines are fitted threading additional ropes gets trickier. I have had to unthread some as the initial route taken sometimes doesn't run clear and fouls those existing. Getting there. Cheers, David.

-
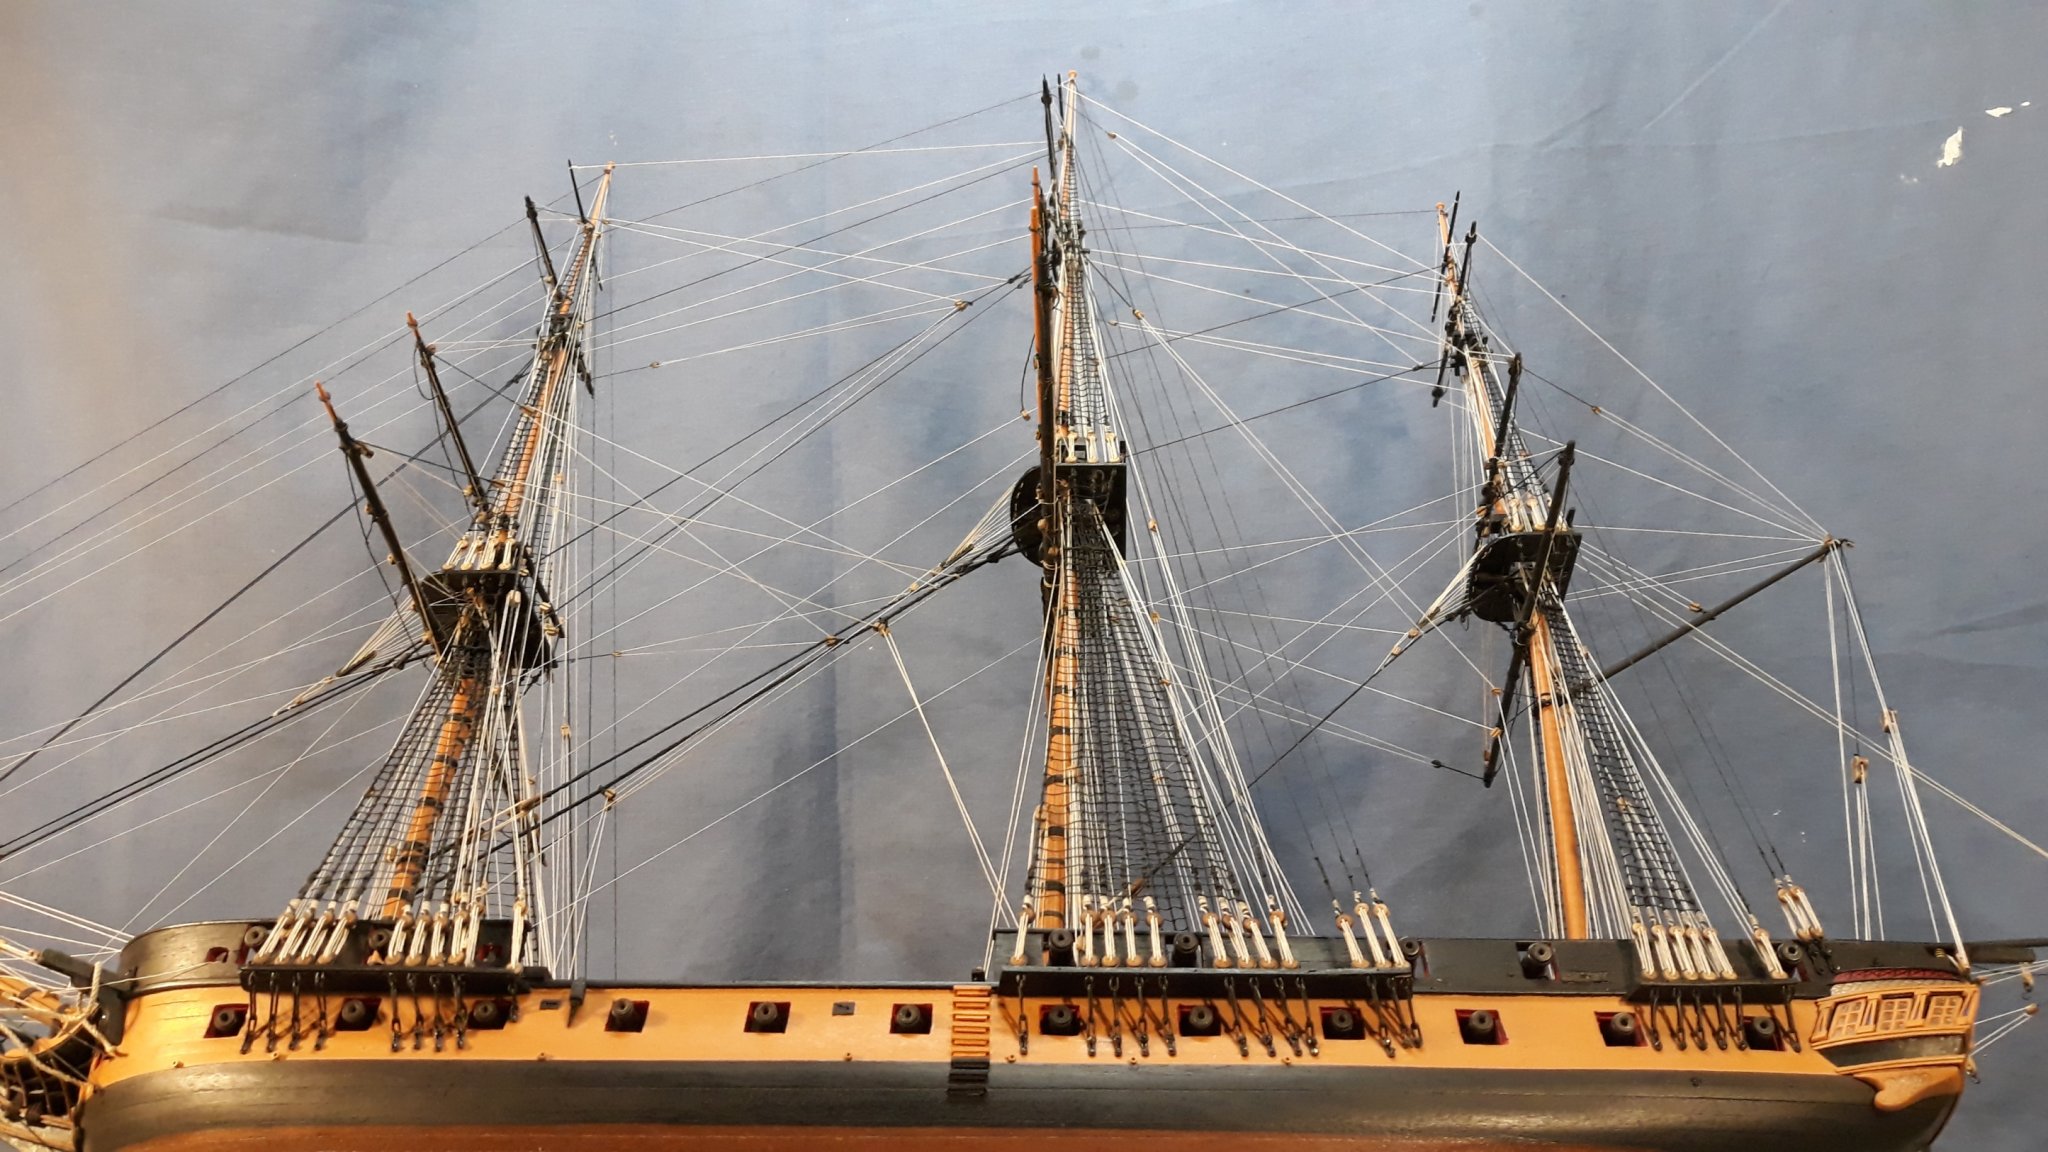
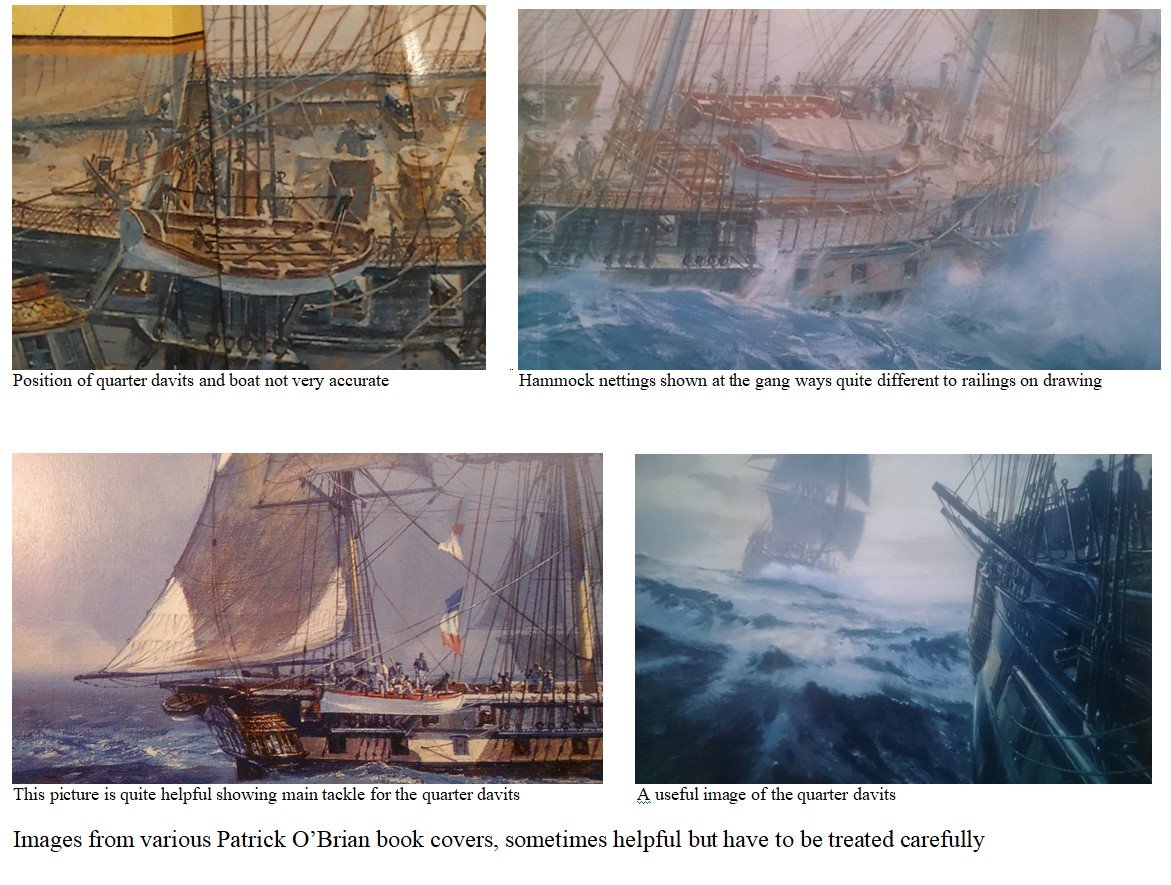
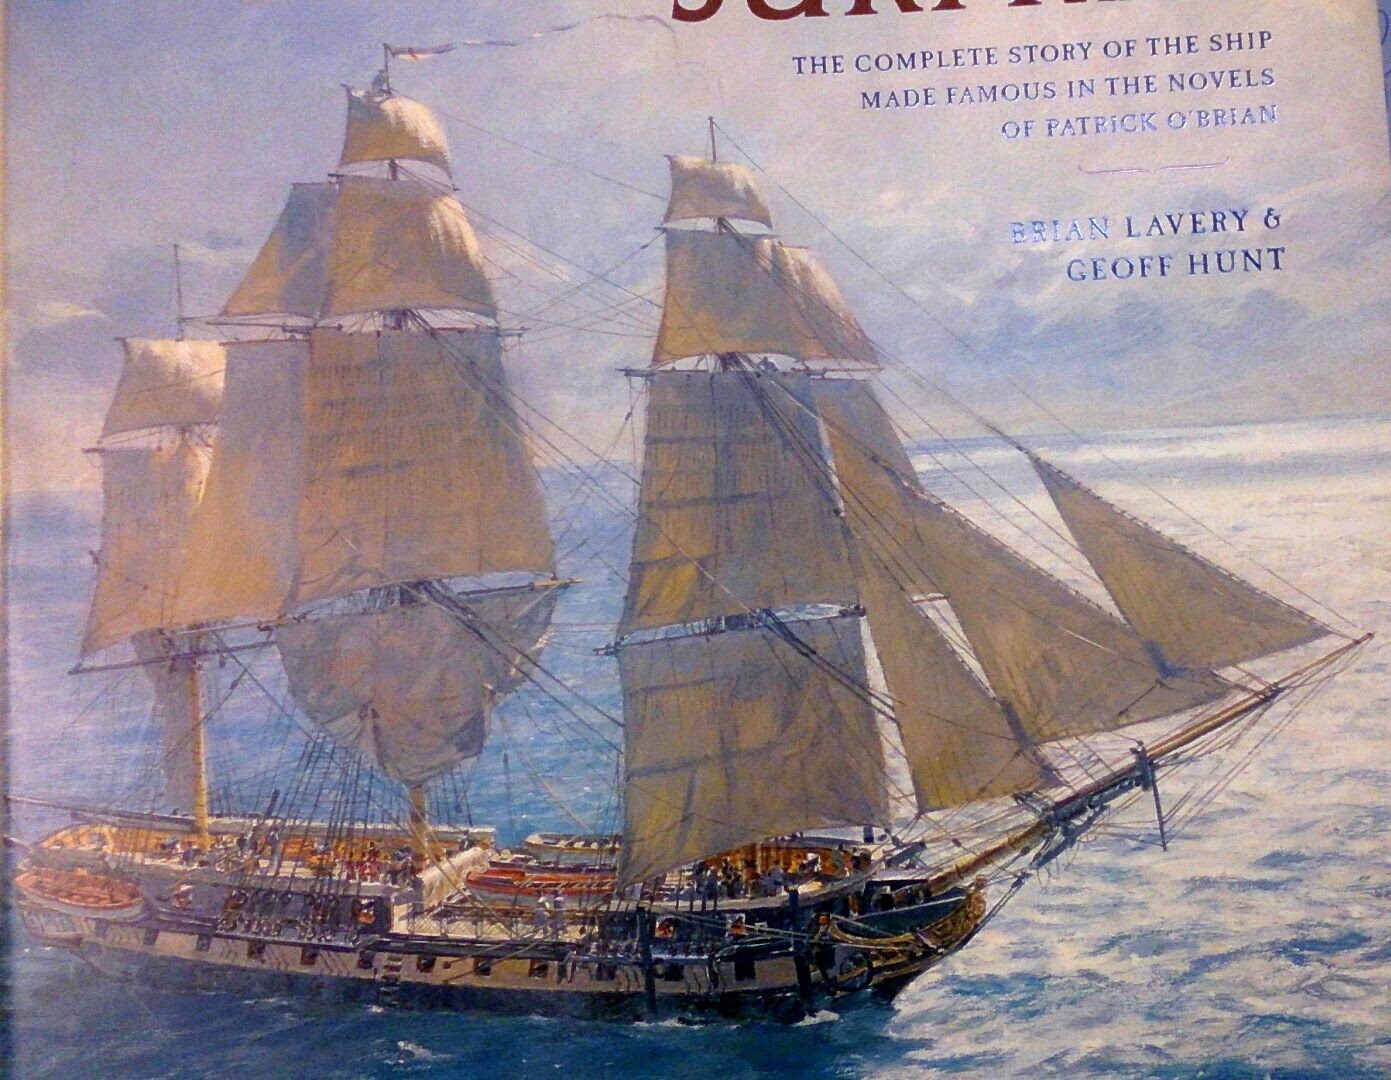
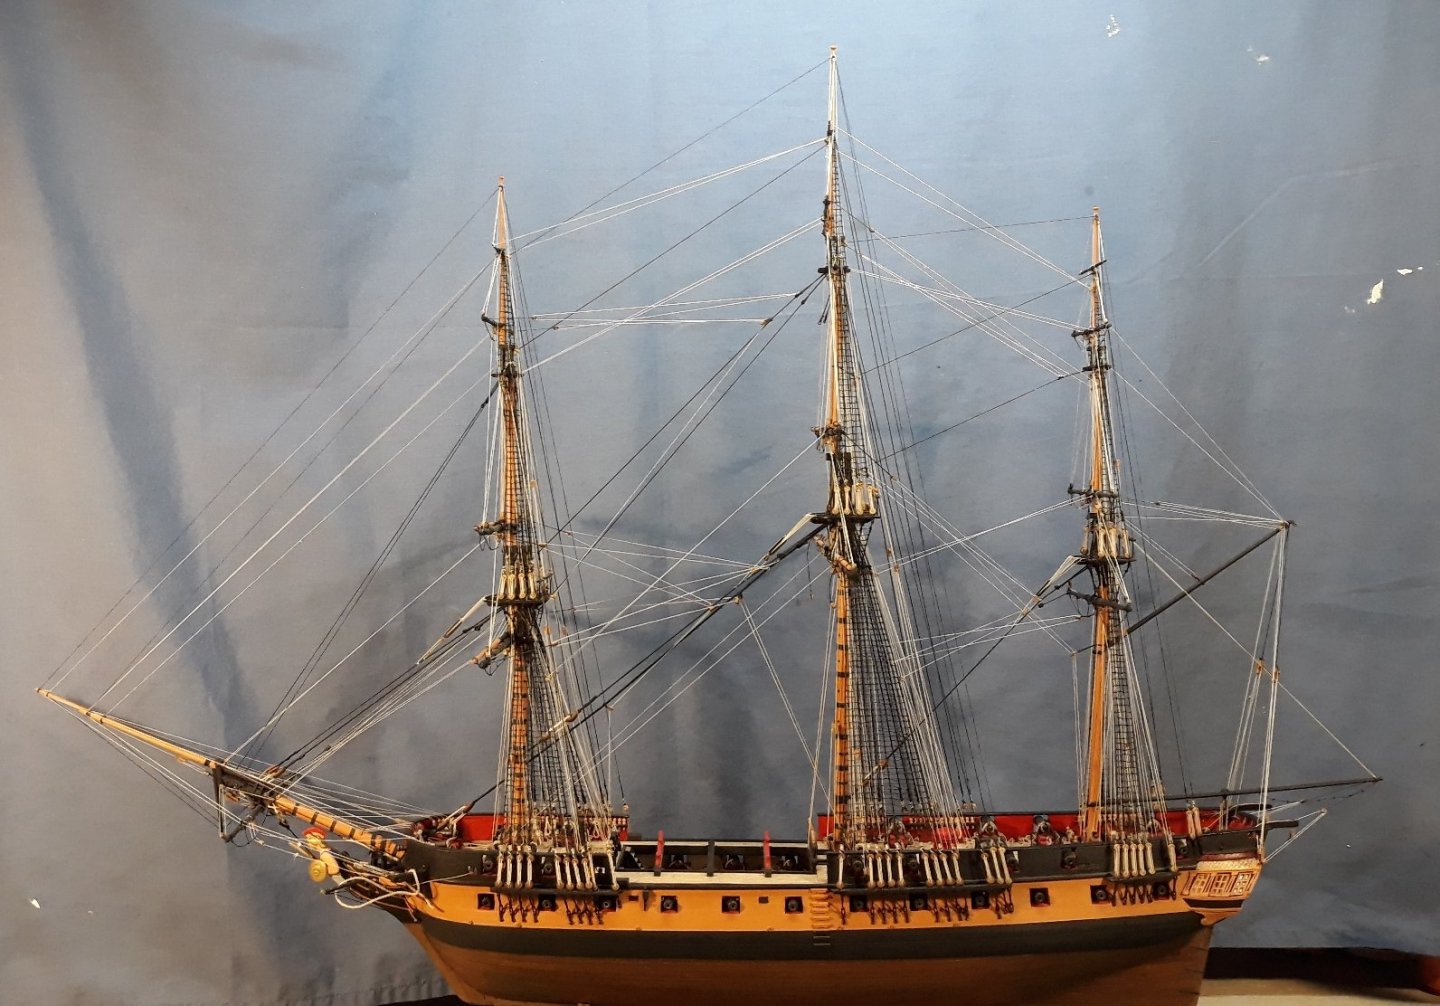
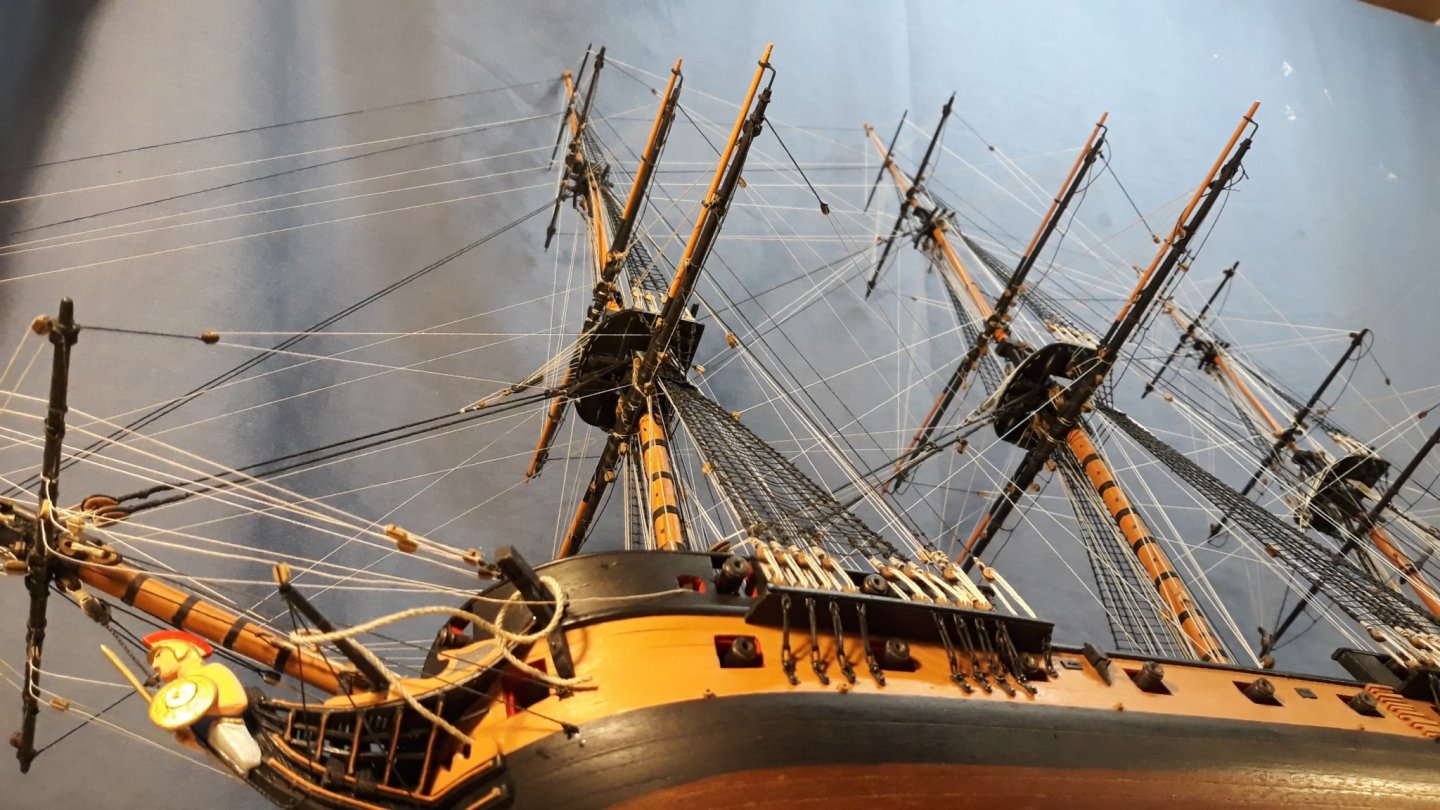
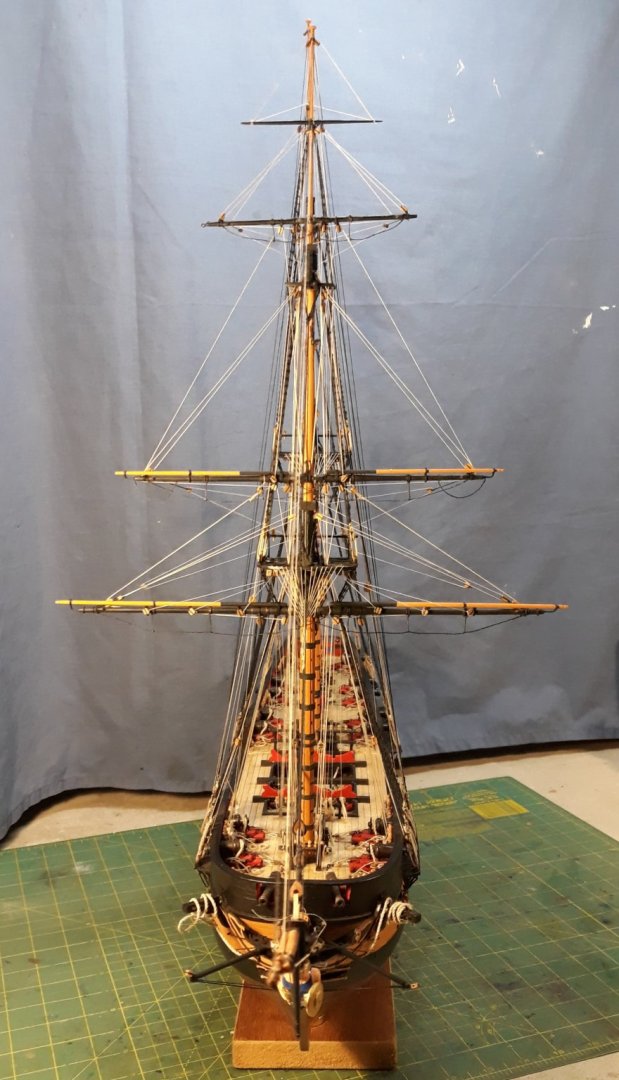
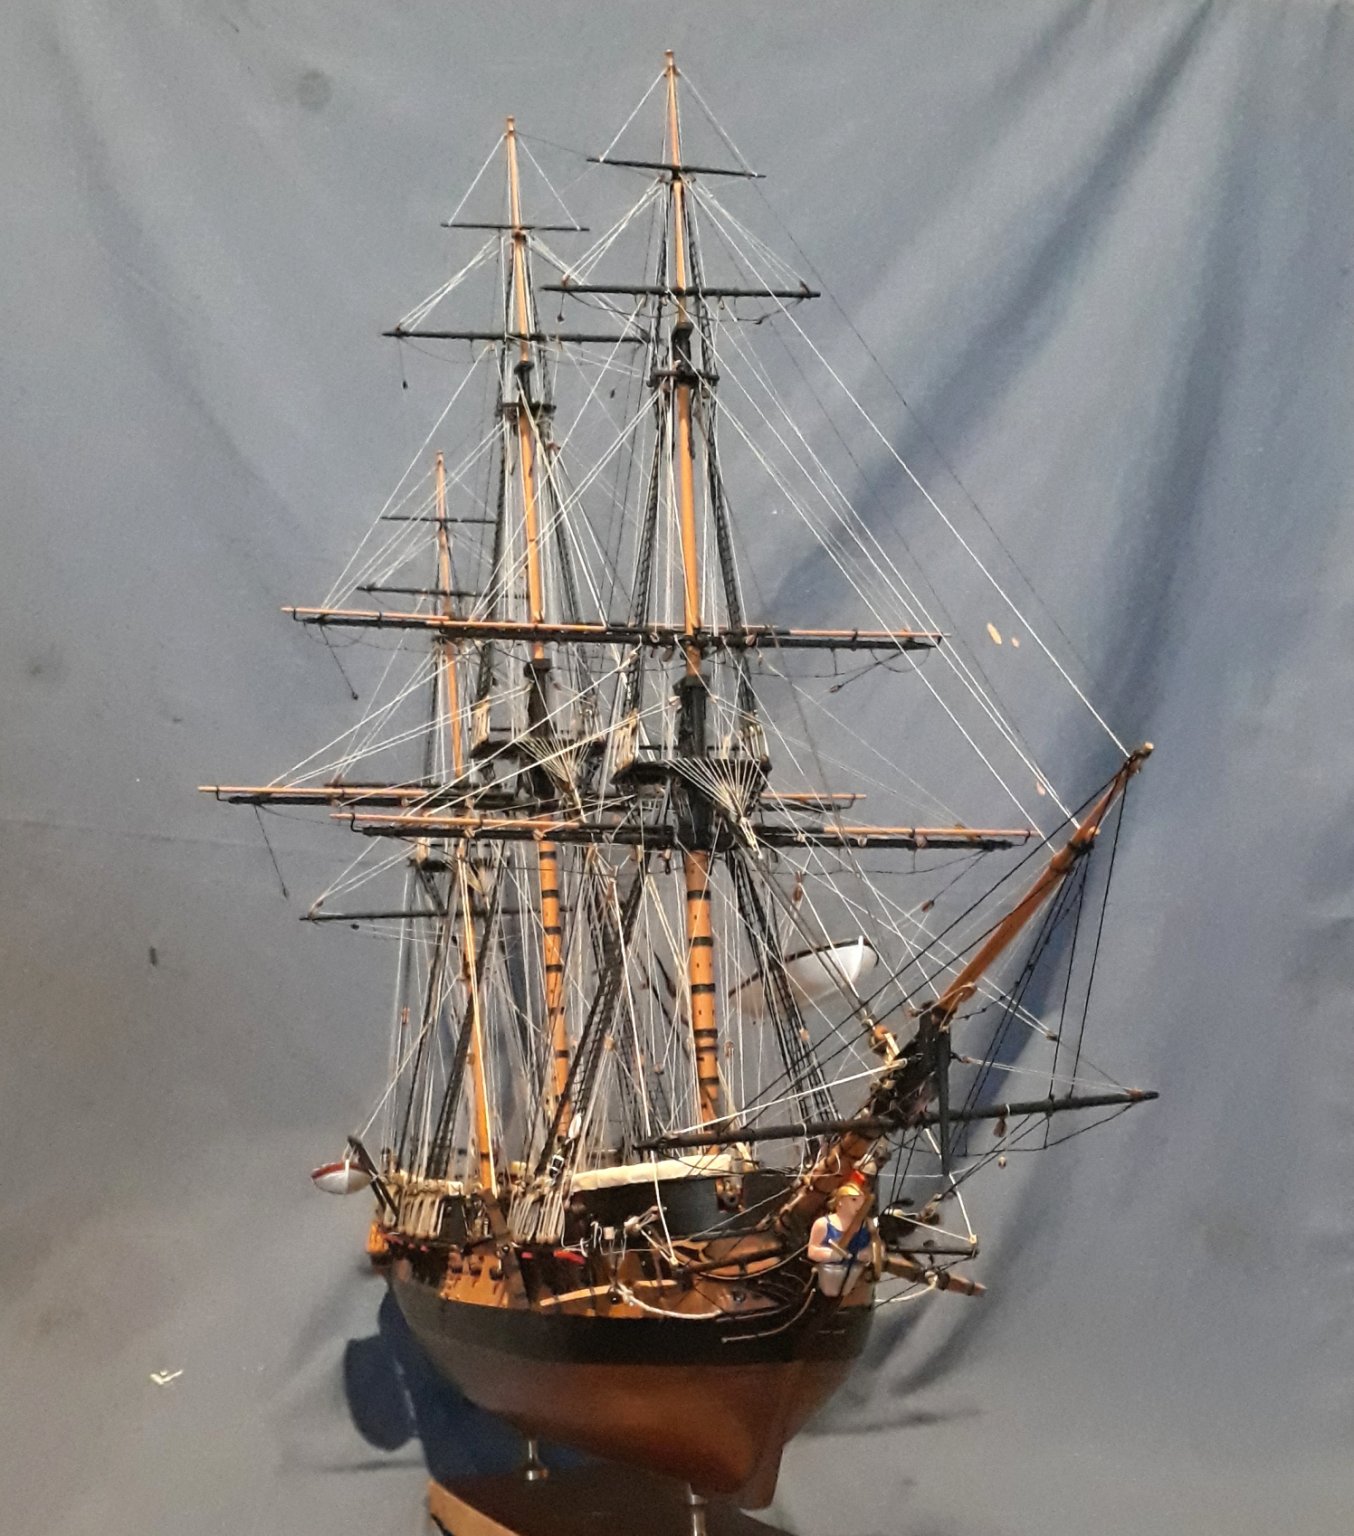
The rig is based on drawings in the Brian Lavery and Geoff Hunt book "The Frigate Surprise" which has both the original and the Patrick O'Brian masting with the 36 gun frigate main mast. My build includes the larger main mast. The layout in the book also increases the mizzen mast size to be almost the height of the foremast. I am no expert but I assume this is needed to balance the increased power generated by the larger sail area on the main mast. Any clarification would be appreciated. Cheers, David.


.jpg.a181cc1a7312bf9149bed7f4deaea09c.jpg)