

jhearl
-
Posts
355 -
Joined
-
Last visited
Content Type
Profiles
Forums
Gallery
Events
Posts posted by jhearl
-
-
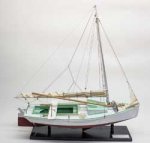
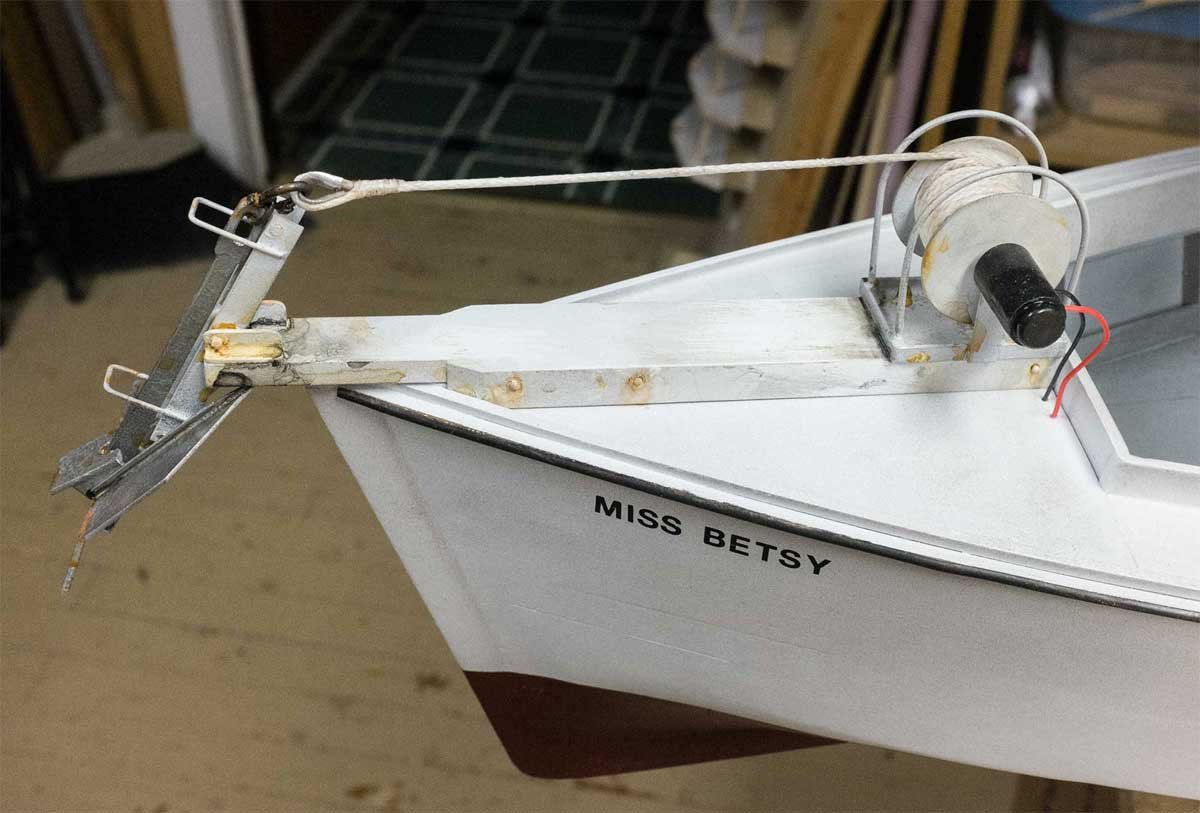
To the best of my knowledge, that's one end of the main sheet. It runs up to the double block on the boom.
- mtaylor and thibaultron
-
 2
2
-
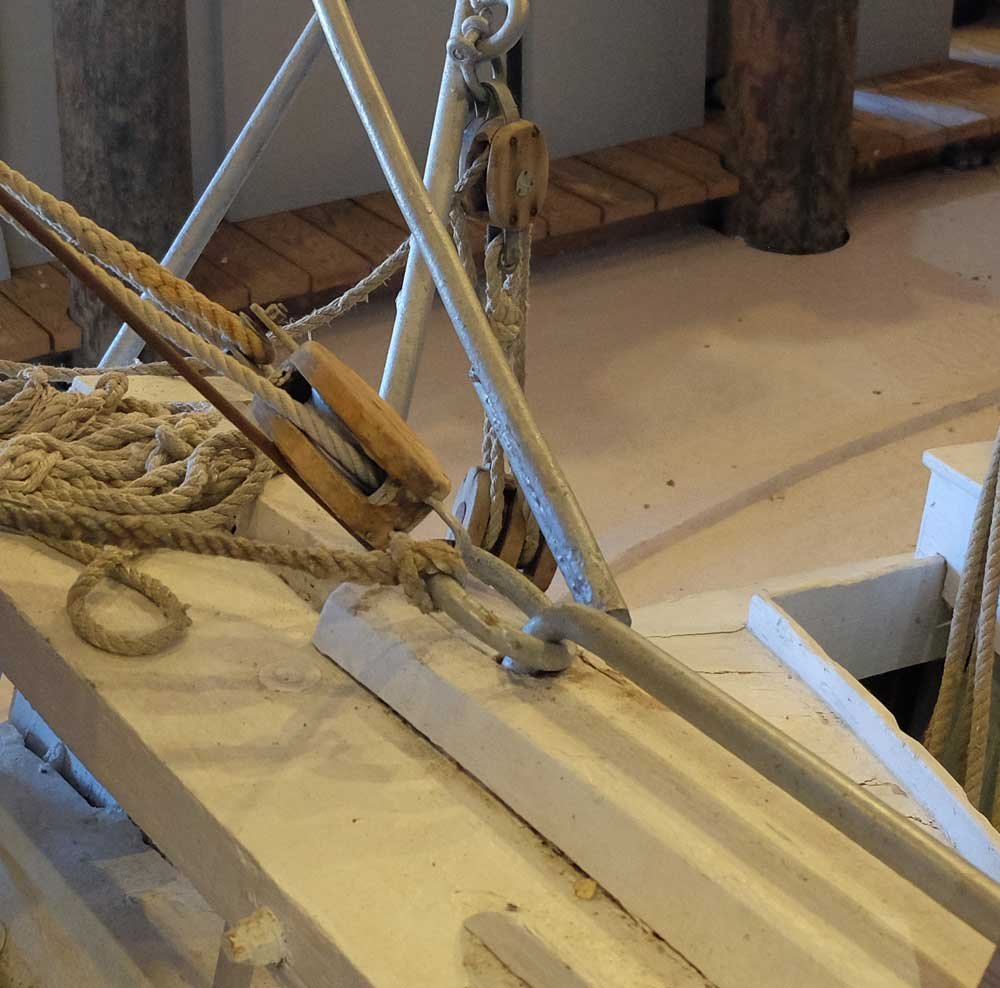
Actually, it was a simple as that. Below are two pics from real skipjacks showing the block and the ring around the traveler. The first is the E.C. Collier at the Chesapeake Bay Maritime Museum, and the second is the Joy Parks at the Piney Point Lighthouse Museum.
-
Andrew-
Left you a PM just now.
John
- Dave_E, lstmysock11, mtaylor and 1 other
-
4
-
Earlier this week, I sent some small pieces of wood to a friend in another state. (Nothing commercial about it - just a friend-to-friend thing.) They wouldn't fit in a regular envelope, so I put them in a padded CD mailer. That's about 6" square. The wood was very light and the whole package probably weighed only a couple of ounces. Took it to the post office and the clerk asked if it needed to get there in a hurry. I told him no - it could ship the cheapest way. The price? $10.30!! We were both floored but he swore that was the right price. As I stood there, I looked at the display of "If it fits, it ships" envelopes, I saw there was one considerably larger than my CD mailer and it was $8.95, which was the cheapest mailer they have. I asked if I could just put my envelope right into one of those mailers and he said, "Sure." So for $1.35 less, the package was sent priority mail to arrive in 2 days, had a tracking number, and $50 insurance. Crazy.
-
I use pieces of 1/32" brass rod to position the toe rail. Here's how I do it:
I place the forward end of the toe rail up against the stem (or wherever its final position is supposed to be). While holding it in place with one hand, I drill down through the toe rail into the deck beneath. (Be careful not to drill out the side of the hull but you want the brass rod to be in the deck deep enough that it won't easily fall out.) I then stick a piece of 1/32" brass rod into the hole, through the toe rail and down into the deck, then snip the excess rod off leaving about a half-inch above the toe rail. No glue at this point.
Now, move aft along the hull and toe rail until you reach a point where the toe rail needs to curve inward. Hold the toe rail in place, drill a hole there through the toe rail and deck, and insert another piece of brass rod. Keep working your way aft inserting more rods as necessary to keep the toe rail conformed to the desired curvature.
At this point, the toe rail should be lying nicely in place without you having to hold it at all. Carefully lift the toe rail off the deck a quarter inch or so, being sure that the brass rods don't come out of the holes in the deck. That will allow you to put your glue of choice on the deck or underside of the toe rail. Press the toe rail back down into place and wait for the glue to dry. I typically prefer small dots of medium CA for this purpose. I always put a dot on each of the pieces of brass rod where they go into the deck. If you prefer yellow glue, you may need to hold the toe rail tight to the deck with tape until the glue dries.
Once the glue has dried, snip off the remaining ends of the brass rod and file them down level with the top of the toe rail.
In the picture below, you can see a few of the brass rods I used for this particular boat after they had been filed down. No two boats are alike, so placement of the rods will vary. If your toe rail has scupper holes, be careful not to put a piece of brass rod through the hole.
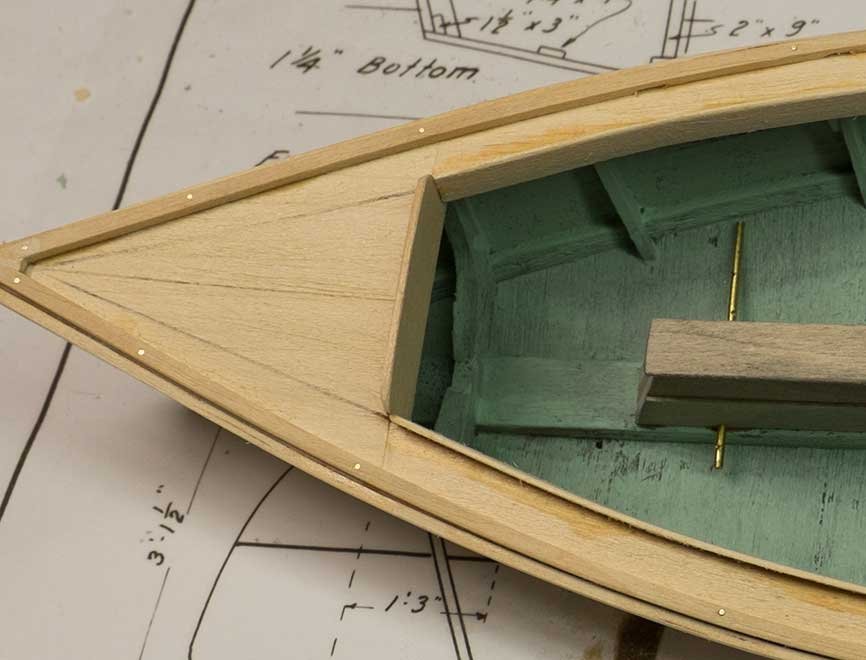
It is helpful if the hole you drill is just slightly smaller than the 1/32" brass rod. You want a snug fit but not so tight that you can't move the toe rail off the deck. Make a hole in a test piece before you start drilling into the model itself. This technique can work for rub rails as well. Figuring out just where to bend the rub rail can take a little practice, so you might want to do a test run on some scrap to get a feel for how it works before you move to the model.
Hope this helps -
John
-
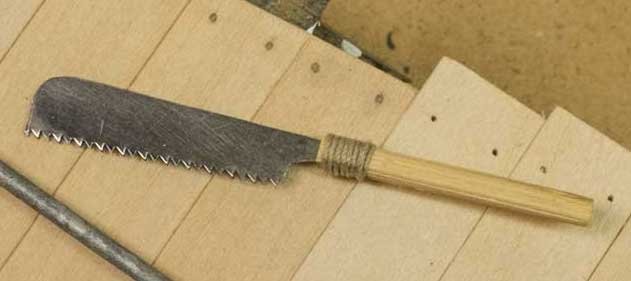
You can cut these saws with a cut-off wheel in a Dremel. Just be sure to wear eye protection. Here's a Japanese-style pull saw I recently made for a diorama from an old Exacto saw blade.
- thibaultron, mtaylor and Canute
-
3
-
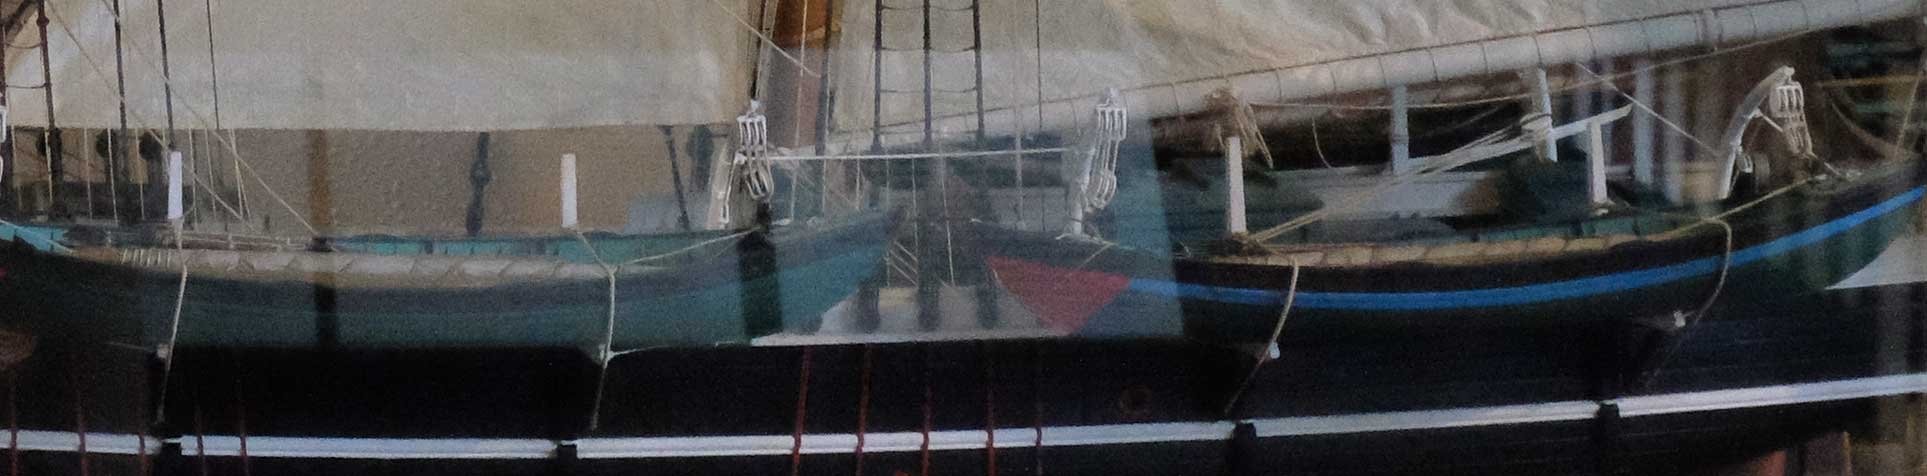
This photo may help. It's a part of Ronnberg's model of Kate Cory in the New Bedford Whaling Museum

Not the best photo but they appear to all be the same height above the waterline.
You could also try sending an email to the Cape Ann Museum where Mr. Ronnberg is a curator - curatorial@capeannmuseum.org
Cheers -
John
- Keith Black and mtaylor
-
2
-
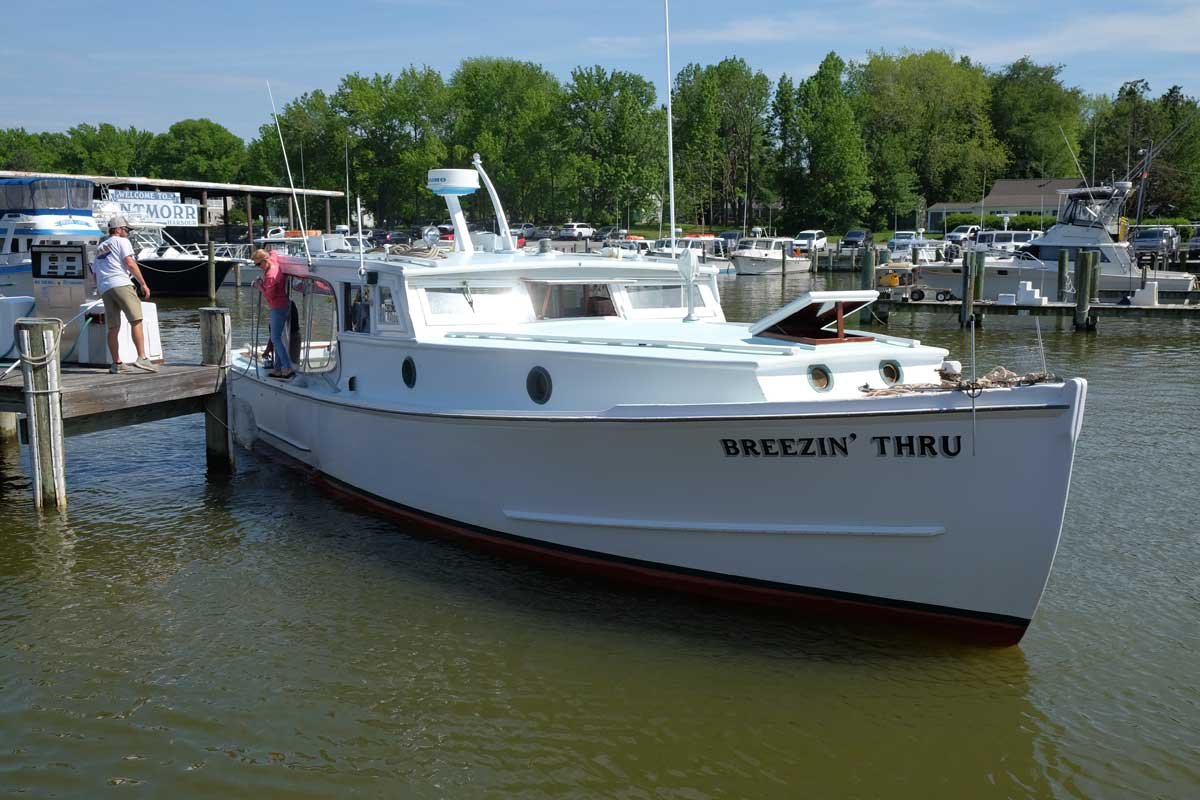
You will notice that Breezin' Thru has a half-round metal strip on the rub rail, which is a very common feature. Do a Google search on "half round brass wire" and you'll find it in several different sizes. It can be blackened, then glued and/or pinned to the edge of the rub rail.
Here's an example of one of my models where I used it:
-
Last time I was up your way in 2019, I visited Kentmoor Marina on Kent Island where Breezin' Thru was docked at that time. No idea if she is still there.
Cheers -
John
-
10 hours ago, glbarlow said:
I can’t imagine the need for a wider table. I’ve had my saw for 12 years and that need never came up.
The advantage of the wider table is that you can use the Byrne's sliding table without having to remove the rip fence. You just slide the fence over to the right. I go back and forth between cross-cutting and ripping frequently so the wider table was worth it for me. It would drive me nuts to have to keep removing and re-installing the fence. I also bought the micrometer but after trying it a couple times, it has been sitting in the drawer ever since. I work at larger scales (typically 1:16), so that degree of accuracy is unnecessary for me.
Cheers -
John
-
-
-
I did not intend to imply that cropping produced a larger, magnified image. Clearly it does not. But one needs to think about the ultimate use for the image. If you're intending to use the image in a book or perhaps a magazine article, then cropping may not be the best course of action. If you're planning to make a 16"x20" color print of a tiny feature on your model to hang on your wall, it certainly won't work. But in reality, most people use images of their models on websites such as MSW, or perhaps, to email to friends. In that case, resolution is a minimal factor.
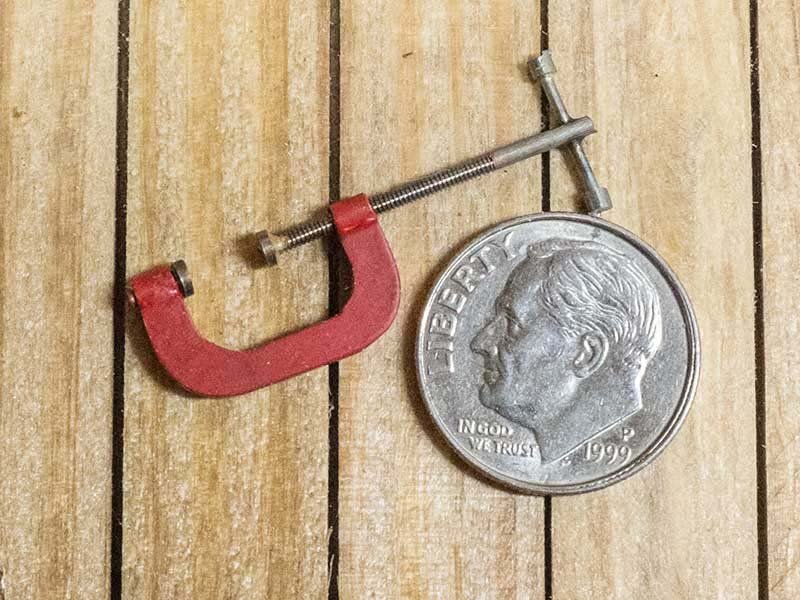
For example, the image of the C-clamp is 800 pixels wide. If printed at 300dpi, it would only be 2.66 inches wide, which might be too small for a book. But posted on the web, it's an entirely acceptable size. So, I'm only saying consider the intended use for the image in your choice of equipment. Macro photography is a cumbersome and time-consuming type of photography that simply may be unnecessary for the majority of model photos. But, each to his own.
Cheers -
John
- mtaylor, Canute and thibaultron
-
3
-
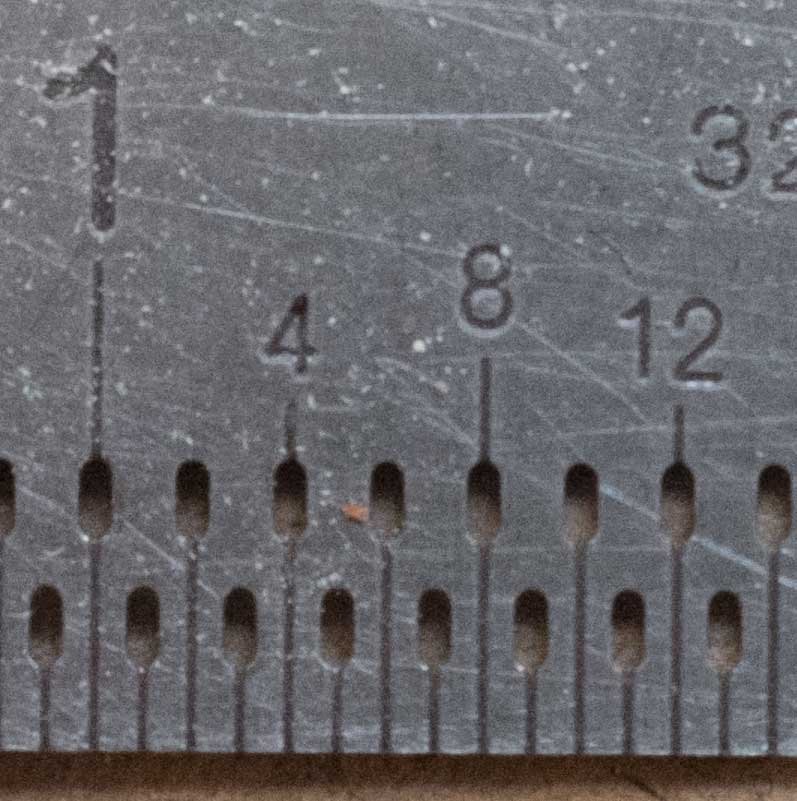
I would offer a somewhat contrarian view and say that macro gear may not be the best solution for close-up model photography. I own a Nikon D800 and three different macro lenses plus a bellows and tripod - altogether some quite expensive equipment. I use none of it for model photography. Instead, I use what would be considered a high-end point-and-shoot (Fuji X100F). That camera has a fixed focal-length 23mm lens and a 16 megapixel sensor. The camera cost around $1K new but now sells for around $500 used. It has a lot of controls that someone used to a digital SLR would want, which is one of the reasons for it's high cost. But, I can use that camera hand-held, in relatively poor light (it has an f2 lens), and get very good results. It is able to close-focus to just under 4 inches (so-called macro mode) but because of its 23mm lens, it's also useful for taking a shot of a whole boat. I almost never use a tripod - just hand held. The advantage of the 16mpx sensor is that it's easy to crop in on something to get the impression that it was shot with a macro lens but generally has better depth of field. Newer cameras have even larger sensors, which means even tighter crops.
Here, for example is a quickie shot (uncropped) of a ruler about as close as I could focus:
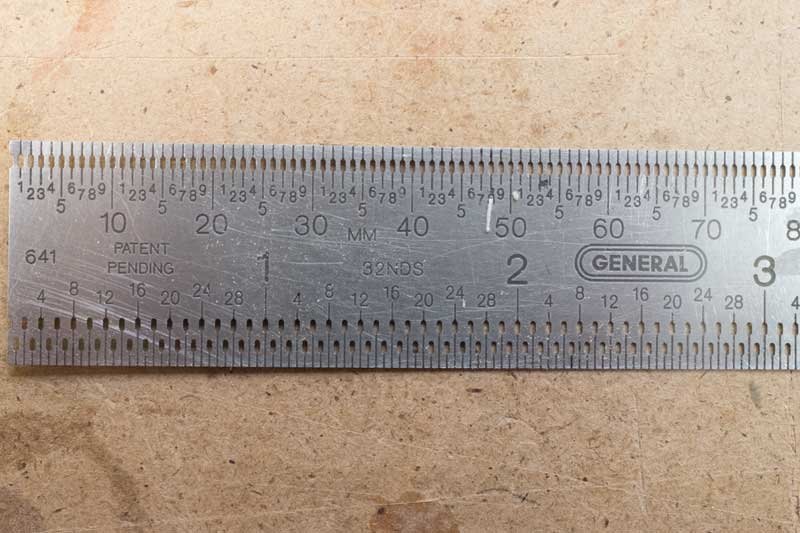
Here's a crop from the same image (slightly out of focus but I wasn't being very careful with it). It was shot at f/8 at 1/110sec.
Here's an actual photo from one of my builds. You can see there's a much greater depth of field than would be typical with a macro lens:
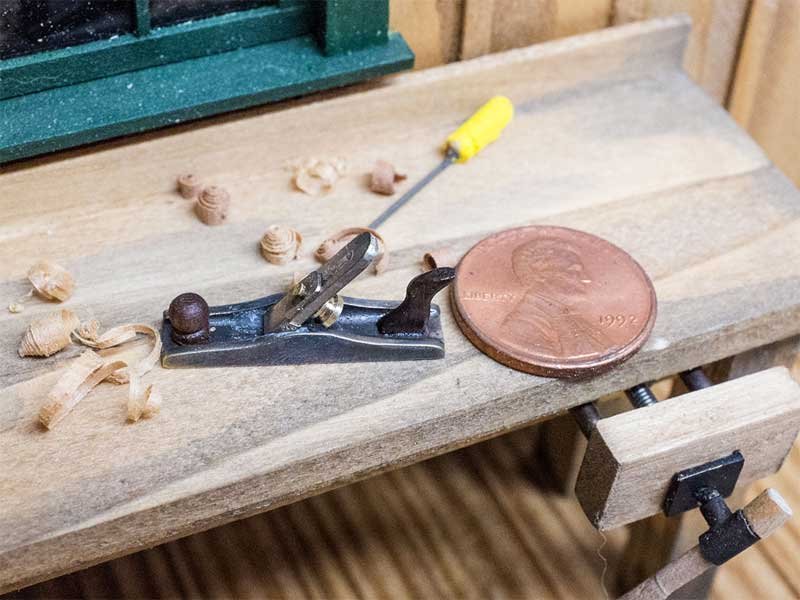
And another:
There's nothing wrong with macro, but it does require a lot more work and a lot more care in using it than just picking up a little point-and-shoot and hand-holding it. Not to mention it can require much more expensive gear and, if you get into focus stacking, much more time. So I'm just offering this as an alternative. If you already own a digital SLR, before you buy a macro lens, try a wide-angle lens if you have one. I have a 16mm lens for one of mine and I can achieve similar results with it although it doesn't focus as closely as the P&S camera.
Cheers -
John
- mtaylor, Rik Thistle, J11 and 4 others
-
7
-
17 hours ago, Gregory said:
Last I ordered, Malco does require a minimum $100 . Blades are great..
You're right - my bad. Try Global - https://www.globalindustrial.com/g/metalworking-tools/metalworking-saw-blades/jewelers-saws/Jewelers-Slotting-Saws-1-1-2-Diameter
-
Try Malco - https://www.malcosaw.com/
By the way, it's not a good idea to post your email address on the site. You should use PMs if you want a private contact.
Cheers -
John
- Ryland Craze and Canute
-
2
-
If you look at the picture of the X-Y table on the Micromark site, you'll notice two pan-head Philips screws and washers attached to some nuts down in the T-slot. In the vise that Micromark sells (#15118), there are two slots in the base of the vise. Those screws will go down through the vise base (washers under the screw heads) into the T-nuts and allow you to tighten the vise down to the table.
Although that vise is somewhat lighter than real machinist vises, I think it's adequate for your use because you're just using a Dremel anyway. You're not going to be doing any heavy-duty machining - probably just drilling holes. Although I don't use an X-Y table on my drill press (early Micromark version) I do use that vise for holding things I need to drill and it works just fine.
Hope that helps -
John
-
Many years ago, I bought a magnetic gluing jig from Micromark and it has proven to be very useful to me.
https://www.micromark.com/Magnetic-Gluing-Jig-10-1-4-Inch-Square
-
16 hours ago, SweepHall said:
Yeah, found chronos the cheapest but with 5% off at hobbies, it works out about £10 cheaper getting it from them. Unfortunately they don't have any in stock at the moment.
The comment I'm about to make is not germane to the subject at hand, but the comment above reminded me of an experience I had many years ago when I worked as a clerk in a small, local hardware store. A customer came in looking for some particular item - I don't recall what it was - a package of screws or something small - but we had it in stock. When he saw our price he complained that the big box store had it for about 1/3 less. I asked him why he didn't buy the item there and he replied that it was out of stock. To which I replied, "Oh, when we're out of stock on this item, we sell it for 1/3 less too." That was the point at which I rang up the sale. 😄
-
This image of the main topmast from Ronnberg's Smuggler plans may be of some help:
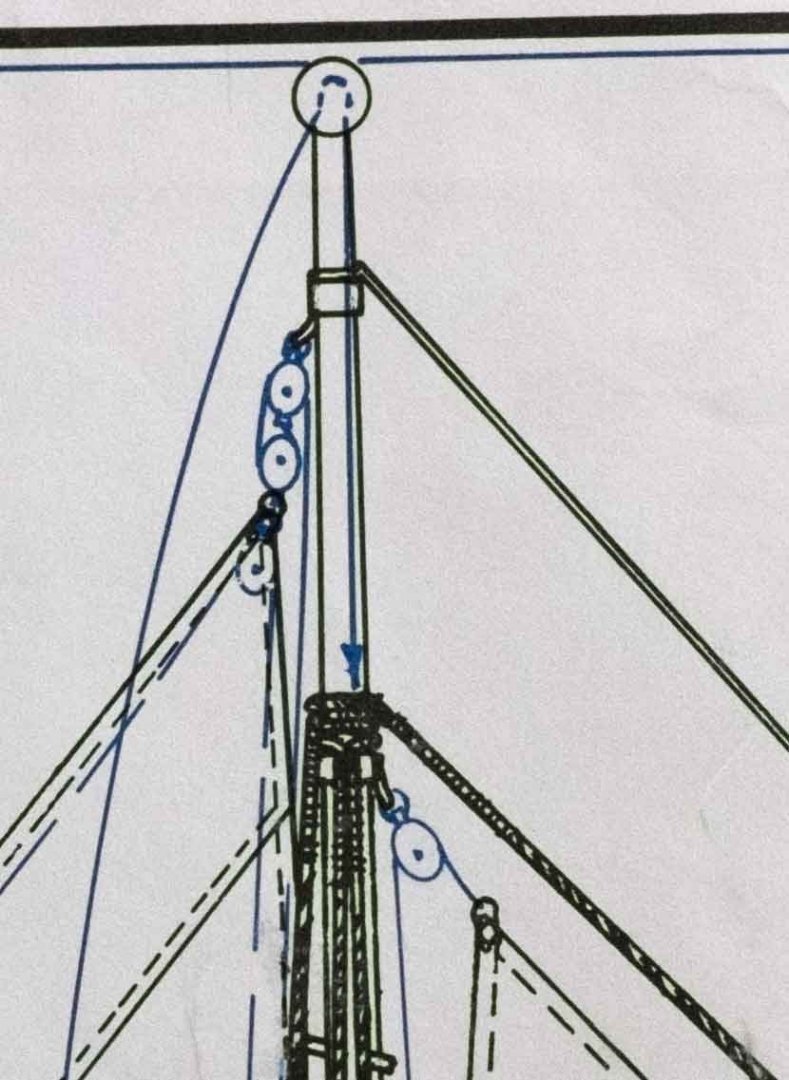
Ronnberg calls the lower line the "main top mast stay" and the upper line he calls the "main topgallant stay." In the notes he says that "At this period, "topgallant stay" was a colloquial term for "topmast spring stay" on fishing schooners." Smuggler dates to 1877. Note that the main top mast stay terminates in an eye that is seated over the shrouds and backstays. The upper line also terminates in an eye that is seated over the topsail halyard band.
The forward ends of both those lines terminate at eyestraps on the topmast cap - topgallant stay on the port side, topmast stay on the starboard side - as Chapelle shows in his illustration.
Hope that helps some.
John
-
Given the fact that different computers reproduce colors that can vary widely, it's impossible to tell from a photo whether or not the color you see on your hull is the same color I see on my laptop screen. So I wouldn't comment on whether or not it's "right" although it looks very orange to me. I have been using a rattle can paint for the bottoms of my Chesapeake Bay workboat model hulls for the past few years. It's Rustoleum 2X Ultra Cover "flat red primer" which has a reddish-brown color. It's only about $4 a can at Walmart, so you might give it a try on some scrap.
Cheers -
John
-
18 hours ago, BobG said:
. His photos that chronicle his build are great but I would love to have read further explanations of what and how he was doing some of those steps.
I"m not sure if you are aware, but if you click on any image to open it, you will see some icons at the top of the window. There's one that looks like a circle with an "i" inside it. If you click on that icon, it will bring up comments on the right side of the image where he explains what's going on in each image.
-
Bob -
Thanks for the nice compliments, but if you want to see a truly beautiful model of Smuggler, take a look at the one built by Bob Steinbrunn. Truly amazing!
Cheers -
John
- BobG, Ryland Craze and Brianh526
-
3
-
Little Machine Shop makes a quick-change tool post for the Sherline. https://littlemachineshop.com/products/product_view.php?ProductID=4039&category=
I have one very similar to it from a company that has since gone out of business but I have been able to buy additional tool holders from Little Machine Shop. I highly recommend a QCTP. They are expensive but worth every penny to me because I find myself changing tools frequently. I have bought several extra tool holders over the years. I have carbide tools, HSS tools, and even a knurling tool, each in its own holder.
One other thing that has not been mentioned so far is the weight of the larger lathes. I don't have room in my shop to keep the lathe set up all the time. I have to store it under a workbench. Bringing out the Sherline is no big deal, but one of the larger lathes can weigh upwards of 1oo pounds! I sure as heck wouldn't be moving that thing around. Also, as others have said, if you buy the Sherline, absolutely buy the long bed. I made the mistake of buying the short bed and quickly came to regret it. It's possible to upgrade later, but it's 3 times more expensive than buying it up front.
Definitely check the prices at https://www.discountcampus.com/
They are an authorized Sherline distributor and, in fact, anything you buy gets shipped directly from Sherline anyway and carries their full warranty.
Cheers -
John
- Jorge Hedges, Canute, dvm27 and 1 other
-
4


Helping hands troubles
in Modeling tools and Workshop Equipment
Posted
This third-hand device - GRS® BenchMate® Double Third-Hand Soldering Station - RioGrande is quite expensive but functions beautifully. You do not need to tighten the joints while using it. It also features a soldering block, which is very useful. For me, it has been worth every penny.