


DBorgens
-
Posts
327 -
Joined
-
Last visited
Content Type
Profiles
Forums
Gallery
Events
Posts posted by DBorgens
-
-
Darius,
Just found your log. I like the work you’re doing, she looks good. I’m also building Pegasus and have not updated my own log in a long time. Love the blue paint, it will look sharp.
regards,
Dave B
-
Just found your log and will pull up a chair and follow. You’re doing a great job, especially the transom. I wouldn’t worry about the number of stanchions, the ship will look just as nice. First builds are like school, every task is a learning experience so don’t beat yourself up (BN was my first build as well). I found Bob Herman’s log very helpful.
-
When I eventually finish Pegasus, I plan to build Speedwell. Your kit will be perfect as I don’t have the machine tools.
Dave B
- KenW, Chuck, Knocklouder and 6 others
-
 9
9
-
Wow, awesome build. I’m glad I came across your build.
Dave B
-
Welcome!
- Dave_E, mtaylor and Keith Black
-
3
-
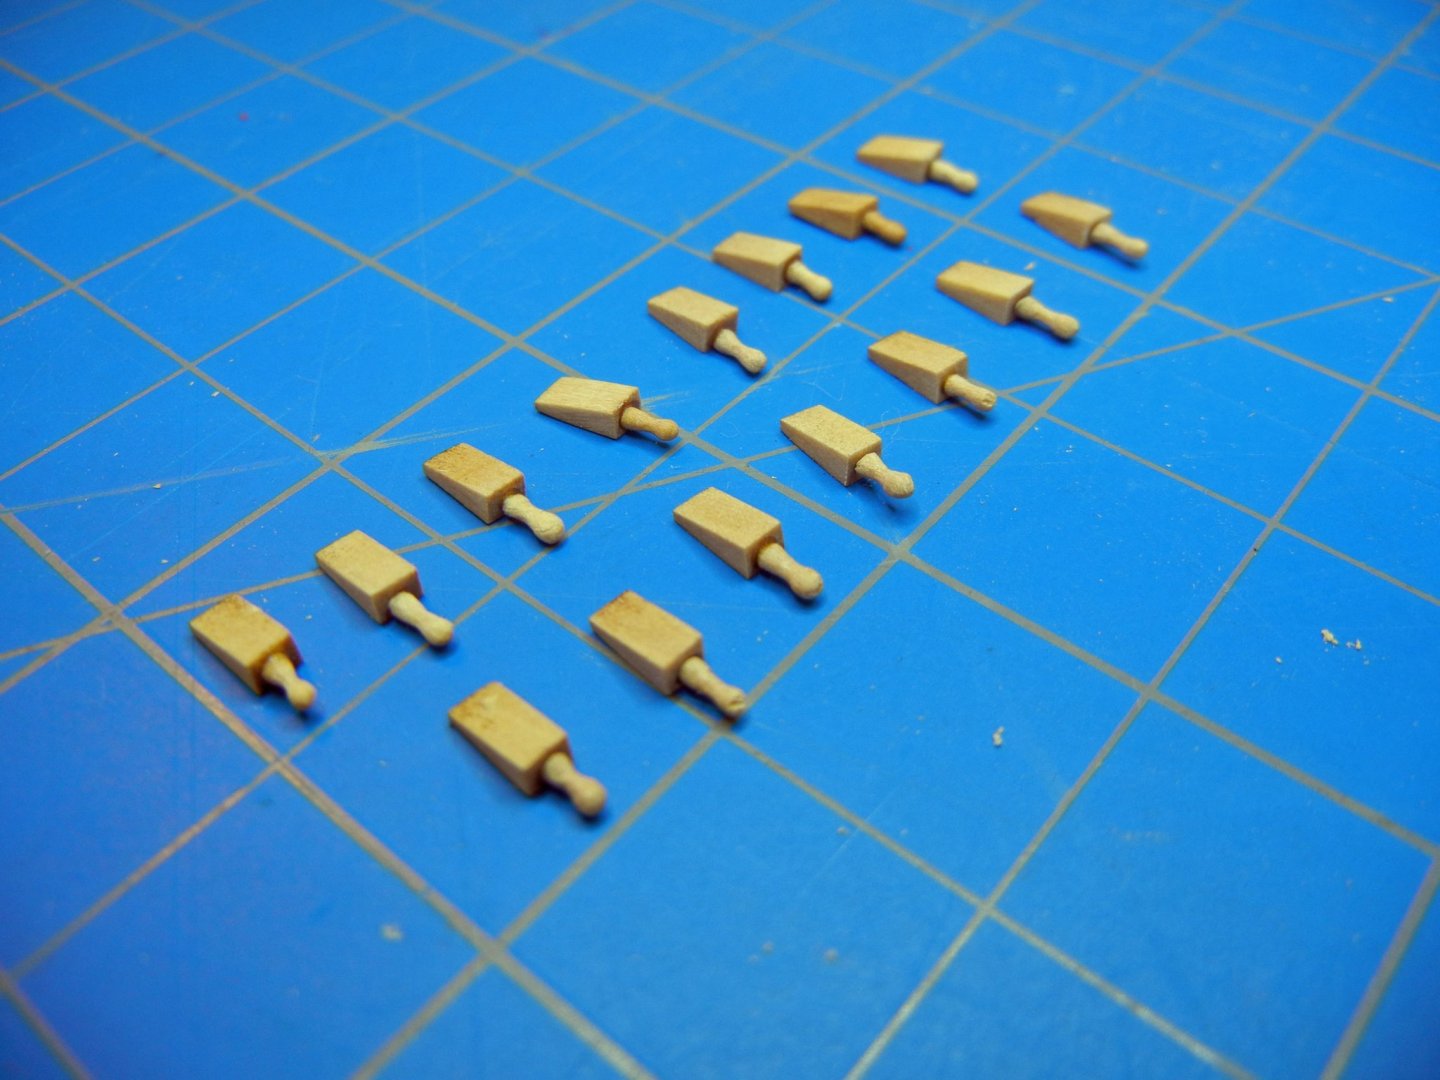
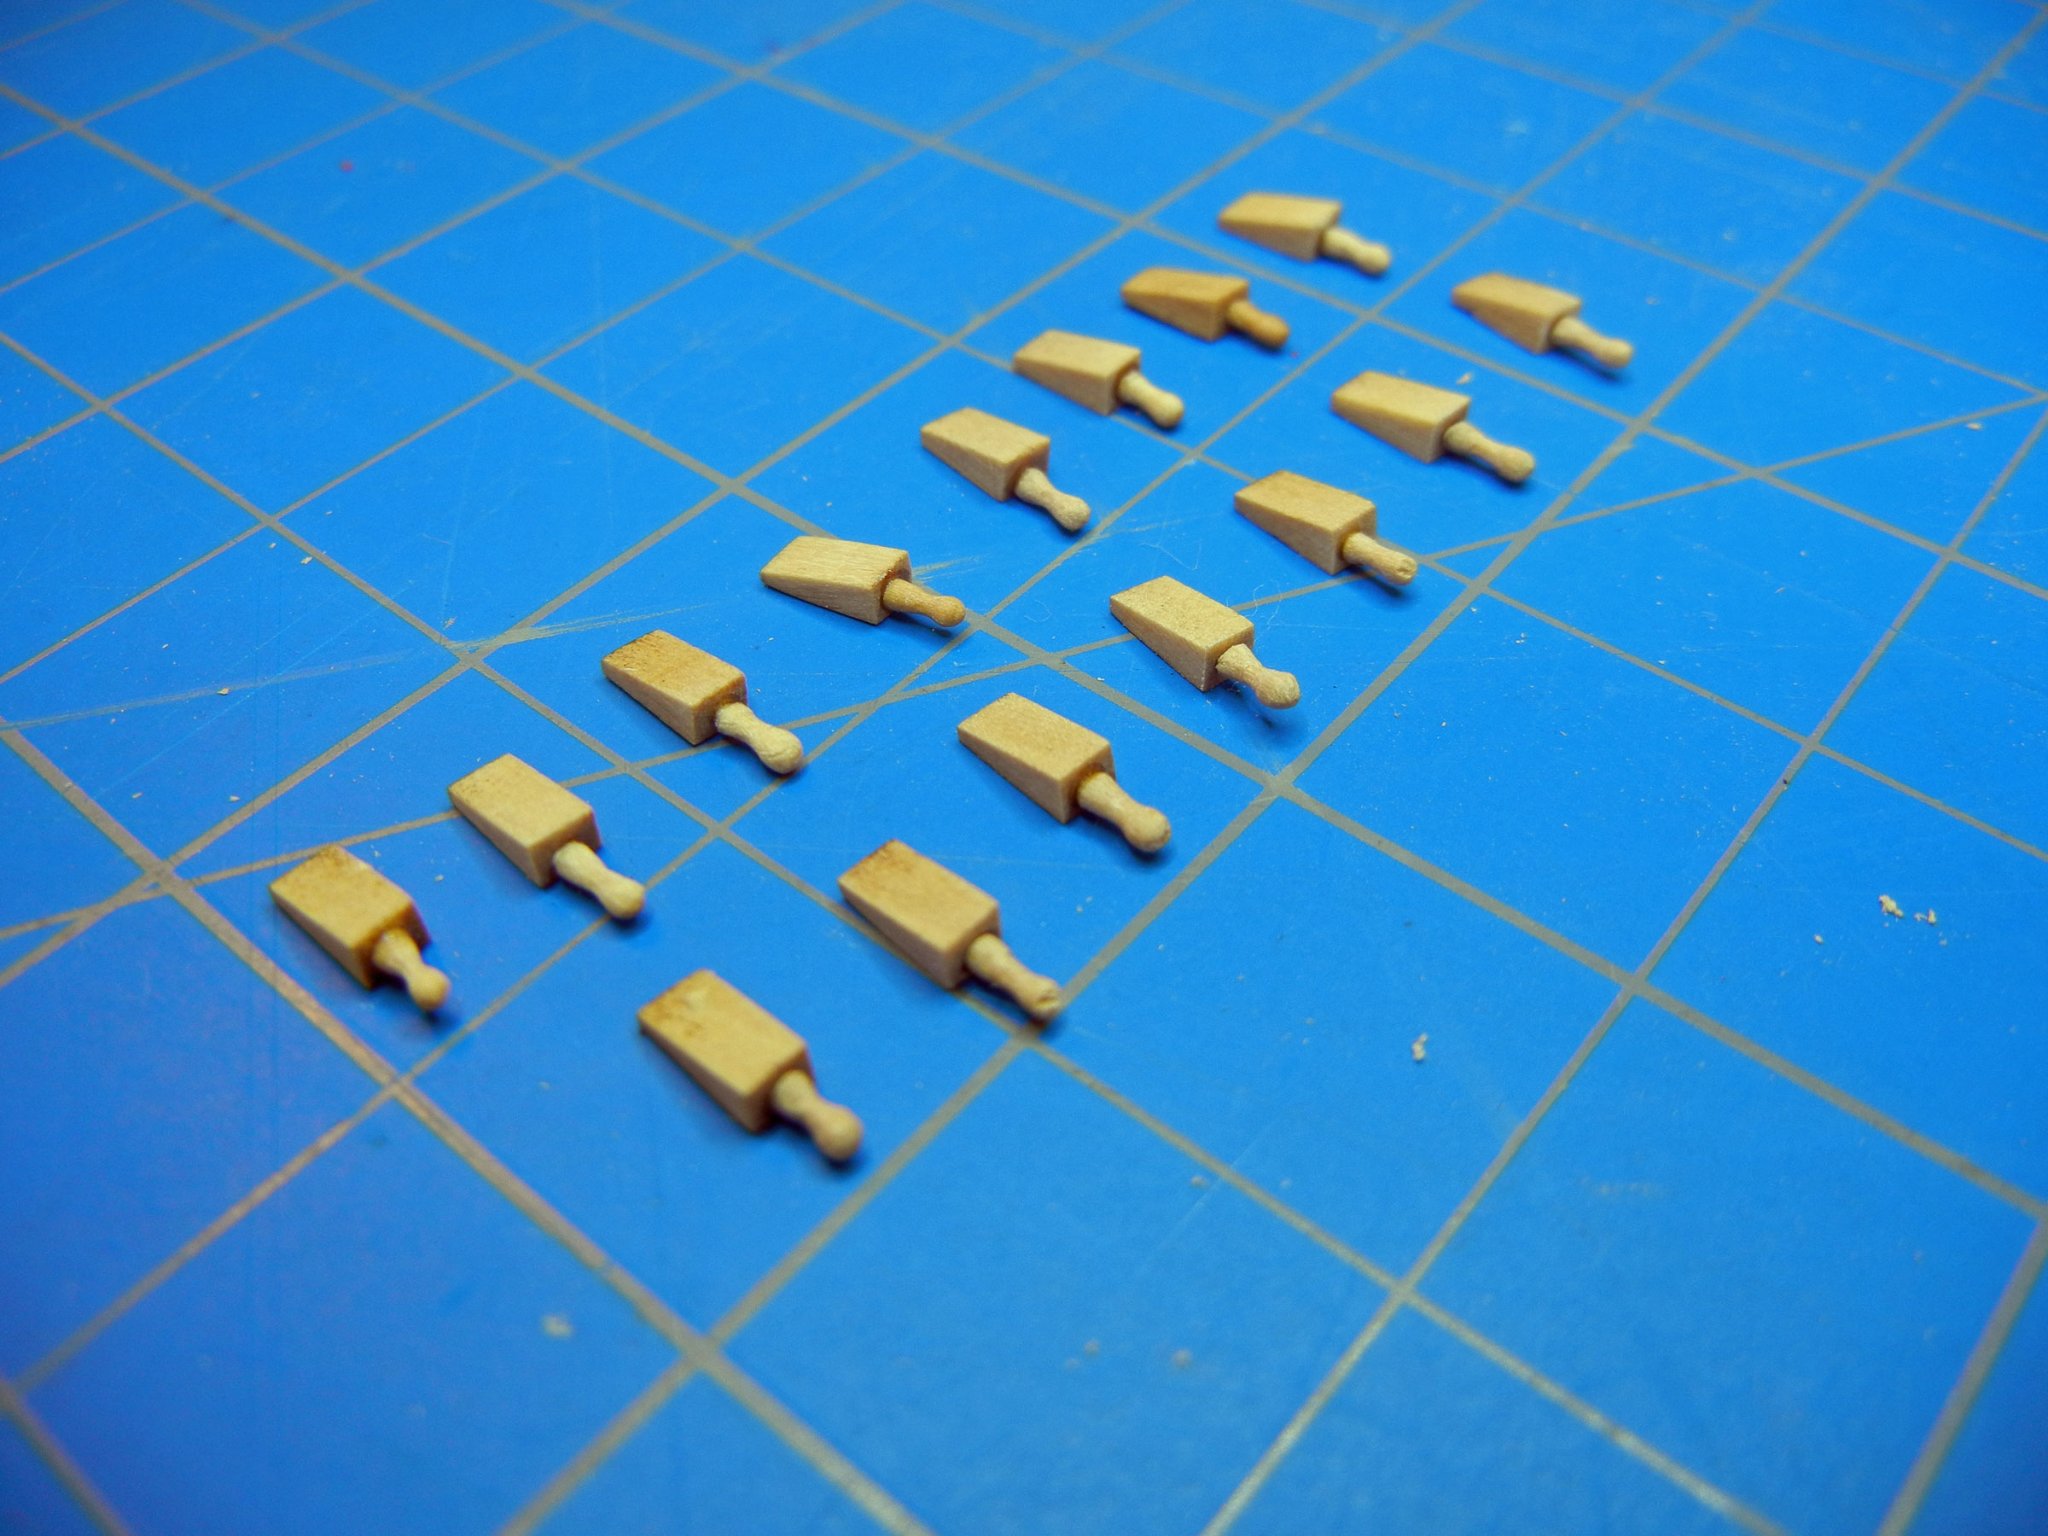
Quoin handles. I started by using my Dremmel to turn these but had a few problems. The Dremmel is fast even on low speed and I tended to make them too small (if that is possible at 1/64). I also discovered my Dremmel does not run true. I switched to a pin vice and it worked much better.
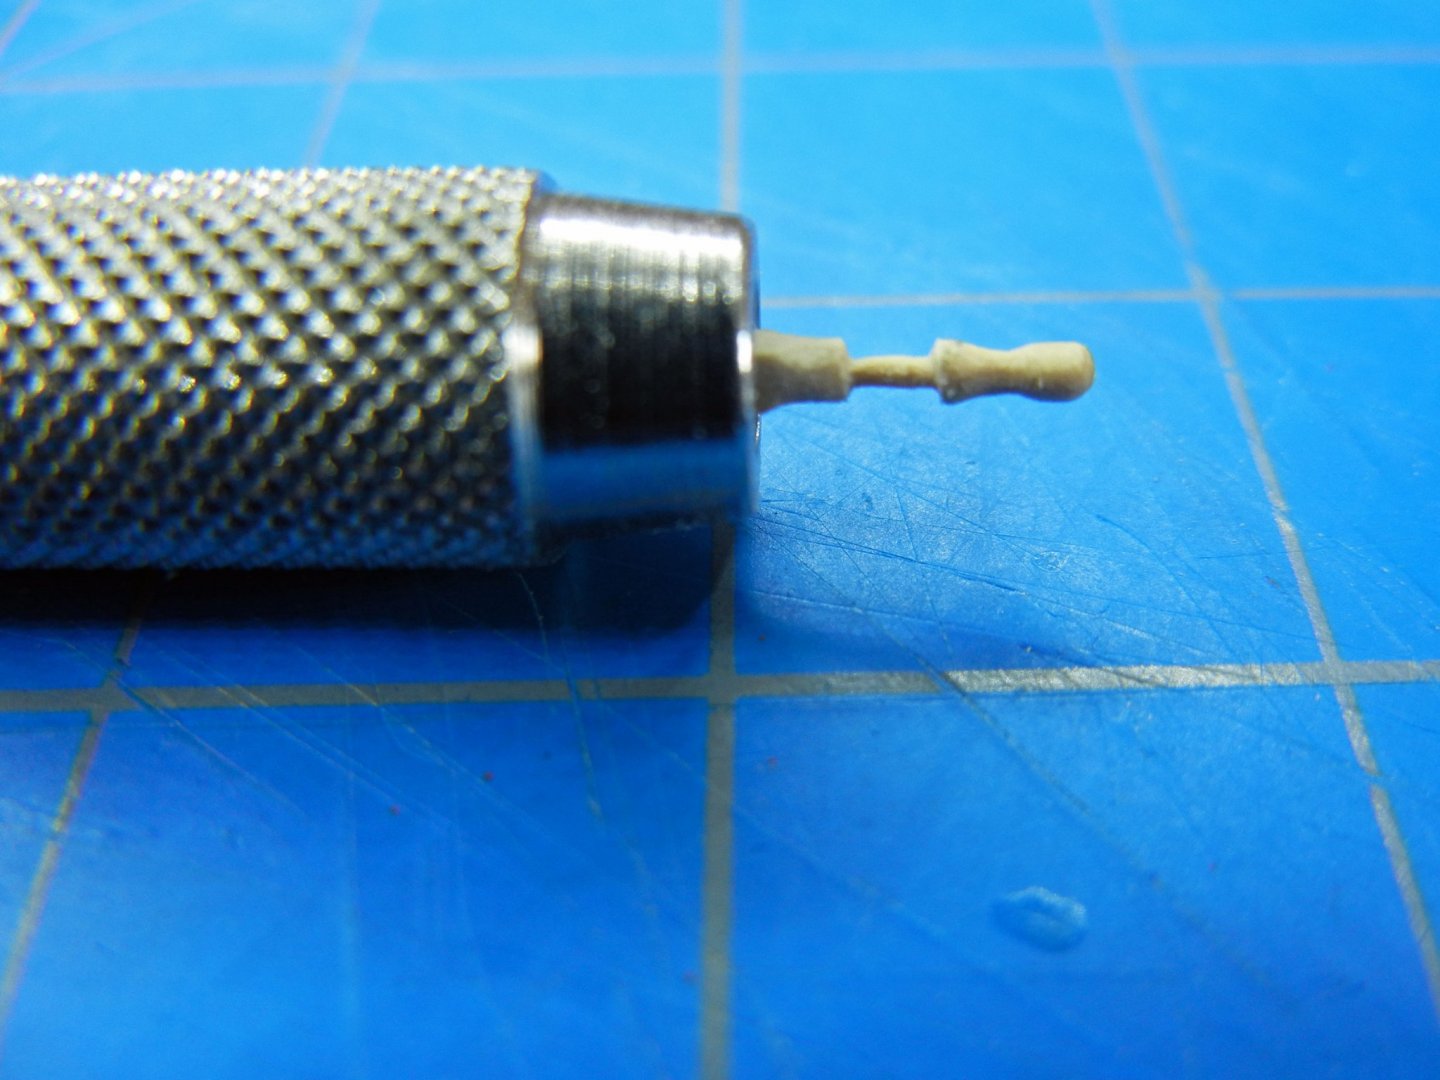
It "only" took 25 pins to get 15 usable on the model. And I still have one spare.
Dave B
- CiscoH and GrandpaPhil
-
2
-
-
-
Beautiful and inspiring. I look forward to your masking and rigging.
Dave B
-
Unfortunately I don't have the proper tools now to for these good ideas. I did file another set using a lighted magnifier and a magnifying visor. Was able to make the axles round by working slowly. Found it somewhat relaxing which is good as I have a few dozen axles to file. 🙂
Dave B
- allanyed, thibaultron and mtaylor
-
3
-
Allan,
Great solution! Sure beats trying to make them round with a flat file.
Thanks,
Dave B
- thibaultron and mtaylor
-
2
-
Switching to guns.
As other Pegasus builders have mentioned the canons and carriages are out of scale and not the most pleasing. I broke down and bought canons and carriages from Syren. My first freehand attempt had too much taper, I can do better.
As I considered making a jig to assemble the carriages, a group member pointed out Chuck's jig for carriages on his Winchelsea log. His is similar to what I considered. So I started measuring calculating and making jigs. My second one was a success. See my description in Discussion for a Ship's Deck Furniture, Guns, boats and other Fittings
The Syren mini-kit is well made and of high quality. The only drawback is that these are the smallest size and the parts are fiddly little things. With a bit of care and they turn out well. There is no comparison between the kit and Syren parts.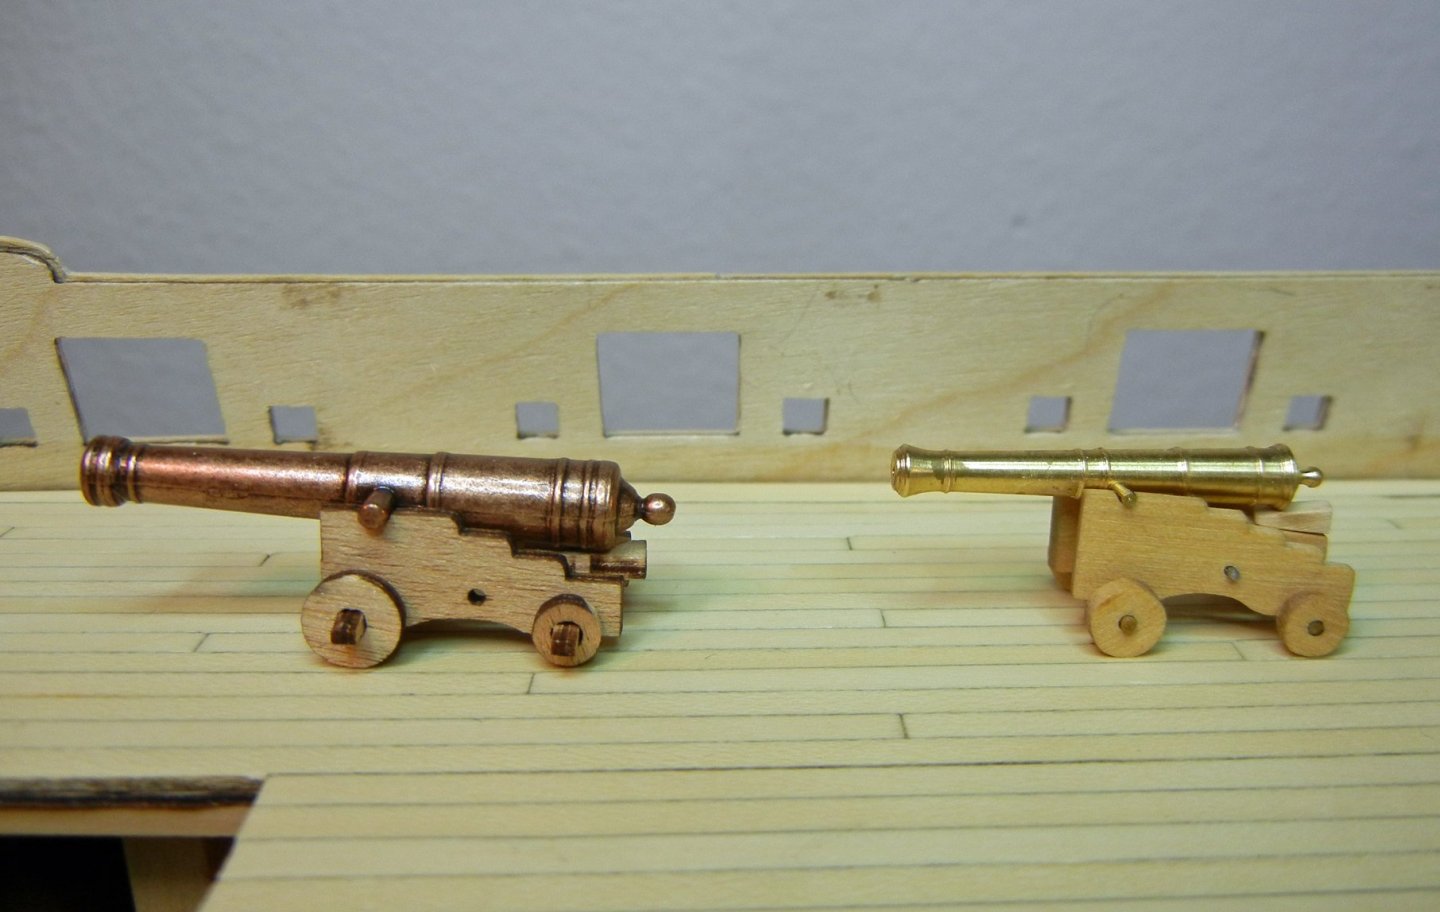
Dave B
- BenD, Kathy Teel and GrandpaPhil
-
3
-
Welcome aboard Matey,
You're in the right place. Look around the build logs and search for a San Francisco log. I have learned a great deal simply reading logs and looking at pictures. Don't be afraid to ask questions and pick our brains, at least those who still have some.
Dave B
-
I purchased Syren canons and carriages for my Pegasus build and needed a jig to assemble consistent carriages. This article describes one method of making a carriage jig. This jig is sized for the smallest of Chuck's carriages. (Disclaimer; I considered making a jig when a club member pointed out Chuck's jig shown in his Winchelsea build log. Chuck's is similar to the one I planned.)
Before building the jig, separate the sides and axles from the laser cut carriage kit and sand the laser char off from these parts.
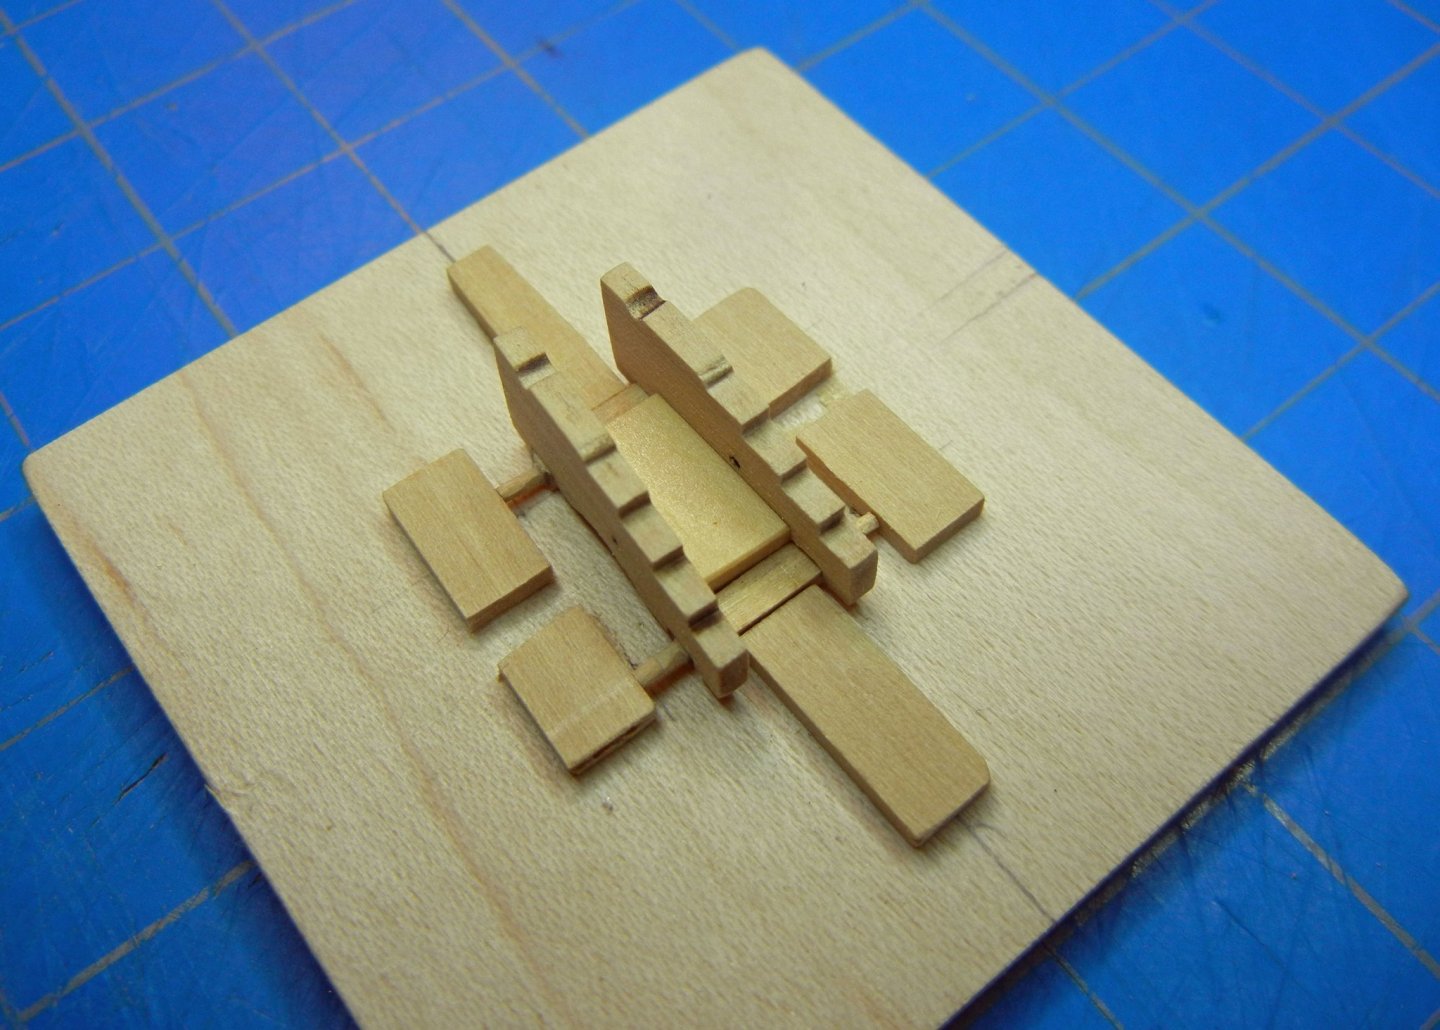
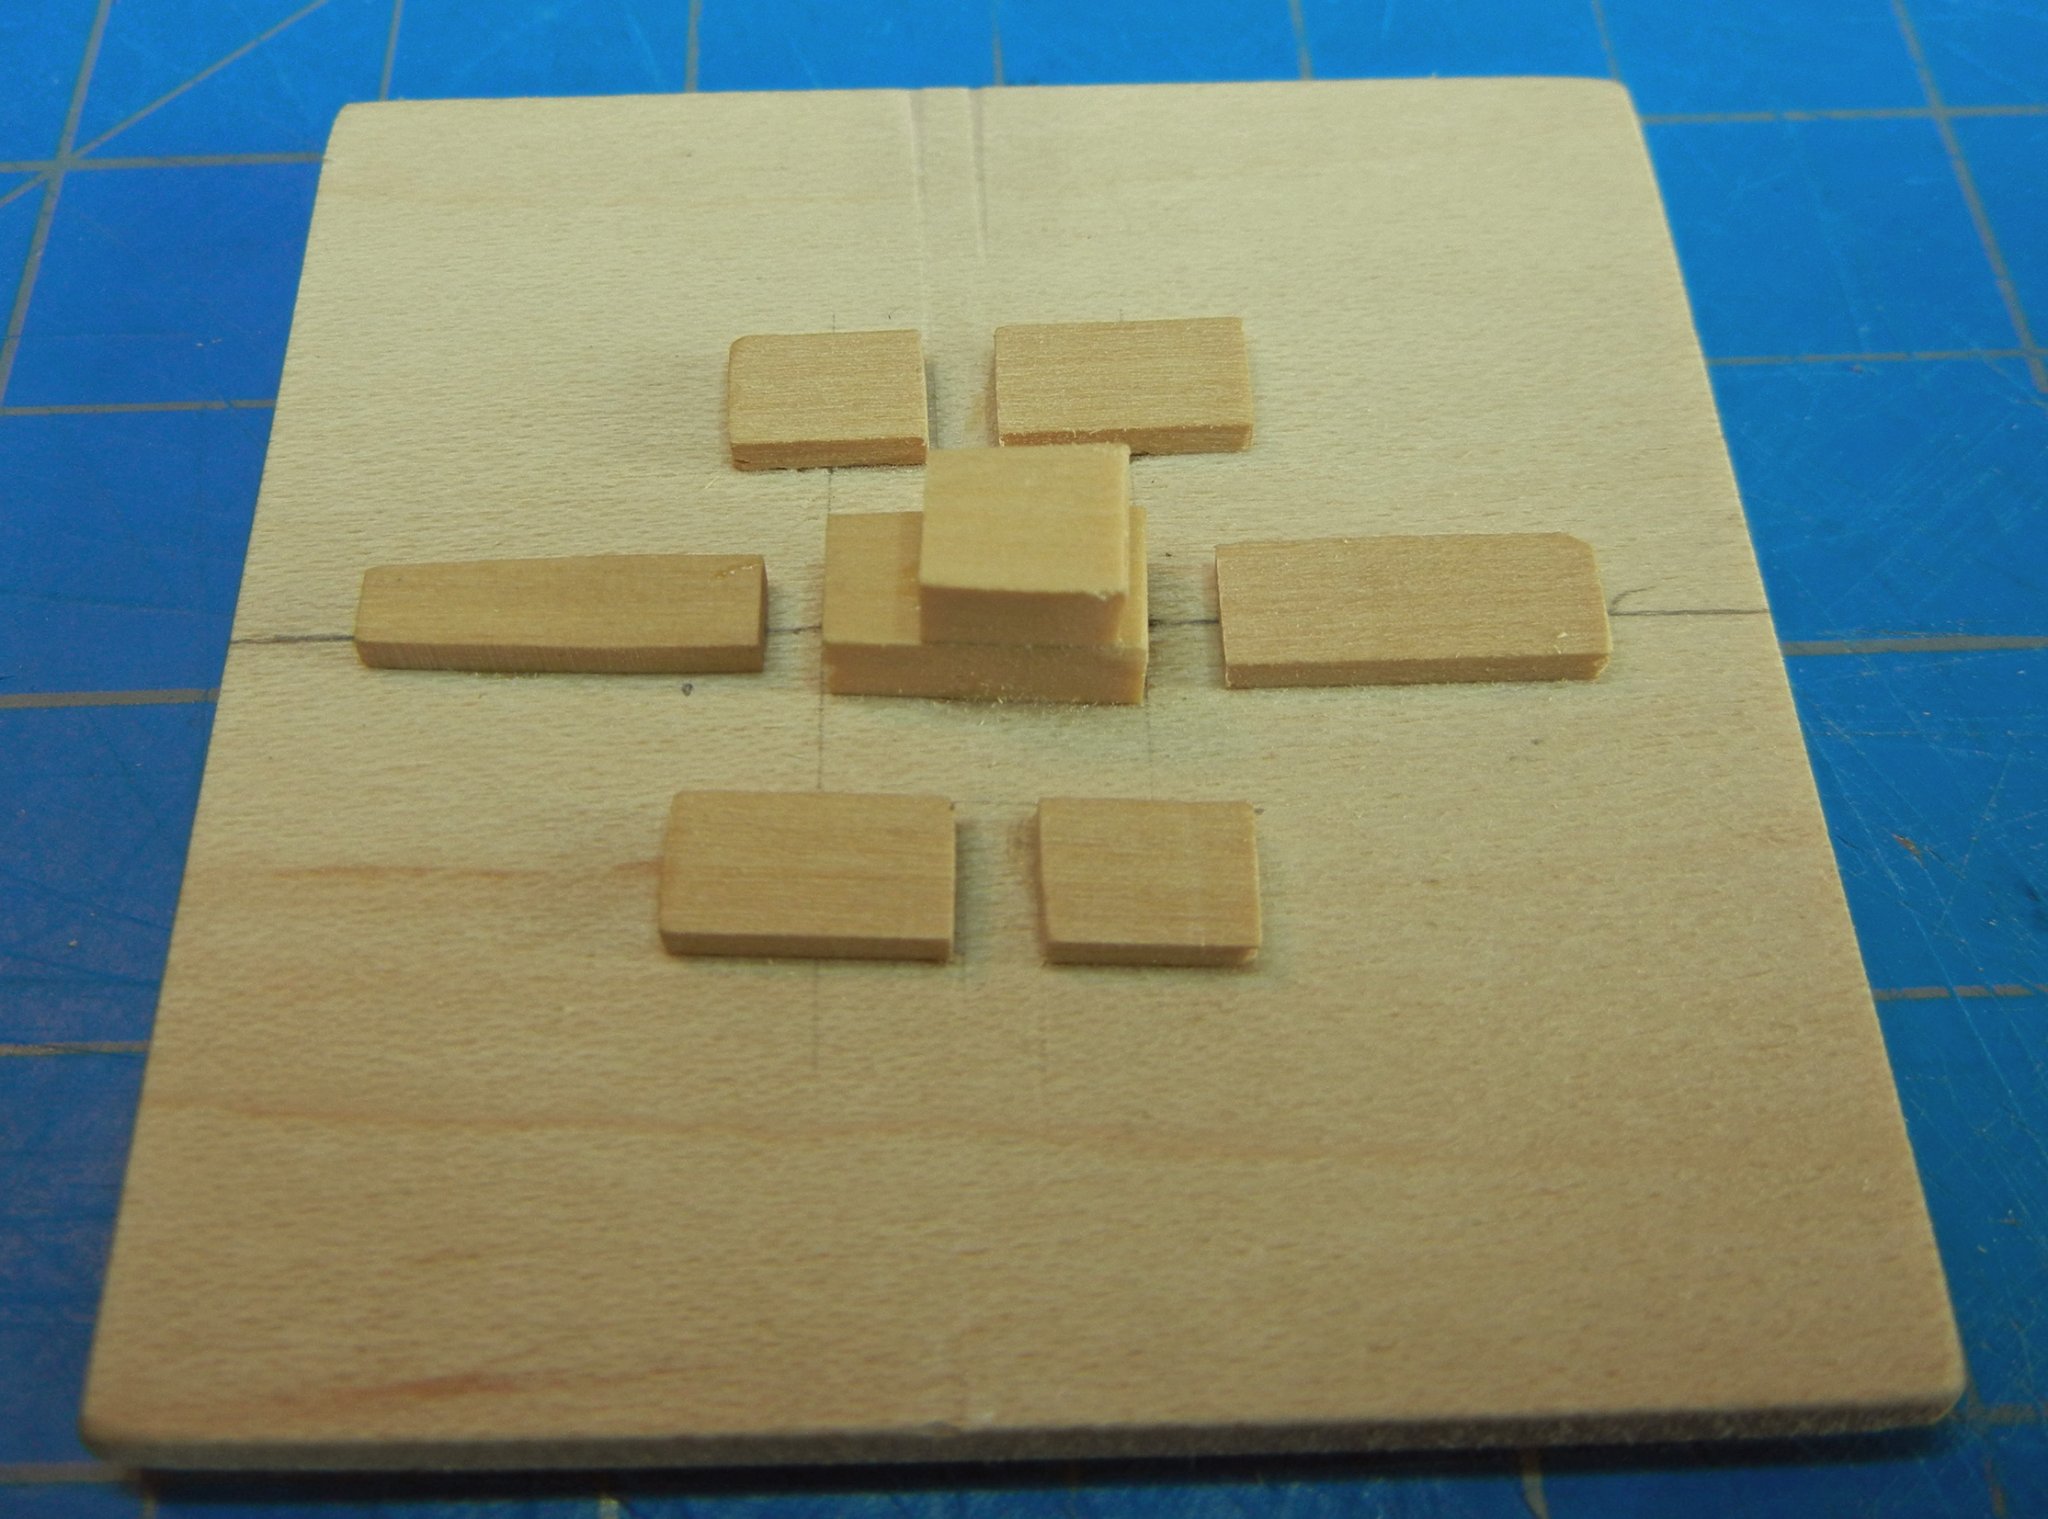
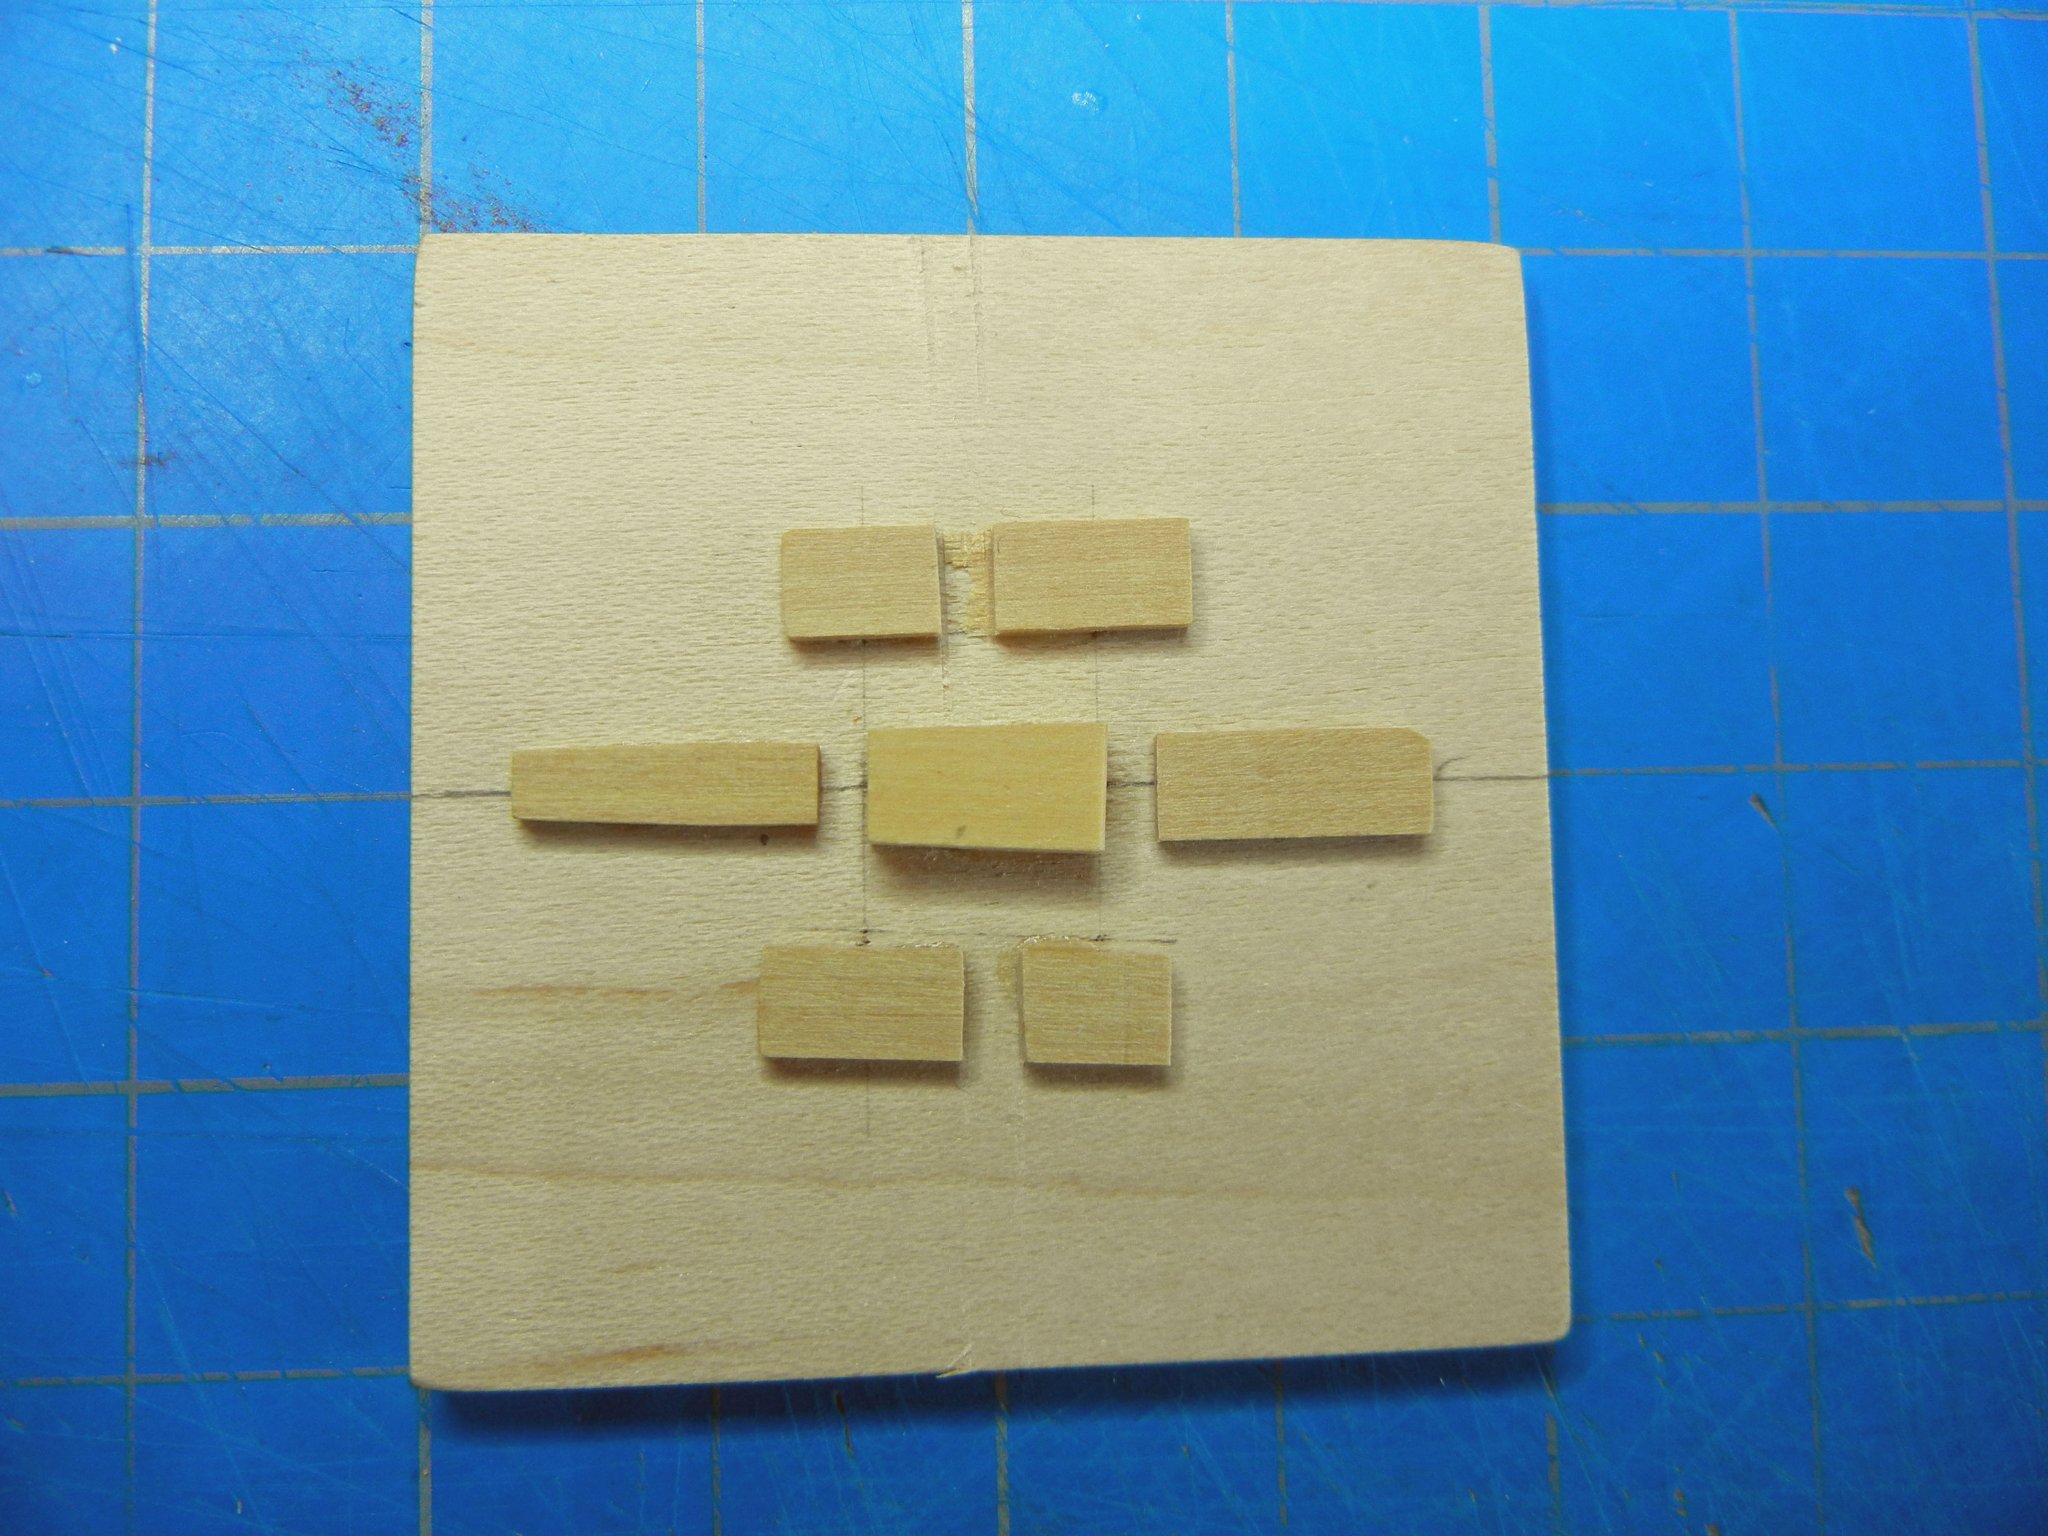
The first block is a trapezoid that sets the taper of the carriage sides (the center block in picture 1). The shape of this part is set by the width of the axles and the distance between the axles. Record the width of the lengths of the center portion of the axles as well as the distance between the axles on both sides of the carriage. In this case the front width is .19 in (4.8 mm), the back width is .22 in (5.6 mm) and the length is .40 in (10.2 mm). [The taper measured 2.25 degrees on each side, which is easily cut using a Byrnes saw taper gauge.] Block height is .125 in (3.2 mm) then raised to .25 in (6.4 mm) is better to help keep the carriage sides vertical. This block is cemented to the base along the center line. The higher block works much better than the original.
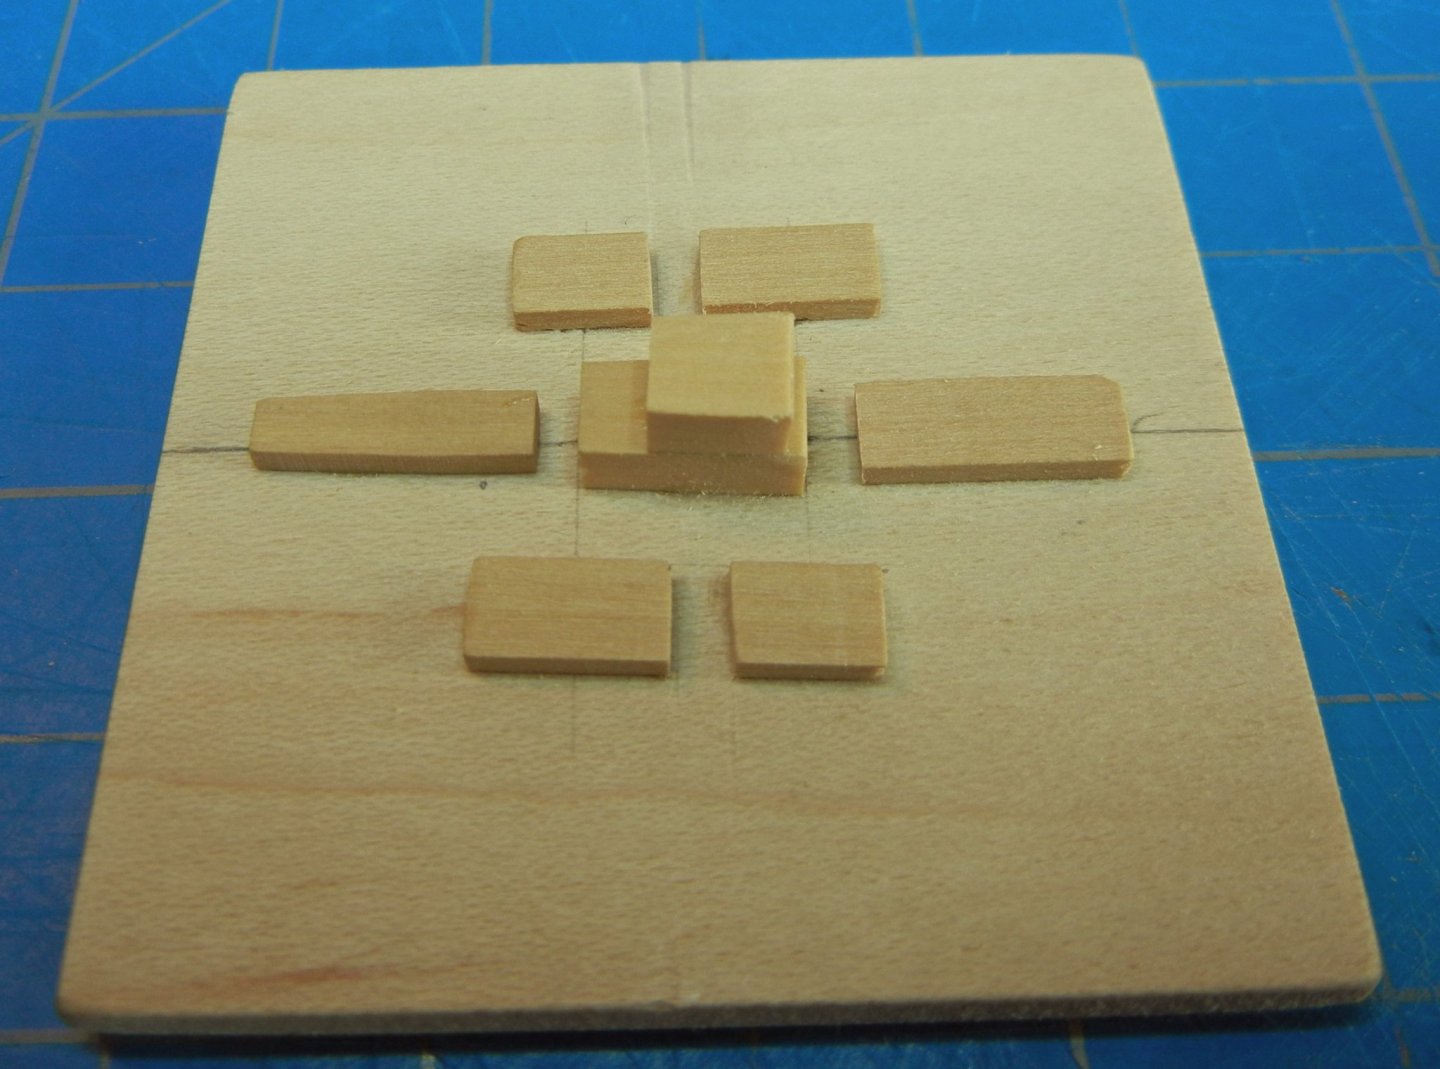
Picture 1 - jig layout
The front block (left block in picture 1), is also tapered to clear the carriage sides. Place this block using the front axle to ensure a close fit to prevent movement of parts when assembling the carriage. Be careful to ensure the axle is set wide side down as it is not square.
The back block (right block in picture 1) is set with a small gap to the axle. This will allow the carriage sides to set the exact axle location.
The side blocks (top and bottom in picture 1) are set using the axles in place to ensure symmetry (a small piece of double backed tape under the axles will prevent movement). Ensure that the axles are centered on the jig and parallel. I used one block for each side, then cut out the center of each side after gluing them in place. This allows use of a square (or short scale) to keep the carriage sides vertical when assembling.

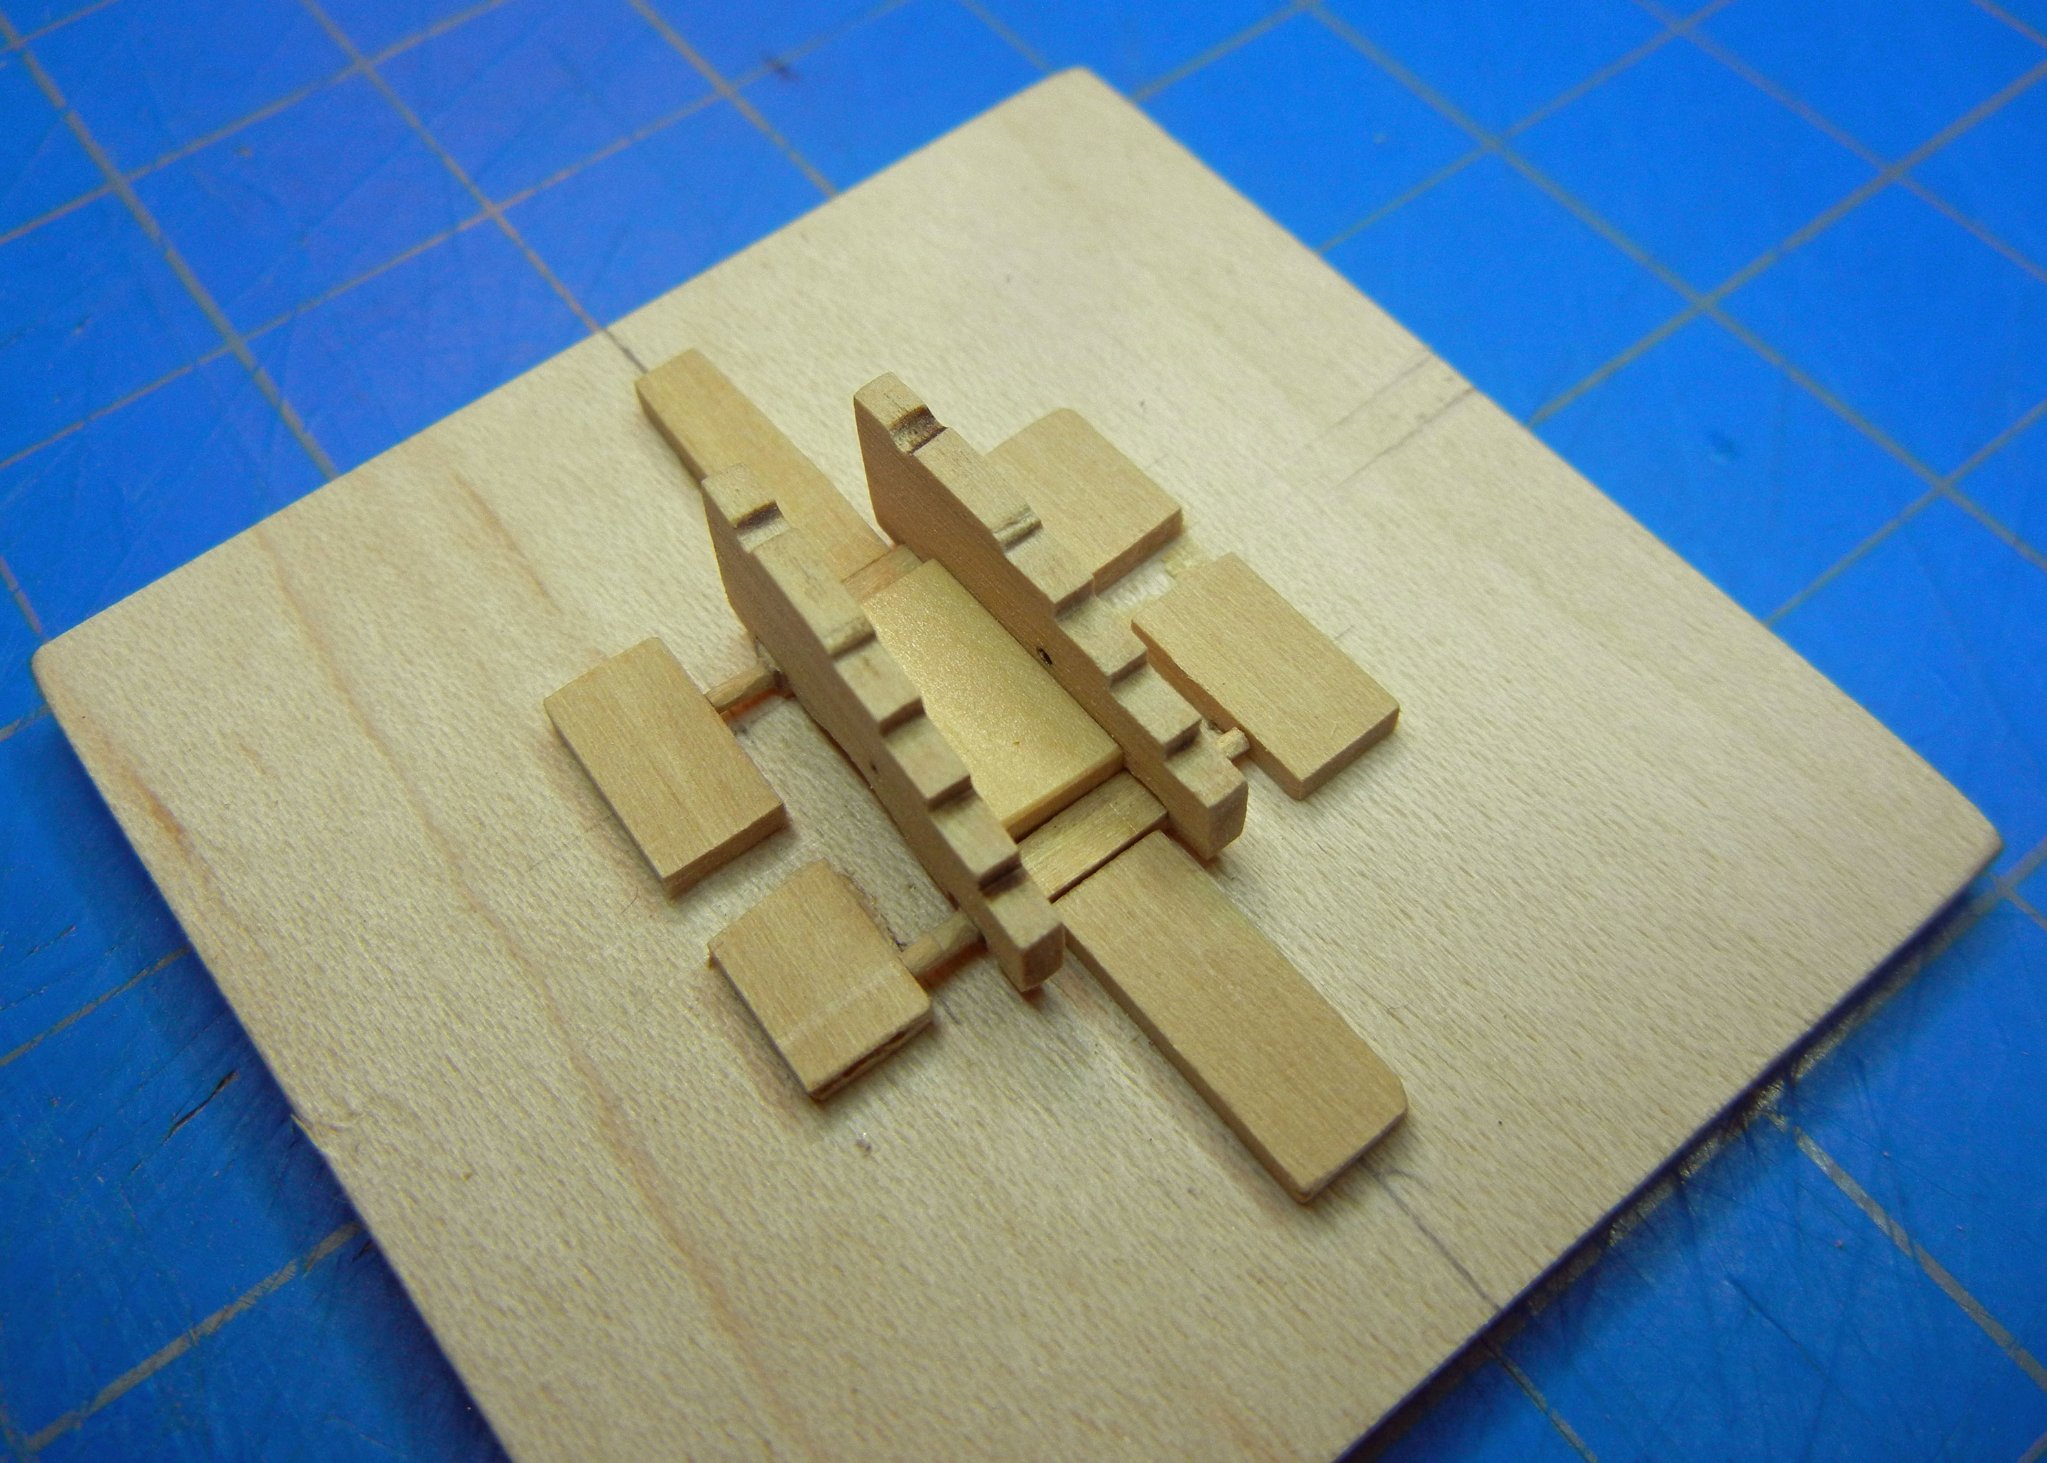
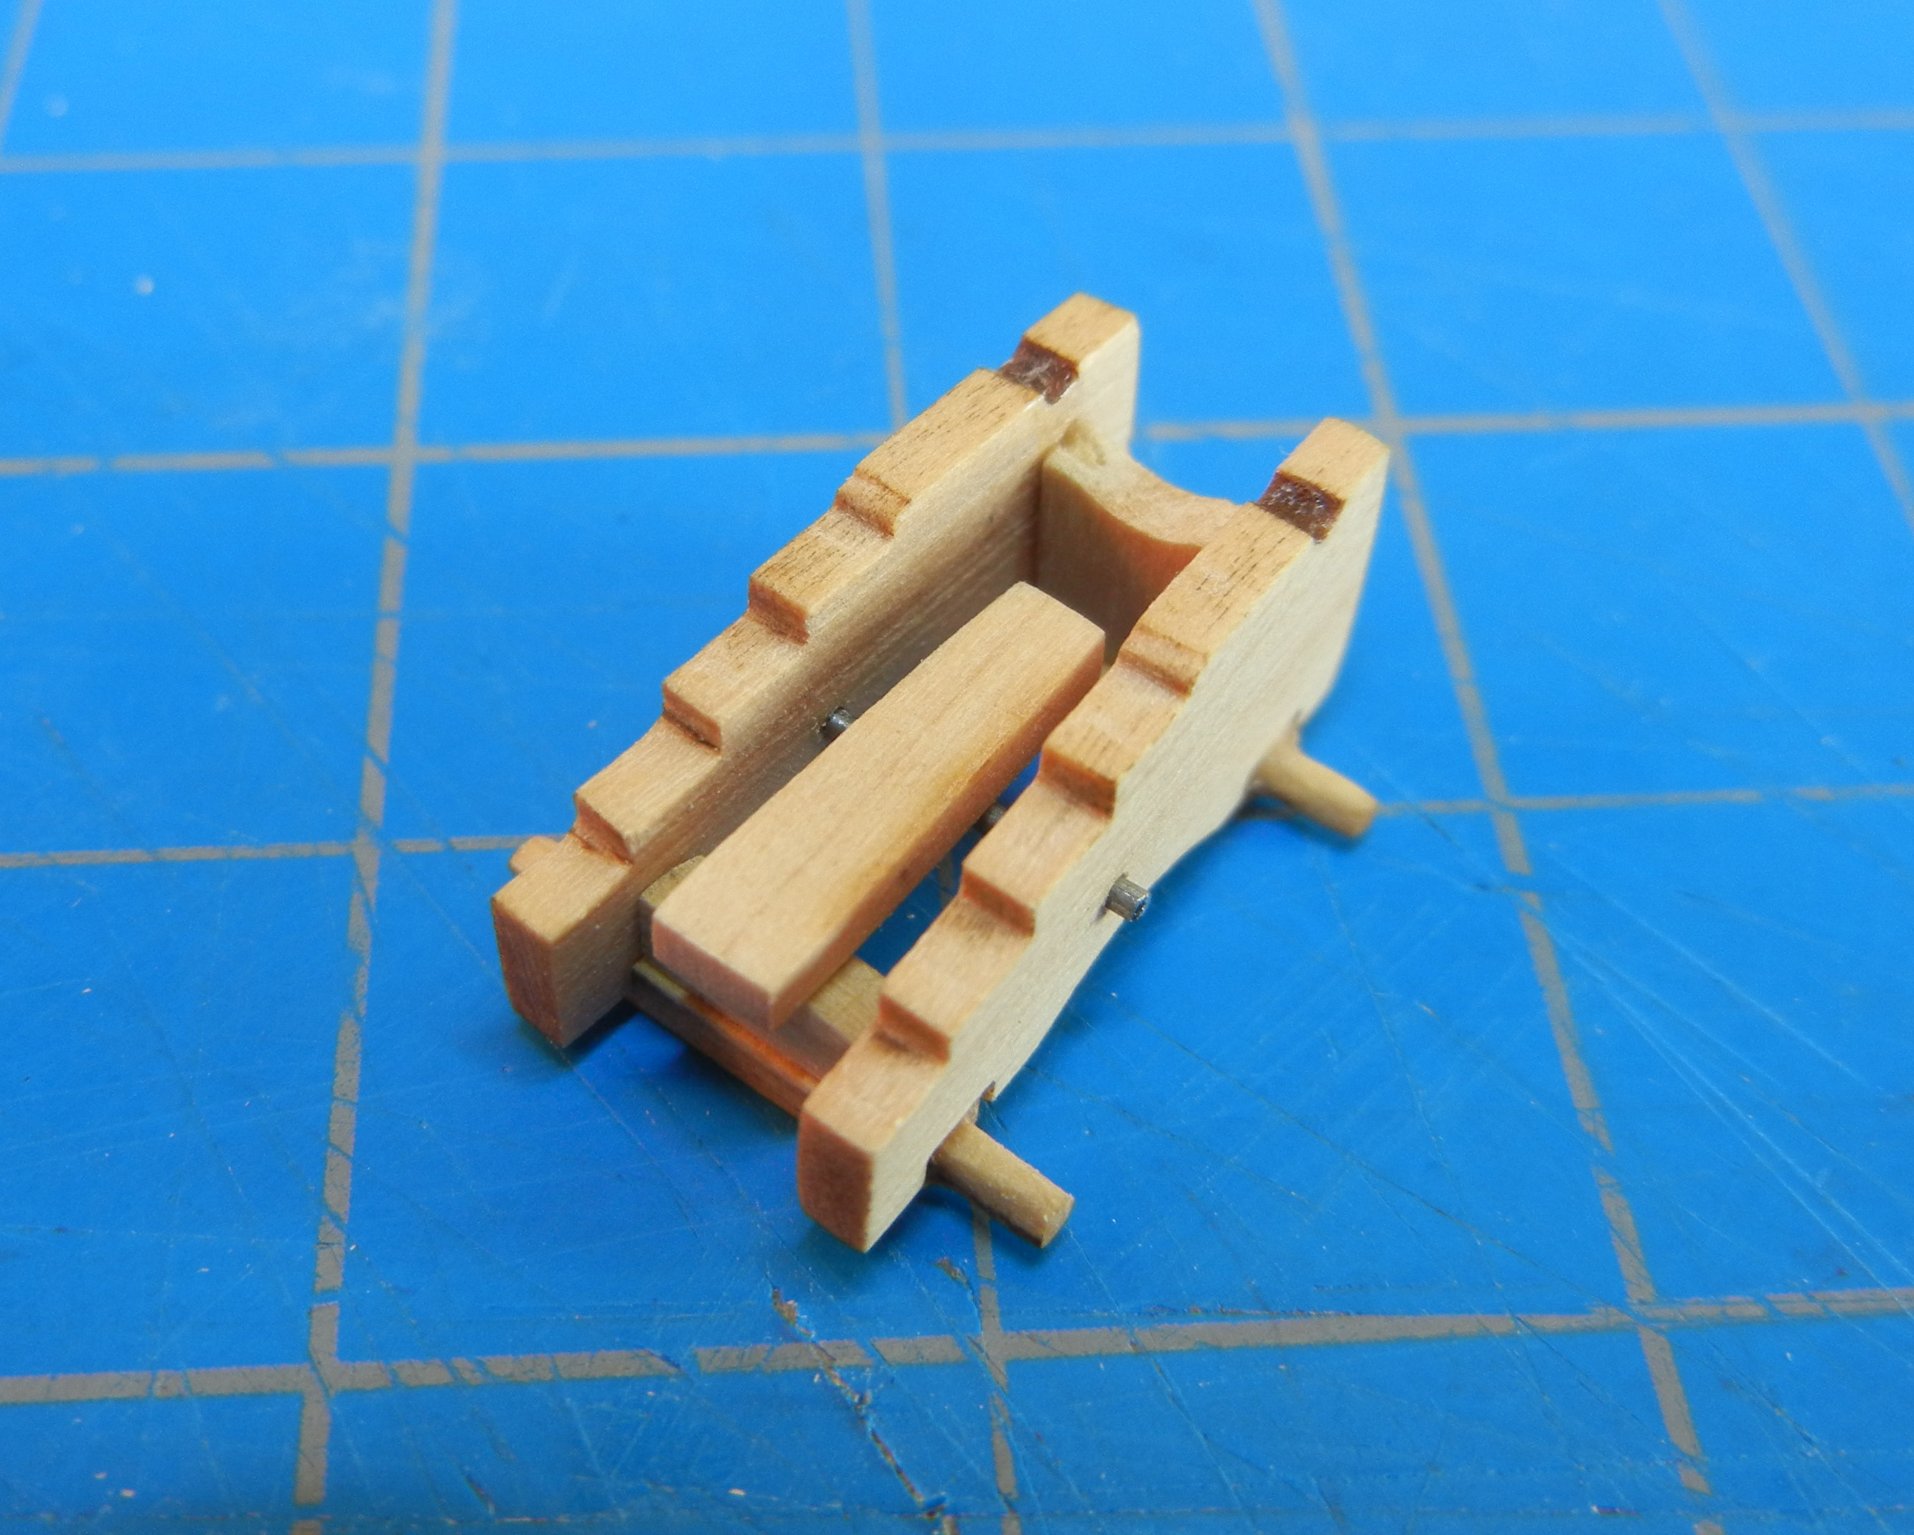
Picture 2 - partially assembled carriage in the jig.
Remove the carriage from the jig before installing the front and back braces, the supporting wire and bed.
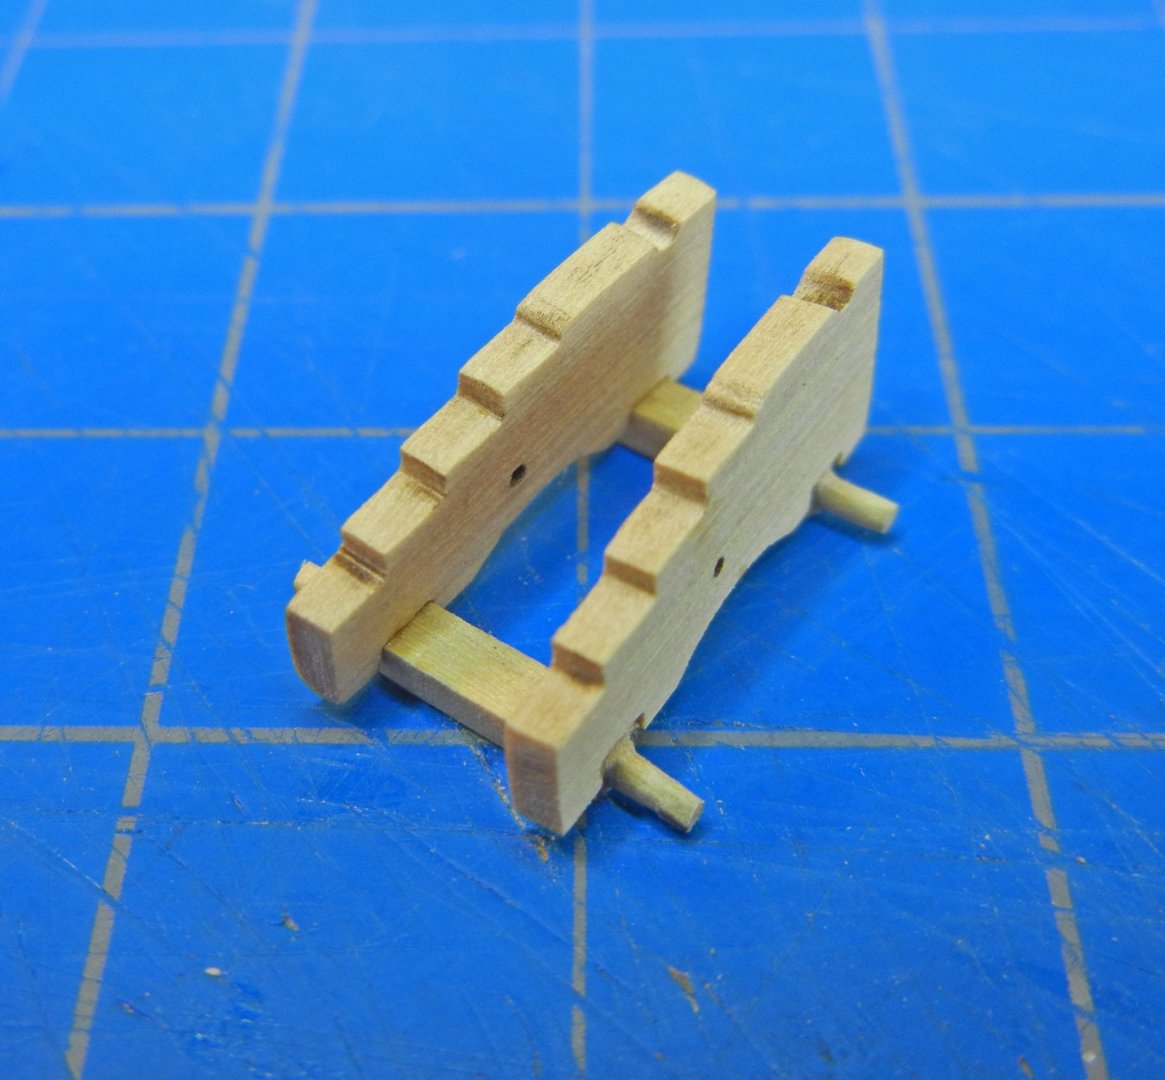
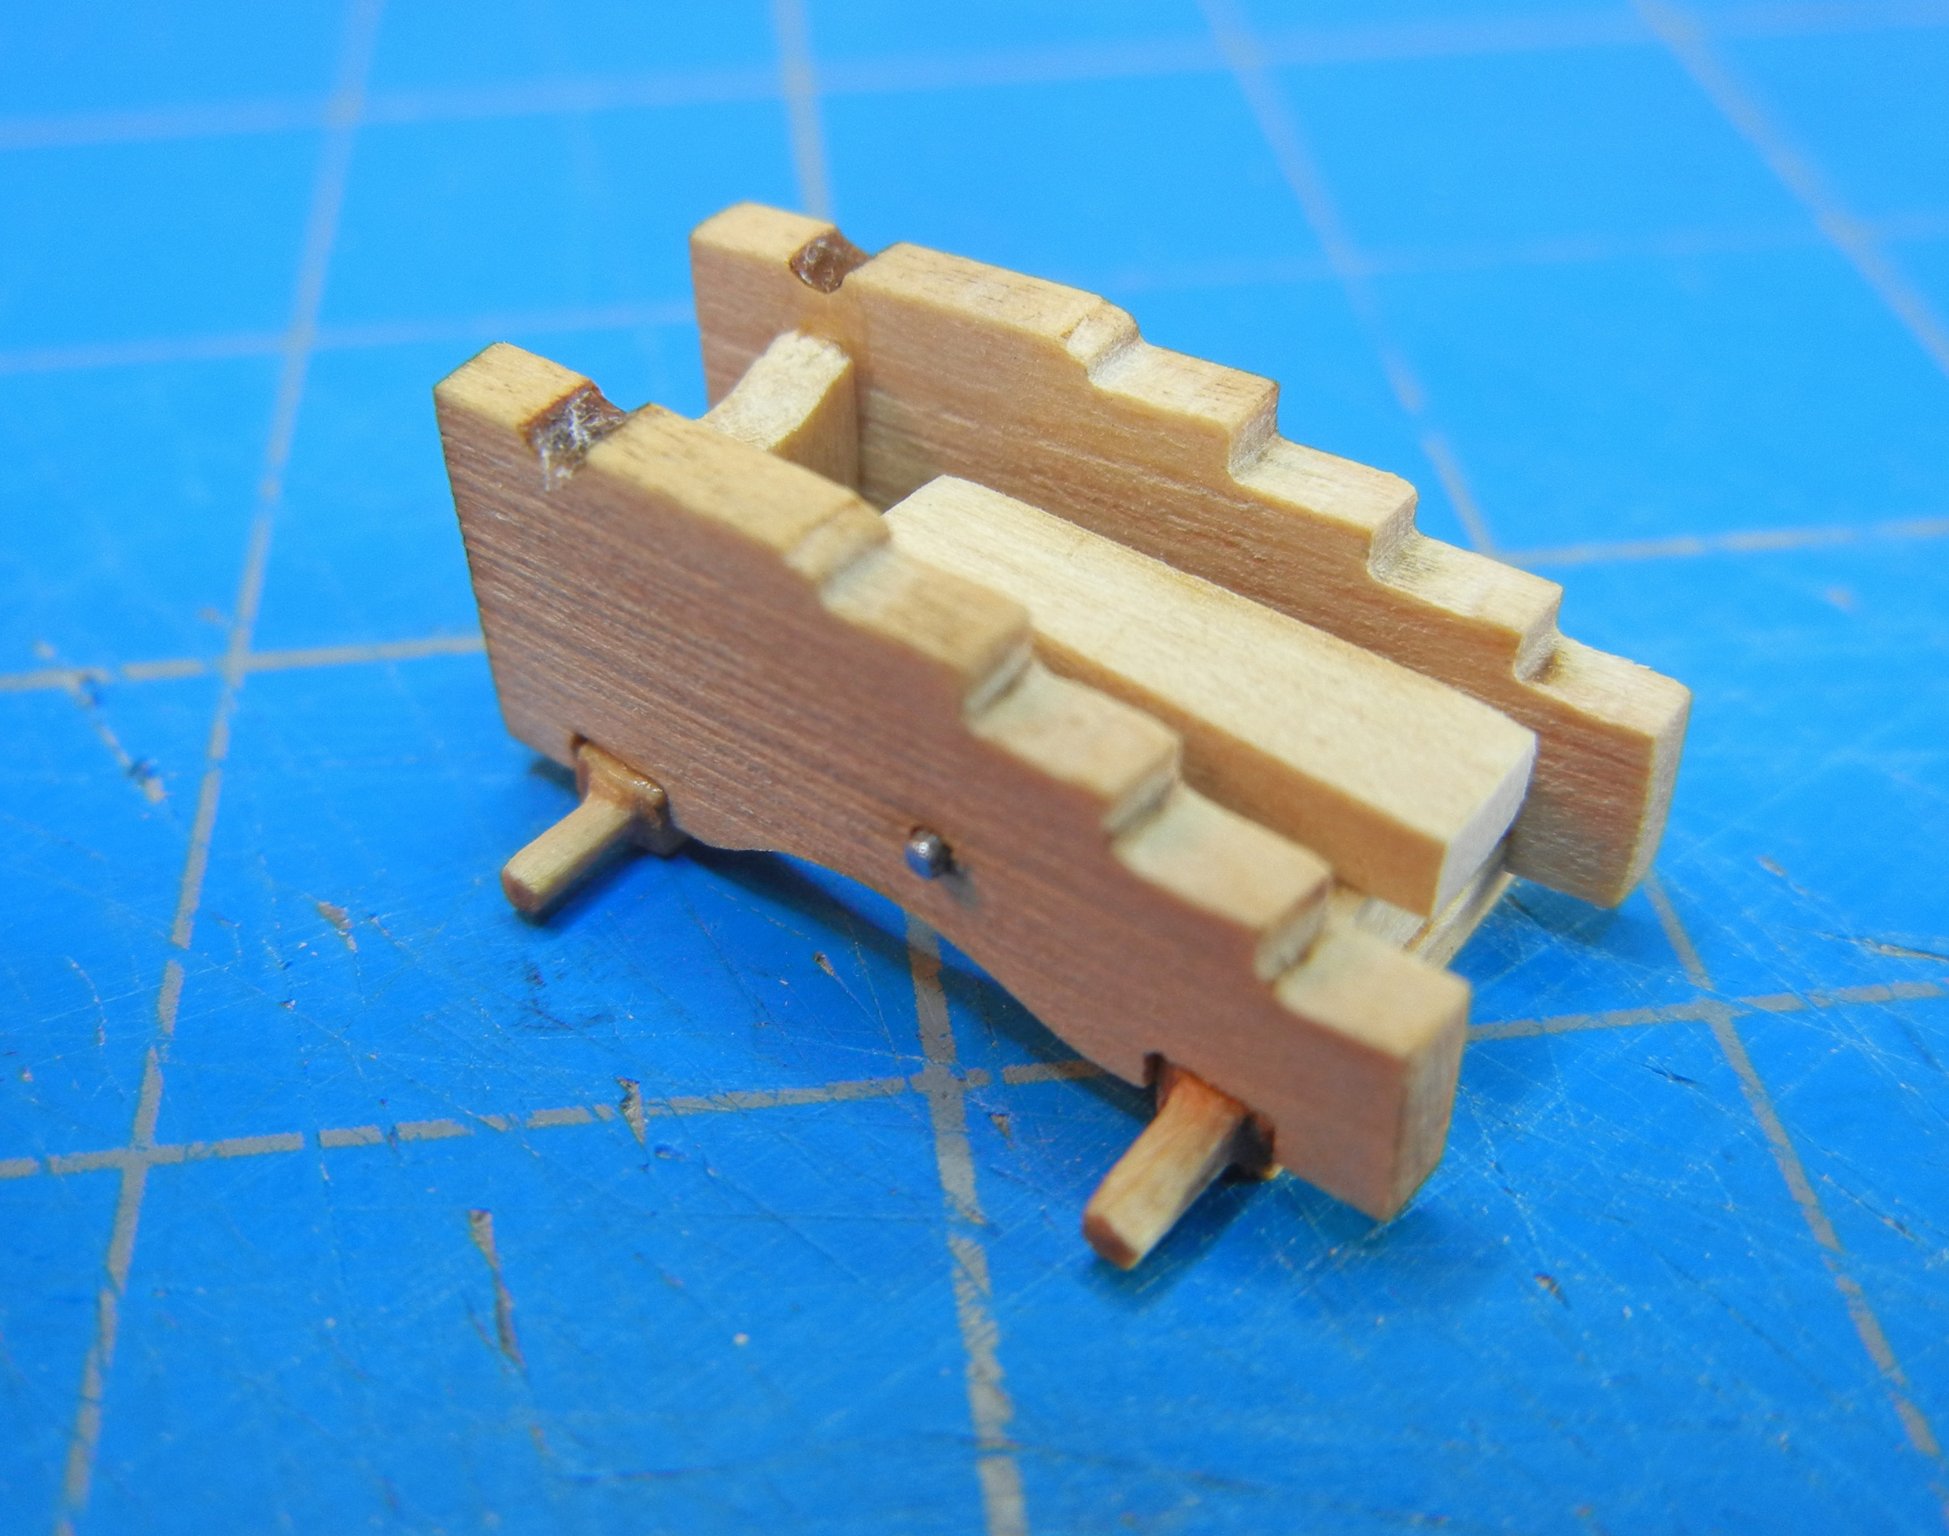
Picture 3 - carriage out of the jig.
Add the front and back braces (carefully trim to fit), the supporting wire and bed.

Picture 4 - carriage ready for painting.
 Picture 5 - carriage ready for painting.
Dave B

- Gregory, mtaylor, Chuck Seiler and 6 others
-
9
-
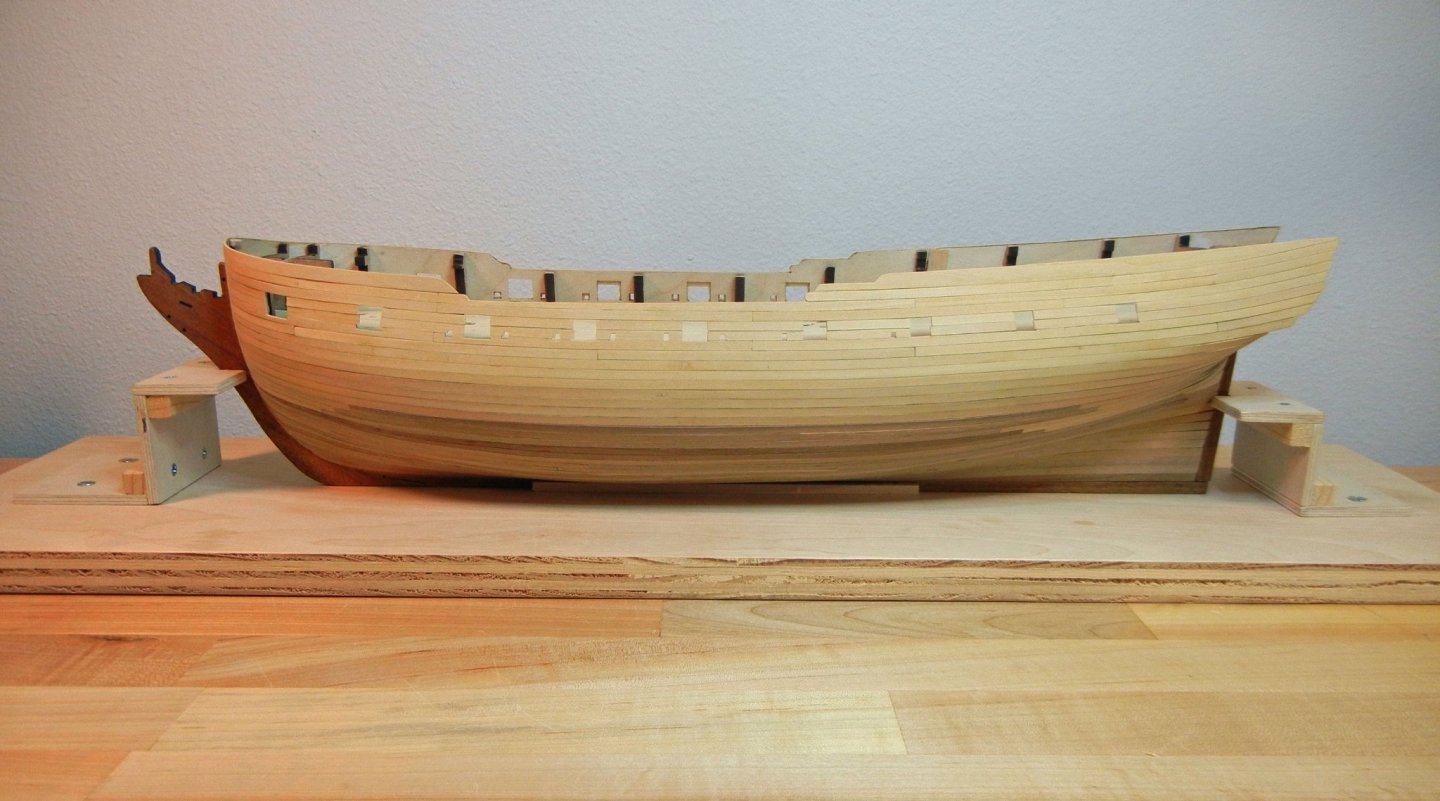
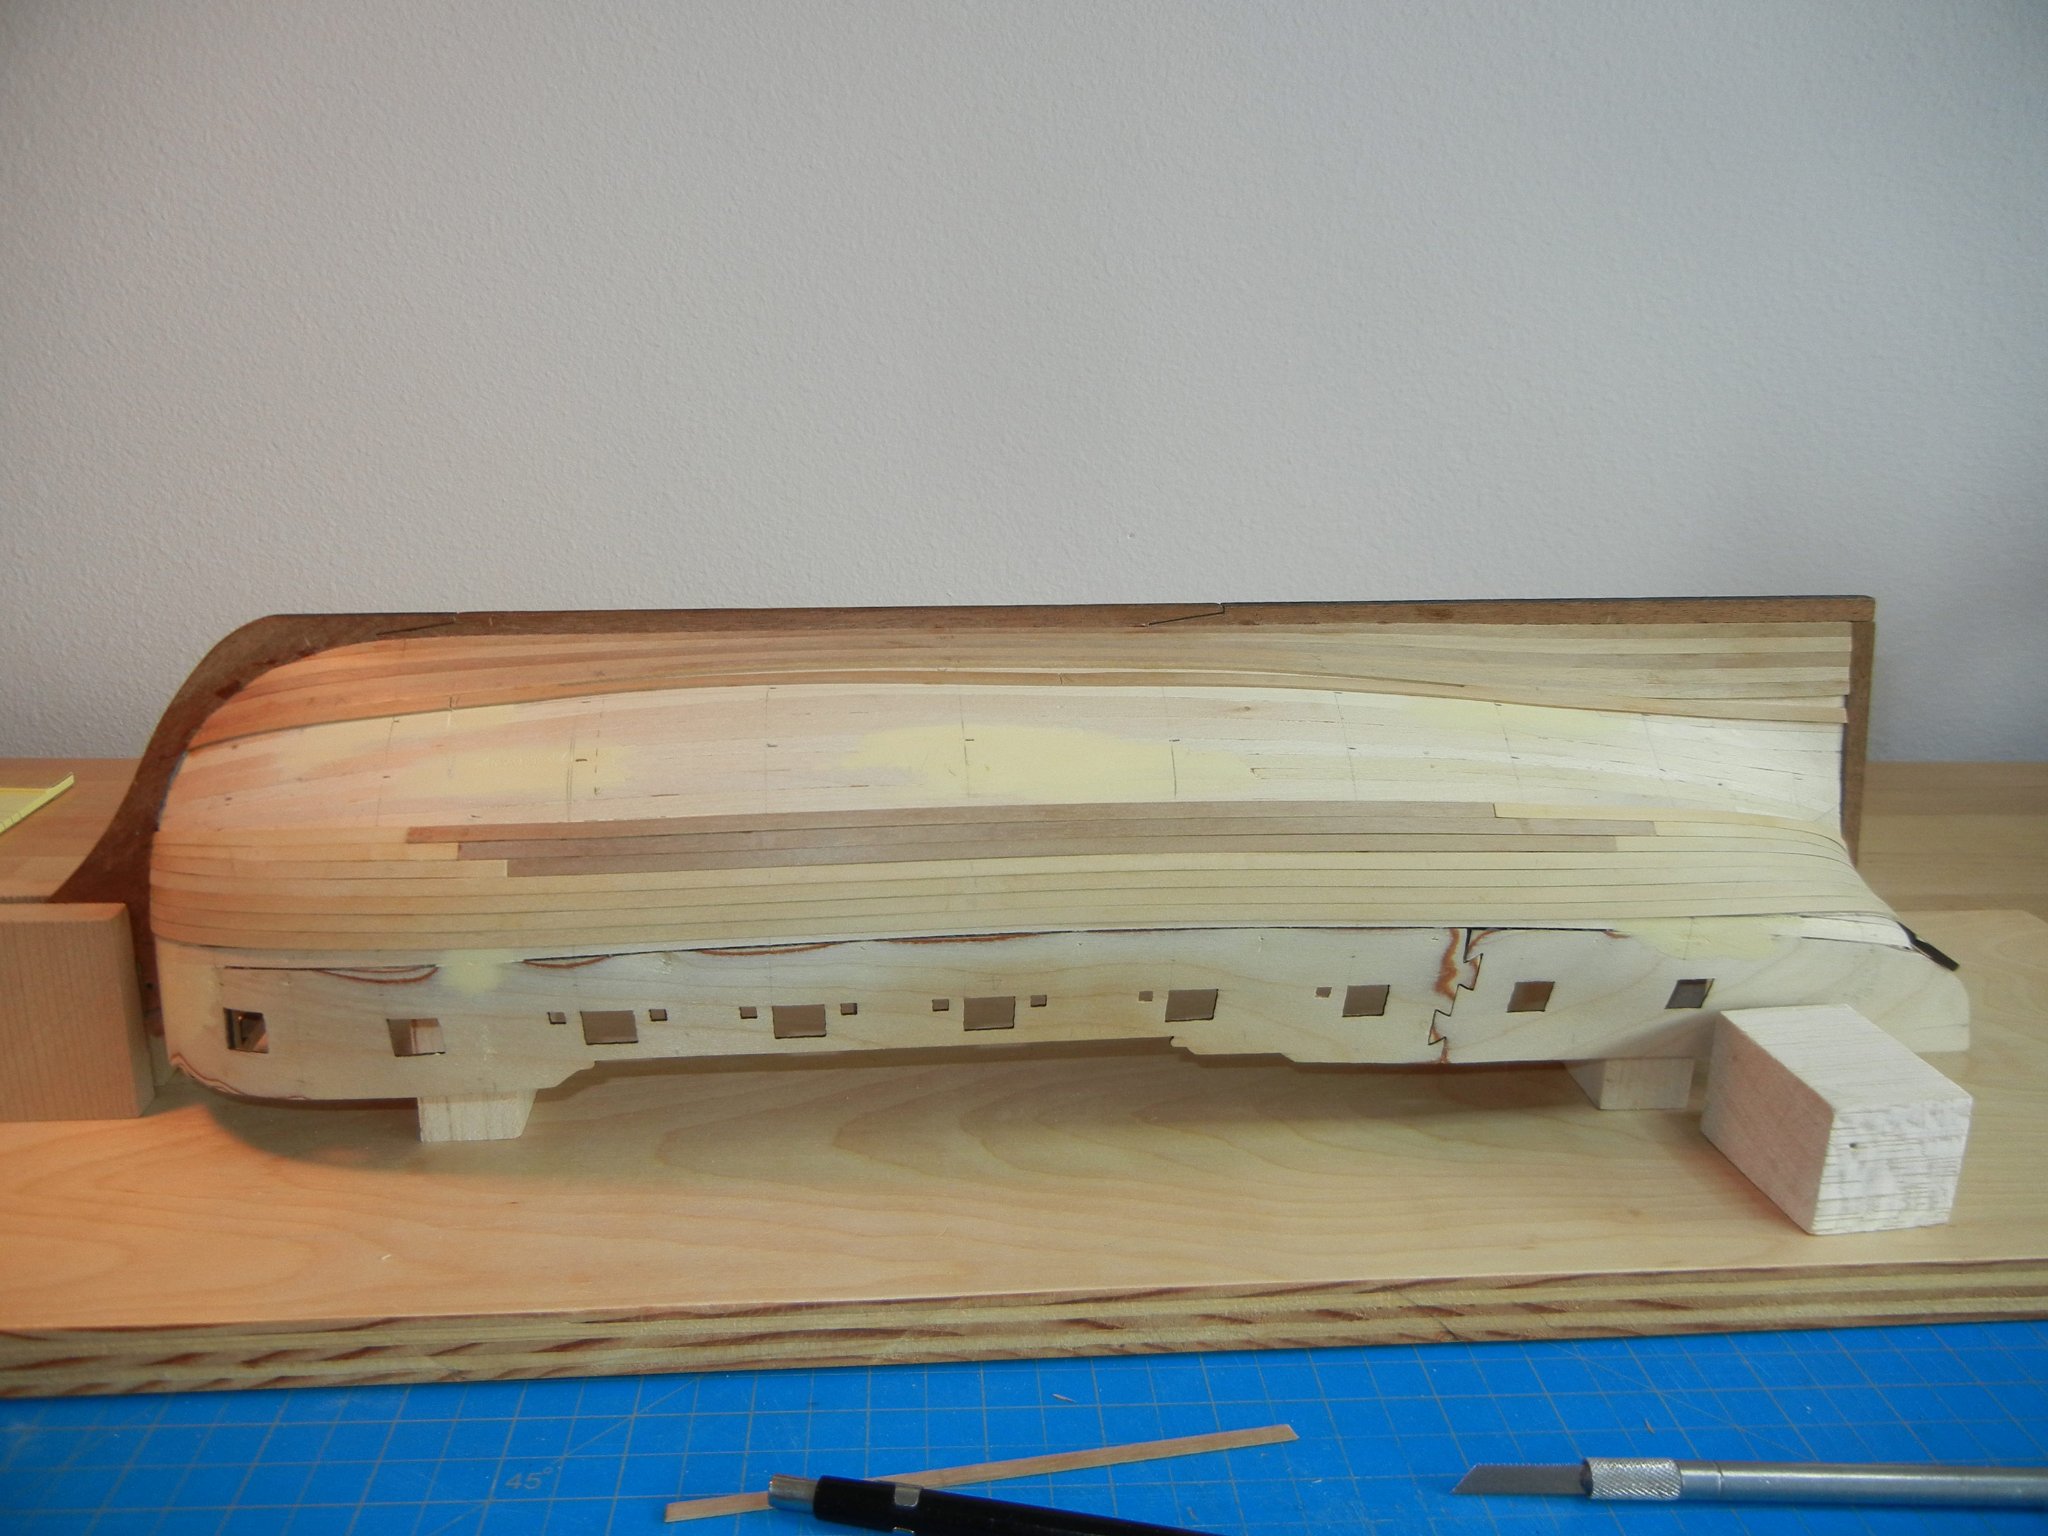
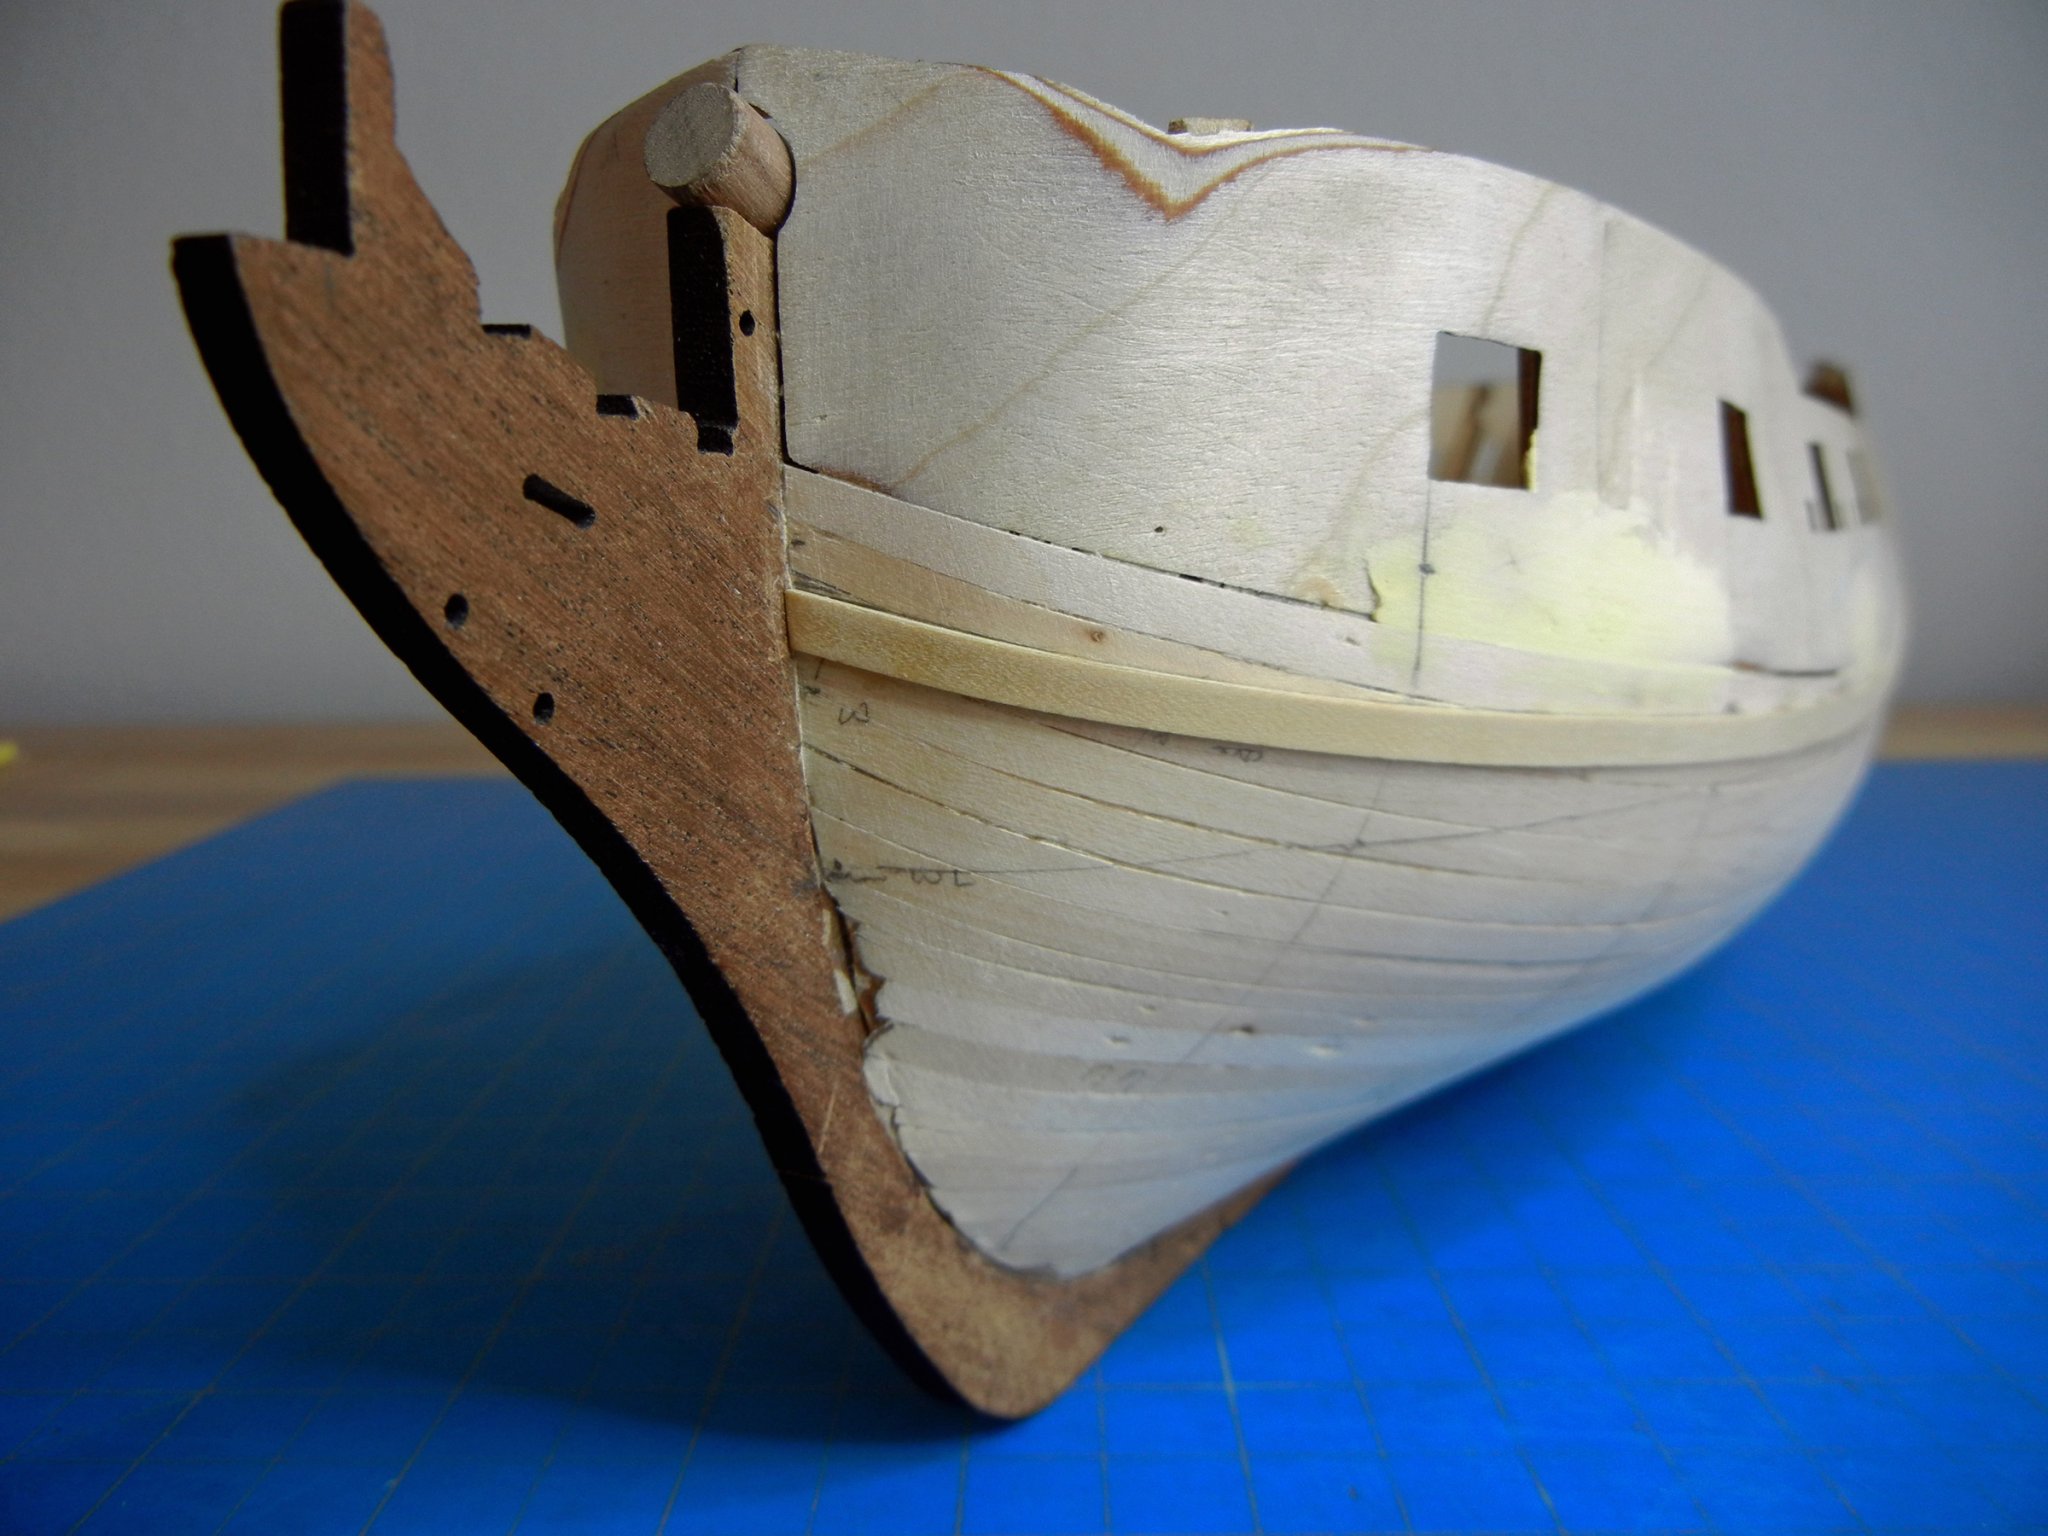
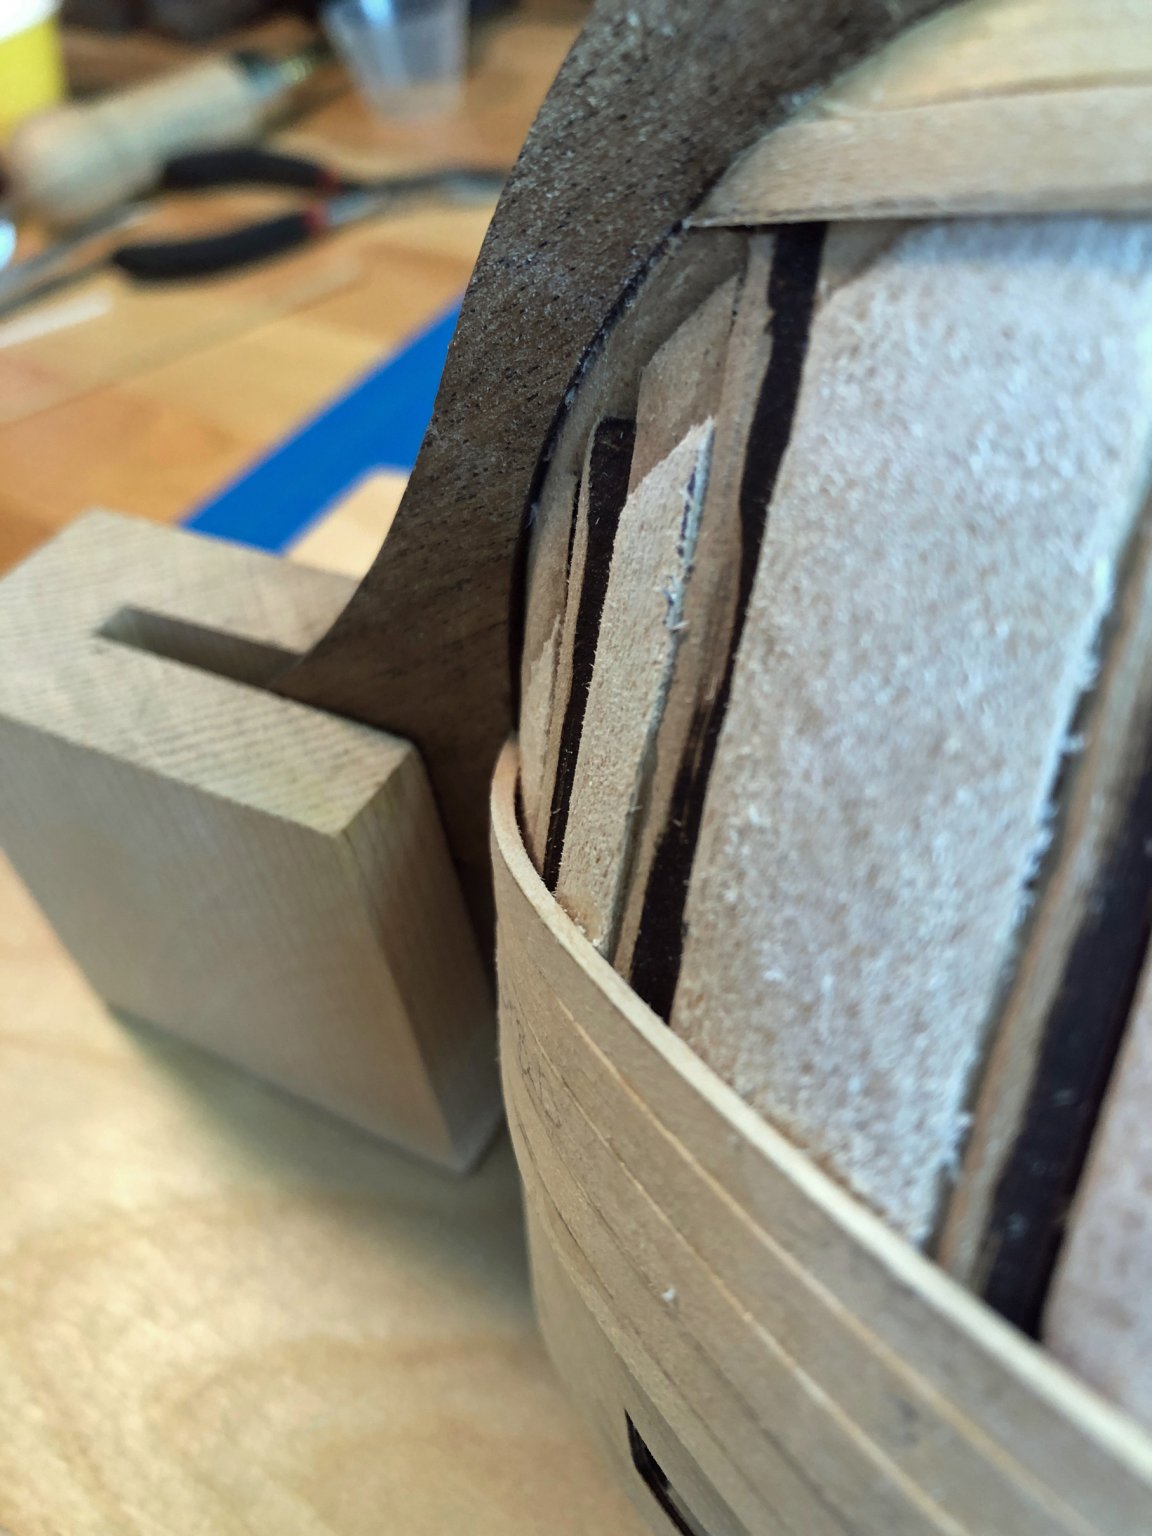
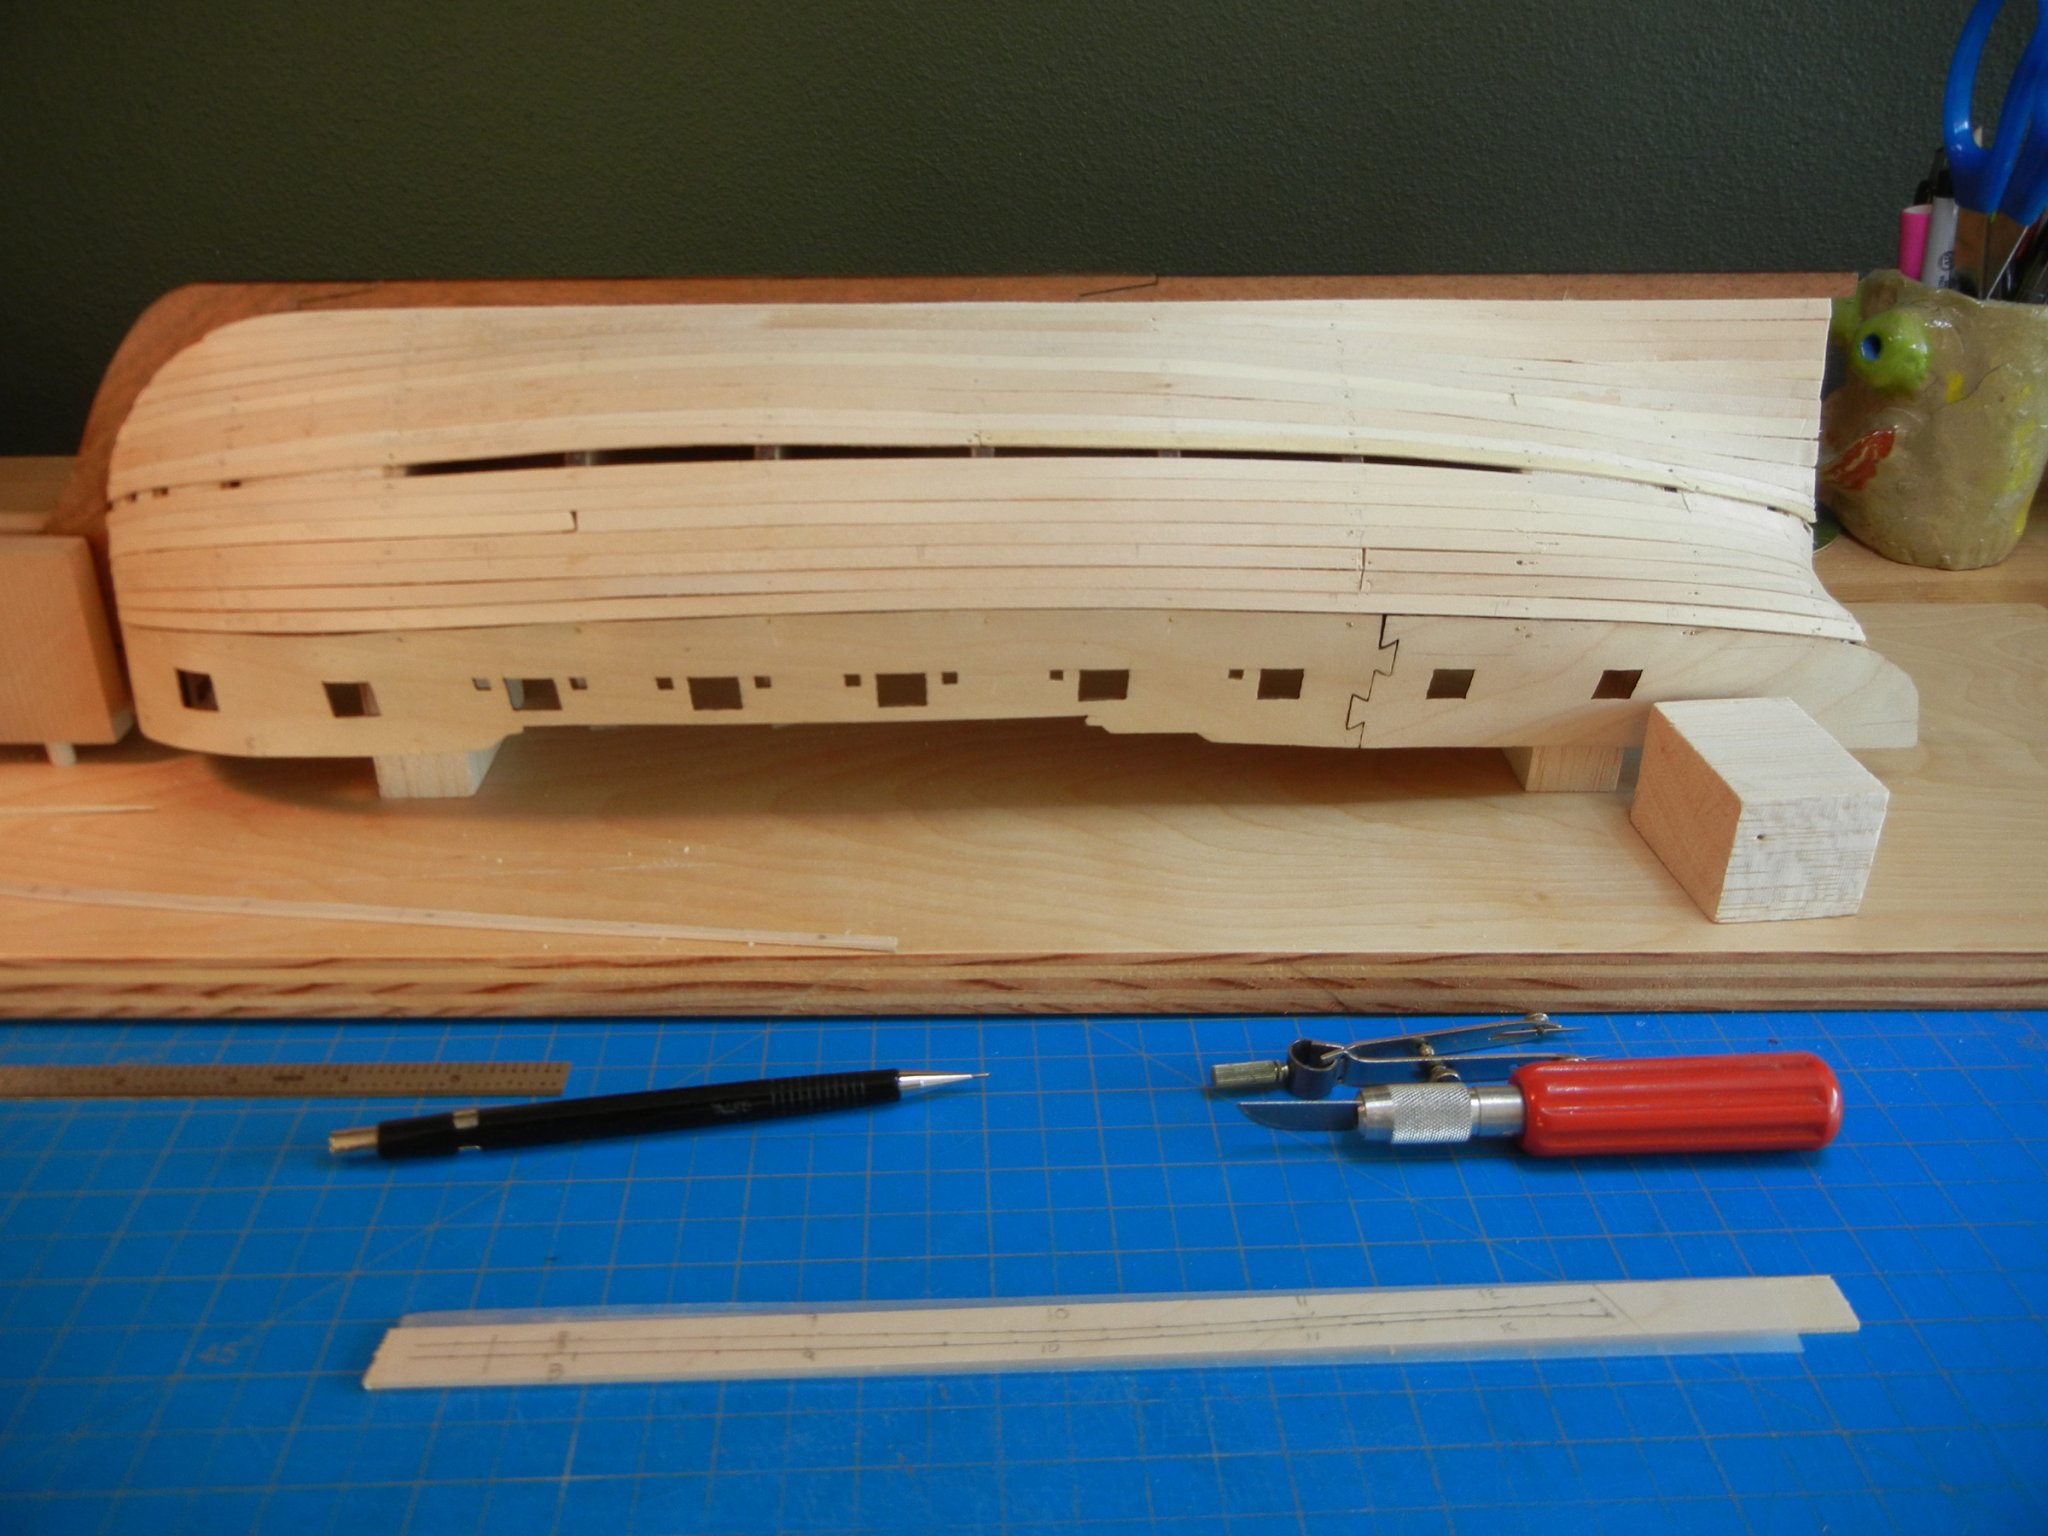
Pegasus took a holiday as we did some home improving. Currently I have completed the second planking. Started at the bottom of the wale working down and with the garboard plank working up while alternating sides to keep everything symmetrical. At least somewhat symmetrical. With box wood becoming scarce, I used the kit walnut under the copper.
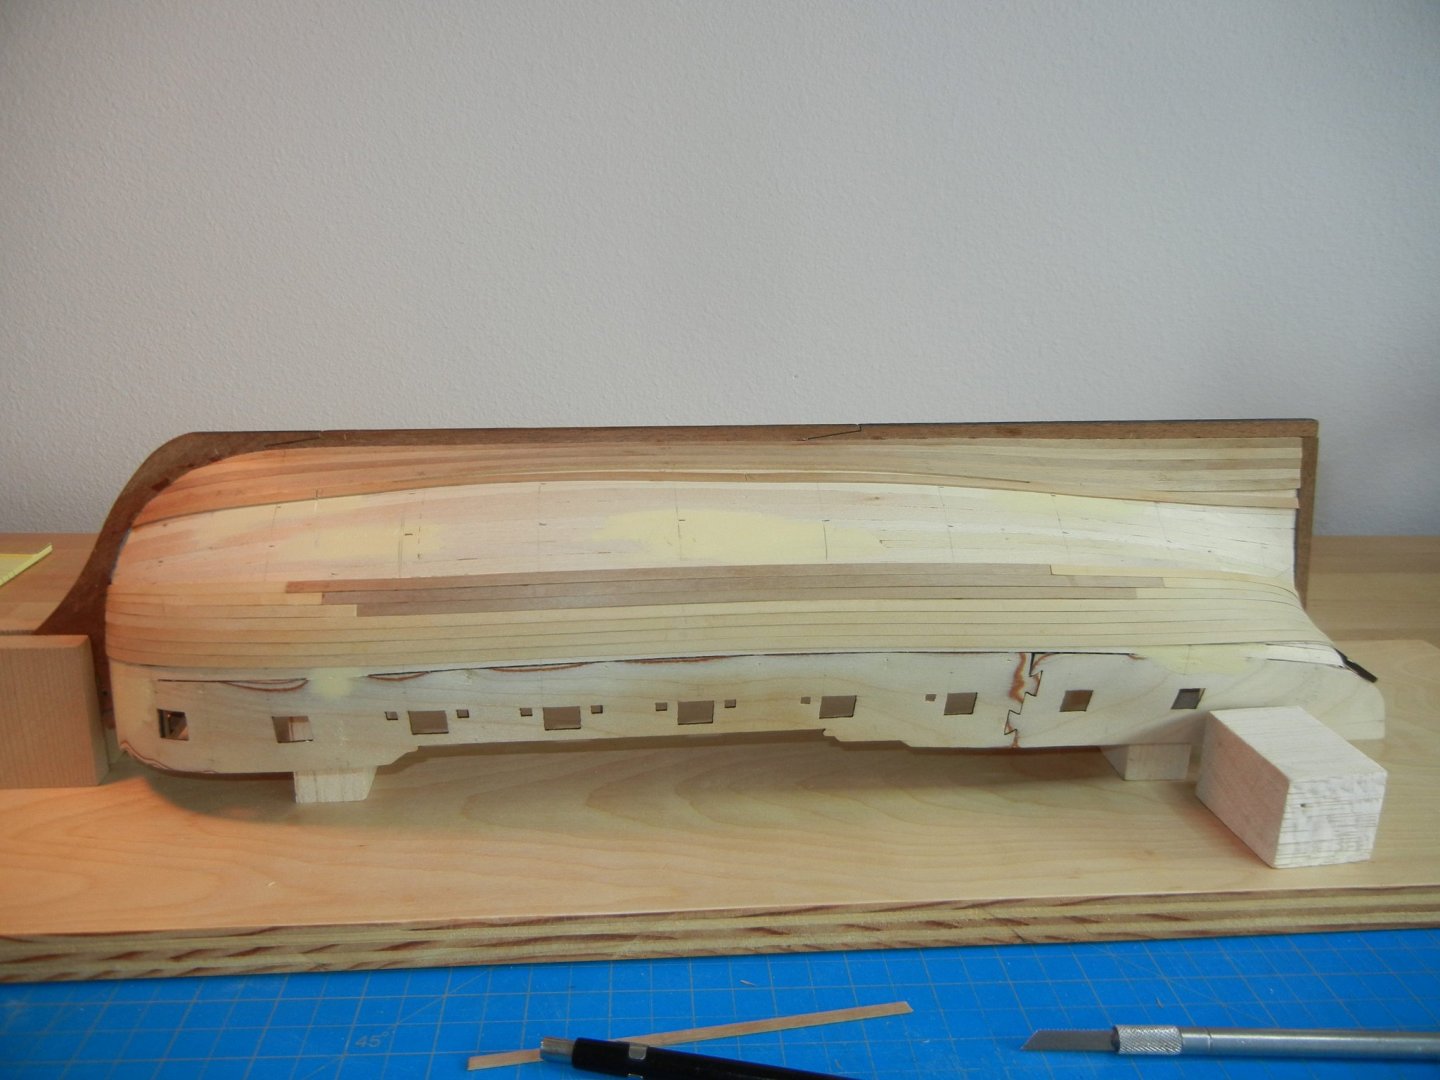
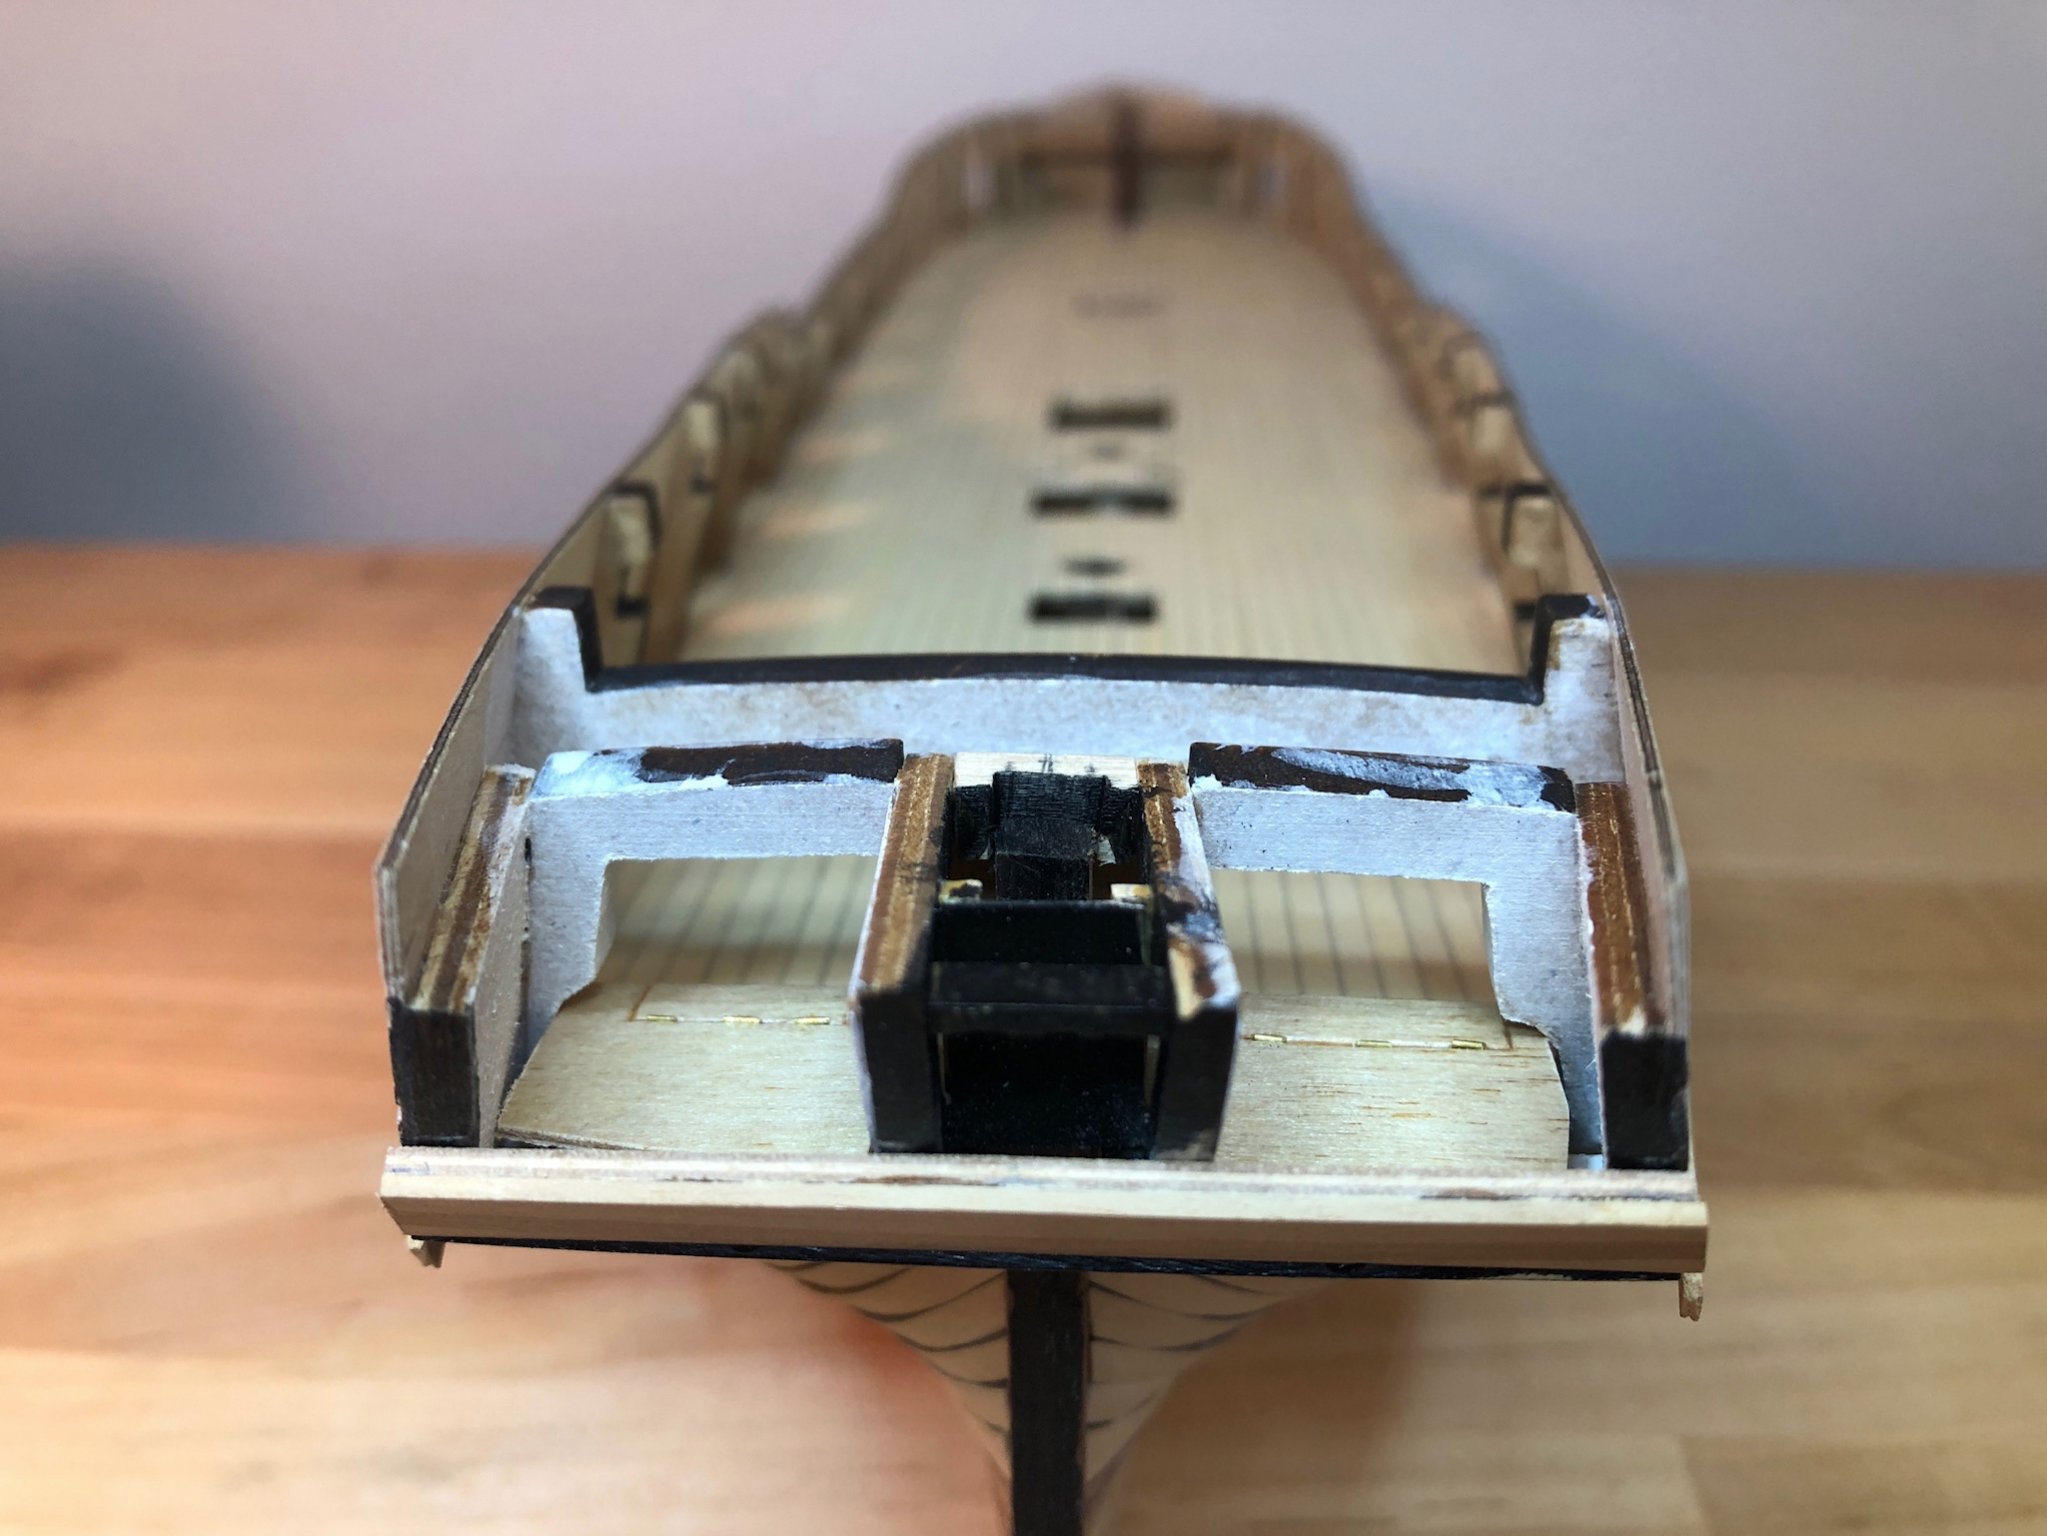
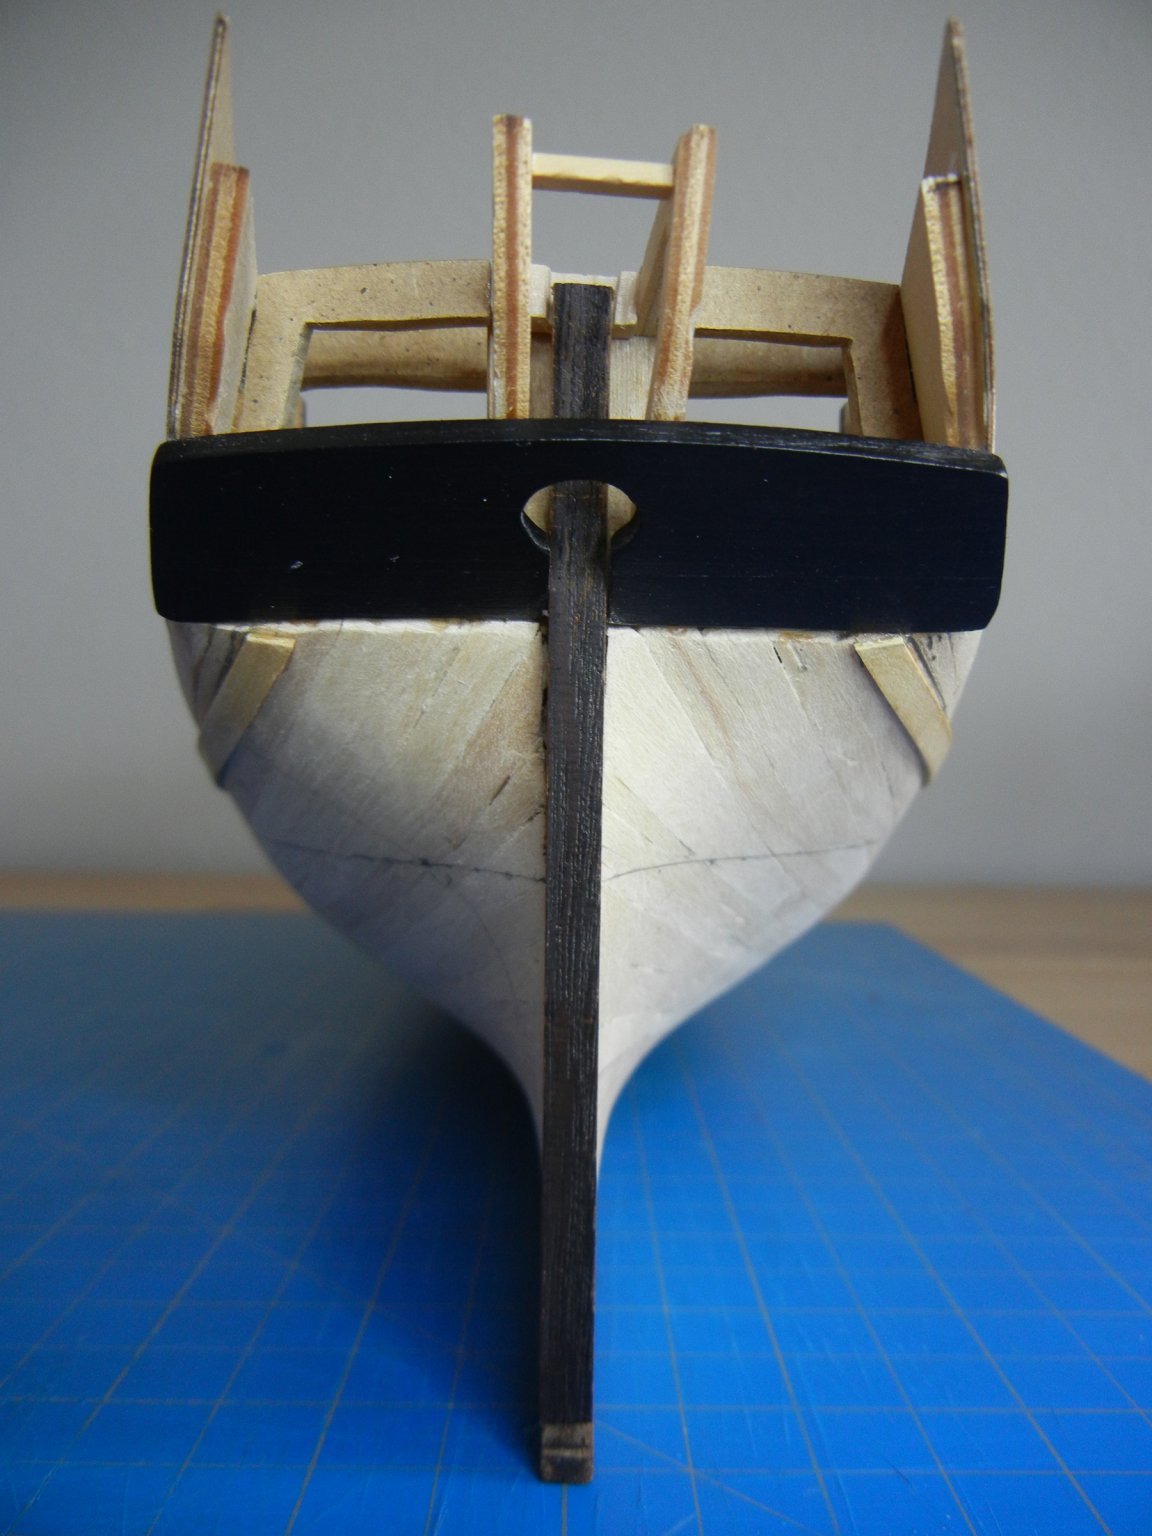
Time to install the upper counter. There is no laser cut pattern for this piece so, after a couple of cardboard patterns, I made and installed the counter.

During time I discovered that I am too narrow at the stern fascia and the inner supports are canted to starboard. Too late to fix but won't be obvious when competed (I hope). I also made the rudder box and painted the inside of box and aft structure edges black to help hide my error.

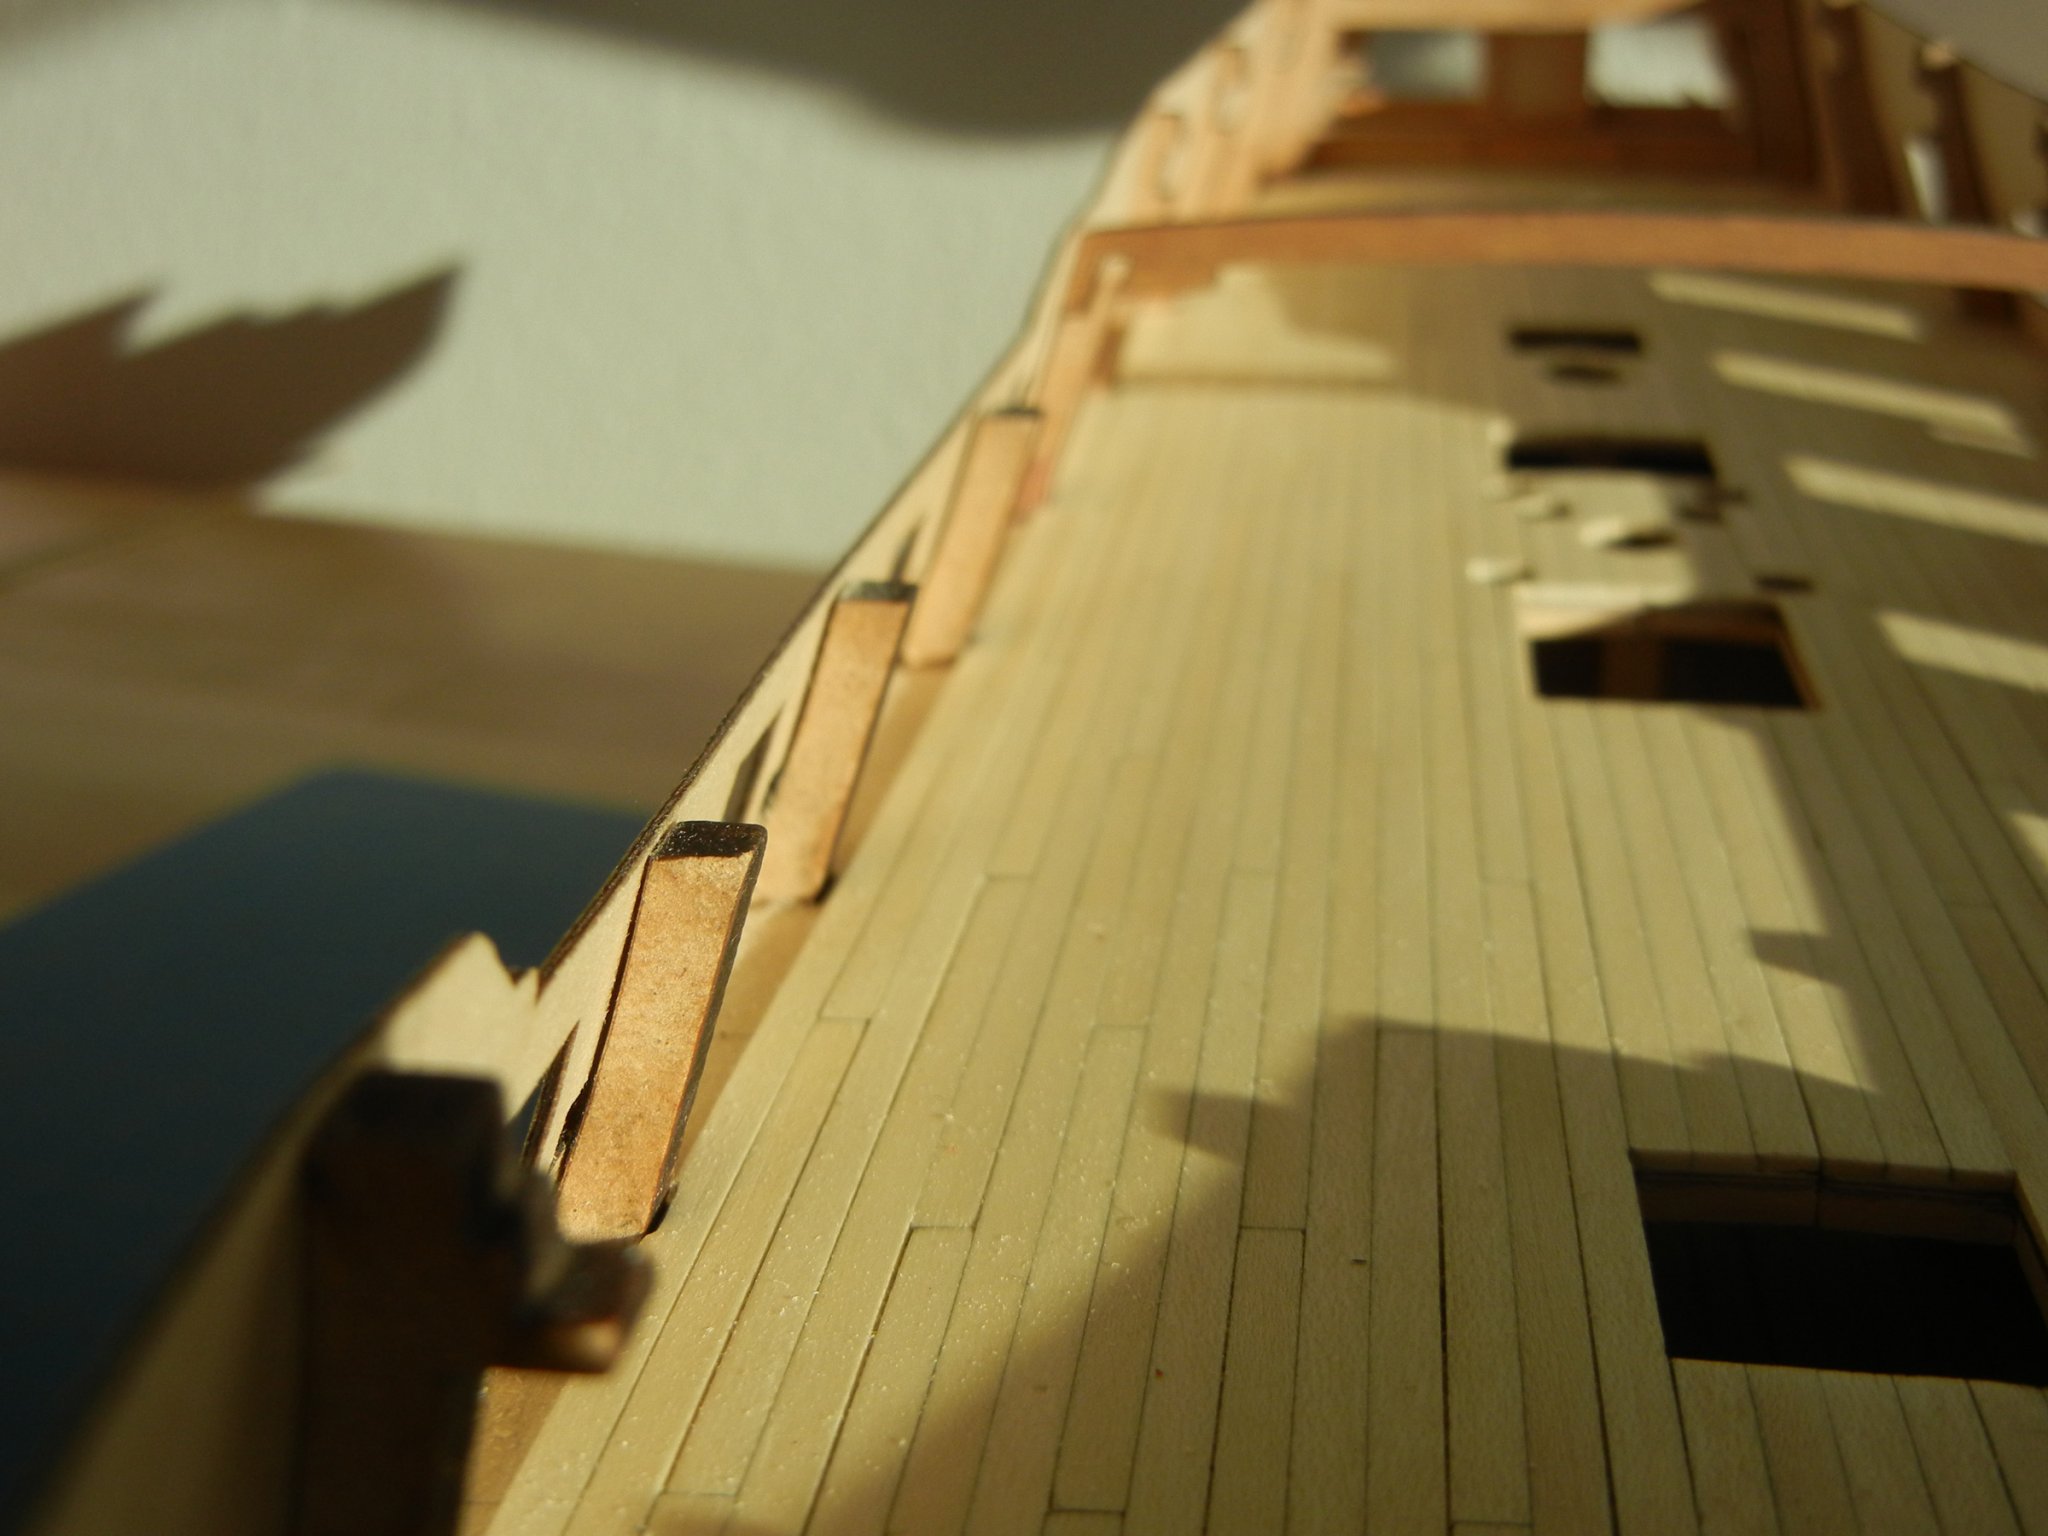
Continuing planking at the black strake, I switched to scale plank lengths (about 130mm) which one builder noted that it is easier. It is.
Finally planking completed, awaited opening gun ports and sweep ports. I will install the wale later with 1 mm planking using a top and butt pattern.
Dave B
- BenD, Kathy Teel and GrandpaPhil
-
3
-
Thanks, I wasn’t aware they pivoted.
Dave B
- KeithAug, druxey, Keith Black and 1 other
-
4
-
-
-
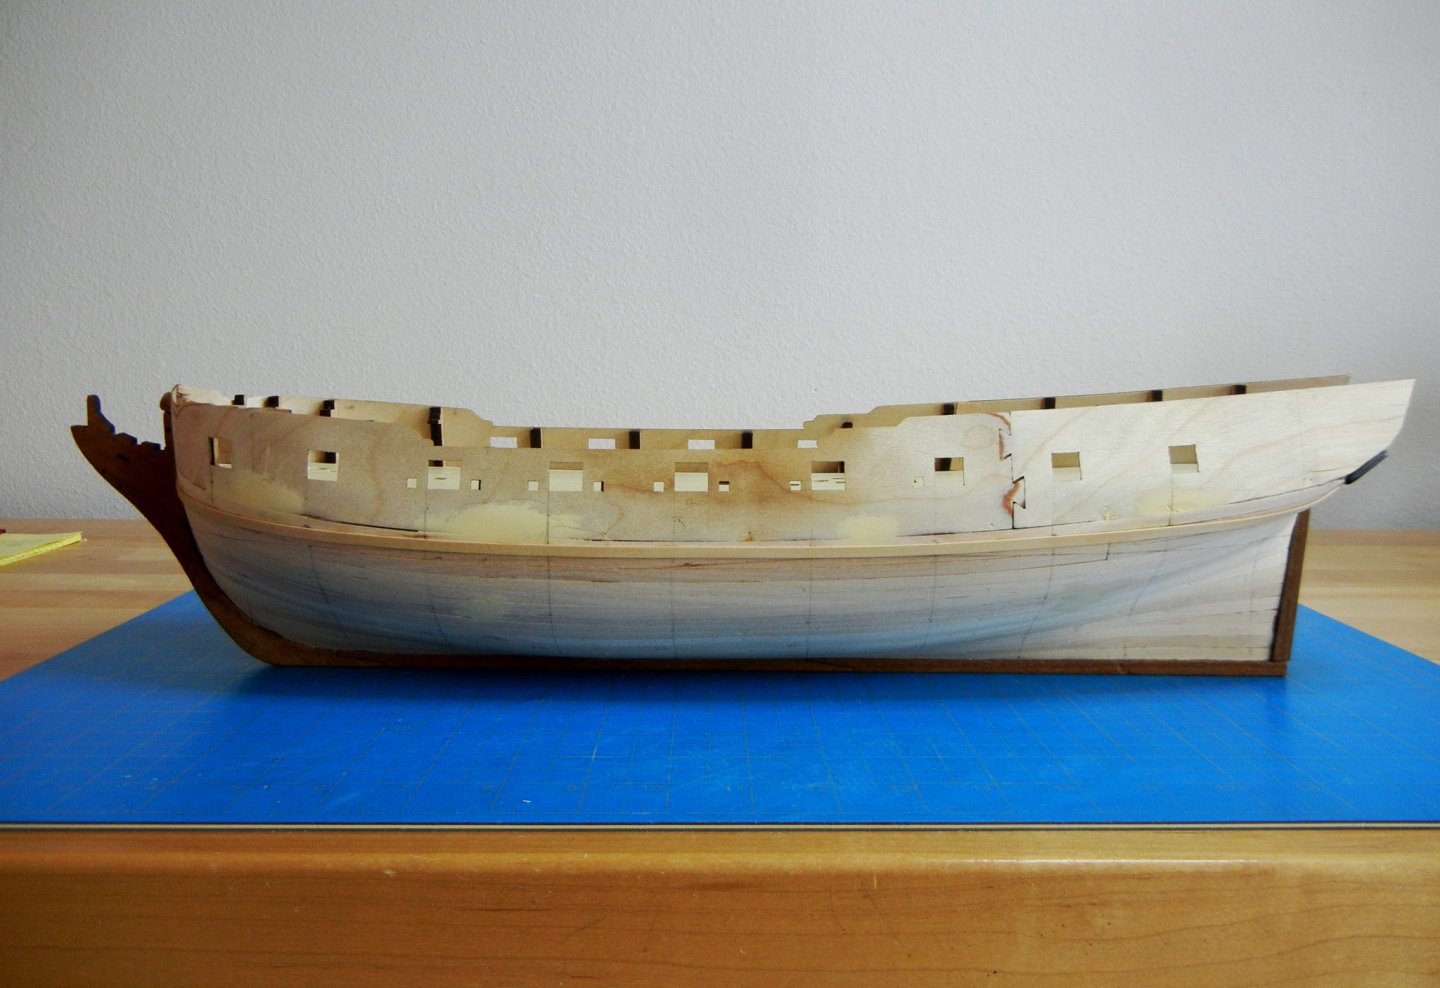
Does anyone else find starting the final planking intimidating? I so want to get the run of the strakes reasonably right. So I spent much time marking the location of the wales and the waterline (for reference). Judging from the plans the wale should be a few millimeters above the waterline at the waist. Having set the lines, it’s time to get started.
I am using Chuck’s method of edge bending using dry heat. Practicing with a walnut strip, I found it fast and actually fairly easy. Switching to the boxwood plank, I formed the edge curve, then I formed it around the bow (actually freehand by holding the plank against a board to approximate the bend needed). The plank also has a twist at the stern which I carefully heated in place on the hull (covering iron perfect for this). I glued the strip in place without much force. So far I am liking the dry bending method.

Dave B
-
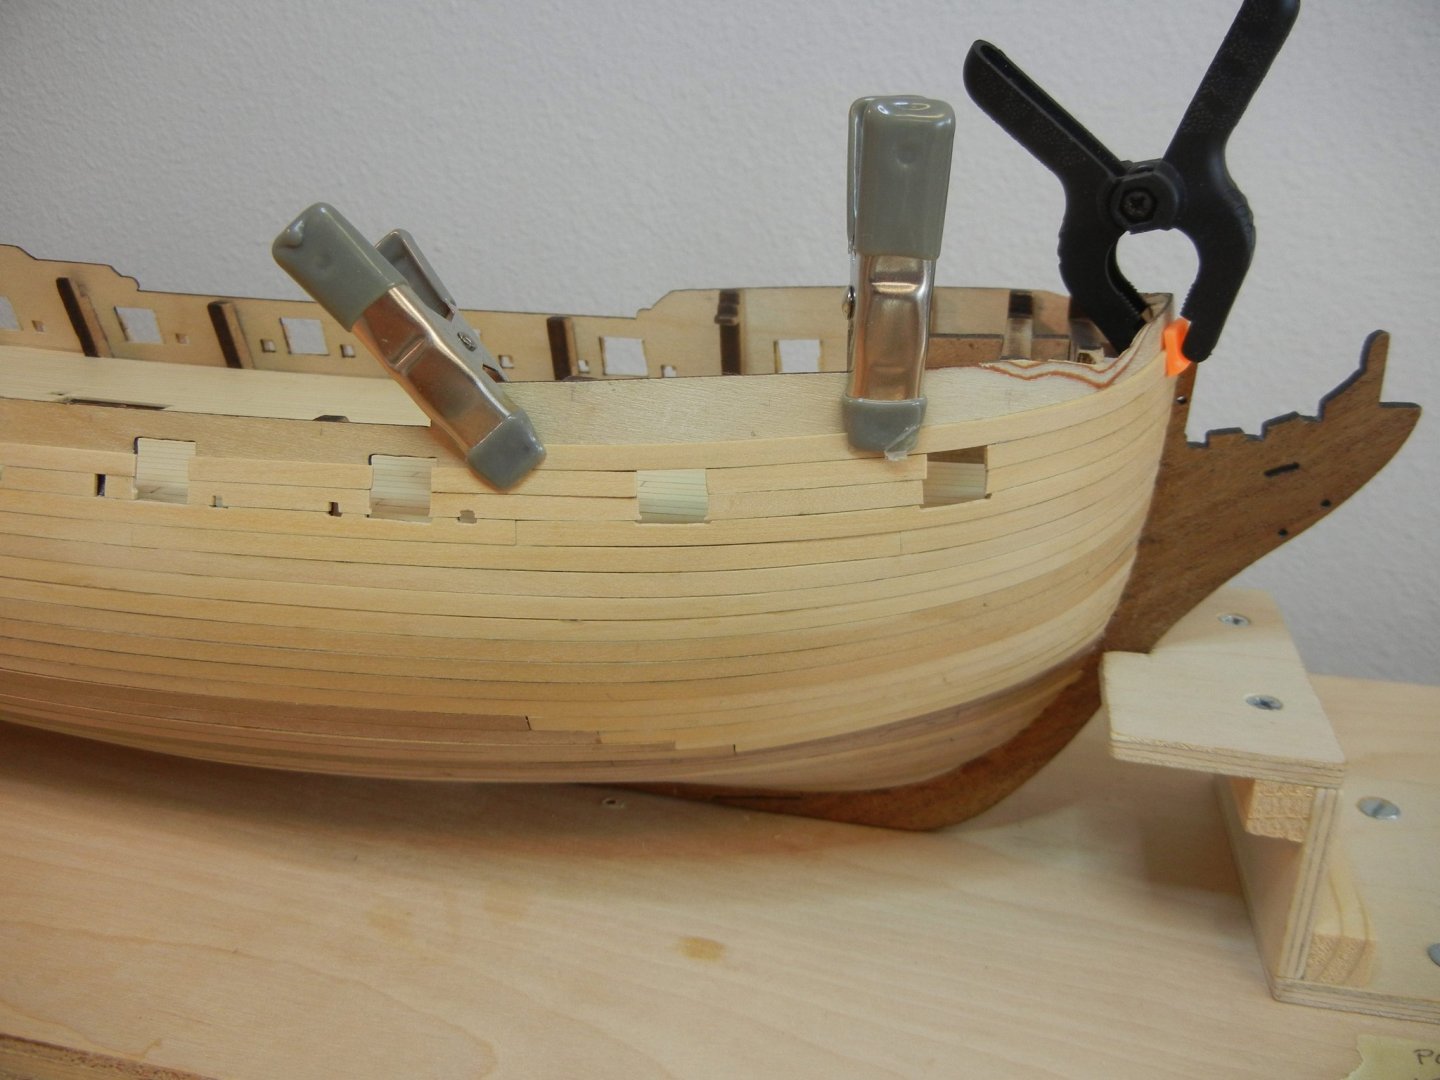
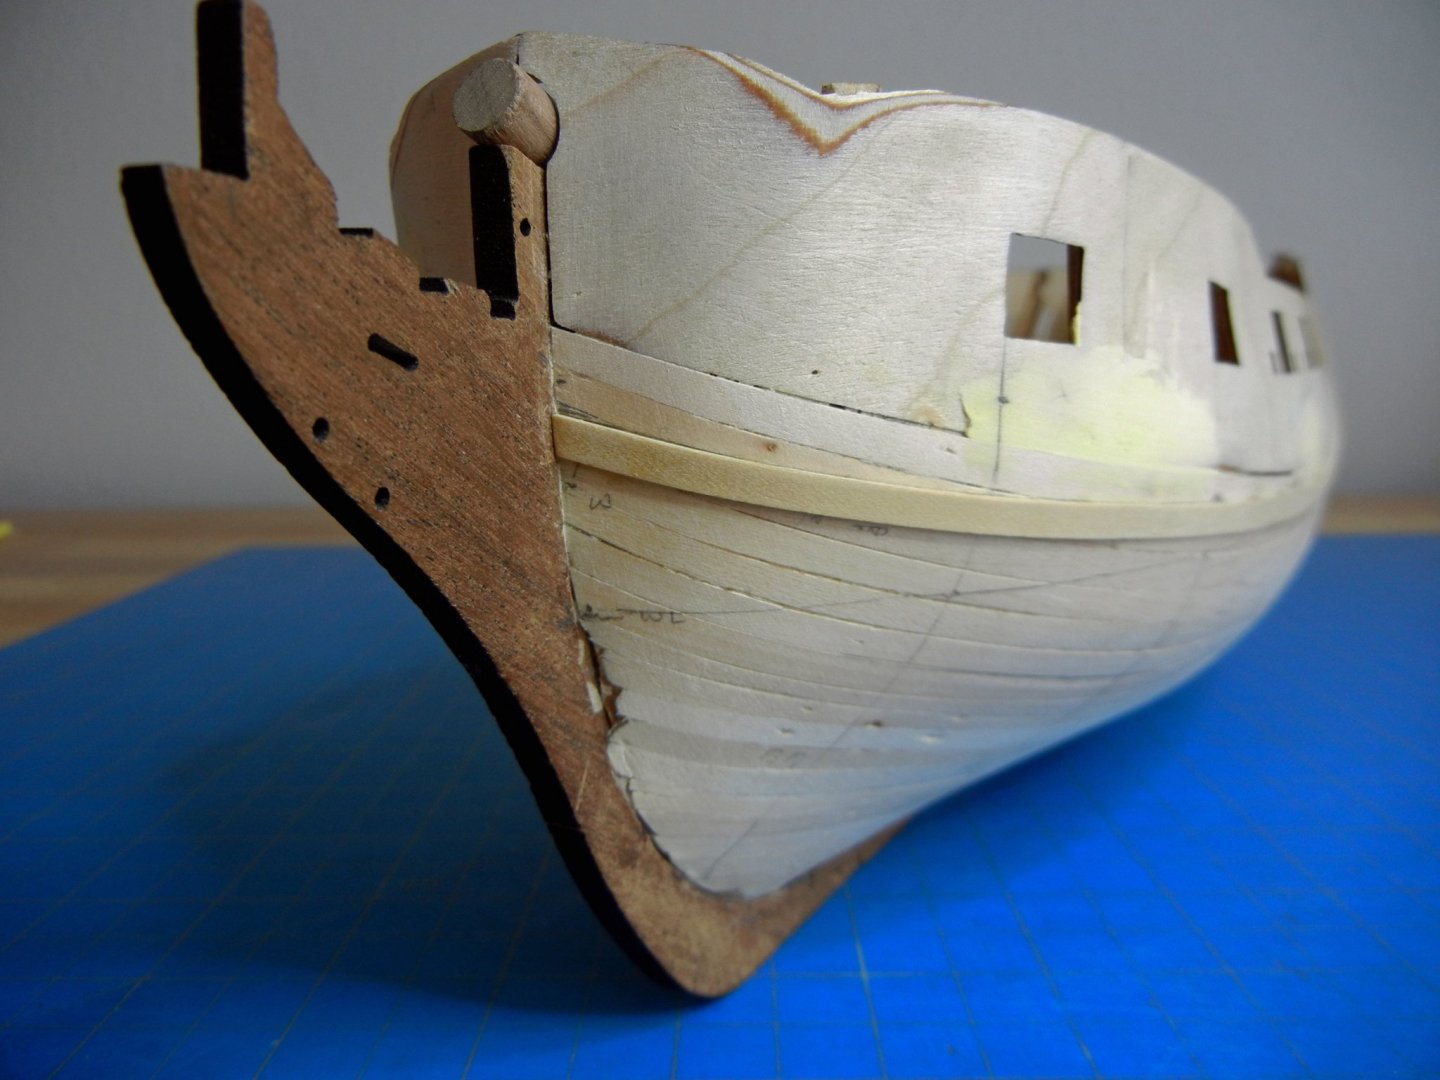
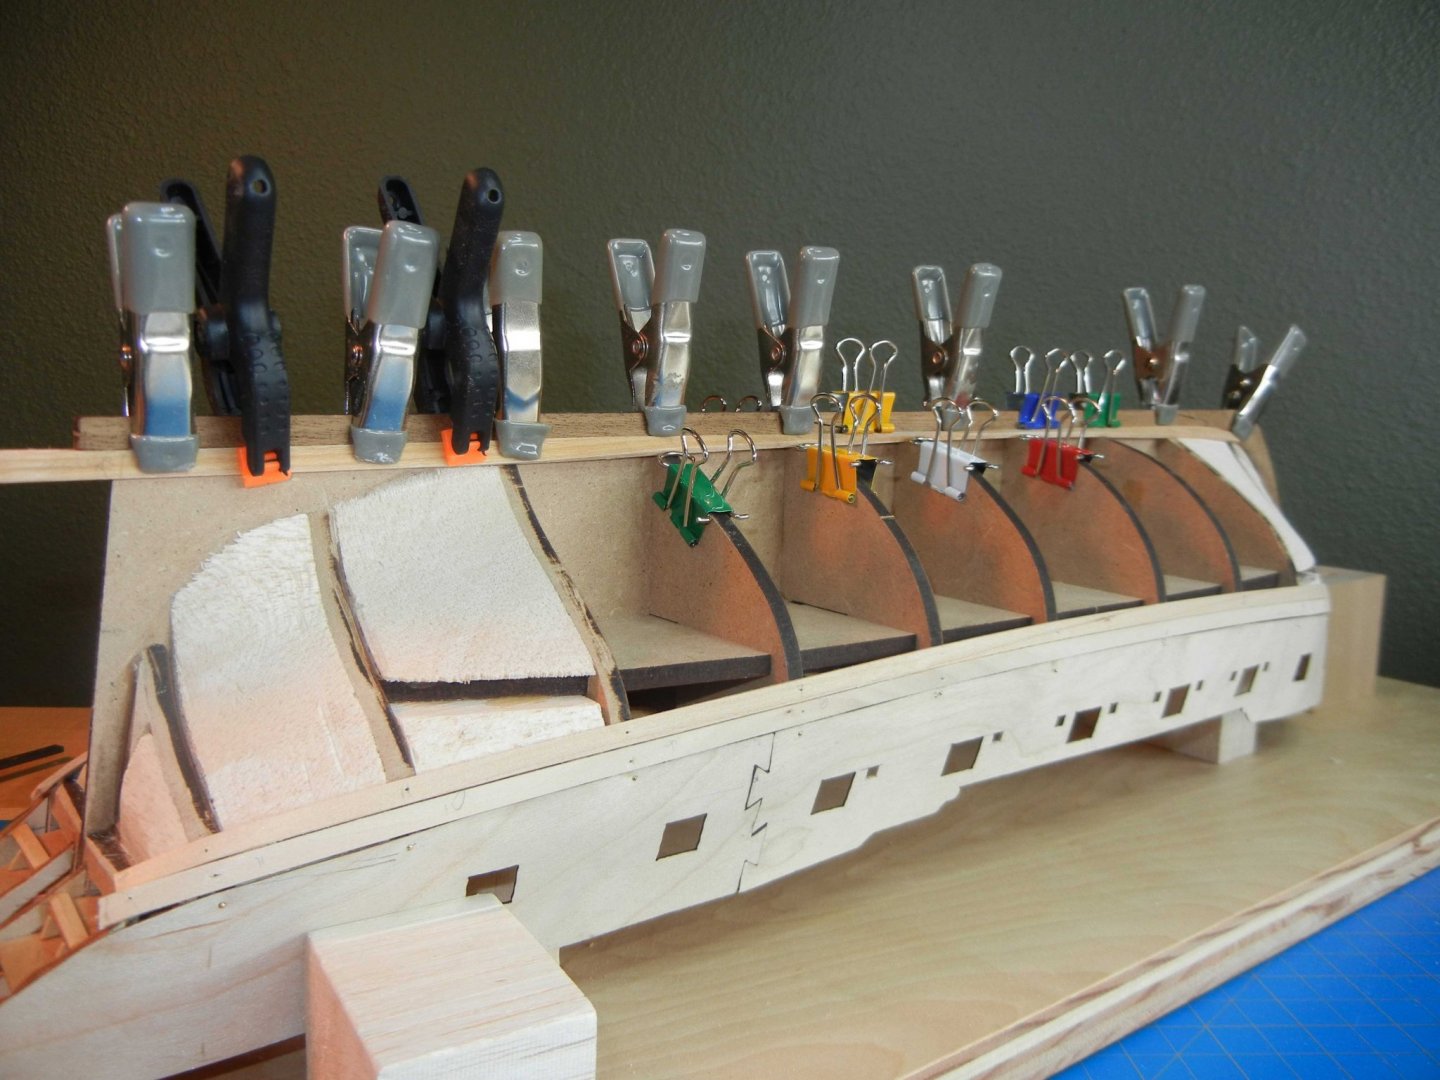
My original attachment of the gun port strips to bulkheads 5, 6 & 7 (which will be removed later) using double sided tape and clamps did not produce the proper contour. You can easily see the gaps.
Why not try reheating and clamping in place? Since I could not use a hot water soak again, I applied heat using a covering iron from my RC sailplane days. I used the highest heat setting on the iron which produced a nice toasted effect. I’ll need to keep this in mind if I use the iron for final planking.
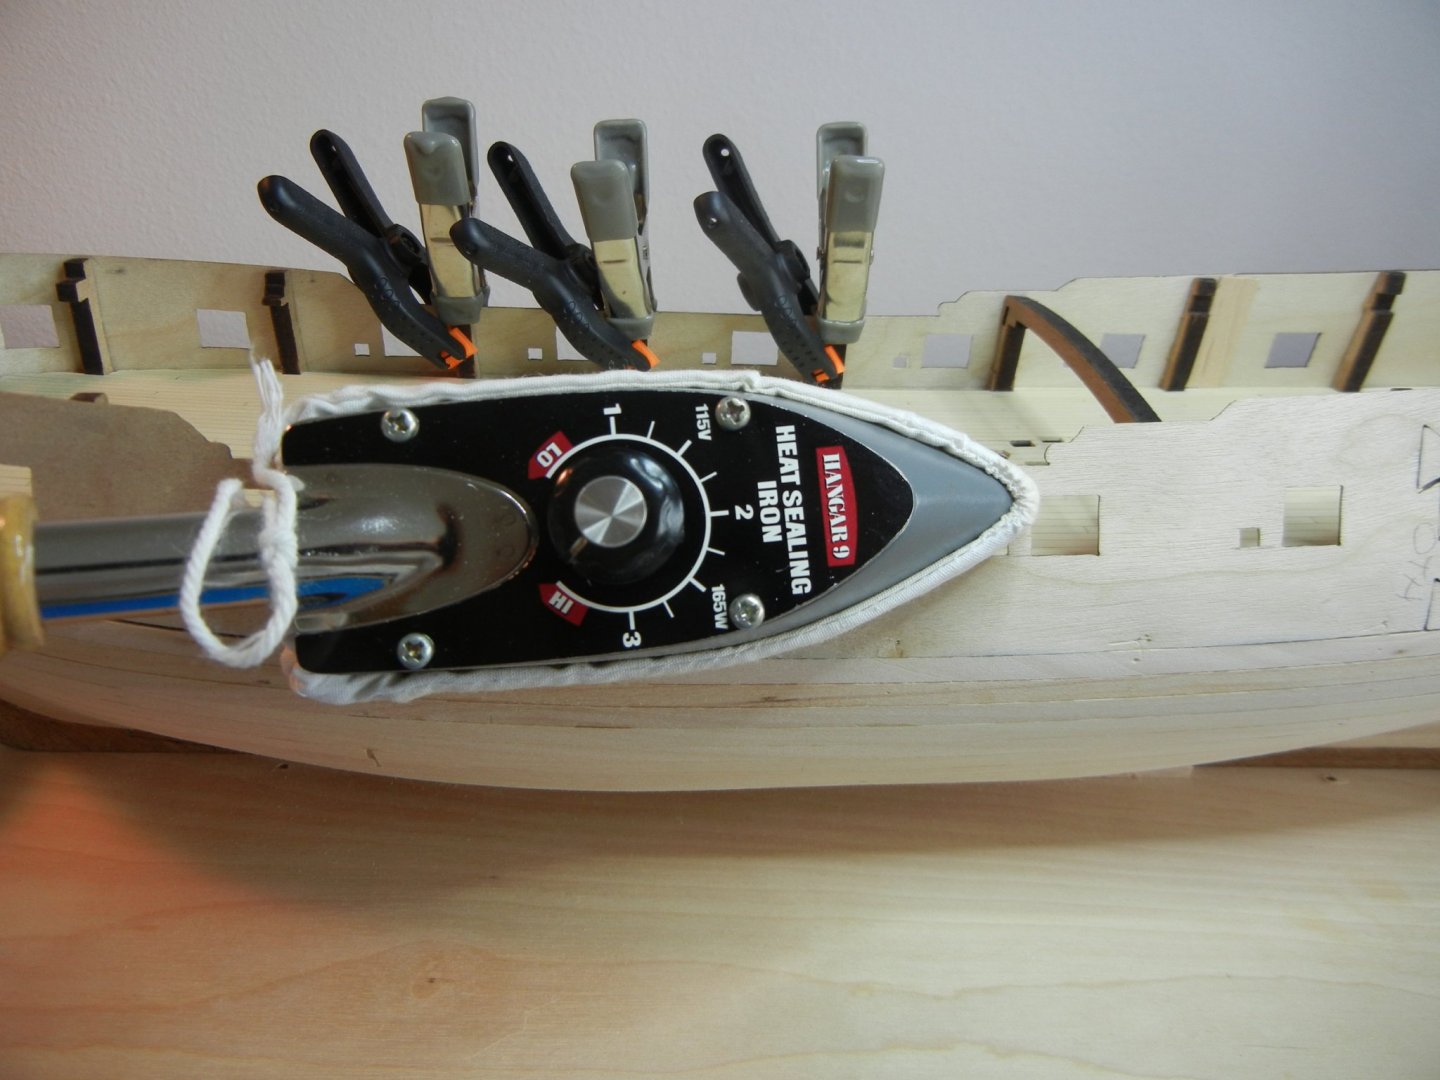

After several heating and clamping cycles (fortunately, they cooled fairly quickly) the gaps remained closed.

Dave B
-
-
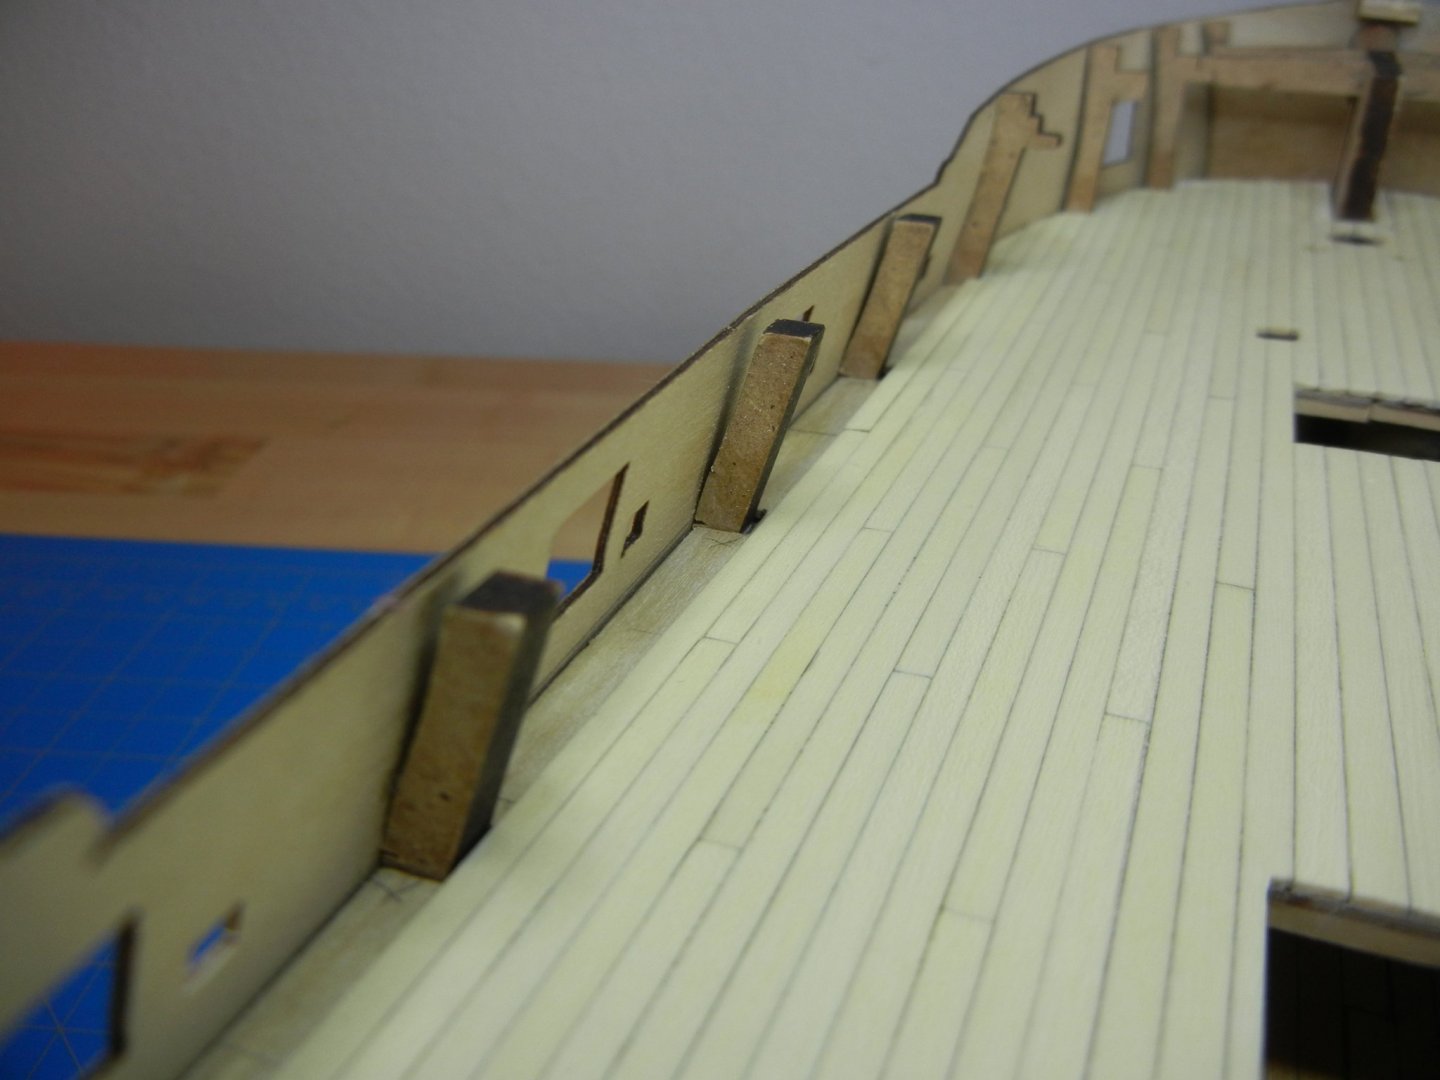
Getting started with first planking. The kit supplied lime wood is nice to work with.
Gap forming at bulkhead 1, looks like time to spile. The kit does not provide lime strips for spiling, so I switched to 1/2 inch wide basswood strips.

First planking almost finished. The last strake had to be made in halves as ½ inch was not quite wide enough for the full curvature.

Dave B
-
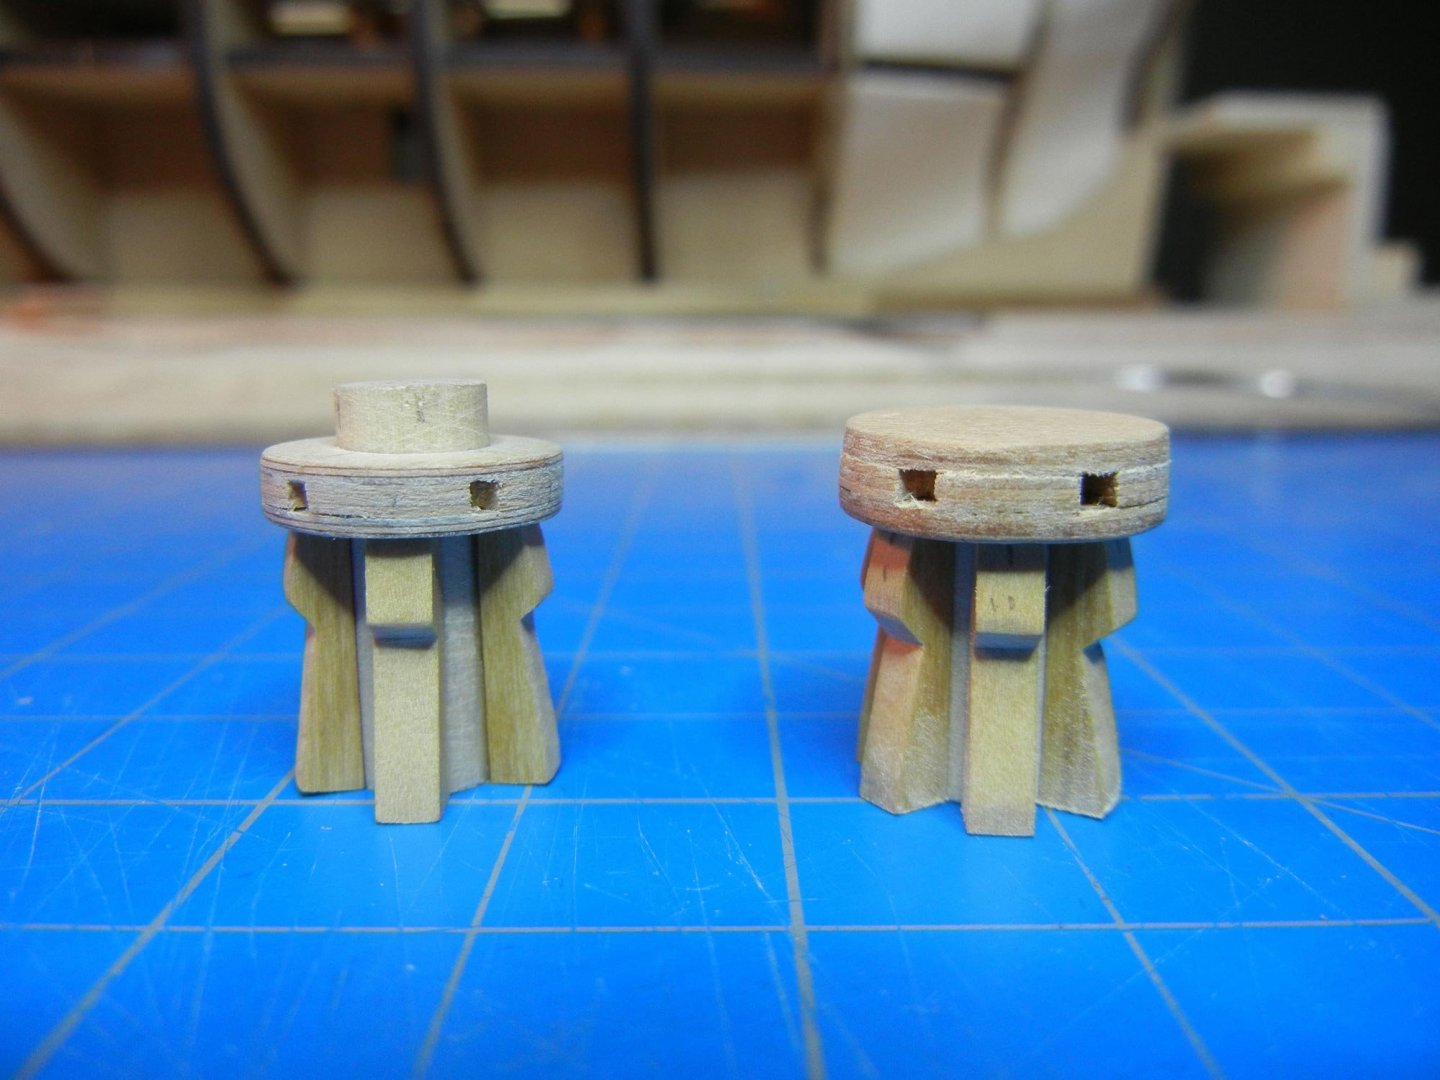
I have been working on Pegasus for a year and a half, and am just now starting the build log. Aside from the beauty of the ship, I chose Pegasus for the wealth of guidance available here on MSW (thank you in advance, I need a lot of help). At this point I have completed through the first planking and the build has progressed normally with few surprises.
This is a very good kit, but like many, it begs for some scratch and sub kit “improvements”. My first choice is new capstans based on TFFM. Looking at these now, I need to finish some details.
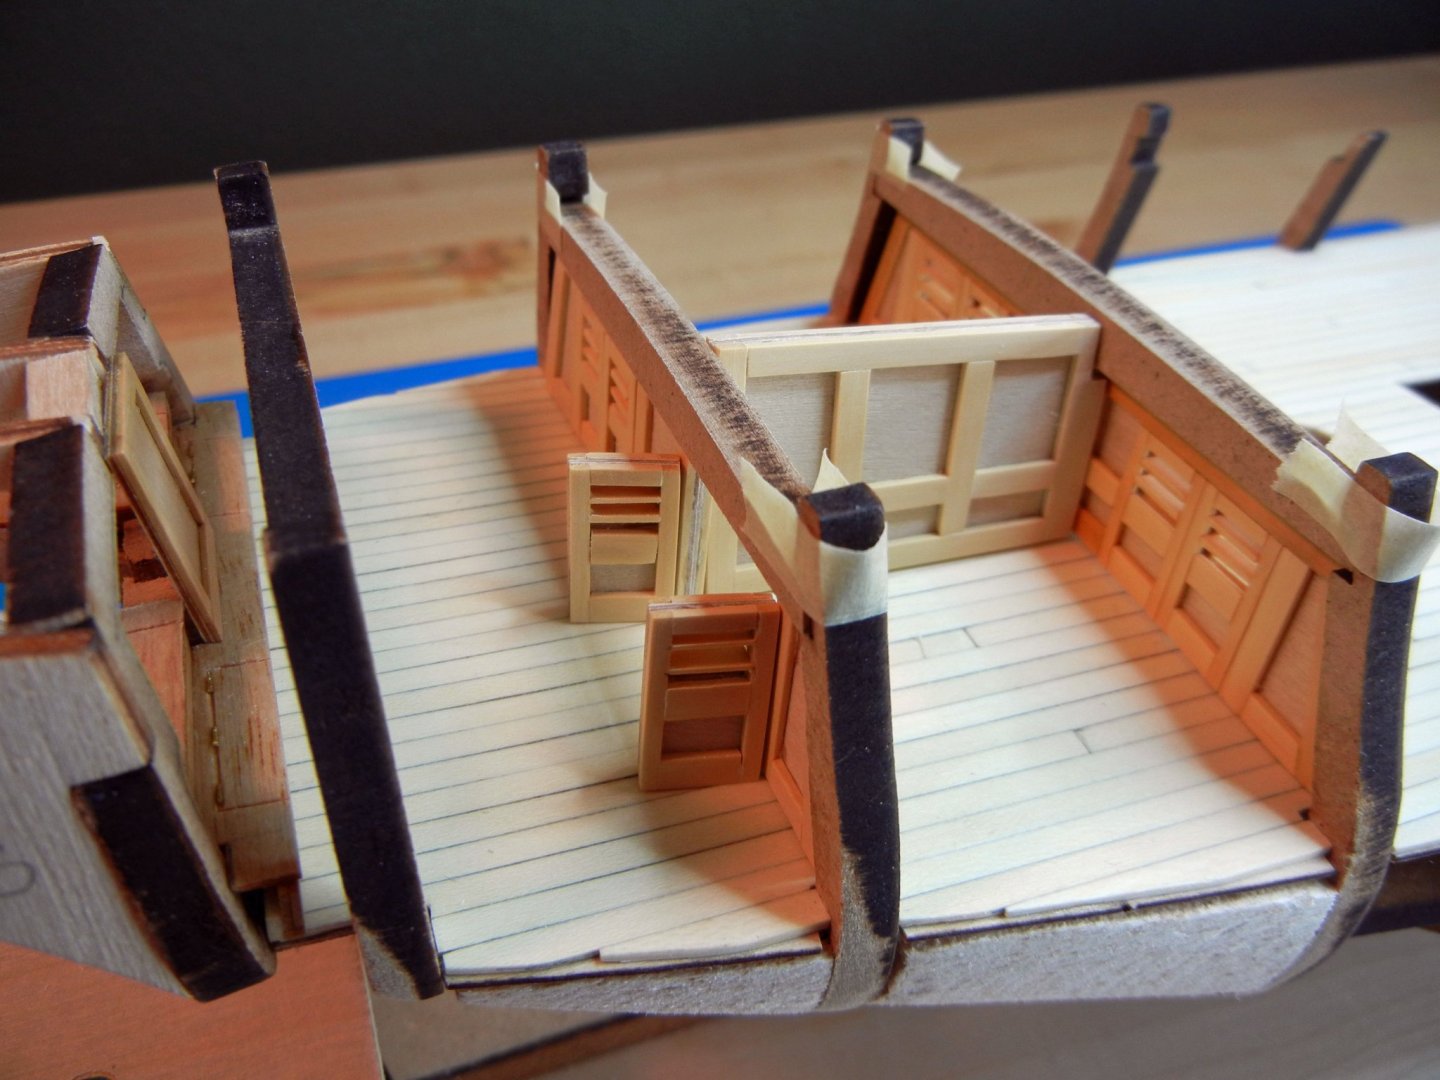
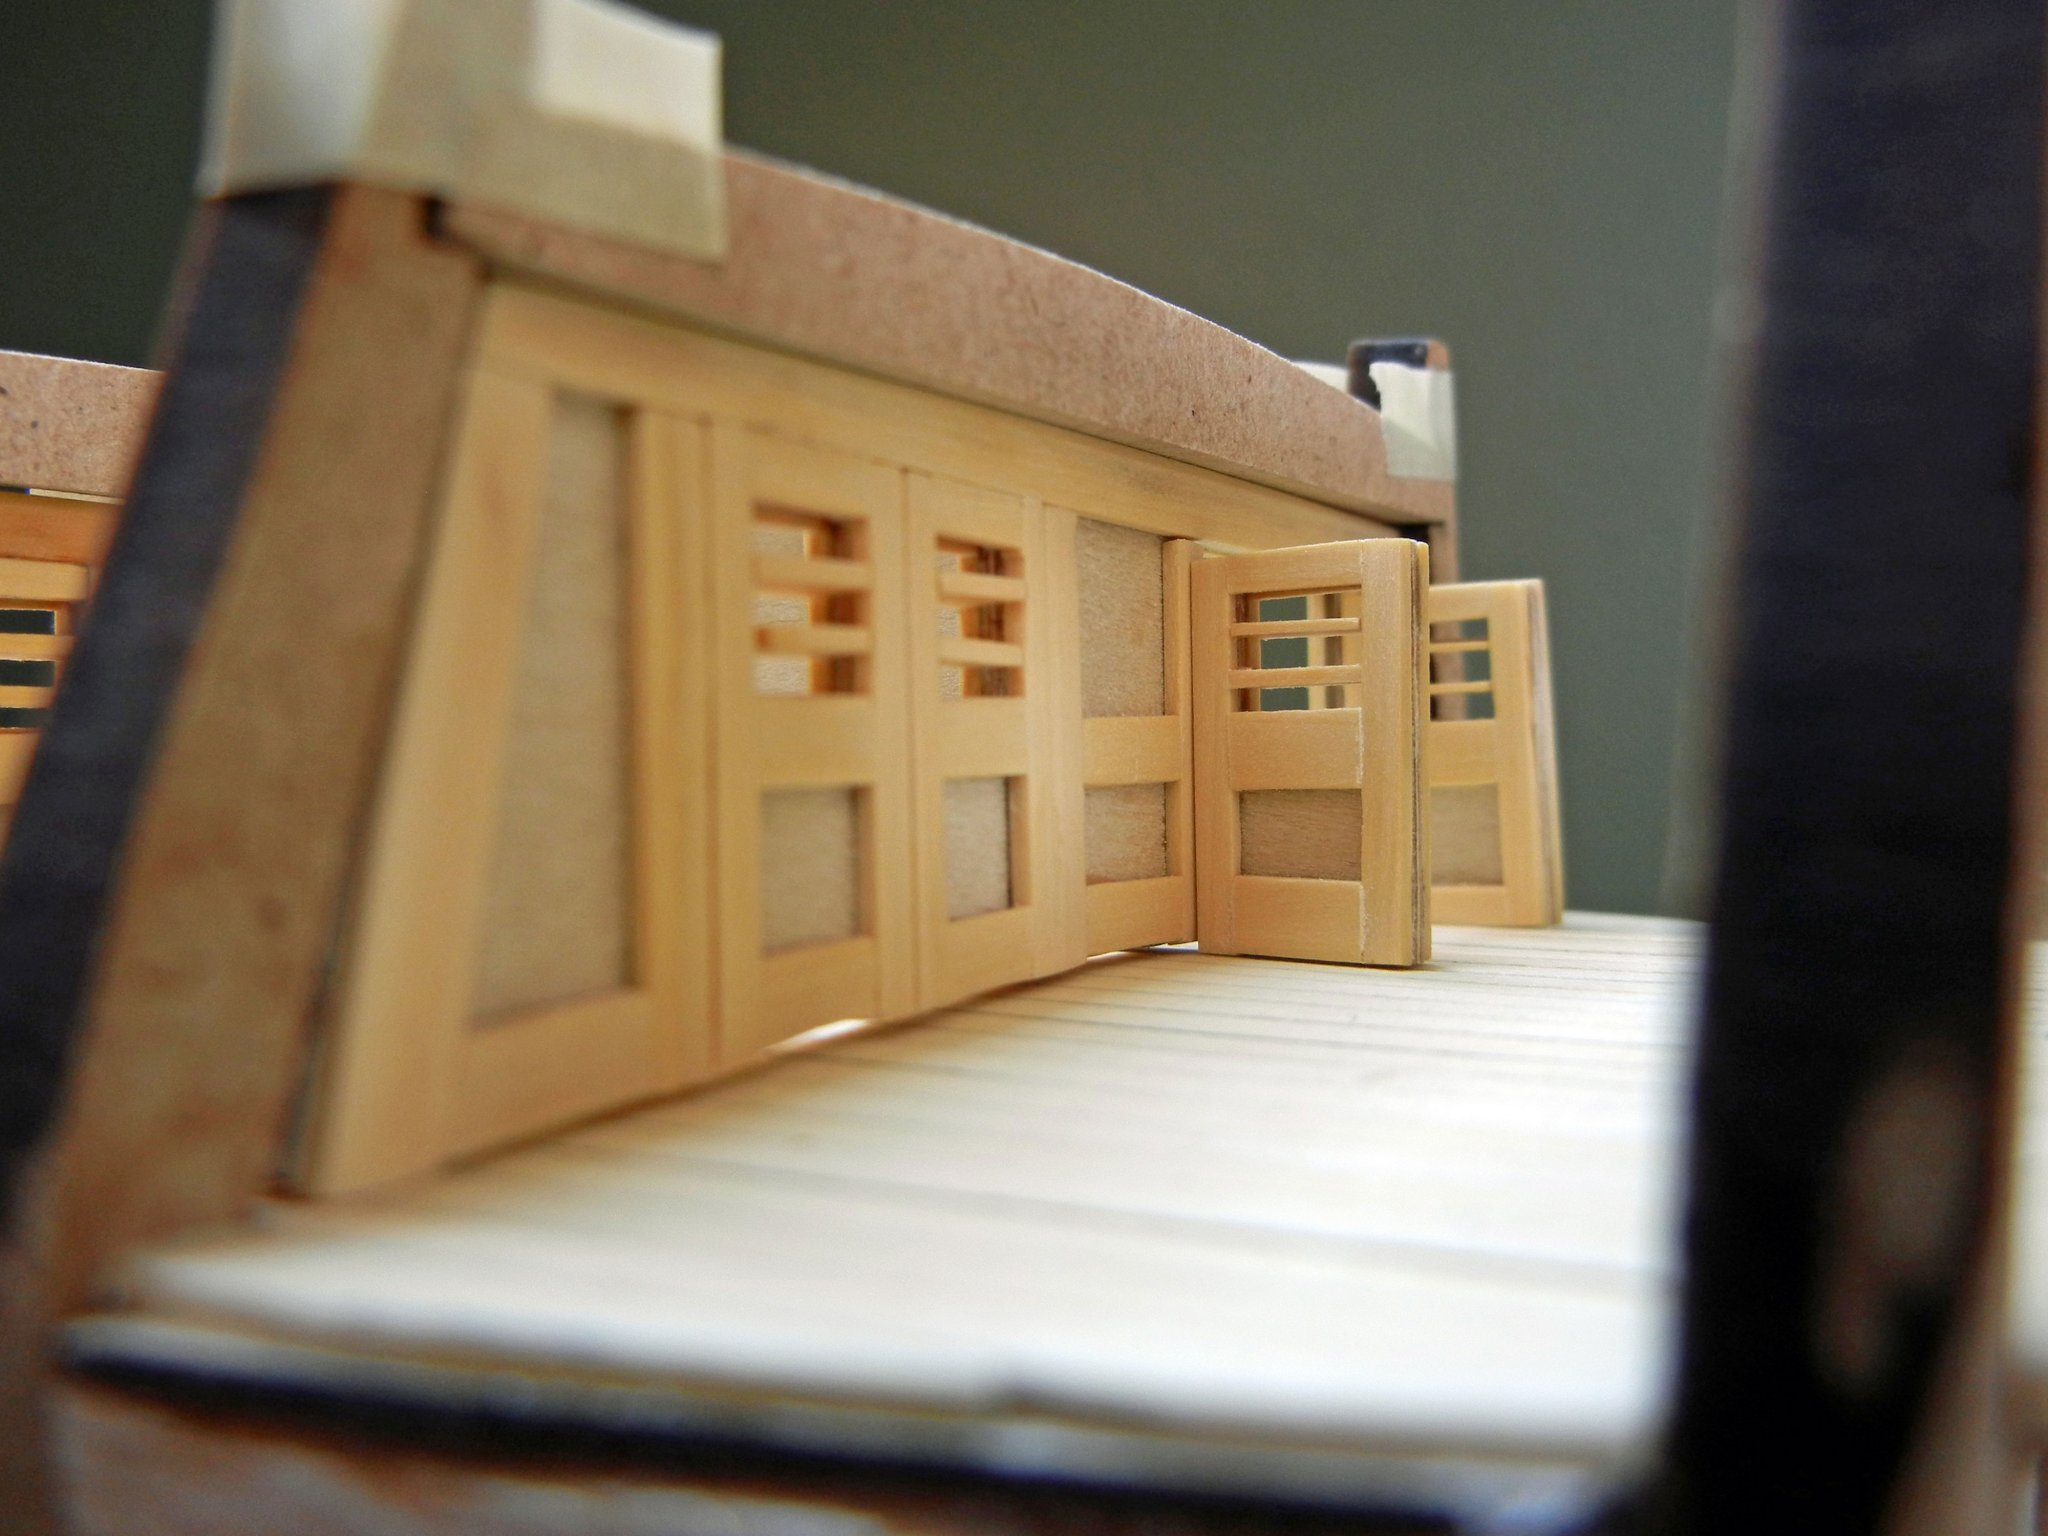
The main deck begged for cabins, which provided a distraction from assembling the “big bones”. Working from scratch allows some design work and creativity. Trial fit of cabin partitions.

Dave B
-


Hello from Seattle - looking to buy a built ship
in New member Introductions
Posted
Wyapa,
Welcome to MSW. You’re asking the right question. A good place to start is here http://modelshipworldforum.com/ship-model-plans-and-research.php
A common starter is Model Shipways Bluenose. It is a good starter with many build logs on this site.
Dave B