


von stetina
-
Posts
164 -
Joined
-
Last visited
Content Type
Profiles
Forums
Gallery
Events
Posts posted by von stetina
-
-
Thank you everyone,
I wish my photography was better. When finished I'll hang a neutral gray something behind it and do a better job of it.
My last bit of rigging that I'm putting in is a real problem to do. Apparently the heart problem made me stupid too as I completely skipped the harbor stow of sheets connected to the above clew lines as described in the Underhill book. Home from the hospital I got into the model room to look at my work and immediately saw what I'd done. I looked at the several feet of fine chain left aside for doing the lower sheets and about freaked. Reaching in in there around the main mast was tough. Things aren't as nice as I'd like. I'd also left out most of the staysail rigging.
I spent a lot of time repairing damage done getting into the already there rigging. I inadvertently cut braces with my safety razor blade on a stick tool, etc. etc.
I'm super anxious to start a new model. I might even re-do Lightning. I'm looking at either Red Jacket, or the 4 mast barque Parma too.
Bruce
-
Hi Ed,
First class work as usual. It's fun catching up on your build after being away from things.
I found the standing rigging work on my Lightning model very enjoyable. I swore my whole way through the running rigging. I'm about finished and glad of it. The air in my modeling room will be blue for years. The tiny .008 line needed for some things was a horror show. Though this was my first ship model.....
Can't wait for the next model.
Bruce
-
Hi all,
I've been gone getting my ticker re-plumbed. Had a bad ekg, then a heart catheterization for a stent, found out a stent wouldn't work. I had a triple bypass at the Gainesville/Shands V.A. Hospital within 4 days. Had a bleed, they stopped that. I went home for 3 weeks and passed out. Ambulance to Tallahassee this time as they could only get me back to the V.A. hospital by chopper for $40.000. I spent 5 more days with them trying to figure out where my blood went. Anyways, the V.A. was terrific [Tallahassee too] and I'm all patched up and am shortly to finish Lightning. Below are some pictures of me adding rigging that I forgot to put on earlier. It is a terrible job getting in behind what was there. Also Lightning has that recessed deck with the flying bridges making it very hard to get to the belaying pins.


- GrantGoodale, RichardG, bhermann and 15 others
-
 18
18
-
Hi Ed,
Looking great Ed.
Looking at your build takes me back many years to this same stage in my Lightning model. Before I closed up the hull I powdered the inside with insecticide. I felt it to be important, especially here in Florida where we grow them big and many as well as tiny and terrible. Later when I went to step the masts I found some powder partially filling the mast step for the mizzen. I made mini vacuum by taping a soda stray on the end of my shop vac and hosed the step out.
Bruce
- Landlocked123, EdT, GLakie and 2 others
-
5
-
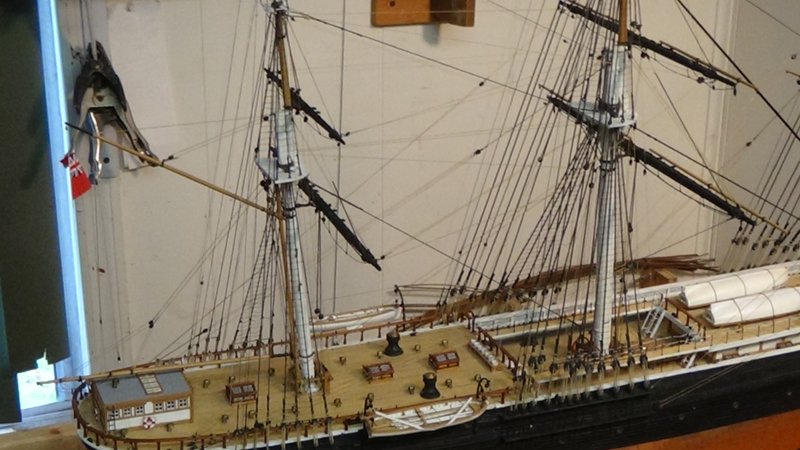
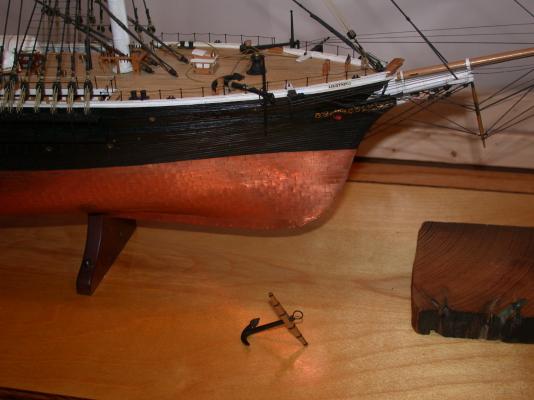
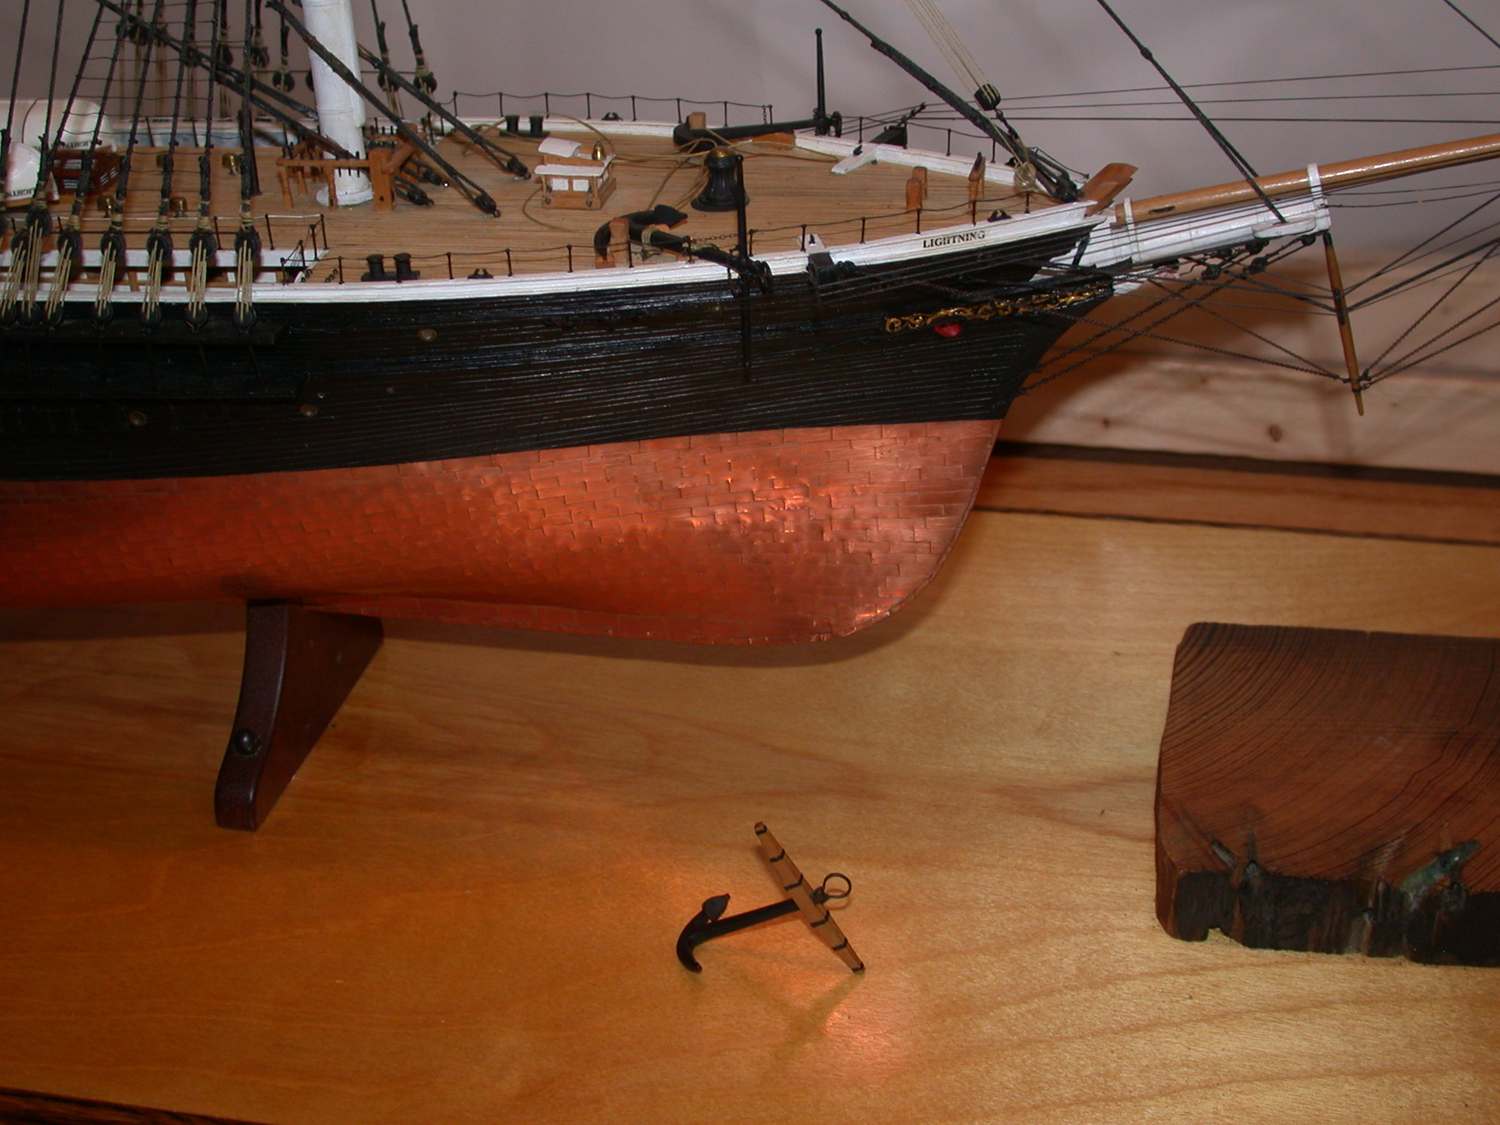
After looking at the model for all this time I found that the wooden stock anchors noted on my plan set looked out of place on such a progressive vessel. The big splash of brown drew the eye too much up on the this area. I made an artist's call and put more modern looking anchors in place. I find it much more pleasing to the eye. My research showed the type as correct for this period also. I feel that as long as this was historically feasible it would be OK.
All for now. I'll be back soon.
Bruce
-
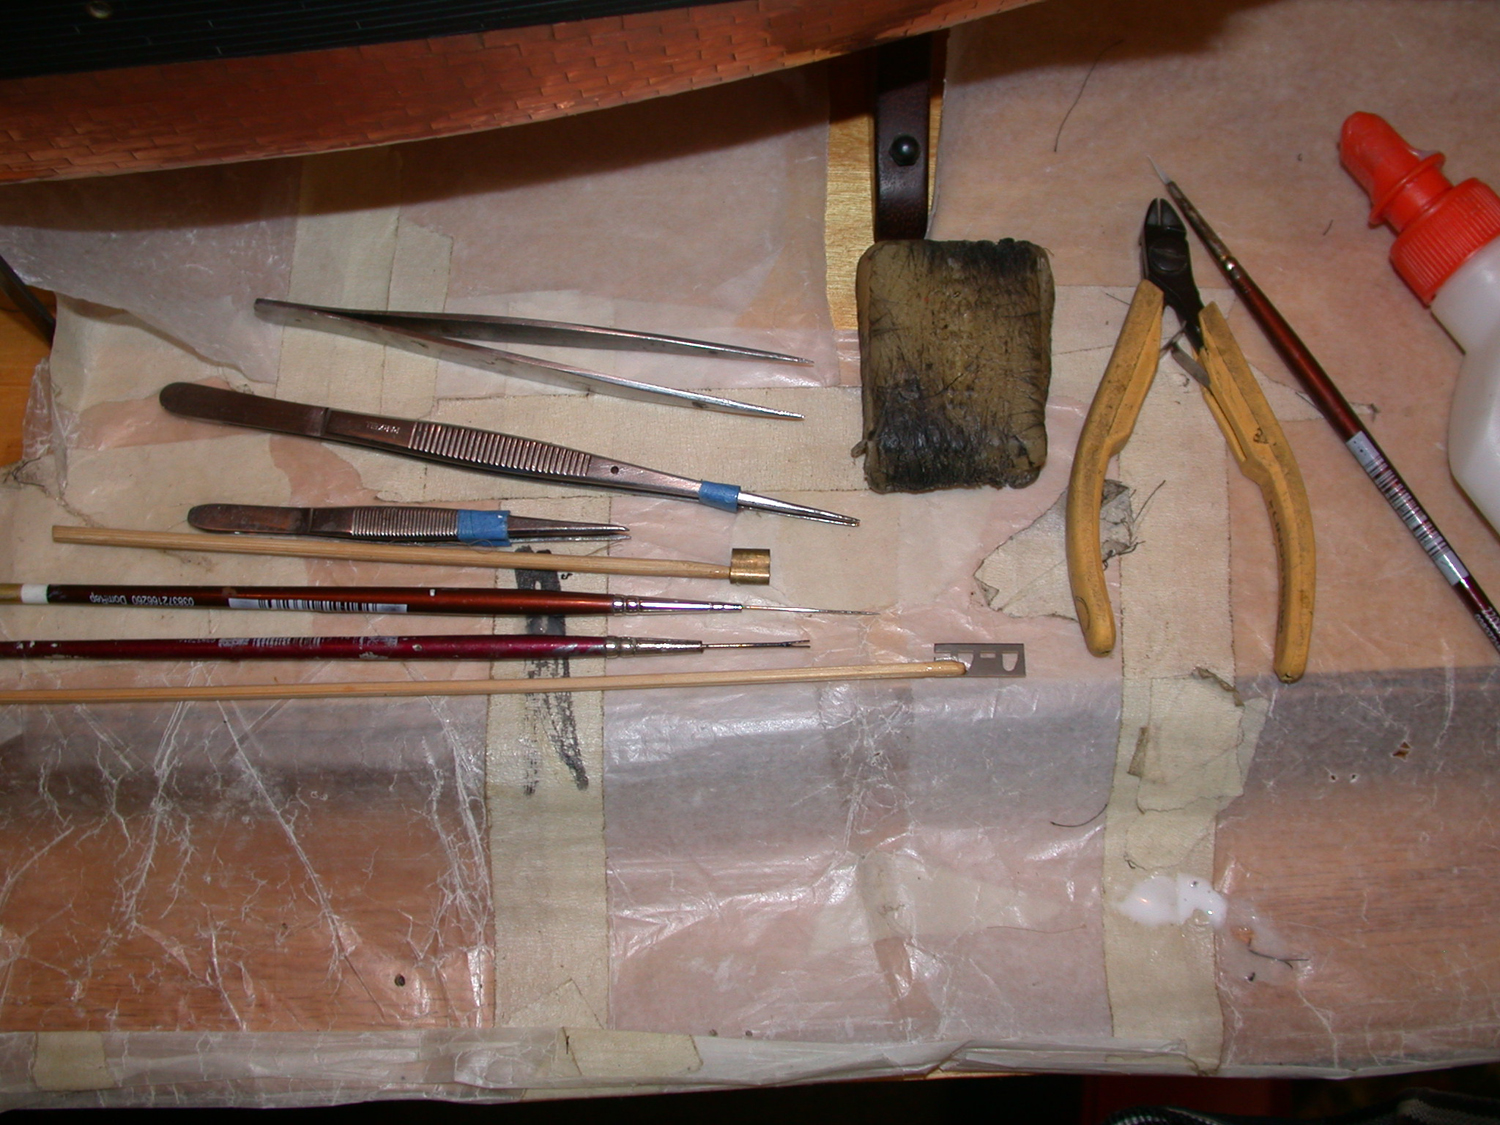
These are the tools in use. Not many. 3 tweezers have done most of the work. There is a paint brush handle with a needle in it. This is for undoing knot goof ups. For cutting off loose ends you can see the bamboo stick with a broken off safety razor half. Very sharp.
Bruce

- mtaylor, popeye the sailor, mcpwilk and 6 others
-
9
-
Hi Druxey, Thank you.
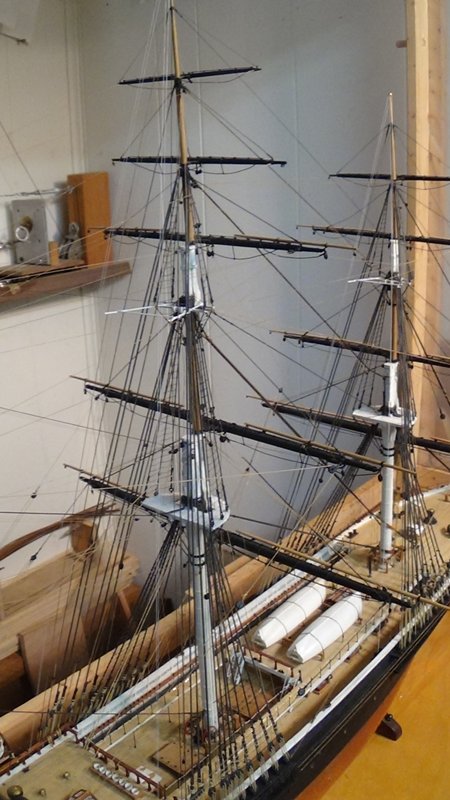
These pics show the ratlines in place. Up from the rail a bit are the fairleads. They are made by cutting tiny brass tube pieces that have had a groove turned into them so that they can be tied on. They must be check for the fit of the lines that travel through them first. They are so tiny that a dab of glue on them stuck them in place, after drying they were tied on. On the topmast and topgallant shrouds the shrouds get too close together and the ratlines are carried over onto the backstays. I found this fact in the Underhill book about masting and rigging.
You can see that not all of the ratlines go across all of the shrouds, but only the 5th is carried over all of them.
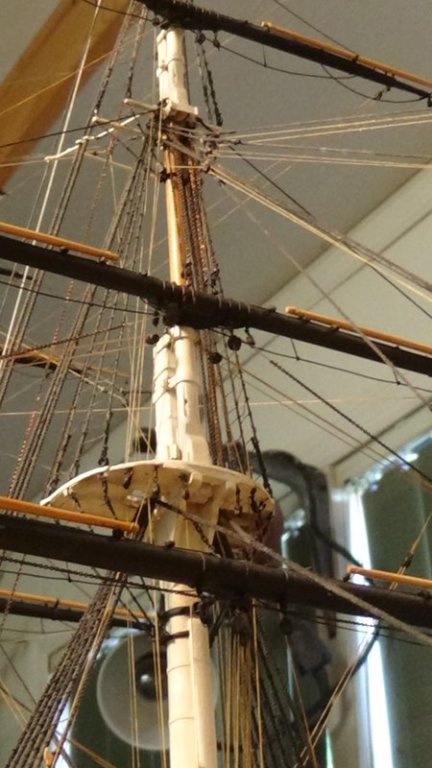
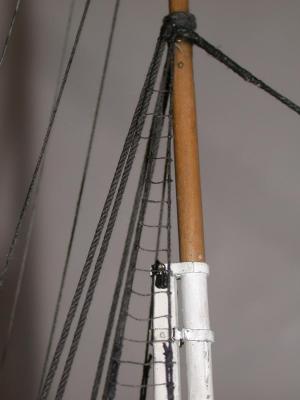
On the top and topgallant masts you can see the practice of using bullseyes instead of deadeyes. The plans show this as well as many old photos. It was probably easier to take up the slack under way?
If you look at earlier photos of the lower mast tops you can see the extra bracing McKay used for extra strength between the top and cap on the lower mast doubling. Also you can see his practice of using a 3rd topmast backstay carried before the last shroud. [it sure makes the ratlines there a problem.] I'm sure it helped down on the Australia run in the storms. Also the 11 1/2 inch shrouds, stays, and backstays up to the topgallant level would give a lot of extra strength for hard driving. The extremely long sharp hollow entrance was probably for storm performance also. I think she had the sharpest entrance of all the clippers. It's no wonder his ships held so many records for speed and 400 plus miles per 24 hours. The immigrants must of had quite a ride. 3rd class down below must have been quite an experience. I wonder if they had access to the ship surgeon too. Did they get to hear the band or get the ship newspaper Lightning Times? The very long list of captain's rules sure applied.
Bruce
-
Hi guys,
It's good to be back. I've finished the work that I need to bring in the bucks, now it's fun time.
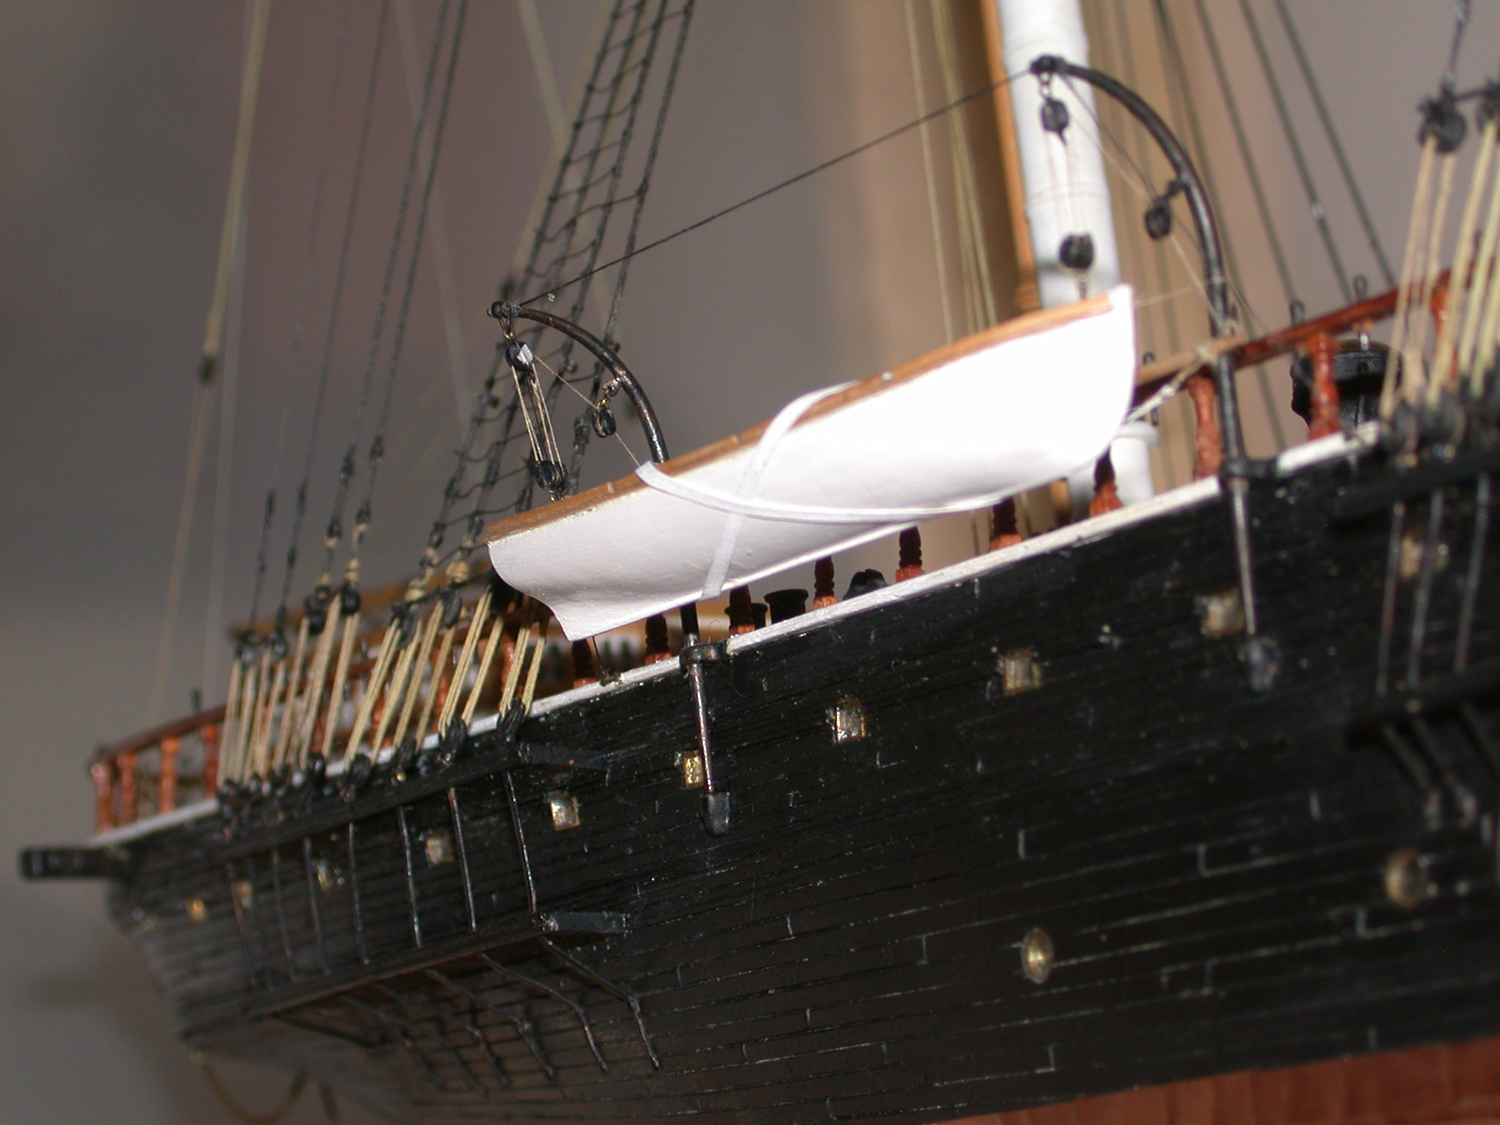
I'm doing the ratlines now. I'll never forget how to do a clove hitch, there are well over 1000 of them. As I began I found that my tweezers were opening too far at times and stretching the ratlines above and below. By limiting them with tape I solved this. I forget the dia. right now, but I think the thread is about .015.
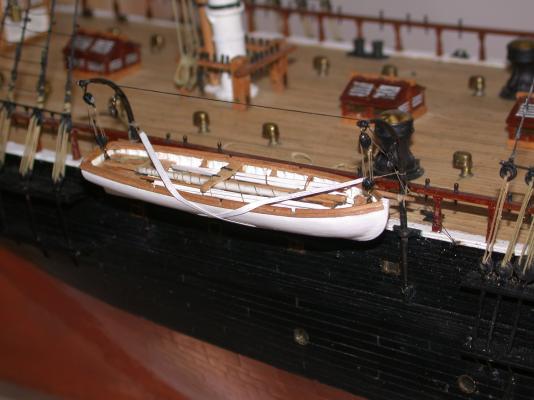
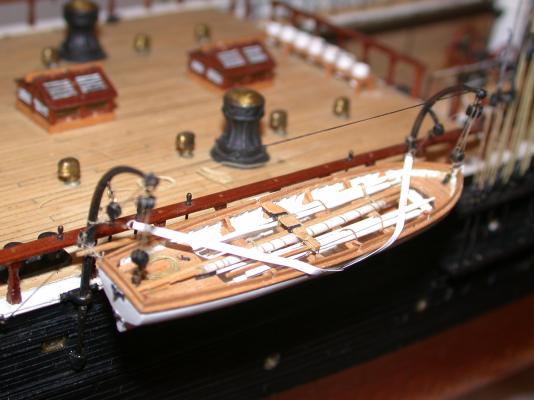
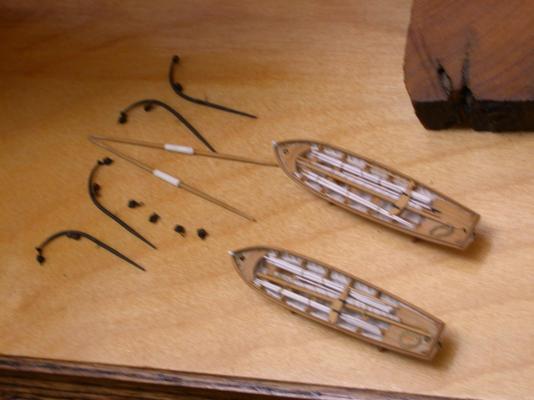
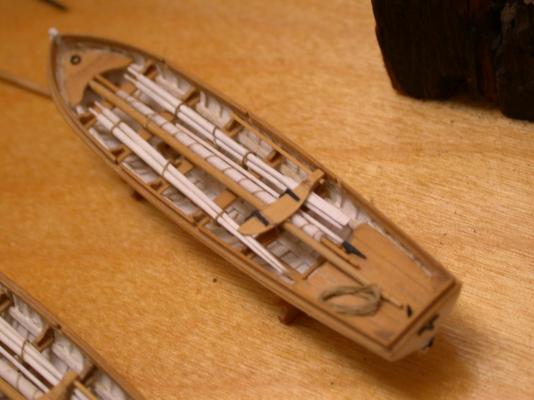
As I had finished this side I could finally put on the davits and hang the boats. The griping straps are of paper strengthened with acrylic gesso.
I found that very few tools have been needed. I'll show the later. I've been up all night so i'll get back to you this evening.
It's so good to be back, I've missed you all. I see Dan wrote. Hi buddy.
Bruce

-
Hi Ed,
It sure is looking terrific!
I'm finally almost done with Lightning's ratlines. Over 1000 clove hitches, I'll never forget that knot if I live 500 years!
Them I'm ready to start installing the yards. It will be quite a moment to finally open my drawer full of yards and start in on them. I'll be posting my progress pics soon. I'll be showing the tools I've found the most used. Not many at all.
Once again, your model is wonderful.
Bruce
-
-
-
Looking awesome Ed! The stern looks great, I had the same things happen with Lightning's stern planking. The moldings were especially challenging. I'll bet you can wait to carve that stern eagle and decorations on there. She had some of the prettiest hull decoration of any clipper. I think YA and Red Jacket were the best decorated. Although it's awefull hard to beat lady Lightning with her lightning bolt....
Bruce
-
Hi Ed,
I've noticed the changes in photos. In MacGregor's Book there are some good photos. YA is there changed to the closer mast doublings done by putting a sort of dogleg to clear the shrouds, and iron mast caps. I don't remember if she had been switched to bullseyes for upper shrouds or not. I have 3 different plans of 3 different ships done by Crothers and the differences are interesting.
I found it at only one small RR business They are the only place I found it in 10 foot bulk packs, everyone sells it by the foot. I'll look up their name and post it later or e mail it you. I found that for Lifghtning I needed more than 9 feet.
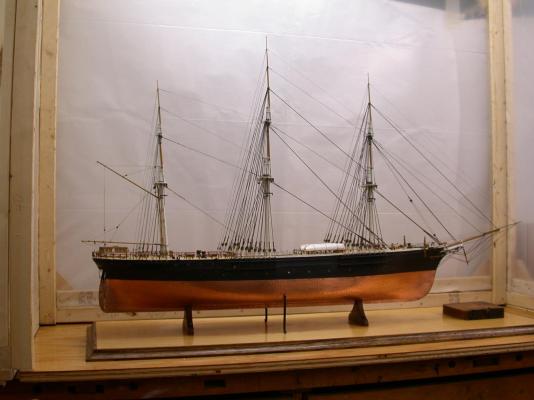
Enlarge the case...it really brings home the size of these ships doesn't it. I read somewhere that one could build two 74 gun ships with the timber it took to build some of the big clippers.
Shop foreman shown below. winking.
-
As soon as the ratlines are done I will mount the davits and boats. Braces go over this area so I think it's time to put them on. Another thing to catch a finger on...
I have no pictures yet but I'm doing the ratlines. I quickly learned to use tape wrapped around the tweezers to limit the amount they open. They would damage the work when they opened.
For doing work shaping blocks I modified a set of tweezers. A lot of blocks are tiny at this scale. Some smaller than a grain of rice. I'll try to remember to take a picture of them.
All the photos for a bit. I've a brass Fairfield coal drag conveyor and a stock pen to build to bring some money in. It kills me to have to take time off from the Lightning. I'll keep an eye though to reply to anyone.
Bruce
-
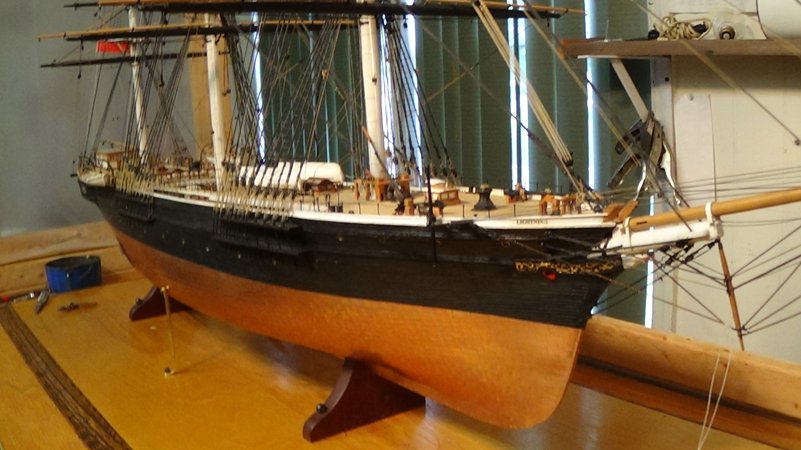
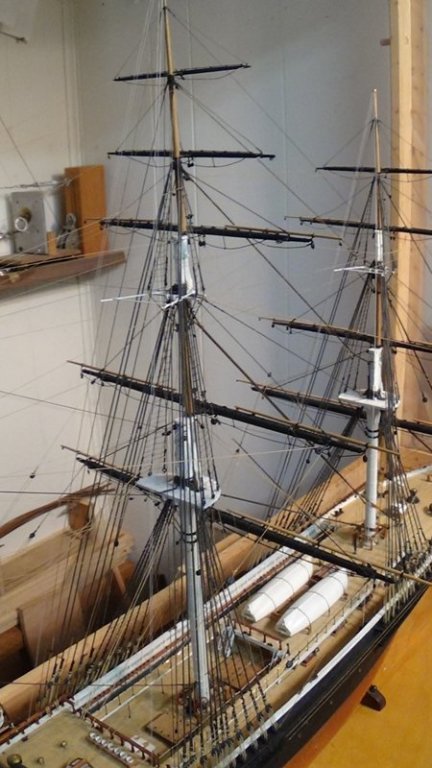
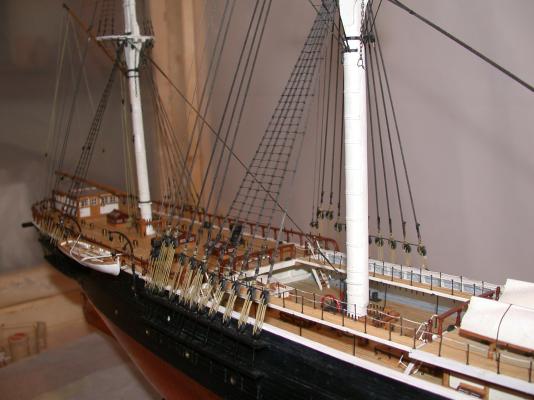
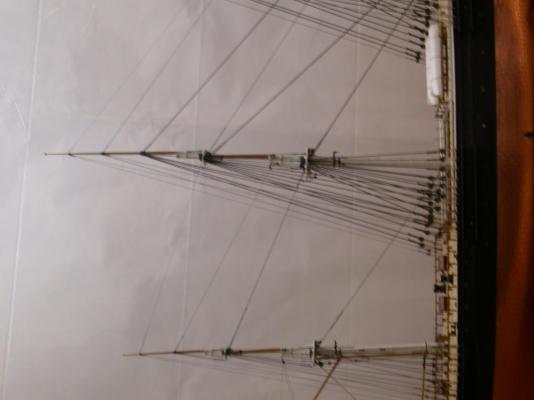
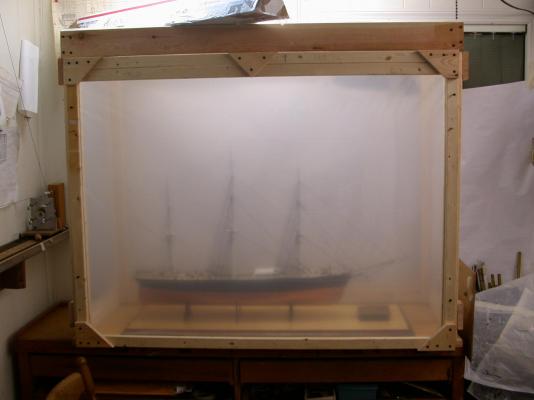
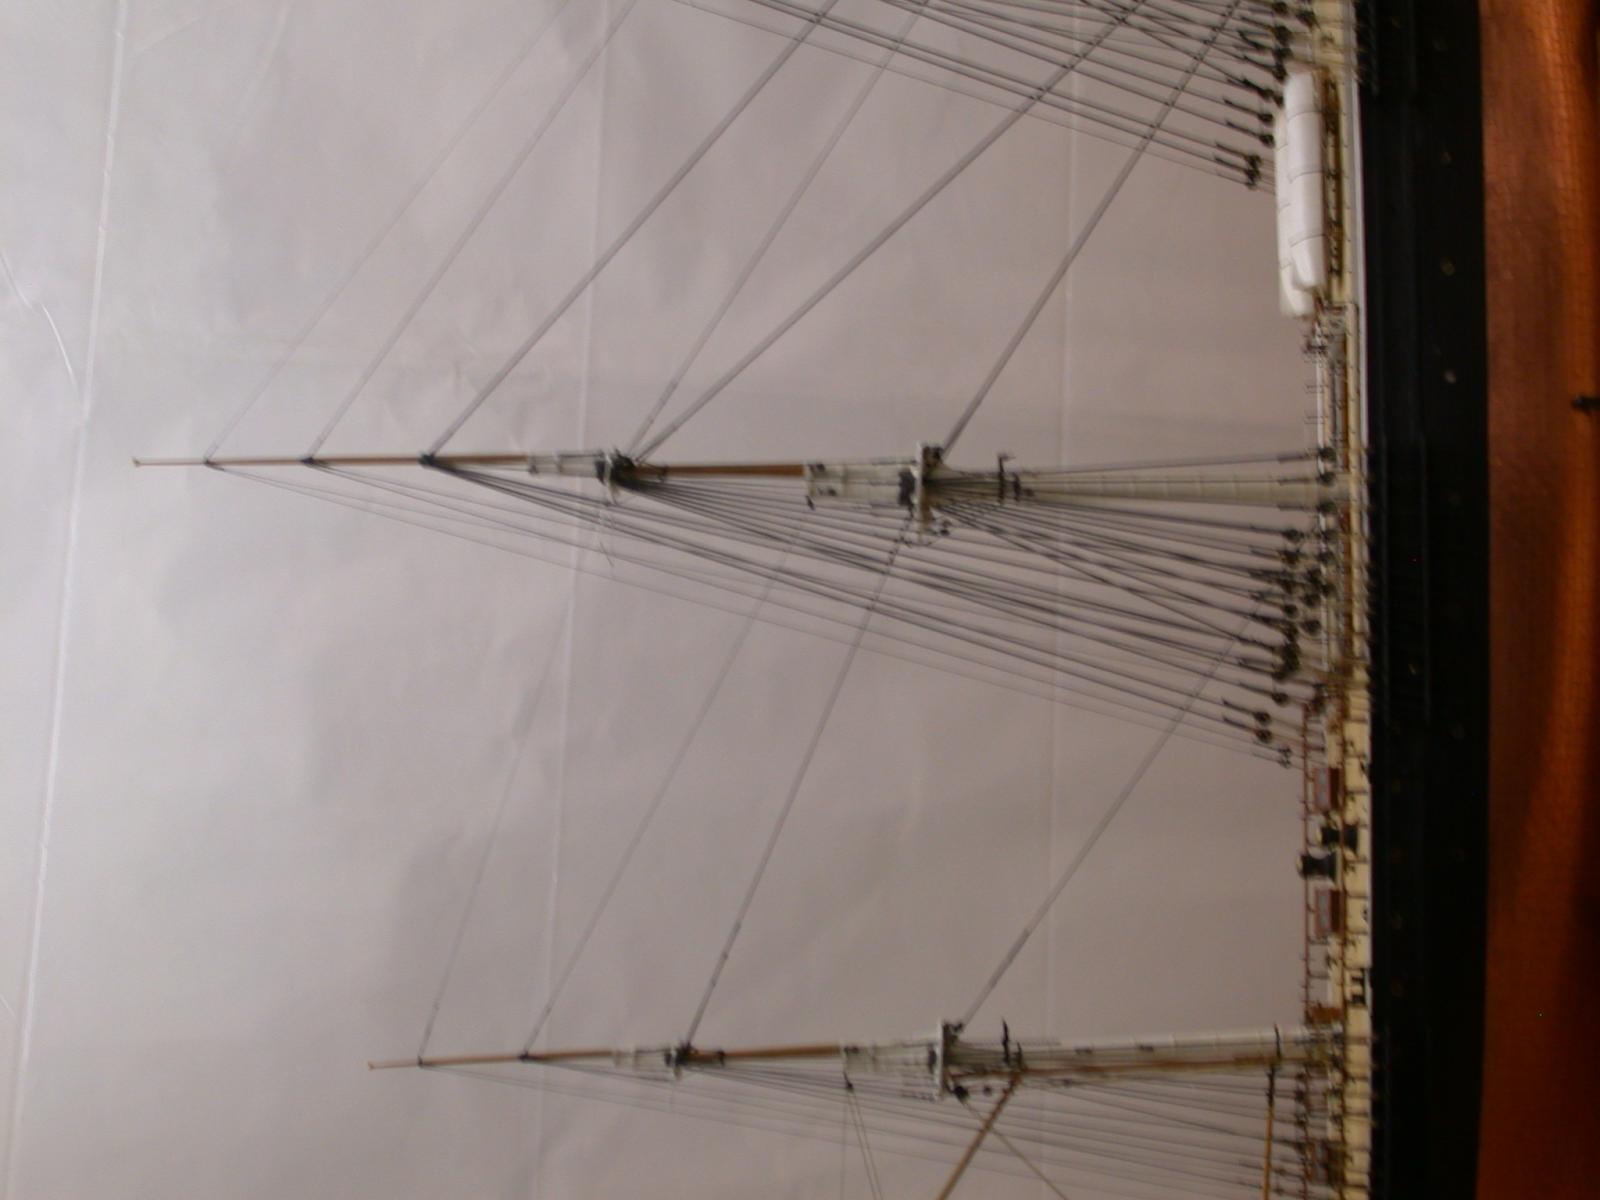
A look at the overall project. It's such a relief to be able to button up my model safely in the temporary case. You might notice that the ship is mounted on it's base at this point. It was time for the stability and safety of being fixed in place. The supports on the side are blackened brass. I experimented with different looks for this and settled on the simplest way. The model will need to be shipped a long way and need this stability.
-
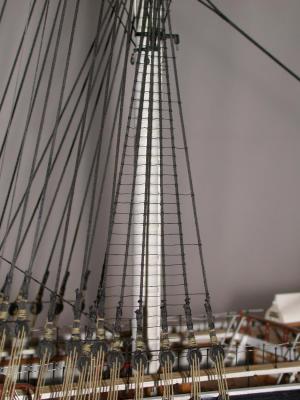
A look at the backstays. Originally I had intended to us Conservators wax on all of the rigging. However I found that it didn't lay down fuzz well enough so for the running rigging I switched to beeswax. On the heavier lines of standing rigging the Conservators wax was good, but when used on the finer stuff I wasn't happy.
I keep bumping fingers into the thin lines and they slacken. I was trying deal with the idea of doing some over when I just wiped a finger of, um, spit, down the line. It tightened right up! So now besides being careful I just do this.
I'm not to this point yet but in Wingrove's ship modeling book he says to put the yards on by doing the highest first and working down. Have any of you done this?
-
Hi Rob, Elias, and Druxey,
Thanks, I've been anxious to get back to work on the Lightning. I have a bit more to post coming up, then I'm afraid it's back to work hustling to make a buck. At least it's work that I enjoy. For the RR guys I build in brass.
Anyone wanting to see how an iron ship modeled in metal looks go to Gerald Wingrove's website. He has some very good books published too.Just the complicated little machines he makes to build his model is worth a look. The metal forming and rivet making tools for this ship model a incredible.
Bruce
-
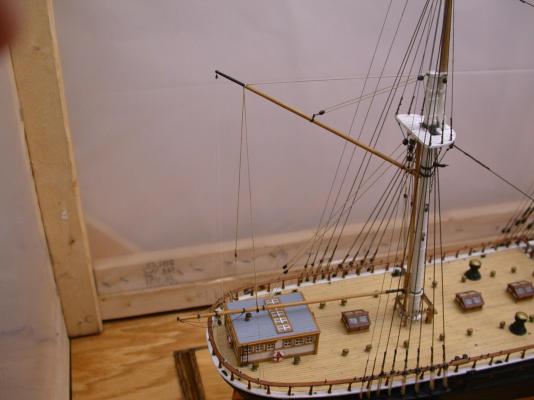
It felt great to finally put on the spreaders. Waiting to put them on until now allowed me to position the length and spread correctly. Putting them on too early could have resulted in a bad fit.
They are made of brass also. Another thing I wanted to mention is the use of bullseyes instead of deadeyes here. This is correct for the period.
Time to spend some time with the wife, I'll post more later.
Bruce

-
The spanker boom and gaff rigged in place. Using the correct different sizes of rigging bring on the appearance of reality. Seeing the blocks in place is bringing the ship to life for me. Just as doing the rigging on my oil paintings brings the ship to iofe for me.
I took a piece of brass tubing and ovaled it out to wrap my coils of line around to be put on the belaying pins. A touch of white glue fixed their positions.
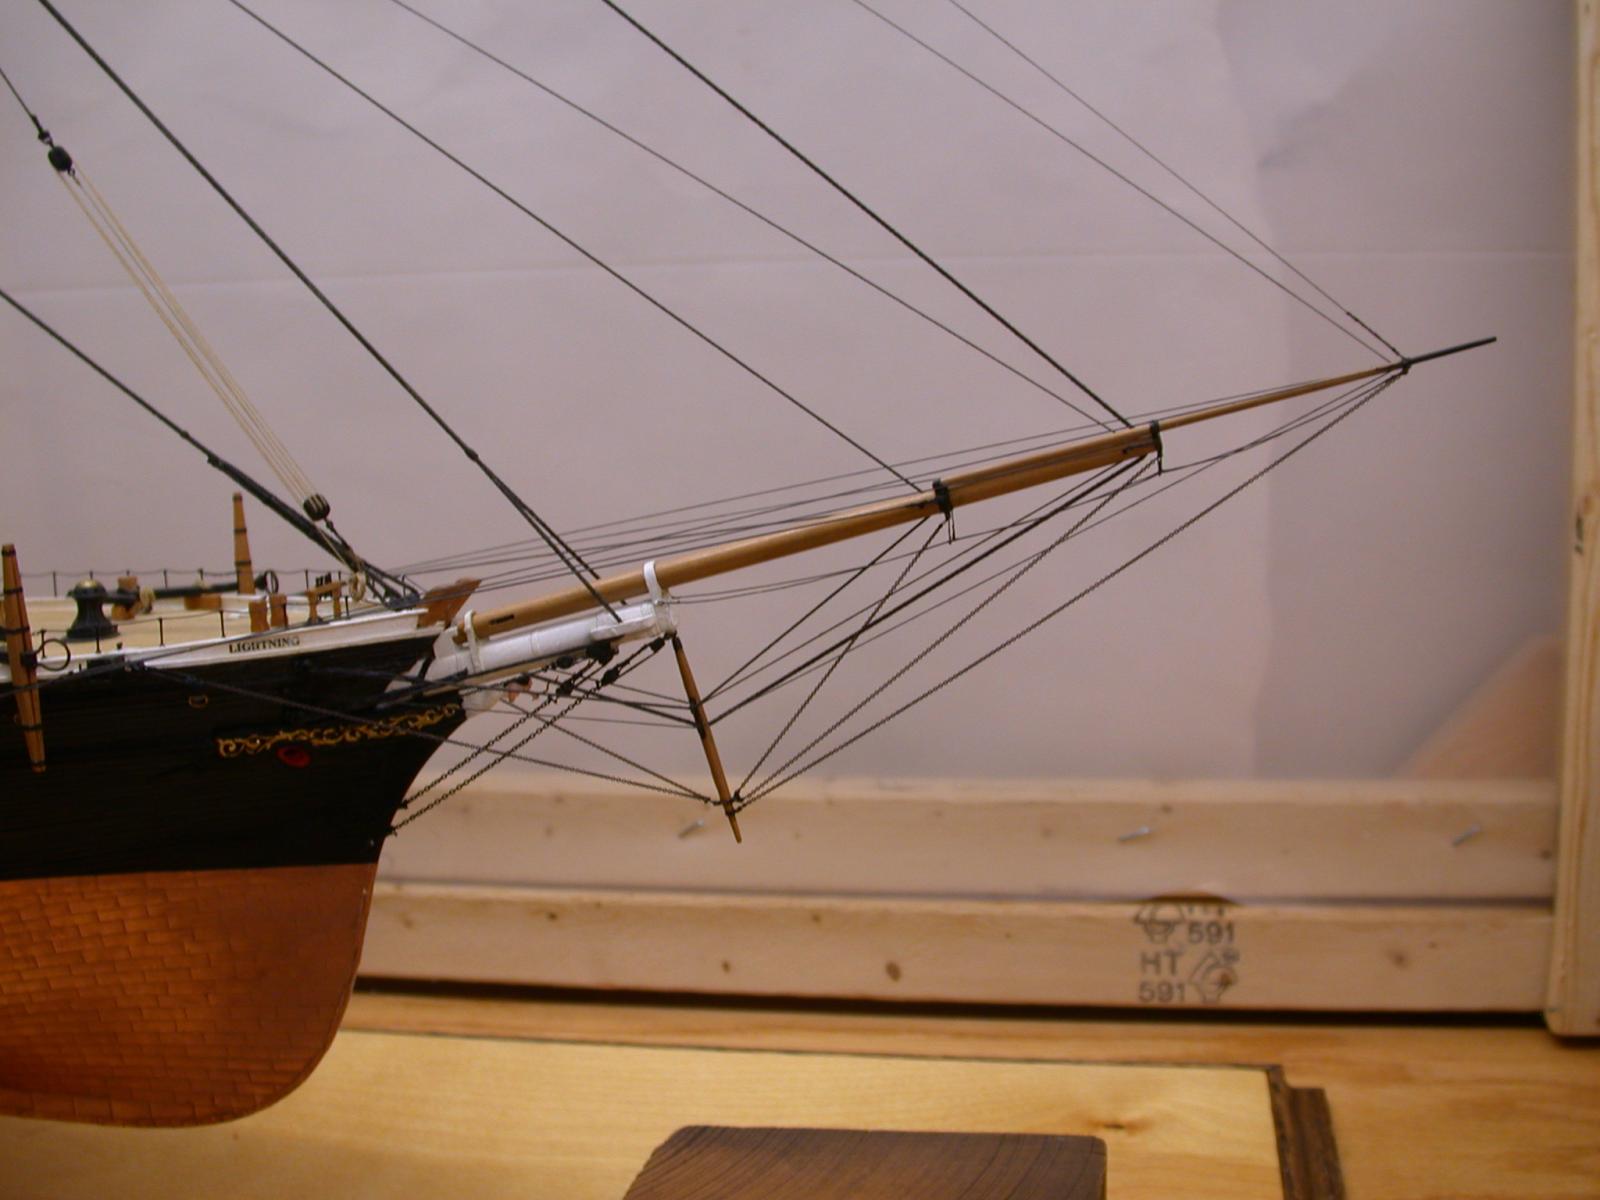
OH! I forgot to tell you, the flying jib boom is made of brass. The wooden one would have broken. I kept bumping the brass one. Next ship at 1/8 scale I'll do more of this.
Bruce
-
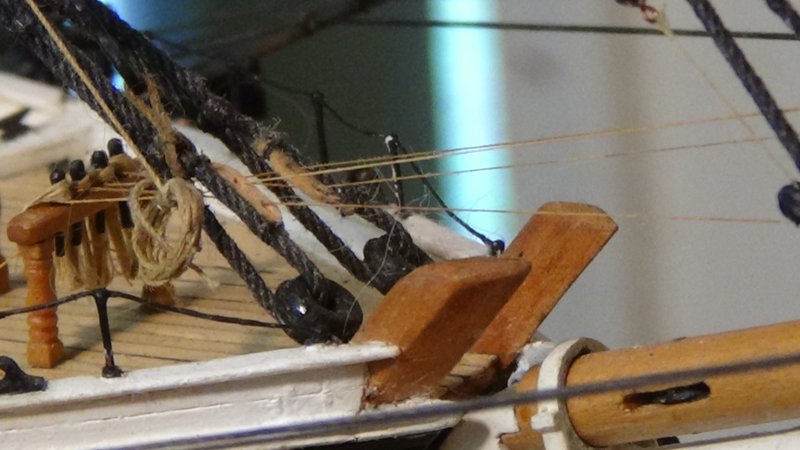
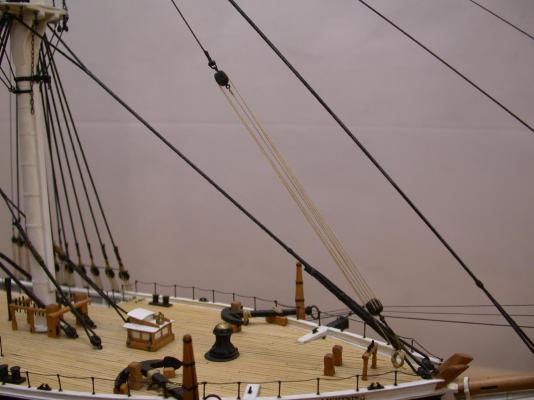
The fish tackle in place. On the far side you can see the whisker booms finally folded down, rigged and fixed in place. I tied fine thread on them to be sure they stayed there
Bruce.
-
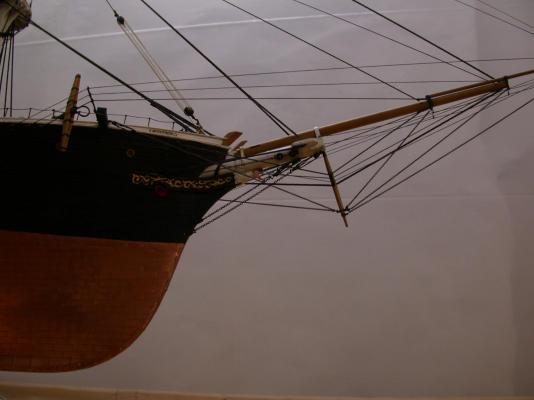
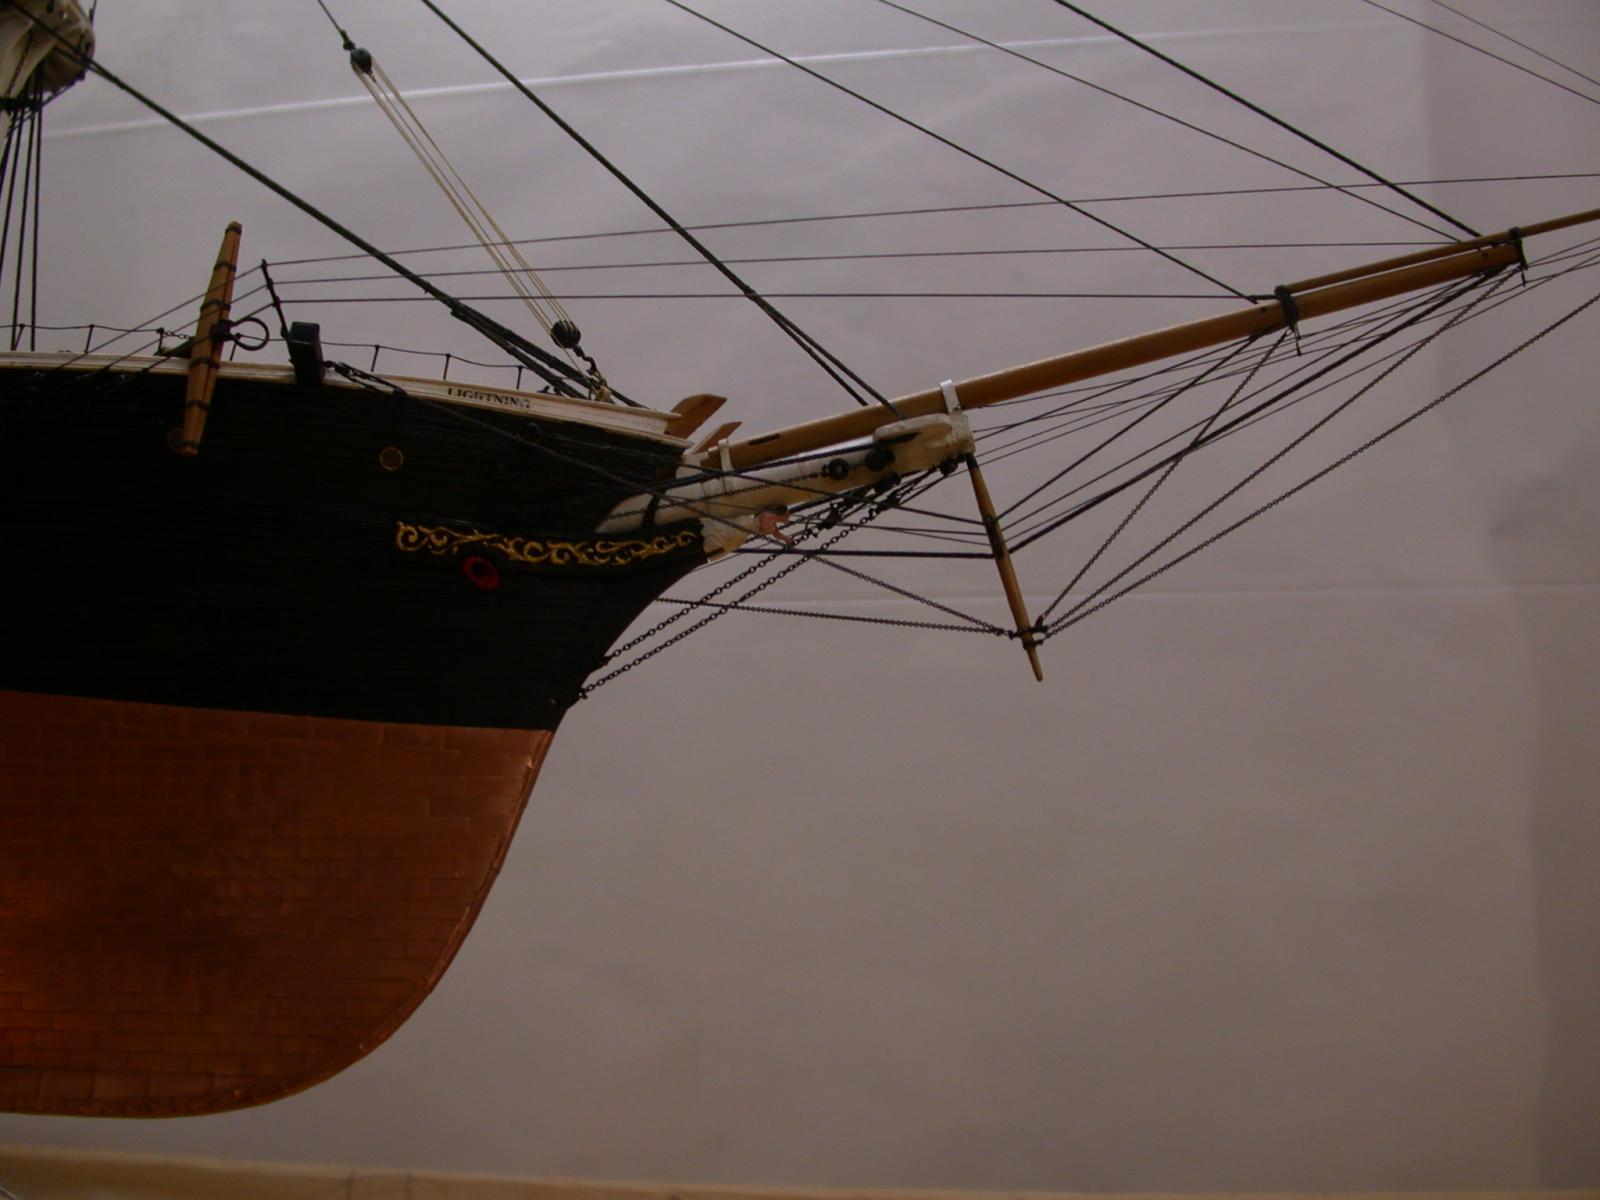
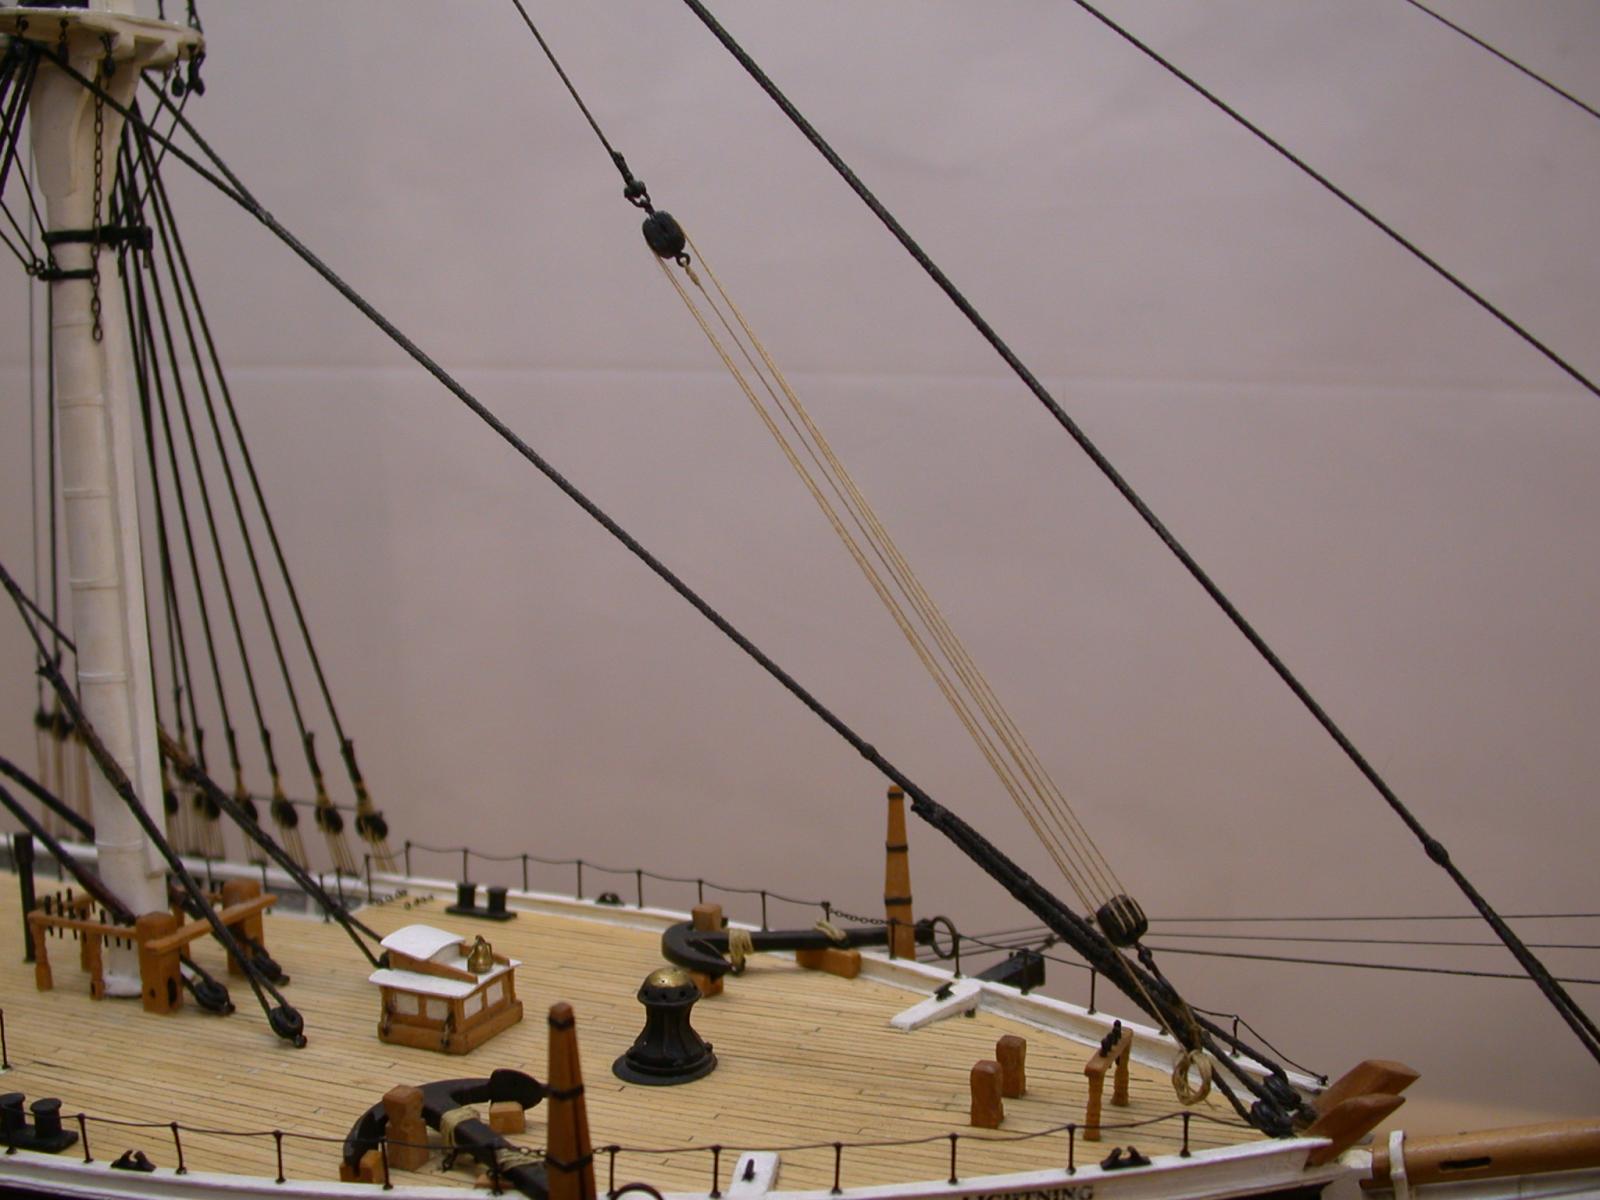
The bow is complete. Notice the different size chain. The chain was difficult to size so that there was no slack. I did this by removing links and adjusting the bullseyes.
I bumped the chain with a finger and it went slack....pre stretch the chain first!
Bruce

- Mirabell61, tarbrush, SailorGreg and 12 others
-
15
-
Hi folks,
I've been busy with commission for railroad models.
This is a temporary case I made to keep my model clean as I rig it. It had been colelcting an impressive array of cat hair and etc. It took a while to clean it, especially the rigging. It was time for a solution.
The front lifts off, and the model slides out to turn it around.
I will post a lot more photos soon as the standing rigging complete except for ra\tr lines which are under way.
Sorry for being away so long.
Bruce
-
Looking great! Anybody that doesn't think American clipper were the best is nuts. And realize...Webb built light! His ships lasted extremely well though, which makes me wonder about the idea of power to weight ratio that we are concerned with on our racing machines these days. It may have applied there as well.
Here is something that weirds me out... After so many of Donald McKays ships burnt, his barn burnt too when he retired! But so many of these ships burned no matter what builder. Still, a lot of his ships went that way.
Another interesting thing is that his Staffordshire was lost with all aboard right before his giant Great Republic burnt.
Bruce
-
I'm an old custom automotive painter. When I got out of it water based automotive acrylic were in use on all kinds of vehicles. For farout finishes I used Createx Autoair. Lots of wild colors. There is a specific reducer and there is an important difference. There are also extenders. Final coats and primers were solvent type still.
I'm also a fine artist and use that type of acrylic too. I carried the reducer over into my artists acrylics and it was a huge help after all the years of mediums and etc.
Von Stetina


Glory of the Seas by Rwiederrich - Medium clipper 1869 (discontinued in lieu of new log)
in - Build logs for subjects built 1851 - 1900
Posted
Hi,
I'm back after overcoming a variety of adversities, and am glad to see how nicely your build is coming along. At about the point you are at now the air in my shop was turning blue with a wide range of nasty 4 letter words.
Don't know if I'll be remembered after all this time.
Your model is looking beautiful! I'm long ago finished with LIGHTNING. I hope to put it in the gallery. Still needs a case though. I'm started on RED JACKET.
Bruce Von Stetina