sparrow Posted November 3, 2013 Author Share #61 Posted November 3, 2013 Hello Jan,Just to let you know that I'm enjoying your build ,thanks for the learning.Edwin Hi Edwin, I am very glad that you like my build! You are welcome.:-) Best regards, Jan Quote Current build: Royal Caroline by Panart First completed build: Golden Star by Mantua Link to comment Share on other sites More sharing options...
sparrow Posted November 3, 2013 Author Share #62 Posted November 3, 2013 Hi Sparrow, Very nice job you're doing there........i must try this sculpey business myself some time, especially after seeing Doris's efforts which are beautiful ! I hope you don't mind me saying this but I did prefer the original blue that you were using this one seems a bit too bright, will follow with interest as she was my first build and it's interesting to see how other people tackle builds. Cheers Jack Hi Jack, thanks for your comment. Definitely go ahead and try Sculpey yourself. It needs some practice that I am still gaining and quite a lot of patience but the options are endless. Doris work is definitely an ideal and master work that I can only adore so far. Actually the blue is probably less bright in reality than on those pictures. However there are people who prefer the previous blue while some like this one more. I am still not sure which shade is actually the closest to the real RC... Do you have a build log of your model? Cheers, Jan Quote Current build: Royal Caroline by Panart First completed build: Golden Star by Mantua Link to comment Share on other sites More sharing options...
jthemanjack Posted November 3, 2013 Share #63 Posted November 3, 2013 Hi Jan , When I built her I did not even know what a build log was to be honest , this was a number of years ago before i even owned a computer ,although I have posted images of her in the finished Kit built section, she has the Humbrol Azure blue colour scheme ,i may build her again in years to come and follow your example of improving on the kit contents , Cheers Jack Quote Link to comment Share on other sites More sharing options...
sparrow Posted November 4, 2013 Author Share #64 Posted November 4, 2013 Hi Jan , When I built her I did not even know what a build log was to be honest , this was a number of years ago before i even owned a computer ,although I have posted images of her in the finished Kit built section, she has the Humbrol Azure blue colour scheme ,i may build her again in years to come and follow your example of improving on the kit contents , Cheers Jack Hi Jack, I have found your RC in the gallery and it really looks nice. The Humbrol color scheme is also looking fine. Nevertheless I am going to keep this color, hopefully it won't be so bad in the end. In case you will build this kit again definitely look also at the build log of Marsalv who is doing really great job on RC - many things I am not able to tackle with such a high level of precision as he does... Cheers, Jan Quote Current build: Royal Caroline by Panart First completed build: Golden Star by Mantua Link to comment Share on other sites More sharing options...
marsalv Posted November 4, 2013 Share #65 Posted November 4, 2013 Hi Jack, I have found your RC in the gallery and it really looks nice. The Humbrol color scheme is also looking fine. Nevertheless I am going to keep this color, hopefully it won't be so bad in the end. In case you will build this kit again definitely look also at the build log of Marsalv who is doing really great job on RC - many things I am not able to tackle with such a high level of precision as he does... Cheers, Jan Thanks for great compliment . Quote Link to comment Share on other sites More sharing options...
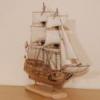
sparrow Posted November 9, 2013 Author Share #66 Posted November 9, 2013 Hi dear visitors, there is some more progress on the model. Another Sculpey ornaments added to the ship... Blue Ensign and Landlubber Mike 2 Quote Current build: Royal Caroline by Panart First completed build: Golden Star by Mantua Link to comment Share on other sites More sharing options...
sparrow Posted November 9, 2013 Author Share #67 Posted November 9, 2013 Construction of rudder. I haven't used the supplied plywood parts however I have made my own using balsa wood which was covered by 0.5mm walnut planks to match the color of the ship. I have made some own hinges from brass. Mirabell61 1 Quote Current build: Royal Caroline by Panart First completed build: Golden Star by Mantua Link to comment Share on other sites More sharing options...
sparrow Posted November 9, 2013 Author Share #68 Posted November 9, 2013 Finally here is my first attempt on the ornaments on the lower part of the stern. I have printed the pictures on a decal paper but I am not sure if the colorful images look right there. So I am currently trying some different way and will probably replace those... Also the rudder is visible on its place painted with white color. Cheers, Jan Shipyard sid, marsalv and Blue Ensign 3 Quote Current build: Royal Caroline by Panart First completed build: Golden Star by Mantua Link to comment Share on other sites More sharing options...
flying_dutchman2 Posted November 16, 2013 Share #69 Posted November 16, 2013 Beautiful all around and I like how you did your cannons, but I especially like the Siamese, very pretty cat. Marc Quote Current Built: Zeehaen 1639, Dutch Fluit from Dutch explorer Abel J. Tasman Unofficial motto of the VOC: "God is good, but trade is better" Many people believe that Captain J. Cook discovered Australia in 1770. They tend to forget that Dutch mariner Willem Janszoon landed on Australia’s northern coast in 1606. Cook never even sighted the coast of Western Australia). Link to comment Share on other sites More sharing options...
sparrow Posted November 20, 2013 Author Share #70 Posted November 20, 2013 Beautiful all around and I like how you did your cannons, but I especially like the Siamese, very pretty cat. Marc Hi Marc, thanks for your positive comment! The cat is actually Ragdoll and indeed he is quite nice. Cheers, Jan Quote Current build: Royal Caroline by Panart First completed build: Golden Star by Mantua Link to comment Share on other sites More sharing options...
bhermann Posted November 20, 2013 Share #71 Posted November 20, 2013 I have printed the pictures on a decal paper but I am not sure if the colorful images look right there. So I am currently trying some different way and will probably replace those... Jan My limited experience with decals suggests the colors come out truest if they are applied to a white background. In this case I am picturing painting the entire area under the transom white, then making a decal that covers the entire rectangle, with the background blue color printed on the decal. That might make the figures appear the way you want them to. I have read about (but never done) people printing their patterns on paper and then gluing the paper to the hull. Just a couple of thoughts - I look forward to seeing what you come up with - although I think that what you have already looks very nice!. I love the boot at the top of the rudder. Bob Quote Current build -- MS Bluenose Future build - MS Flying Fish "A ship is safe in harbor, but that's not what ships are for." - William G. T. Shedd Link to comment Share on other sites More sharing options...
sparrow Posted December 2, 2013 Author Share #72 Posted December 2, 2013 Jan My limited experience with decals suggests the colors come out truest if they are applied to a white background. In this case I am picturing painting the entire area under the transom white, then making a decal that covers the entire rectangle, with the background blue color printed on the decal. That might make the figures appear the way you want them to. I have read about (but never done) people printing their patterns on paper and then gluing the paper to the hull. Just a couple of thoughts - I look forward to seeing what you come up with - although I think that what you have already looks very nice!. I love the boot at the top of the rudder. Bob Hi Bob, thank you for your comment and suggestions. I have finally given up with the colorful print and instead I used office white paper that I covered first with golden color and then printed with black only. Then I needed to cut out the pattern and apply a little of golden color on the edges so that the white would not be seen. See the pictures... I think the golden scheme looks better and does not stand out so much in contrast to the other ornamentations. Cheeers, Jan bhermann, Landlubber Mike, Blue Ensign and 1 other 4 Quote Current build: Royal Caroline by Panart First completed build: Golden Star by Mantua Link to comment Share on other sites More sharing options...
sparrow Posted December 2, 2013 Author Share #73 Posted December 2, 2013 Hello, so some more progress on the Sculpey ornaments - this time the Royal coat of arms for the midships bulkhead. Also the stairs on the hull have been remade using wood and Sculpey. Jan Blue Ensign, Landlubber Mike and hexnut 3 Quote Current build: Royal Caroline by Panart First completed build: Golden Star by Mantua Link to comment Share on other sites More sharing options...
marsalv Posted December 2, 2013 Share #74 Posted December 2, 2013 Wonderfull work - as usual . Quote Link to comment Share on other sites More sharing options...
ZyXuz Posted December 2, 2013 Share #75 Posted December 2, 2013 That Lion and Unicorn badge is just awesome! love it! Quote Visit My Blog! http://malaysiamodelship.blogspot.com/ Previous Build: HMS Race Horse (Sergal) Current Build: HMS Unicorn (Corel) Link to comment Share on other sites More sharing options...
sparrow Posted December 4, 2013 Author Share #76 Posted December 4, 2013 Thanks a lot guys for your compliments! Quote Current build: Royal Caroline by Panart First completed build: Golden Star by Mantua Link to comment Share on other sites More sharing options...
bhermann Posted December 4, 2013 Share #77 Posted December 4, 2013 Jan - I think the gold figures on paper came out very well. They stand out better than the original attempt, and blend nicely with the rest of the ornamentation on the transom. Good fix! Your sculpting work looks marvelous to me. Keep going Bob Quote Current build -- MS Bluenose Future build - MS Flying Fish "A ship is safe in harbor, but that's not what ships are for." - William G. T. Shedd Link to comment Share on other sites More sharing options...
sparrow Posted December 5, 2013 Author Share #78 Posted December 5, 2013 Jan - I think the gold figures on paper came out very well. They stand out better than the original attempt, and blend nicely with the rest of the ornamentation on the transom. Good fix! Your sculpting work looks marvelous to me. Keep going Bob Thanks Bob, I am also quite satisfied with the remake. I am happy that you like my sculpting work! Jan Quote Current build: Royal Caroline by Panart First completed build: Golden Star by Mantua Link to comment Share on other sites More sharing options...
sparrow Posted December 5, 2013 Author Share #79 Posted December 5, 2013 Hi, work on Sculpey ornaments continues. Currently I have started to sculpt the ornaments for the starboard. Here is little better captured progress of a few first sculptures. For the first two I have used the original kit ornaments and created a push mold and then used it for creating the base of the sculptures. However I am still less sure if that is really needed as usually those that I scratch come out better... Have a great day, Jan WackoWolf and olliechristo 2 Quote Current build: Royal Caroline by Panart First completed build: Golden Star by Mantua Link to comment Share on other sites More sharing options...
marsalv Posted December 5, 2013 Share #80 Posted December 5, 2013 (edited) Wow . I can not find words. You are really sculpey master. I admire your patience and skill. Edited December 5, 2013 by marsalv WackoWolf 1 Quote Link to comment Share on other sites More sharing options...
sparrow Posted December 6, 2013 Author Share #81 Posted December 6, 2013 Wow . I can not find words. You are really sculpey master. I admire your patience and skill. Thanks again for your compliment, I actually really started to enjoy sculpting. I thought it would be really tiresome to create most of the RC ornaments from scratch but now I really like the work. You should also try it once.:-) Jan Quote Current build: Royal Caroline by Panart First completed build: Golden Star by Mantua Link to comment Share on other sites More sharing options...
sparrow Posted December 17, 2013 Author Share #82 Posted December 17, 2013 This is an update on the progress of the starboard ornaments. First parts were gilded and glued into place. Also the little angels in the two "circles" were remade to be smaller and little more looking like the original... Thanks for visiting. WackoWolf, Mirabell61, bhermann and 1 other 4 Quote Current build: Royal Caroline by Panart First completed build: Golden Star by Mantua Link to comment Share on other sites More sharing options...
WackoWolf Posted December 17, 2013 Share #83 Posted December 17, 2013 Beautiful detail work. Very nice and clean. You have done an excellent job with the detail. Keep the pictures coming. Quote Wacko Joe Go MSW :) Link to comment Share on other sites More sharing options...
Mirabell61 Posted December 17, 2013 Share #84 Posted December 17, 2013 Excellant work Jan ! thanks for sharing your build-log, shall be looking out for more to come Nils Quote Current builds -Lightship Elbe 1 Completed - Steamship Ergenstrasse ex Laker Corsicana 1918- scale 1:87 scratchbuild - "Zeesboot" heritage wooden fishing small craft around 1870, POB clinker scratch build scale 1:24 - Pilot Schooner # 5 ELBE ex Wanderbird, scale 1:50 scratchbuild - Mississippi Sterwheelsteamer built as christmapresent for grandson modified kit build - Chebec "Eagle of Algier" 1753--scale 1:48-POB-(scratchbuild) "SS Kaiser Wilhelm der Grosse" four stacker passenger liner of 1897, blue ribbond awarded, 1:144 (scratchbuild) "HMS Pegasus" , 16 gun sloop, Swan-Class 1776-1777 scale 1:64 from Amati plan -"Pamir" 4-mast barque, P-liner, 1:96 (scratchbuild) -"Gorch Fock 2" German Navy cadet training 3-mast barque, 1:95 (scratchbuild) "Heinrich Kayser" heritage Merchant Steamship, 1:96 (scratchbuild) original was my grandfathers ship -"Bohuslän" , heritage ,live Swedish museum passenger steamer (Billings kit), 1:50 "Lorbas", river tug, steam driven for RC, fictive design (scratchbuild), scale appr. 1:32 under restoration / restoration finished "Hjejlen" steam paddlewheeler, 1861, Billings Boats rare old kit, scale 1:50 Link to comment Share on other sites More sharing options...
sparrow Posted December 18, 2013 Author Share #85 Posted December 18, 2013 Thank you guys for your compliment! I do really appreciate them! Cheers, Jan Quote Current build: Royal Caroline by Panart First completed build: Golden Star by Mantua Link to comment Share on other sites More sharing options...
Sailor1234567890 Posted December 18, 2013 Share #86 Posted December 18, 2013 How about a pic from further back so we can see the full effect? Those little sculptures look awesome. Quote Link to comment Share on other sites More sharing options...
sparrow Posted December 19, 2013 Author Share #87 Posted December 19, 2013 How about a pic from further back so we can see the full effect? Those little sculptures look awesome. Hi and thanks for your comment. Sure I will do a picture from further back and post it here soon. Jan WackoWolf 1 Quote Current build: Royal Caroline by Panart First completed build: Golden Star by Mantua Link to comment Share on other sites More sharing options...
sparrow Posted January 4, 2014 Author Share #88 Posted January 4, 2014 Hello, let me wish all the best to the new year and many hours on shipmodeling! Here are some pictures from the progress on the Sculpey ornamentation work. I have also included a few pictures from a bit further away as I promised. Not all the ornaments are glued and most of them are just dry fitted - I still need to finish the "clouds" from brass wire. This "clouds line" will be placed according the illustrations below the birds. You can see an attempt on this on one of the pictures (the 5th one). Thanks for watching. Jan Landlubber Mike, WackoWolf, marsalv and 2 others 5 Quote Current build: Royal Caroline by Panart First completed build: Golden Star by Mantua Link to comment Share on other sites More sharing options...
Bgformula Posted January 10, 2014 Share #89 Posted January 10, 2014 I have a question on what you are doing hereDSC_3437.JPG - Size: 214.42KBImage 12 of 16? Are you filling in the gap, if so what are you using to do this? Your finish looks great, thanks Bill Quote Link to comment Share on other sites More sharing options...
sparrow Posted January 12, 2014 Author Share #90 Posted January 12, 2014 Hi Bill, thanks. Basically on these pictures I used sawdust from the hull that was grinded away when smoothing the surface. The sawdust was mixed with diluted white glue and then it was "painted" on the hull in order to fill in the little wholes between the planks. Then I let it dry and sand down and repeated if needed. There are also different methods on how to do this. Someone just uses varnish and sanding repeatedly. And for sure there are many more methods. Hope this helps you... Best regards, Jan Quote Current build: Royal Caroline by Panart First completed build: Golden Star by Mantua Link to comment Share on other sites More sharing options...

Recommended Posts
Join the conversation
You can post now and register later. If you have an account, sign in now to post with your account.