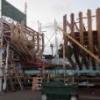
kscadman Posted August 6, 2014 Share #1 Posted August 6, 2014 Welcome to my second build log.After several months of work on my U.S. Syren I've come to realize why many here on MSW work on several builds at a time. Currently I'm at a point where I need to do some wood working (rolling & tying hammocks is a tedious thing). My work so far has gone easily and quickly. The keel is assembled, Rabbet is cut, and the building jig is assembled and faired. The stem alignment blocks are spot glued and the keel has been dry fitted. So far I've had zero problems. The holes to pin the stem lined up perfectly. Now its time to roll a few more hammocks then install the transom horses and transom. I did a quick dry fit and it looks good. Attached are some pics Richard CaptainSteve 1 Quote Current Build - U.S. Syren 2nd Build - HMS Bounty Launch When organizing your thoughts, never use the Dewey Decimal system. Link to comment Share on other sites More sharing options...
augie Posted August 6, 2014 Share #2 Posted August 6, 2014 Multitasking! Looks like a good way to take a break from 100 hammocks......and a nice looking kit to boot. Smooth sailing, mate! Quote Augie Current Build: US Frigate Confederacy - MS 1:64 Previous Builds : US Brig Syren (MS) - 2013 (see Completed Ship Gallery) Greek Tug Ulises (OcCre) - 2009 (see Completed Ship Gallery) Victory Cross Section (Corel) - 1988 Essex (MS) 1/8"- 1976 Cutty Sark (Revell 1:96) - 1956 Link to comment Share on other sites More sharing options...
kscadman Posted August 7, 2014 Author Share #3 Posted August 7, 2014 Thanks mate. I'm already working on a launch for my Syren so why not "go big" with another launch. Richard augie 1 Quote Current Build - U.S. Syren 2nd Build - HMS Bounty Launch When organizing your thoughts, never use the Dewey Decimal system. Link to comment Share on other sites More sharing options...
Keith_W Posted August 7, 2014 Share #4 Posted August 7, 2014 That's great, another Bounty Launch! Join the club, i'll be following this one. Quote Regards, Keith 2007 (completed): HMS Bounty - Artesania Latina 2013 (completed): Viking Ship Drakkar - Amati 2014 (completed): HMS Bounty Launch - Model Shipways Current: HMS Royal William - Euromodel Link to comment Share on other sites More sharing options...
kscadman Posted August 7, 2014 Author Share #5 Posted August 7, 2014 Thank you Keith, I hope to do her proud. I was working on my transom and it has the word "TRANS" on the outboard side. At first I thought that it would be planked over, but as I looked through the drawings and instructions I didn't see any instructions on planking. Then I looked at the relationship between the transom and rudder and noticed that there is no room for planking. I have the feeling I'm going to need to sand off 1/32 and then add some 1/32 planking. Richard CaptainSteve 1 Quote Current Build - U.S. Syren 2nd Build - HMS Bounty Launch When organizing your thoughts, never use the Dewey Decimal system. Link to comment Share on other sites More sharing options...
Keith_W Posted August 7, 2014 Share #6 Posted August 7, 2014 Yes Richard, that's what I did. I sanded it back and then planked over it. CaptainSteve 1 Quote Regards, Keith 2007 (completed): HMS Bounty - Artesania Latina 2013 (completed): Viking Ship Drakkar - Amati 2014 (completed): HMS Bounty Launch - Model Shipways Current: HMS Royal William - Euromodel Link to comment Share on other sites More sharing options...
jburchfield1@wowway.com Posted August 7, 2014 Share #7 Posted August 7, 2014 I'm writing down all these tips/tricks since that Launch is gonna be my next build and I want to be able to find them again. I will be following closely. Quote Previous build(mostly) - 18th Century Longboat Current build - Bounty Launch Next build - San Francisco by AL Future build - Red Dragon Future build - Mayflower from Model Expo Link to comment Share on other sites More sharing options...
Gahm Posted August 7, 2014 Share #8 Posted August 7, 2014 I just discovered your second build log. That looks like a neat little model. And you seem to be off to a very good start! If my carronades get too boring I need to do a similar thing Thomas Quote Current Built: Model Shipways Syren (US Brig 1803) Last Built: Anfora (kit bashed) Ictineo II (1st steam powered submarine 1864) Link to comment Share on other sites More sharing options...
kscadman Posted August 7, 2014 Author Share #9 Posted August 7, 2014 (edited) Thank you all for your comments! Keith - Its good to know I'm following in the wake of those who have gone before me. How did you go about sanding the transom down? I was thinking about using a block and large piece of sandpaper. Pops - I'll try to make sure to note when I divert from the instructions. When I get time I'll have to read thru your Longboat build to see if I can find some tips. Thomas - It IS a neat little model, but at 17 inches its bigger than the pictures represent. Plenty of room for added details. I would recommend it based off of what I've done so far. Plus I can apply what I'm learning from this to my Syren launch (still sanding the hull on that one) Richard Edited August 7, 2014 by kscadman Quote Current Build - U.S. Syren 2nd Build - HMS Bounty Launch When organizing your thoughts, never use the Dewey Decimal system. Link to comment Share on other sites More sharing options...
Keith_W Posted August 7, 2014 Share #10 Posted August 7, 2014 Hi Richard, I sanded it down freehand. But if I were to do it again I would glue a handle on it with some PVA and sand it face down on some sandpaper. The handle can be removed with alcohol later. Any residual glue marks would be hidden under the planking. Quote Regards, Keith 2007 (completed): HMS Bounty - Artesania Latina 2013 (completed): Viking Ship Drakkar - Amati 2014 (completed): HMS Bounty Launch - Model Shipways Current: HMS Royal William - Euromodel Link to comment Share on other sites More sharing options...
kscadman Posted August 7, 2014 Author Share #11 Posted August 7, 2014 Thanks Keith - good to know I'm on the right track. If it doesn't work then I can get a piece of 1/8 basswood and cut a new one. Richard Quote Current Build - U.S. Syren 2nd Build - HMS Bounty Launch When organizing your thoughts, never use the Dewey Decimal system. Link to comment Share on other sites More sharing options...
usedtosail Posted August 7, 2014 Share #12 Posted August 7, 2014 That's what I did - cut a new one from basswood sheet. Whatever way works for you. I will enjoy following along with your build. Quote - Tom - Current Build: Vanguard Speedy Completed: Vanguard Duchess of Kingston, Stove Project, Ships Wheel Project, NRG Capstan Project, Billings Half Moon, Dumas Chris Craft 1938 27' Triple Cockpit Barrel Back, Panart Santa Lucia , Model Shipways Constitution , MS Bounty Launch , HMS Beagle Member: Nautical Research Guild Link to comment Share on other sites More sharing options...
kscadman Posted August 10, 2014 Author Share #13 Posted August 10, 2014 Keith & Tom thanks for the advice it came in handy. I sanded down the transom to 1/8" then I took some 1/32" x 1/4" basswood and made planks for the transom and glued them on. I managed to get the transom flush with the sternpost so i shouldn't have troubles with the rudder installation. I like most others have decided to stray from the grey and white suggested by the kit. I'm going with oak but I'm going to keep the gunwales & breasthook cherry. I'll keep the white below the waterline and add blue to the sheer plank. I found some 3/32" X 3/32 basswood to use for the frames and I've stained them, the transom and keel oak. Should be starting the frame bending tonight. Richard CaptainSteve, jburchfield1@wowway.com, usedtosail and 1 other 4 Quote Current Build - U.S. Syren 2nd Build - HMS Bounty Launch When organizing your thoughts, never use the Dewey Decimal system. Link to comment Share on other sites More sharing options...
kscadman Posted August 12, 2014 Author Share #14 Posted August 12, 2014 Hello all, I need a little help I'm working on my frames and I've noticed that when I take off the clamps the frames pull off the molds just a little bit. Should I re-soak and re-clamp the frames or will they hold their shape once I start planking? Thanks in advance for any help. Richard Quote Current Build - U.S. Syren 2nd Build - HMS Bounty Launch When organizing your thoughts, never use the Dewey Decimal system. Link to comment Share on other sites More sharing options...
Keith_W Posted August 12, 2014 Share #15 Posted August 12, 2014 Hi Richard, don't worry about the cherry frames being loose. The only structural role they have is to hold the planks together. They are too weak to hold the shape of the boat. As you will find from reading several build logs, the boat seems to get wider after she is removed from the plug. The most important structural element, apart from the planks, are the thwarts. You will notice your boat will feel much more solid after you install these ... much later in your build! Quote Regards, Keith 2007 (completed): HMS Bounty - Artesania Latina 2013 (completed): Viking Ship Drakkar - Amati 2014 (completed): HMS Bounty Launch - Model Shipways Current: HMS Royal William - Euromodel Link to comment Share on other sites More sharing options...
kscadman Posted August 20, 2014 Author Share #16 Posted August 20, 2014 (edited) I successfully finished bending and installing the frames. Now just a little bit of fairing to get it right. Also I stained all my planks, so the prep work is done. Richard Edited August 20, 2014 by kscadman jburchfield1@wowway.com 1 Quote Current Build - U.S. Syren 2nd Build - HMS Bounty Launch When organizing your thoughts, never use the Dewey Decimal system. Link to comment Share on other sites More sharing options...
dgbot Posted August 20, 2014 Share #17 Posted August 20, 2014 I take the planking was already precut? David B Quote Work in progress USS Maine in cardstock.http://modelshipworld.com/index.php/topic/7446-uss-maine-by-dgbot-hmv-card/#entry220003 Completed Blockade runner Teazer http://modelshipworld.com/index.php/topic/6063-blockade-runner-teazer-by-dgbot-card-stock/#entry175967 Completed The Monitor Lehigh http://modelshipworld.com/index.php/topic/6920-the-monitor-lehigh-by-dgbot-card-model/#entry203680 Completed Kingston Class MCVD http://modelshipworld.com/index.php/forum/10-kit-build-logs-in-progress/ Link to comment Share on other sites More sharing options...
kscadman Posted August 20, 2014 Author Share #18 Posted August 20, 2014 (edited) David Yes, the planks are laser cut. According to the instructions they are a little wider and are to be sanded down to the proper width. There are line off marks on the molds that are projected to the outer edges of the frames. The planks are supposed to be sanded down to those widths. You can see them on the third mold from the transom. Richard Edited August 20, 2014 by kscadman Quote Current Build - U.S. Syren 2nd Build - HMS Bounty Launch When organizing your thoughts, never use the Dewey Decimal system. Link to comment Share on other sites More sharing options...
usedtosail Posted August 20, 2014 Share #19 Posted August 20, 2014 Those frames look fantastic. Nice job. Quote - Tom - Current Build: Vanguard Speedy Completed: Vanguard Duchess of Kingston, Stove Project, Ships Wheel Project, NRG Capstan Project, Billings Half Moon, Dumas Chris Craft 1938 27' Triple Cockpit Barrel Back, Panart Santa Lucia , Model Shipways Constitution , MS Bounty Launch , HMS Beagle Member: Nautical Research Guild Link to comment Share on other sites More sharing options...
kscadman Posted August 20, 2014 Author Share #20 Posted August 20, 2014 Thank you Tom! The only thing I'm trying to figure out now is how to do the final fairing without breaking the spot glue. I've tried to sand going across the frames but I've had a couple break loose on me. I'm thinking about trying to go with the frames. Any suggestions? Richard Quote Current Build - U.S. Syren 2nd Build - HMS Bounty Launch When organizing your thoughts, never use the Dewey Decimal system. Link to comment Share on other sites More sharing options...
usedtosail Posted August 21, 2014 Share #21 Posted August 21, 2014 Yes, I sanded with the frames for the final fairing, testing with a batten as I went. Quote - Tom - Current Build: Vanguard Speedy Completed: Vanguard Duchess of Kingston, Stove Project, Ships Wheel Project, NRG Capstan Project, Billings Half Moon, Dumas Chris Craft 1938 27' Triple Cockpit Barrel Back, Panart Santa Lucia , Model Shipways Constitution , MS Bounty Launch , HMS Beagle Member: Nautical Research Guild Link to comment Share on other sites More sharing options...
esion Posted August 21, 2014 Share #22 Posted August 21, 2014 (edited) The build is looking good so far! I completed this model about a year ago and it has some challenging steps for sure. Most of my cherry frames were either cut askew or cracked and I had to buy more cherry strips in order to get some good pieces and to make them fit just right. So, kudos for making yours look so good. Also, one of the snags that I hit was the laser cut planks didn't fit perfectly. When I went for final assembly the last few planks had gaps and didn't fit well. I ended up having to make some custom planks along the way. So, if you run into the same issue, I just bought some replacement wood of the same thickness and custom fit each plank that didn't fit. Shoot me a PM if you need any advice, or hit a snag on any of the steps. Edited August 21, 2014 by esion Quote Link to comment Share on other sites More sharing options...
kscadman Posted August 21, 2014 Author Share #23 Posted August 21, 2014 Thank you Tom & esion. Tom - last night I did as you did and sanded with the frames. I also re-read the instructions and there's 1 sentence about sanding with the frames. (duh on my part). I laid my batten along the plank lines as I went. The only part I don't like is I have a slight gap on the port side with mold #3 (the first one that doesn't have a frame) I've got a 1/64 to 1/32 gap but I think I should be ok with it since the frame will be canted. esion - I'll keep the PMs in mind should I run into any troubles. I projected the planking lines to the frames so I'll find out tonight how well I did. I'm going to try to get the first garboard bent & fitted. Richard Quote Current Build - U.S. Syren 2nd Build - HMS Bounty Launch When organizing your thoughts, never use the Dewey Decimal system. Link to comment Share on other sites More sharing options...
kscadman Posted August 22, 2014 Author Share #24 Posted August 22, 2014 The first of the planking has begun! I have my sheer planks molded to the frames. So tonight I'm going to work on the garboards. I did find one thing curions about the kit. I glued the sheer tabs on to the molds correctly, but when I push the sheer planks flush with them the sheer planks wont line up with the planking marks on the molds. I think I should go ahead and follow the planking marks and not worry about the sheer tabs. Also when the planks are flush with the sheer tabs the planks are offset from the transom by 3/32 on each side. In pictures 4 & 5 you can see the planking lines and the distance from (top) of transom and (top) of sheer plank. Has anyone else run into this condition? Richard CaptainSteve and jburchfield1@wowway.com 2 Quote Current Build - U.S. Syren 2nd Build - HMS Bounty Launch When organizing your thoughts, never use the Dewey Decimal system. Link to comment Share on other sites More sharing options...
dgbot Posted August 23, 2014 Share #25 Posted August 23, 2014 Have you experimented with bending the wood a little? David B Quote Work in progress USS Maine in cardstock.http://modelshipworld.com/index.php/topic/7446-uss-maine-by-dgbot-hmv-card/#entry220003 Completed Blockade runner Teazer http://modelshipworld.com/index.php/topic/6063-blockade-runner-teazer-by-dgbot-card-stock/#entry175967 Completed The Monitor Lehigh http://modelshipworld.com/index.php/topic/6920-the-monitor-lehigh-by-dgbot-card-model/#entry203680 Completed Kingston Class MCVD http://modelshipworld.com/index.php/forum/10-kit-build-logs-in-progress/ Link to comment Share on other sites More sharing options...
kscadman Posted August 23, 2014 Author Share #26 Posted August 23, 2014 Yes, The wood is being nice to me. Its just that I'm not sure if the sheer plank and the transom should be flush or if some sanding room is designed into the plank. Richard Quote Current Build - U.S. Syren 2nd Build - HMS Bounty Launch When organizing your thoughts, never use the Dewey Decimal system. Link to comment Share on other sites More sharing options...
Keith_W Posted August 23, 2014 Share #27 Posted August 23, 2014 Yes there is sanding room built into the planks. The most critical plank to install is the garboard plank, make sure you don't install it too far forward! That was a mistake I made, and a number of other people as well. CaptainSteve 1 Quote Regards, Keith 2007 (completed): HMS Bounty - Artesania Latina 2013 (completed): Viking Ship Drakkar - Amati 2014 (completed): HMS Bounty Launch - Model Shipways Current: HMS Royal William - Euromodel Link to comment Share on other sites More sharing options...
kscadman Posted August 23, 2014 Author Share #28 Posted August 23, 2014 Keith - Thank you for the heads up. I took a measurement from the hull planking profile on the drawings and looked a the pics from the instructions and some build logs so hopefully I have it right. I think I may spot glue them just enough to hold while I form the second plank. Richard Quote Current Build - U.S. Syren 2nd Build - HMS Bounty Launch When organizing your thoughts, never use the Dewey Decimal system. Link to comment Share on other sites More sharing options...
kscadman Posted August 24, 2014 Author Share #29 Posted August 24, 2014 (edited) Well the 1st garboard is installed and I'm not exactly happy with it. I have a dip in the fairing at mold #7 which you can see in picture 6. Not to sure what to do about it. I'm going to go ahead and work on the starboard garboard and see how fair it is after it dries. Richard Edited August 24, 2014 by kscadman st george 1 Quote Current Build - U.S. Syren 2nd Build - HMS Bounty Launch When organizing your thoughts, never use the Dewey Decimal system. Link to comment Share on other sites More sharing options...
Gahm Posted August 28, 2014 Share #30 Posted August 28, 2014 Richard, as usual, excellent craftsmanship! Your Bounty Launch really looks good so far! Do you plan to use the same building technique on your Syren long boat? Thomas Quote Current Built: Model Shipways Syren (US Brig 1803) Last Built: Anfora (kit bashed) Ictineo II (1st steam powered submarine 1864) Link to comment Share on other sites More sharing options...

Recommended Posts
Join the conversation
You can post now and register later. If you have an account, sign in now to post with your account.