seaniem1971
-
Posts
25 -
Joined
-
Last visited
Content Type
Profiles
Forums
Gallery
Events
Everything posted by seaniem1971
-
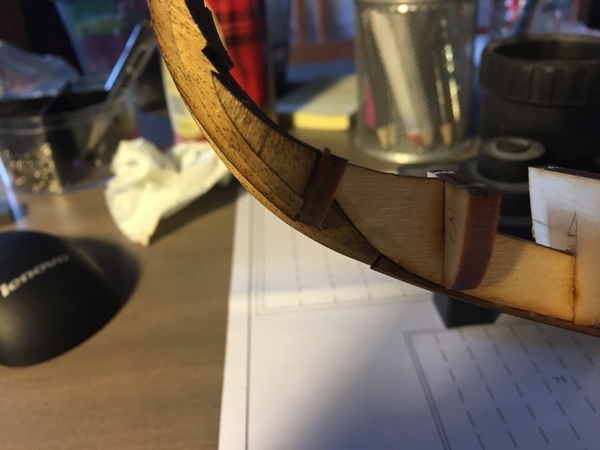
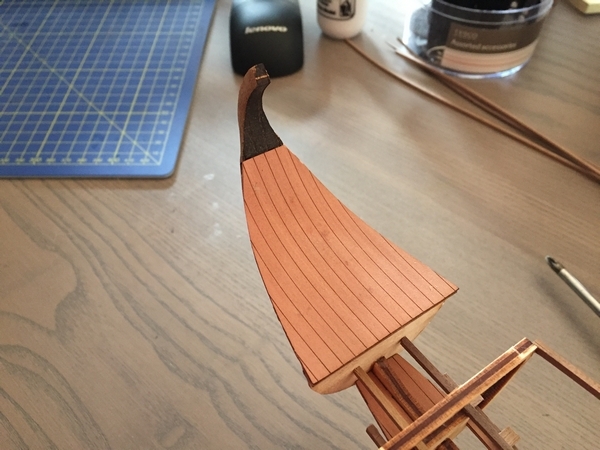
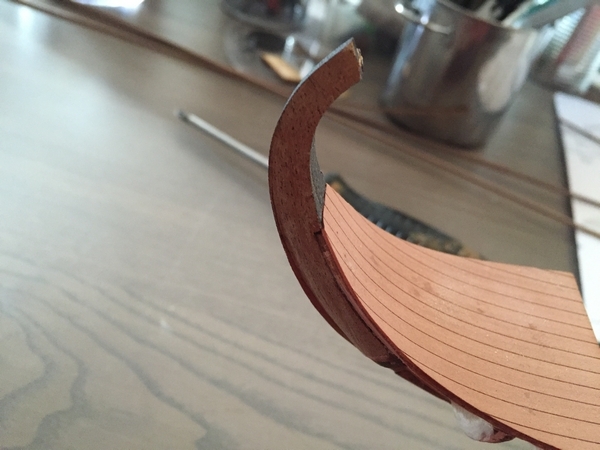
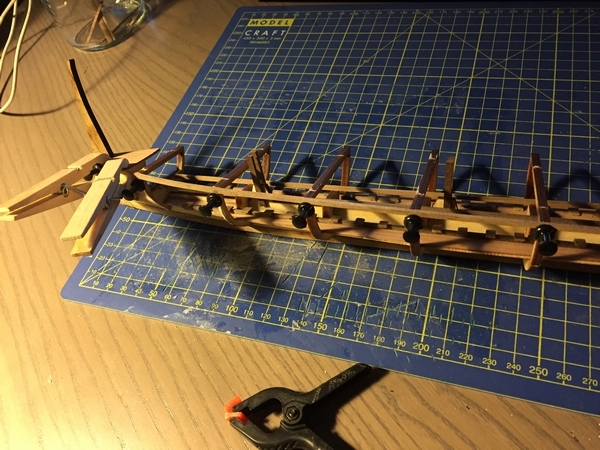
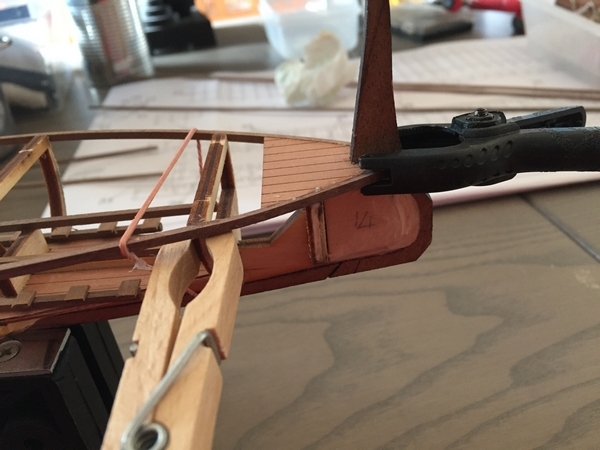
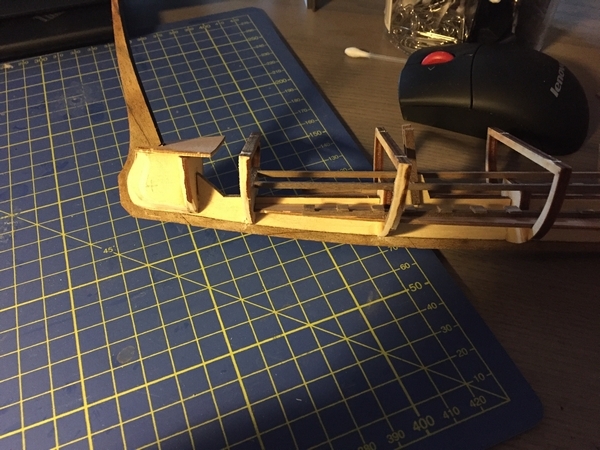
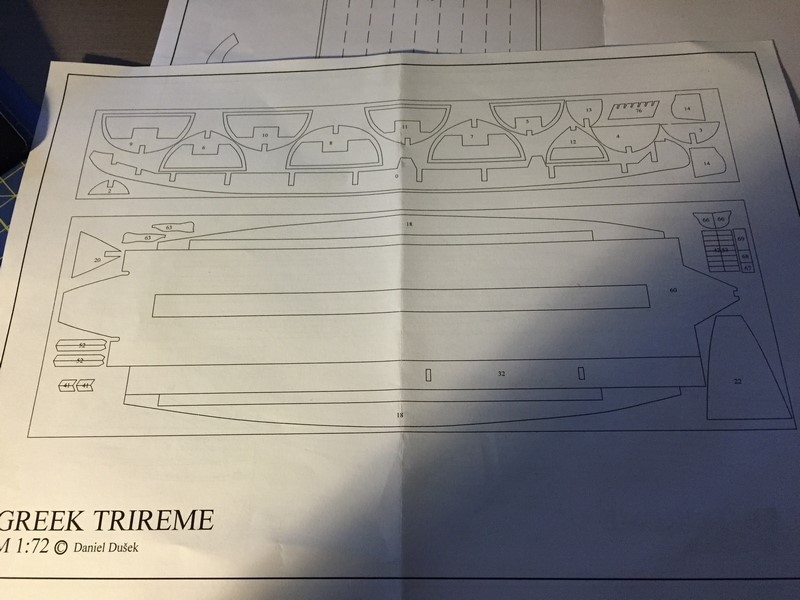
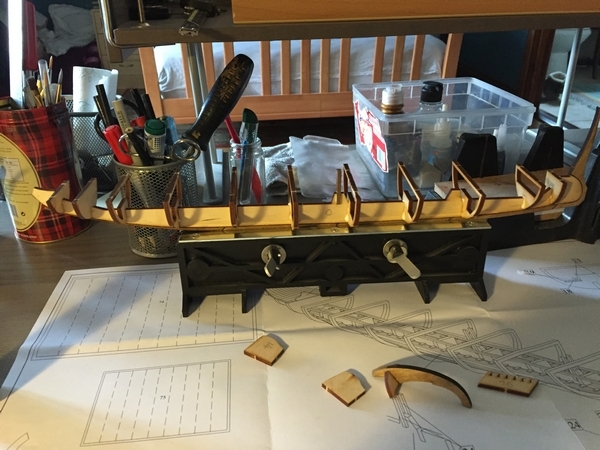
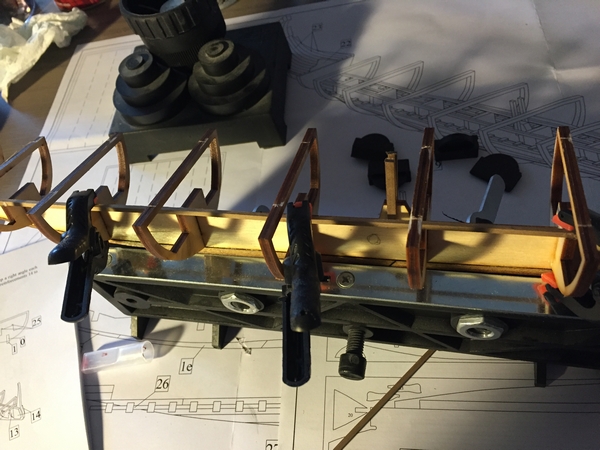
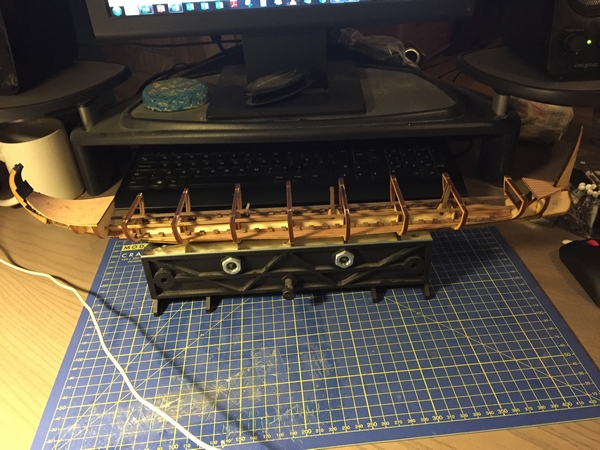
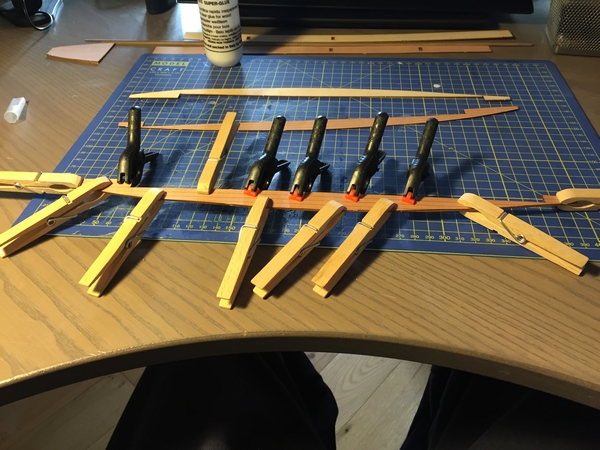
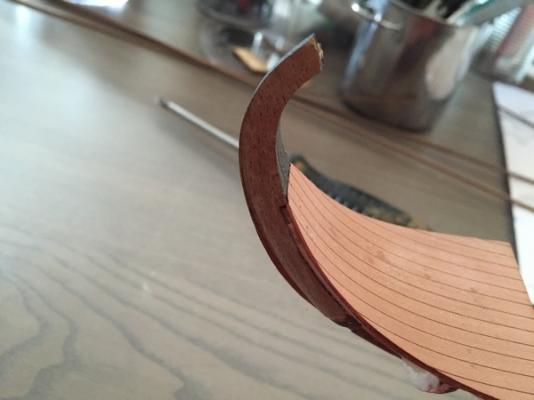
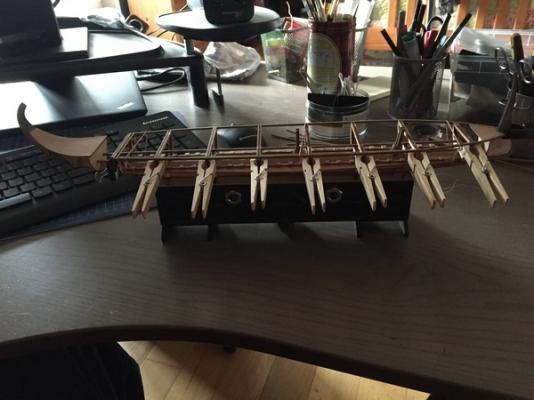
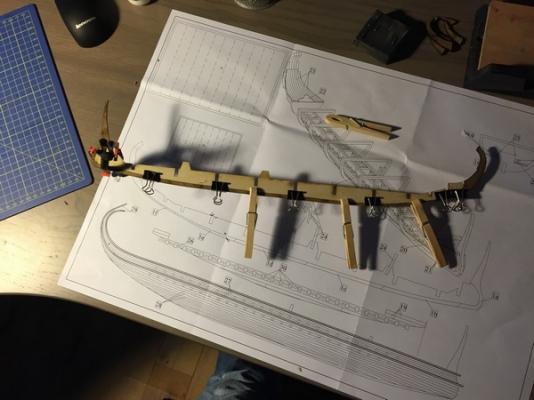
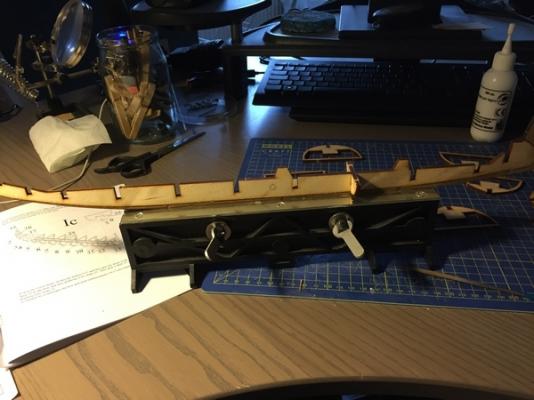
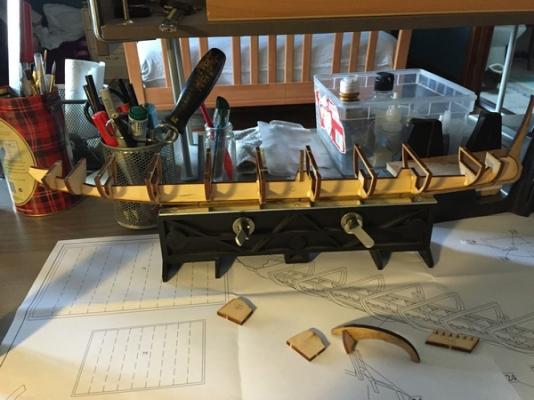
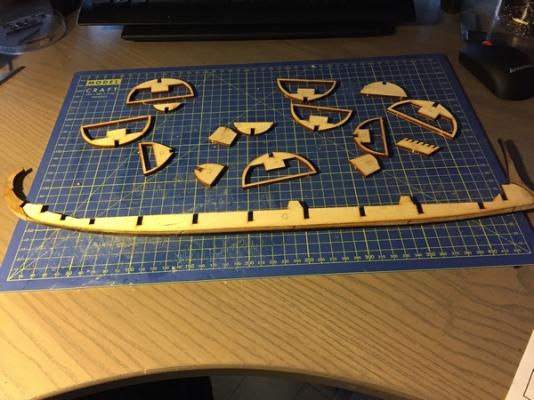
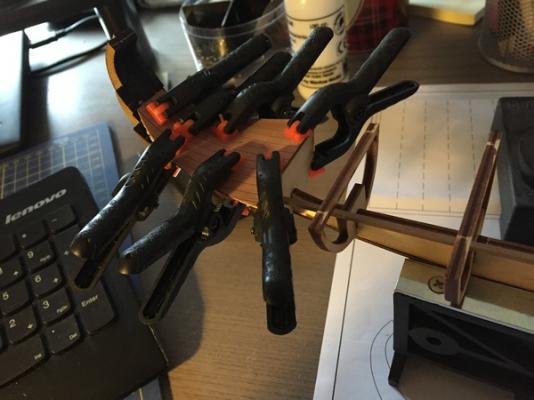
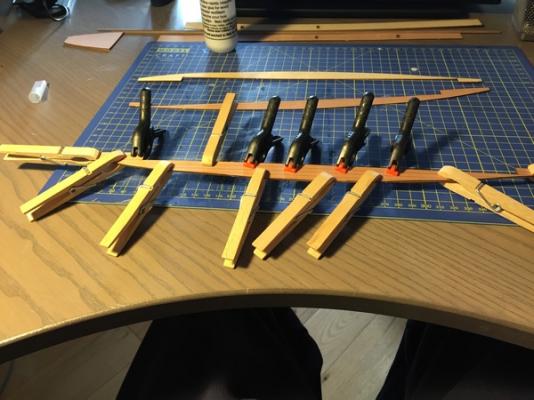
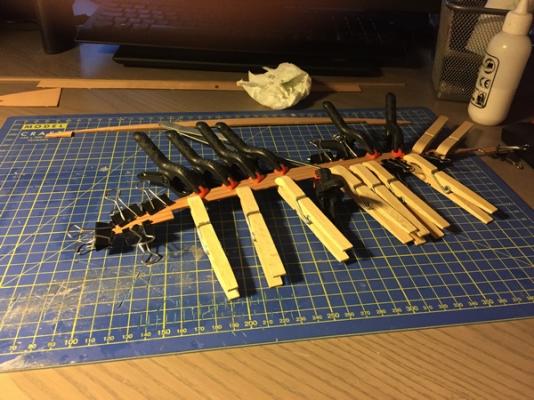
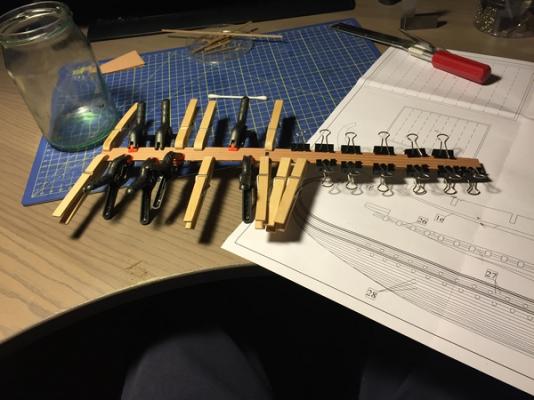
 OMG. Just typed out a mini update and mistakenly deleted..... so for the 2nd time see below...... Ok this is only a mini-update as I think I have gone as far as I can on the planking without a few new tools to help me. Many thanks to all who have offered advice and solutions to some of the problems that I was having and indeed to Daniel Dusek for his email, offer and help. To move my project along and to get a bit more productive I have purchased the following: 1. Electric Plank Bender: have been using a domestic steam iron here and it has been fine for making basic curves and bends but just won’t work for the more acute bends as described below. Also have used a hand crimping bender but these leave unsightly marks and indentations on the planks which are not suitable for the top planks in particular. 2. Hand Guillotine and mini mitre box : Having difficulty getting square and consistent lengths for the seats. I am razor sawing these which are 4 x 5mm and am using a standard mitre box meaning the razor saw slips around in the slots as they are far too wide. 3. Some clamps: assortment of various clamps. Using Fams’ idea on the clips combined with elastic bands suggestion from Antony. Thank you both. Anyway on with the update: Firstly I have filed down the relevant frames and bulwarks along the proposed planking lines both Bow and Stern. This is straightforward towards the bow but gets more complicated at the stern where there are a series of supports either side of the tail like keel to flesh out and align with the decking at the stern of the ship. I have reduced these by a combination of grinding with my dremel and final shaping by hand filing. Not exactly sure of the correct profile here but have followed the general shape as per the side elevation and plan views from drawings 'Plan 1' & ' Plan2'. Anyway this is what I have gone with for the stern. How the planks line up not fully sure yet as haven't been able to bend the strips at this angle so far. Waiting on the electric bender to do this. This is how it looks at the top. Might have reduced a little too far.......mmmmm Next I have heated and curved the first two 2 x2 mm strips for both sides of the bow. I have taken Antonys advice and nominated a frame to join the strips at stern and bow ends given that they are 4mm in thickness giving ample width to get a fixing for each strip. I have only fixed two strips both from the bow side and will join from the last frame at the stern end. I am then taking on board Daniels advice and running a strip then from stern to bow but then have to bend and shape those strips when the electric bender arrives. So the photos below show where I'm at waiting for the equipment to arrive to continue with the planking. That's it for now folks. Might start one of the other 'modules' while I'm waiting for my new toys but I'll wait to publish this so that the log reads progressively and evolves in line with the instructions. Thanks again for your help. Talk Soon Sean


-
Wow - thanks Fam that's really smart.. I'm gonna go that now. I think the ones that I have should be the right size. Many Thanks Sean
-
Hi Daniel Thank you for the support and indeed the honest and open communication. I actually think I will be able to get through without replacement plans but if I do require them i will contact you for that. Very much appreciate the offer though. Warm Regards Sean
-
Thanks Don. It was very good of Daniel to respond to the comments and difficulties that I was having. As I said in previous post many or all of these may be due to my inexperience. I will be sure to avail of the service you mention if I require it. As I said happy enough with the kit with the exception of the decking veneer which is just a personal preference. Would also have liked the planking strips to have fitted bow to stern but it's maybe more authentic in its current form in this regard. The actual full size replica which has photos posted on a couple of the build logs also does not have this. Look forward to seeing more models and would absolutely prefer to support a smaller family run business than the larger more established ones......that's why I went with this model over the Amati one. I'm hoping my comments aren't taken as being in any way critical - I'm just relaying my experience while building this kit. Great respect for people like Daniel who deliver products for niche markets and follow that up with a personal touch such as his communication with me earlier.
-
Super stuff Antony. Just the advice I needed on the joints.......believe it or not I never thought of elastic bands - Doh. I'm putting down the stupidity to beginners exuberance.......
-
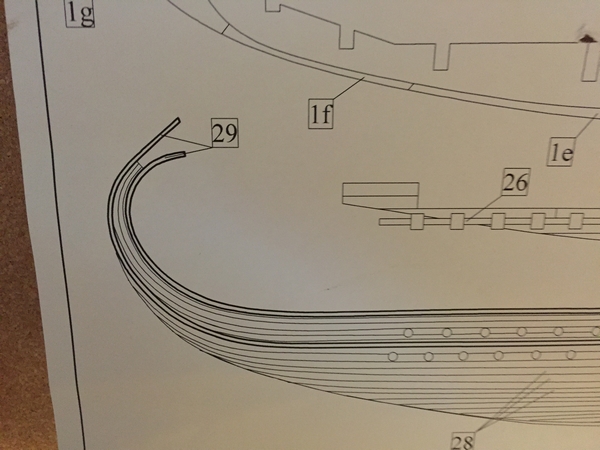
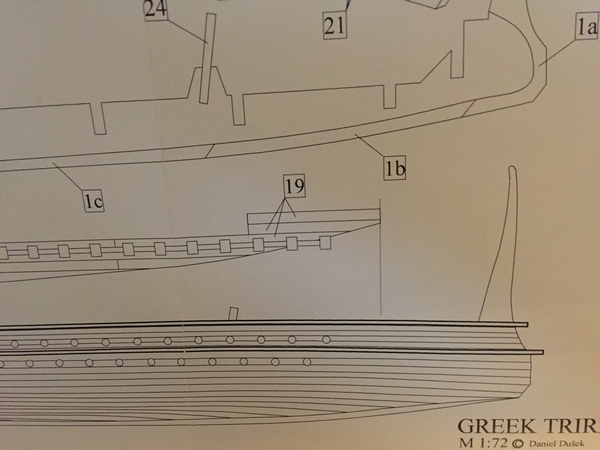
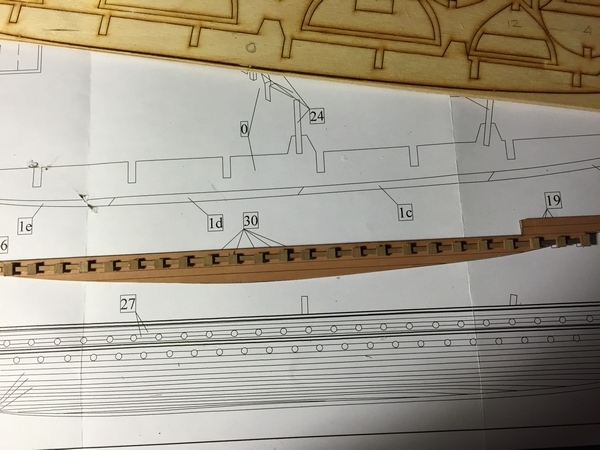
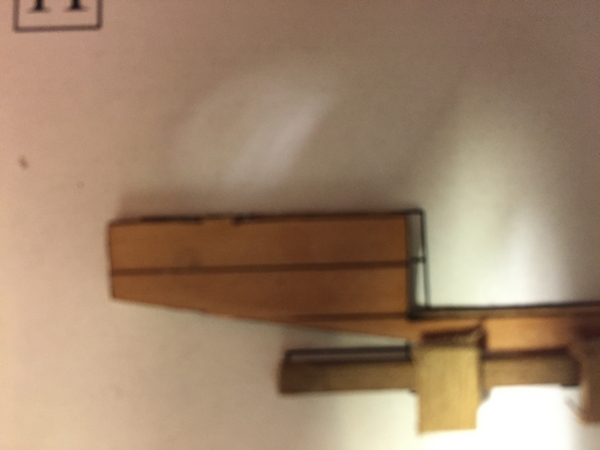
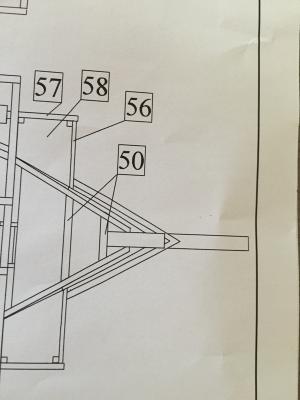
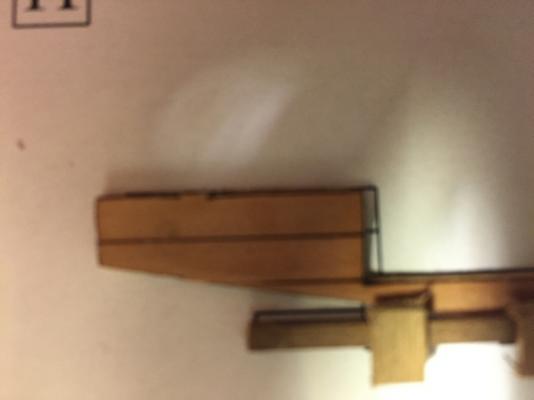
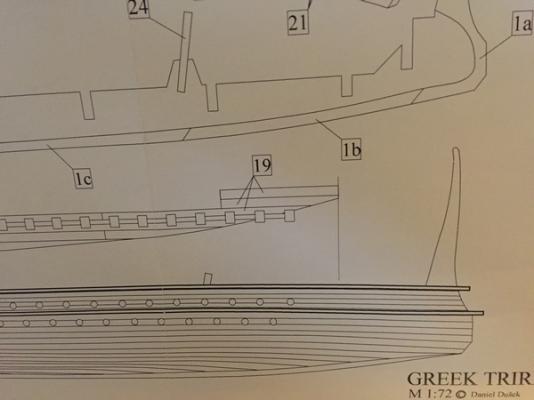
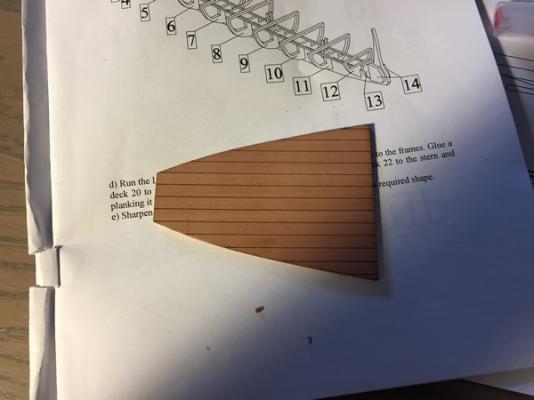
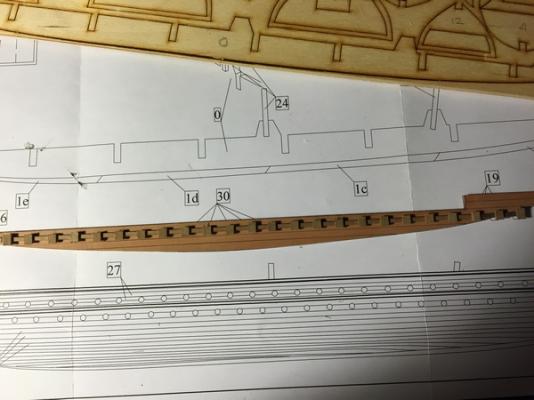
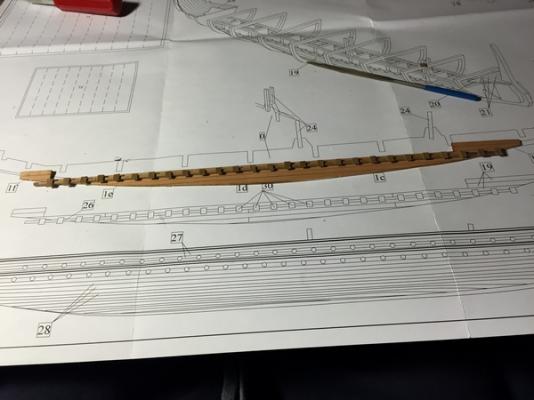
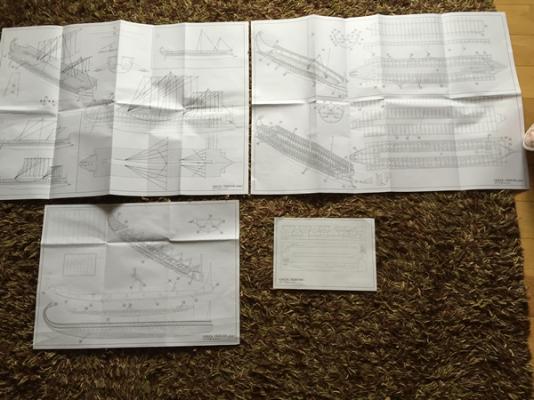
Hi Daniel, Thank you for the suggestions and the explanations. I will possibly buy an electric plank bender, I know that you recommend this in the instructions. I certainly take your points on the materials and the cloth specifications. In relation to the drawings and the scale - maybe this is only for this part but the lower deck do not line up with the drawing Plan 1. This was noticeable to me as I was using the drawing to gauge distances between the seats. I attached a picture of the exact area of mismatch in my update. Also see below. I haven't proceeded in any other area where I have been using the drawings at this stage with the exception of the keel fitting onto the false keel. These pieces fitted together perfectly and I commented on this in my post. Thanks Sean
-
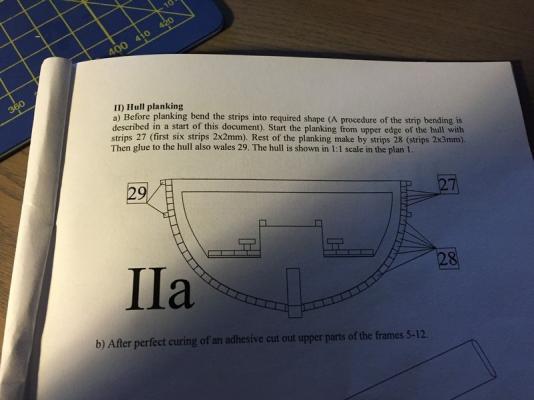
So I've started the planking process after reading some of the literature on the site. Mmmmm think I'm gonna struggle...... The drawings seem to indicate that the planks will run horizontally along the length of the hull with obvious plank bending required on the bow and stern (which curves upwards also ). I've read a few of the logs on here for this model to see exactly how these are completed and downloaded some of the photos for reference even though most of these are scratch builds not kit builds. The kit instructions are not particularly good in this regard for someone at my level. The first obvious challenge is that the length of the planking strips 2x2 for the first 6 rows and then 2x3 for the remainder are not long enough to run from bow to stern. So the first decision is where to join the strips........Mmmmmmm ..... pretty disappointing. A build log by Ships88 on here shows some of the detail and he has left the planking short towards the stern where it also is required to curve upwards. I guess I'll go with this solution at this time. I'll read some more and make a final decision later. Hope my terminology is correct here its only taken from some of the literature as a first read so it will improve in time - I hope. . Anyway first steps was to cut and sand down with my Dremel the 'bearding' lines on the bow to take the first plank. I've taken material off the bulwark and the next two adjacent frames.......hope this is correct. Just gonna take my time here as I haven't completed plank bending before. Having read through the building tips and techniques section. I have decided to use a steam iron to do the bending. All I am doing is putting a fairly small bend in the 2x2mm strips for the first six rows on the port side of the bow. I have a hand plank bender which i didnt want to use for the top strips as the impressions show at the top of the strip and is unsightly. The Mantua roller type bender I have broke several strips so I've left it alone. Not sure that i am using it correctly either. Lastly I don't have the right clamps to fix the first strip to the top of the frames as there is a support bar that runs across which impedes my ability to be able to use standard pegs, clips or clamps that I have. This update shows hardly any or slow progress but learning as I go along. Thanks Sean


-
Cheers Antony. Agree with the frames. Lots of problems with my last model because of this on the planking (I've placed it against a wall so that the differences in the hull planking are not apparent). The deck planks however are not exactly square as a result which is visible on close inspection. Schoolboy errors really. Feel like a bit of a automaton following the instructions so exactly obviously because of a lack of experience and expertise. Would love to be more 'free flow' and autonomous like you guys. Looking at some of the stuff in the gallery last night again - Wow.
-
Thanks Canute - necessity is the mother of invention they say.........anxious now having read the planking literature in the help section here - bearding lines rabbet lines etc etc. . I don't have an electric plank bender so this is going to be 'interesting'....So far its been quite straight forward - very ACDC, the next few days will be more Leonard Cohen me thinks !! Heh heh. Thanks again for sharing.
-
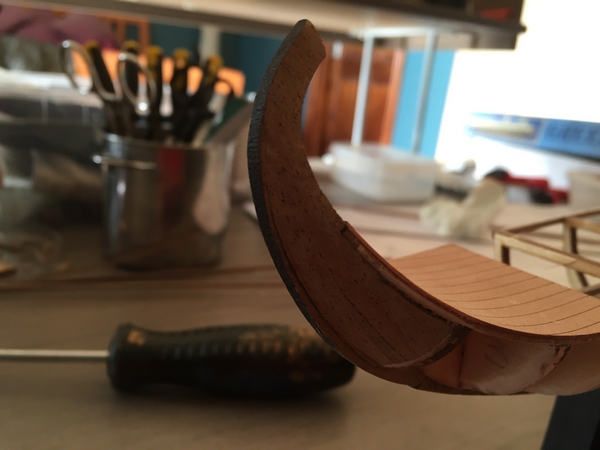
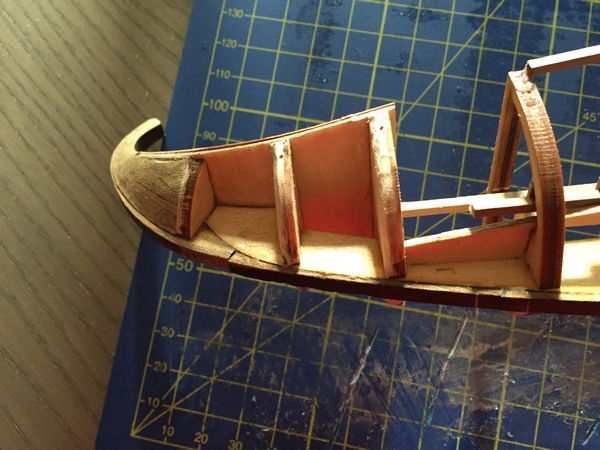
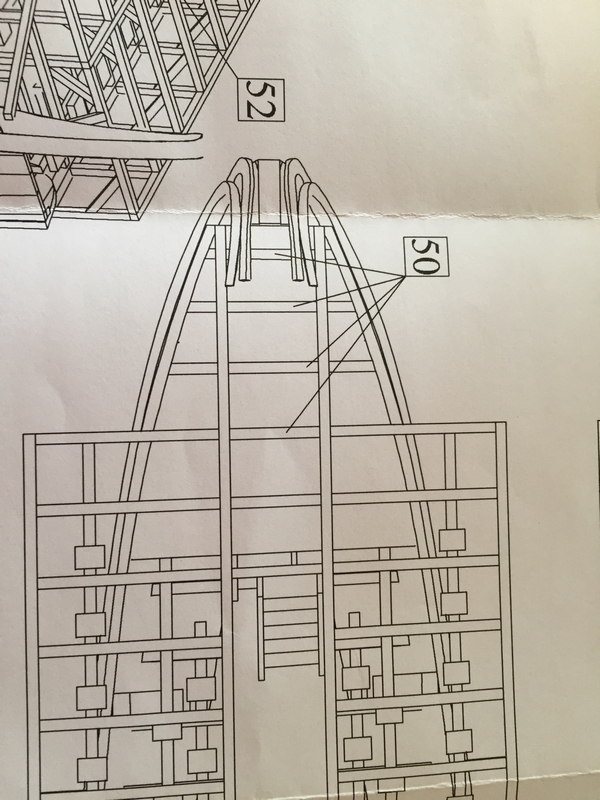
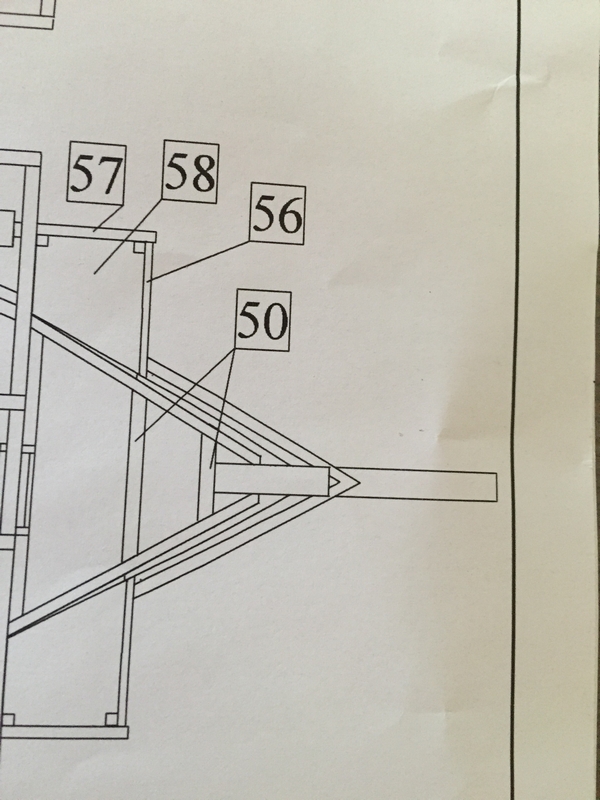
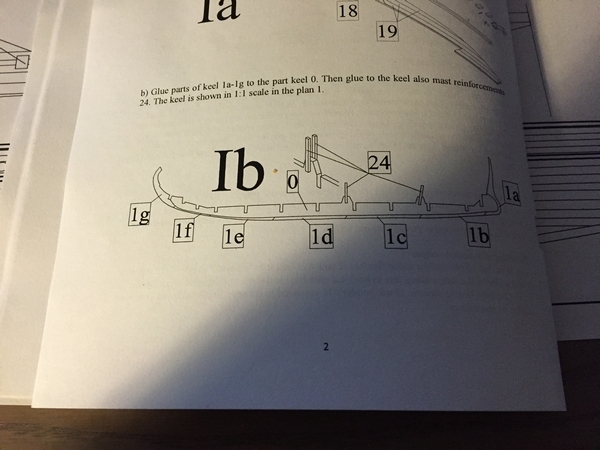
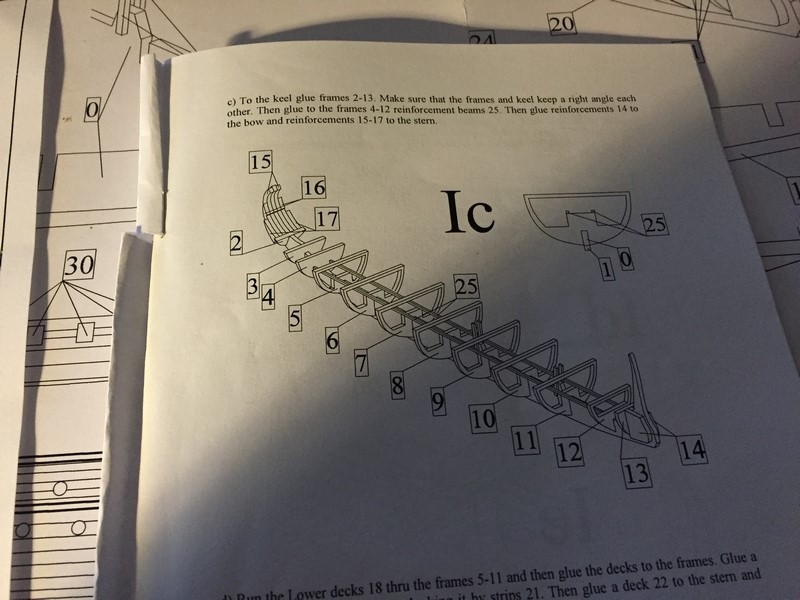
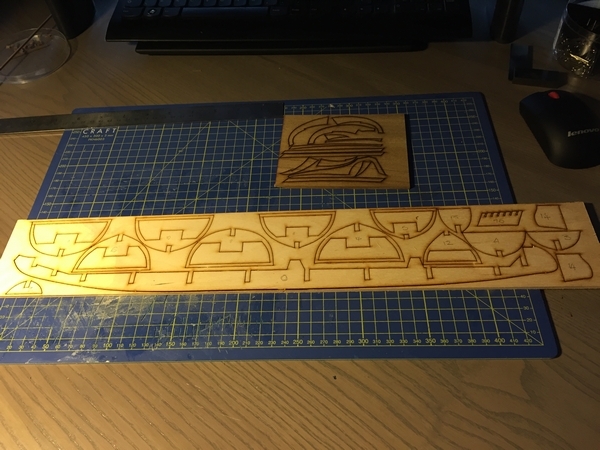
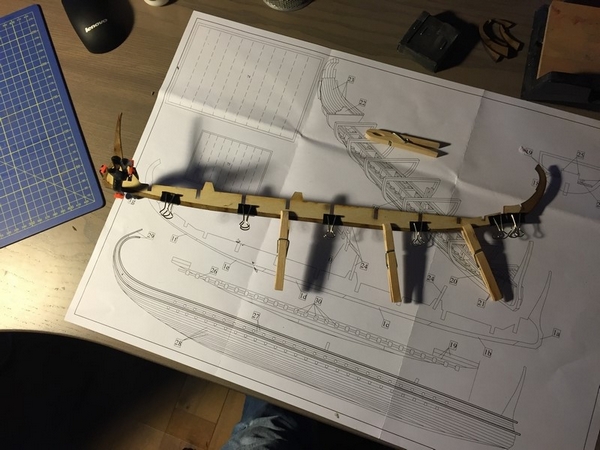
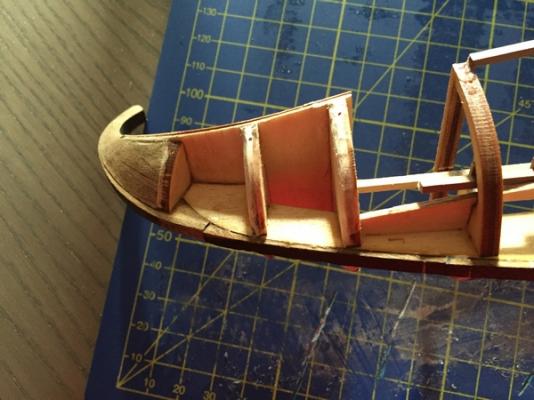
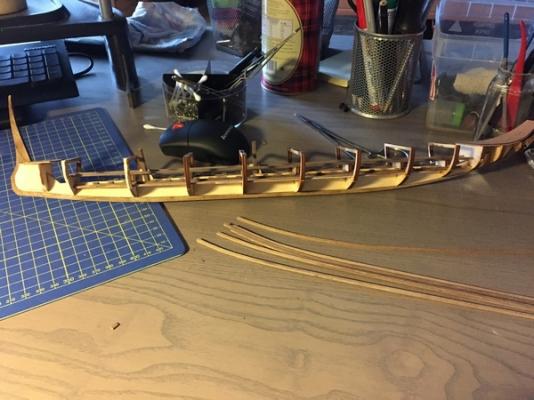
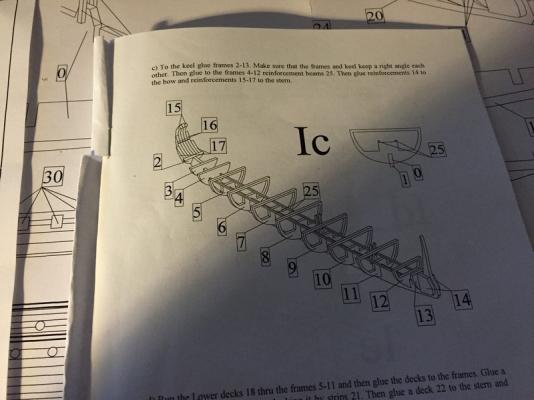
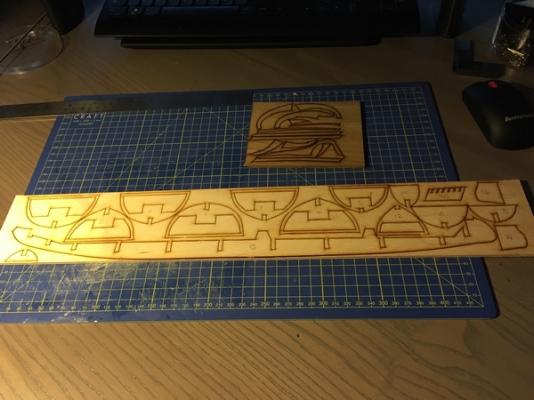
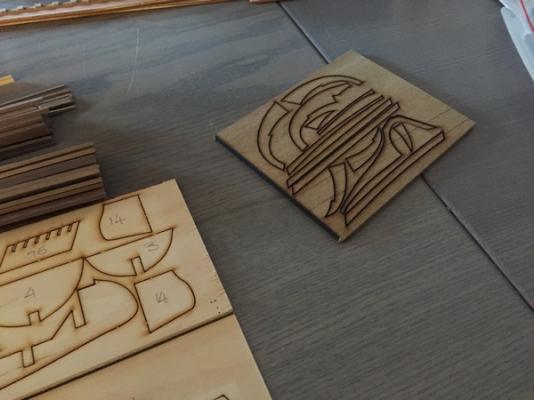
Ok so now for the keel and hull assembly. The keel is assembled from a plywood centre spine (4mm) and parts 1a-1g (all laser cut parts 4mm) which form the bottom of the keel. Parts 1a-1g are glued to the bottom of the plywood spine. All parts are all easily cut out and they assemble accurately and tightly together. Happy with that. There are also a number of what are called 'reinforcements' which are glued outside of the curved keel at the stern of the ship. These will facilitate the curved decking later on. Now for the Hull frame. Each part is easily identified from an A4 drawing contained in the kit. I clamped my finished keel and placed the frames in sequence as denoted in the instructions. Simple. Was a bit paranoid on the squareness of each frame piece as the last model I completed there were a few that were not exactly squared and it caused difficulties on the hull planking and the decking planking. Anyway used a miniature set square and all seems fine. Also clamped the frames vertically to ensure alignment along the length of the hull. Next glued two 2 x 2 mm strips along the inside of the frames as denoted in instructions - these will act as the 2nd level deck seat beams. Also clamped to ensure straight and even fit. Next was bending and fitting the veneer decking (with plywood underboard) at the bow and the stern. The one at the stern no problem and used a couple of pieces of timber to clamp both pieces together as suggested by Antony in an earlier post. Worked great and little to no warping of the veneer. I'll use the contact glue option maybe in the future as I have a couple more of these to do later on in the build. The larger of the two however needs to be curved as per the shape of the keel at the stern. Hadn't done this before so simply placed the piece in a mug of boiling water and then when I took it out used the outside of the hot mug to shape the curve on the decking. Glued and clamped to deck when I had the basic shape. Probably unconventional but anyway it worked!! Hurray!! Lastly I fitted the two lower decks with seats and glued in place. Voila. Coming along ok and thanks to all for the advice and tips so far. Next step is the hull planking which I will have to bend and shape planks which I haven't attempted before so Ill have to read up on here about that before I attempt anything so that'll take a few days with probably a couple of pilot runs before I attempt it on the model. Enjoying this so far but I think the hard yards are ahead for me..... any way ill just keep plodding away.... I've also learned how to post properly. Thank you mtaylor Enjoy rest of weekend all Sean


-
That's a great suggestion and one that ill use in future now and it makes perfect sense as i was using PVA. Your other tip on the propelling pencils is also smart. Thank you.
-
Thanks Shihawk. Its the first time i have seen or used it so i suppose that its just an initial disappointment. Having said that I've only built one ship before this so I don't have an extensive knowledge or alot of experience. I certainly don't want to be overly critical either.......I'm happy enough with the kit generally. I've already laid the veneer now so just gonna keep going.
-
Thank you for the link. Think I have it now. Gonna do an update soon so we soon find out!!
-
Thanks Anthony for the feedback. On the veneer point you make, I don't dispute that this is the standard thickness of the veneer. i guess the point I was trying to make is that a physically planked deck would have been a nicer detail. ceratinly not trying to be a purist or anything just a preference I would have. I certainly take your points on the dowel for the masts and indeed I'll follow your advice on the sails and see how it turns out. Thanks again for the advice Sean
-
Apologies - some of the photos in my last update seem out of sequence. Dunno why this is happening. I'll wait until I have typed the update next time before I attach any jpegs. Schoolboy errors I expect...... Thanks Sean
-
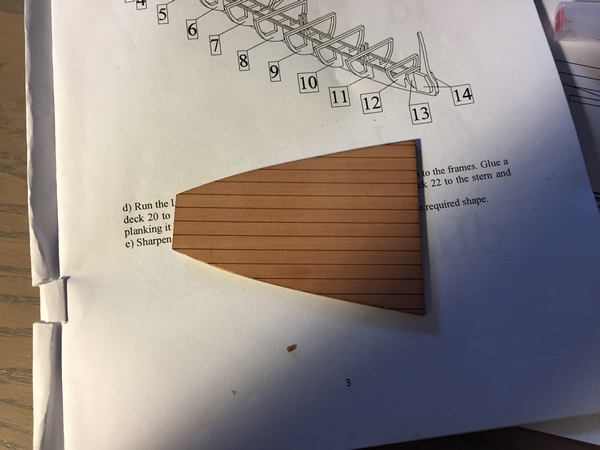
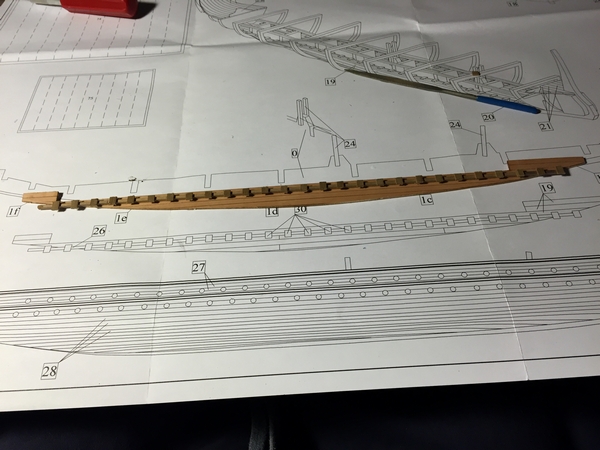
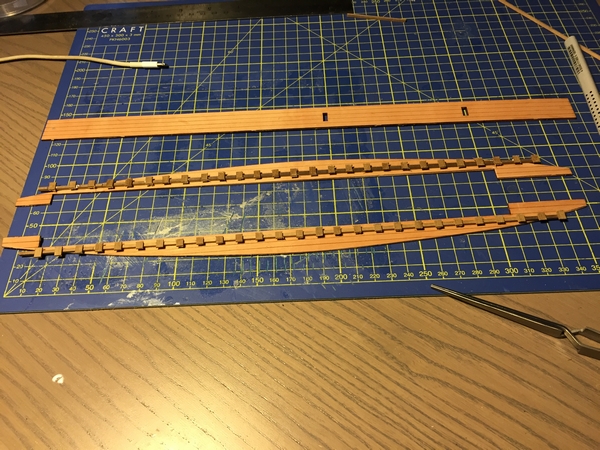
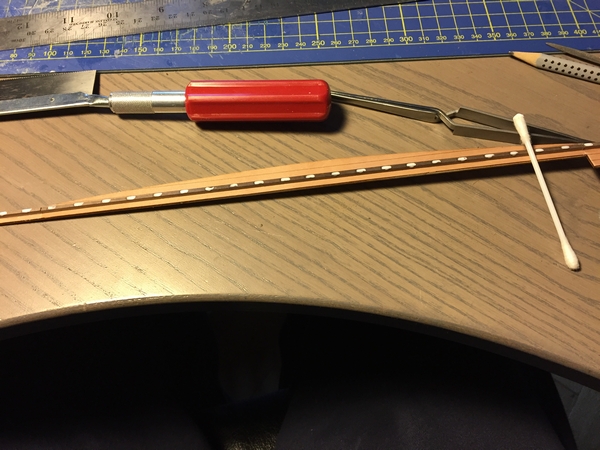
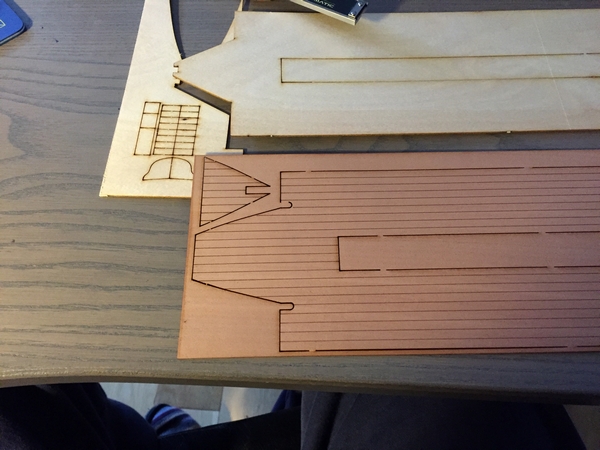
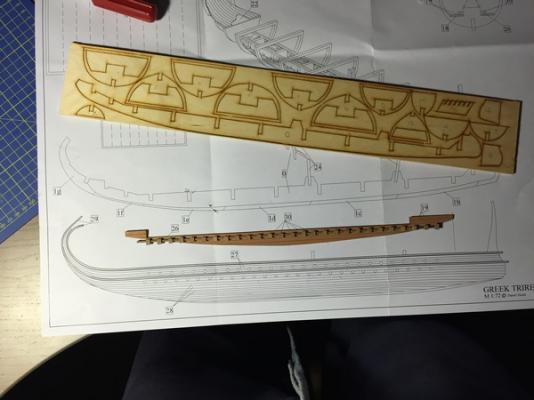
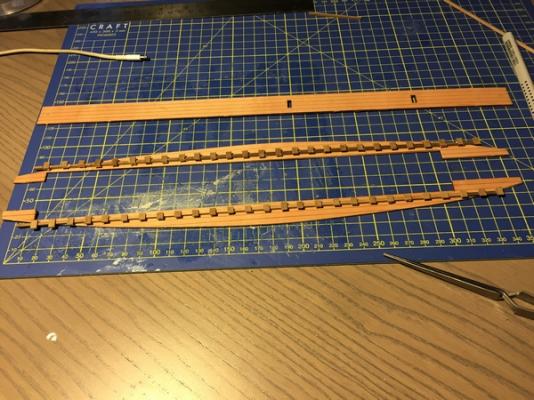
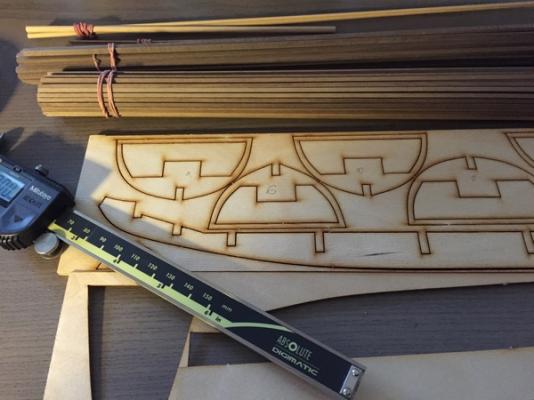
Right so following the instructions I have taken the lower deck and glued the veneer to the under-board. The veneer warps and curls up such is the thinness of the material and I had to clamp down the edges to prevent curling. Next I glued a 2mm x 2mm beam (# 26) for the lower deck seats into position on the plank effect veneer and sub board. The beam is actually 2mm x 2.5mm or thereabouts...... I then cut out 27 seats for each side. I need to get a guillotine or chop as I am hand cutting (razor sawing these and they are varying in width somewhat. A very tedious activity when doing it as I have done so I put on some Van Morrison to ease the pain and get me through!!! . The seats are made from # 30 strips 1 x 4mm as stade in the parts listing but are actually 4.3mm in width. The lenght of the seats are approx 5mm from the drawings but some concerns on that below when I went to place the seats on the beam or rail and placed the laser cut out of the deck onto the drawings. It is also noted that the actual laser cut out deck panels and plank effect veneer does not fit exactly onto the drawing meaning that the drawings aren't exactly 1:1 in fact. It about 4mm off. Mmmm........I have used the drawings for the seat interval lengths so hoping that this doesn't affect anything. The drawings aren't denoted as being 1:1 in fact so maybe thats me assuming something that i shouldn't. I cant see any other way of referencing however in the absence of them being that scale. Not the best really and am pretty disappointed by this. Anyway here's the finished lower decks with seats. OK. So thats the first step completed. Given my inexperience not sure whether I am over-reacting or not on the quality of the veneer decking and on the dims of the parts so far and the I think mismatch on the drawing scales to the lasered cut outs. Next stage is the Keel and Hull construction. Thanks Sean


-
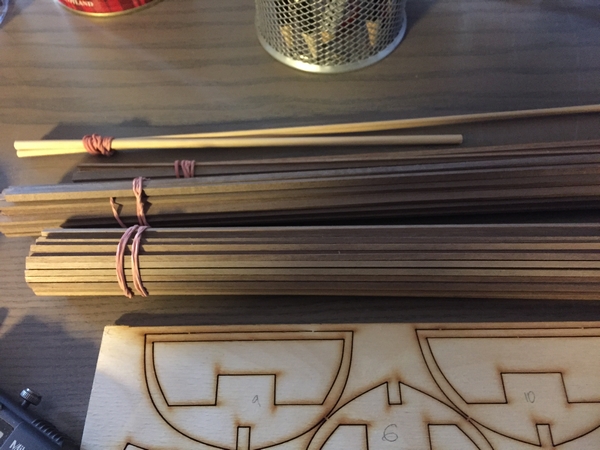
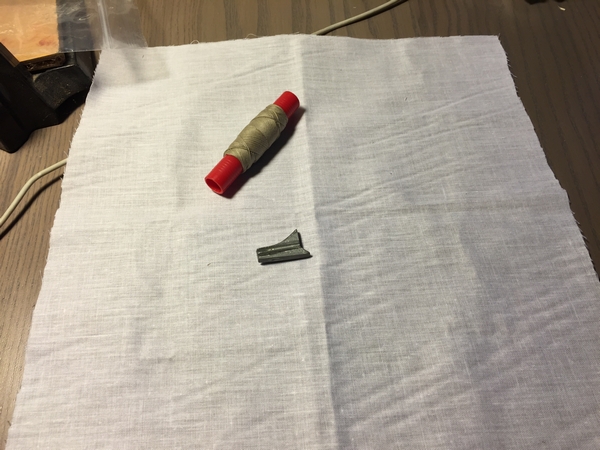
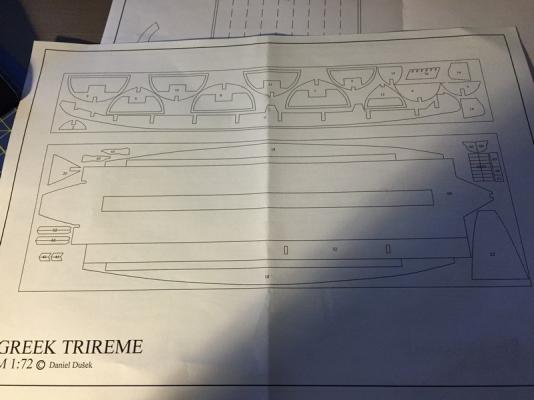
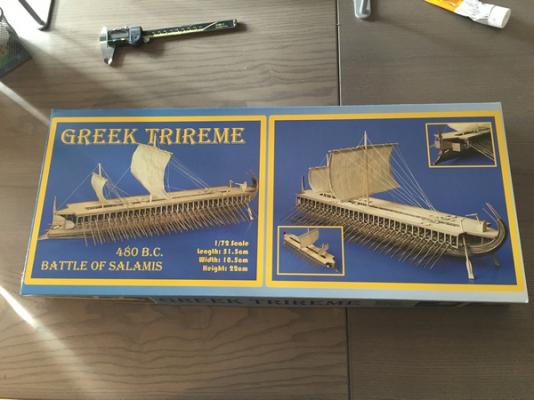
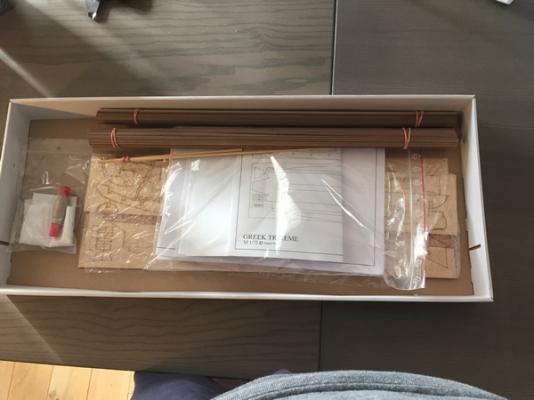
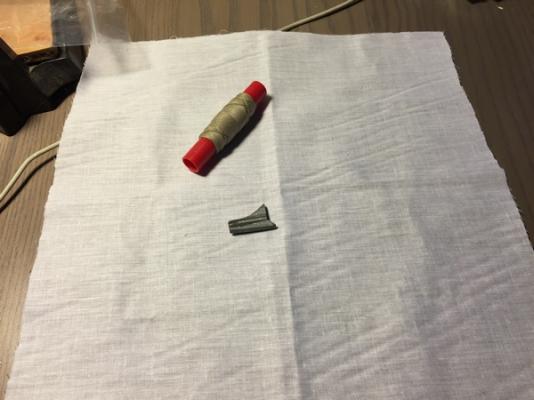
Hiya Folks Just gonna get this log going with a quick first impressions having unboxed the kit, completed an inventory of the parts and read through the instructions. This might seem superficial as a start point but the kit arrived in a heavy duty cardboard outer carton well packaged and unlikely to be damaged in transit. The kit box inside was a lot heavier material than the previous Amati Drakkar kit which I built. So far so good. The parts were all accounted for and inside a polythene bag was the build instructions and 4 what seem like scale drawings in different projections of the ship itself. Also a catalog of the kit range from Dusek. A count and parts numbering system was contained at the back of the instruction manual which seemed pretty clear albeit I have only sped read it at this stage. It contains demonstration diagrams and instruction narrative. The English is a bit disjointed in places but I think that is to be expected give that the kit is manufactured by a family business in Czech Republic. One A4 sheet for the keel and hull construction and then 3 other 1:1 scale drawings of the ship. These seem quite clear at this point. All good so far. On inspection of the various parts, the planking seems to be of good quality and there is little variance in size certainly judging by basic visual inspection. The lower decks seem to be formed by gluing a wood veneer (with planking lines) onto a base board. The veneer is VERY thin at about 0.5mm. Mmmmmm a bit disappointing TBH. The main masts material is 4mm dowel and the foremast seems very lightweight at just under 3mm (2.93mm). Again a bit disappointing as the kit box photo and marketing photos indicate a more substantive material. The sail material is very thin cotton (0.18mm) and this is accompanied by the rigging which is again a fairly lightweight thread. Not sure Ill use either TBH. The ram is made from metal and seems fine. Other materials seem fine and are all laser cut. Hope I've covered everything for a first step. Now on with the build....... Thanks Sean


-
Hiya Folks, Just read the log guidelines and just opening my log. Hope I've complied with the forum rules. Received my model today via UPS. Only my second build and first on here in front of an audience!!! Hope it goes well. Hoping to have it completed in a couple of months - work permitting. However setting deadlines is probably the worst thing I can possibly do. Deep breaths ... Next step gonna complete an inventory on the parts/materials and instructions and give first impressions later or tomorrow. Thanks Sean