


ricky146
-
Posts
22 -
Joined
-
Last visited
Content Type
Profiles
Forums
Gallery
Events
Posts posted by ricky146
-
-
Hello Praho.
I have Delftship on my laptop. No problems with downloading it from my point of view.
You are right that it is aimed at full size ships but I believe it is equally at home with models.
The buoyancy calculations and the hydrostaics may not be as relevant though.
I have not used it very much but it is rich in features and will certainly take some learning.
The basis of the program is 'surface modelling'.
Hope this helps
Ricky
-
Beautiful work!
A real inspiration. The attention to detail is great.
It is a model I have looked at several times but always come up with some excuse not to tackle it - might have to take the plunge soon though.
-
Hello Jrozhon and welcome to the forum.
You have chosen a beautiful hull for your first ship project although your model aircraft experience will certainly be a bonus.
A hull with a lacquered finish showing the wood planks will bring its own problems as mistakes cannot be filled with big patches of filler.
So take your time with the planking and treat each plank as its own project.
I was looking at your front frames, the ones either side of the bowsprit. Most models of this design either have the frames alongside the keel or at 45 degrees to help support the planks so I cannot offer any advice unless you have the plans available. I am surprised though that you have had to cut the bowsprit.
Your work so far looks really good and you have had some good ideas like the aluminium angle pieces.
Keep it up and keep posting.
Ricky
-
Thanks John. You are quite right!
It is all too easy to just carry on blindly but everyone makes mistakes including me - even good kit producers like Mantua.
I will write to them as they may be able to make an amendment to the instructions for other customers.
As it turned out I was able to pry off the deckhouse and just turn it round so no great problem in the end.
-
Time for an update.
It has been an interesting couple of building days.
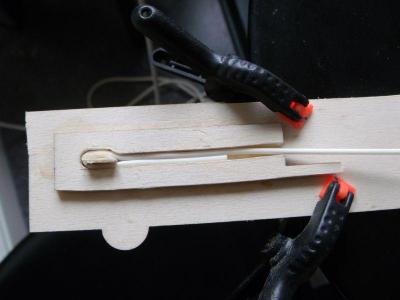
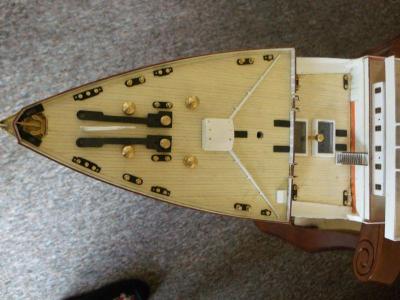
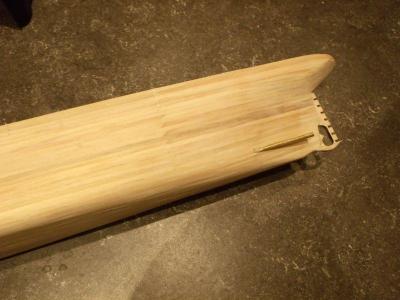
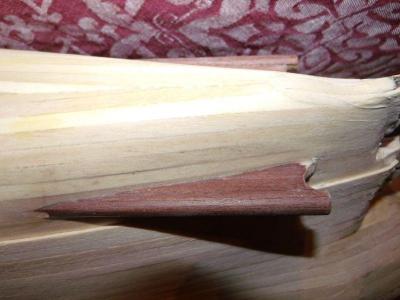
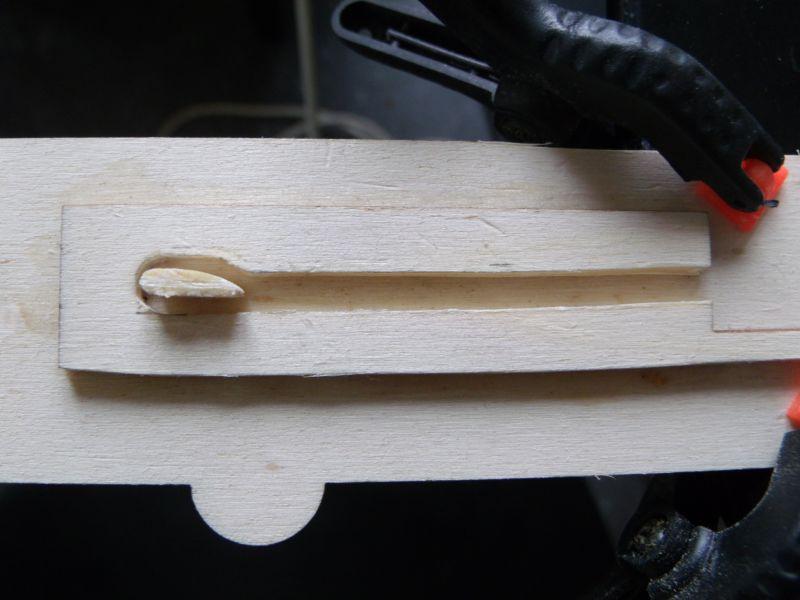
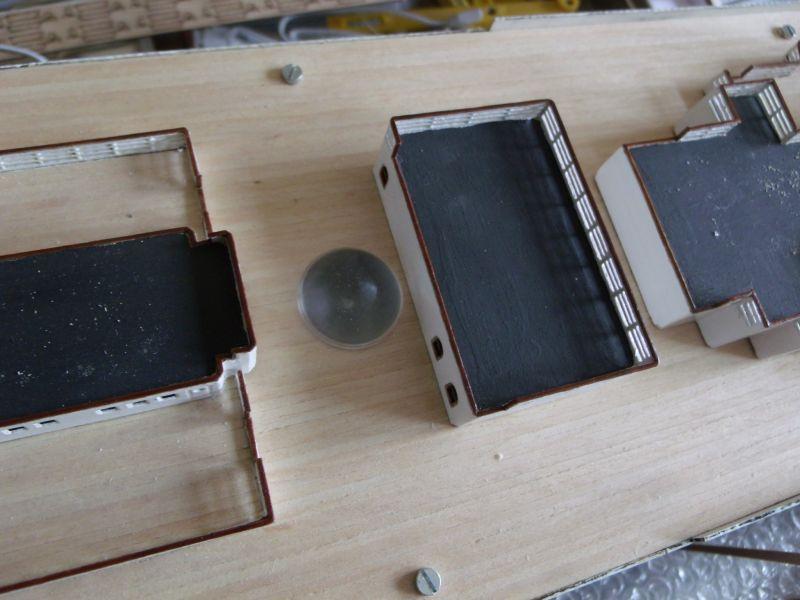
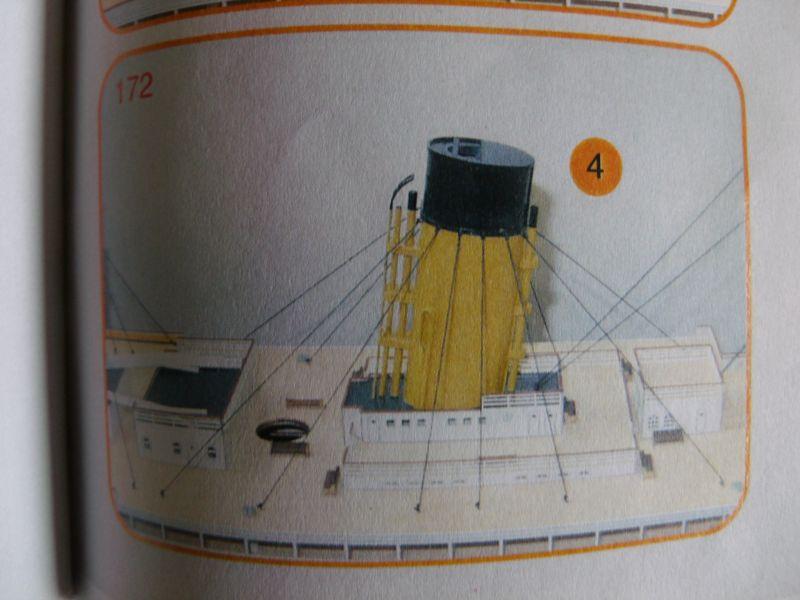
Firstly, the funnels.
These require plastic tubing to be bent to specific shapes and glued to the funnel. The instructions suggest
using a hair dryer. This resulted in burnt fingers and floppy plastic pipes that I could not get right. In the end I built a little jig
from scrap wood and then used the hair dryer to soften the plastic so that I could press the pipe into the jig.A good result I think.

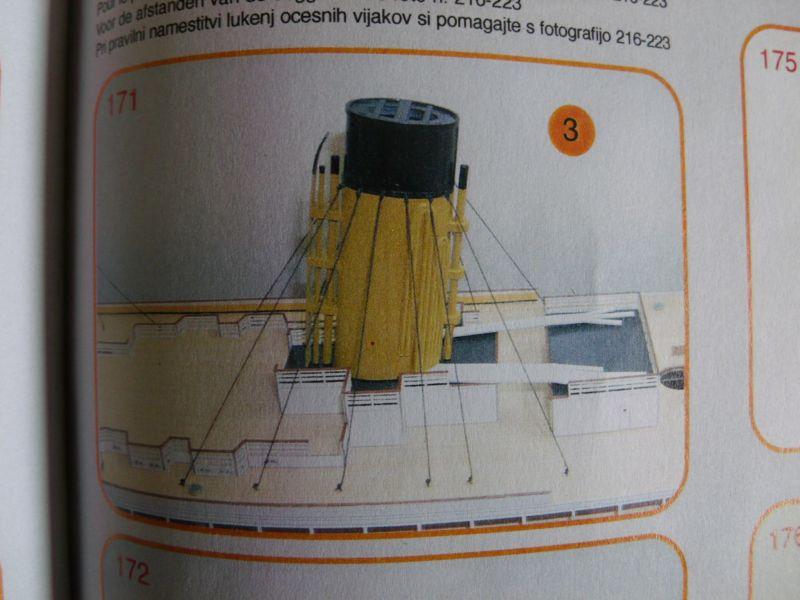
Now came a problem – the first real
one I have had.David, I don't know if you have spotted this one yet.
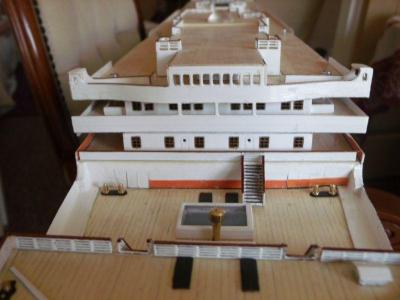
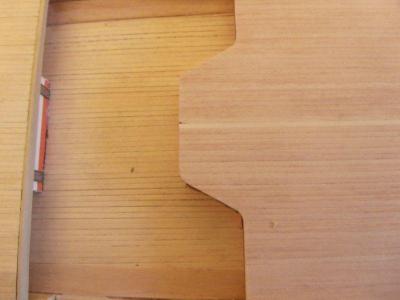
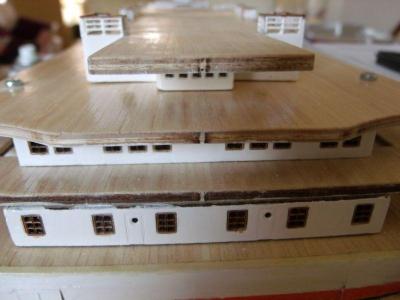
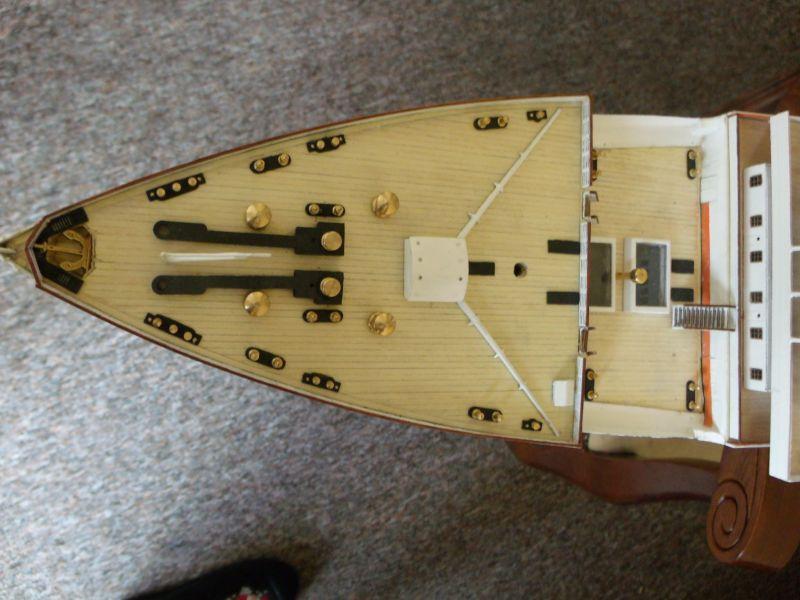
The instructions clearly show the position of the deck cabins – see the photos. The rectangular structure with 3 sides containing handrails shows the gap in the handrails to the rear.
I built it this way as shown in the photo.
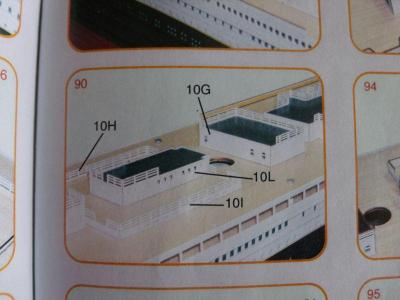

Now I am at the stage of fitting the funnels and the later instructions show the rectangular structure has turned around!! This is actually the correct way round as the pipework runs across the section with no handrail from funnel 3.


I guess the lesson here is …...... I don't know what the lesson is!
Oh well, never mind. I will prise the structure off and re-glue it the correct way round if I can.
Please keep the comments coming - they really help.
-
Great detail on the traps, Popeye.
I love the weathered effect - very realistic.
Makes me want lobster for dinner tonight.
Ricky
-
Wow Sarah!
You have added some great detail there and at a very small scale.
I love the figurehead and smokestack. This is the kind of detail that makes it YOUR model and not just a kit build.
Keep it up - I will be watching as it progresses.
Ricky
-
Thanks Sarah!
Luckily the quality of the kit is very good and the parts all fit very well.
I know some people actually fit out some of the cabins on this model.
How they do that is beyond me.
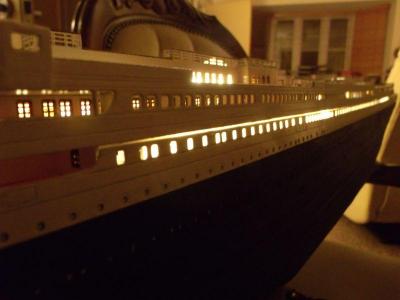
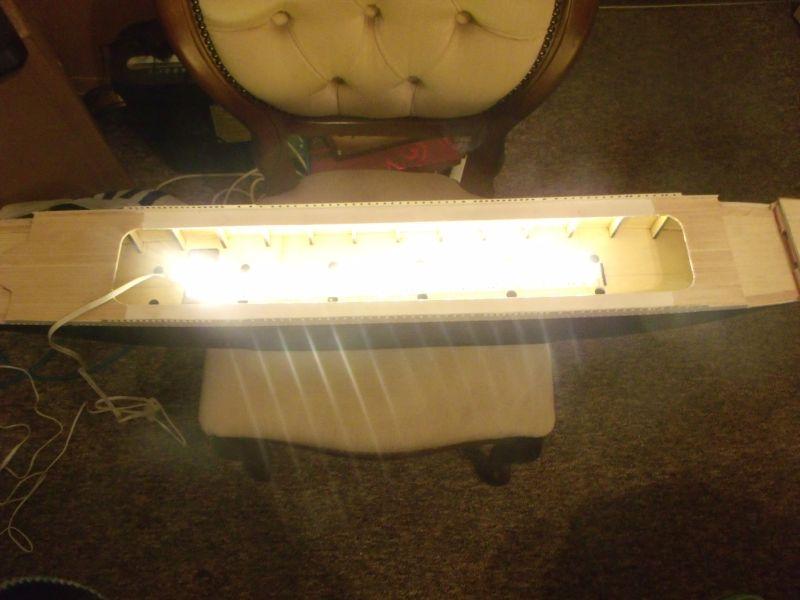
I am really pleased with the lighting, even though I have not fitted all of it yet.
More photos in an hour or so.
Ricky
-
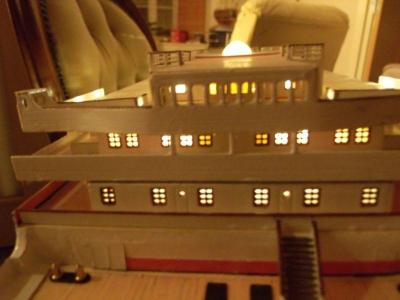
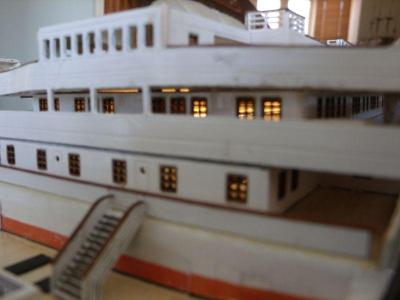
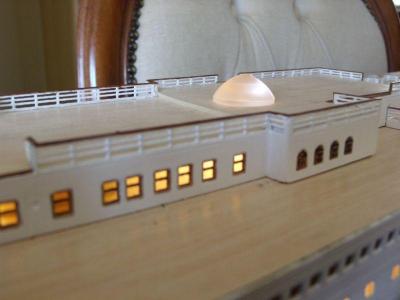
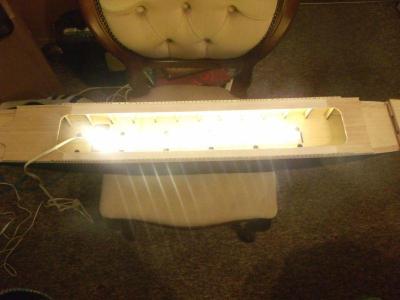
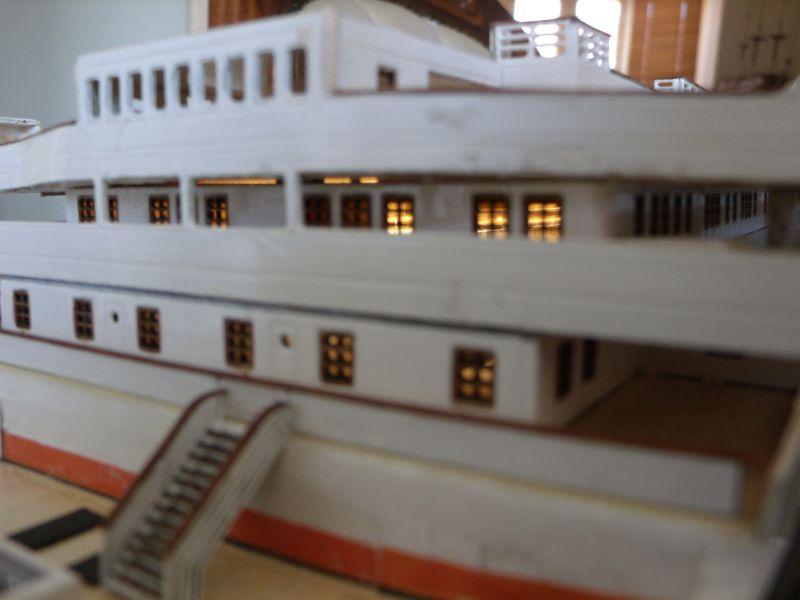
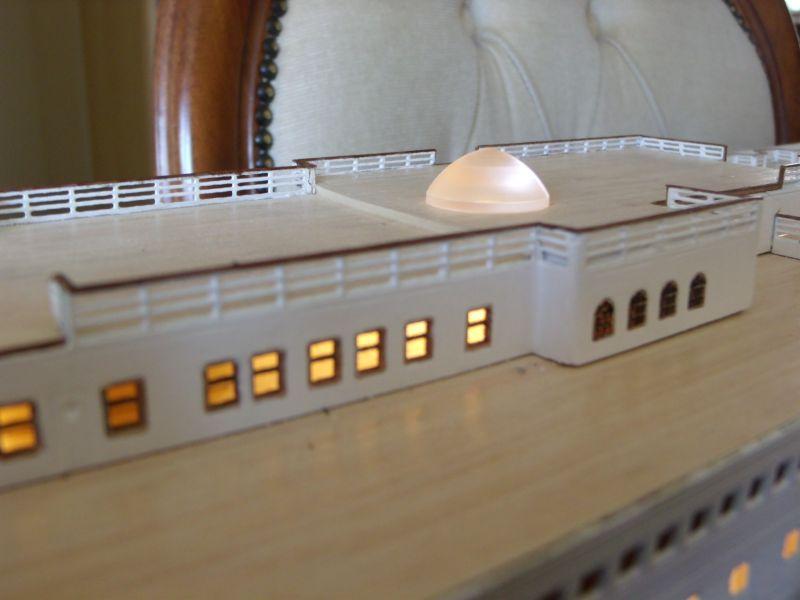
Time for another update
Below are some photos showing the lighting effect at night. I am liking the effect but I think I have 'lost' my bag of led's that I bought for the navigation lights - will have to buy some more.
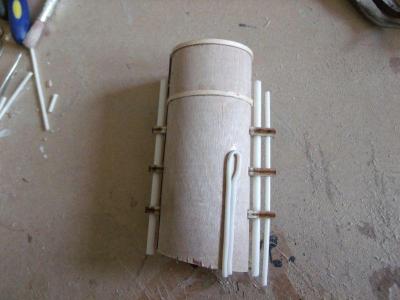
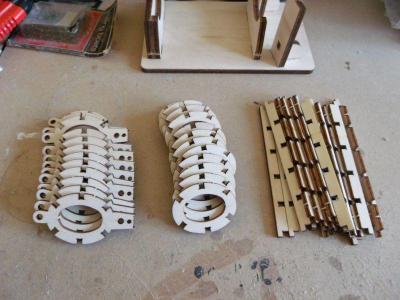
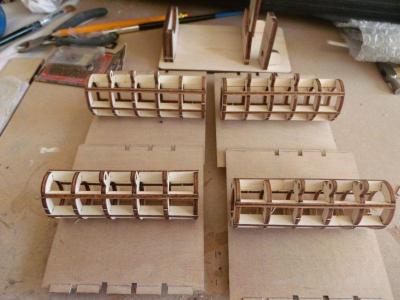
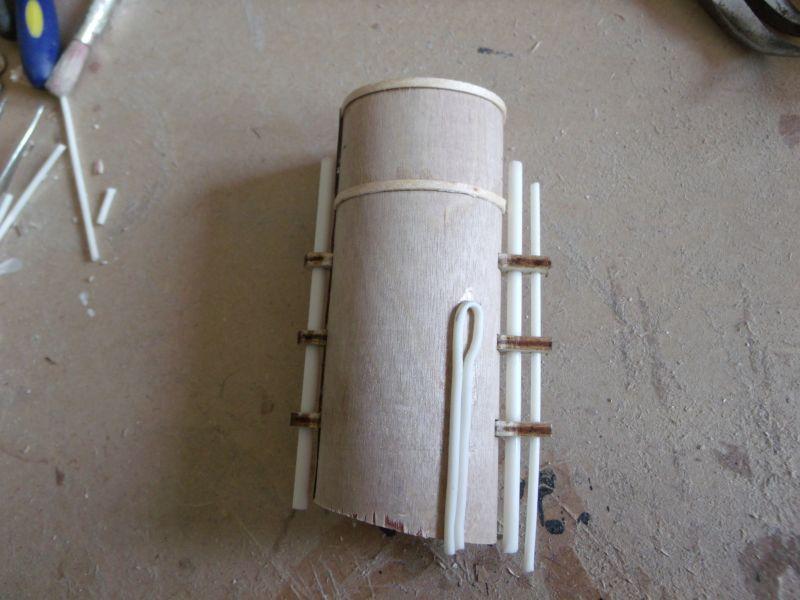
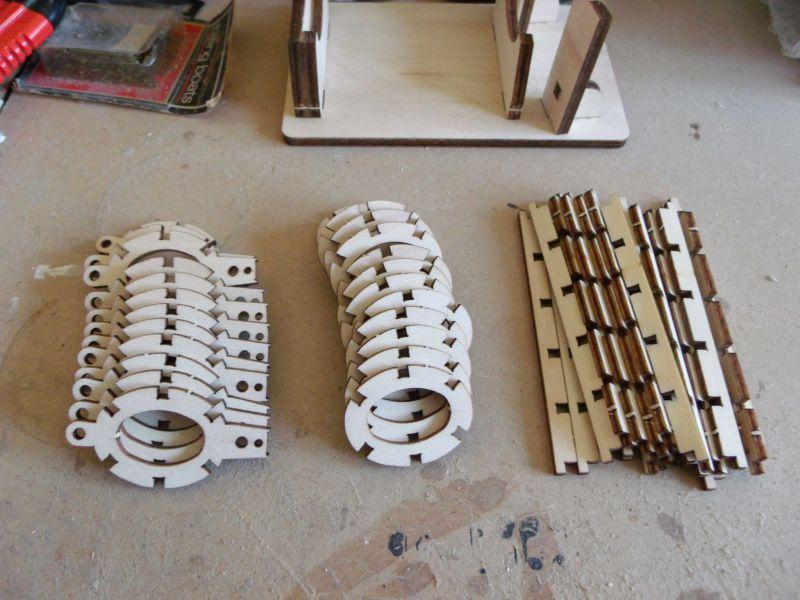
I have now started work on the funnels.
The kit contains a neat jig to ensure that the base of the funnels are all cut to the right angle.
First job was to dry fit all the parts together and then make sure that the thin mirror-ply will fit correctly.
No problems encountered. All the structures were then glued and the ply carefully rolled around them. Super glue is your friend with this job.
Currently, I am adding the detailing and pipework to the funnels. Also, I will have to go out tomorrow and get some paint for them. This is one part of the model that must be the right colour!

-
Beautiful neat work Alfons.
Keep it up.
Looking forward to more progress.
Ricky
-
Good to see this log coming back Popeye.
-
Time for another update on this build.
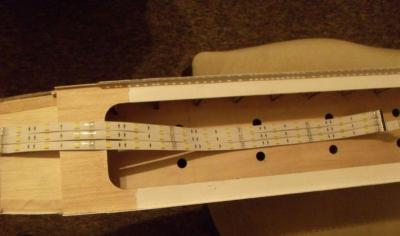
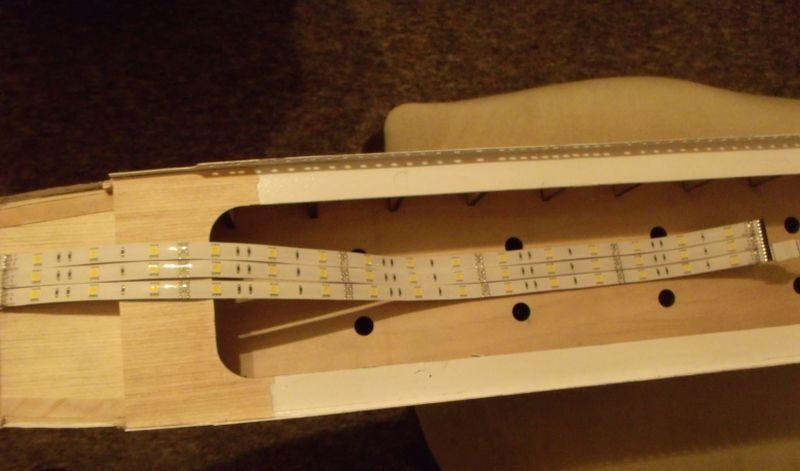
I have now cut the lighting strips and positioned the sets of 3 leds roughly where I want them in the hull. I will include some shots of the actual lighting installation when I finalise the position. Foredeck fittings are in place and most of the handrails are done.
In the photos, the superstructure is loosely screwed in place and I have yet to think of a sensible way of linking the power to the hull - I am thinking of a small jack-plug somewhere.
I will take some more photos tonight - It looks much better in the dark!
-
You have been busy, Popeye.
I love the lines of this build - a really graceful hull.
Your attention to detail and forward thinking is evident here just as it is in the Lobsie twins. I am looking forward to seeing this build progress and have added the kit to my wish list.
-
Thanks John. The downtime on the forum gave me the chance to get on with some serious building.
Xavjar. The kit is great but I would suggest giving the RC part a miss. If you are intending to go the RC route then you can get better motors cheaper from any good model shop and the installation is easy in a hull of this size.
David. Great to hear from another Titanic modeller!
It sounds as if yours will be far more detailed than mine. I did consider fitting out some of the cabins and cafe etc but decided against it mainly because of the scale.
150 led's!! Wow! I have fitted the strip today and will post some photos later tonight. I intend to have led navigation lights, steaming light and stern light but that is probably as far as I will go.
I look forward to seeing photos of your build.
-
Thanks Dan!
Yes, the strips can be cut. You get 3 strips in each kit and each strip consists of 5 sets of 3 led's. There is a scissor symbol showing where to cut each one. Then with some careful soldering it is possible to lengthen the gap between each set of 3 leds. There are four contacts to solder marked as 12v+, R, B, G.
So I suspect you can also choose which colour you want although I have not tried it yet.
Ipaid about £20 for the led kit at Maplins. Not bad for 45 bright led's including the power supply.
-
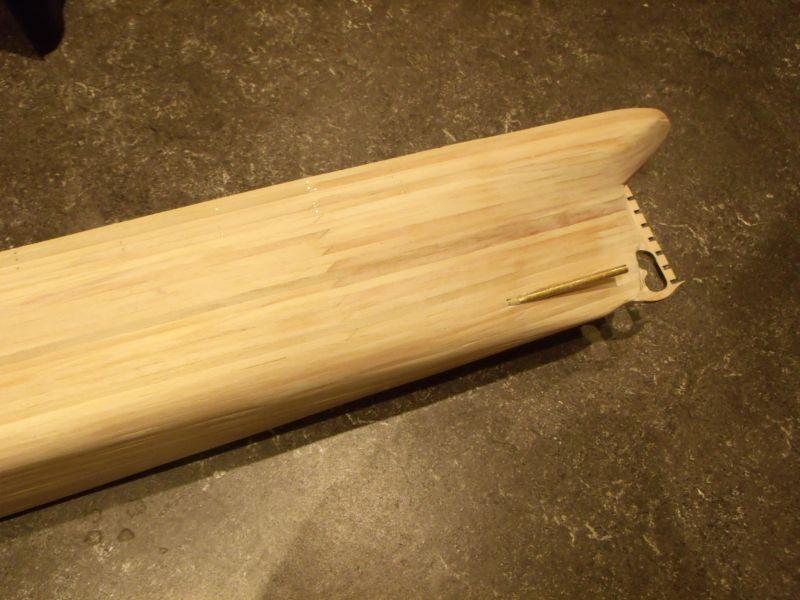
Well, here goes with a repost of my Titanic build. It will take a few posts to catch up but I will do my best.
The Mantua kit comes in 5 parts including the RC part. I am building this to include the RC part but it will mainly be a static model, hence posting in this forum.
I started the model in early December 2012 and have been surprised at how fast I have progressed - too much time building and not enough time for the house chores!
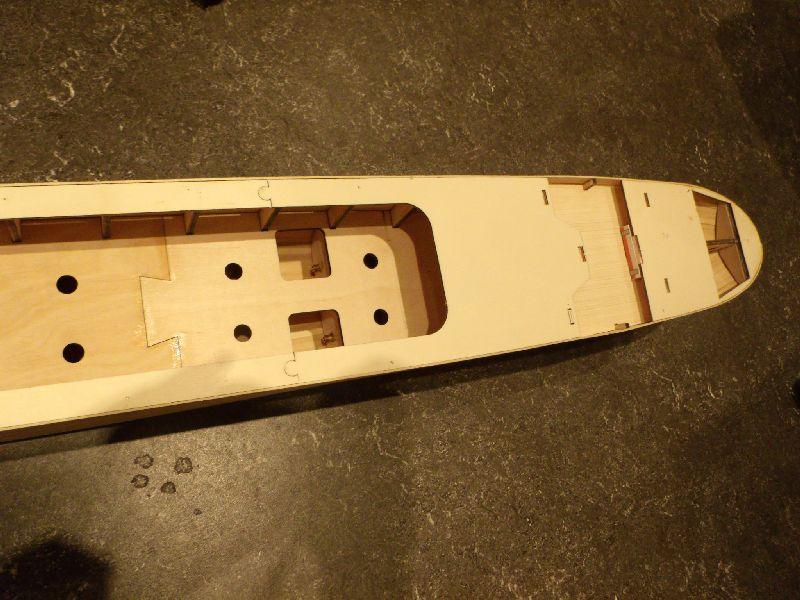
The kit is very complete and I have not really had any problems yet. The hull is a standard 'double plank on frame' construction and as long as you take care with the planking, the hull builds straight and true.
I prefer to treat each plank as a separate project and not worry about the progress.
Anyway, on to the photos ...


America by popeye the sailor - FINISHED - Billing Boats - 1:72 scale
in - Kit build logs for subjects built from 1851 - 1900
Posted
Great modification, Popeye. That is what modelling is about - putting your own stamp on it!
Looking forward to more posts.
Ricky