


Jeff Titus
-
Posts
6 -
Joined
-
Last visited
Content Type
Profiles
Forums
Gallery
Events
Posts posted by Jeff Titus
-
-
-
-
23 hours ago, HakeZou said:
I've made a bit more progress on the lifeboats and have also discovered an error in the kit. I've painted the lifeboats over the last three days and have installed the floorboards for the larger one. The photo shows the current state of all three, along with the stained gunwales pieces. I should have done a better job of filing down the center lines, but that will soon be well hidden under the floorboards.

As for the error, the parts list indicates that 17 double-sheave blocks are required (that's part E for those building the kit). As with everything else, OcCre has been generous; my kit actually came with 20 of them. Unfortunately, the plans actually call for 32 of those blocks. I've written OcCre to notify them—though I'm sure I wasn't the first—and have requested replacement parts. The blocks I'm short will be installed on the anchors, lifeboats, and lifeboat davits, so this problem won't interfere with my progress yet. But hopefully they arrive by the time I'm ready to install those last items on the ship!
Thanks for the heads up on the shortage. I have this kit sitting on my self for building in the near future. I will make a count and see how many I have and contact OcCre if necessary.
-
8 hours ago, HakeZou said:
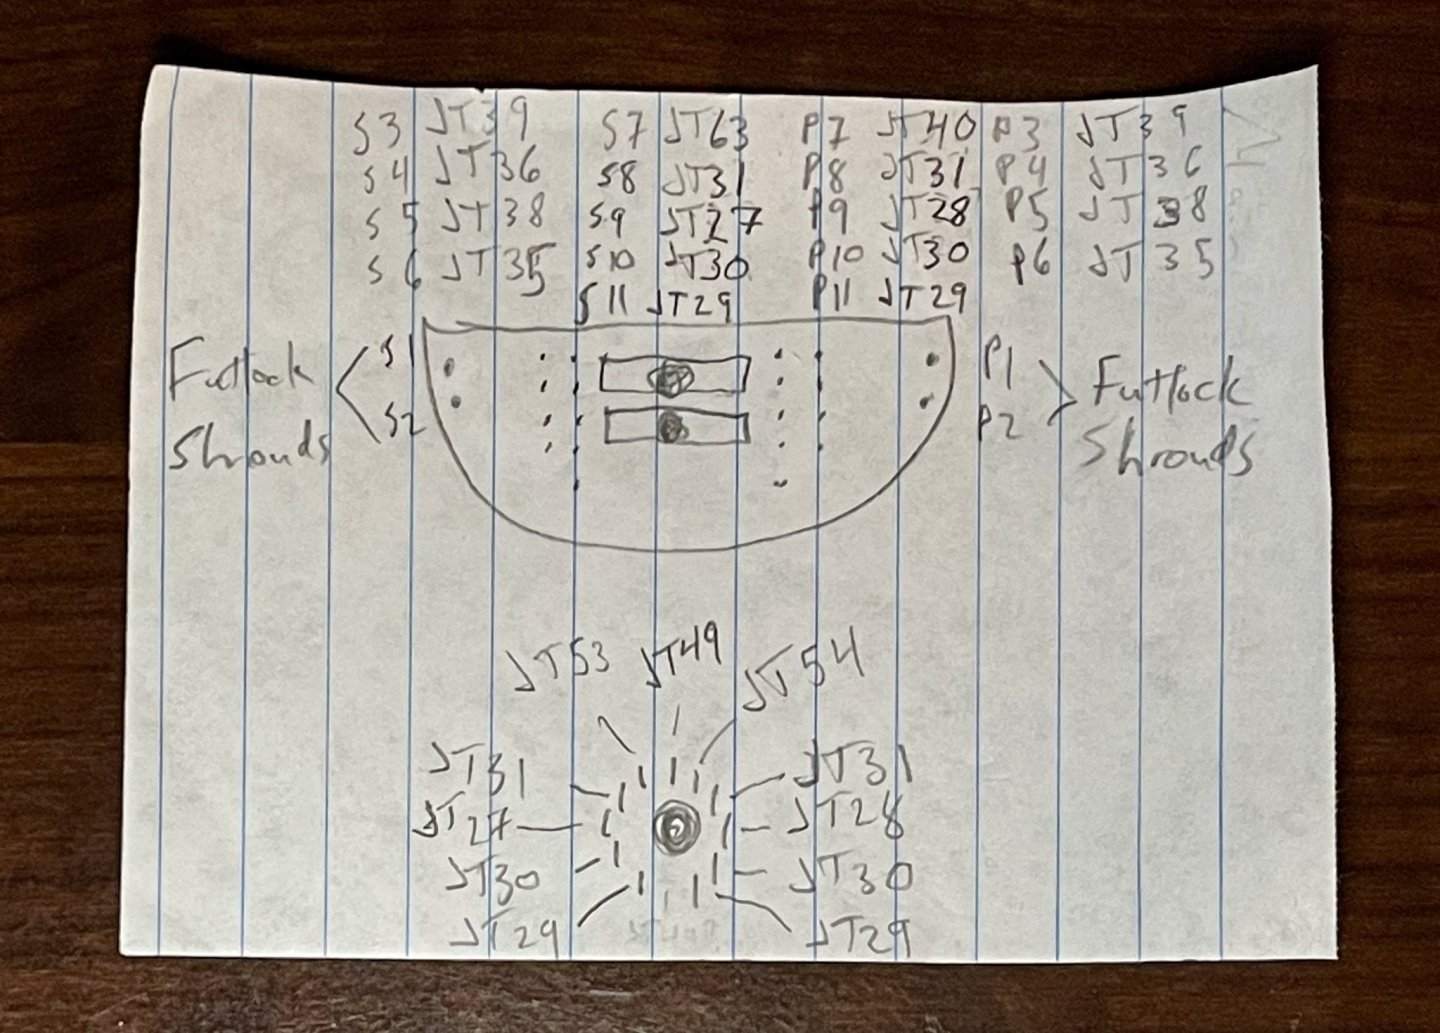
Some more slow and steady progress this weekend, as my attention has shifted to the foremast. First, I reviewed and revised my rigging plan for the foremast. I'm now at the point where I'm committed, so hopefully everything works out as well as I think it will. As I worked on this, I found the Philadelphia Ship Guild's Gazela Primeiro 2010 Crew Manual to be immensely helpful. The Gazela Primeiro is also a barquentine, so the rigging plan is very similar, even though OcCre has simplified the Endurance's for the kit. Section 2 of the PSG's Crew Manual provides detailed diagrams of the pin rails, spars and sails, the rig, and a few other things. While my pin rail diagram is in an Excel spreadsheet, I did everything around the mast by hand. In the diagram below, you can see the 22 holes through the foremast top and the eleven eyebolts at the base of the mast. The JT numbers refer to OcCre's labeling of the various ropes. I've numbered the mast top holes S1-11 and P1-11 for the starboard and port side, respectively. Put simply, the plan is:
- S1-2/P1-2: The upper shrouds run down through these holes and descend as the futtock shrouds.
- S3-6/P3-6: Running rigging (sheets and clewlines) from the two topsails, descending below to the pin rails.
- S7/P7: The flying jib and jib halyards, descending below to the pin rails.
- S8-11/P8-11: Standing rigging (slings and lifts) from the spars, descending below to eyebolts at the base of the mast.
- JT49 (staysail halyard), JT53 (fore gaff throat halyard), and JT54 (fore gaff peak halyard) run through the trestletrees, descending below to eyebolts at the base of the mast.
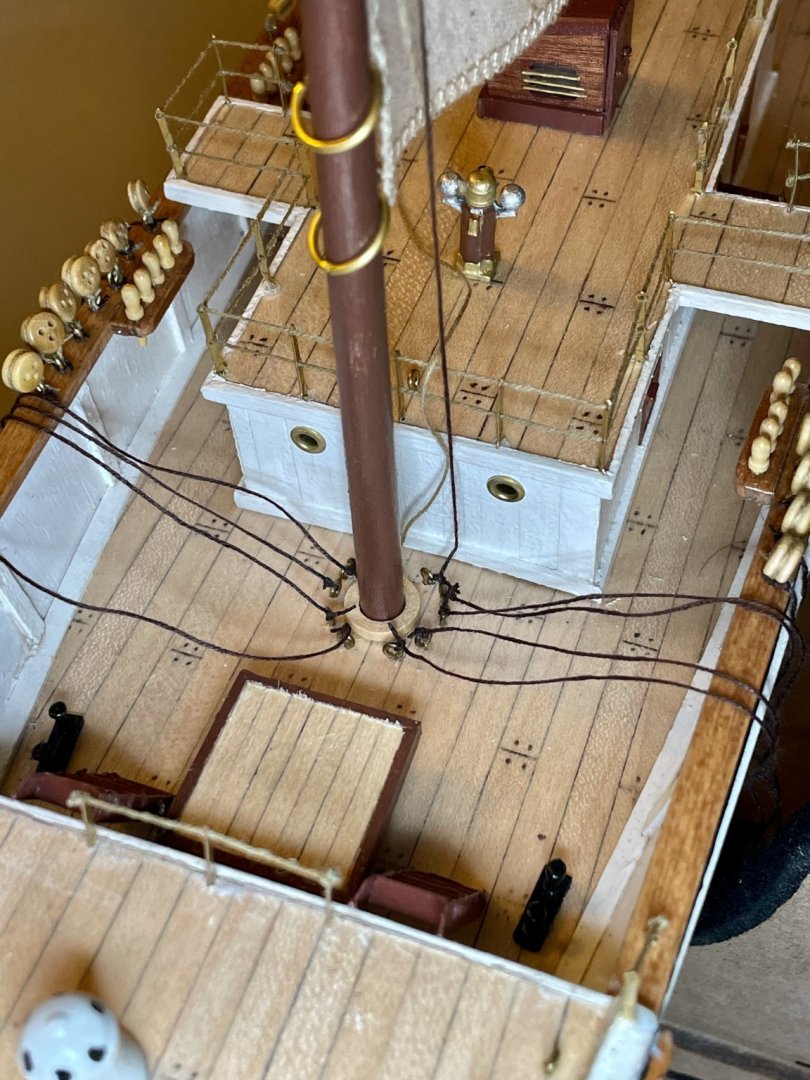
And here's the mess at the base of the foremast. The slings and lifts are coiled and dangling off the sides. The staysail lift is coiled and resting on the bridge deck. The peak and throat halyards are installed (and, unfortunately, the FrayCheck I applied to the knot stiffened up too much of the peak halyard; I think that this little kink will be less obtrusive once the other ropes have been run up.
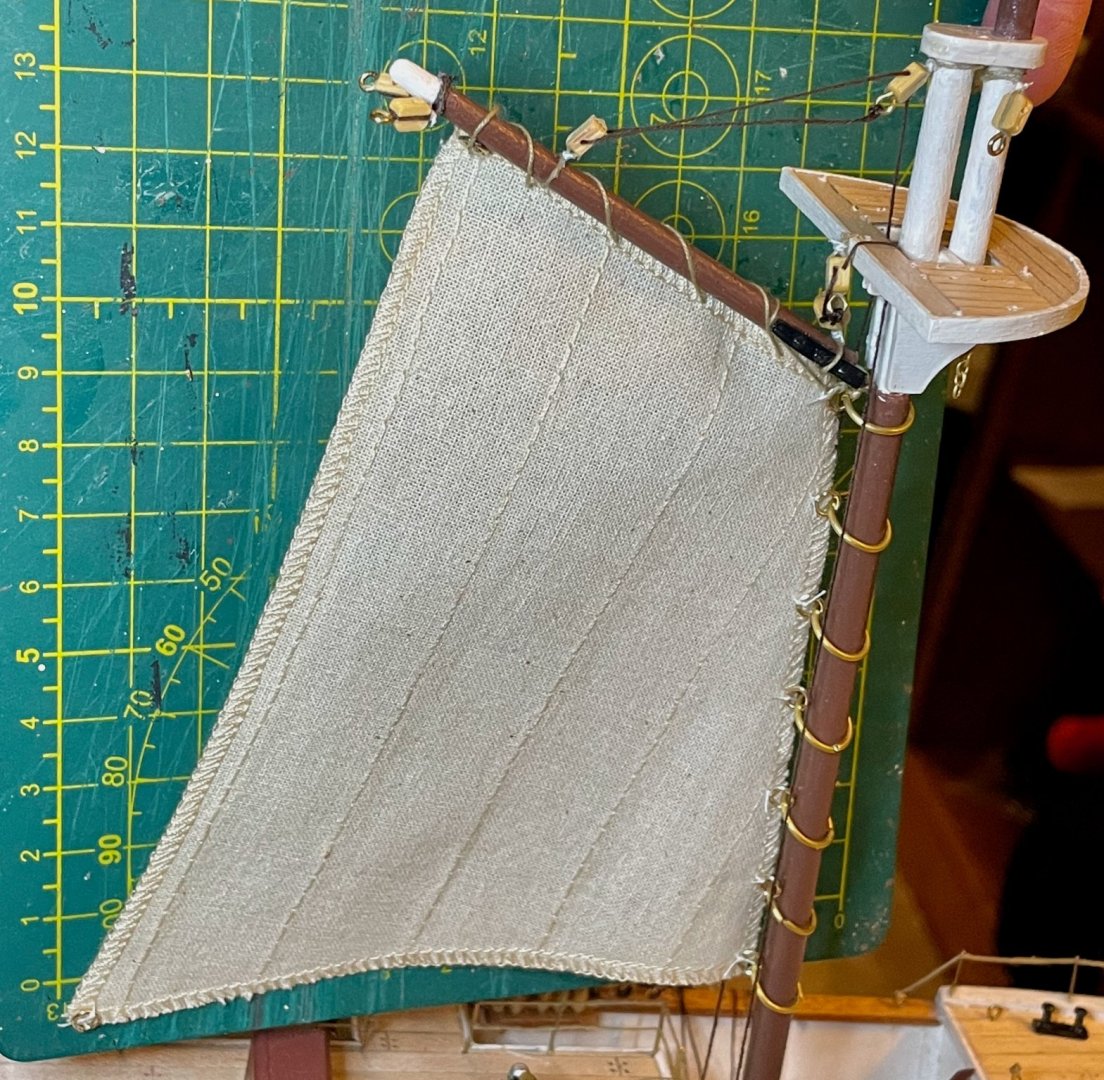
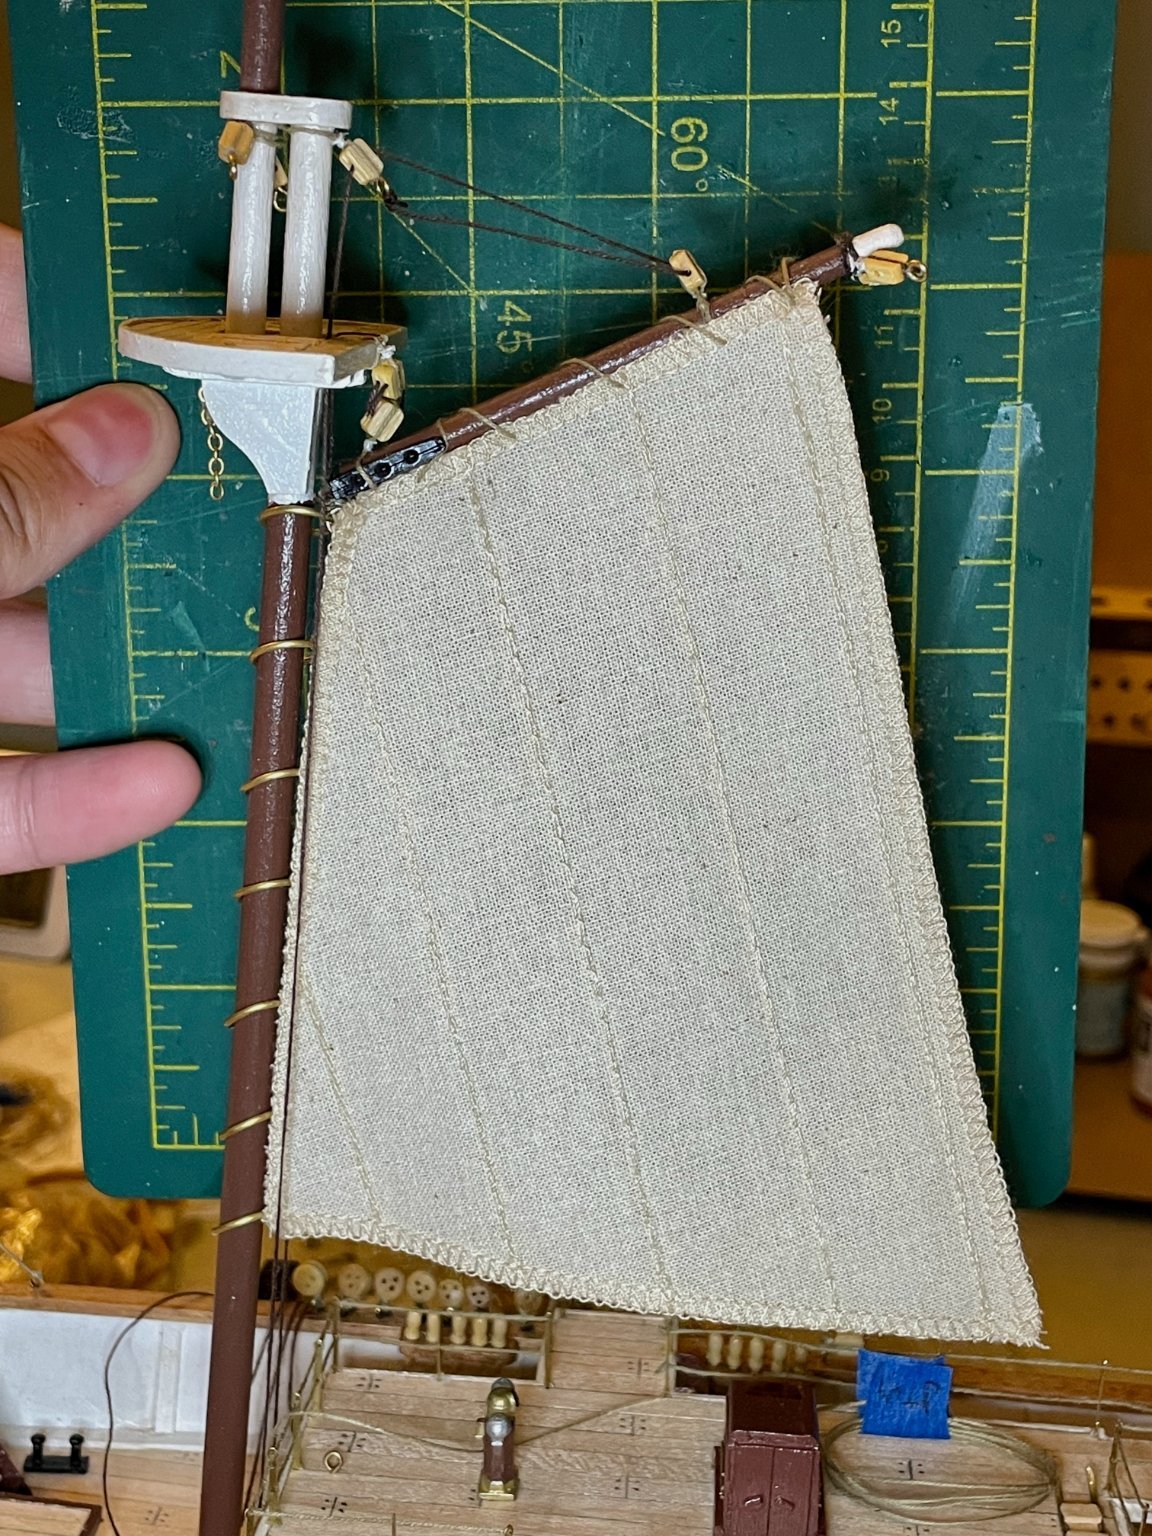
I've also partially rigged the fore gaffsail, in similar fashion to the mainsail. This time, I remembered to take a photo of both the windward (main display) side and the leeward side. On the leeward side, you'll notice the small rings in the clew and peak corners, as well as the seven small rings sewn onto the luff for attaching the larger rings around the mast. I haven't yet figured out how to get my blocks to lay down exactly the way I want, so the halyard blocks look a bit wonky.

Next steps: Prepare and hoist the square sails, continuing to work from the inside outward.
The manual looks like an excellent reference. Thanks for posting the link.
-
17 hours ago, HakeZou said:
Yes, definitely a sigh of relief, Keith. The second planking is definitely needed for this kit. Without it, the plywood walls of the main cabin would have to be left bare.
I've squeezed in a little time sanding now and am already feeling better about how things look at the stem. In the photo from my last post, you can see the raggedy edges there, which looked even worse in person. The counterstern is an interesting challenge for sanding and filing. As you work on your Endurance, keep an eye on the hole that houses the rudder. It's not wide enough for my flat file and so shallow that I can't get much movement with my square file. I've already cut the rudder from its plywood sheet so I can check the fit at this stage. It will be slow going to be able to fit the rudder in and requires frequent attention from the shop vac to clean it out!
In watching the next few tutorial videos, I notice that OcCre applies the satin varnish before painting. I'm still new enough in this hobby that I don't understand why...nor do I adequately understand the difference between satin varnish and satin finish (which I thought were interchangeable terms). I'd love to hear some thoughts and advice on this from more experienced builders. I have some time before I'm ready for painting, but will need to make my decisions on that in the next few days.
I assume they use the satin varnish/finish as a sealer to fill wood pores in order to get a smother paint application.


USS Constitution by JSGerson - Model Shipways Kit No. MS2040
in - Kit build logs for subjects built from 1751 - 1800
Posted
I just found your Constitution build and it looks like I have a lot of catching up to do.