Alex jM
-
Posts
17 -
Joined
-
Last visited
Content Type
Profiles
Forums
Gallery
Events
Everything posted by Alex jM
-
Thanks Arthur, yes, it's a pear.
-
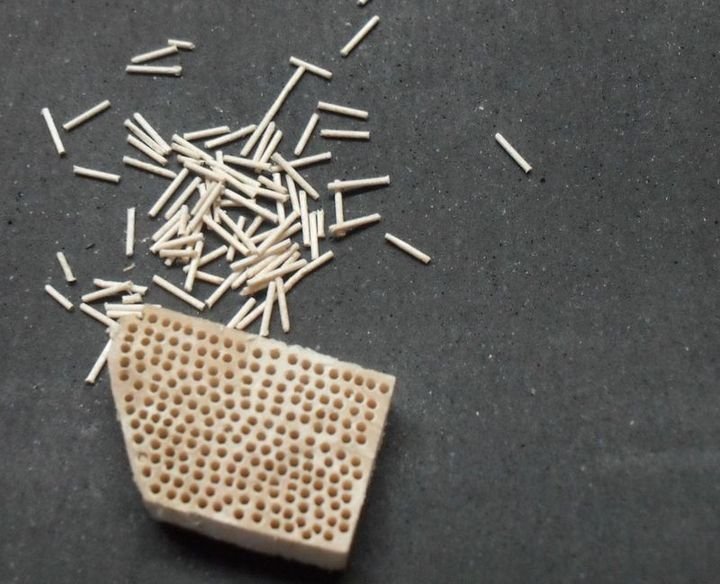
Hi Manatas, I'm sorry, I'm having problems with my computer right now, so I'll answer briefly and without pictures. Everything that works with large forms will also work with small ones. That is, you make the same tool, only in miniature. Look for blanks made of good steel. In order to have less work, it is better to take blanks in shape as close as possible to the shape of the future tool. I usually use old needle files, dental burs, scalpels, hacksaw blades and so on, there can be many options for blanks. Once on the Internet I saw articles on this topic with pictures and explanations. Search, there should be good information on this topic. You also need to know that the tool is the last thing you need to pay attention to. The main thing is the brain, then the hands, and only then the instrument. You can do the same work with a minimal set of tools as with a large one. A wide variety of tools make the job a little more convenient and faster. I hope that Google translator translated my words correctly.
-
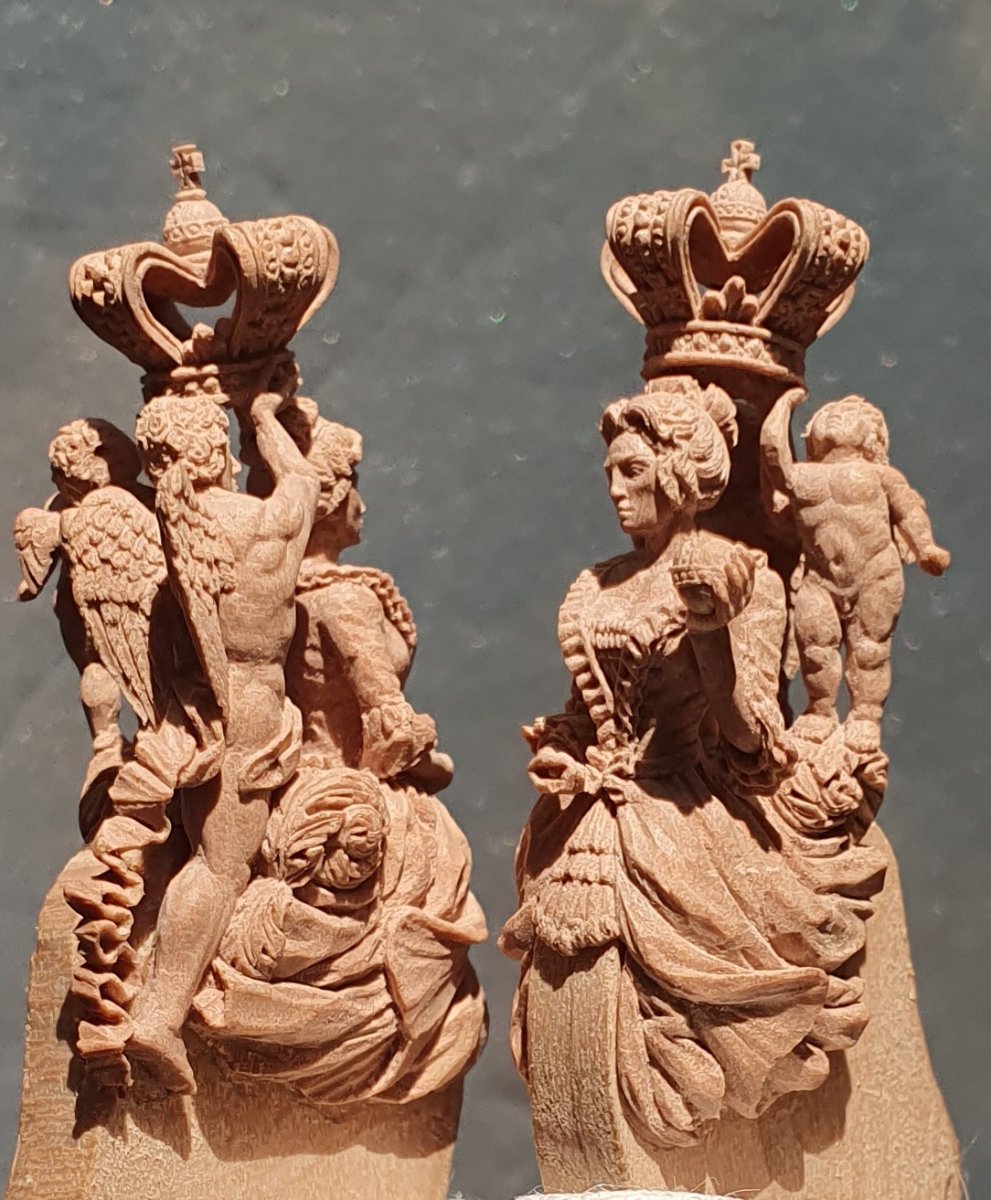
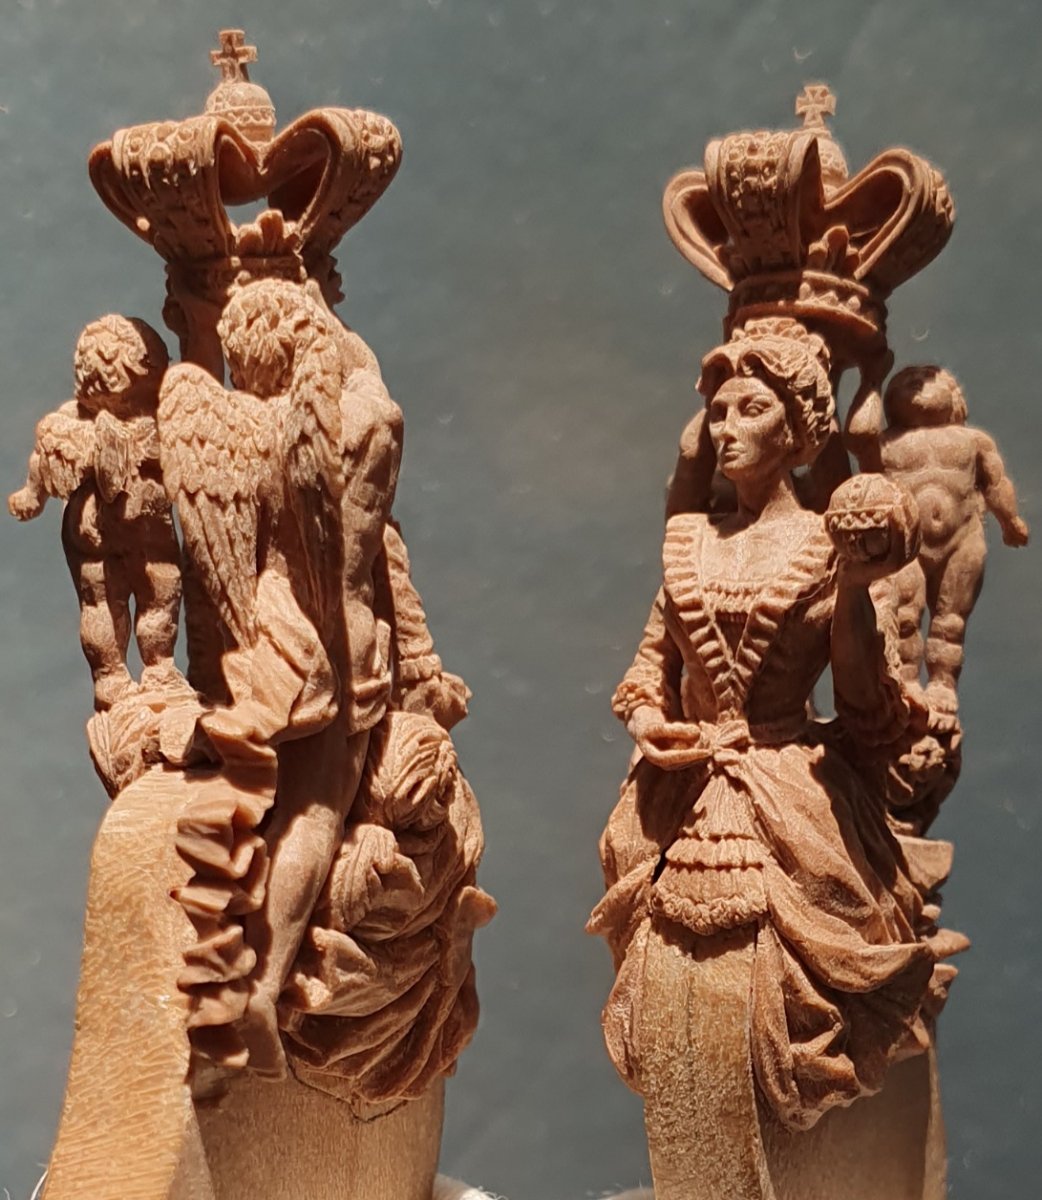
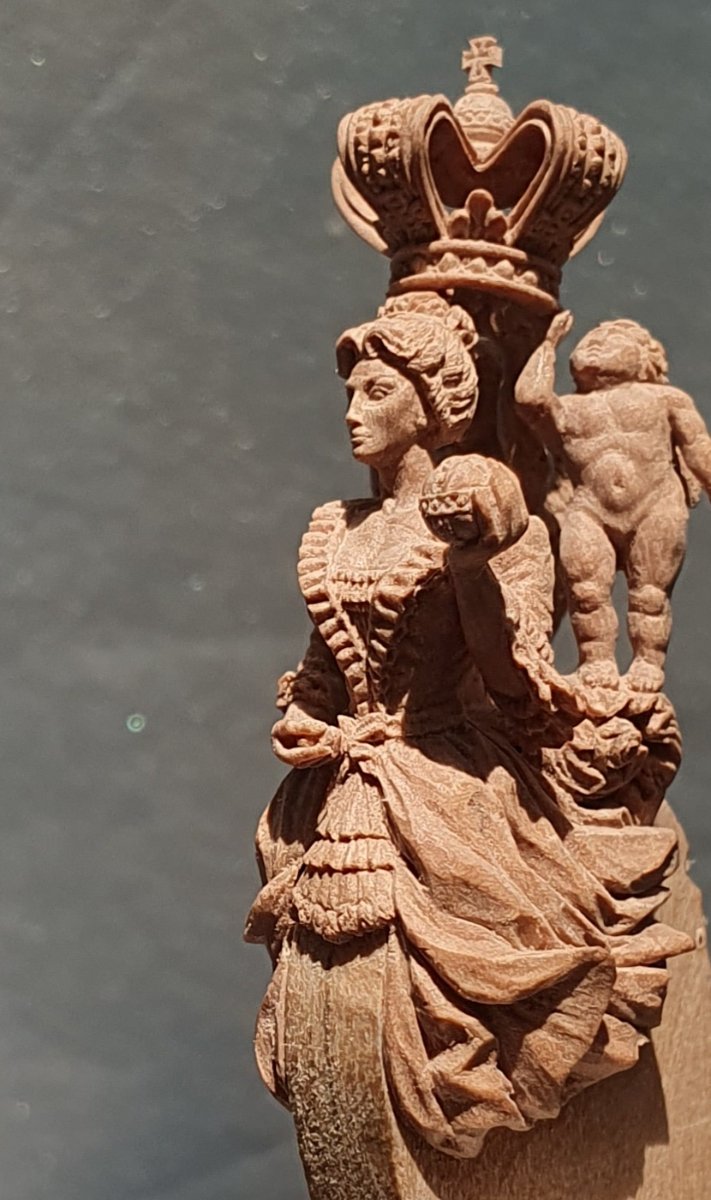
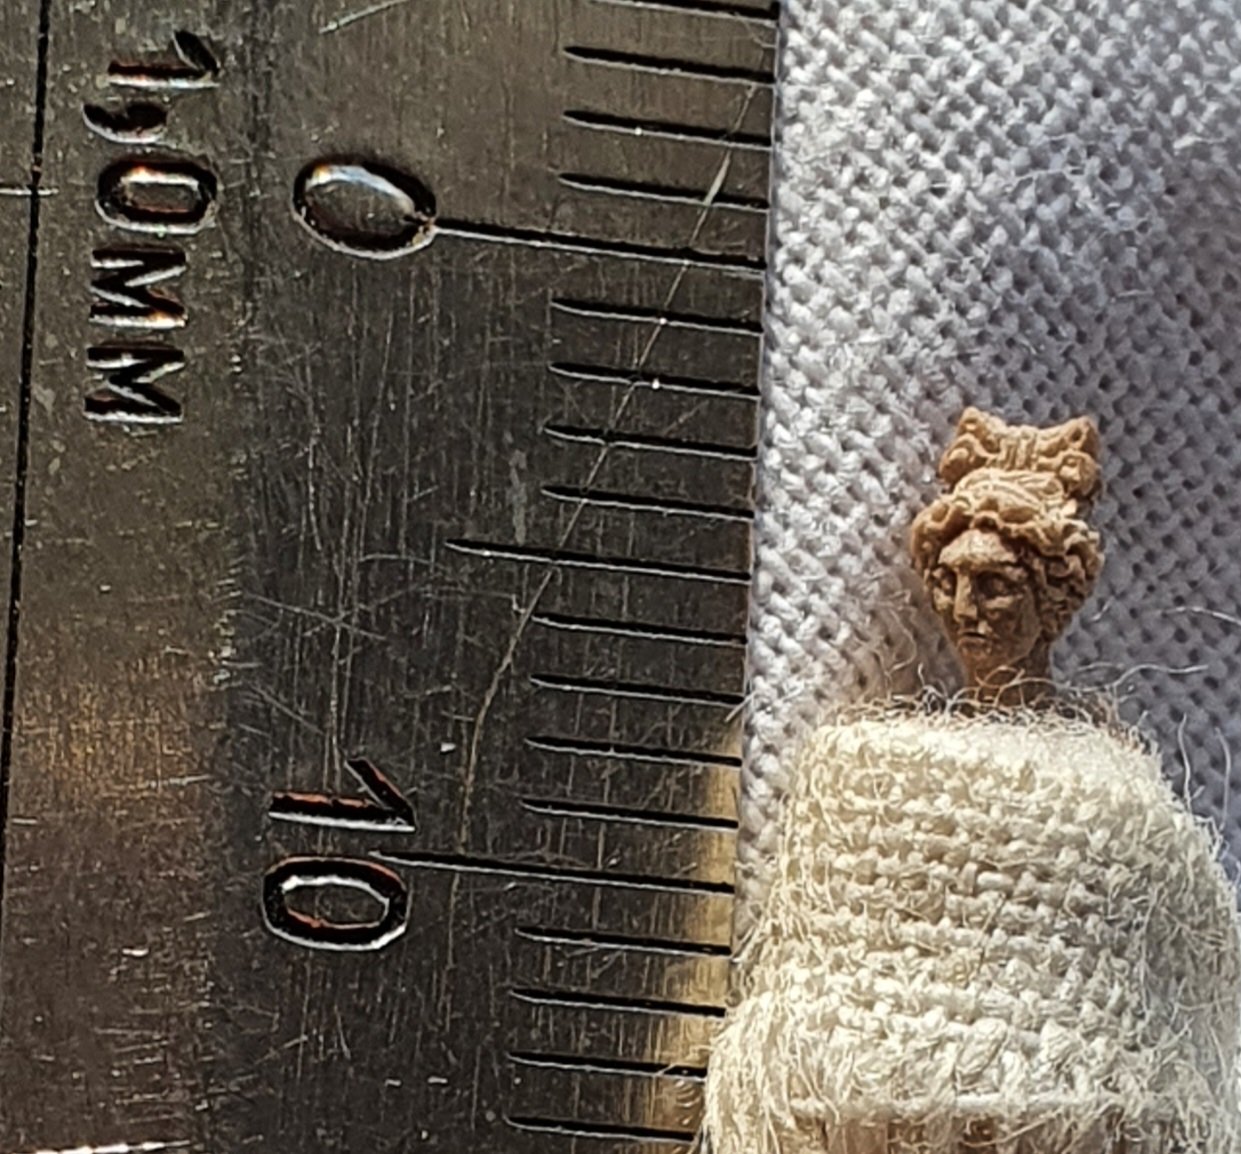
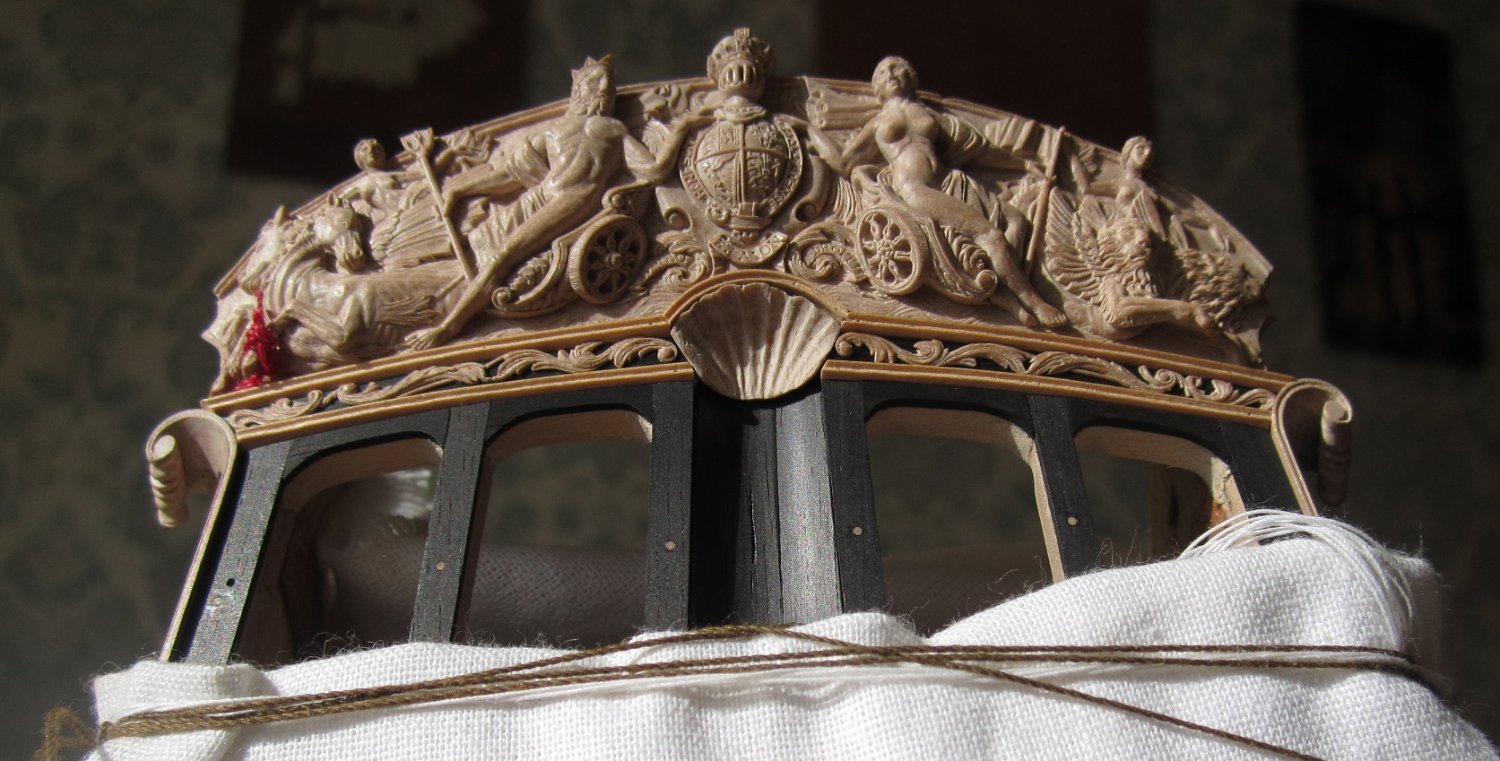
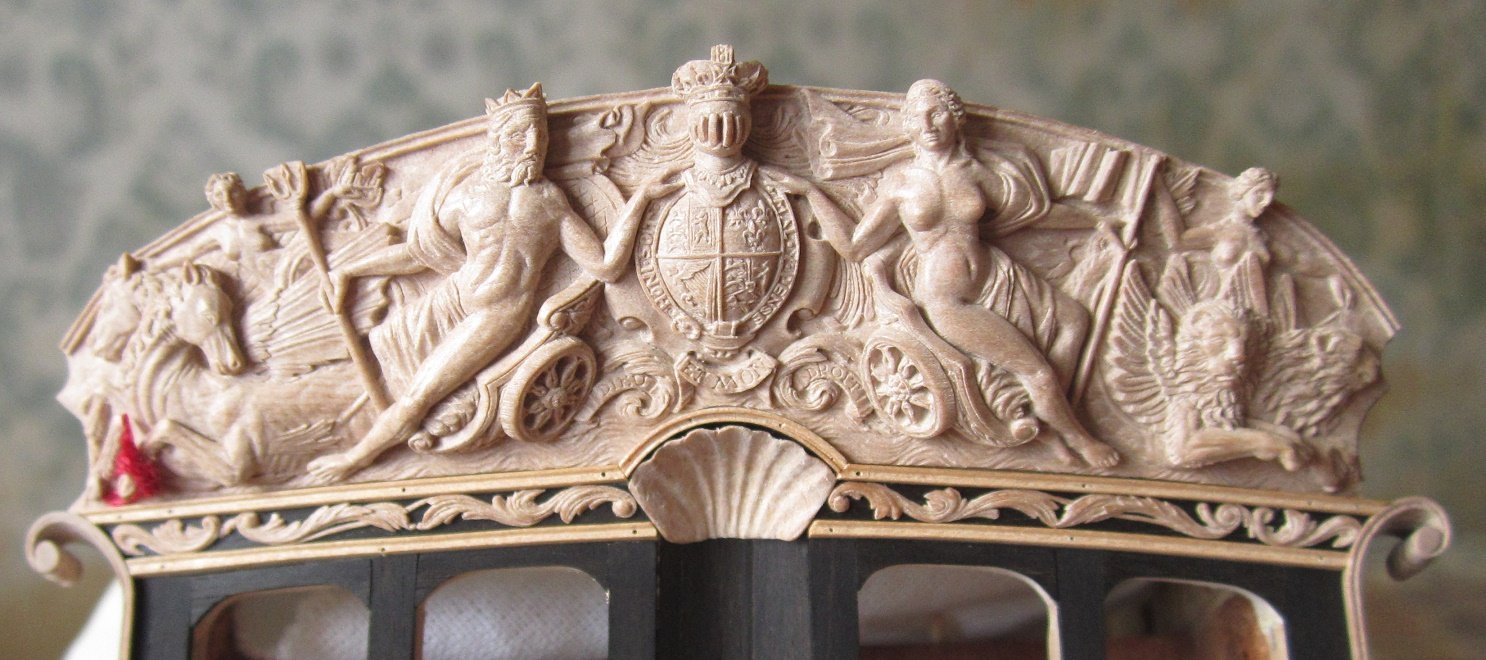
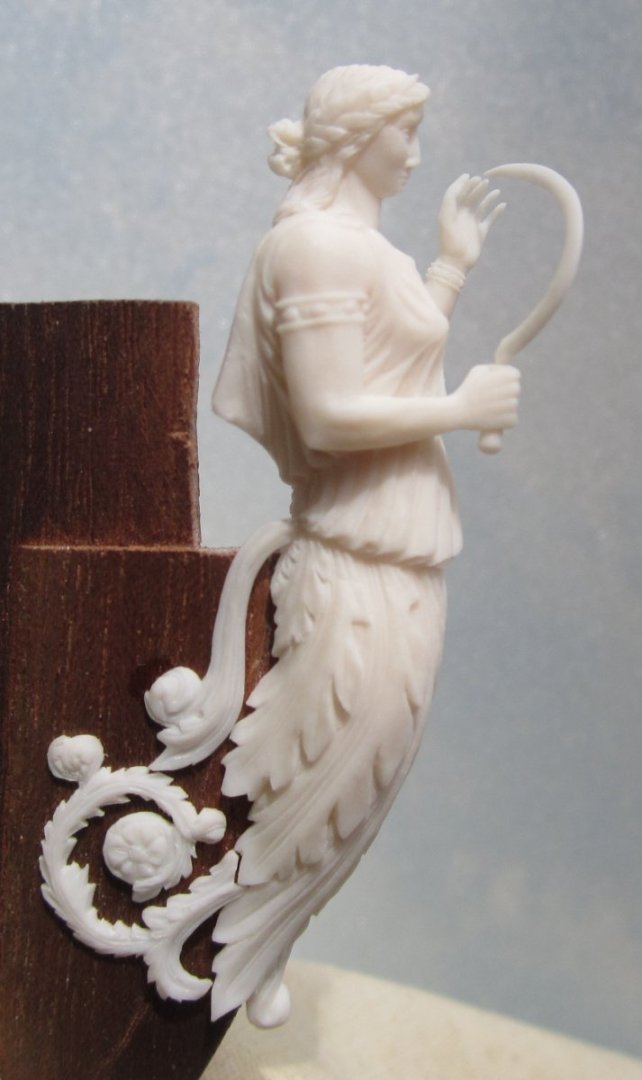
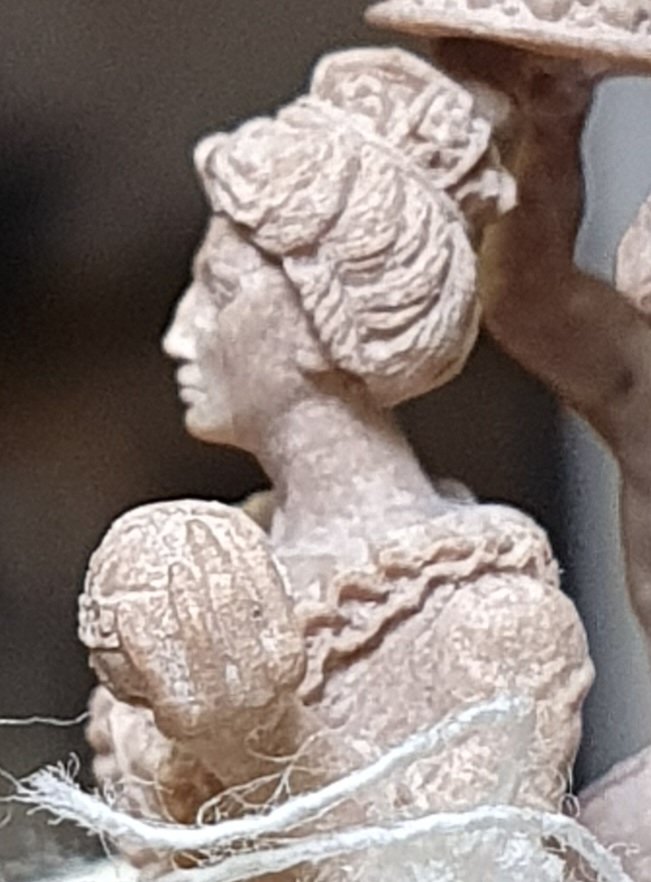
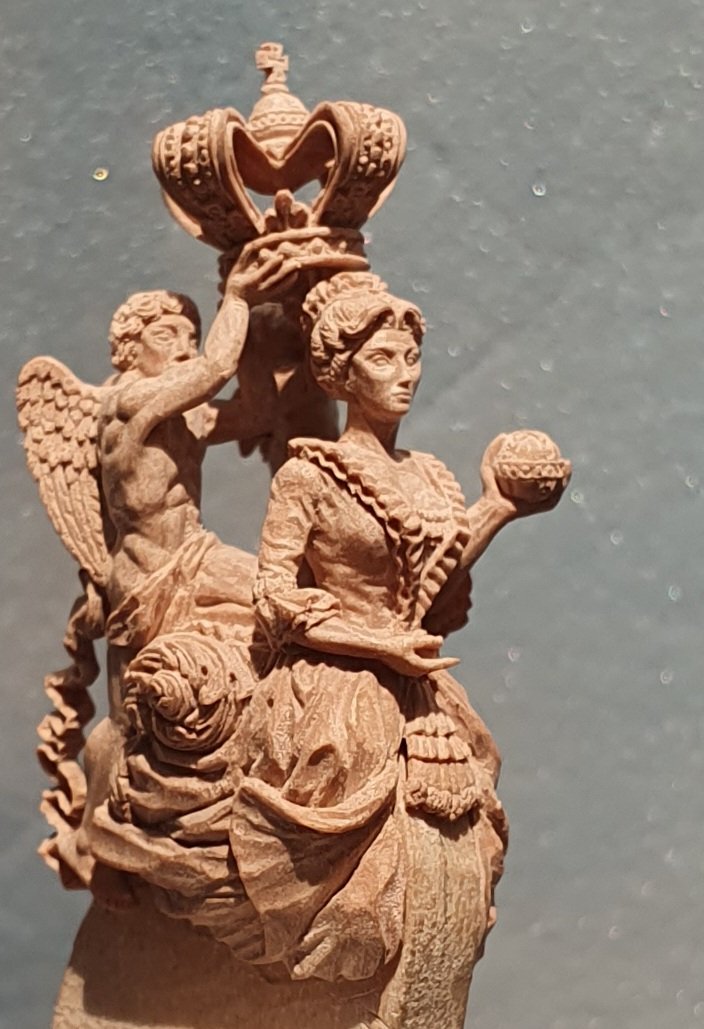
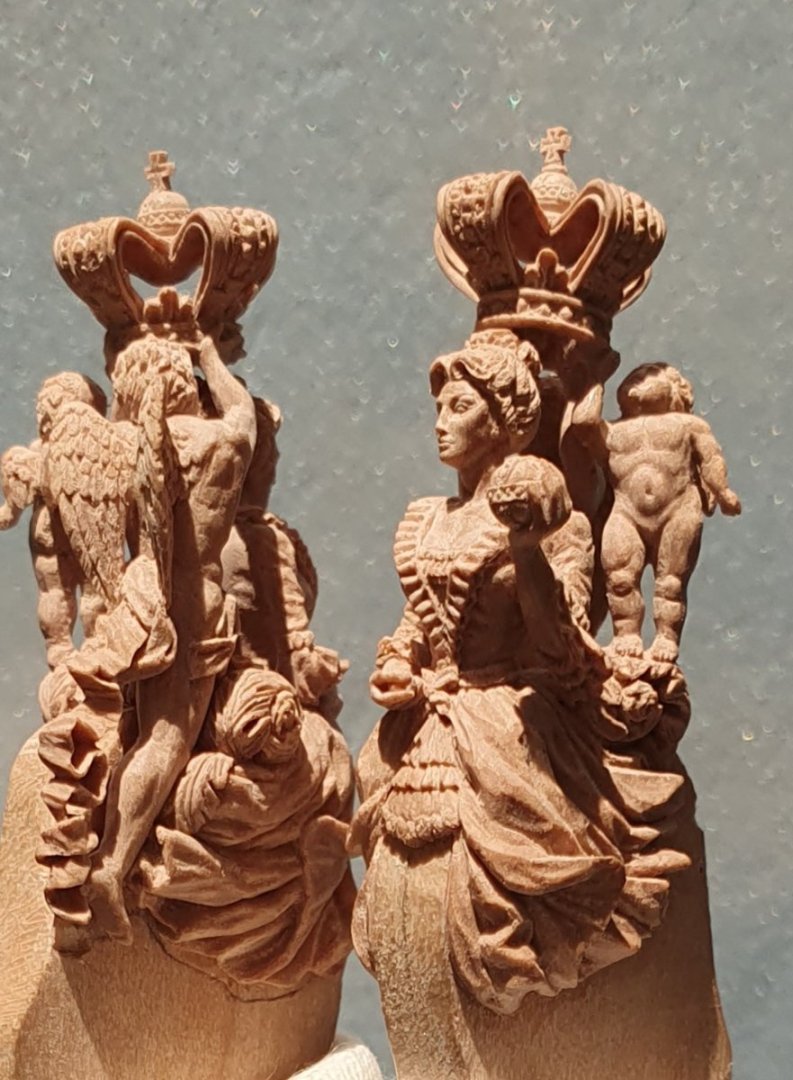
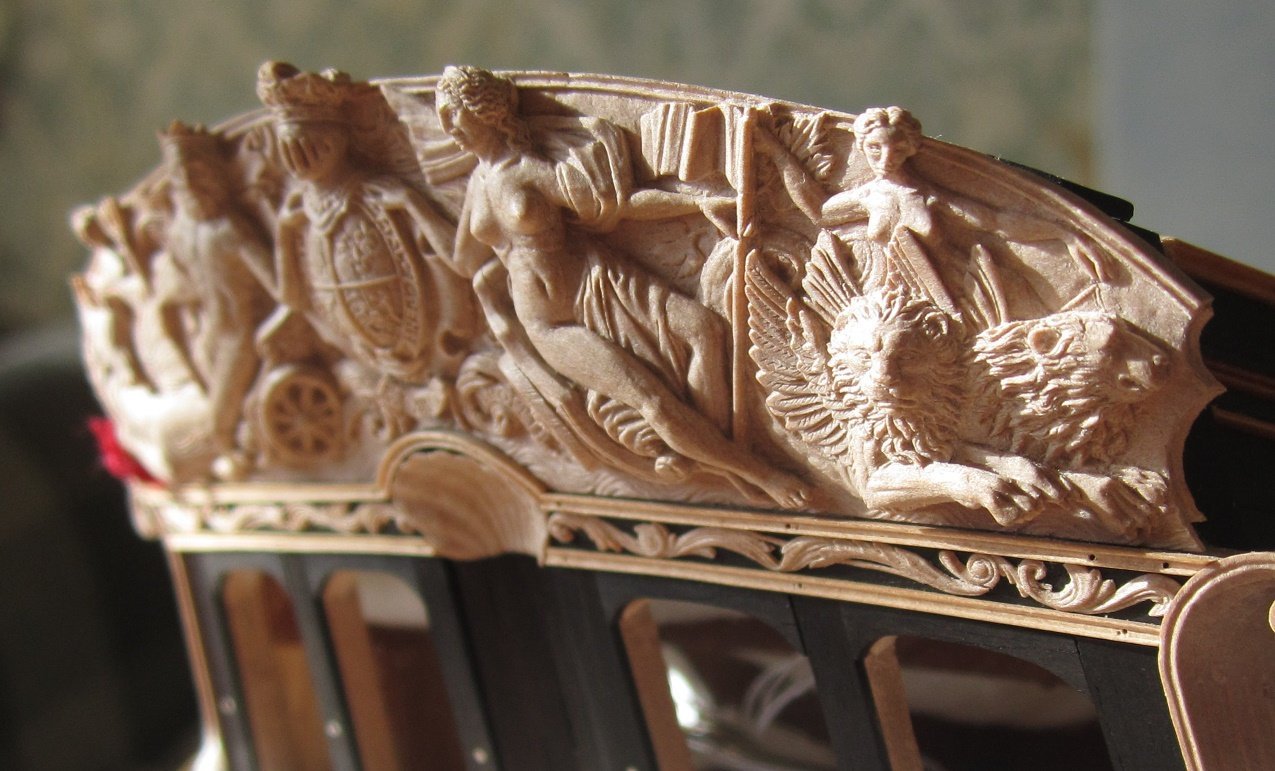
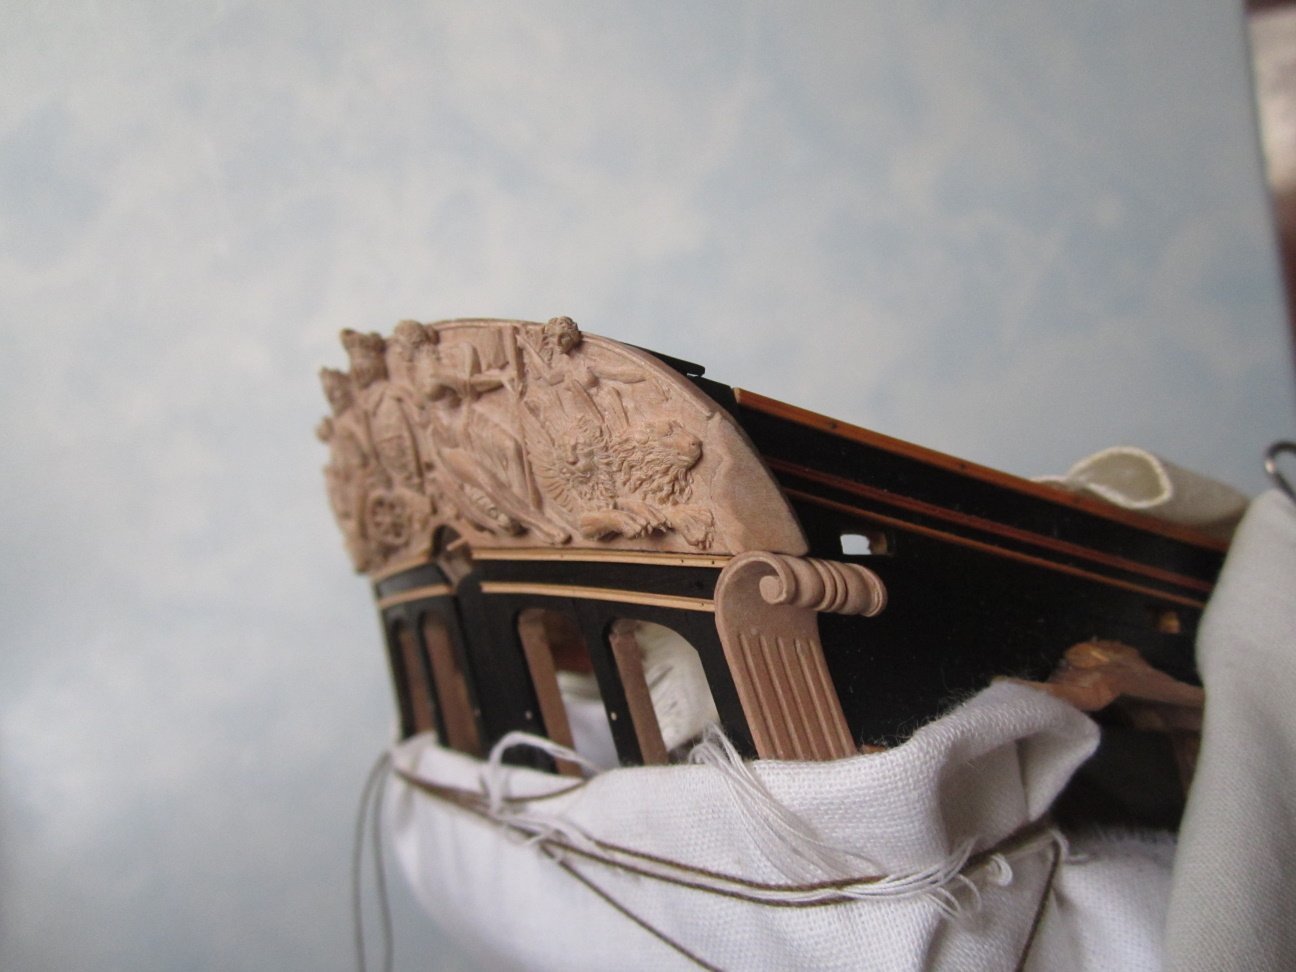
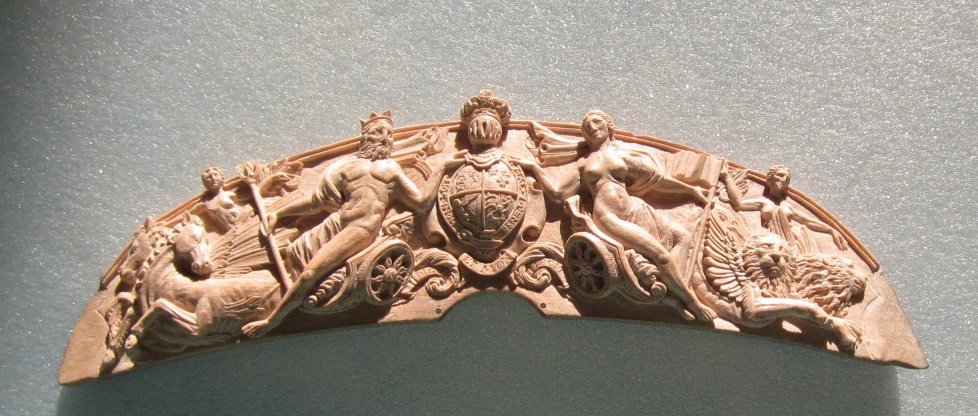
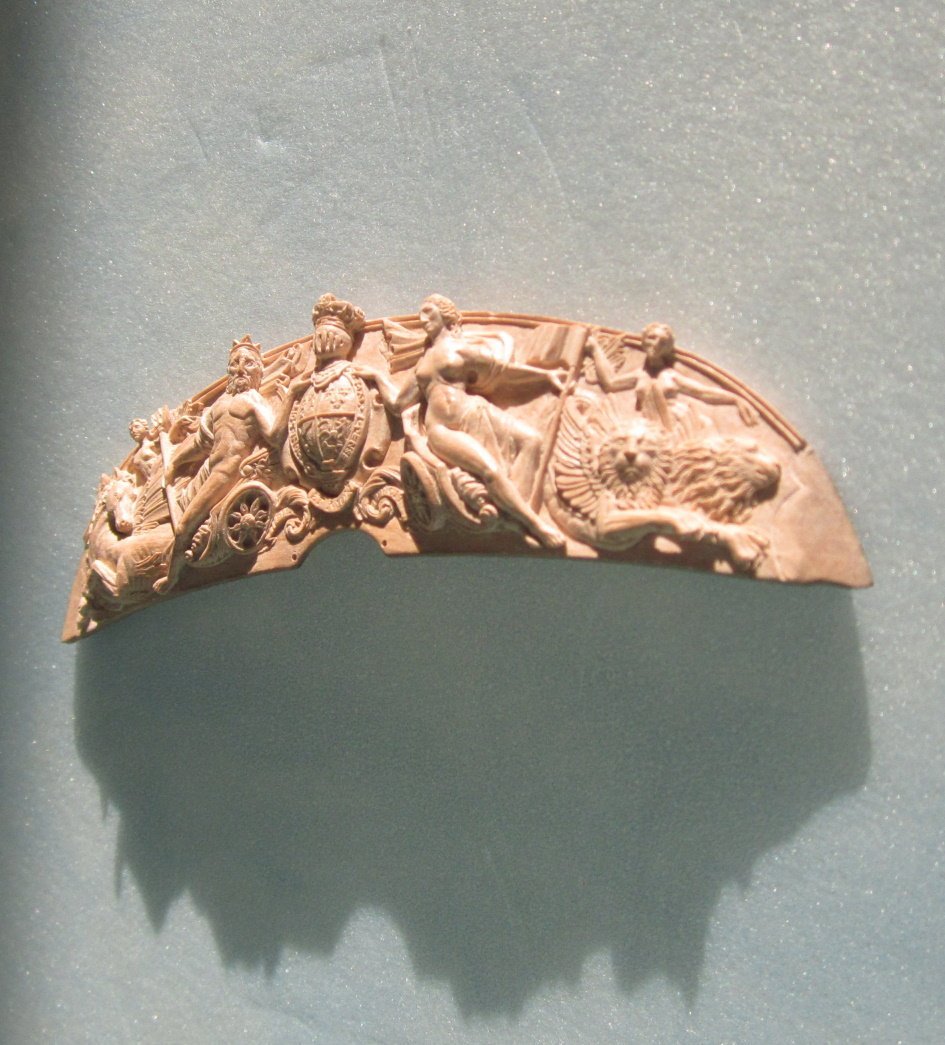
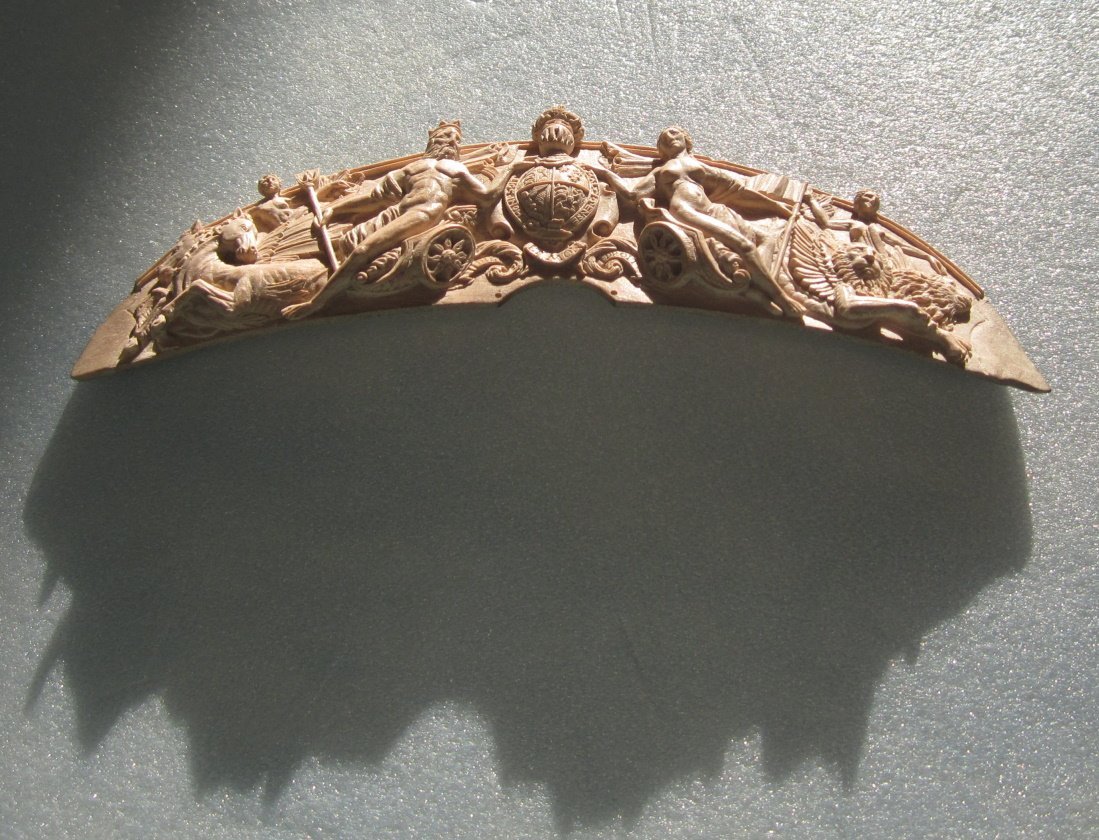
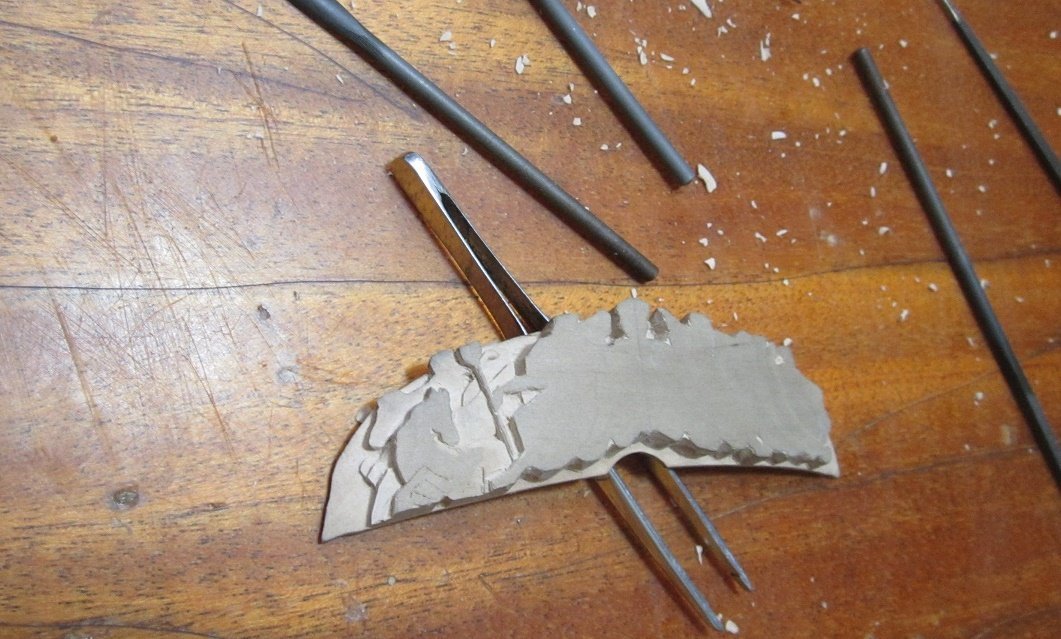
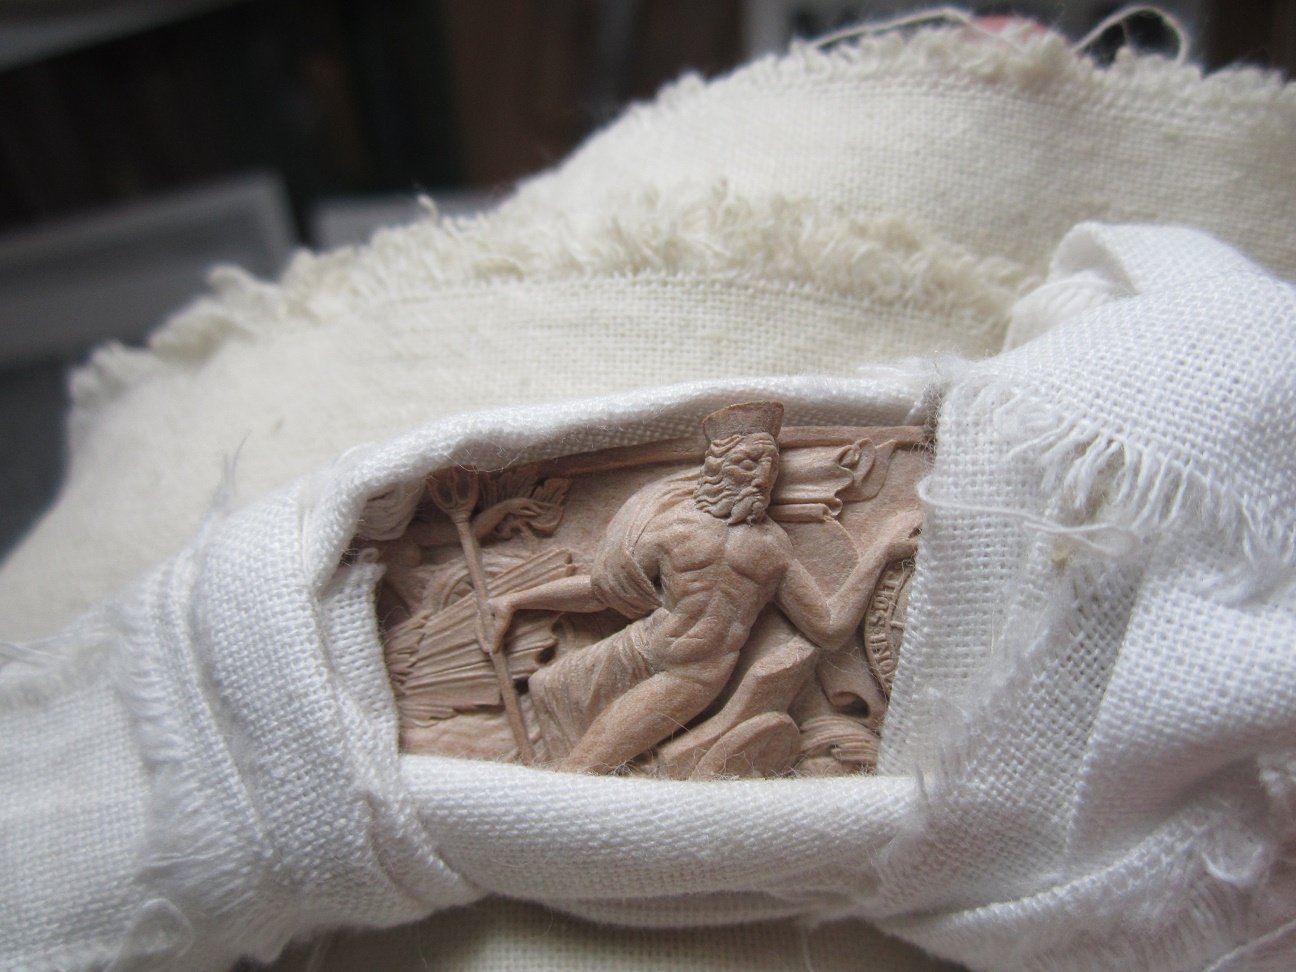
A little offtopic. For those who want to use white color without resorting to coloring, I recommend elforin. An artificial substitute for ivory and mammoth tusk. In processing it is almost like wood, but if with wood, especially when working with small parts, it is necessary to take into account the direction of the fibers so as not to break the part, then elforin is equally good when cutting in different directions. Pay attention to the fingers of the left hand. (Brittany, 1855, height 50 mm.) I would have to work very delicately with wood to get such fingers.

-
Thanks Charter33.
-
Thanks Giorgio, I did the main work on the figurehead a few years ago. It remains to finalize some details. I am a professional decorator. Please contact if someone needs to make a sculpture and other decor for the model.


-
Thank you all for the good reviews and likes.
-
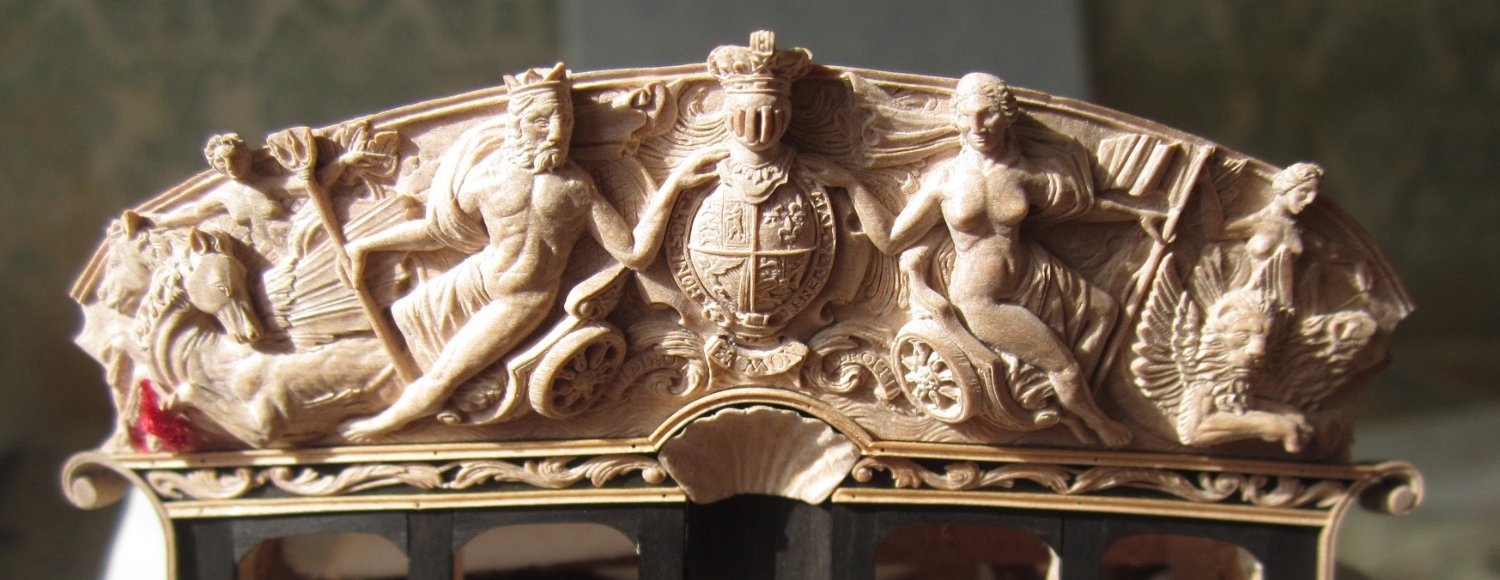
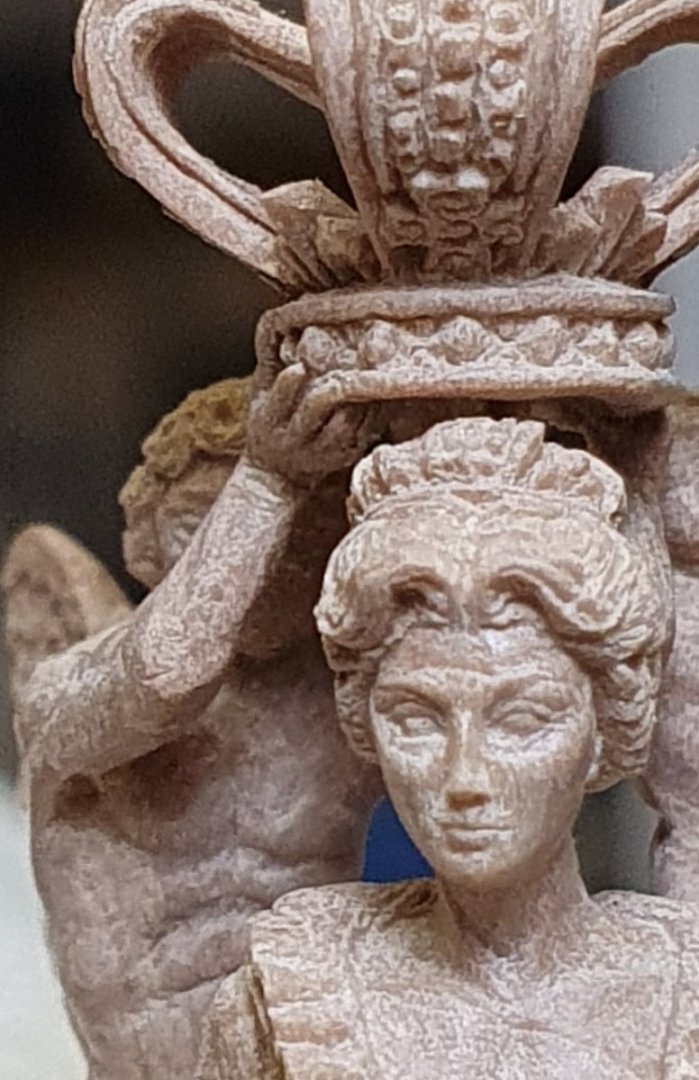
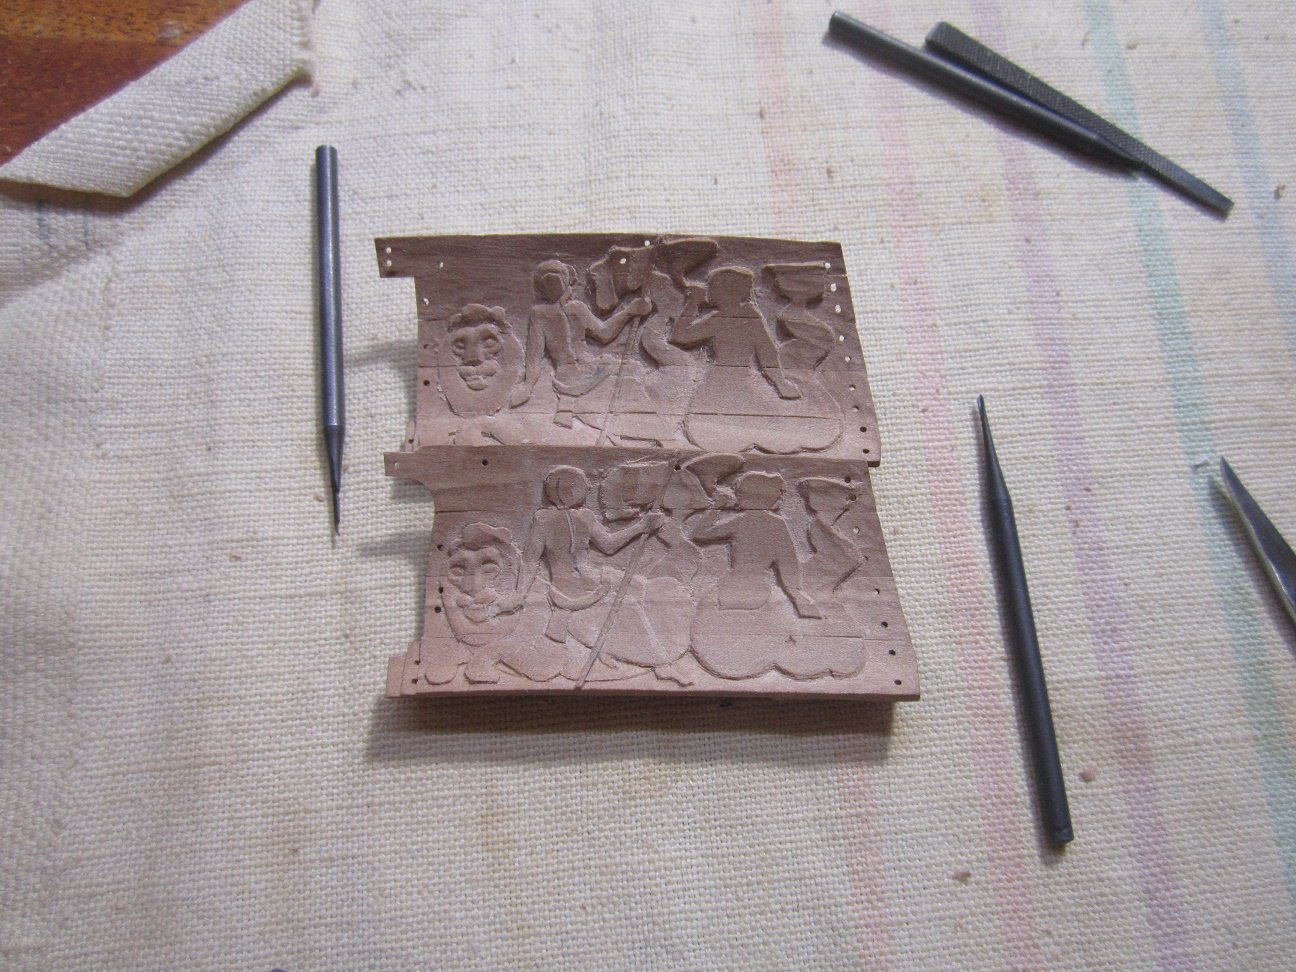
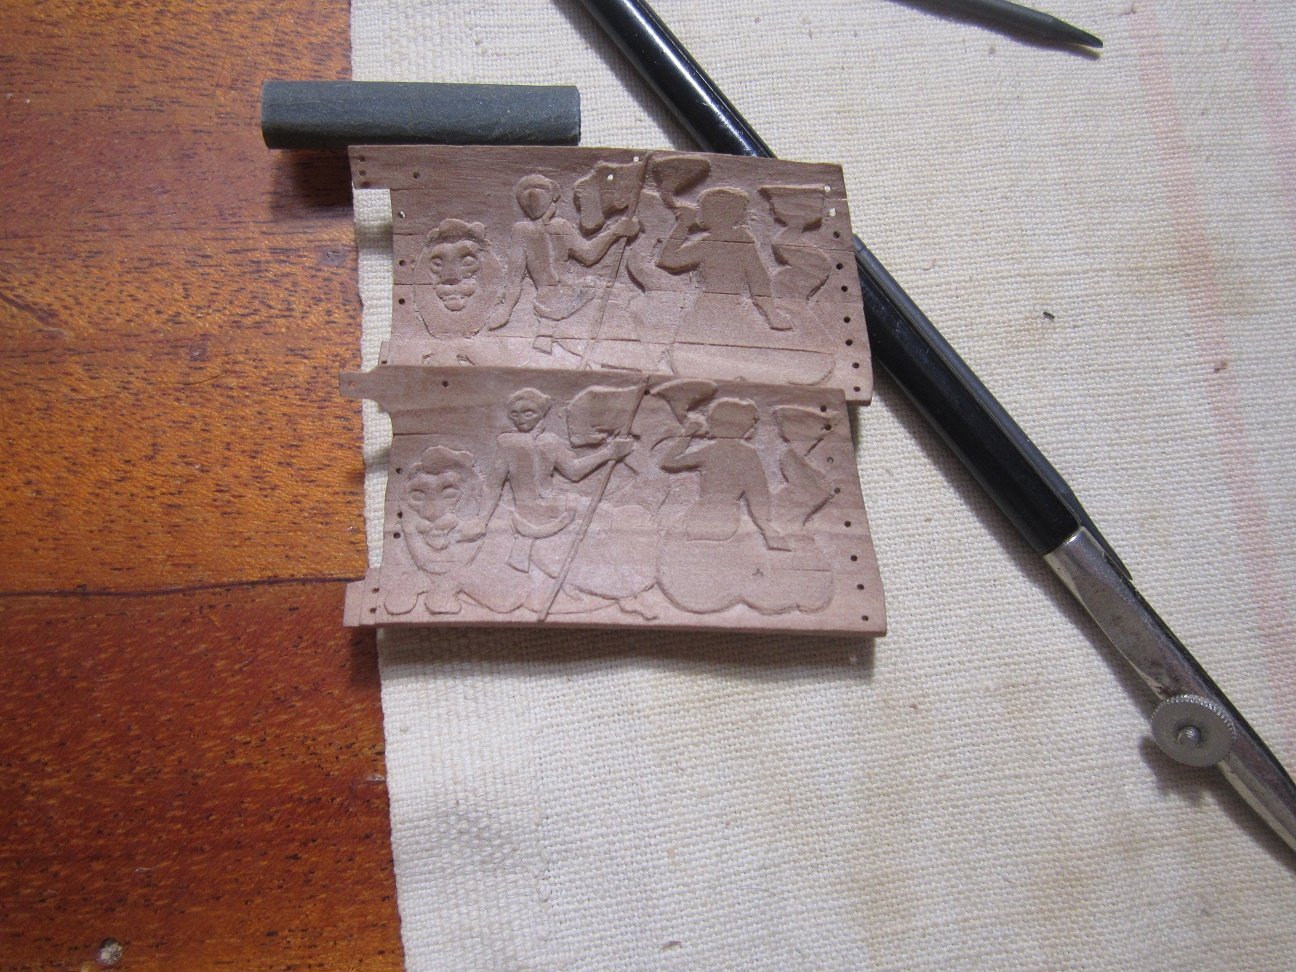
Thank you all for the good reviews and likes. Allan, shooting a high-quality miniature carving video - in my opinion - will be technically difficult. You will need a professional zoom camera, professional lighting, and correct, accurate caption commentary. And besides, it's a long process. For example, working on just one hairstyle (Apollo's bow) for one sculpture took about four hours (unfortunately the photo does not convey all the details). And even if you watch a video with cuts and with an acceleration effect, it will still take a long time. It's better to watch a Stephen King series than such a boring video 😃
.jpg.63969fd6353dd80a3b164d2228b24d65.jpg)

-
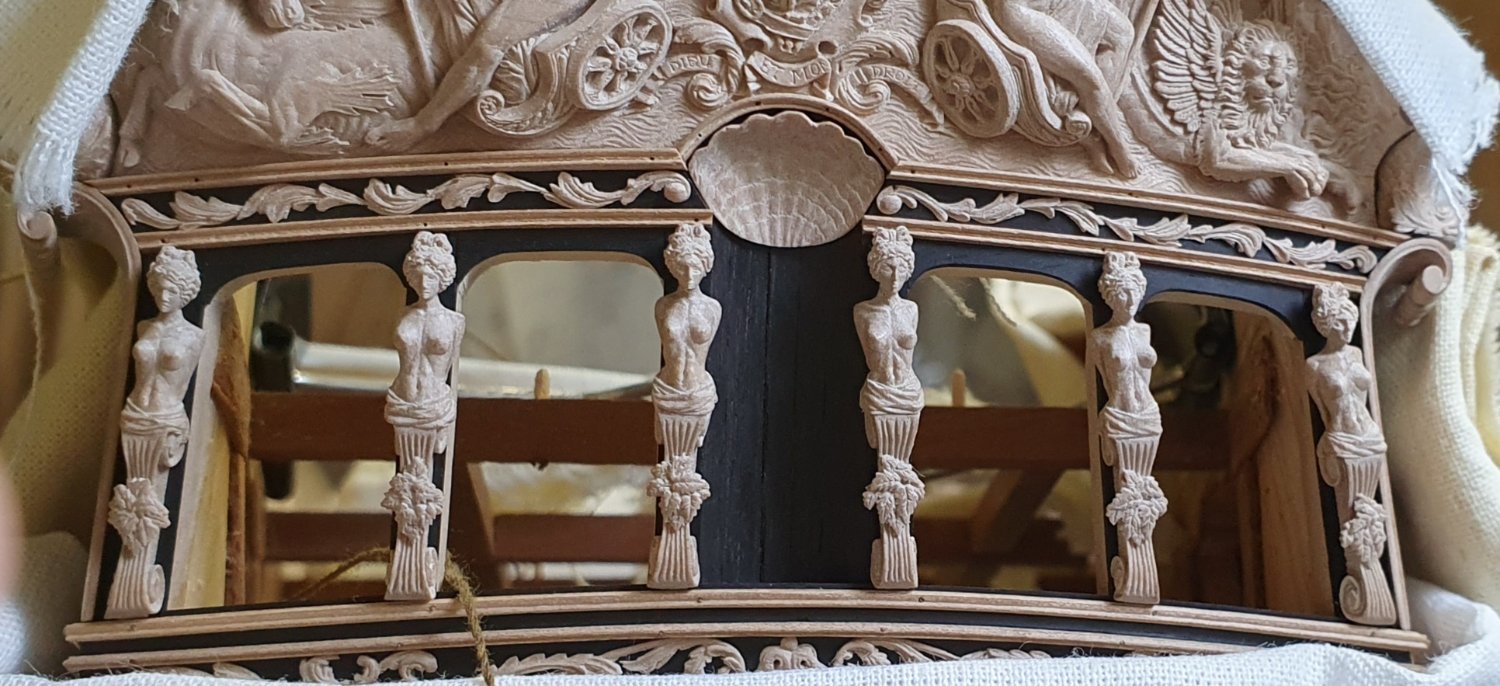
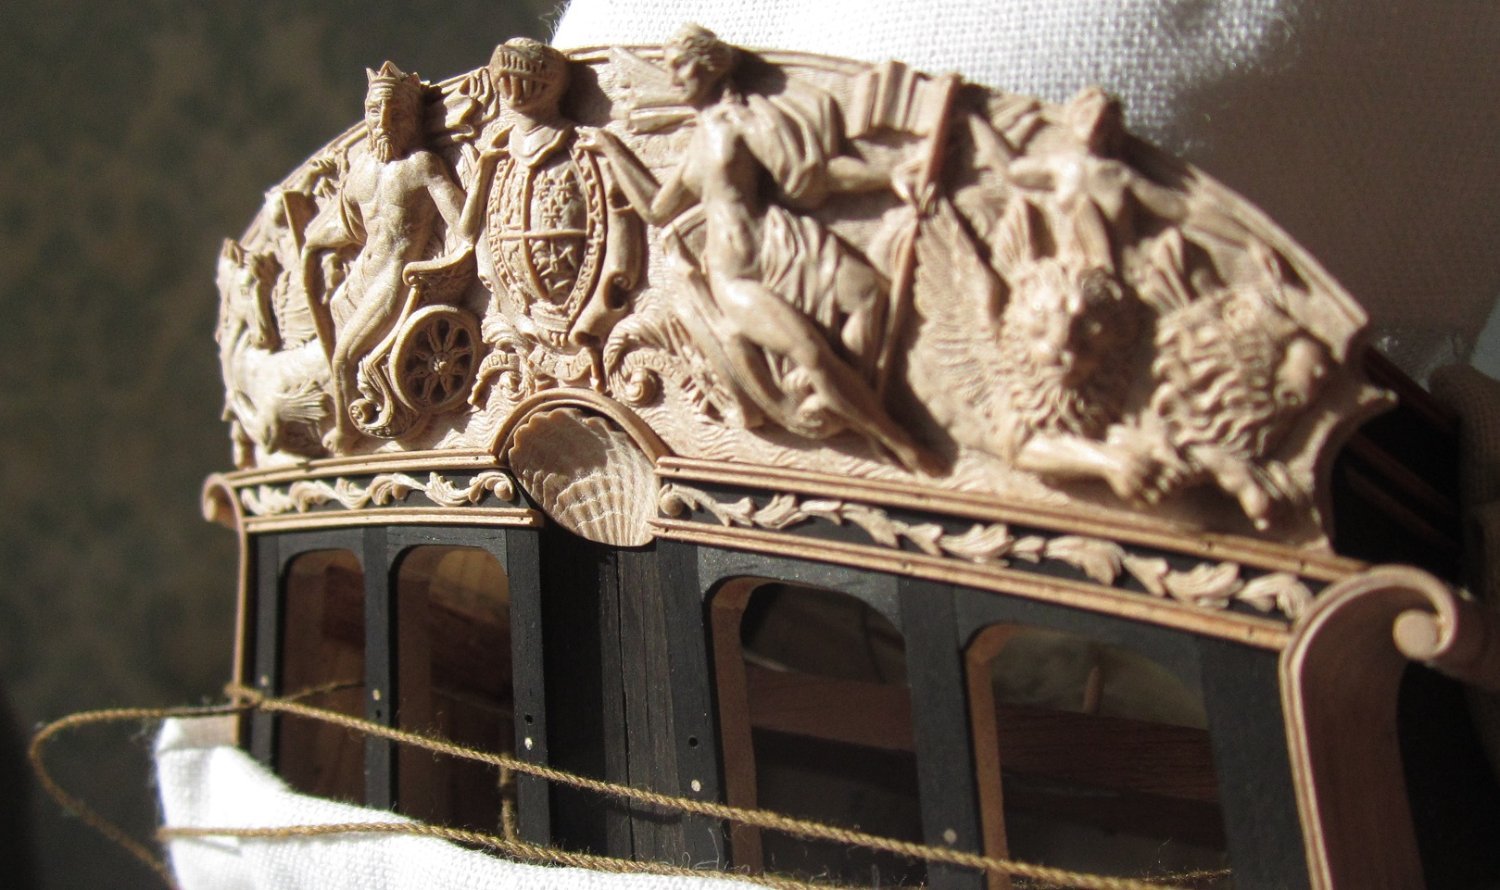
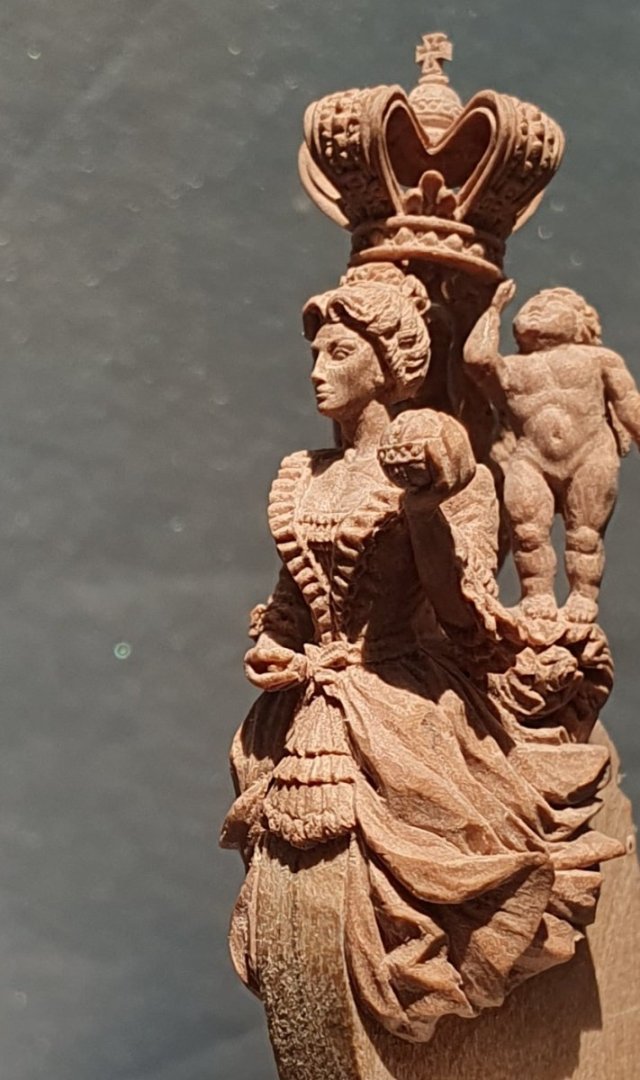
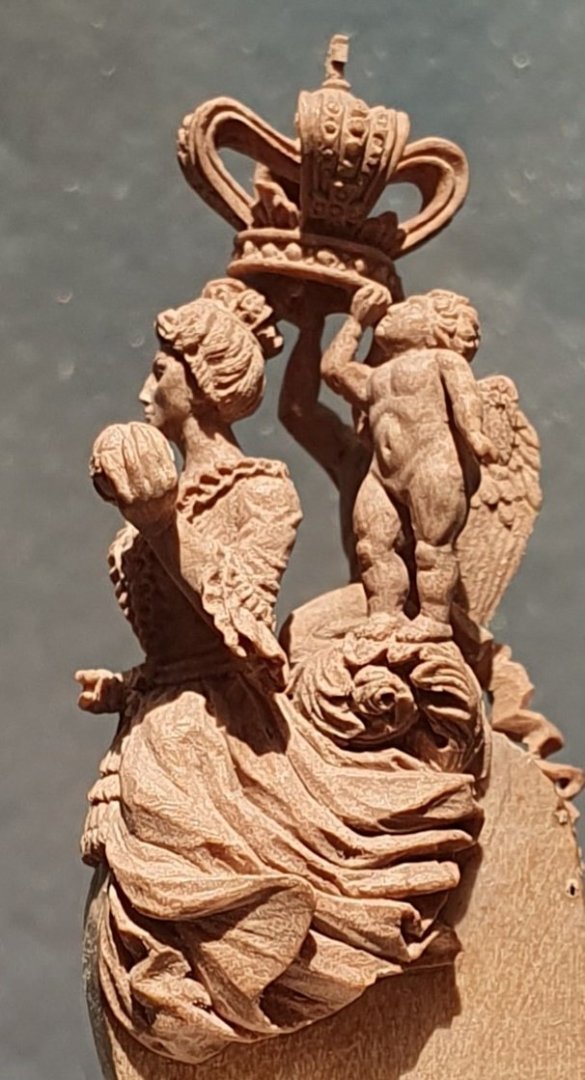
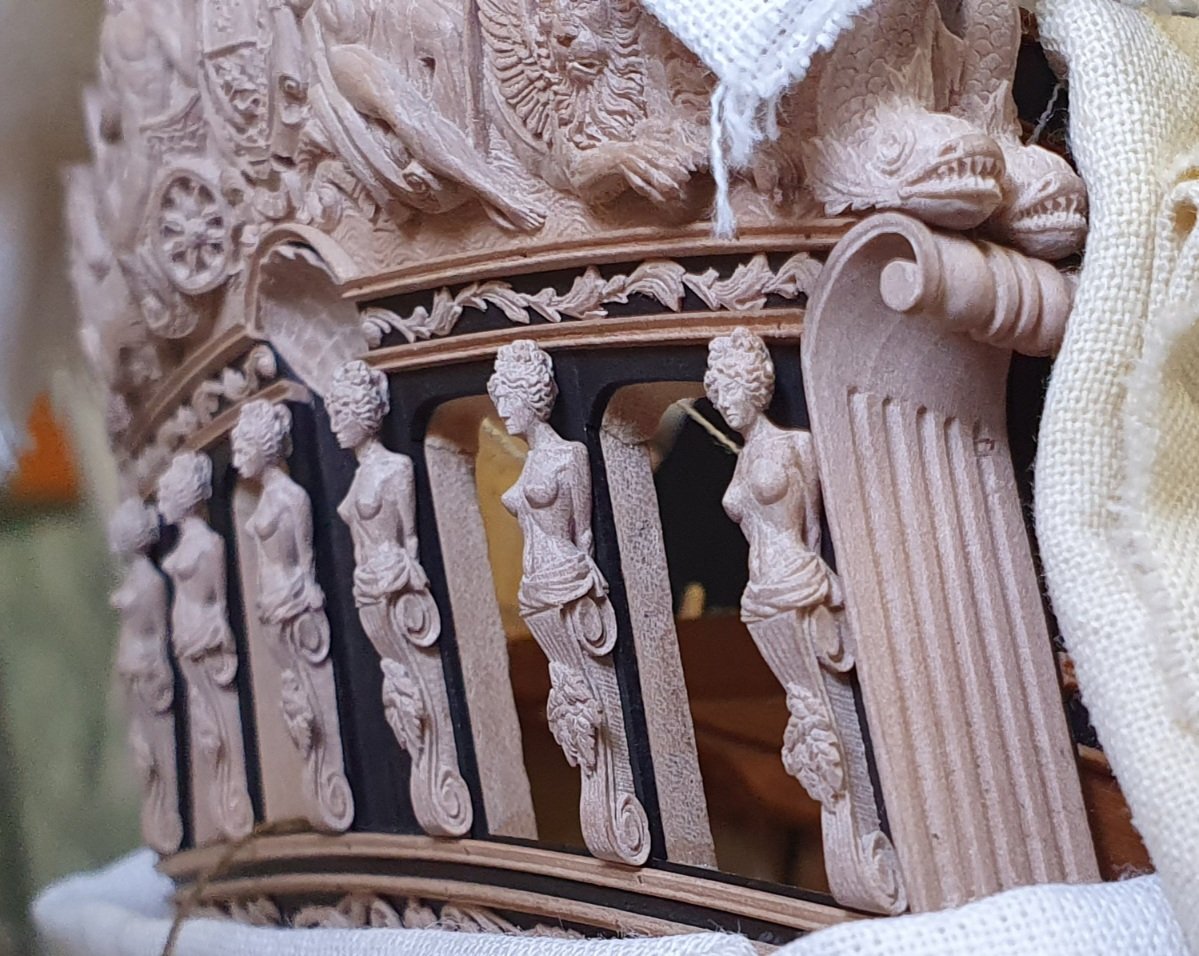
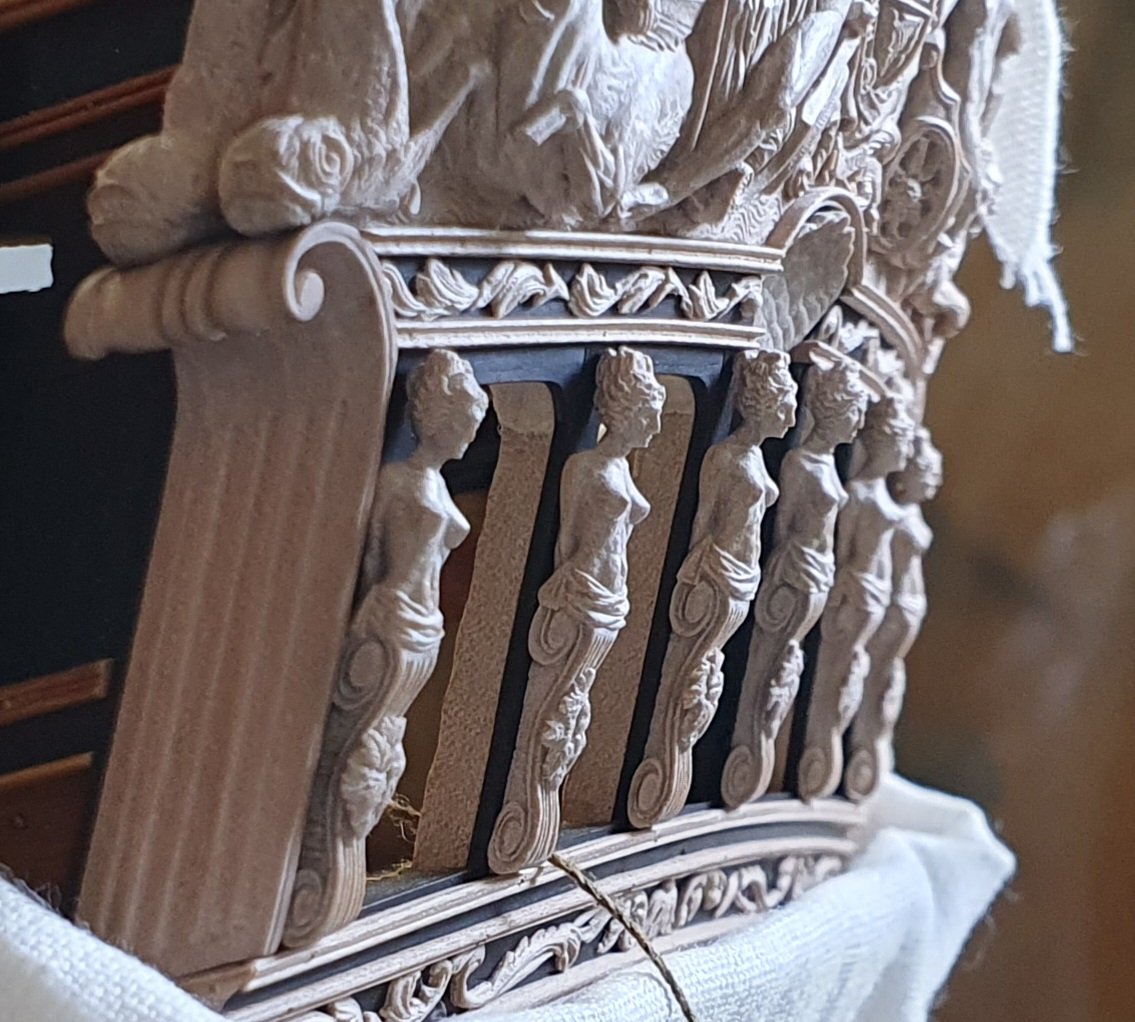
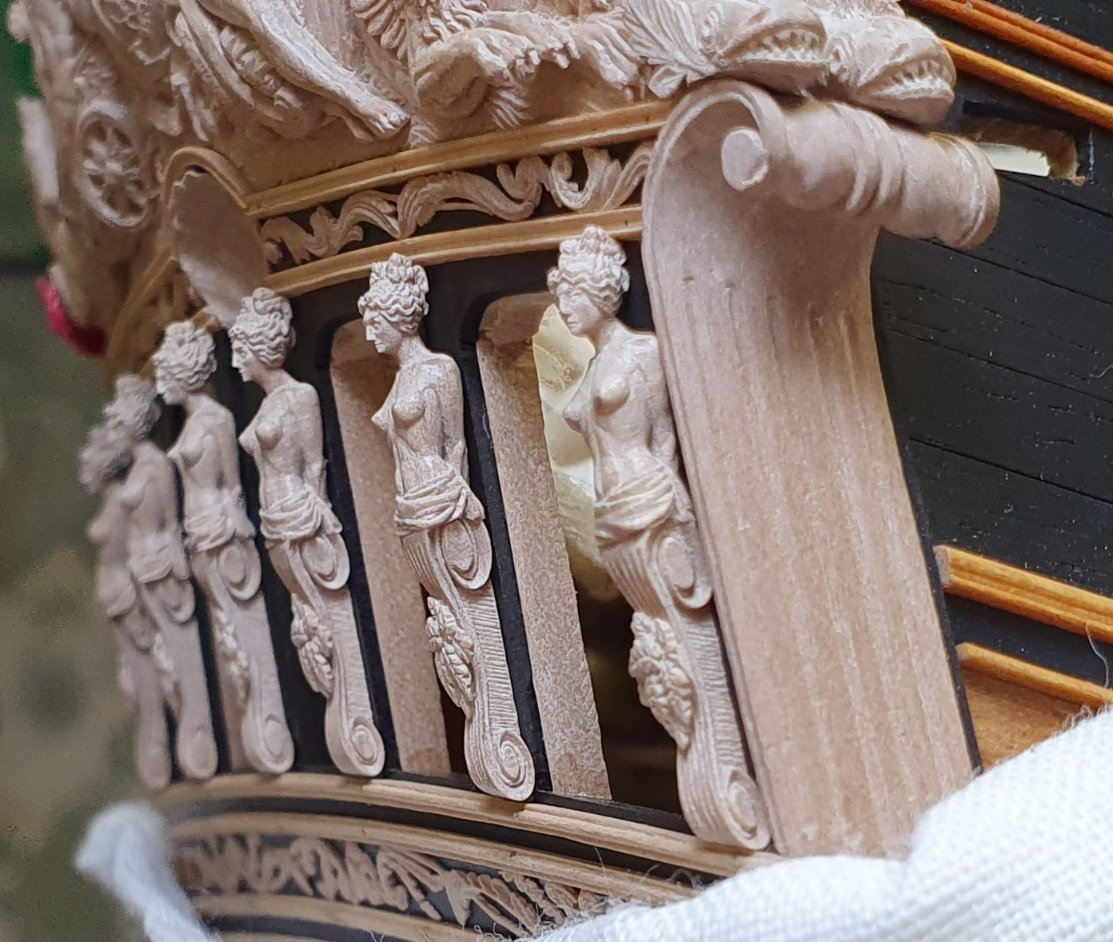
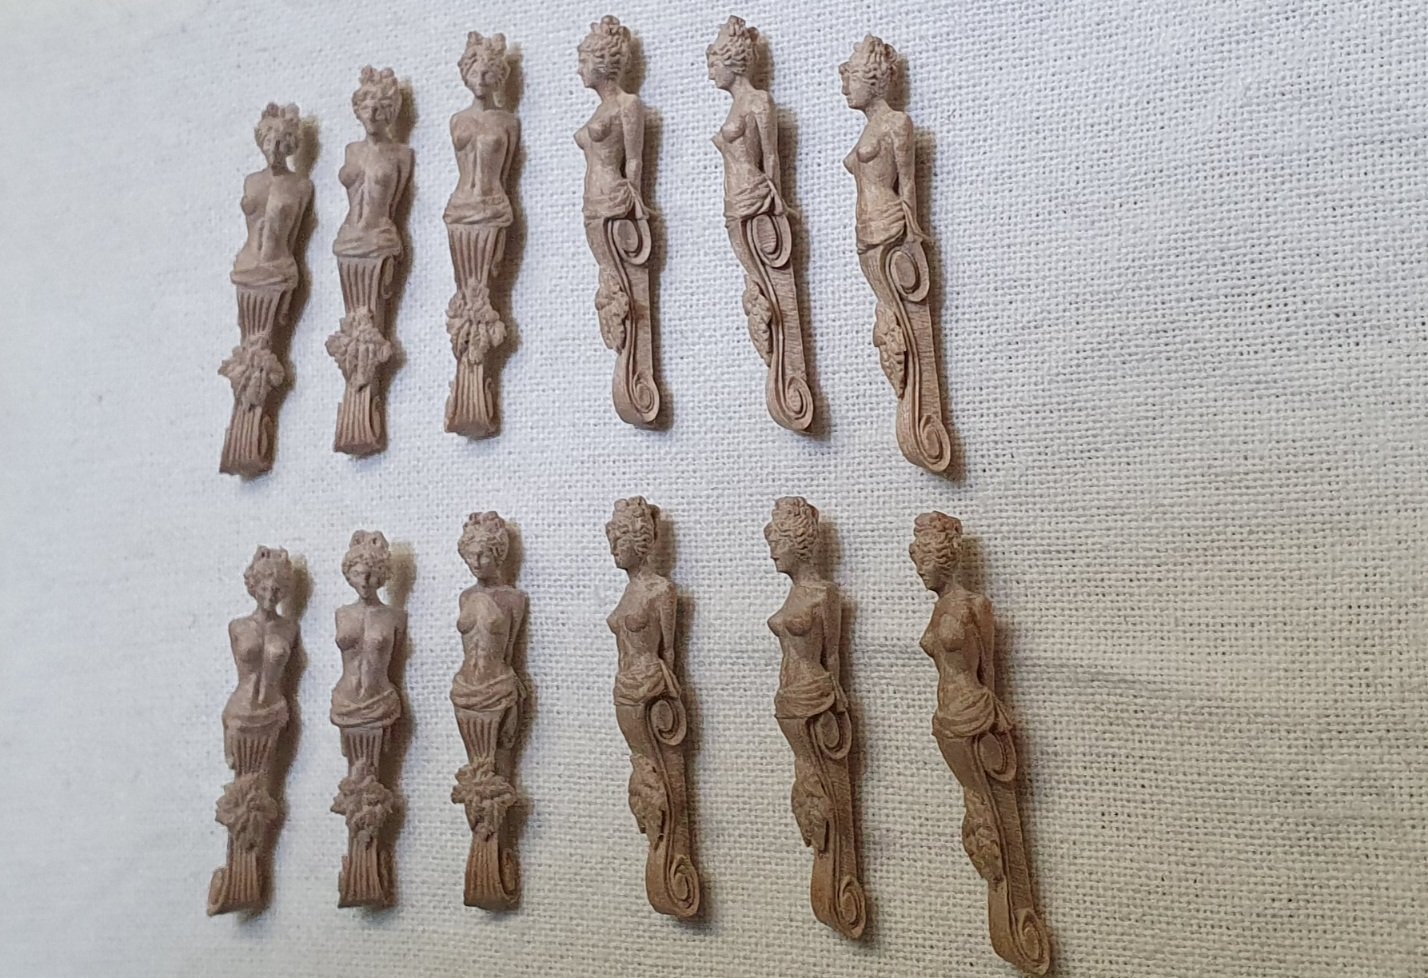
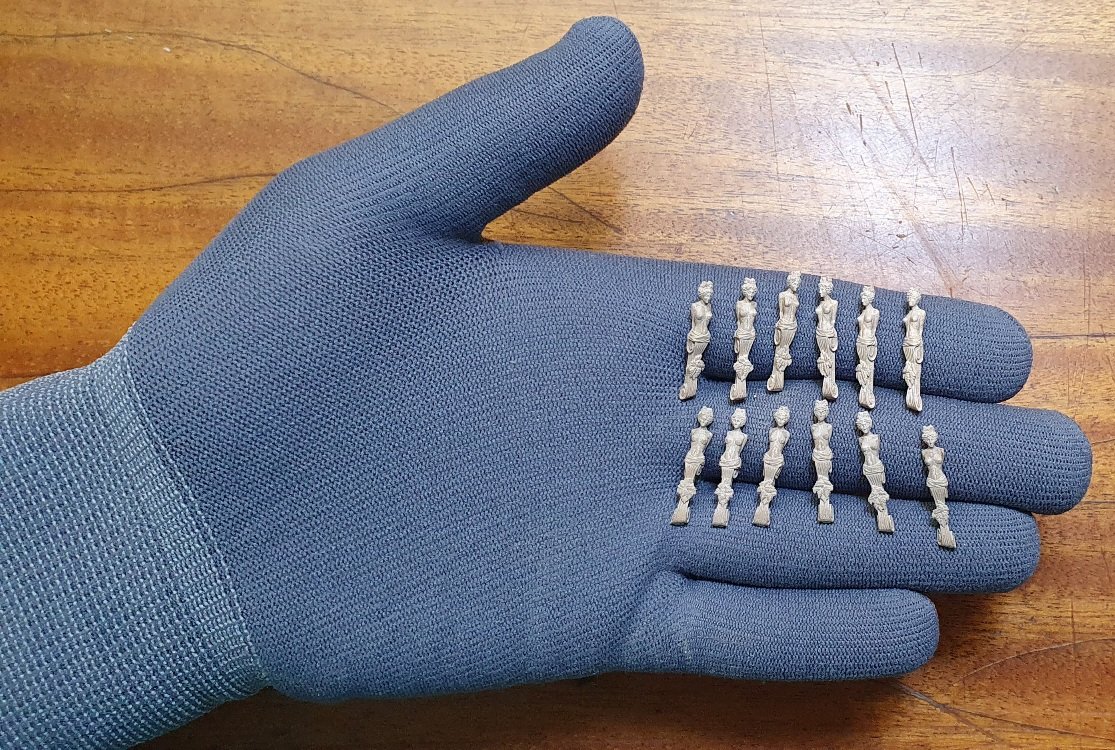
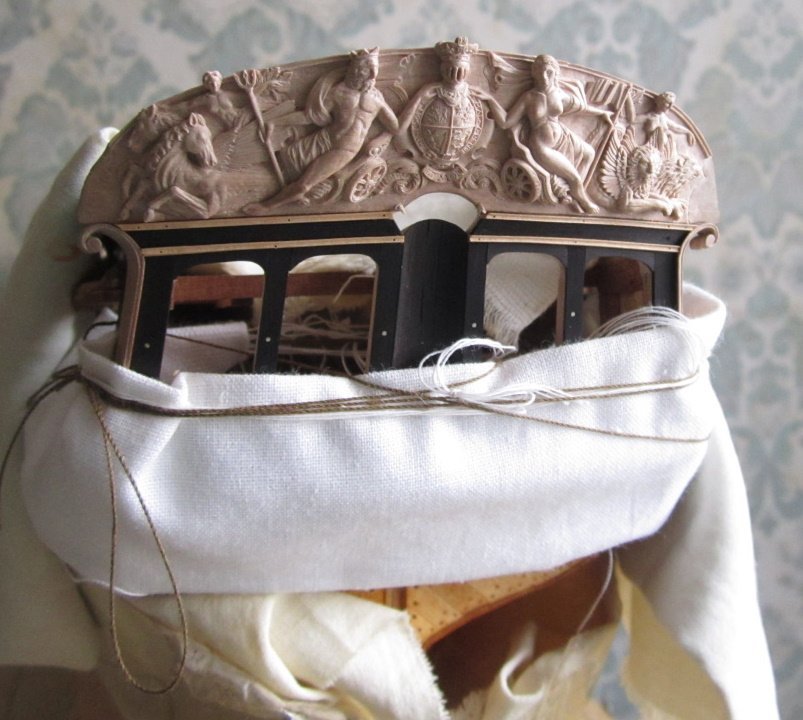
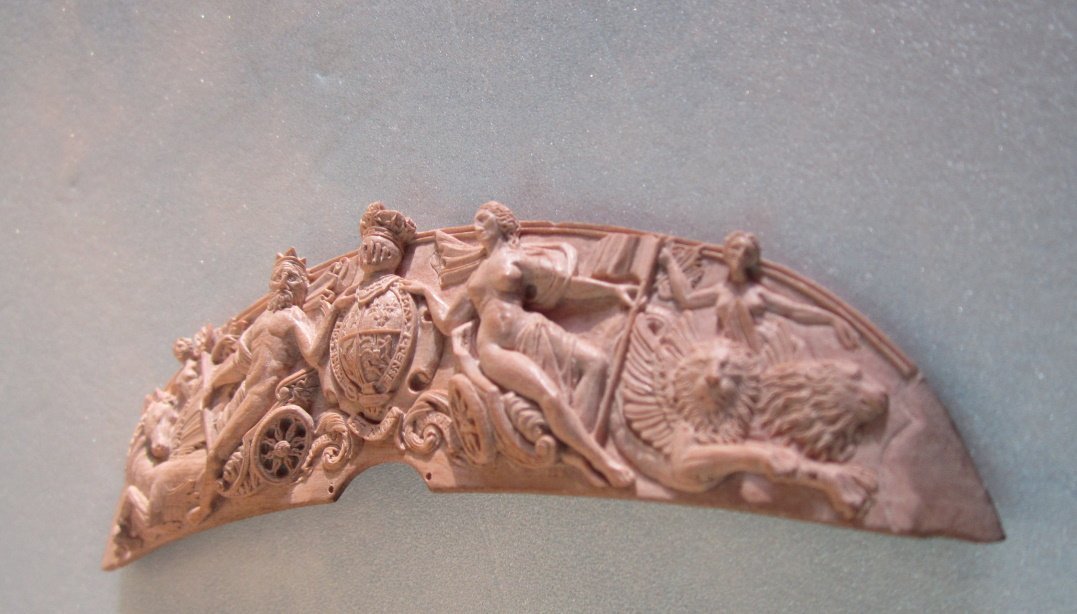
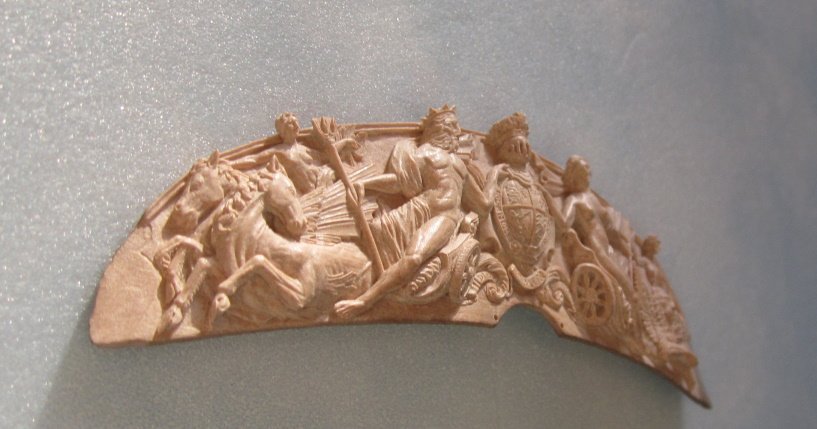
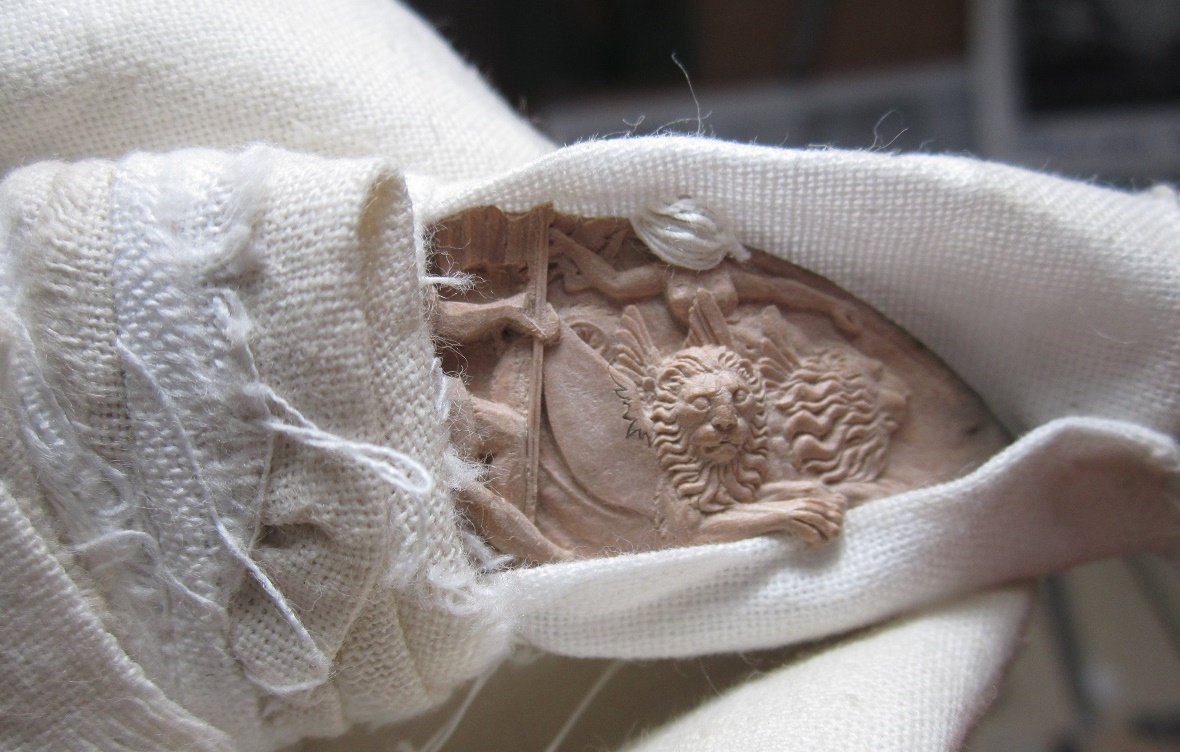
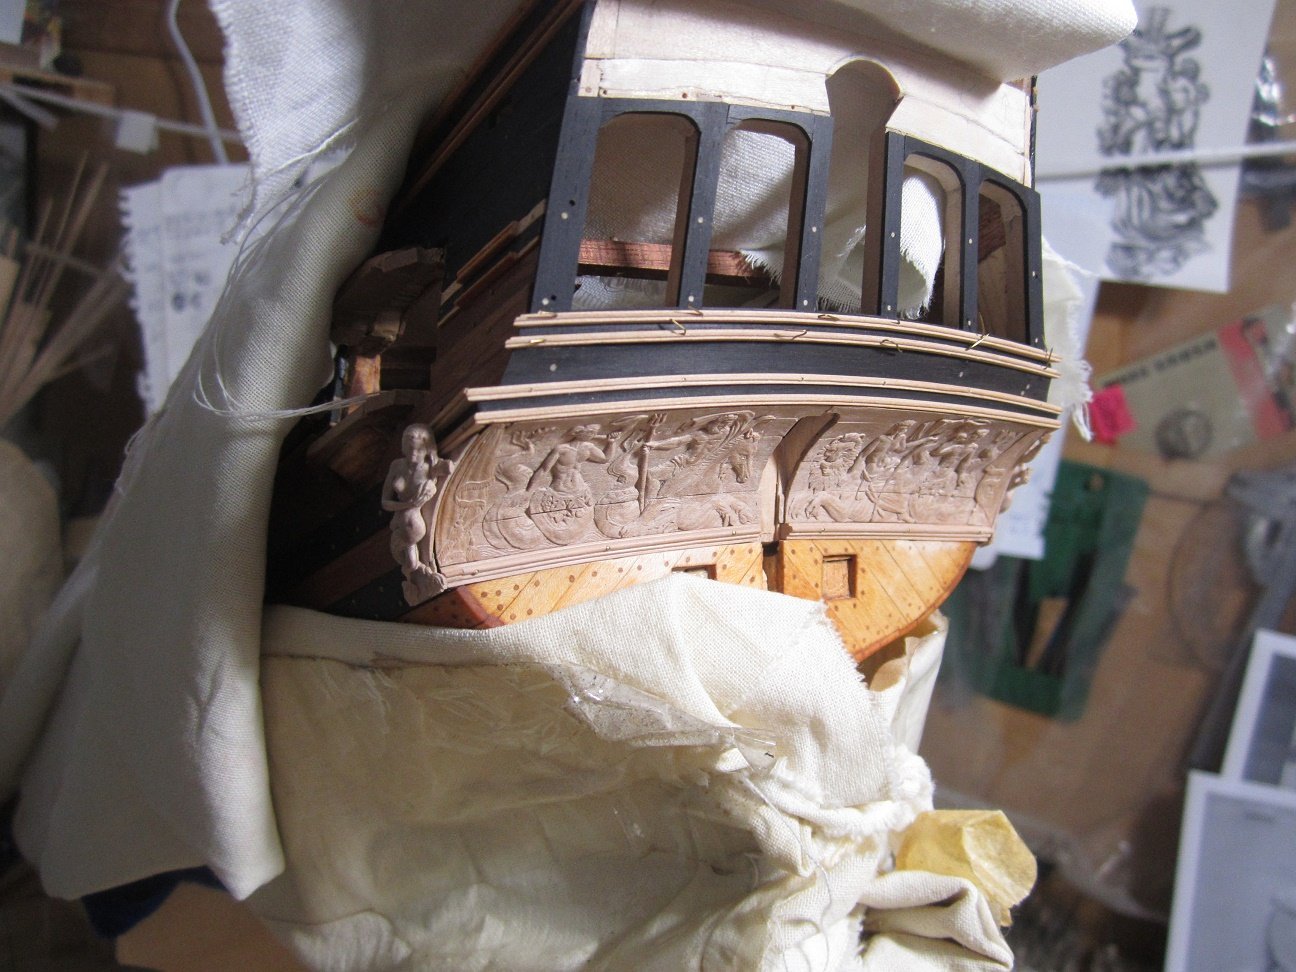
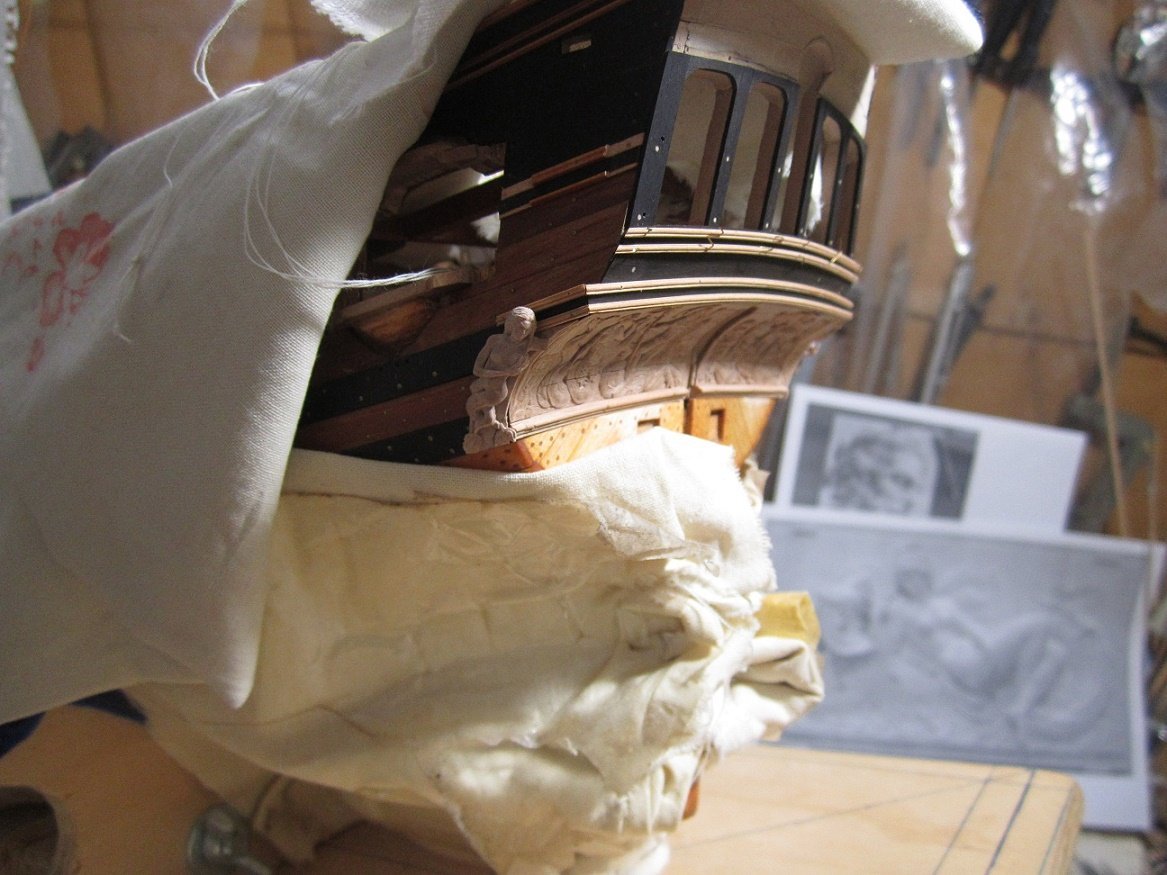
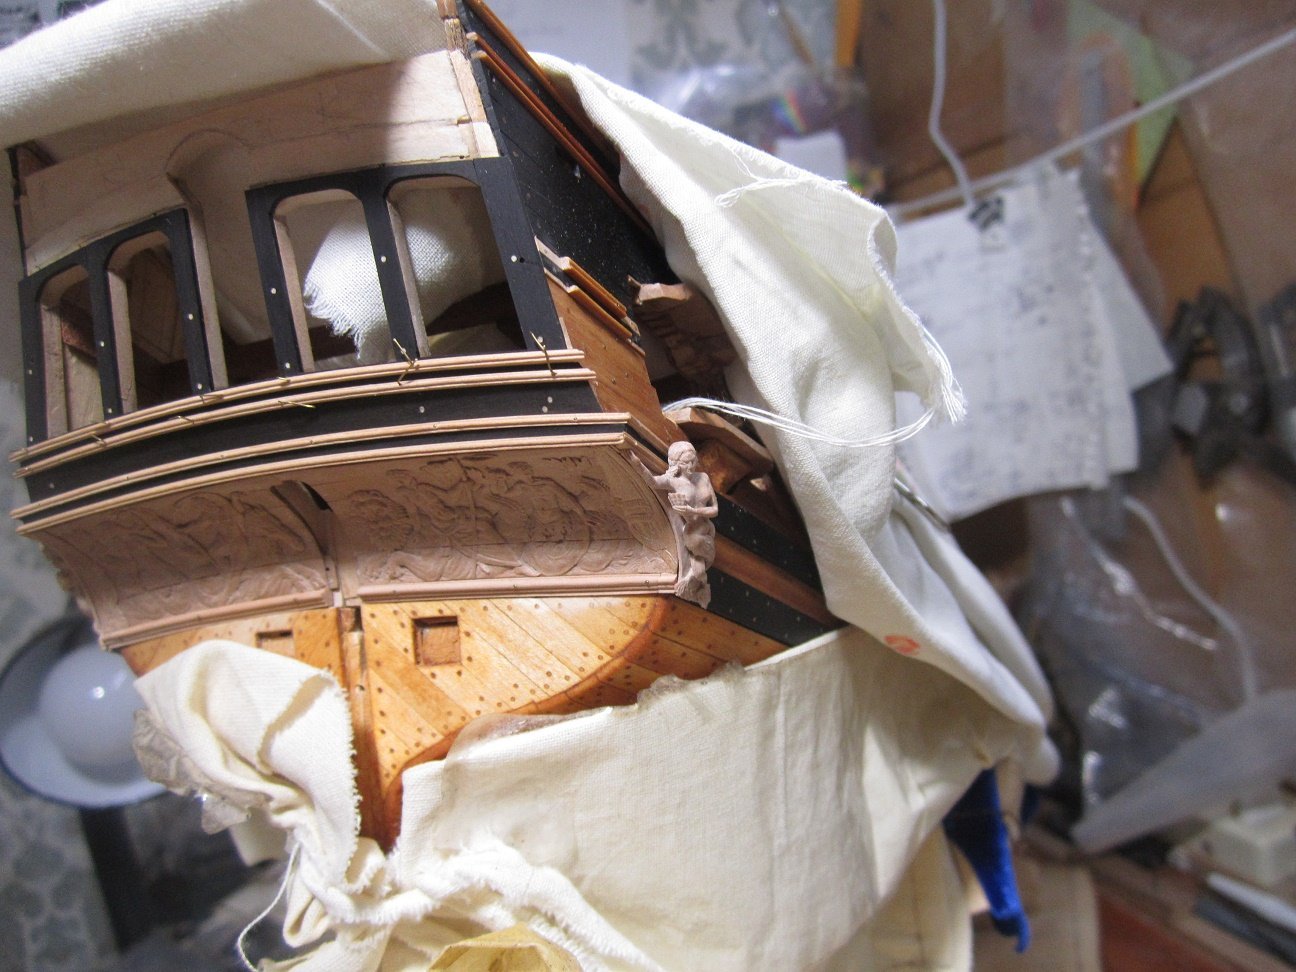
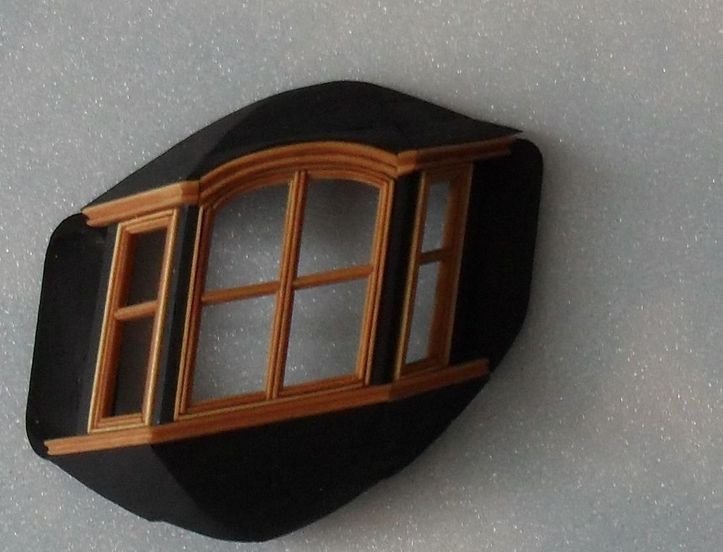
Thank you Hubac's Historian. Hello everyone. I tried on careatid figurines on the model. The final installation will be after installing windows.


-
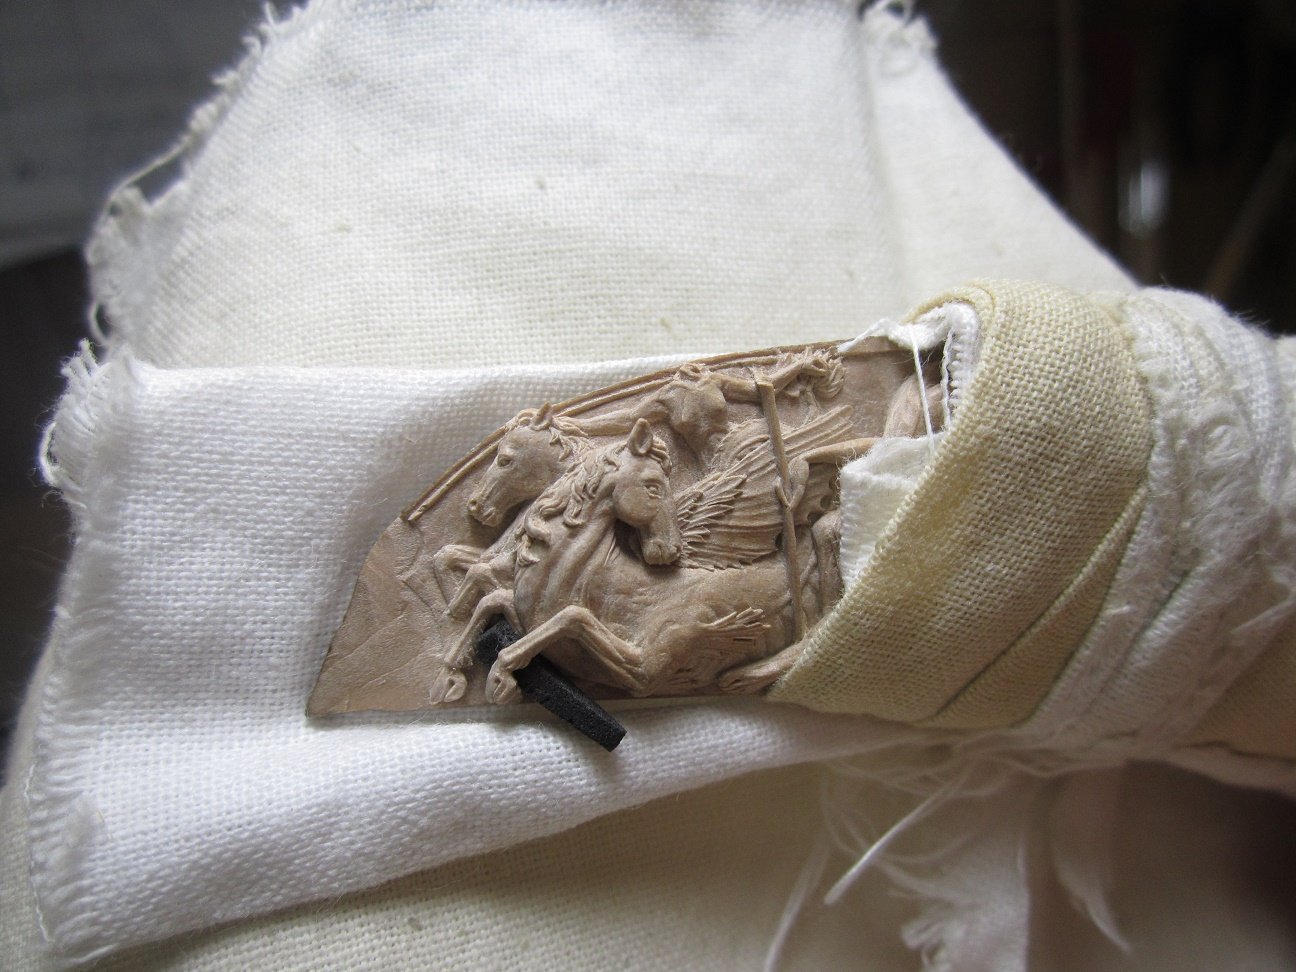
Google Translate. Thank you all for the good comments and likes! Model 1. Unfortunately, the threads on this model have broken parts. I will glue these parts in place at the last moment. Model 2.


-
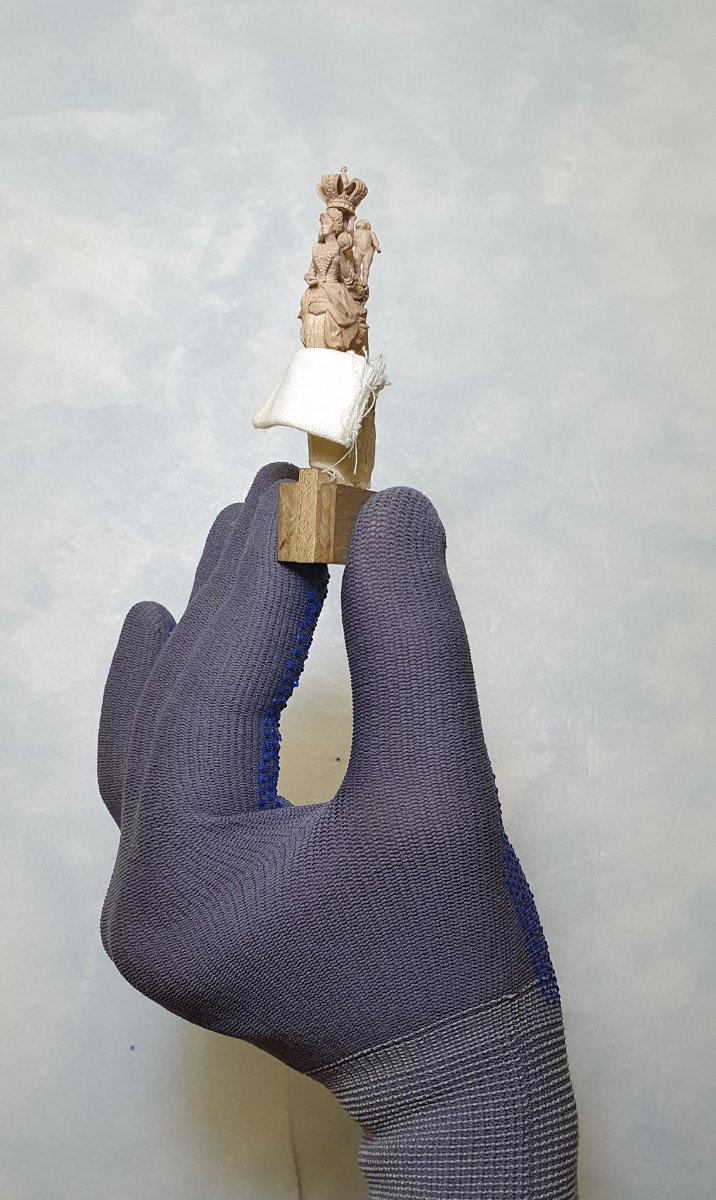
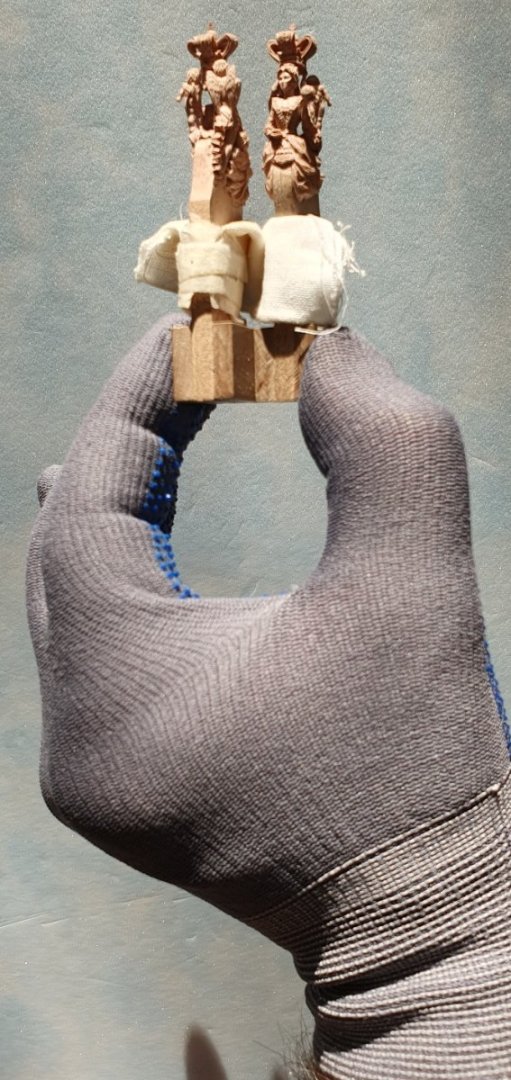
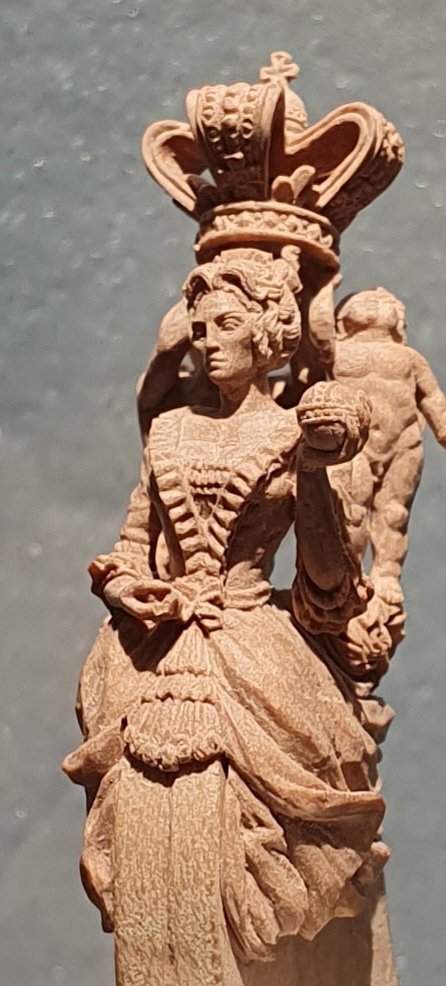
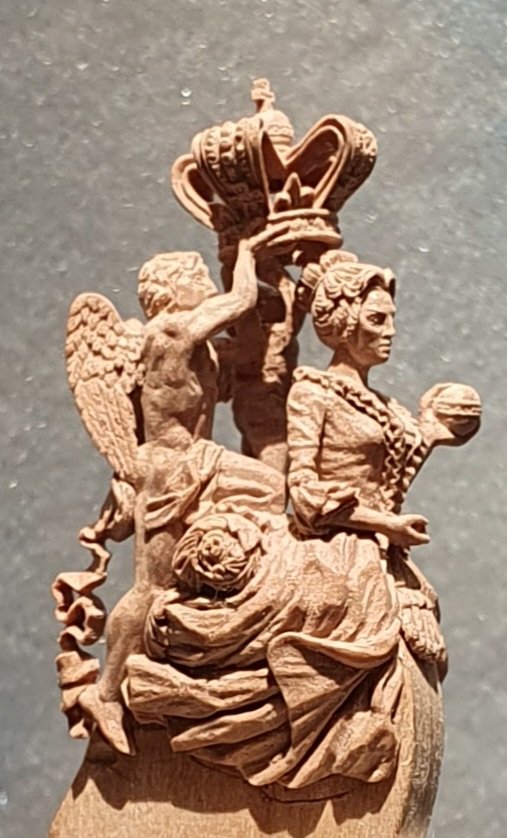
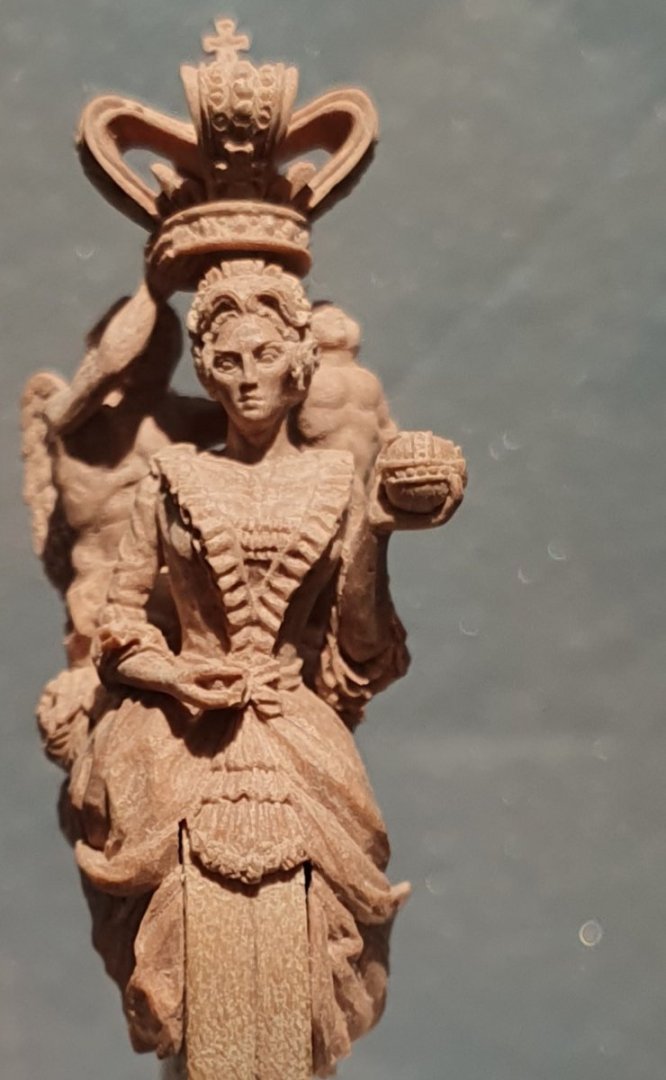
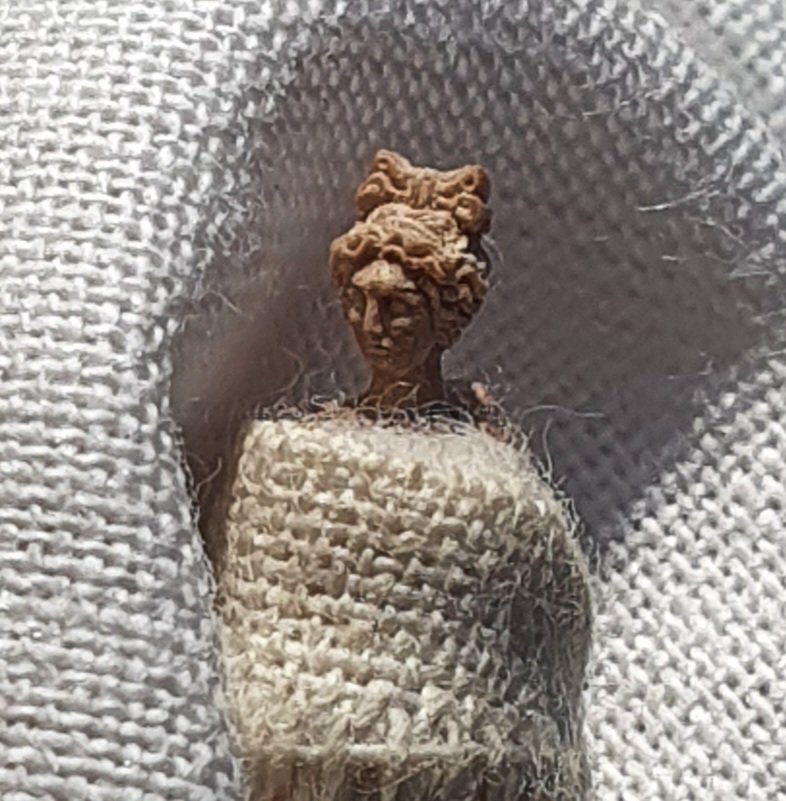
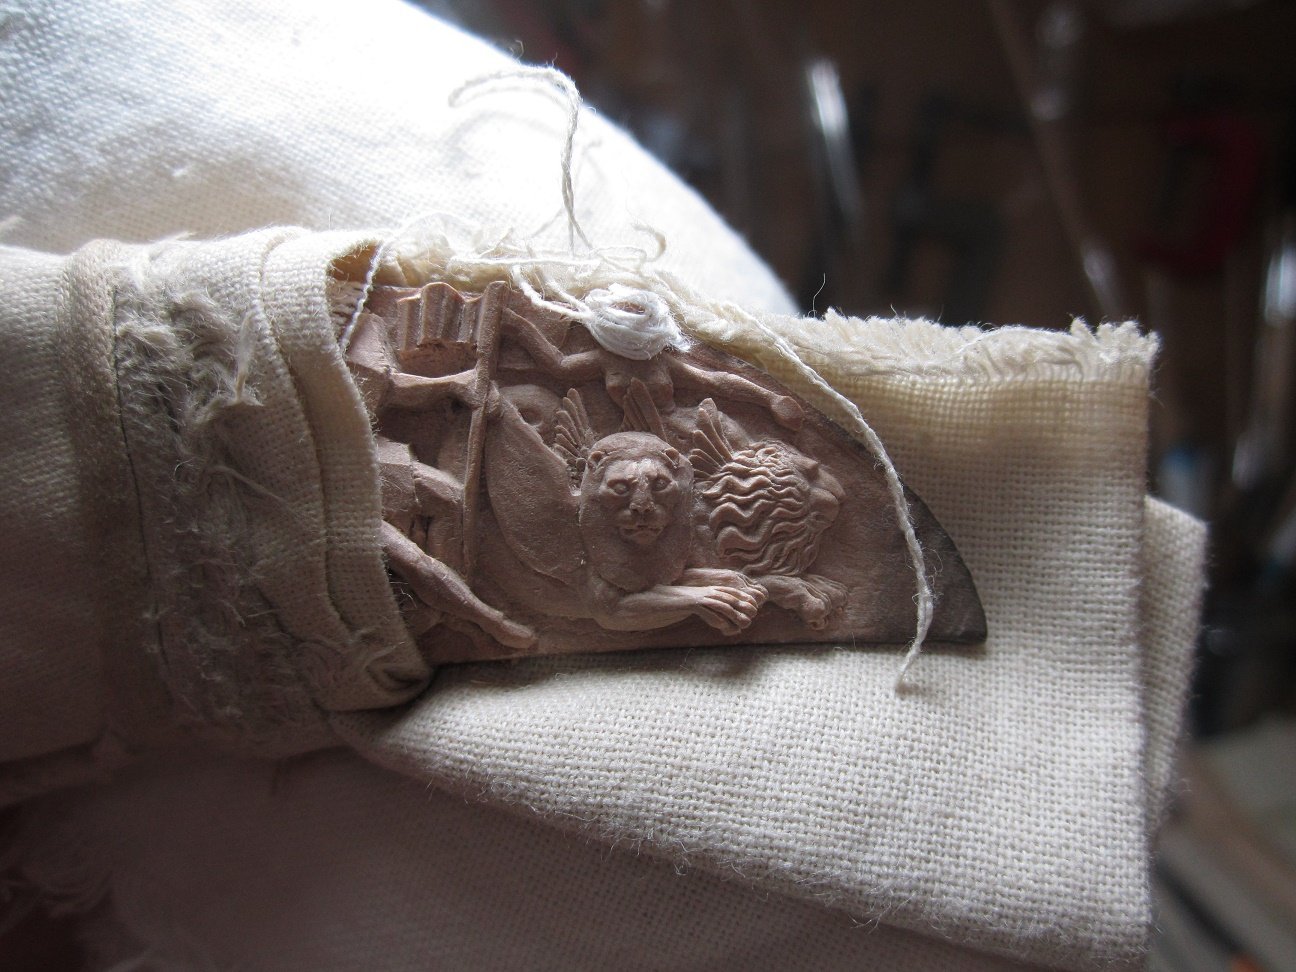
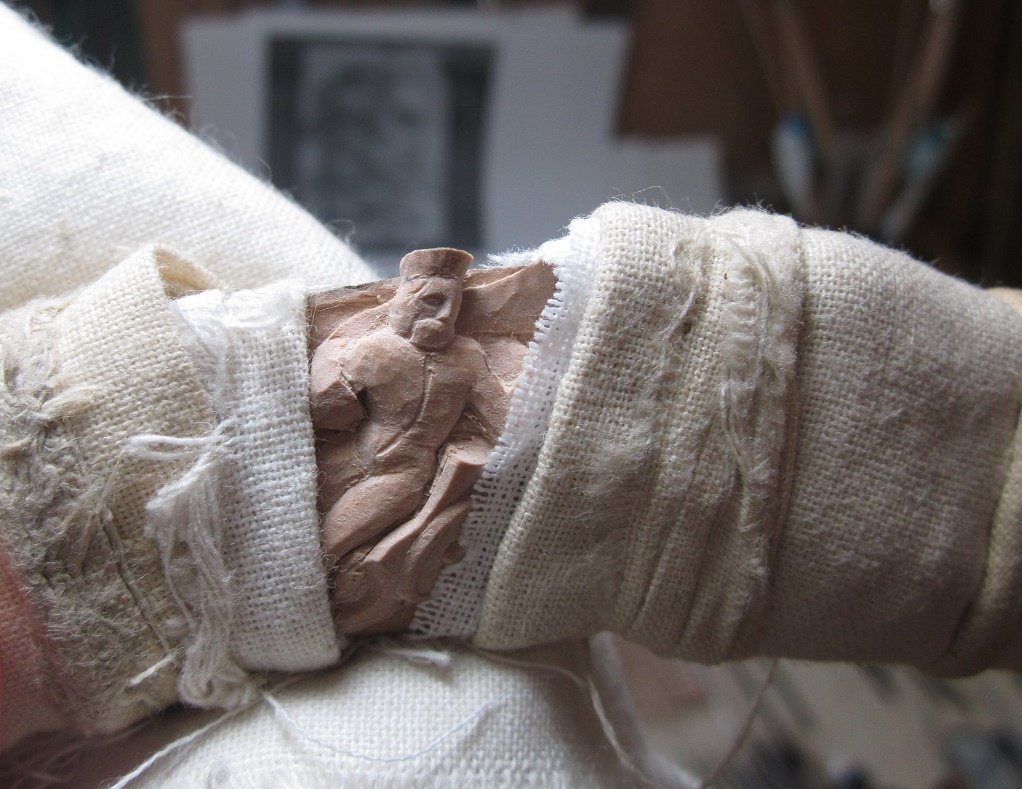
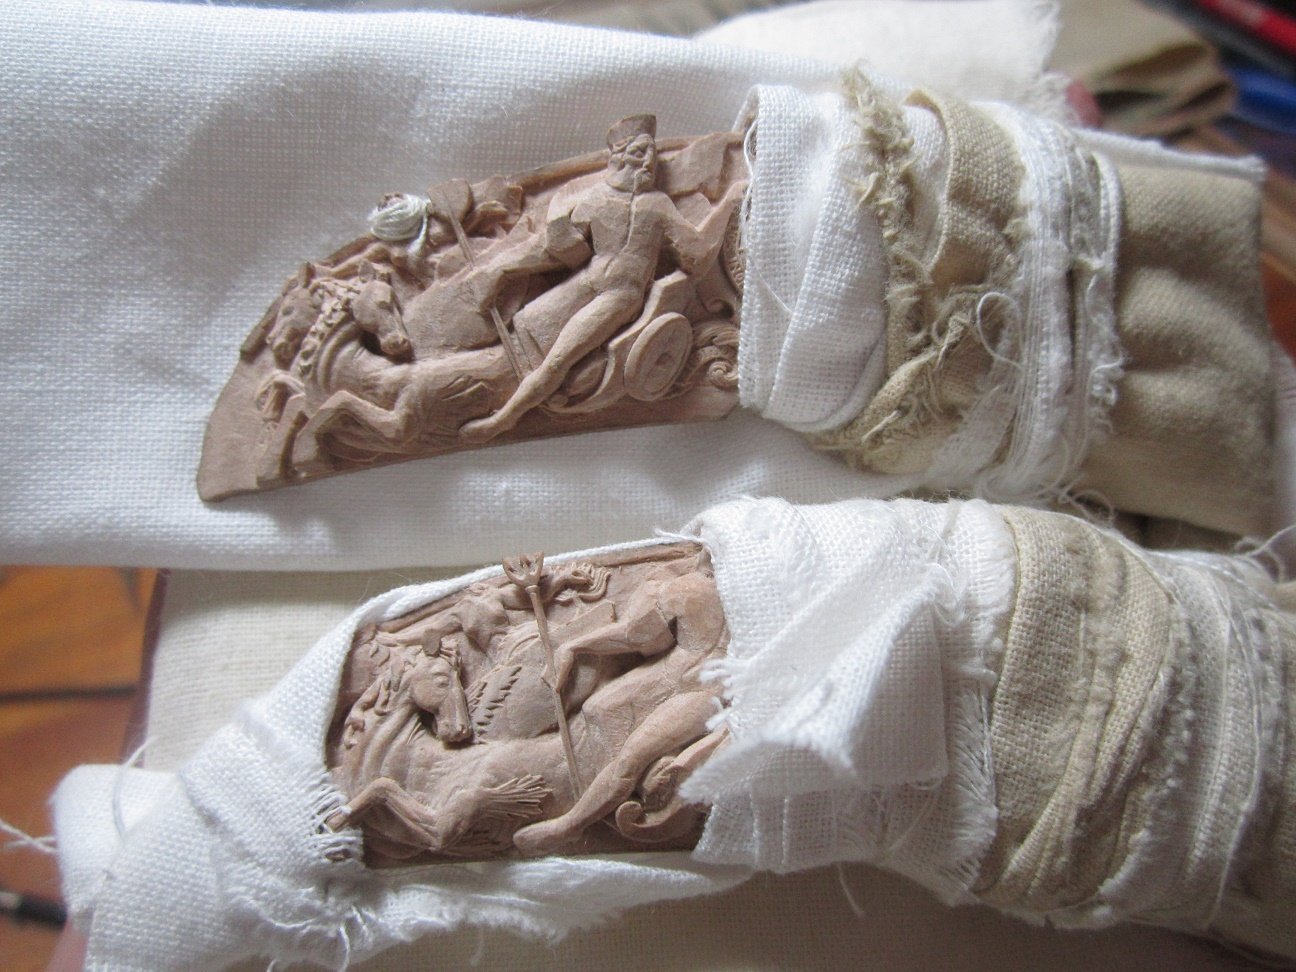
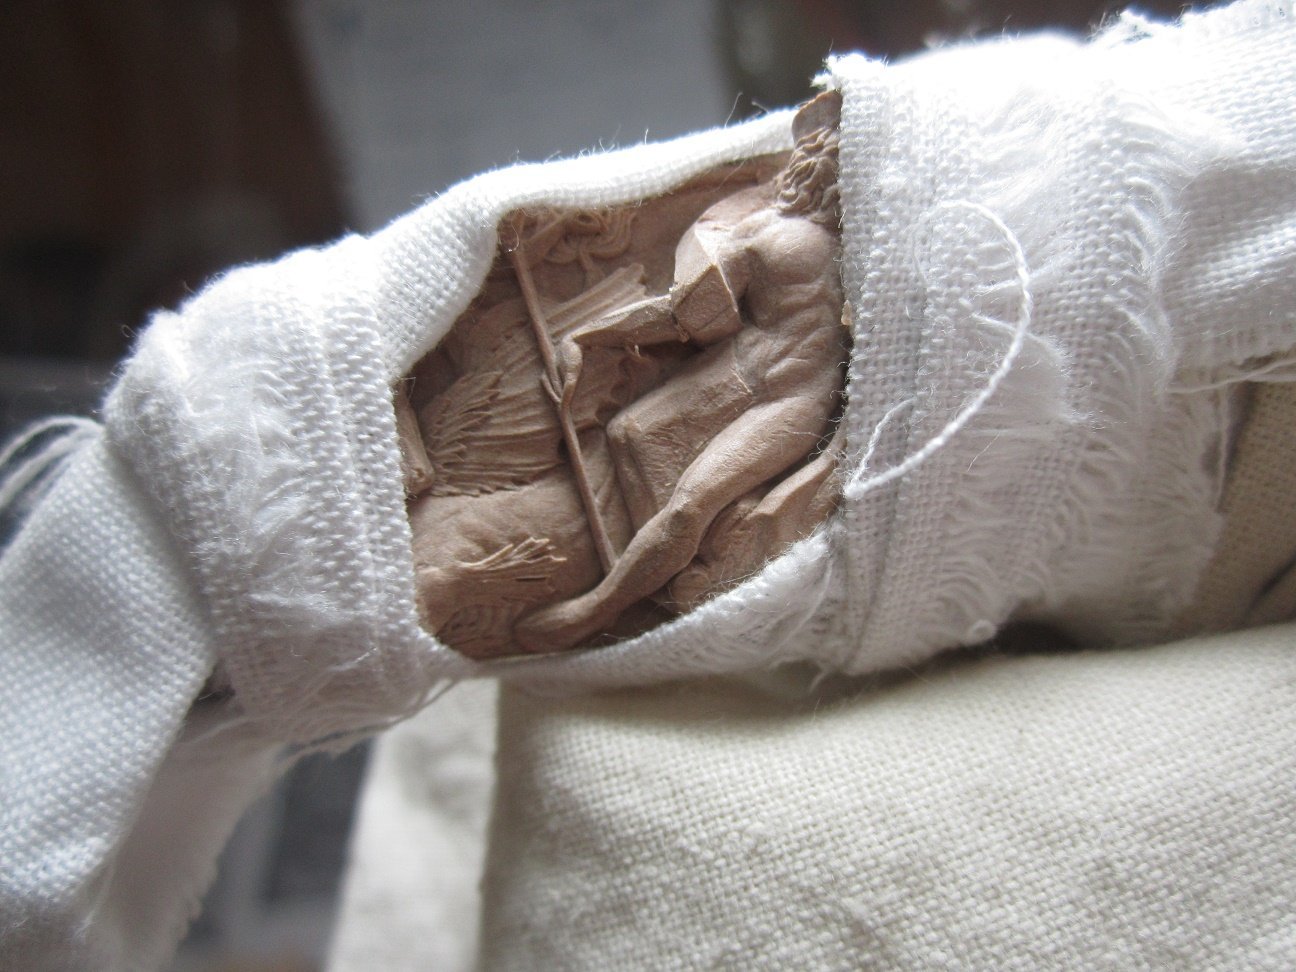
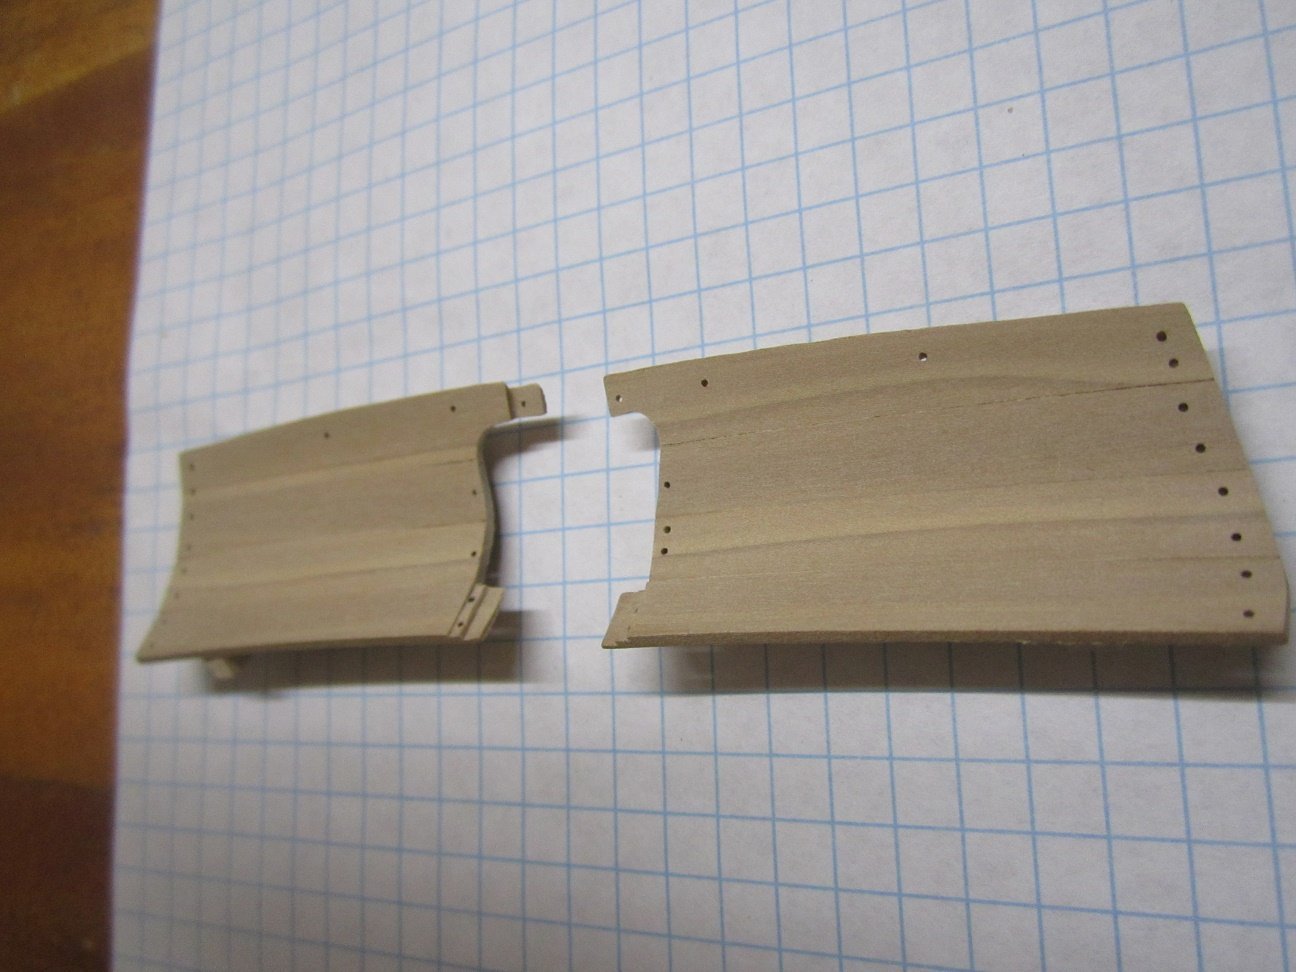
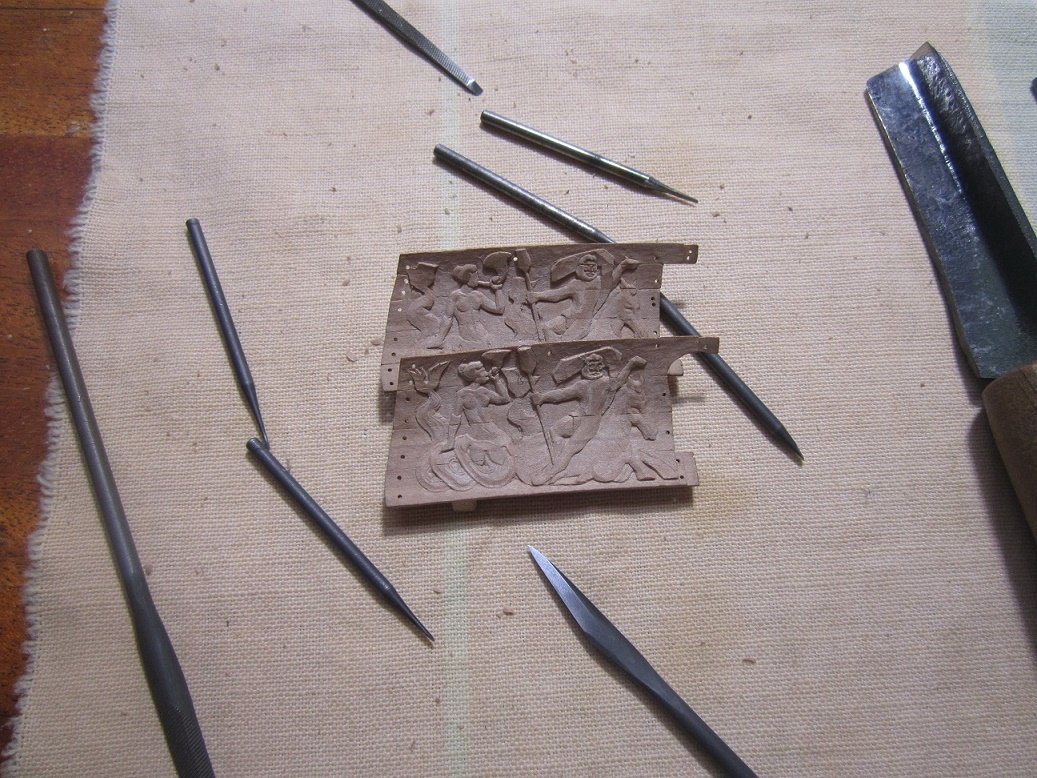
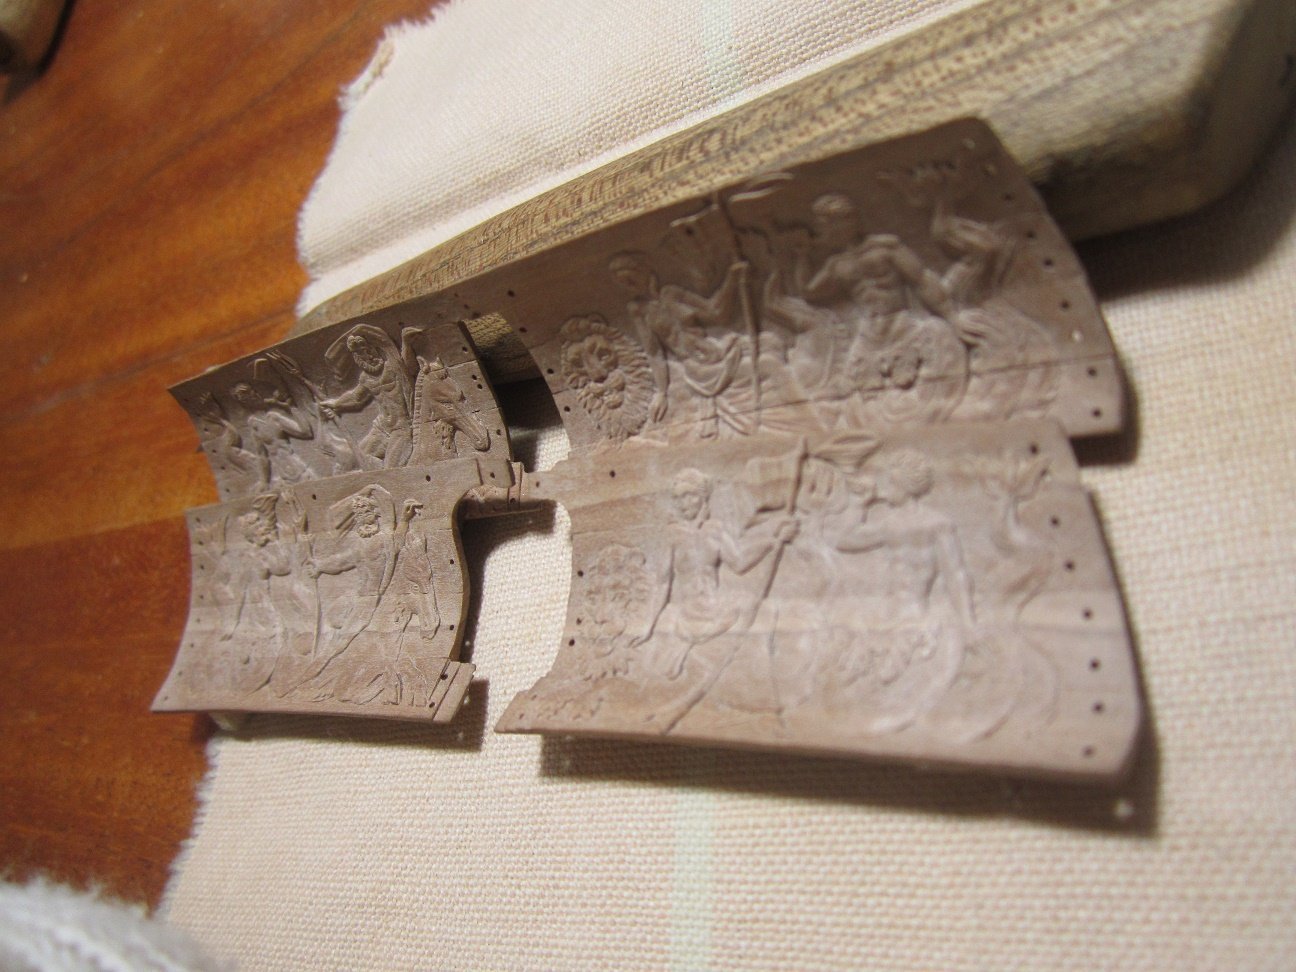
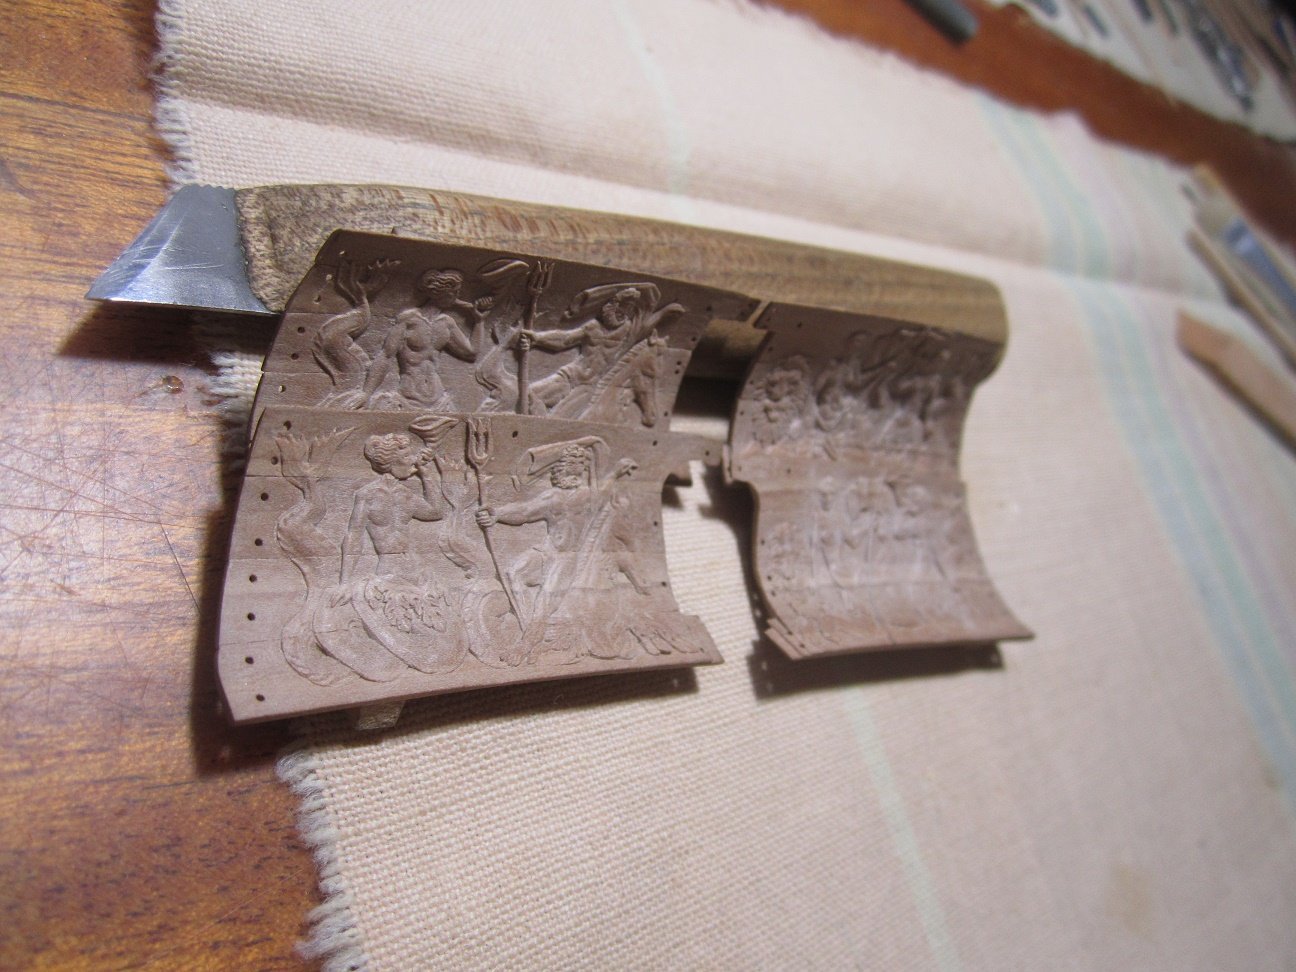
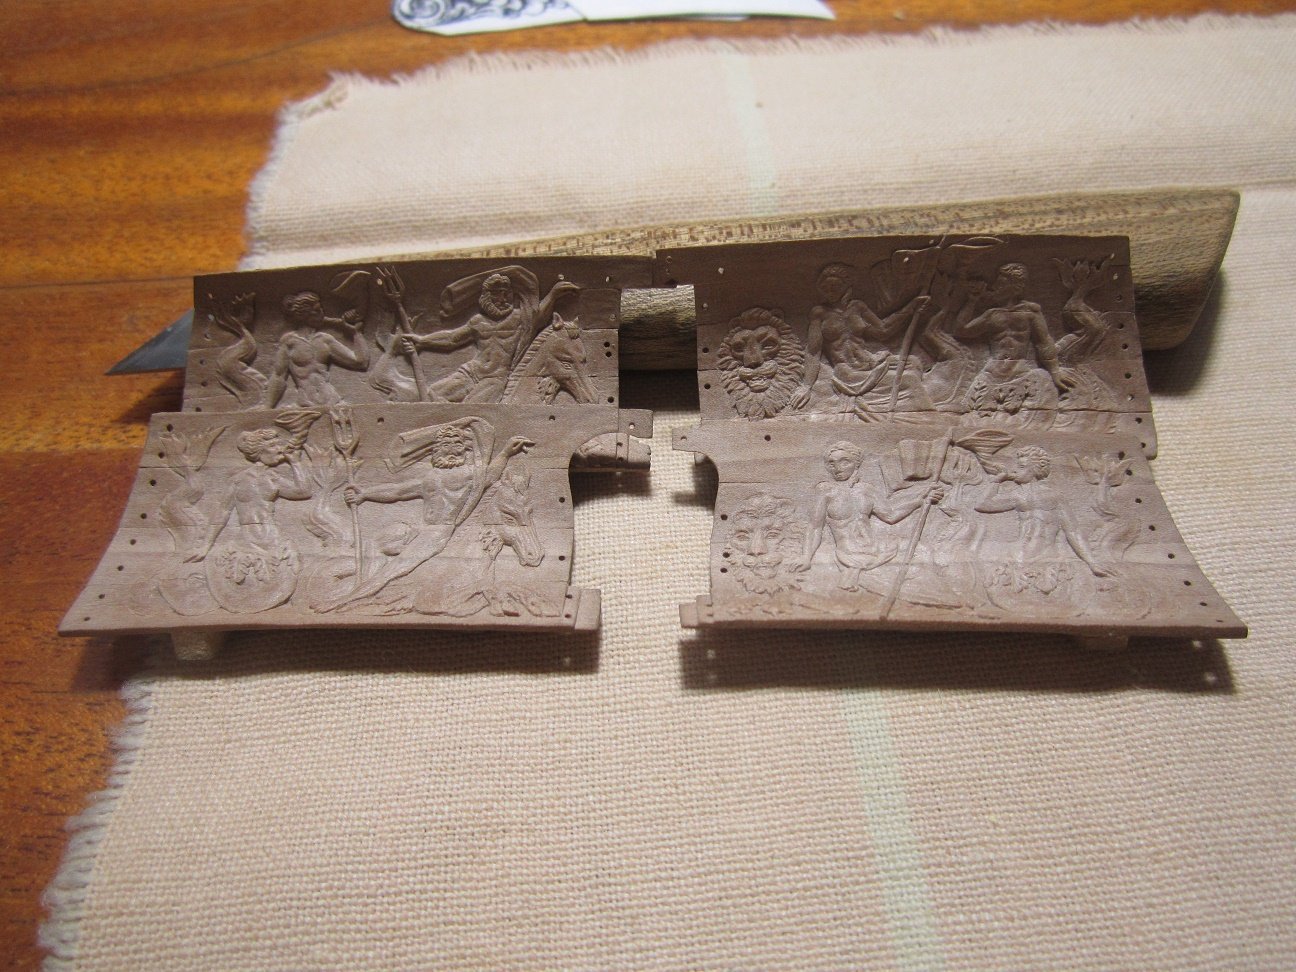
Of course, when necessary, I use the method of fixing in a vise and gluing to the substrate, but if there is a choice, I prefer to hold in my hand. The angle of attack of the cutter changes faster (the vise must be rebuilt) and the range of these angles is larger. And what is more important, in order to control the shape during work, you have to constantly rotate the sculpture by changing the angle of incidence of light. The fabric is necessary to protect against the skin of the fingers. This is a pear.
-
Thank you all for the good comments and likes! The work is not finished yet, some details and background need to be finalized.
-
Google translator. Thank you Albert, thank you all for the likes. Sorry for the poor photo quality. The old cheap camera does not always capture the fine details of the thread. Cold, artificial lighting. Natural light (weak sunlight). Natural lighting (bright sunlight).


-
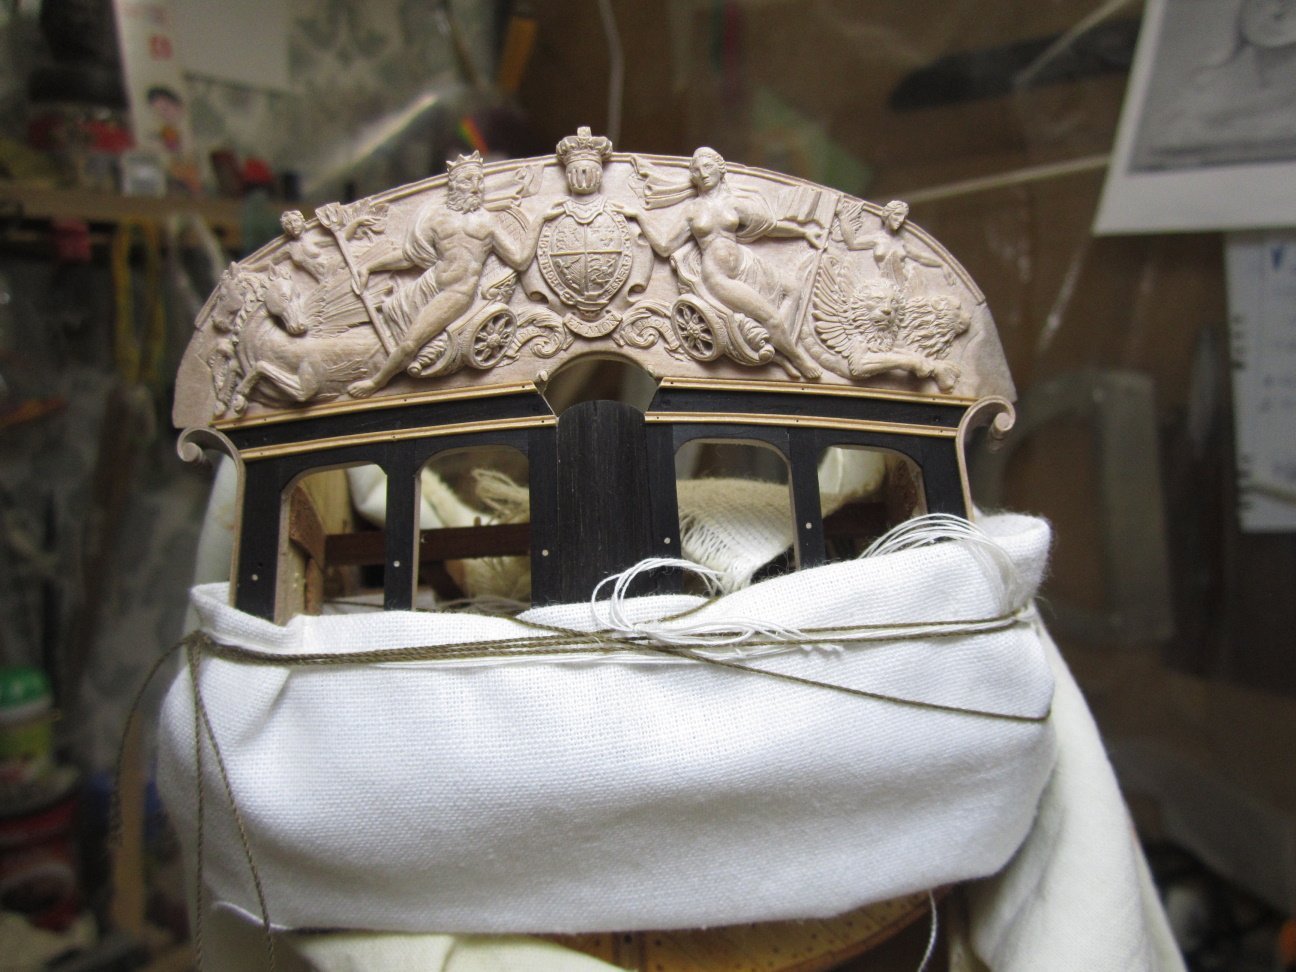
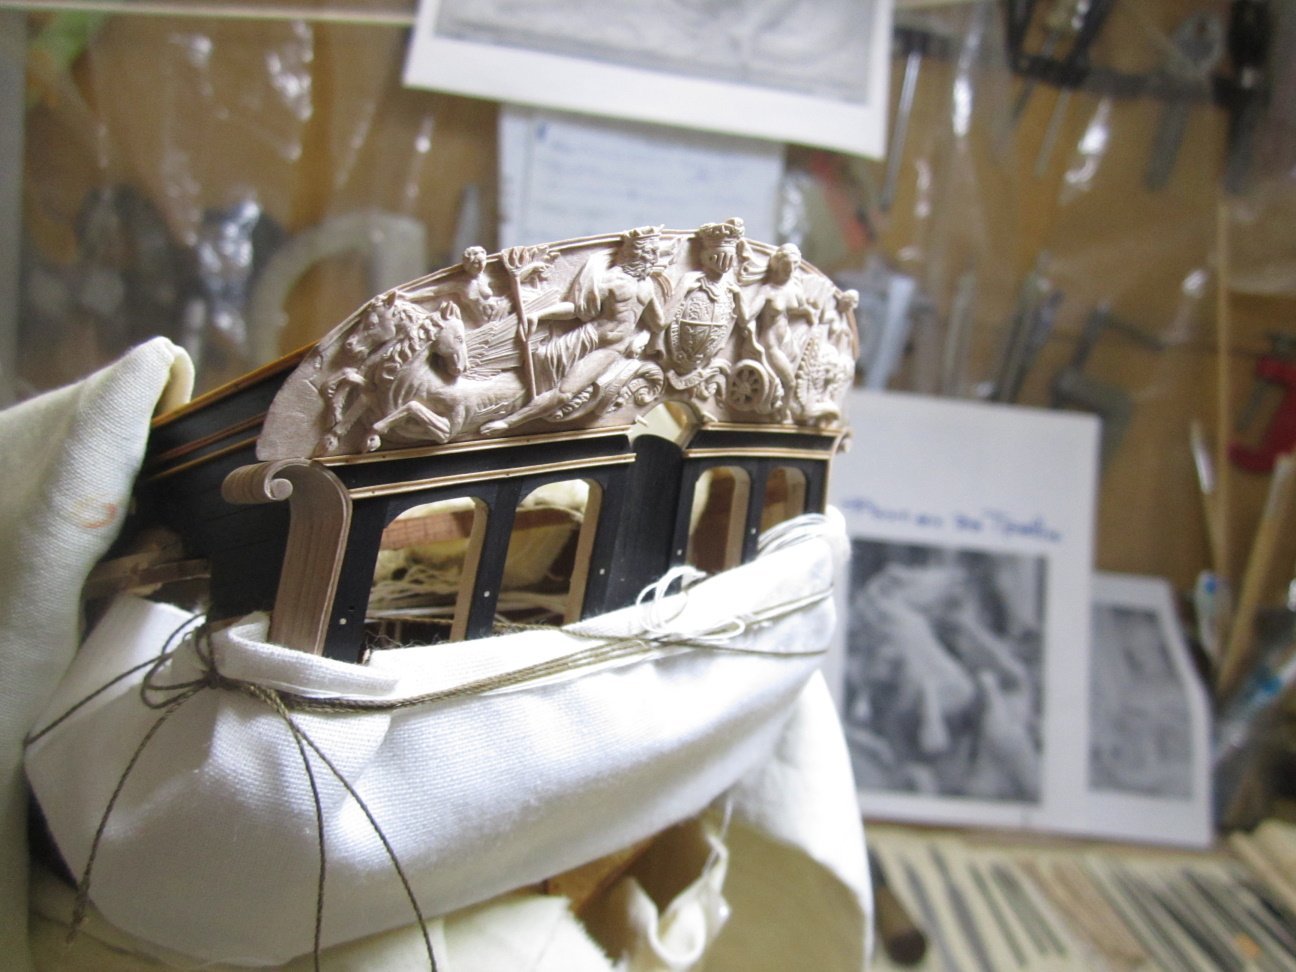
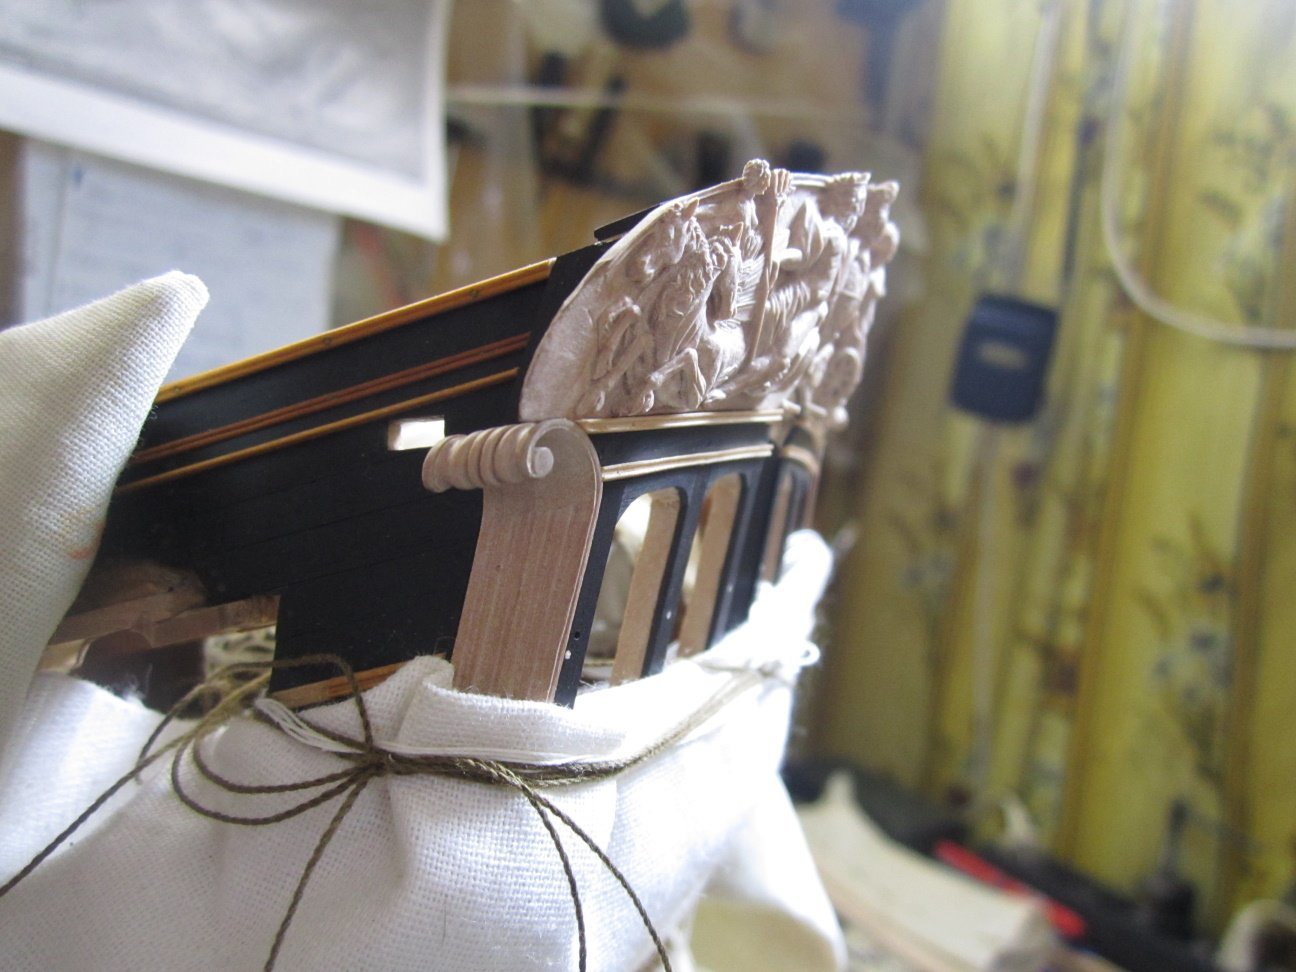
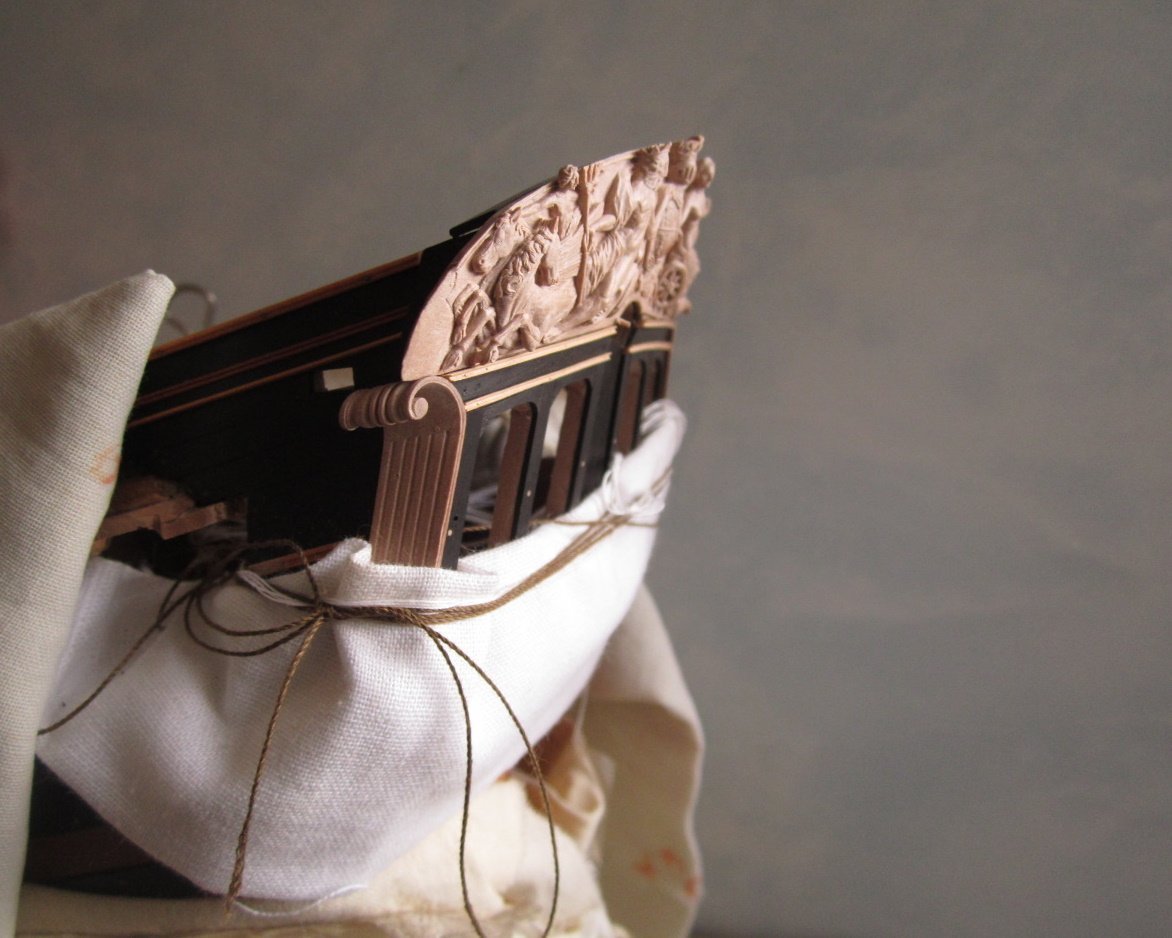
Google Translate. Thank you all for the good comments and likes. Happy New Year! Photo of the process of working on the central composition.
-
.....

-
......

-
......

-
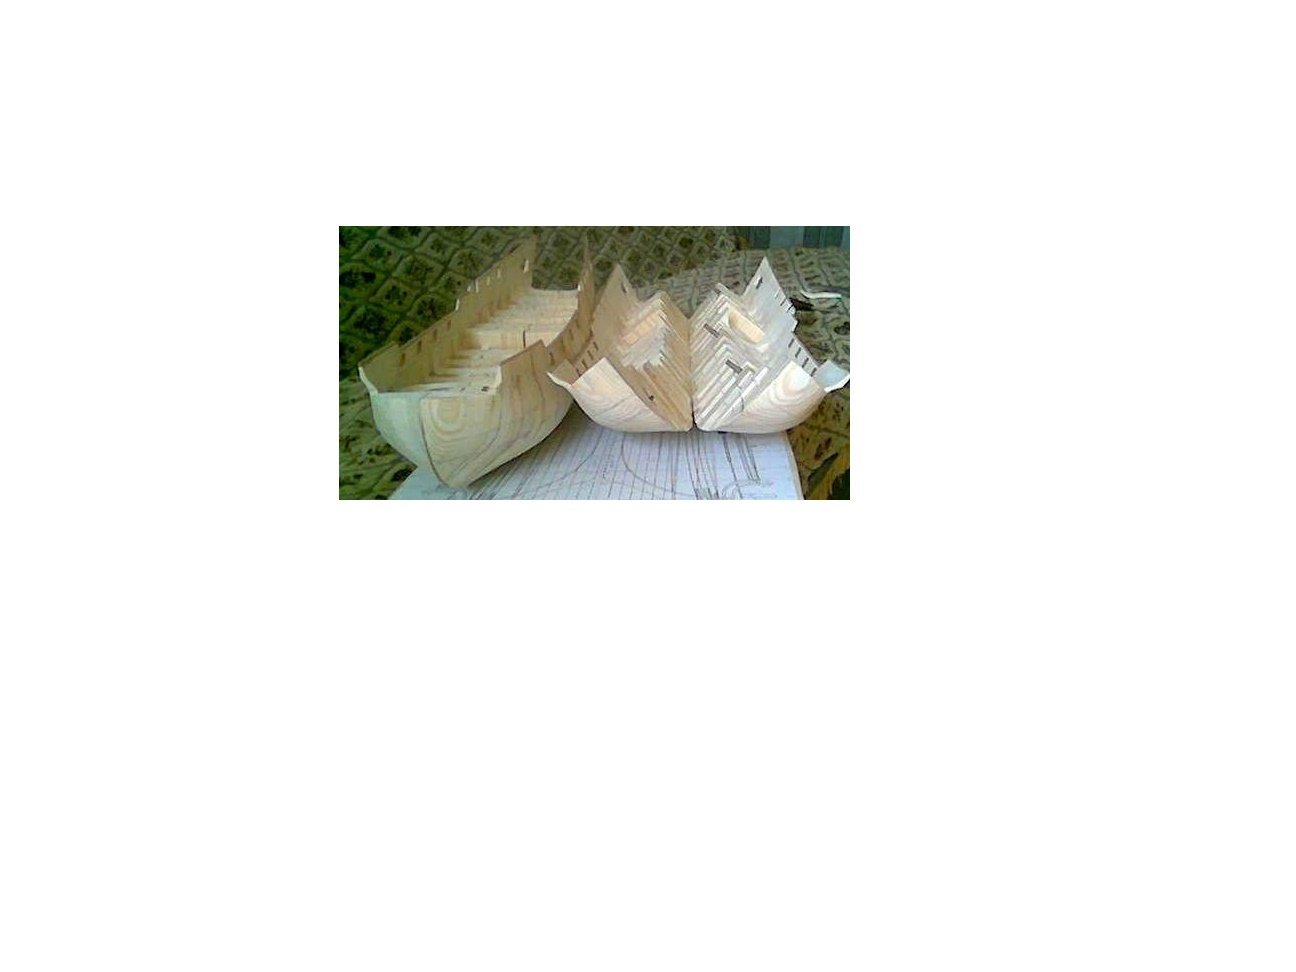
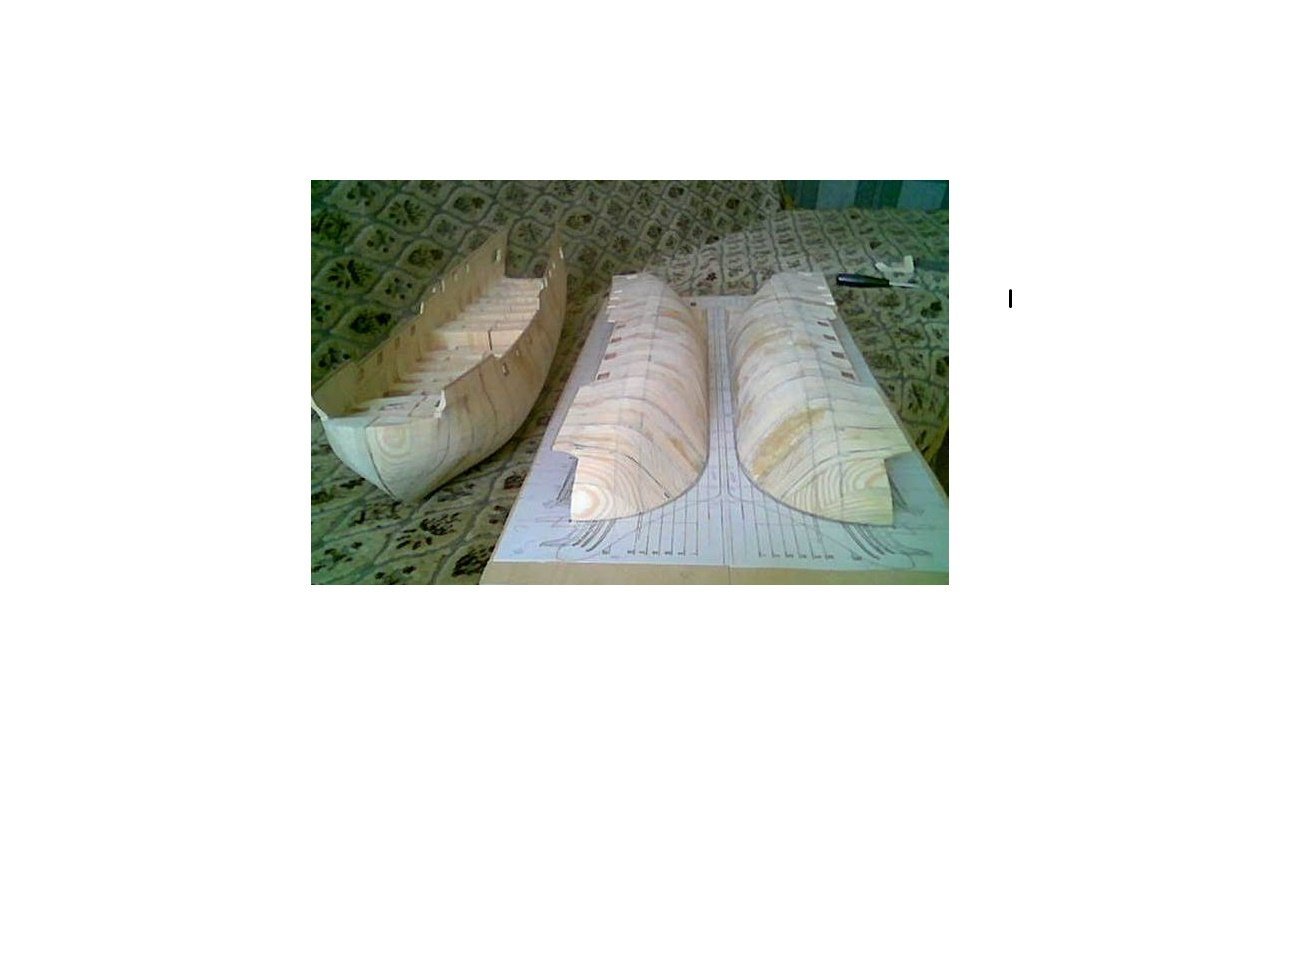
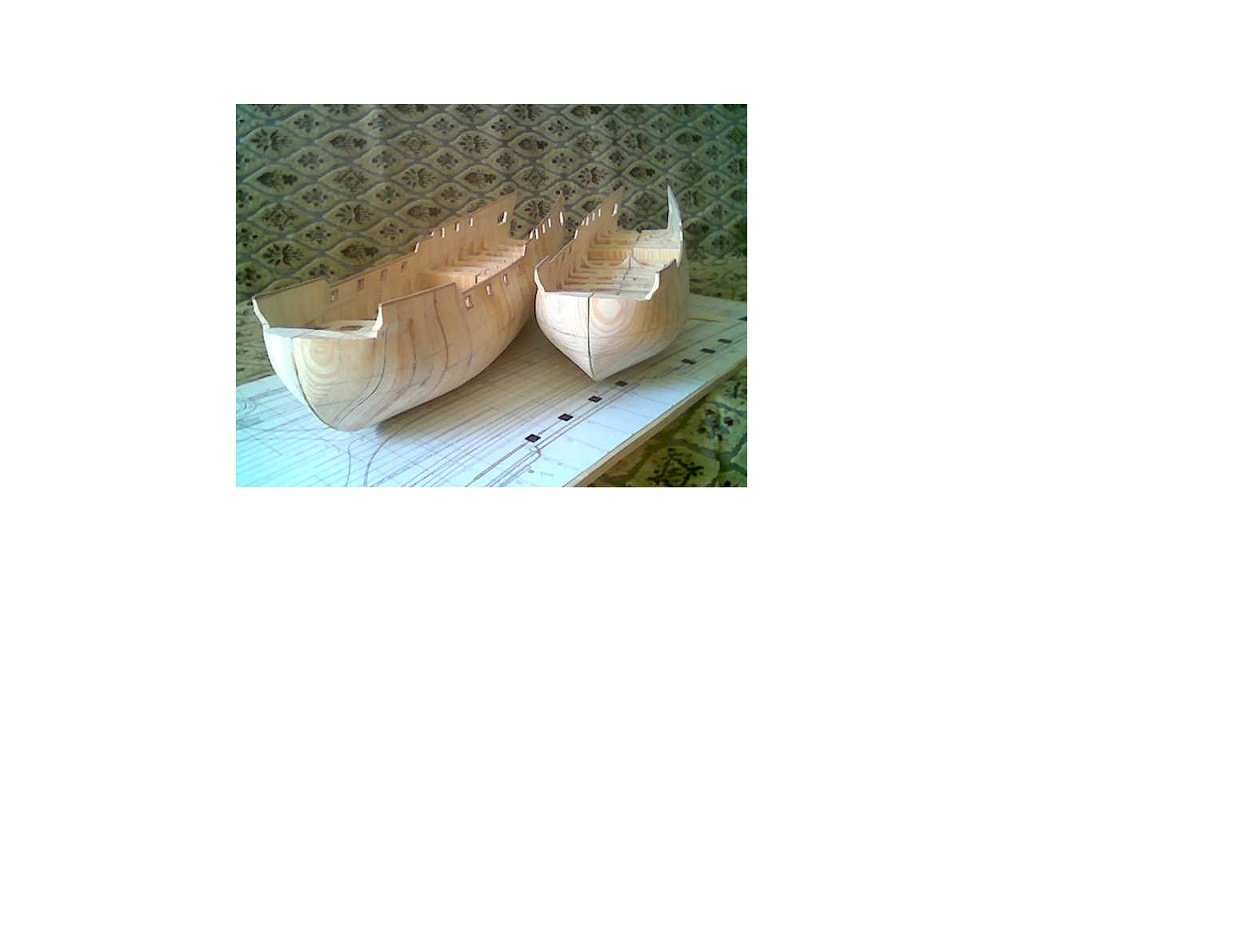
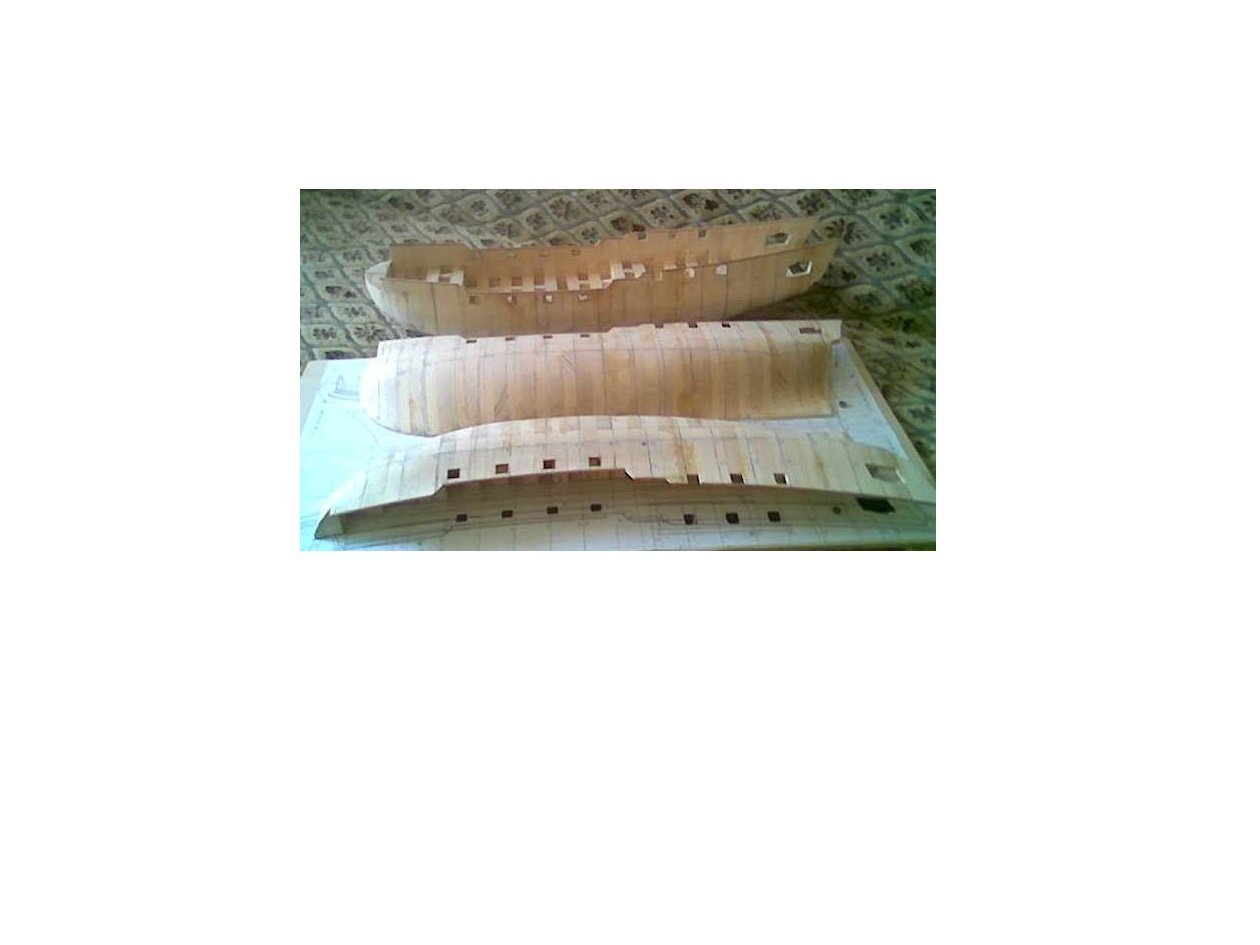
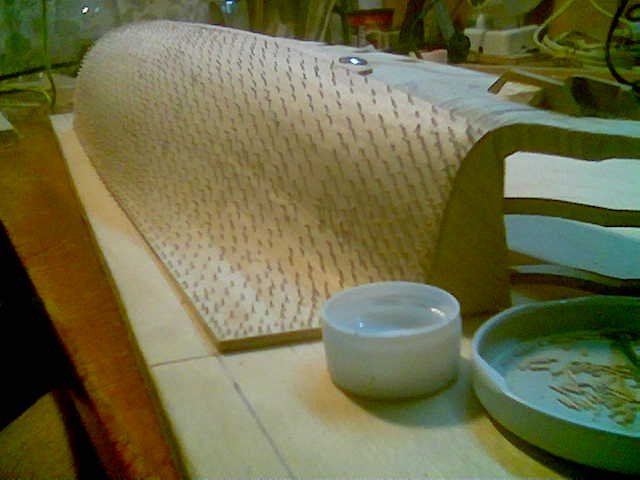
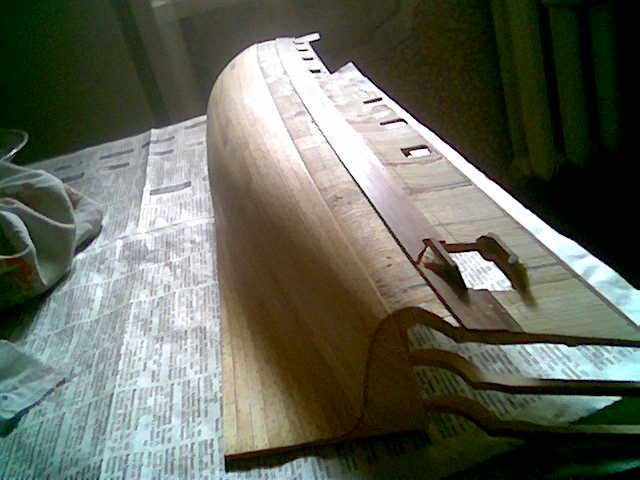
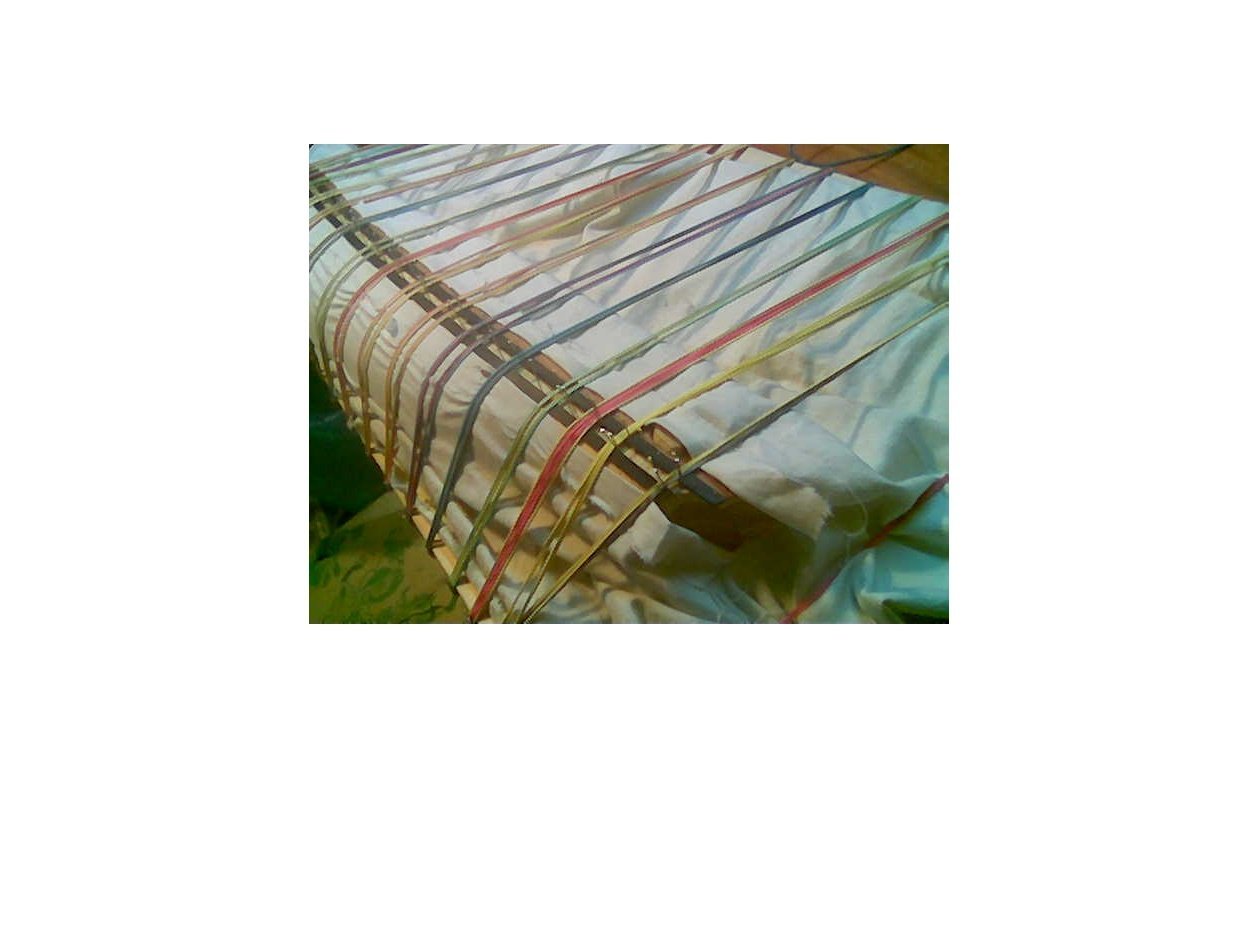
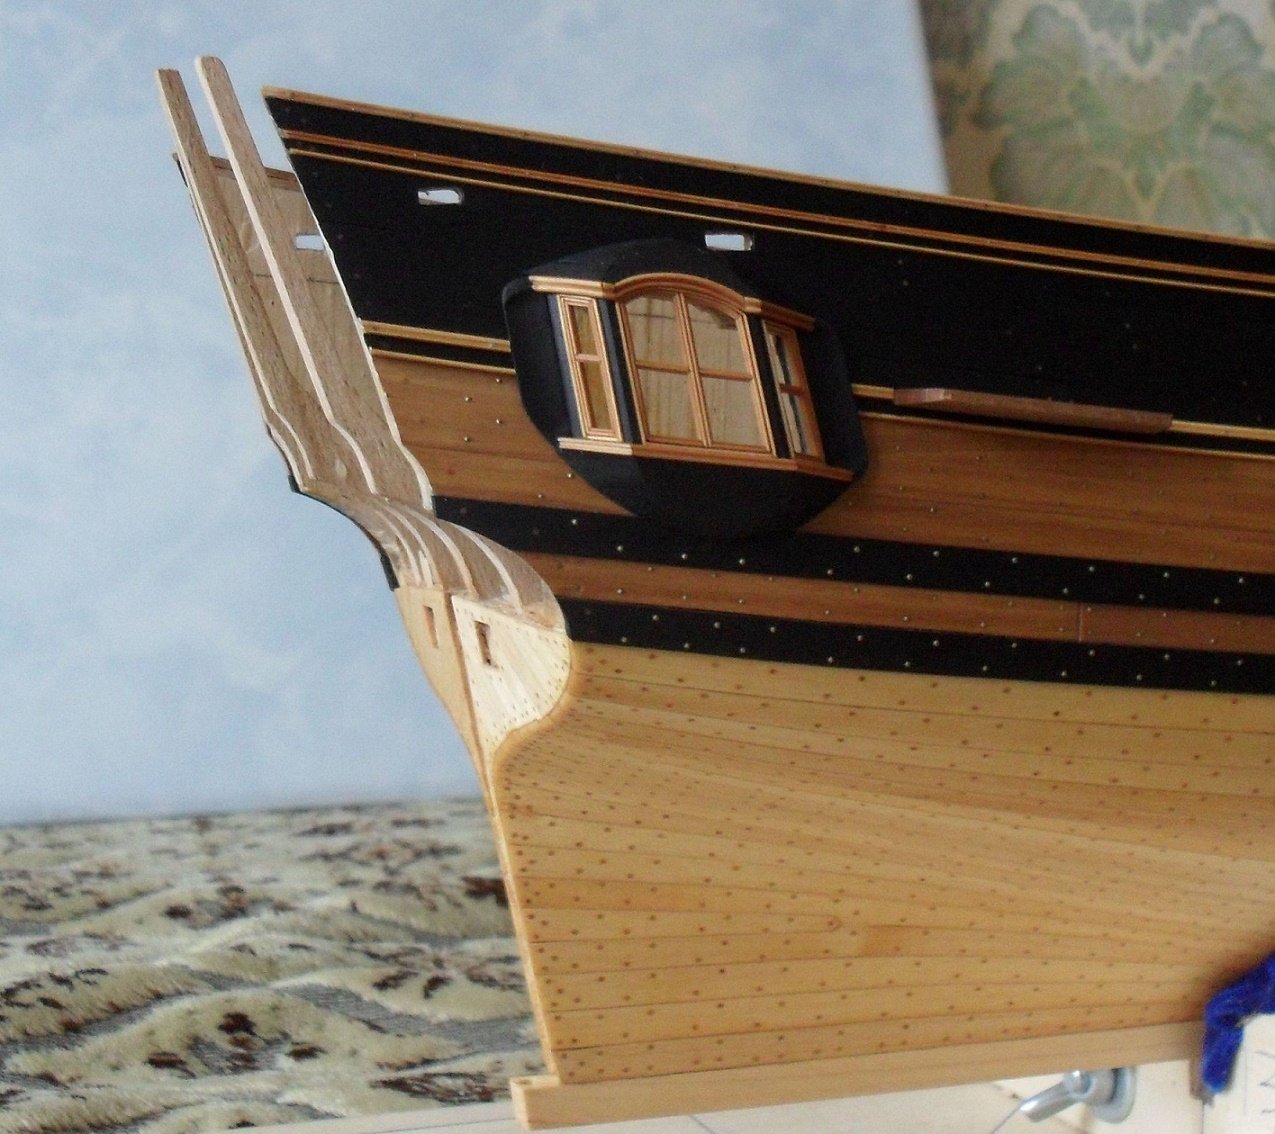
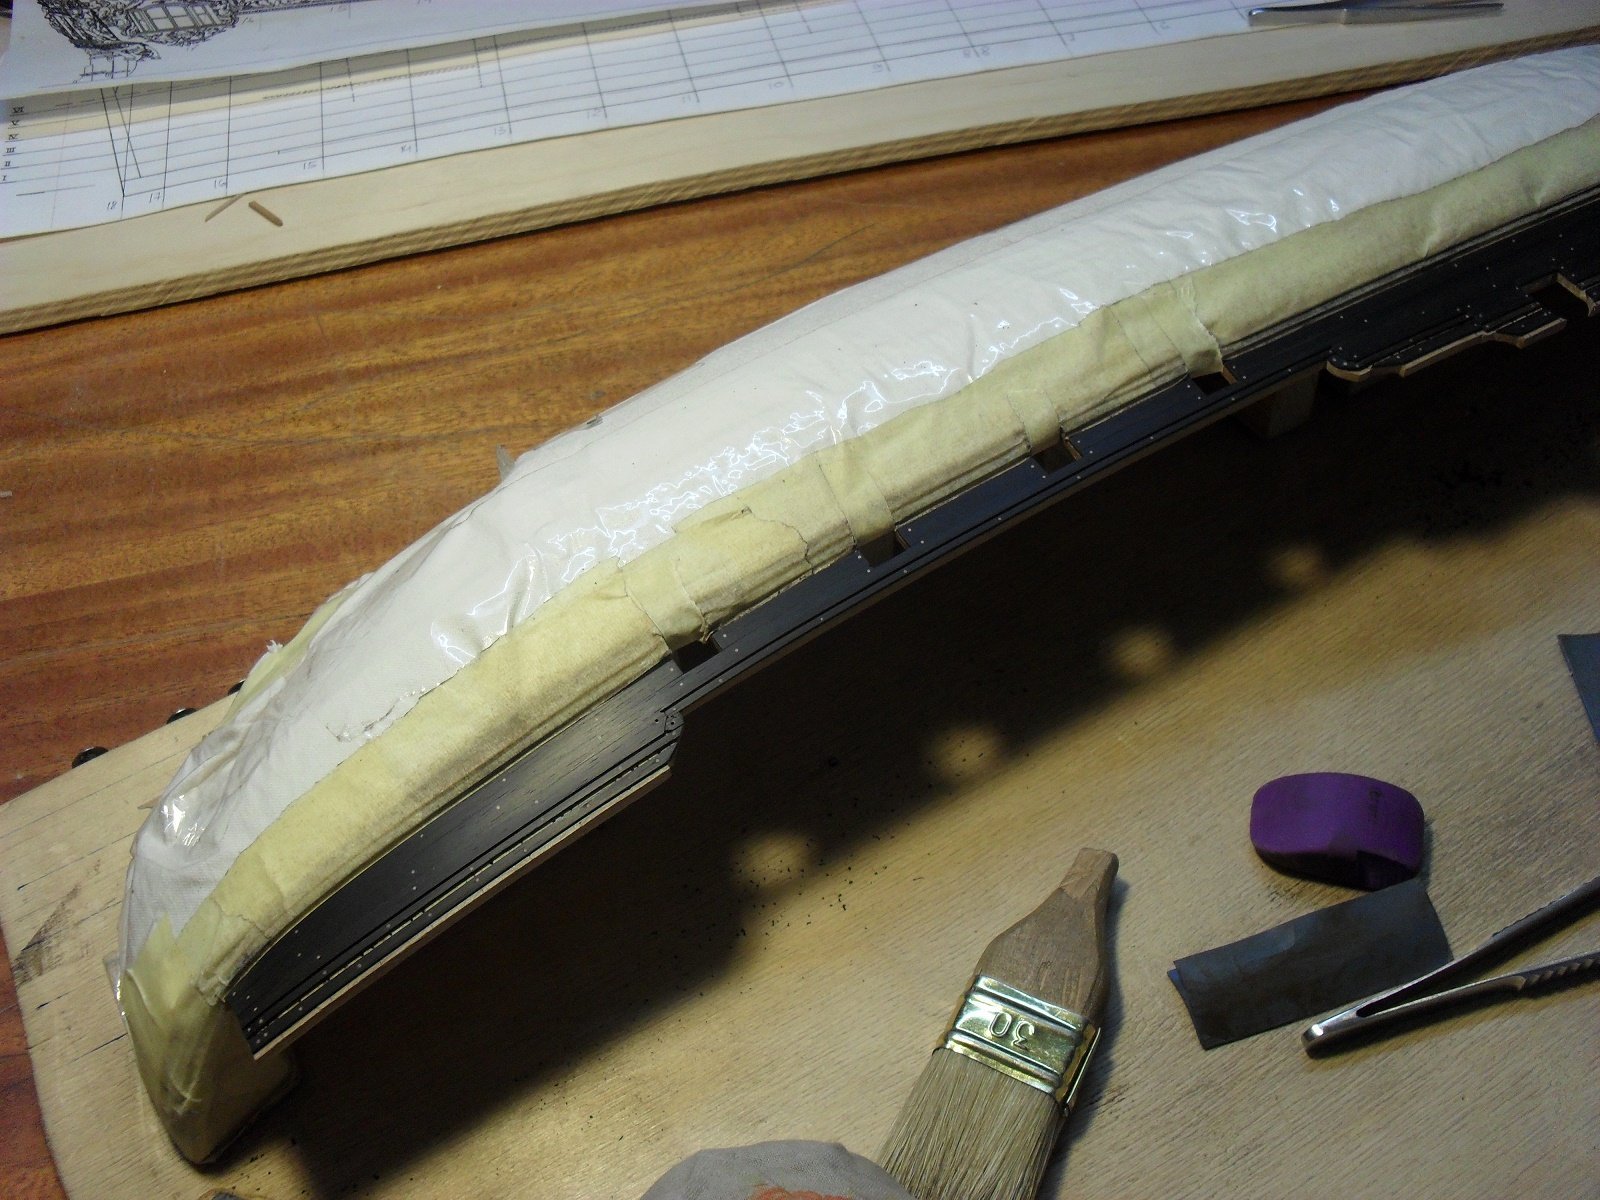
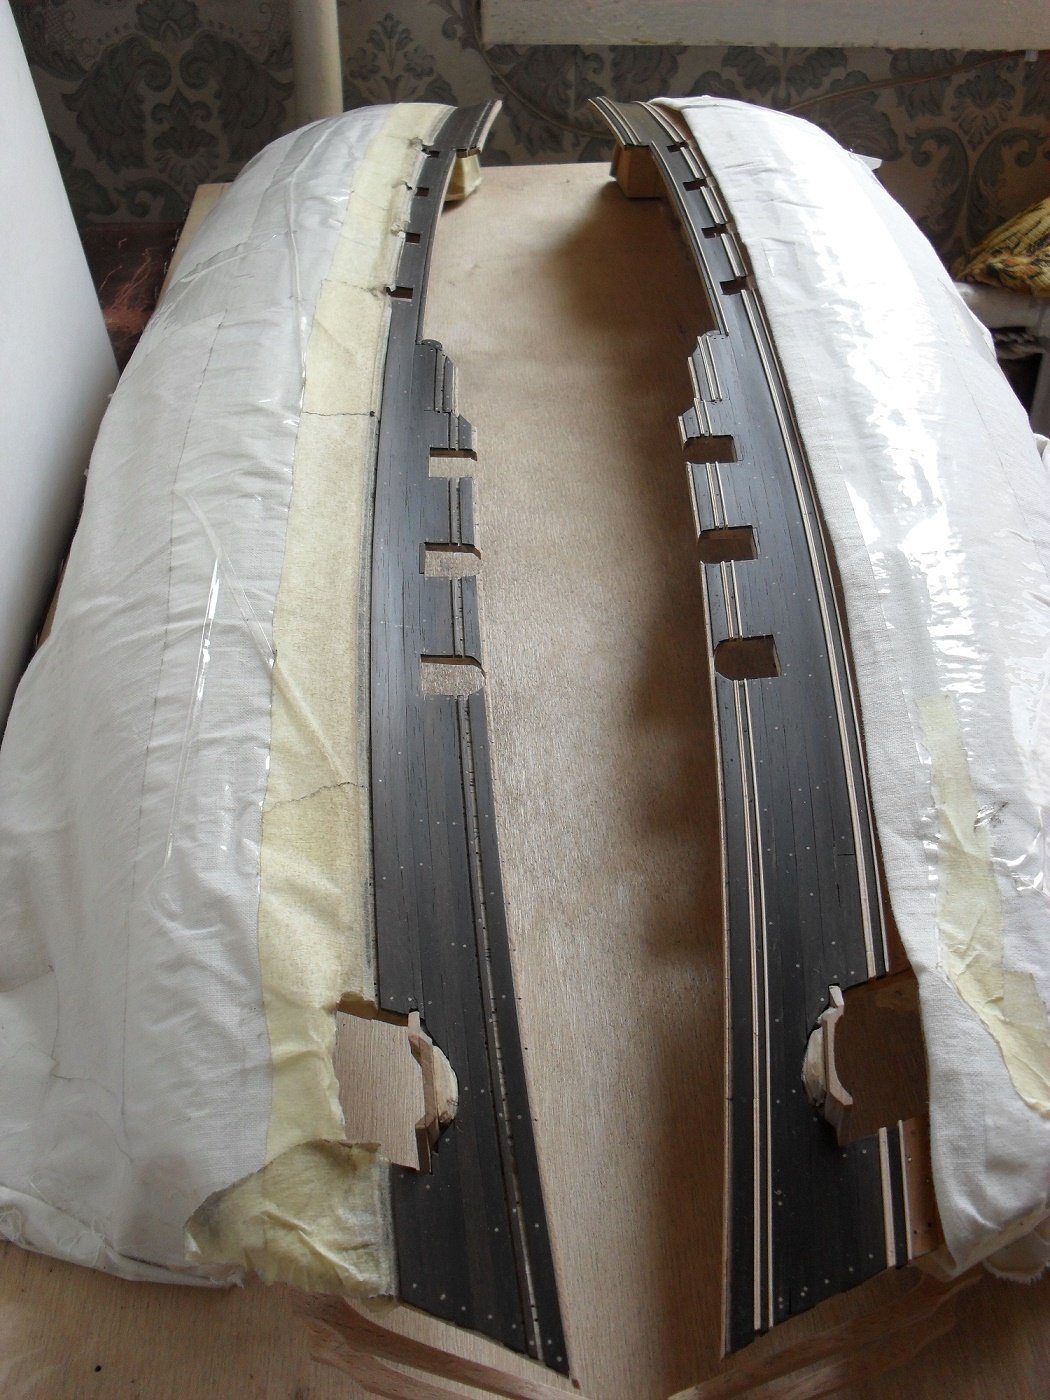
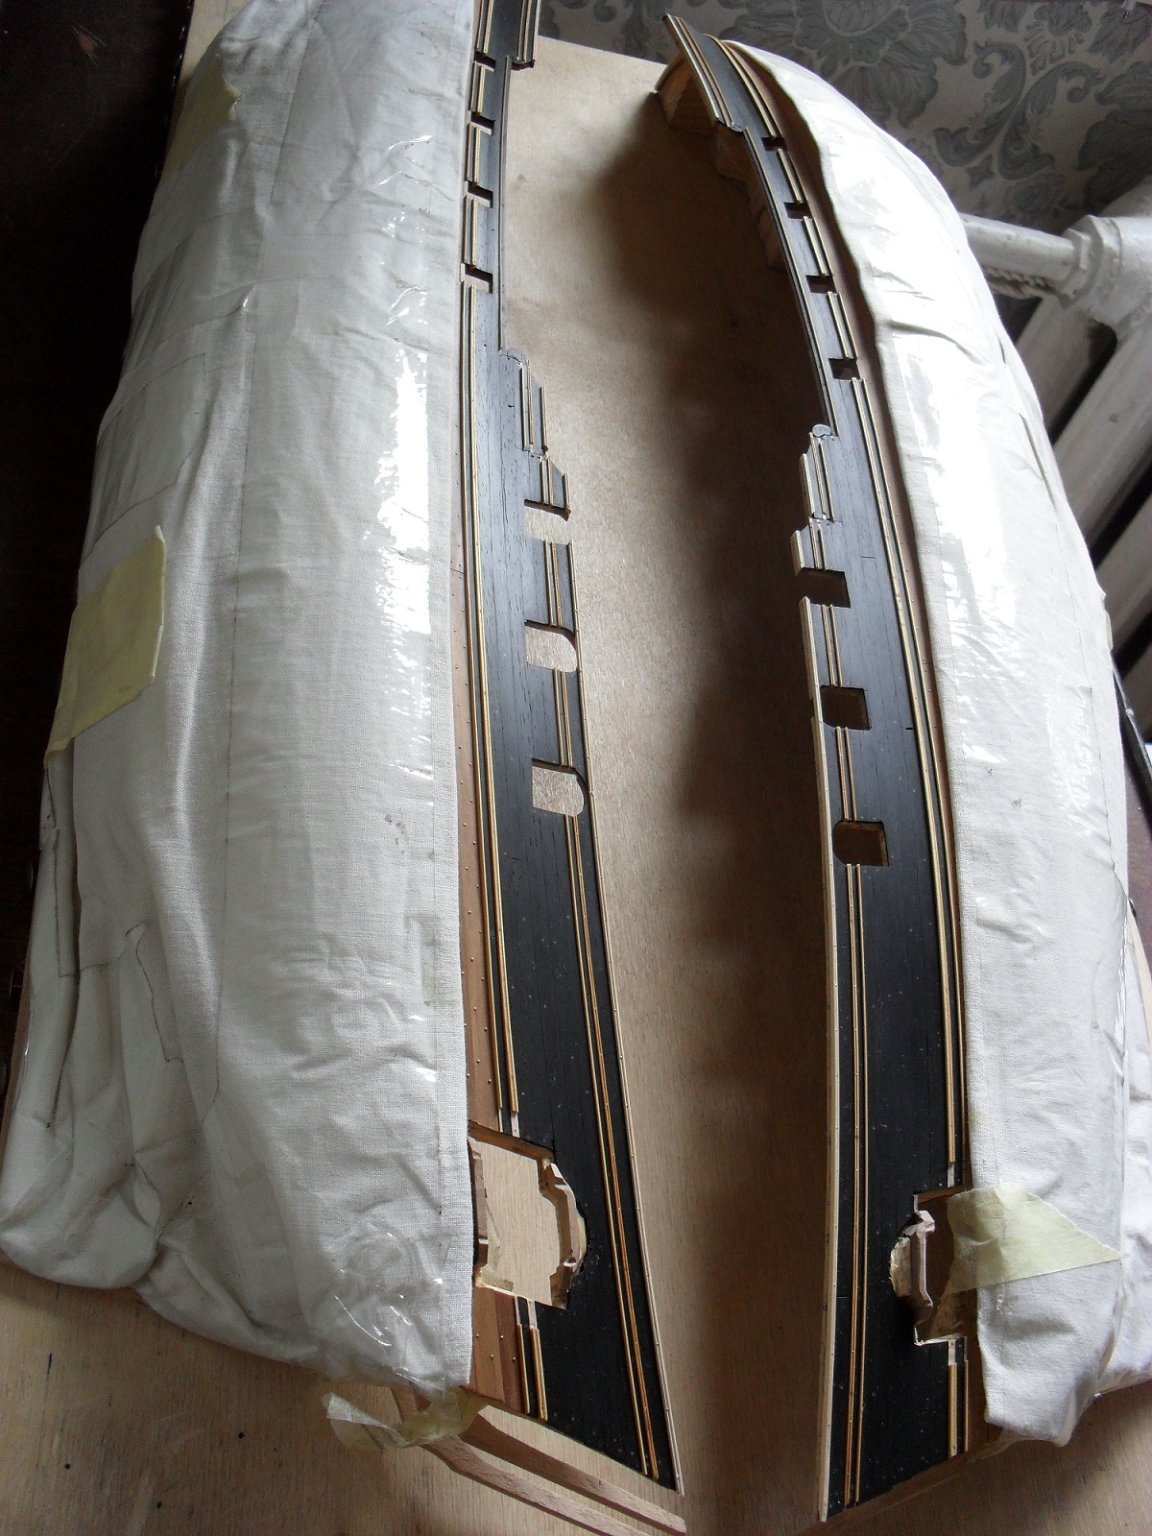
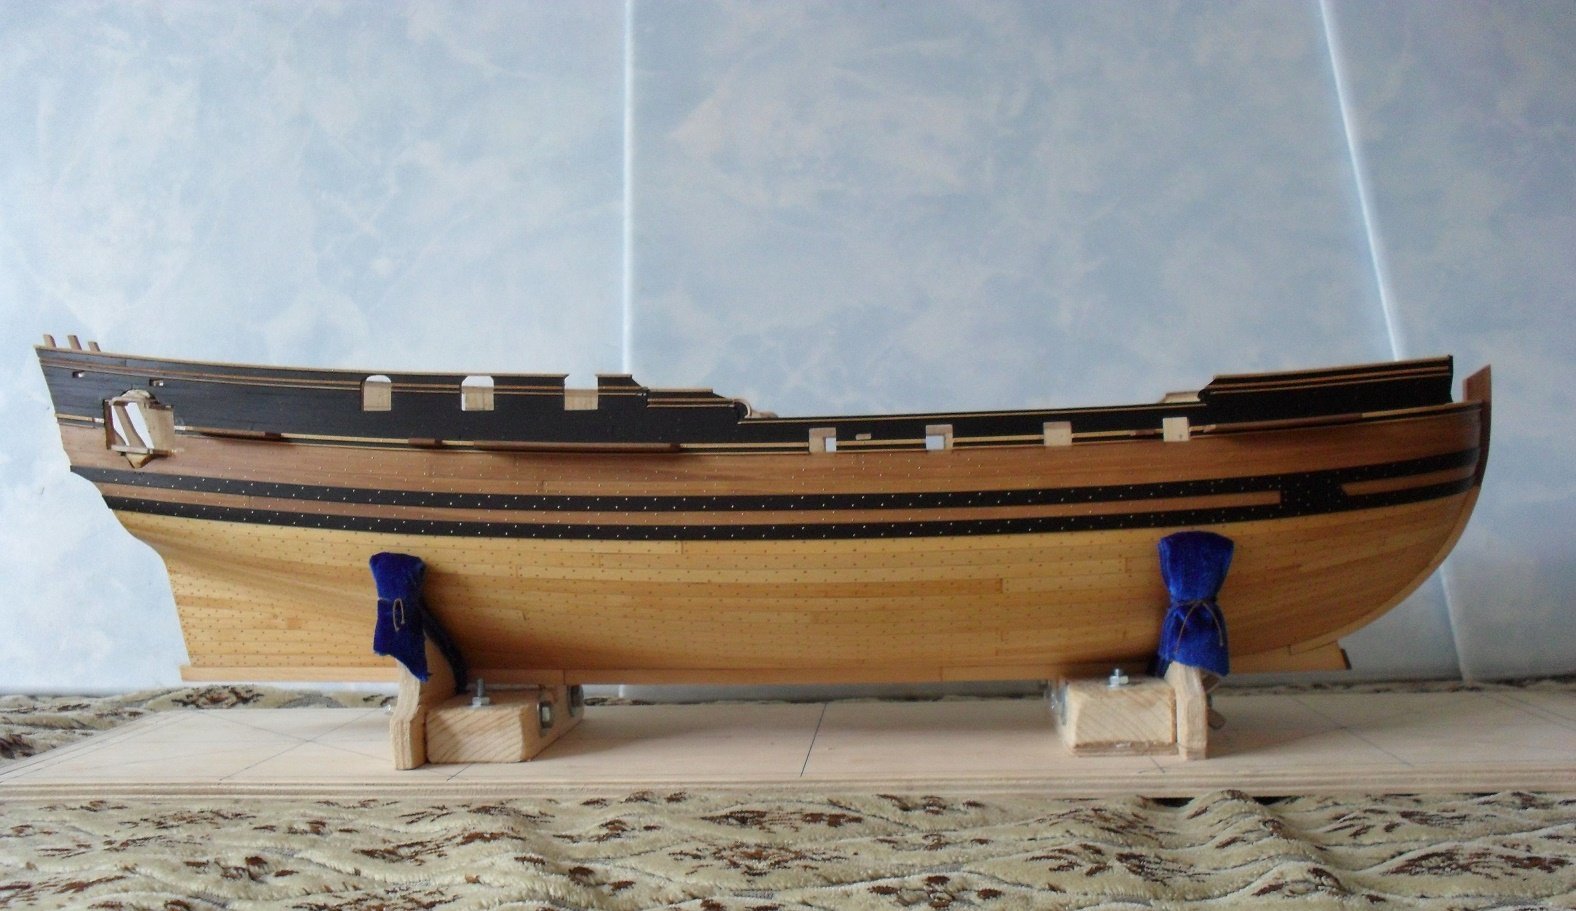
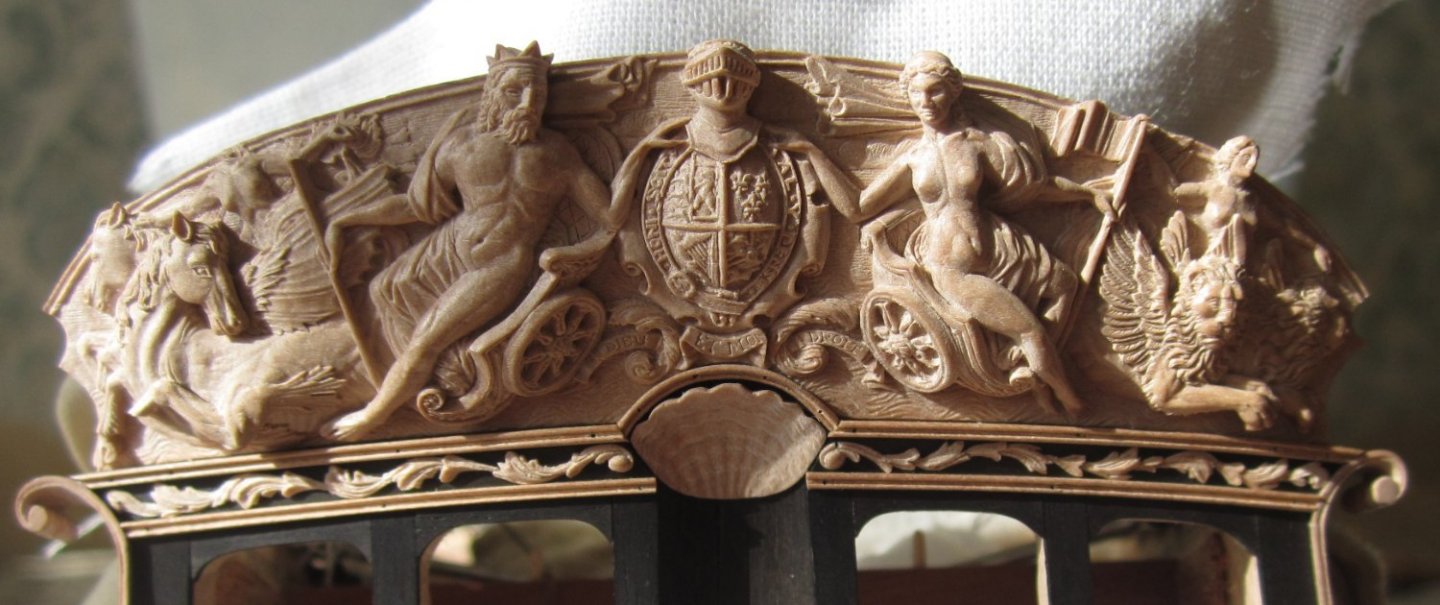
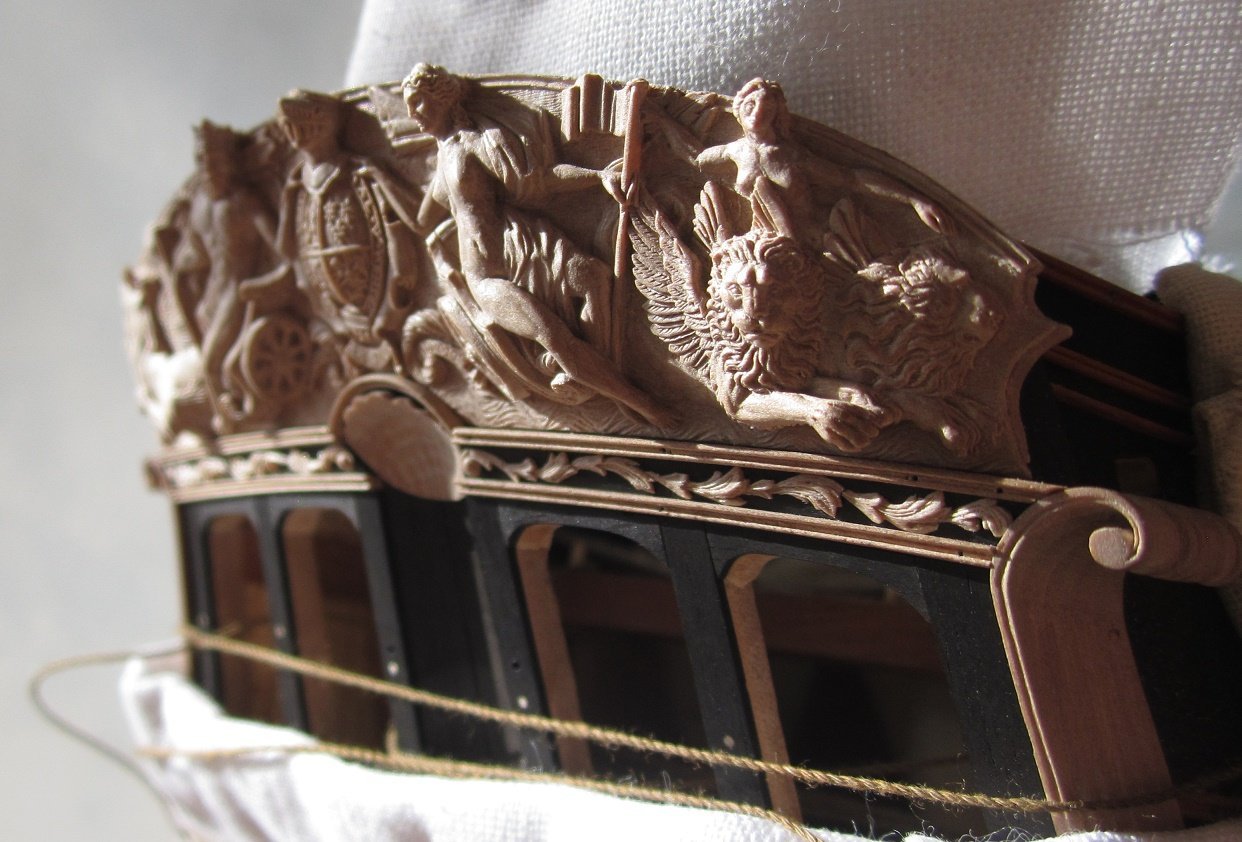
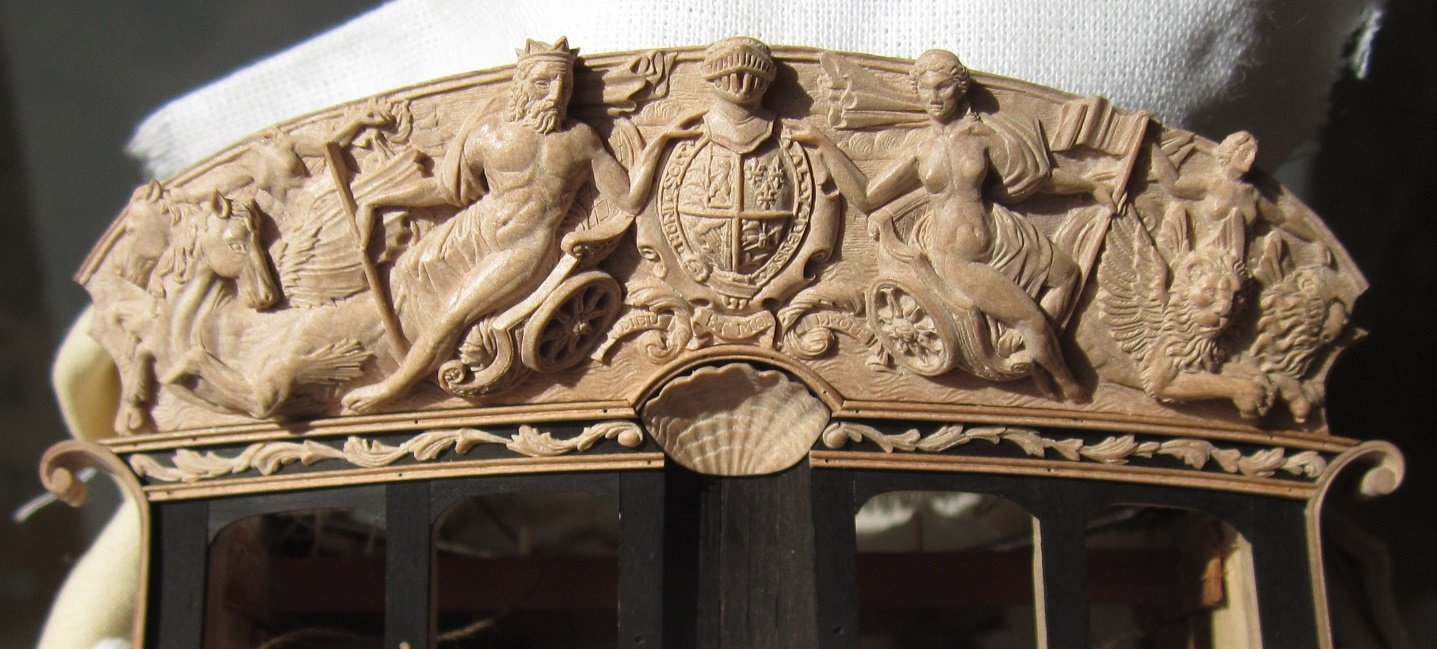
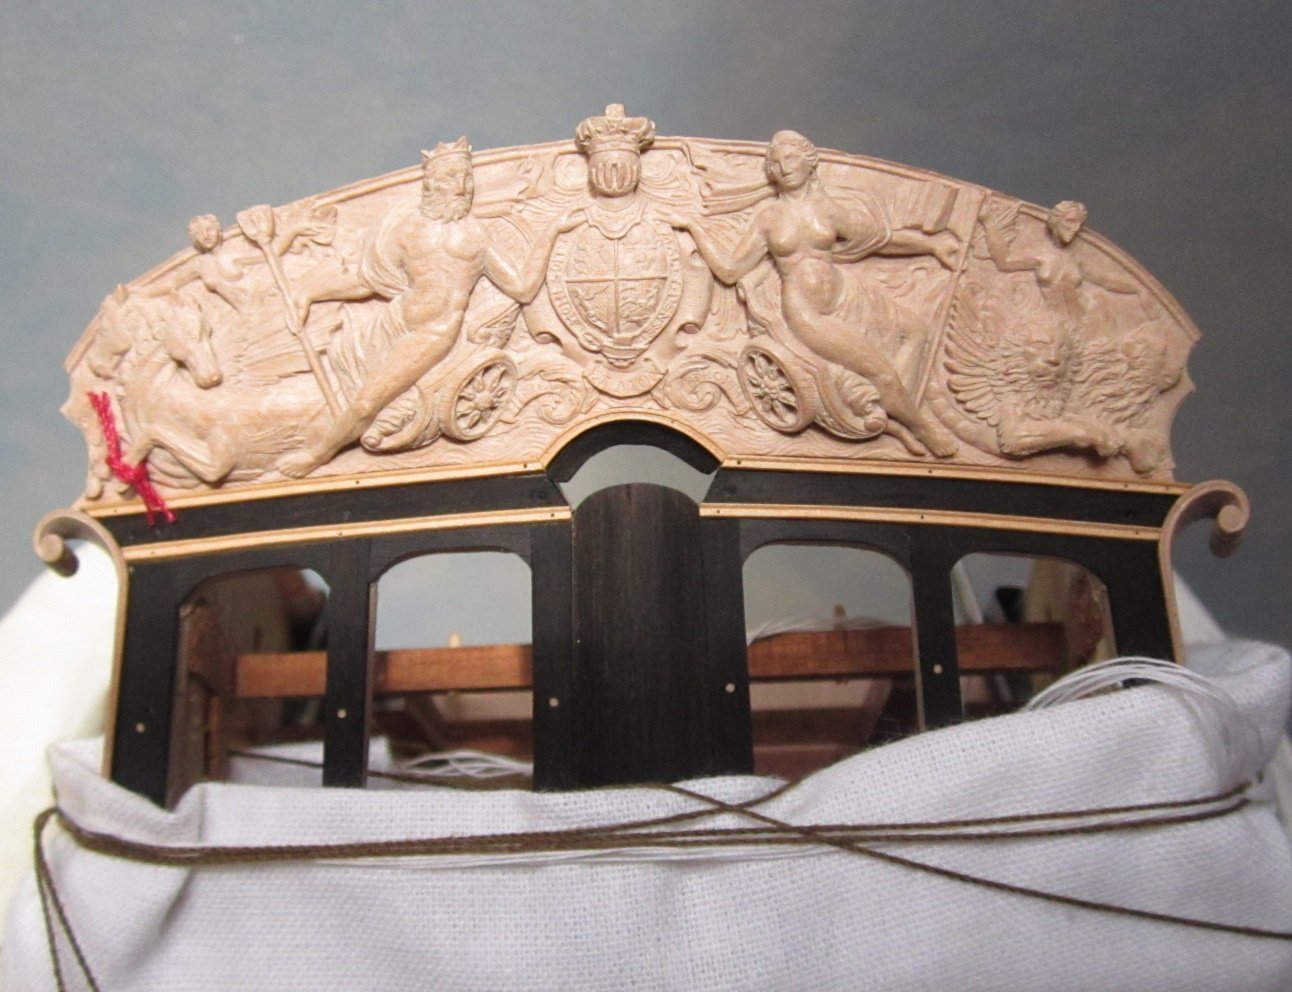
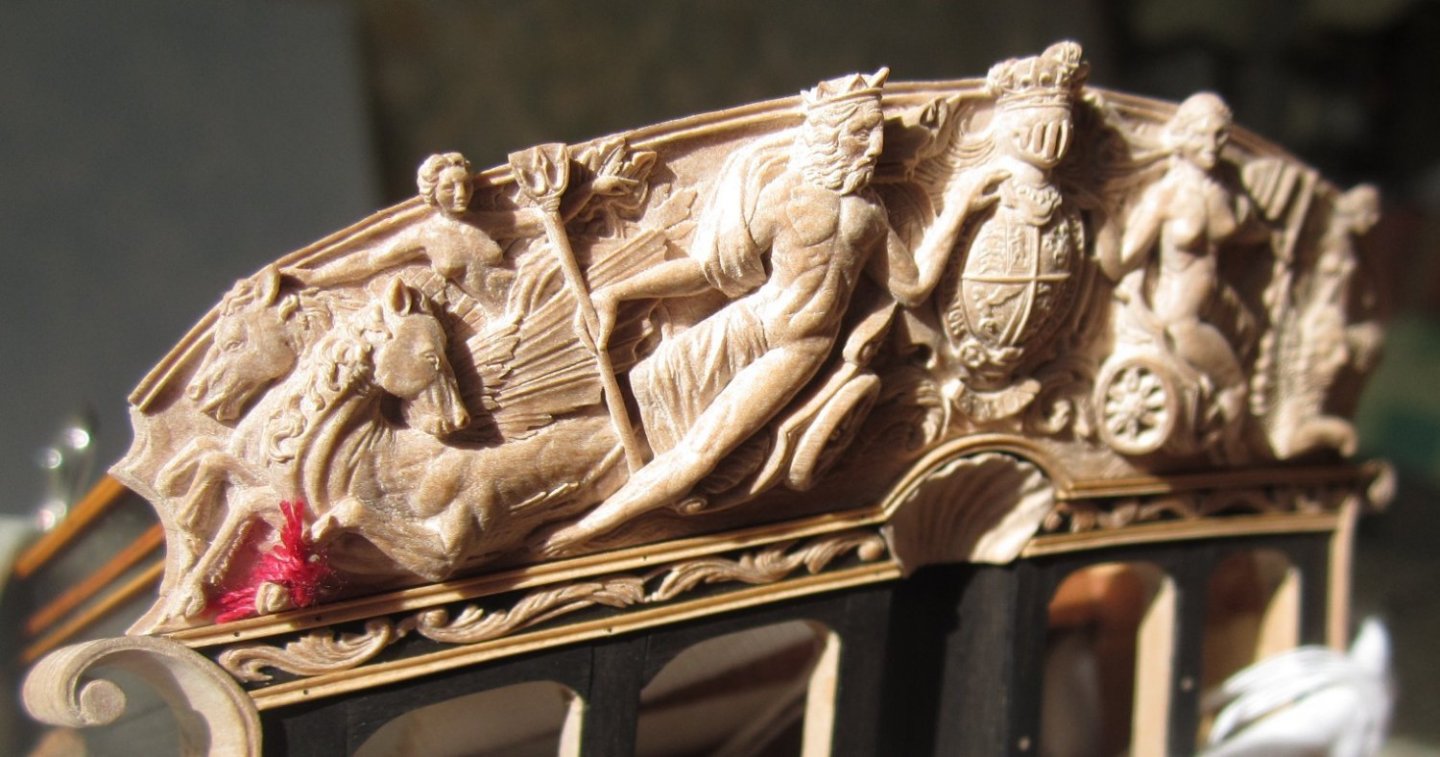
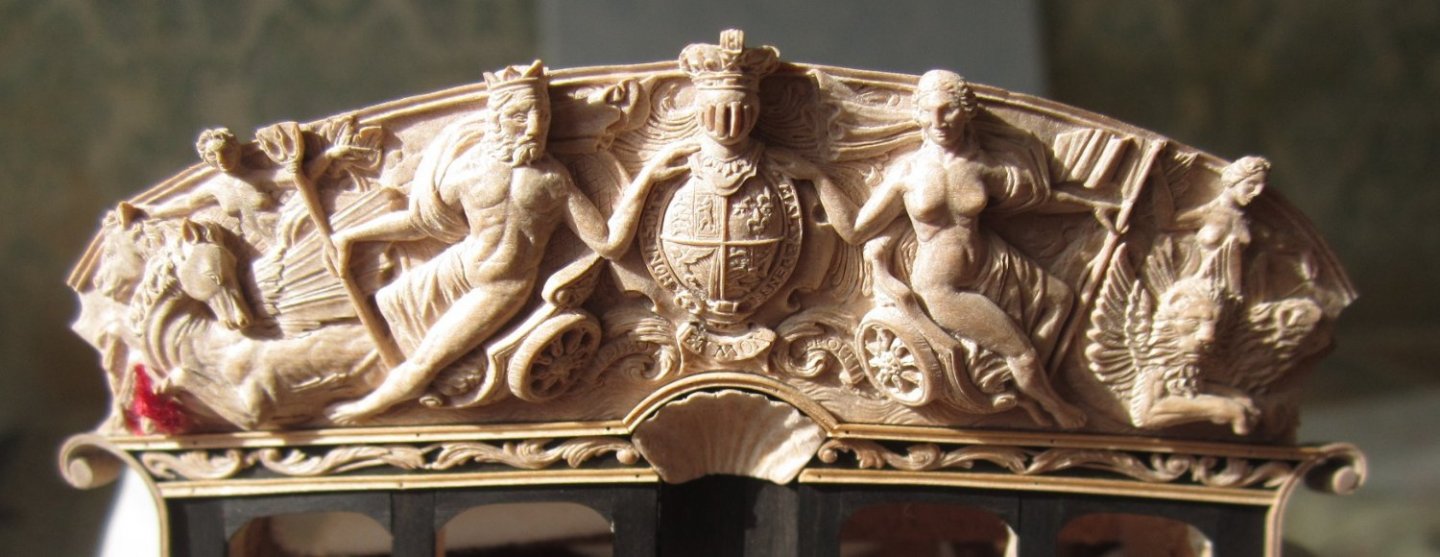
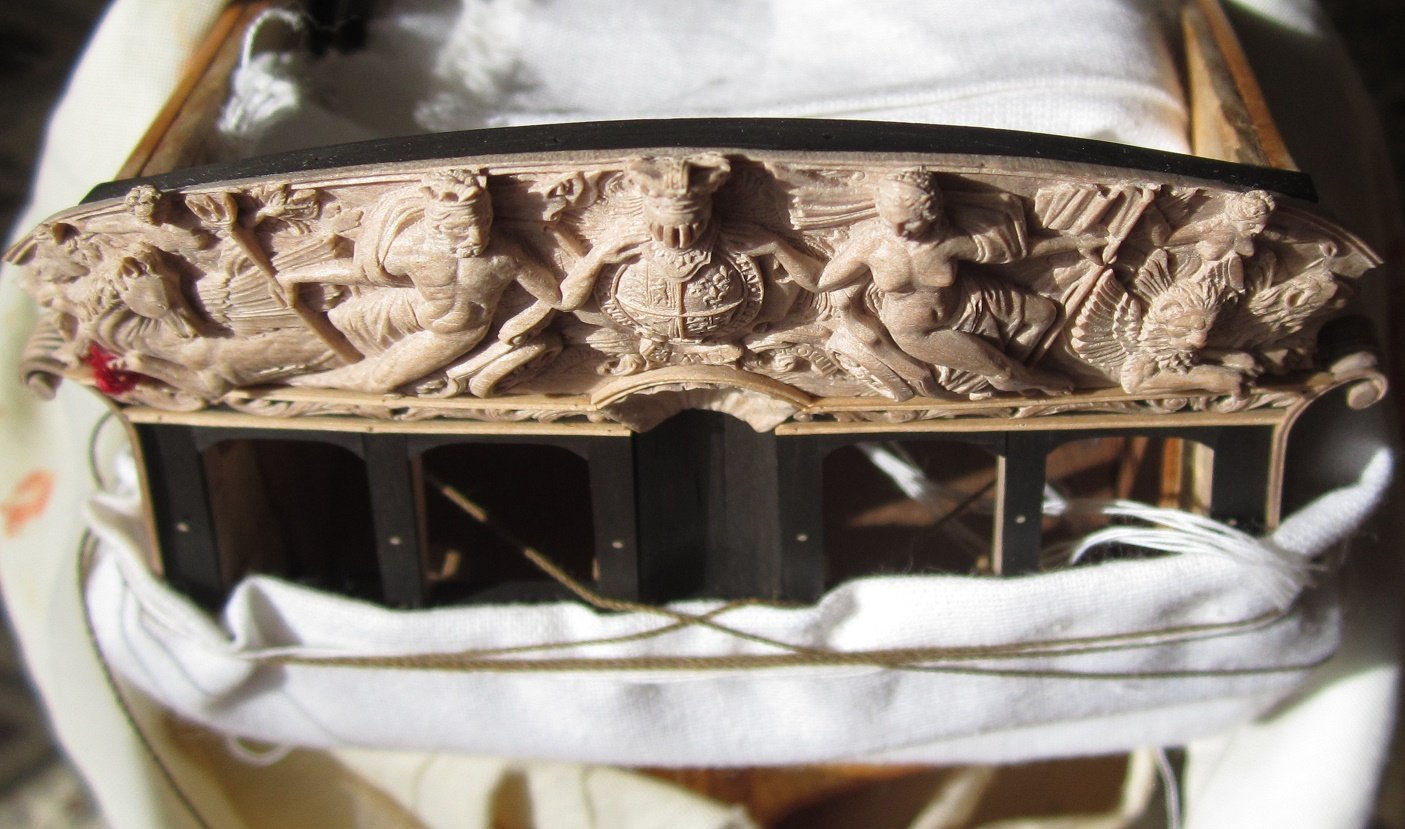
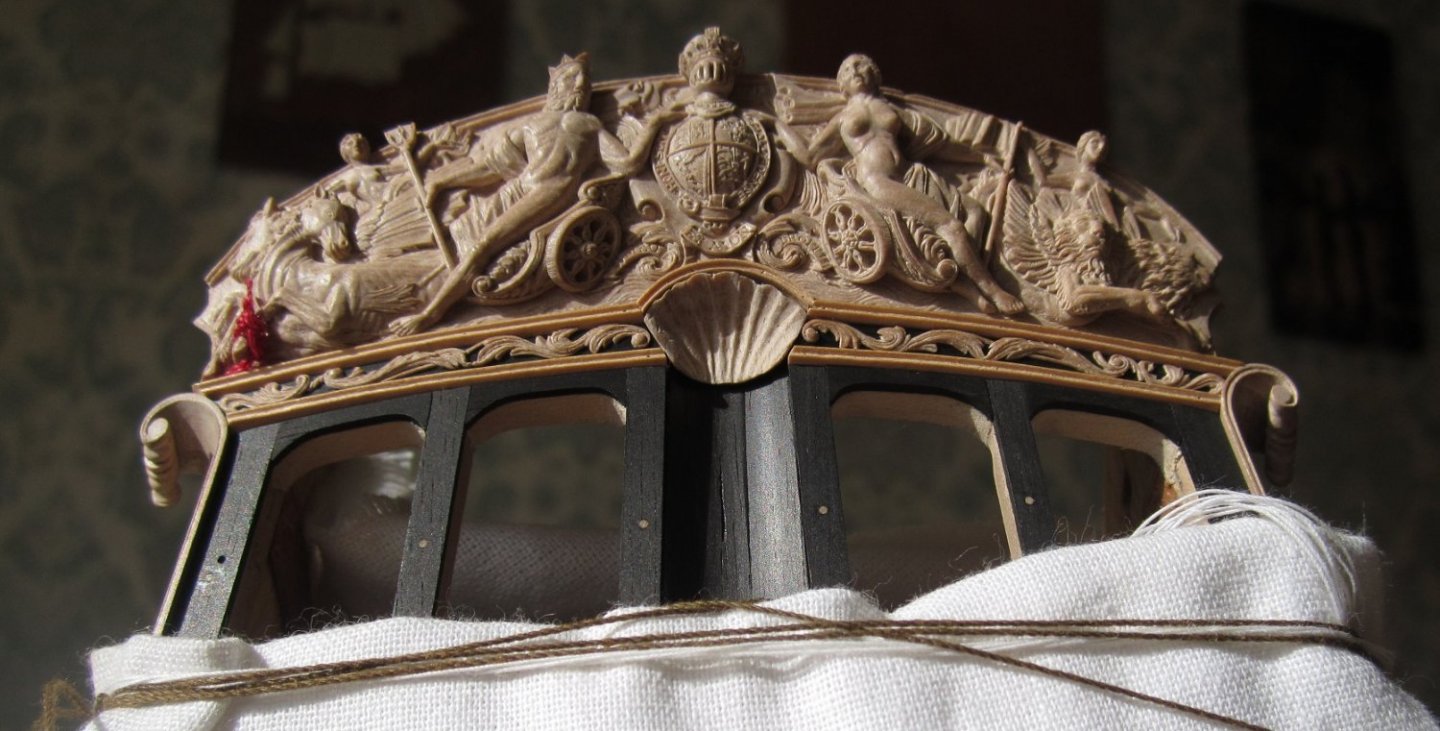
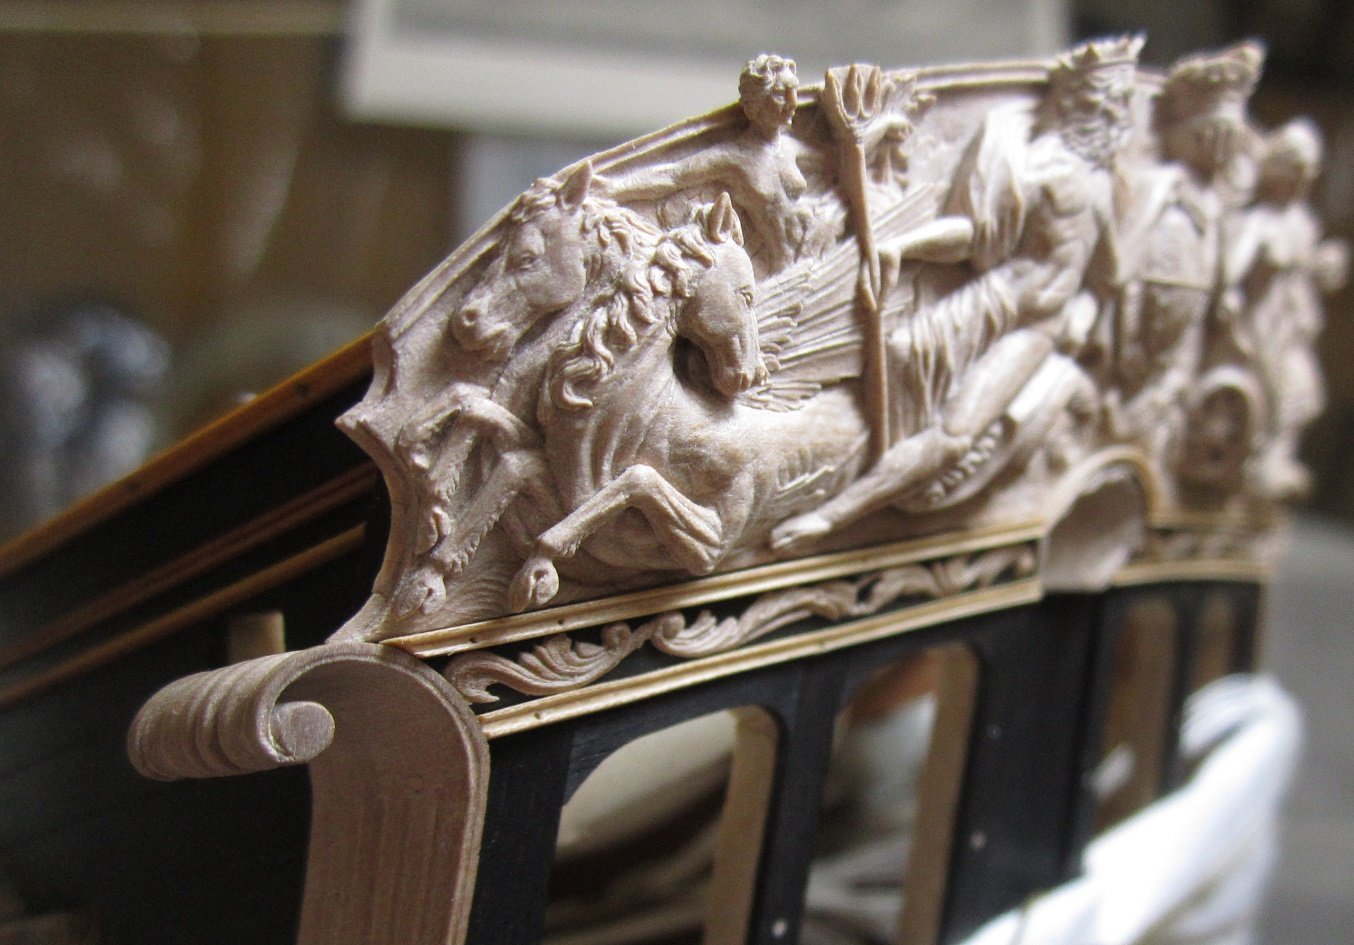
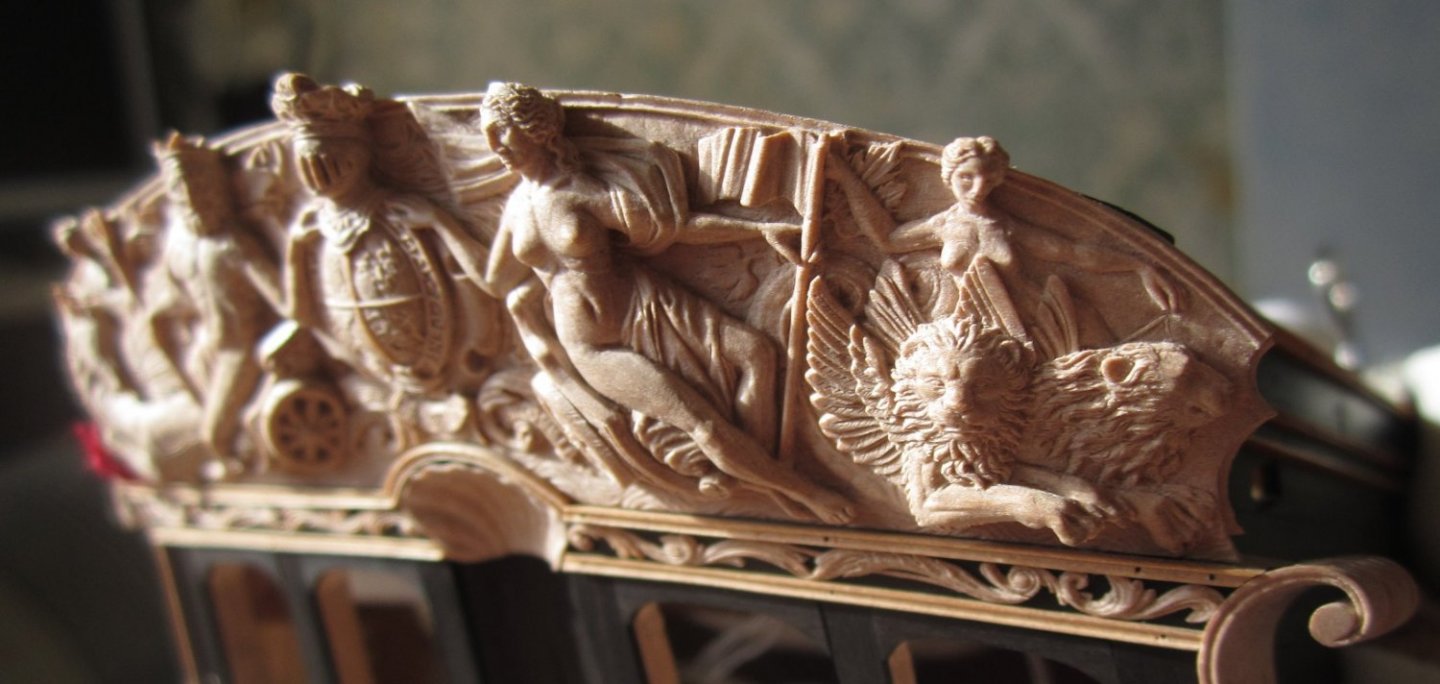
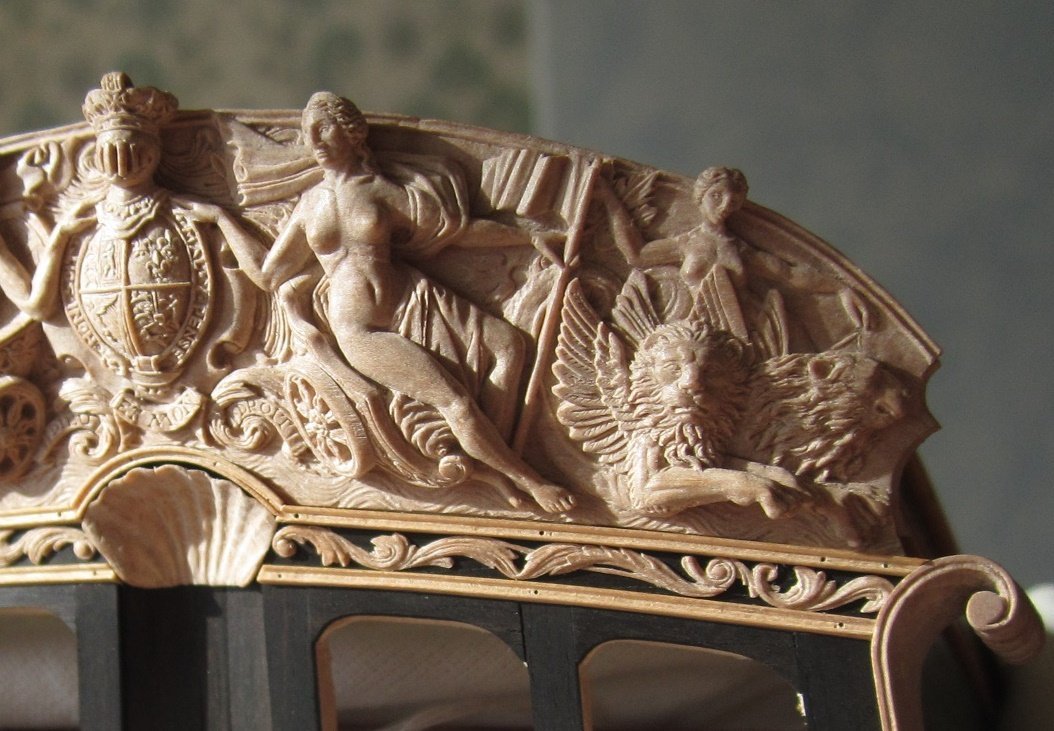
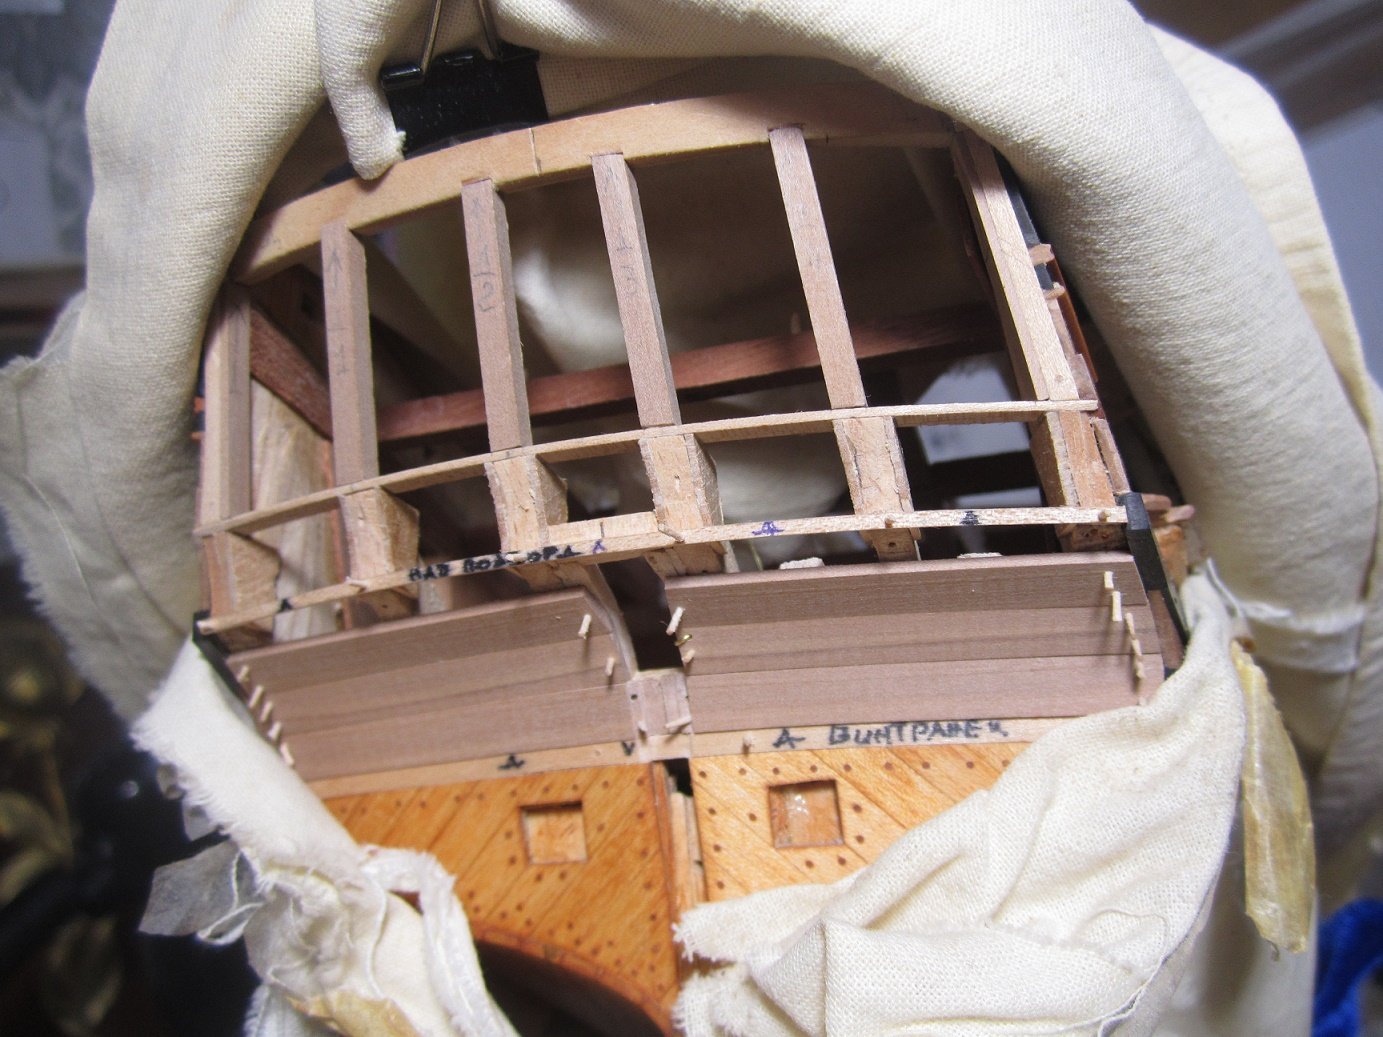
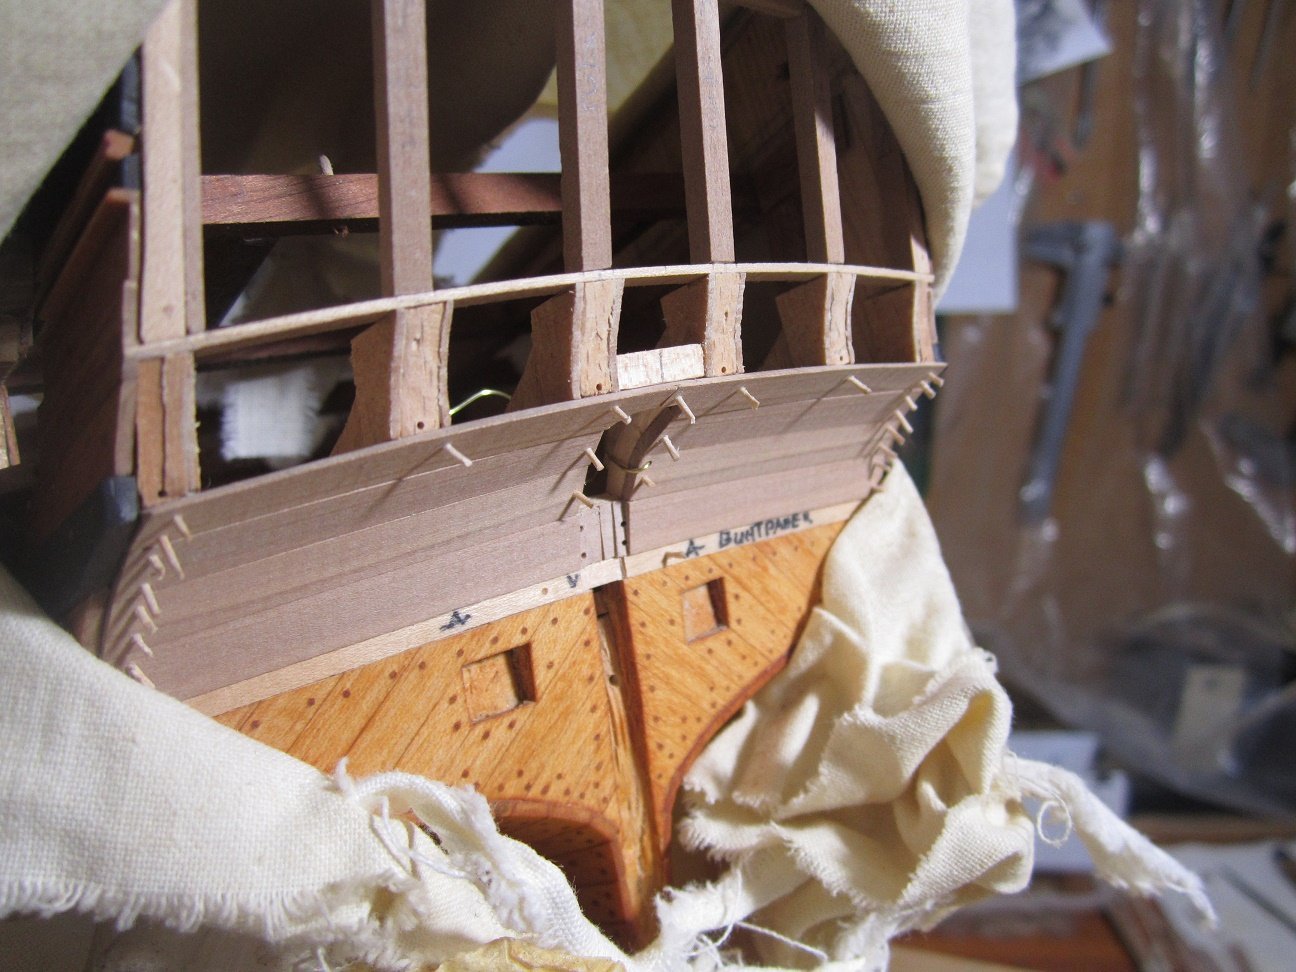
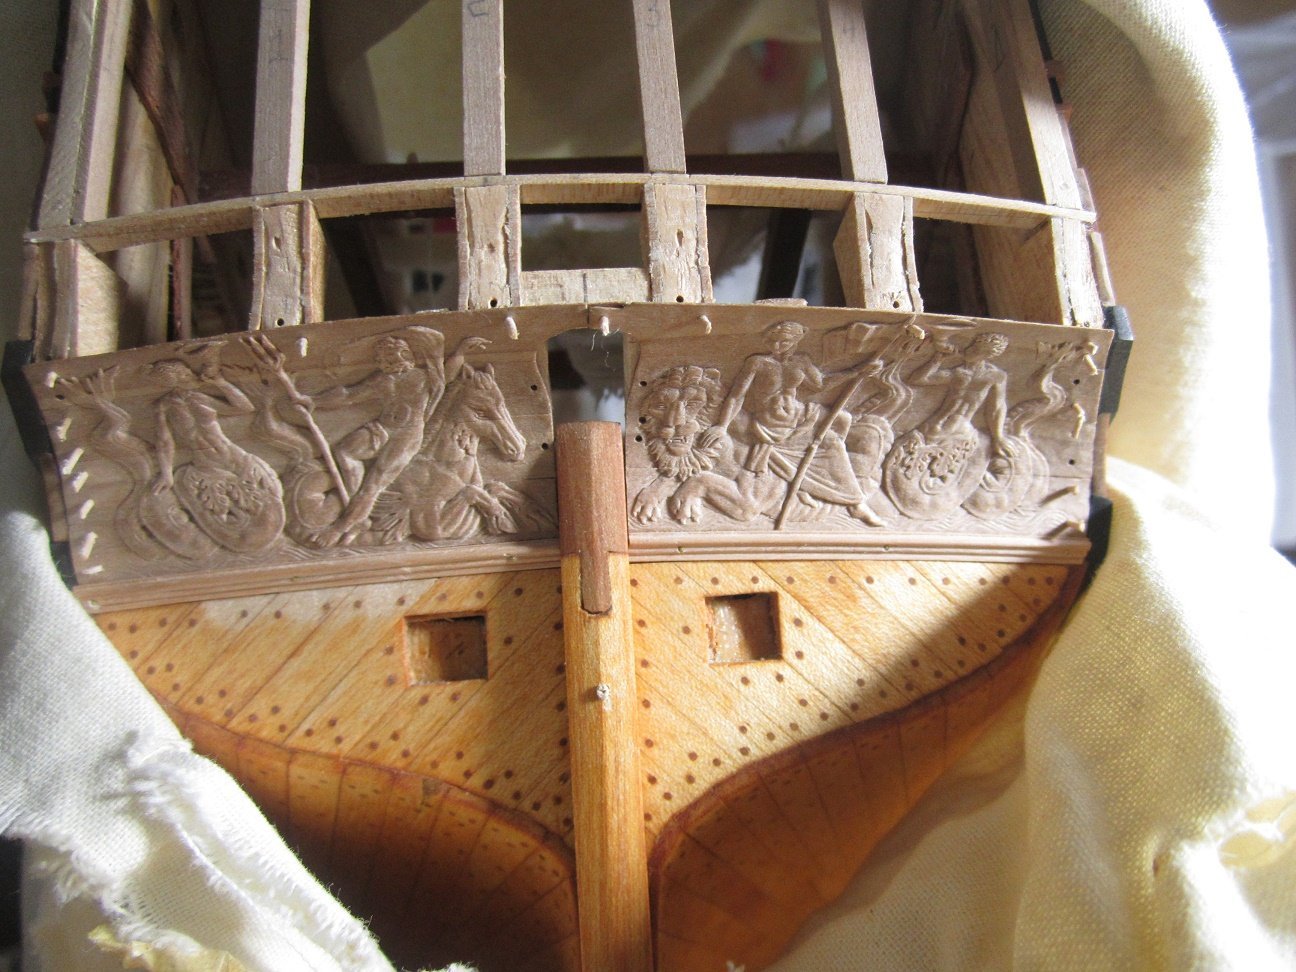
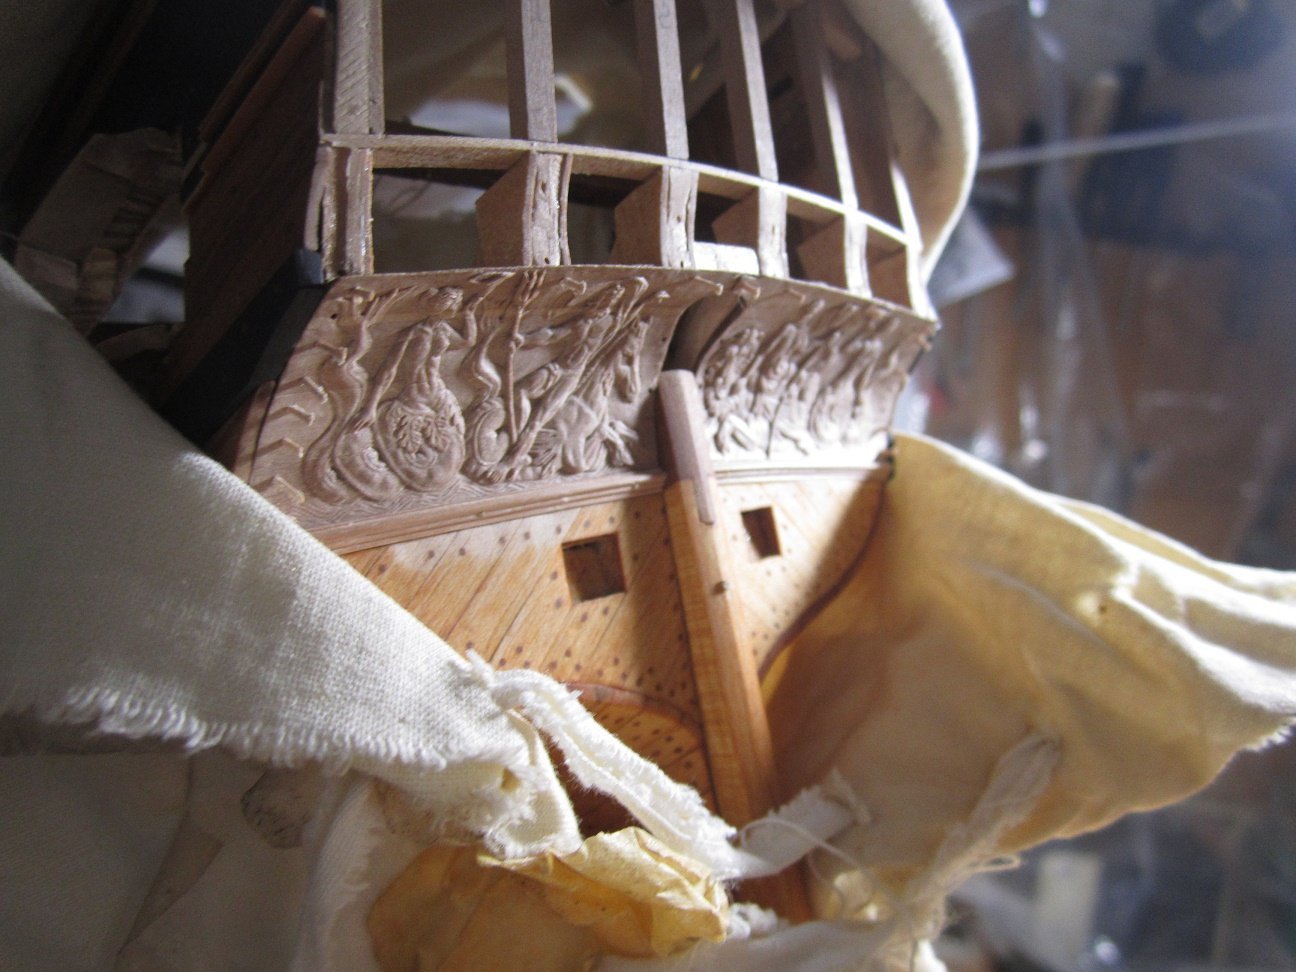
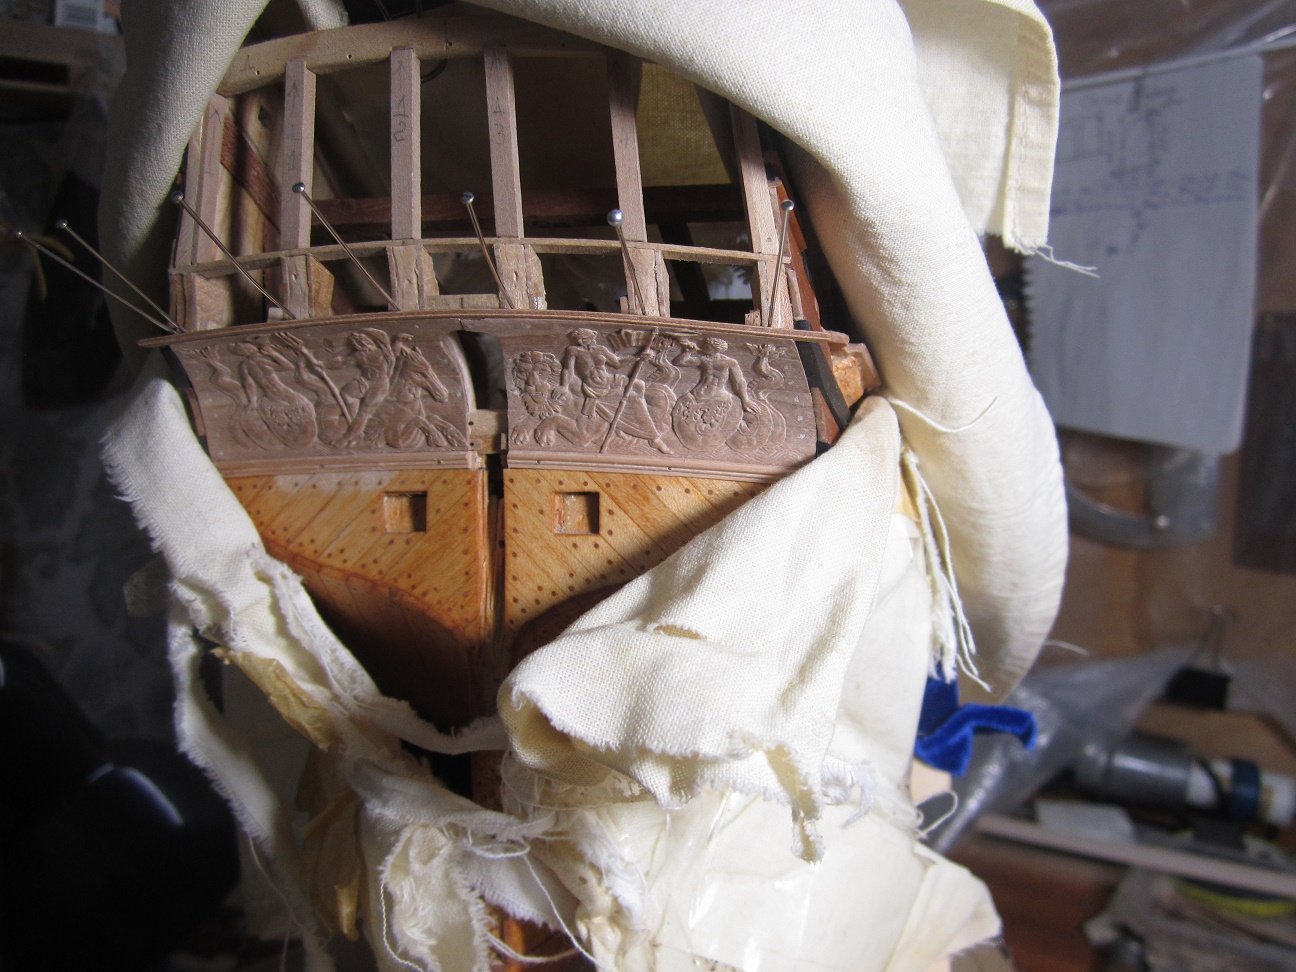
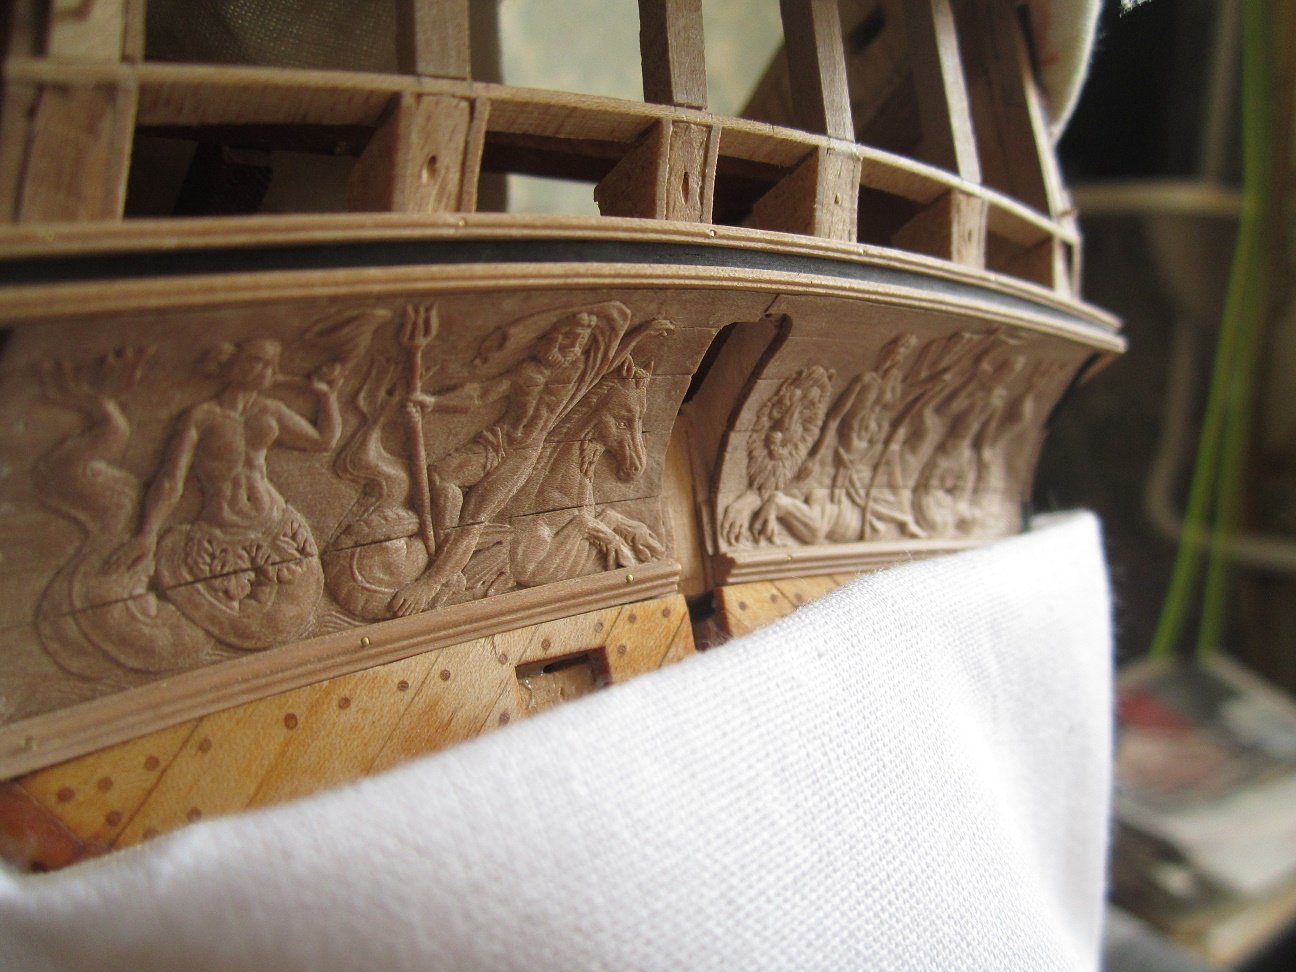
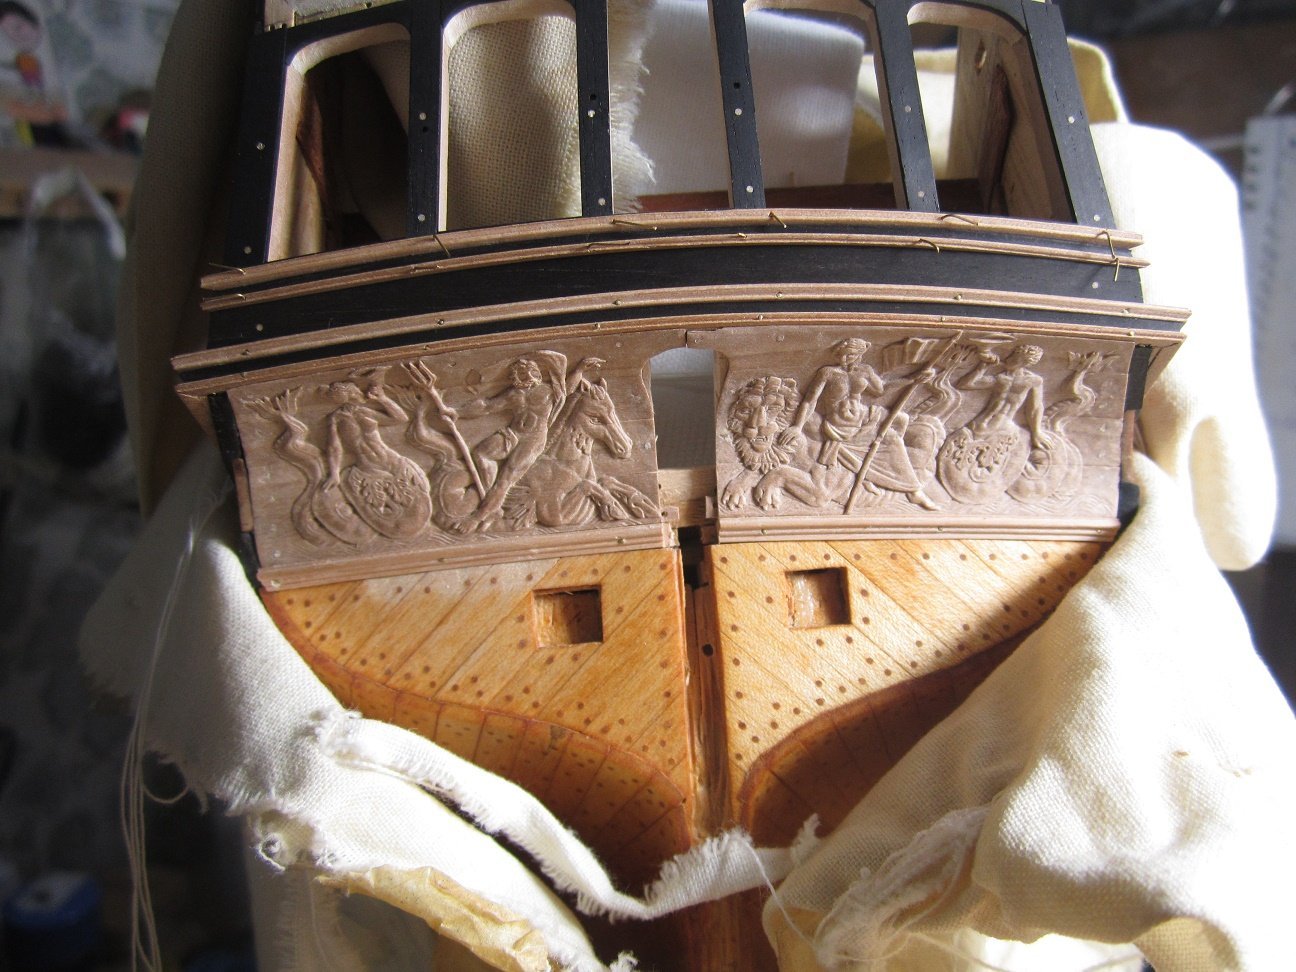
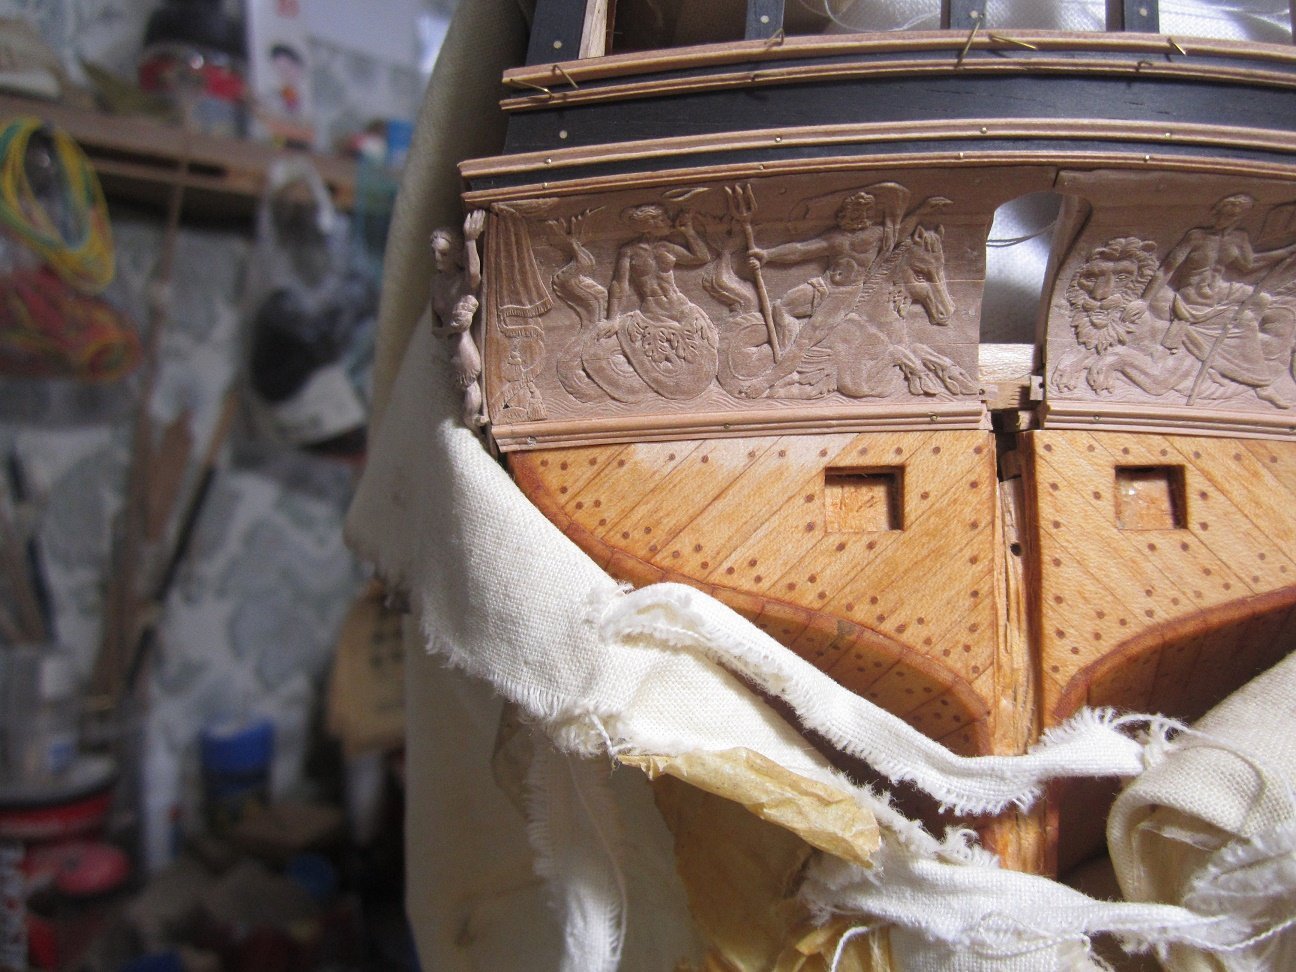
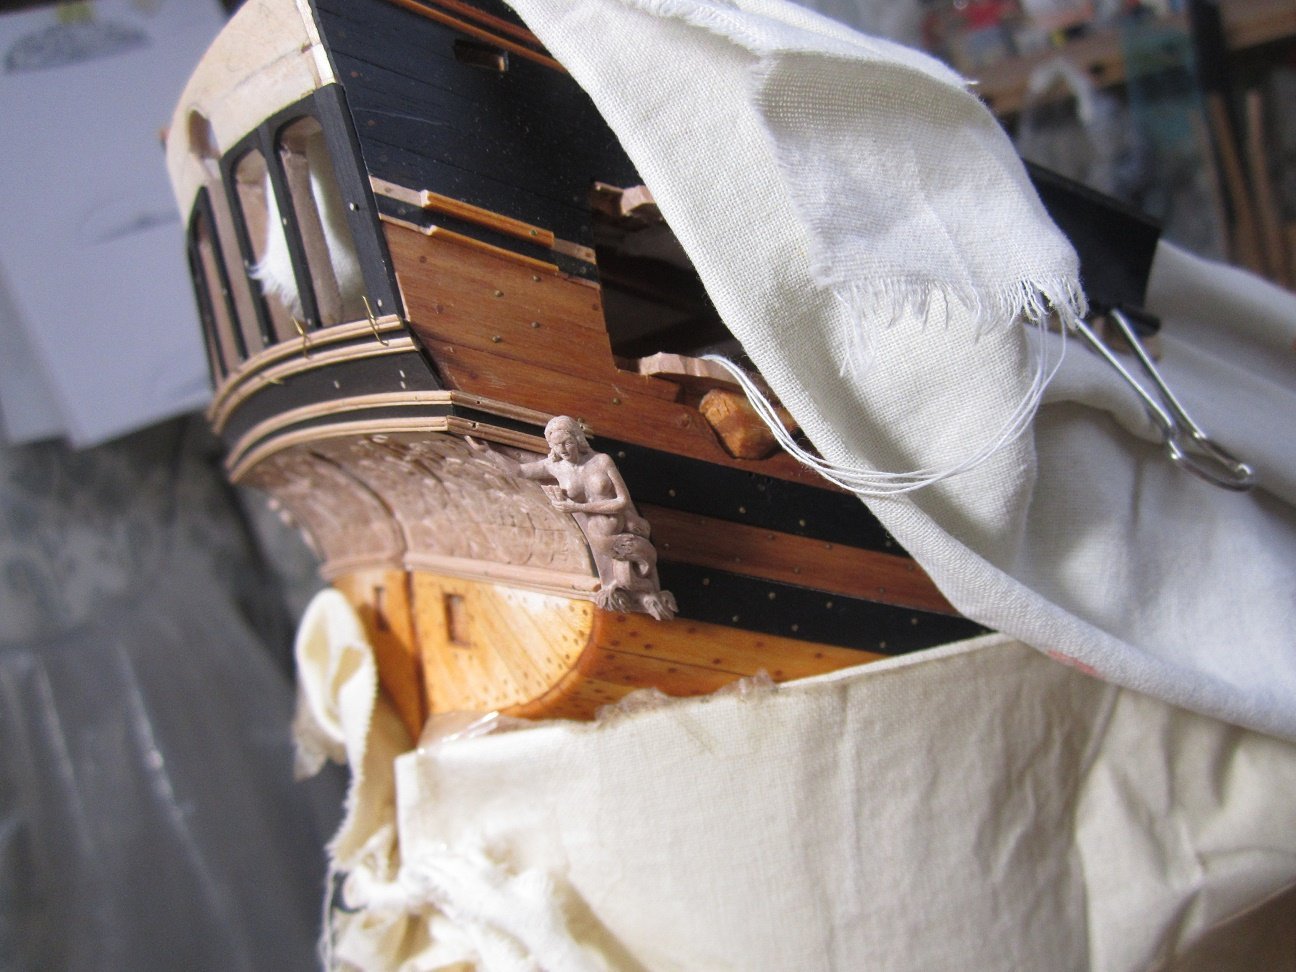
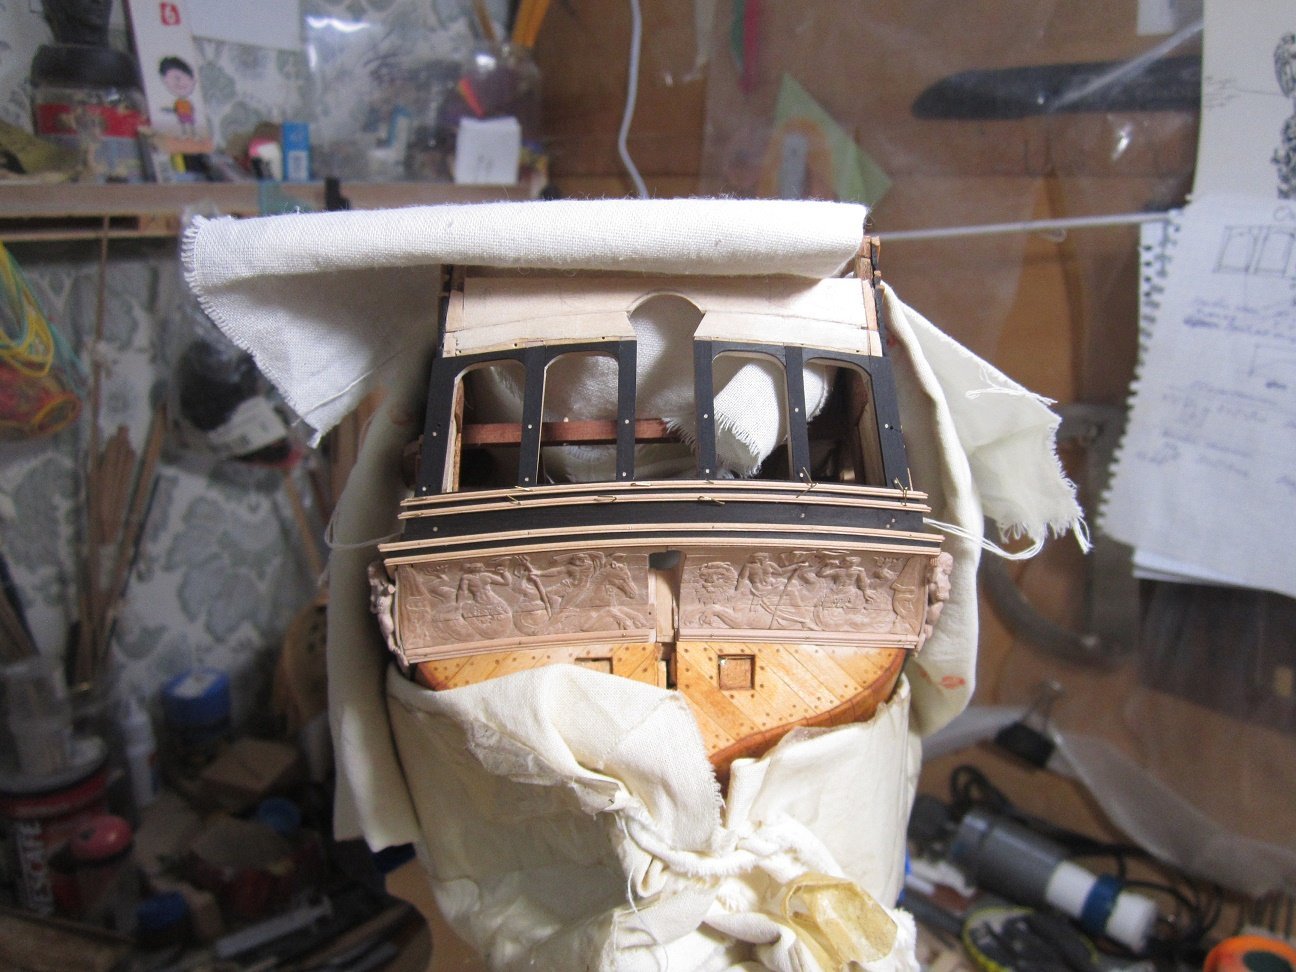
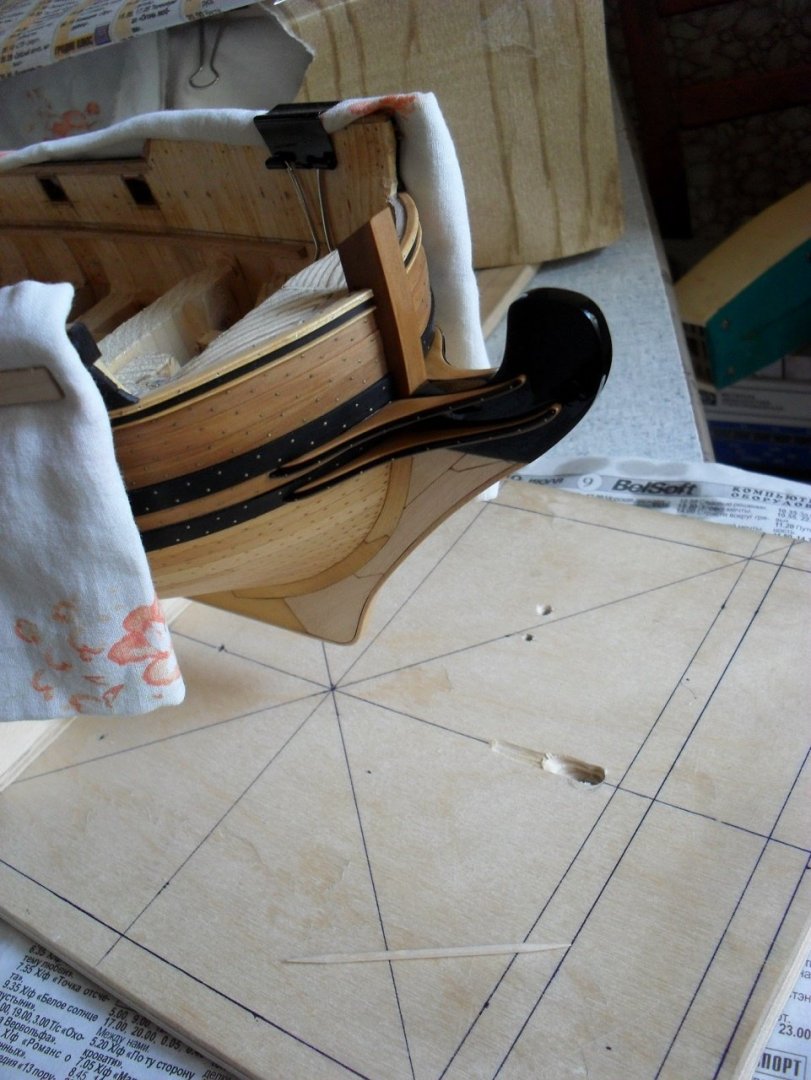
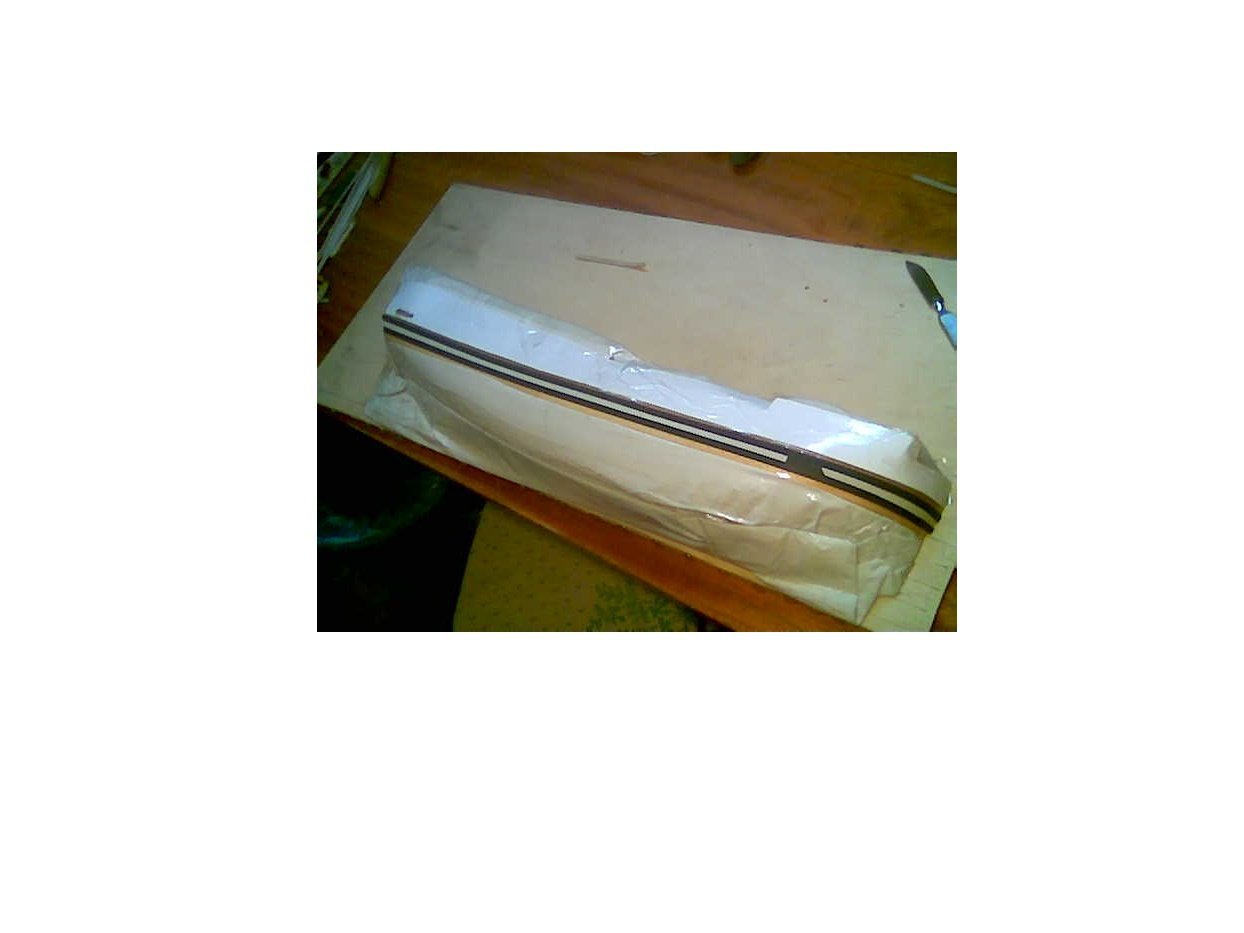
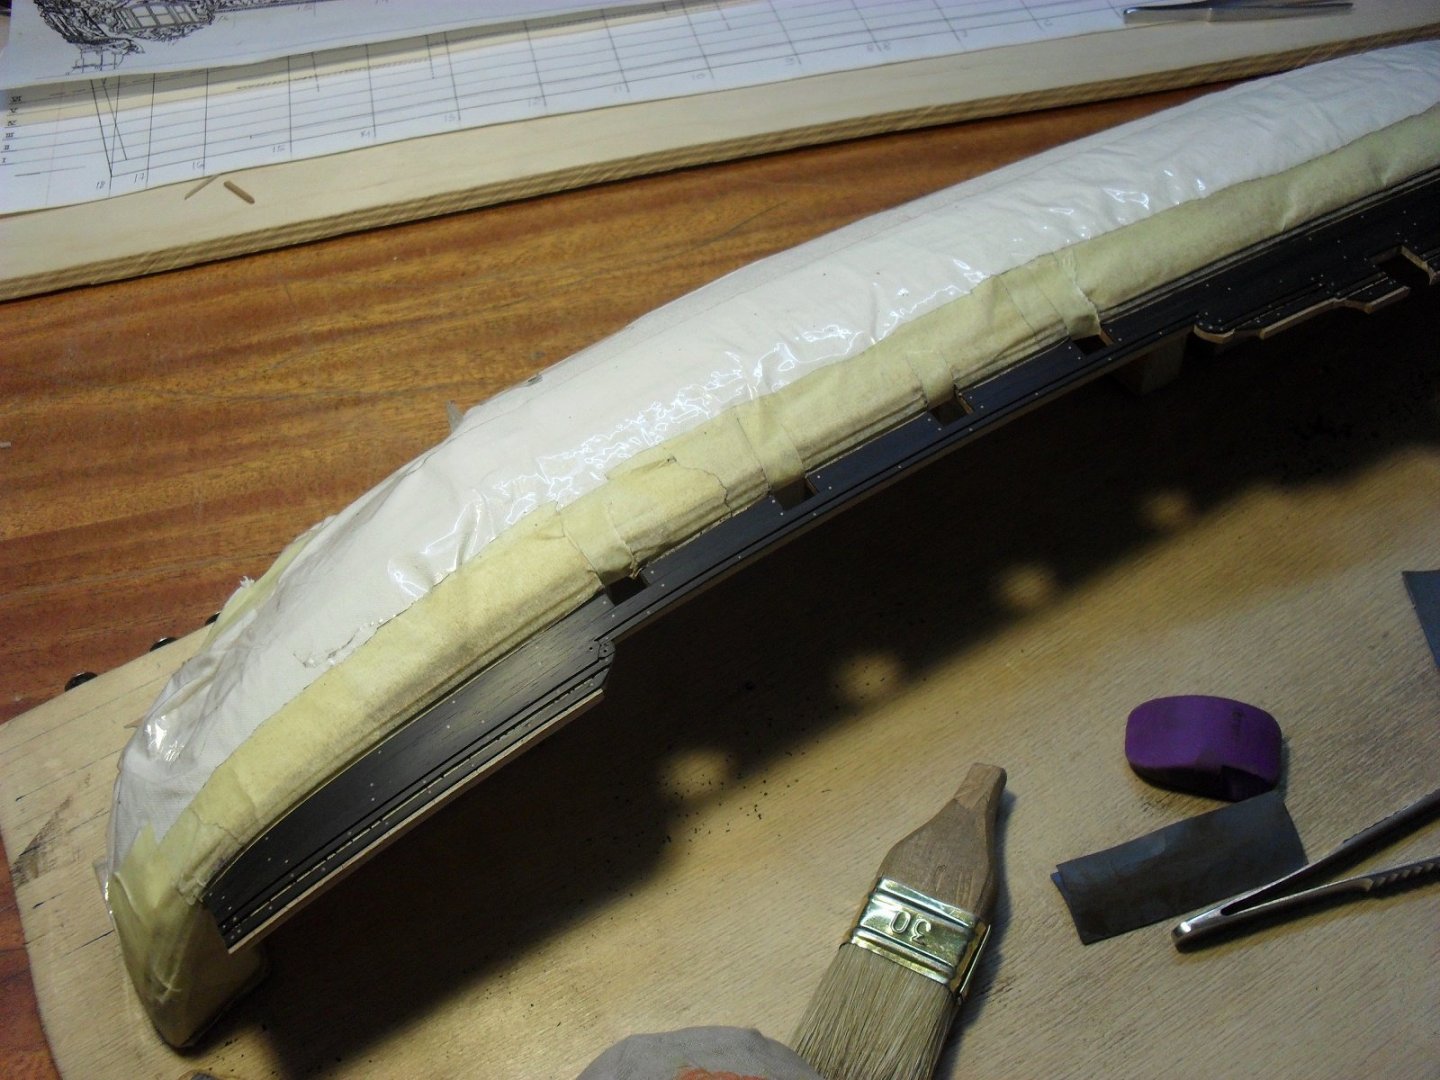
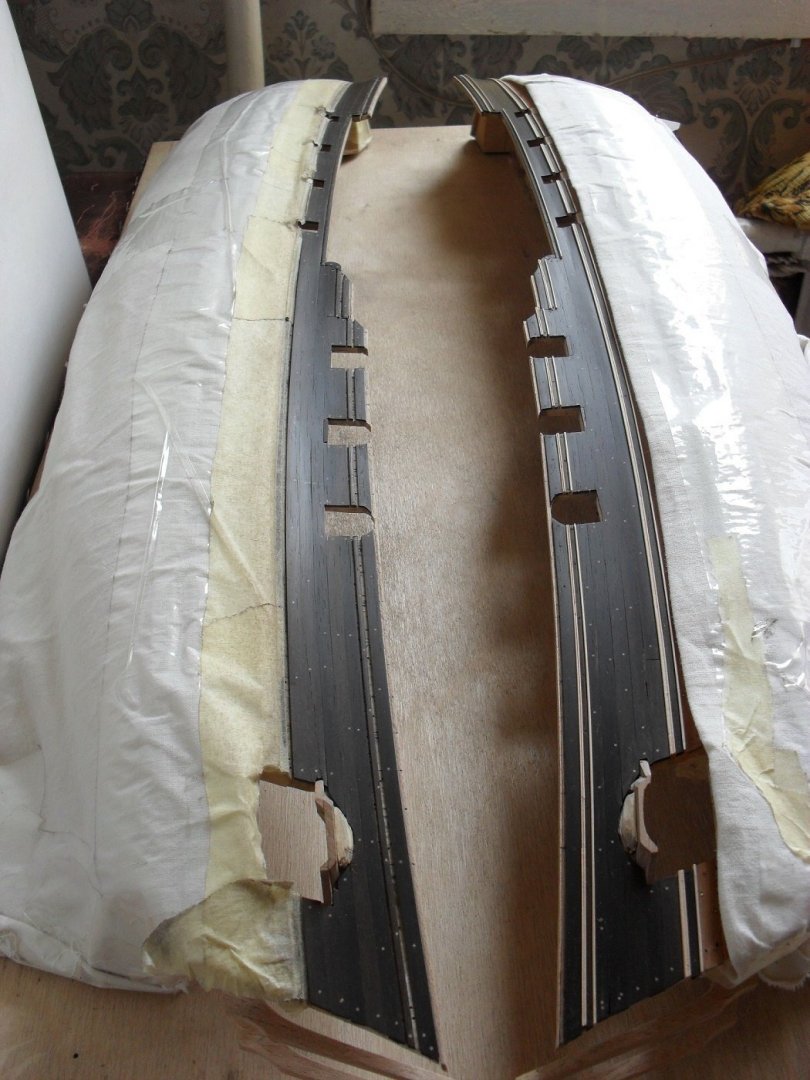
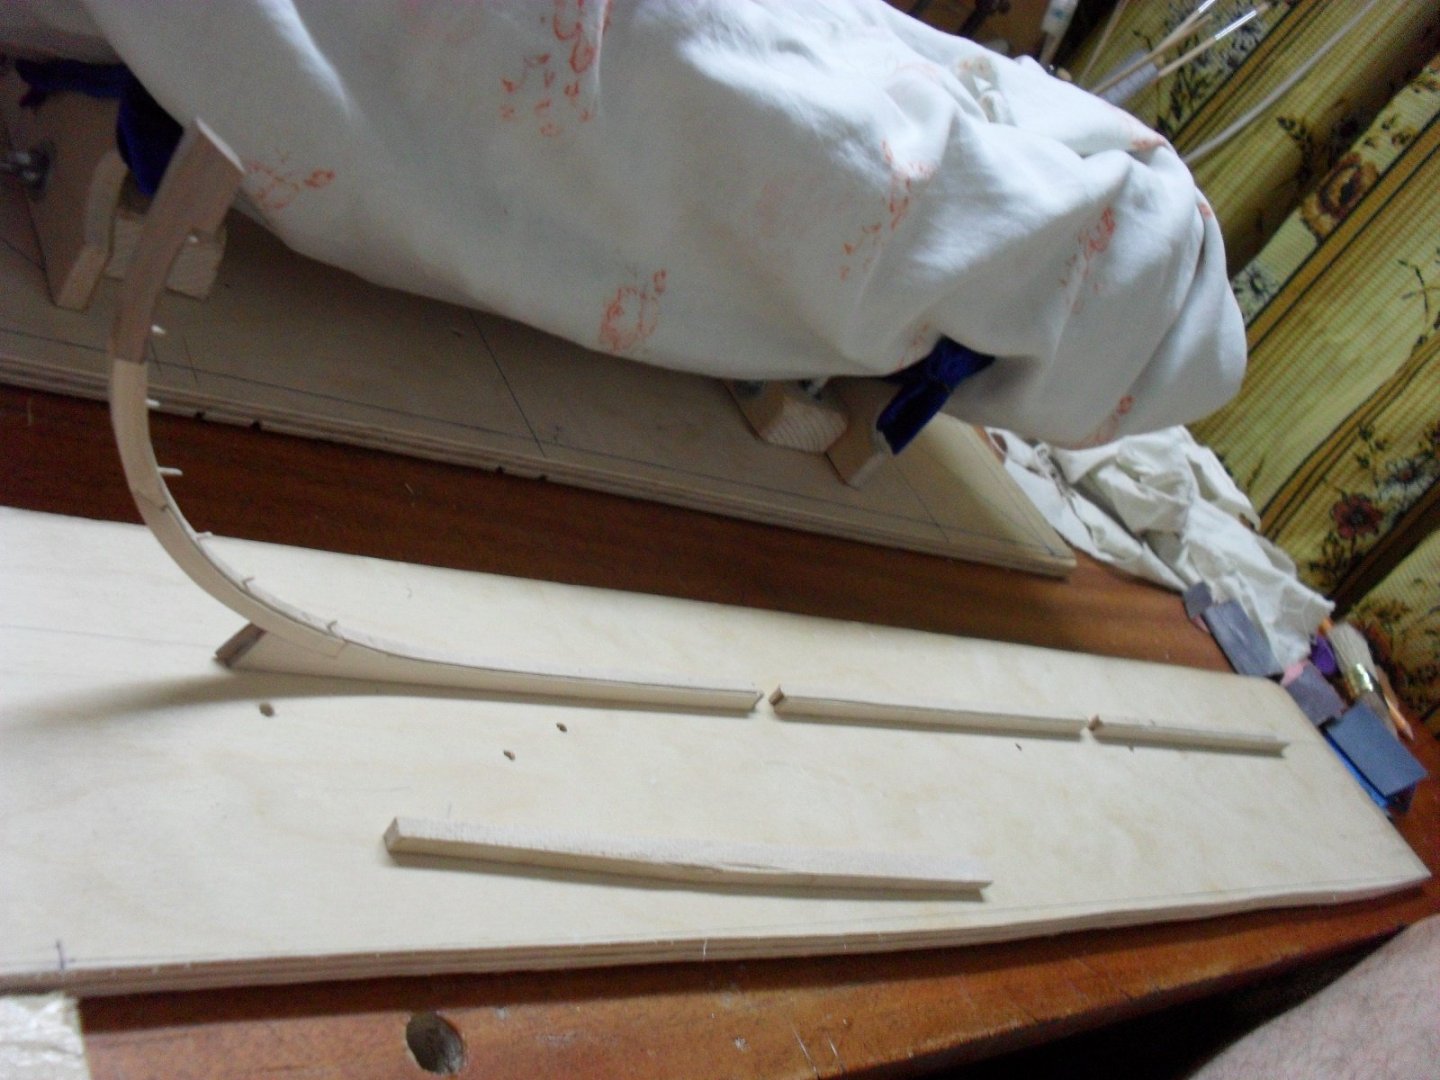
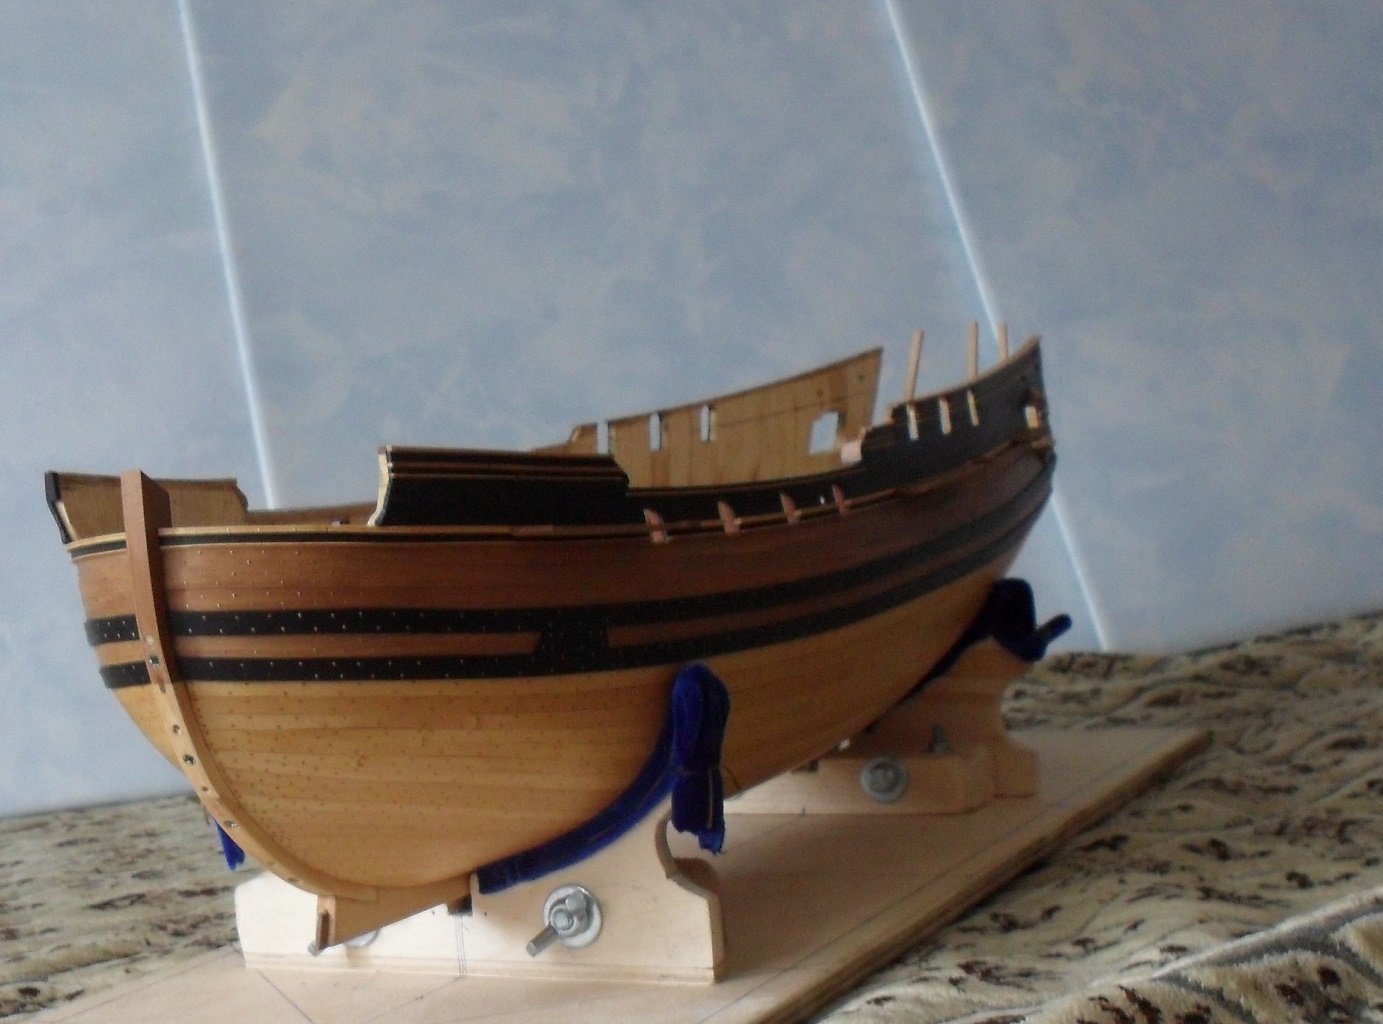
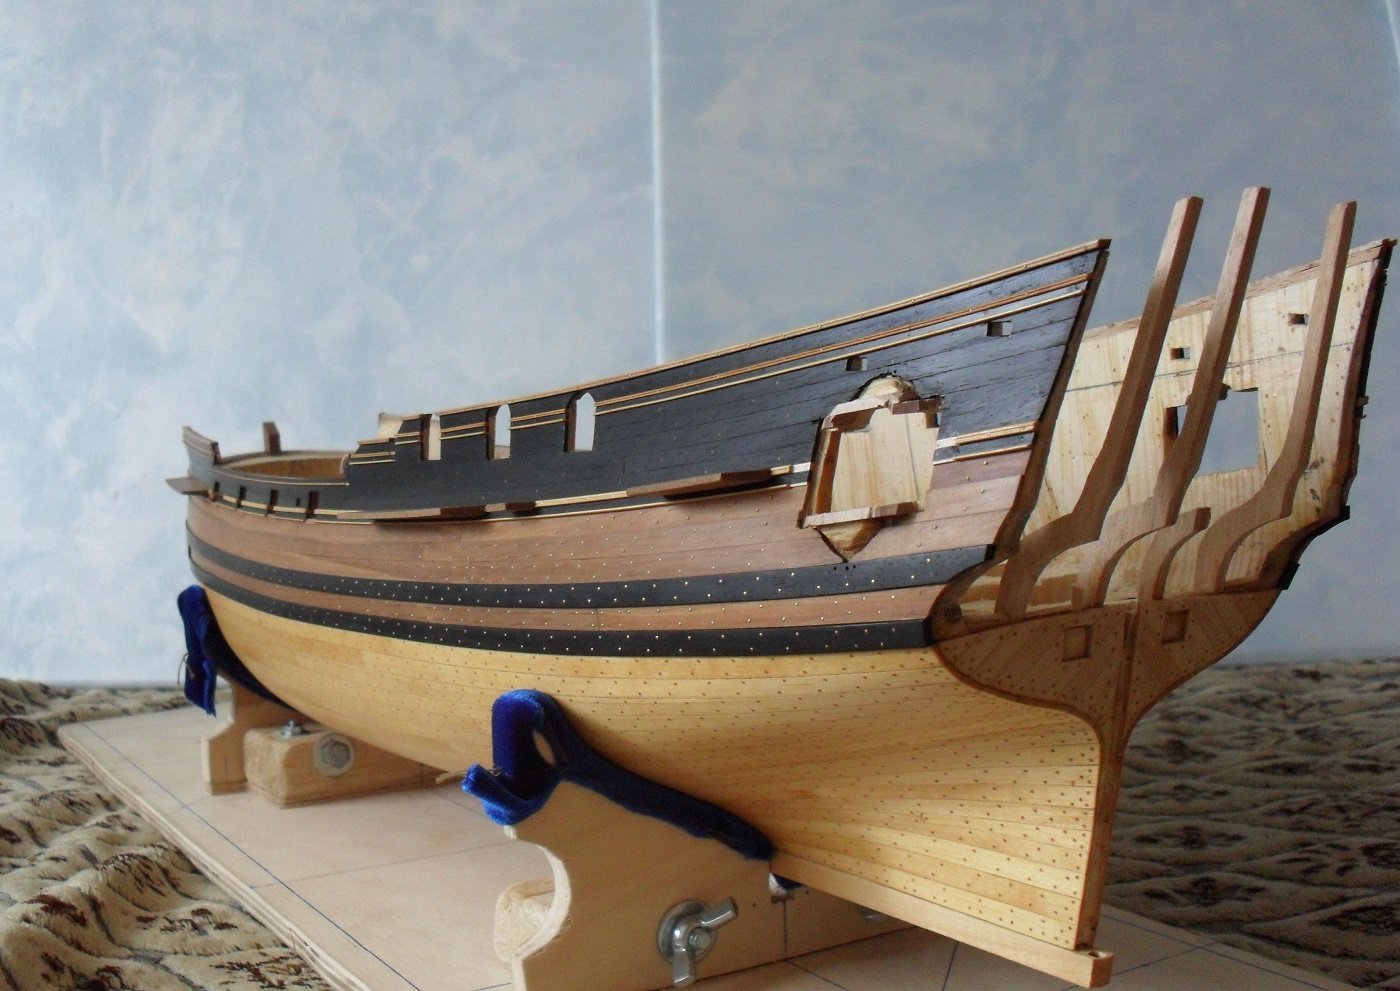
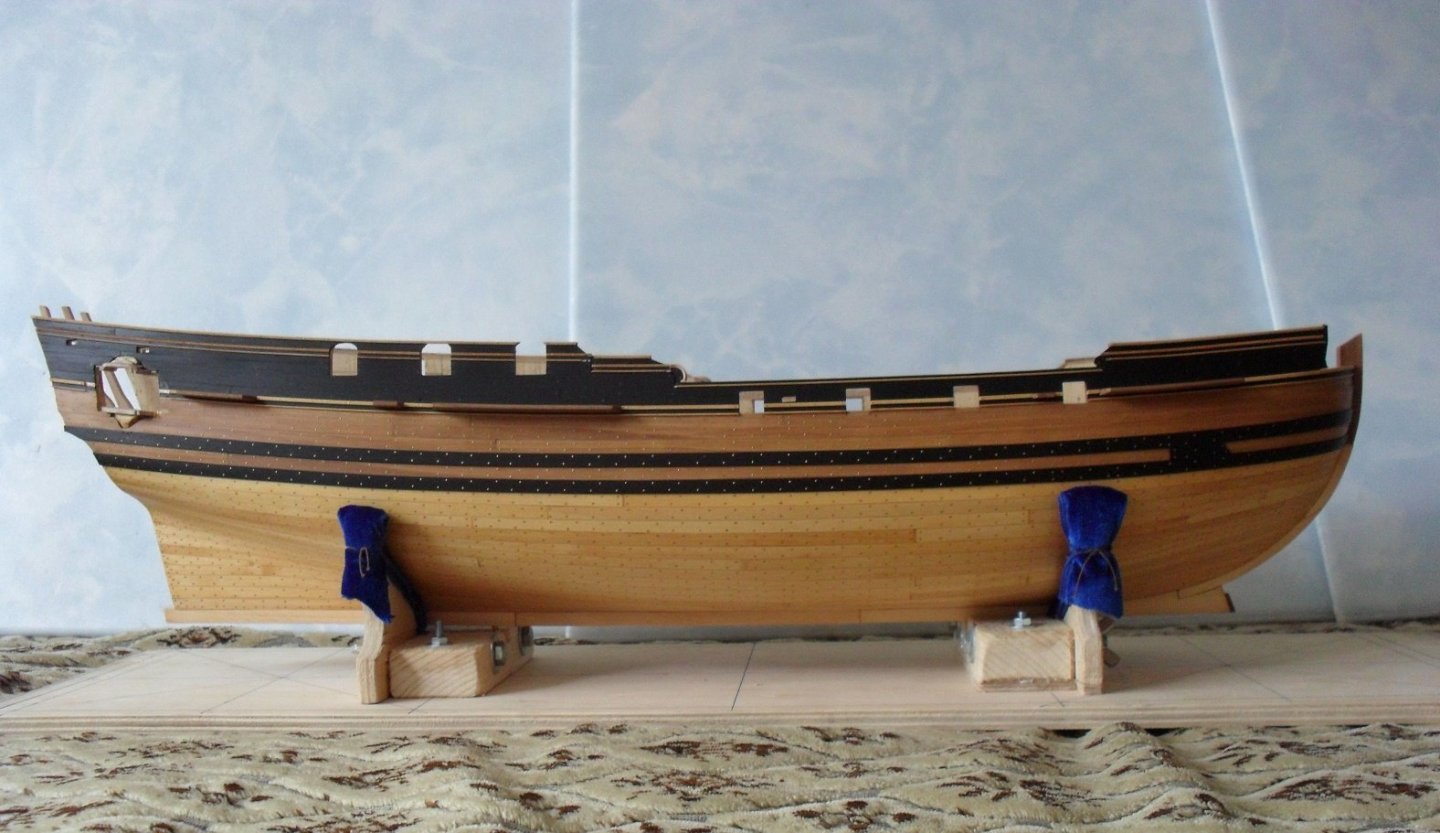
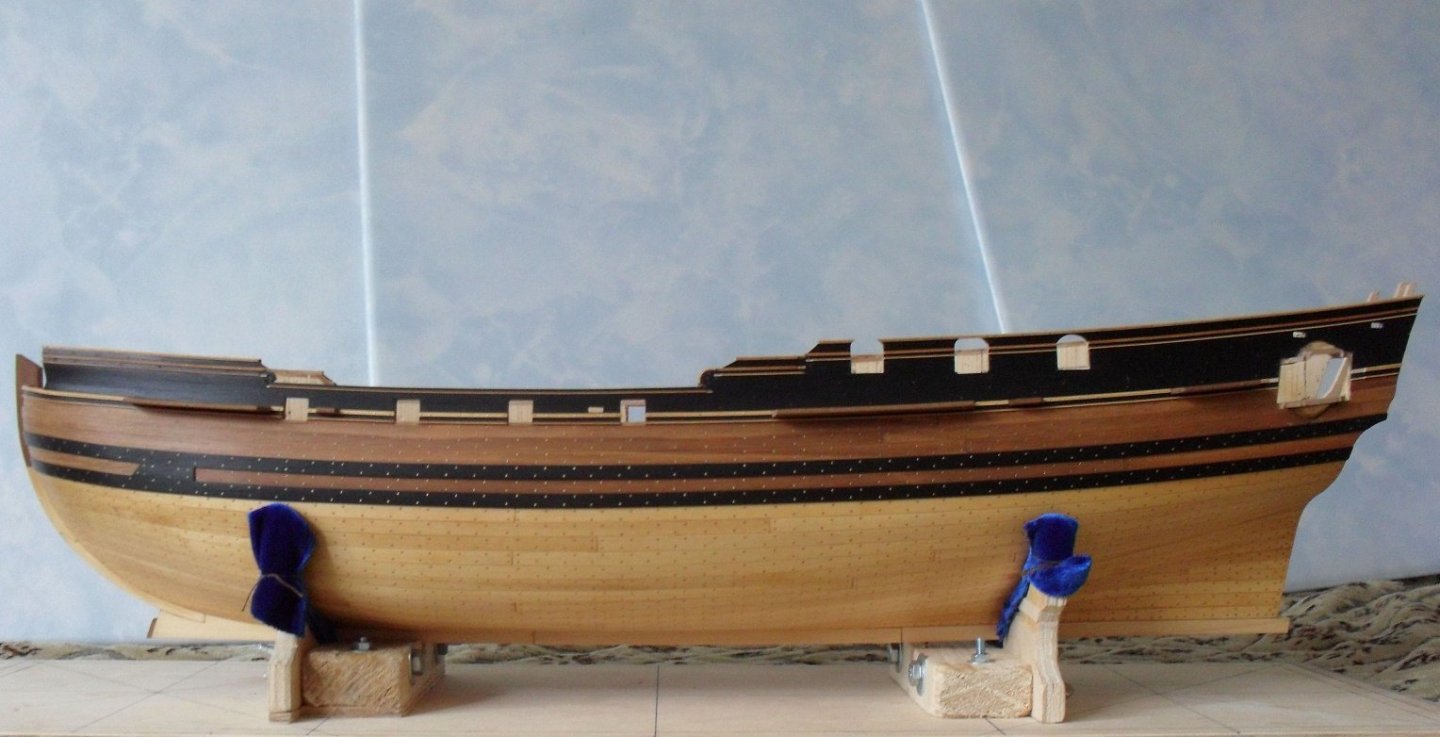
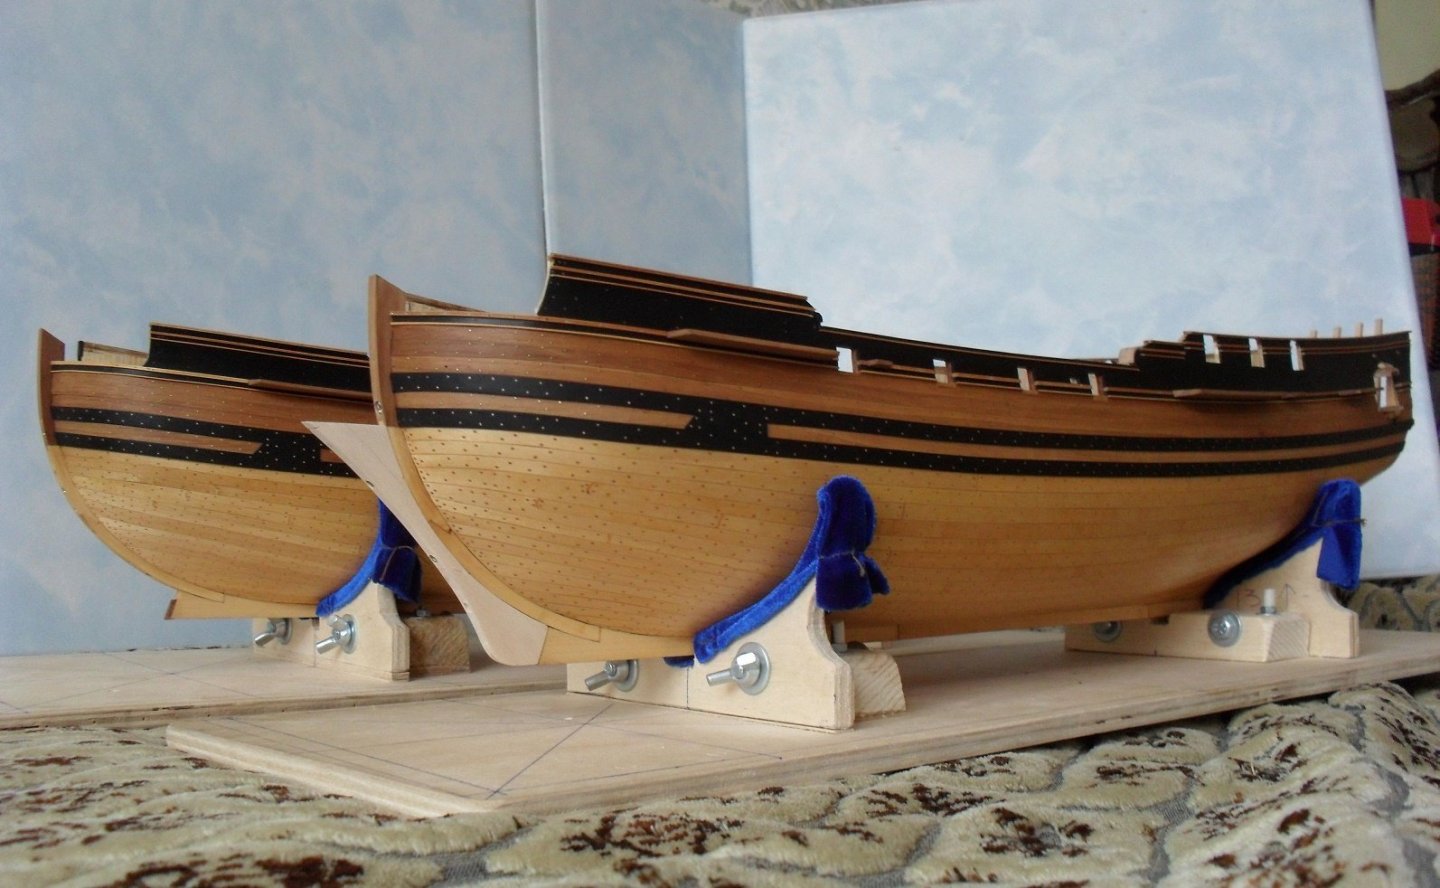
Google Translate. Hello to all! In this thread I will be showing the construction of a model of one of the most beautifully decorated ships of its time, the royal yacht "ROYAL CAROLINE" built in 1749. Construction of two models at once began in January 2009. During a year and a half, construction was active (hulls were made and sheathed, the main decks and many other efficient things were made) and then due to lack of time, construction became sporadic. Now I am trying to speed up the process and reach the finish line. My main goal is to show the beauty and harmony of the lines of the ships of that era, the beauty of the high-quality processed wood surface and the production of spectacular decor. Also, one of the models will be put up for sale and I am looking for potential buyers. I will not communicate much on the forum, so I apologize in advance if I do not always answer. In addition, I use Google translator, and this program is not perfect, it can distort the meaning of the sentence and then I have to spend a lot of time on clarifications and not the fact that everything is cleared up. Let the pictures speak more. Sincerely, Alexander. So, let's begin) ROYAL CAROLINE 1749, 1:48 scale, royal yacht. Material: Pear (two colors), Madagascar ebony, maple.