mysticlee
-
Posts
5 -
Joined
-
Last visited
Content Type
Profiles
Forums
Gallery
Events
Everything posted by mysticlee
-
Roger, thank you for your compliment, and you are absolute correct regarding lengths. I used several known lengths (as you mentioned), along with draft, freeboard, beam, and bowsprit length, compared to the corresponding measurements on the model, to arrive at a scale of 102.2:1. As a retired engineer/Coastie, I try to get the details right, and make educated estimates where necessary. For example, since I don't have the exact measurements of virtually any of the actual deck fittings, fixtures, etc., I'm also using photos to estimate sizes and locations, and scaling accordingly. We love Mystic, and we were fortunate enough to buy a house built in 1866 when we moved here (on the Seaport side) in 2018. It's not as grand as those across the river, but it has its own history. We enjoy the beauty of those historic homes on the Groton side of the river on our daily walks through town and beyond. John, yes, it's my favorite, and I have numerous photos to guide my modeling. --Lee
-
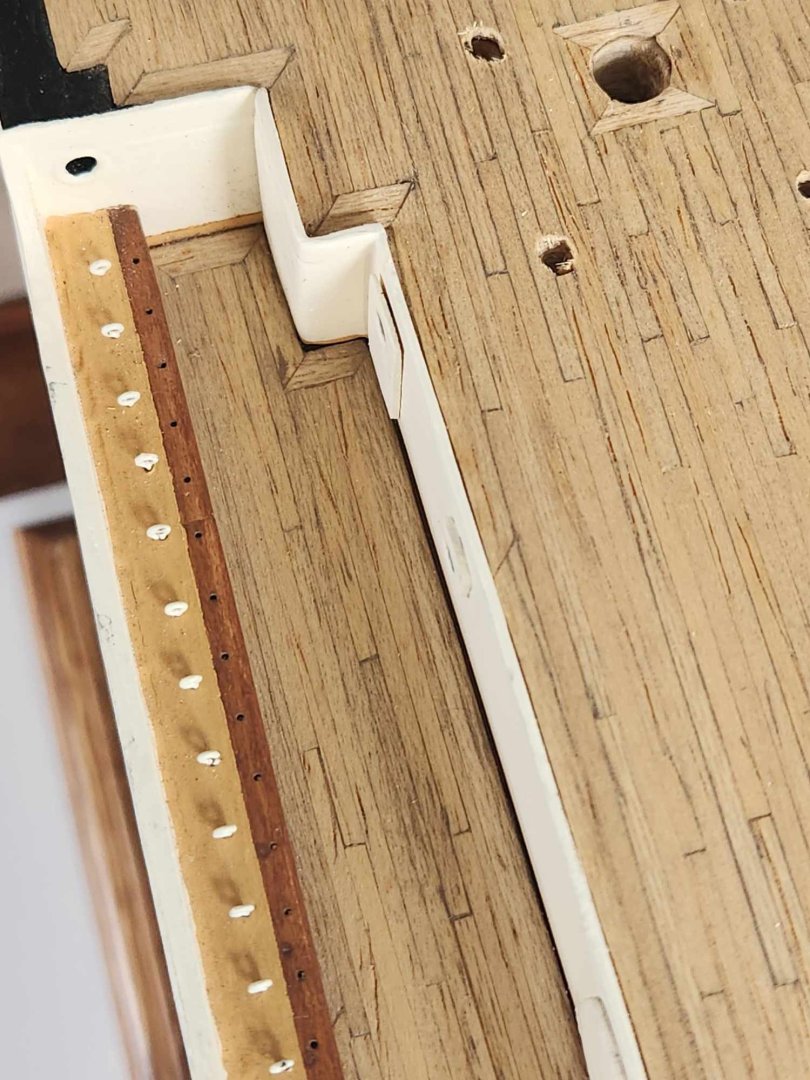
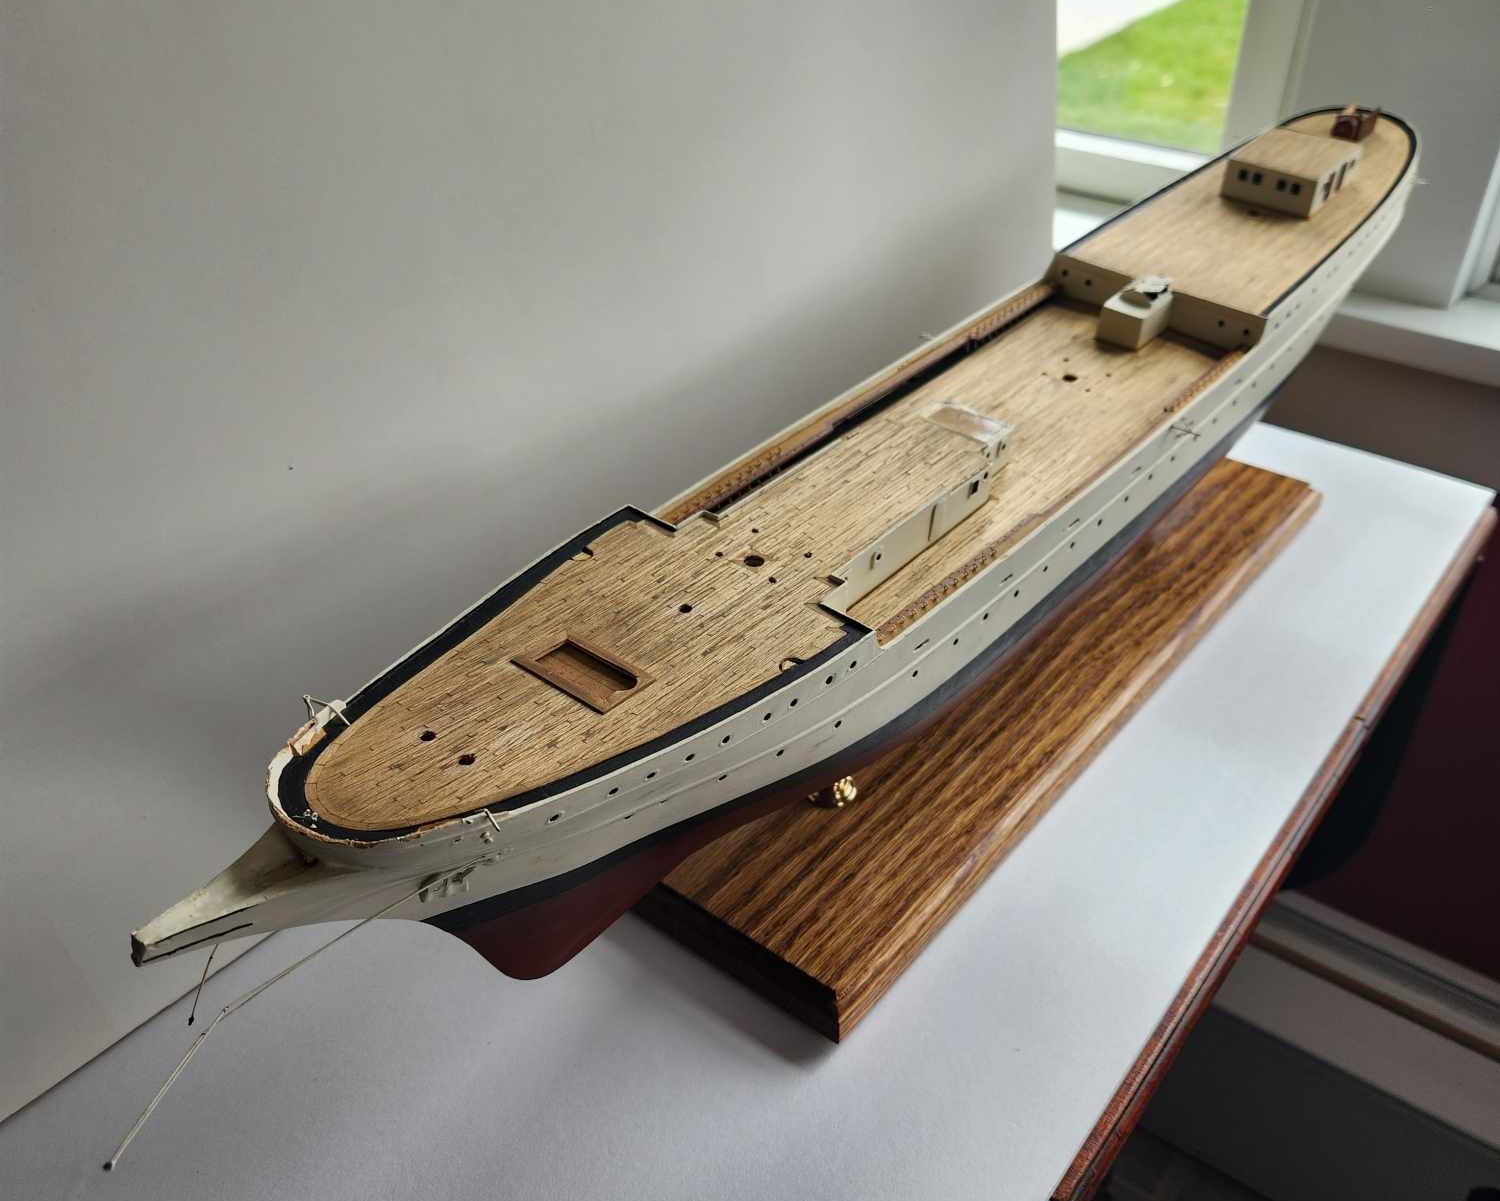
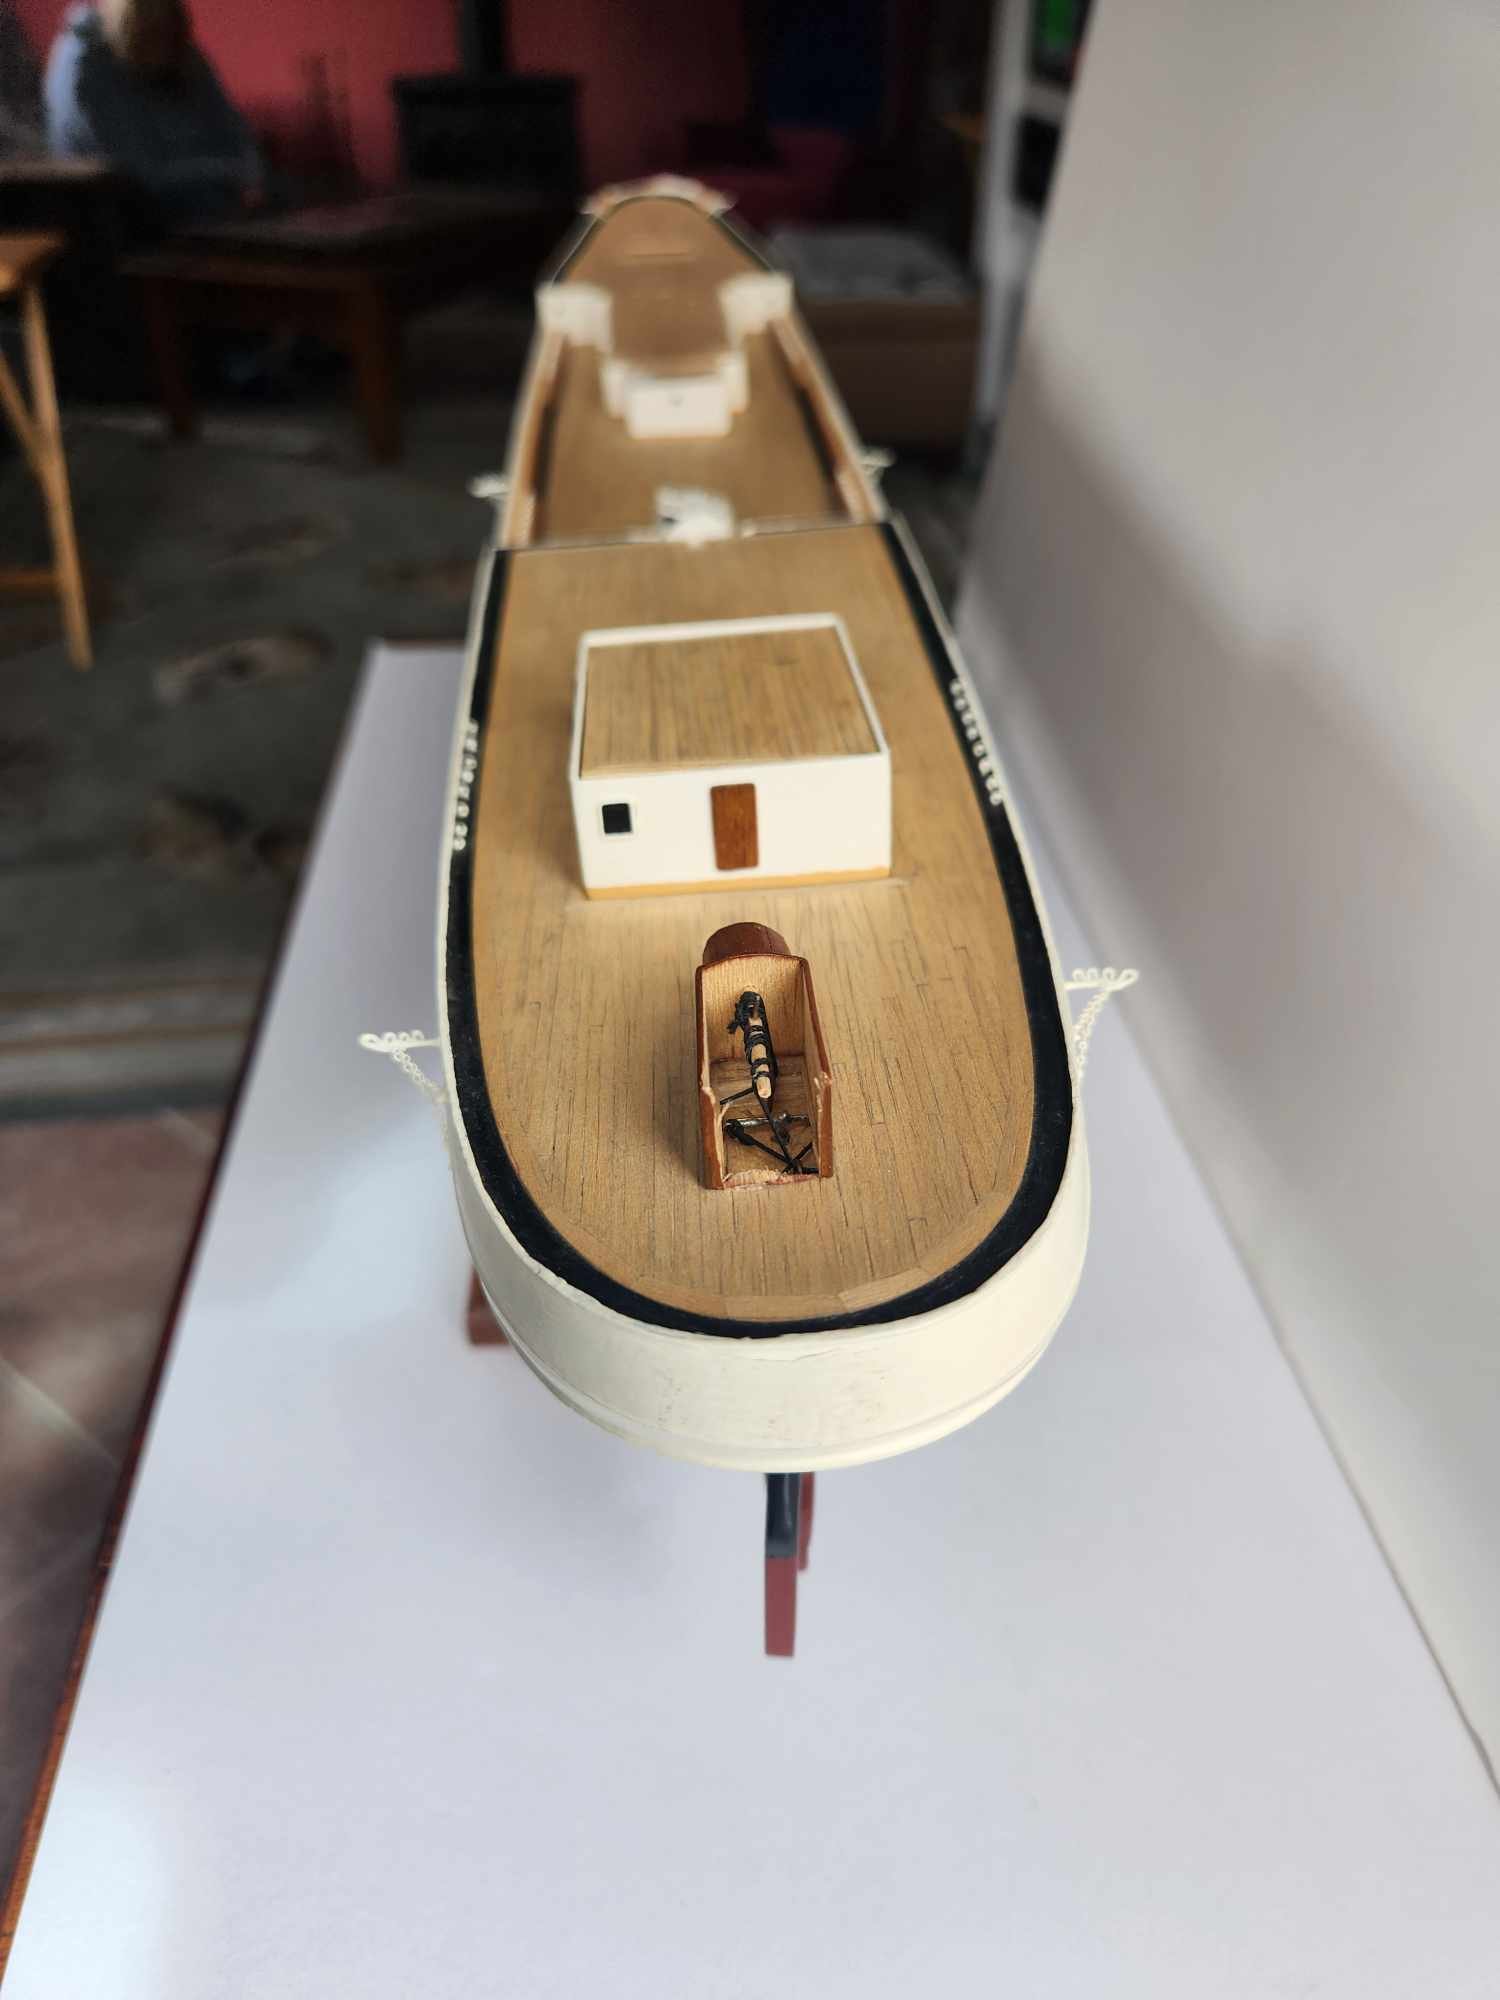
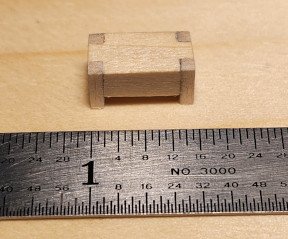
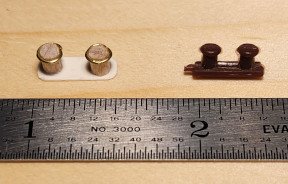
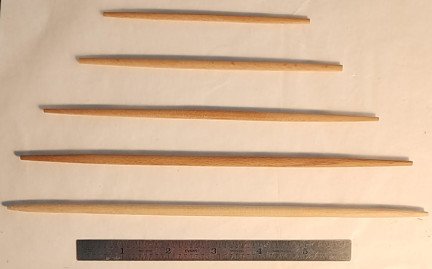
Since my last post, I created spreadsheet to identify the various deck fittings that need to be modeled, and mapped out the attachment points for the standing and running rigging on the deck, masts, and spars. The original model kit included written instructions and diagrams to describe the assembly, and it simplified much of the rigging and fittings. Also, the instructions were not specific on the placement of many of the parts (such as where the yards attach to the masts), so I'm going back to my Eagle Seamanship book, other documents, and photos (both recent and especially those in the photo book my academy class put together after our 1972 cruise) to identify the actual rigging and fittings. Things are quite small on this model, so I'll be making some decisions on what to include and what not to include, compared to the actual ship. For example, I'll probably limit the running rigging to the braces, sheets, and possibly the clew lines between the yards/sails and the pin rails. I'll likely show the buntlines and leach lines on the sails themselves, but not carry the lines down to the pin rails, mainly because of the complexity and density of those lines. After all, the Eagle has over 180 lines of running rigging (in the configuration I'm modeling...over 200 in its present configuration), and I don't have the confidence and skill in depicting all of them, along with their attachment points, blocks, metal cheek blocks, etc. The model kit only showed the braces and sheets, and in greatly simplified form (i.e, using only a few blocks here and there, and in some cases running lines directly to the deck where one or more blocks are used for mechanical advantage on the actual ship). I'll settle on something between what the kit showed and what's on the Eagle. I started making a few of the many fittings and fixtures I plan to model. First, I need eight "large" mooring bitts (four on the forecastle, and four in the waist). The model came with several smaller plastic bitts that I may make use of in other areas (if I can remove the molding seams), but they are too small for use as mooring bitts. I didn't find any sources among ship modeling company websites for bitts that were of the size I needed (and that resembled the bitts on the Eagle), so I decided to make my own. To create the bitts, I fashioned loops of 24 gauge wire, glued each loop to a 1/8" dowel cut to 5/16" in length, and glued two of these to a small piece of heavy card stock (to simulate the base). Next, there are four benches on the mizzen deck that are used underway to cover four of the mooring bitts. I thought it would look better to model the benches instead of showing those bitts. I used a small block of basswood notched in the corners for the body of the bench, and 1/16" basswood square dowels for the legs. Below are the bitts (both my fabrication and the kit's plastic version) and bench before painting. I'll be painting the bitts in Coast Guard spar color (which I need to mix myself to match the fittings I had previously painted on the model), with a medium gray strip around the barrel of the bitts. The bench will be painted to resemble the mahogany wood on the actual ship. Regarding paint, most of the fittings on the Eagle are painted Coast Guard spar color, including the masts, yards, tops, and cross trees, so I'll wait until I have everything fabricated (including the numerous attachment points), before painting. There are a few items that will be painted white or "mahogany" (including repainting the white on the hull) that will also be deferred until all are fabricated. The model came with all ten square sail yards and two mizzen spars, but I determined that the square sail yards were not to scale (too small), based on the actual lengths of the yards from the ship specs. What I found was that the main and fore course yards supplied with the kit were a very close match to the length of the lower topsail yards, the lower topsail yards a match to the upper topsail yard lengths, etc., through the top gallant yards a match for the royal yard lengths. So I created new course yards (the kit's royal yards were too small for anything except material for possible use in other fittings). I tapered a 1/4" dowel using a drill and sand paper, and cut to length. Below shows the five yards for the foremast (the mainmast is identical), the largest being the one I made. The kit included a few plastic "tensors" for connecting some of the standing rigging to the deck. They are oversized compared to the actual ship's turnbuckles, and resemble the pairs of deadeyes and connecting ropes that are found on wooden sailing ships. Instead, I'll create over 80 turnbuckles that more closely resemble the metal turnbuckles on the actual Eagle. More on my plan for the turnbuckles, and other fittings, in future posts.
-
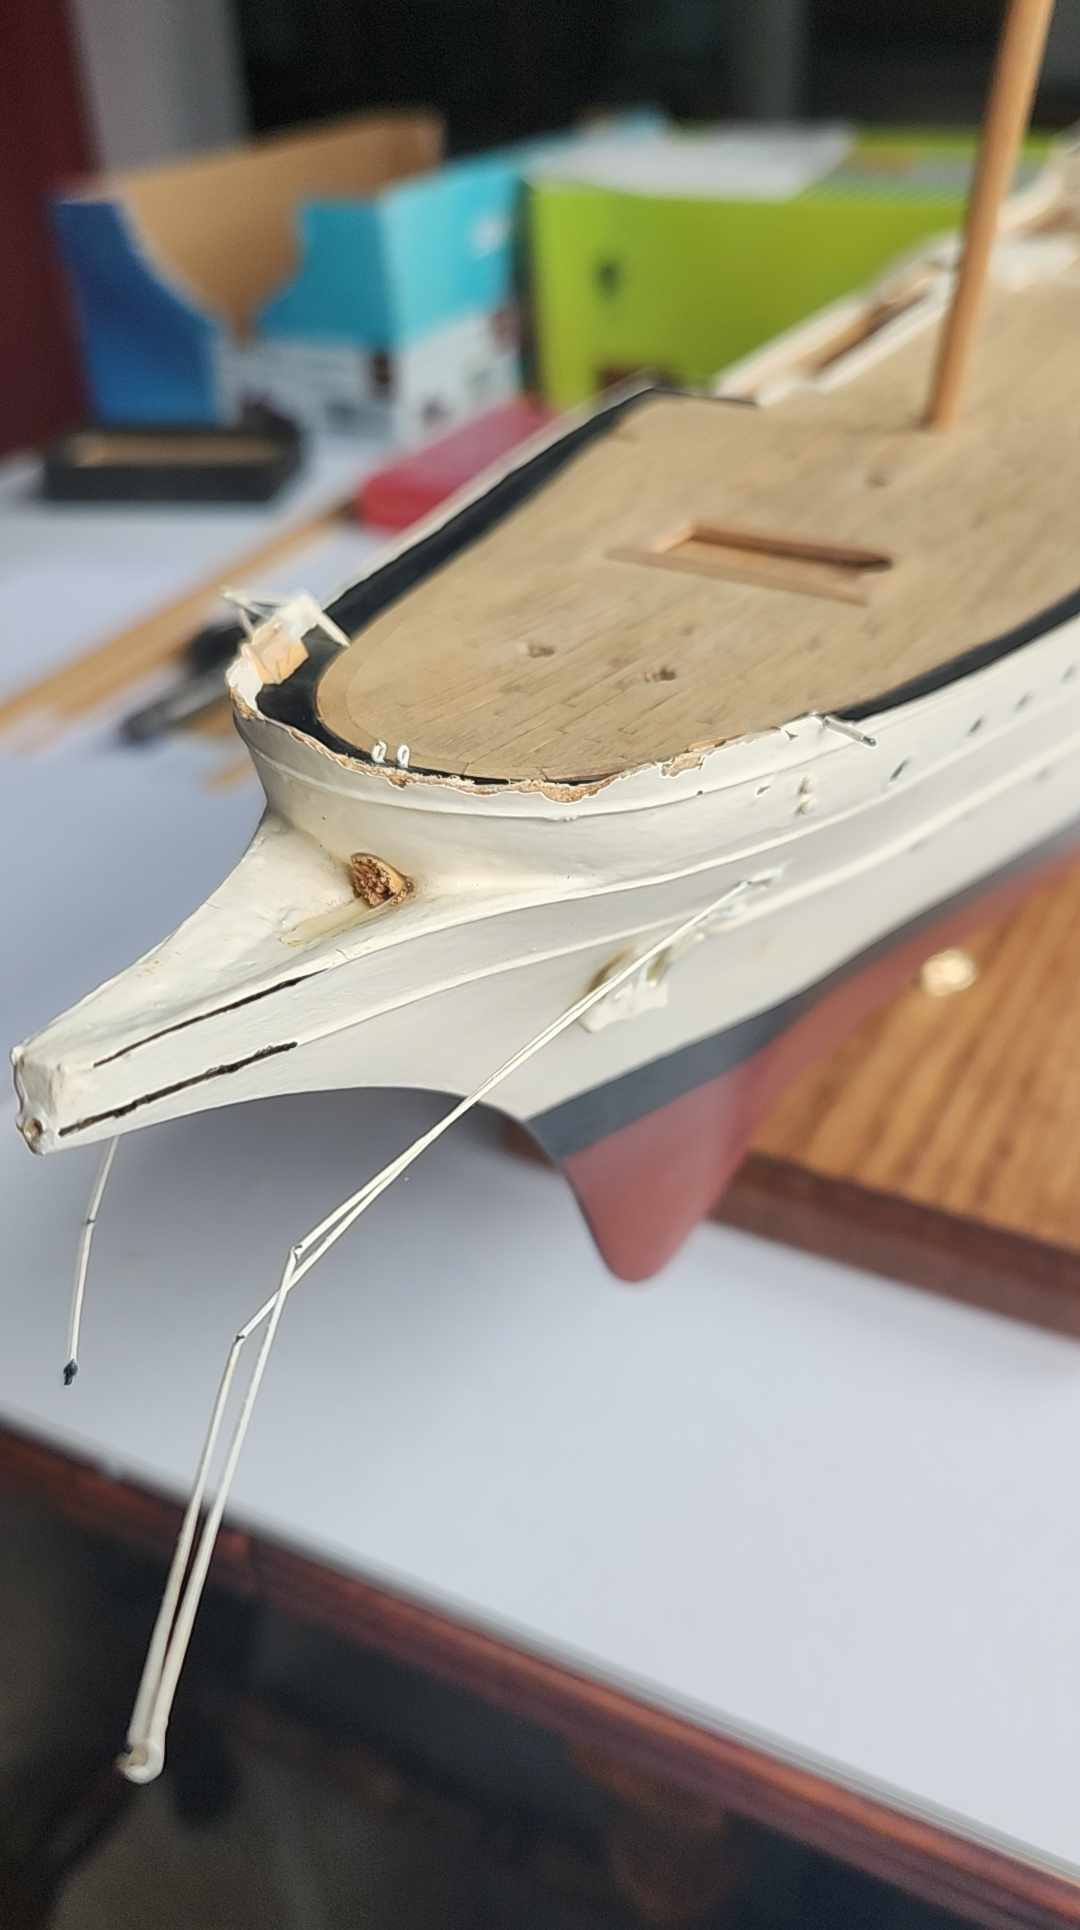
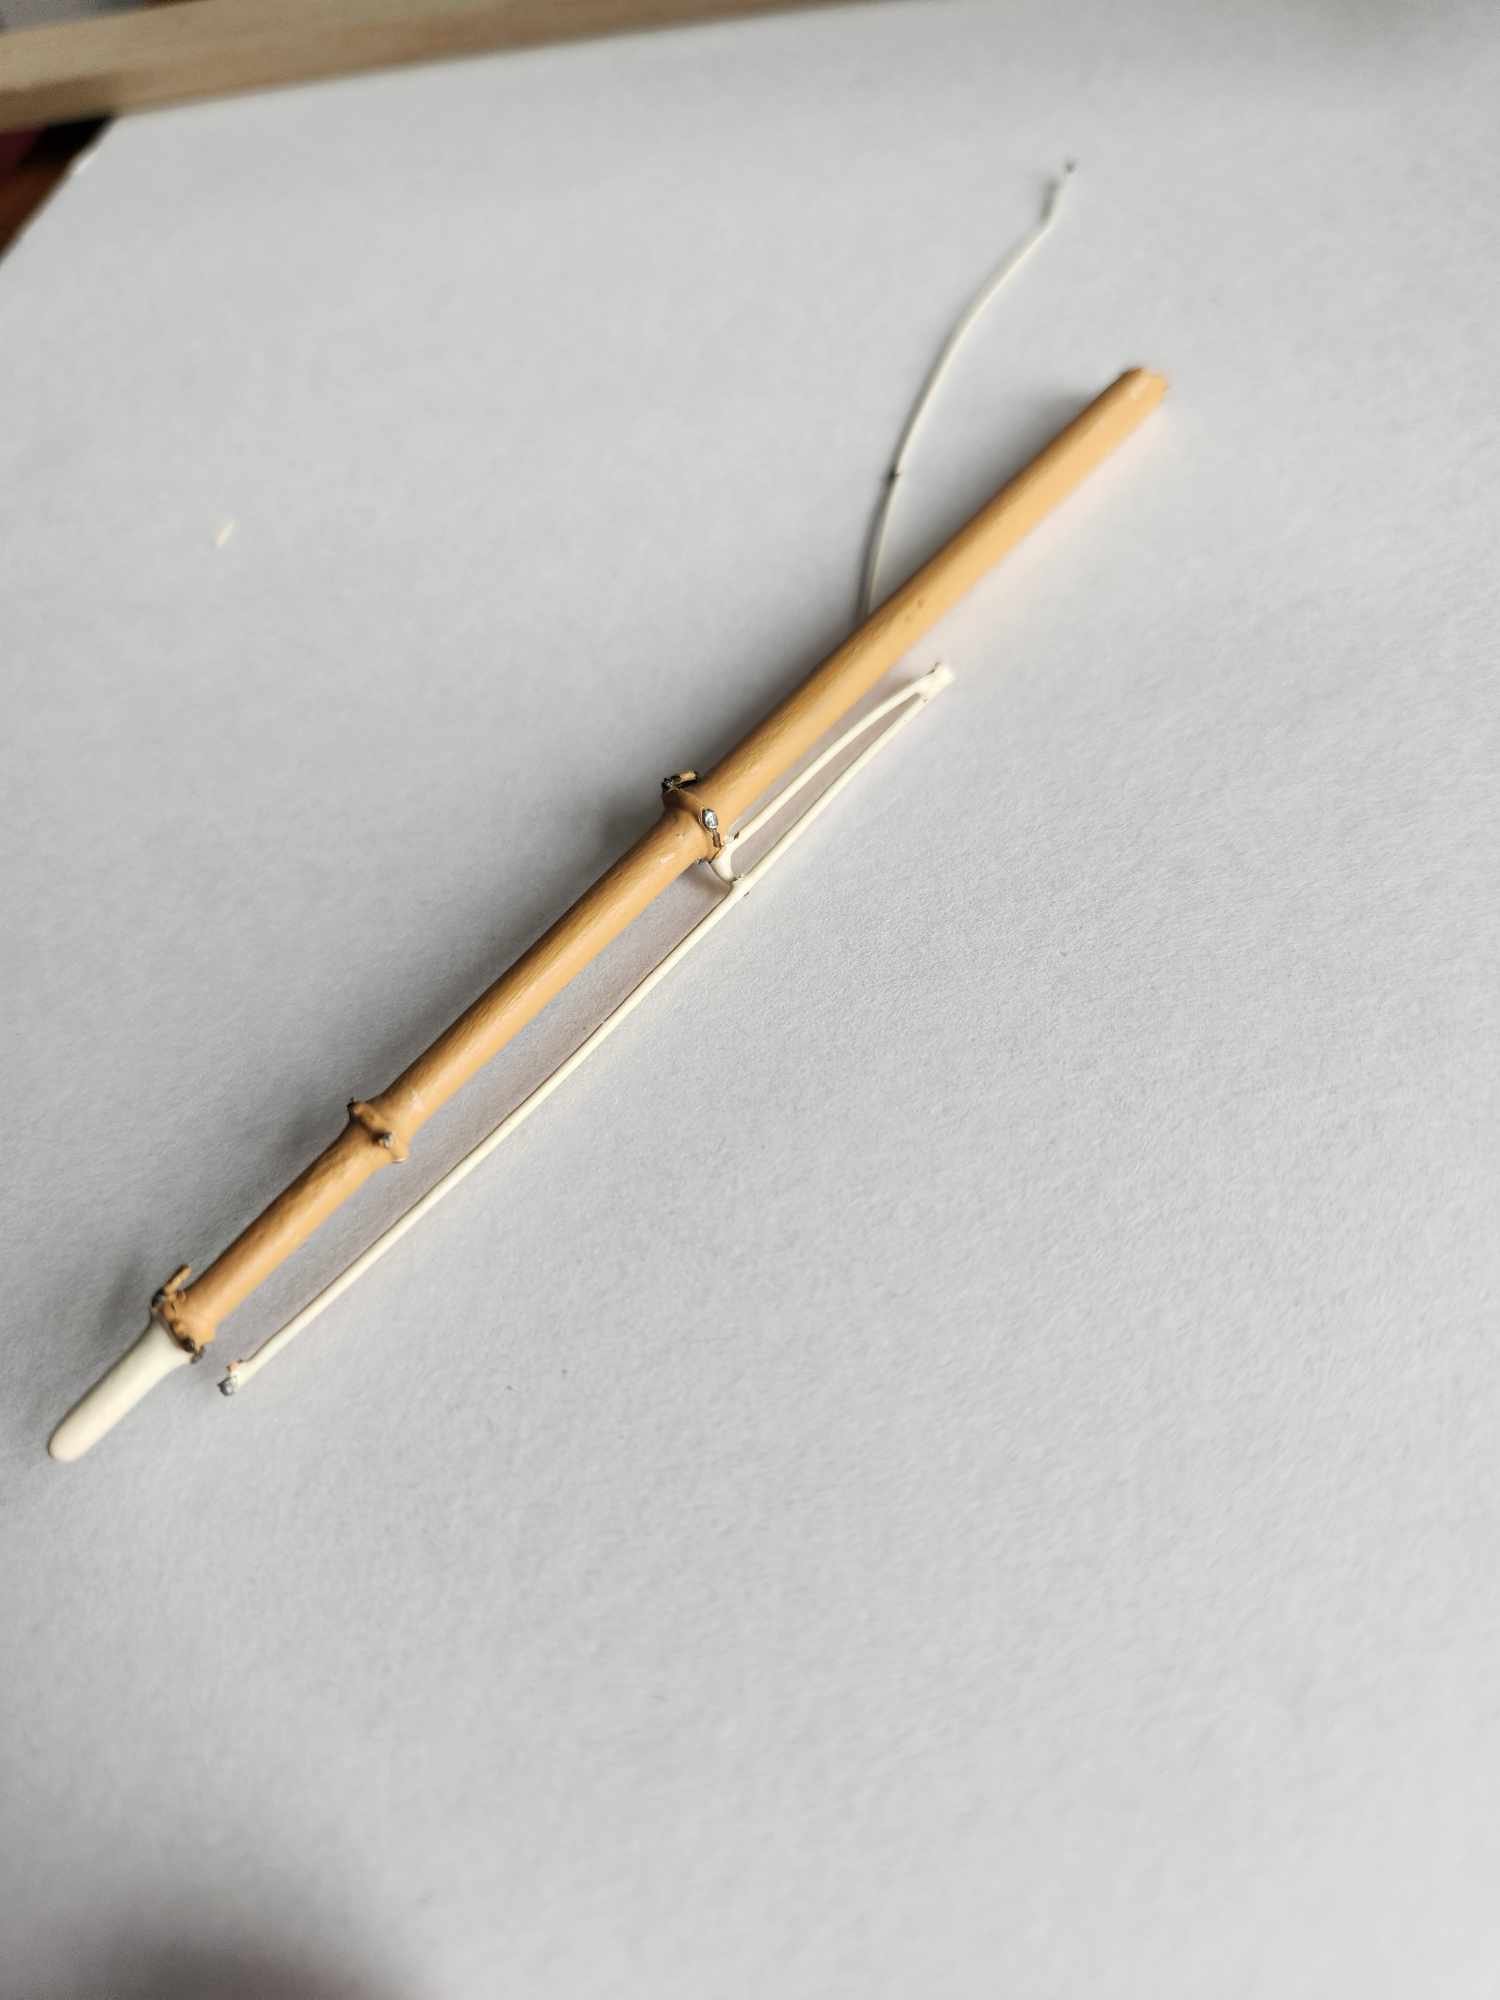
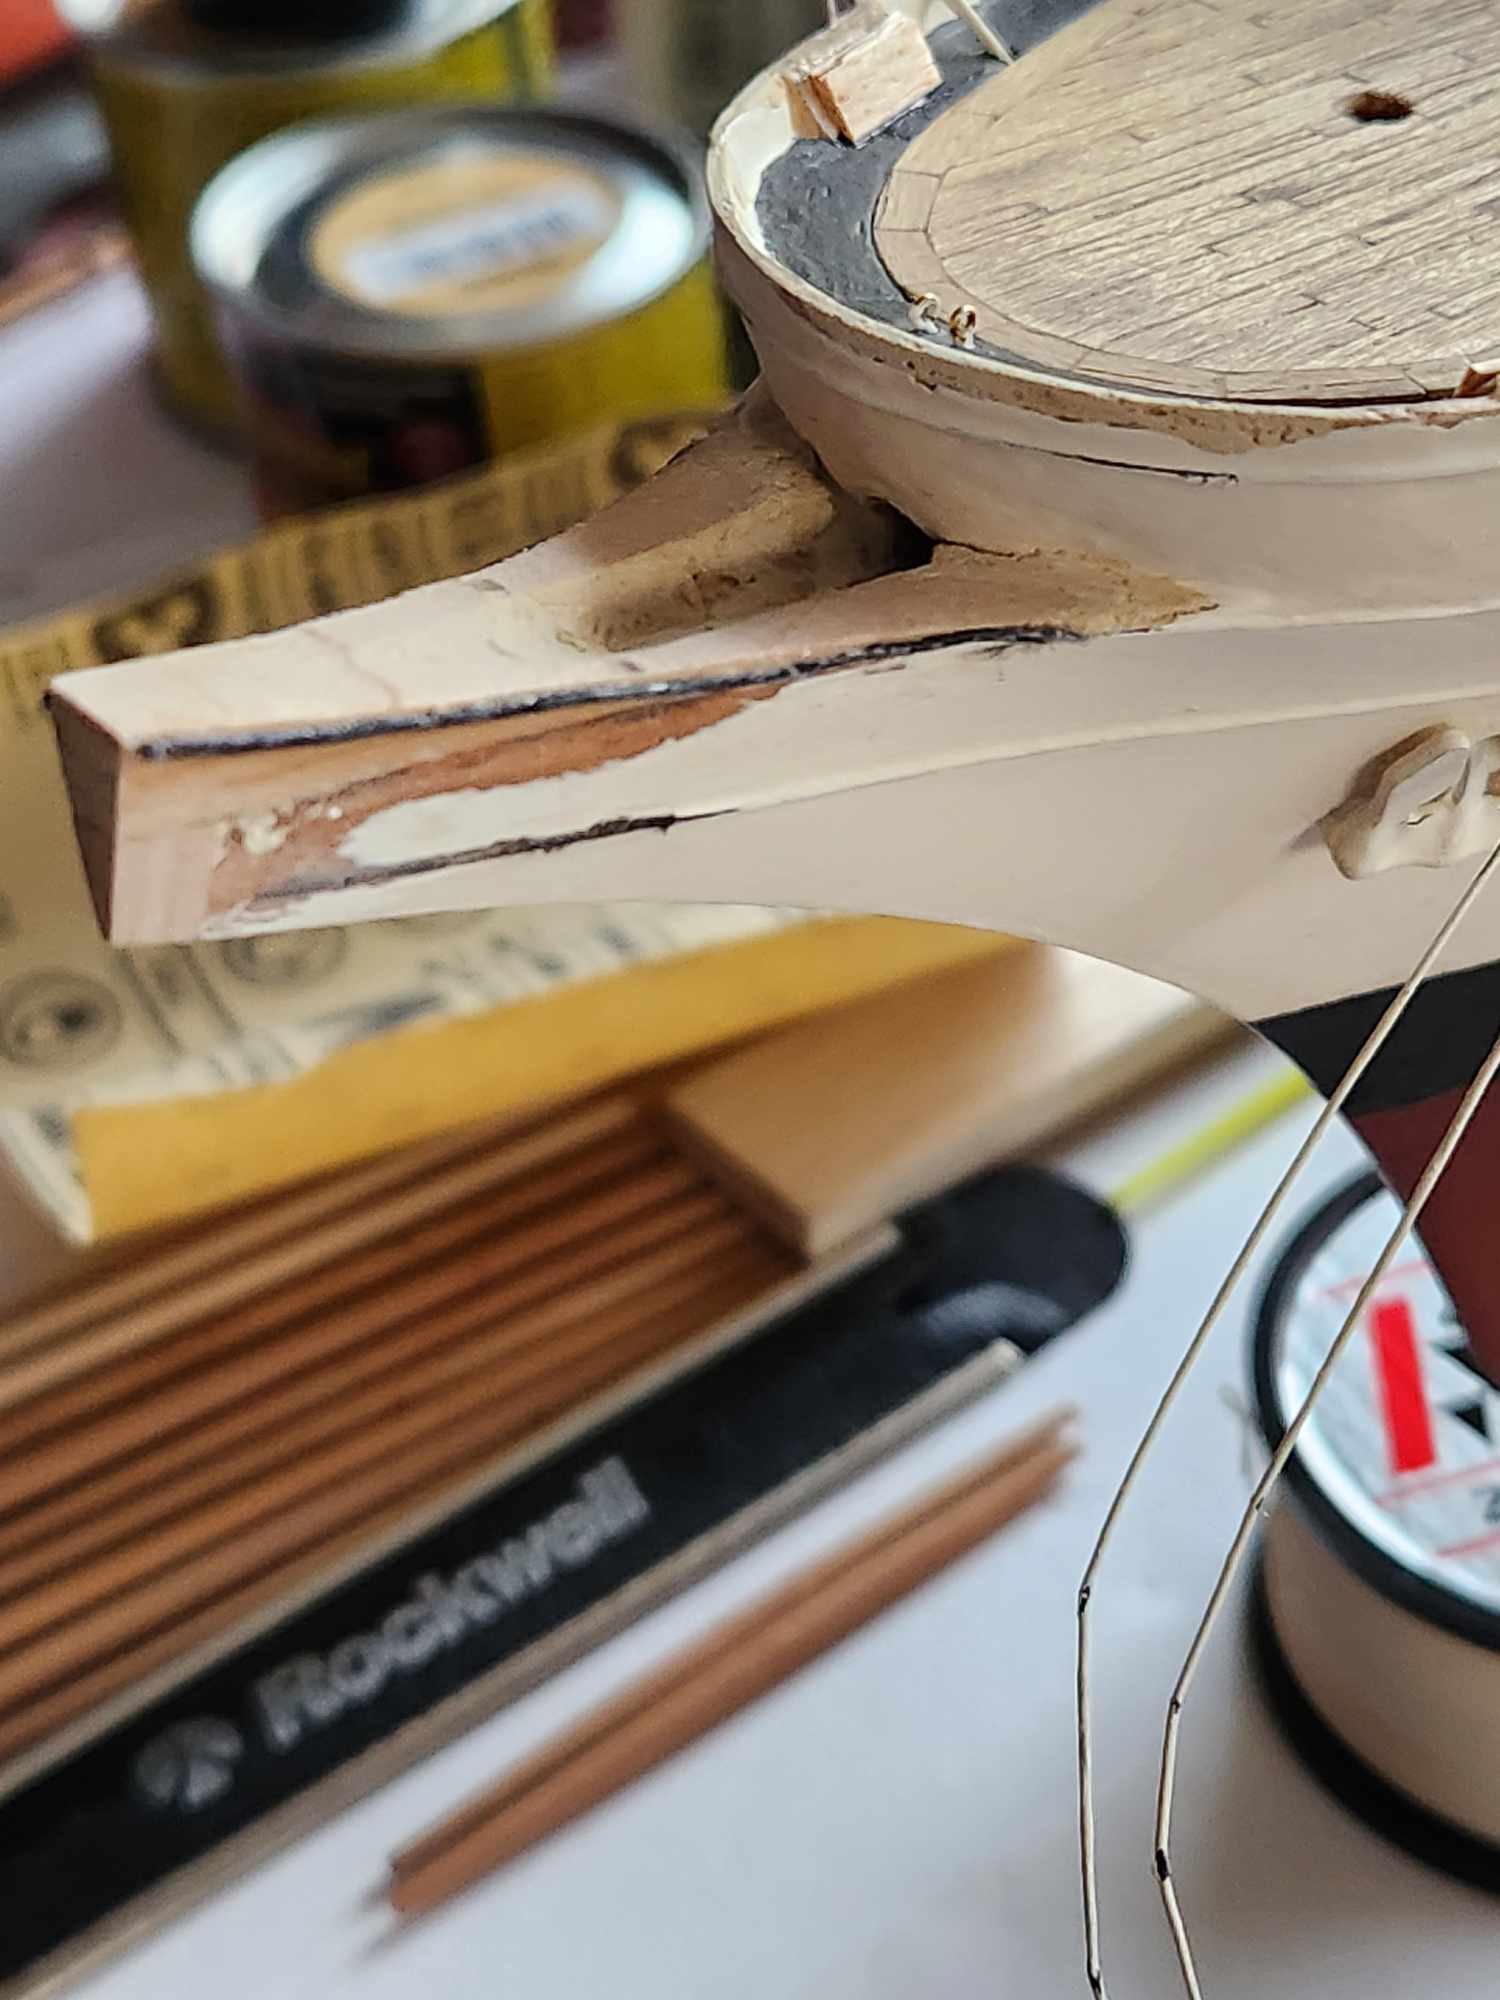
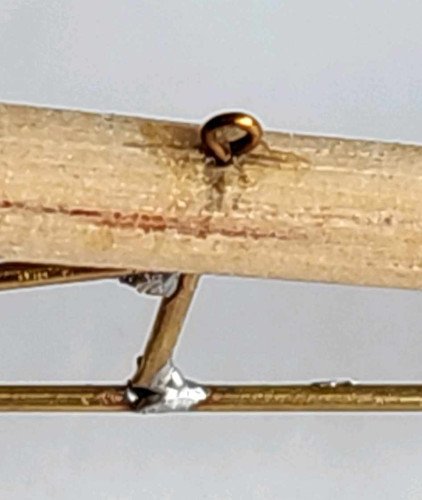
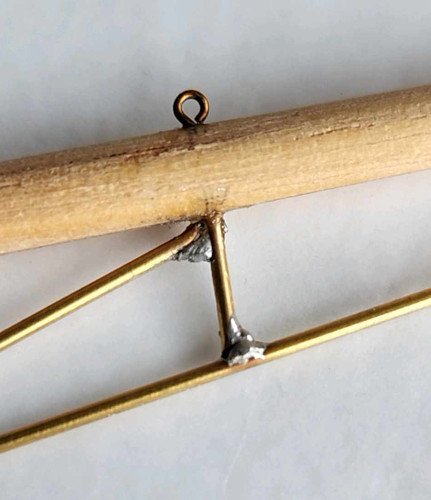
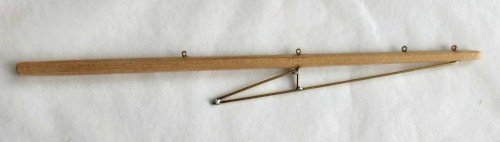
For the new bowsprit, I tapered a 3/16" dowel using a drill and sandpaper. Then I constructed the bobstay, martingale stay, and dolphin striker using 1/32" brass tube, soldered at the junction points. This assembly is glued to the bowsprit using CA, after creating small indentations in the bowsprit at the contact points. I'm hoping this will be strong enough, but I may decide later to reinforce these glue points with PVA or epoxy. At key attachment points (for the staysails), I hand-drilled holes partway through the bowsprit, and inserted eyes cut slightly shorter than the hole depths, and glued them in with CA. I did this first on a test piece, and they seemed to be very secure. I'm not worried about the discoloration on the wood, as it will be painted later with Coast Guard spar color. I still need to add attachment points on the sides of the bowsprit to anchor the stays. While I had my soldering iron handy, I repaired the forward port-side bumpking, shown below. I'll paint it white when I repaint the hull.

-
Thank you Rick. I have many challenges ahead with this build, and I'll welcome any and all tips and advice.
-
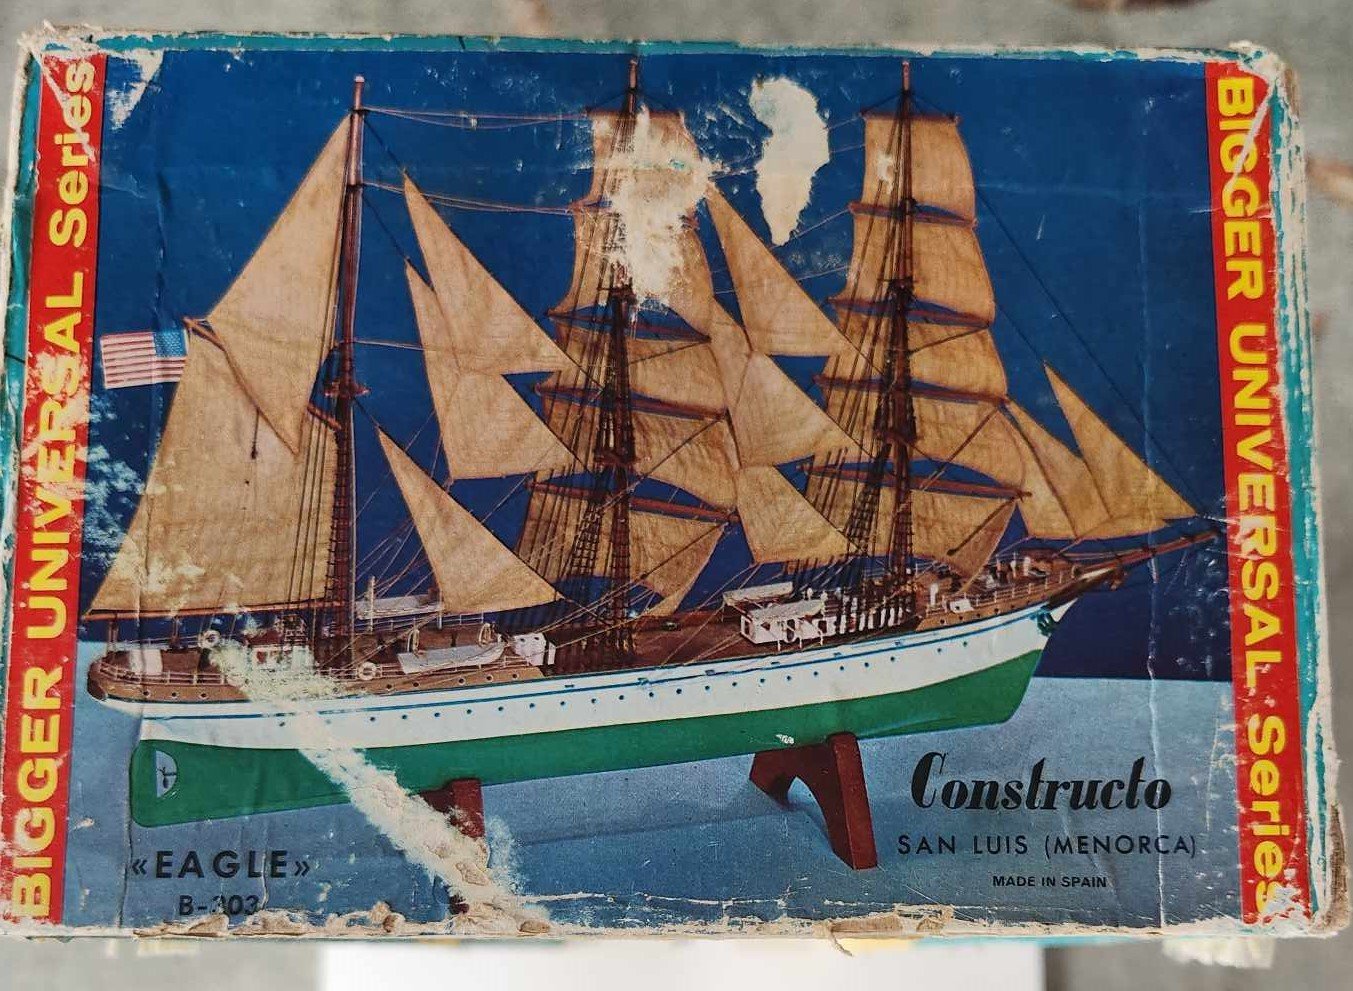
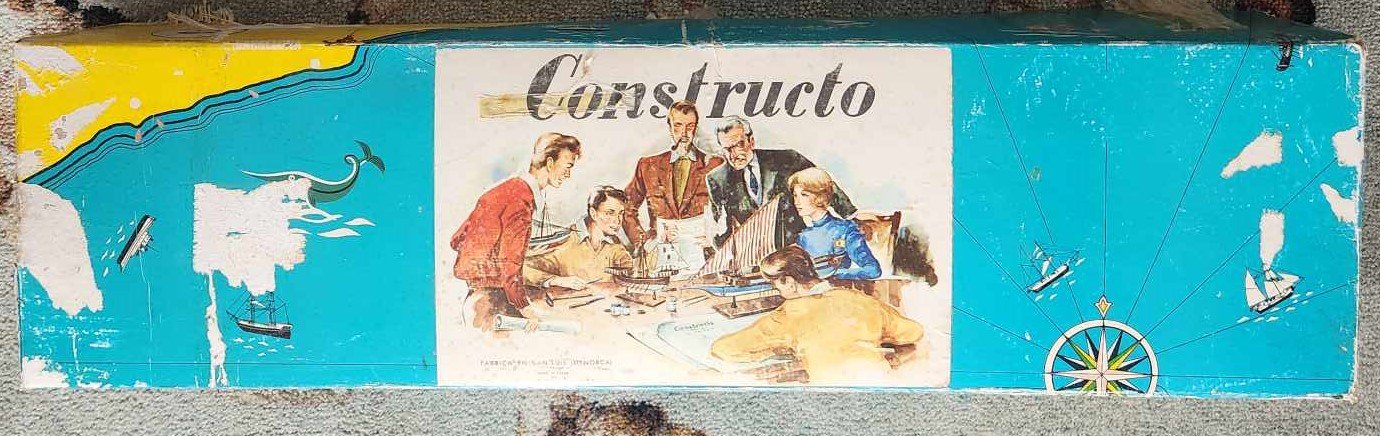
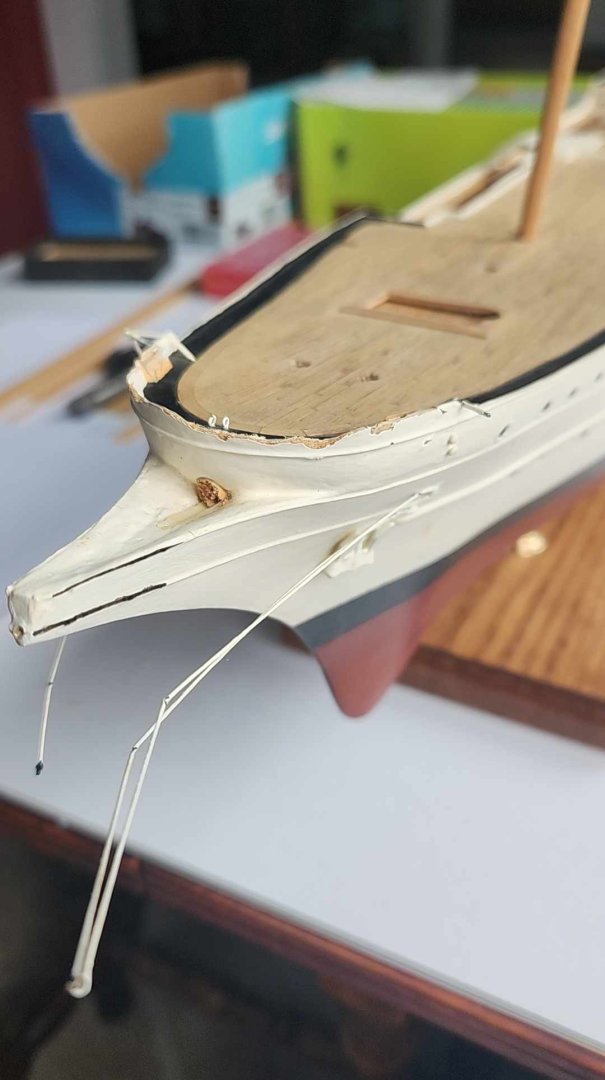
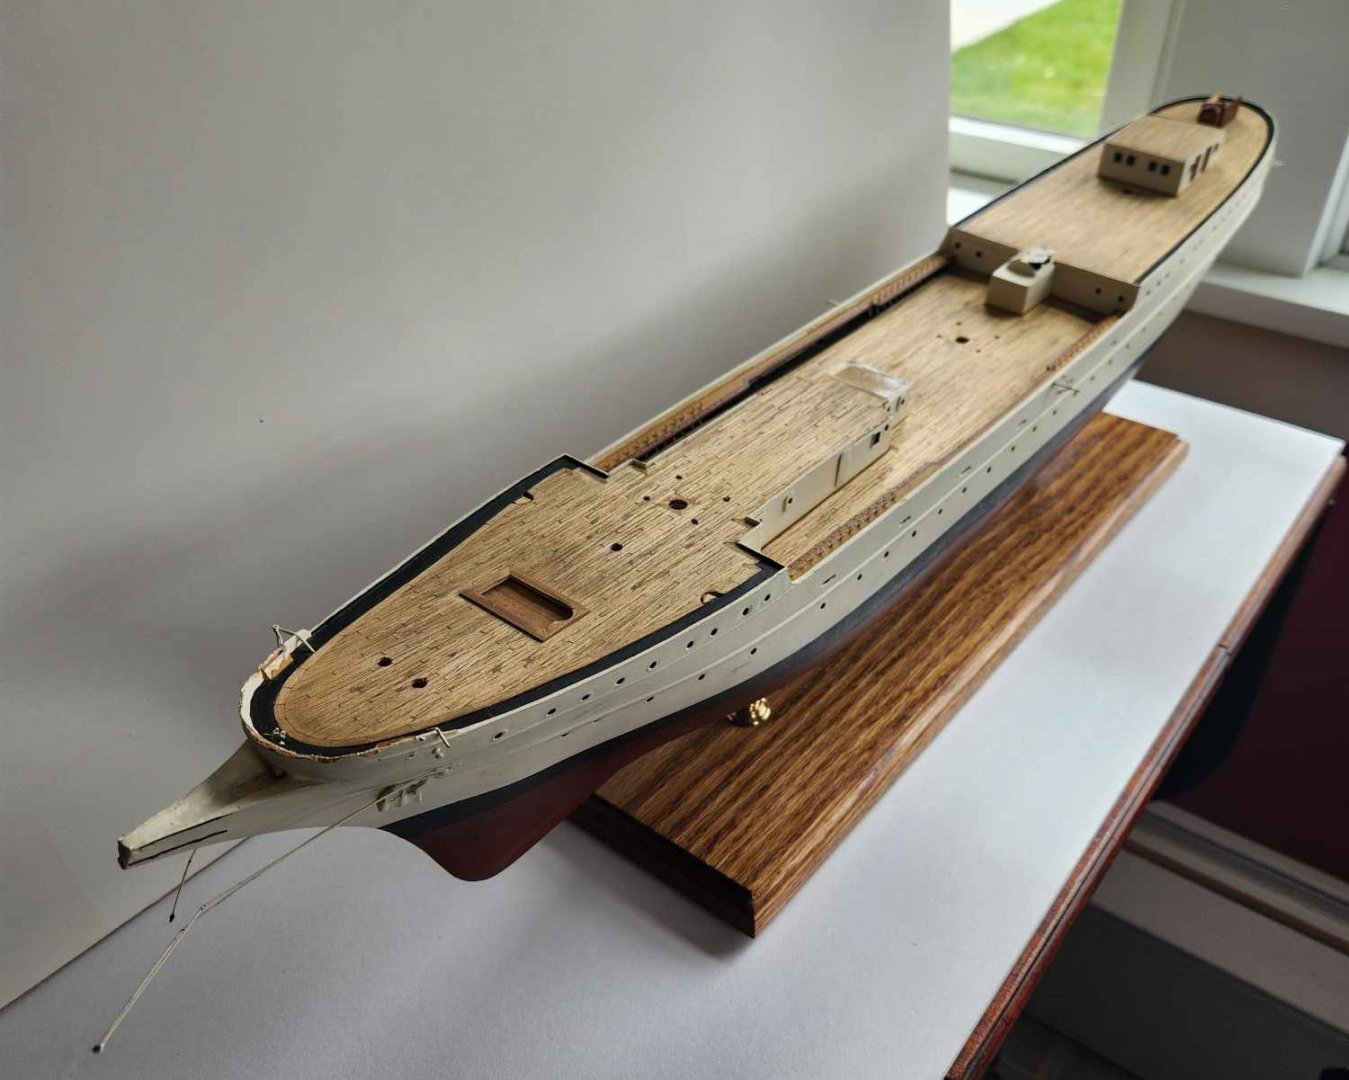
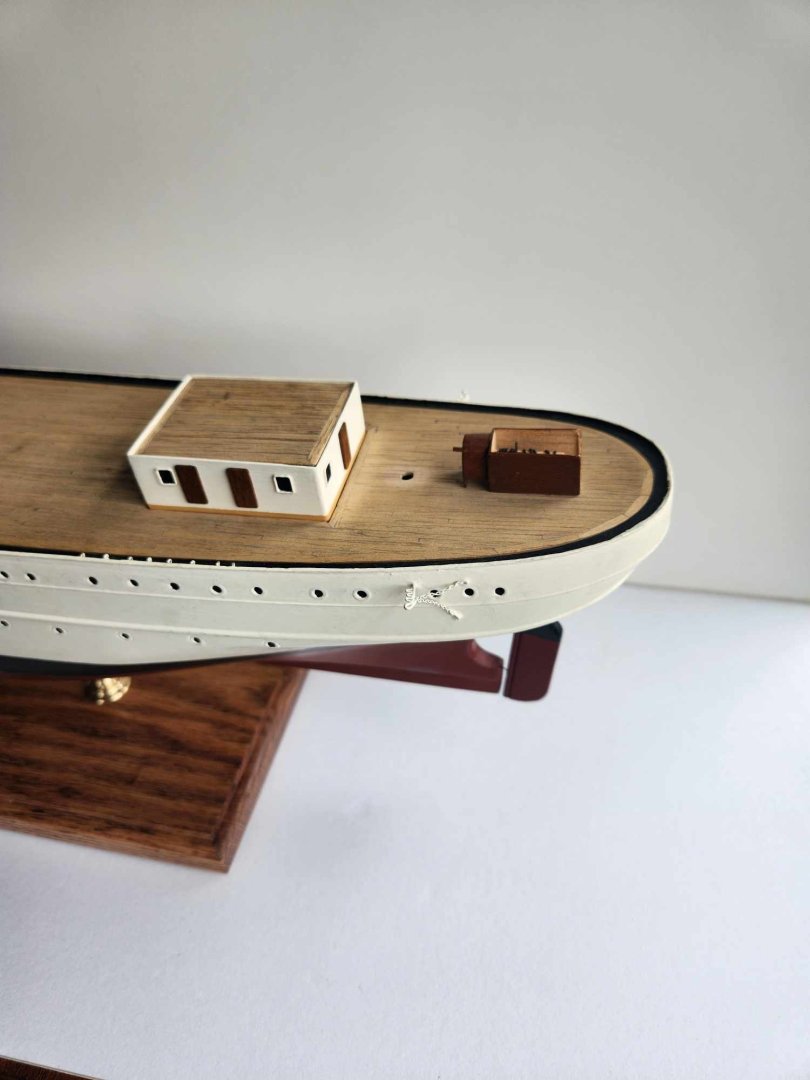
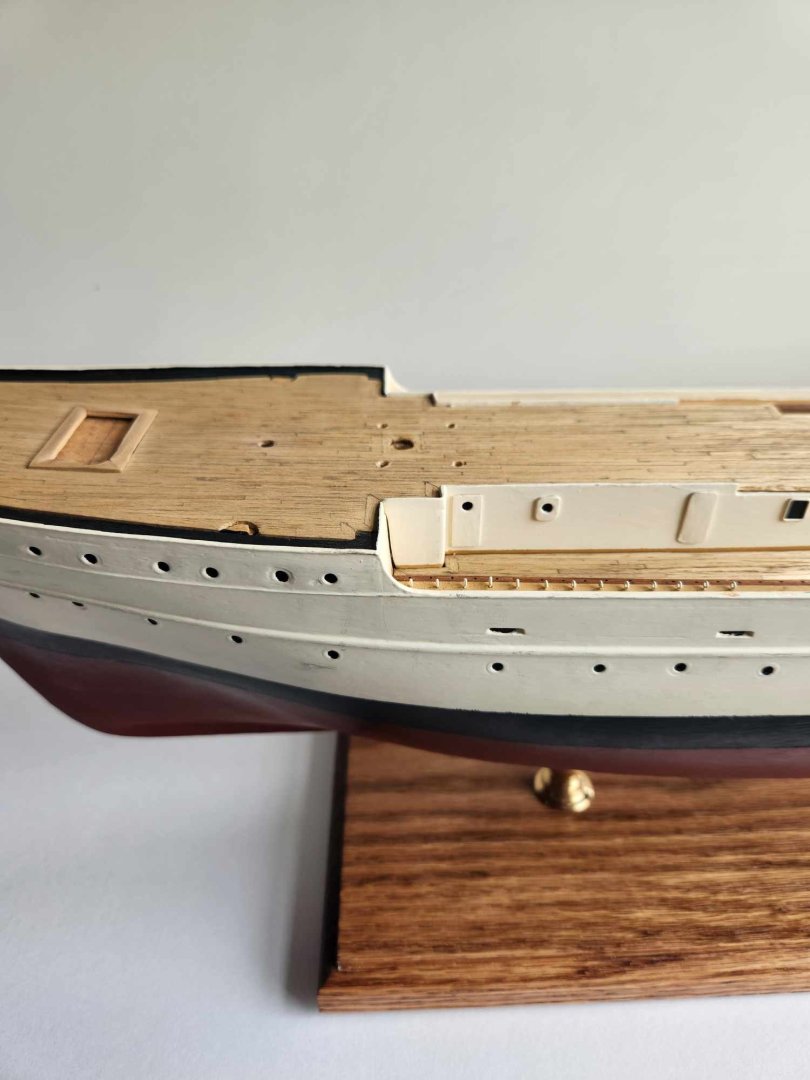
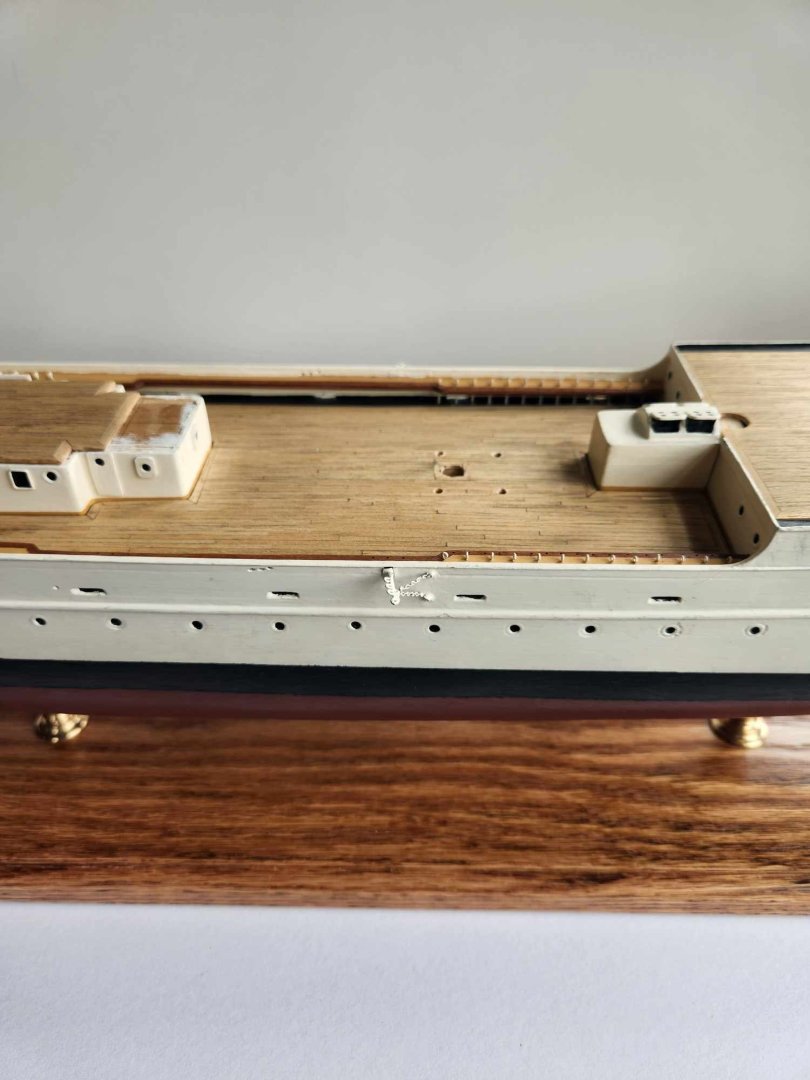
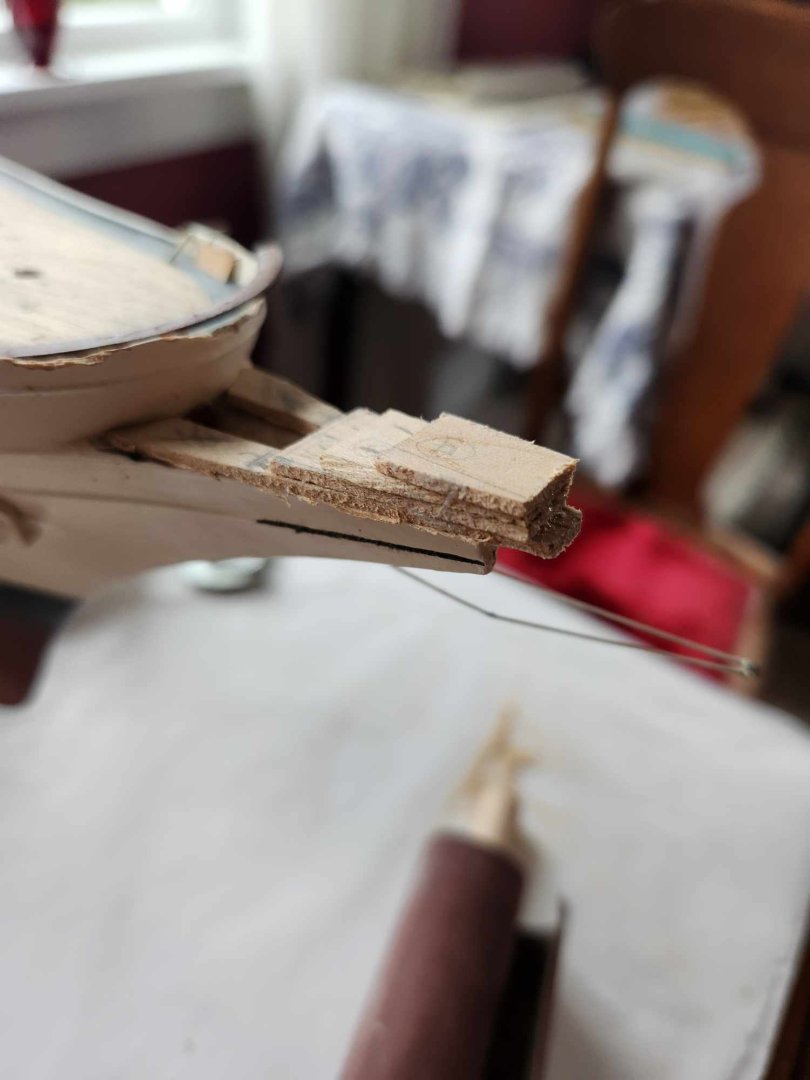
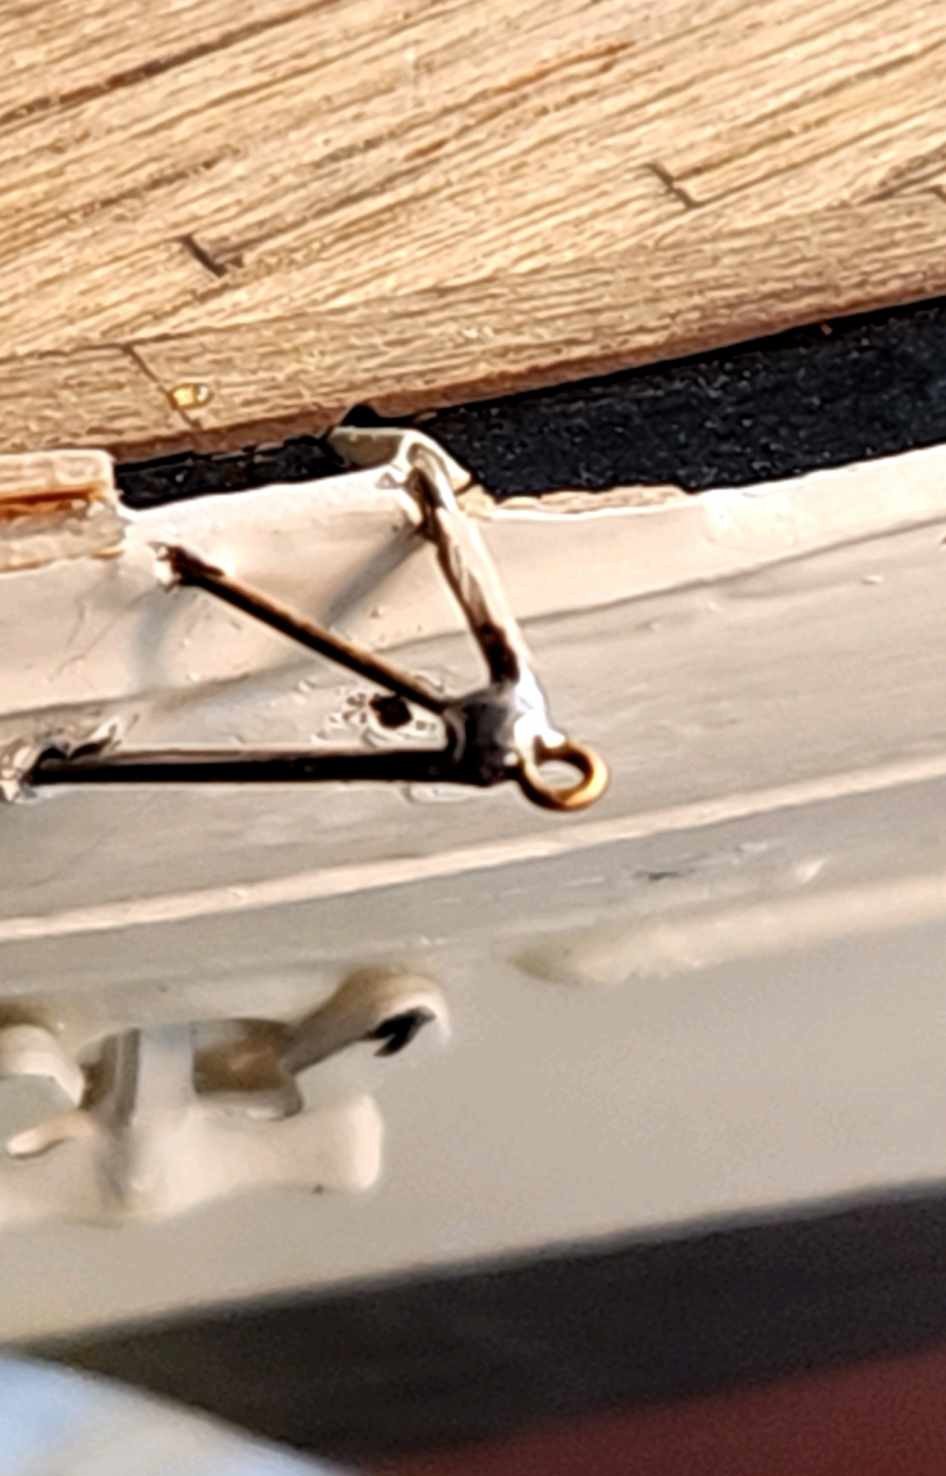
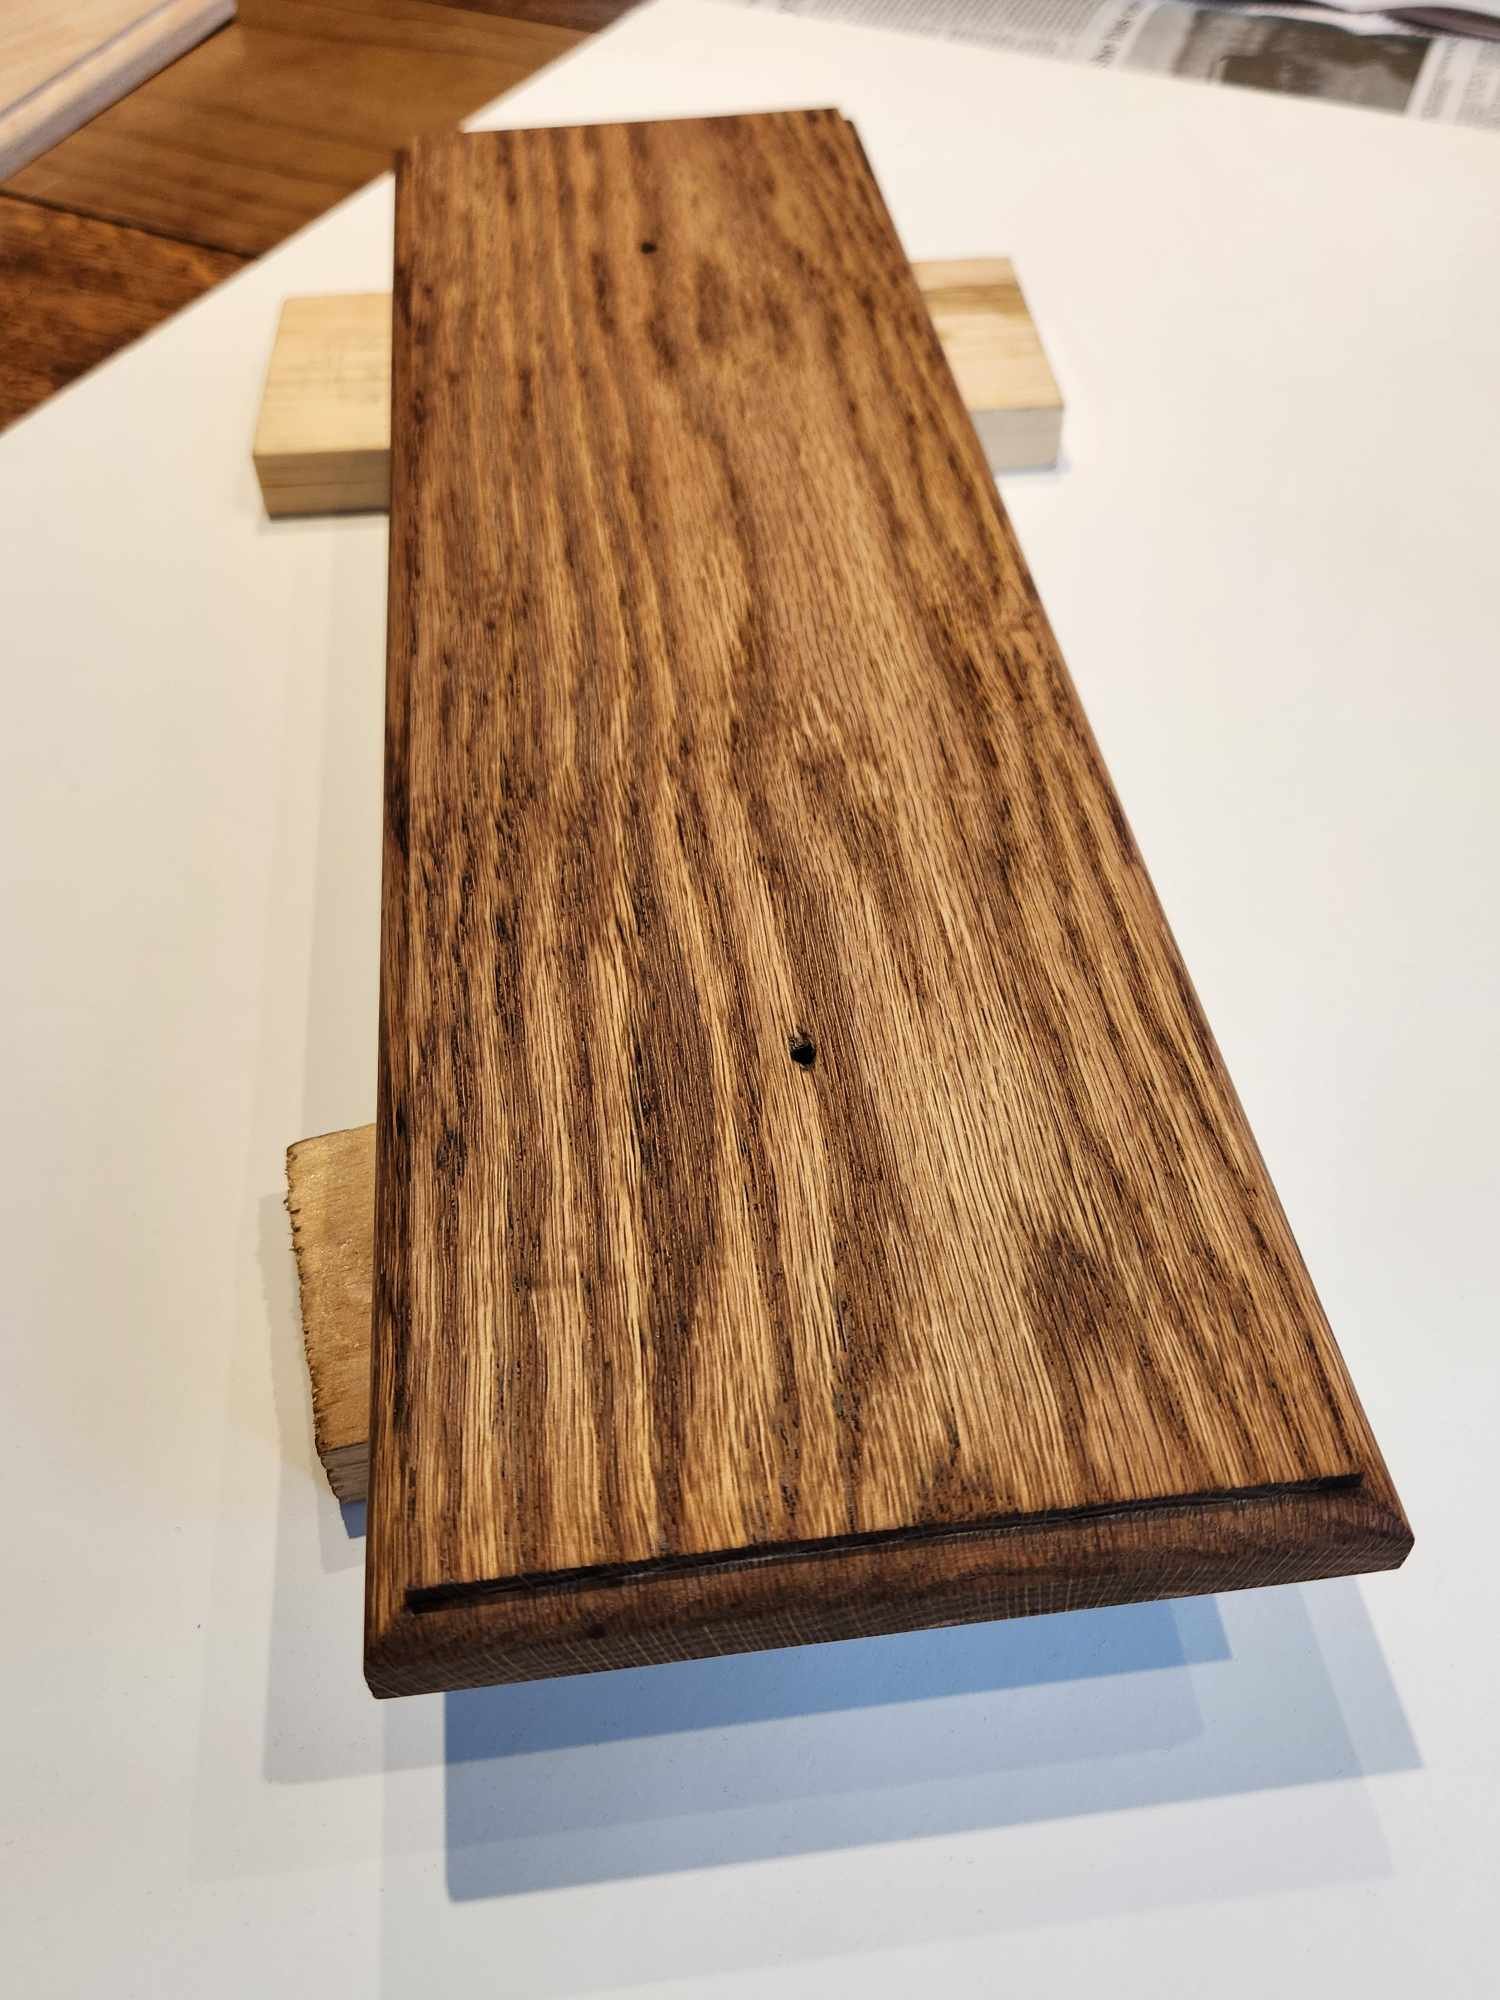
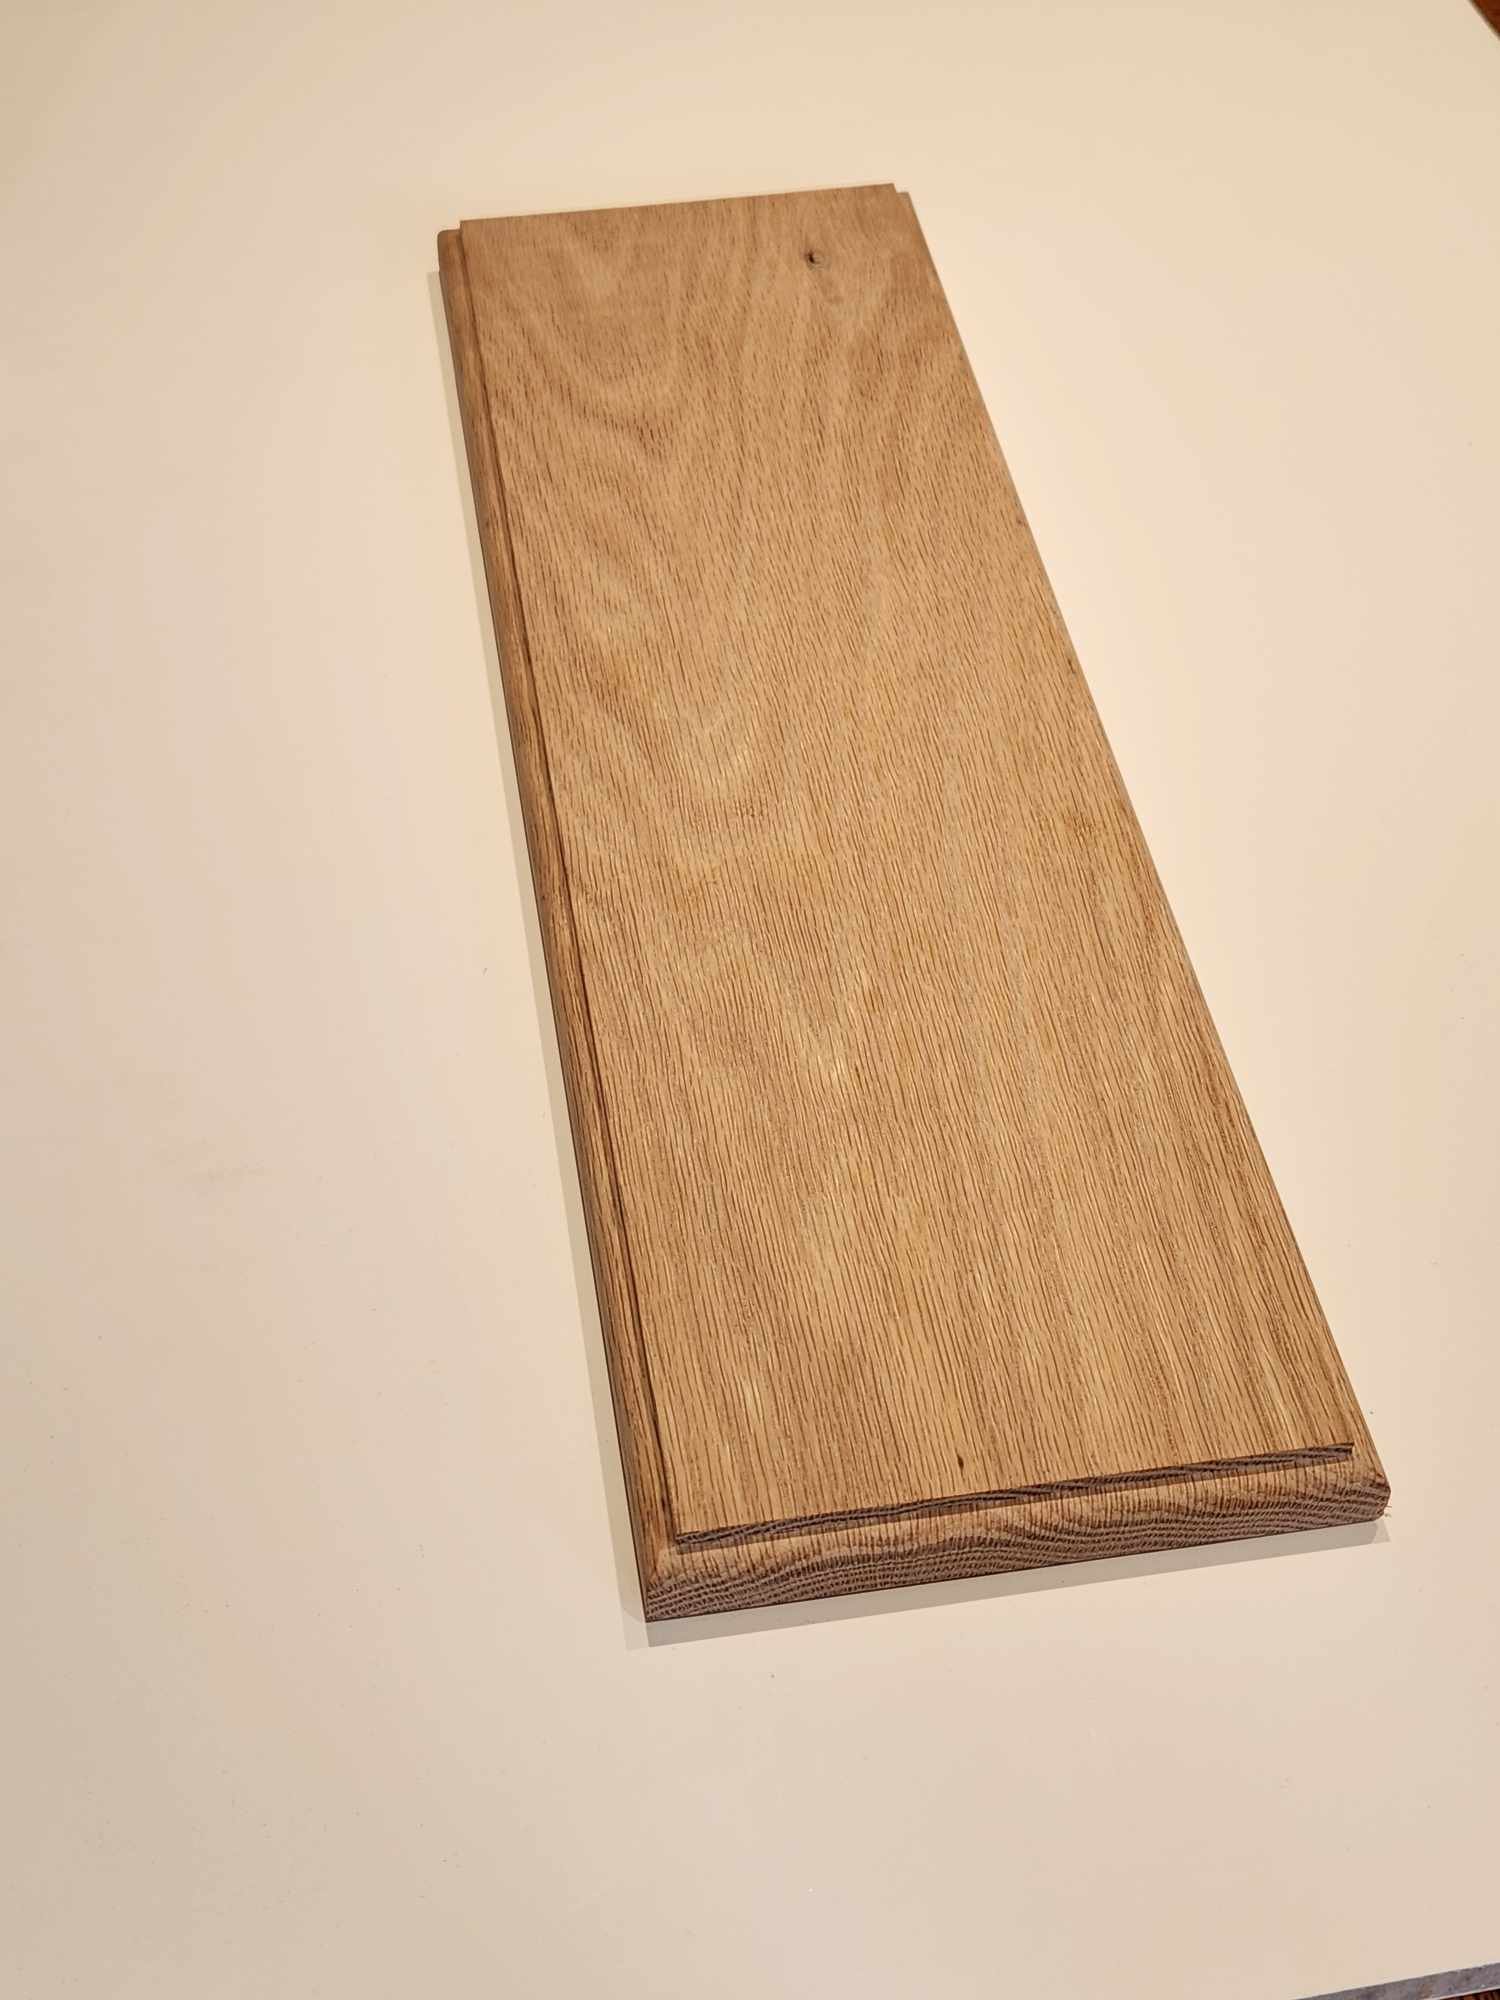
Introduction US Coast Guard Cutter Eagle (WIX-327), originally the German training barque Horst Wessel. Length: 295 feet; beam: 39.1 feet; height of foremast and mainmast: 150.3 feet above the waterline (other specs are found on various Coast Guard websites). I am a retired Coastie and as a cadet, I had the privilege of sailing on the Eagle several times, the most notable being in Operation Sail 1972, sailing from New London, CT, to Europe. During the ocean crossing, we competed in, and won, the Boston Teapot Trophy, awarded annually to the training ship that logs the greatest distance under sail in 124 hours (we covered 1,104 miles). After docking in Portsmouth, England, for several days, we competed in the main event of OpSail 1972 - the tall ships race - that included three Class A ships: Eagle (United Stated), Gorch Fock II (Germany), and Dar Pomorza (Poland), along with hundreds of Class B and C sailing vessels. The five day race started off of Cowes, England, sailing north through the English Channel and the Skagerrak, and ending off the tip of Denmark. The race was highly eventful, with a great start for Eagle, many maneuvers and sail adjustments, parted sails and lines in stormy seas, and periods of unfavorable winds. To their credit, Dar Pomorza won the race, with Gorch Foch trailing by only a few minutes, and Eagle taking up third place. Following the race, Eagle made several port calls, ending in Lubeck, Germany, where thousands of visitors toured the ship, including several of Horst Wessel's original crew. The final event of OpSail was the Parade of Ships, with six square-riggers in one column, and smaller vessels in another column, sailing in to Kiel Bay, Germany, on display for the crowds attending the 1972 Summer Olympics. This was not the first, nor the last, transatlantic crossing for Eagle, and she continues to be both a rigorous training environment for the cadets, and an impressive ambassador for the Coast Guard and for the United States. All of this is to say, I have fond memories of the Eagle, and always wanted to build a model of the Eagle. In fact, I started this model in 1977, completing the hull, deck, and some of the fittings, until around 1979 when the project was boxed...until early 2024! Many military and post-military moves caused some damage to the model, but nothing that can't be fixed...and it's time to resume construction. The Model This is a model by Constructo, Barcelona, Spain. It is a wooden hull, with various wooden parts including bulwarks, cabins, shaped wooden tops and crosstrees, tapered wooden masts, spars, and bowsprit, and a few deck fixtures; plastic parts including windlass, winches, ship's wheels, chimneys, binnacles, life boats, blocks, pulleys, tensors, ladders, belaying pins (actually, fife rails), running lights, etc.; various metal parts such as eyebolts, pins, grommets, etc.; and stitched cloth sails. The instructions and diagrams (in both English and Spanish) indicate a scale of 1:185, but this would equate to a model of about 19 inches, whereas the actual model (with bowsprit) is 34 5/8 inches. From this actual model dimension, I calculated a scale of 1:102.2 for the 295 foot ship, or 1" = 8.52'. Early on, I decided that I wanted a more realistic model than would be possible with the provided plastic parts and off-scale components, so while generally following the assembly instructions, I started creating some of my own fittings, and adding details not in the instructions. The Build My goal is to complete this model to show the Eagle as it was in 1972. This means two significant variations from the Eagle's present configuration: 1. No racing stripe, as per 1972. I feel it's out of place on an historic ship such as the Eagle. There would have been better, more subtle ways to show the Coast Guard's name and colors. 2. Spanker and single gaff only. I understand why the gaff was split in later years (to match the ship's original configuration), but that's not how it was configured in 1972. Other changes that have occurred since 1972 include relocated port and starboard running lights, a new pilot house in the aft part of the waist, different life boats, changes in ventilators and other deck fittings, new antennas for current electronic navigational aids, and most recently, a new figurehead. I'm sticking to the 1972 configuration as much as possible, guided by photos and publications around the same period, along with my personal photos and recollections. My first task is to survey the damage, and develop a repair plan. I had boxed the model in its original box, but with a cut-out at one end for the bowsprit I had already finished and glued in place. Even with a large dowel protecting the bowsprit, it broke at the hull, and took with it the stays I had installed. This proved to be a blessing in disguise, because I determined that the bowsprit wasn't angled correctly (too low), so that gave me the opportunity to rebuild the stem and create a new bowsprit. Other damage included broken bumpkins (who bumped the bumpkins?), crushed wood around the bow pinrail, and a few broken fife rails. I had already painted the hull (red below, black along the waterline, white above), but the white paint was scuffed in a few spots, so it will need a new coat of paint. In my next update, I'll provide photos of the current status, outline my plans, and begin work on the model. Update#1 Below are photos of the box end and side for the Constructo model I purchased in 1977. Next are photos of the model as it stands right now. I had previously constructed the decking with pieces of 1/16" square stock, sanded and lightly stained to resemble the Eagle's teak deck. The below image shows the broken bowsprit. The dolphin striker, martingale stay, etc., are not correctly sized, which will be corrected when I rebuild the bowsprit. Although several of the above pictures show a finished base, that was actually the first sub-project I did in this process. I started with a piece of bare oak board, cut to size, routed the edges, then sanded and stained with three coats of golden oak stain, followed by three coats of wipe-on satin polyurethane. I ordered the brass stanchions online, and had to modify them by drilling out the internal threads (for the bolts that came with them) so I could fasten the base through the stanchions into the ship's keel and hull. Now to start repairs. Below shows where the bowsprit was broken off, with some of the stays dangling, and the edge of the bow chipped away. Also note the bumpkin on the right is missing the eye and bottom support. I built up the stem using several layers of wood, so as to bring up the angle of the bowsprit, as shown below. Repairs are mostly done, as shown below, although a few touch-ups will be needed after I remove the dangling stays and re-work their attachment points. I used wood filler to repair the edge of the bow. Still needs some filling and sanding. The forward pinrail will sit on top of this edge, which will hide any slight imperfections.