djford
-
Posts
46 -
Joined
-
Last visited
Content Type
Profiles
Forums
Gallery
Events
Everything posted by djford
-
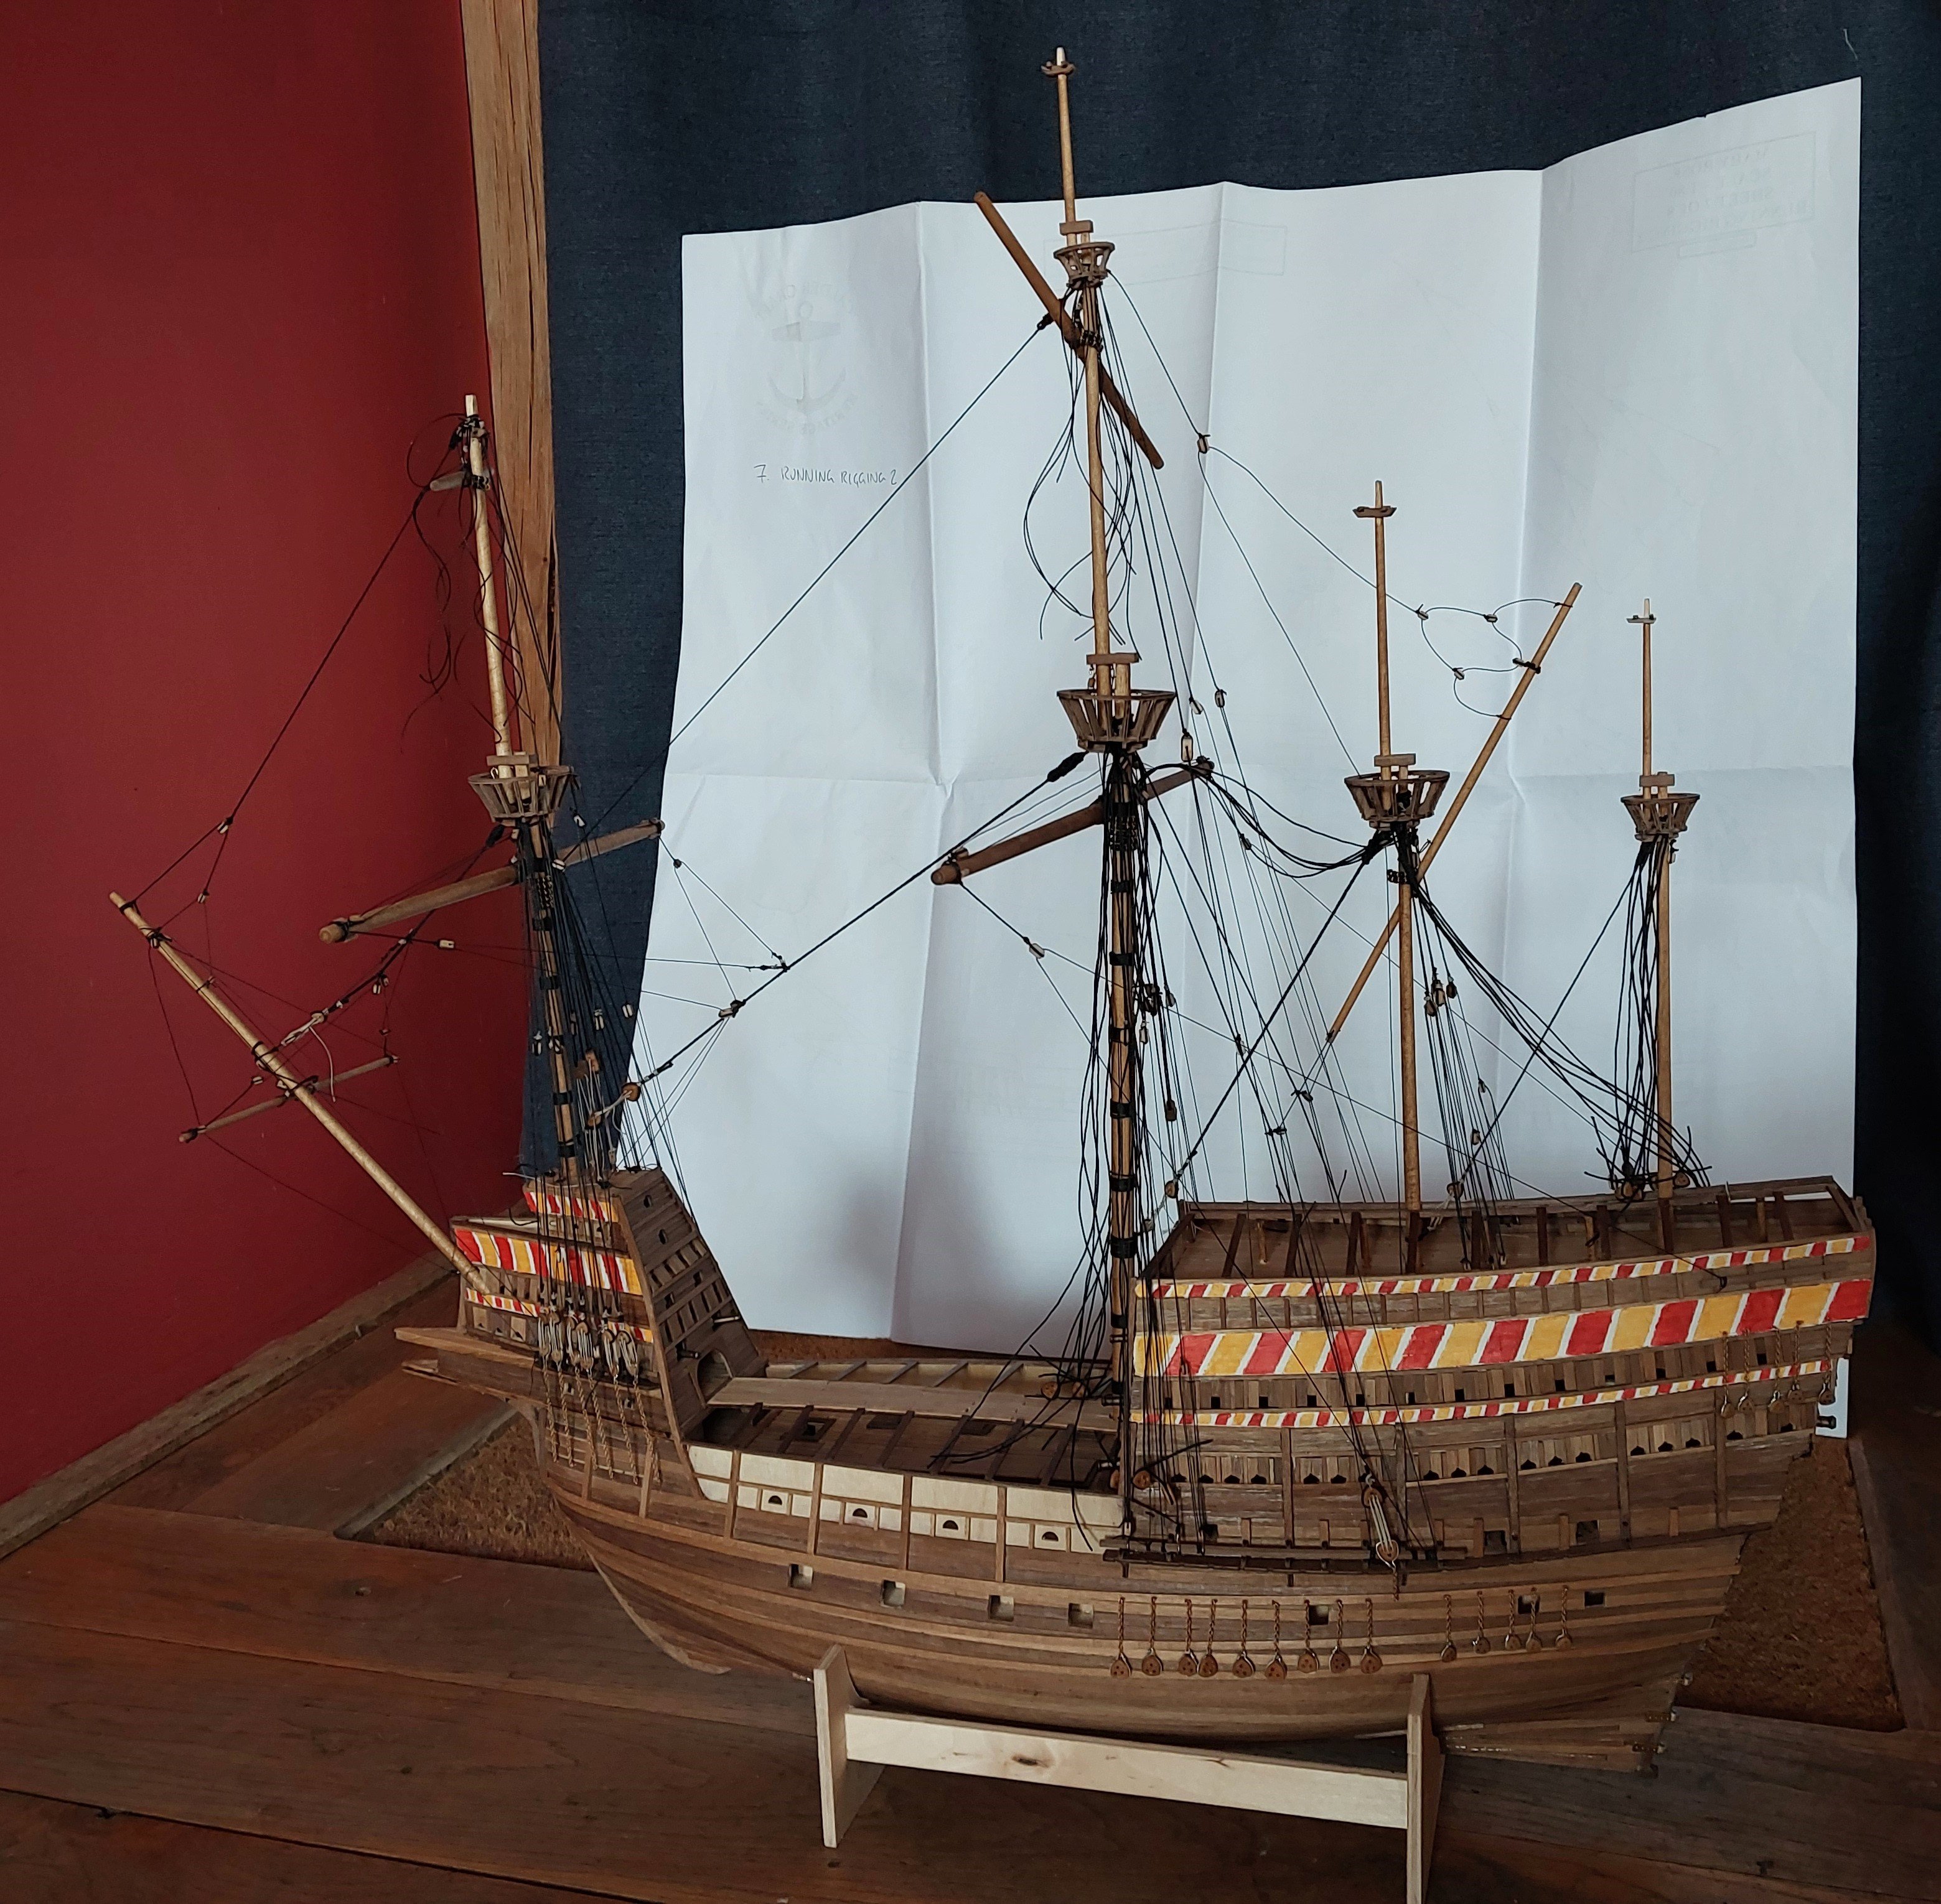
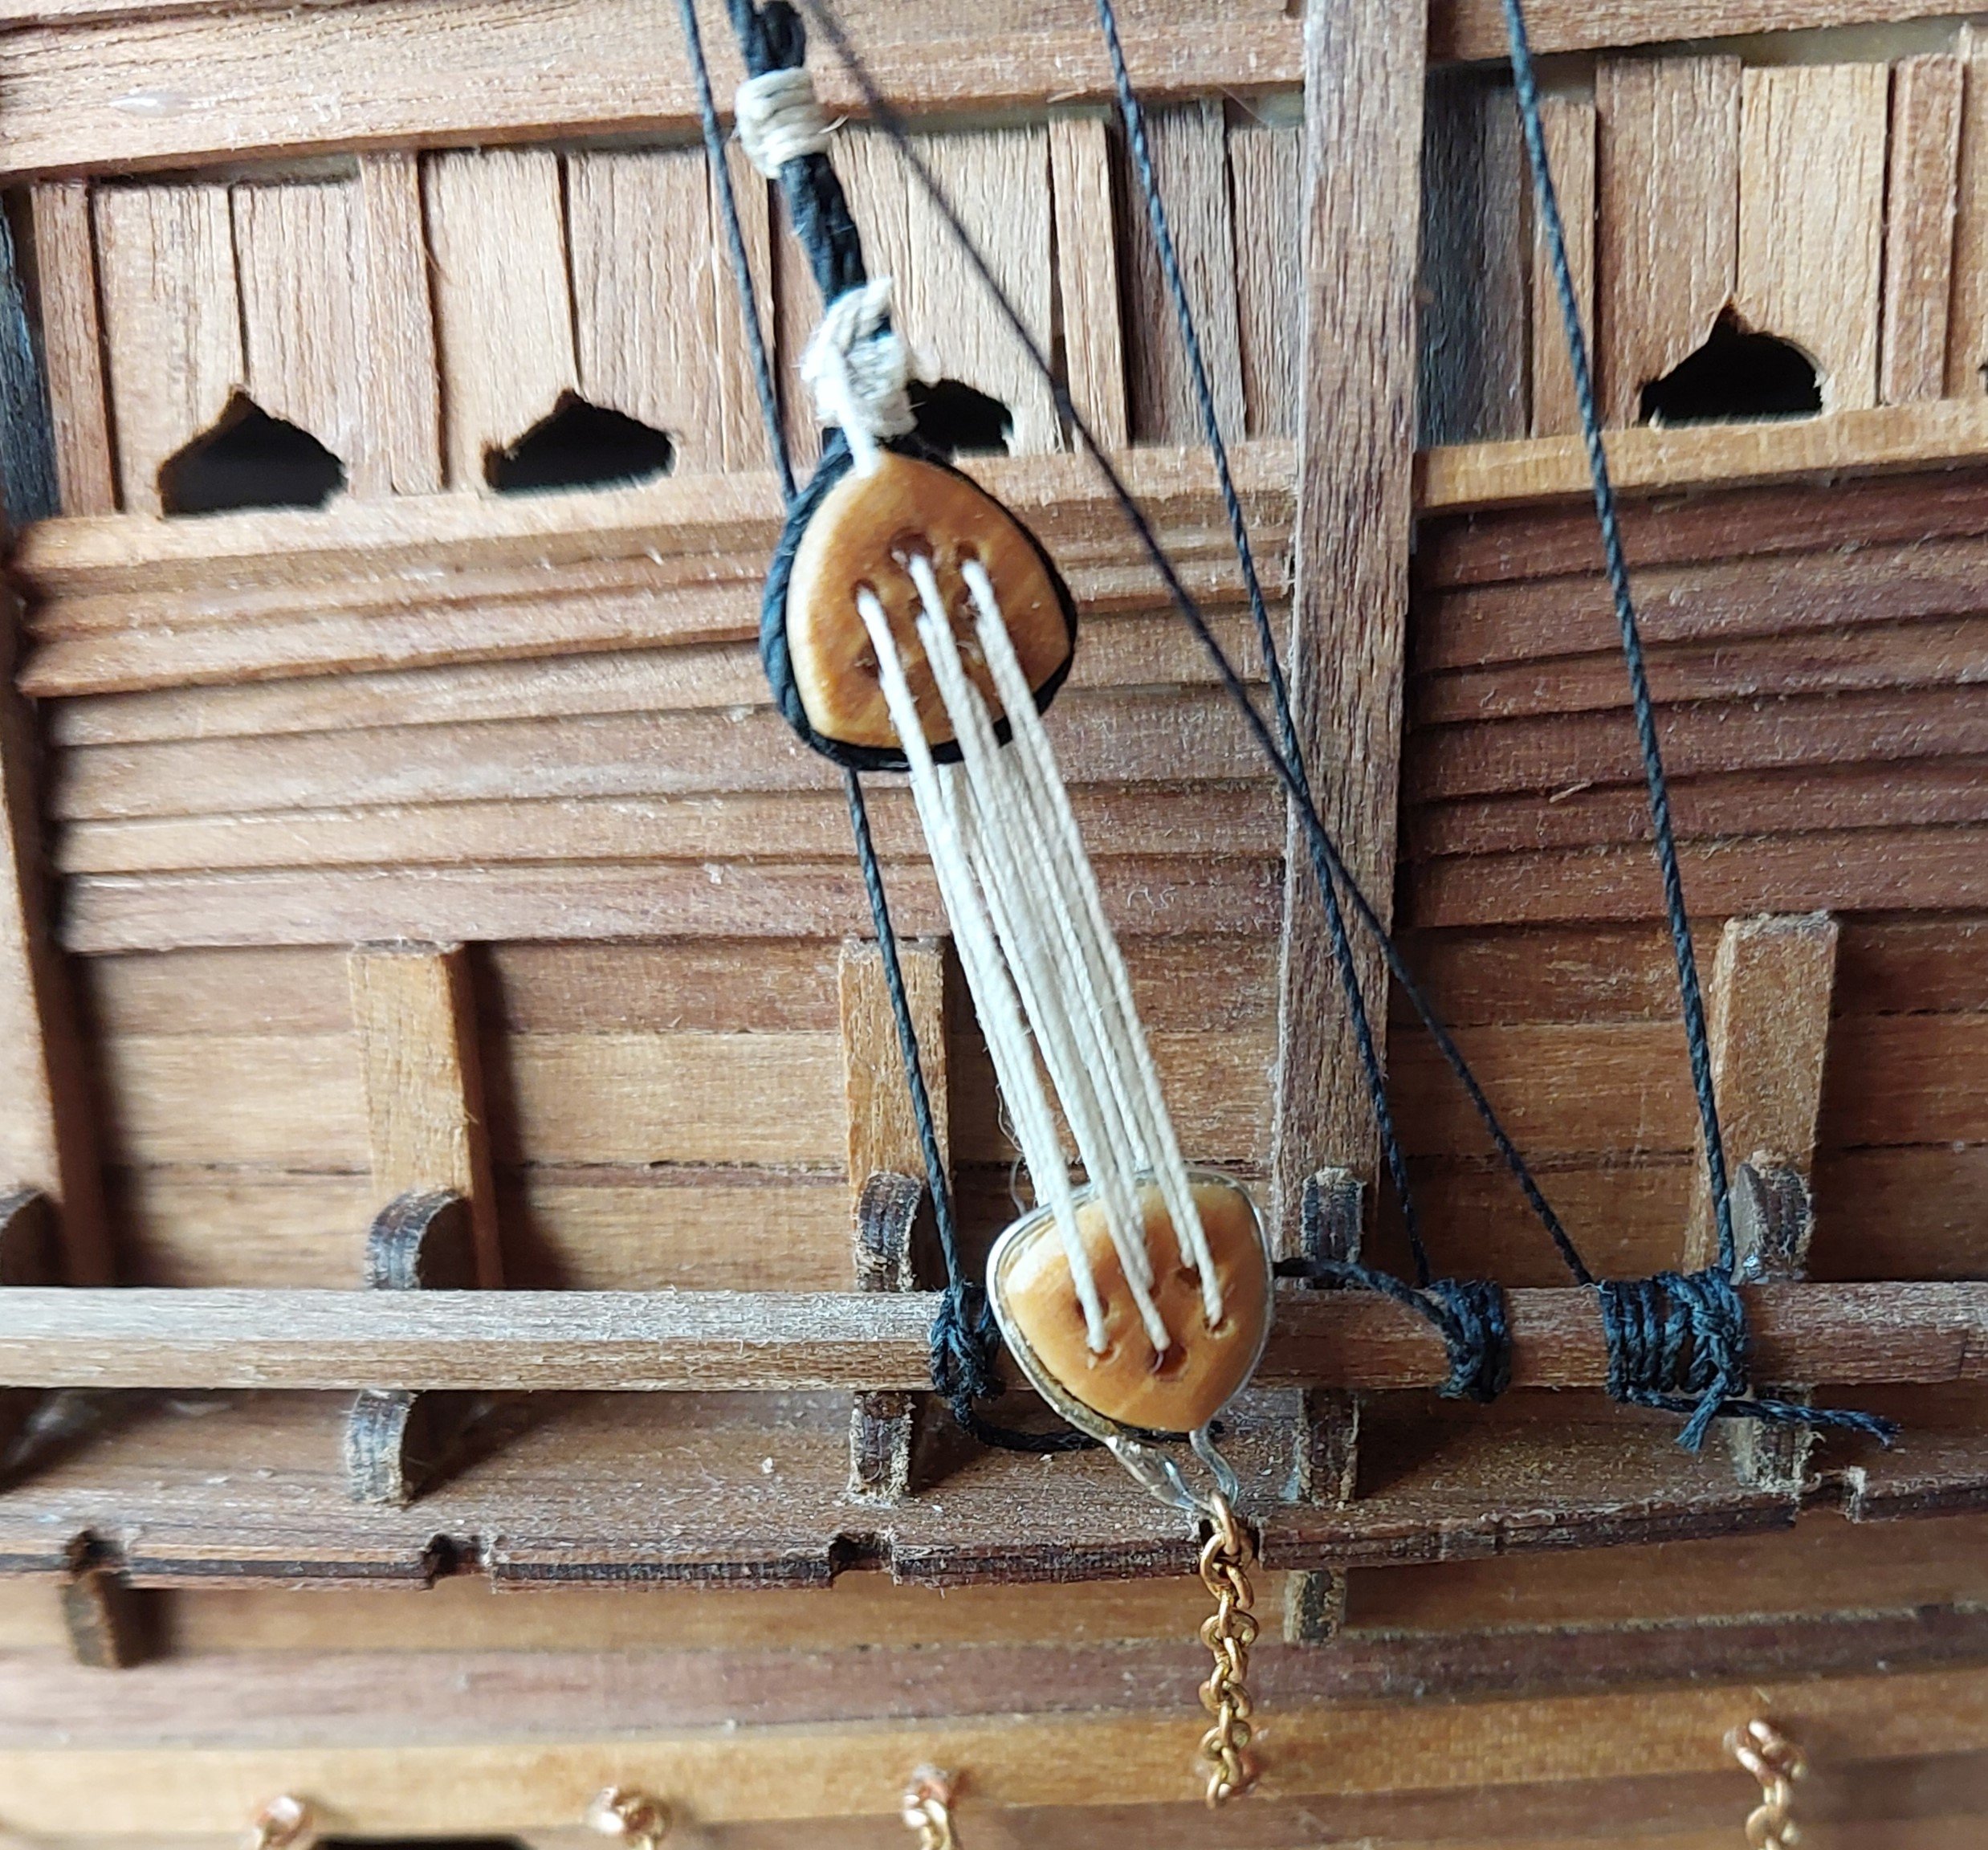
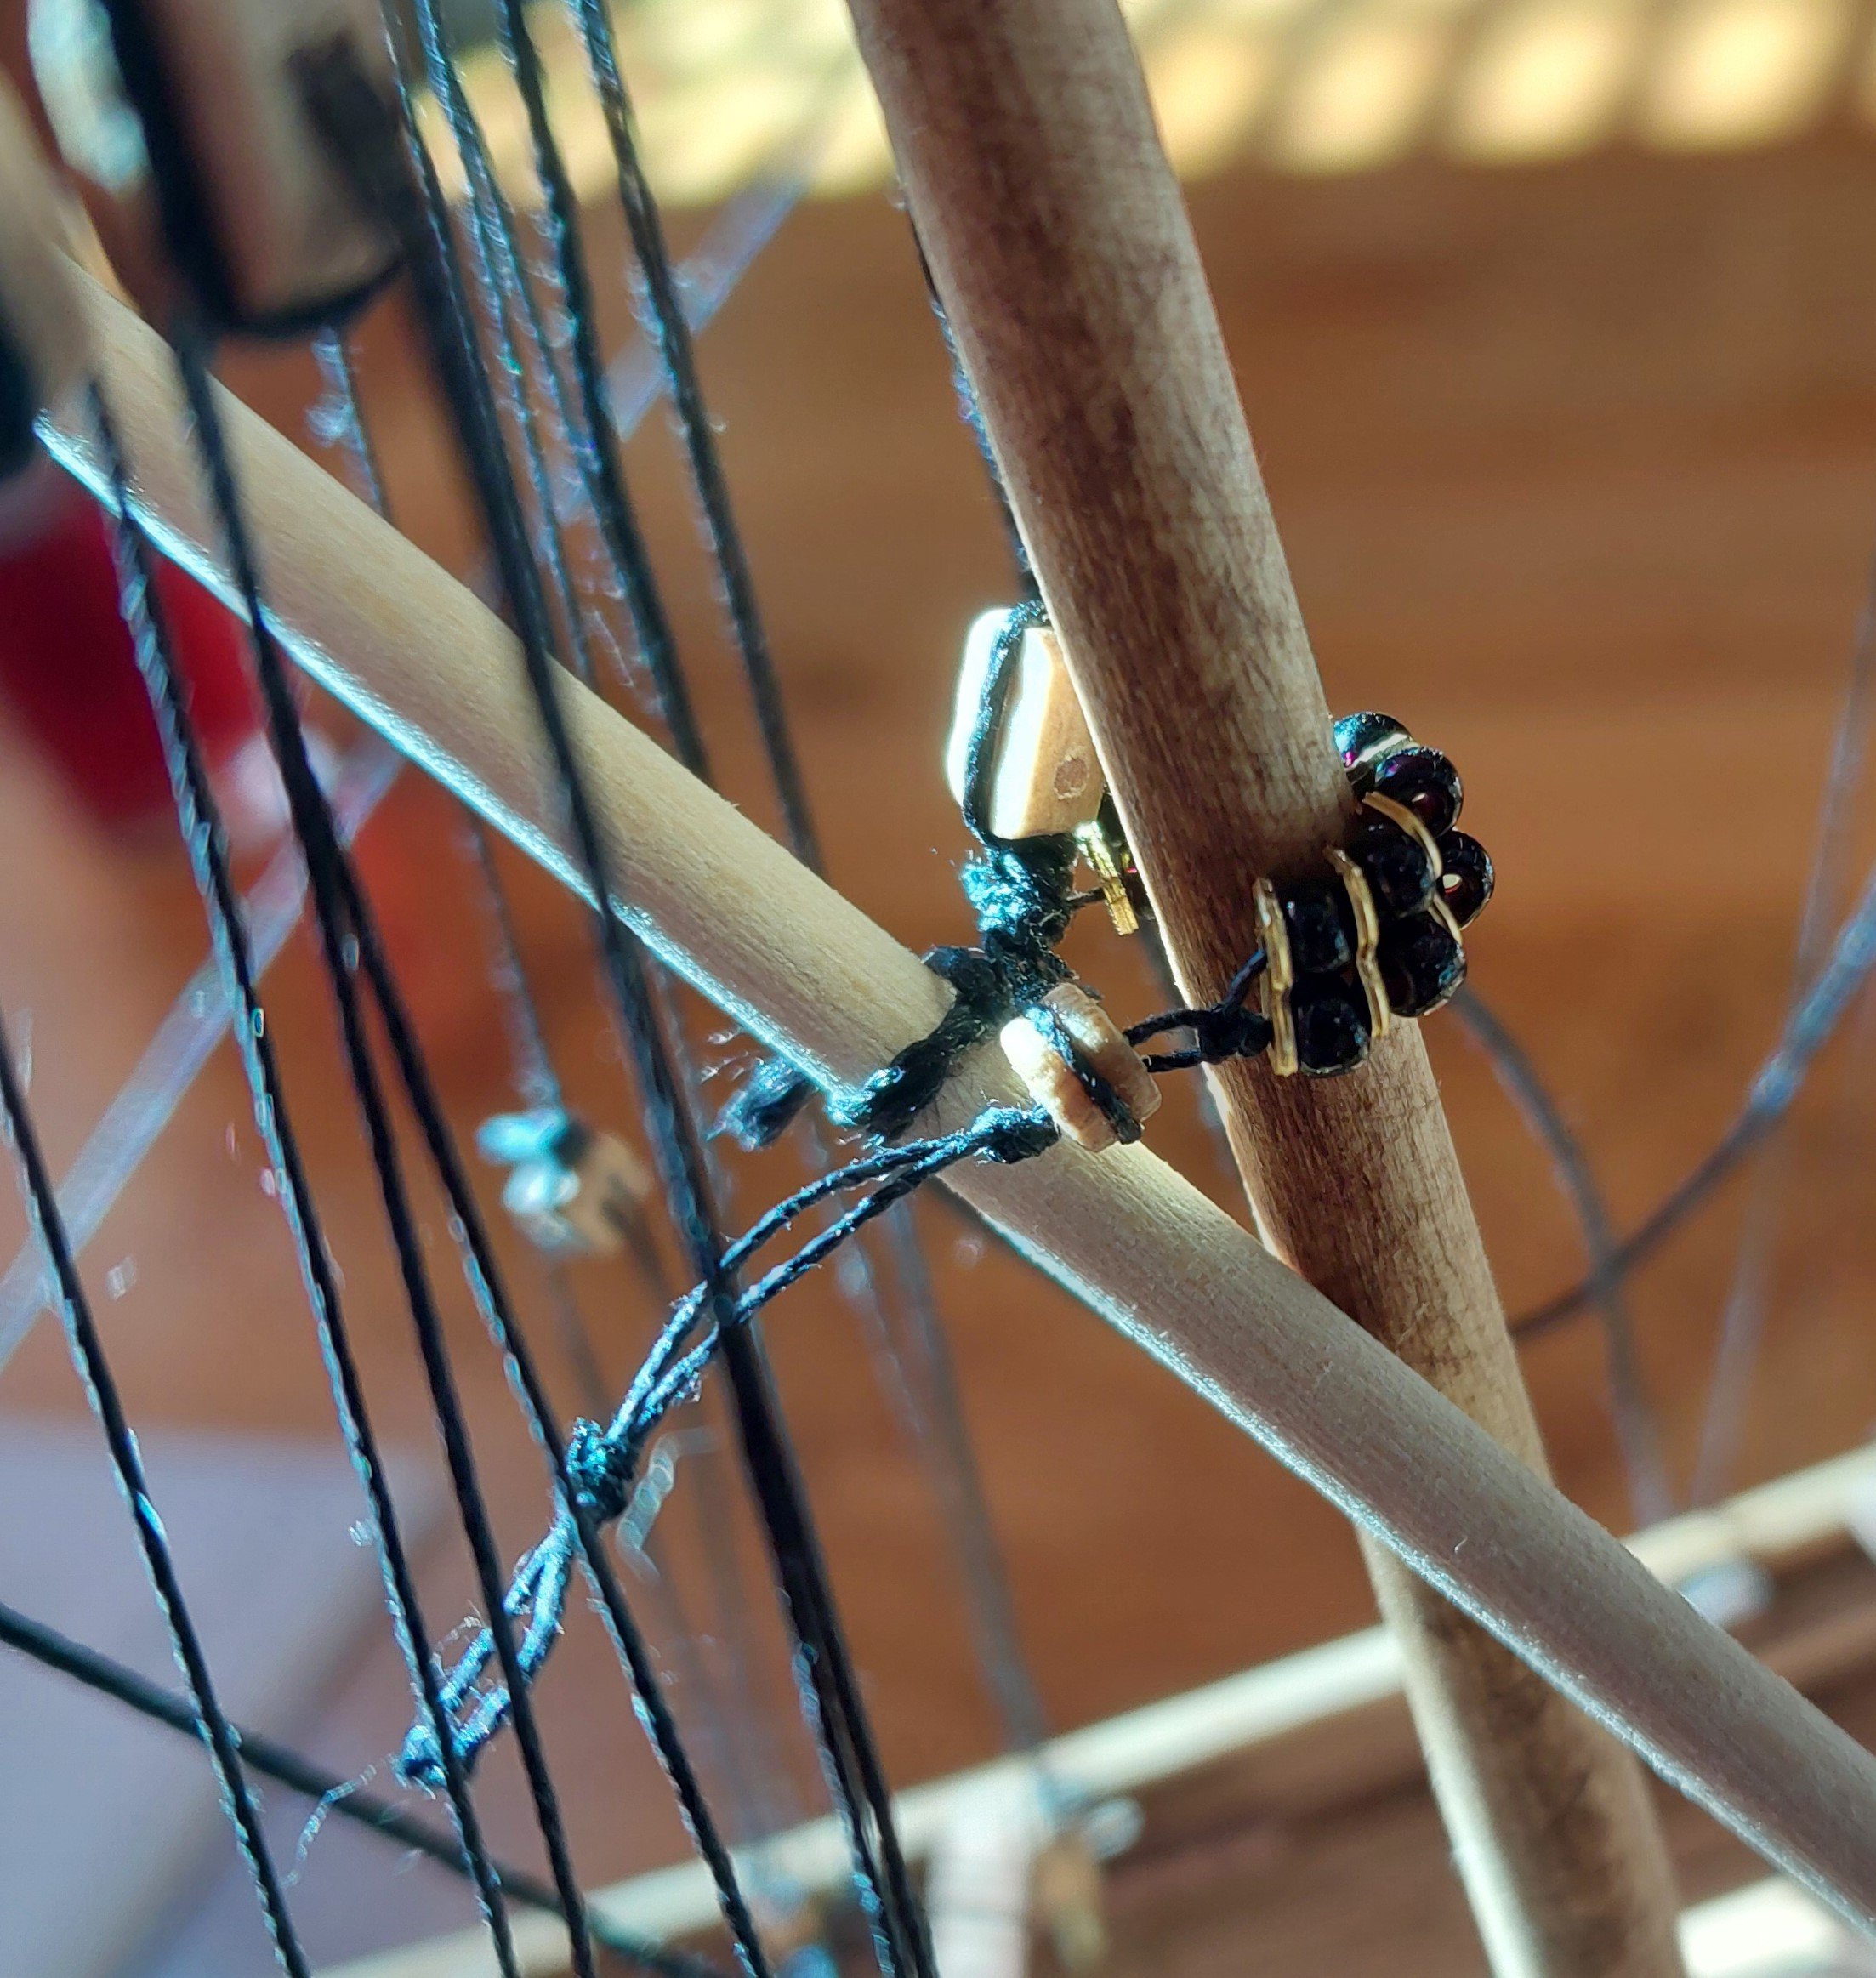
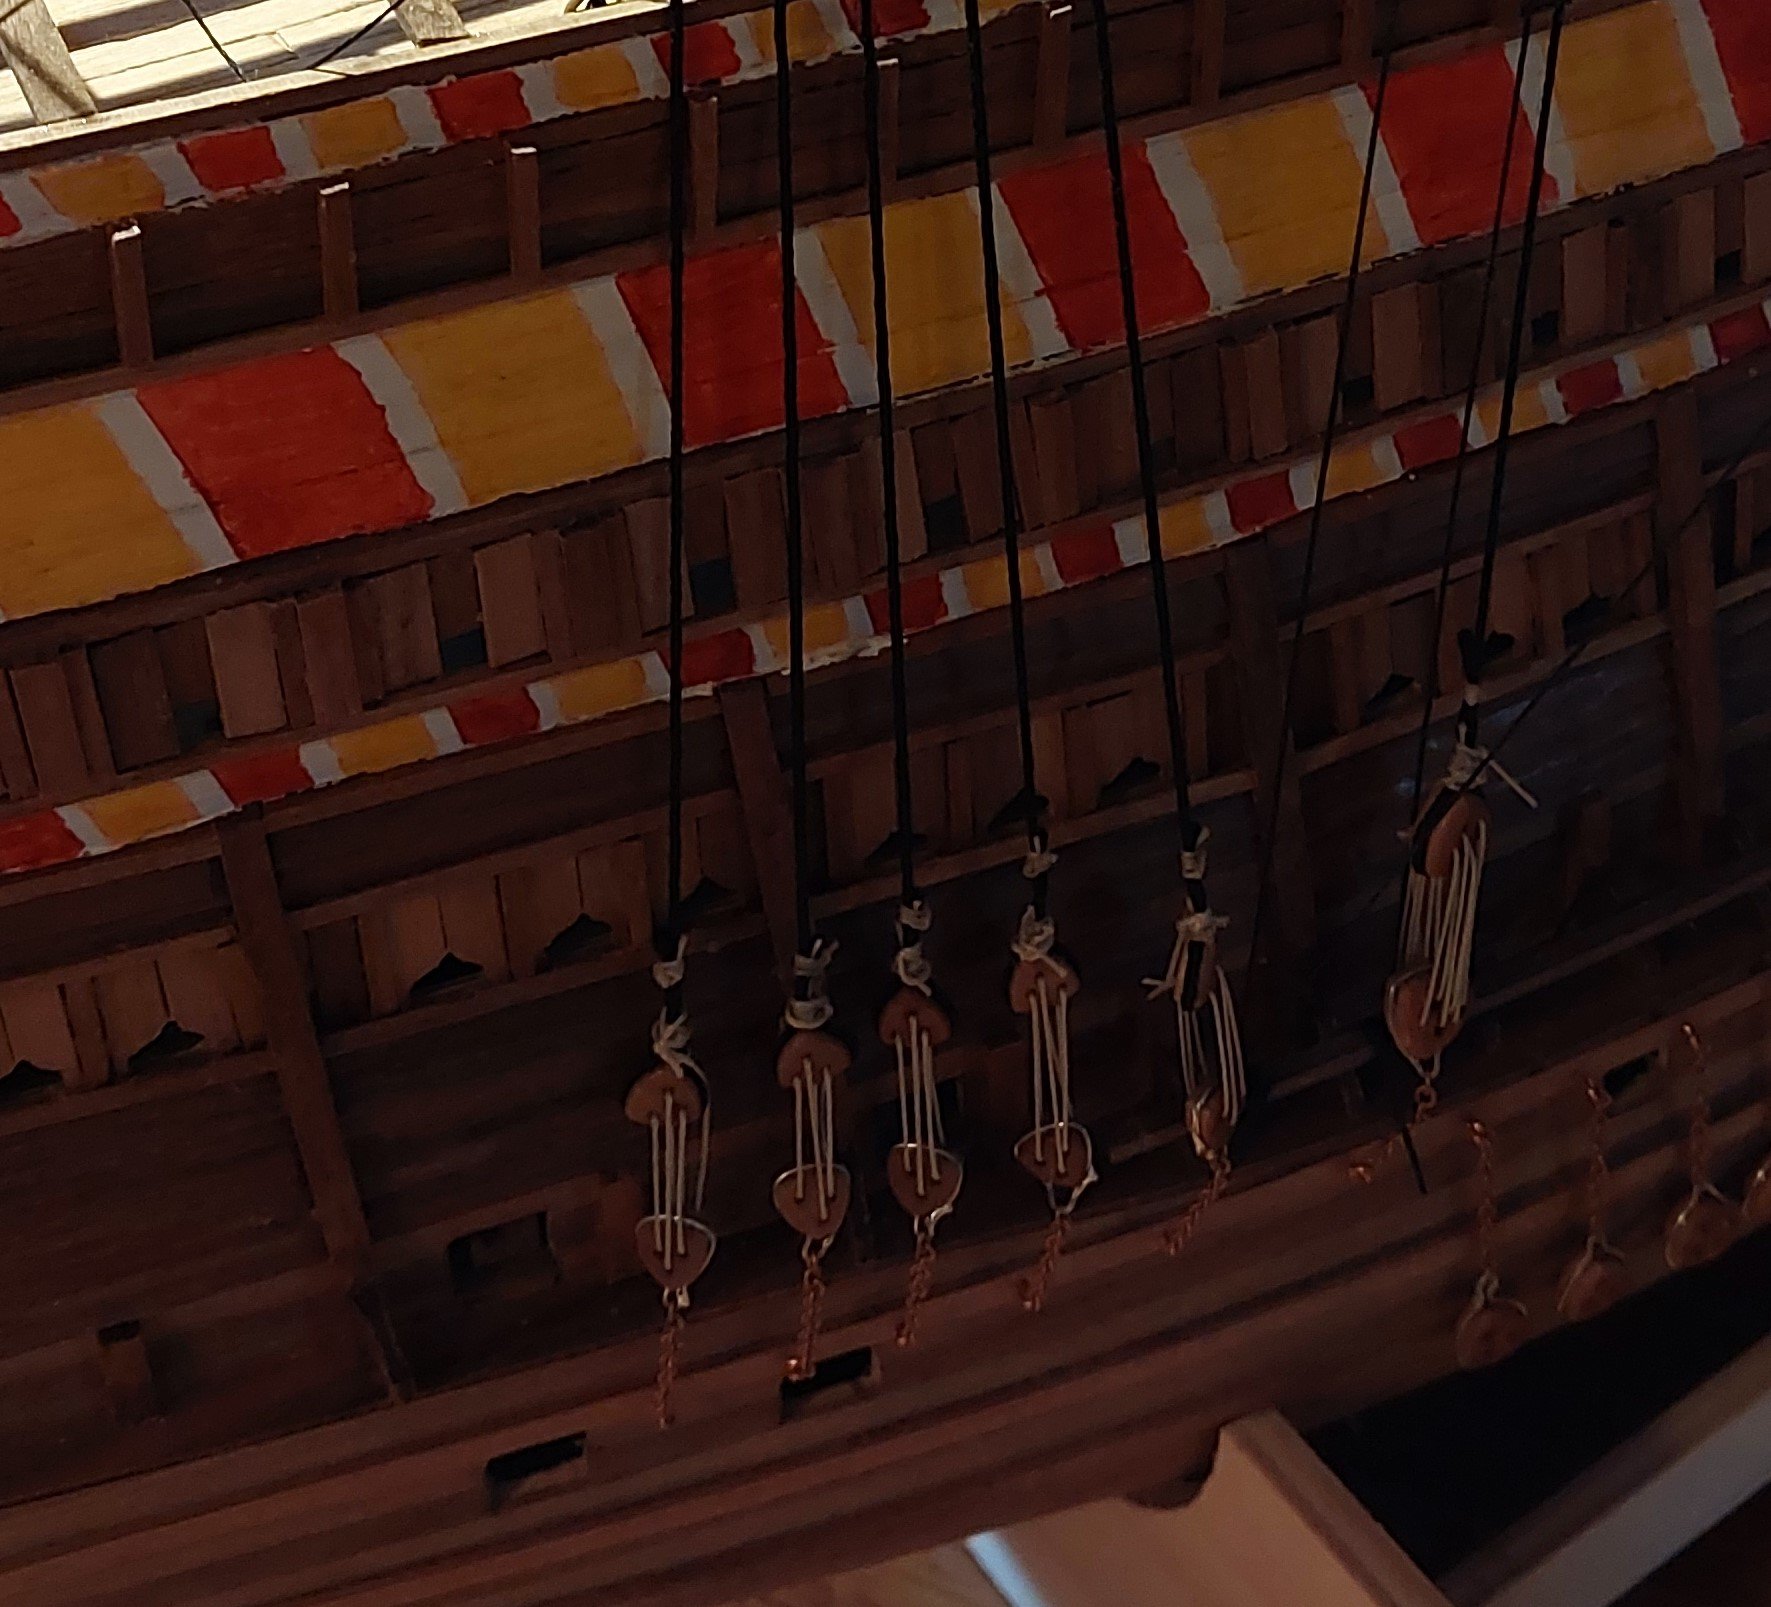
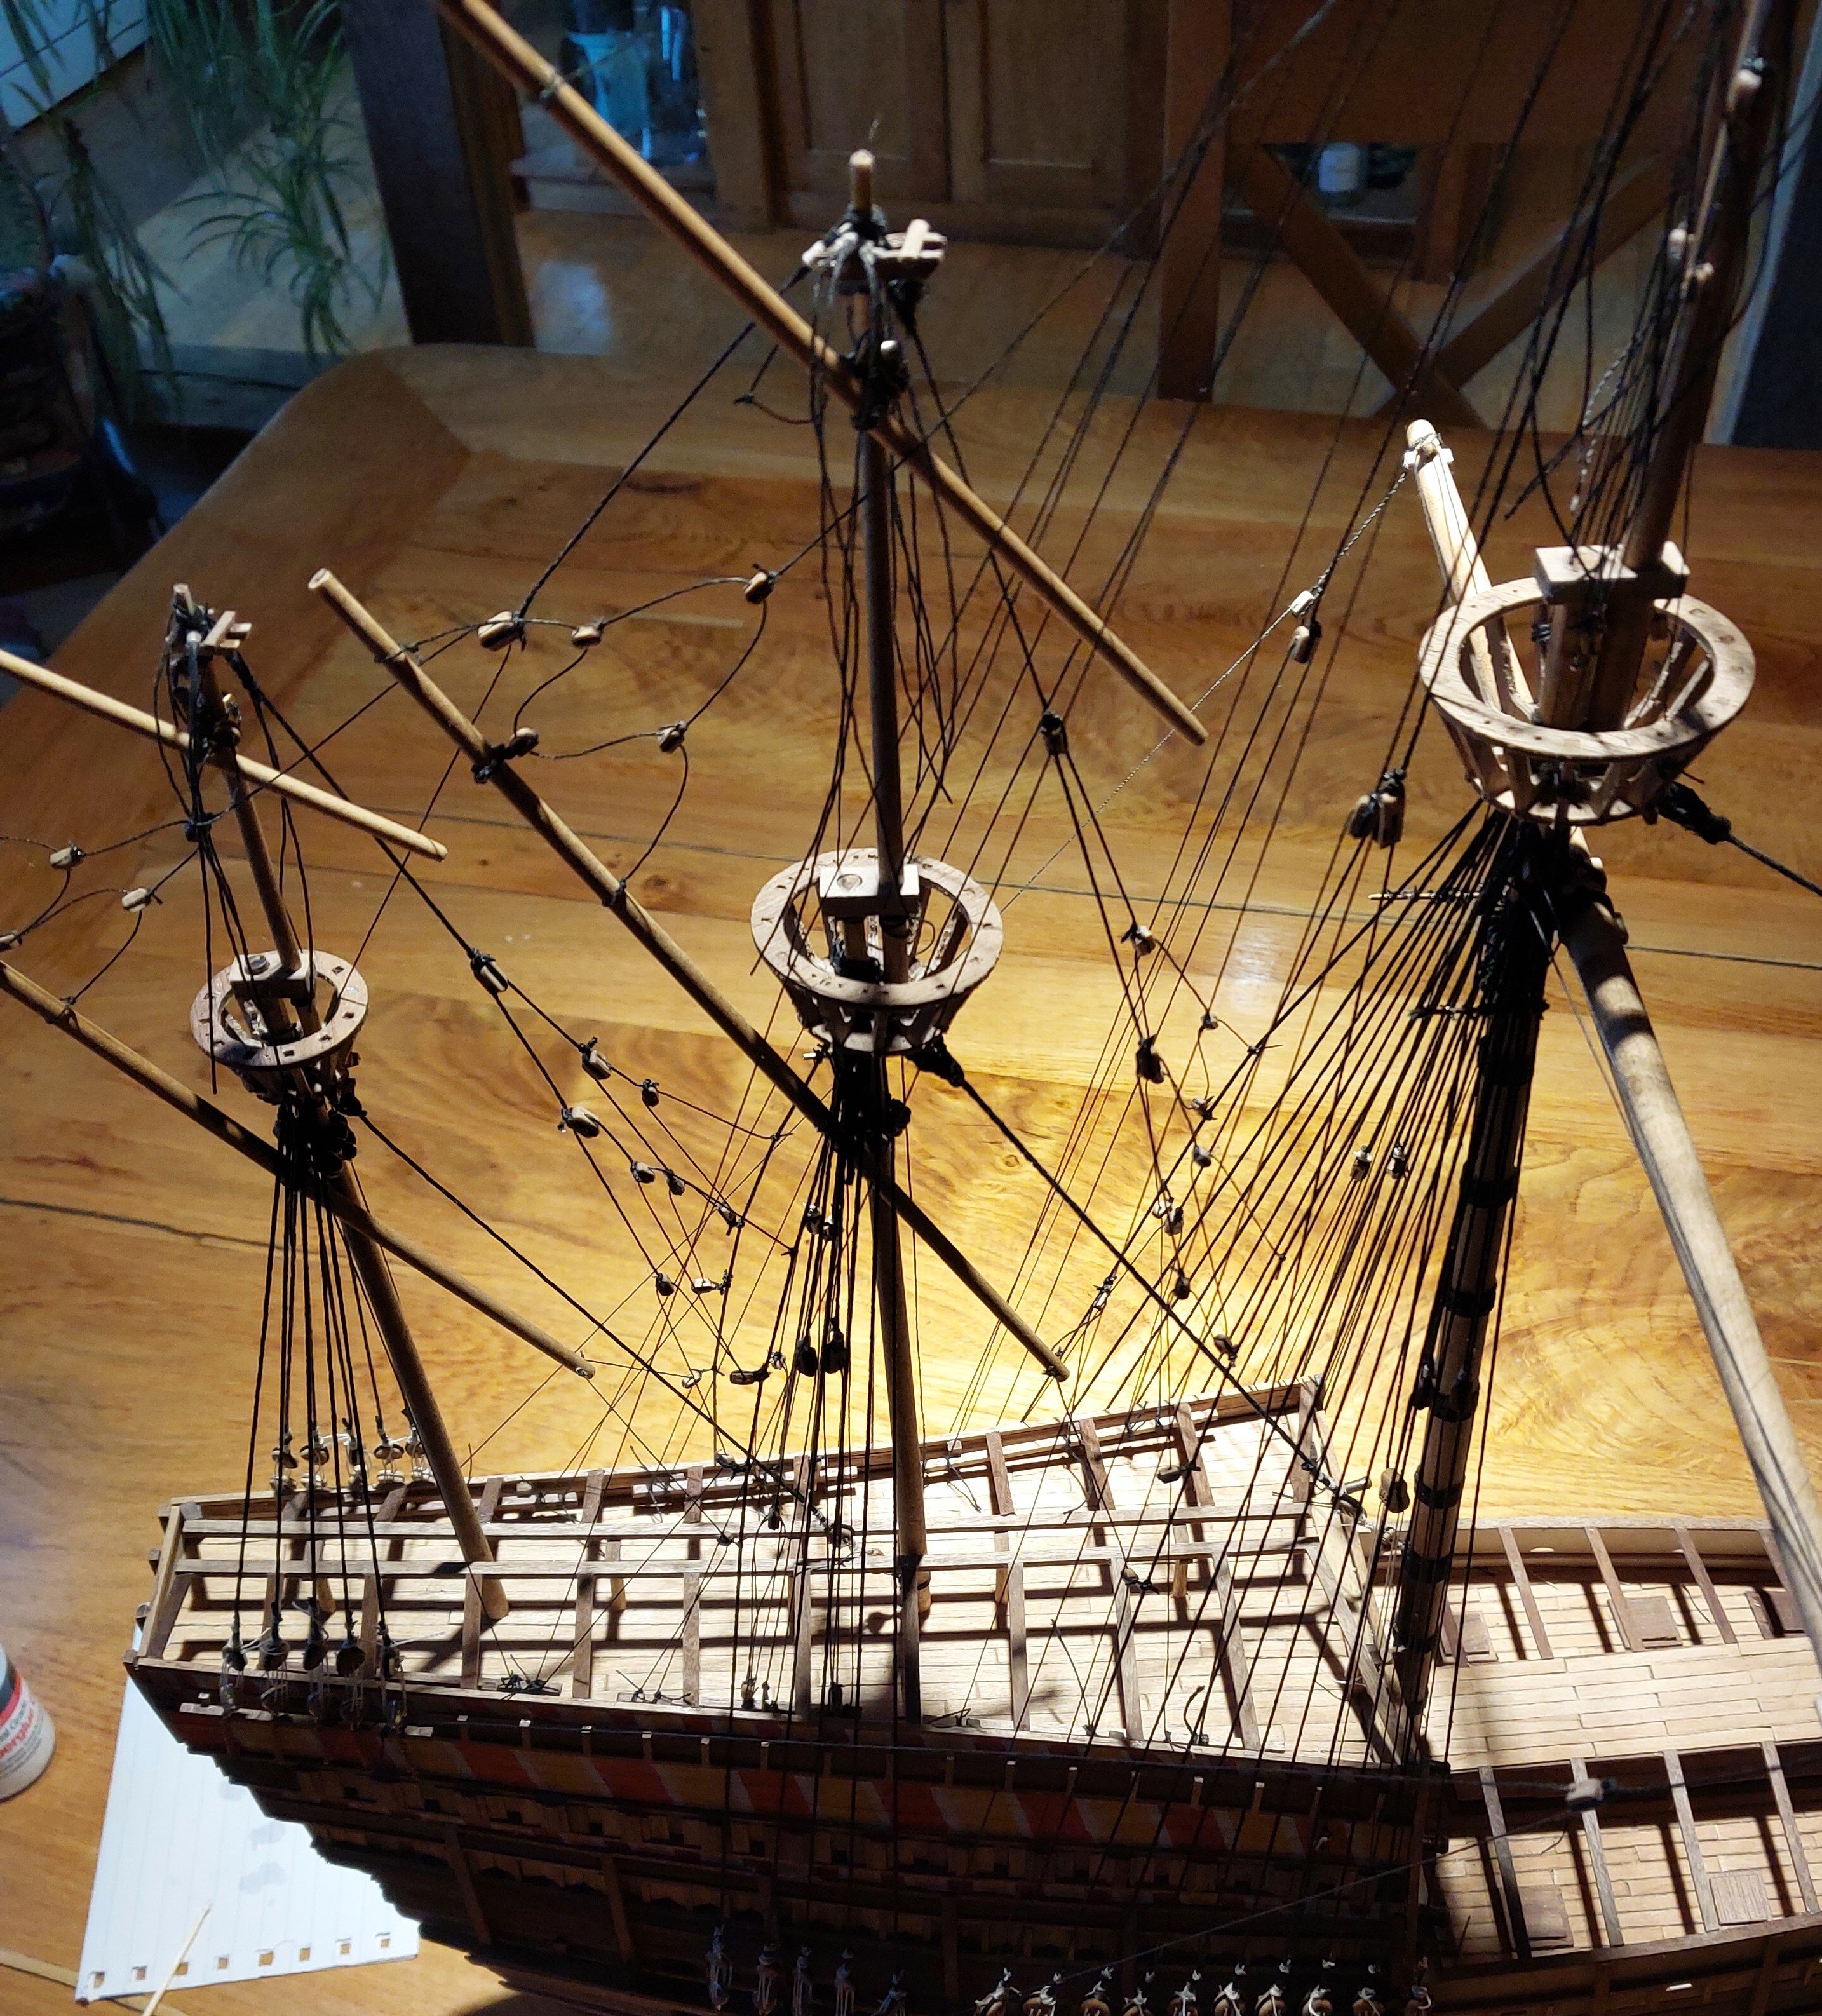
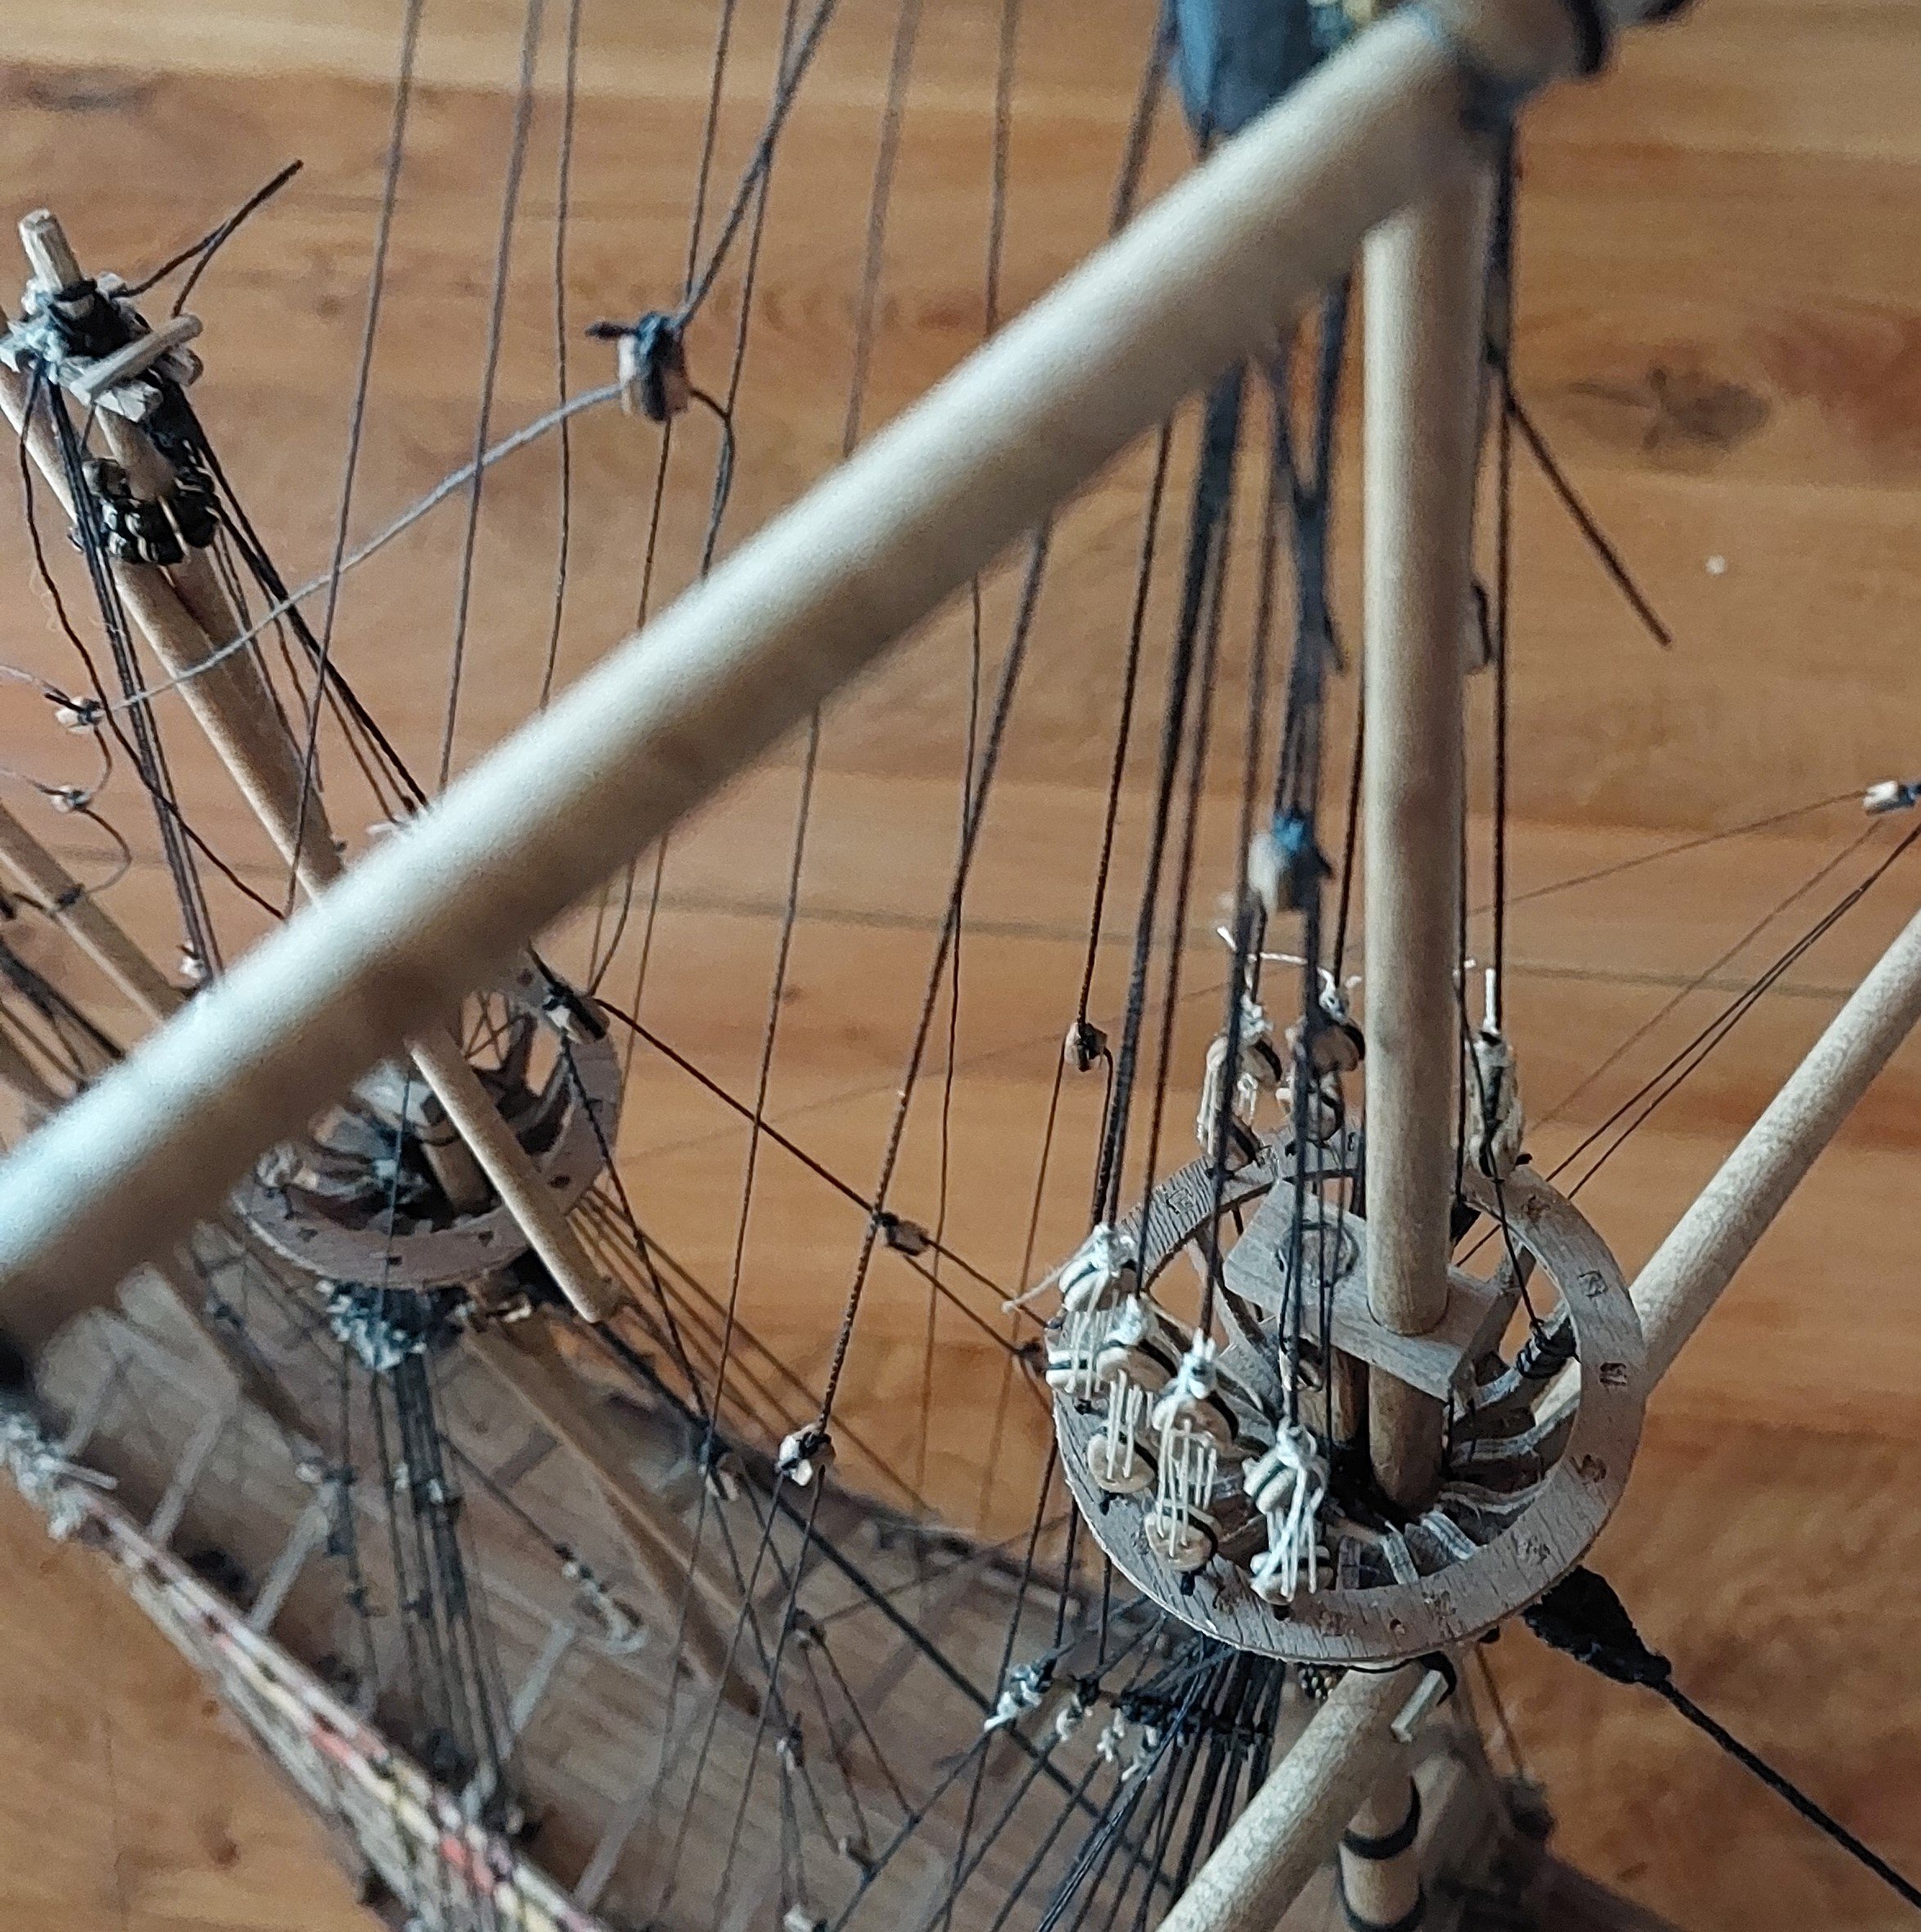
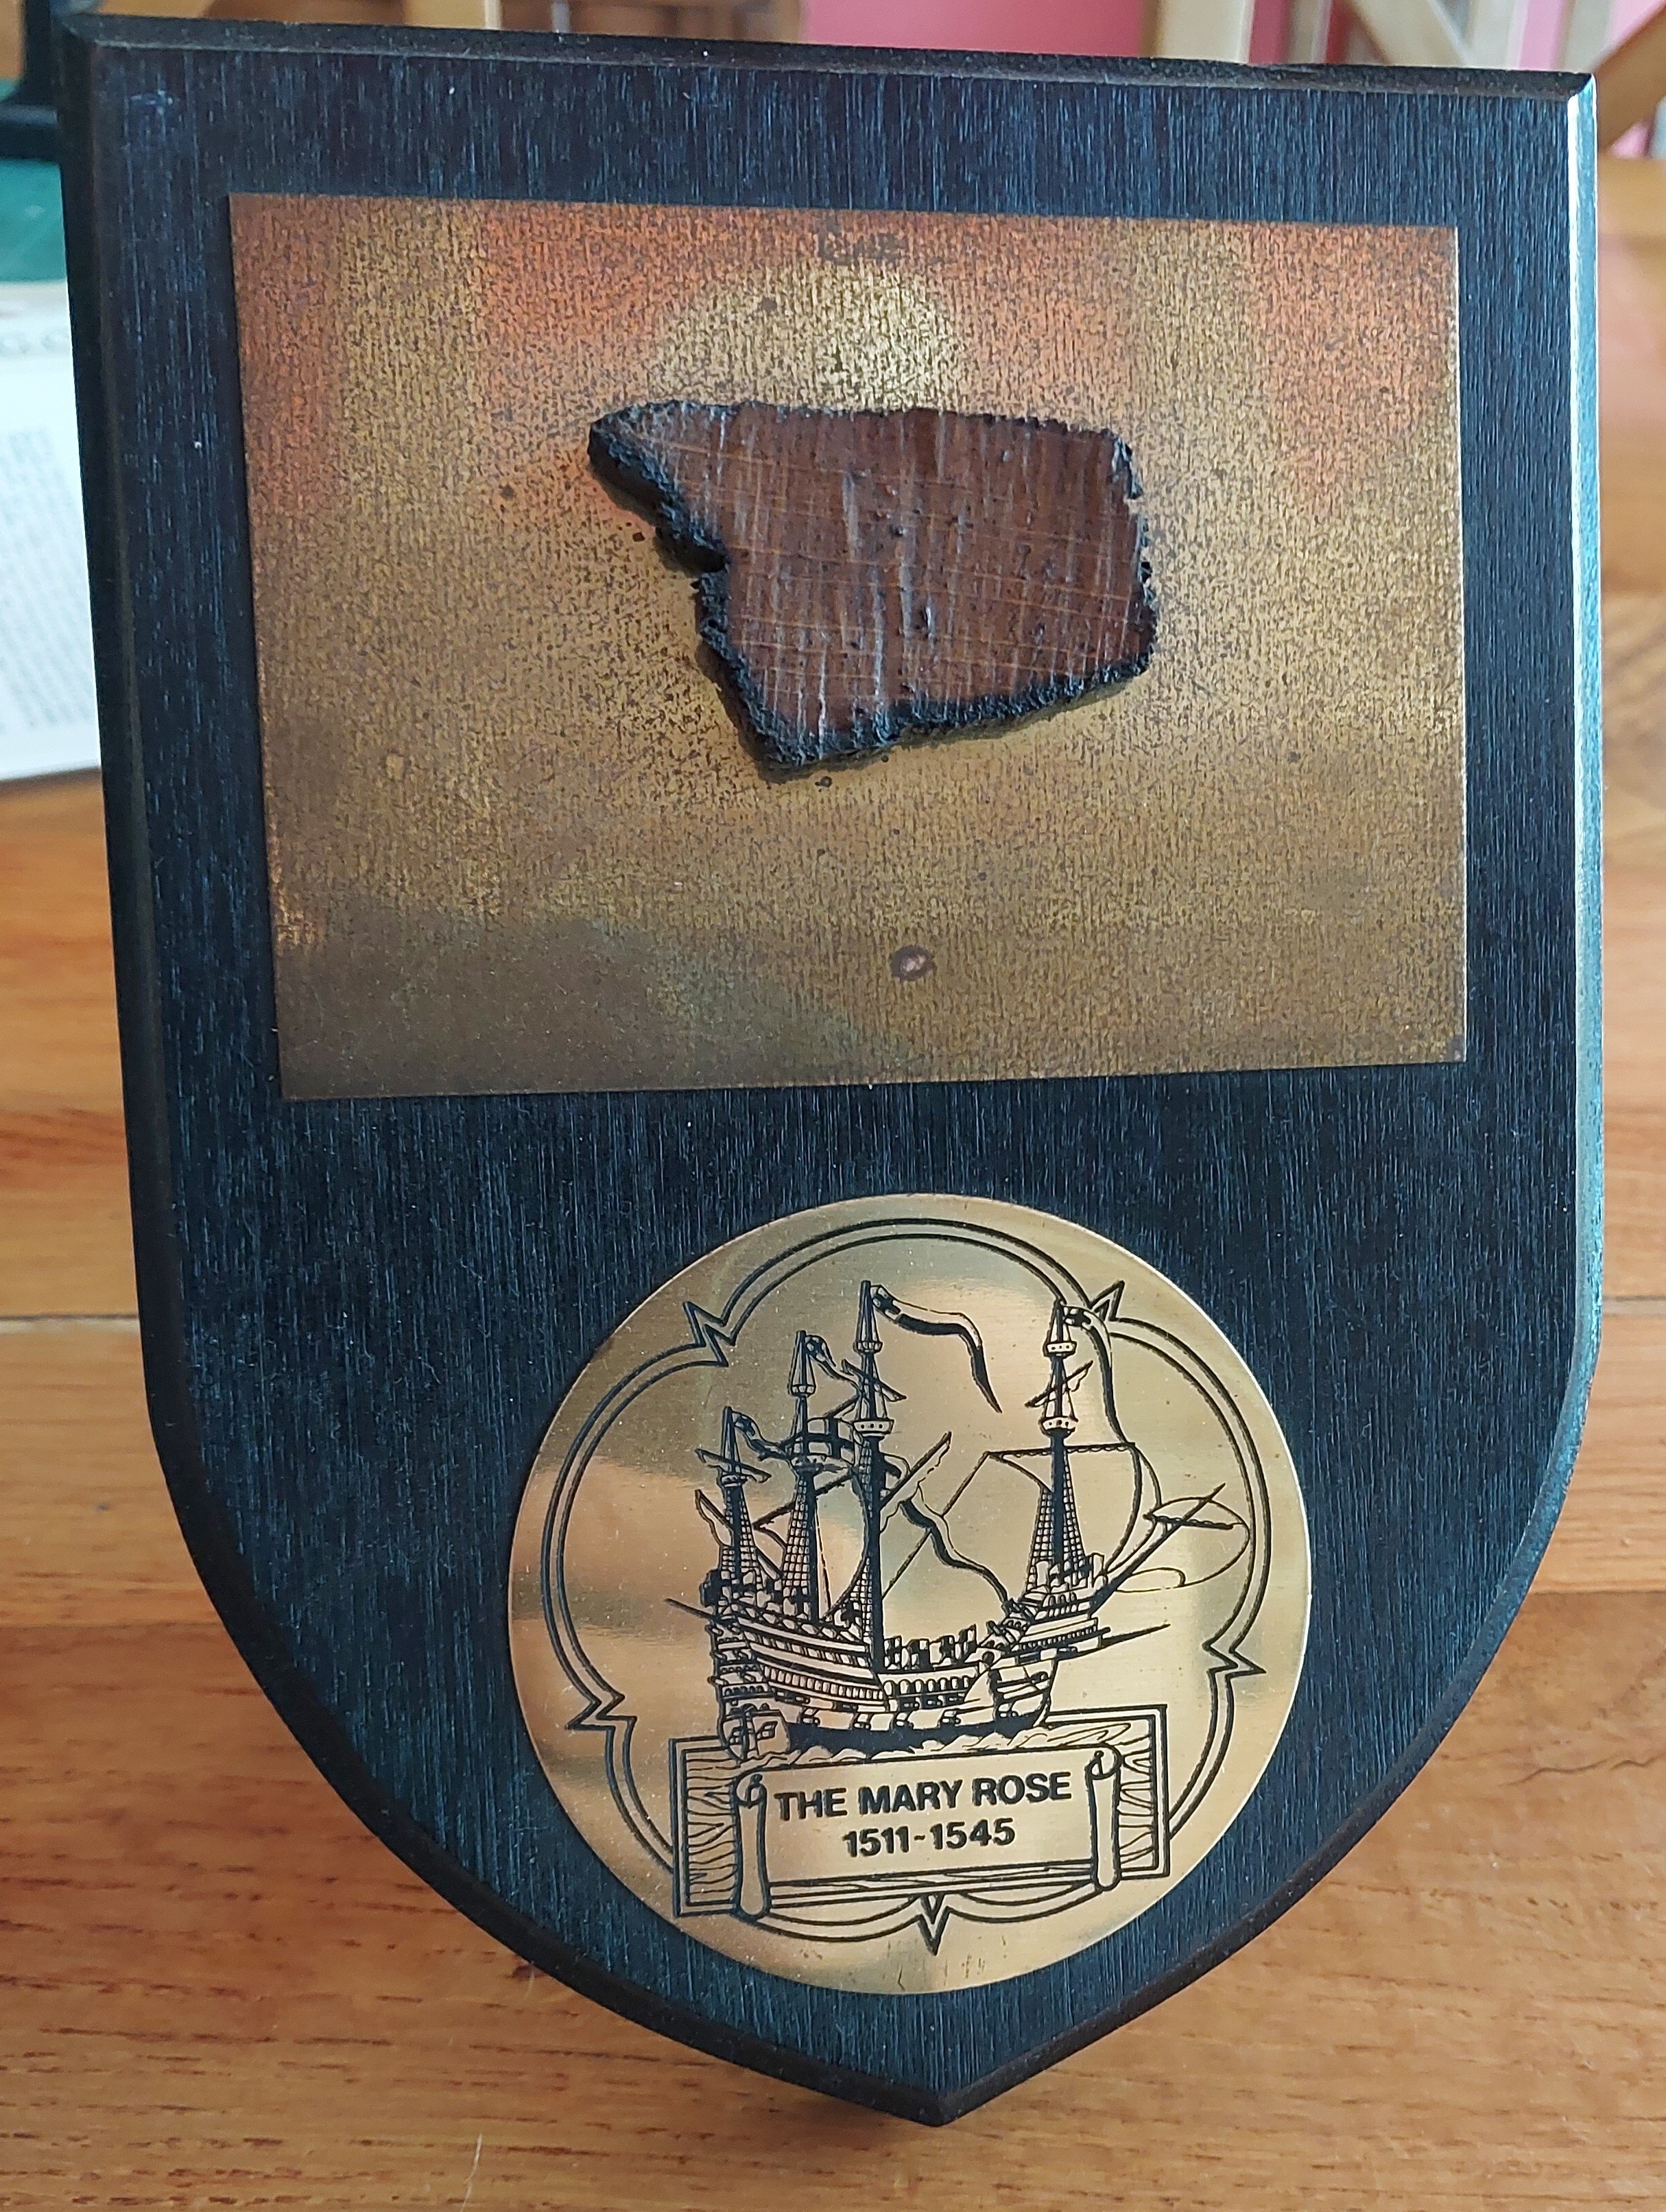
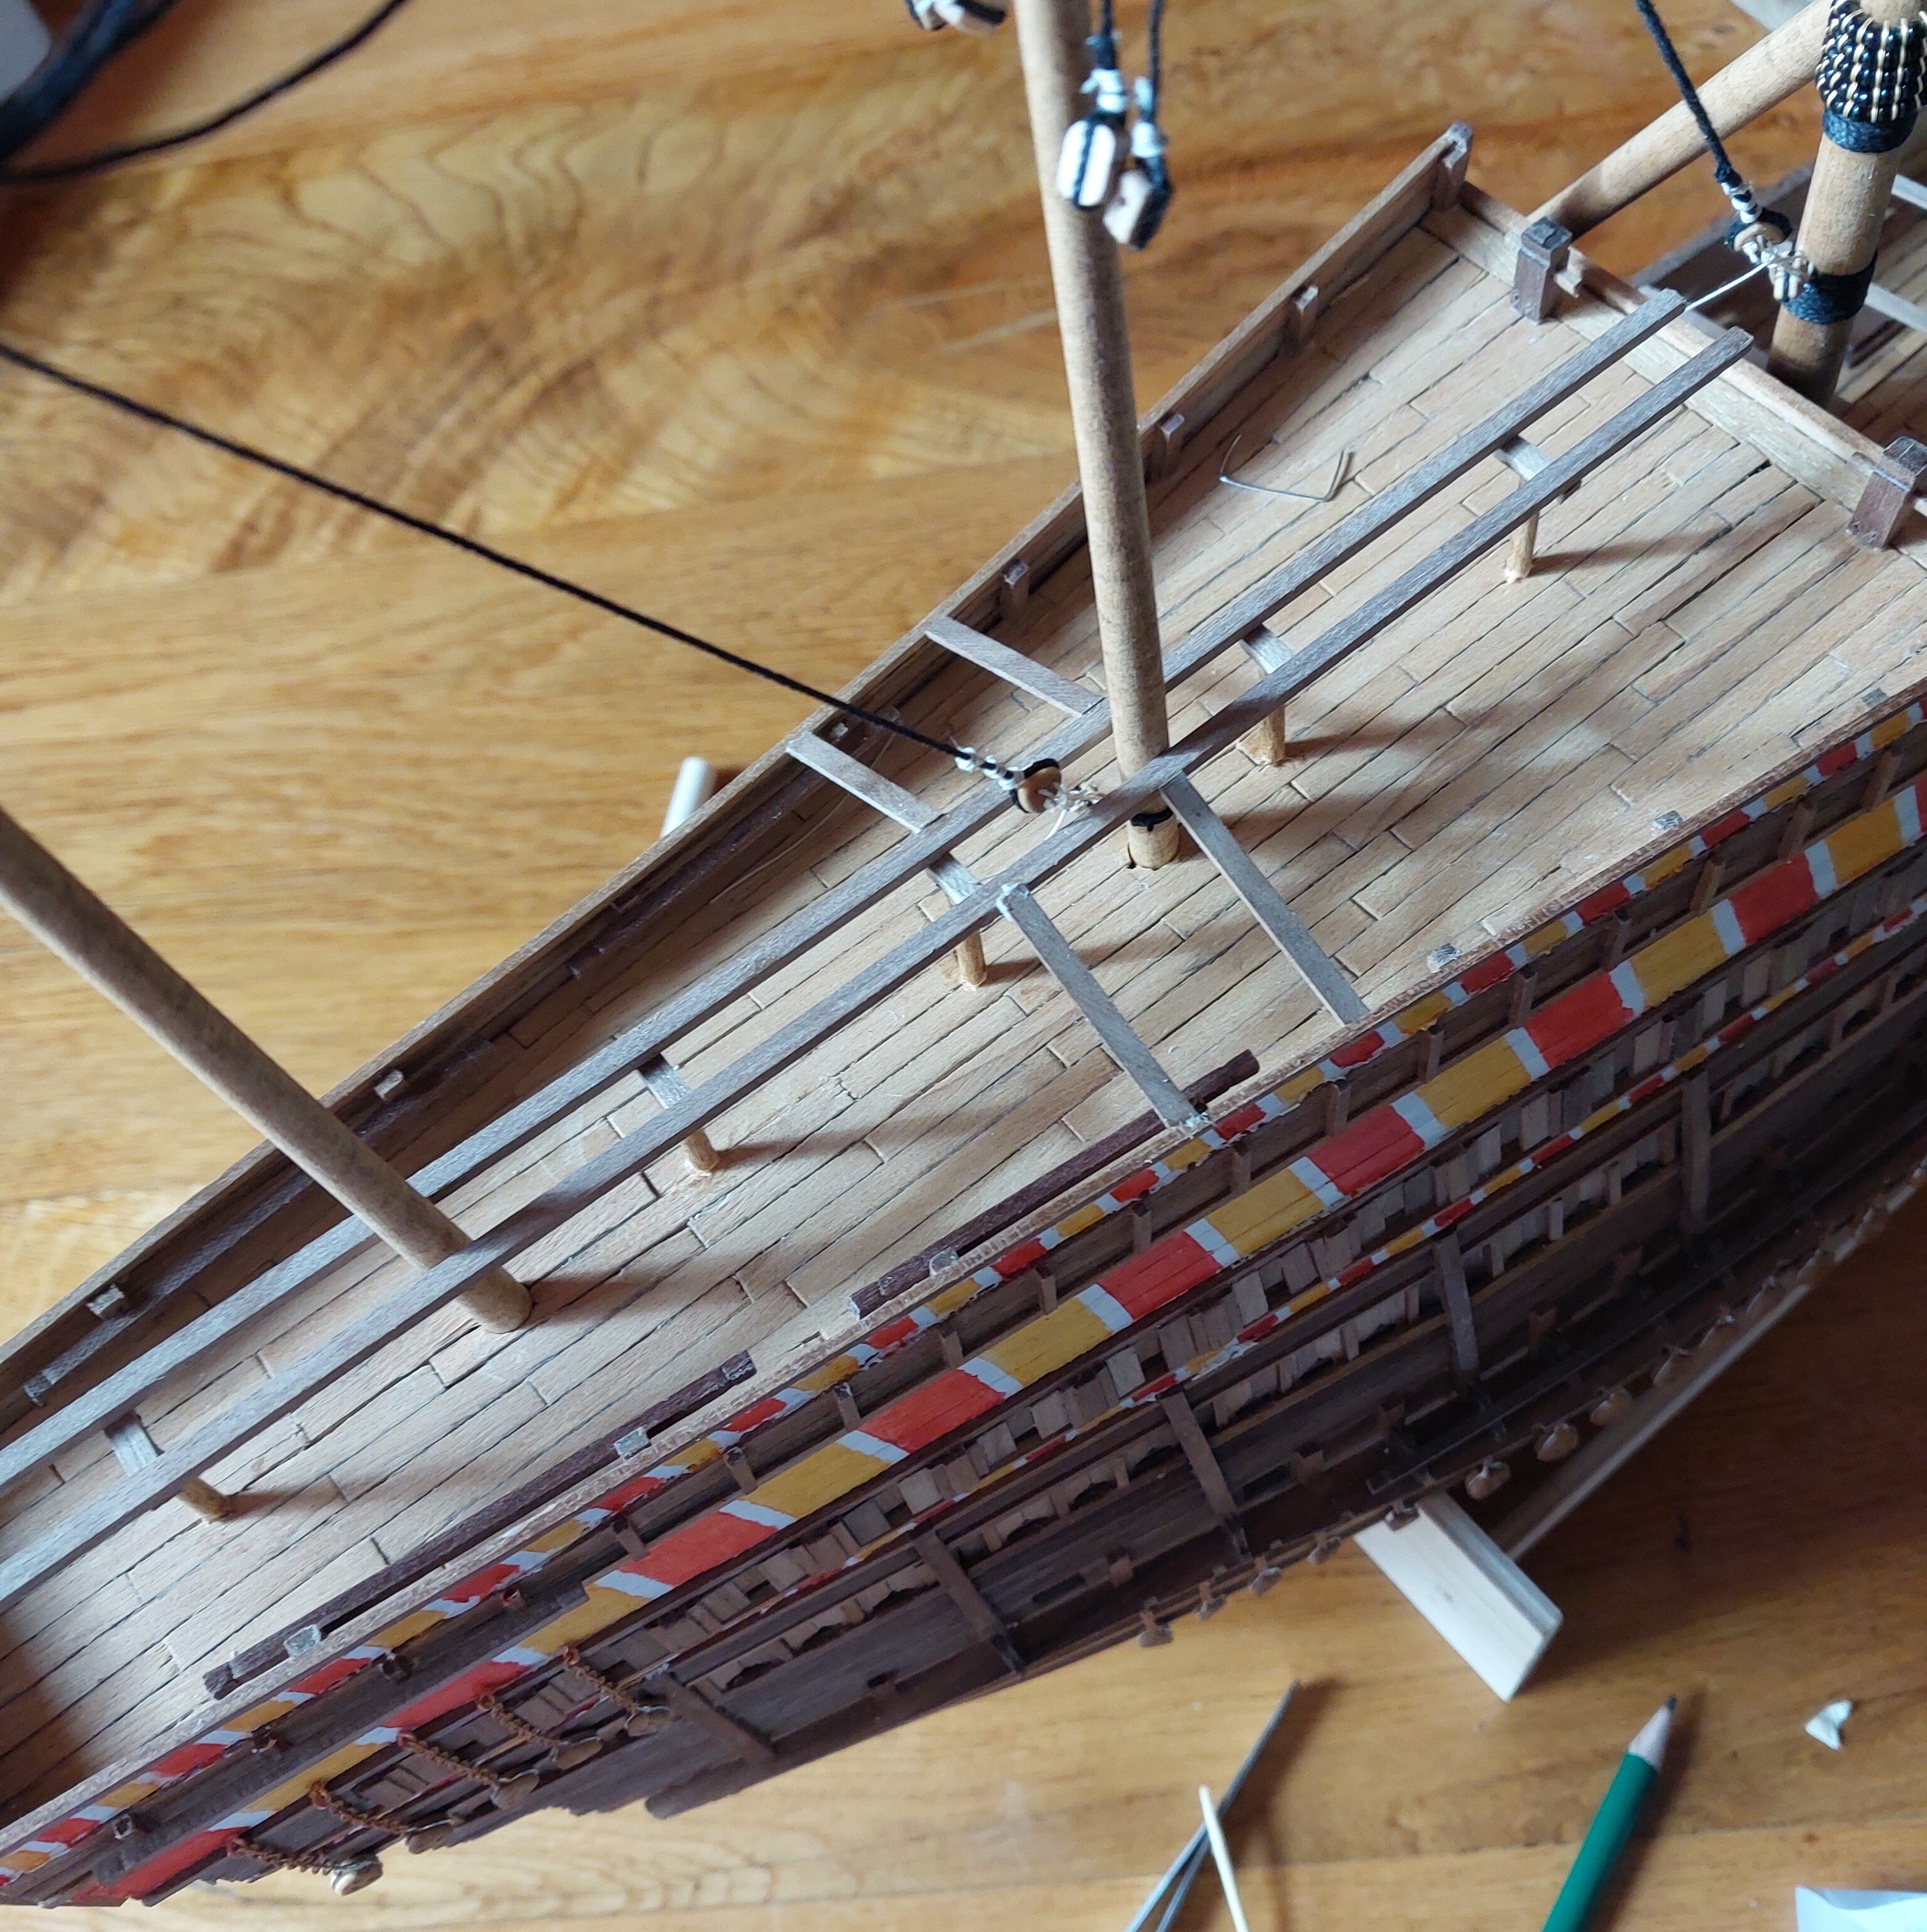
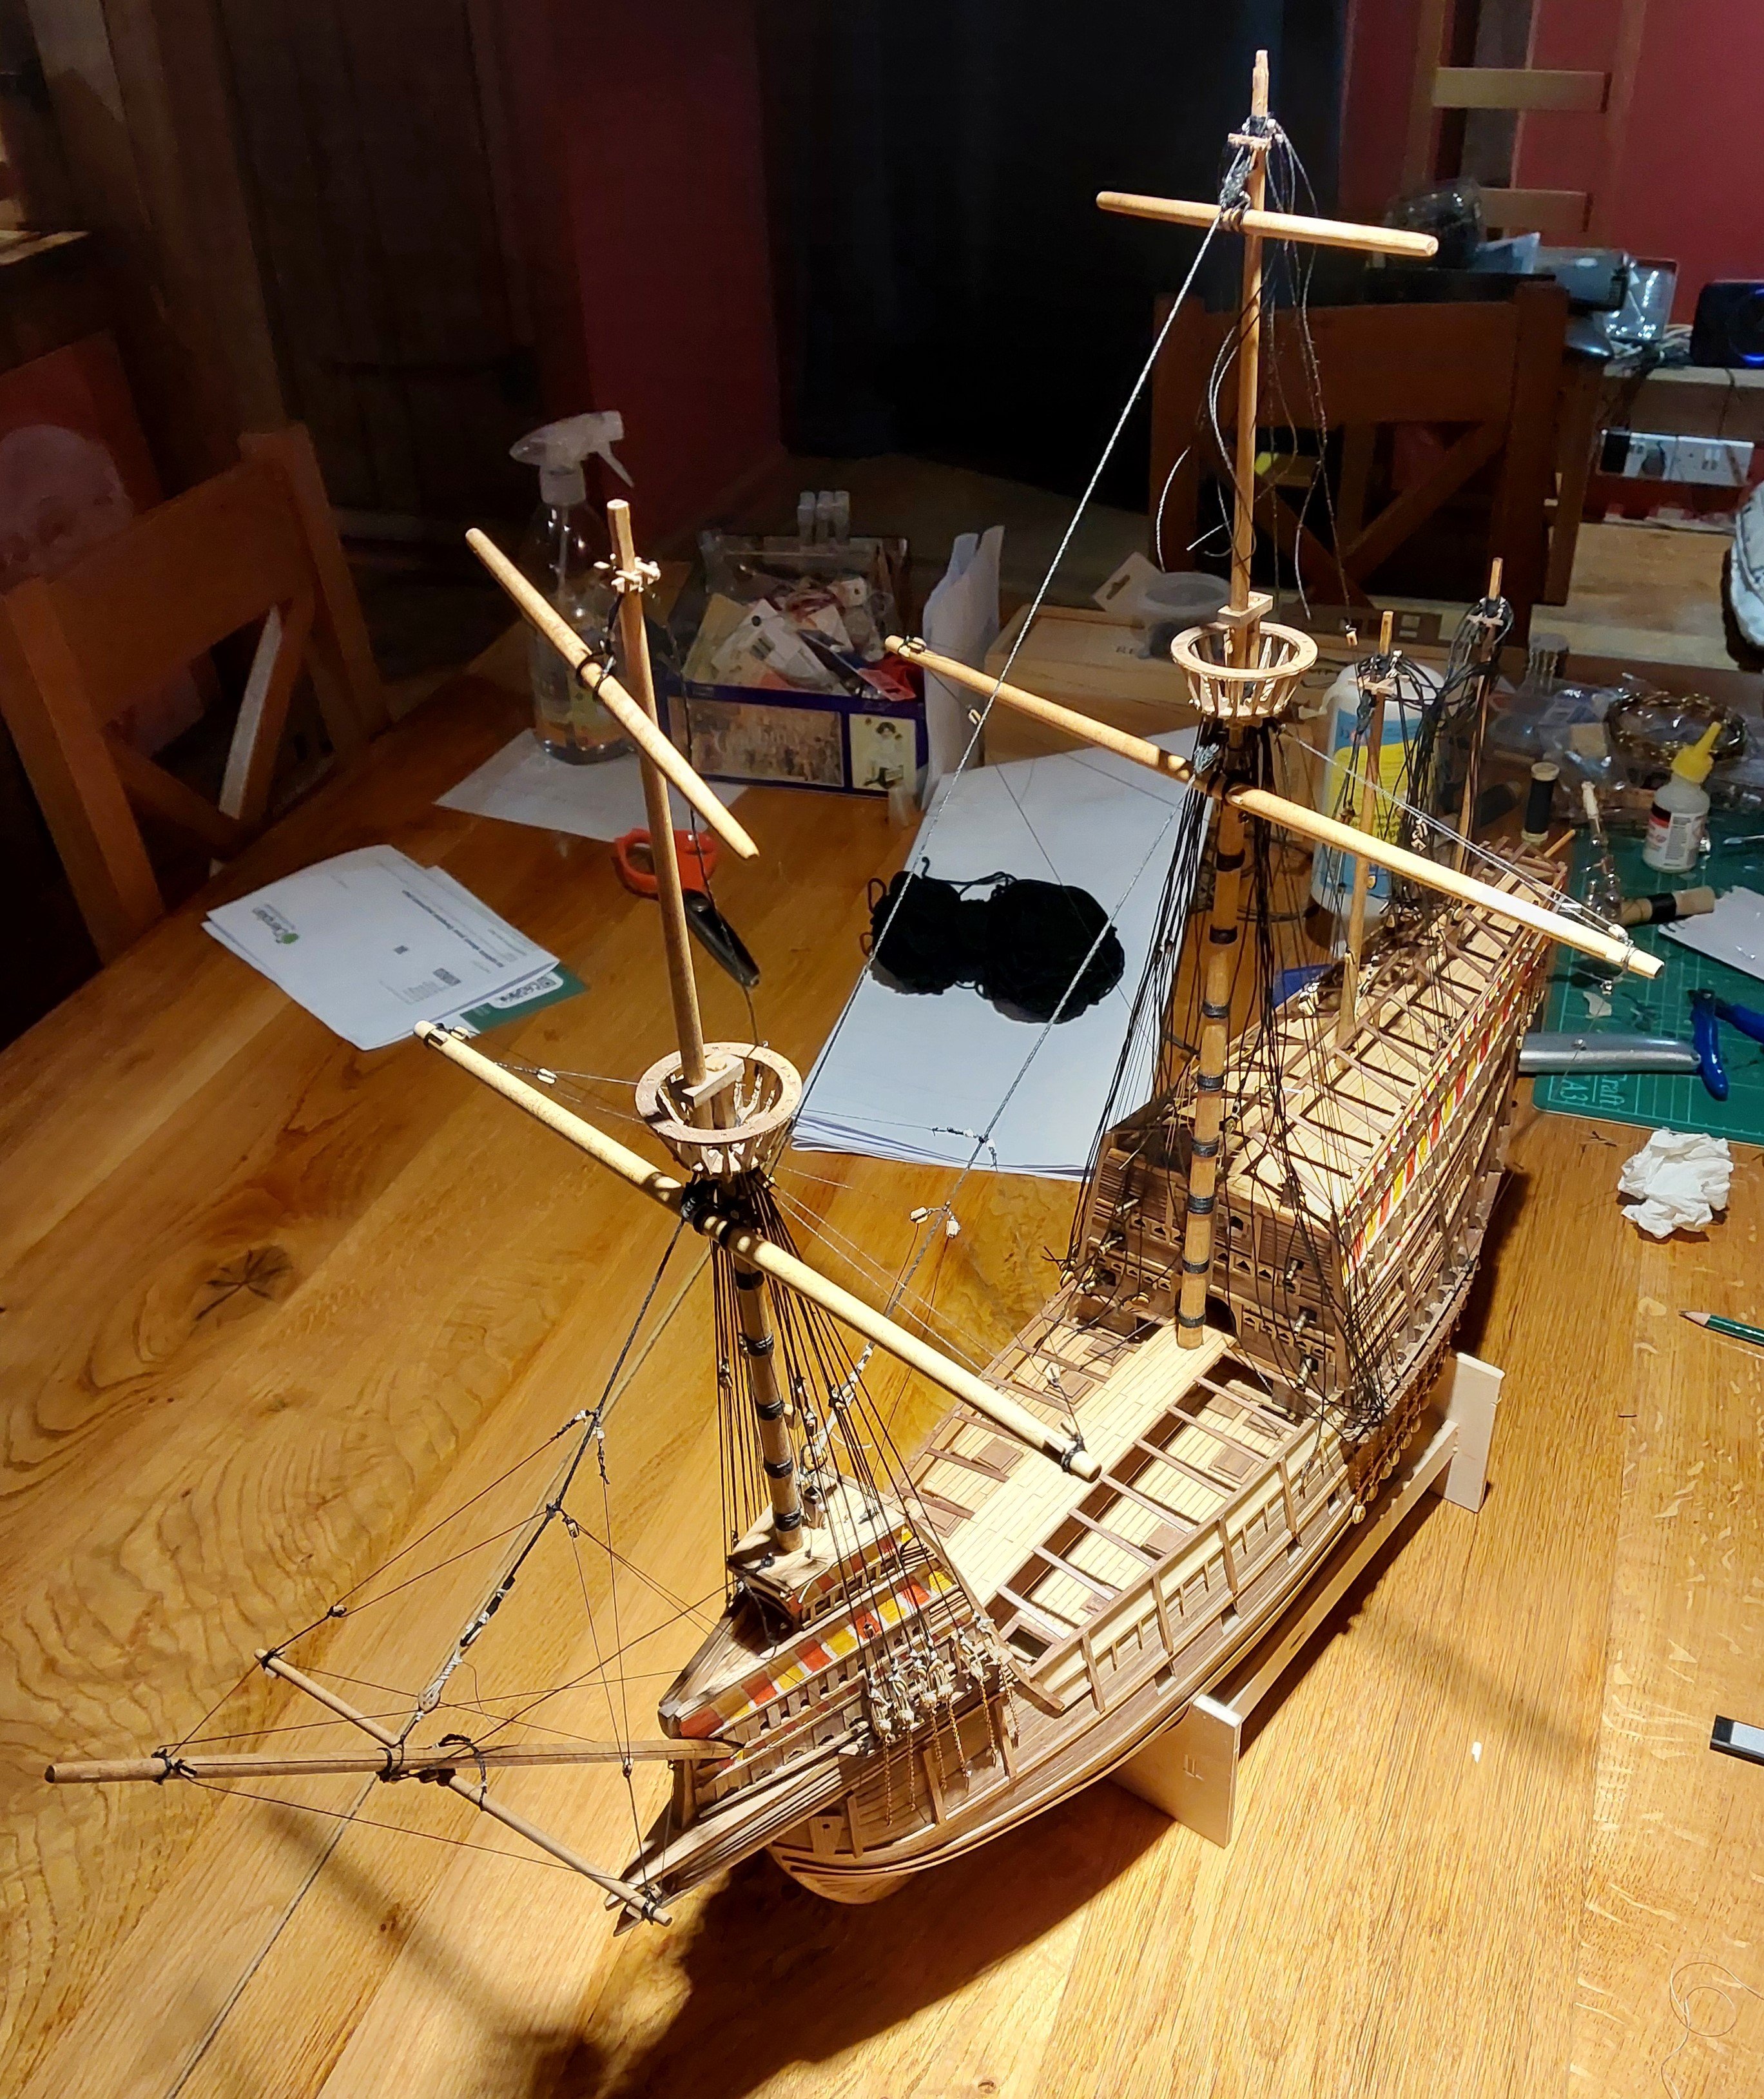
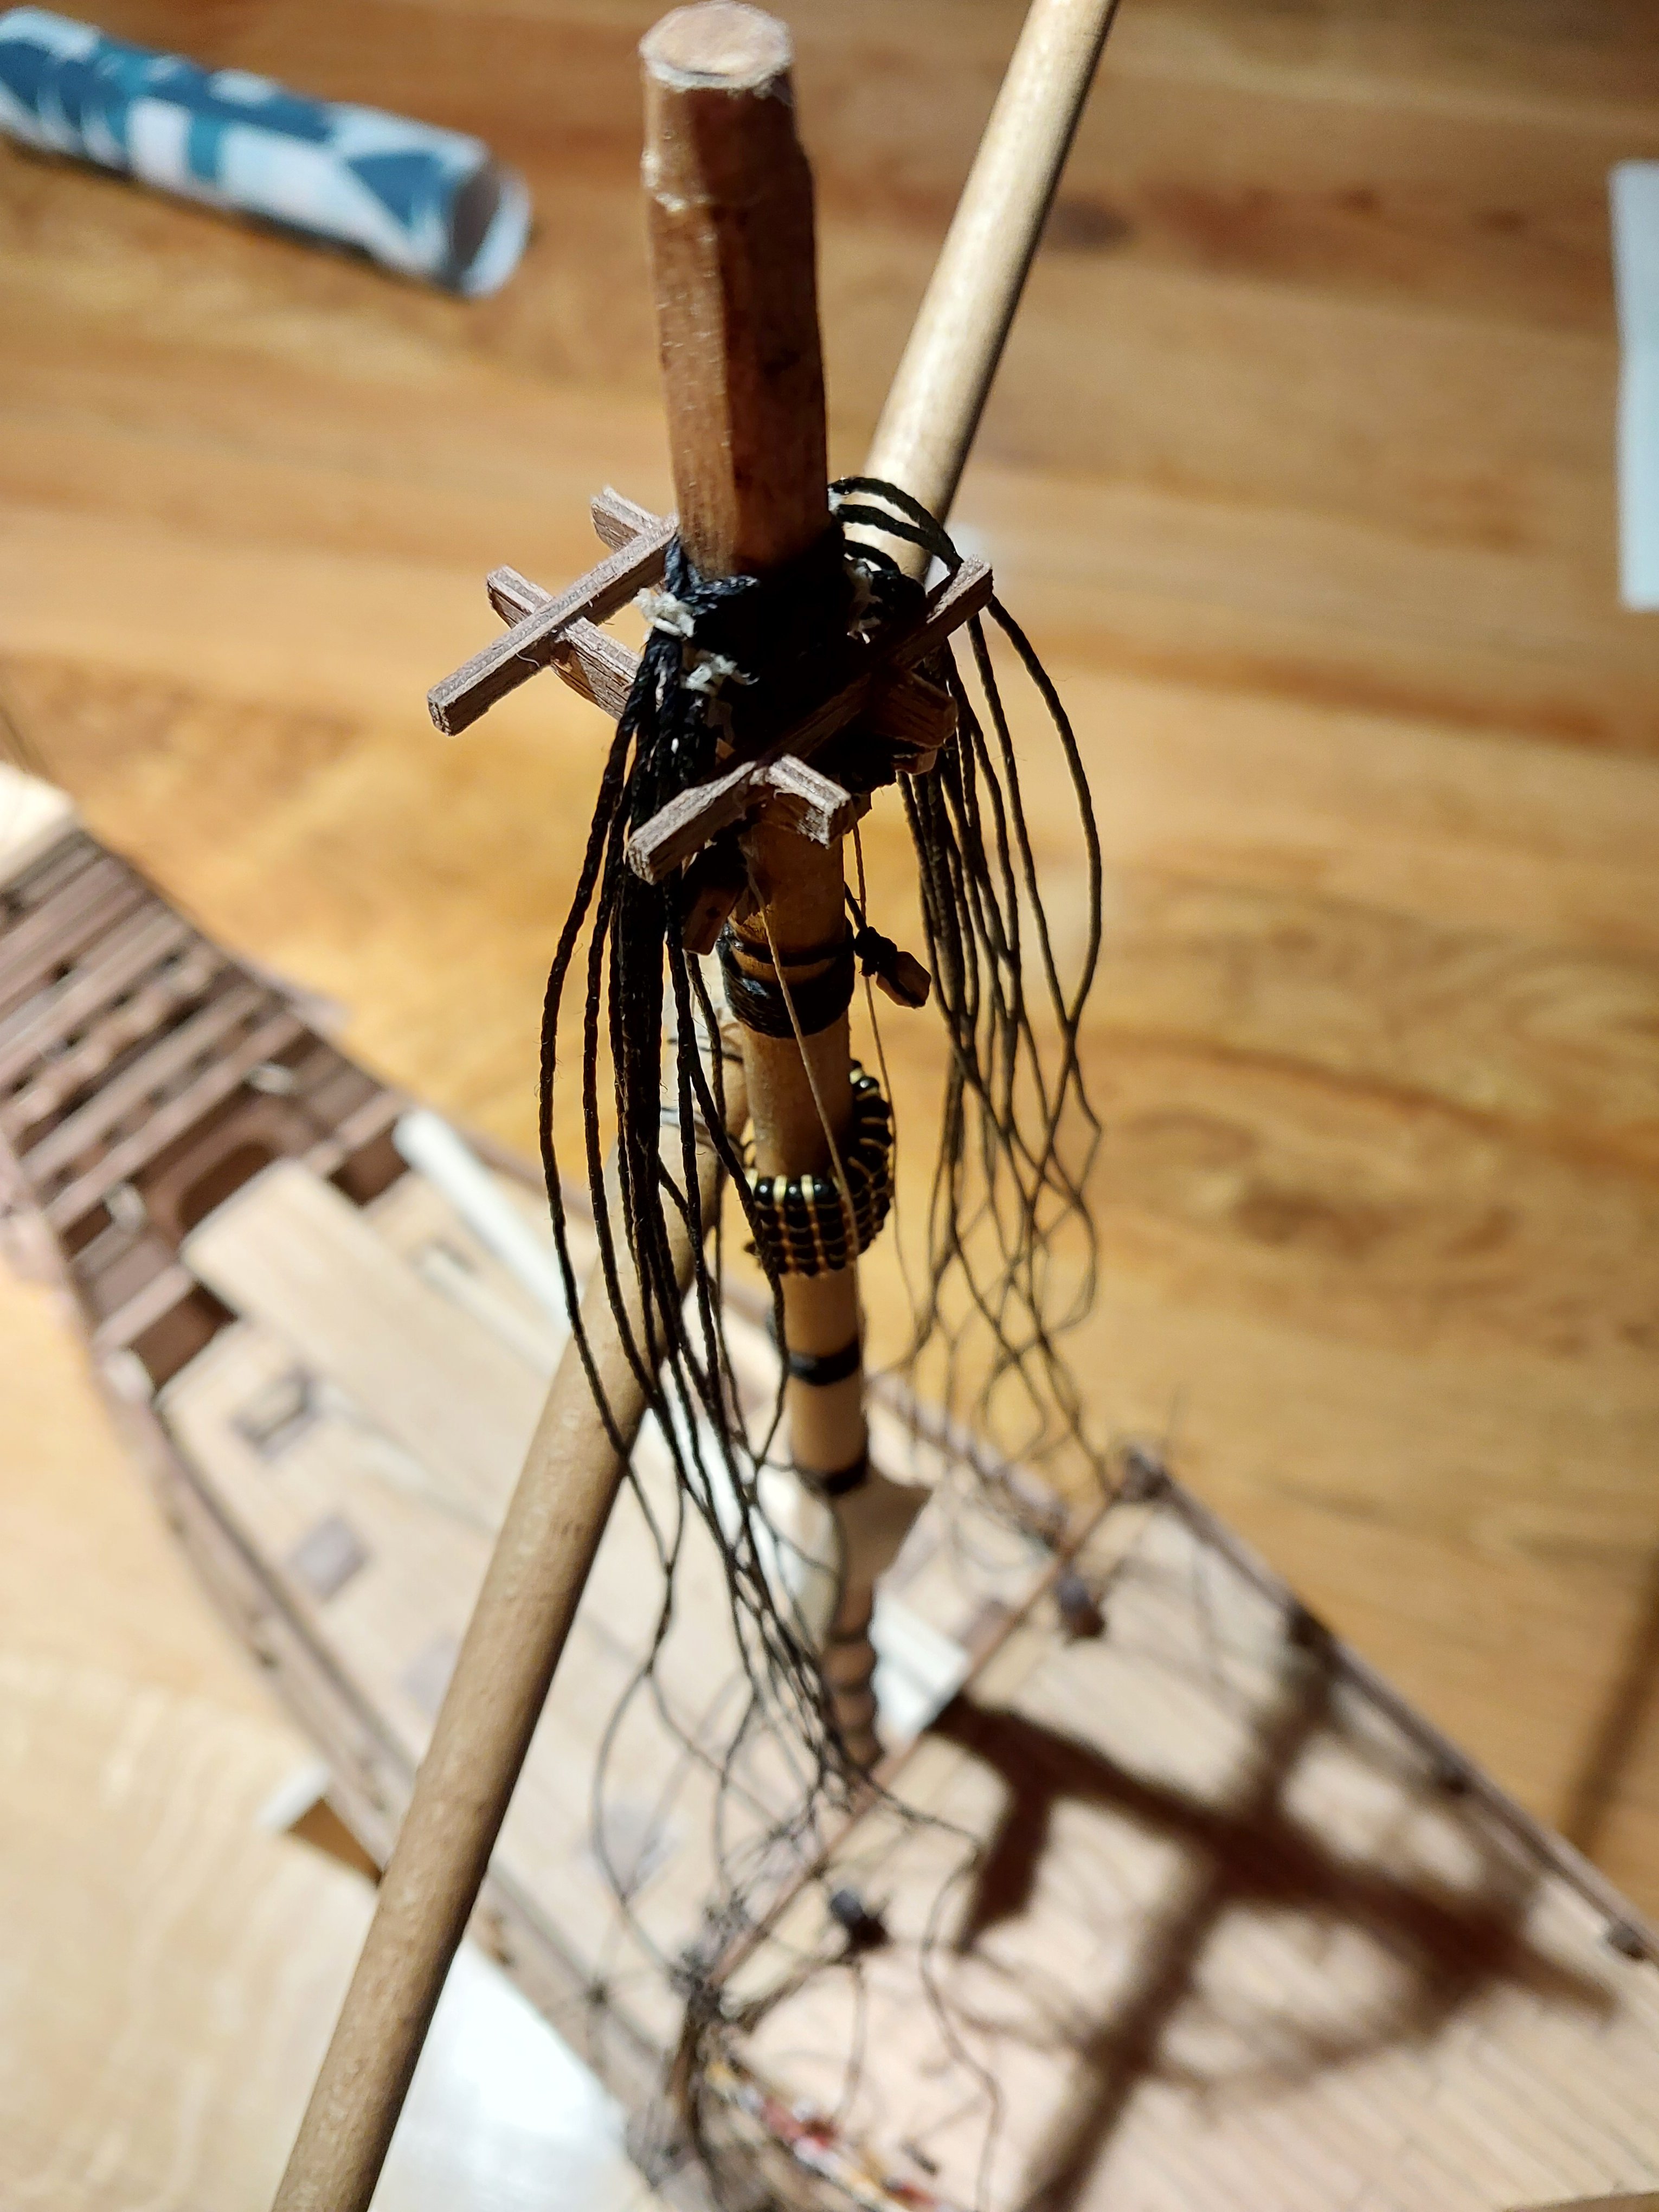
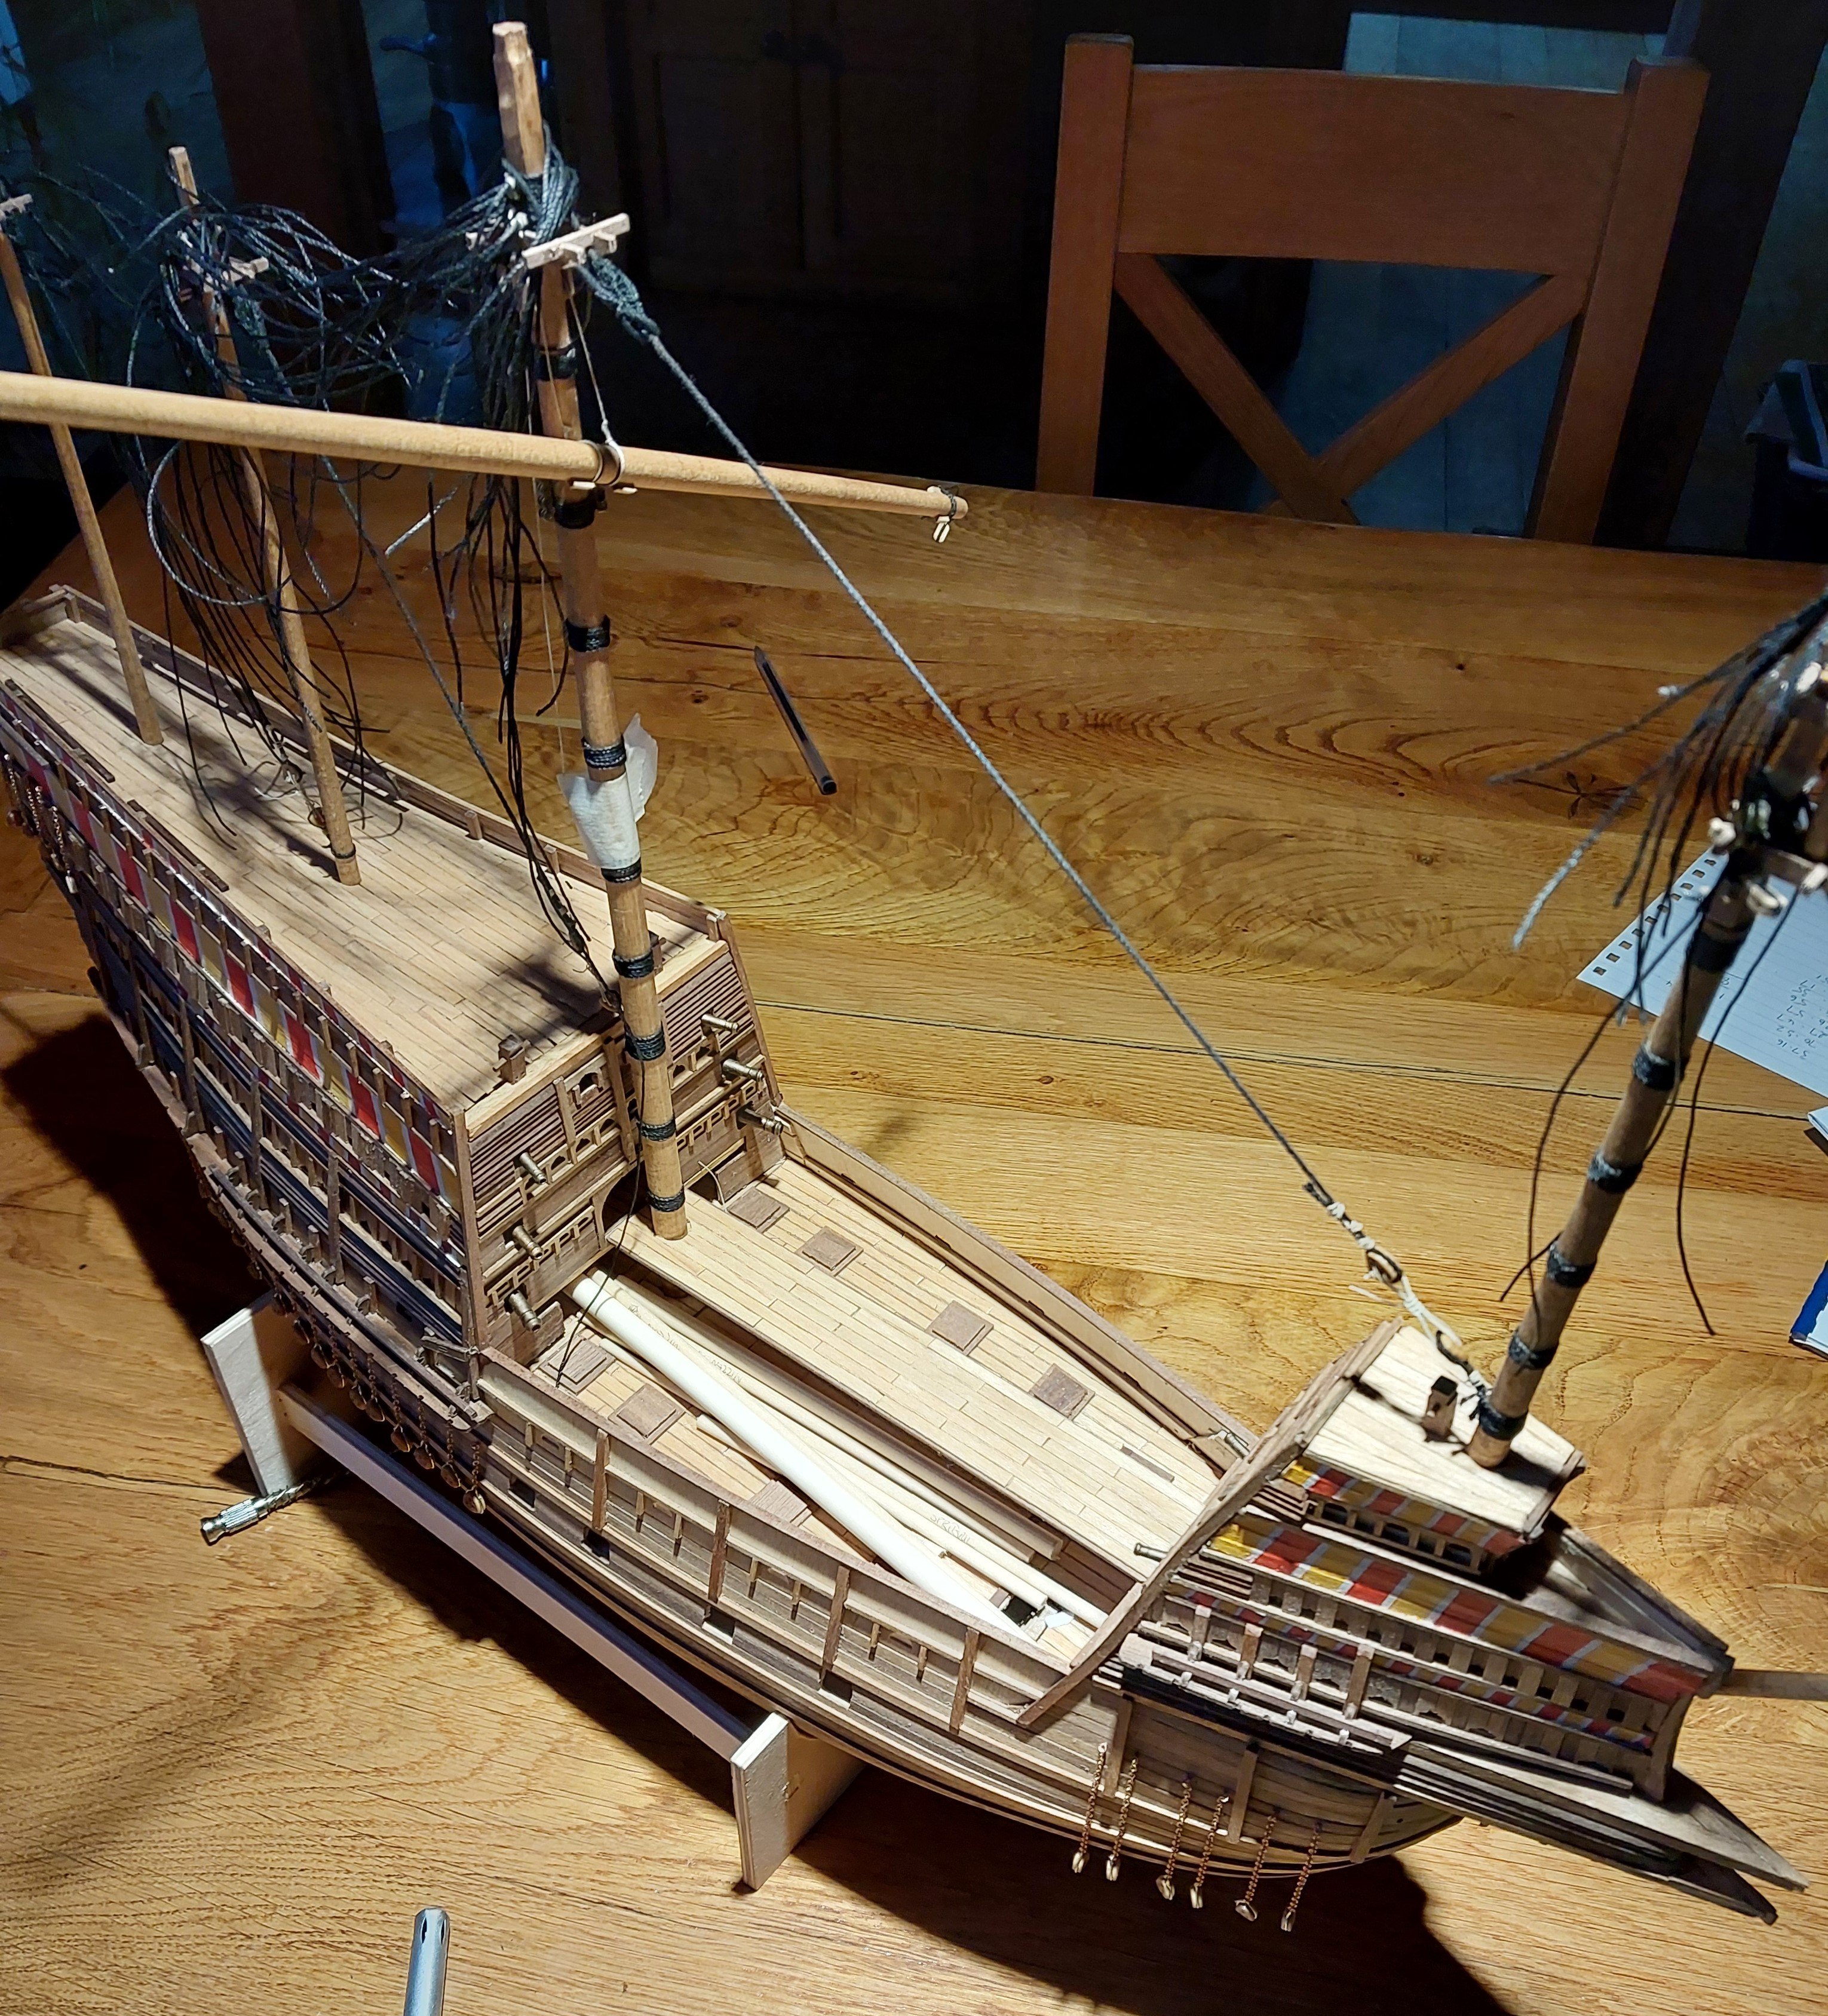
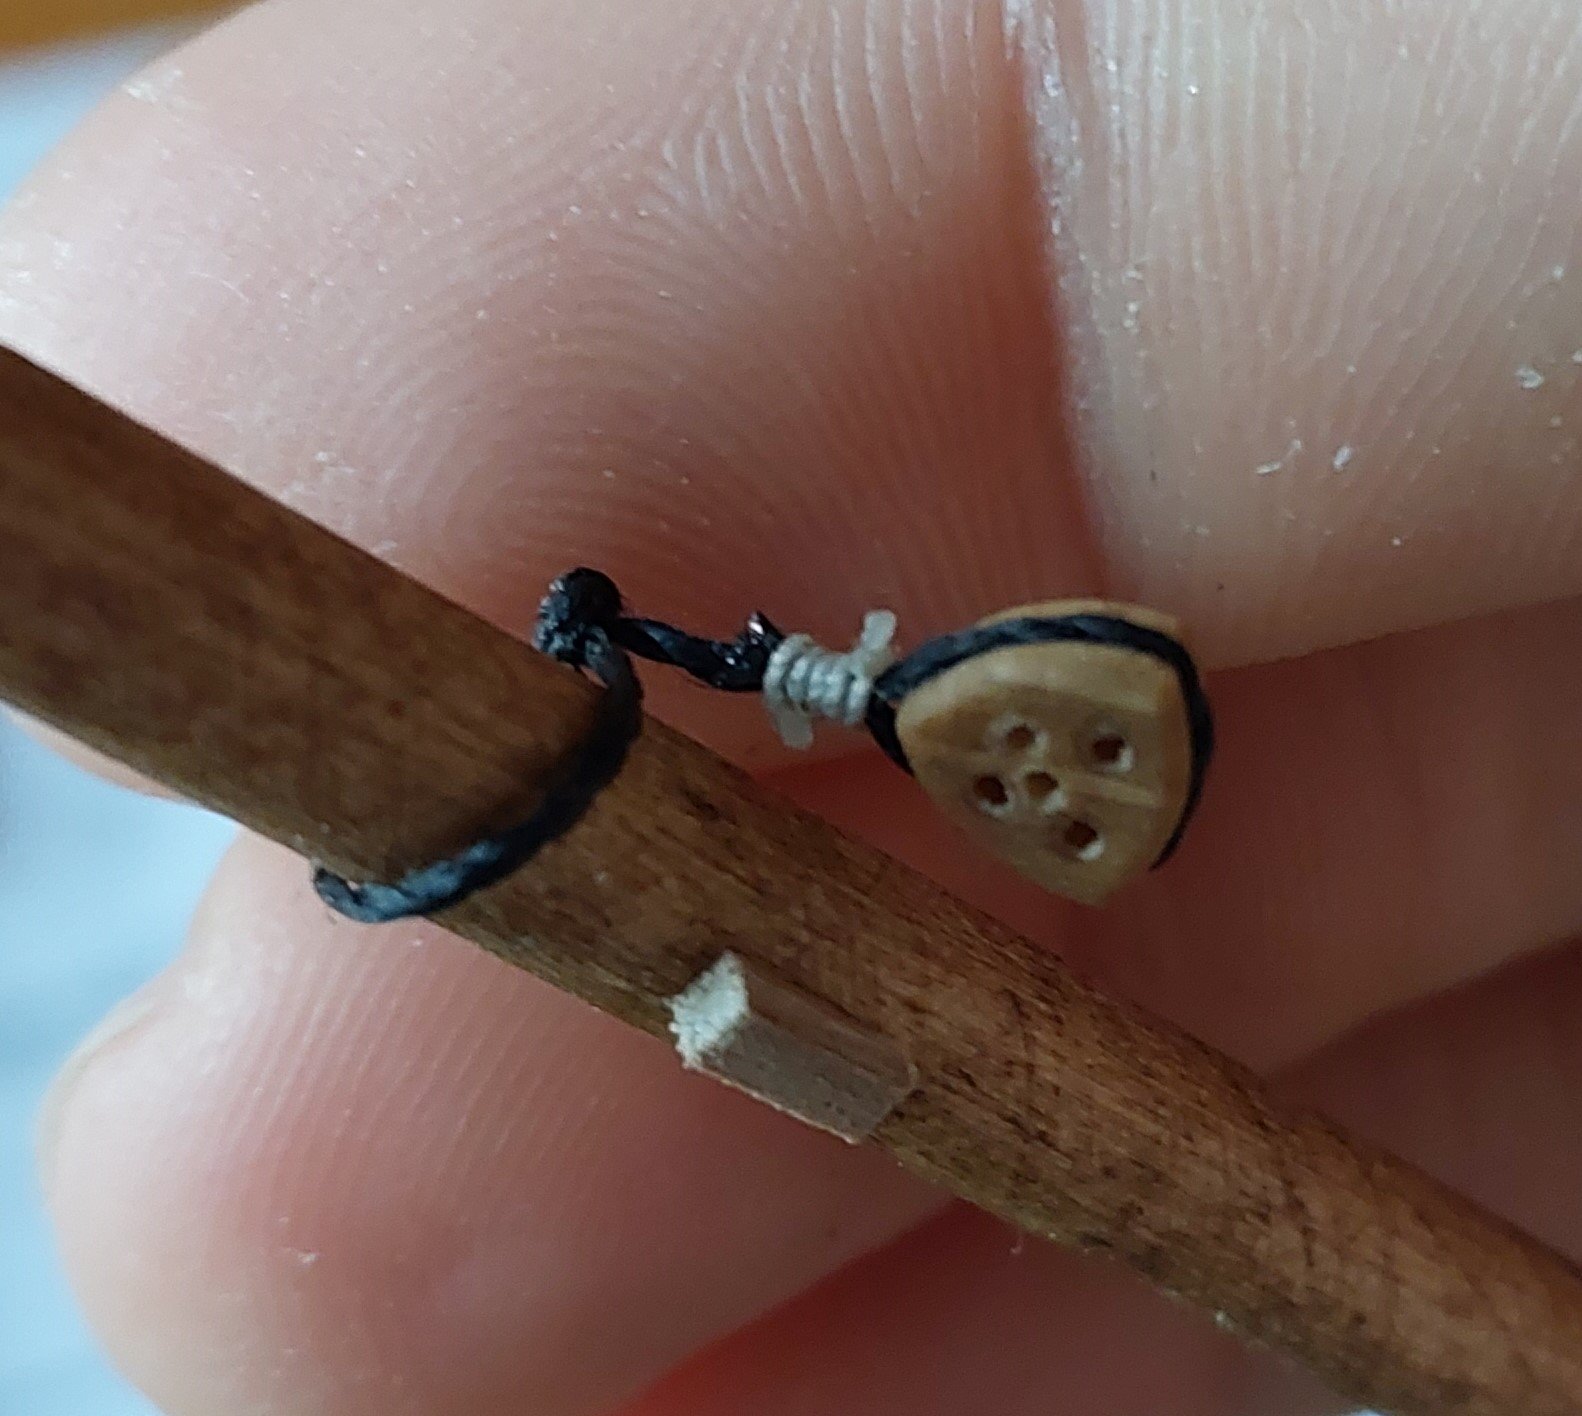
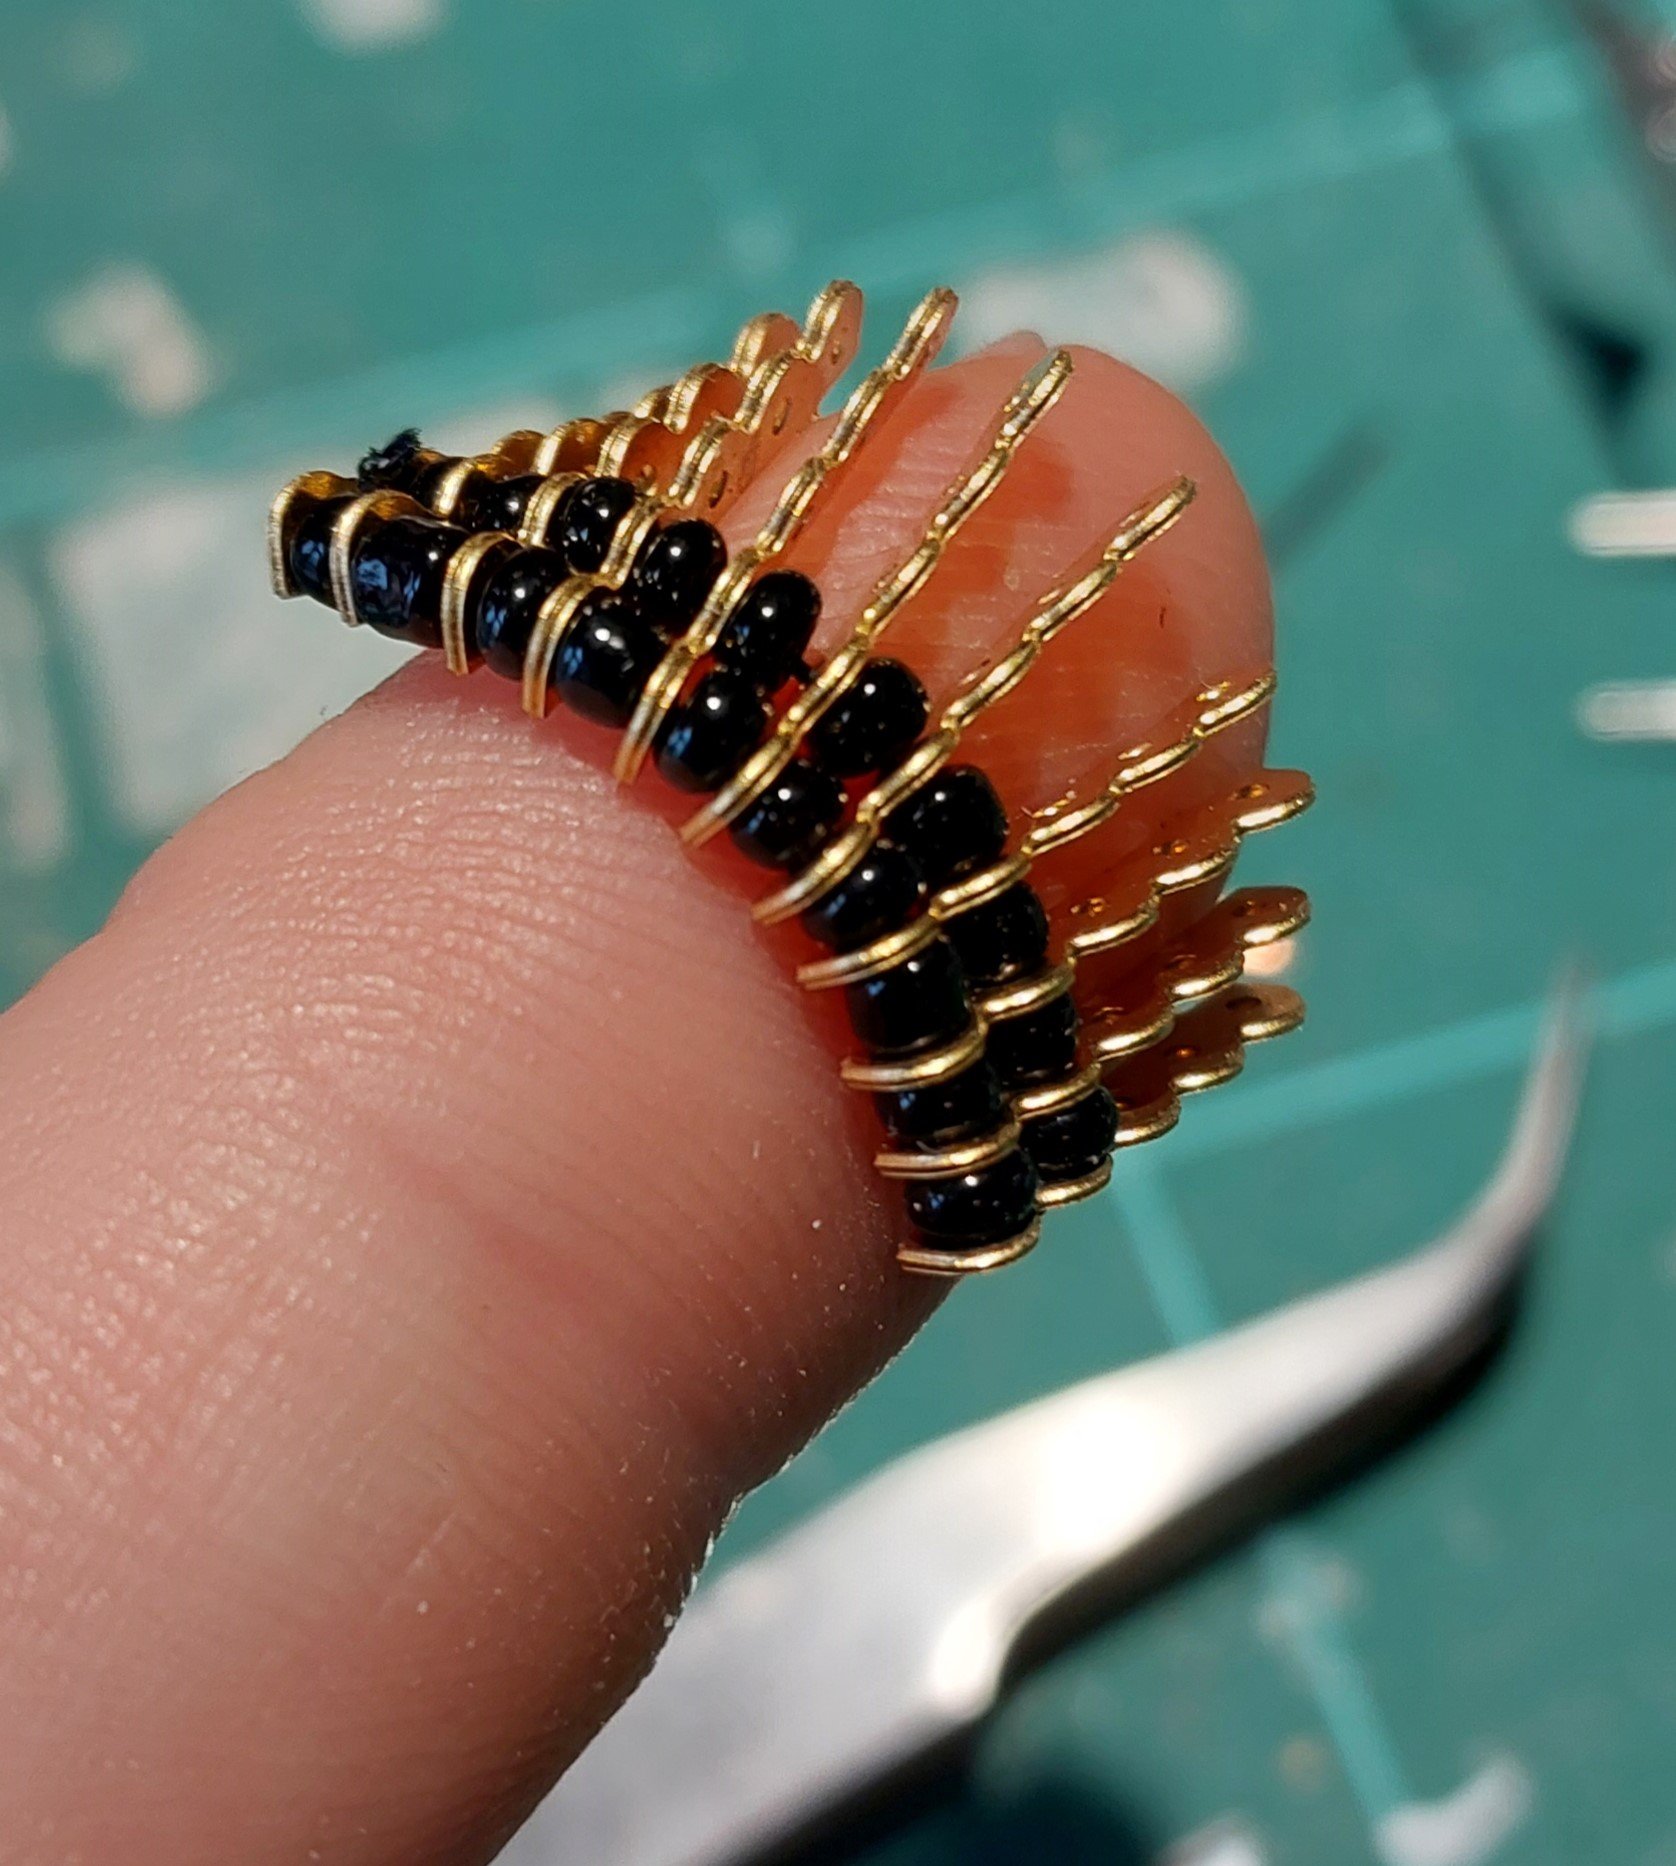
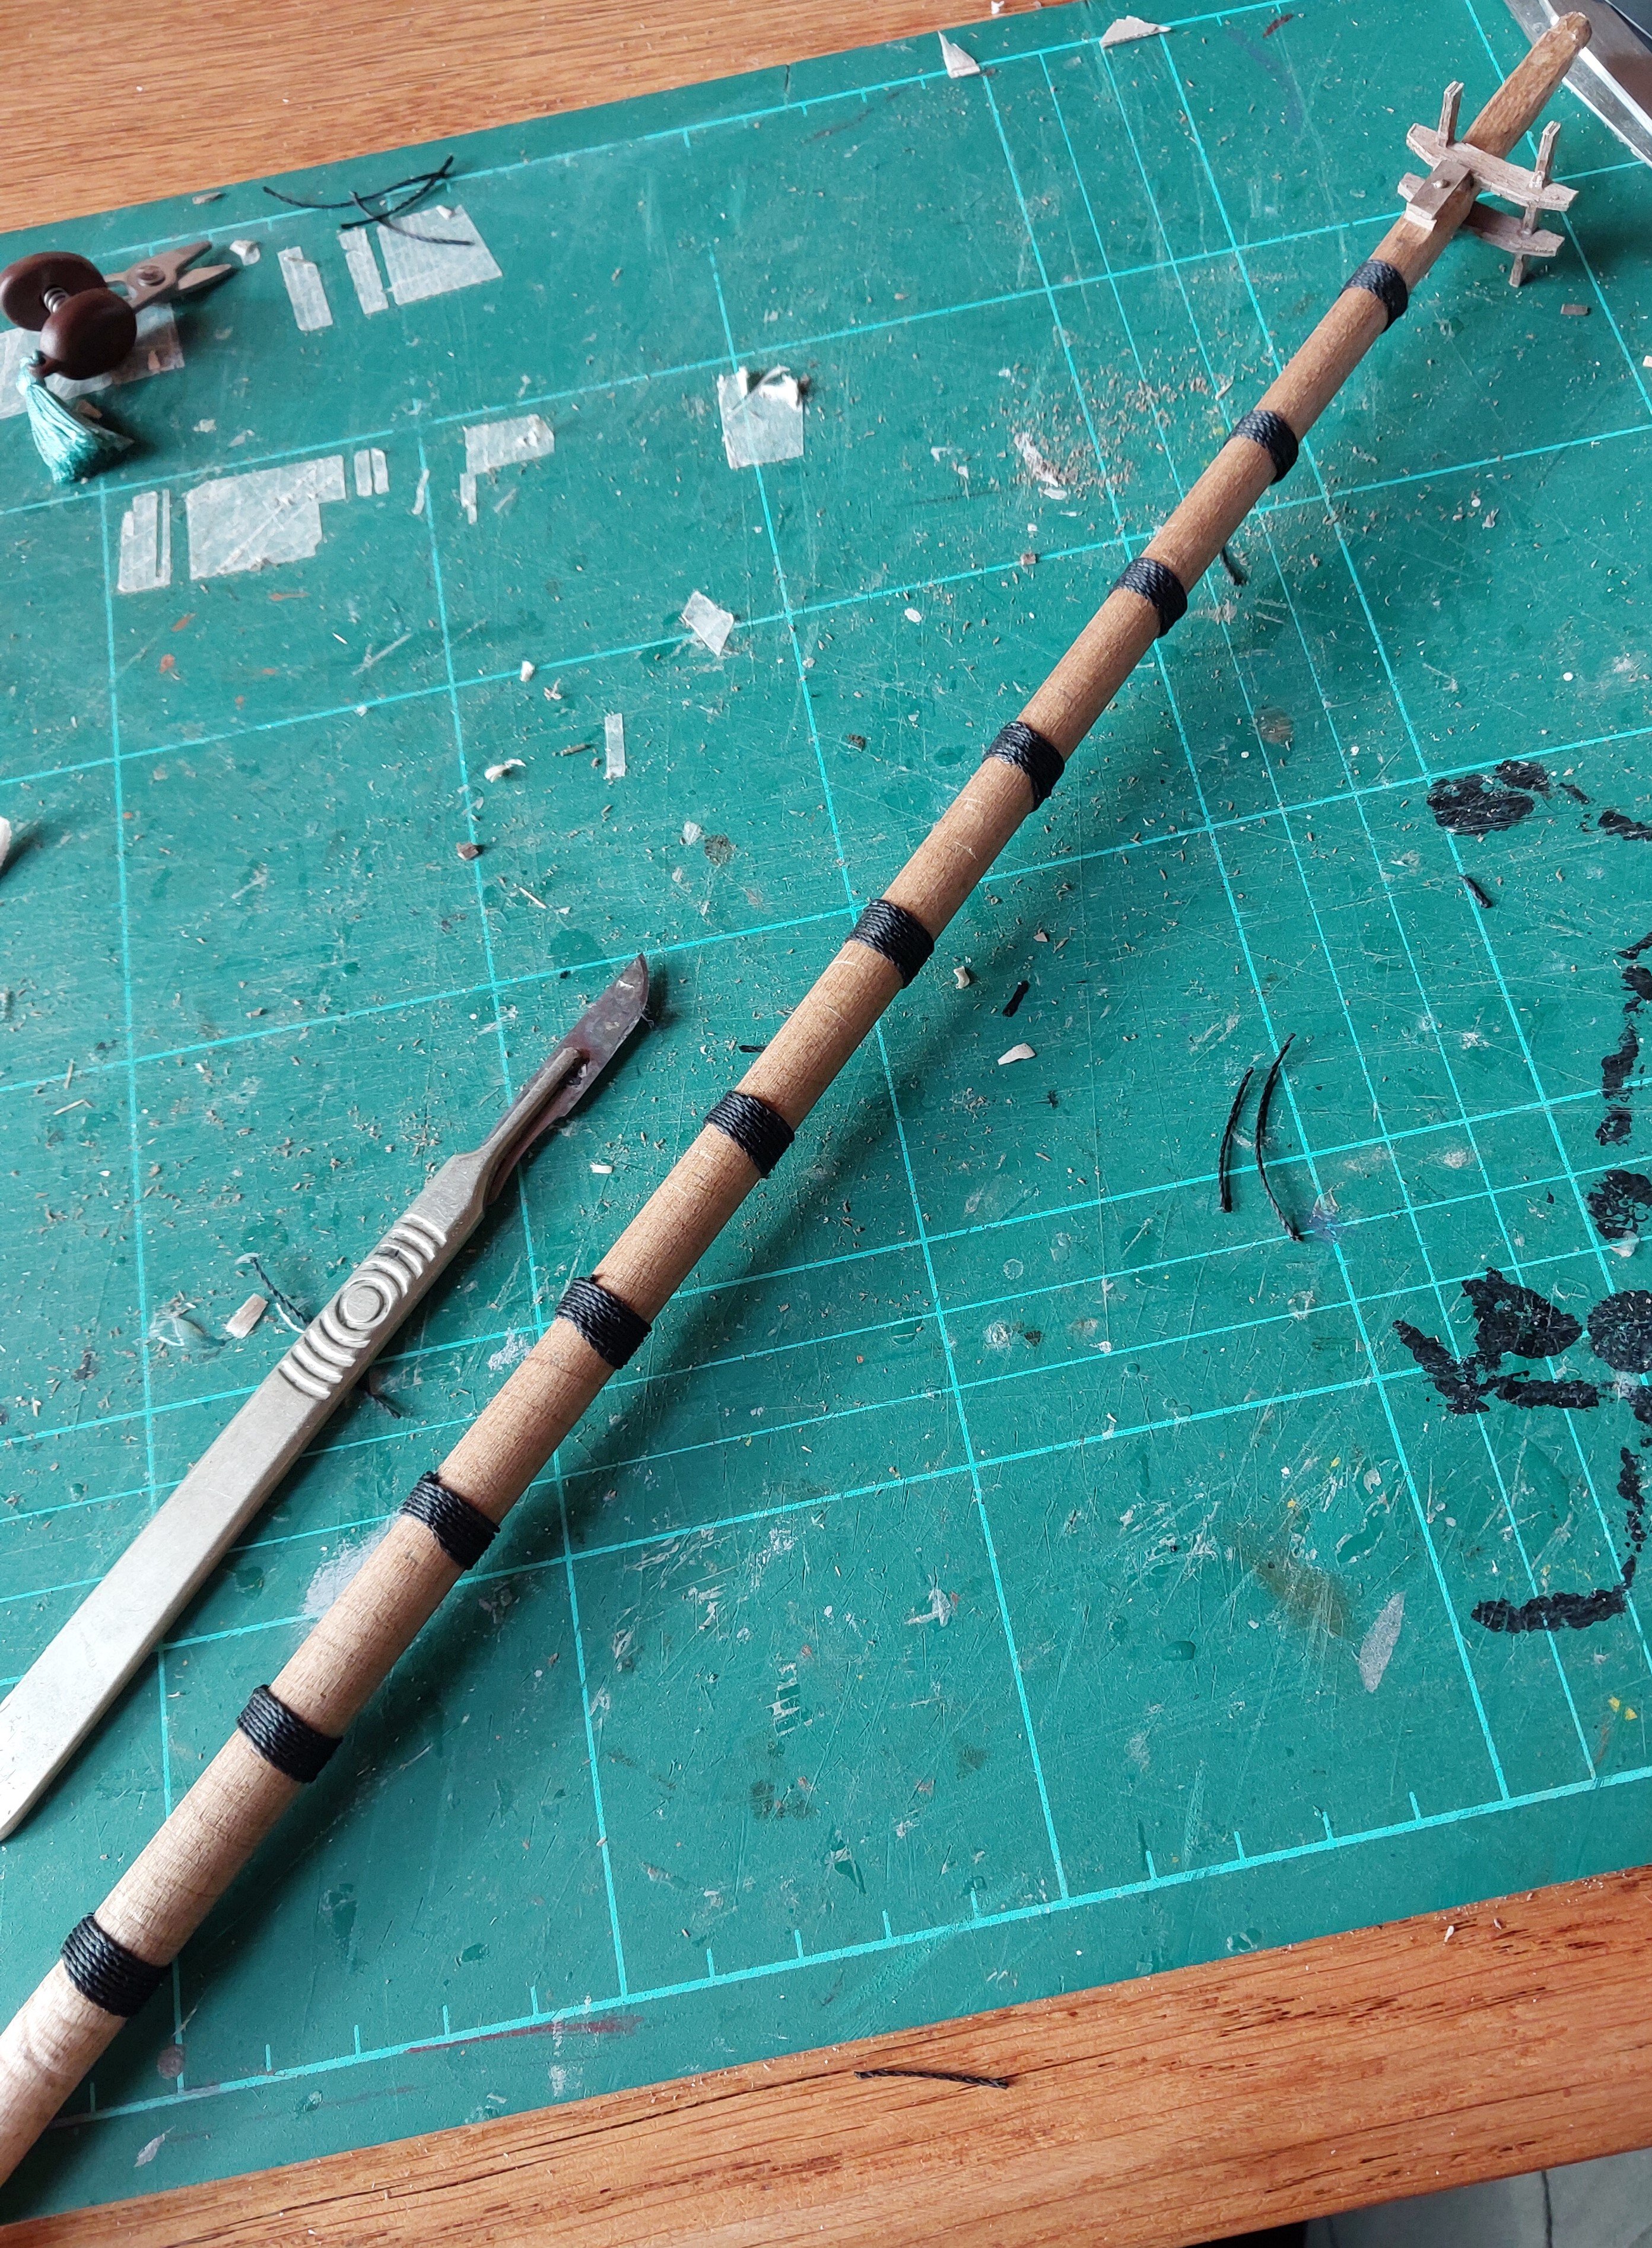
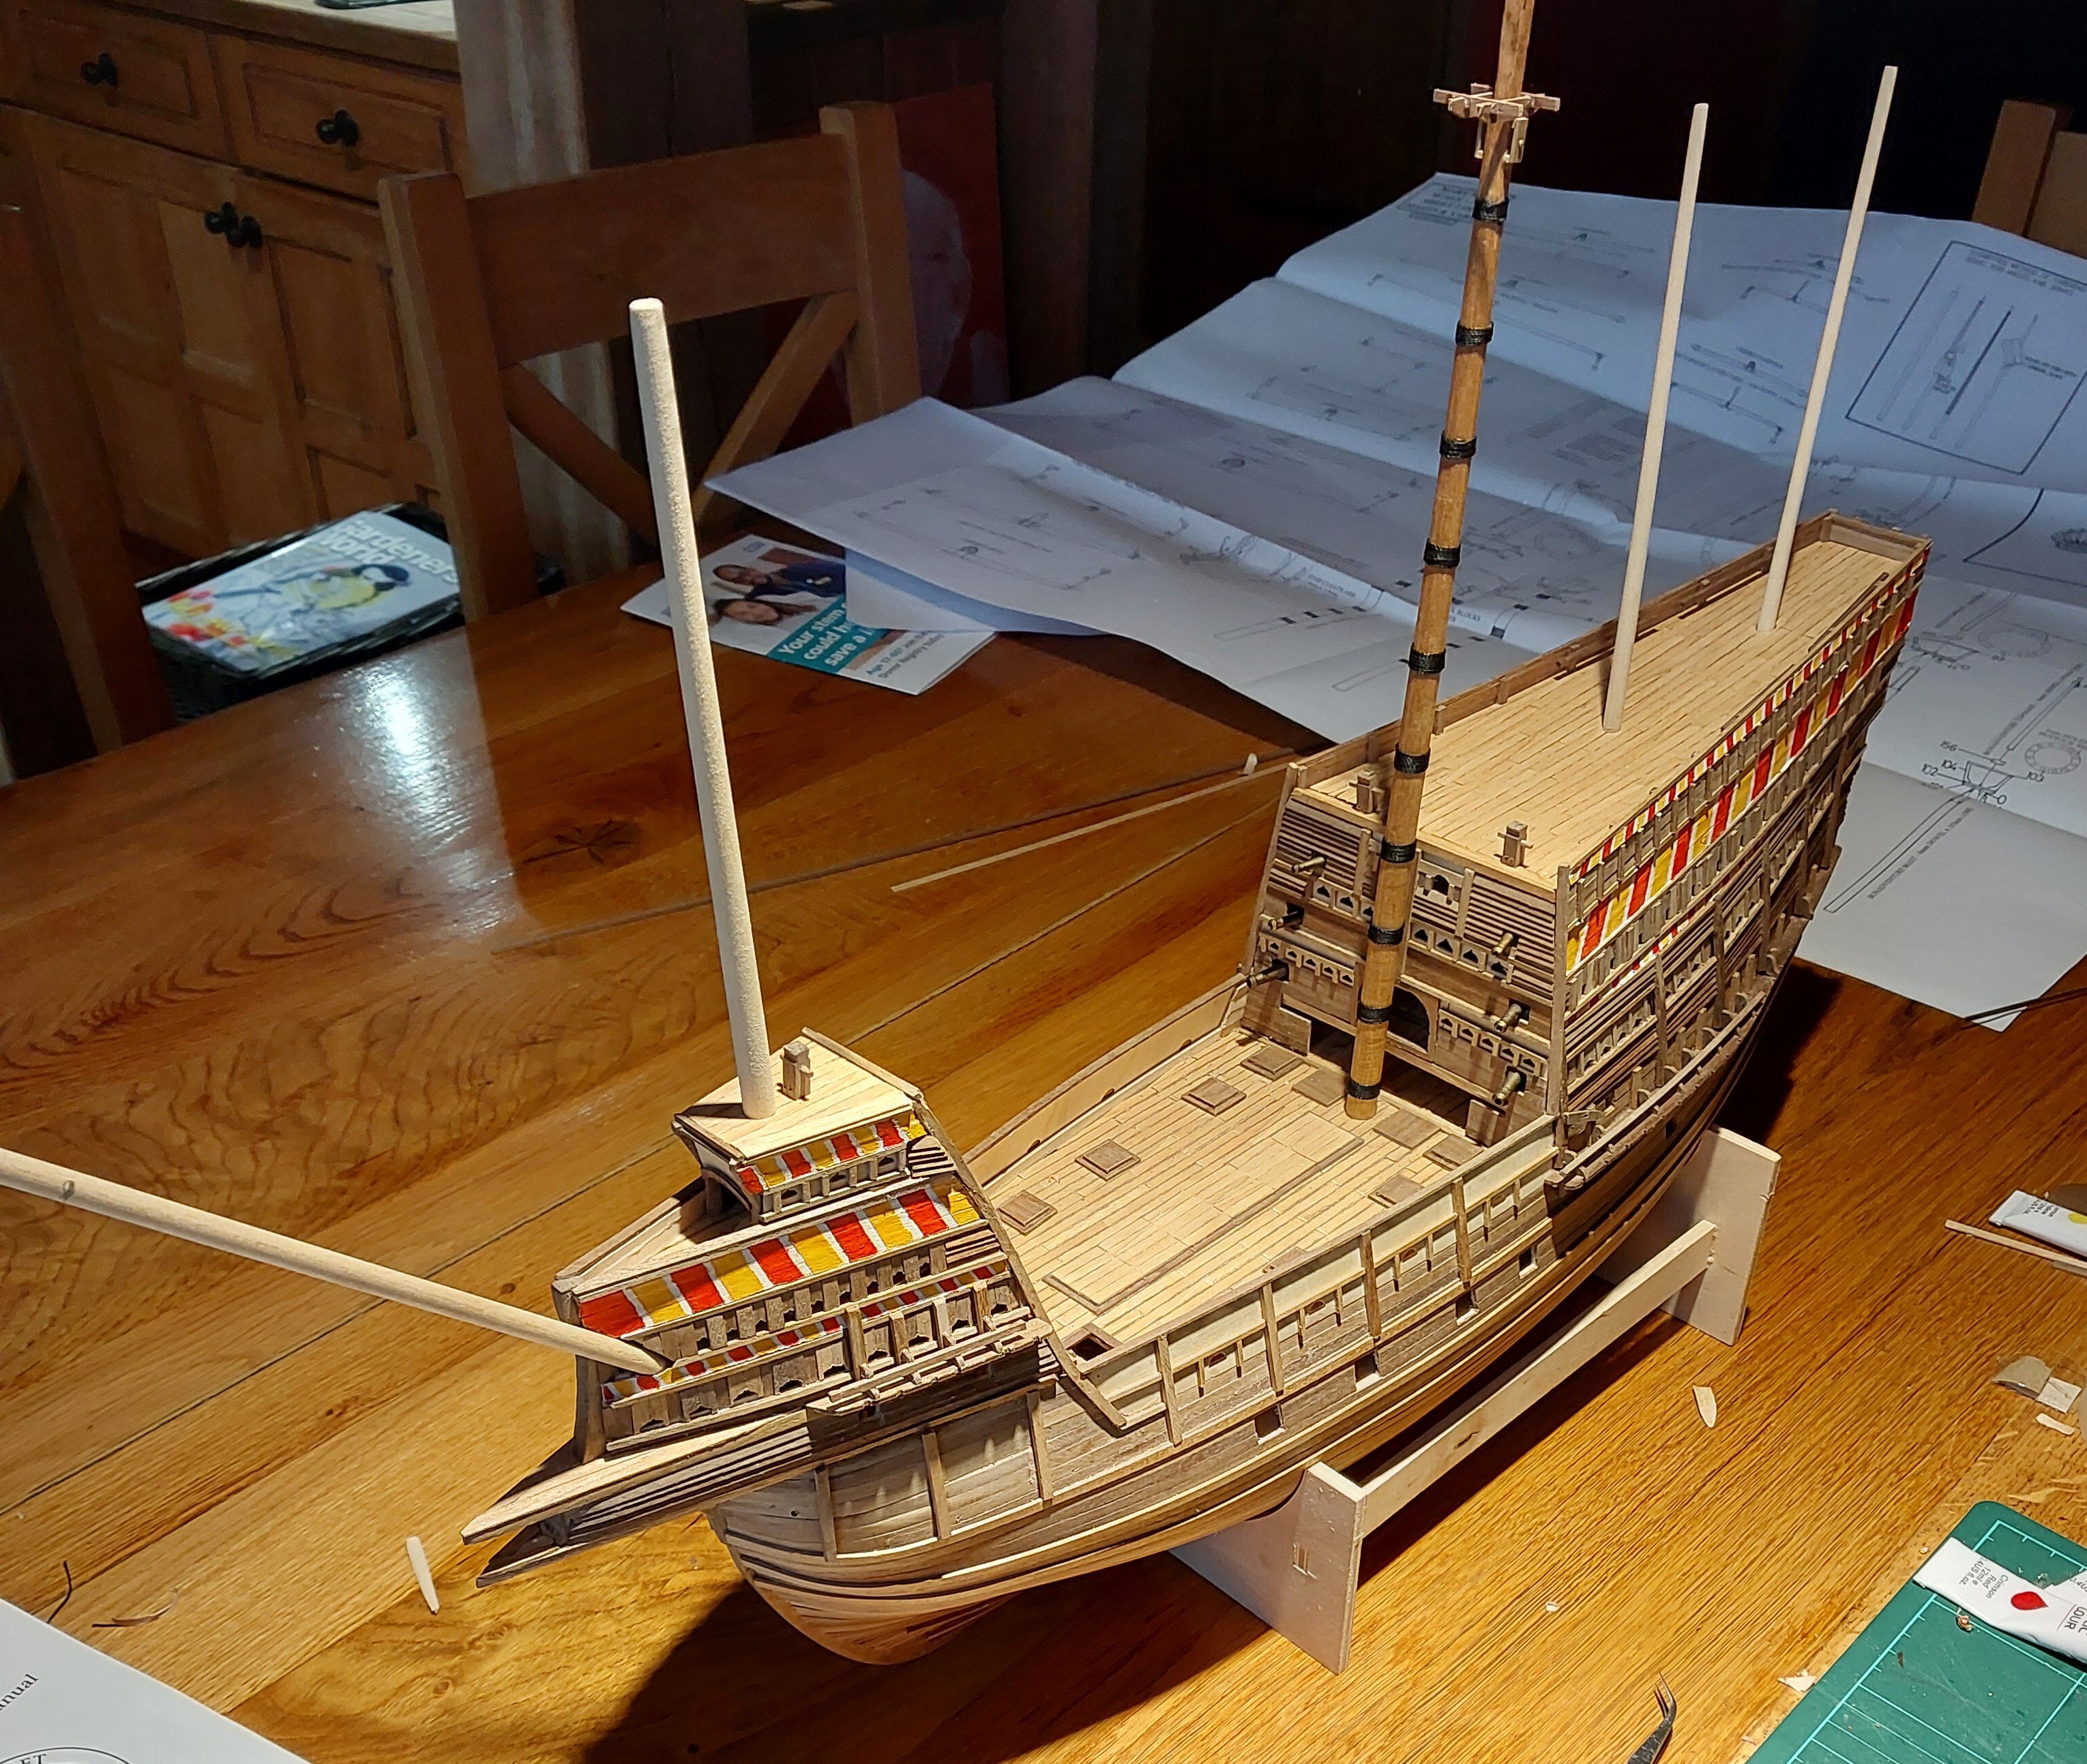
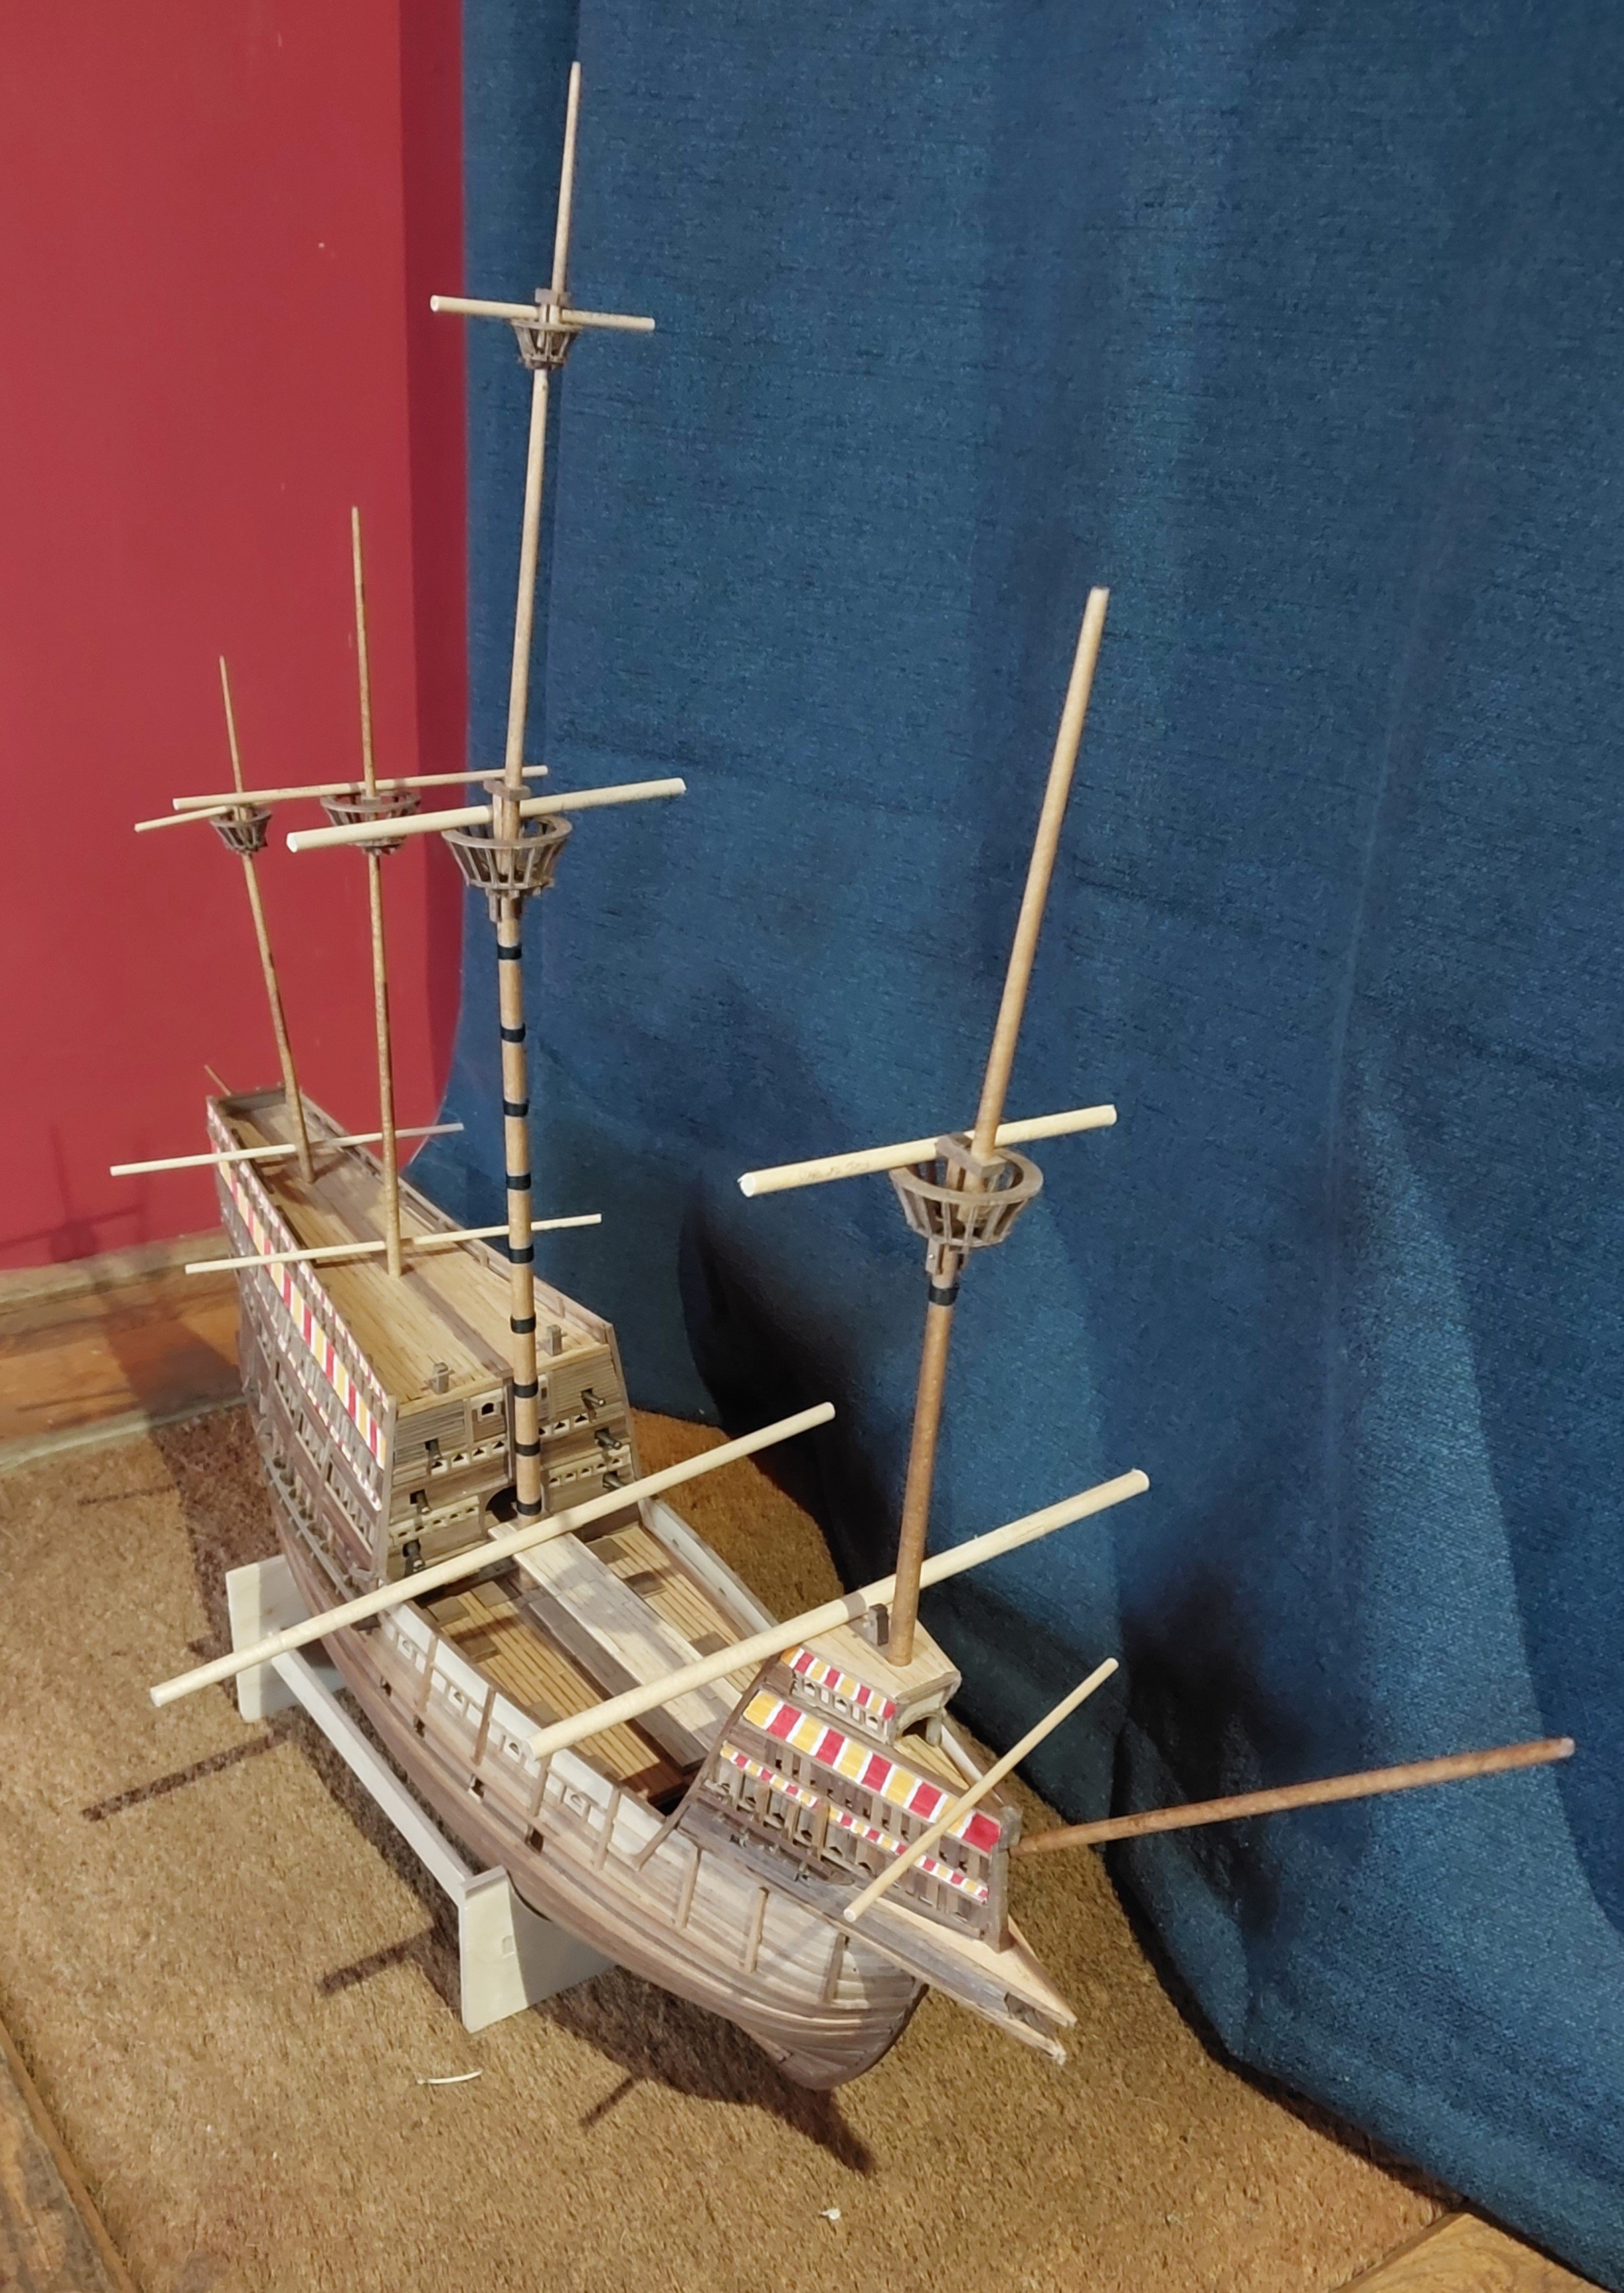
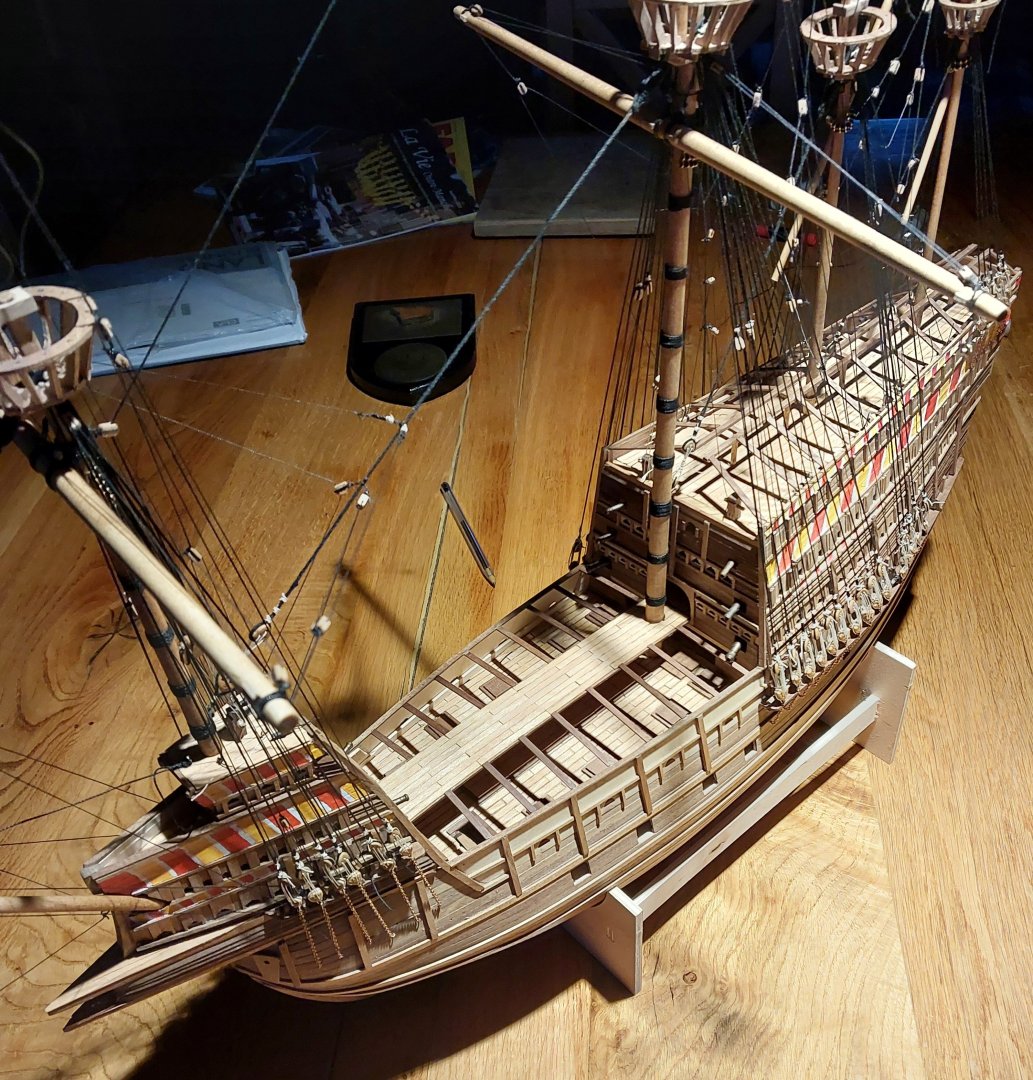
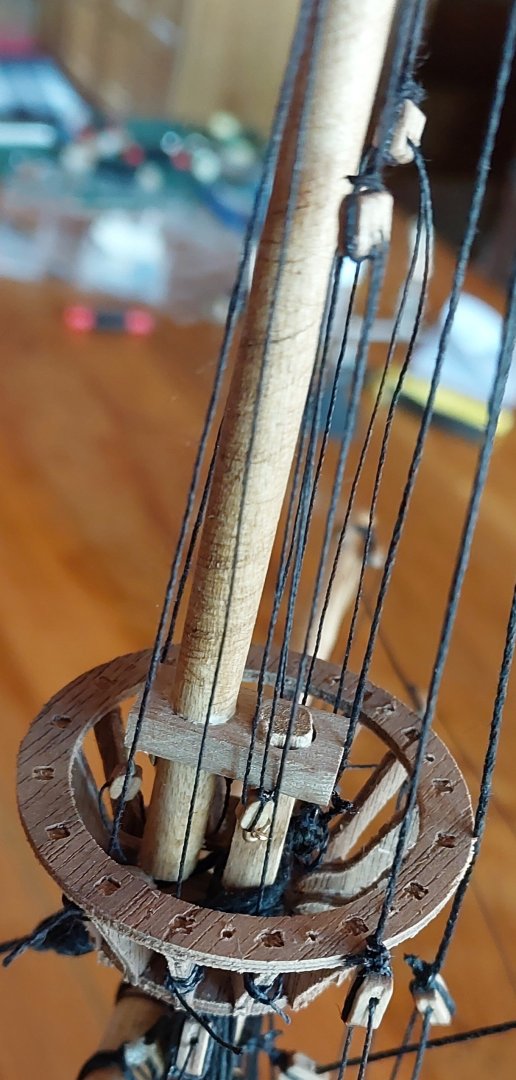
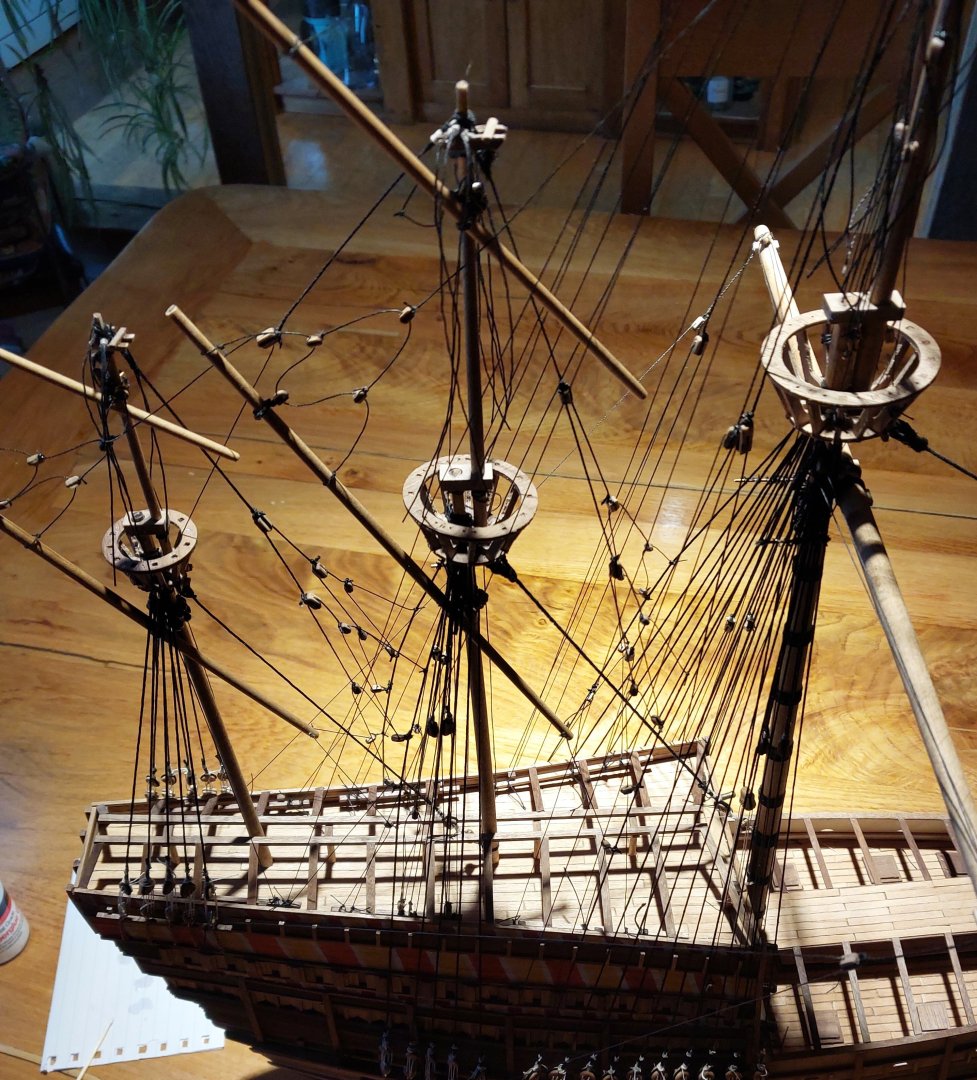
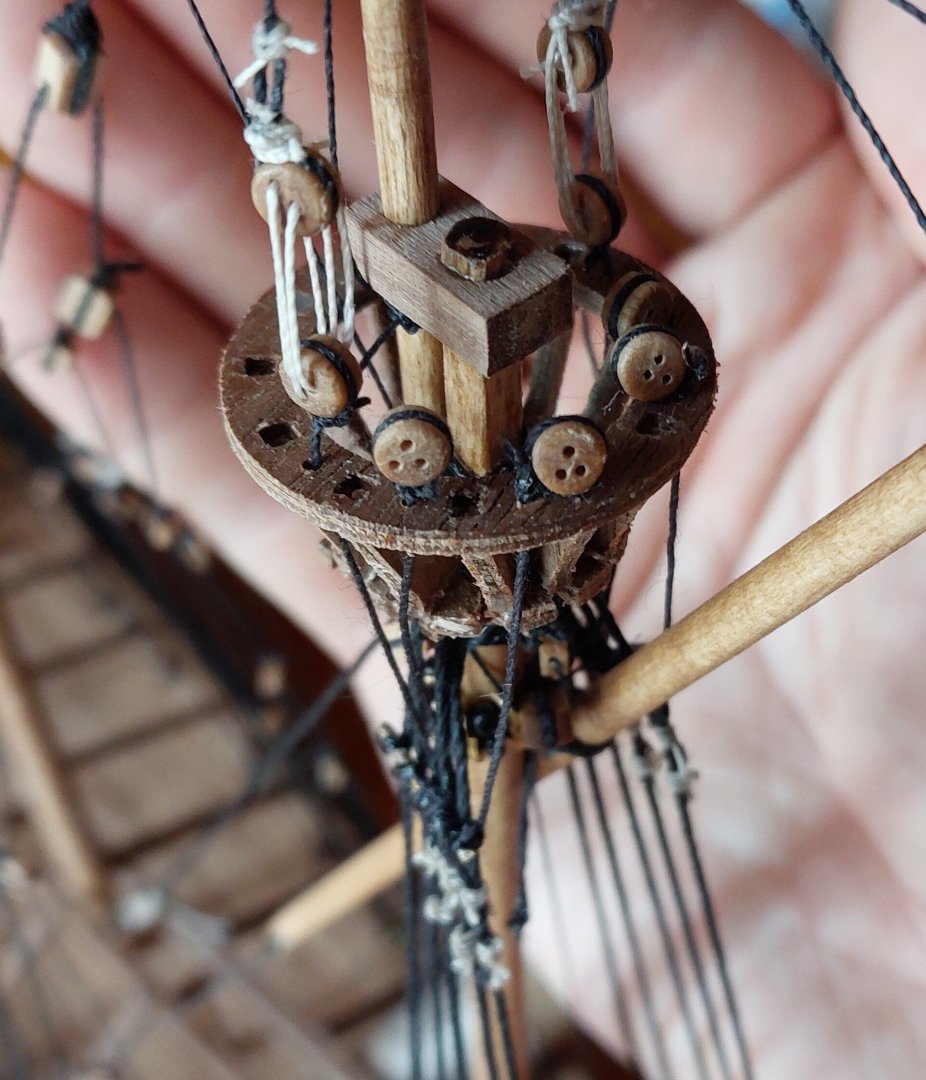
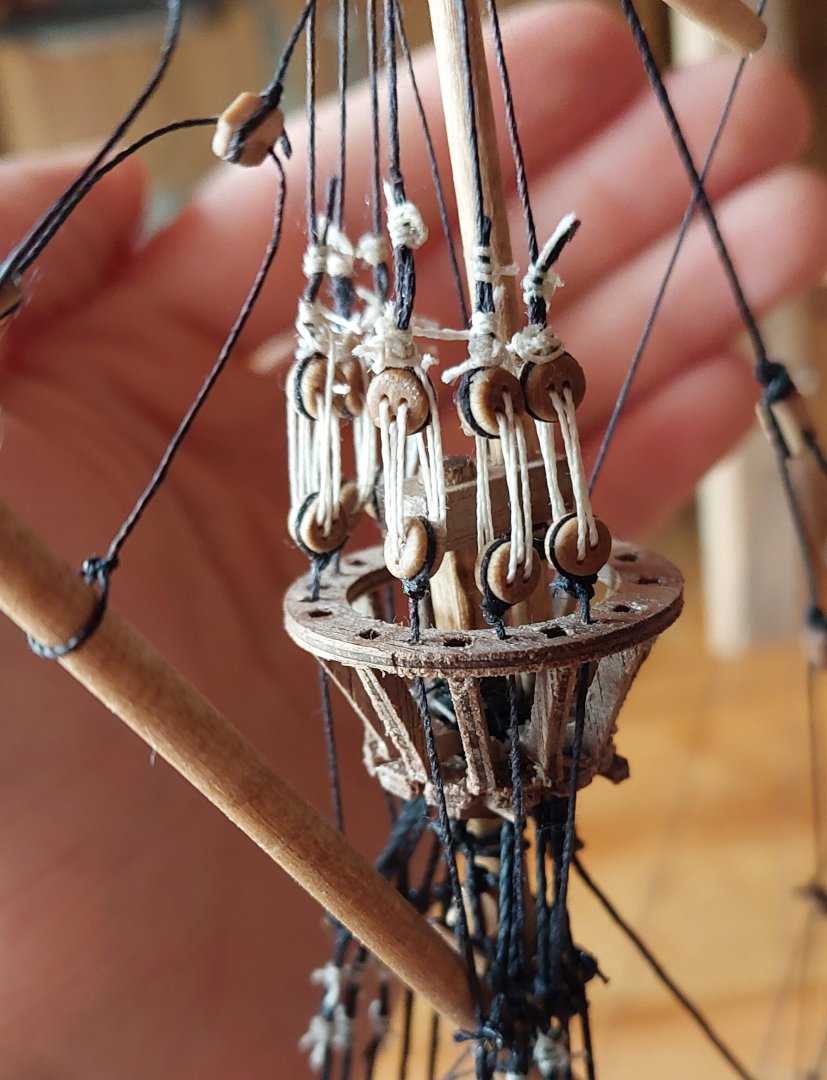
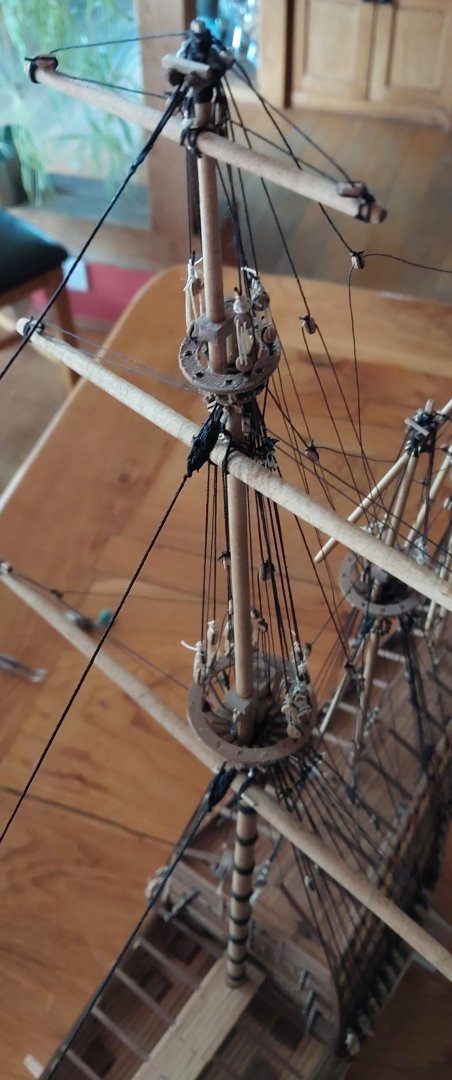
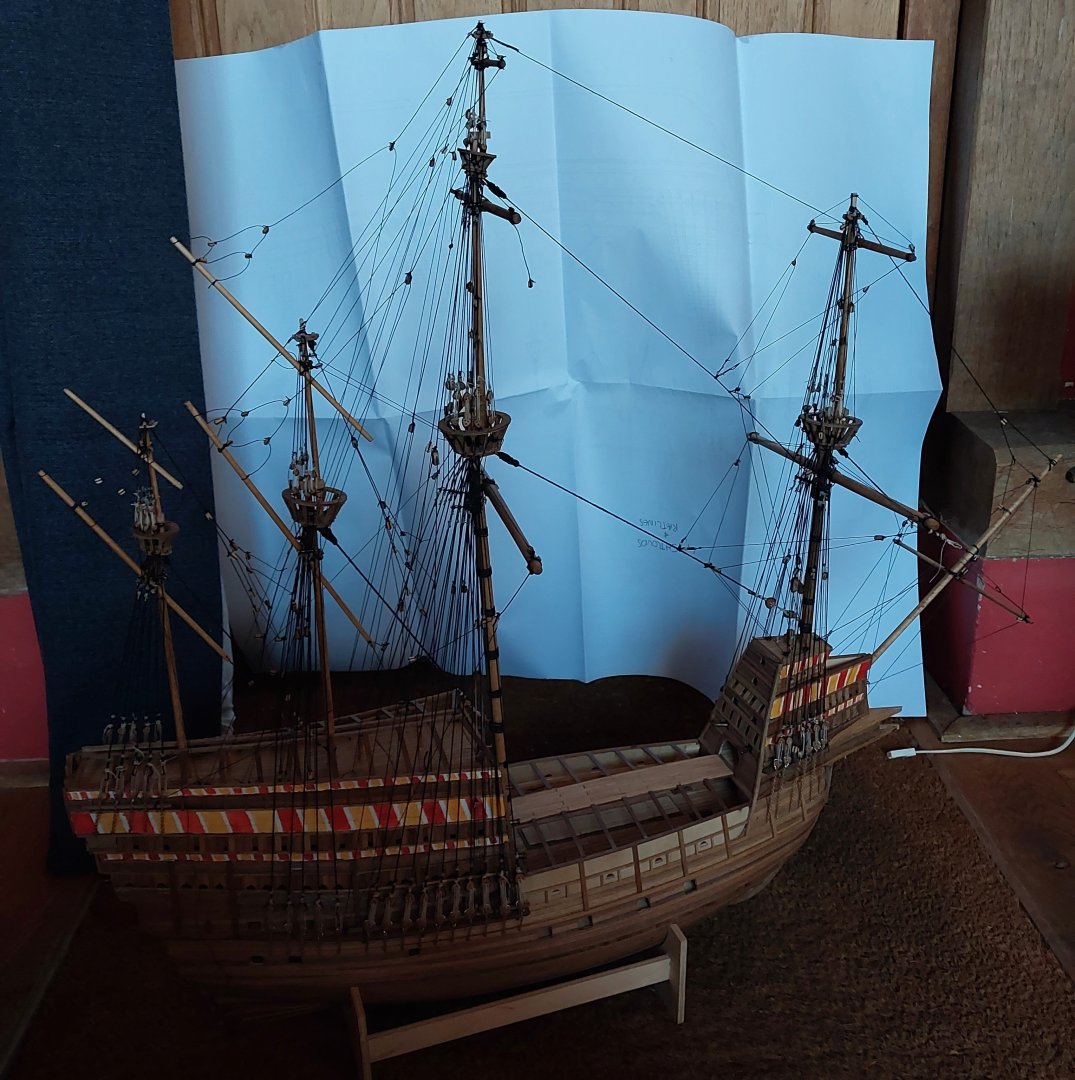
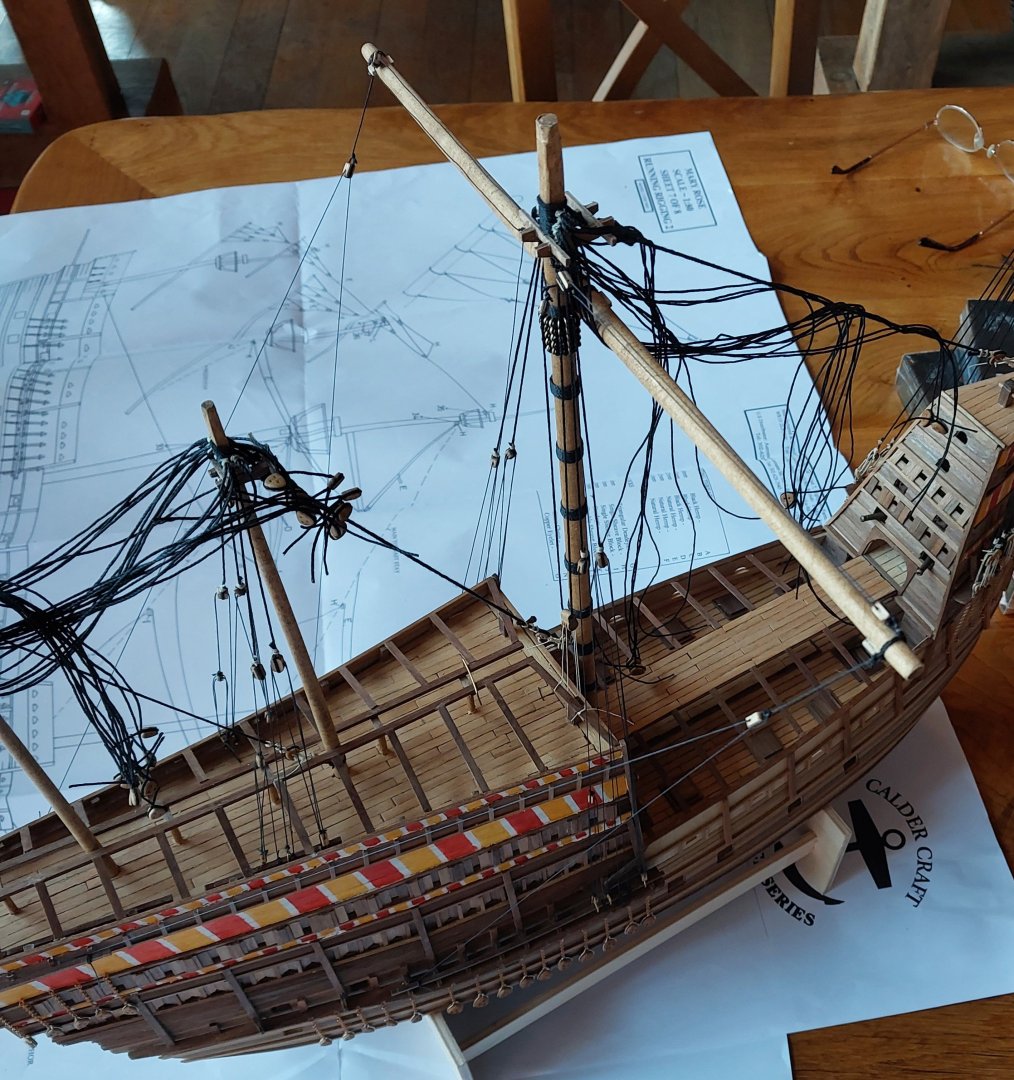
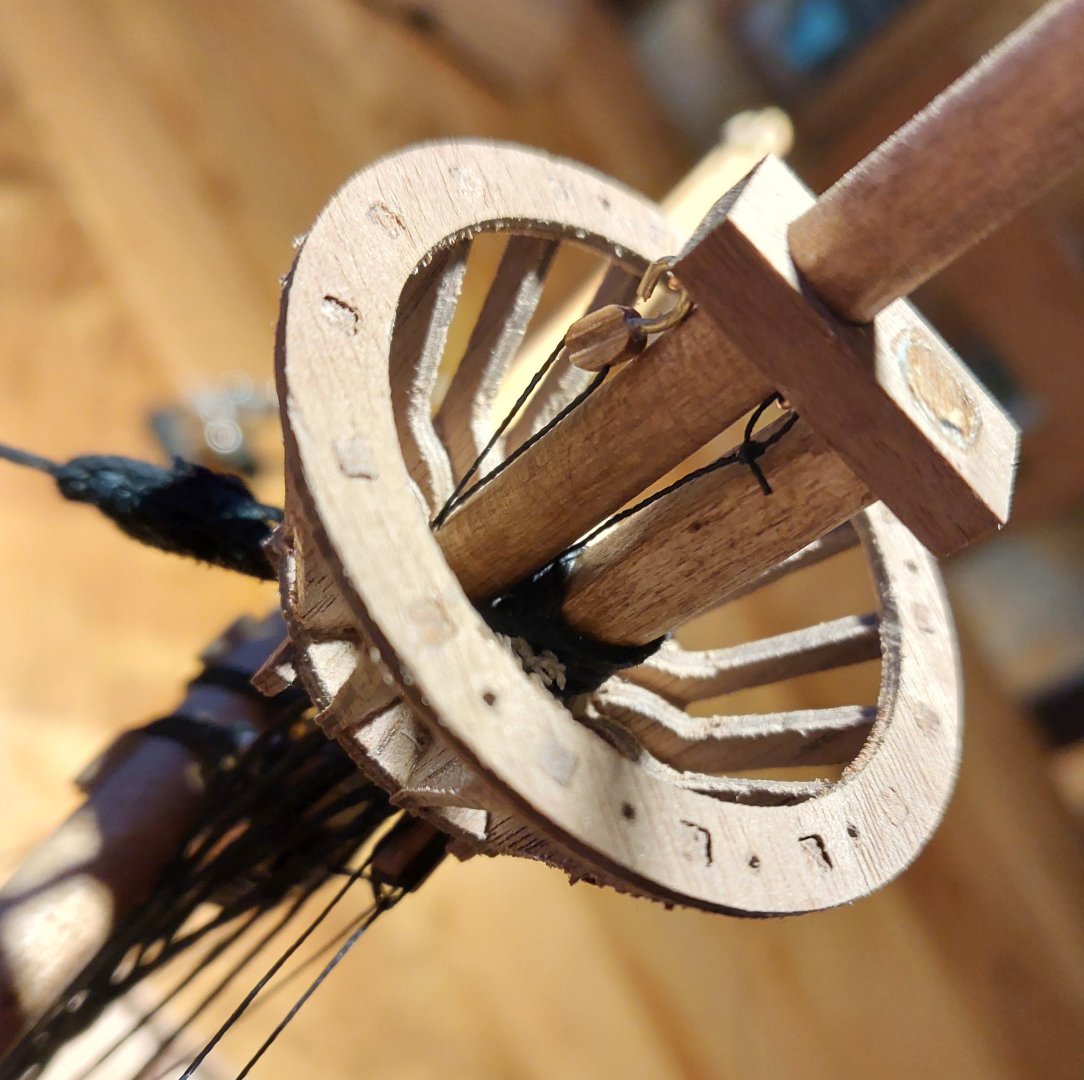
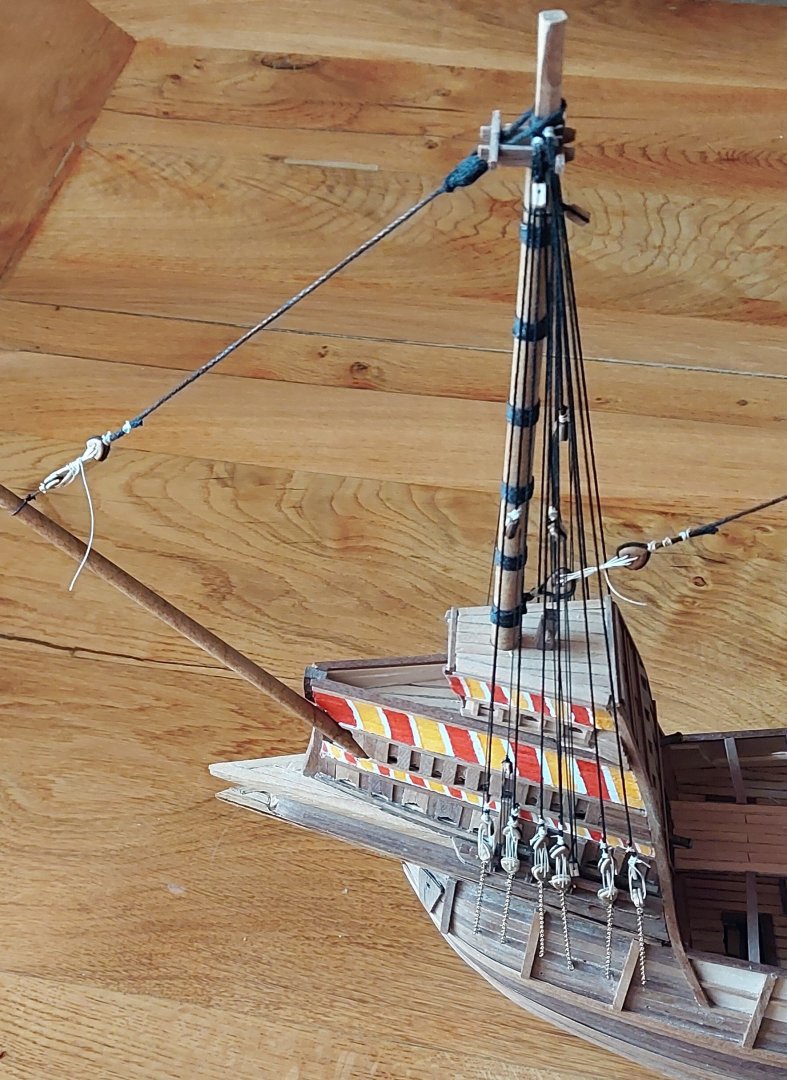
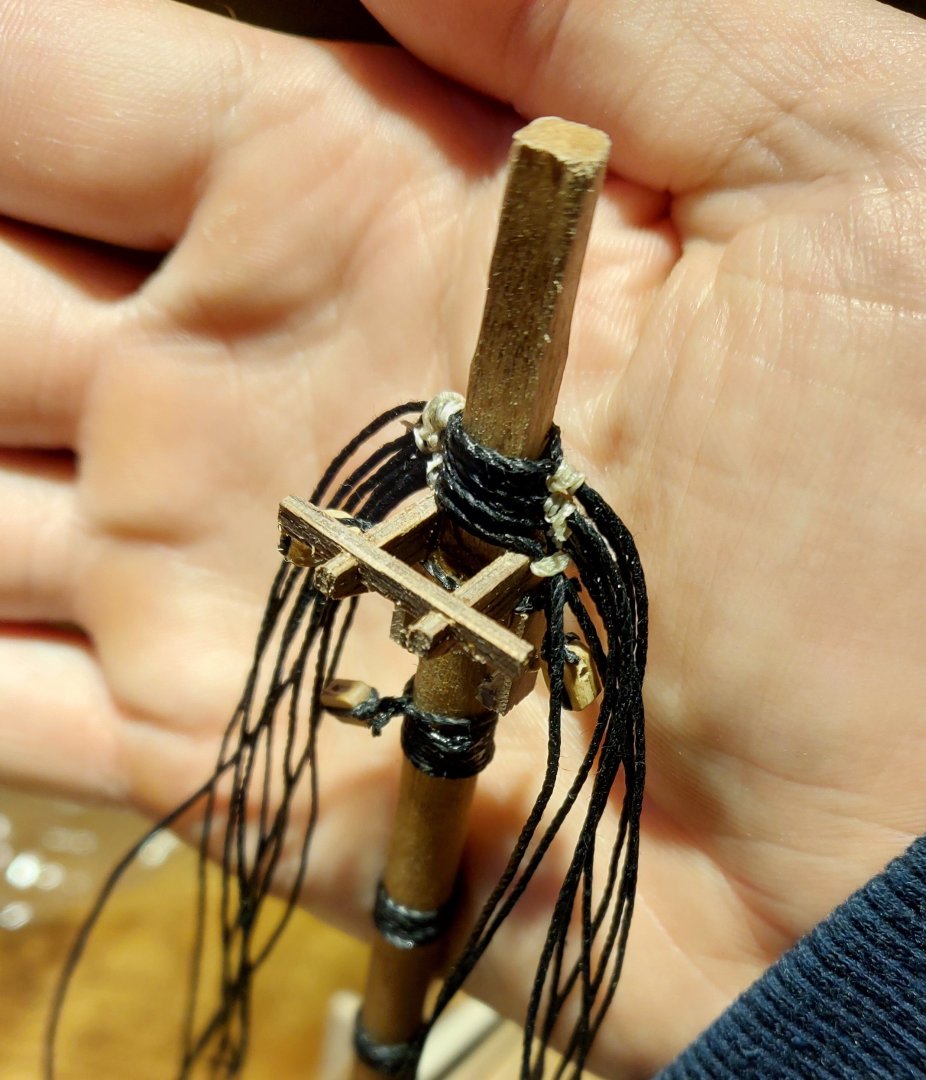
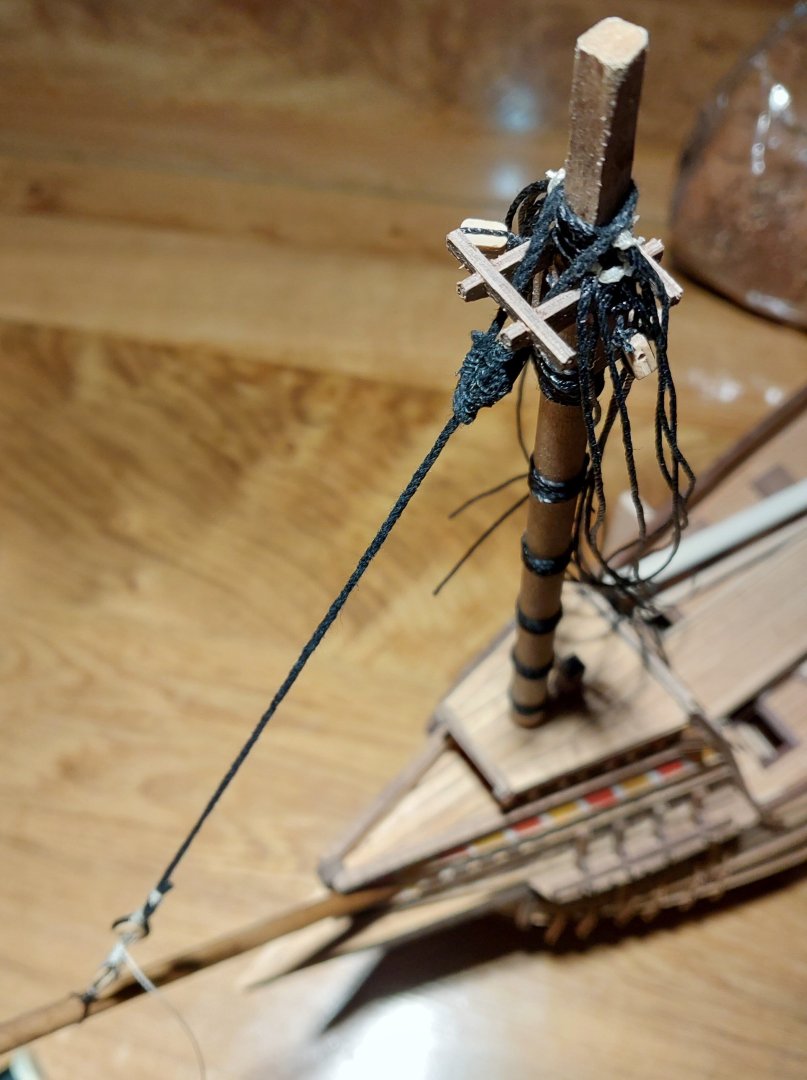
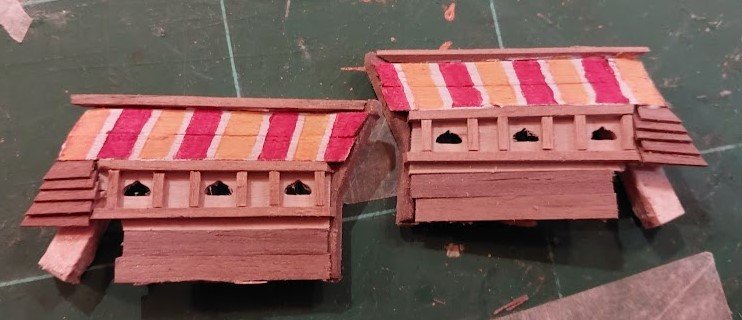
Whoops. That'll be a four month update break! Sorry all, life got in the way and progress has been slow on the Mary Rose. Developments have still been made though, between a few trips away and a new work contract (the boring parts of life). I'm going to condense a lot of the work I've done down into a few short photos as I can't actually remember the exact order some of this went on in, but the following is a summary of the last few months of steady work. Here we go! First, here's a full shot of the ship as she was in the first week of March. Excuse the backdrop - that's one of the Caldercraft instruction sheets. Here's some details; the parrel for the lateen yard on the mizzen, rigged following Anderson's diagrams, and the first of the 7-holed deadeyes set up on the mainmast. Here's the shrouds linked up on the mizzen: And here's the whole line of mainmast shrouds tied down: Honestly this was one of the main factors in the slow update - I completely burnt myself out tying these, and whilst the process was satisfying I'll be happy not to have to tie another deadeye in place for some time! But it's so nice and neat now they're all tied down. So much less spaghetti mess! Looking much better. Now on to the topmasts. Take note of the plaque in the background please - more on that later. Futtock staves - lengths of brass rod as per the Caldercraft kit. I might have used wooden strips in hindsight, but I don't think these show too badly: I put a single tackle in the main top and fore top. I'm not sure if there would have been any in the mizzen or bonaventure mizzen, but at this scale I went for simplicity: All four lateen yards in place - Anderson's book notes that ships prior to the 1600s would likely have been lateen rigged on the mizzen topmast, but doesn't provide a way of actually rigging them. Something to ponder! Futtock shrouds and deadeyes on the bonaventure mizzen top: Not my neatest knots in some palces, but I'm actually really happy with how these have worked out - and the shrouds all being tied off makes the ship look, well, shipshape! Again, I felt very burnt out on the project during this period, so photos are few and far between - I think it took me a couple weeks between sessions to get these done in all. Here's the main topmast at a nice artistic angle: And here's the whole mainmast assembled - the only thing missing are the braces for the top yard and topgallant yard. And all the sail controls. And probably some other things... Well, that summarises the progress I've made. It doesn't look like a lot in these photos, but man does it feel like it! Here's an updated shot: As you can see, all the yards have their controls in place, with the exception of the main topmast yard and the bonaventure top lateen yard. The former I simply need to complete - running the braces to the shrouds on the mizzen and back to the deck - but the latter is a bit of a puzzle. As I mentioned above, Anderson is not clear how these would have been rigged, so I've left it til last. The Caldercraft plans have the lead for the lifts going to the mizzen topmast, but that's where I have the lifts for the bonaventure lateen, so it seems unlikely the bonaventure top lateen would also go there. My current thinking is to perhaps run the bonaventure top lateen lifts to the tip of the mizzen top lateen, but that seems a little tenuous - any input would be very appreciated here. I still need to do the ratlines, but other than these points the main bulk of the rigging work has been done. That is, until sails are considered. The Caldercraft kit has no sails, and I understand most people rig sails before rigging the yards in place, so that ship has (aha) sailed. I have a few square feet of linen that would be suitable, but I'm currently considering putting furled sails in place - this would be easier for sure, and also more closely match the Anthony Roll. Any opinions are welcome here - open to ideas! My other tasks are to finalise details - cannon, the figurehead (haven't forgotten that!) and gunport covers, amongst other things. There's also the spar that sticks out the stern, which I took off as I kept knocking it. I believe this would have been a tie-point for the bonaventure yards, and in the Anthony Roll it also has a rope ladder hanging from it, so I'll need to investigate that. And finally, here's a little cool piece of history. I mentioned the plaque in the background earlier, and here it is: A family friend gave this to me the other month. As I understand it, he was clearing out his late father's possessions and came across it - his parents had entered a competition run by the Mary Rose trust in the 80s, presumably to fund the archaeological project and subsequent raising. This was one of the prizes, and is apparently an actual piece of the ship. I'd call this quite ethically questionable myself, and I doubt it'd pass muster today, but 50 years have passed and the damage has been done - nonetheless, I intend to keep this with my model wherever I end up displaying it. Thanks for reading, and sorry for the long break!


-
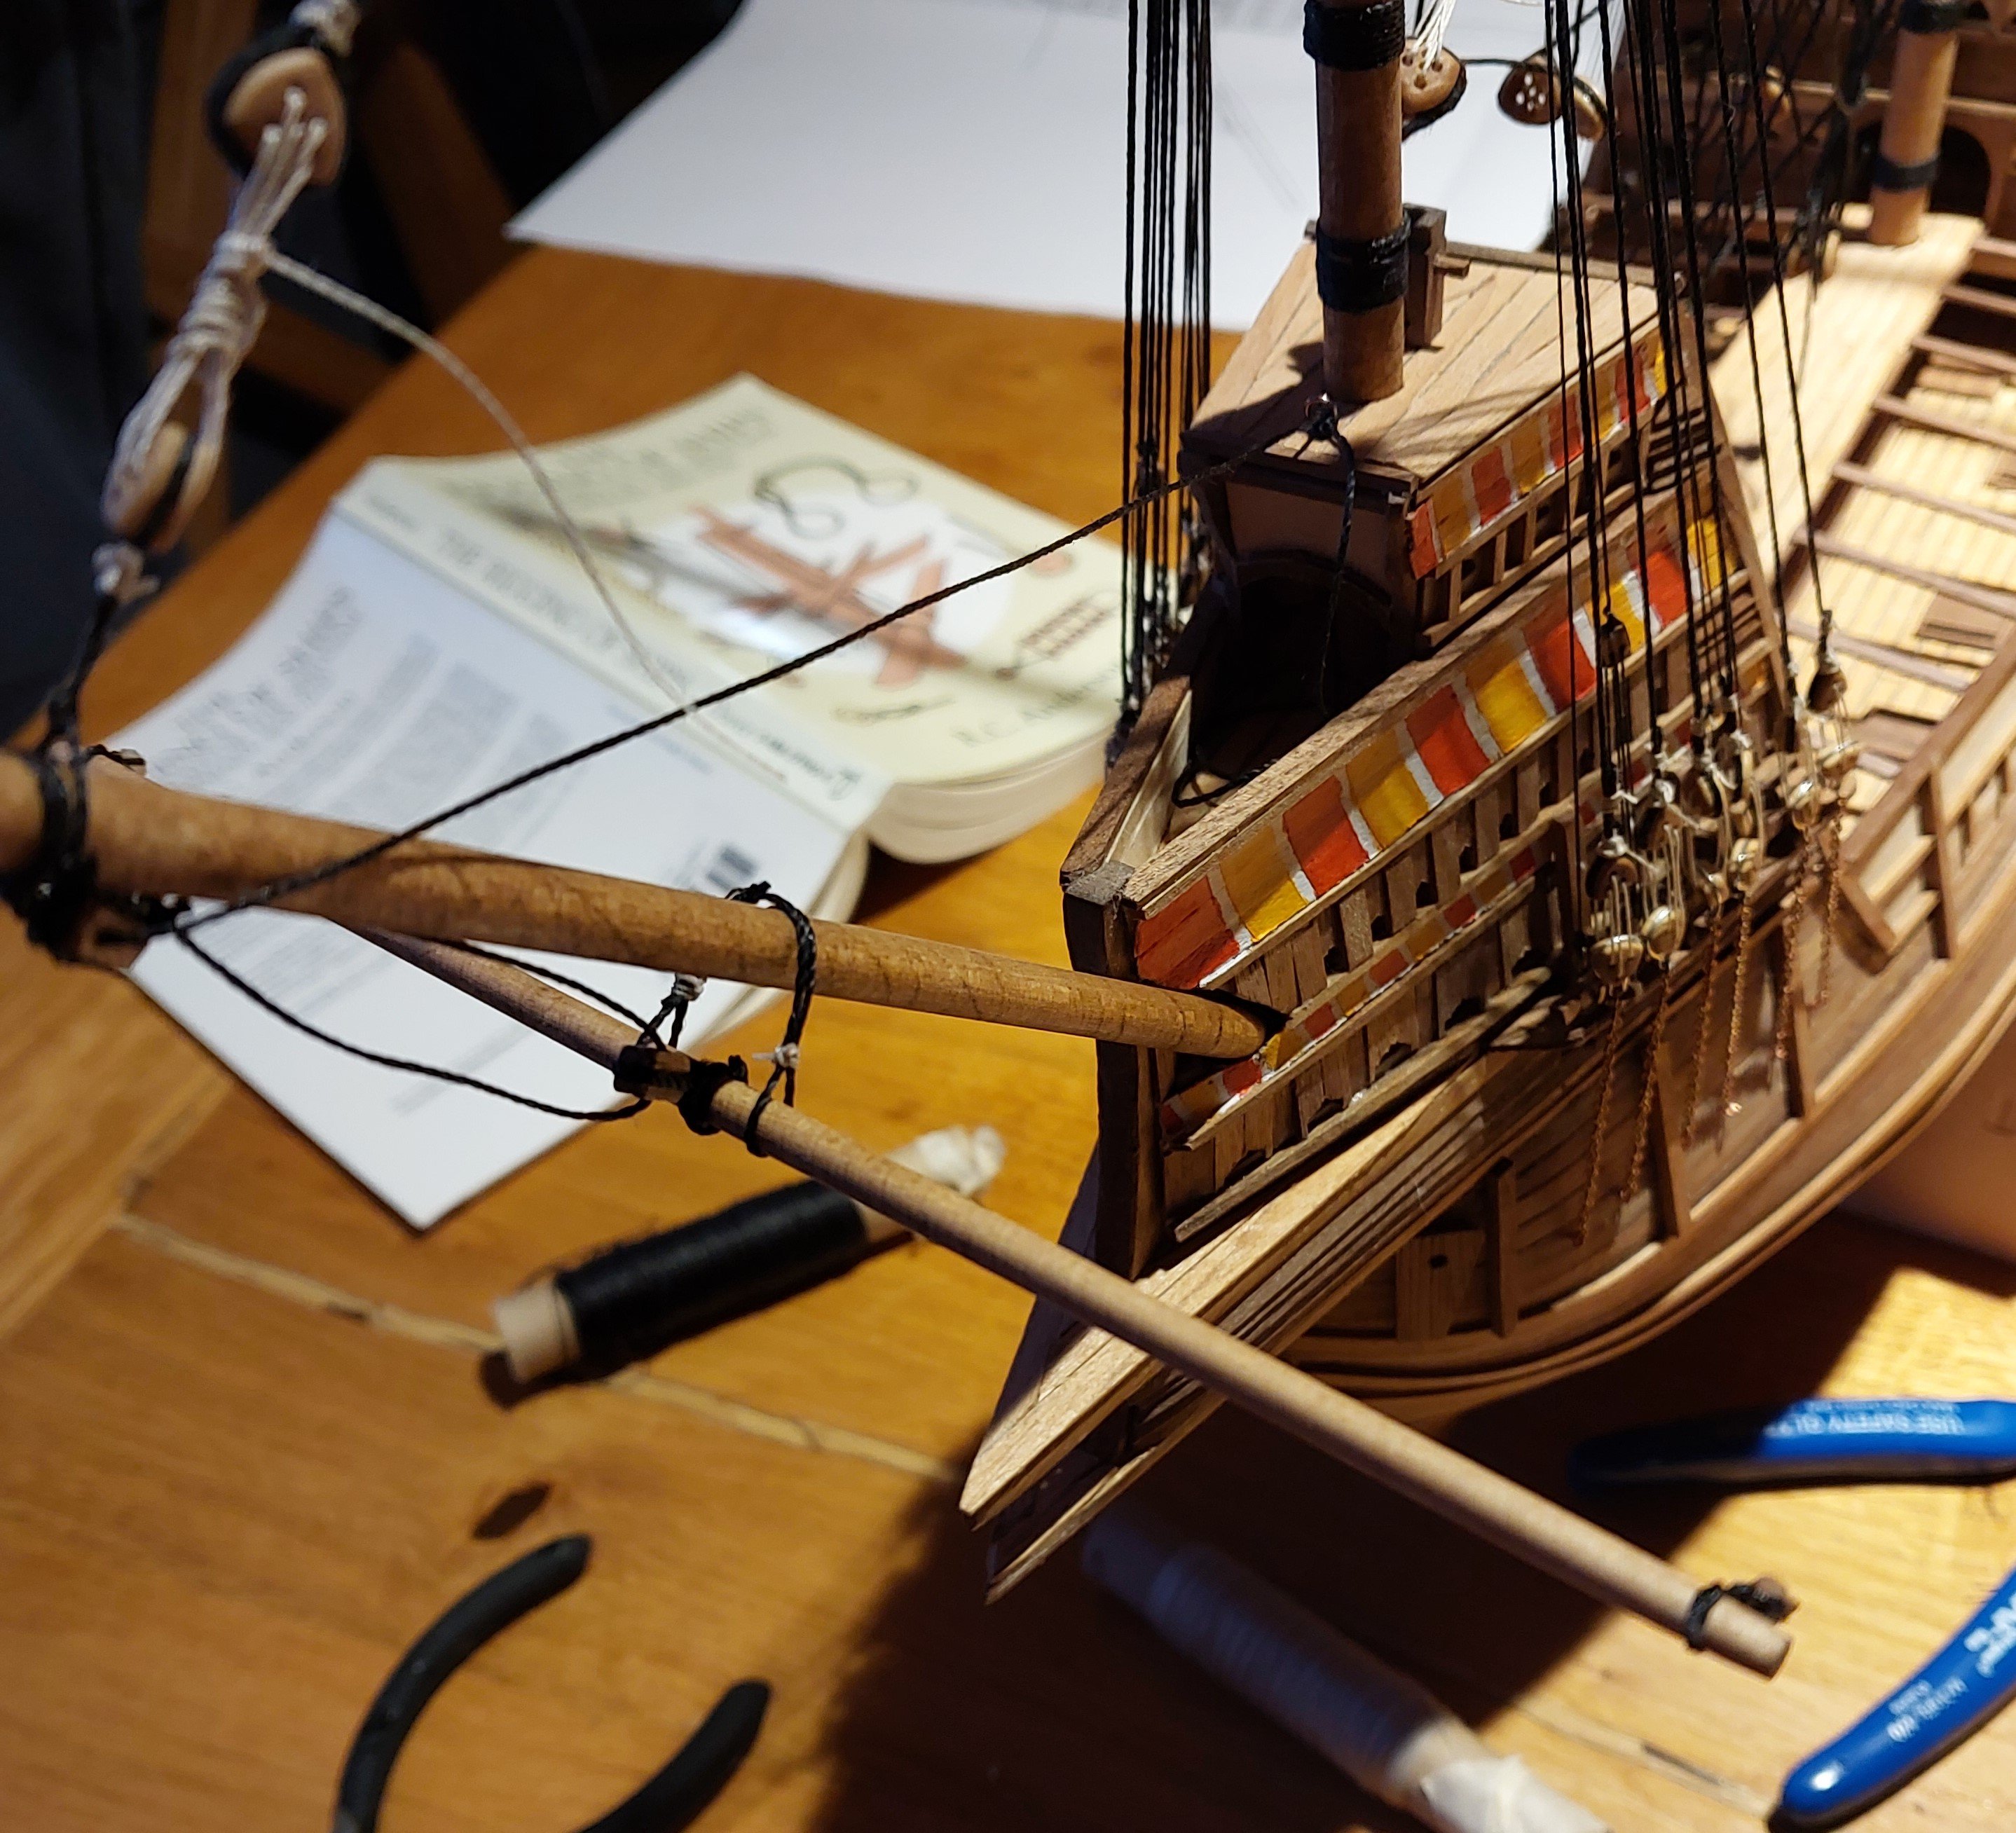
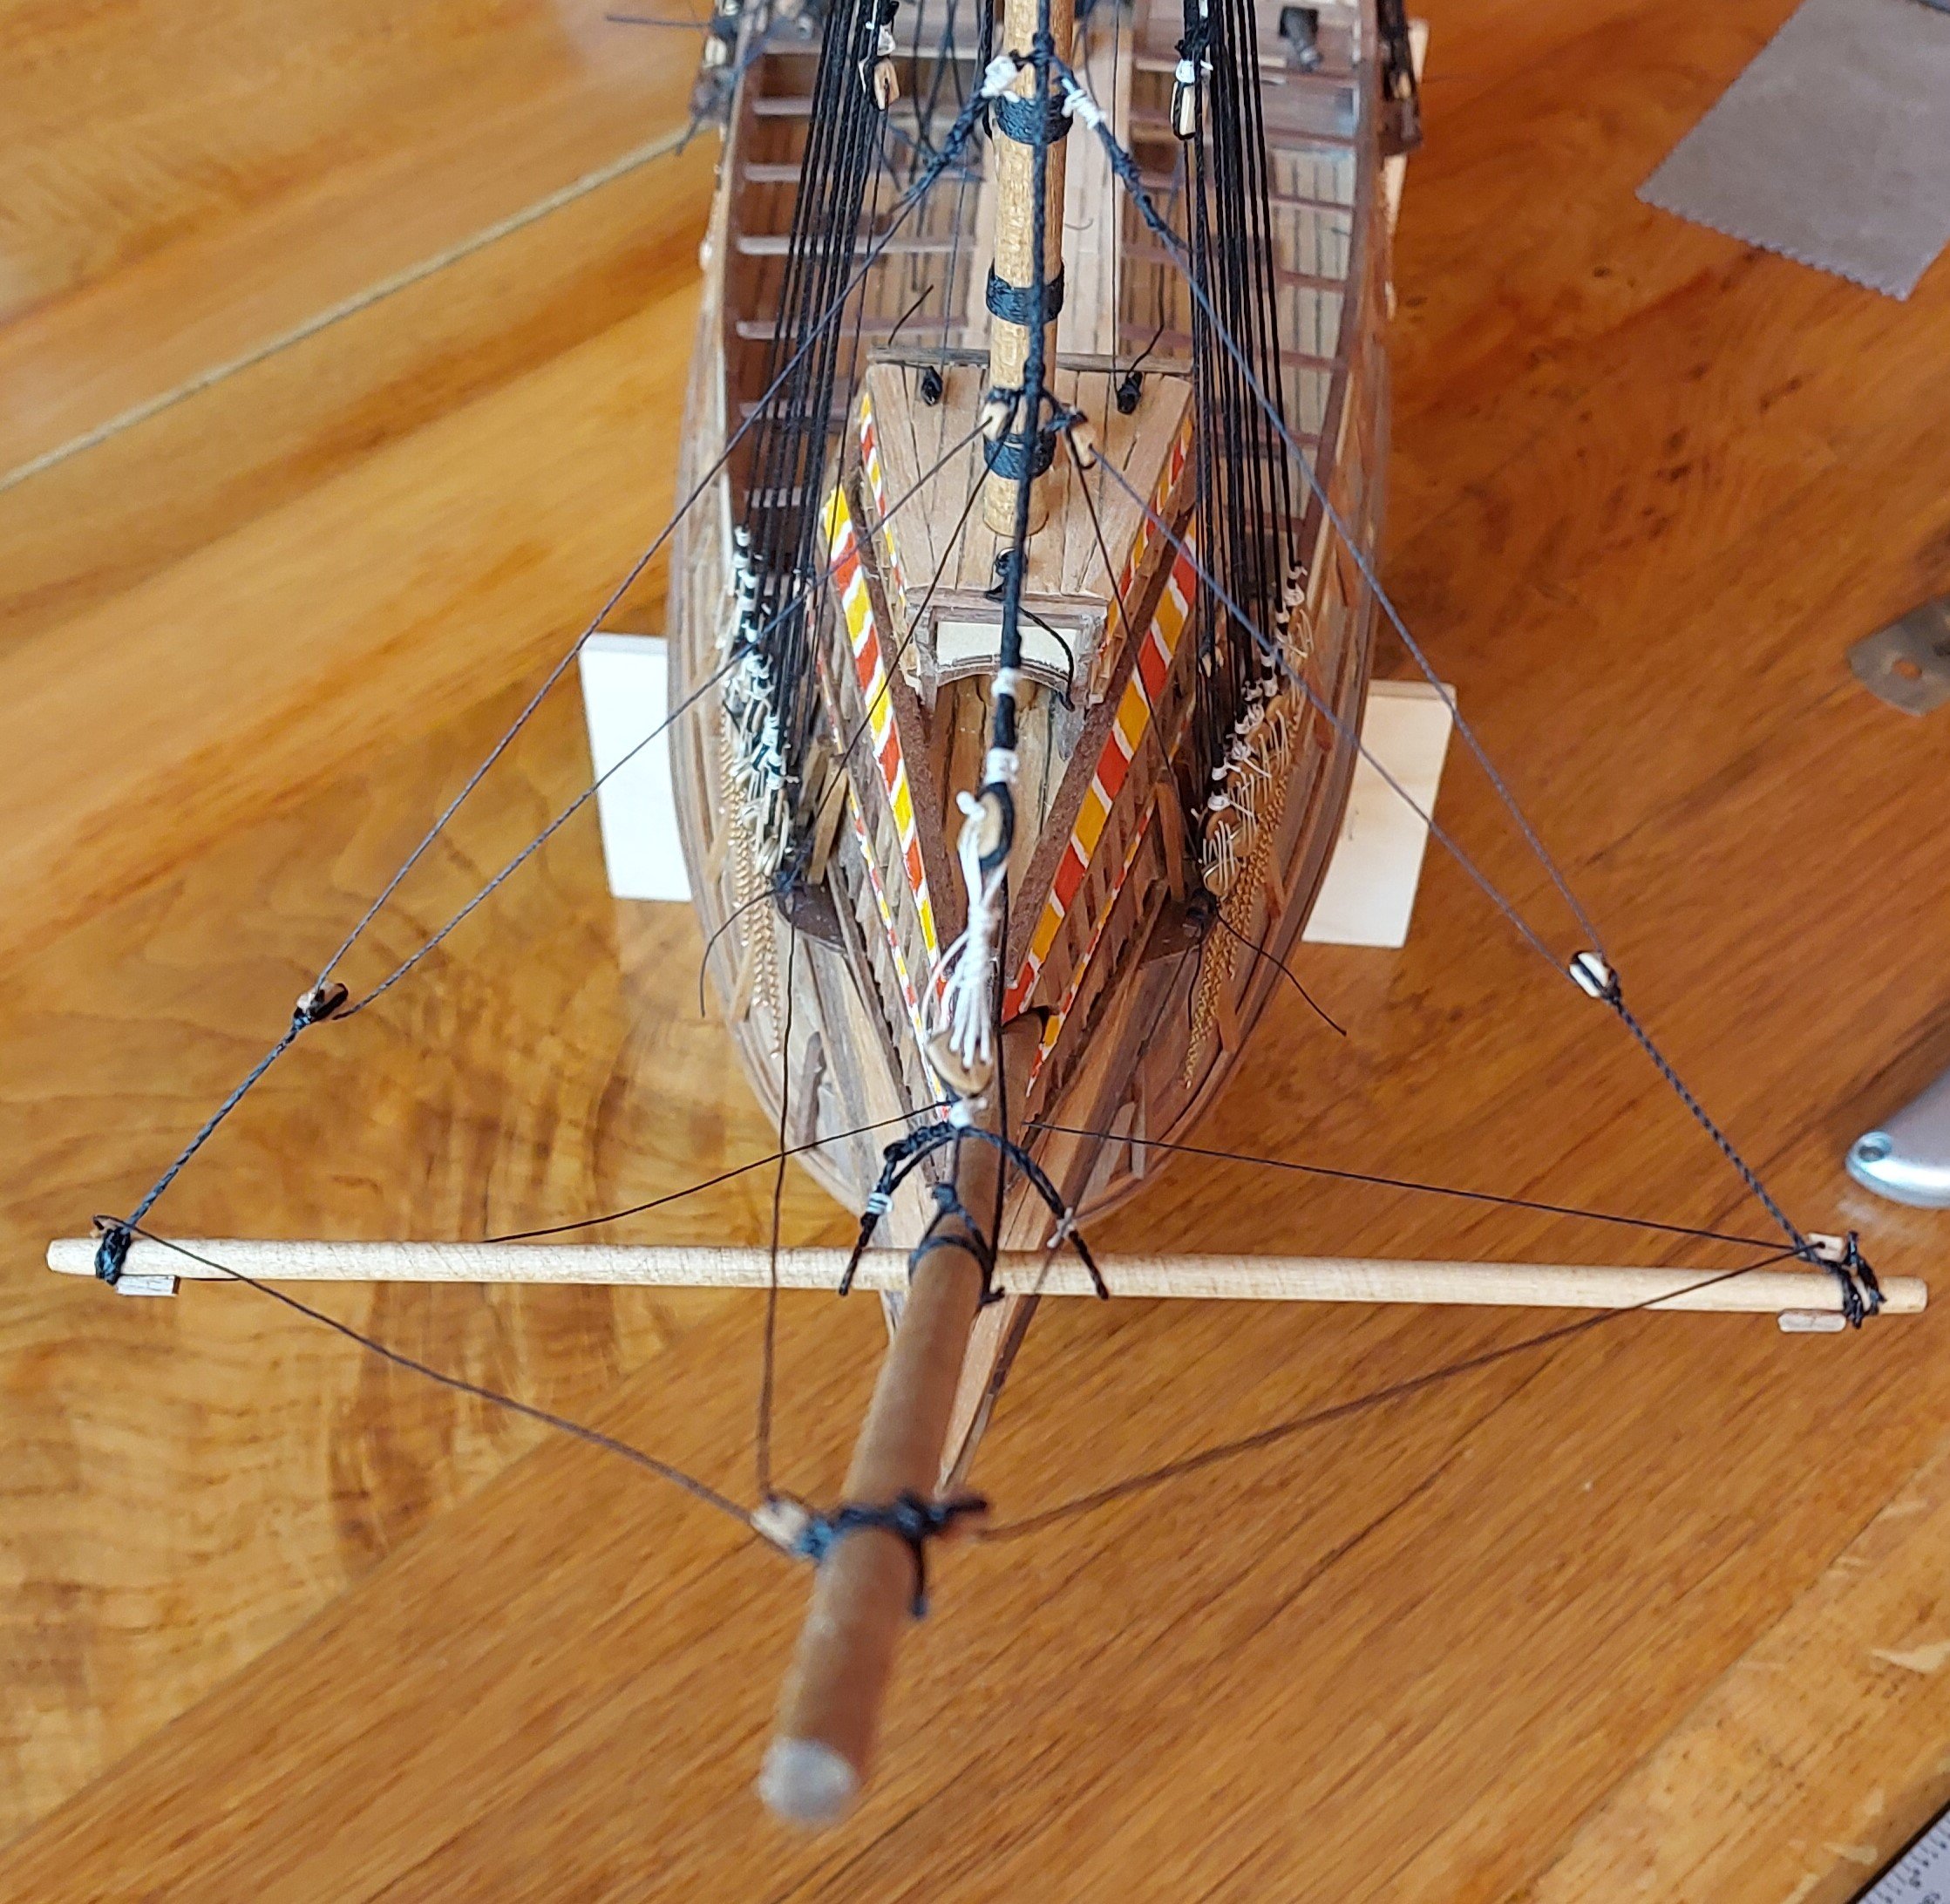
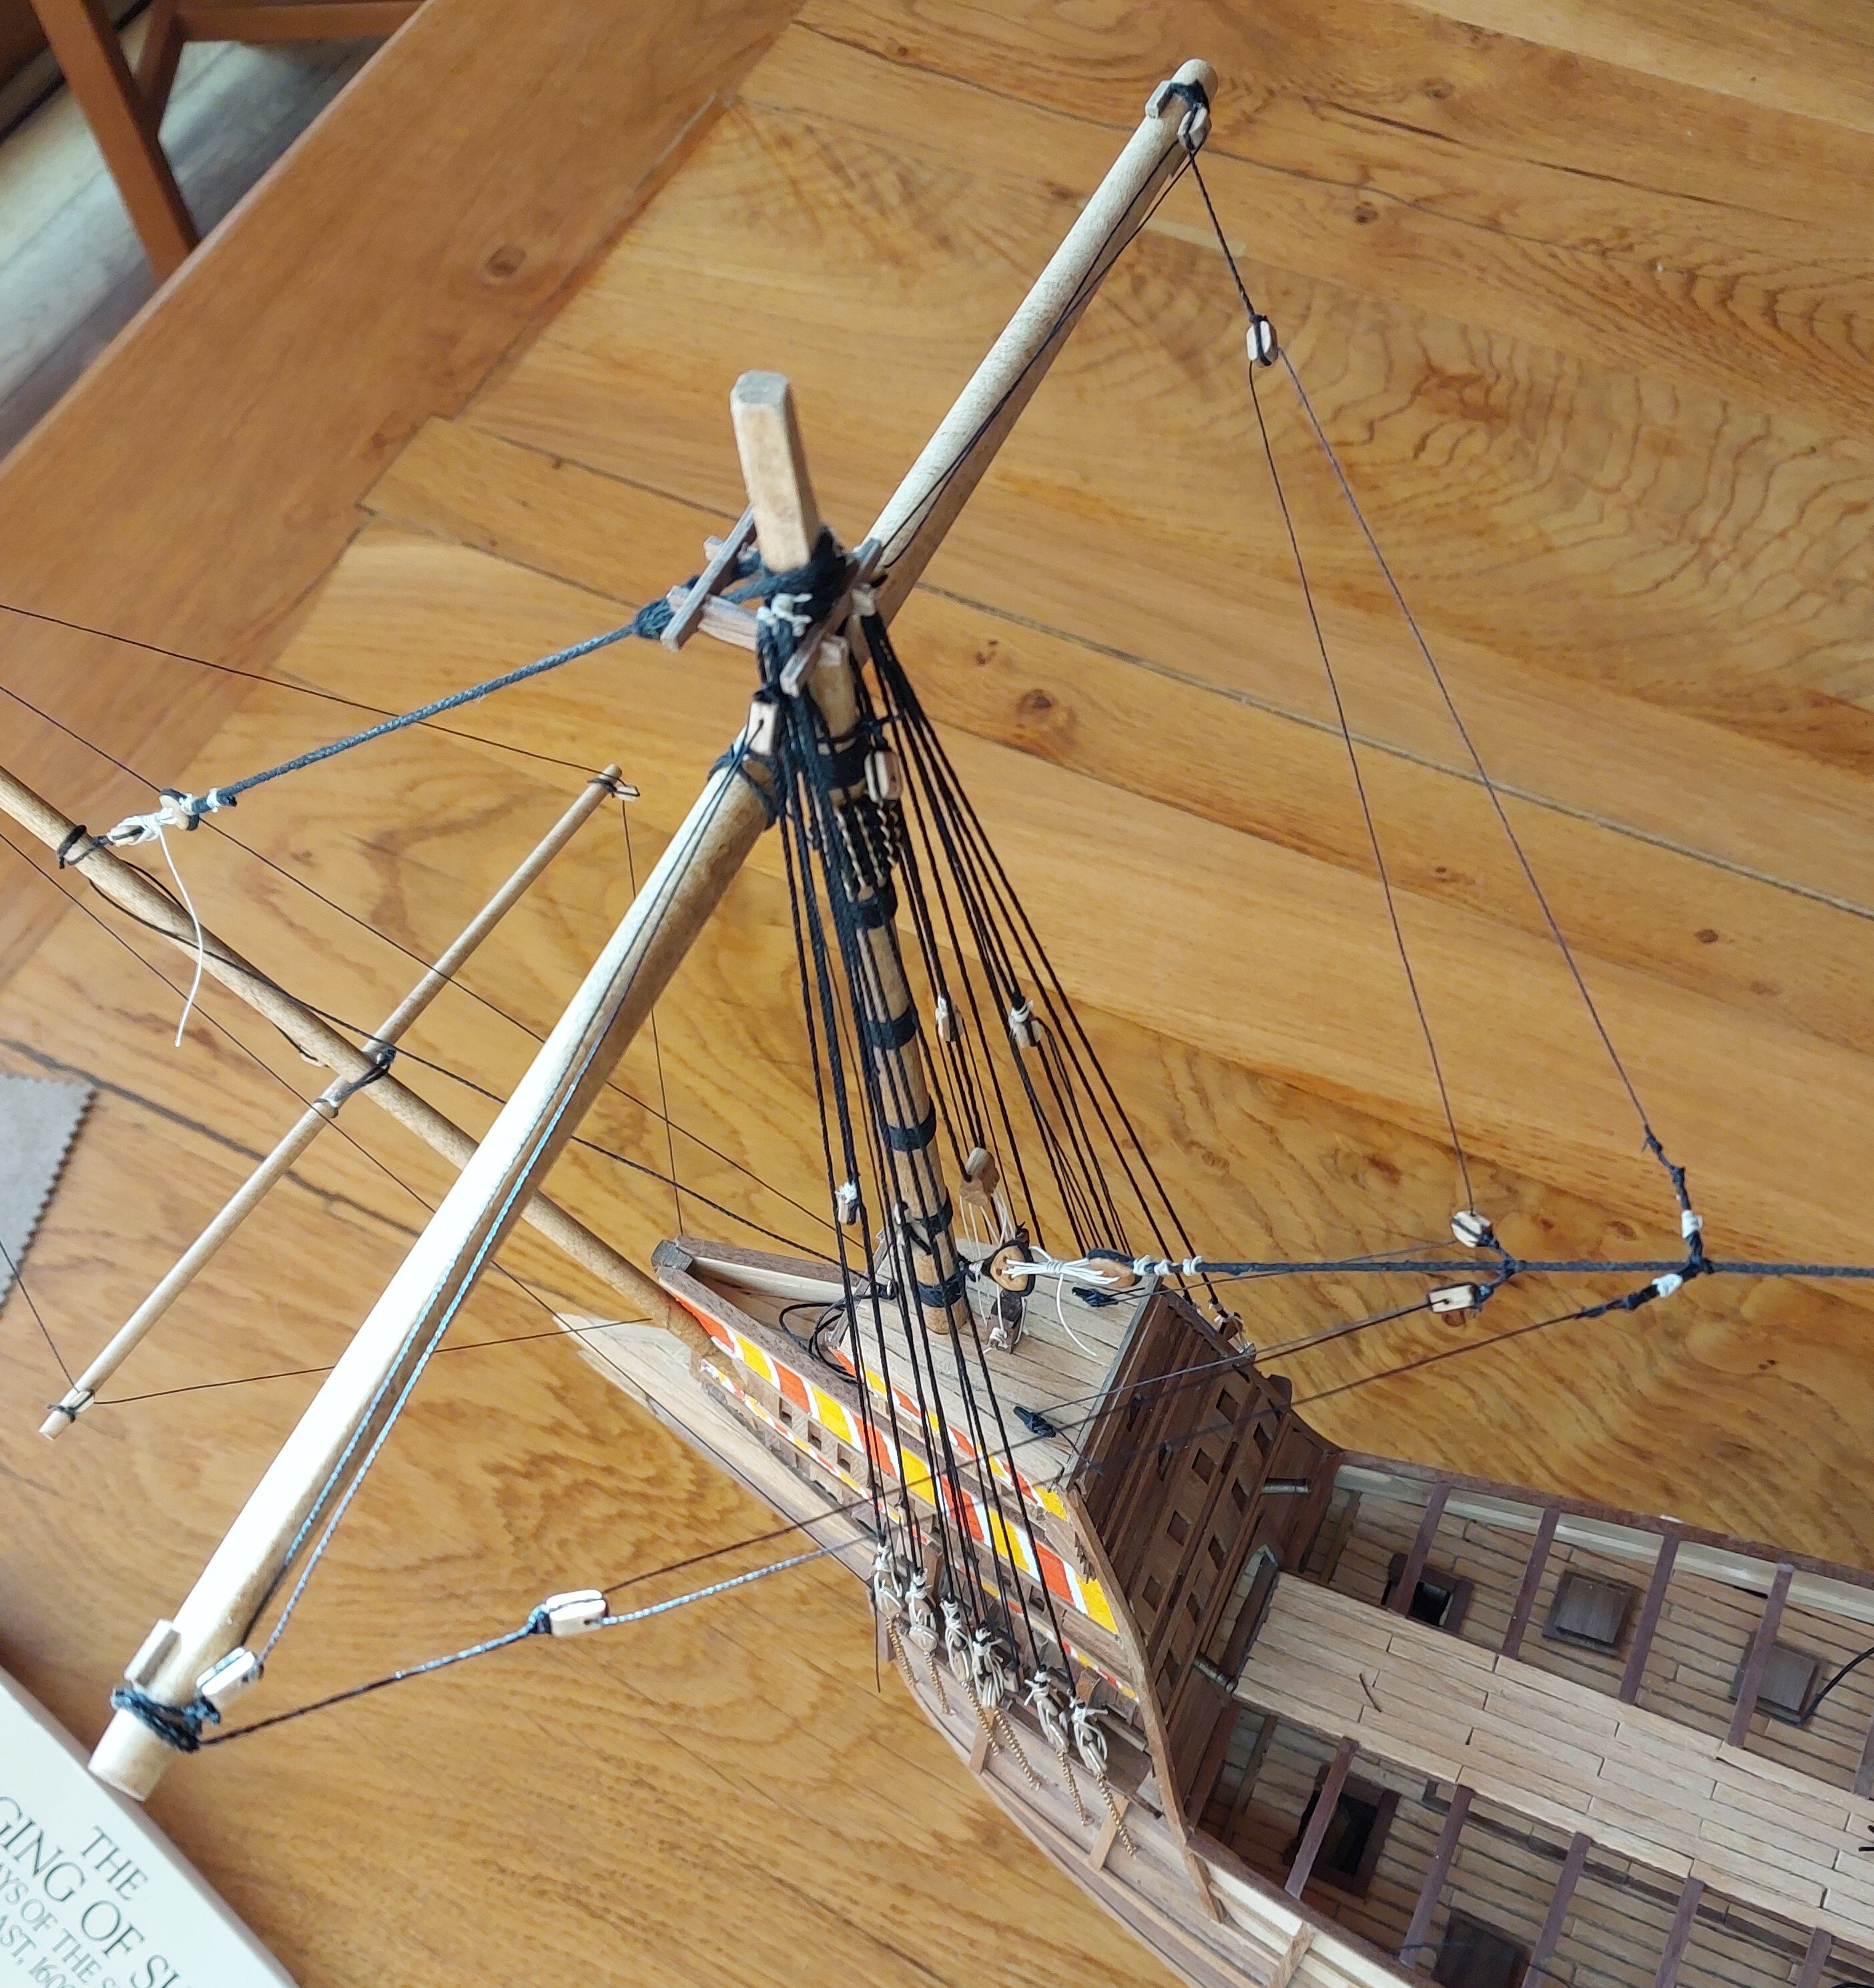
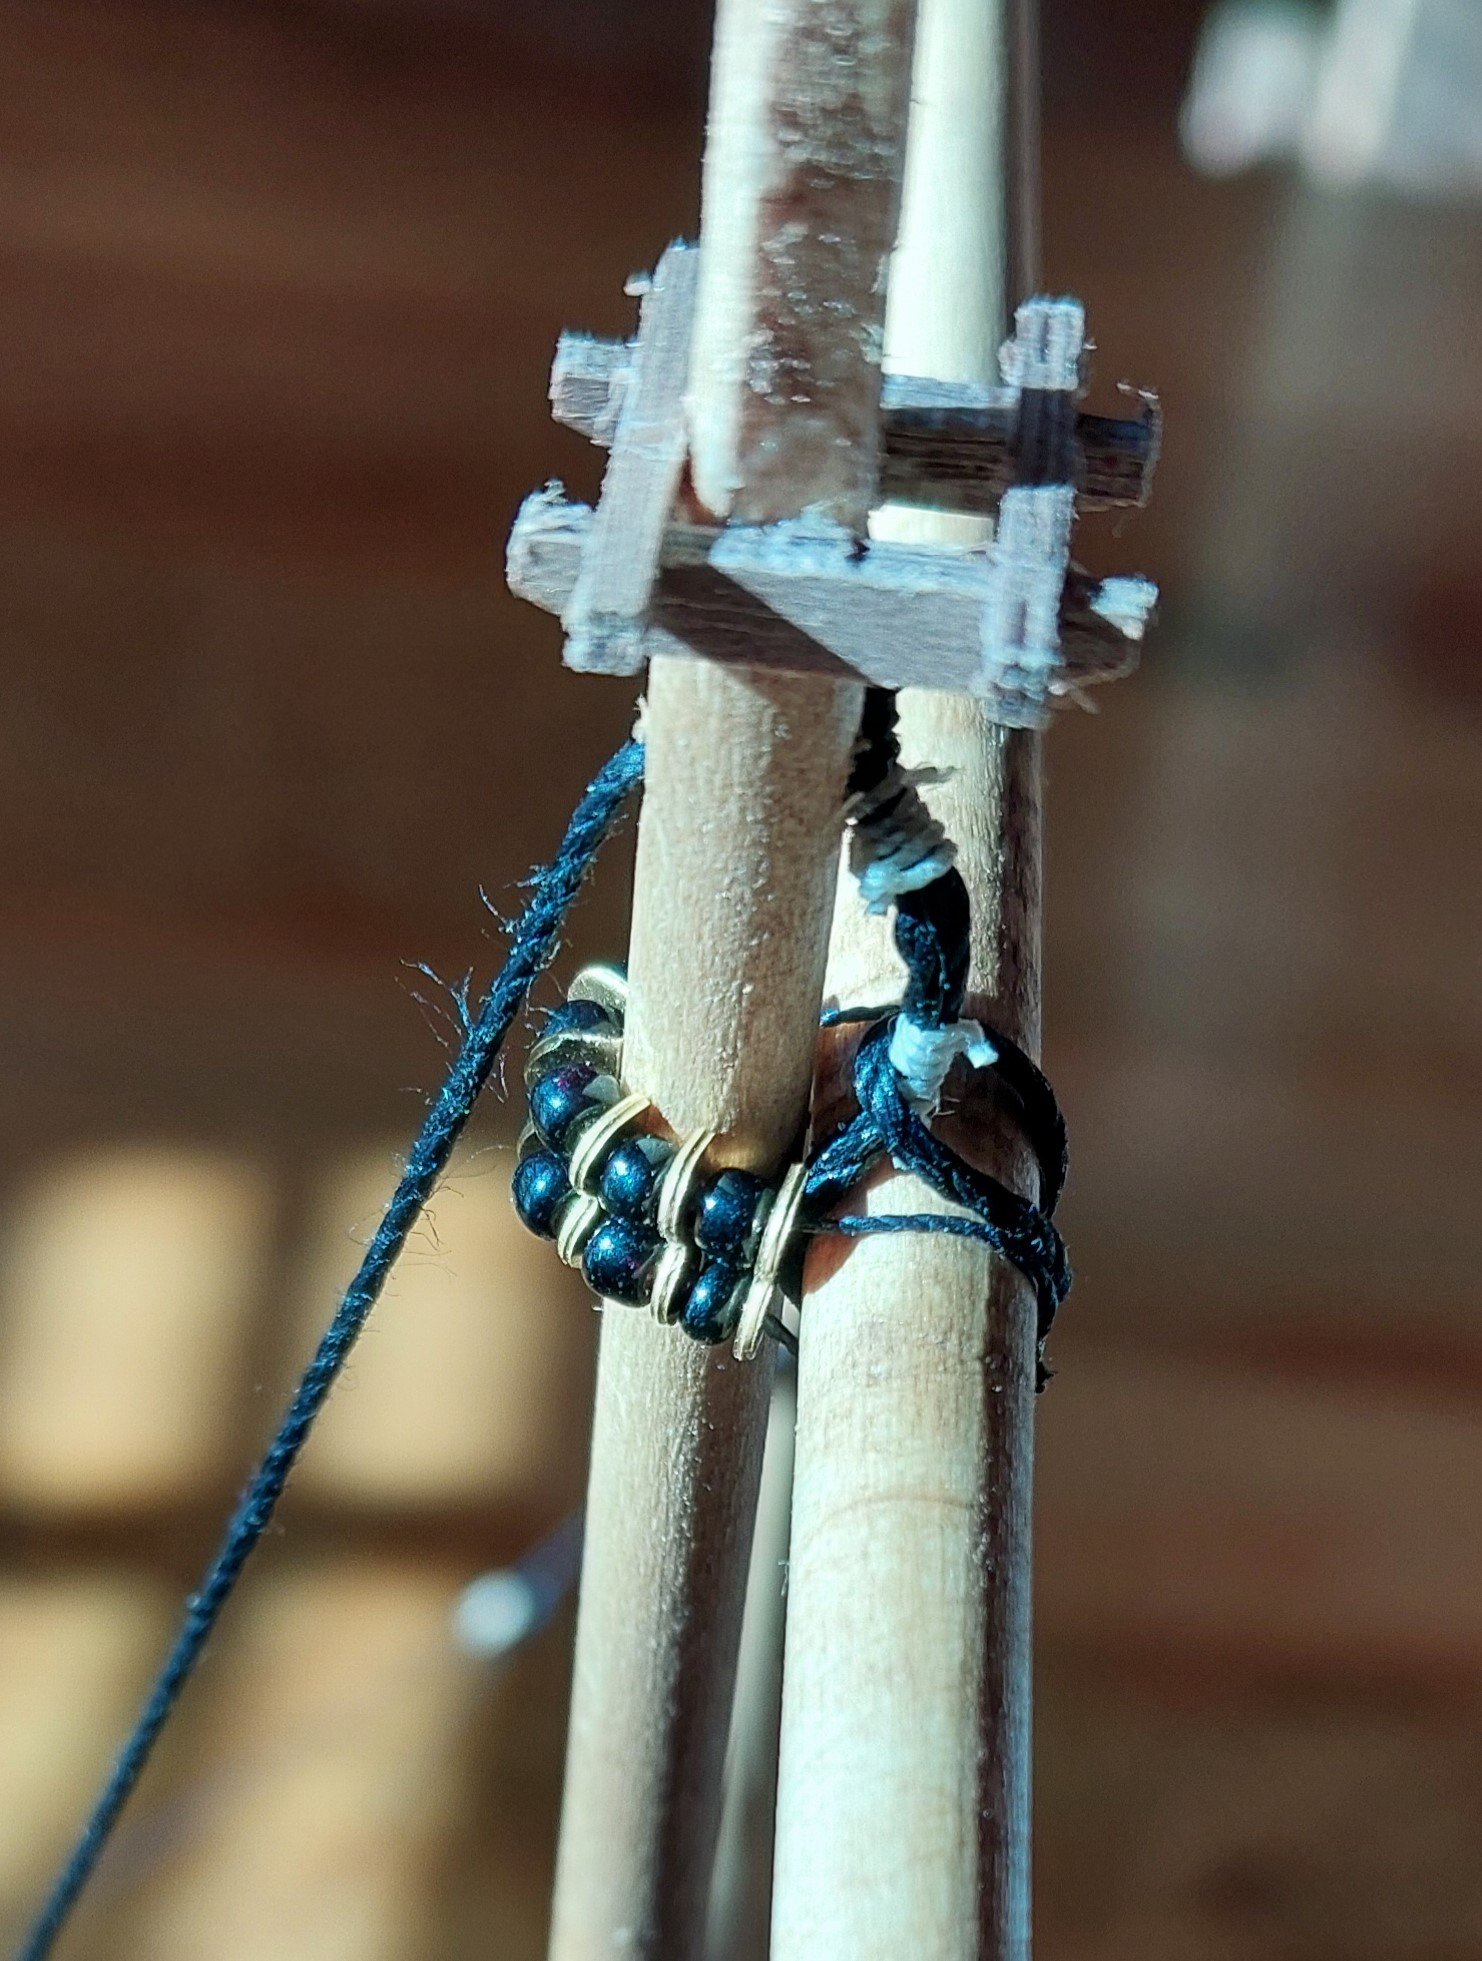
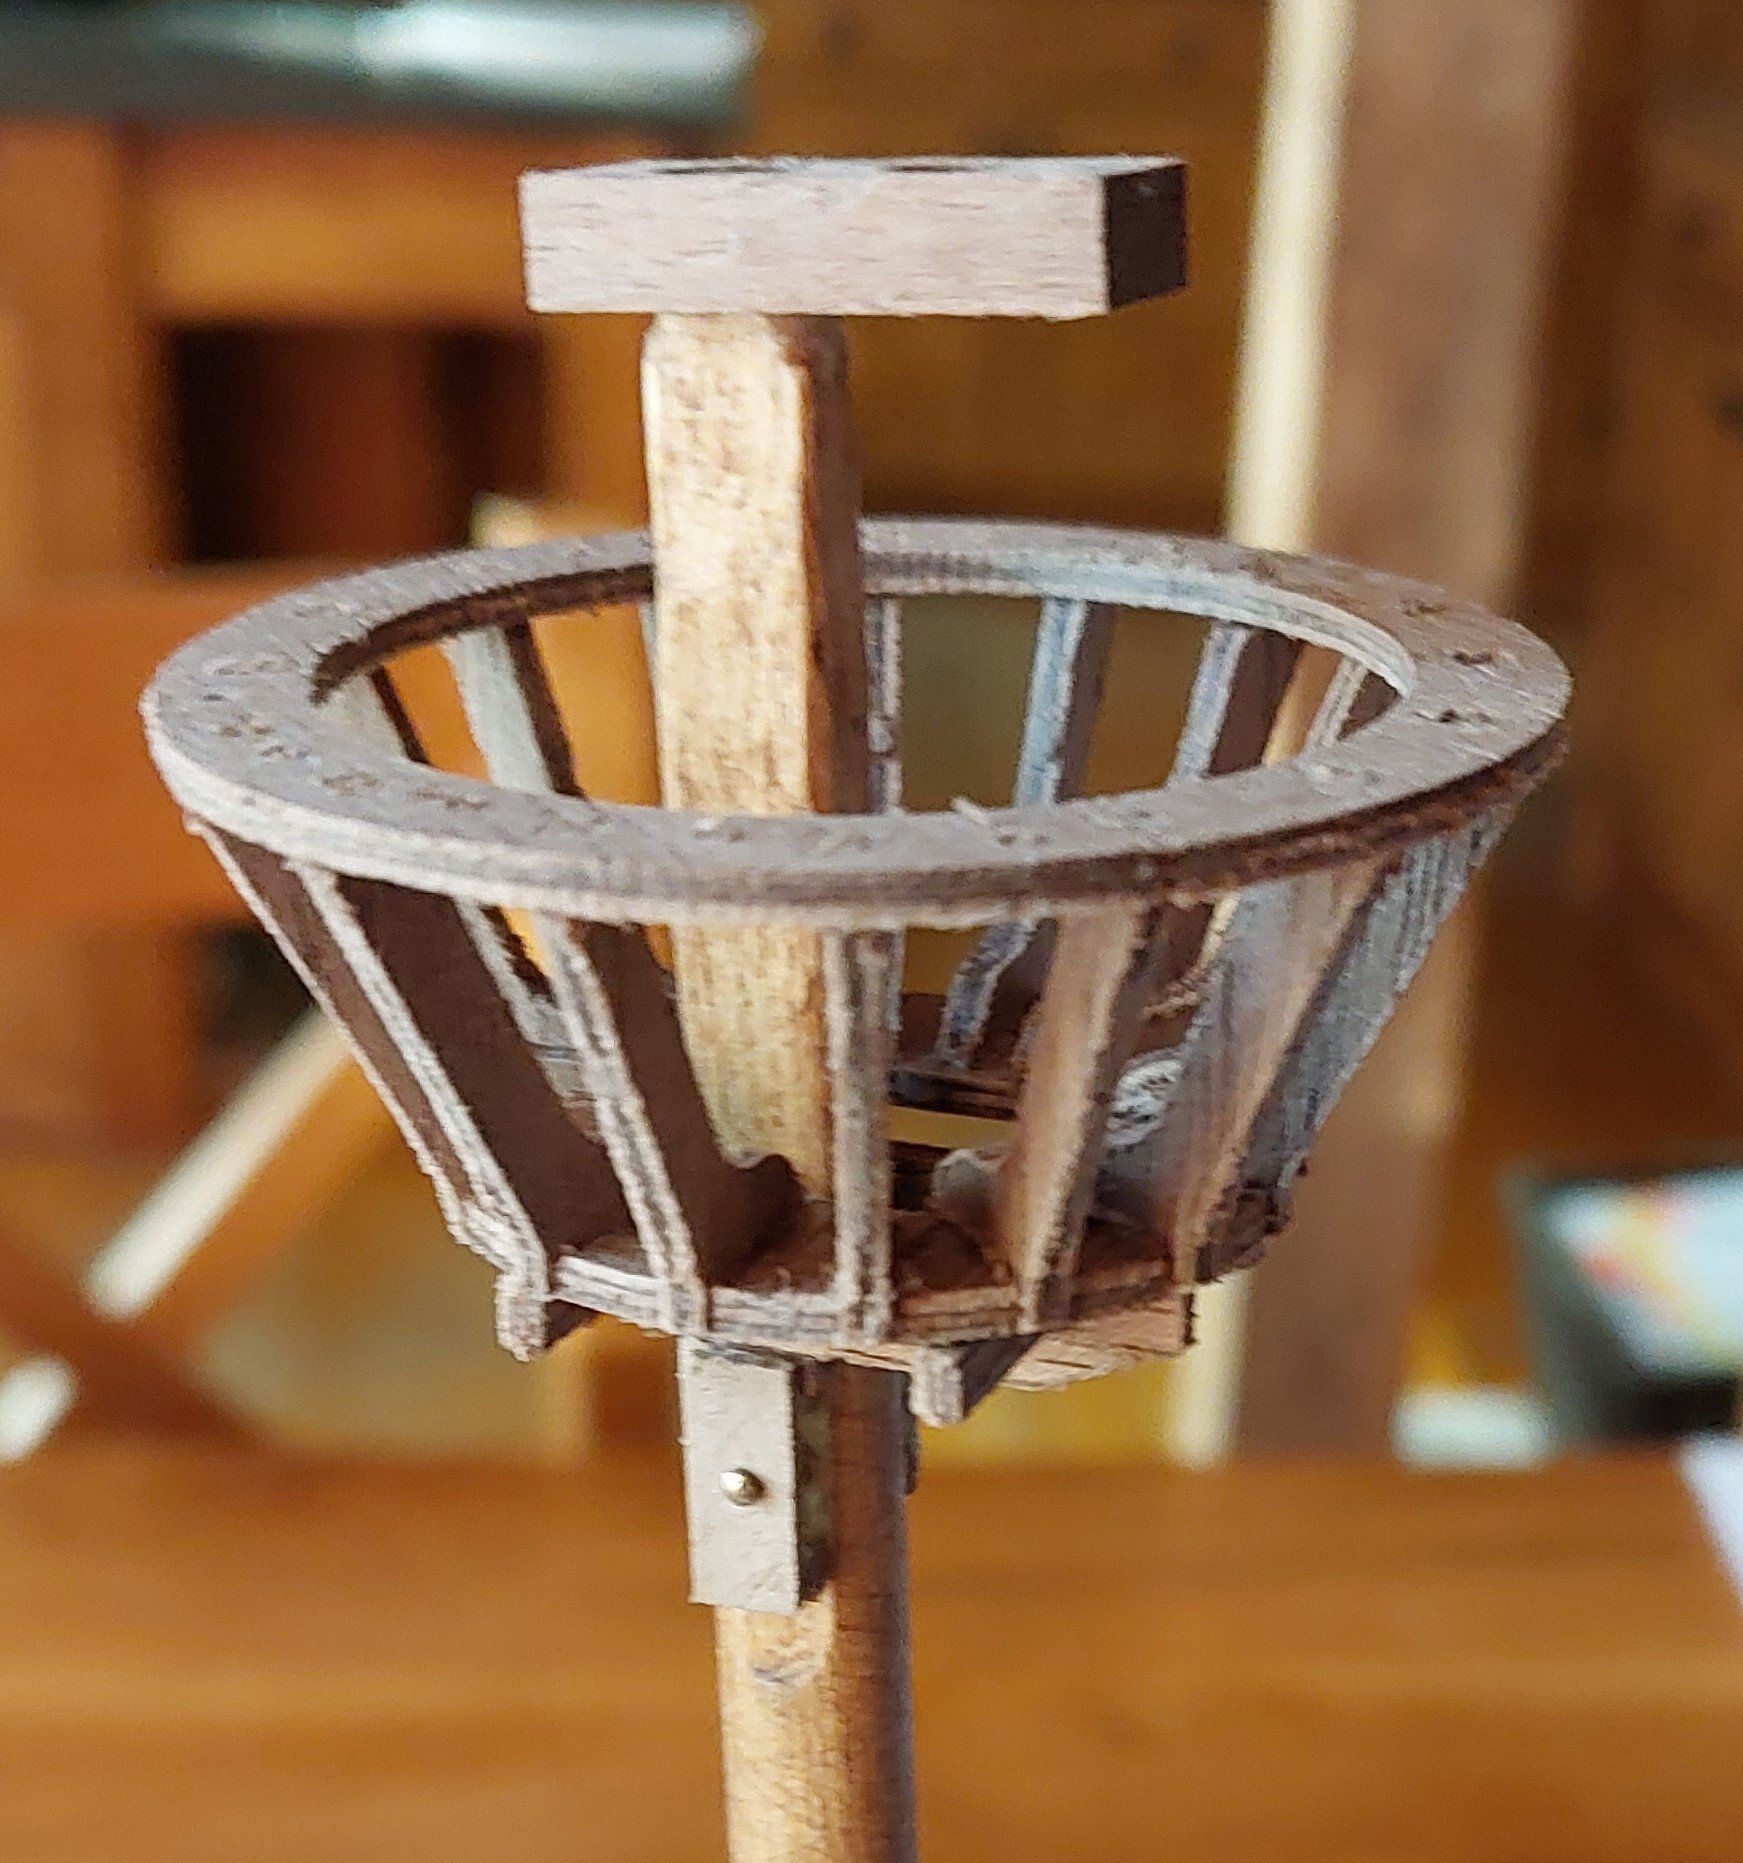
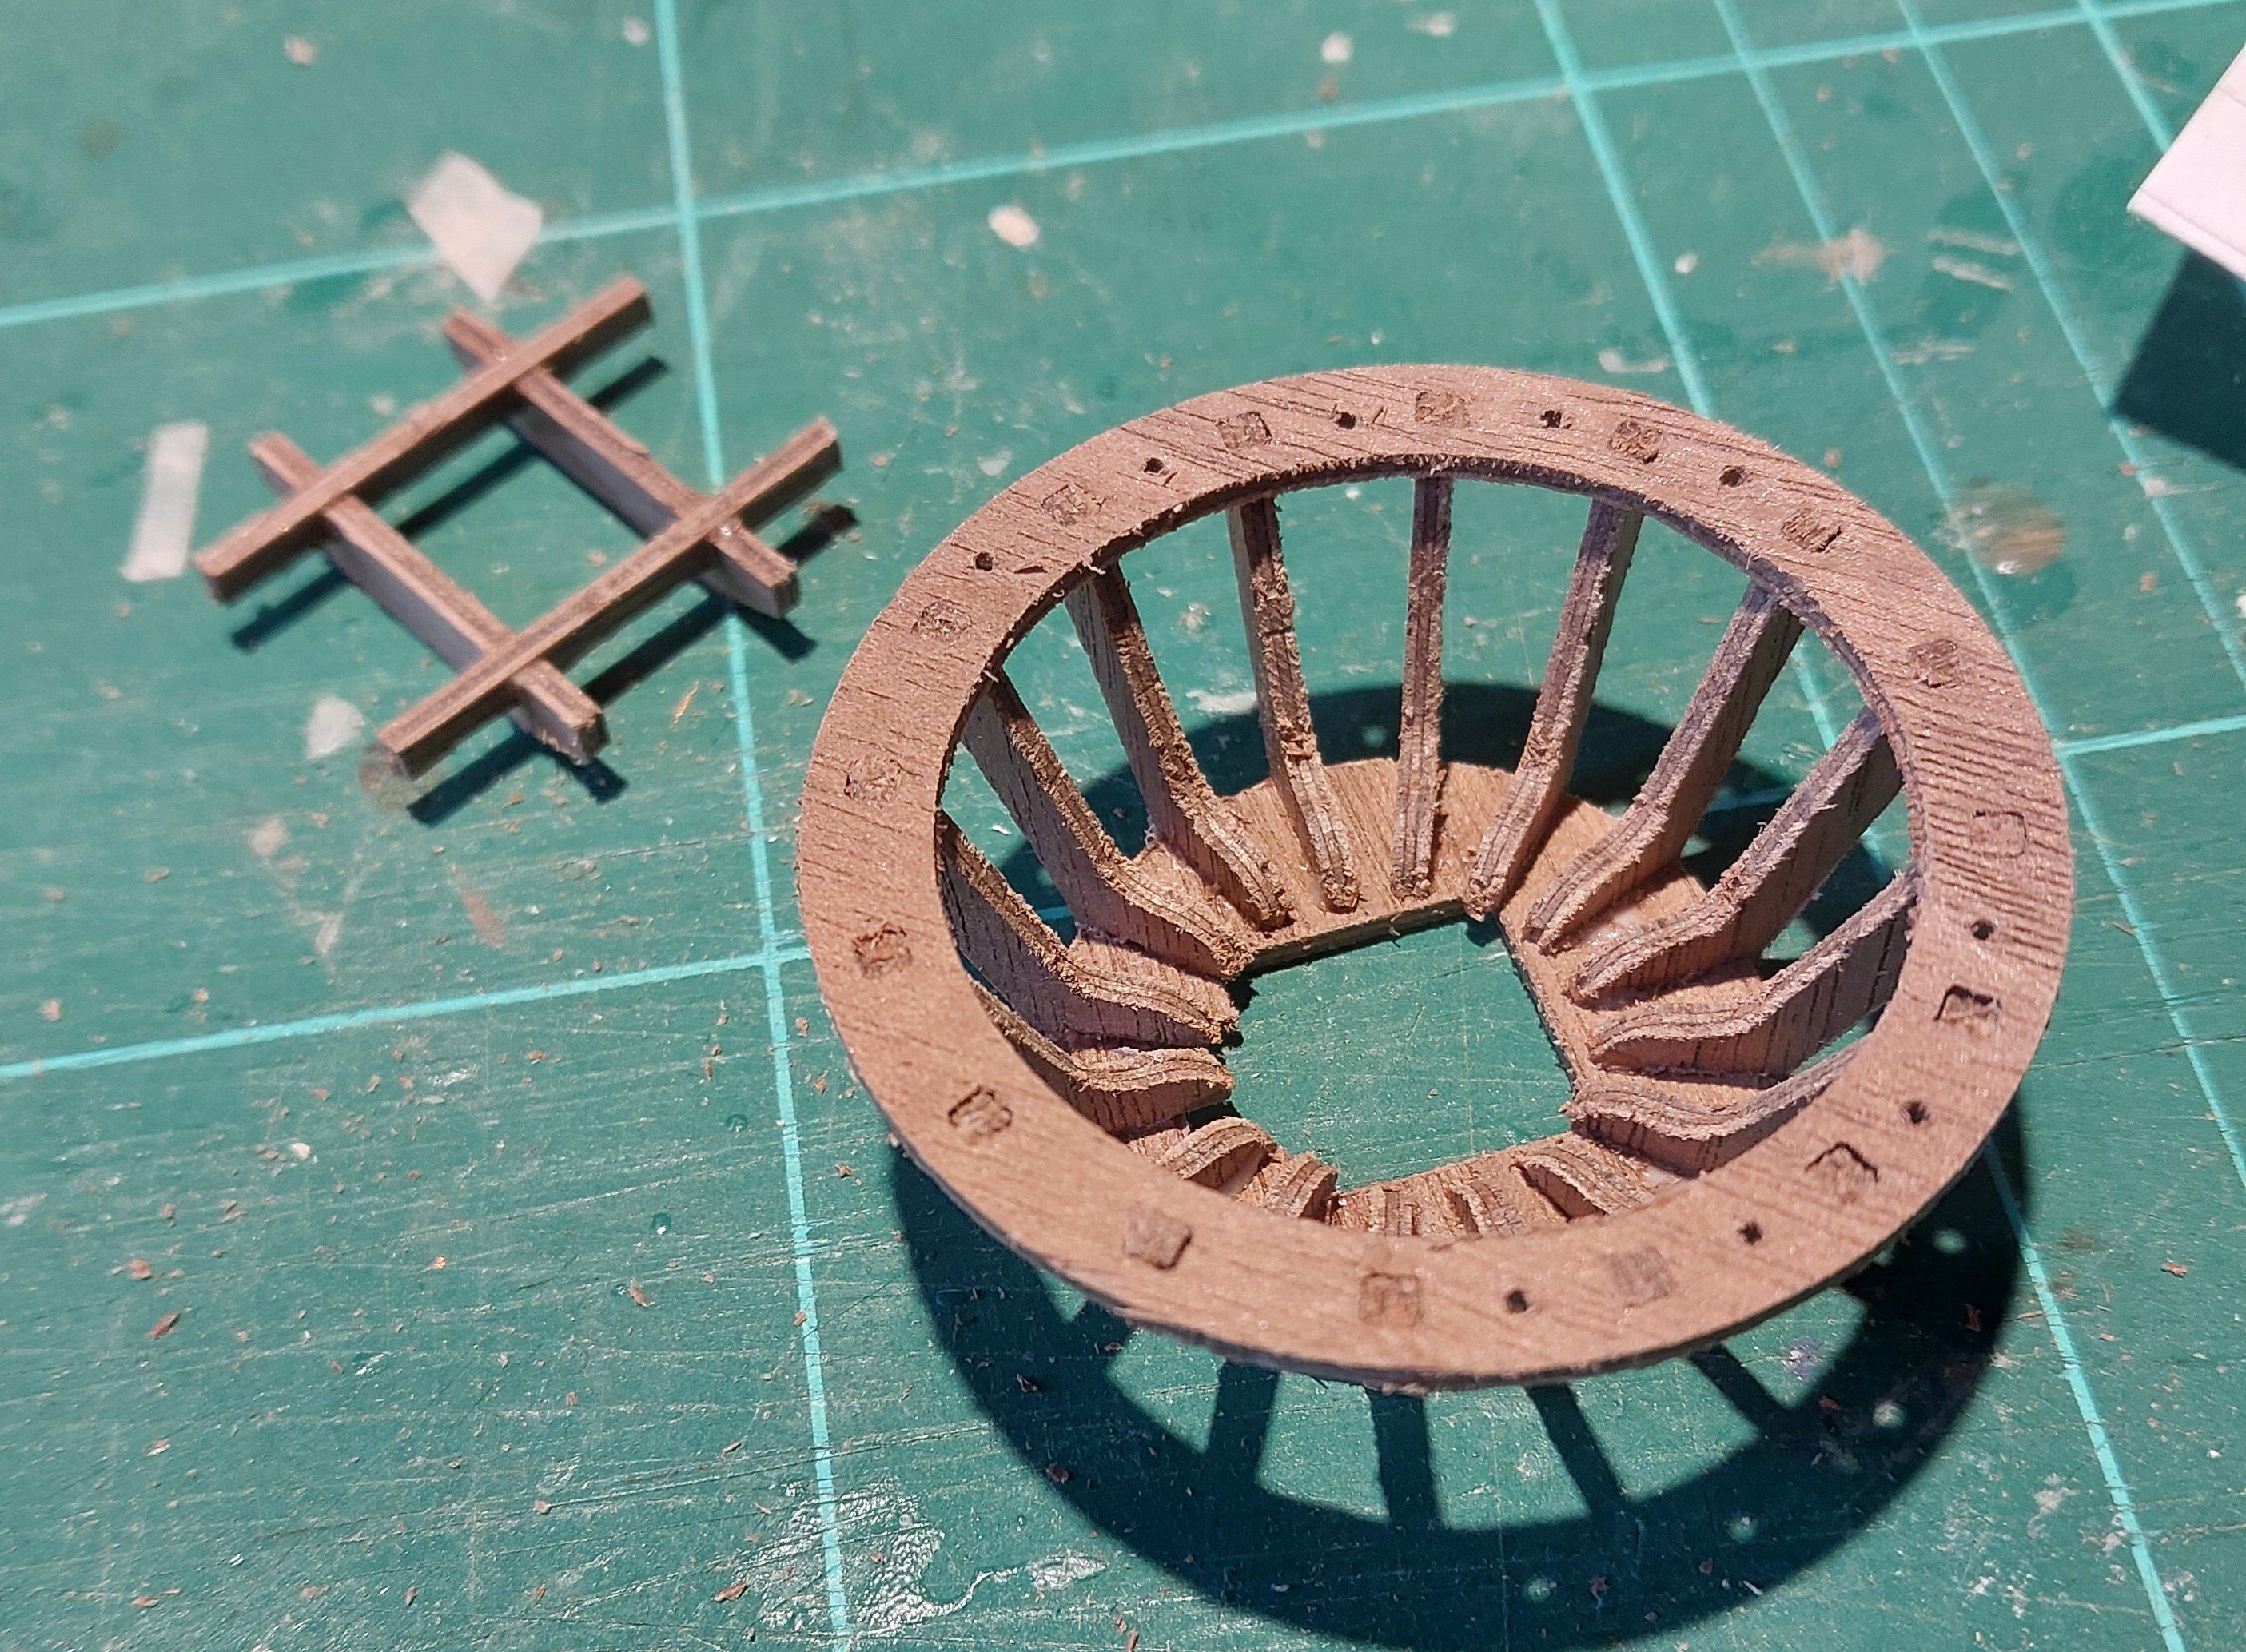
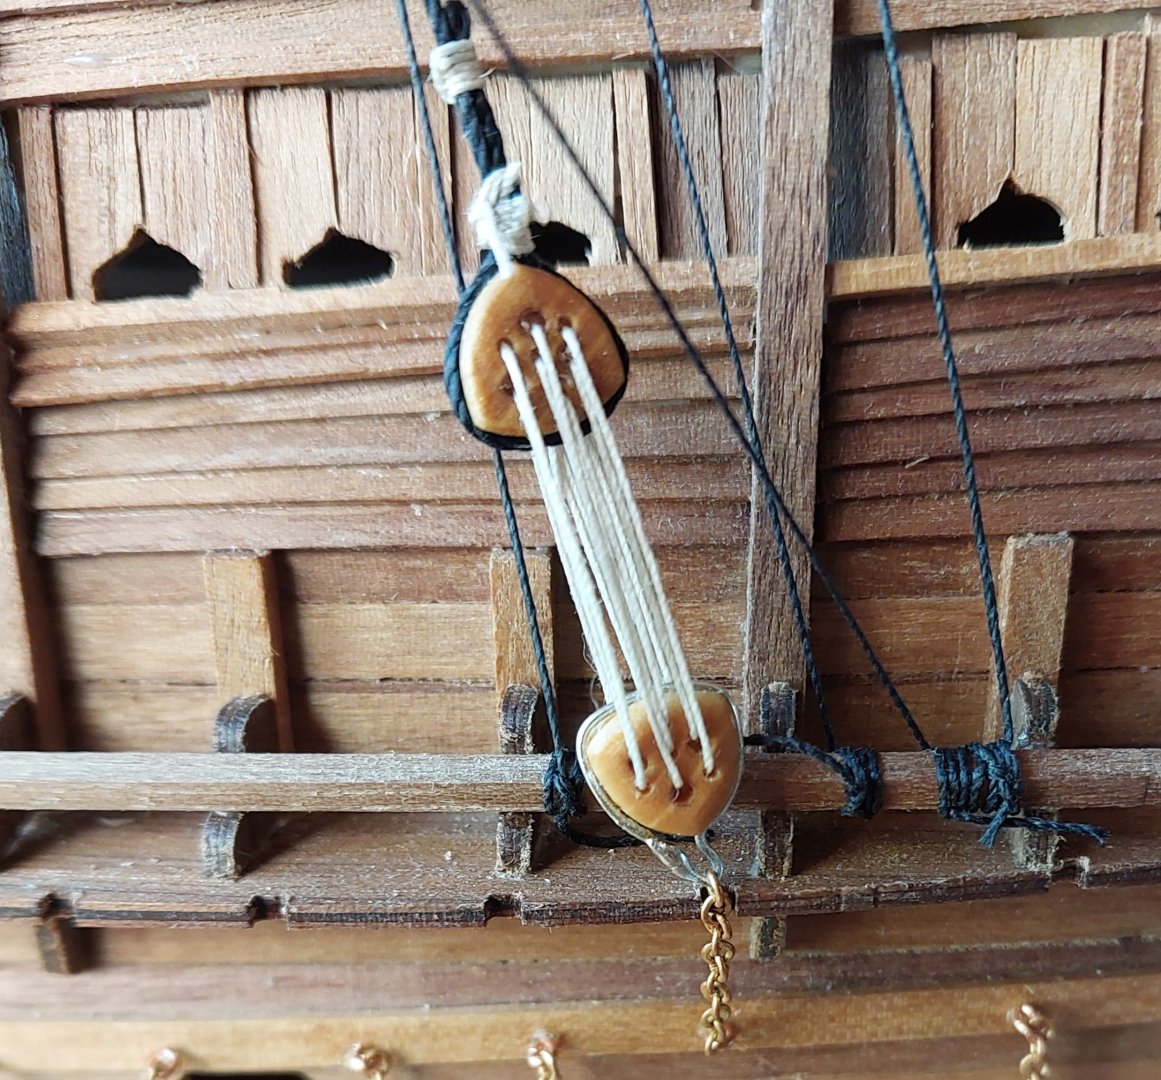
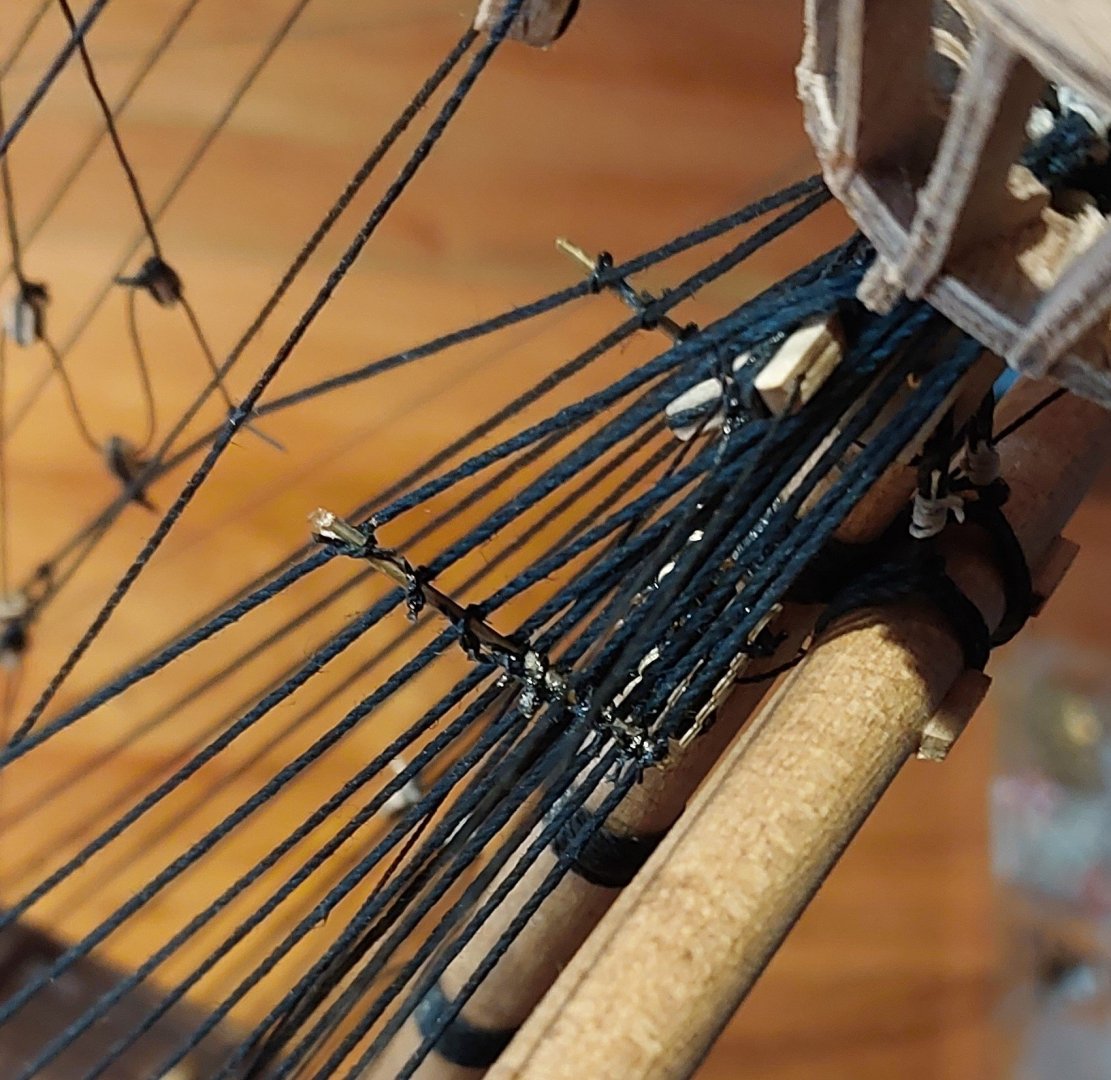
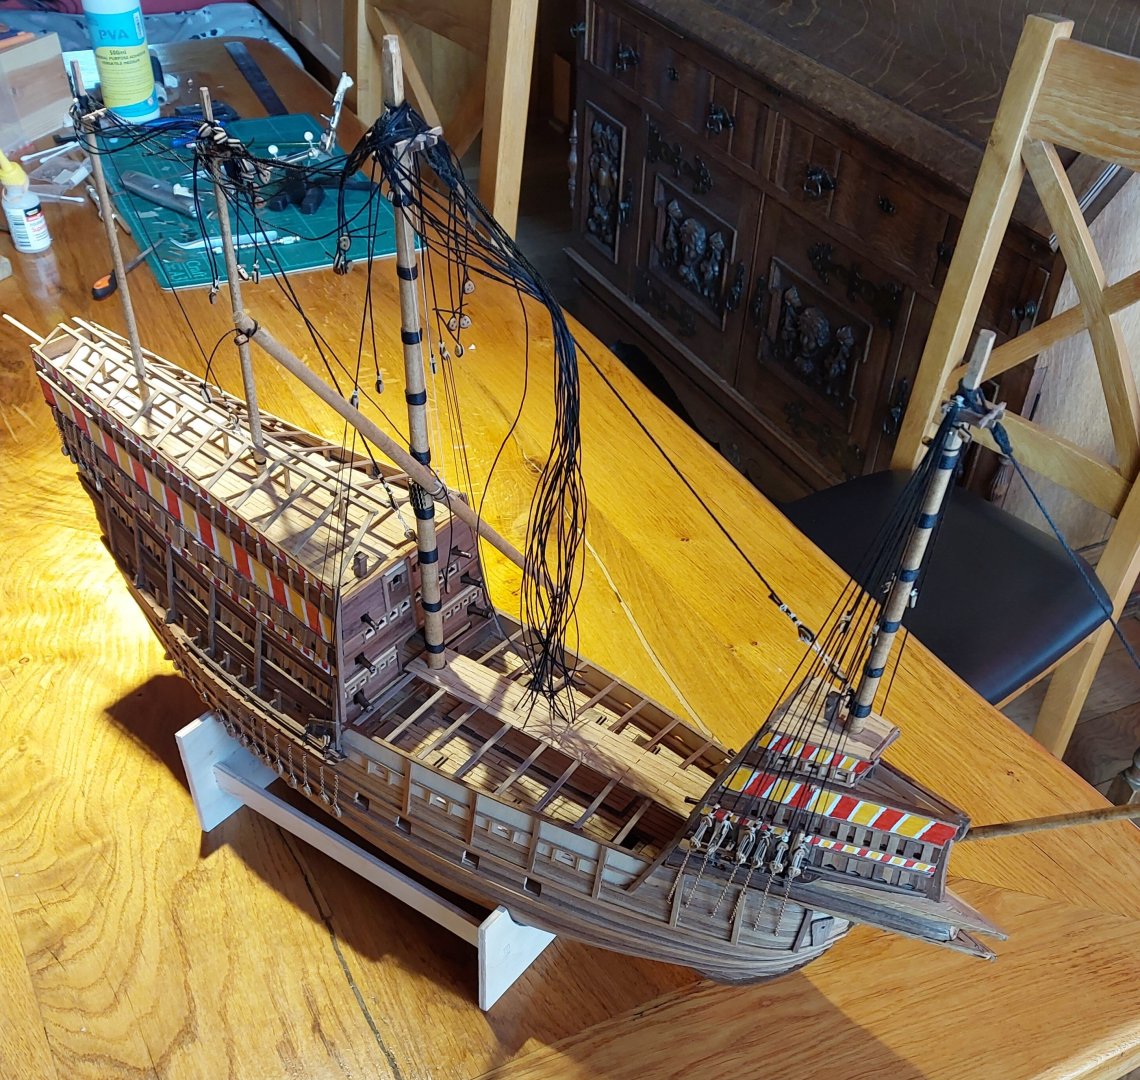
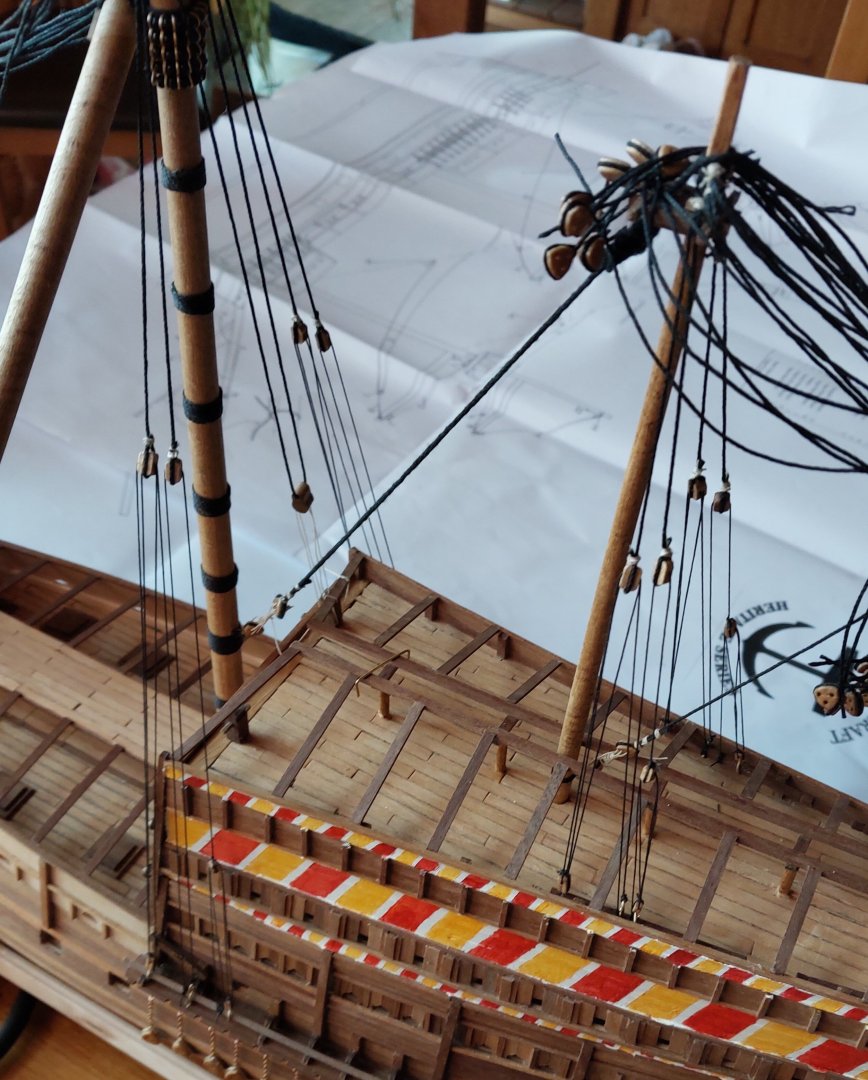
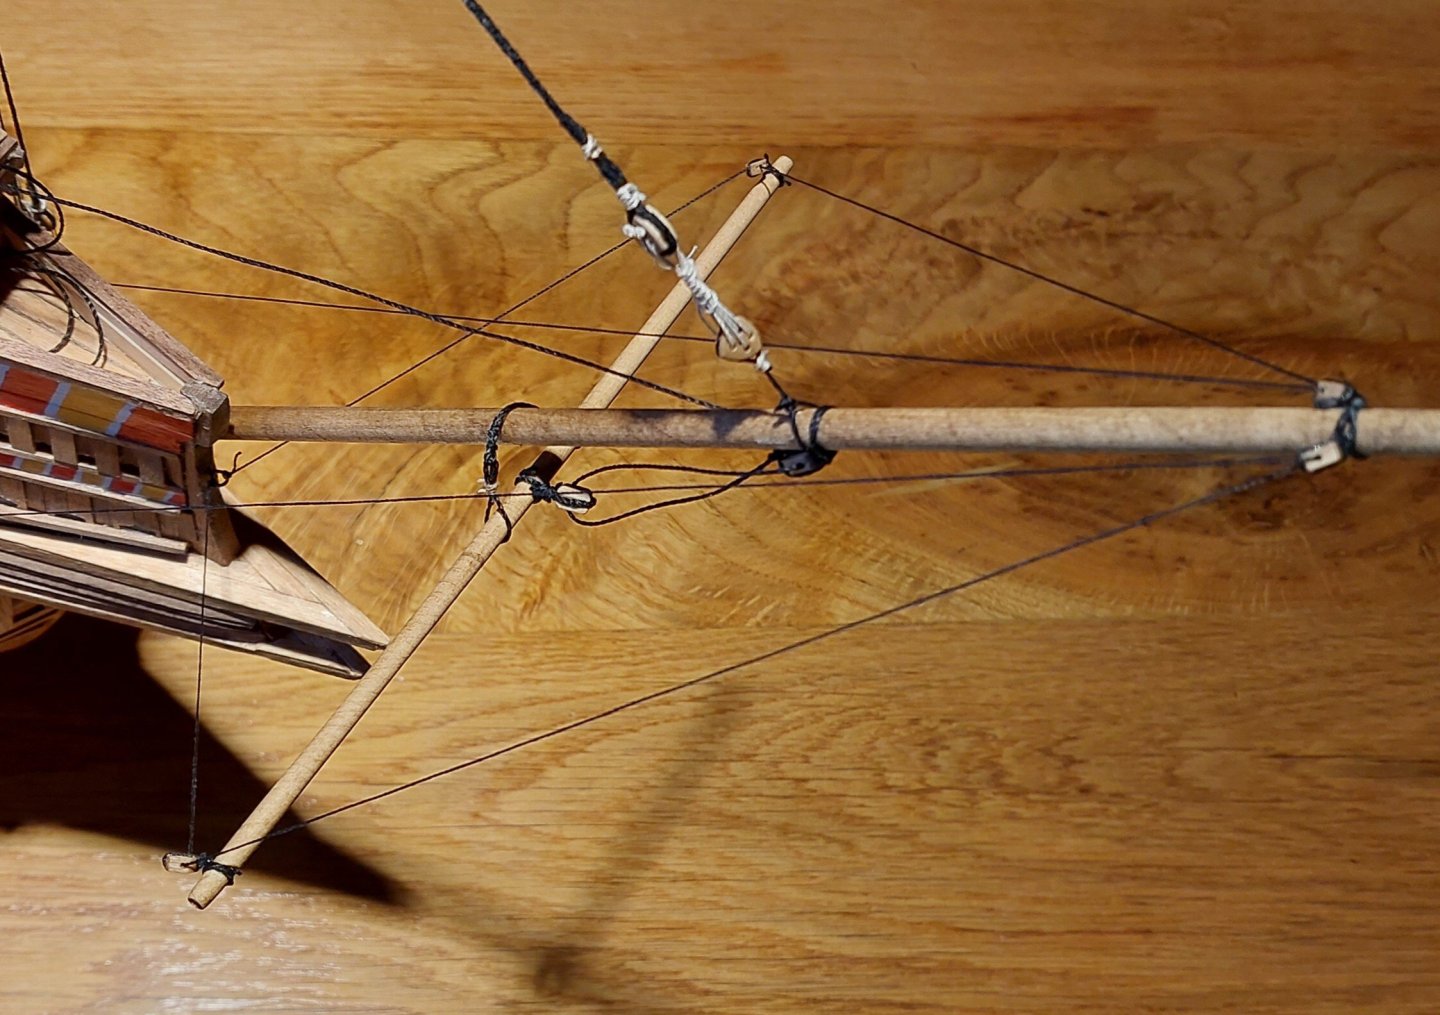
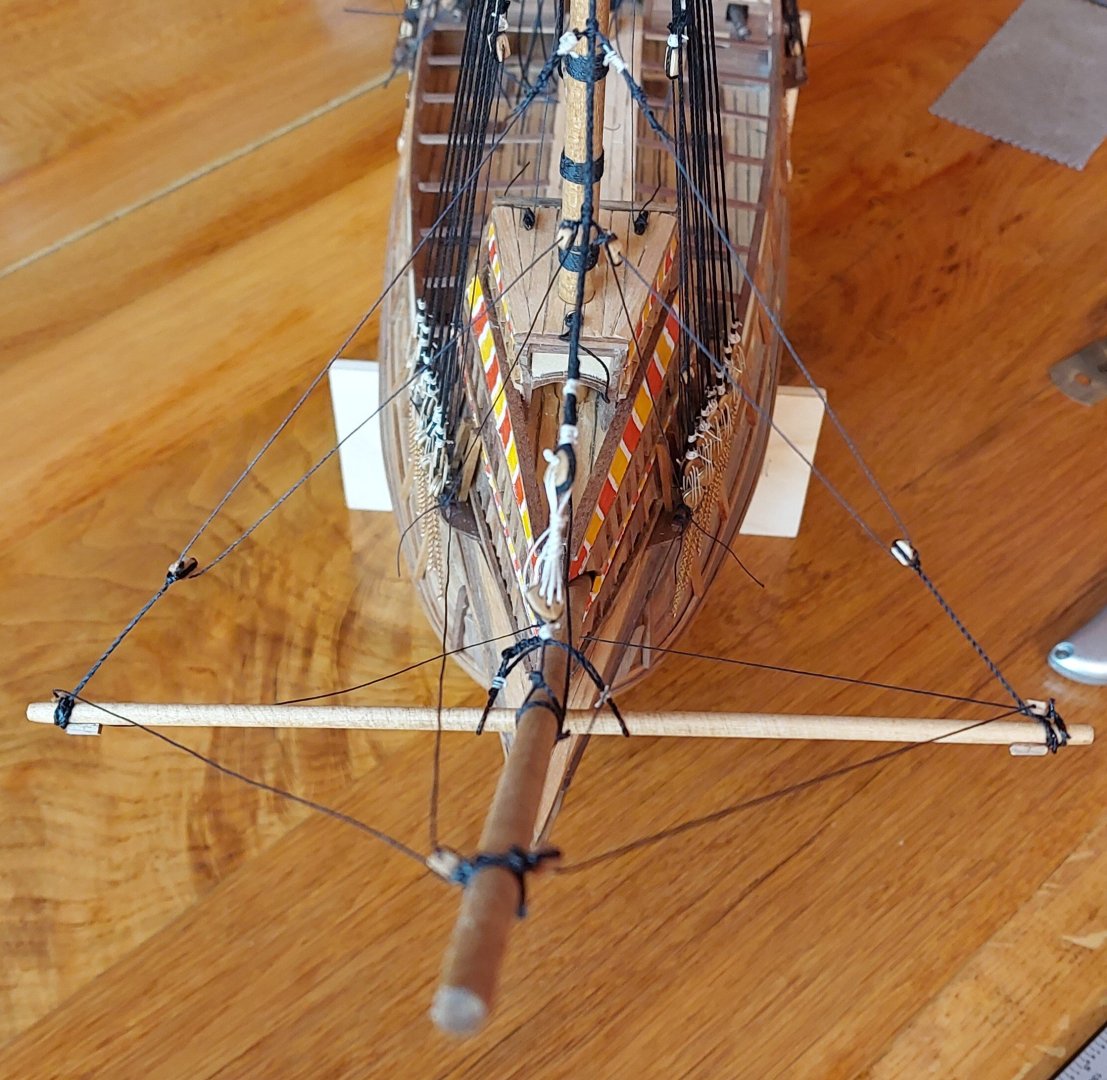
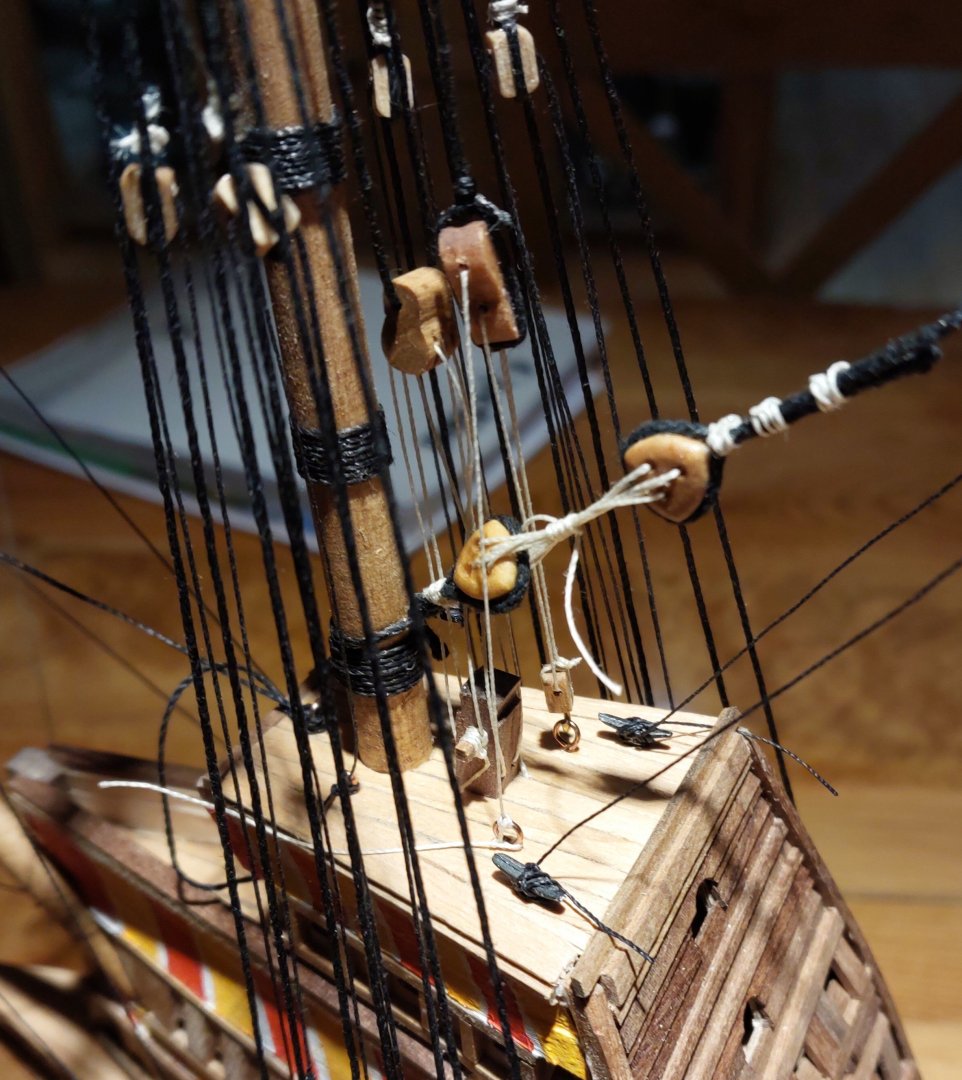
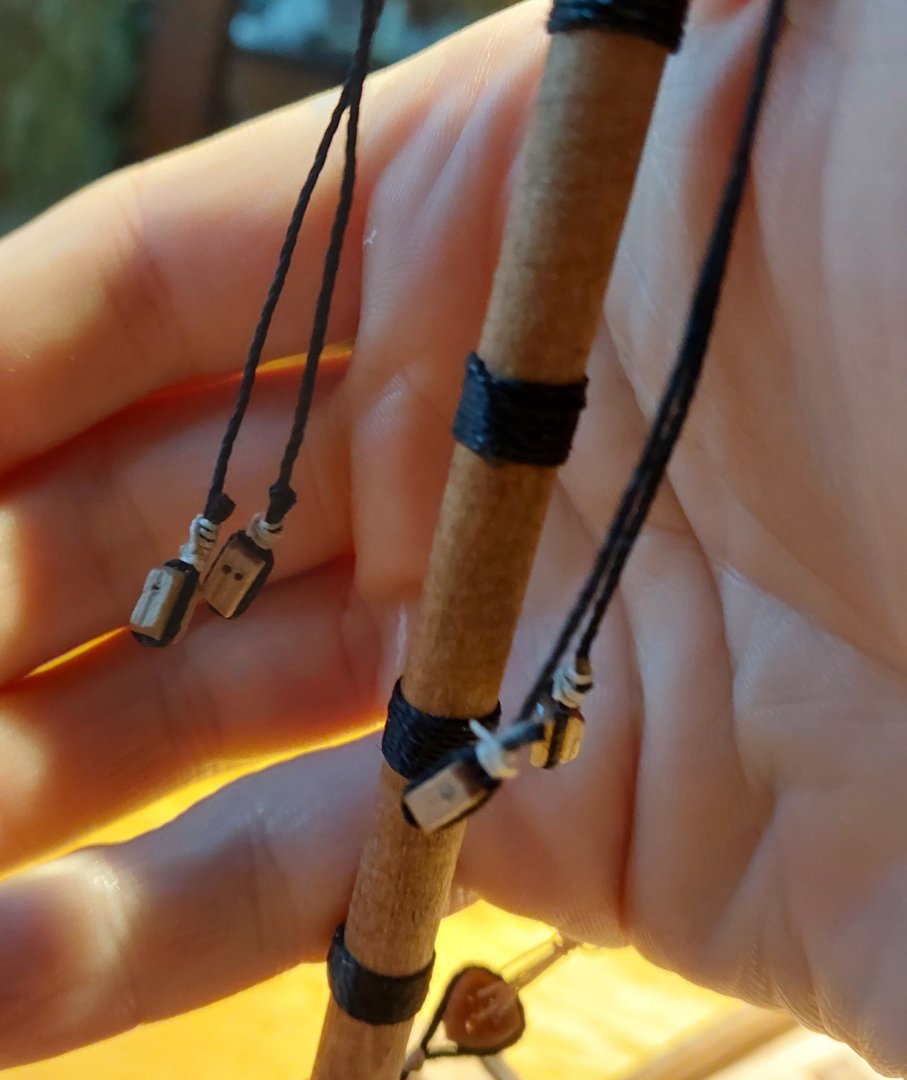
Huge update this week! First, I put together the boarding netting frame over the sterncastle as I discussed last time. Here it is in progress: And here it is finished up, with a quick coat of Danish oil: I'm extremely happy with how this came out. Initially it was a bit nerve-wracking, as I've really got no idea if this is how it would have looked, but I think it does look quite good! The gap down the middle means the various stays can come down without any interaction with the masts, and I might even use the middle rails as belaying points for some of the lines, especially off the mizzen and bonaventure mizzen. Here she is in full view: Because of the upward slope towards the rear of the sterncastle, the structure also has a very pleasing movement to it. Overall, very pleased! Now with that done, I could move on to the rigging! Here are the tackles on the main and mizzen: I belayed the mizzen tackles on to the internal rail that the Caldercraft kit had me put in. I've since added another one of these rails towards the front of the sterncastle rail, though I'm really not sure whether the lines would more likely be belayed to the outside rail on the channels. I can't see how that would make anything easier to operate, but I'm happy to move knots around if needed. Here's the spritsail yard with its halliard. I'm currently belaying the halliard to the front of the top forecastle deck. Anderson says that this would normally be at the base of the bowsprit, but the Mary Rose's ridiculous bowsprit makes that an impossibility, so this is probably not how it was actually done. I've also put the block for this right where the forestay is attached to the bowsprit, whereas normally I believe the forestay would be attached below the spritsail. This makes the braces for the spritsail a little awkward, as they're belayed via blocks on the forestay - I think it still works. Here are the lifts, and a better view of the various attachment points: The lifts originate from the apex of the forecastle, which is in line with Anderson's direction of 'below the bowsprit'; I think this makes as much sense as anything else. And here's the braces attached to the forestay: Again, probably not exactly right, but I can pull on the various lines and operate the yard, so I'm happy. I tightened up some of the slack after I took this photo - don't judge that starboard lift line! Here are the attachment points for the braces up close. Sheet bends on seized eyes for the static points, which are clove hitched round the stays. The blocks are just attached as normal with a clove hitch on their line as well. Neat! I sped ahead with the rigging after this. Here's the main yard rigged with lifts and braces: And here's the fore yard: (the eagle-eyed amongst you will note that I actually put the fore yard on before I completed the braces on the spritsail yard. Enjoy the narrative!!) And after this I got the tops on: Now she's really looking shipshape! I had a bit of a mare with these, as they wouldn't sit flat and I actually snapped the cross-trees off the main mast. Nothing a bit of glue couldn't fix... Here's the mainmast top and main topmast, showing off the toprope underneath: I'm belaying this off of one of the two knights on the front of the sterncastle. In hindsight, I wish I'd put one centrally and used the other for the mizzen, but they're way too attached to want to rejig at this point, and at least it's another attachment point. The toprope here was actually functional, holding the mast up, but I did end up glueing the topmast in after I popped an eyebolt out applying too much pressure - it's not like I was ever going to remove it! Here's the main top yard with a very neat parrel if I do say so myself: The caldercraft kit only provides 5-ribbed parrels for this job, but Anderson specifically says these only had two ribs. I simply cut some of the 5-ribbed sections into pieces, and found it so much easier than the larger parrels down below. Hopefully this will have streamlined my process somewhat for the rest. As noted in a previous post, I've deigned not to paint my parrels black as suggested - I like the brass. Here's my helper: It was very sunny today, which made a lot of the tinier knotwork that much more pleasant. It was around this point that I realised that the Caldercraft kit doesn't provide crosstrees and trestle trees for the tops of the fore, mizzen and bonaventure mizzen topmasts, or for the main topgallant. You're supposed to use bits of strip wood glued to the mast as stops to prevent the shrouds slipping down. As far as I'm aware, crosstrees were used on all masts and topmasts to spread out the shrouds, so I made this one for the fore topmast: It's not perfect, but it's good enough at the scale. Not too time consuming either! And with that I got the fore topmast in place: You can also see I've got the halliard for the fore top yard on, and the main topstay tied down. It's hard to tell but the main backstays are in place too, in a two-part running setup as described in Anderson's book. Huge progress, as I said - I've really gotten into the flow of this this week! And here's the forecastle's top deck, with everything so far belayed: Getting a bit crowded! The main topstay is off of the fiddle block, whilst the main yard is off the sheave block to the knight behind it. They aren't touching, I promise. There's not too much more to go on this, but it's gonna be fiddly to get much more in! Anyway, that's that for now. Thanks for reading!


-
Thanks Steven! I wasn't sure about the tackles so good to hear I'm on the right track Luckily the pattern is very spaced out - if I use this stuff i'll be able to cut out sections of just plain netting, though as it was very cheap I'm also on the lookout for other options. My plan is to dye it either a dark brown or black, most net fabric here seems to be white by default, so I'll hopefully update soon on that front!
-
Okay, smaller update today! I tied the blocks in place for the tackles - these are on the foremast, but I've also put tackles in place for the main and mizzen mast. None on the bonaventure, as Anderson's book omits any info on that, and it seems like it was quite a small mast even on the Mary Rose. Here's the tackles set up on the foremast: It seems like most models (and likely most real ships) attach their tackle hooks to eyebolts on the channels. I've hooked and lashed mine to the belaying rail, at least on the forecastle, as there's really not much space around it for an eyebolt. That said, I've got a whole bunch of spare eyepins, so I could change this if there's a notable outcry. There's still enough room on the belaying rail to belay the yards to, so I don't foresee this being a major issue. Here's the first deadeye on the shrouds. I've spaced these 2.5x the width of the deadeyes, so here about 14mm apart, using a bit of wire bent to the right distance: And here's the first one tied off: And then, because I was on a roll, here's the whole foremast done: And a view of the full forecastle: Looking pretty snazzy if I say so myself! Obviously I need to do the ratlines, and I've only done the foremast and not the fore topmast and the shrouds for that, but it's progress. And then on to the boarding nets, or lack thereof. The Caldercraft kit has beams across the waist, which are similar enough to both McElvogue and Marsden's books that I've followed their lead - here's an in-progress shot: Yep, I think this is the correct way forward. I've decided to create something similar to the above waist beam solution for the poop deck, so here's my mockup for that: Excusing the blutac, you can see that my suggested solution is 'T-shaped' supports in line with the three masts, and then a rail on each side of the mast. My intention is to then add the rafters from the outer railing to these central rails at a similar spacing to the beams on the waist, hopefully allowing me to keep belaying lines in place without too much extra hassle. I also took @Louie da fly's advice and had a look at a local fabric store: This is some material intended for net curtains (extremely out of fashion, but a remarkable selection). The holes are about the right size for my purposes, so as long as I can cut around the extremely tasteful butterfly pattern I think this will do well. I'm still going to keep my eye out for other options though! My other issue with this is that it's polyester - my initial plan of tea or coffee staining the fabric won't take very well to synthetic fibres like this, so I'll need to investigate a better solution; perhaps some sort of oil paint wash? Anyway, that's the update for today. I'd be very keen to hear any feedback on my proposal for the boarding nets, but until next time, thanks for looking in!


-
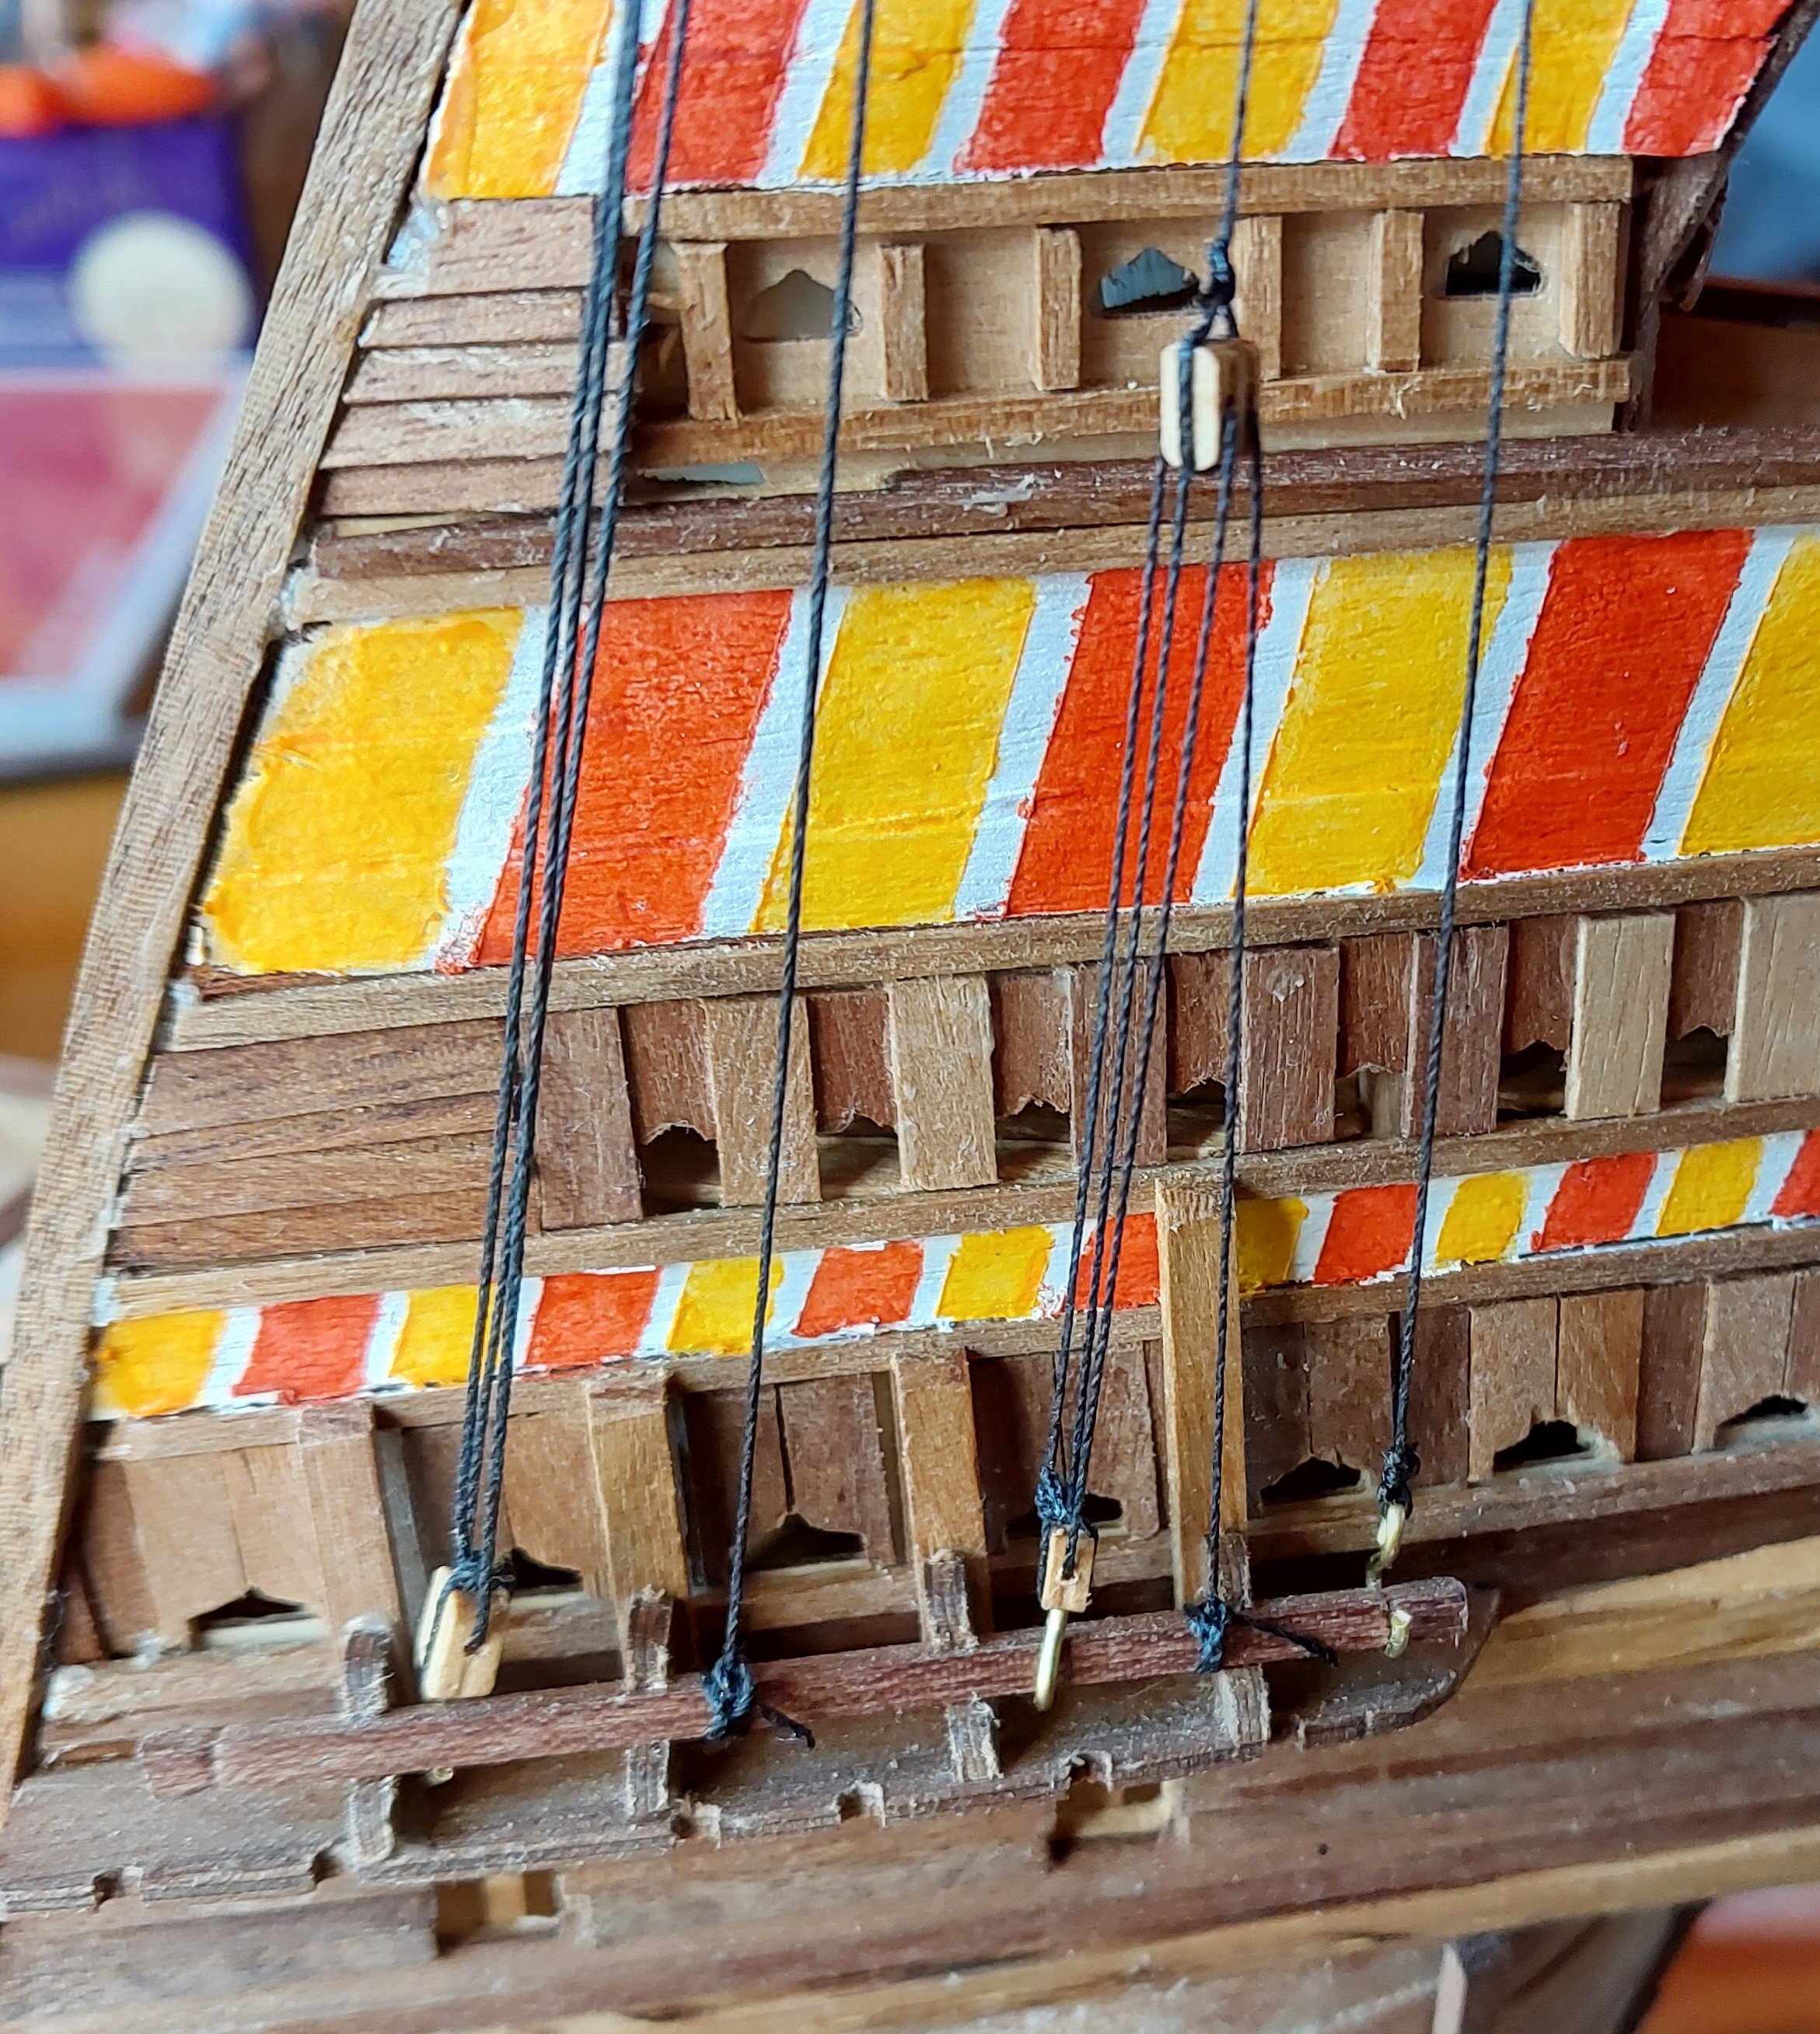
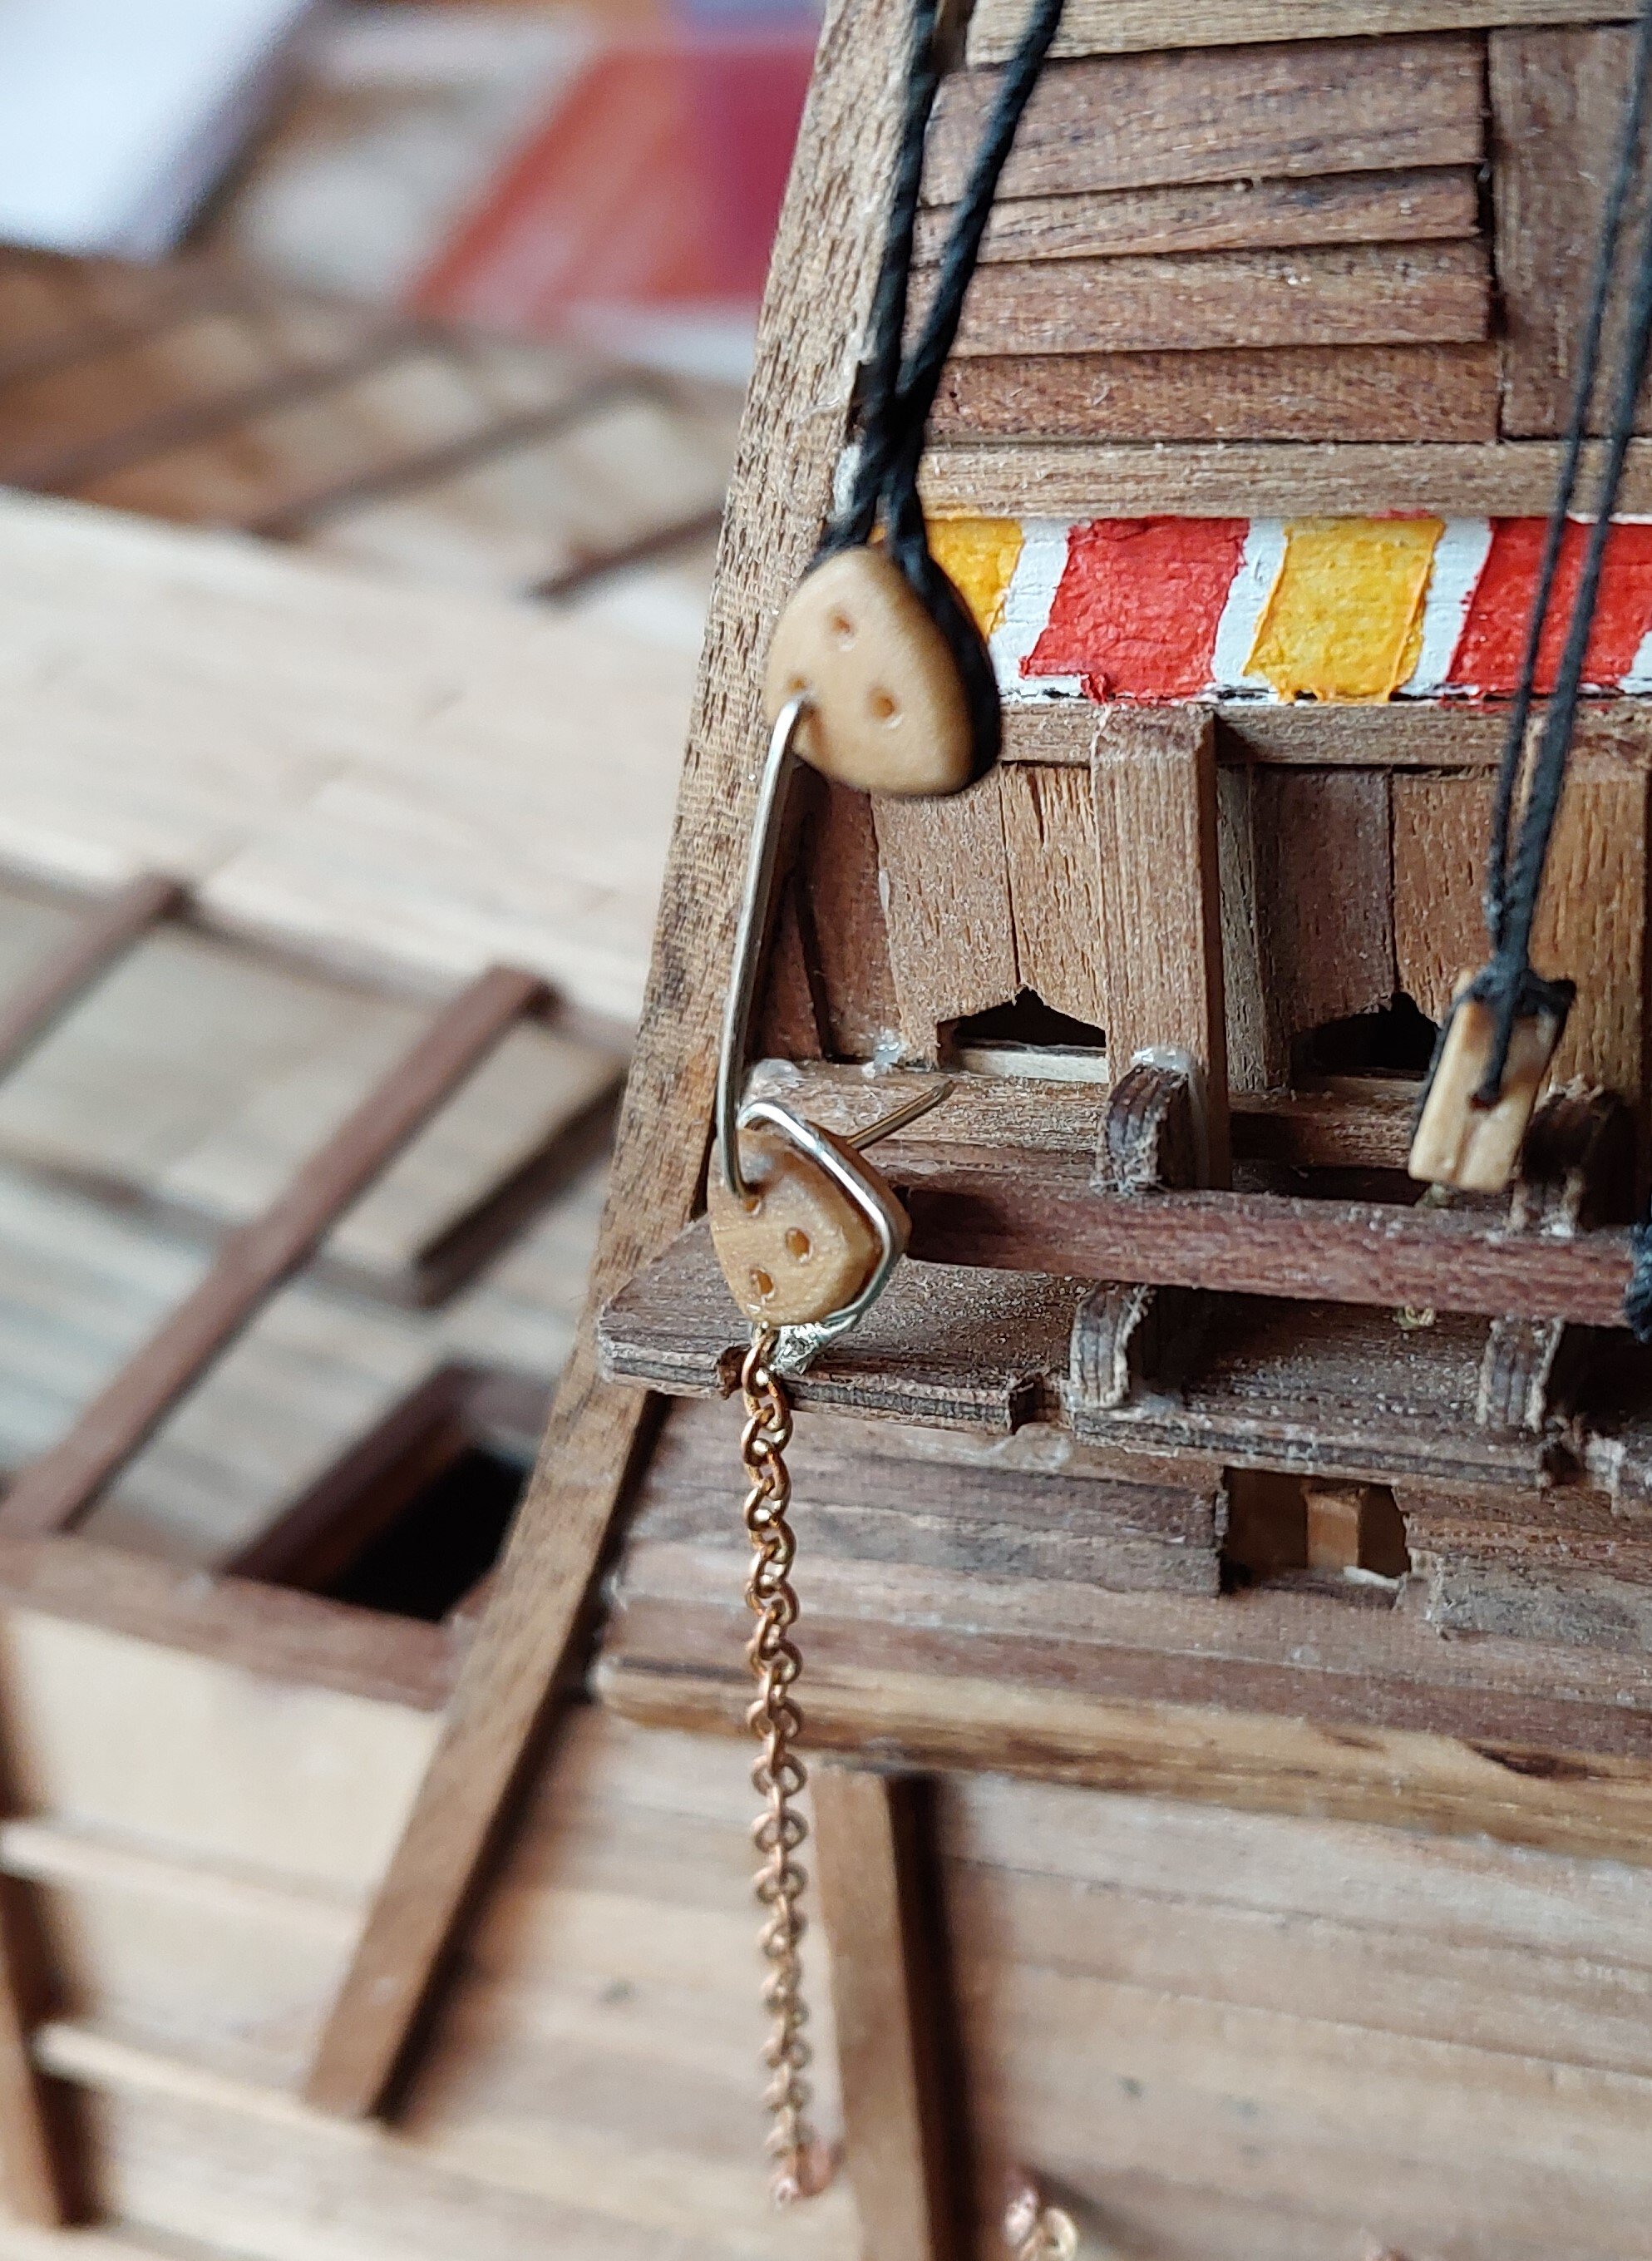
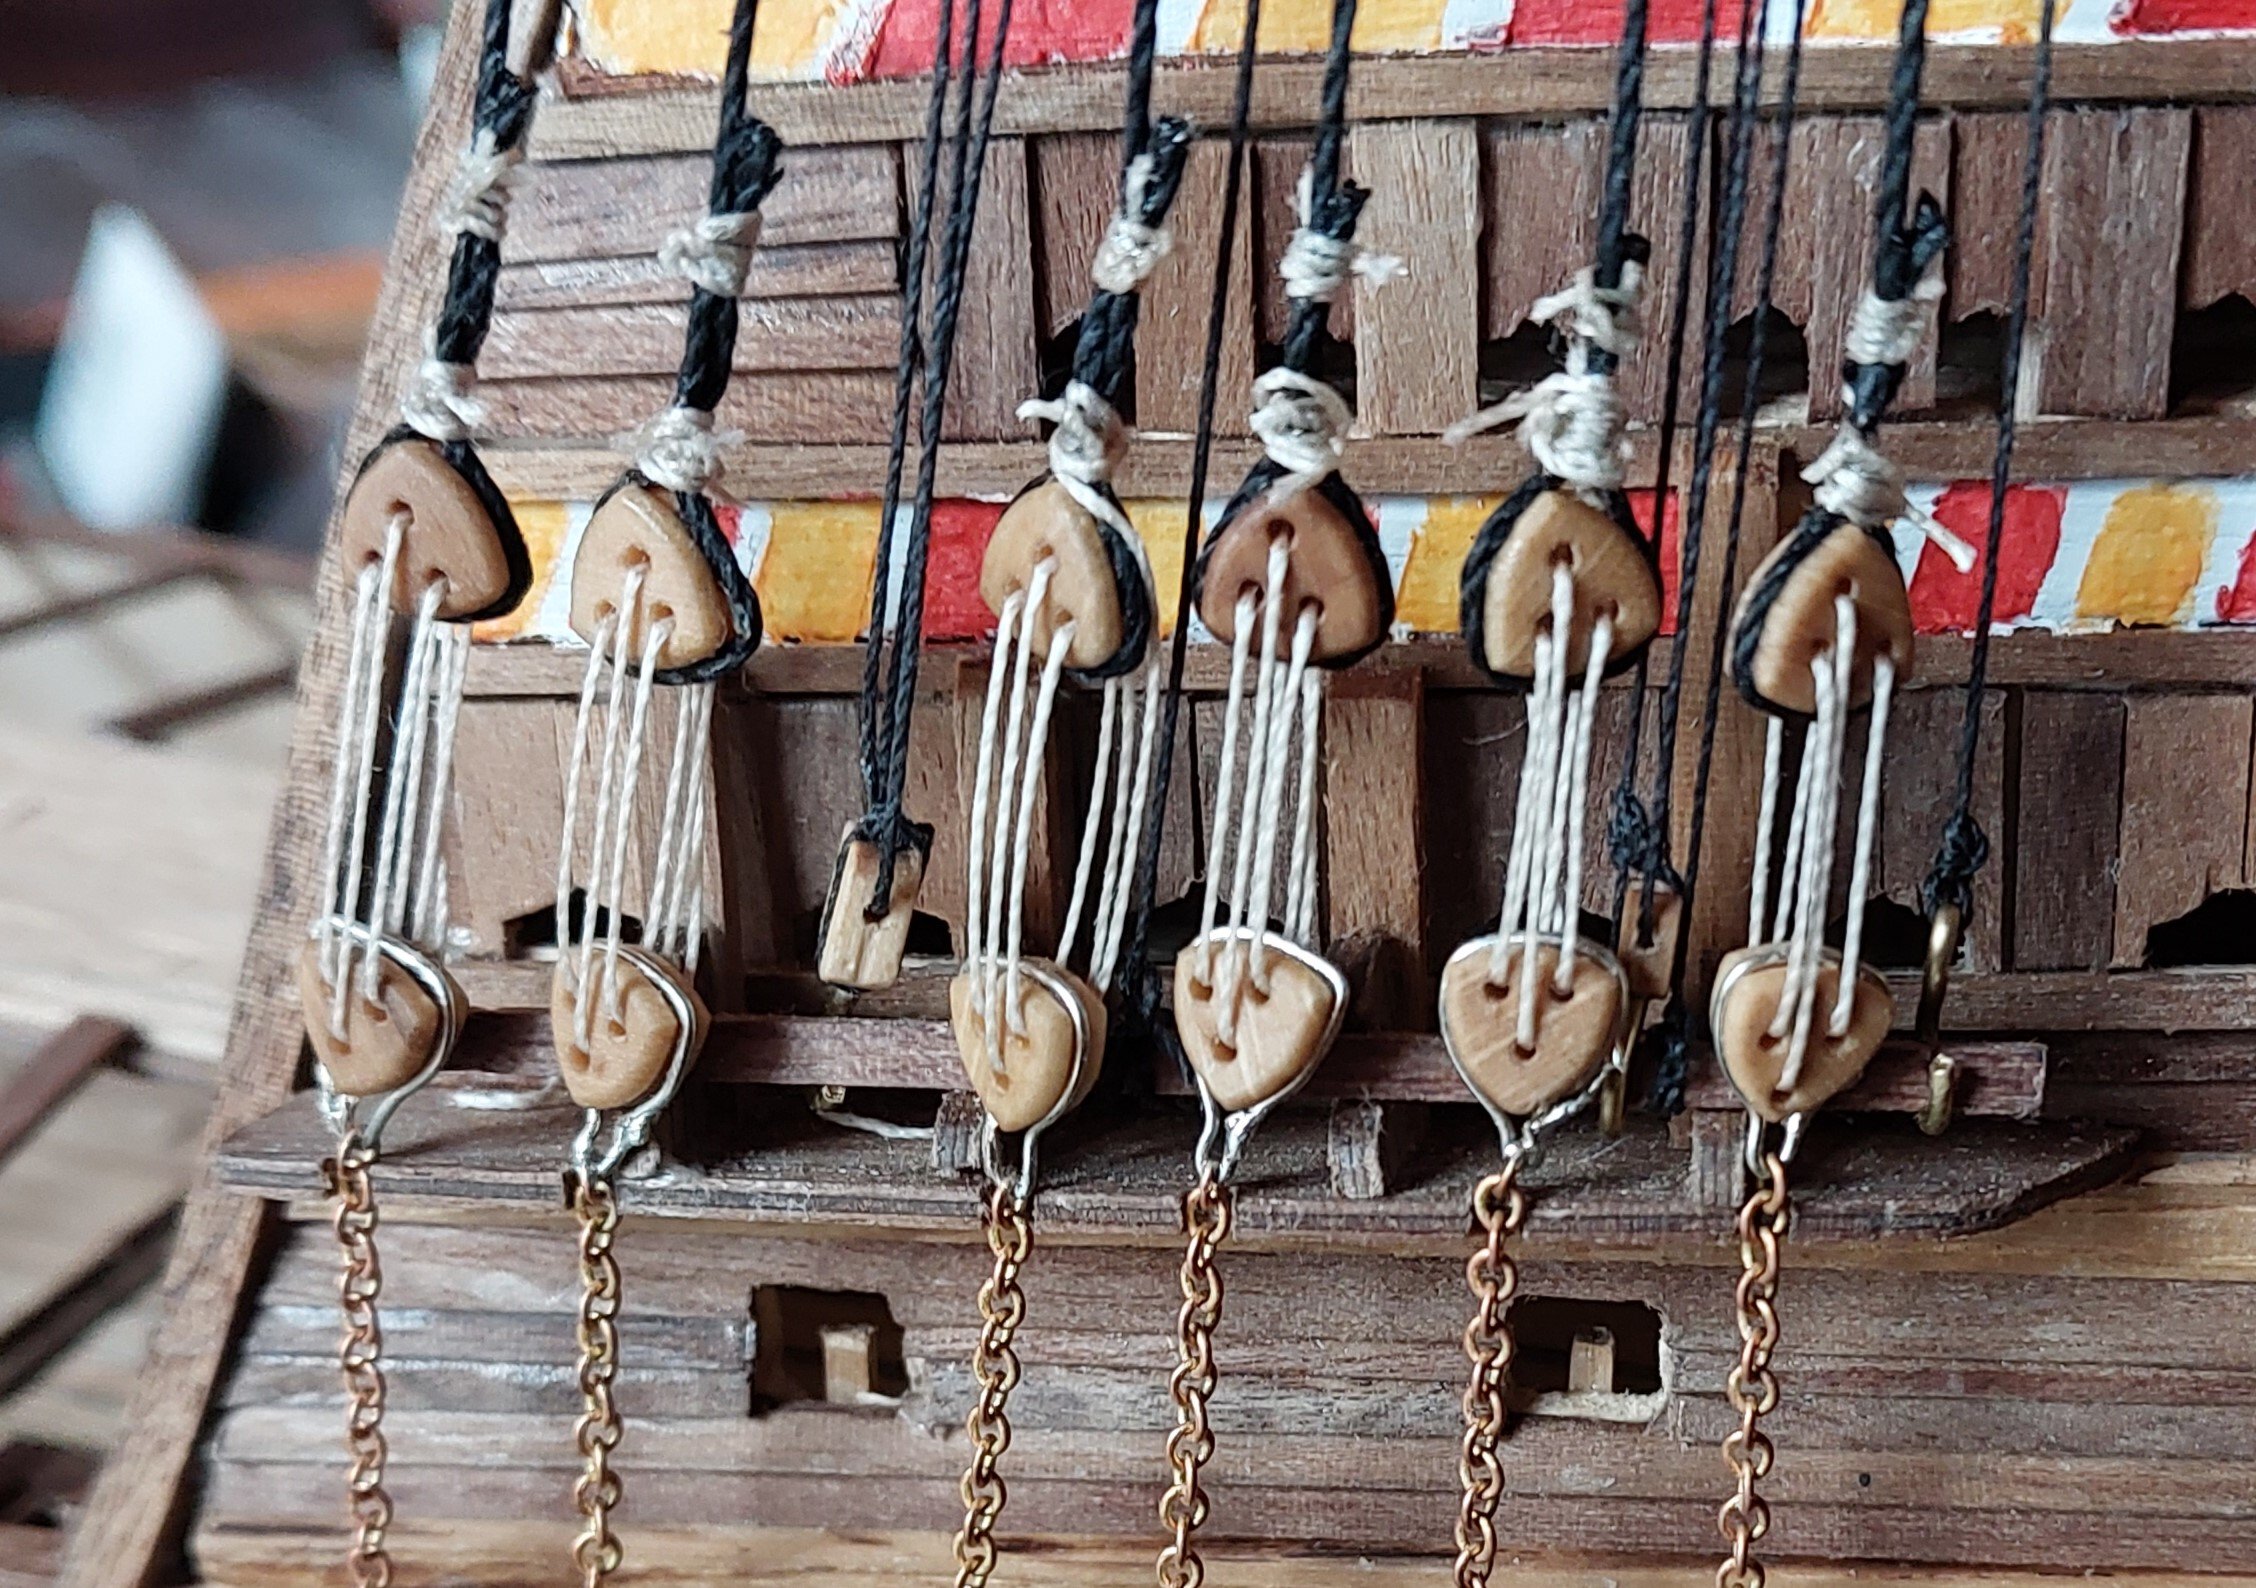
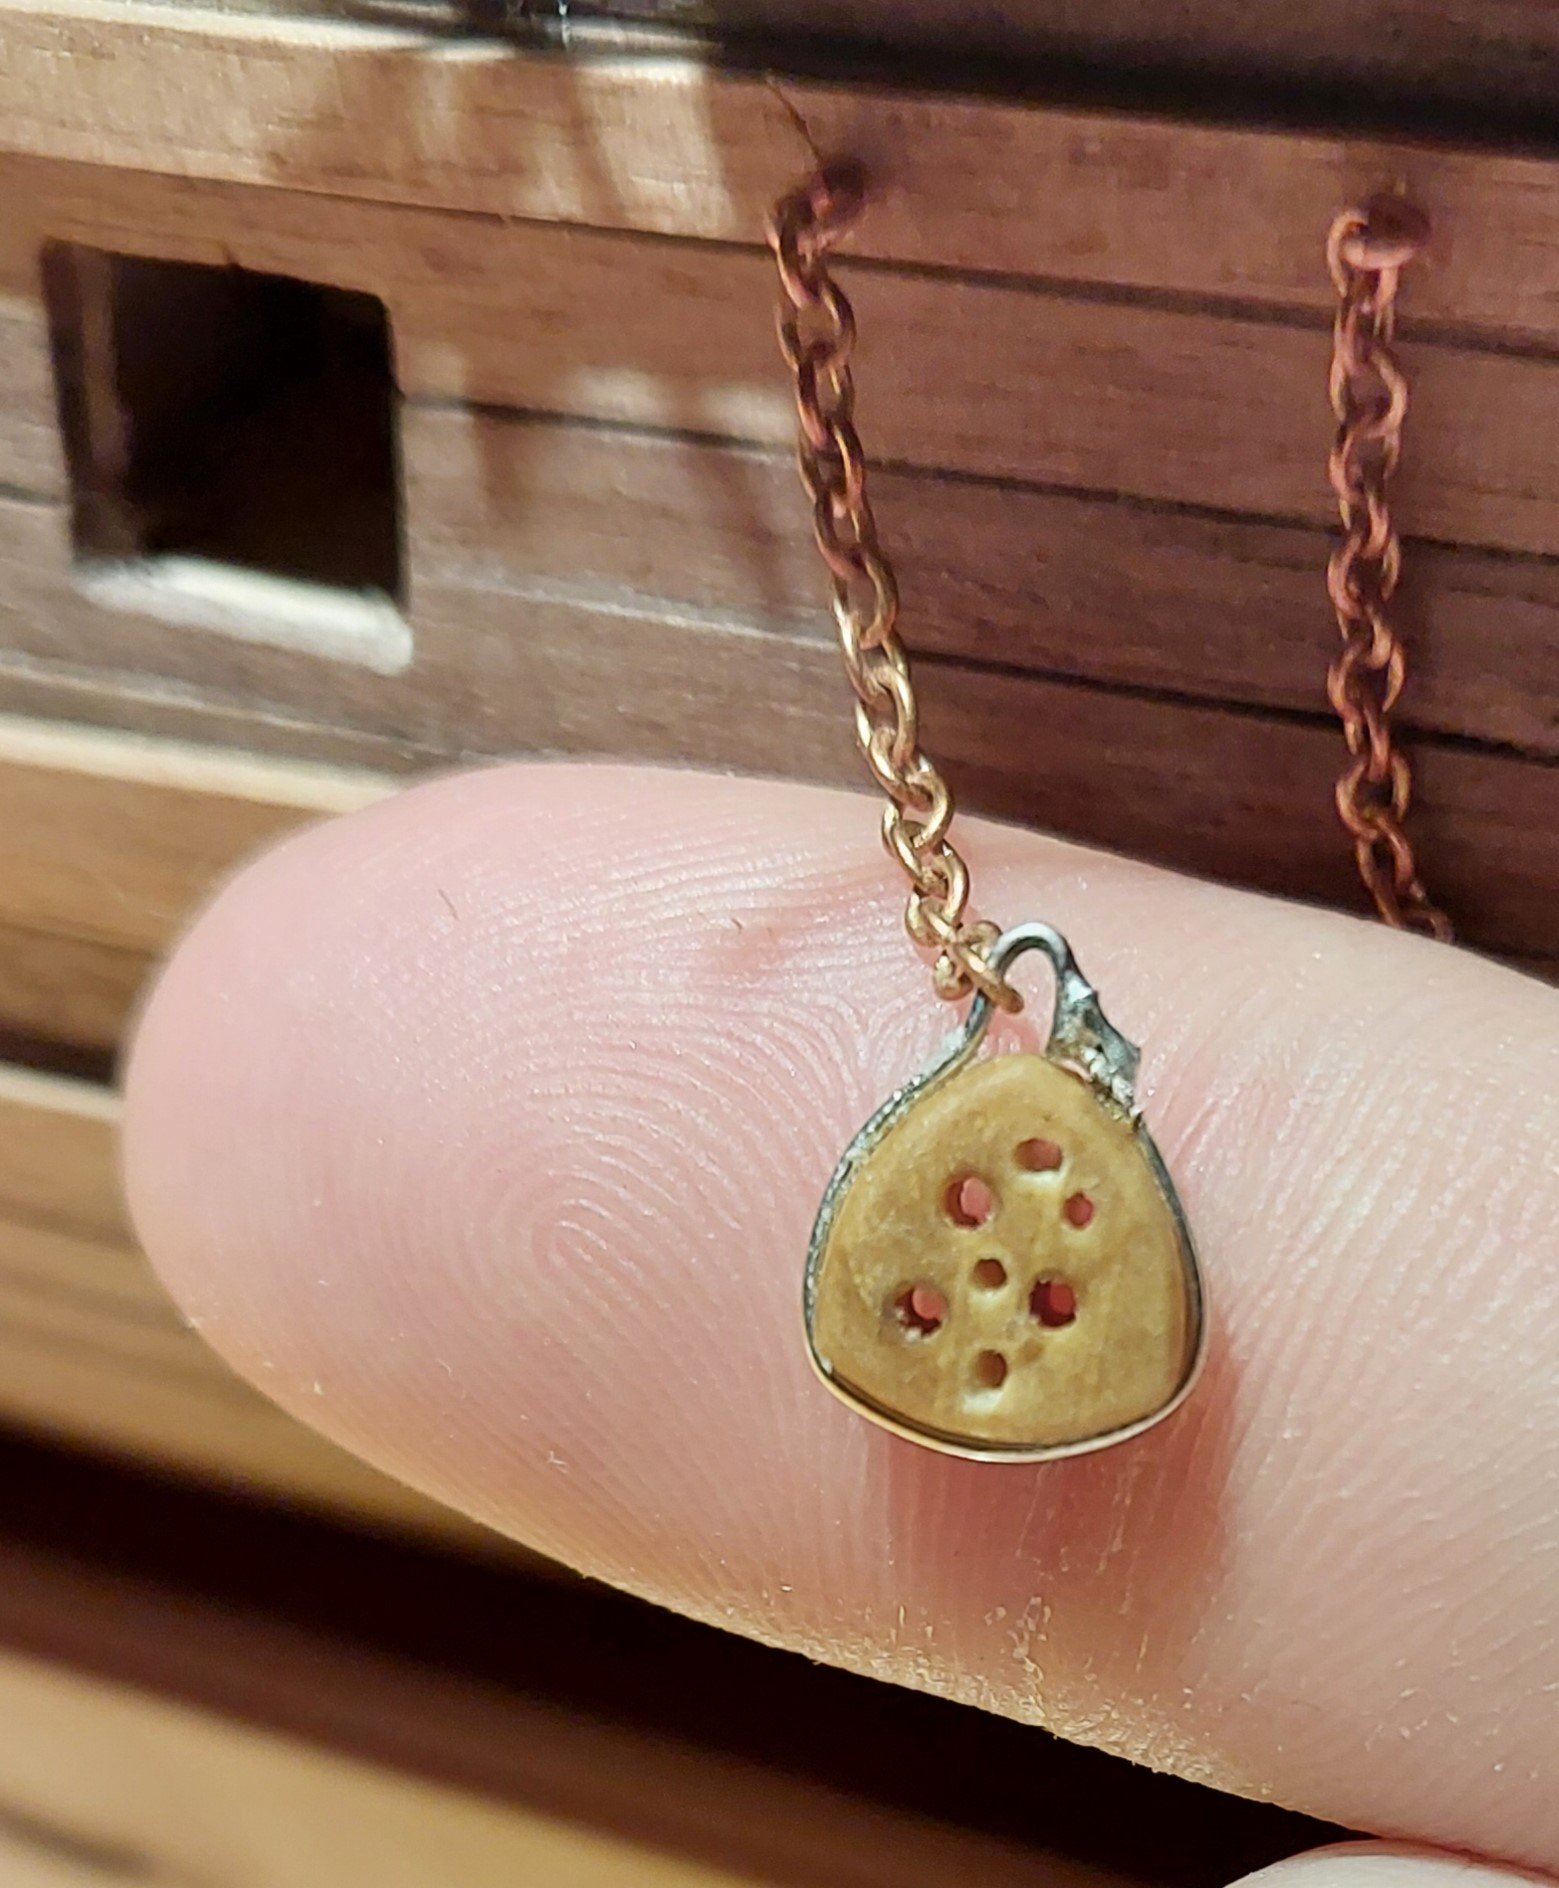
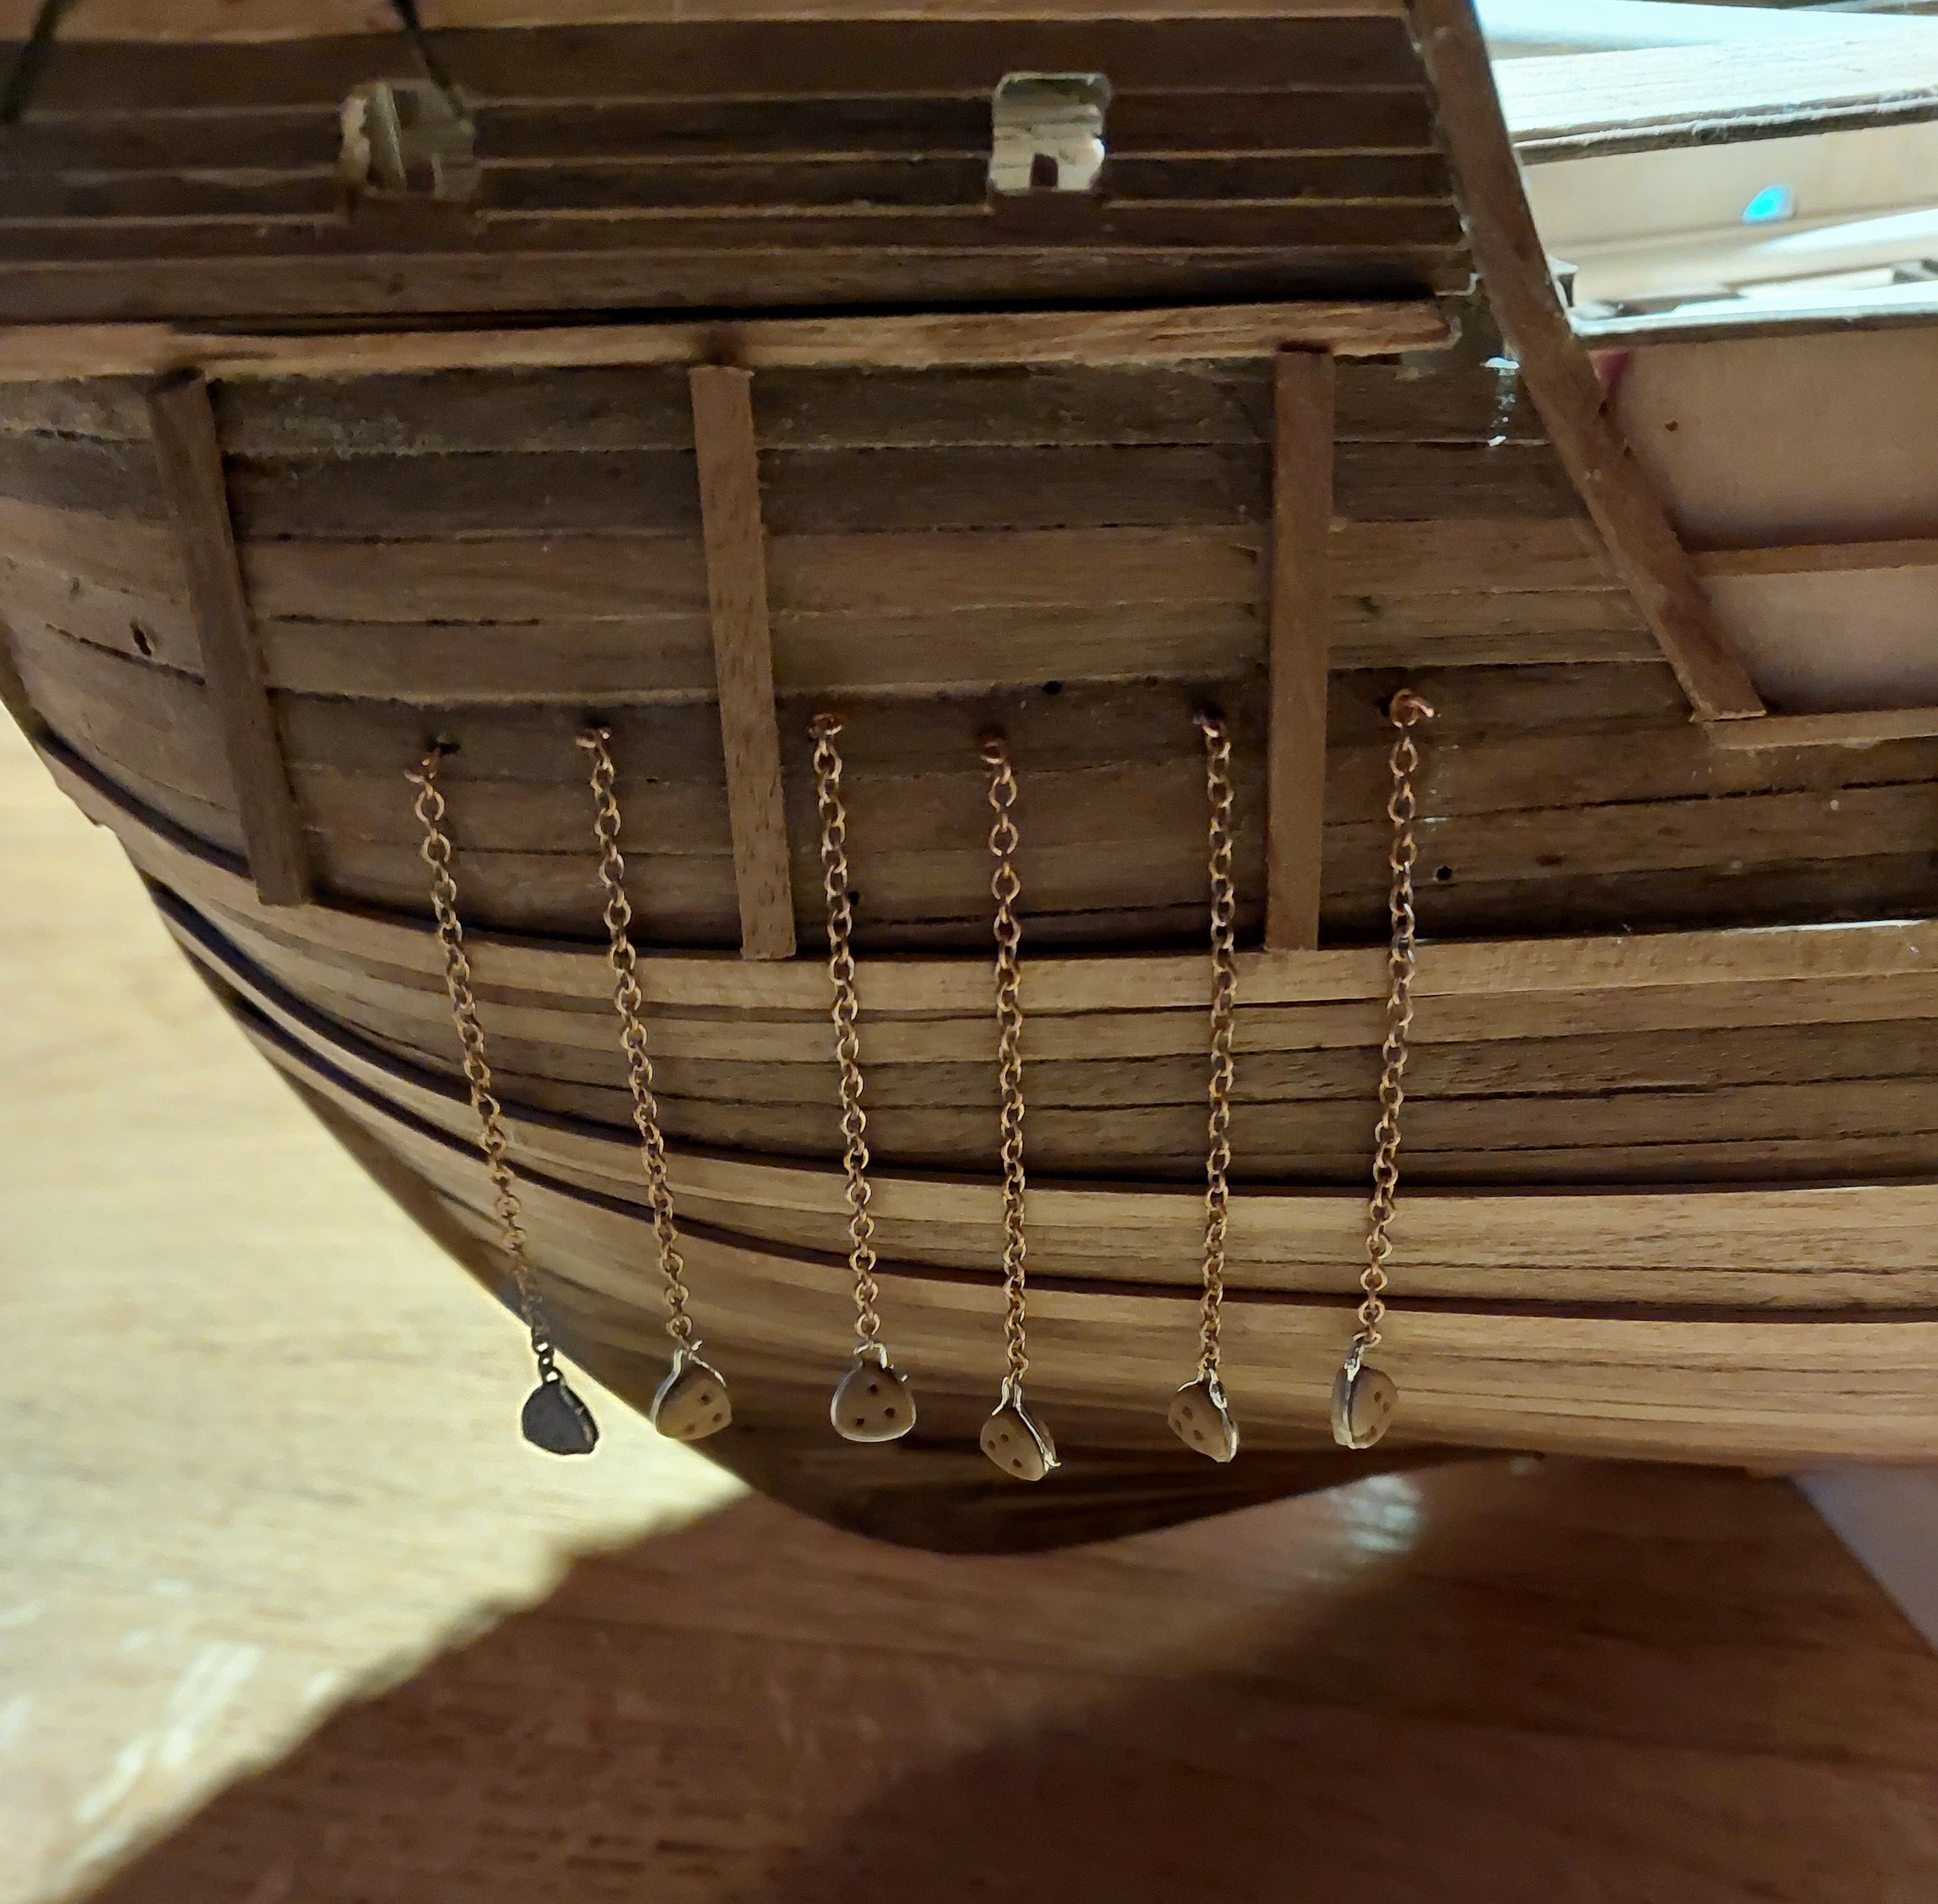
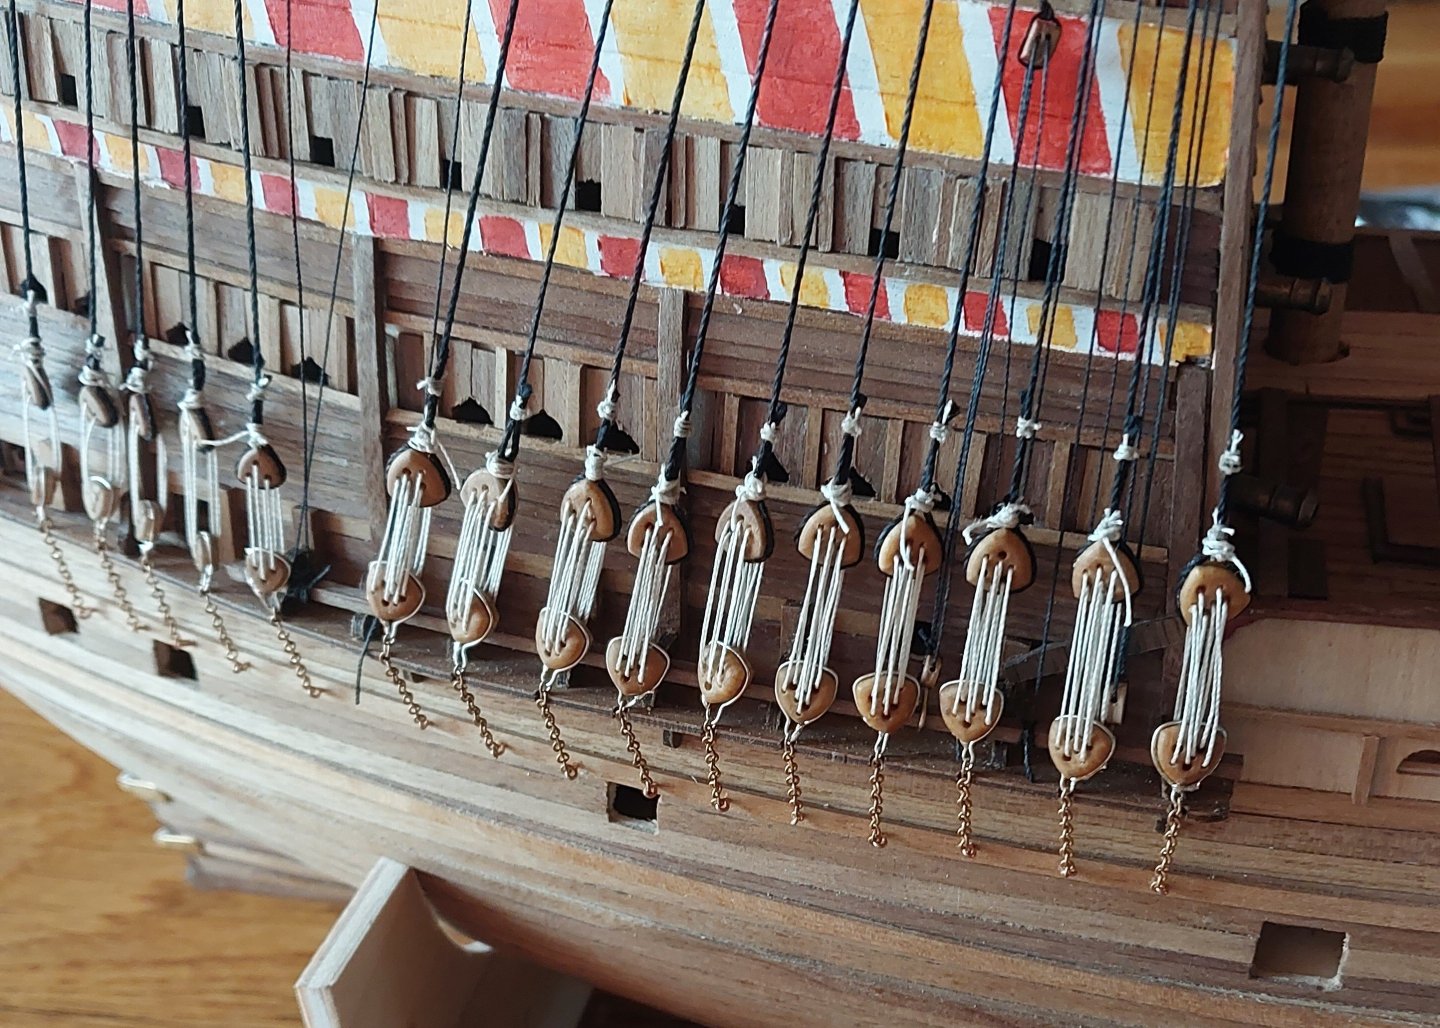
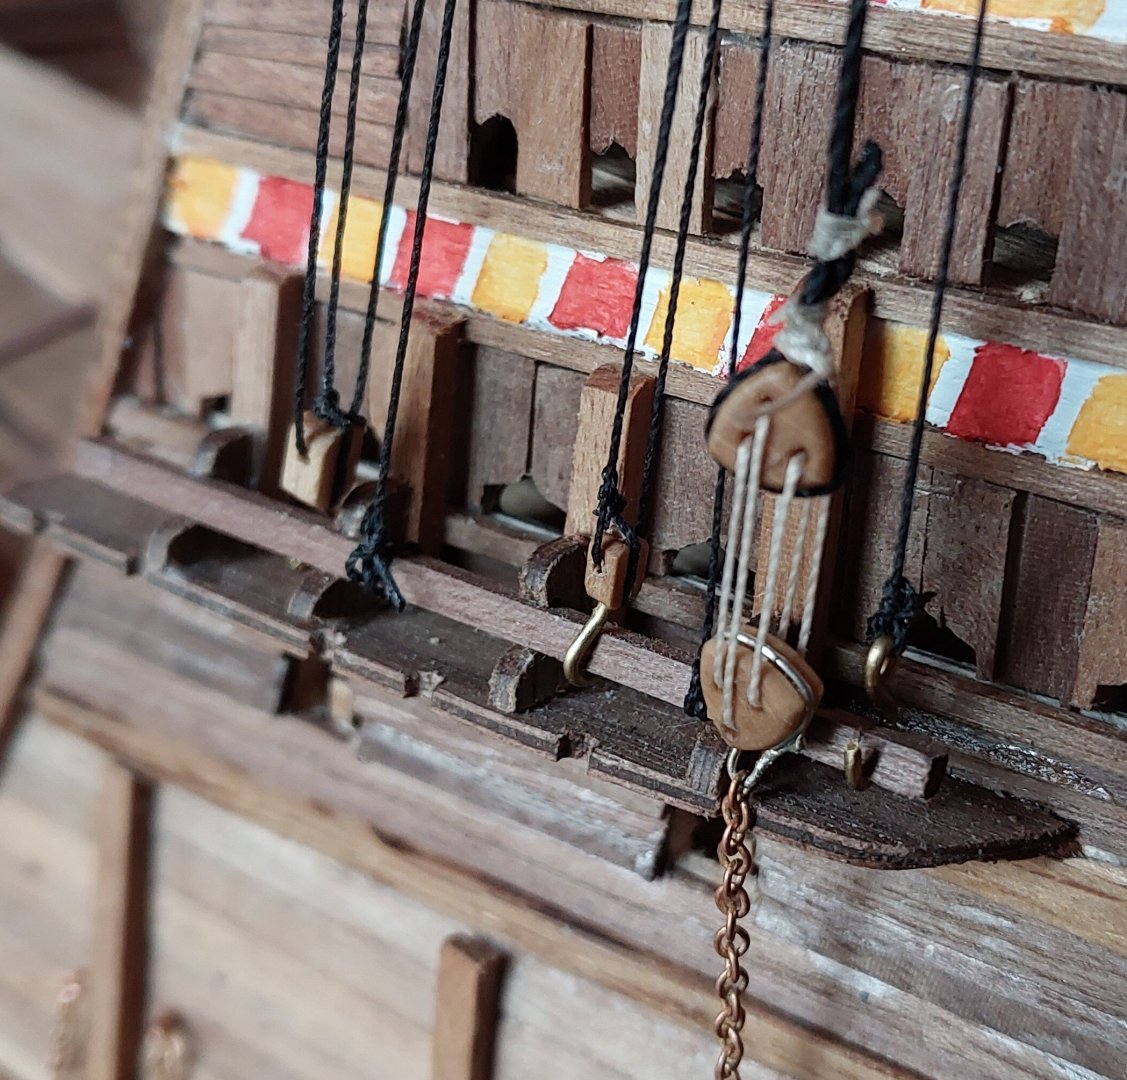
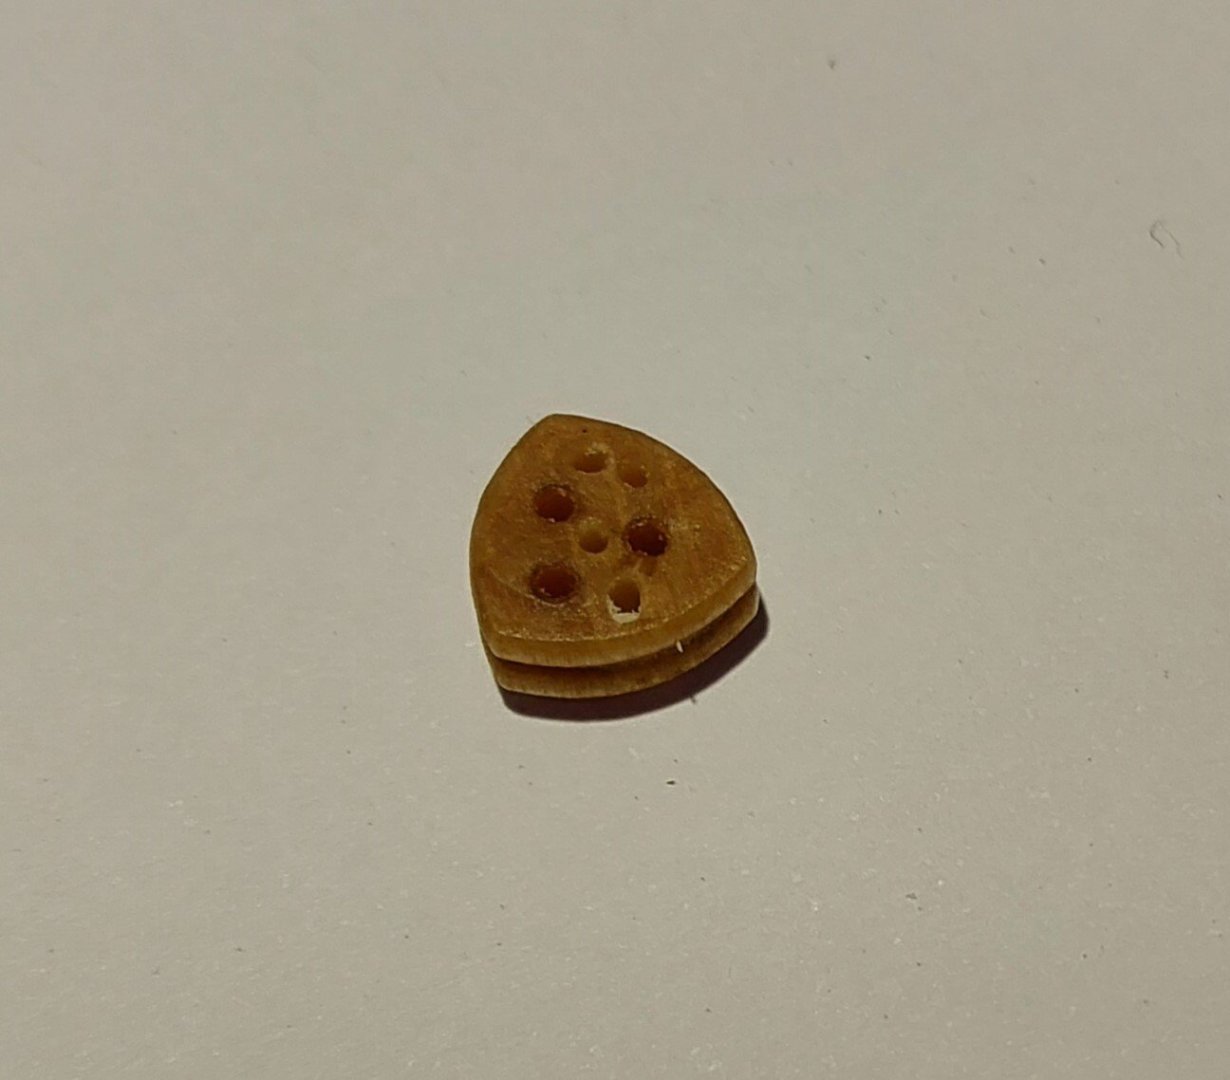
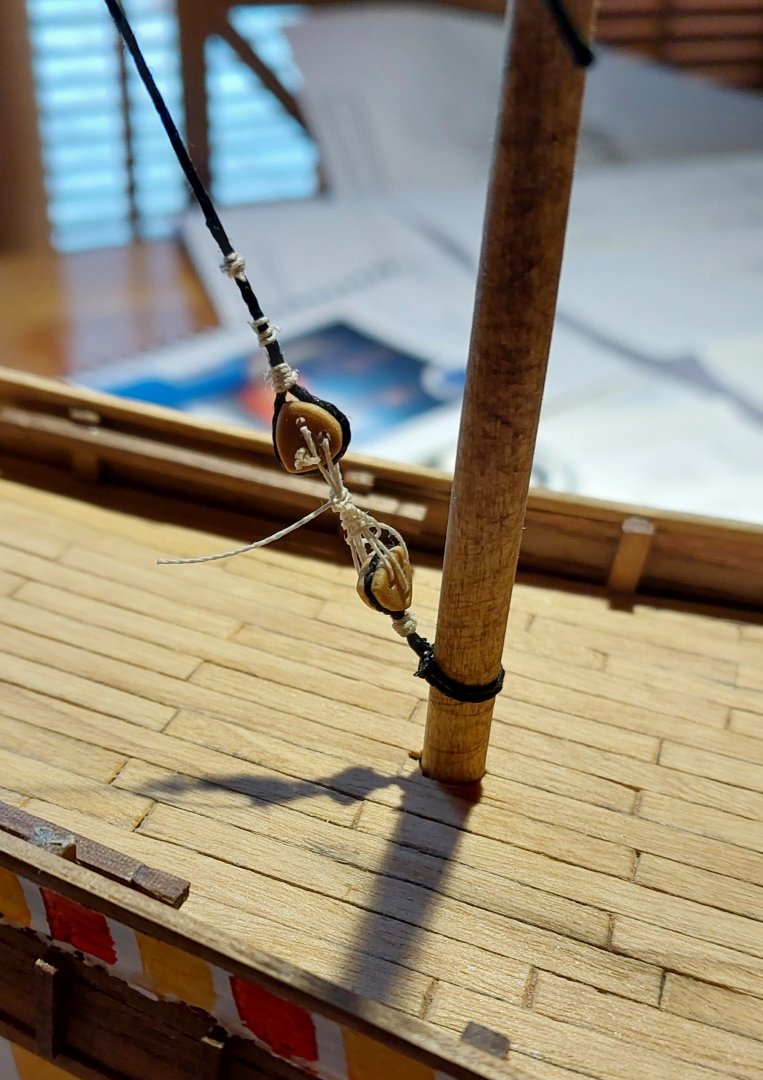
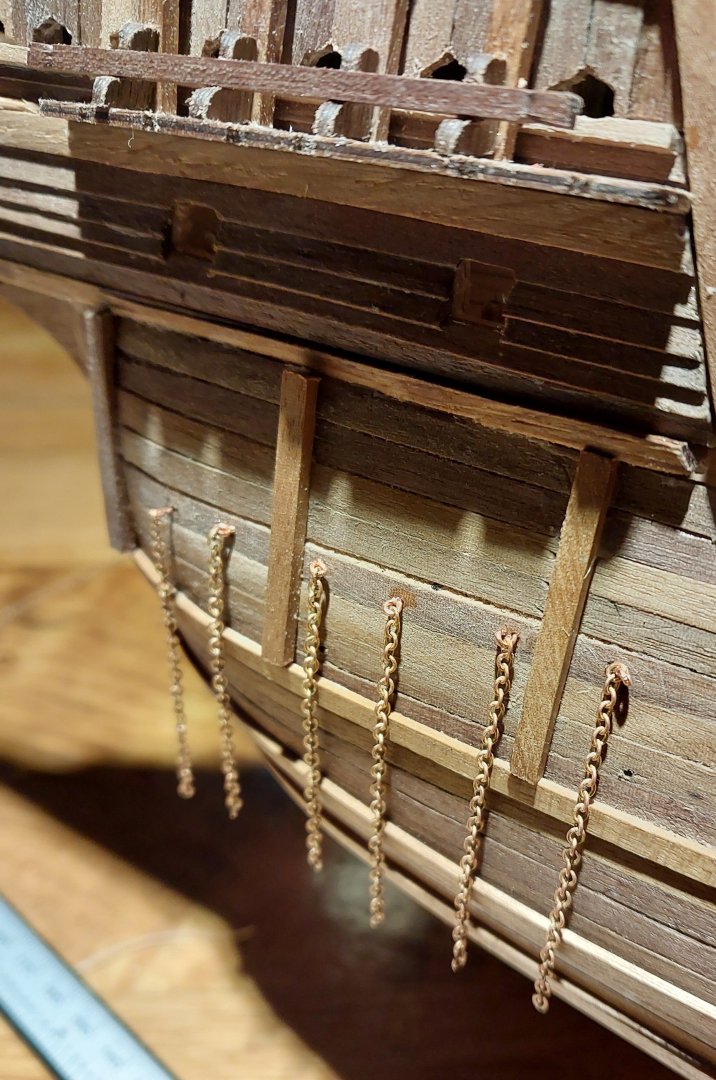
After a couple weeks away, I'm back to (admittedly slow) progress! I always find it a struggle to return to a project after a few days off, and this is no exception - it took me some days to summon up the courage to keep working on the Mary Rose. Nevertheless, here we are - on to the rest of the standing rigging. Here's a rather nice photo of the mainmast with tackles and shrouds in place. The tackles are a bit of a frustration for this project - Anderson's book includes them, and clearly they were involved in at least some capacity on ships of this era, but they're not included in the Caldercraft model at all. This means there's not enough blocks, especially double blocks, in the kit, so I've had to order some extras - those are in the post at the moment, so that's holding up some progress. In a similar vein, I ordered some larger deadeyes for the mainmast, in order to drill the four extra holes per deadeye. These are 12mm across, which is slightly too large for the scale, but in situ they don't look massively out of place, and there was no way I was comfortable drilling out much smaller than this. They're also a slightly different shape to the ones in the original ship; I simply don't have the tools or technical skill to make these as accurate as I'd really like. That said, I have taken the time to wrap wire round each deadeye and solder them to the chains, so you can't fault me entirely: This one needs a bit of tidying up, but it's the general plan fo the rest of the ship. So that's what I did: As you can see, the larger deadeyes are only for the shrouds on the mainmast, whilst I've used the standard 8mm deadeyes for the rest of the shrouds. Here are the longer chains on the foremast: And I've also put in all the forward stays - here's the bonaventure mizzenstay: This stay is actually the same diameter line as the shrouds - I realised a bit too late that I should have used a thinner line for the mizzen and BA mizzen shrouds, but I'm not sure that it's worth the time to rip them out and put new ones in. As such, I've just made the BA stay a finer line, as it would have looked obtrusive to be the same weight as the mainstay, but I've kept the shrouds a bit thicker. Hopefully not too much of a disaster. Here's a view of the mainstay - I've currently lashed it with a collar straight to the foremast. Anderson's book indicates that this was common, but with the collar leading on to a hole in the stem itself - clearly impossible when the forecastle is this tall. I think this looks okay, but I'm amenable to change if someone gives me a better solution! As mentioned above, I'm waiting on some new blocks to arrive so that I can put the tackles in, but my main concern now is the boarding netting. I can't really connect the shrouds to any of the deadeyes on the sterncastle until I know what I'm doing on the poop deck - either an A-frame to support netting, the netting itself, or completely ommitting it. I'm tempted to construct some sort of A-frame and see how it looks, and then do the standing rigging with the presumption that I'll be able to reach around the shrouds to put a net in after the fact if I want to. Thanks for following along!


-
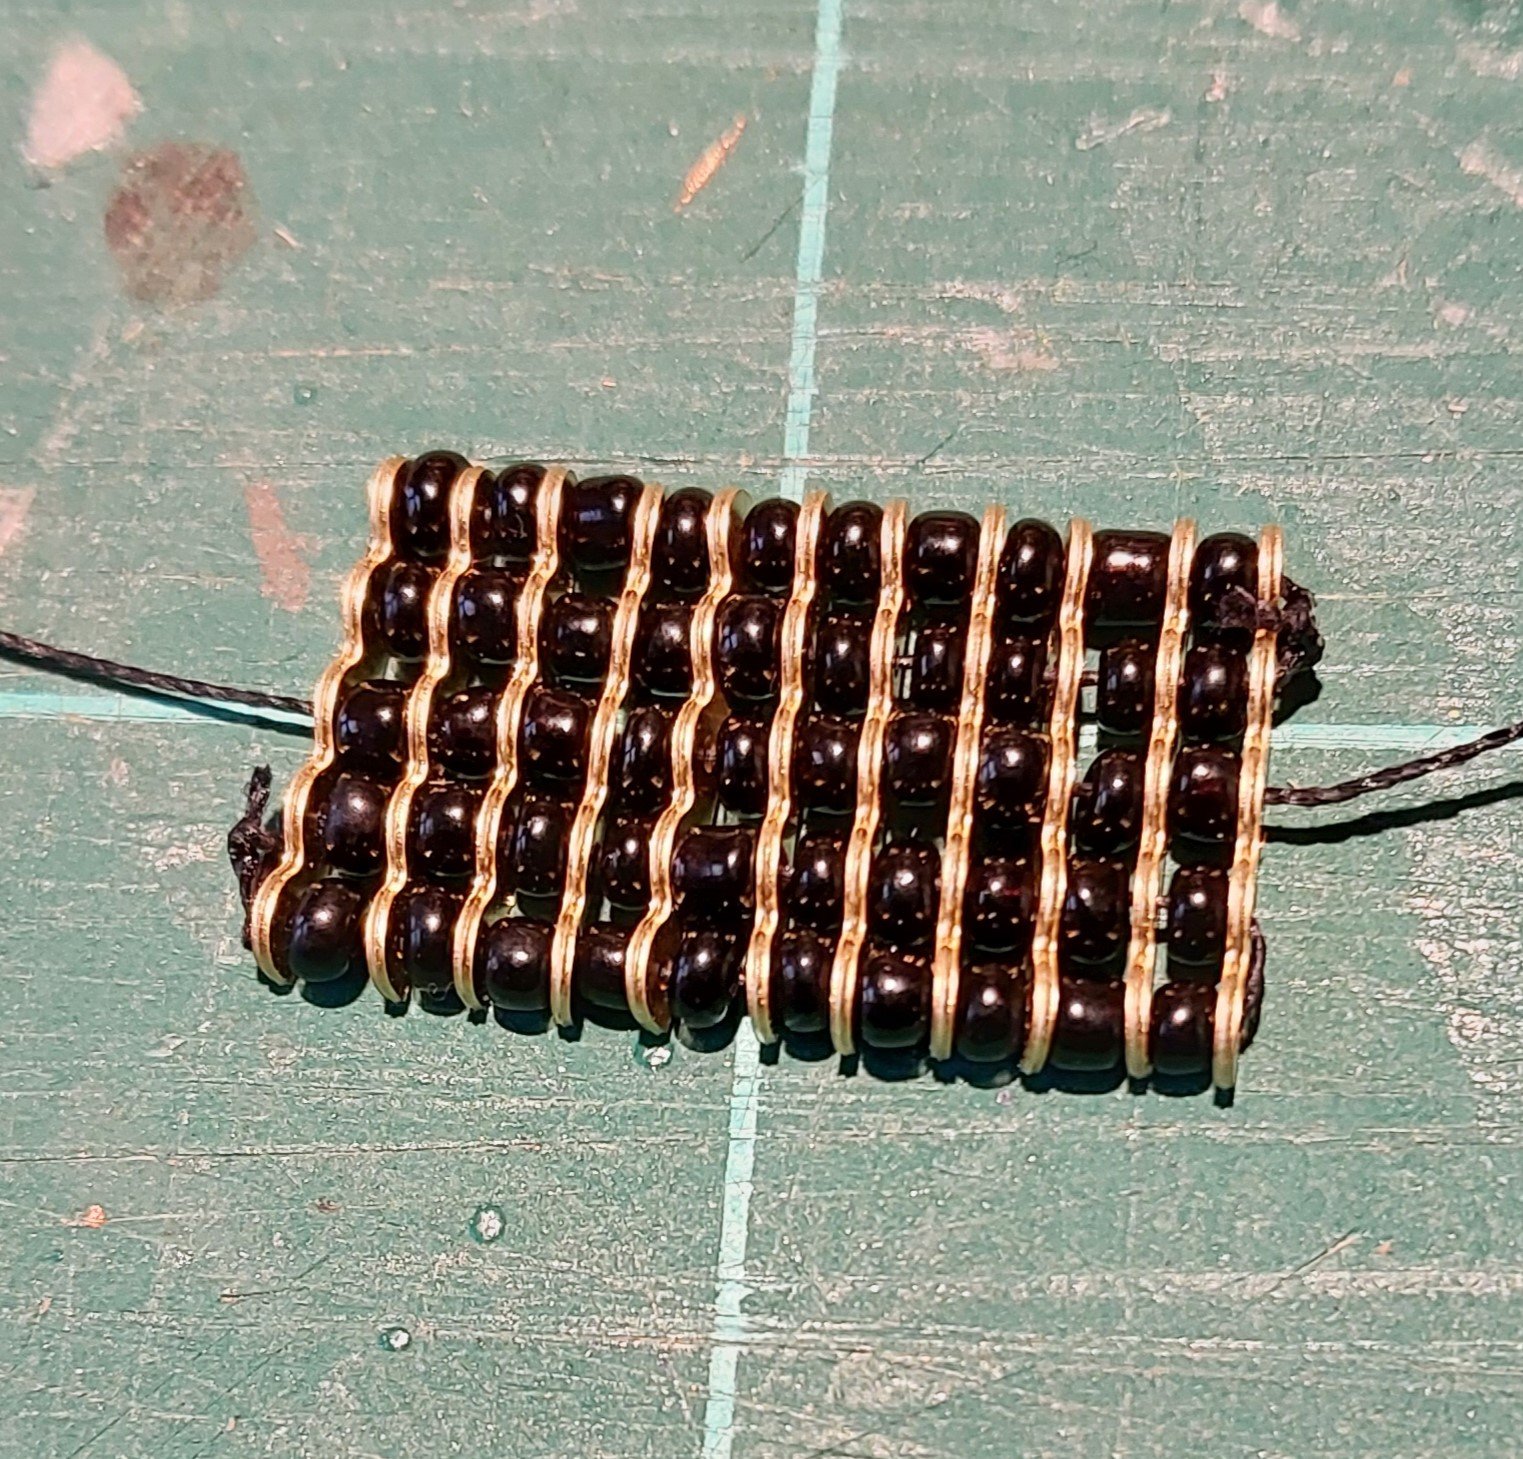
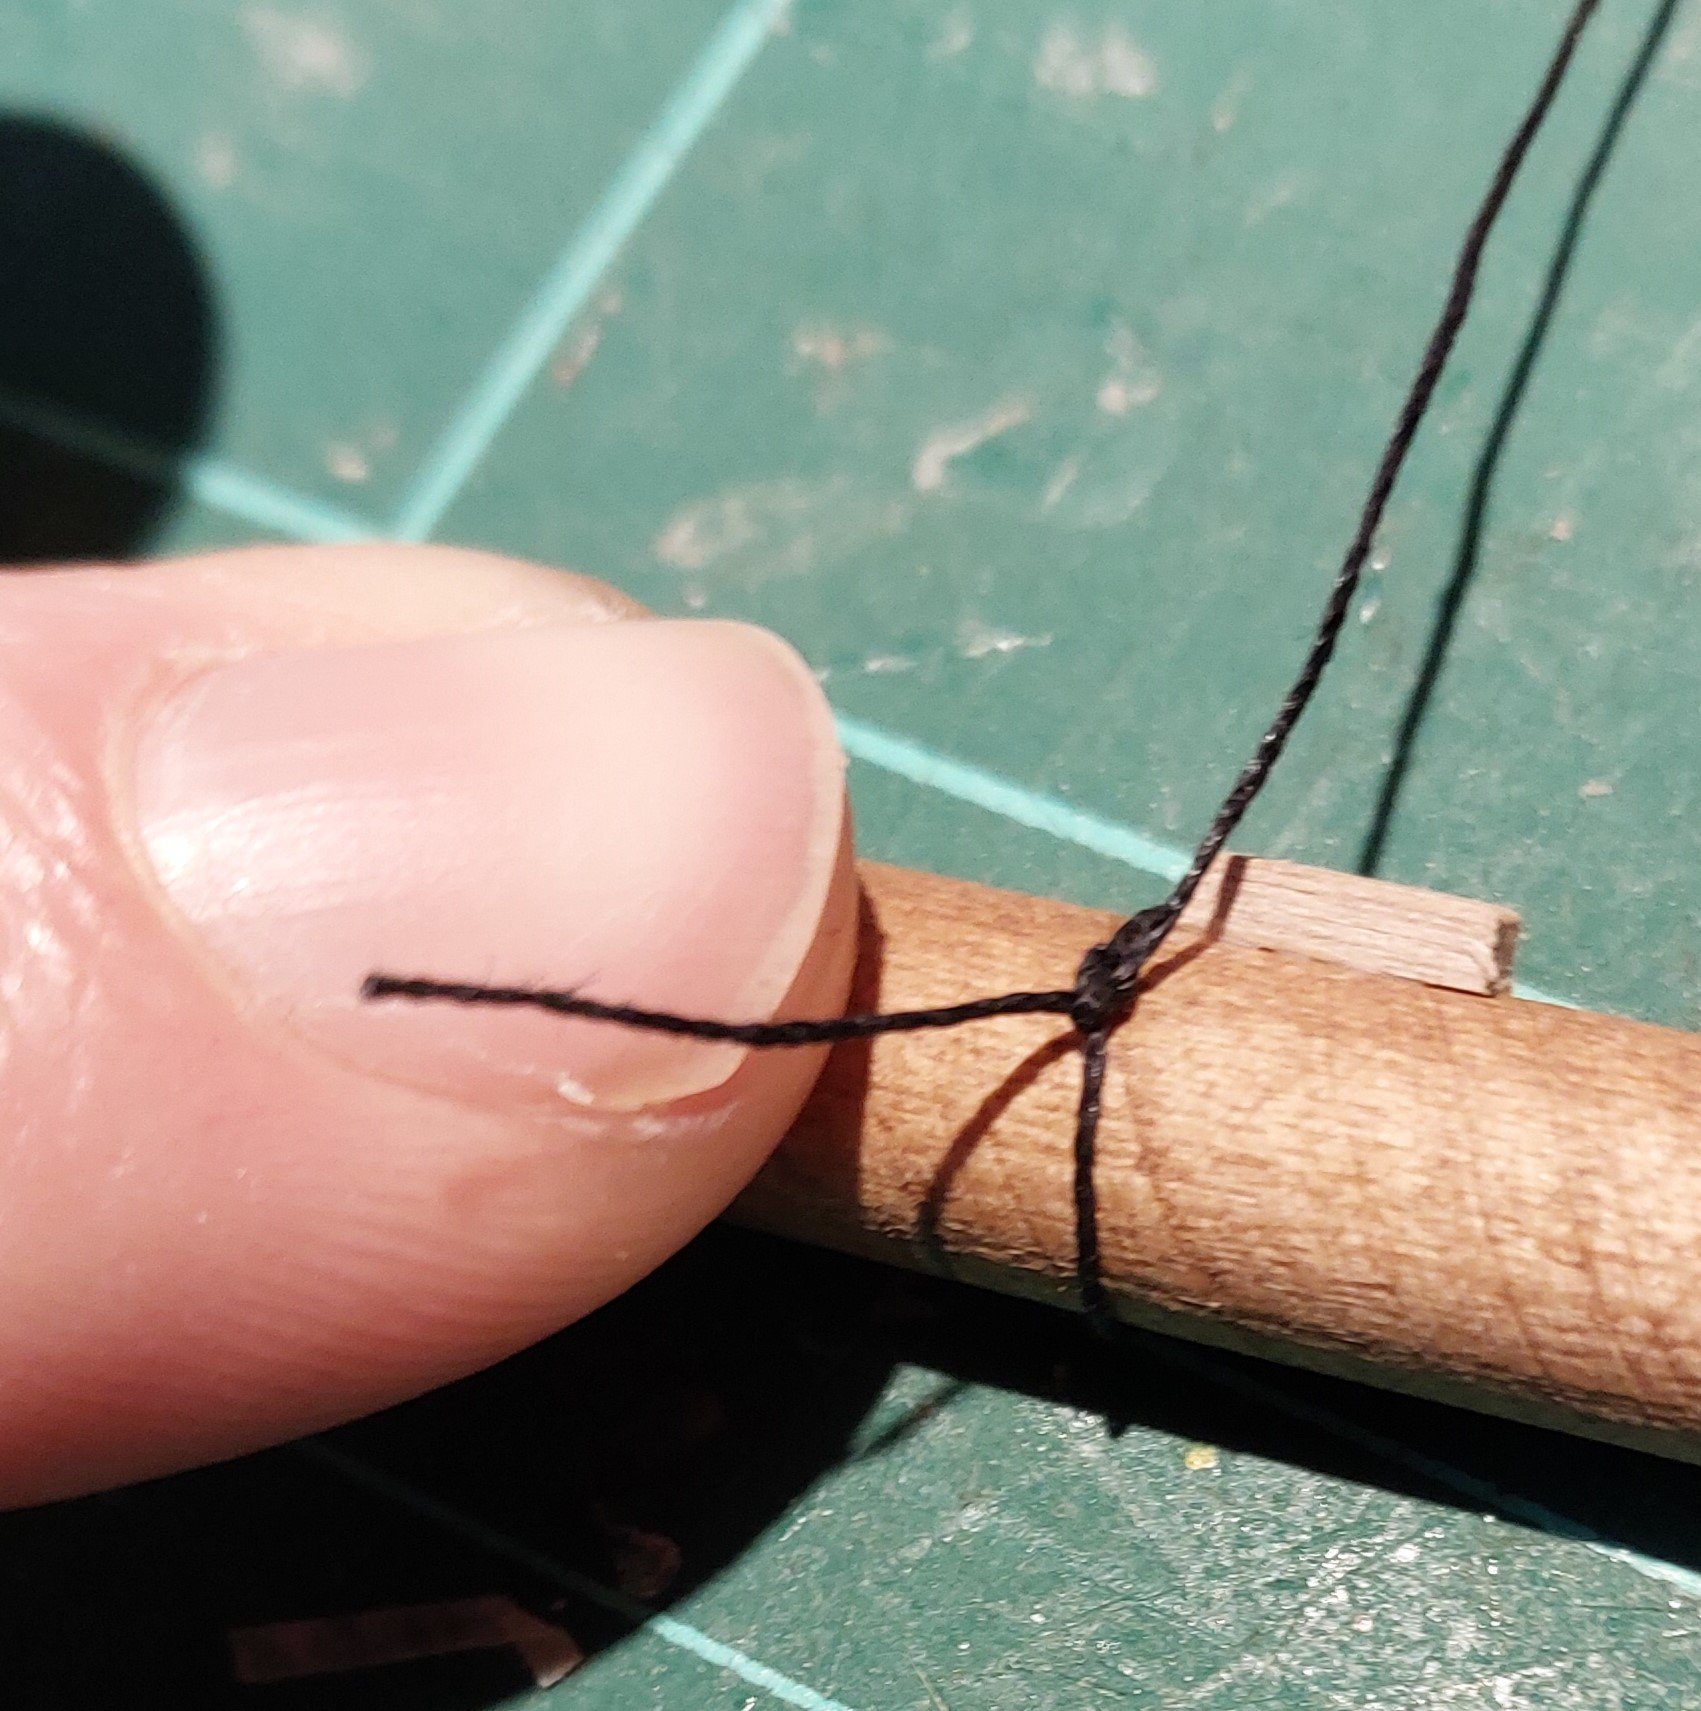
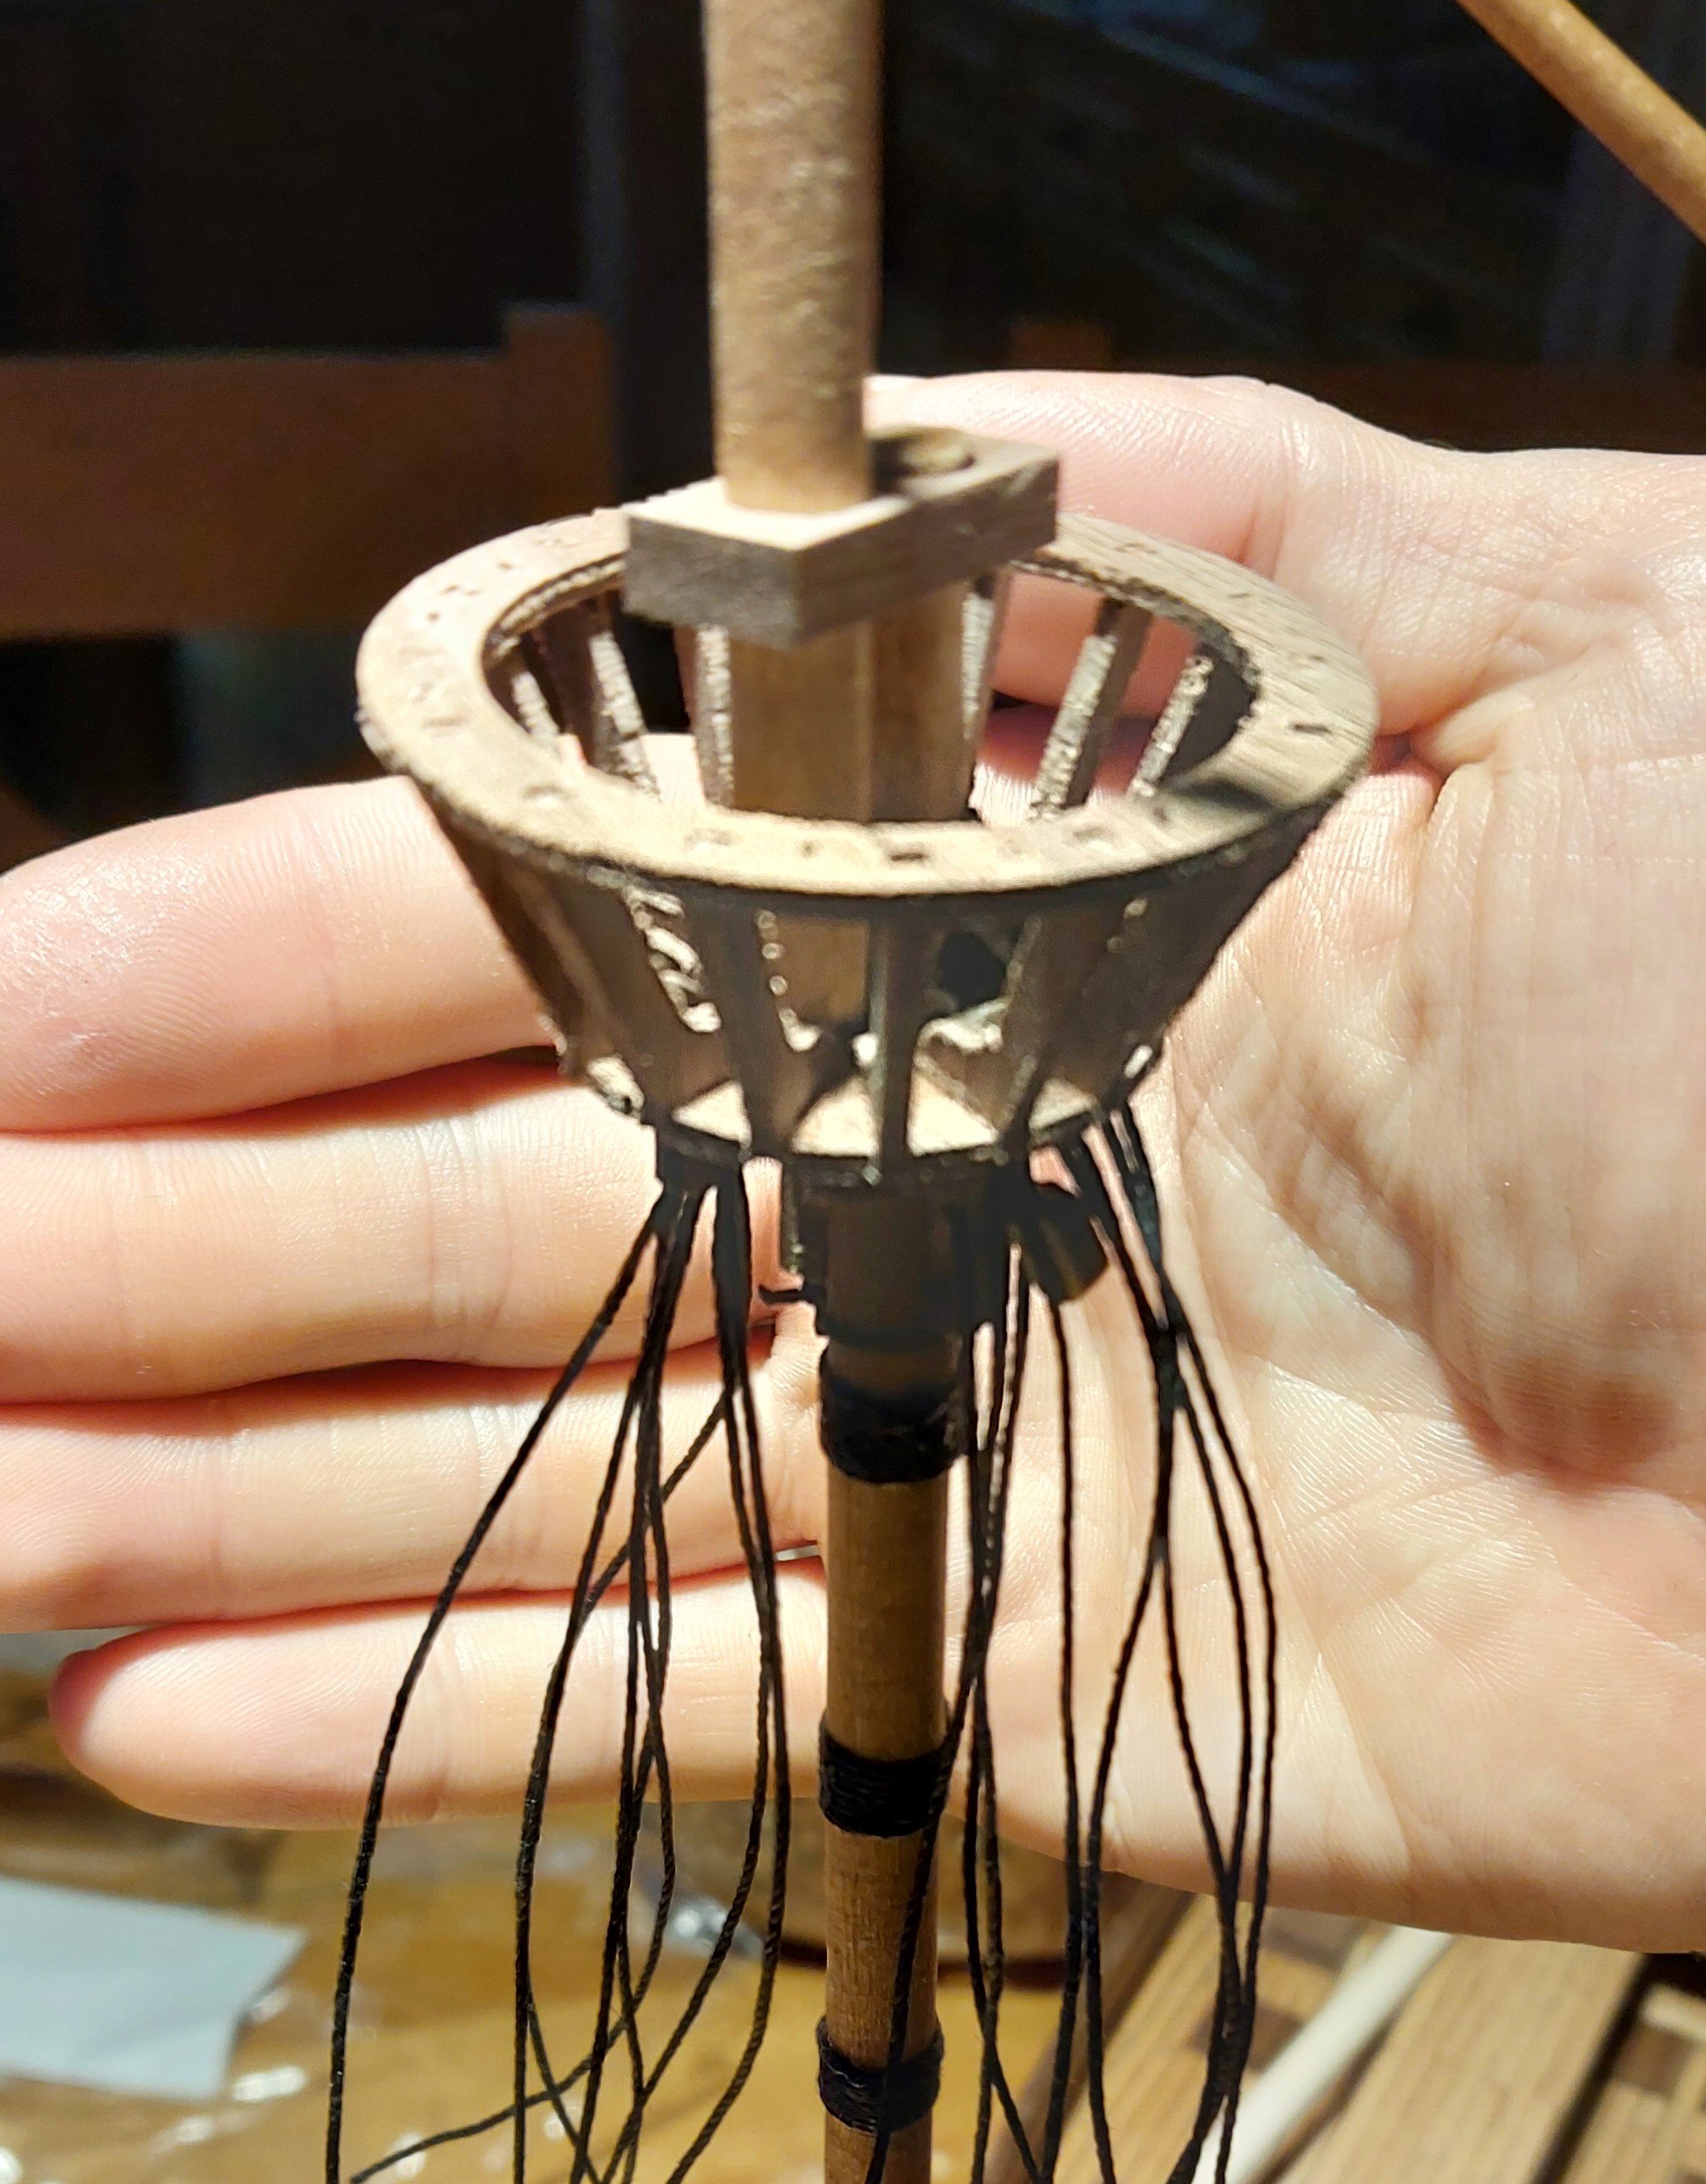
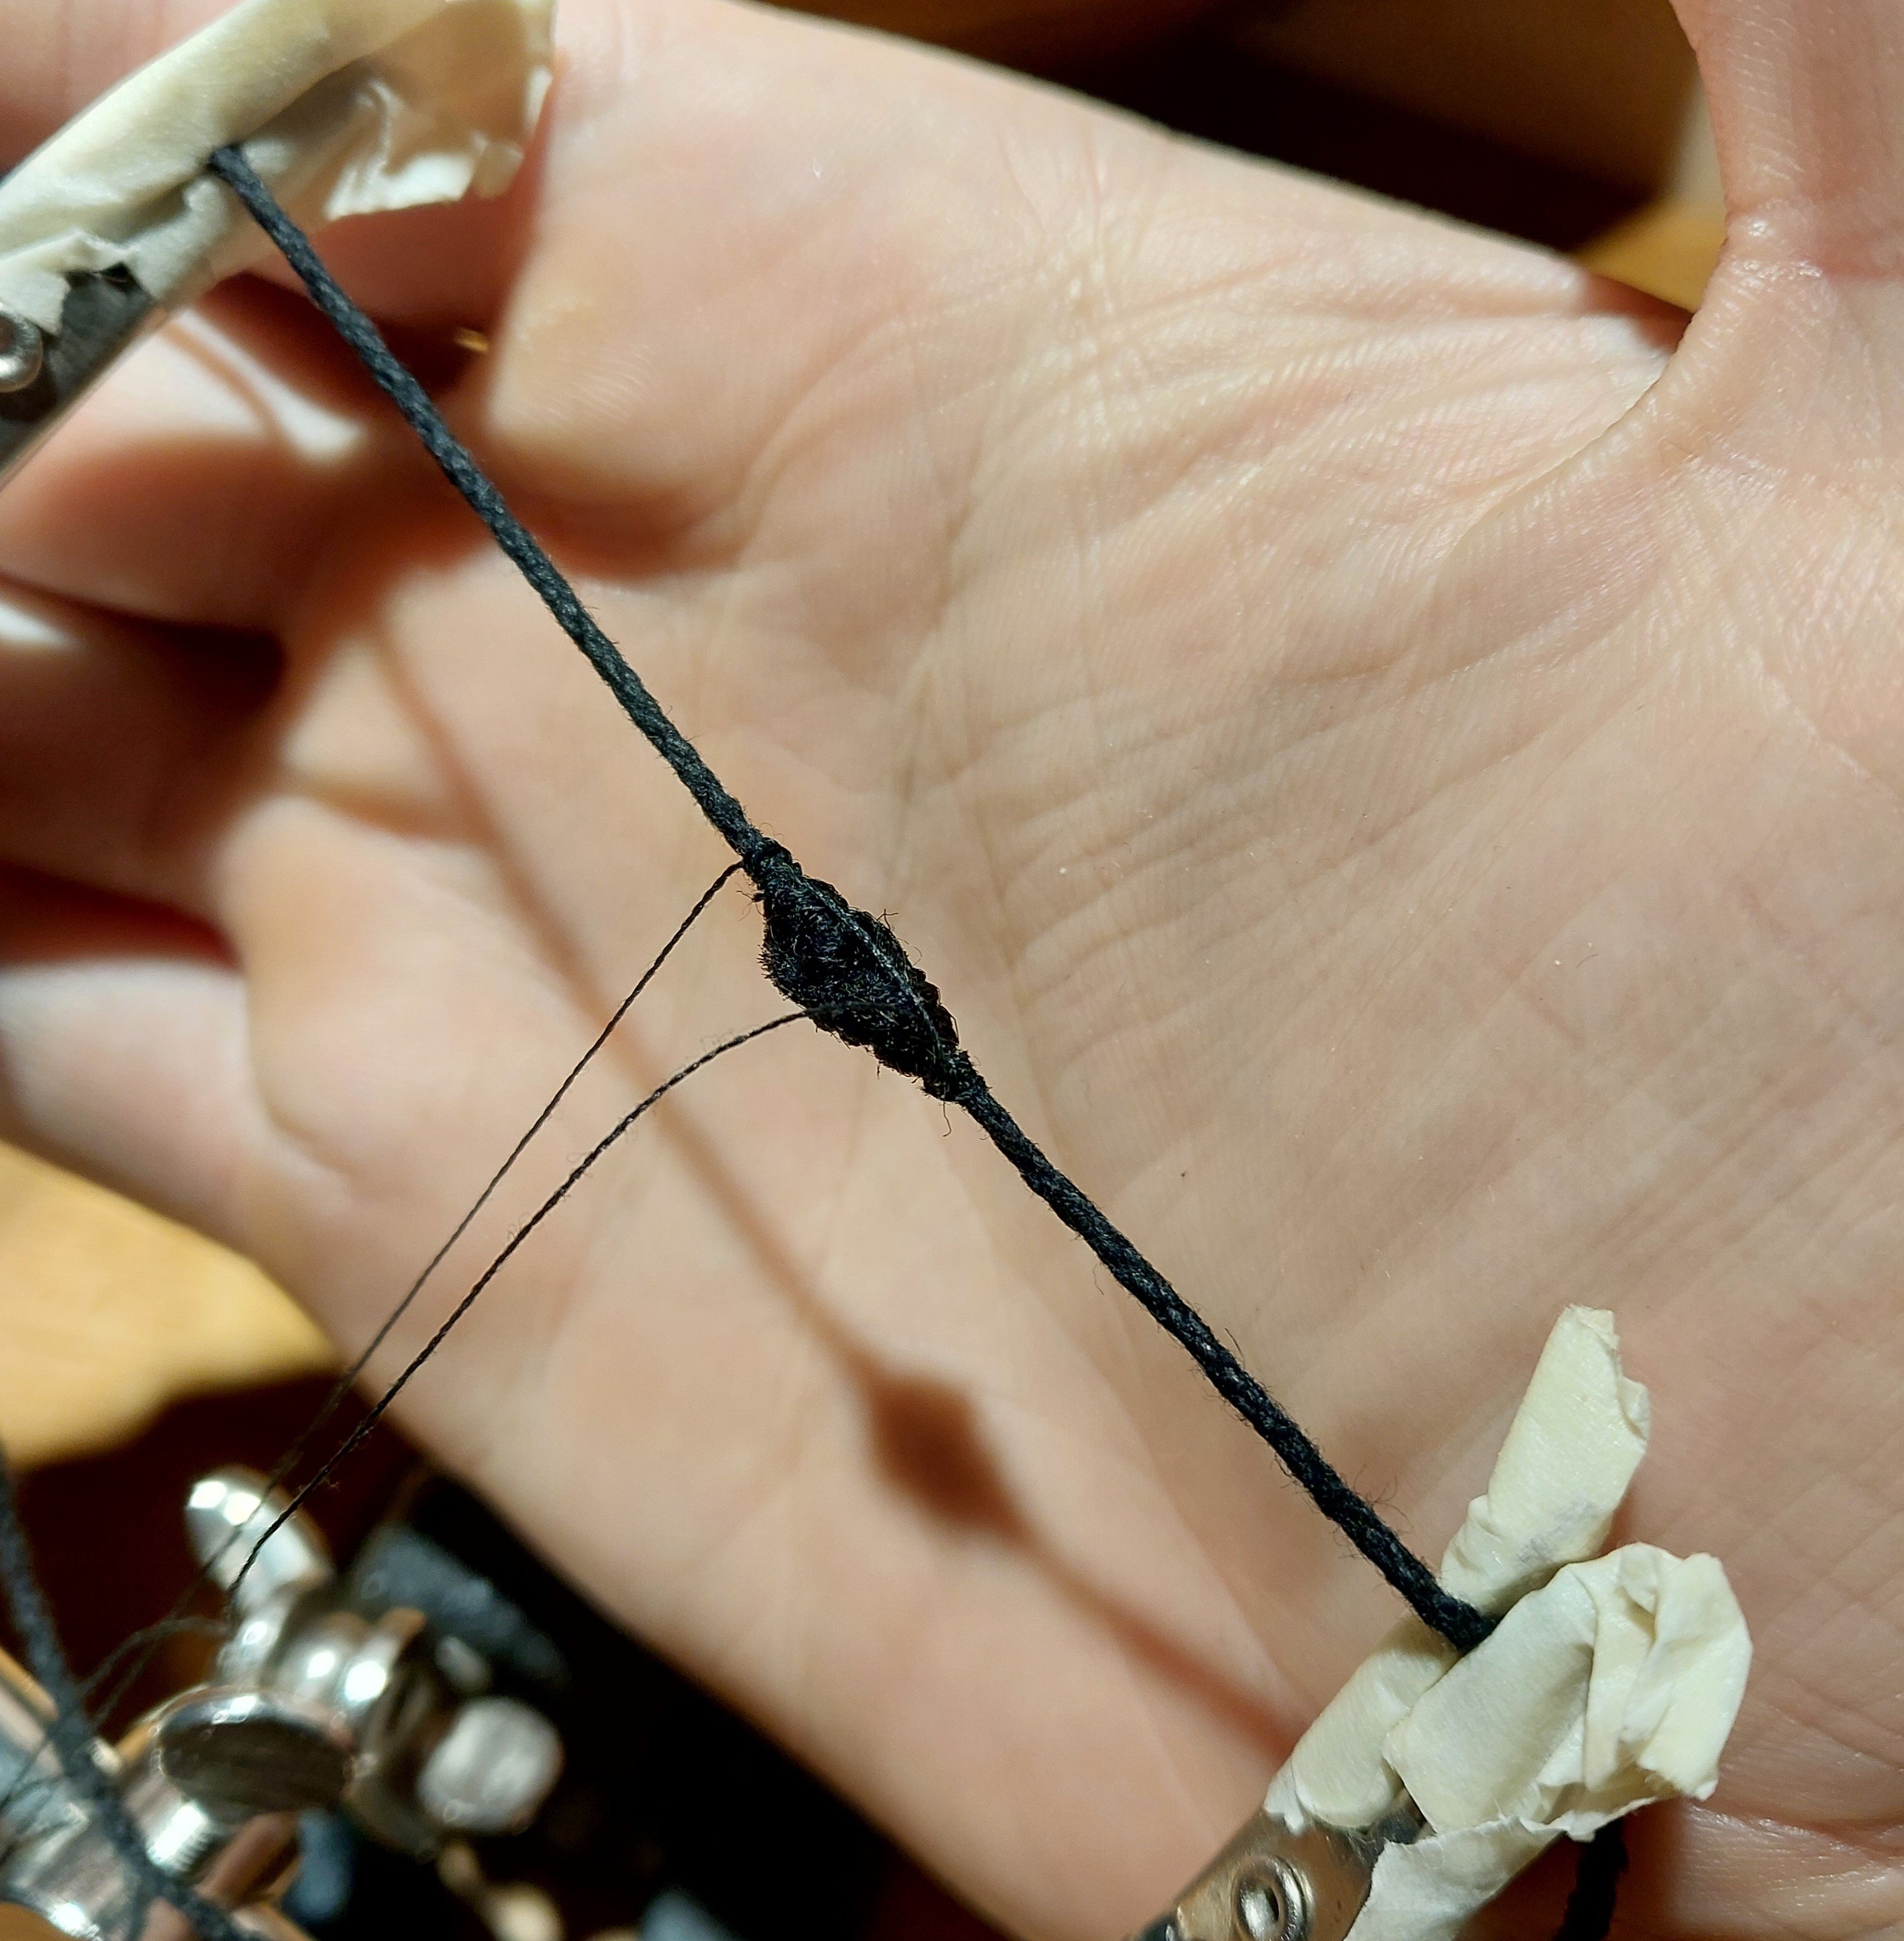
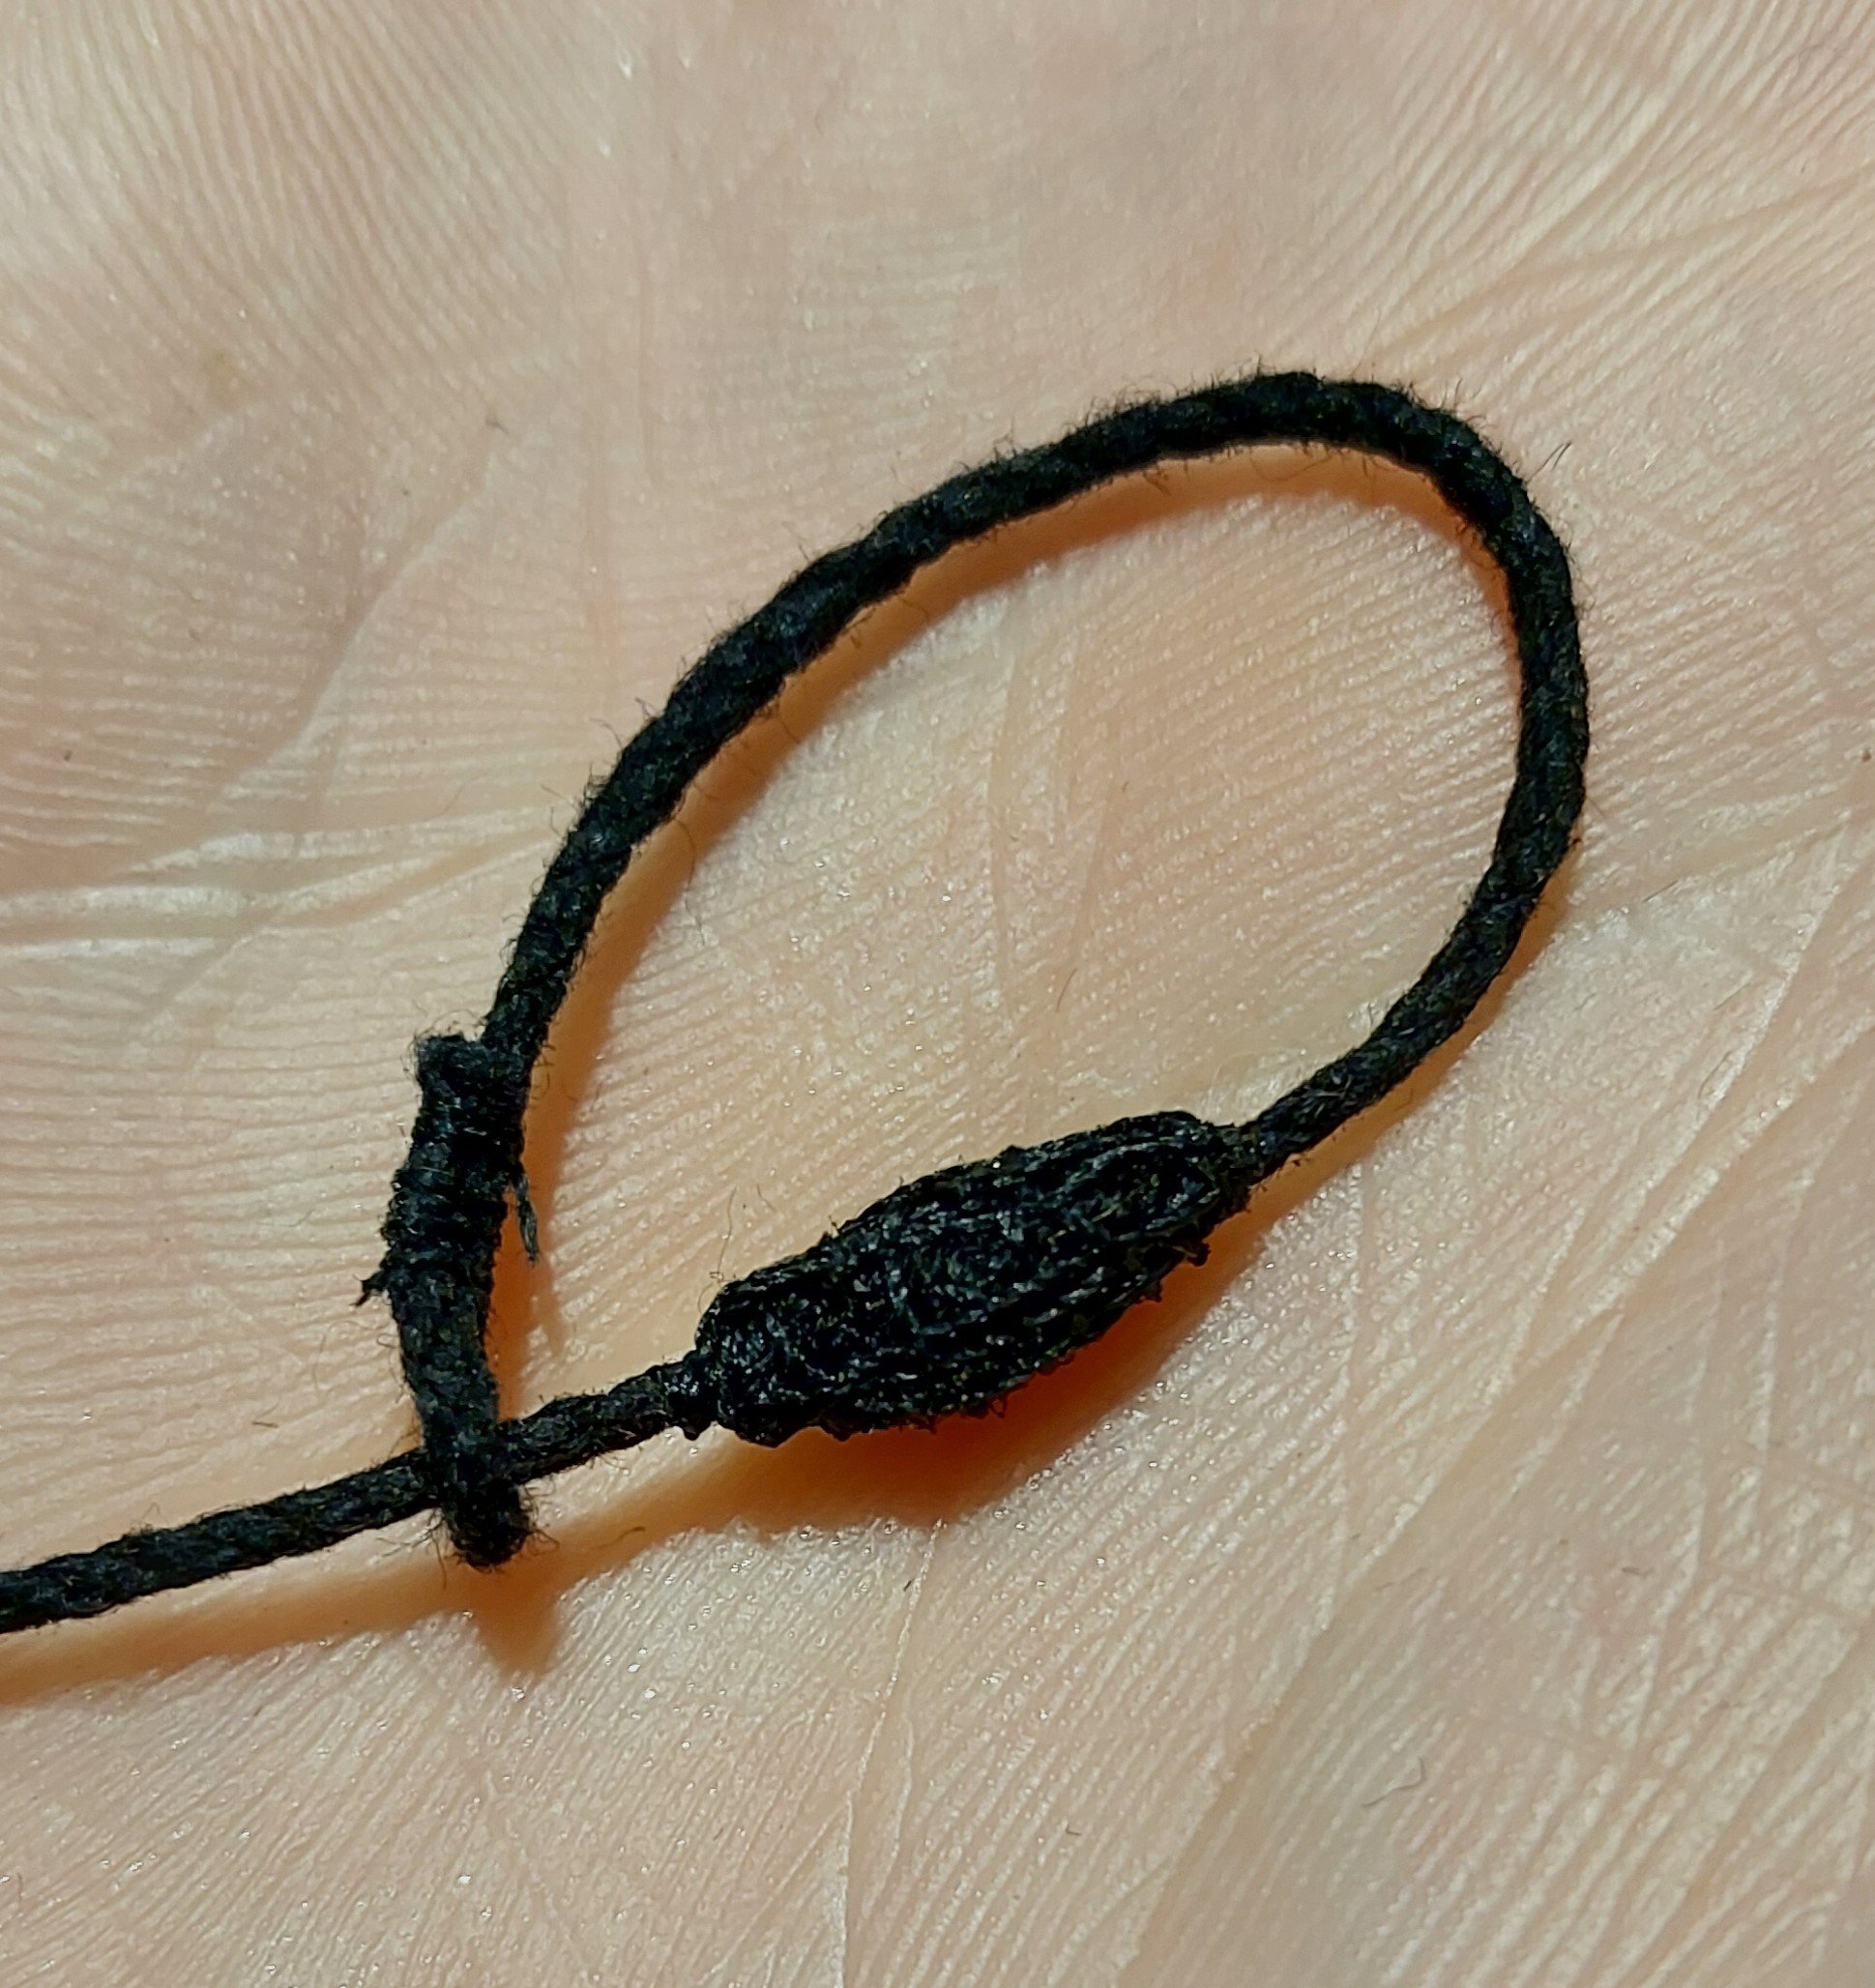
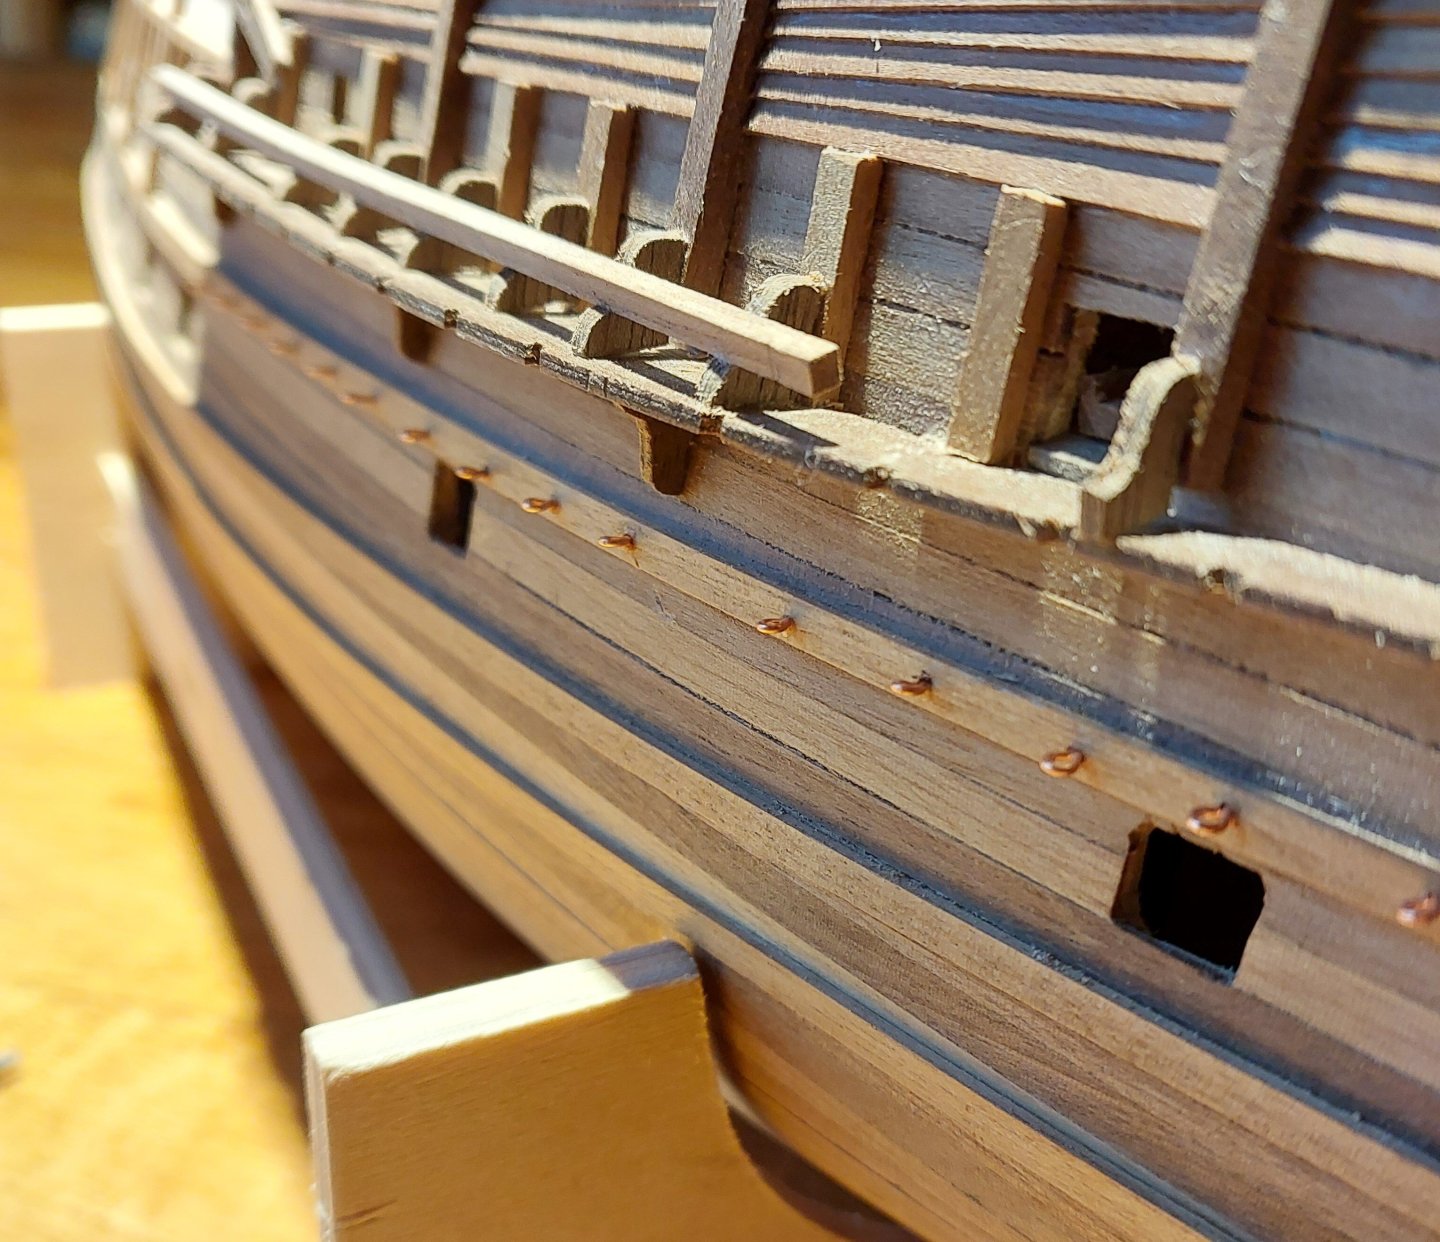
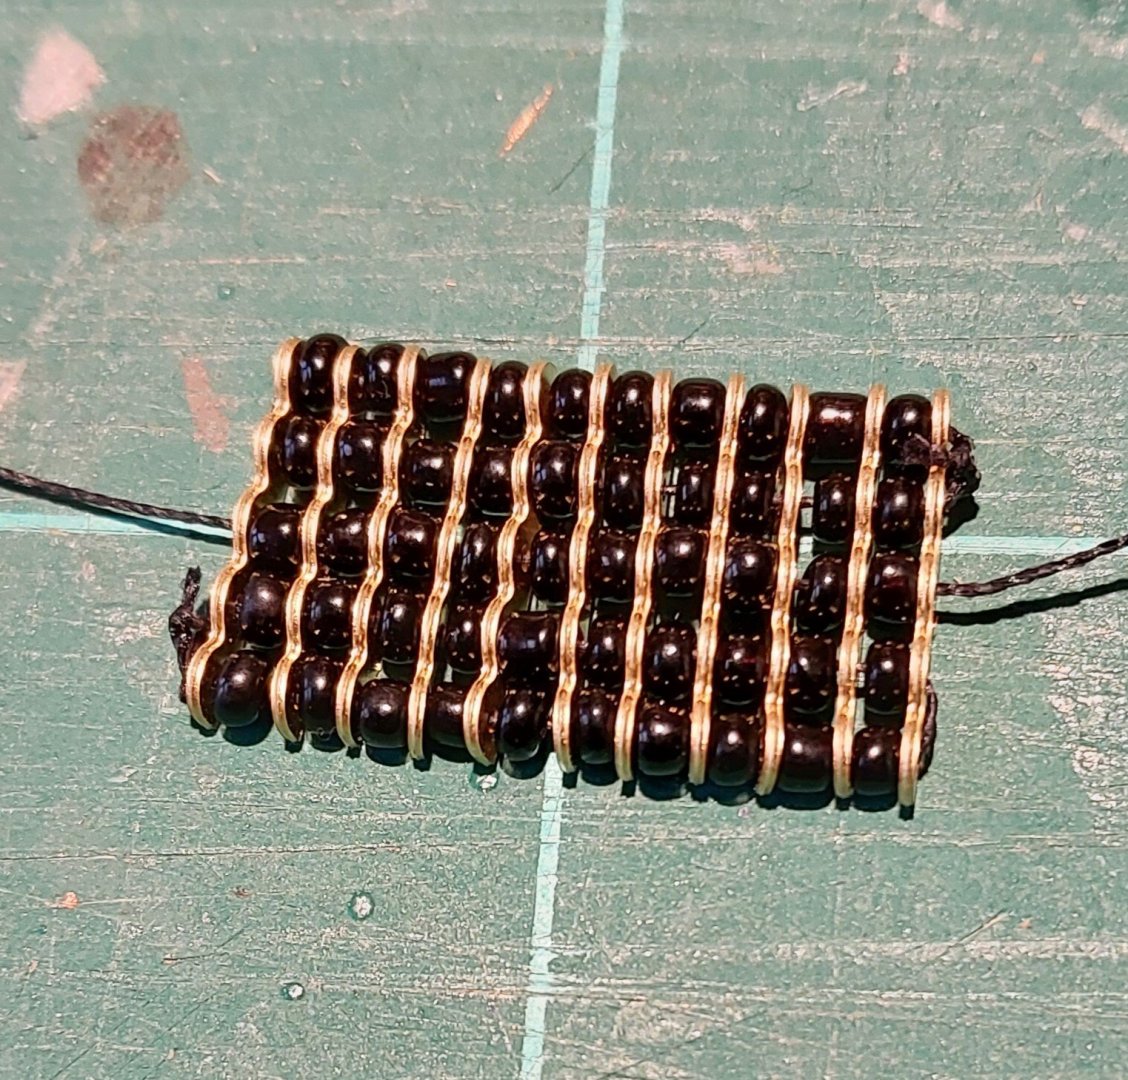
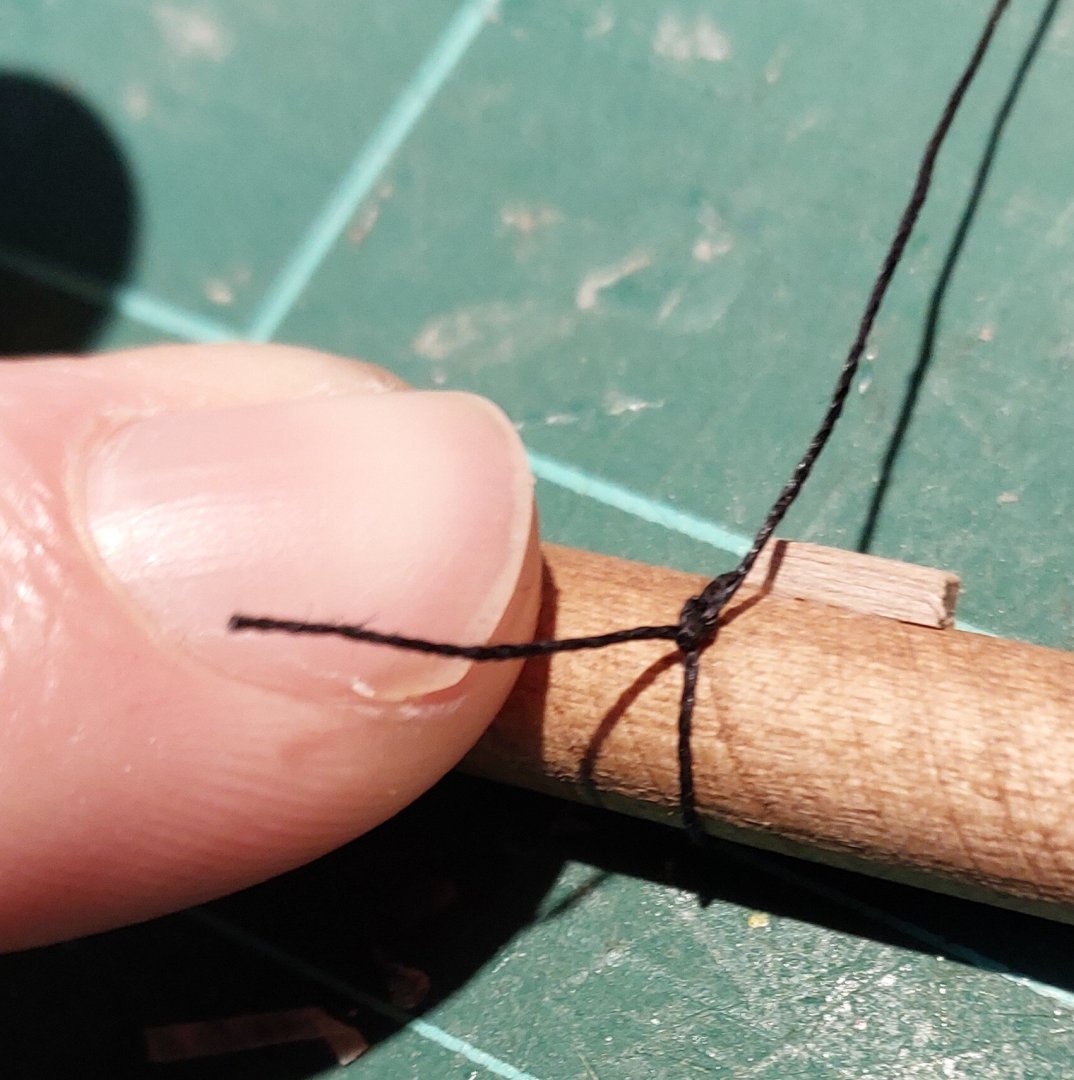
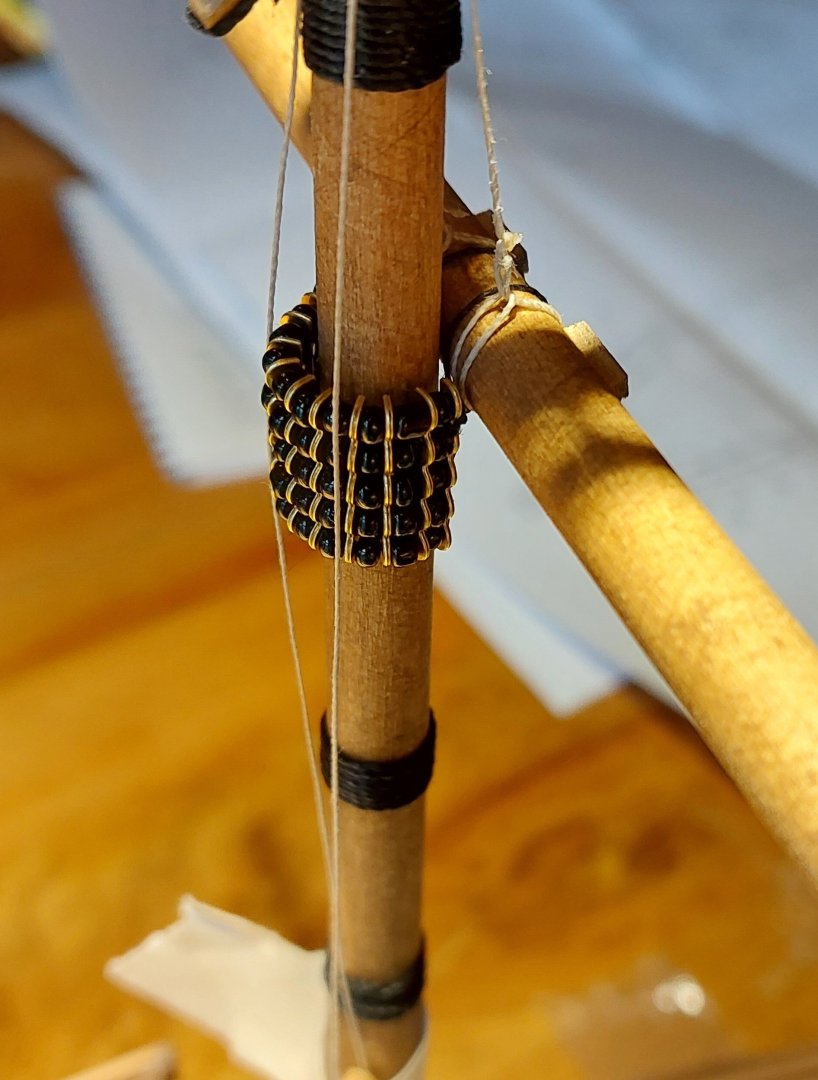
Another update! I've made a start on the standing rigging. Here's some eyebolts in the hull for the deadeye chains: I added in the bolts at the top of the sterncastle as Caldercraft's original placement was no longer anywhere near the right place for the bonaventure mizzen's shrouds. At the front, I put the bolts in quite low on the hull, though still higher than those for the mainmast. Here they are with chains on: I'm a little on the fence about these as the chains are much longer than the others, but in order to meet the channels at a decent angle they had to be a bit lower - I could still move these up, but then I'd have to fill in the holes... I'll see how it looks once I've got some deadeyes in place. On the subject of deadeyes, here's the forestay deadeye attached to the bowsprit: Pretty pleased with that! I've decided to use the 'natural' hemp provided by Caldercraft for my seizings, at least where they'll be most visible, as I like the contrast. Perhaps not traditional, but if I'm putting the work in I'd like it to be a talking point. As a side note, I took the rectangular spacer off of the bowsprit shortly after this photo, as I wanted to adjust where the stay would lie. After this, I decided to attack the main yard parrel. I mostly wanted to do this as it was concerning me how fiddly the process would look, and I wanted to get the feel of attaching one before there were shrouds up blocking access, especially on the already quite blocked-off main mast. Here's the parrel mid-assembly: Caldercraft's kit provides 1mm seed beads and etched brass ribs for the parrel. In the instructions, they say to paint the brass black. Honestly, as the parrels would have been wood anyway, I felt like painting it is just sorta hiding the material mismatch - and the brass looks quite nice against the walnut I've been using as it is. I'm leaving them unpainted for now. The Rigging of Ships in the Days of the Spritsail Topmast dedicates a few pages to parrel construction, and in it Anderson muses on a few different ways these would have been tightened off from the deck. He also offers a simple option, which is just to have two loops for the yard, threaded onto the centre of the parrel. That's what I've done - I'm not professing to be an expert in rigging at all, and I think keeping things simpler where possible will be a boon later down the line. On that note, here's the smallest bowline I've ever tied: And here is the yard mounted with the parrel: You can see the hoisting assembly, which goes to a block lower down on the mast. I've just taped that to the mast for now, as I really do need to get the standing rigging in place before I start messing around with the belaying on the sterncastle. And speaking of standing rigging, here's the shrouds on the foremast: I've also put two pairs of tackle pendants at the base of the masthead here, following Anderson's instructions. I wasn't sure if the Mary Rose would have had them, but I figure I can cut them off a lot easier than I can put them in under the shrouds! The top still fits on: And now for a really fun challenge; making a mouse! I followed Anderson's instructions directly in this: a piece of wool wrapped around the stay, then fine thread tied around it at each end before a criss-cross of sewing around the whole structure. It's a little misshapen, but I'm quite pleased with it! I siezed the eye at the end instead of splicing it - definitely not that brave. This was all in aid of getting the forestay in place, and so here we go: I've only loosely tied this off for now with a few half-hitches as I'm sure it'll need adjusting once the other bits of rigging are in place. I think in reality I should tie it off on the stay above. Here's a top view - the spaghetti begins. That's all for today!


-
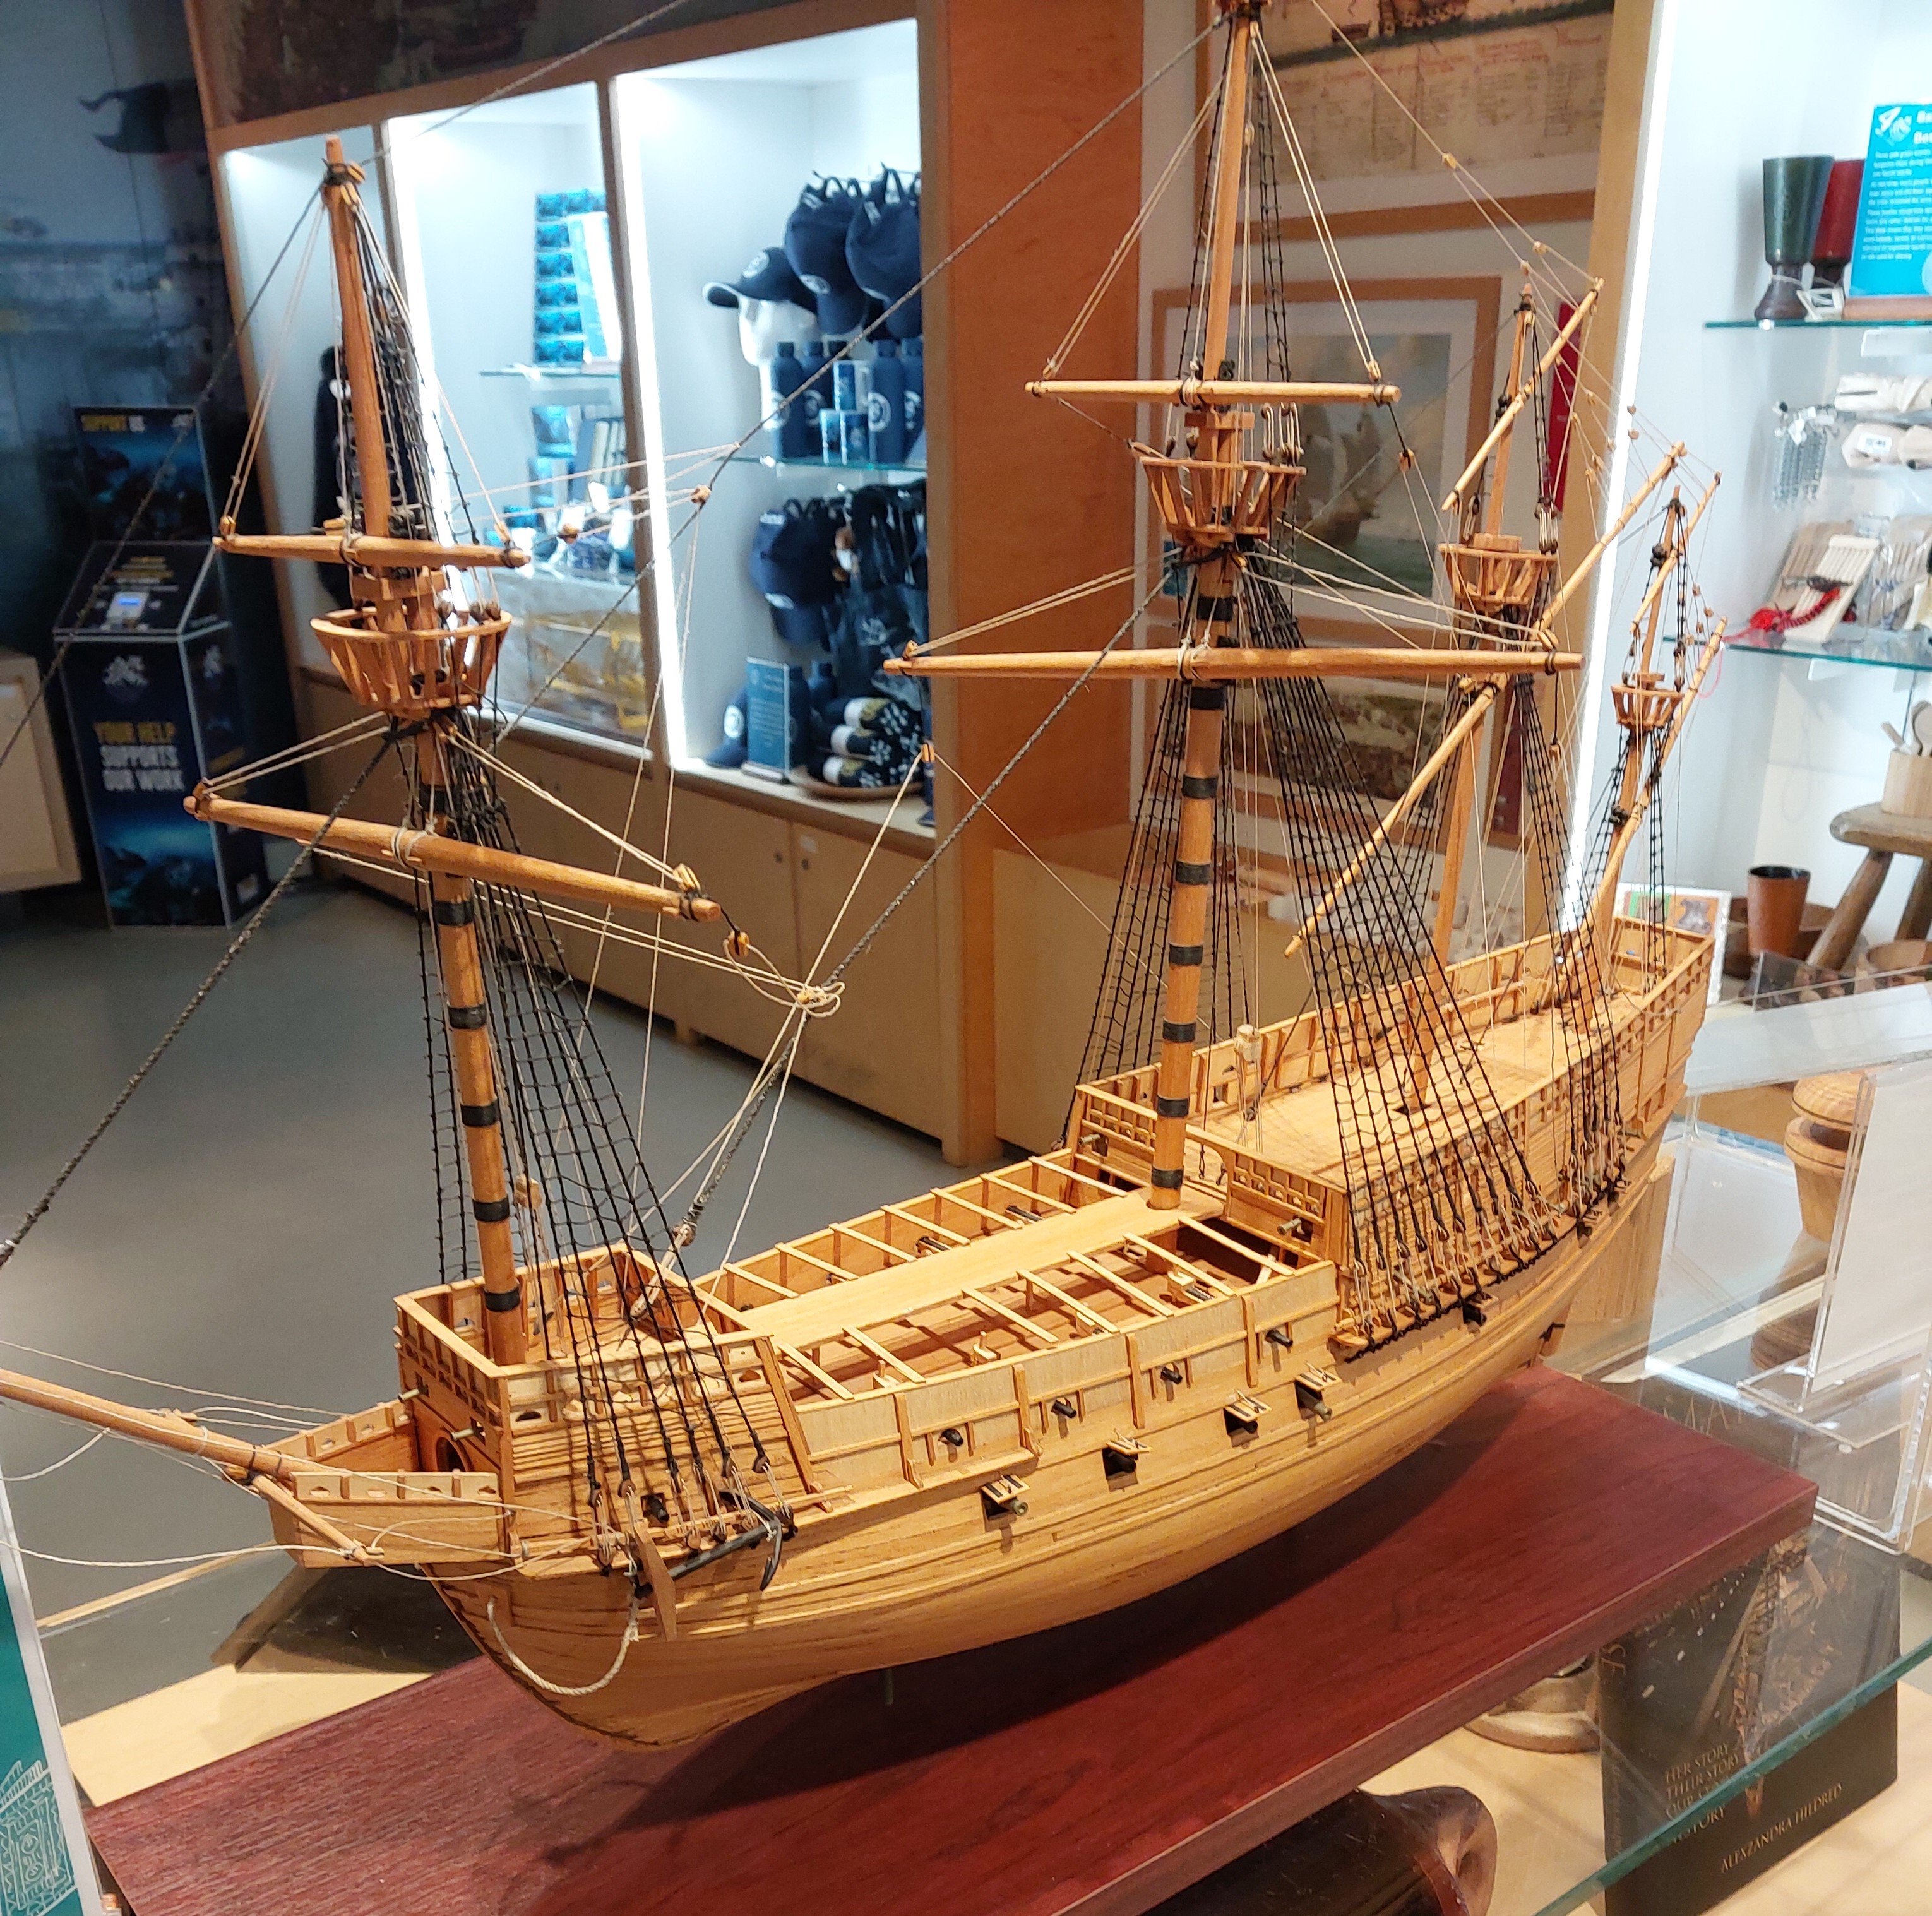
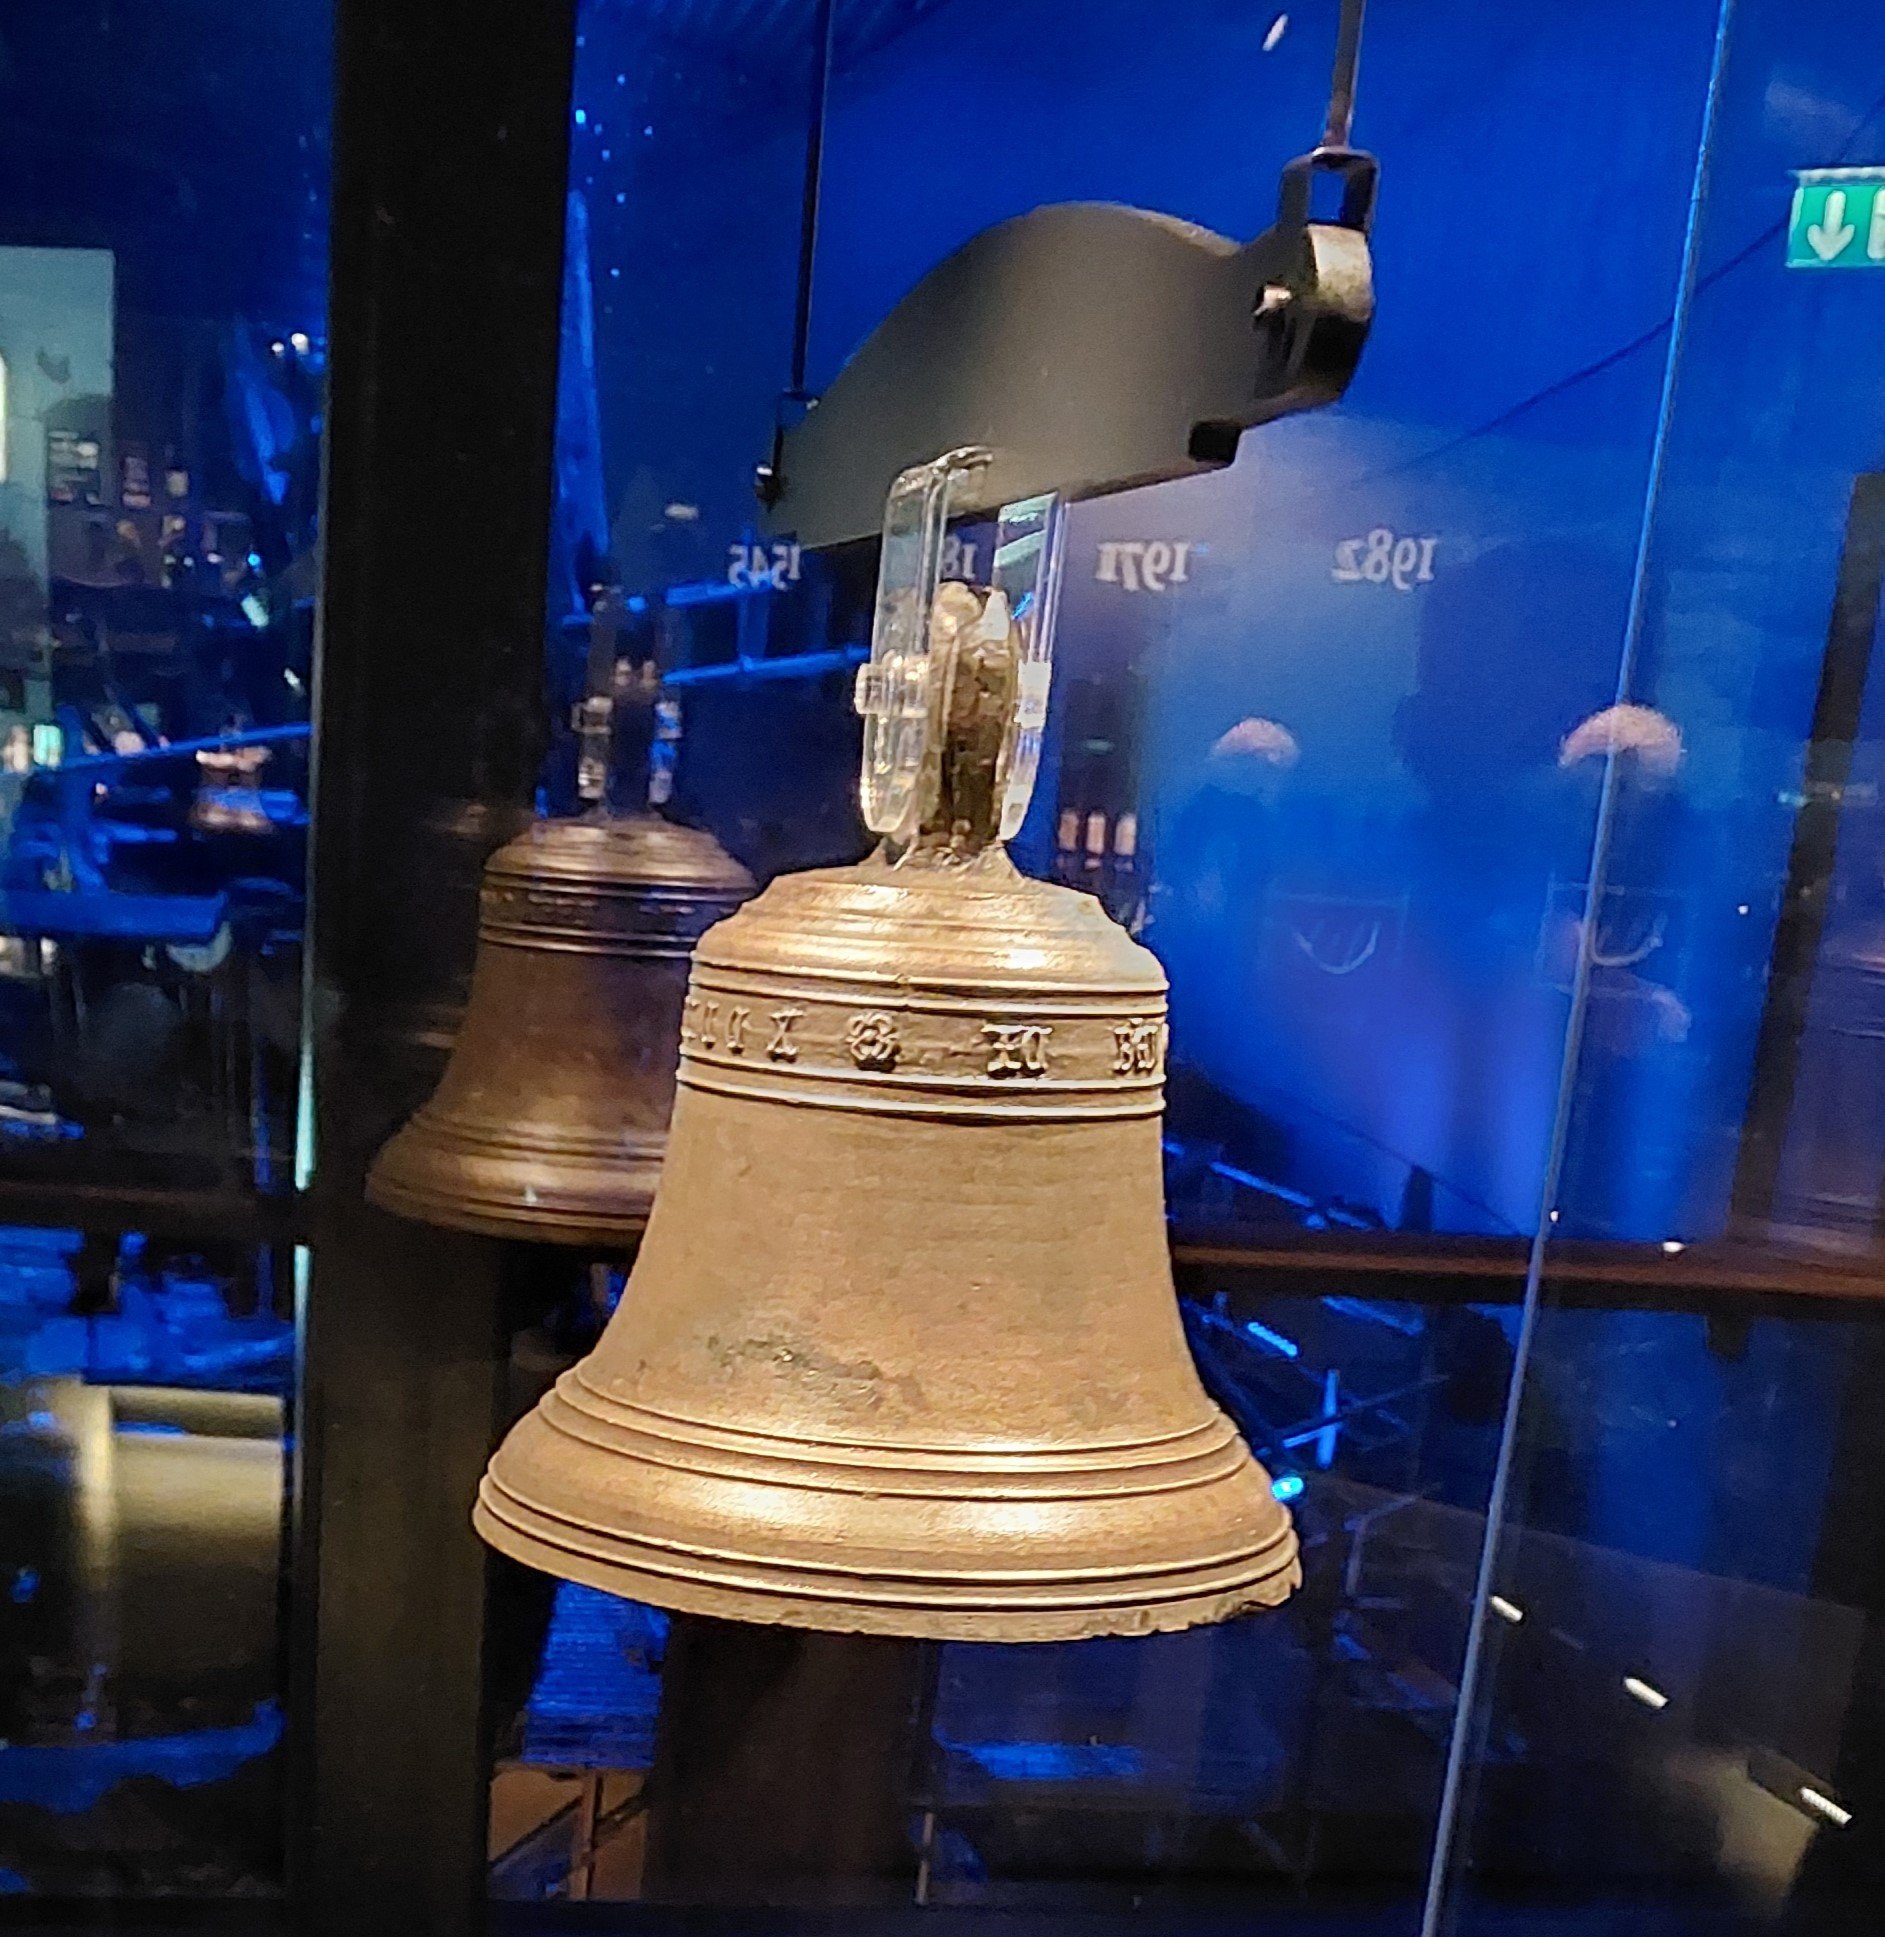
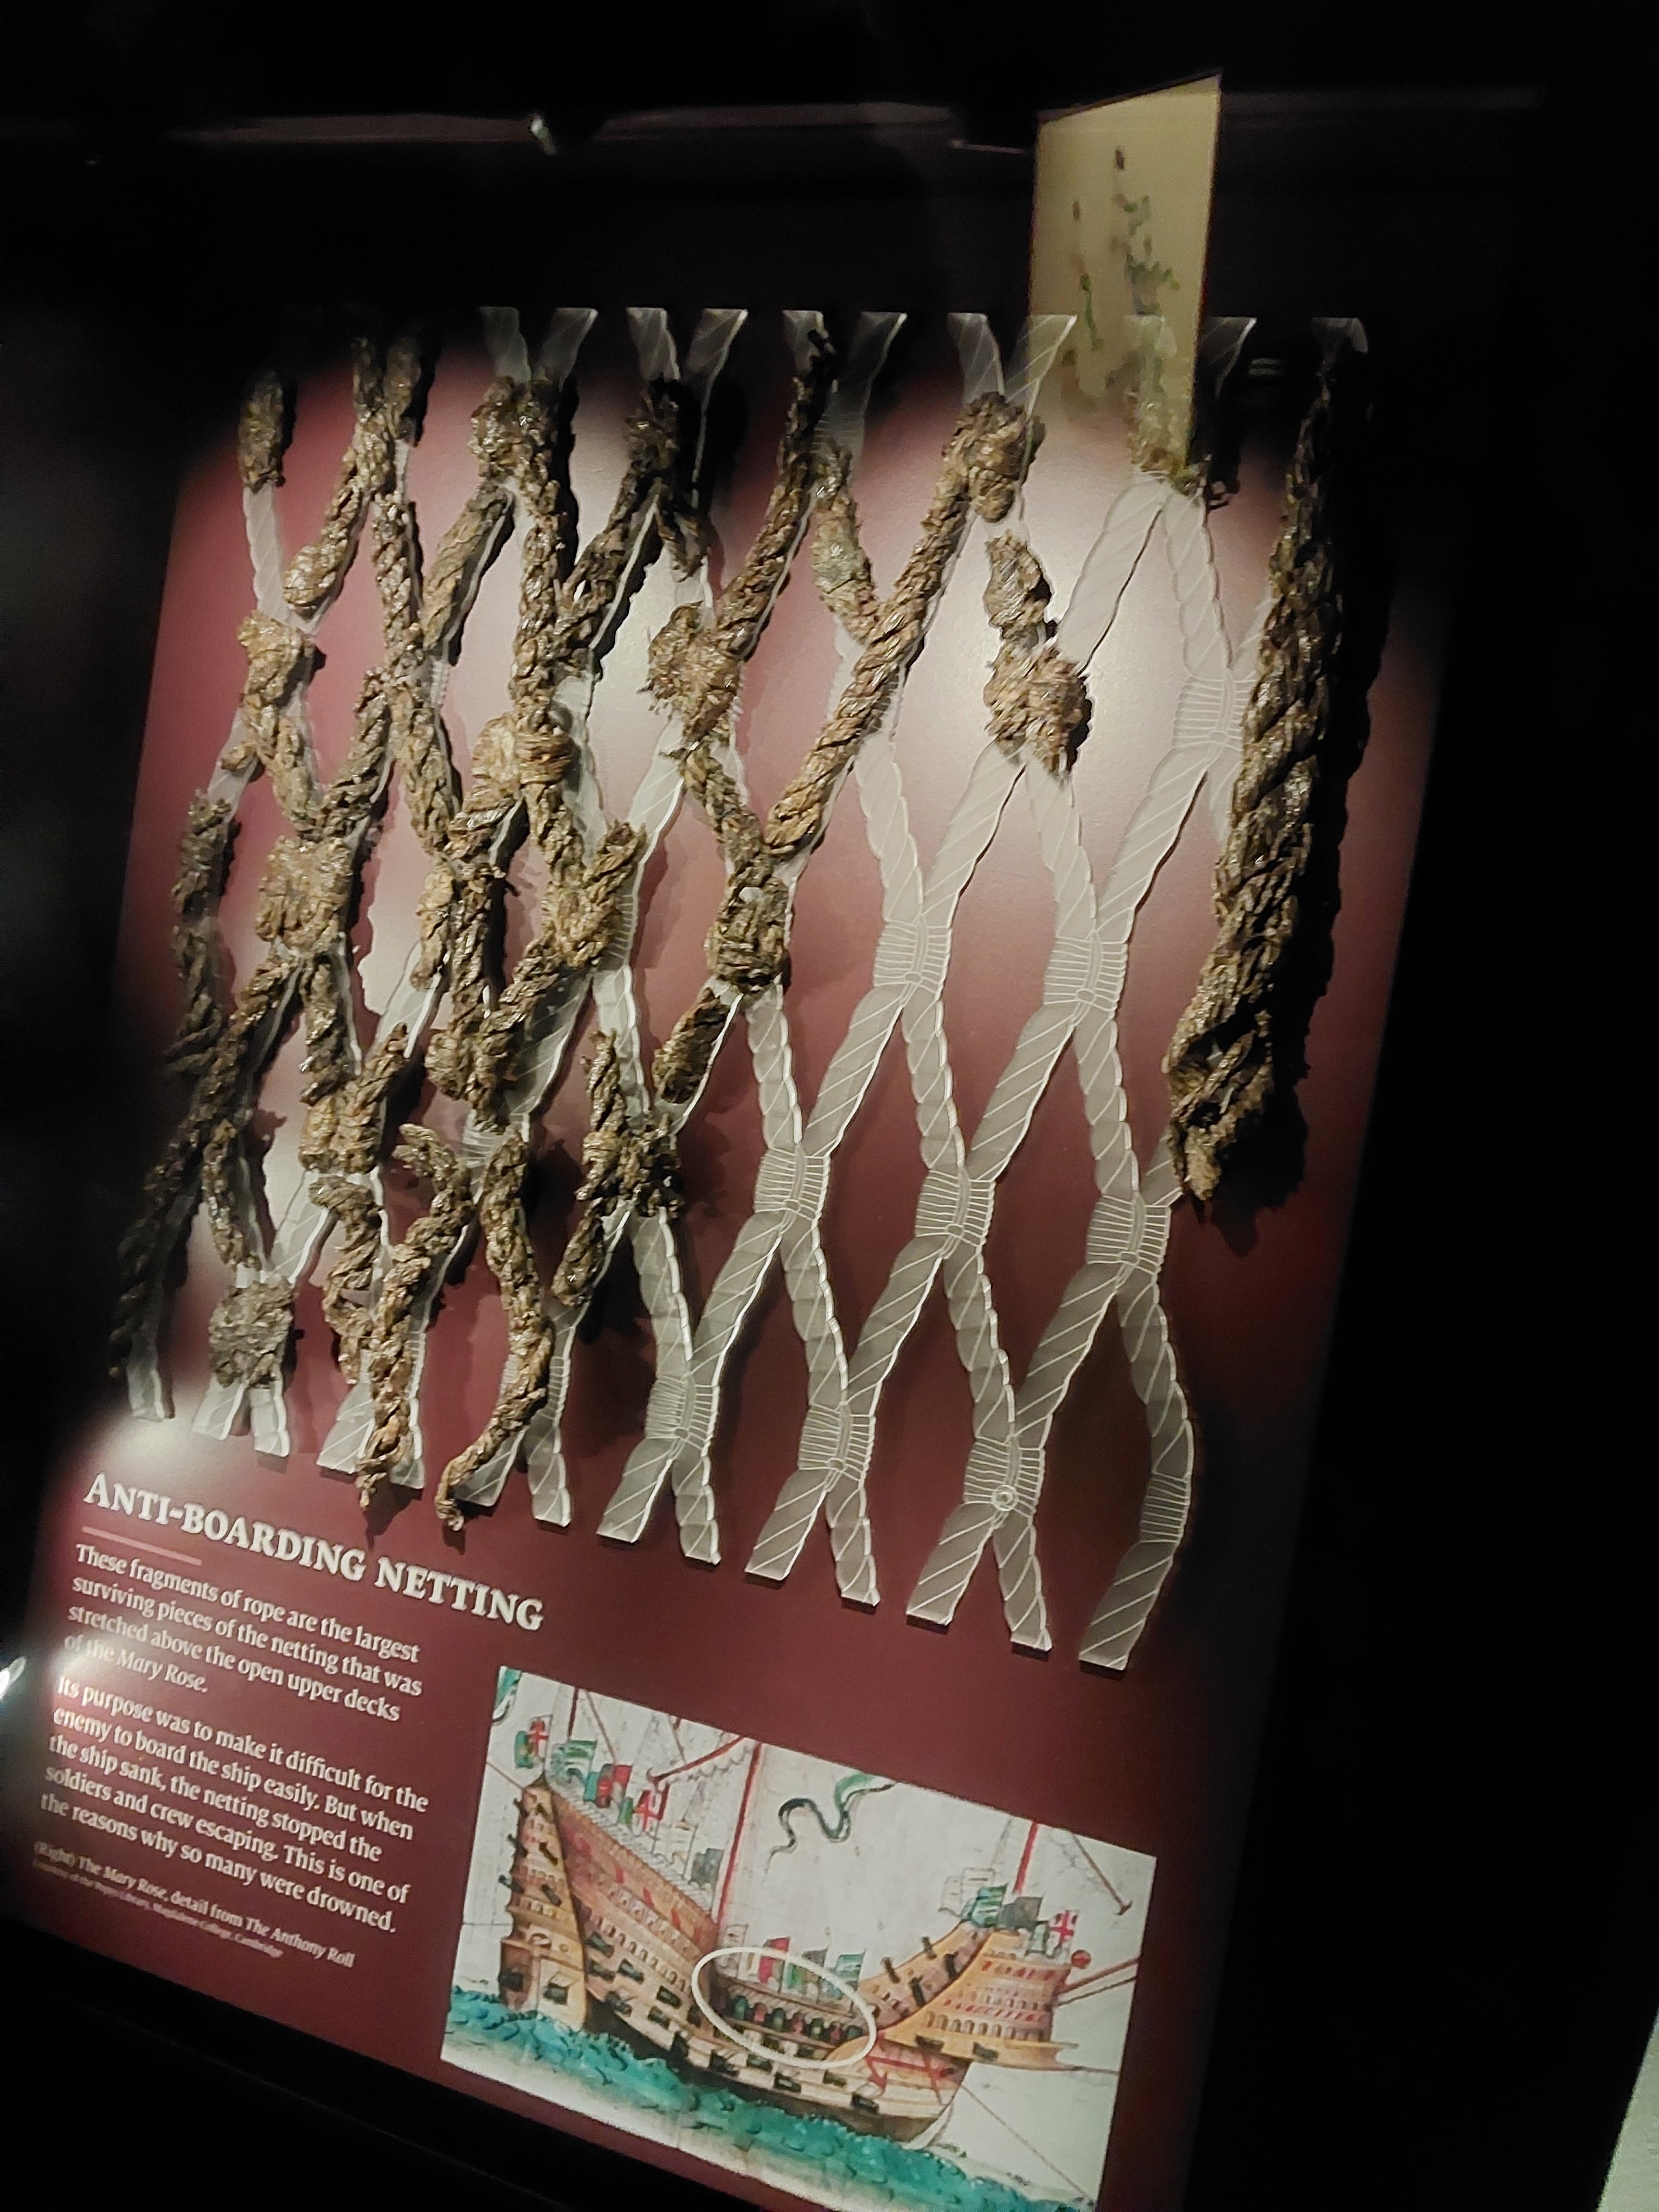
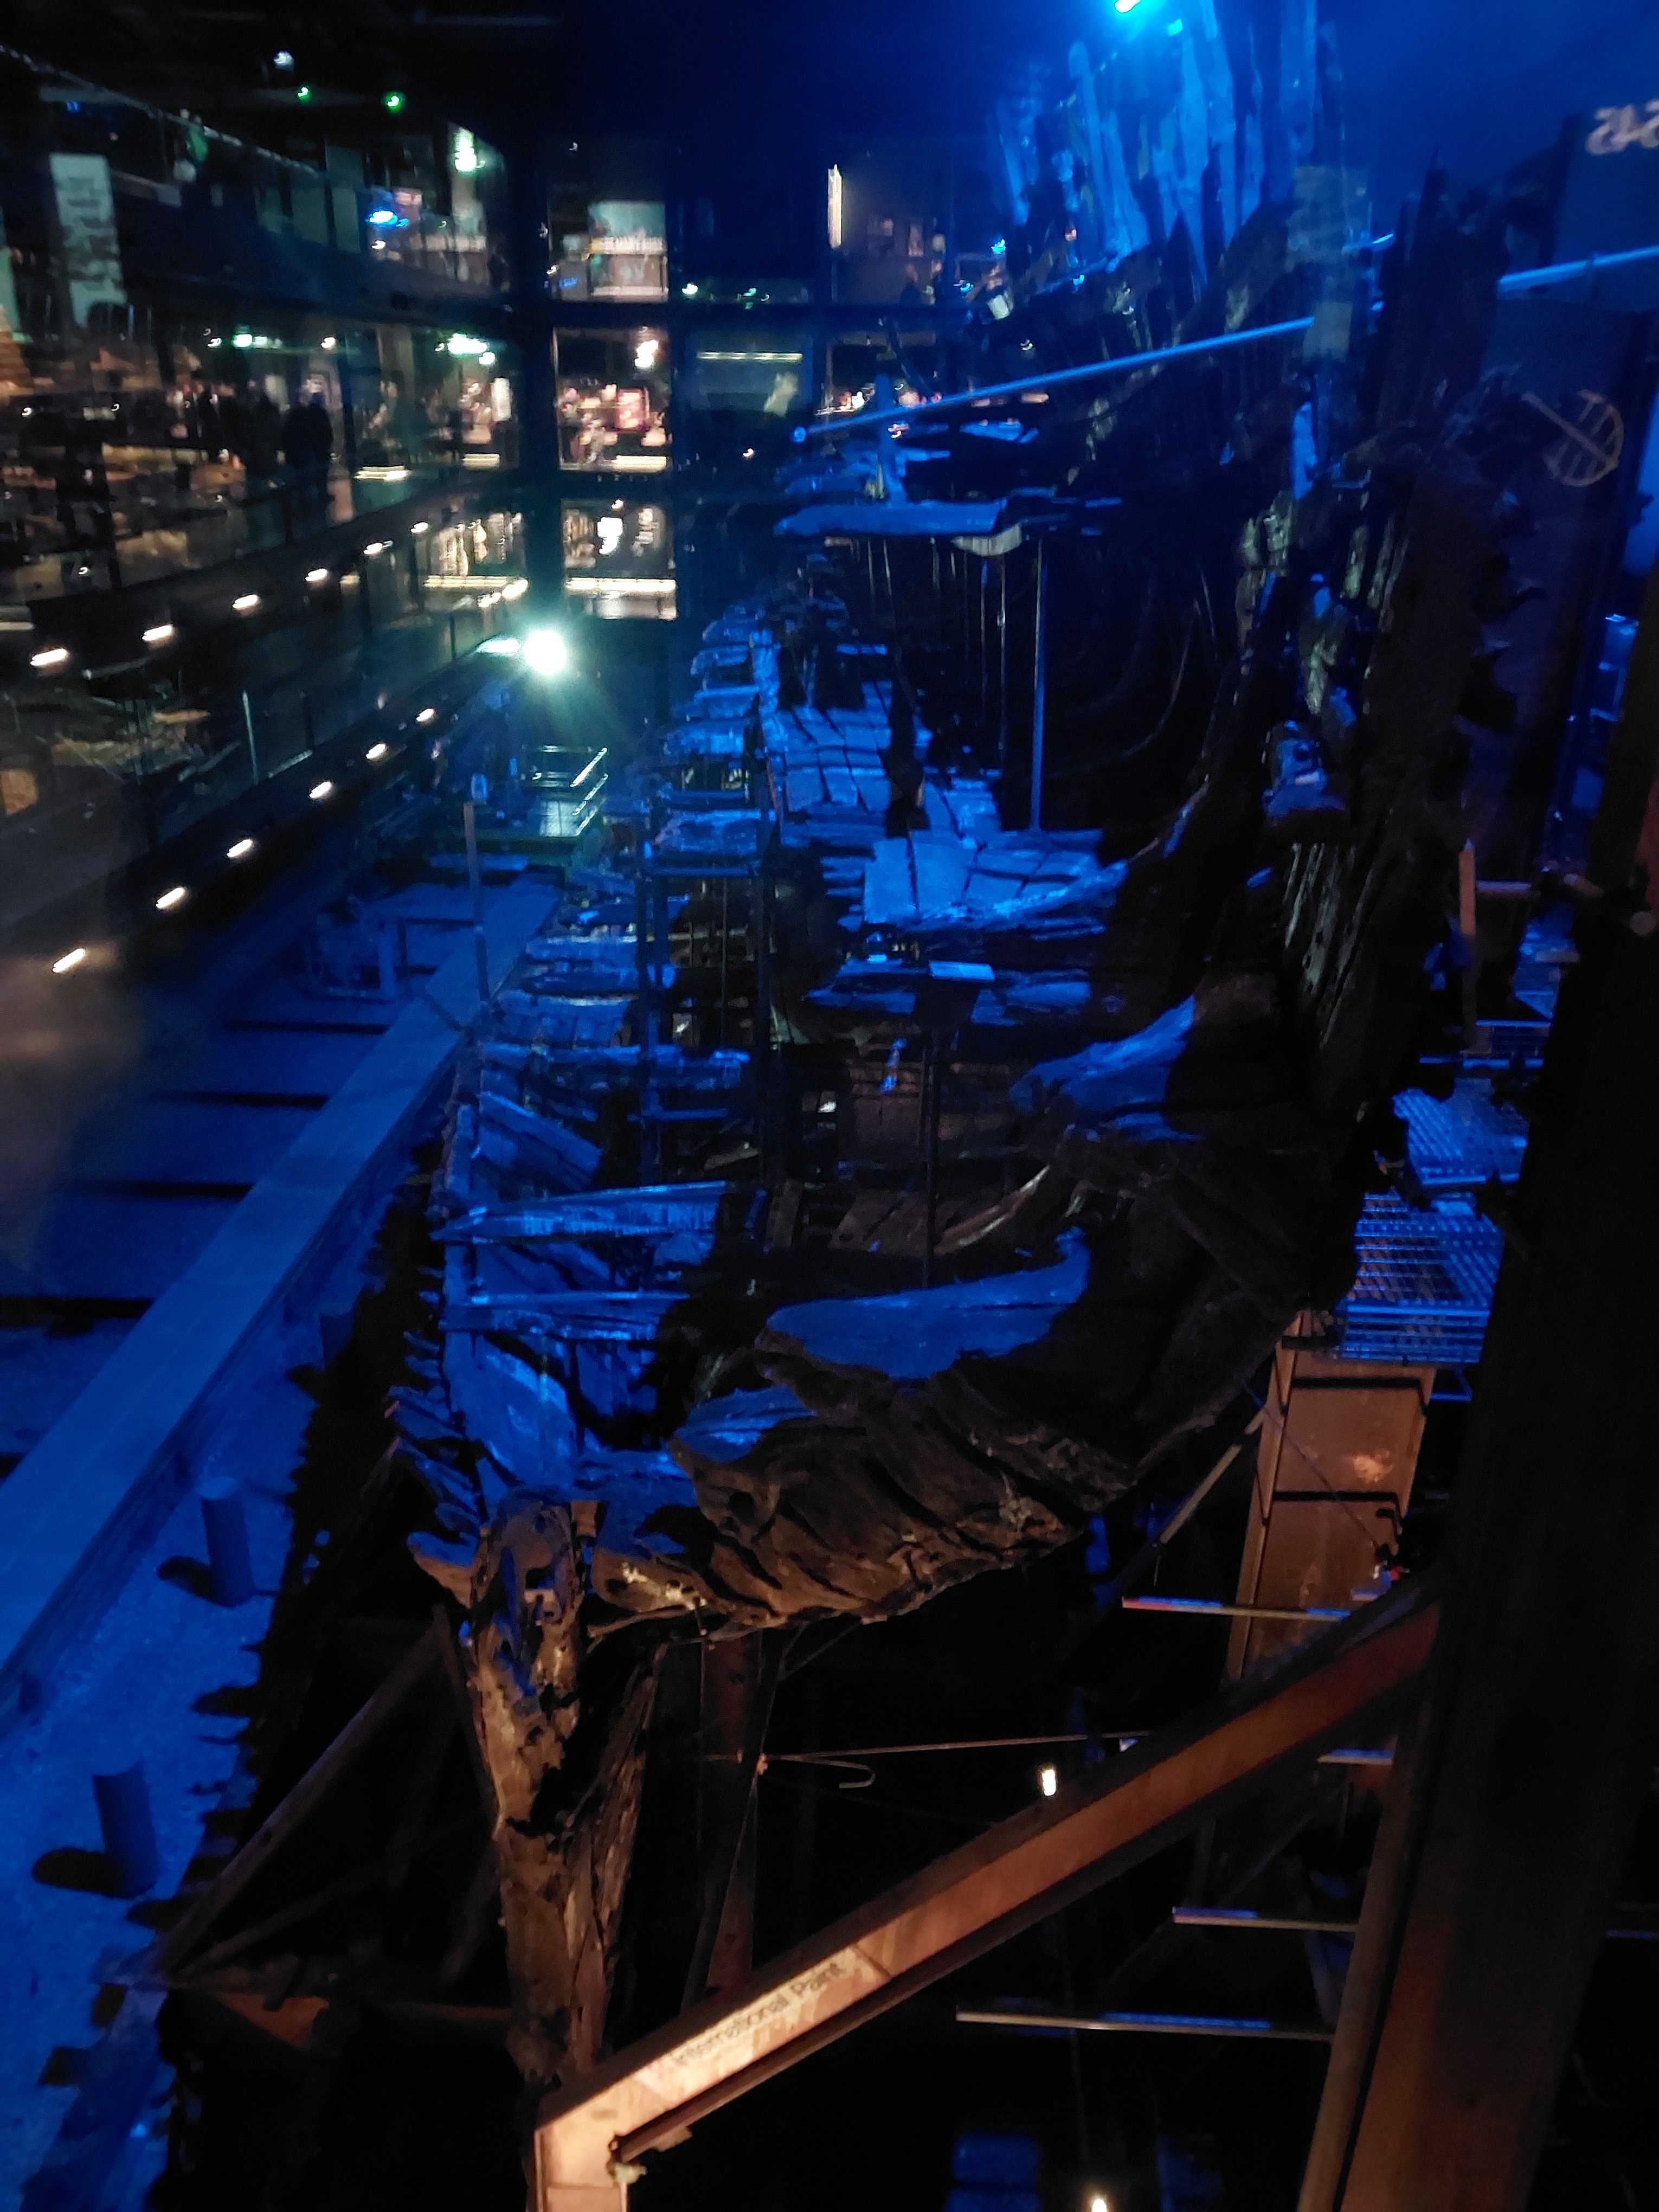
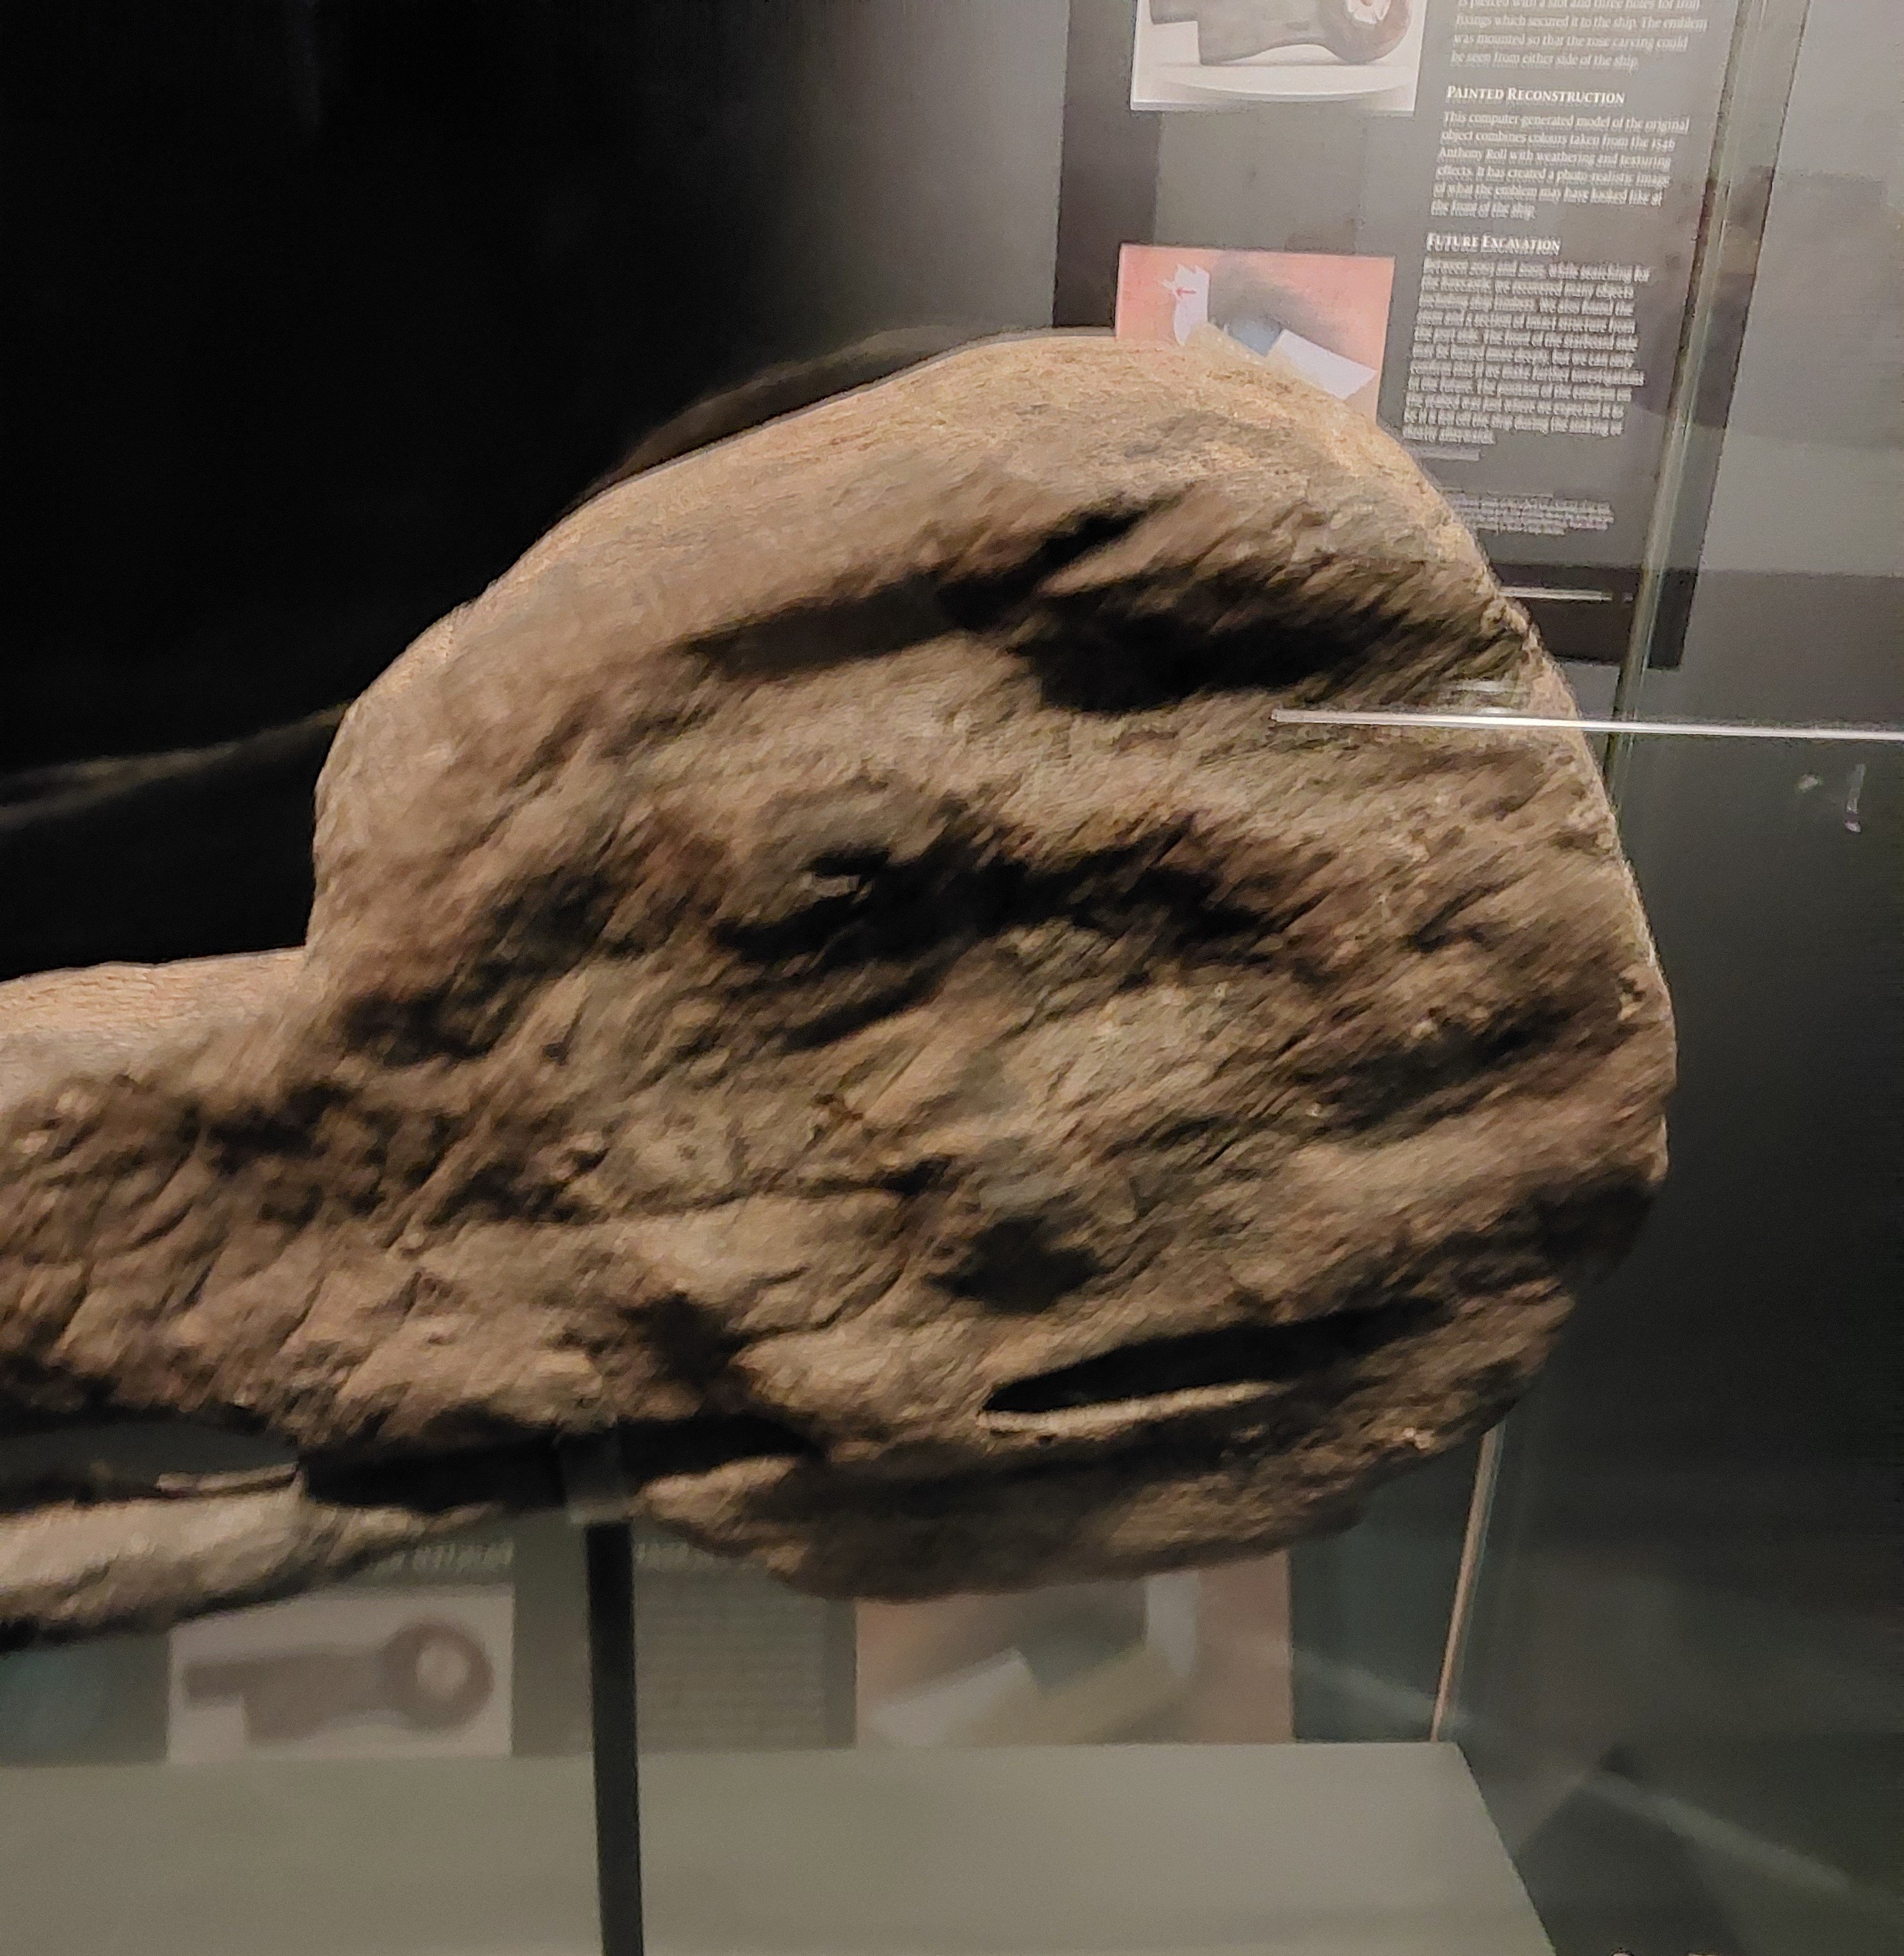
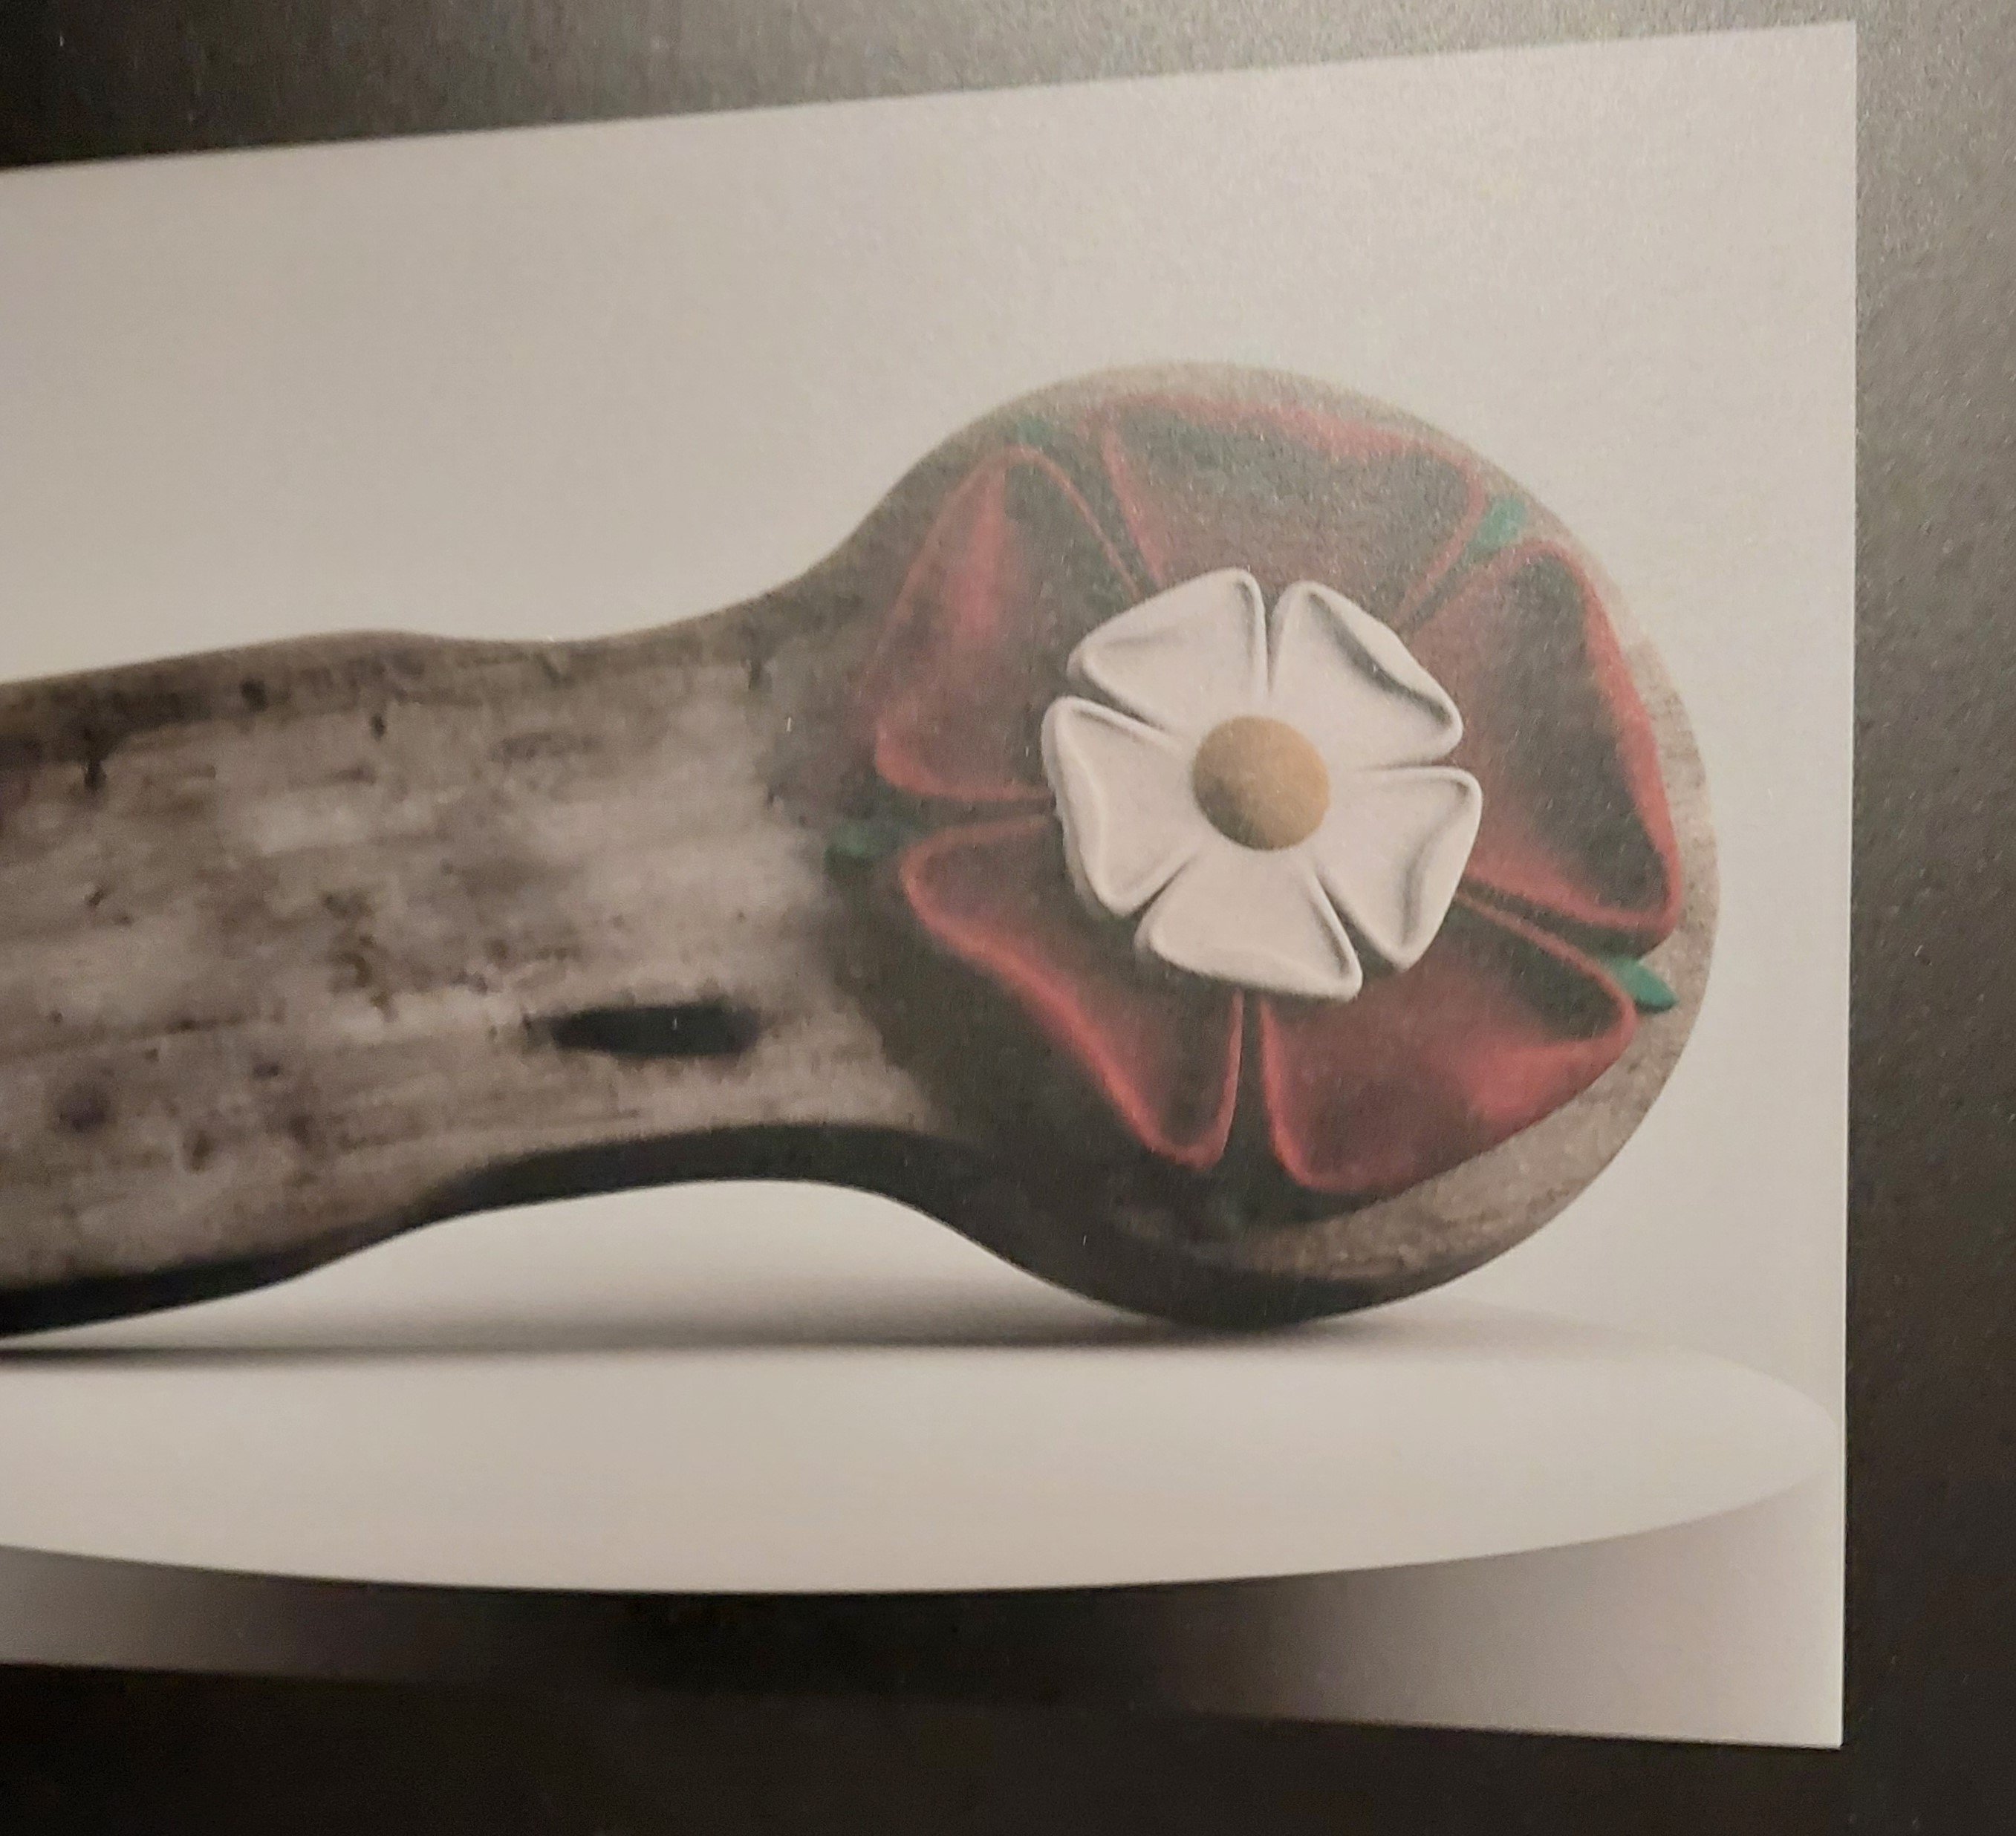
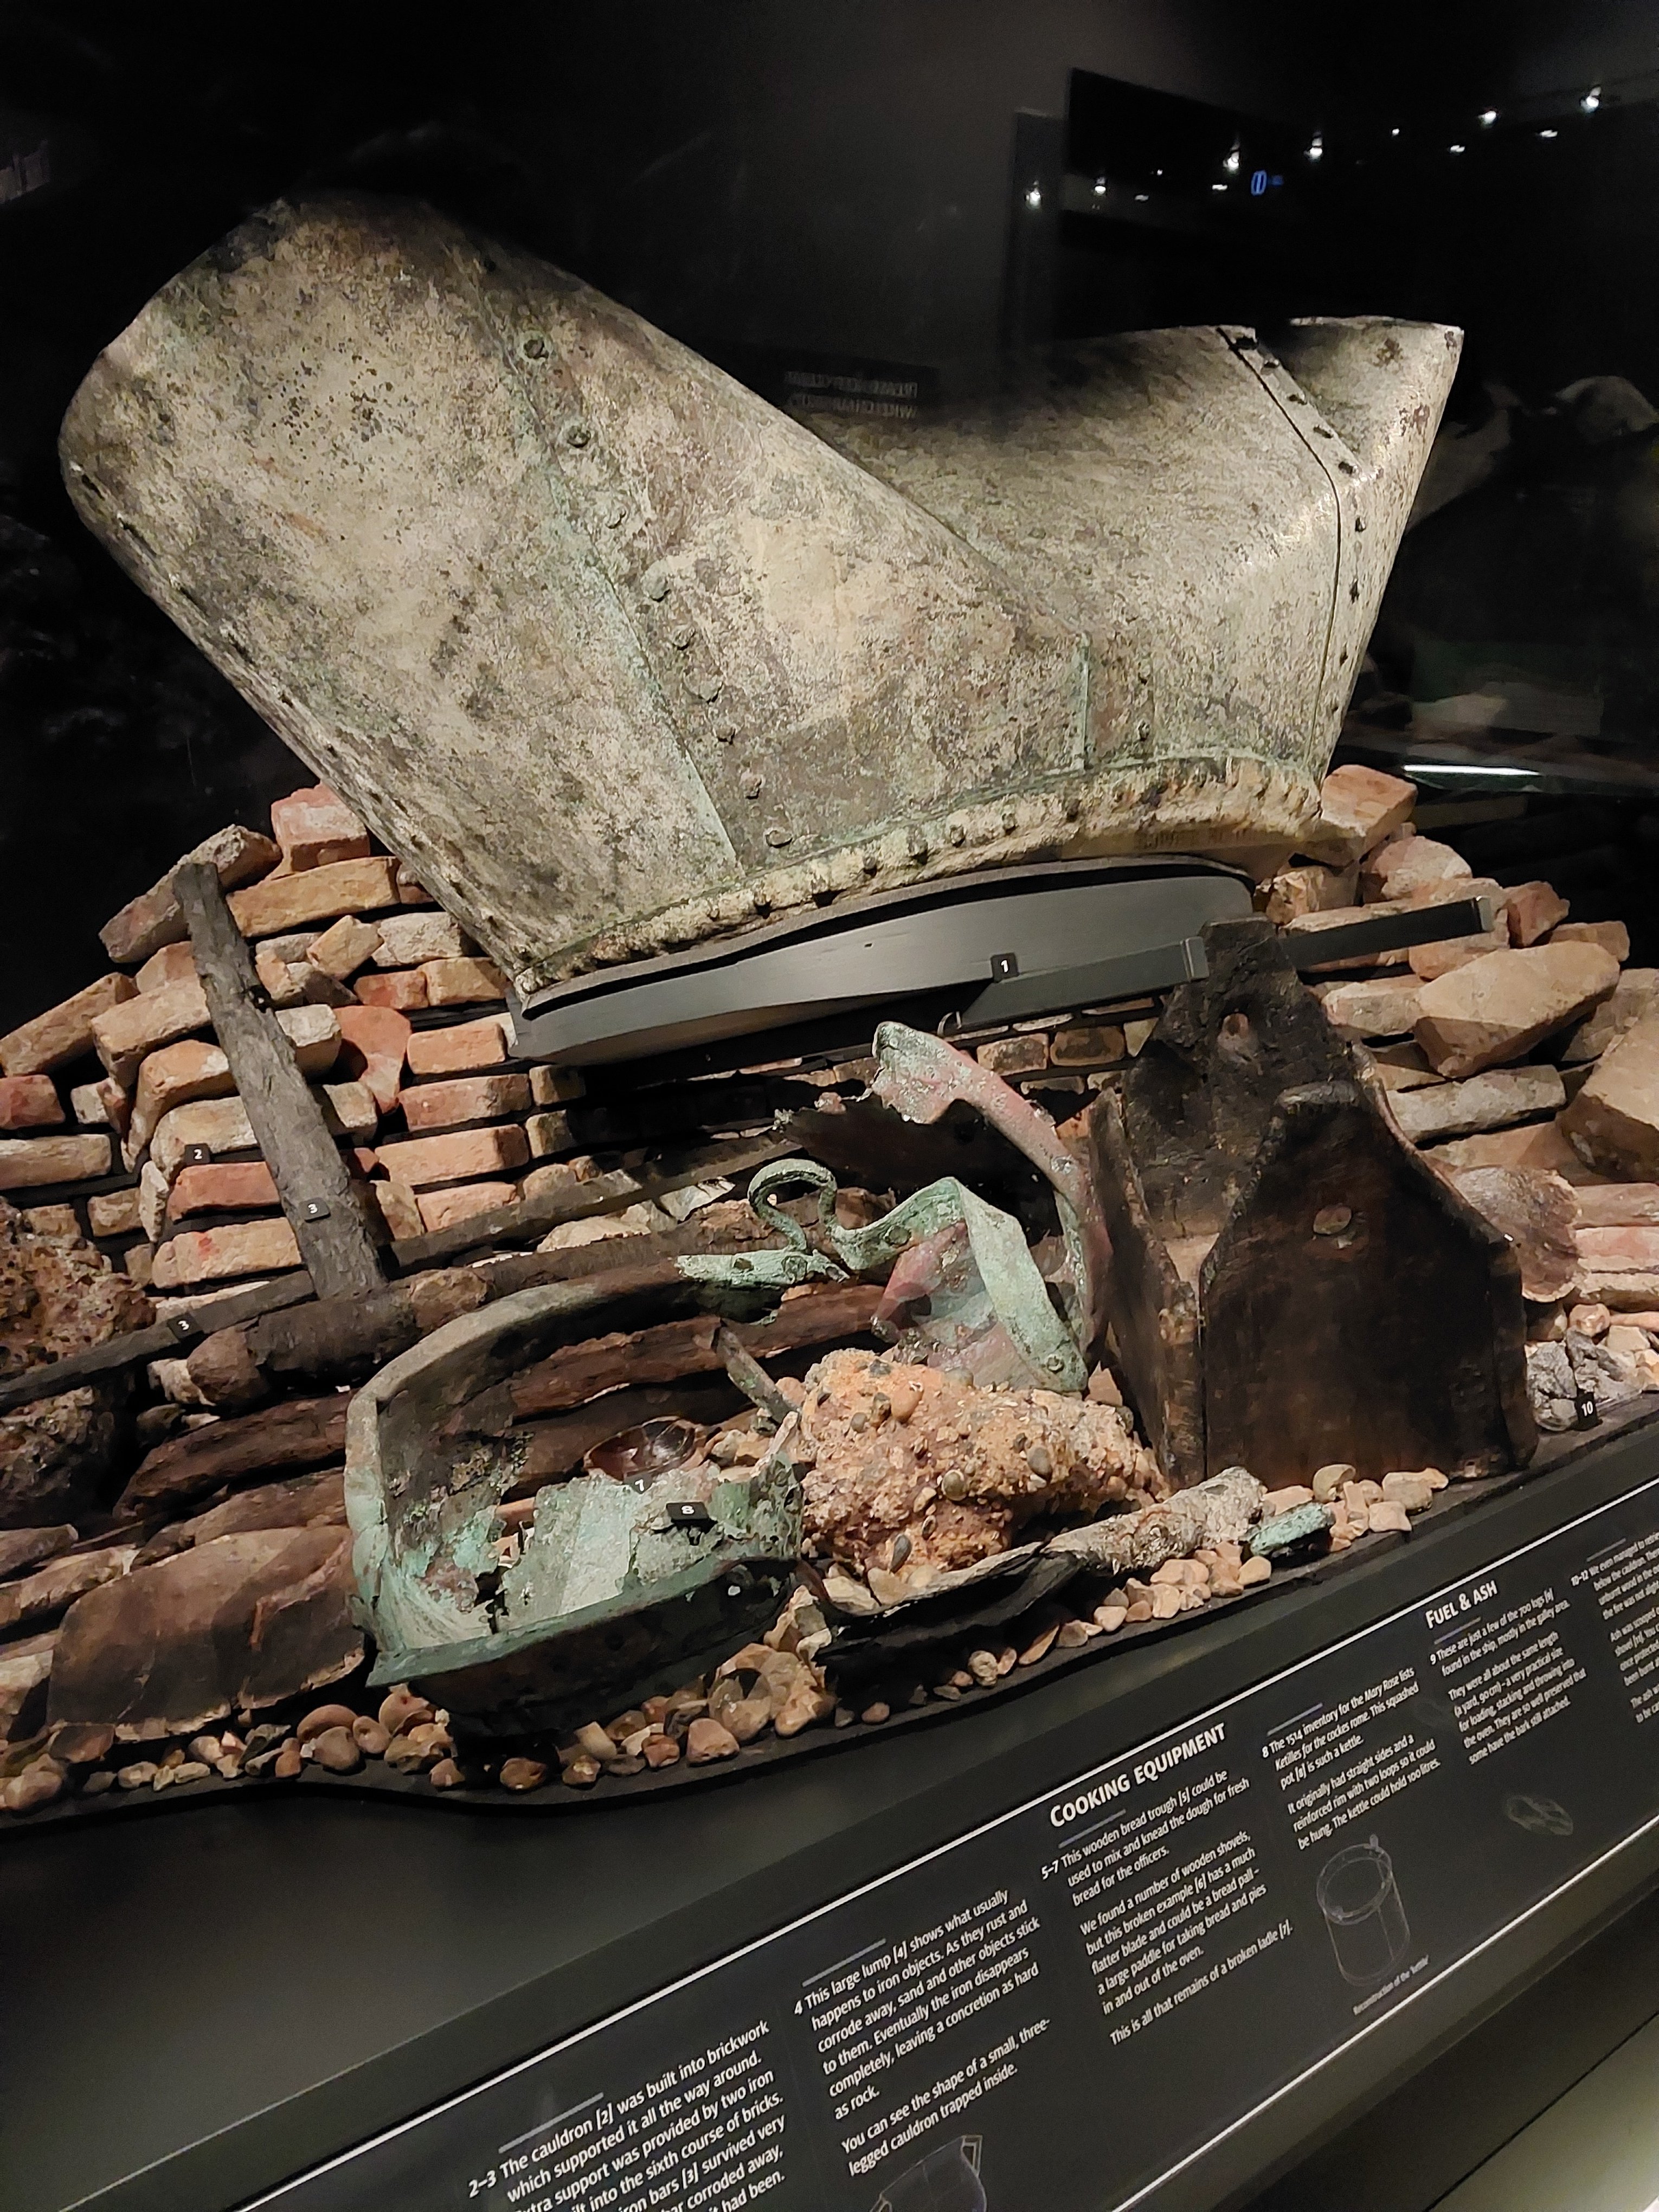
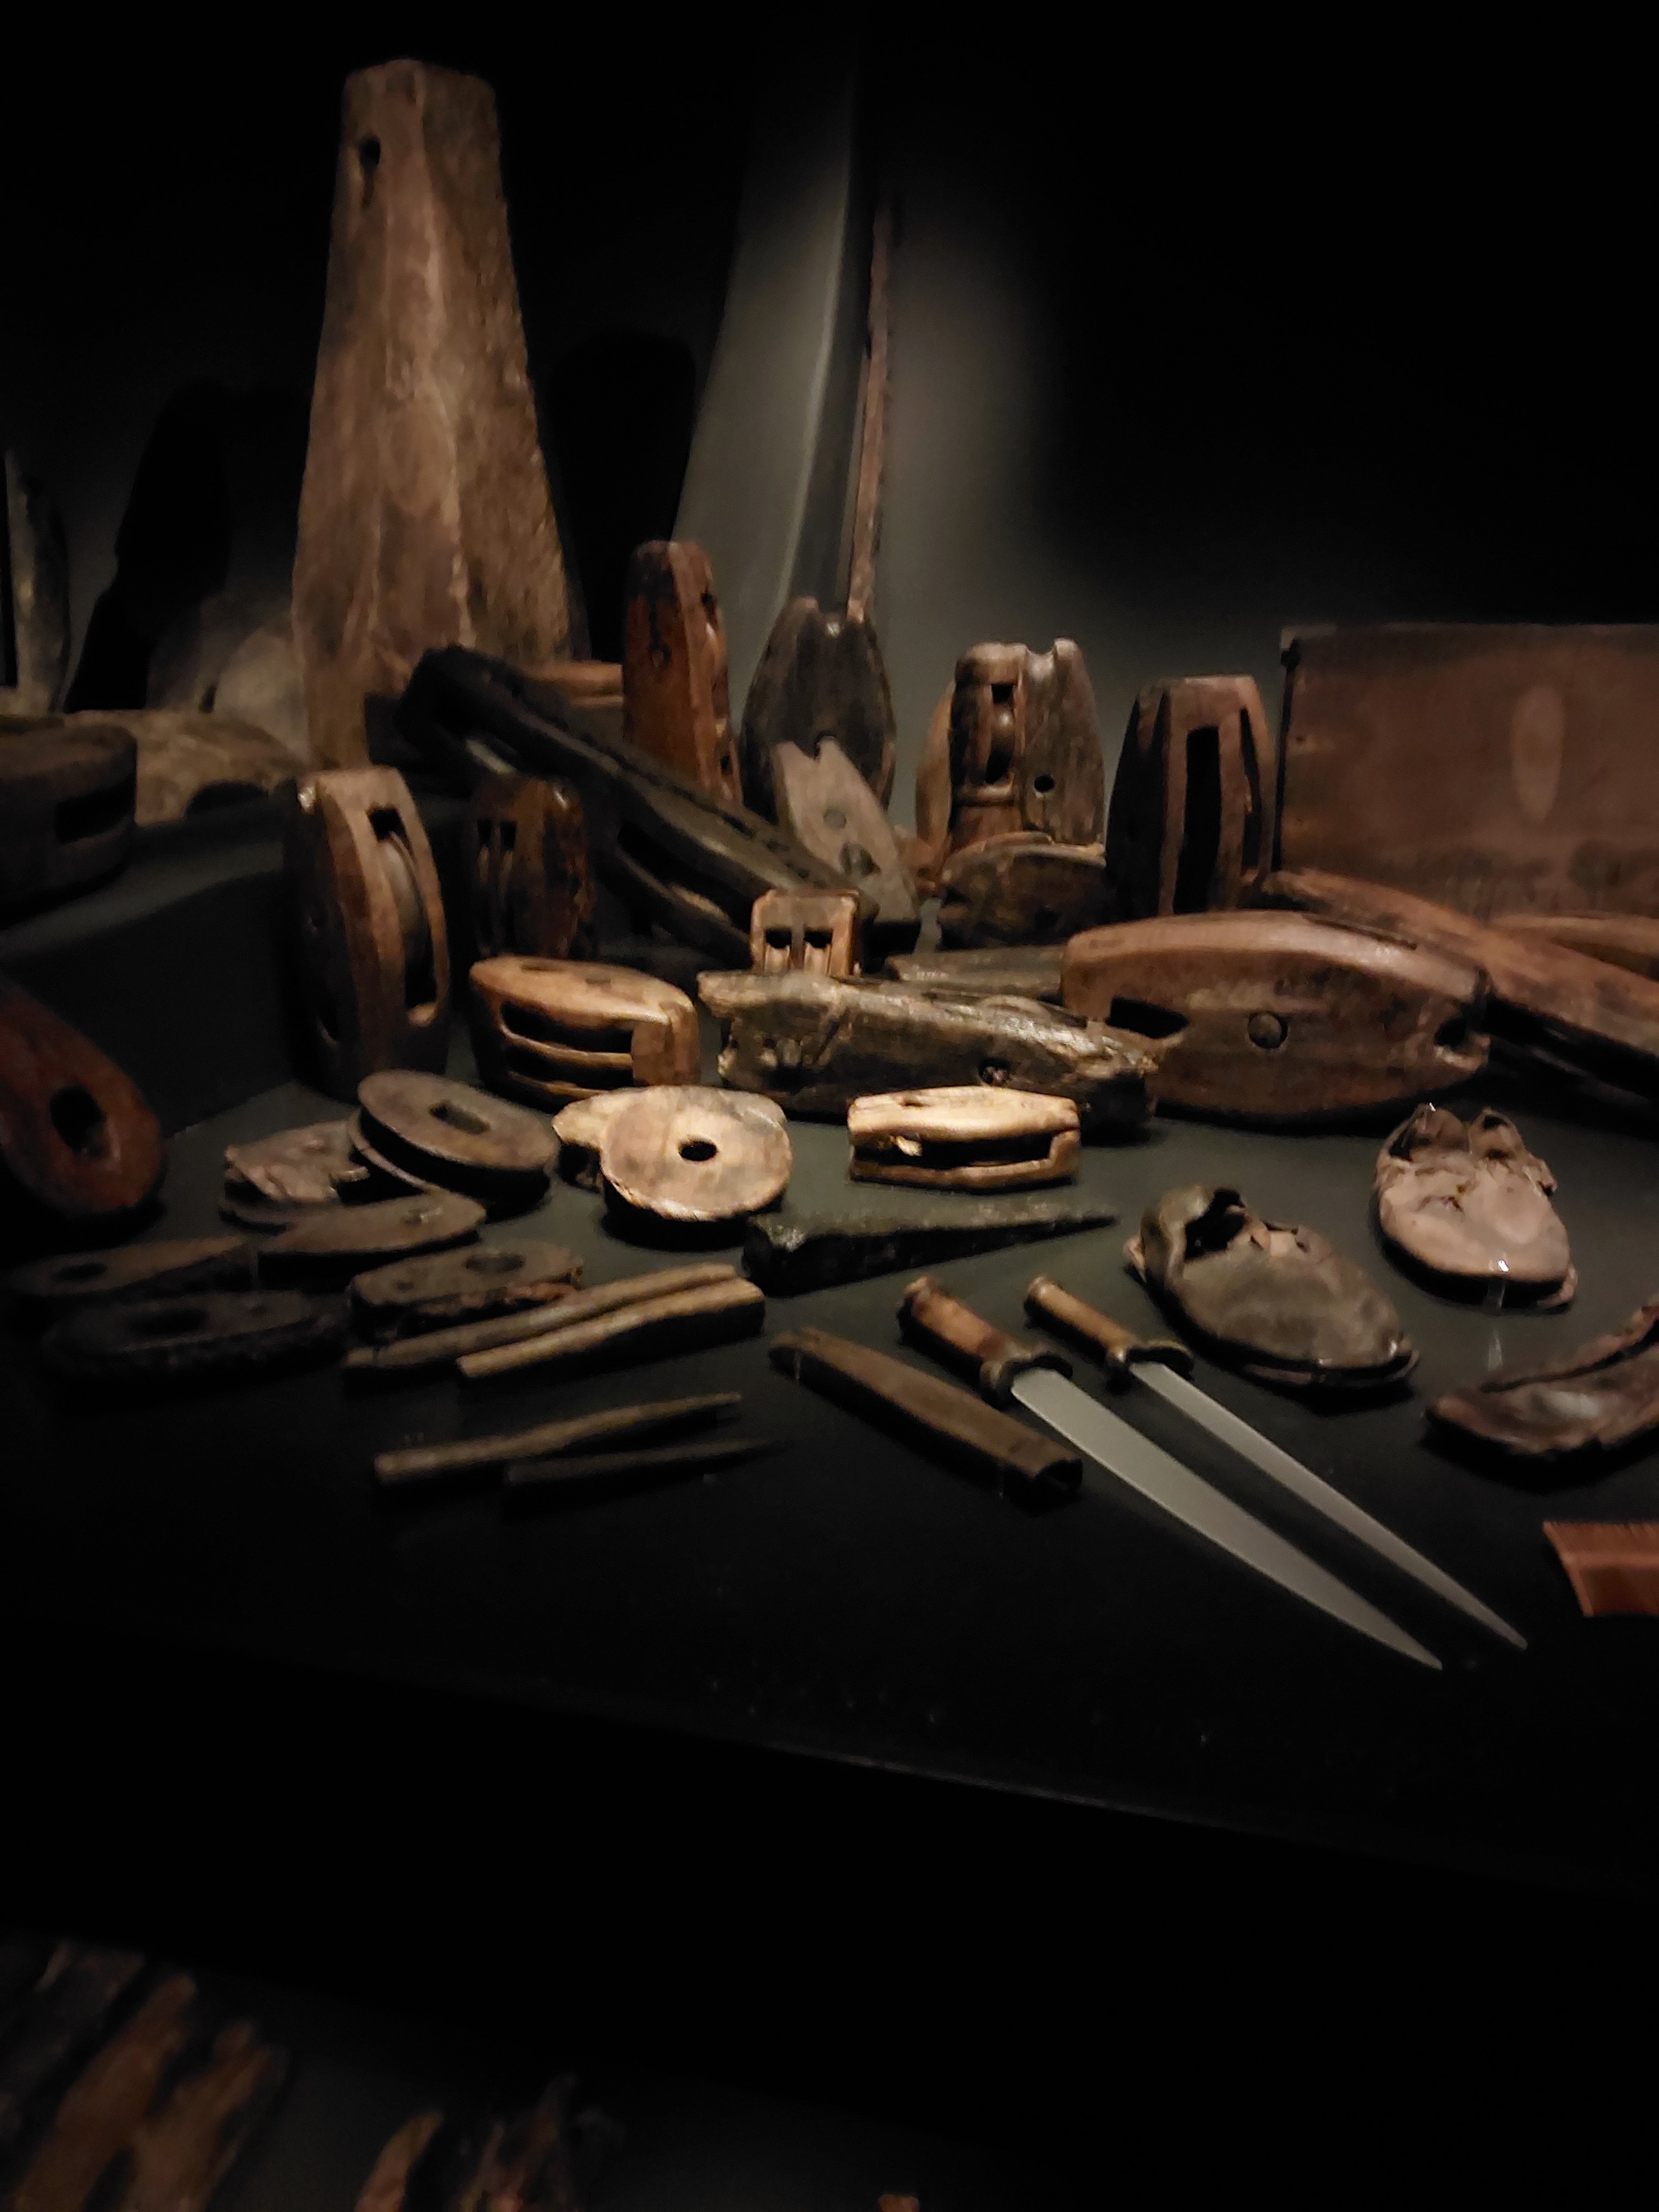
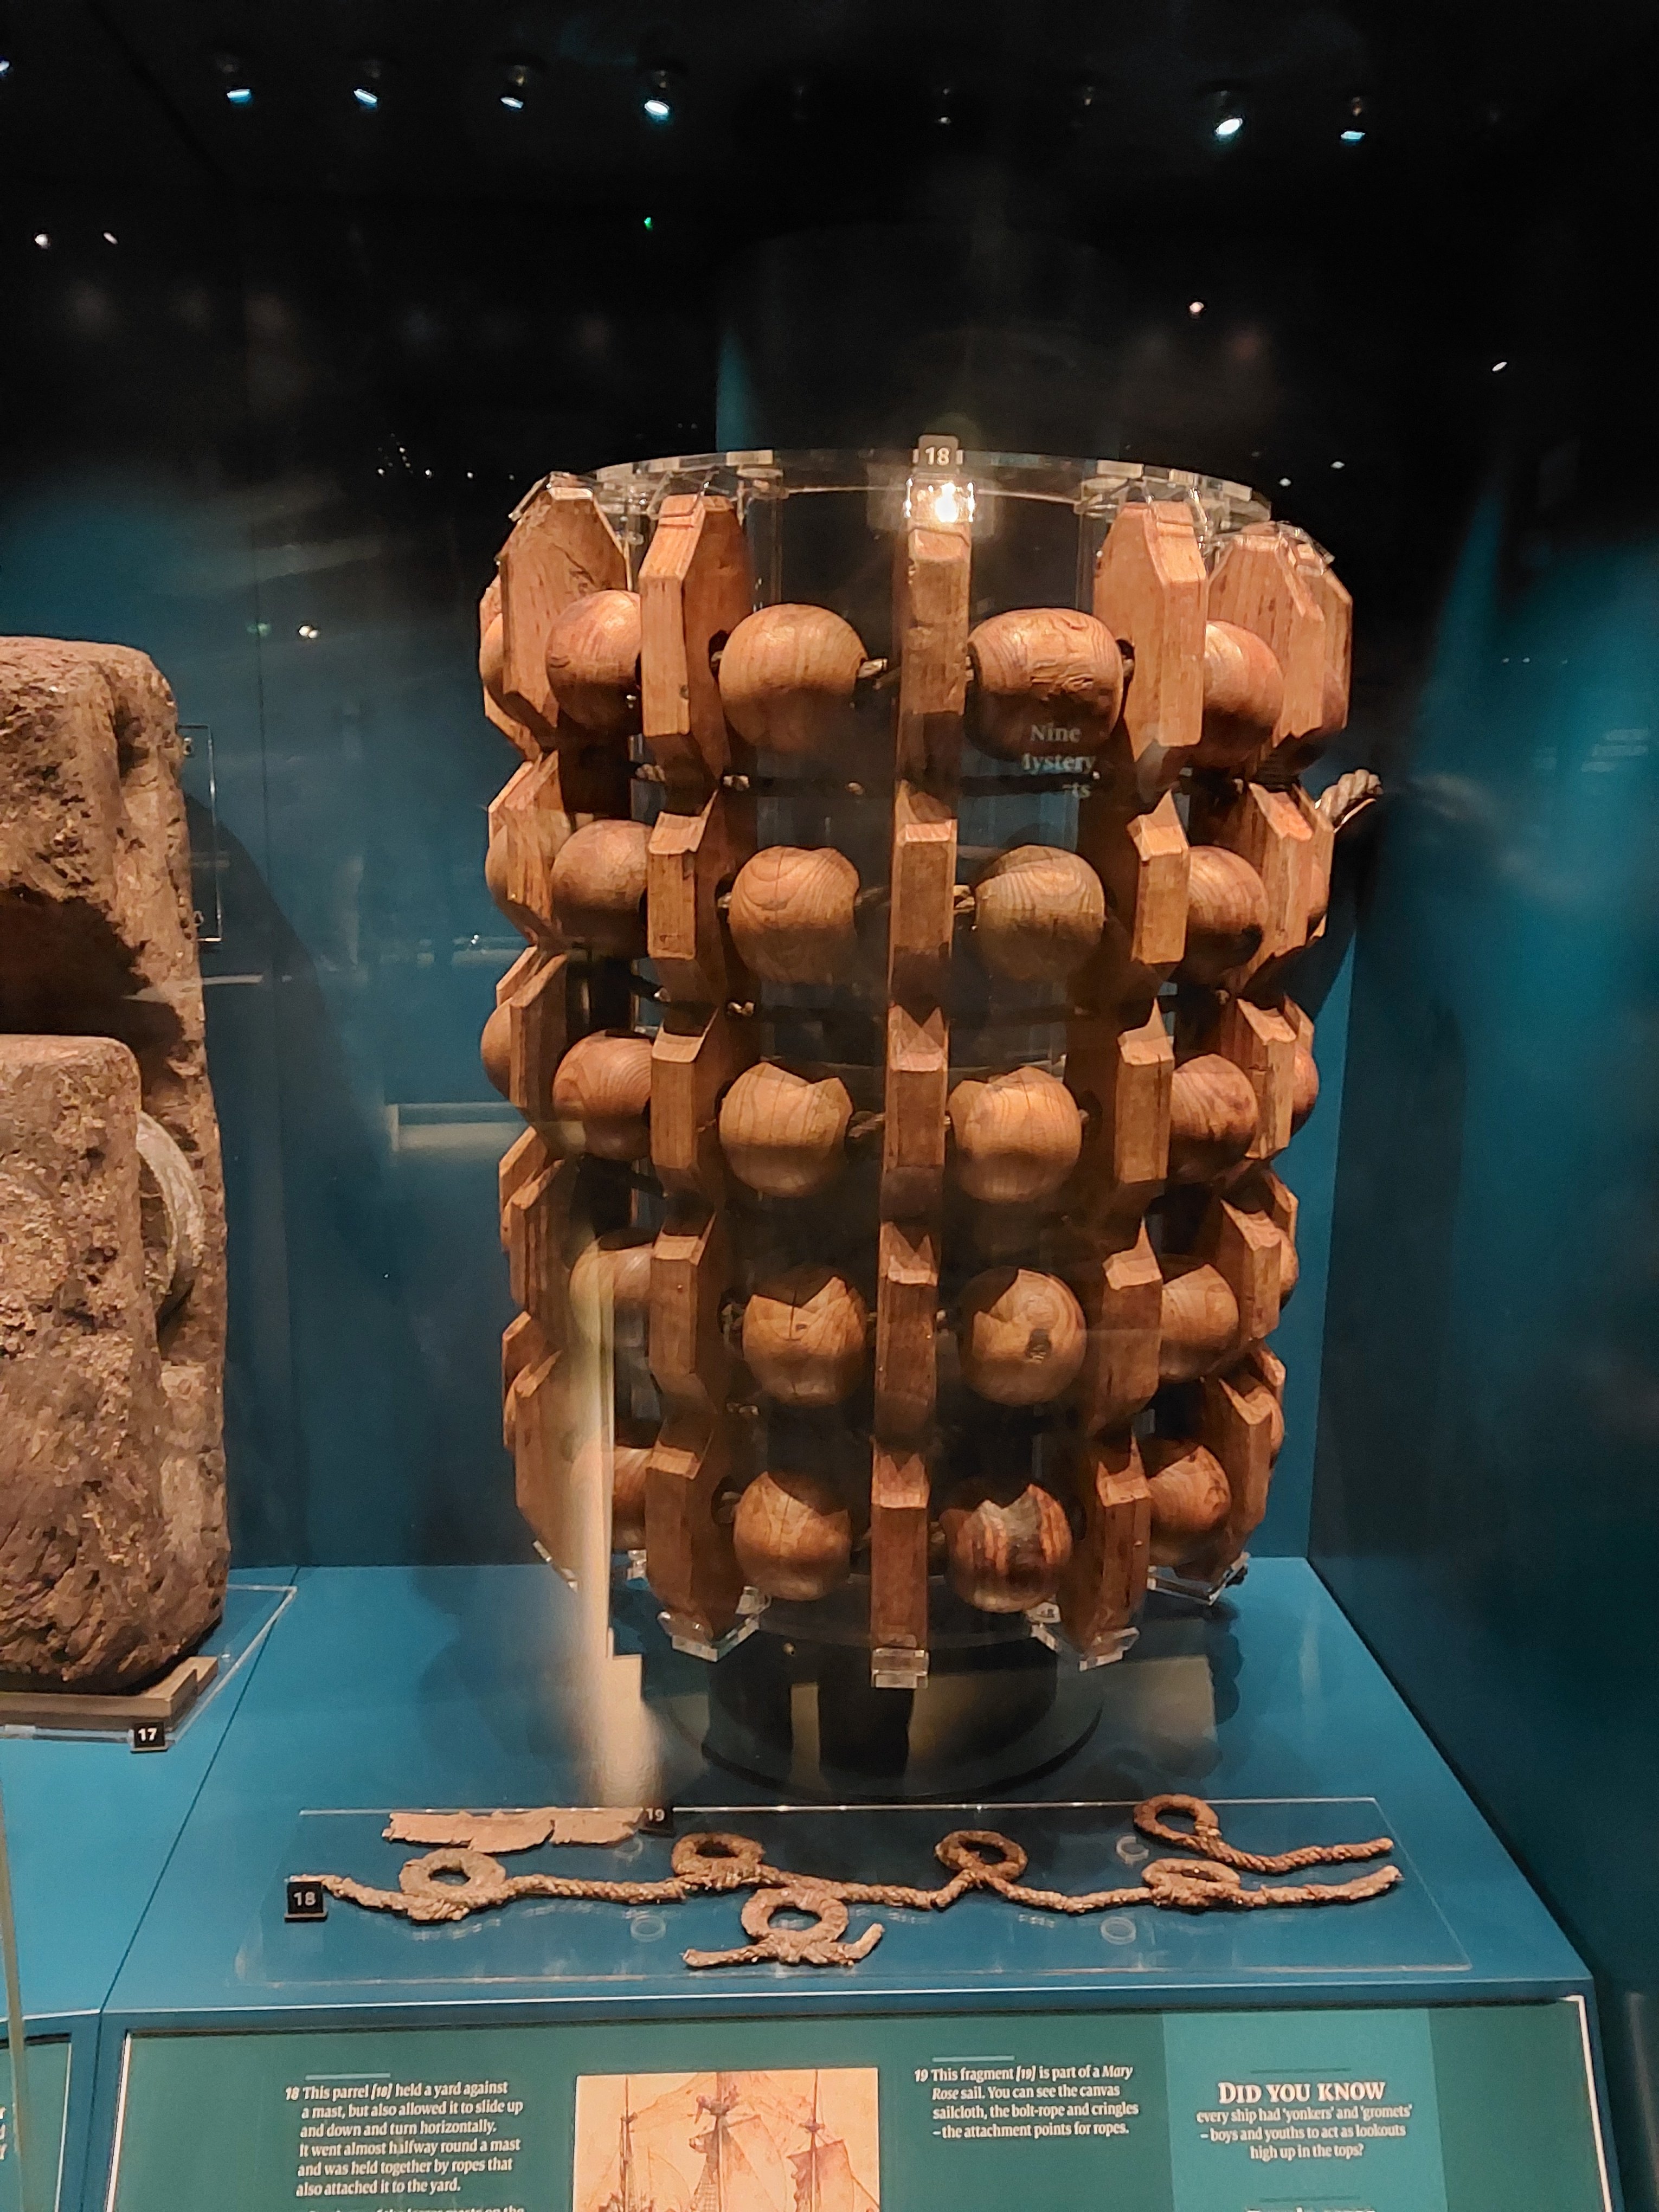
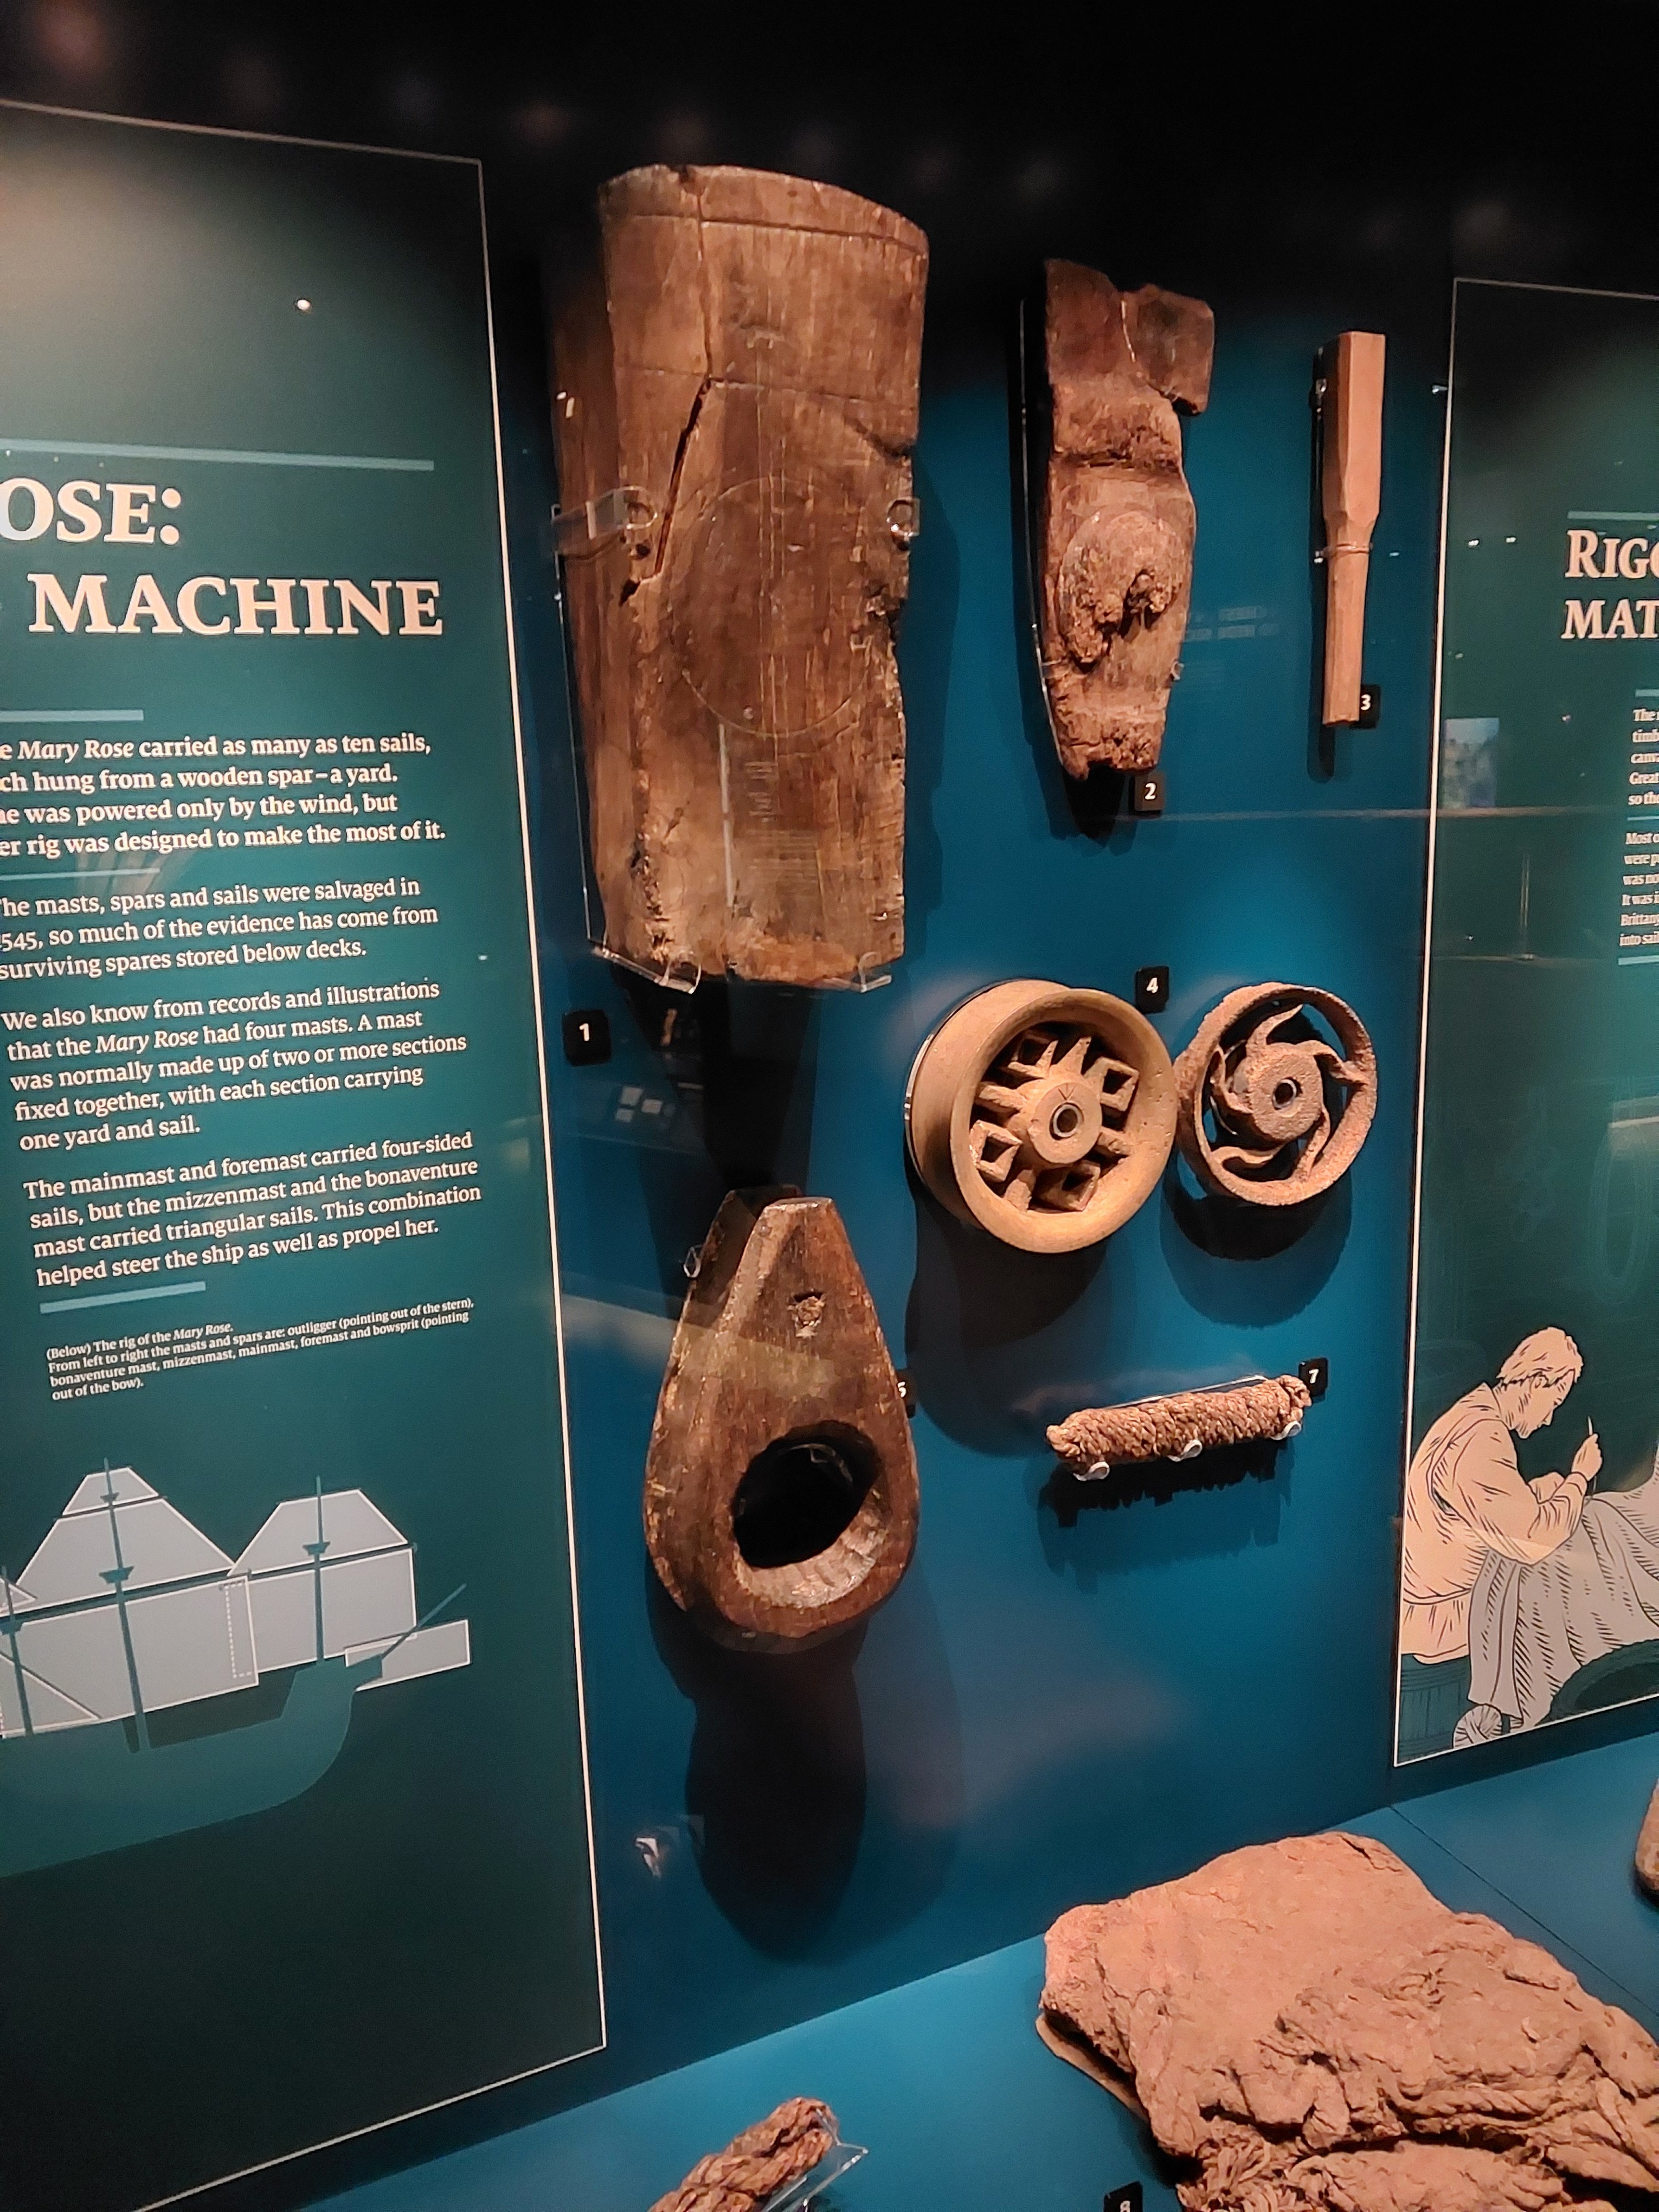
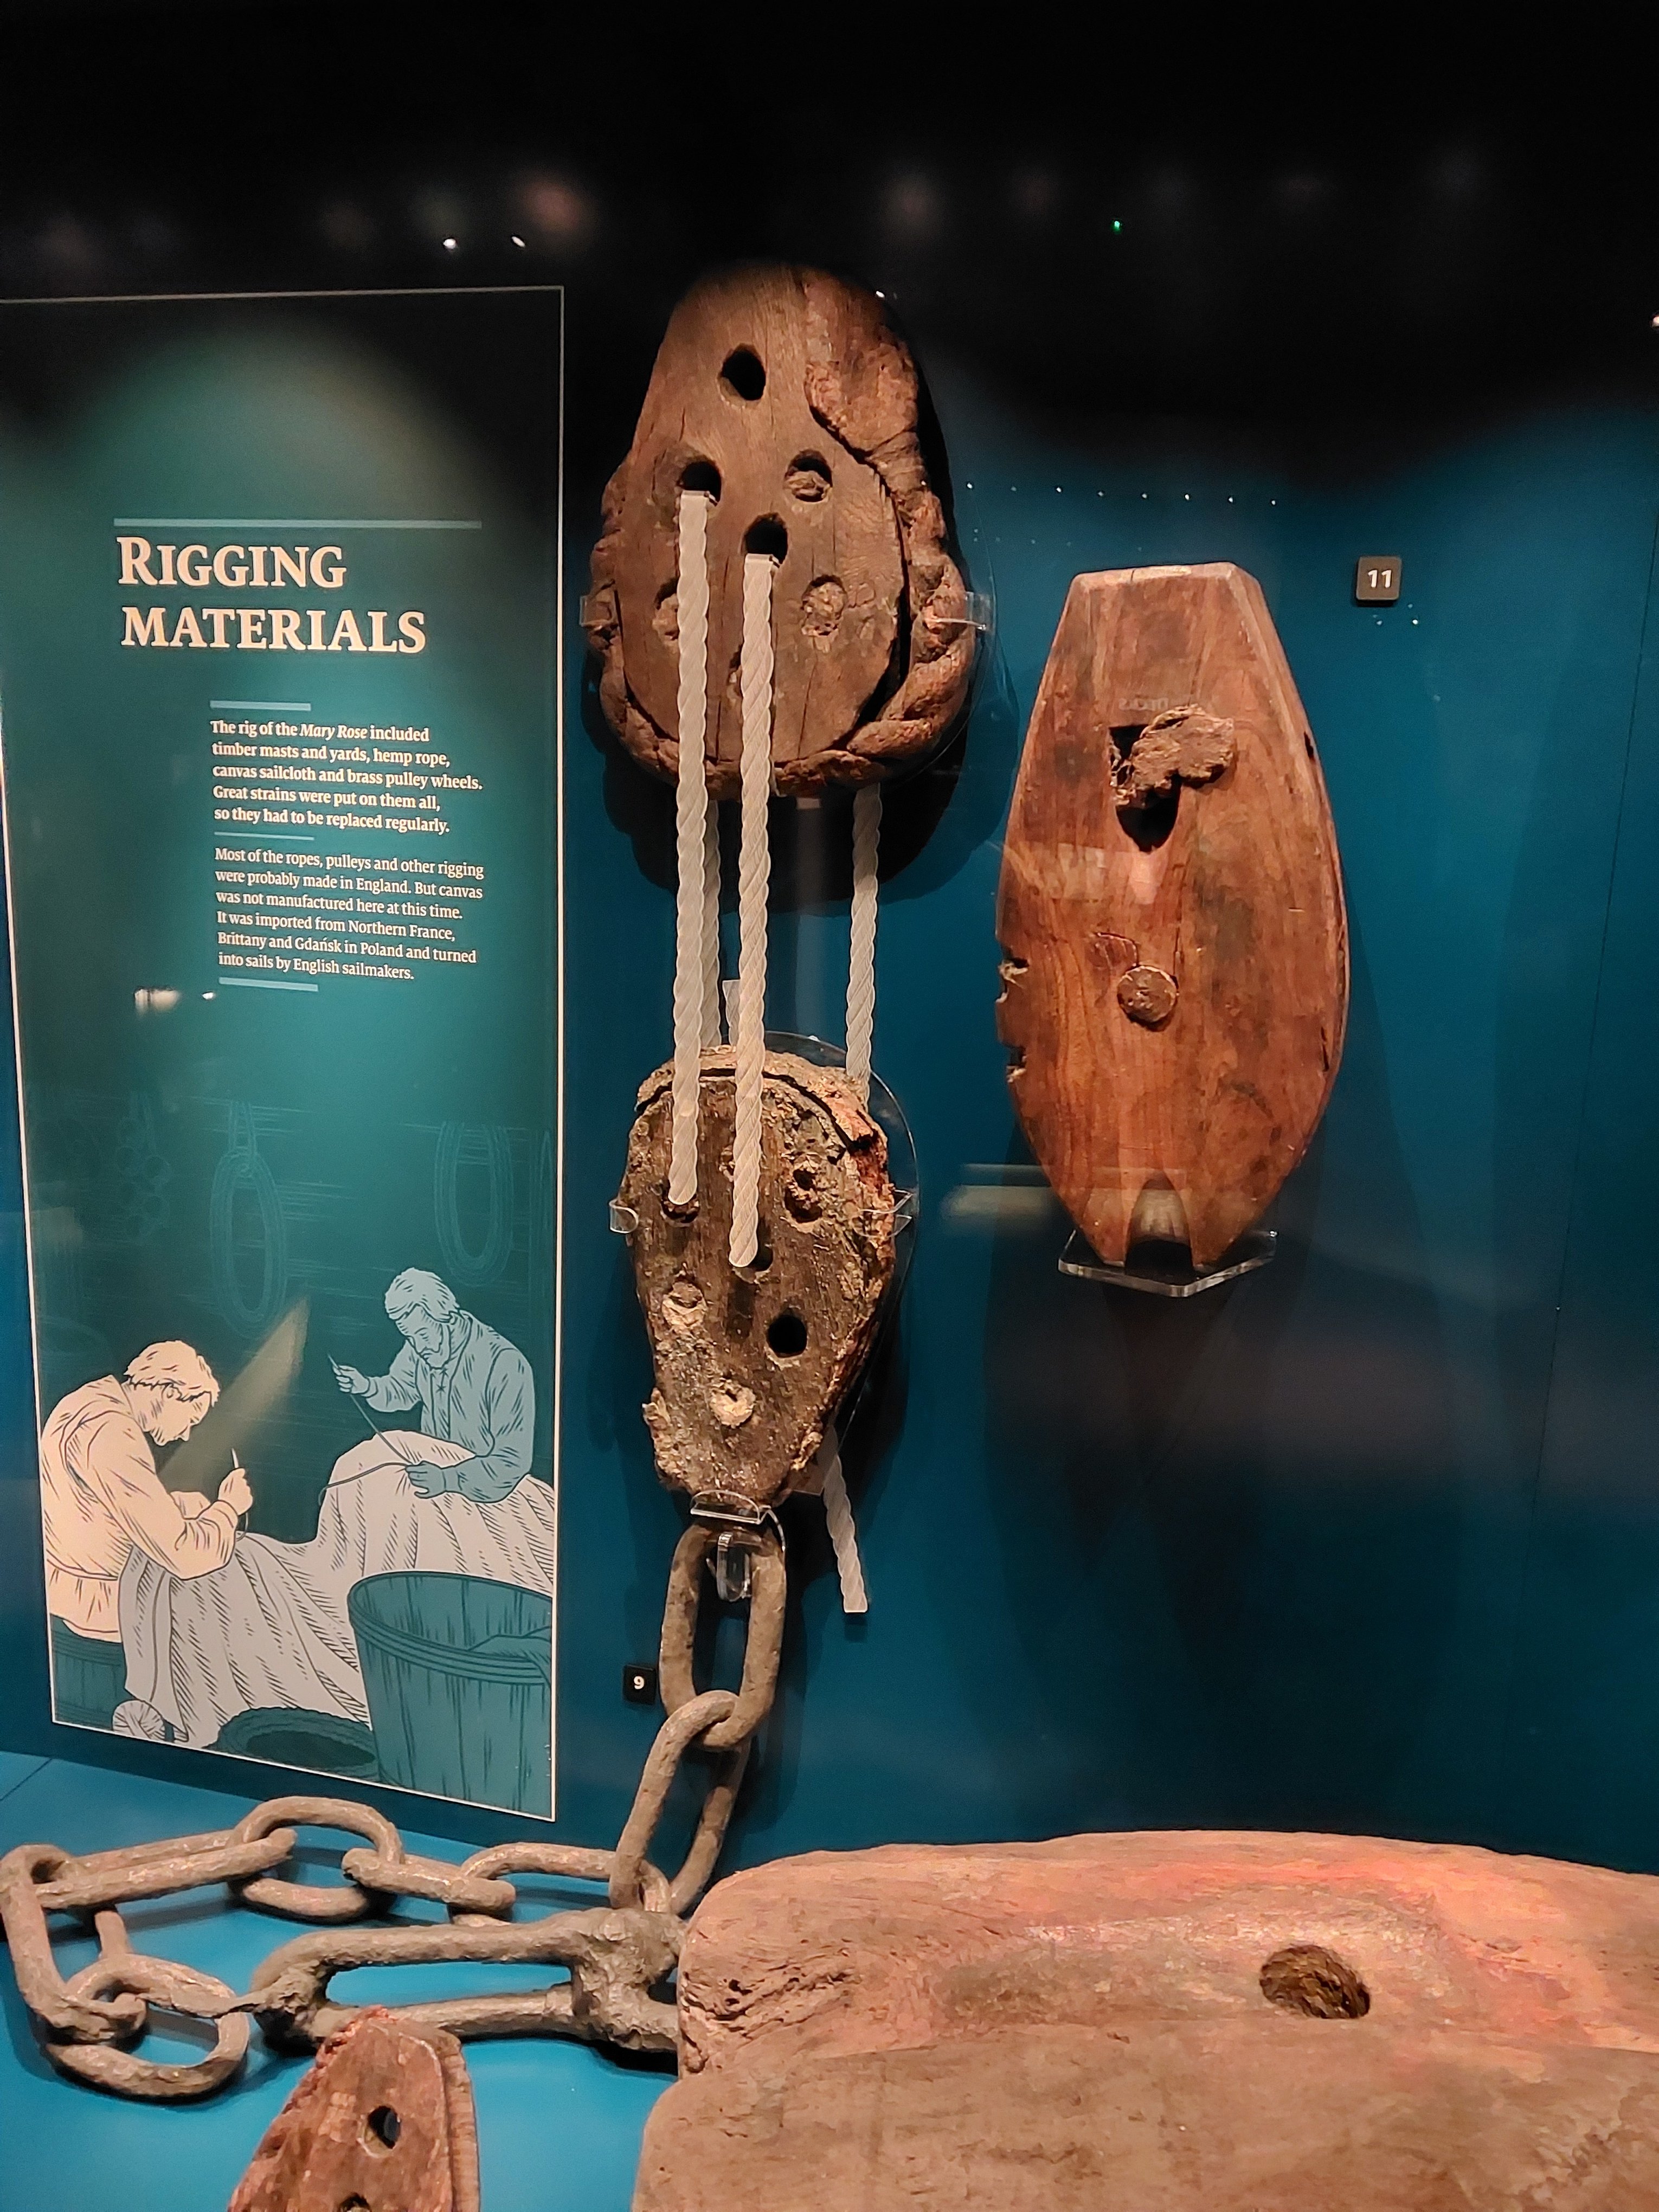
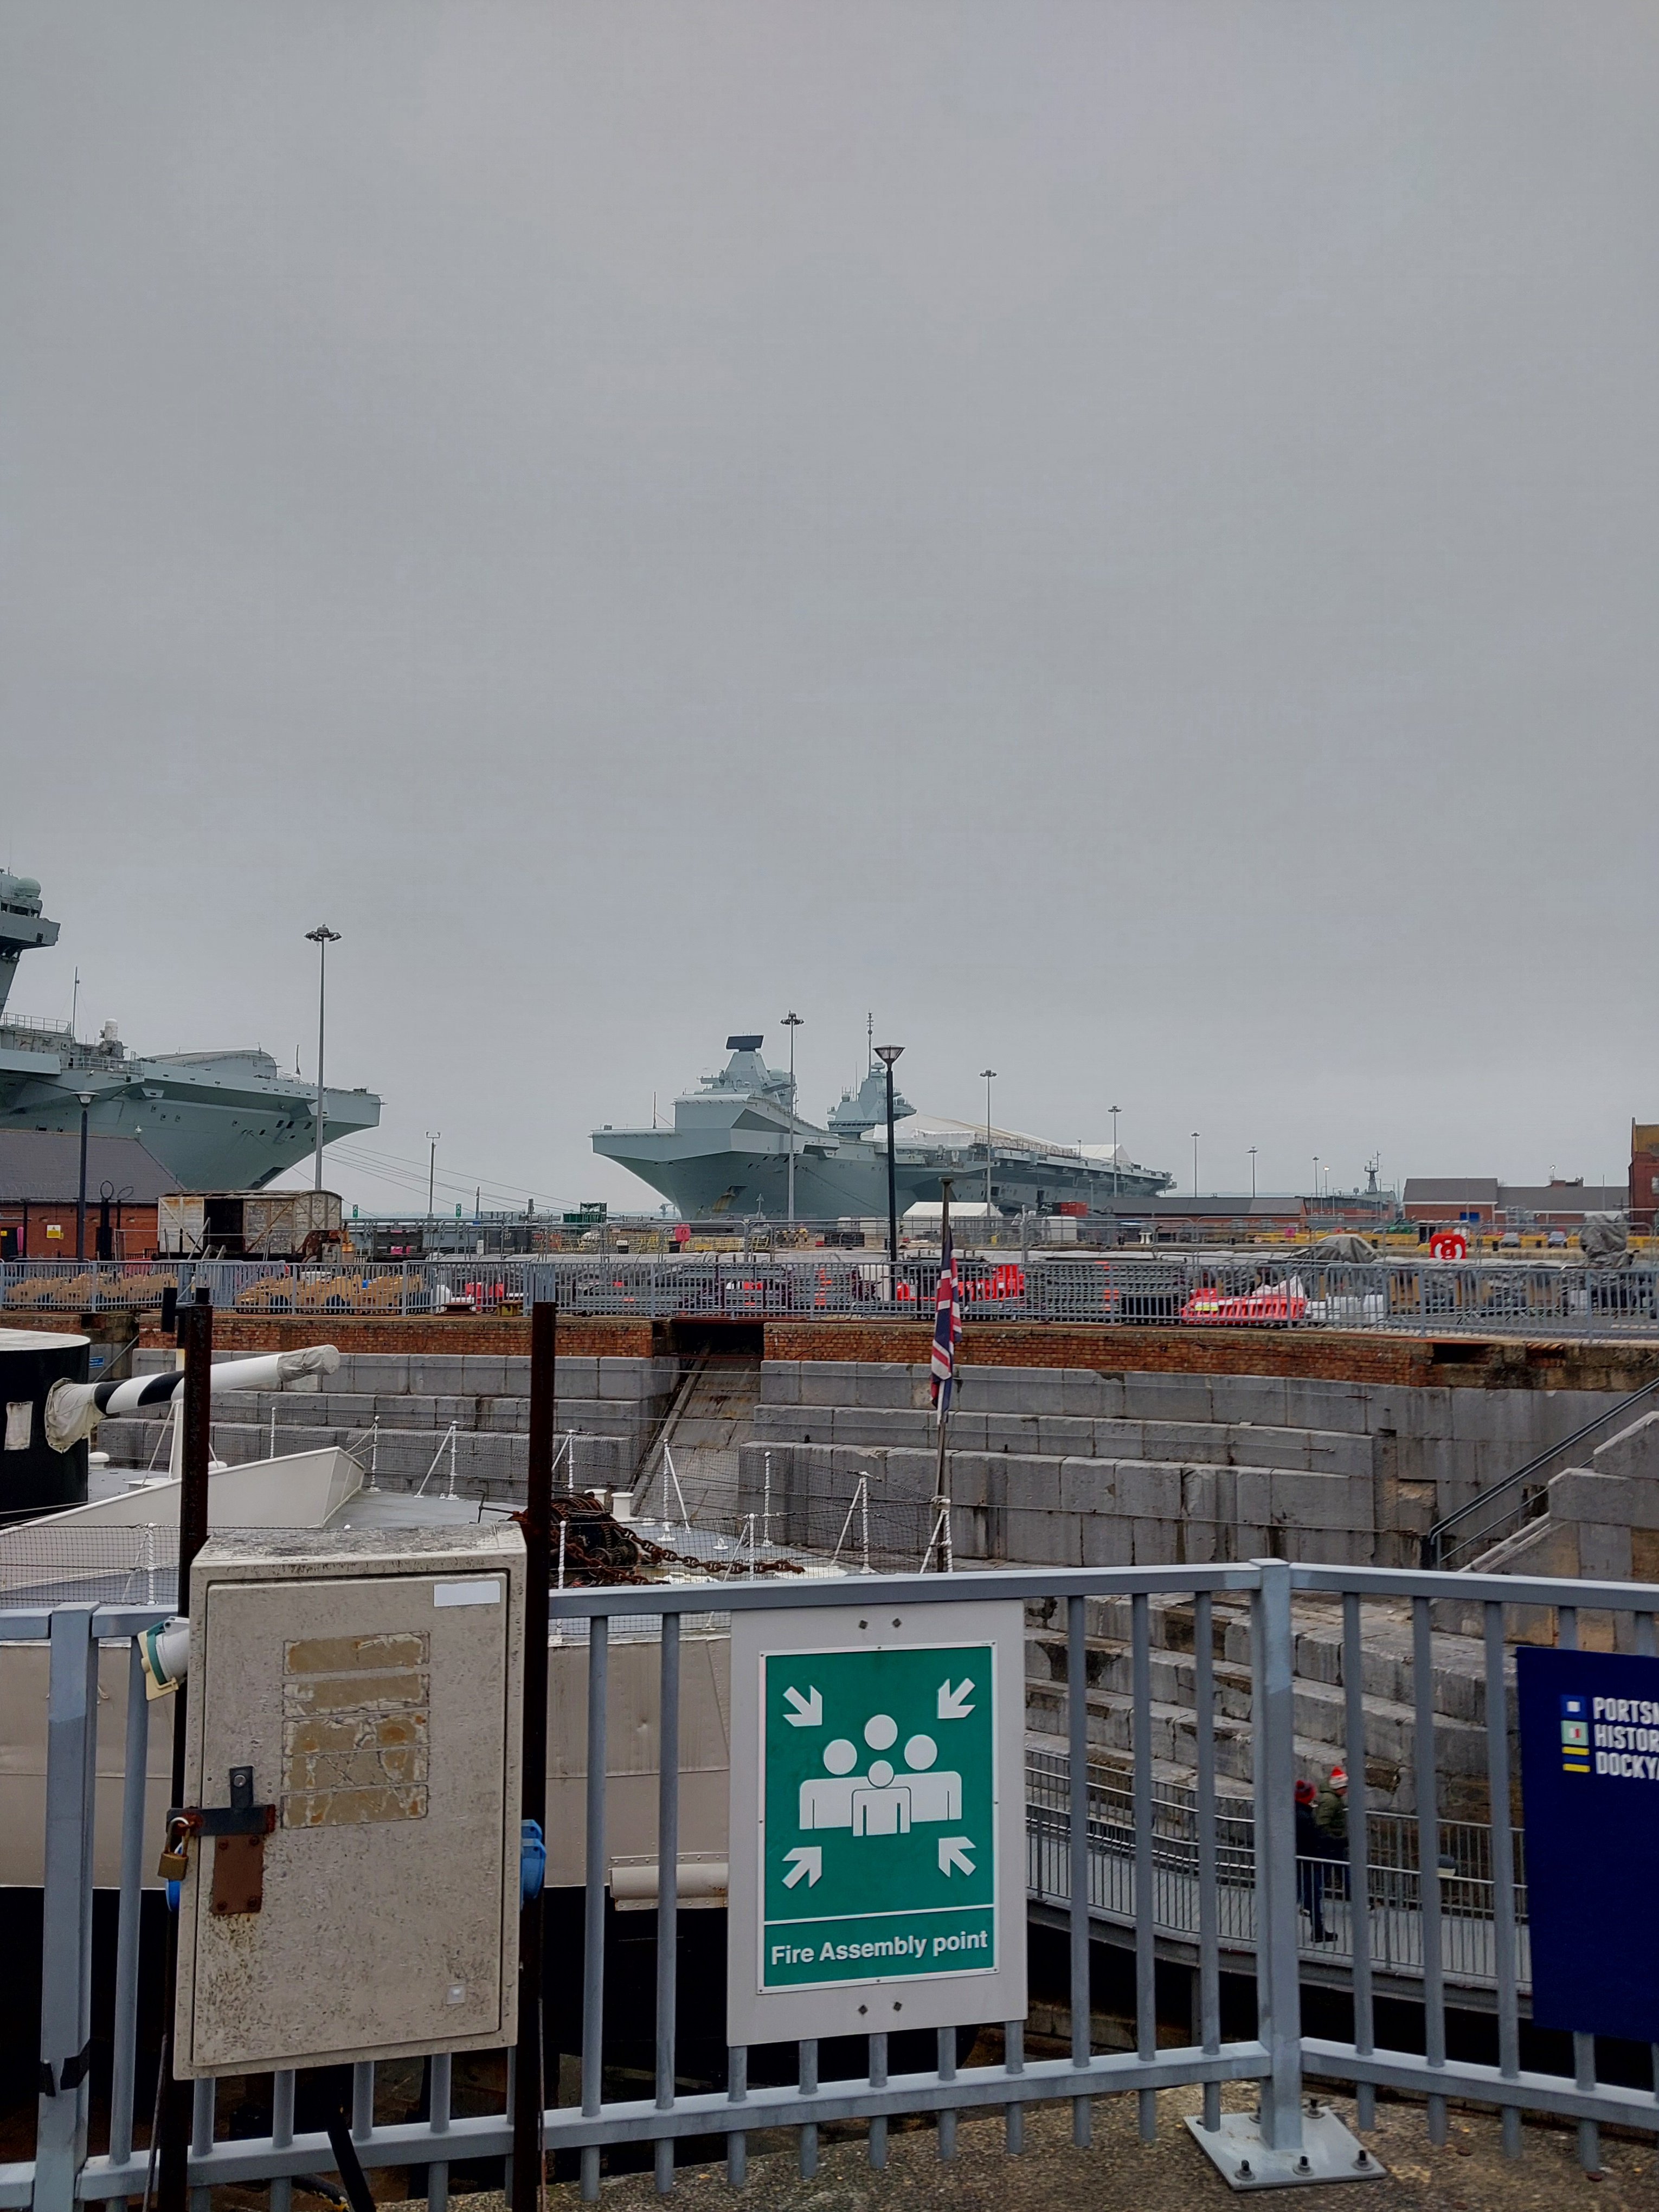
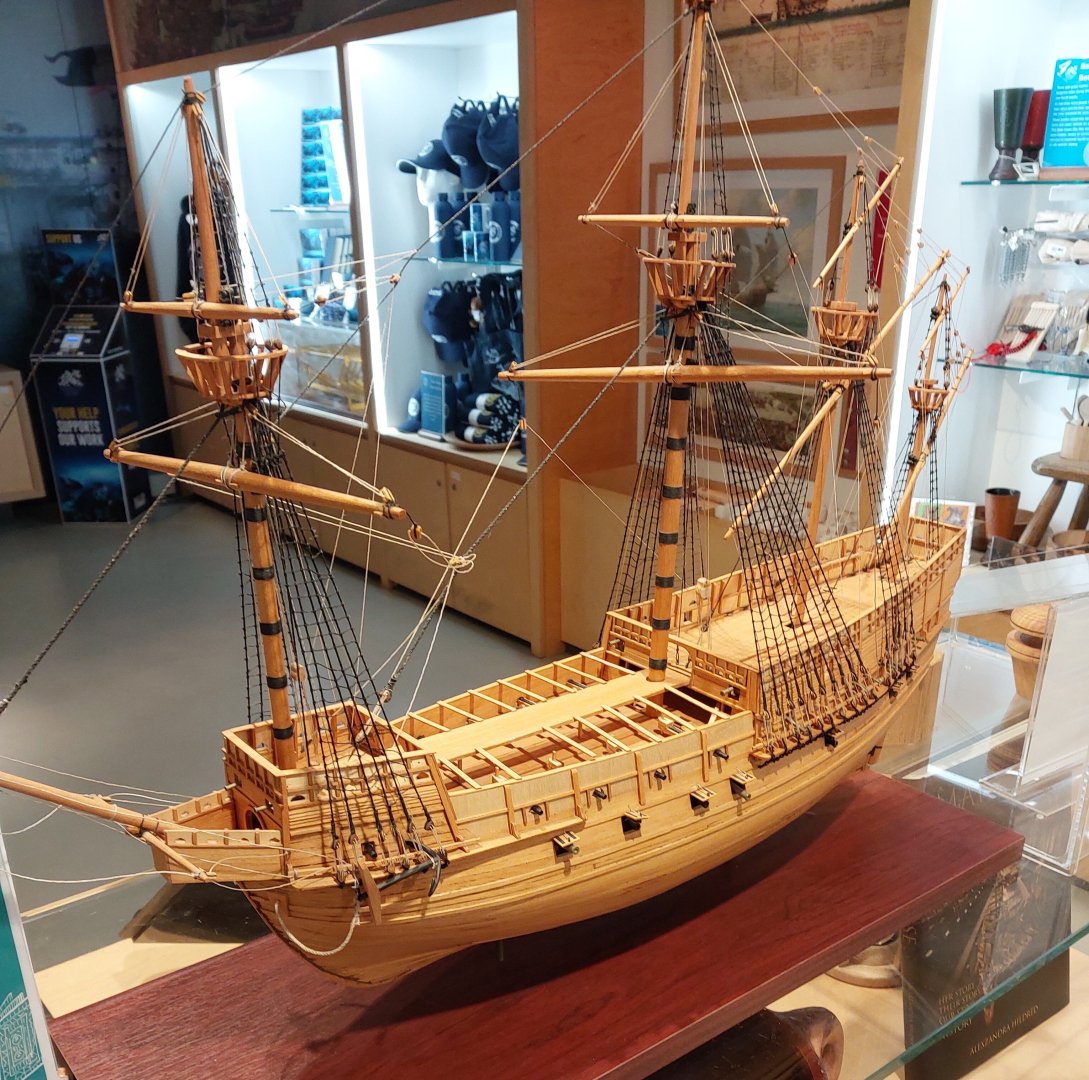
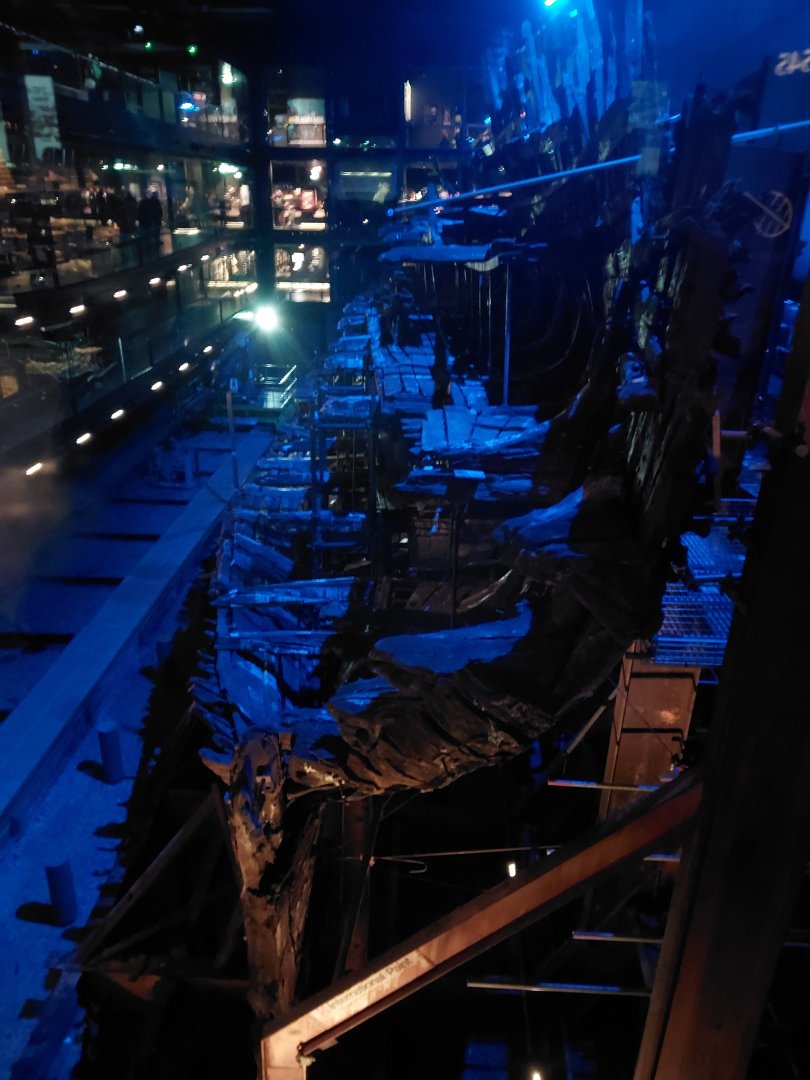
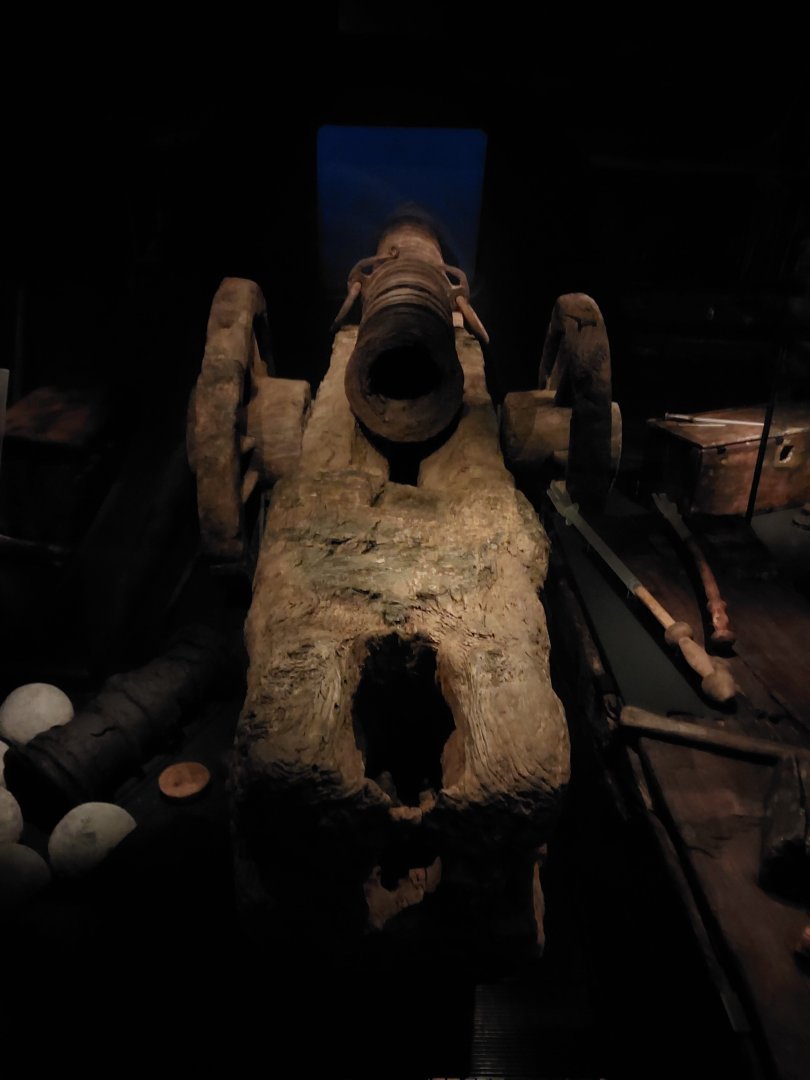
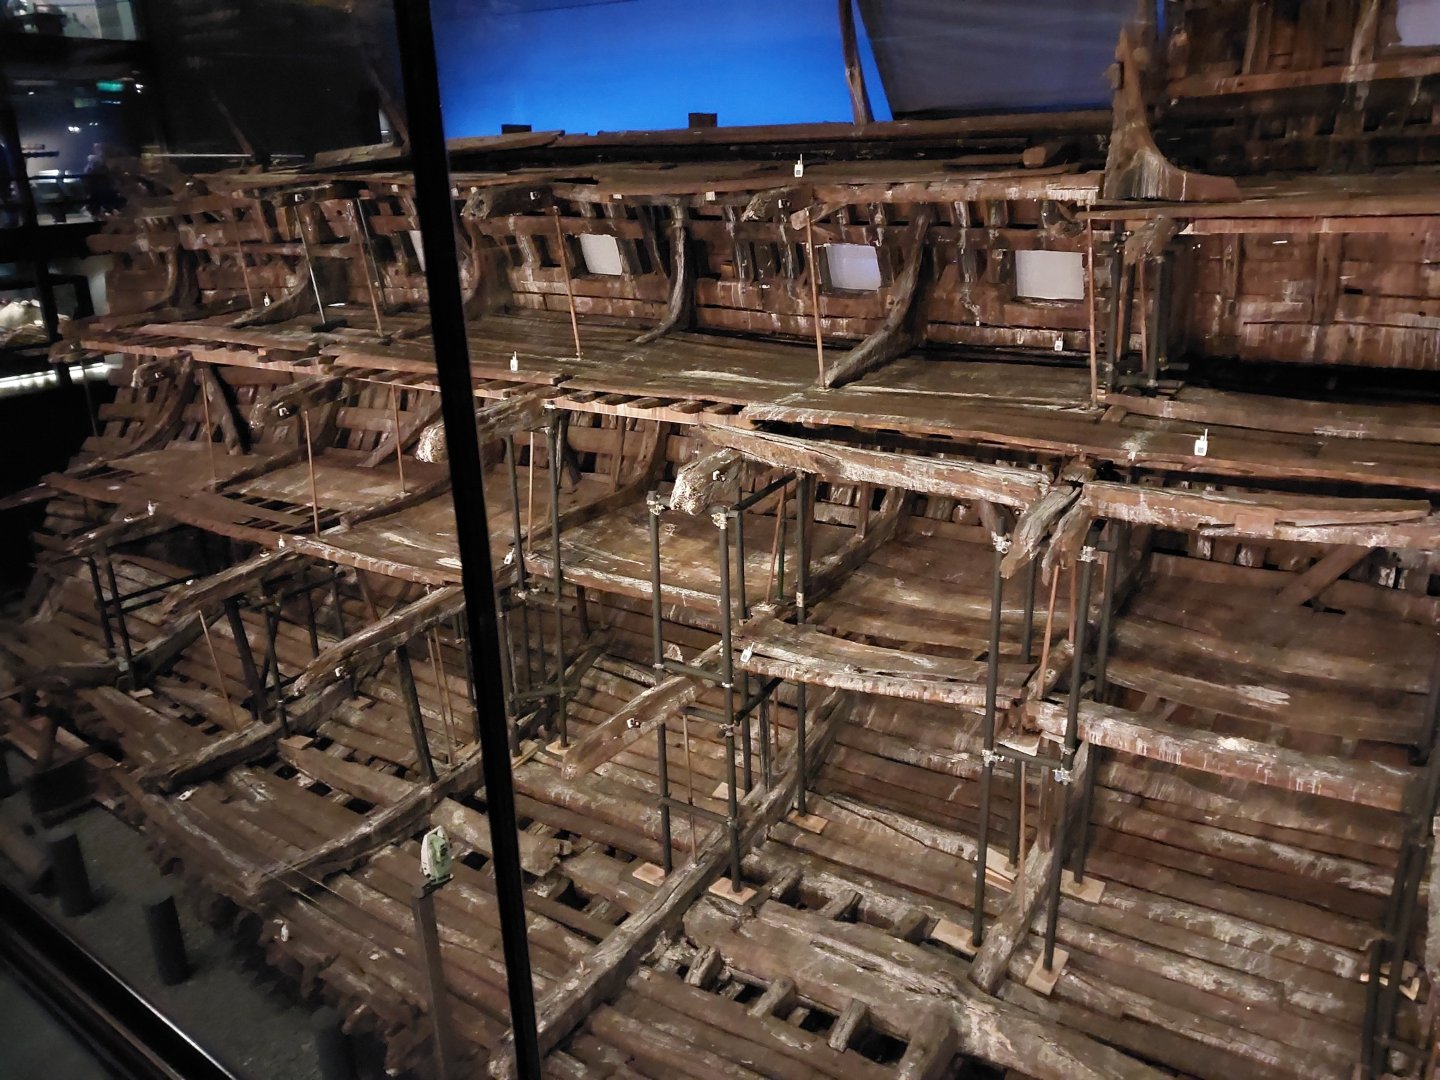
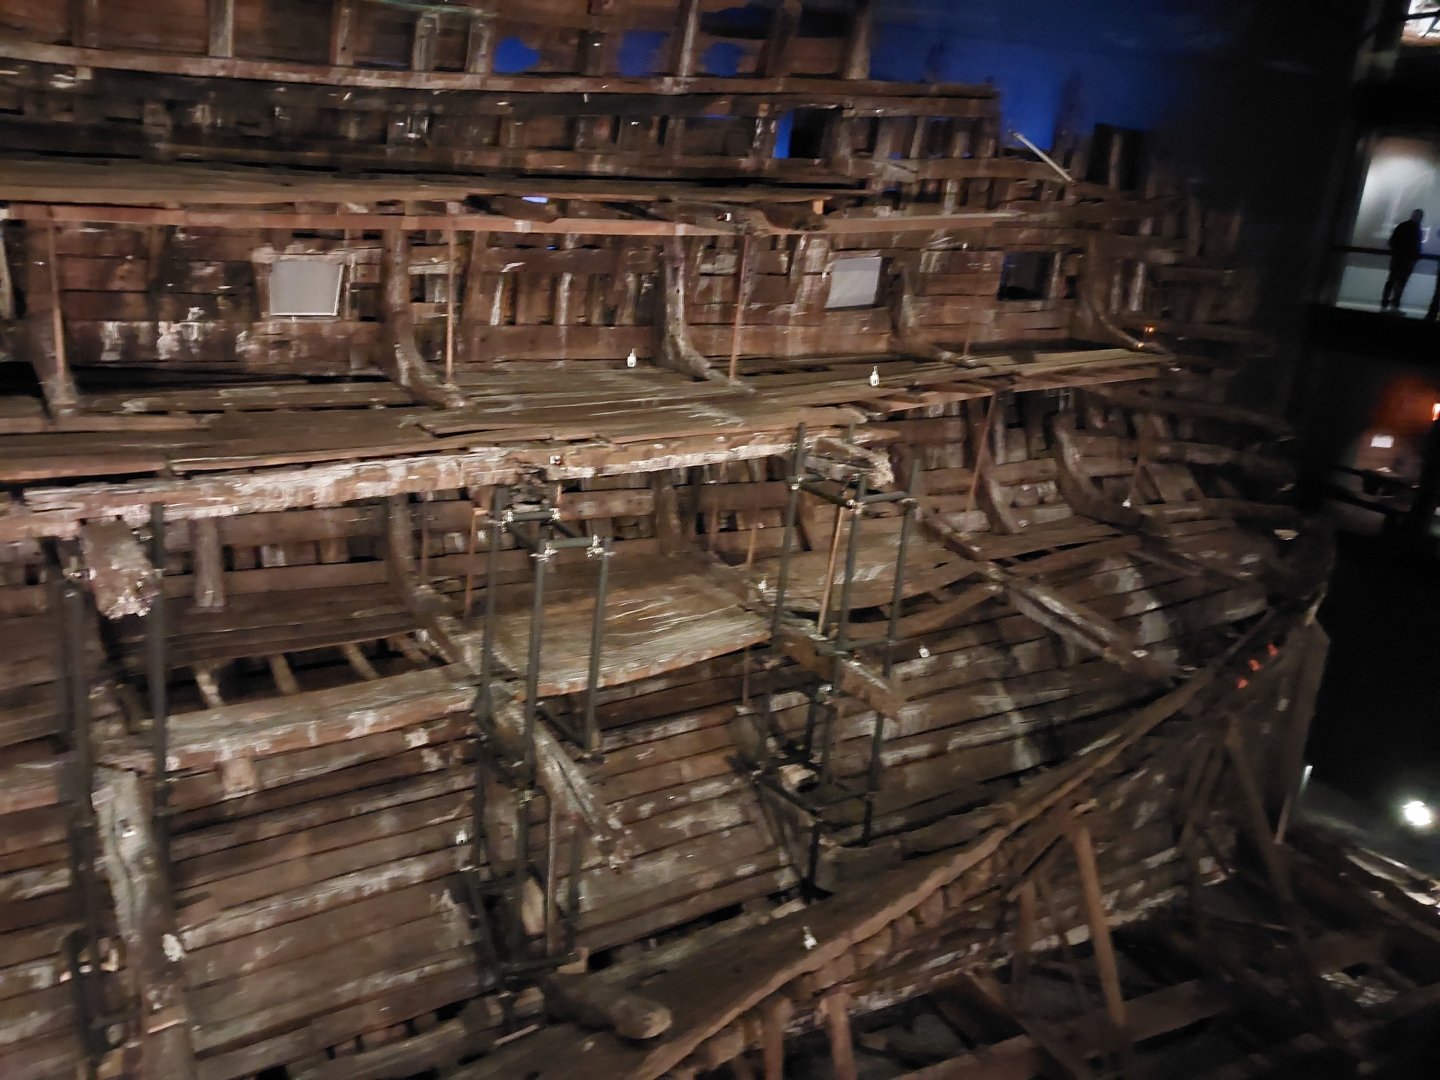
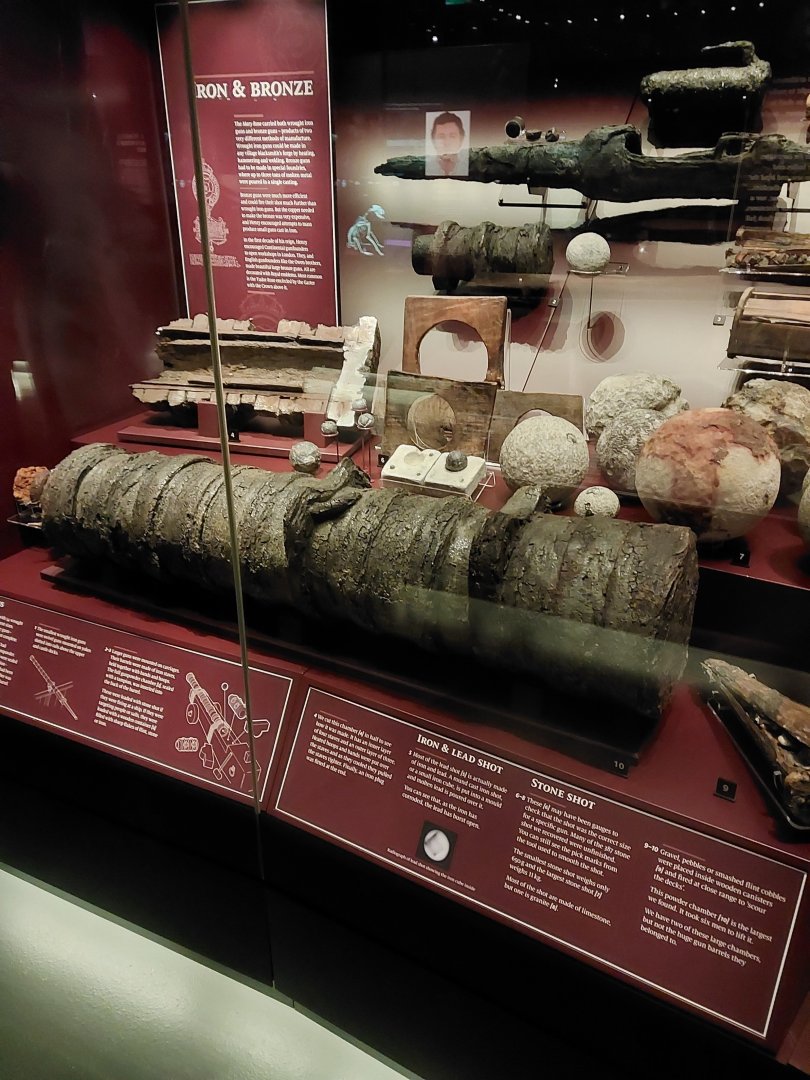
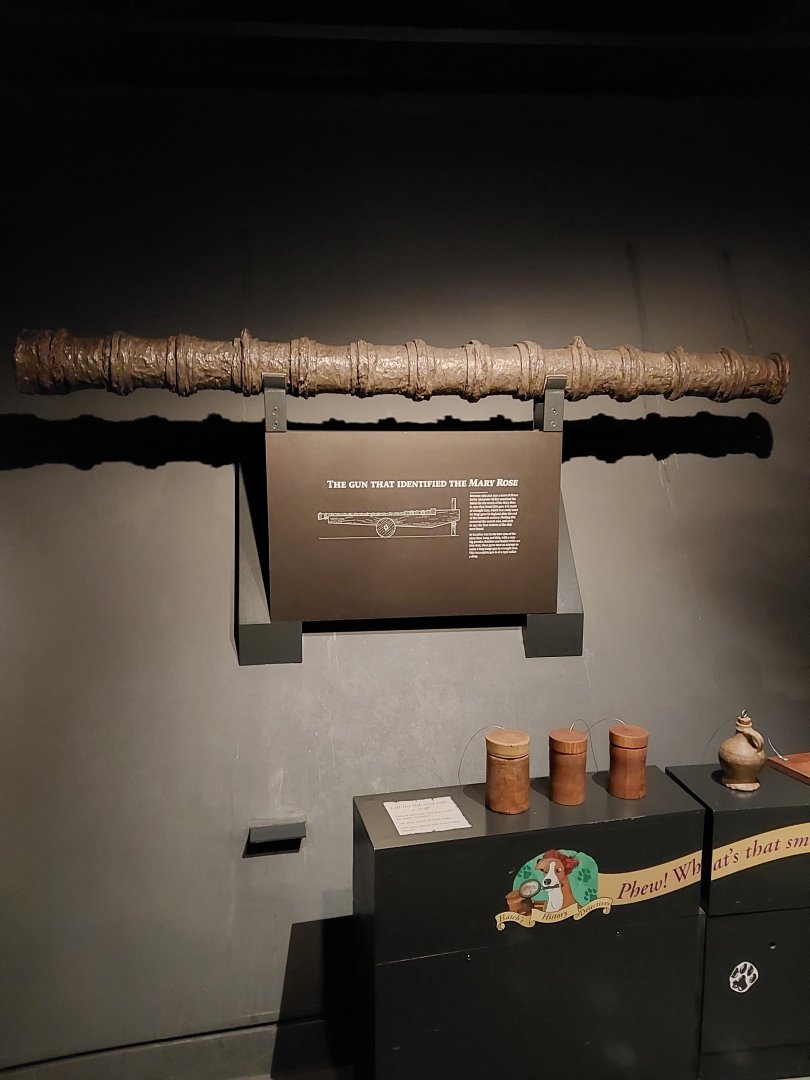
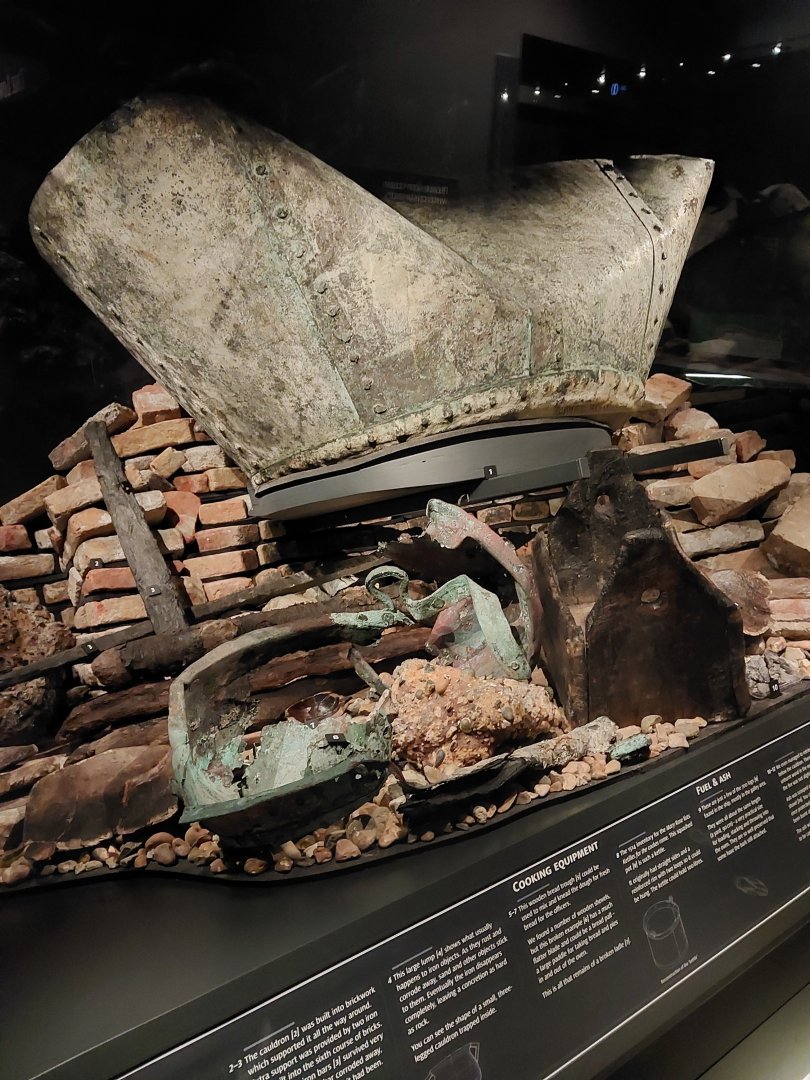
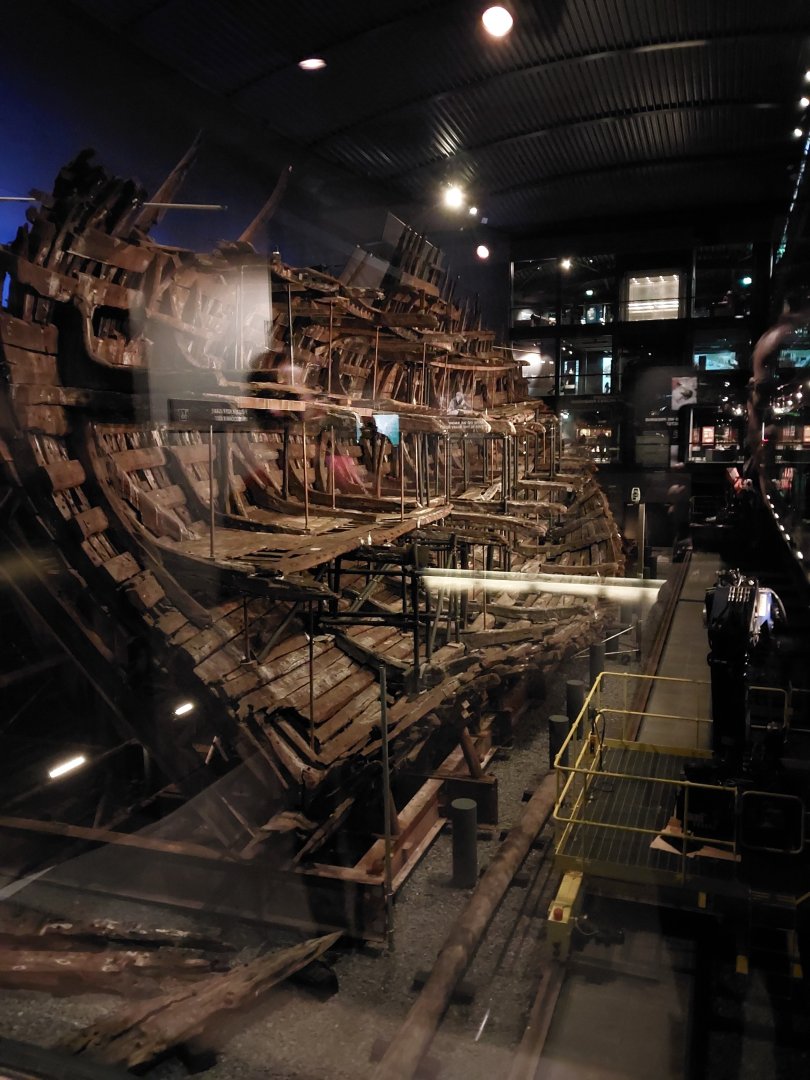
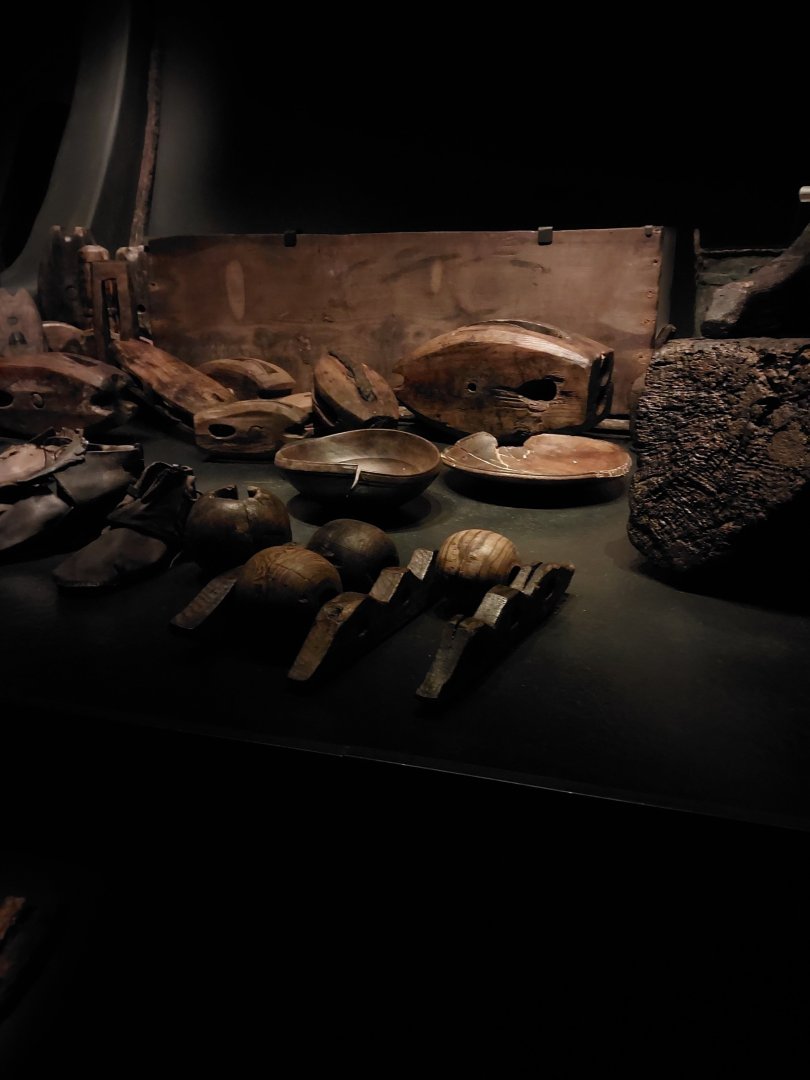
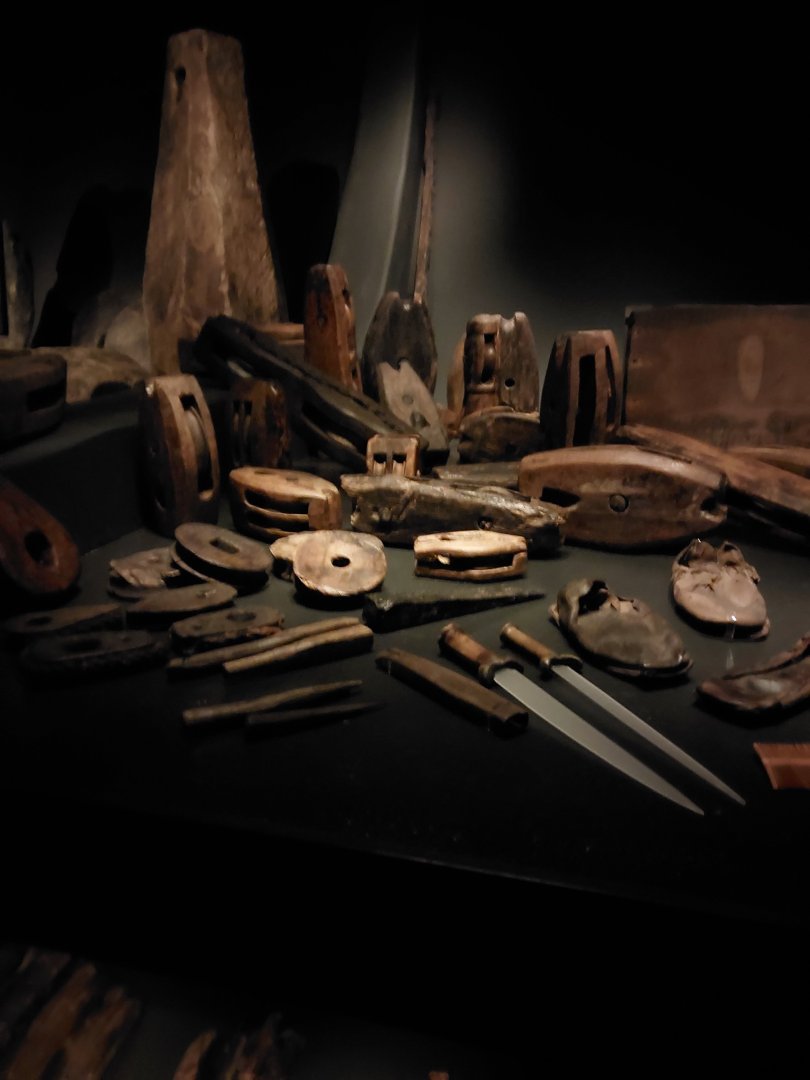
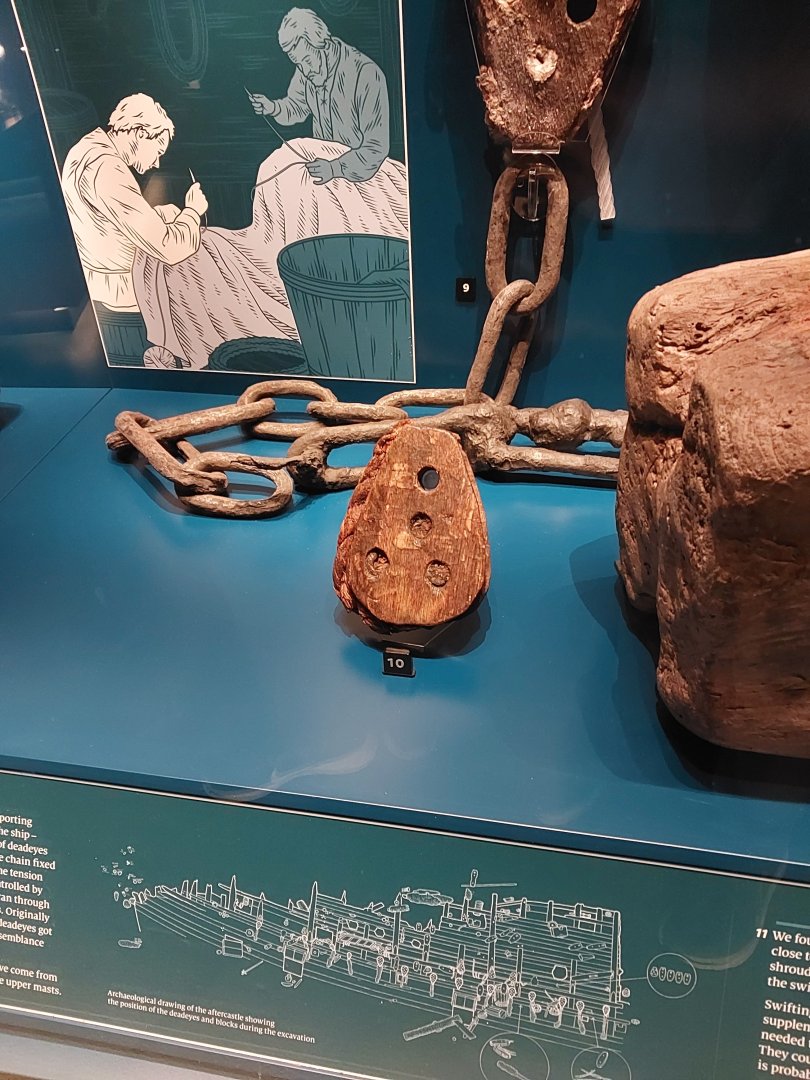
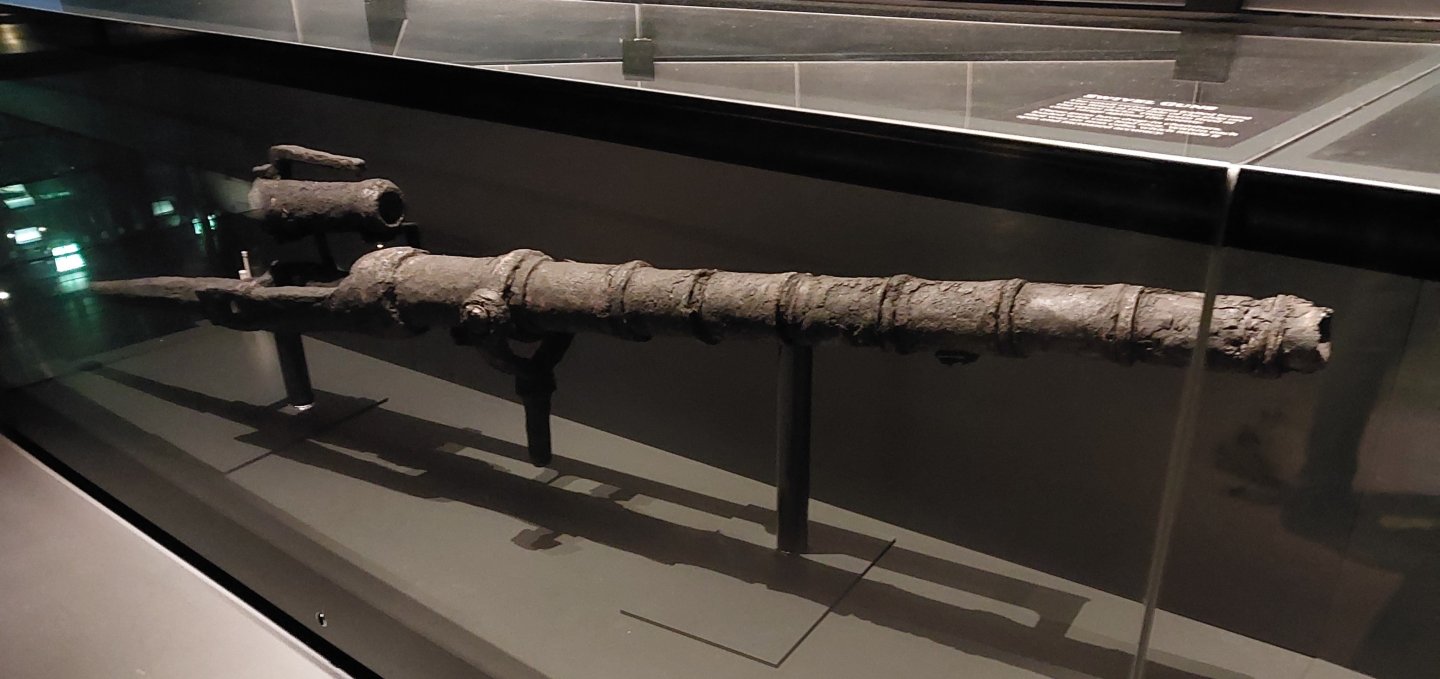
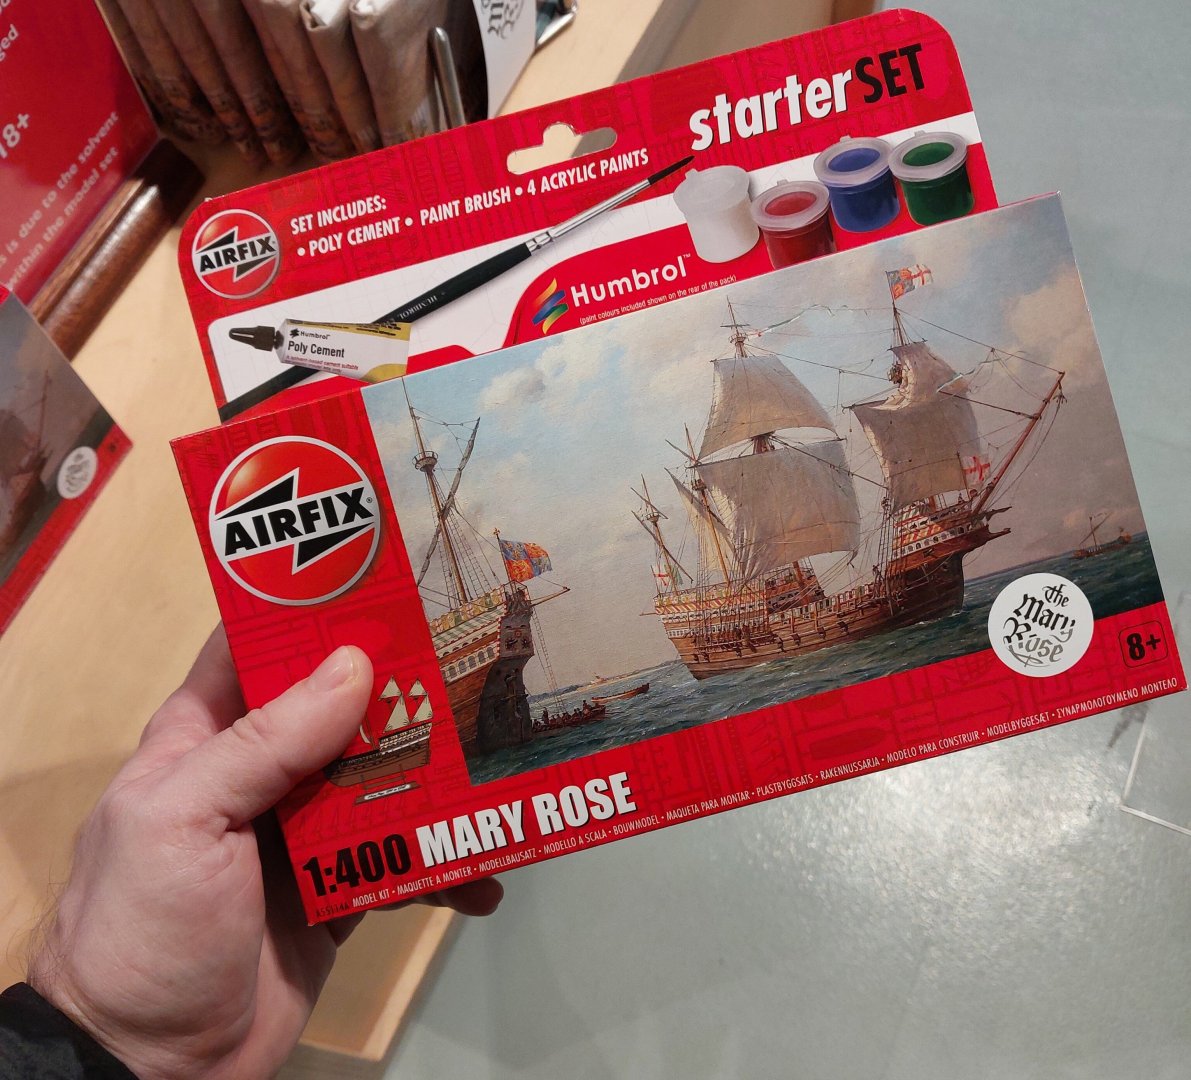
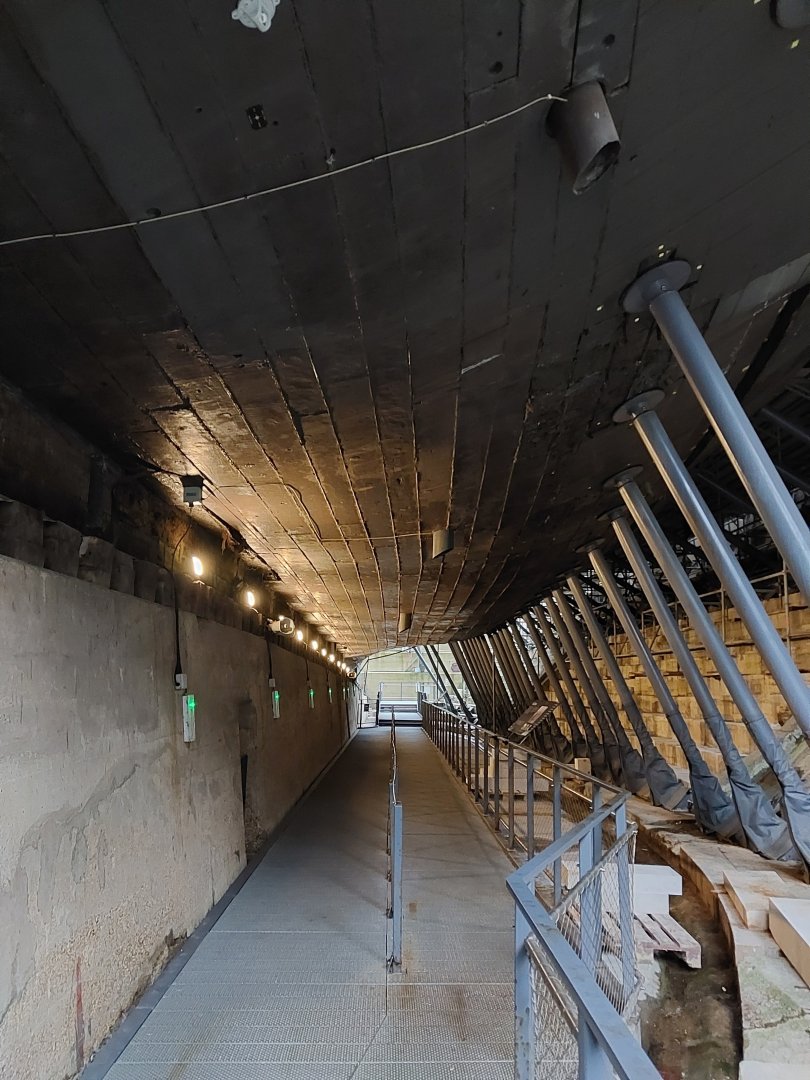
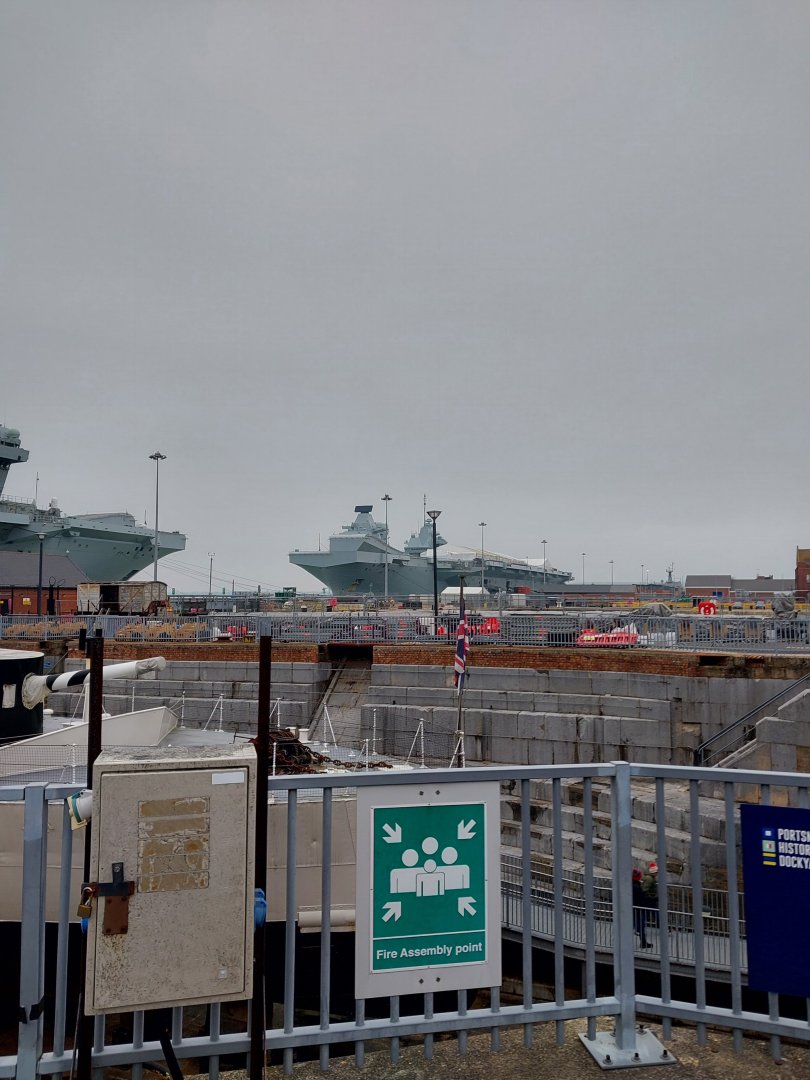
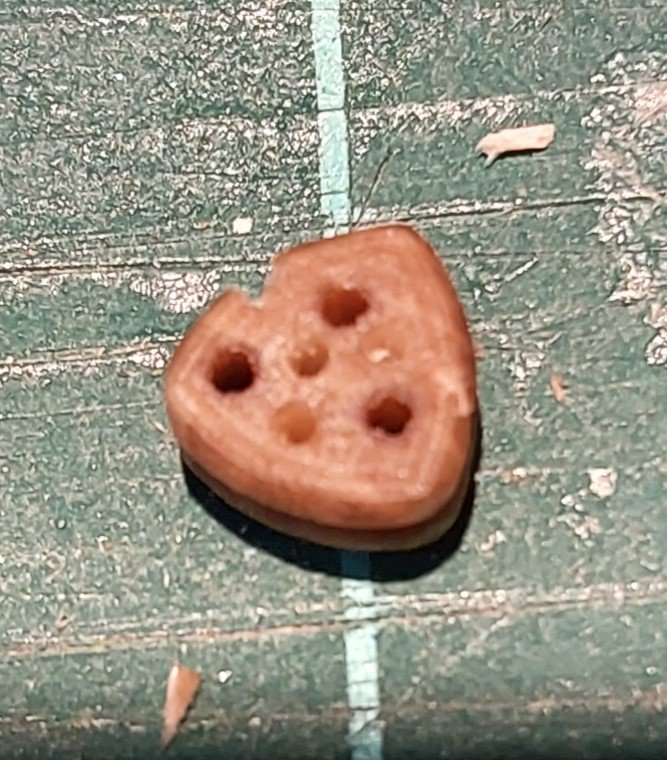
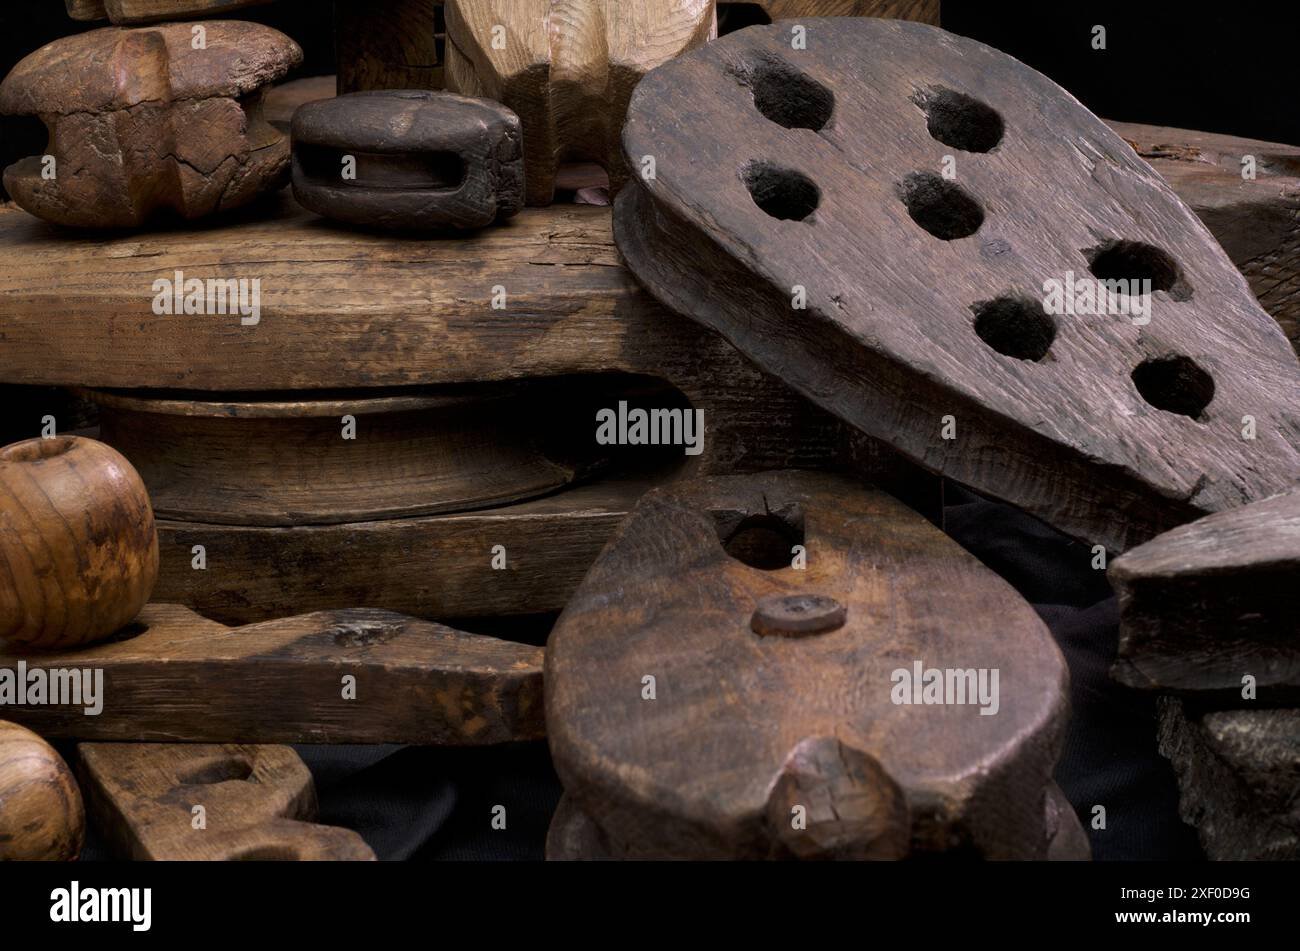
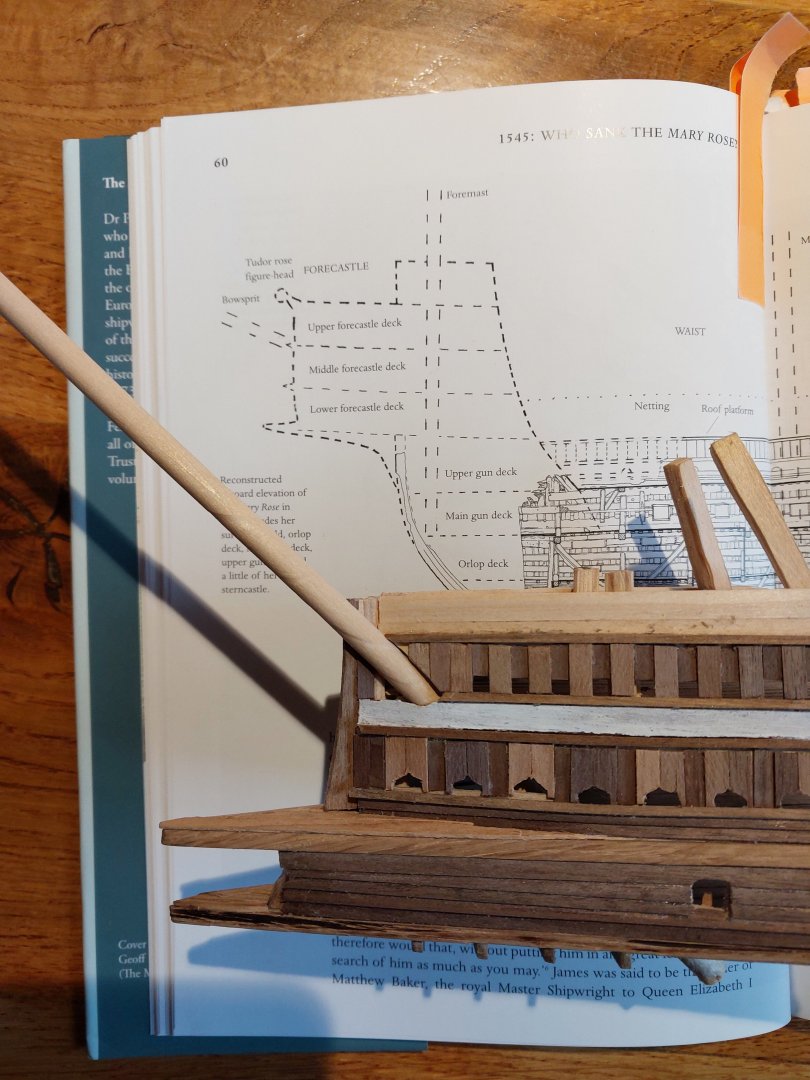
And here's a slightly build-adjacent post: I went to the Mary Rose Museum in Portsmouth Historic Dockyards this weekend! I've been meaning to go ever since I started this build, and it was nice to be back in the city (even if it was a rather gloomy day). I took a whole bunch of photos, but for the sake of brevity I'll just post some of the more interesting ones relating to my build. I'd really recommend the museum if you ever get the chance to go - it is quite expensive, but to see the ship in real life is really something else, and the rest of the dockyard attractions are also fascinating. First of all, the Caldercraft model according to the instructions: Curiously, this is clearly made with a very different wood to the version I have. I imagine it's been updated somewhat, but still interesting to note. The museum gift shop sells the kit for £400 - significantly more than I paid for it! A few of the various infographics within the museum use diagrams that this was clearly based on, with short castles and the weird boxy forecastle. Obviously this was an early vision of the ship, but I'm surprised that they've not updated it. On to the actual museum. Here's the ship's bell: And some anti-boarding netting: This hasn't helped my quest to add the netting to my own build, but it was very cool to see some of it. I think at my scale each hole will be about 1mm - I'm concerned this will block vision into the waist a little. Here's the first glimpse you get of the ship herself: You'll have to excuse some of the following photos - my phone was really struggling as the main room of the museum is kept quite dark, I assume to preserve the wood. This wasn't my first trip to the museum, I've been twice before, but it always blows me away how well-preserved the ship really is. It's possible to pick out individual cabin walls, and one of the museum staff used a laser pointer to show us where the carpenter and ship's doctor were located - fascinating. Here's one of the slings: The same museum staff member - who was, incidentally, dressed in full Tudor costume - gave me an interesting factoid on this. All of the two-wheeled cannon carriages were apparently military cannon, brought aboard for use by soldiers who were untrained with the larger, four-wheeled naval cannon. This explains some of the mix of cannon aboard, with breech-loaded slings mostly in the waist and castles, whilst the naval cannon were operated by the ship's permanent maritime soldiers in the main gun deck below. This was apparently the very beginning of what we now call the Royal Marines, that is, soldiers who were deployed upon ships. Here's some more views of the ship herself. We were standing at around the height of the main gun deck and waist here. I tried taking a panoramic photo here but unfortunately the light levels were simply not good enough. Even so, I hope you can get an idea of the scale of the Mary Rose from these, as well as how remarkably well-preserved she is. On the same level we found the figurehead, and some digital reconstructions of it: I'll definitely be trying my hand at recreating this - fantastic stuff! Further on, some more really interesting stuff about the cannon; I'd guess these were some of the better preserved bits, and I'm sure they're very popular with the public as well. Really interesting to see these in person, and has happily reinforced my 3D-printed creations. Awesome stuff. Here's one of the two enormous ship's cauldrons, arranged as it was found: One of the bricks here had a dog's pawprint on it, a lost remnant of an animal now nearly 500 years gone. Crazy. The Mary Rose from the bow end: Here are some of the blocks, tackle and other rigging paraphernalia: You can see a few parrel beads on the left there, though there was a fully assembled parrel later in the museum. A note - where the museum wanted to demonstrate missing parts, they've replaced them with perspex, as with the blades on the knives in the right photo. This is to help distinguish what is real and what is reproduction, especially in the gloomy museum. Here's the parrel: The ones in the Caldercraft kit are seed beads with brass etching for the ribs - that's the next project for me, so wish me luck! And here are everyone's favourite deadeyes: On the bottom photo you can see one of the pulleys in the process of being carved out - this was found in the carpenter's cabin. How amazing is that?! Another cannon, this one a brass culverin that points forward out of the sterncastle's forward wall. This is placed in a position that directly mirrors the wreck of the hull, helping give visitors an idea of where everything would have really sat: And here's an interesting one: That's one of the 'fowlers', or Pierrier à boîte which were discussed earlier in the build log for my forecastle. On my model, these are 12mm long. You can see the 'beer tankard' breech loading mechanism, which would have been filled with gunpowder. Again, I took a fair few other photos, but mostly more of the same, a few references of cannon etc. - a lot of what I'm doing now is rigging and masts, which are pretty absent in the museum - for obvious reasons! On the way out I did find this, which I thought was quite funny: I've had a look at this online, and it would appear that the castles in this plastic kit are actually more accurate than the Caldercraft model. Hilarious. There was one other slightly more accurate model in the entrance foyer to the dockyard itself, but unfortunately I didn't get a photo of it - I'll definitely be going back, so will try and remember next time. A few last photos to finish off the post, not the Mary Rose but in the dockyard. First, the hull and keel of the Victory: Last time I was here, you couldn't walk underneath, but at the moment the ship herself is coated in scaffolding - we did go onboard, but photo opportunities were limited. She's undergoing major restoration, and will be under wraps until 2035! And here's a modern juxtaposition, the HMS Queen Elizabeth and HMS Prince of Wales (not sure which is which!) A photo doesn't do justice to how enormous these things are - from a distance they looked like buildings on the skyline. A fun tidbit from the trip - the Queen Elizabeth has a Tudor Rose as her 'figurehead', much like the Mary Rose did. That's all folks. Again, if you get the chance to go to the museum, please take it - it's a real labour of love. Thanks for reading!


-
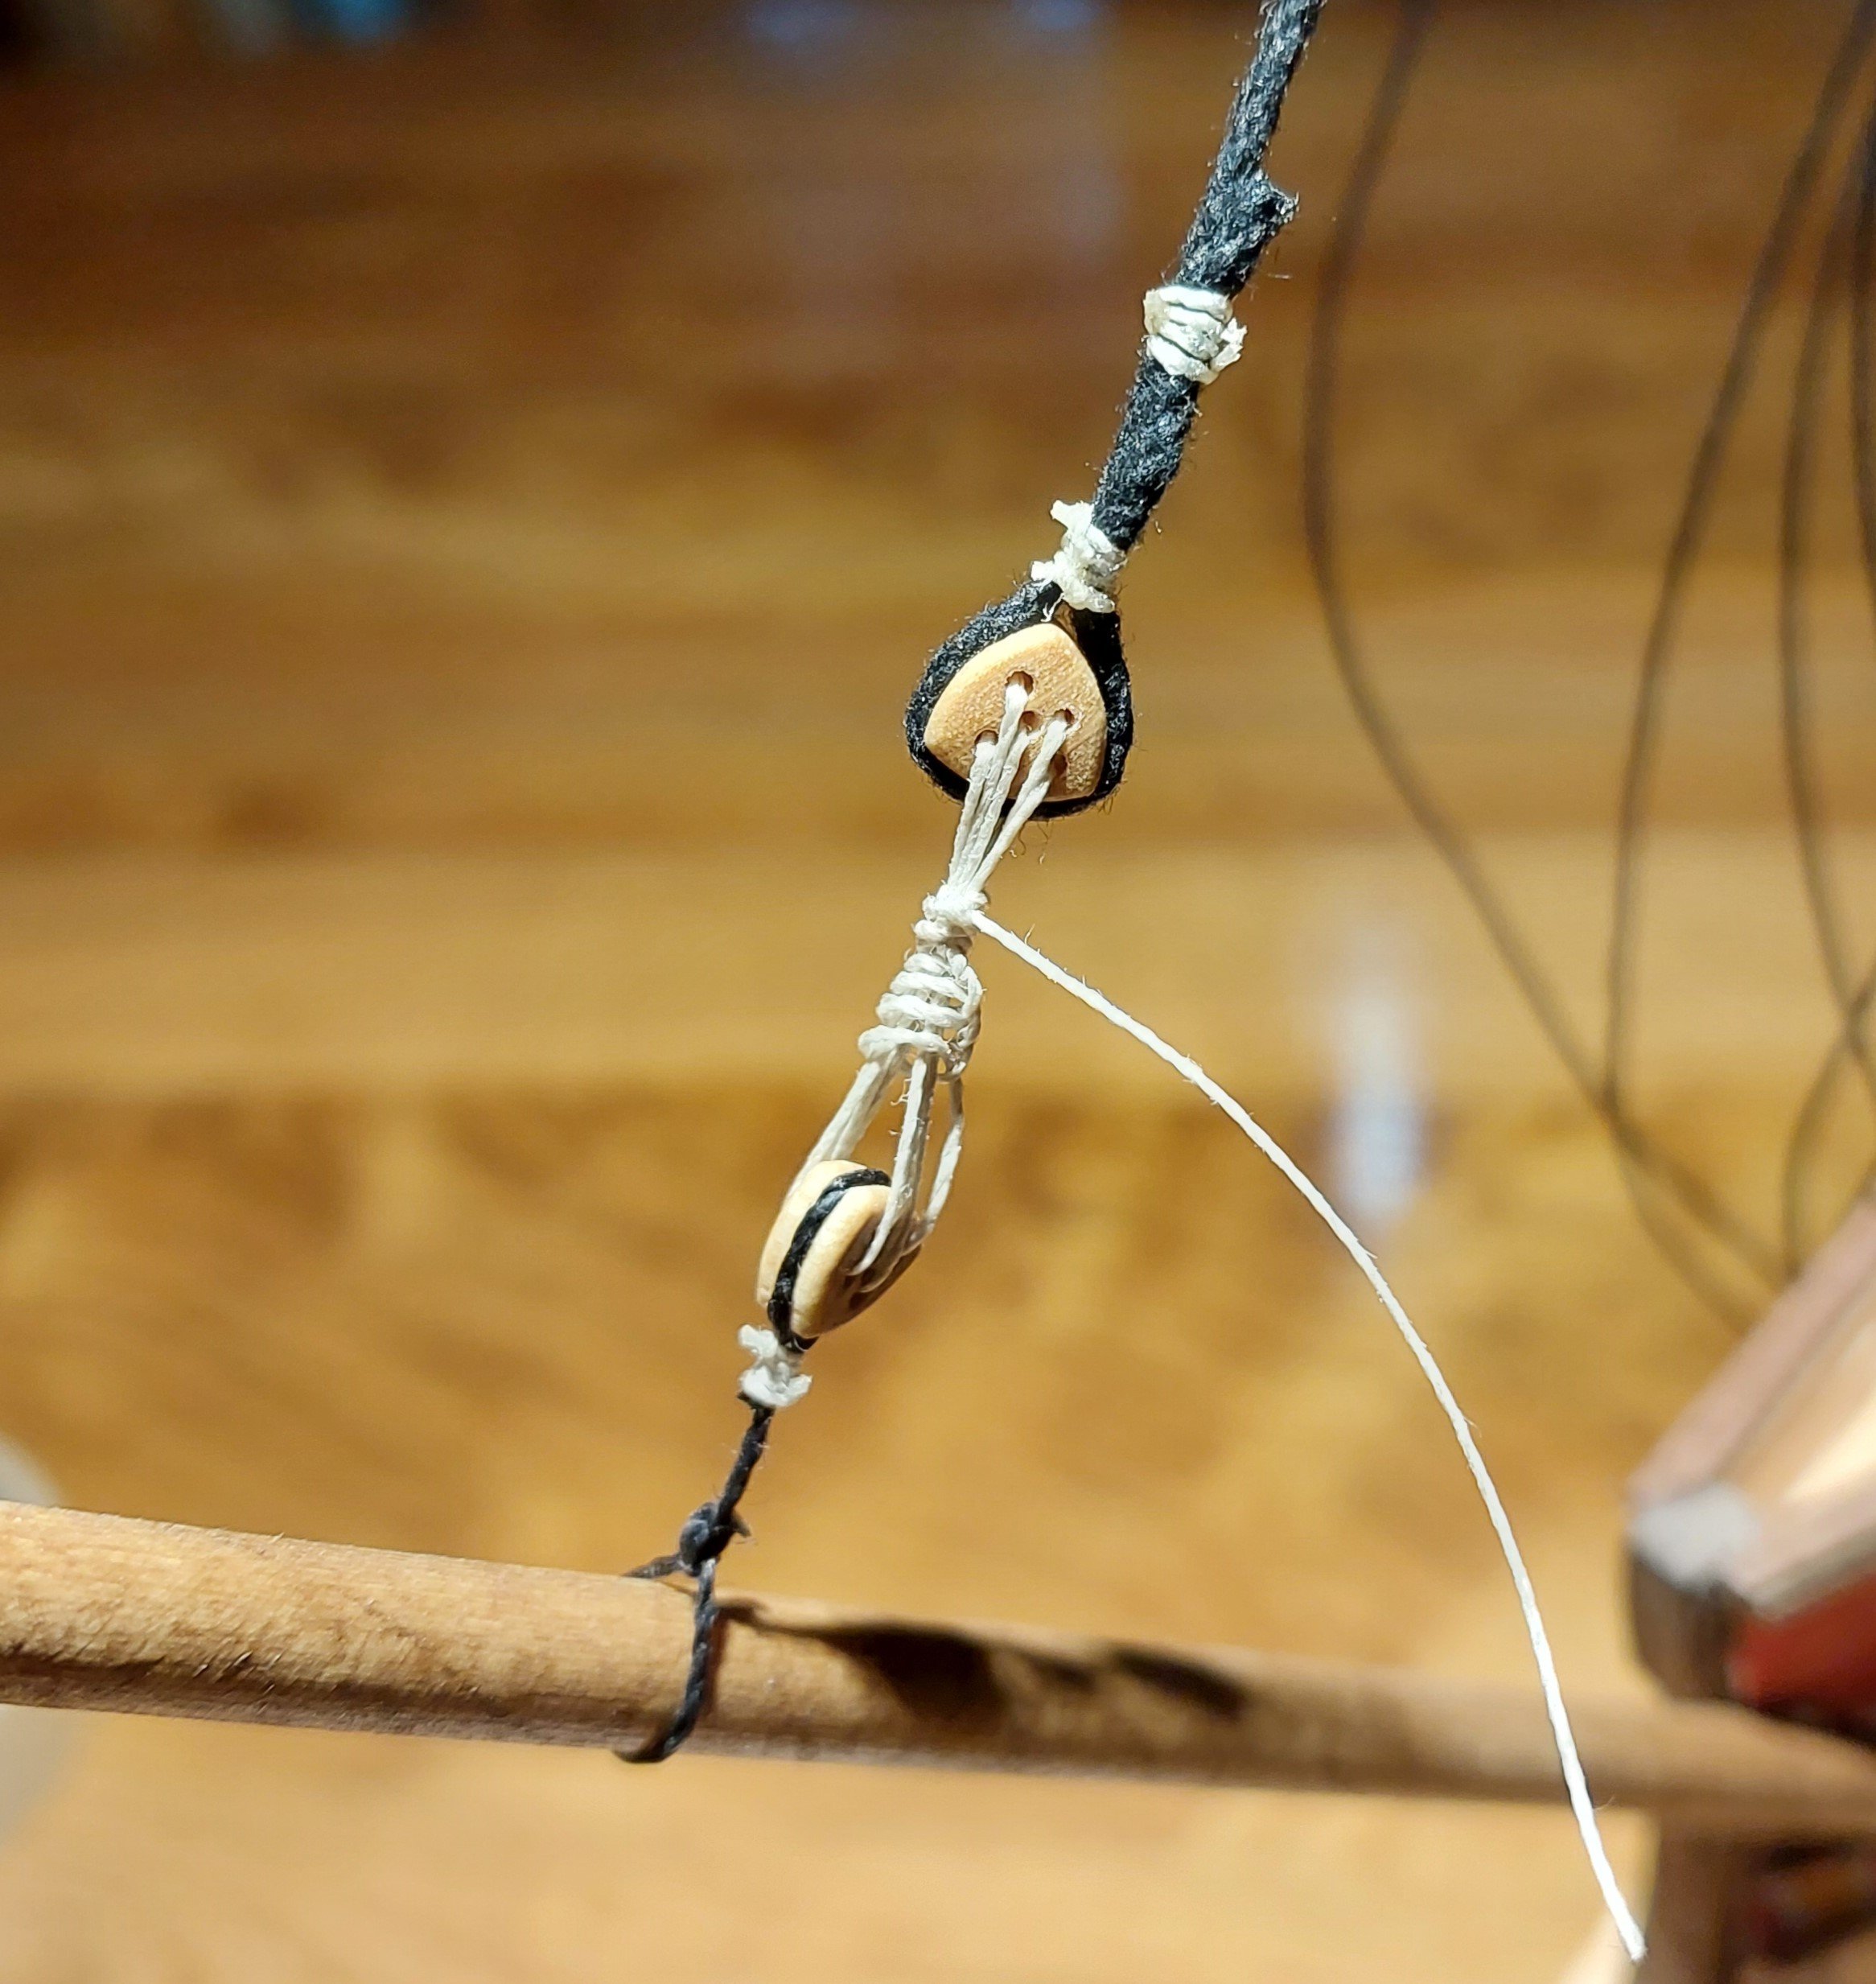
Thanks Patrick! I really like the colours, they stand out especially nicely against the walnut I've used in the sterncastle. Thanks for the heads up about the 7 holes only being for the mainmast - that'll save me a hell of a lot of work. I had a go at drilling a few extra holes into one of the deadeyes: I think this should work, though I suspect six might be easier to manage than seven for most of them. At this scale it's going to be a bit of a mess of threads, so I'll have a play with this. Not sure I've got the craftmanship skills to create deadeyes like you have on the Golden Hind! Thank you very much! I've put them at the heights suggested by Anderson in The Rigging of Ships, which has the fore top slightly lower than the main top, and from this the mizzen top is slightly lower etc. etc. - whether that's how the Mary Rose was, we'll never know, but I do agree it's an attractive way of doing it, so I think that's how they'll stay! Absolutely, there must have been a huge amount of weight in each top with all the various darts and hand-cannon they had up there as well, I can easily see how the capsizing happened. Thank you very much Eric!
-
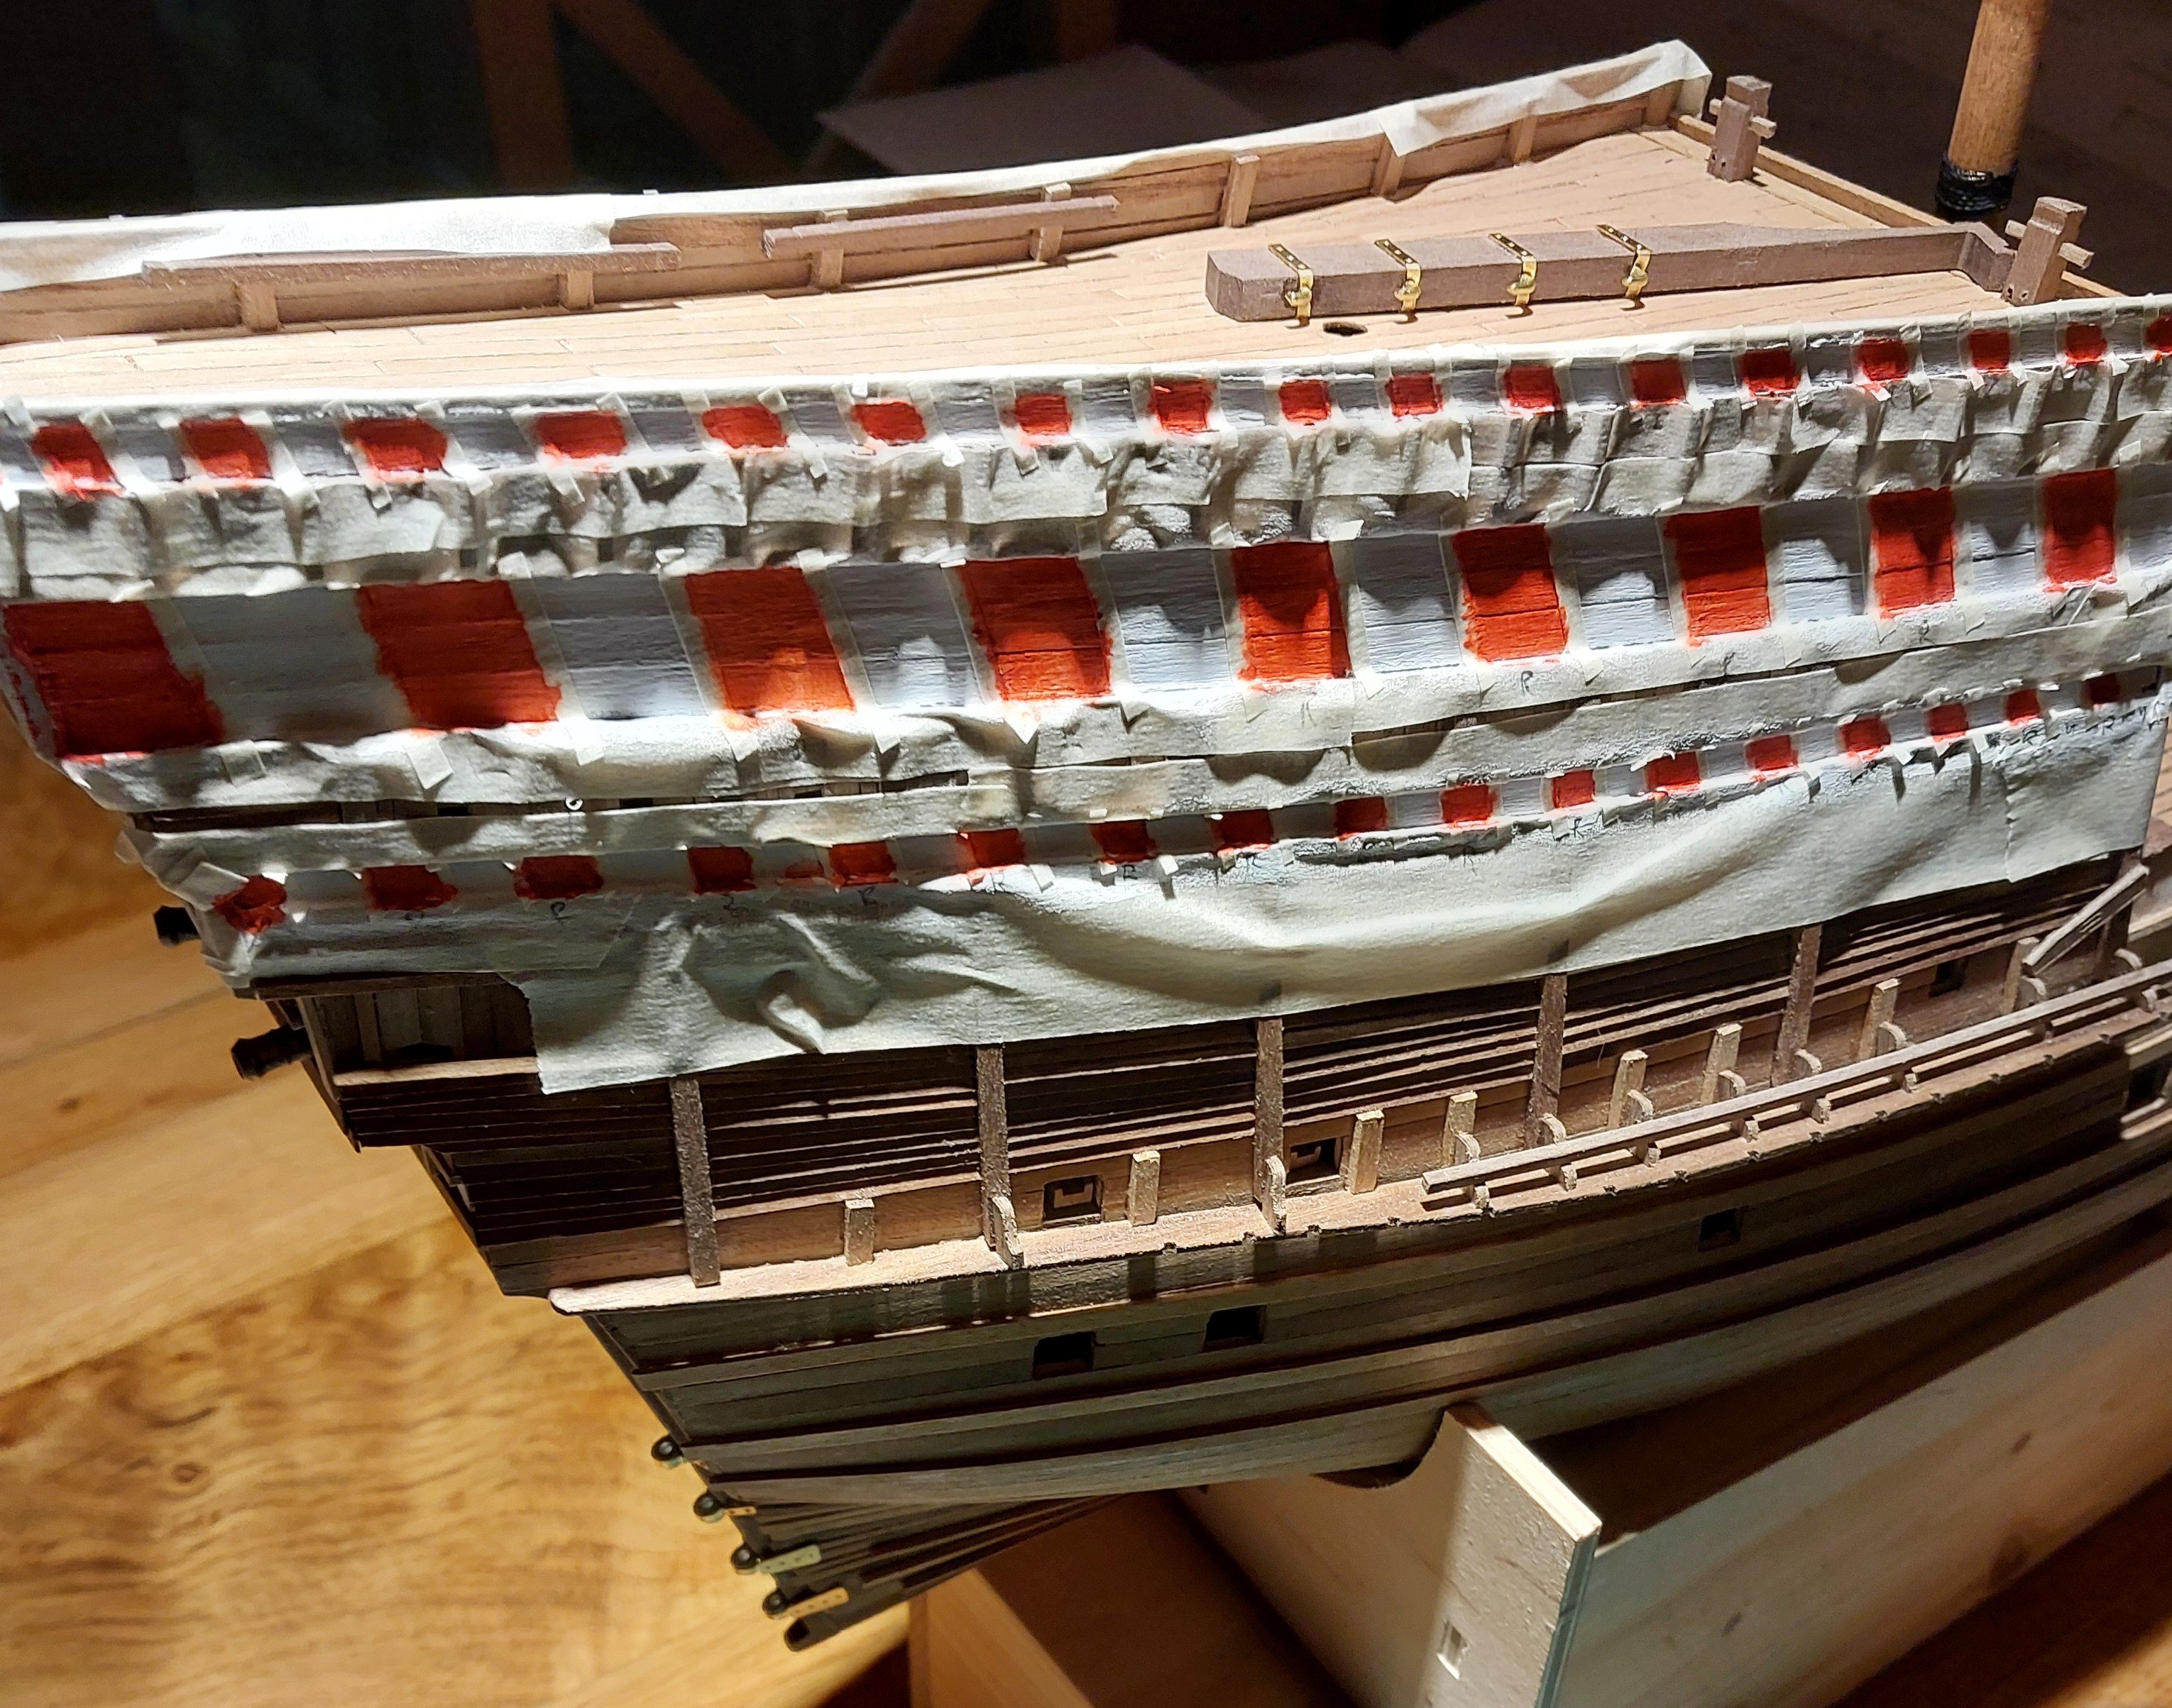
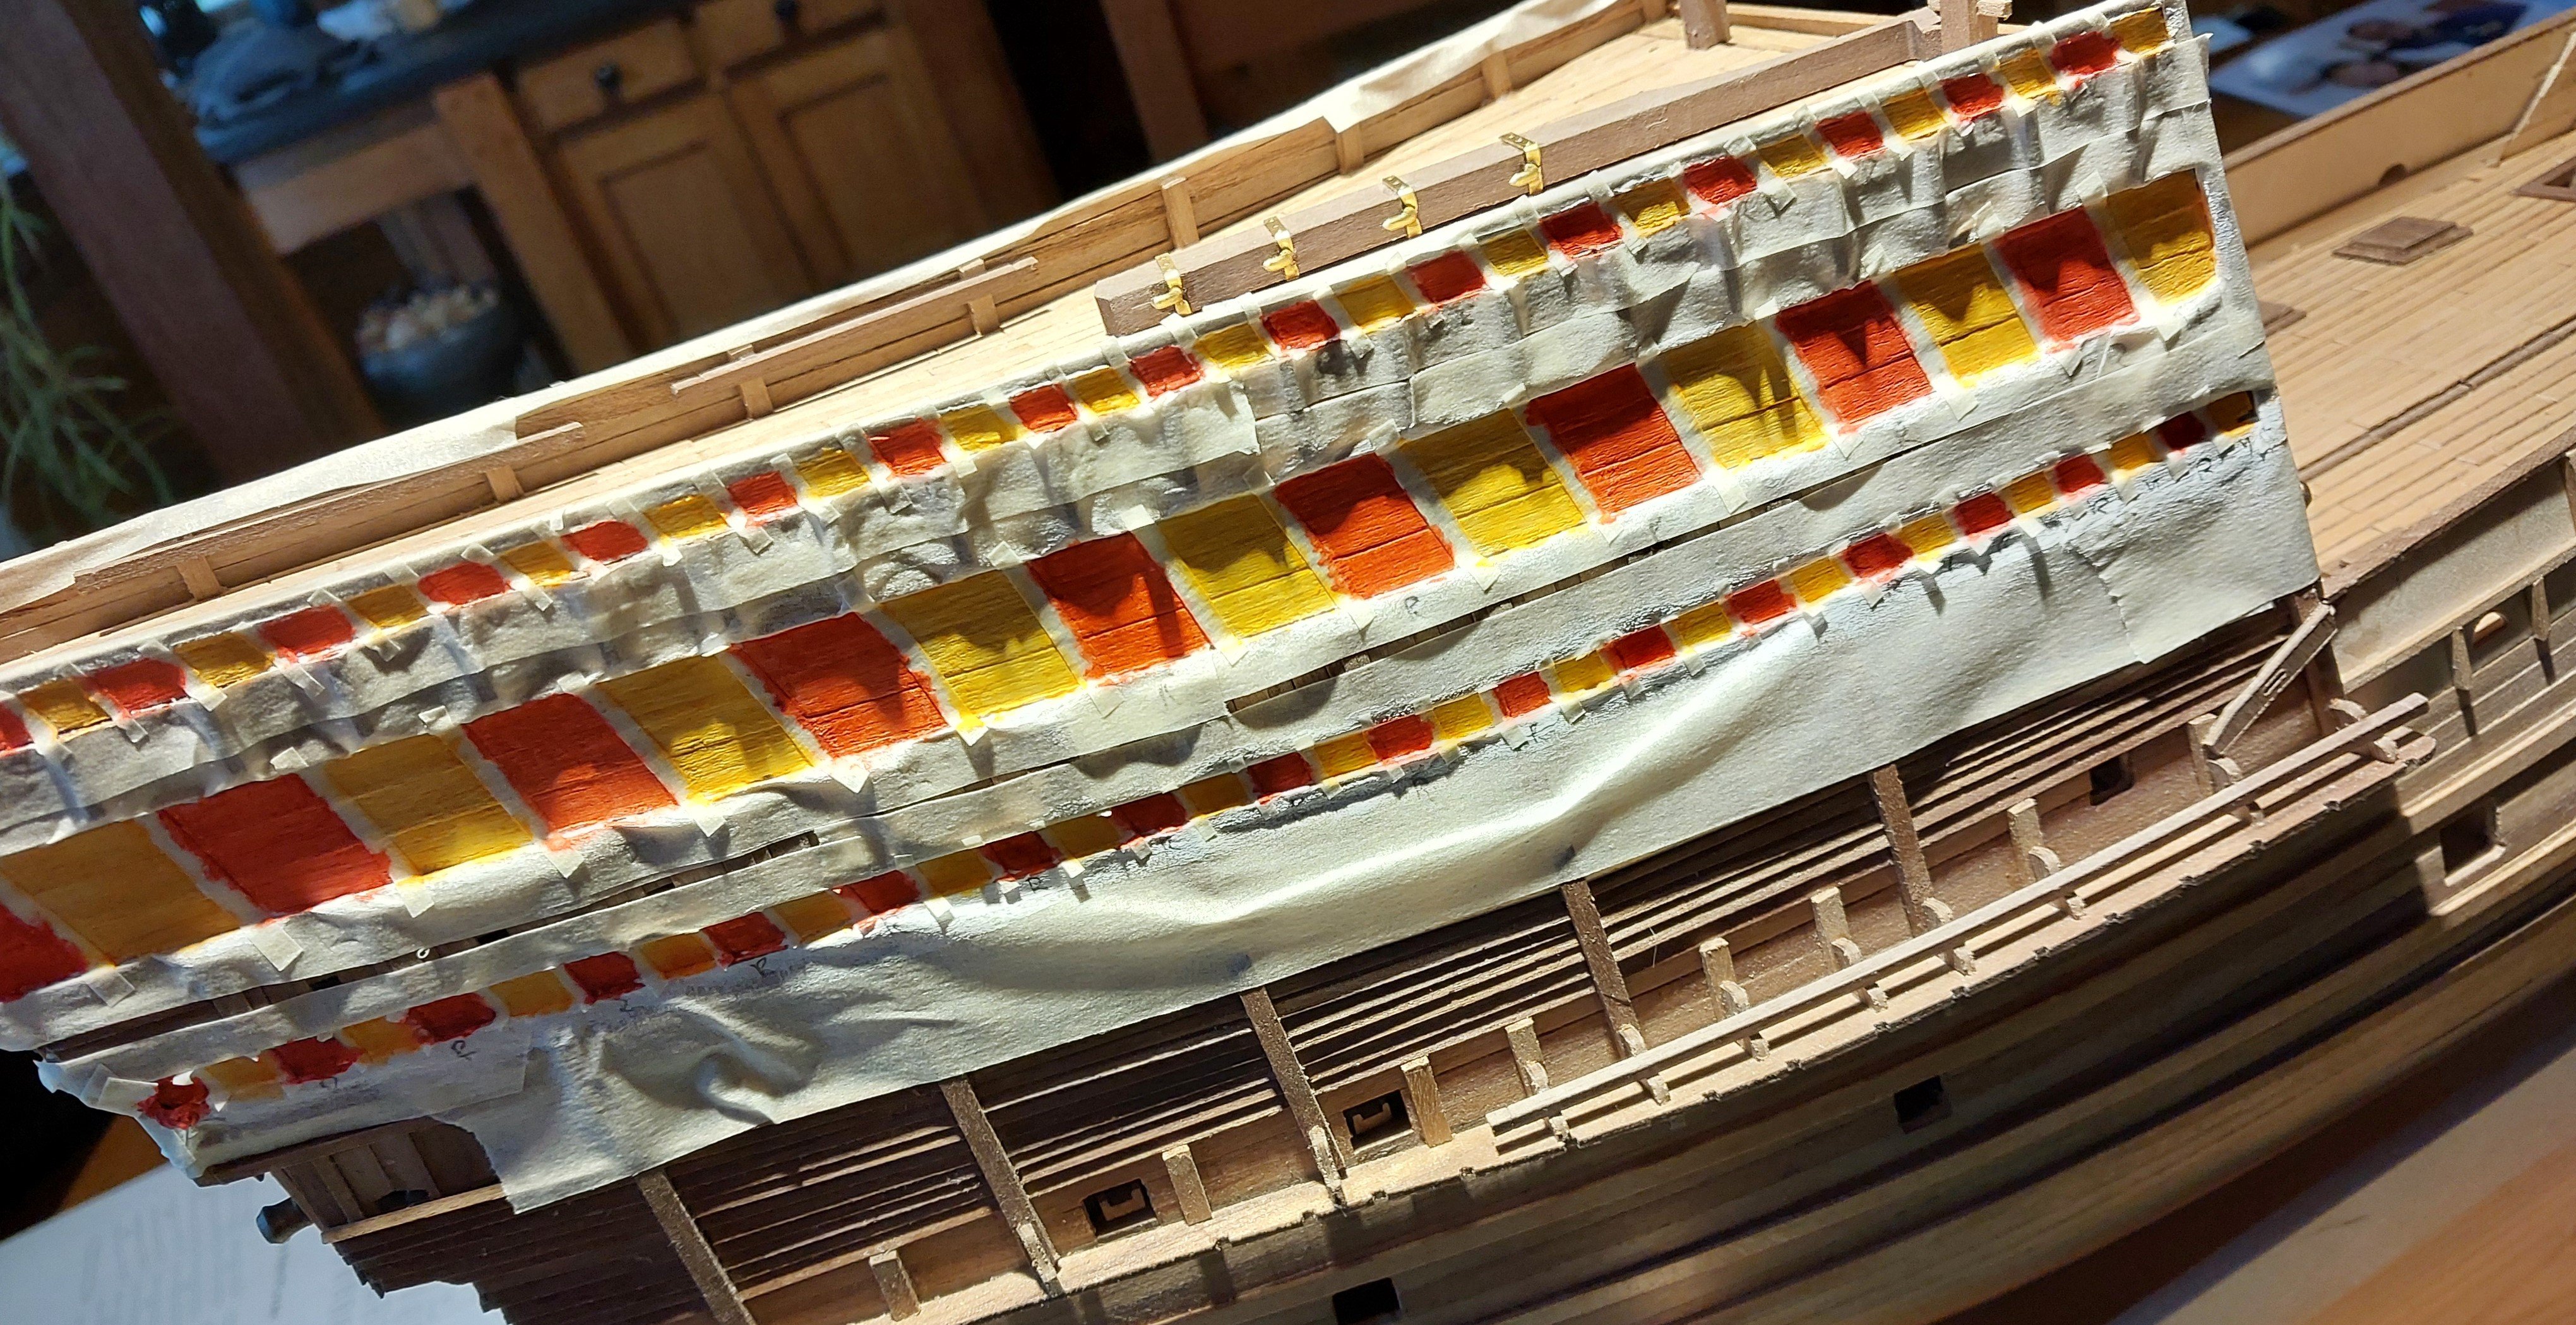
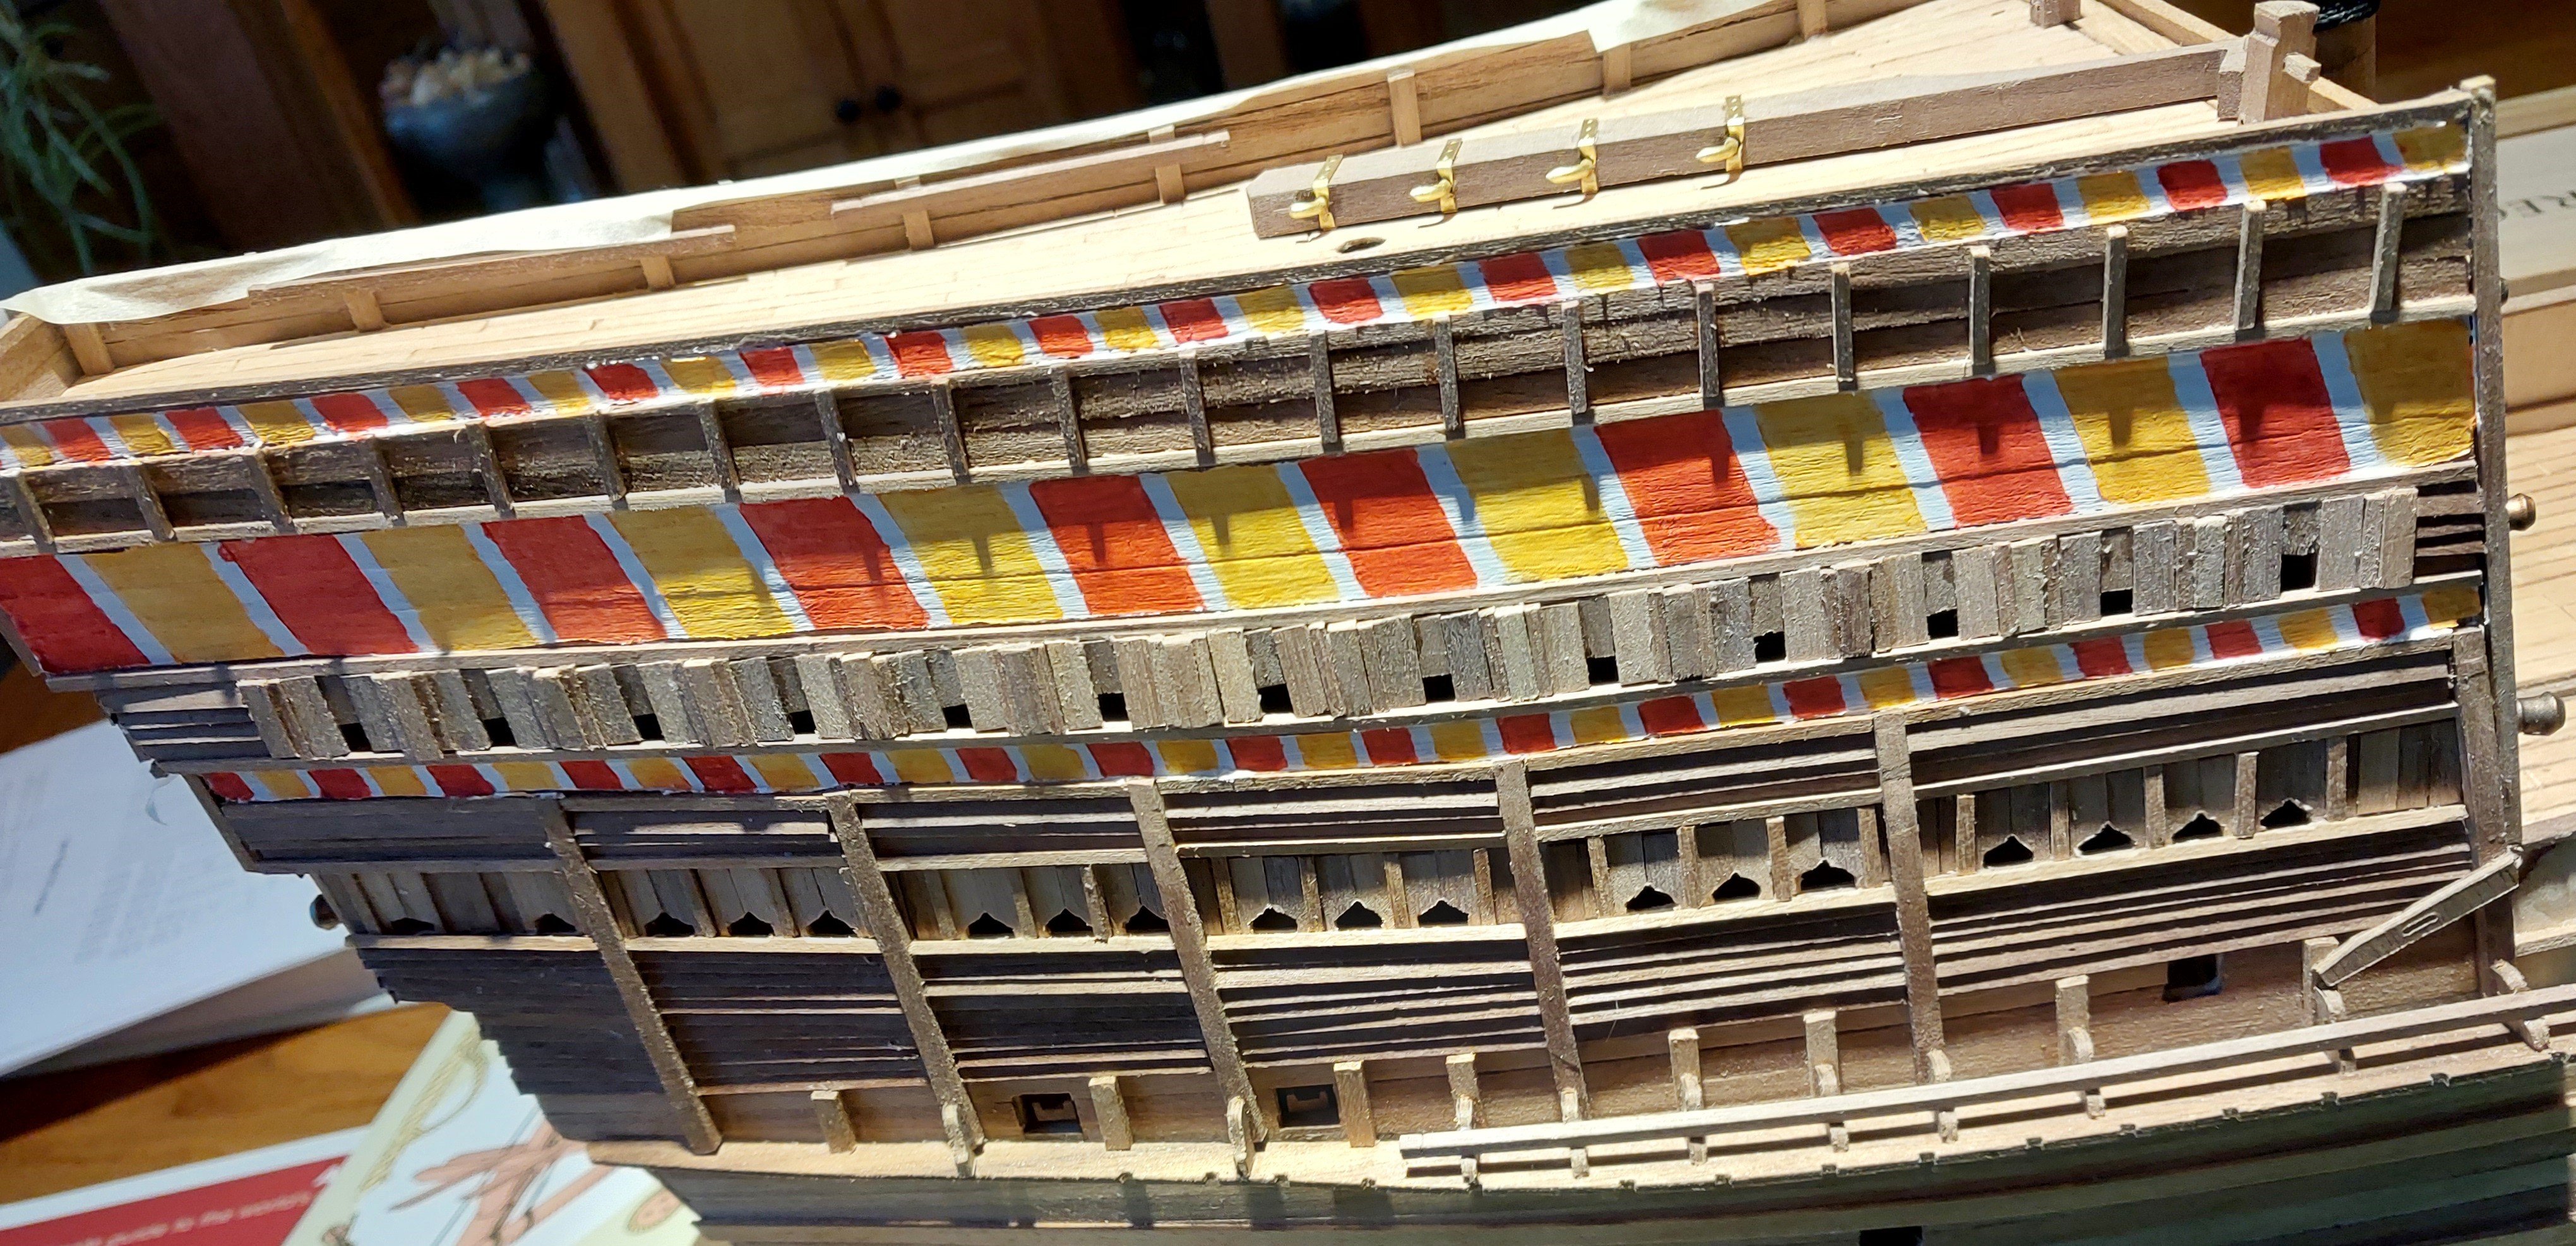
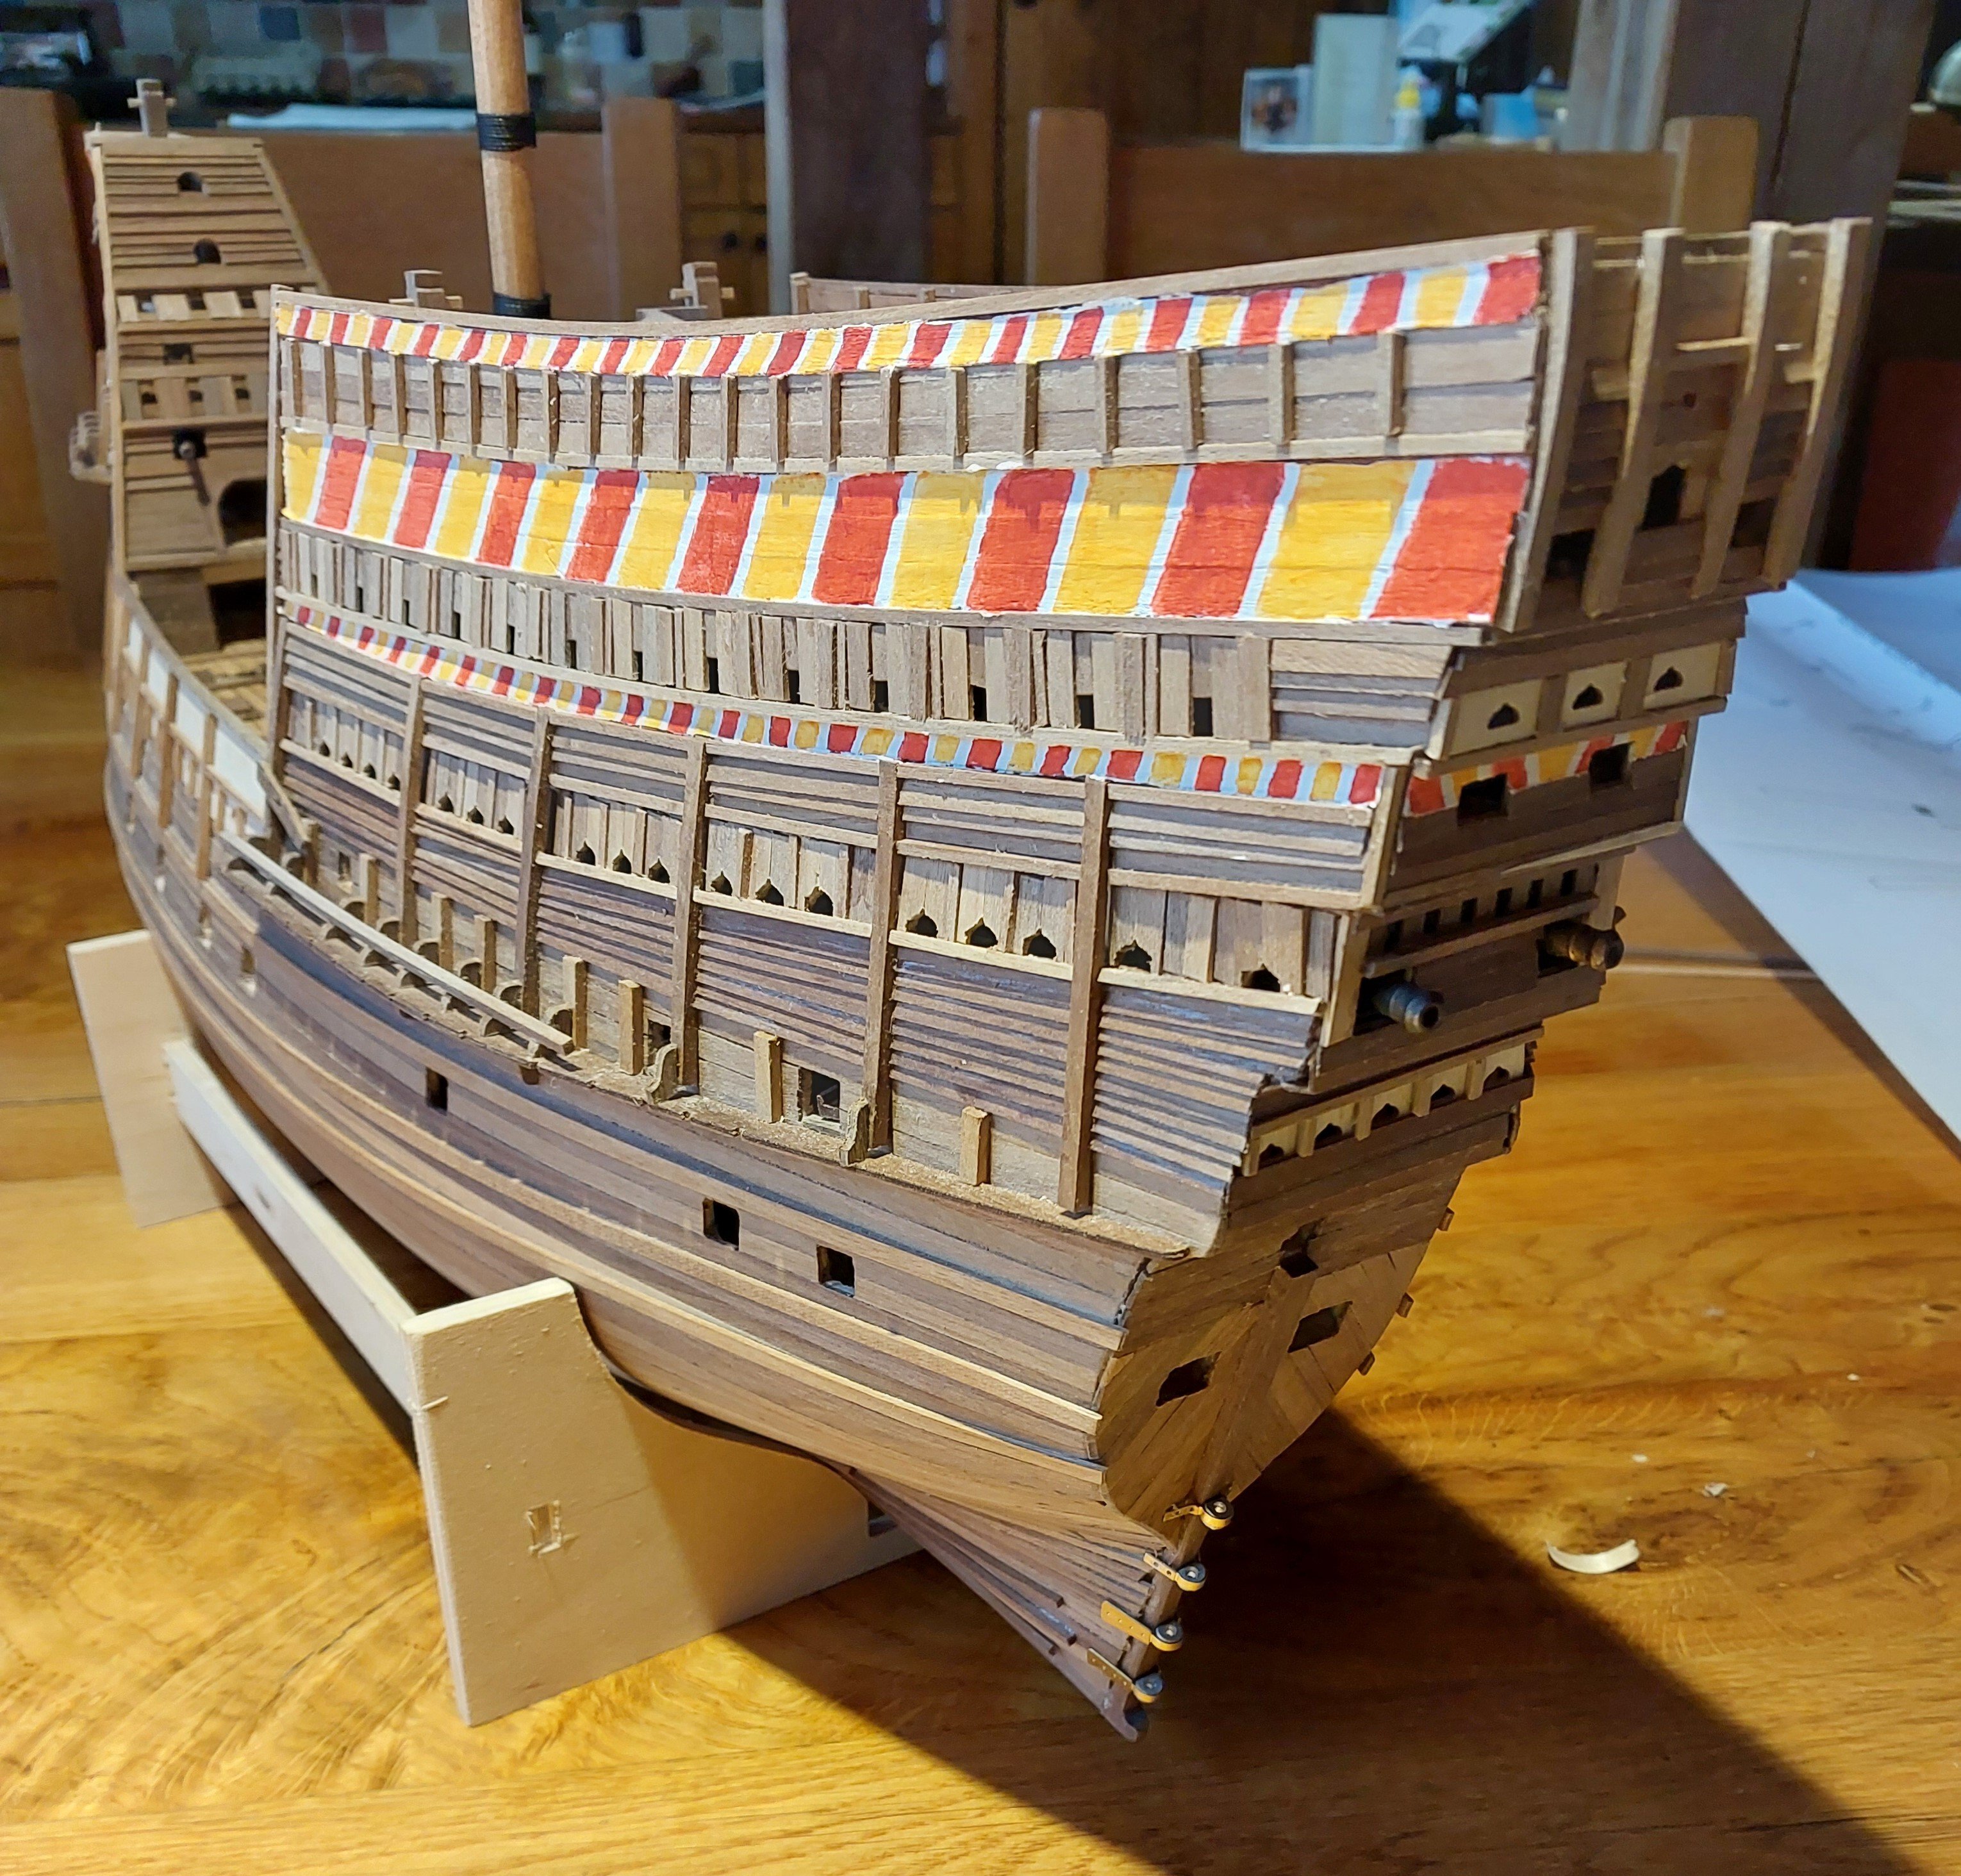
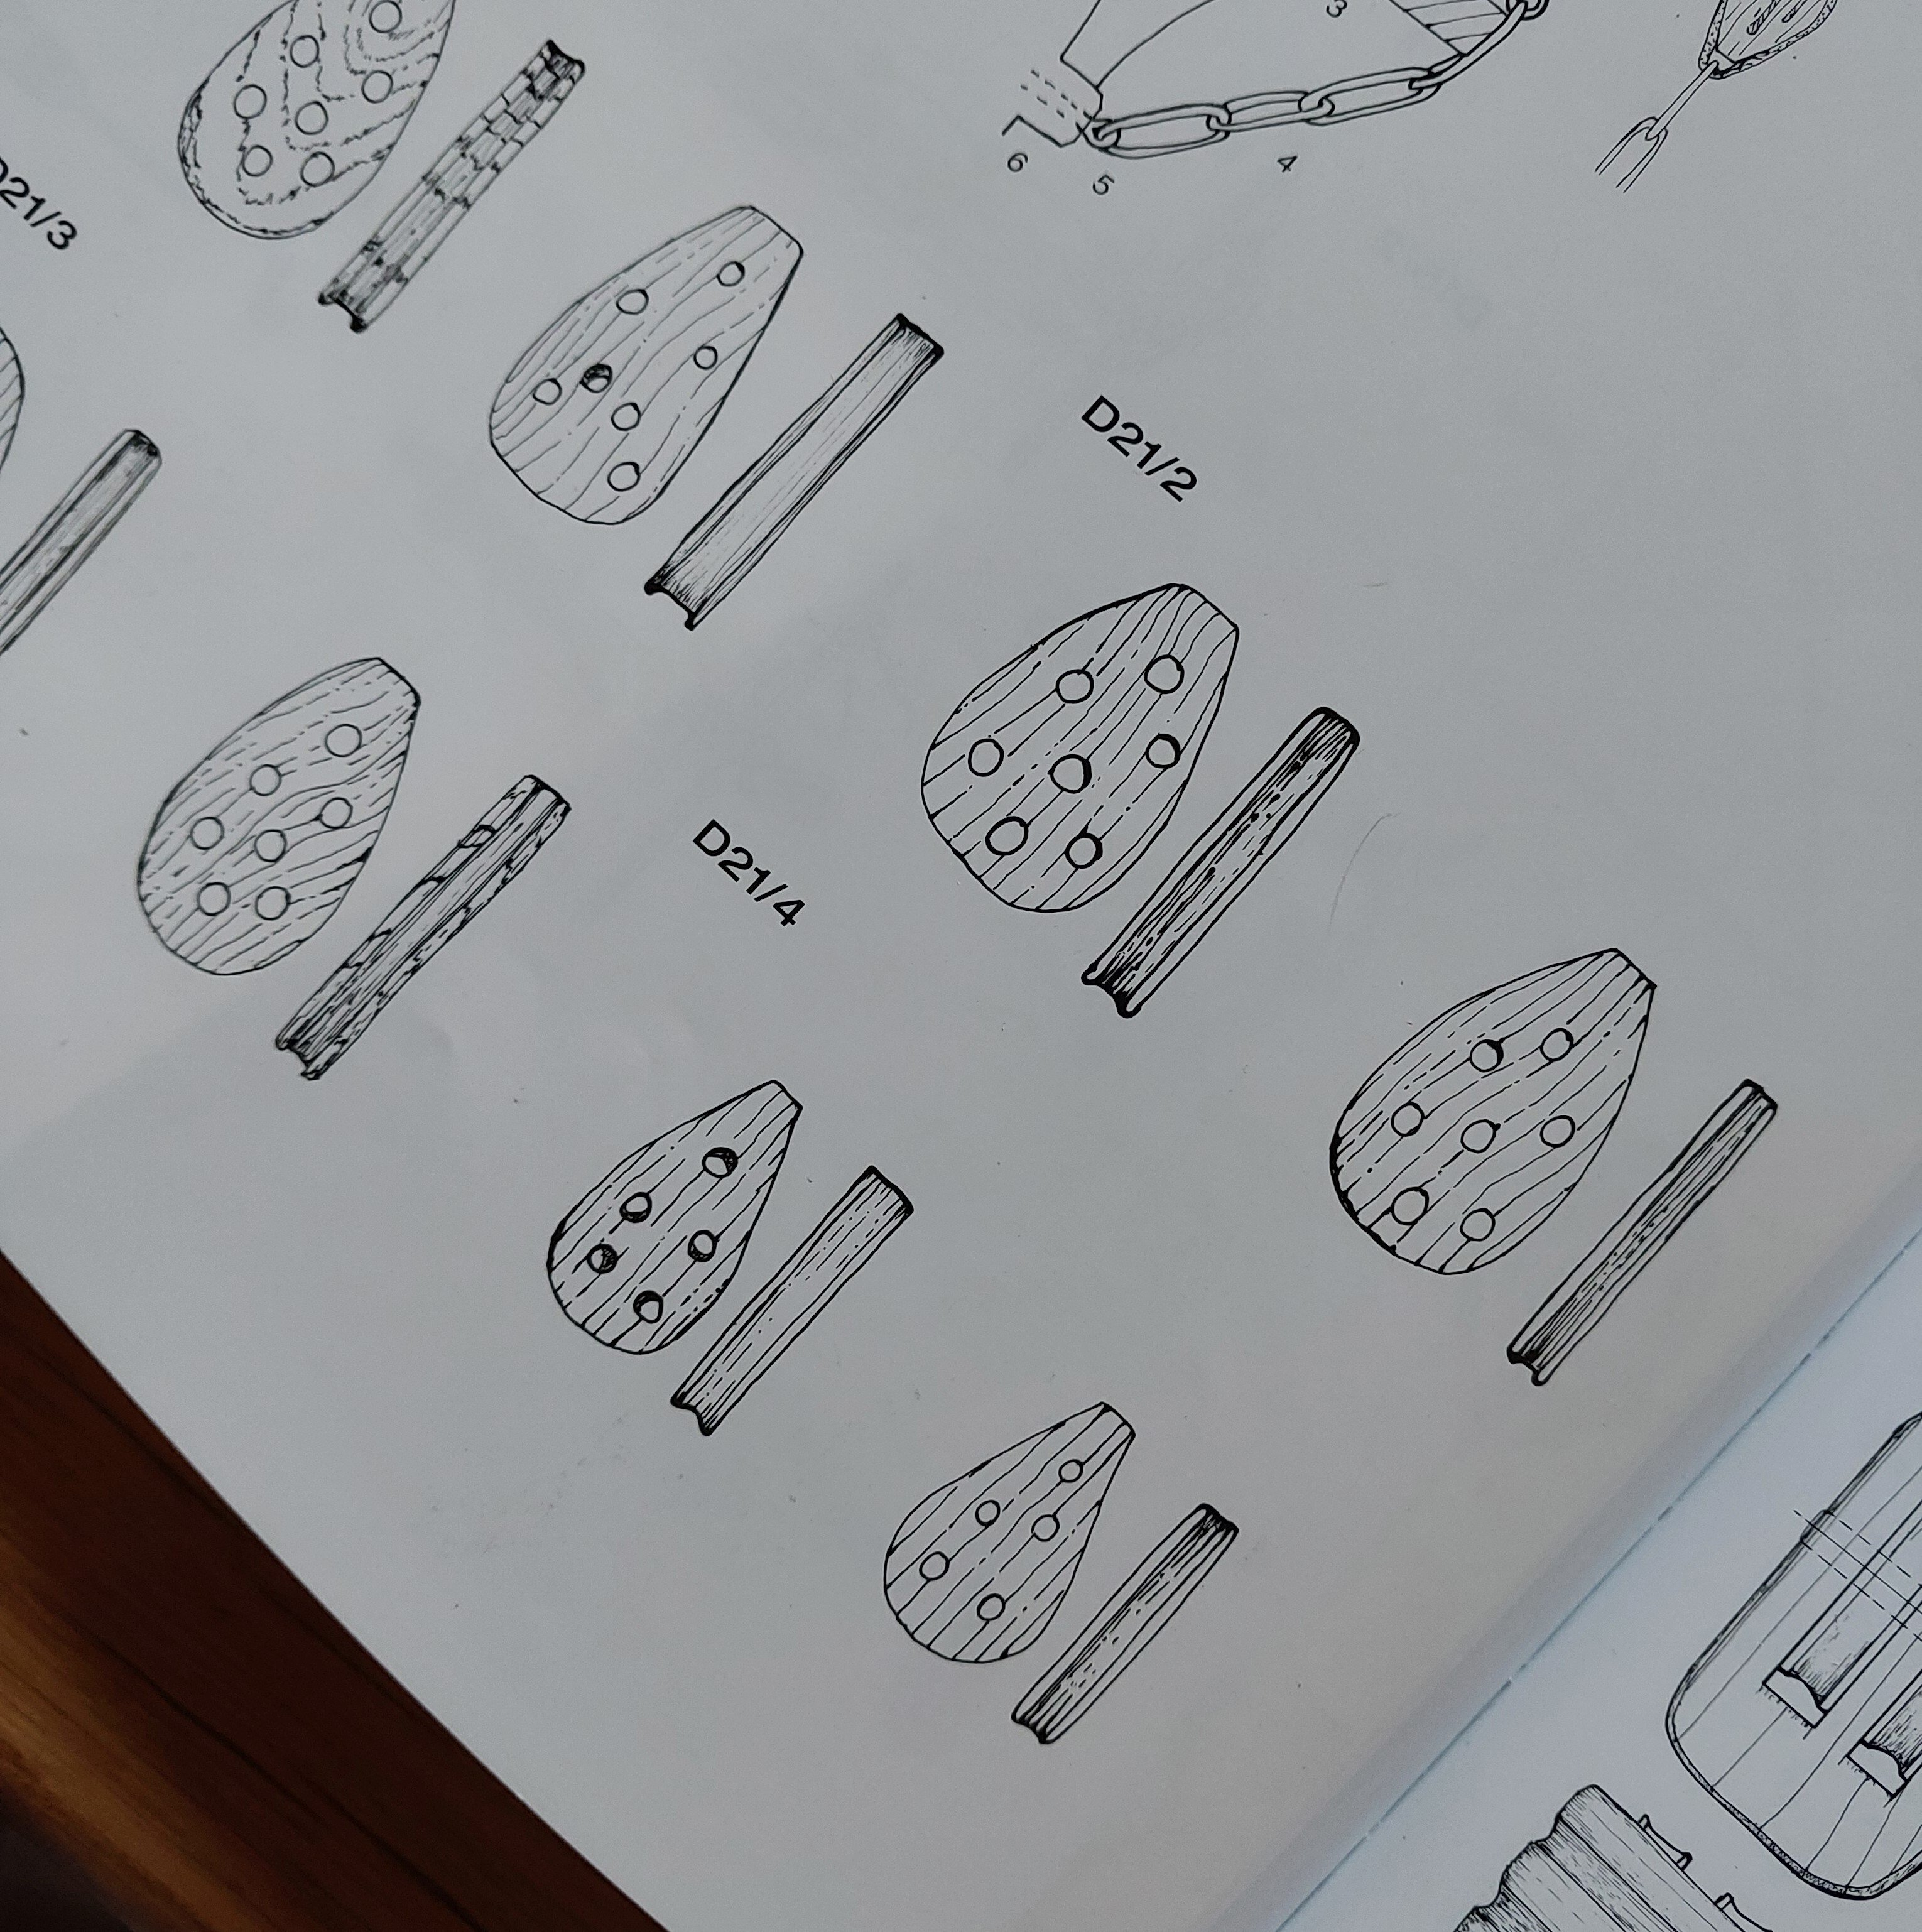
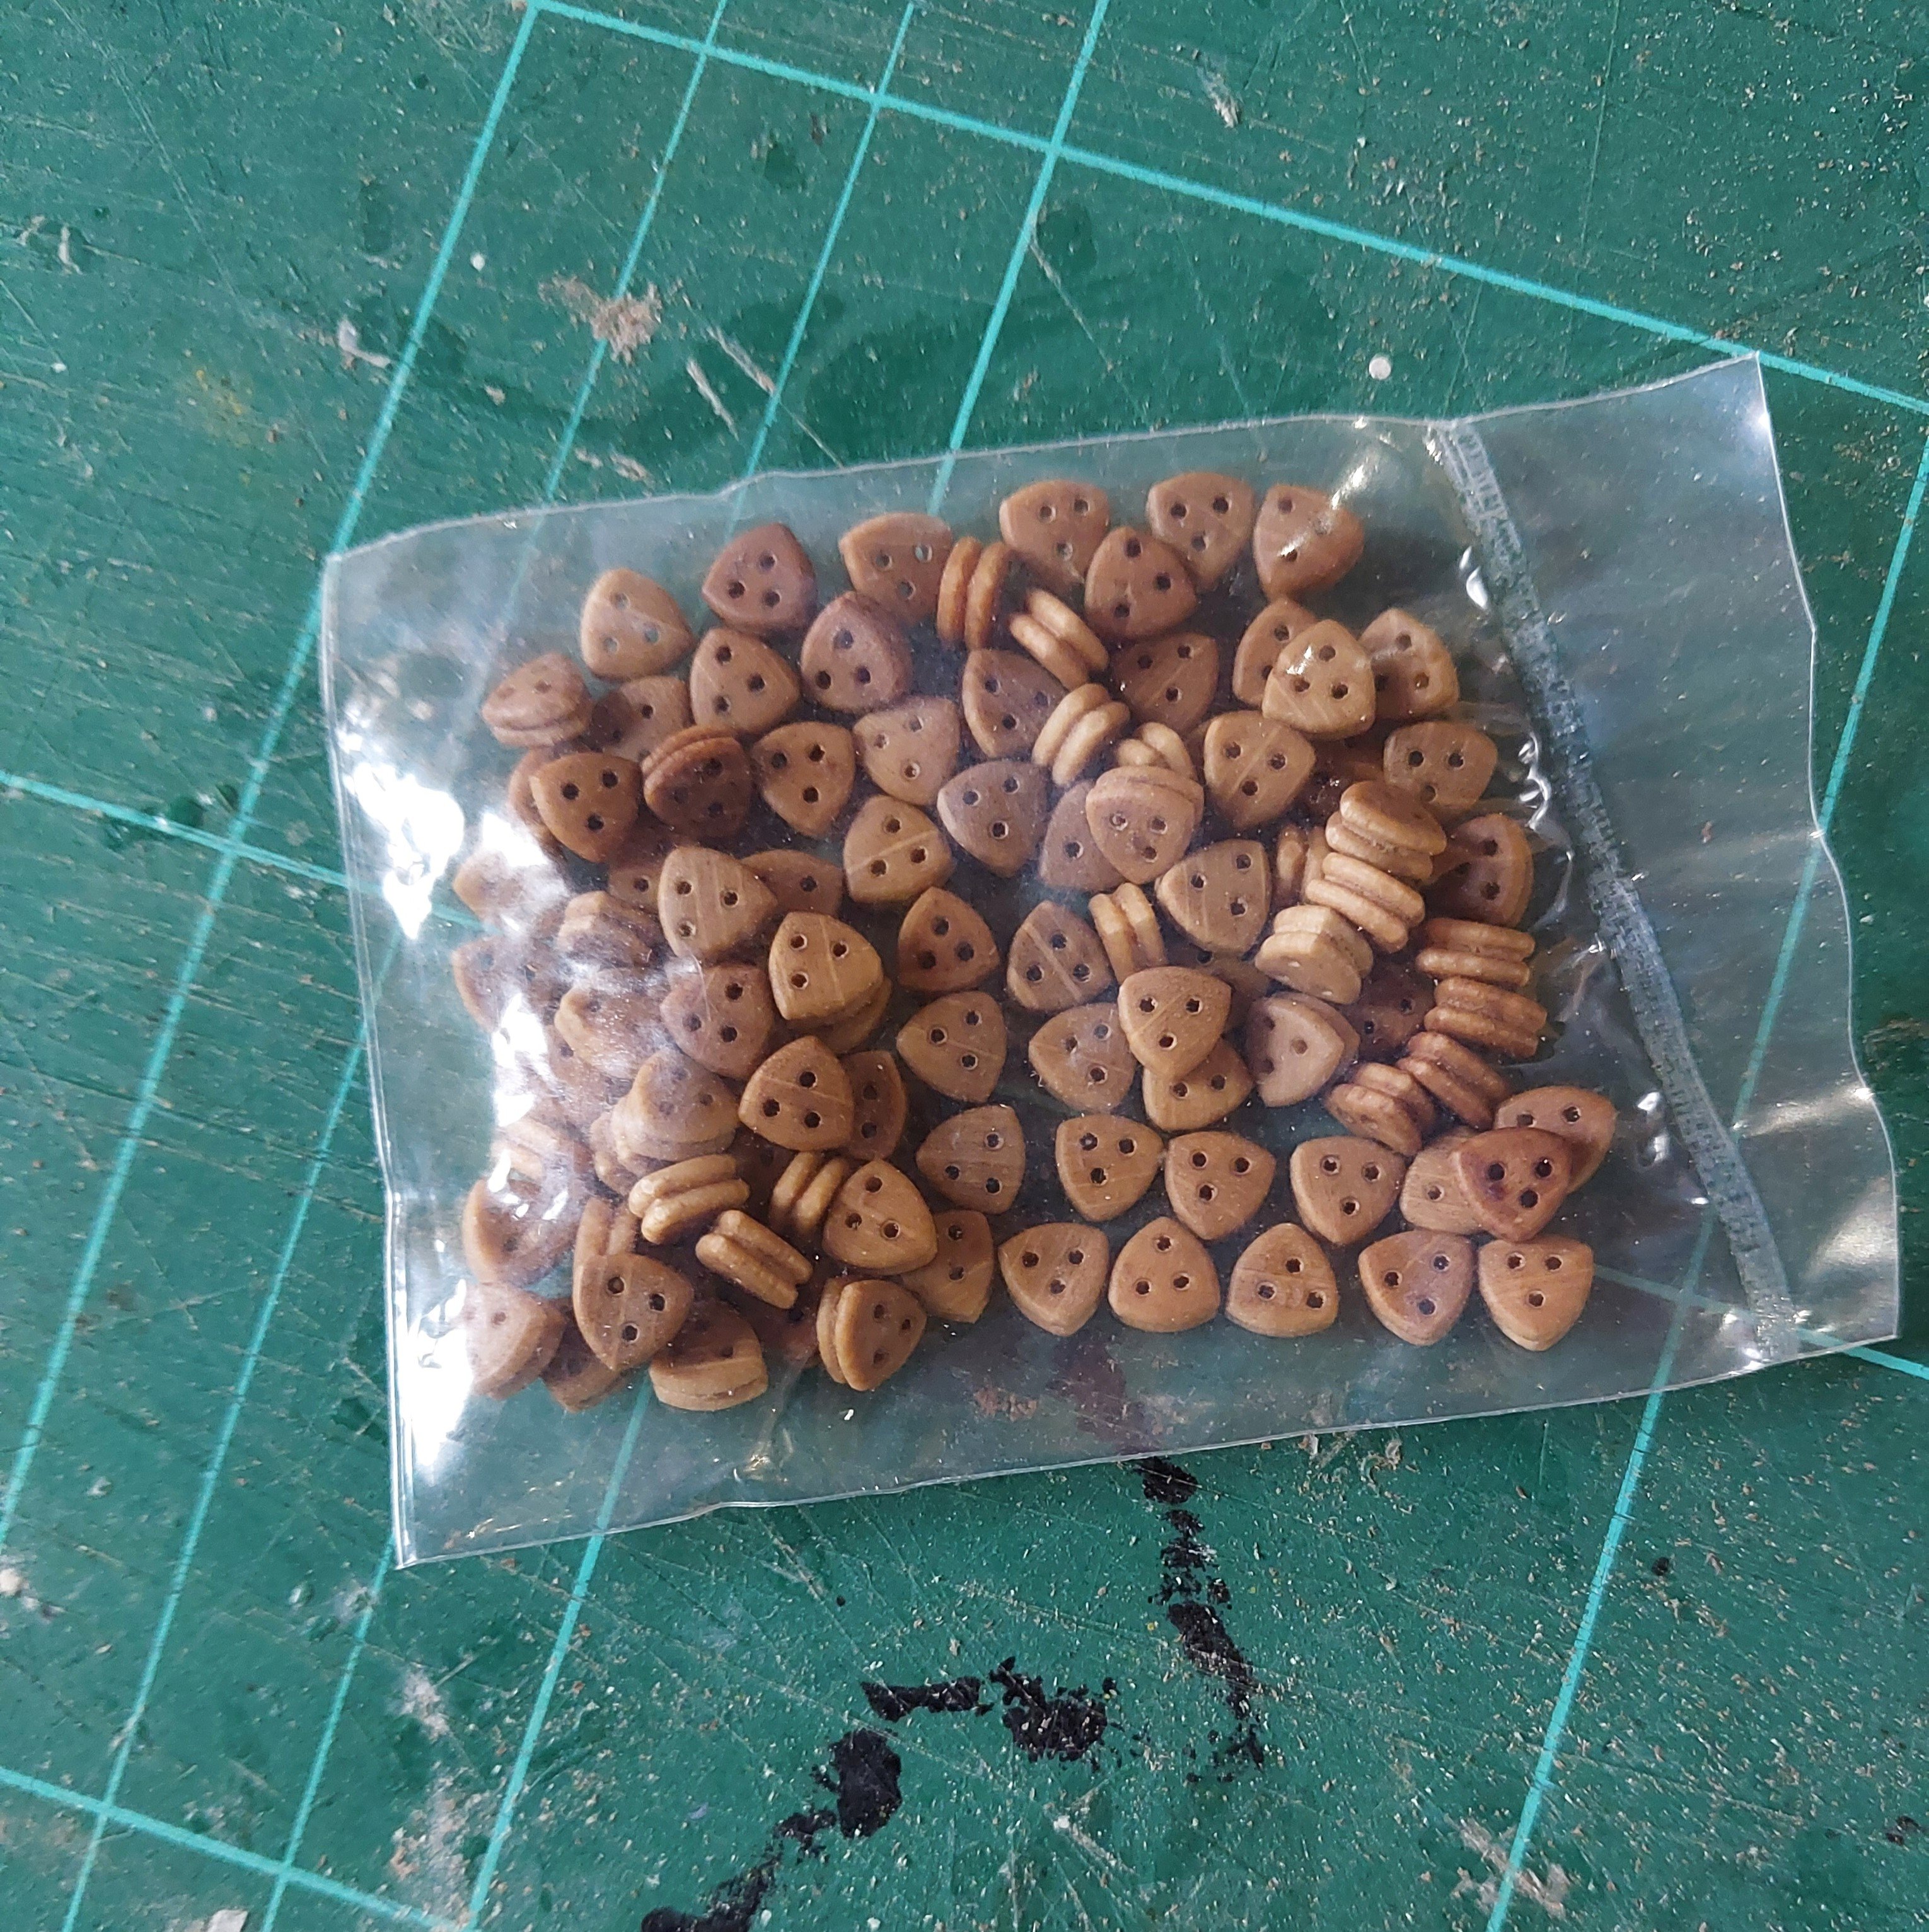
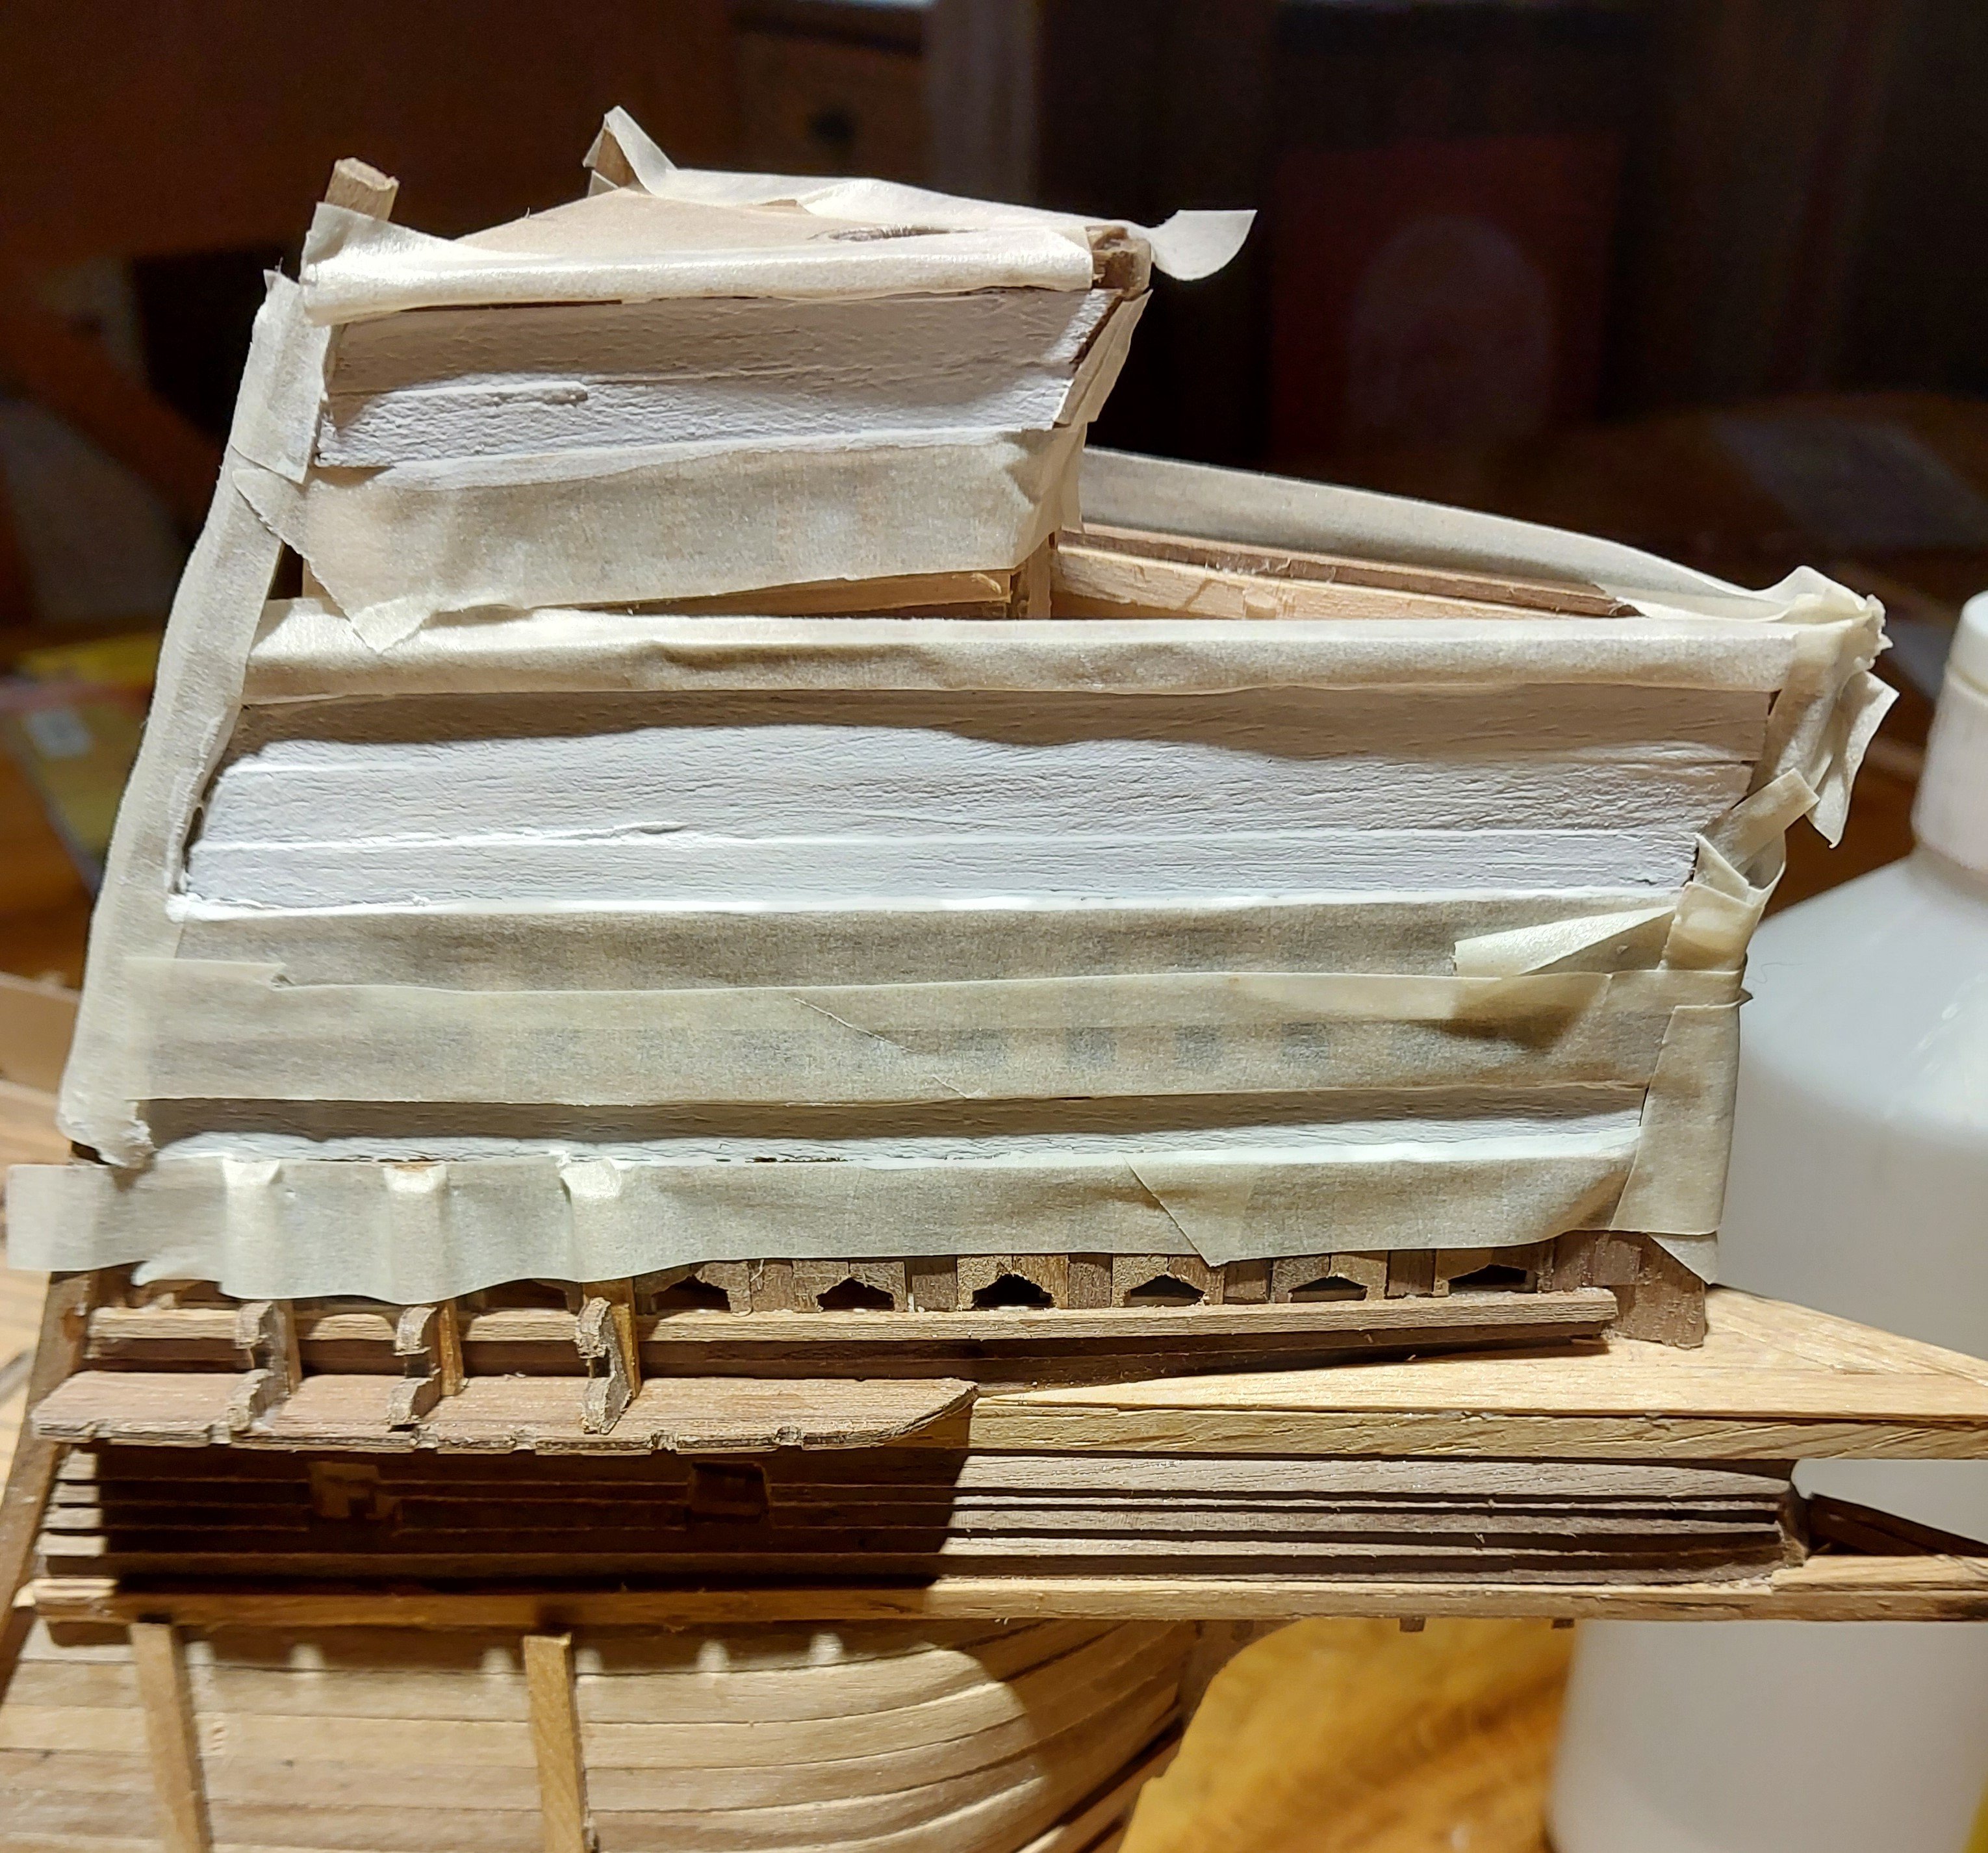
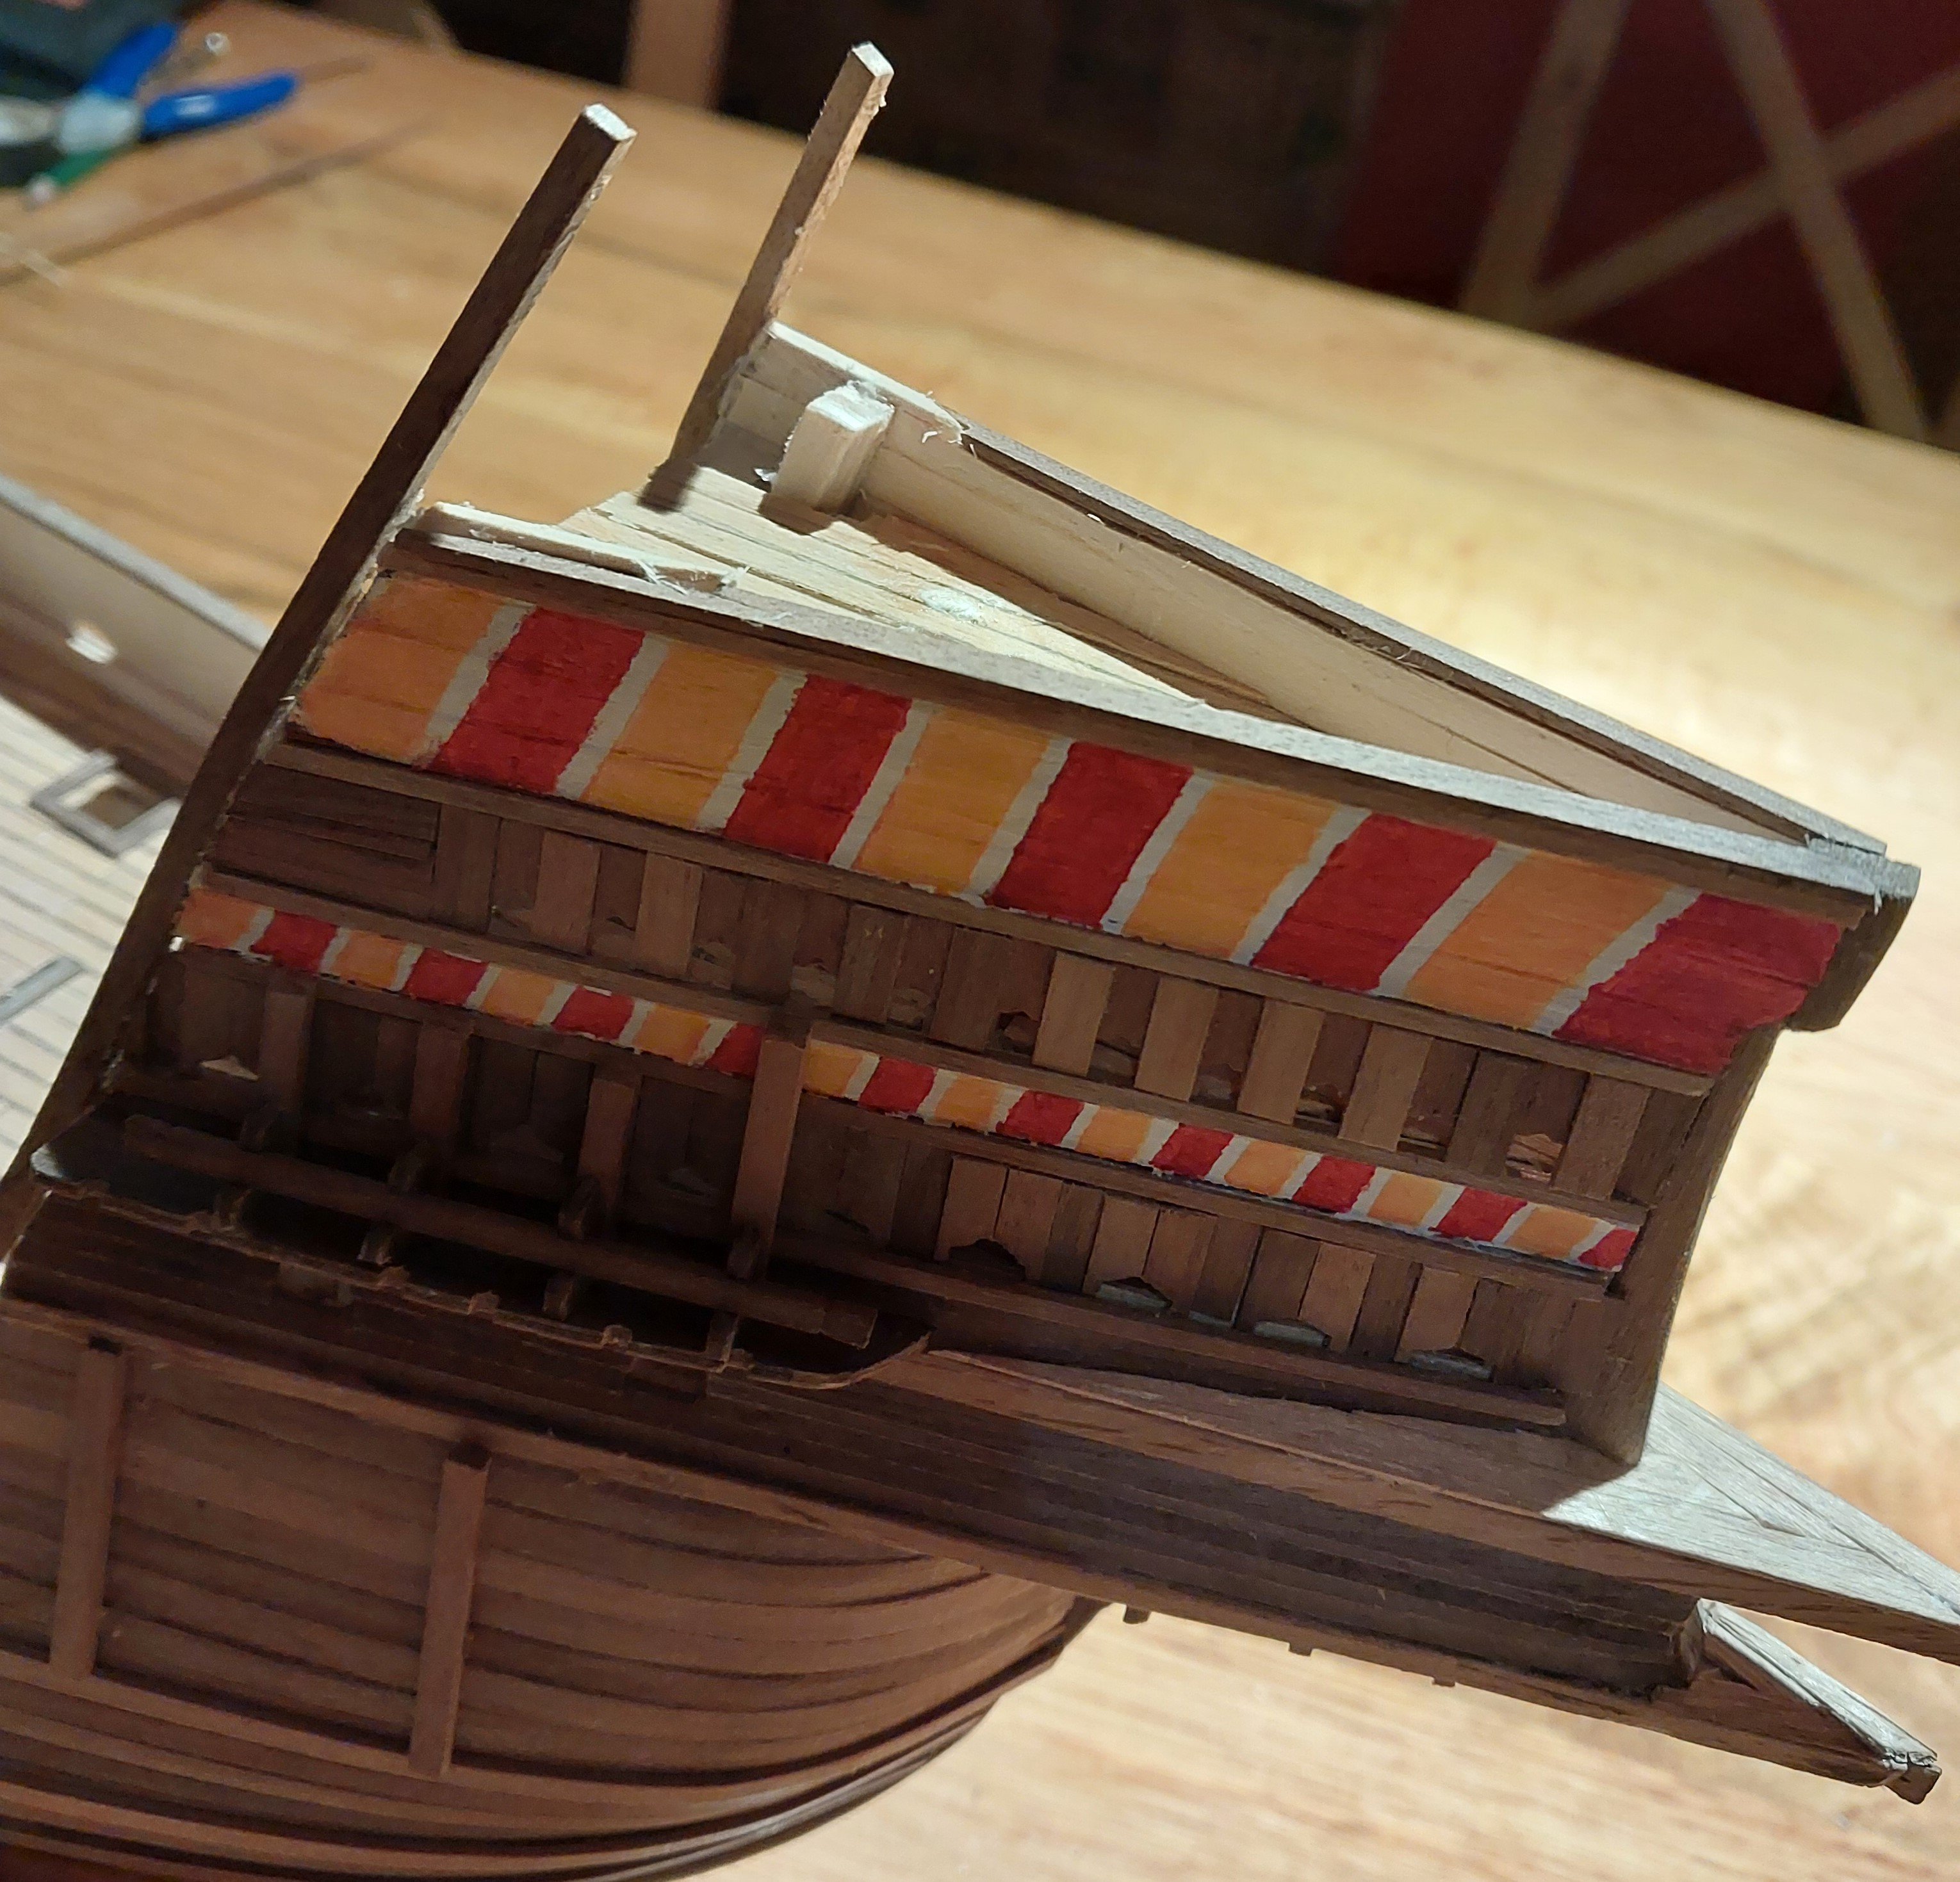
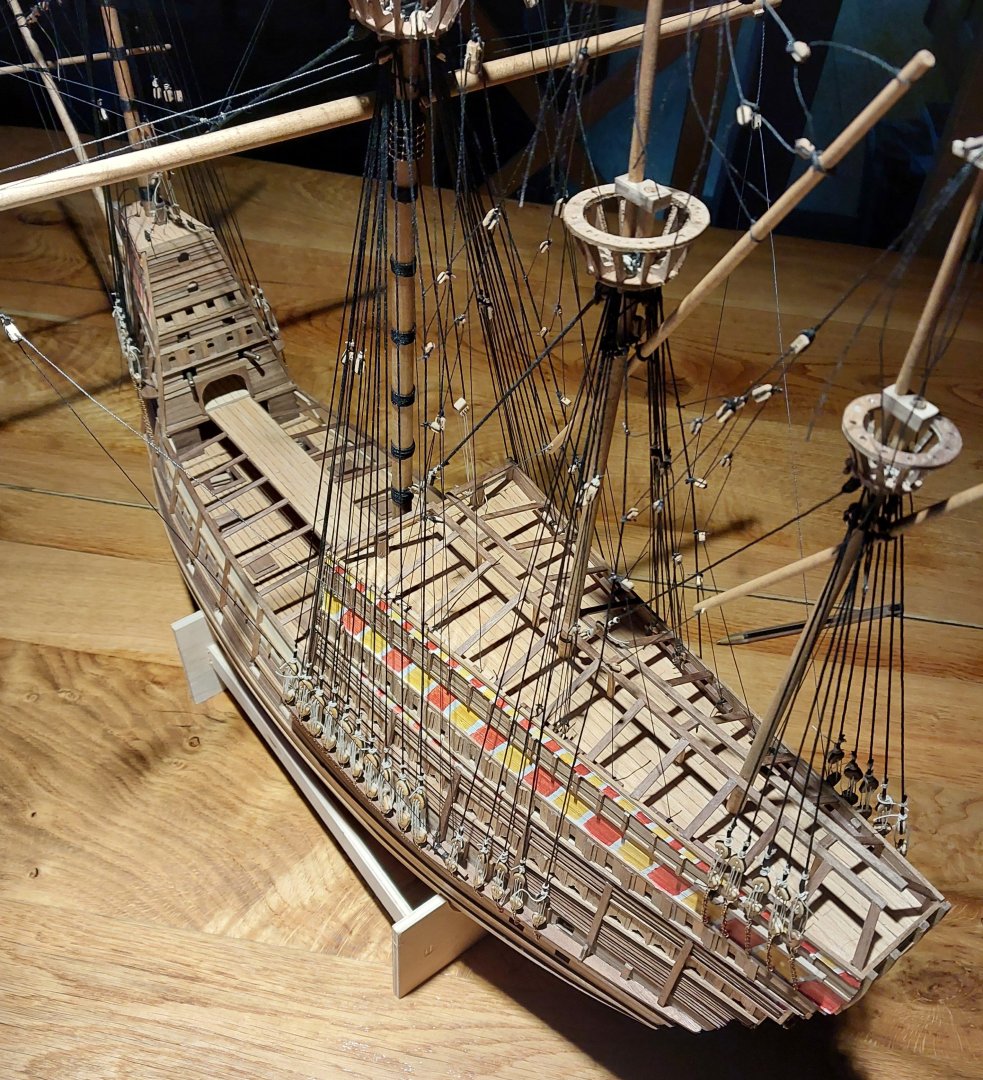
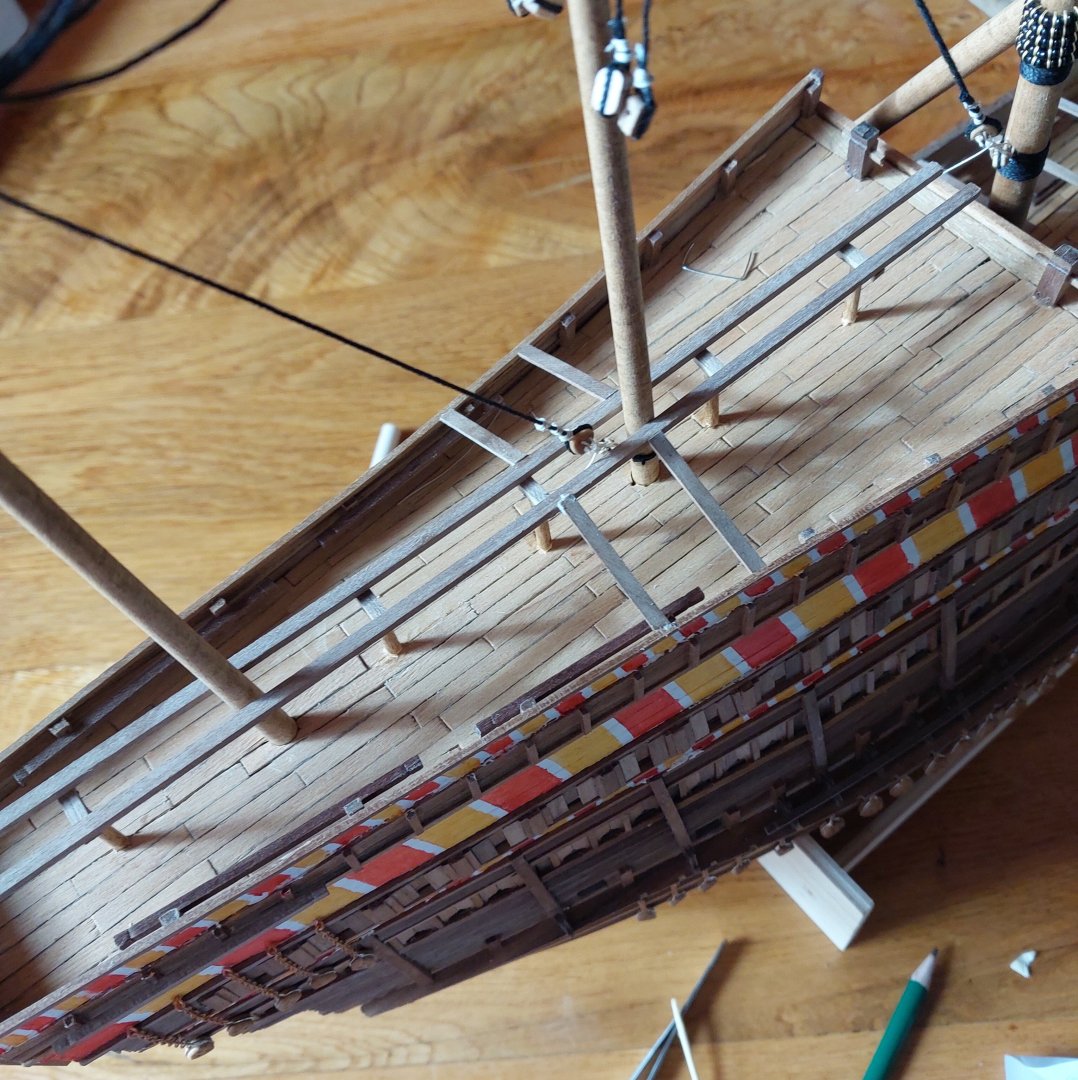
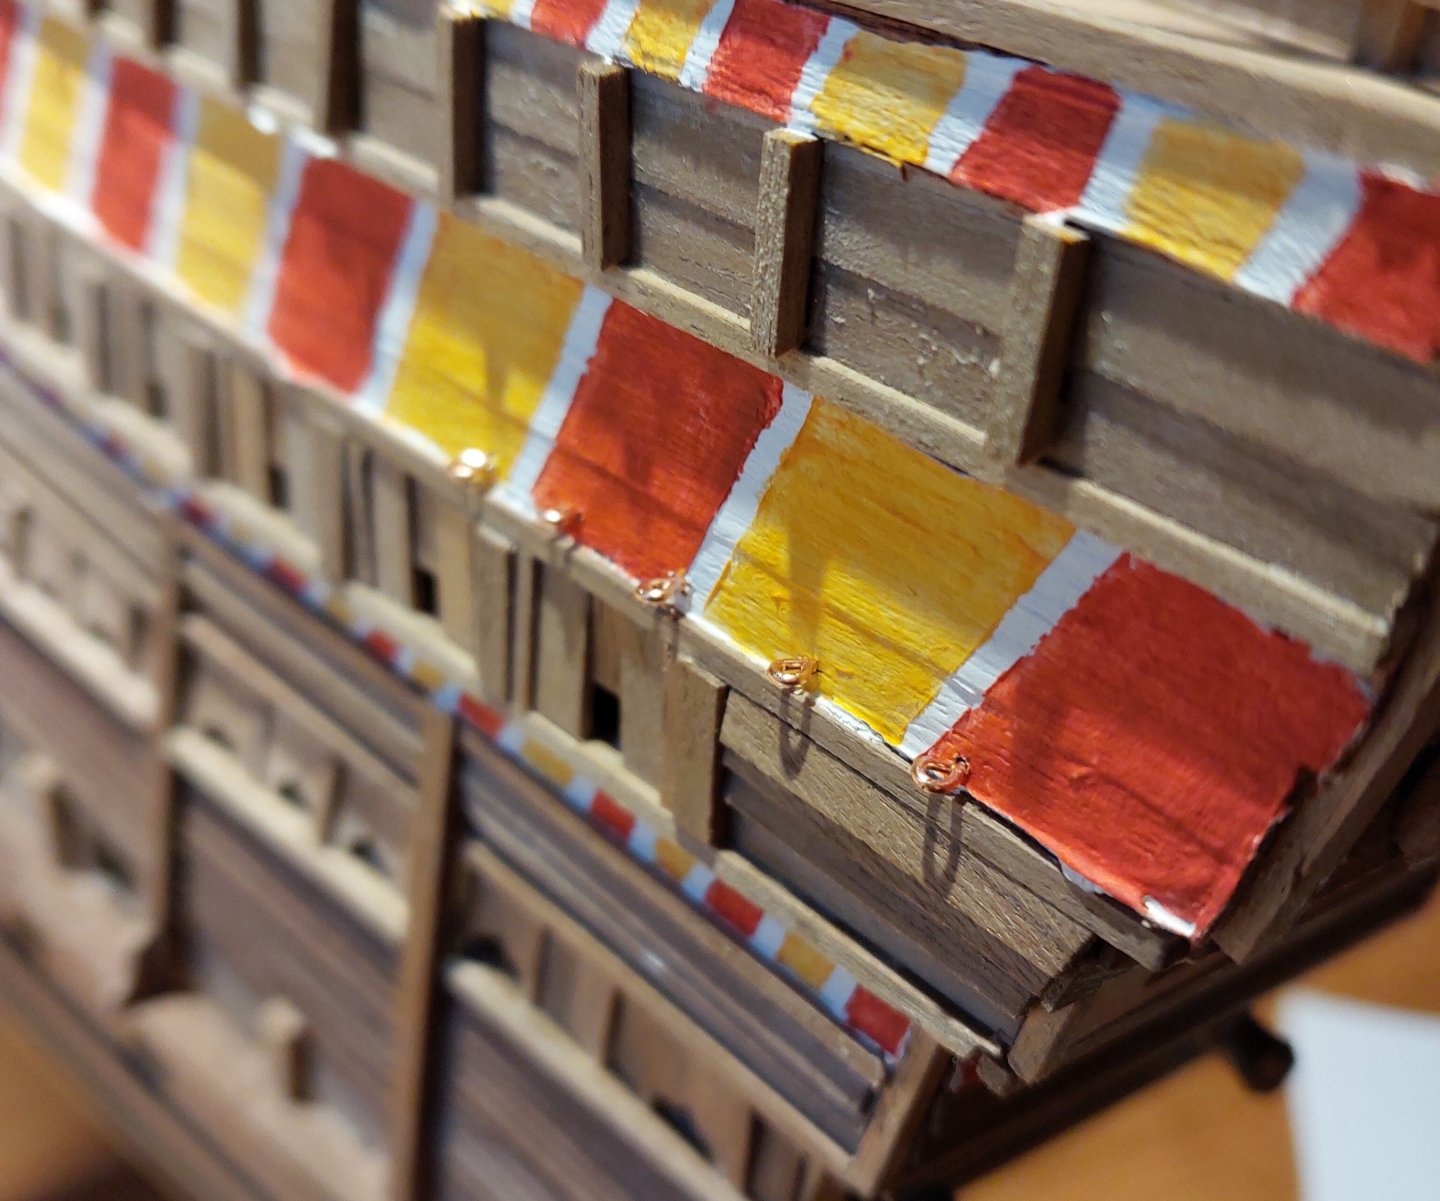
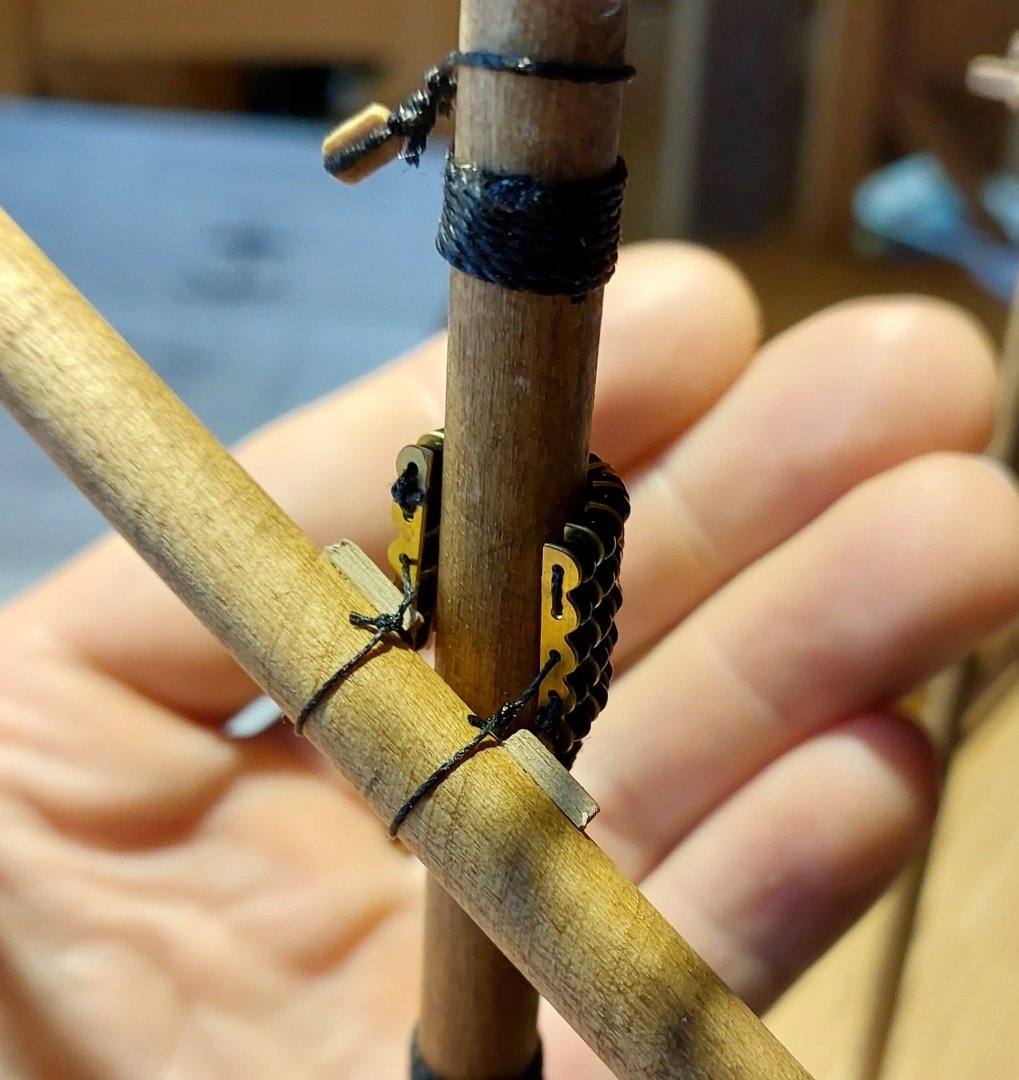
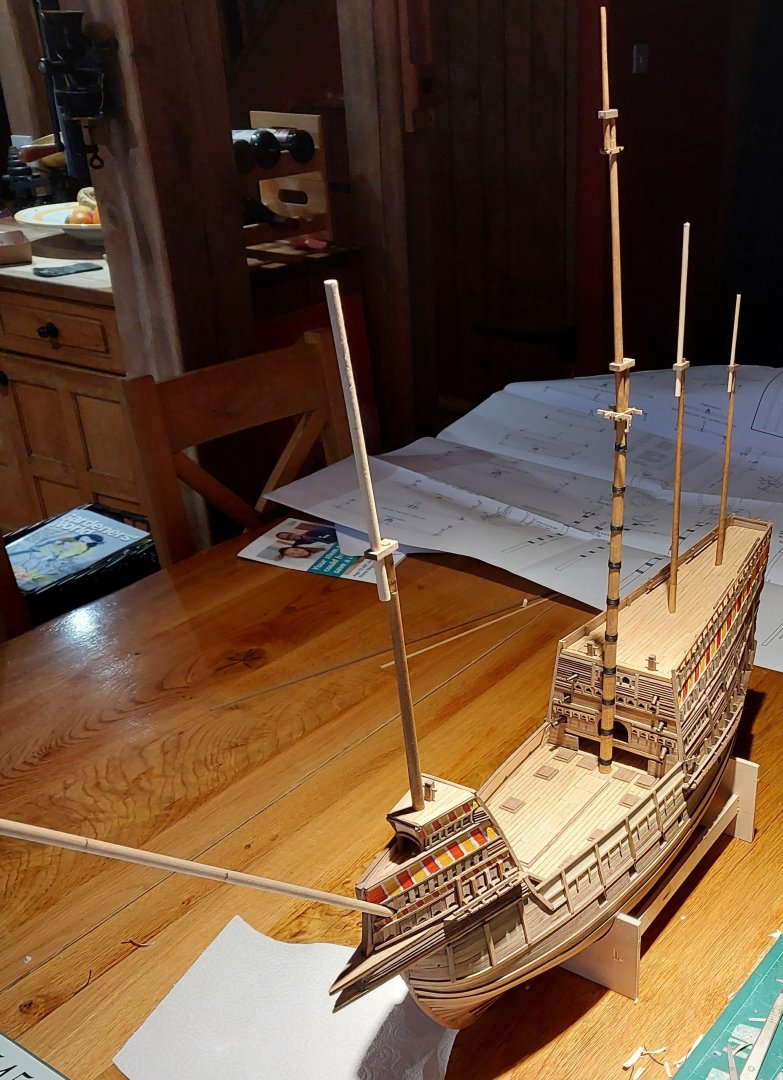
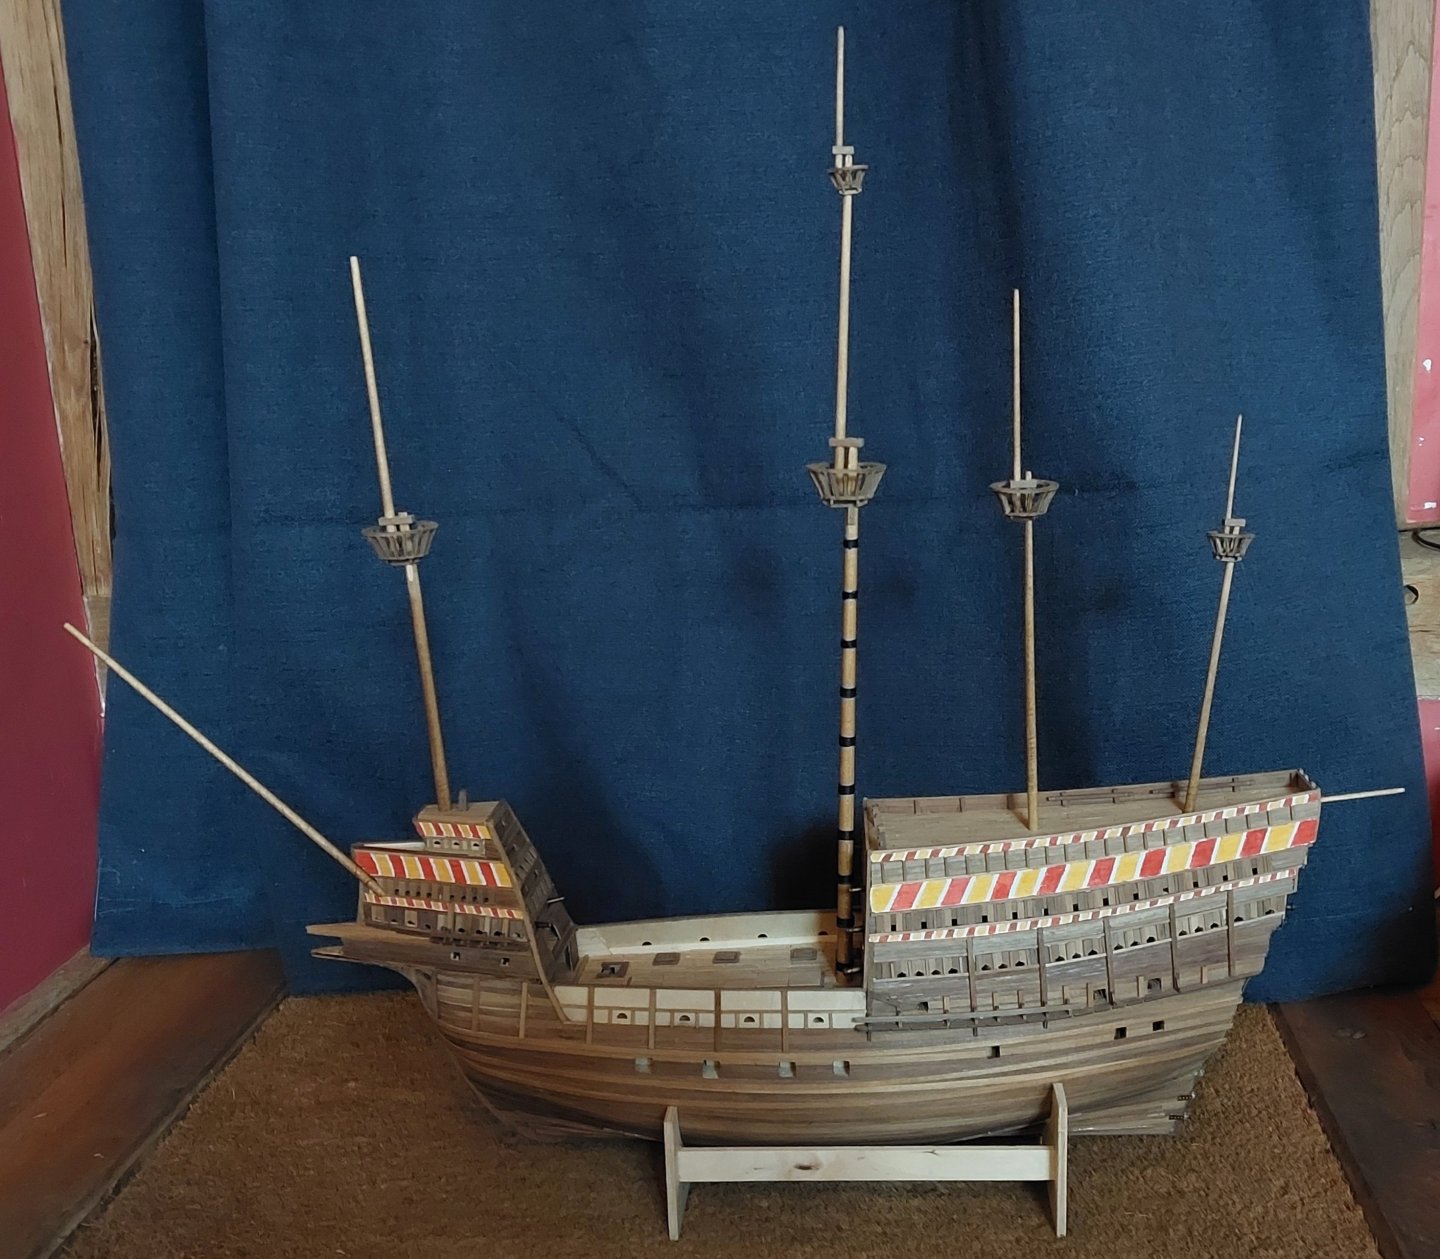
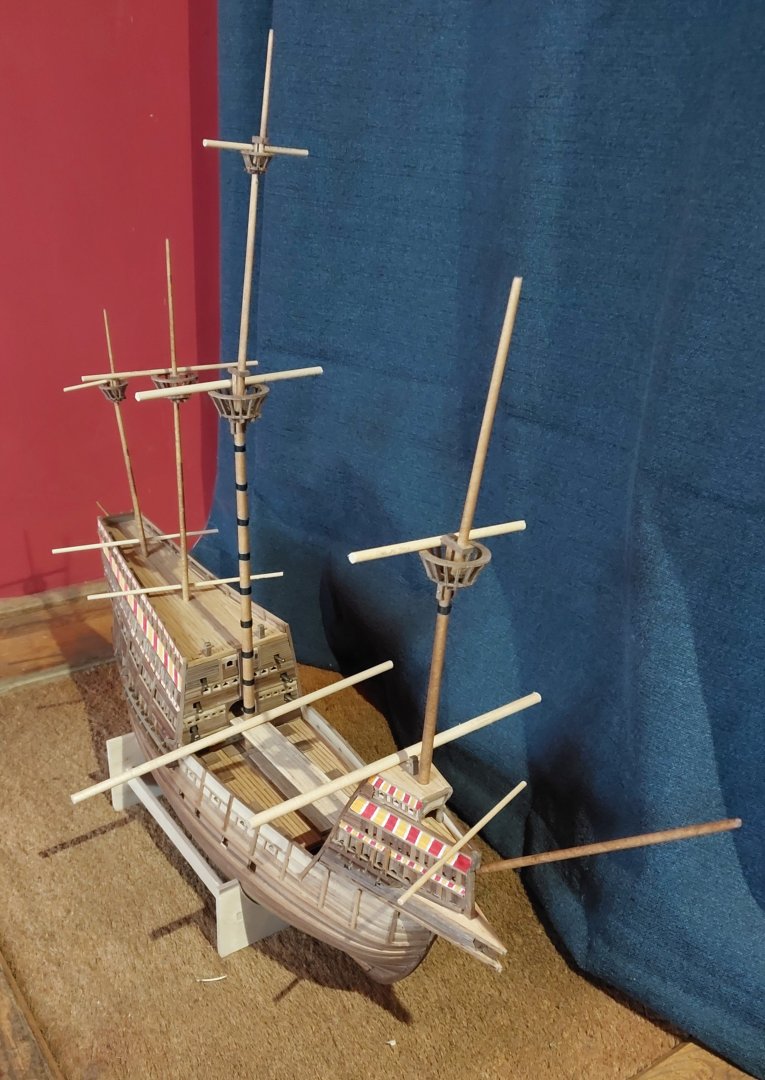
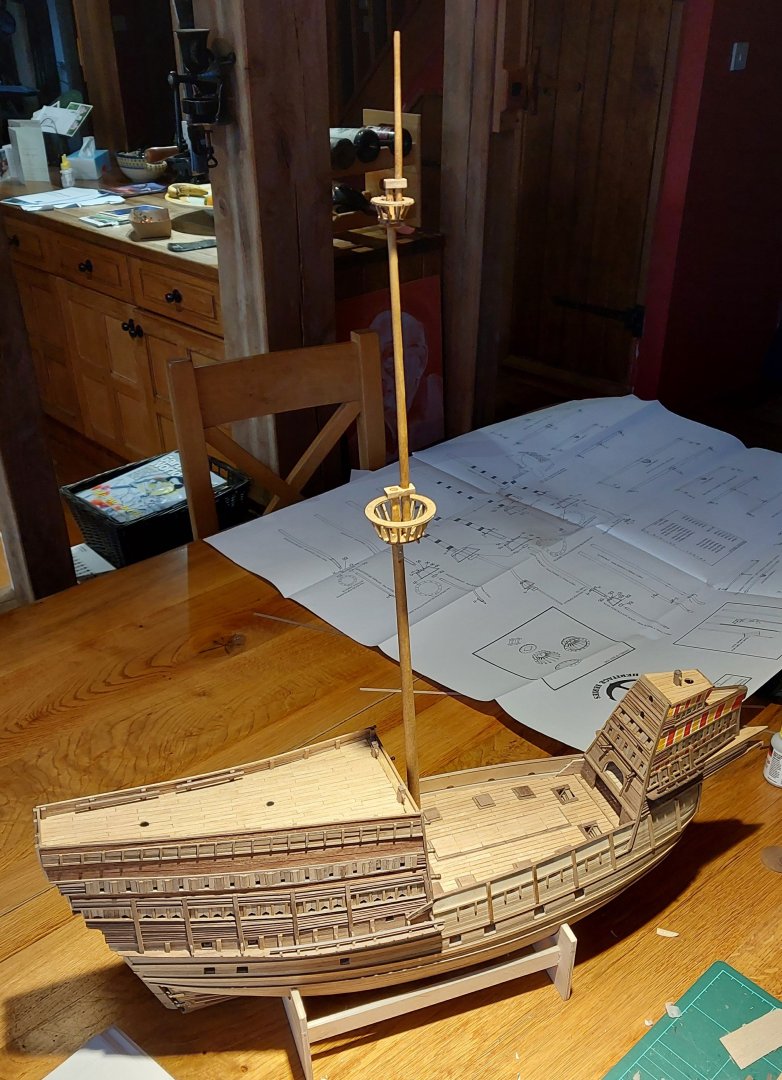
So - even more progress! First, I put the wooldings on the mainmast: Caldercraft only speciified 8 wooldings here, but Anderson thinks that there were normally more in the 15th century, so I went with 10 wrappings. Hard to prove that one either way! Then I finally got round to what I've been putting off for ages: Masking tape. Then a layer of painting gesso, followed by... More masking tape. Honestly, placing the tape was the most tedious task, because once I got the paint out it didn't take too long: And then the yellow: And finally, the grand reveal: I even painted some stripes on the transom: So that was fun. Glad that's over - what a slow process! As I was on a bit of a roll, I moved on to adding the other masts - now I've stuck with my mainmast being slightly longer than it perhaps really was, I can work out the heights of the other masts from it. My bonaventure mizzen wasn't sitting at a good angle, so I had to take the longest 6mm drill bit I could find to move the hole in one of the internal decks - no damage that's visible! Here she is in full view, all masts in place. The bowsprit isn't cut to length yet - I was reluctant to cut it too short. And here are the topmasts: The main topmast is slightly wonky as this is all dry-fit - I am fully aware of the kink in it! Here you can also see two marks on the bowsprit dowel. The shorter one is McElvogue's measurements, though I'm very dubious of his scale here. The longer mark is around what Anderson recommends, though he also notes that it's very difficult to prescribe as it's nearly impossible to tell where bowsprits start and end within the bow of the ship. I ended up taking the measurement from the stempost, and the longer mark is what I used. Here the masts and bowsprit are, tapered, stained and in place (dry-fit still, I'm not insane). I'm really happy with how the stripes look on the sterncastle. Some of the angles of my masts are a little off - I especially need to adjust the mizzen. And then, not to jump ahead too much, I cut all the yards to length: These are mostly based on Anderson's measurements, though Peter Marsden's book also has listings for most of them. He omits the mizzen topyard and the spritsail yard, so for those I've used Anderson's suggestions. I will say that the main yard feels ridiculously long - 85 feet! But it does seem to be backed up by the sources, so it's what I've gone for, though I can still cut these shorter if needed. Now I've got these cut to length I'll need to taper and prepare them for mounting, which also means tackling the fiddly-looking parrels, so it might be a short while before my next update. However, I'll leave you with an interesting conundrum; deadeyes. See below for McElvogue's drawings of the deadeyes, and some of the actual examples pulled up from the wreck: And now see the deadeyes provided by Caldercraft: Not quite enough holes, methinks. Any suggestions for how to go about making myself some 7-hole deadeyes would be very appreciated, though at this scale I do wonder if it's worth the effort - I'm sure @Louie da fly would appreciate it though! Thanks for following along as always!


-
Thanks Steven. Yes, it seems silly to make any amendments for such a small percentage change. I've ended up leaving my mainmast as it is, but I have slightly shortened the main topmast and very slightly shortened the main topgallant mast - overall it's about 145ft from the deck now, which is still pretty tall, but now looks much more in proportion - I'll update soon with proper photos. I'm using Anderson's guidelines for the other masts, so now I'm happy with the main mast the rest should go smoothly. Famous last words. Thanks Patrick! Looks like I'm on the right track if slightly too tall with my mast - in proportion it seems like it's around the right size. Useful image! I'd like to say it's probably artistic license. In Anderson's book he does mention that masts were getting shorter throughout the two centuries after the Mary Rose sank, so I suppose they could have been much taller (despite the instability). I've had similar qualms about the length of my bowsprit as the angle is quite extreme as well. Thanks for the kind words and comments on the last post everybody! I'll be updating very soon with some major mast progress I hope 😁
-
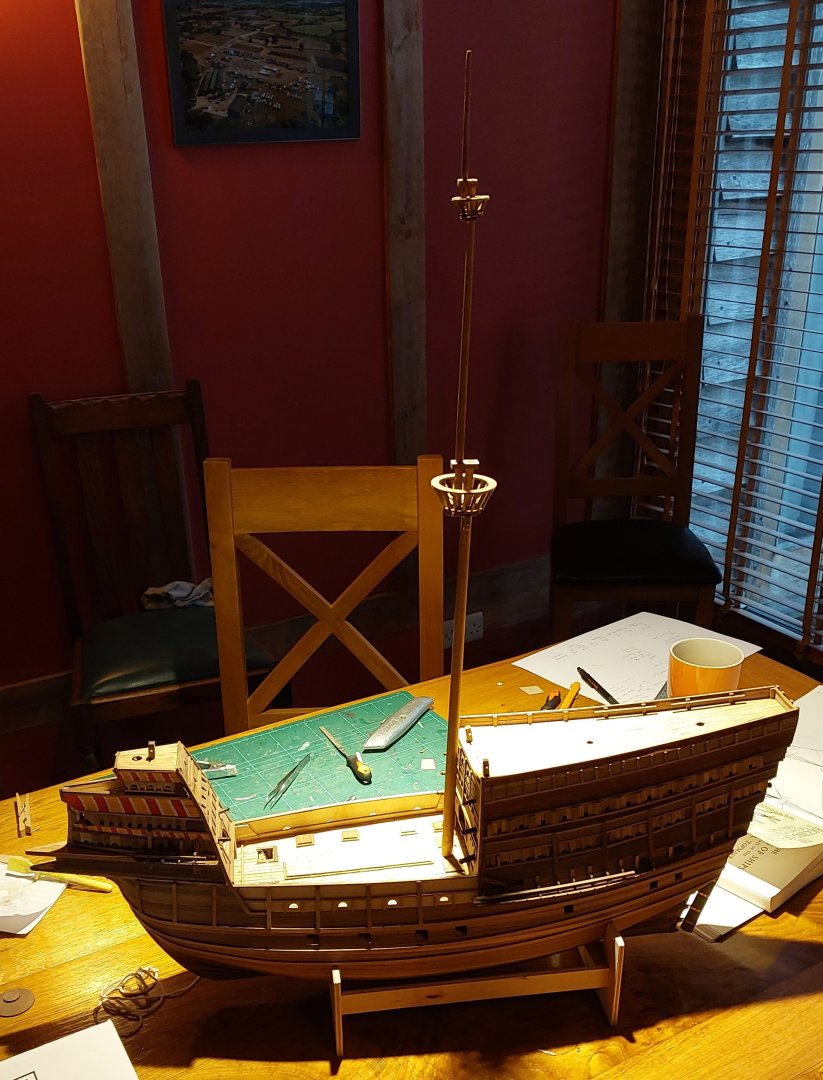
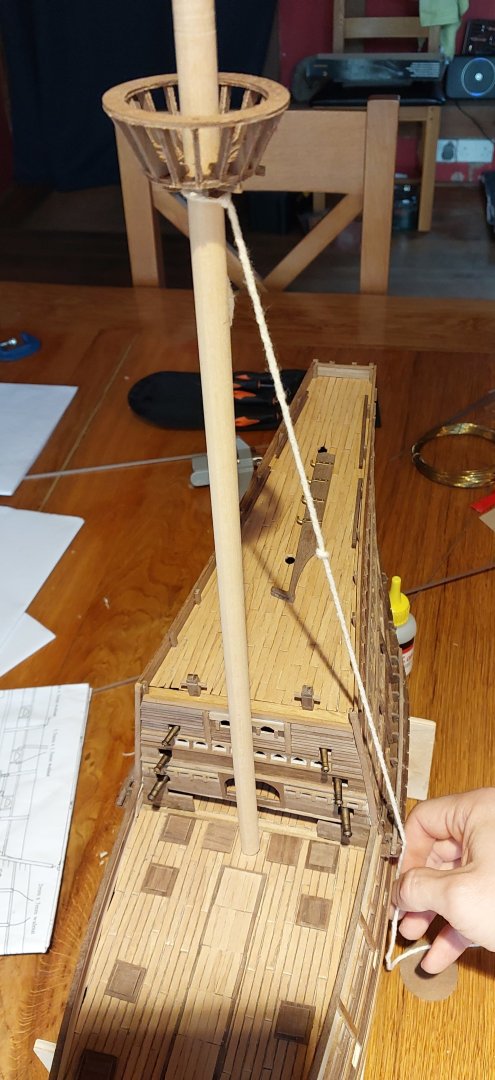
Thanks very much Steven!! I made a little bit more progress today, and wanted to share it as I've reached a point I'm slightly unsure on. Here's the masthead for the mainmast: I built this mostly to Caldercraft's specifications, but I squared off the head instead of rounding it, as according to Anderson's book this is probably more period accurate. Also it's easier. Here's me testing out the topmast: Here's the mainmast, main topmast and main topgallant tapered, in place with mastheads assembled and dry-fit: And so my concern, for those with more knowledge and experience than me - does this look too tall? To scale, the total height here is just around 180 feet from the keel, or 150 feet from the deck. McElvogue quotes a source suggesting 150 feet for the main mast, but it isn't clear whether this is just the main or the whole structure - if it's the whole structure then that's actually way longer than my construction here, but if not then mine is likely a little too tall. Nothing is glued in here, so I can easily shorten each of the three sections, but I'm a little tight for clearance with the shrouds off the first top - I suspect I can only lower it by around 1-2cm before I have real issues. Any input would be very appreciated!


-
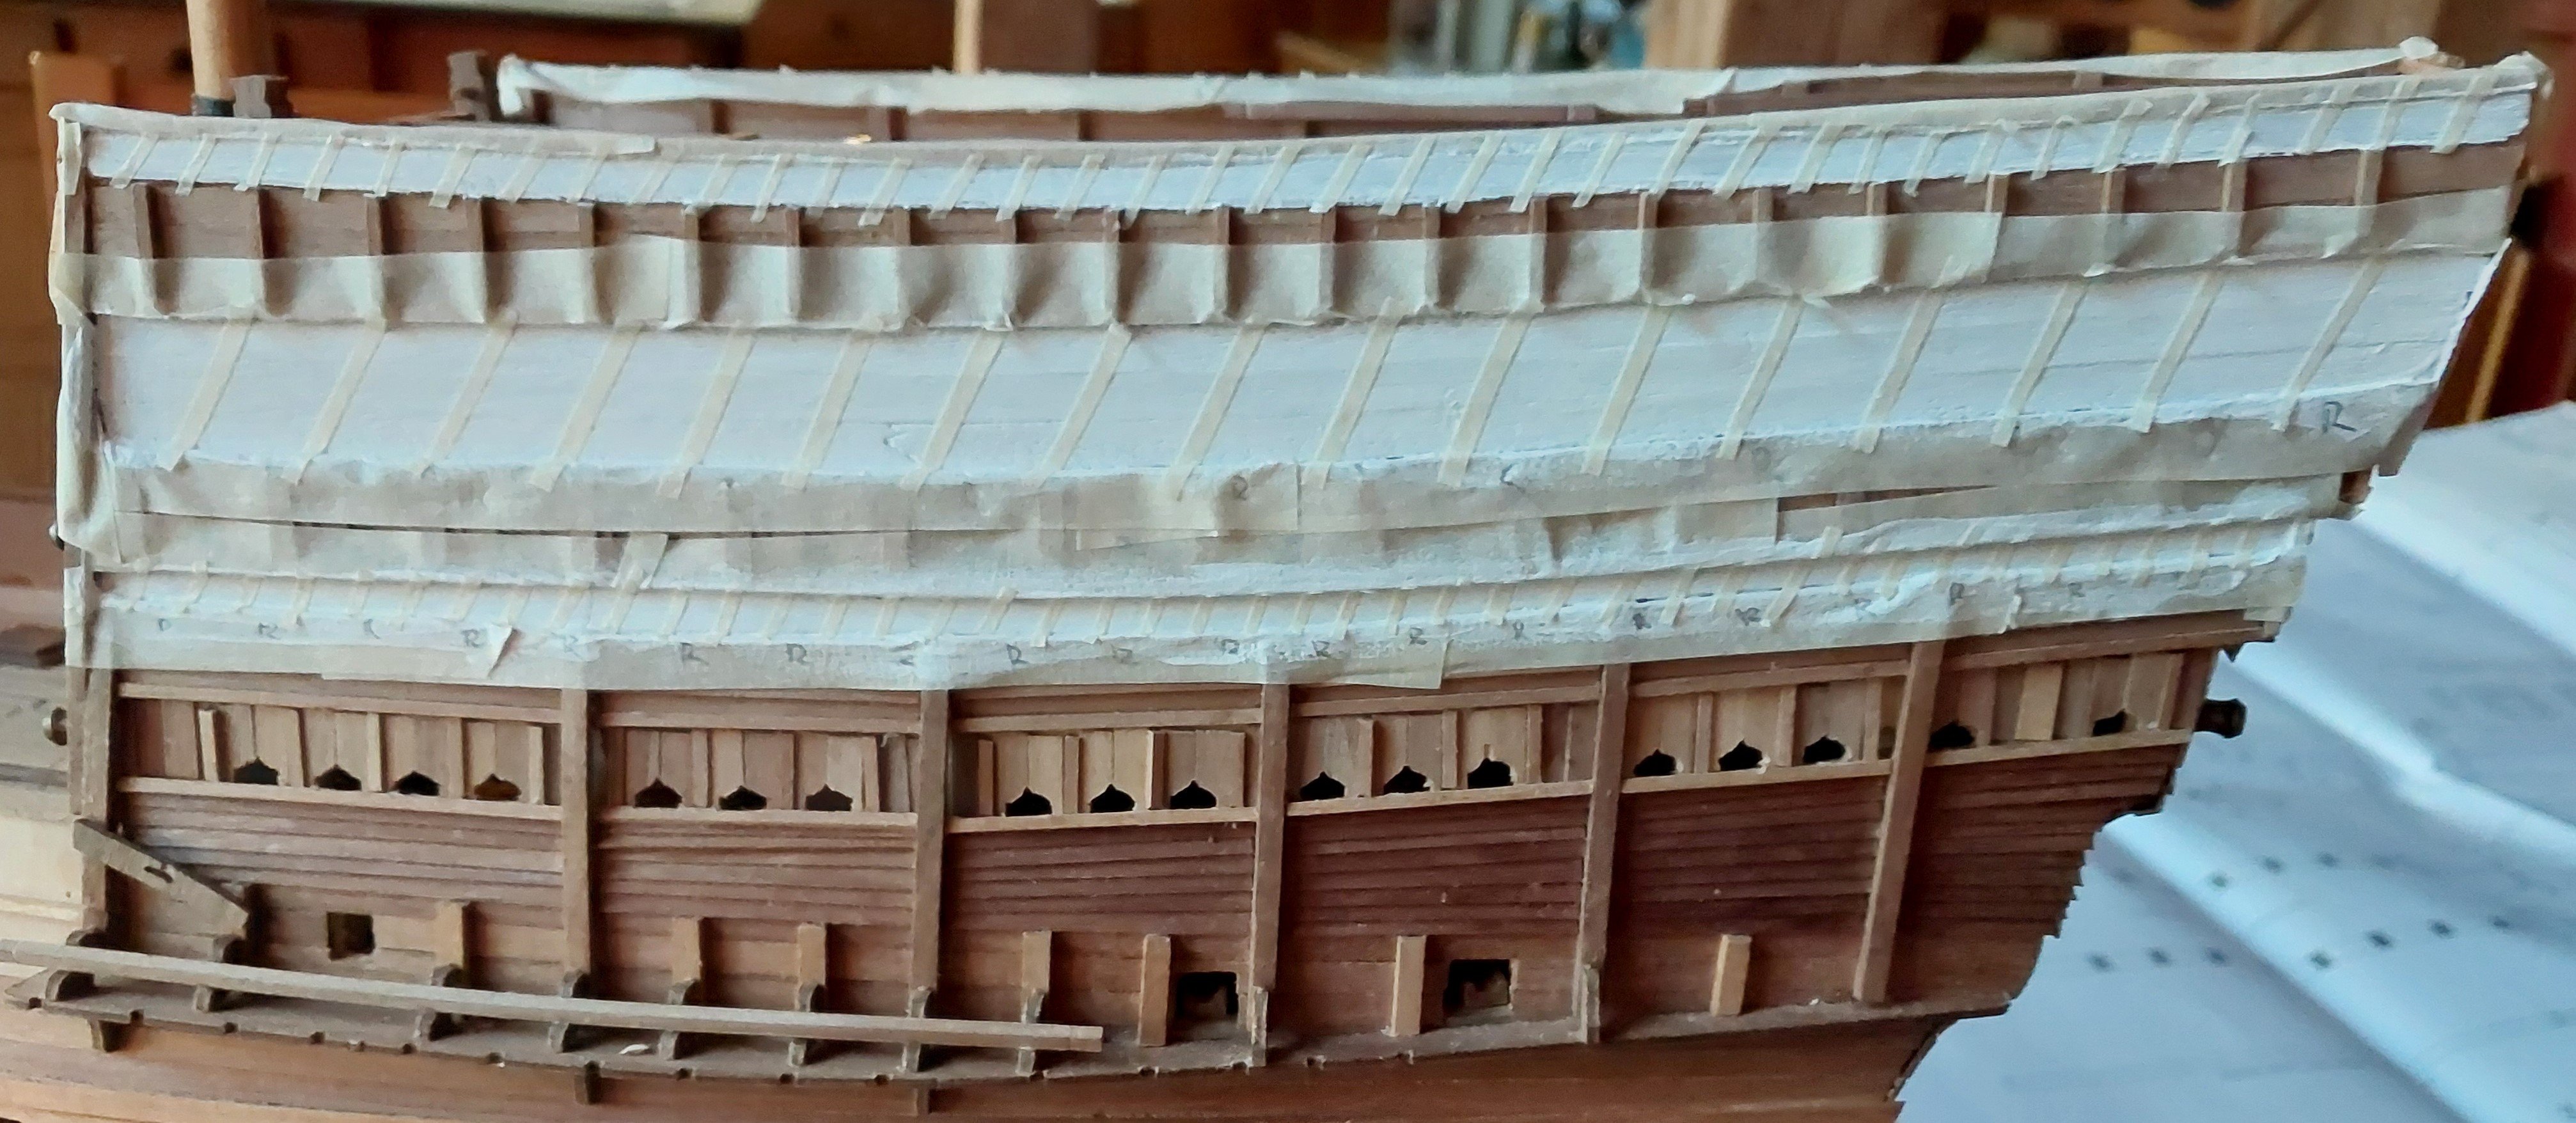
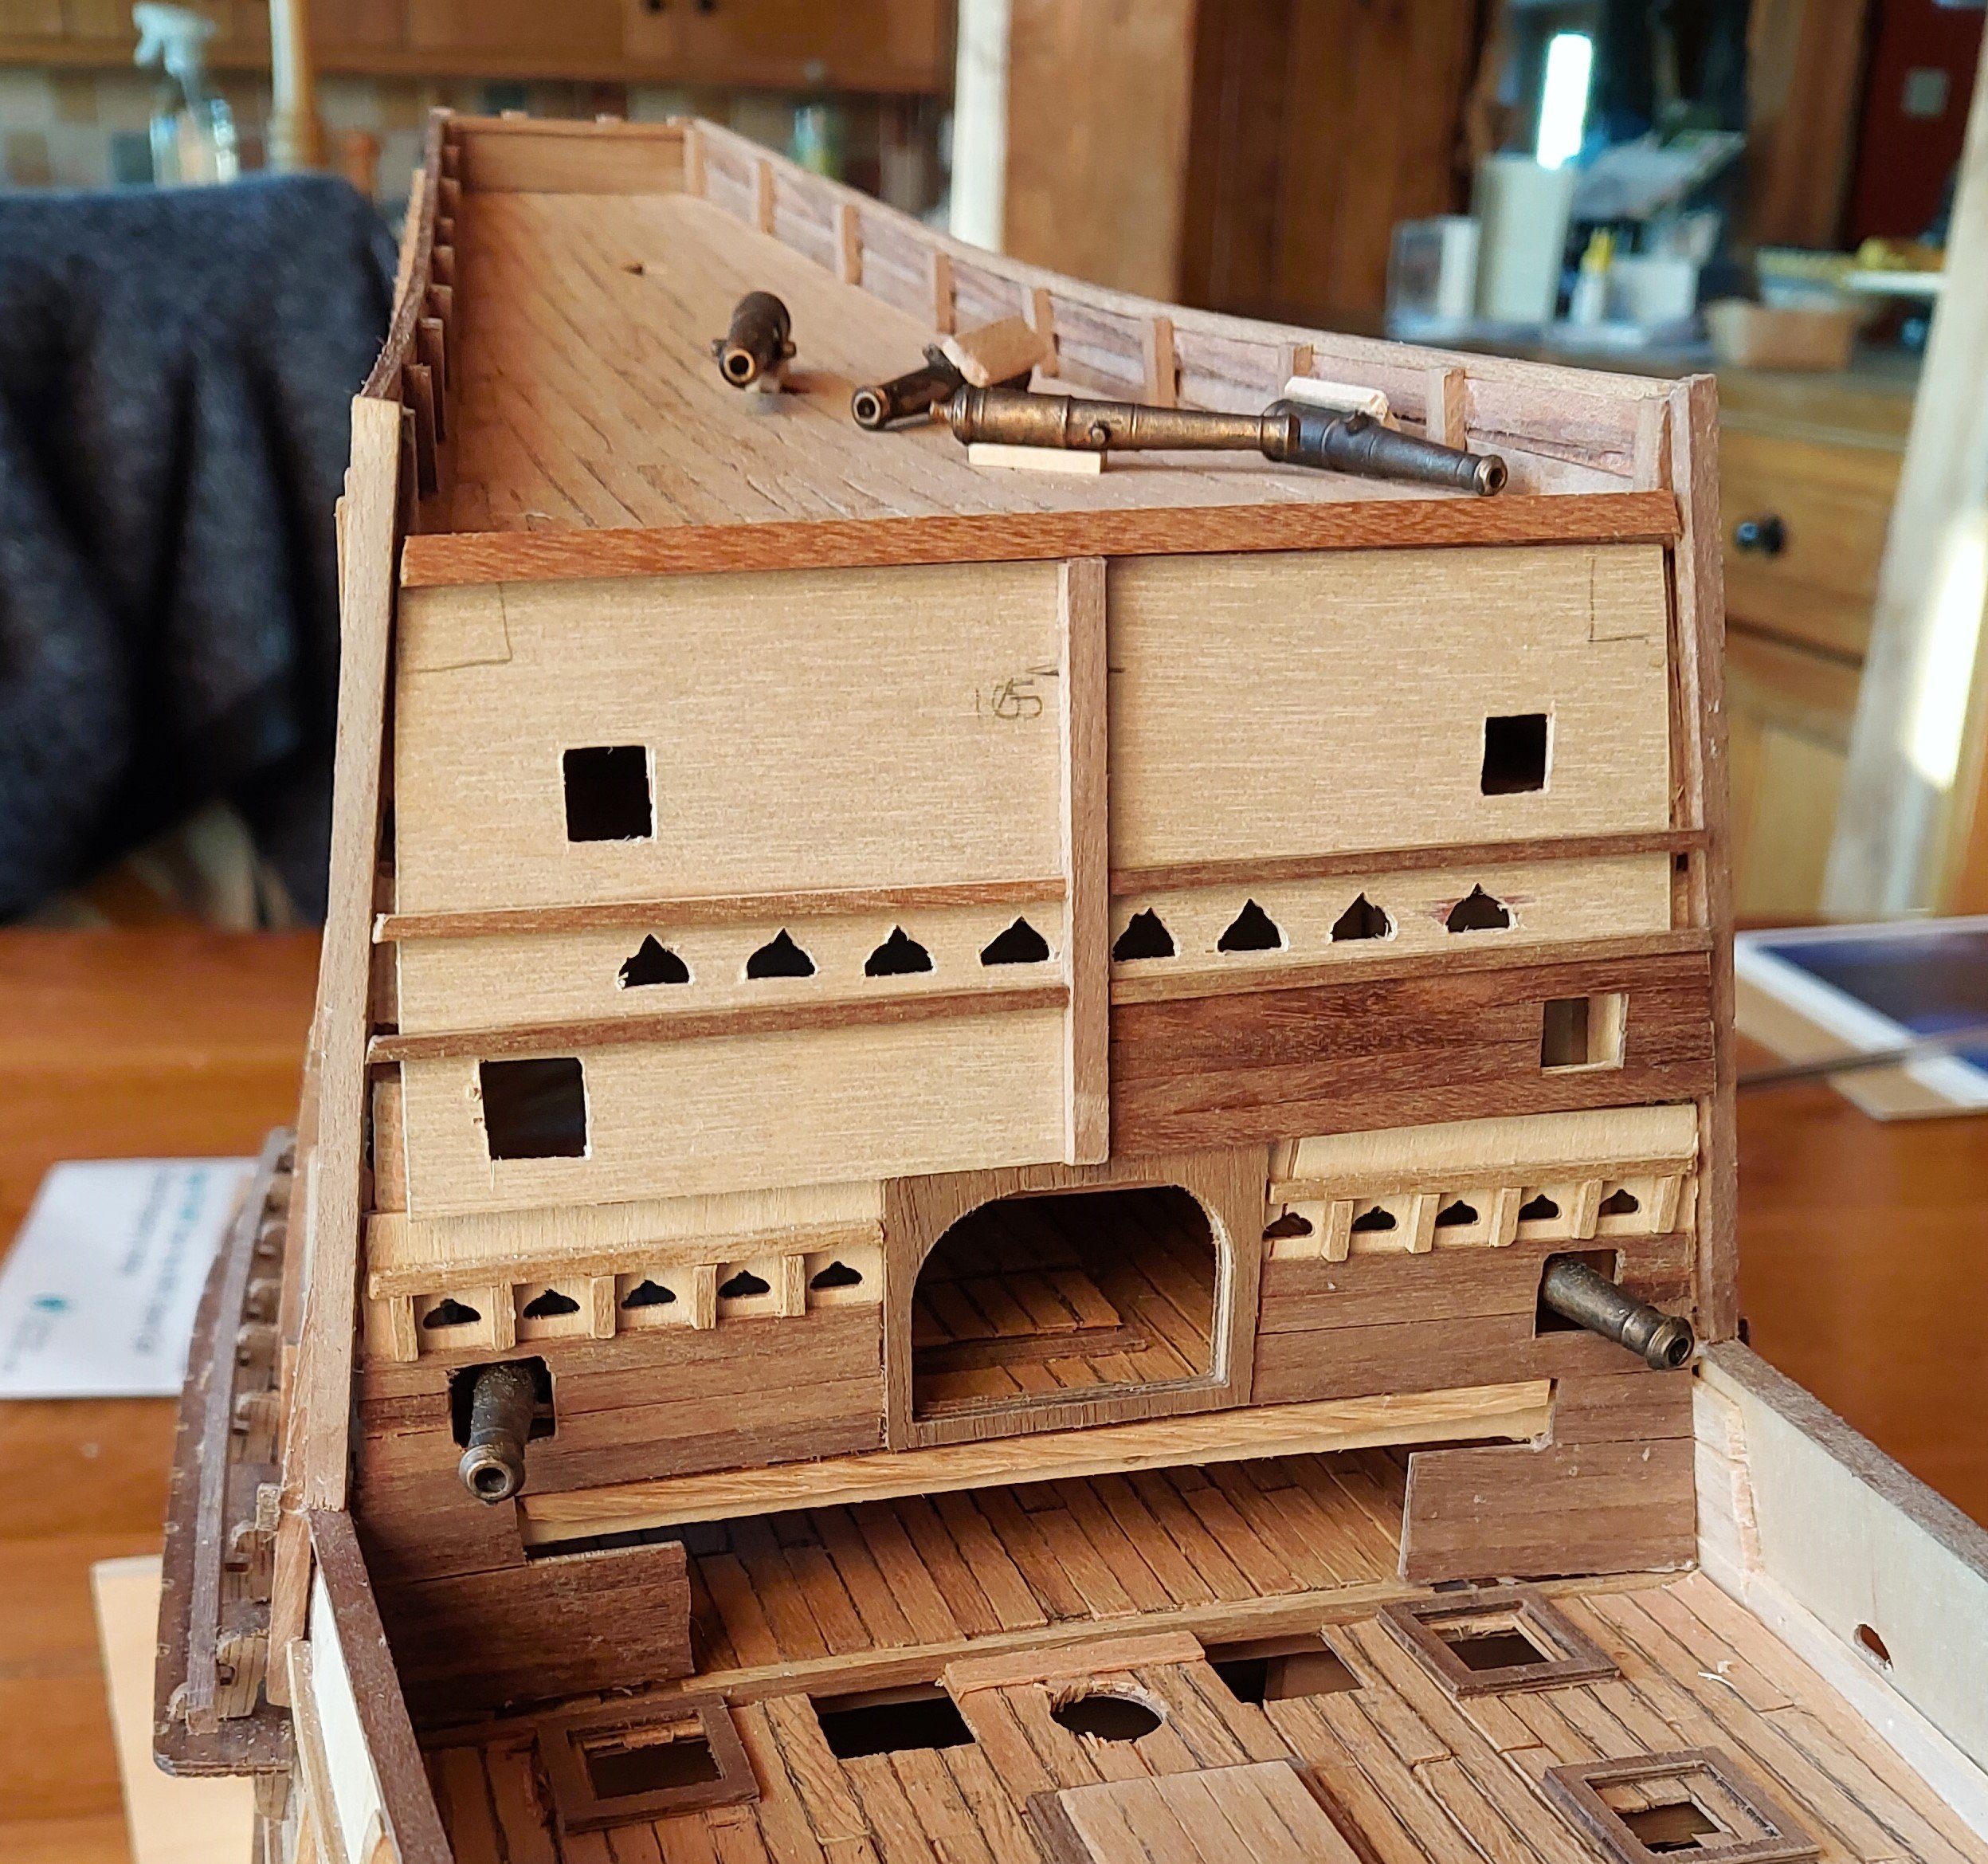
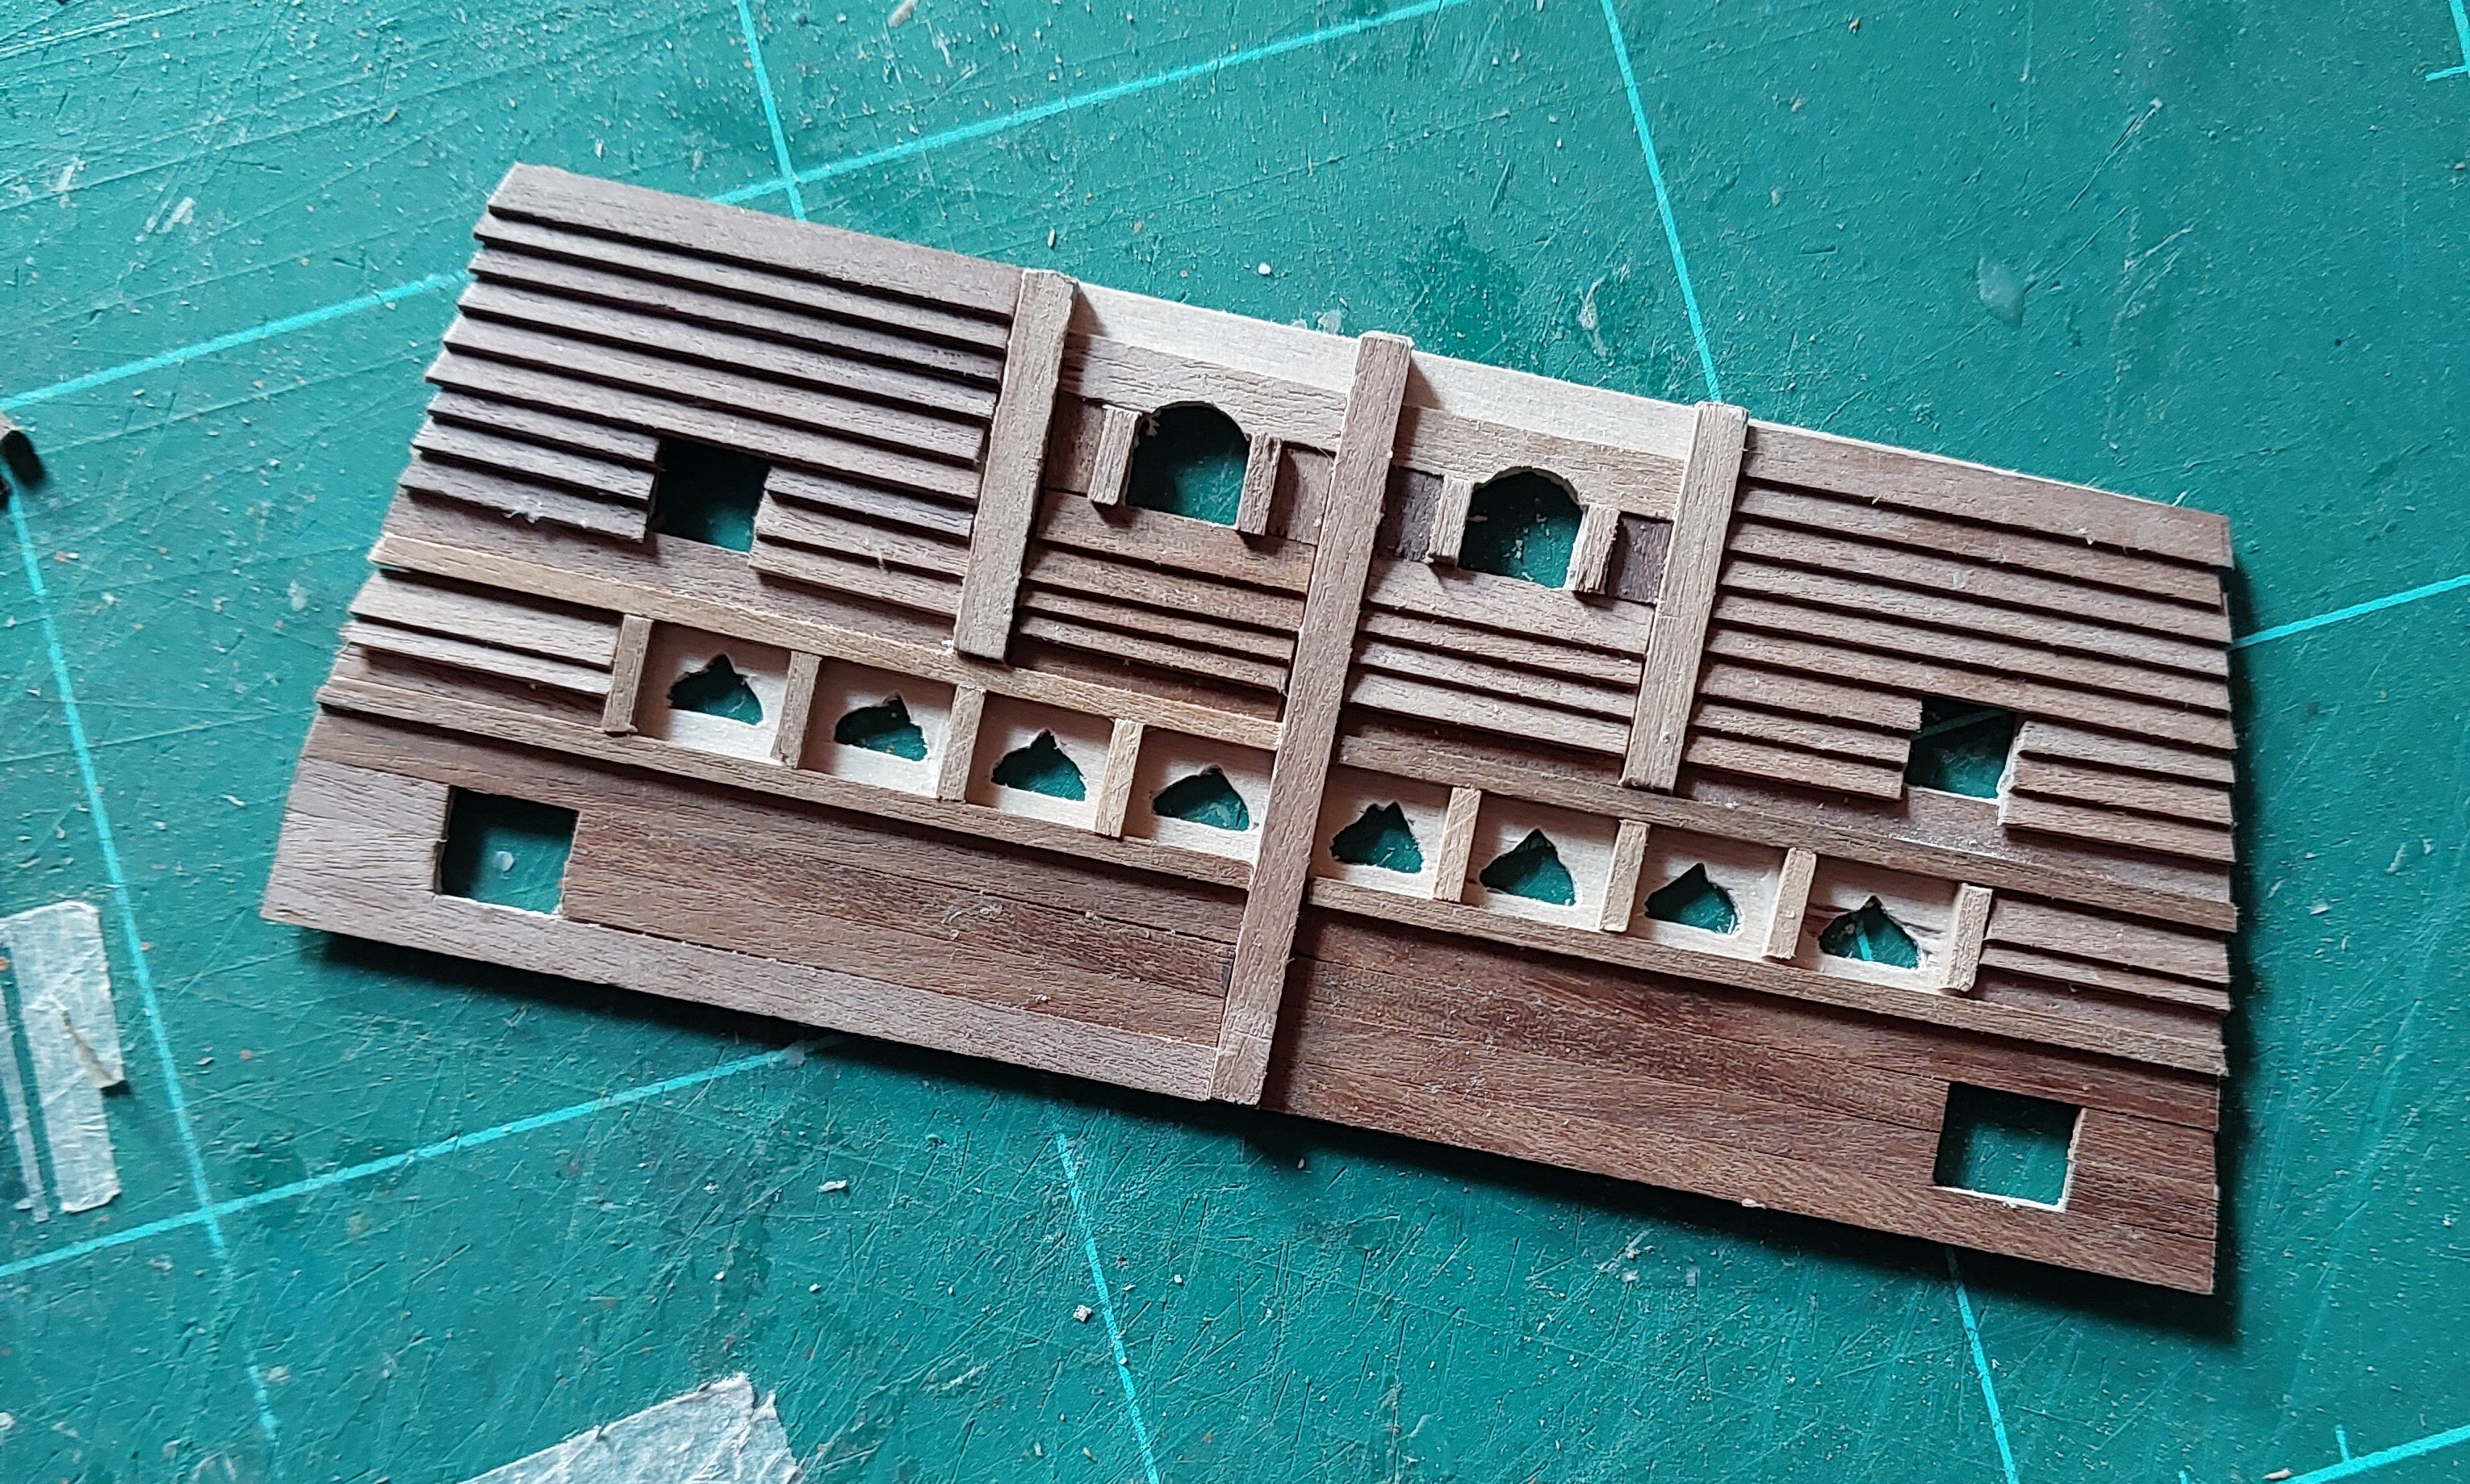
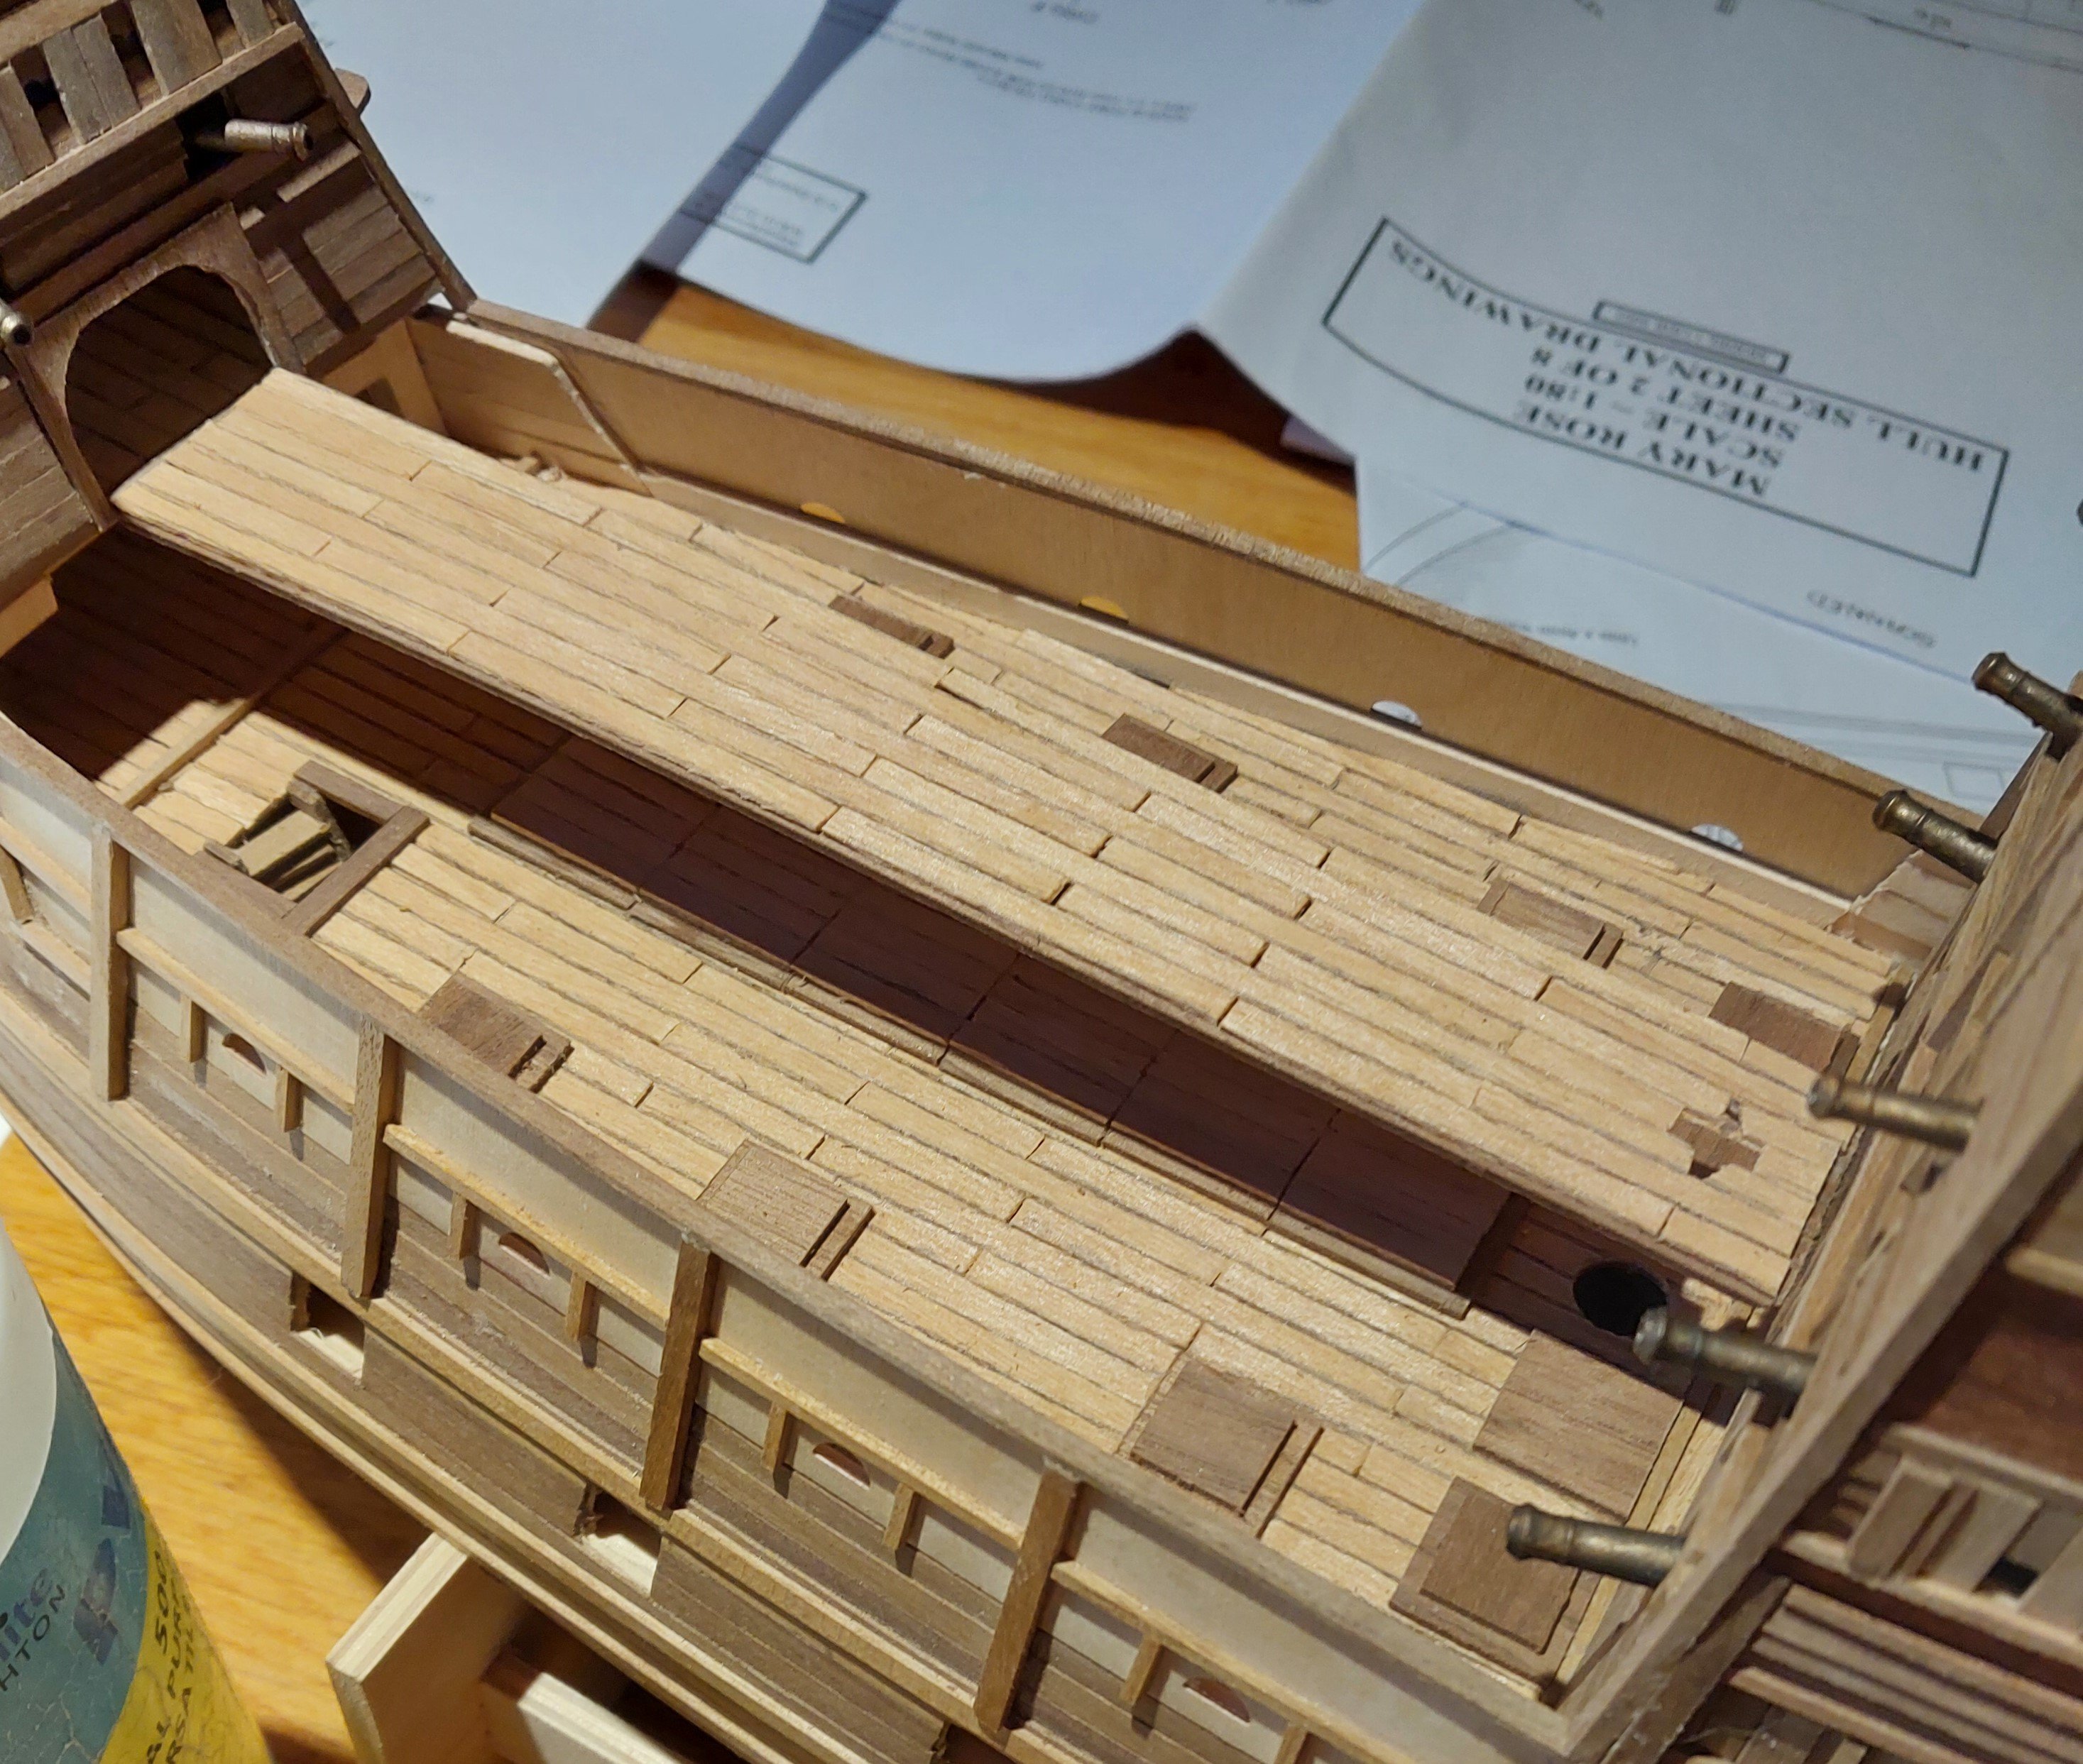
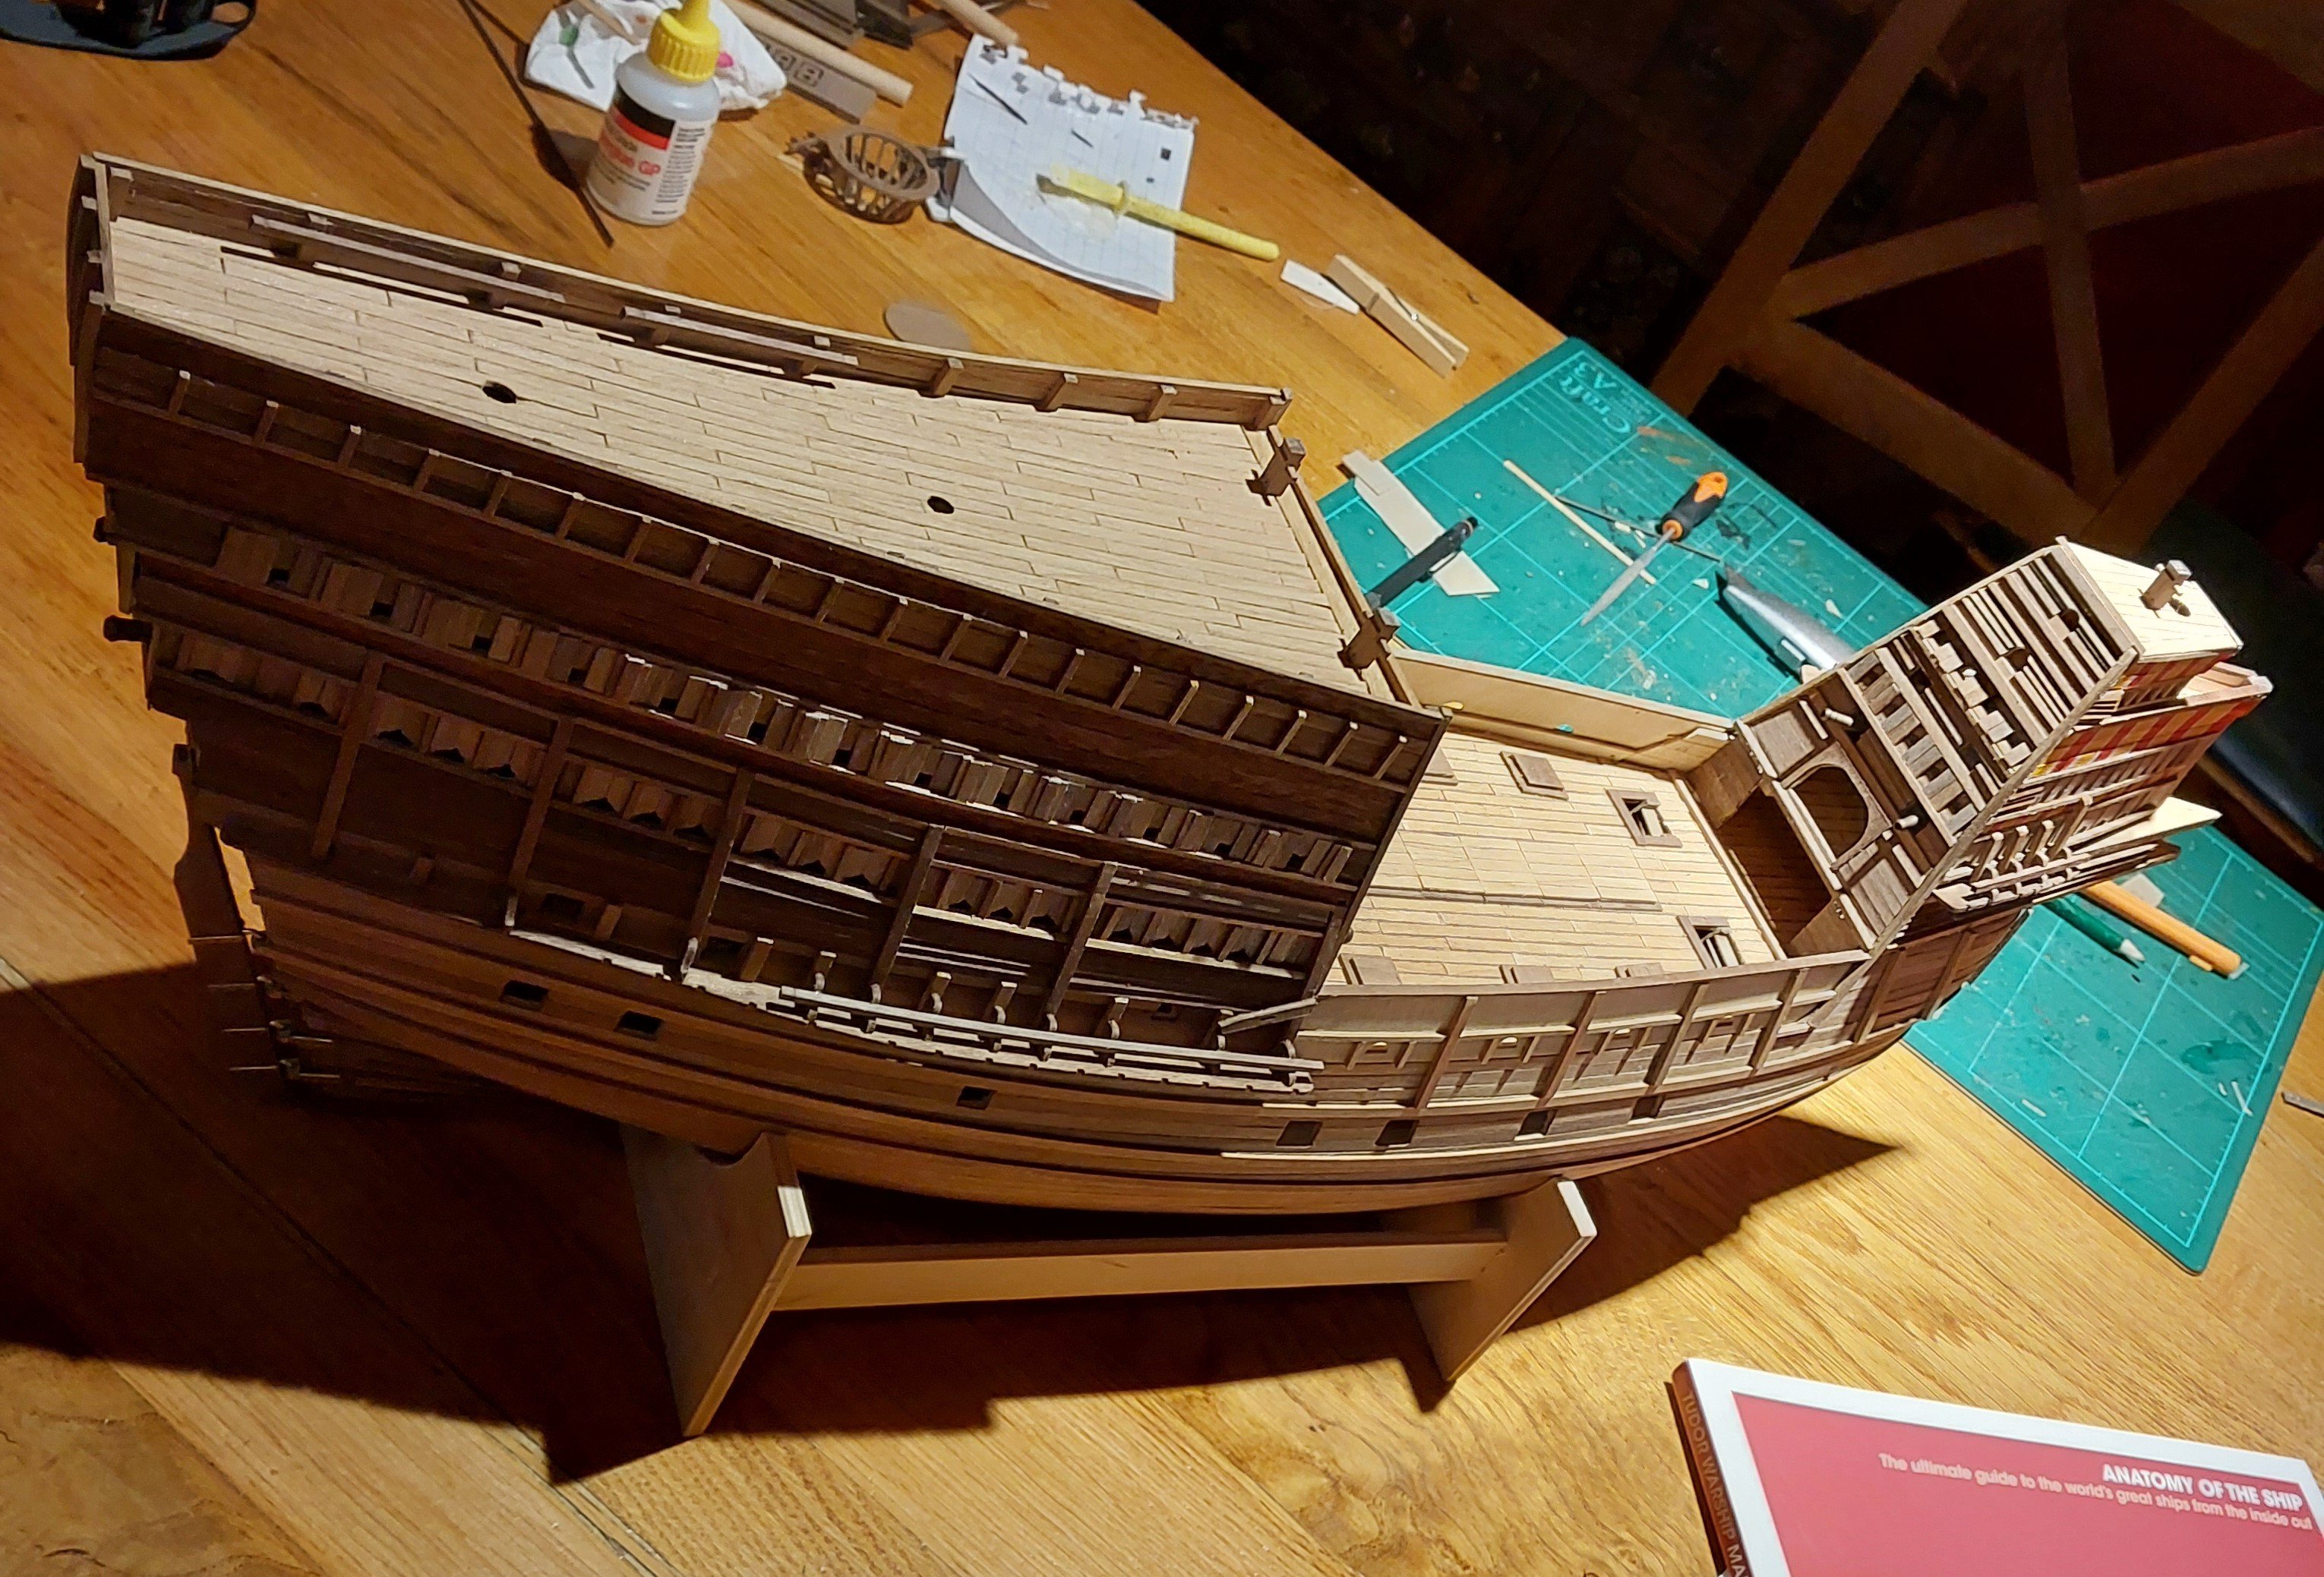
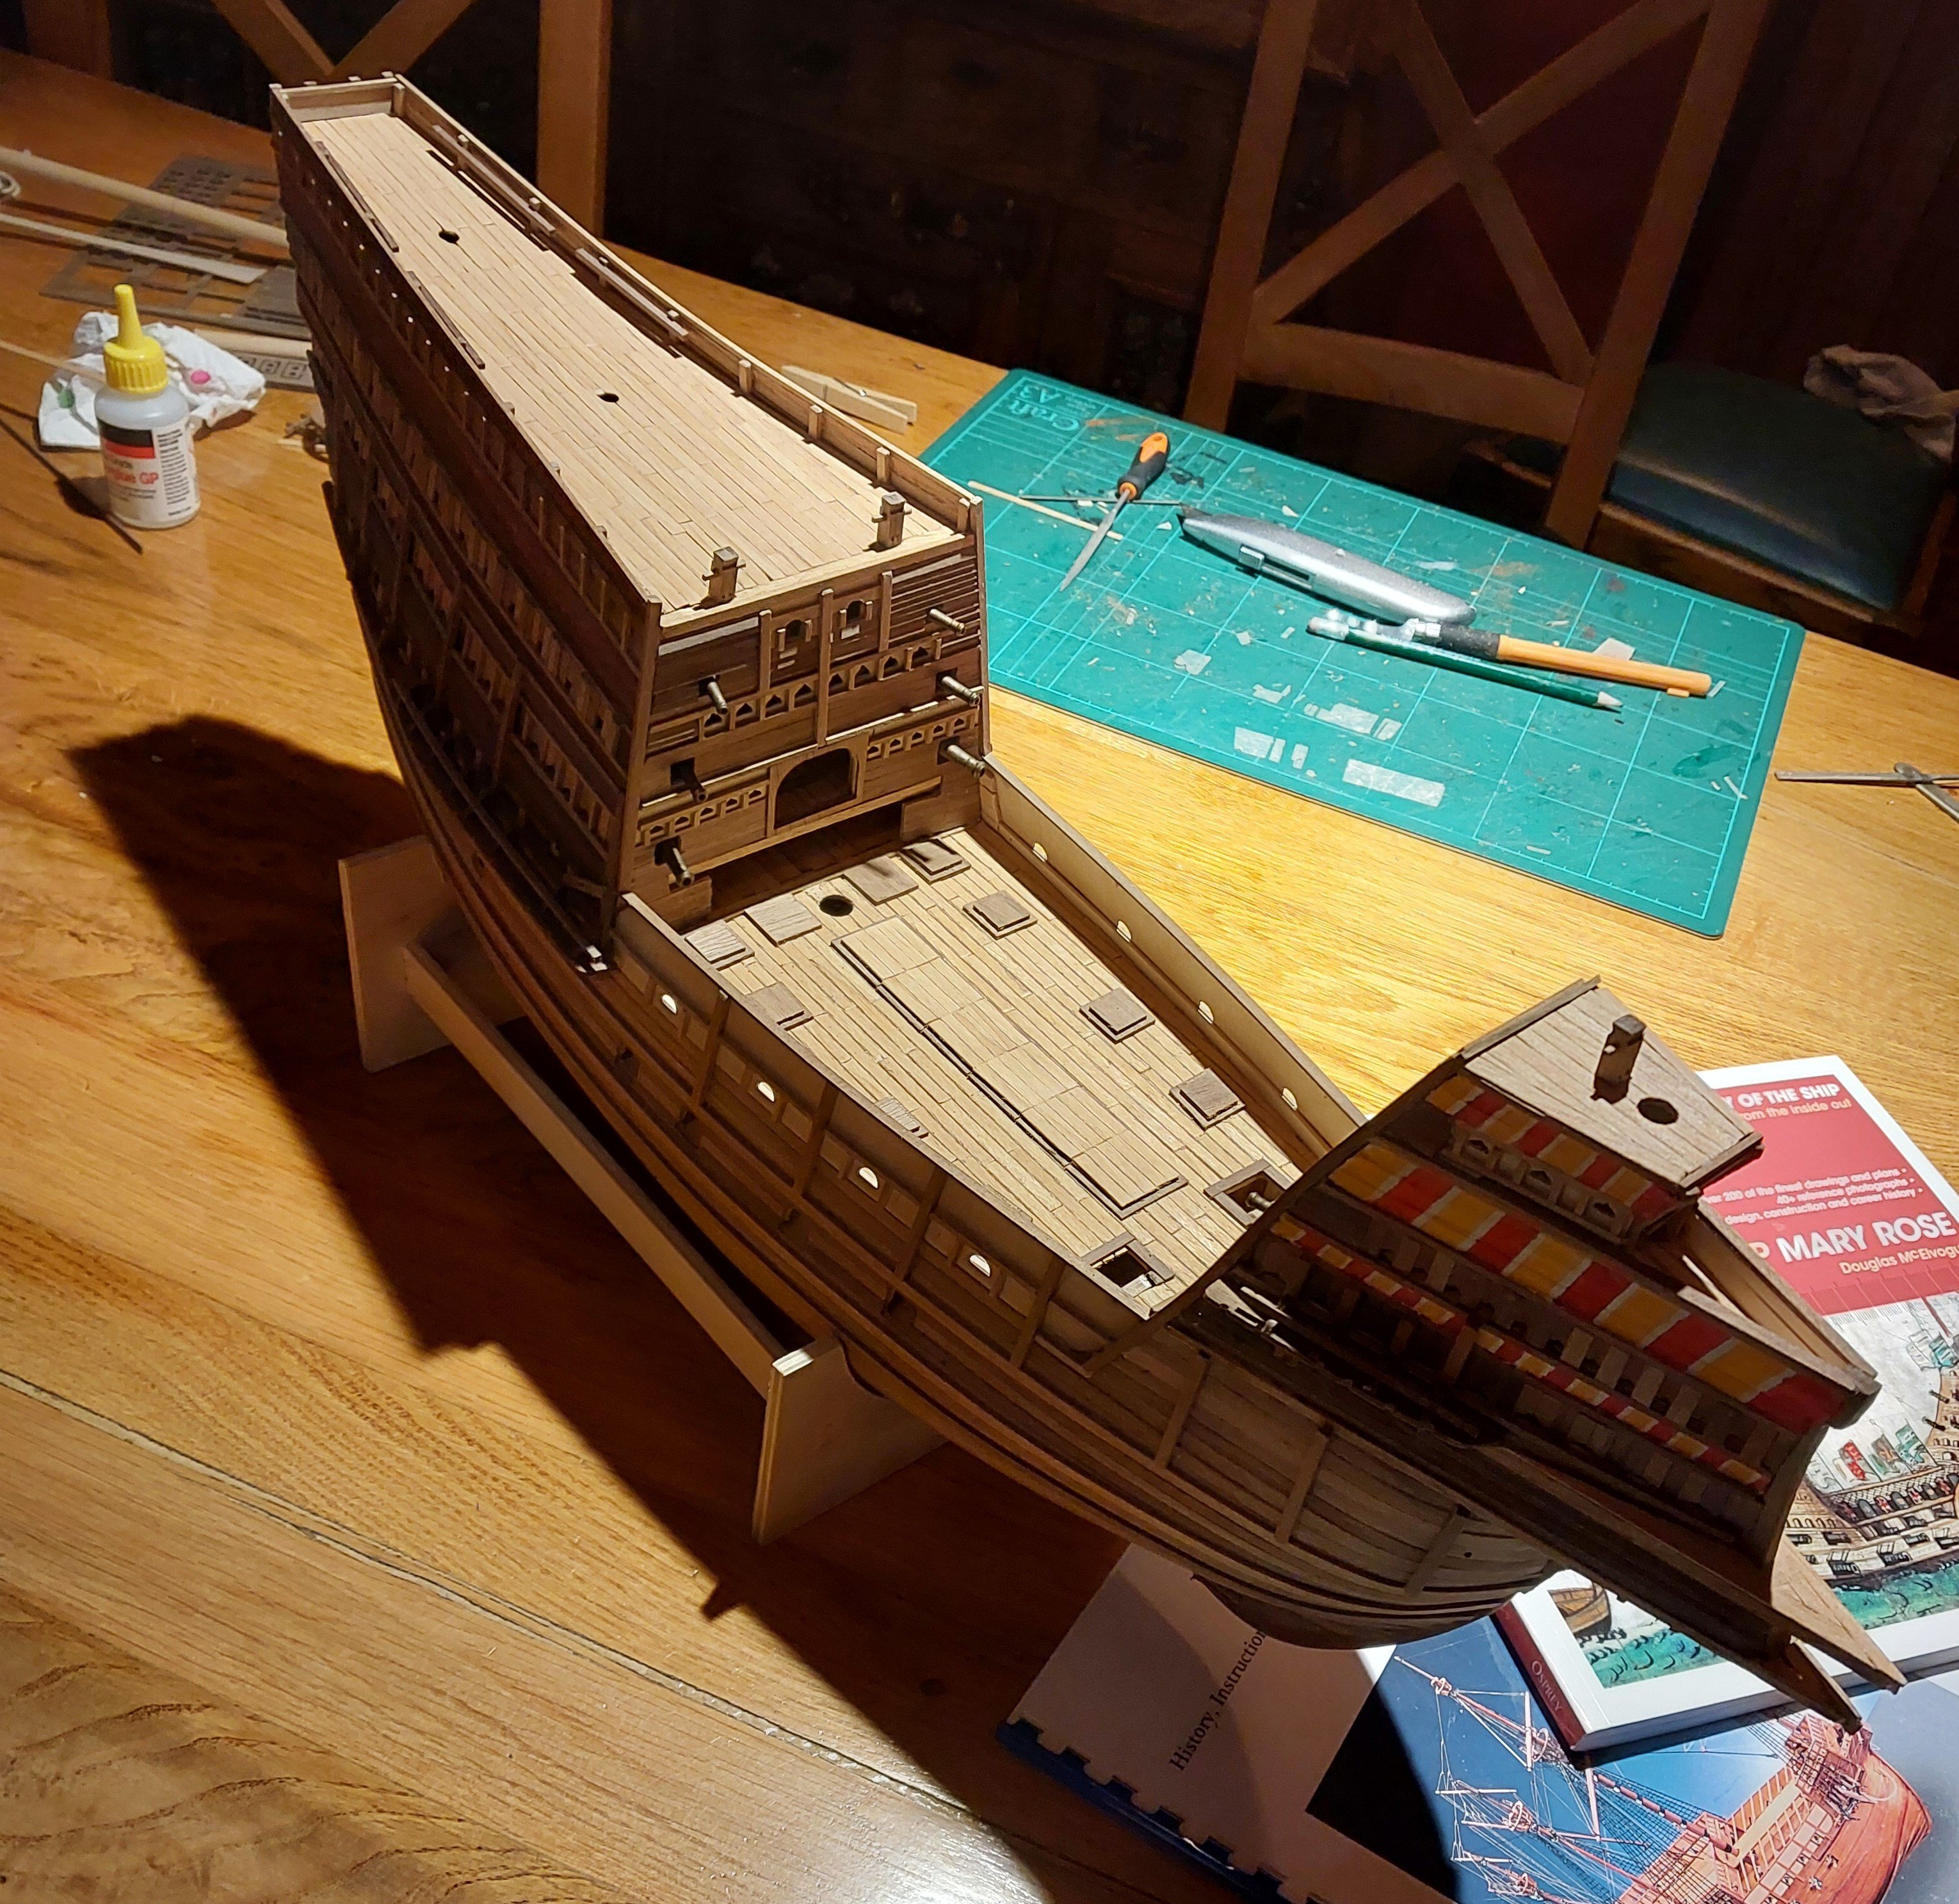
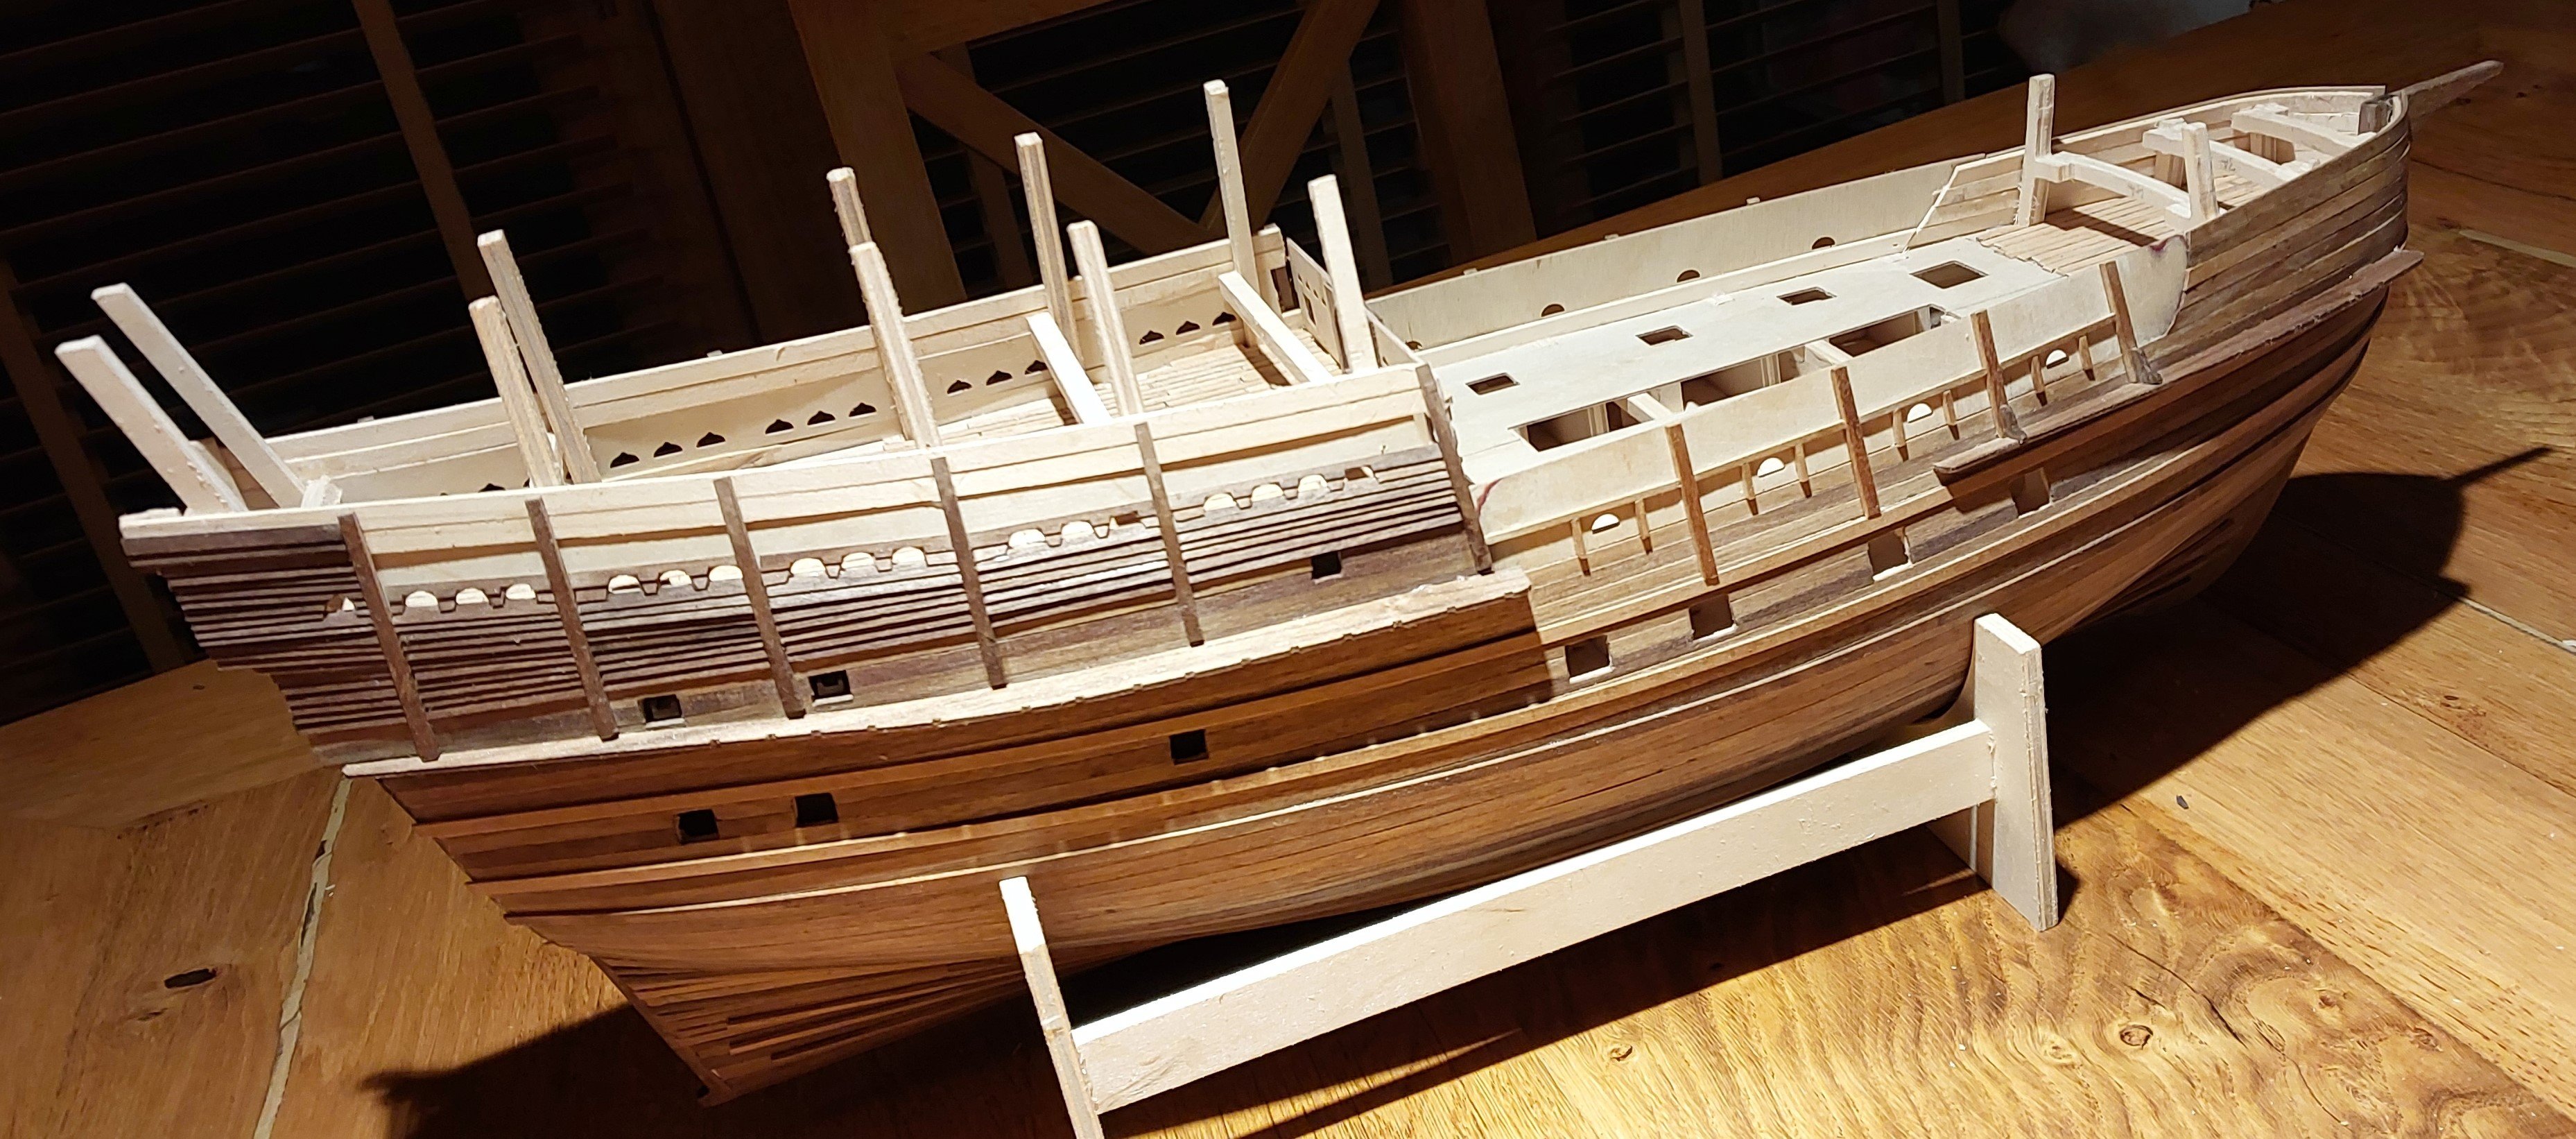
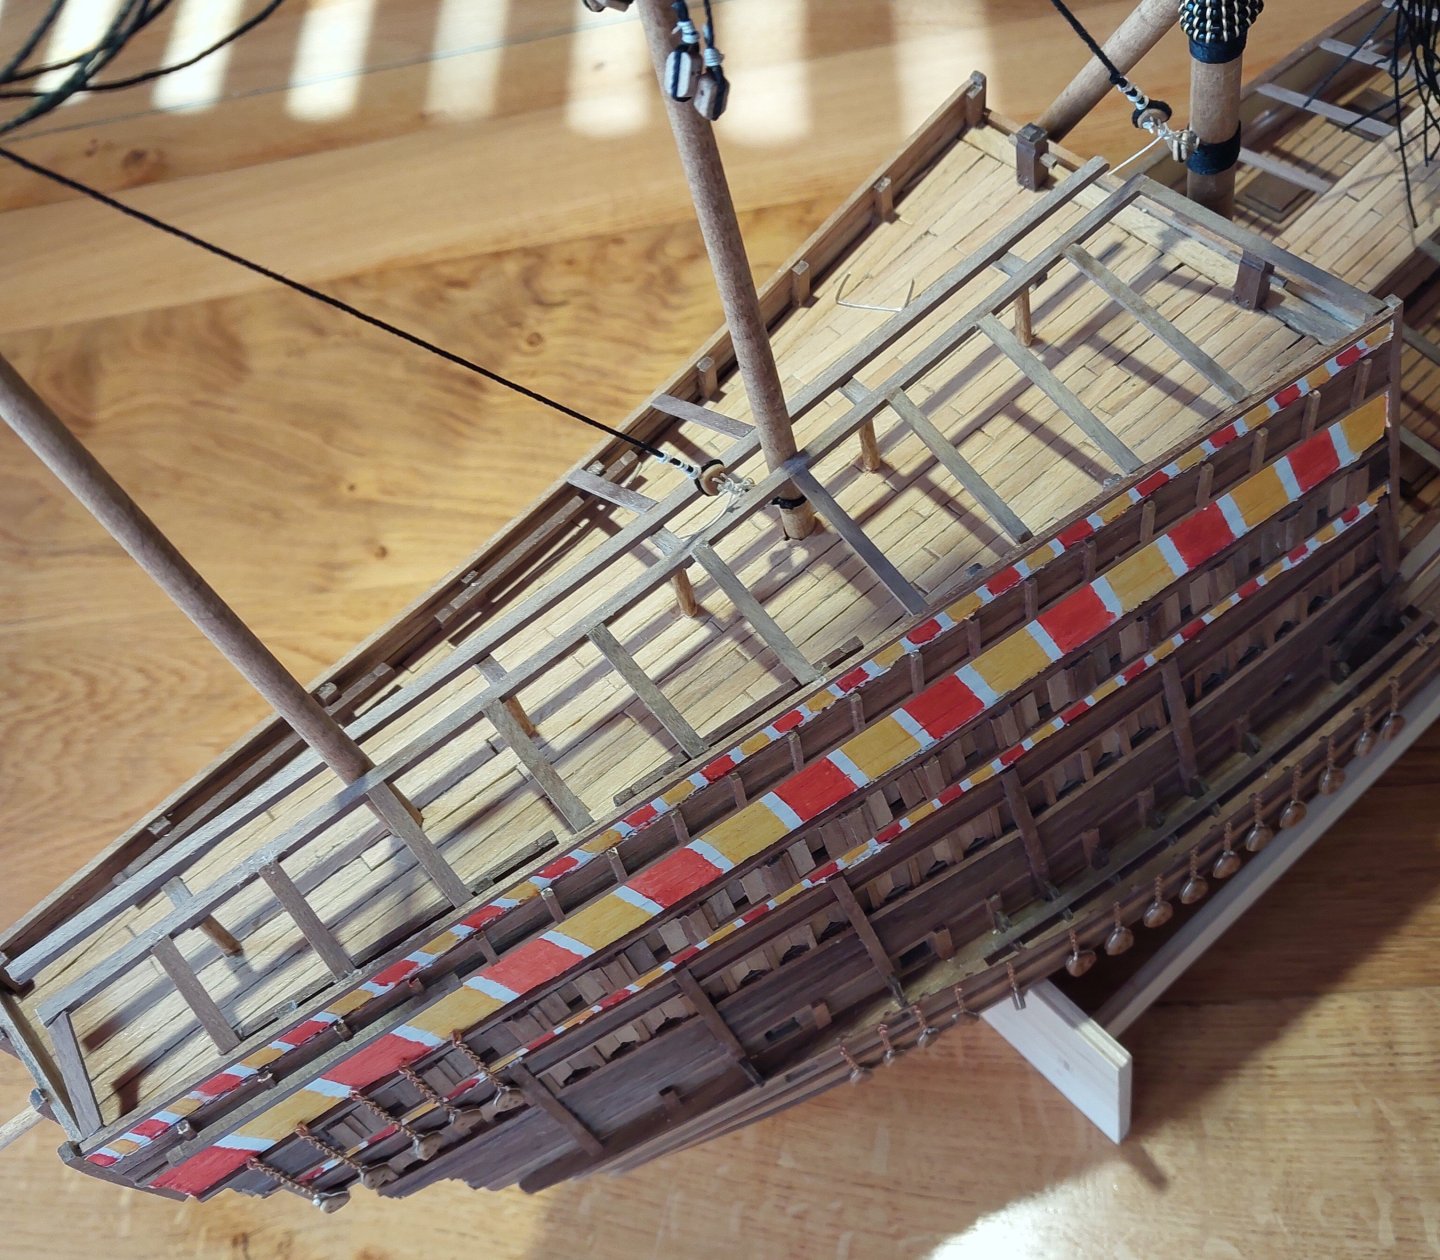
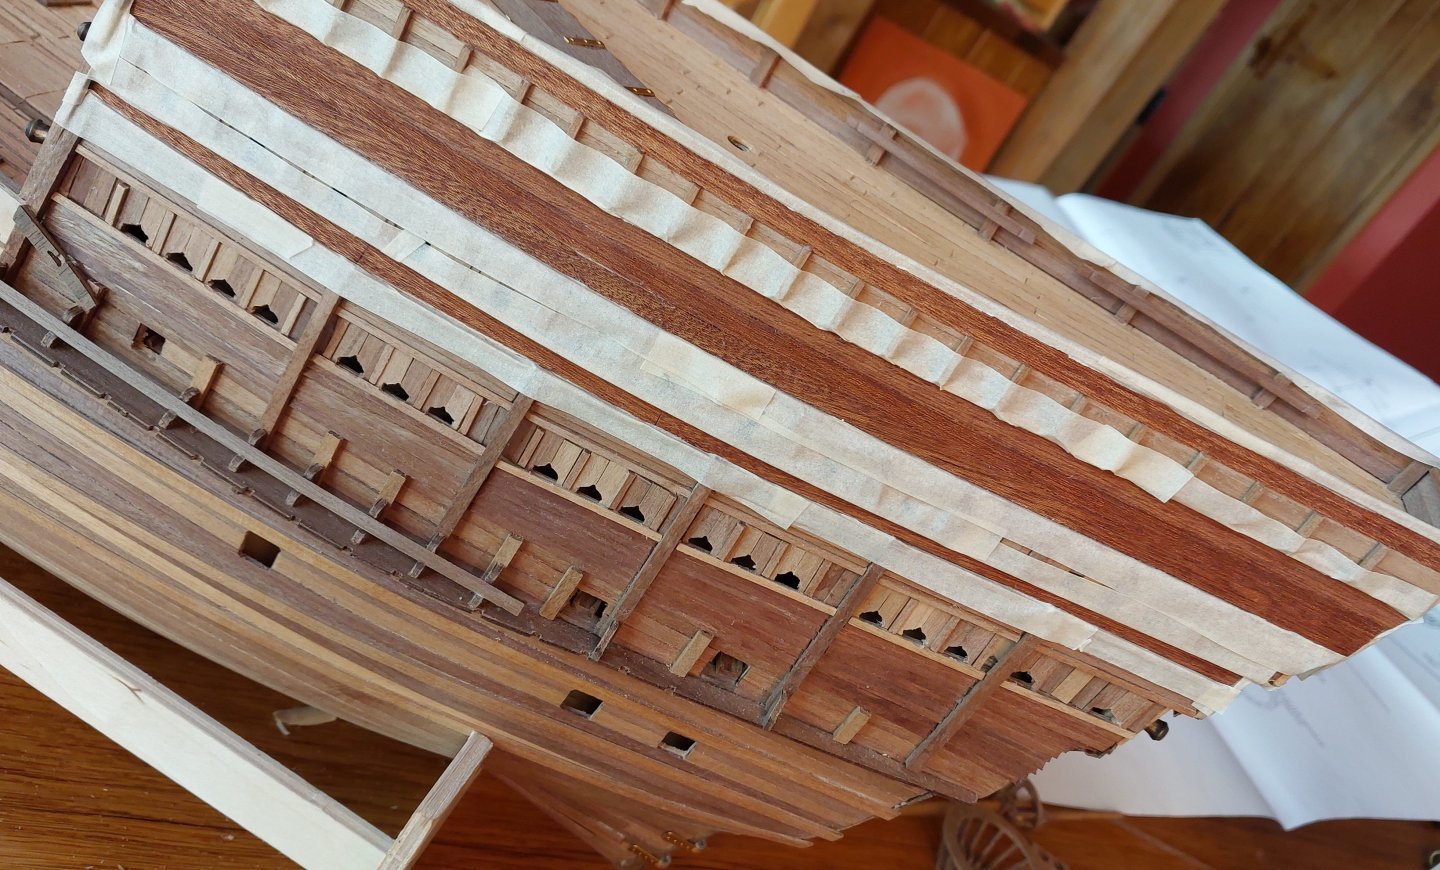
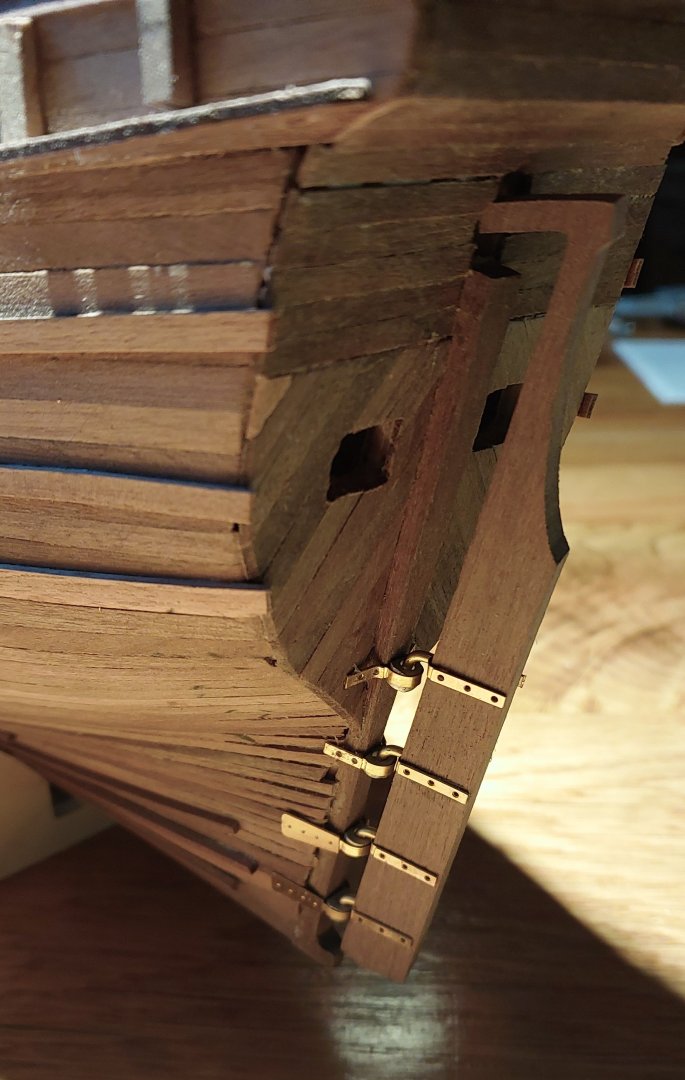
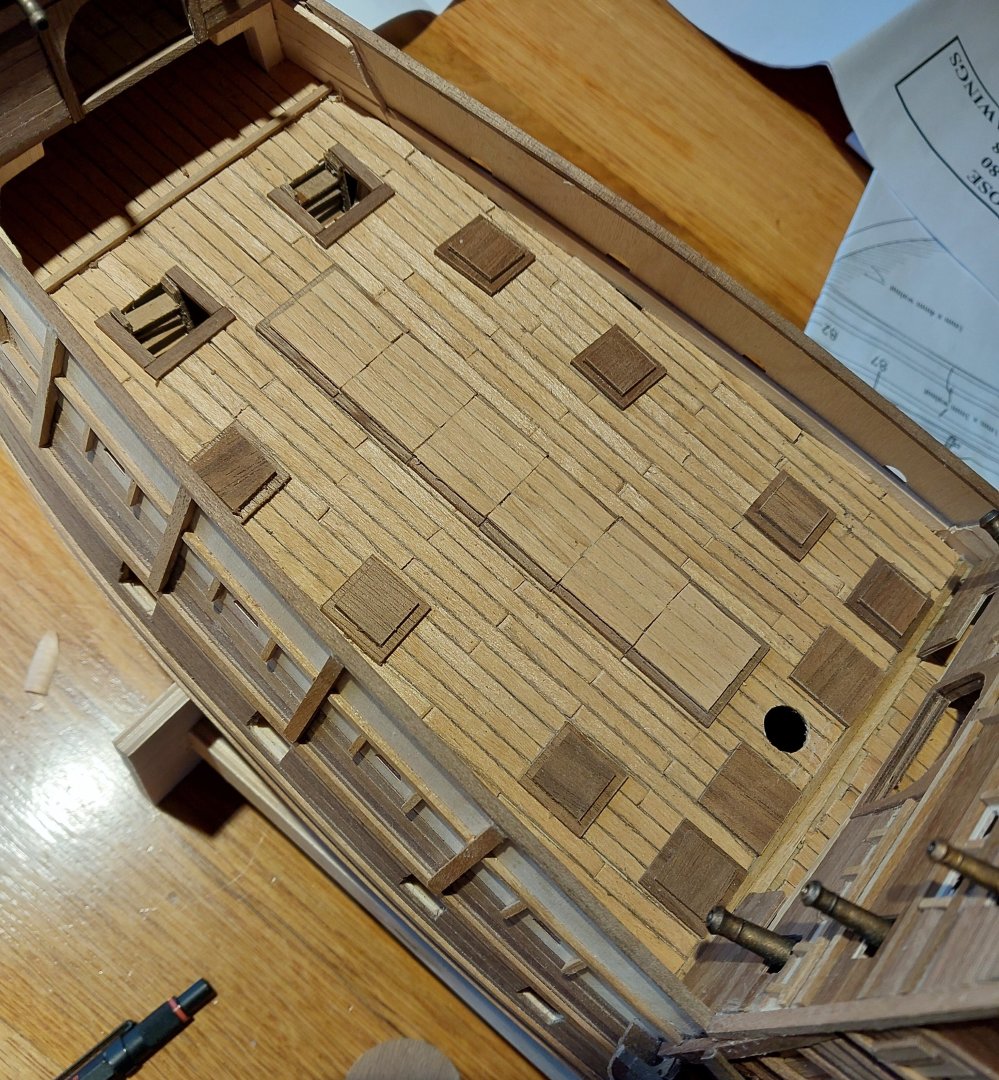
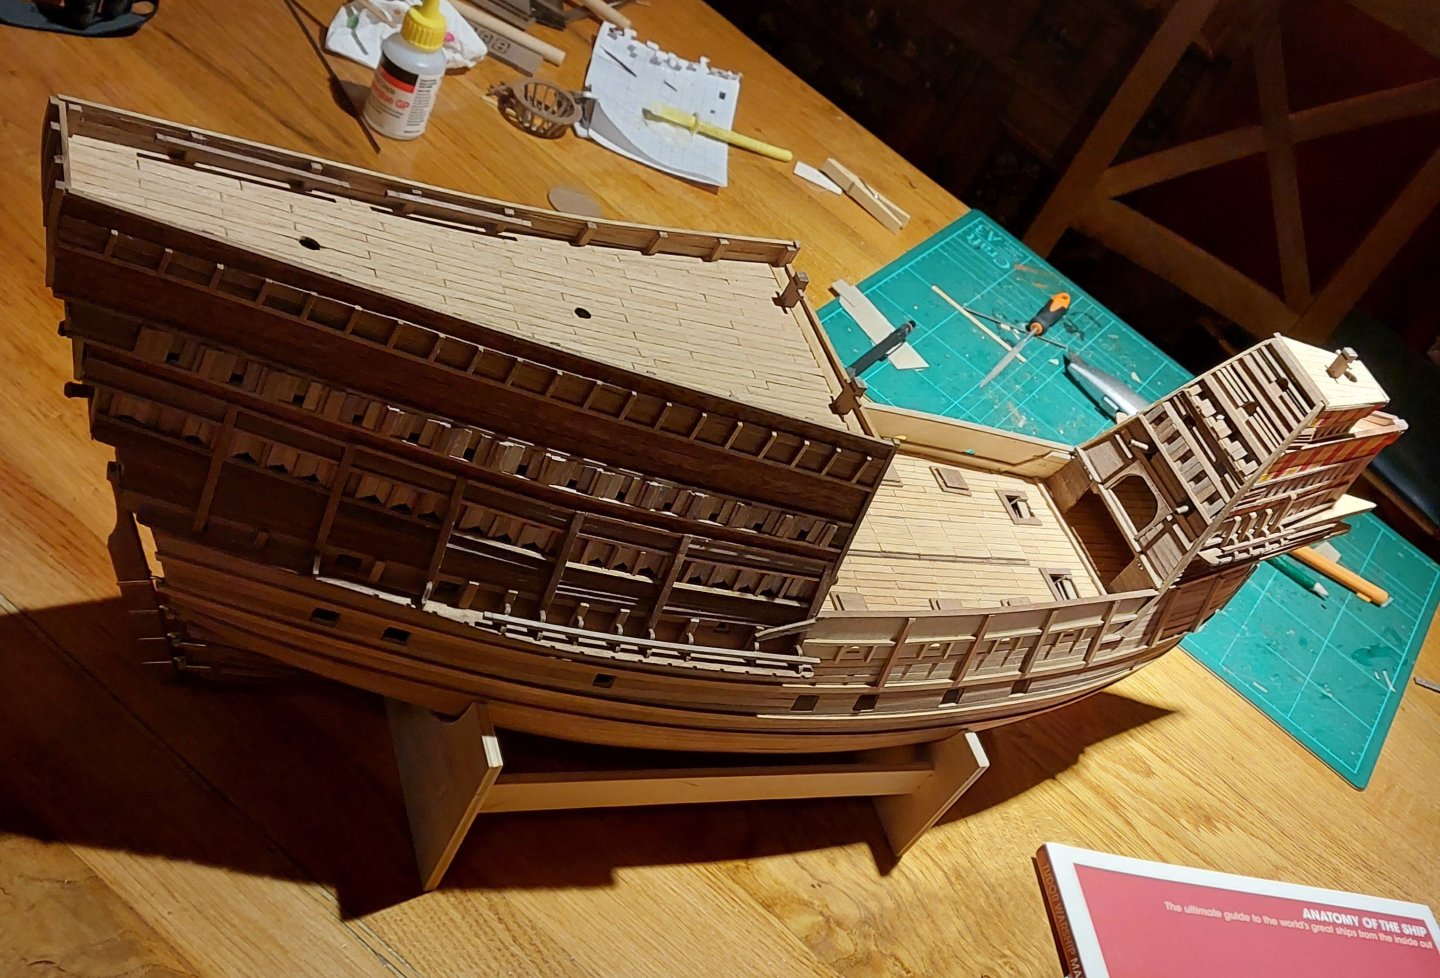
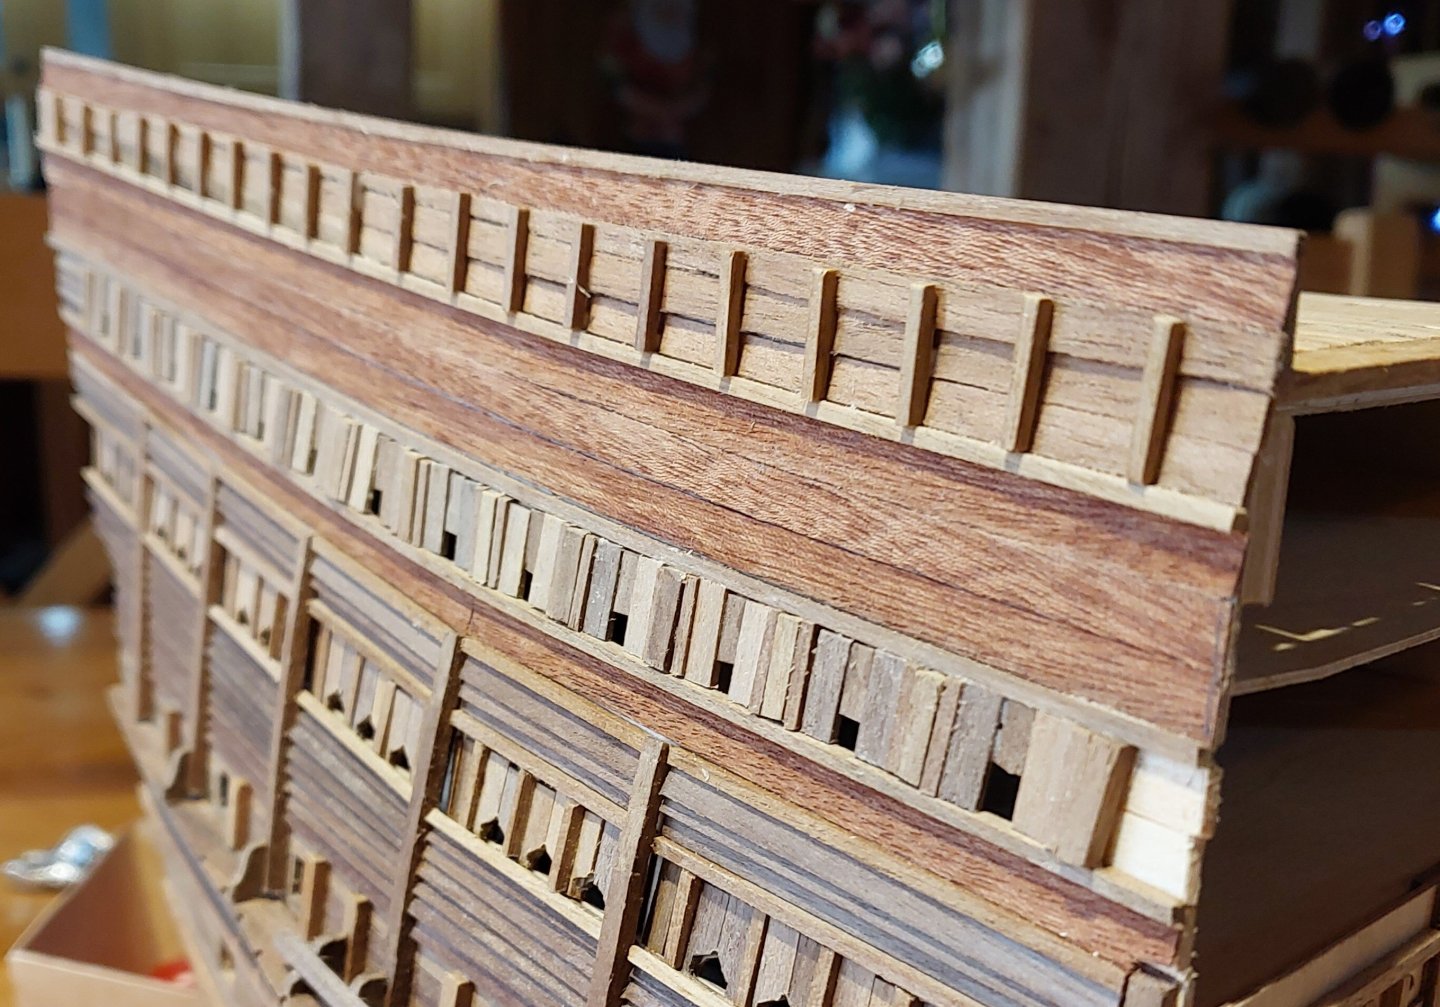
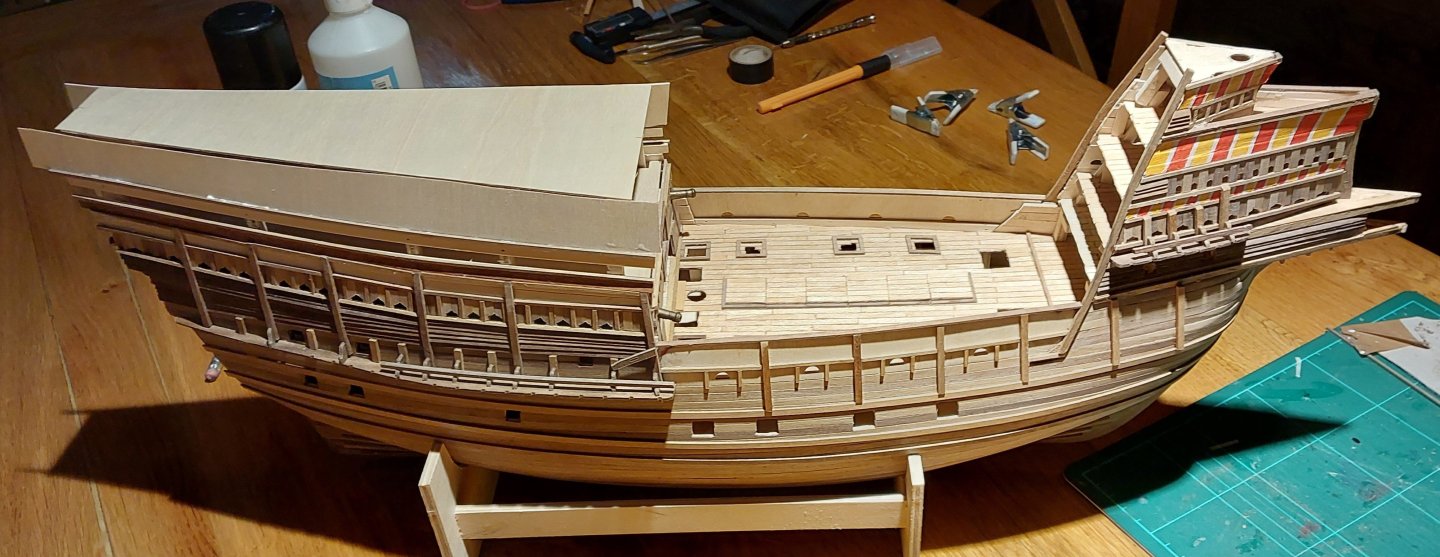
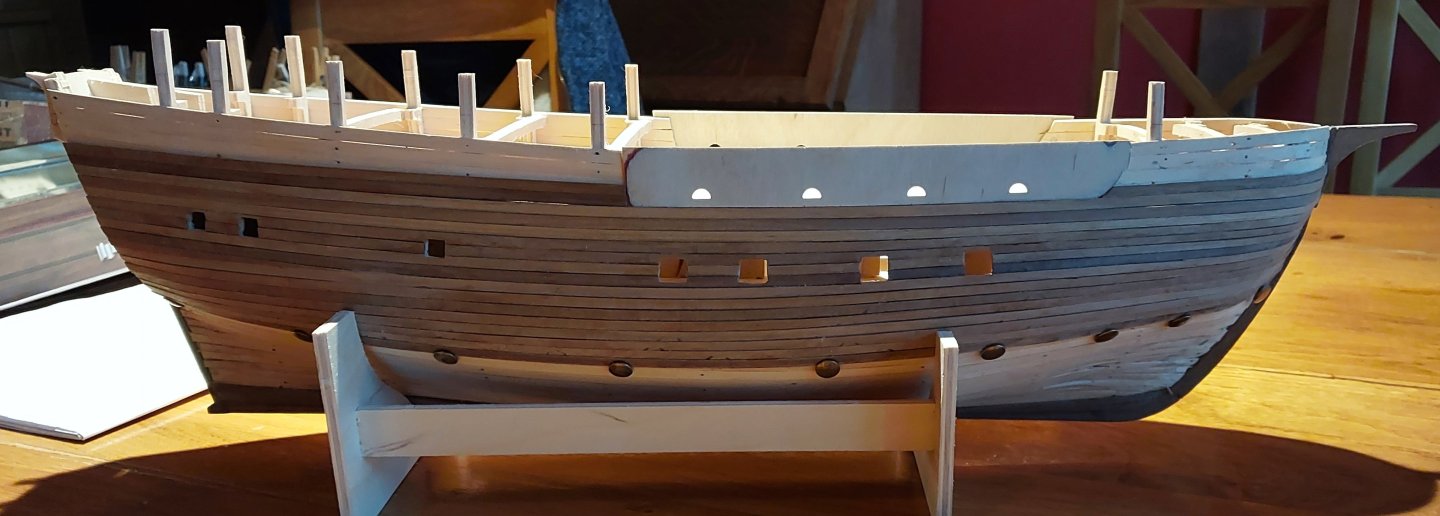
And another update! I knuckled down this week and got a lot of the tedious bits left to do on the hull out of the way. Here we go: I put the rudder brackets on and attached the metalwork on the rudder itself. This is actually still removable - I feel like I'm going to knock it and don't want to bend the relatively soft brass out of shape, so I'll just keep it off whilst still working on the build. Then I started on the aft side of the forecastle: Most of the following building work is done using the same principle of 0.8mm plywood as a foundation followed by planking over it with walnut. I won't go over the major details, so here's a few photos: I made sure to keep the cannon pointing out at a suitable angle - the Anthony Roll has these pointing upward at quite an angle as well, but mine are relatively horizontal. The way I'd put my decks in meant I couldn't follow the lines of cannon and windows exactly like the Anthony Roll depicts, but I've tried to be relatively faithful to that design, with the two windows at the top. Here it is finished: I'm really pleased with how this has come out. I used the same sort of design for my various portholes and cannon ports as I did along the sides of the ship, so it fits very well with the rest of the build. On to the sterncastle: I had a bit of scrap ply that was almost exactly the right width for the entire sterncastle's forward face, so I marked out where I wanted the various apetures and cut them out. The small arched openings are a little messy, but it doesn't show up too badly on the final product. Here it is test fit with some of the details added: And here with the rest of the detail: Here it is with everything in place, and again I'm very pleased with this. I ended up adding one more strip of 2x3mm walnut at the top to fill in the gap between the face and the poop deck. She's absolutely bristling with cannon now! I also finally got around to finishing up the waist: Caldercraft had some very strange designs in mind for the 8 ventilation hatches here, with an open square at the bottom and then a top plate that's only just large enough to sit on top of the opening. I'm not entirely sure what the idea was for this - there's supposed to be another larger square on top of each of them, but they were so flat and uninteresting that I've left them off. There's no evidence these holes even had hatch covers, but I wanted at least something on them as I'd not planked the deck below. The provided ladders were also way too long - an extremely frustrating part of the build. I ended up covering up the two ladderways on either side of the mast - they didn't exist in the real Mary Rose, as there was a bilge pump where one of them is. Then I build up the trestle-tree and the top for the main mast: I tested the mast length again and found that Caldercraft's measurements are just slightly shorter than I'd expect. According to R.C. Anderson's The Rigging of Ships in the Days of the Spritsail Topmast, the mast should be 2.4x the length of the beam. That puts my mast at 336mm, which is 88 feet in real scale, though that's measuring from the deck and not from the keel - but Anderson notes that masts were getting shorter throughout the 16th and 17th centuries, so it stands to reason that the Mary Rose's could have been slightly longer. Most sources seem to think that the mast was around 80 feet. As you can see, I have some wiggle room here, as my shrouds still won't interact with the sides of the sterncastle - especially once they go over the trestle-trees. I think I might be conservative and bring the trees down to the 300mm mark, or 78ft from the deck. I also planked up the waist gangway. This will eventually support the struts for the boarding netting on each side of the waist, but I needed it planked now as I'll be putting in the masts soon and the mainmast goes through it. And with this update, I'm pretty sure the main bulk of the build is done! I still need to paint the sterncastle stripes, but otherwise the majority of the wood is in place. Caldercraft's kit is extremely generous in this regard - despite the huge amount of extra stuff I've built, there's still an enormous amount of spare timber. The only thing I've ordered extra of is 3x2mm walnut strips. I did order extra 1.5x1.5mm wood as well, but it was left out of my order and I didn't end up needing extra. Thanks for following along as always!


-
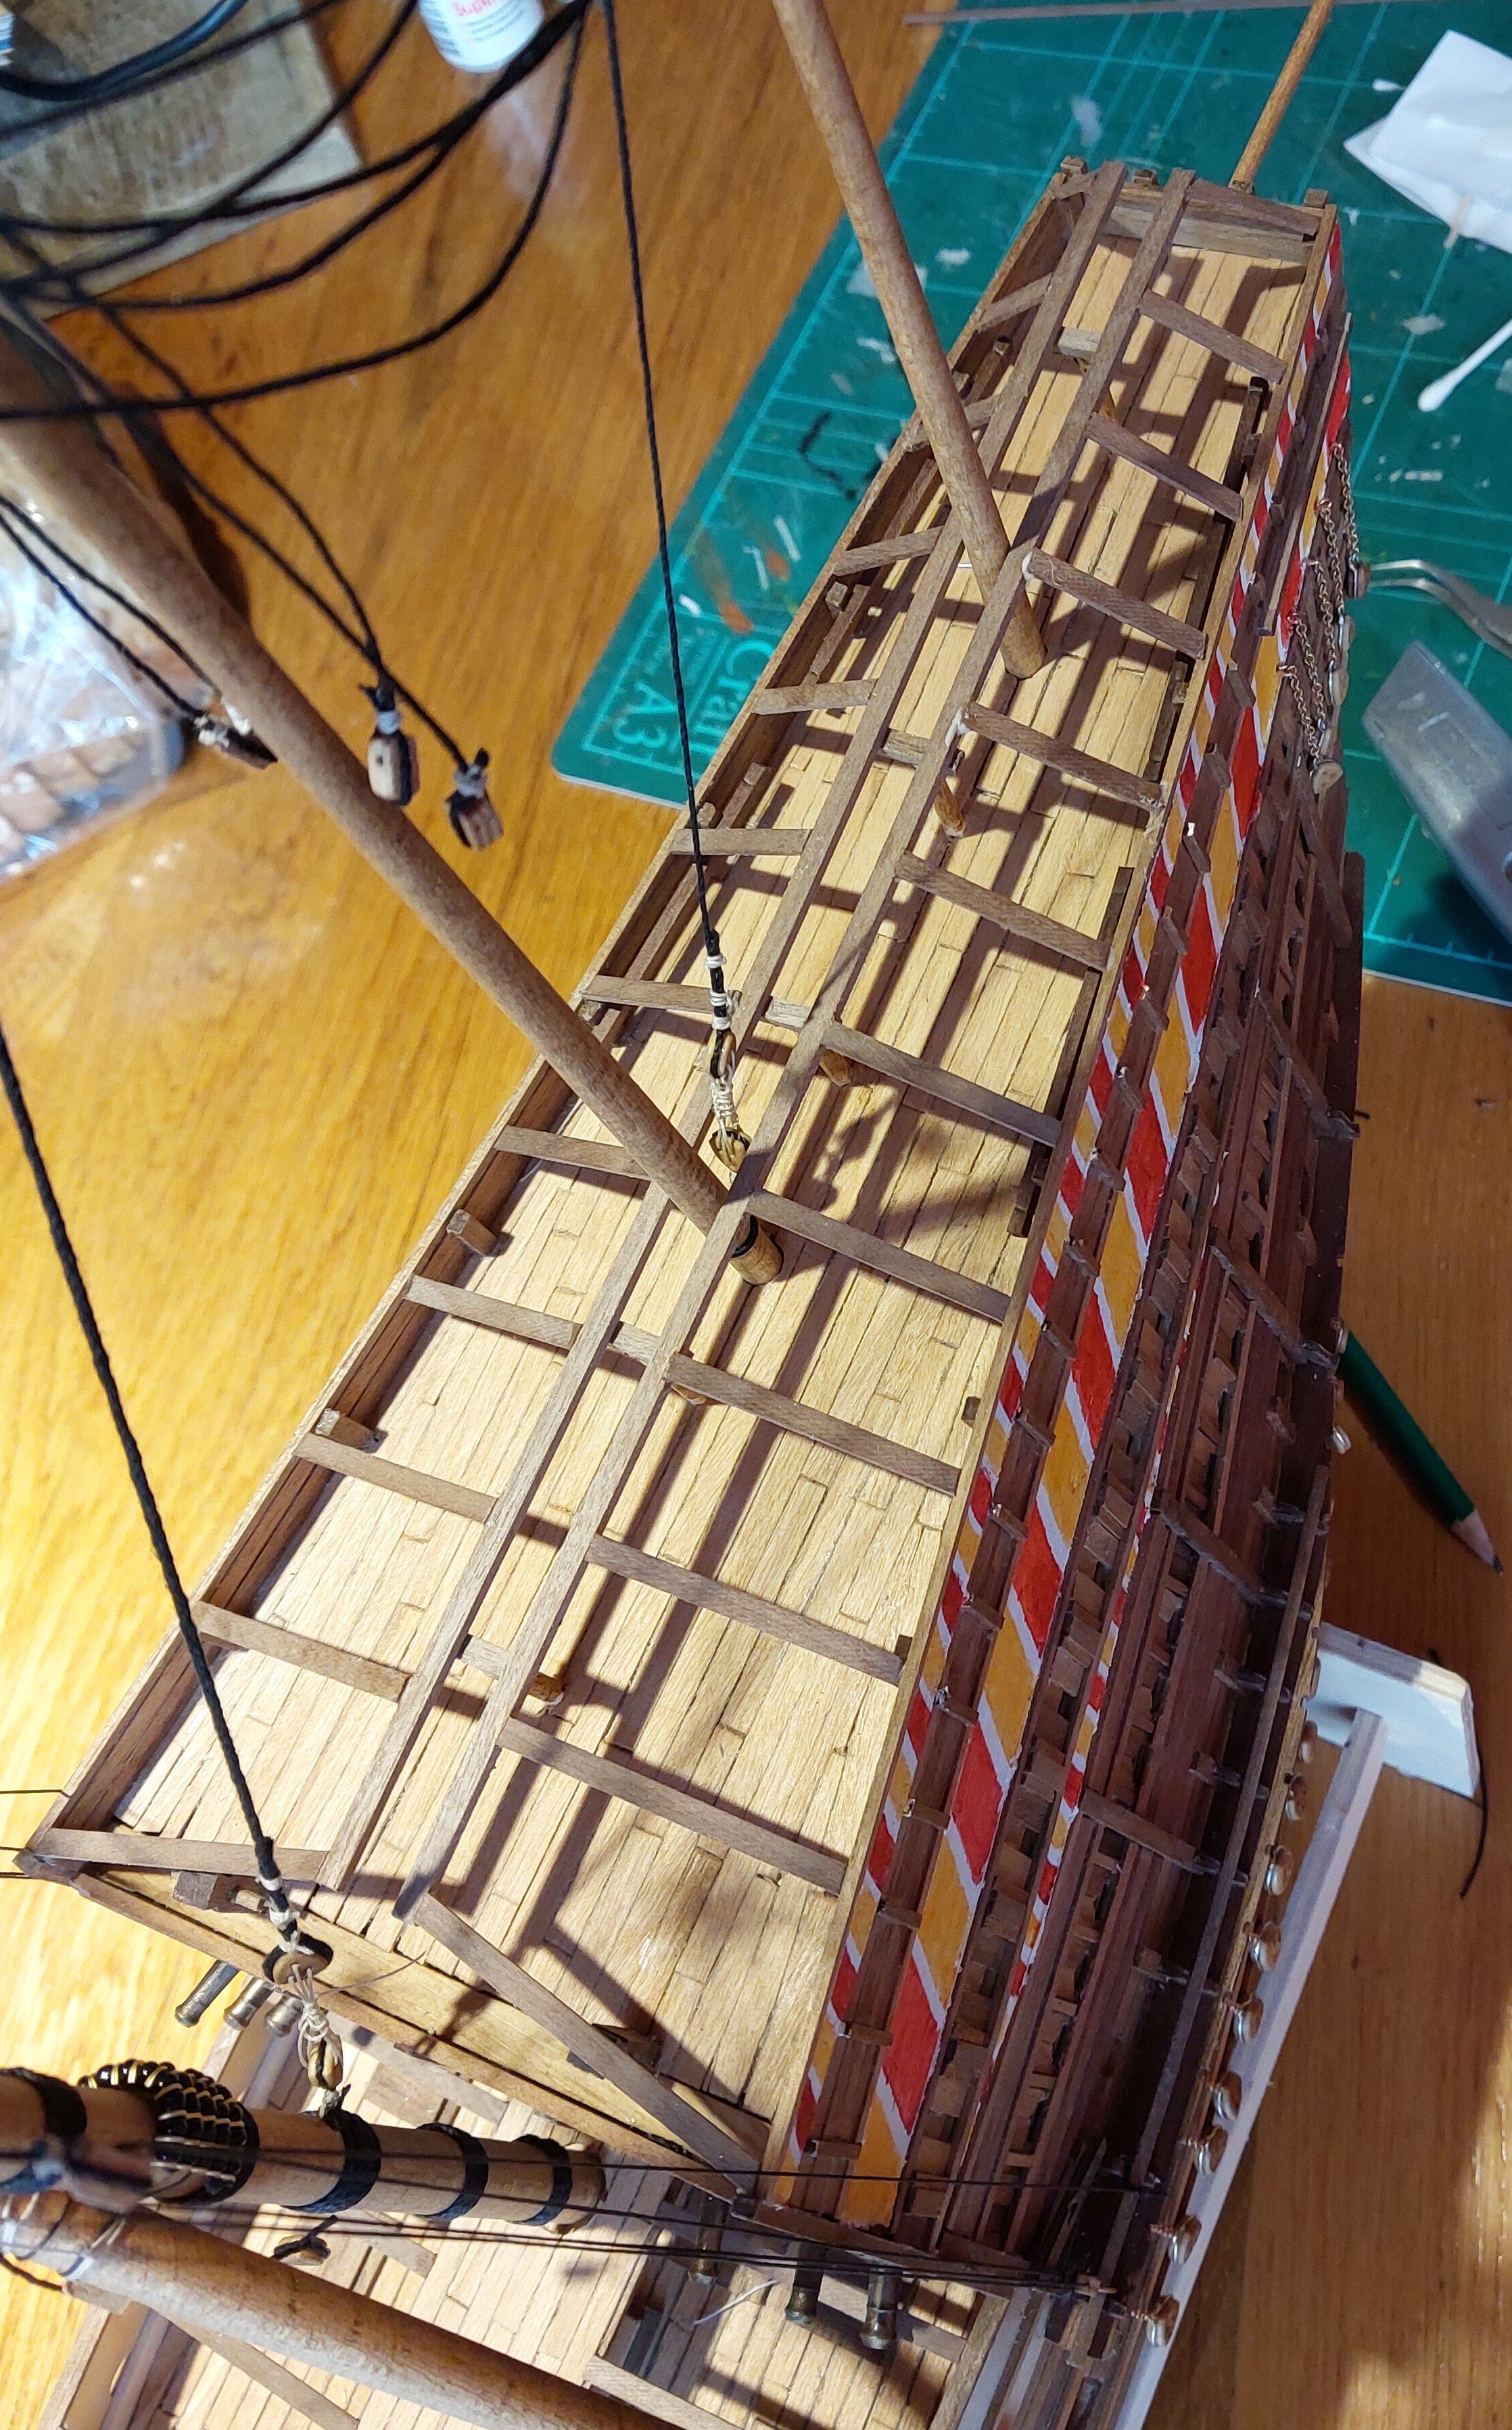
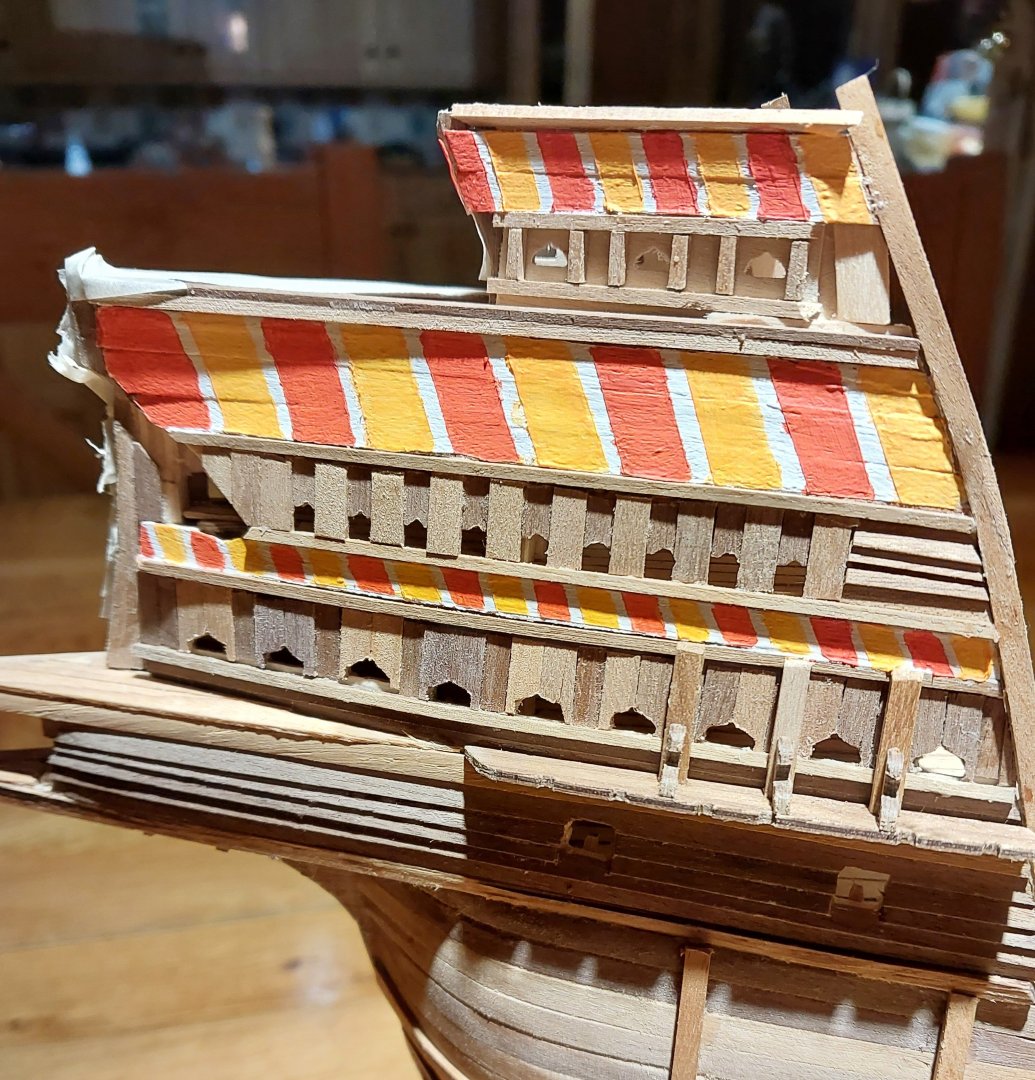
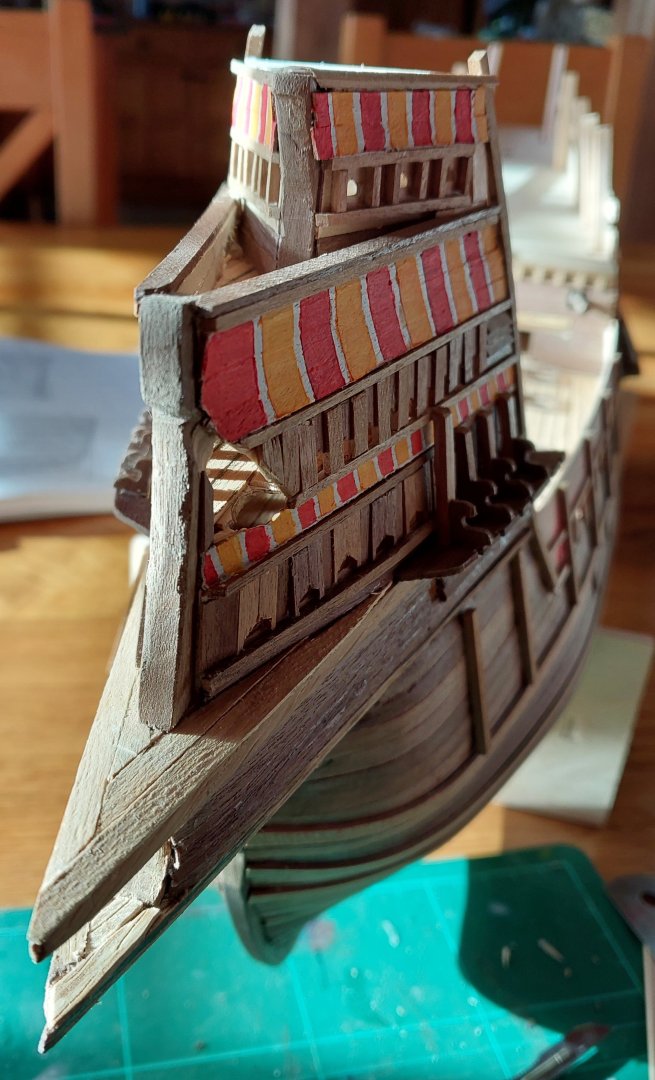
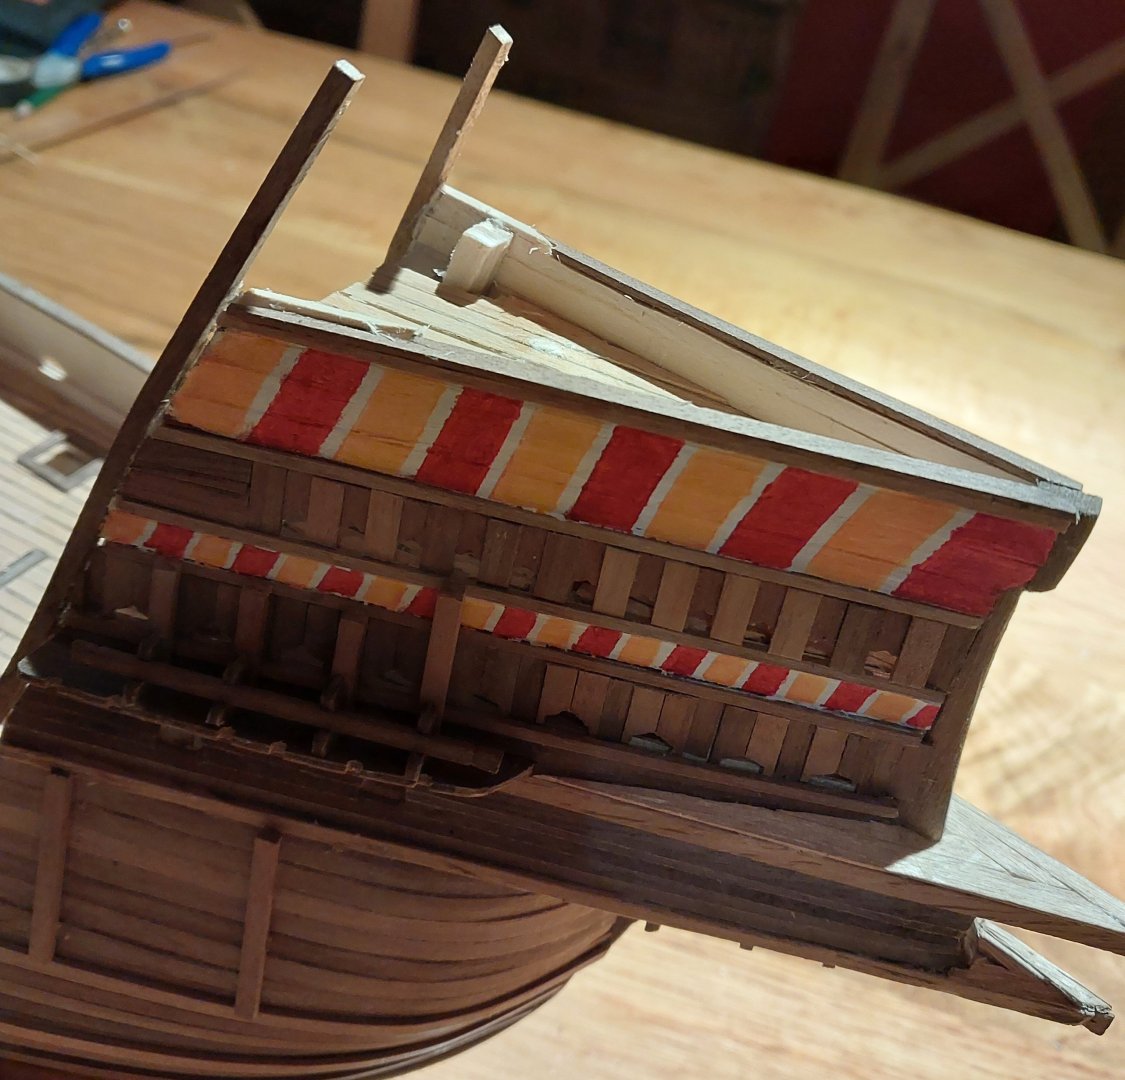
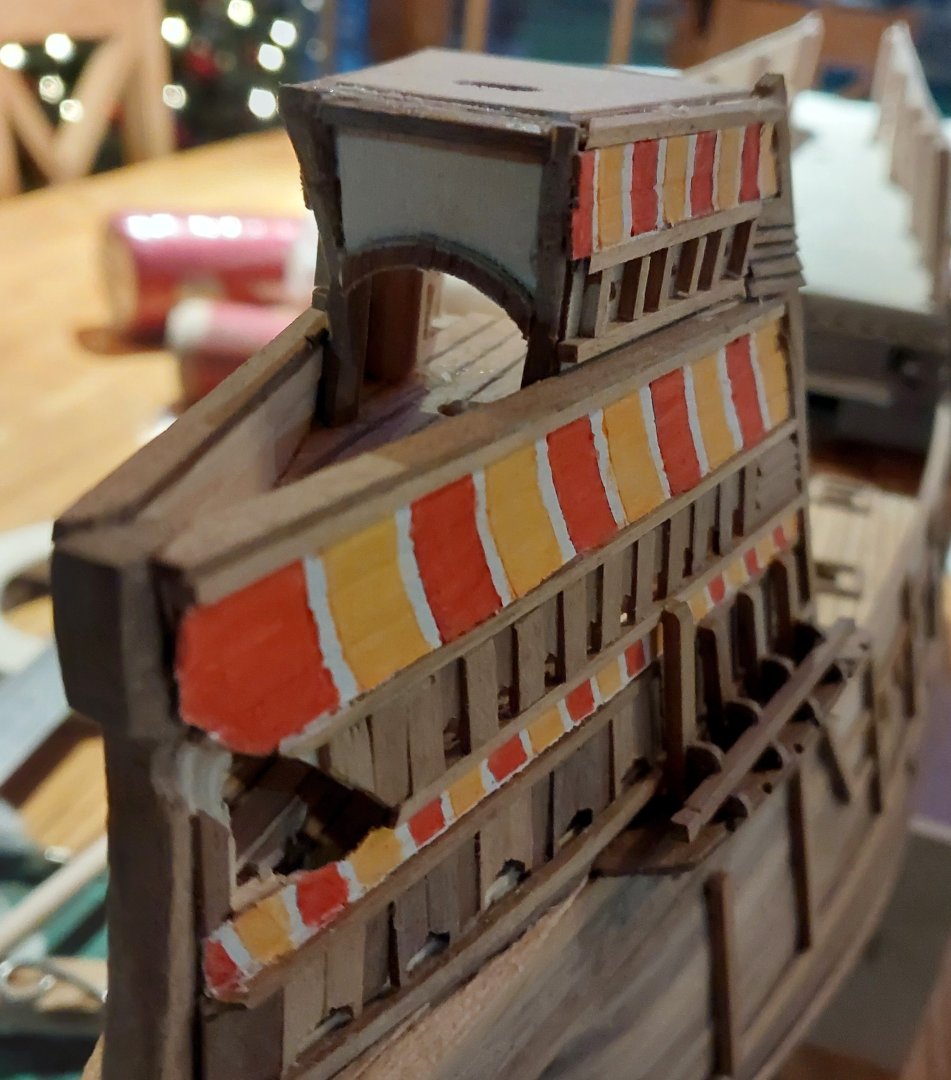
Thanks for the kind words everybody! Here's my next update, but first: Oh, I'll definitely be giving it a go! I've got some boxwood lying around so at some point it's definitely on the agenda - as is a trip to the museum to go see the real thing 😁 Yes, these are the issues I've been dealing with as well - and it's something I'm going to have to consider very soon as I think the nets will have to go in around the same time as the masts. I think I'll probably go with something similar to Mcelvogue's interpretation, though Marsden also has some input which I need to review. My other concern is actually sourcing a net that's that fine; I think judging by the scale I need around a 1.5mm hole size and probably about 0.8mm cordage - not really something I want to make myself, but I suspect that might be the only option. I did buy some sample fabric on etsy, but it was far too heavy for my purposes. I was also thinking of perhaps using some hessian fabric (burlap or jute for the non-UK speakers here) I have lying around, but even that seems too coarse. I'll keep looking. Yeah, the Anthony Roll also has the shields in the waist, and the Embarkment painting has them on the forecastle as well - but how they'd have been mounted is completely unknown! Agreed the boarding nets wouldn't have been permanent, but for sure at least some of the support structure for them must have been. Looks to me like there was a sort of A-frame 'tent' structure on the sterncastle, and then the waist has a central walkway from which the nets were supported on spars - much like @Louie da fly detailed above. On with my (small) update for today! I carried on with the decking on the sterncastle's poop deck: A bit of a weird shape resulting in a jigsaw puzzle, this, but it looks pretty good now it's done. And then I tackled the railings. I wasn't keen on doing an open railing - I love what @Baker has done on his version, but I certainly don't have his artisanal skills and I doubted my own ability to make it look as good. First I built up the sides and added a series of 9mm uprights: These are spaced around 30mm apart, but I did play a little fast and loose with this, as at this point in the build nothing is quite square any more. Sue me. I promptly forgot to take a single photo between this and completing the railing on this side. So here it is: As you can see, I have interpreted the cross-hatching on the Anthony Roll image as a series of uprights which support the railing. As mentioned in the previous post, all of the strips of slightly reddish sapelli veneer will eventually be painted with the red and yellow stripes, just like the forecastle. Here's the other side: This side was a pain in the *** to get right - the whole thing is, it turns out, about 1.5mm off level. All things considered, less than it could have been, and not really noticable, but a huge nightmare when you've only got the right wood in 4mm widths. Ah well! Shortly after this was taken, I added in the clinker planking on the exposed pine midway up at the front of the sterncastle wall. And then I moved to the back! Here you can see me building up the transom and testing out where the cannon will go. As you can see, I'm not building up the carriages properly, ommitting the wheels and the rear structure of each - only I, and everyone who sees this, will ever know! I tried to follow the structure shown in the Anthony Roll as much as possible in this build, and for the most part it was just a puzzle of working out how to fill up the gaps and create something that'd be strong enough to support itself and the planking over the top. It's a little bit of a bodge in places, but I think it's come out looking great. Here's the planking over the middle set of cannons: Again, the strip of sapelli will be painted with stripes. In the Anthony Roll this stripe is actually above the ports, but this lines up with the stripes on the side of the sterncastle, so I thought it would look a bit better. Next the top deck: This posed a little bit of a challenge as I needed to include the middle window, and so I had to move where I'd initially planned to put the cannon ports. Not a major issue, but one that some better pre-planning would have avoided. I'm ver pleased with my uprights here; they all required a very slight curve that was a pleasure once I got it right. N.b there aren't any obvious uprights in the Anthony Roll's depiction of this section, but I'd rather have these on the outside as it breaks up what would otherwise be rather bland clinker planking. Speaking of which: Here she is! This is really beginning to look, to excuse the pun, ship-shape. I'm super pleased with how this bit has come out. Next I'll be working on the aft side of the forecastle and the fore side of the sterncastle, at which point I'm very nearly done with the bulk of the initial build. Thanks again for all the lovely comments and the engagement with this build. See you next time!


-
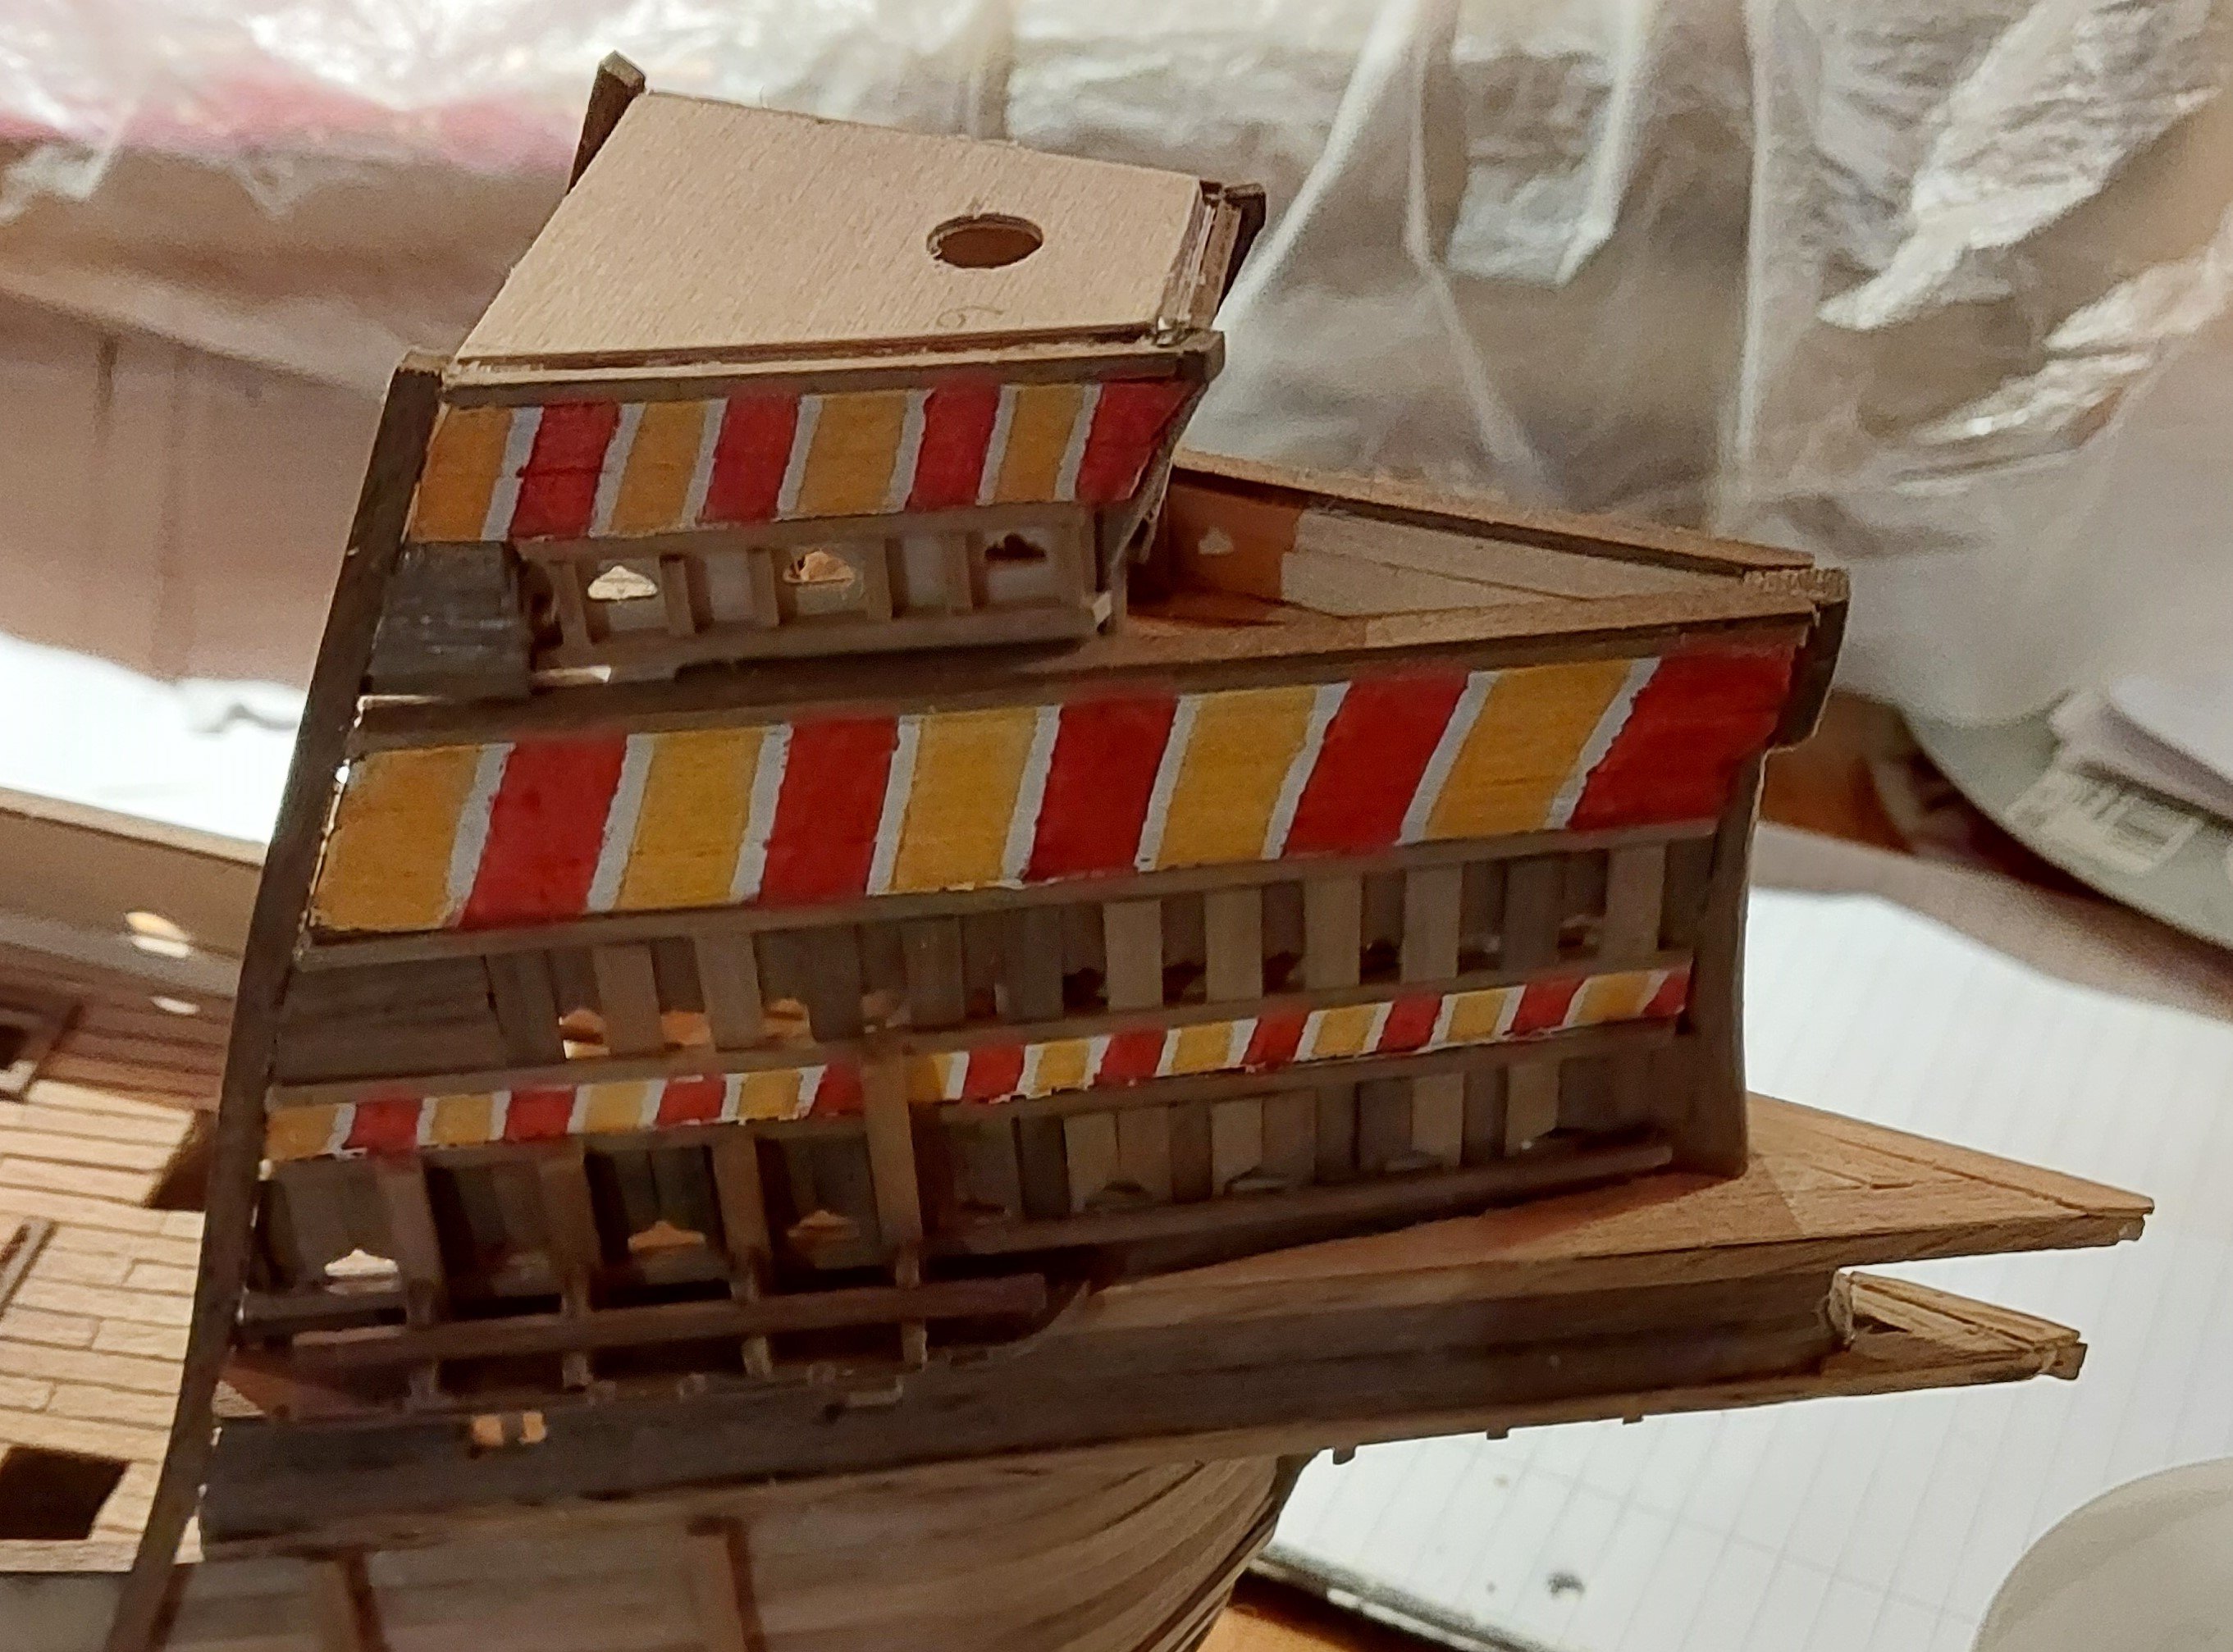
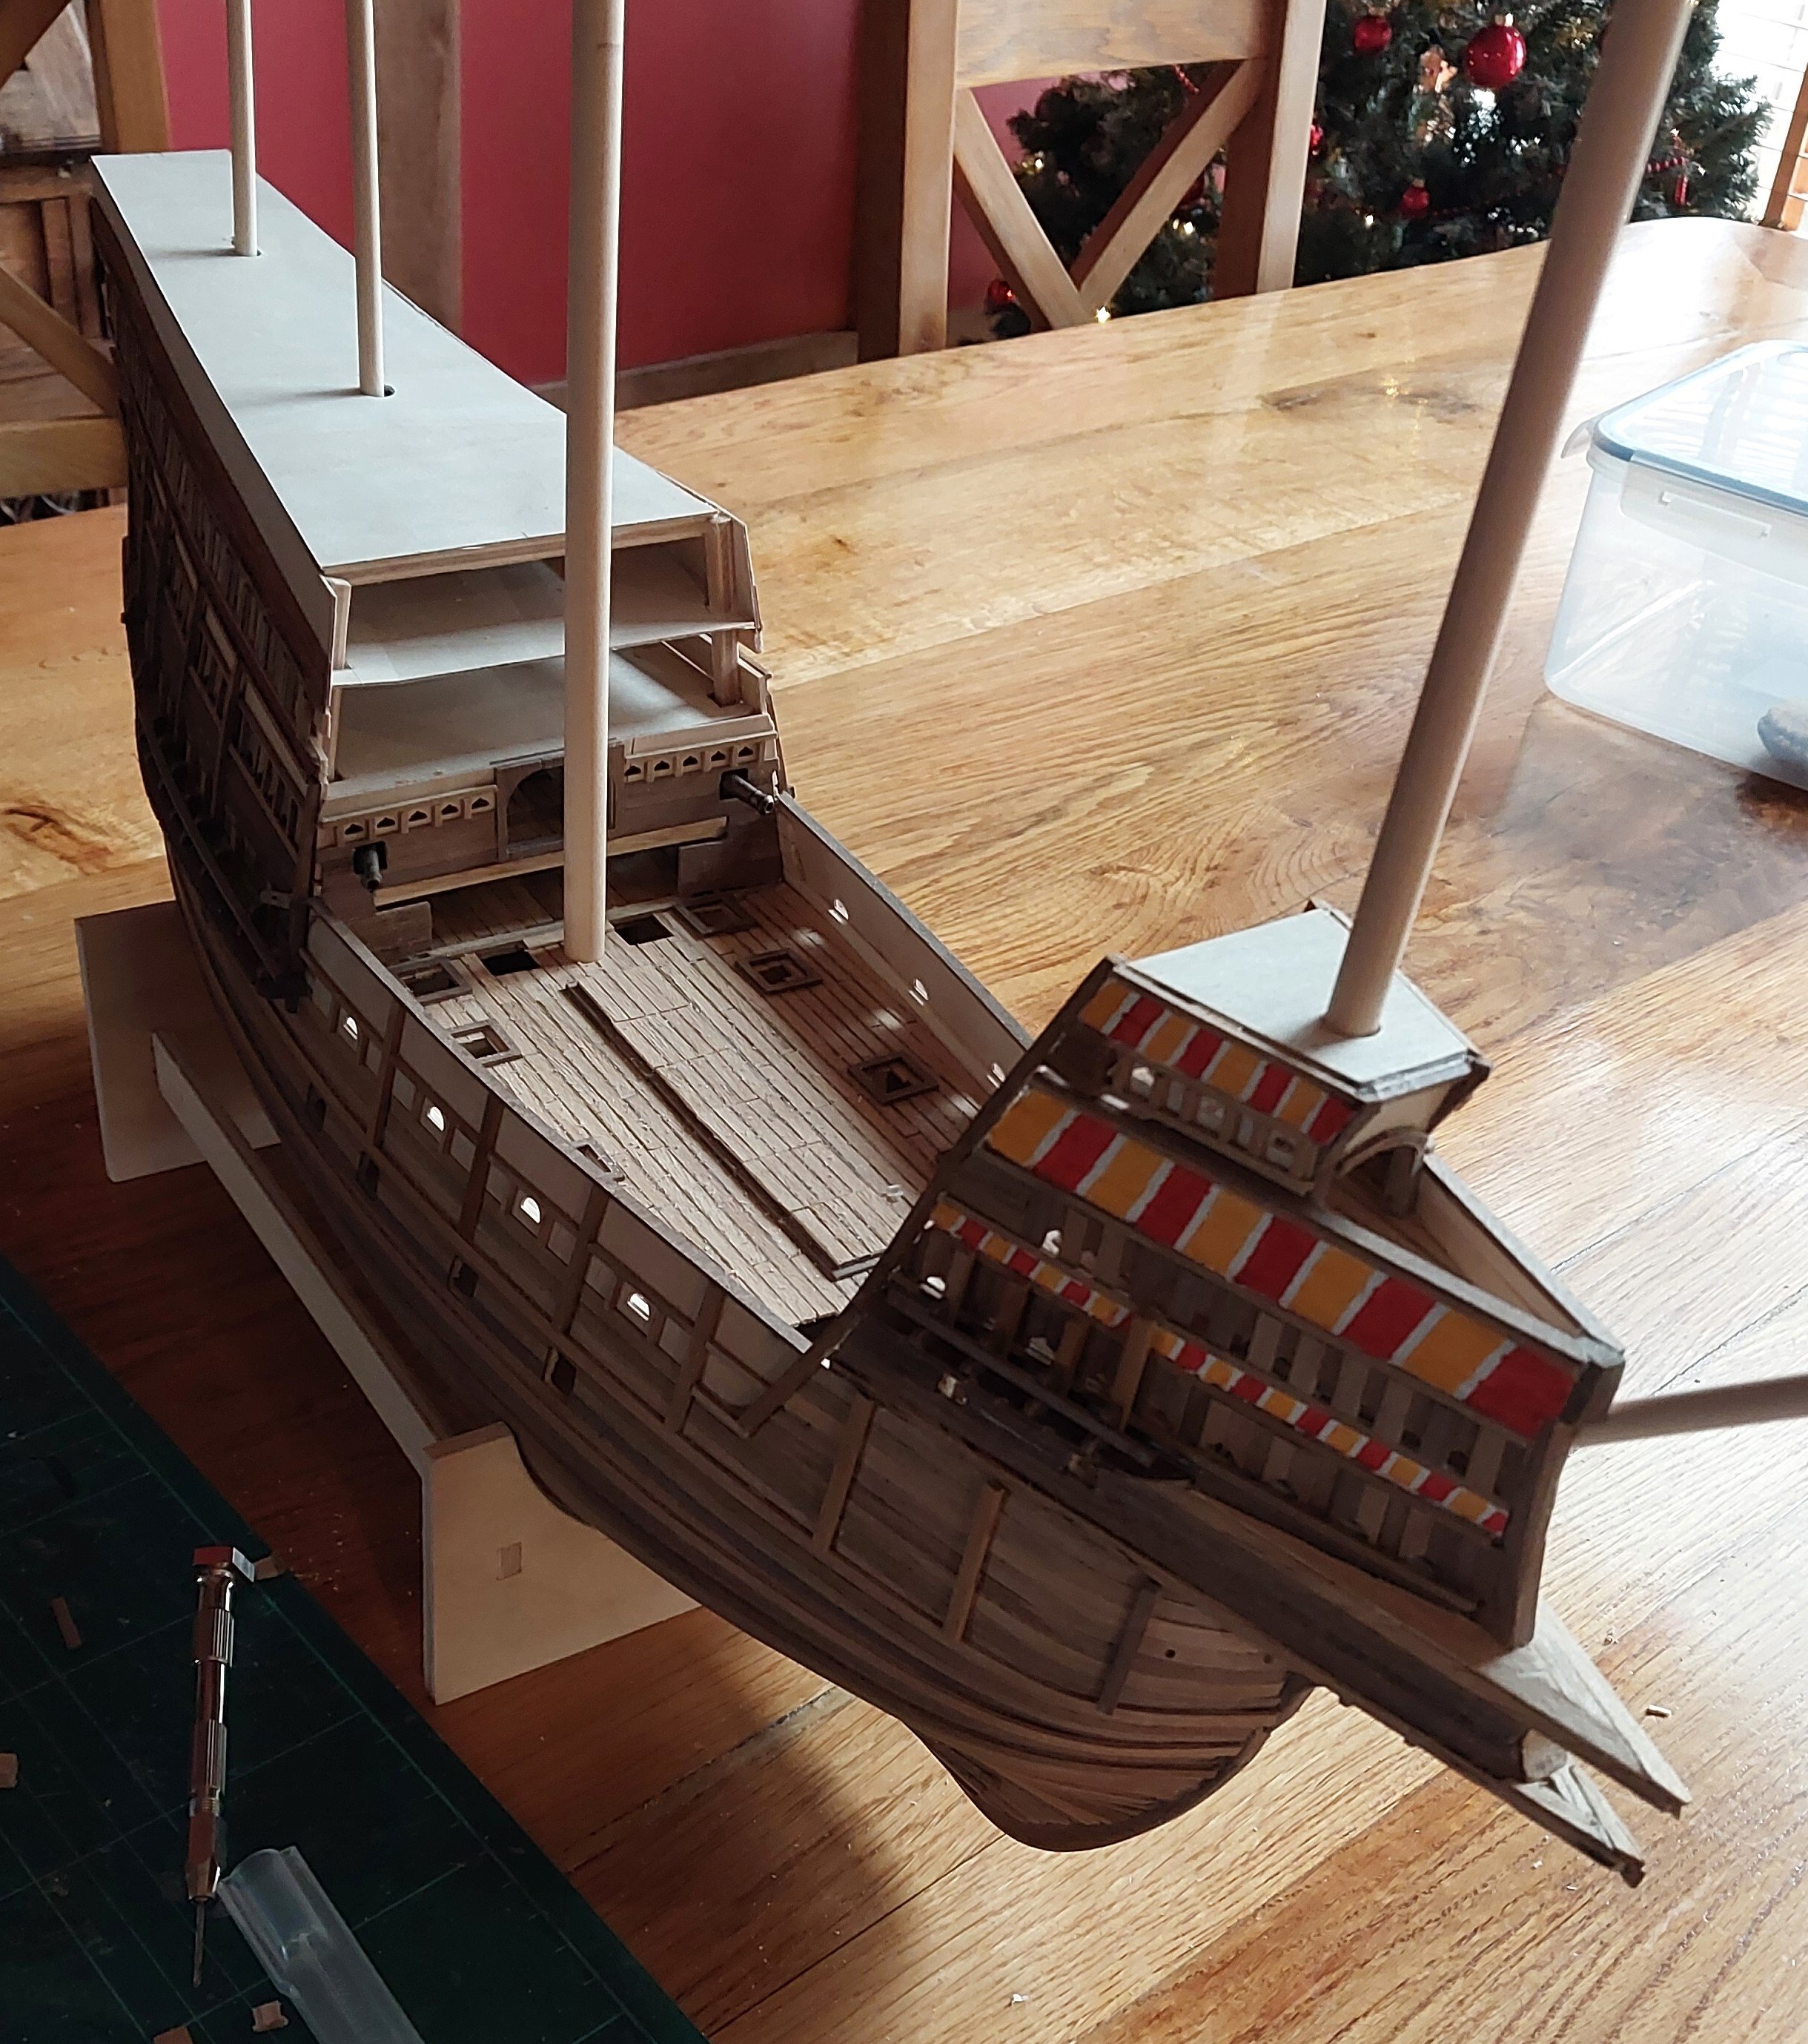
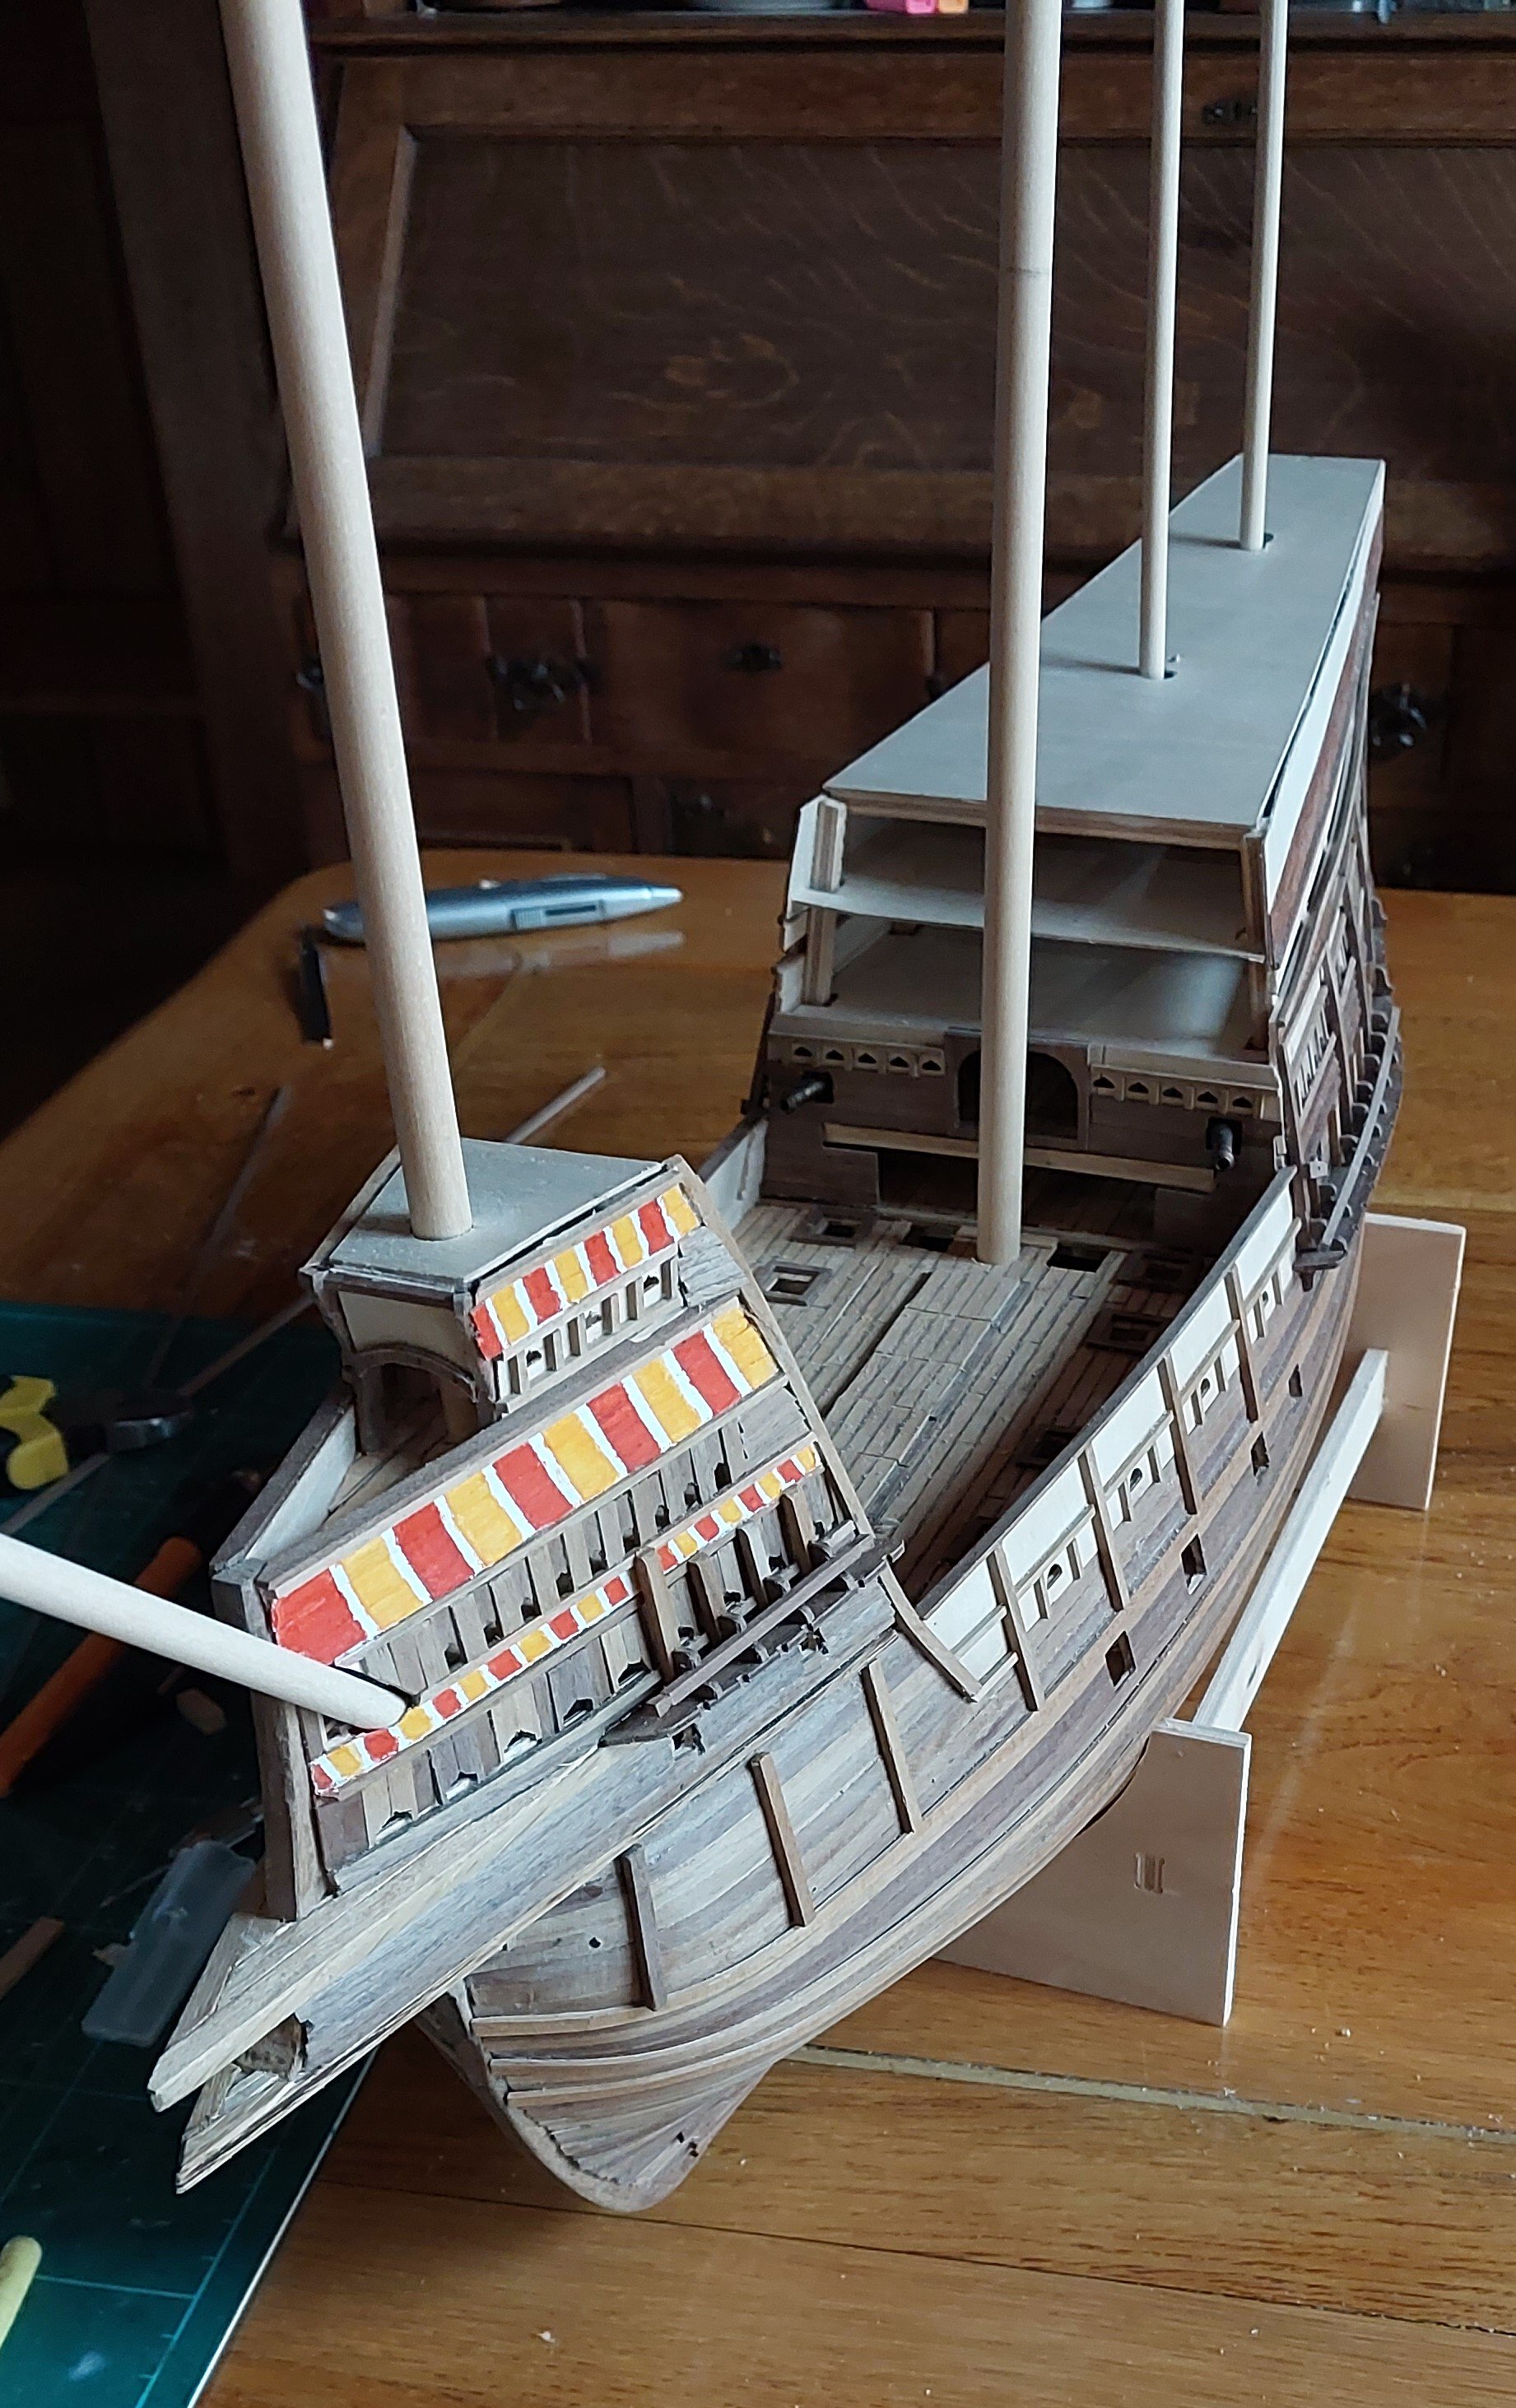
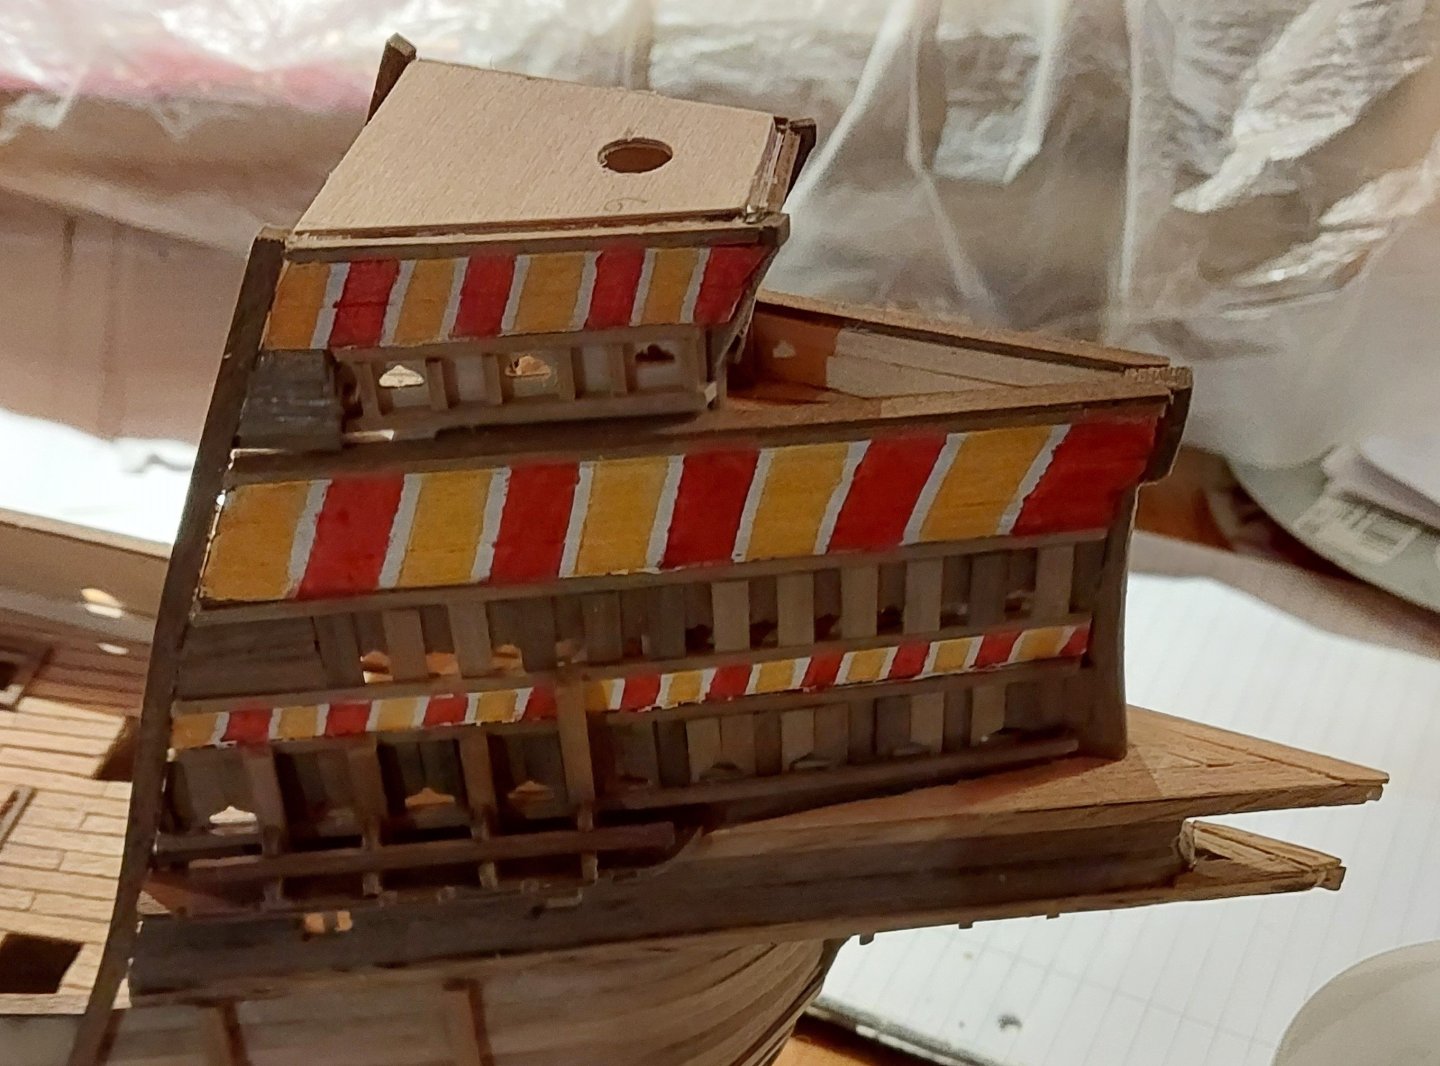
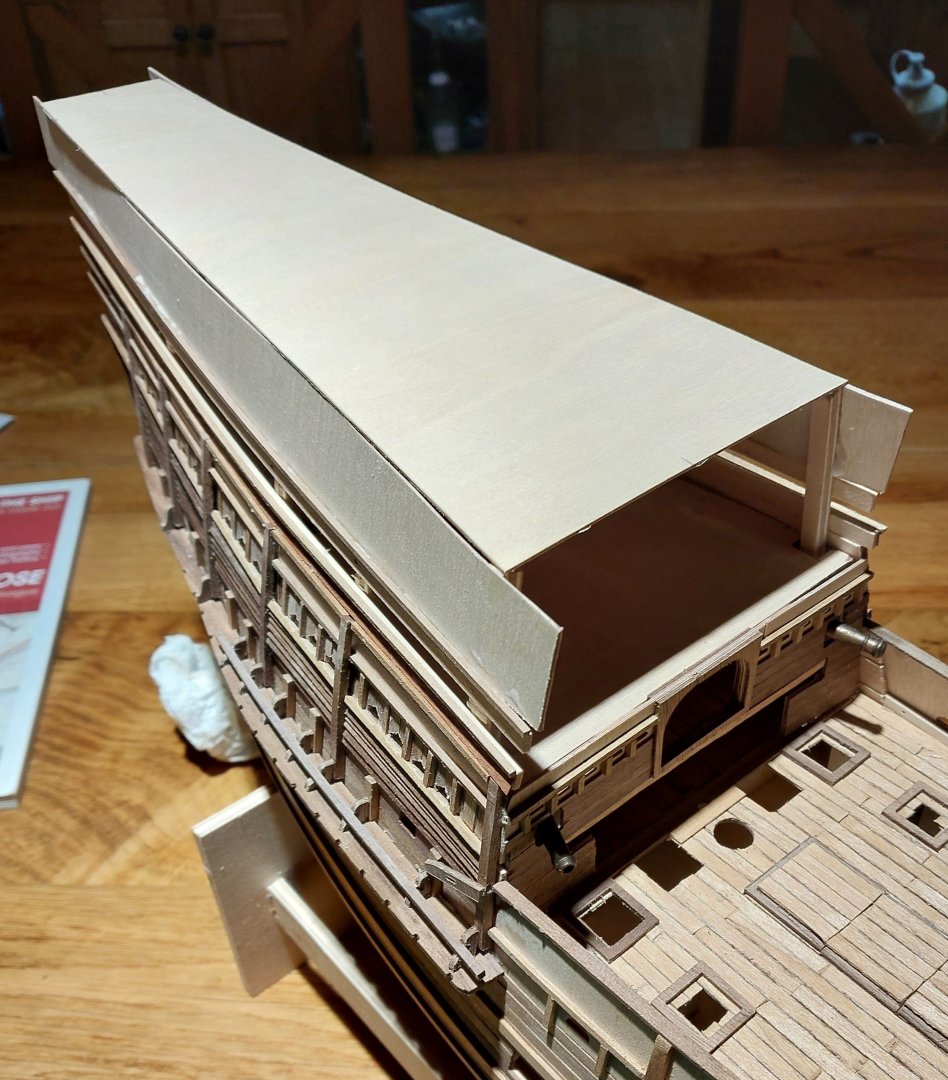
I ended up agreeing with both of you on this. Back to the drawing board; see below! First of all, I carried on with my initial construction of the forecastle. Where we left off was pretty close to done, but I finished off with the roof of the cabin and the beams that run vertically up the aft side: In the Anthony Roll these are extremely curved - I toned that down somewhat, but I did add a little curvature in. It's possible these would have been completely straight. On with the masking tape! This was a time-consuming process, but worth it in the end. Here you see the first layer of gesso on: And here's the stripes! Pretty happy with this - a few messy bits that I'll clean up later, once the sterncastle is painted. Another view from the front: And now time to rip off that top cabin. I wasn't happy with it, and especially after the feedback from my last post I knew it would never be right to me. Luckily I'd not actually attached it very strongly, and some careful prodding with a hobby saw later... My original front post for the triangular cabin was around 5mm thick, and after some even more careful application of the saw, I had these: Which had mostly survived unscathed! The original Caldercraft kit had a little archway for the front of the forecastle. I figured I might as well use it here, and created this: And a side view: I'm much happier with this shape, and I think it works well with the rest of the structure. This means the forecastle is mostly completed, other than the entire aft wall. I still need to decide whether to include the Tudor rose 'figurehead' that was apparently affixed to the tip of the upper deck. Now I've not just been working on the forecastle - if you recall from a previous post I wasn't happy with the clinker planking I'd done over the portholes, so I took those off. Here's what I replaced that with: I believe that this is much more in line with the 'original', as far as we know. It's also in a similar style to what I've done on the forecastle, so I'm much more satisfied with it. You can also see I've started building up the walls above - these are just thin sheets of plywood as a basis for the coming construction. Here's the poop deck dry fit to check the height: And a full side view: And since then, I've actually made huge progress, adding in the middle deck: Note I'm not planking the two internal decks; they'll be practically invisible through the tiny portholes, and I'm running a little low on the tanganyika planks I've used for the rest of the decking, so it seems sensible to not waste the wood here. Each of these decks will have two cannon fore and aft, but as you can see in this photo there's little visibility around the barrels anyway. I'll probably not spend too much effort making the carriages perfect either for this reason. There are thirteen portholes on the next level up, separated by distinct uprights. I managed to get exactly thirteen with a pattern using the various scrap pieces the build has generated thus far, which I'm quite pleased with. I'll be rounding out the top of each porthole later down the line. The strips of sapelli veneer will be painted over with gesso and then stripes. And here's the top deck in place, with masts all test fit just because I could: A view from the other side: My plan is to put a small railing around the top of the sterncastle as well, which will give me space for the top line of stripes. In between this and the previous line is a strange pattern of cross hatching - I'm not entirely sure what to do here, so any input would be very appreciated. A couple final details before I sign off - the top of the forecastle planked: And a full view of the sterncastle's port side: You can also see I've started planking the poop deck here. Once the railing is in place my next task will be working out how on earth to get 1:80 scale boarding netting to look good. Any suggestions?! That's all for now - I've packed up for Christmas as we've got lots of family round and the dining table was required. Thanks for reading, and happy holidays to all!


-
Yes, I'm not entirely sure about it, but I think I'm happy with how it looks. If it doesn't work out it's only the top deck to rip off later 😉 That said, if you look at the Anthony Roll there are three obvious flags on the very top of the forecastle, and so I was going with the assumption they were on each point of the triangle. There's one more flag on the forward tip of the forecastle itself. We'll see! Thank you very much, that means a lot!
-
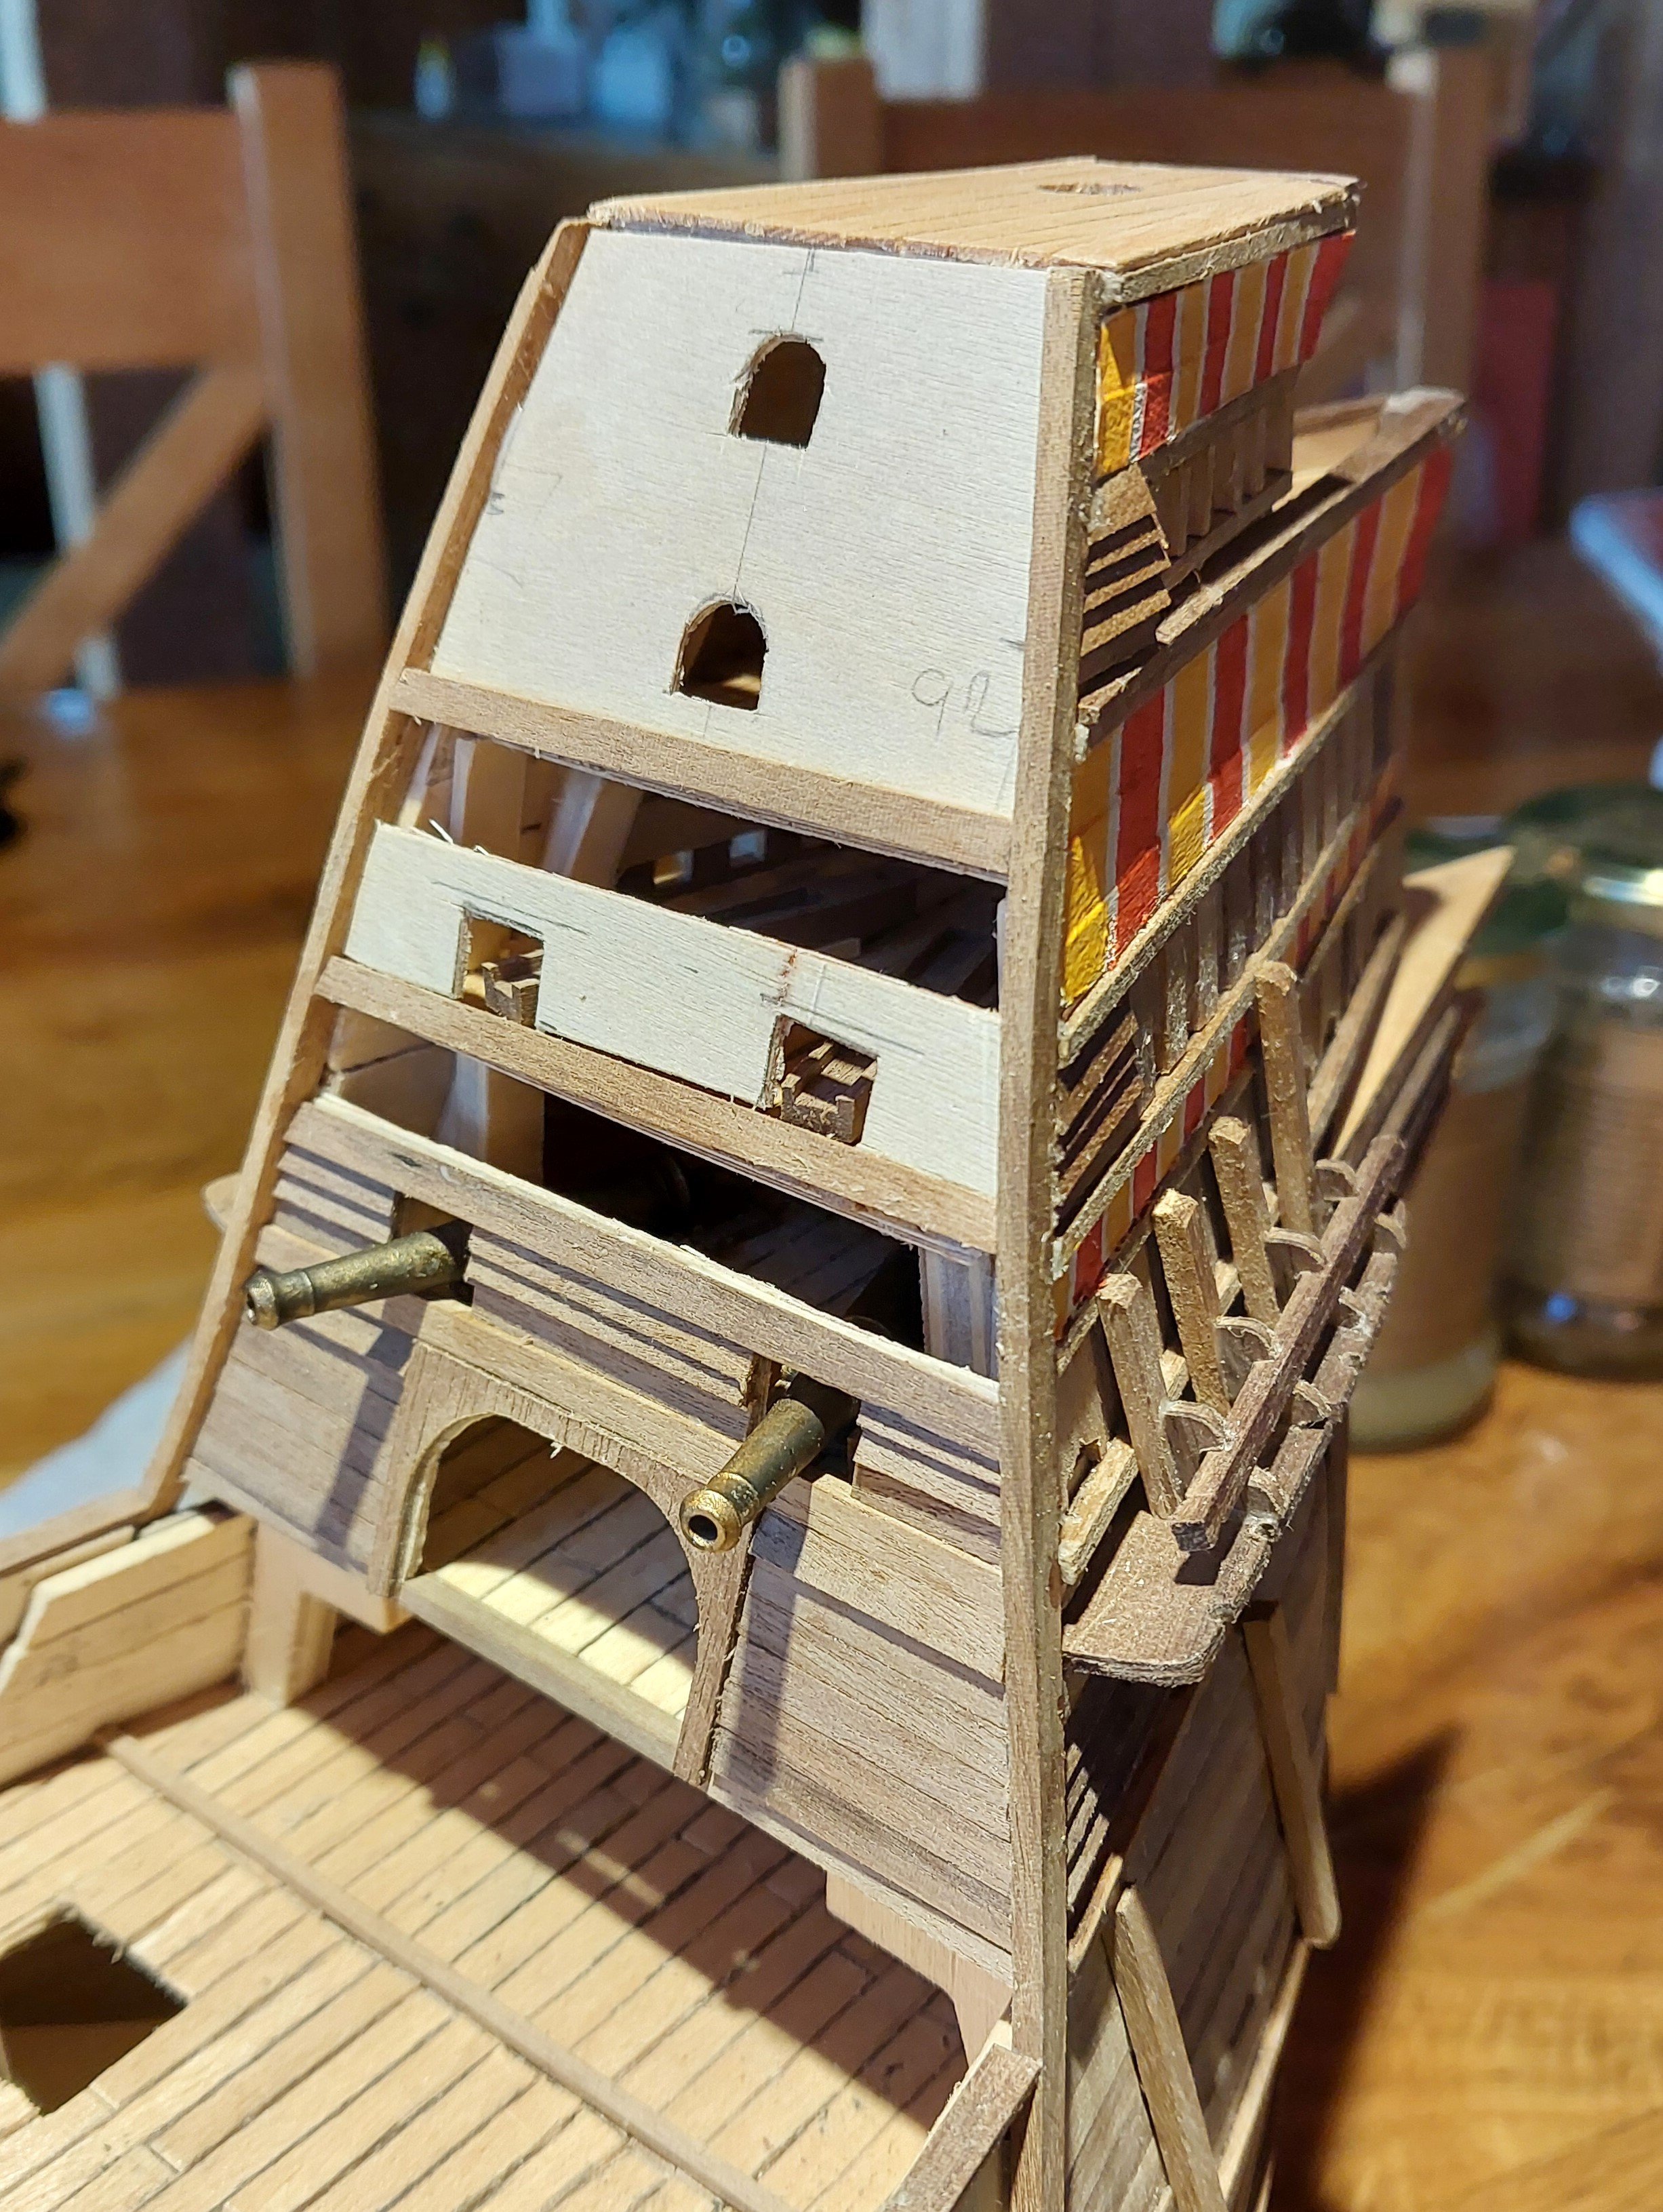
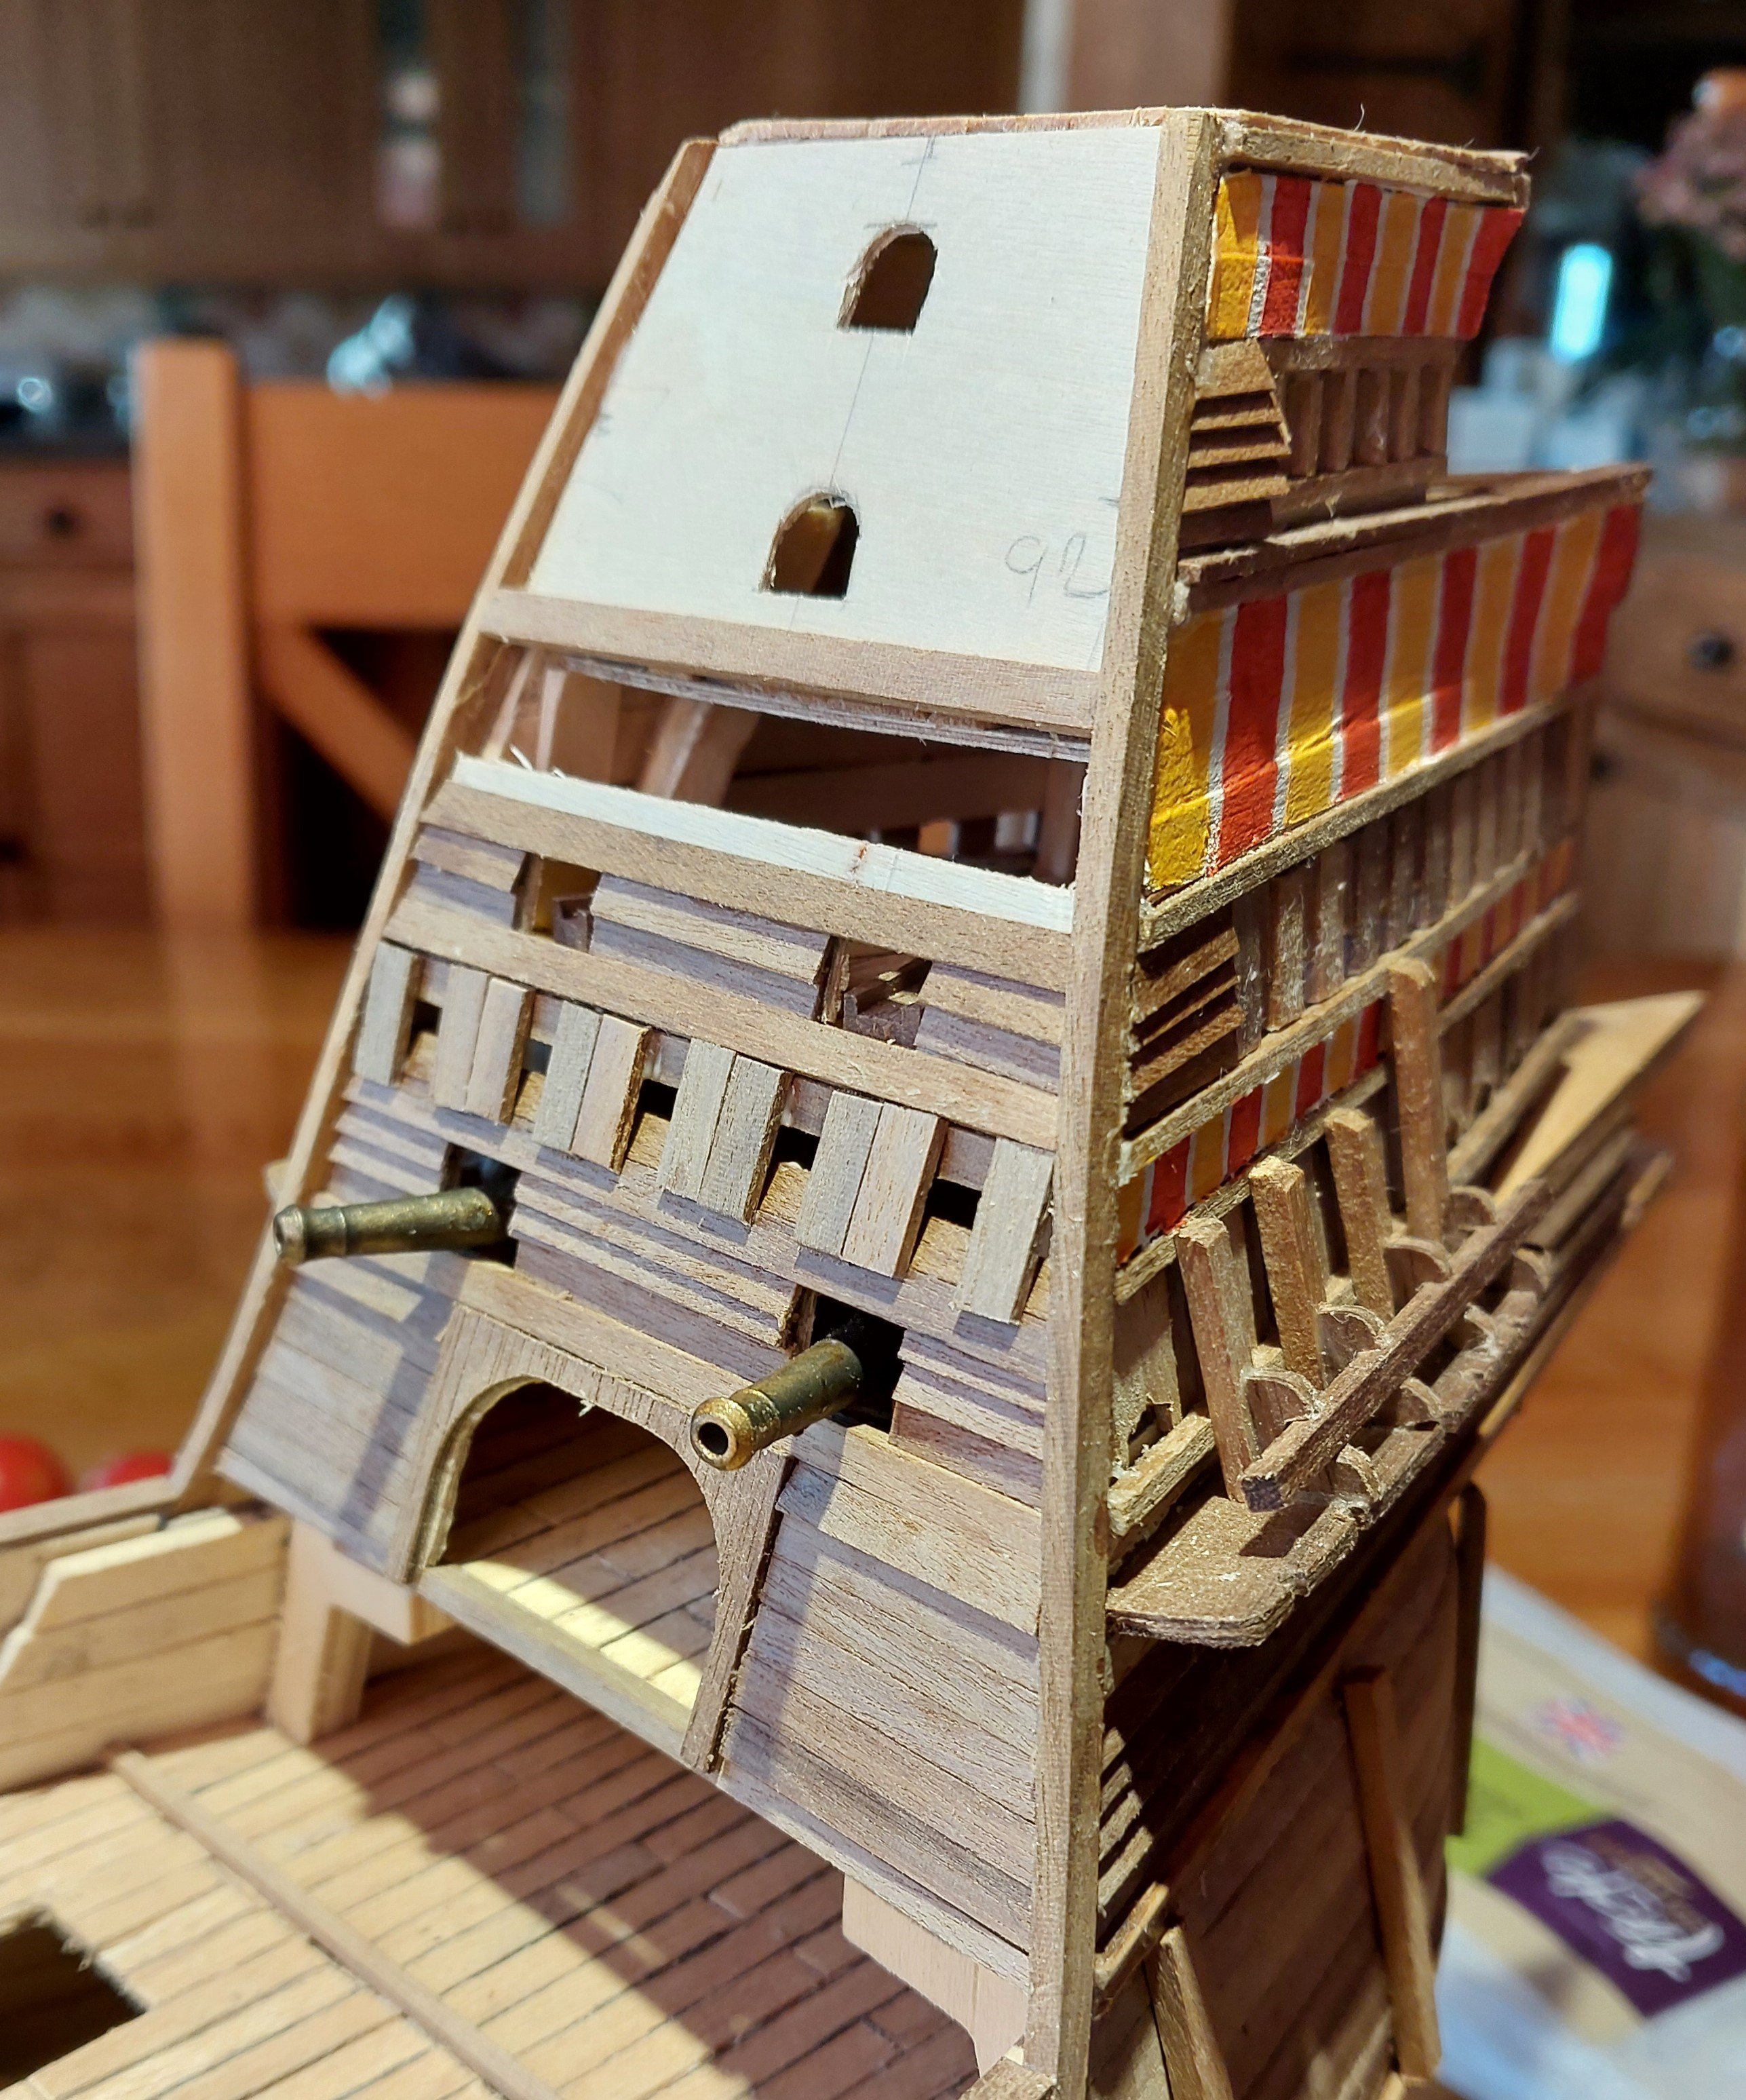
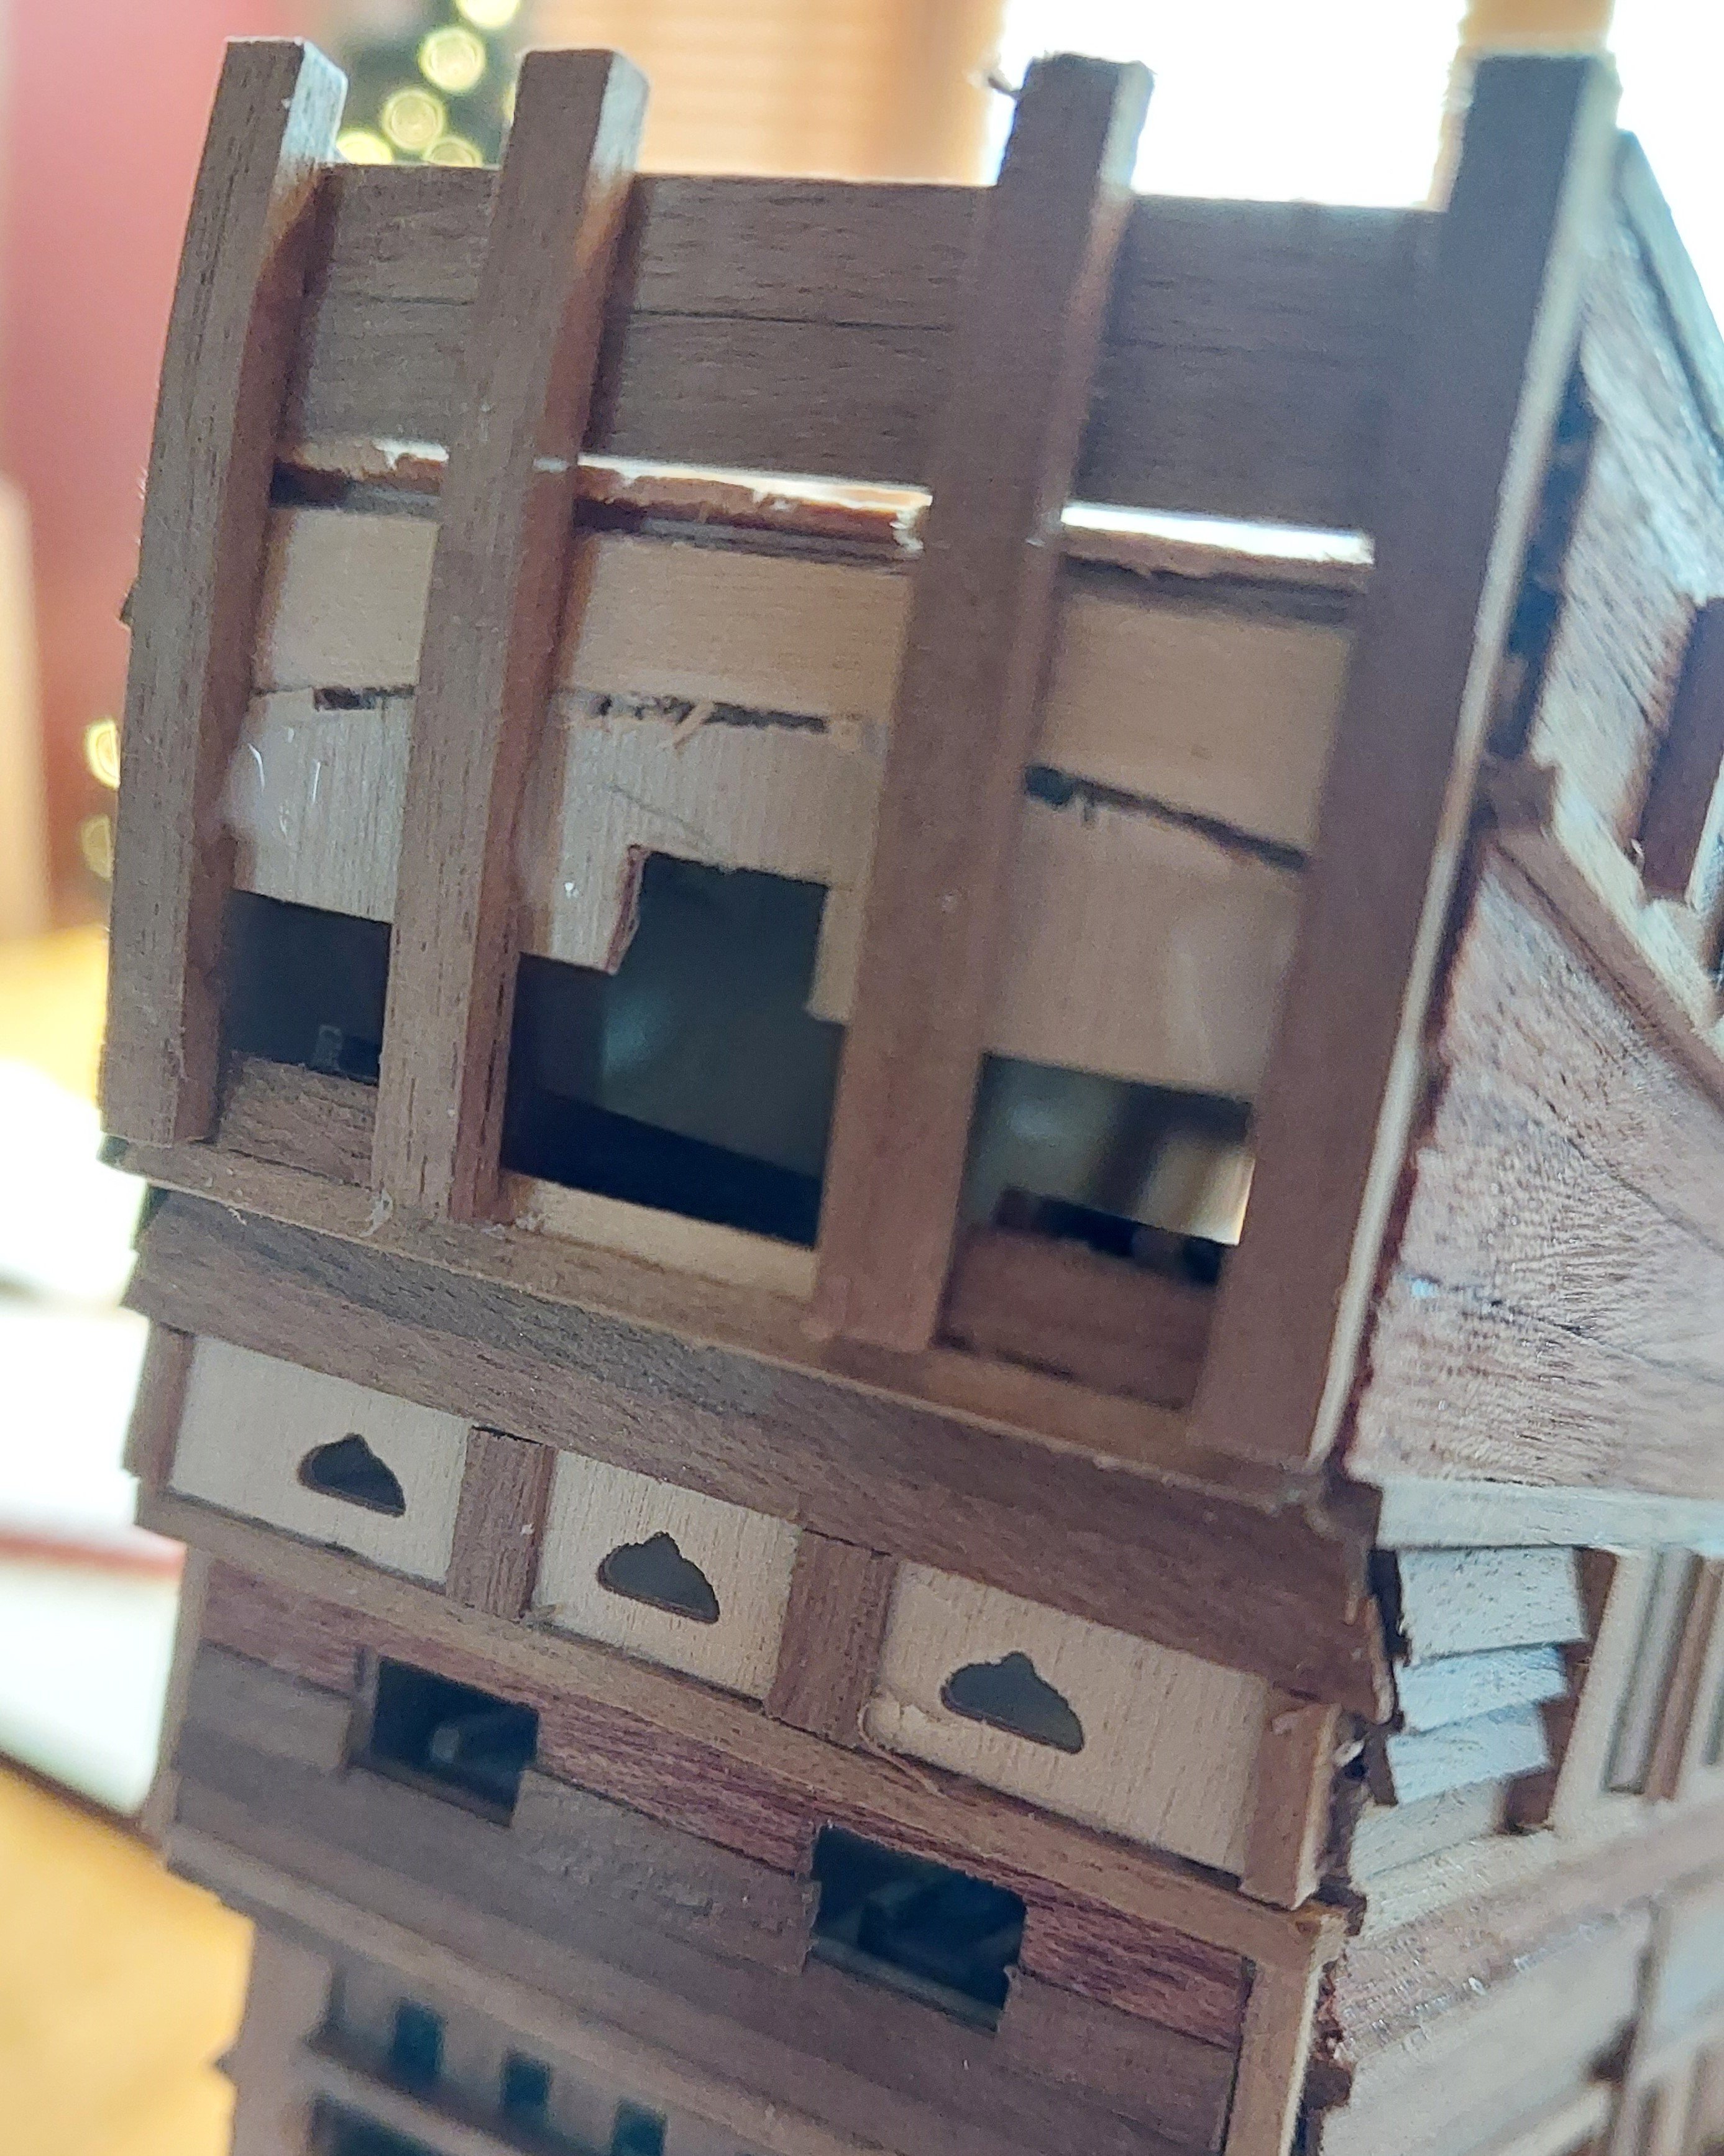
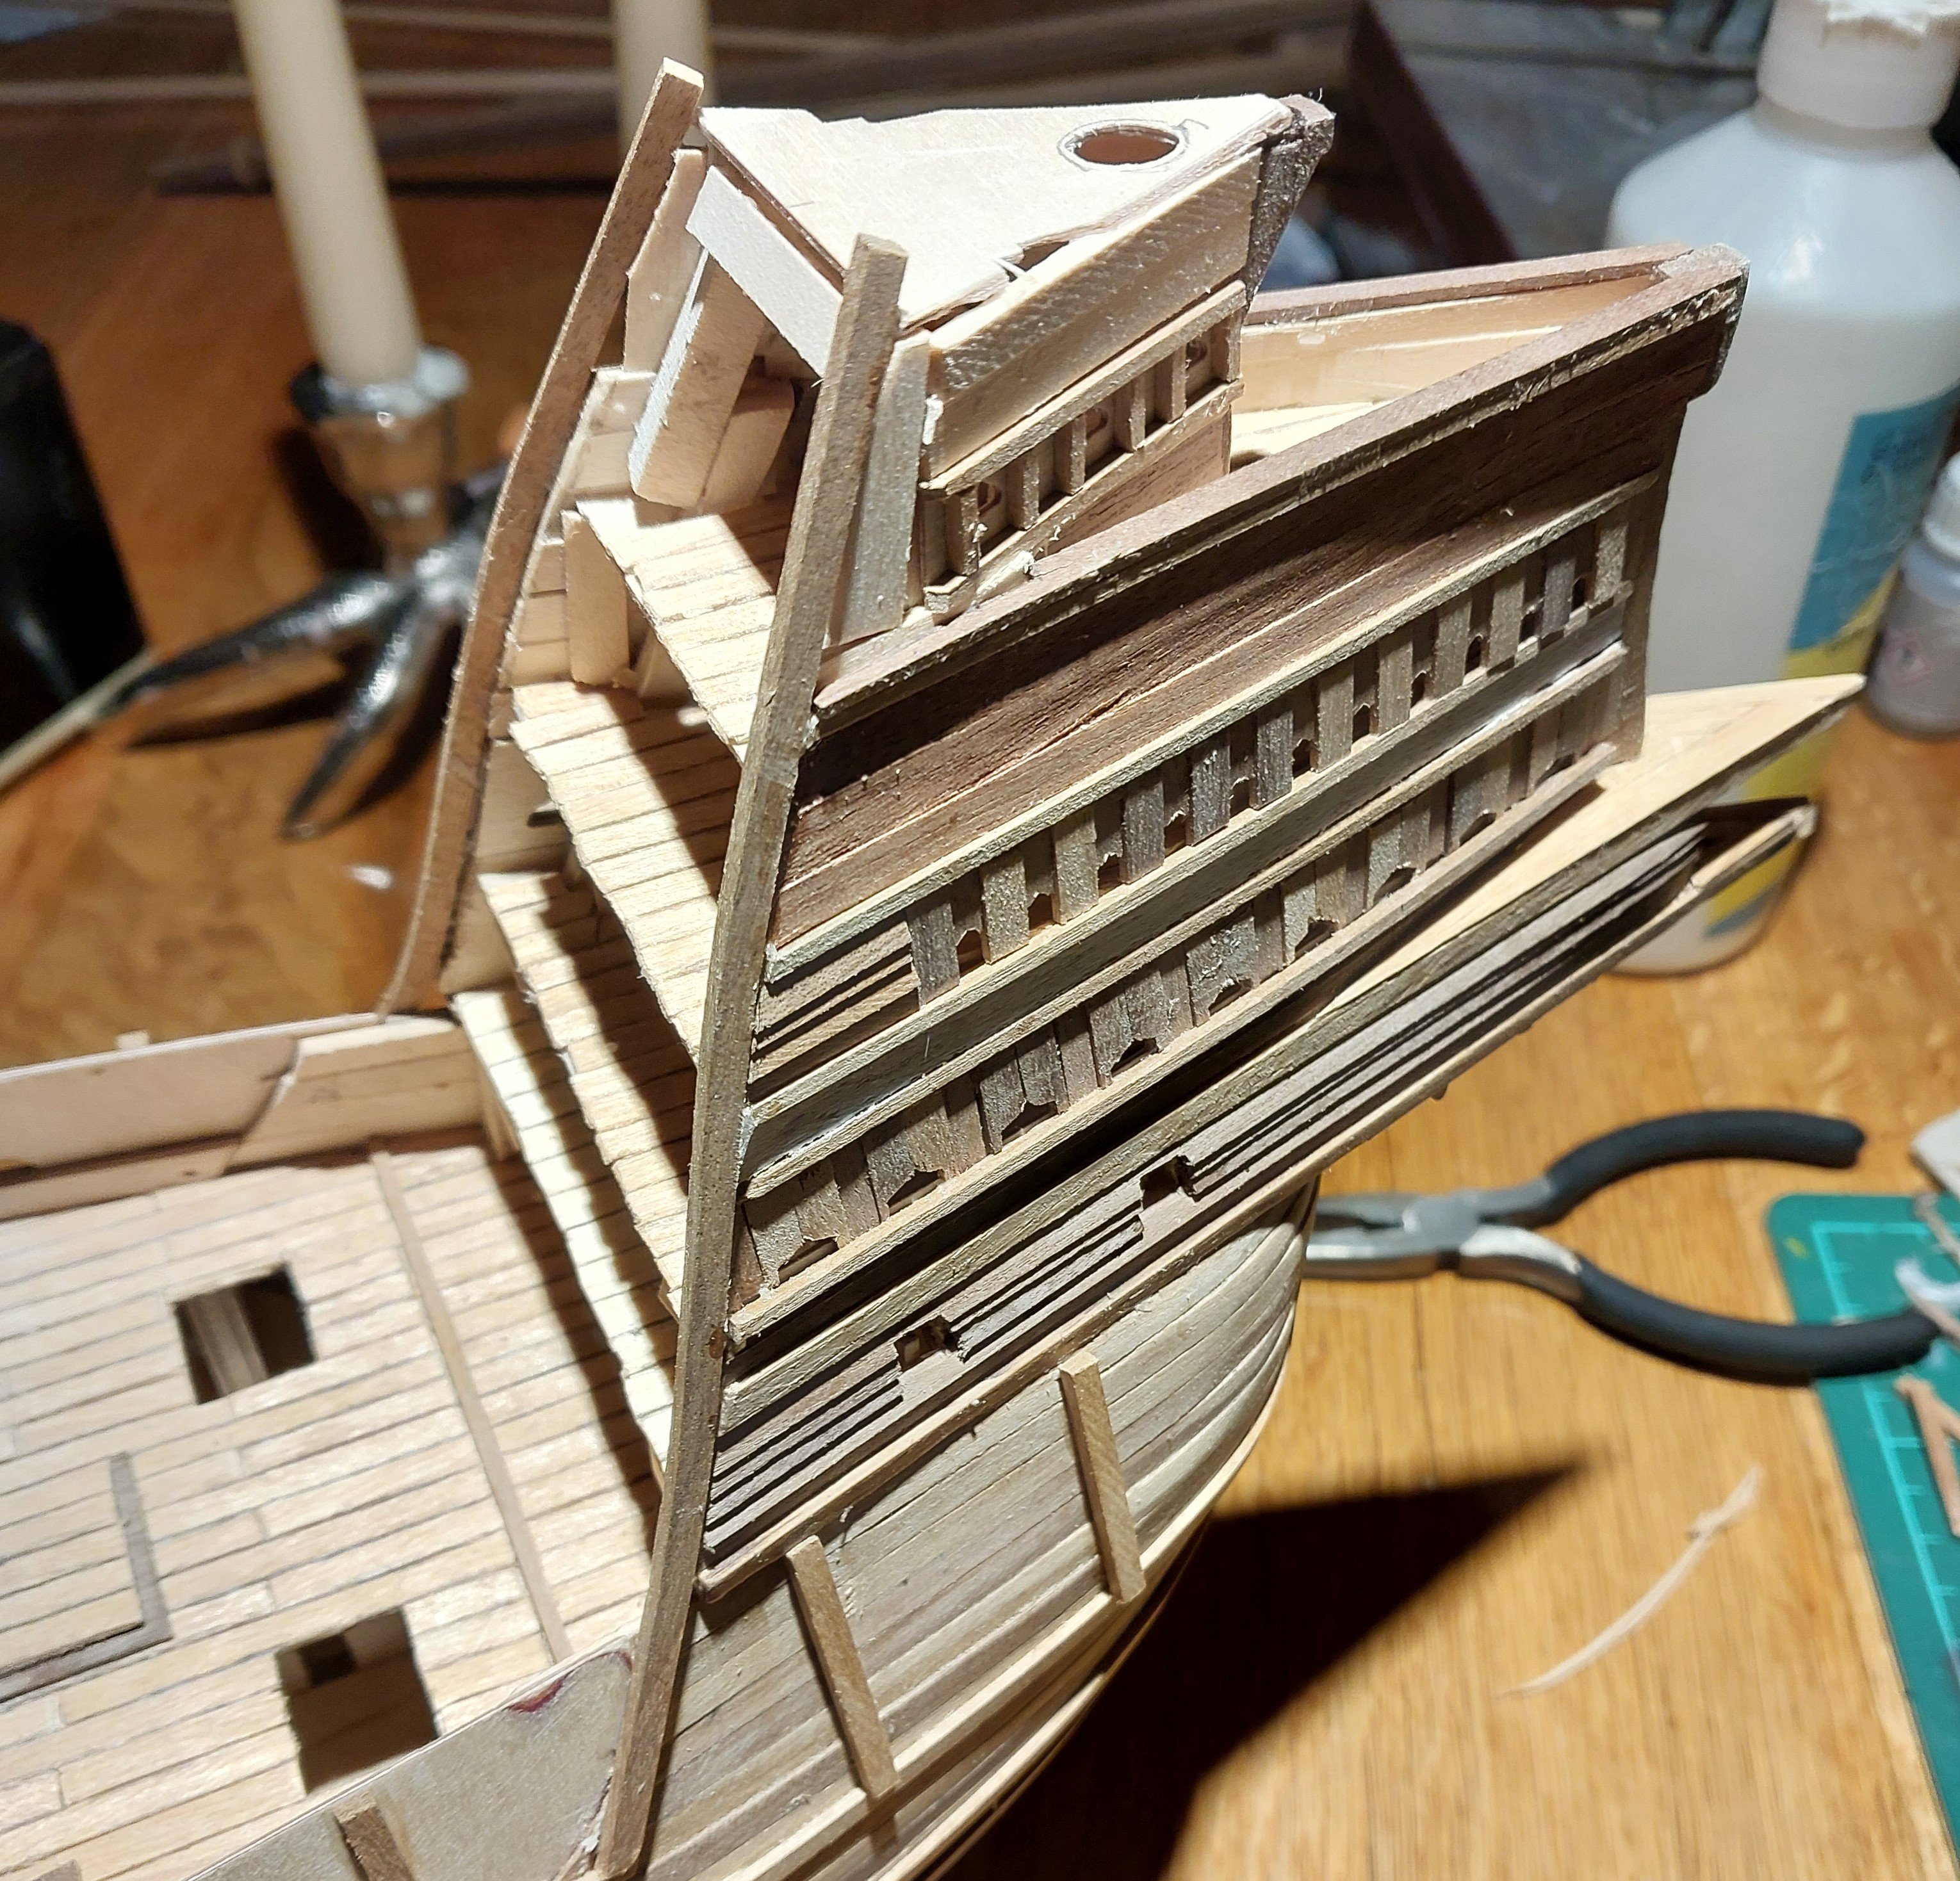
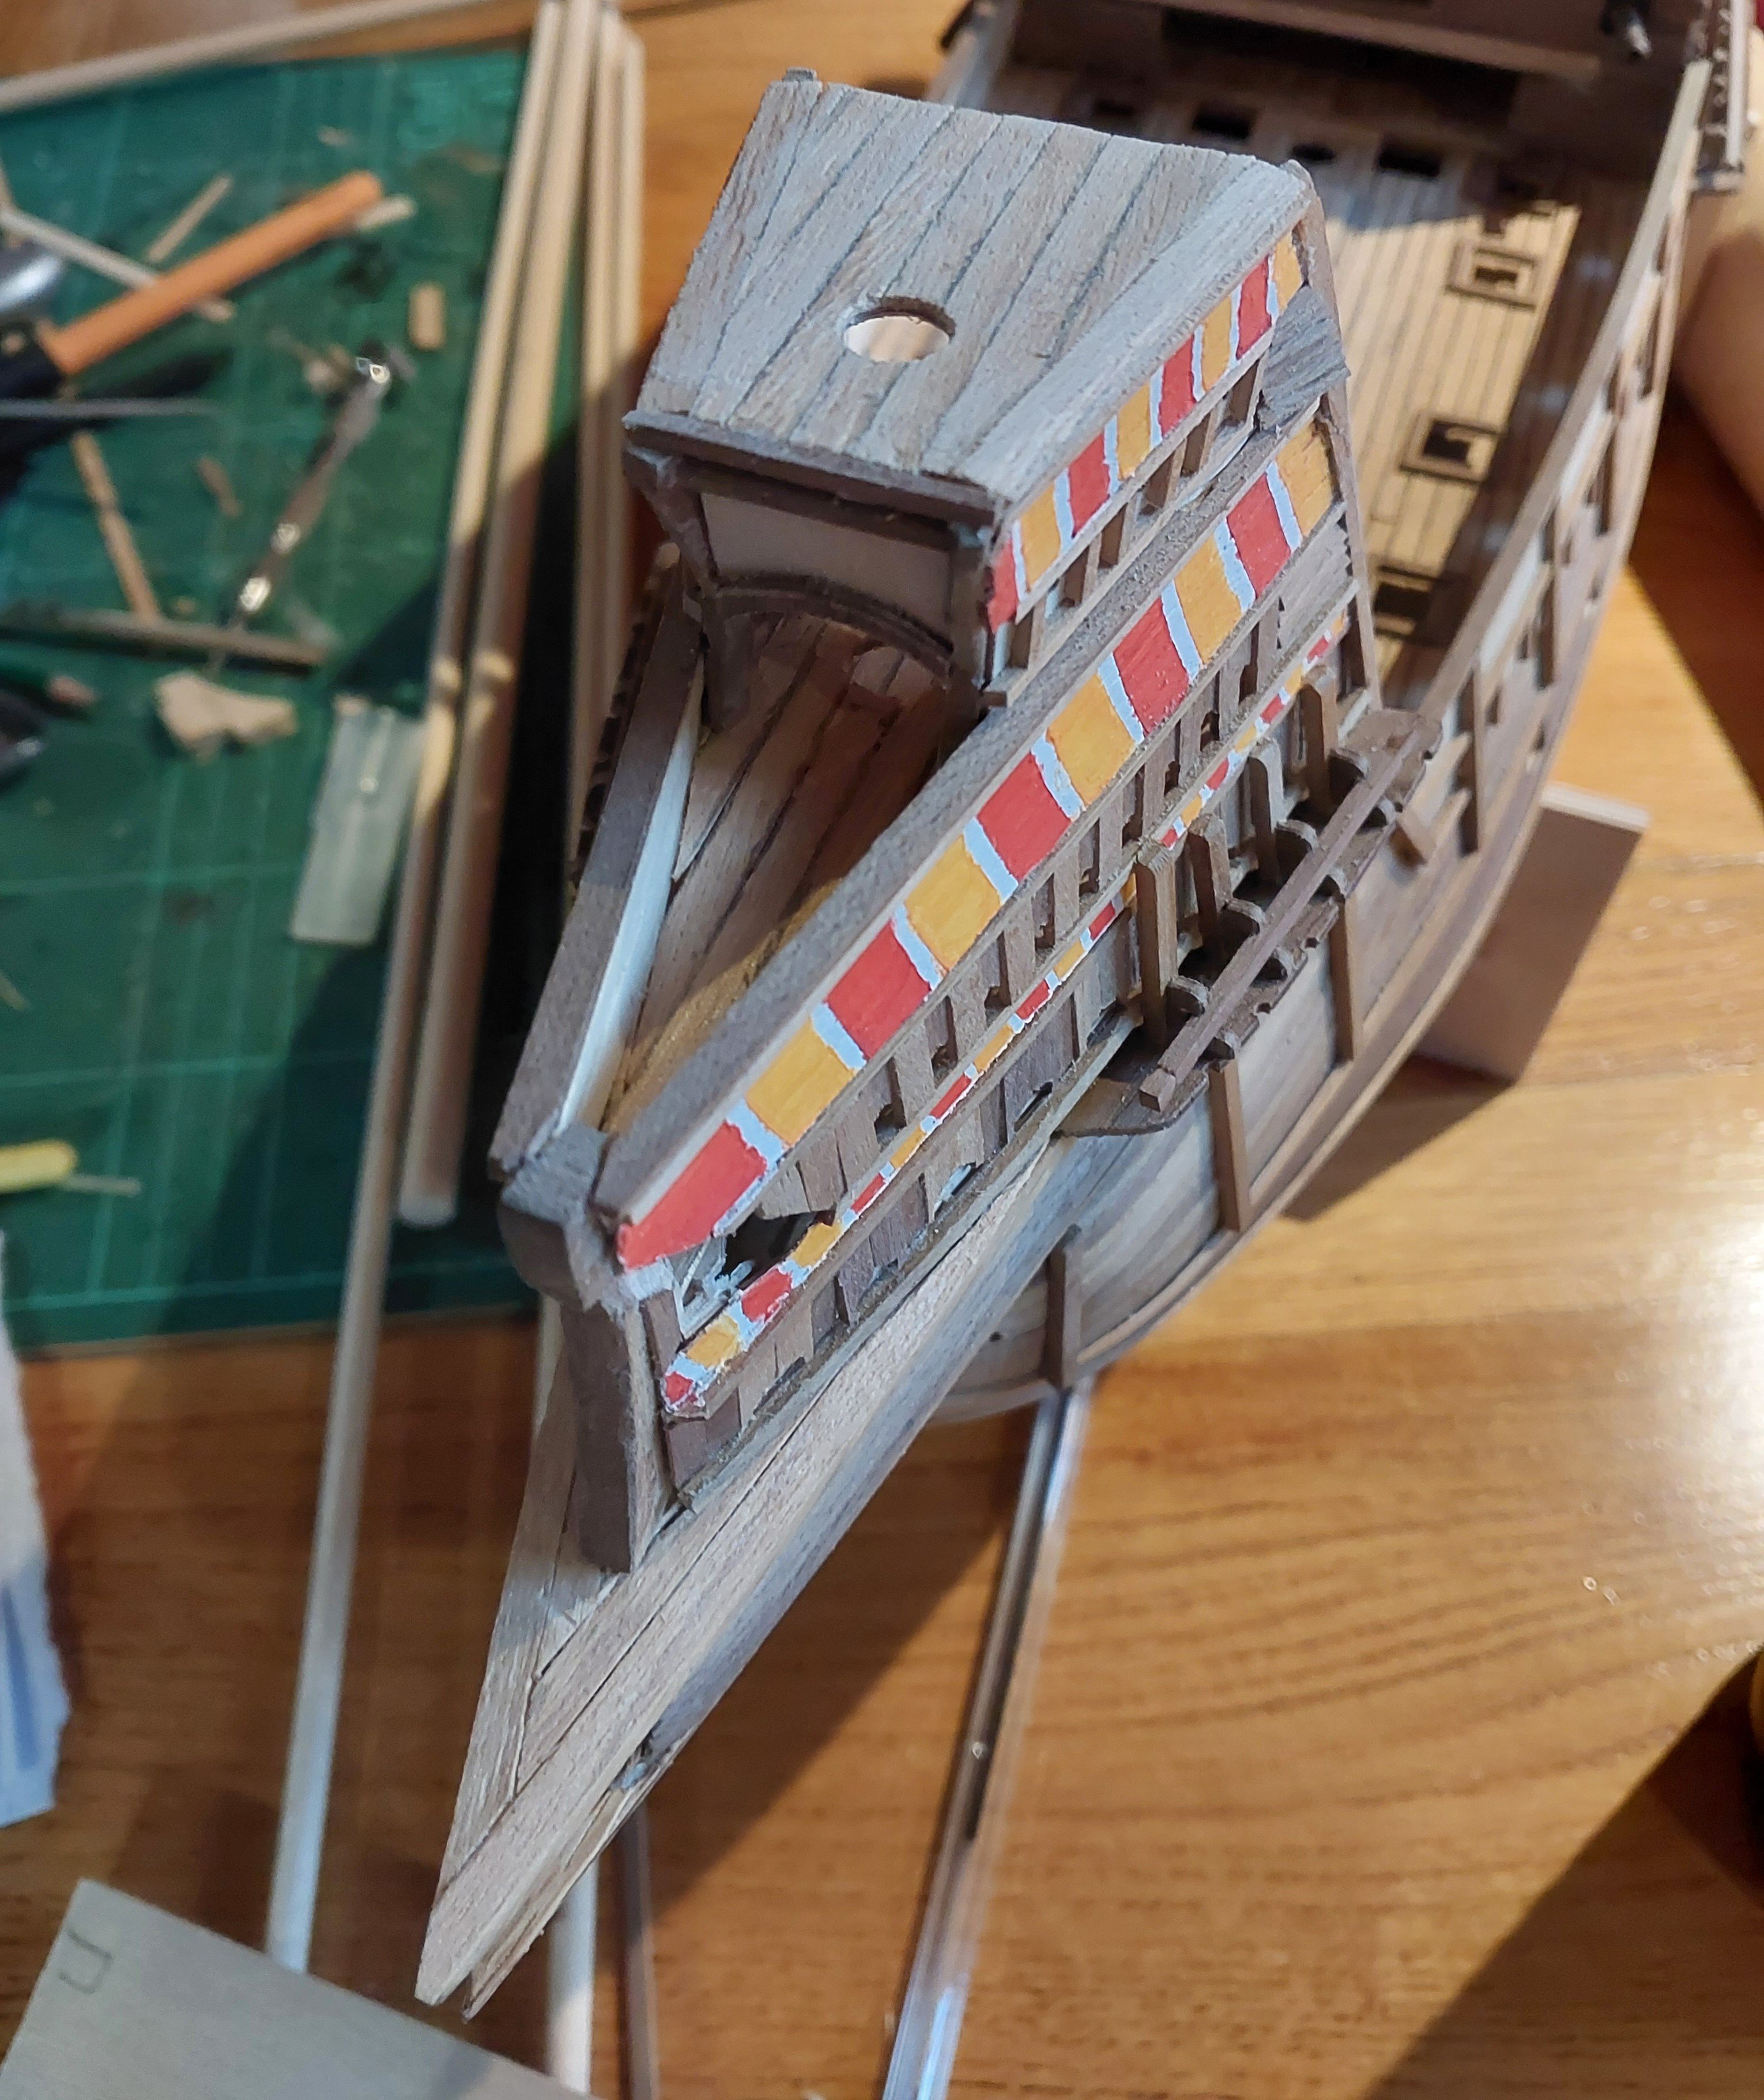
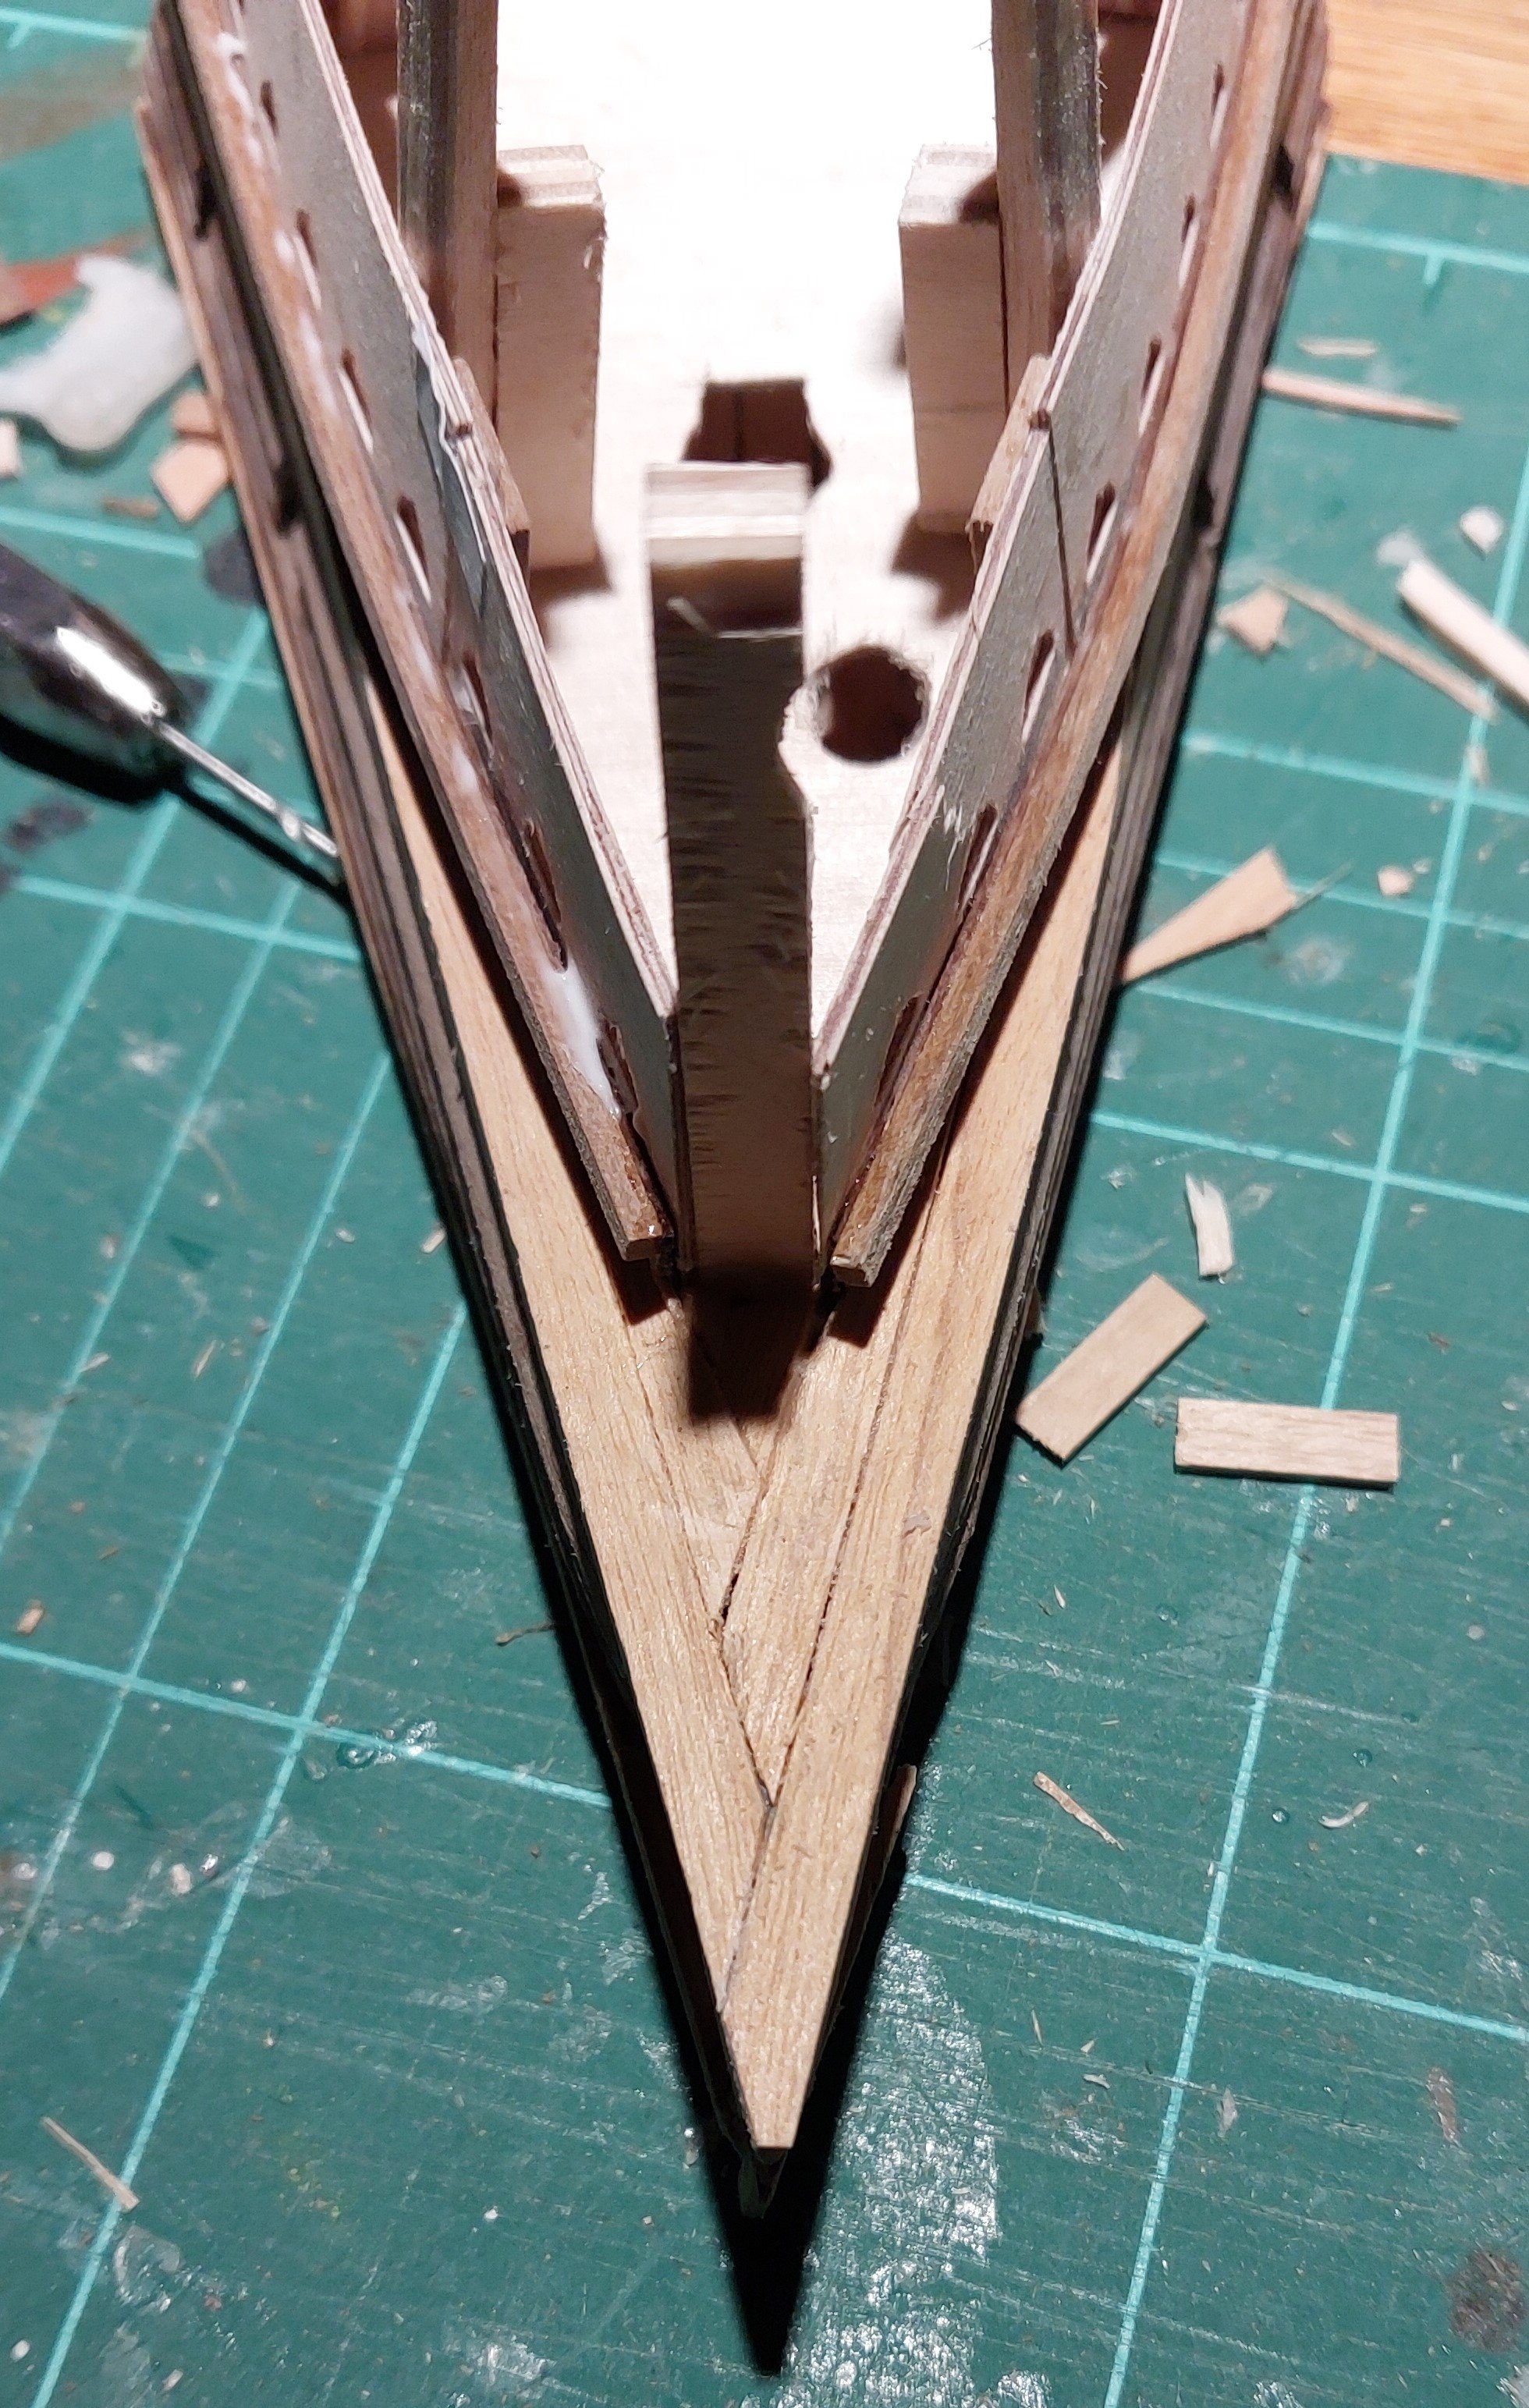
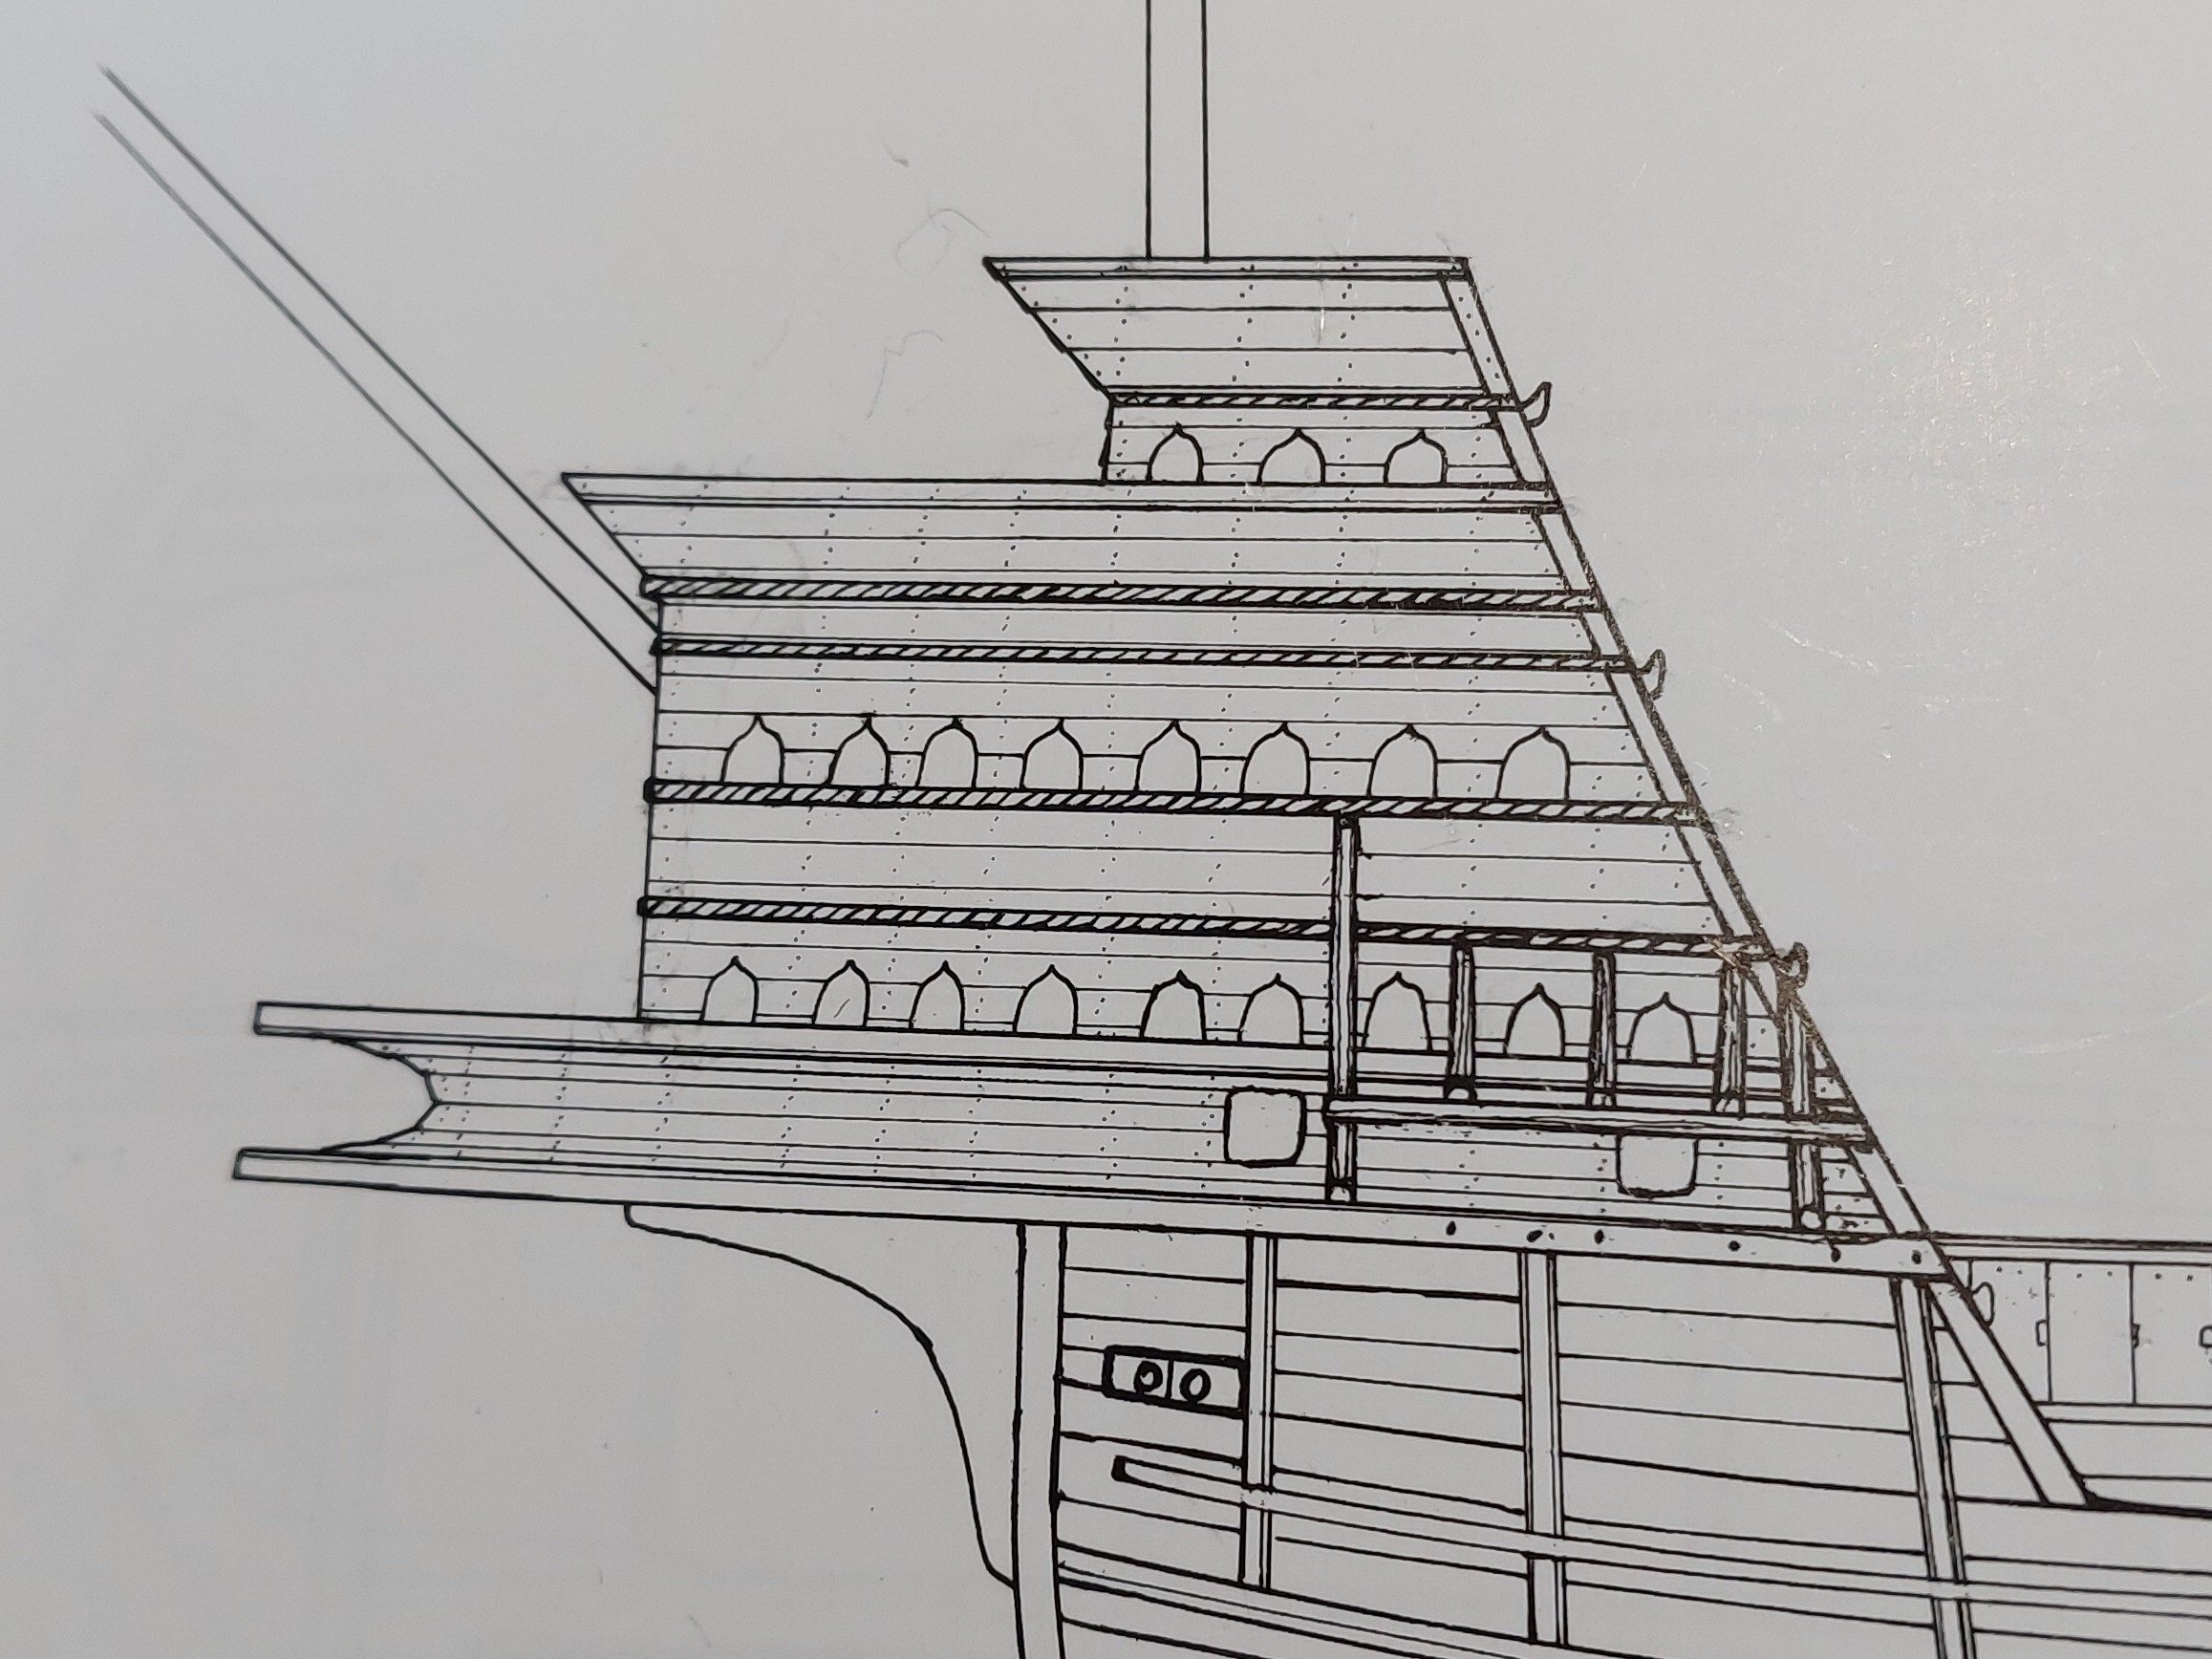
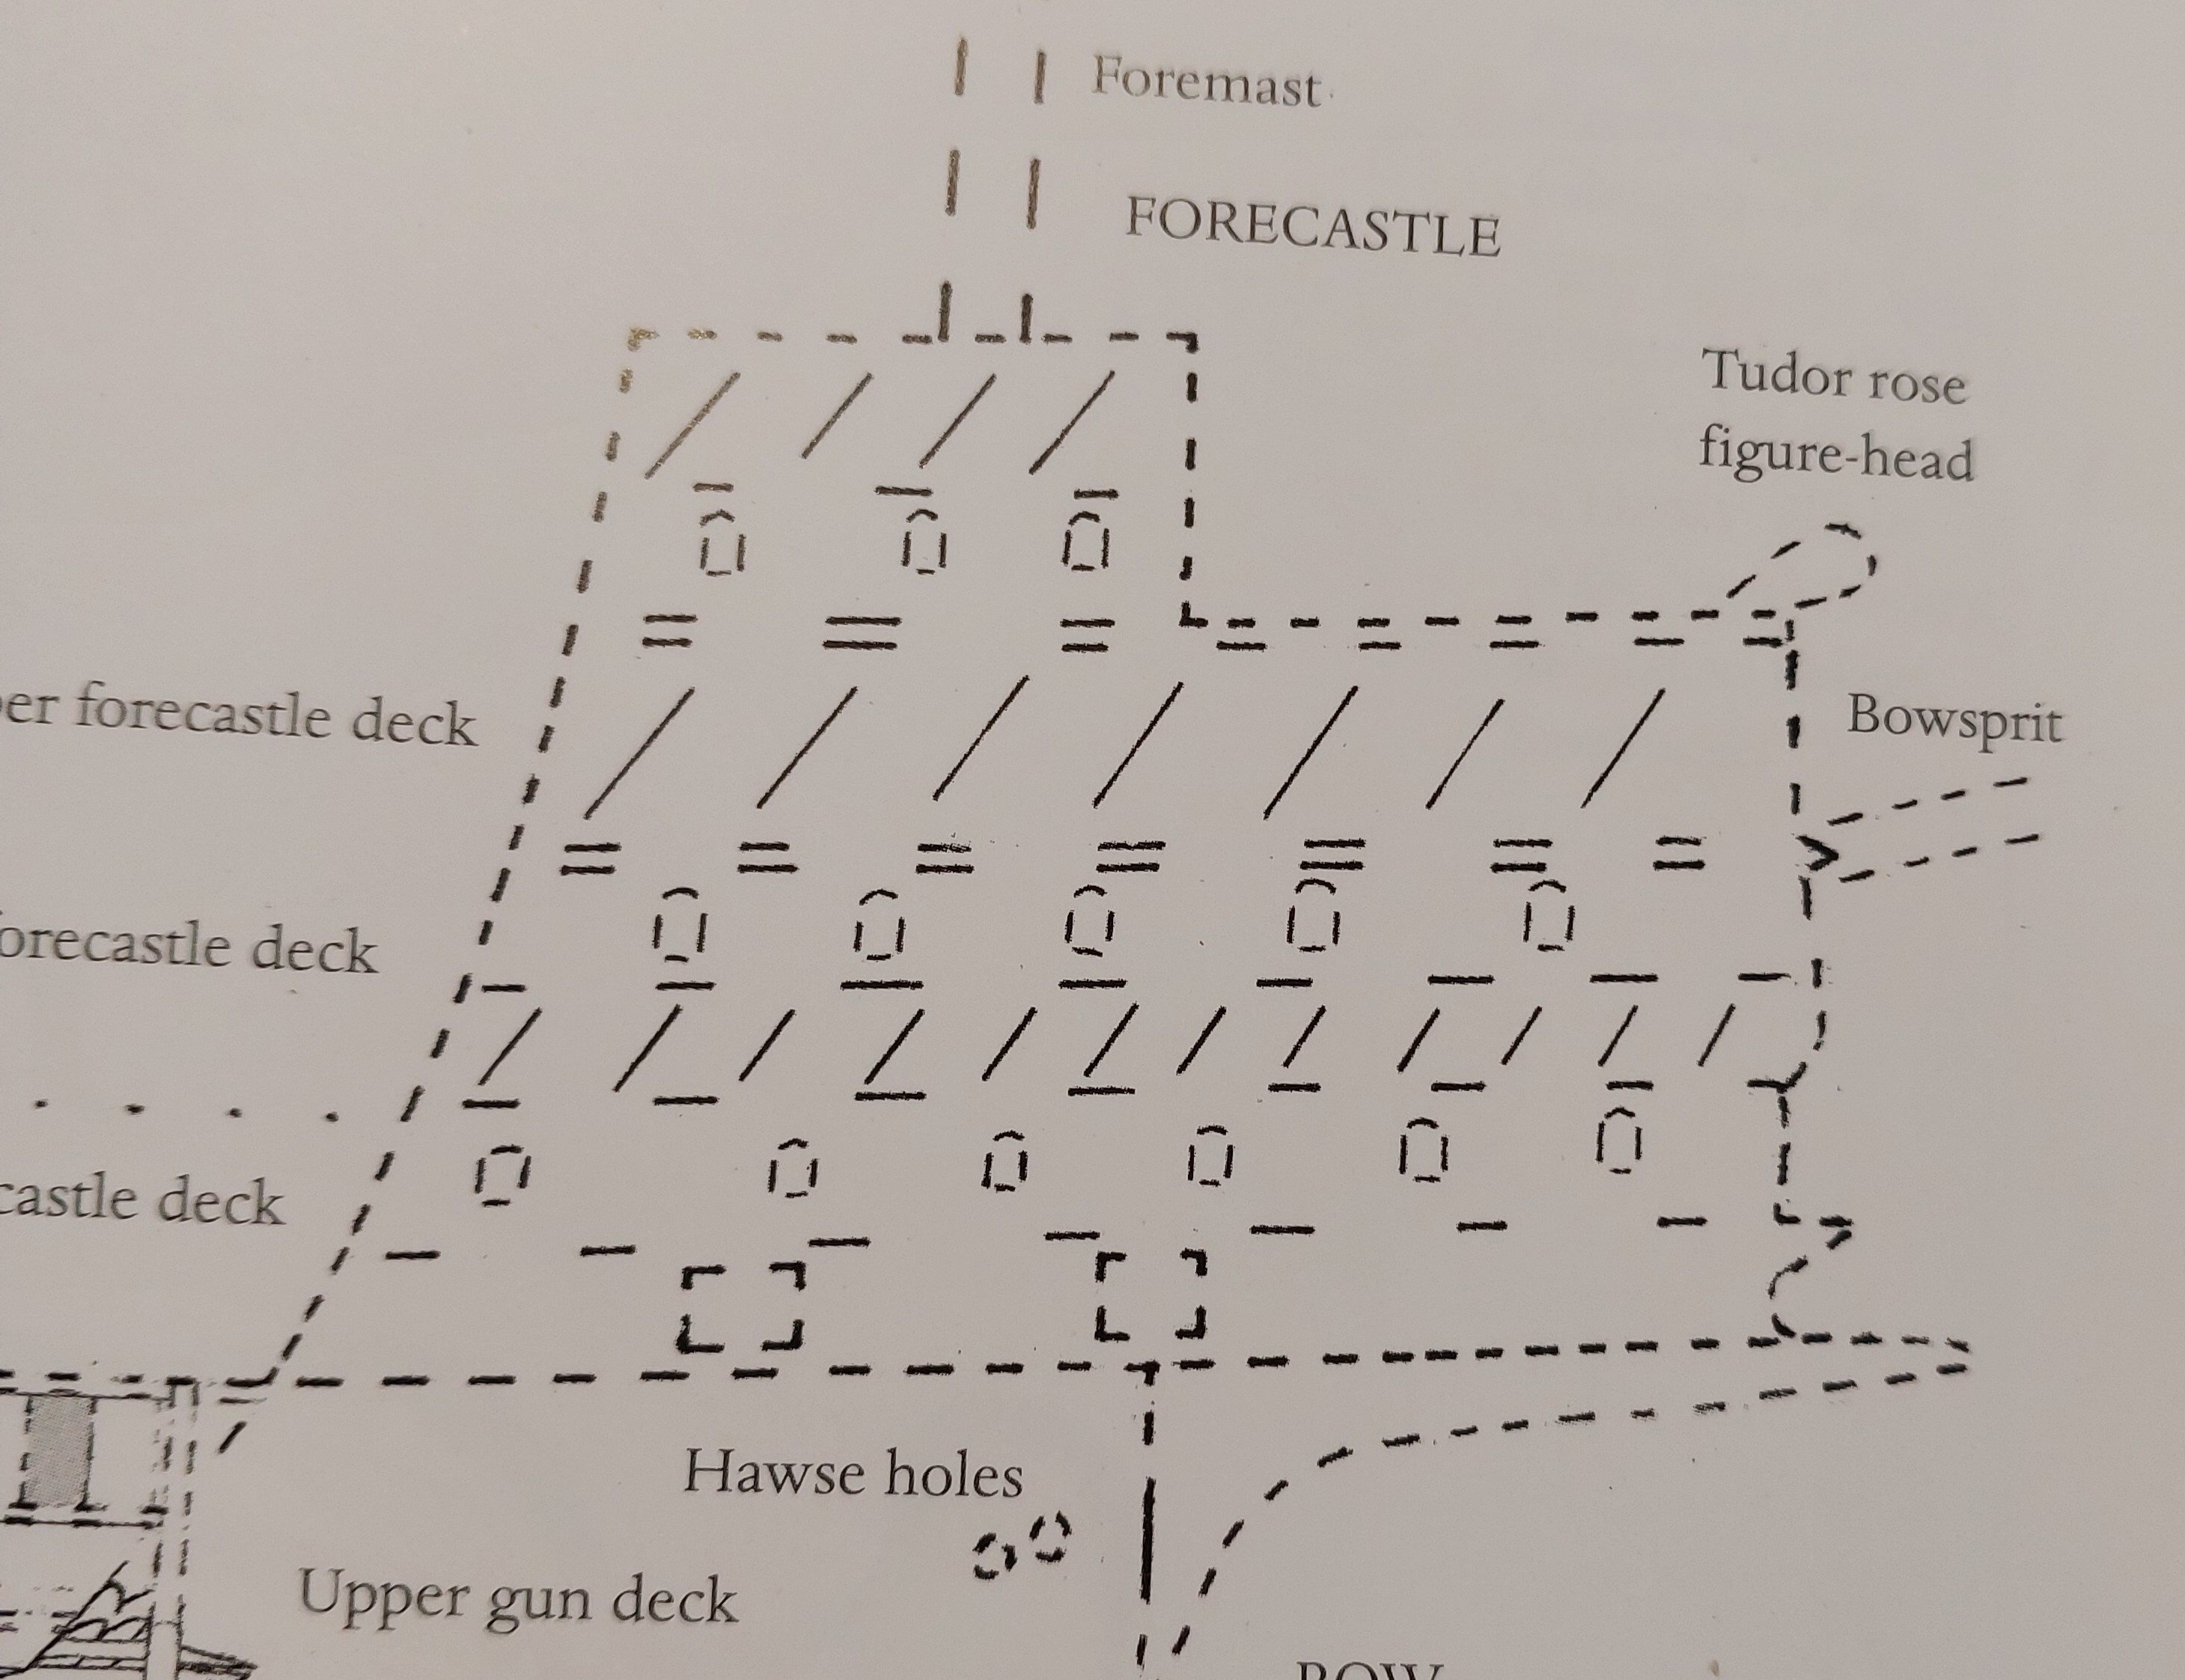
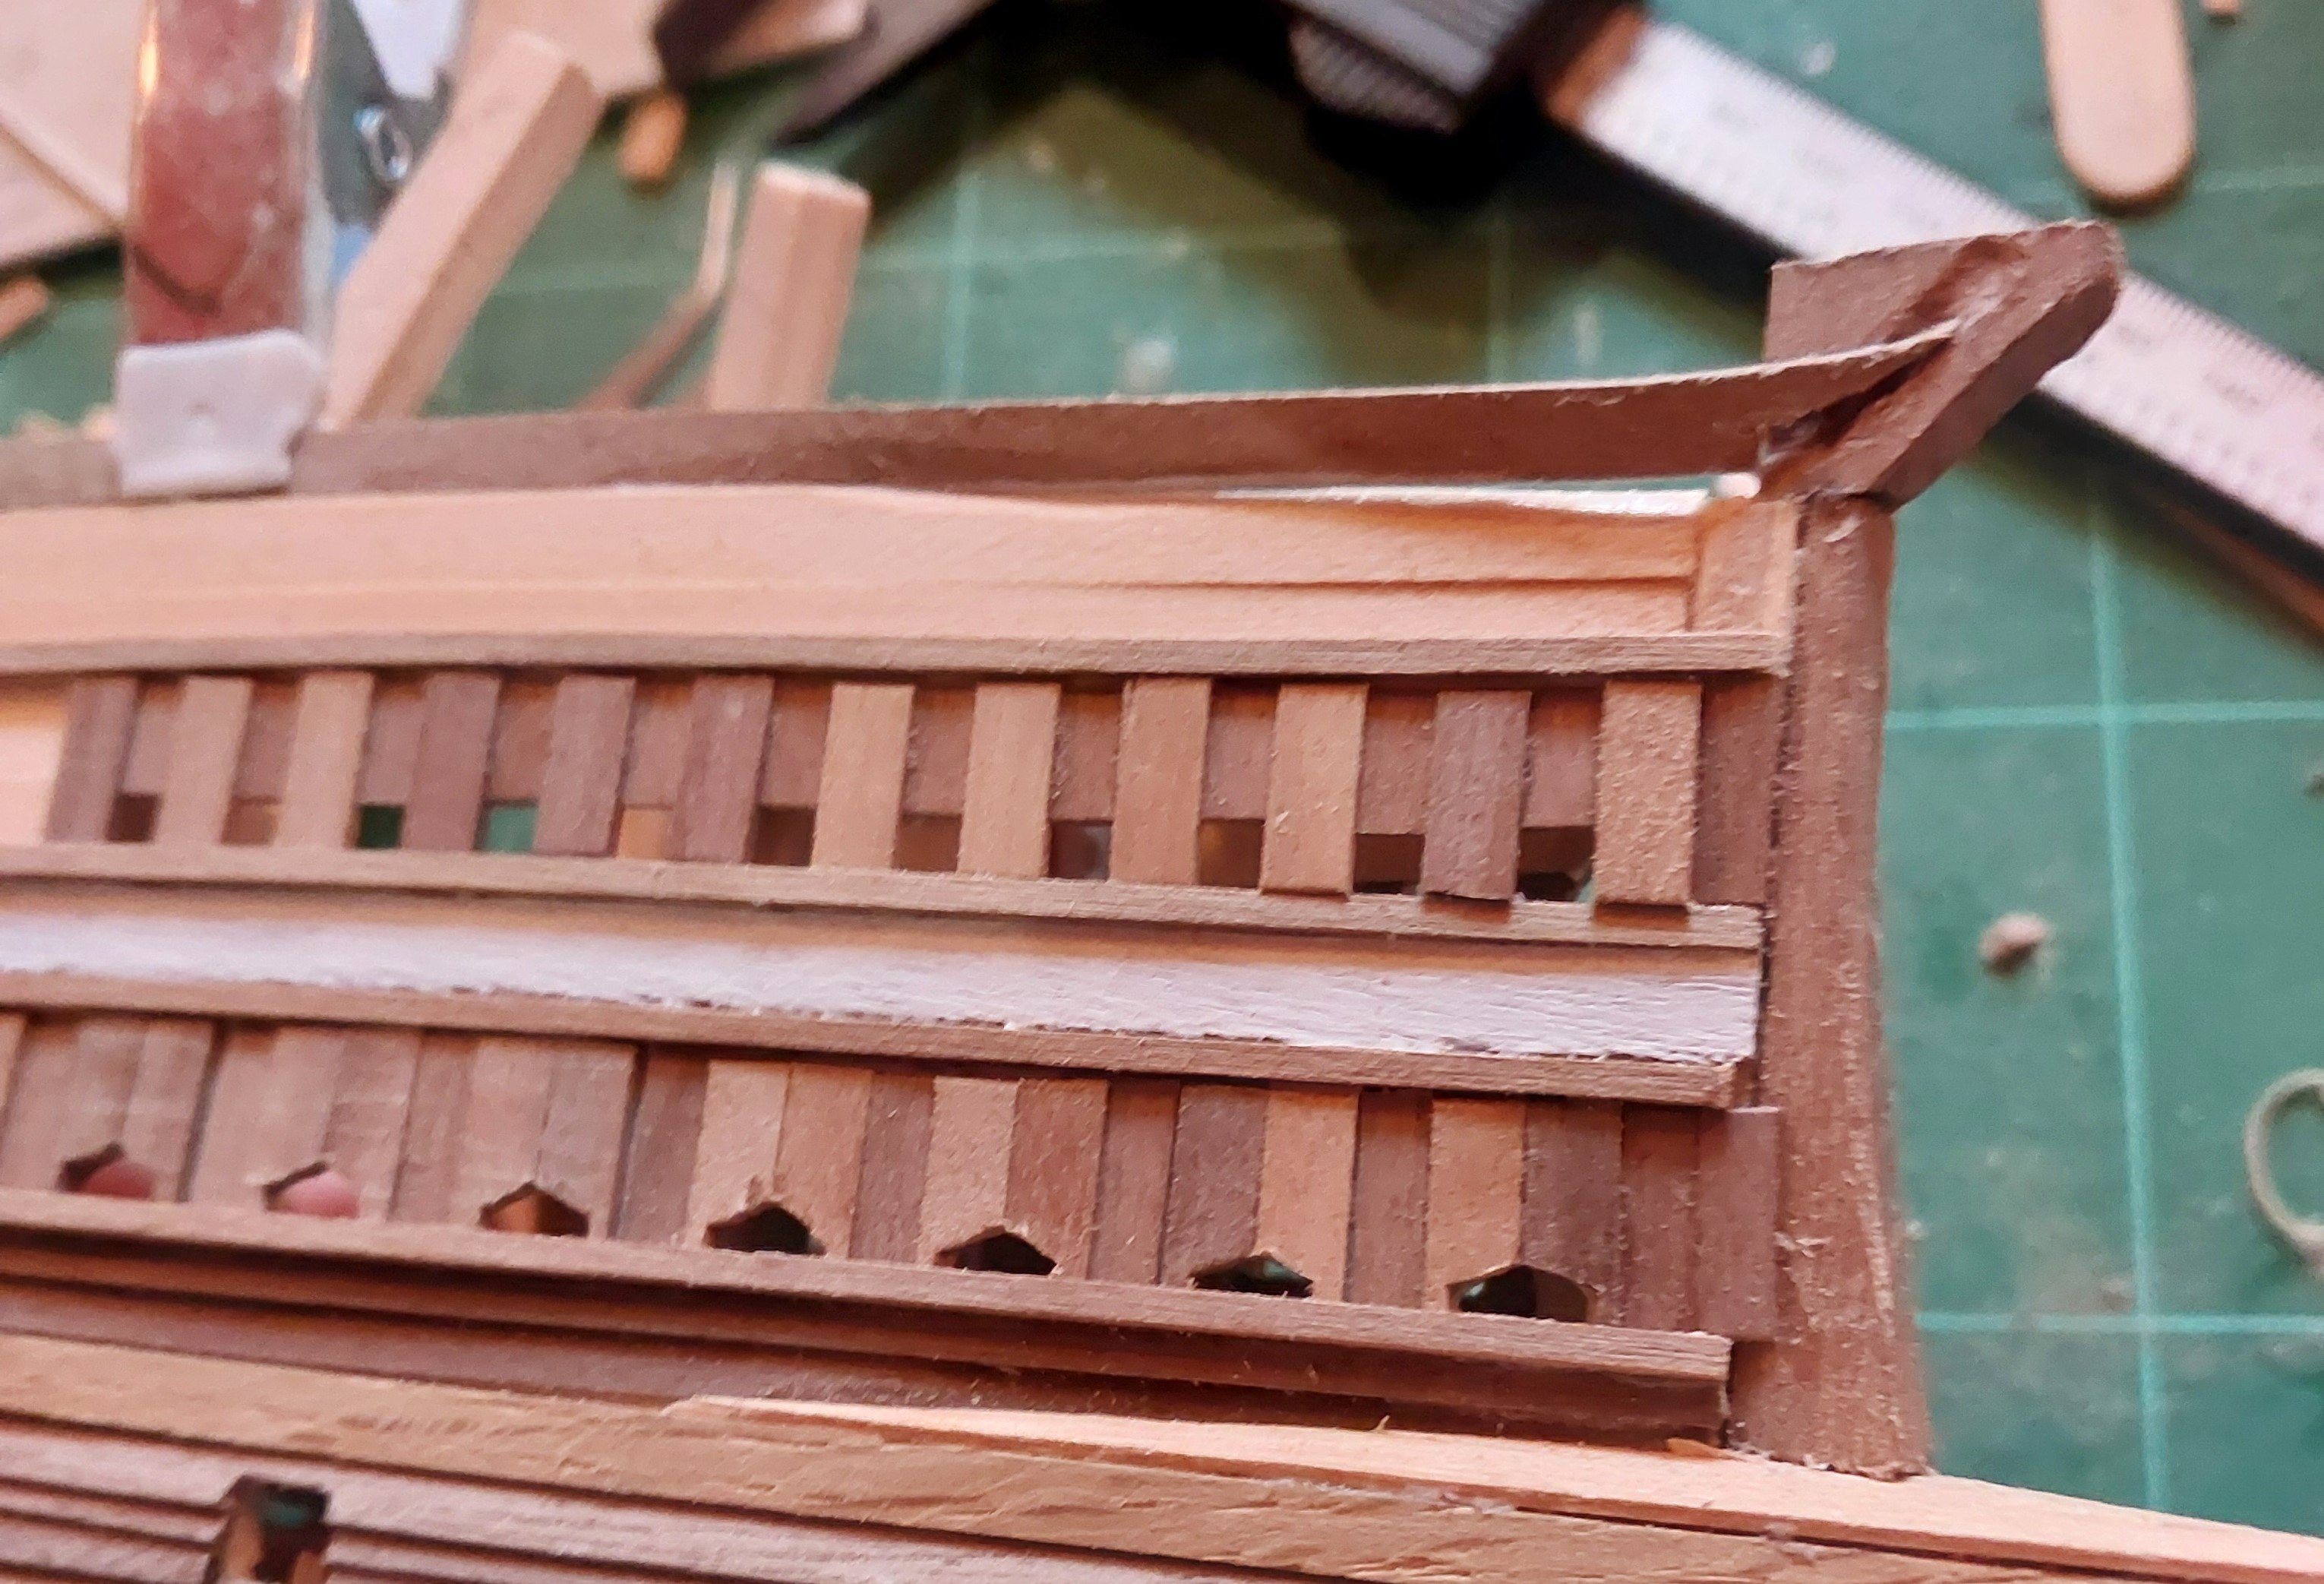
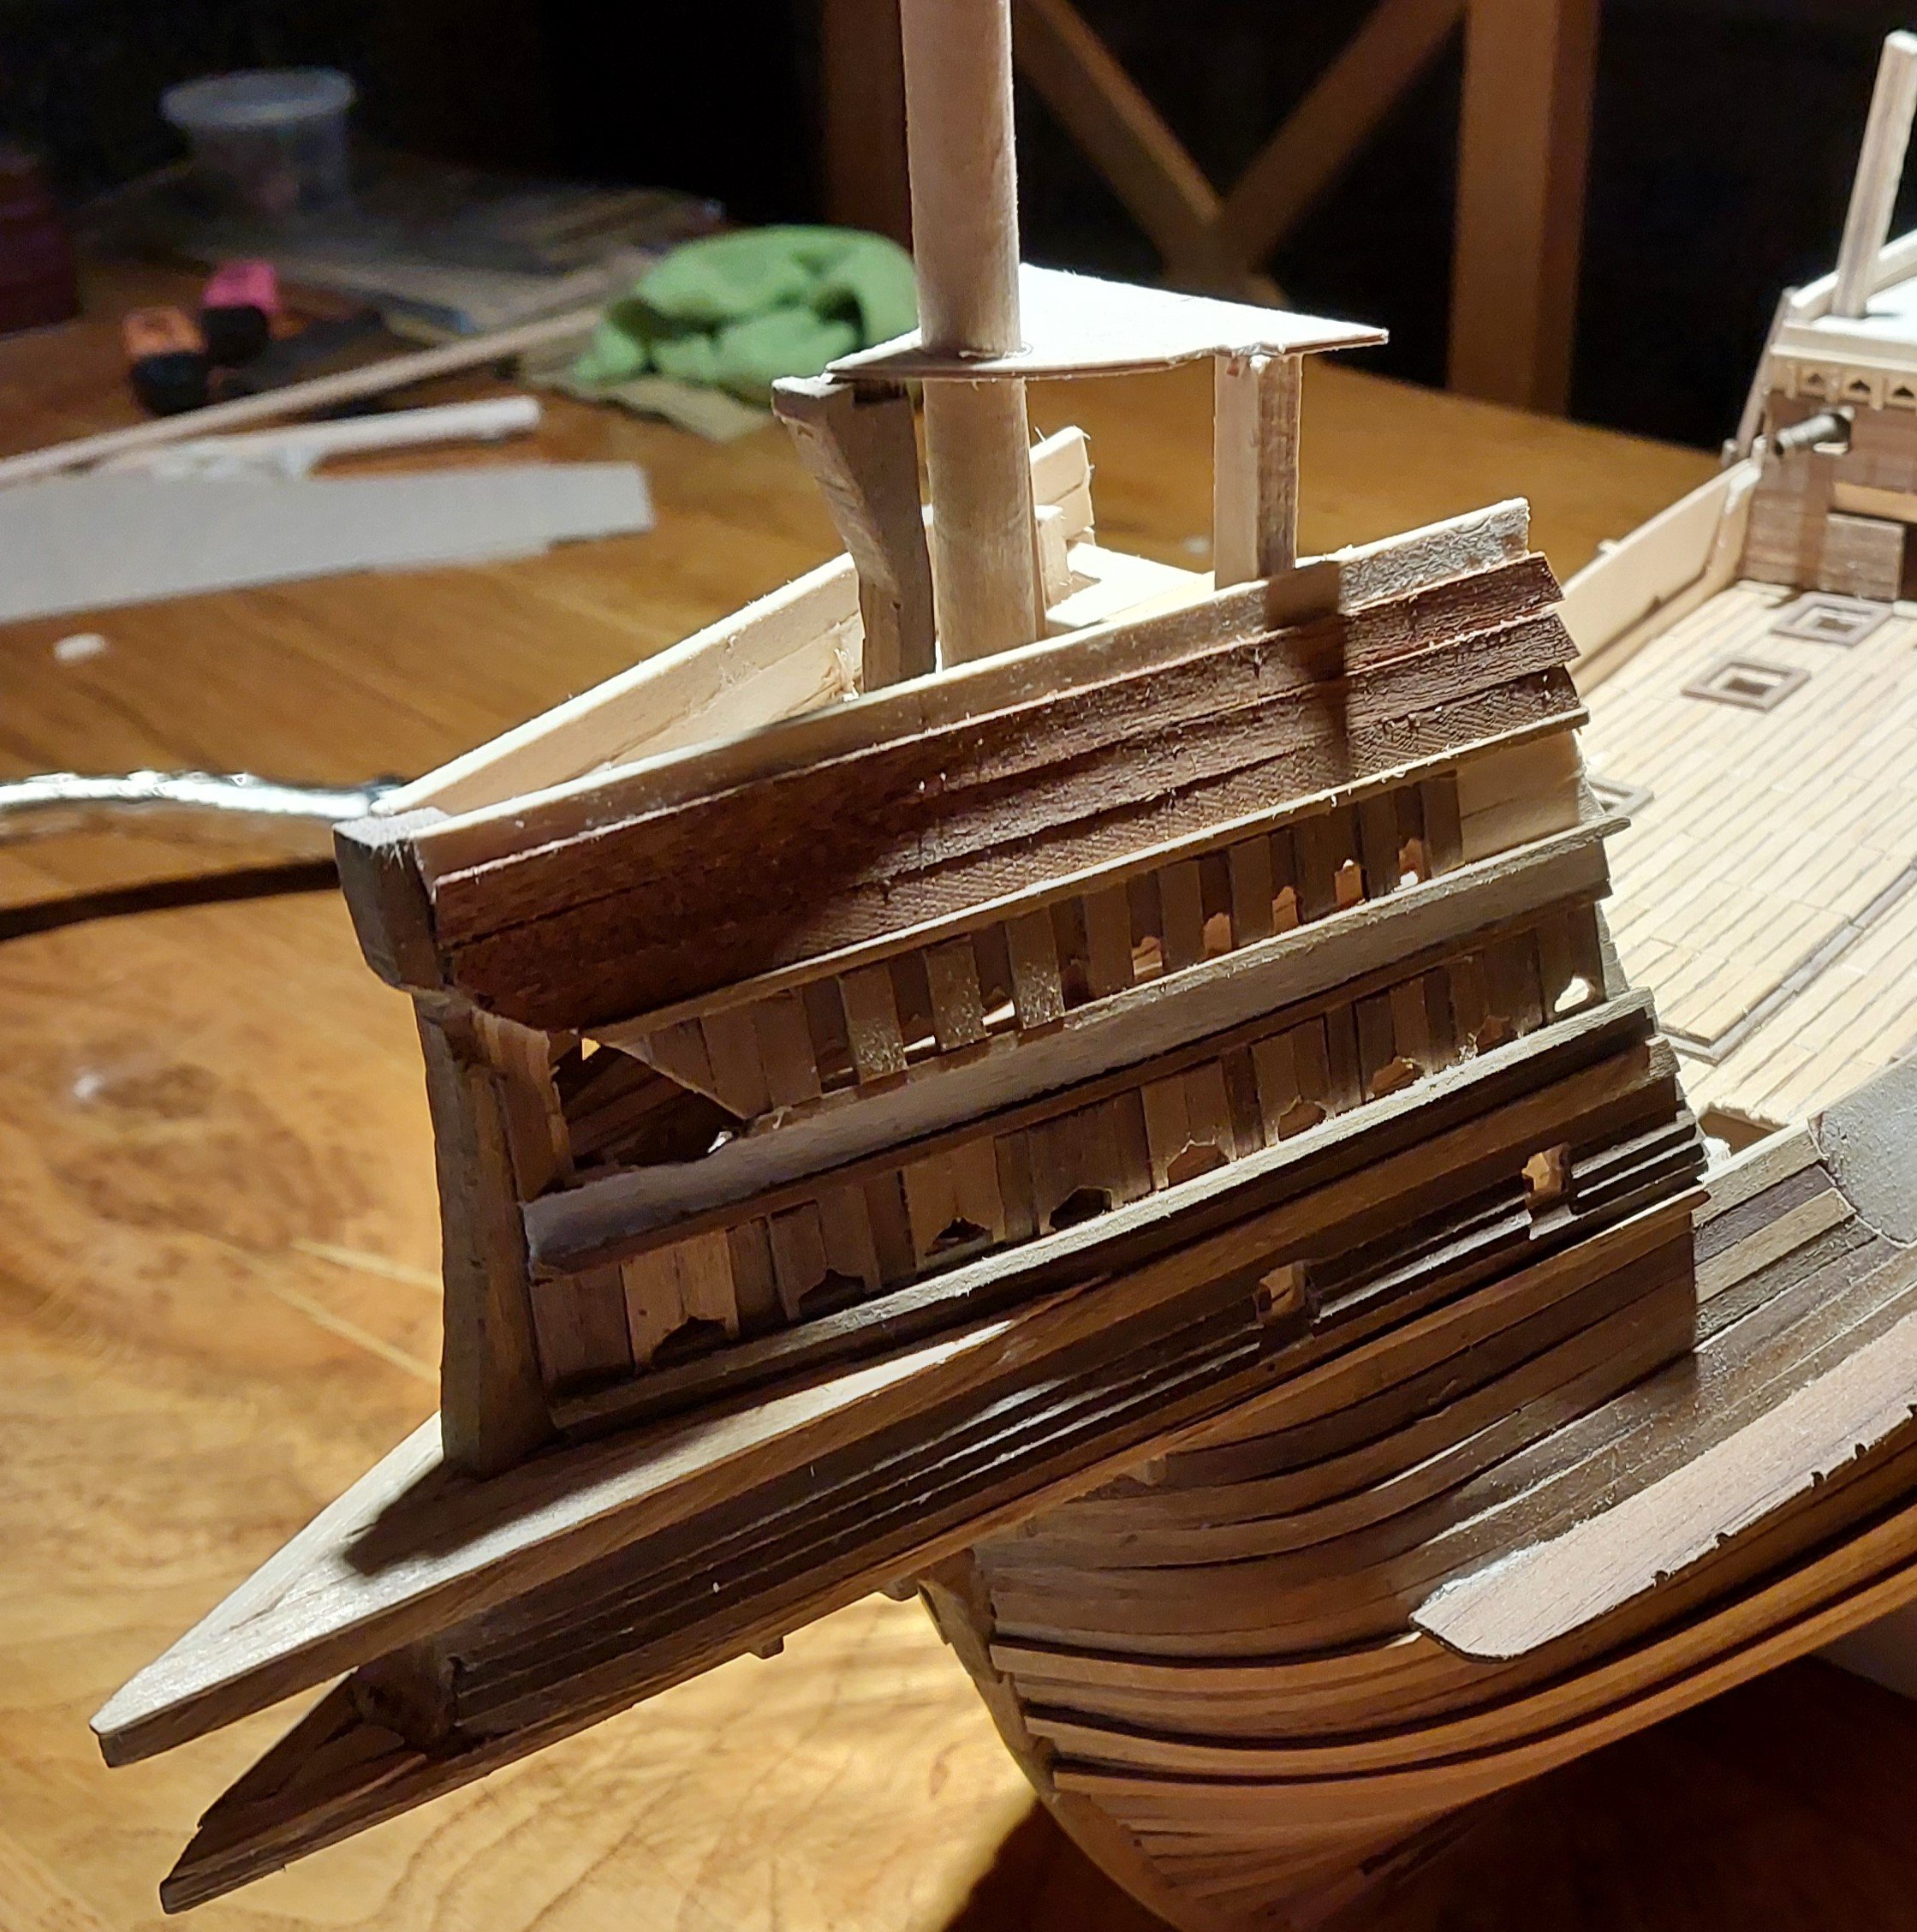
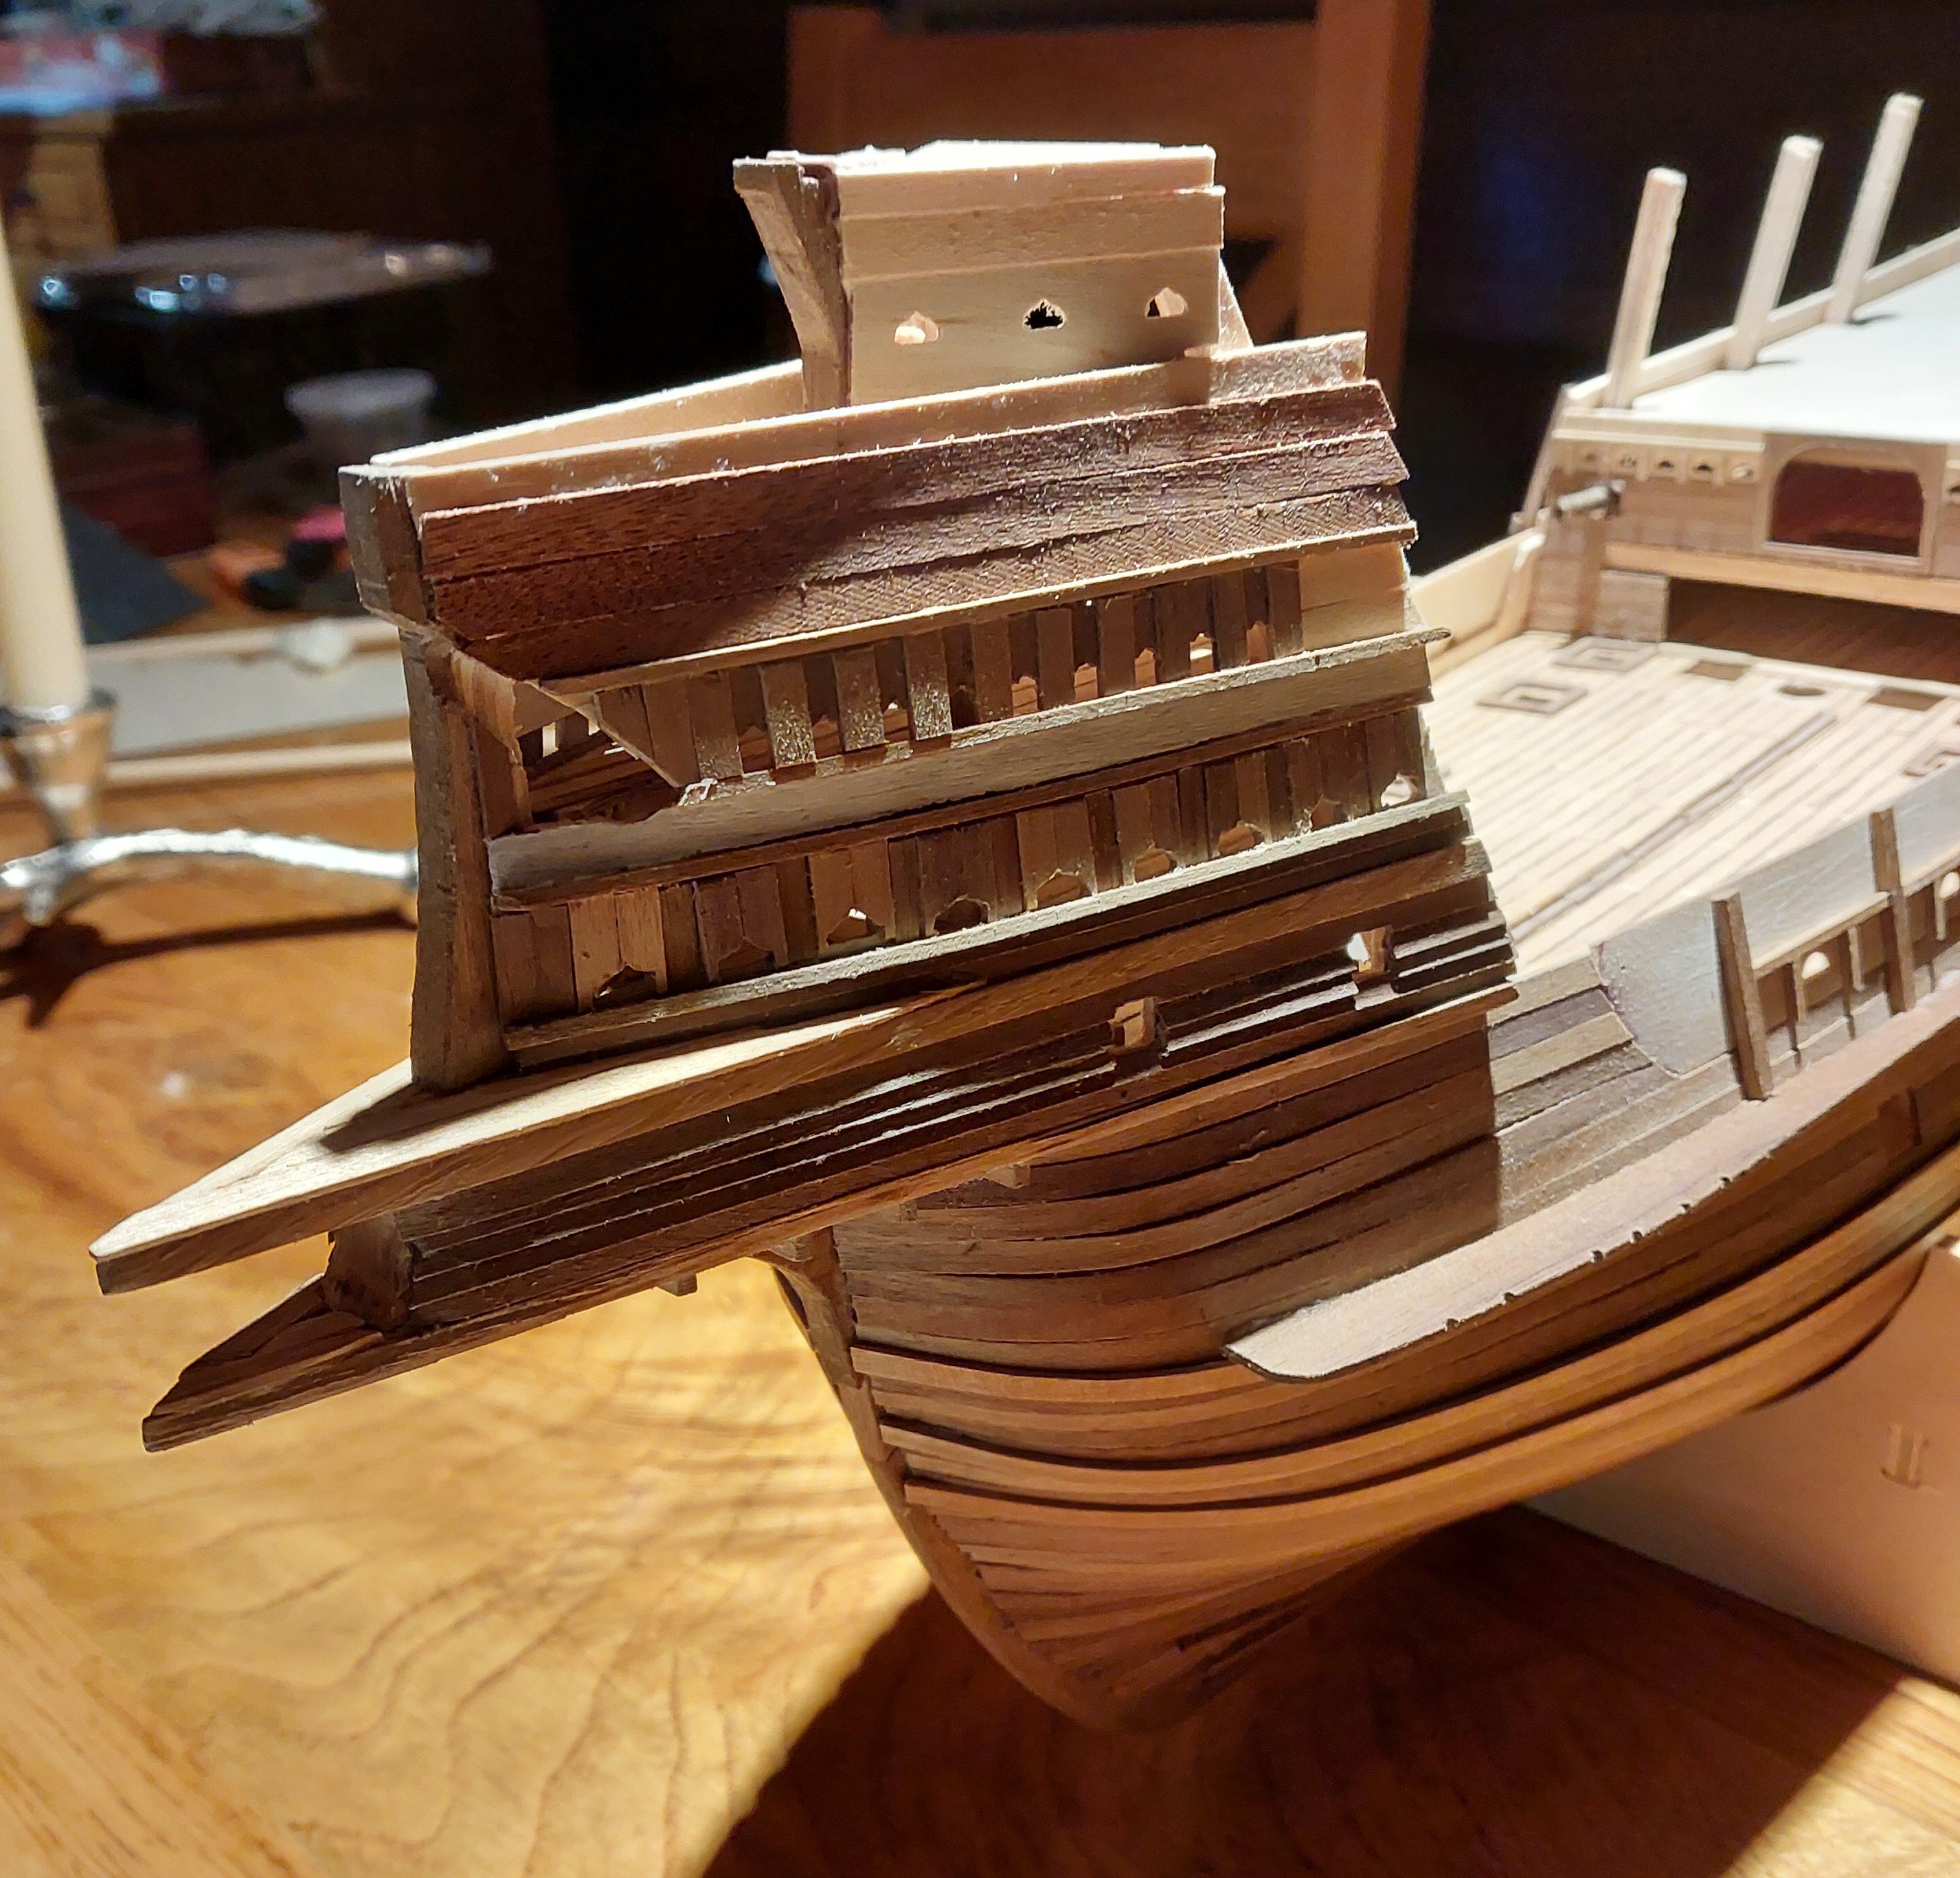
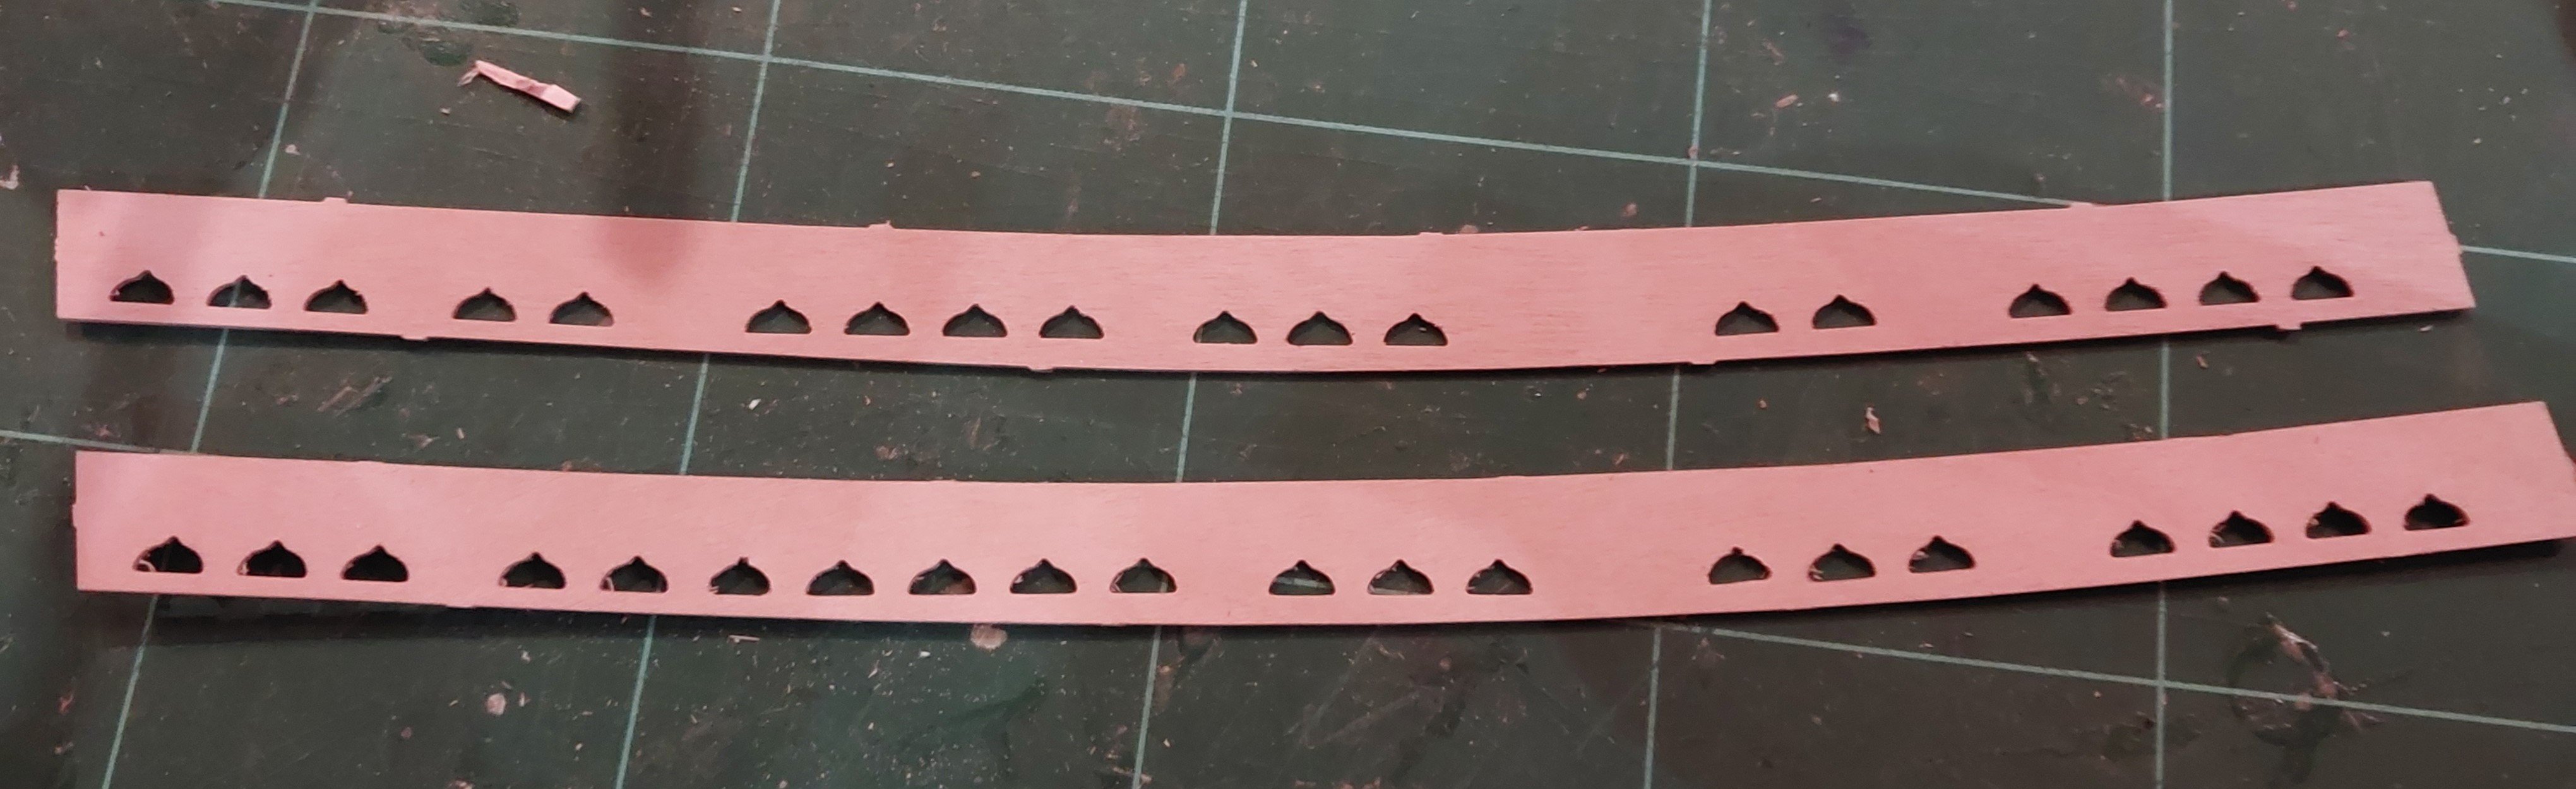
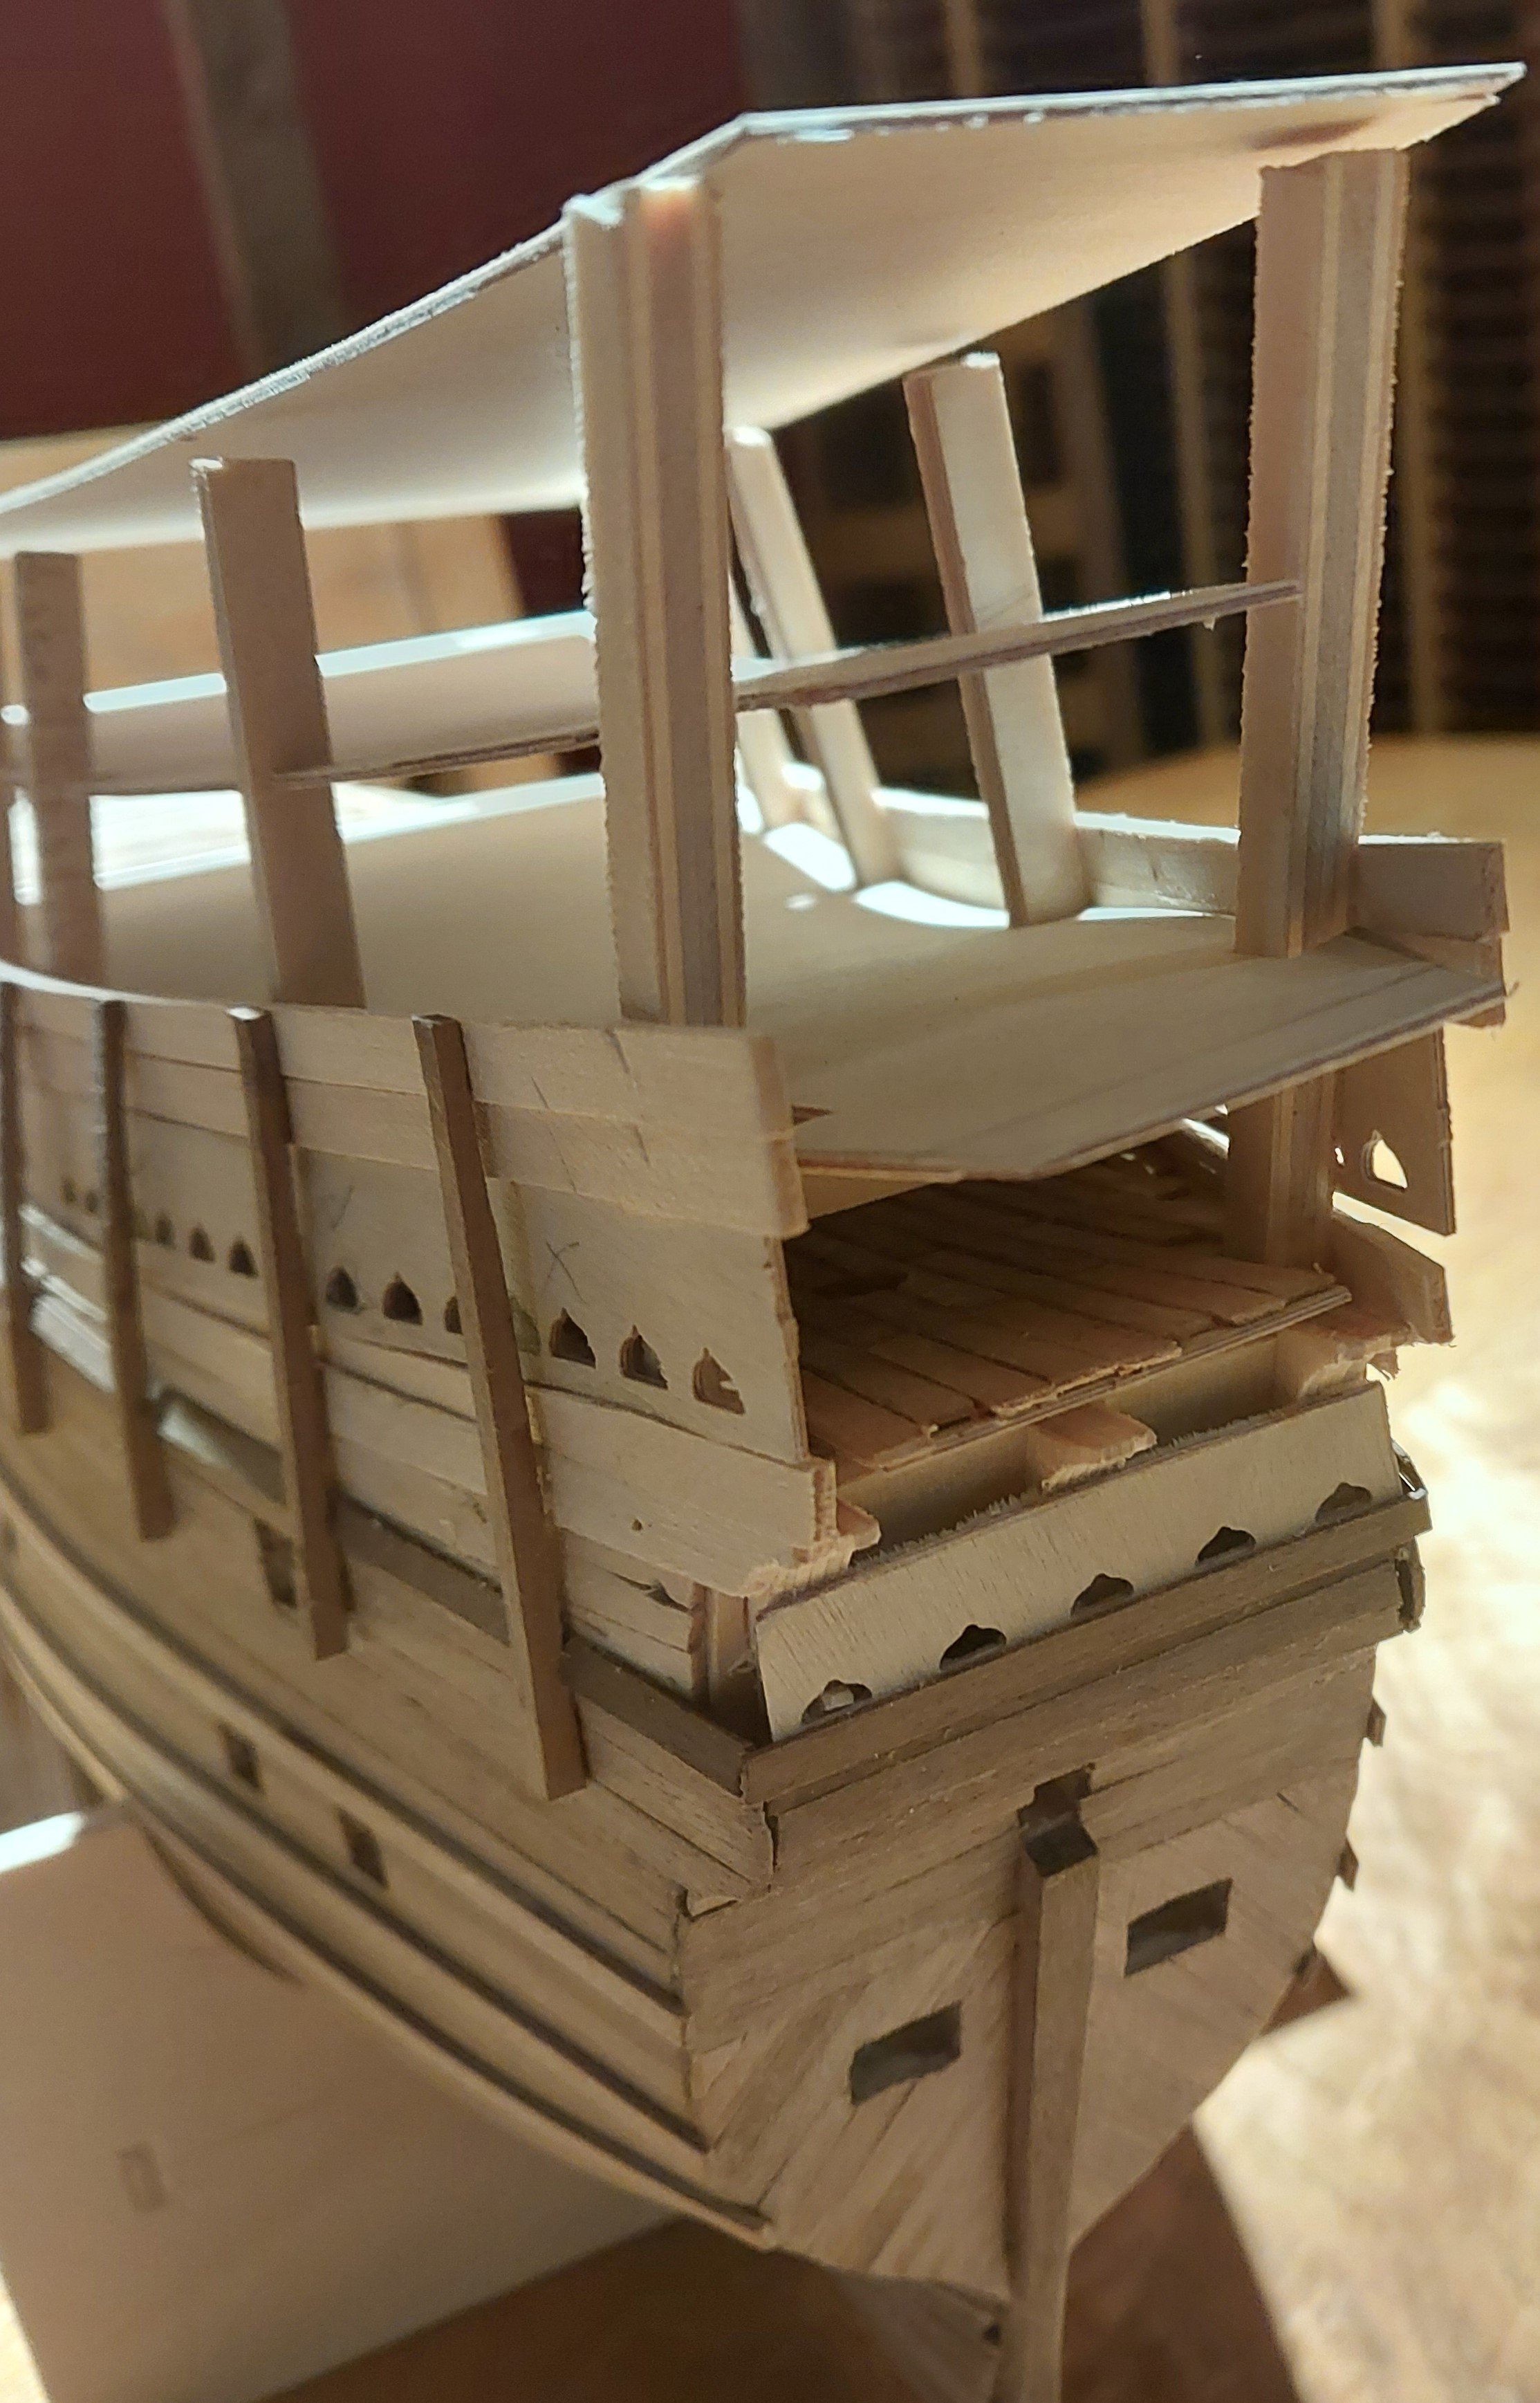
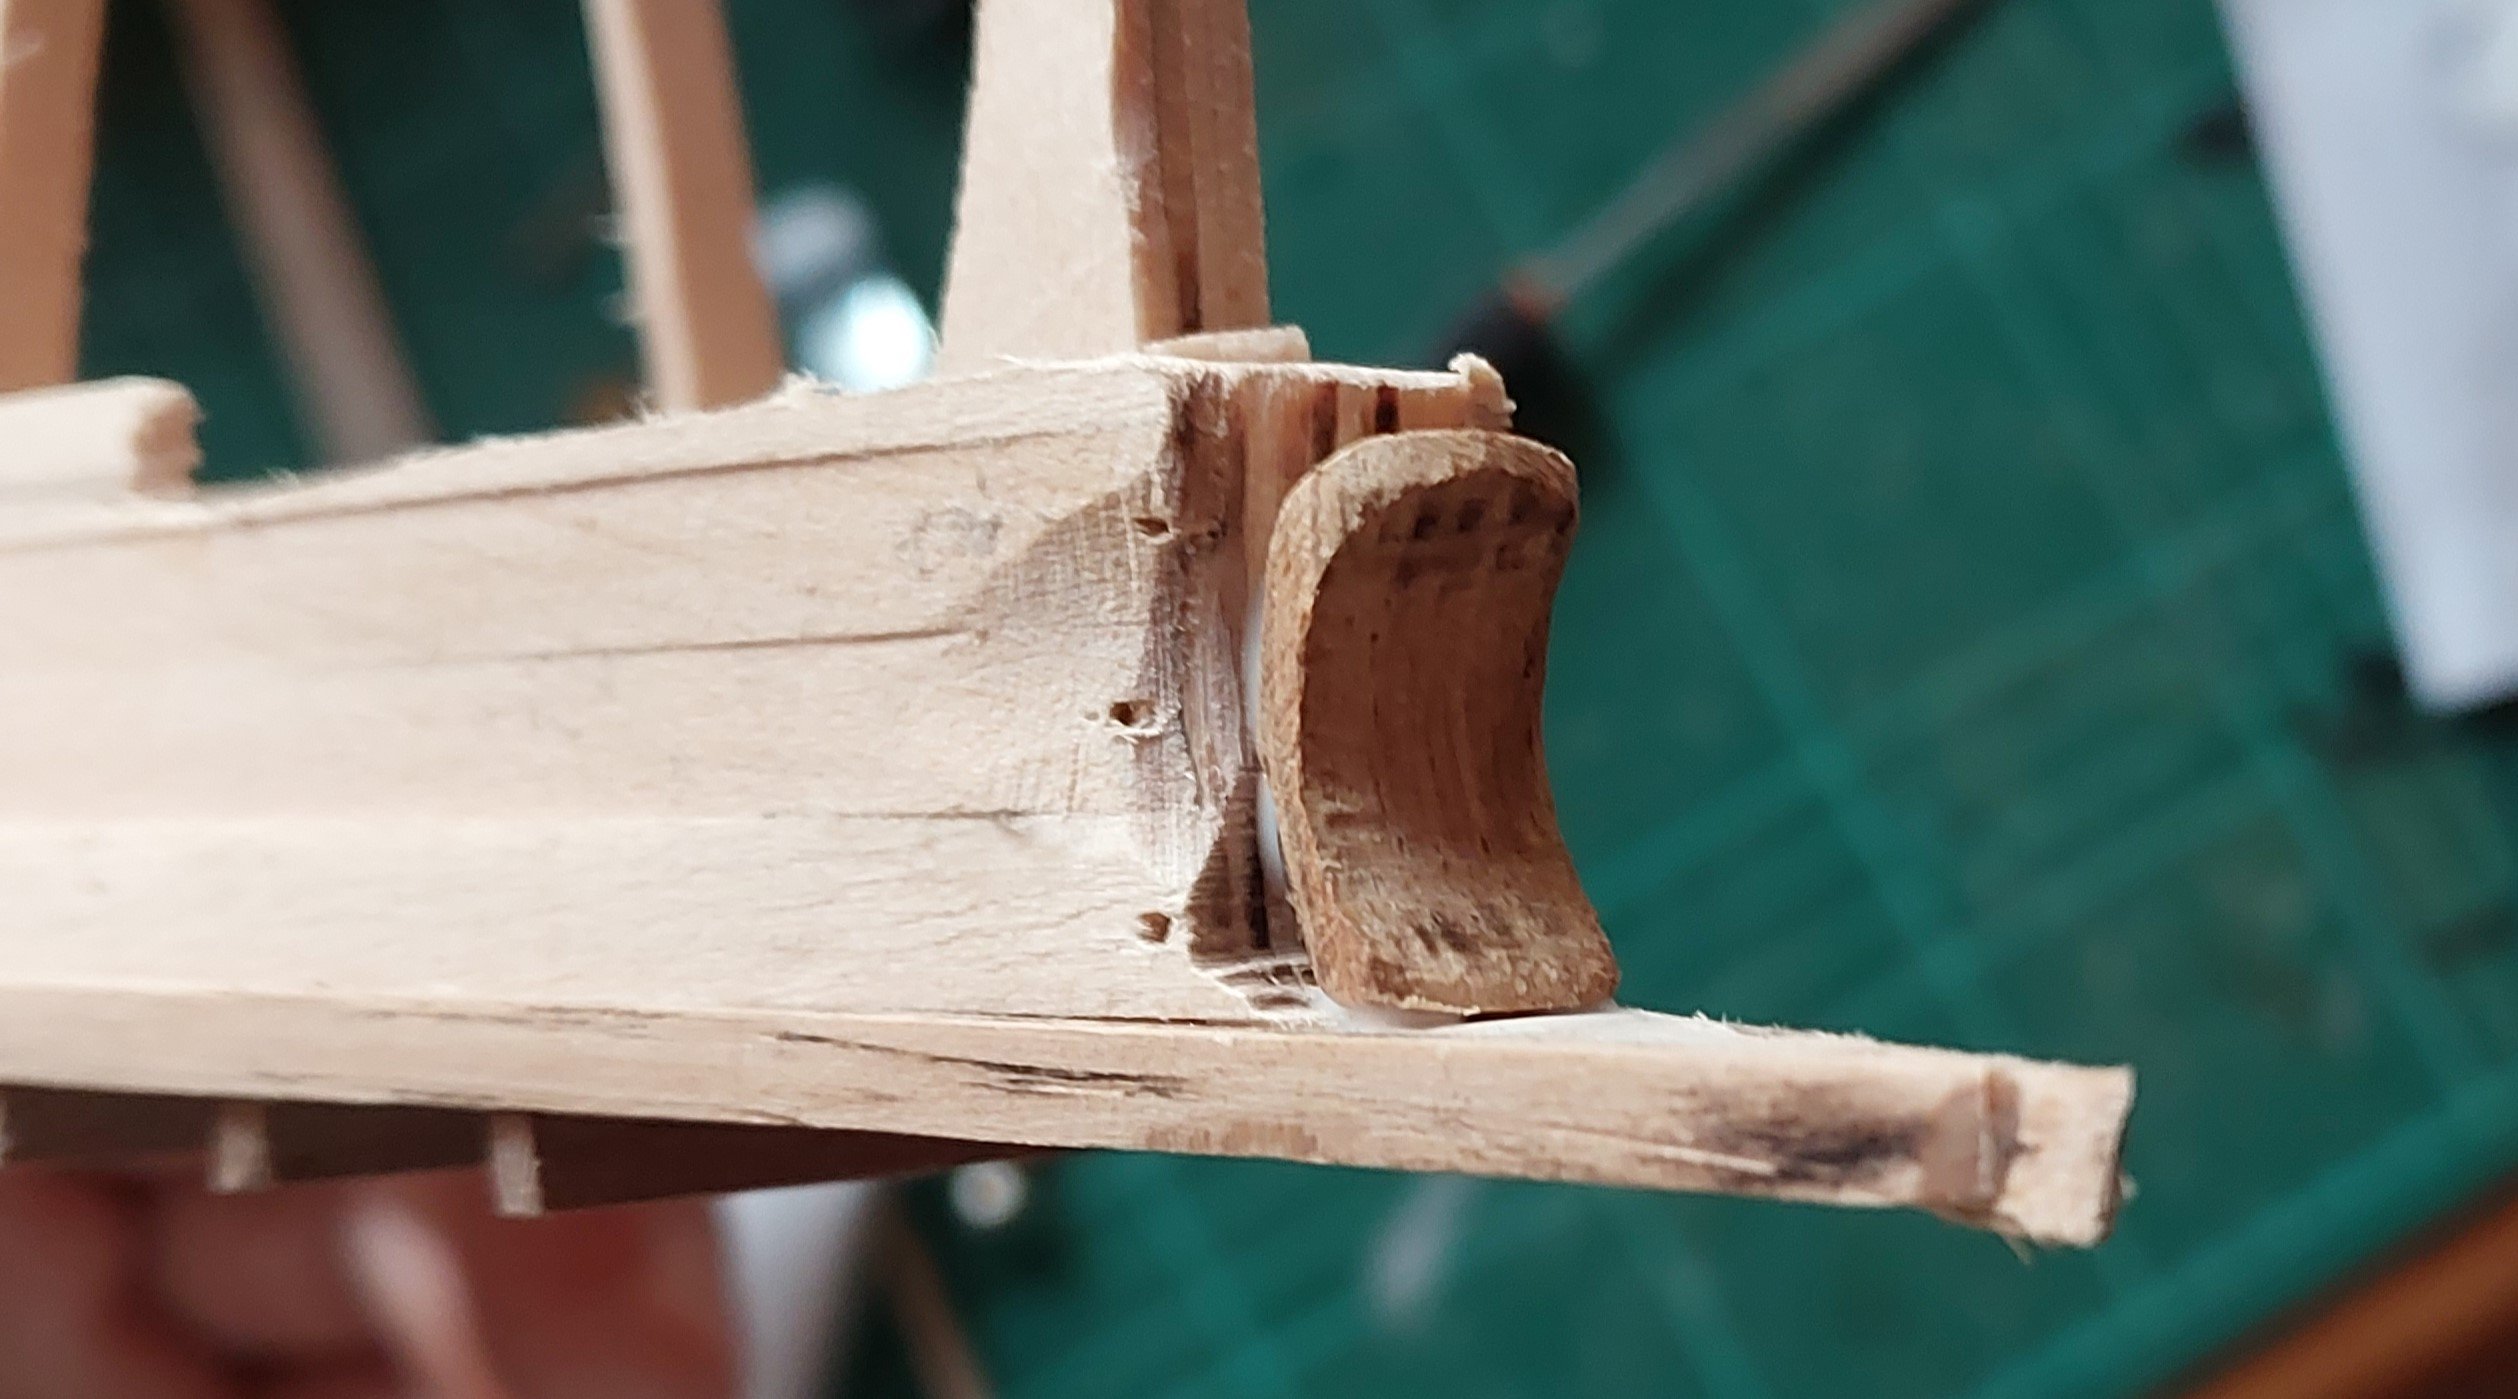
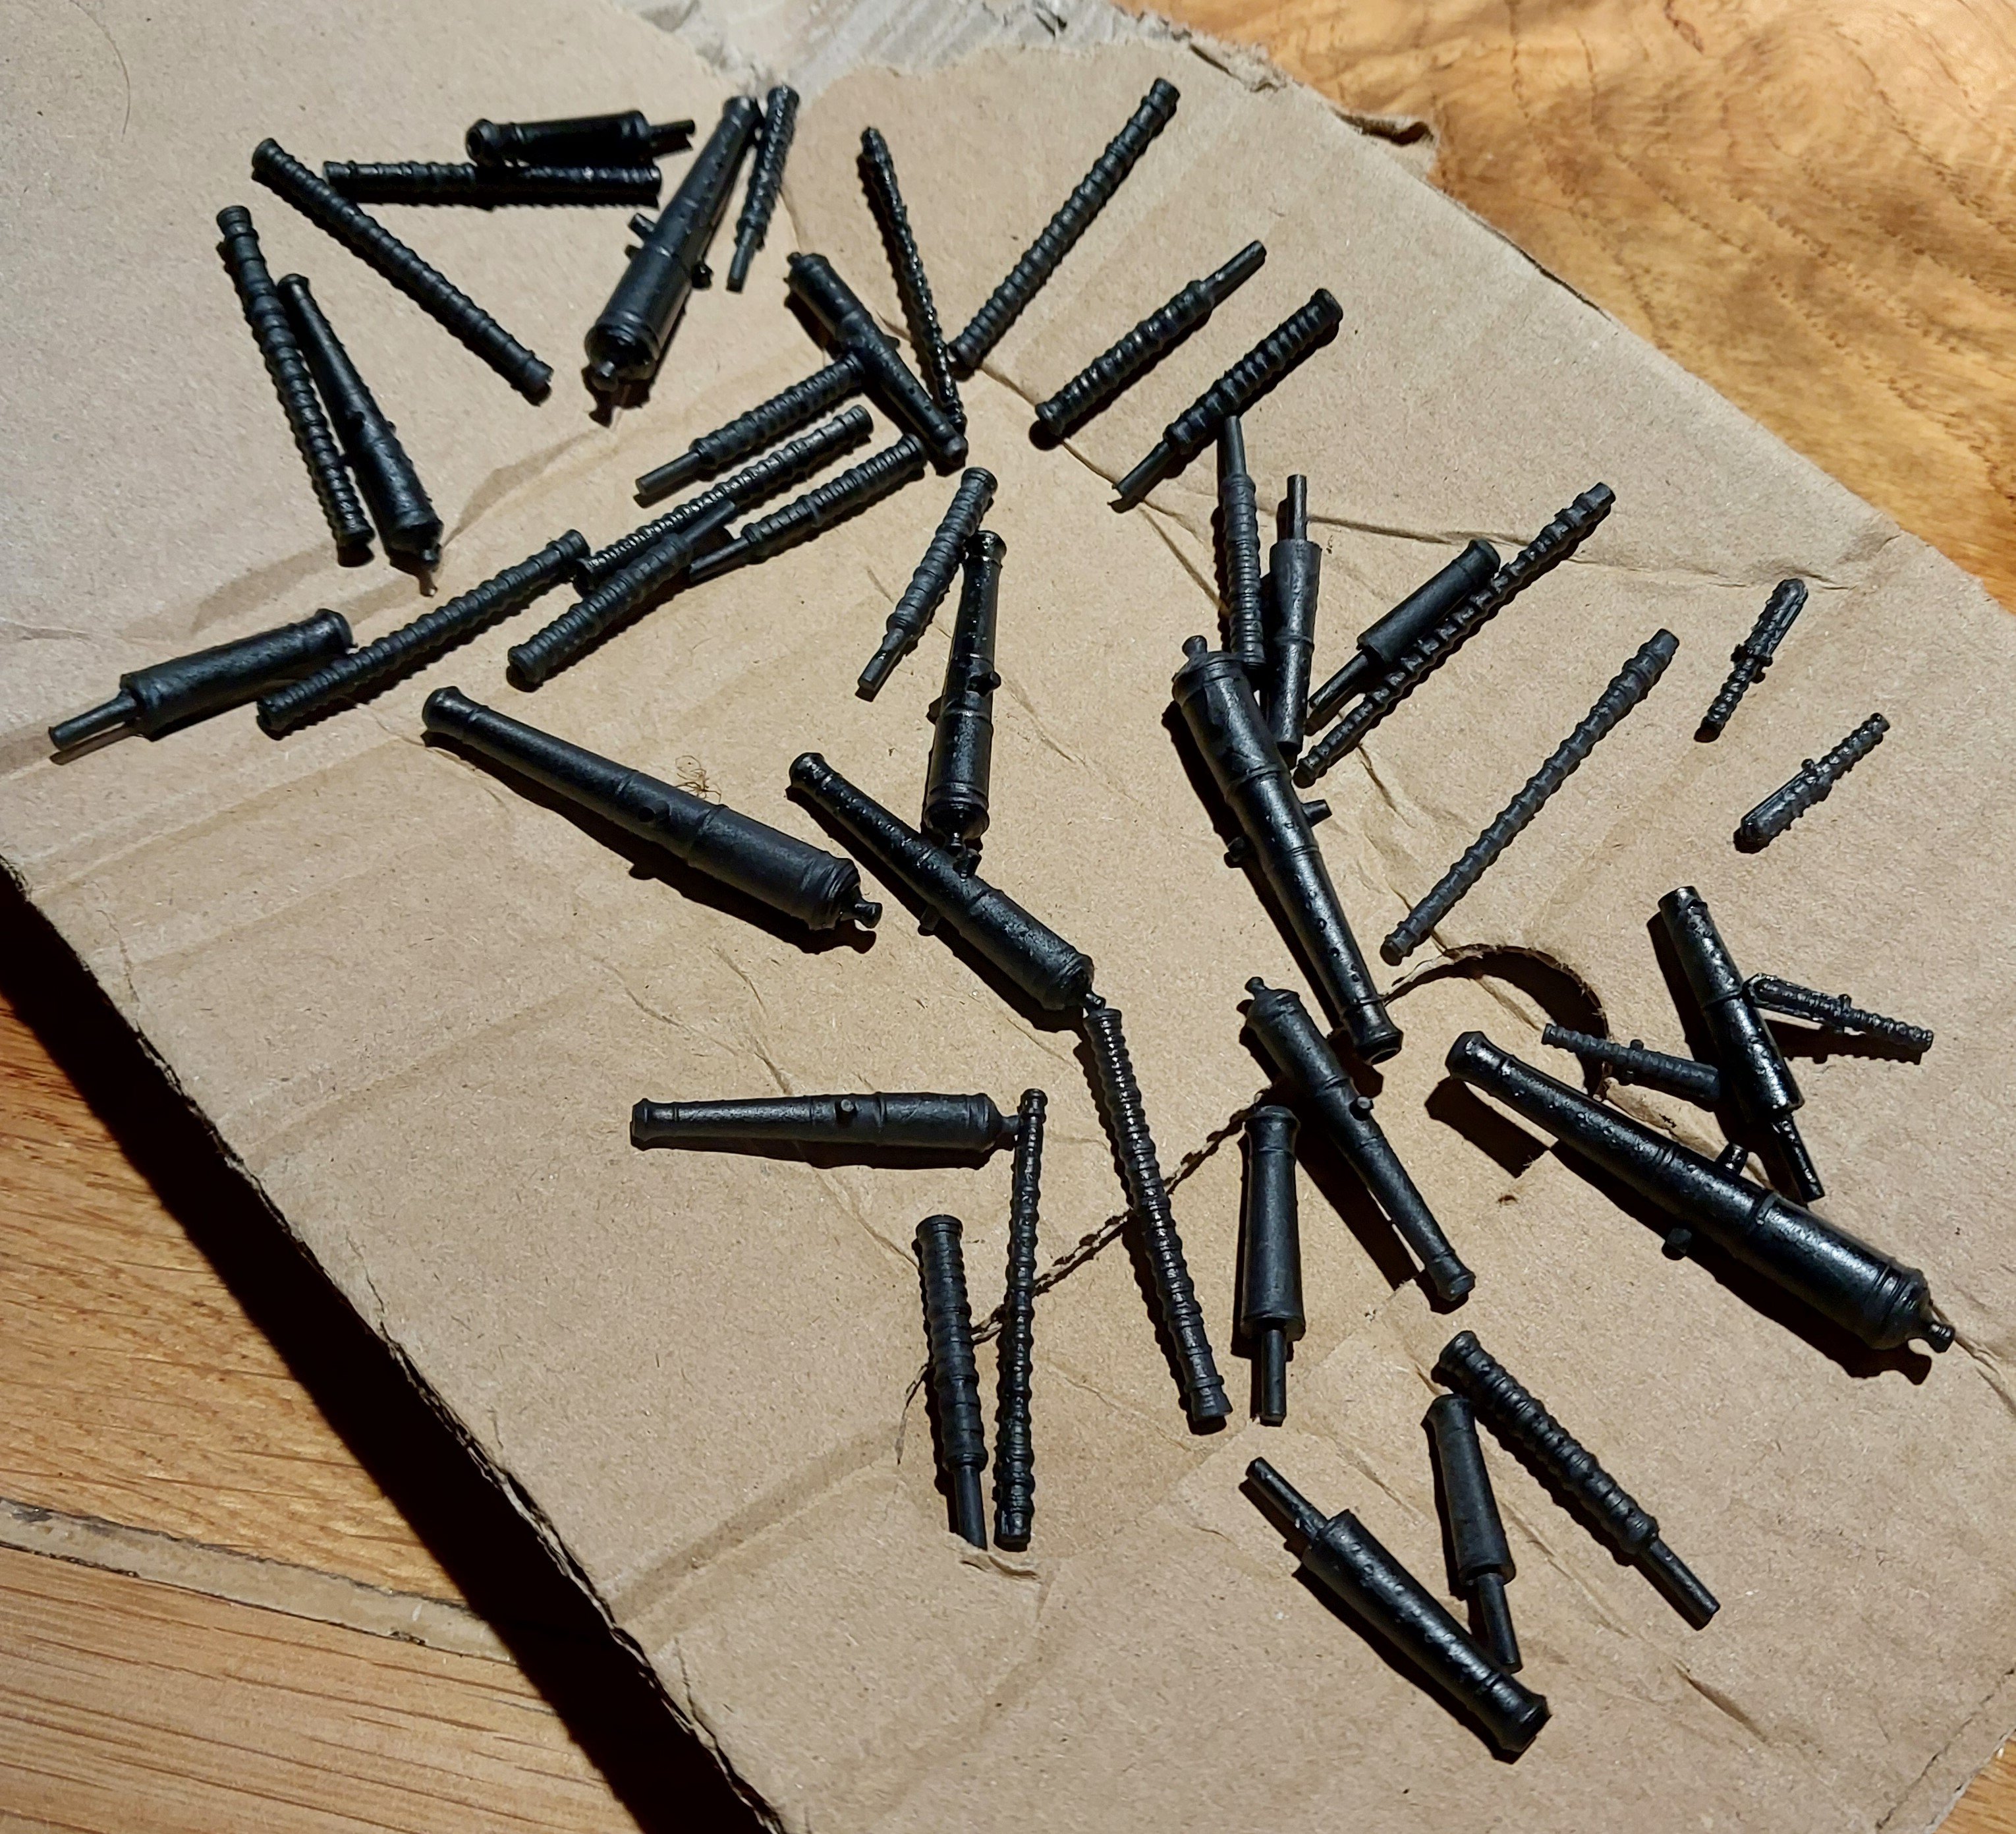
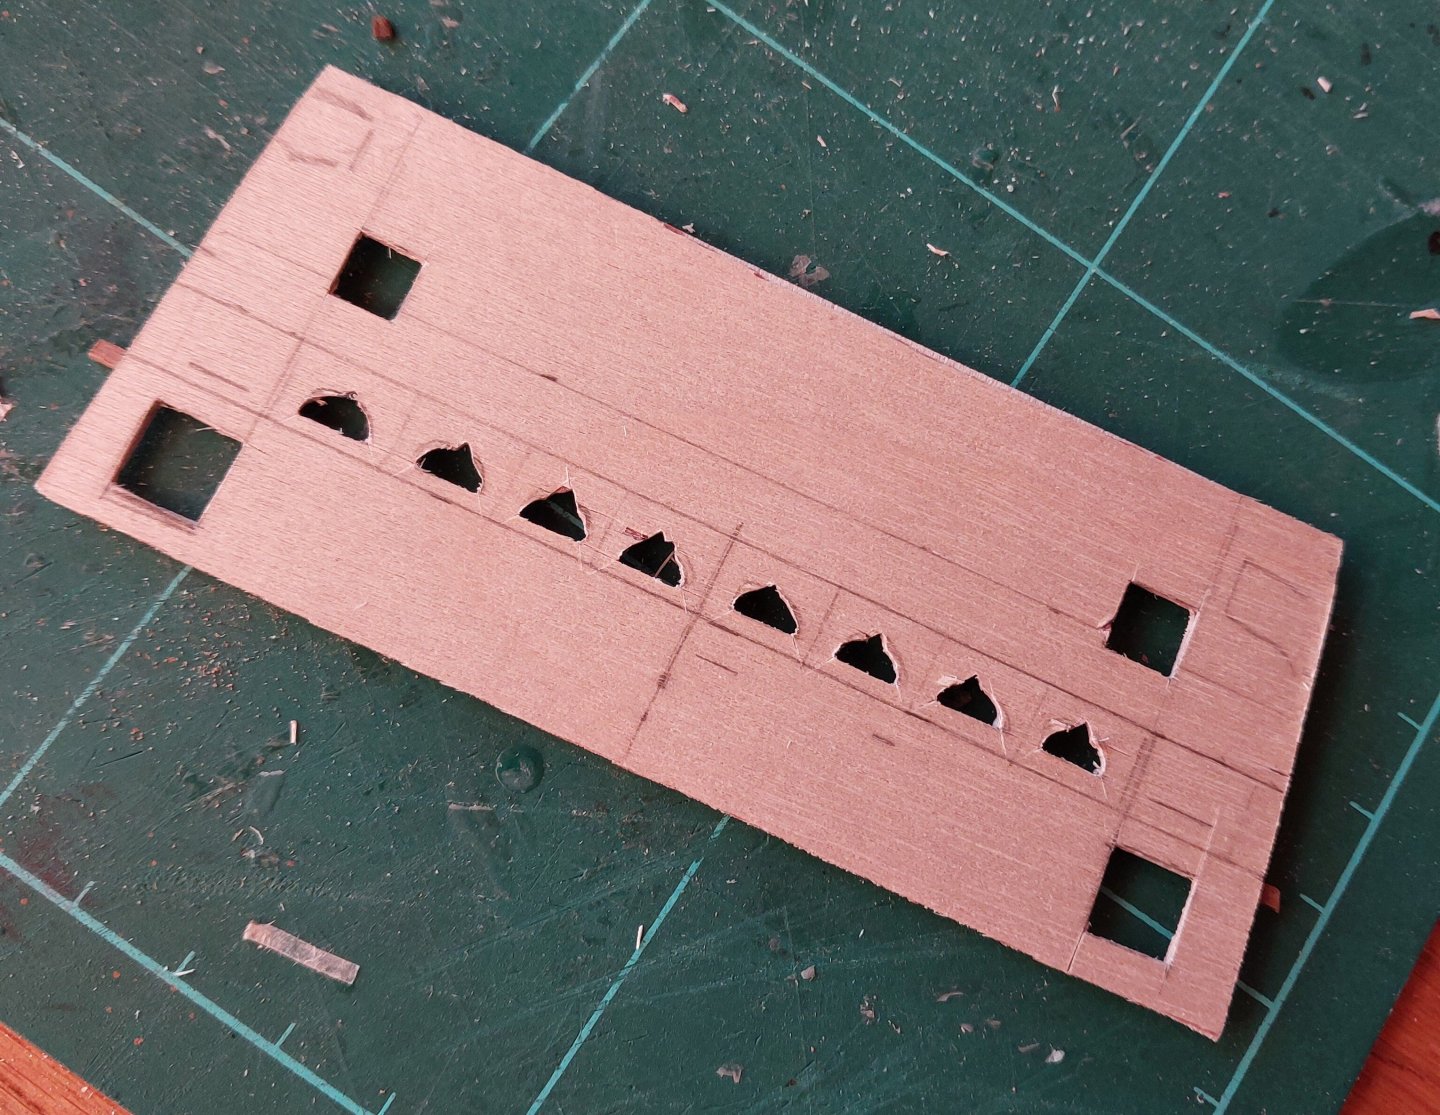
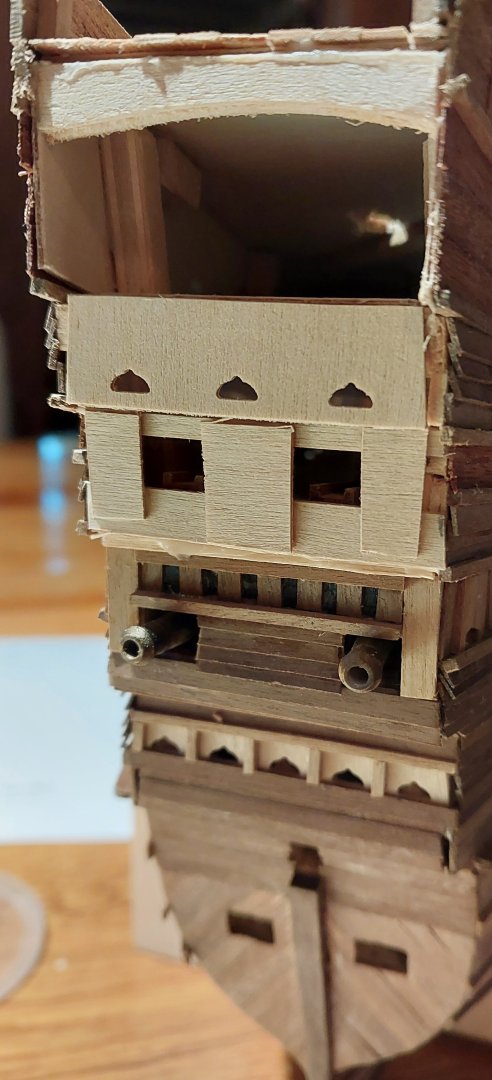
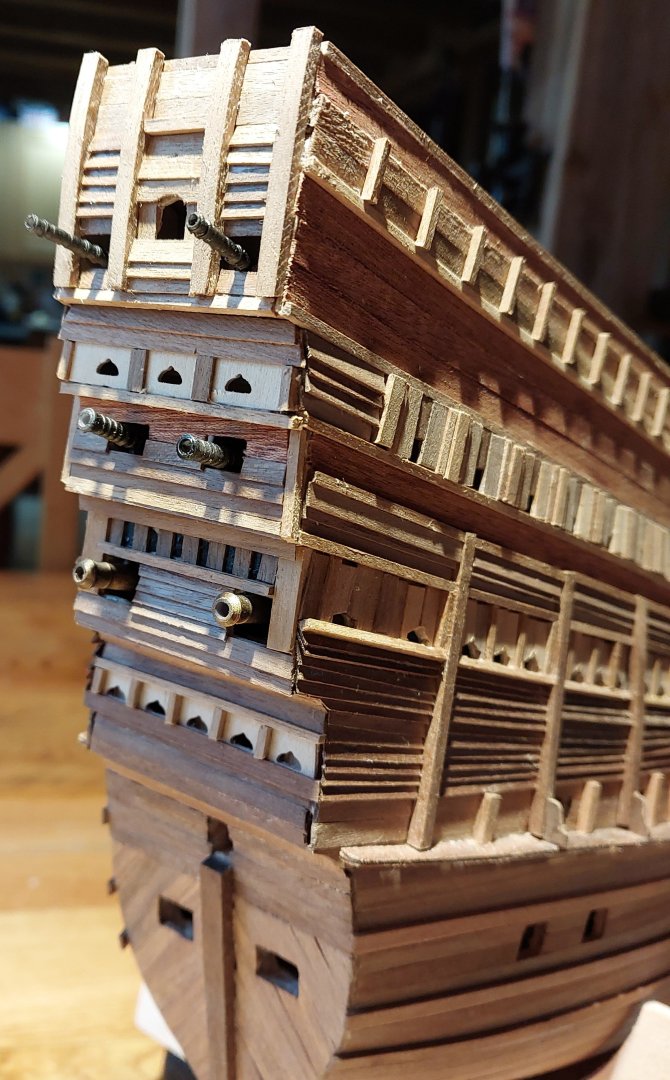
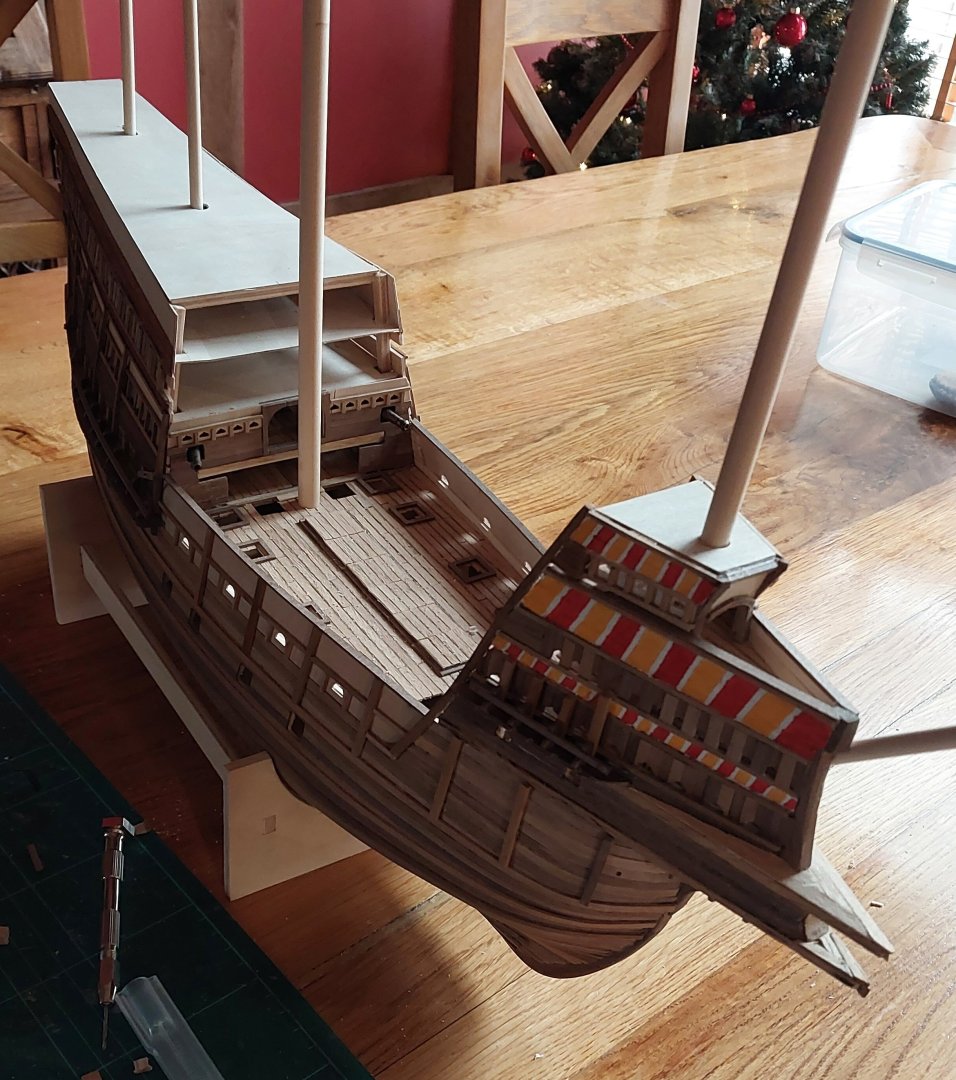
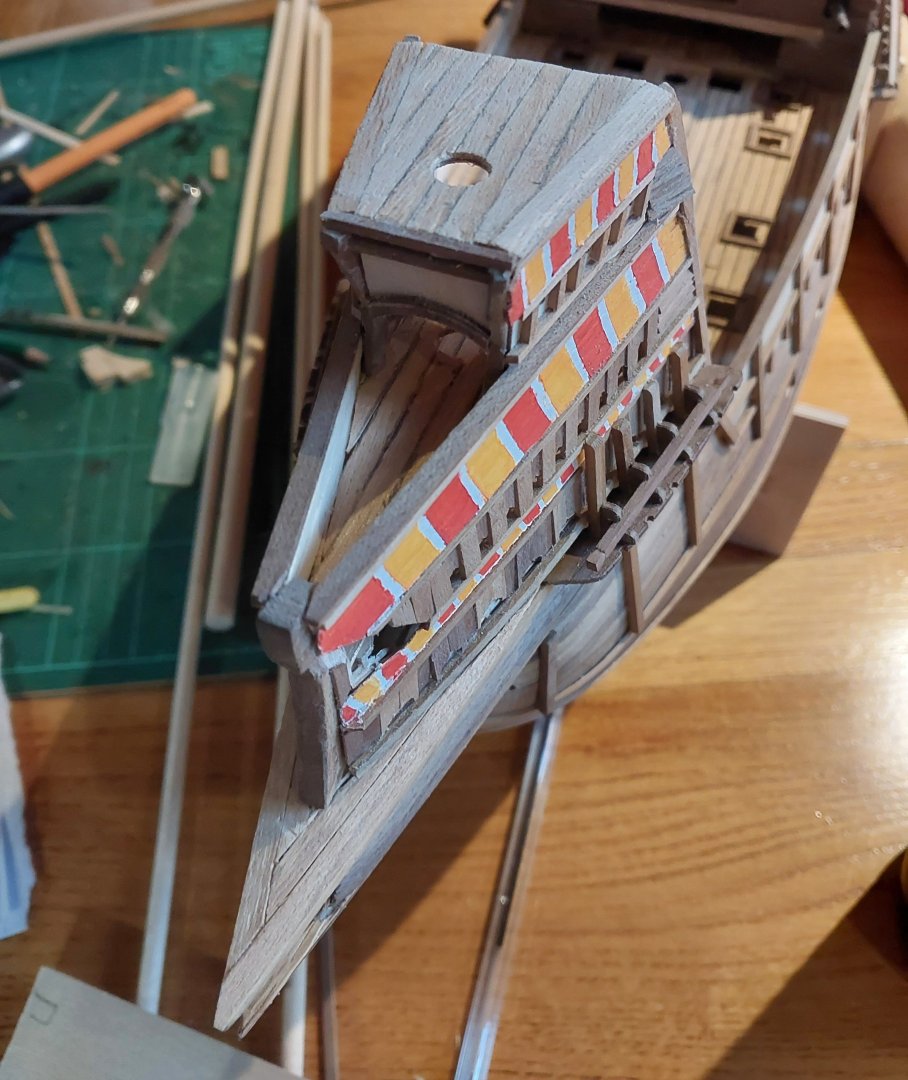
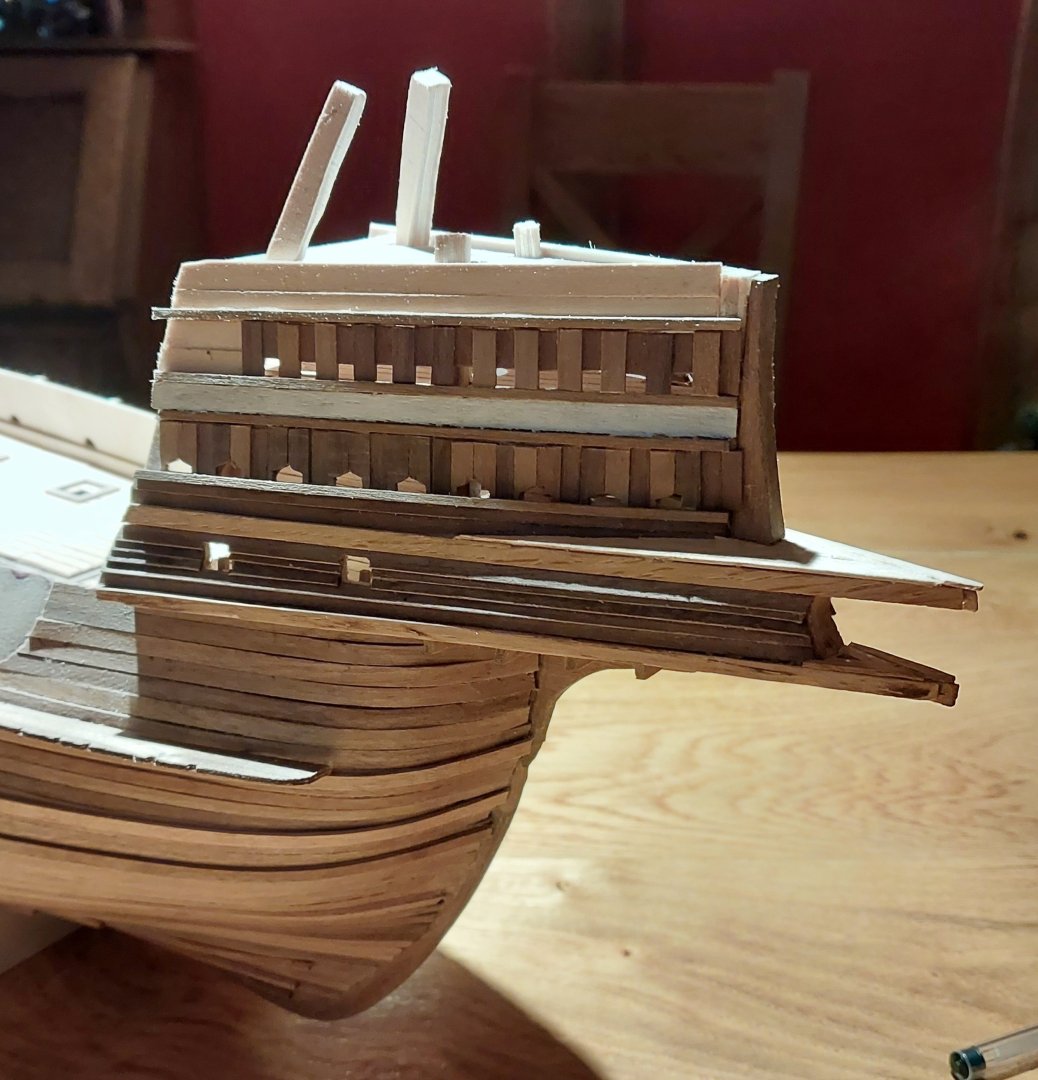
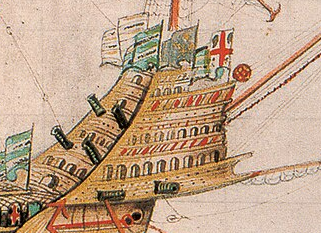
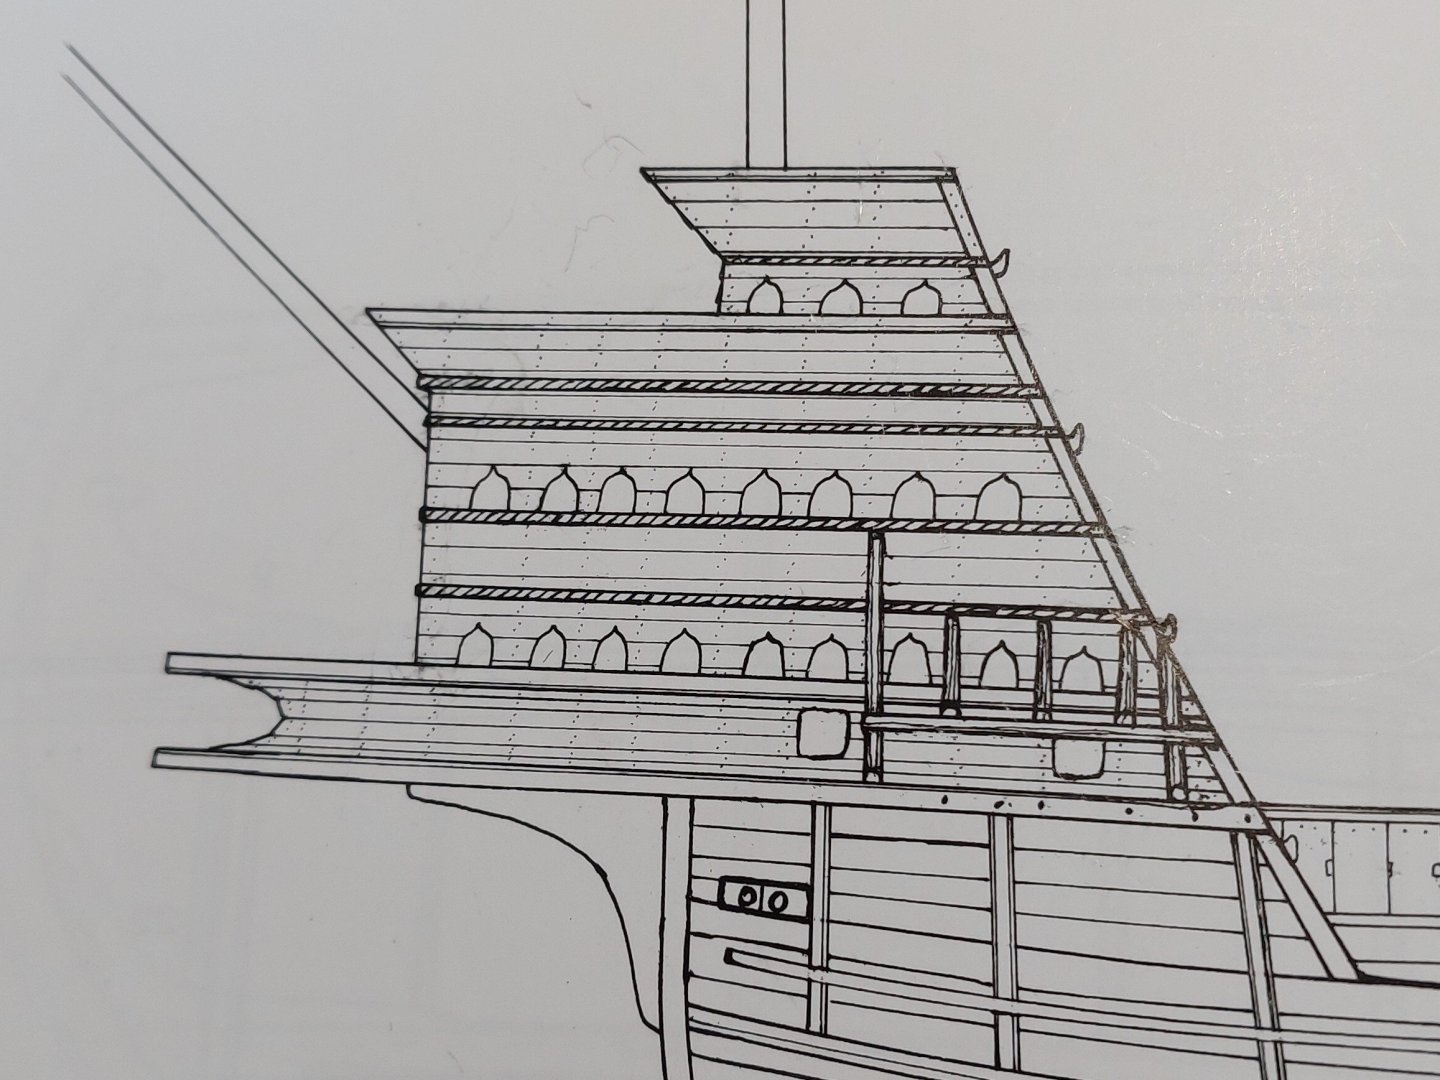
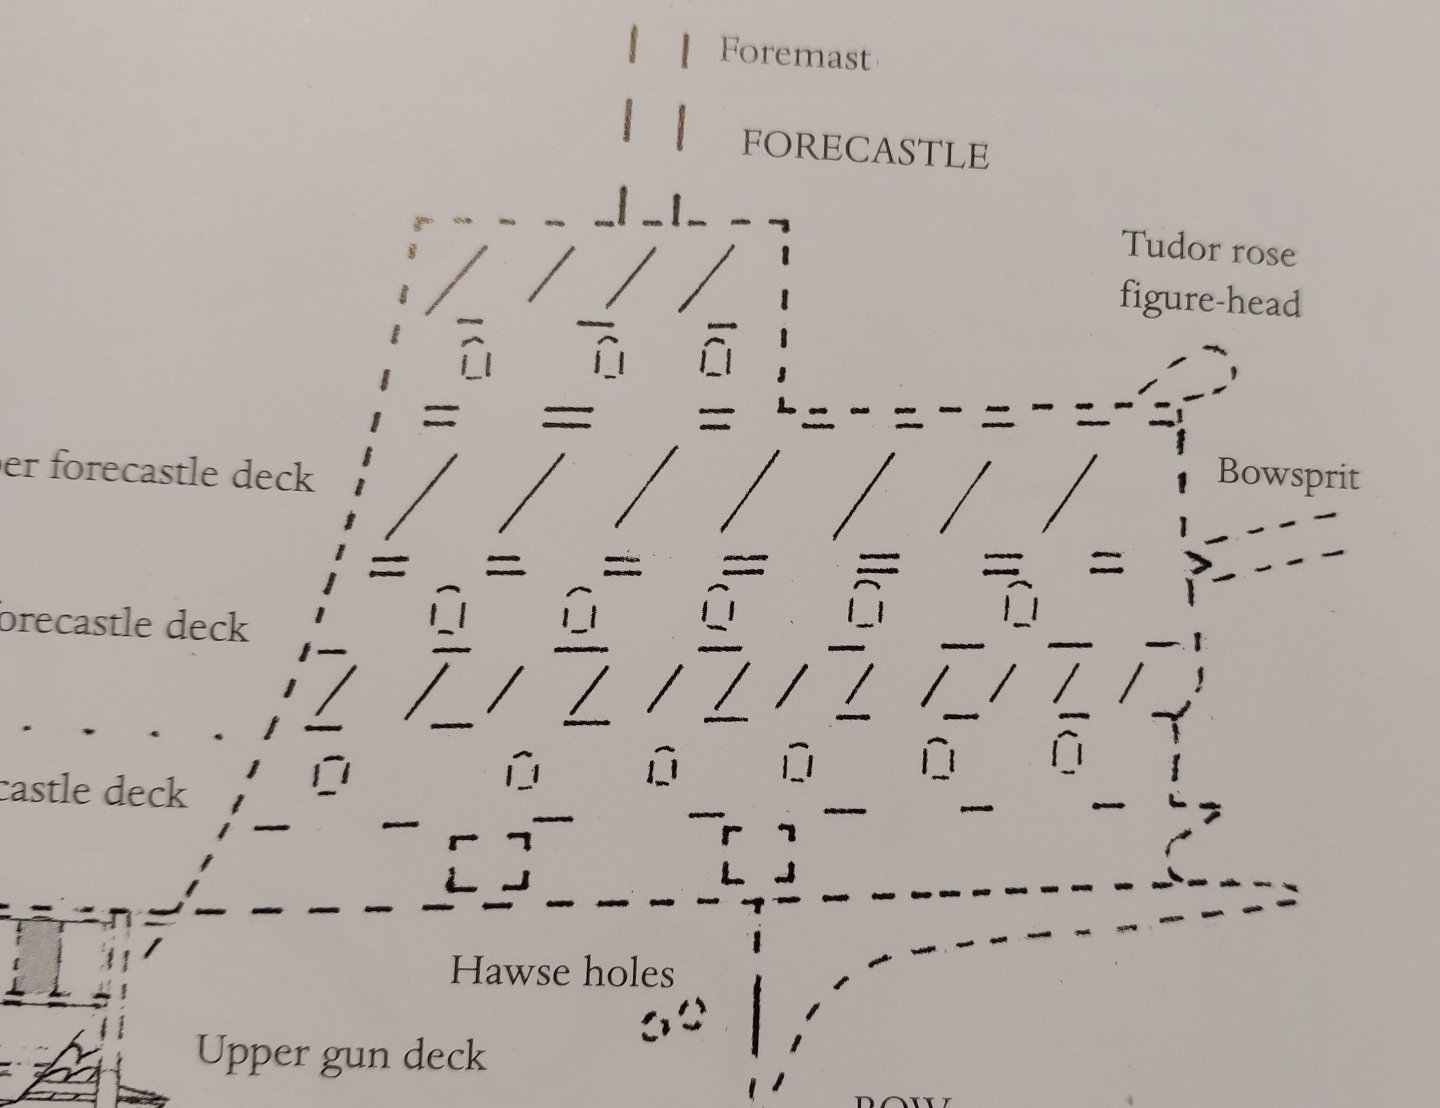
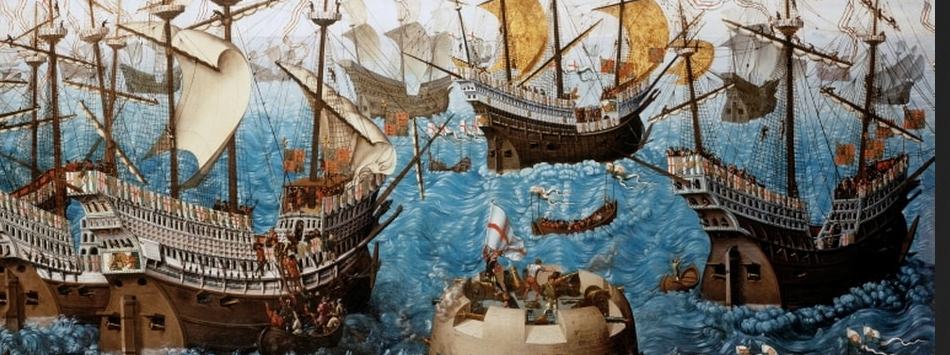
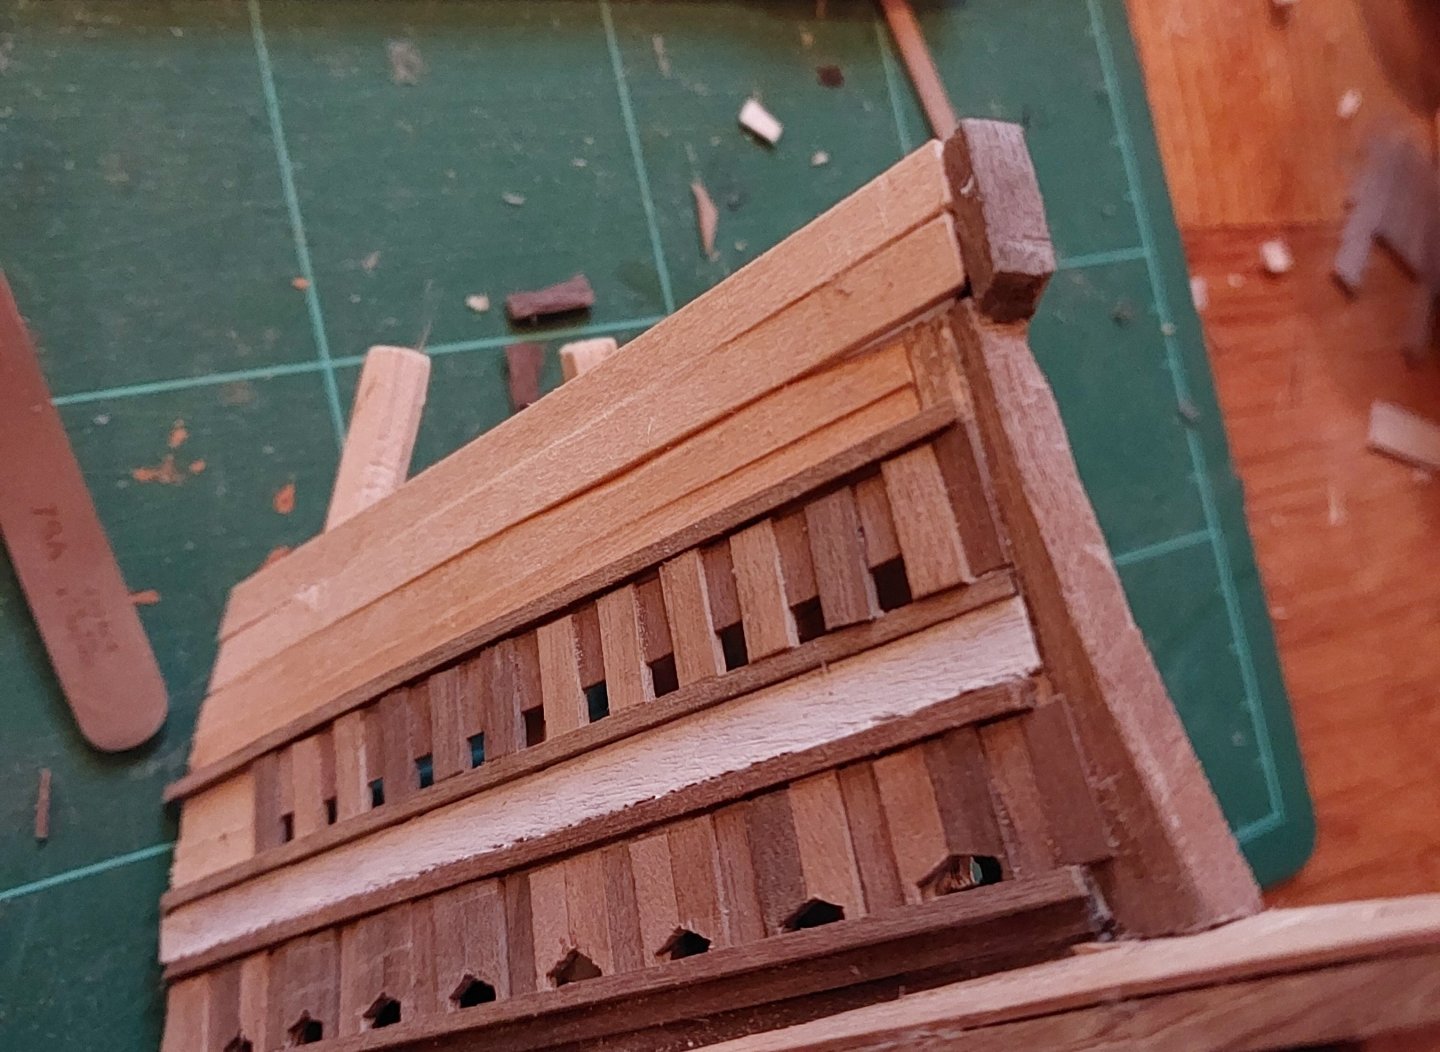
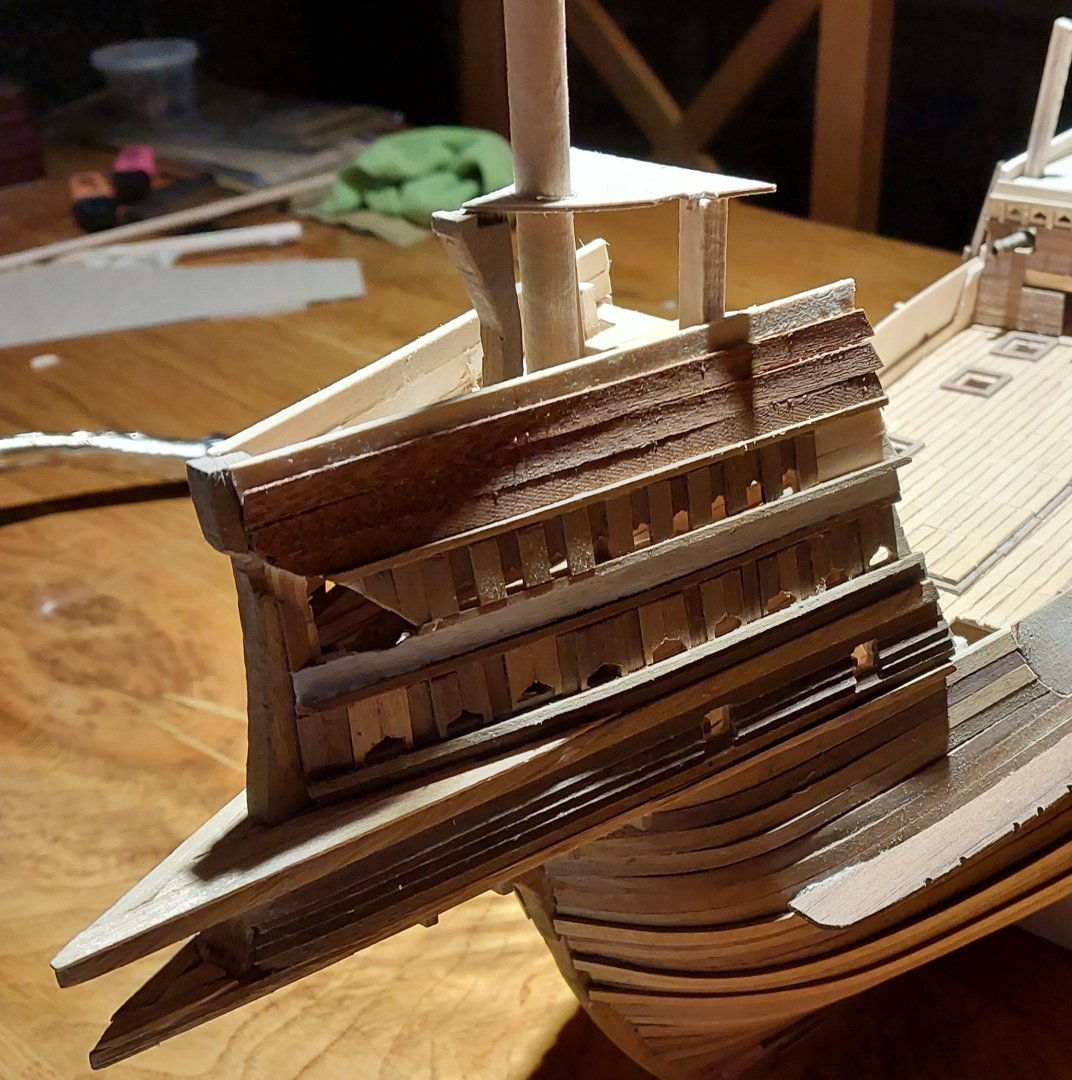
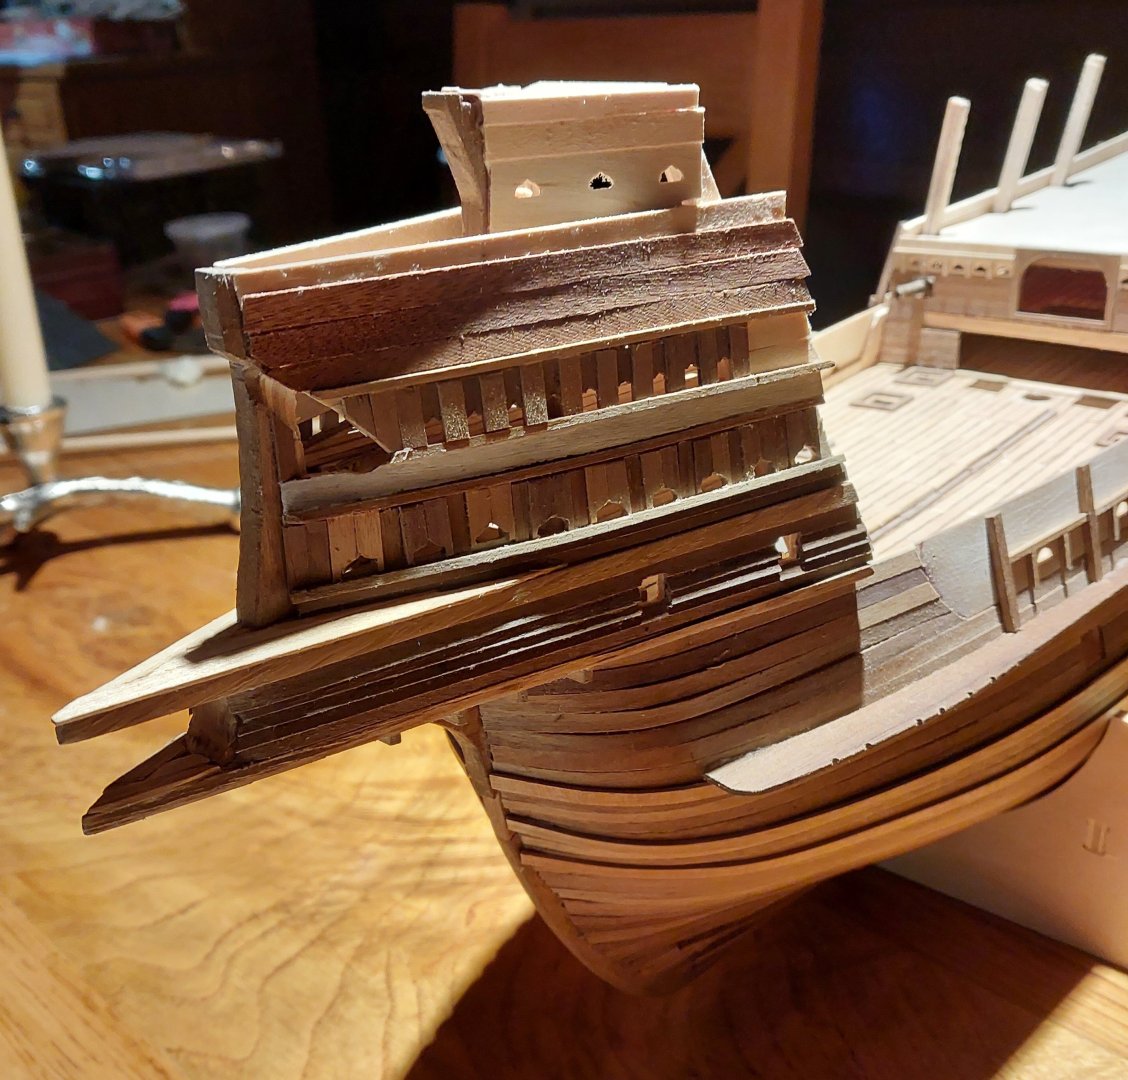
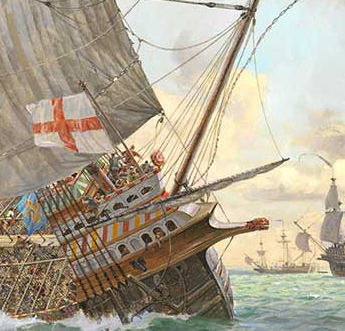
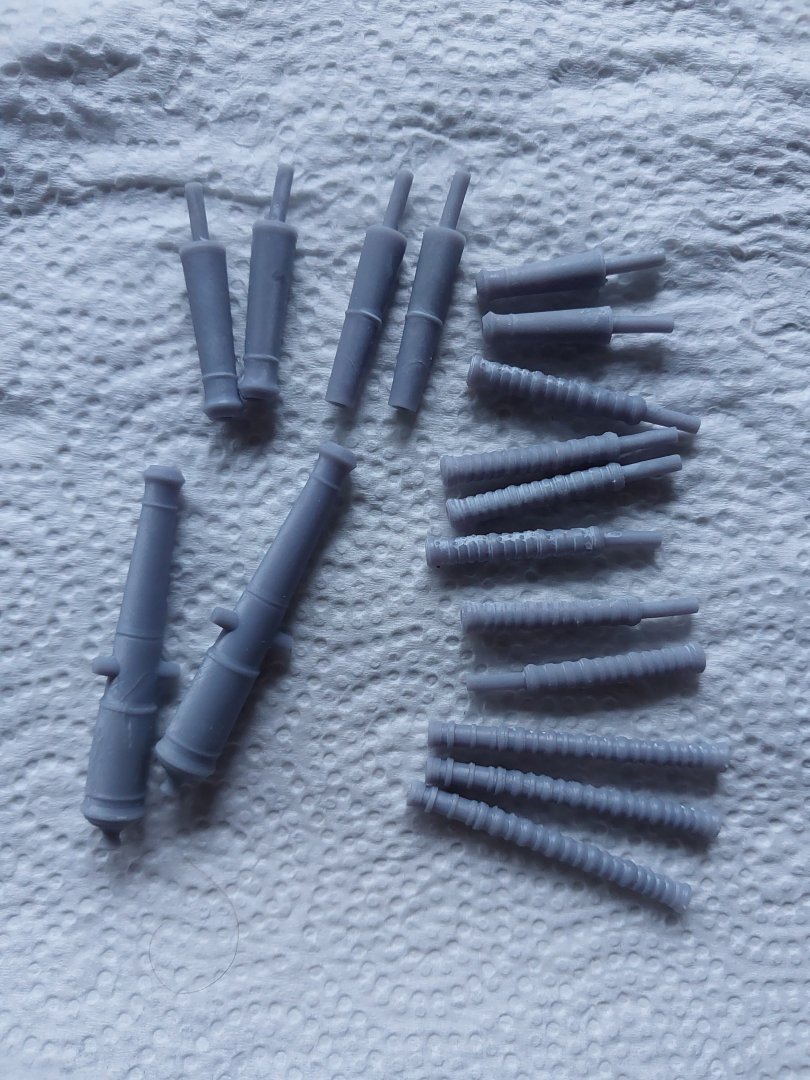
I'd be interested in your research - though I've already added in my interpretation of the drawings I have for my model 😉 I hope your vacation is going well! Here's today's update. After taking off the clinker over the gunport holes, I turned my attention fully to the forecastle this week. Well, sort of fully - here's my 3D-printed bronze cannon, now painted bronze. I'm very happy with how these have turned out. For the paint I used Army Painter Weapon Bronze, followed by a wash of Citadel Nuln Oil and a drybrush of both Weapon Bronze and Citadel Leadbelcher. I was tempted to add a little verdigris with some weathering powders I have, but I think that might be taking it a little too far! Here's two of them in place: So. Forecastle. In a previous post I mentioned that I was unsure about how to deal with the delta-shaped top of the lowest deck of the castle where it meets the second deck. In the end, I simply planked over it. This looks similar to some of the reference images I'm using, and I'm pleased with how these planks have fit together. You can see here the offset hole I've cut for the bowsprit and the slight divot I've taken from the front supporting post to accomodate it as well. And here's my solution for the pavisade gunports - I'll be replicating this on the sterncastle as well, though slightly differently as the ports are spaced slightly closer together there. In McElvogue's book he has a lovely illustration of how these would have fit together, and I loosely copied that. The ports need a bit of cleanup in this photo, but they're far better representations of the various media than what I'd done before. Also in this photo note the white band across the middle where I'll be painting the yellow and red stripes depicted in the Anthony Roll. I used white painter's gesso for this as it's designed for use on wood and provides a very solid base coat - another layer still required. For the top layer of ports I've created a similar pattern, but as these are smaller in the various sources I have I resorted to a bit of improvisation. Later on I filed out a little groove in the top of each port to create the same 'dimpled' shape as the lower ones. Here's a couple photos of it in situ: You can also see a sneak peek at my sterncastle progress - I stuck in the four cannon and have begun the pavisade gunports there too, but I'll update that properly in the next post. I'm happy with how the forecastle looks here, and though I am a little concerned about the height I think it does match the historical sources quite well. Now onto the main issue that's caused me consternation over the last few days. First, let's look at the Anthony Roll's depiction of the forecastle: And then here is McElvogue's drawing of it: And Marsden's: So my questions were mostly around the top 'cabin' and the two 'prows' that extend over the top deck and the cabin's roof. In McElvogue's work they're extremely pronounced, whilst in Marsden's they're nonexistent. I can't believe that Anthony Anthony would have added the slight curve forward in his illustration if it wasn't there, but it certainly doesn't feel like a sharp point is what we're working with here. Additionally, both of the archaeologists have omitted any kind of railing on their top deck here, implying that there was no access to this point on the ship, and yet to manage the masts there must have been a need to climb up here. Certainly health and safety wasn't what it is today, but I'd be surprised if there was nothing at all, especially when looking at the Embarkation painting, which definitely has a pavisade-style railing, much like in the waist of the Mary Rose: Here's my creation with the bowsprit in place against one of Marsden's drawings: As you can see, the bowsprit on mine is at a much steeper angle - I could change this still, but it does appear to have been steeper based on the various historical sources, and McElvogue's book has it at around a 40 degree pitch. For the prow, I initially experimented with creating something similar to McElvogue's work, bending a plank to meet a very pointed 'stempost' at the tip of the castle: I think that if I'd got this to work, it would have looked quite nice, but after a lot of struggling I just couldn't make the planks sit right, and it didn't feel like the Anthony Roll's depiction at all. I moved on to a slightly less prominent 'prow' (forgive me, I have no idea what this point should be called). And this is what I've decided to go with - it still expands the top 10mm or so of the castle without creating a major headache of plank bending, and looks a lot more like the Embarkation painting. Here's a view of the inside: The two planks here raise the height around 10mm above the deck - that's just over 1 metre to scale. My plan is to have this as the railing of the top deck, and build up the cabin at the back of this structure. So that's what I did: Here's the cabin, with three supports to estimate a good height. This is 20mm above the railing planks, which I intend to lower slightly. You can see that I've planked over these with a very thin sapelli veneer; this will be the base for another strip of white gesso before I paint on the stripes. And some walls on the cabin: I again used some of the precut boards from the Caldercraft kit for this - I believe that these would have been part of the original forecastle, so it's nearly accurate 😉 I'll put in some more interesting planking around these once I'm happy with the basic structure. And here it is on the ship: And from the front: I'm sure that this is deviating wildly from known historical evidence at this point, but ultimately it is a model, my first semi-scratch build - and I'm pretty damn pleased with how this has come out. Do let me know your thoughts. Thanks for reading!


-
Well today I learned - and that's annoying, because the Caldercraft instructions have them as I've placed them on the hull. I should have looked this up first! I woke up this morning and decided it would always annoy me if I didn't change this. I've already ripped some of these off and I've started on the planking of a similar area on the forecastle - I'll update soon with my new version. Thanks for the reply!
-
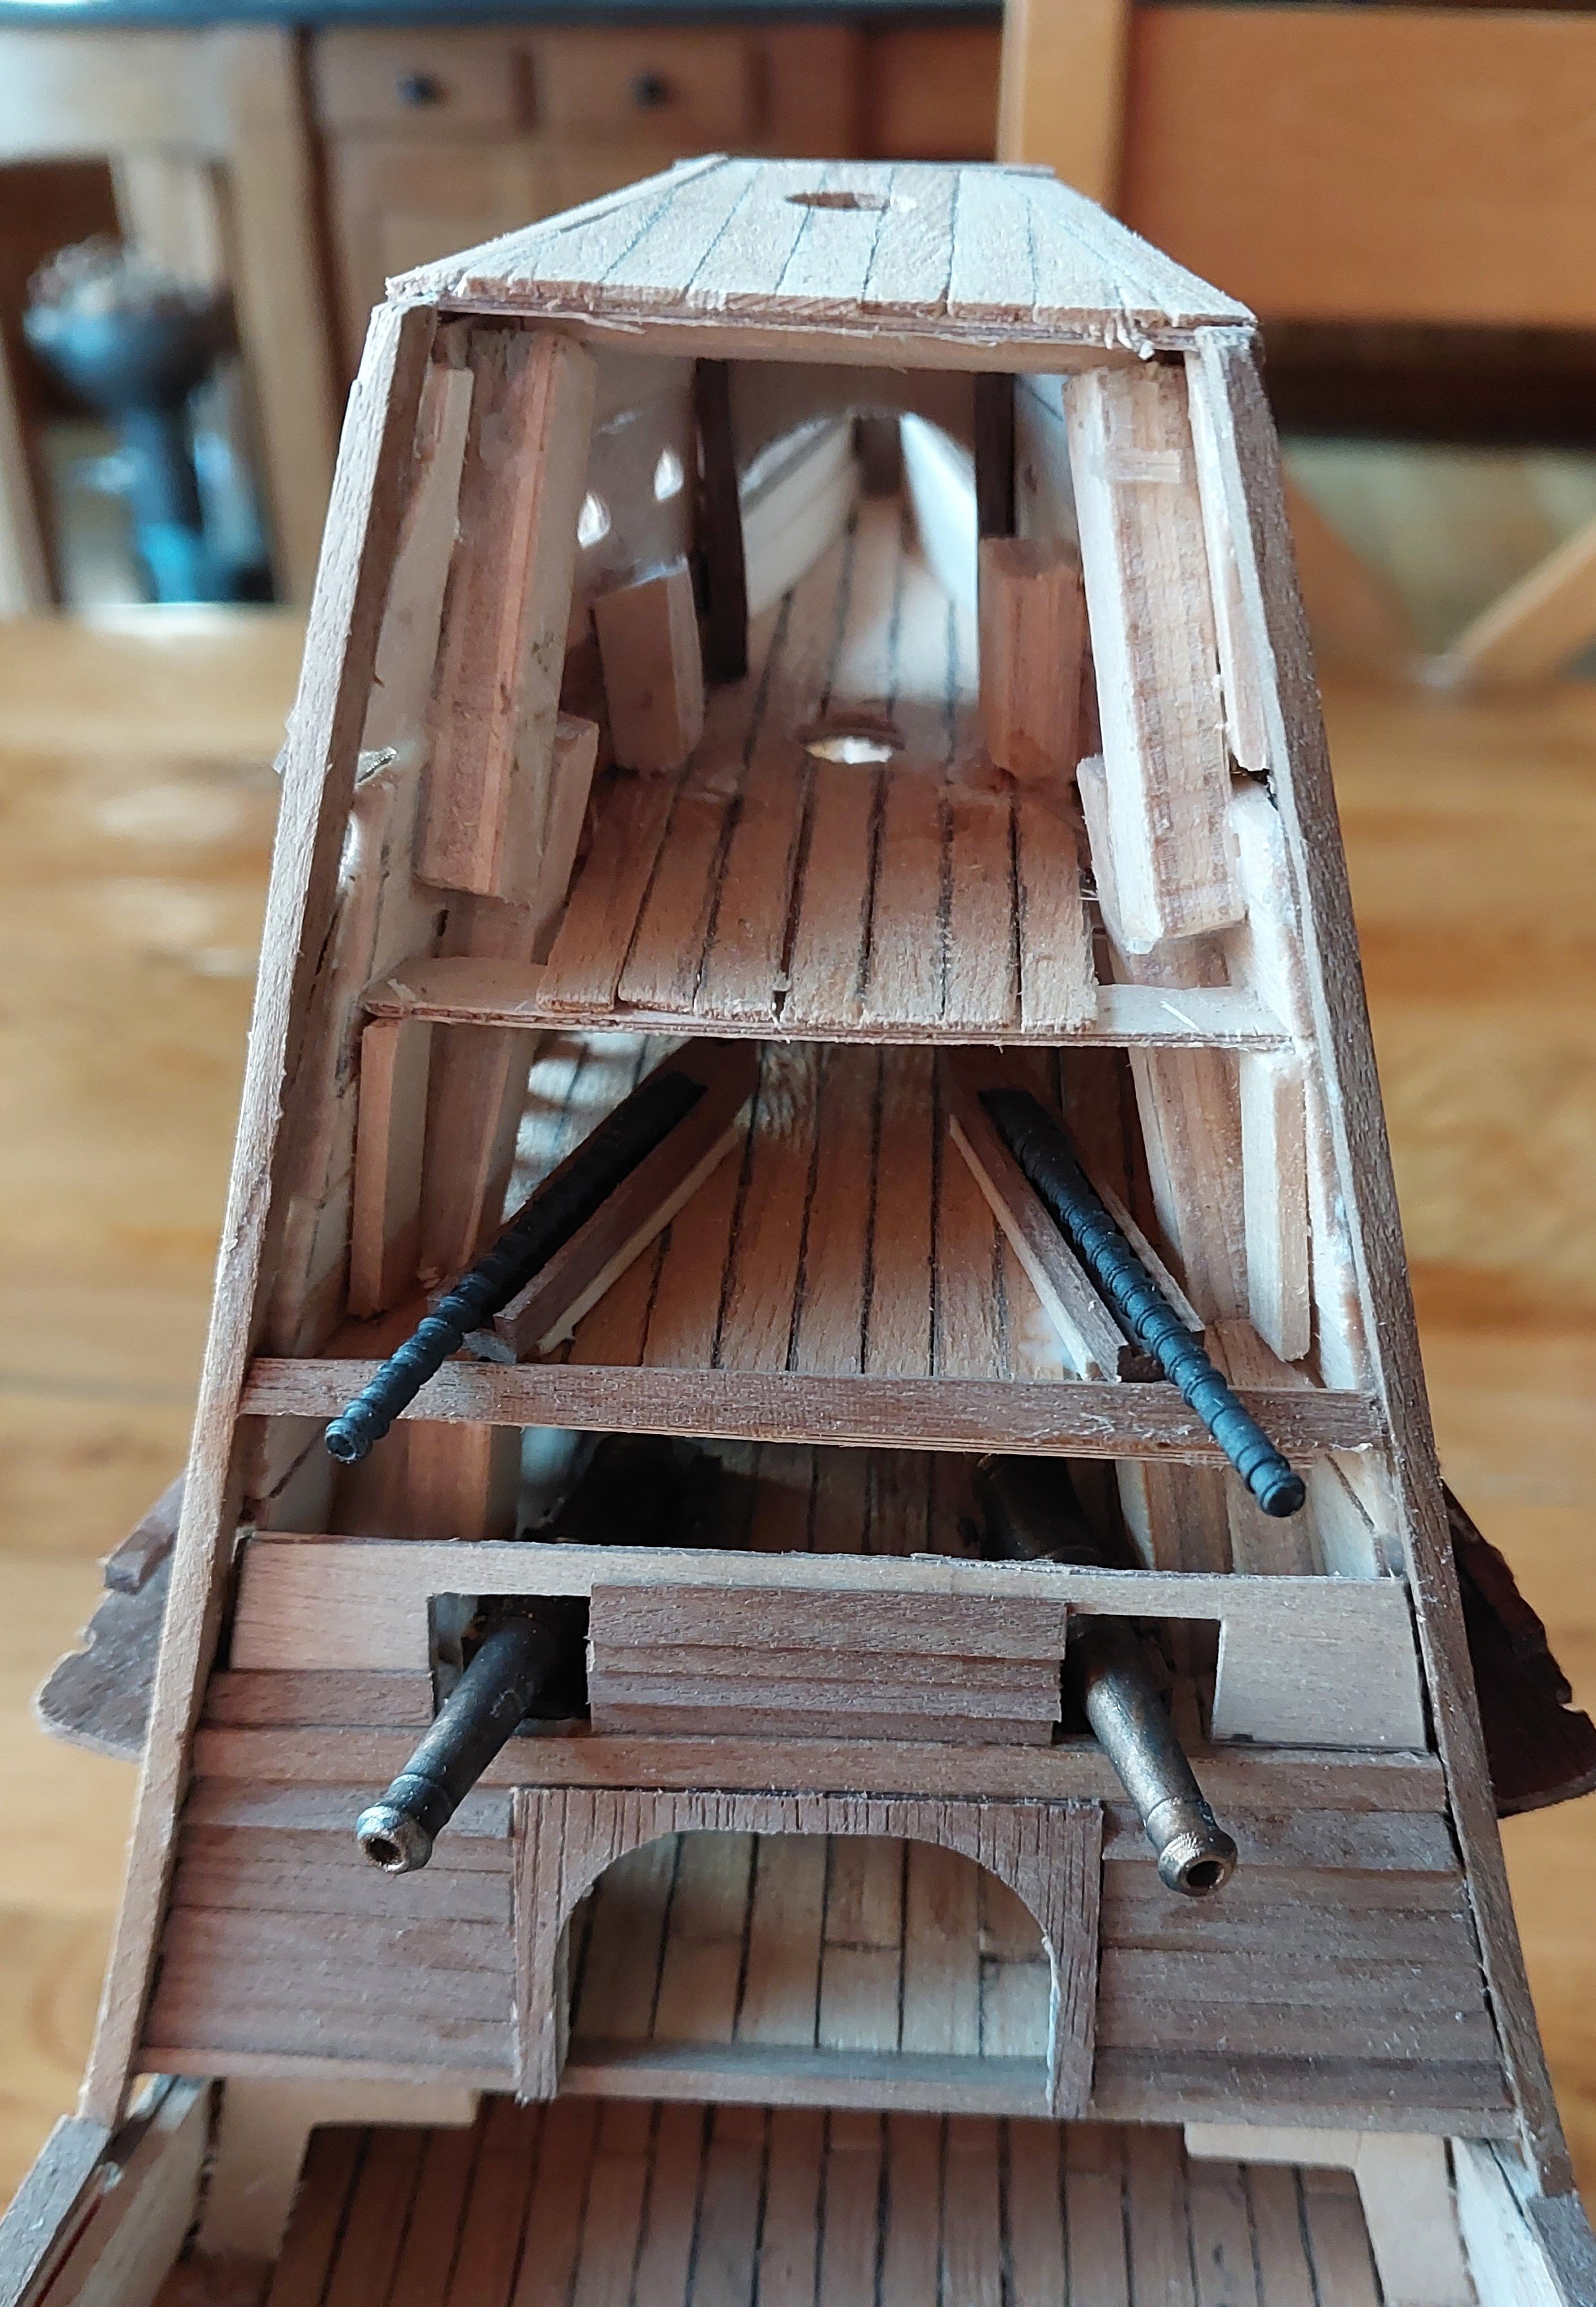
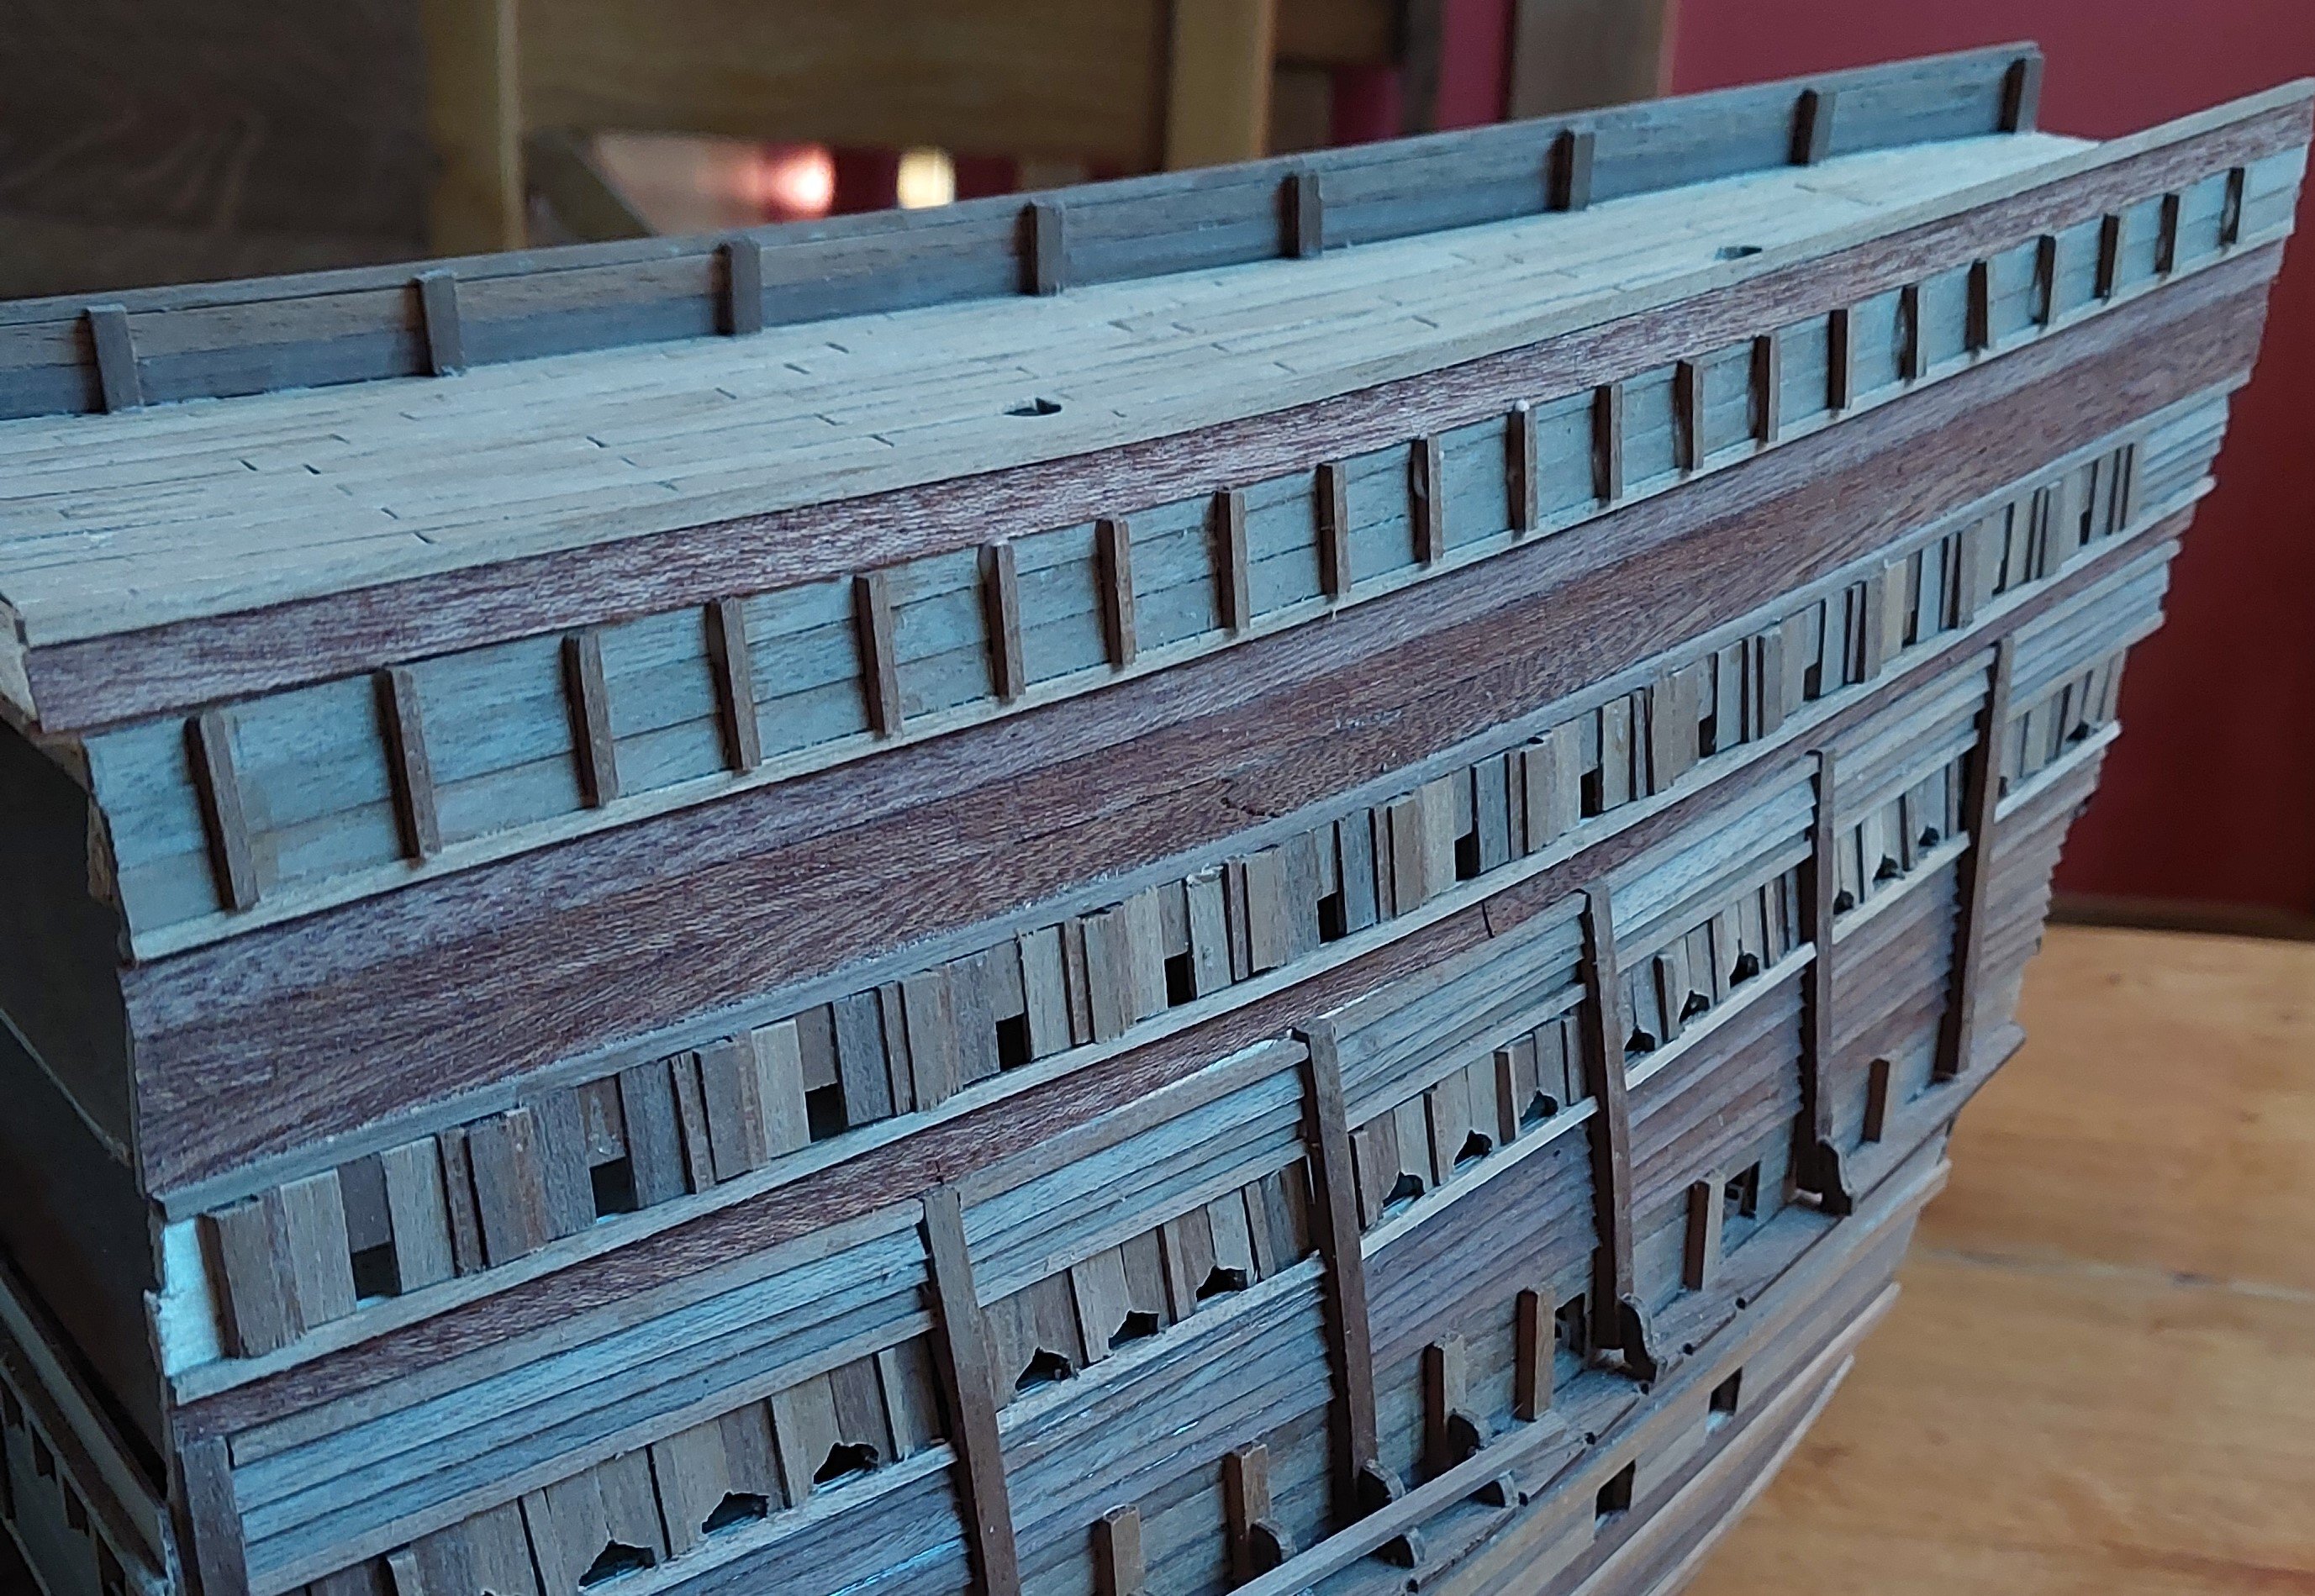
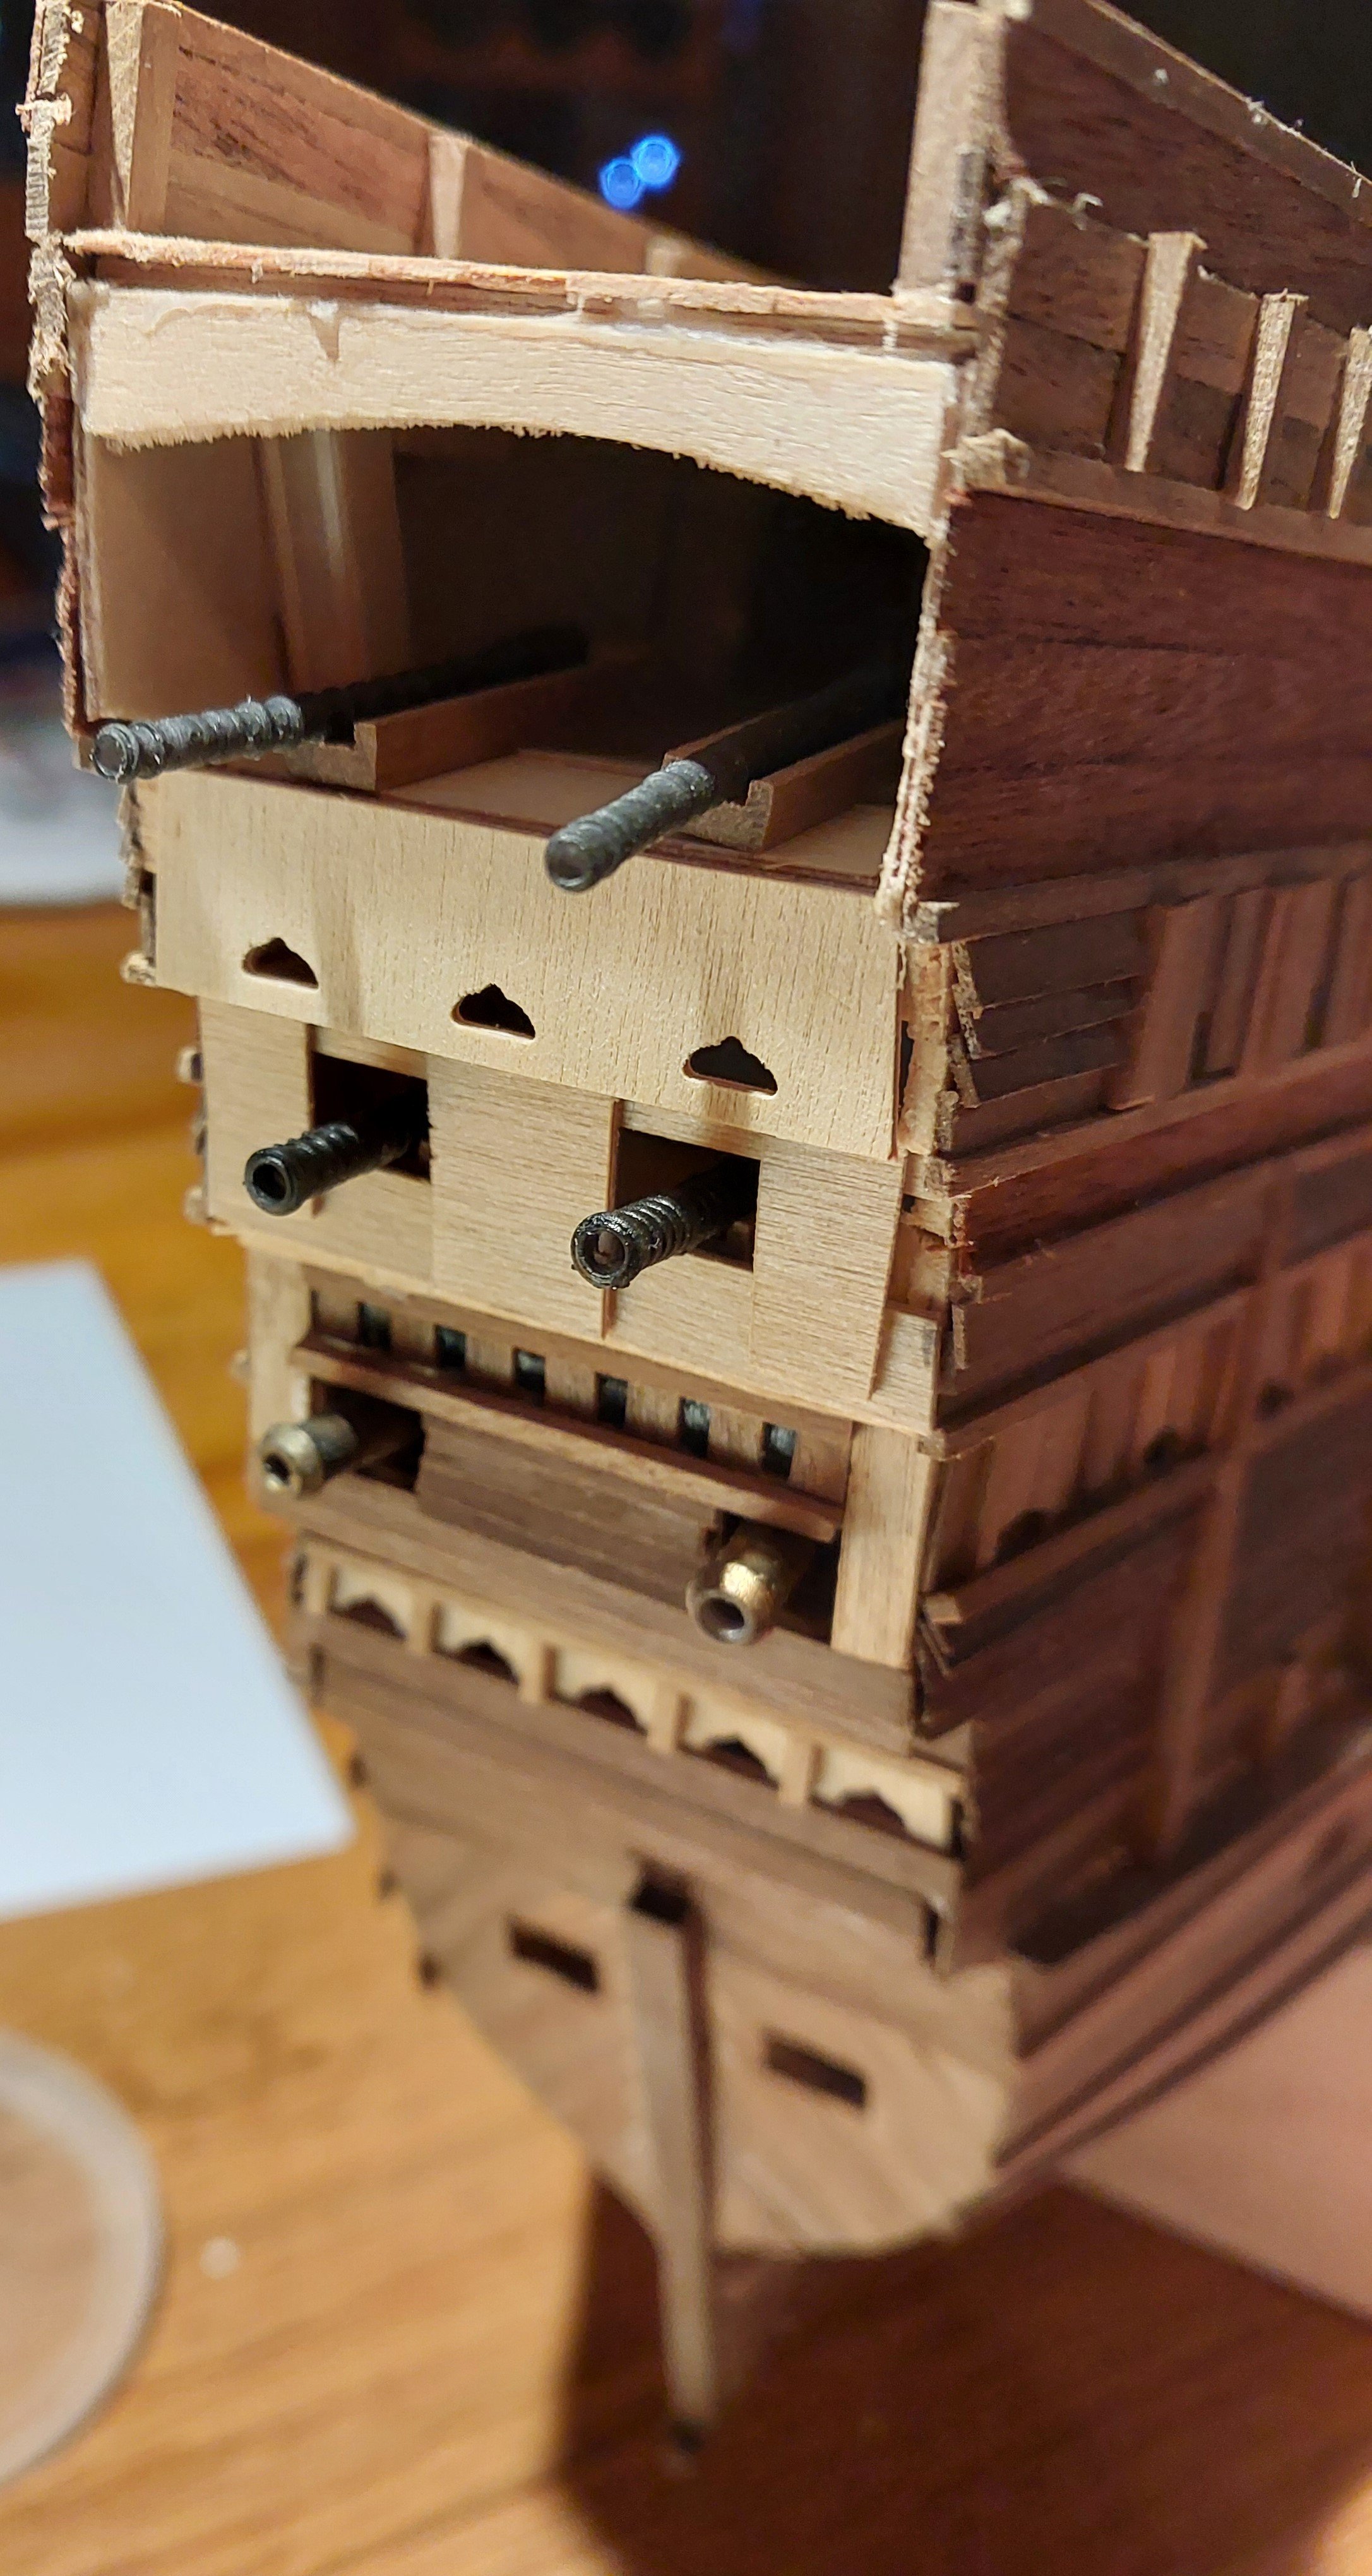
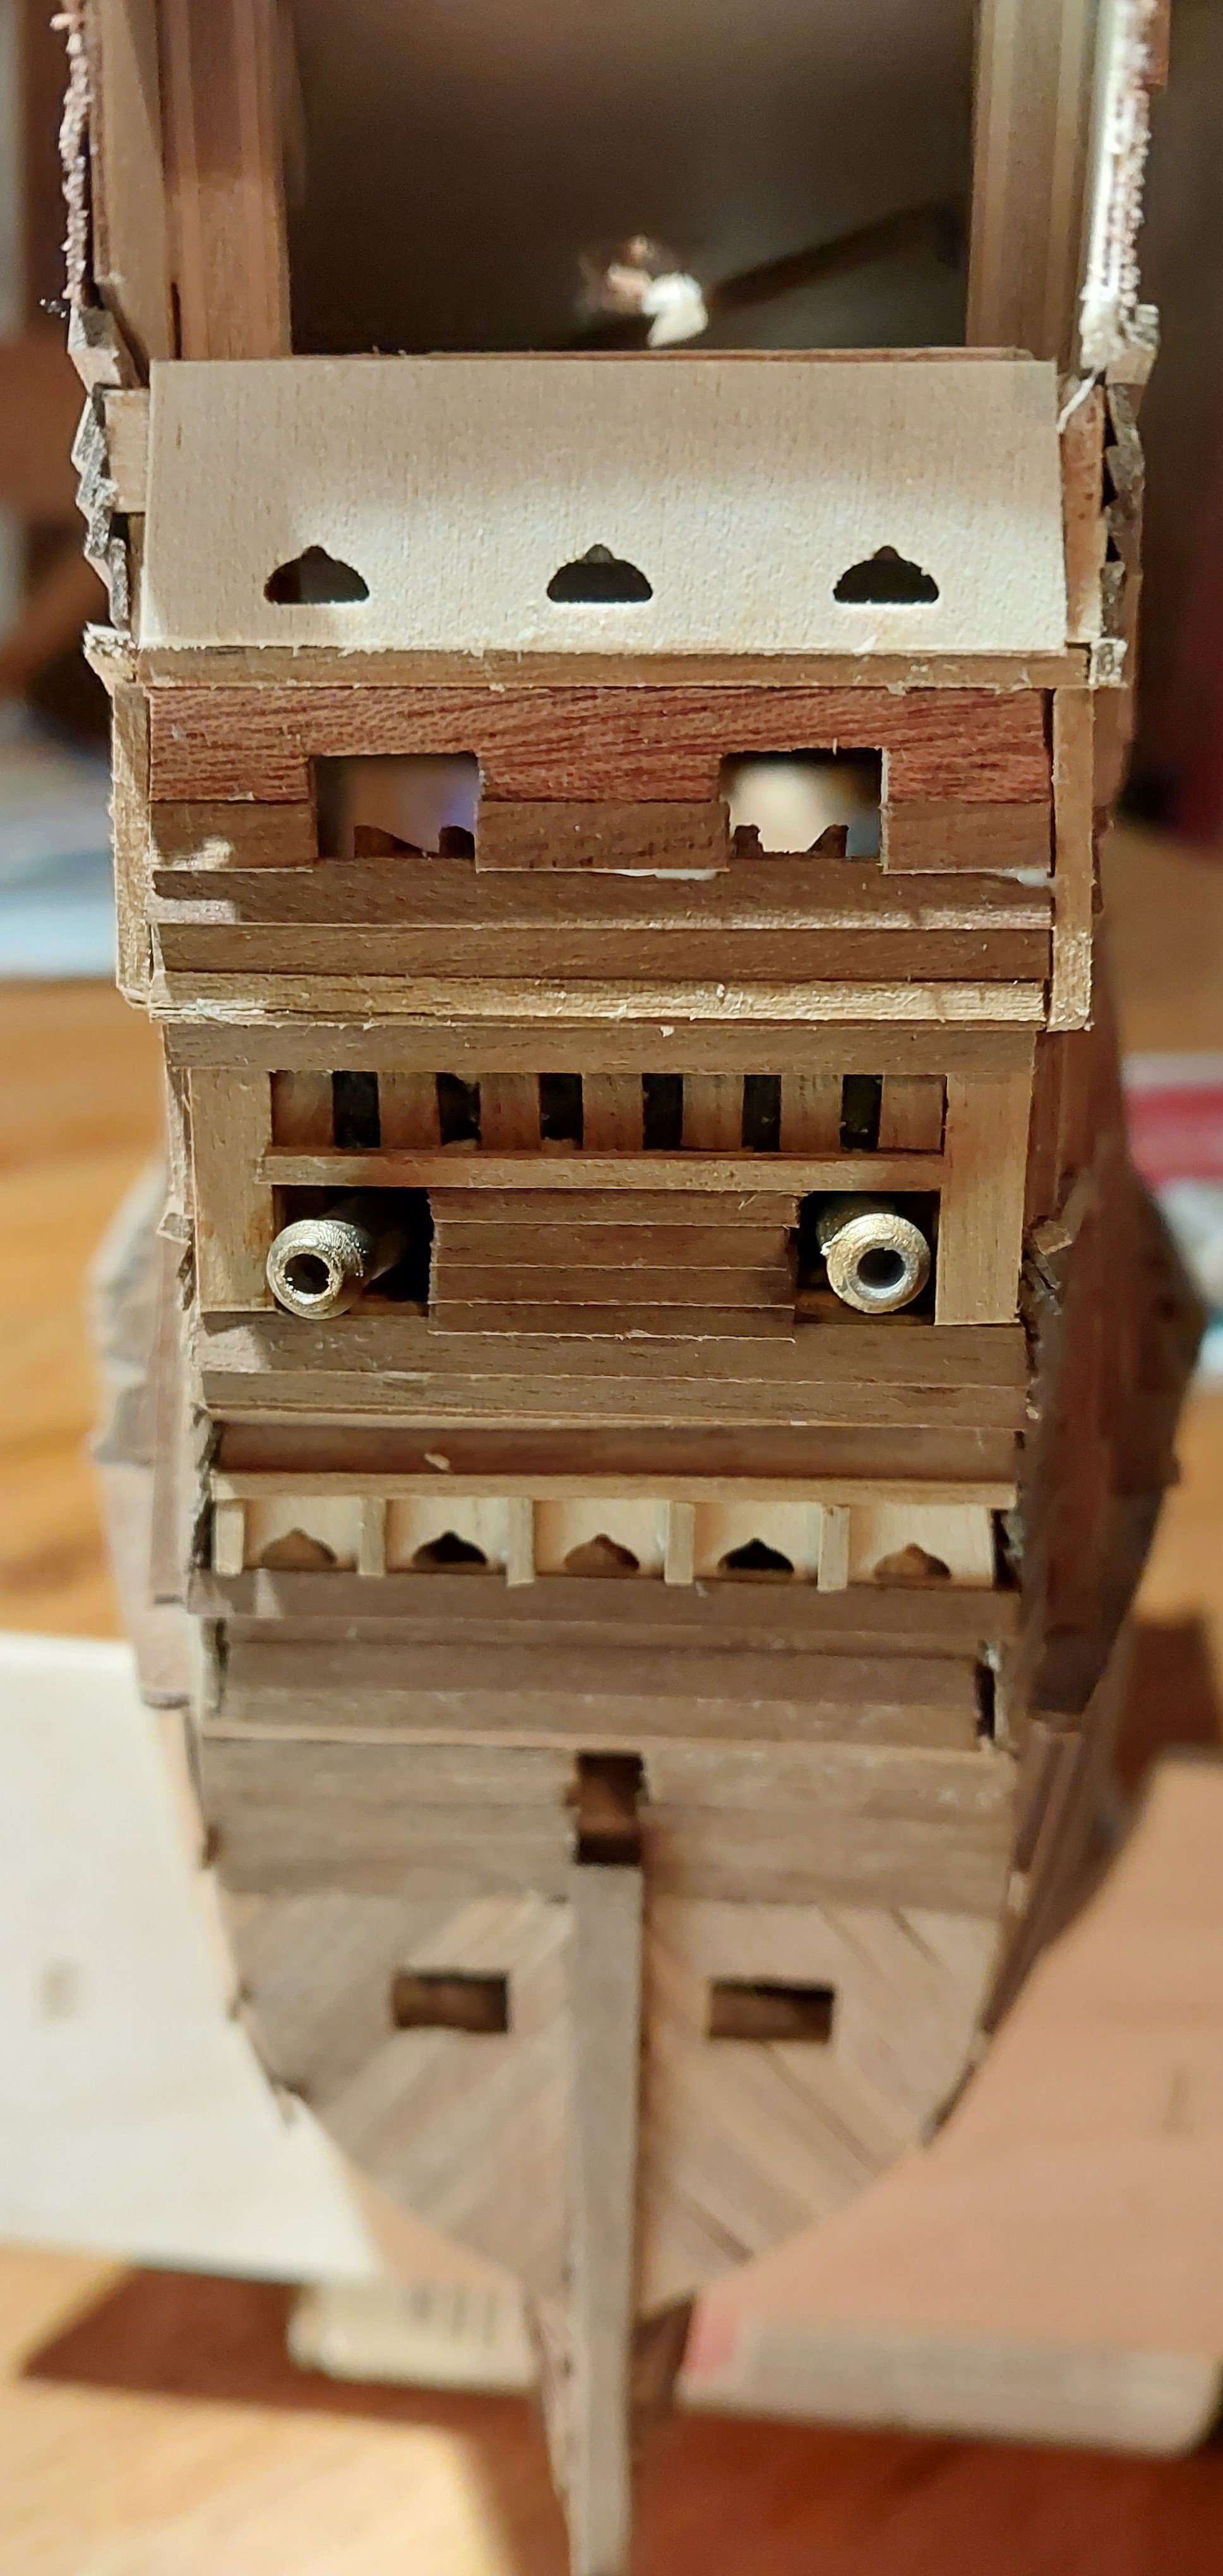
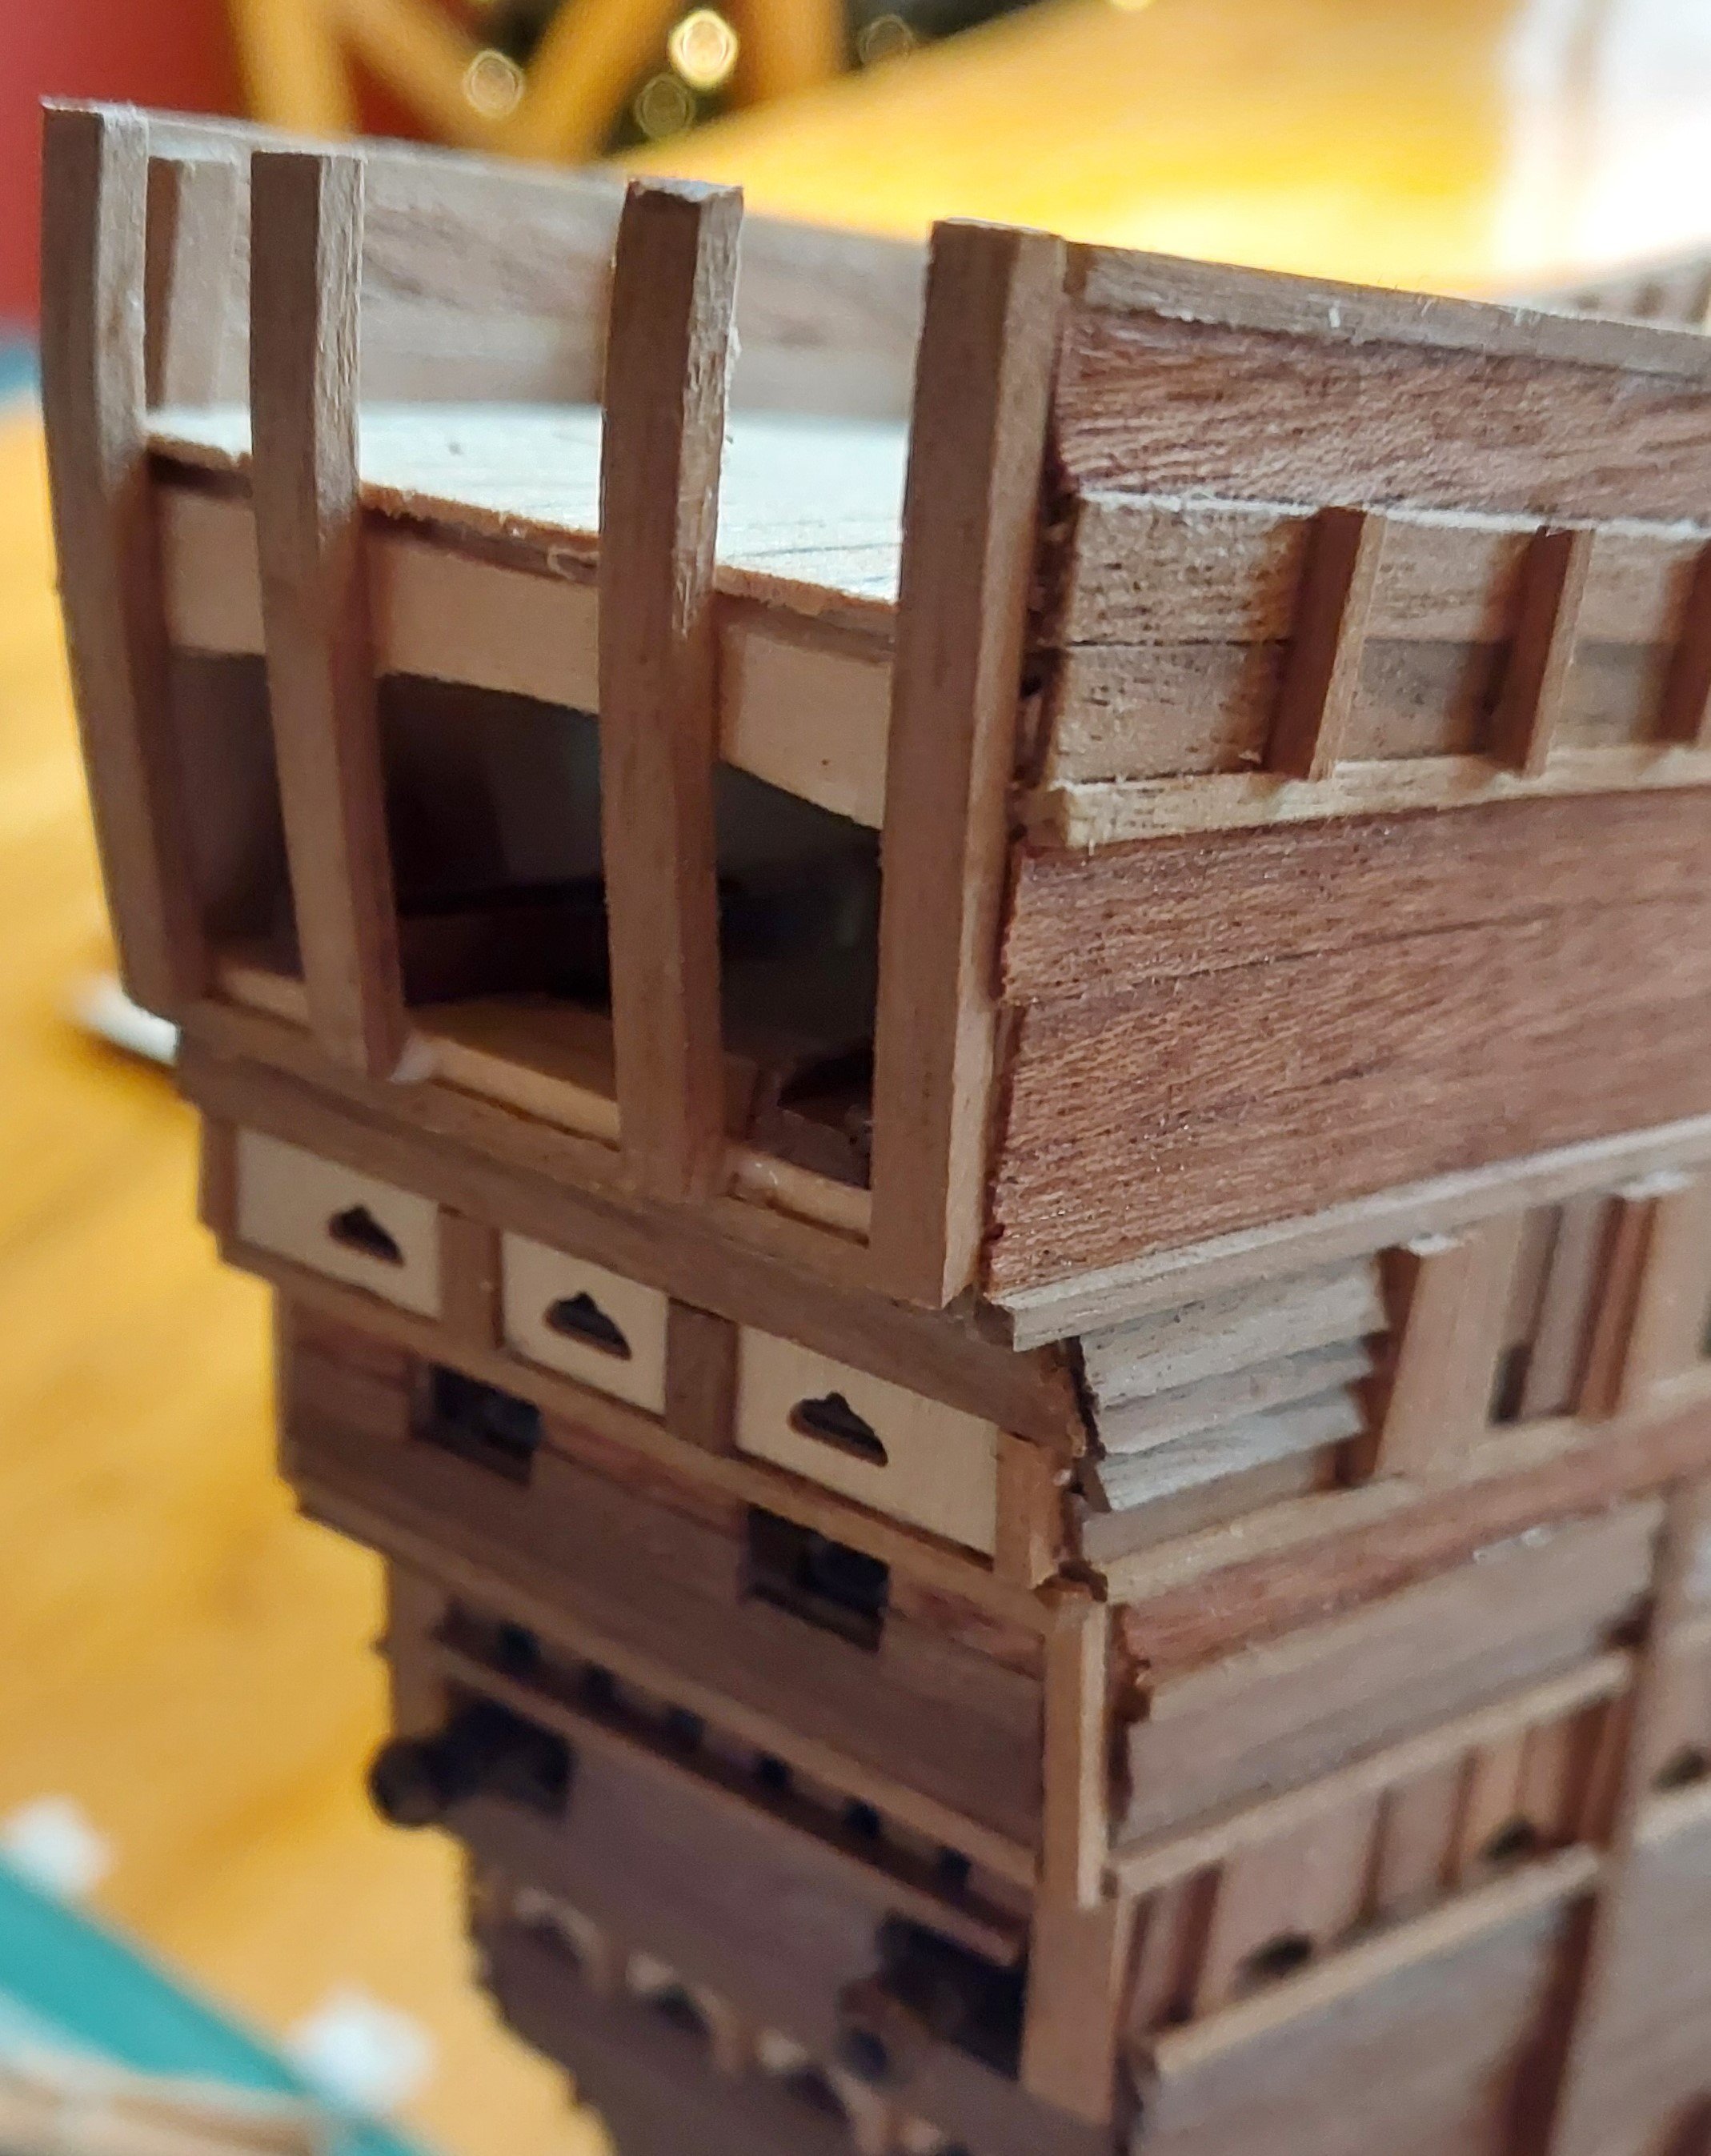
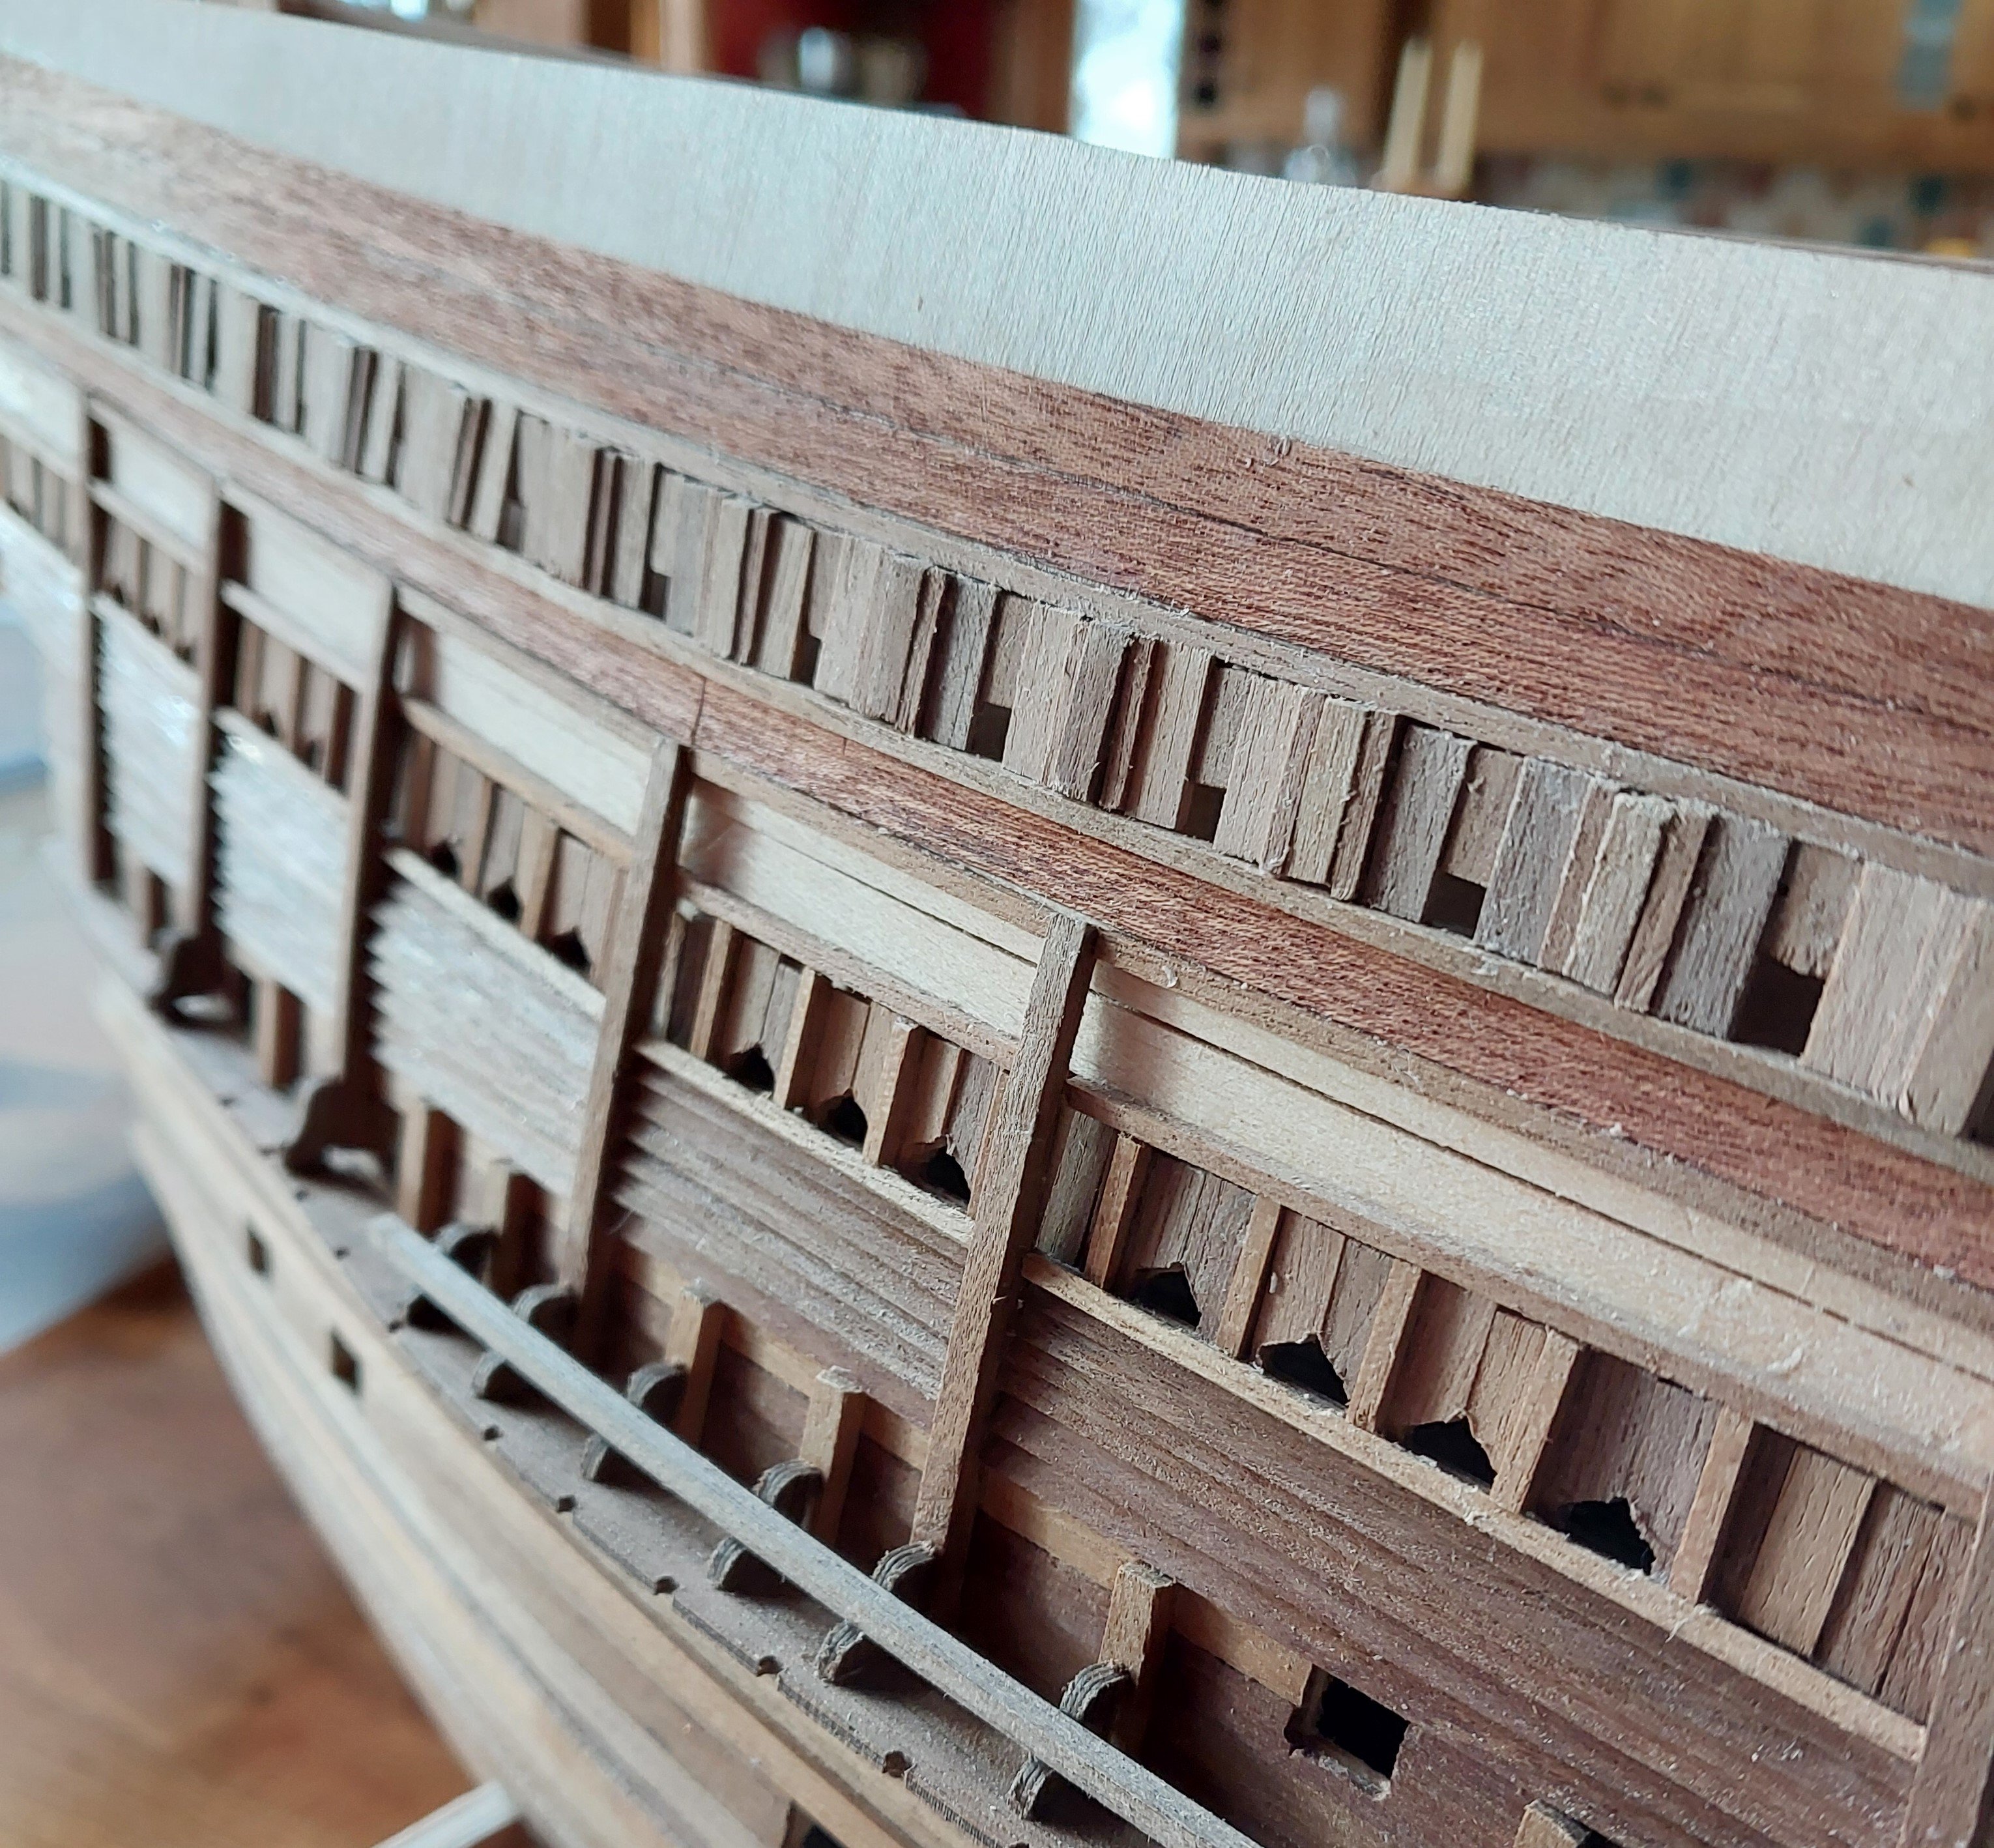
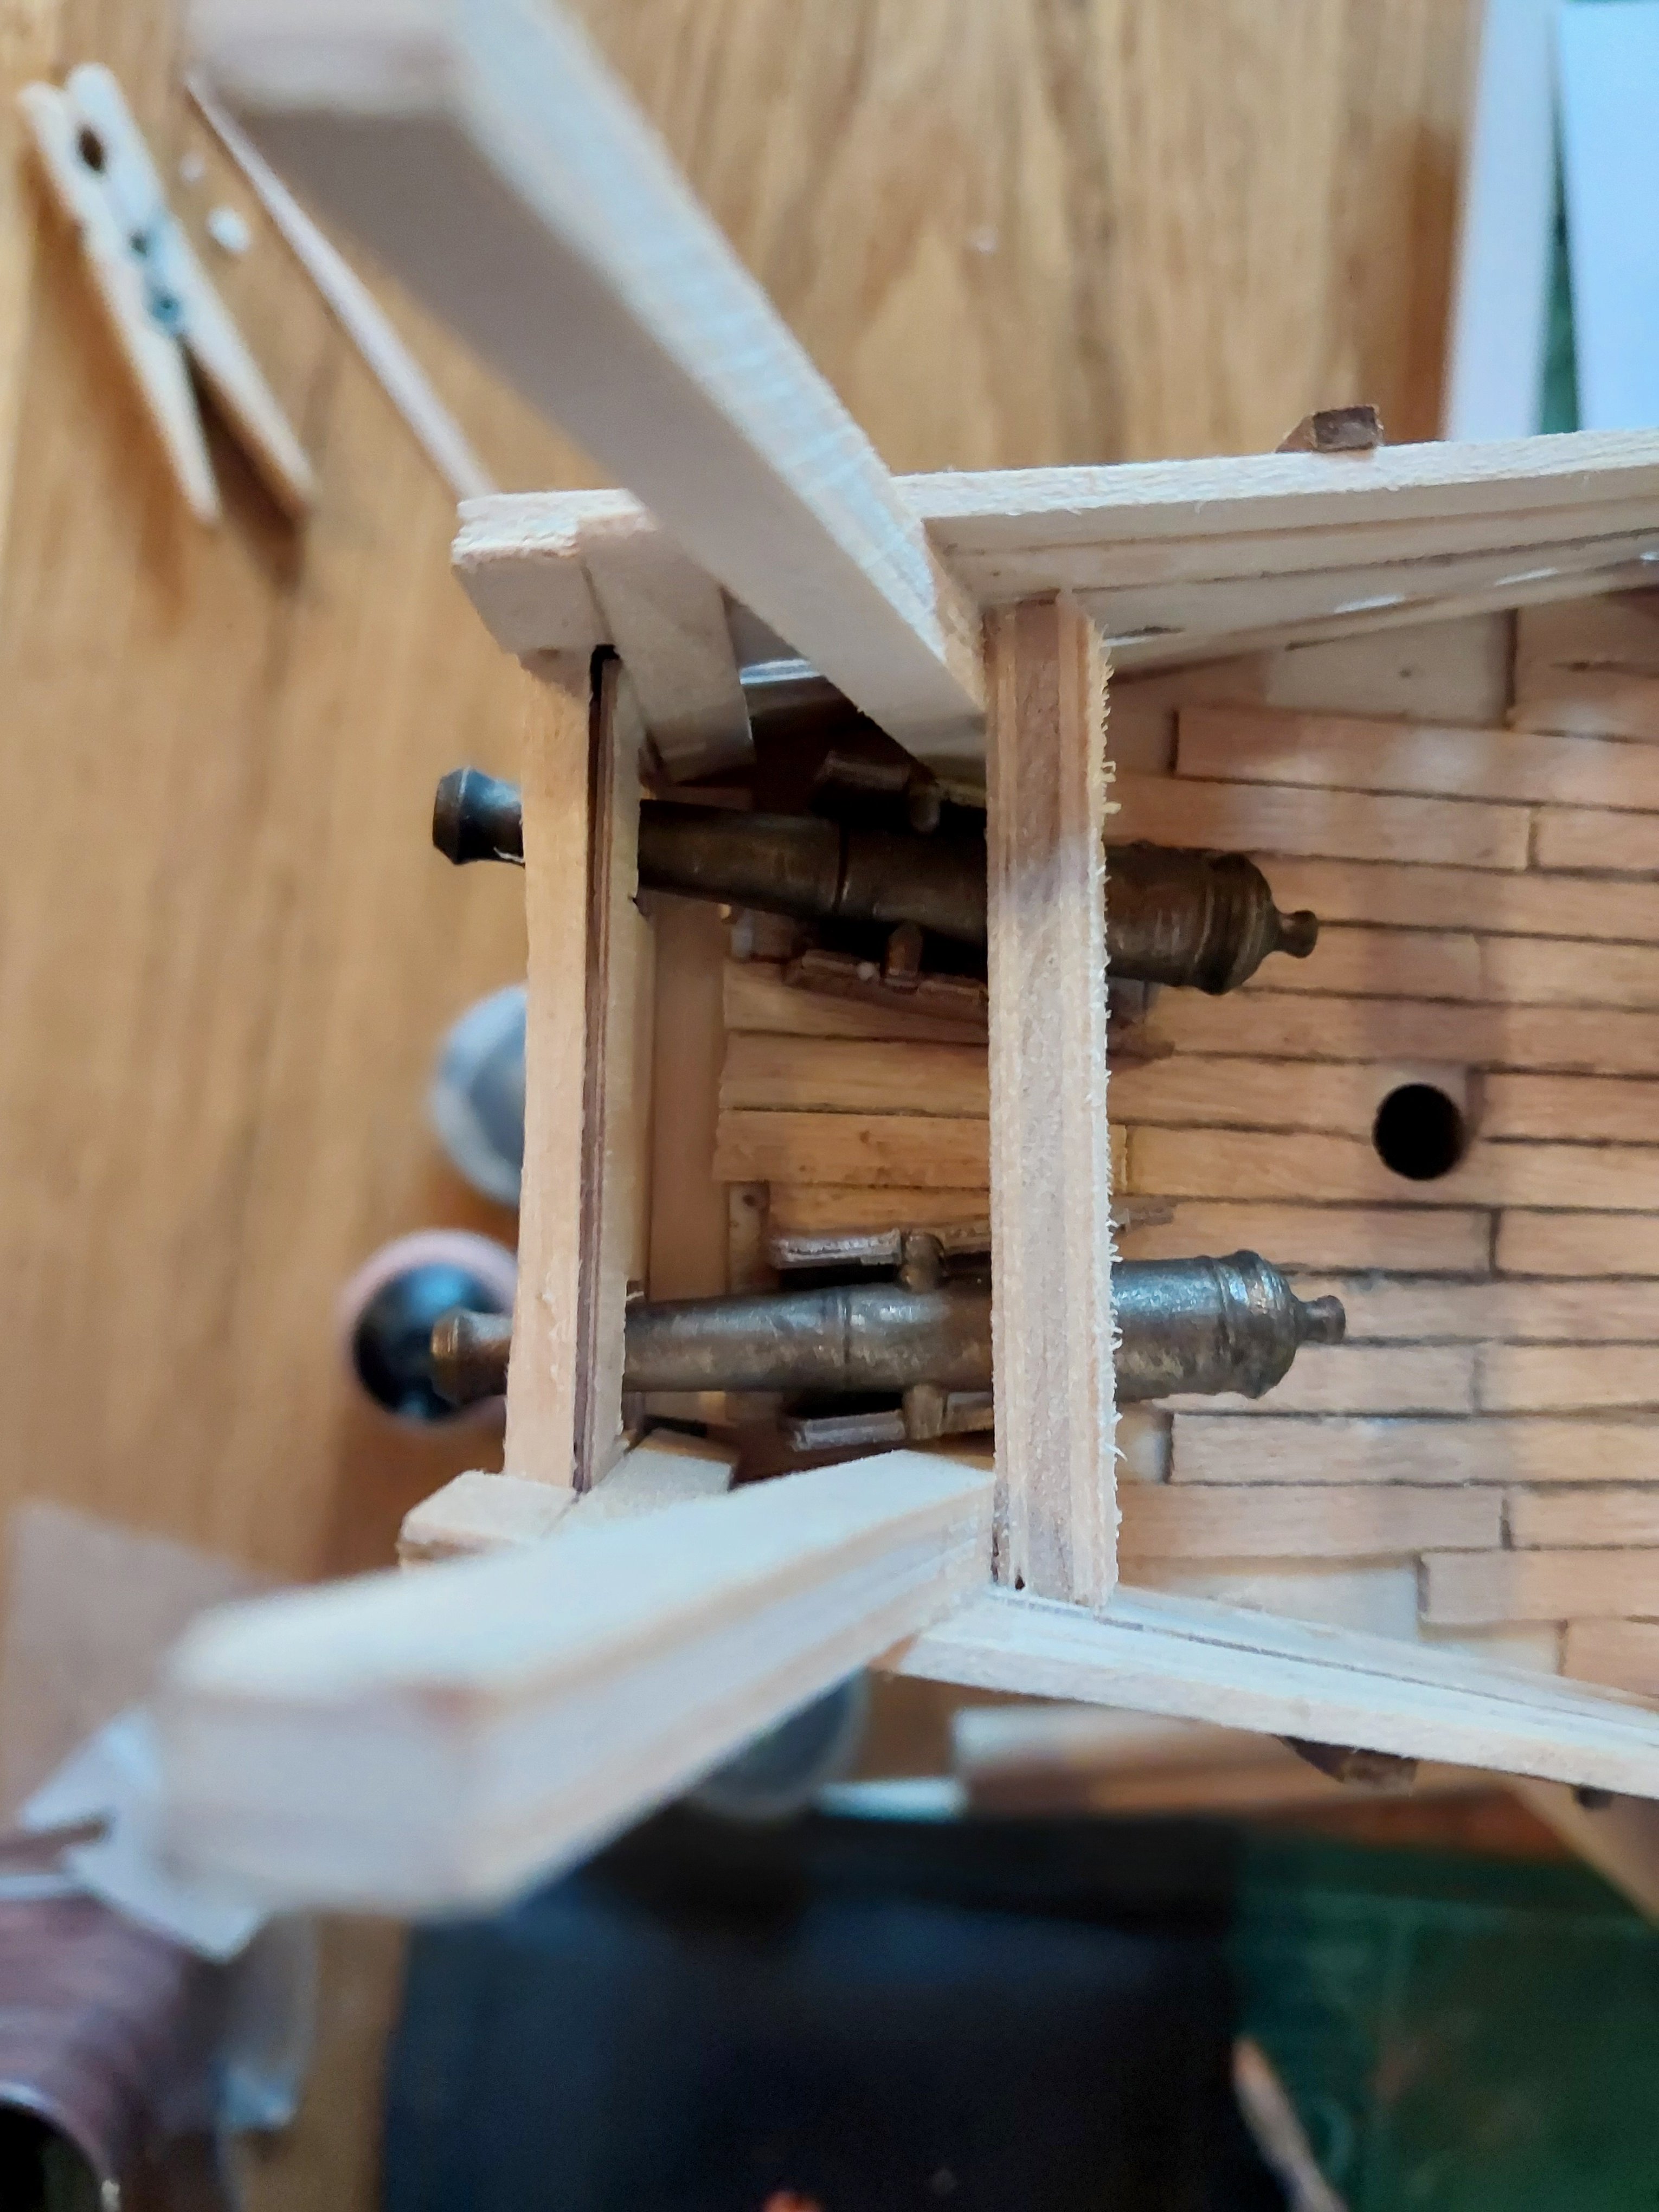
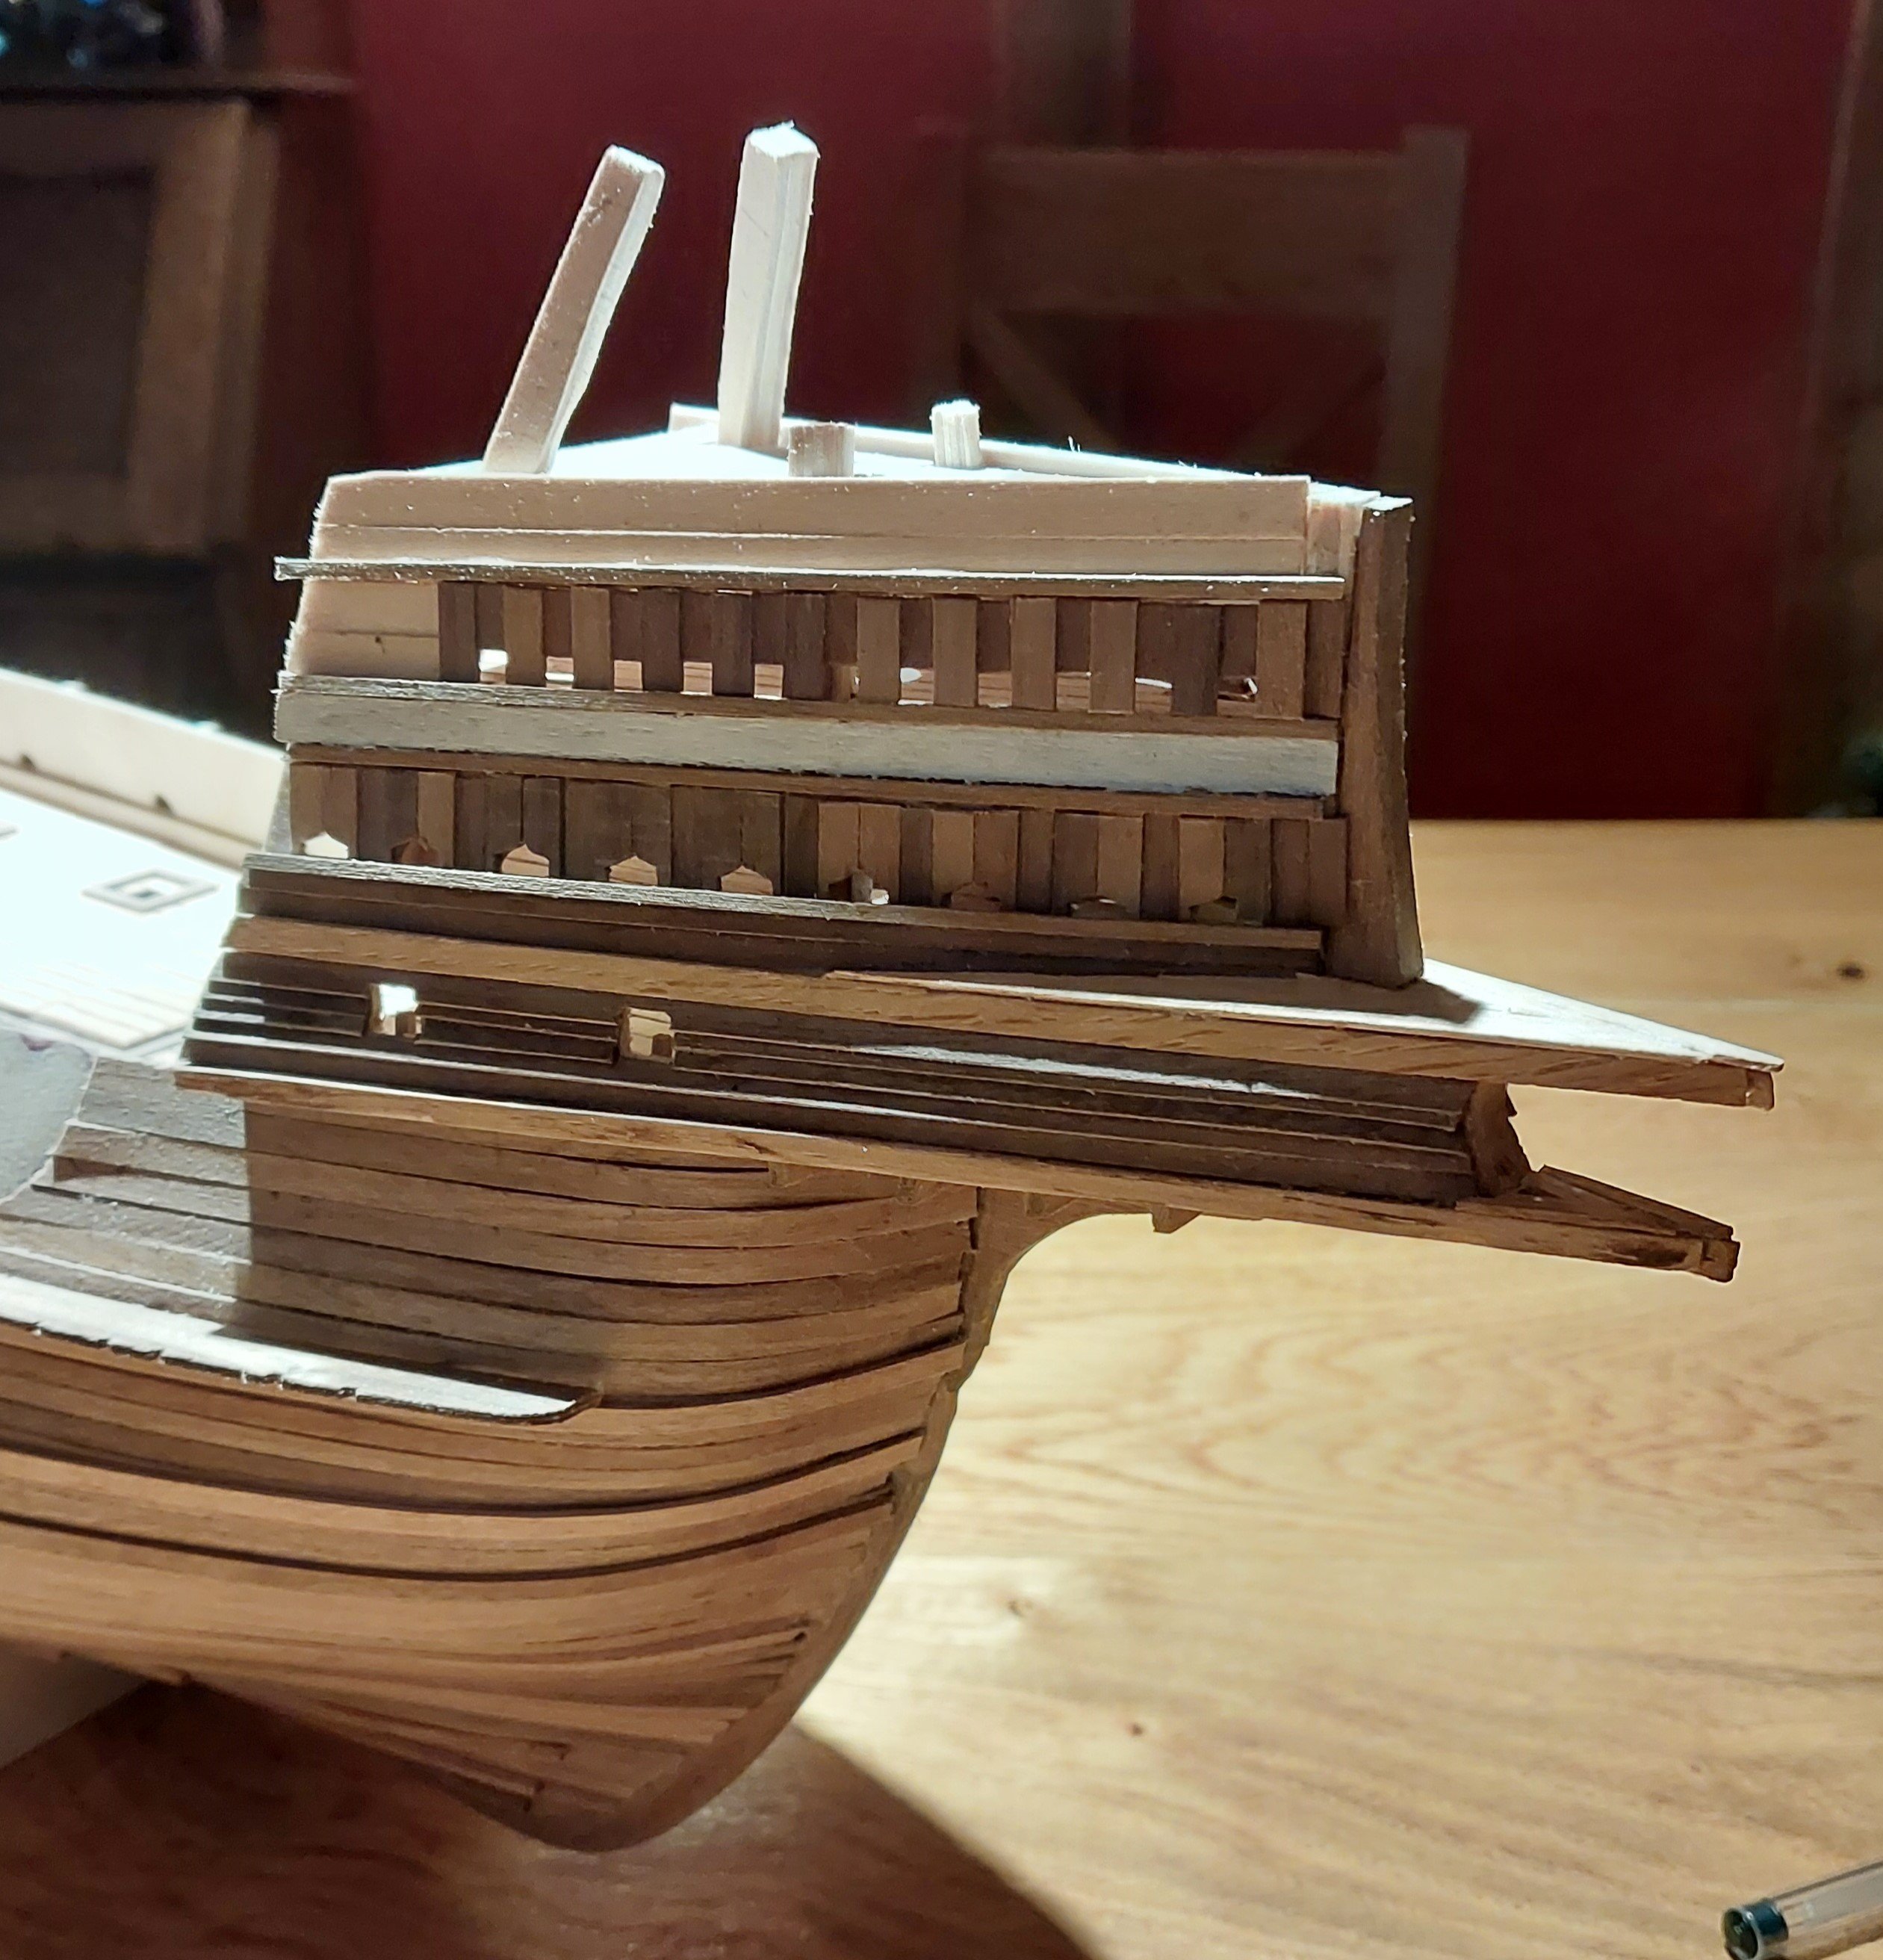
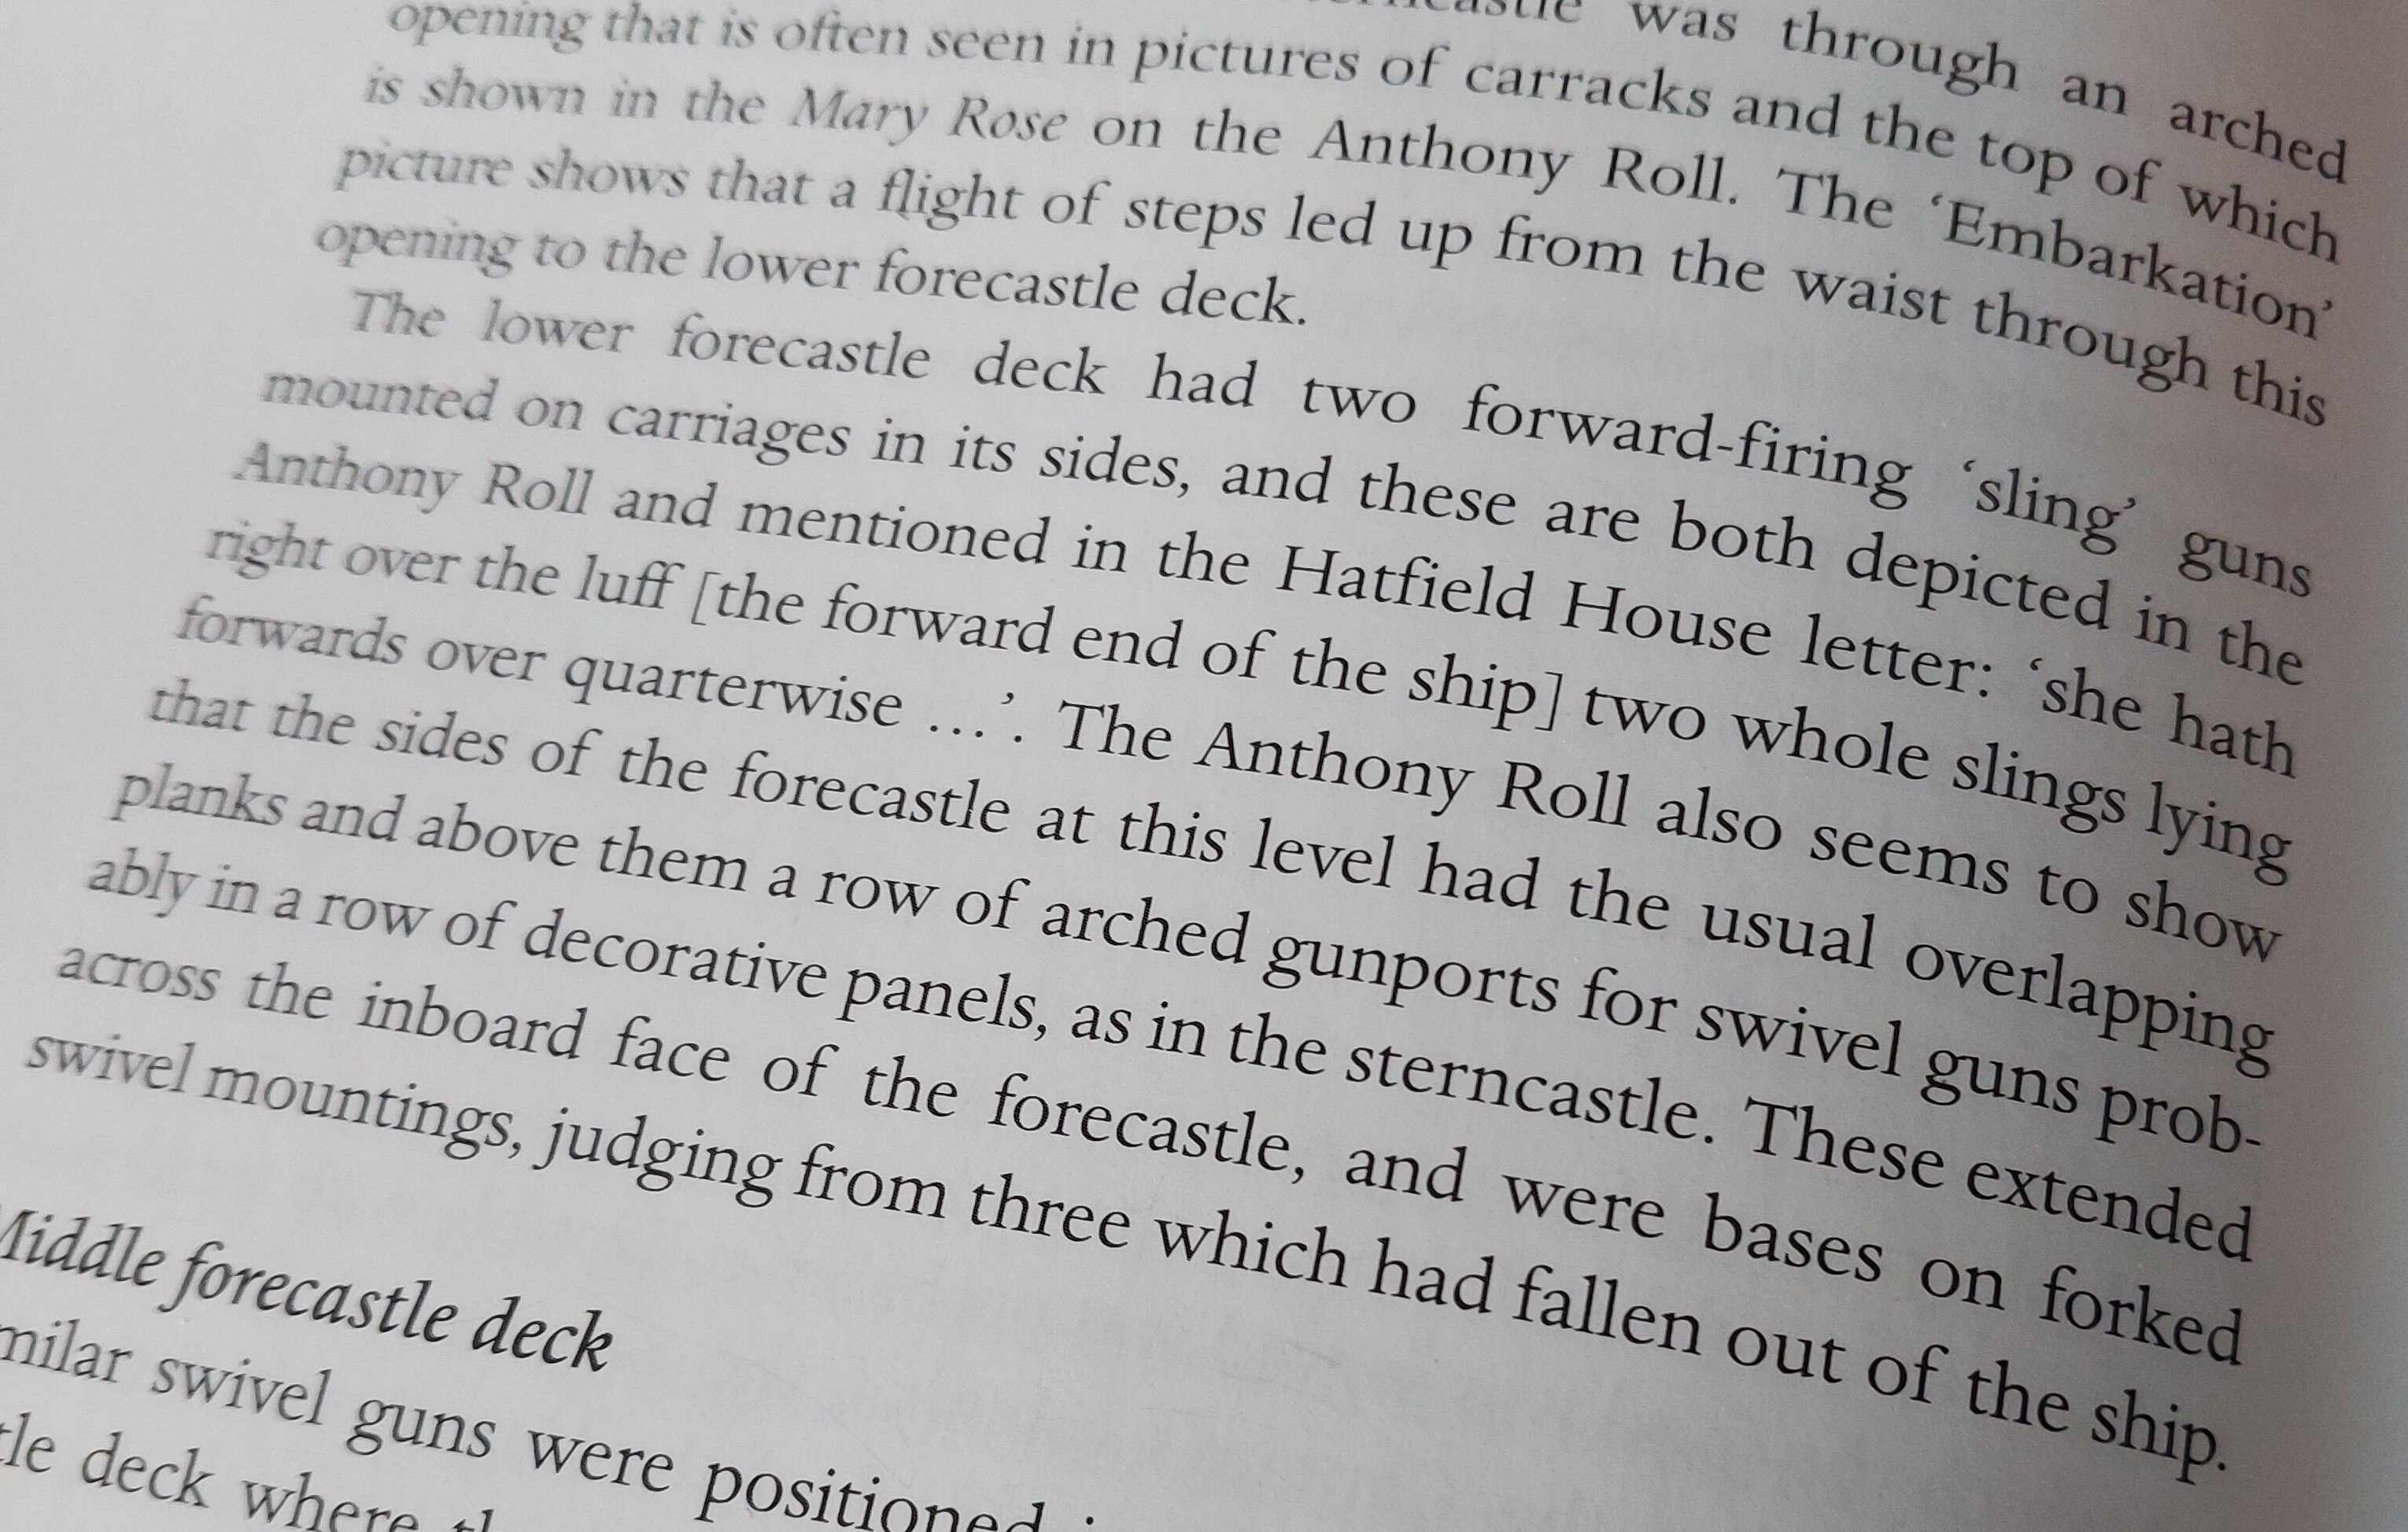
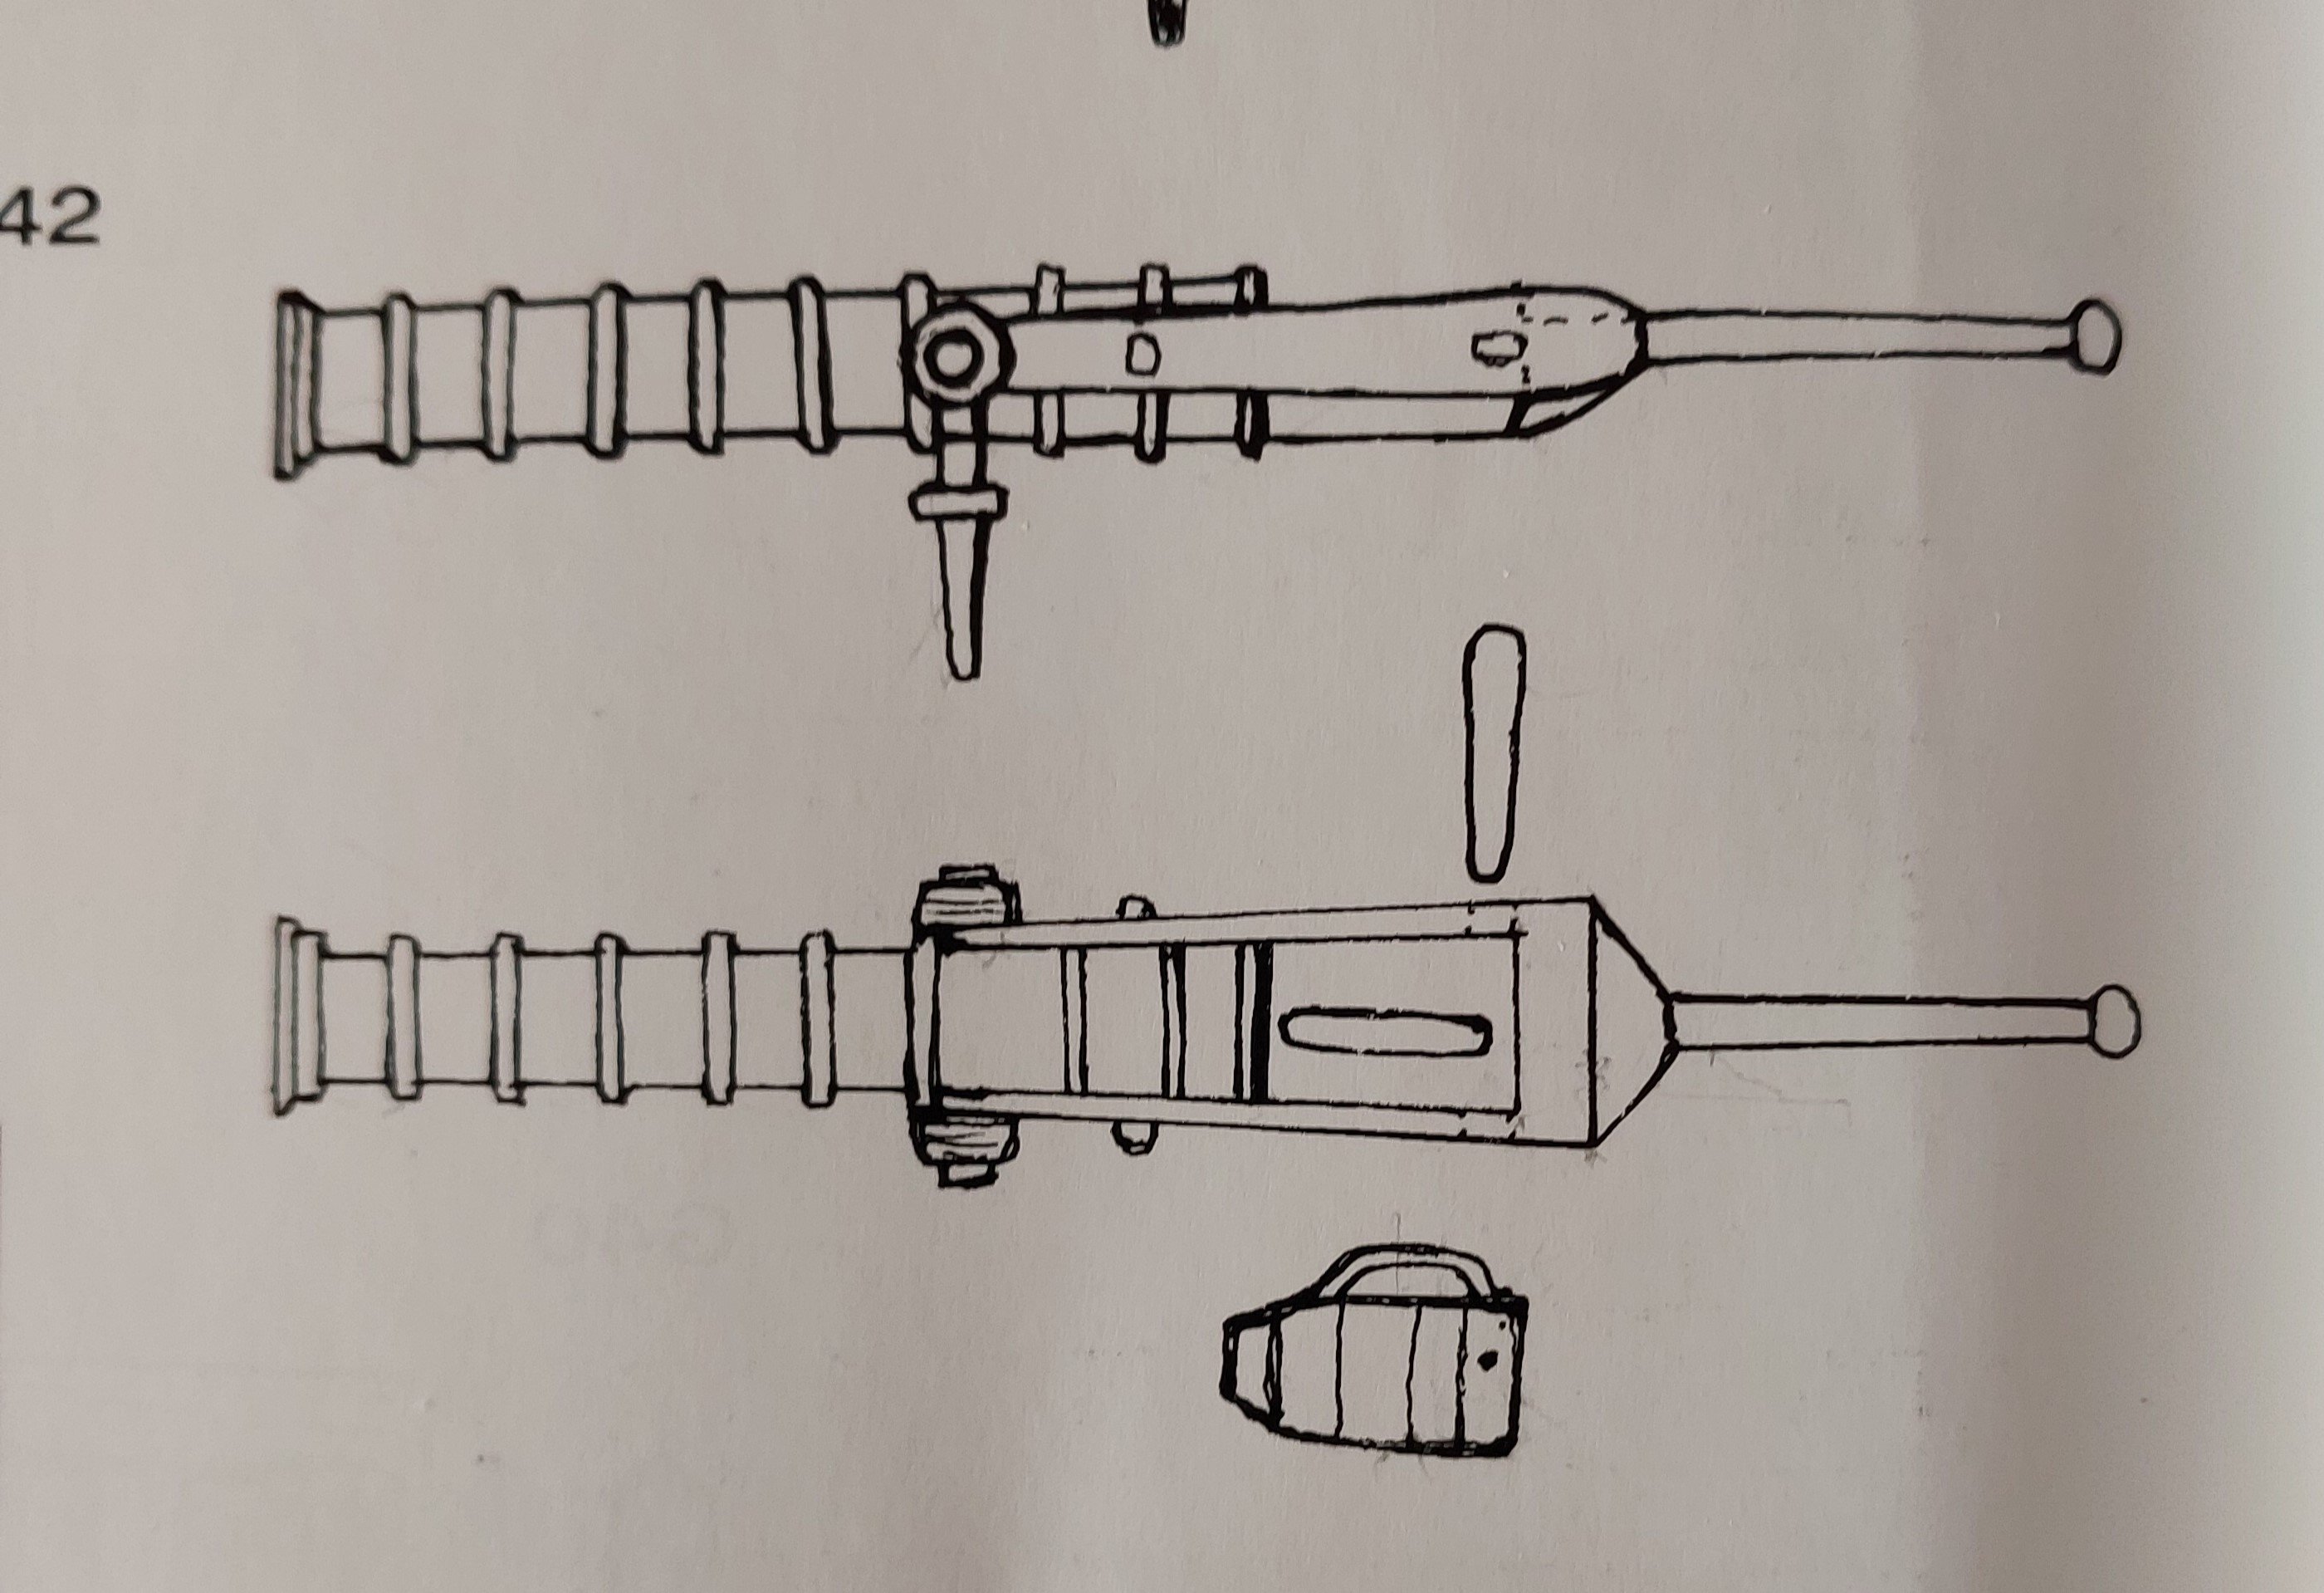
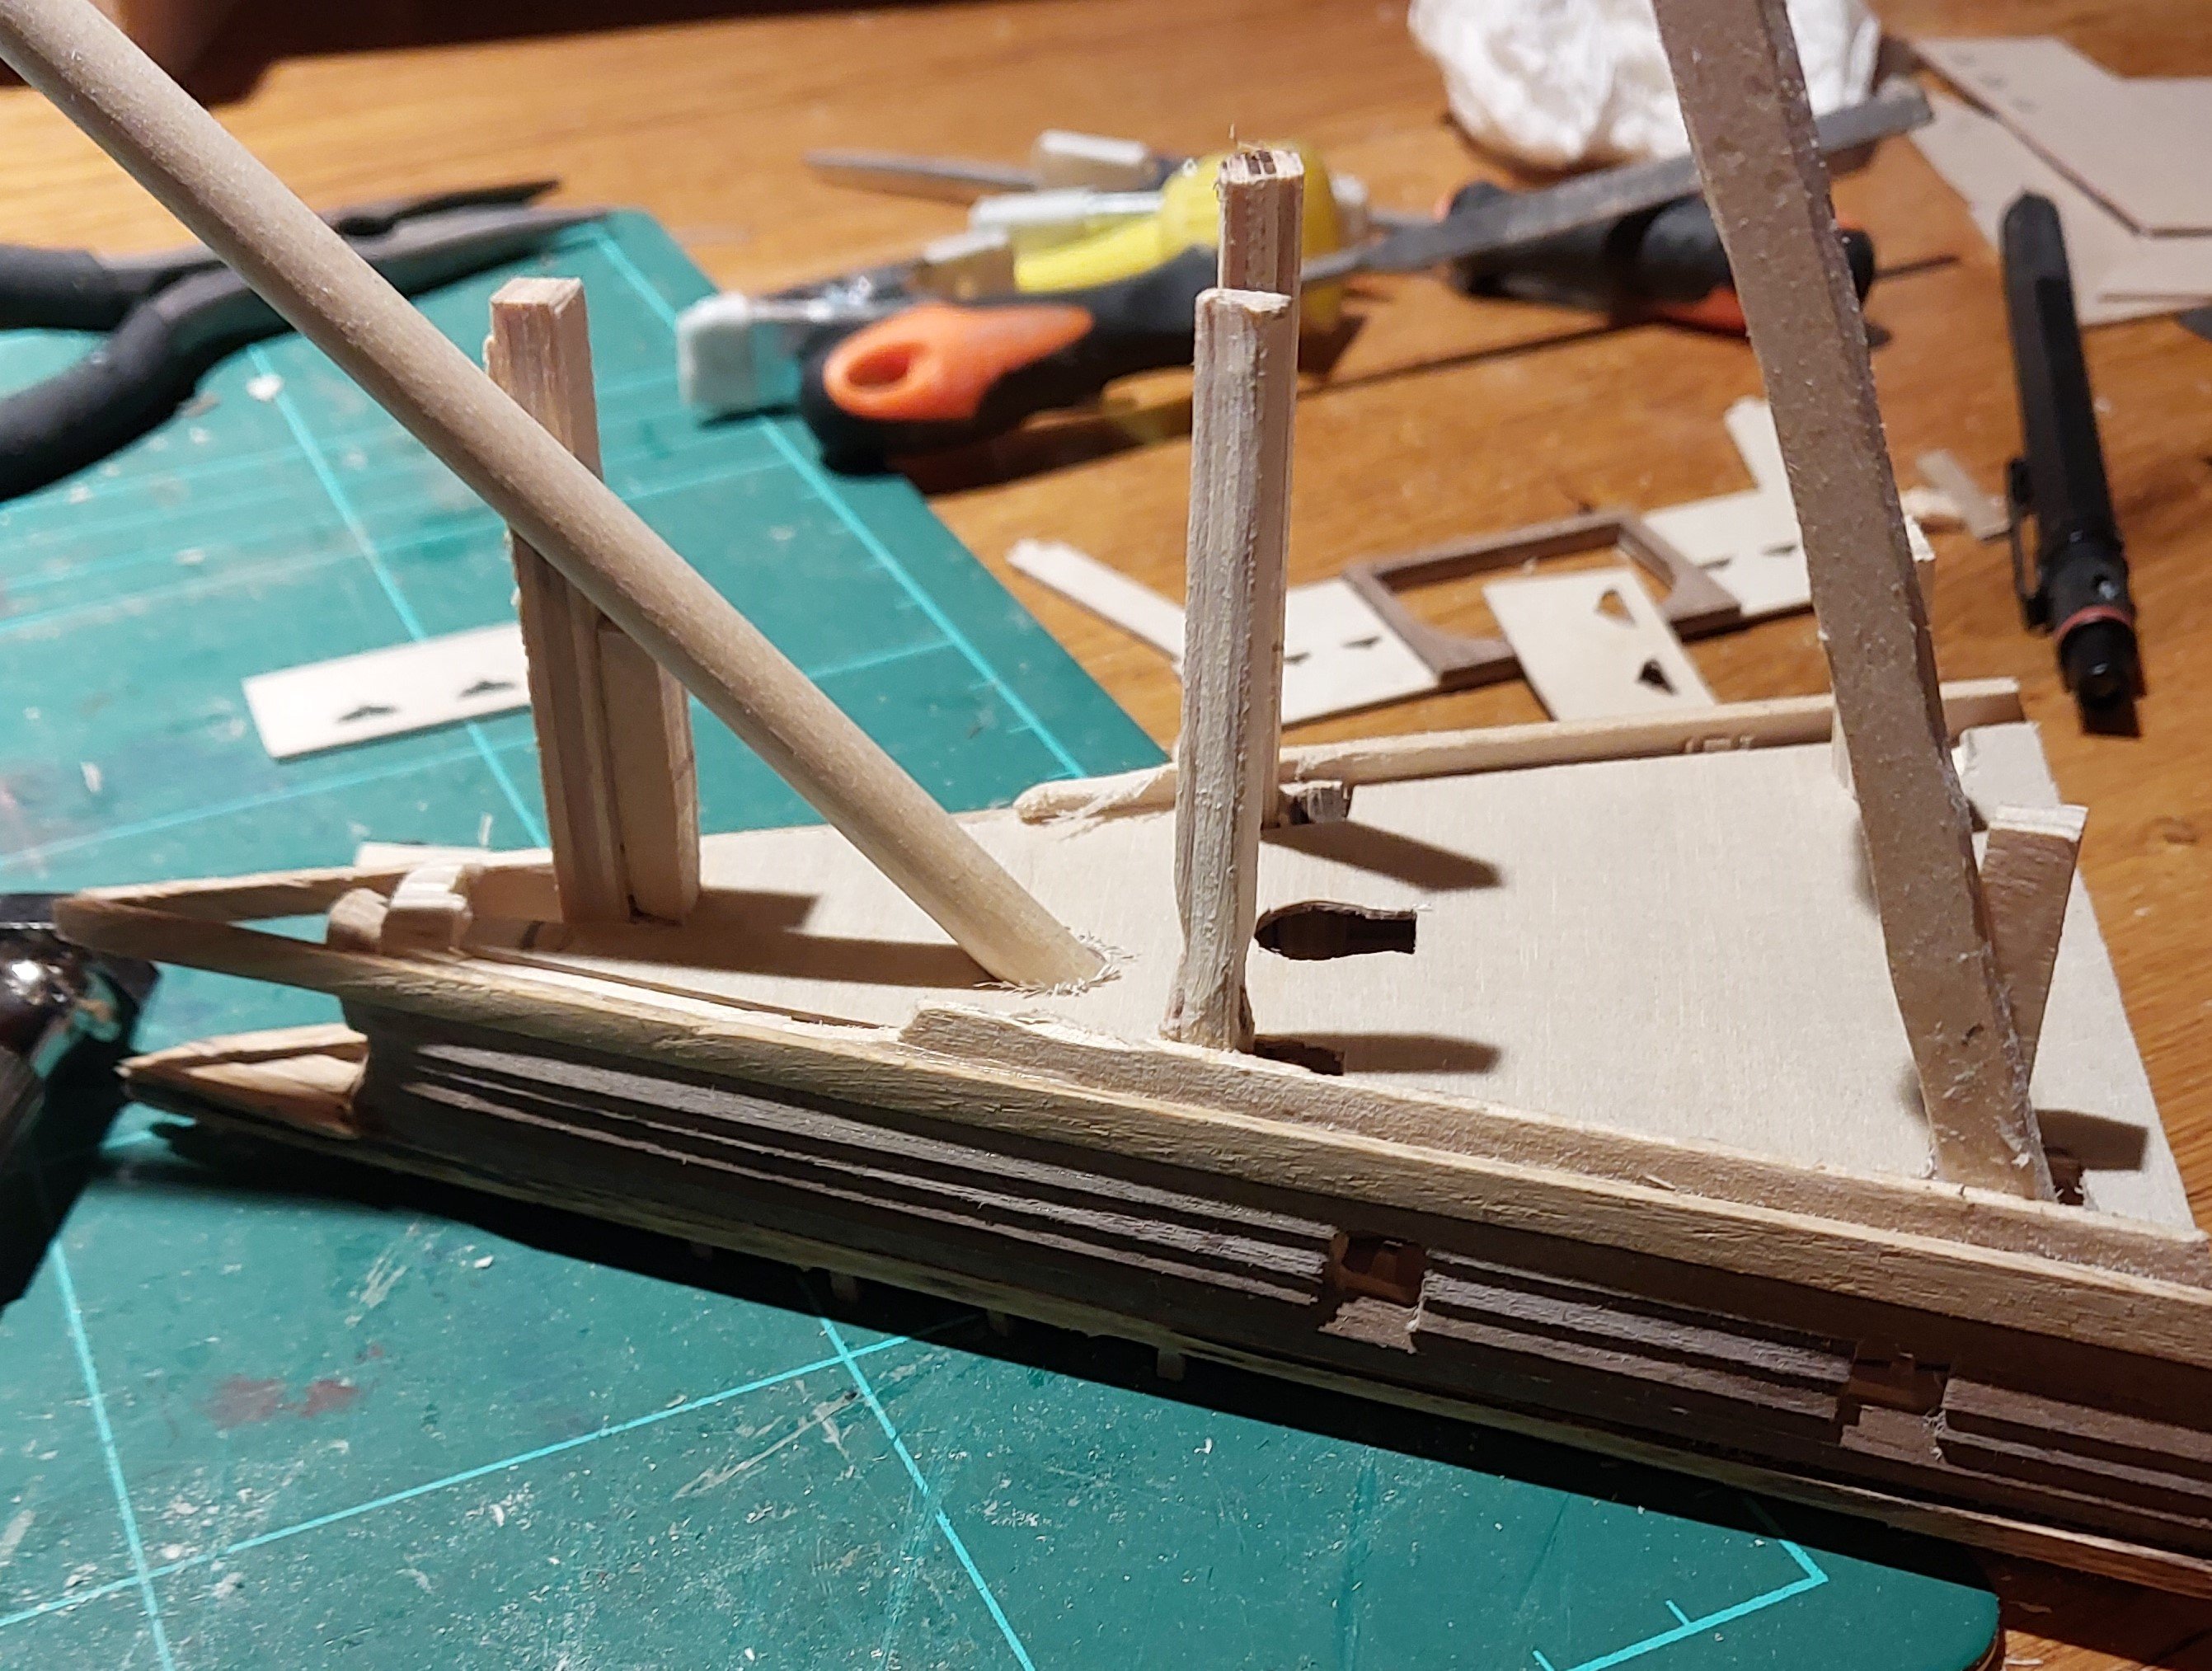
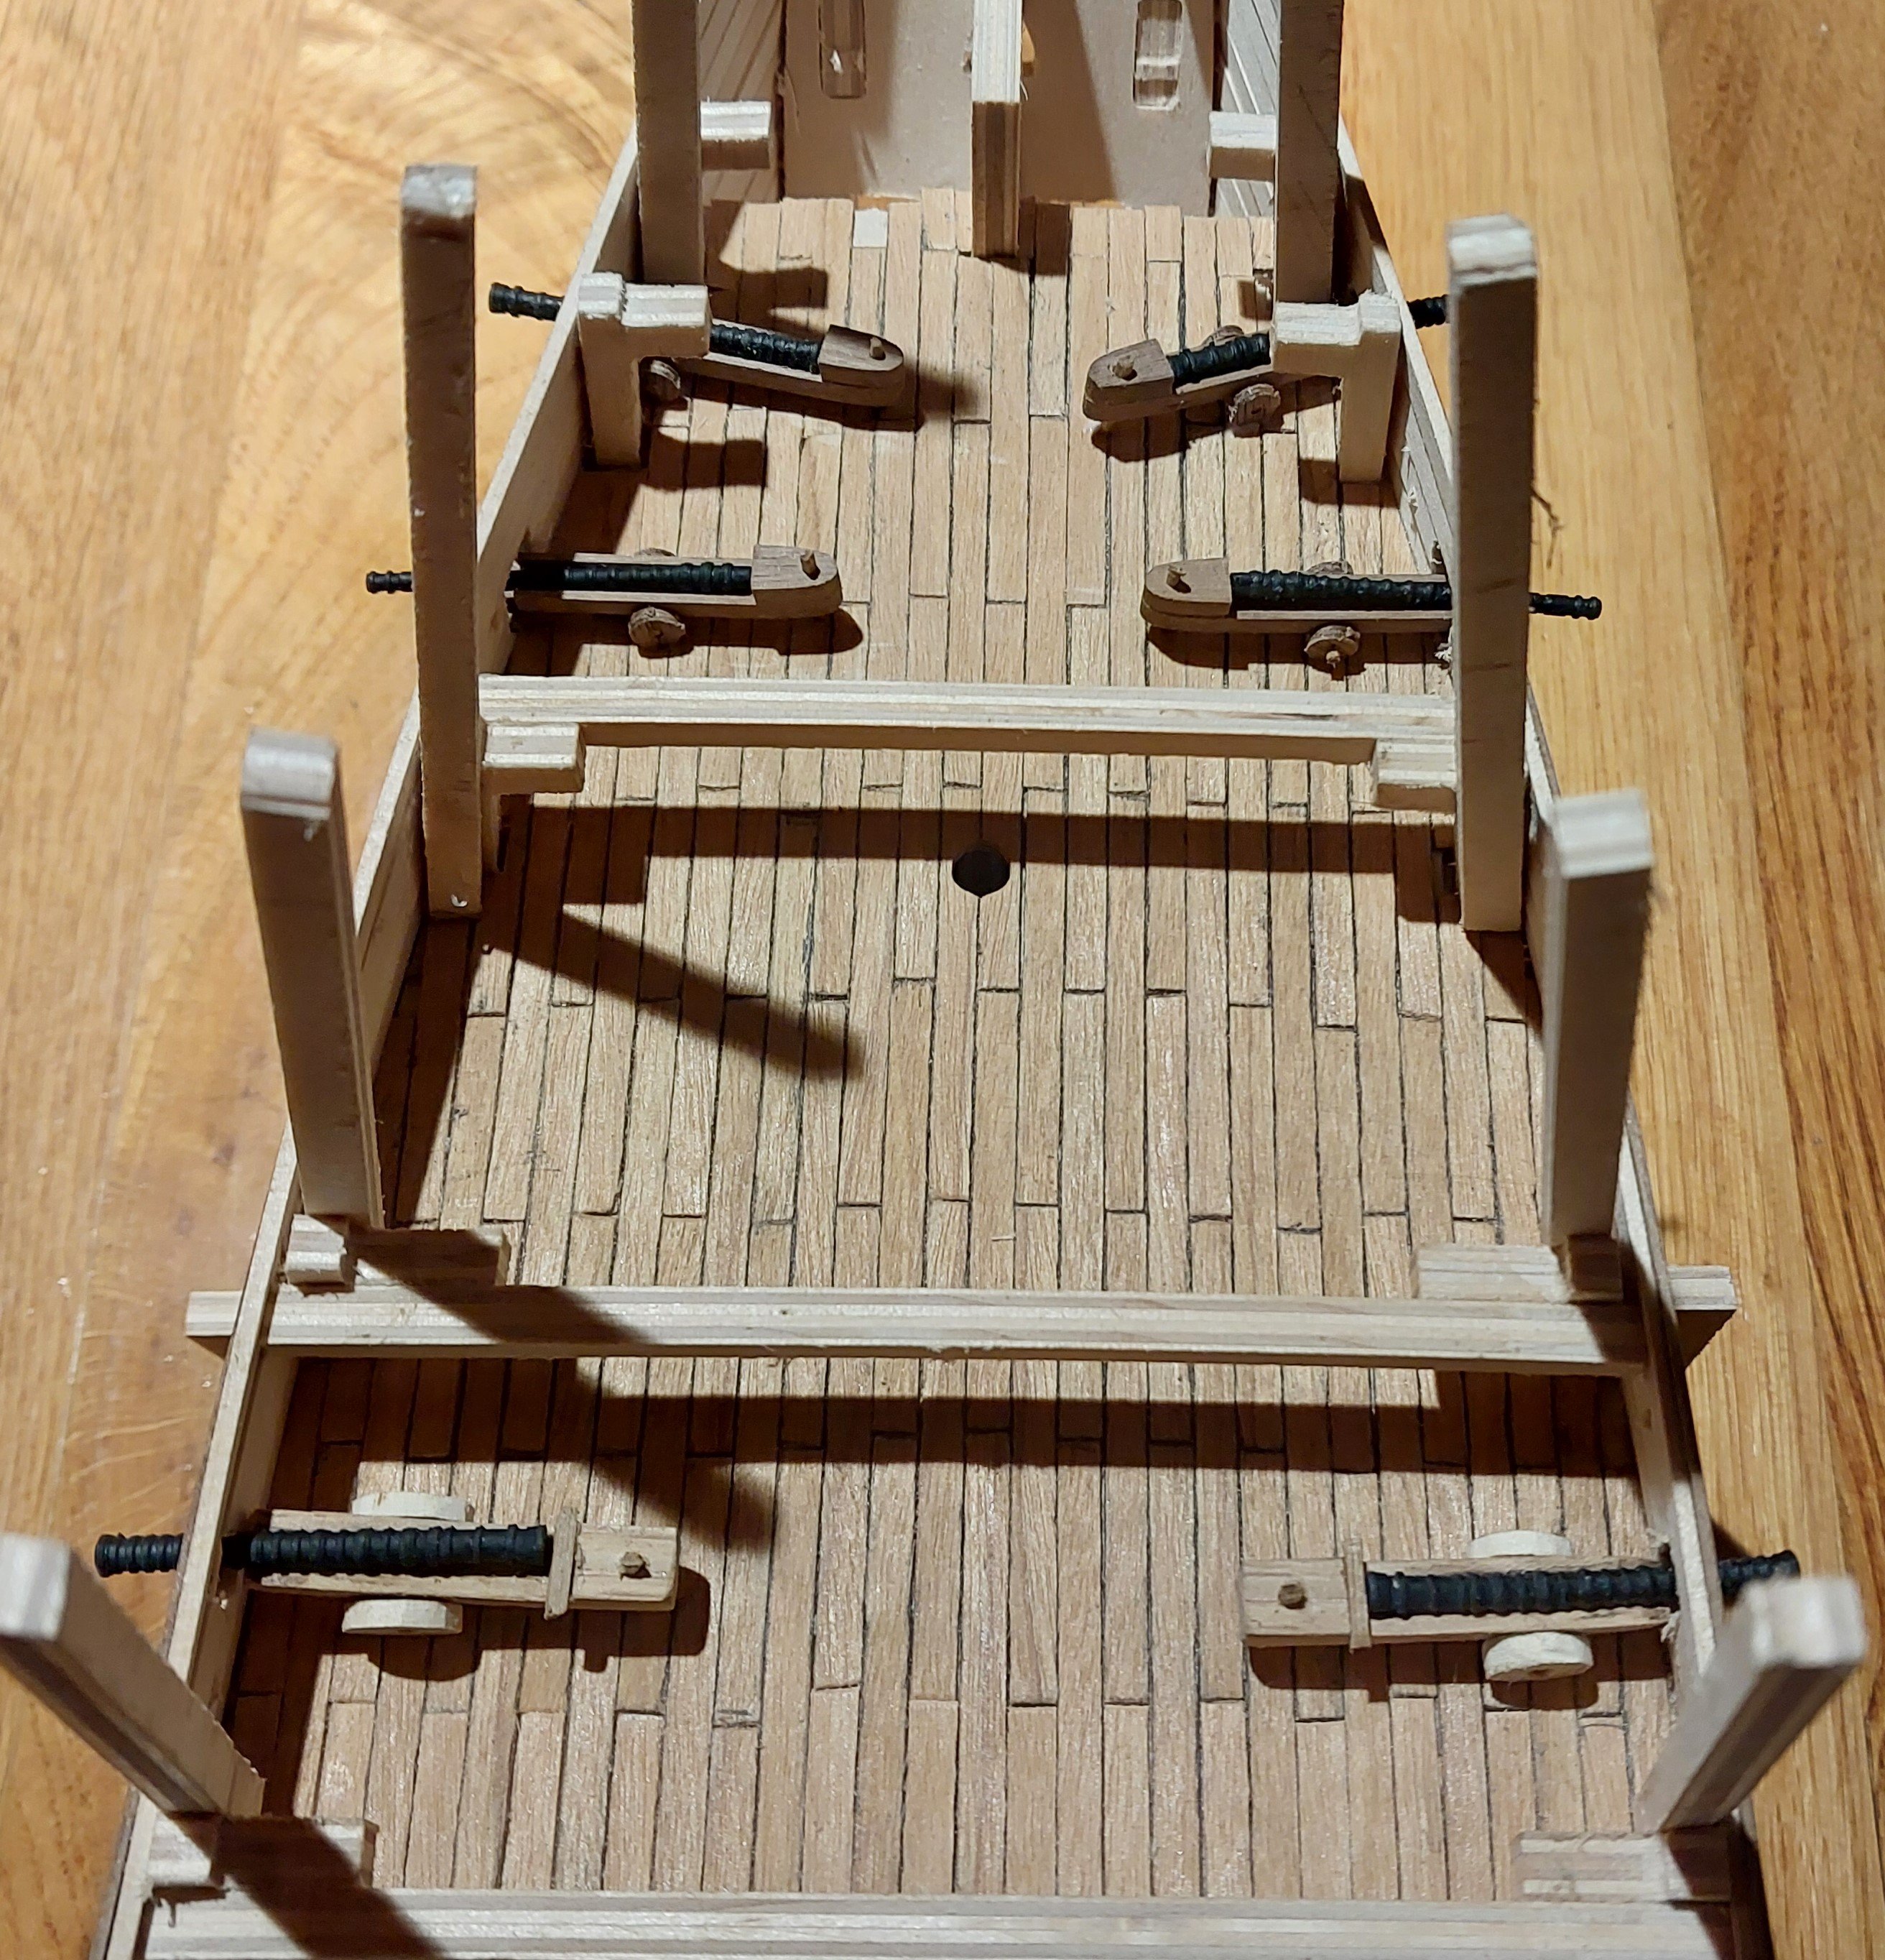
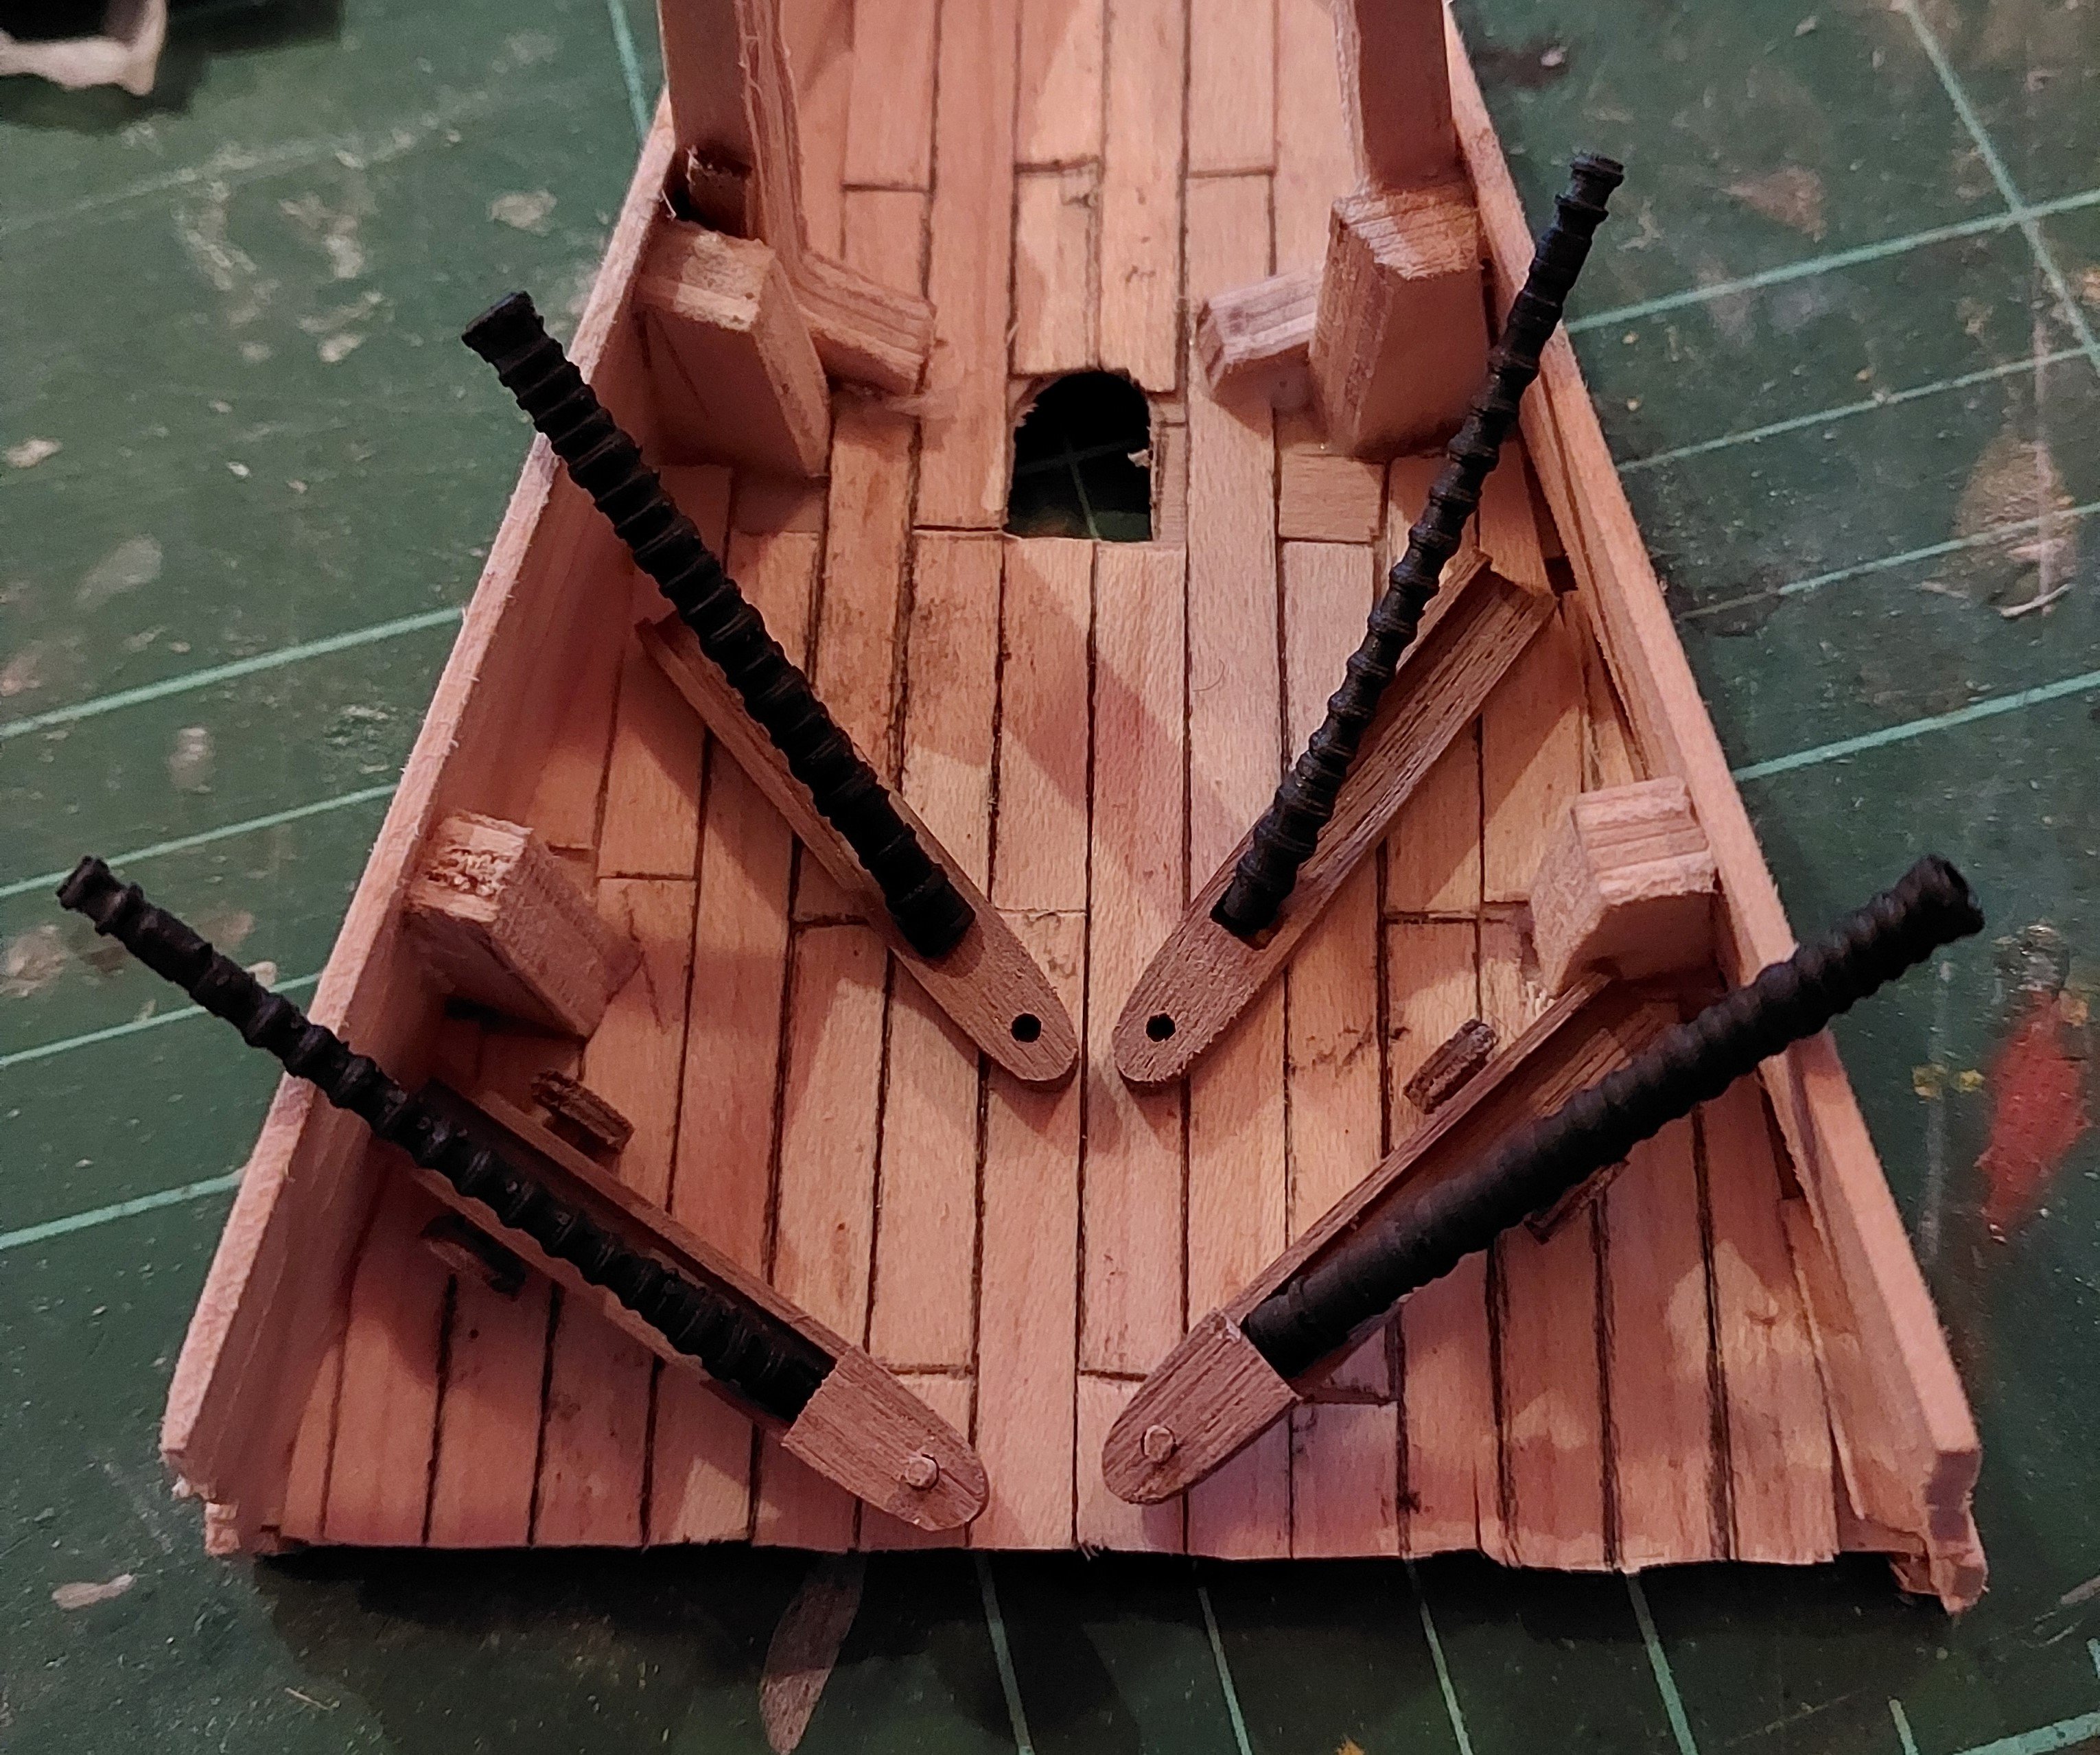
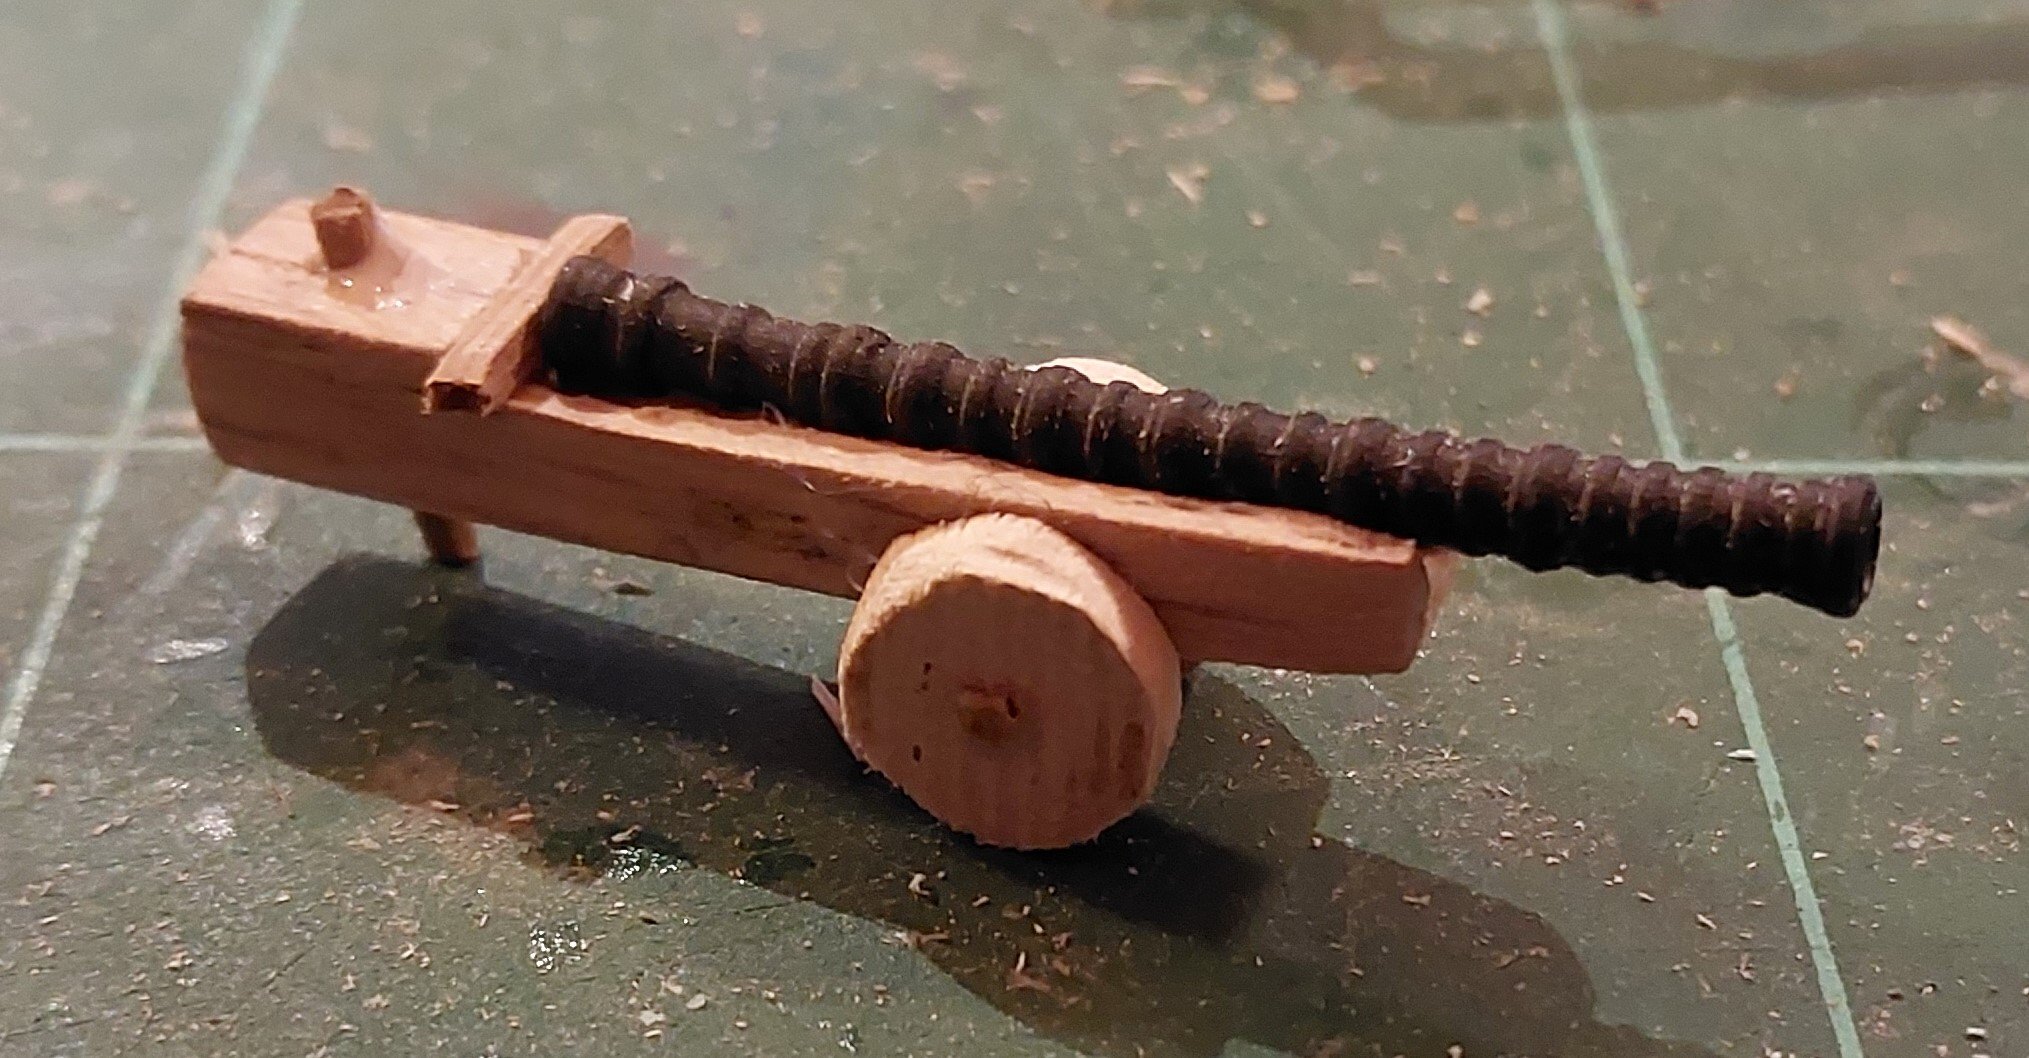
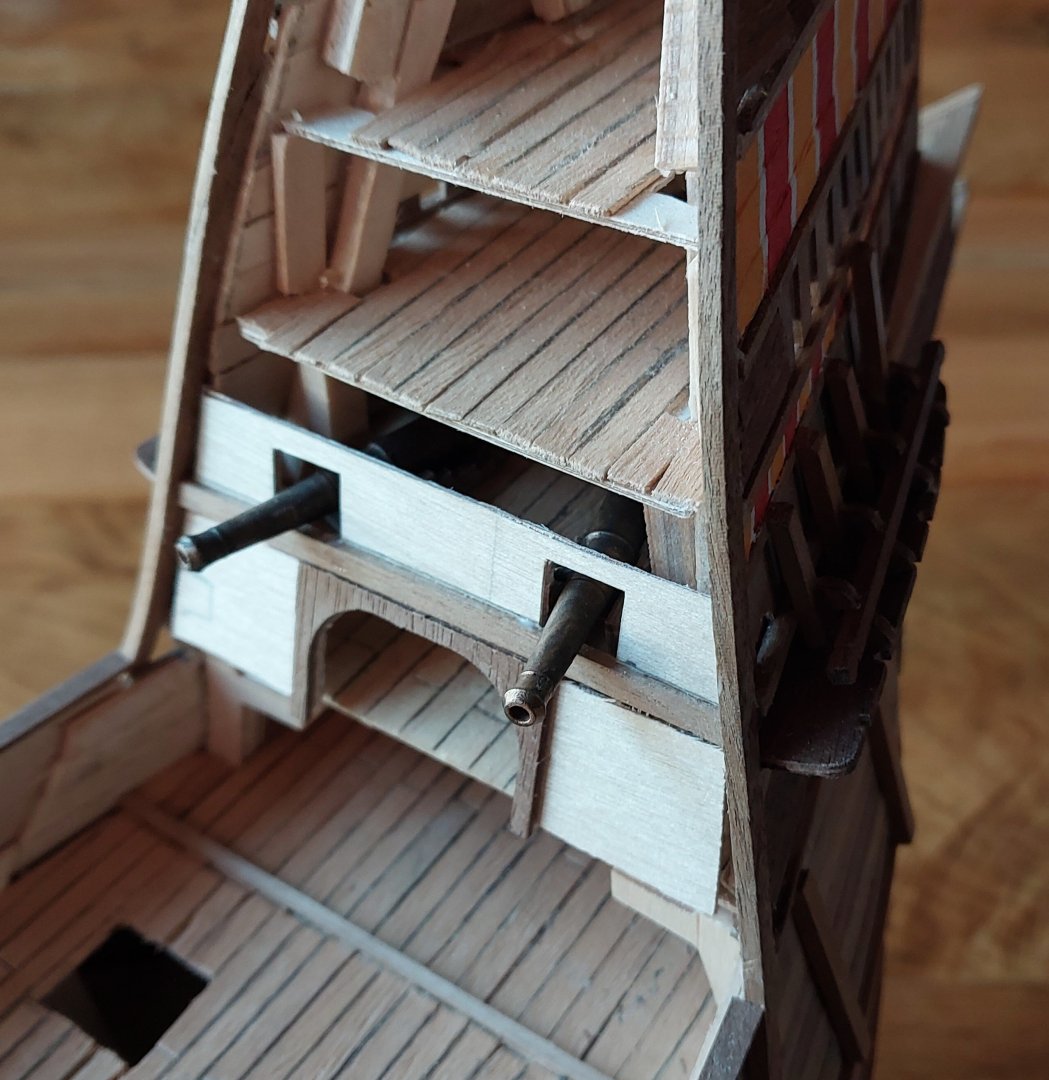
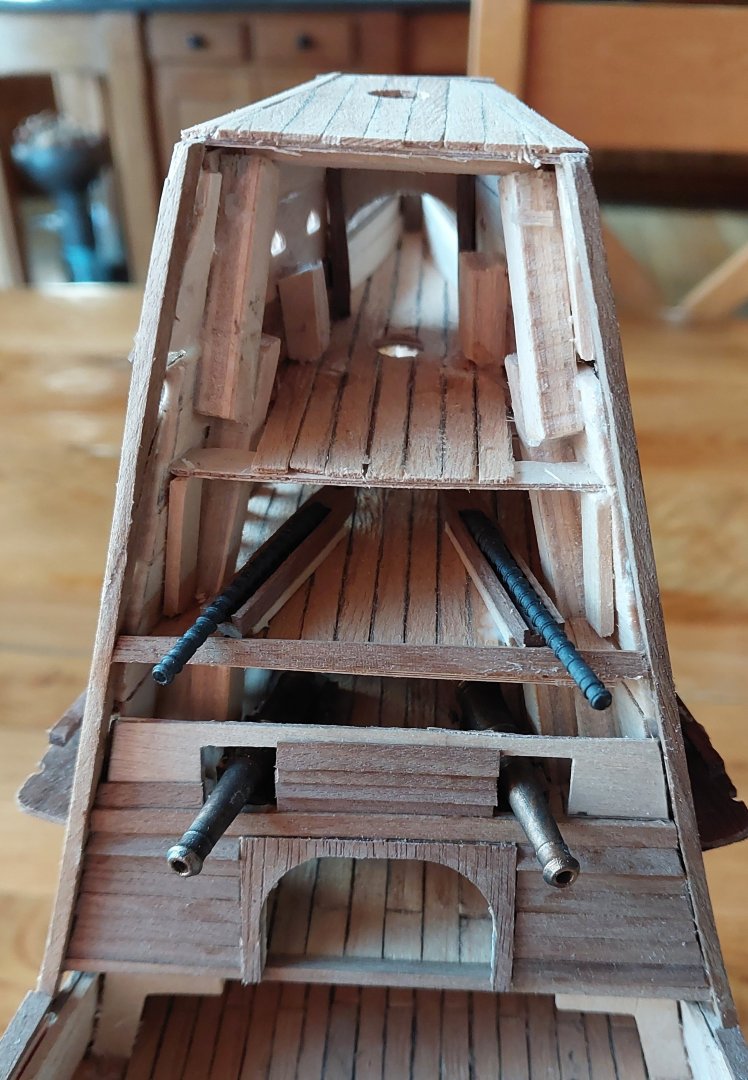
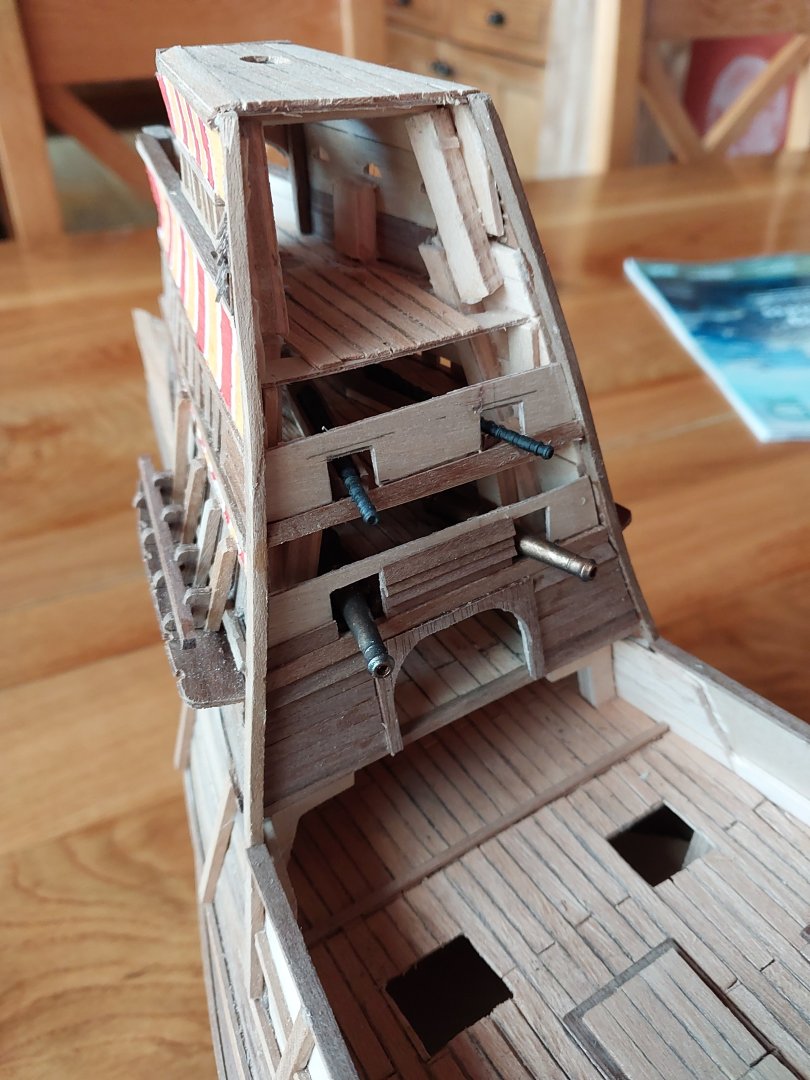
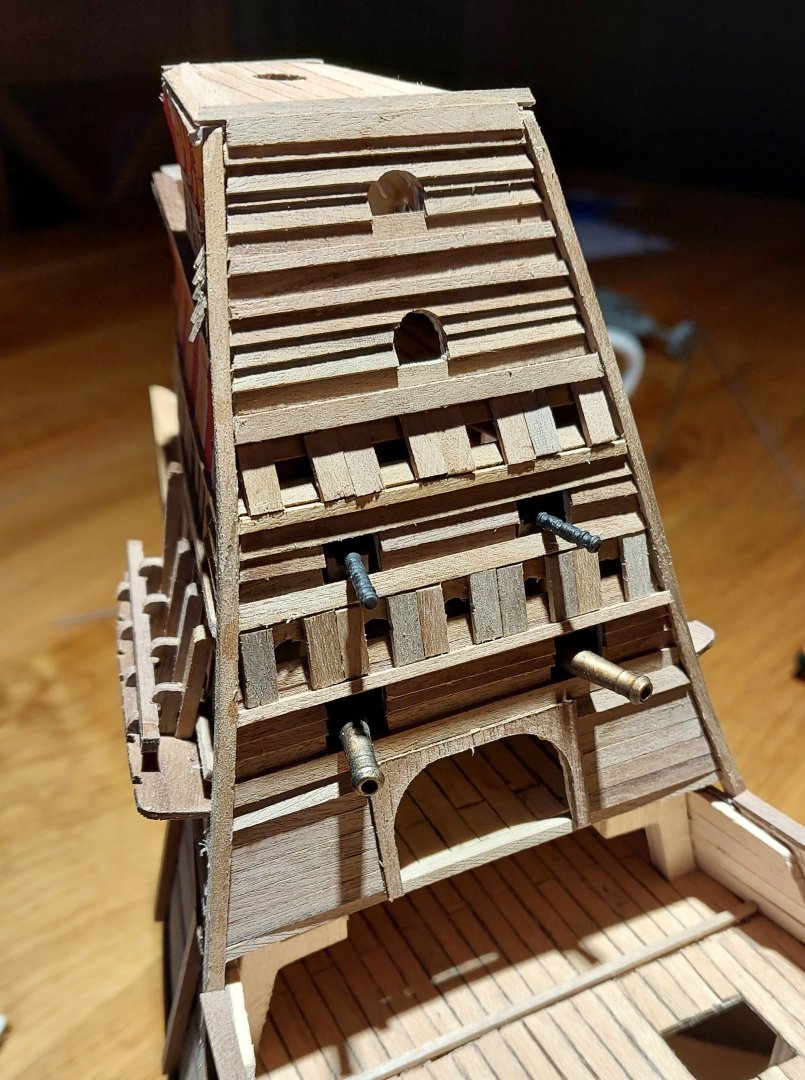
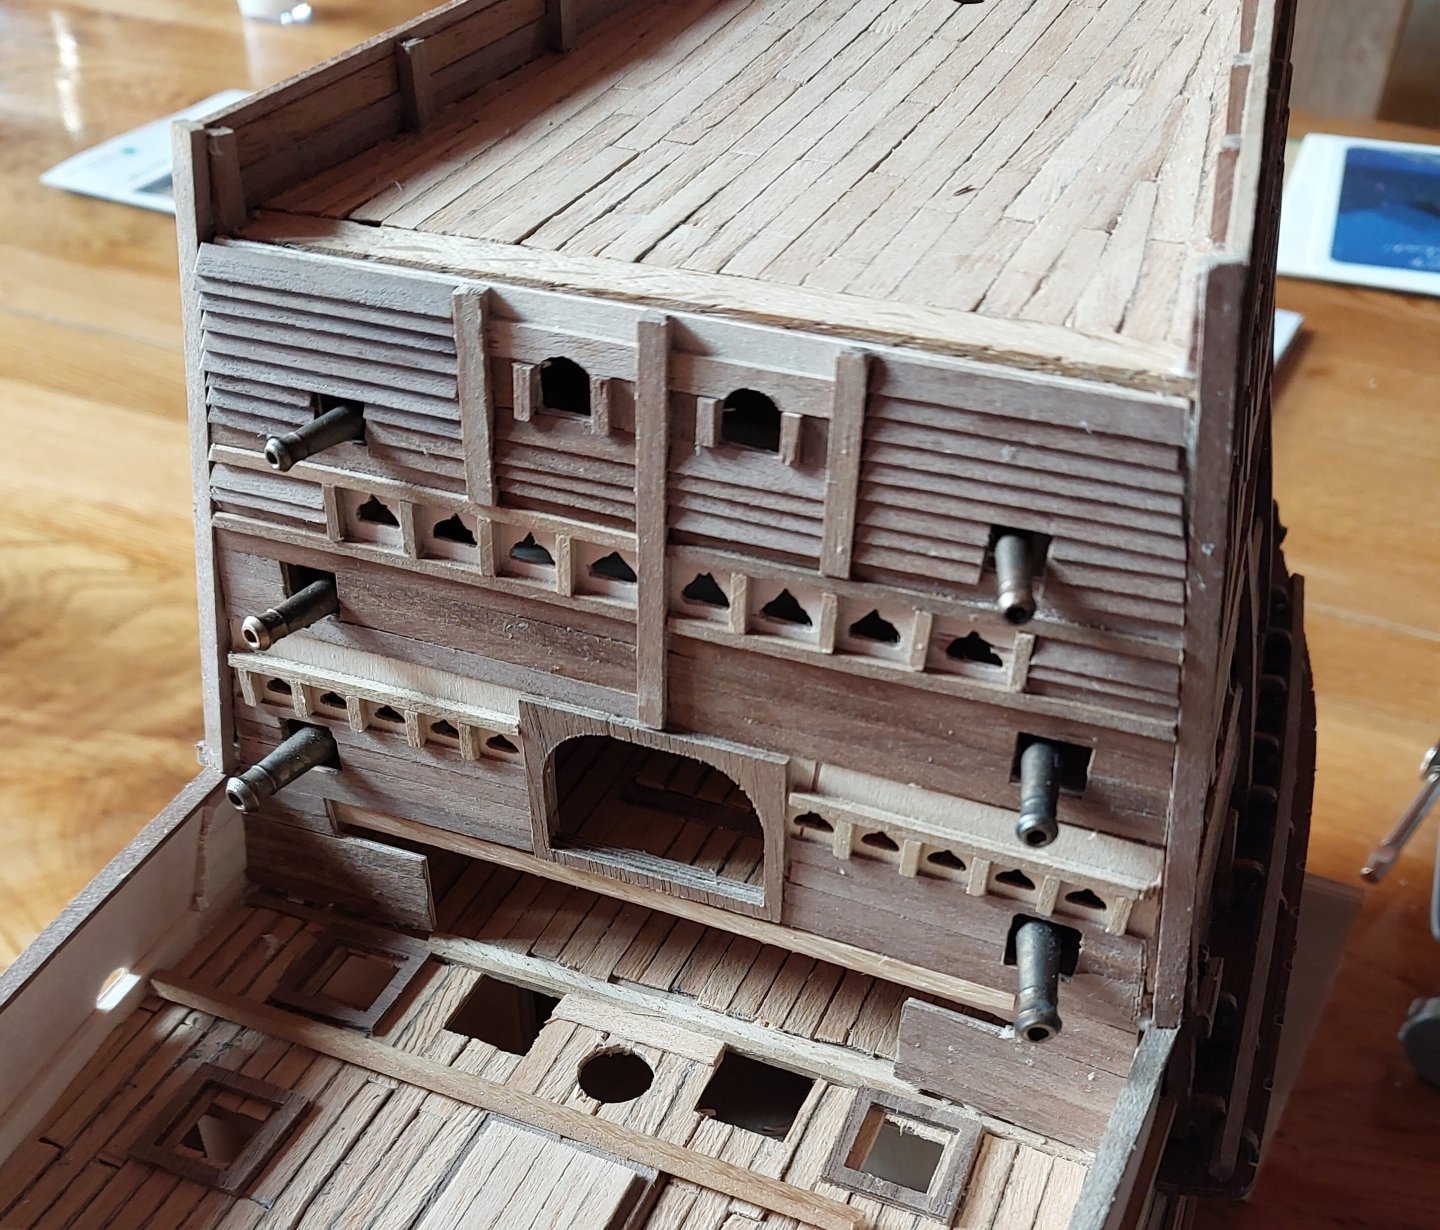
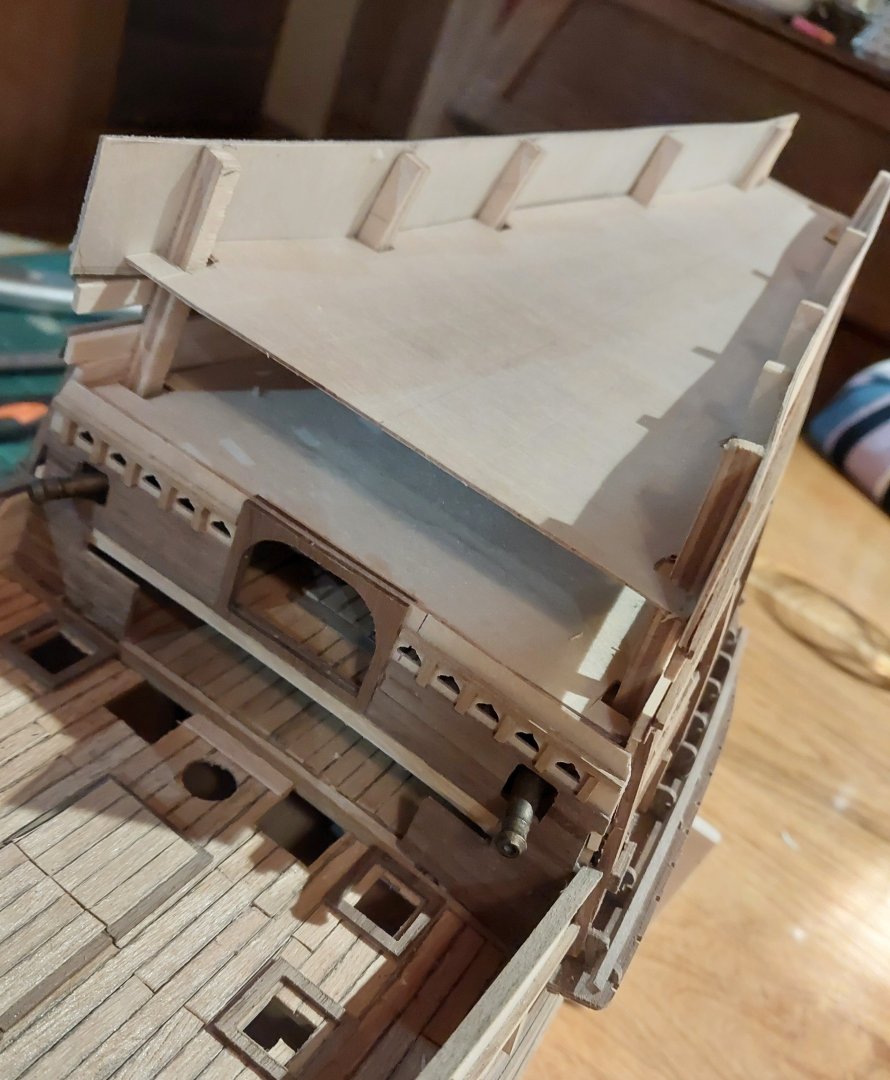
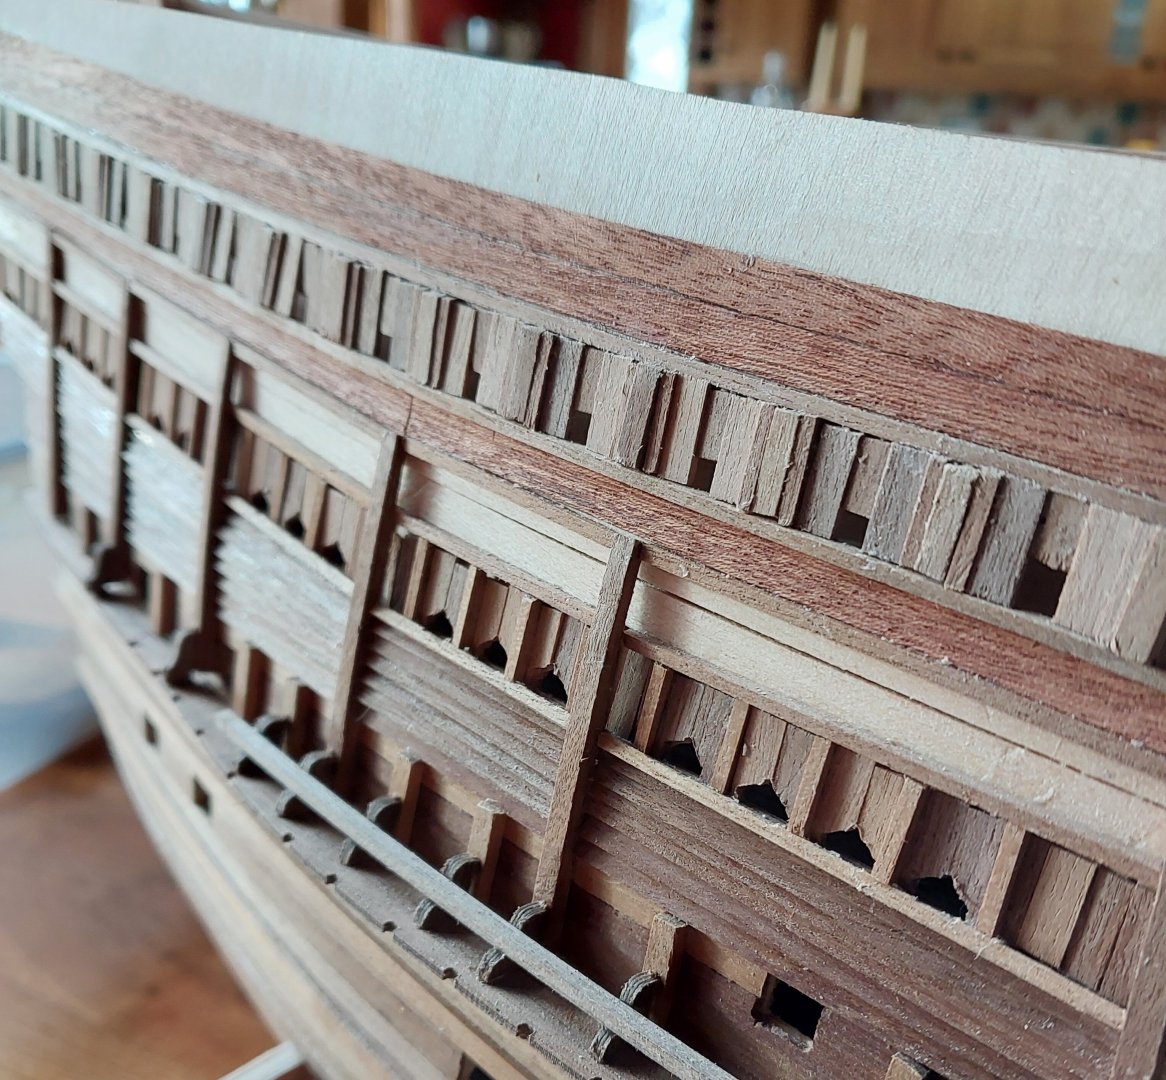
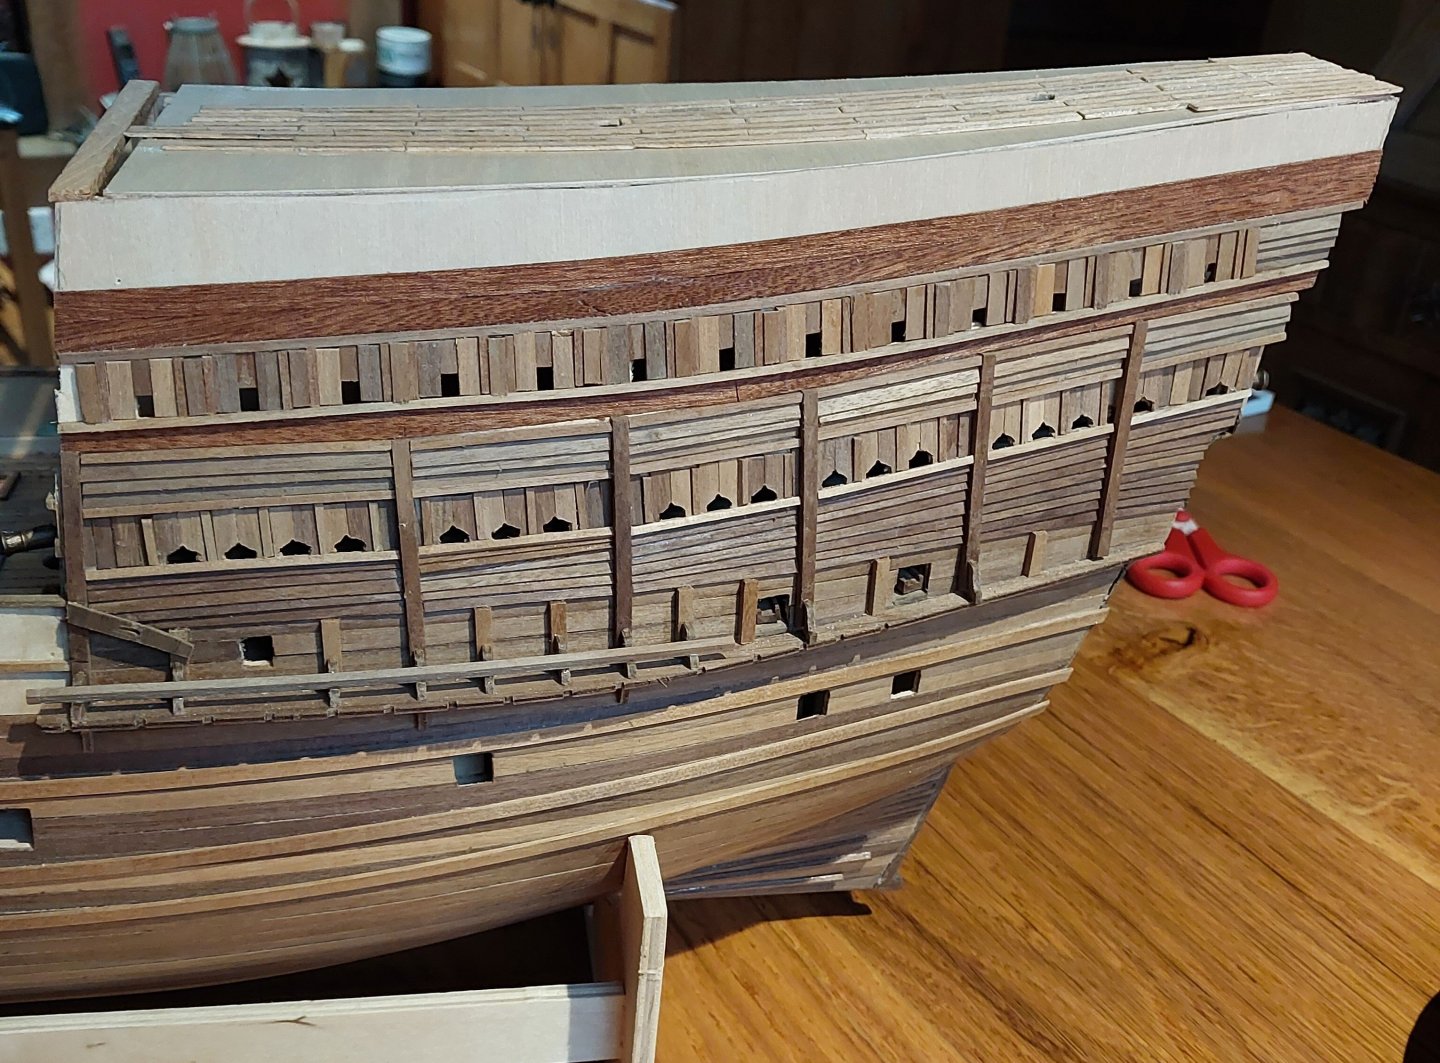
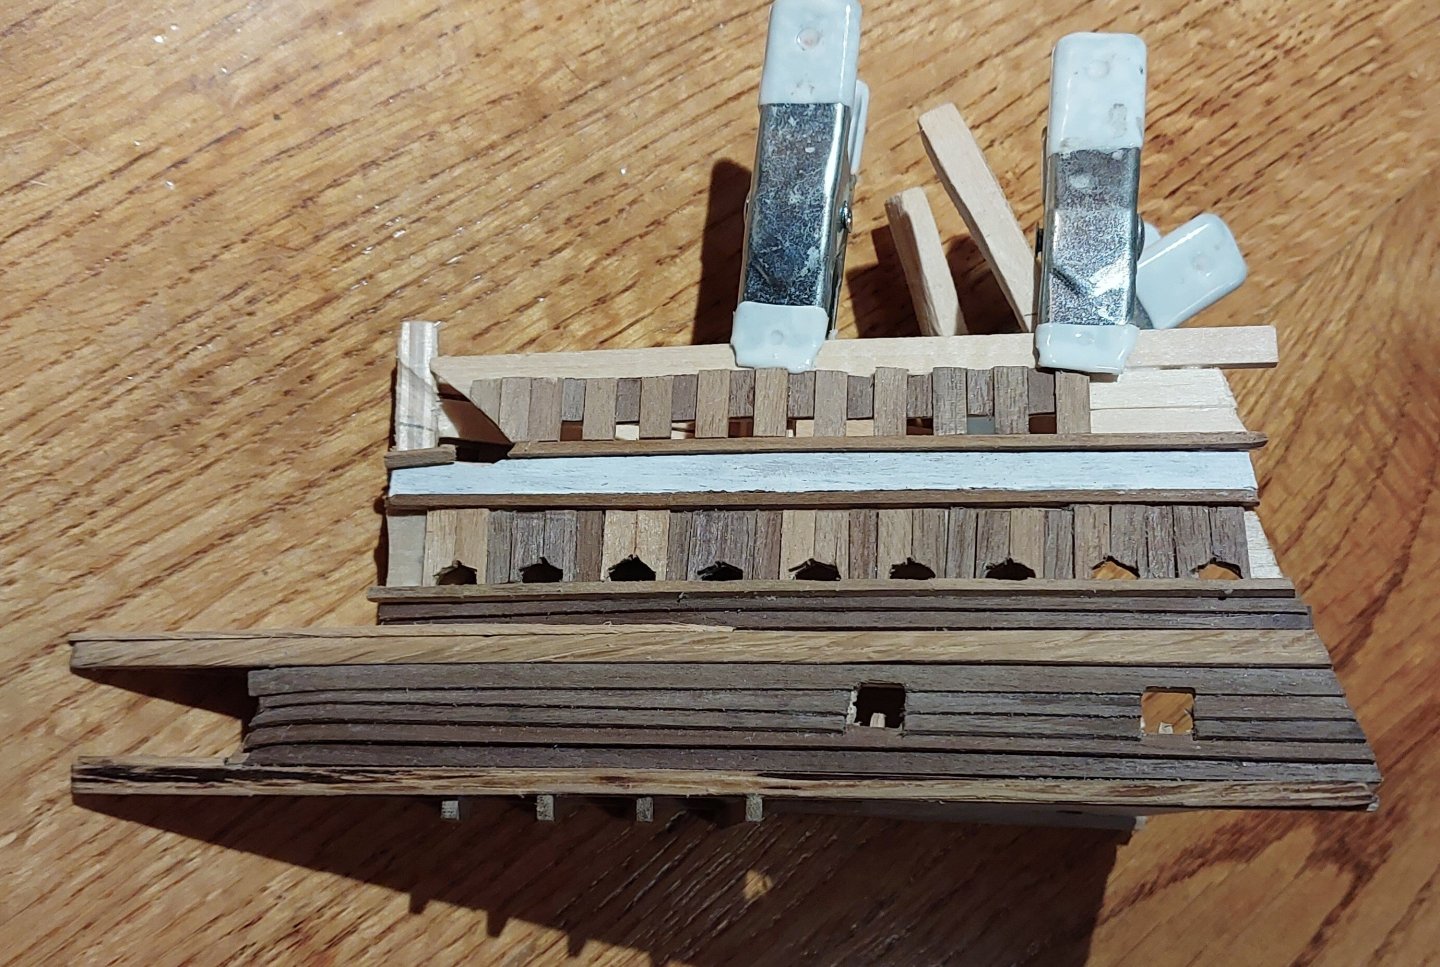
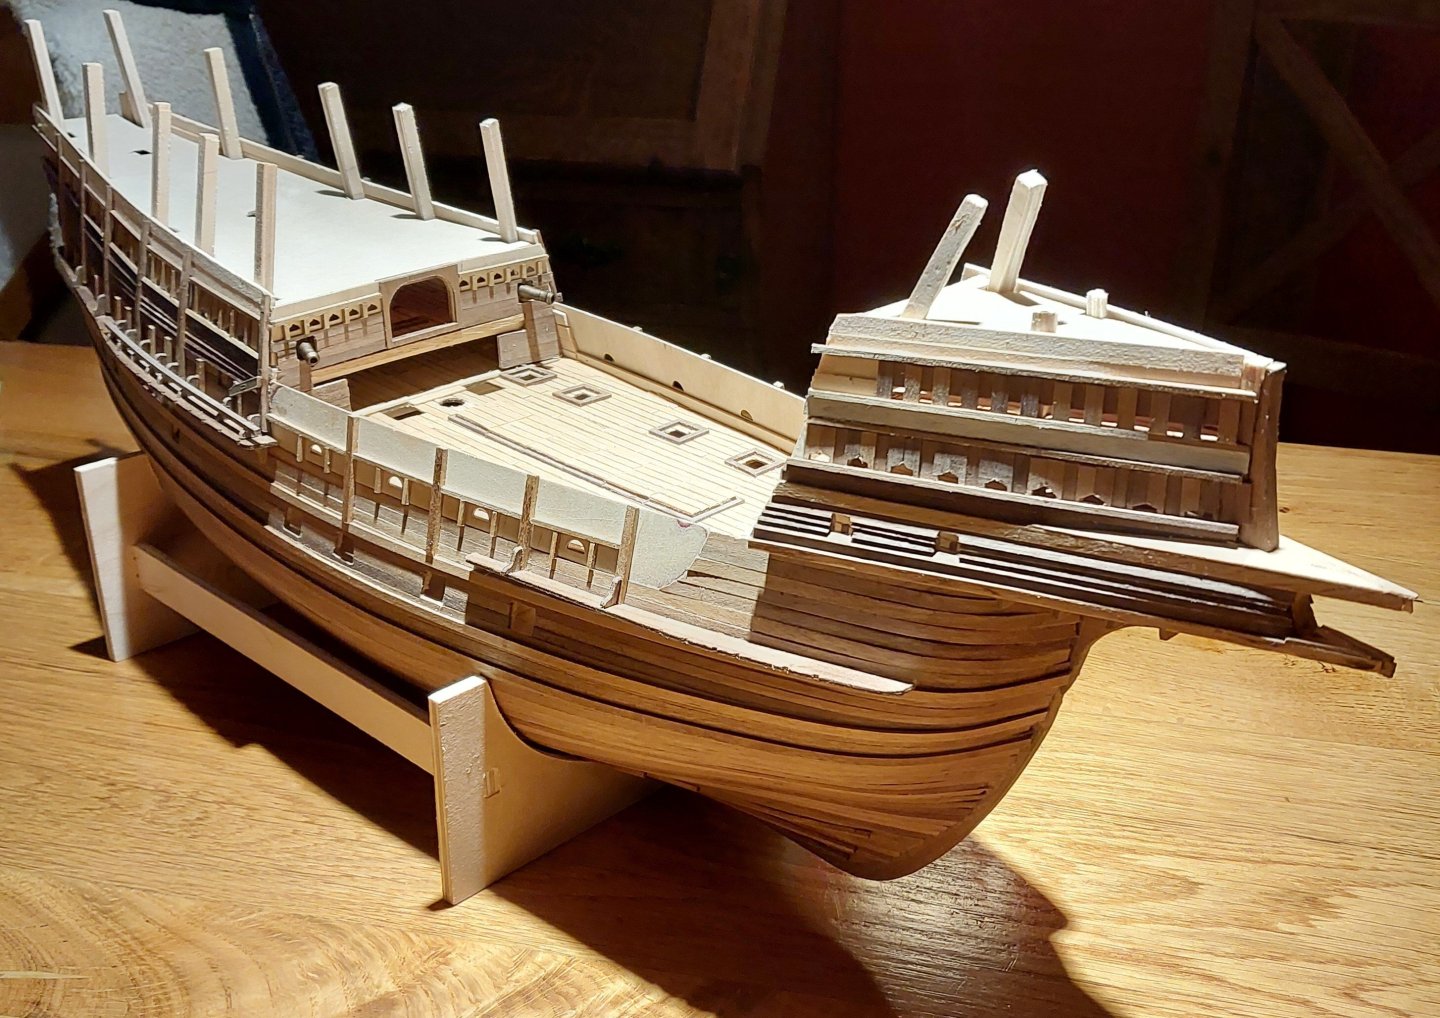
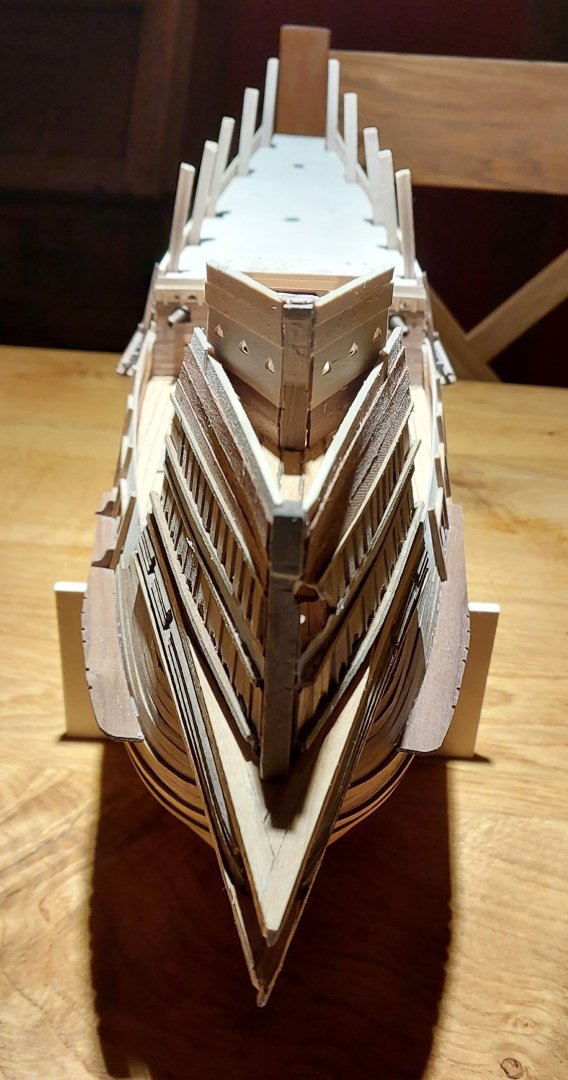
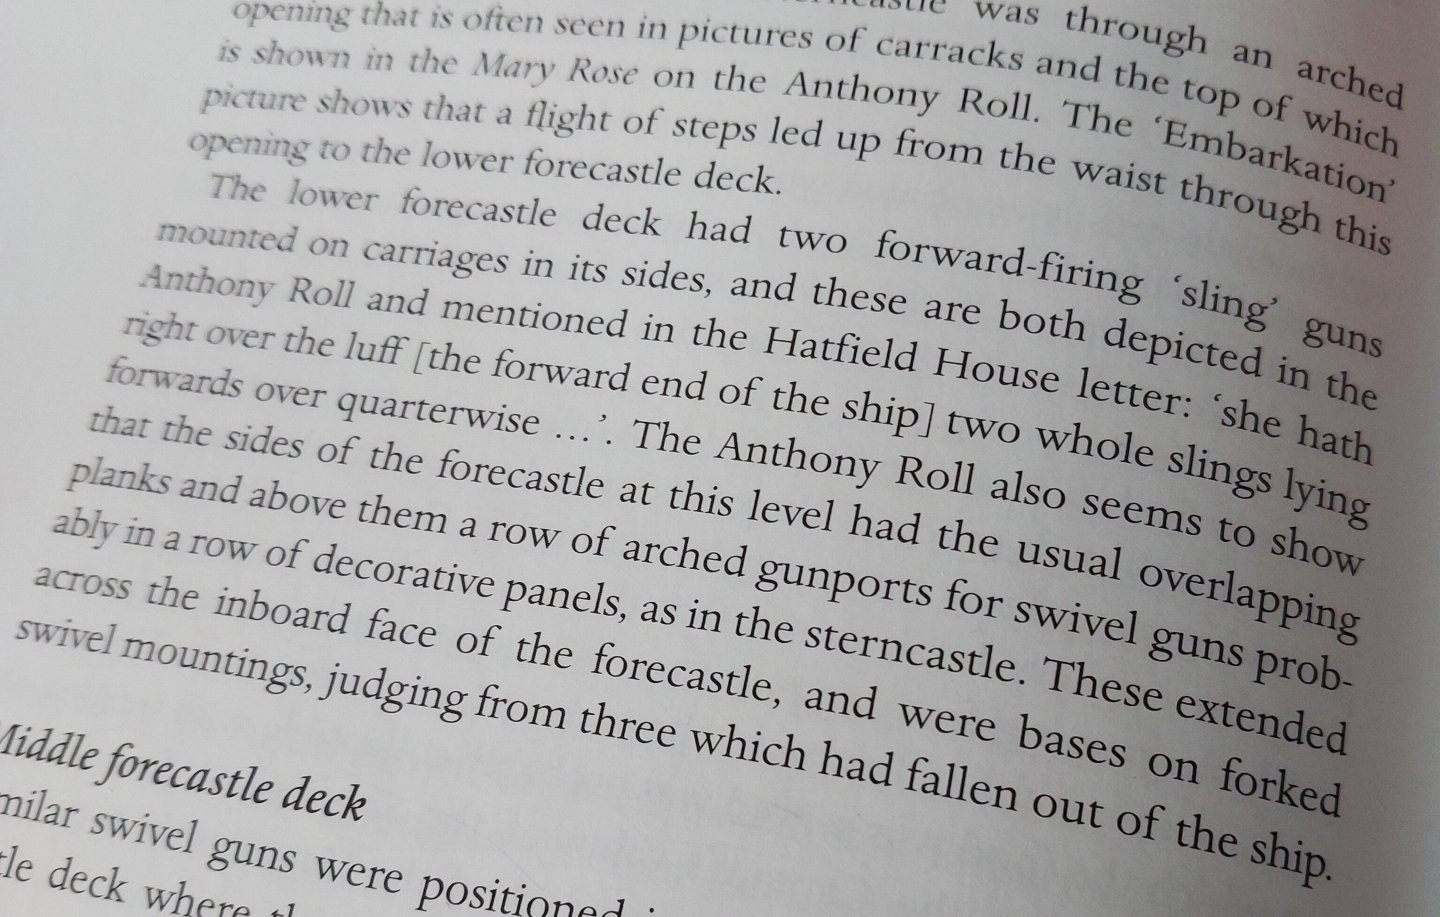
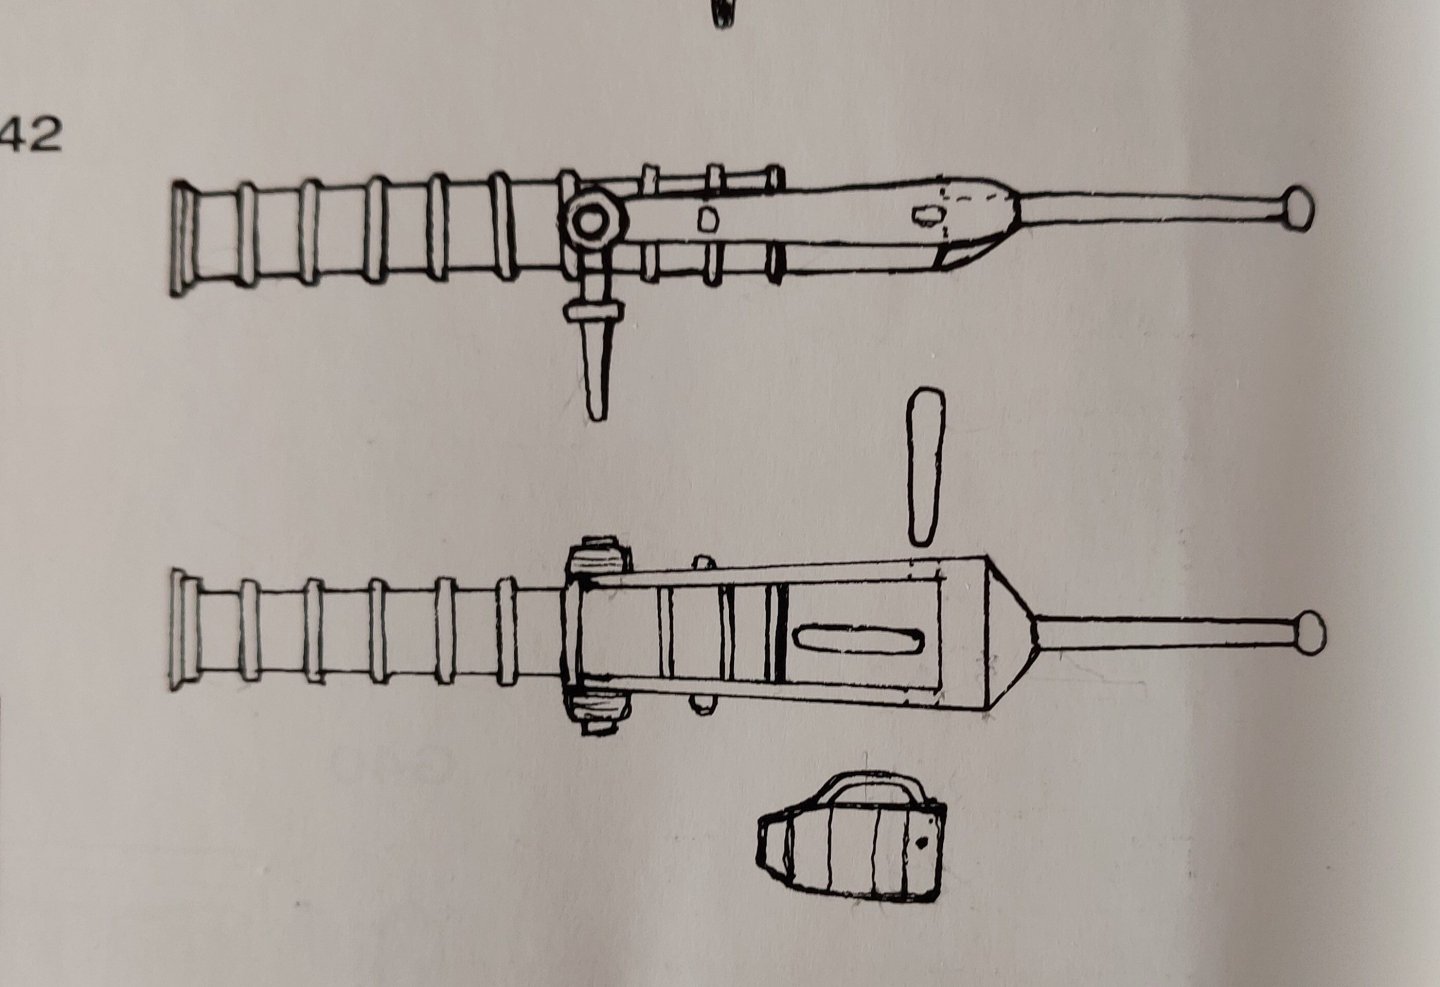
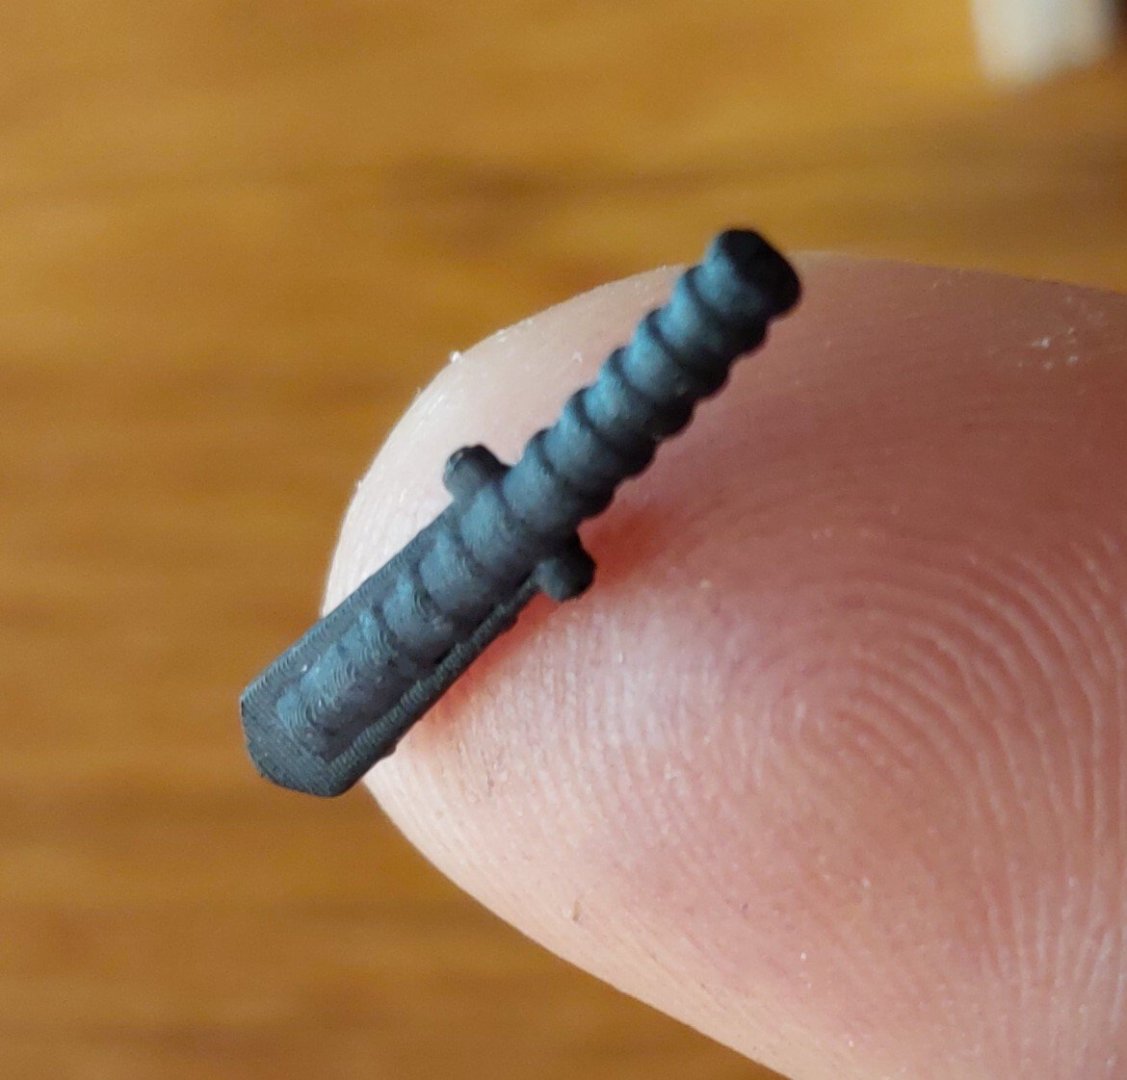
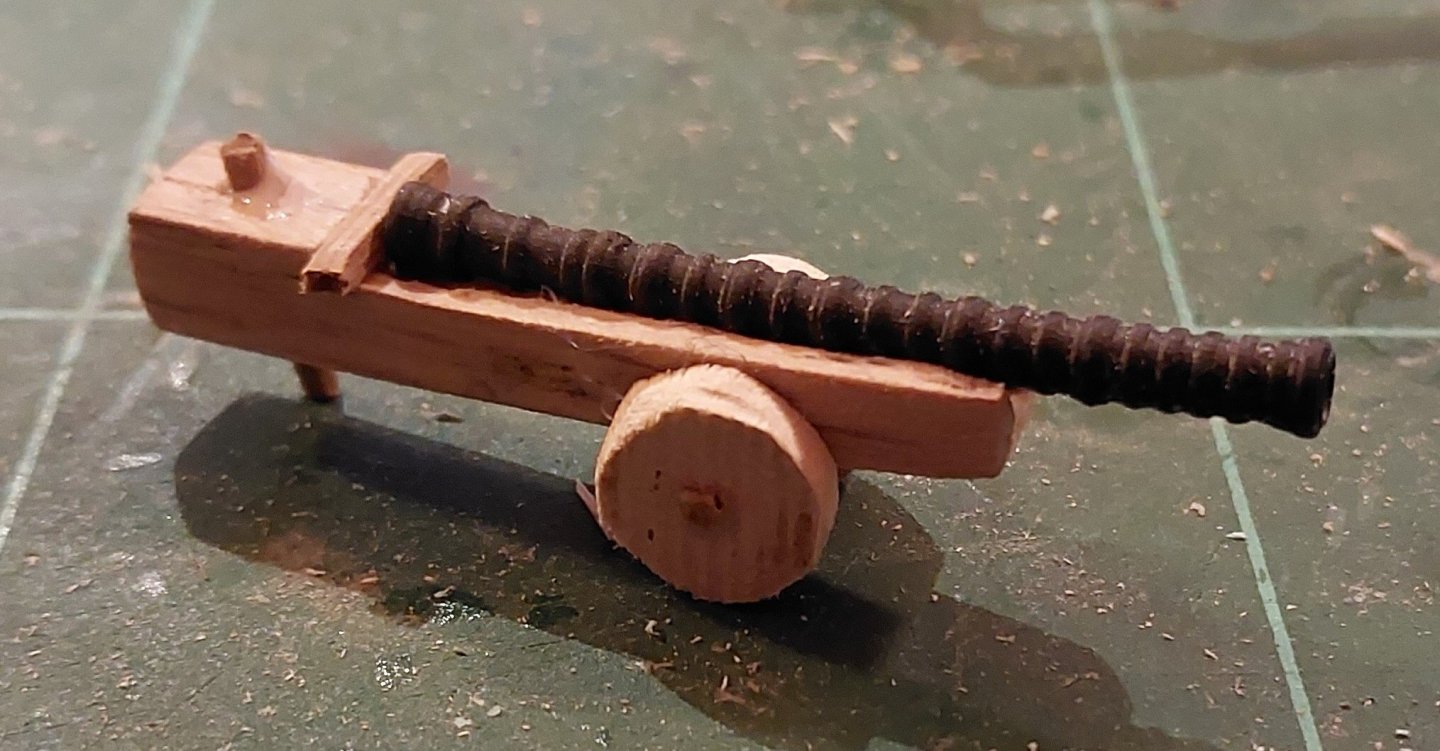
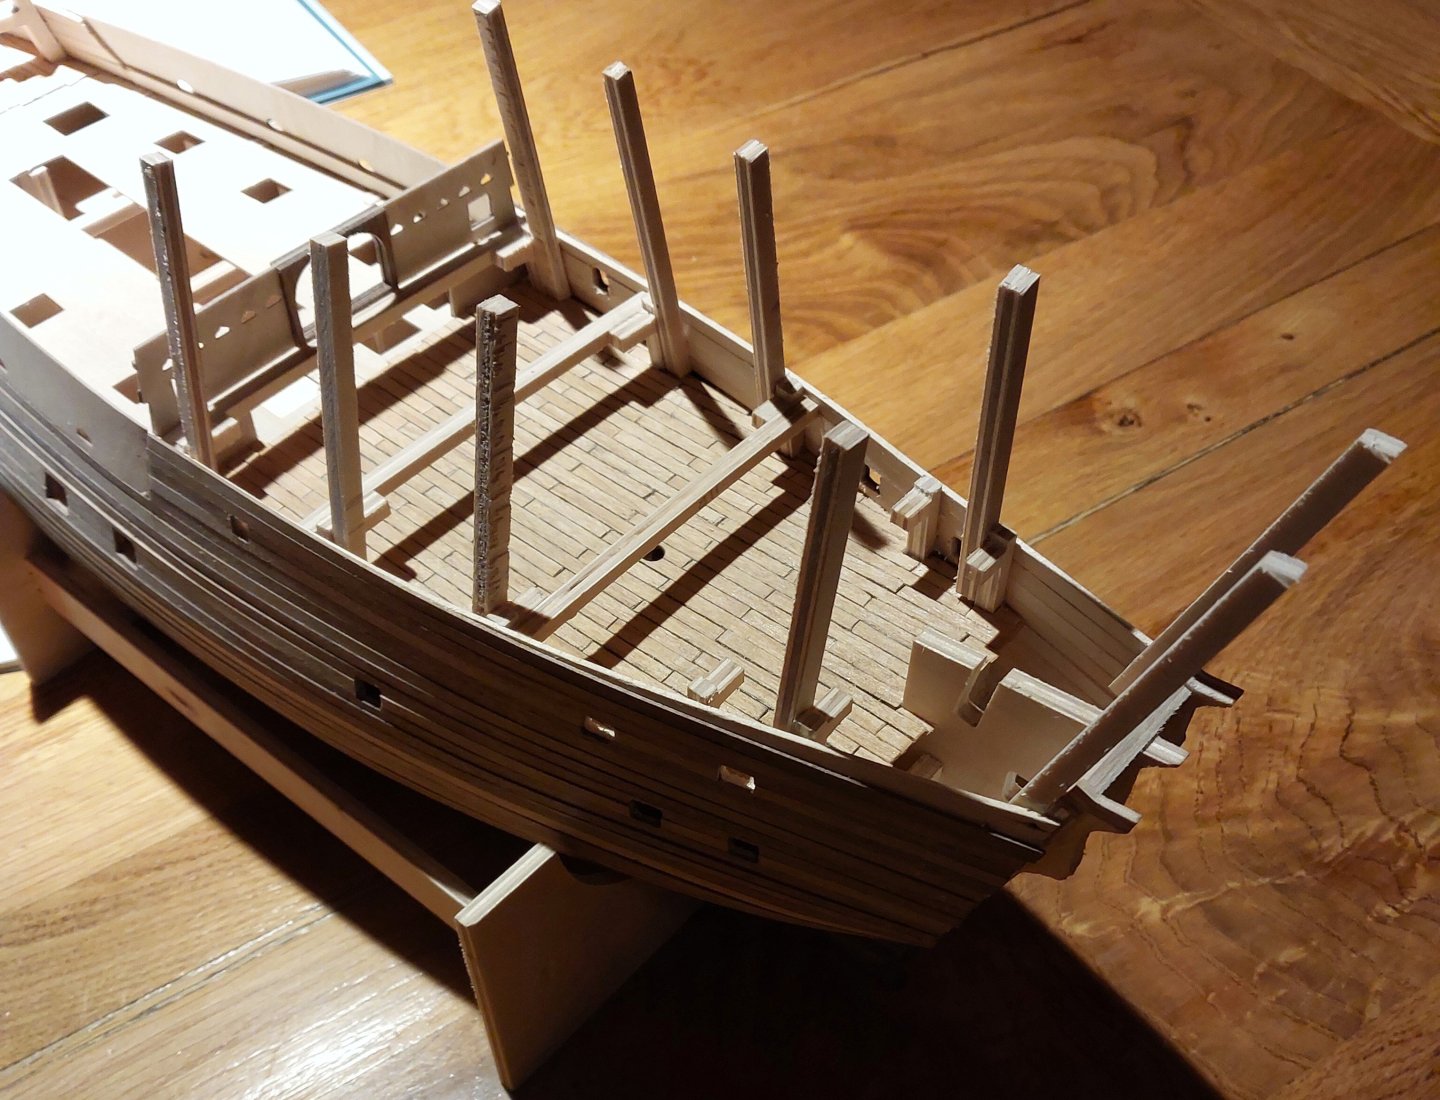
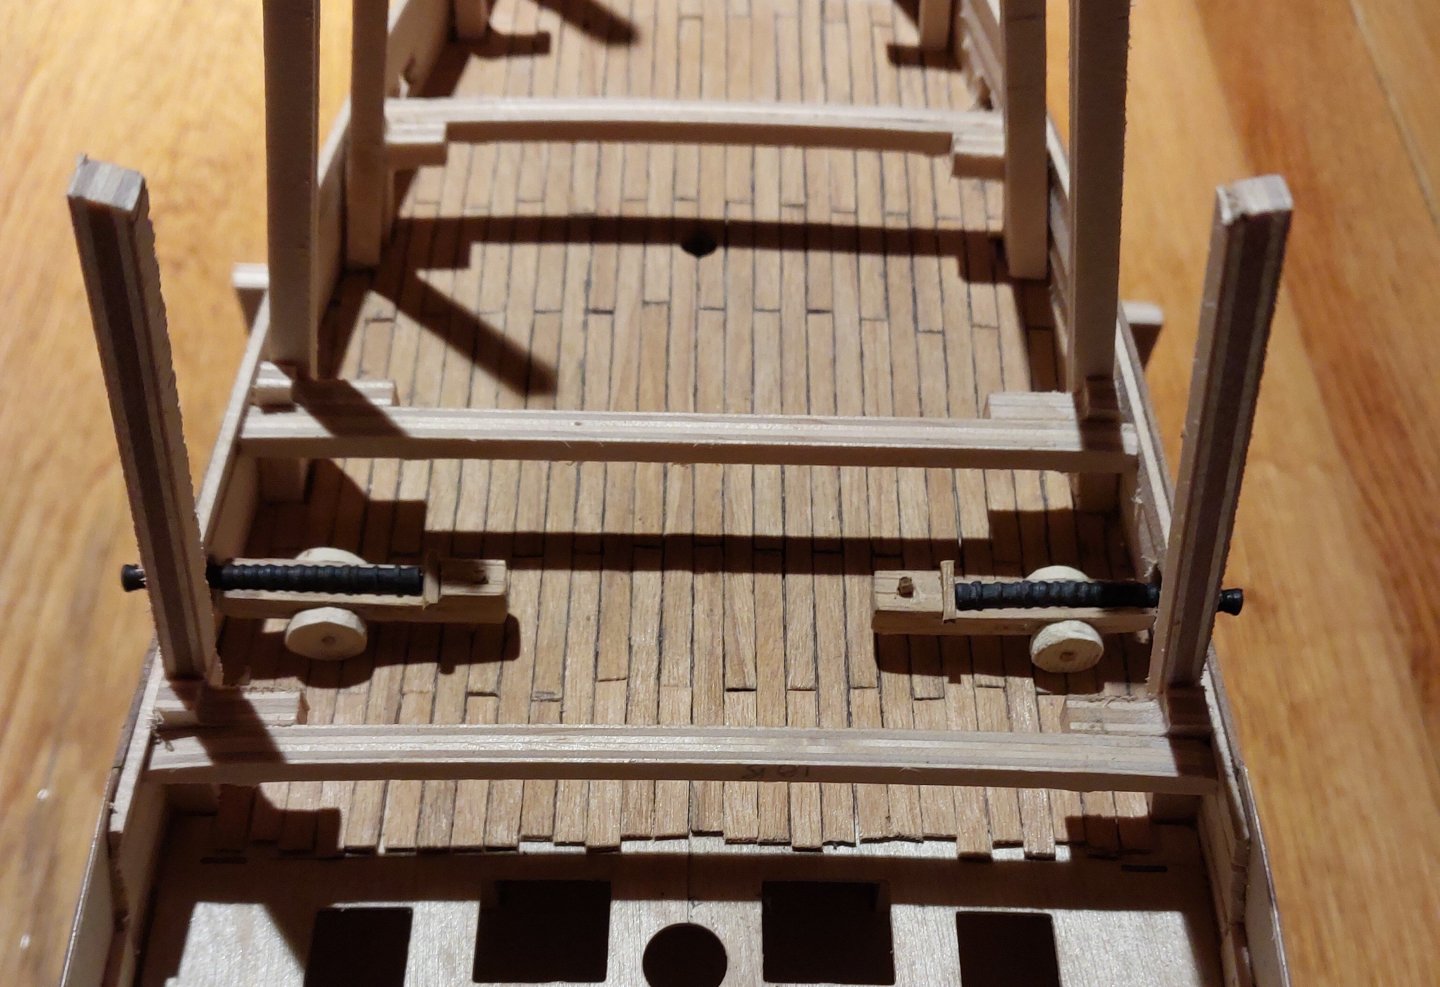
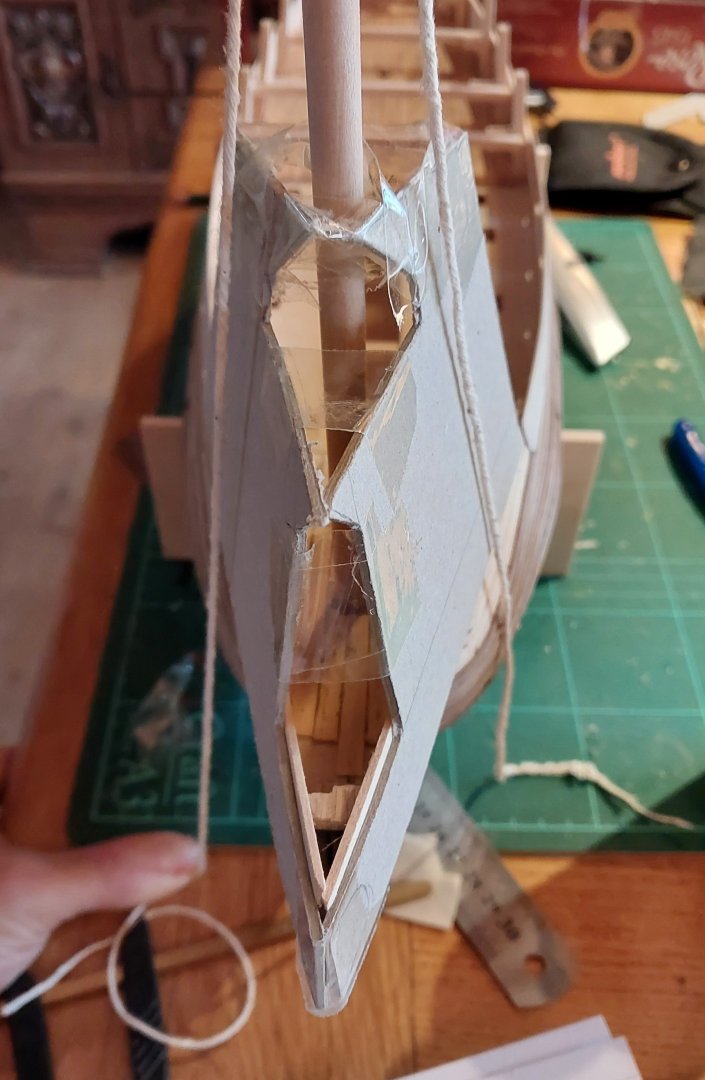
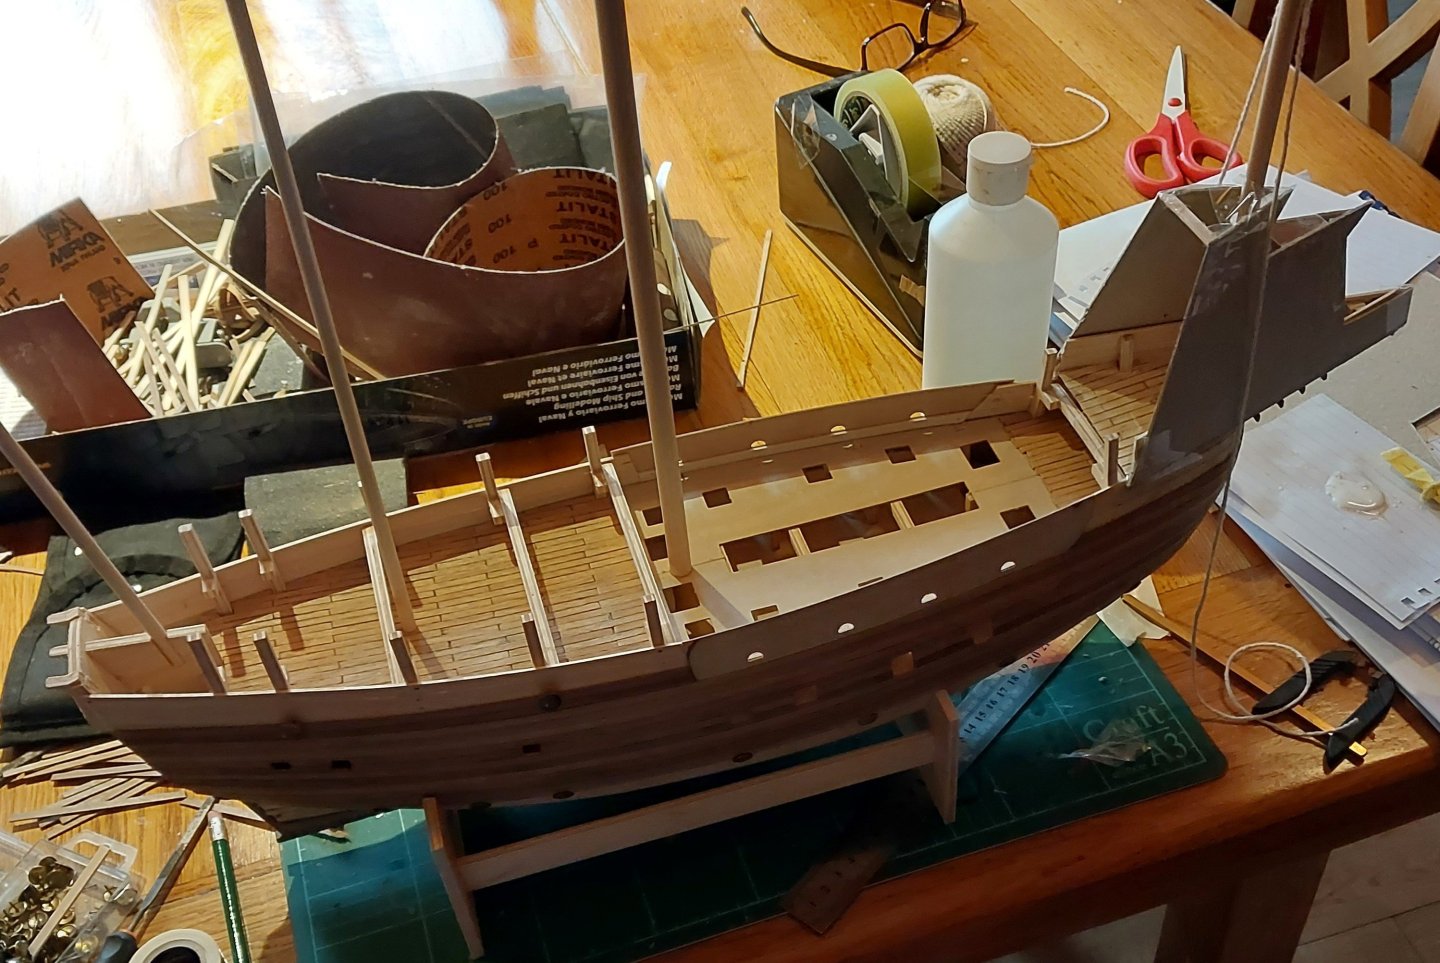
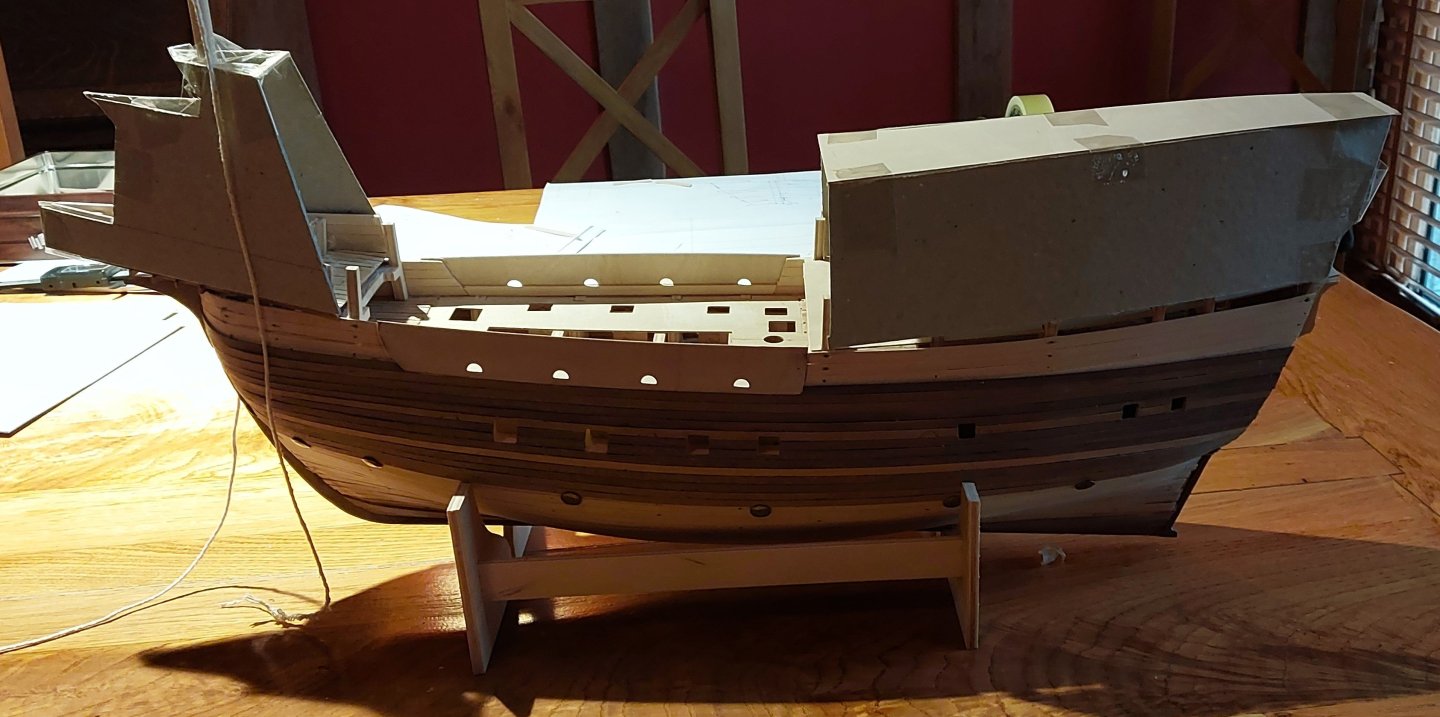
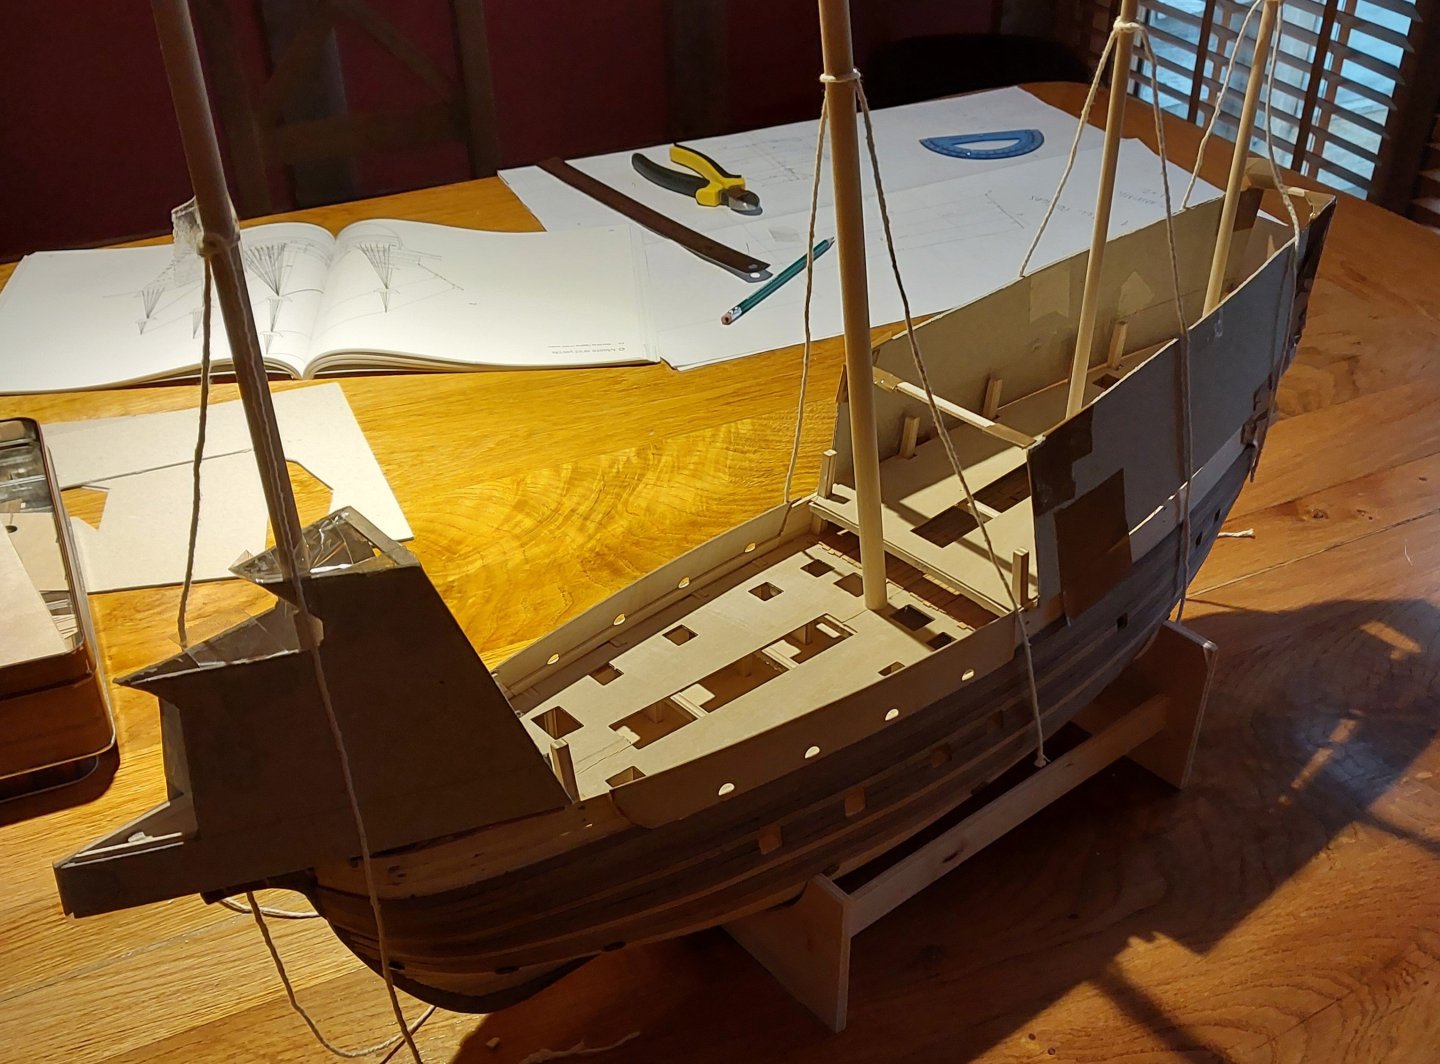
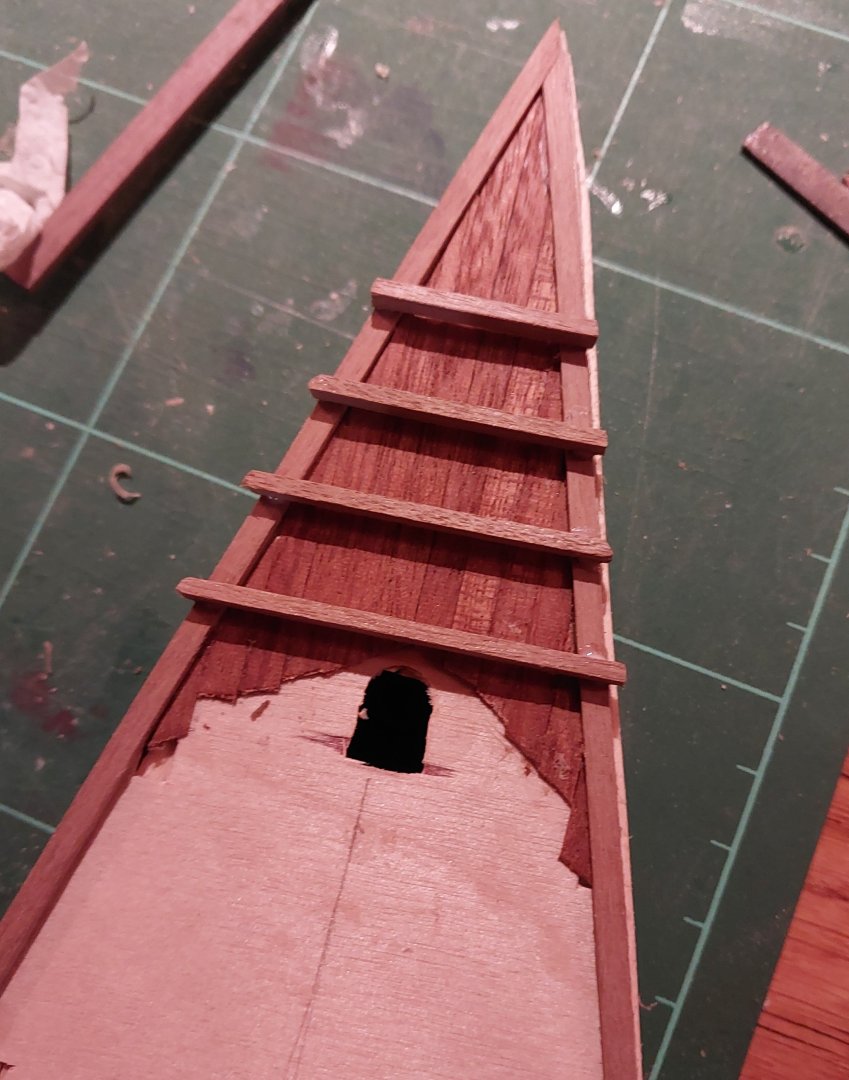
Marsden's book suggests a staircase underneath the forecastle in the 'nether deck' at the end of the waist, going up into the lowest deck of the forecastle. There was also a large arch-like entrance on the aft end of the lowest forecastle deck, as shown in the Embarkation painting and in the Anthony Roll - I'd postulate that there must have been internal stairways at the front of the forecastle, as there wasn't really enough room elsewhere and the baording netting over the waist would have impeded stairways on the outside. But that aside, here's my new update! After some discussion with @Louie da fly and a very helpful article he provided, I've decided to go with smaller cannon in the forecastle. Peter Marsden retains that there were 'slings' in the lowest deck, based on a letter exchanged with Henry VIII: However, I don't think they'd fit, and they certainly wouldn't look right in my build. As such, on Steven's recommendation, I'll be using Pierrier à boîte swivel guns - in both Marsden and McElvogue's work I believe these were known as 'fowlers', and here's a drawing from McElvogue's book: As you can see, these were short iron cannon, mounted on a spike and breech-loaded. Here's a 3D printed one at the 1:80 scale I need: That's 17mm long. I glued a small upright in each of the forecastle gunports as a mount. I'll insert the cannons later, as I'm sure I'll knock them around whilst building otherwise: This leaves me with far more room in the forecastle, and so I'm considering putting in the stairway as discussed earlier in this thread - I'll have to have a think about that. Whilst I was working on the forecastle, and now I'm happy with the cannon situation, I stuck in the next deck and cut holes for foremast and bowsprit. The bowsprit is slightly offset so as to not conflict with the mast. The upright at the front marks the apex point of each triangular deck from here on up, so I'm going to need to work out how to make the walls work around this and the bowsprit as I build them. I've got some ideas, but there might be a few revisions! Back to the... back. The sterncastle is coming along well: The carriages for these guns are now in place, and I'm able to add and remove the barrels through the gunports - again, I'll stick those in permanently when I'm not likely to break them off in the building process. I still want to paint these up a little nicer as well. The Caldercraft kit comes with these nifty plywood sheets for the small gunports on the higher level of the sterncastle, so I used them. Here I've also put in the upright standards provided in the kit. McElvogue's drawings have these extending up the whole height of the sterncastle, but Marsden's don't, and as these were nicely shaped for the hull as part of Caldercraft's original build I've kept them at this length. Above these the sterncastle will continue for another 40mm, or around 4 metres of real height. I've decided that three decks makes most sense - that's therefore four including the poop deck at the very top. There won't be railings on this, but there will be a boarding net 'tent' supported on short poles. This is visible in the Anthony Roll - I'm just not quite sure how i'll make it yet. Another view from behind, where you can see some of the work I've also done on the transom: Each of the shaped gunports was planked over with overlapping clinker-style planks. McElvogue seems to think that the actual ports would have had flat sections of board on them instead, but honestly I'd already started doing this by the time I reviewed his drawings, and I'm sure not going to undo the work here. Well, I suppose I could, but I think this looks quite neat as it is. What do you think? I have also put in the strakes on the hull: And added various other details, including the beginnings of the channels and the planking around the waist bulkheads: It feels like quite a small update this time, but it's been a lot of time-consuming work. I'm close to completing the hull whilst also very far away from it! Today I began planking the waist deck: And this brings me to a close. I've organised to borrow some bronze paint from a friend, so I'll be painting up the cannon that go on the next deck of the sterncastle very soon, which will allow me to progress significantly. Otherwise, it's just more laying of planks for me. Thanks for reading!


-
Agreed - just catching up on this and I think the staircase must be inside, possibly even further forward. There was simply not enough room on the waist to have it much further aft. Your forecastle is looking great, very inspiring!
-
Thanks Patrick! Yes, the sources I've read seem to think there must have been some sort of stairway below the forecastle leading into the first deck of it. Another reason that these full-size carriages wouldn't have worked. I would guess that the stairwell would be aft of the mast, but I suppose up to interpretation! Looking forward to seeing what you come up with on your build 😁
-
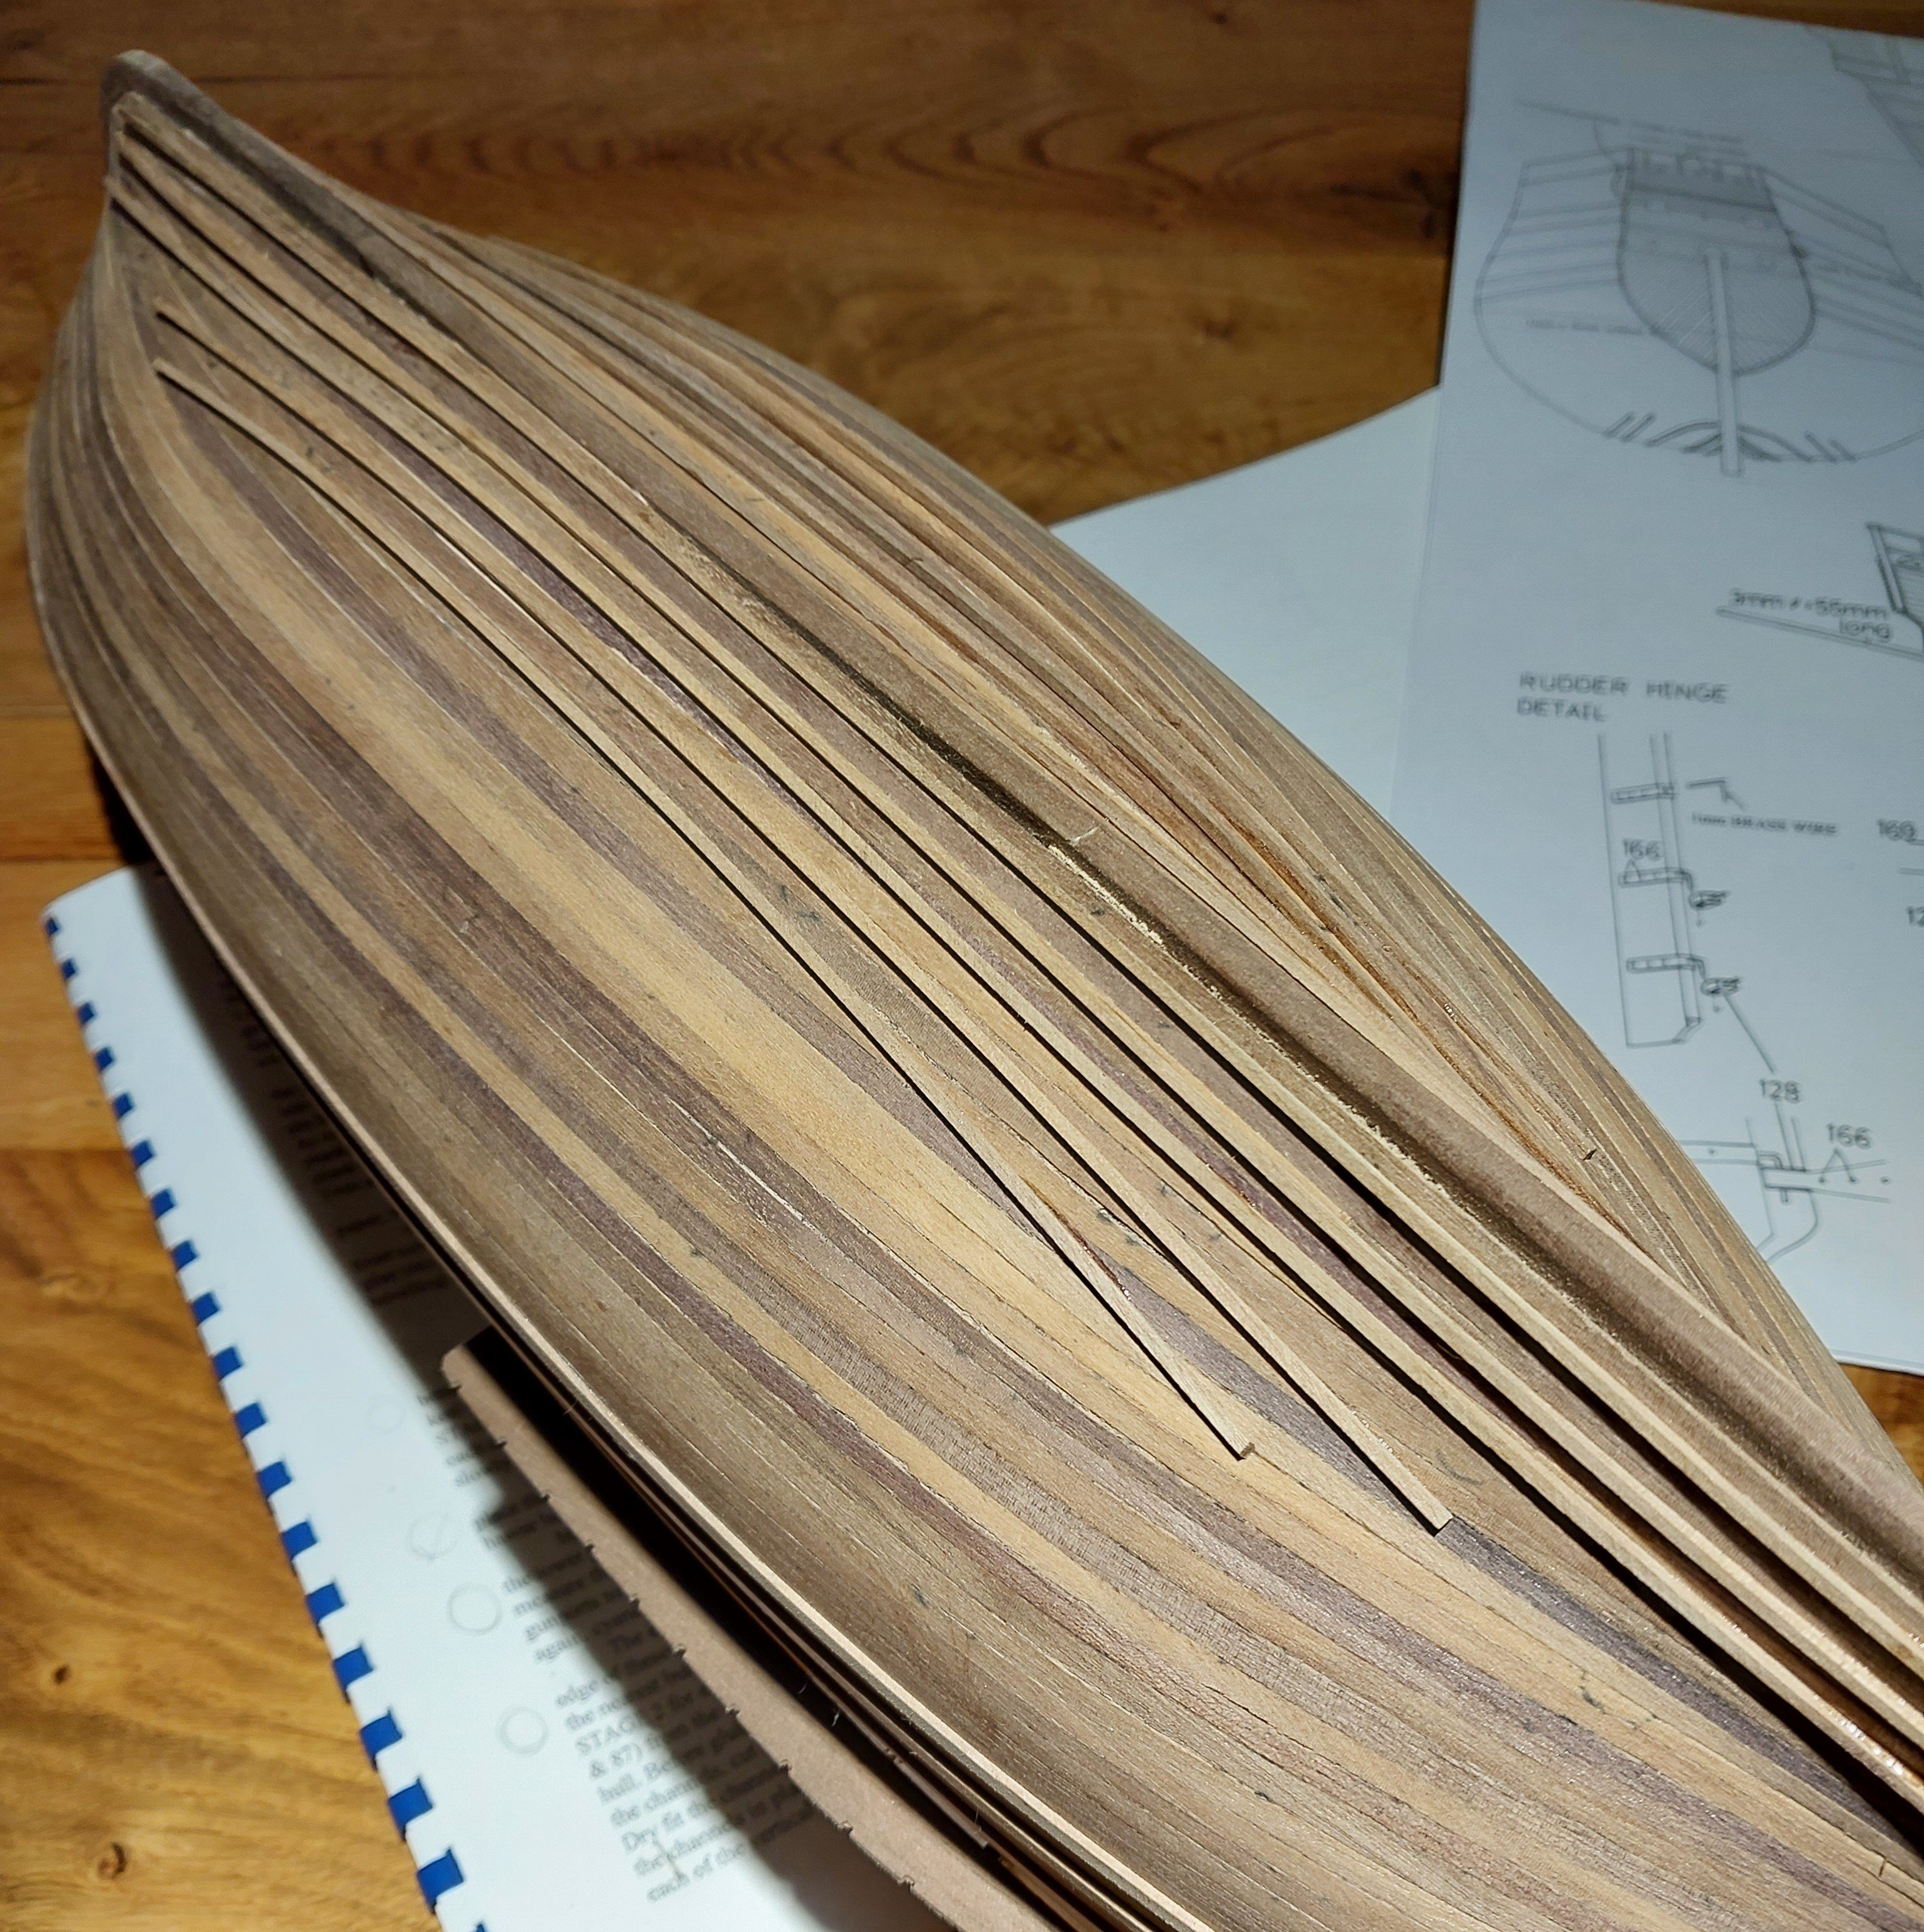
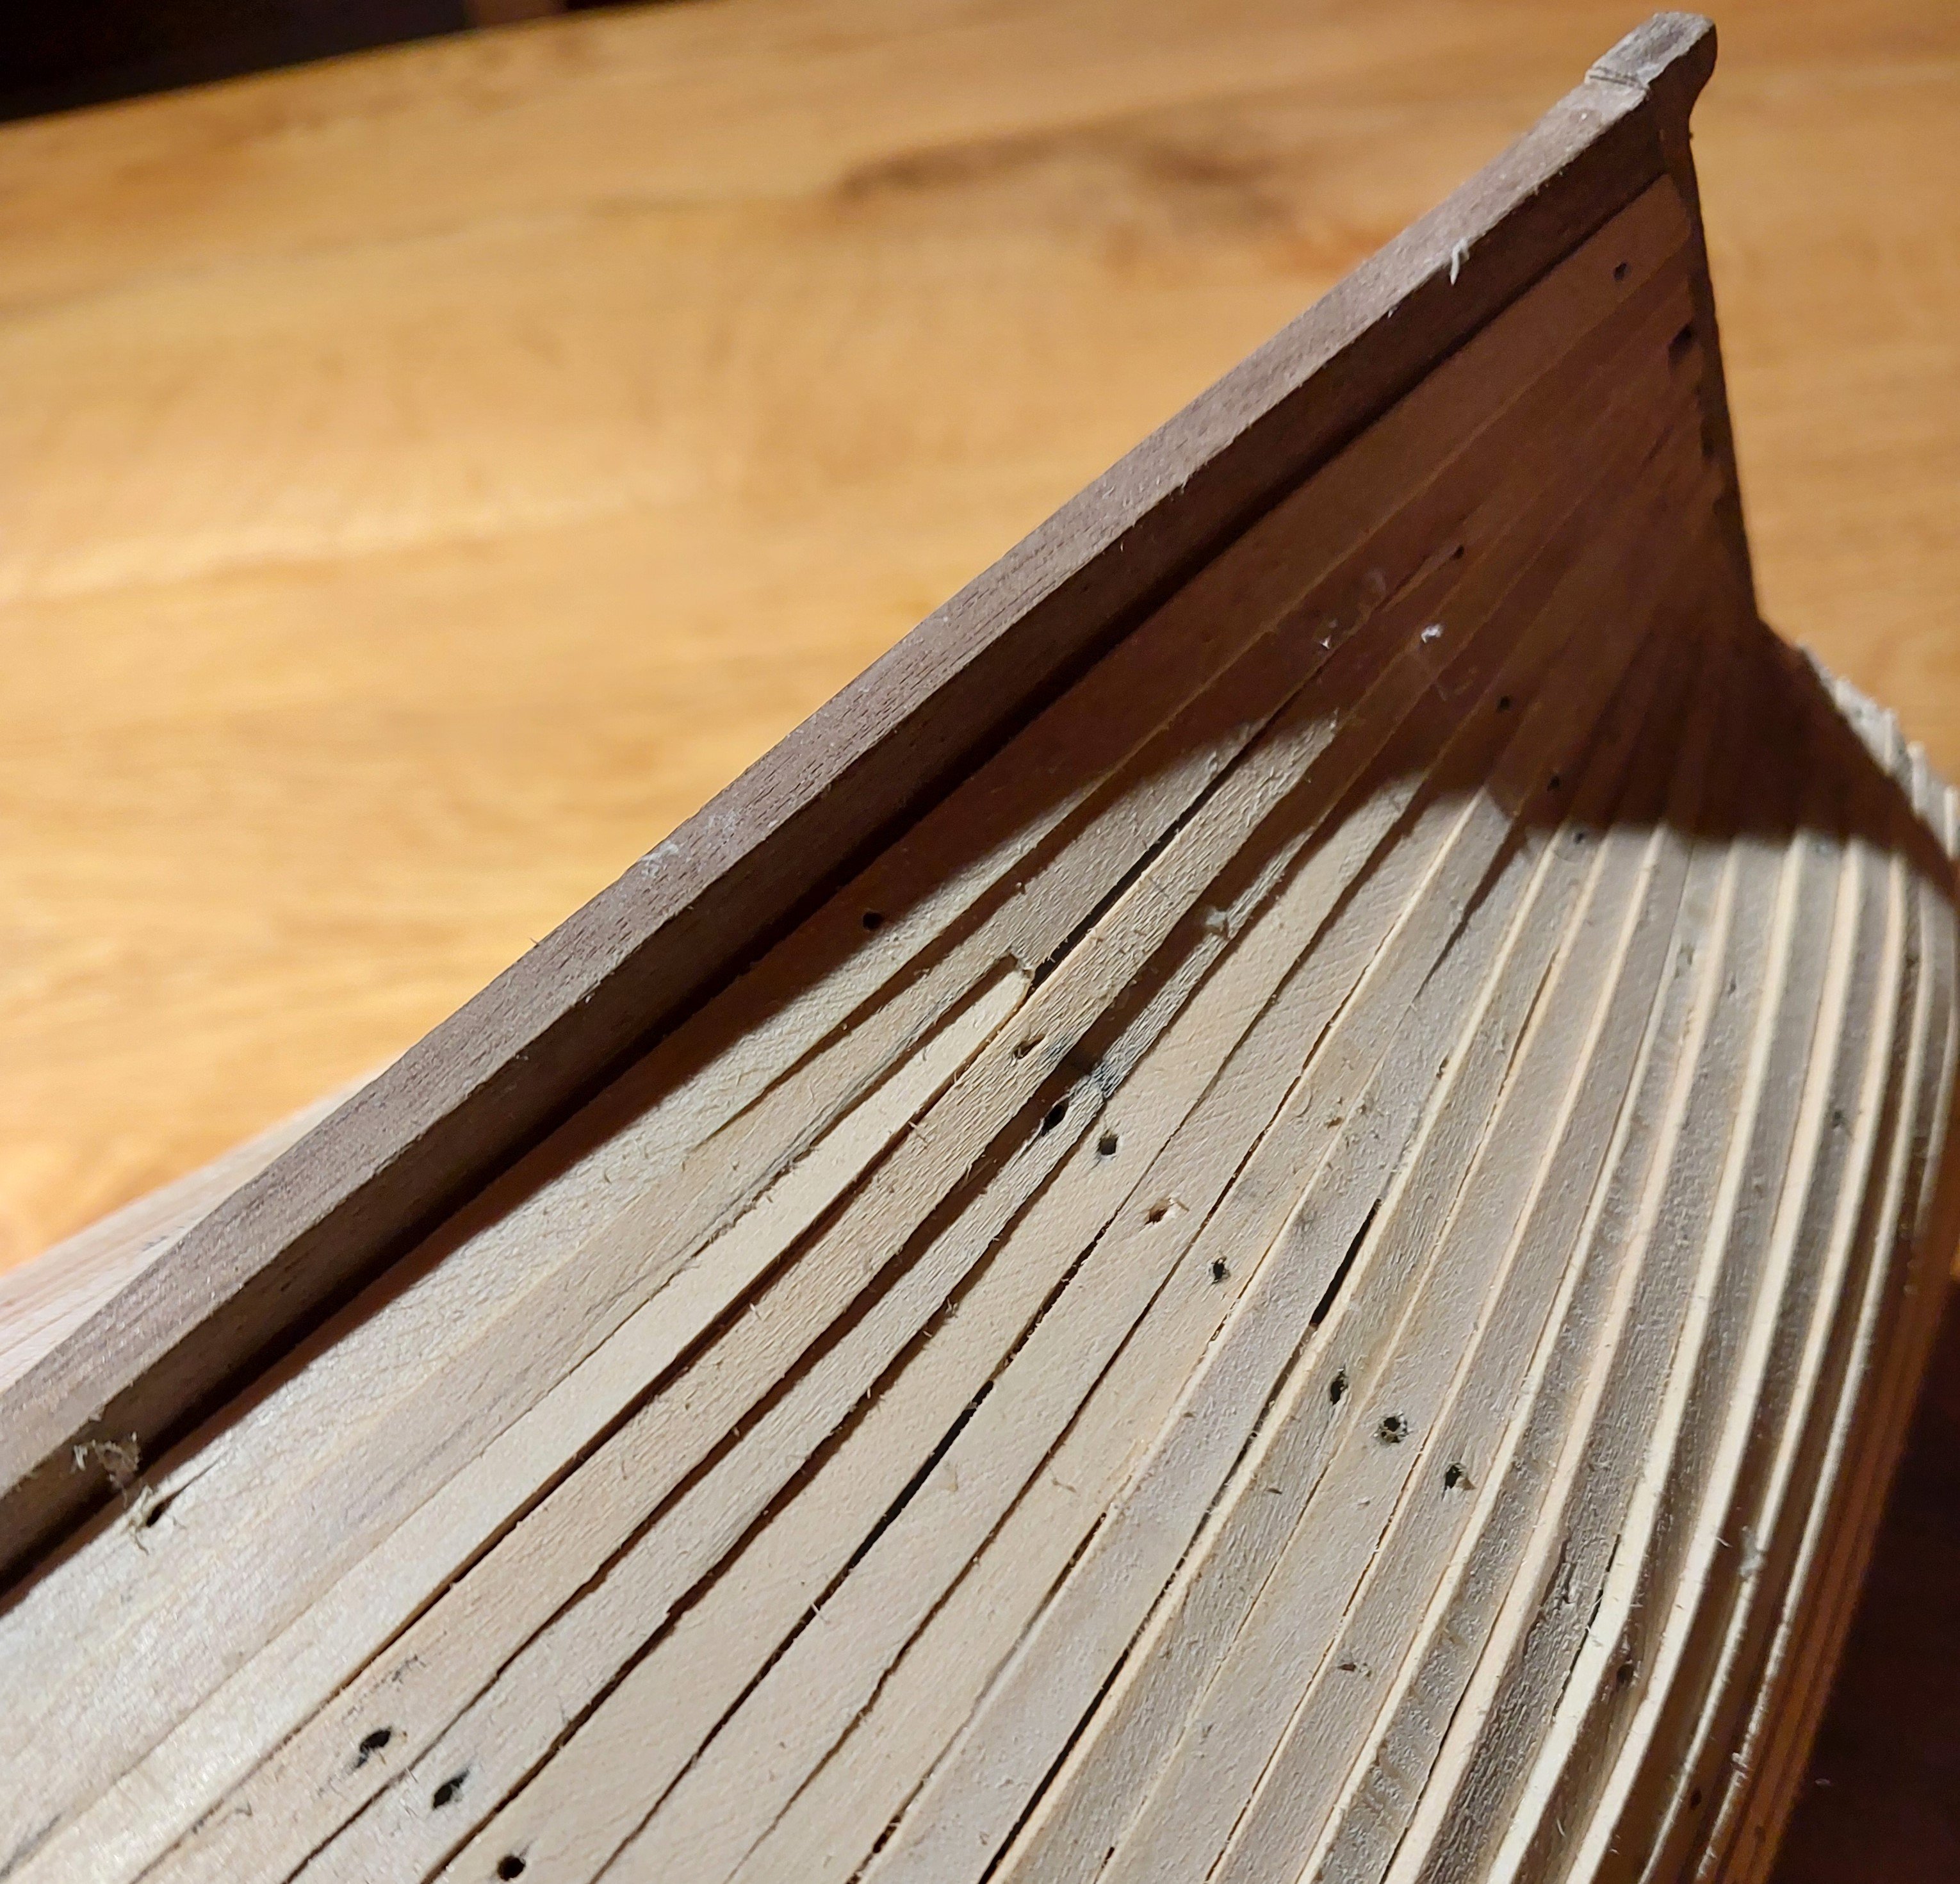
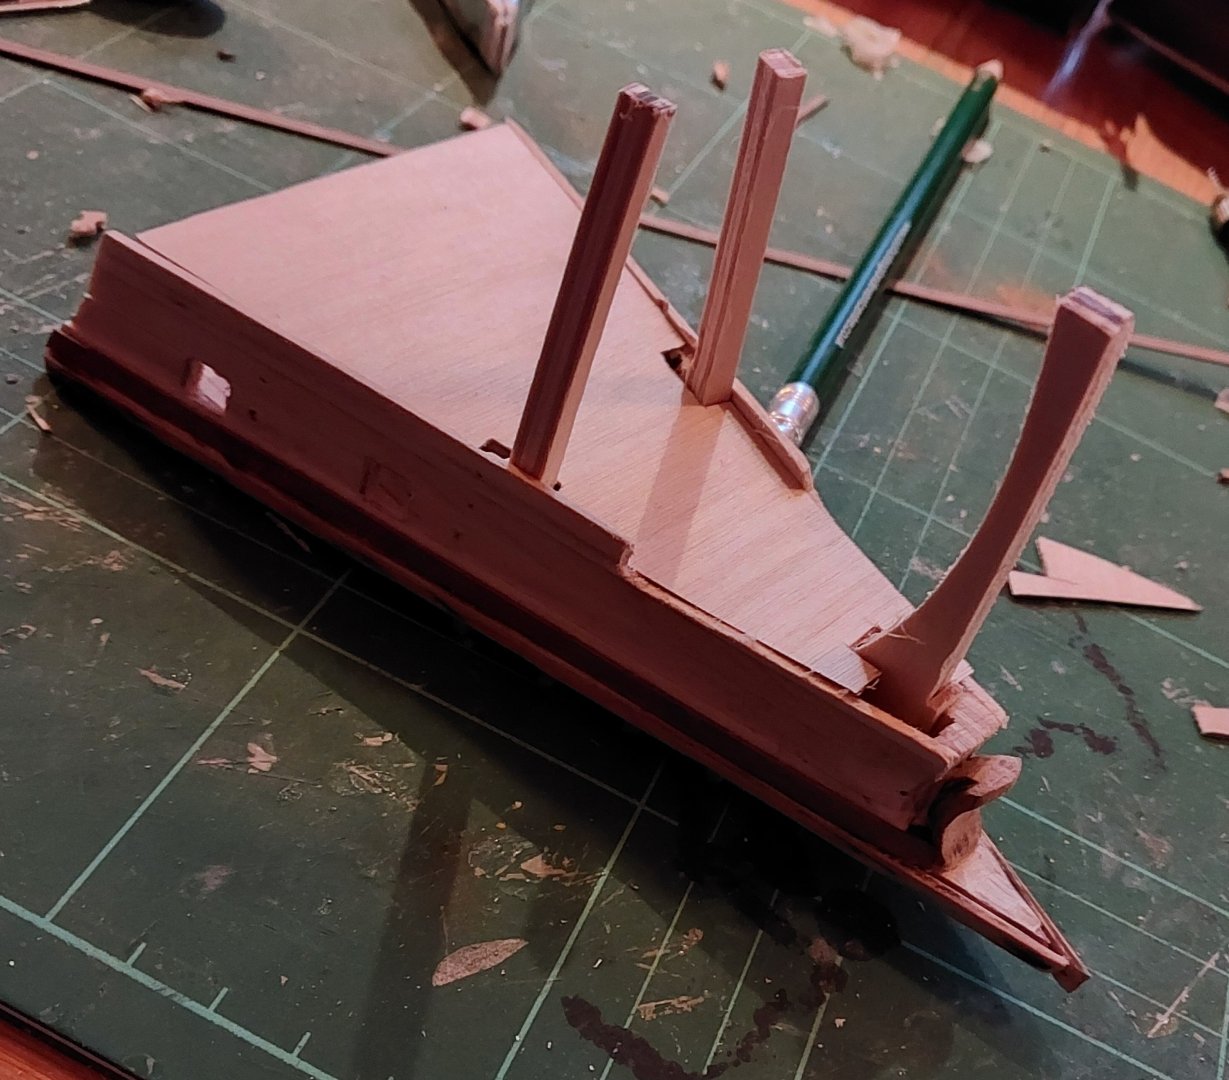
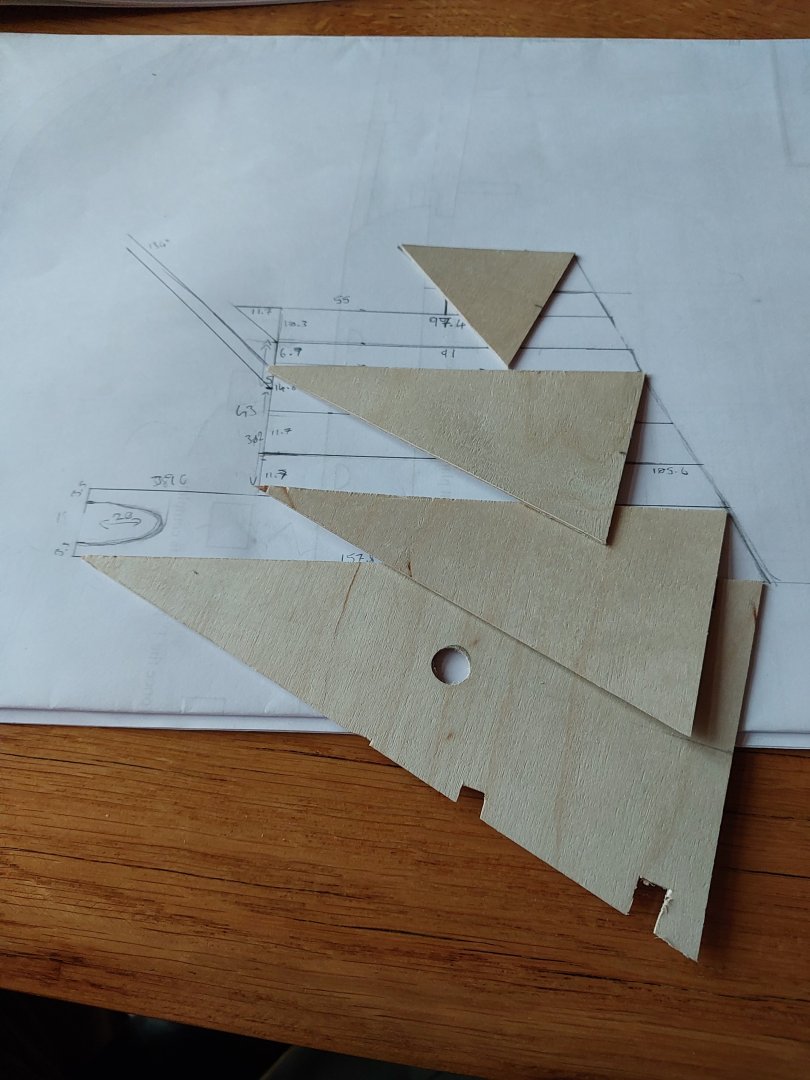
Yes, so as per all the sources I've found the forecastle likely had three decks and then one 'half deck' that was more of a sort of cabin on the top. I'd agree that it seems a little high, so I'm prepared to lower the total height by 5-10mm as I build it - my aim is to have each deck between 18-22mm in height, equating to around 2 metres of real height, and see how it looks once I've reached that point. As it doesn't exist any more, I don't think that there's a better way of getting it perfect. Agreed, a flat plane it is. Here's my first draft in wood: This was achieved by taking a dremel and some curved files to a piece of oak firewood. The intention is for the clinker-style planking of this deck to curve against the edge of this piece in order to replicate the style shown in the Anthony Roll. I've also taken a great deal of inspiration from this modern image: Where again we can see a flat face at the apex of the triangle. I think the forecastle in this painting is a bit short, but you can still see the 'half deck' on the top just behind the foremast. My forecastle interpretation has developed a little further as well - I added in some test uprights and cut out the second deck. I've actually since removed the foremost upright here as it was slightly too far forward - the next two decks are significantly shorter than the prow of this one. I'm not really sure how I'll handle the transition there - it seems strange to have a completely flat 'delta' shape at the prow, but the point of the next triangle is around 30mm back from the point of this bottom layer. The modern image I shared above does have a small flat area in the same place, but it's not quite as large. I've been ruminating on this issue for a while! Another issue is that even the cannon carriages provided in the Caldercraft kit are too large for my forecastle. The recoil from these would back them straight into the guns behind them. However! looking through McElvogue's book and he has some drawings where the wheels on these carriages are further back (the two in the photo are assembled according to Caldercraft's instructions), and the front third or so of the carriage itself protrudes out of the gunports. I think this might be the solution - other than modelling up some shorter barrels! Speaking of which, here's a whole bunch of cannons primed and ready for a bit of a paint job touchup: These are all based on the scale drawings in McElvogue's book, but I'll be placing them on the ship based on the rather detailed overview of each gun deck in Marsden's book. And here's the other work I've done this week - the planking is done! I'm really pleased with this. There's a couple areas with slight issues, but overall it's the best planking job I've done by far. I'm especially proud of the scarf joints I used for the last planks: Whilst slightly raised here, they've sanded down really nicely. Well worth the hour or so of frustration to get them right. Here she is after a go-over with 80 and 100 grit sandpaper: # And then with a nice 400 grit finish: The wood's slightly damp here as I wiped it down with a wet cloth to remove some of the dust - I'm hoping a coat of Danish oil will give her a nice natural finish. I also added in some uprights to the sterncastle to around the height I'm aiming for: And in doing so I encountered an interesting discrepancy. McElvogue's scale drawings were used as a basis for this, and they roughly match the height in some of the illustrations from Marsden's book. However, in McElvogue's case he suggests two internal decks in the sterncastle plus the poop deck - three total above the nether deck and main gun deck that're already in place on my model. In Marsden's book he suggests three internal decks above the nether deck - lower, middle and upper sterncastle, with the poop deck above covered in boarding netting. As mentioned earlier, I'm planning on keeping my decks around 20mm in height, and these uprights are 70mm high - giving me some leeway to shorten them if needed. I'm not sure which deck number would be correct, but after studying the Anthony Roll I'm leaning towards three internal plus the poop deck - the Anthony Roll has two very obvious lines of portholes, but they're spaced very far apart. Either the top deck was a good few metres high, or there was another deck in there. Marsden's rationale is that there must have been more decks in order to accommodate the 400+ men aboard the Mary Rose, and I'd be inclined to agree with him. I'd be keen to hear other people's thoughts on this too! Finally, the last thing I did this weekend was put together some gun carriages: These are much more like the actual carriages would have looked compared to what's provided in the kit. However, they're quite labour intensive to create, and are really not very visible inside the ship: I think I'll keep these ones in place, as the front of the sterncastle will have an opening, but for the carriages at the back I'll likely default to the Caldercraft provided bits. Anyway, lots of progress here - now for the tricky bits where I have to make big decisions. See you next time!


-
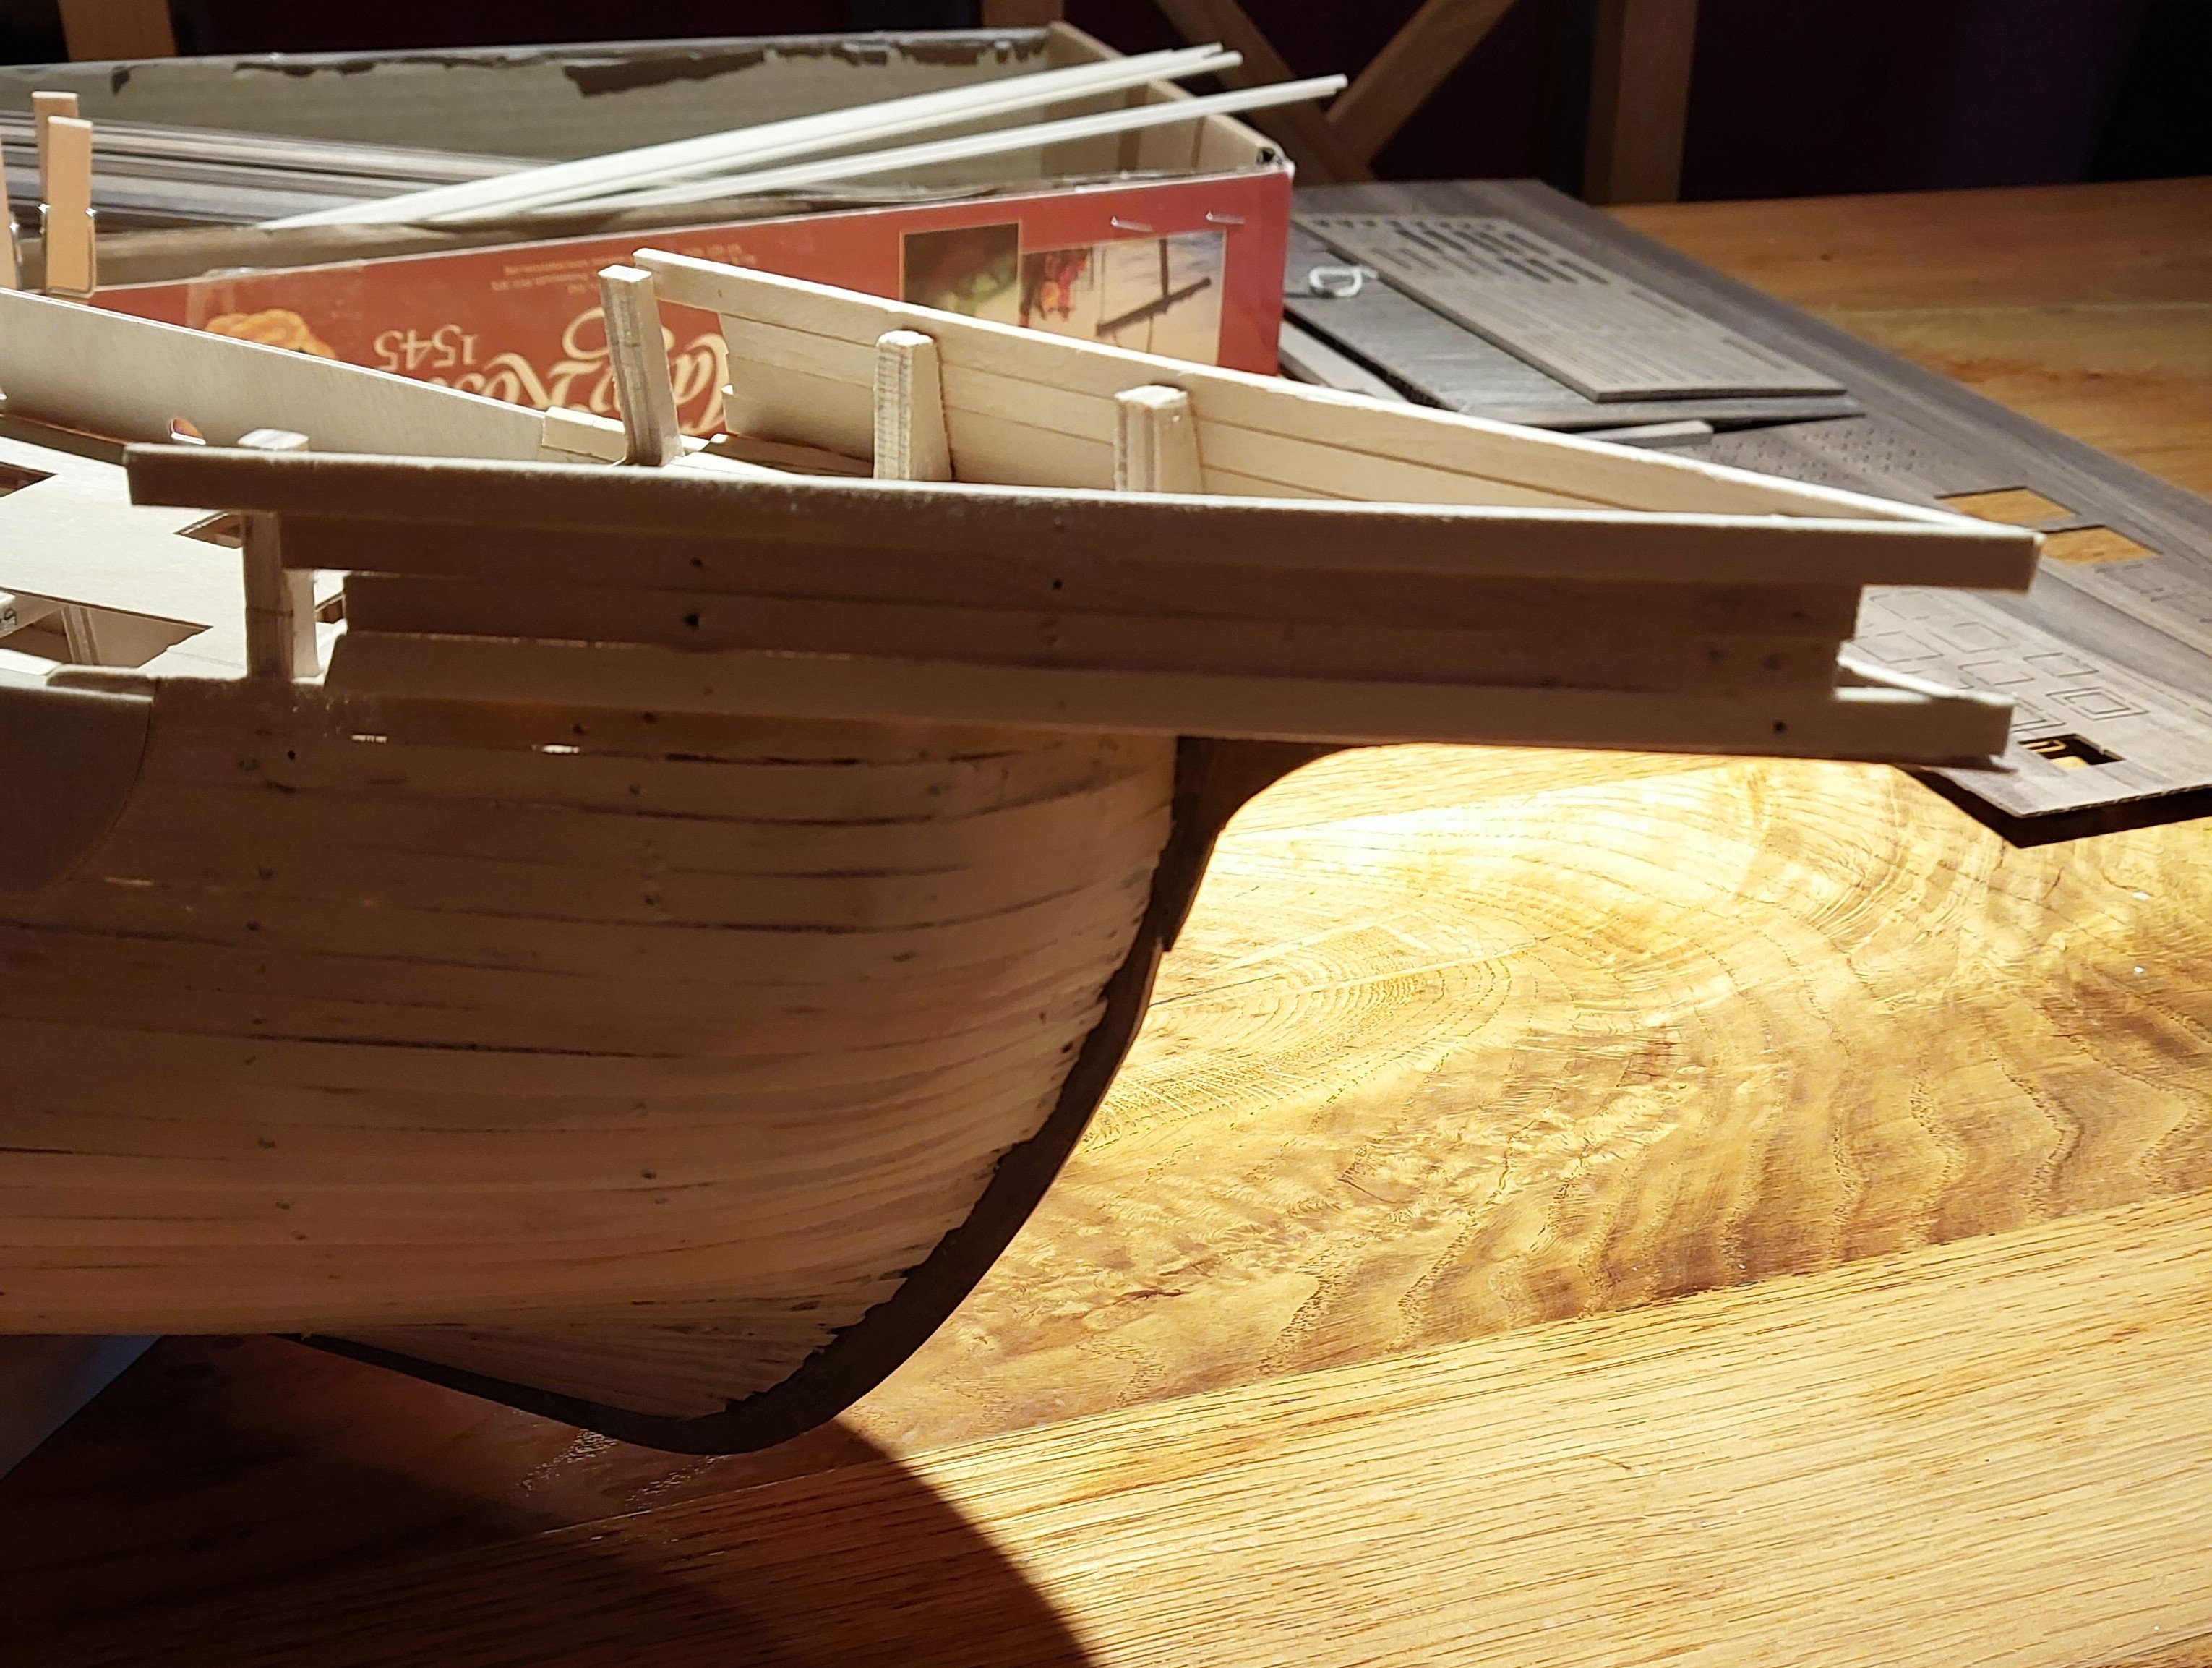
Hi both, thanks for the comments! Yes, I spent a little time mocking the castles up in cardboard. Here we go: First, the forecastle. Liberal use of sellotape - please don't take this as evidence of my modelling skill. I took the measurements for this straight from McElvogue's book - Marsden's is slightly different, but largely follows the same design principles and height, so I'm happy to continue with this. A piece of string tied to the mast where the top will be - again, based on McElvogue's rigging plan. This didn't interact at all with the sides. Obviously this is not 100% accurate, but I'm pleased with it so far. I feel like the height is good, and it's not too obnoxiously tall. Here I put the other masts into their respective slots - the foremast is further forward than the Caldercraft model's instructions as it comes up through the forecastle. I might have to move the other masts around a little bit too but at the moment I'm happy with their placement. Inspired by this success, I continued with the sterncastle: I had trouble getting the cardboard to hold the right shape without internal supports, so it may look a little skewed in some of the following photographs - there really isn't much to attach it to at the moment. Here all the masts are in place with the 'shrouds' at the correct height. Again, no interaction when held straight and when the sterncastle is the correct width - in this photo it has splayed open at the top where the mizzenmast shrouds fall. My only concern with this is how high the shrouds are on the mainmast - they start slightly lower than the shrouds on the foremast on my model, and I think this is because I'm measuring McElvogue's distance from the Caldercraft model mast. I would guess the waist panels on my model aren't as high as in McElvogue's drawing. Either way, the solution is to raise the height of the top on the mainmast slightly, which won't cause any issues with shrouds against the sides. I'll definitely be measuring this again before committing to that change - but as we don't have the masts of the original ship, it is of course up to my interpretation. I also don't think the shroud channels on the Caldercraft model will be accurate to the original, so I might well end up customisng these. As you can see in this photo, the height of the shrouds on the fore and mainmast is relatively similar - the mainmast would ideally be slightly taller: Either way, I'm pleased with this experiment - at least for now I know that the proposed forecastle design will work with this height of foremast top, and I can work around the heights of the shrouds in the mainmast once I'm closer to putting in the superstructure. As you can probably tell from these photos, I've been doing this in between letting planks dry on the ship - here's where we are with that: Getting there! And finally, here's some of my experiments with 3D printing cannon barrels! It's hard to get across the size of these, but I've modelled them off of drawings in McElvogue's book - there will be 16 'dummy' barrels which have 2mm x 8mm pegs at the back to stick into the gunports on the main deck, and then a number of full-length barrels for which I will have to create carriages. I'm currently printing a second batch of these, so I'll report back once I've made more progress. Thanks for reading!


-
Thanks Mikki - yes, I suspect so. Agreed, both are an apparently bottomless wealth of information! Yeah, I don't believe that I could have scratch built this with my current skillset - the castles are a looming concern on that front 🤣 thanks for following along! I had not considered it - I'm not sure where exactly they'd go, and I'd be a little reluctant to cut random holes just for that sake. If there's evidence that they existed in specific spots I'd be interested to hear more!
-
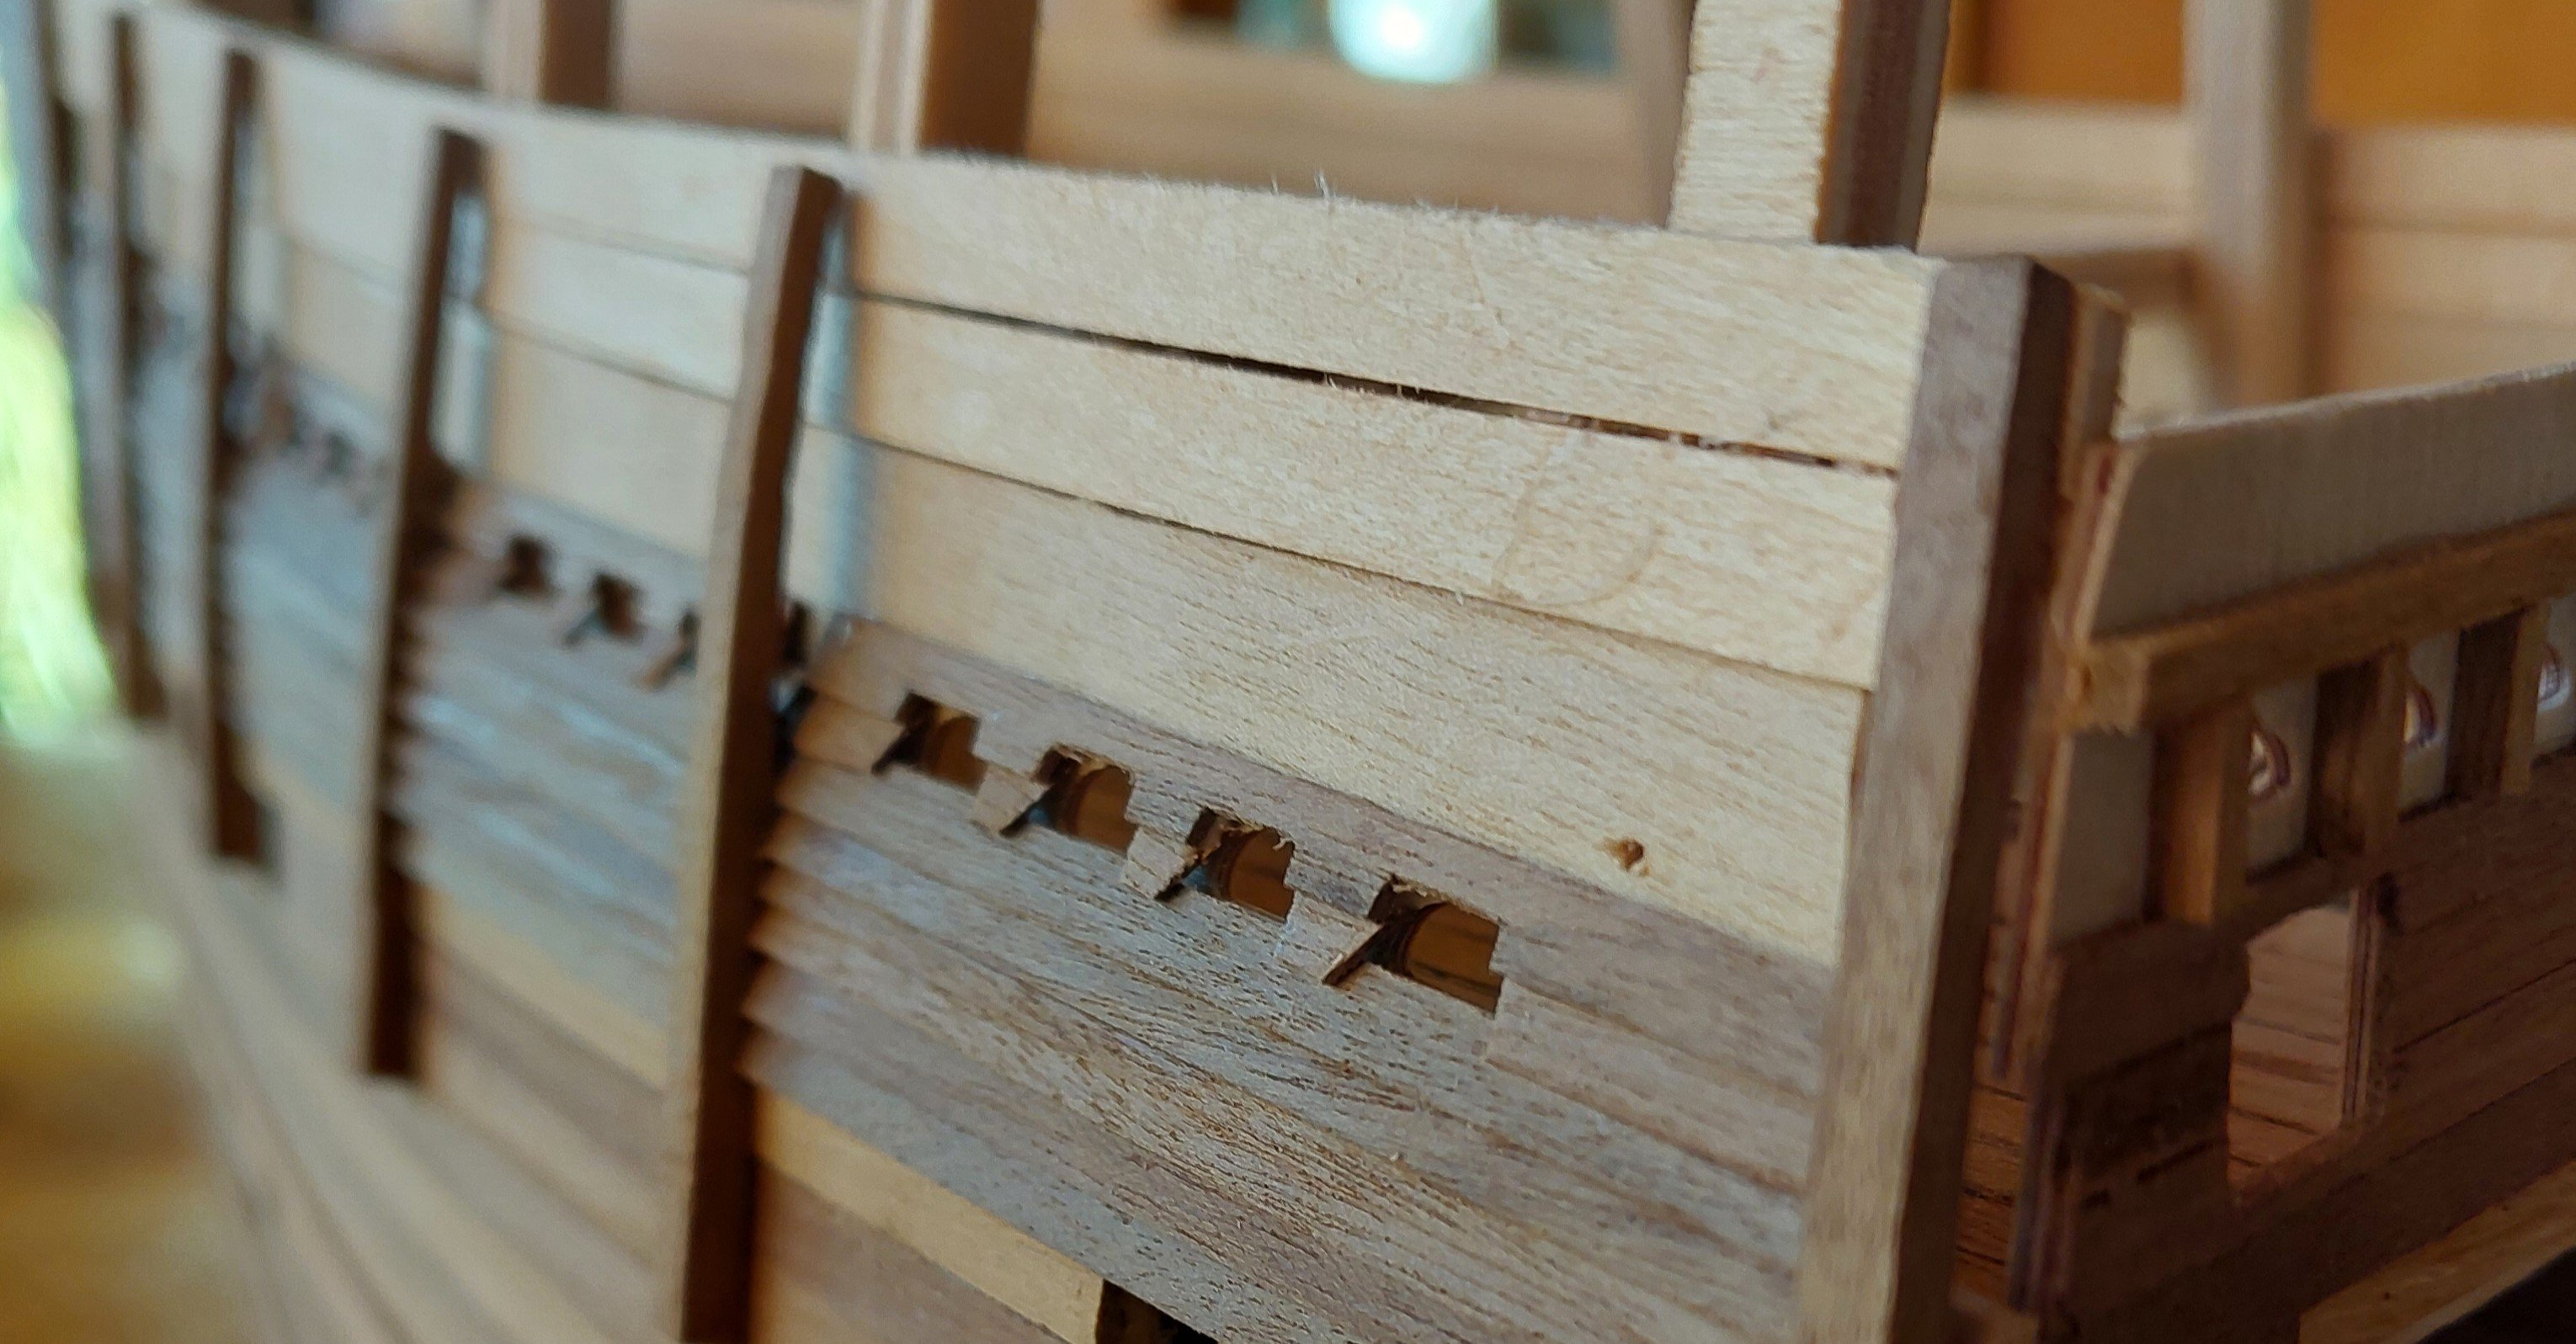
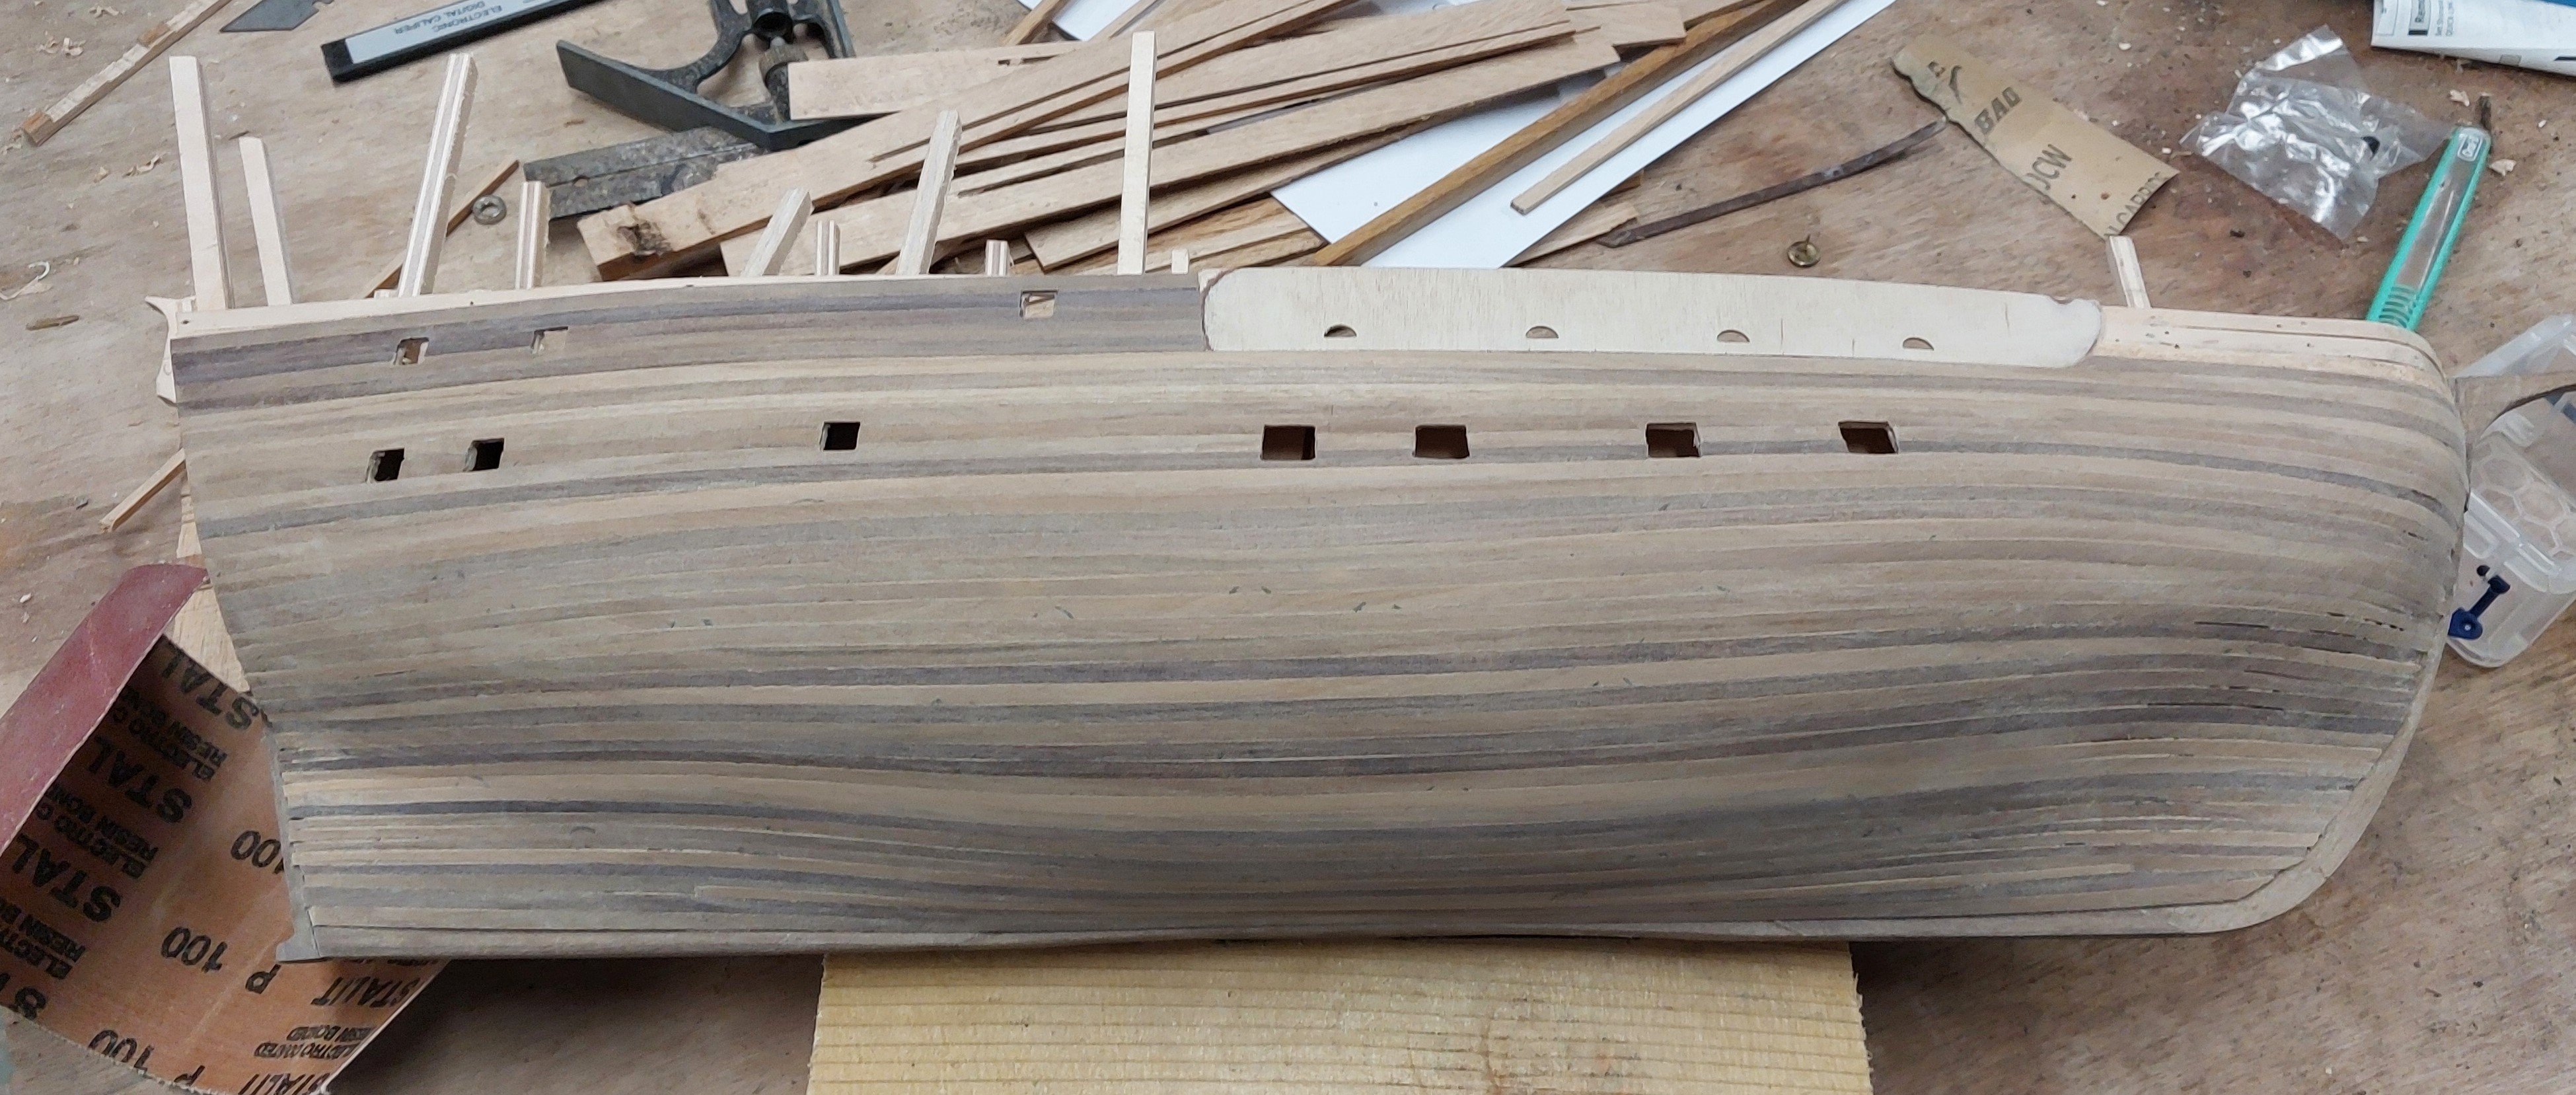
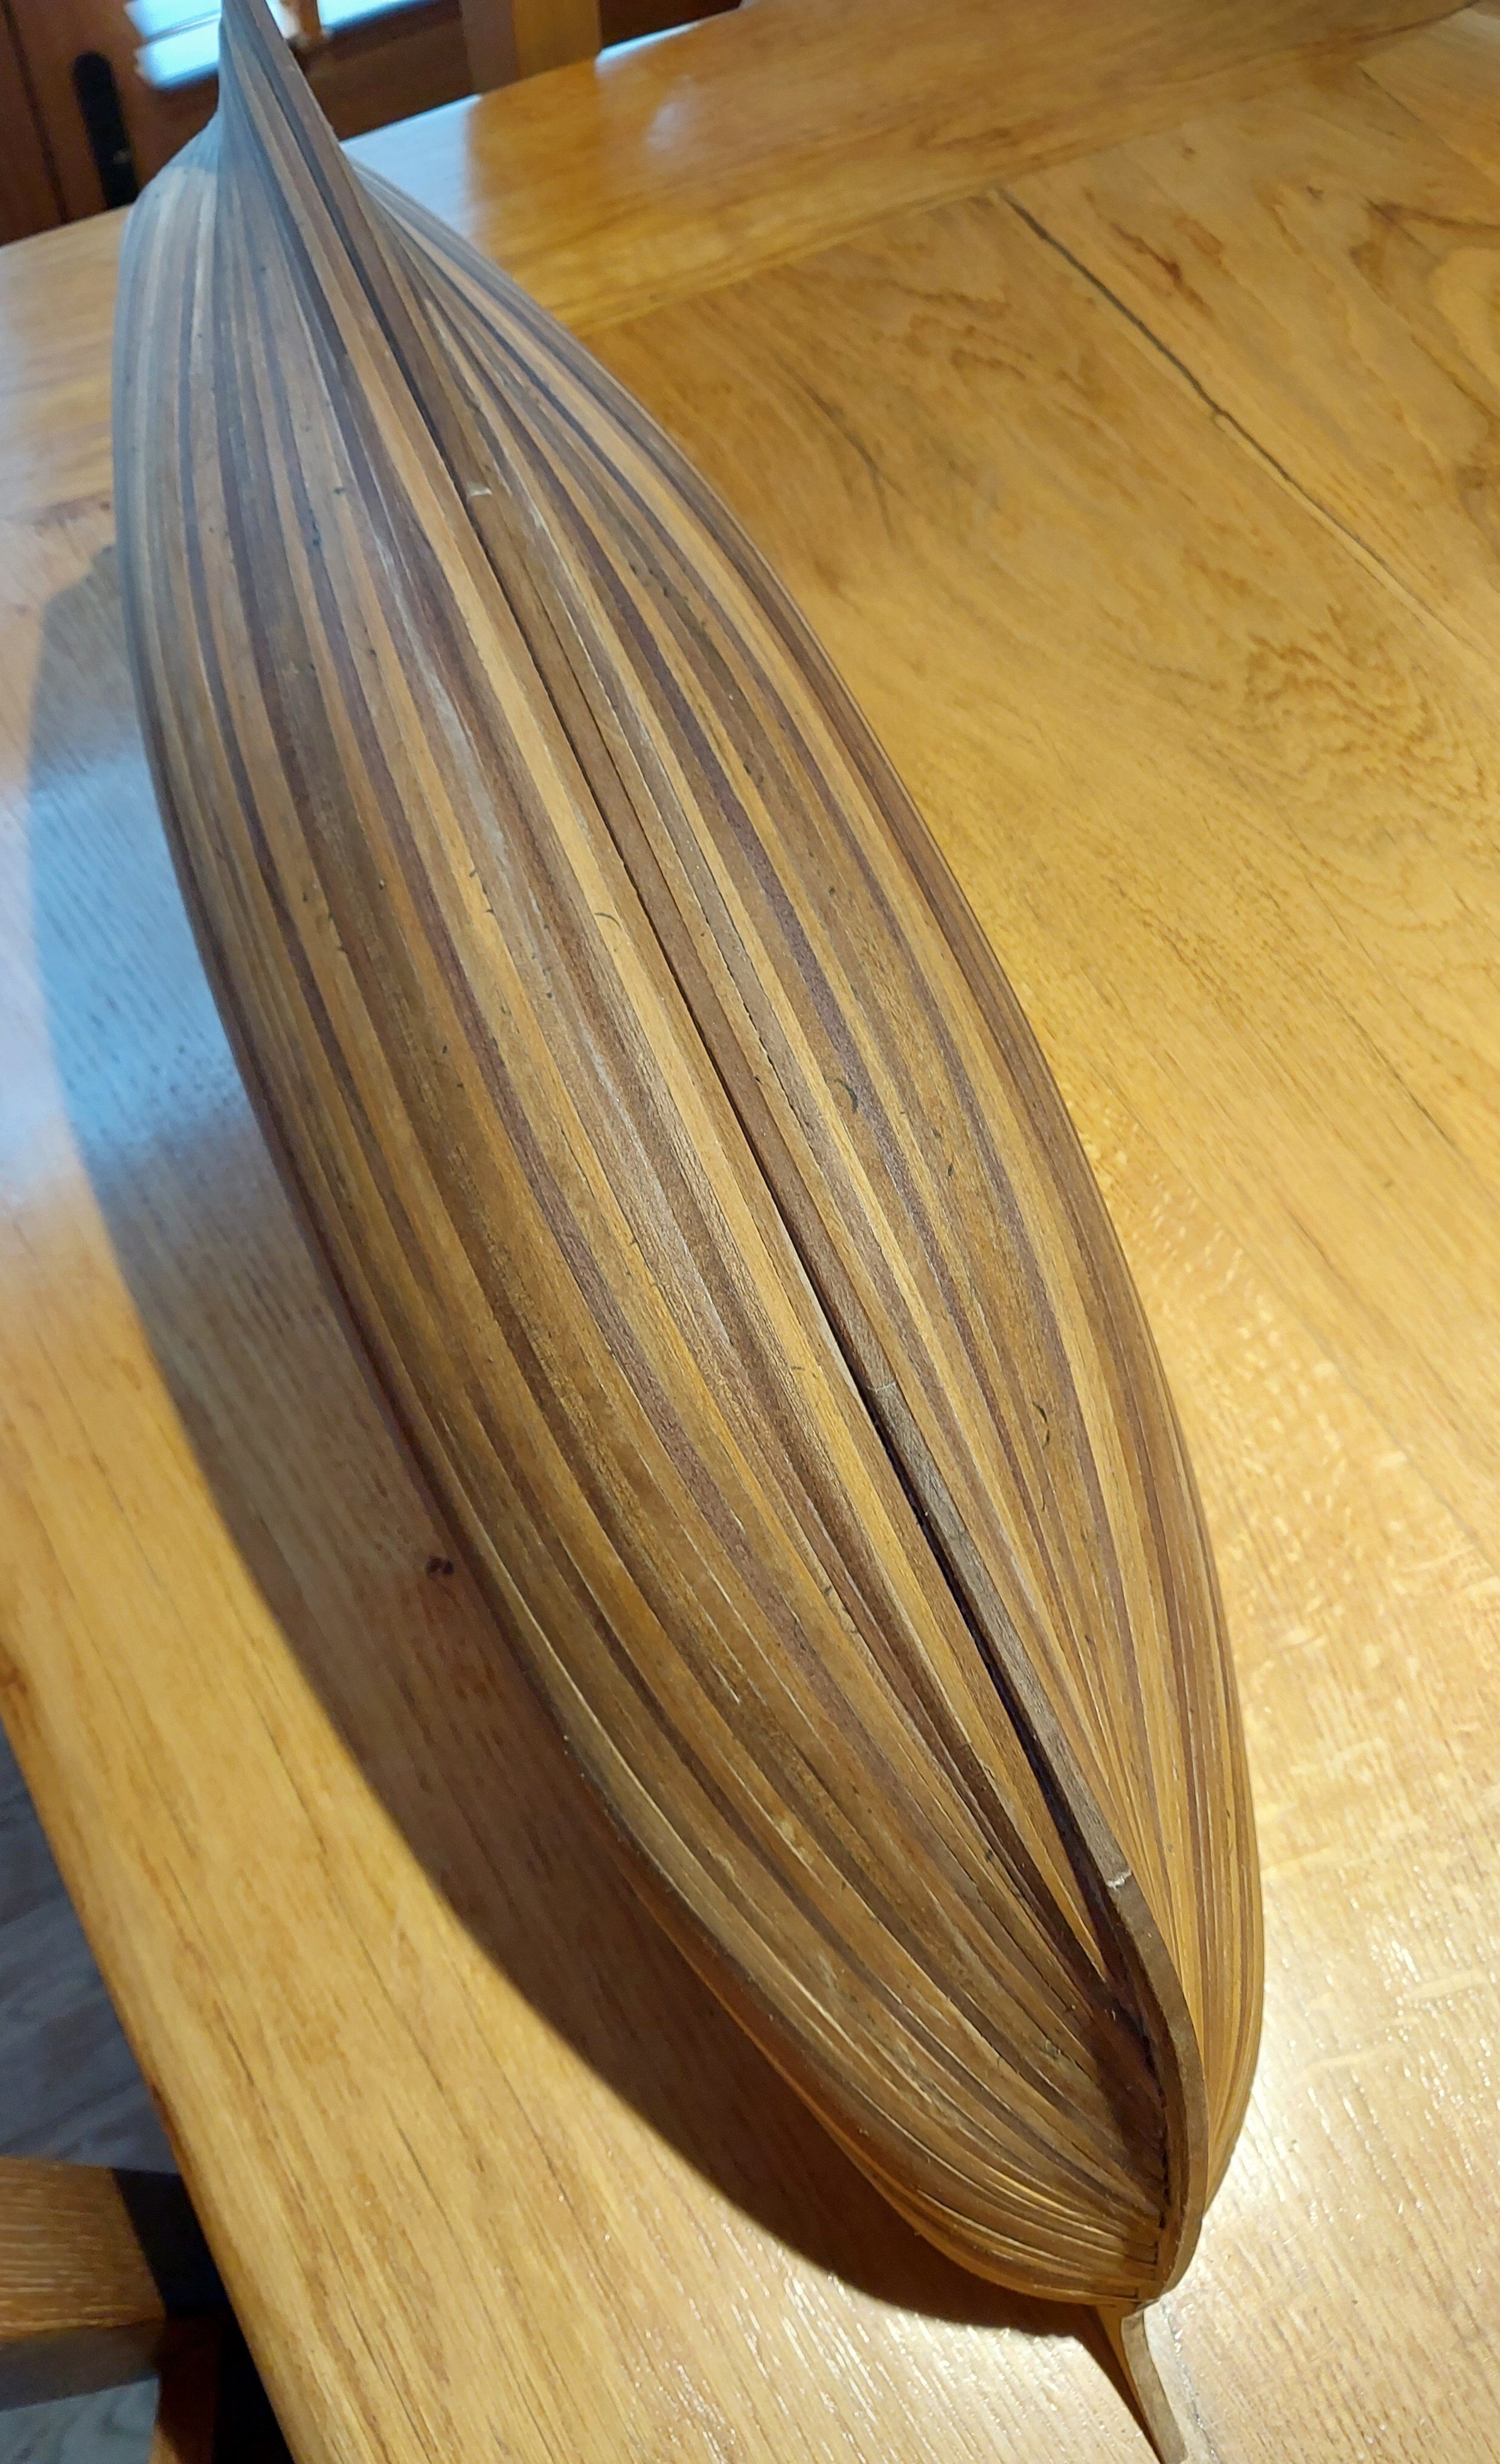
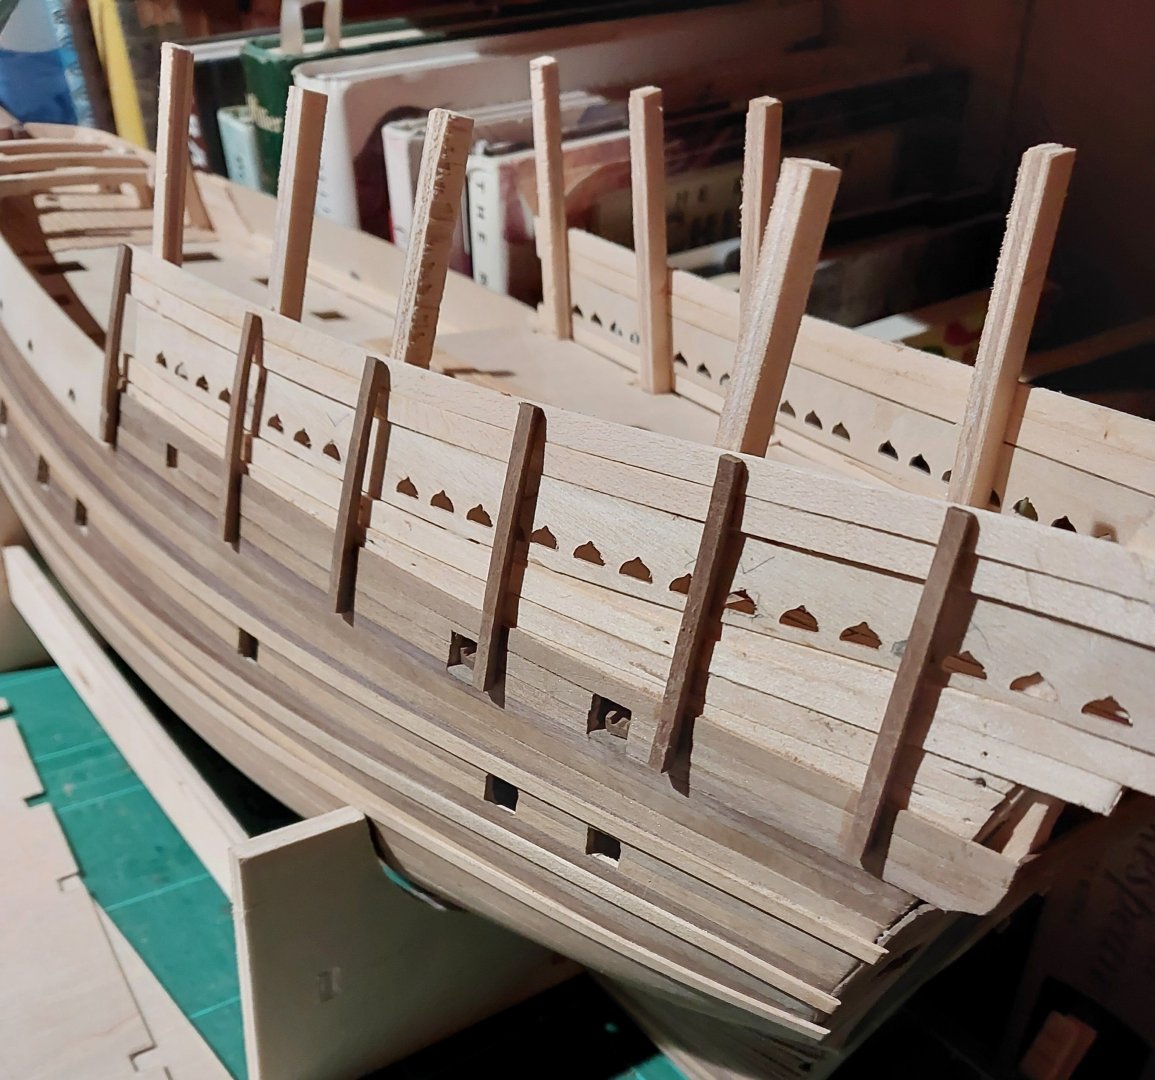
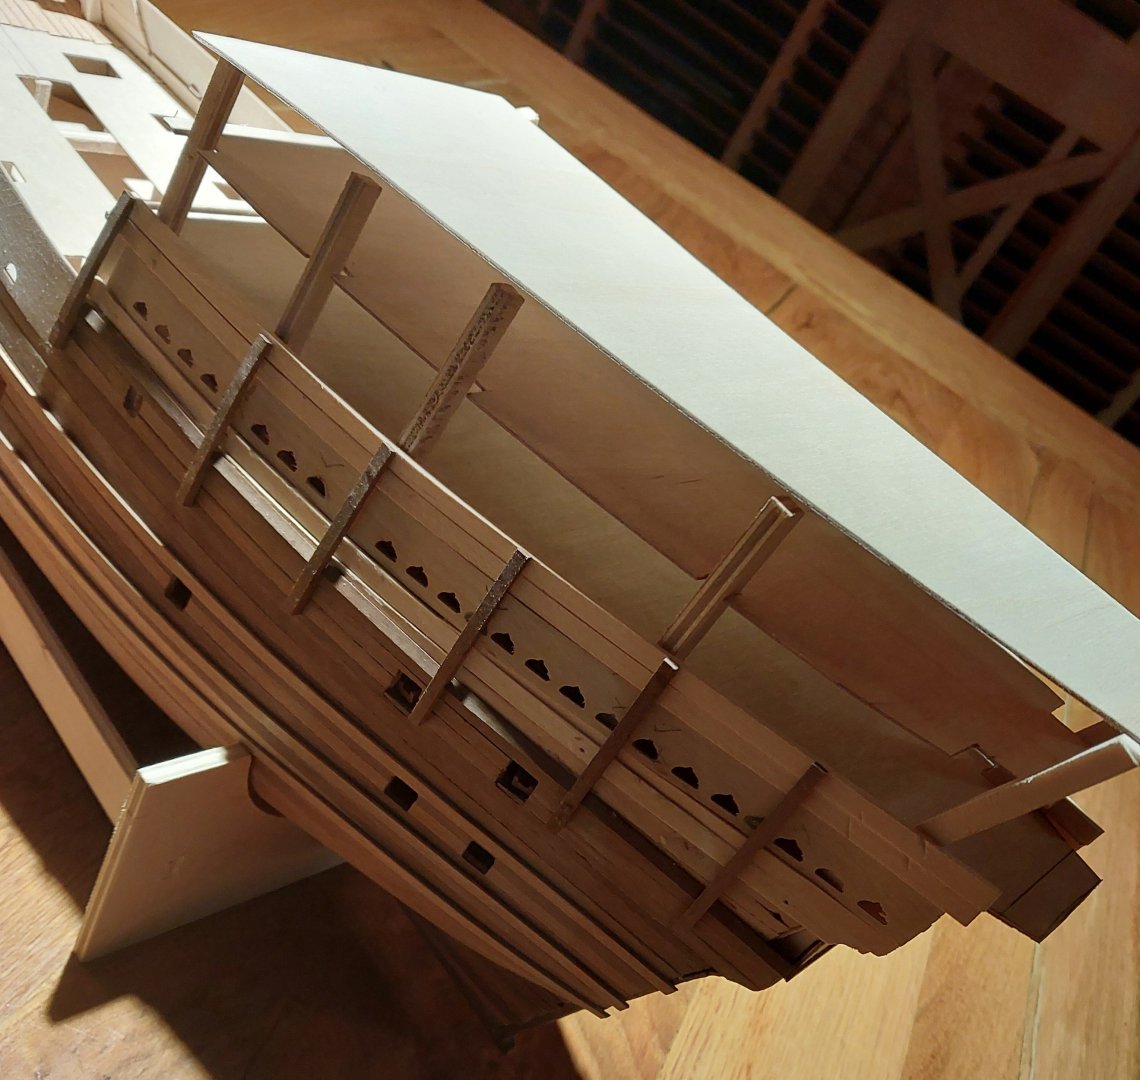
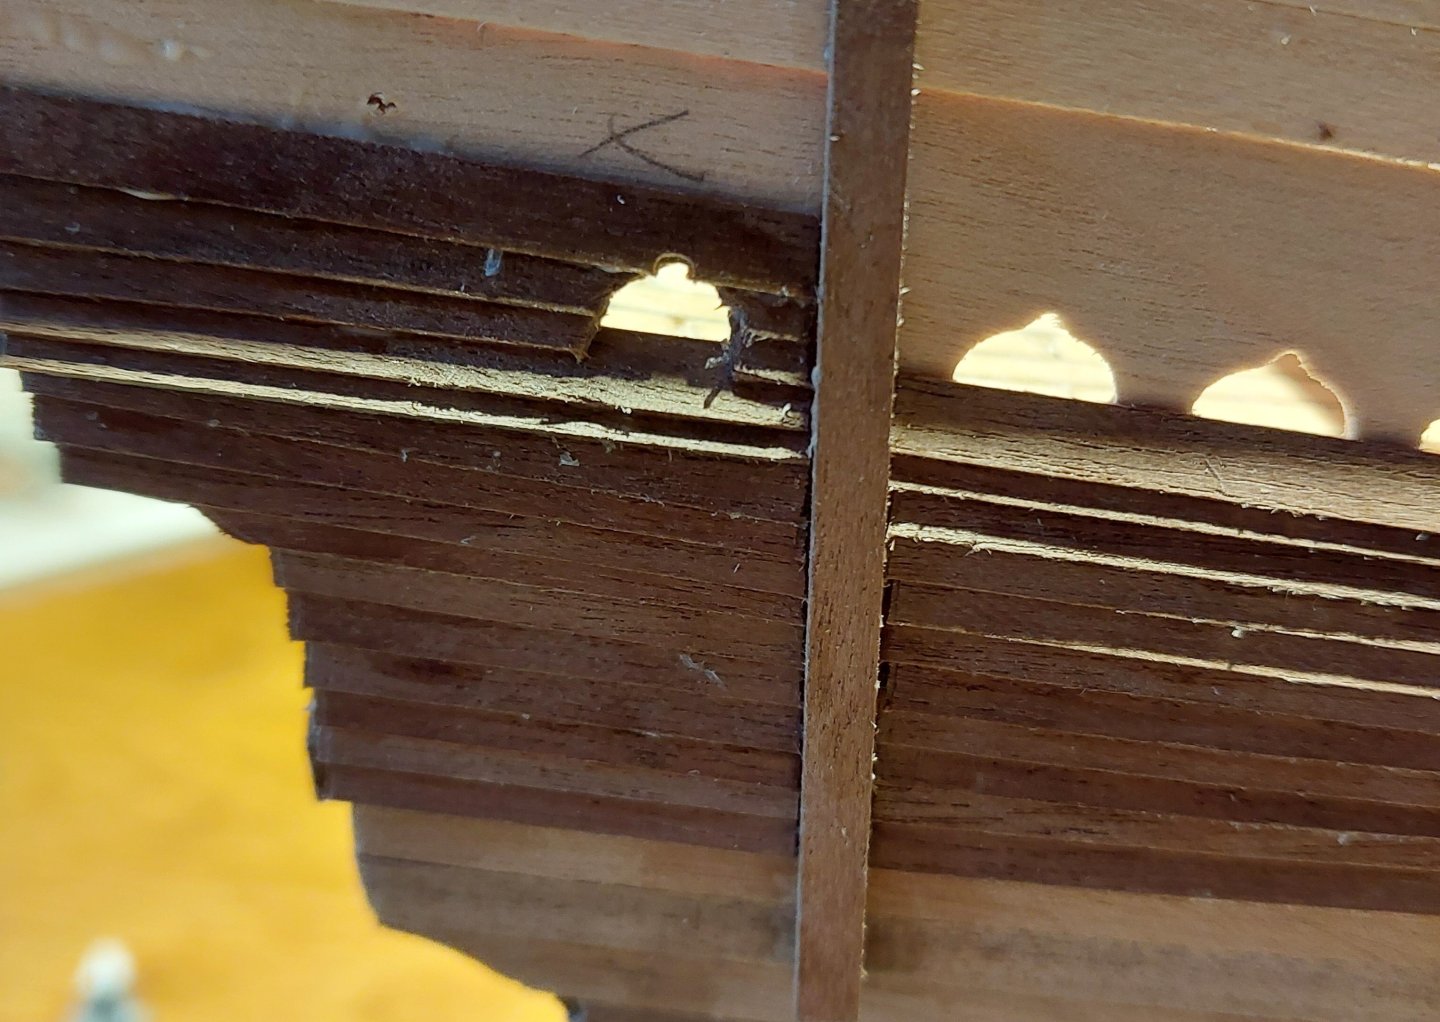
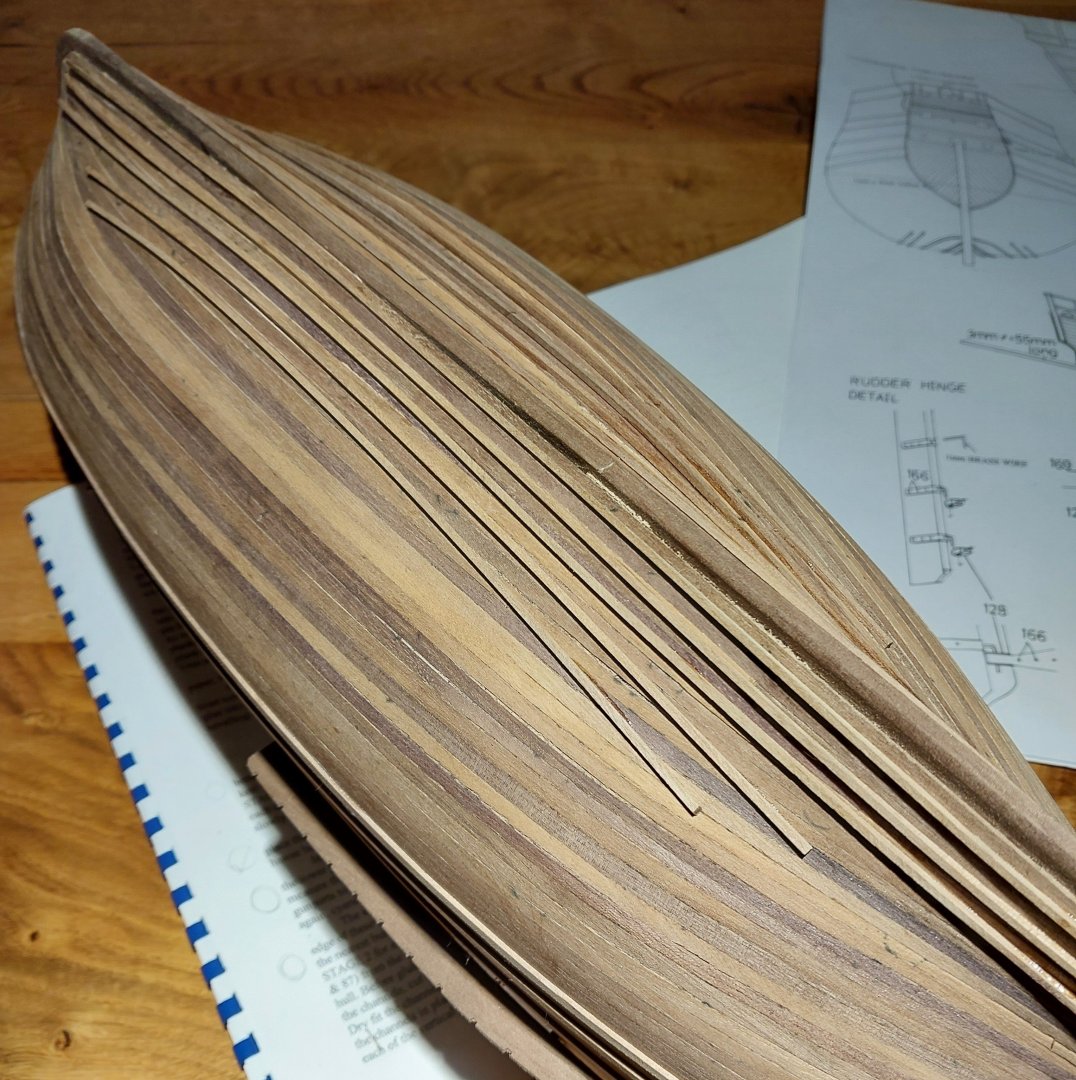
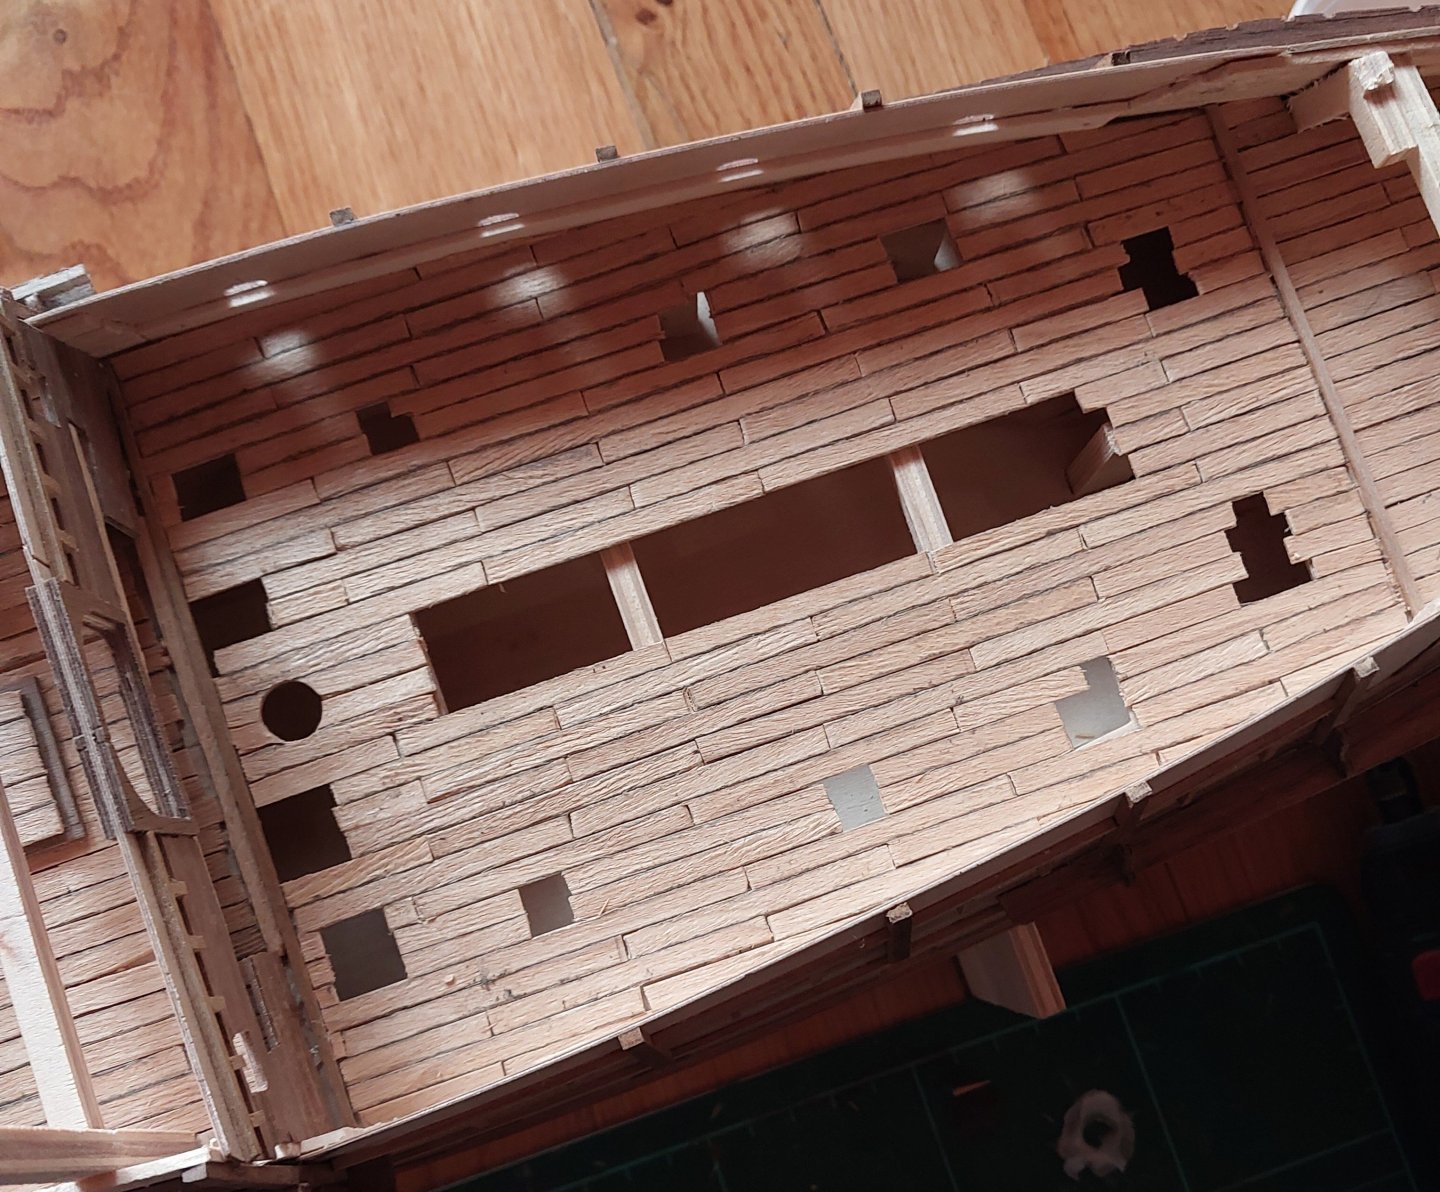
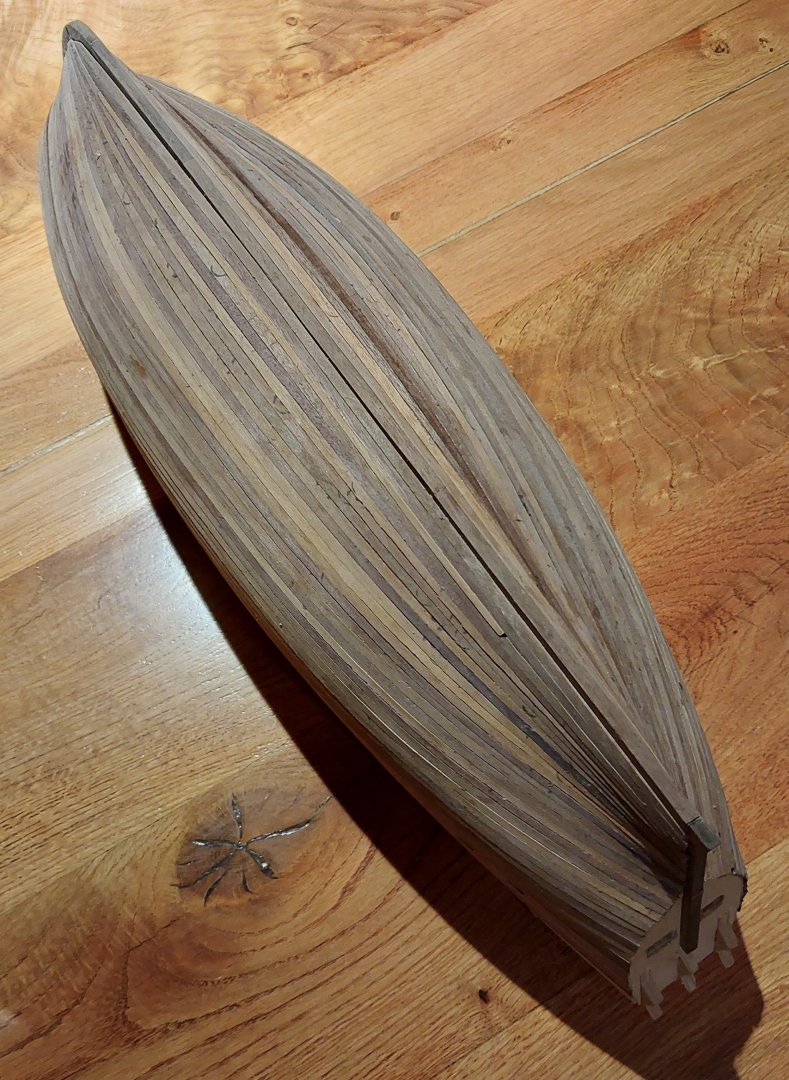
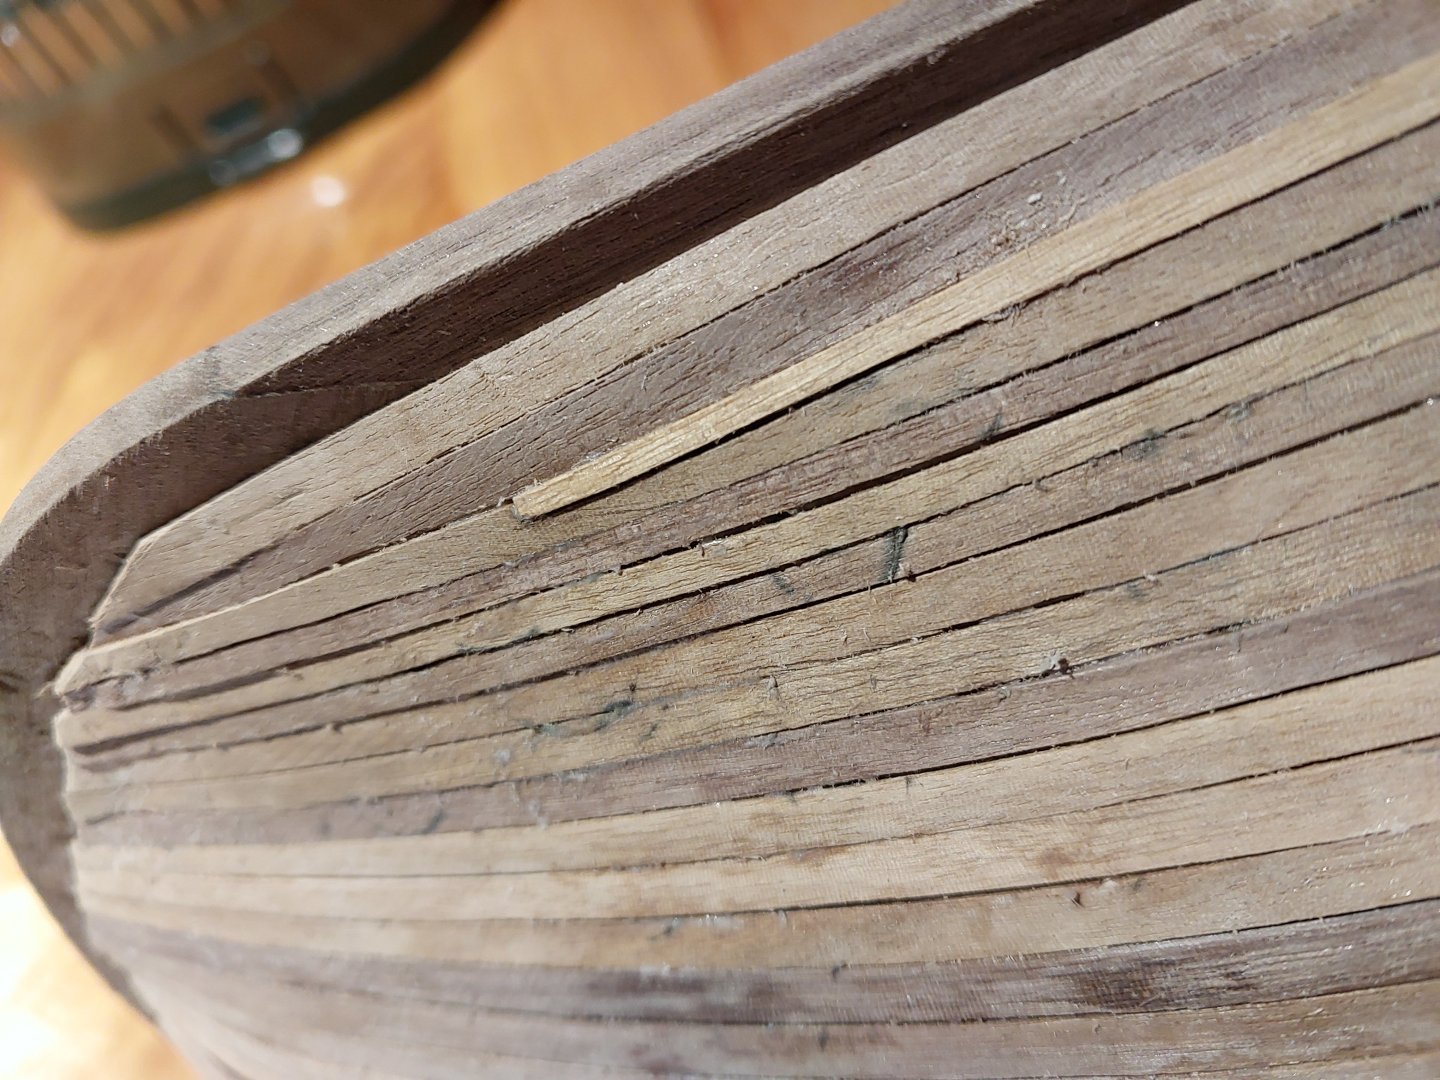
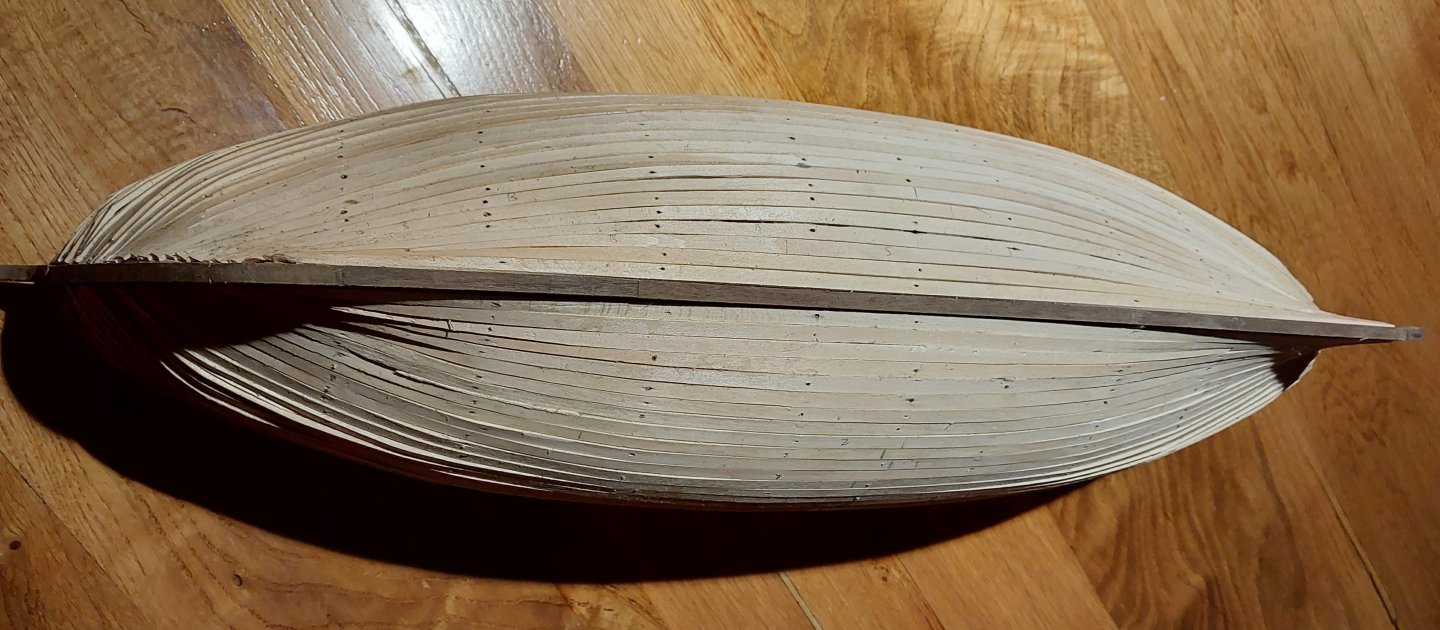
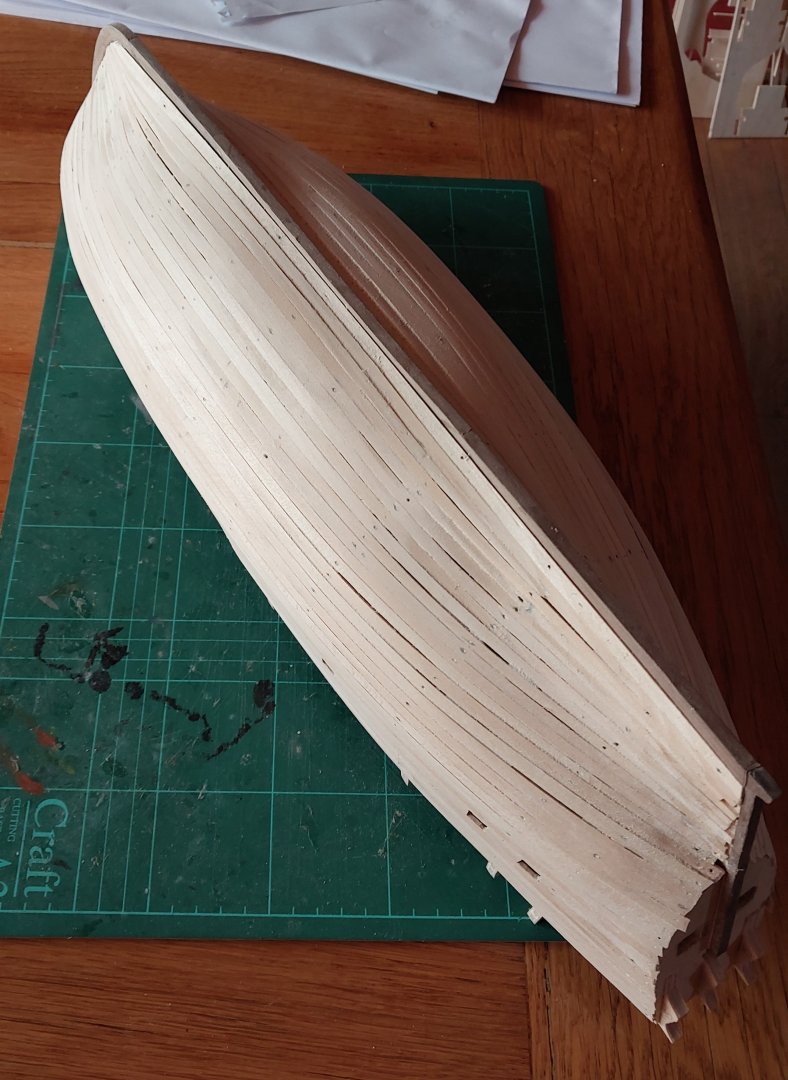
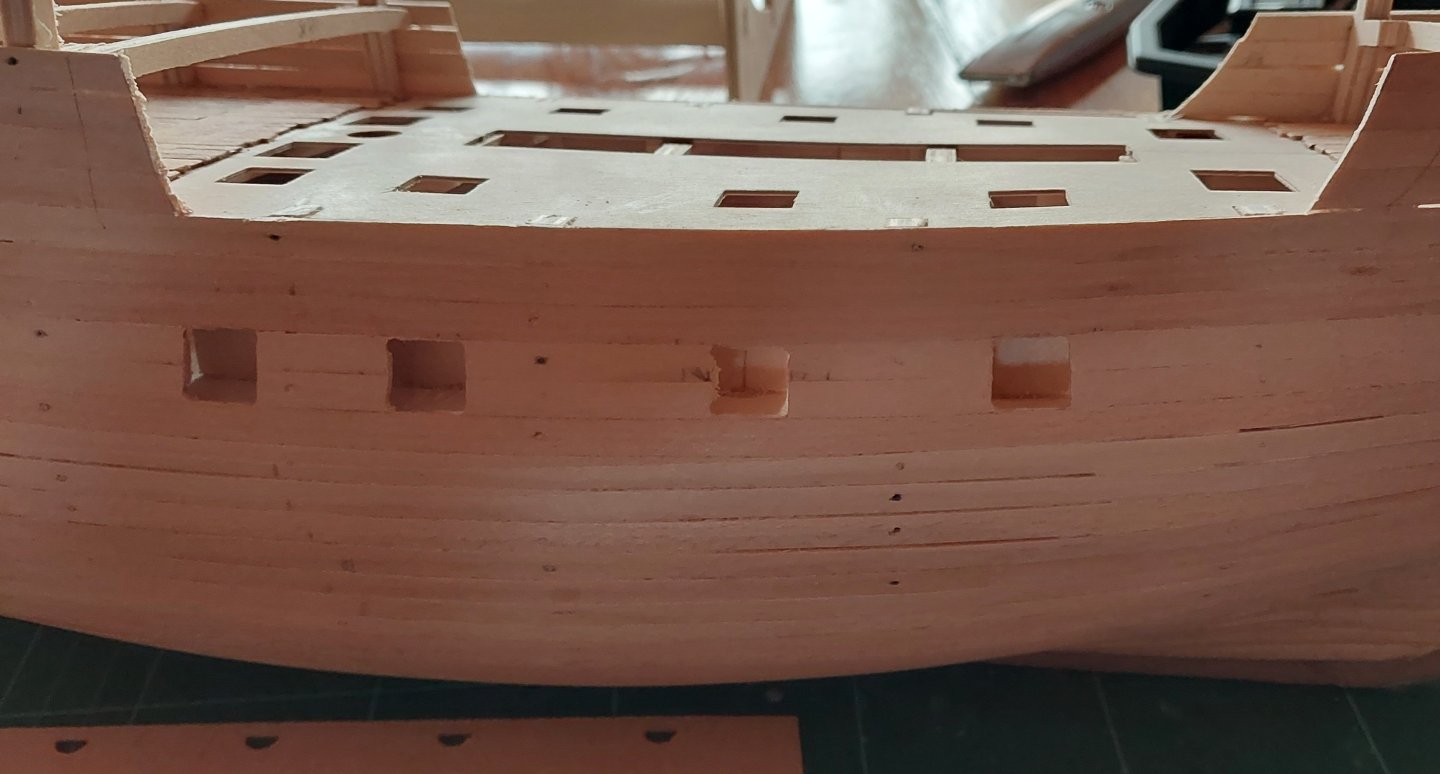
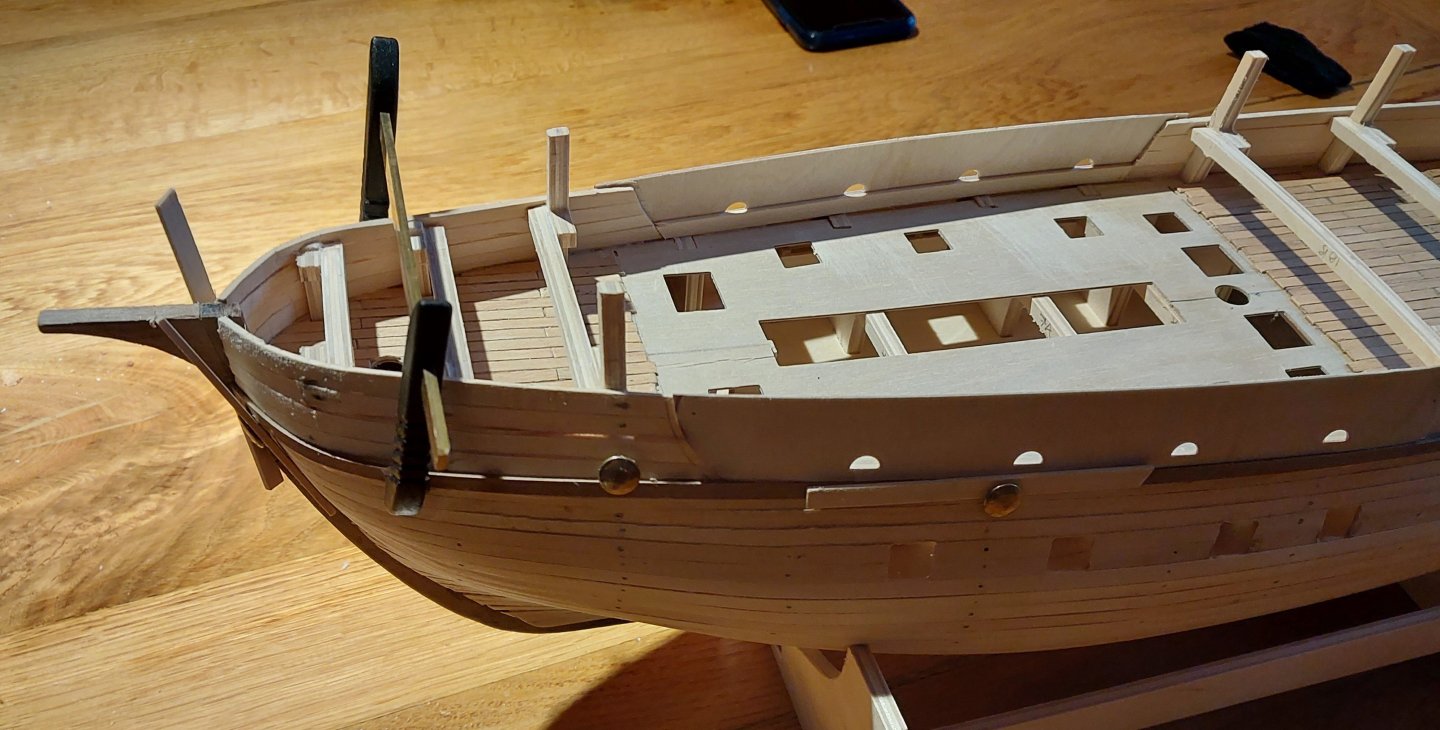
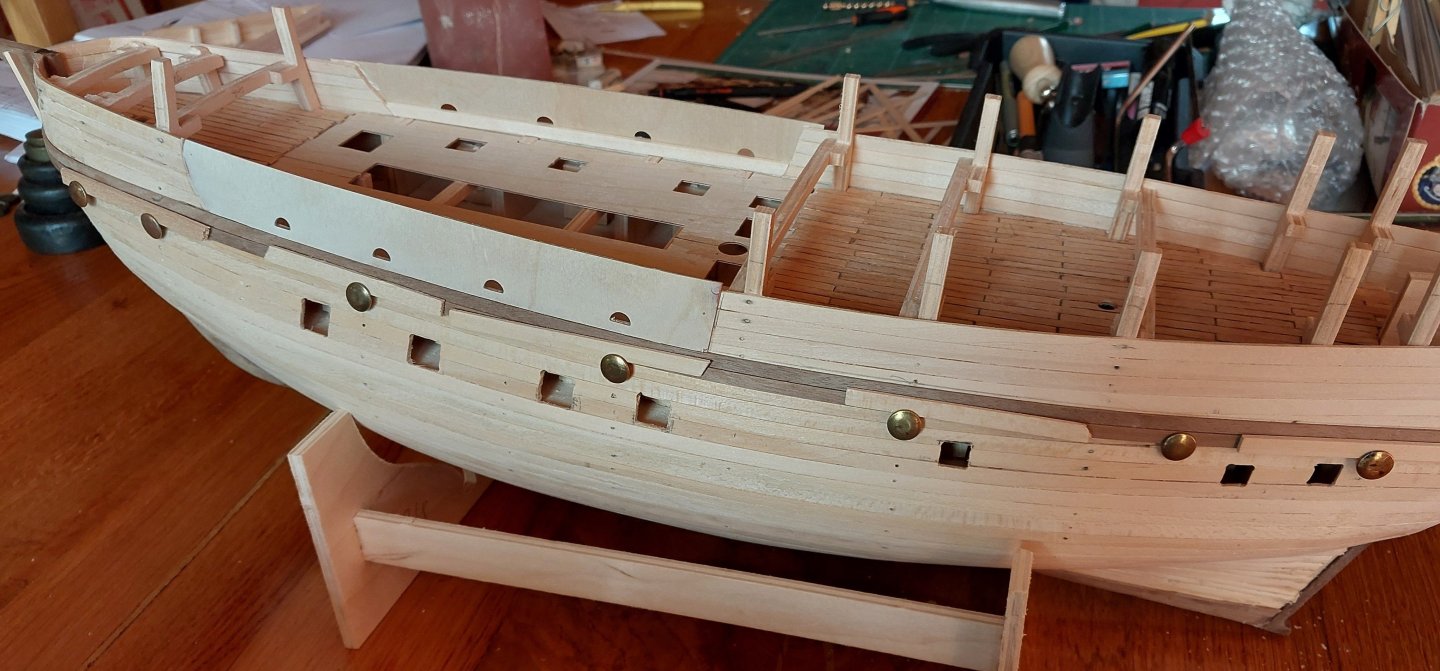
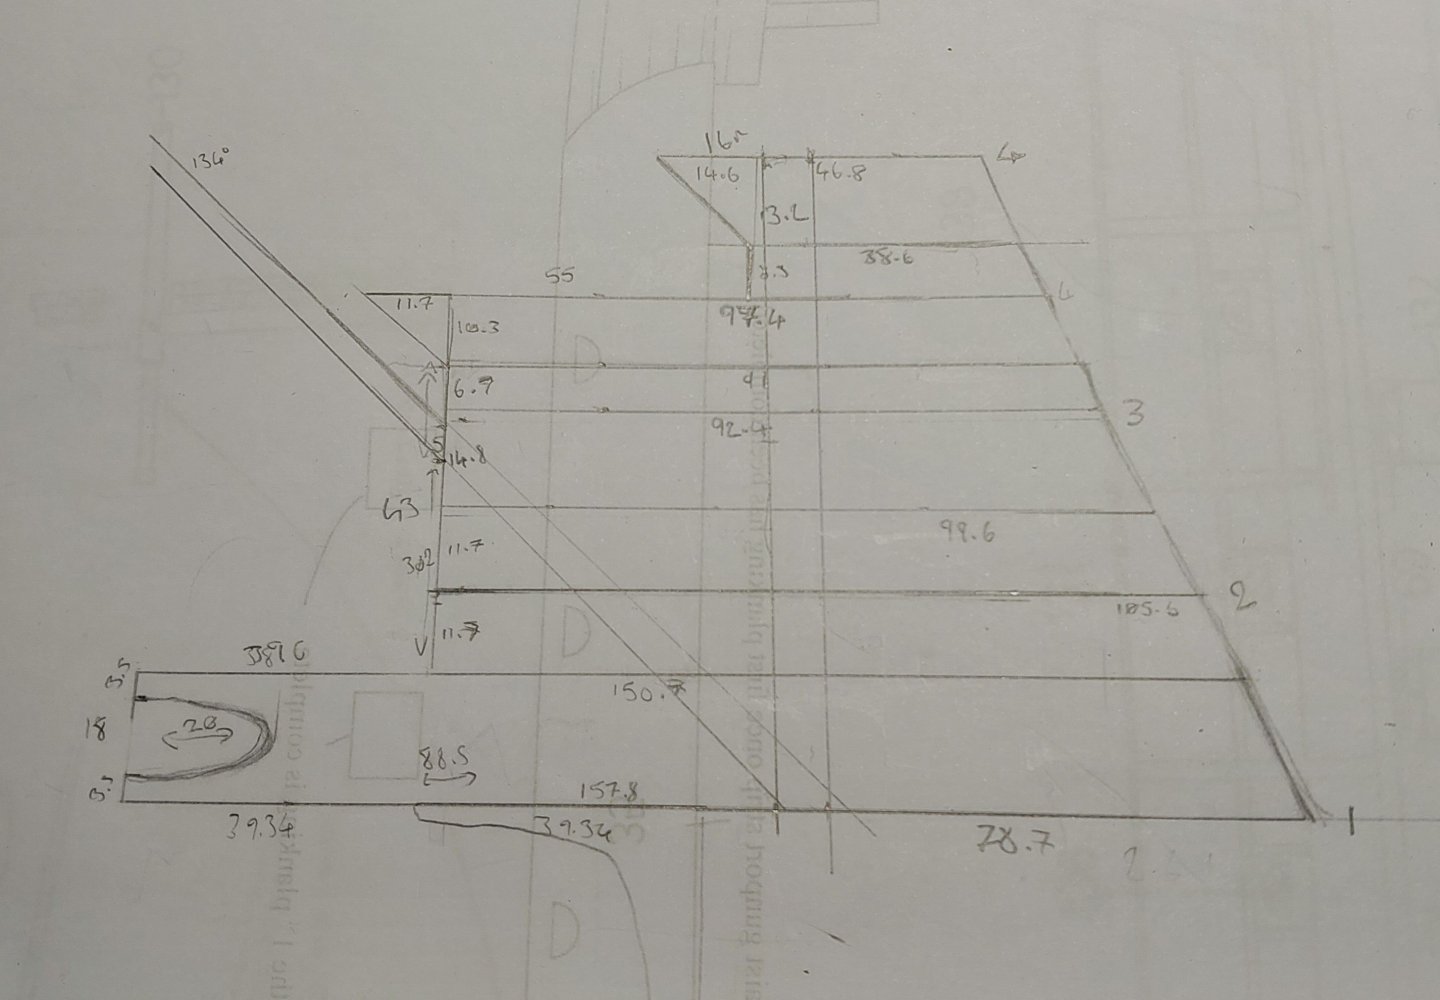
And another update - with a very shipshape ship! Here's the full hull planked (first layer of course). I'm really pleased with the work I did on this. My last two attempts had a lot of gaps which required some liberal use of wood filler, and whilst this is certainly not flawless - there's a few ridges, especially around the bow - it's a huge improvement on my last attempt. I even threw in a couple mini scarf joints instead of just cutting filler wedges: But of course this won't be visible in the final model, as the next layer has to go over it. Anyway, some more progress, gunports opened up: As a note, the ports in the plans from Caldercraft are not in the right place - not because they'd be historically inaccurate, but because one of them actually intersects the bulkhead within the ship and not the block where the barrel is supposed to go. Quite surprising really, as the instructions have been otherwise quite good. The eagle-eyed amongst you might also notice the front two bulkhead uprights in the forecastle are now gone. I cut these off earlier as my adapted forecastle won't match the shape of the uprights. I think I'm going to take the third set off as well, but for now they're quite useful for laying the ship upside down whilst working on the hull. Here's the hull after a vicious attack from an orbital sander: Some of the gaps are more obvious now, but the main bulk of the hull is smooth enough that I'm comfortable planking over it. I did take a woodcarving gouge to the planks by the keel as I'd not cut the rabbet deep enough. I tidied up the waist in preparation for its sidings - removed the bulkhead uprights and cut the ends of the planks framing each castle to a nice taper. And here's the next layer beginning! You can see the waist panels have also been put in, along with a reinforcing plank behind them. I think I should have started the first plank layer 5mm higher so that this plank ran all the way along the length of the ship, but it'll likely be planked over anyway. The Anthony Roll only shows three gunports in the waist, and four in the 'nether' deck beneath the sterncastle. Marsden's Who Sank the Mary Rose? details four in the waist and three in the nether, and McElvogue's book agrees on the four in the waist, but has a series of smaller gunports in the nether deck. I think I'll probably go for the three in the nether deck, but I'm not going to open these out until I'm ready to begin the construction of the sterncastle proper. Here's a few more second layer planks in place: I've put two untapered planks at the keel and at the wales. From here I think I can get away with about a 1mm taper for the majority of the work - I'm sure this will change as I go lower down the hull. The walnut provided is a nice quality of wood, but there is a lot of colour difference in the various planks. I'm tempted to go with it, as I'm sure with some finish over the top it'll all blend together anyway. I know the actual boat was likely painted, especially with 'white stuff' as antifouling below the waterline - unsure if I'll recreate this. I do intend to add the stripes on each castle as depicted in the Anthony Roll. And on the subject of castles: Here's McElvogue's interpretation of the forecastle scaled up to 1:80. At present my plan is to follow this, at least as much as is feasible. After some discussion with @Louie da fly on here, the structure of at least the first deck of the castle is a little clearer - especially the two 'prongs' at the prow. My deck cut-outs from the first post sit nicely on this: (Note that the hole for the mast will need to move - I measured this against the original kit's mast placement, and the foremast in the adaption will be slightly forward of this.) Here's an initial mock-up with some of the scraps from the initial planking: Obviously this is a very rough start - I'm not entirely sure how the planks will meet at the prow, and I'm less sure about how the two prongs will sit. I'm sure there is better terminology than 'prongs'. And here's the underside, which will rest on the knee at the top of the stempost. Again, all old scraps of wood, mostly from a previous build. That's all from me today - feels like a lot of progress, but also like there's a huge amount to do. Thanks for reading!


-
I'm actually looking at 3D printing a few test pieces at the moment - there's little variety in the metal ones provided, and I'd like to include a mix of bronze and iron cannon on the main gun deck as the Caldercraft 'dummy barrels' are only culverins and not port pieces or slings. Hopefully an update on that soon!