HOLIDAY DONATION DRIVE - SUPPORT MSW - DO YOUR PART TO KEEP THIS GREAT FORUM GOING! (Only 24 donations so far out of 49,000 members - C'mon guys!)
×


djford
-
Posts
46 -
Joined
-
Last visited
Content Type
Profiles
Forums
Gallery
Events
Everything posted by djford
-
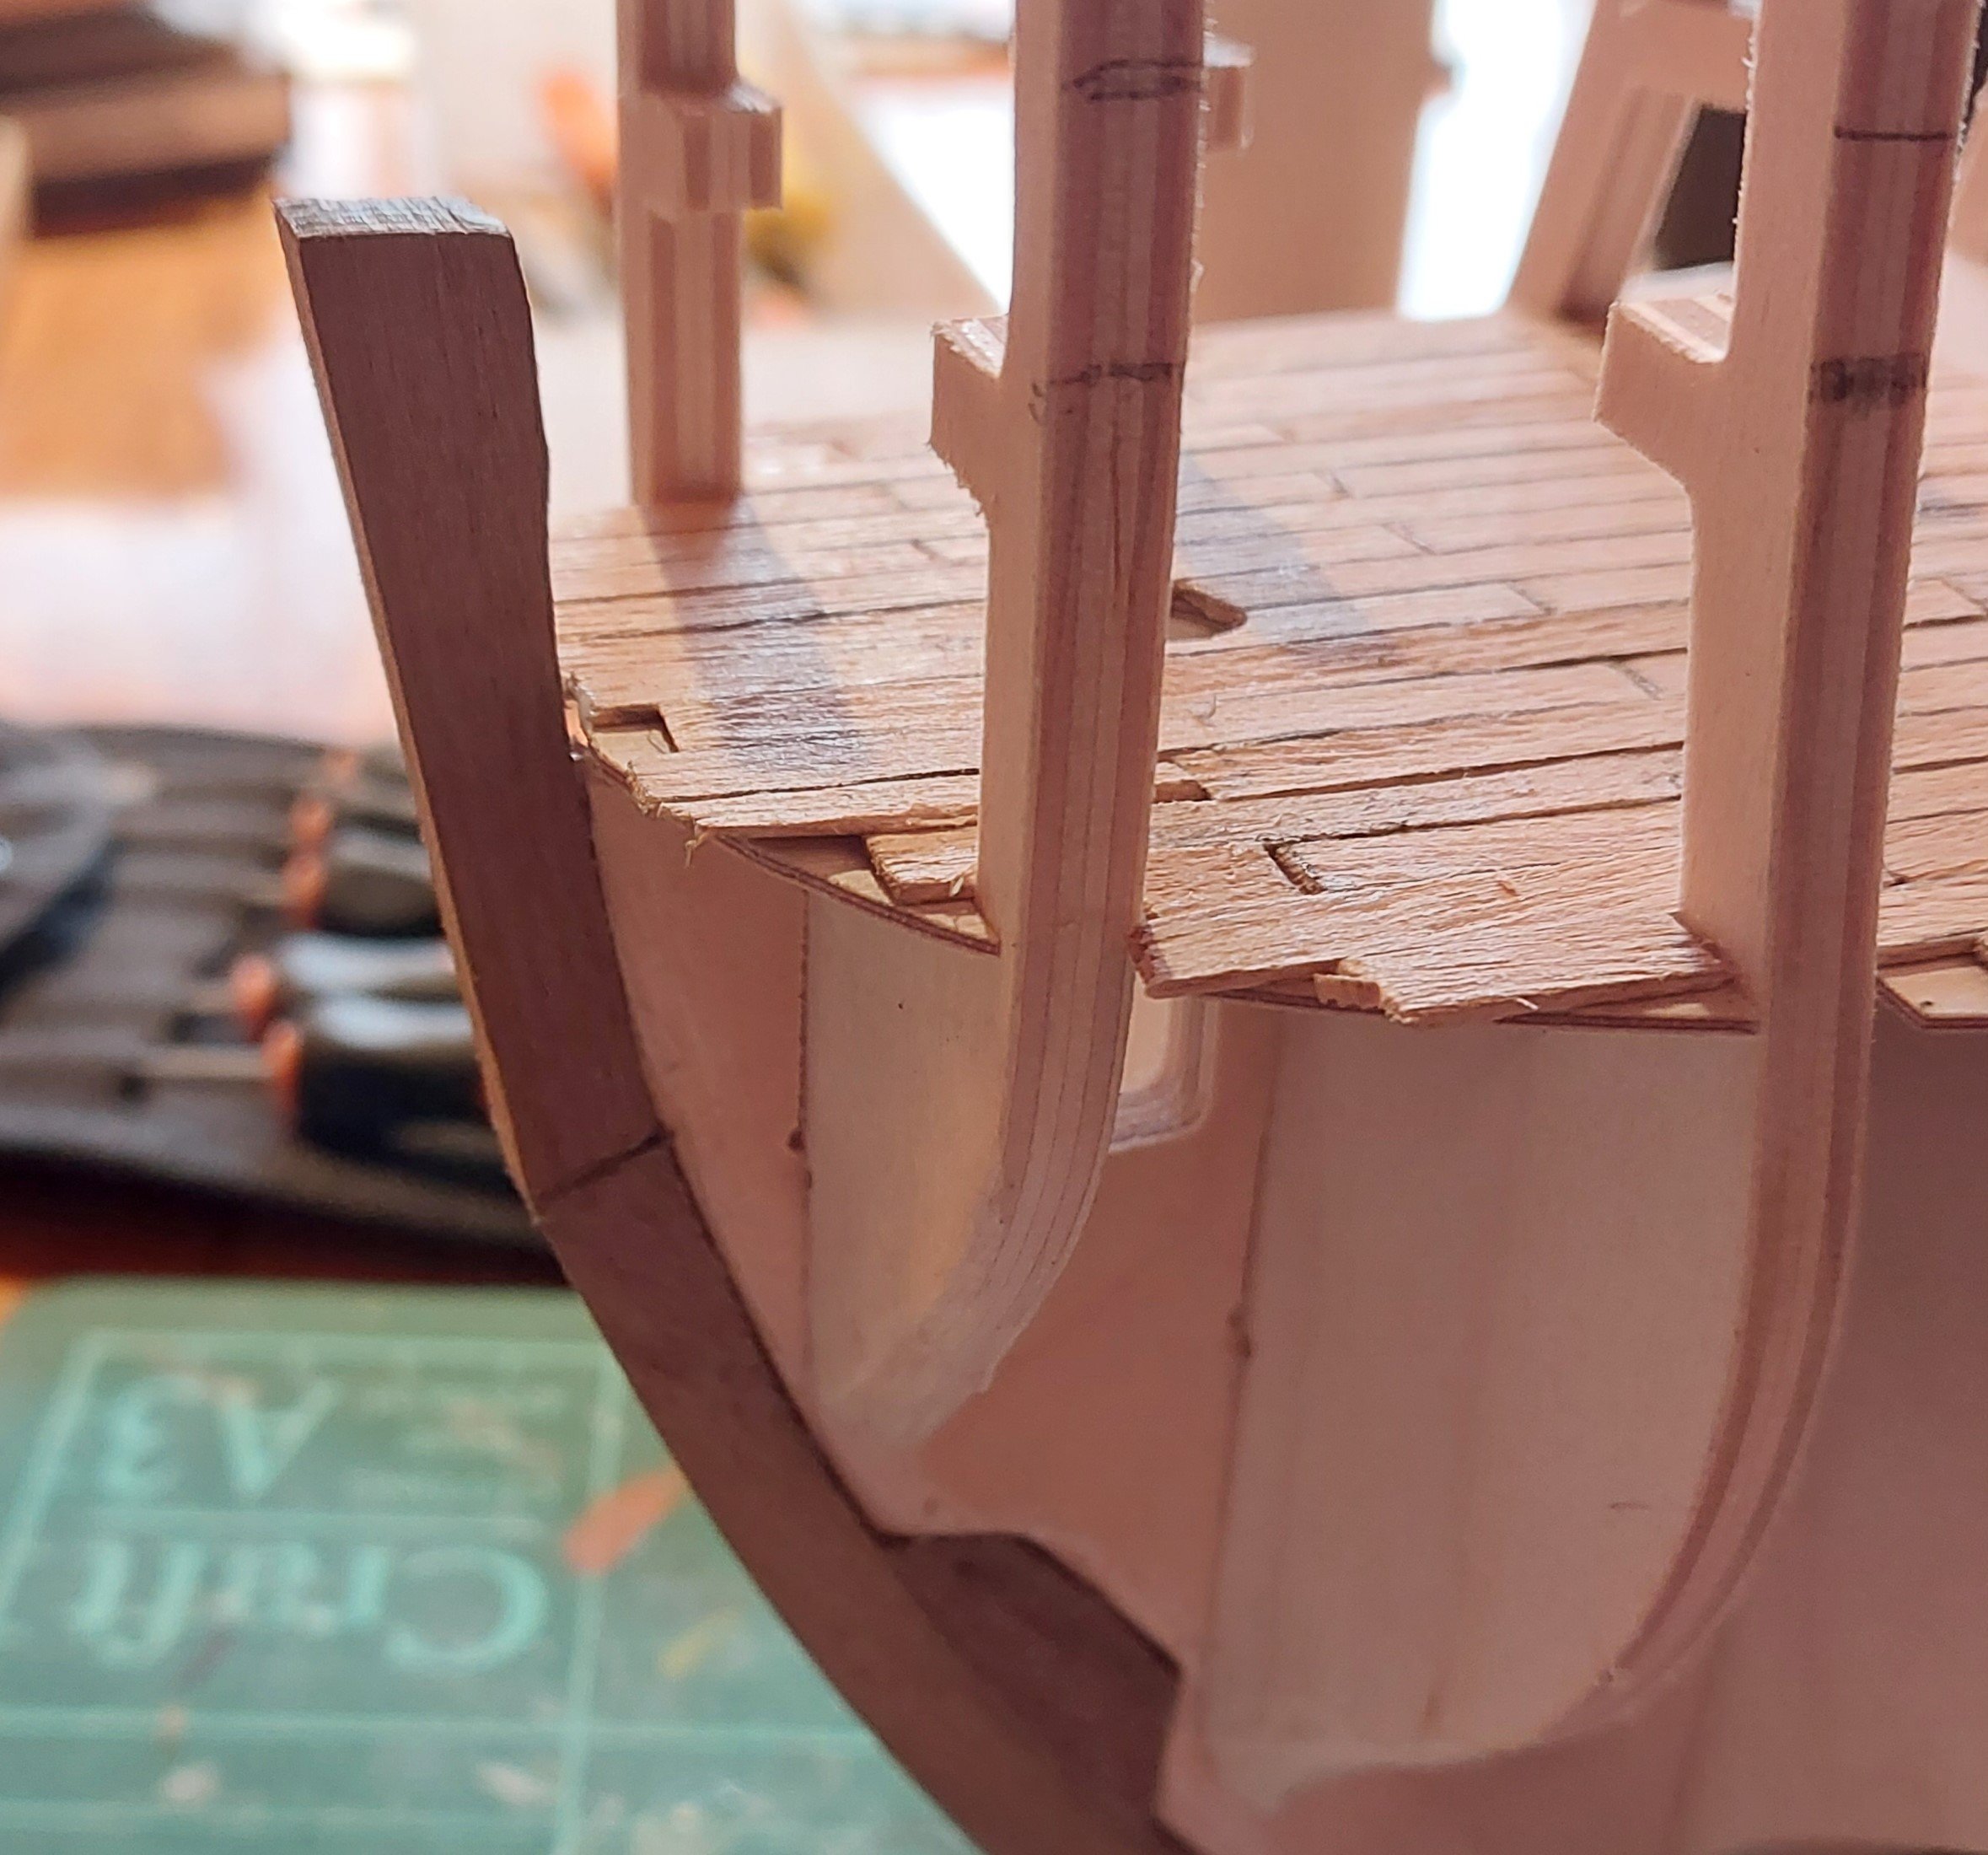
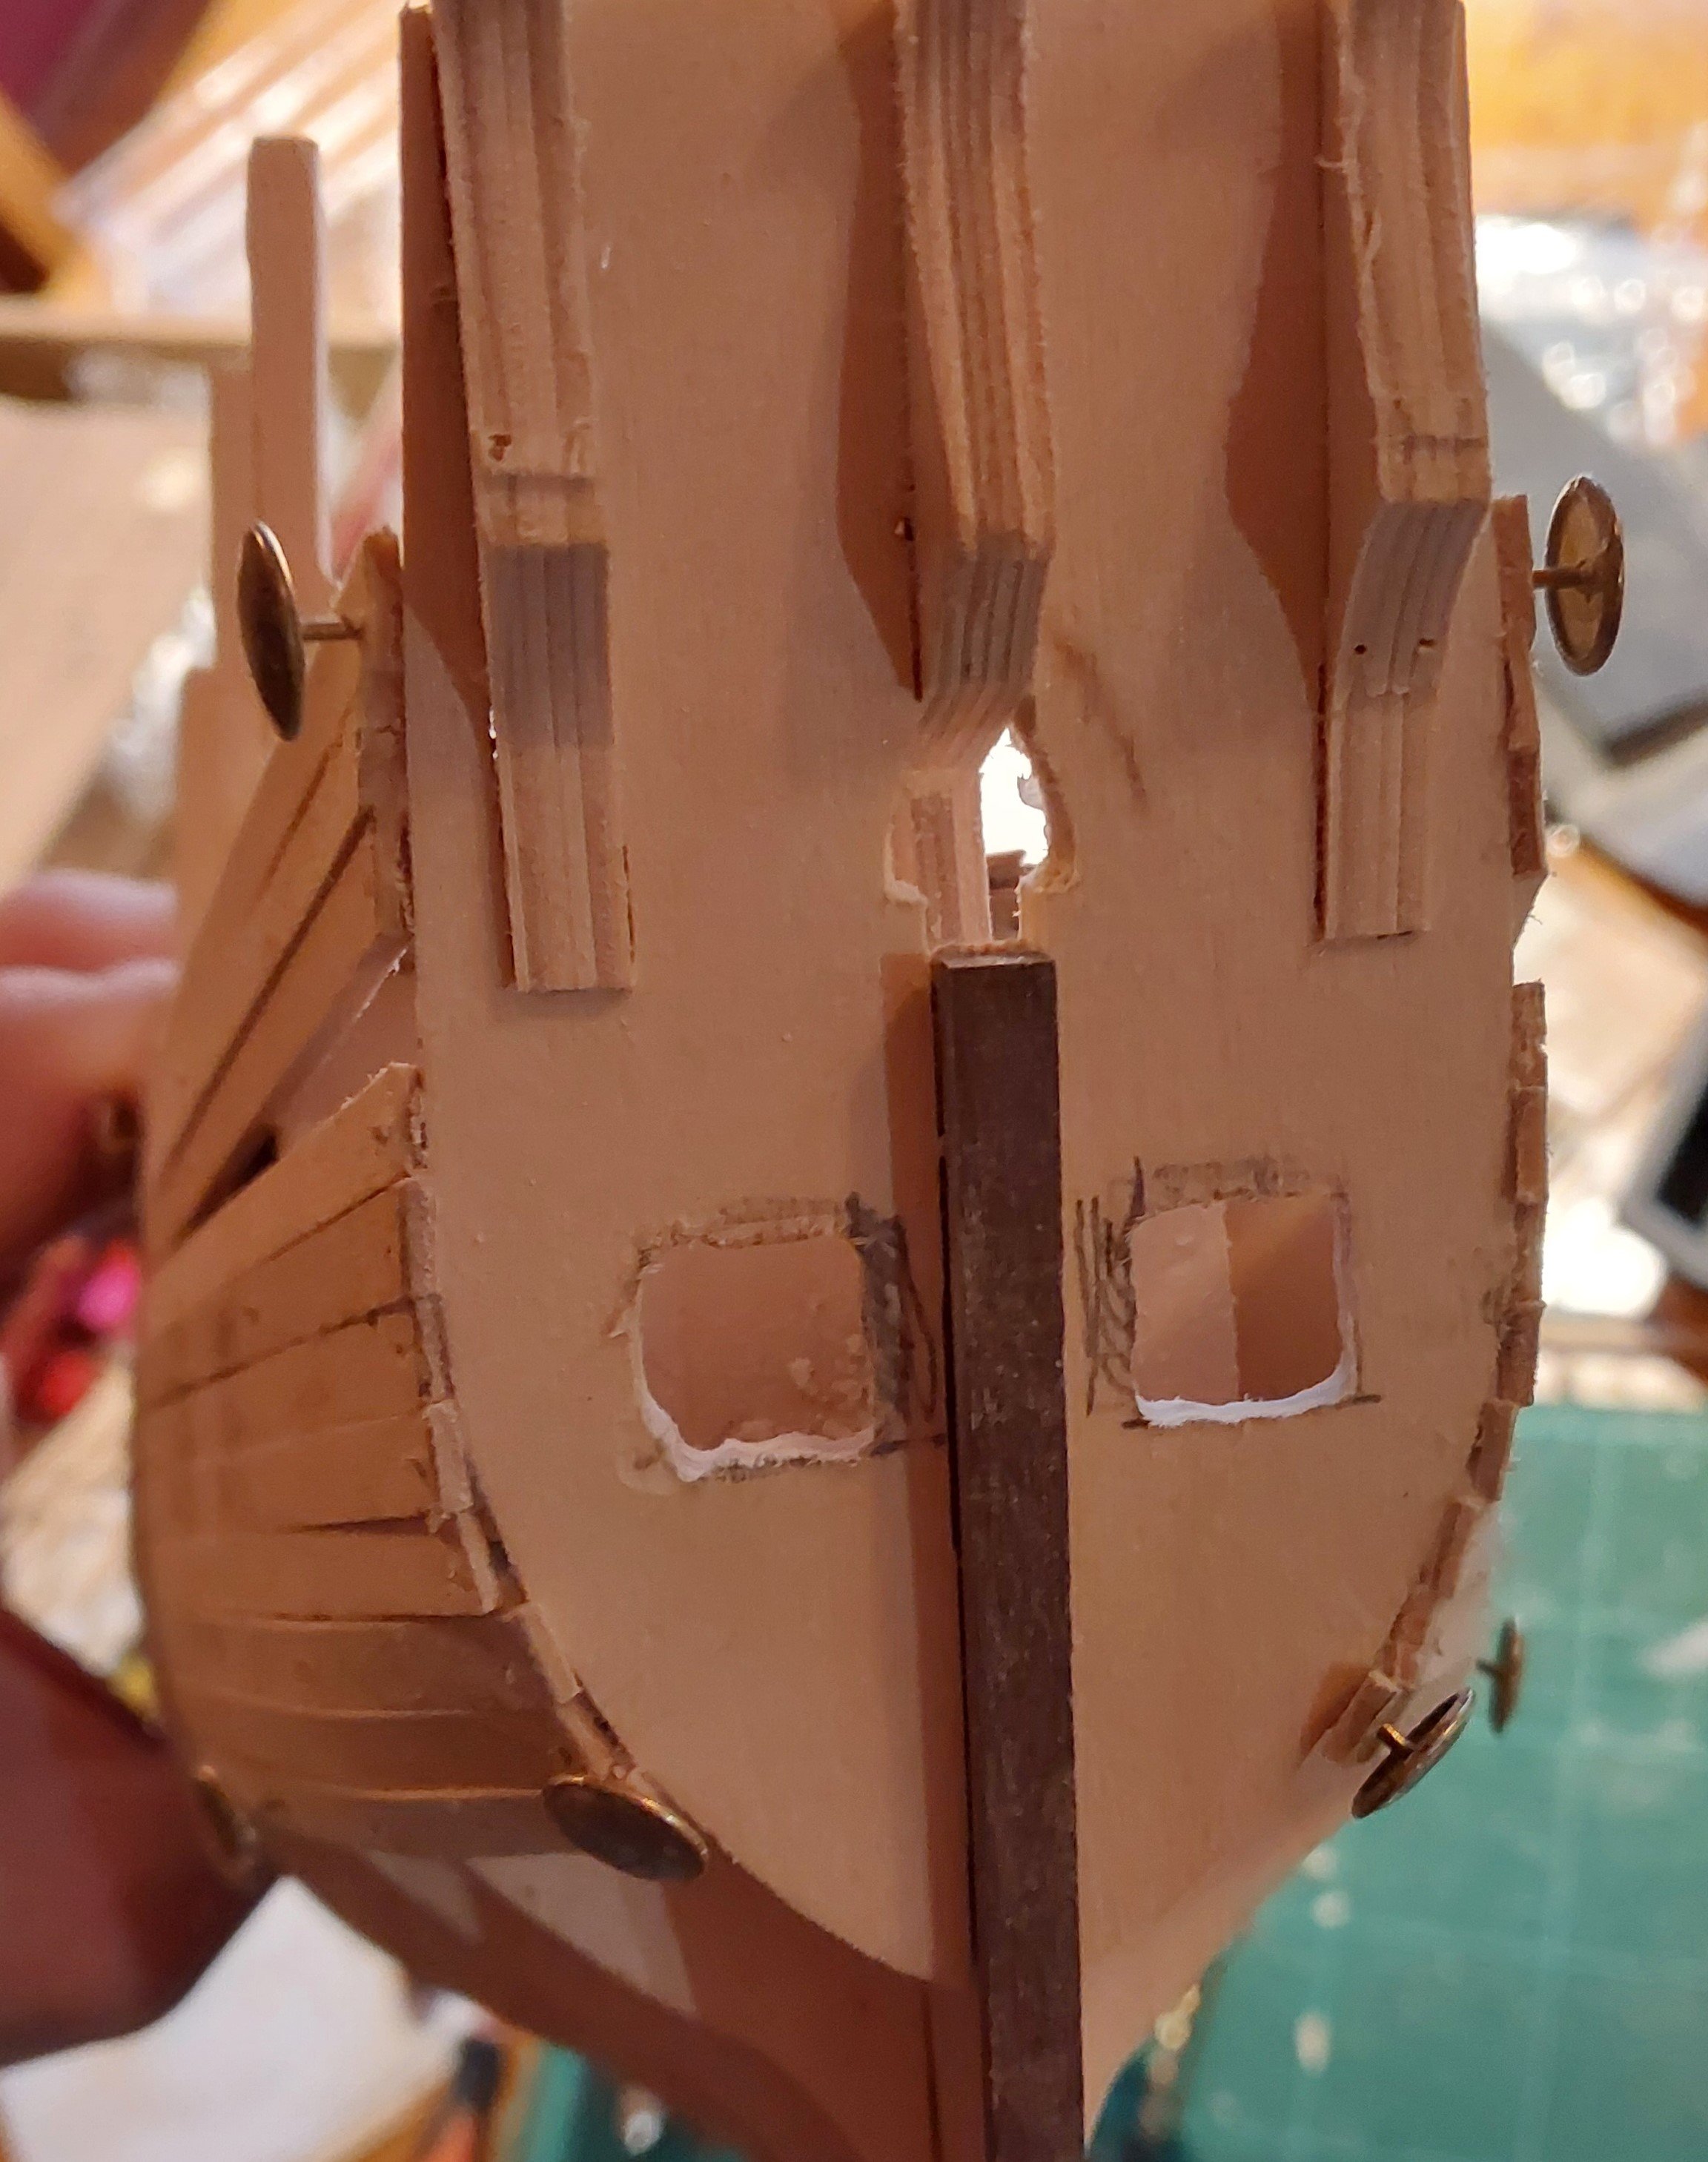
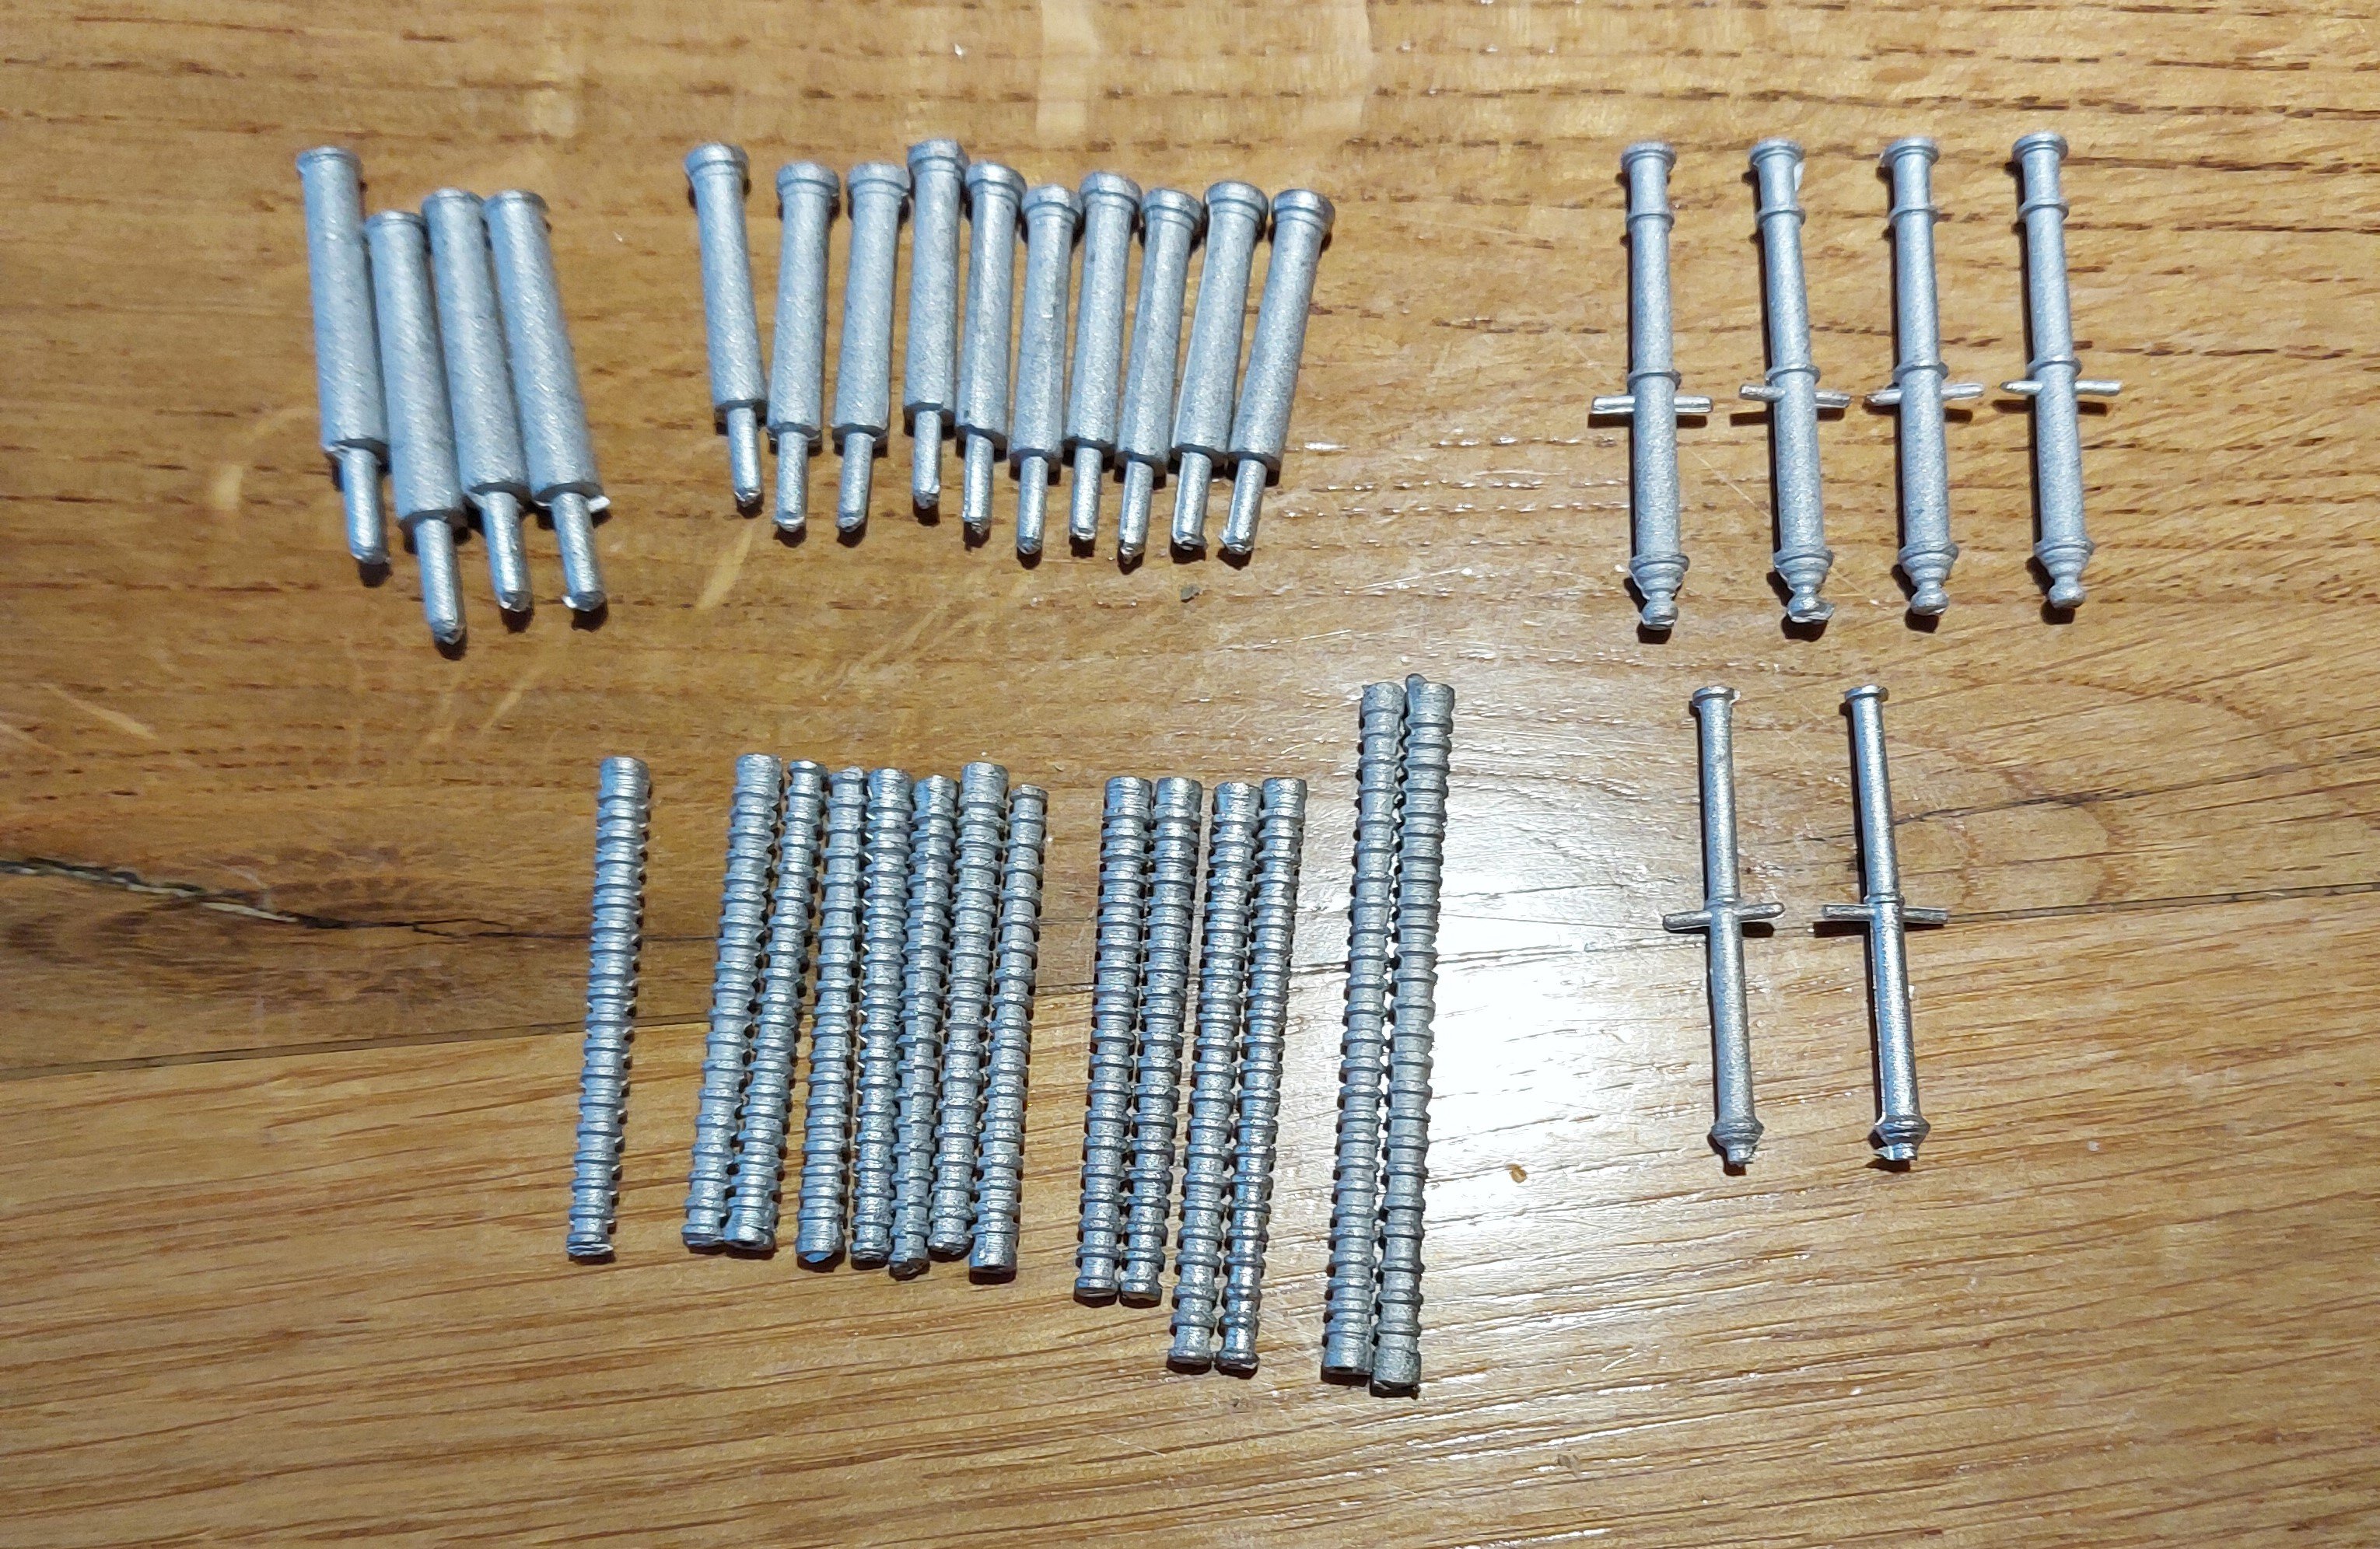
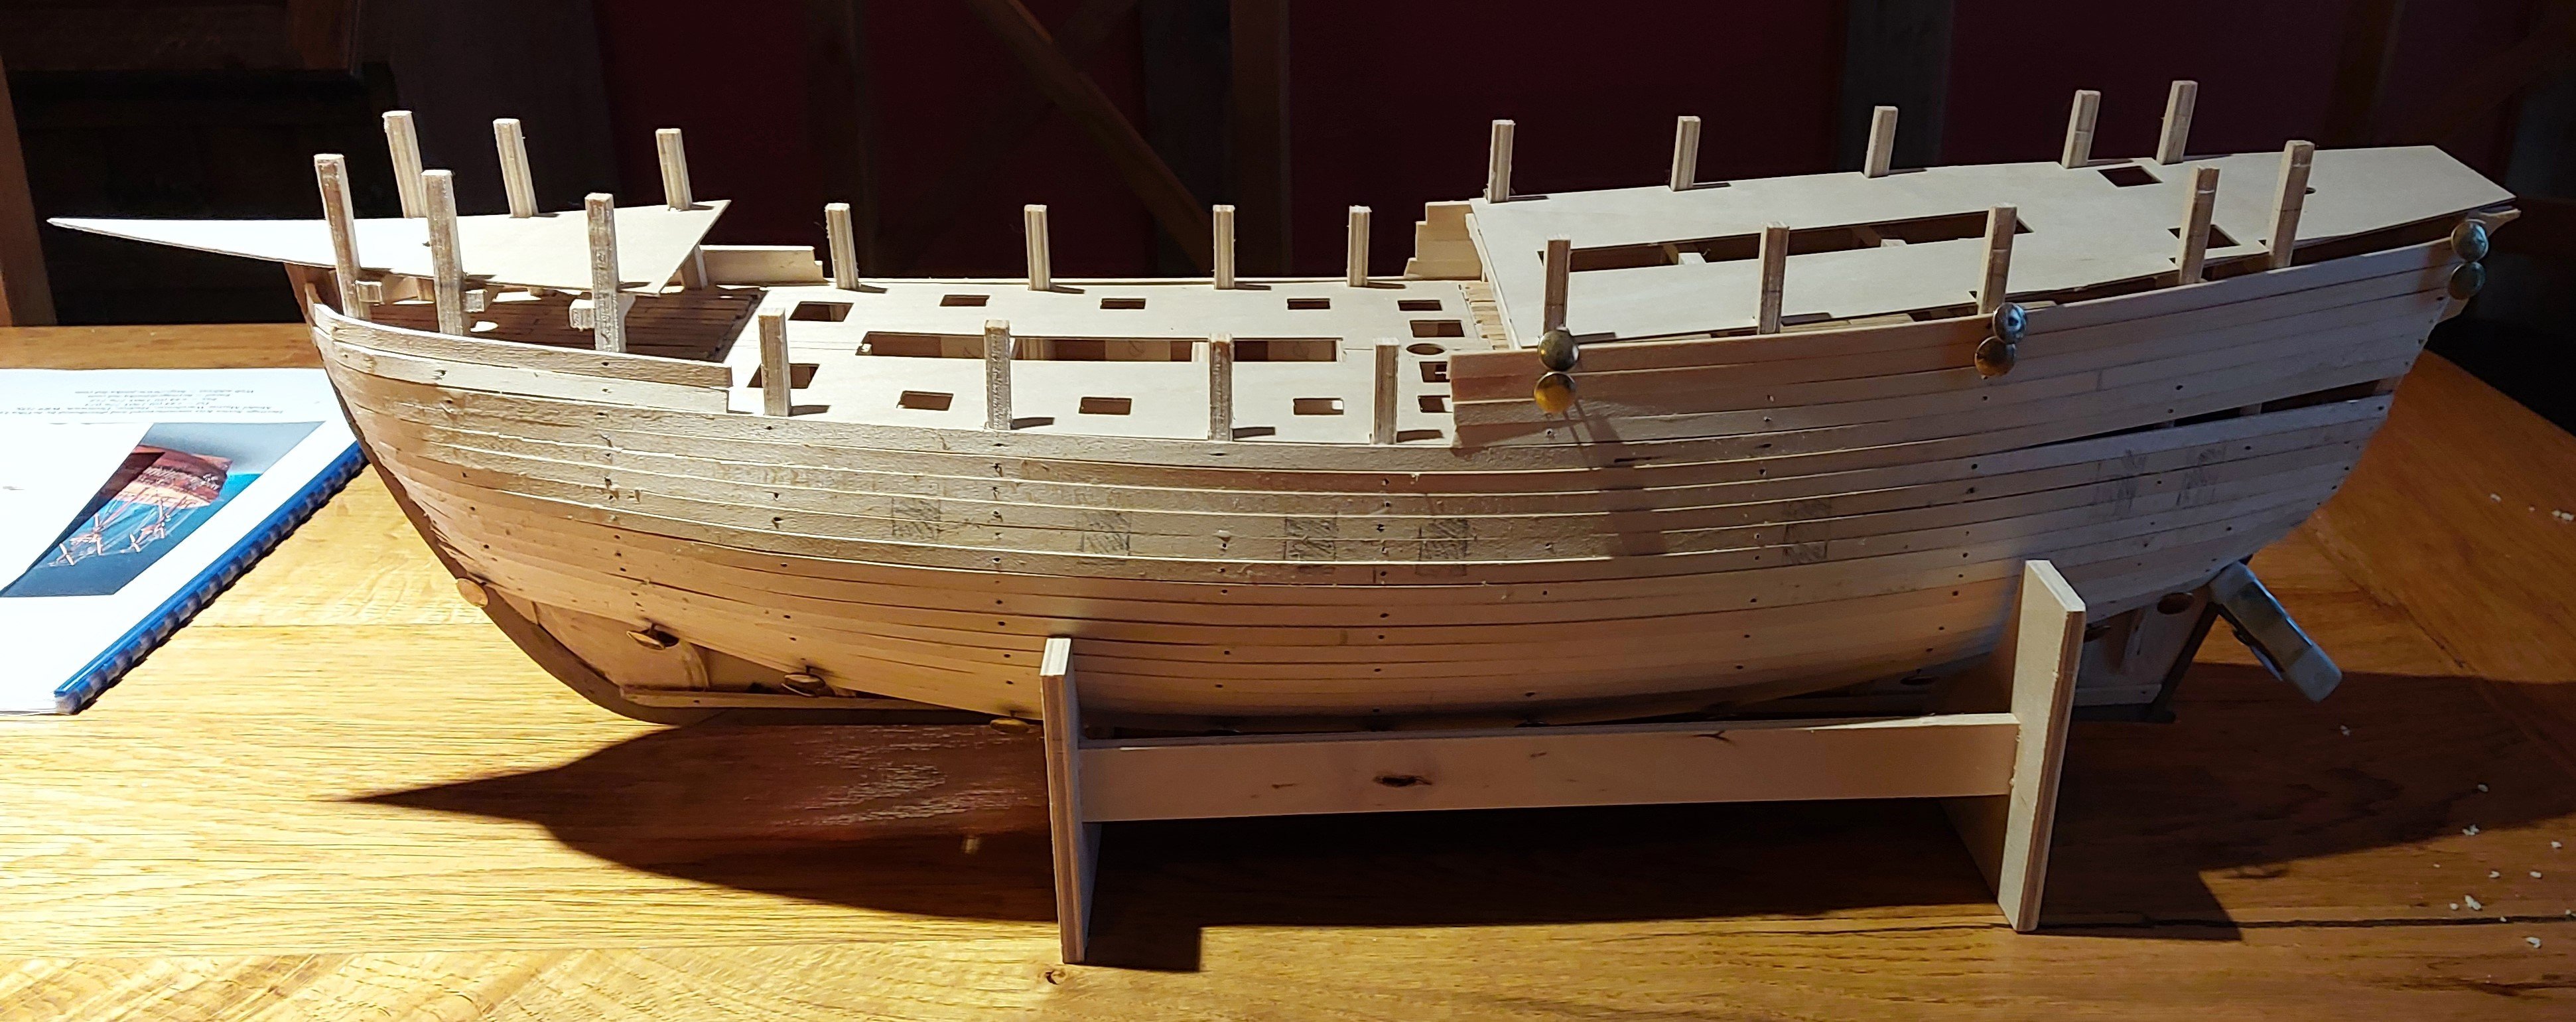
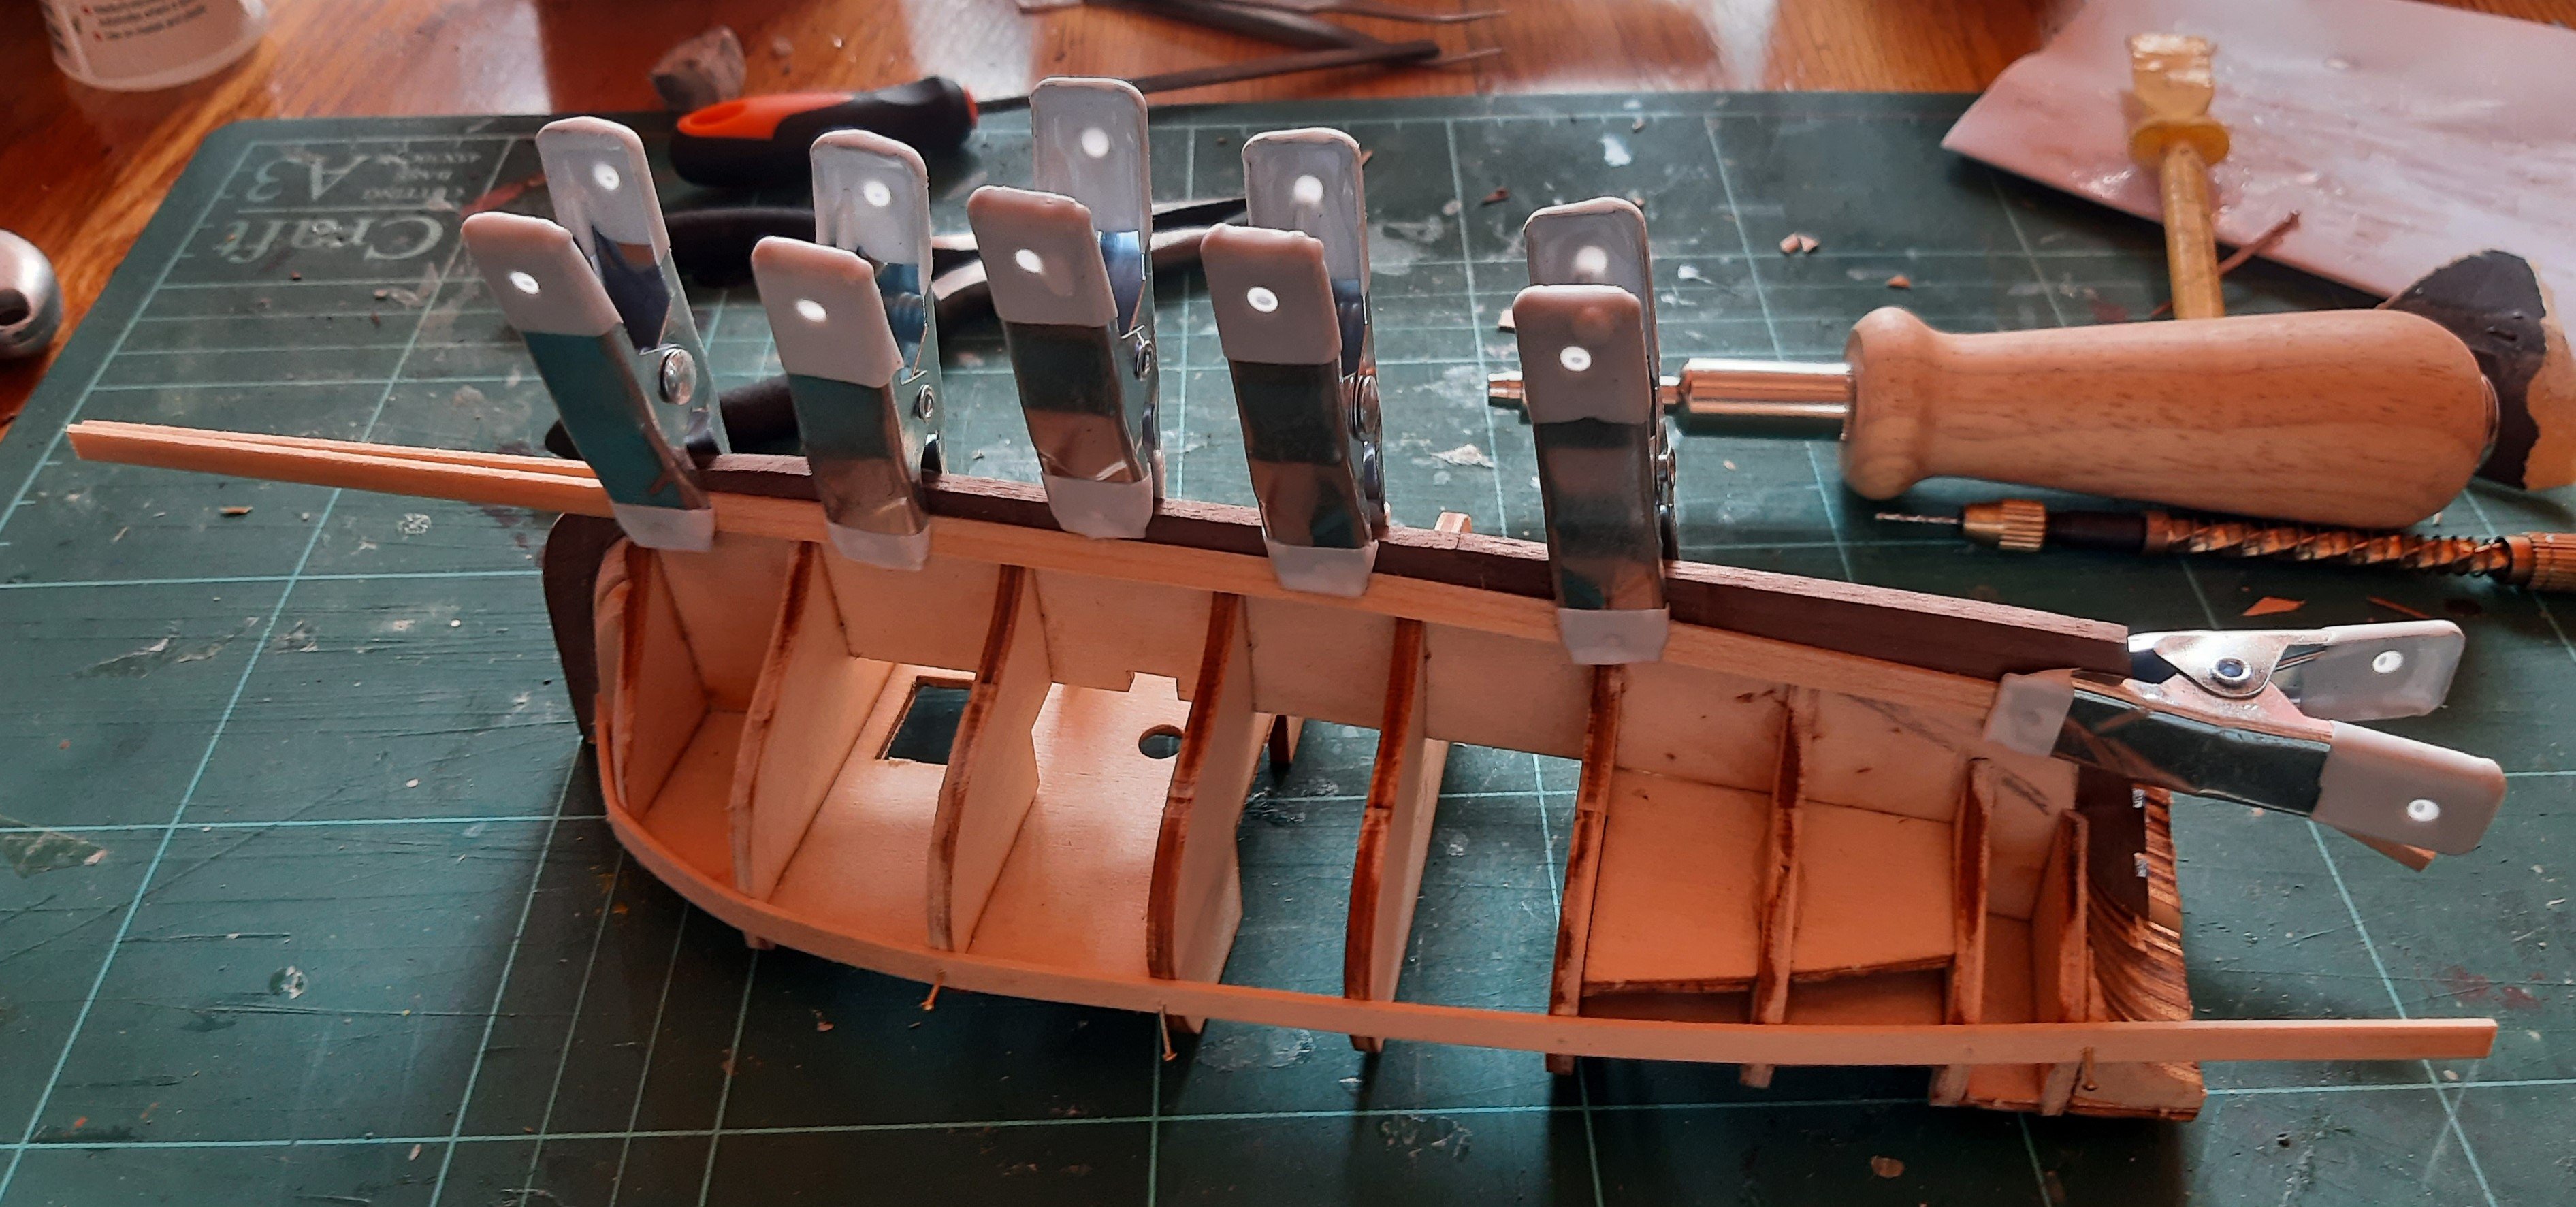
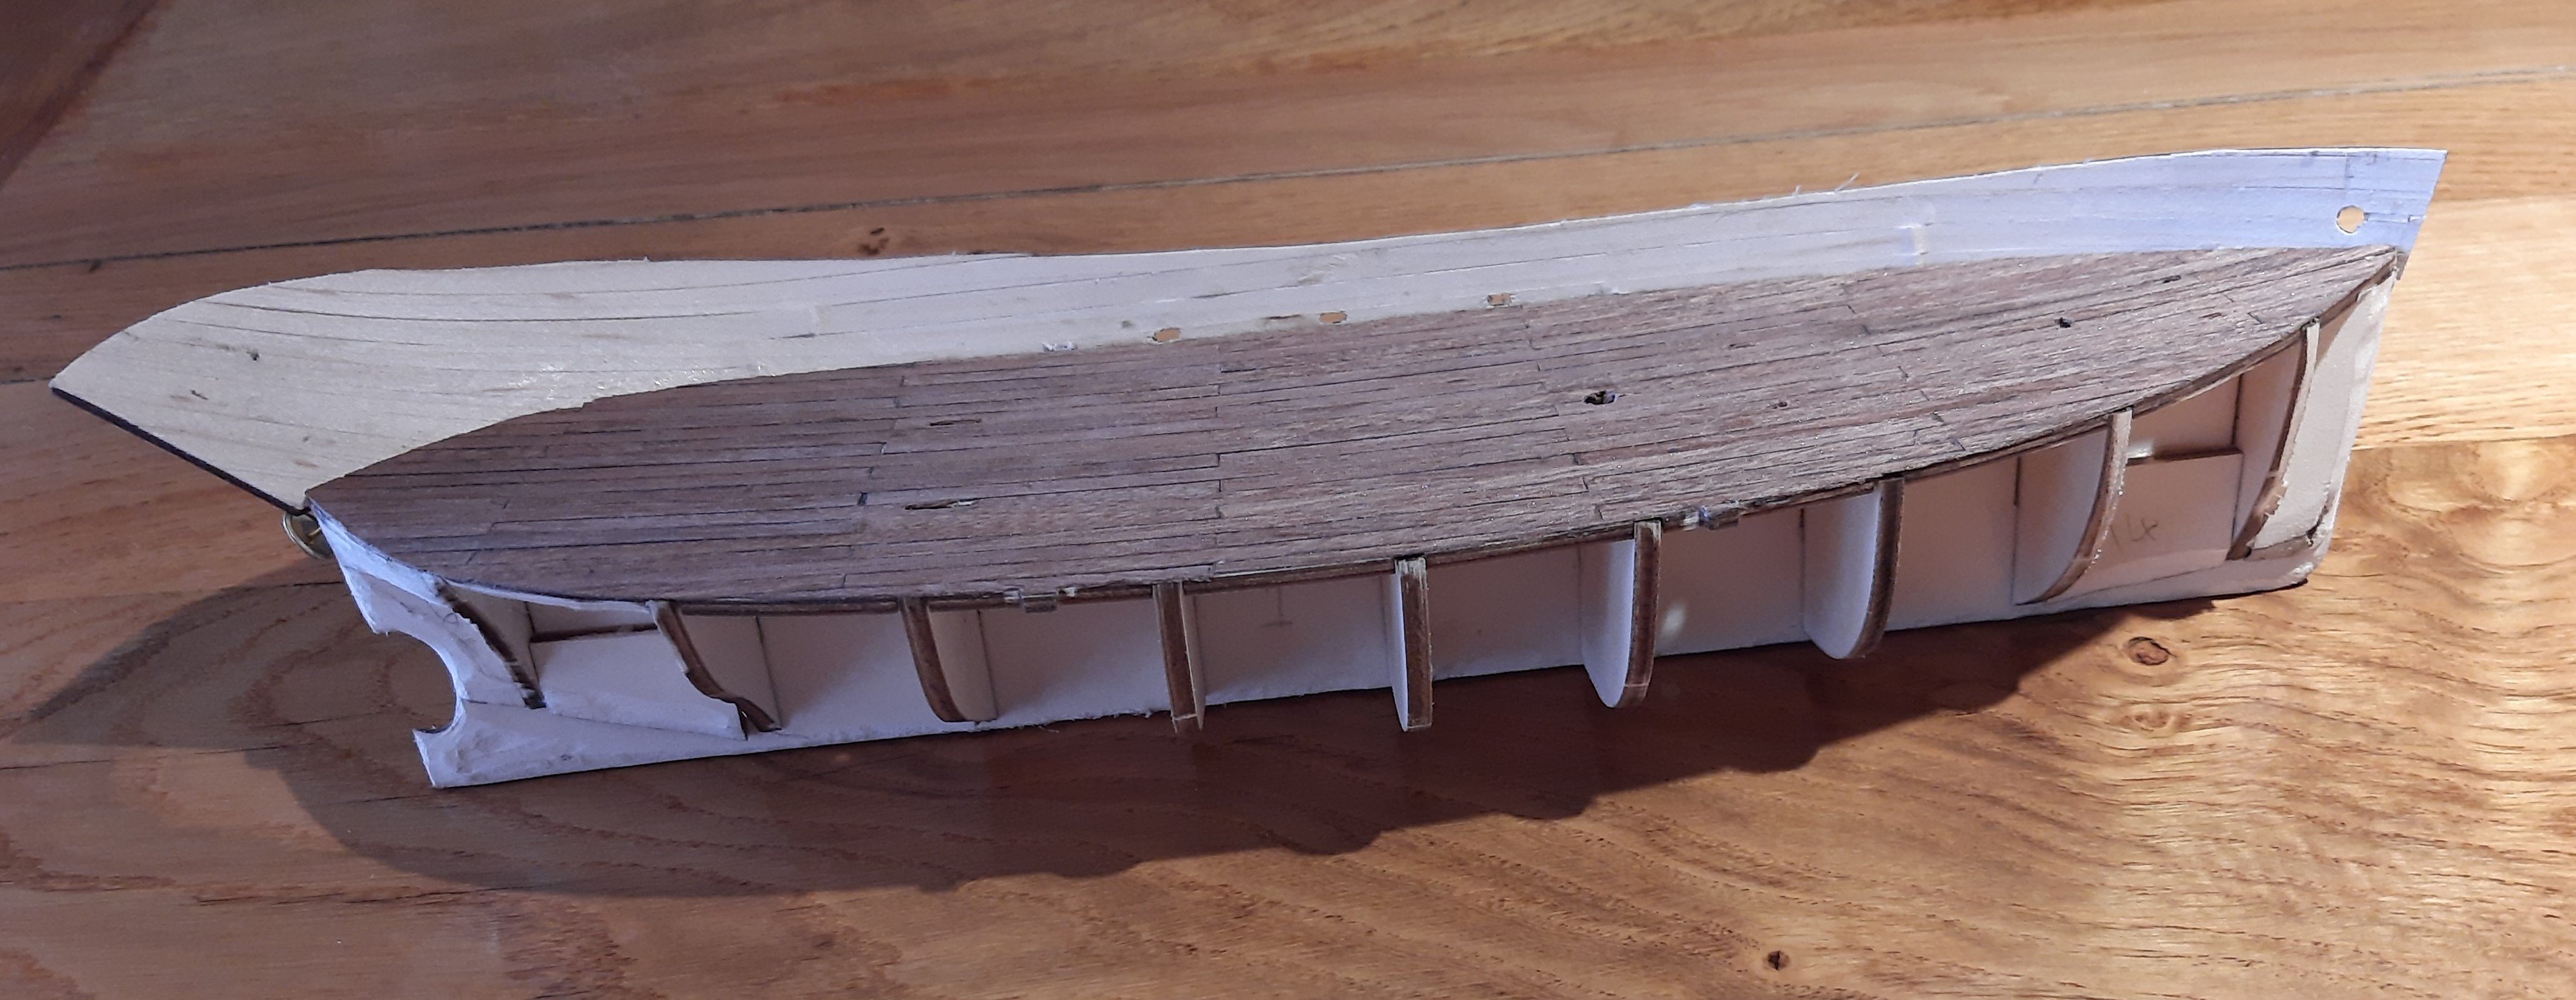
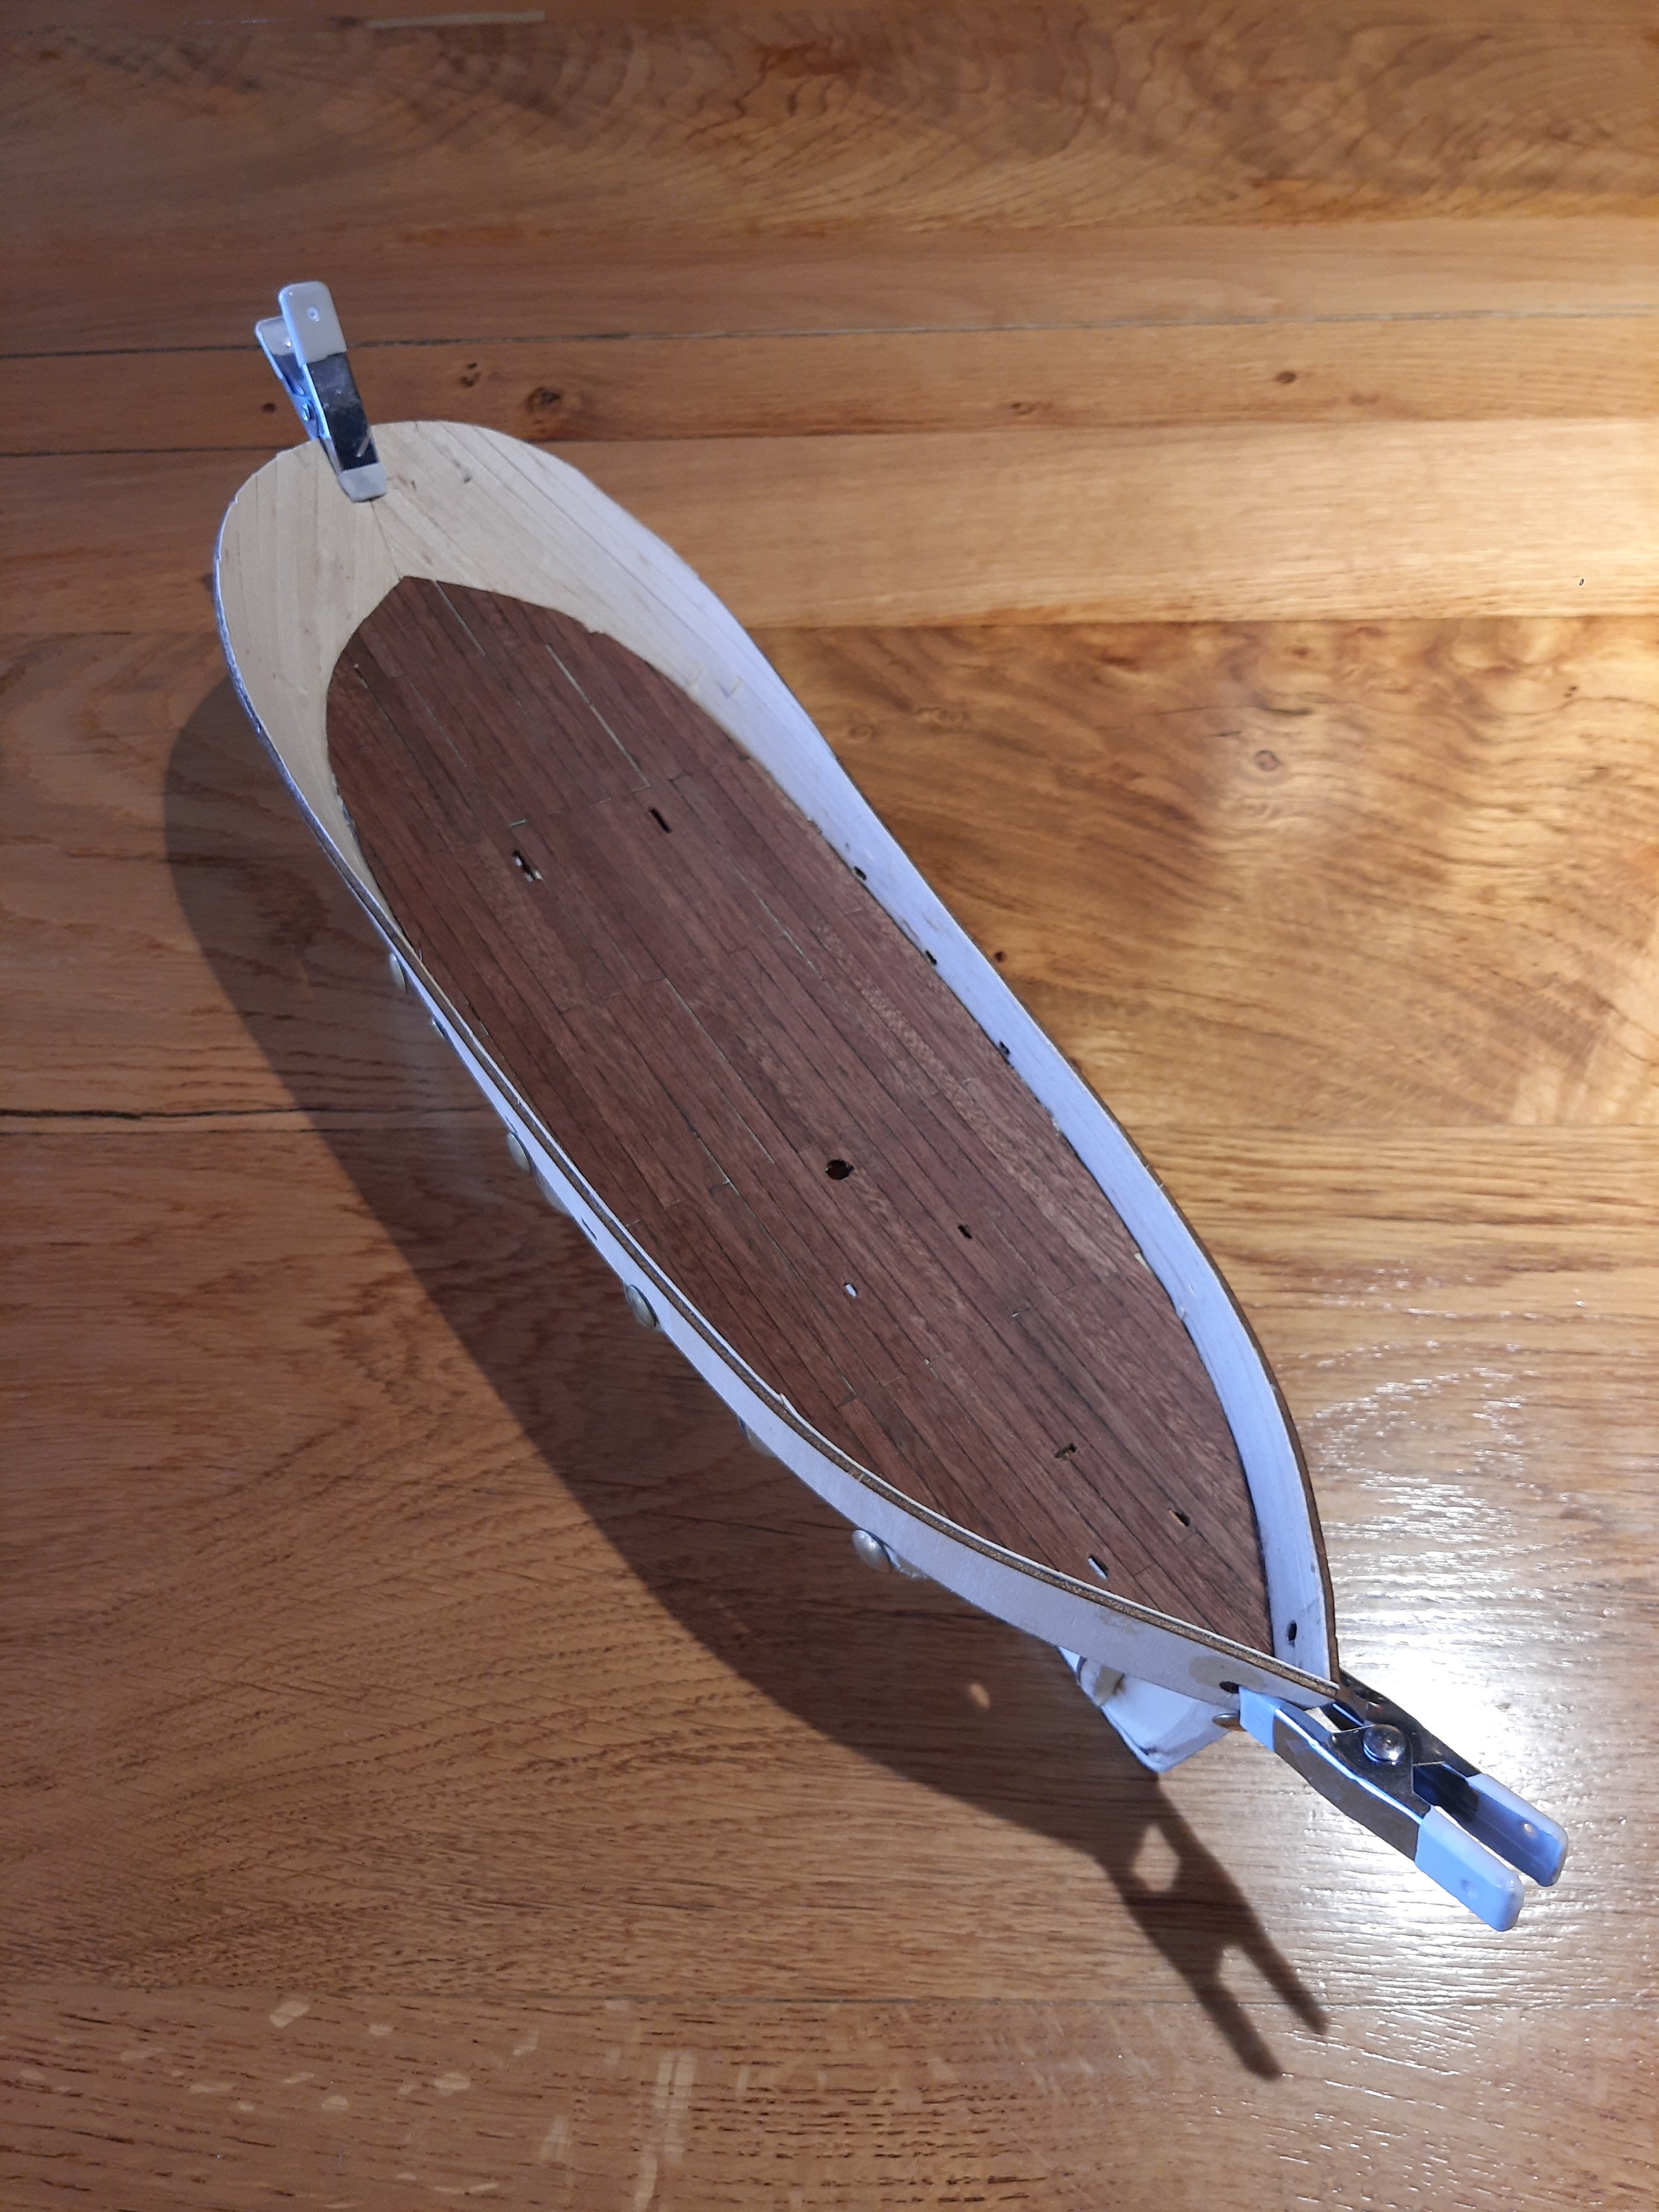
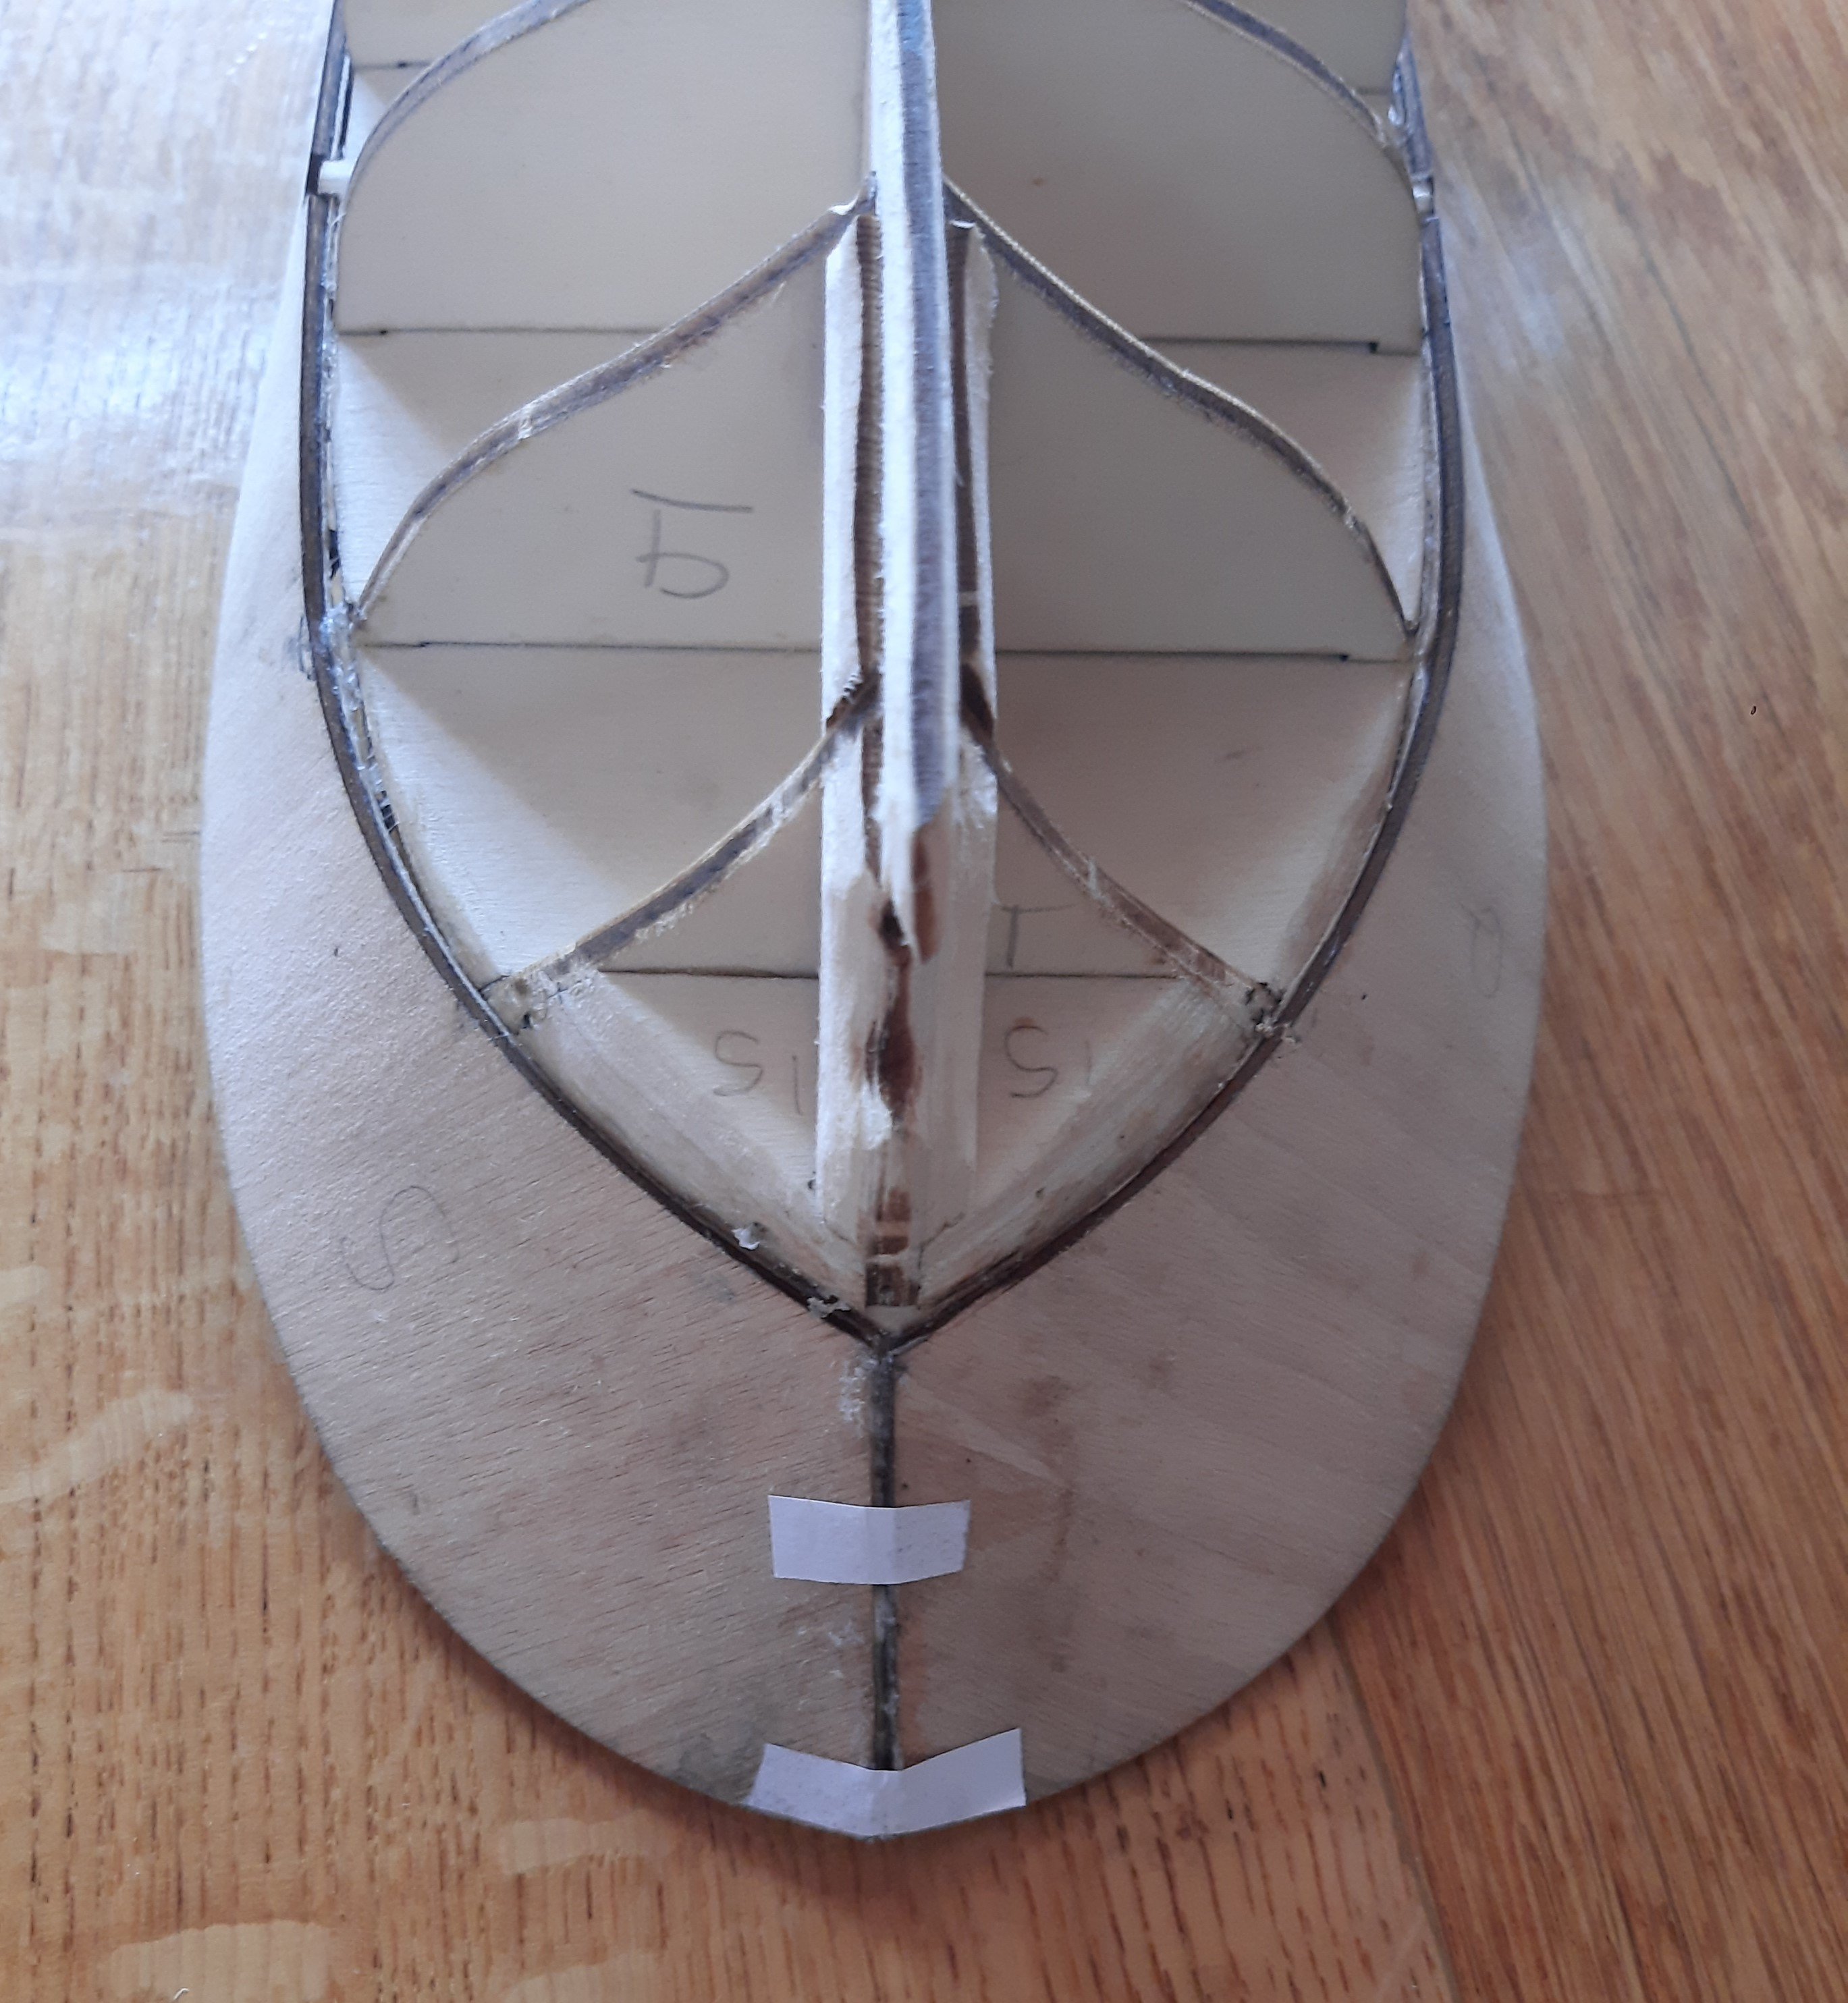
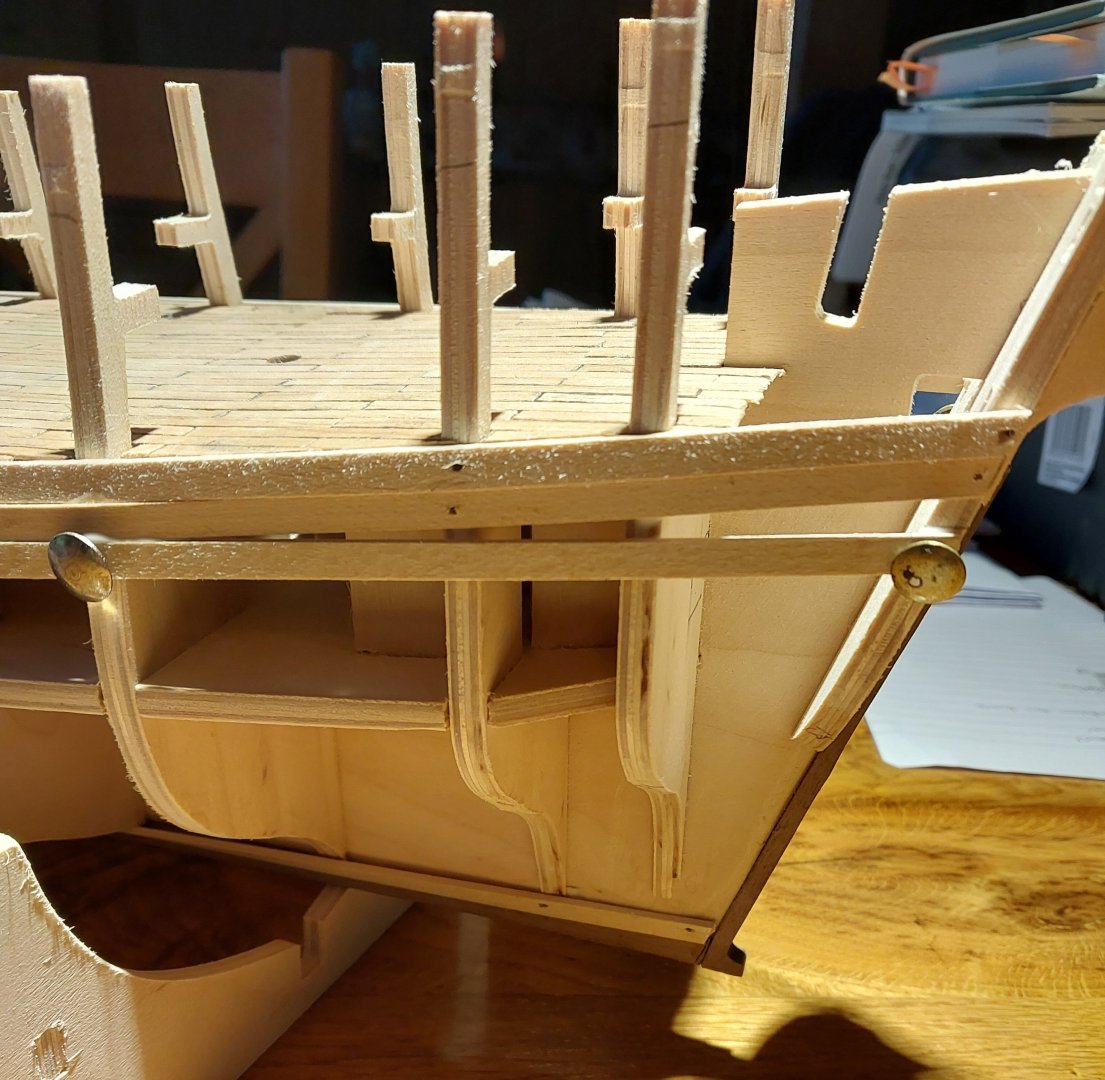
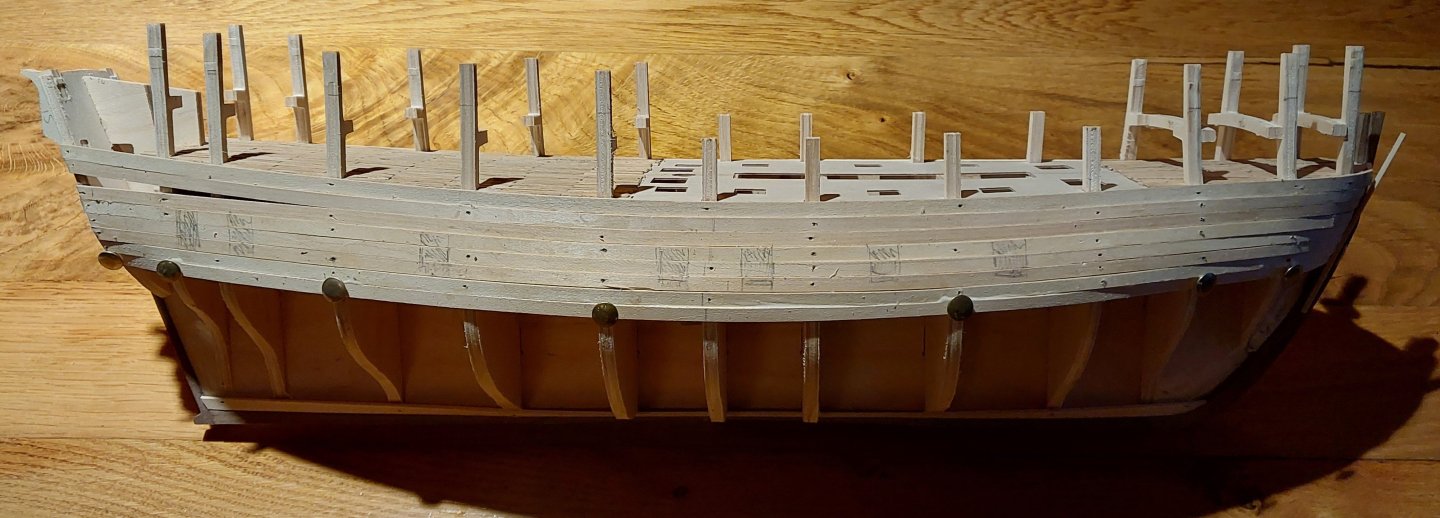
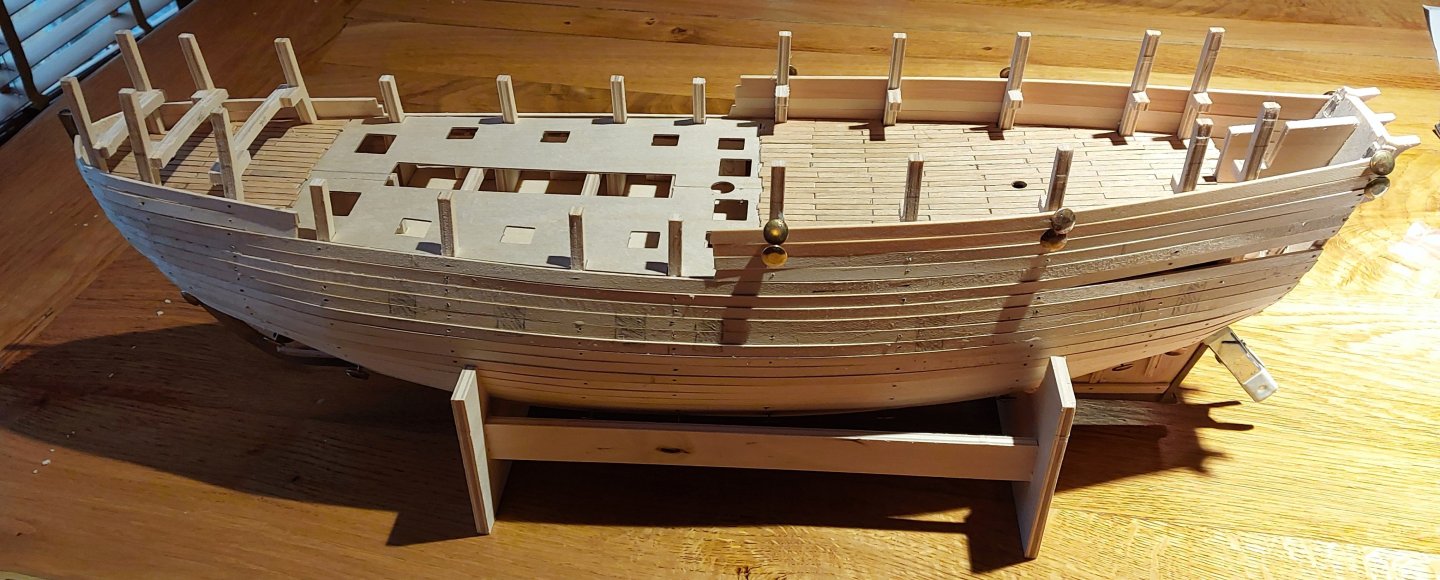
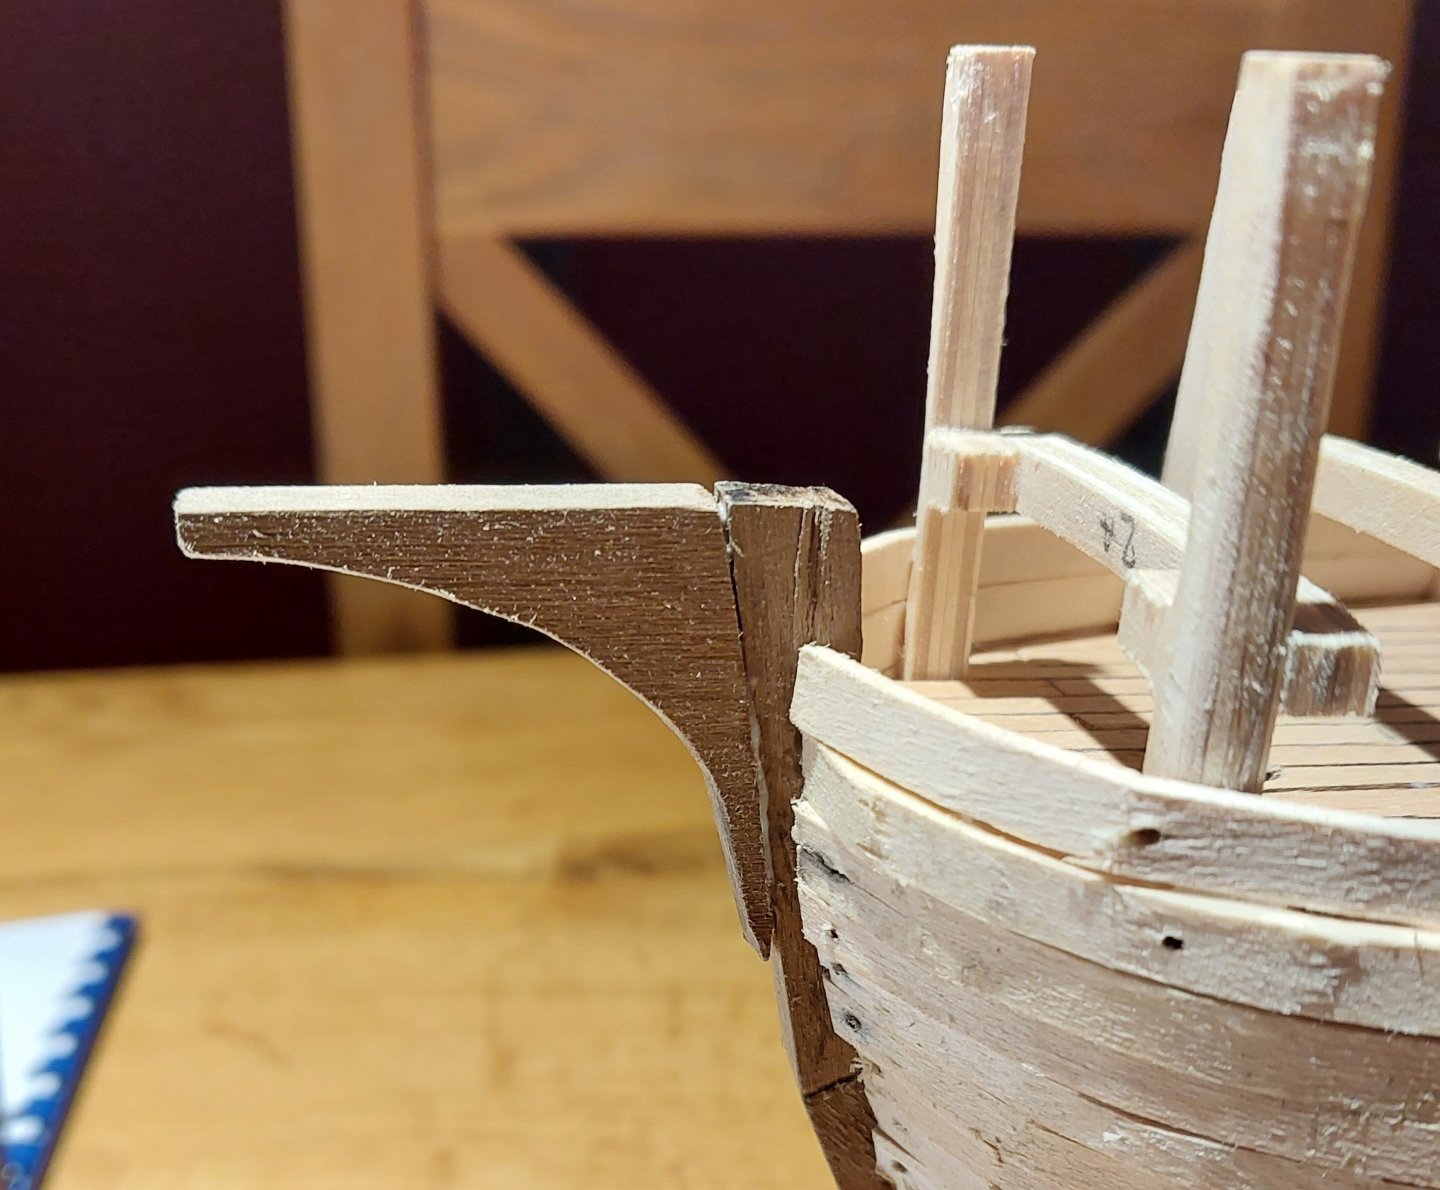
Time for an update! I made a lot of progress on the kit this last week or so, and began making some amendments as discussed in my first post. First, I finished planking the deck under the forecastle: As mentioned in the previous post, the planking ends here as there's a dividing wall at the aft end of the forecastle. I also made my first scary major amendment to the kit, and cut off the stem to replace it with my own. I think it looks okay - the join is much less noticable in person, especially after some sanding. I made this out of the sprue which the keel was CNC'd from in the first place as it's the same thickness and wood type. First planks going on: And at the top: For better or worse I followed the line of the deck for the first plank. This necessitated a very early gap for a stealer. Not sure if that's correct, but this a double planked hull, so any crimes can be hidden later with the second layer. I also stuck some extra 'dummy' blocks into the transom. The Caldercraft model doesn't include the sternchaser guns shown in the Anthony Roll, and there were no guns found in the transom, but Marsden does allow for their inclusion in his overview of the main gun deck. If nothing else, I can always decide against including these later. In between planks drying in place, I also cut two holes in the transom for the sternchasers. Obviously the photo shows the holes before cleaning them up! If I decide against these in the future I can always plank over these when I put the main planks on the transom. Still debating! On the subject of cannon, here are all the provided barrels. They're some sort of very soft white metal, which I assume may be lead. They're also not very well cast - lots of the barrrels are filled with flash from the casting process, and there are a lot of seam lines. I emailed Caldercraft's UK distributor asking for more cannon to meet my needs, and they quoted me a quite extortionate amount for what I asked for. I think I'll have to make my own. So to finish off this update, here's where I am on the first layer of planks: As you can see, I've reached the base of the first sterncastle deck. I'm 2/3 of the way to the keel with the lower planks. Overall, they've gone on quite easily - I took to soaking them thoroughly, but the lime? is very pliable even when dry and I've not had many issues. There are small gaps in a couple places around the bow but nothing a bit of filler and some sanding won't cure. And, to finish off, a new addition to the stempost. This follows the scale drawings in McElvogue's book, which came out to 38mm at 1:80 scale. It looks correct to me compared to most of the material. Hopefully my next post will come to you with a completed hull and possibly a cannon update. Watch this space! Thanks for reading.


-
Yes, I'd noticed the extra gun deck and wasn't going to include that. Certainly the Caldercraft model doesn't include any rear-facing cannon on the transom or in the fore or sterncastle decks - those I'll be adding in for sure. I think at this scale any of the smaller anti-personnel guns are too small to include, but I've got my eye on a few additions - stay tuned! I've picked up a copy of The Rigging of Ships, thank you for the suggestion. Thank you very much! Yes, I'd agree - McElvogue is very free with his interpretation. Ultimately my model will have to be my own interpretation as well. To both of you - yes, I'm interested to see how three castles looks when fully mocked up. Note that the forecastle will also have a small 'half deck' just behind the foremast - I'm certain that it will seem very top-heavy, but it would also appear that that's how the carracks were designed. I'll update with progress soon! Thanks for the kind words.
-
Very smart little build Eric, congratulations on it!
- 86 replies
-
- 1
-

-
- San Francisco
- Artesania Latina
- (and 2 more)
-
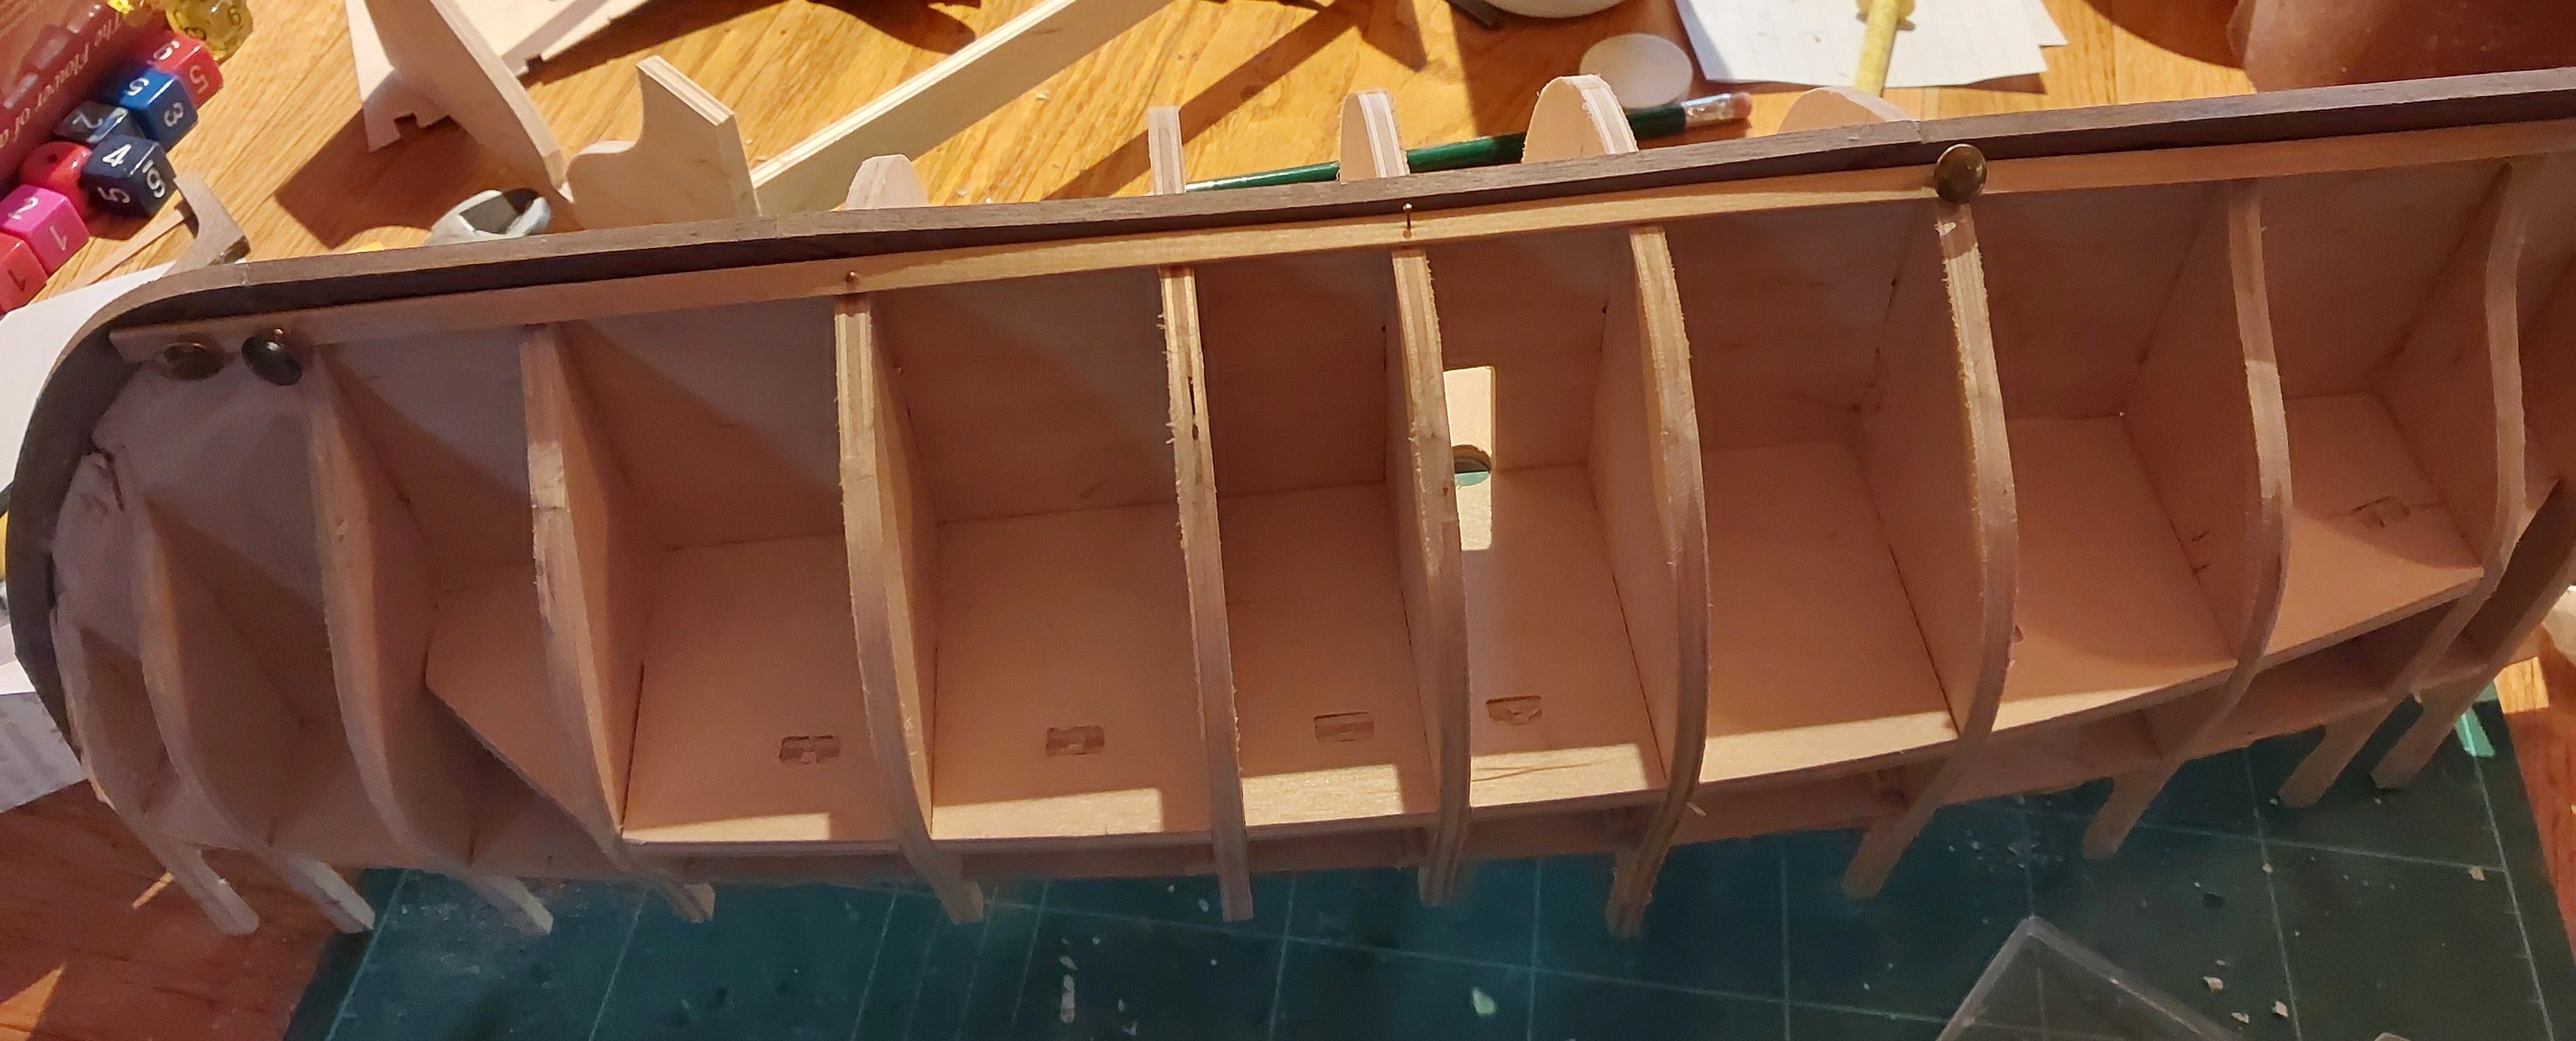
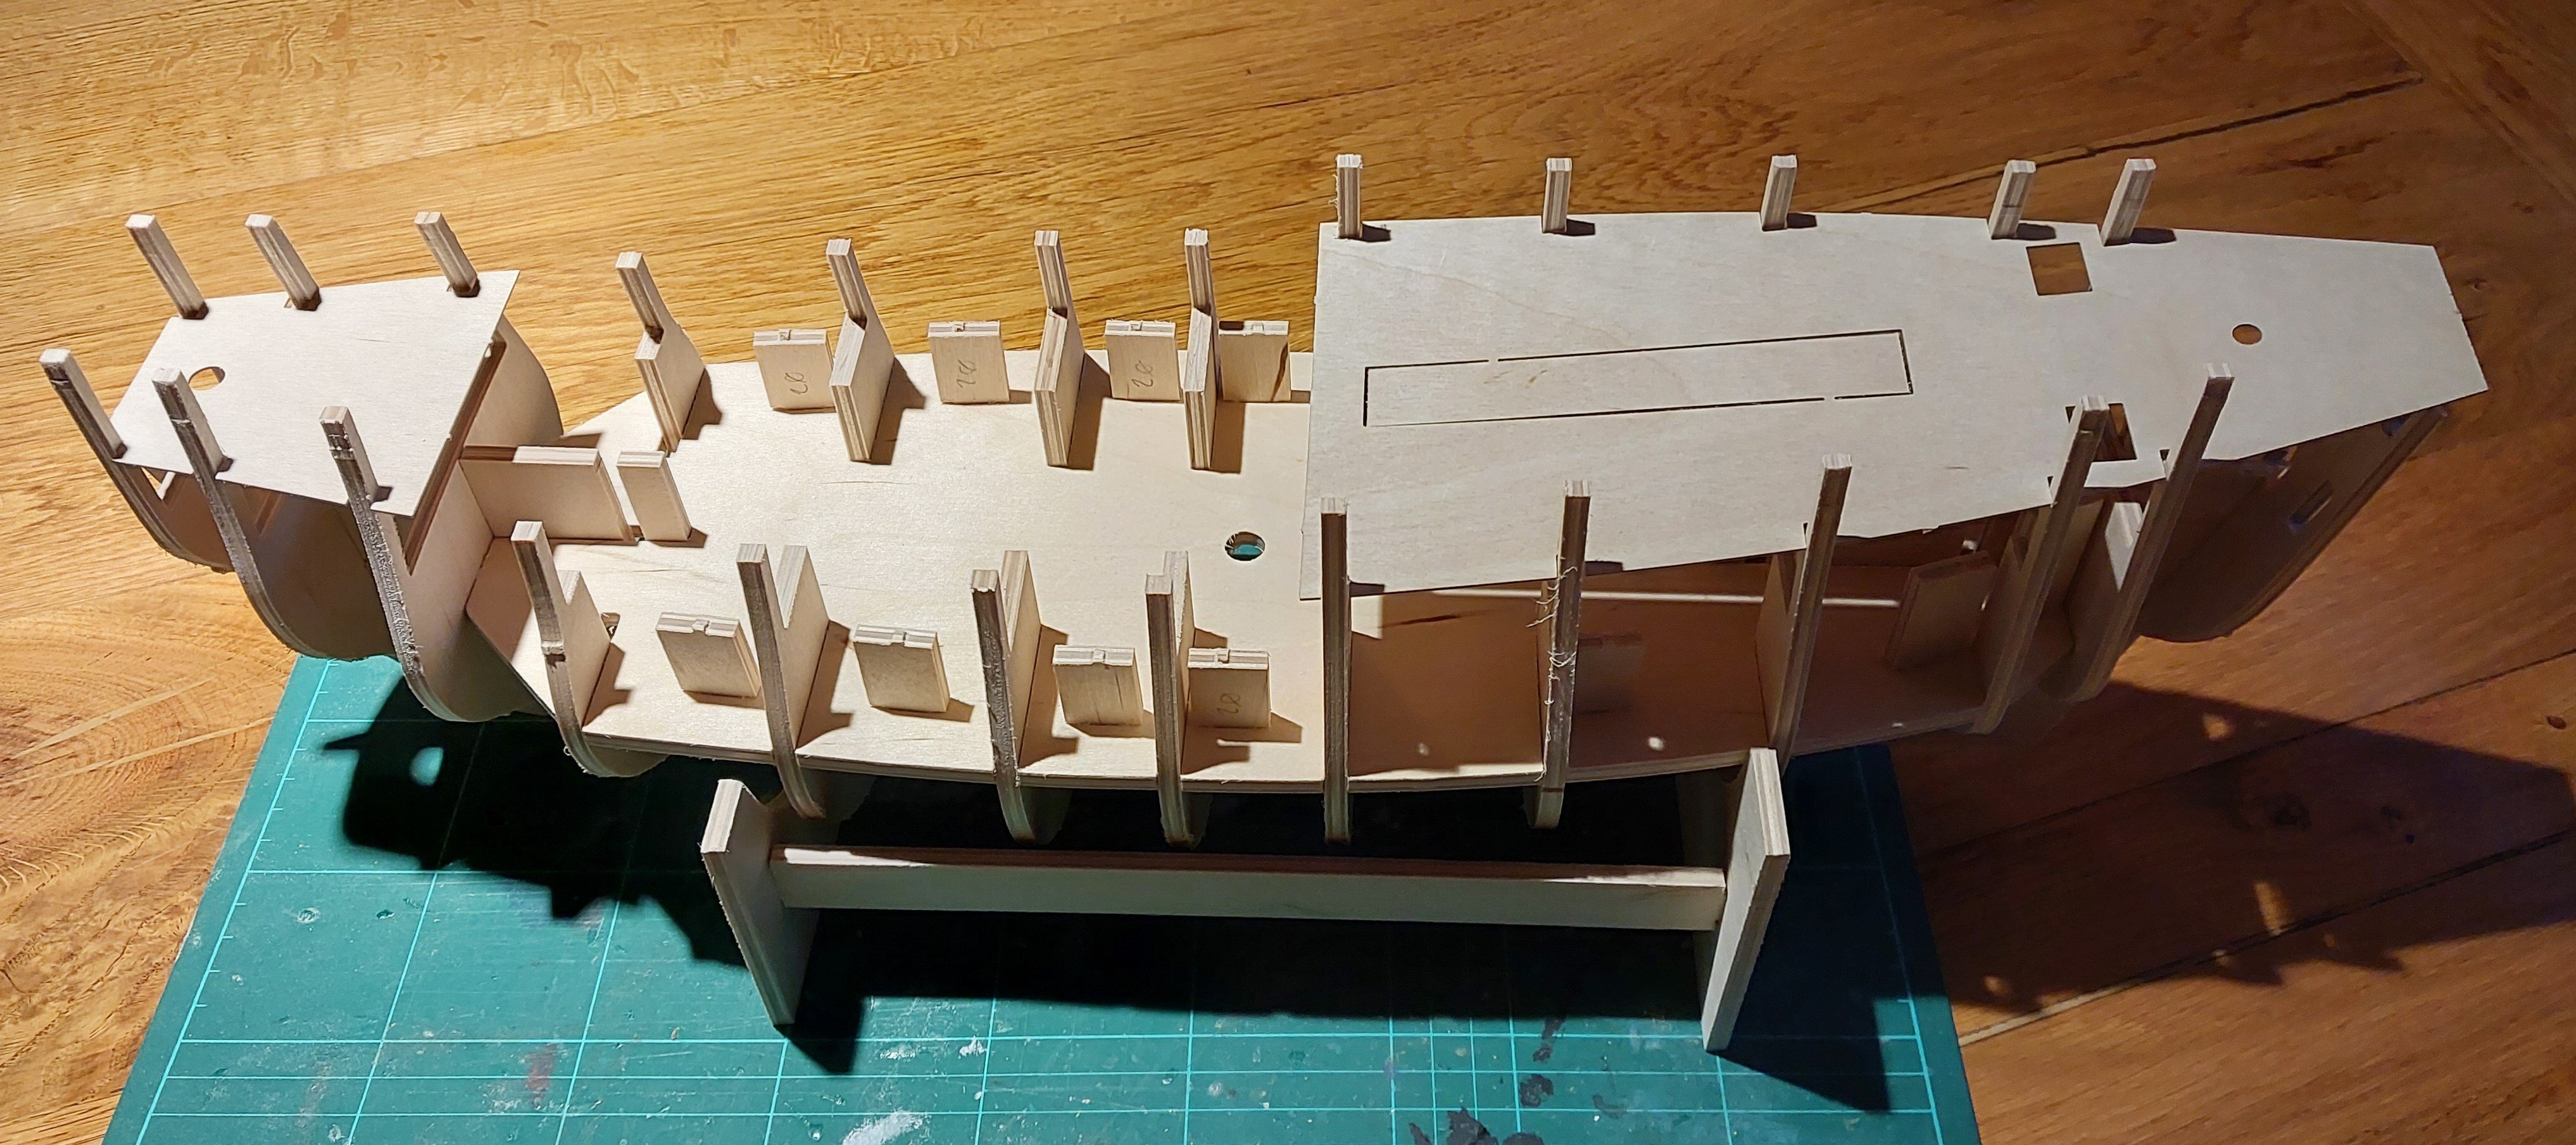
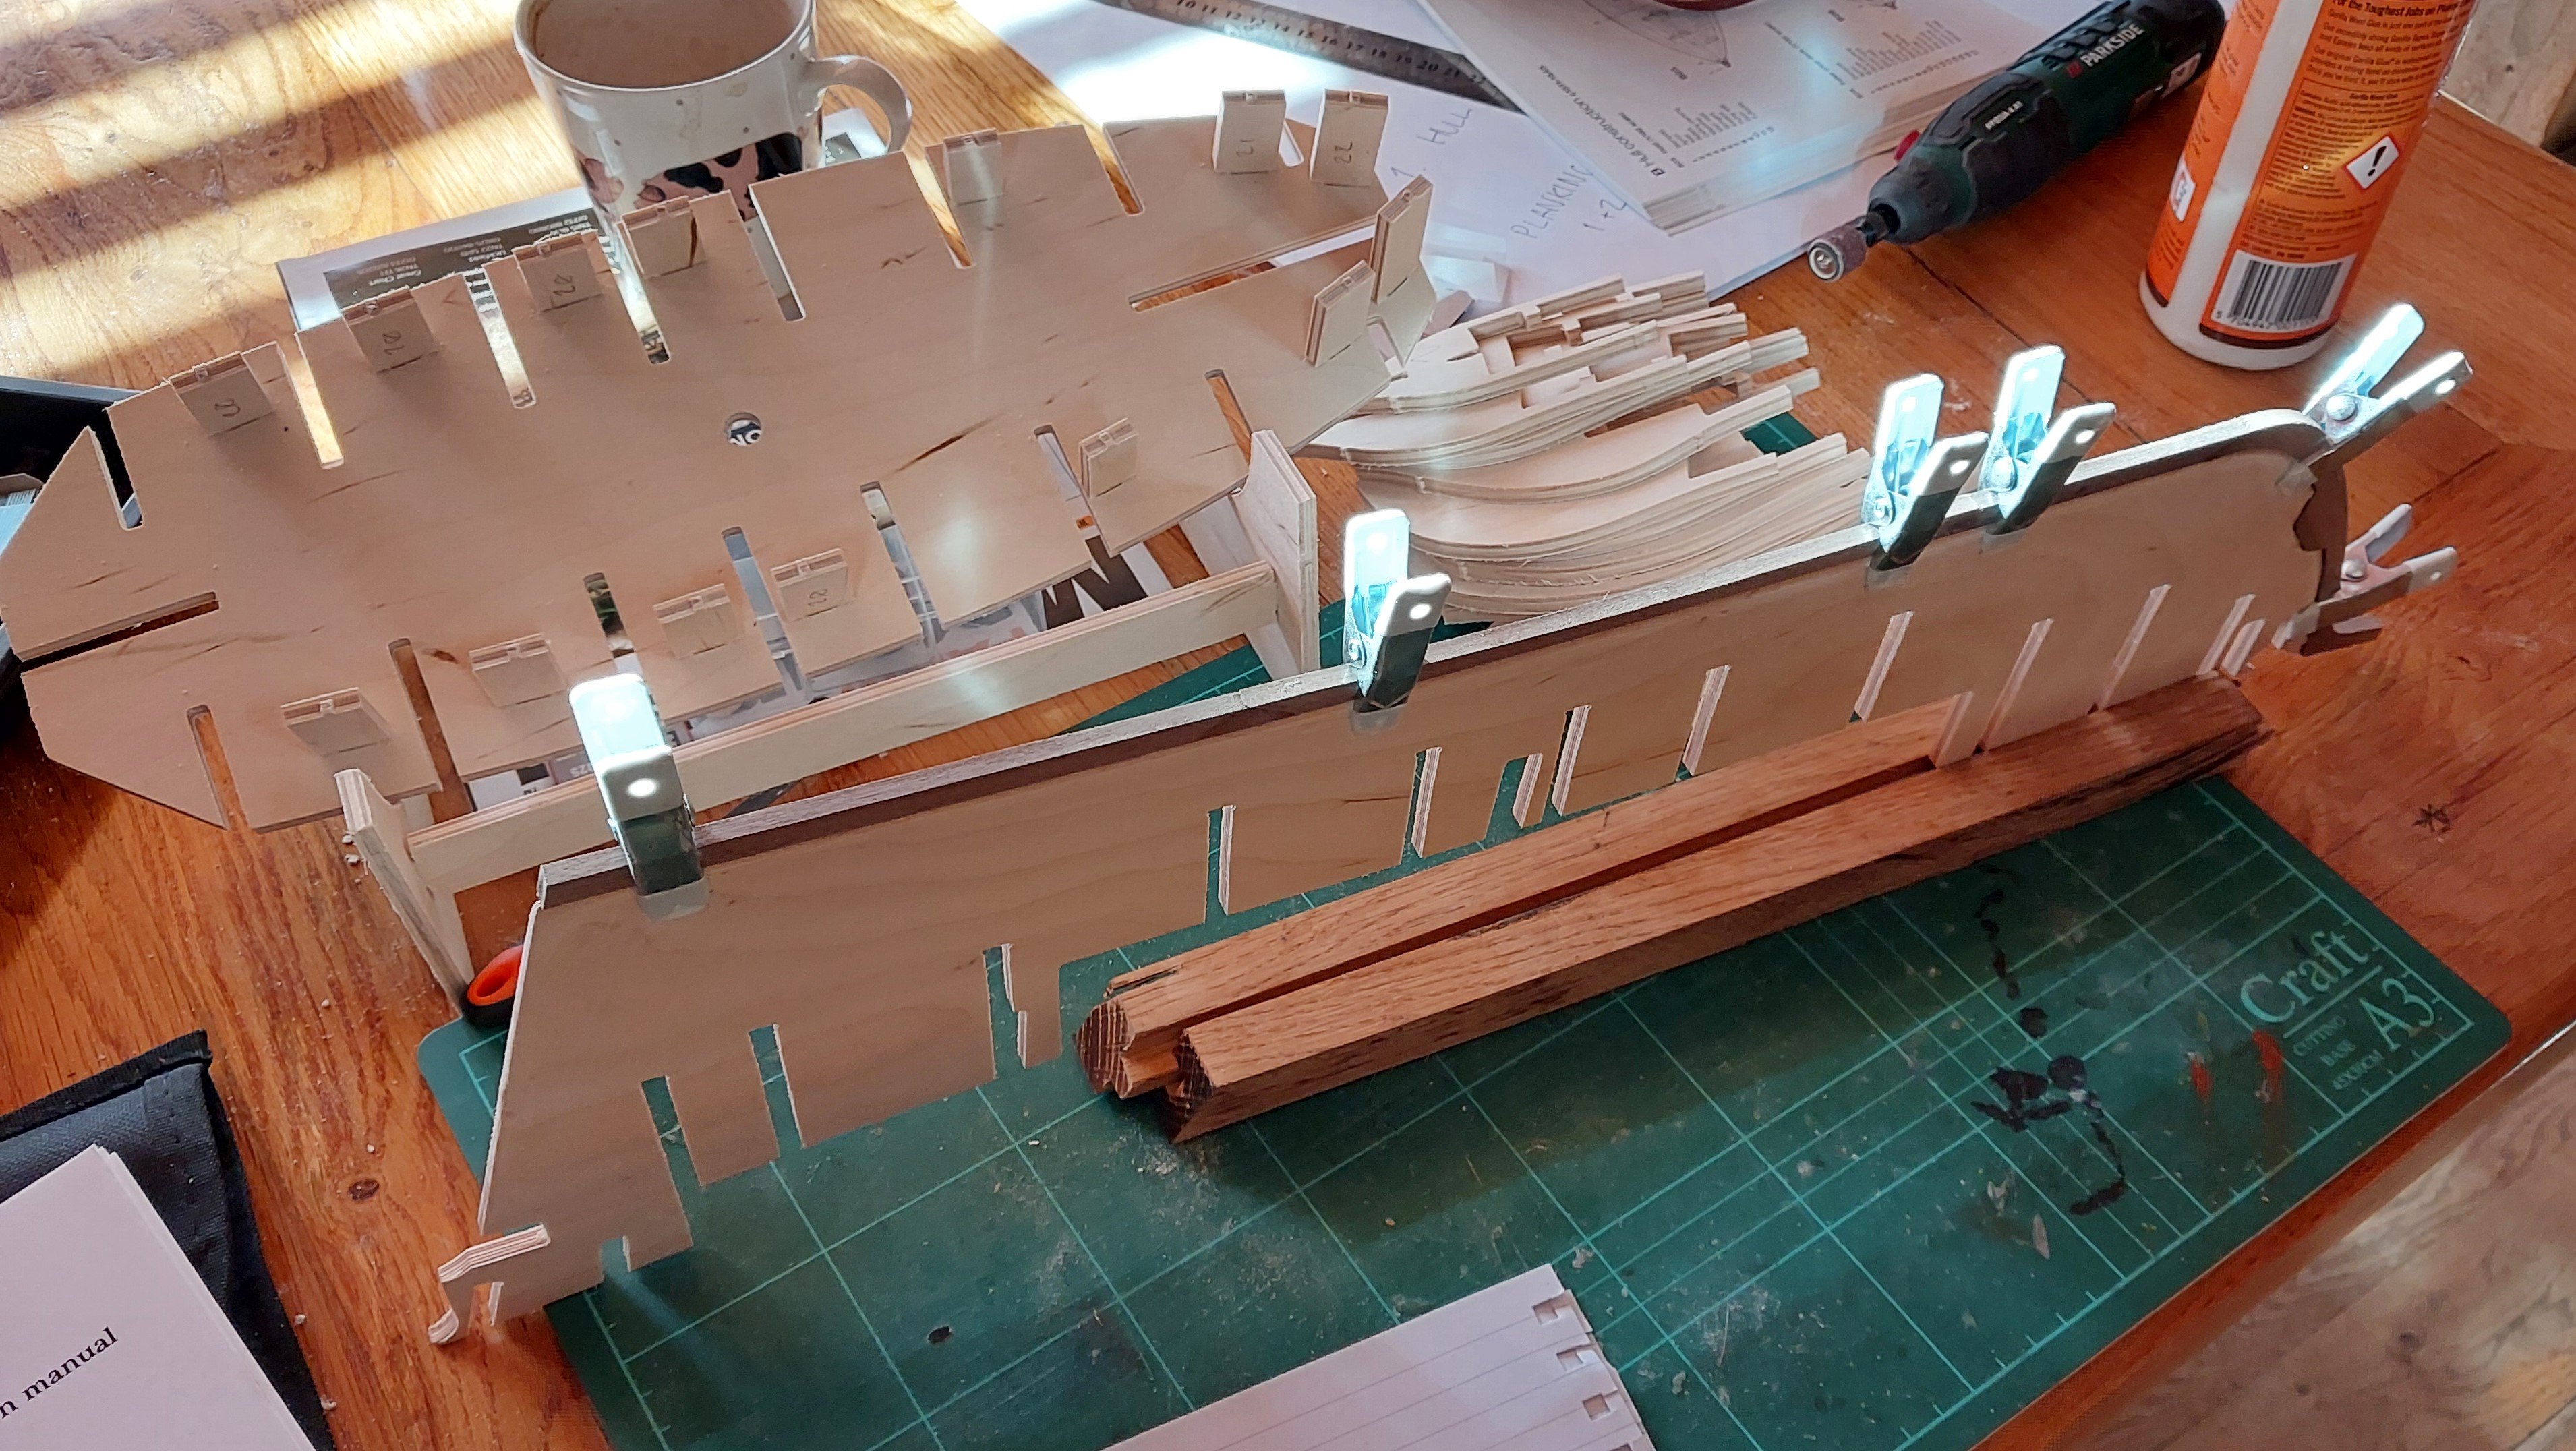
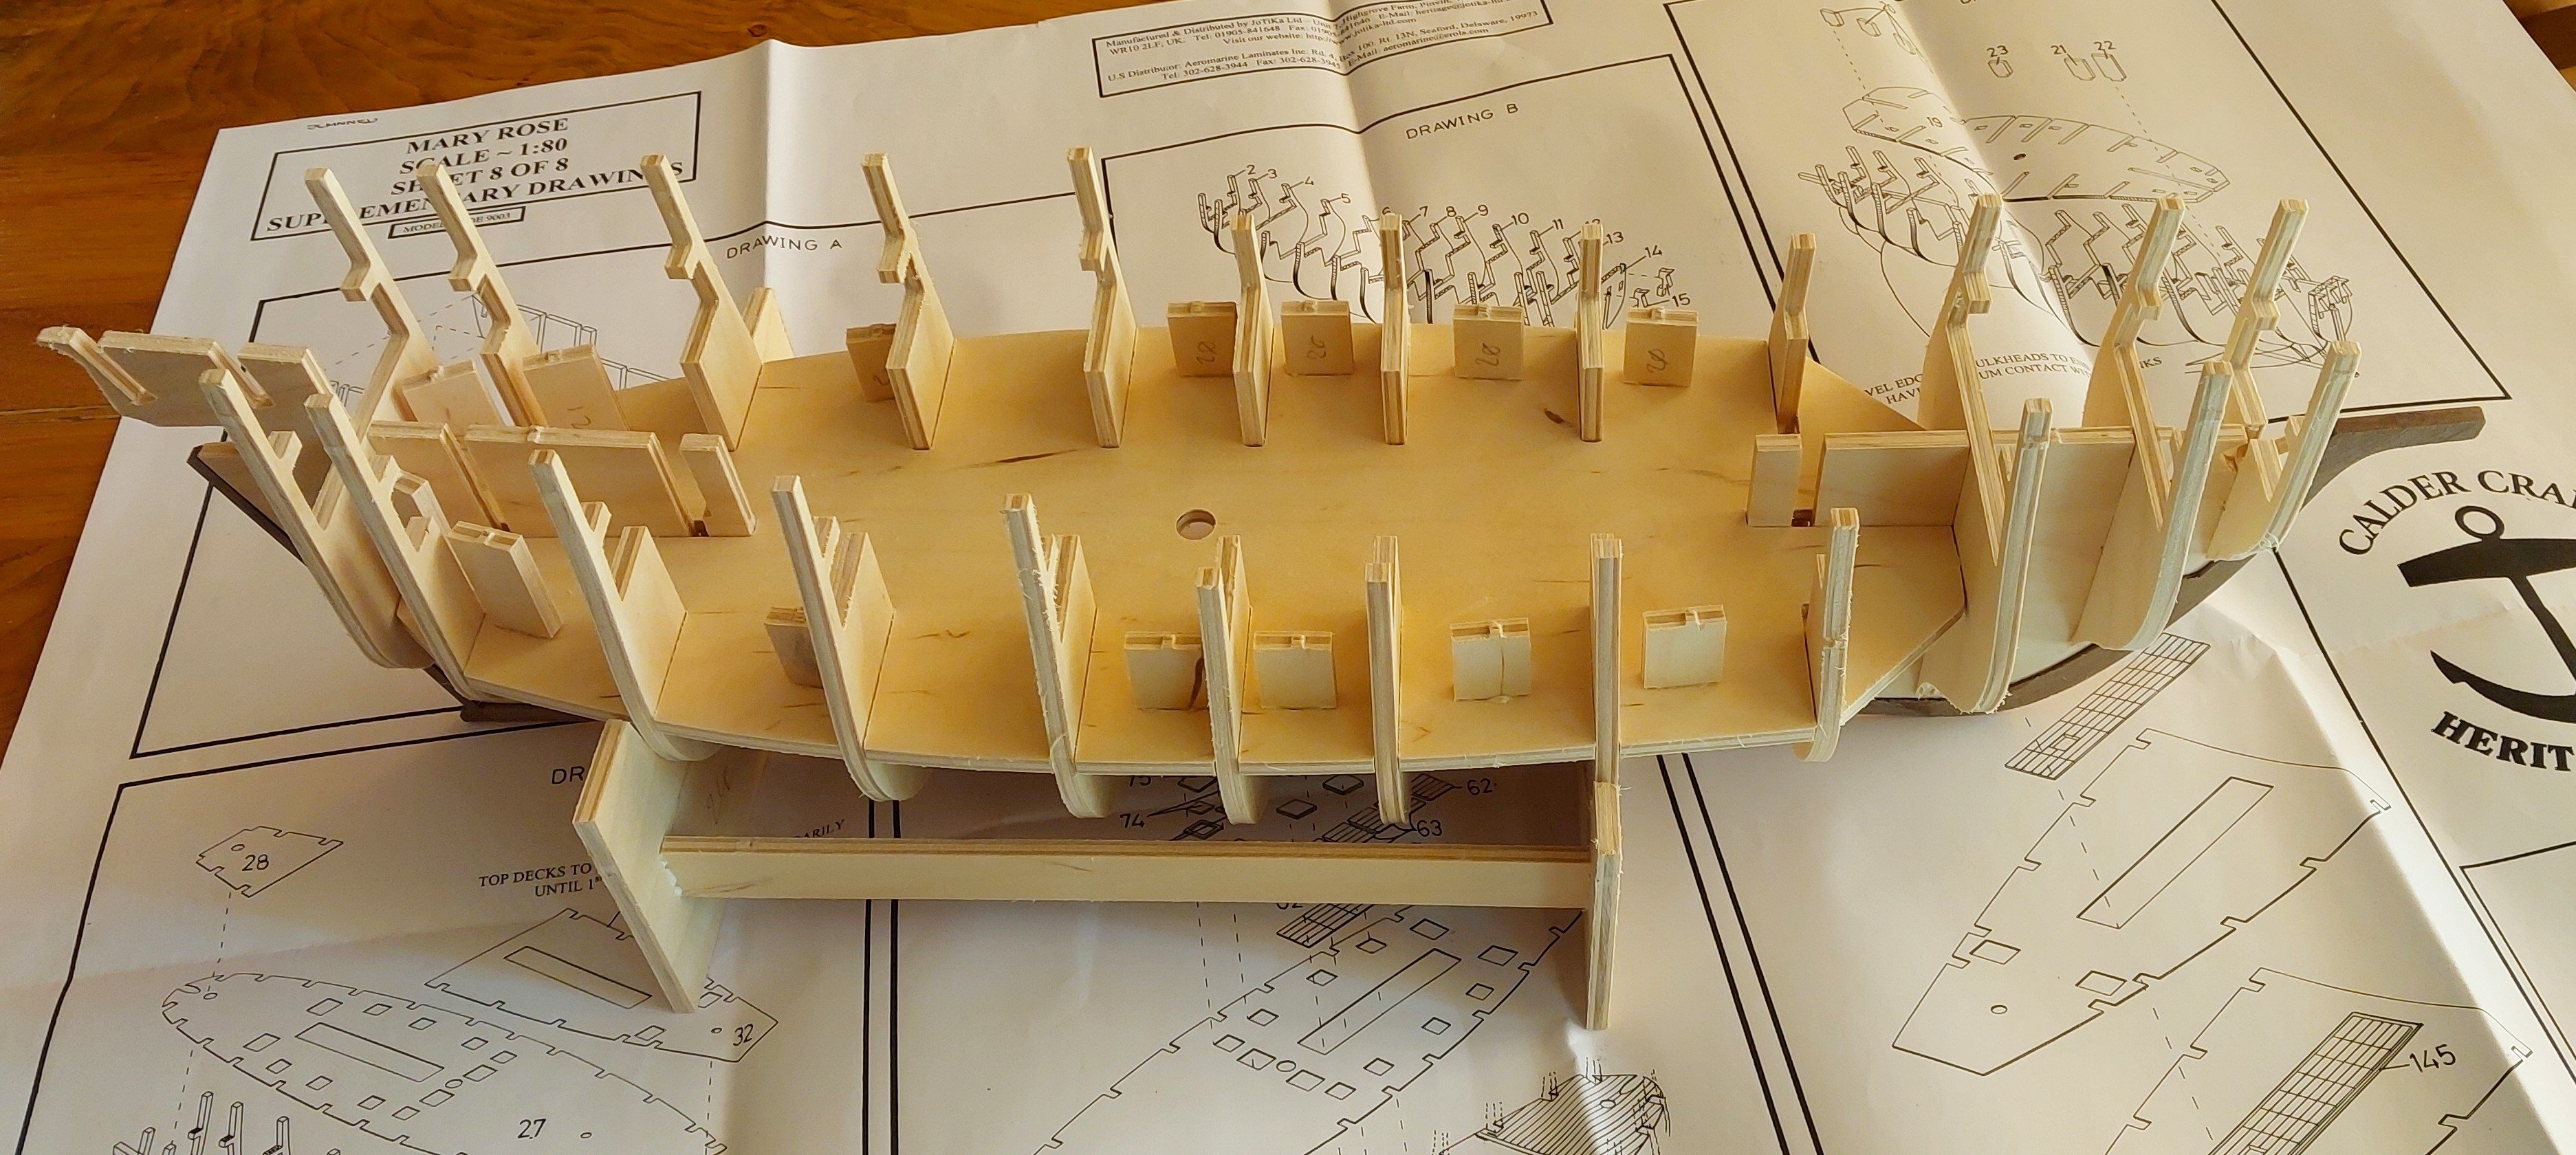
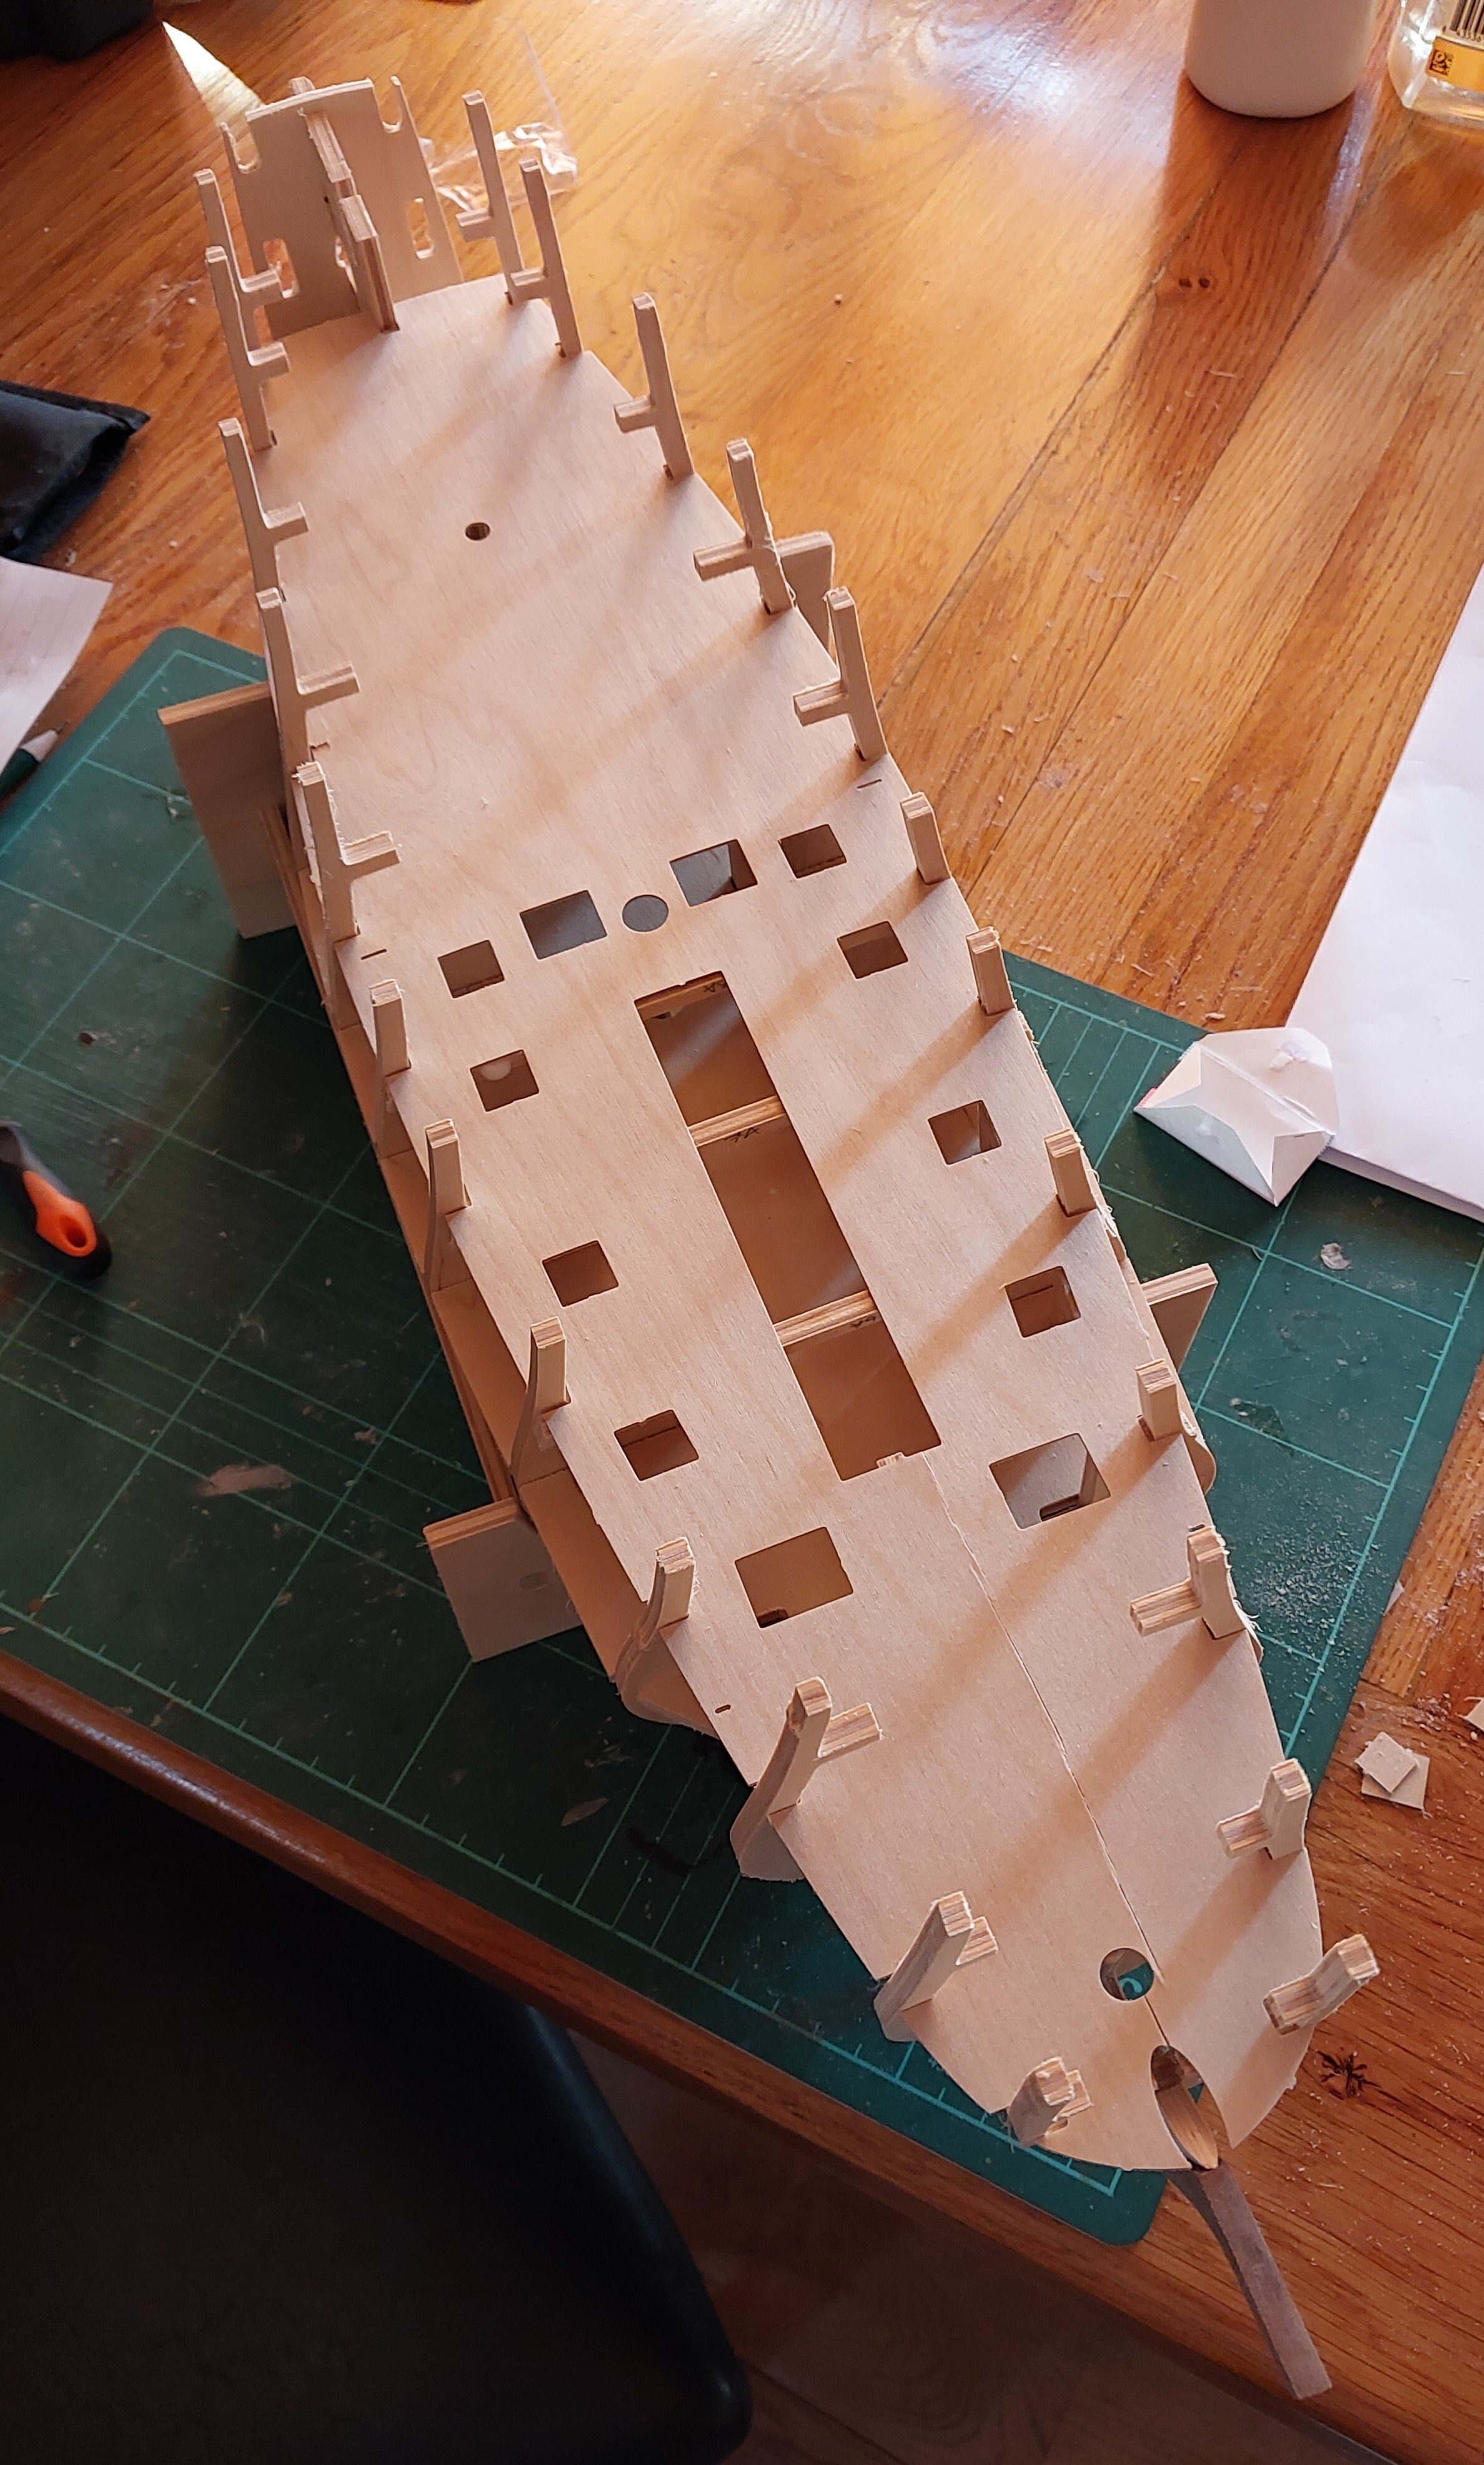
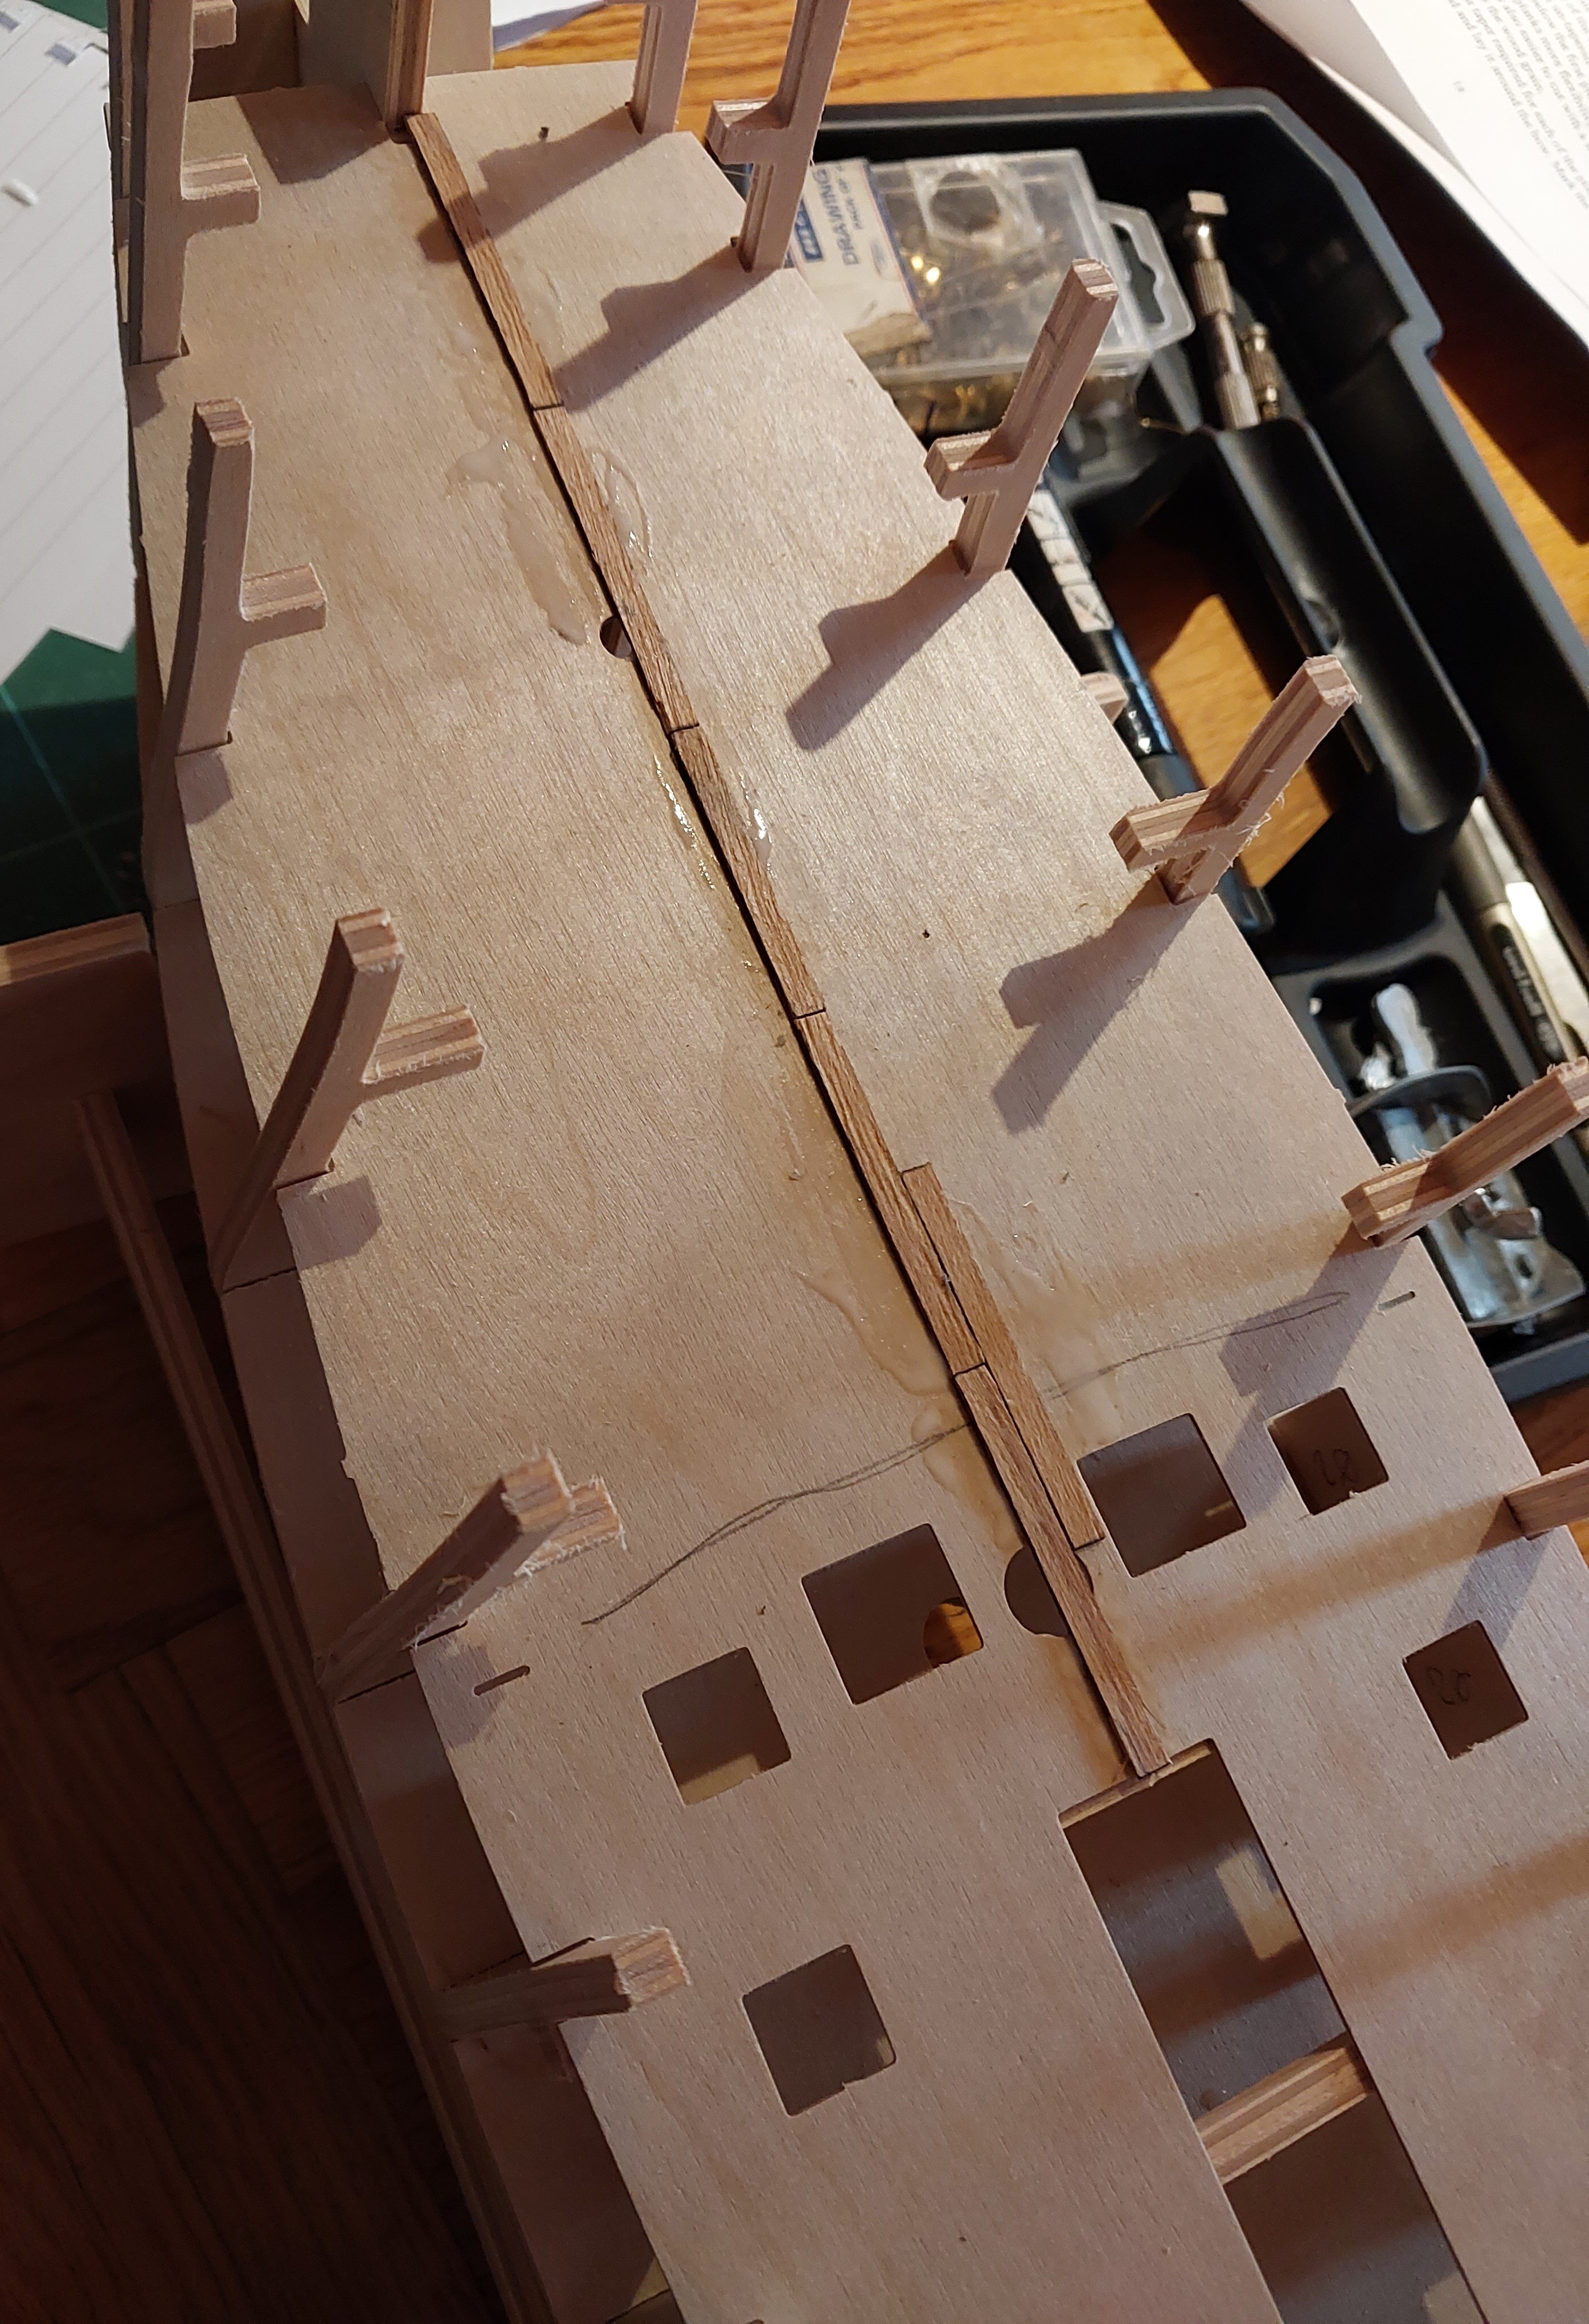
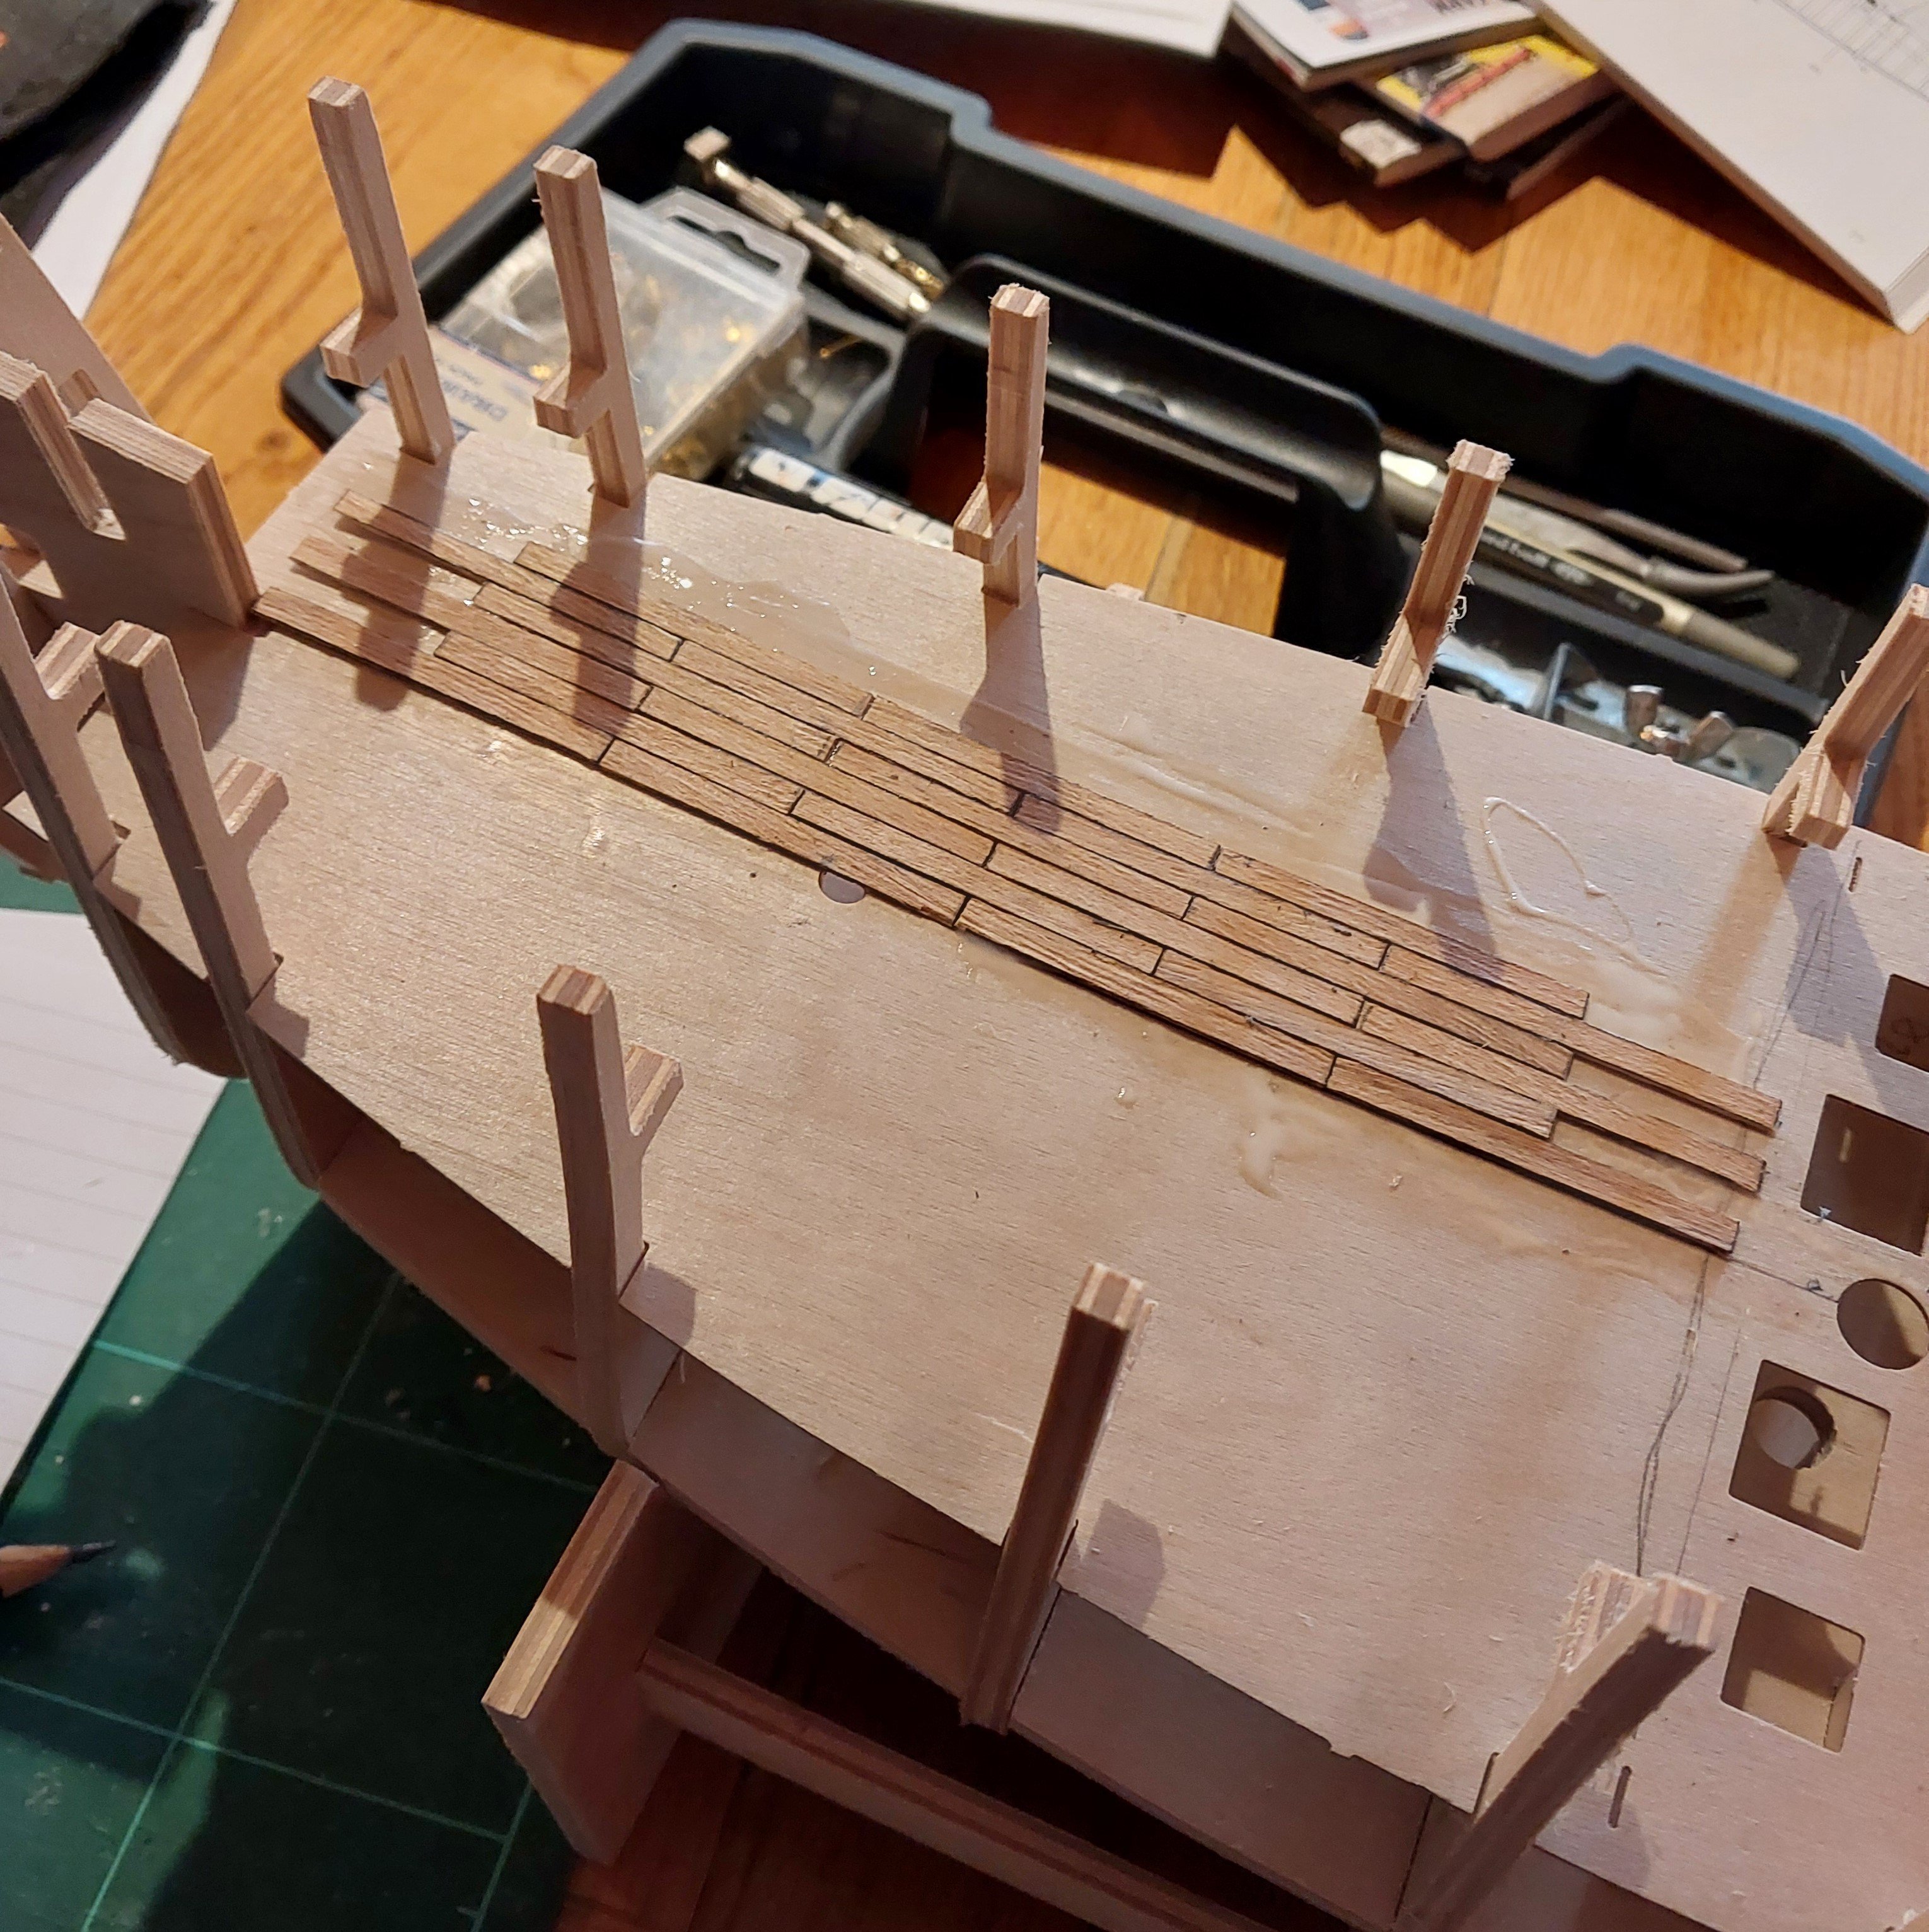
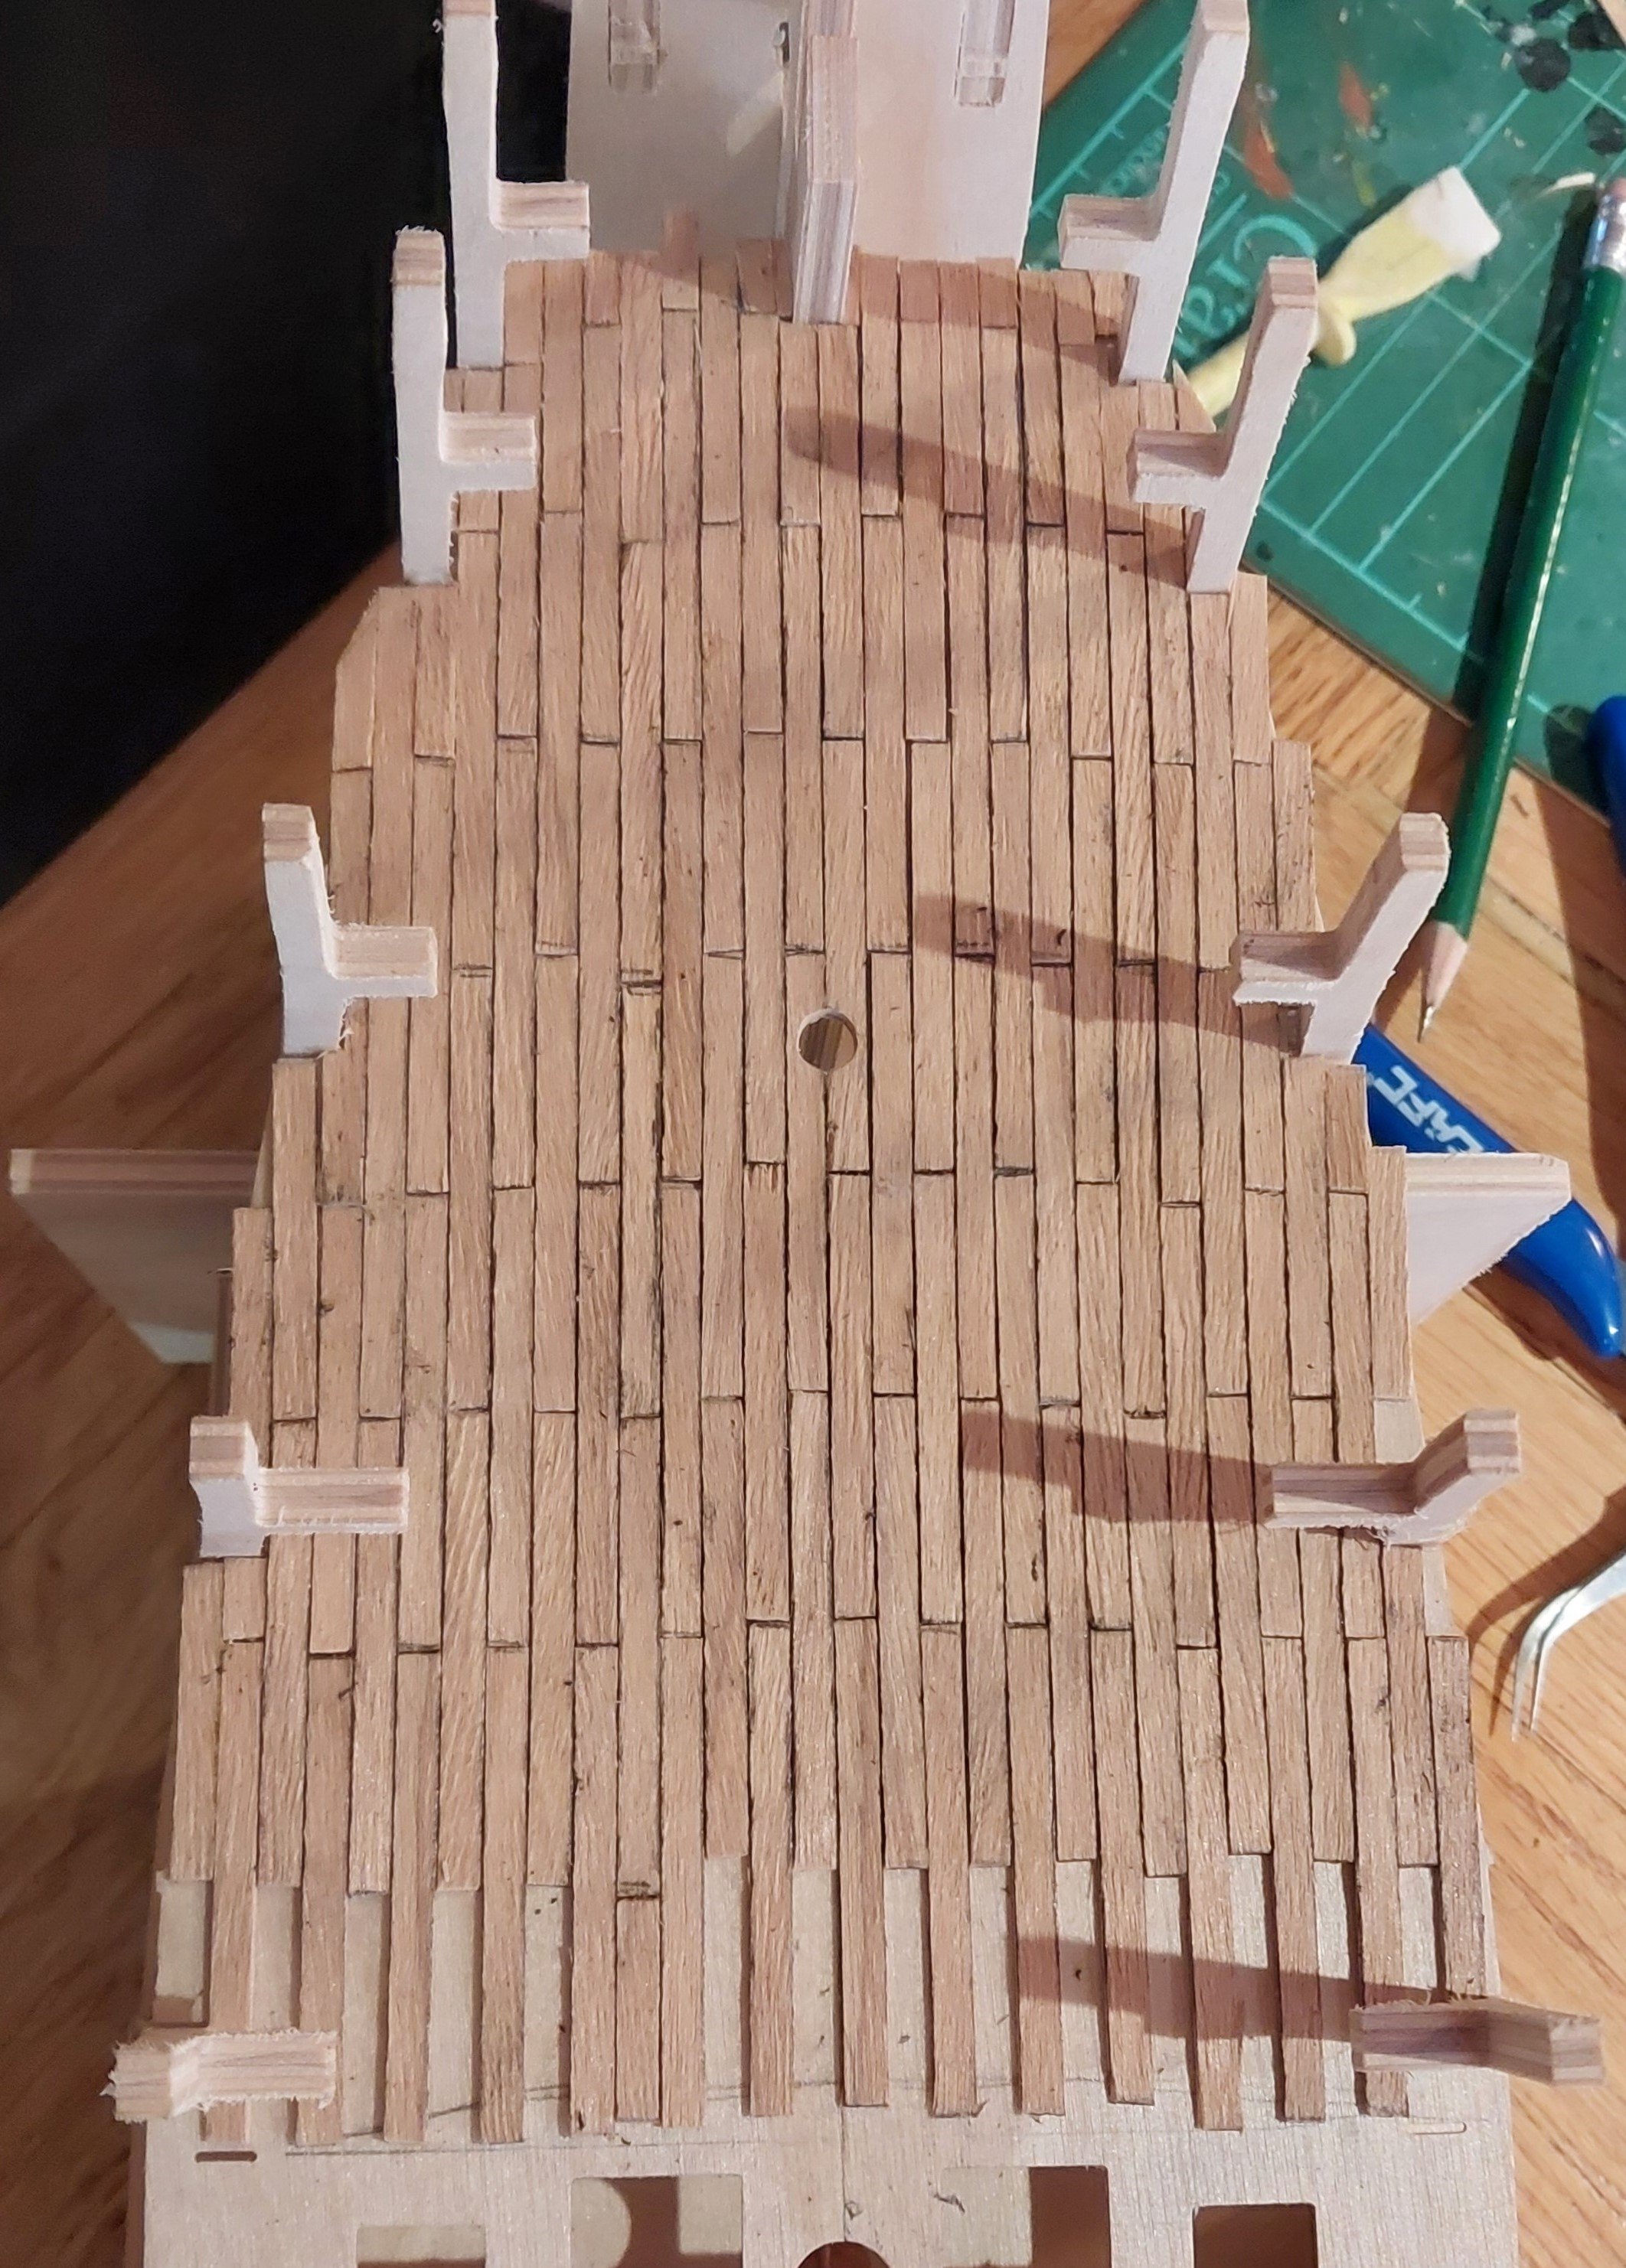
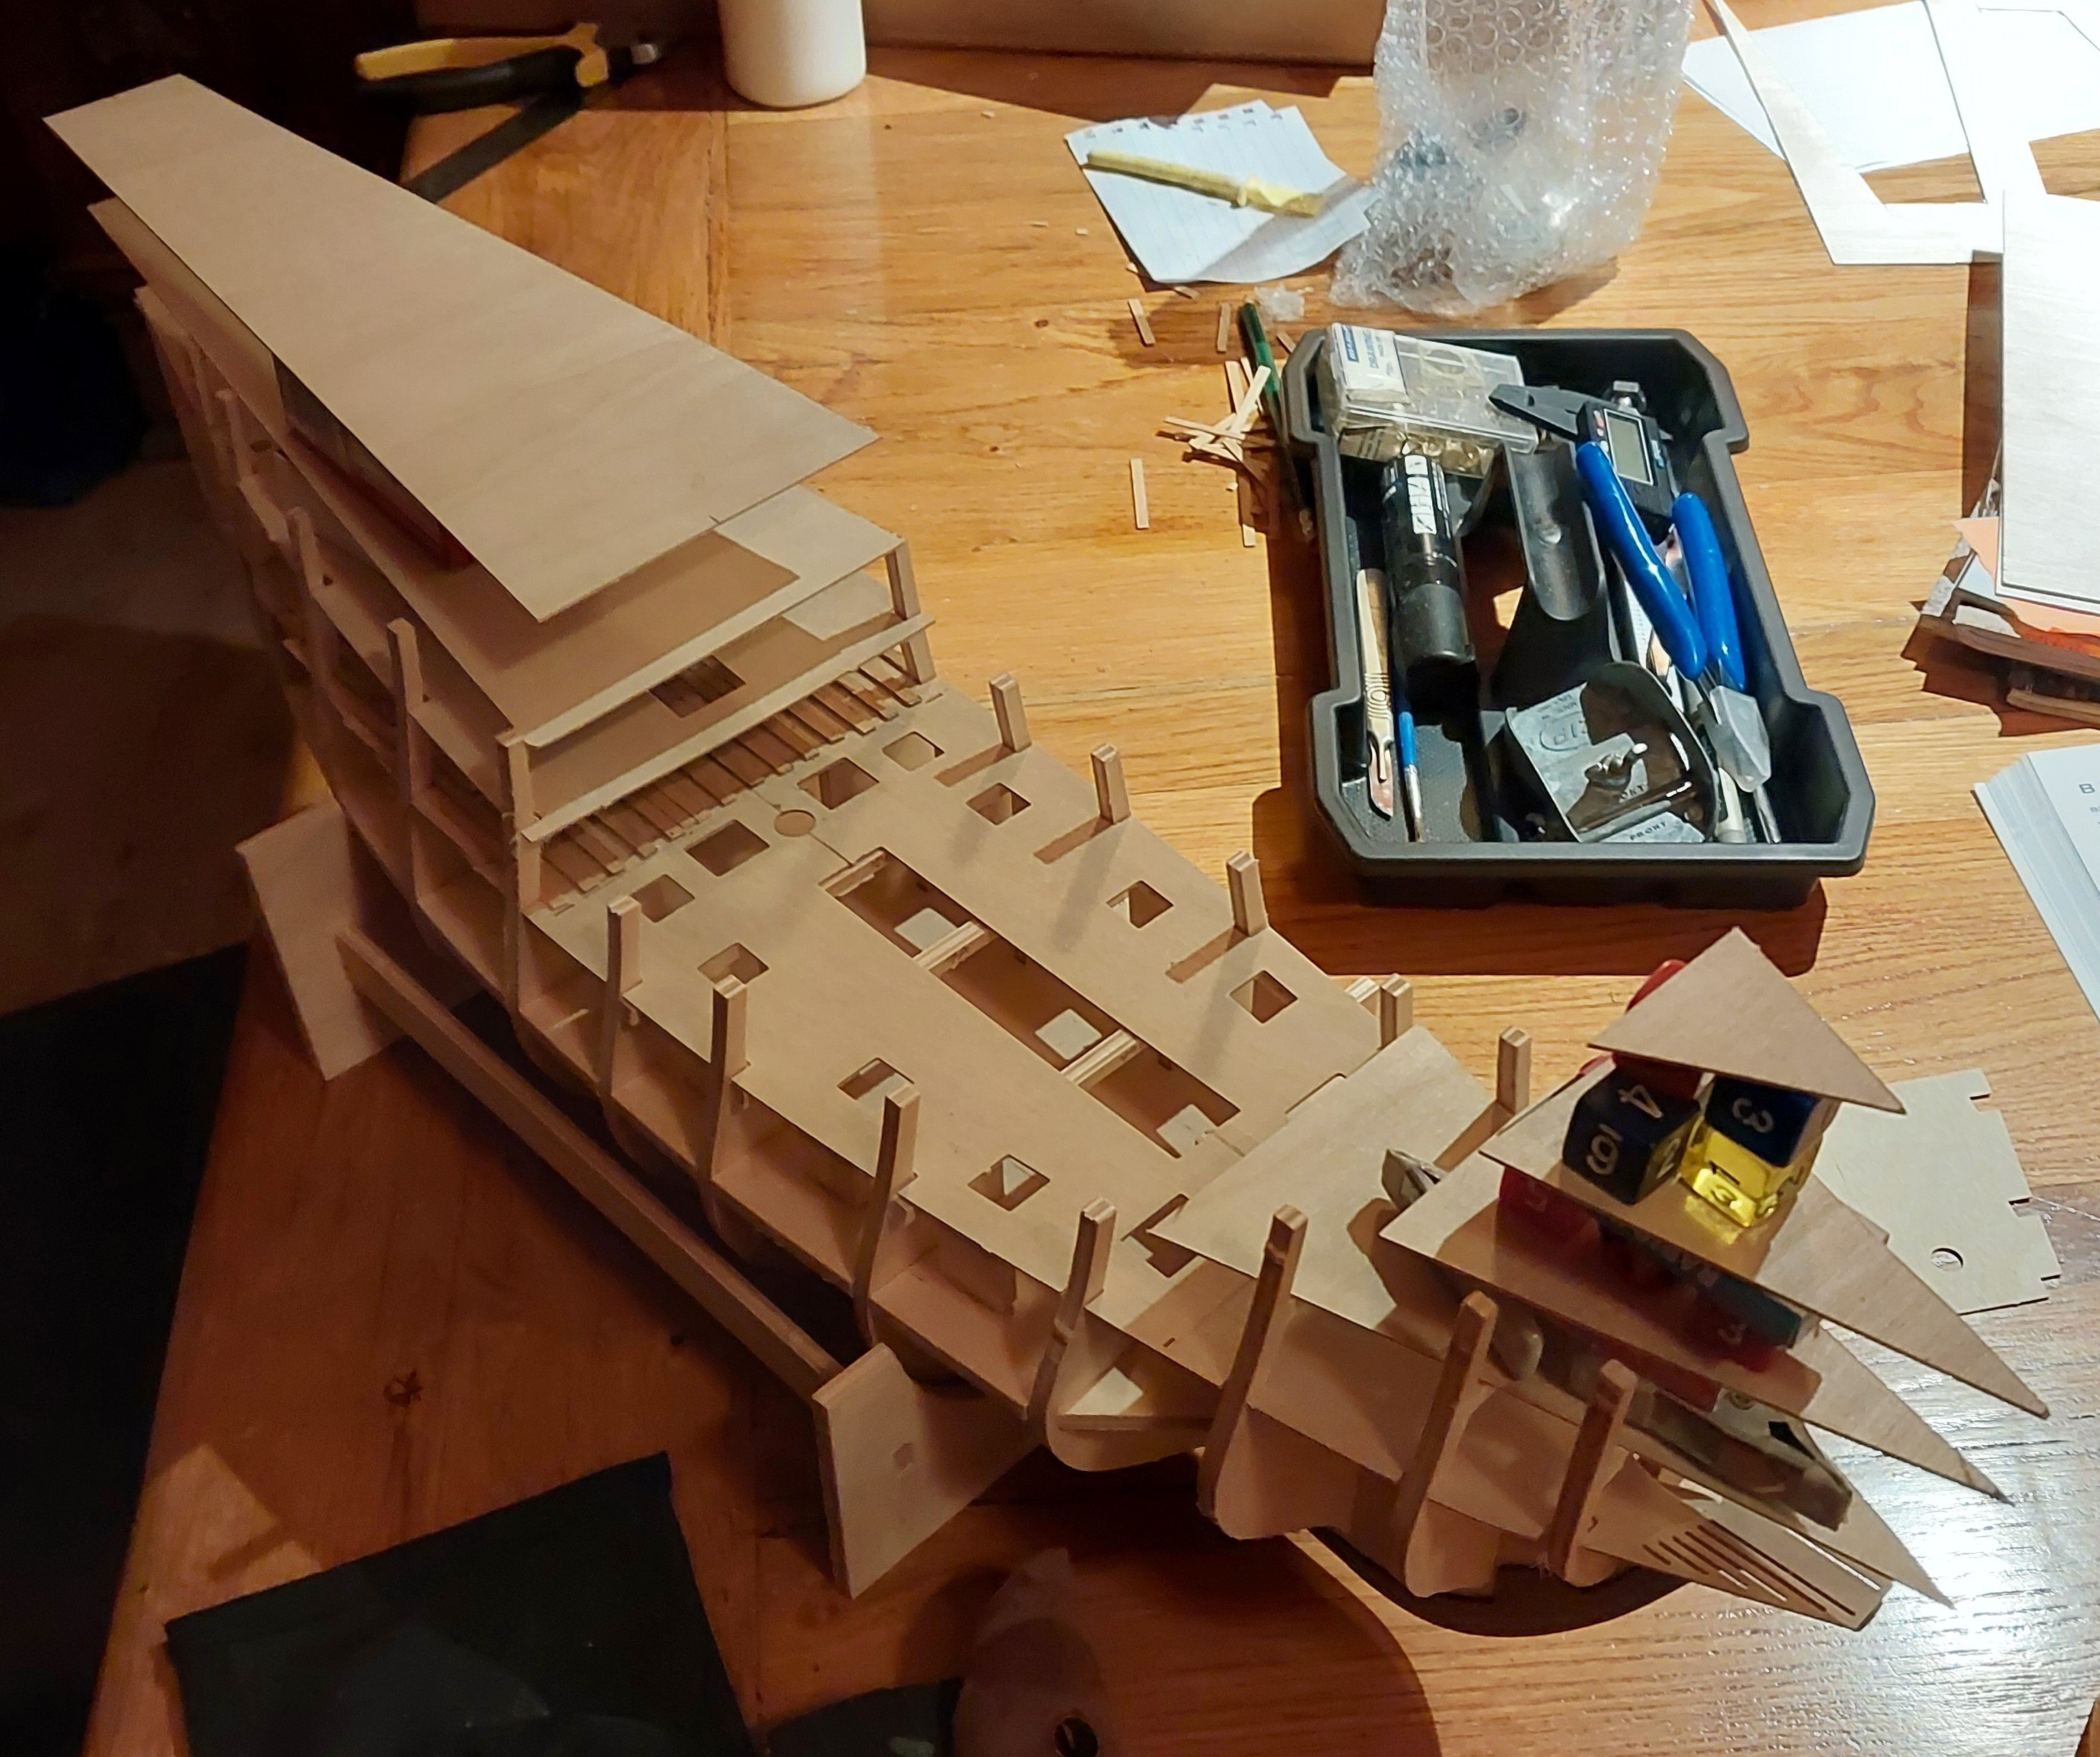
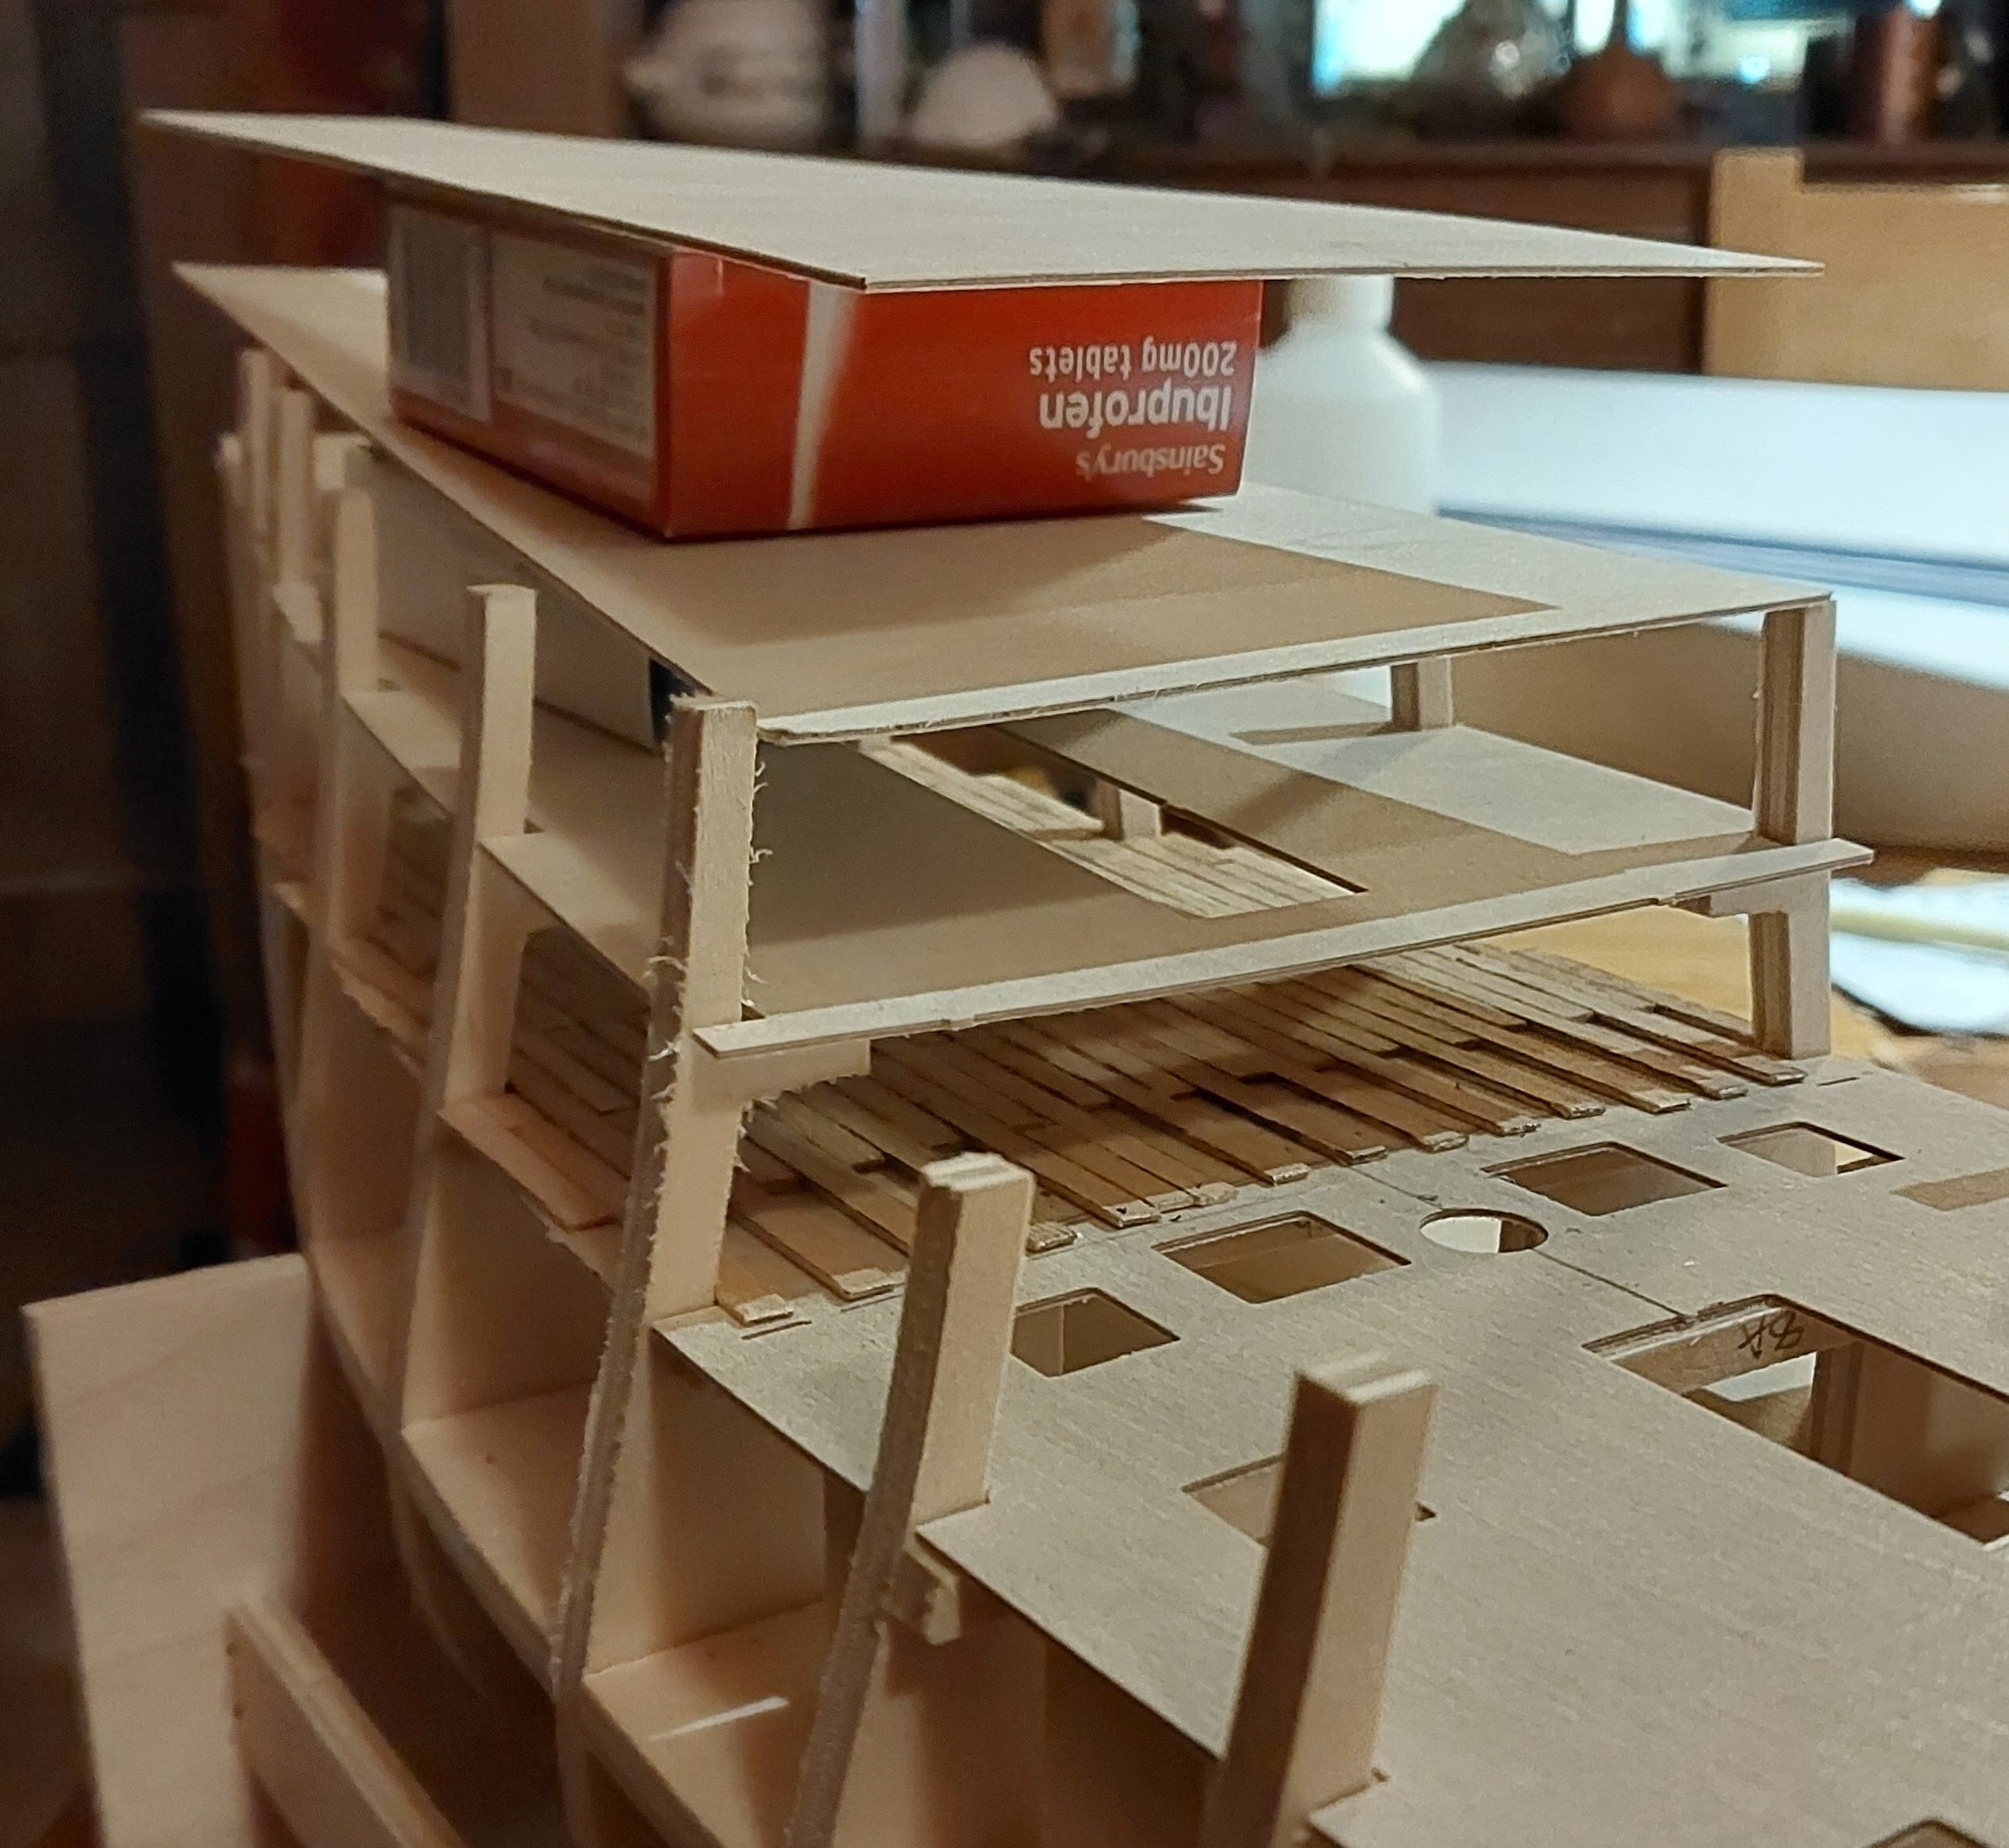
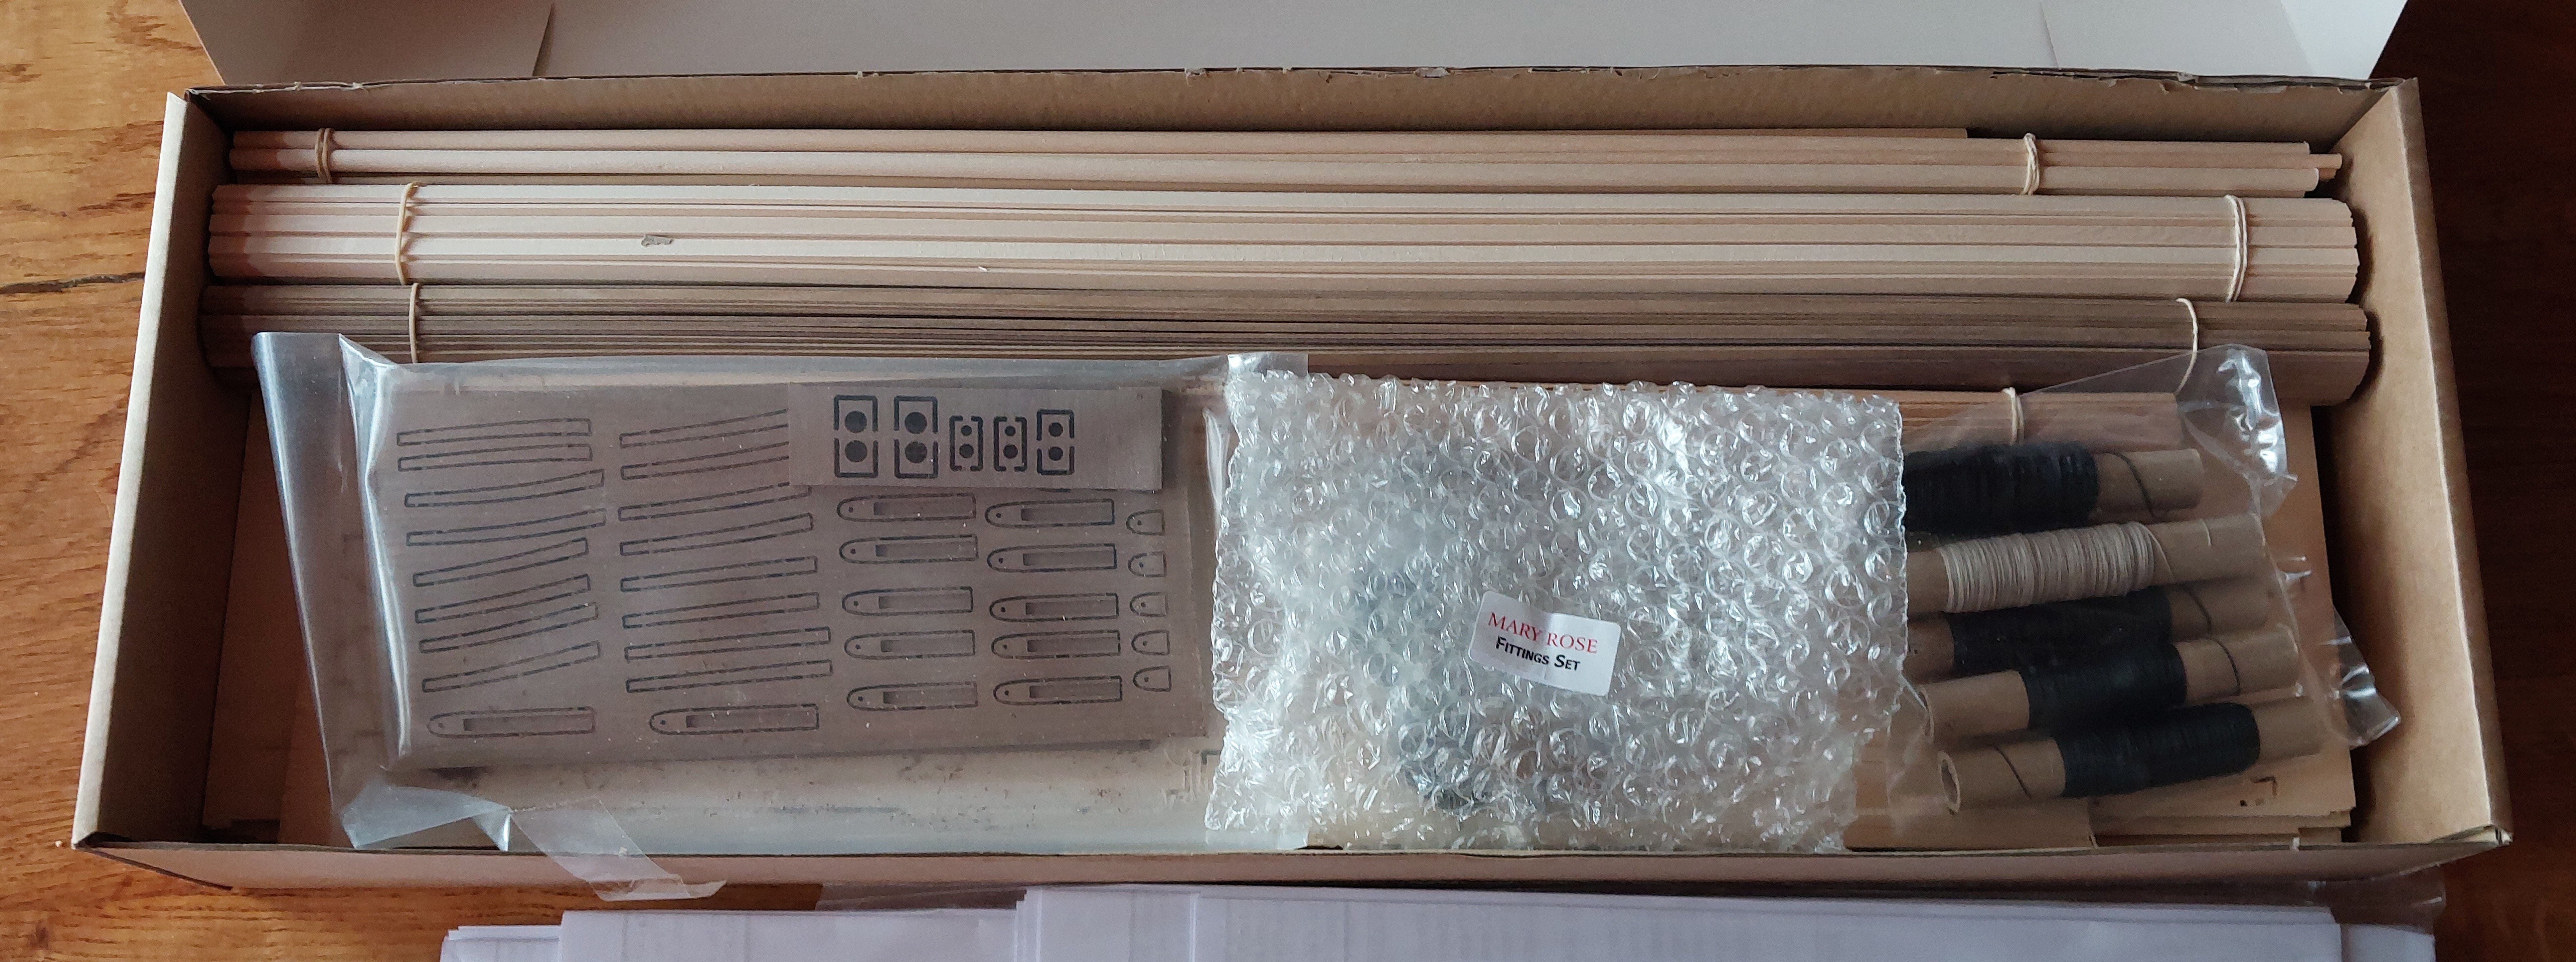
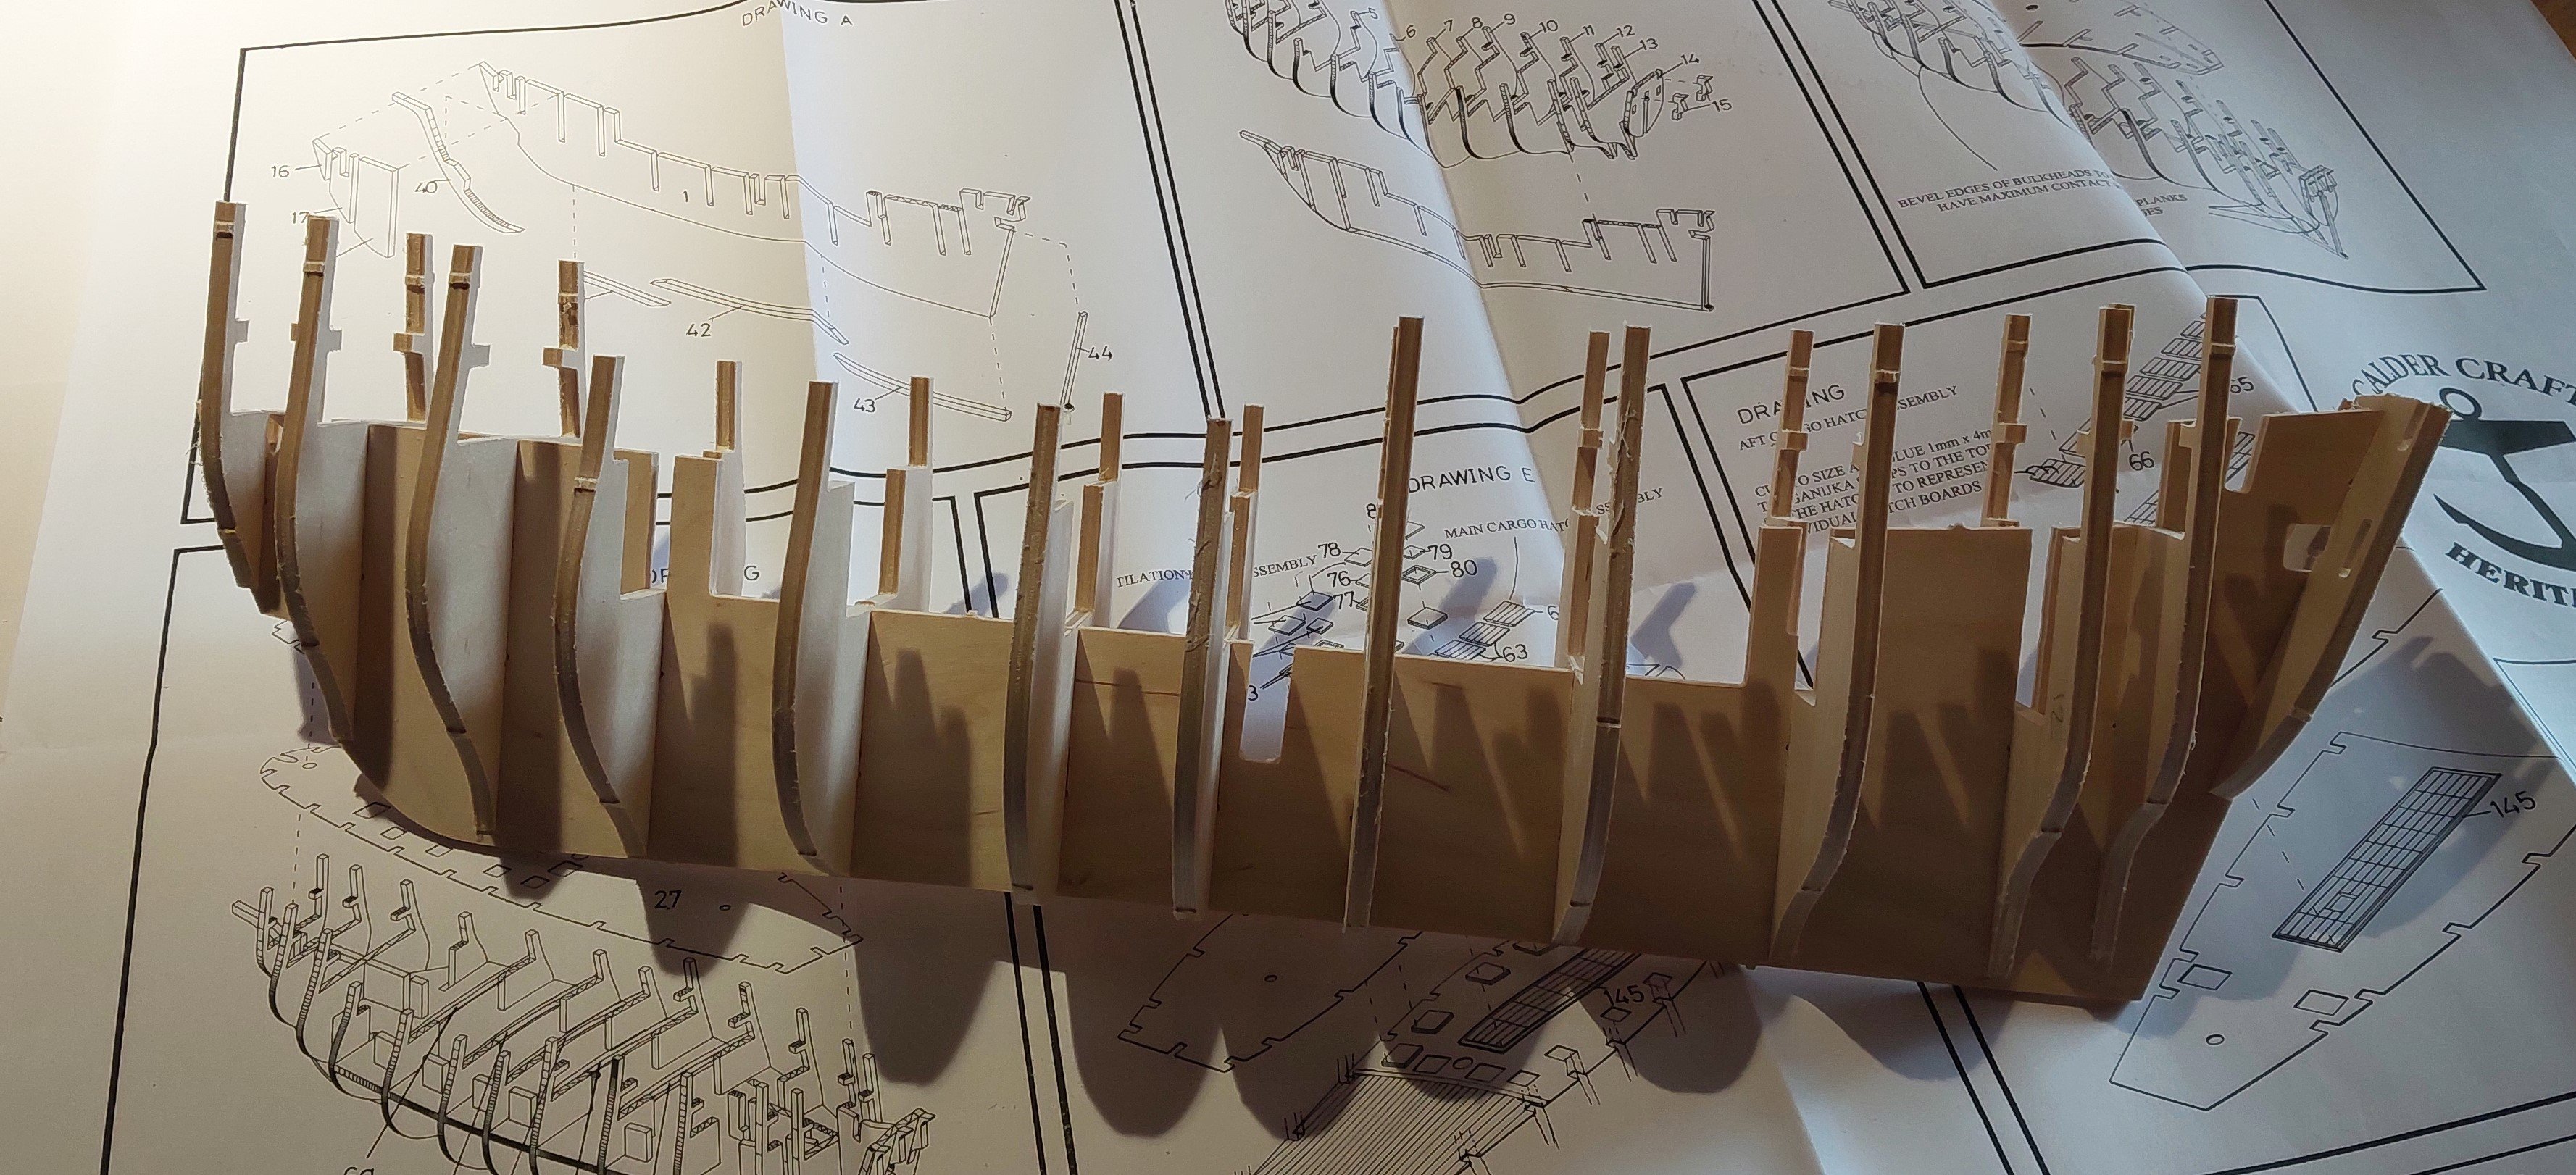
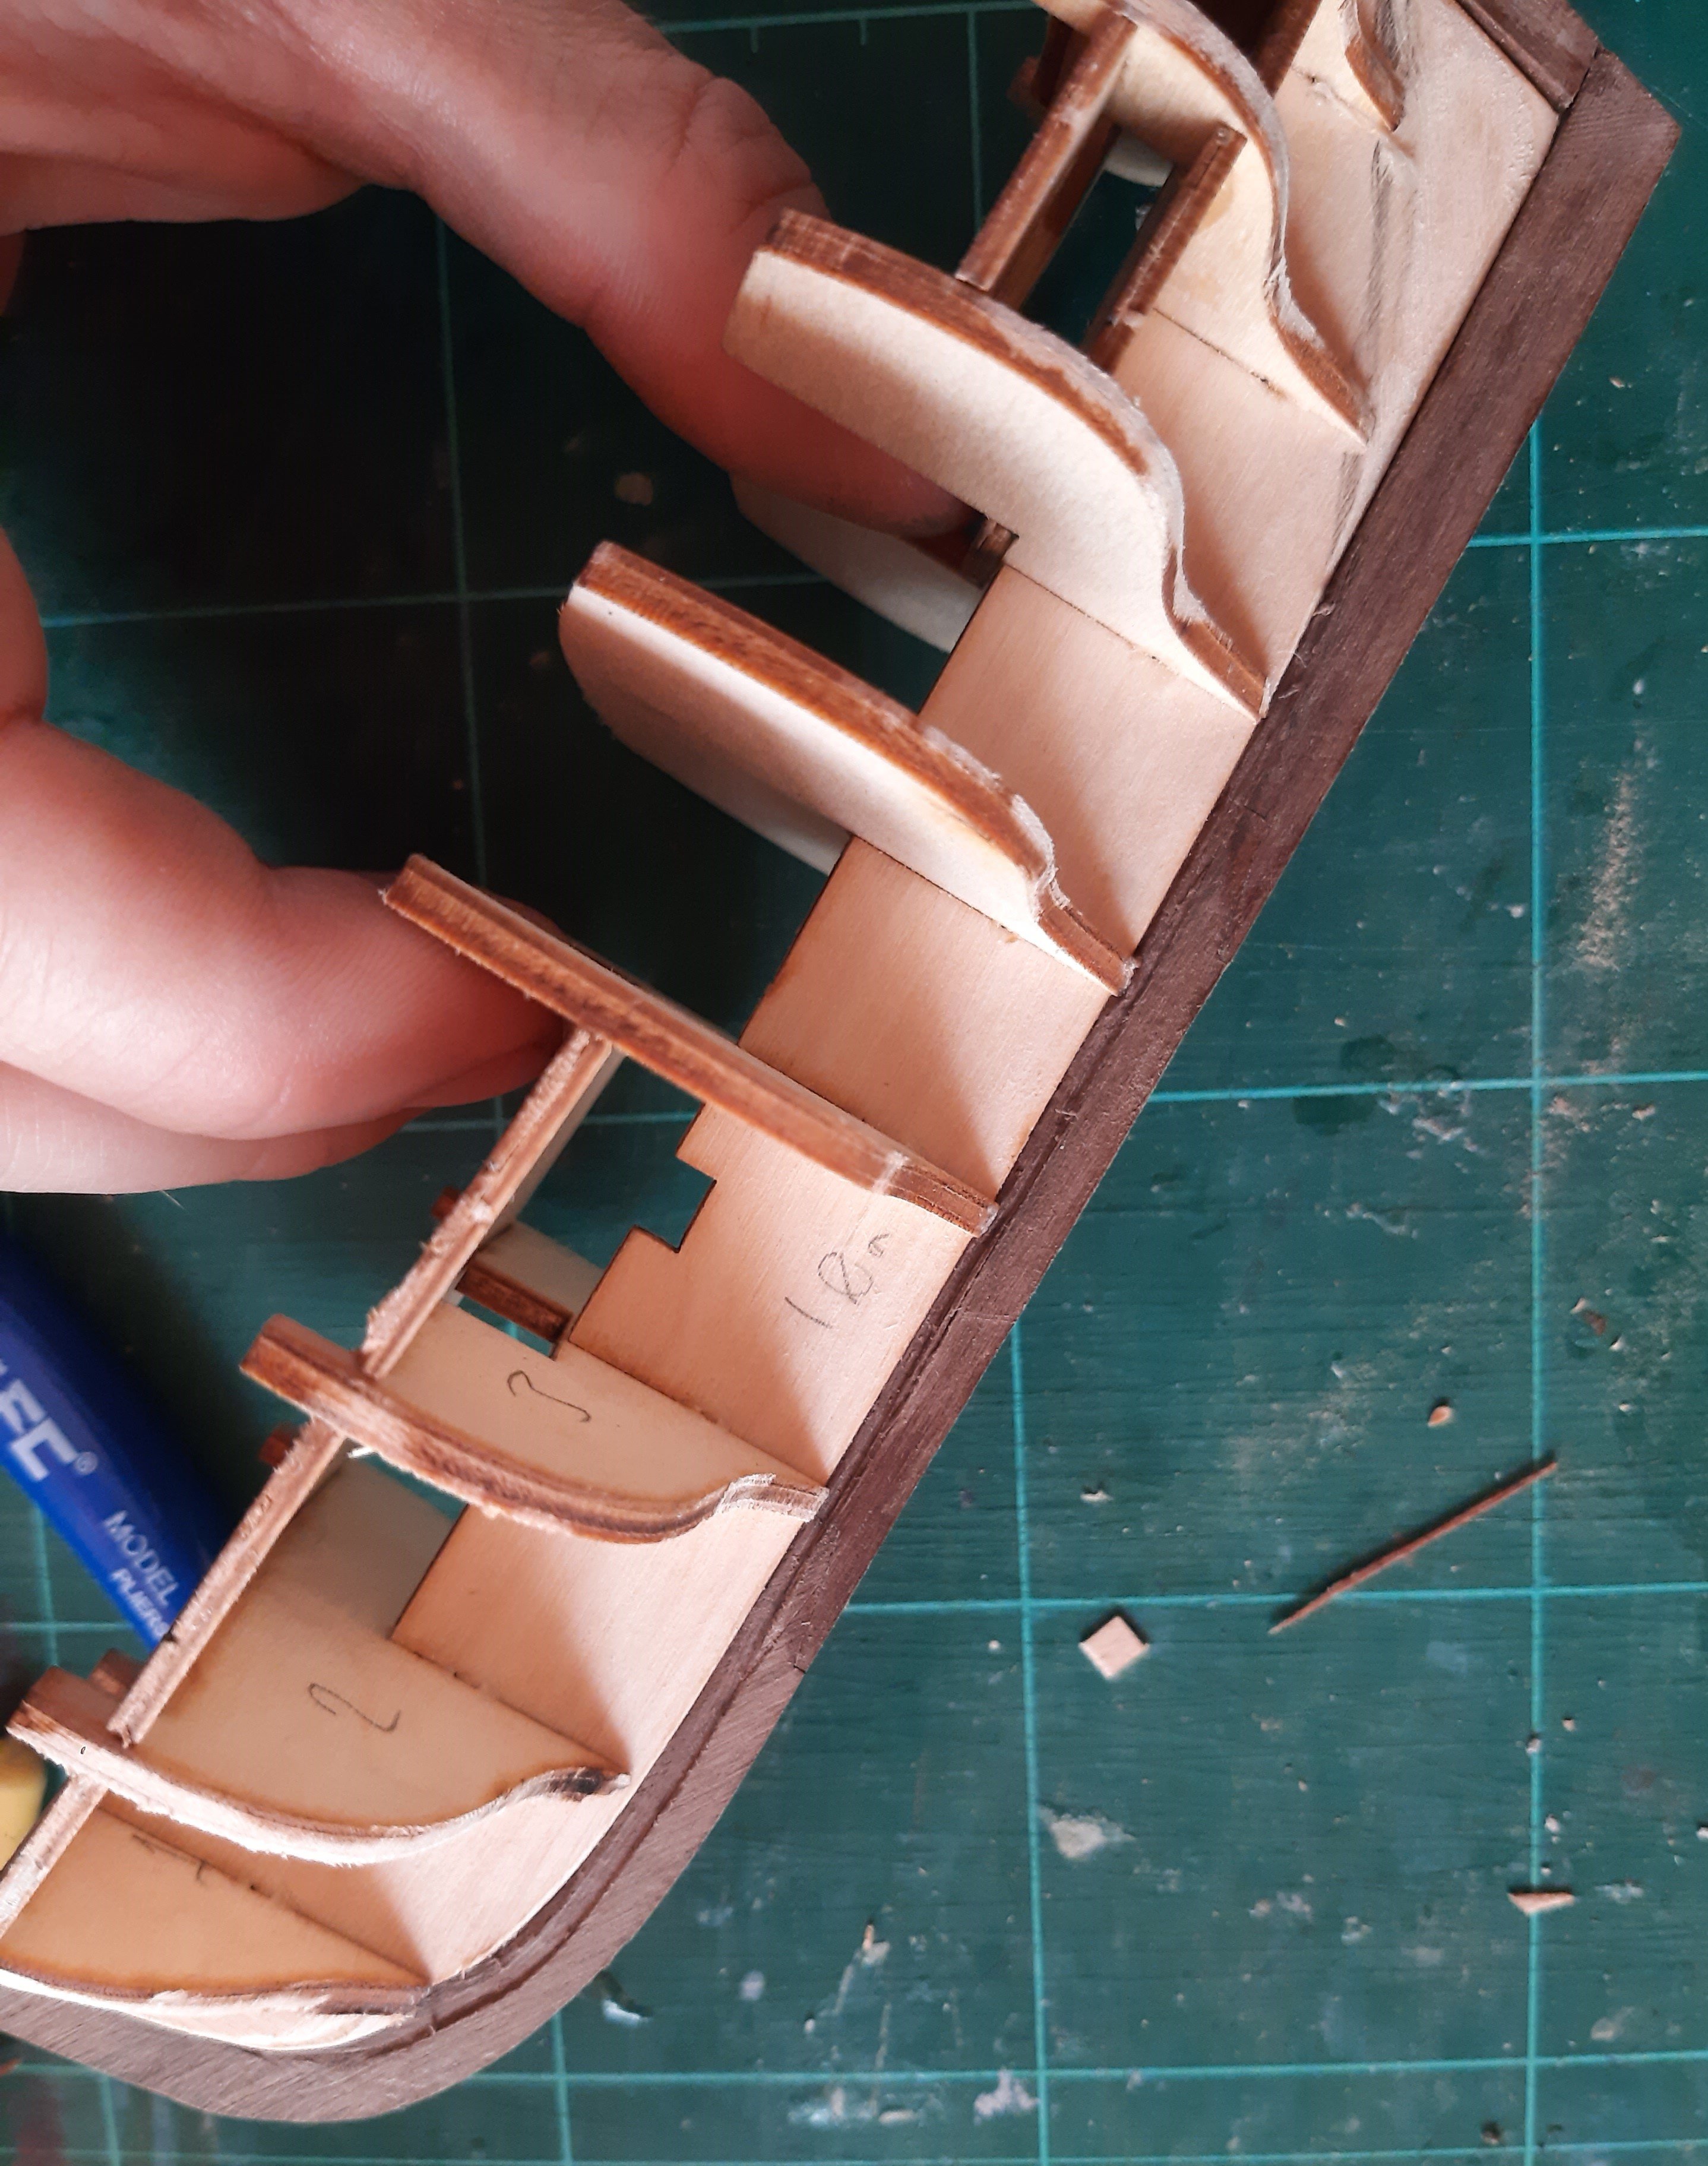
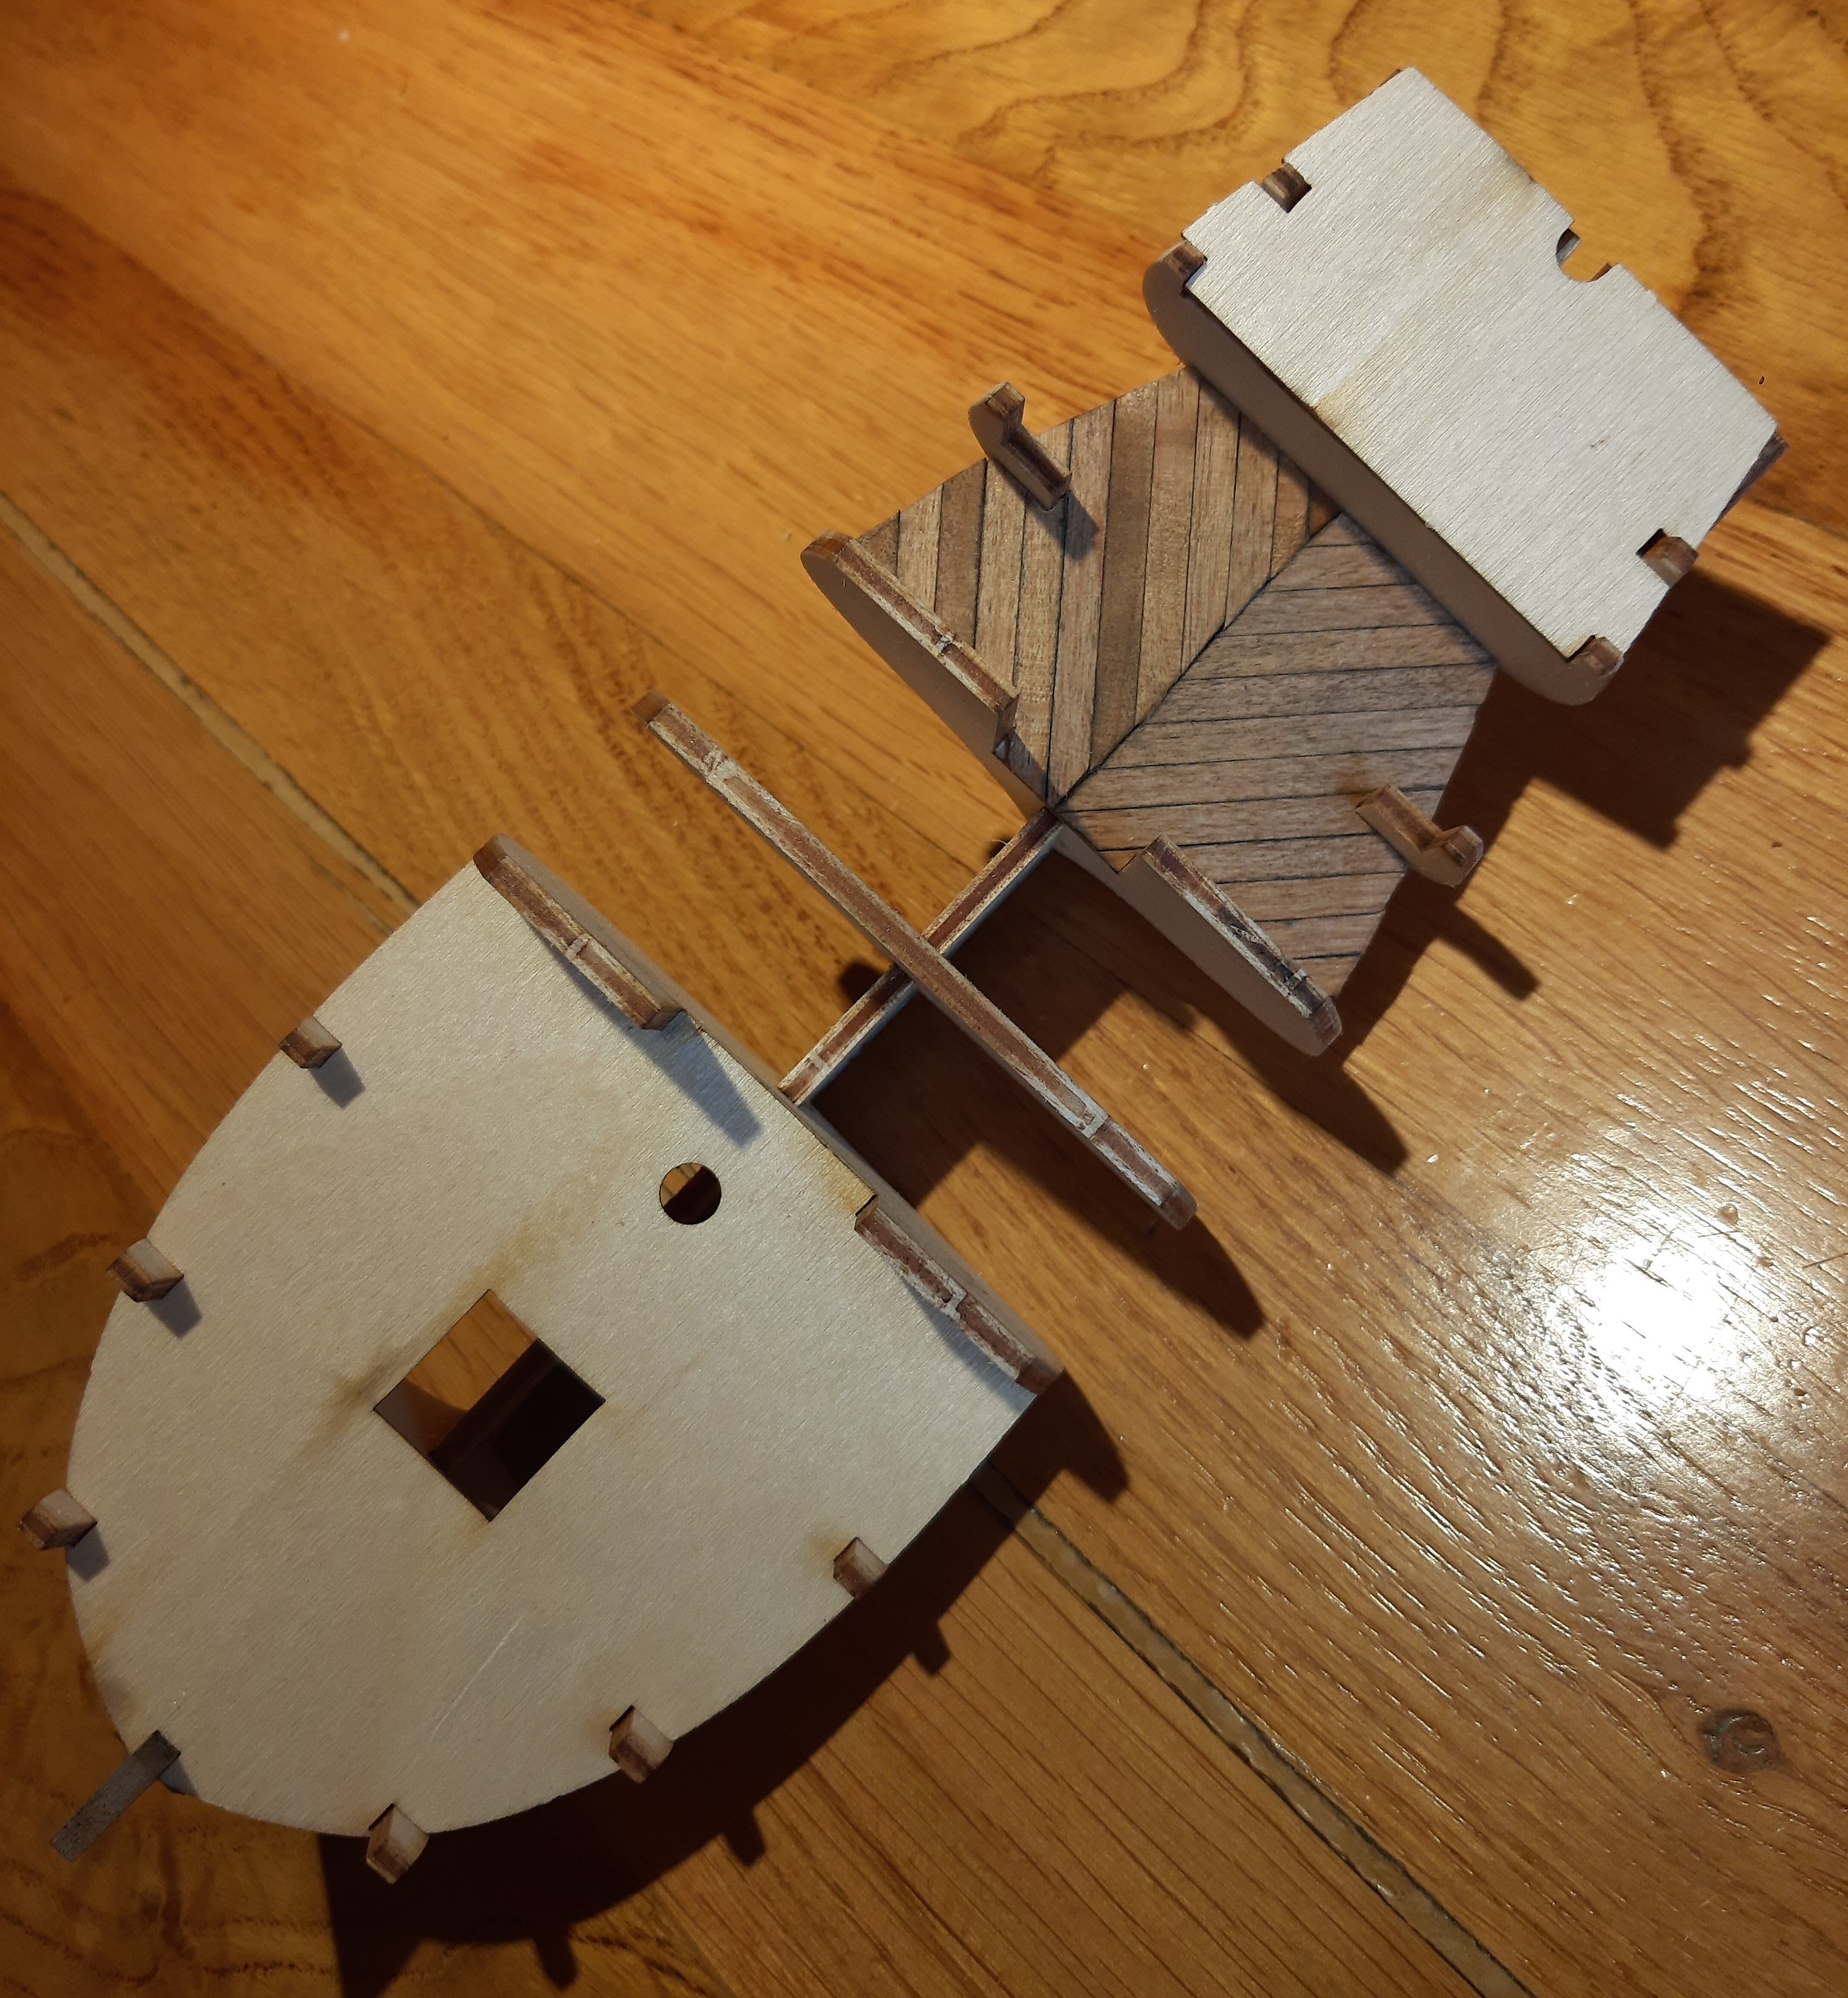
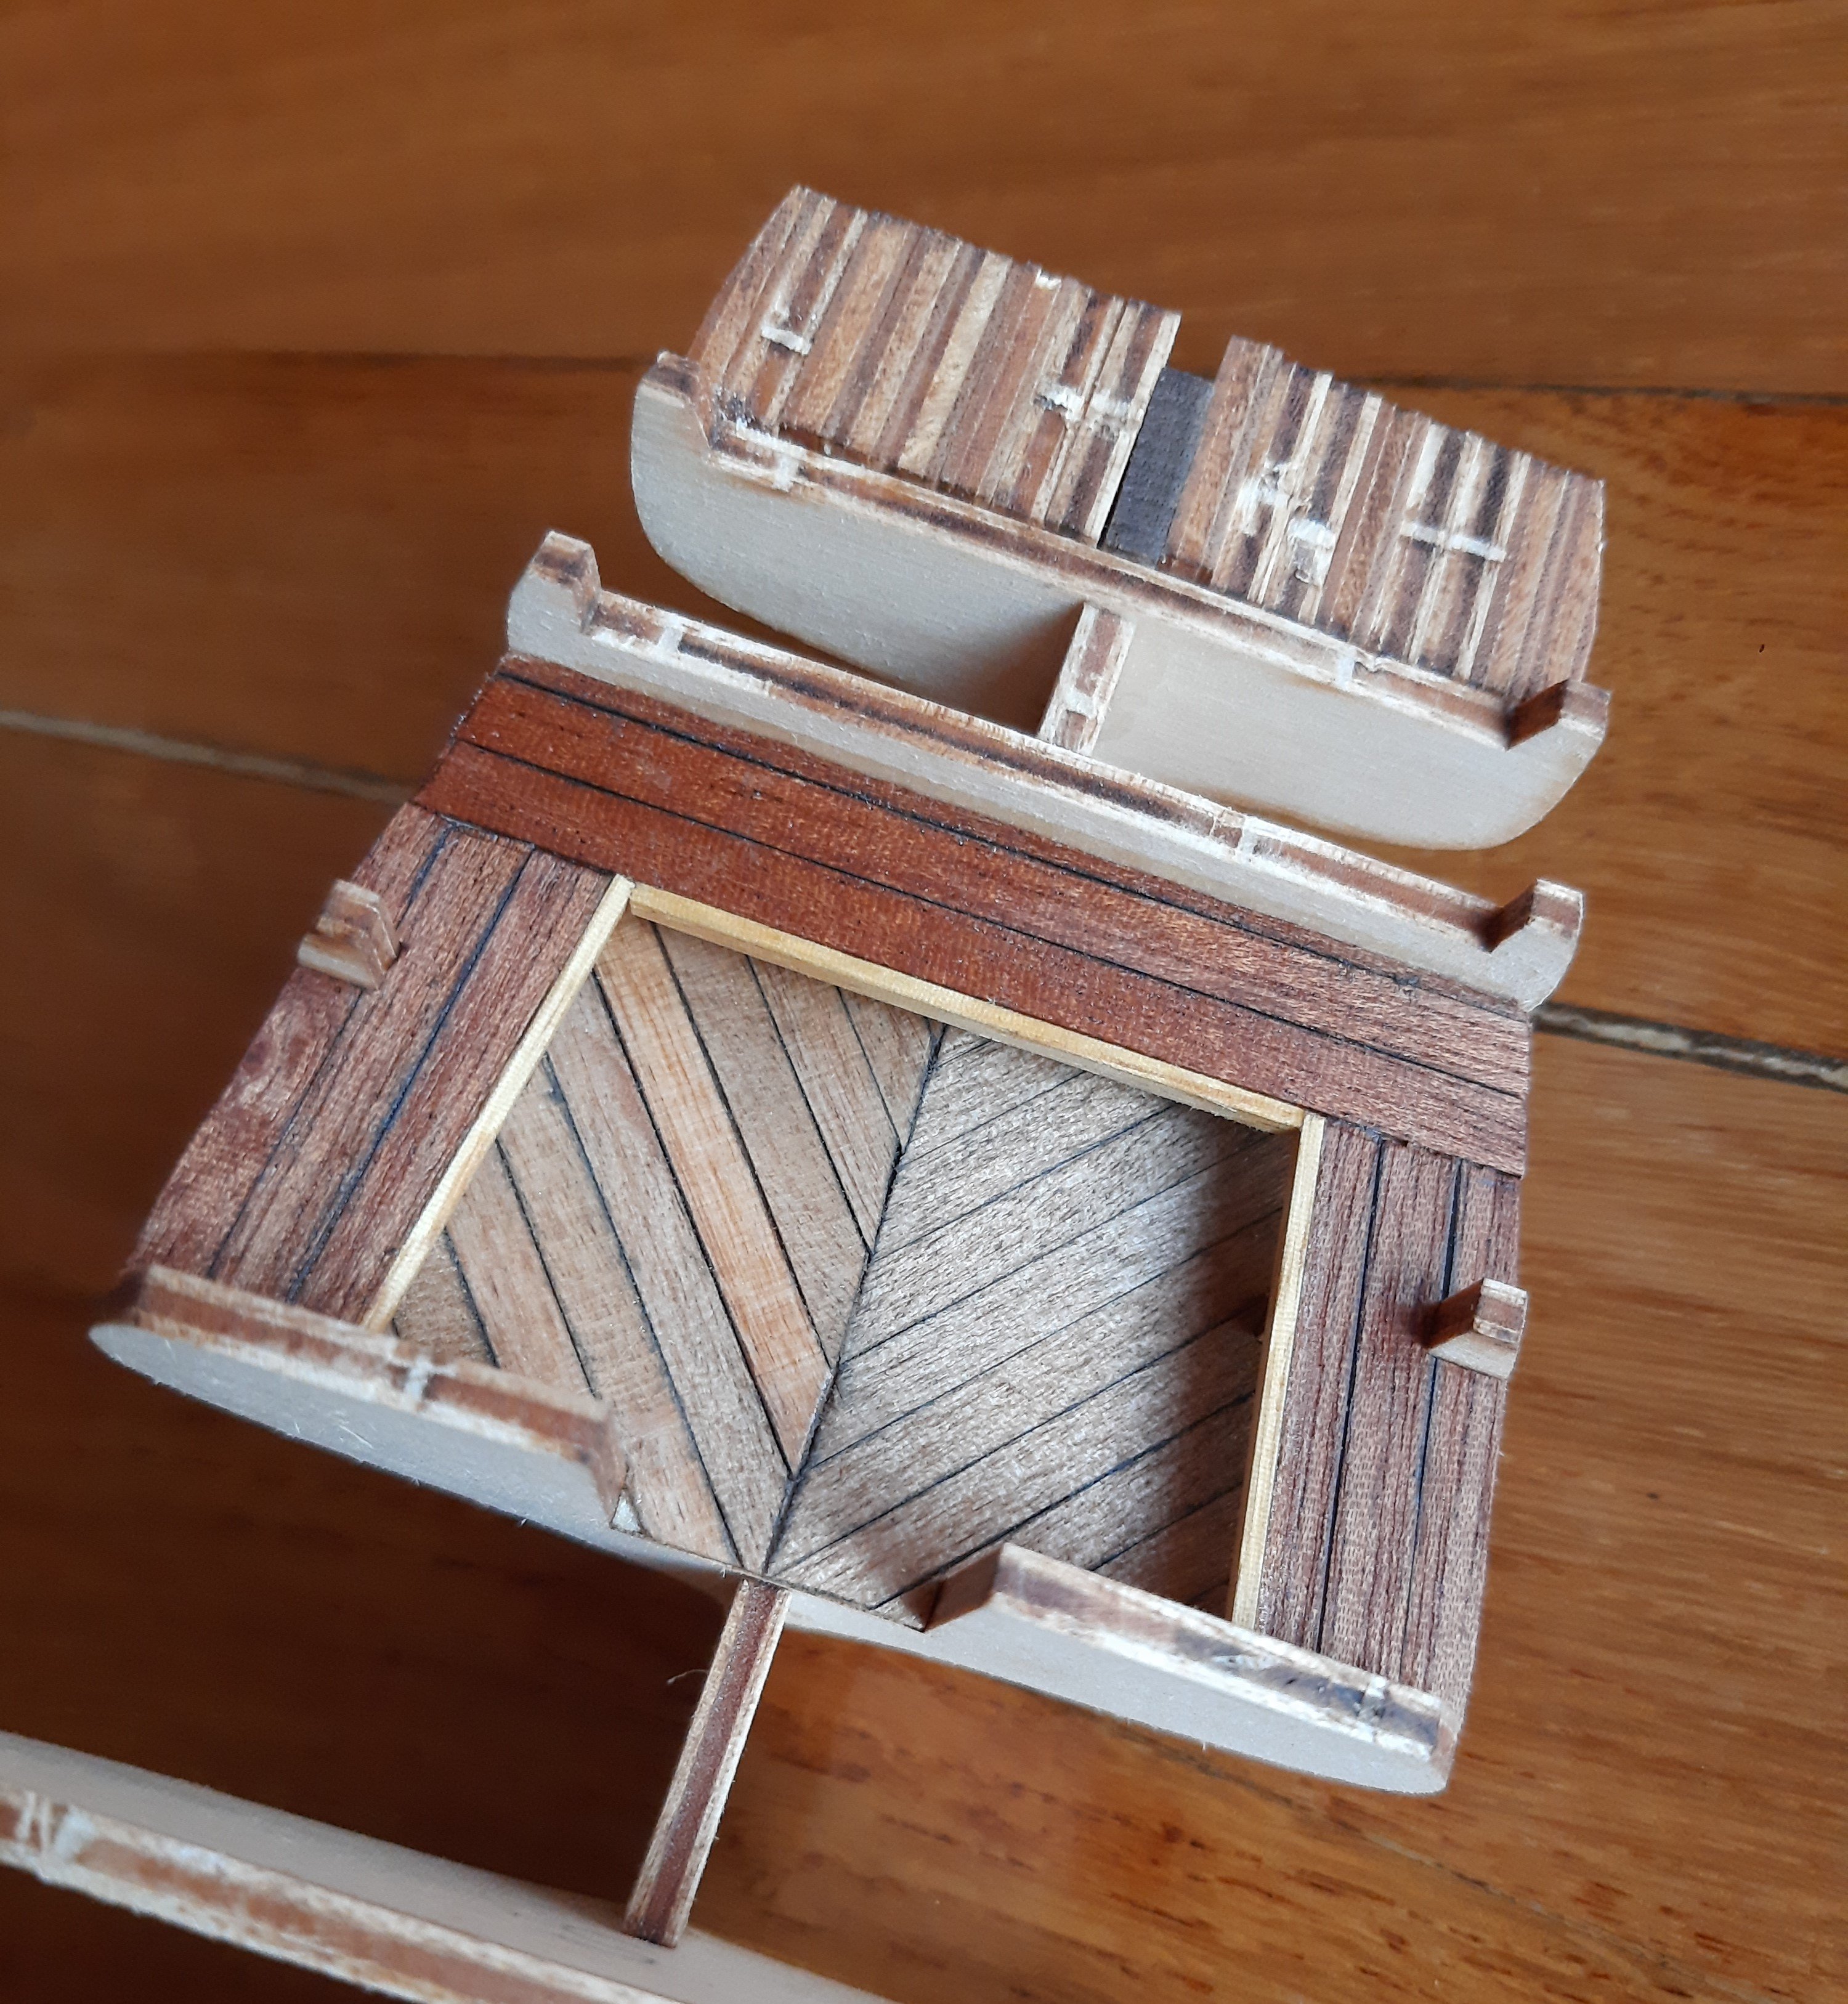
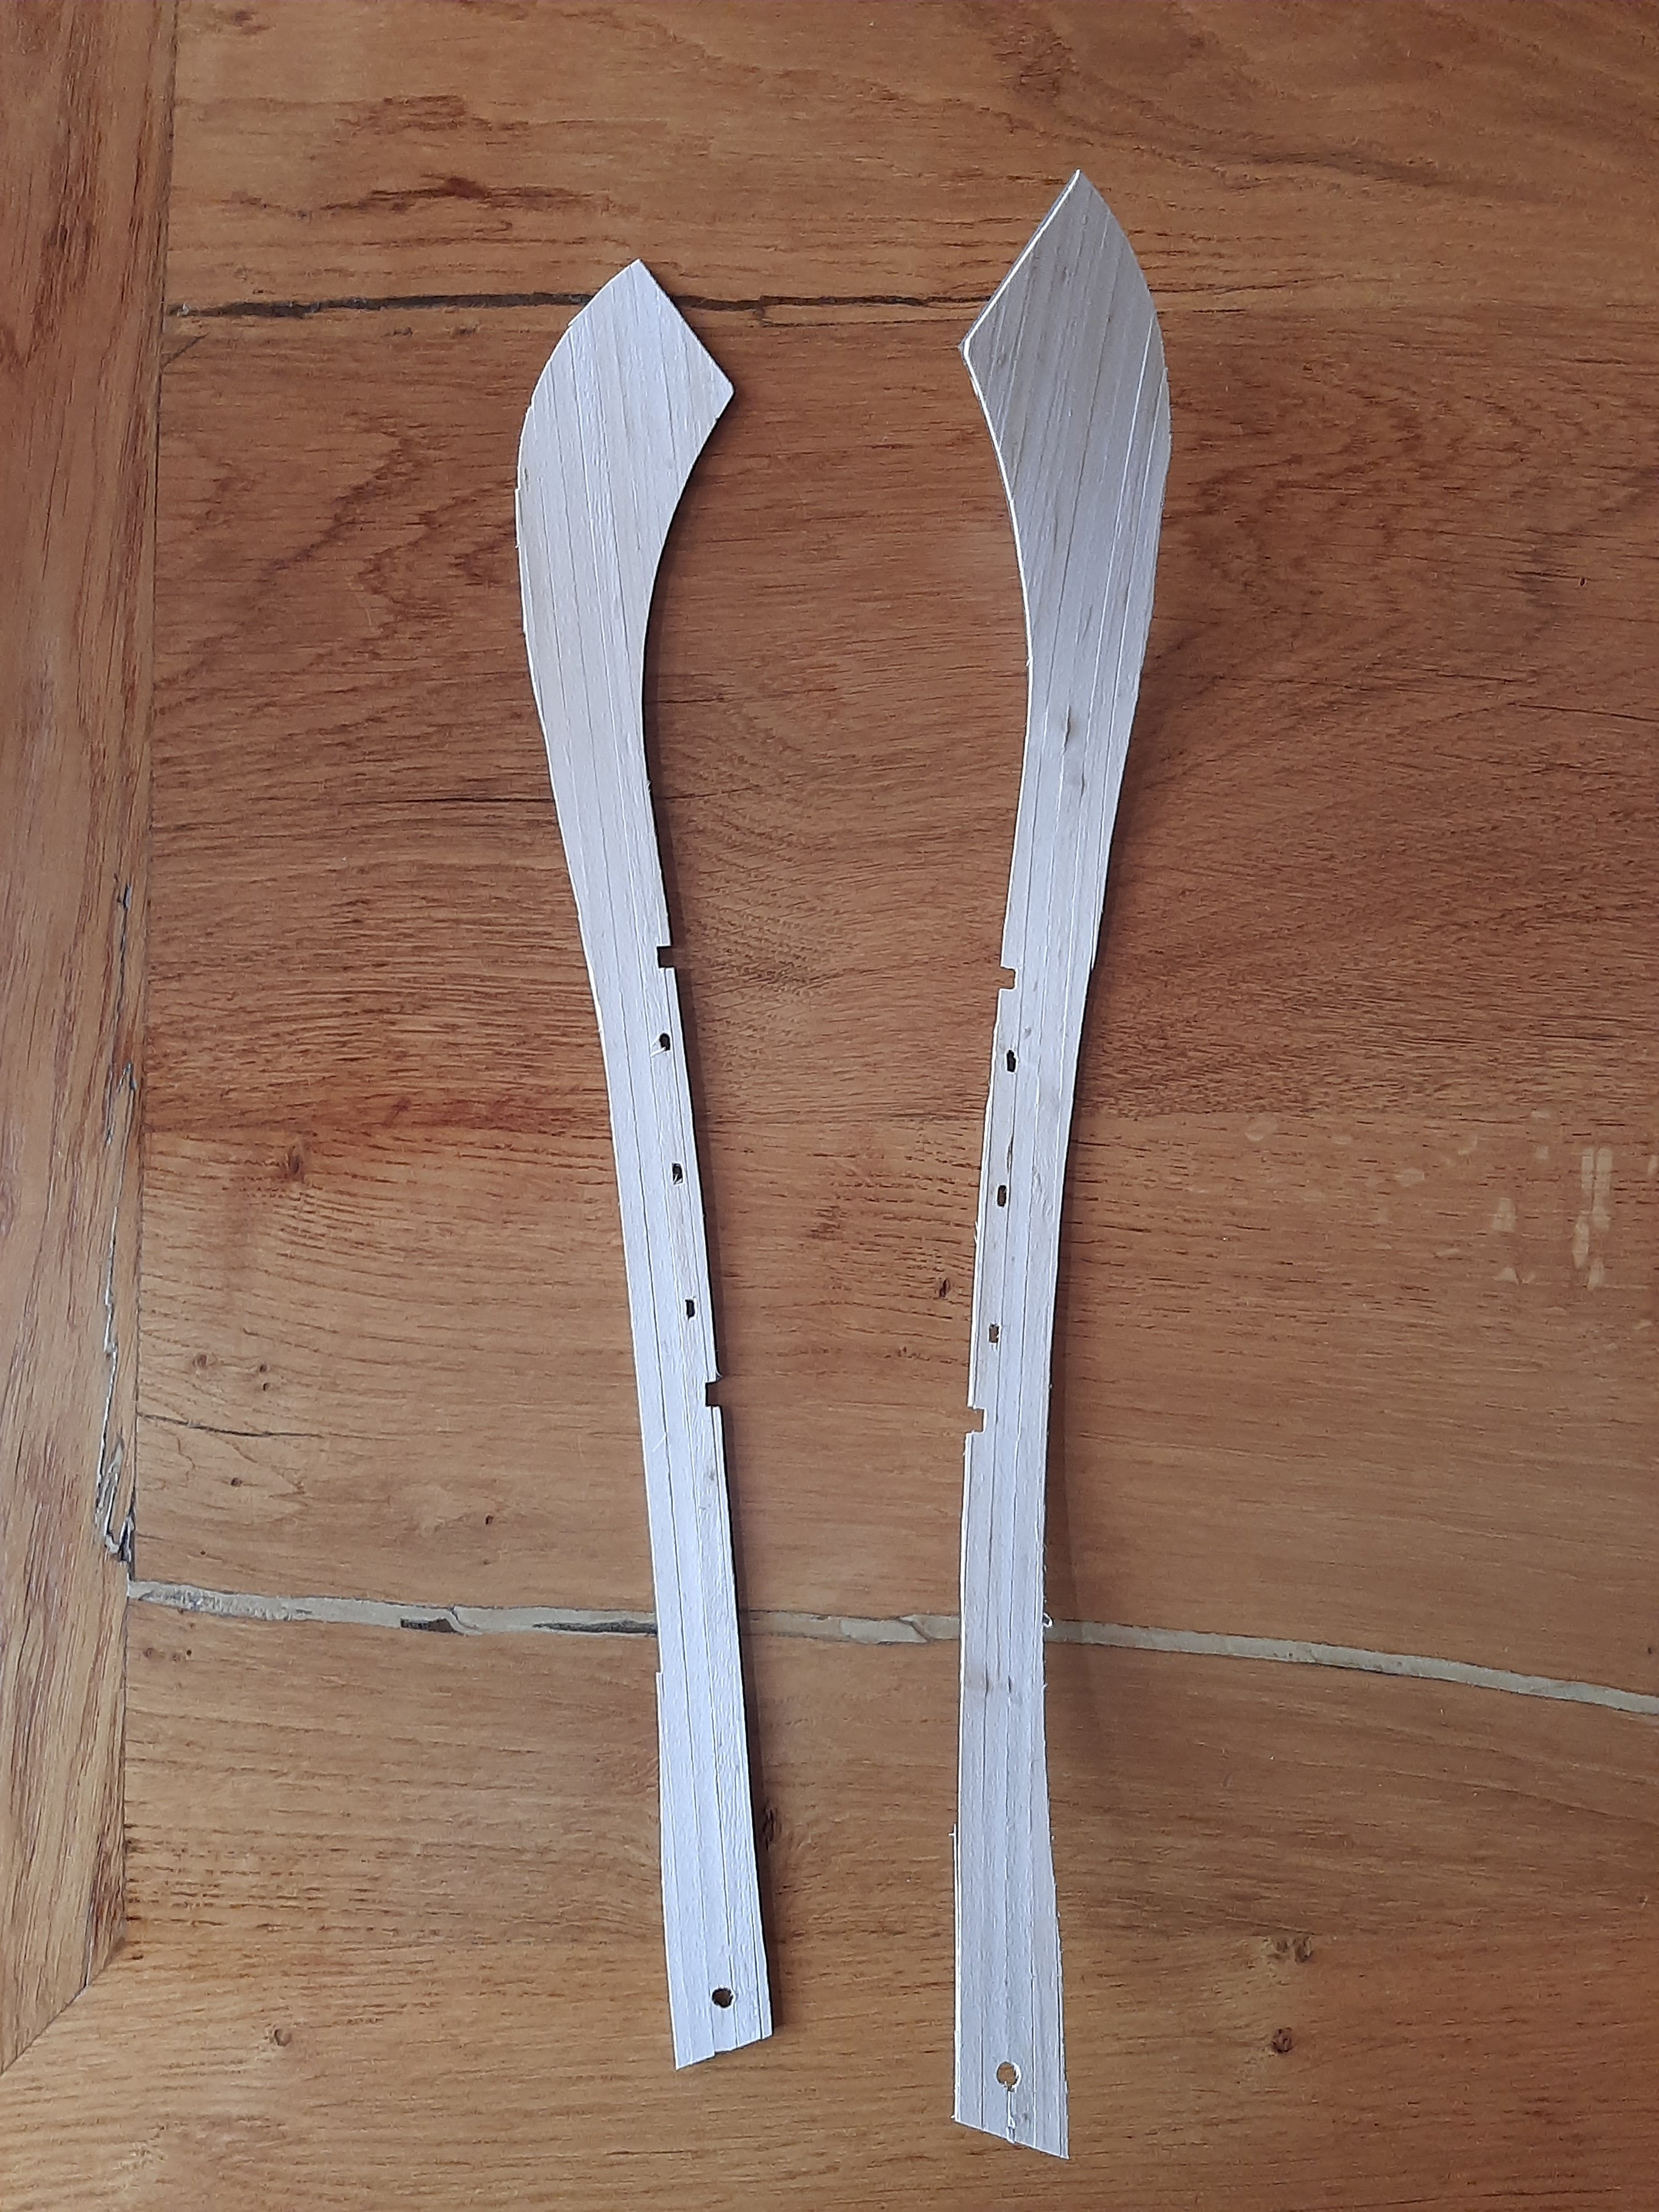
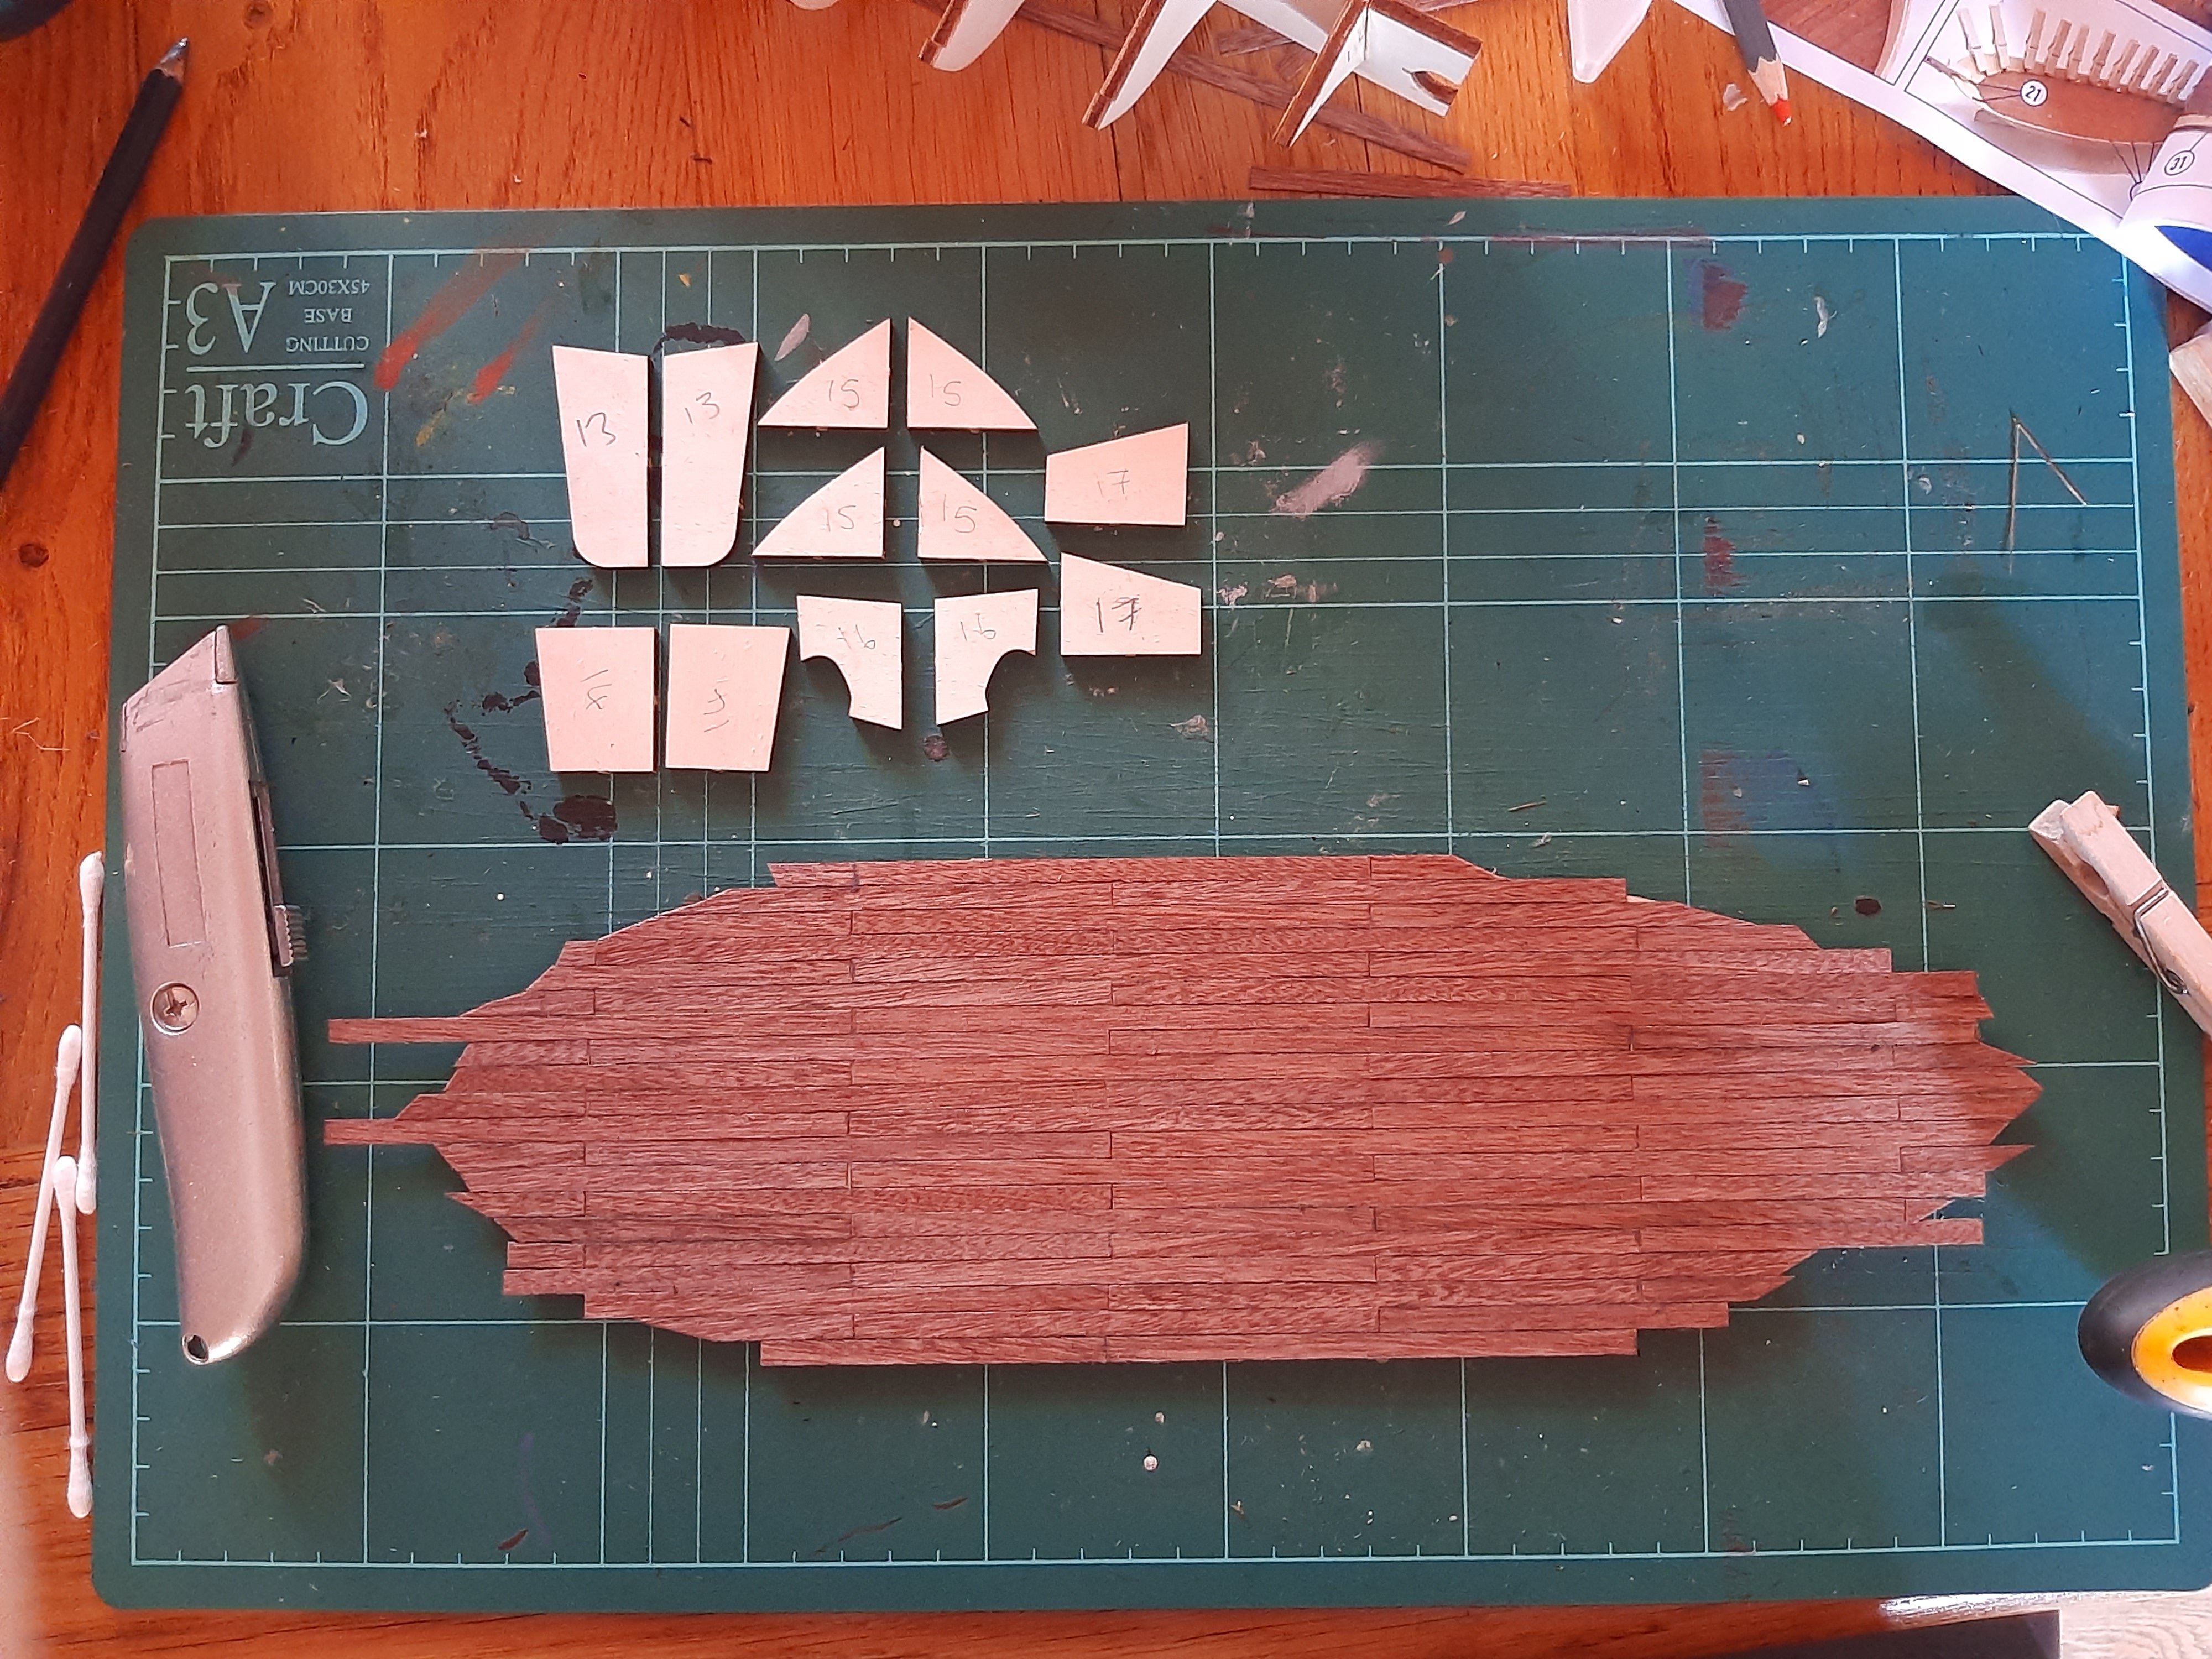
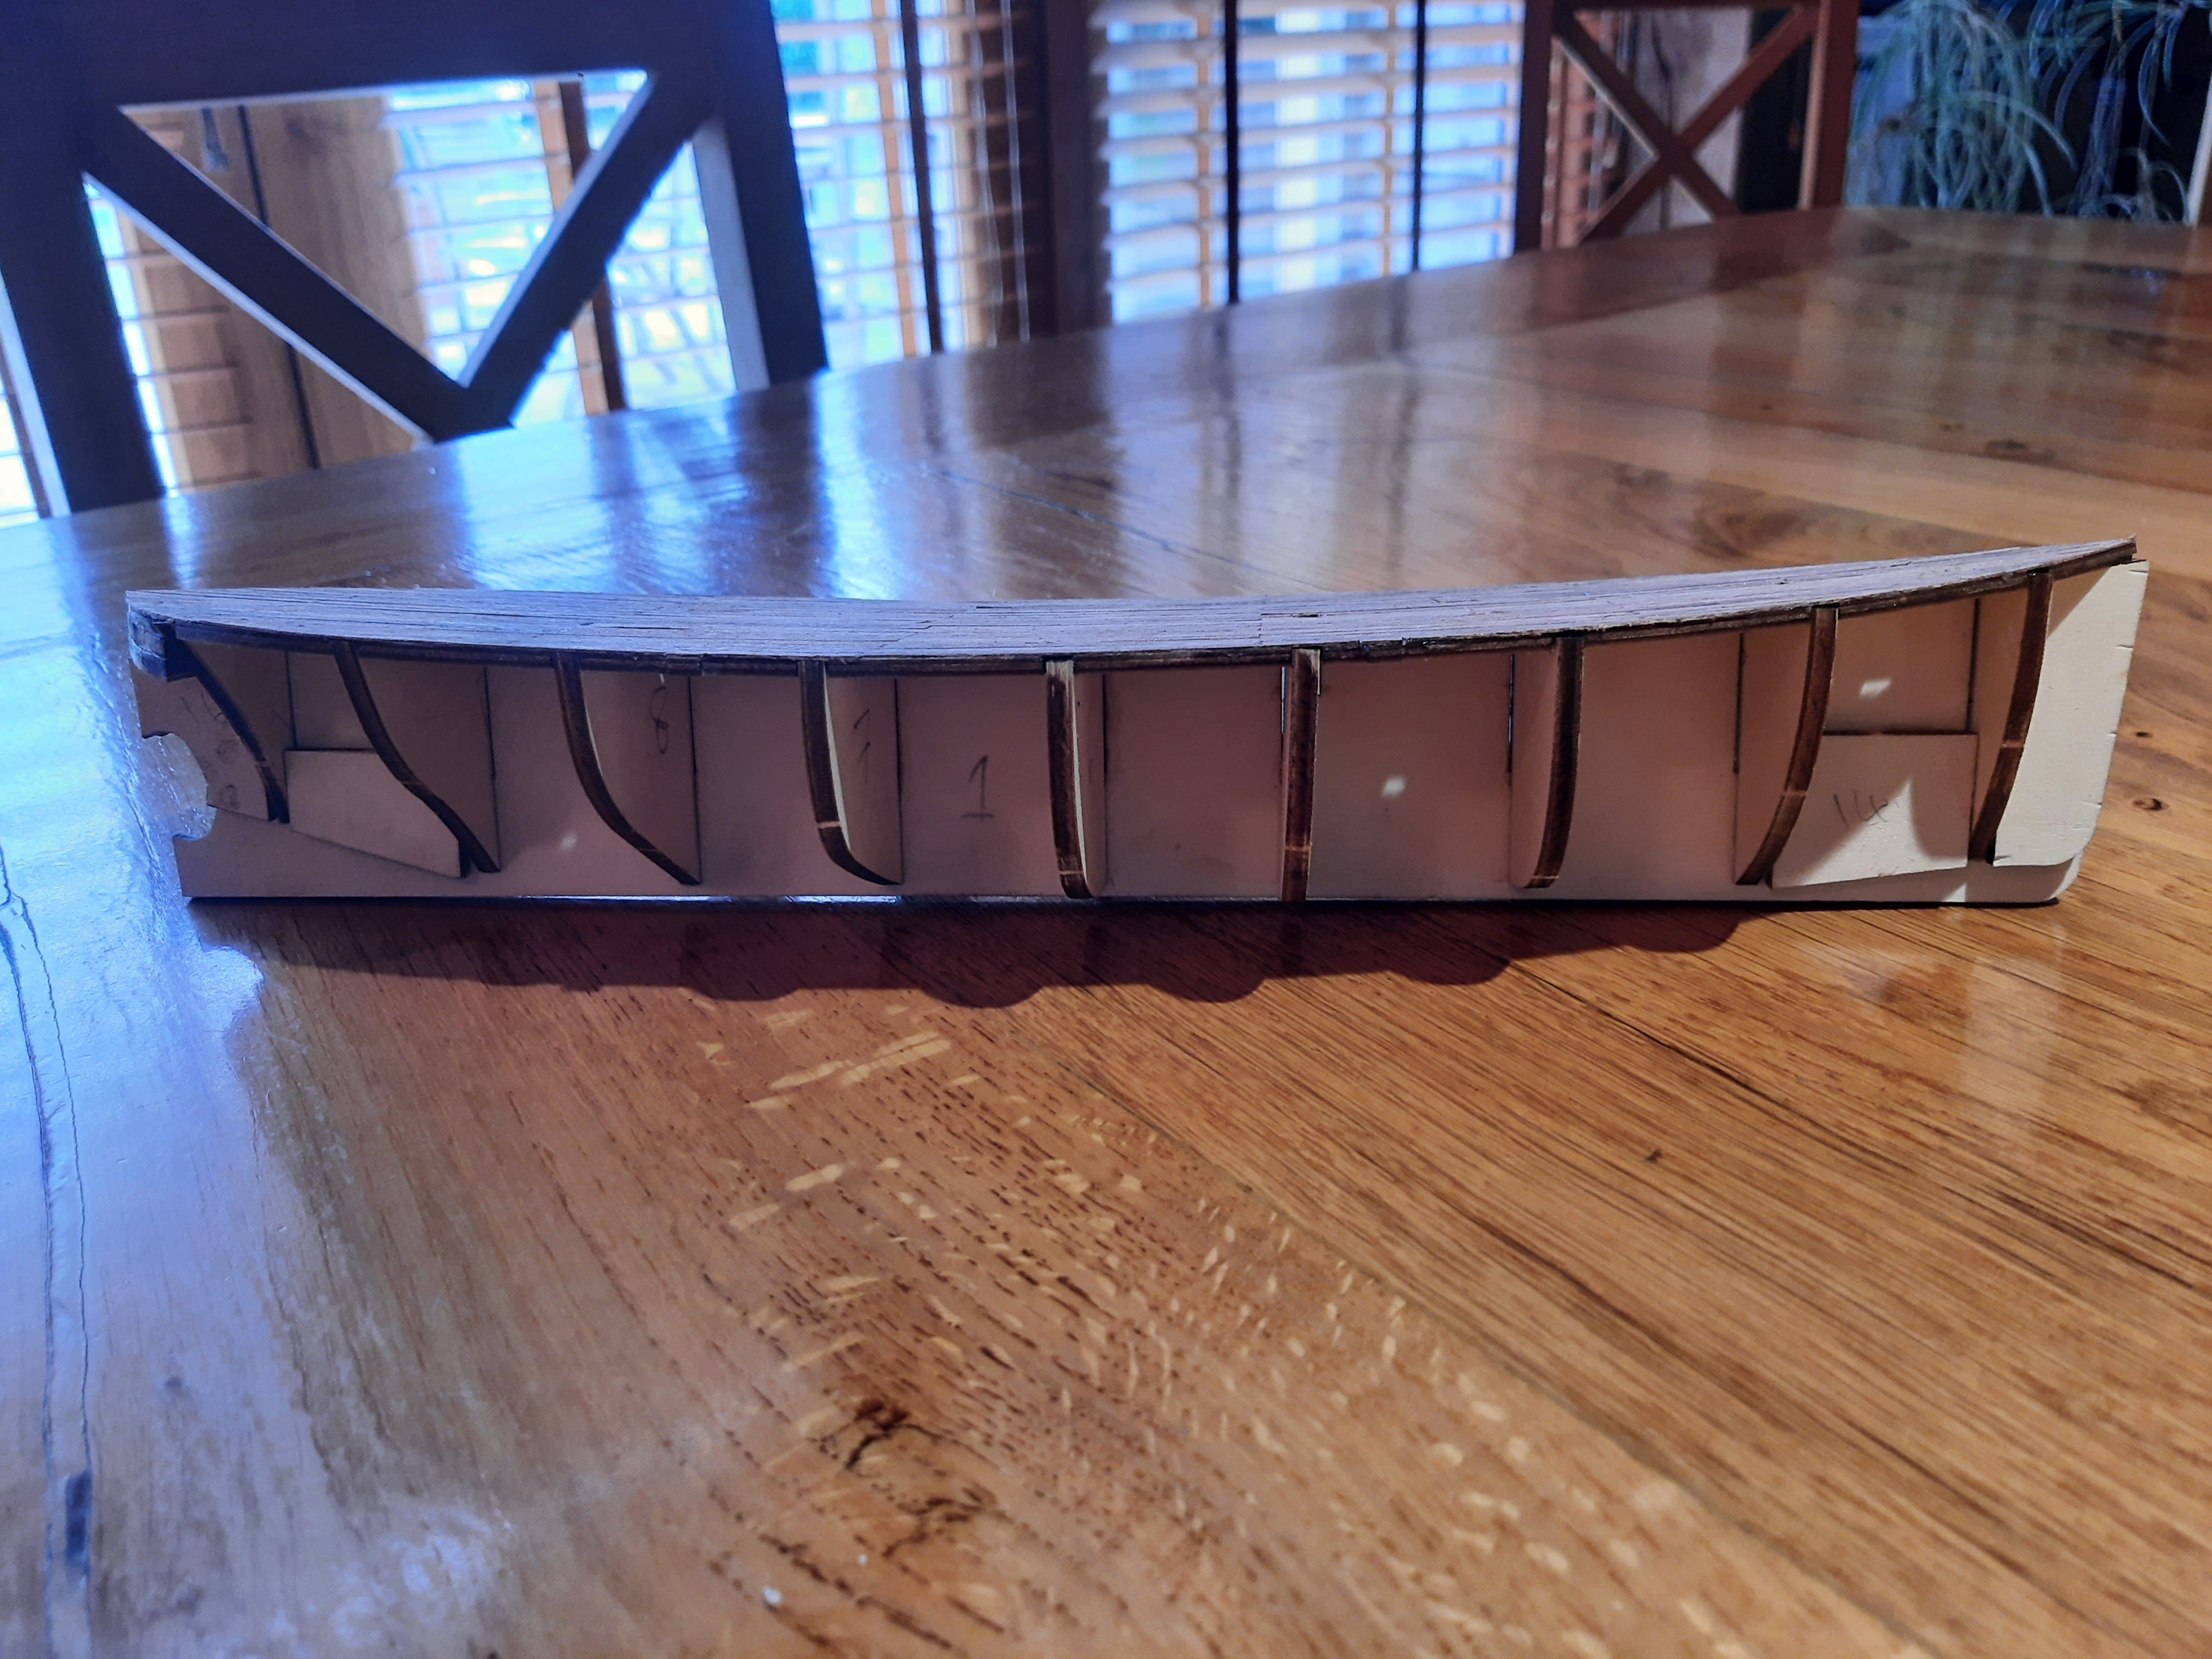
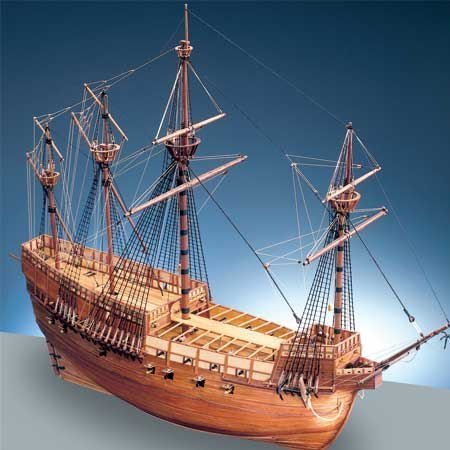
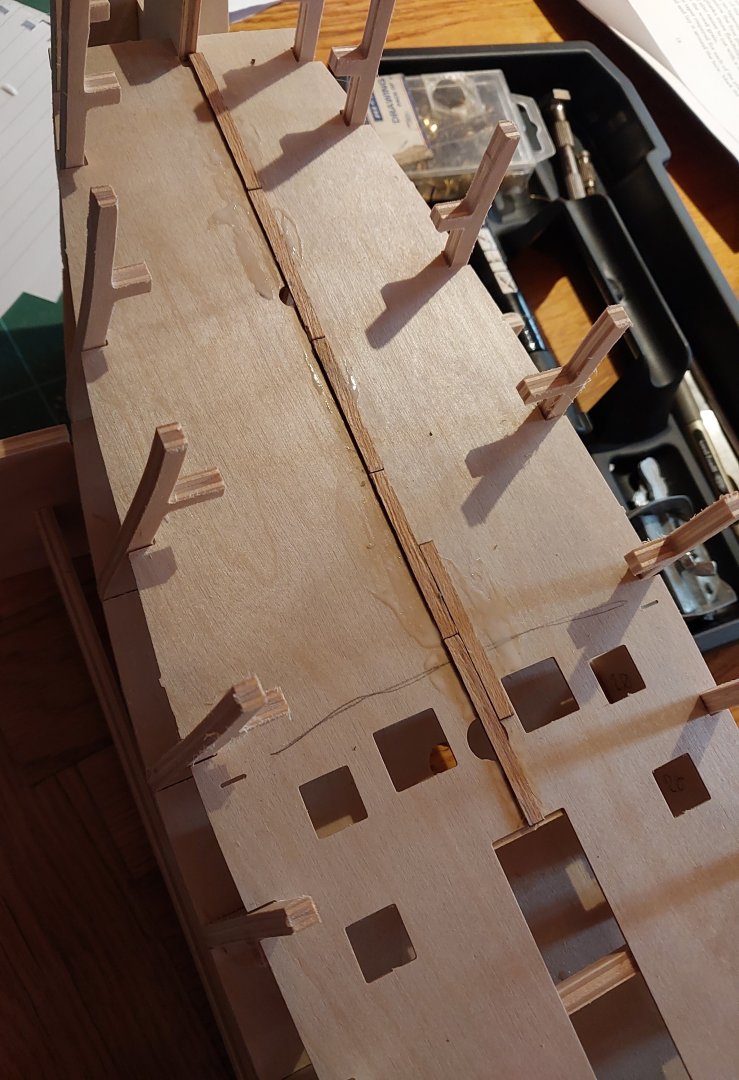
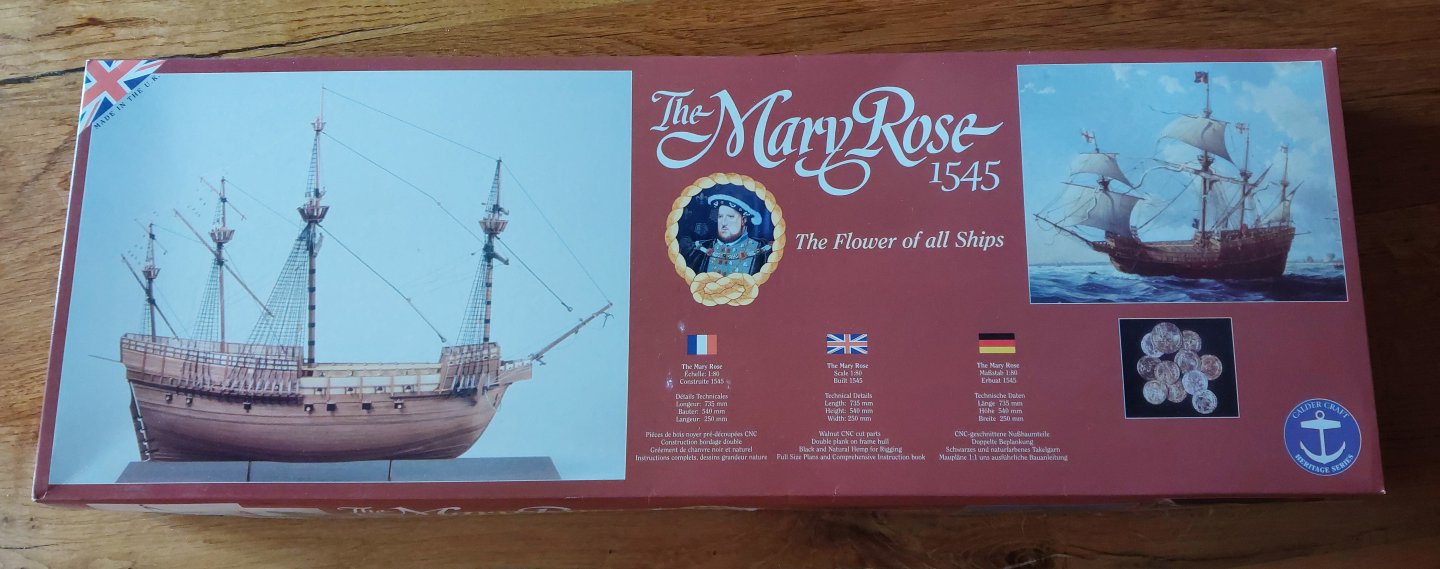
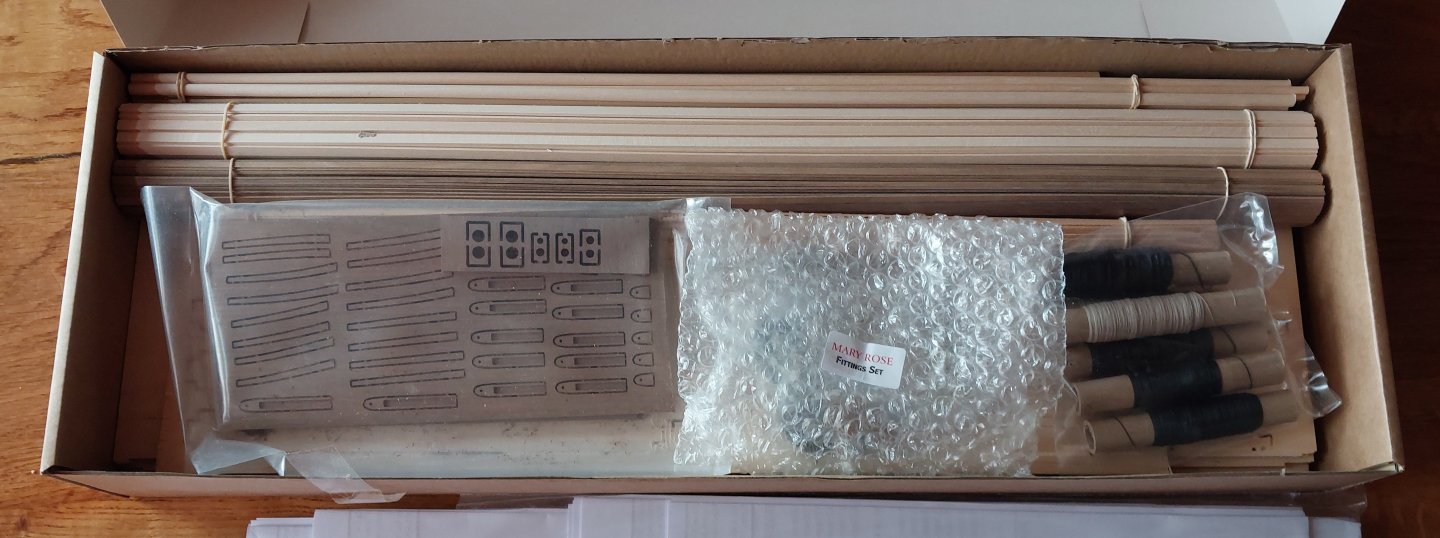
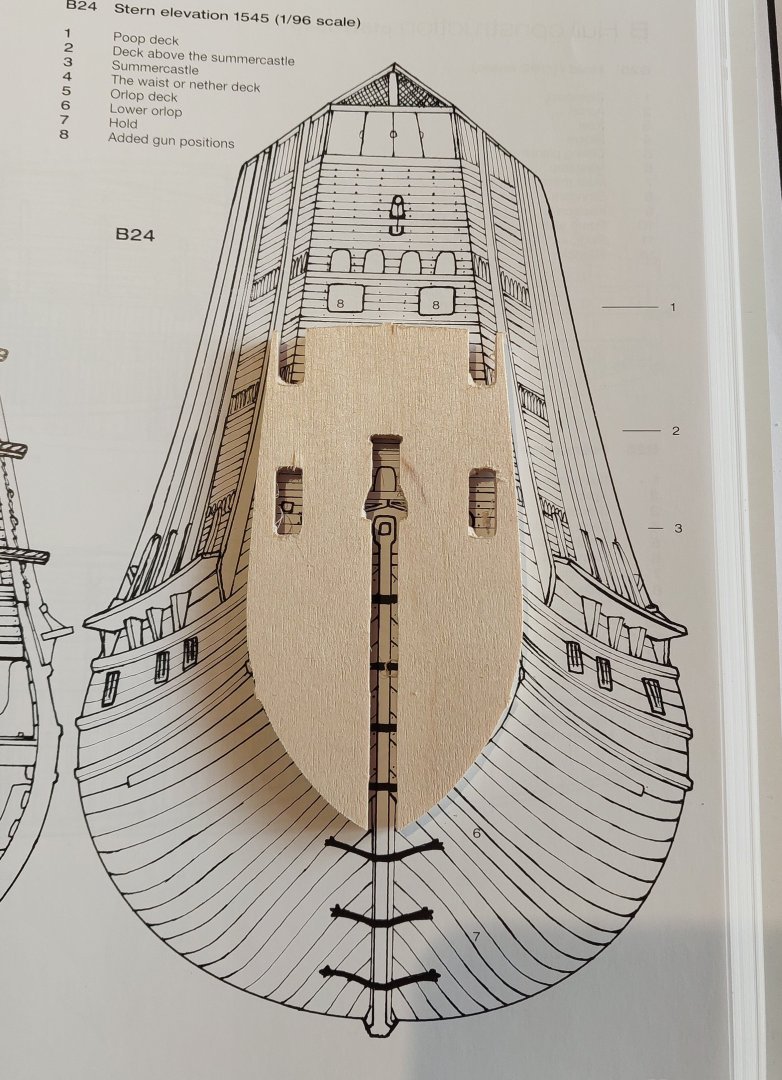
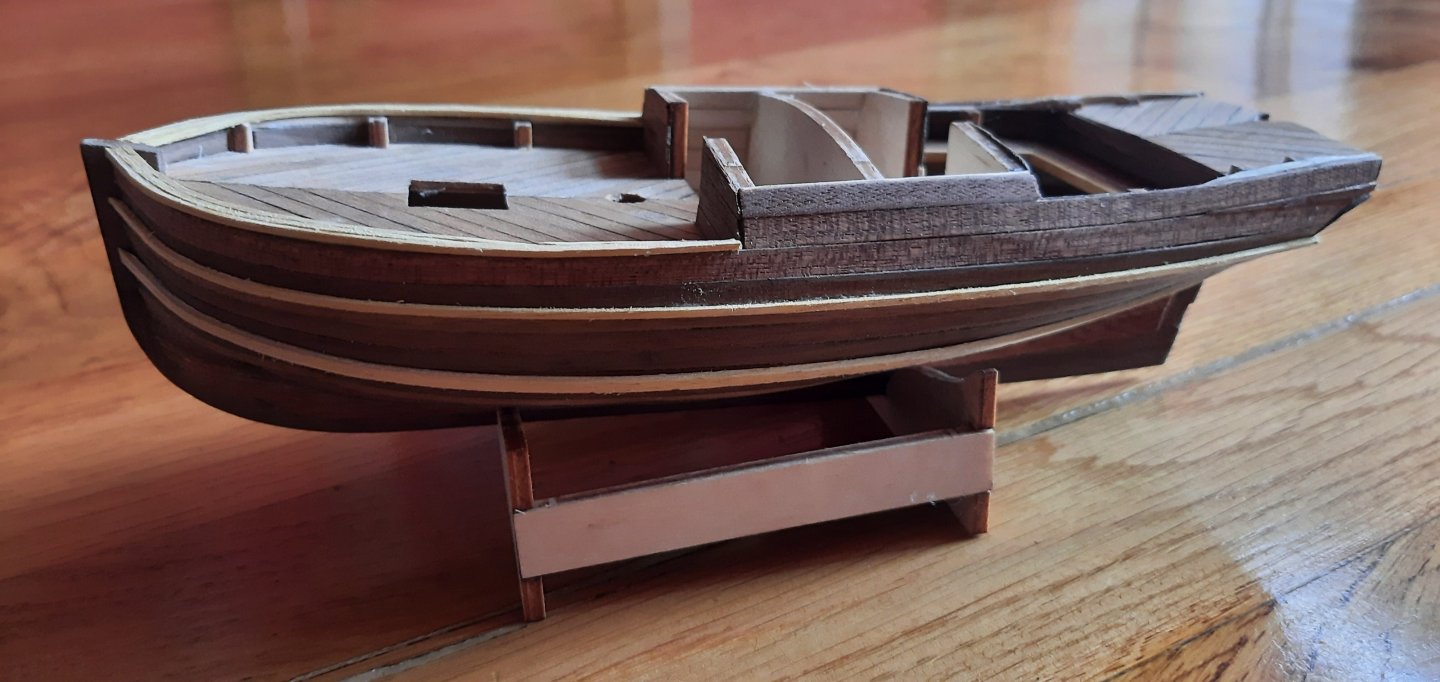
Hello! And welcome to my third build log. Today I'll be sharing some of my initial progress on the Mary Rose kit by Caldercraft. Introduction I lived in Portsmouth for a few years, and was very keen to build one of the historic dockyard ships - HMS Victory of course being the most famous. Caldercraft also produce a kit for the Victory, but it is prohibitively expensive for a relatively novice builder. The Mary Rose was the next obvious choice. Mostly made famous for her tragic sinking in the Solent in 1545, the Mary Rose saw active service for over 30 years of Henry VIII's reign. In the early 1970s, she was rediscovered, and many will remember the live broadcast of her being brought back to the surface in 1982; you can watch this on YouTube here, alongside a very young King Charles. I visited the Mary Rose museum as a child, during which time the remains of the hull were being sprayed with preservative chemicals. I've since visited now that she's dry and on proper display, and I'd wholeheartedly recommend it if you're ever down in the city. I can recommend some good bars too. Caldercraft's model was designed in conjunction with the Mary Rose trust. This, you would think, guarantees historical accuracy. You would think. Here's a stock image of the completed kit: If you're reading this, you might already be aware of the problem, but for the uninitiated here is the only contemporary picture of the Mary Rose, from the Anthony Roll, an inventory of the Tudor fleet: Compare the two photos and the issues will be very clear; Caldercraft's kit is based on a 17th century galleon, and the Mary Rose was a carrack, with high castles fore and aft. Caldercraft also has far less cannon than the Anthony Roll depicts, and as we know, the more cannons the better. Incidentally, this was one of the factors that lead to the original ship's sinking, as her open gunports sank beneath the water of the Solent. I digress. I would really rather make a kit that resembles the original ship, and though there is very little of her remaining above the gunwales, the historical evidence for the high castles appears to be very convincing. As such, my intention is to build the kit - but to add a number of decks to each castle and make a few other amendments to bring the finished product more in line with the historic original. References Other than the above image, there are a number of references I'll be using for this build alongside the instructions for the base kit. If you're a regular broswer of ModelShipWorld, you may have come across @Baker's fantastic (ongoing at time of writing) scratch build of the Mary Rose, which was a huge inspiration behind my thinking about editing the kit. I'm certainly not ready to scratch build my own version, but his build is a masterclass in both building and research. I'll certainly be referring to parts of this throughout. I also had a brief chat with @Louie da fly, who was extremely helpful with both advice and some recommendations. Thanks Steven! I'm still not sure how to make those deadeyes There are two key books I'll be using: Douglas McElvogue's Anatomy of the Ship: Tudor Warship Mary Rose, and Peter Marsden's 1545: Who Sank the Mary Rose? McElvogue's book is a fabulous resource, full of his own fully scaled drawings of his interpretation of the ship. It's likely a lot of it is made up, but it does follow the majority of the archaological evidence, and I'll be using his measurements throughout. After all, we'll never know exactly what she looked like - this is my interpretation. Marsden's previous book Mary Rose, Your Noblest Shippe was my original port of call, but unfortunately it appears to be nearly unobtainable in the UK. I emailed the author, and he recommended 1545 instead, as this is a more recent version of his research - one which corroborates the extra decks in both fore and sterncastle. As a note, Peter Marsden is a well-established maritime archaeologist, and alongside his work on the Mary Rose he's also partly responsible for the UK's protection of wrecks act. Fascinating! On to the build. First Steps Caldercraft's kit packaging is first class. The instructions are pretty detailed, and printed on massive sheets of paper in full scale - really useful. Here's my first look at my expensive purchase: A look inside: And beneath the instructions: That's a lot of dowel! You'll have all seen the basics of kit building before, so I won't go into much detail, but here's a nice little indication I'm on the right path with my alteration ideas: This illustration is from McElvogue's book, and is in 1:96 scale. The 1:80 transom piece is obviously missized, but the general shape matches up - all I'll need to do is add a few decks. Simple. The bulkheads from Caldercraft's kit match up pretty well to those in both McElvogue and Marsden's books. I expected this - the hull is the best preserved part of the ship, after all, and it'll remain mostly the same in my build. Here it is dry-fit. I've only worked with laser-cut bulkheads before, and Caldercraft's are CNC'd 5mm ply. It cuts nicely with just a Stanley blade, but the sawdust was something else. Probably not one to do on the kitchen table again. Glueing the keel on: And the lower main gun deck in place, with false backs for the main guns: N.b. I may move these false blocks around later, or just add some more blanks for the missing cannon. I figured I'd slot them in place for now as they provide some structure to the next deck. I've emailed Caldercraft's parent company Jokita and am in discussion with them about getting some extra cannons shipped over - if that falls through I'm going to have to learn some new skills! Here are the two top decks provided with the kit dry fit on the bulkheads. I'll be using the sterncastle piece, but the forecastle is completely the wrong shape. And here's the upper deck glued in place: You can see that this has a big crack in it in the photo. To get it into place below the forecastle supports you have to bend this piece nearly in half - I don't think it would have ever survived the process even if I were more careful. It's going to be planked over anyway, so no huge issue, but a weird design choice. Laying in some first deck planks: McElvogue's book has these all at the same length on this deck, which works out to 45mm in 1:80 scale. The wood is also excellent, with a lovely grain that I think will come up nicely. I did the classic trick of edging each plank with a soft pencil to simulate caulking. And here's the sterncastle planked: I've only planked up to this point as the front of the sterncastle is going to divide the deck at this point. I also realised midway through that with my additional decks above, this is going to be near-invisible, but I carried on for completion's sake. There will be an open doorway and a number of gunports allowing a view inside, so I don't think it's wasted time. And on the subject of extra decks, here they are: Excuse the various paraphernalia I've used to space these out! Except for the first sterncastle deck, which is Caldercraft's original, these are all 0.8mm ply cut to the shapes laid out in McElvogue's book. Both McElvogue and Marsden agree that there were likely three decks on both castles, with another small half deck atop the forecastle, just behind the foremast. The forecastle here will be slightly further forward - I need to cut some slots in so that it can fit within the bulkheads. I'm glad I took the time to cut these to shape now - I wasn't entirely confident in my plans, but seeing this rough mockup has filled me with a possibly unearned feeling that this is actually achievable with my skills. Obviously there's a long way to go, but I can actually visualise this looking 'correct' - and that's a start. Thanks for checking this out, and please do follow along! Any input is more than welcome.


-
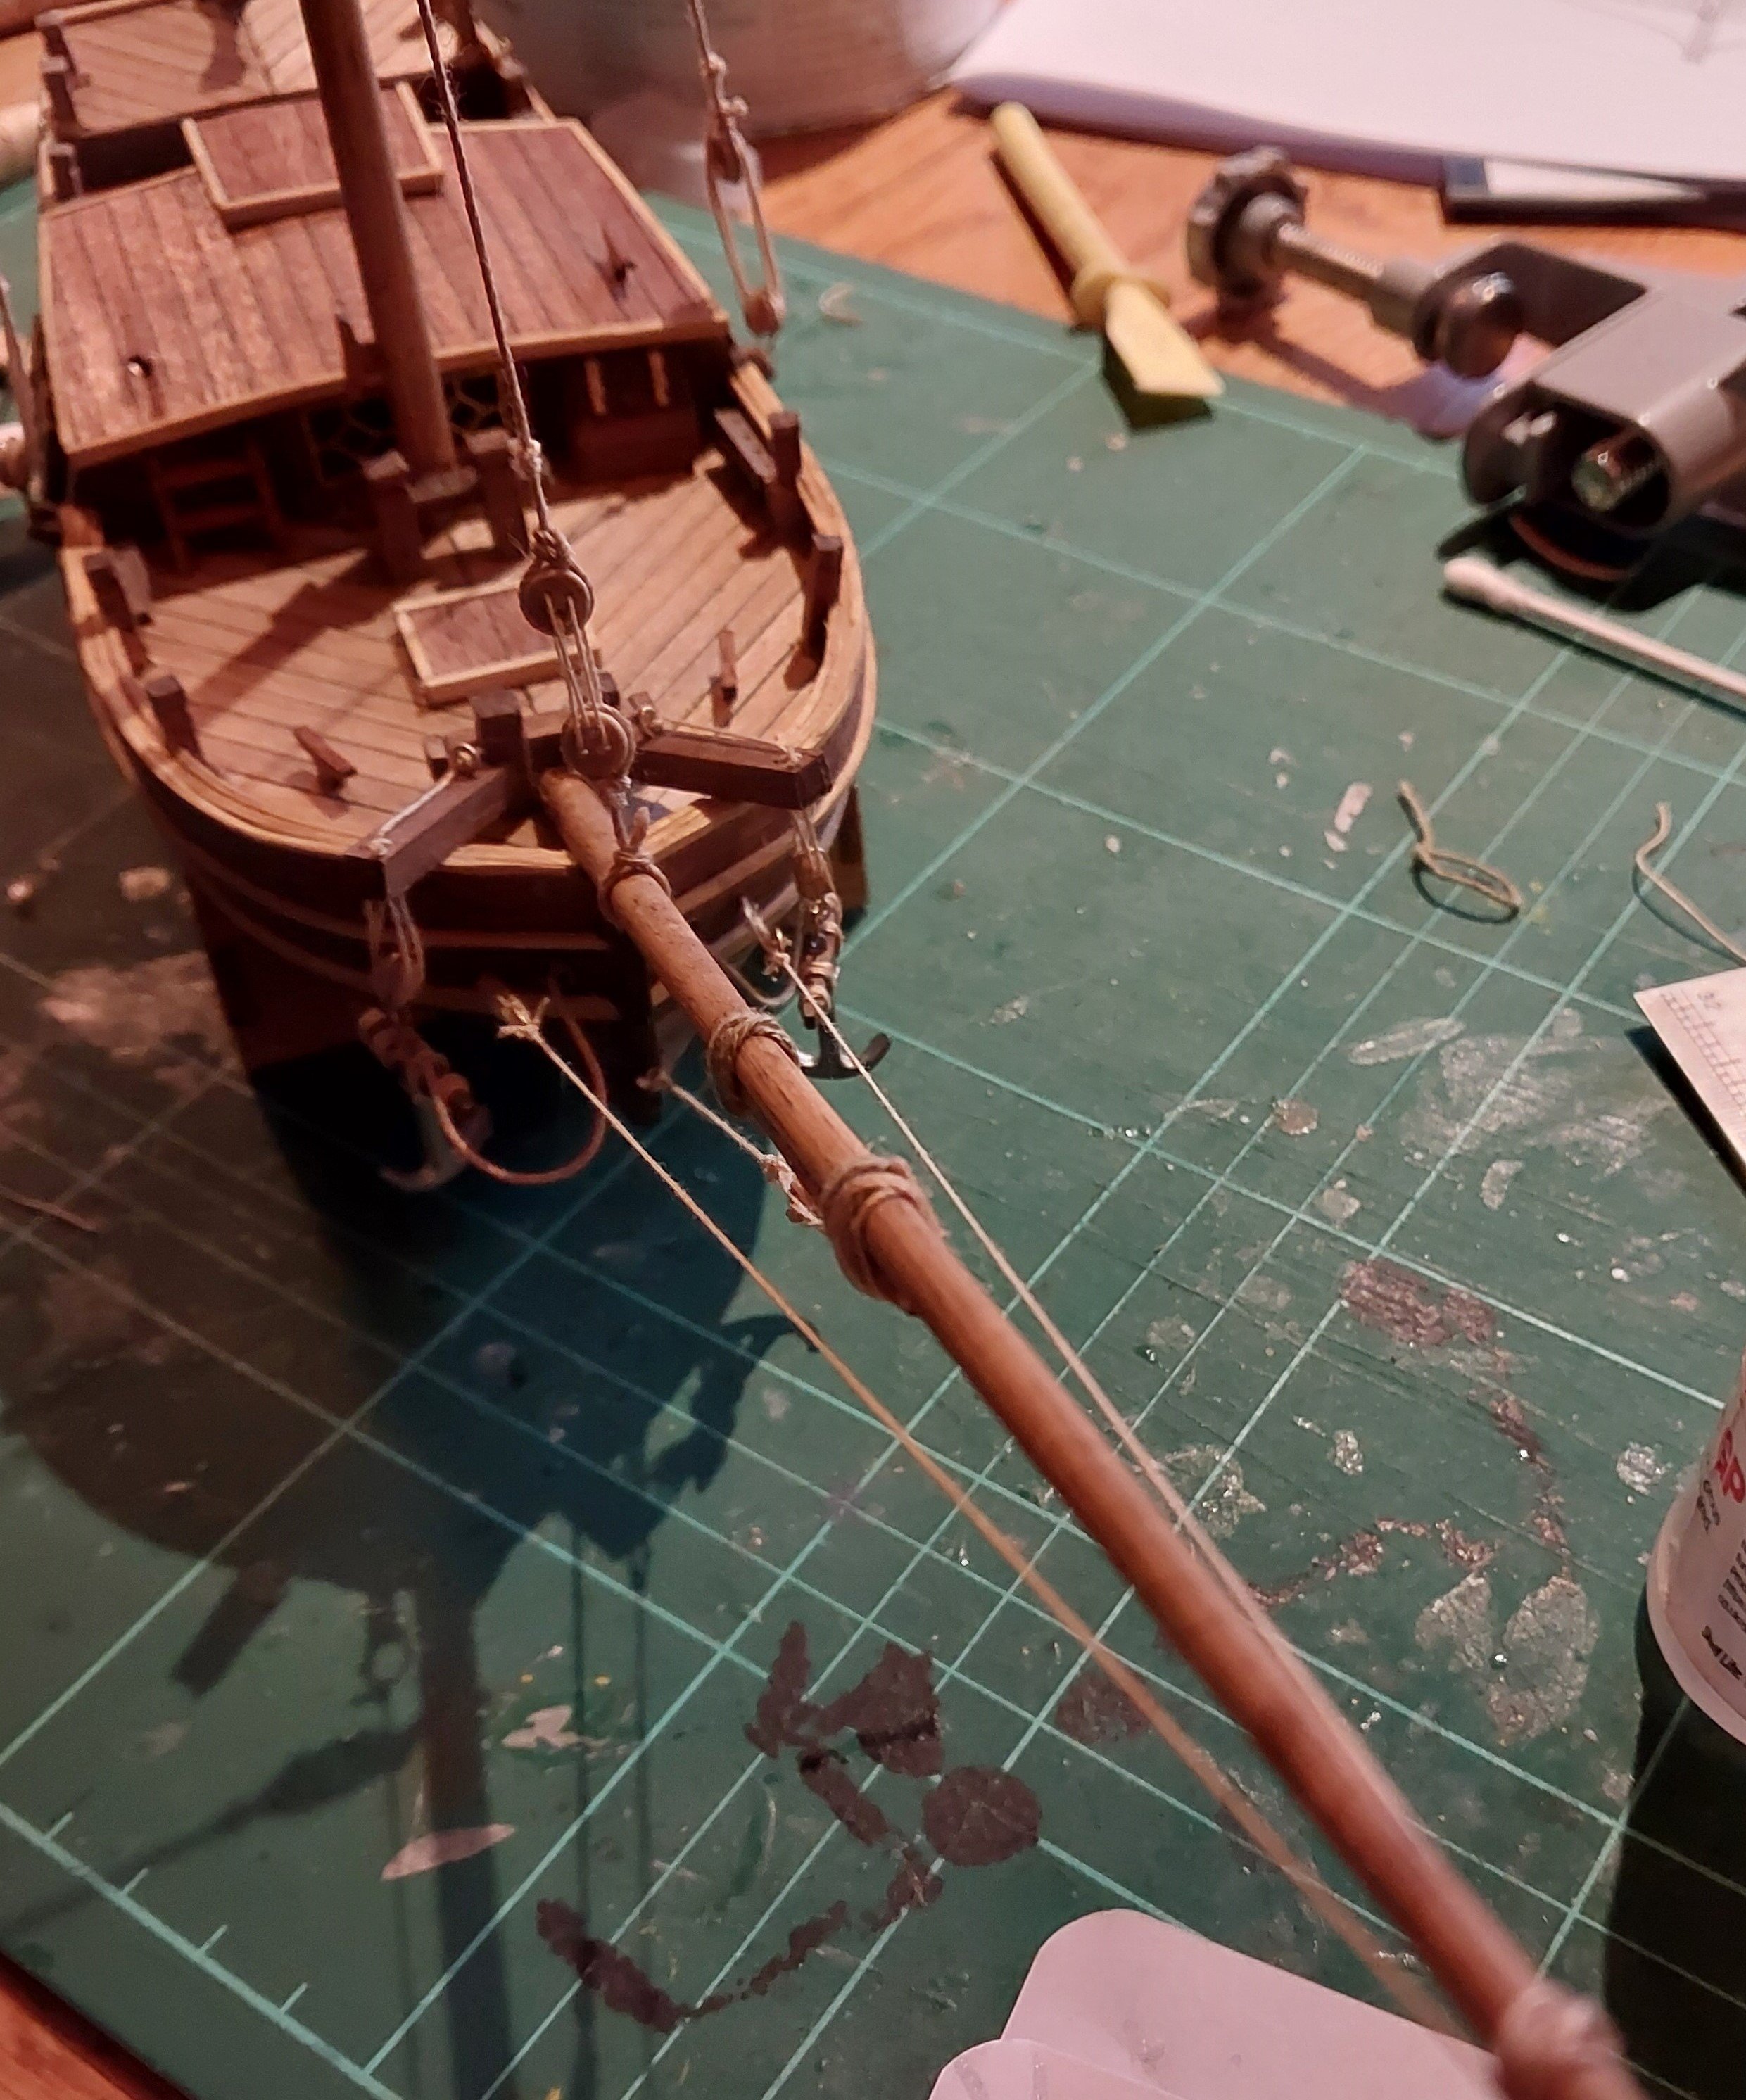
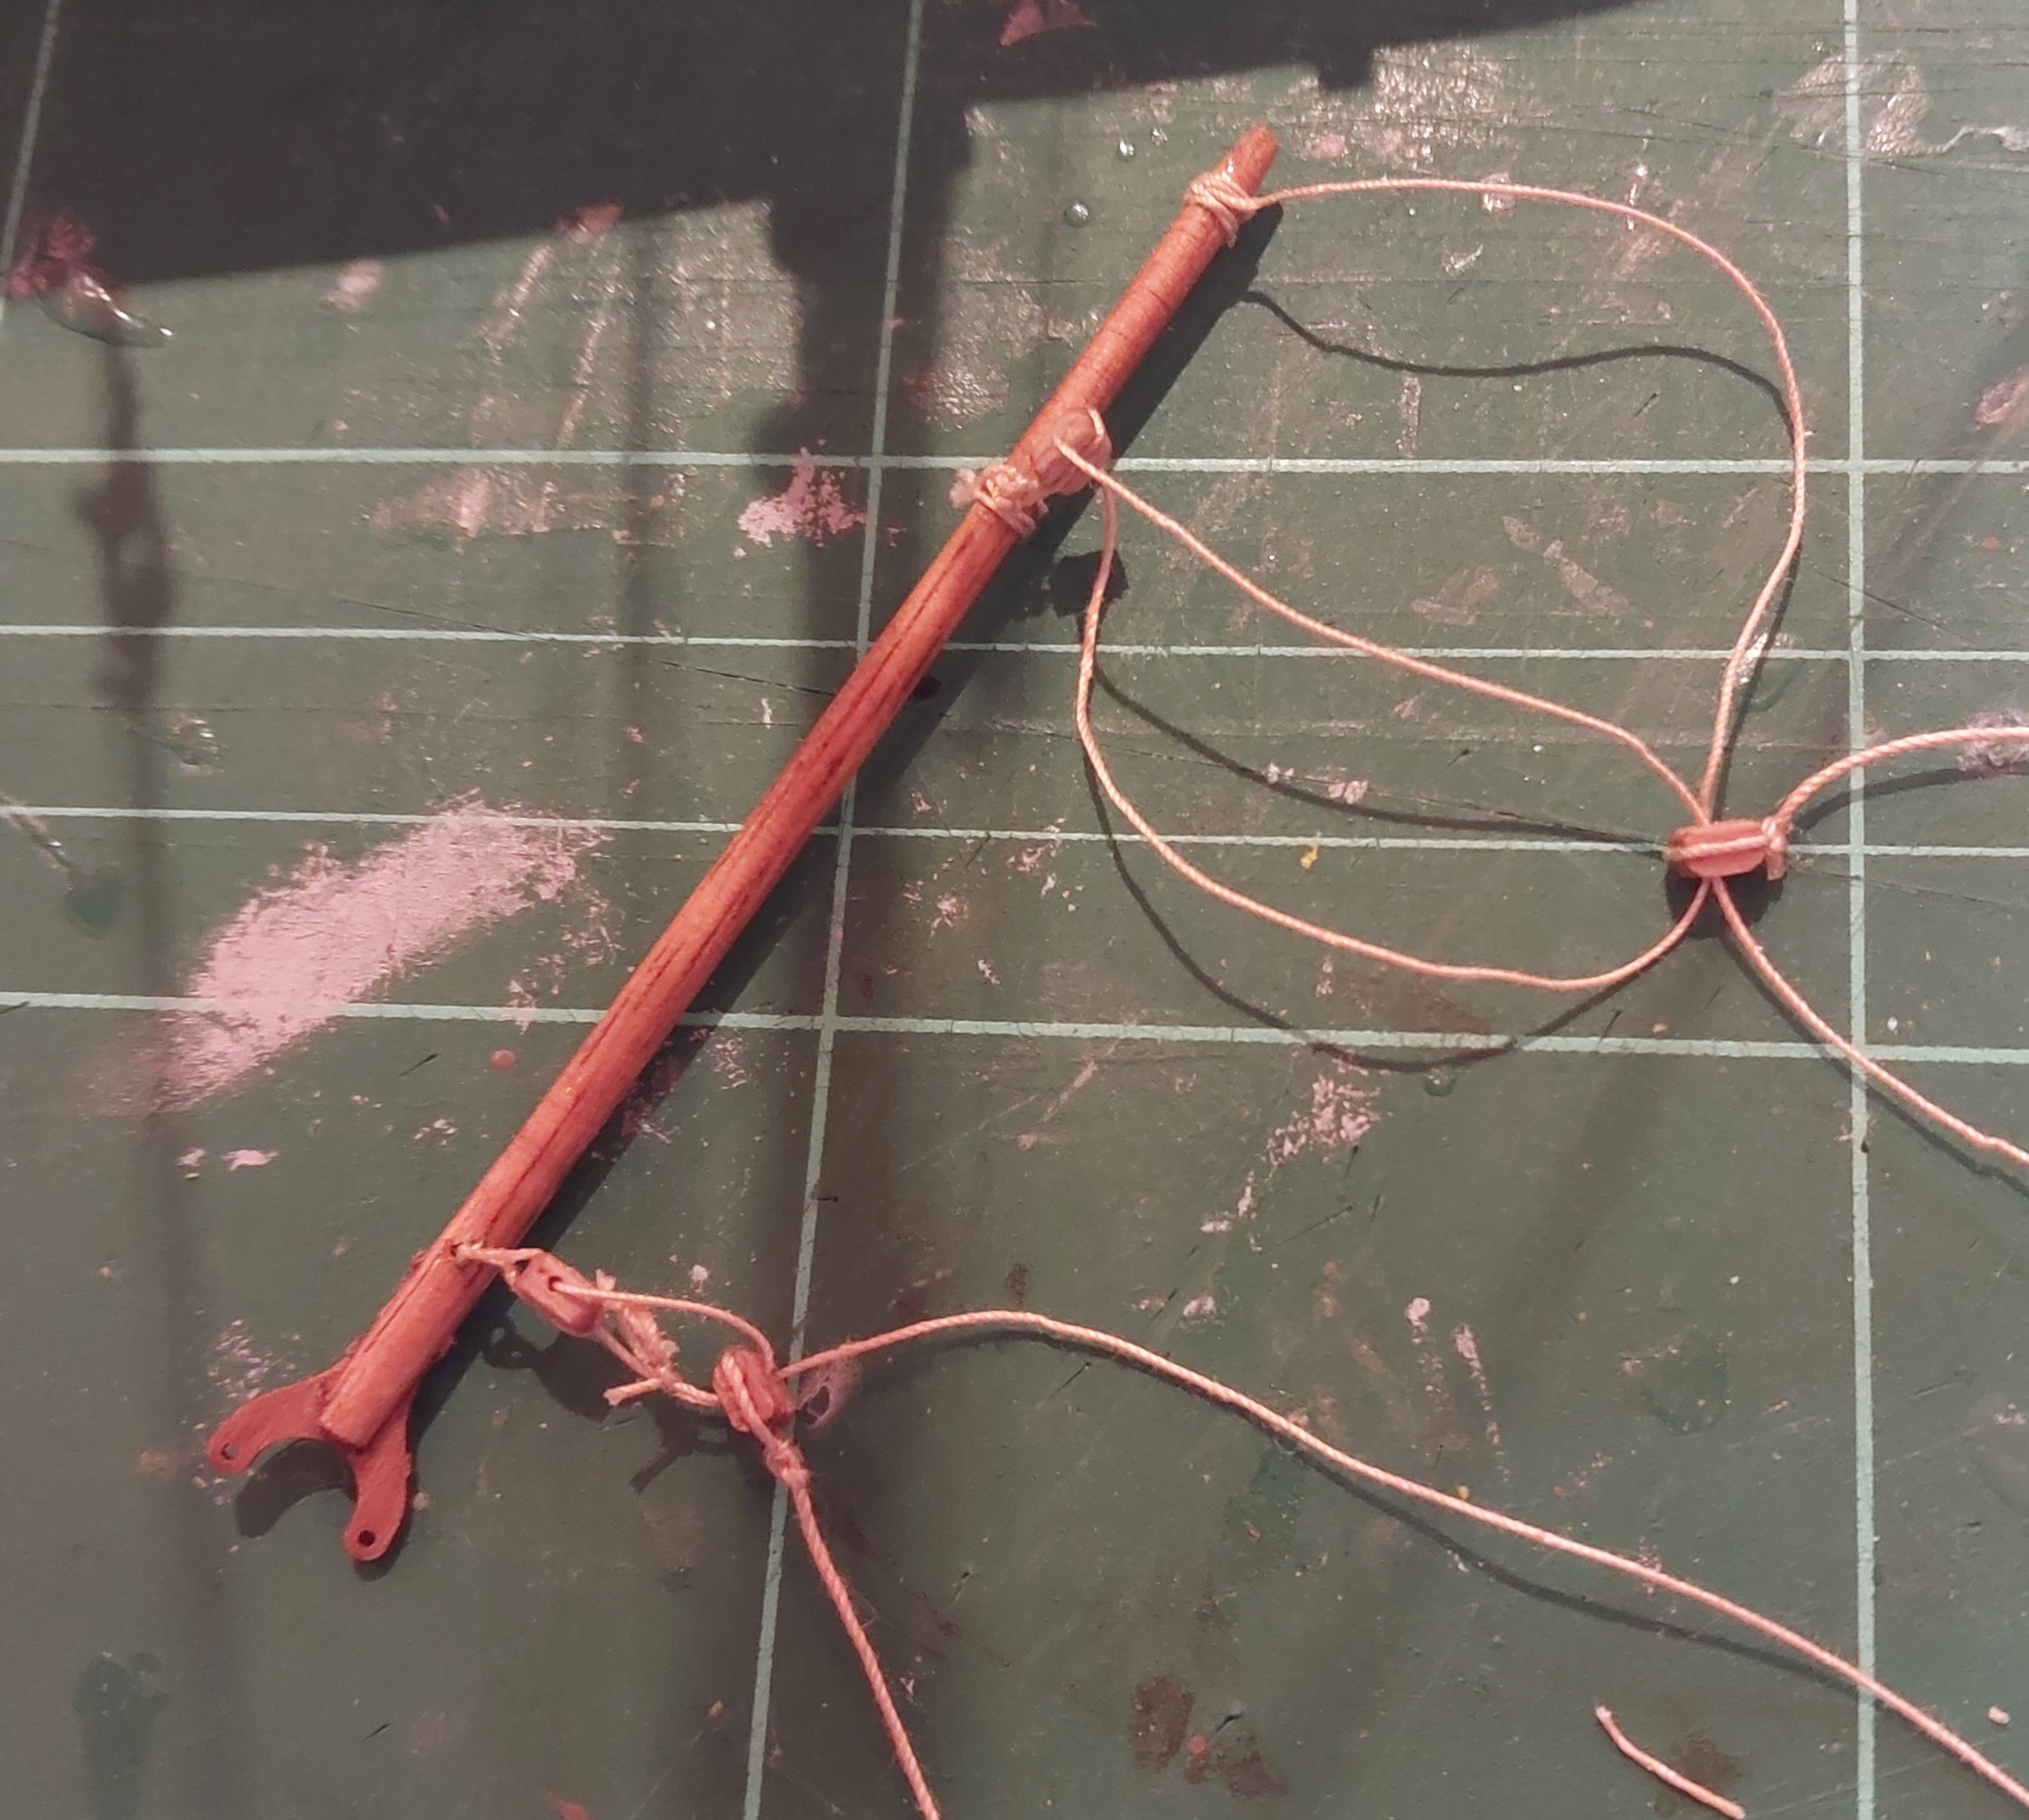
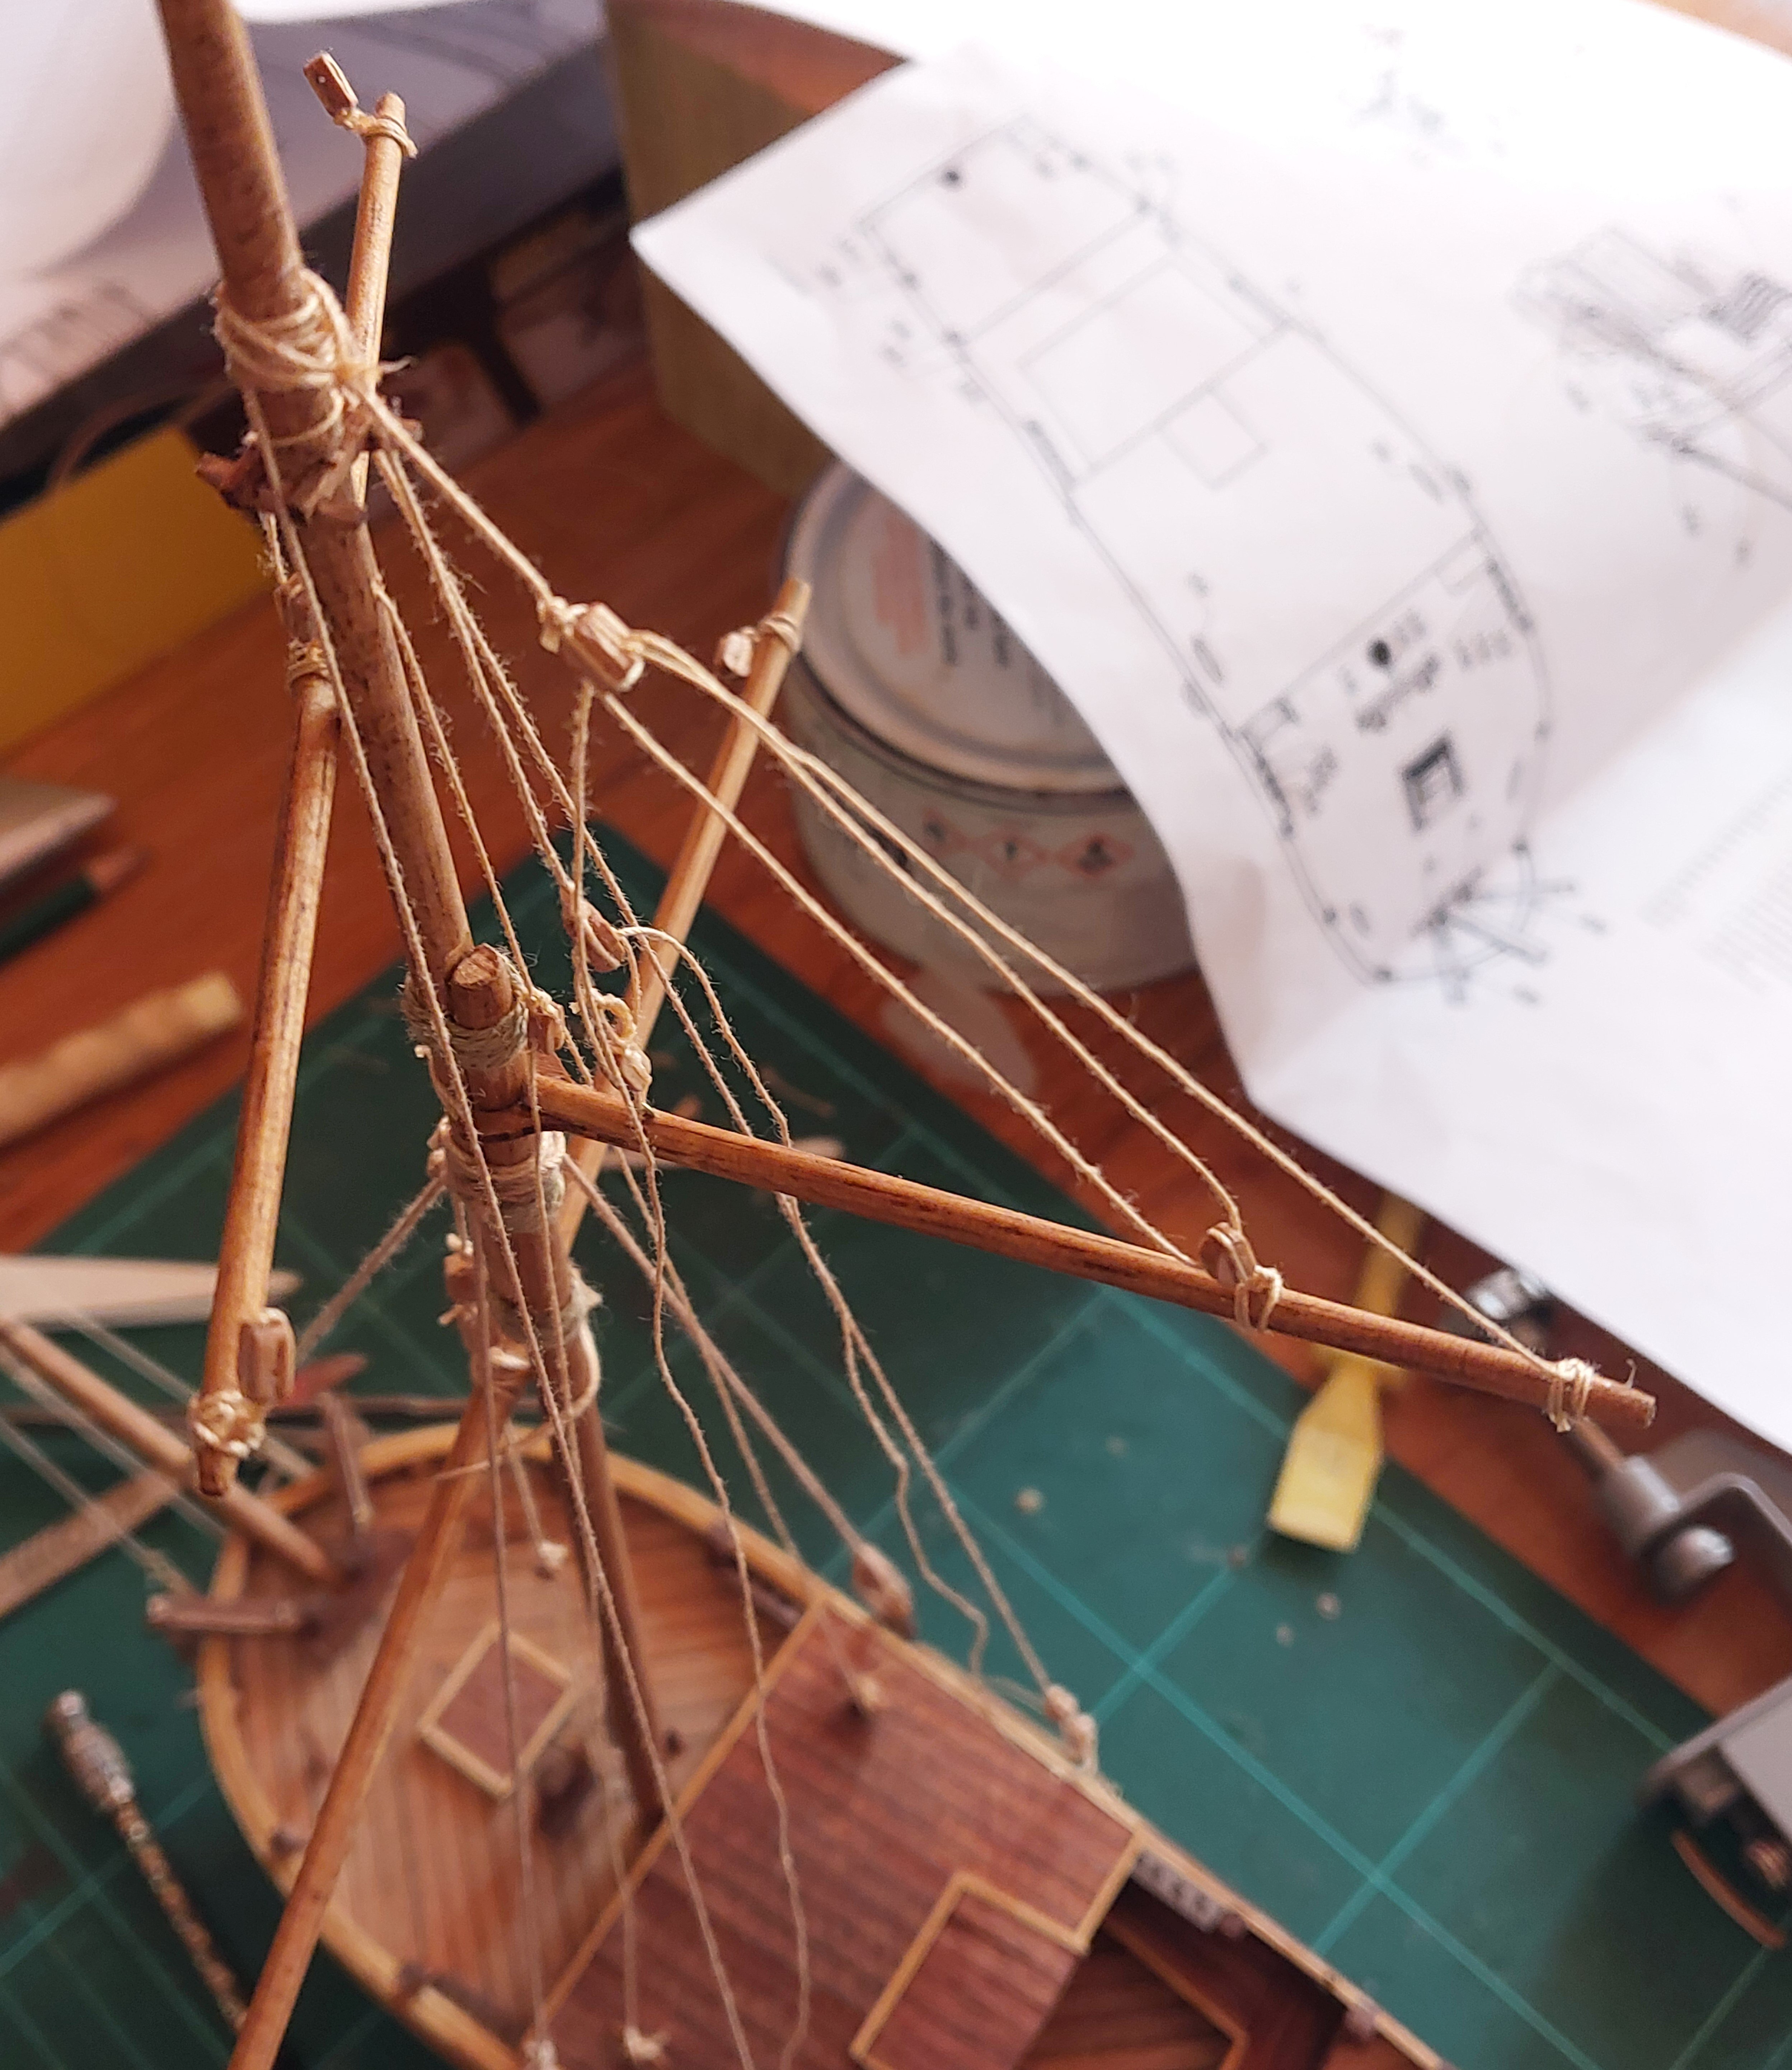
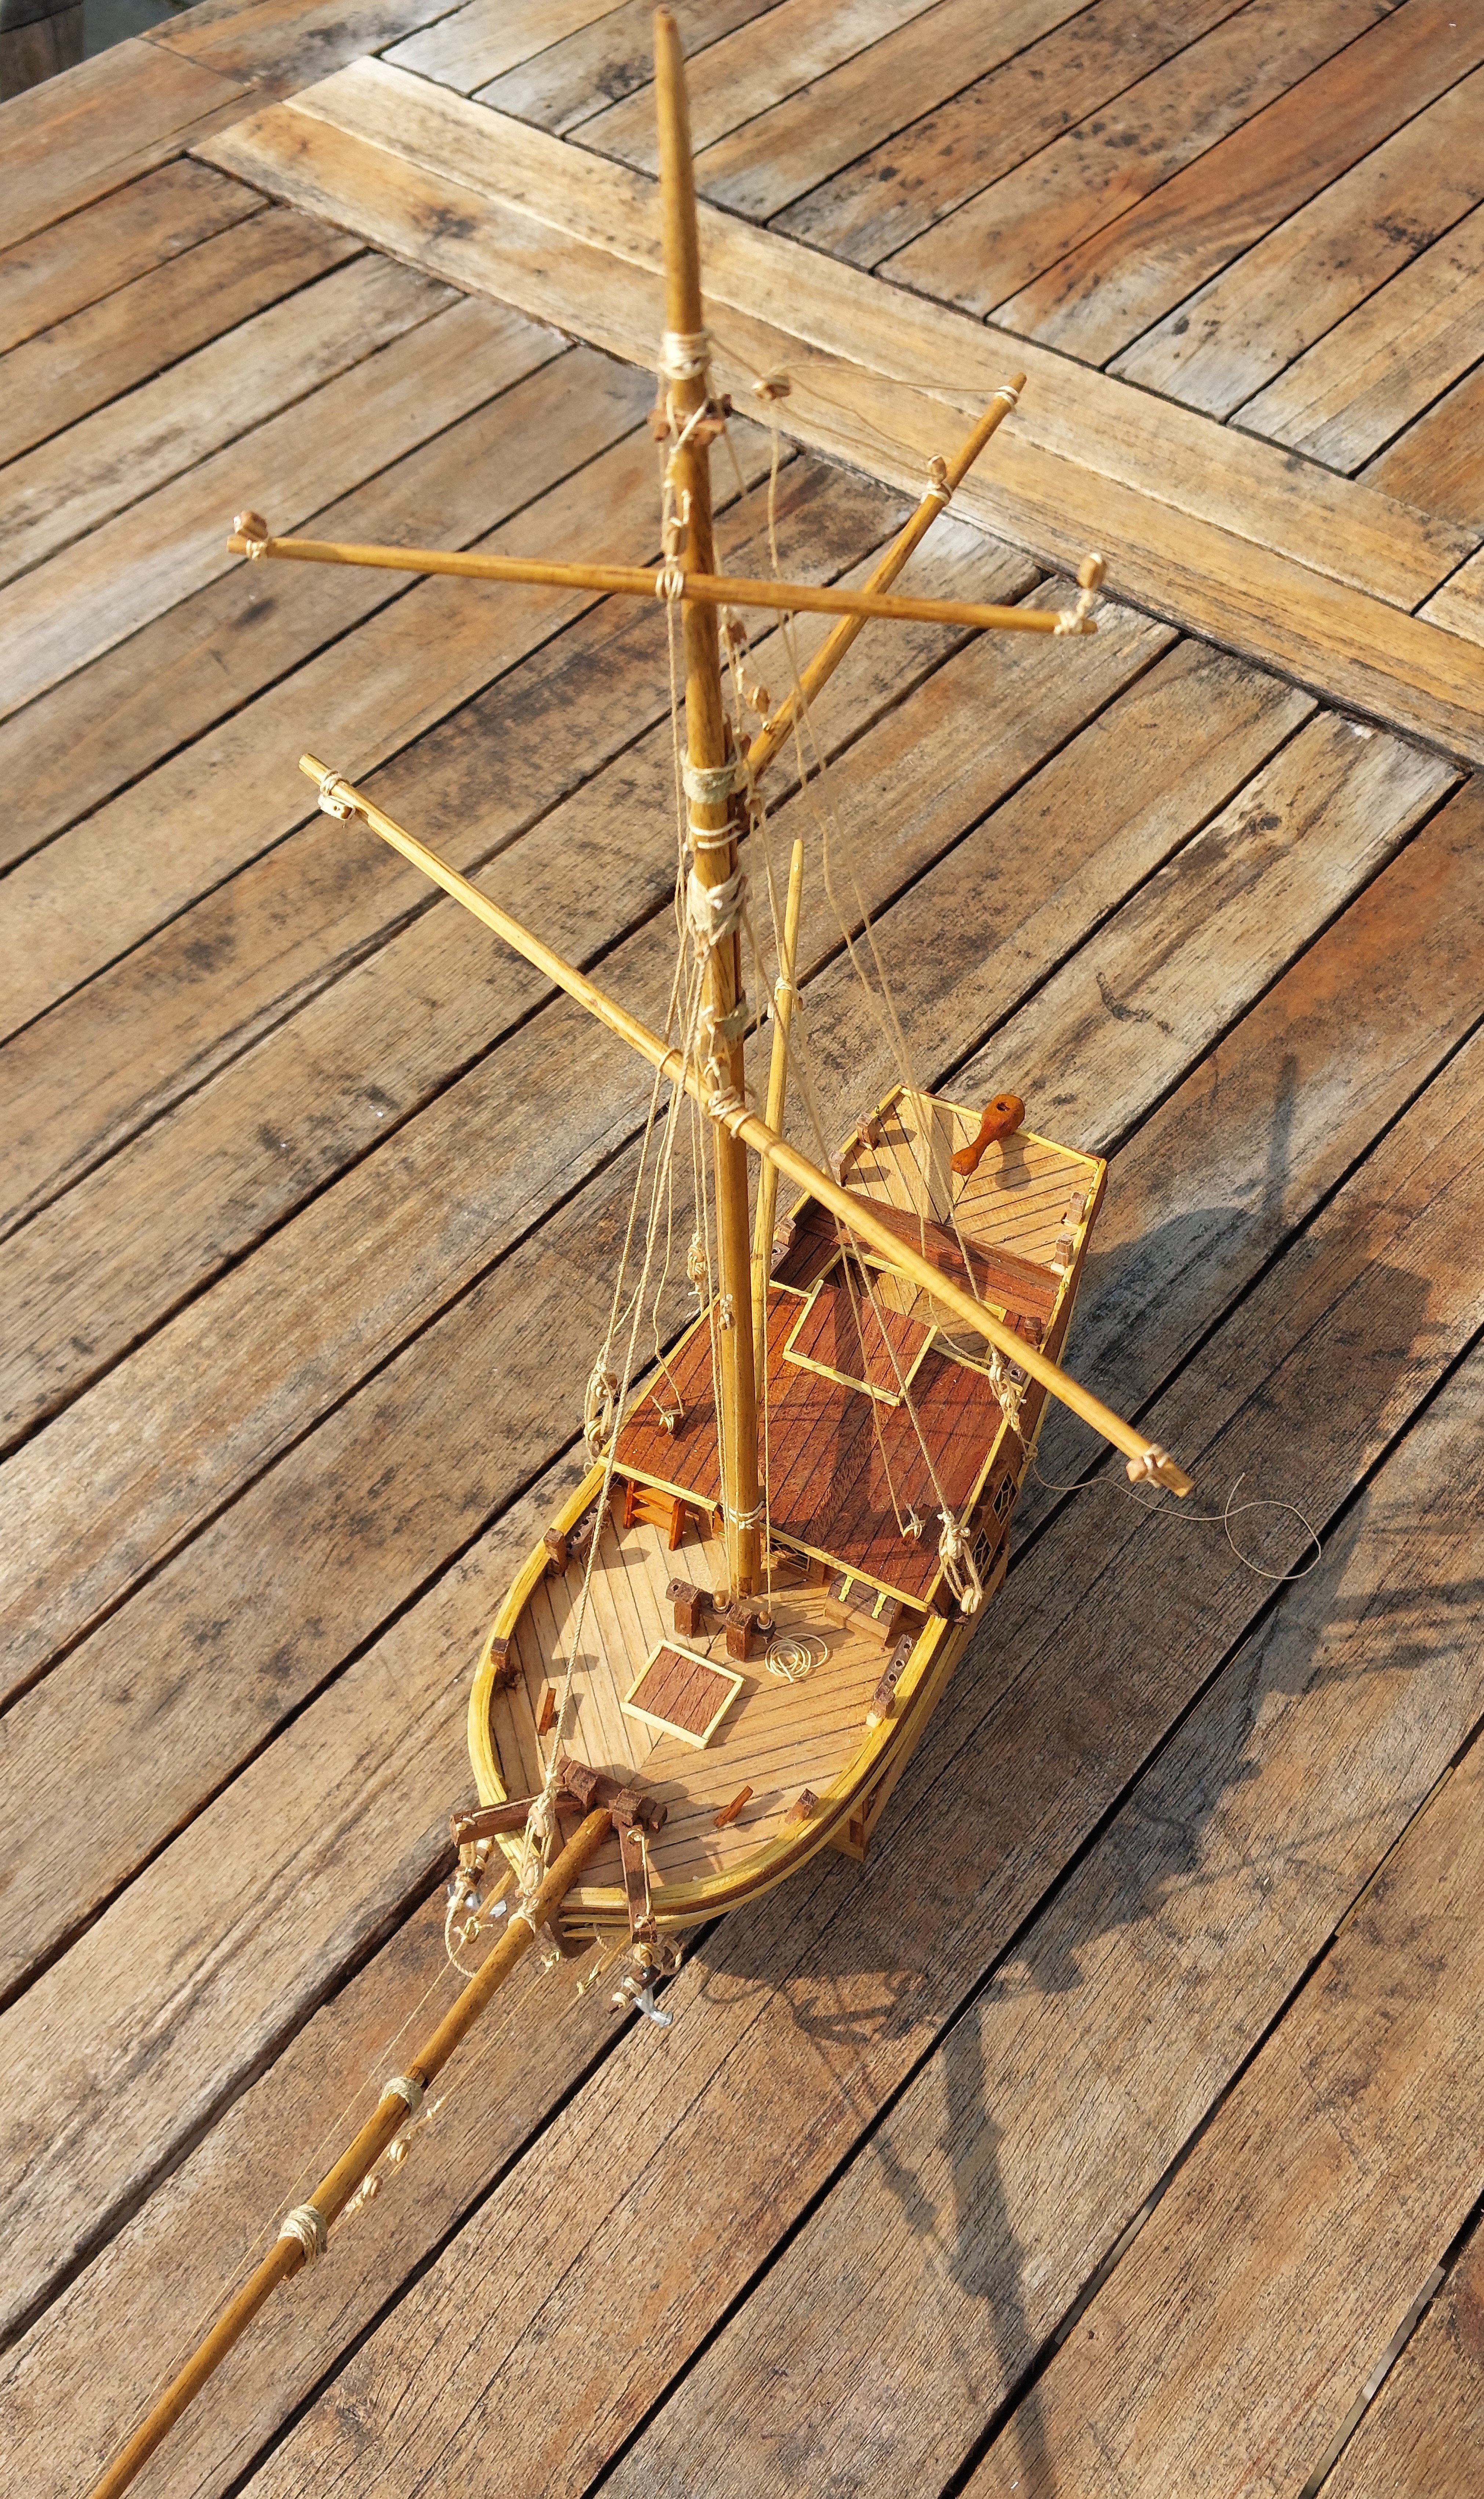
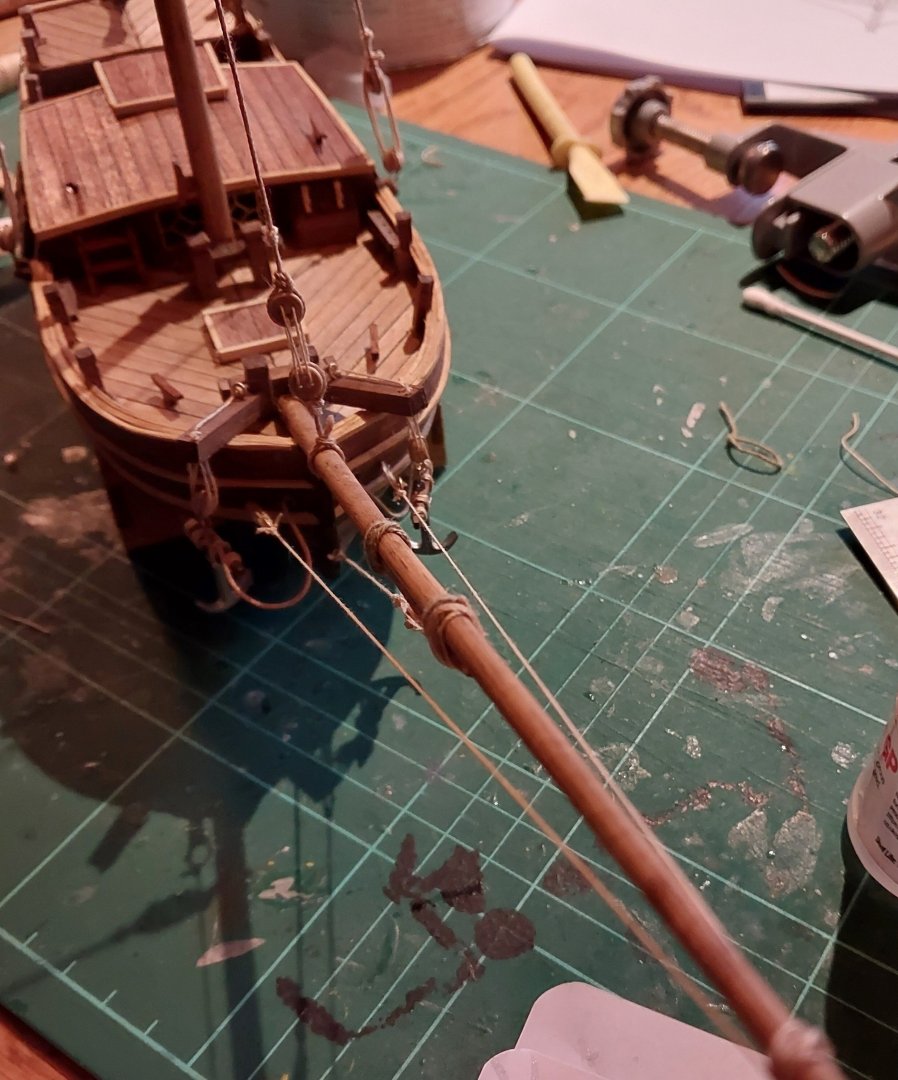
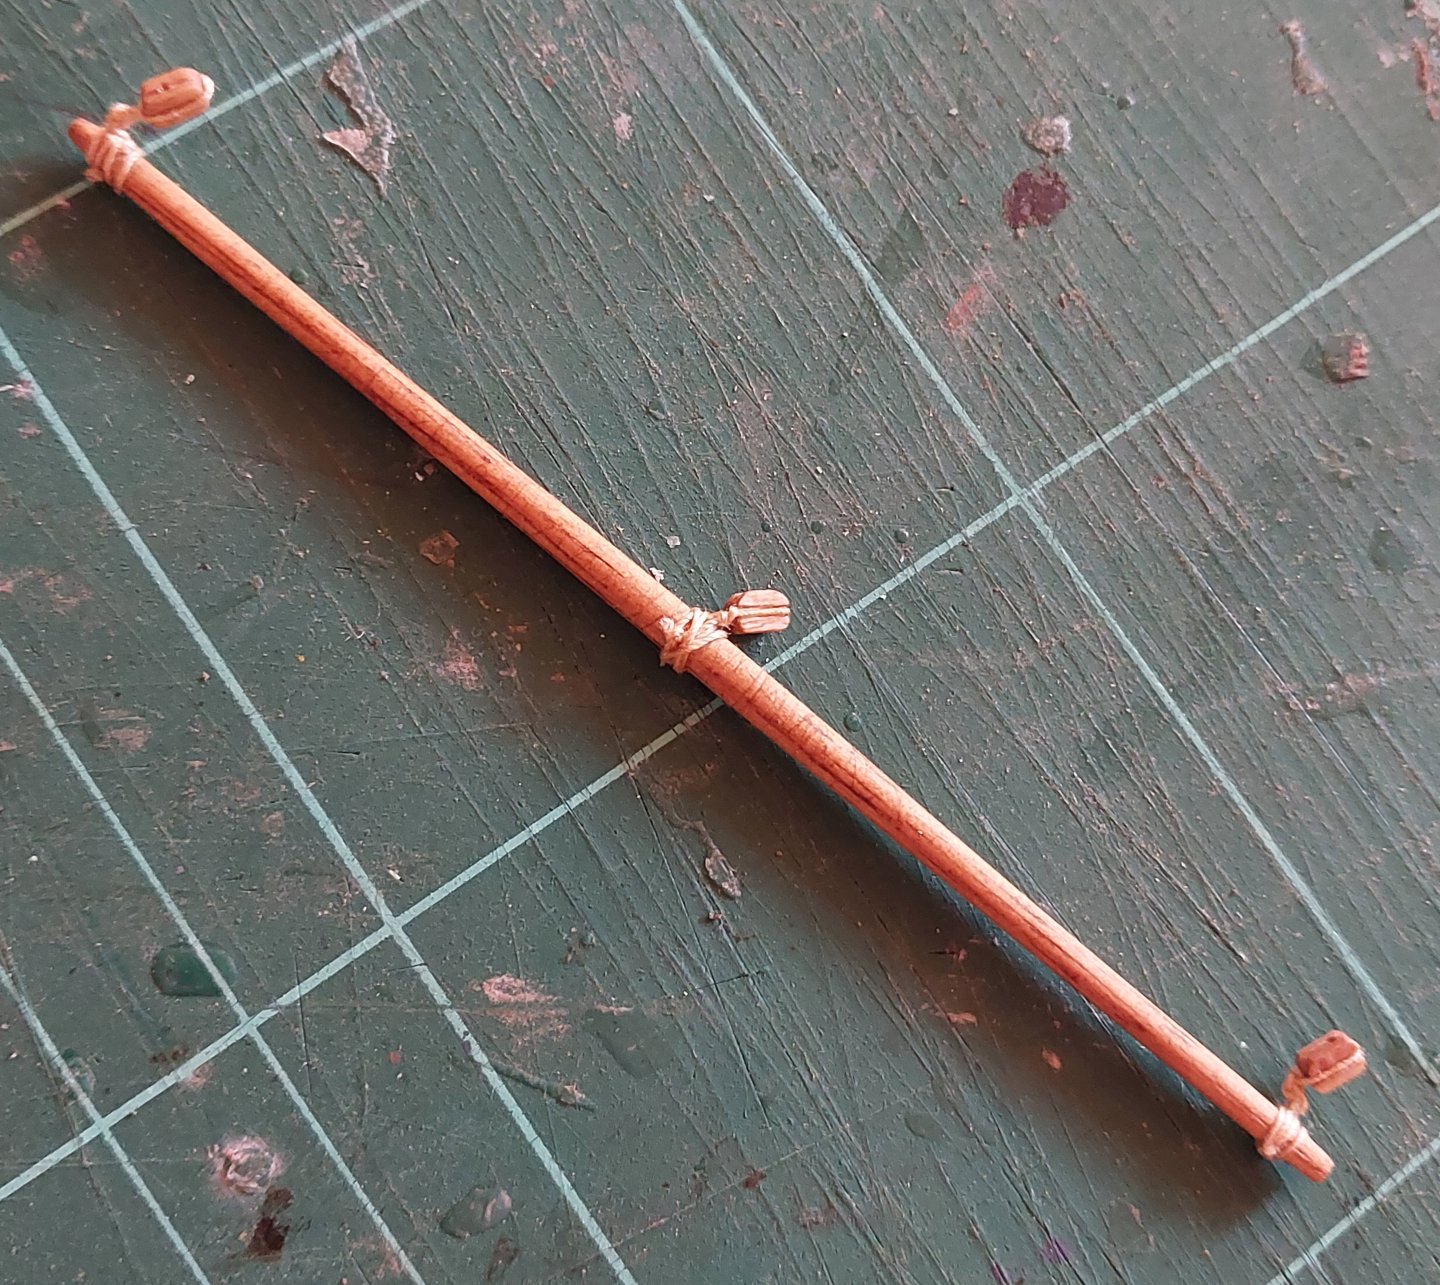
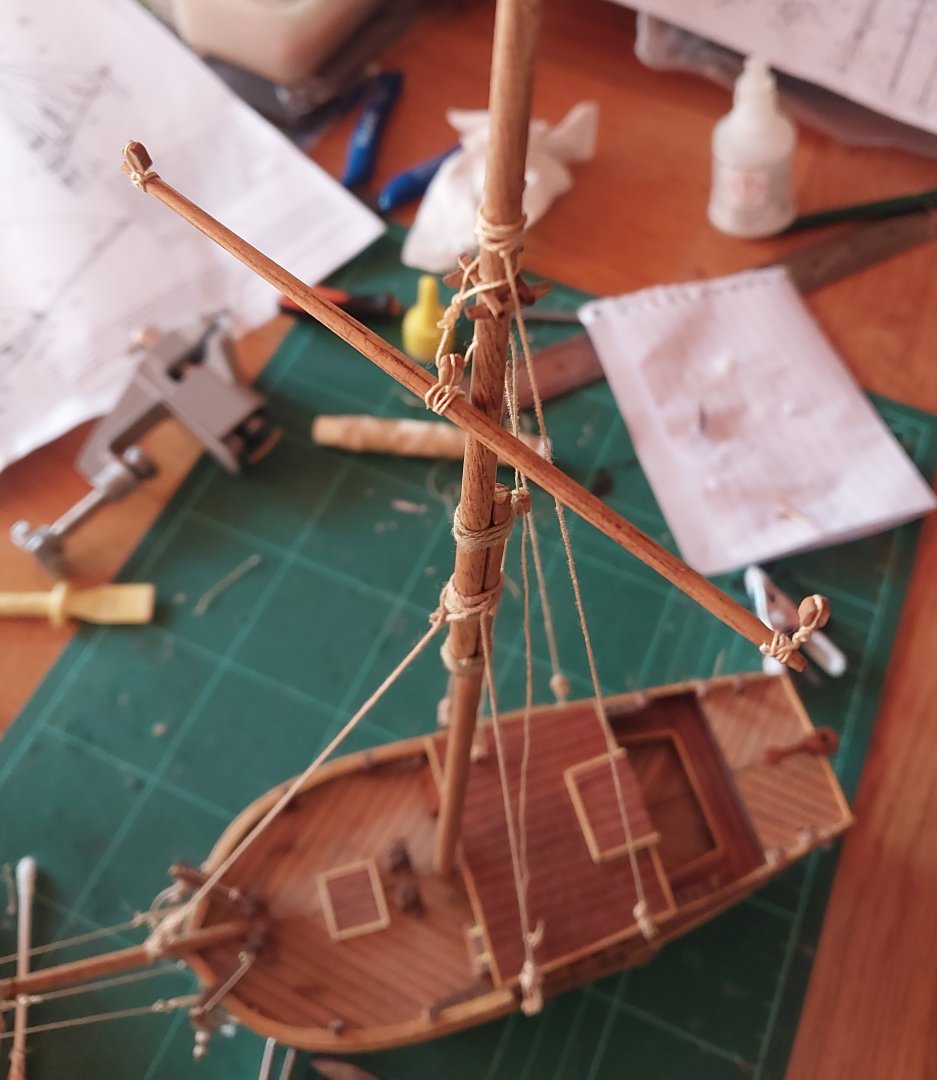
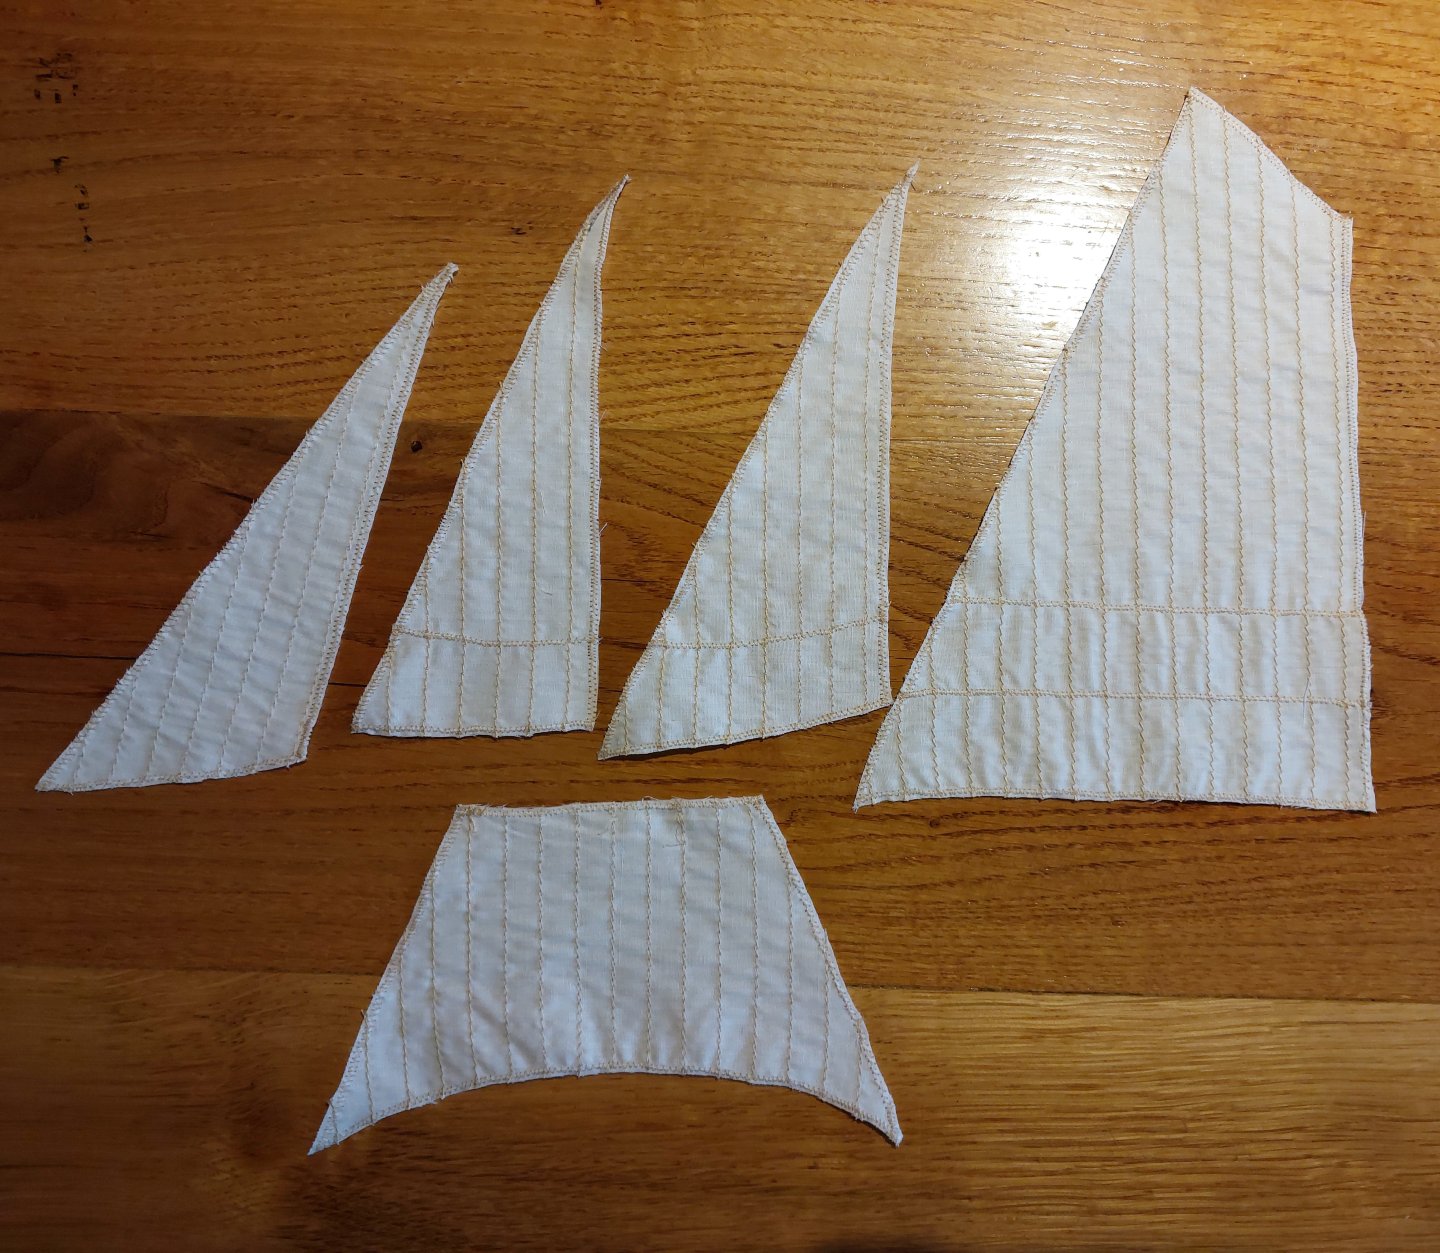
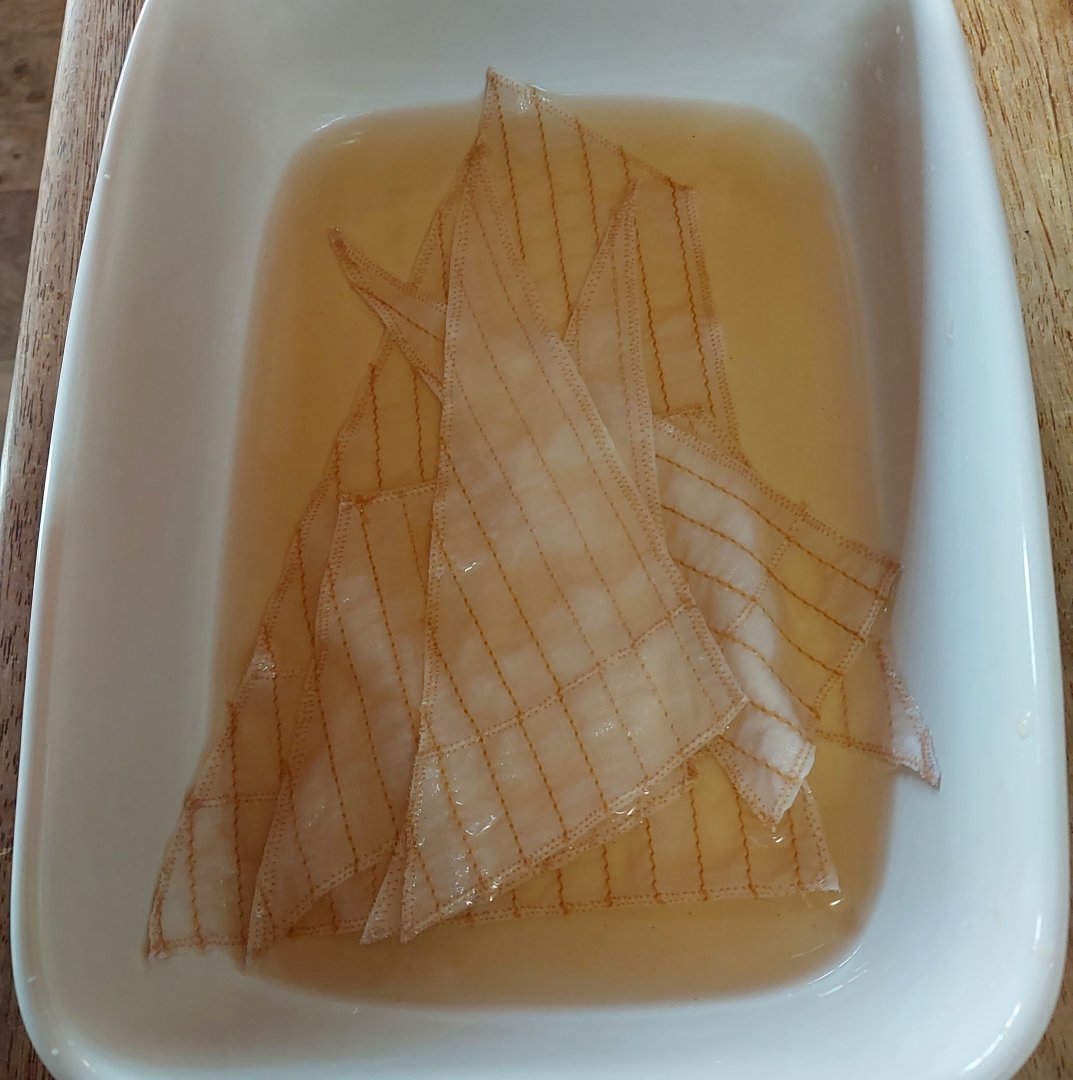
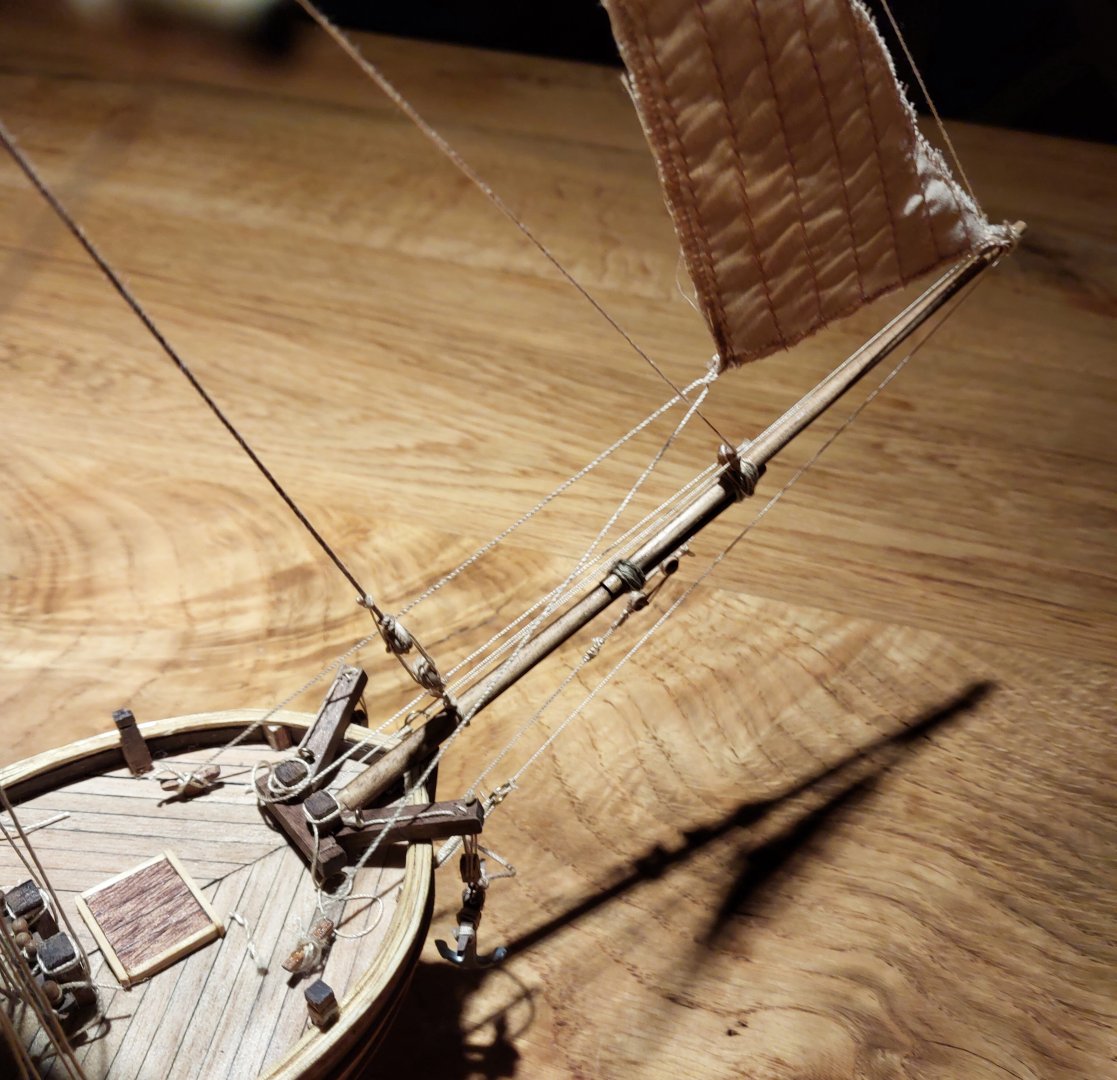
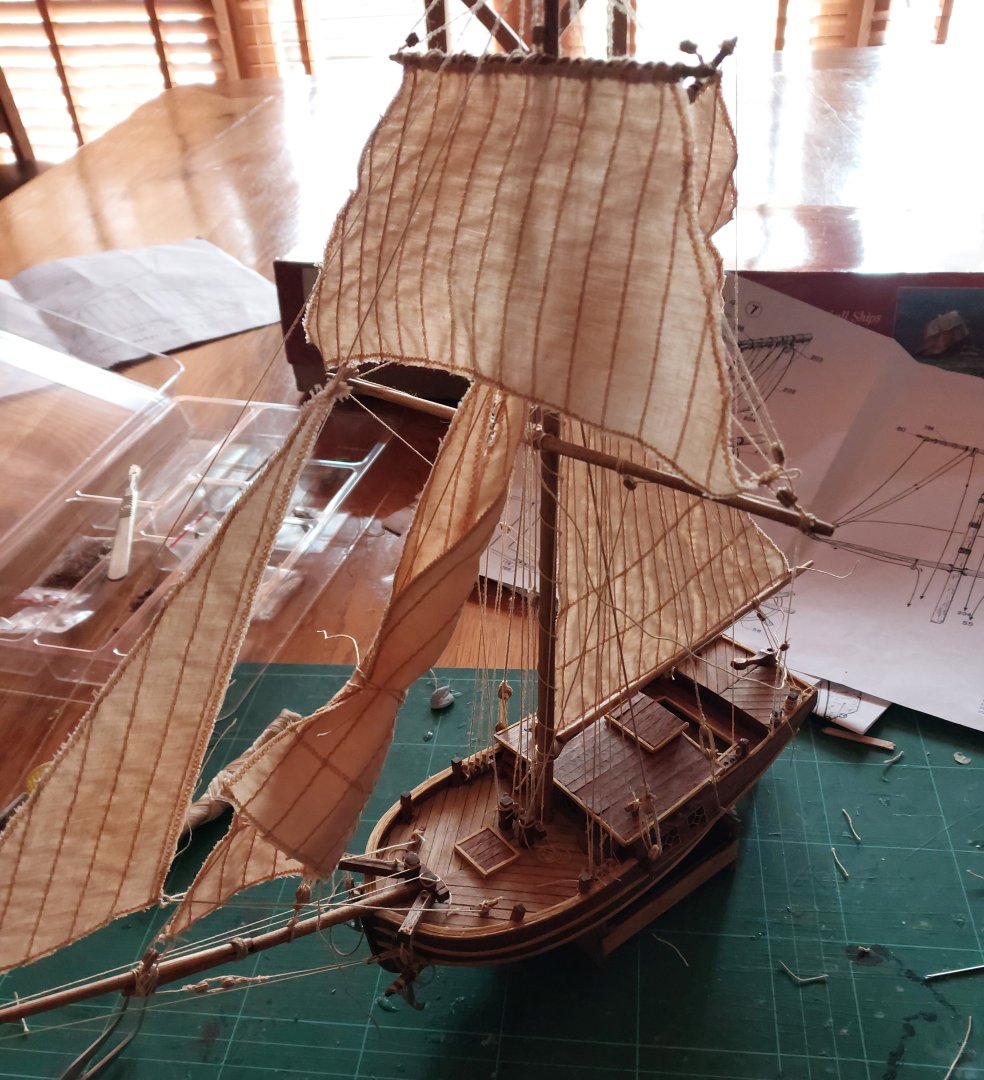
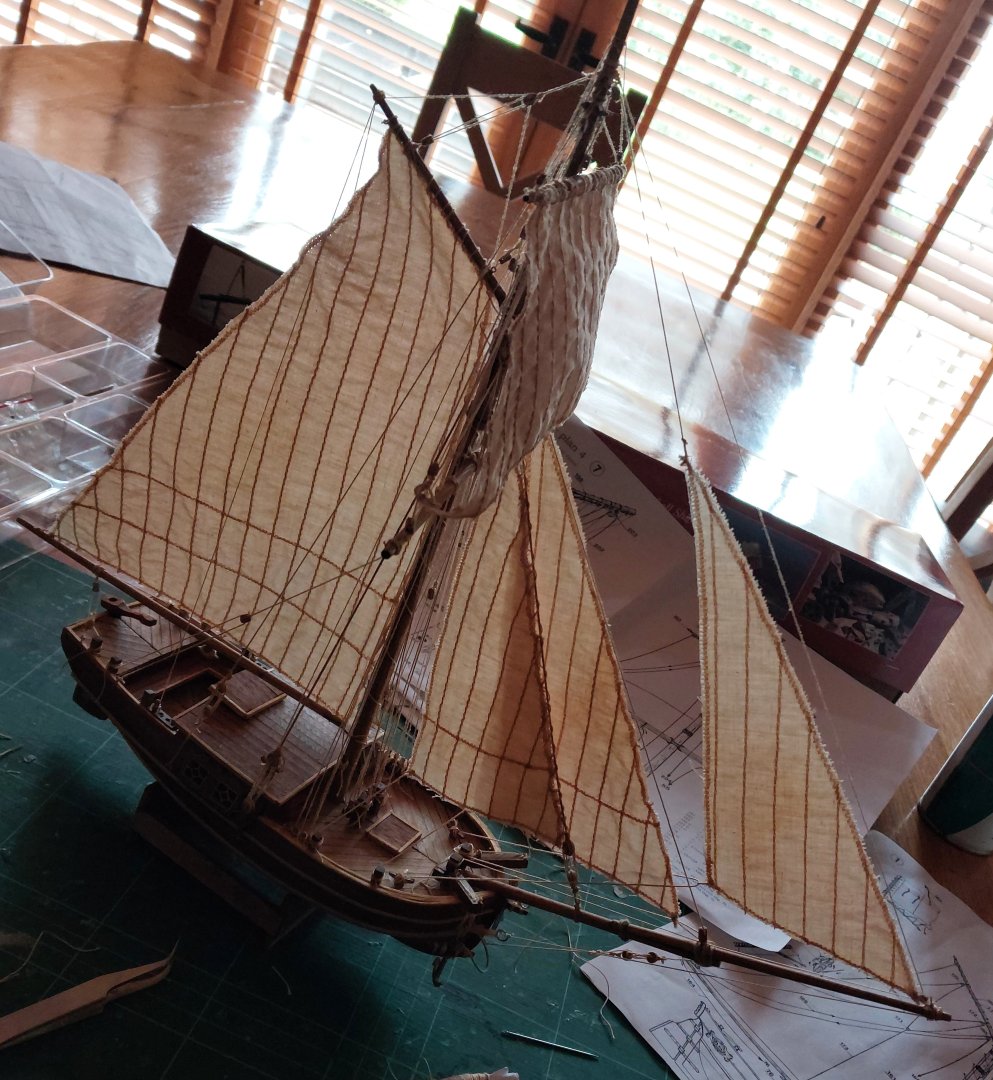
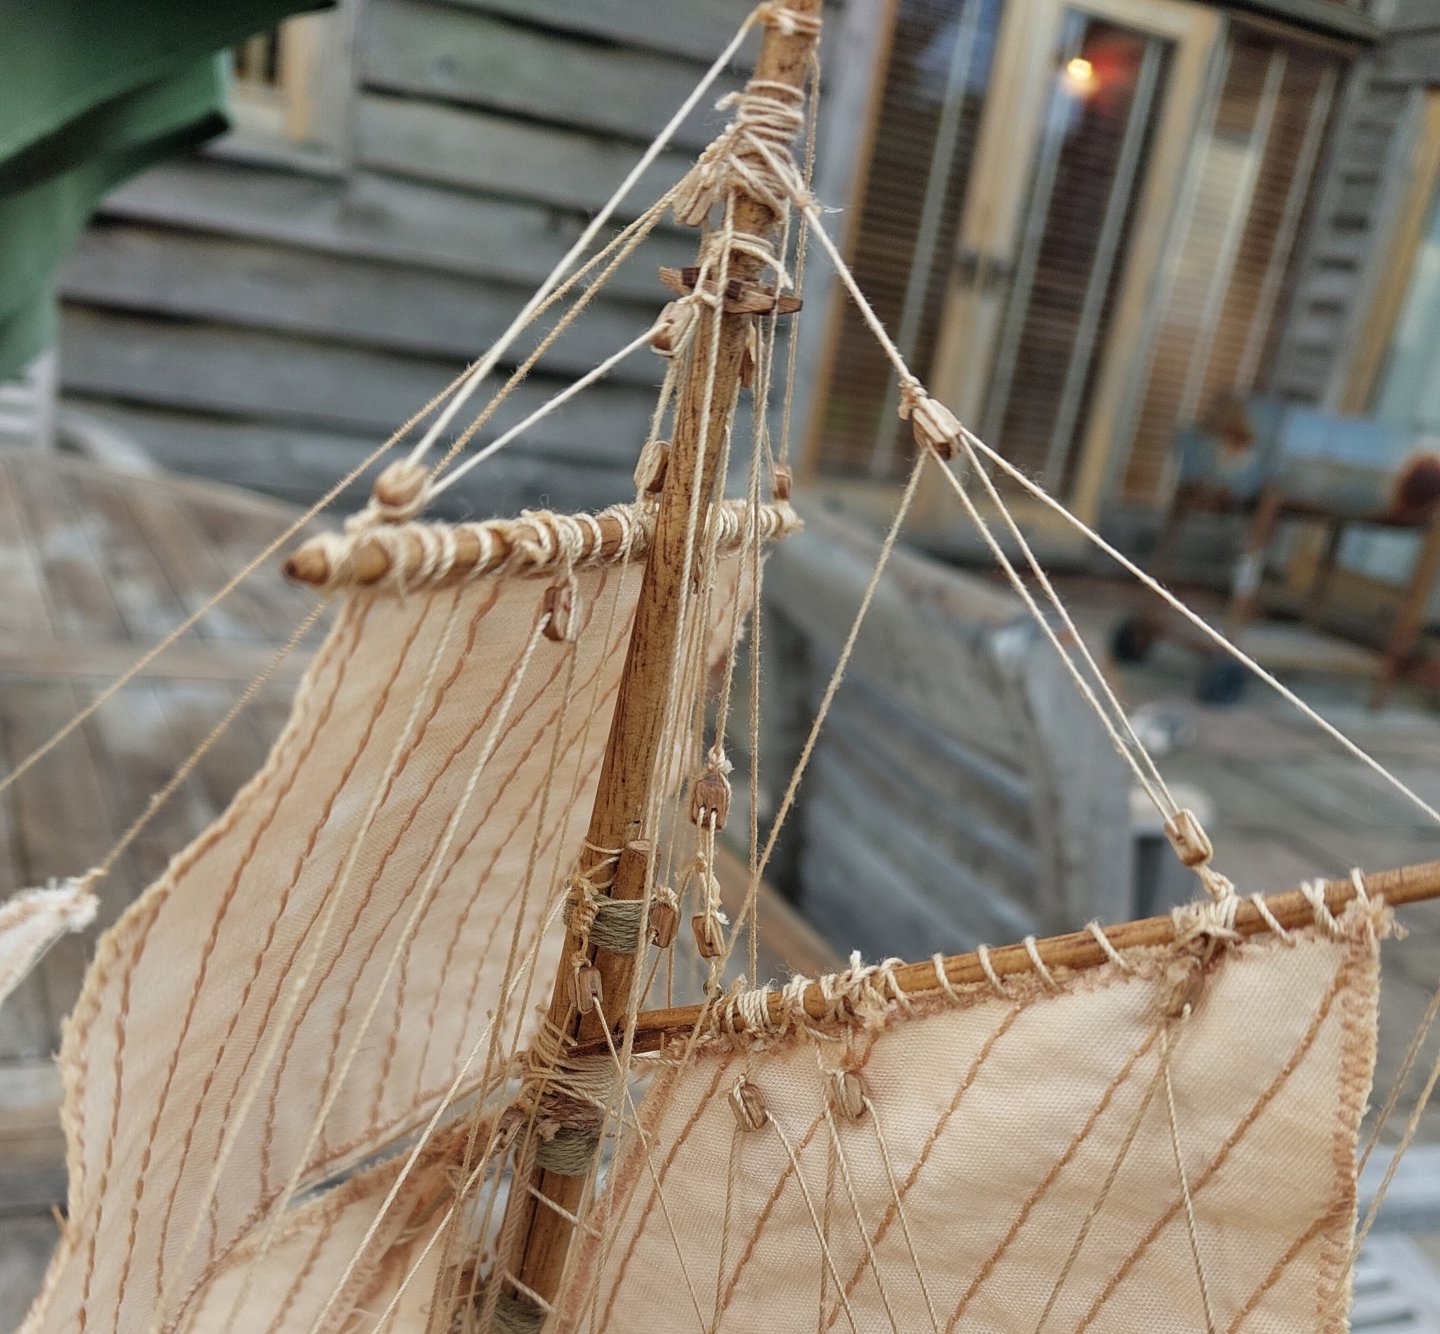
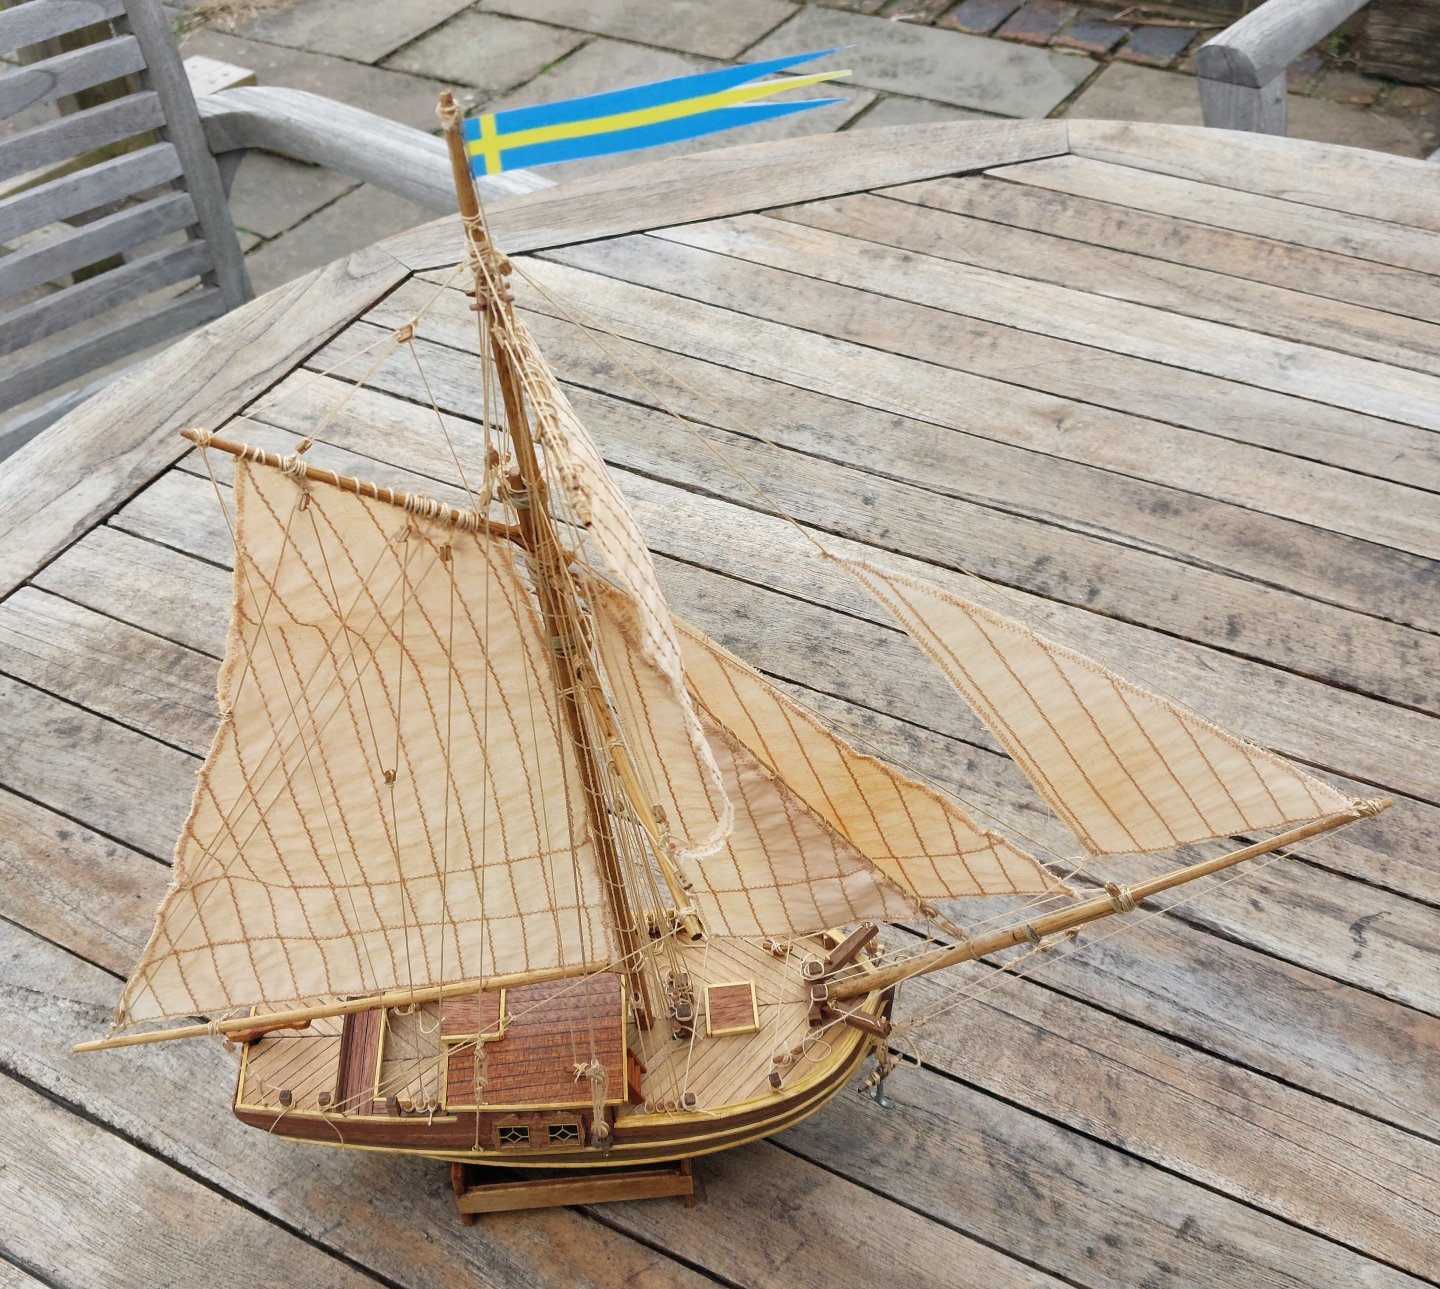
And here's the rigging update... and the sails... and the finale! I ended up being away for a few weekends in a row, and as you'll see below there was some time delay on the sails, so this is an update long overdue. When I left you I'd just put together the deadeyes. Feels like ages ago now! Here's a few photos of the next steps: First, the deadeyes under and above the bowsprit: Then, the lines on either side - I thought these were fiddly as they had to go around the anchor lines. Boy was I waiting for a shock later! Do remember this is my first ever rigging job🤣 Attaching the blocks to the first spar: And putting it in place: Both yards for the square sail attached: And the yard for the top of the mainsail: I started experimenting at this point with what to do with the ends of the rigging lines - I didn't feel that just cutting them all off at the tie point would look very 'realistic', so for a few of them I made little hanks or coils on the deck. Probably a huge trip hazard on a real sailboat! I took her outside for a quick photoshoot in some natural light, with all the spars in place: Ignore that bit of trailing thread... And here's a bit of a timeskip; all the main lines in place and tied off: I smashed through this task quite quickly once I got into the rhythm of it, and really the step-by-step wasn't that exciting for taking photos of. I will say that the instructions given by Mamoli were pretty awful - I mostly just followed the plans. Some more photos of this stage: And then we come to the sails. The fabric sheet that's provided with the kit is fine, but the instructions are really lacking here. Mamoli tell you to 'sew around the edges' before cutting out the shapes of the sails, but even with my rudimentary sewing skills I could tell that this wasn't going to be enough - the sheet would just fray apart once cut out. Instead, knowing I was severely lacking in the seamstress department, I took the instructions and the materials to my aunt, who has a very good sewing machine and many years of experience. She recommended a satin stitch around the outside using some much thinner thread than is provided with the kit. Not historically accurate at all, but in terms of durability, much better. Here's the results: Another note here - we used the 0.25 thread provided in the kit for the seam lines on the sails, and it was nowhere near enough to complete the sheet. I ended up using the 0.4 to do all the rigging lines for the sails because of this. Probably doesn't notice to anyone but me, but still an annoyance. Here's the sails soaking in a nice bath of tea: And, once dry, the first few in place: I sprayed the square sail with a little bit of starch I had lying around to get it to hold a nice 'billowing' shape. Another deviation from the instructions here; the instructions have you lash the front sail to two posts near the bow of the ship. I hadn't even put these on - actually just a mistake on my part - but nothing was lashed to the cleats on deck. I figured that I'd just use these as tie points for the front sail, and I think it looks really good like this. Only a minor change, but worth noting. Here's the other two sails on, tied back for easier access to the tie points and belay pins on the deck: And here's all the sails tied on, just waiting for the hauling lines on the mainsail now: And so, with the final lines tied and the flag glued in place, drumroll please: Overall, this was a really fun experience. I have a few gripes with the kit, and made a fair few adjustments - I didn't put any of the included decorative metalwork on, for example - but really this was a very accessible model with very few frustrations. The wood has come out extremely nicely, and despite my relative lack of boatbuilding knowledge I had an extremely good time with this. The rigging was initially very daunting, but once I got started it was quite straightforward, and other than the sails I found everything was within my wheelhouse when it came to modelling skills. I already have my next kit on the table, but you'll have to wait and see what that is. Thanks for following along!


-
Thank you very much!
-
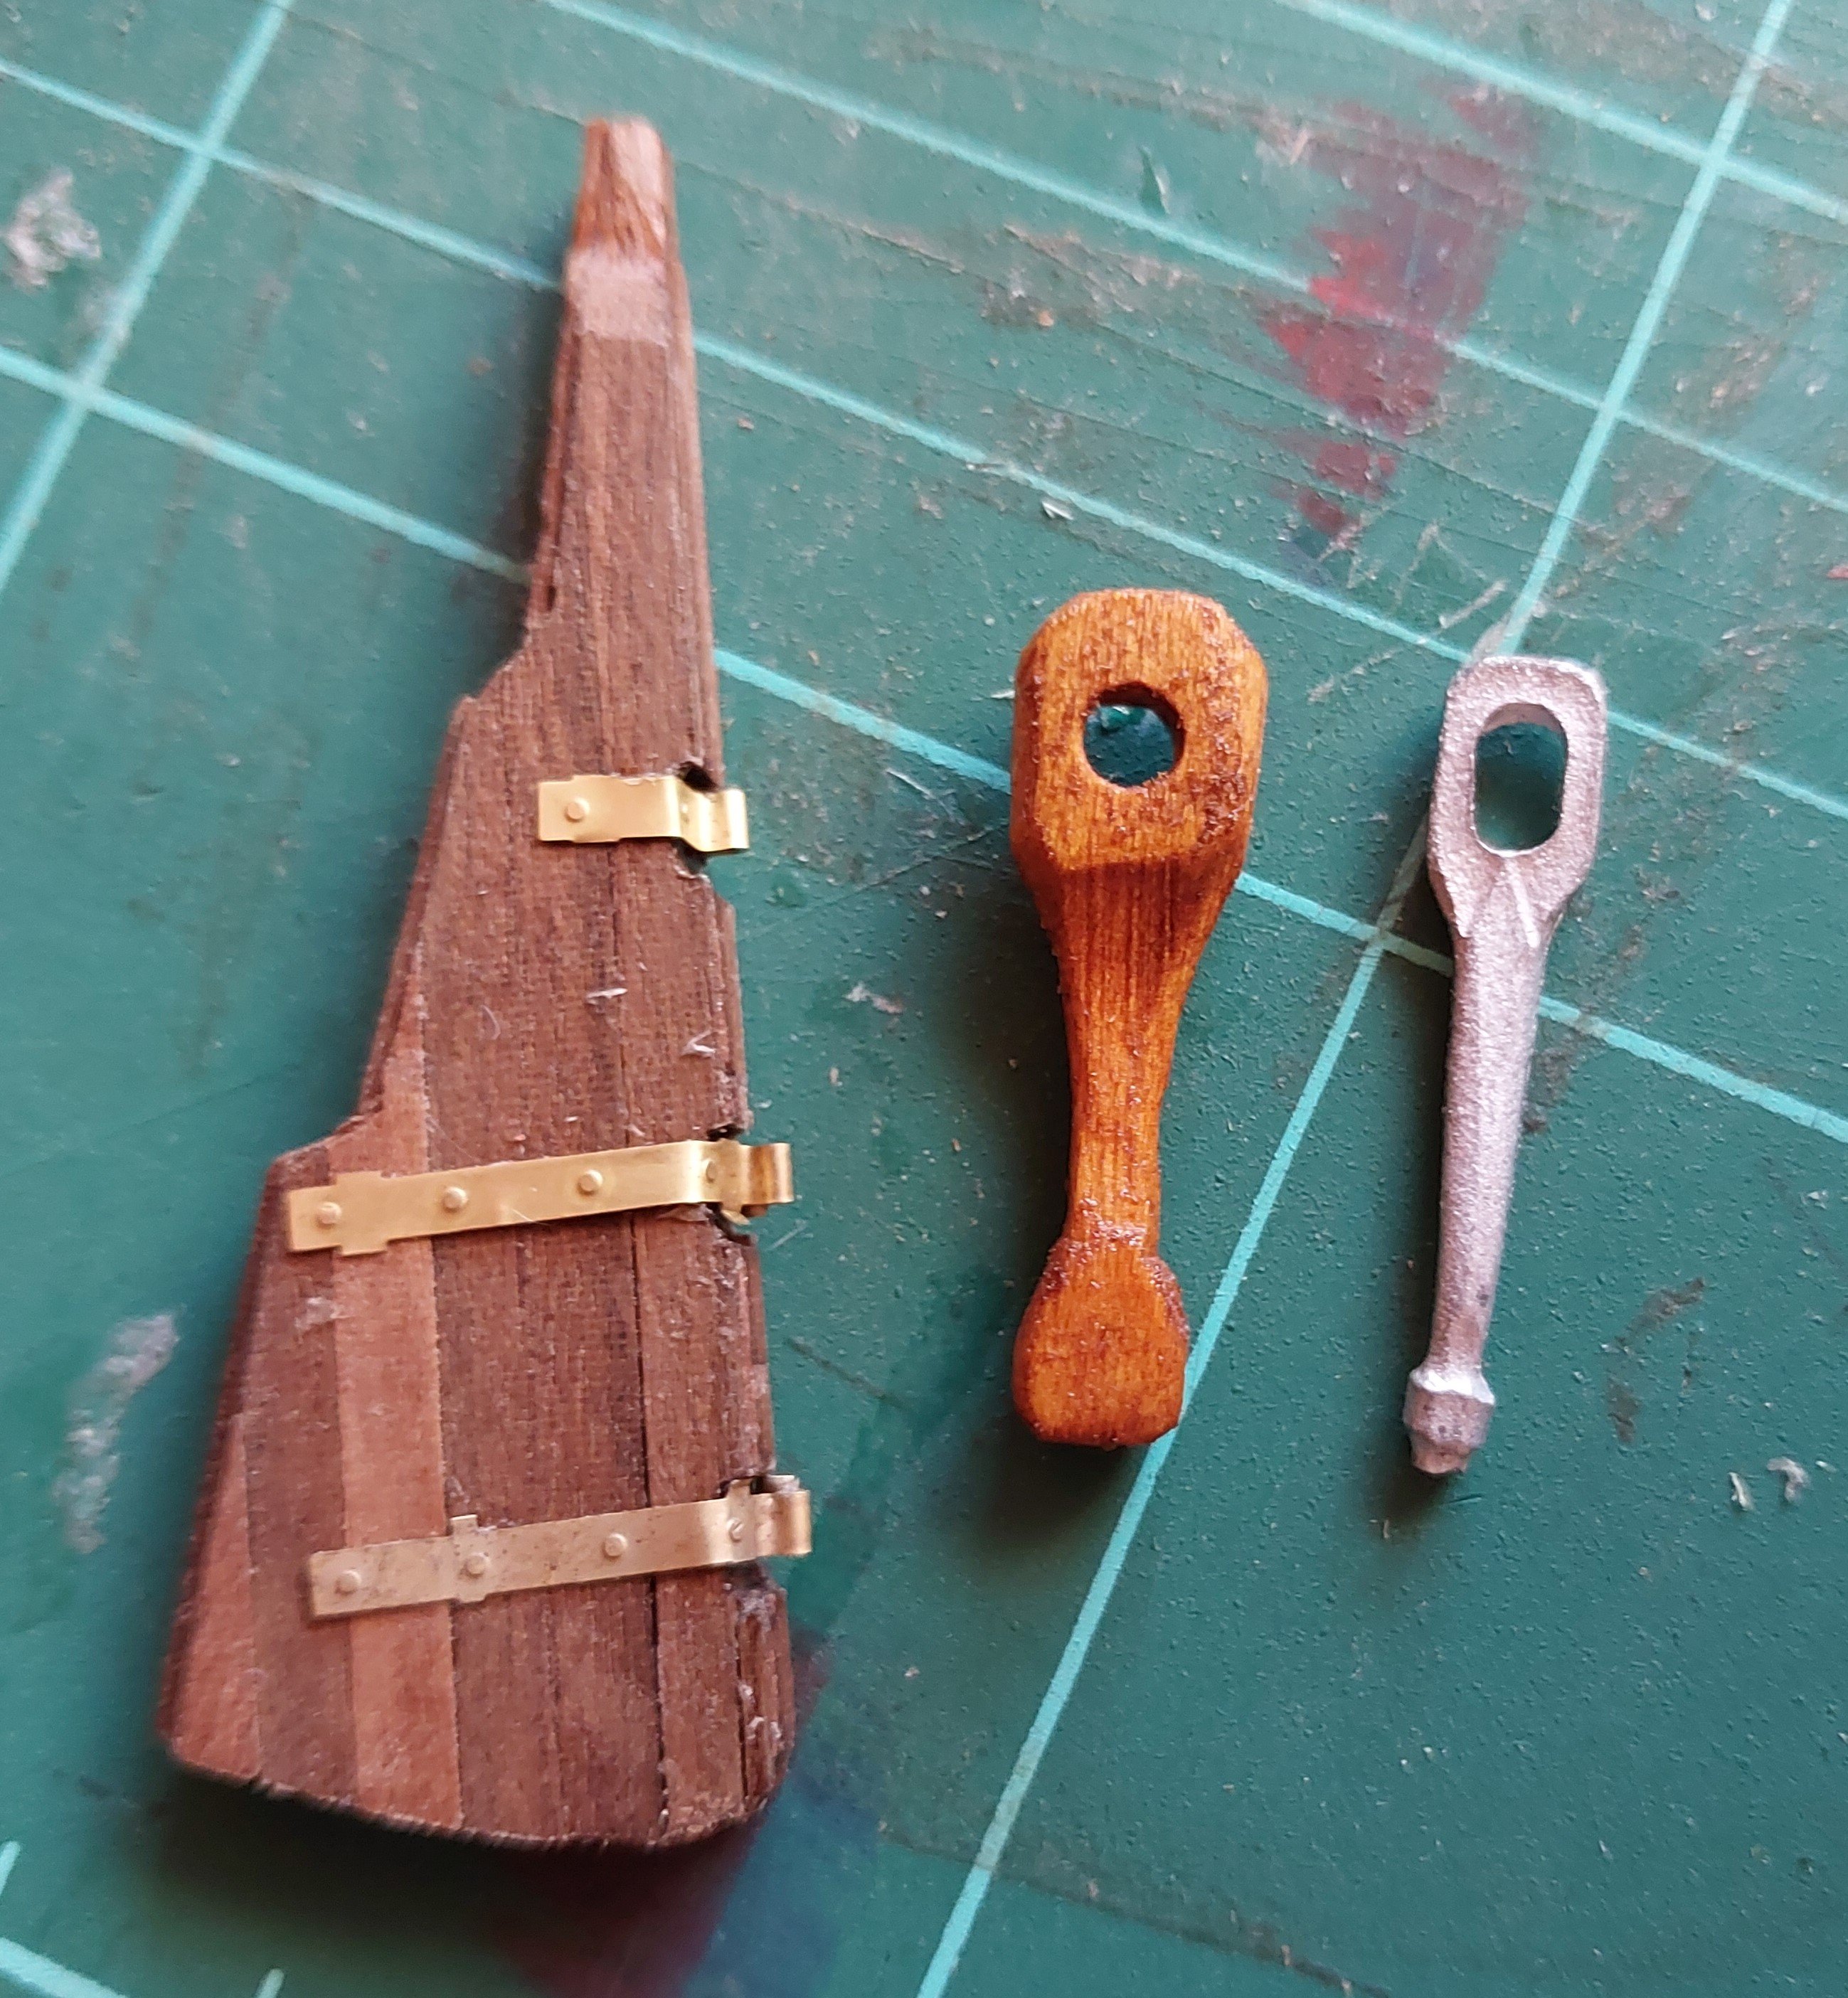
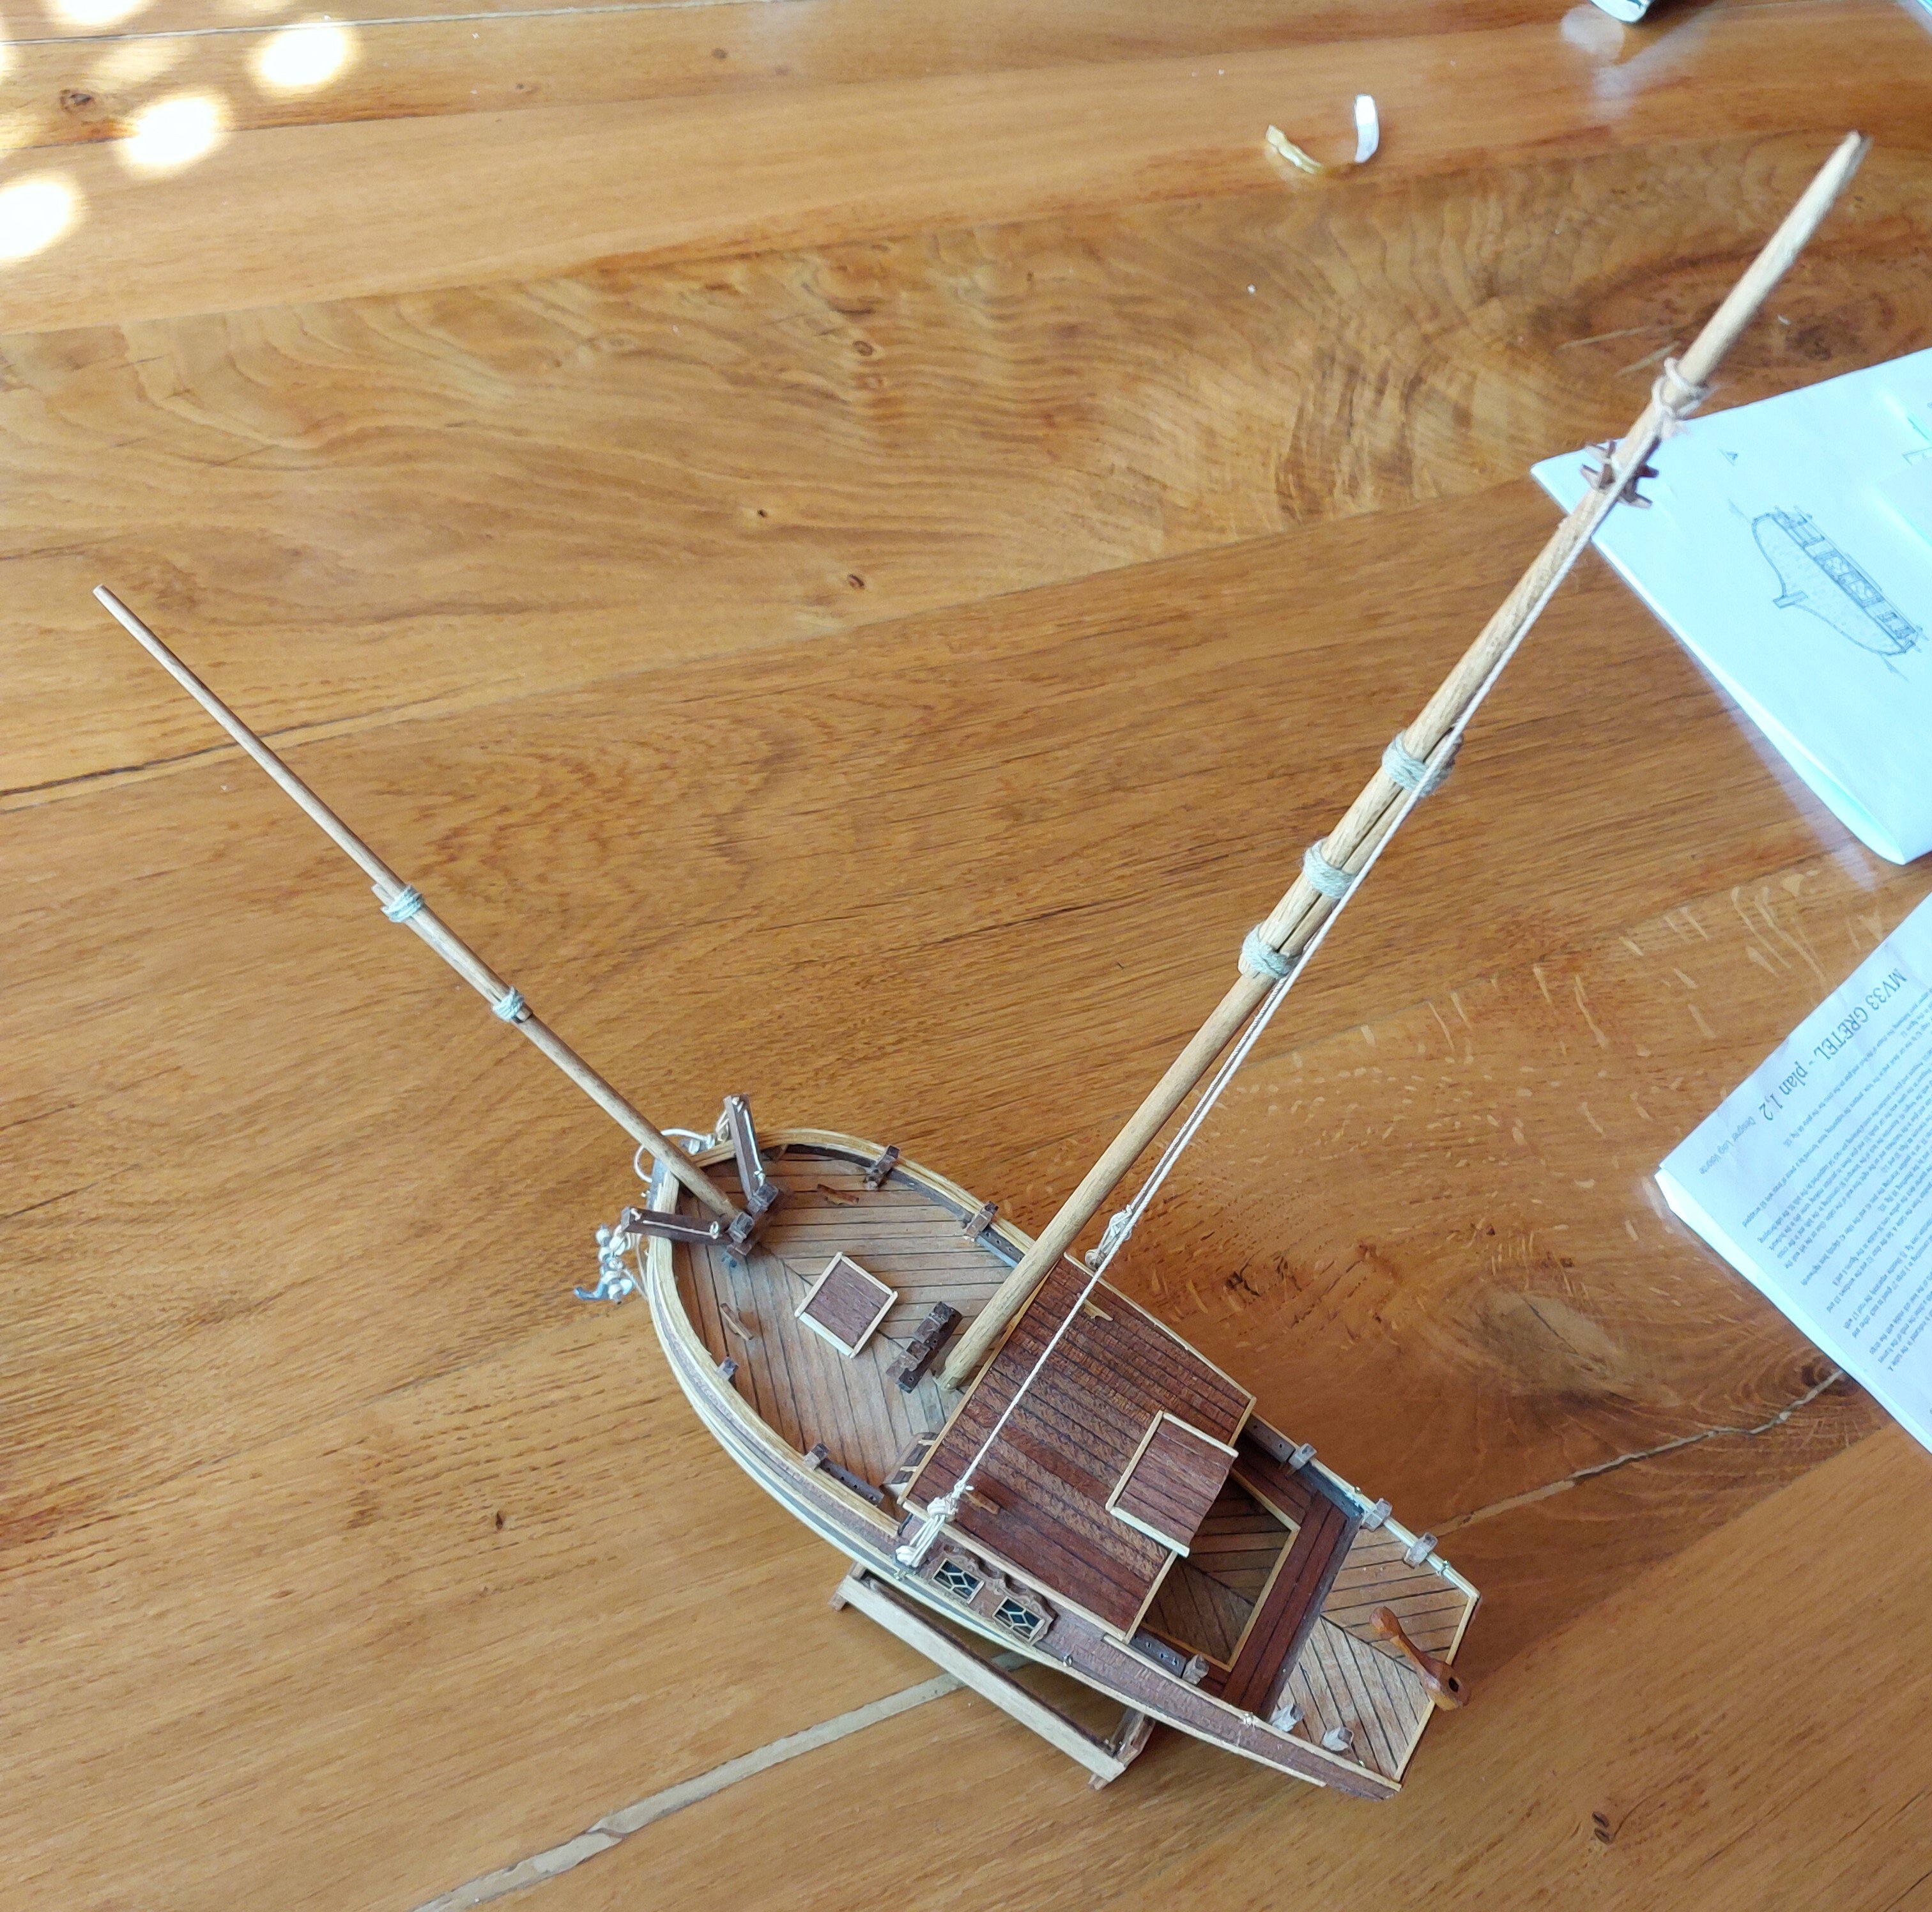
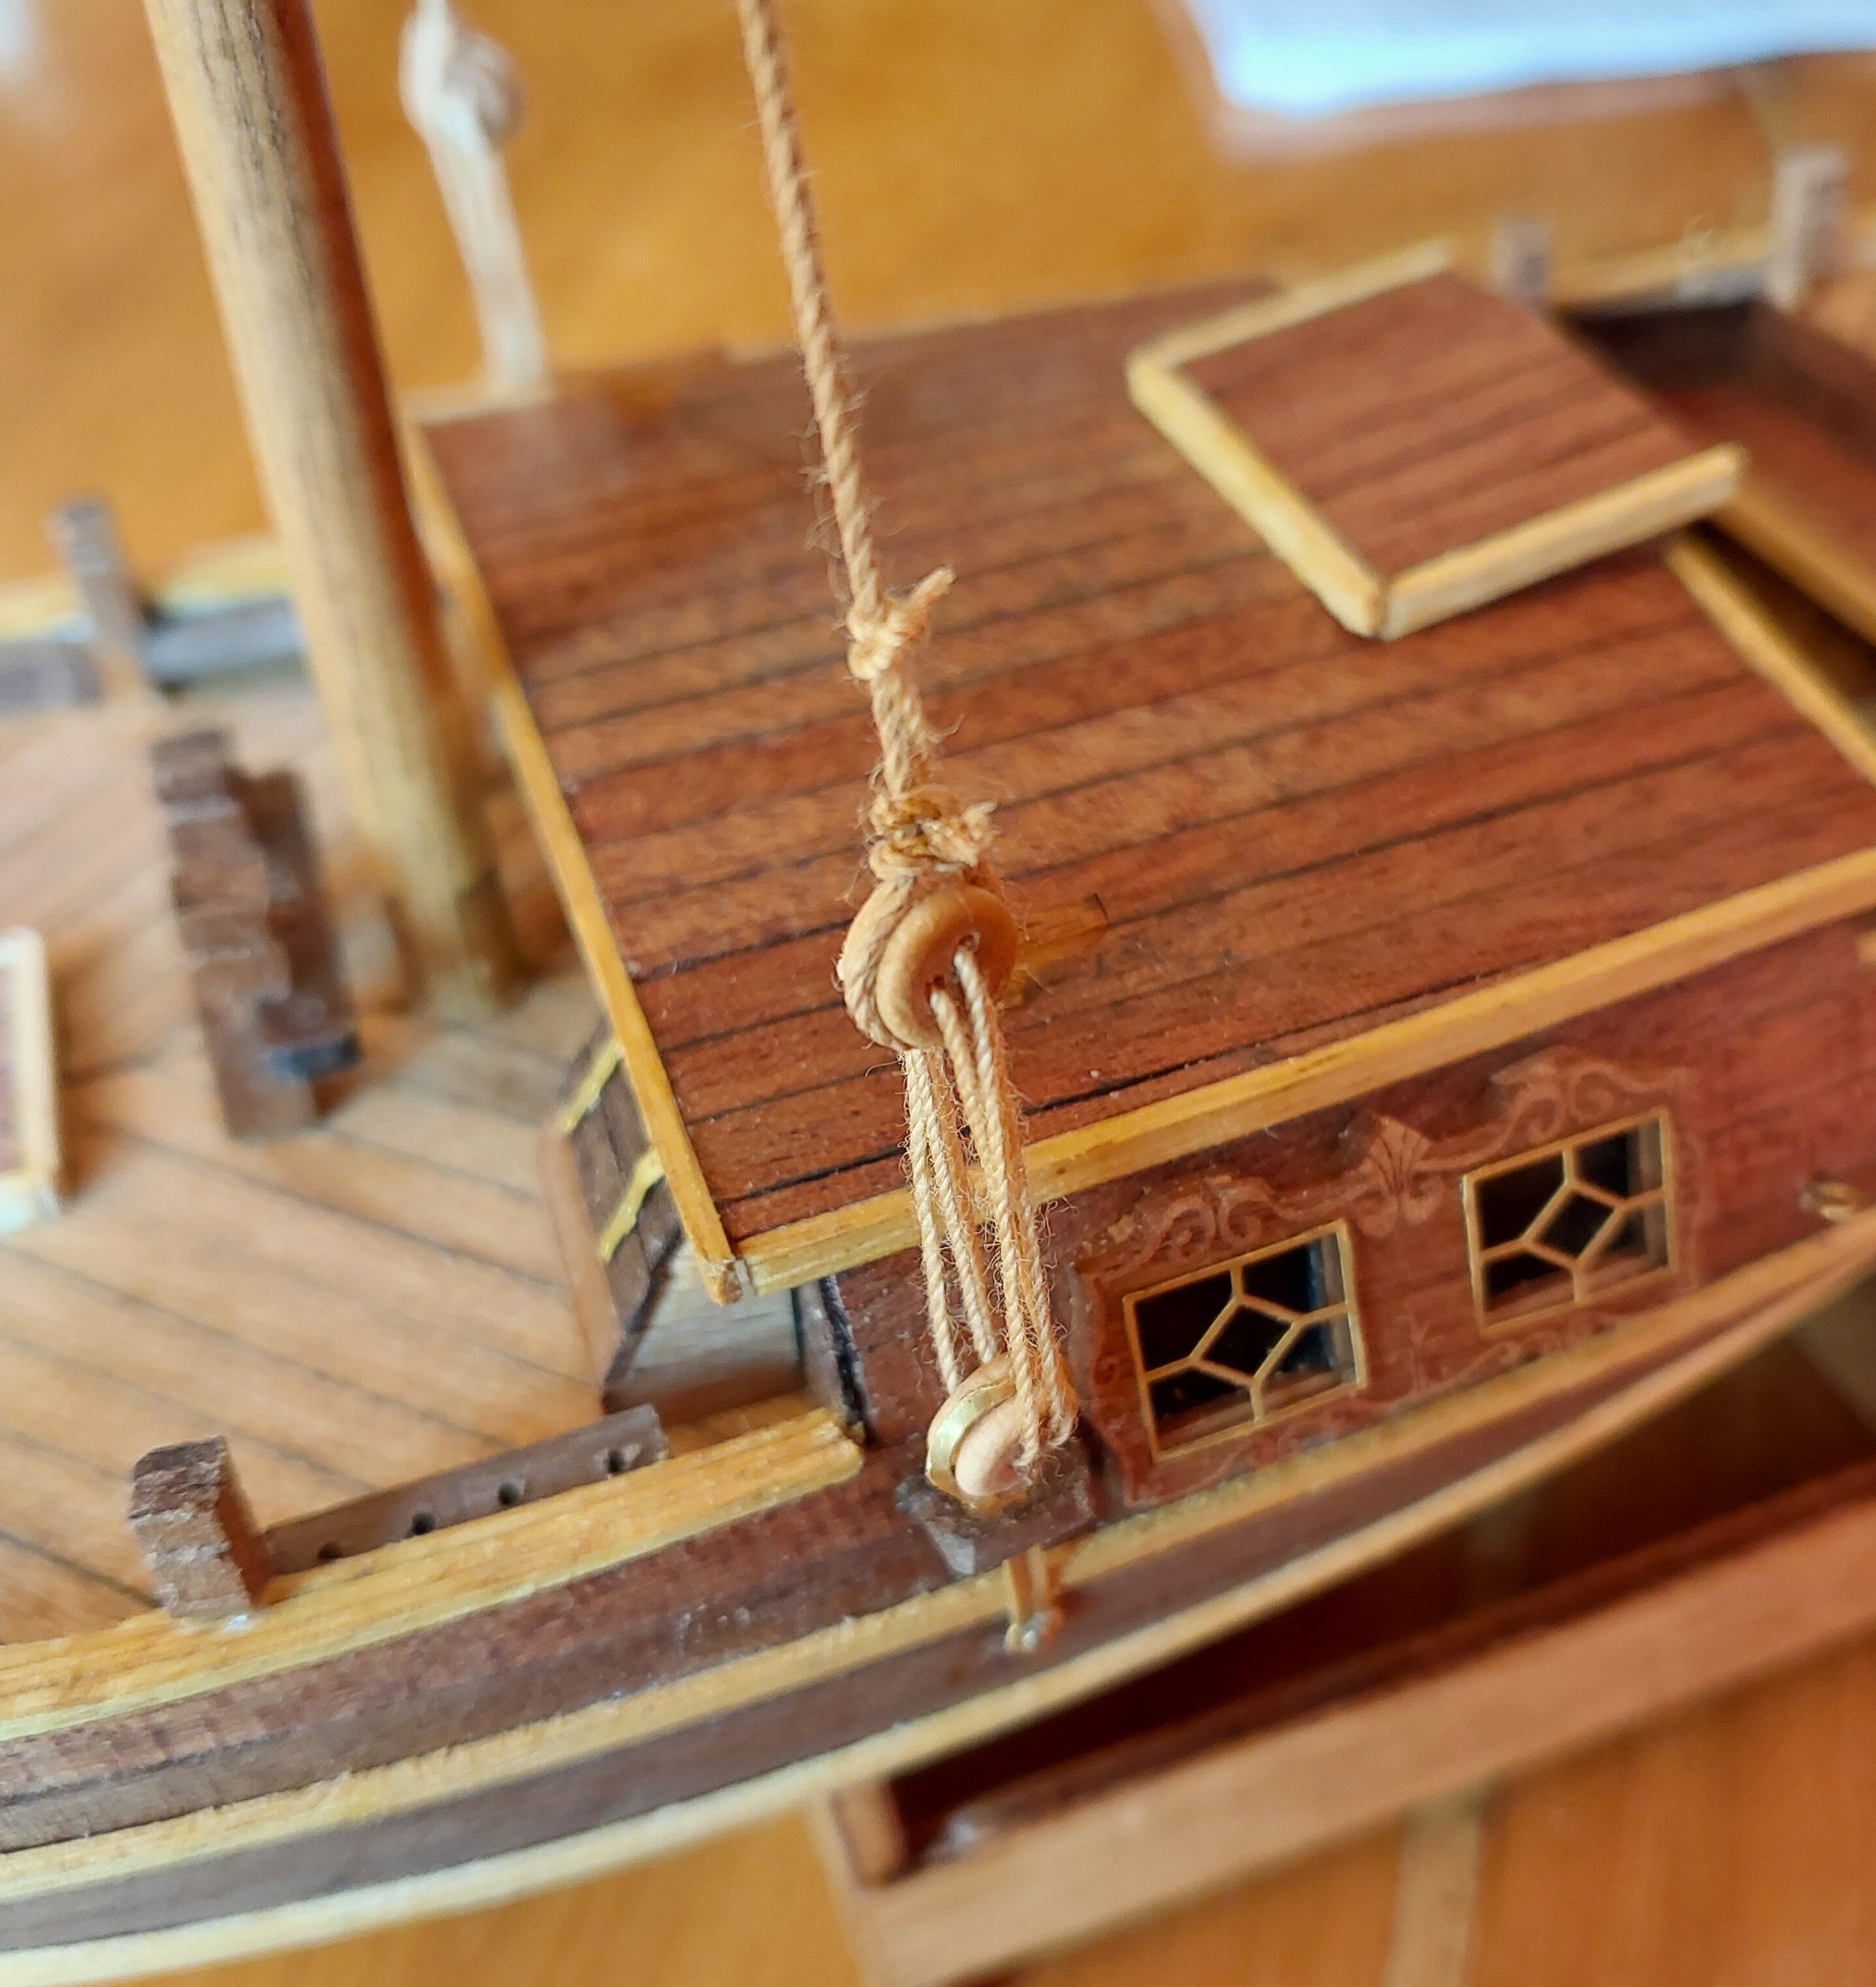
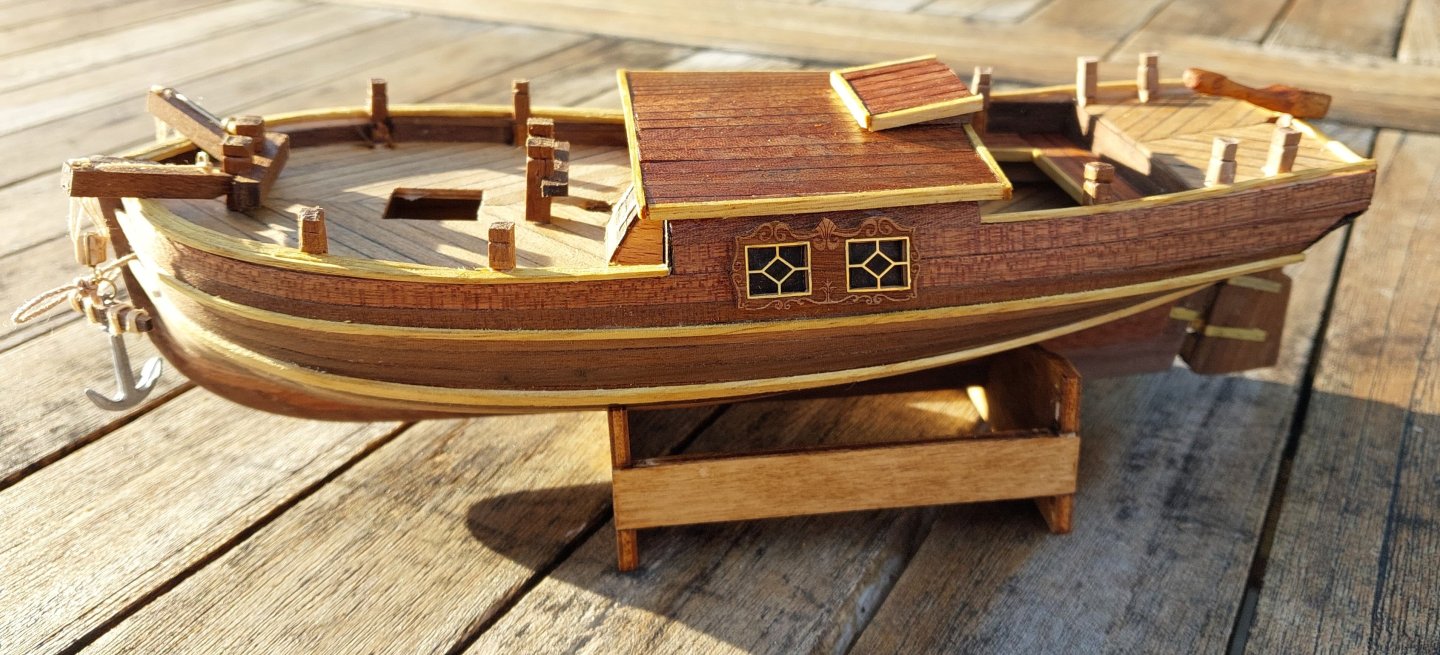
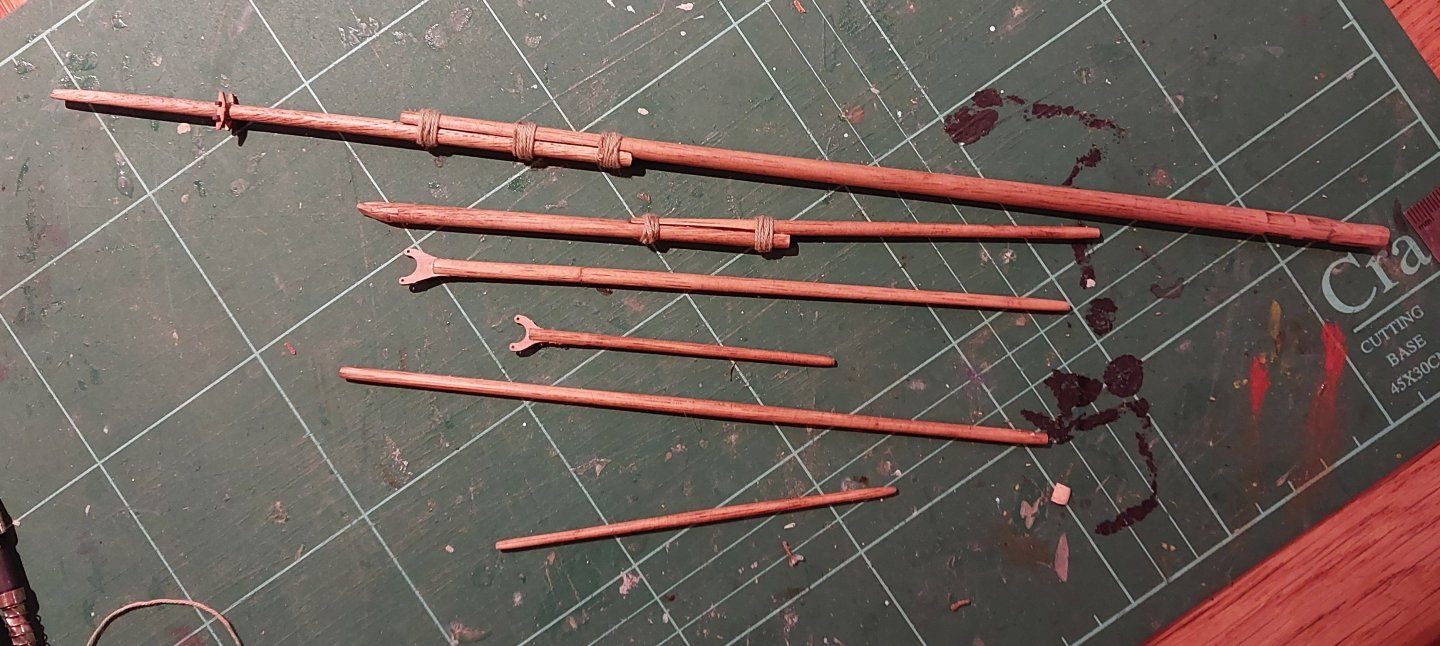
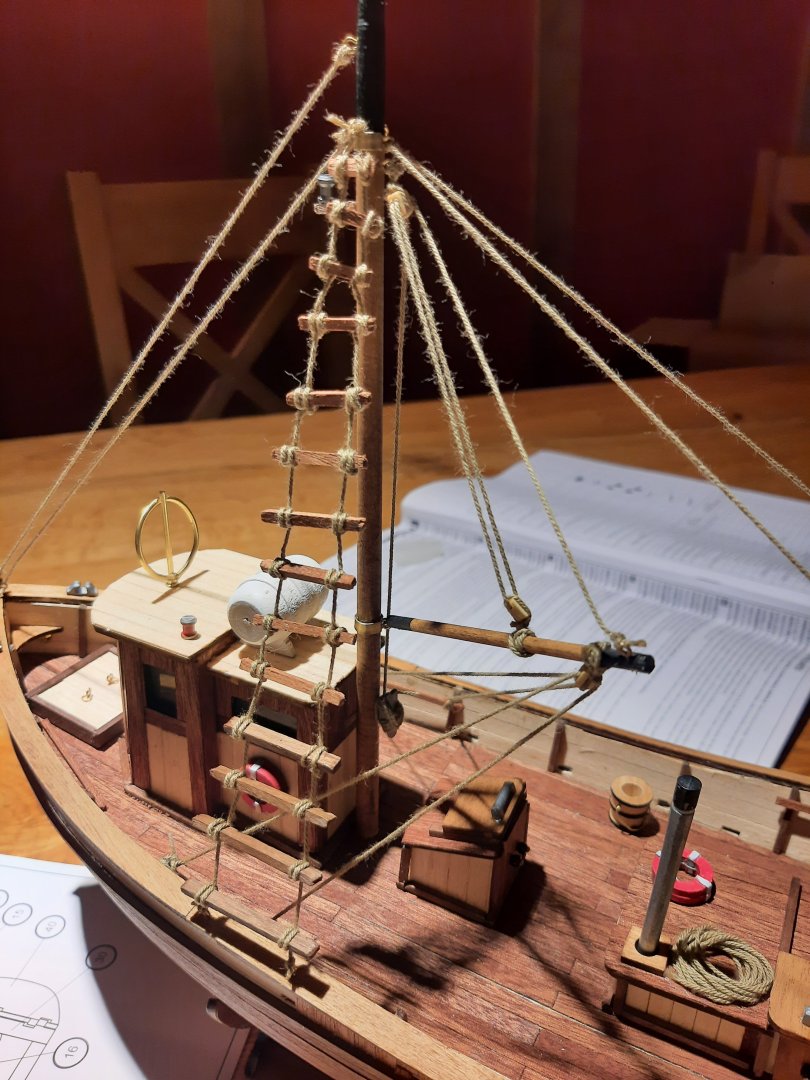
Another week, another update to my build! I'll start this one out with the door and windows. I stuck some paper to the inside and painted it black, as I didn't want to scratch build an interior. Maybe a challenge for a different build! The photo-etch brass for these was a little fiddly, but I found the best way of manipulating these was to let a pair of tweezers open up inside one of the gaps, as opposed to pinching an edge. Not too much trouble. Here's the build with windows on and the roof attached: I'm a real fan of the wood types provided with this kit. Here's some of the deck superstructure: The instructions show some lovely tapers on the top of each of the blocks here. I'm not that skilled. I found a nice approximation of it was to lightly tap a chisel round the top, leaving a little indent. I think it passes muster, but I'd love to get some tips on how to improve that. Here's the roof of the companionway, and you can also see I've started putting on the small posts round the handrail. I've also improvised a handrail on the rear decking - there wasn't anything in the instructions to do this, but I felt it needed something. Next was the rudder and tiller. The photo-etch hinges were a lovely change of pace to my OcCre kit, where I had to fashion the brass myself - I annealed the first hinge but honestly don't think it was even necessary here. The kit comes with this rather naff-looking cast metal tiller. I decided to carve my own out of a bit of spare lime I had lying about. It's a bit chunky, but with a coat of french polish I think it fits in with the rest of the ship. Here's some photos of the ship at this stage - mostly complete with a few final details to add. There's an important point to make here - Gretel comes with a number of cast metal parts, including a decorative plate to put over the transom, and some plaques that sit on each side of the stern. I think they look terrible, and would require some serious painting to improve, so I've left them off. I planked over the transom instead. I might come back to this down the line, but I'm really not keen on this part of the kit. Not historically accurate, but I'm not sure how much it matters at this point. I also haven't attached the figurehead for similar reasons, but I'm much more tempted to stick that on - I may simply apply a dark oil wash or similar to give some life to the metal. Here's the spars and masts shaped and ready: To taper these, I used the same method as with the Palamos, locking them into the chuck of a drill as a makeshift lathe. I think an actual lathe might have to be a purchase at some point, but I'm really not sure what to look for from a hobbyist's perspective - surely a full woodworking lathe would be way too big? Another note - I think the kit was short one 4mm dowel rod. One of those spars was until yesterday supporting an orchid in a flower pot. You'd never know! Test fitting the mast and bowsprit: Also note I covered the hatch in the foredeck with an improvised cover. The instructions call for this to be open with steps leading down, but without an interior I thought that looked stupid, so I've closed it off. And the first rigging in place: The rigging is quite overwhelming to look at, much aggravated by the awful layout of the instructions, which I know I keep harping on about. Incidentally, I found a key to the wood types (which I complained about in the first post) in the middle of the rigging section. No idea how I missed it before, but there you go - I take that criticism back. Nonetheless, I found some success with the first blocks: And whilst my knots might not be historically accurate or ship-ready, at least she's looking neat. I'll come back in a few days with a (hopefully) complete rigging update... before we tackle (pun indended) the sails. Cheers for reading!


-
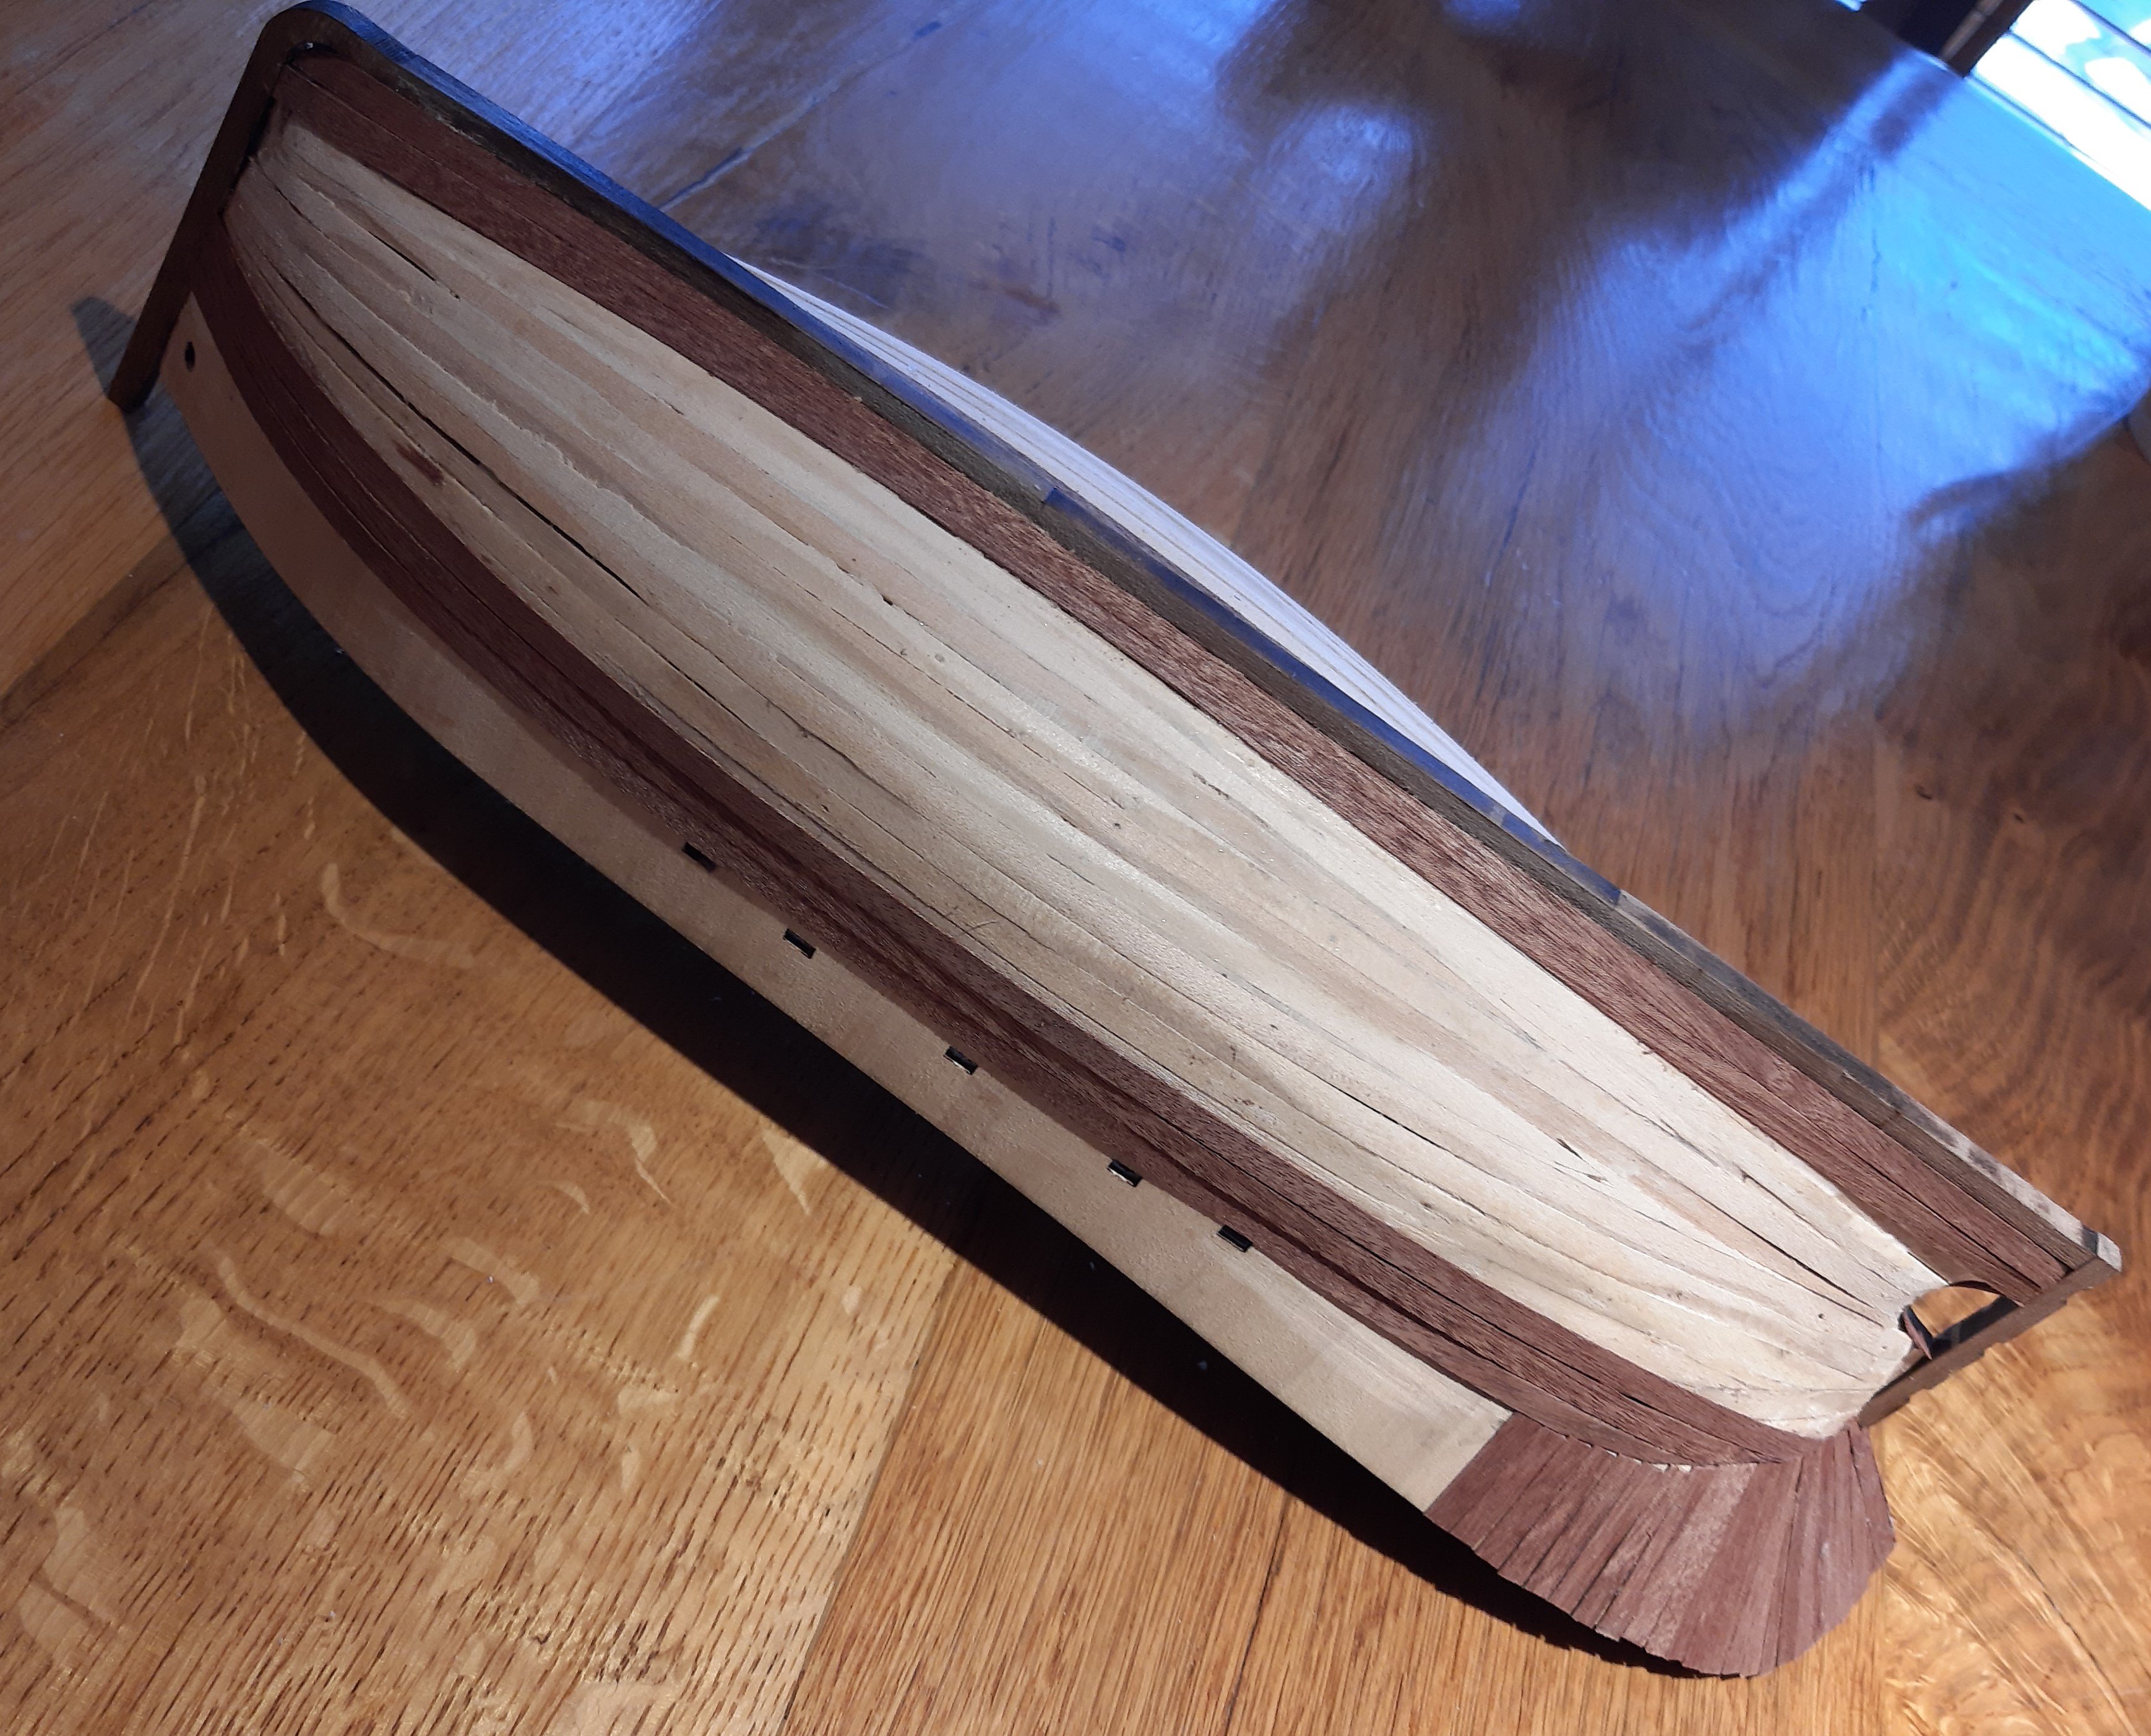
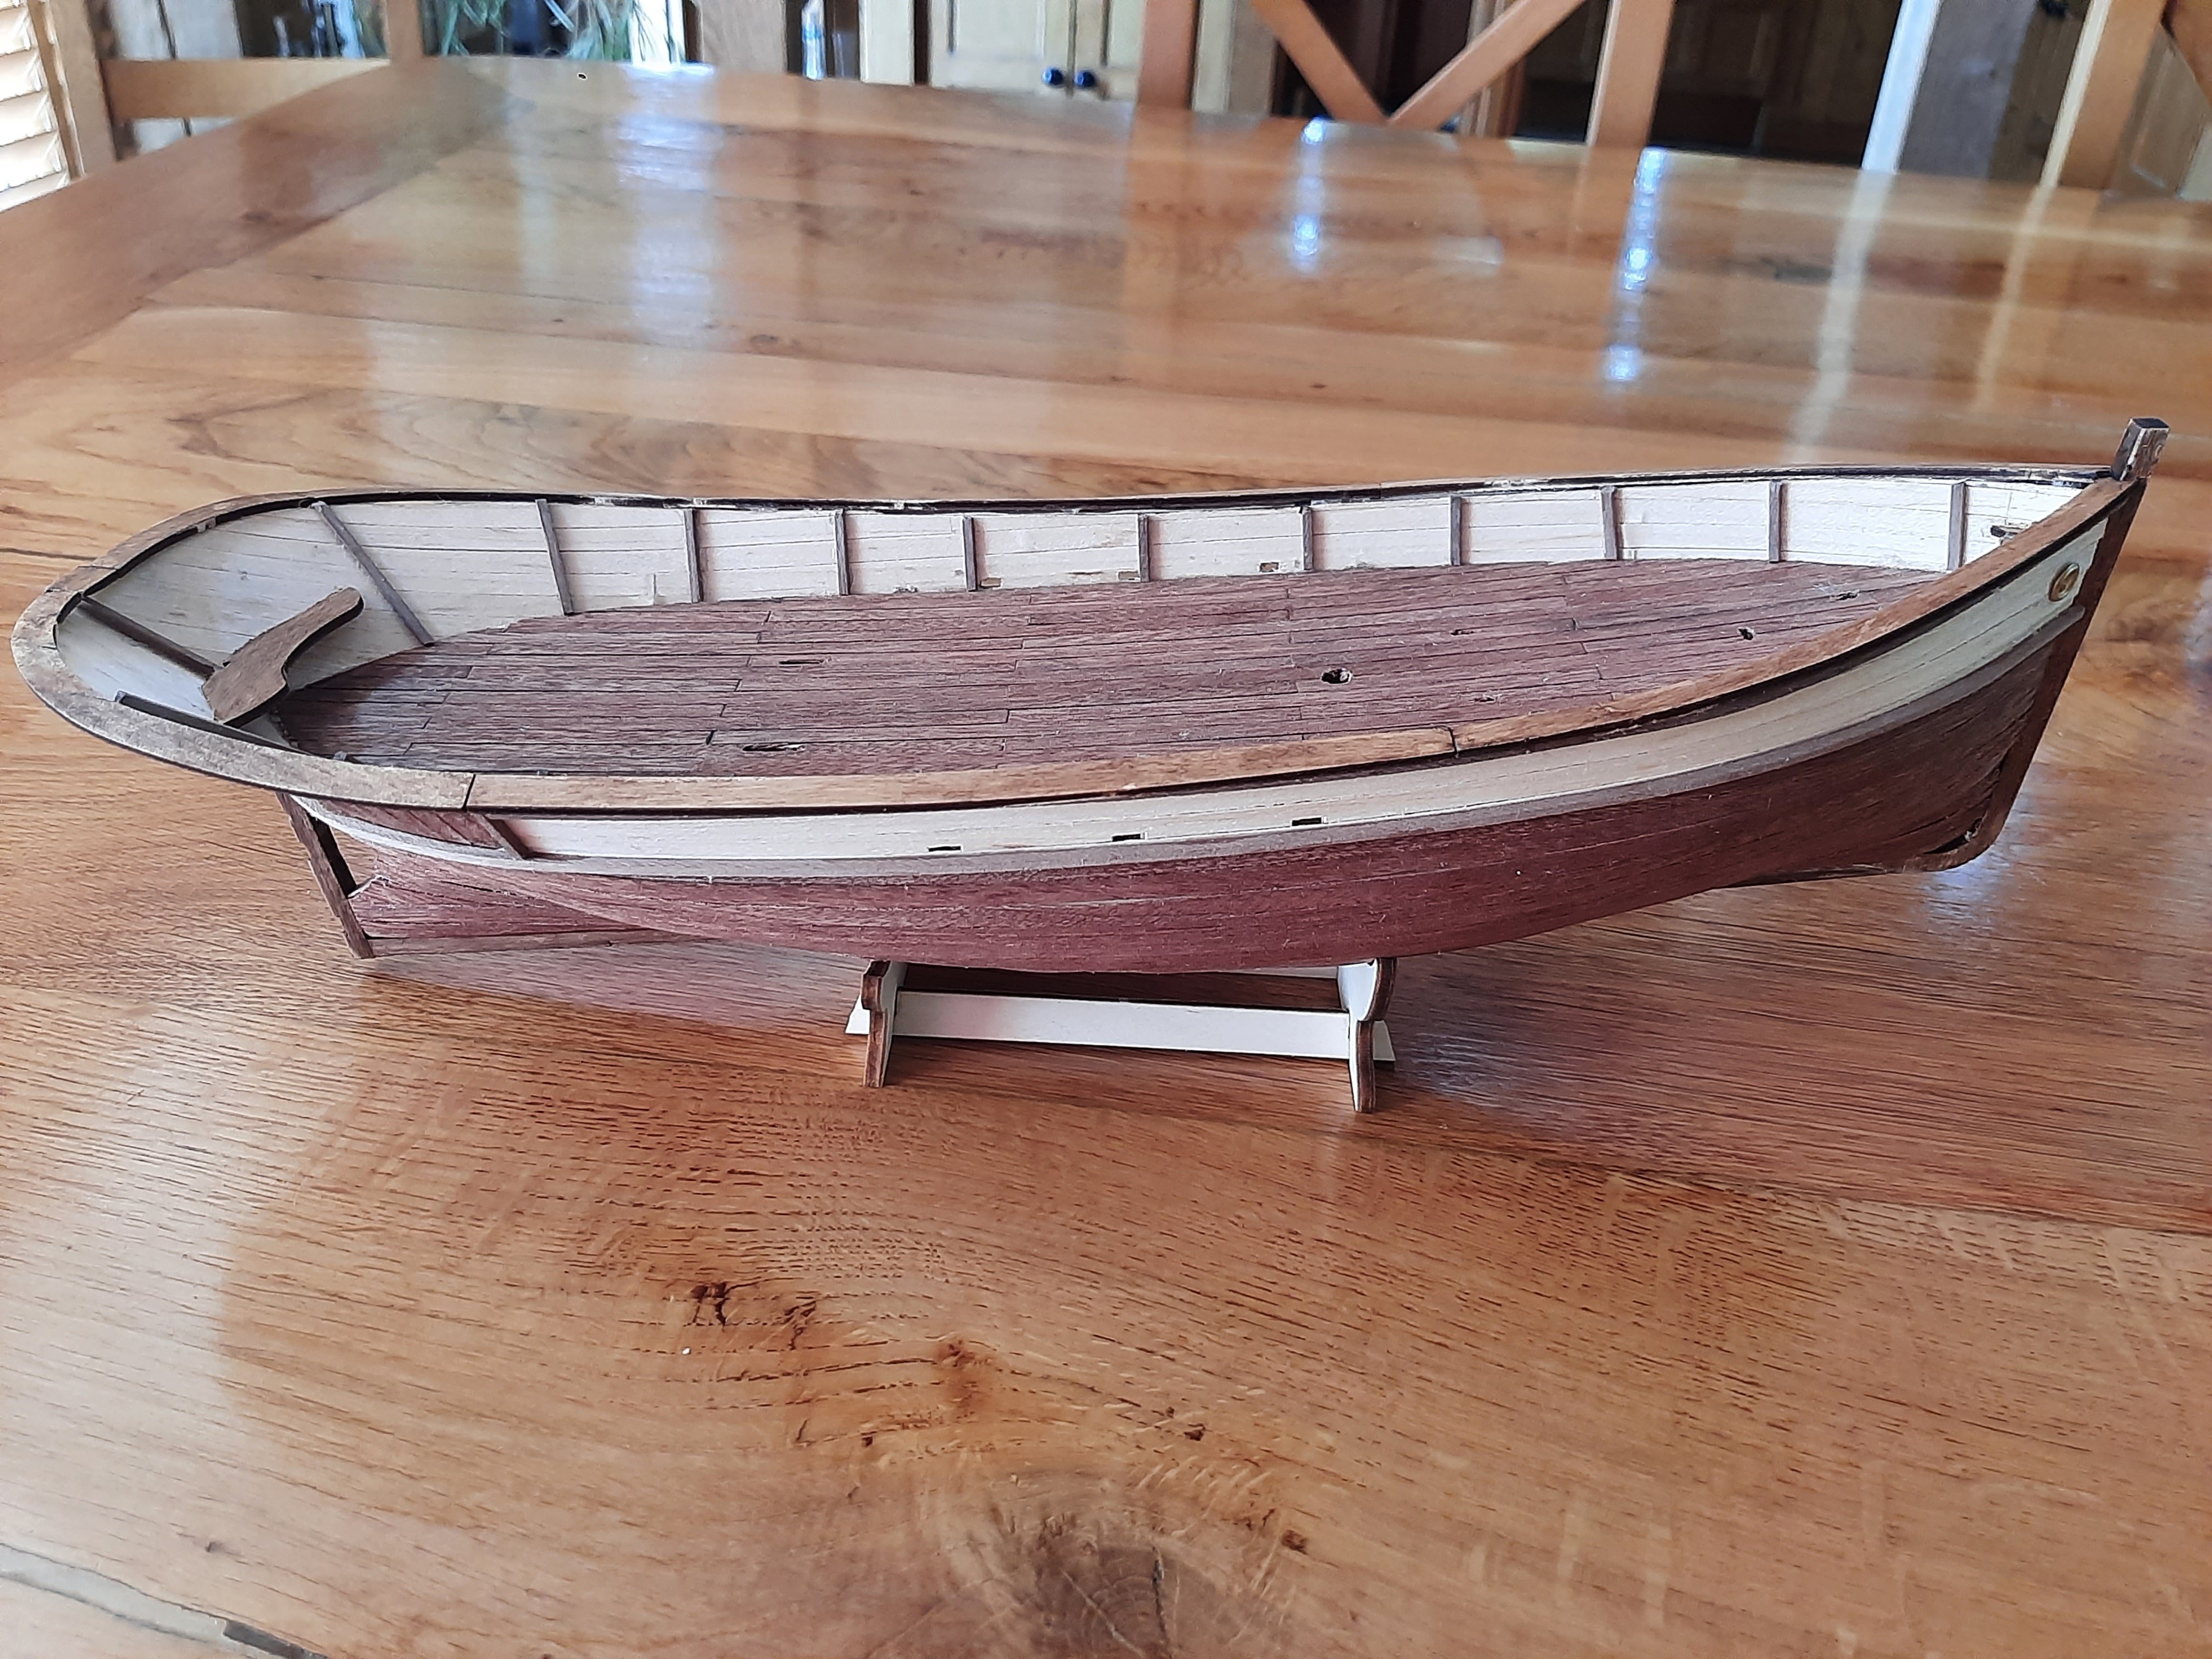
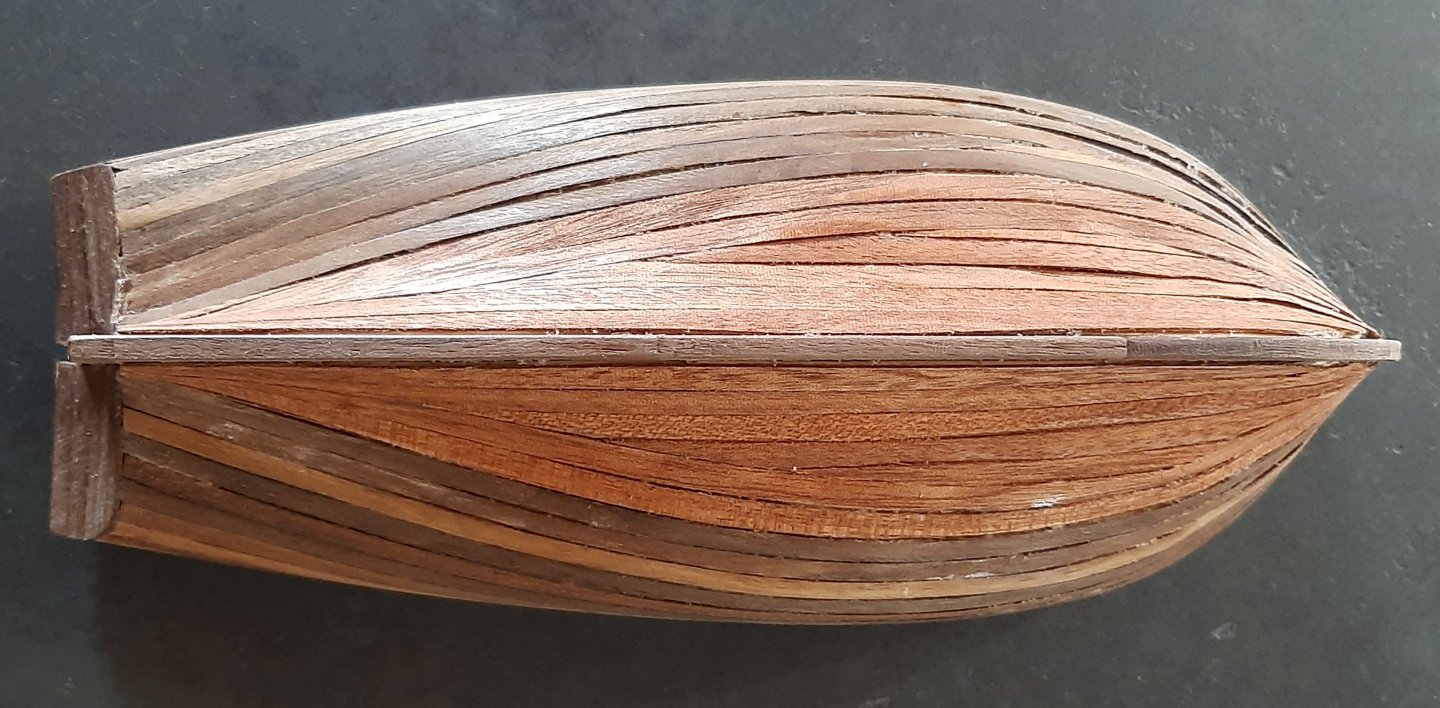
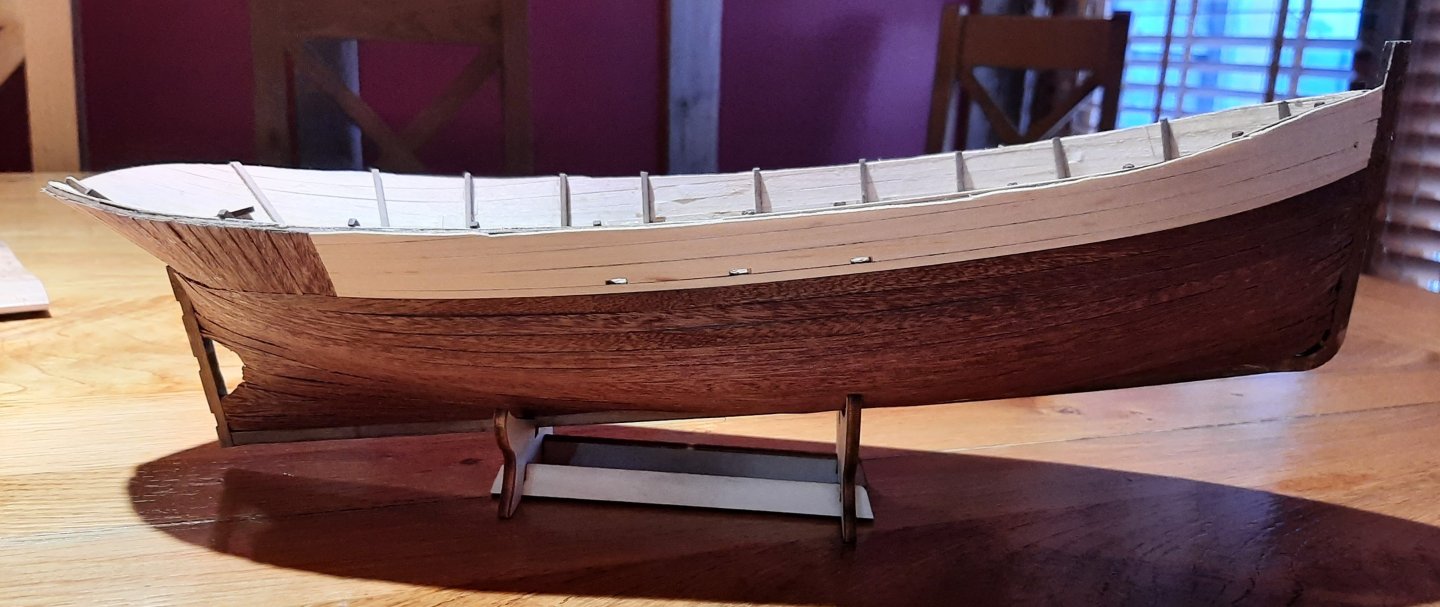
I'm back with the full second layer of planking complete! Now, I started this out full of confidence. I left it somewhat jaded. See why below. Here's the first couple planks on. Here's also my first mistake: The planks by the keel are fine - that's sapele, the kind of wood I was supposed to use. The planks by the gunwales and down to the pencil line here should have been walnut. This is due to a combination of very poorly laid out instructions and my own ineptitude - I really should have checked again. However! Luckily I realised my mistake at this point. I took off a couple of the planks I'd already laid, as the glue was actually still wet in this photo, and left those at the top as the sapele. It's not as directed in the instructions, but I think it comes out well after the fact. Here's a work in progress shot. I really struggled with the walnut strips provided. They're 3mm and have a very slick finish on them which seemed to resist either wood or superglue - I had to hold many of them down as the glue dried, which is the white residue on the planks in the photo below; a combination of my fingerprints and dried glue residue. Messy. Luckily, it sanded off. Frustratingly, I also really struggled to get a lot of the planks to lie fully flat, especially at the bow. You can see the gaps above, and my main solution here was a combination of quite aggressive sanding and some cautious insertion of superglue into the largest gaps before pressing down the looser sections. It's worked, but it's not perfect. I'm not sure how I could improve - I suspect more careful, considered bending of each plank would be in order. Here it is mostly complete, before inserting some stealers. You can see I've given it an initial rough sanding - I wanted to do this before applying the stealers as I didn't want to risk tearing them out. Here's the finished hull before a full sanding. I also need to add the planks to the stern. You can see the gaps I was talking about earlier from this angle, but they're not very obvious when the ship is the right way up, so I think I'm satisfied, if a bit annoyed with myself. And after a good sanding, a coat of Danish oil and the stern planks in place: Certainly a more pleasant planking job than the OcCre Palamos, but still a lesson in frustration. I'm not sure whether tapering to a point is considered correct, but two or three on each side are here, simply because the 'belly' of the ship is so much wider than the bow - do let me know if there's a better method than this. You can also see here I had to insert one very thin gap filler on the starboard side (top side in the photo above). This is actually because the plank below it snapped as it was already half glued down. I don't think it notices too badly, especially when the ship is the right way up. Here she is with the two strake planks glued in place. I think honestly the planking has come together a lot better than I initially feared - especially from the normal viewing angle. I'm not 100% pleased, but I am somewhat satisfied. One extra note for those attempting to build the Gretel in future; the instructions call for you to glue the three 1mm x 1mm strips for the handrail around the main deck together, then bend that construction using pins to hold it in place, then attach it to the ship. Don't bother with all that - I just soaked the wood for 15 mins in some warm water, cut it to length and glued the pieces on one by one. Much easier. Cheers for following along - detailing next!

-
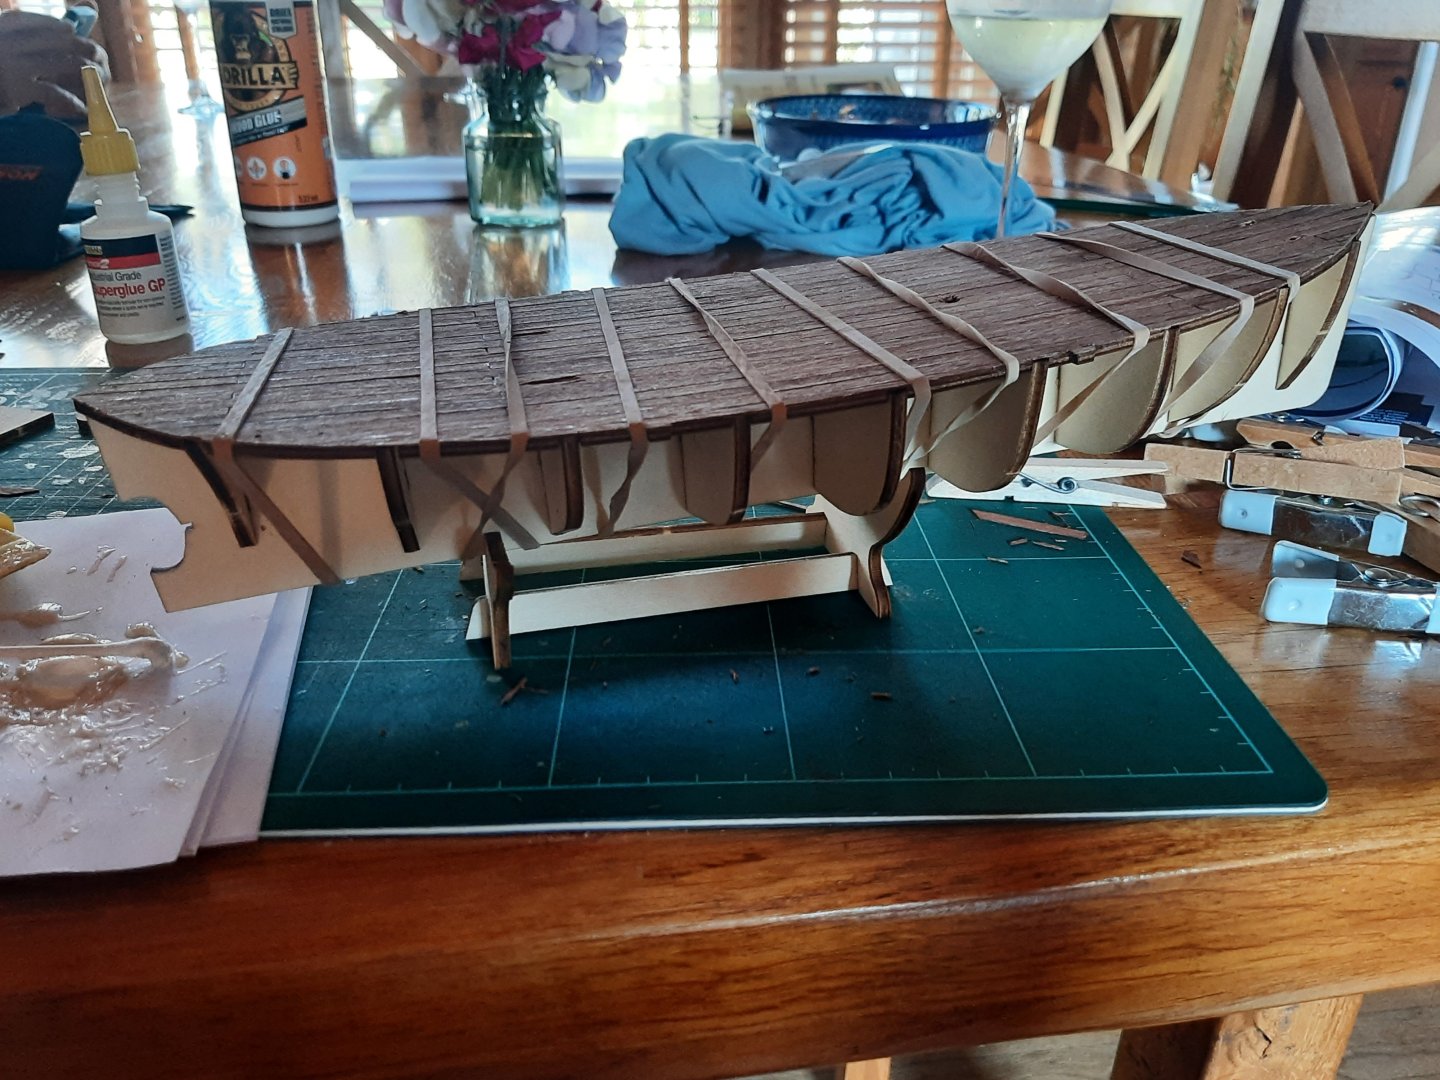
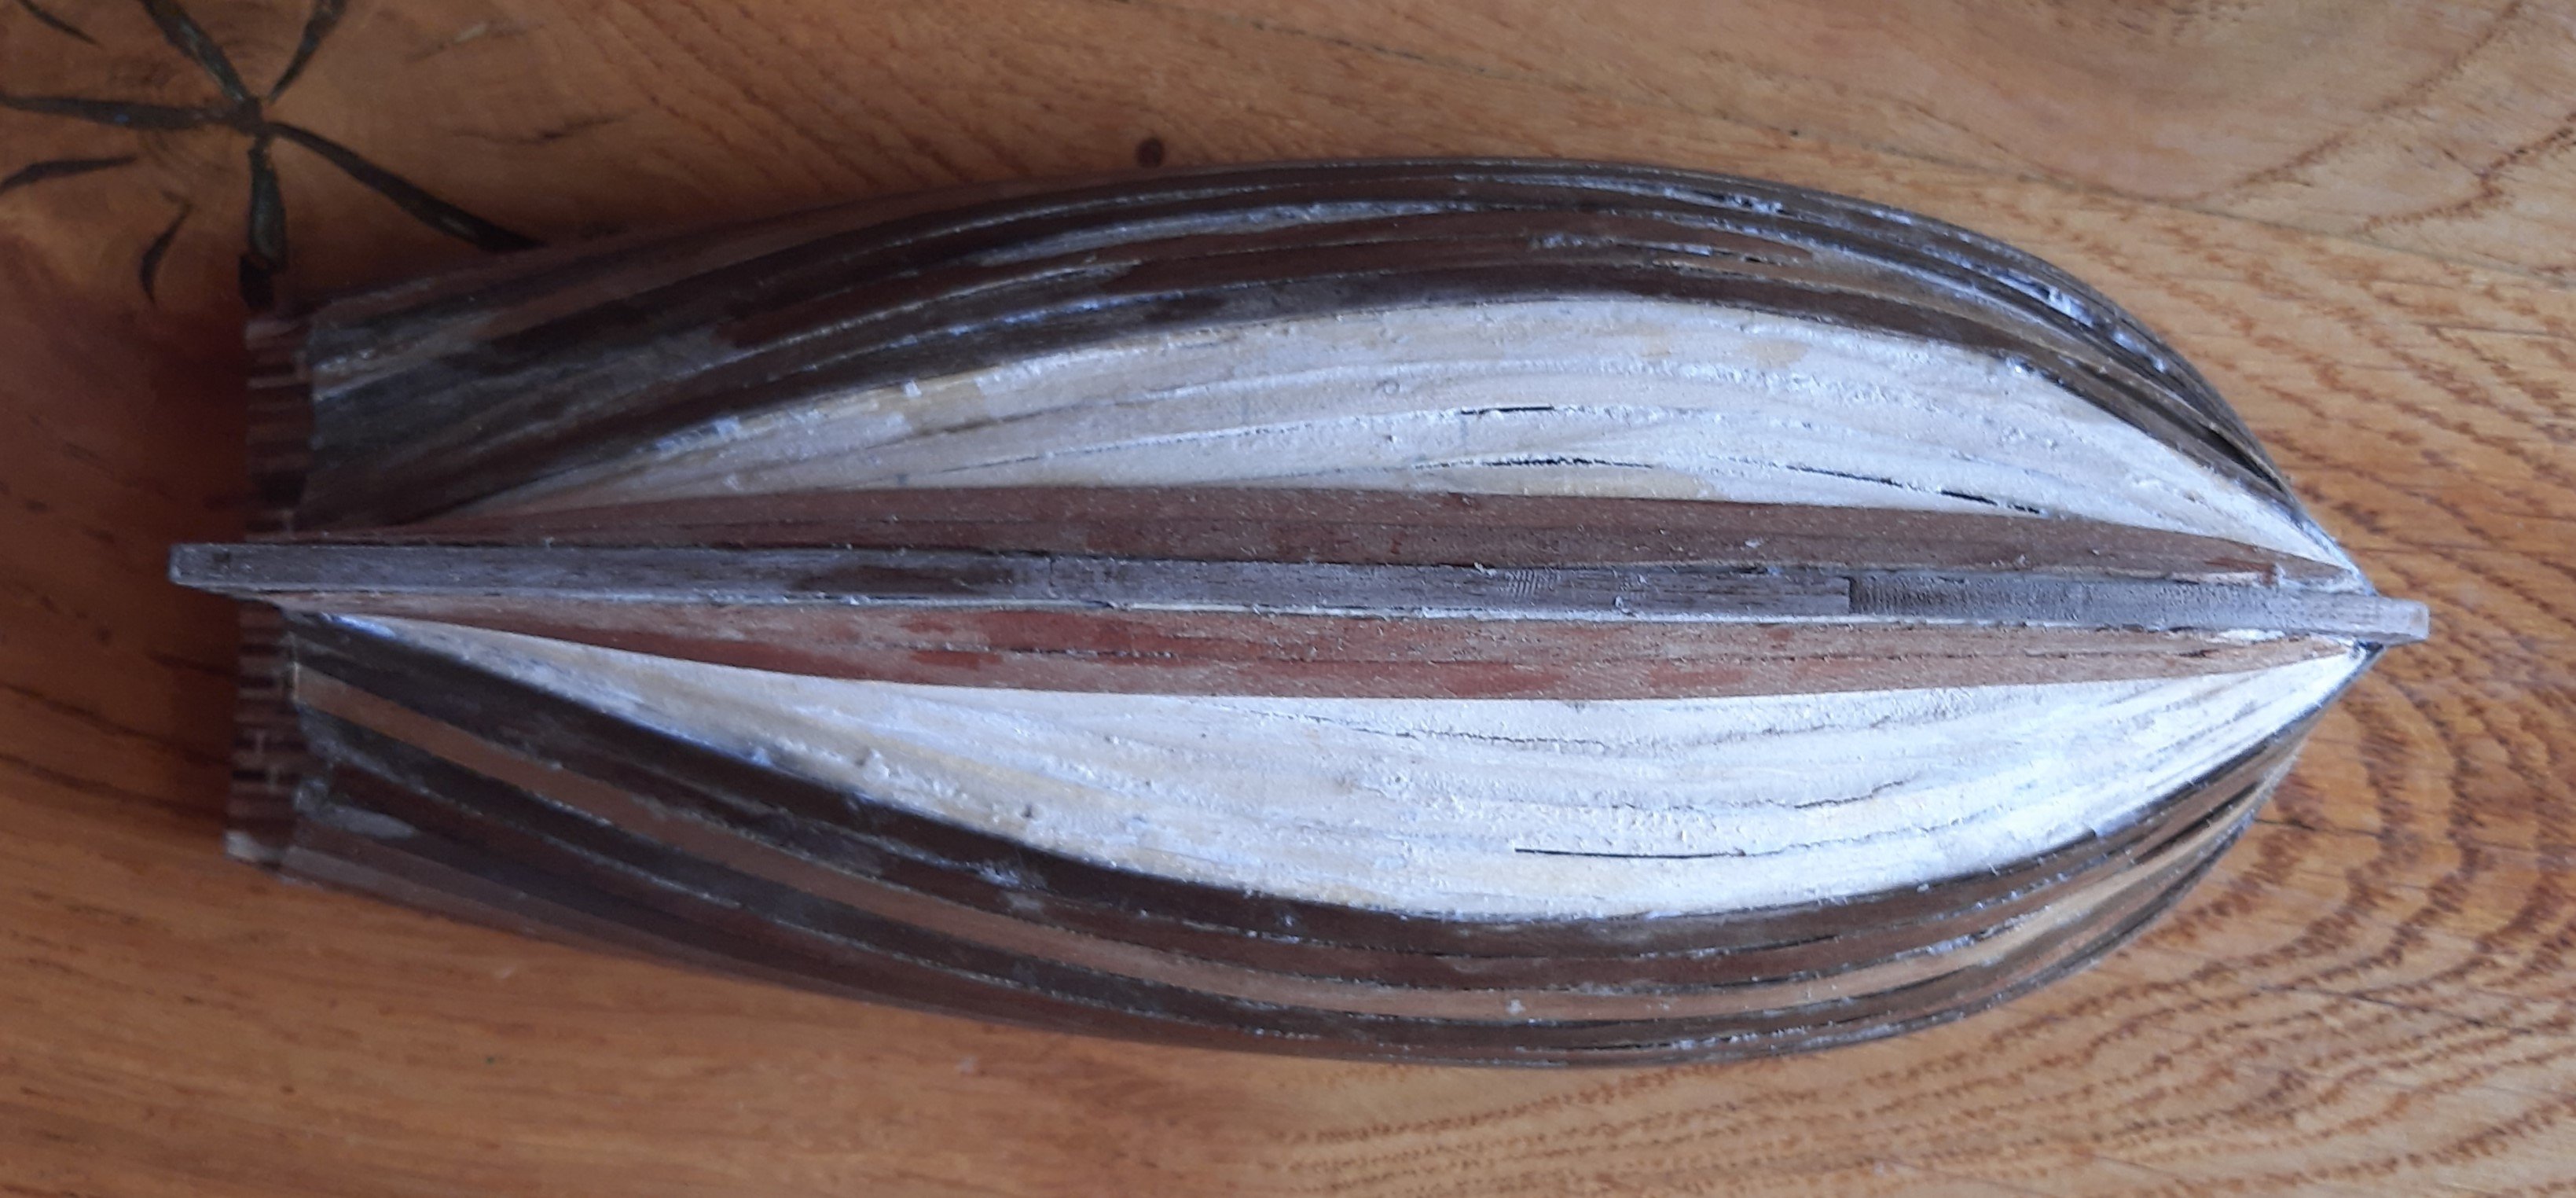
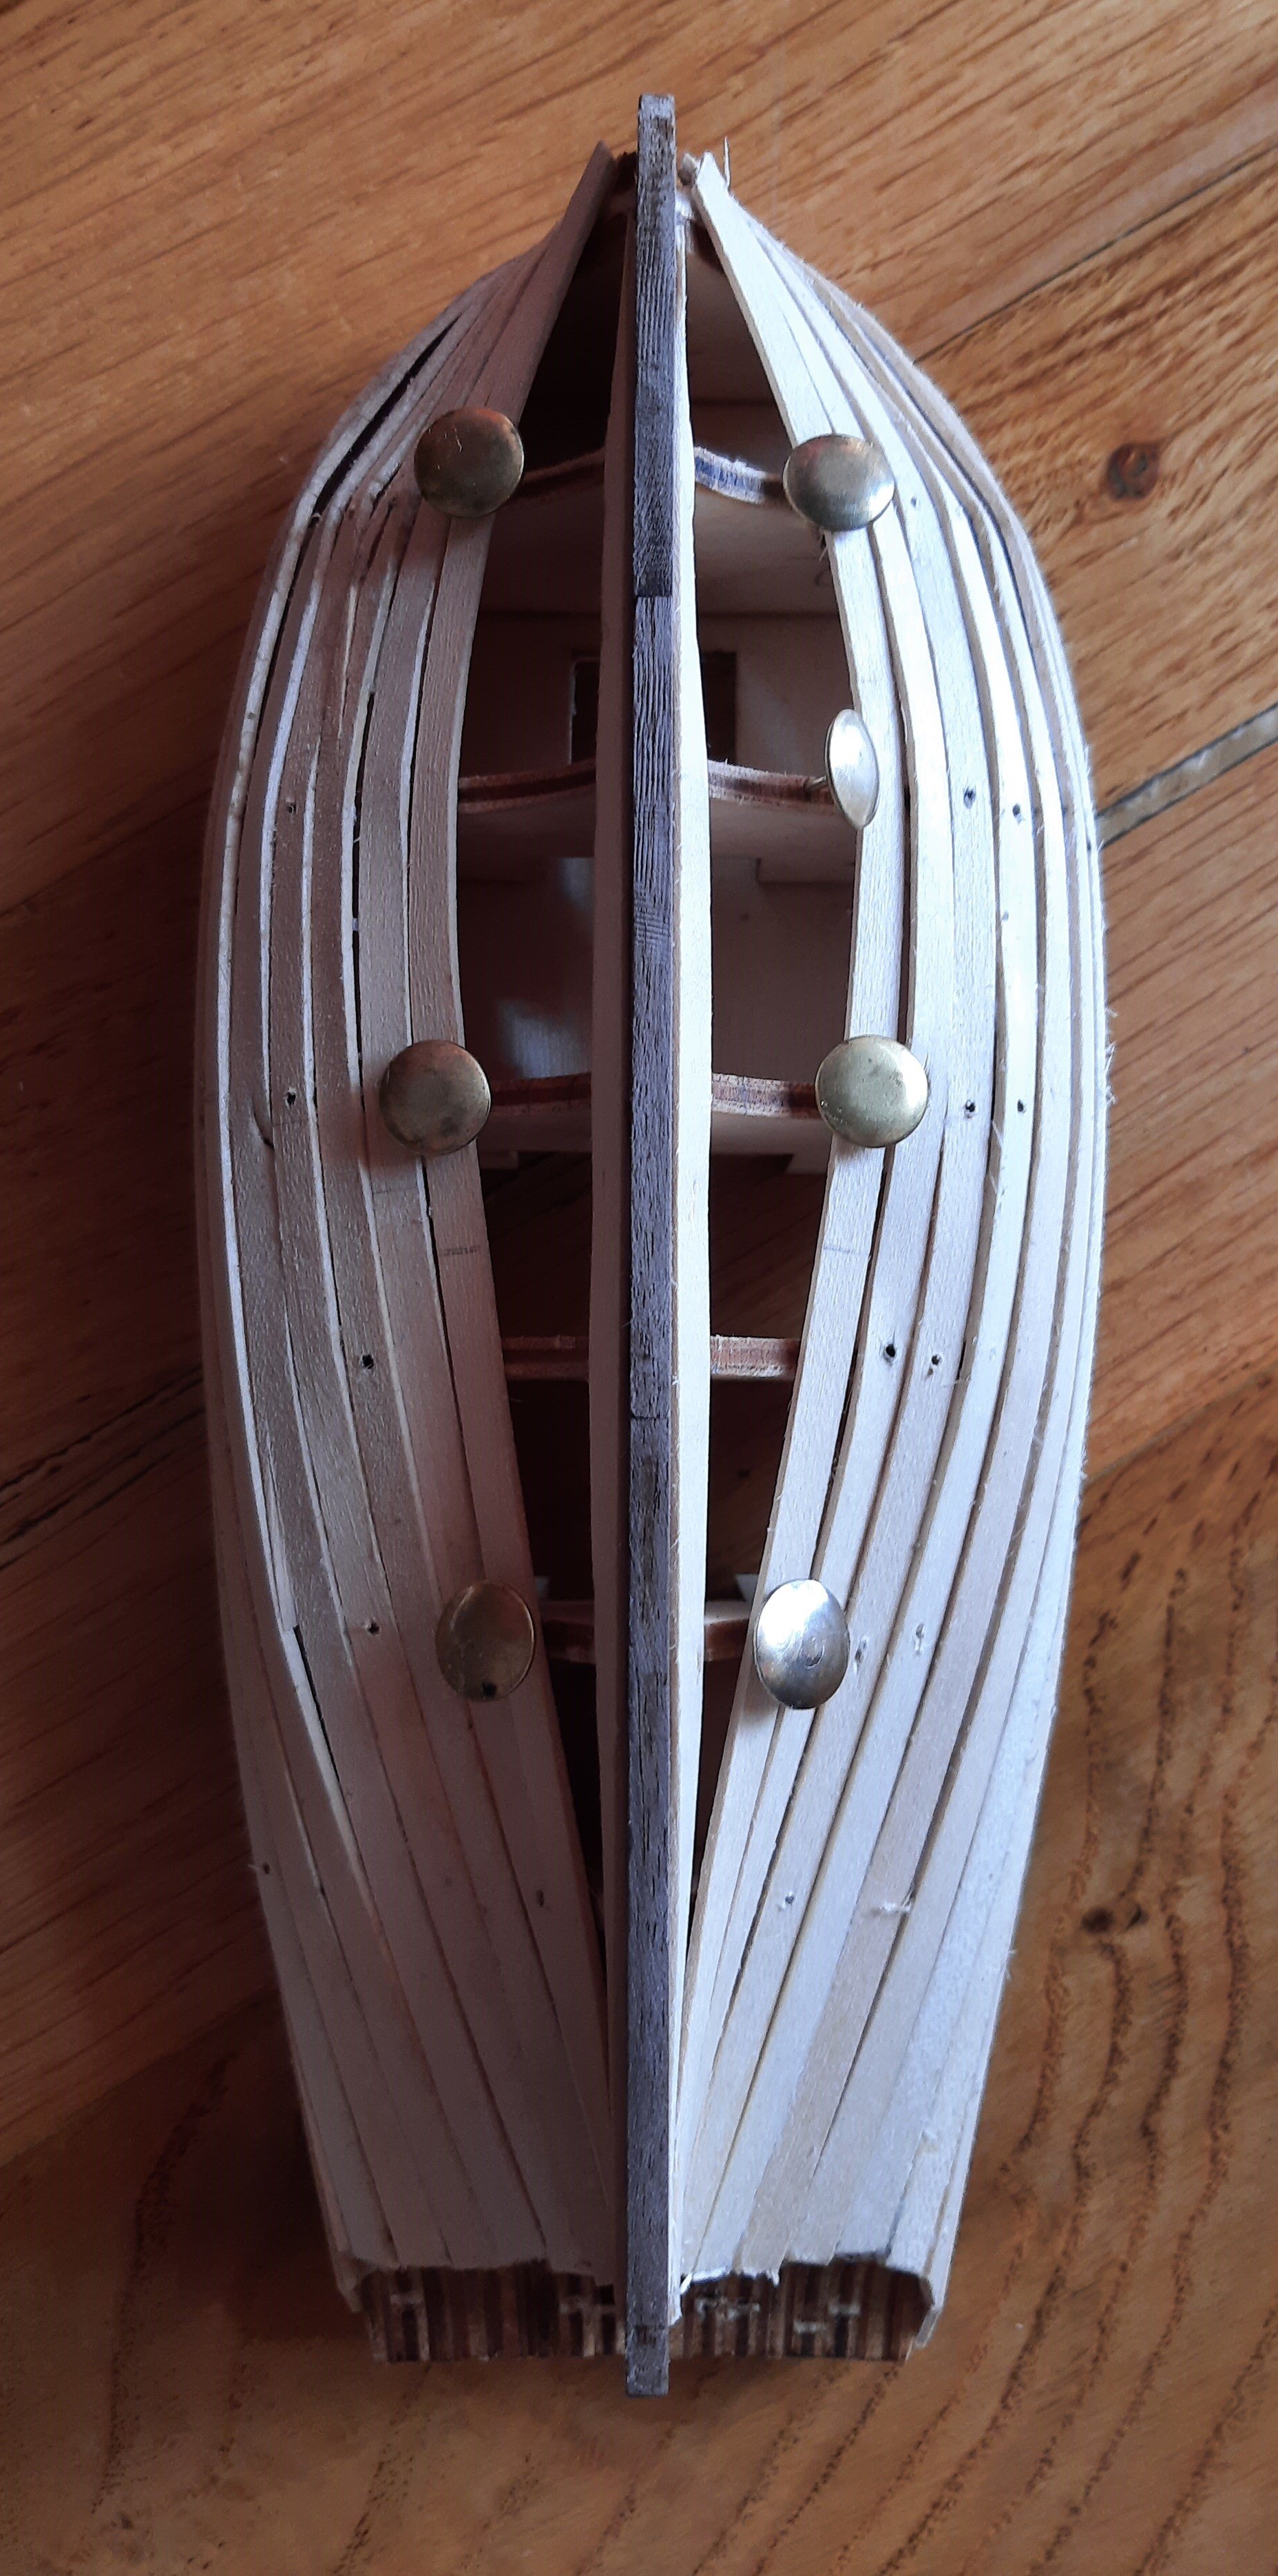
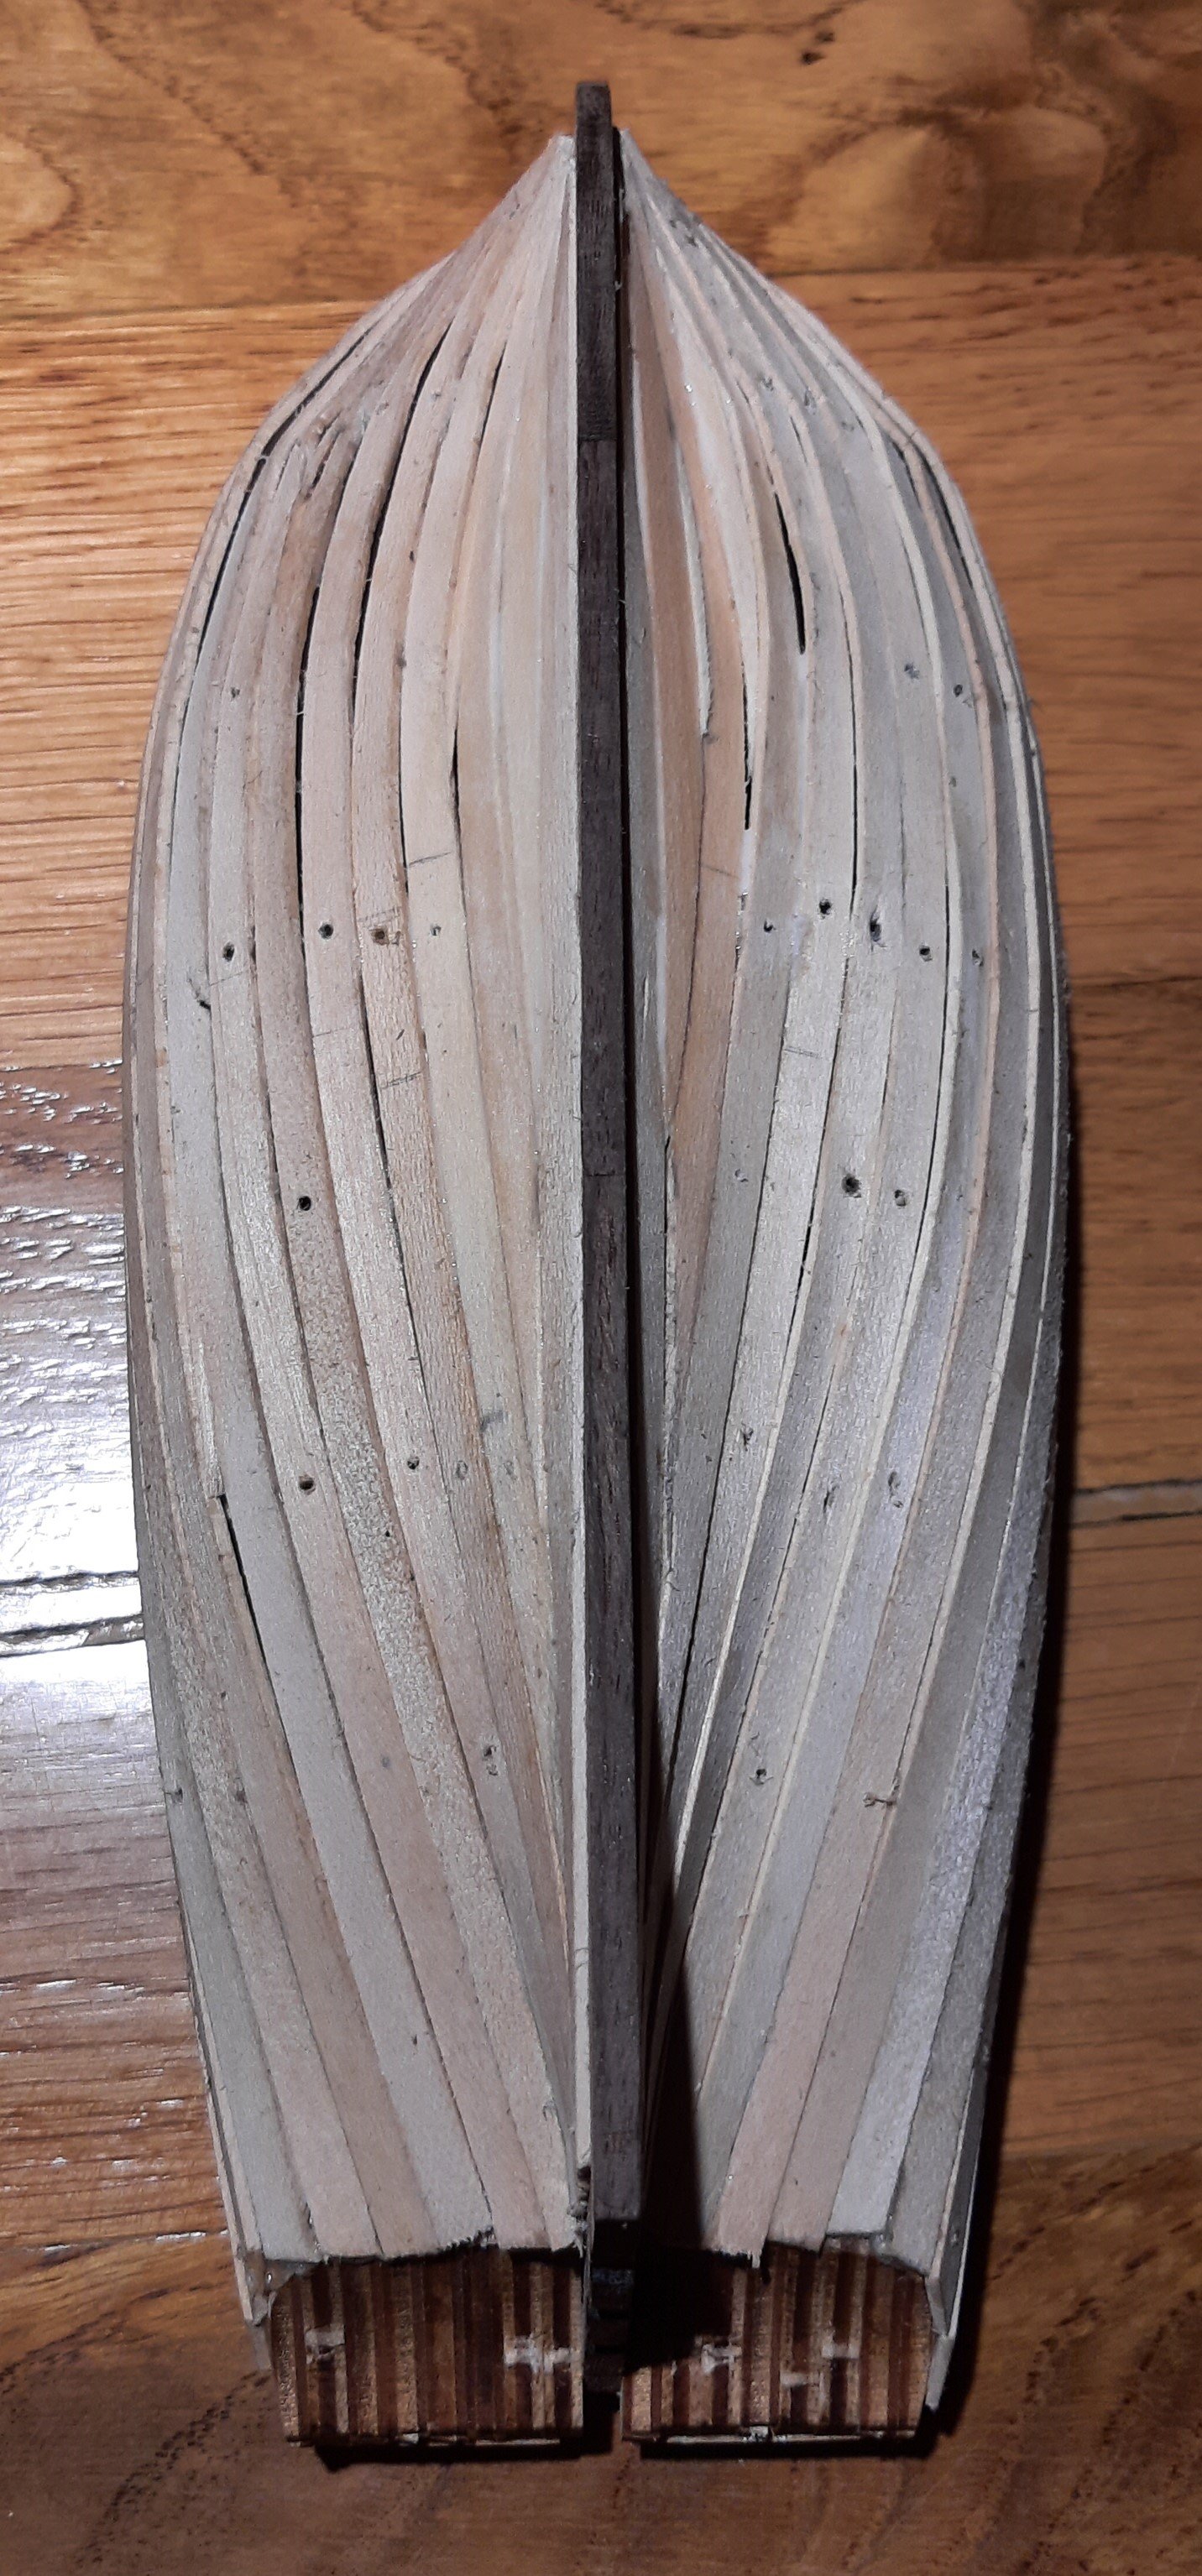
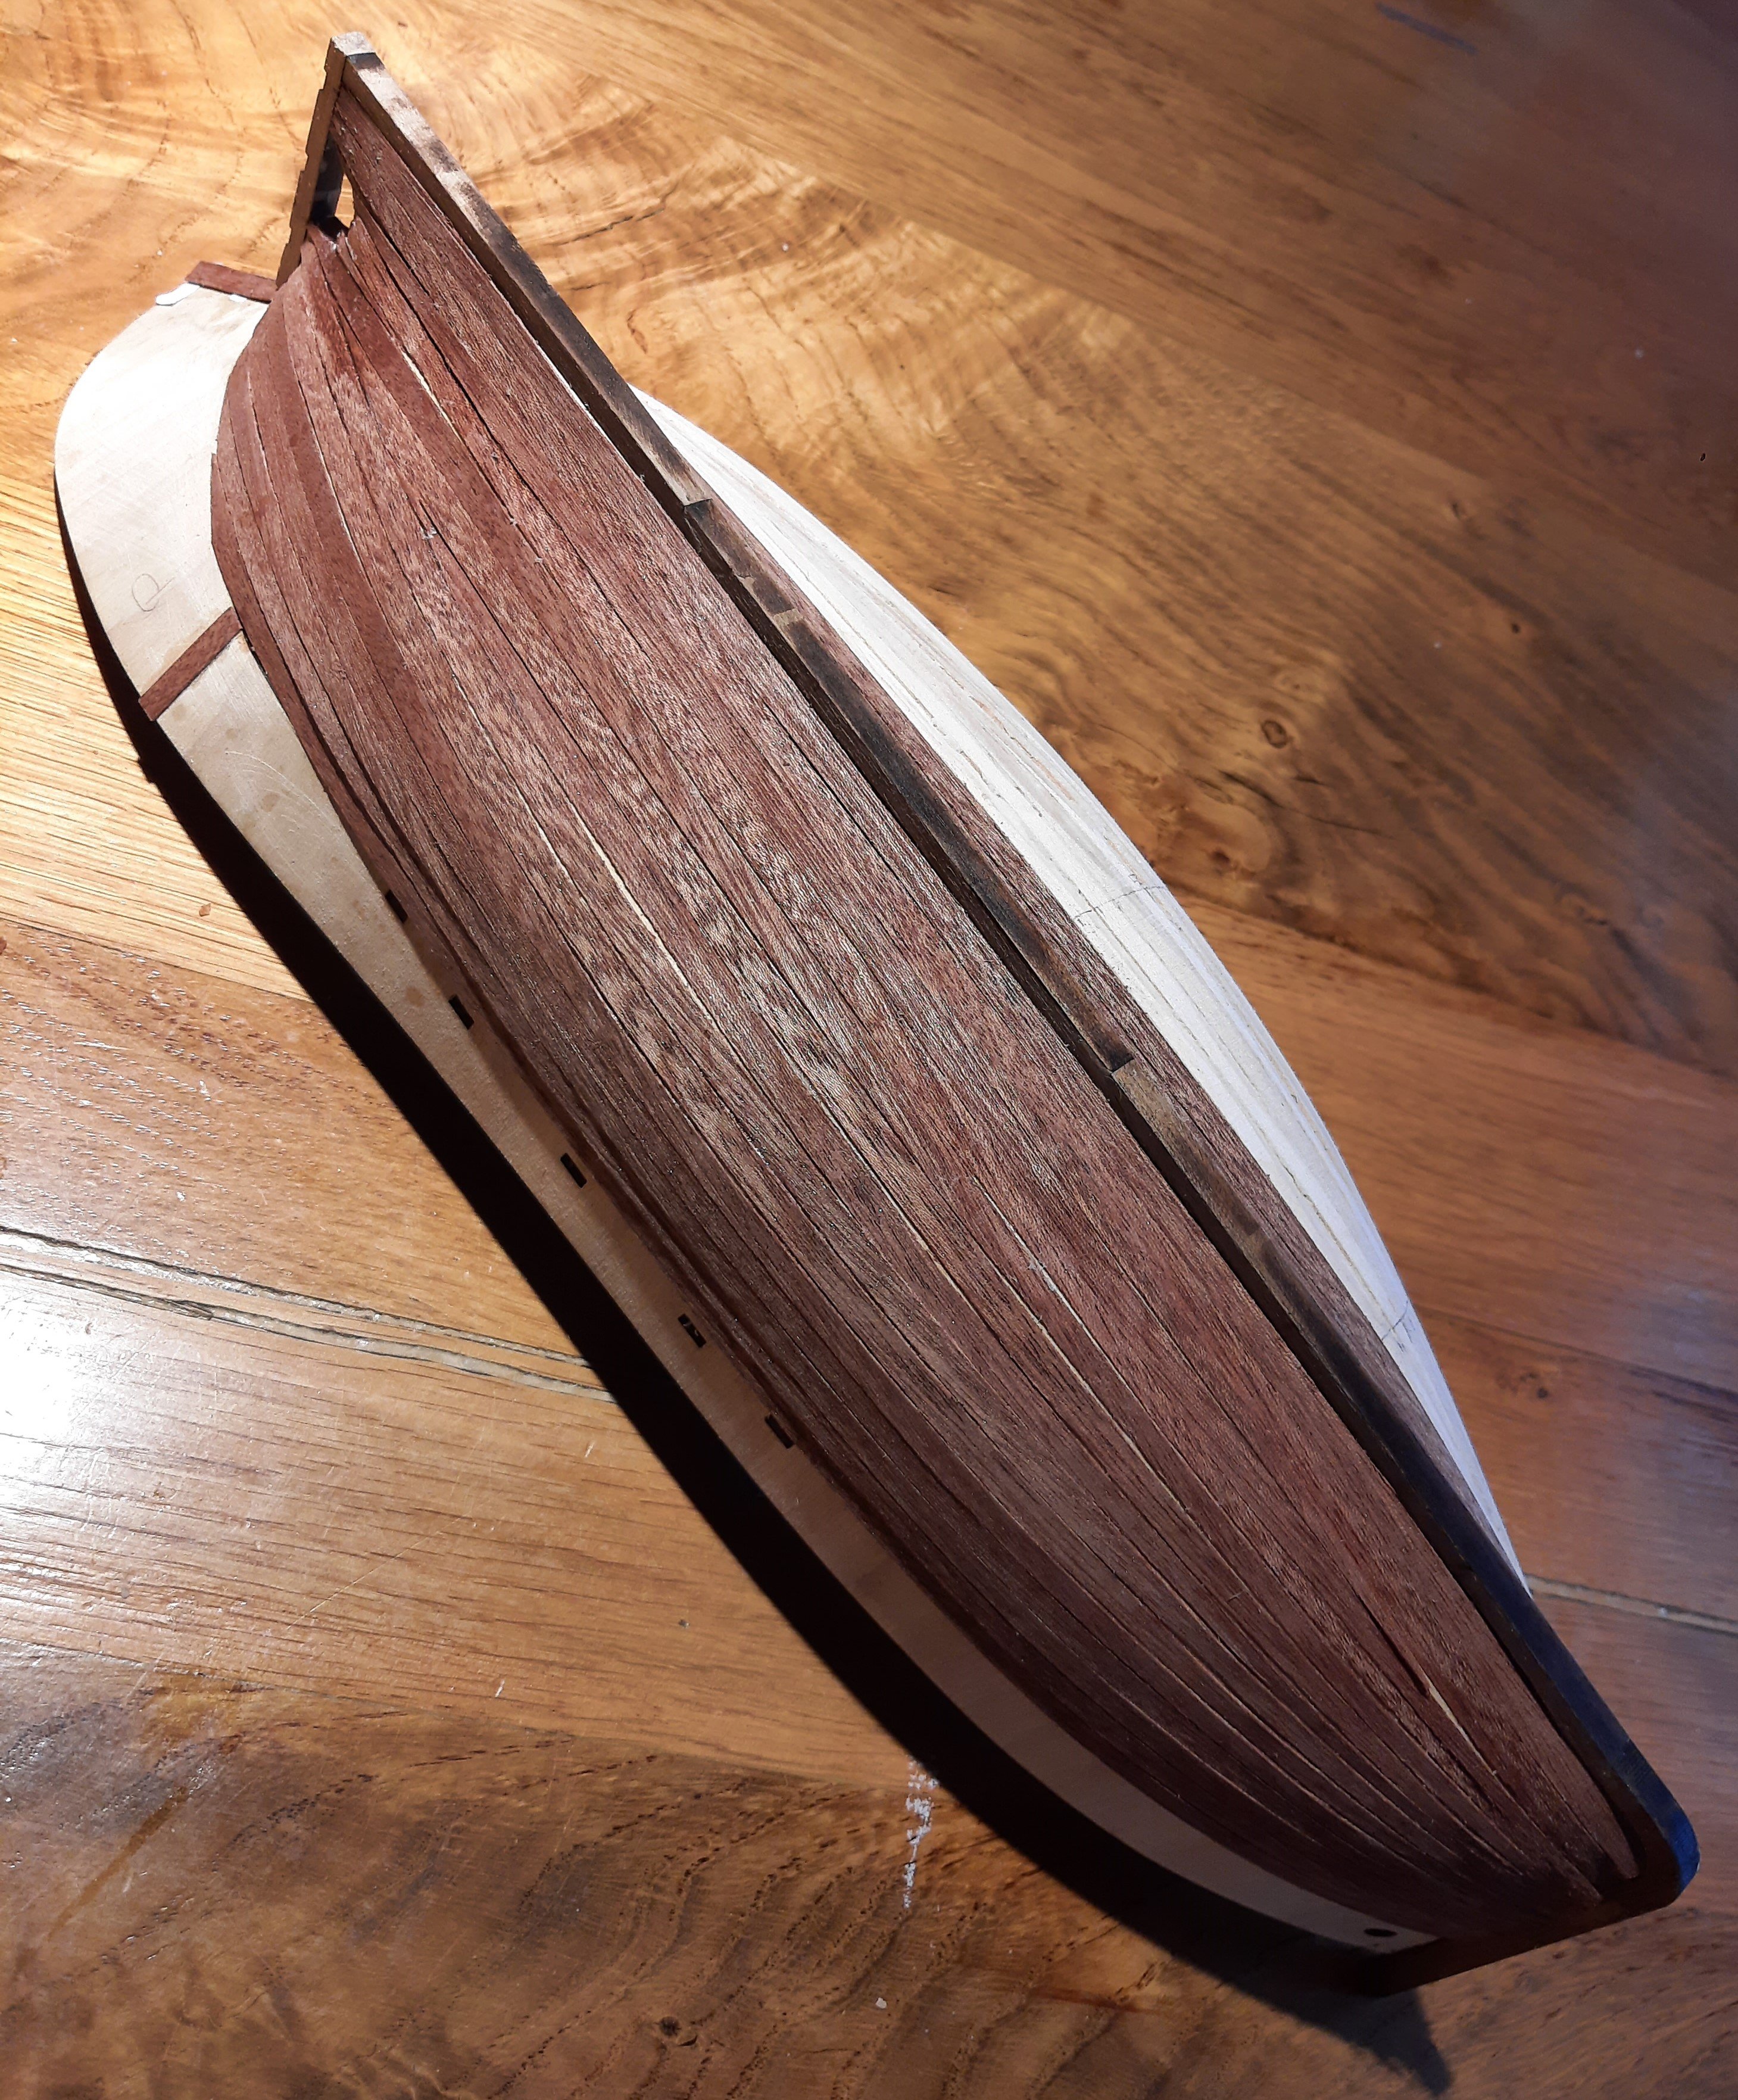
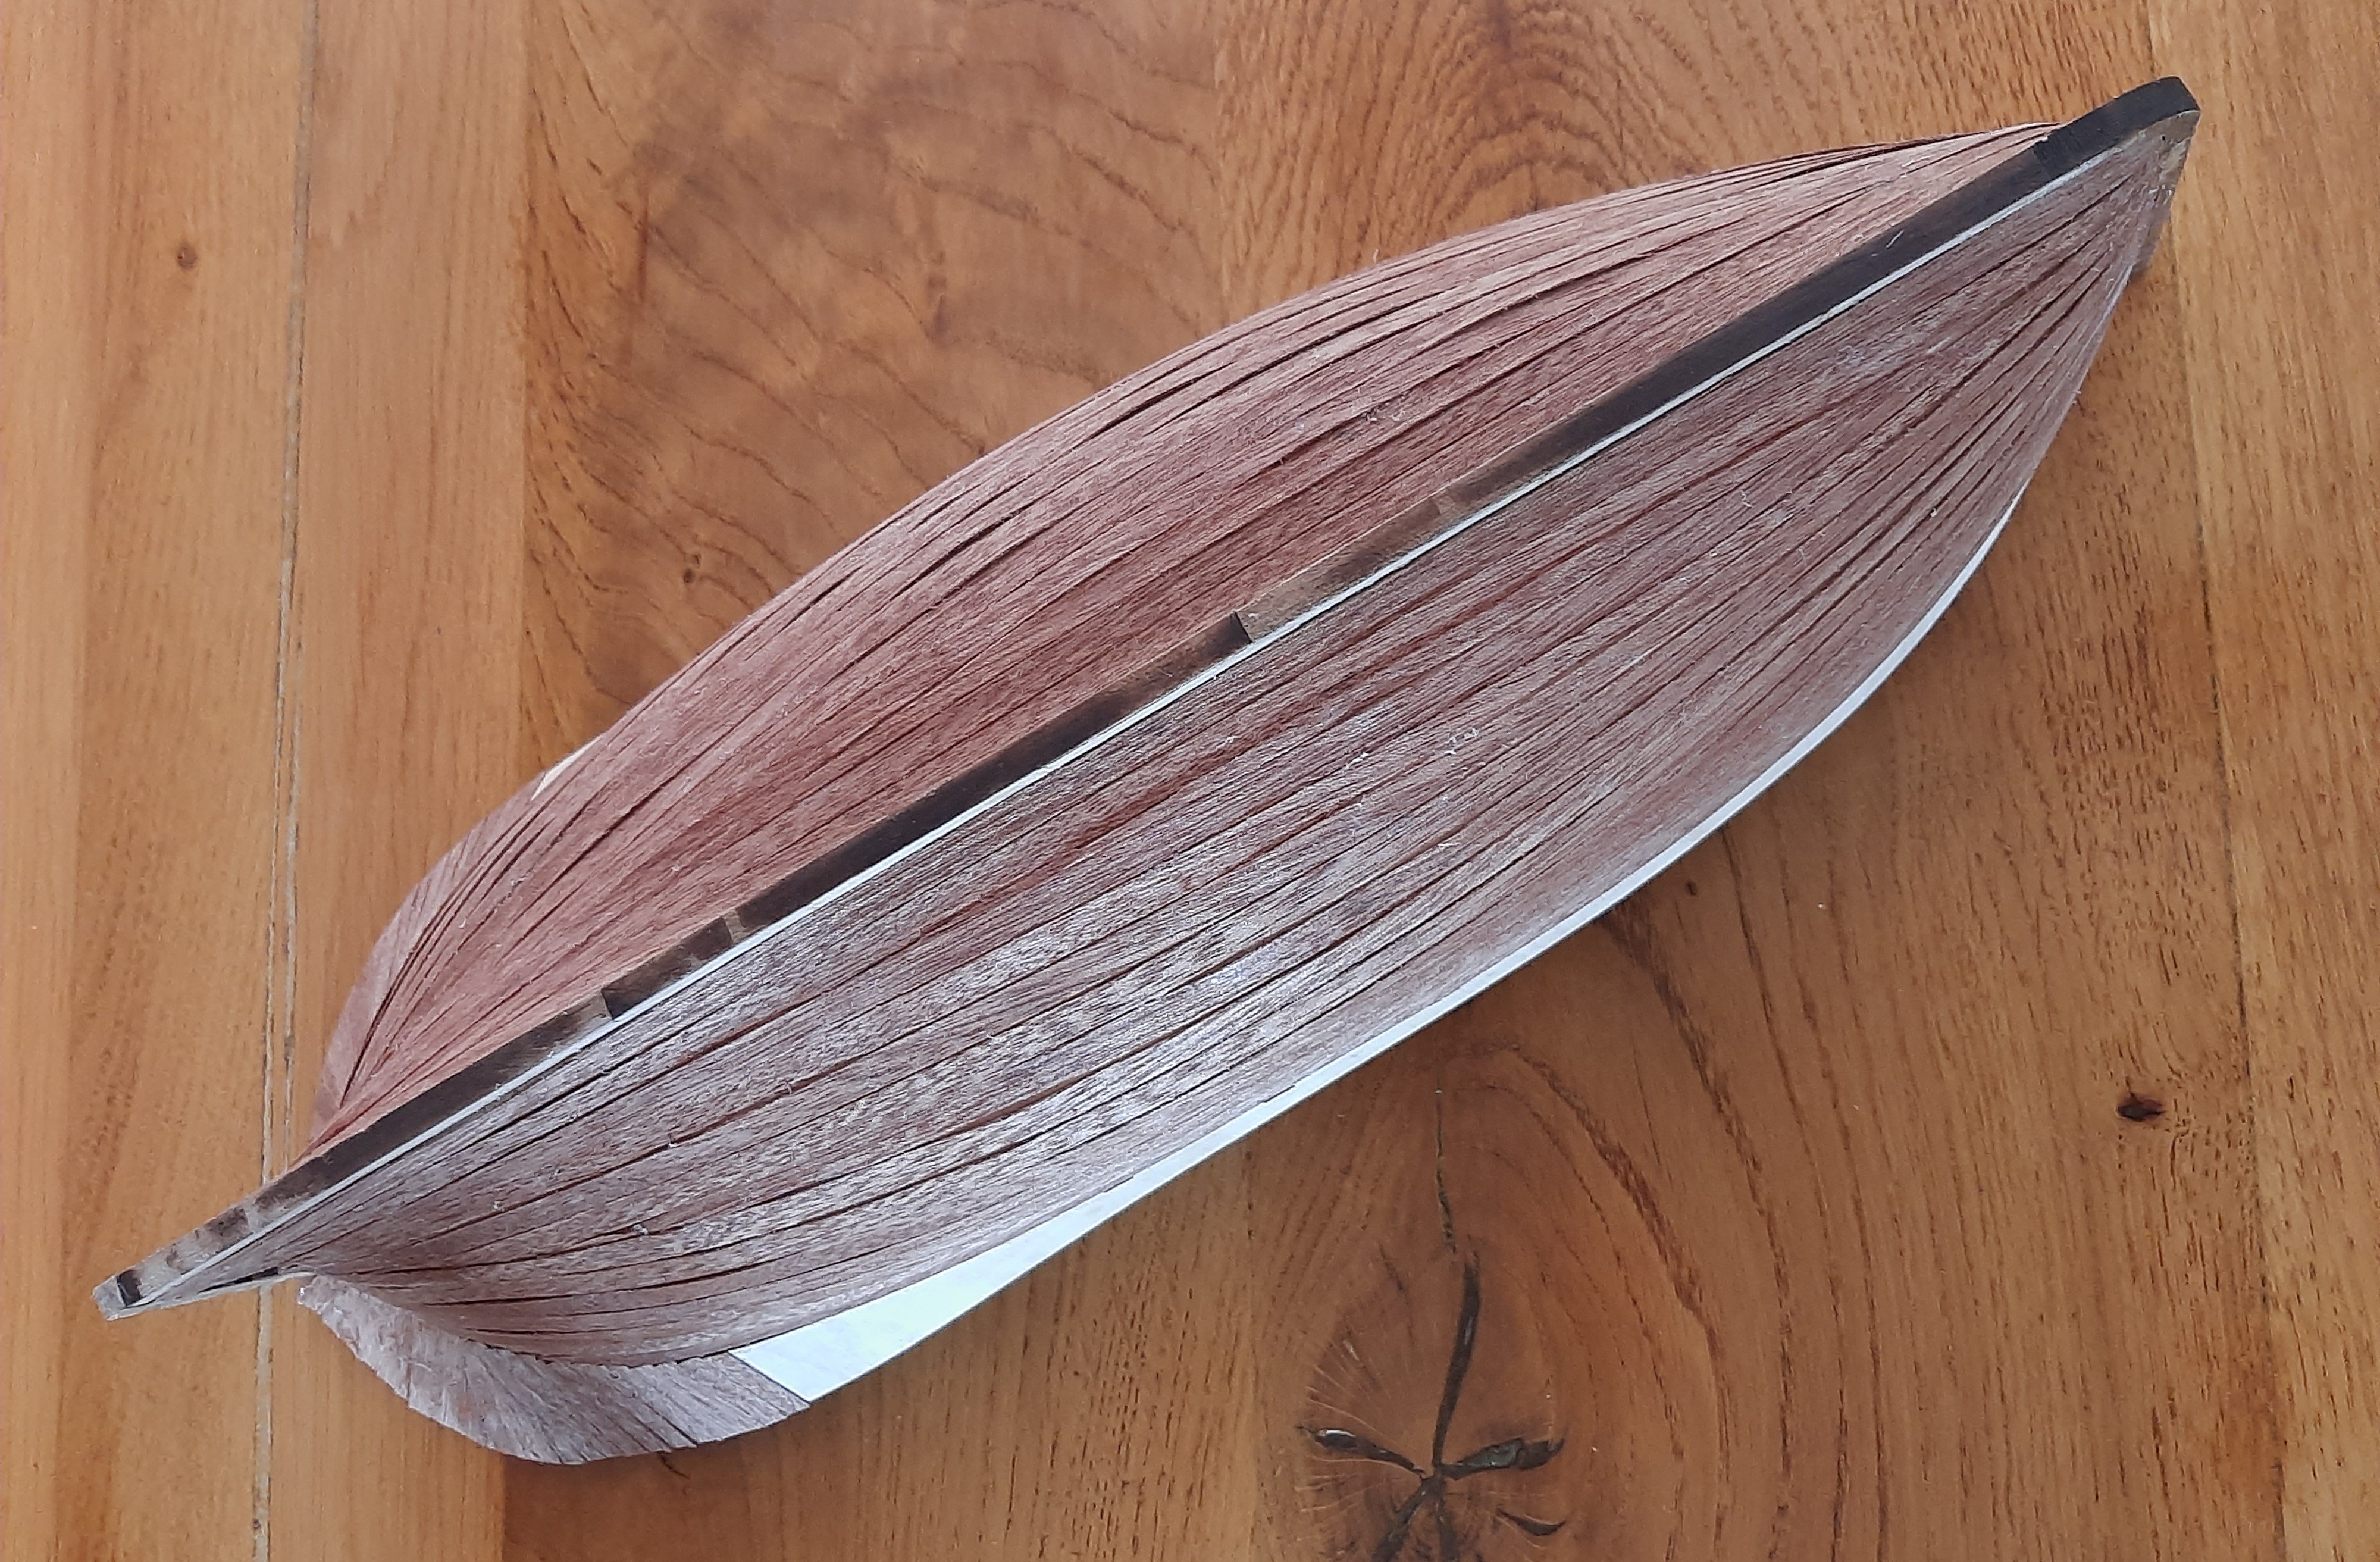
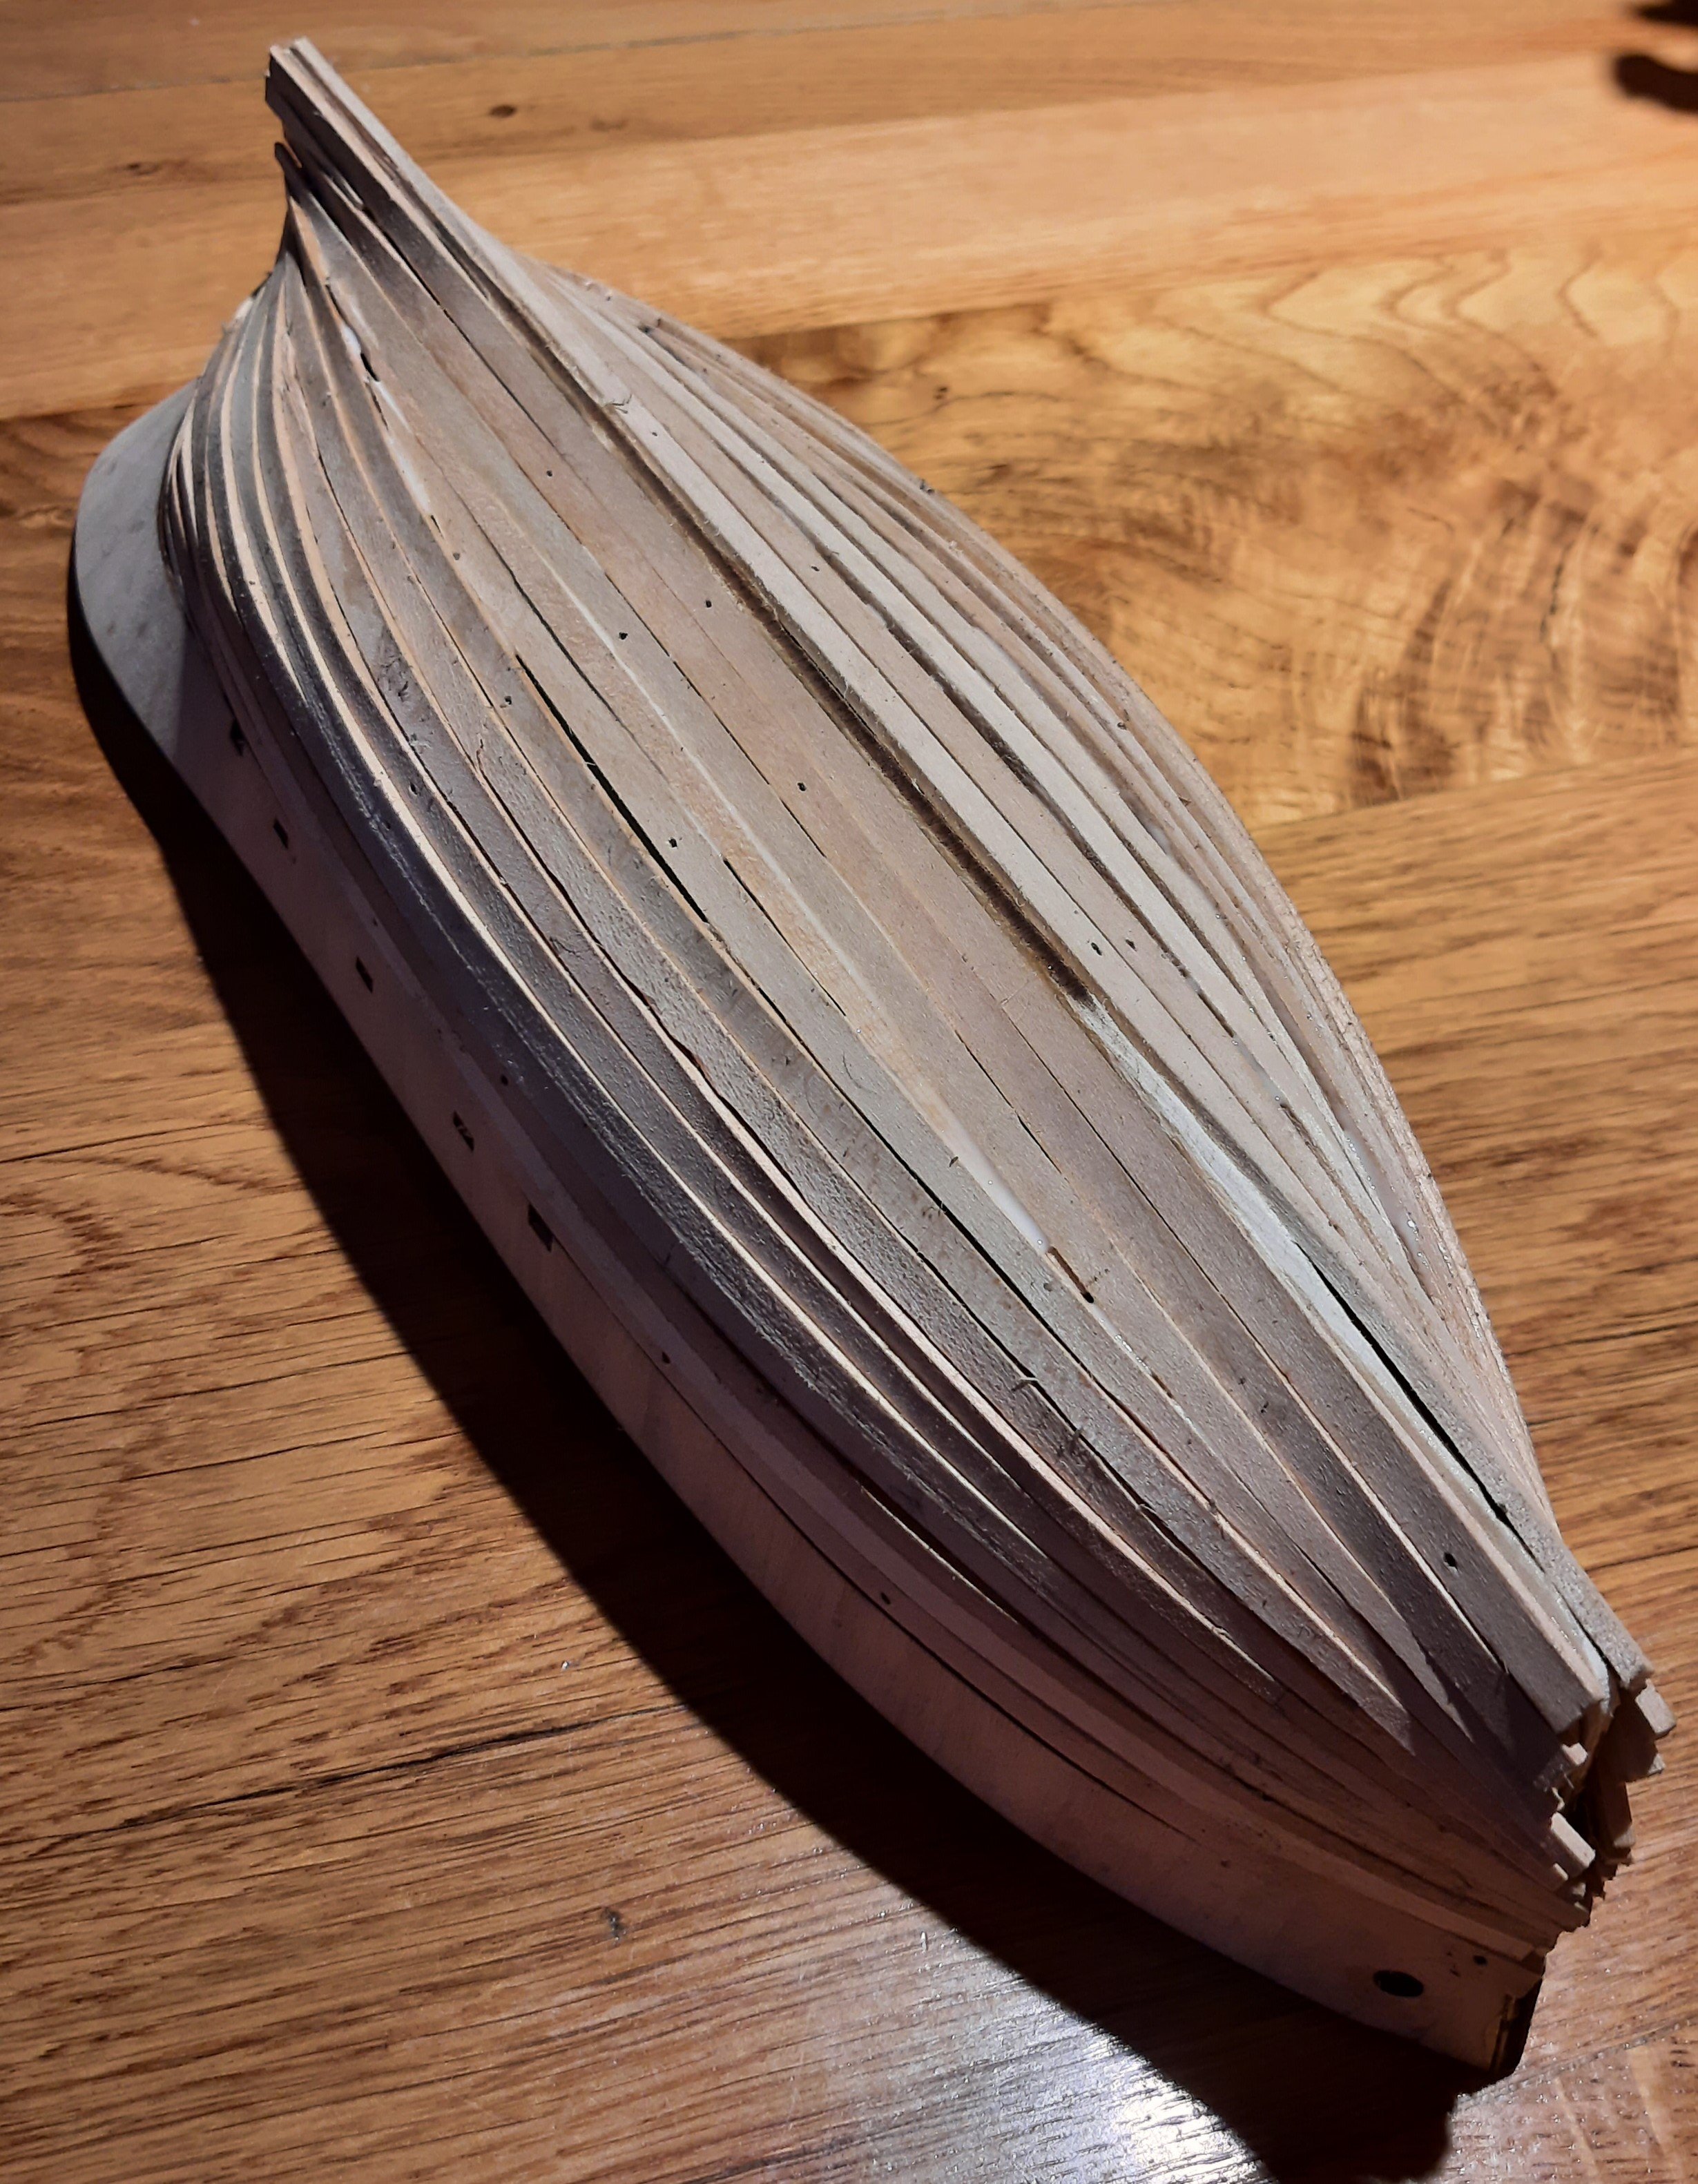
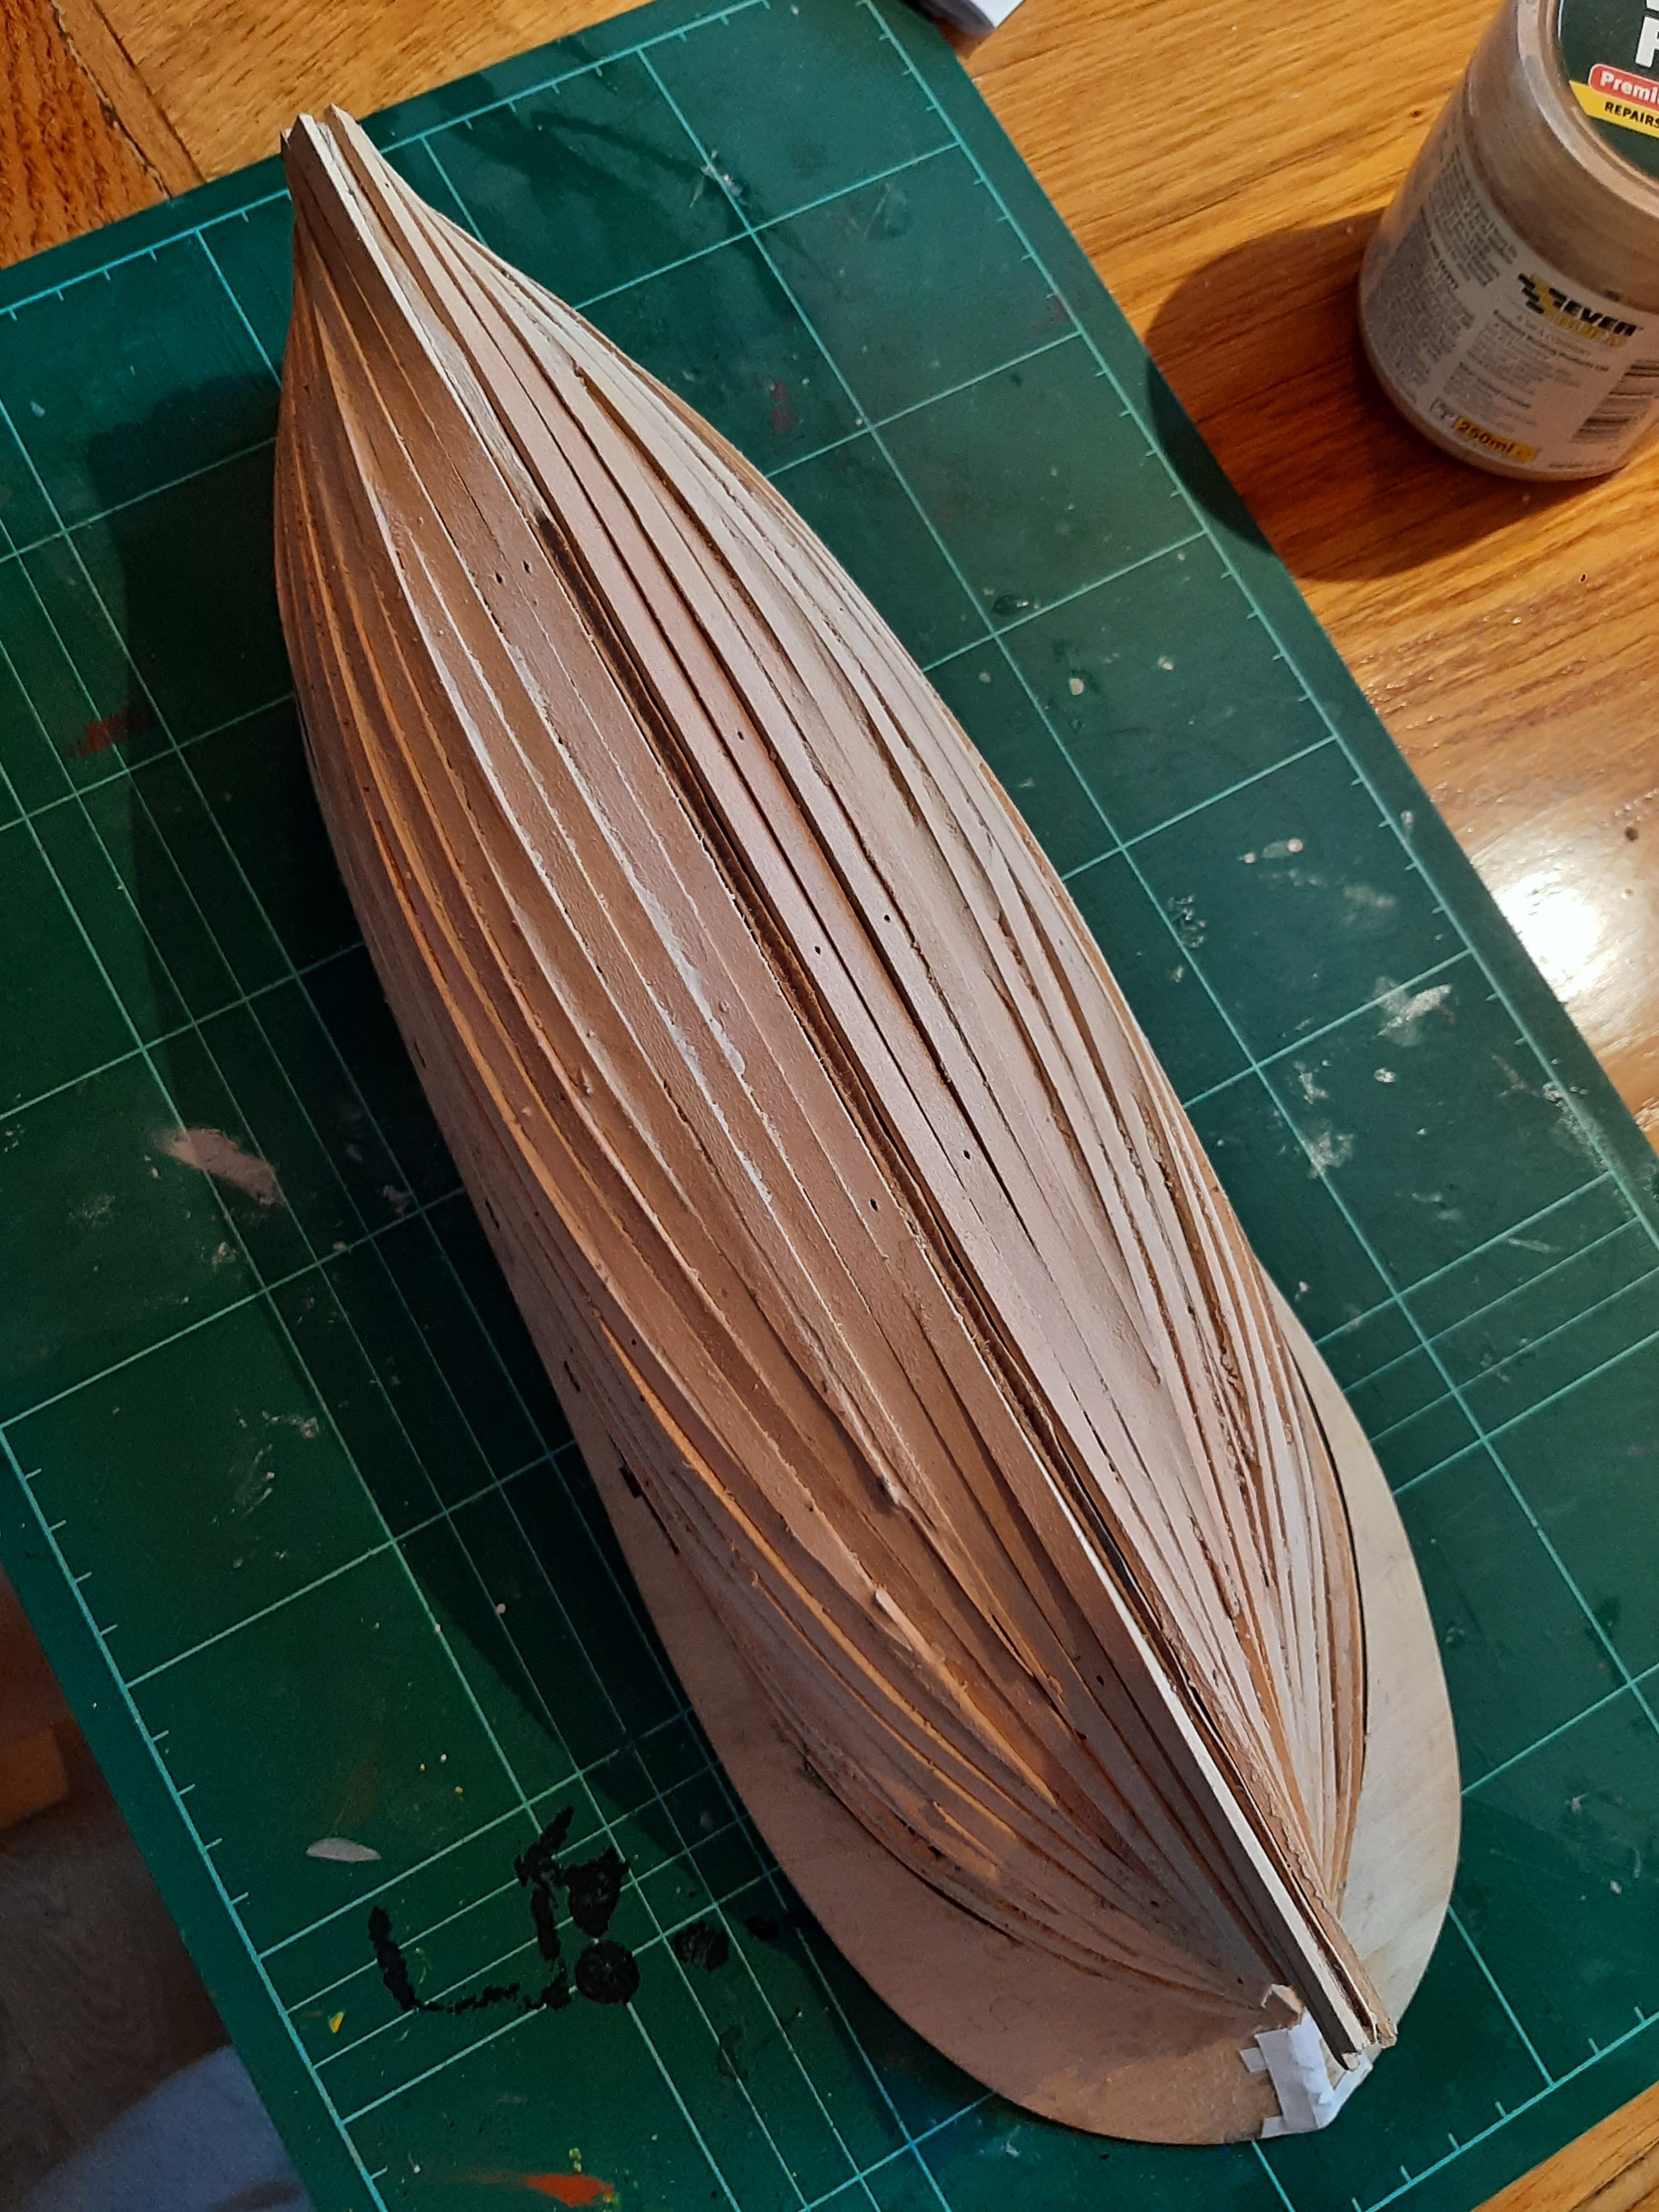
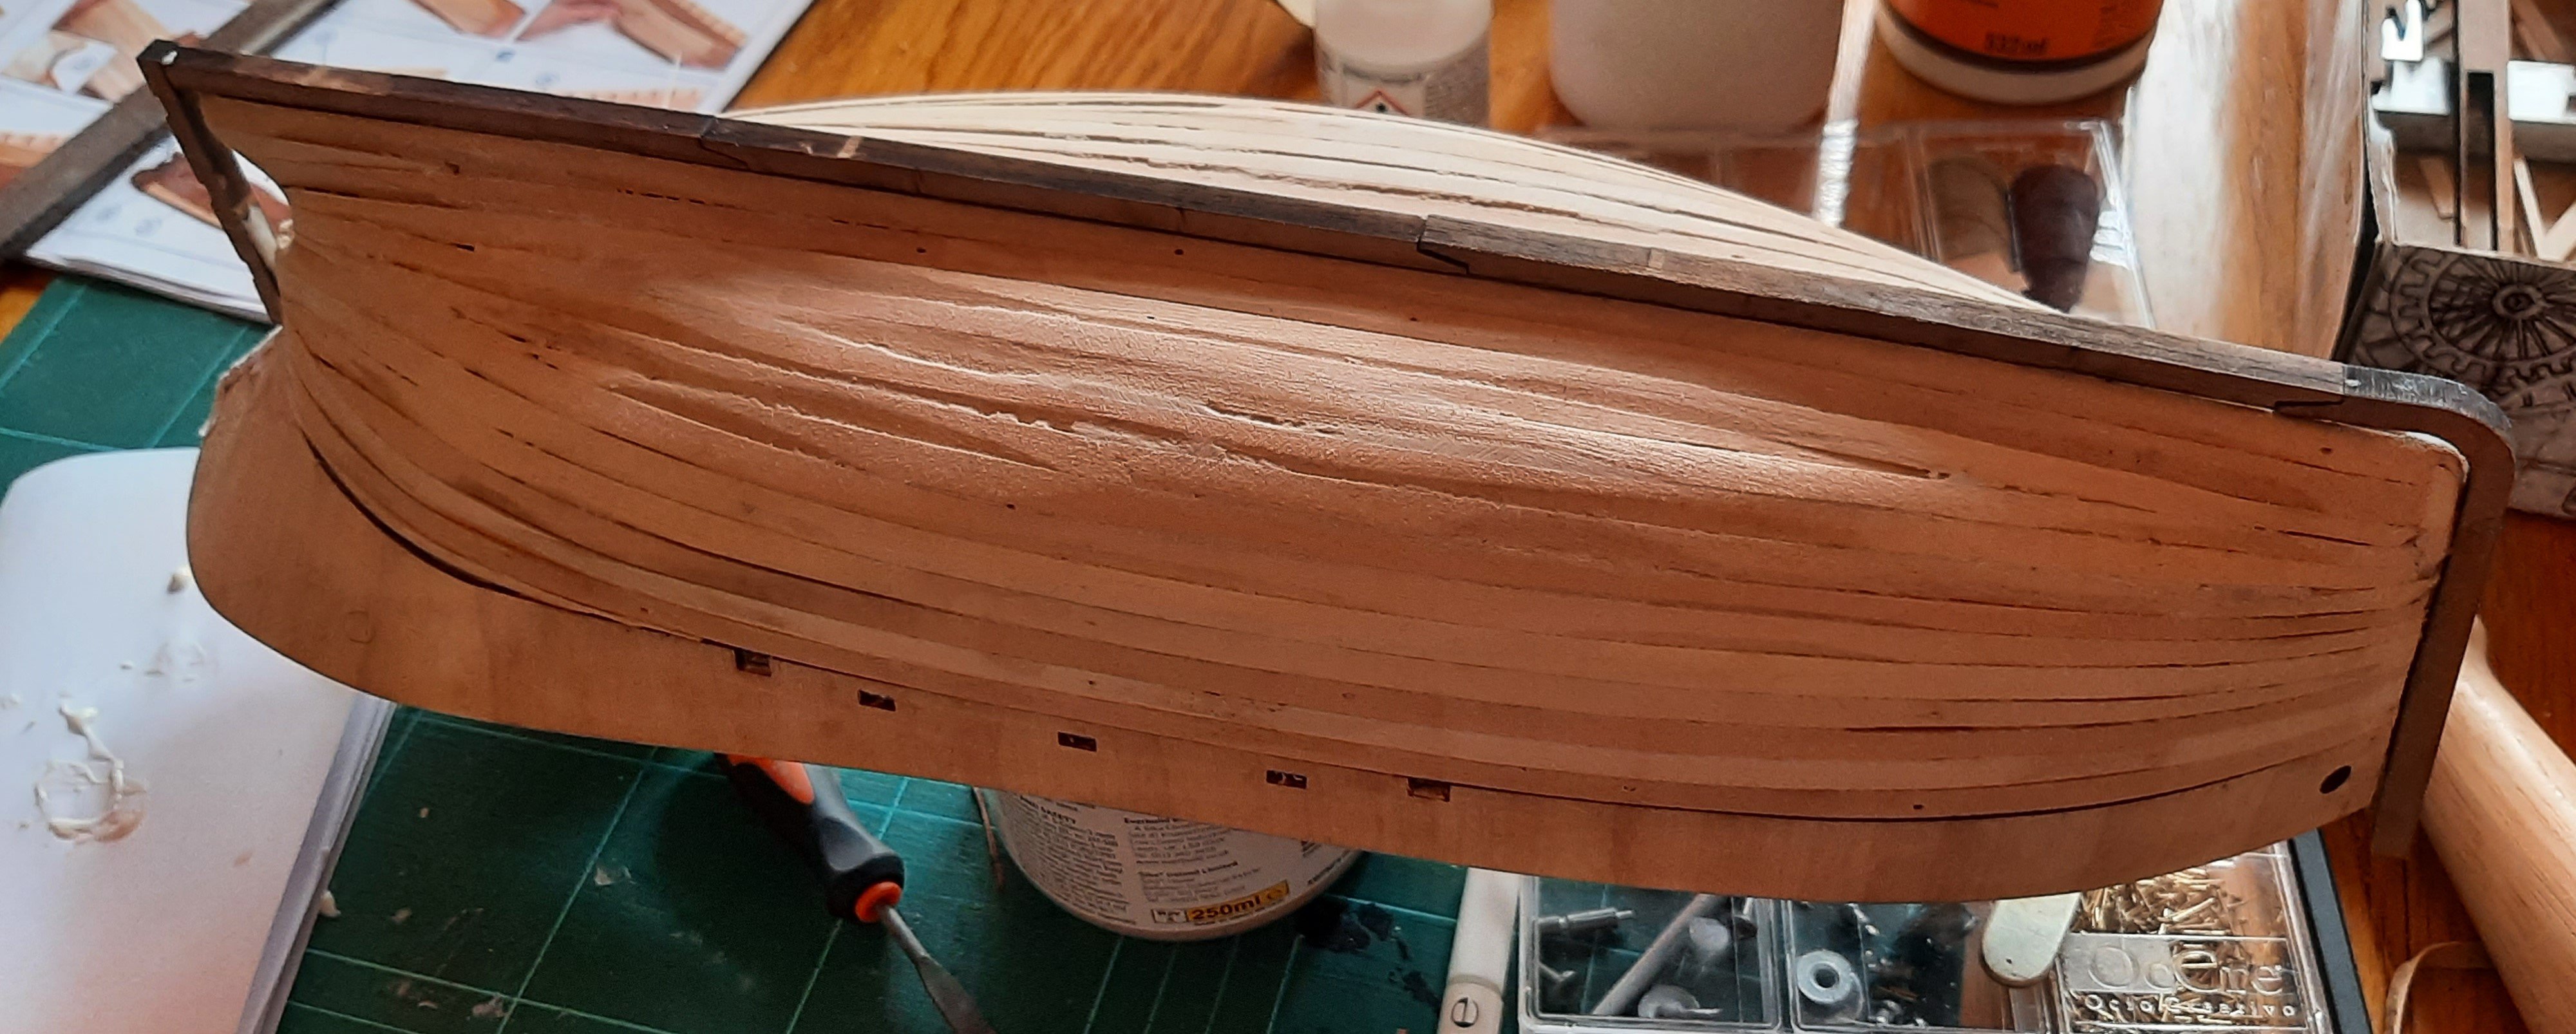
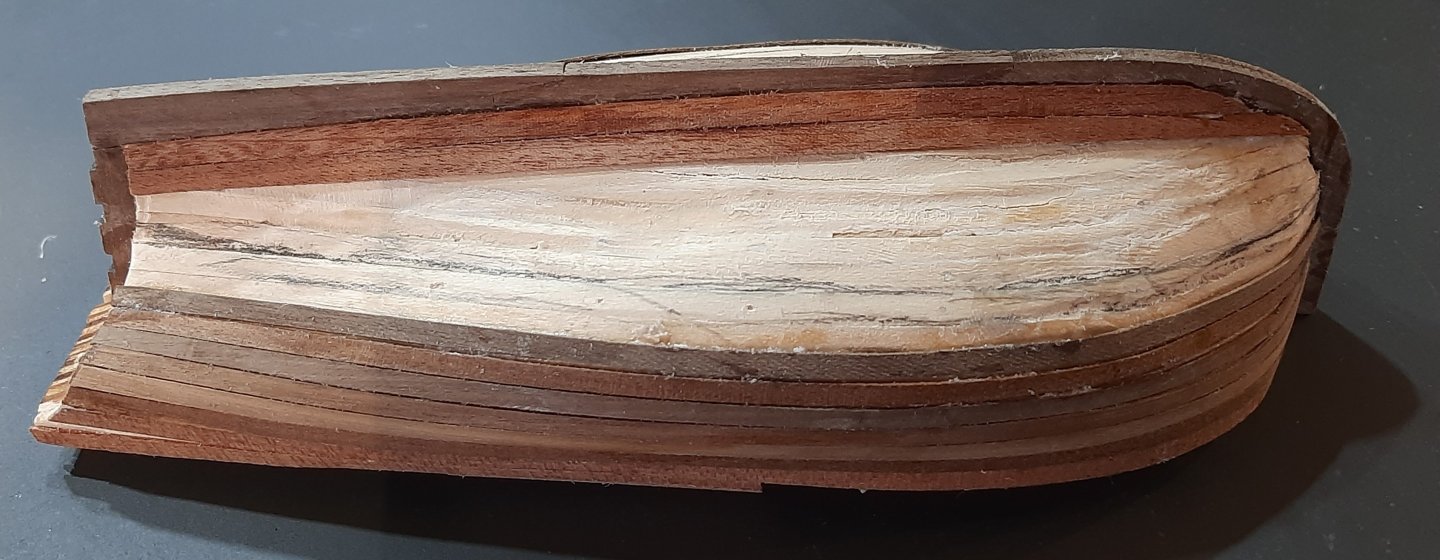
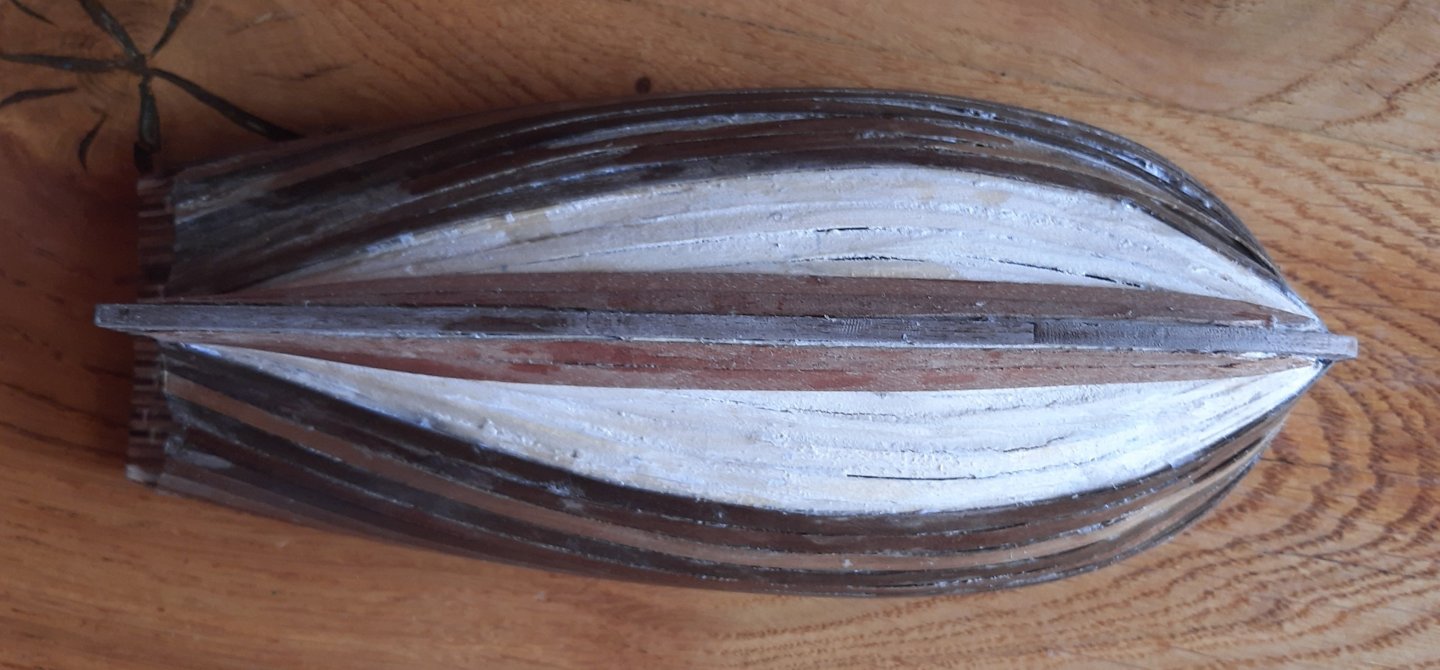
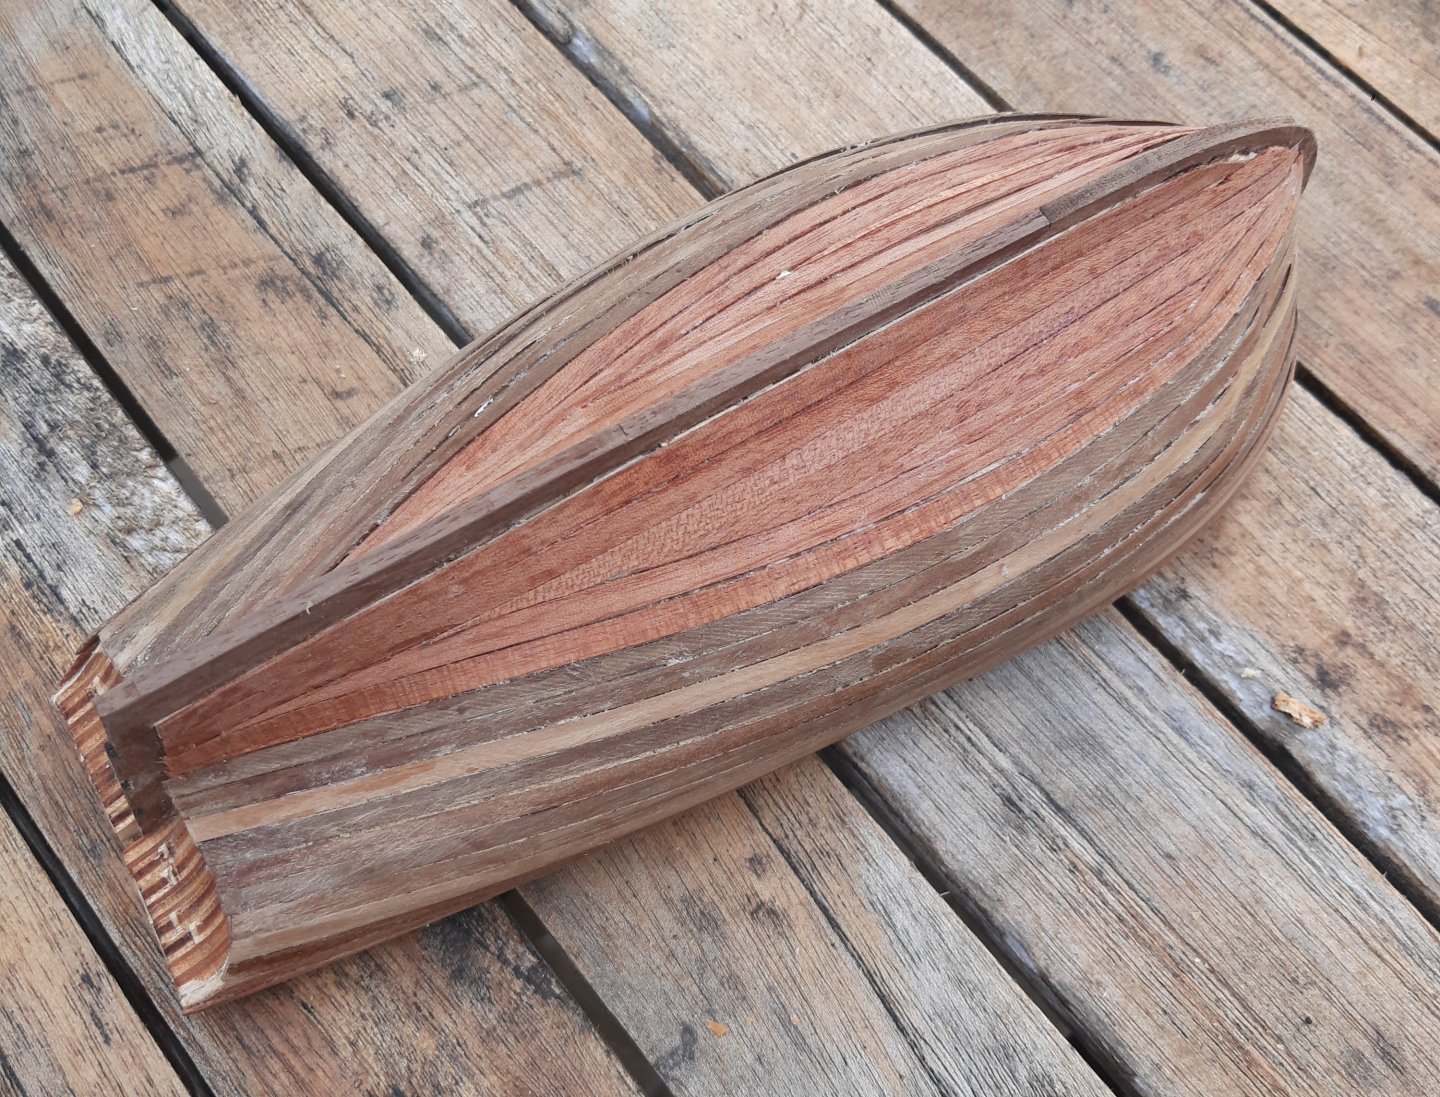
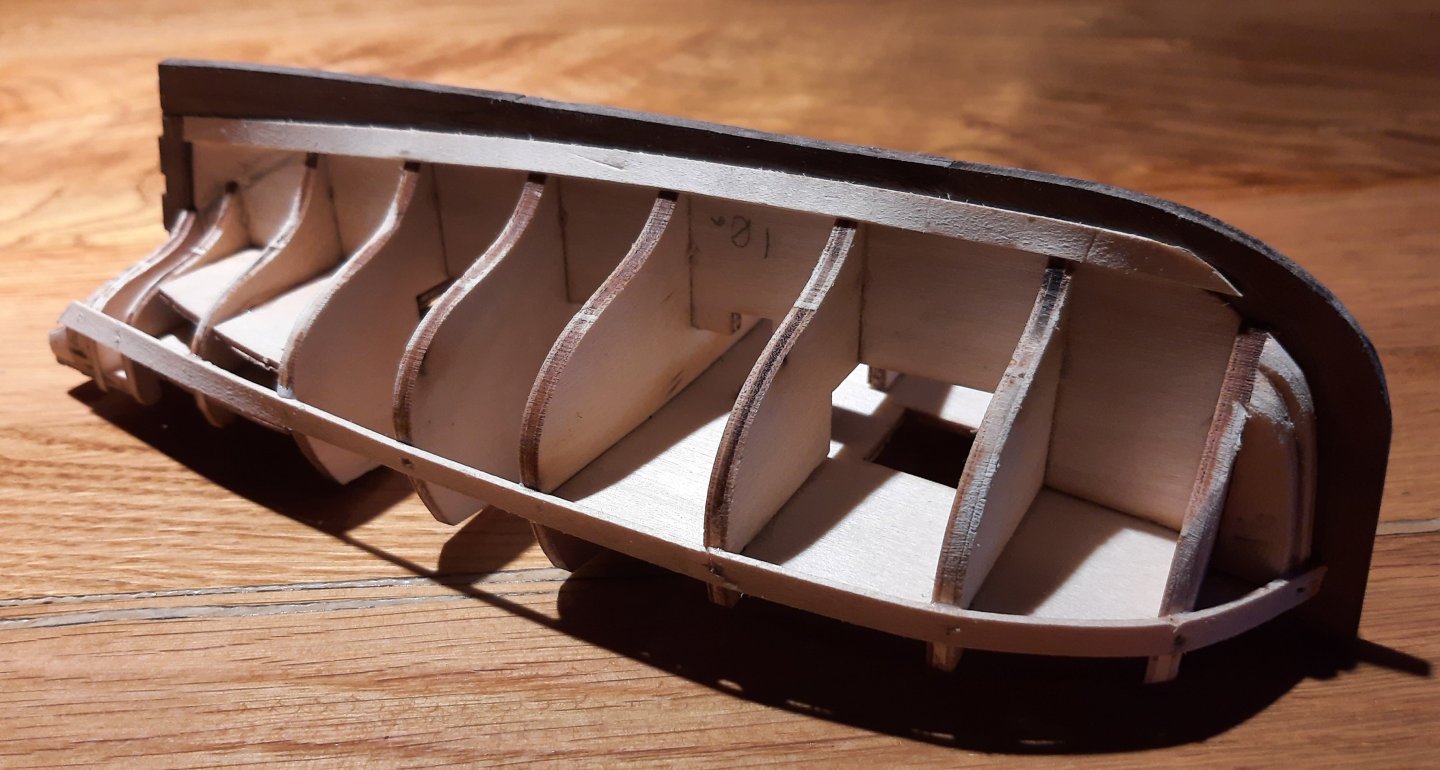
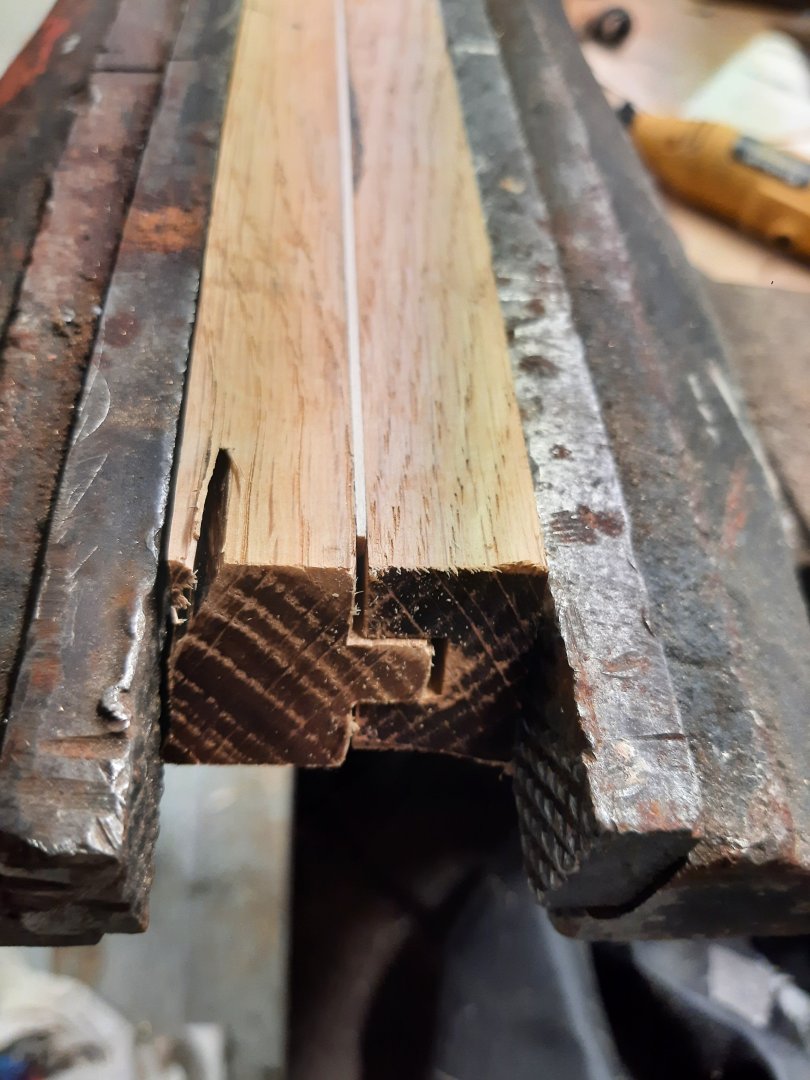
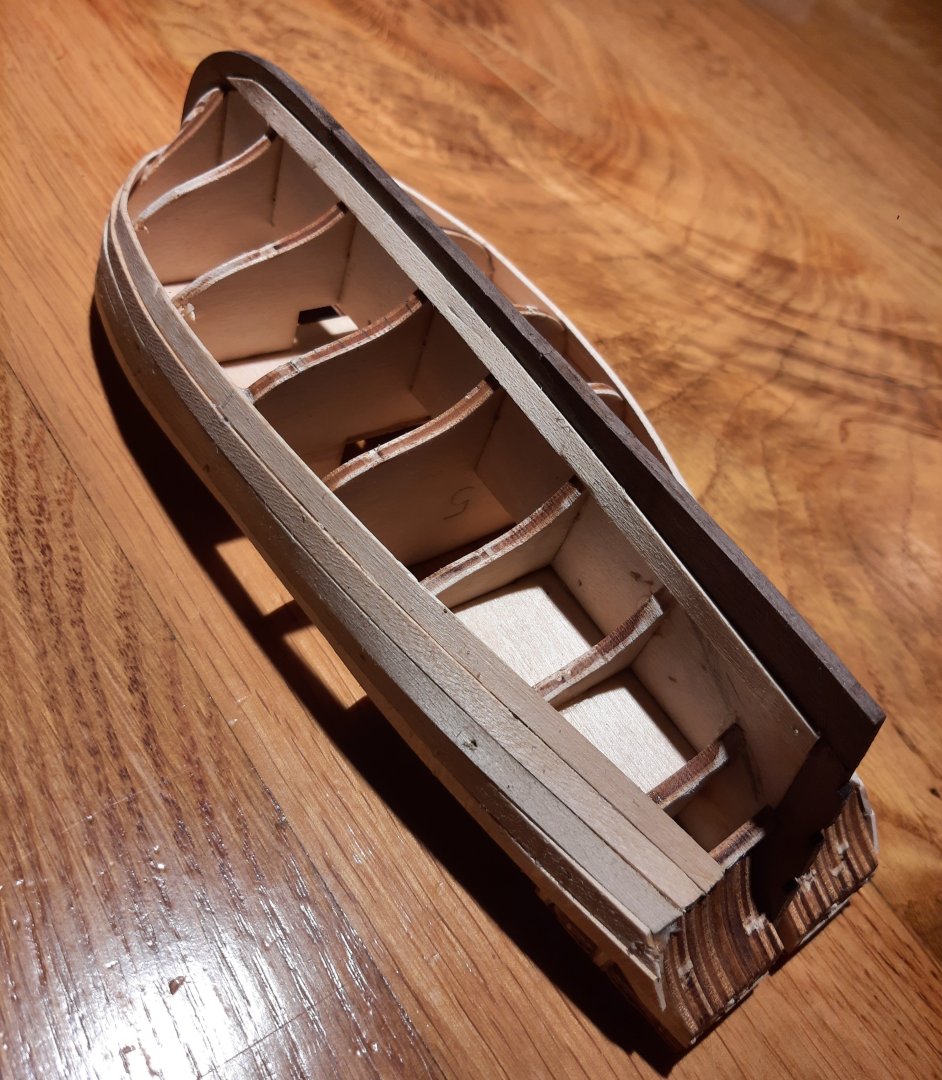
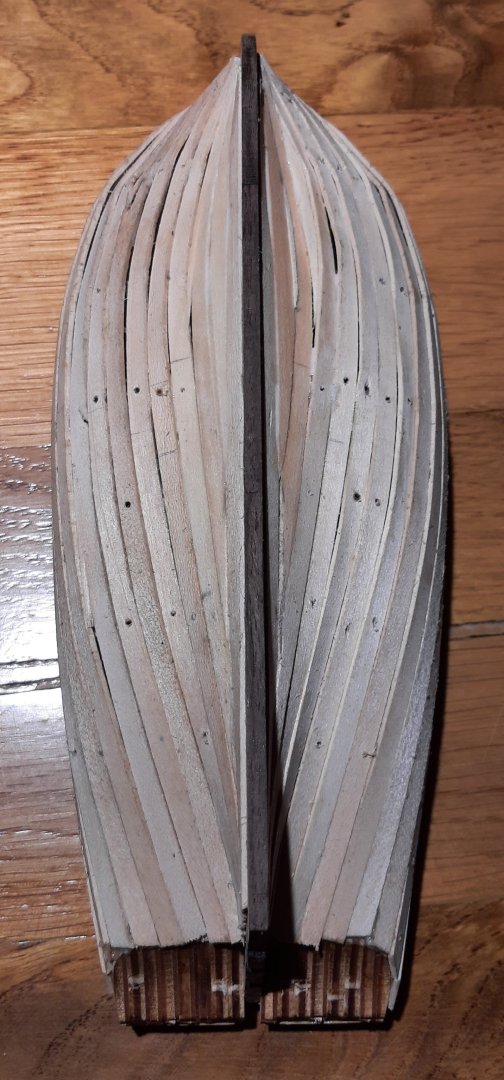
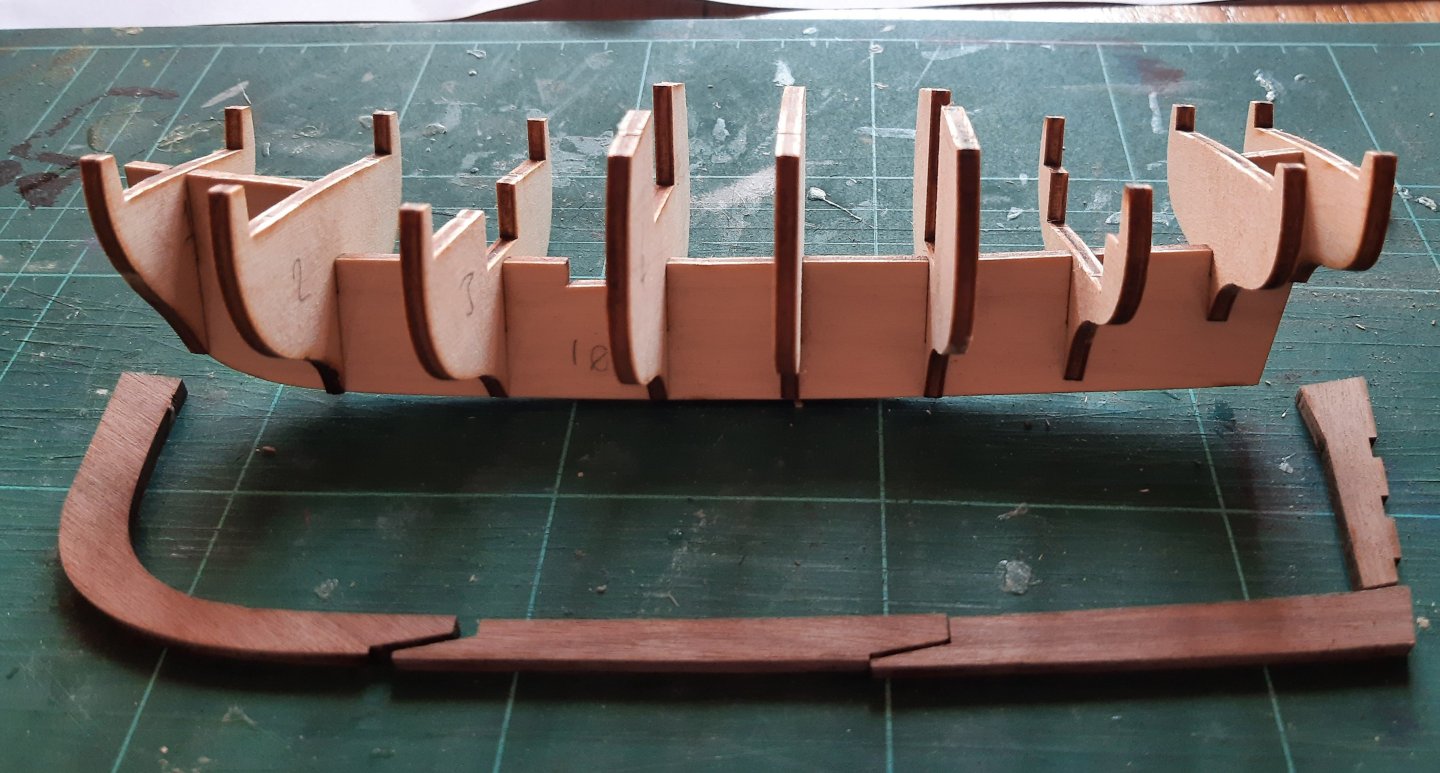
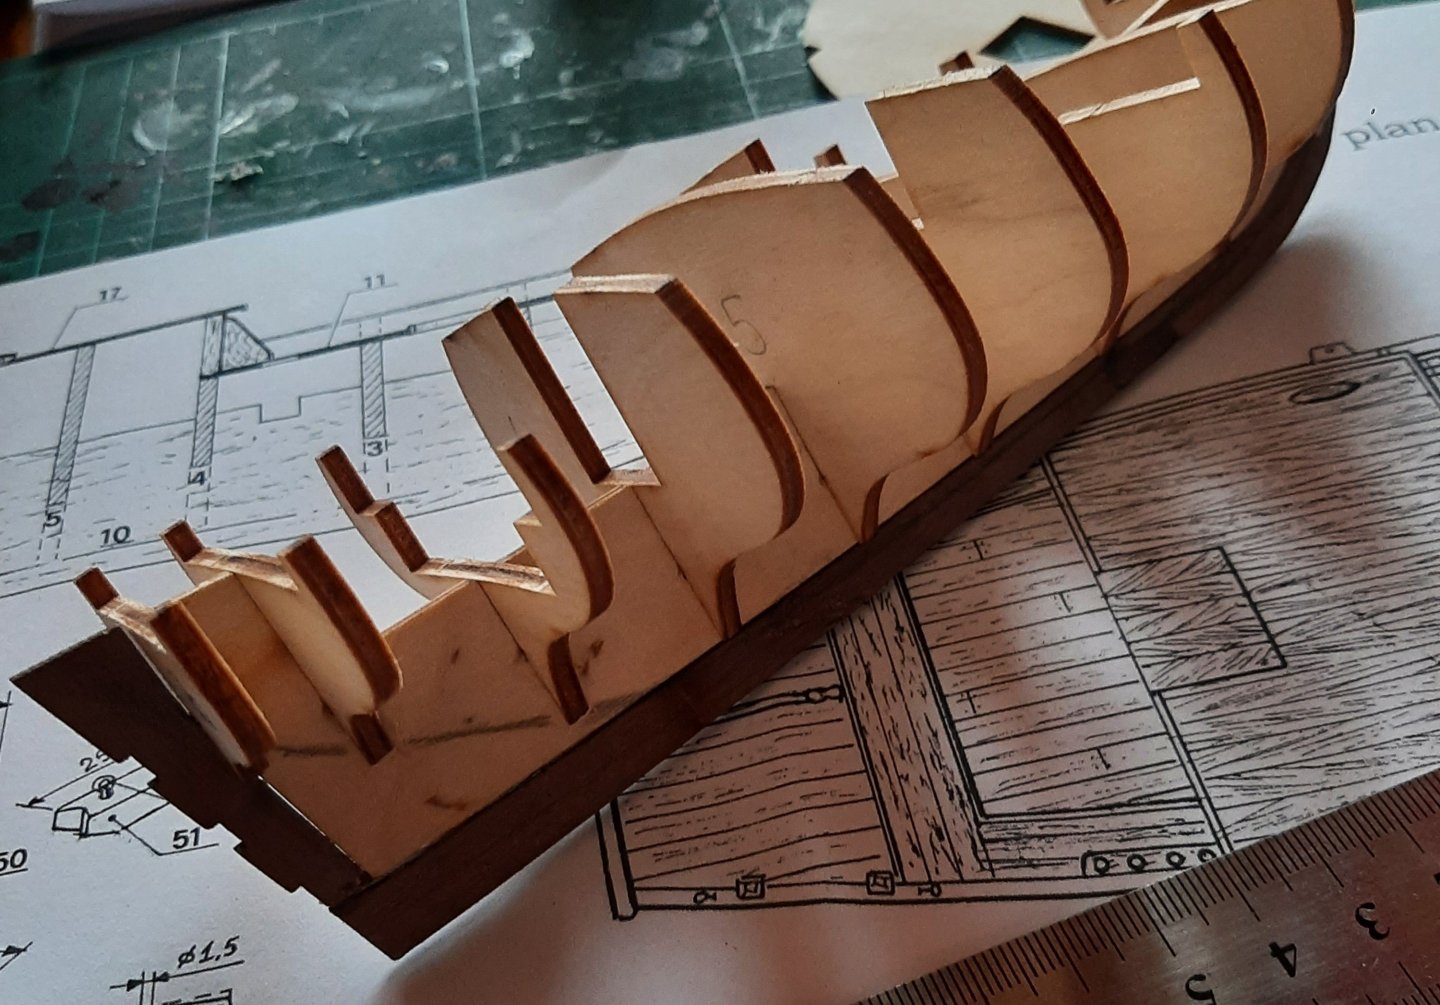
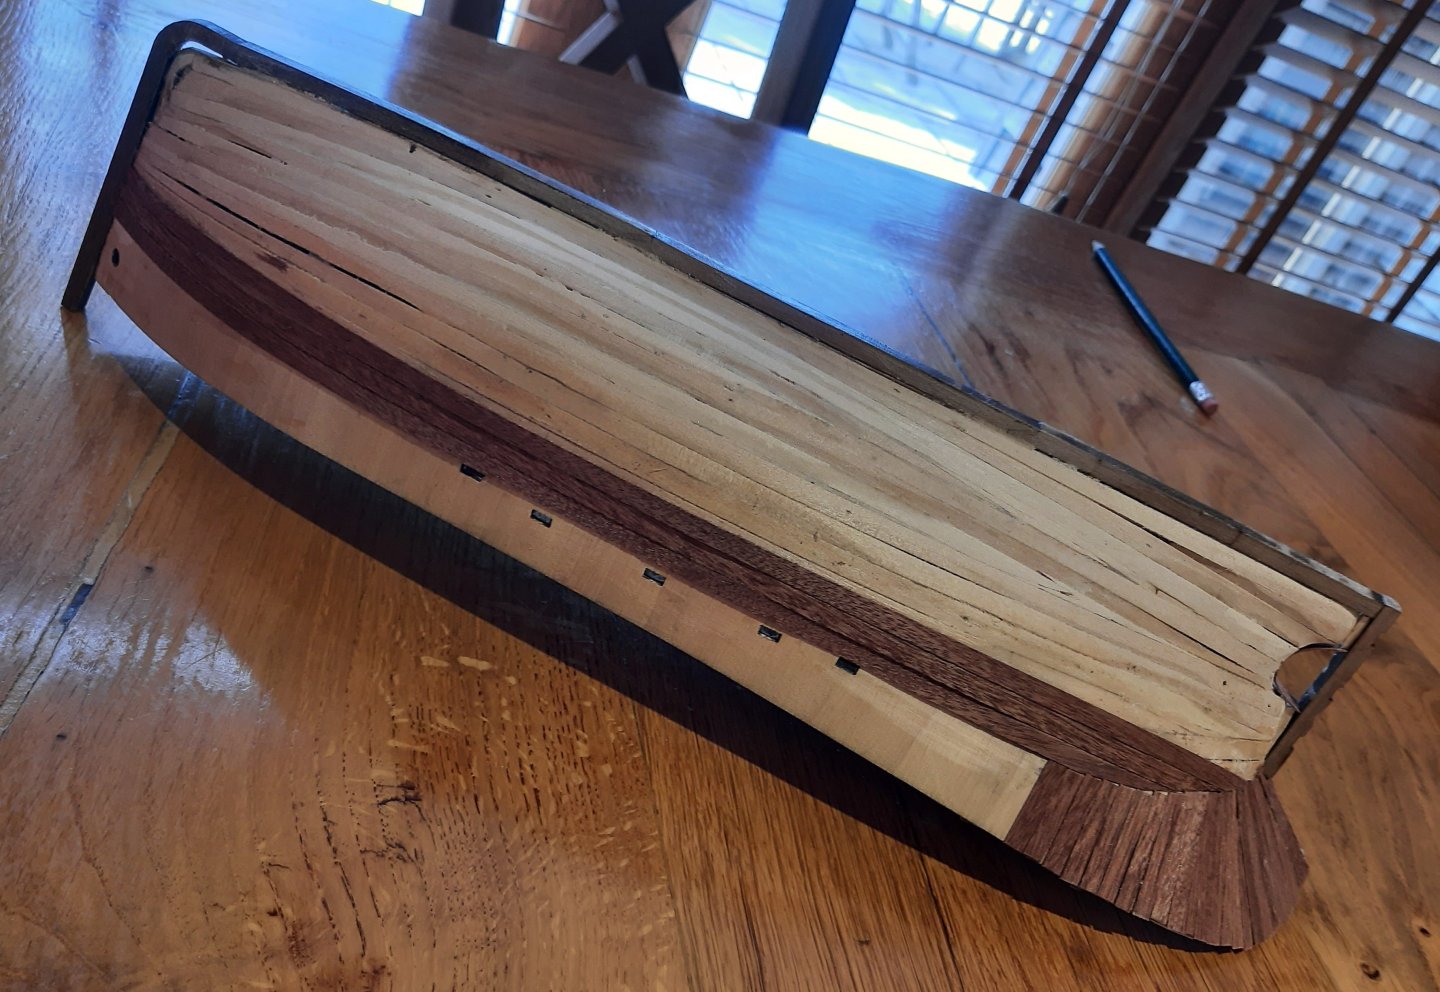
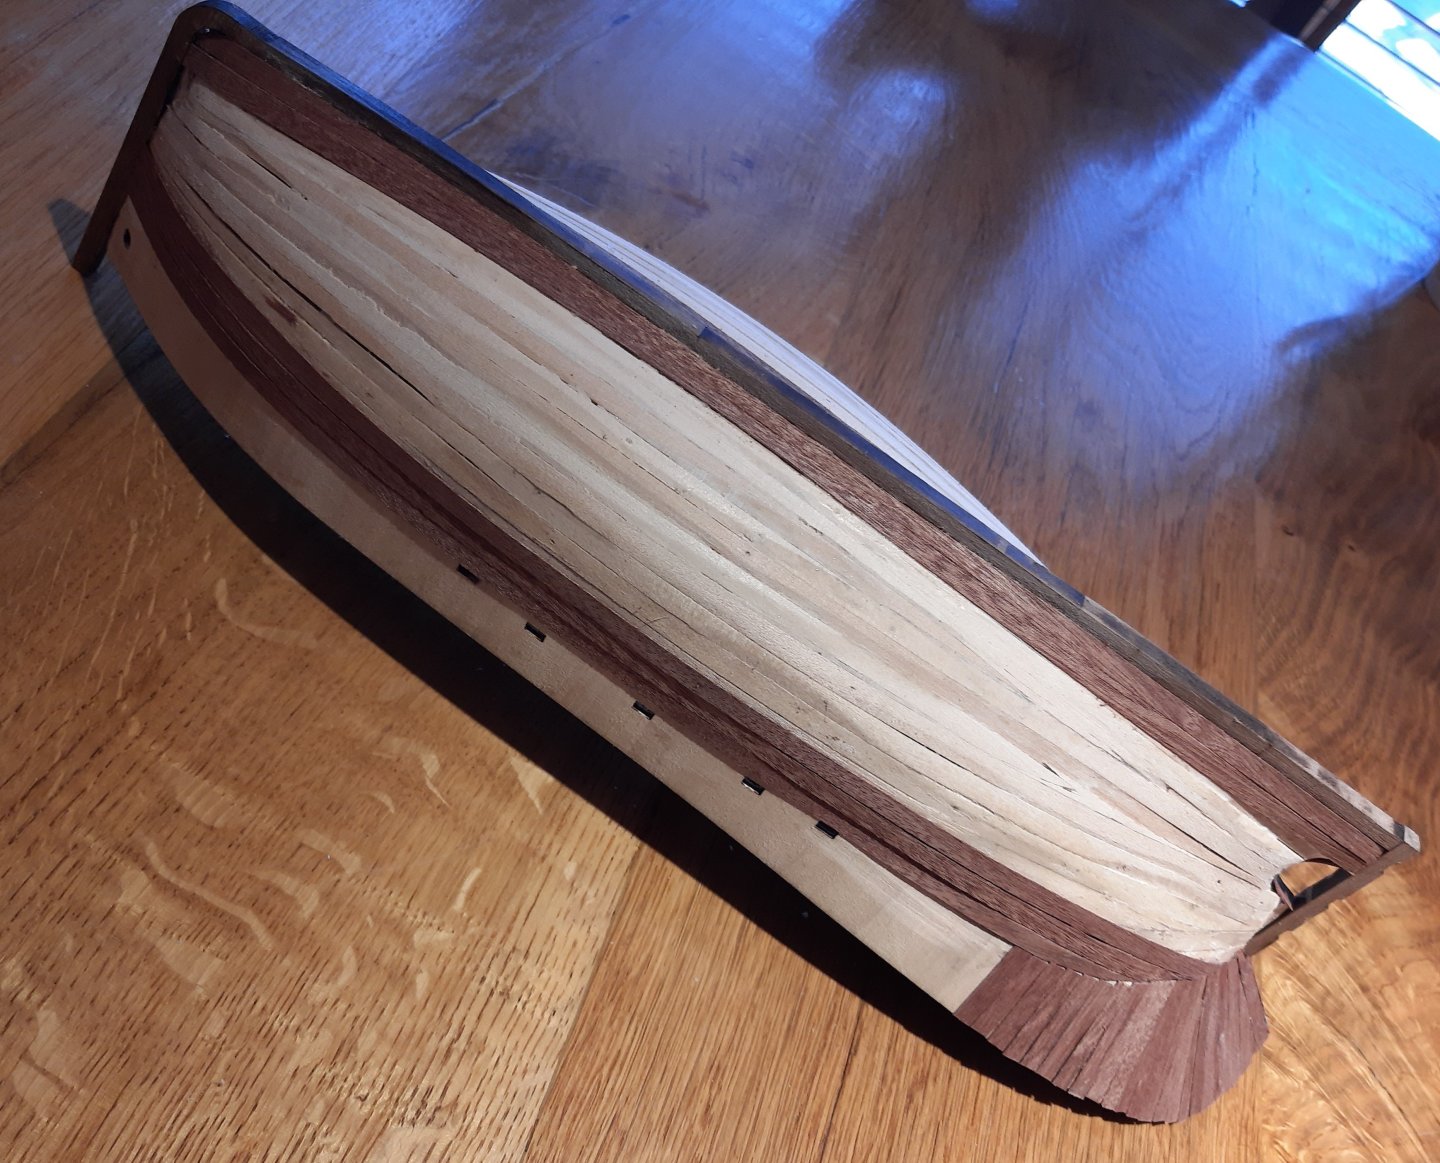
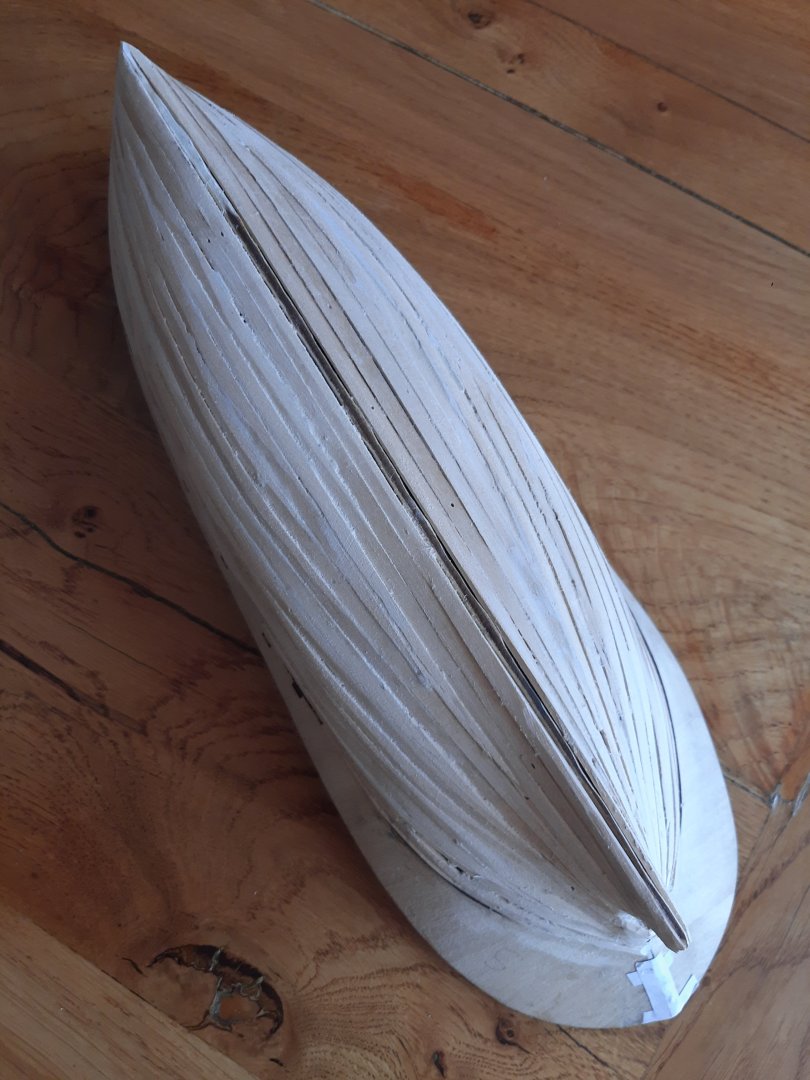
I'm back with a planking update! This was a learning experience, and a pleasant one. On my previous OcCre Palamos build, I did all the plank bending with steam over a kettle. It worked, but it was quite fiddly. This time, I soaked the planks before applying them to the hull. Slower for sure, but far, far more pleasant. I tried using the tiny brass pins supplied, but honestly I just can't see how they're supposed to be useful. My pin pusher tends to bend them before they go into the plywood below the planking - any tips on this would be very appreciated. Here's some pics. First, the rabbet as discussed in my previous post: I was very pleased with this, as it was my first attempt at cutting one. I didn't go deep enough at the stern, and I should have shaved off more of each of the central bulkheads. Oh well - it's all a learning experience. Here's the first planks clamped in place after soaking: You can see one of the brass pins sticking out at the back there. I ended up resorting to drawing pins later, as I could push those in without as much fear of bending them. Here's the first planks glued in place: The soaking method was a far more pleasant experience overall - I'm yet to try using an iron for this process, but honestly for lack of overall faff a tray of water is by far the simplest way of doing this. Now for tapering. Luckily, based on my measurements, I only needed to take 1mm off each plank to make them fit. In the end, I needed to take an extra mm off the last two planks, but I was pretty close! I created a slightly janky tapering jig out of some old floorboard - lock the plank in the join, shut it in a vice, run a chisel over it. Worked nearly perfectly: I was able to very quickly mass-produce planks using this, so well worth the time to cut the boards. Safer than using a knife to taper the planks, and far more accurate. Here's a few more planks glued on: I love the shape of this hull - compared with the Palamos it's so much sleeker, and the transom at the rear makes terminating the planks a dream. Some further work: You can see that some of my planking wasn't very accurate on one side here - I'm not entirely sure where it went wrong, but that gap plagued the rest of the hull. In hindsight, I should have taken the plank off and tried again, but nothing a bit of filler couldn't fix. Here's the planking finished: And here it is after some filling and sanding: Not too bad, for a second-ever go, I think. One more shot: Perfect. Sort of. I've already made a start on the second layer of planking, so you'll get an update on that in the next week or so. I'm a little concerned as Mamoli have not supplied many of the sapele strips - I might have to borrow a couple that were left over from my Palamos build. A bit annoying! Stay tuned.


-
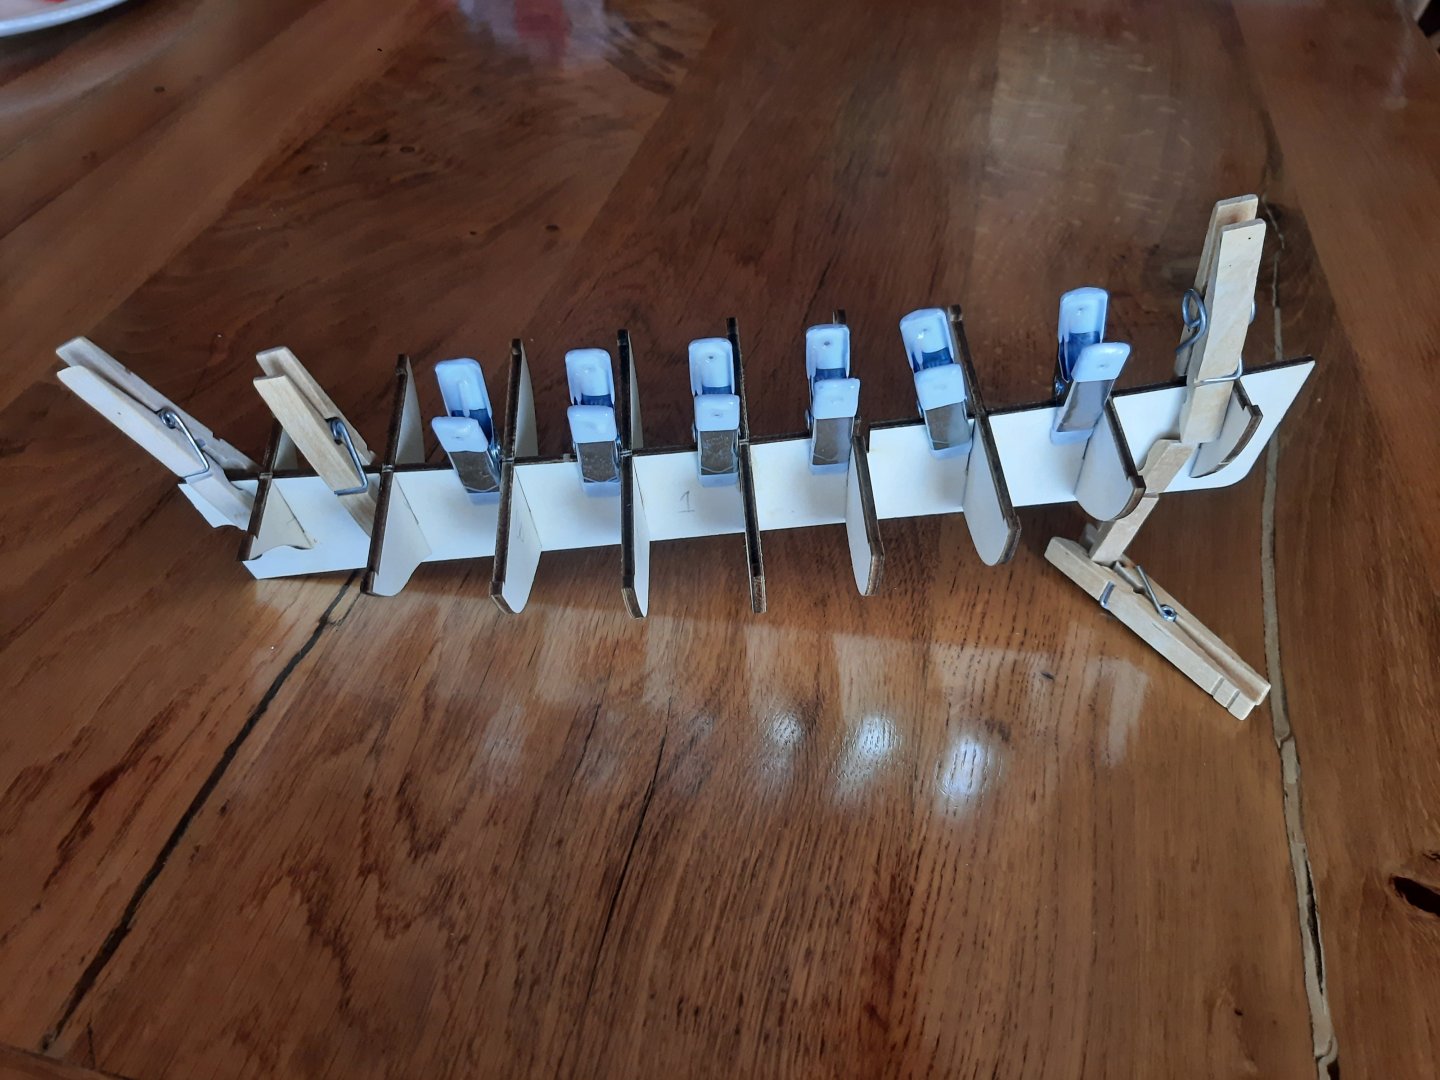
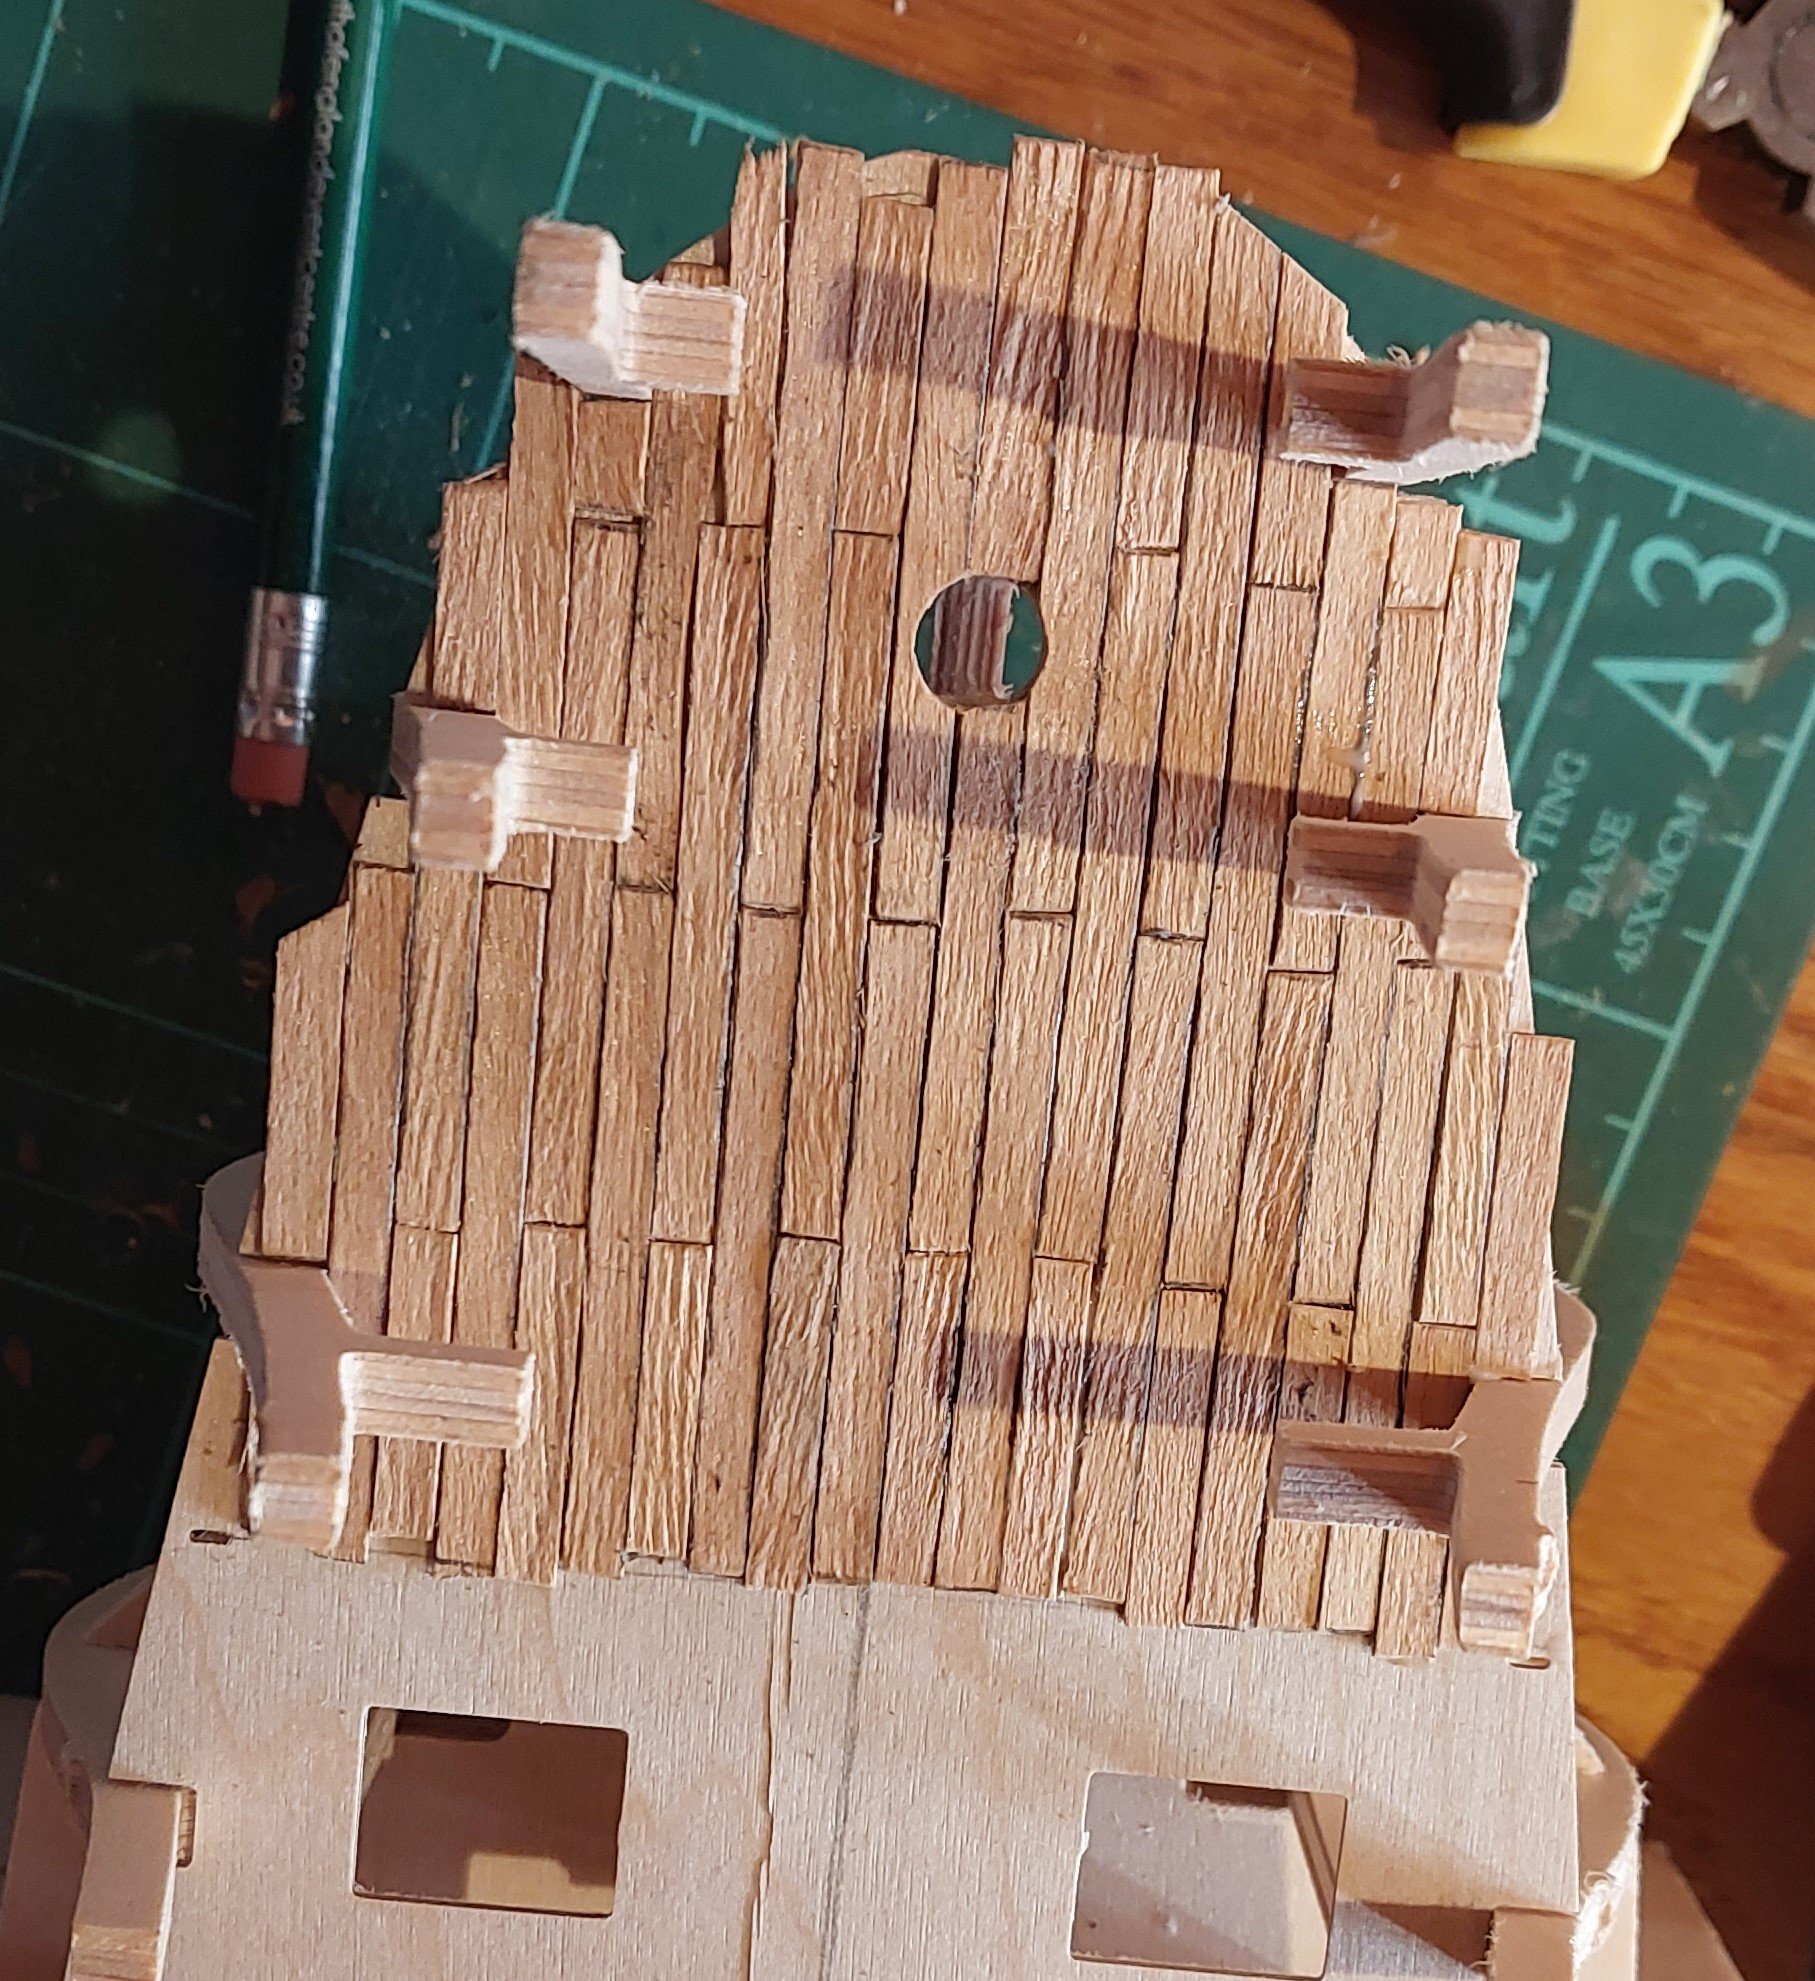
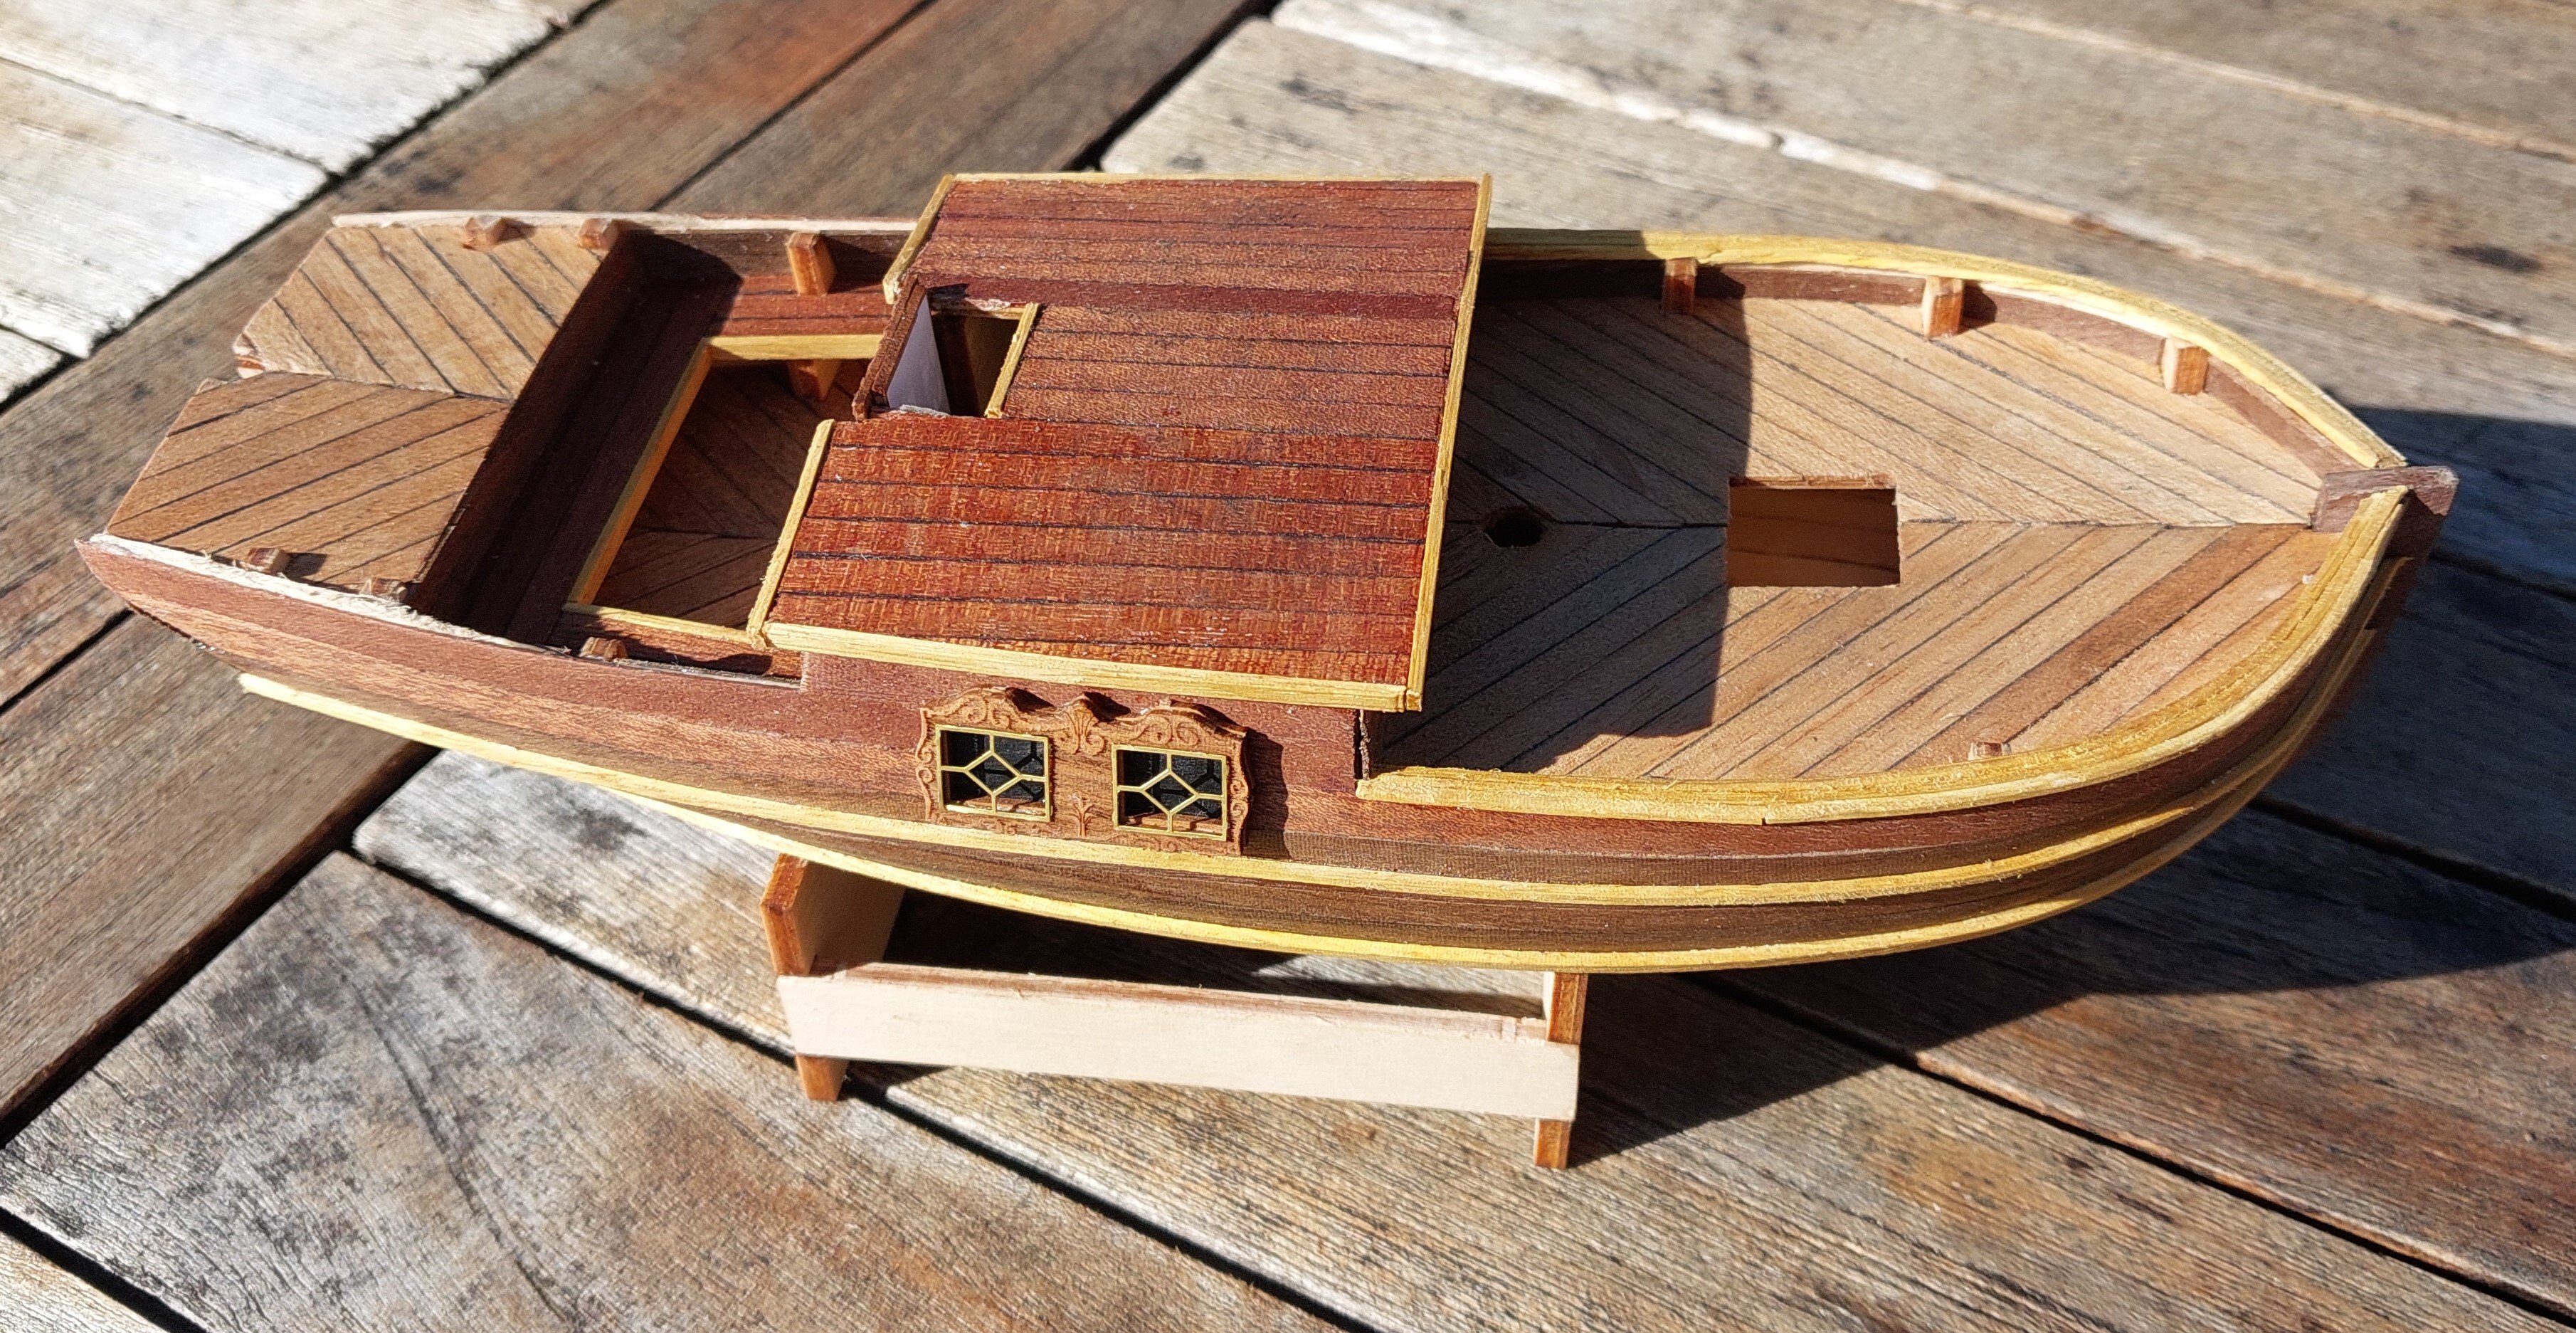
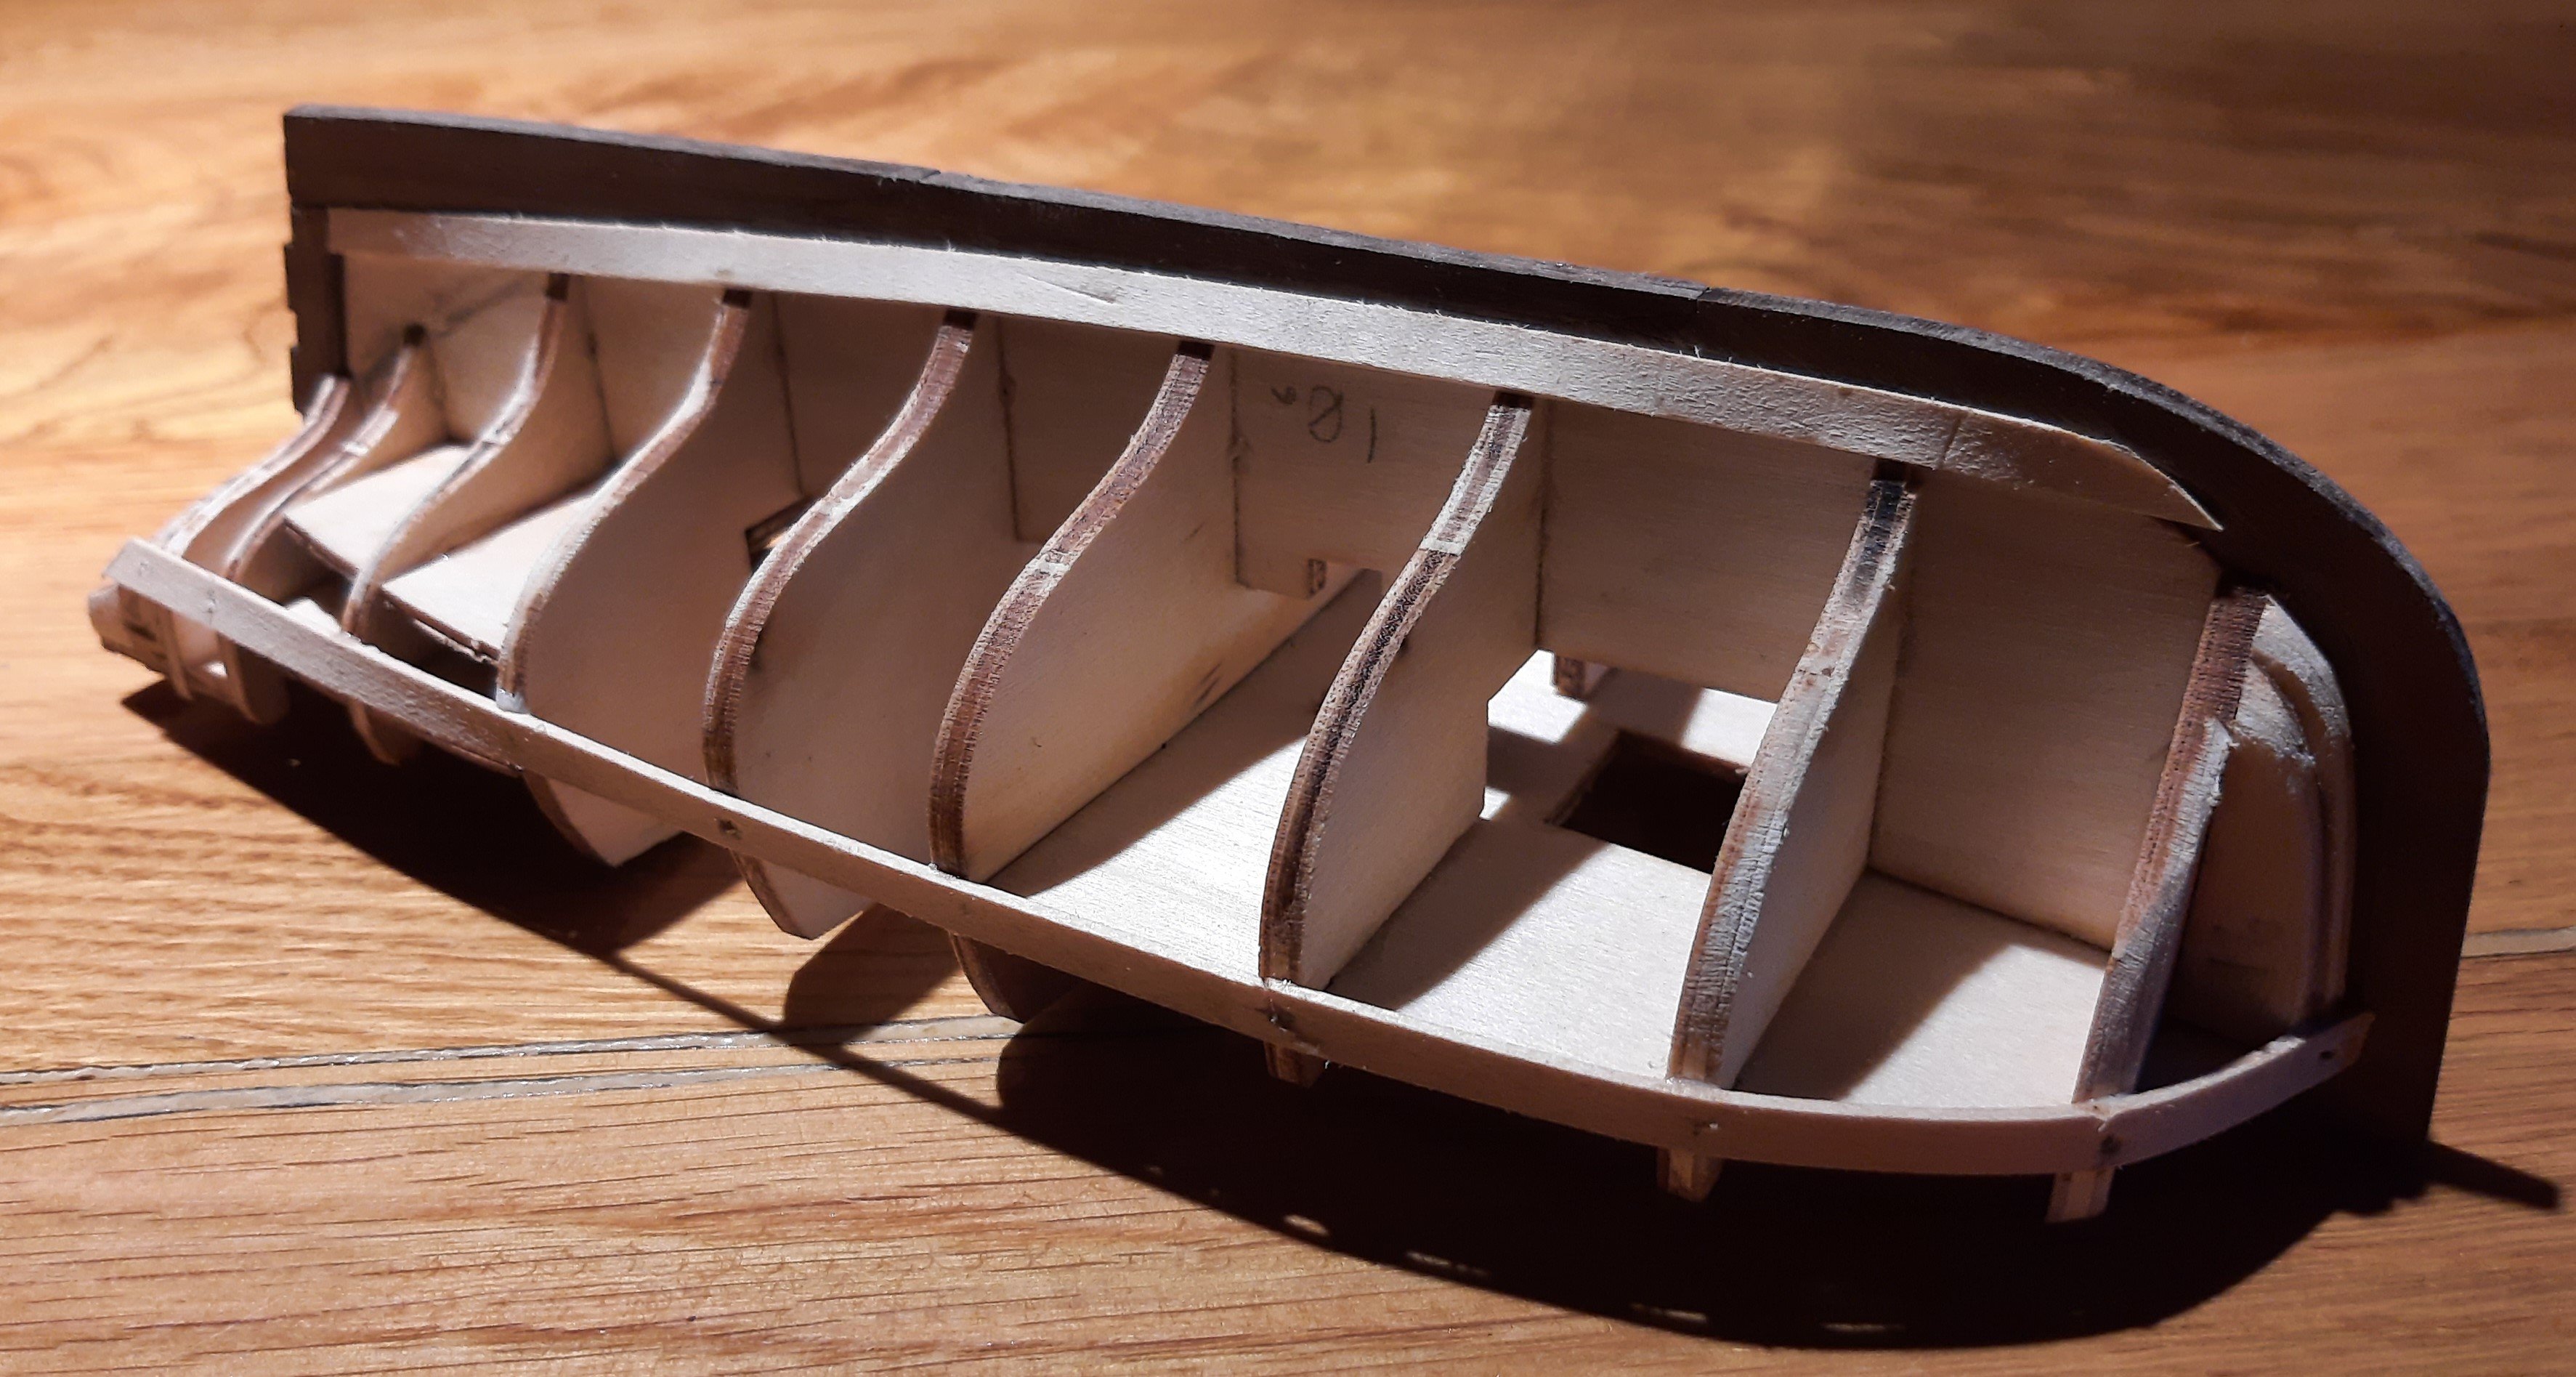
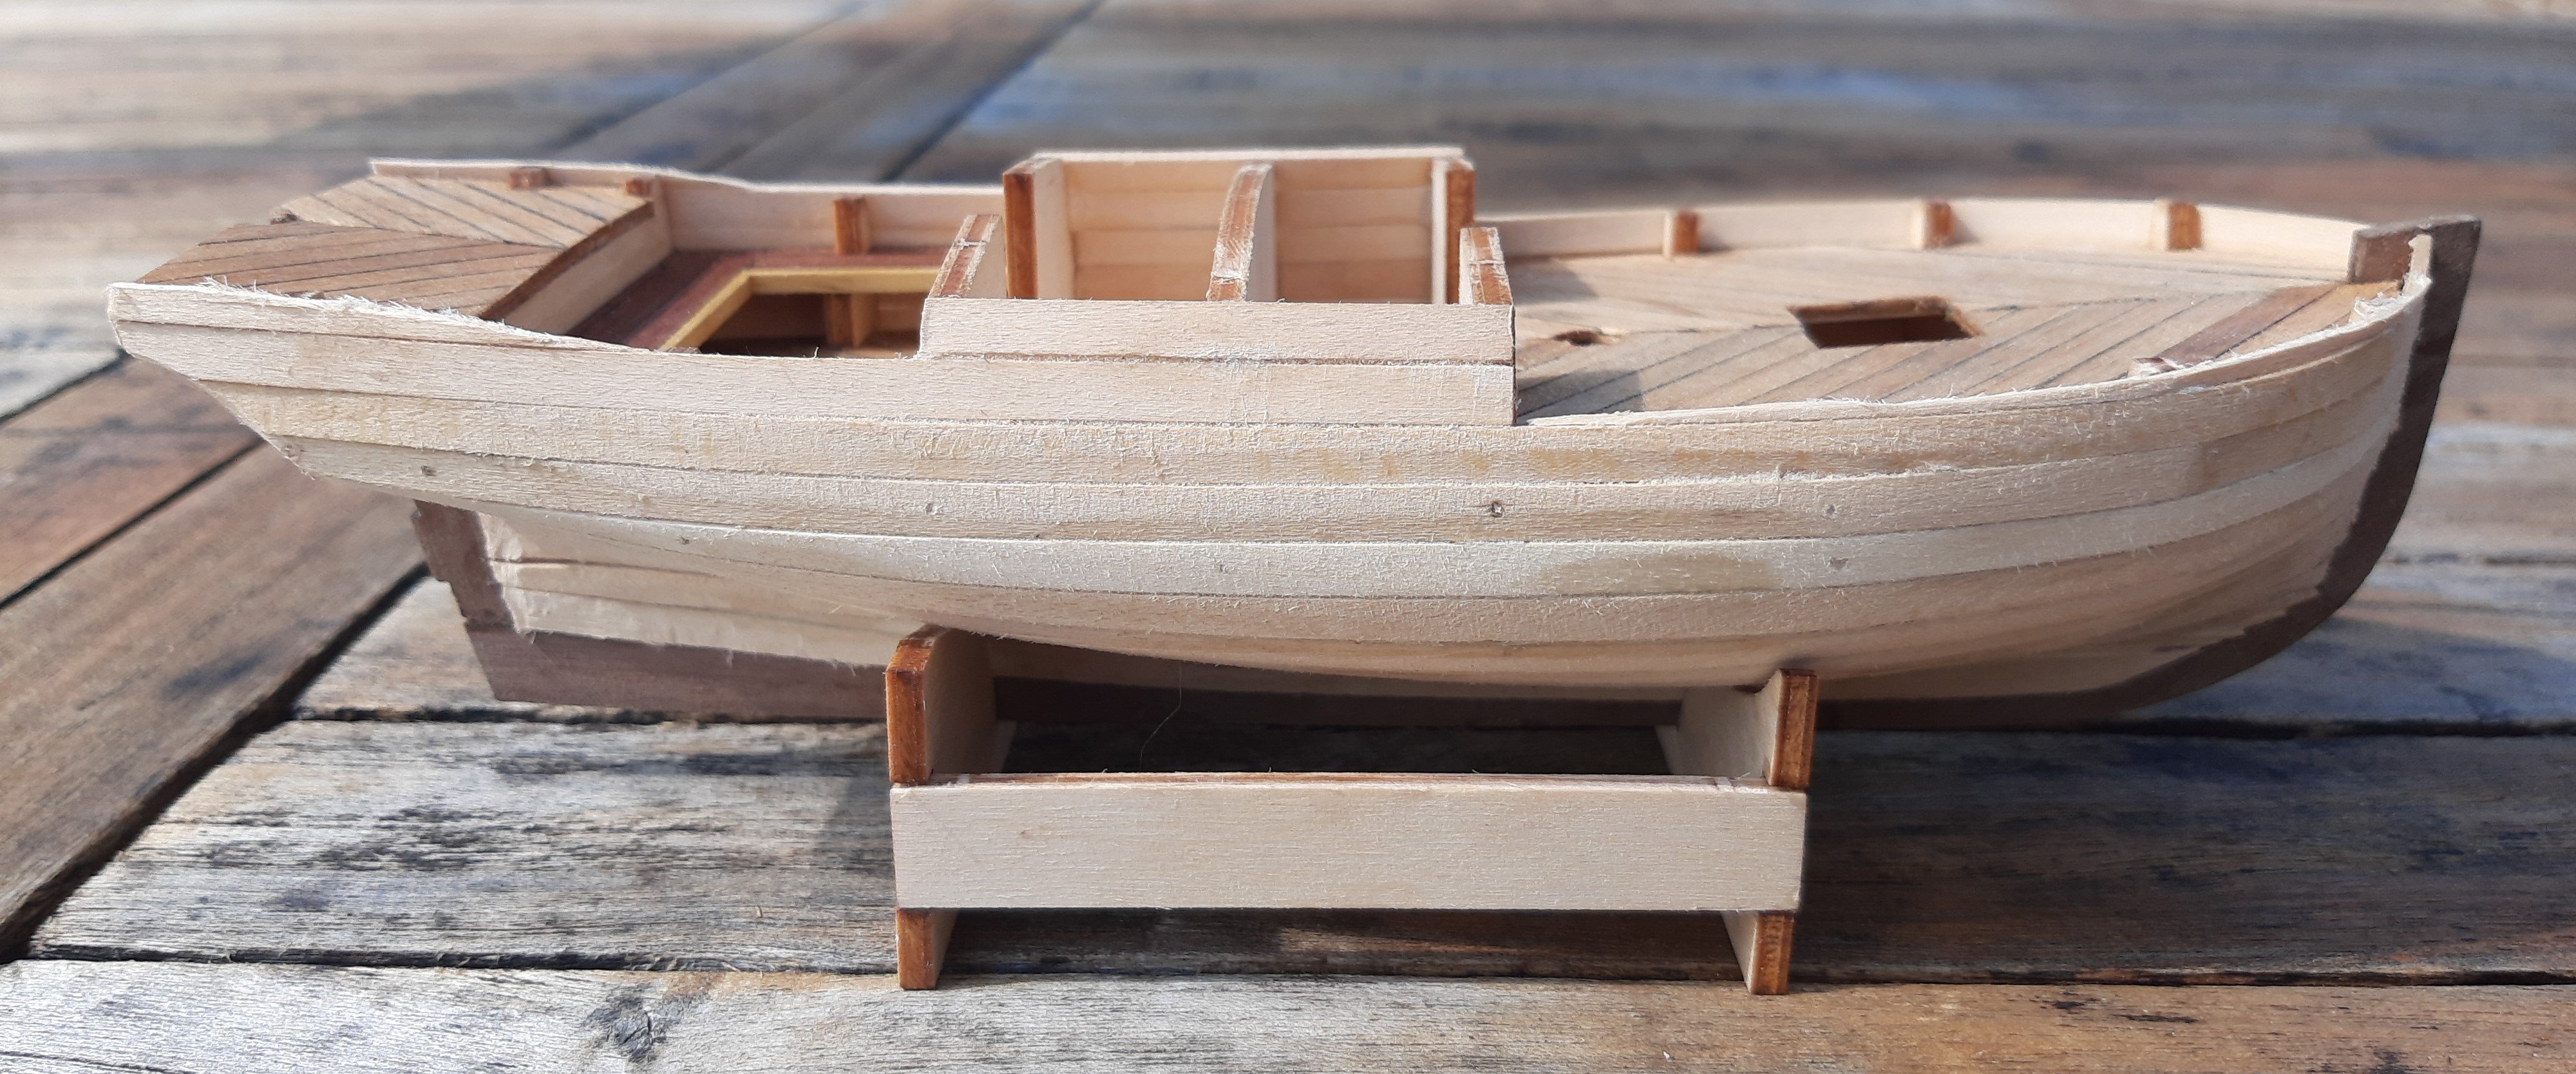
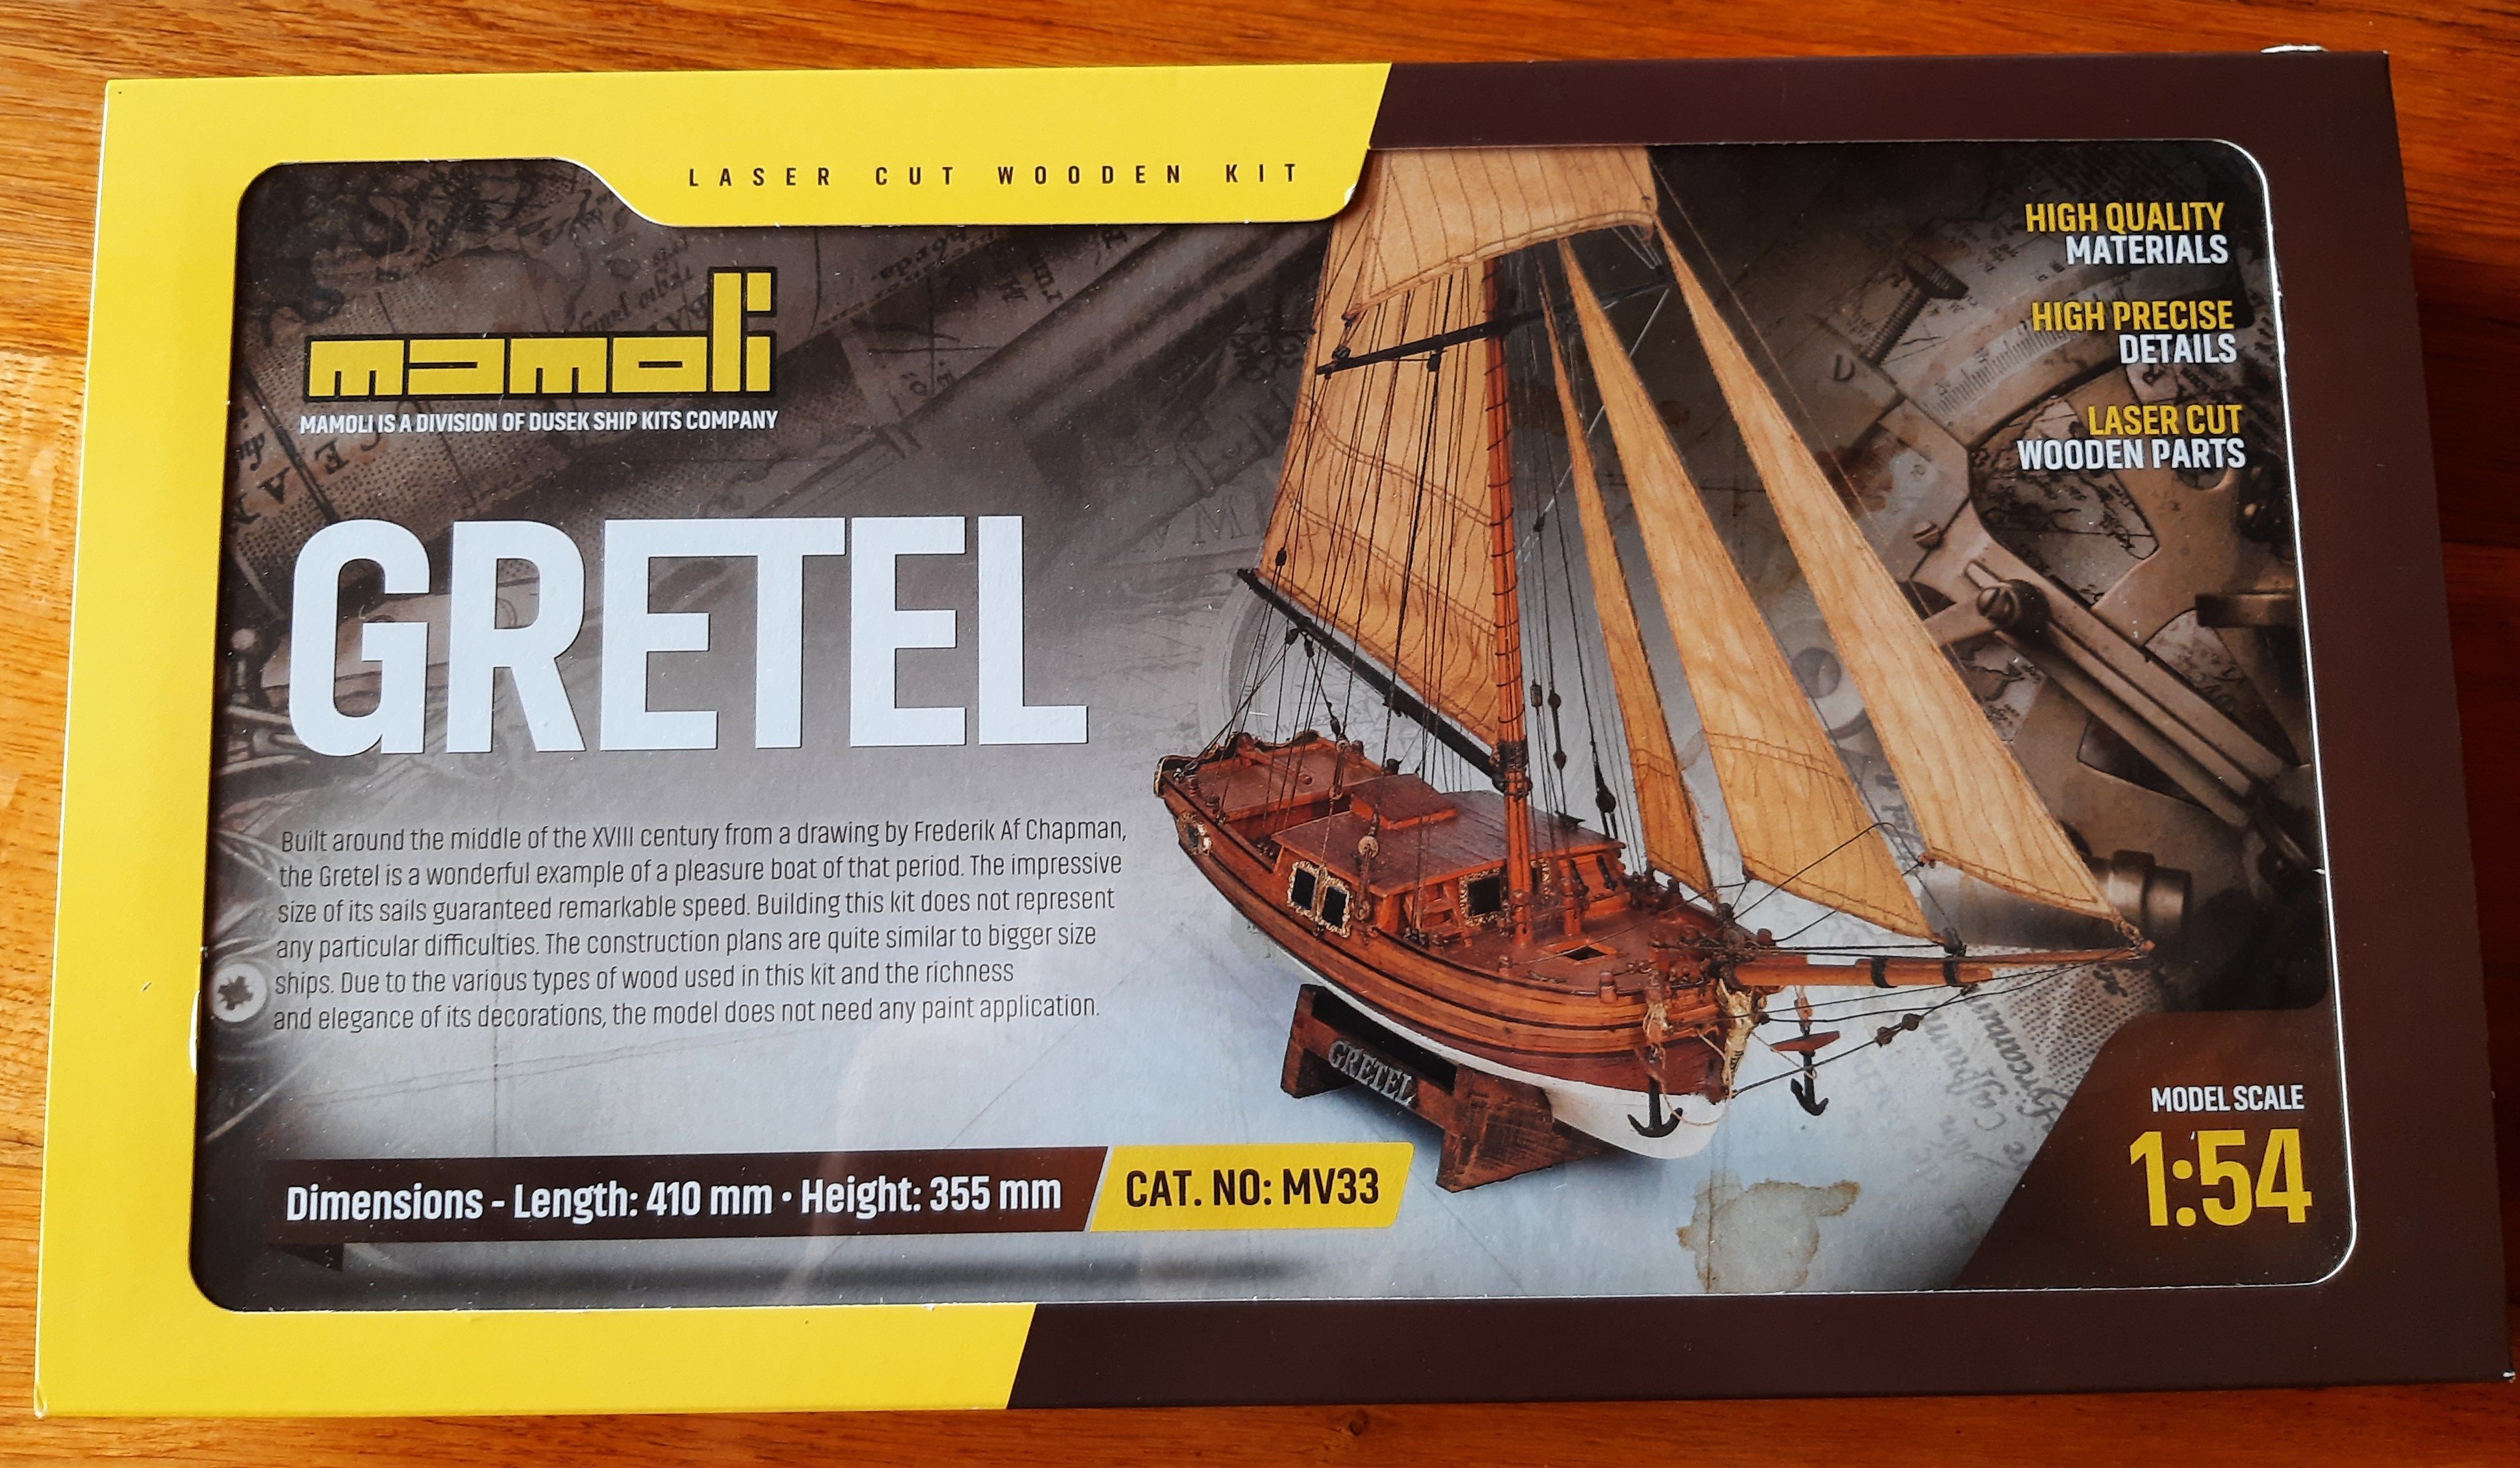
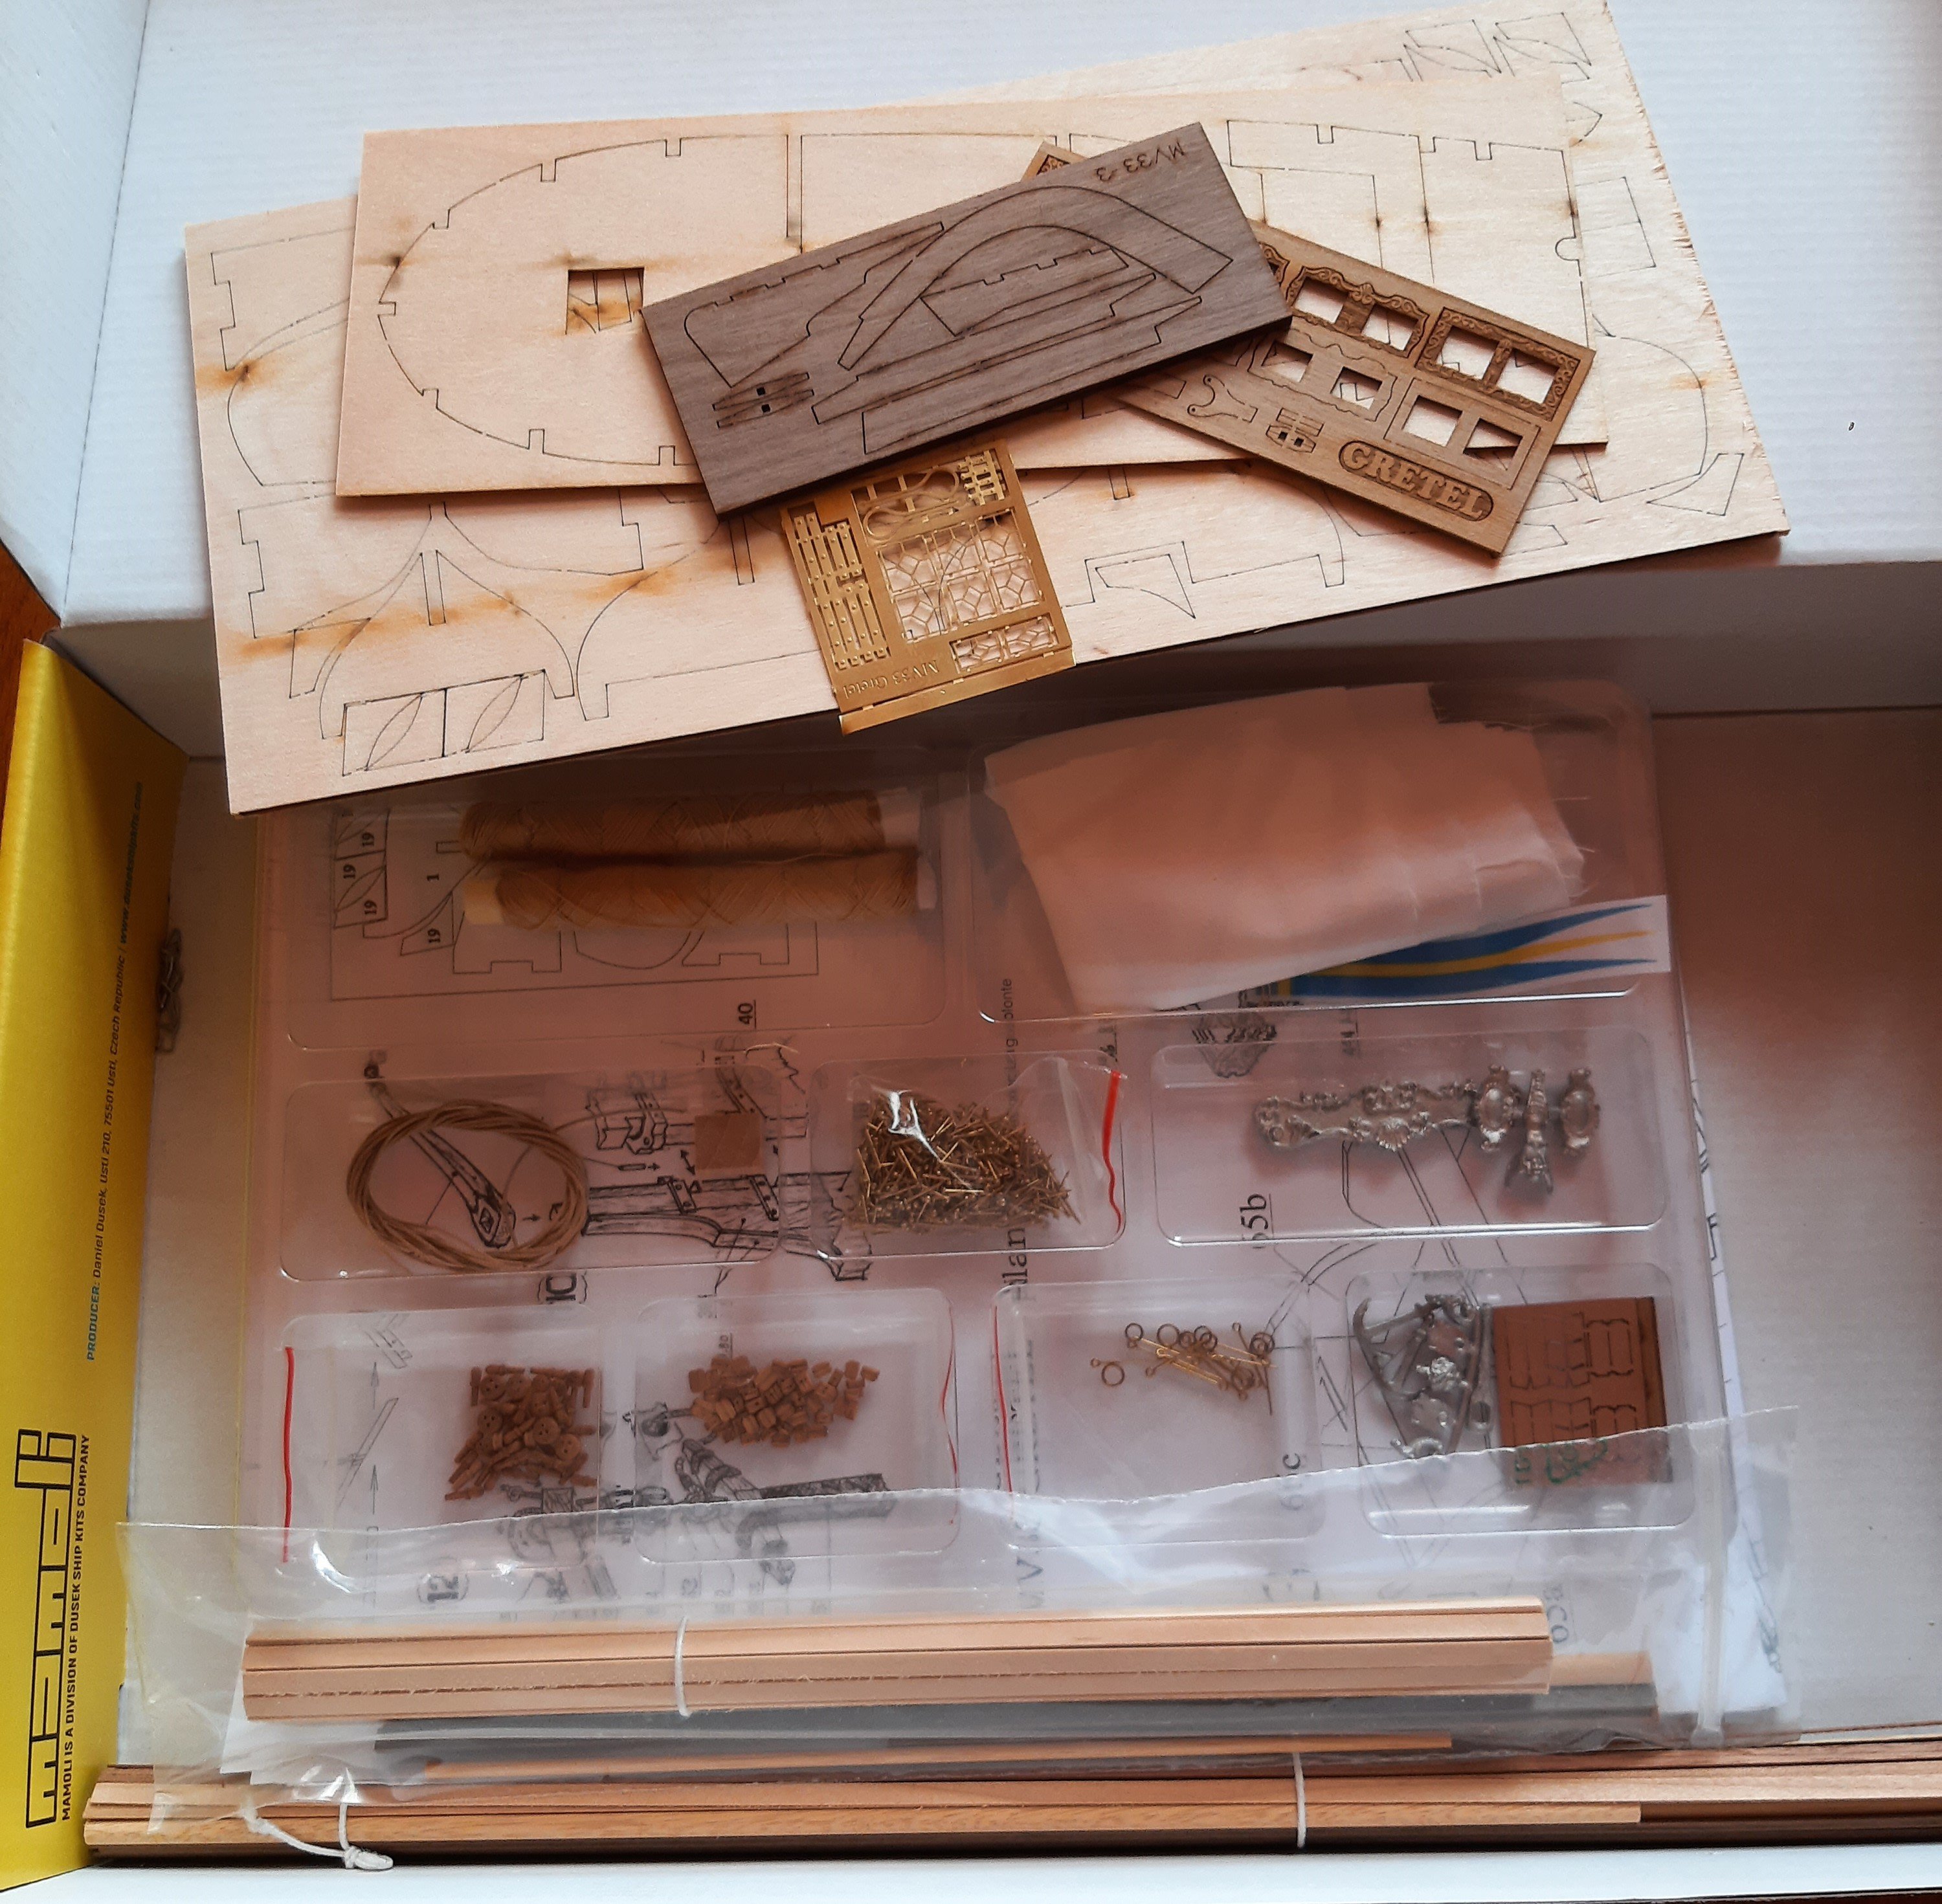
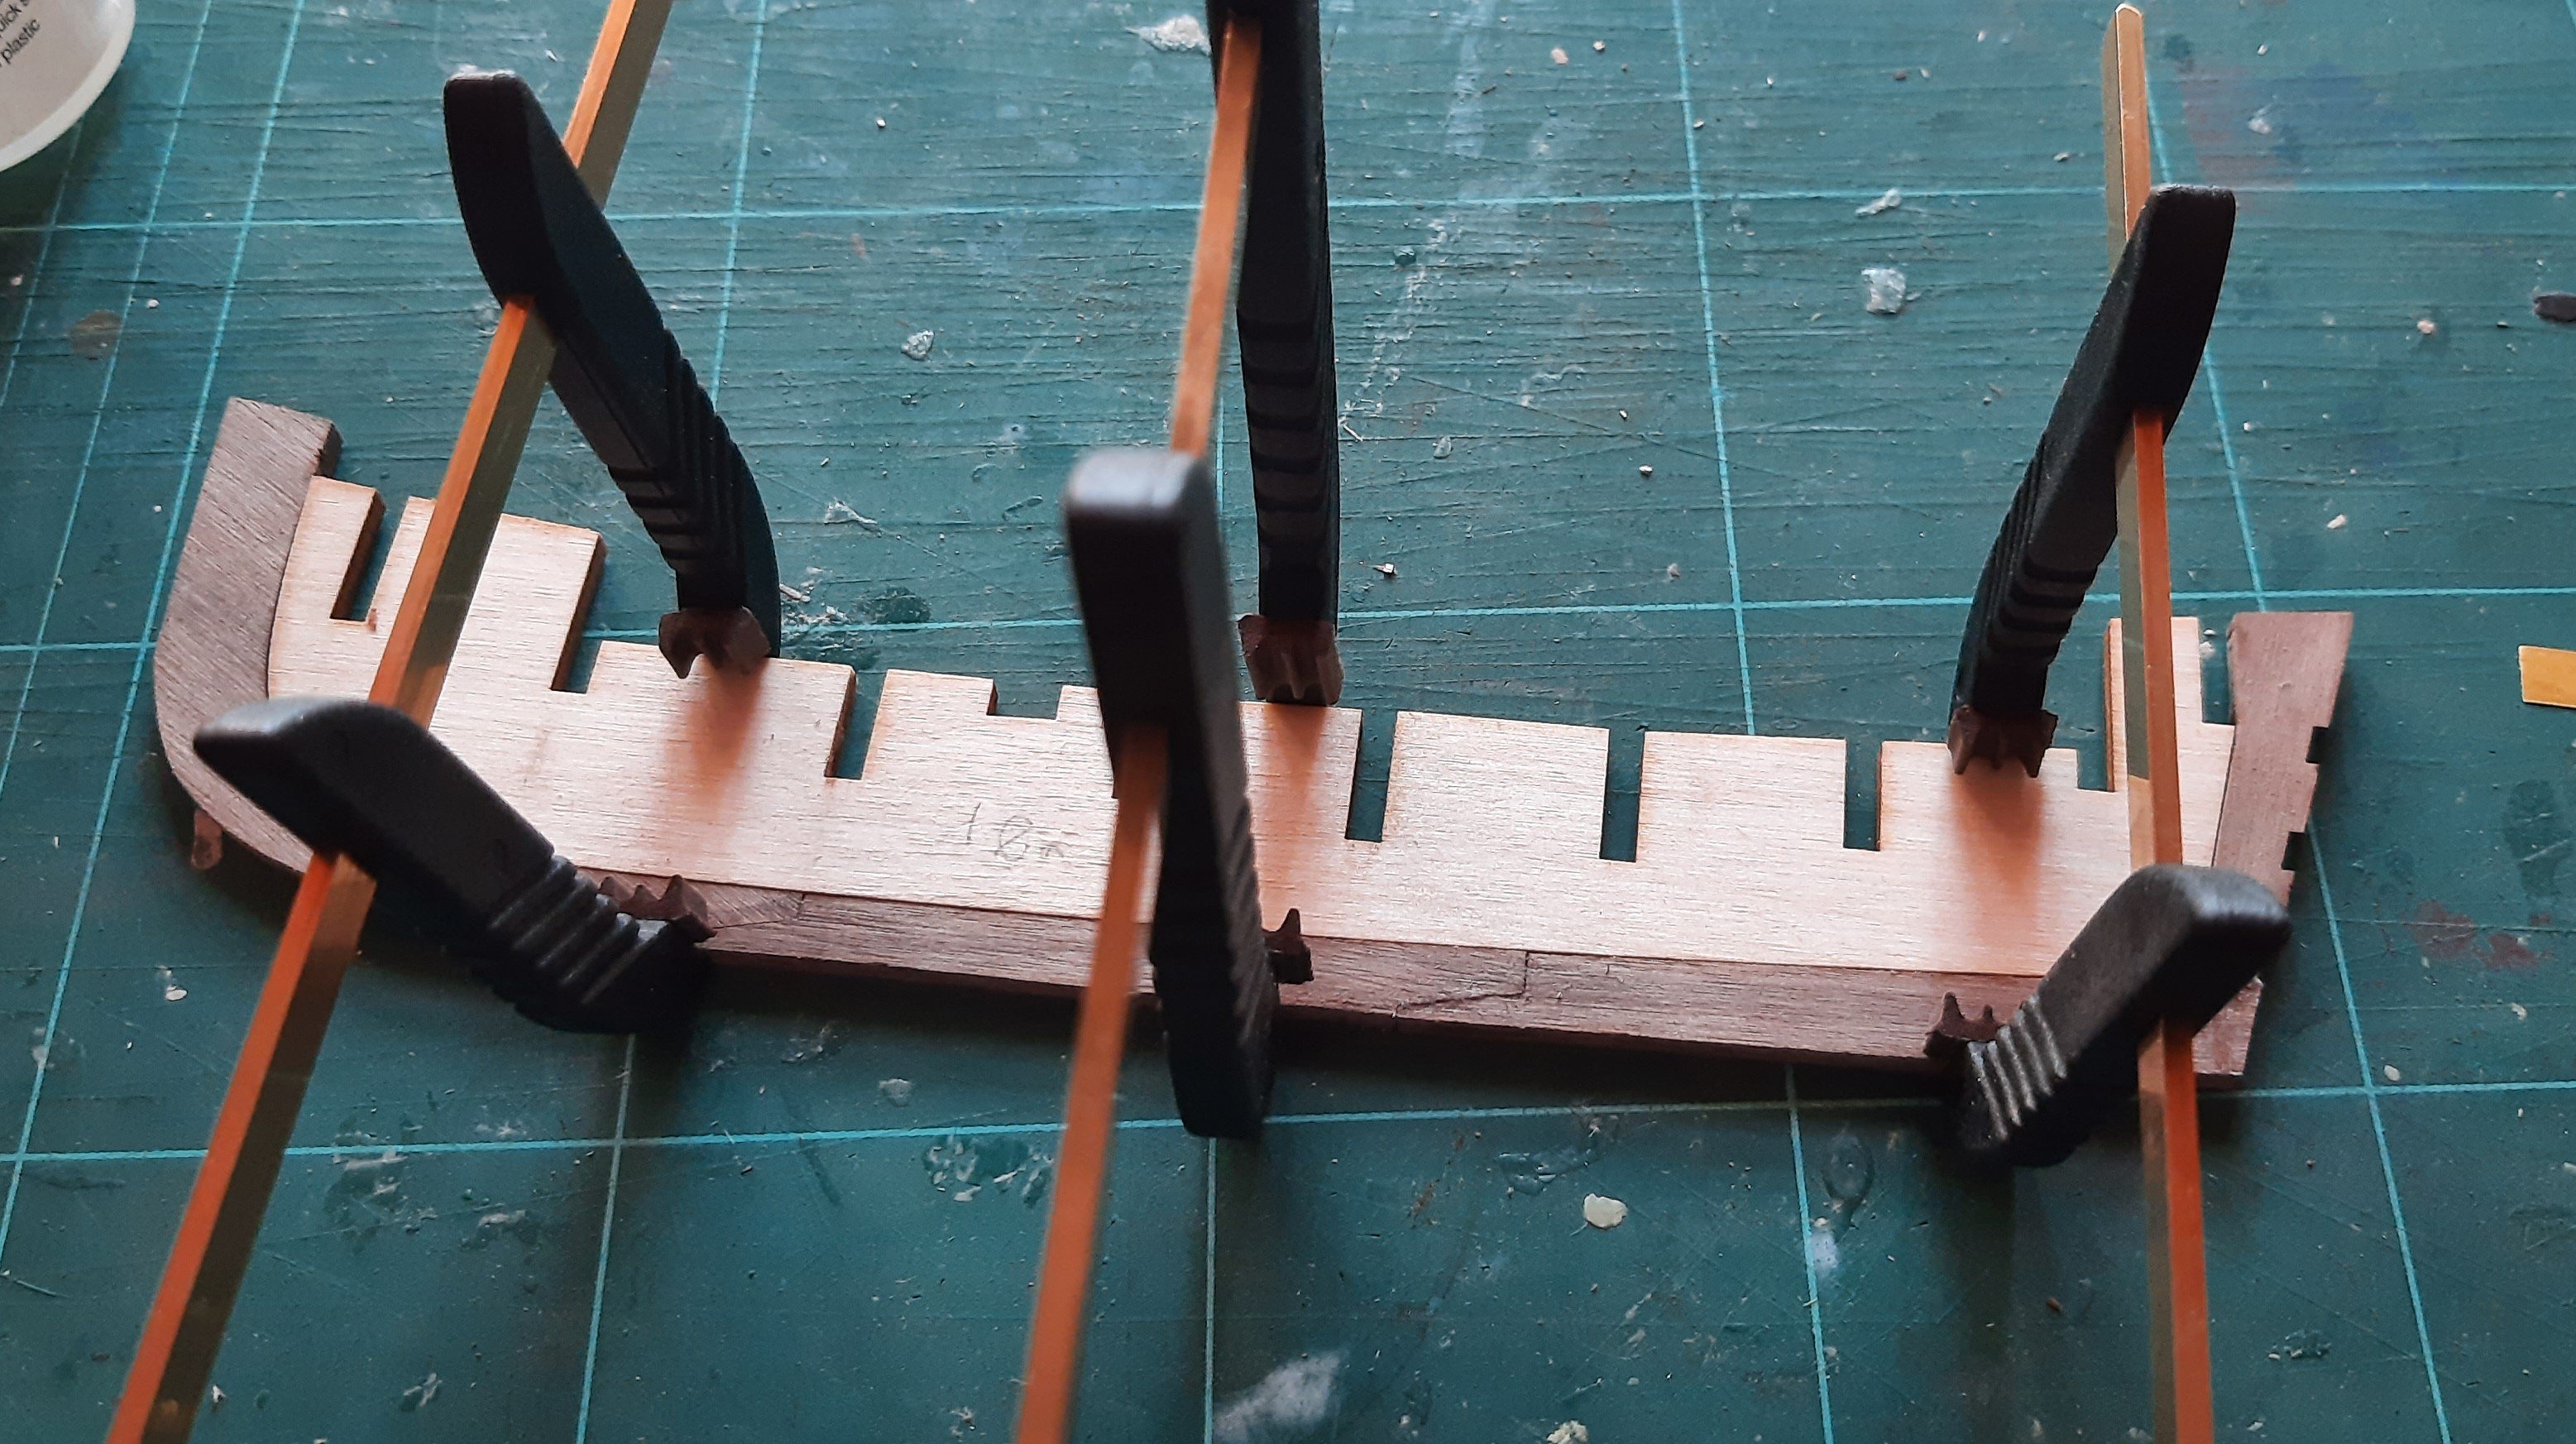
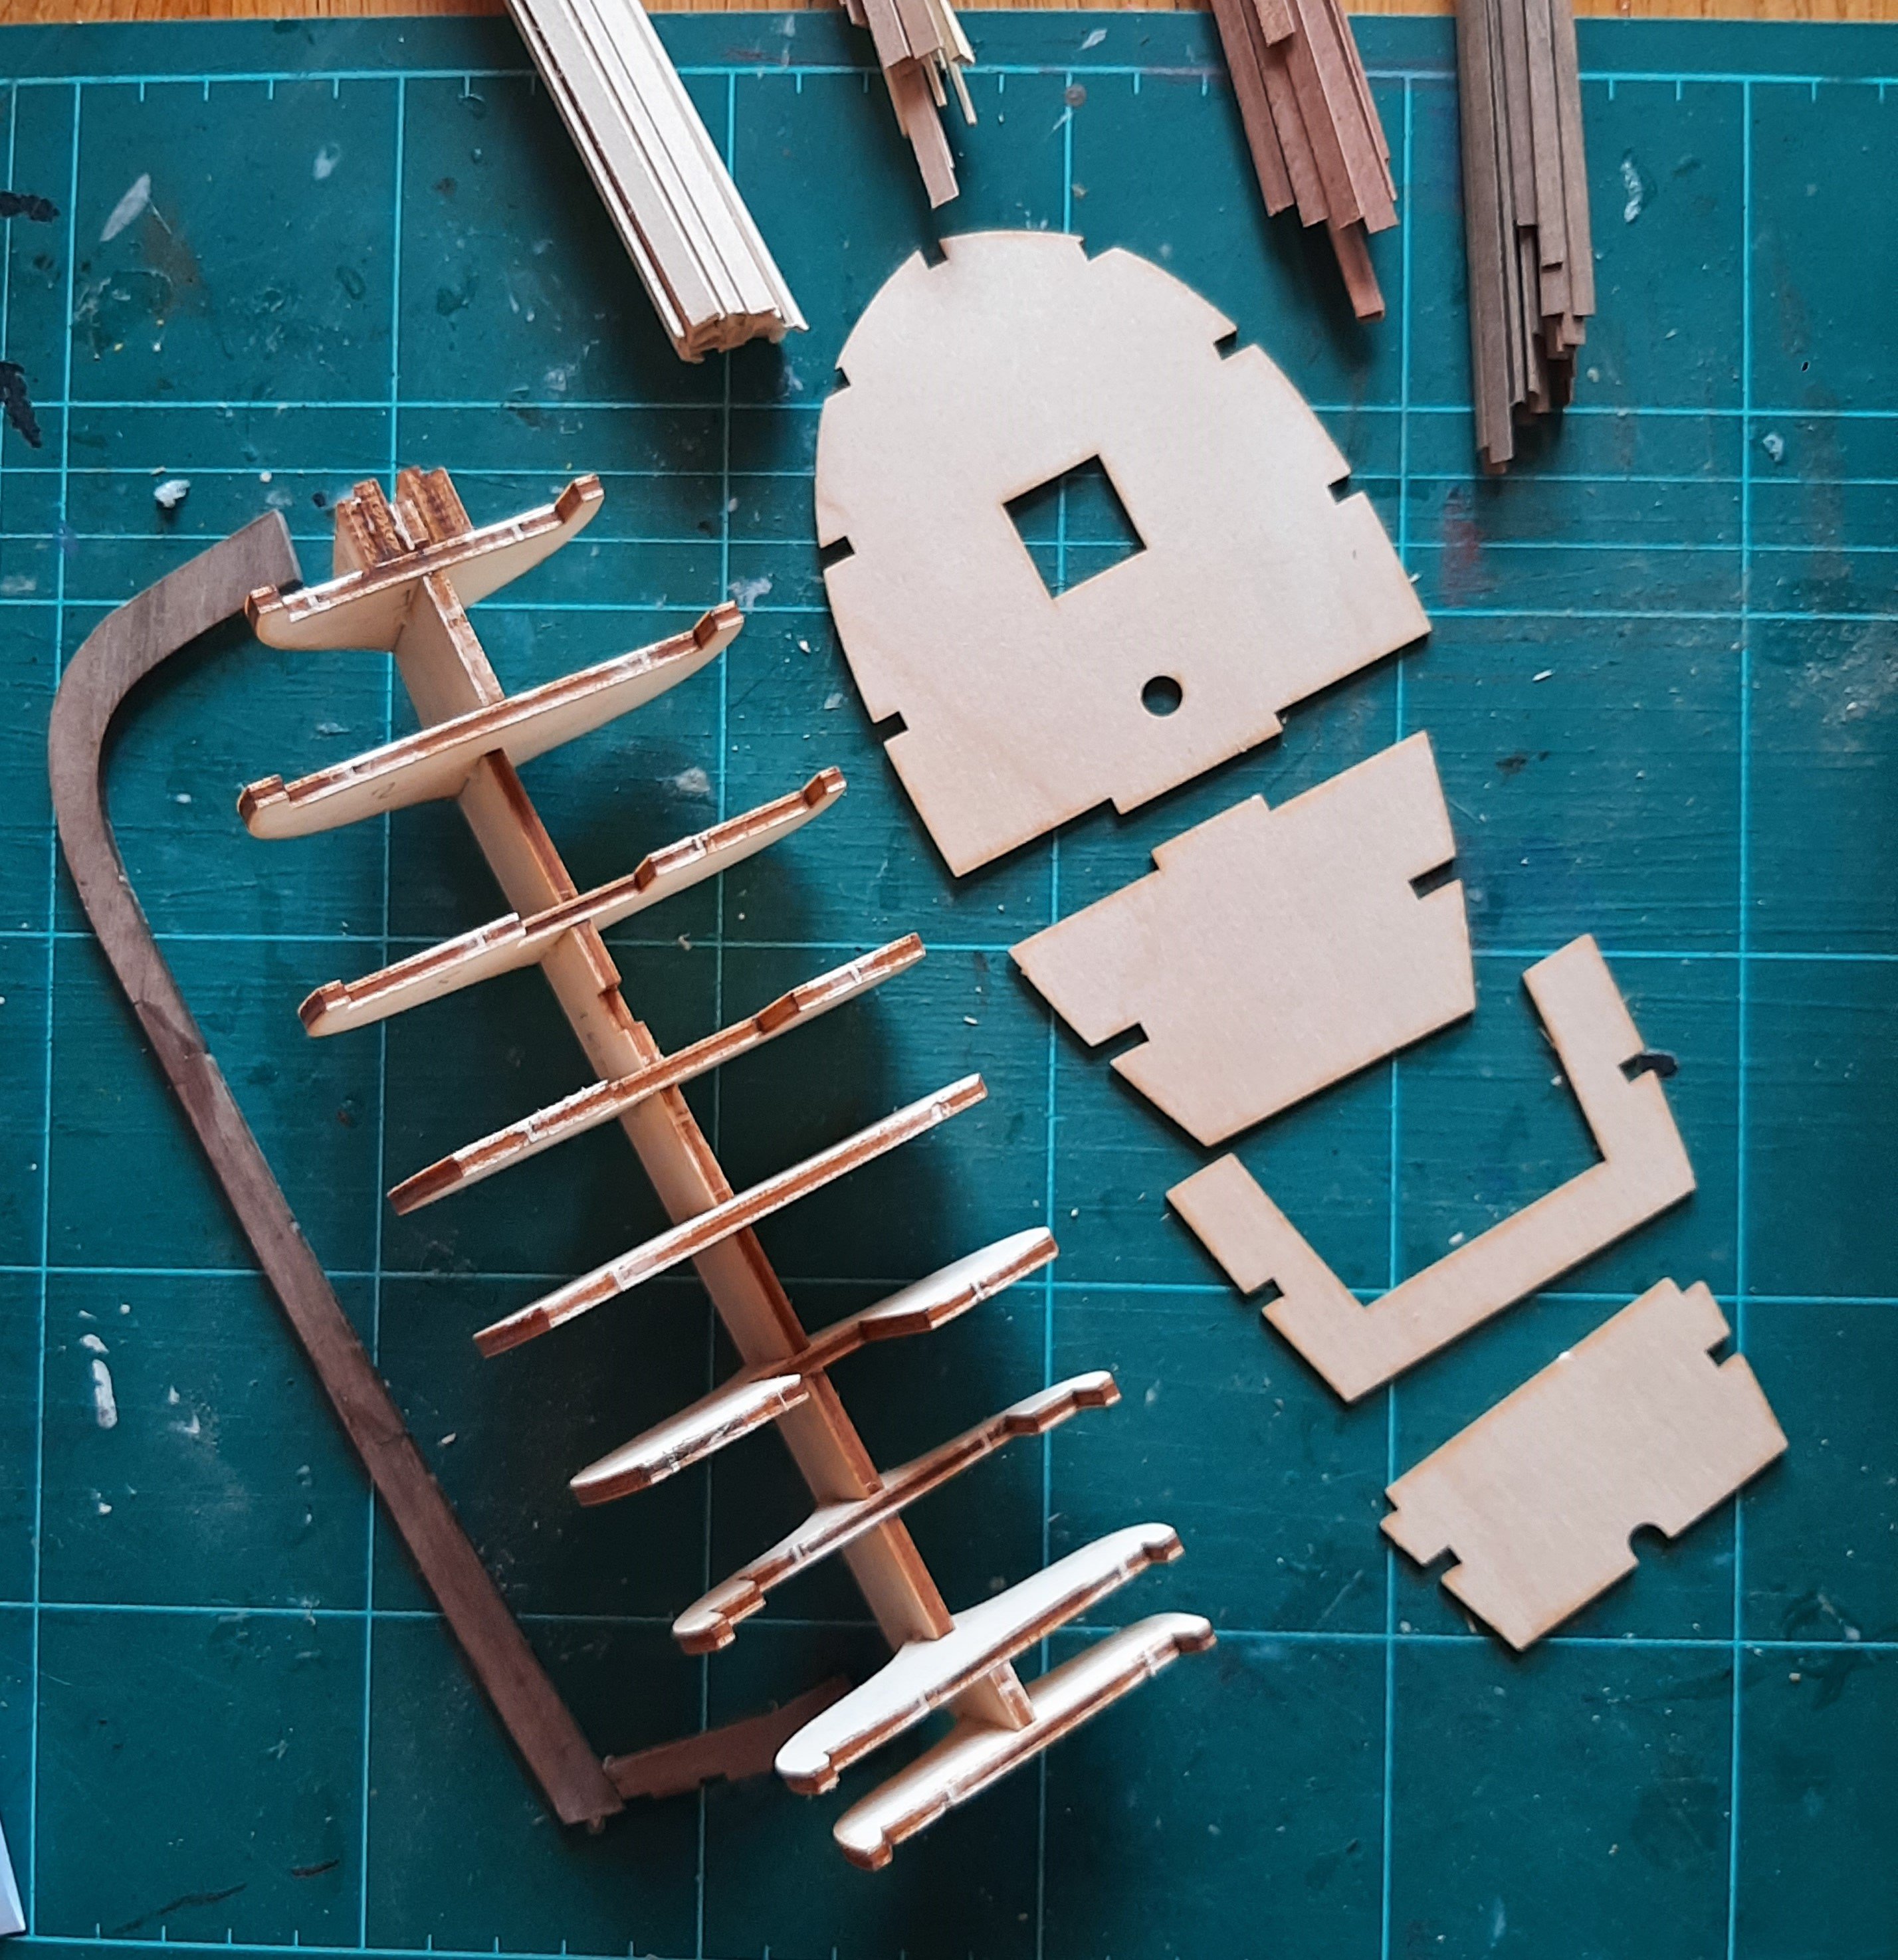
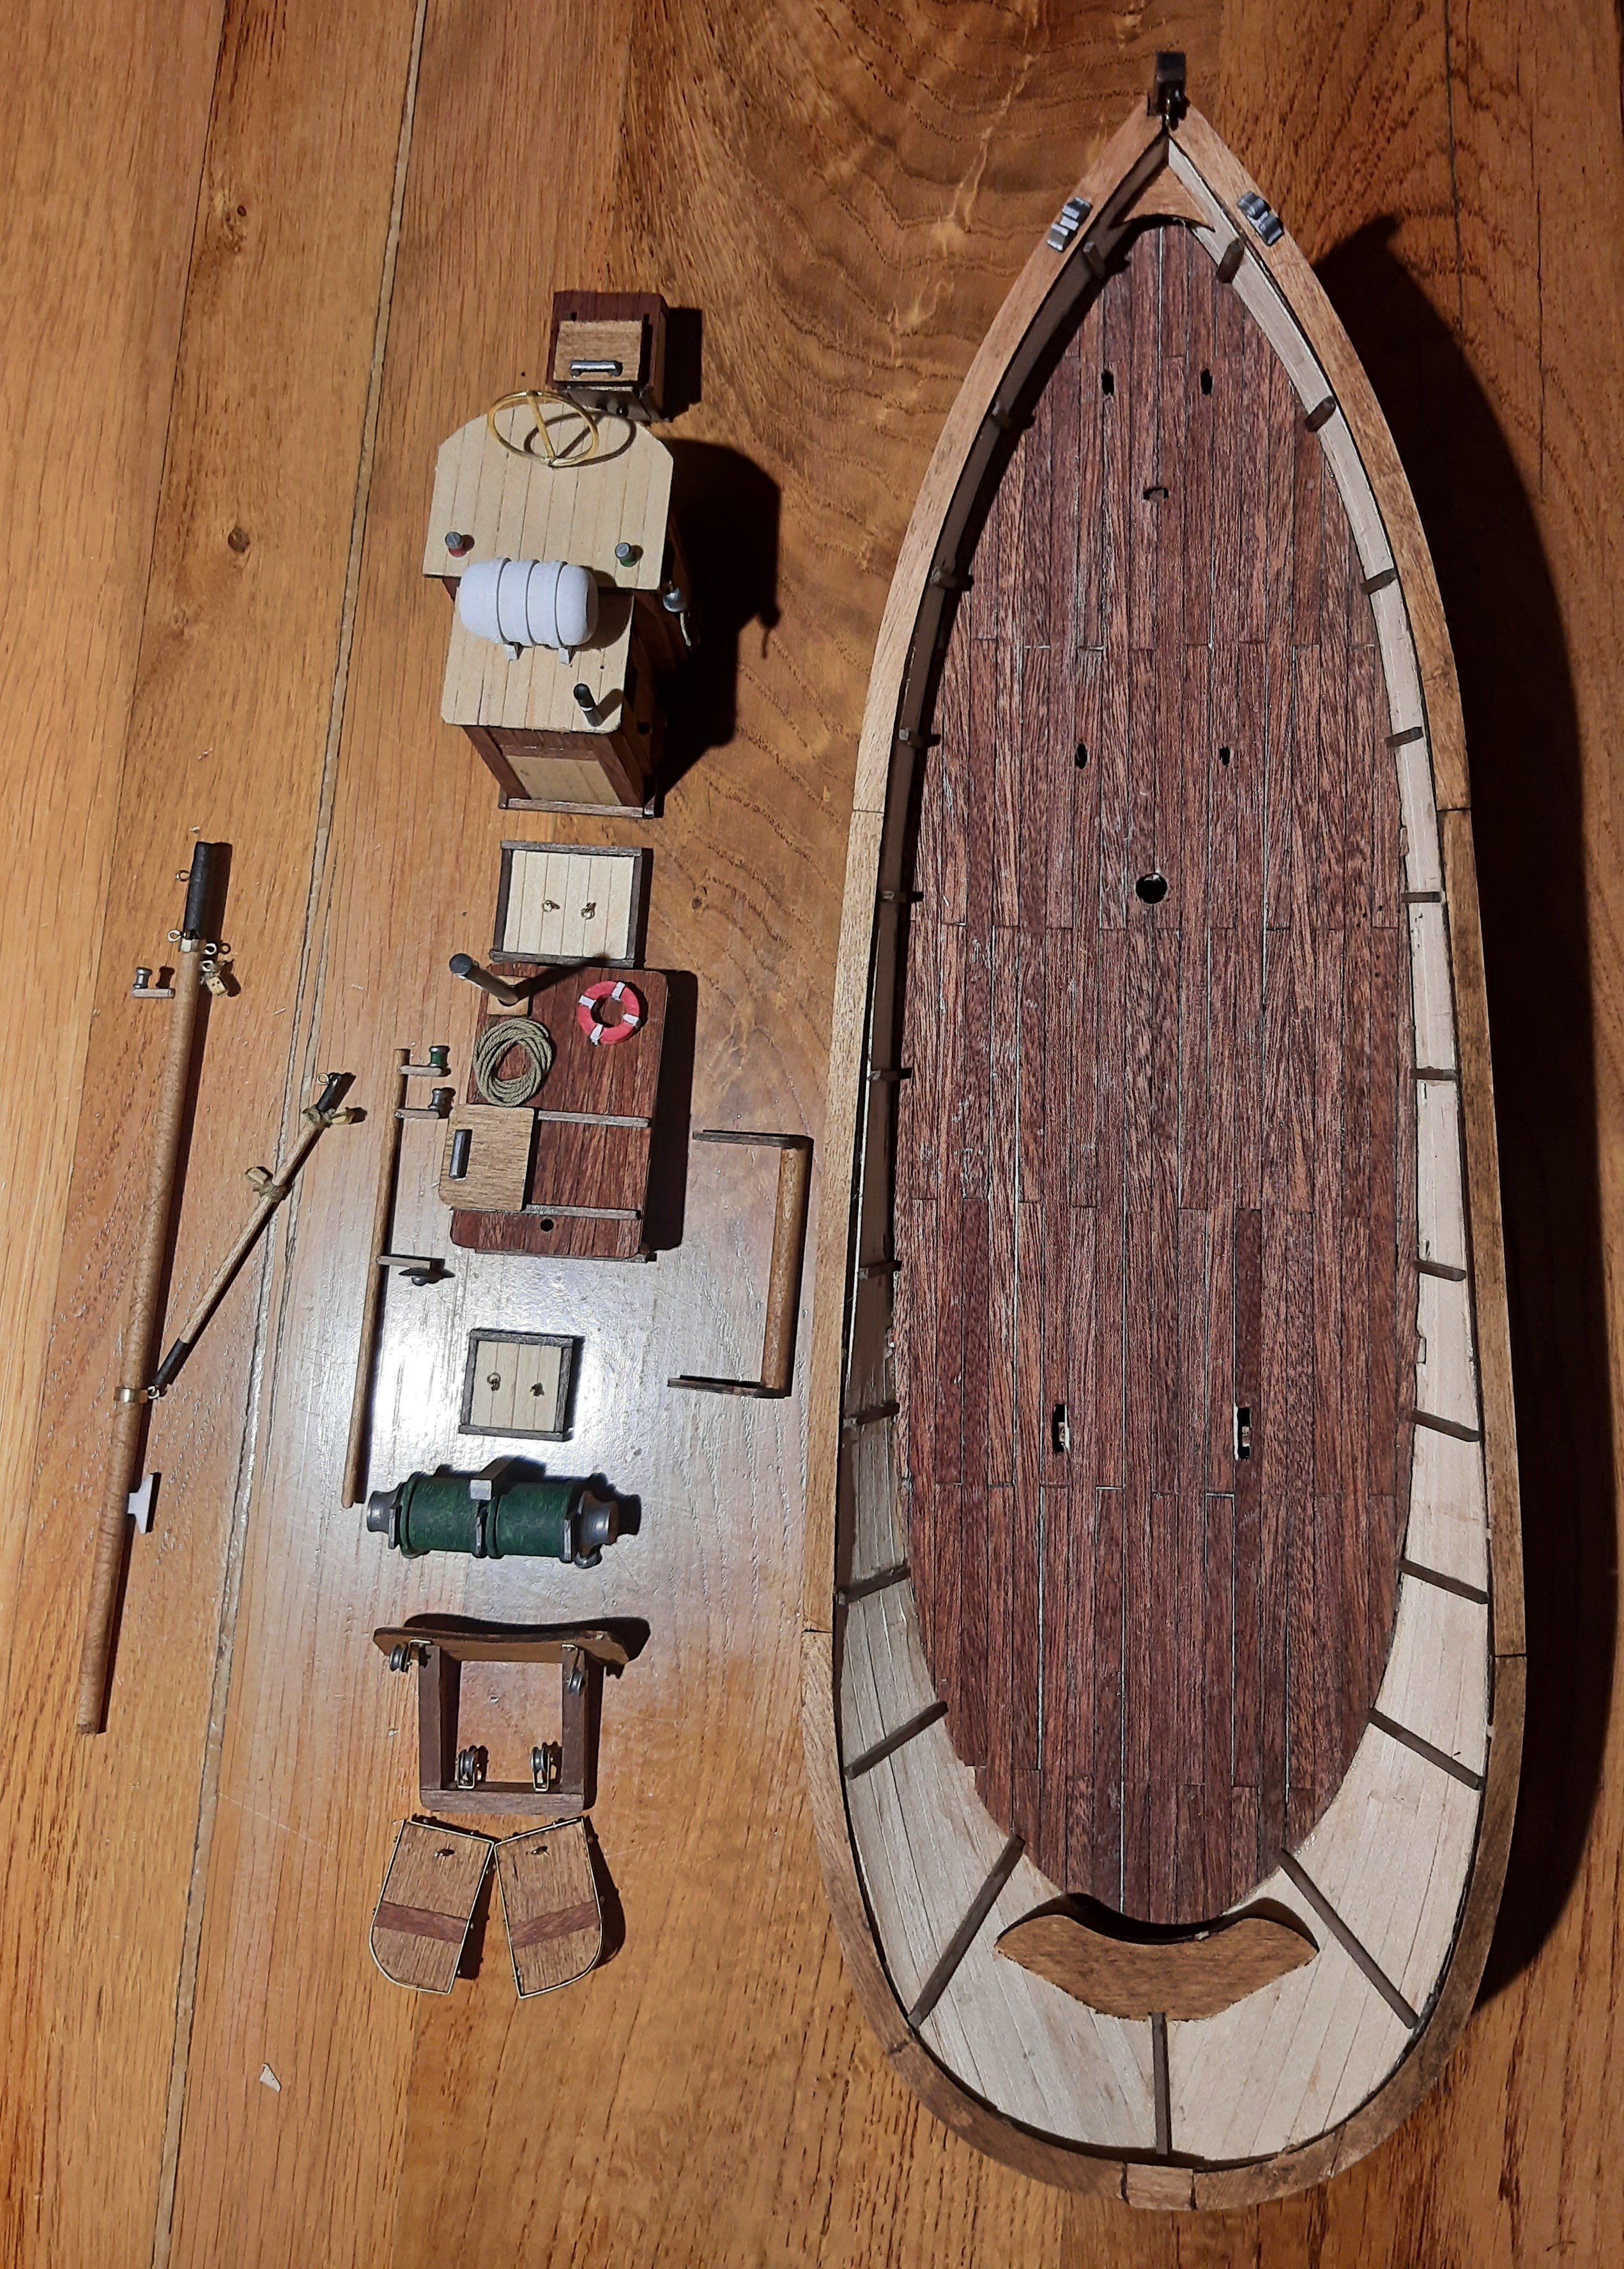
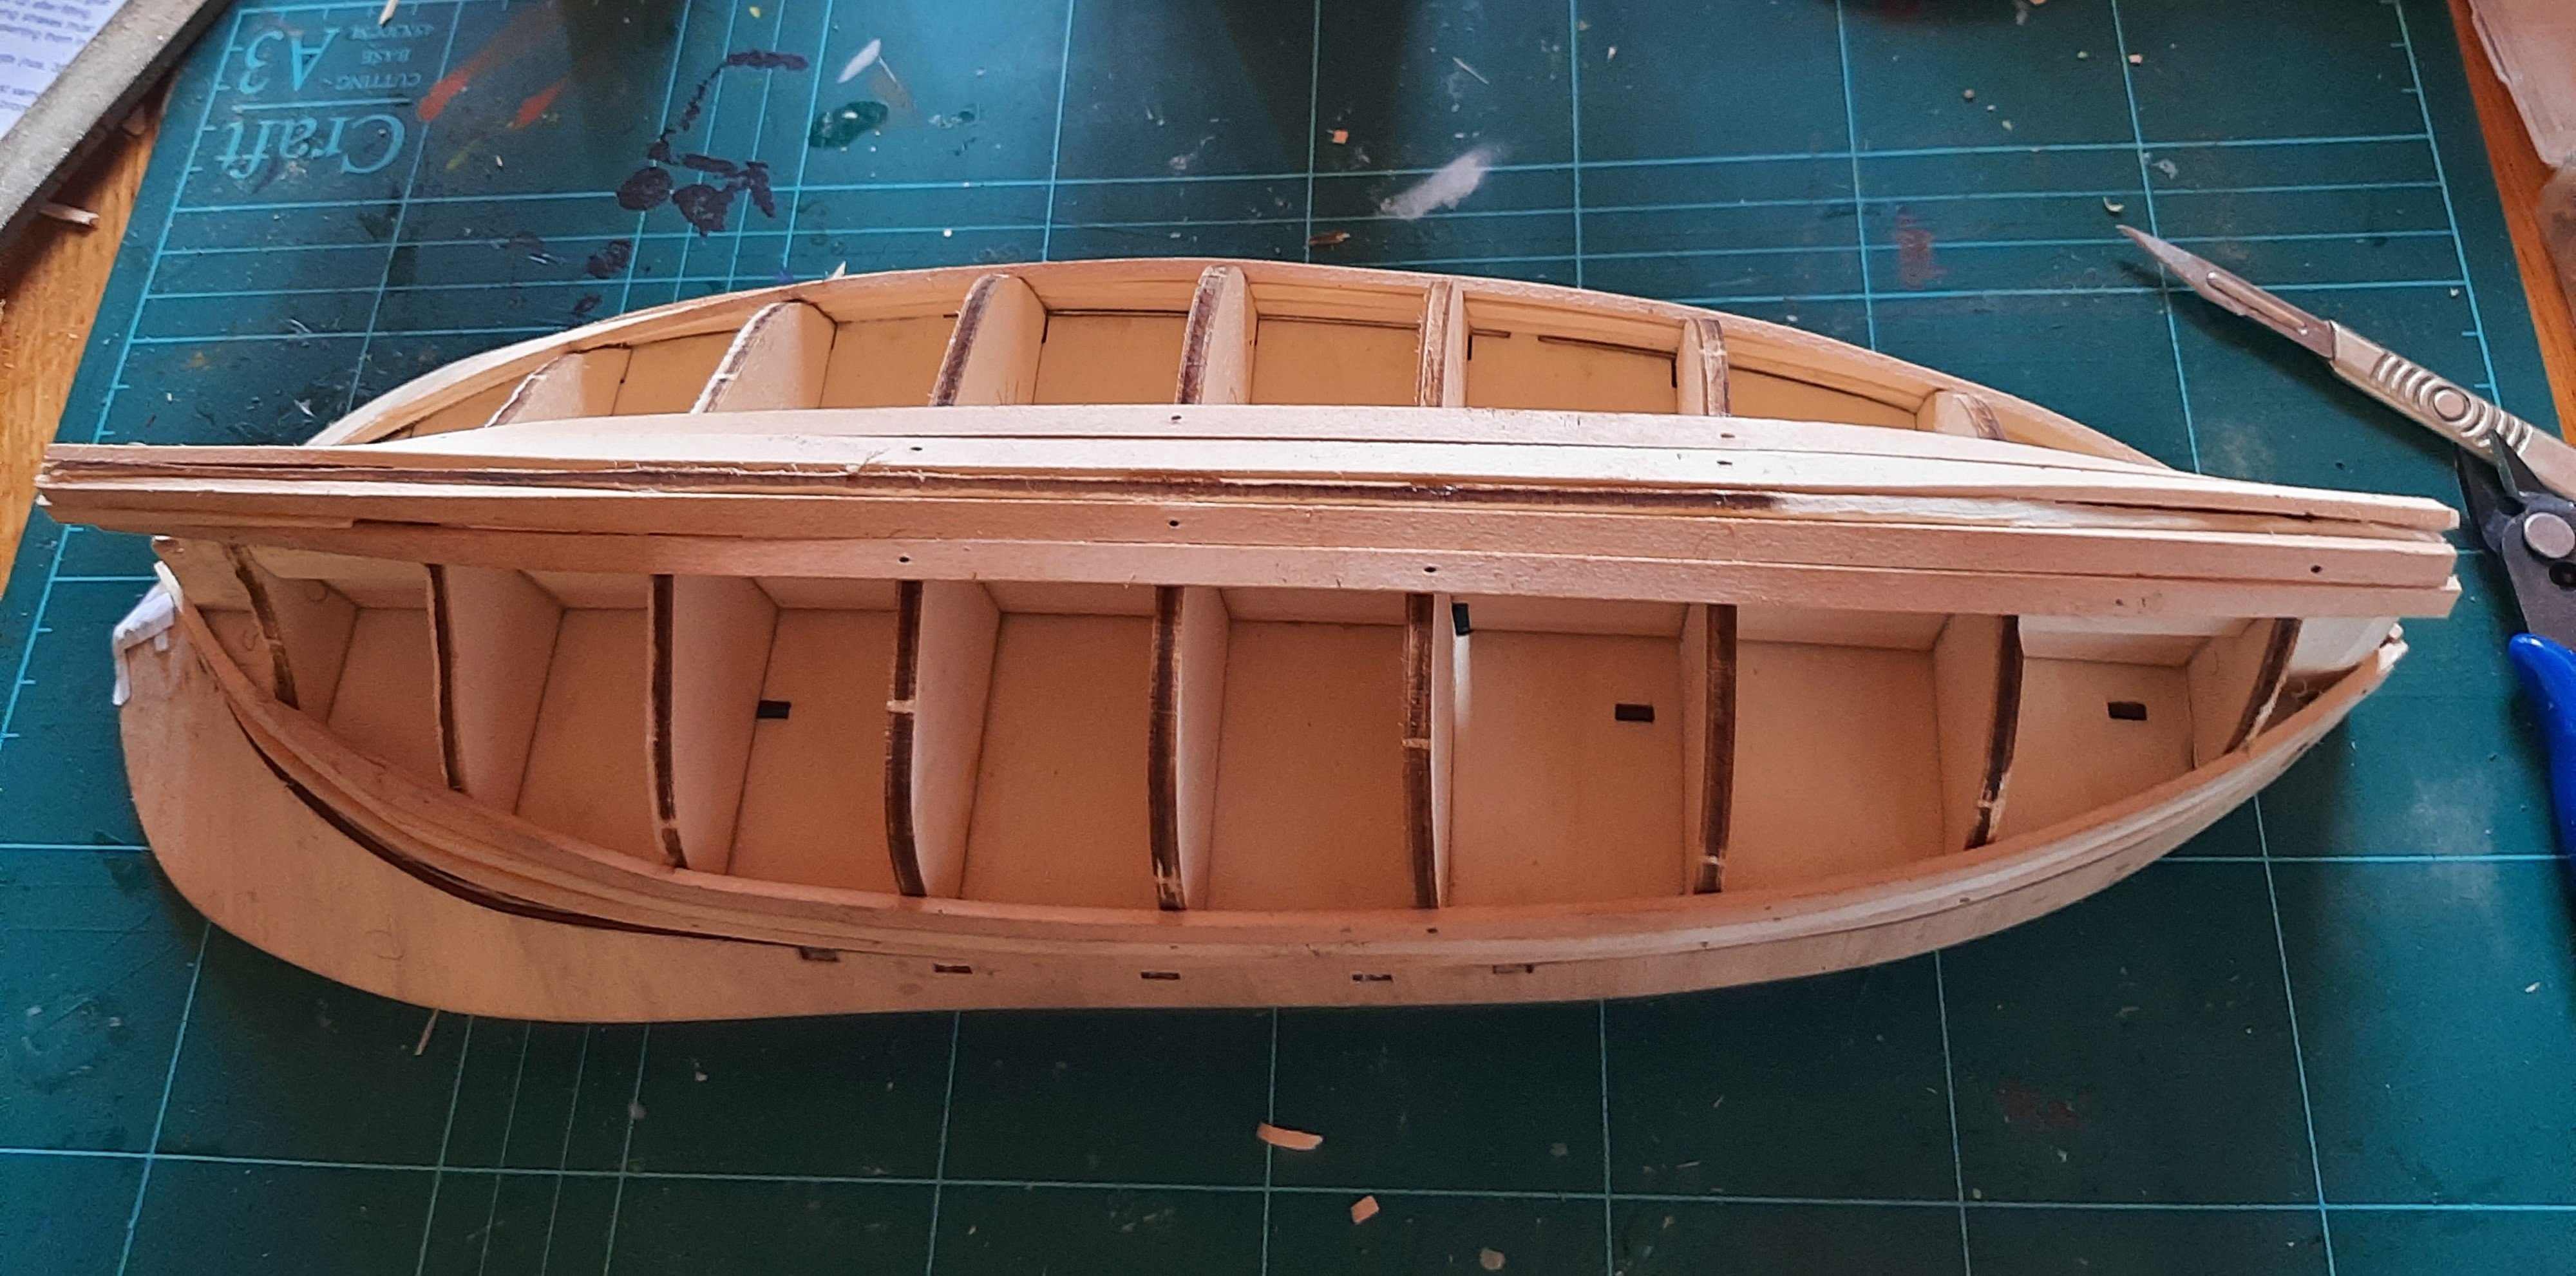
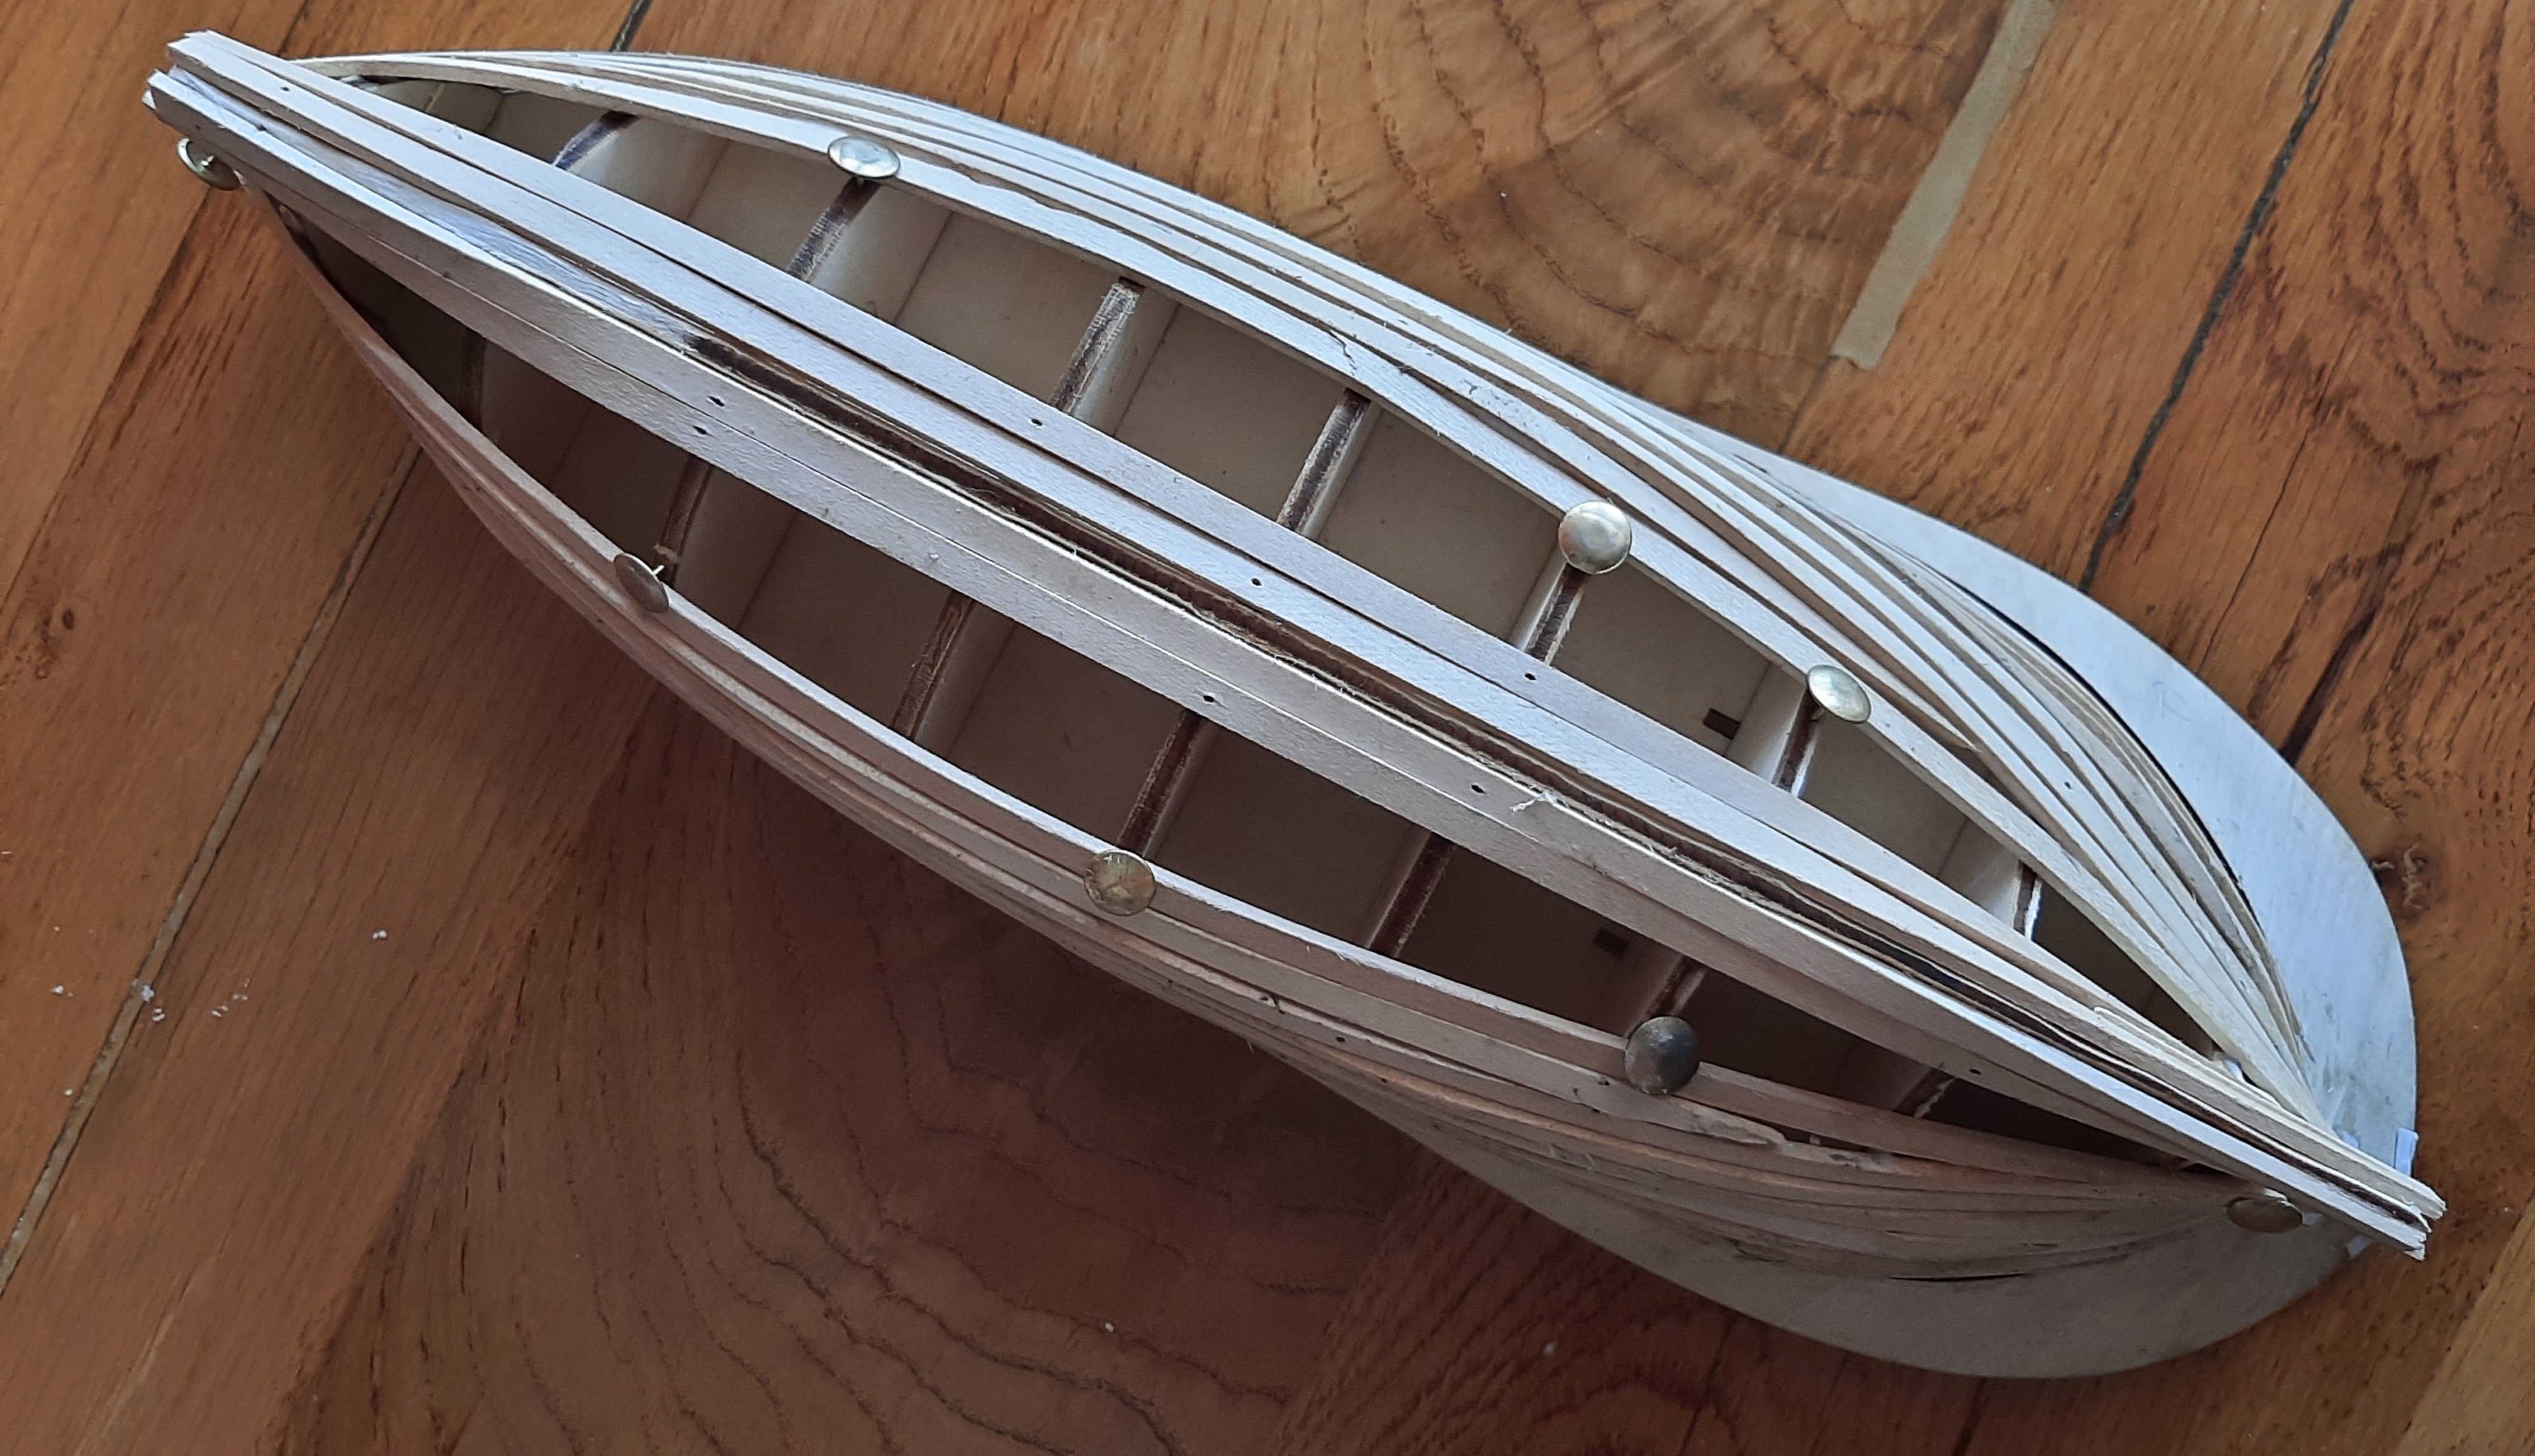
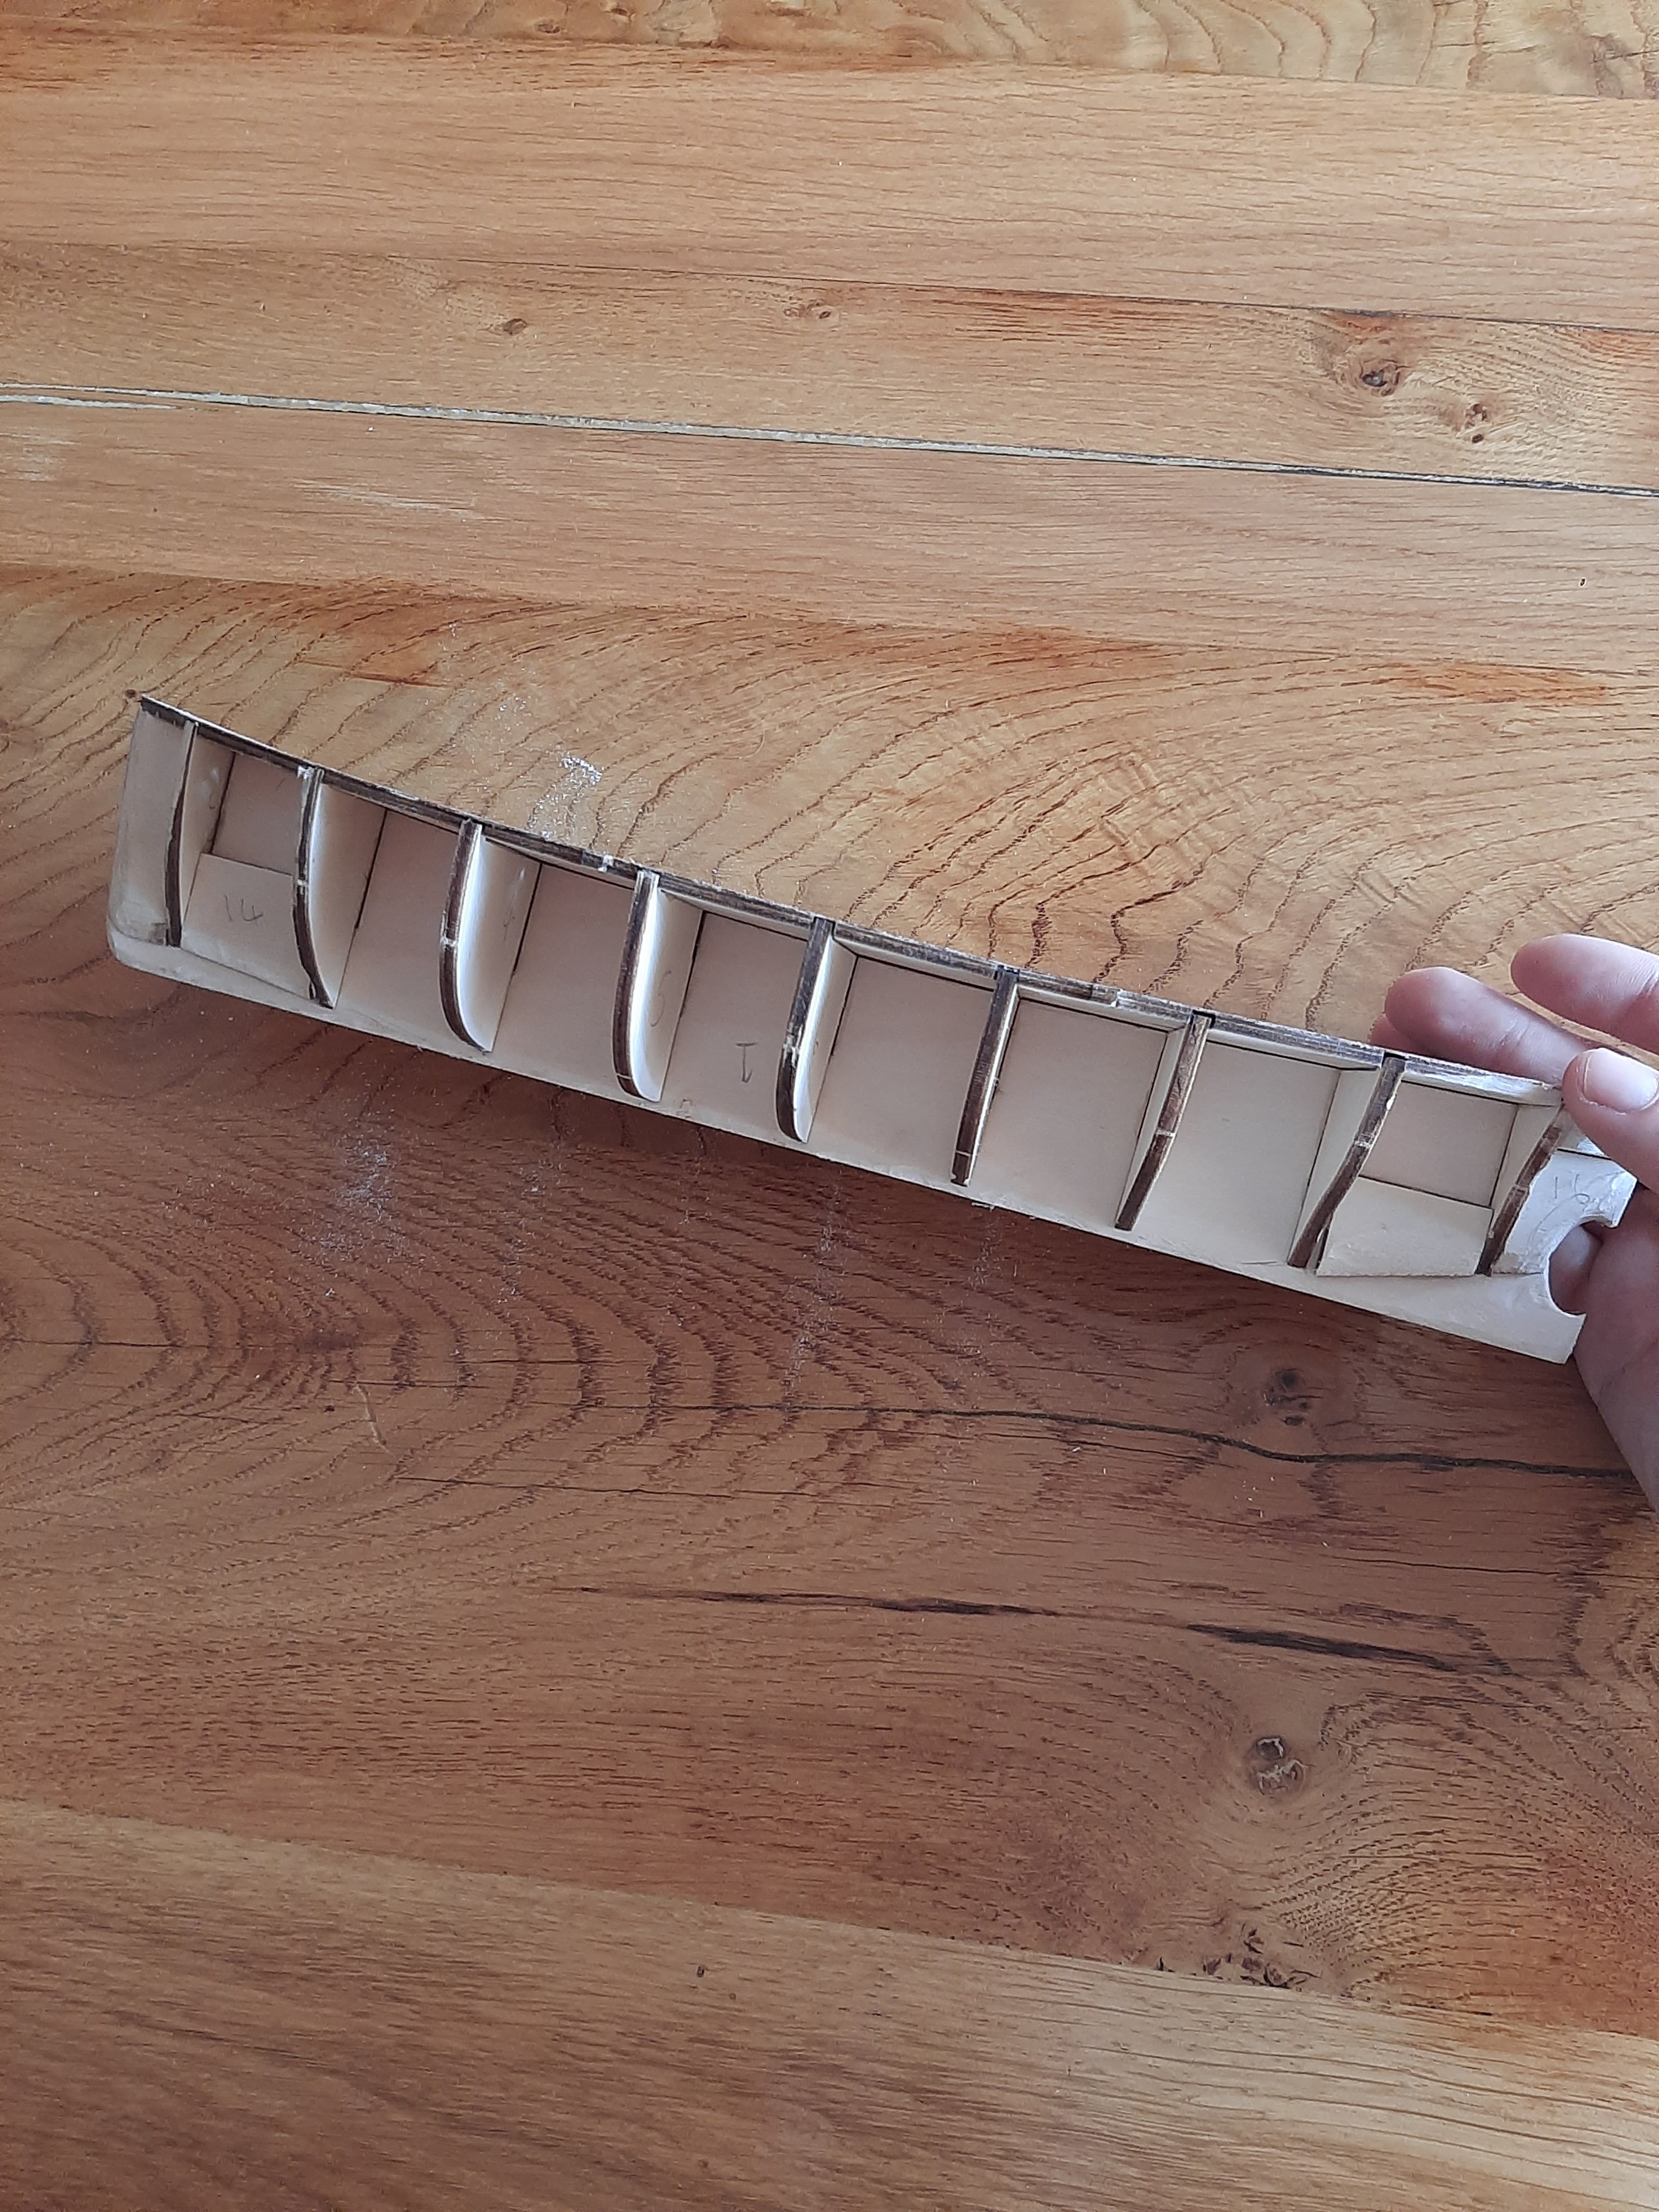
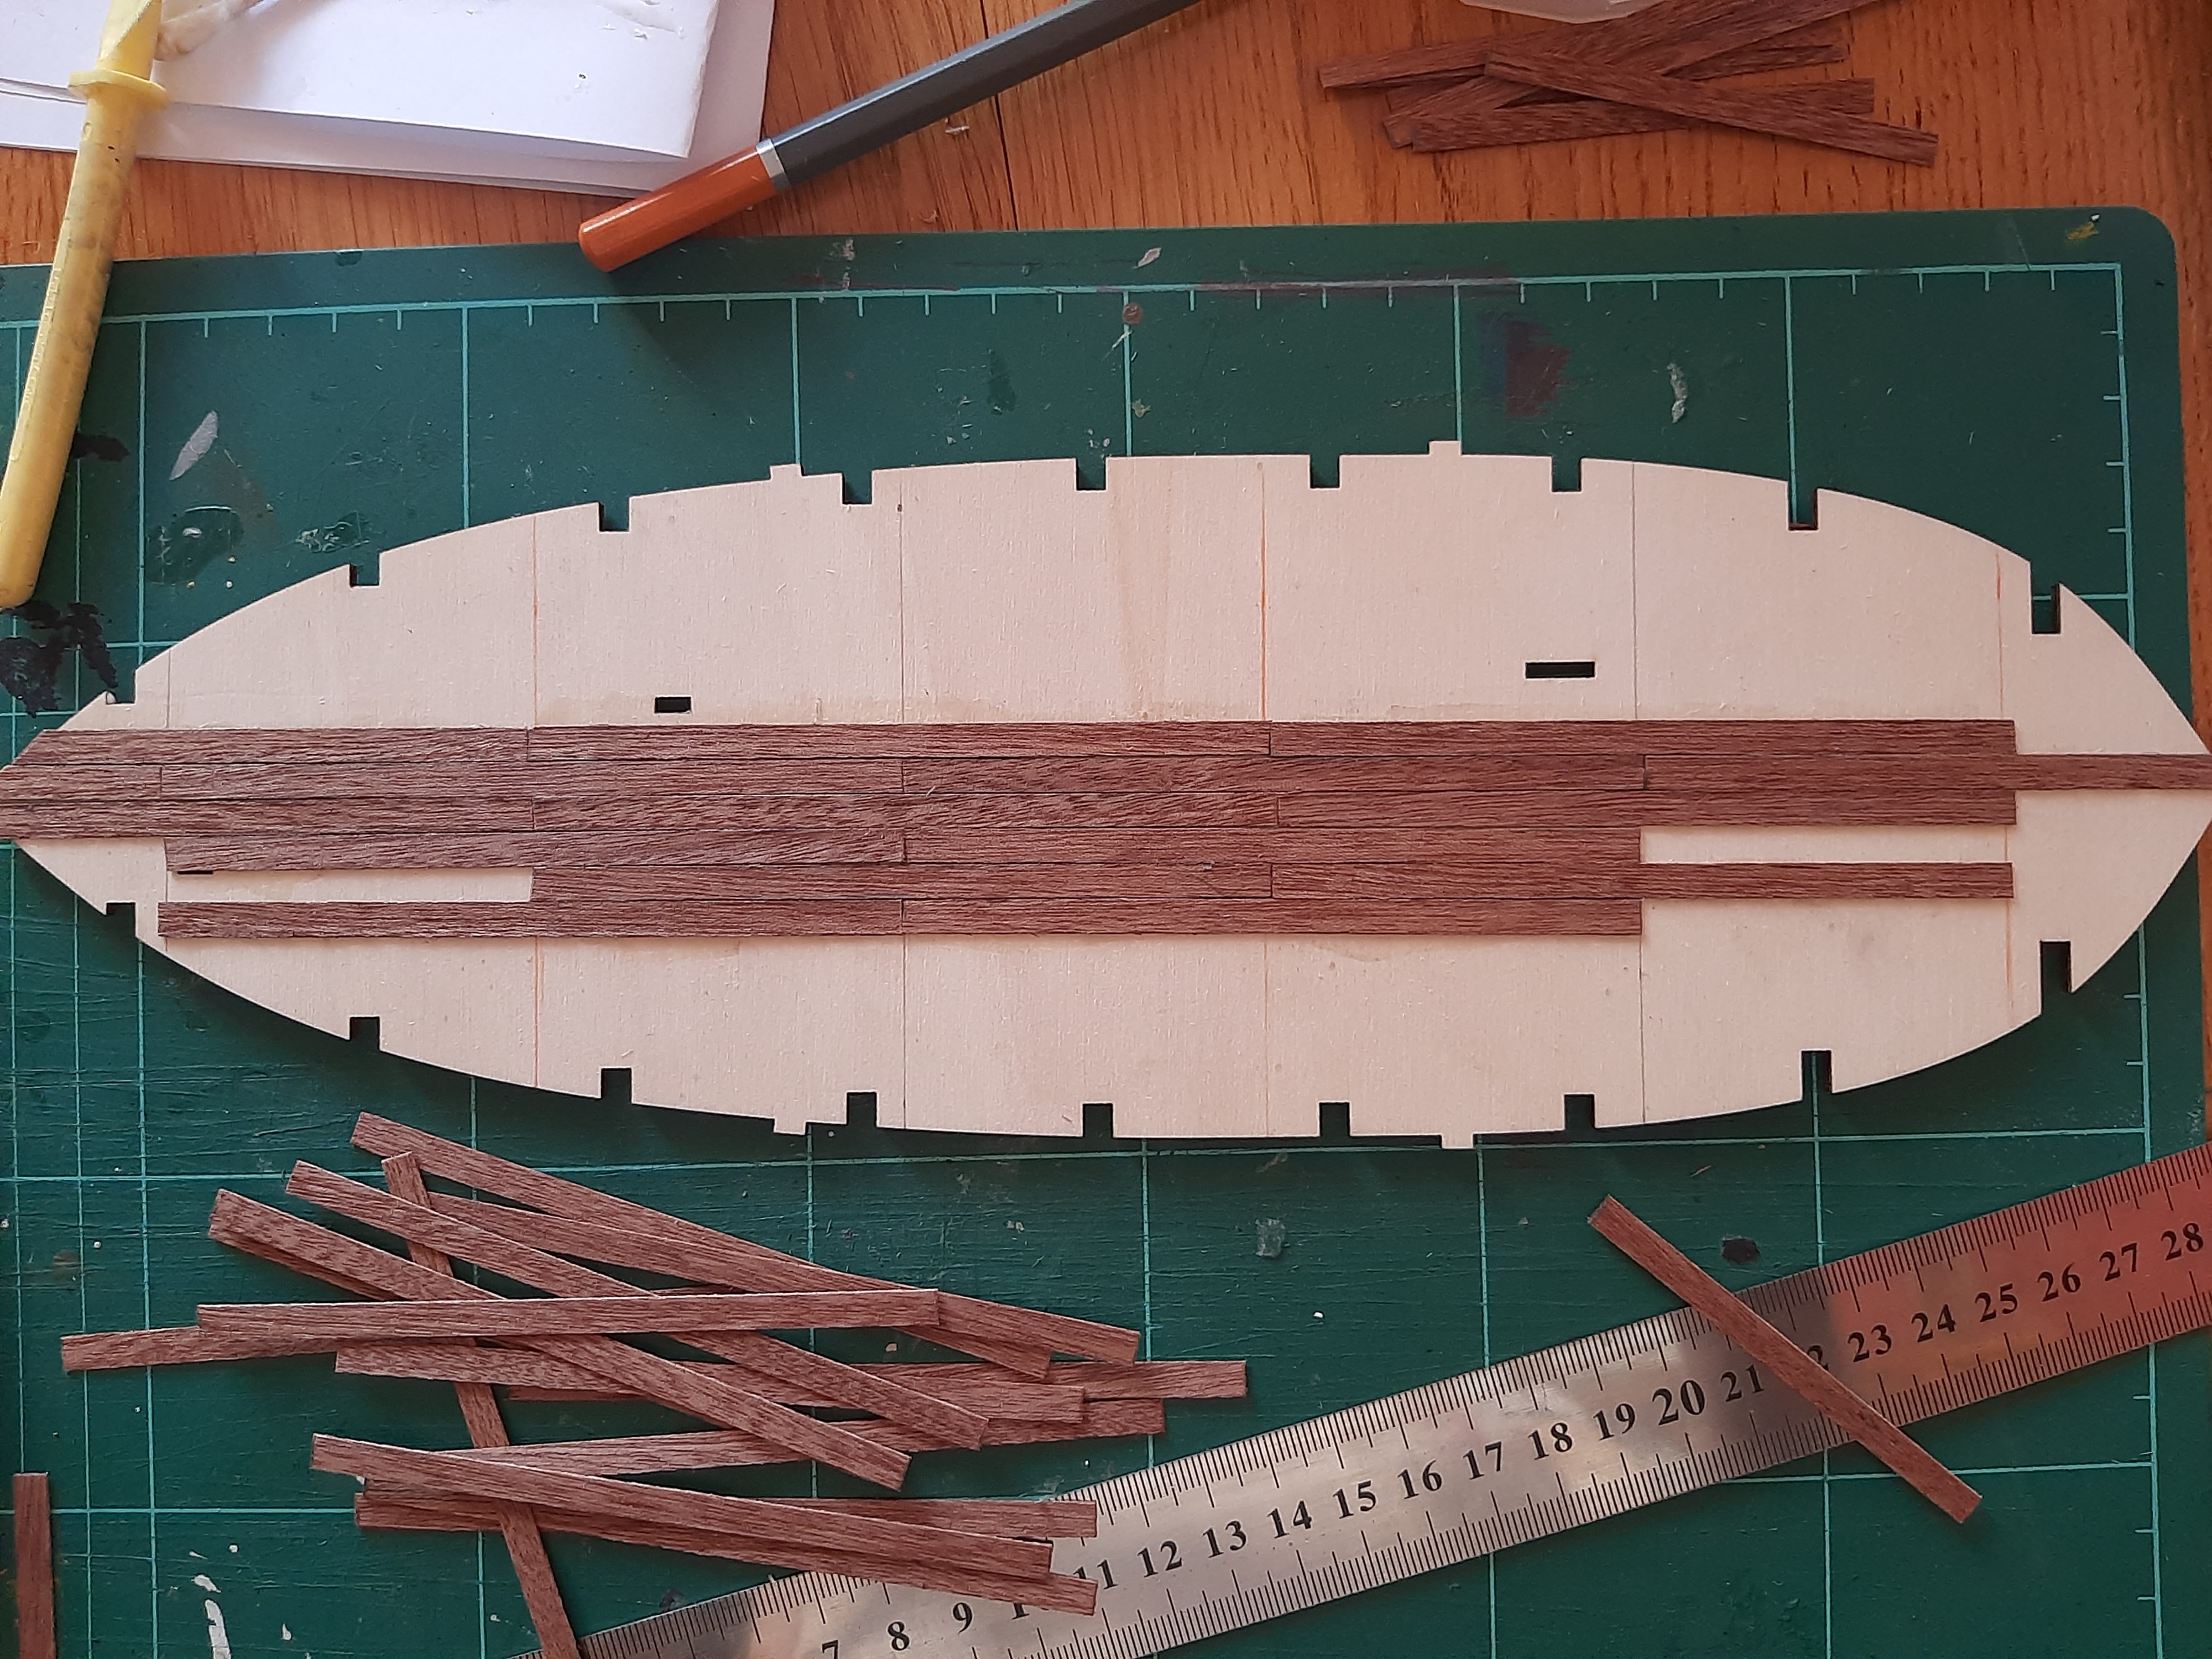
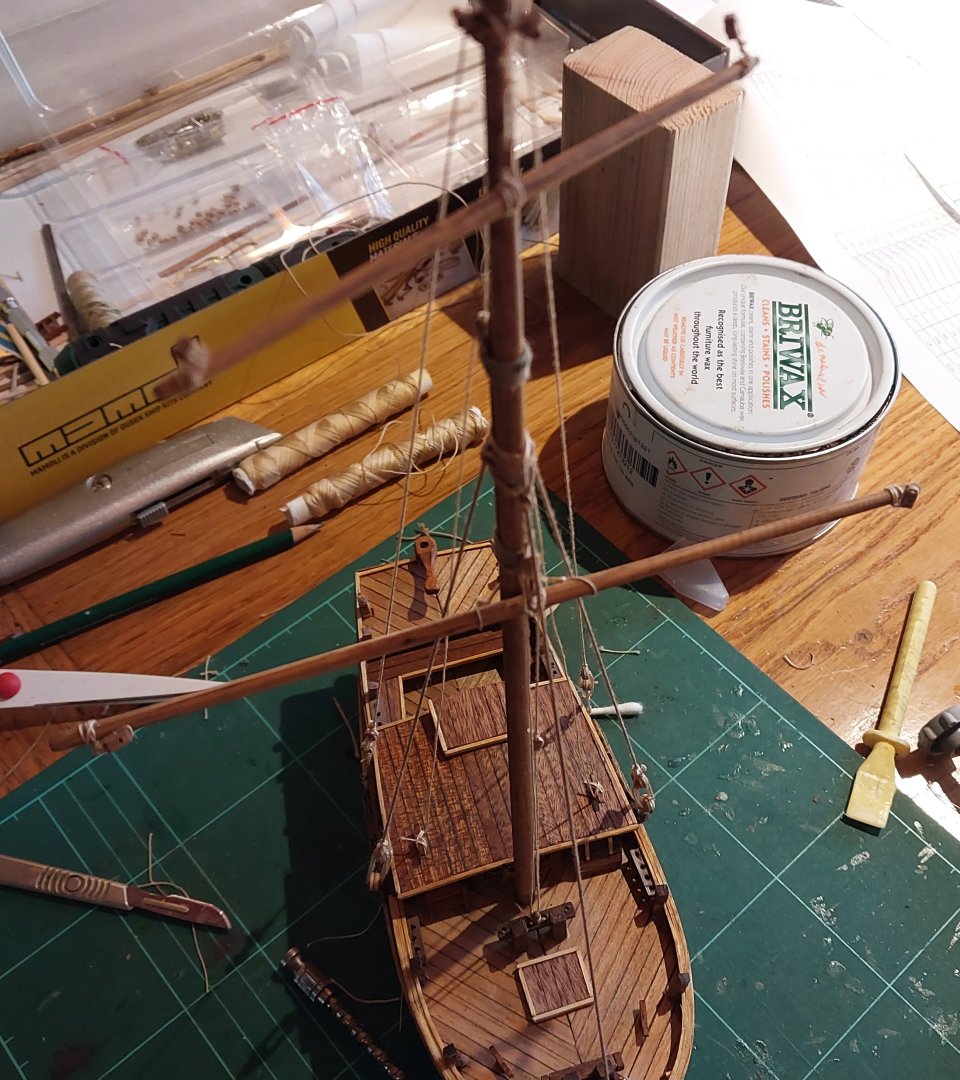
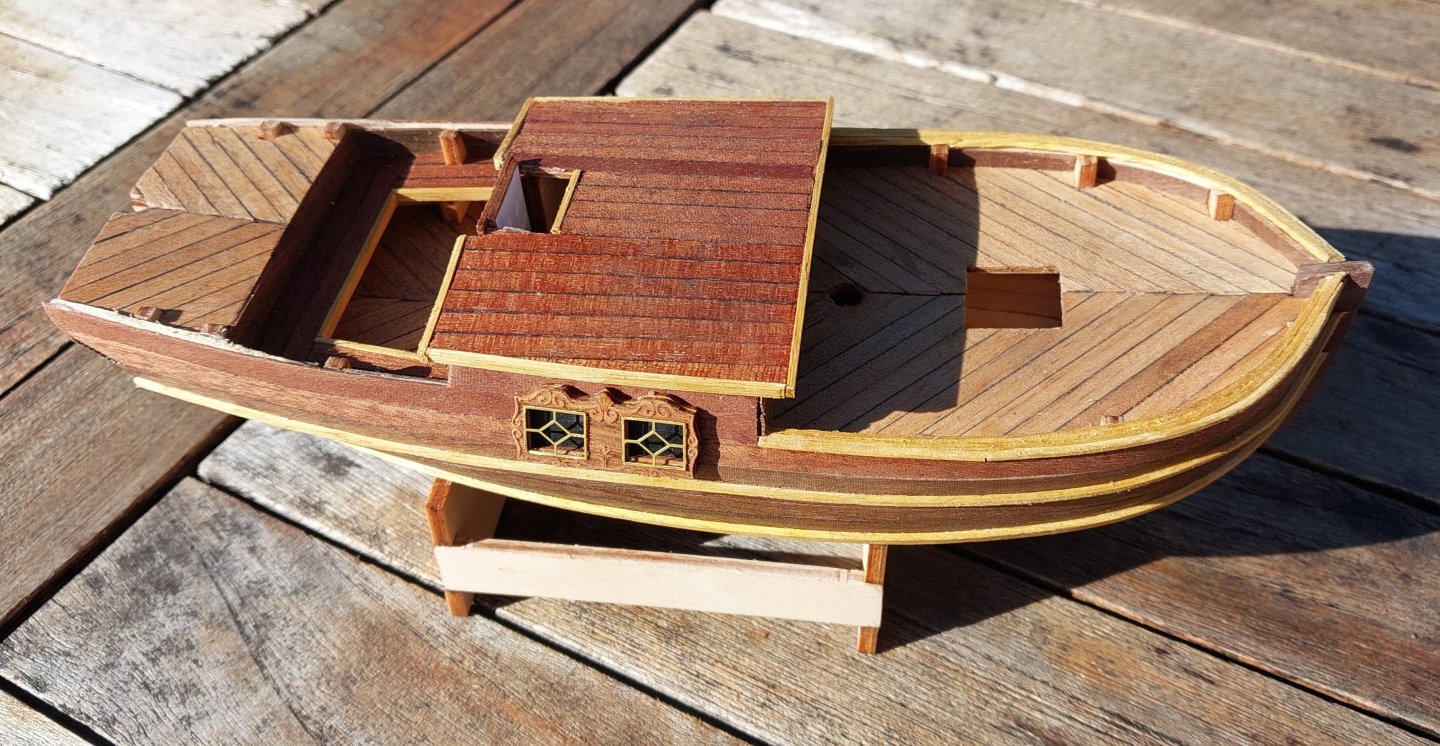
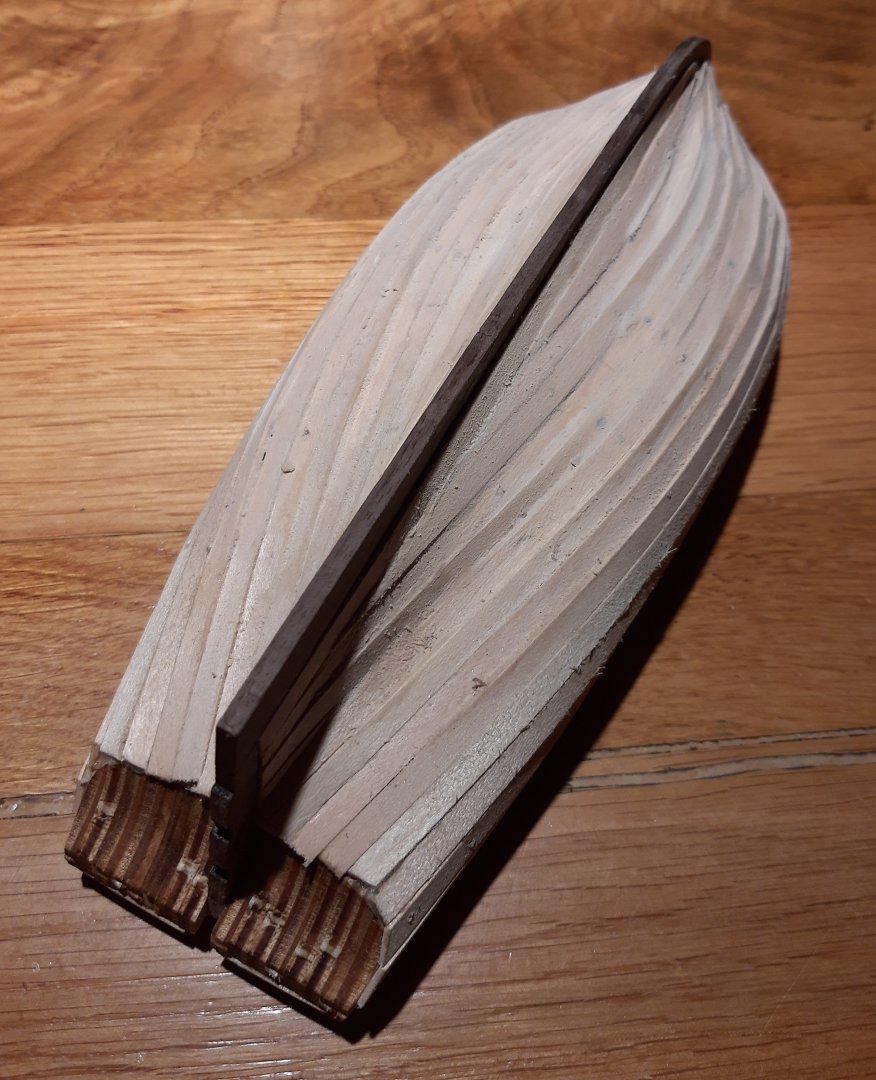
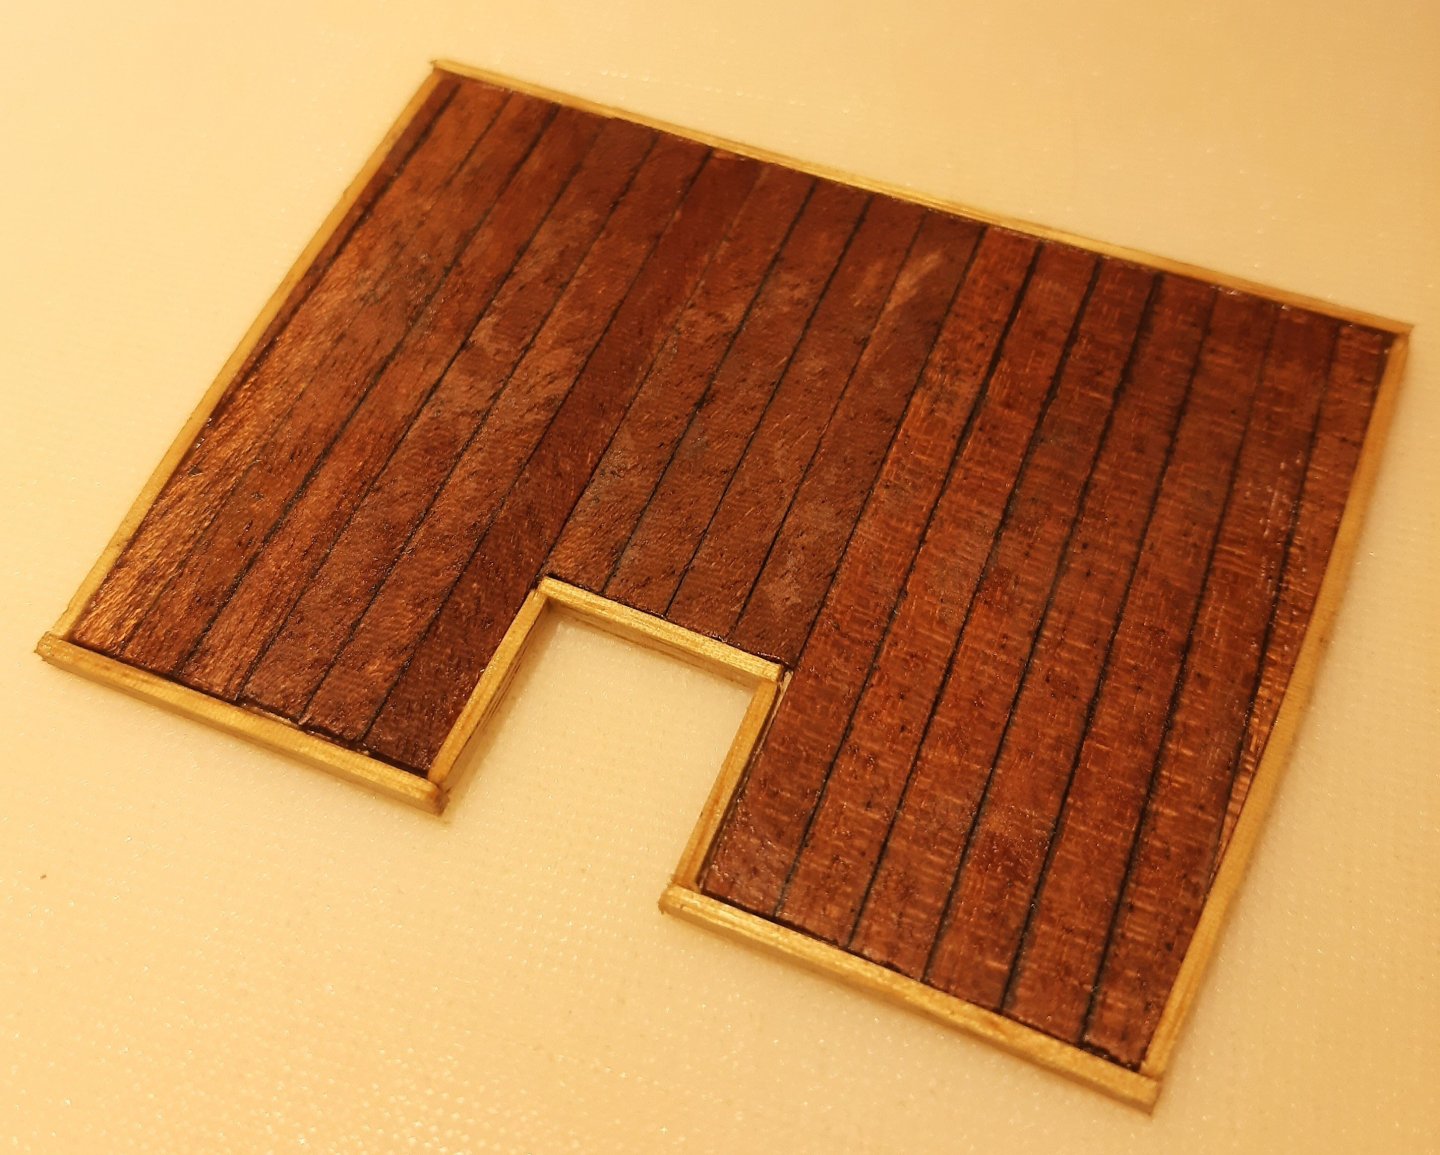
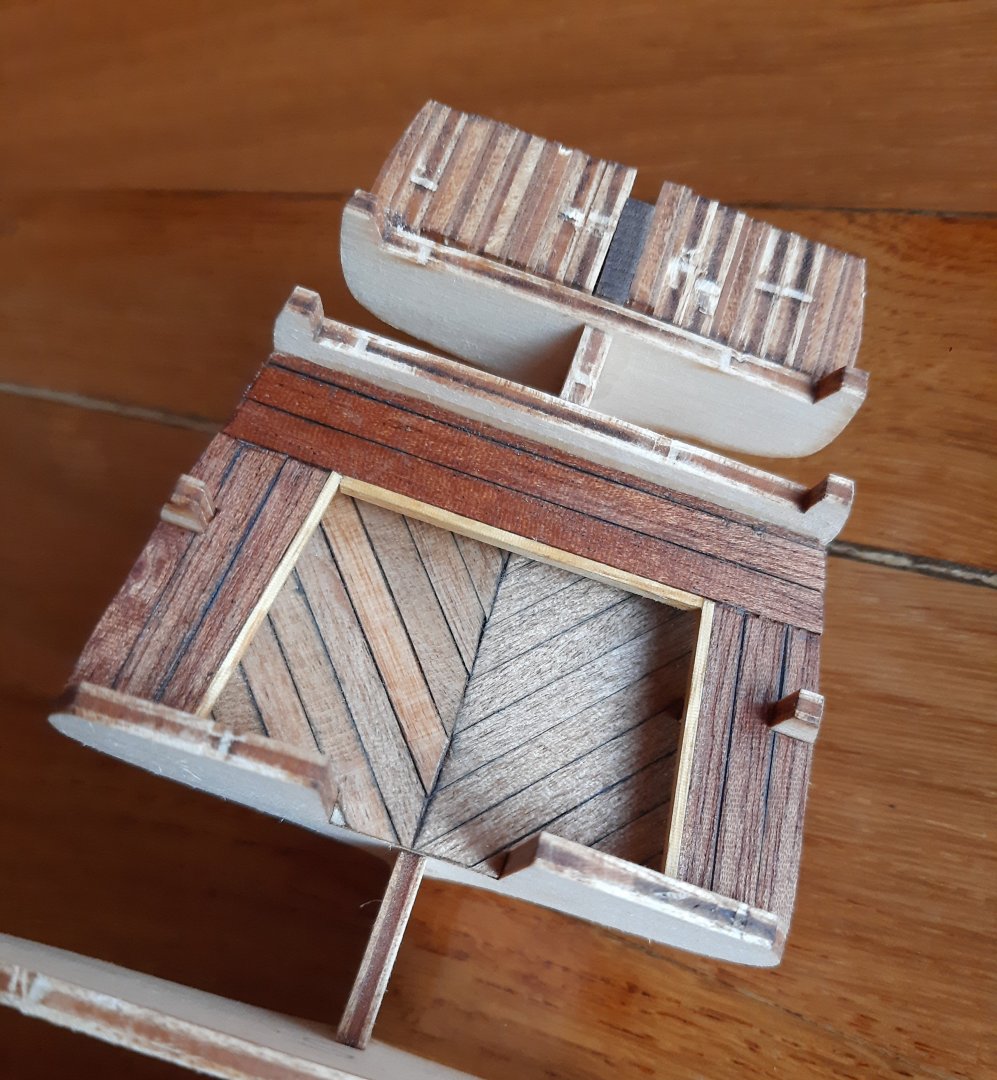
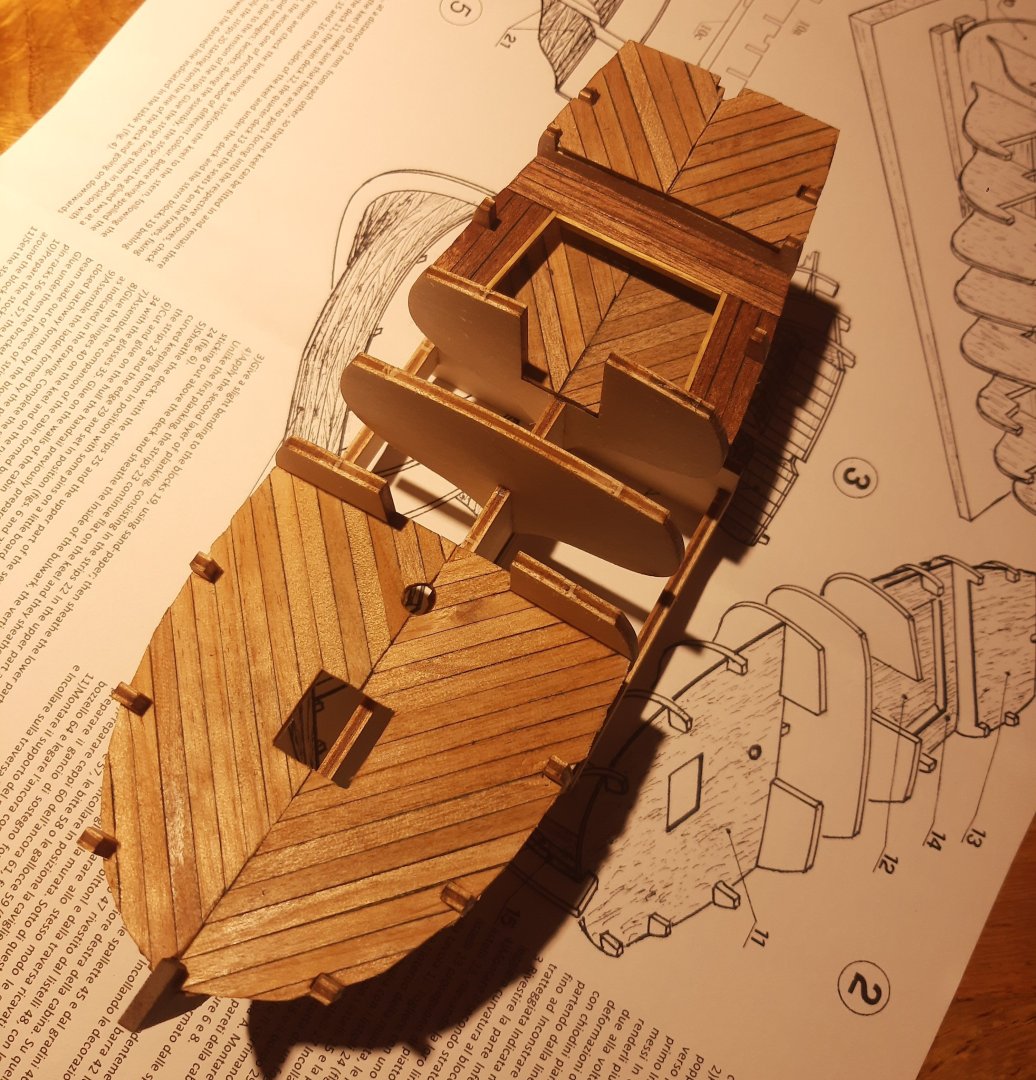
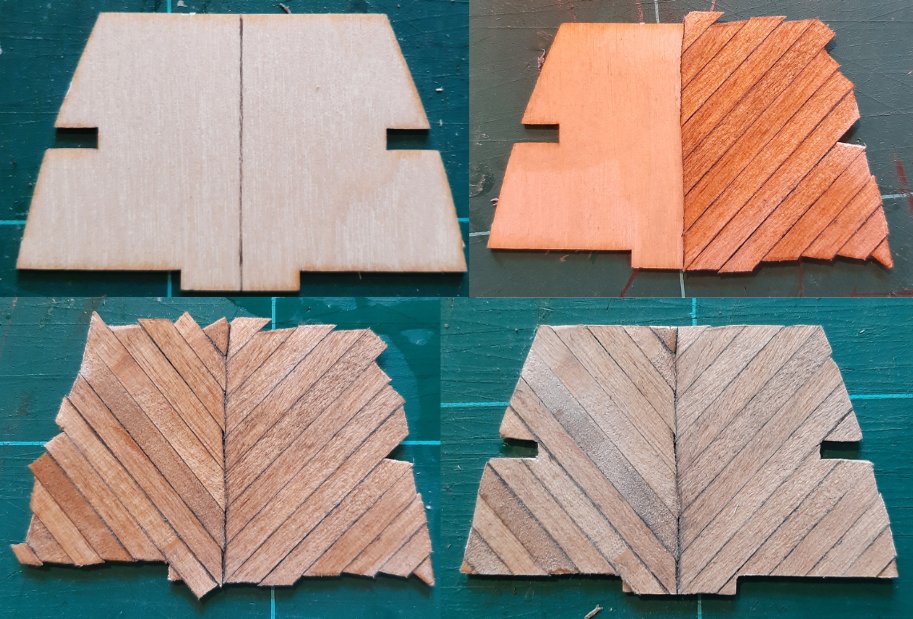
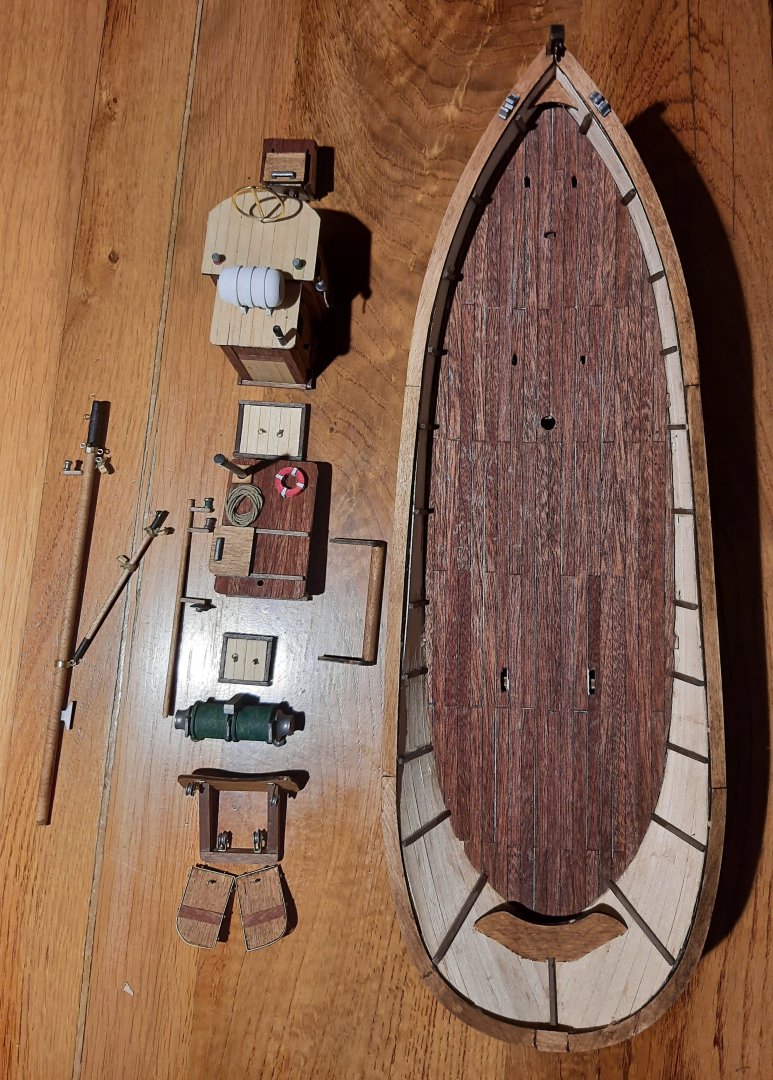
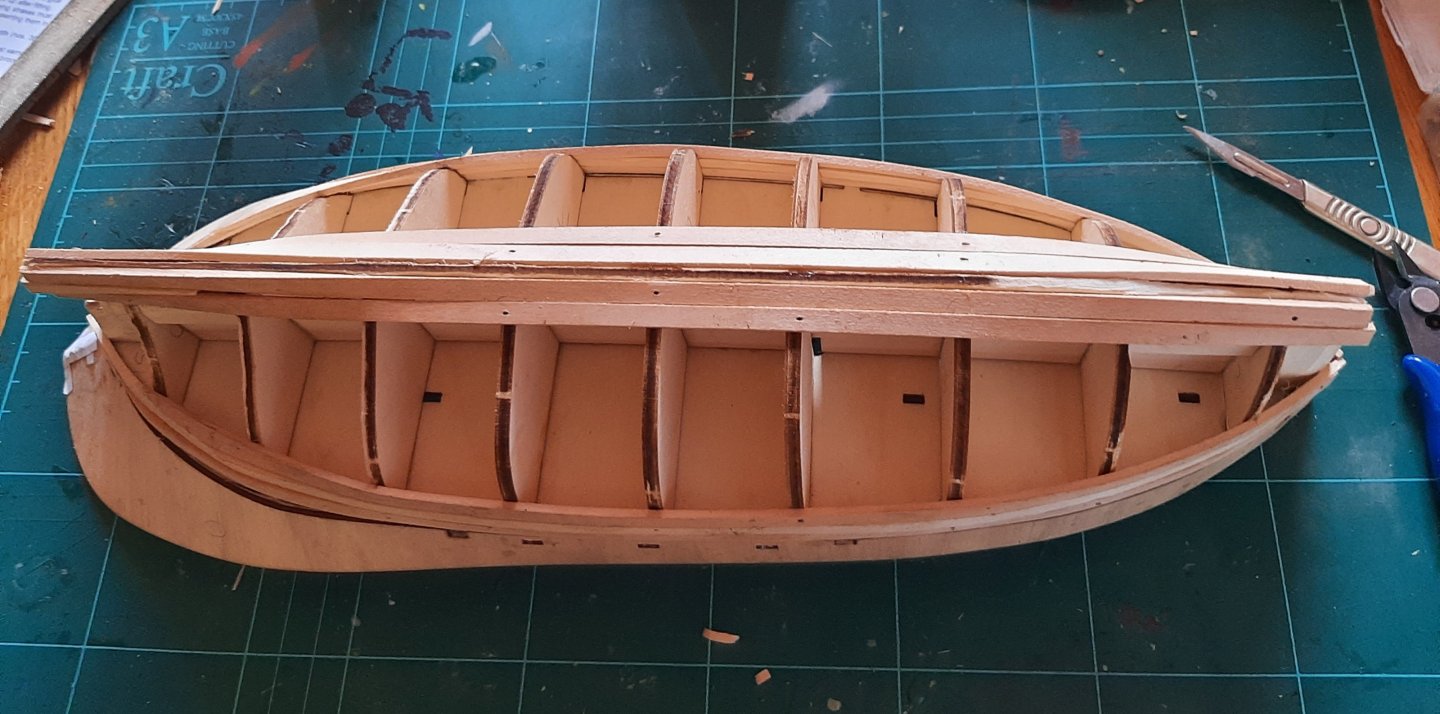
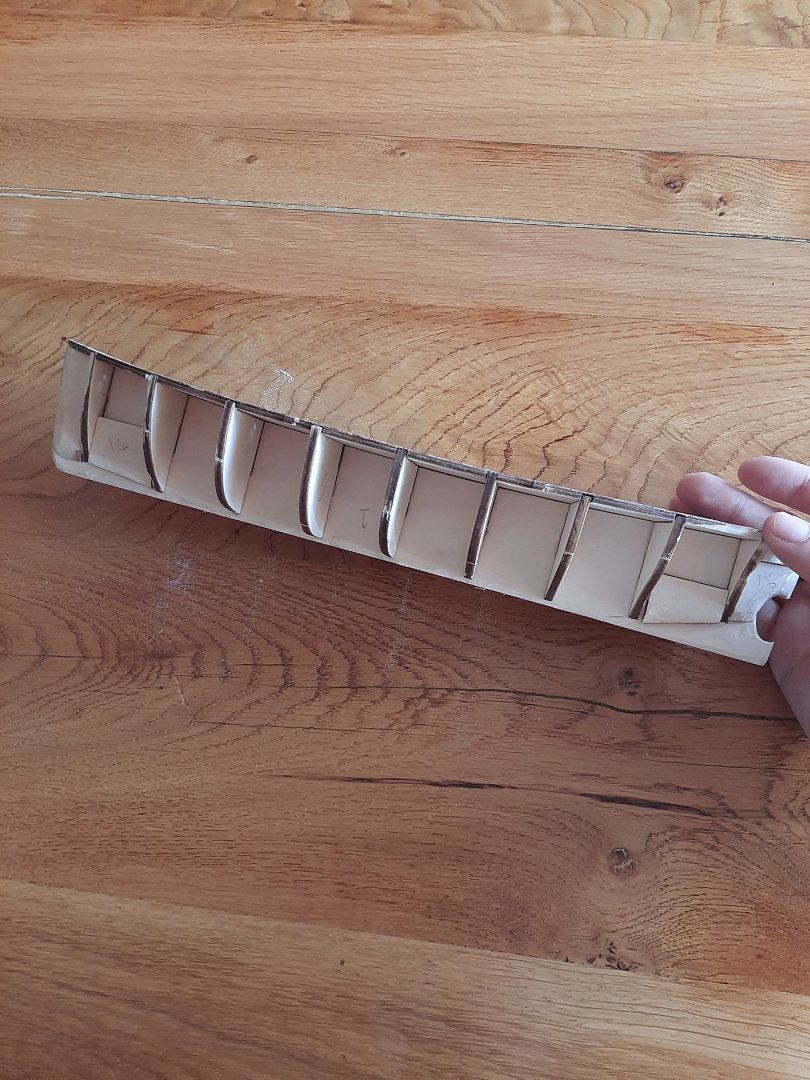
Well hello there. This will be my 2nd build log, after completing OcCre's Palamos earlier this month. Suffice to say, I'm somewhat hooked. I come from a wargaming background, so I'm no stranger to scale models, but working with wood at this scale is a new experience - one I'm keen to explore more. So, here we go: Dusek's reboot of Mamoli's Gretel kit. I wanted to do a nice yacht, and I was torn between this and another, more modern vessel, but I think the Gretel won out just because it looked a bit more 'traditional'. The kit arrived very quickly, and comes in a snazzy yellow and black box: And here are the bits on opening: Cool. I was going to wait a bit before cracking on, but there's a national holiday on in the UK this weekend, so with some extra free time on my hands, I got to work. Unlike the OcCre kit I started with, the pieces from this kit fit together almost perfectly - the laser cutting seems to be very accurate. The ply this is cut from is a little thicker too. Here's everything dry-fit: Now, here's my first deviation from the instructions. There will be lots of this throughout this build - mostly because the instructions provided for this kit are, frankly, shocking. More on that later - I take back everything I said about OcCre's instruction manual though. As directed, I assembled the keel, but I only glued it to itself - not the false keel. I did this so I could remove it later for sanding down the bulkheads prior to planking. Otherwise, I'm pretty sure that I'd end up damaging the very soft wood. Here's the keel being clamped in place whilst it dries: And here's me fitting in the bulkheads. I only have so many small clamps, so I used a bunch of clothes pegs to hold the parts square. This worked well on my previous kit, and it's worked well here. Why work hard etc. This is incidentally where I messed up a little. I need to cut a rabbet into the keel here, and now I'm going to struggle. It wasn't as disastrous as I thought it would be in the end, but I'd much prefer to have not put the bulkheads in before cutting. Worth knowing for future attempts! Because I couldn't lay it out flat, I ended up eyeballing most of the rabbet line. It's come out well enough (I think, having not yet started planking): Here's the various parts laid out, prior to rabbet cutting. I'm going to deviate from the instructions again in a second, but first; a small rant. There are four main planking types provided for this build, pictured here. On the instructions, these are numbered and labelled as, variously, LG, LN or LM. Without the magic of the internet, I'd have had literally no idea which was which - the LN is 3mm, and one of the LGs is 1mm thick, but everything otherwise is 0.5x4mm. Luckily, someone else on ModelShipWorld had had a similar issue with a different Mamoli kit, and whilst I now can't find that thread again to link it, I can tell you what's what for future reference if you're building this kit and struggling like I was: LN = Walnut. Darkest, 0.5x3mm LM = Mahogany (I assume this is sapele mahogany), reddish-brown, 0.5x4mm. LG = Tanganika (A different type of mahogany, apparently), pale tan colour, 0.5x4mm. The thicker planking for the first layer of the planking is also labelled tanganika in the key, but it looks and feels like a different wood - I'd assume it's lime. With my confidence in what planks I was supposed to be using somewhat reinforced, I soldiered on. I decided, perhaps in my hubris, that I'd like a nice herringbone pattern in the decking. Here's my attempt at that process, using the tanganyika wood. I used a 4b pencil to darken the edges of the planks as I stuck them down, trying to simulate caulking. Pretty pleased with this, but a bit annoyed by the wonkiness down the centre line - one to practice. Here's that bit of decking in place. Note that this is another deviation from the instructions - you're supposed to plank the decks after the hull, which means gluing the deck blanks down first. That seems like a really frustrating exercise, so I'm planking these first: Here's the seating planked with the mahogany and lined. I really like the woods provided with this kit - they come up super well with just a coat of Danish oil: Also note I've glued on the blocks to the back here. I think I should actually have done this after the first layer of planking, but I don't think it will matter too much - if it does I guess I'll find out. As it is, I'd have struggled to get the rear decking on in the right place without these stuck on. At this point I have actually already cut the rabbet into the keel - I completely forgot to take any photos of this process. I'll try get one before I put the planks in. And here's the decking complete, all in the same pattern. Very pleased. The last bit I've completed up to this point is the roof, which is the same as the seating in the mahogany: Again, the wood comes out so nicely with minimal finish - I may experiment a little with some other finishes too. That wraps up the build log for now - I expect to make a start on the hull planking next. Stay tuned, and thanks for reading!


-
Thanks Eric, much appreciated, and another huge thanks for your build log - it was a massive help at points. No, I didn't anneal the brass - I considered that, and wonder if it'd make bending it a bit better too, but I just persevered with my Dremel. Only broke one bit, but it was such a time-consuming process - more eroding than drilling through the metal.
-
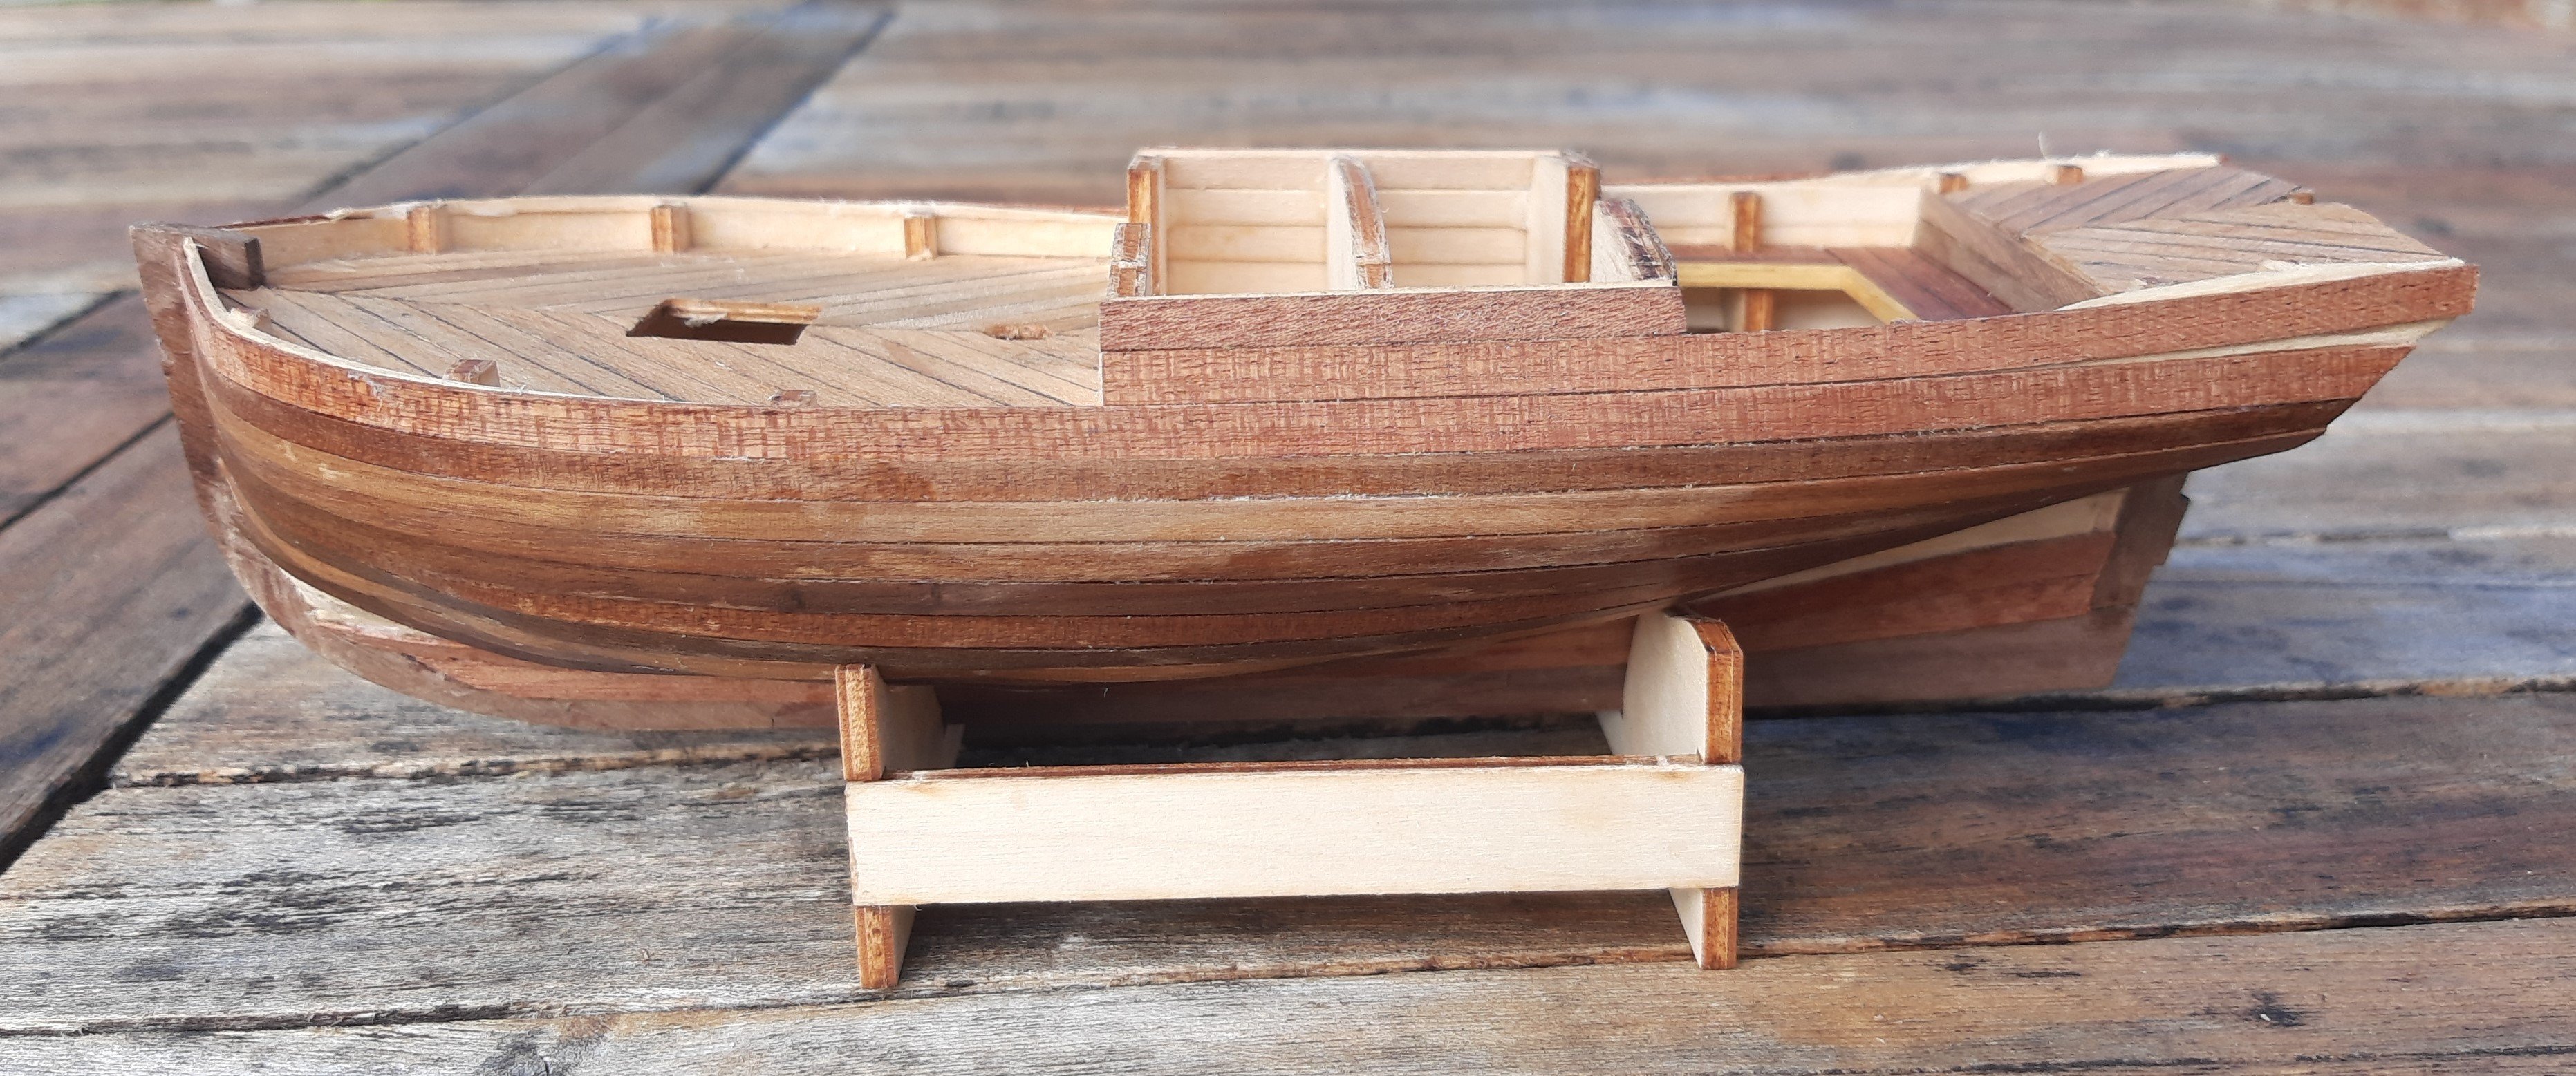
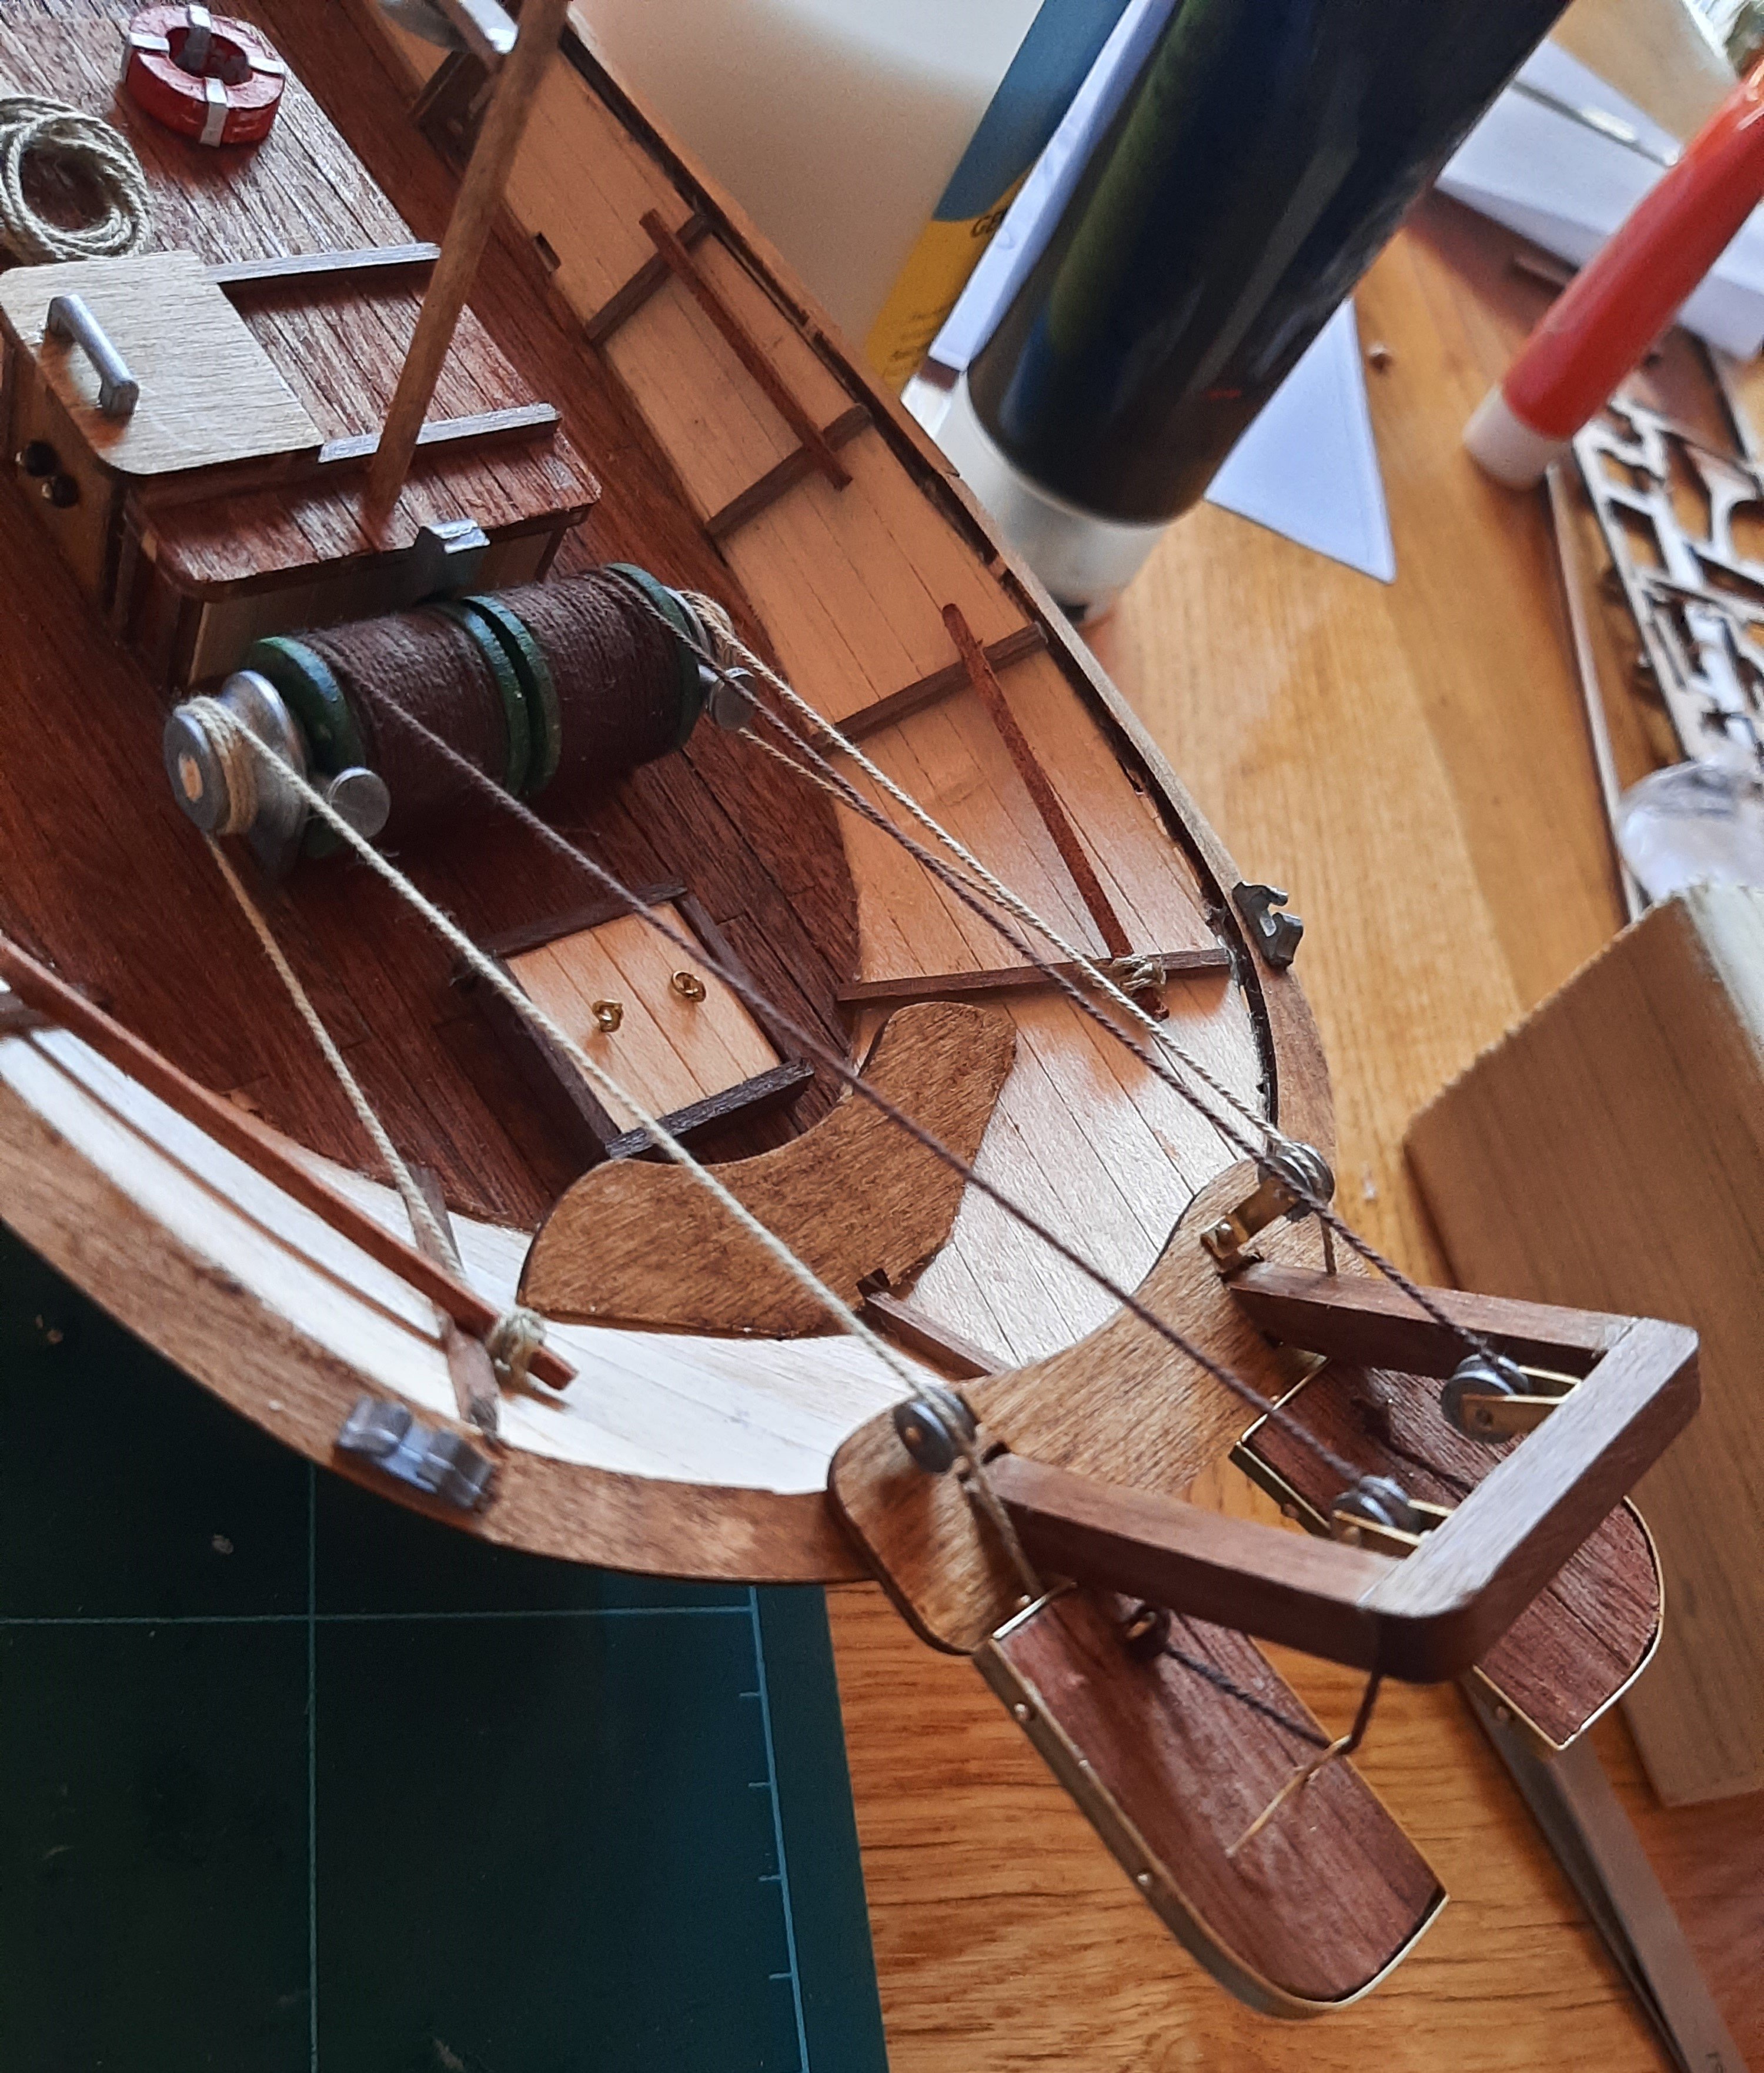
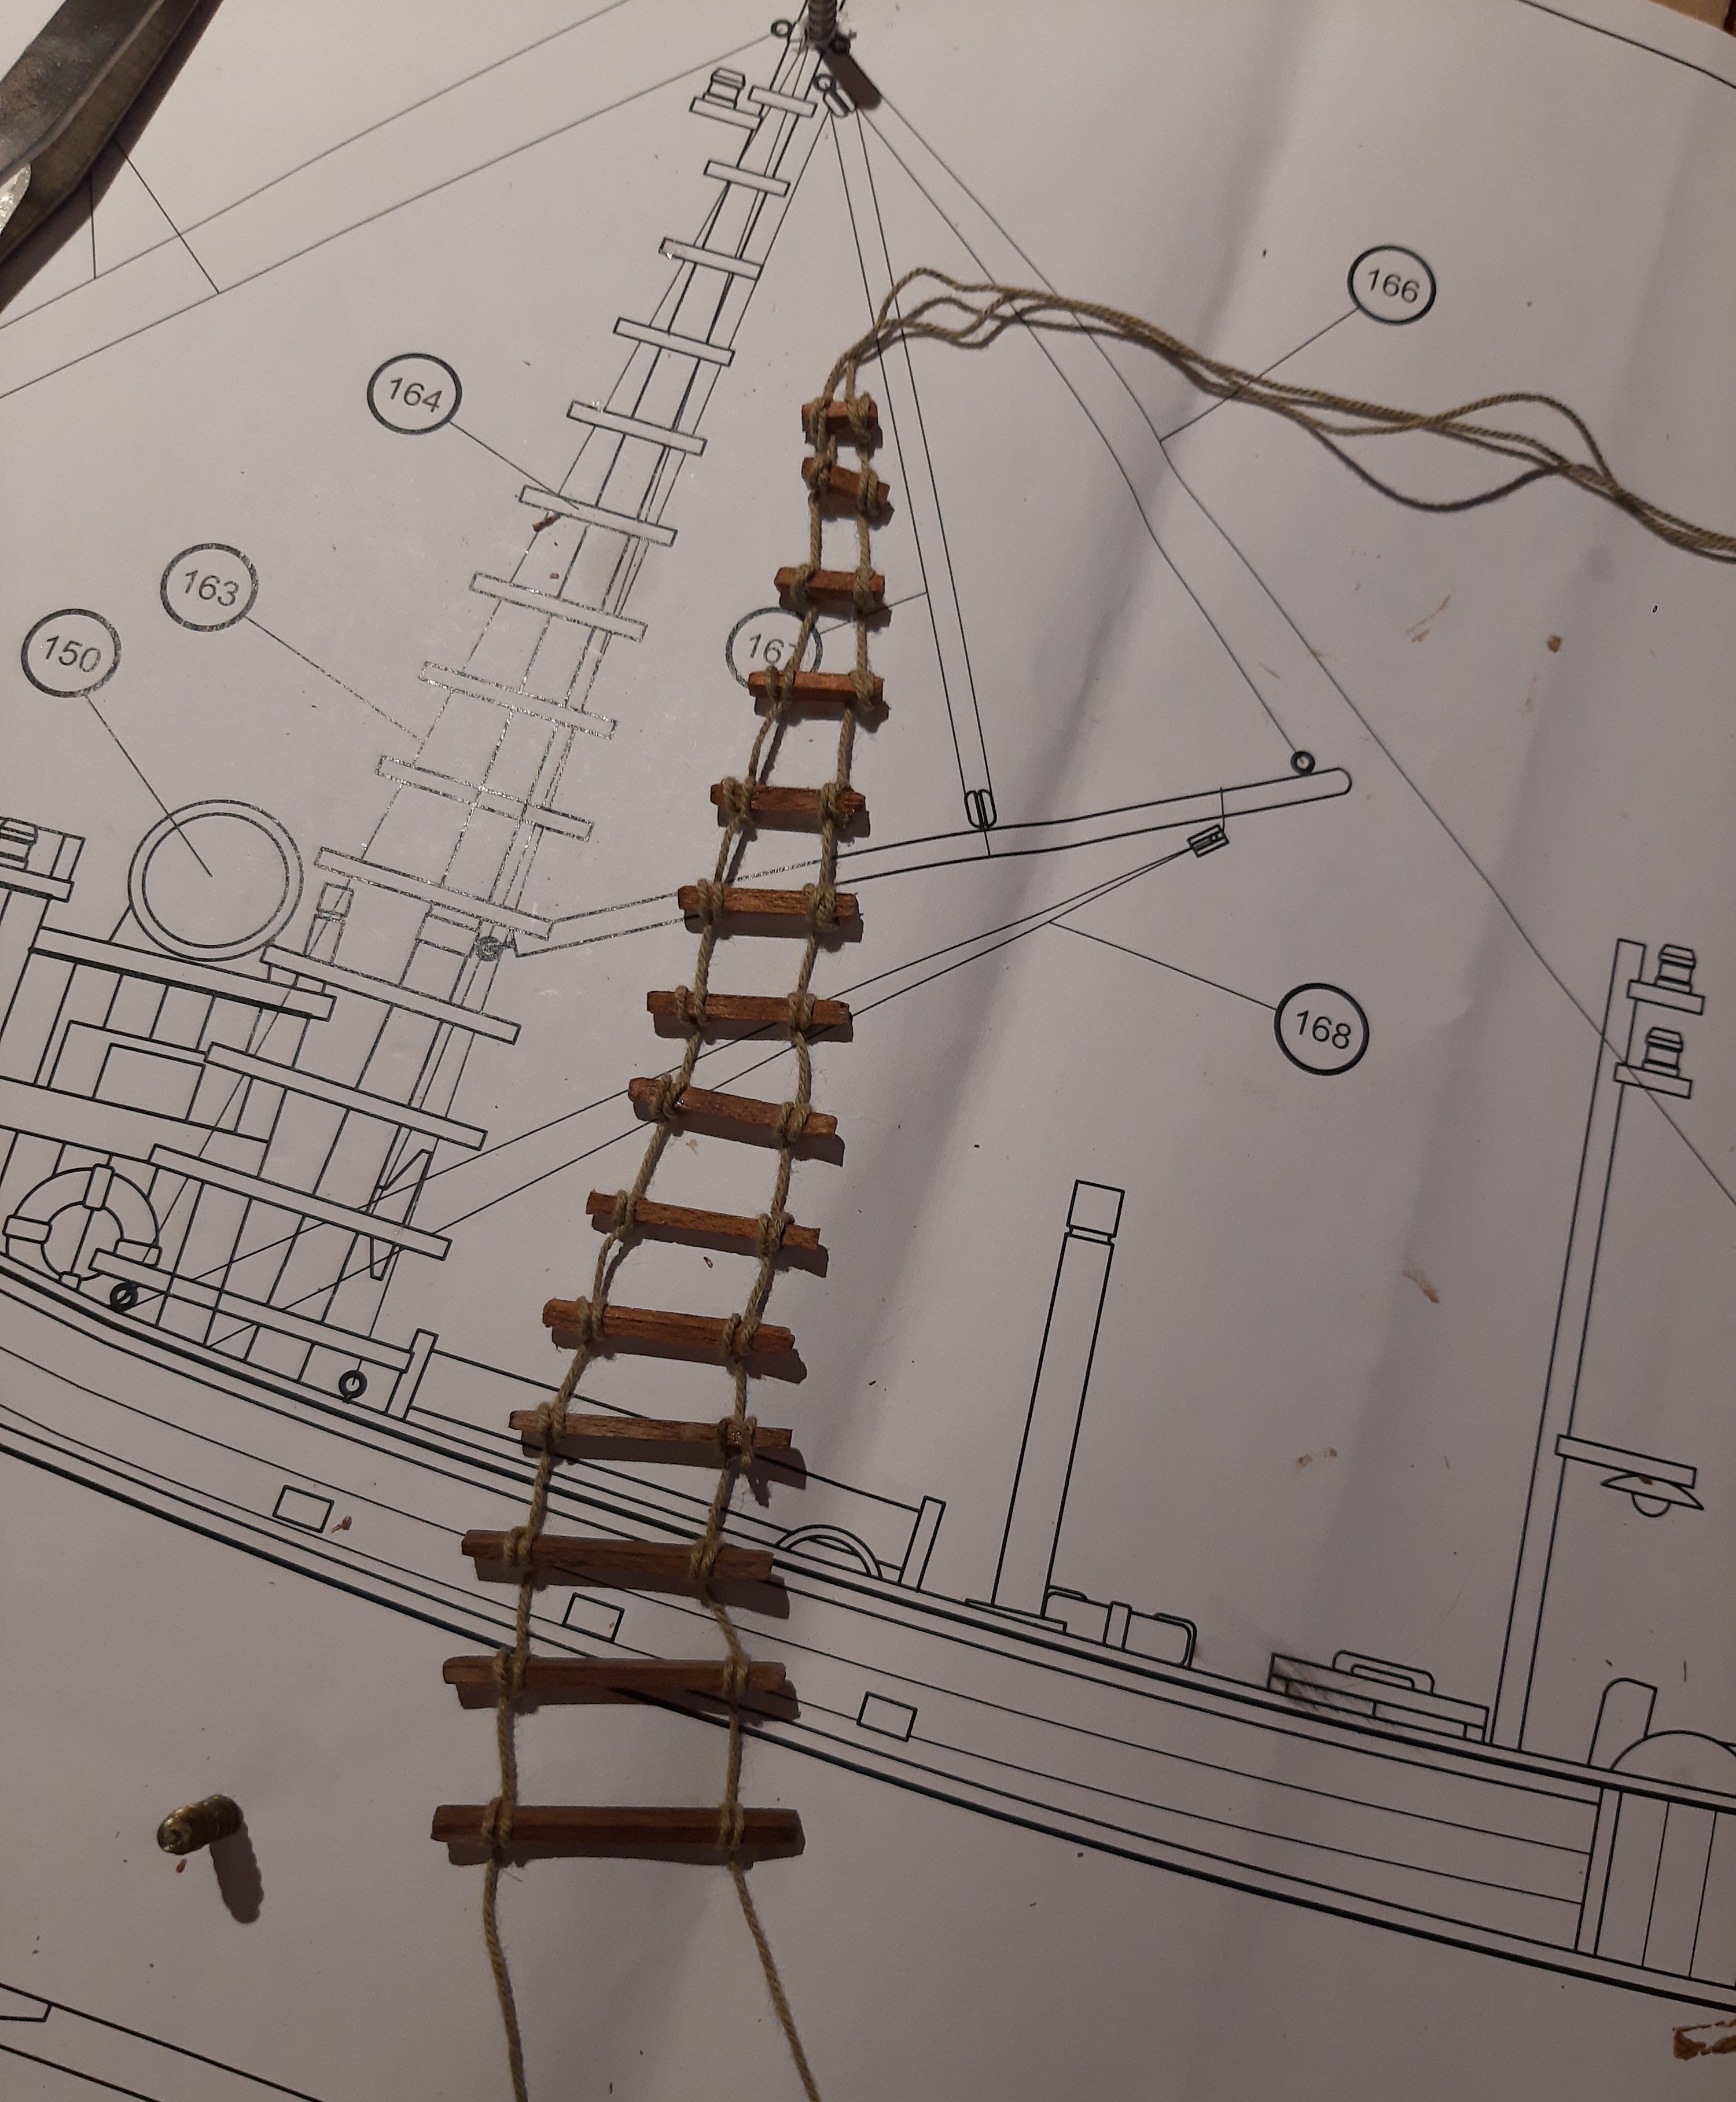
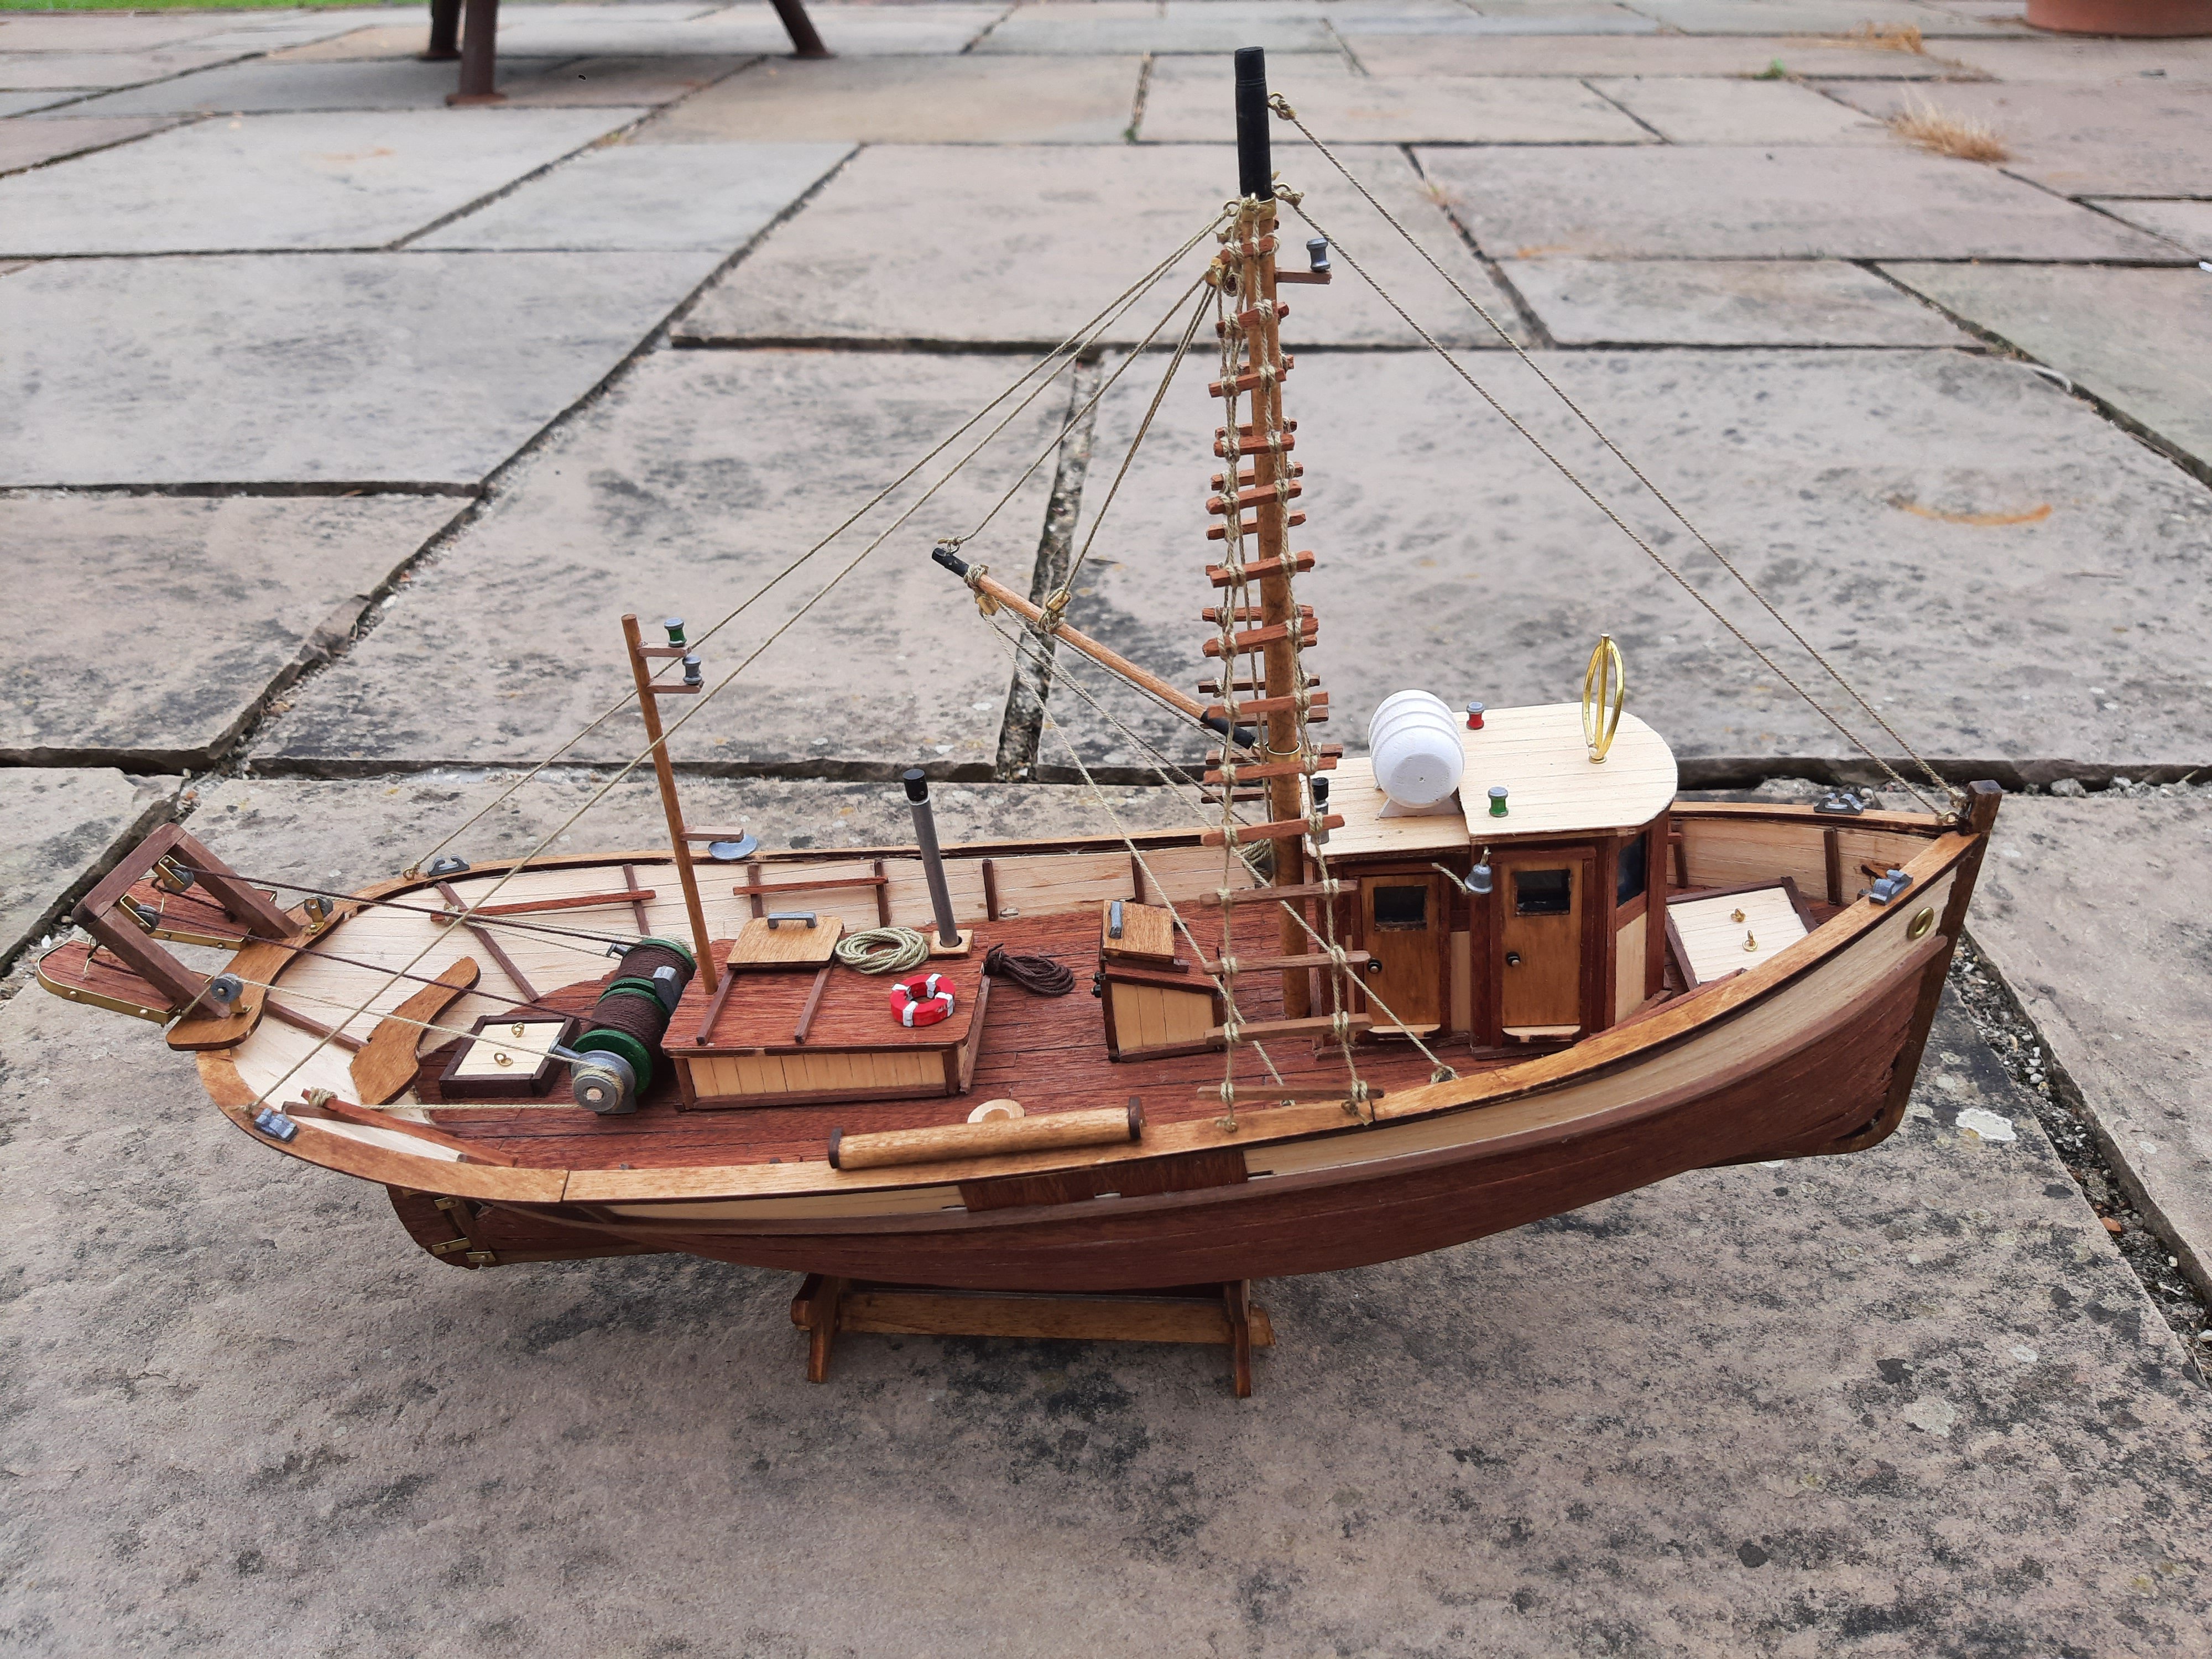
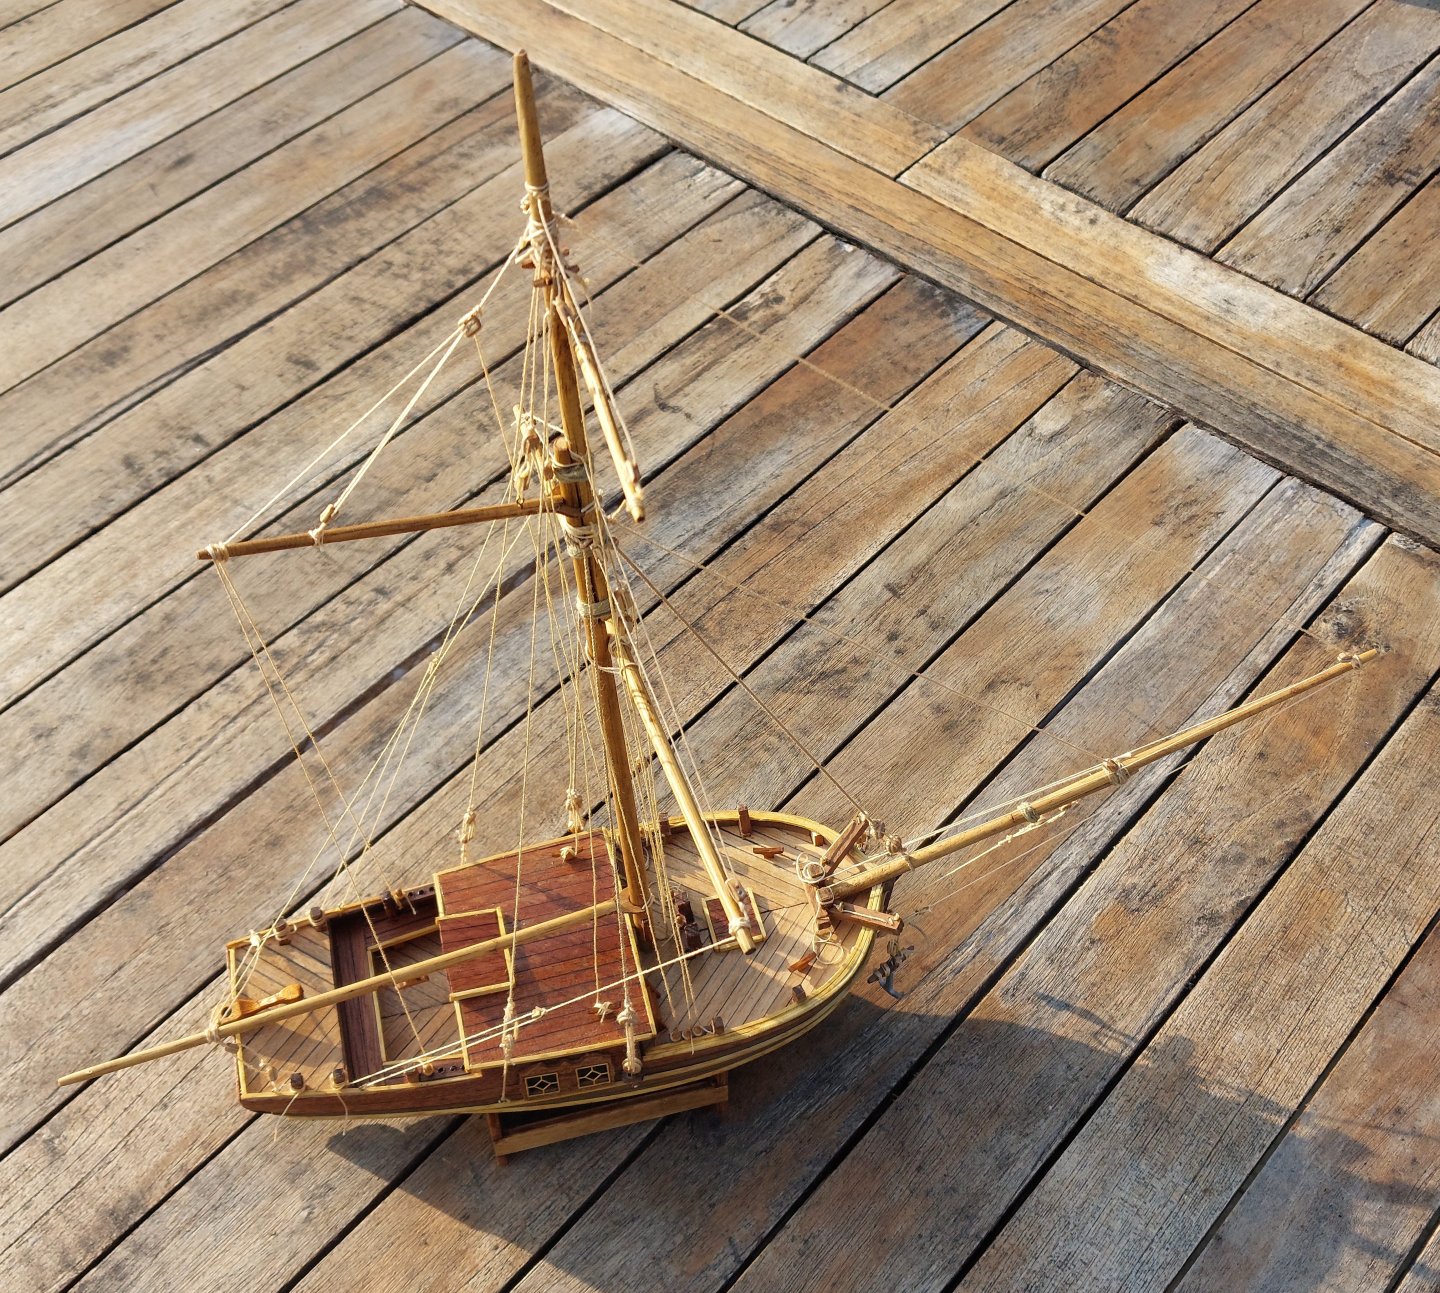
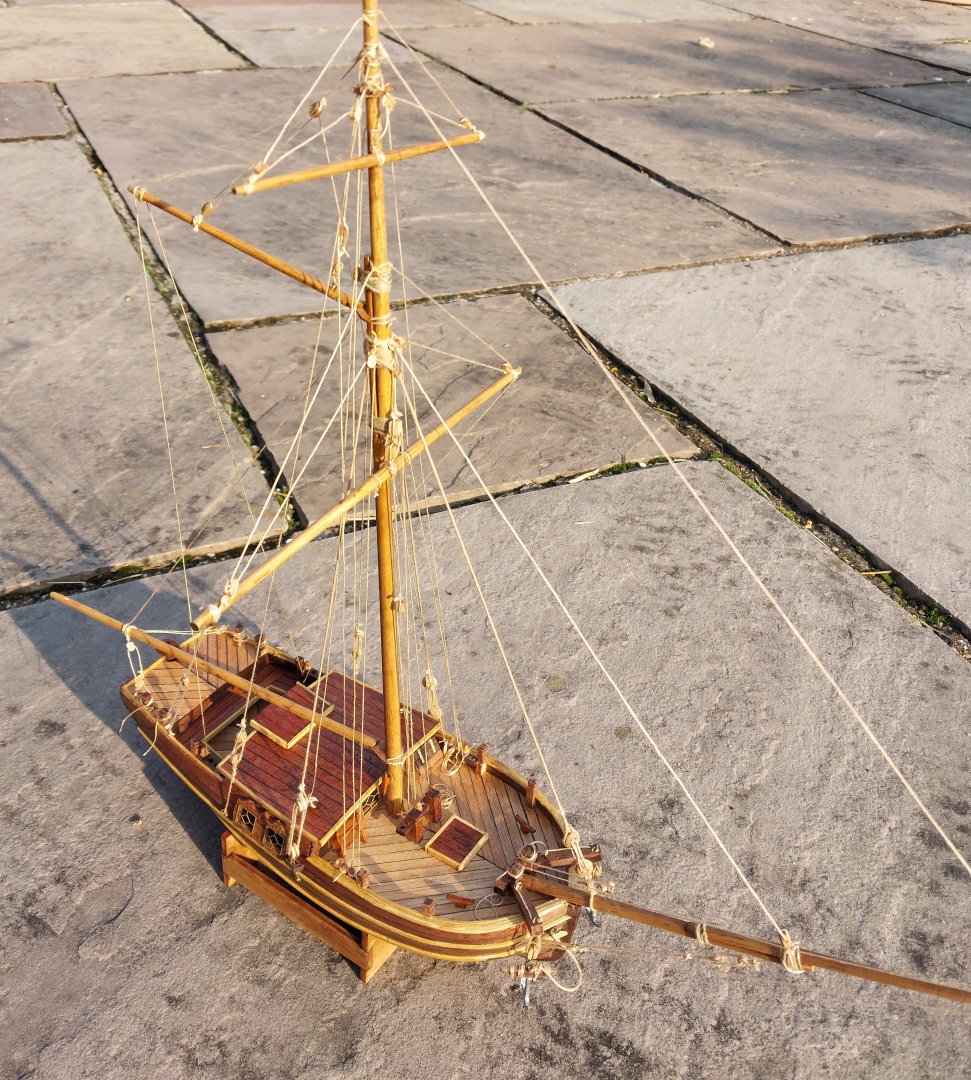
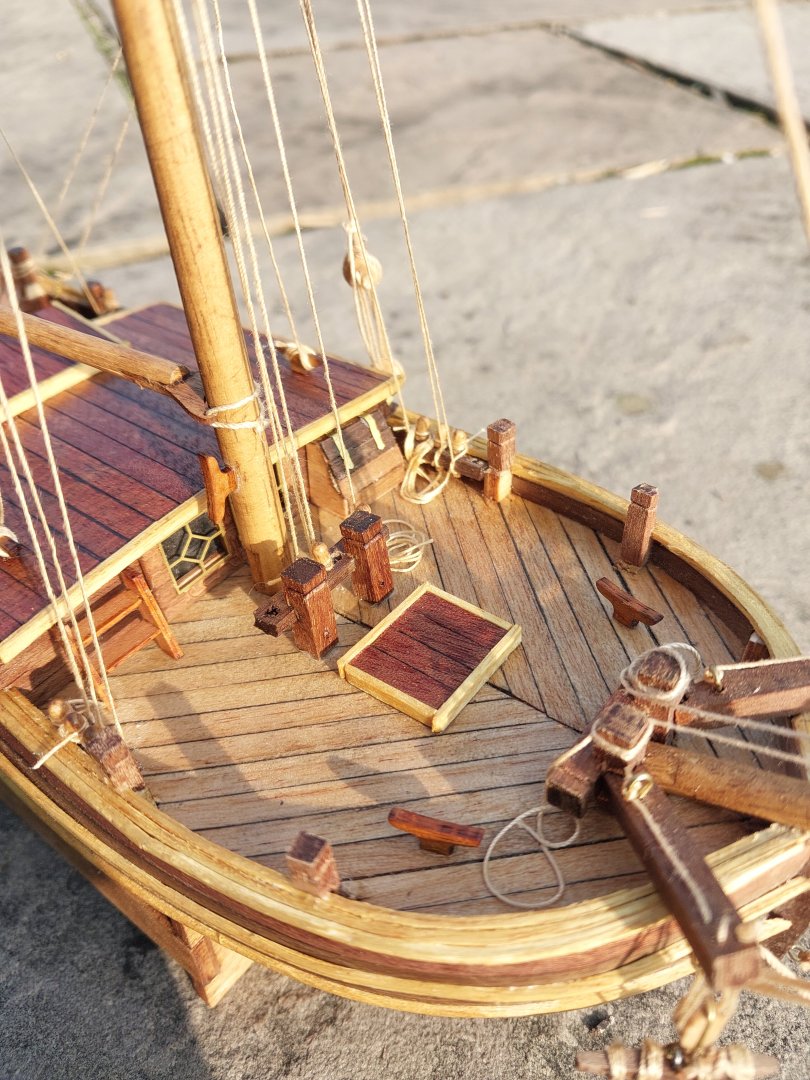
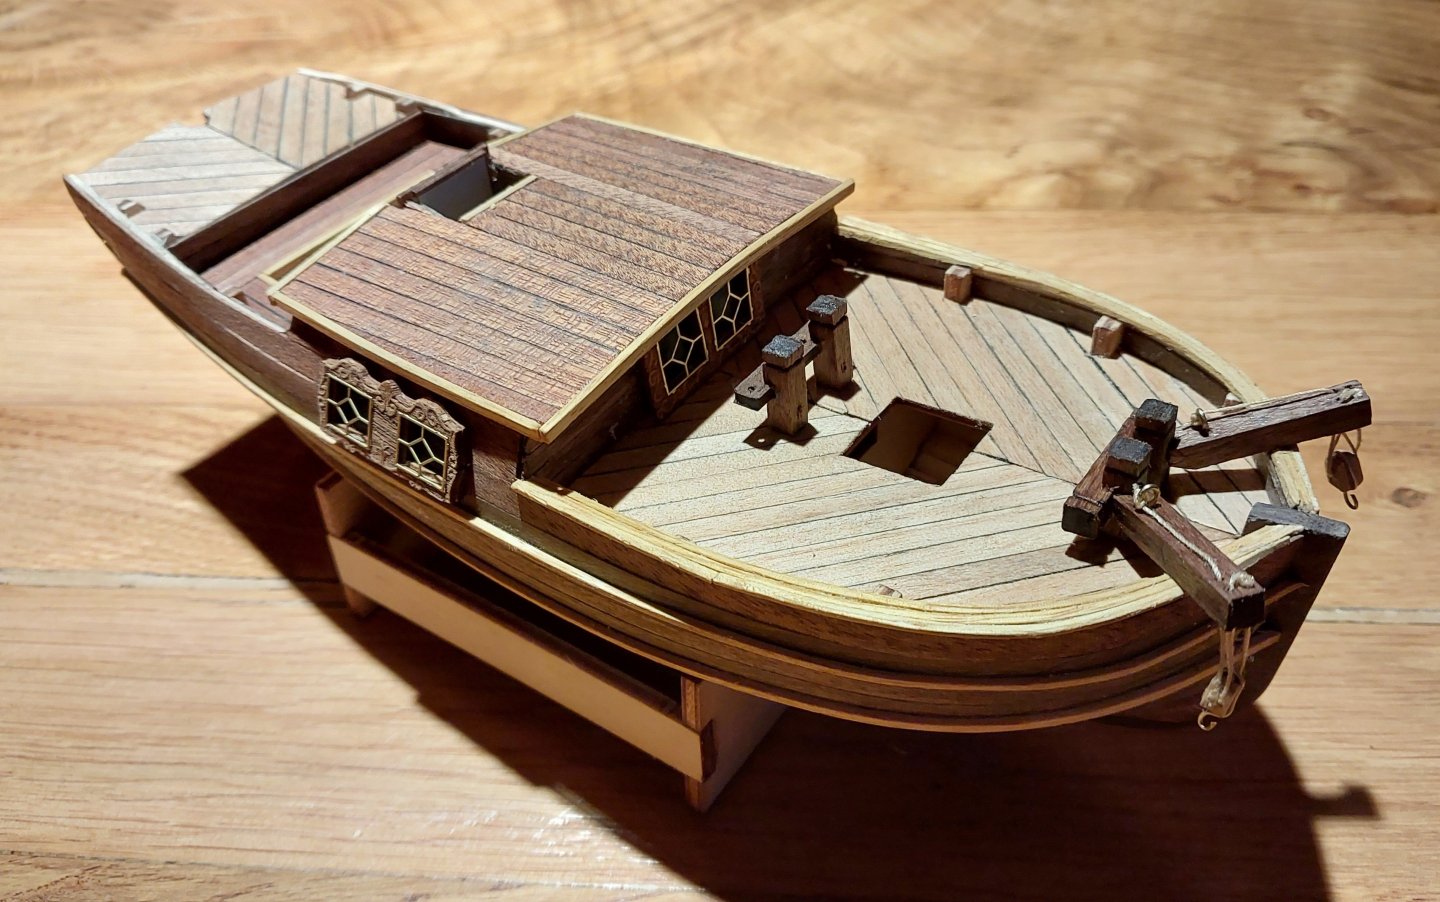
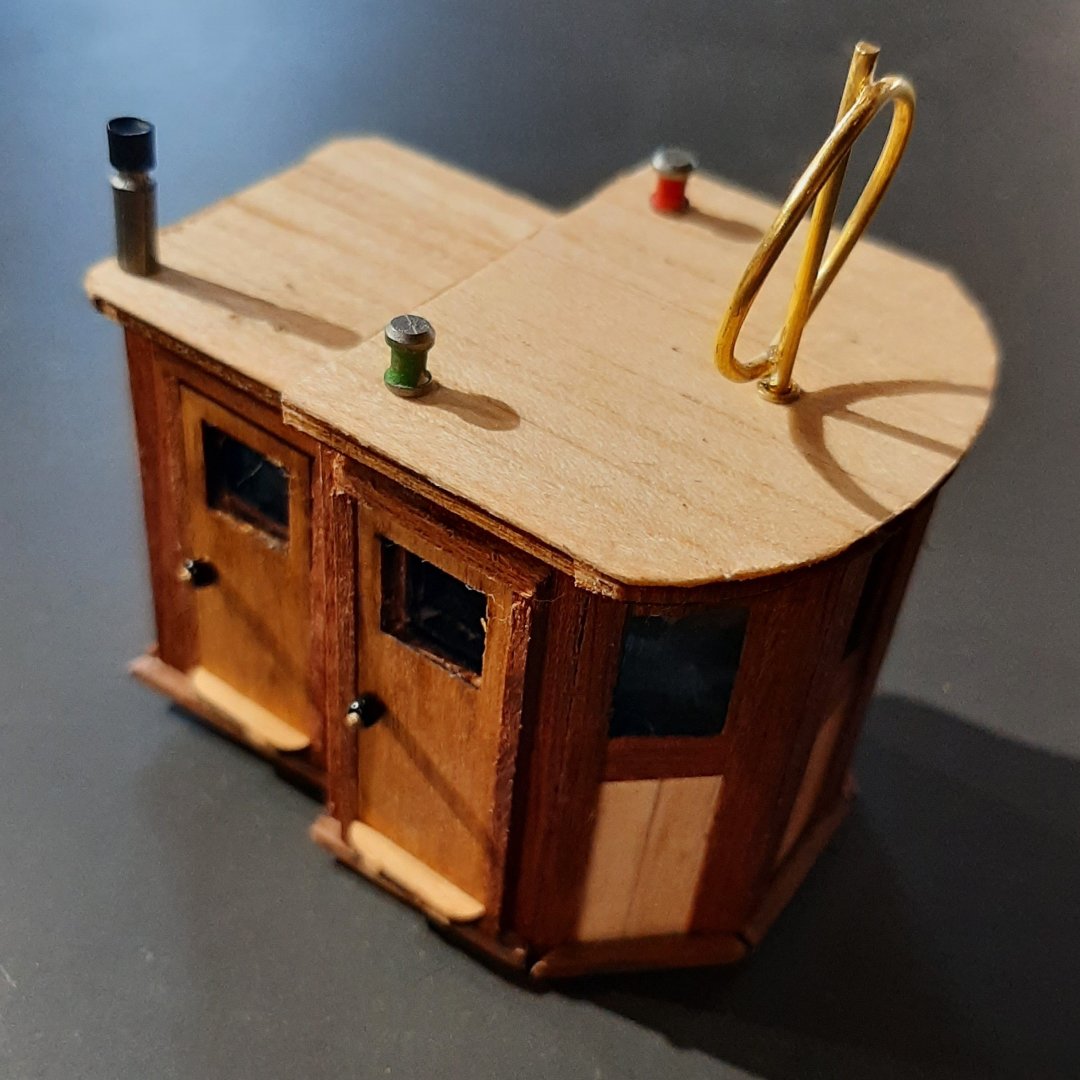
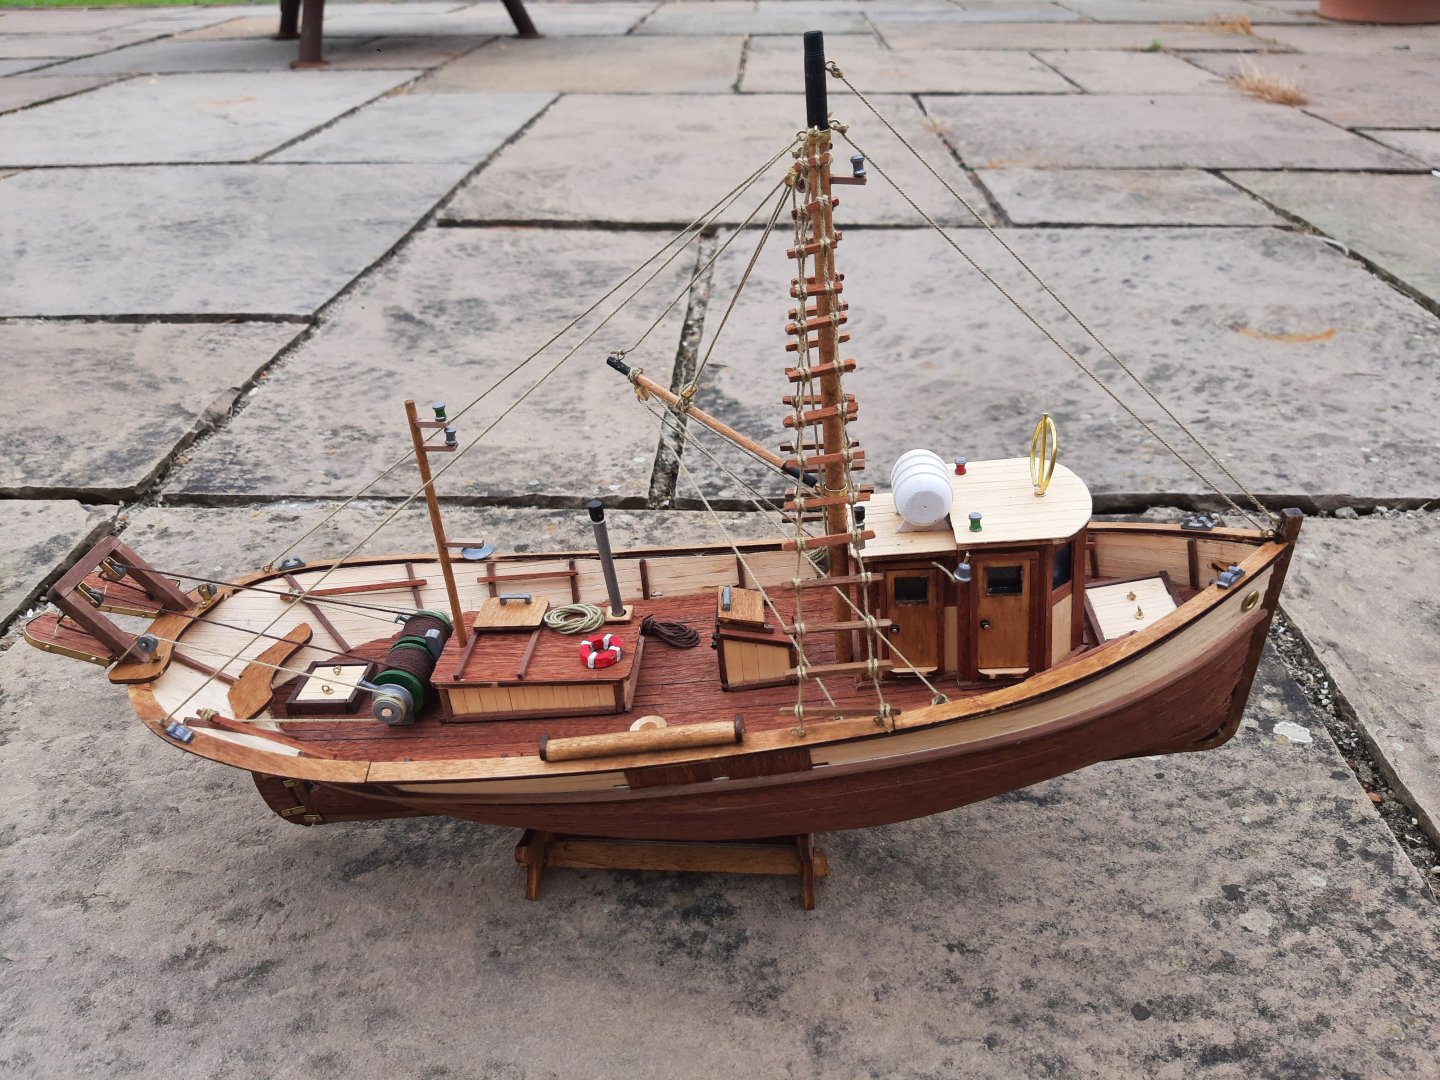
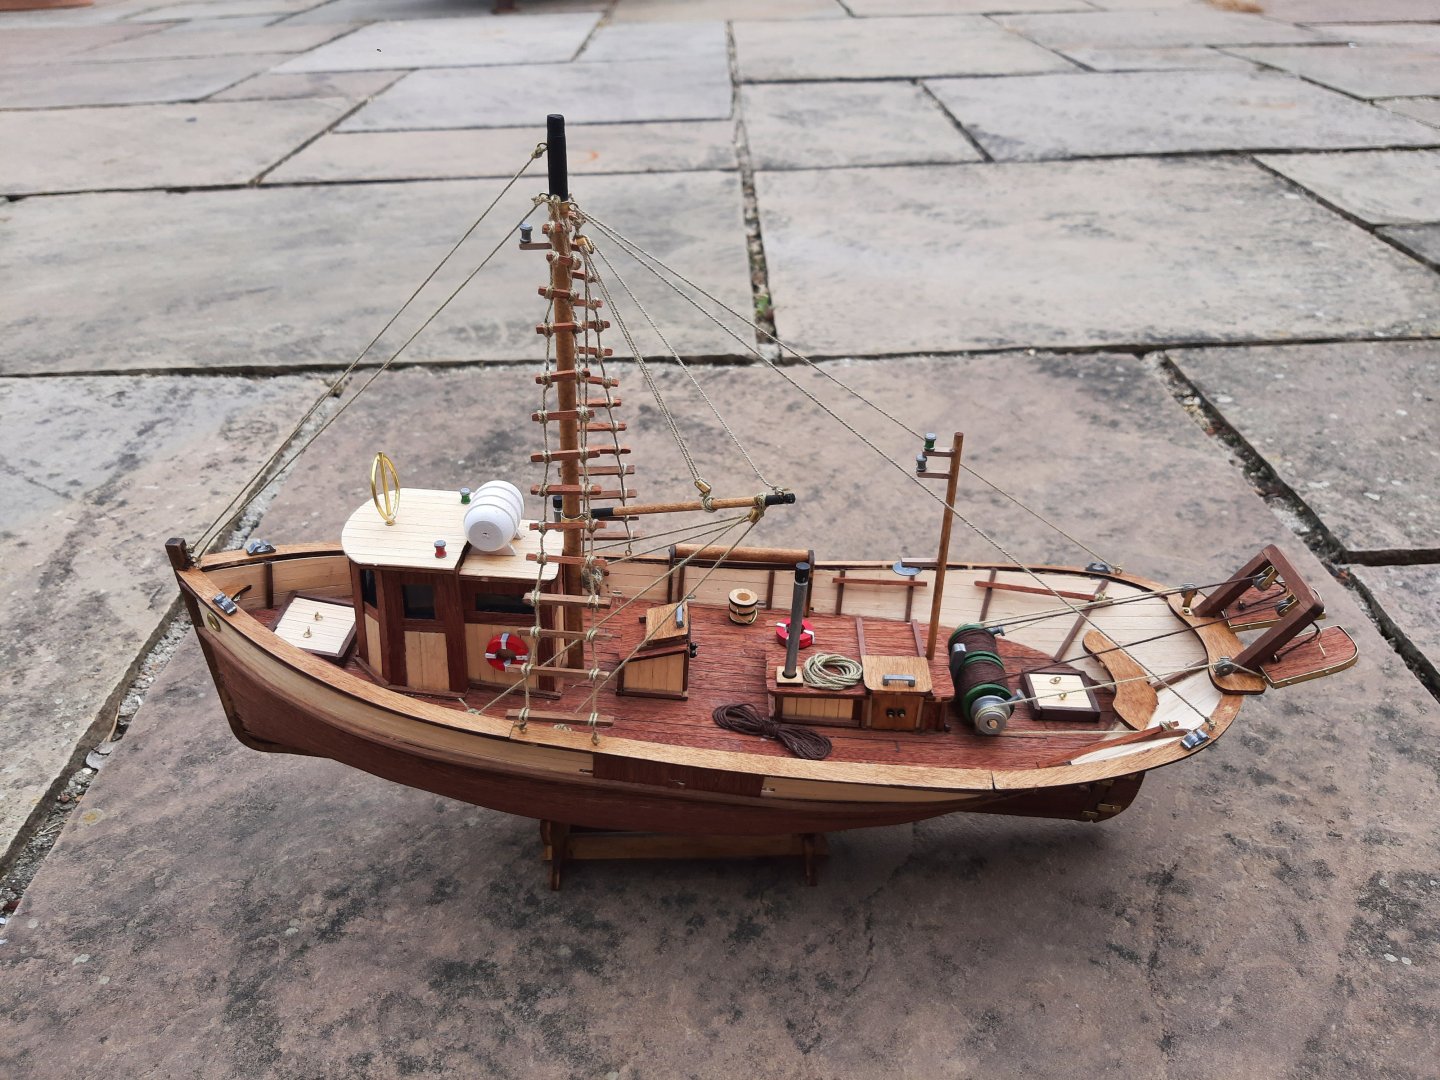
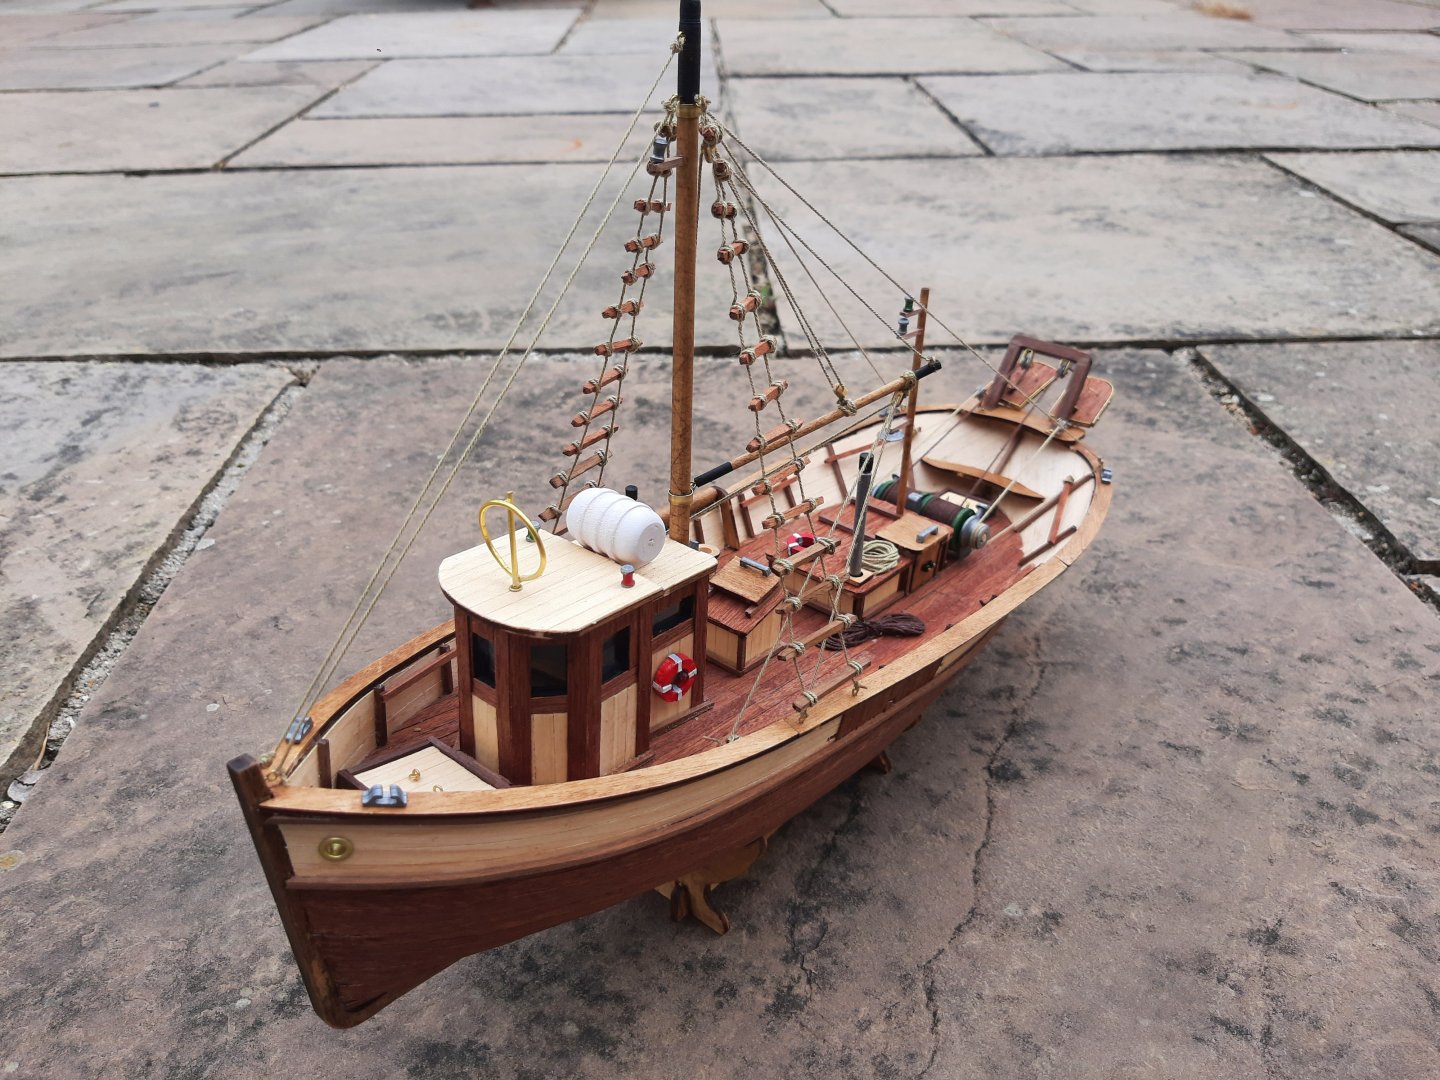
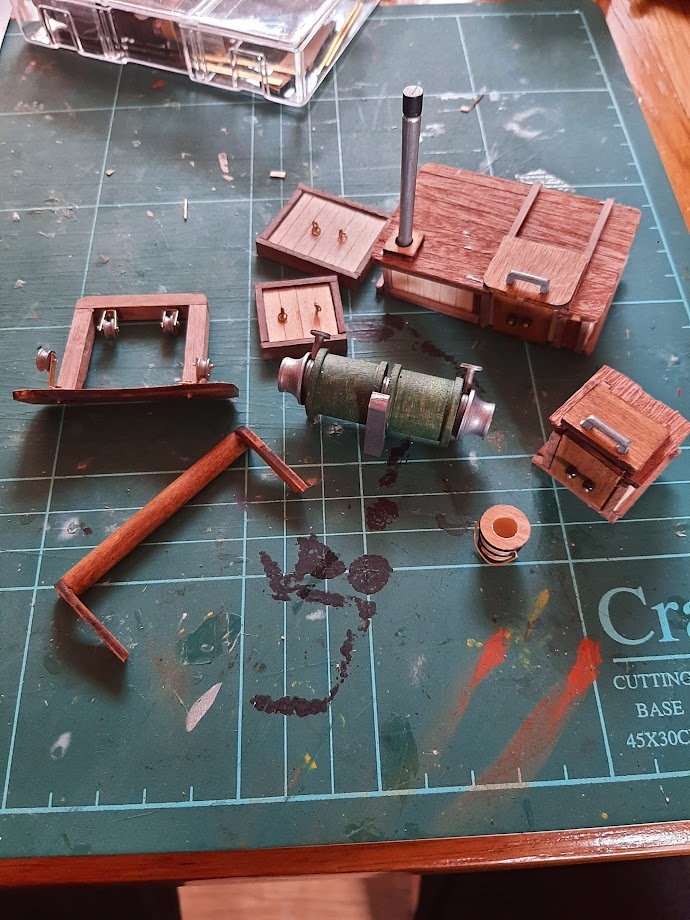
Final update! Here's the cabin: The instructions call for some little pieces of wood to blinker the two lights on top, but honestly I didn't think they looked very good, and I didn't really want to fiddle about with them. This photo was also taken before I glued on the large white barrel thing to the rear roof. Here is a cool photo of all the completed superstructure. I didn't take many photos of this part of the build as I was mostly doing it in between meetings. Lots of little 10-minute work periods, but it went pretty quickly. To taper the mast, I stuck the provided dowel rod in the chuck of a power drill, locked the drill in a vice and held some sandpaper against the dowel as I span it. My poor man's lathe worked excellently, and I'm very pleased with the result. Also note the two cross-pieces on the trawling blades. Paddles? Nets? Not sure what they're actually called. Anyway, I had an absolute mare putting these things together. The brass that frames them was too thick to just punch through, and resisted all kinds of tools - the final solution was a dremel with a tiny drill bit wrapped in some painter's tape so that it was thick enough for the chuck to bite. Miserable experience and by far the least pleasant part of the build in general. Here those paddles are attached: I didn't bother putting the brass cross-pieces on the top face of these. I like how the Sapele wood looks and honestly I was so fed up of the brass once I'd framed these that I just couldn't face it. I don't think that's a detriment to the final piece, and as this isn't a model of a 'real' ship then I think that's fine. Rigging the ship was next, and mostly went well. I created a rudimentary jig to make the rope ladders on each side - a wood screw through a piece of cardboard and the printout of the ship provided: This worked really well, and the two ladders didn't take me too long at all once I'd gotten into the flow of it. Here's the first one attached: As you can see, I'd already done the various bits of rigging round the boom and mast by this point. Sorry, got completely into the flow state and didn't take a single picture of the process. The one slightly frustrating part of this was the block on the underside of the boom - only one of the provided blocks had two holes, so I had to drill a second one into that miniscule piece of wood. From the diagram provided, the boom was only lashed in place on one side, but on my model that just let it swing loosely. The solution was the second hole, which lets me lash it to both sides of the hull. I think that looks fine, but do let me know if it's not kosher. Additionally, note the central cabin entrance thing - per instructions, this actually belongs in front of the main cabin. That would leave about 5mm of room to actually enter the doorway there, so I switched it with the hatch you can see at the front in the photo above. I think that's a much better look, both practically and aesthetically. And, drum roll please; final photos: I'm super pleased with this. There are some gaps, and some bits don't fit properly, and parts are wonky or poorly finished or a bit slapped together. But it's mine, I made it, and I had a blast doing it. Definitely hooked. I've ordered my next kit already. Thanks for following along!


- 21 replies
-
- 10
-

-
-
Hello! I've not given up on this, but I did go away for a week, so I'm just popping back on to update some small progress. I've started putting together the various bits of superstructure: OcCre's instructions on these bits are pretty terrible, so it's been a bit of a slow, frustrating process. Still, progress is continuing. I think the next update will be the last one. Stay tuned!
-
Time for a new update! I've gotten the second layer of planking done, and I'm proud of it. Here's some in-progress shots of that process, starting at the gunwales: As you can see, I also used some offcuts from the planking process to start on the fanned planks round the gunwales at the stern. With three full-width planks at the gunwales, I also added two full-width by the keel: And then I promptly forgot to take any photos in between this and finishing the side: As you can see if you zoom in enough, my tapering plan worked out just fine until right at the end - I guess that's where it normally would fail. I ended up using just one gap-filling plank - everything else was tapered from 5mm to 2.5mm at the bow, then finished at the stern with stealers. A couple tiny gaps visible here, but they're barely noticeable in person. I used this layout on the other side: This was a very quick process, and I ended up doing most of the side in-between meetings at work. You can see a few raised points where the extremely thin veneer has twisted up away from the hull a little. I remedied this later with applications of superglue slid into the gaps on a bit of scrap wood. Again, I ended up with one thin gap-filler plank (the third away from the keel on both sides) but overall I would say this was an extremely satisfying task. Very pleased with myself. Here the boat is with the final planks applied to the gunwales, and a light coat of Danish oil : And here she is from a photo today, with the framing applied to the gunwales and the railings put on. I used a heavy application of Dark Oak Briwax to darken the plywood of the railings. Because my gunwales weren't put on exactly as OcCre decreed, I had some trouble getting them to fit properly, snapped one, and ended up filling a gap at the stern with some scrap ply. Not a fun experience, but worth it in the end as I think it's transformed the look of the piece. Also note the nice brass eyelets - push fit without any need for glue - at the bow. Really brings the boat together. I'm super happy with the progress I've made here. On to the superstructure now - I've actually already made a start on this, but I'll put that in the next update. I will say, getting tiny holes into tiny brass strip has been one of the more frustrating parts of this so far. Any tips on that very welcome. Cheers for following along!


-
Thanks Eric. Yeah, I added a bunch of filler and sanded even more after this. By no means perfect but I'm quite pleased considering it's my first attempt! Putting the keel on first was a huge help, so glad I saw it in your build log first. Not sure it'd have come out at all as nicely without that change. Cheers!
-
This is looking really nice Eric, the deck planking is especially impressive. Keep it up!
- 86 replies
-
- 2
-
-
- San Francisco
- Artesania Latina
- (and 2 more)
-
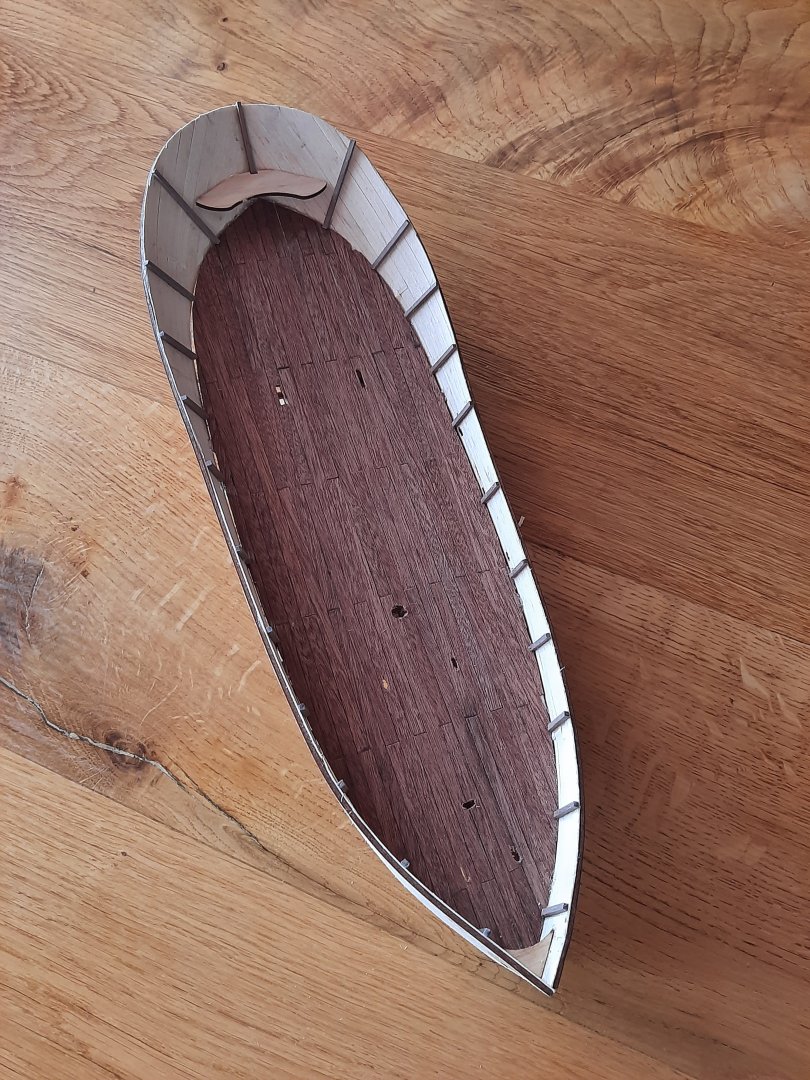
And here's the update! The OcCre instructions tell you to start planking in the middle of the hull. Every piece of advice and tutorial I've seen tells you to start at the gunwales, so that's what I did. I applied two layers at the gunwales and two at the keel before thinking about tapering: To bend these, I held them over the spout of a kettle - it seemed to work reasonably well. The tapering plan I put together seemed to work reasonably well, though I'd definitely got the measurements a little bit off, as I ended up with a few gaps. Here it is halfway done: Again I found drawing pins a great help in keeping everything aligned. I used thin offcuts to fill the more egregious gaps, but overall, as a first-ever planking job I think I did pretty well. Definitely should have thinned the bow down more, but this is all going to be covered anyway, so I think I'll get away with it. Here it is after some major sanding: Not perfect by any means, but she looks like a boat now. I actually did a little more sanding after this photo was taken. Note the stern is significantly more thinned down now - I should have apparently had the planks meet each other past the false keel, as the actual keel sits a little further out than expected. I think this will be fine once the next layer of planking is on, but it's a little irritating, and wasn't clear at all in the instructions. The hull is a very strange shape at the stern, and the lack of a transom made bending, shaping and sanding very onerous. Here it is on the stand: I'm very pleased with how the bow came out. Time will tell whether my shaping of the stern will look good. In OcCre's instructions, they suggest planking and then adding on the keel afterwards. From reading another build log by SiriusVoyager, he recommends putting the keel on first. That's what I've done, and that's the last of this update: As you can see, there's a few little gaps around the keel, but it's on now and I'm relatively sure I'll be able to fill those, either with shims of scrap or with the next layer of planking. Time will tell - I'm pleased with the progress thus far, despite some frustration with the weird-shaped hull. On to the next step!


-
Thanks for the encouragement guys! Here's a quick update of the last couple sessions. I roughly sanded down the keel, bow and stern with a dremel. Writing this now, I know I didn't take enough off in the first pass, but that's okay - all a learning process. And now, on to the dreaded bulwarks. I planked these as directed in the instructions, and began the bending process. In hindsight, I should have used CA glue for the planks here (instructions recommend contact cement, but I used wood glue) as I had some warpage here. Nothing major though, and some careful cuts with a scalpel blade have settled the most egregious bends in the planks down enough that I'm happy with it. Now, on to actually attaching the bulwarks. Oh man. Whoever designed this kit was a sadist. The first one took me a good half hour of struggling, bending, struggling more, bending more... And this is by no means perfect. Oh well - at least it's attached. On to the second one. And there we go. I made liberal use of drawing pins for this, and found them far more effective than the tiny little brass pins provided in the kit. My bending skills require some work, however. For the life of me I couldn't get the bulwarks to meet perfectly at the stern, and I couldn't work out a way of clamping them so that they wouldn't slowly pull apart before the glue had time to dry. So, enter my slightly janky solution: I superglued some printer paper over the join as a brace. Not pretty, not very traditional, but it's going to be covered with planking later anyway, so who's to know? And with that done, I glued in the uprights and the battens for each end of the deck. I had to file the stern one down a little to make it fit against my slightly-too-pointed bulwarks, but I think it looks okay. And there we go! On to planking next (I've actually already made a start at time of writing), so my next update will hopefully be the first planking layer complete. Stay tuned!


-
Thanks Eric! Yeah, I saw your build log before buying the kit, so thanks for the detailed walk through - very helpful.
-
This is my first ever model ship kit. I've recently taken a deep-dive into the hobby, and after doing a bit of research on this forum (and reading through many, many ship builds) I decided to reign in my enthusiasm a little bit and go for a 'beginner' ship. I'm interested in doing some more complex things later down the line, and I'd like to try my hand at some ships in bottles, but this will do as an introduction. This is also my first real foray into a forum like this, so wish me luck! So! The Palamos is a 1:45 kit based on traditional Spanish fishing boats. It's possible to paint it, but I do like the walnut finish they show in the stock photo, so I'm tempted to leave it as is, with the natural wood colours. Lovely. Here's my first steps. I cut out the various bulkheads and keel. There was very little filing and sanding required, and the parts fit together perfectly without needing adjustment. A huge difference from plastic. Note my improvised stand using clothes pegs to hold the ship upright whilst the glue dried. I think I got these about as square as possible, though even this felt somewhat fiddly. Whilst this dried, I started work on the deck. OcCre suggest laying the planks out and drawing in joins with a pencil. I thought that would look a bit naff, so elected to diverge from the instructions and cut the planks to 110mm lengths. There's not much of this wood provided, considering it's also used to plank the hull, so I tried to be as conservative as possible with the planks. In order to keep everything aligned, I drew alternating lines in red and black pencil, 55mm apart. I didn't really have a reference for where this planking should start, so I just eyeballed it - I think it will look fine. I also took the time to coat the edges of each plank in pencil graphite to simulate caulking - I've seen this done in a number of build posts here, and it makes a surprising difference! I cut out the battens for the bow and stern and labelled them all - glad I did as I nearly stuck them to the wrong ends! Also pictured is the deck before trimming. And here's the deck attached... and the battens ready for filing down. And that's a wrap on this session. I'll get the keel thinned down and the bulwarks added on as soon as I find some more time to work on this - thoroughly enjoyable thus far. Looking forward to learning more about the hobby! Doug