JohnWW
-
Posts
29 -
Joined
-
Last visited
Content Type
Profiles
Forums
Gallery
Events
Everything posted by JohnWW
-
Sorry, forgot the pics.


-
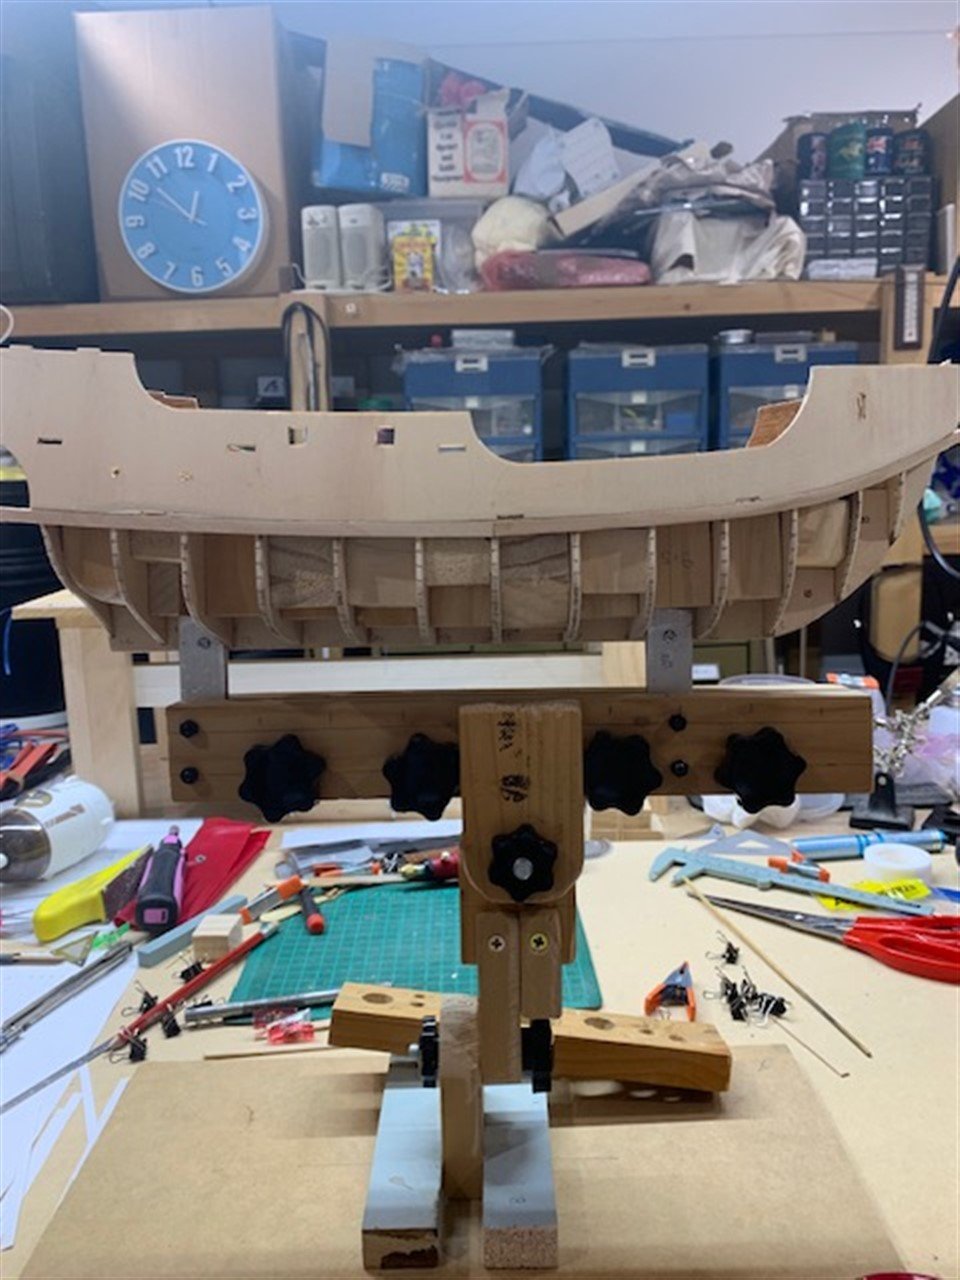
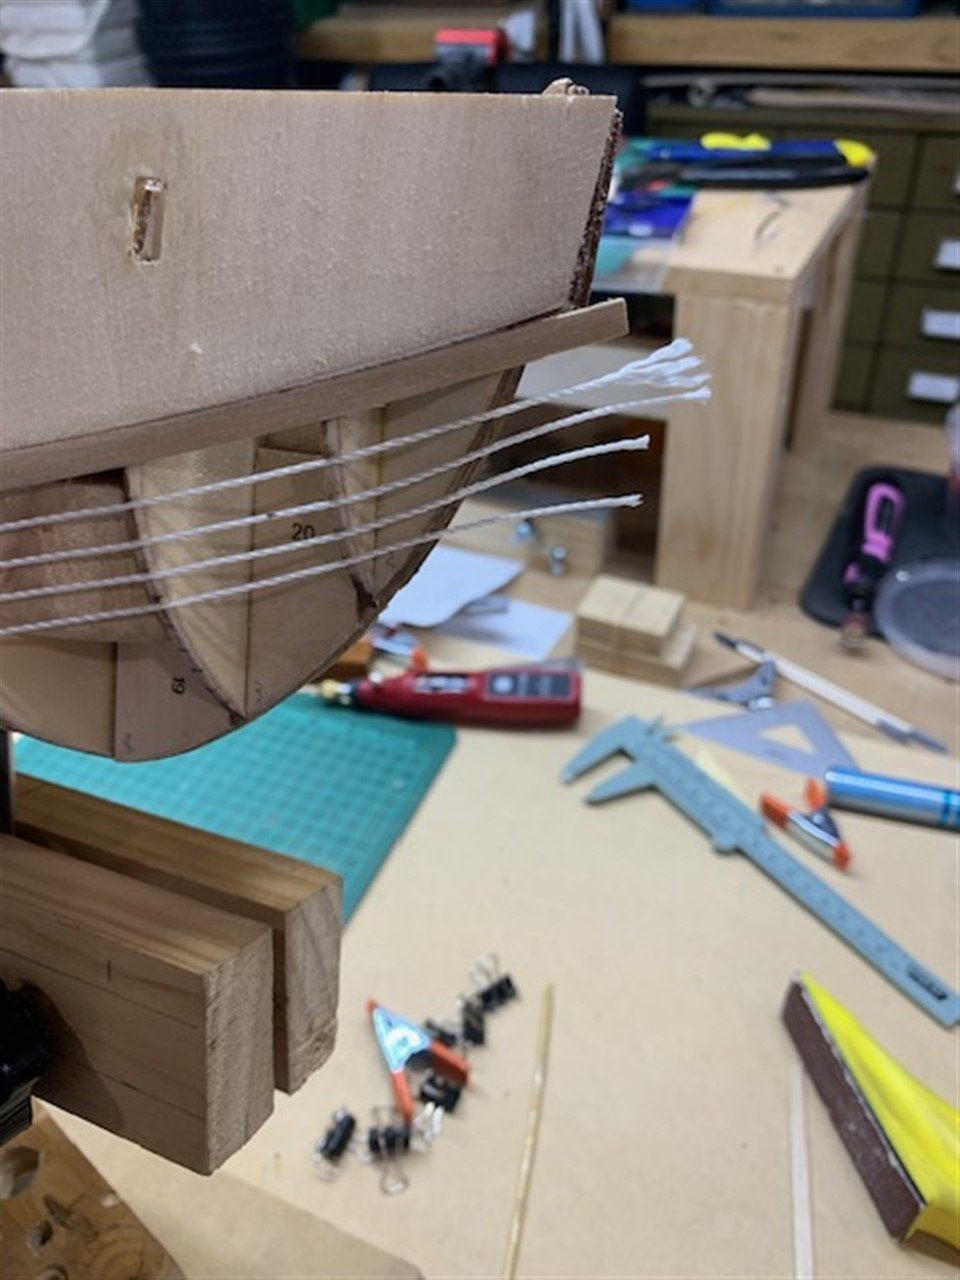
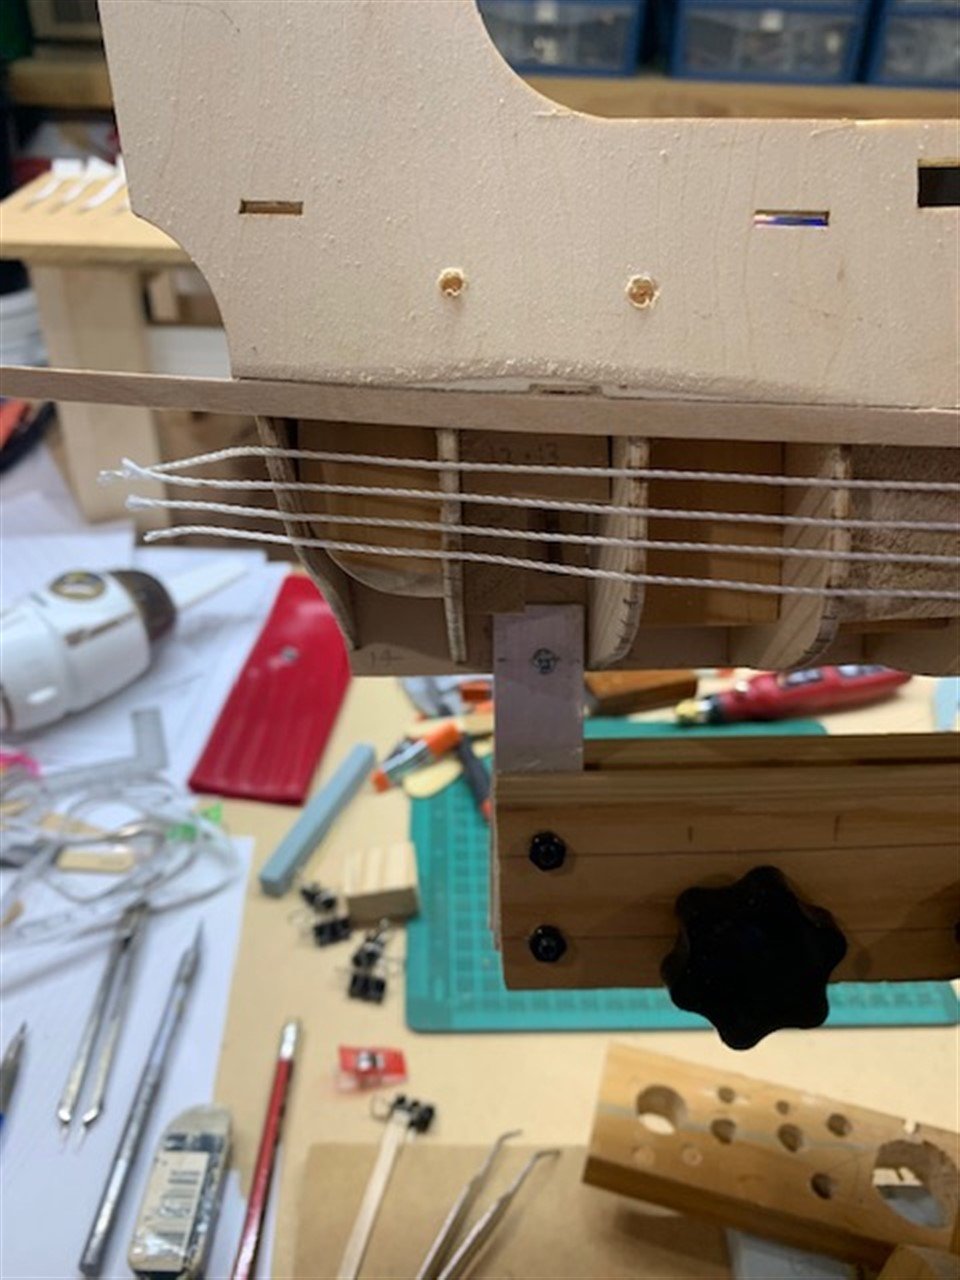
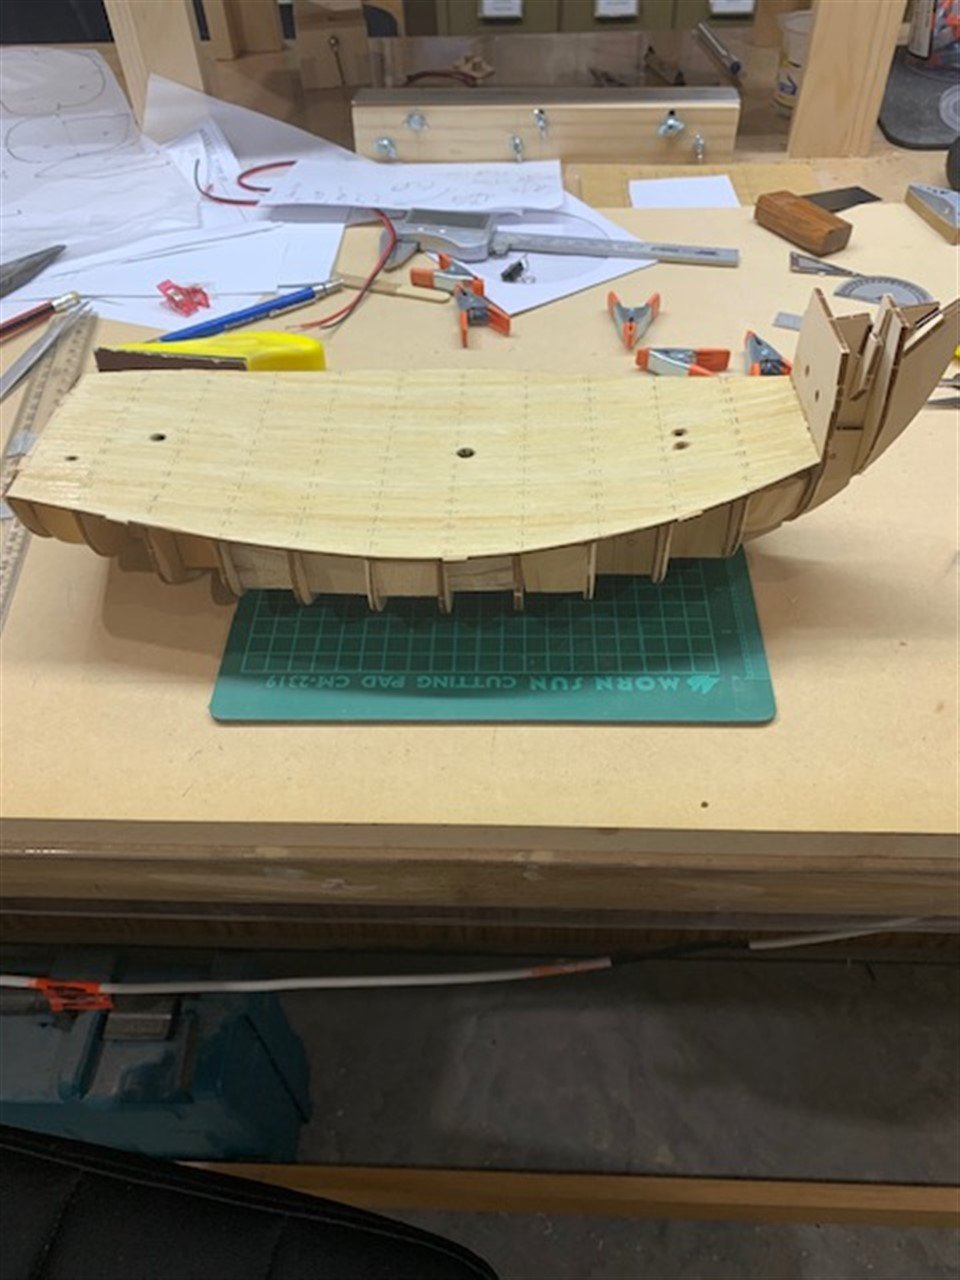
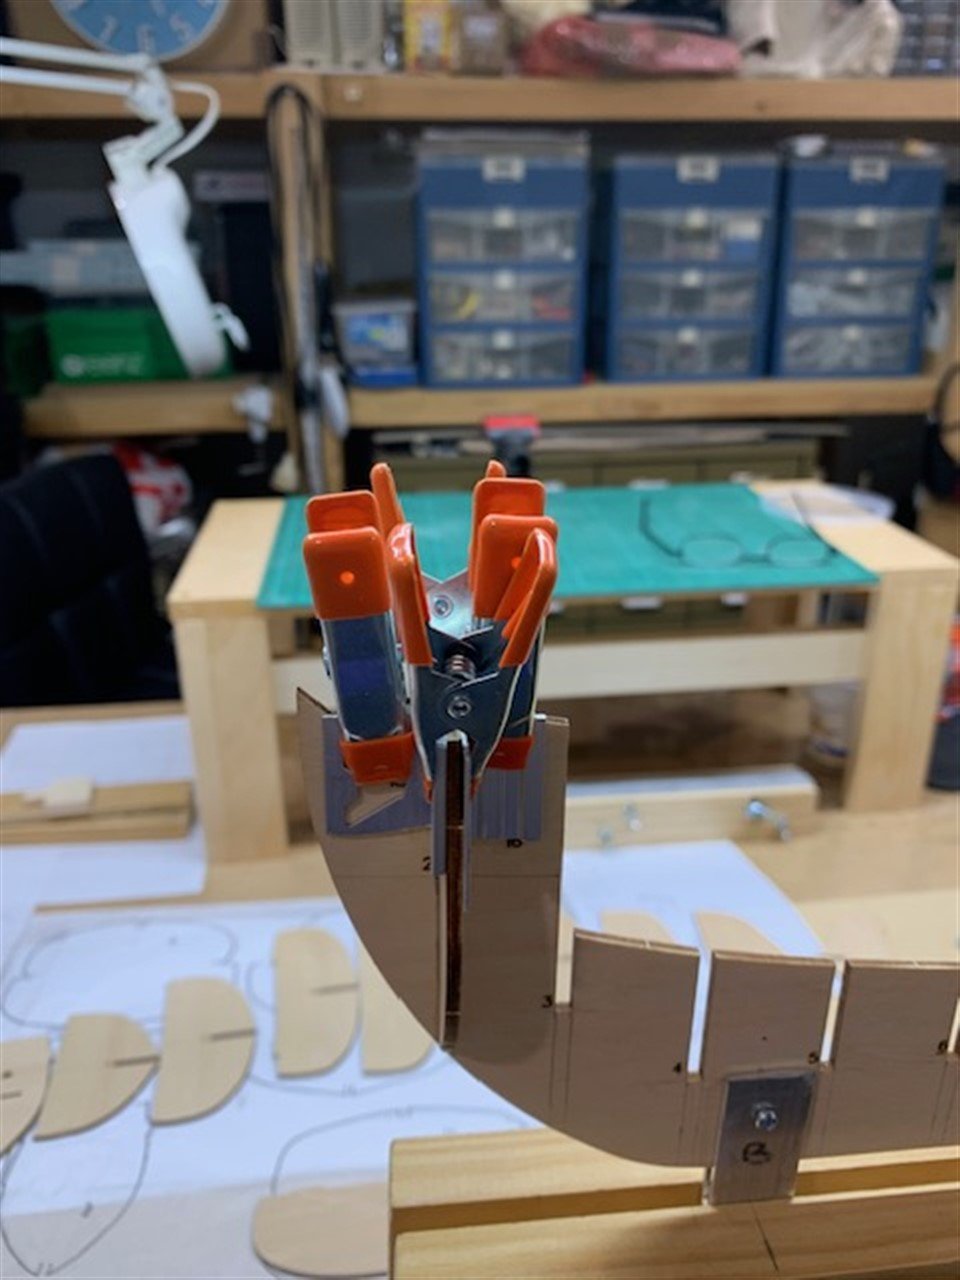
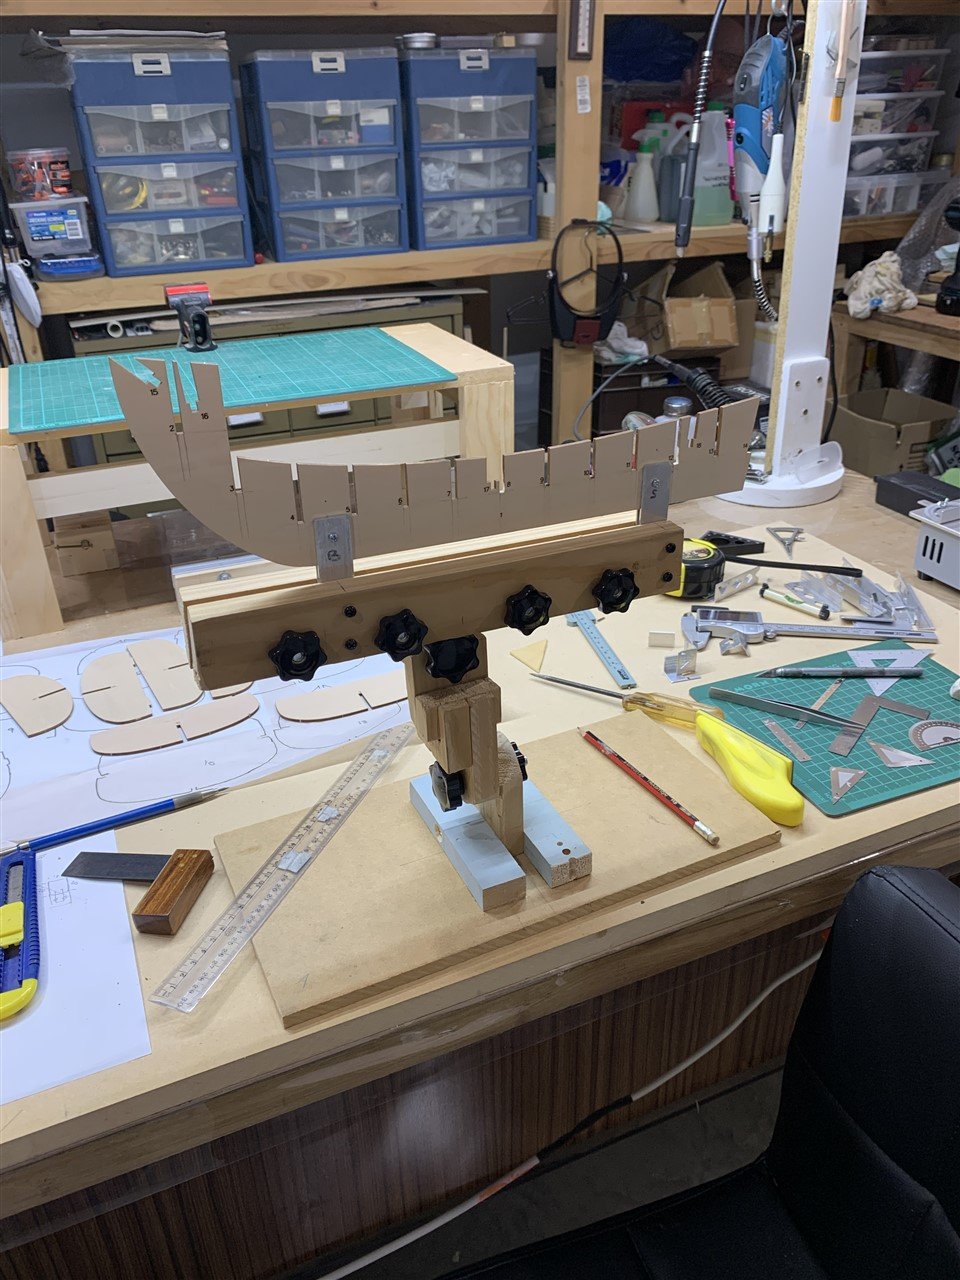
Good afternoon everyone. Well, the time has come to start planking. I've done a few extra little things so far like planking the deck but now ready to plank the hull. I decided to go with Mark's (No Idea) method to line off every strake. His work is a testimony to the excellence of this method. Will take longer but the end result should be better, and I stress should. Before I get too far into this I have a few questions and observations to make. The first thing I did was measure each bulkhead and record that on a sheet I drew up. I then transferred that measurement to a tick strip. Let's say for the sake of this exercise it was bulkhead 7 and it measured 65mm. By the way, the planks a 5mm wide. I then divided 65 by 5 and came up with 13, clever things these calculators. I then took the tick strip to the planking fan and lined it with the 13th row. I then marked the tick strip with those 13 divisions and took it back to bulkhead 7 and transferred the tick marks on the strip to the bulkhead. Now, is this the correct way to do this? The reason I ask is because when I started to put the strings ( used string in lieu of tape, and I have enough tape to wrap up Sydney Harbour Bridge, because the tape kept falling off) it all looked uniform no tapering anywhere, except at the bow. According to AL's instructions, read diagrams, there is no tapering. Even at the bow the plank virtuall runs staight across that the gap fill with shorter planks, still no tapering. I put the first plank on before I did any of this because the edge on the deck didn't look right so I put on the plank and took all my measurements from there. It was my first attempt at edge bending and I am happy with the result. So is it possible that this model, AL's Santa Maria, requires no tapering of planks at all because of the shape of the hull? I think I'll just continue on this way. But will someone please confirm my use of tick strips and fan. Because this is a double planked model, I think I'll plank the other side of the ship as per AL's diagrams and see what the difference looks like at the end. Thanks everyone, I look forward to your advice and opinions. John
-
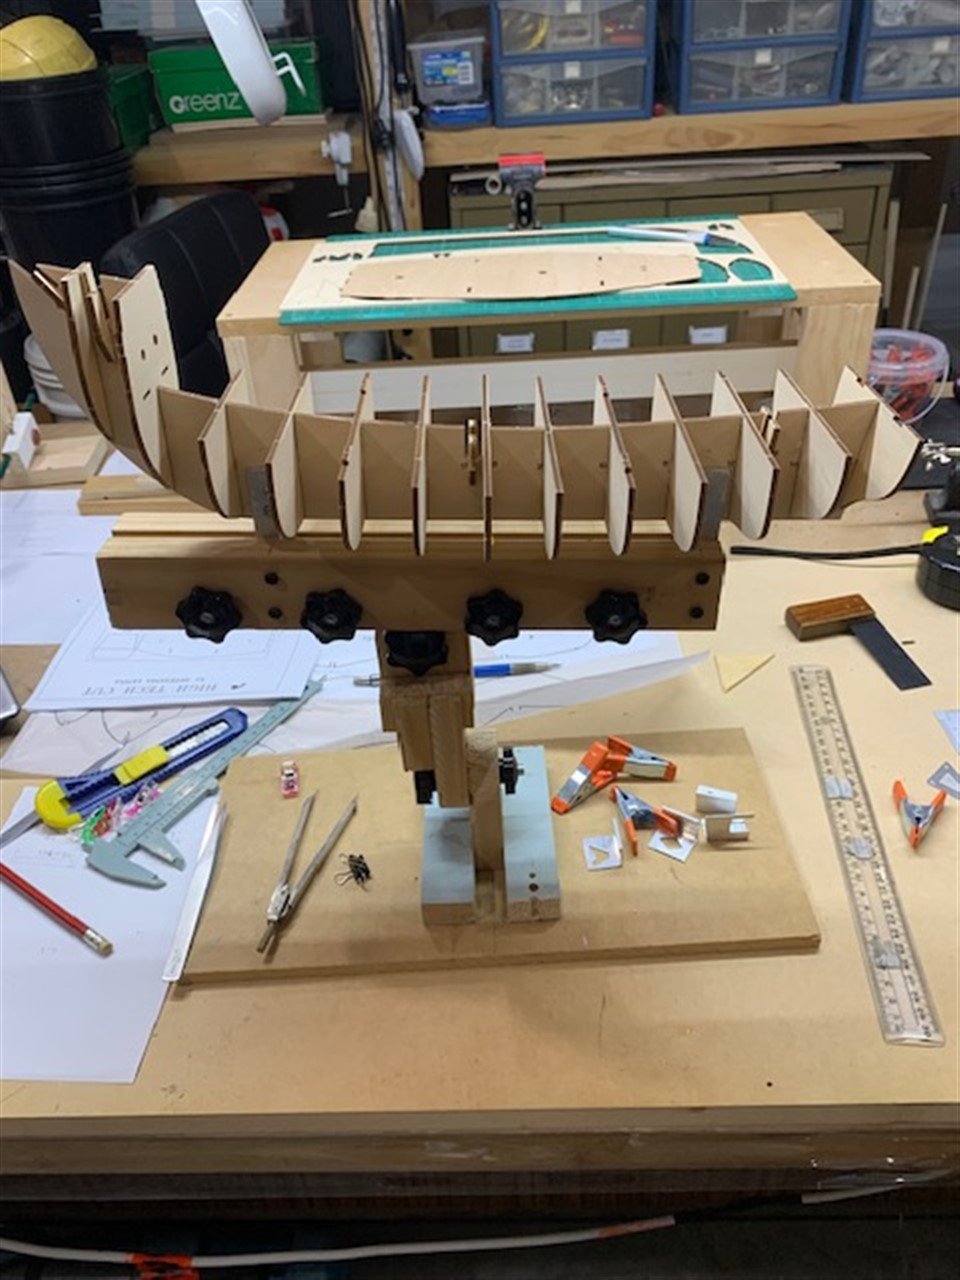
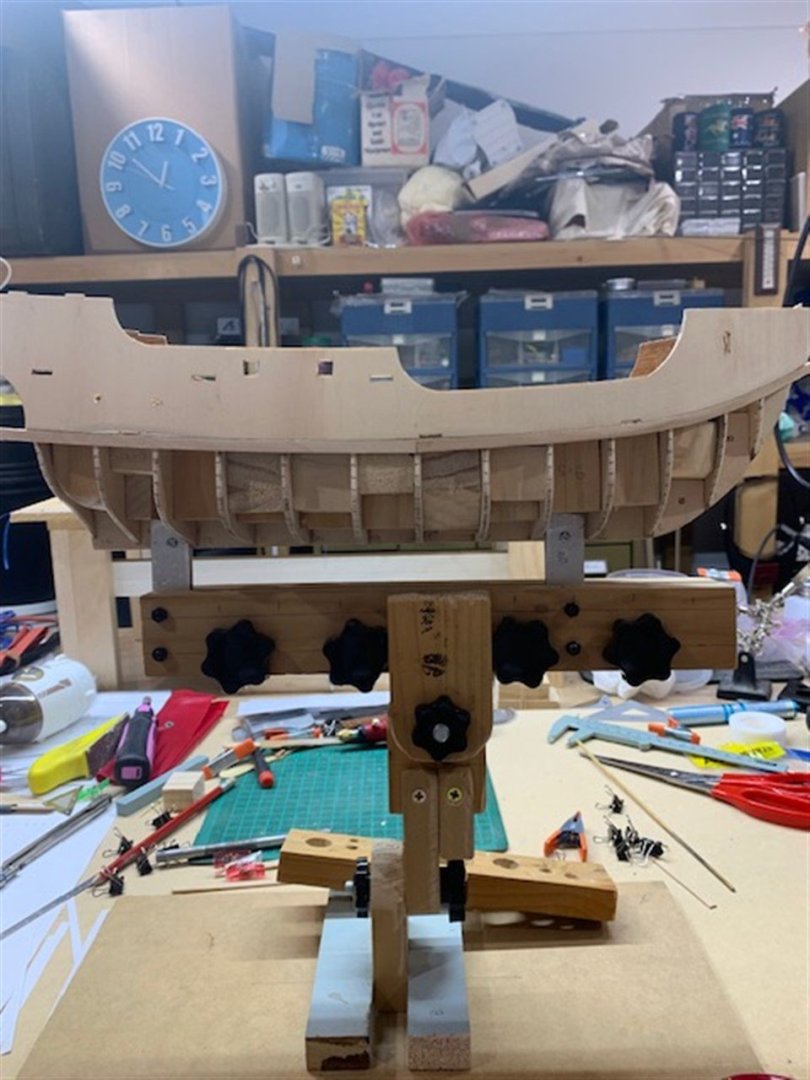
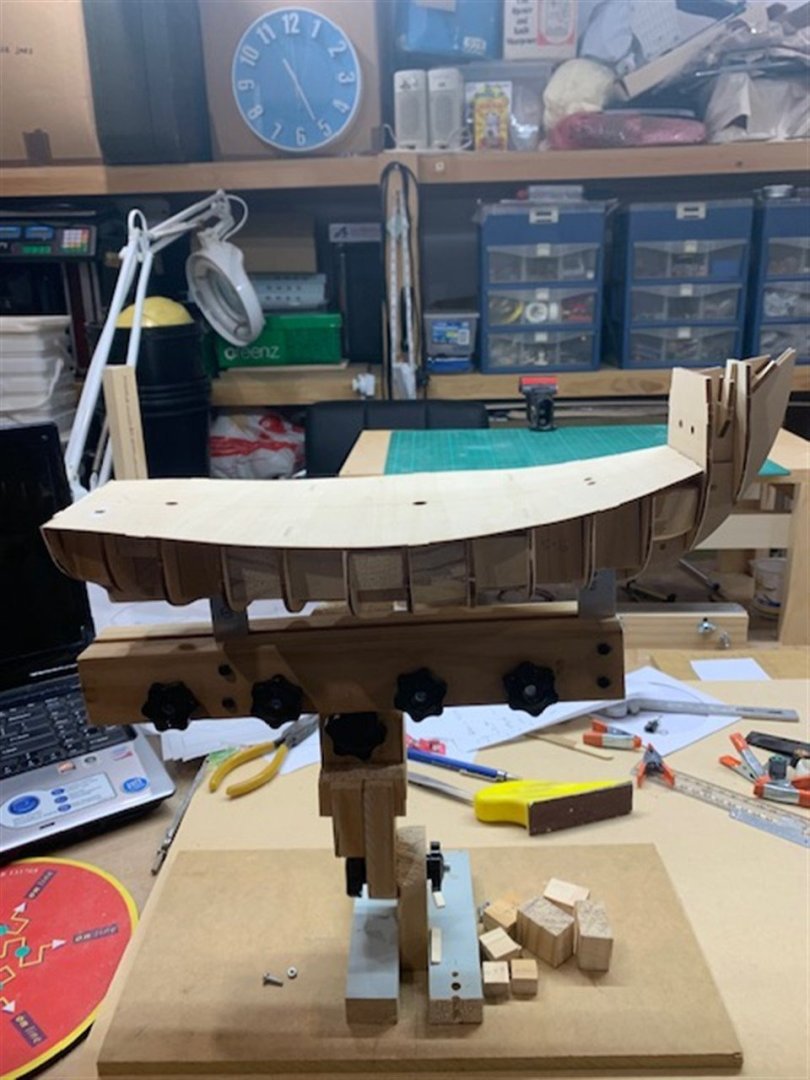
Next report. Things are moving along quite nicely, albeit slowly. I took vossiewulf's advice and blocked the hull between the bulkheads, and I placed them back a bit from the edge to make room for clamps when planking. If I hadn't put these blocks in, as vossiewulf suggested, the bulkhead would have twanged like banjo strings when I was fairing, well, he didn't quite say that, but that's what he meant. Now there's just a mellow hum like a cello. 🙂 I've planked the deck, if that's how you put it, and it went well. Very happy with the way things are going at the moment although I haven't reached any of the challenging bits yet.

-
Thanks Steven, As I said, just a slip of the tongue/fingers. The Santa Anna does look very complicated. I'll leave that to the more experienced modelers. I'll get over this one (hopefully) before I consider tackling something else. I'm still on the easy stuff with this one. The hard yards are yet to come. Looking forward to it though. John
-
Bulkheads installed. Everything is squared and levelled. Now, as vossiewulf suggested, going to measure the bulkheads to fit blocks to brace up a bit.

-
Hi Steven, Sorry mate, you're absolutely correct. I did put Santa Anna but meant Santa Maria. I'll try to be more careful in the future. Anything I write from here on is in reference to Santa Maria. :-)) John
-
Hi Phil & Steven, Thanks for your comments and offers of advice. I selected the Santa Maria because it was a choice in the next build after the beginner model. I've no doubt whatsoever that I'll be calling on you and members of the site for assistance. I've started a build log this time so I hope some members will keep an eye out. The planking and rigging is a bit scary, but as Phil said, it's not as complicated as some of the models. Being an aussie, before I had started anything, I thought I'd have a crack at the HMS Supply, one of Cook's ships. When I had a closer look at it I quickly dismissed those ideas. Anyway, I've started the Santa Maria now and I'm determined to get it finished. I've learned already that patience is as asset in this game. I'm in no hurry. John
-
Thanks vossiewulf. That's something I hadn't thought of.
-
Thanks Bob, looking forward to it. John
-
Well kids, the journey has started. This my first "real" ship. My first was just a small boat to get a feel for things. I learned that near enough is not good enough, it has to be exactly right, and if it's exactly right, then that's near enough. The first thing I noticed when opening the box was a distinct lack of instructions. I suppose they can't include precise instructions because of the many different way of doing things. I'm sure I'll be relying heavily on the very knowledgeable members of this forum. Firstly, I dry fitted the bulkheads to the keel. There were a few that were too low so I had to build them up a bit. There were a couple that were too high and needed to be sanded back a poofteenth, but it has to be right. Today I glued in the first bulkhead, squared it up with aluminium angles. Looks good so far. I have a question regarding strengthening the bulkheads. I read here that a member had trouble when he put blocks in to strengthen everything he pulled the keel out of alignment. Another member had a problem with the blocks when he was planking. Presumably the blocks got in the way of the planking clamps. Is it necessary to strengthen the bulkheads? They are only 3mm thick. Thanks everyone, I'm really looking forward to this.


-
Question re "Line Off"
JohnWW replied to JohnWW's topic in Building, Framing, Planking and plating a ships hull and deck
Hi Phil, Thanks for the info. That must have been a nightmare building the Sata Maria without any instructions, or worse still no guidance available from the internet. I had a look, very nice job you've done. I already have a similar tool as the small iron. I have one used for covering model aircraft. I also made one using a soldering iron. I used a bit of 20mm copper rod, cut 15 mm off the end, braised a 7mm copper rod to the end of it, the 7mm copper rod fits down the inside of a soldering iron I have and there's a plank bender. I also made one that doesn't use heat. A bit of water and pressure and plank bent. I haven't tried it yet of course bit I hope it works. Not sure if I got the idea here or somewhere else on the net. So hopefully I've got enough plank benders to get the job done. -
Question re "Line Off"
JohnWW replied to JohnWW's topic in Building, Framing, Planking and plating a ships hull and deck
Hi Everyone, I've had a look at the plank widths of the model and the first layer of planks are 5mm and the second layer of planks are 4mm so I should be right to line off the first layer. Looking at the quality of Mark's work it's very obvious that lining off is essential if you want the job done correctly. Absolutely fabulous work. Easier said than done in my case but worth the effort to try it. Am I correct in saying that with Mark's example, he lines off every strake? I'm a bit off starting to plank yet but looking forward to getting to that stage. When I first started reading about planking I have to admit it was frightening, now it's only scary. Thanks again everyone. -
Question re "Line Off"
JohnWW replied to JohnWW's topic in Building, Framing, Planking and plating a ships hull and deck
Hi Mark, Could I line off the first layer for practice? I'm not in any rush and it might help with the final layer. What do you think. Thanks. John -
Question re "Line Off"
JohnWW replied to JohnWW's topic in Building, Framing, Planking and plating a ships hull and deck
Double Planked. Unpainted. The outer planks are redish type wood. -
Question re "Line Off"
JohnWW replied to JohnWW's topic in Building, Framing, Planking and plating a ships hull and deck
Sorry, this might be easier.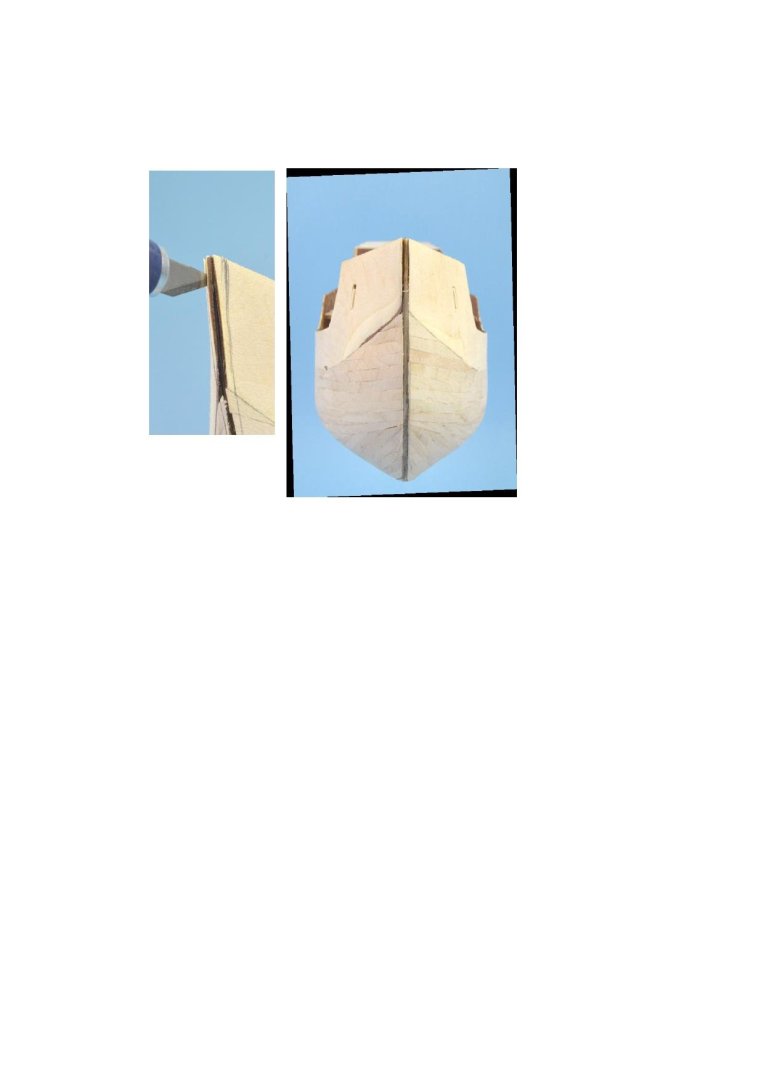
-
Question re "Line Off"
JohnWW replied to JohnWW's topic in Building, Framing, Planking and plating a ships hull and deck
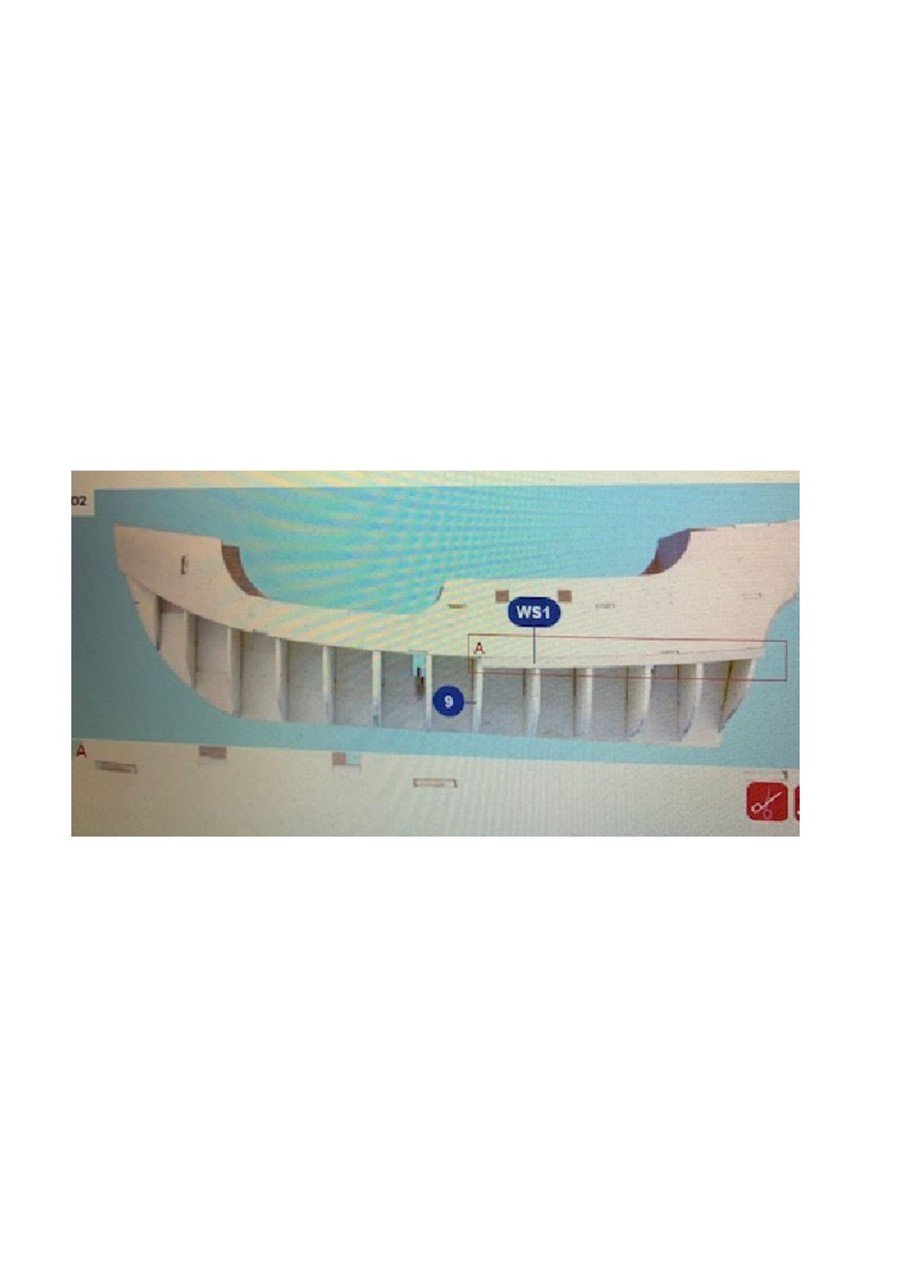
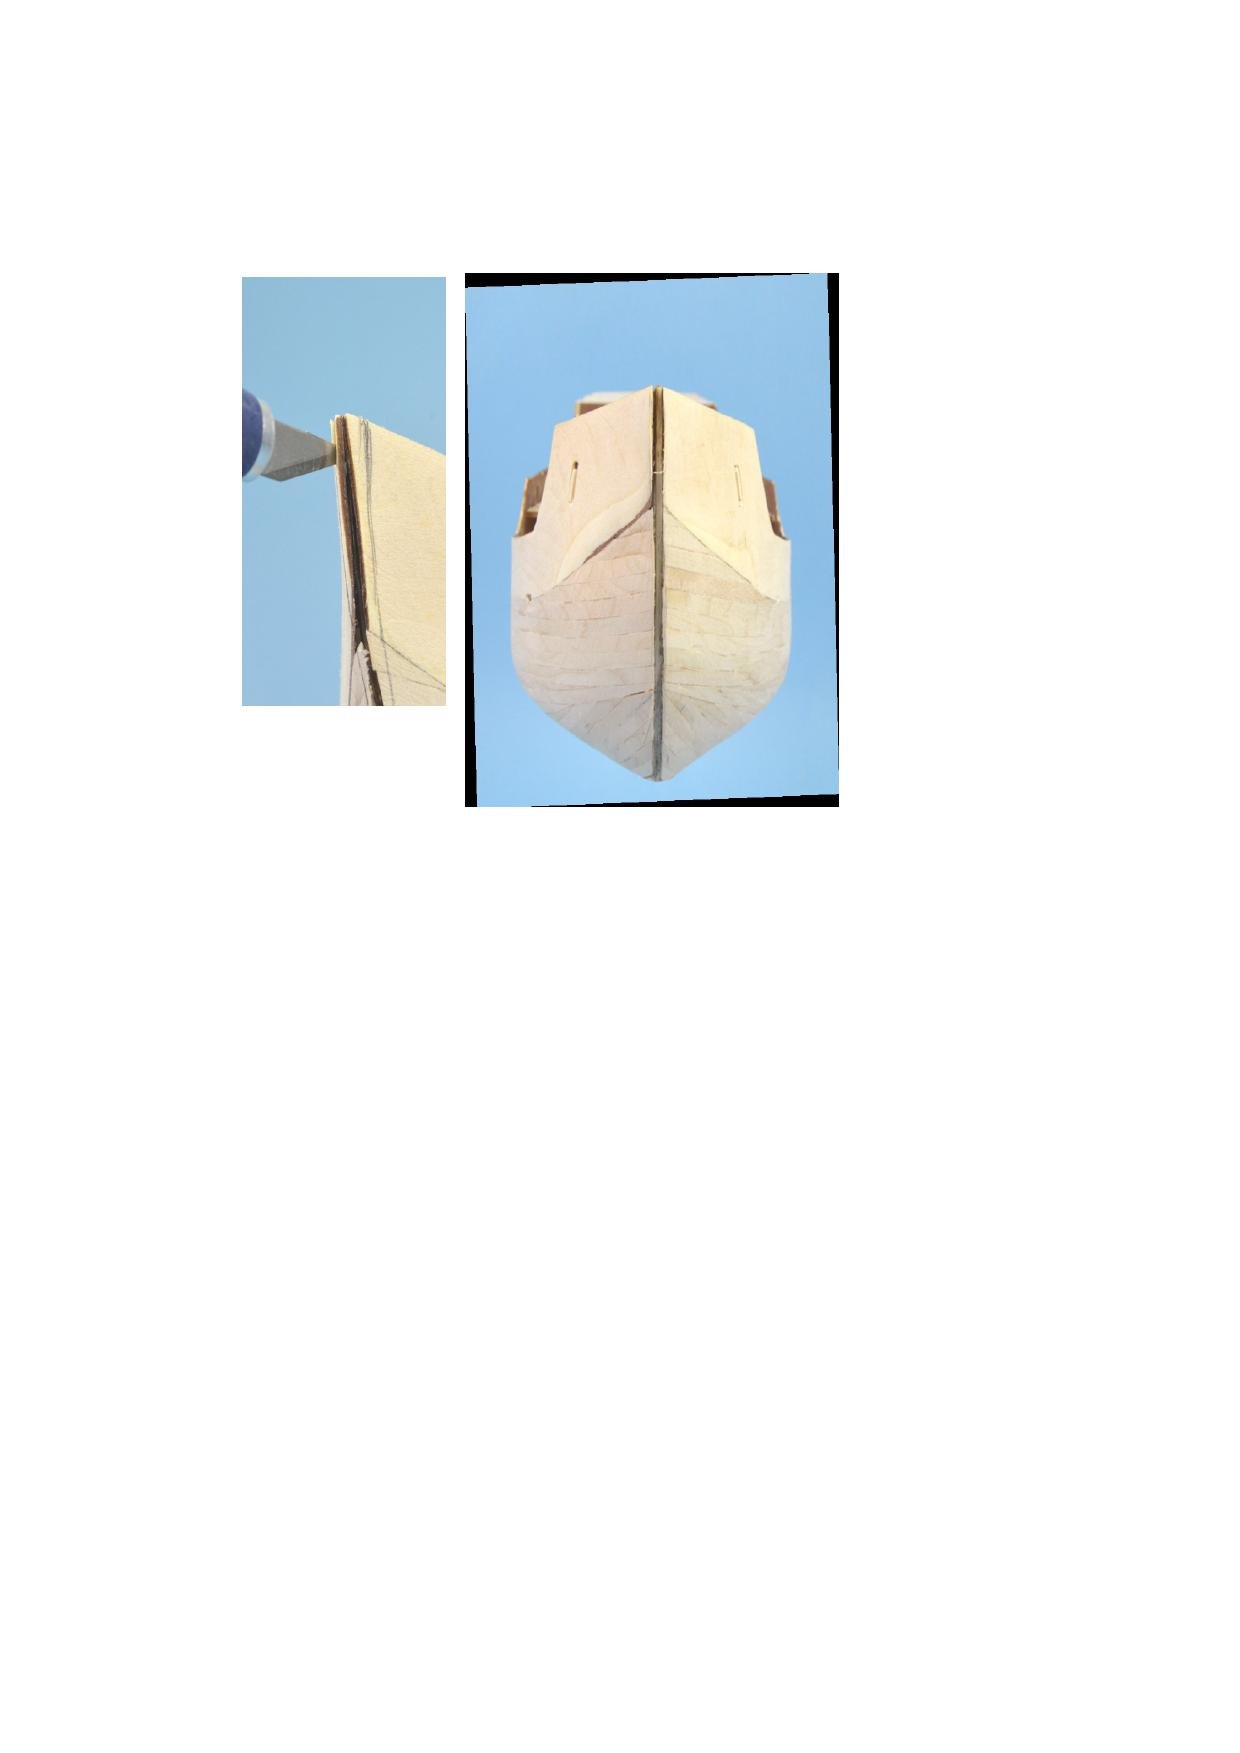
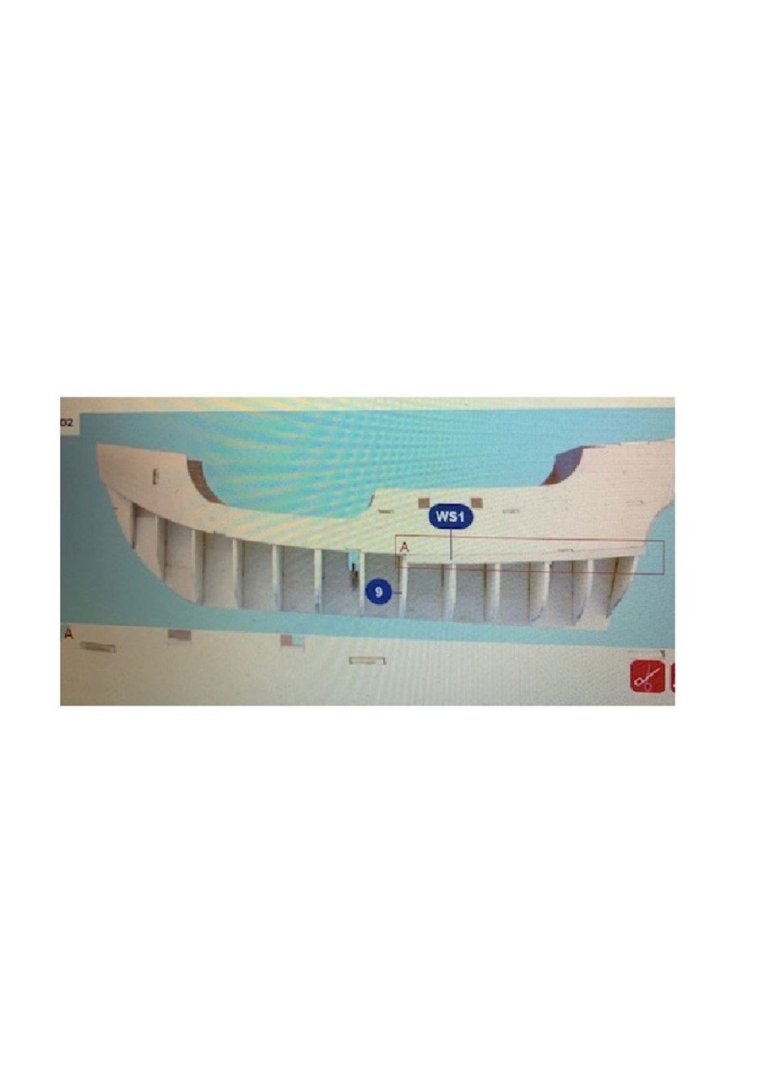
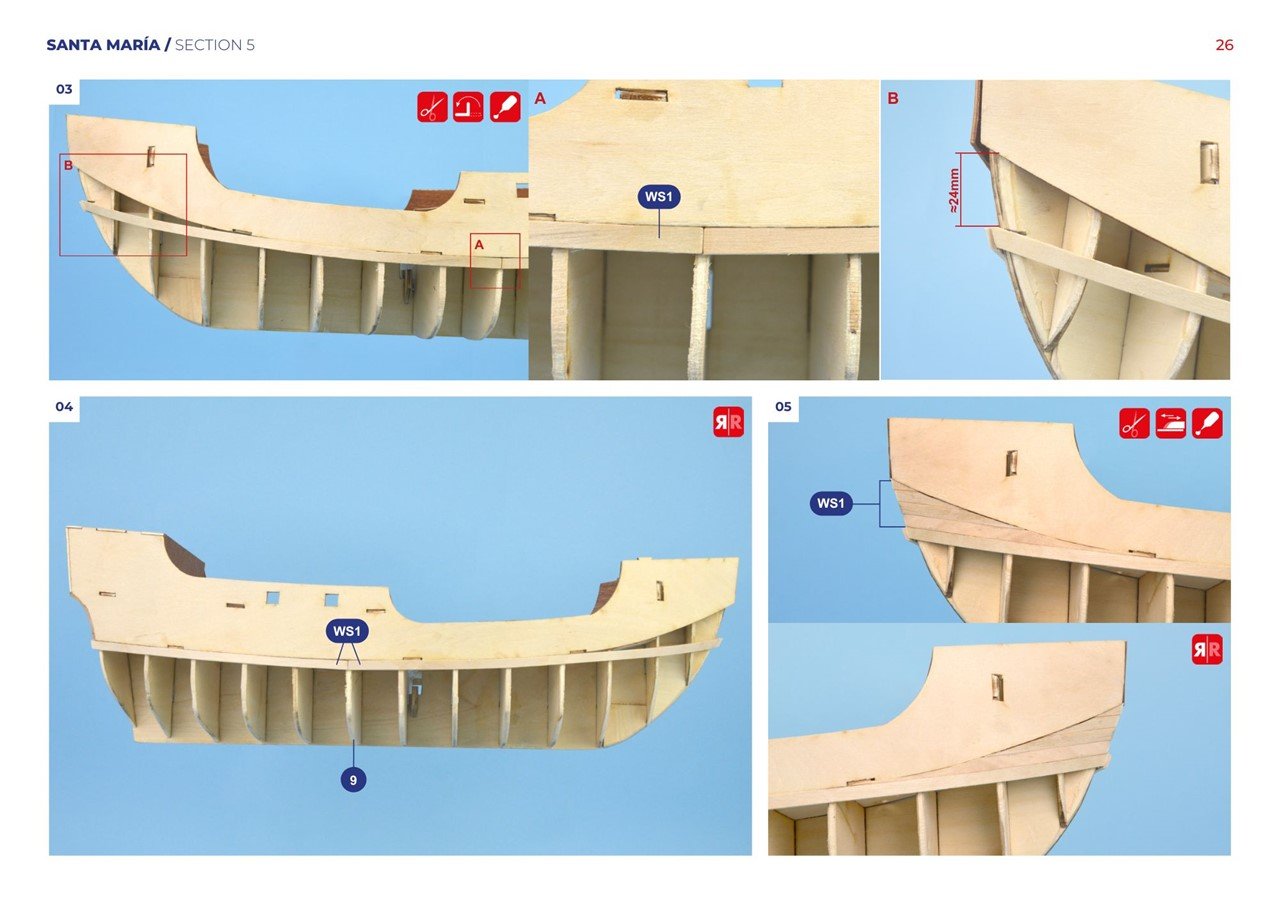
This is how AL terminates the planks on Santa Maria. Would it still be ok to line off this model?Bow Planking AL Santa Maria Instructions.pdfBow Planking AL Santa Maria Instructions.pdf -
Question re "Line Off"
JohnWW replied to JohnWW's topic in Building, Framing, Planking and plating a ships hull and deck
Thanks everyone for your imput, I really appreciate it. It seems building the model correctly and how the manufacturer direct are two entirely different things. My original question and concern was if I attempted the lining off would it alter or interfere with the manufacturers directions later on down the line. Will I have the correct parts to terminate the planks correctly. I'm extremely keen to attempt the lining off as I've never done it before. I've decided to go with the lining off and if I have to make something or alter things a bit then so be it. Being new at this I don't know the correct way ships should be built. I hope to get sterted soon. Just getting my ducks in a line before I start. -
Question re "Line Off"
JohnWW replied to JohnWW's topic in Building, Framing, Planking and plating a ships hull and deck
Thanks for the reply. AL provide no written instructions at all, just drawings. I'm absolutely new to this, but after looking at some of the build logs there's a few things that don't look quite right to me, but it would be unprofessional of me to be critical of another members work. The only thing AL provide is a picture/drawing of what the hull should look like after building. This being my first model that requires detailed planking of the hull I might take your advice and line off the hull. It would be valuable experience for future models. The reason I asked the question in the first place was because I was unsure whether lining off the hull would be detrimental to AL's method. -
Question re "Line Off"
JohnWW replied to JohnWW's topic in Building, Framing, Planking and plating a ships hull and deck
Yes, that's right. Don't know whether to try marking out the bulkheads or just proceed with the manufacturers instructions. -
I'm not too far off starting my second model, AL Santa Maria, and I'm a little confused about "Lining Off". I've watched a build log of someone building this model but it got a bit confusing after a while so decided not to do it his way. AL don't mention any process of "Lining Off" in their instructions. The question is this. Do I attempt, and I do mean attempt as I've never done this before, "Lining Off", or do I stick with the manufacturers instructions. Thanks.
-
Well said harlequin. Even though I stuffed up I learned a fair bit along the way. Extremely happy to finish it.
-
Hi Mark, Thanks for the encouragement. Looking forward to starting my next ship. It's much more complicated than the first model. And yes you're correct, I'm enjoying the research even if it is a bit intimidating. I'm sure I'll be looking for advice. Regards, John
-
Hi Steven, Good afternoon from sunny Scone NSW, jewel of the north. I've been to or travelled through Ballaarat many times. Lived in North East Victoria for most of my life. Saw someone building a model ship on the internet and thought I'd have a crack at it. The photo I posted is my very first model. Bit rough, made a few very basic errors from the start. Anyway, as I said I'm going to have a go at the AL Santa Anna. I will start a build log when I get the model and start it. John
-
Thank you everyone for your replies and comments. It was a valuable learning experience for me. It all went wrong at the planking stage. From the first plank I might add. But I'll never make that same mistake again. From what I've read here, it seems everyone has their own way of doing things which I think is fantastic. I'll try and select what I think is the best option for me. One thing I have learnt, is not to rush. Don't try and complete the build tomorrow. I'm looking forward to the next build. I hope I haven't bitten off more than I can chew. I'm sure I'll be pestering you all for advice with this one. Thanks again. Watch this space.
-
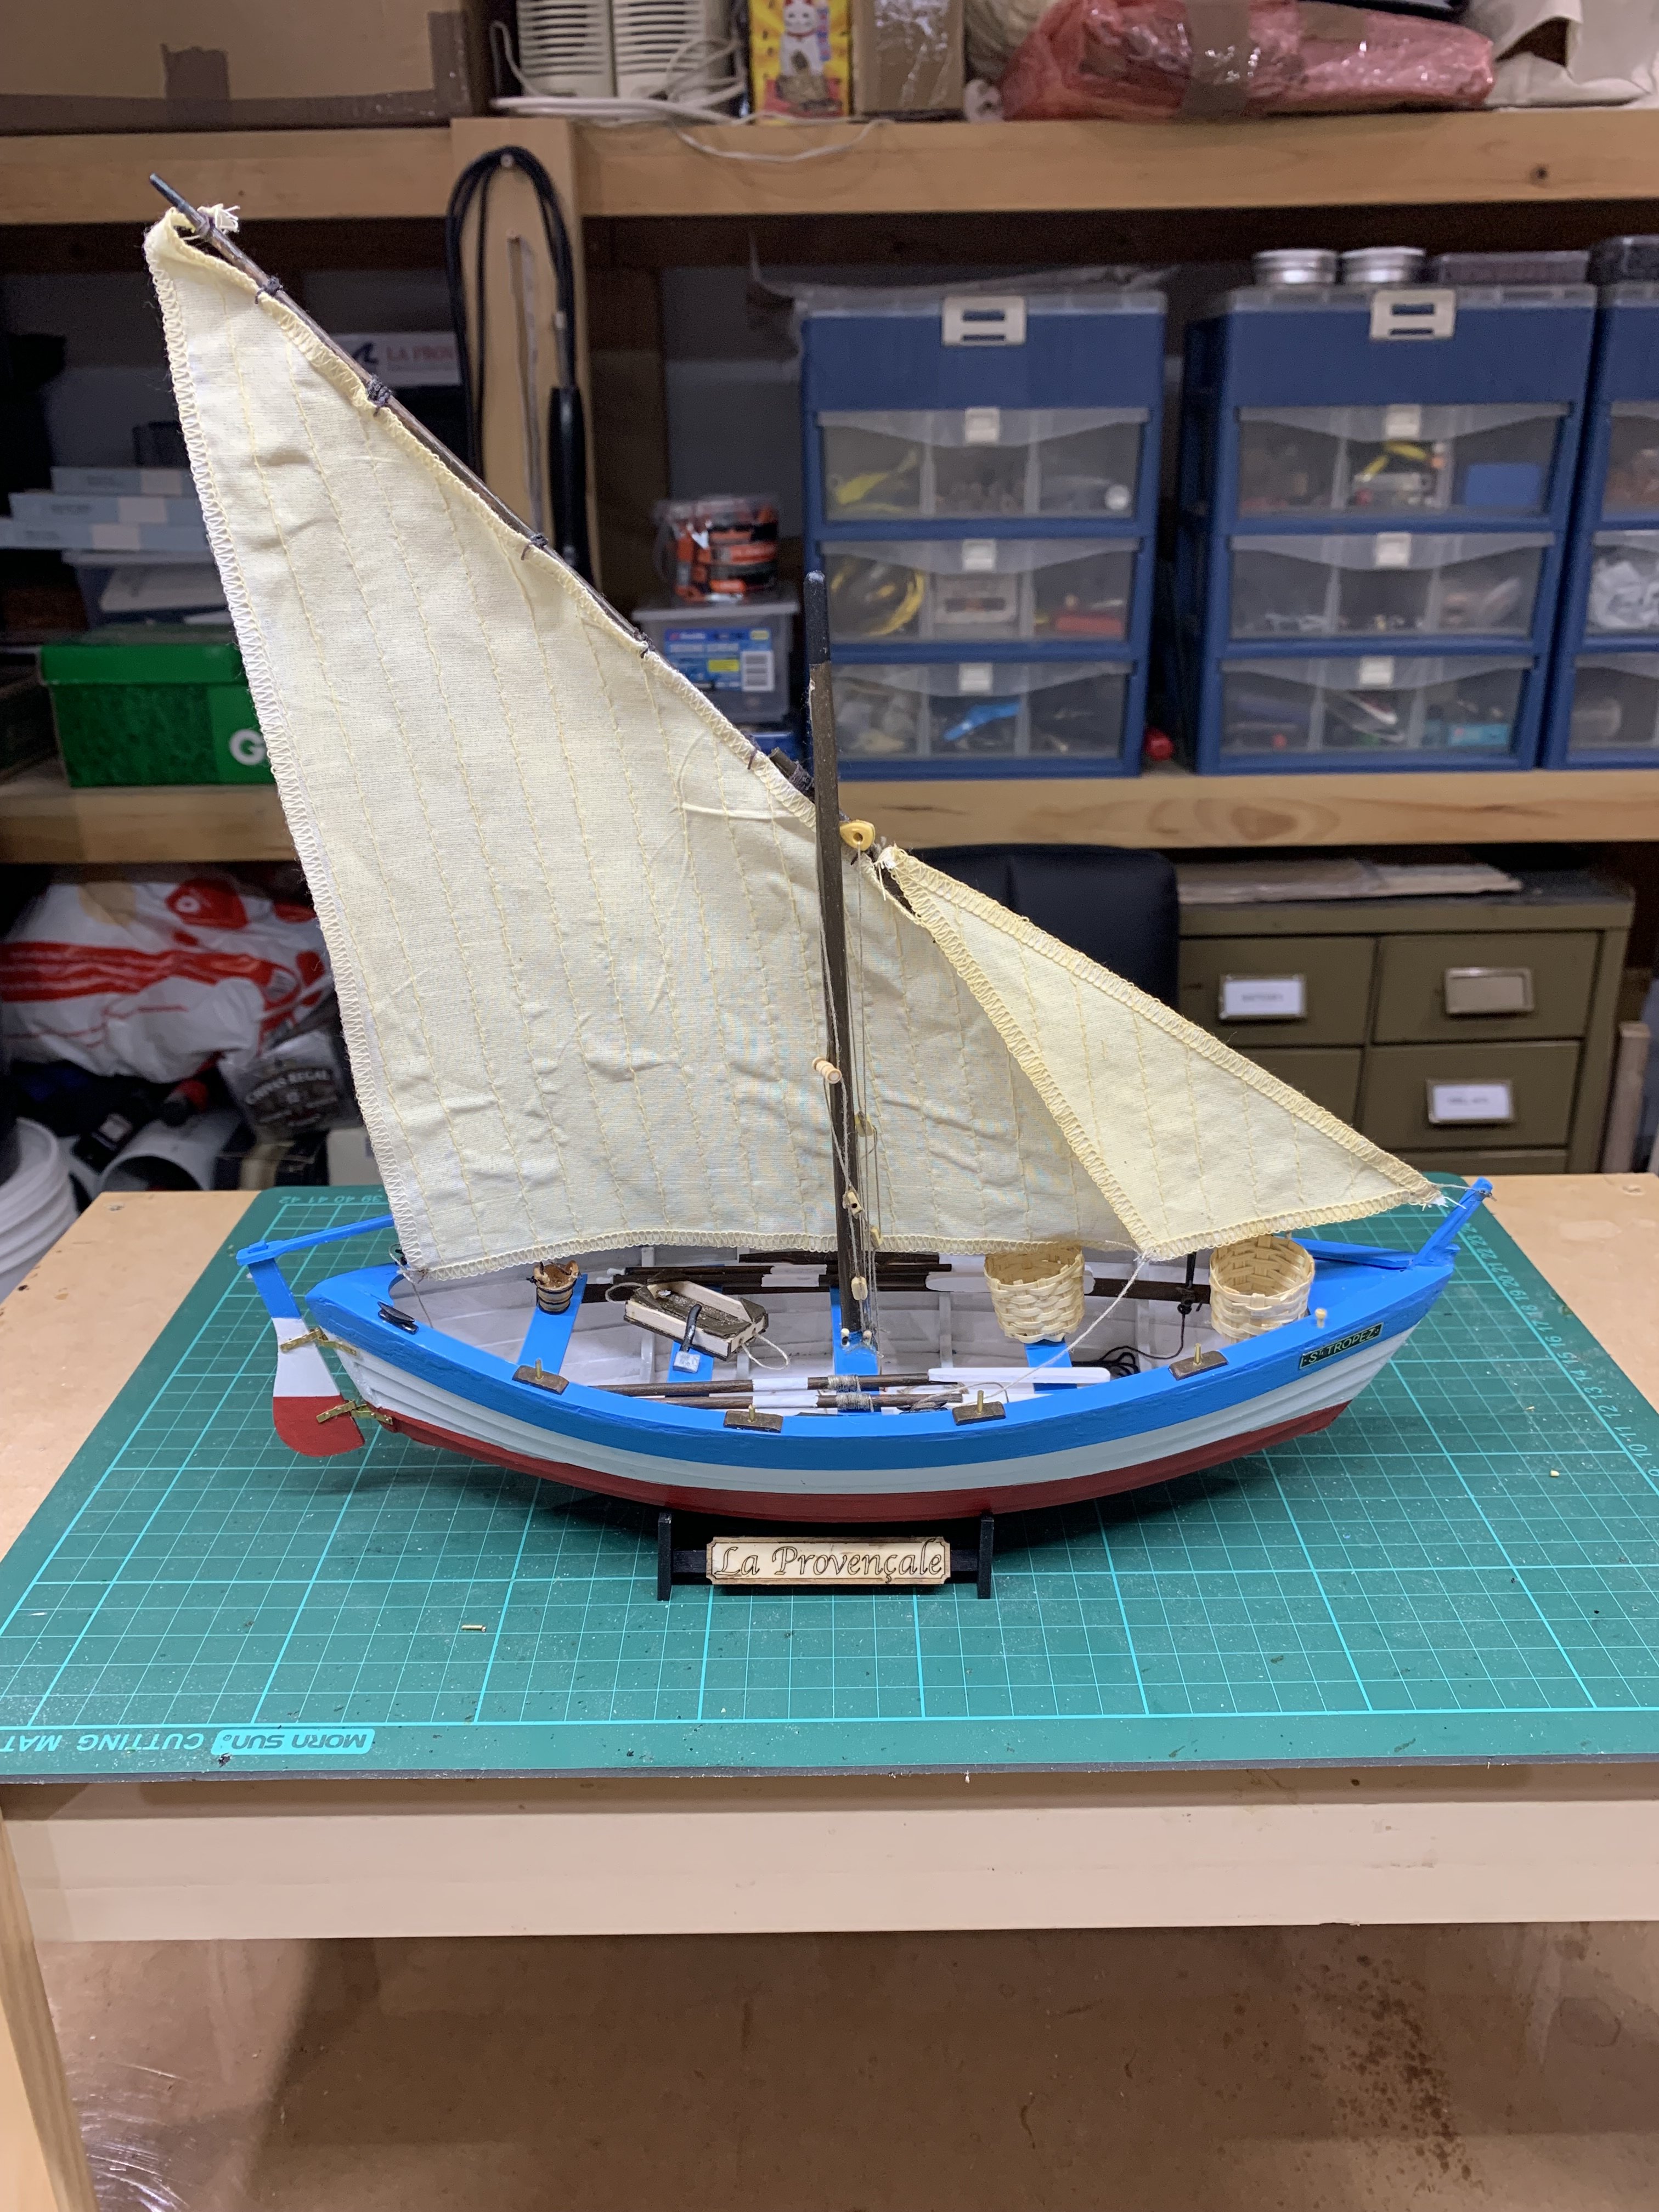
Hi Everyone, I've just completed my first ever model. AL La Provencale. I didn't post a build log because I stuffed it up. The build, not the log. After reading a lot of posts from members I found that they may as well have been talking Swahili, due respect to any Swahilian members or is that Swazilanders. I hardly understood a word they said. I don't know my jibs from my jabs. I think this will take some time before I can speak the correct lingo. Back to the model. I made a major error right from the word go. I measured the planks incorrectly and as a consequence, I was short one end. This of course led to many future problems further on in the build. I was actually quite pleased because I had to solve these problems as I came to them. This changed a few things on the model but I finally finished it. Not quite according to Hoyle but finished nevertheless. I'm having the time of my life. After reading the suggested models for beginners I thought I might have a crack at AL Santa Maria. The reasons for this is that it looks like a number of members here have built this model, I hope they're still around, and there are videos of the build. Also a brief instruction list. It looks like being a bit of a challenge. Being an old fart, I hope I don't pop the clogs before I get it finished. I've attached a photo, to be viewed for a distance. Looking forward to many happy hours here. John

- 24 replies
-
- 20
-