Amphibious0311
-
Posts
30 -
Joined
-
Last visited
Content Type
Profiles
Forums
Gallery
Events
Everything posted by Amphibious0311
-
I may have to give those glues a try! I very quickly found them on Amazon. I feel goofy for both even thinking of sanding the CA off like that. I literally use CA to fill gaps in planes when using resin parts yet it hasn’t dawned on me to sand off the excess on parts for my ship.
-
What glue are you using for your PE? And how are you managing to do it so cleanly? im using a 26 gauge needle and I feel like even with good control I’m getting some excess CA glue.
-
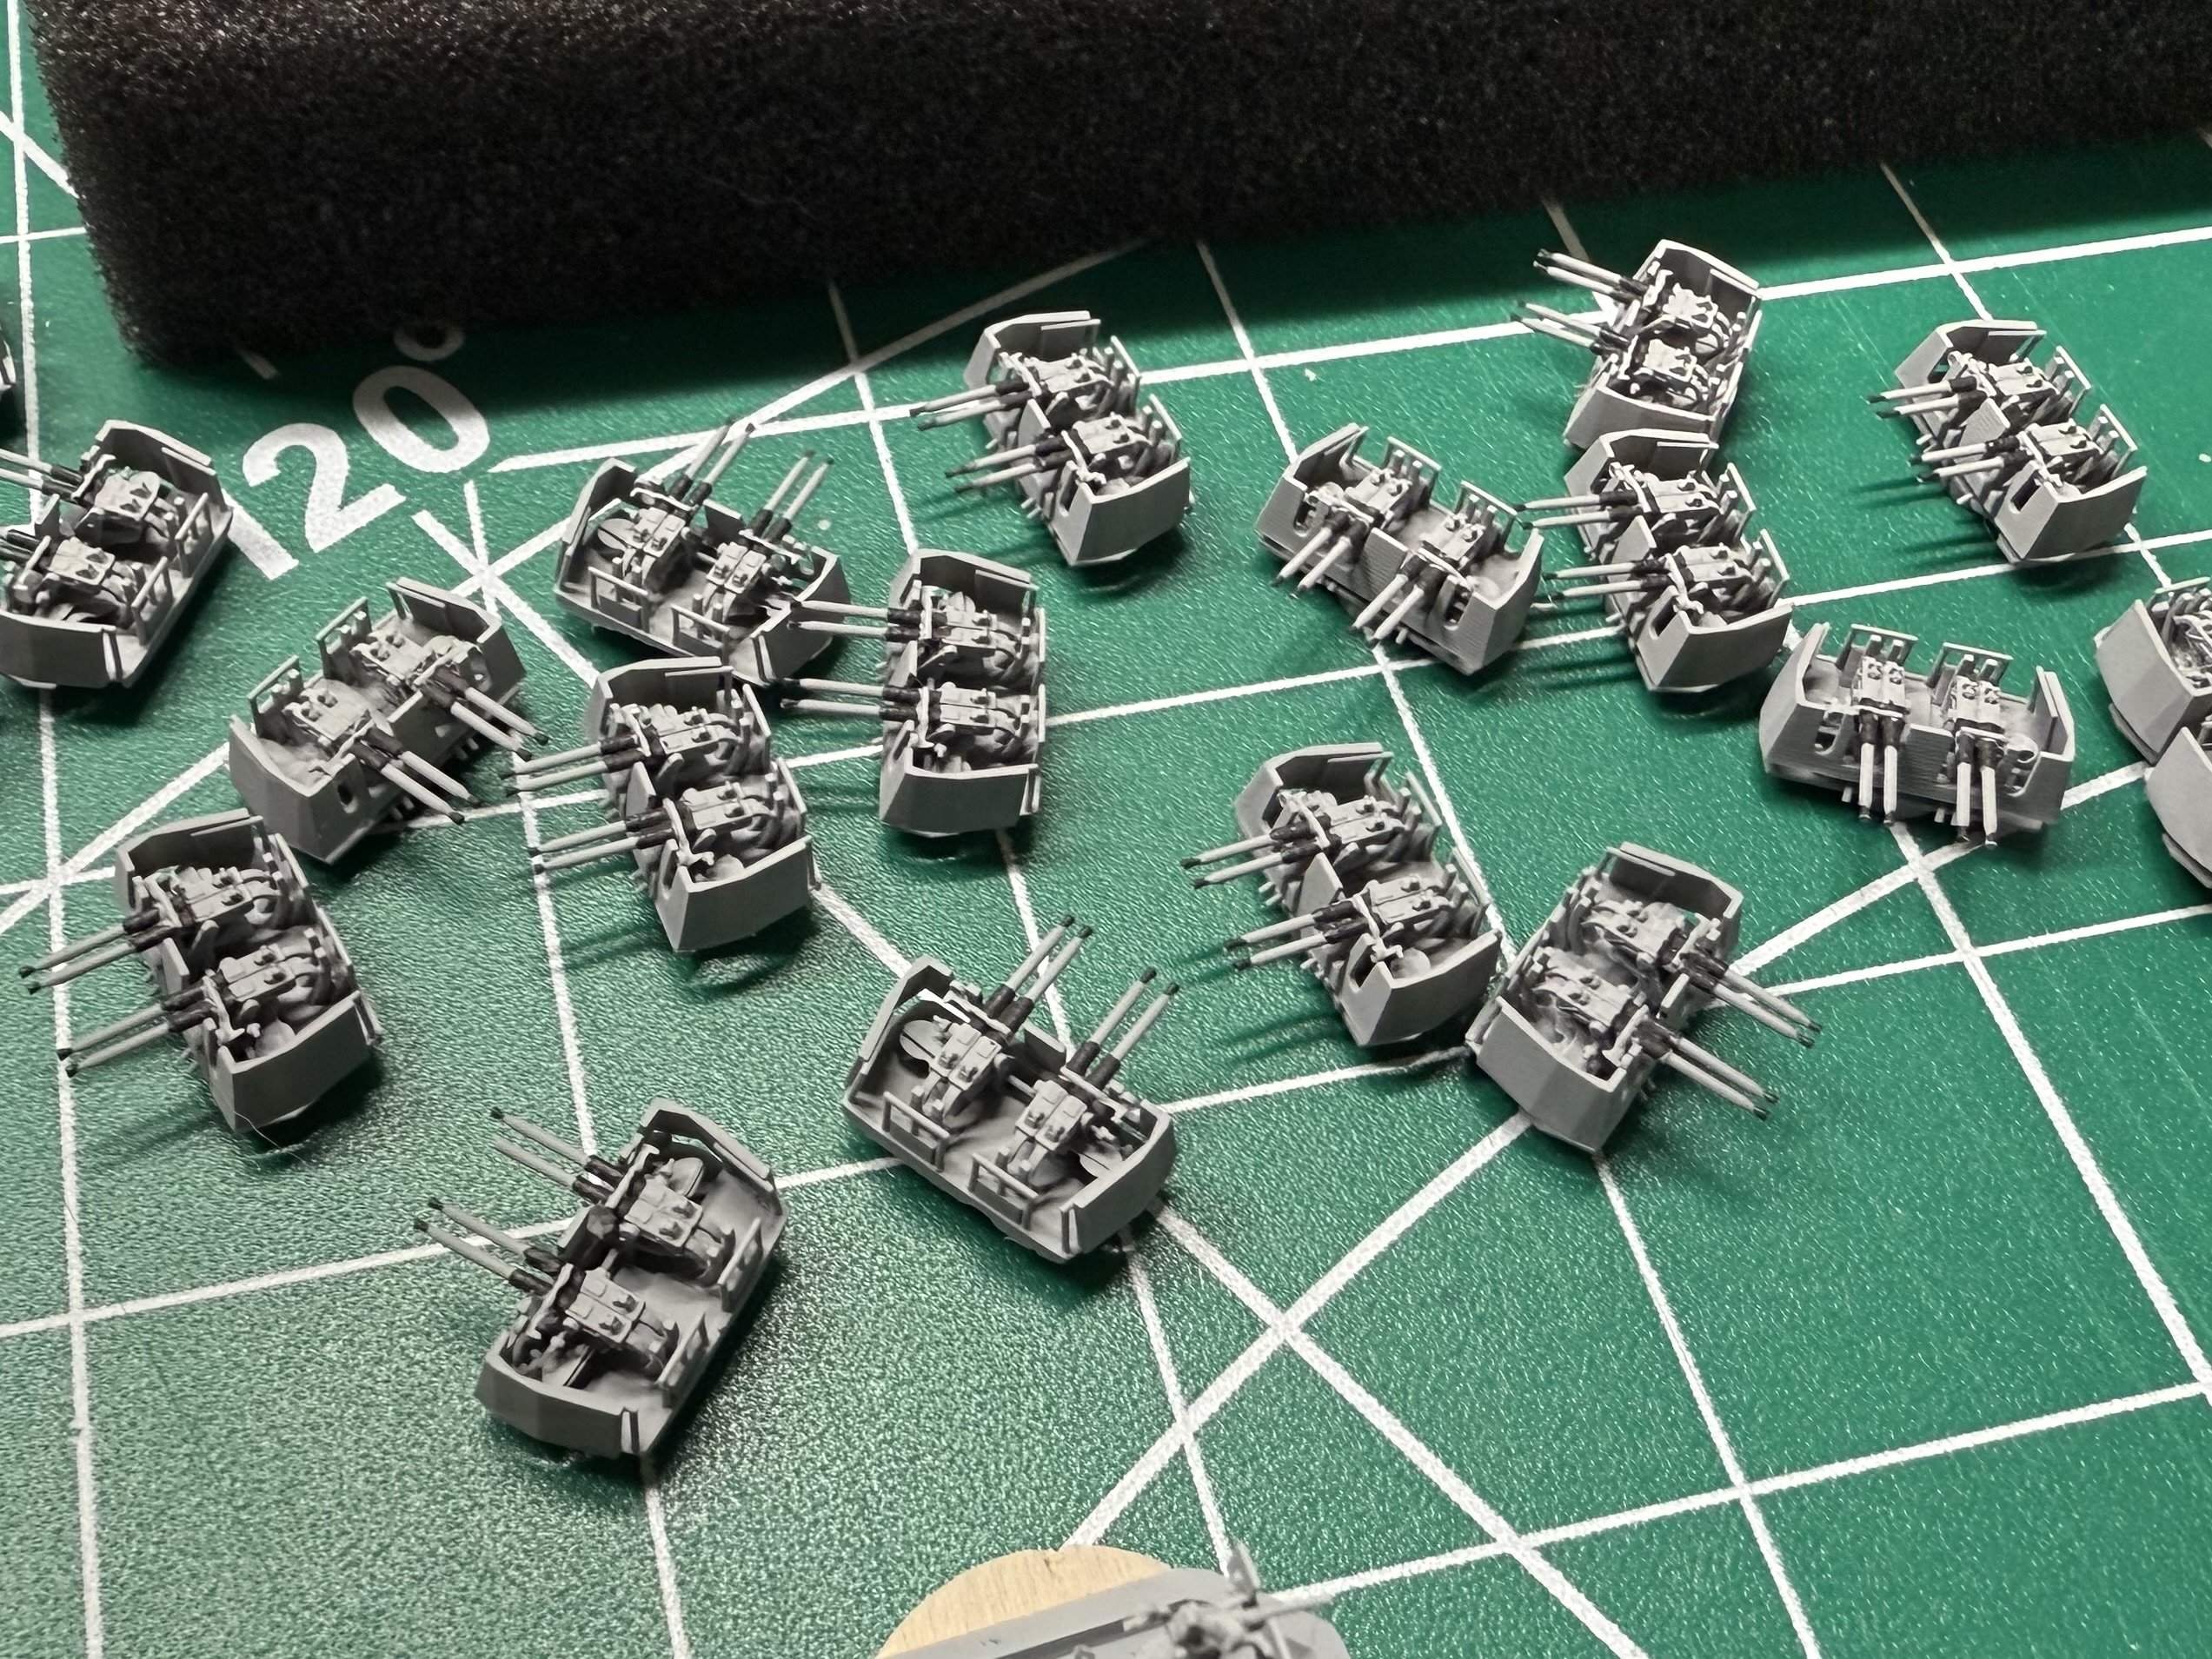
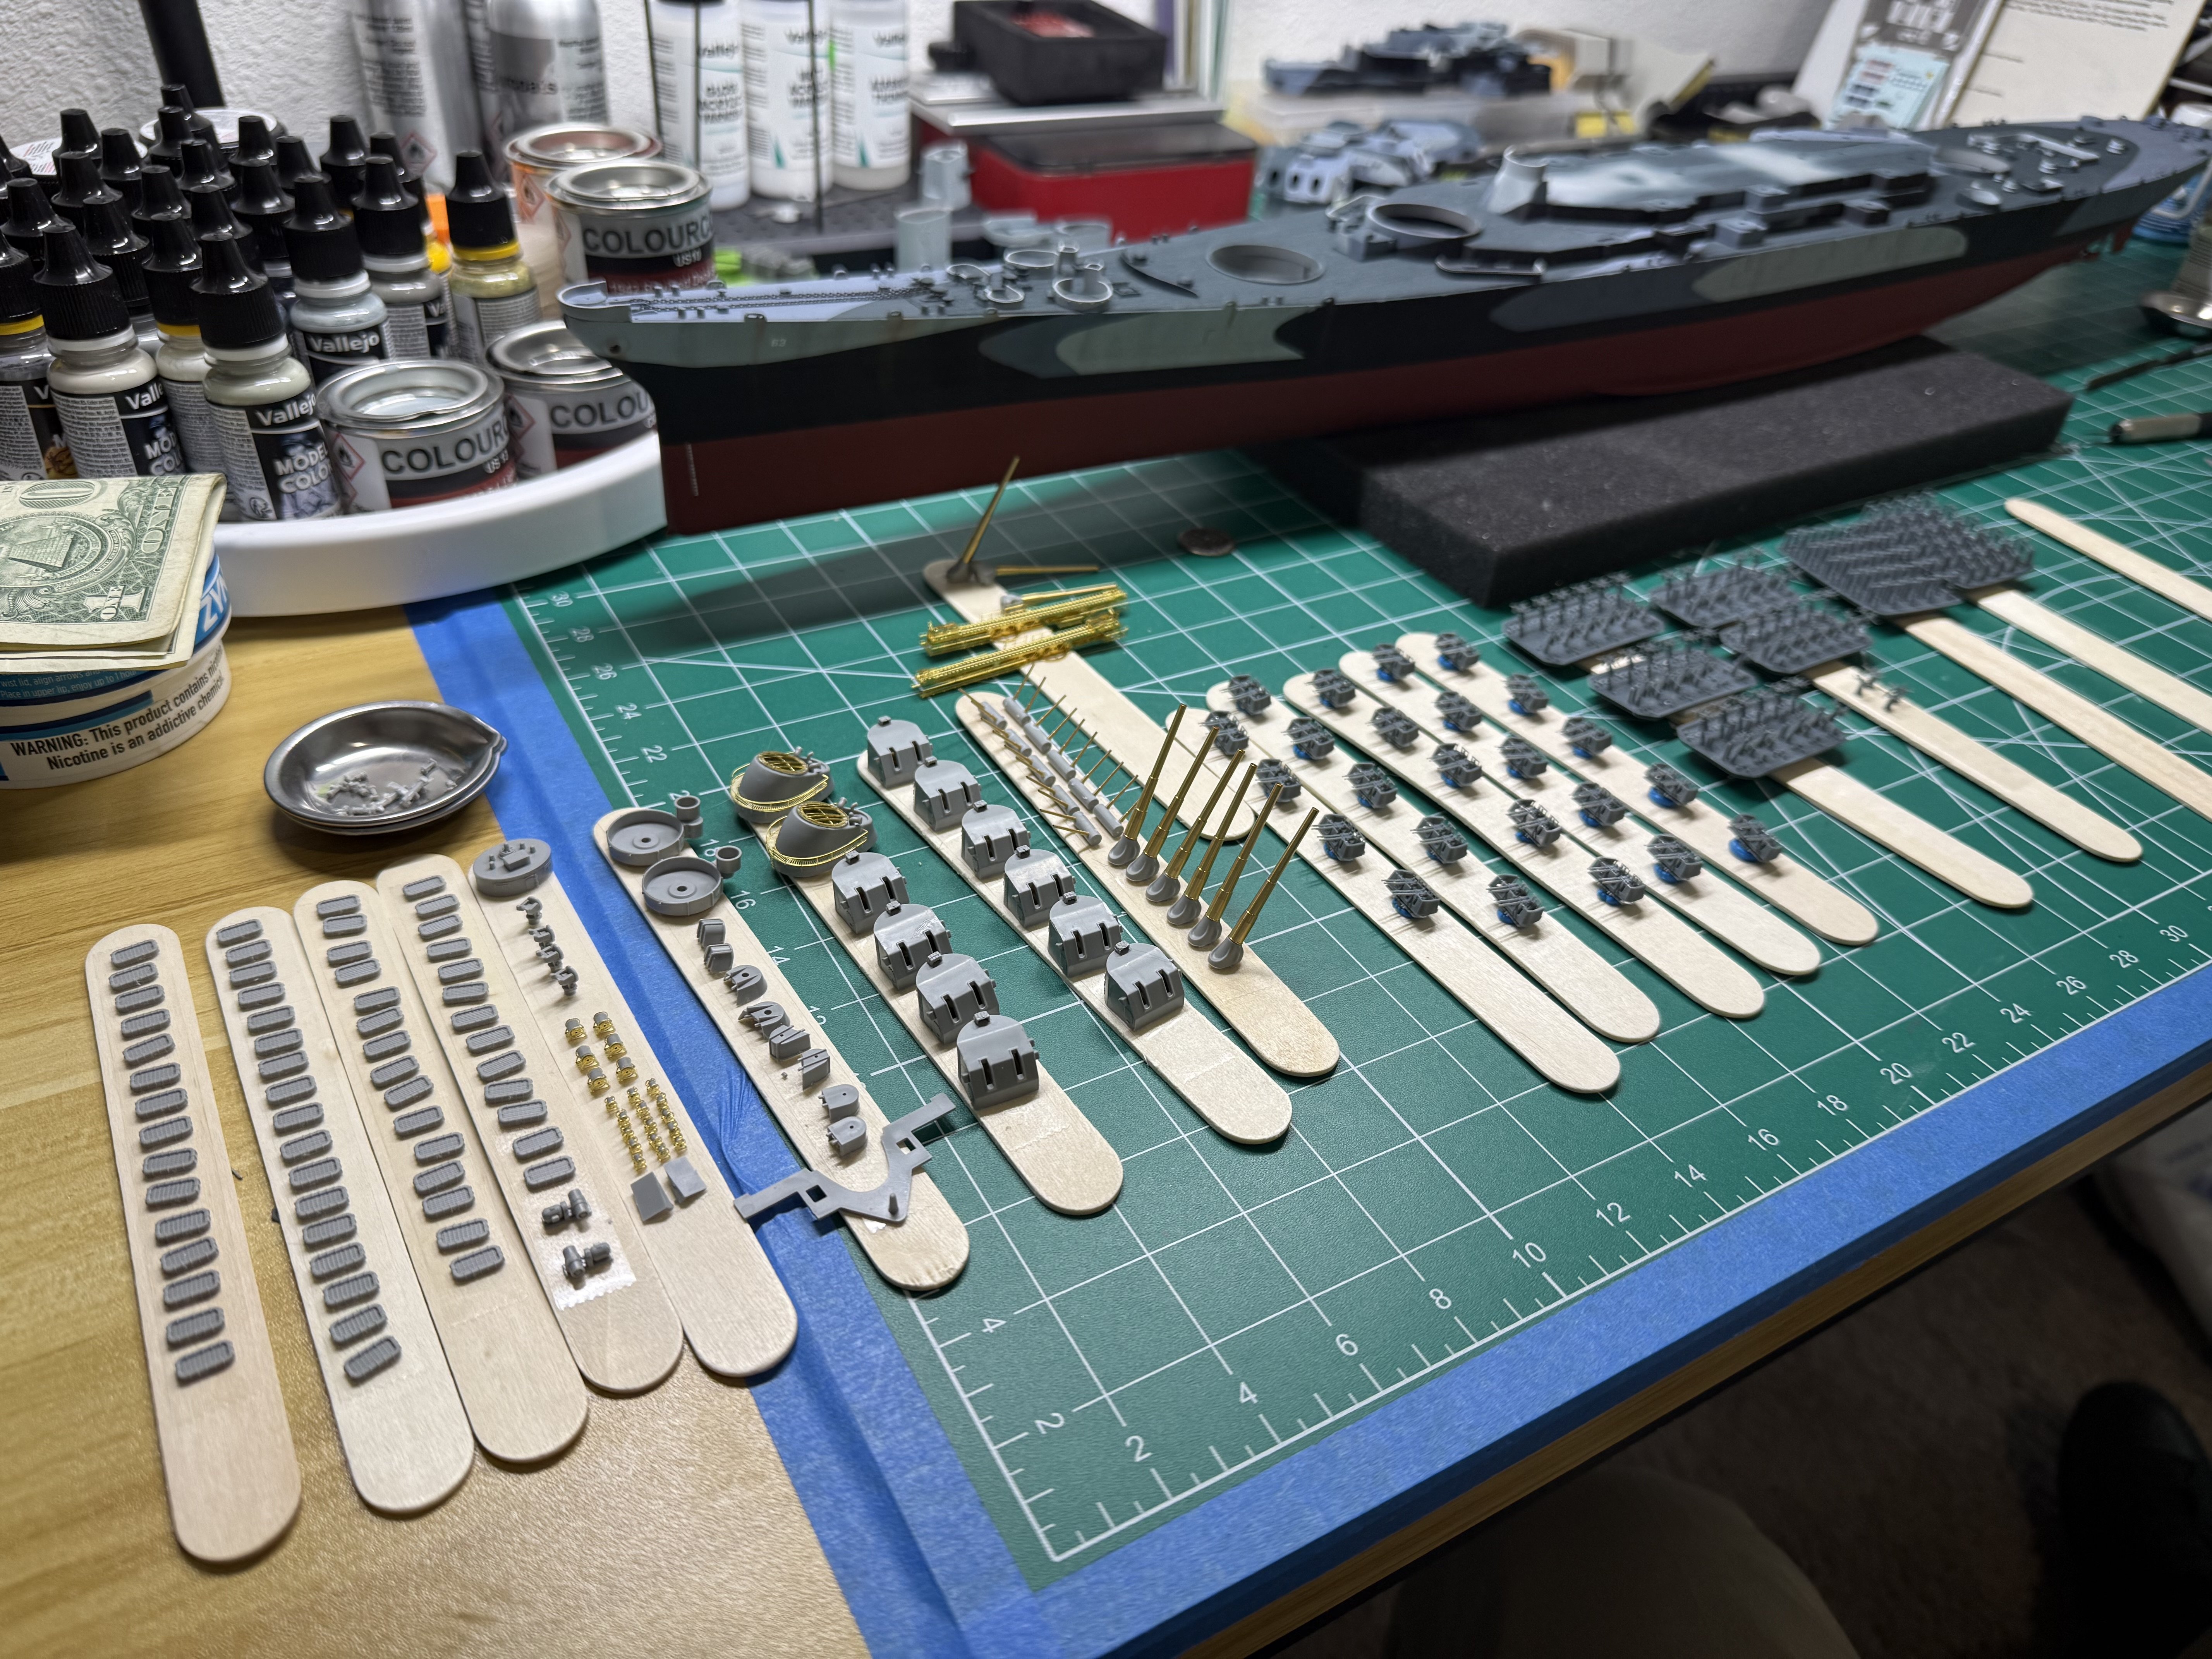
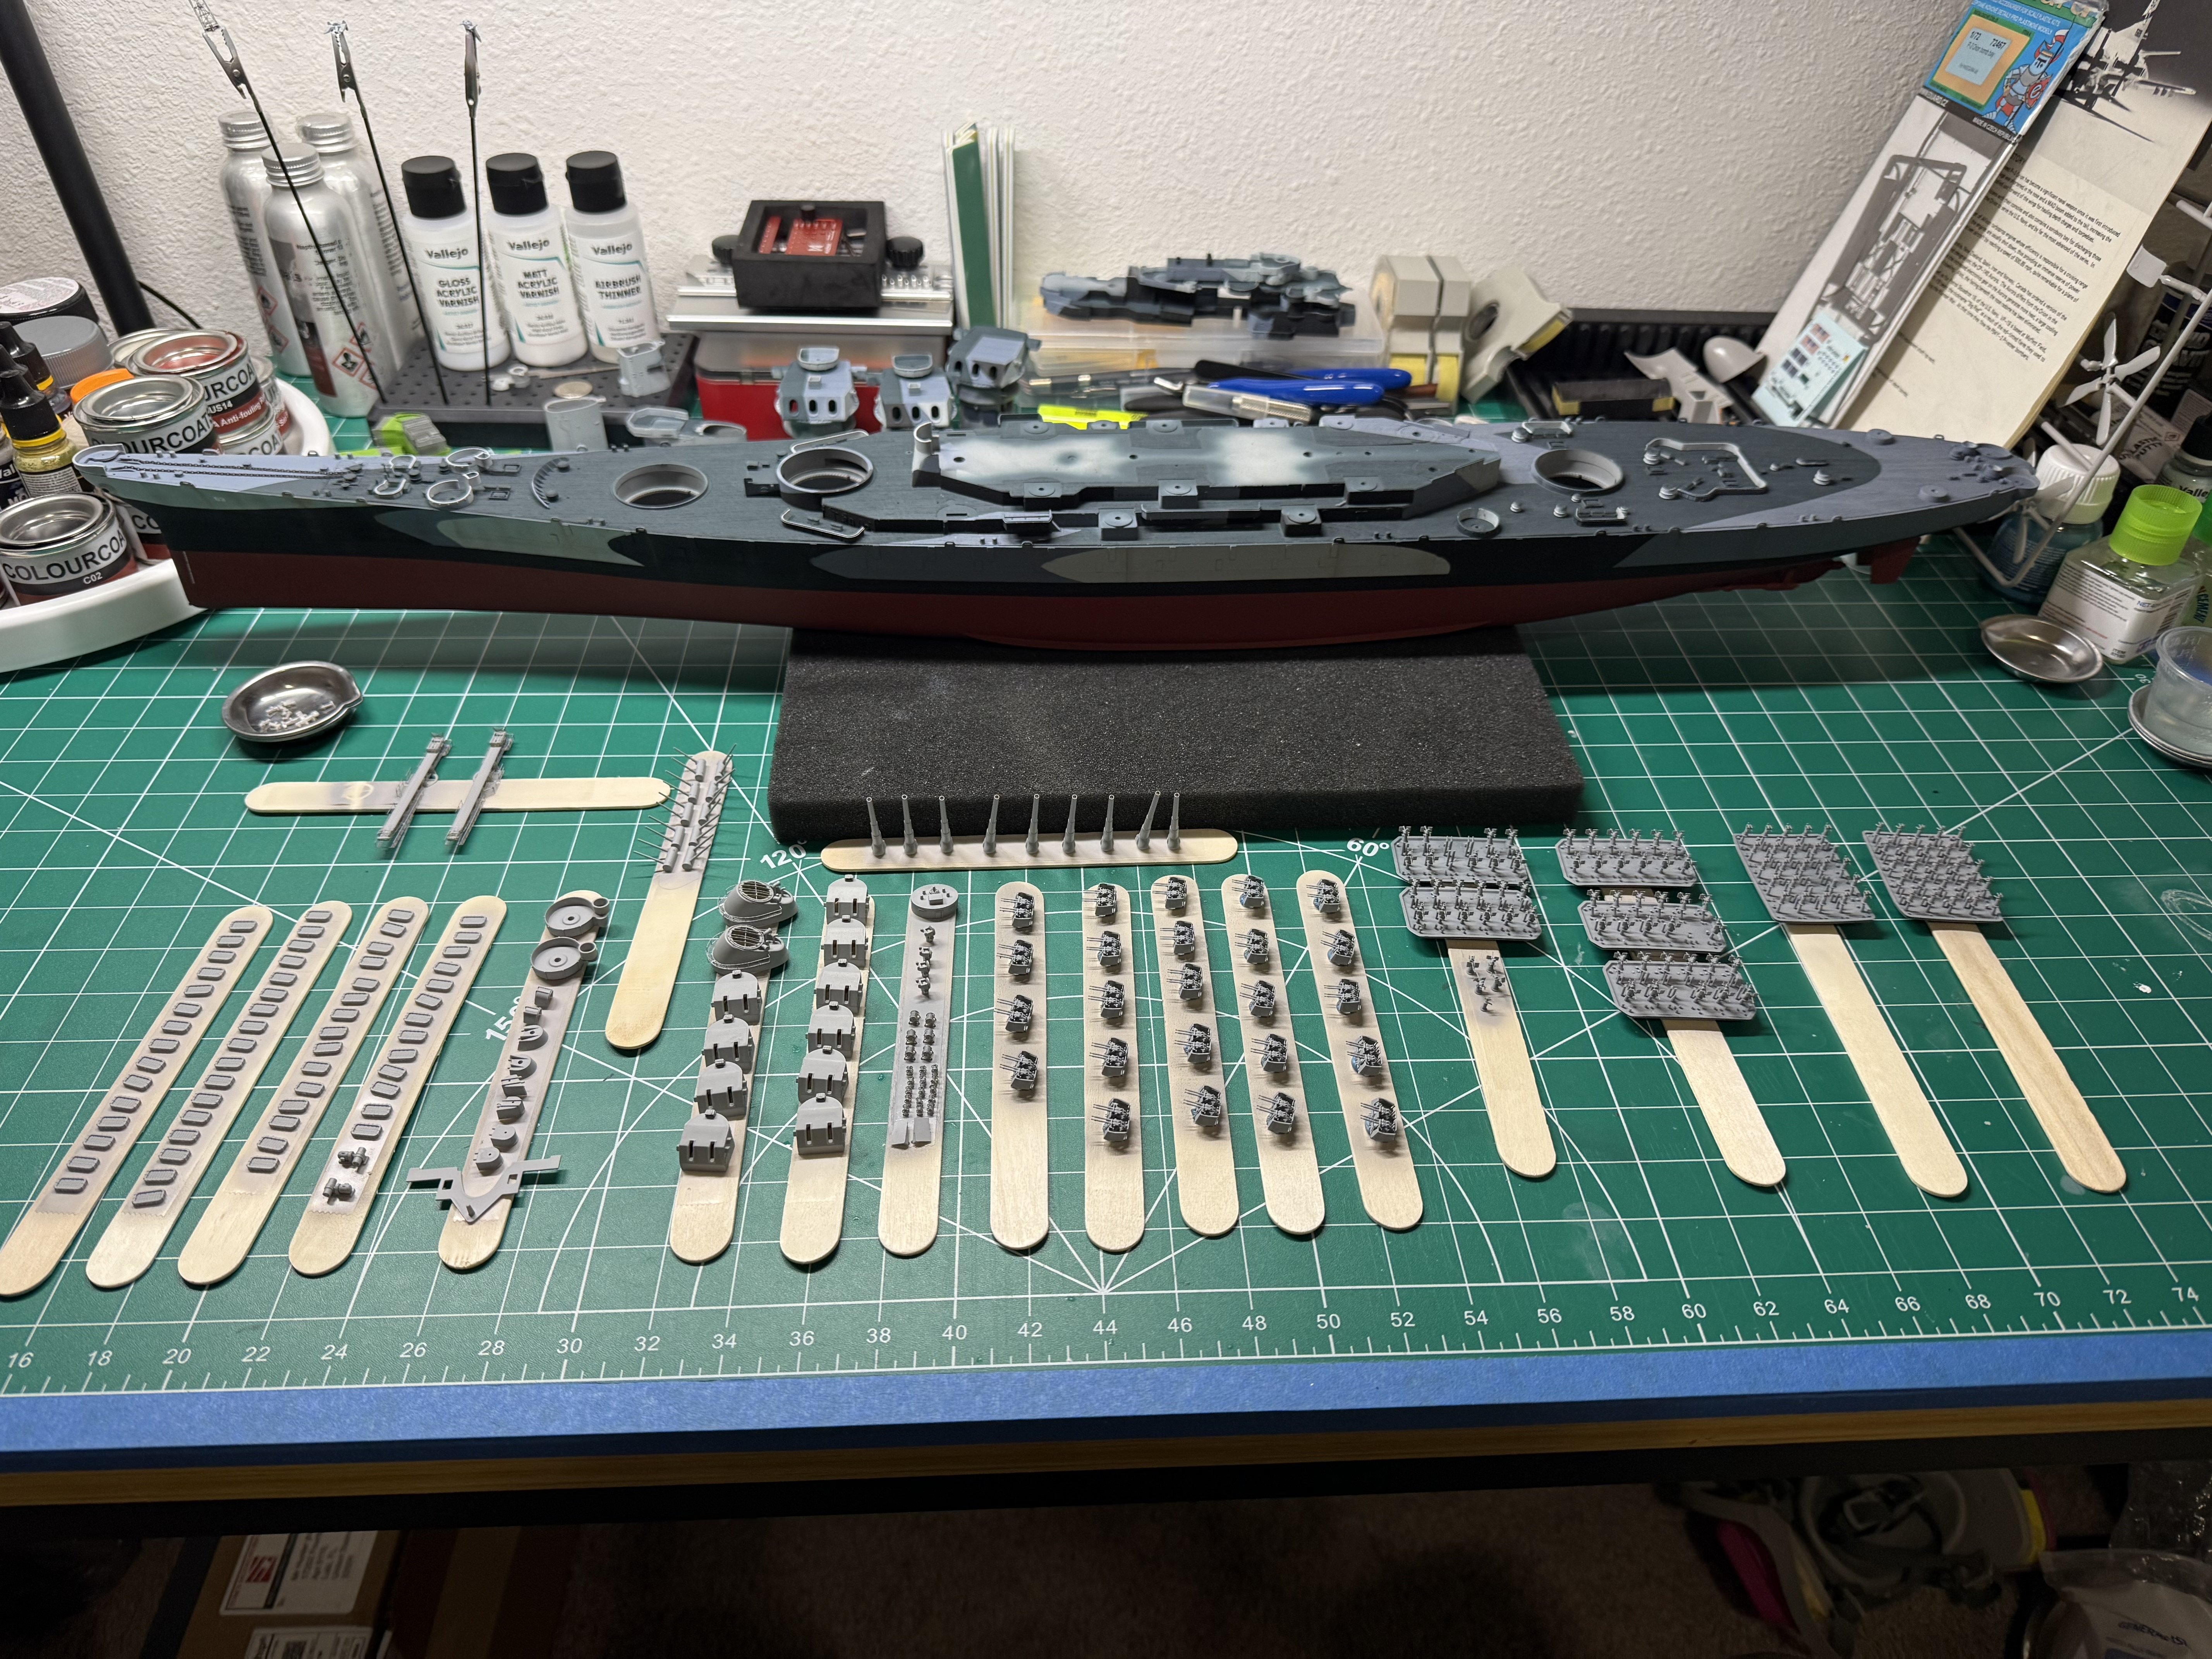
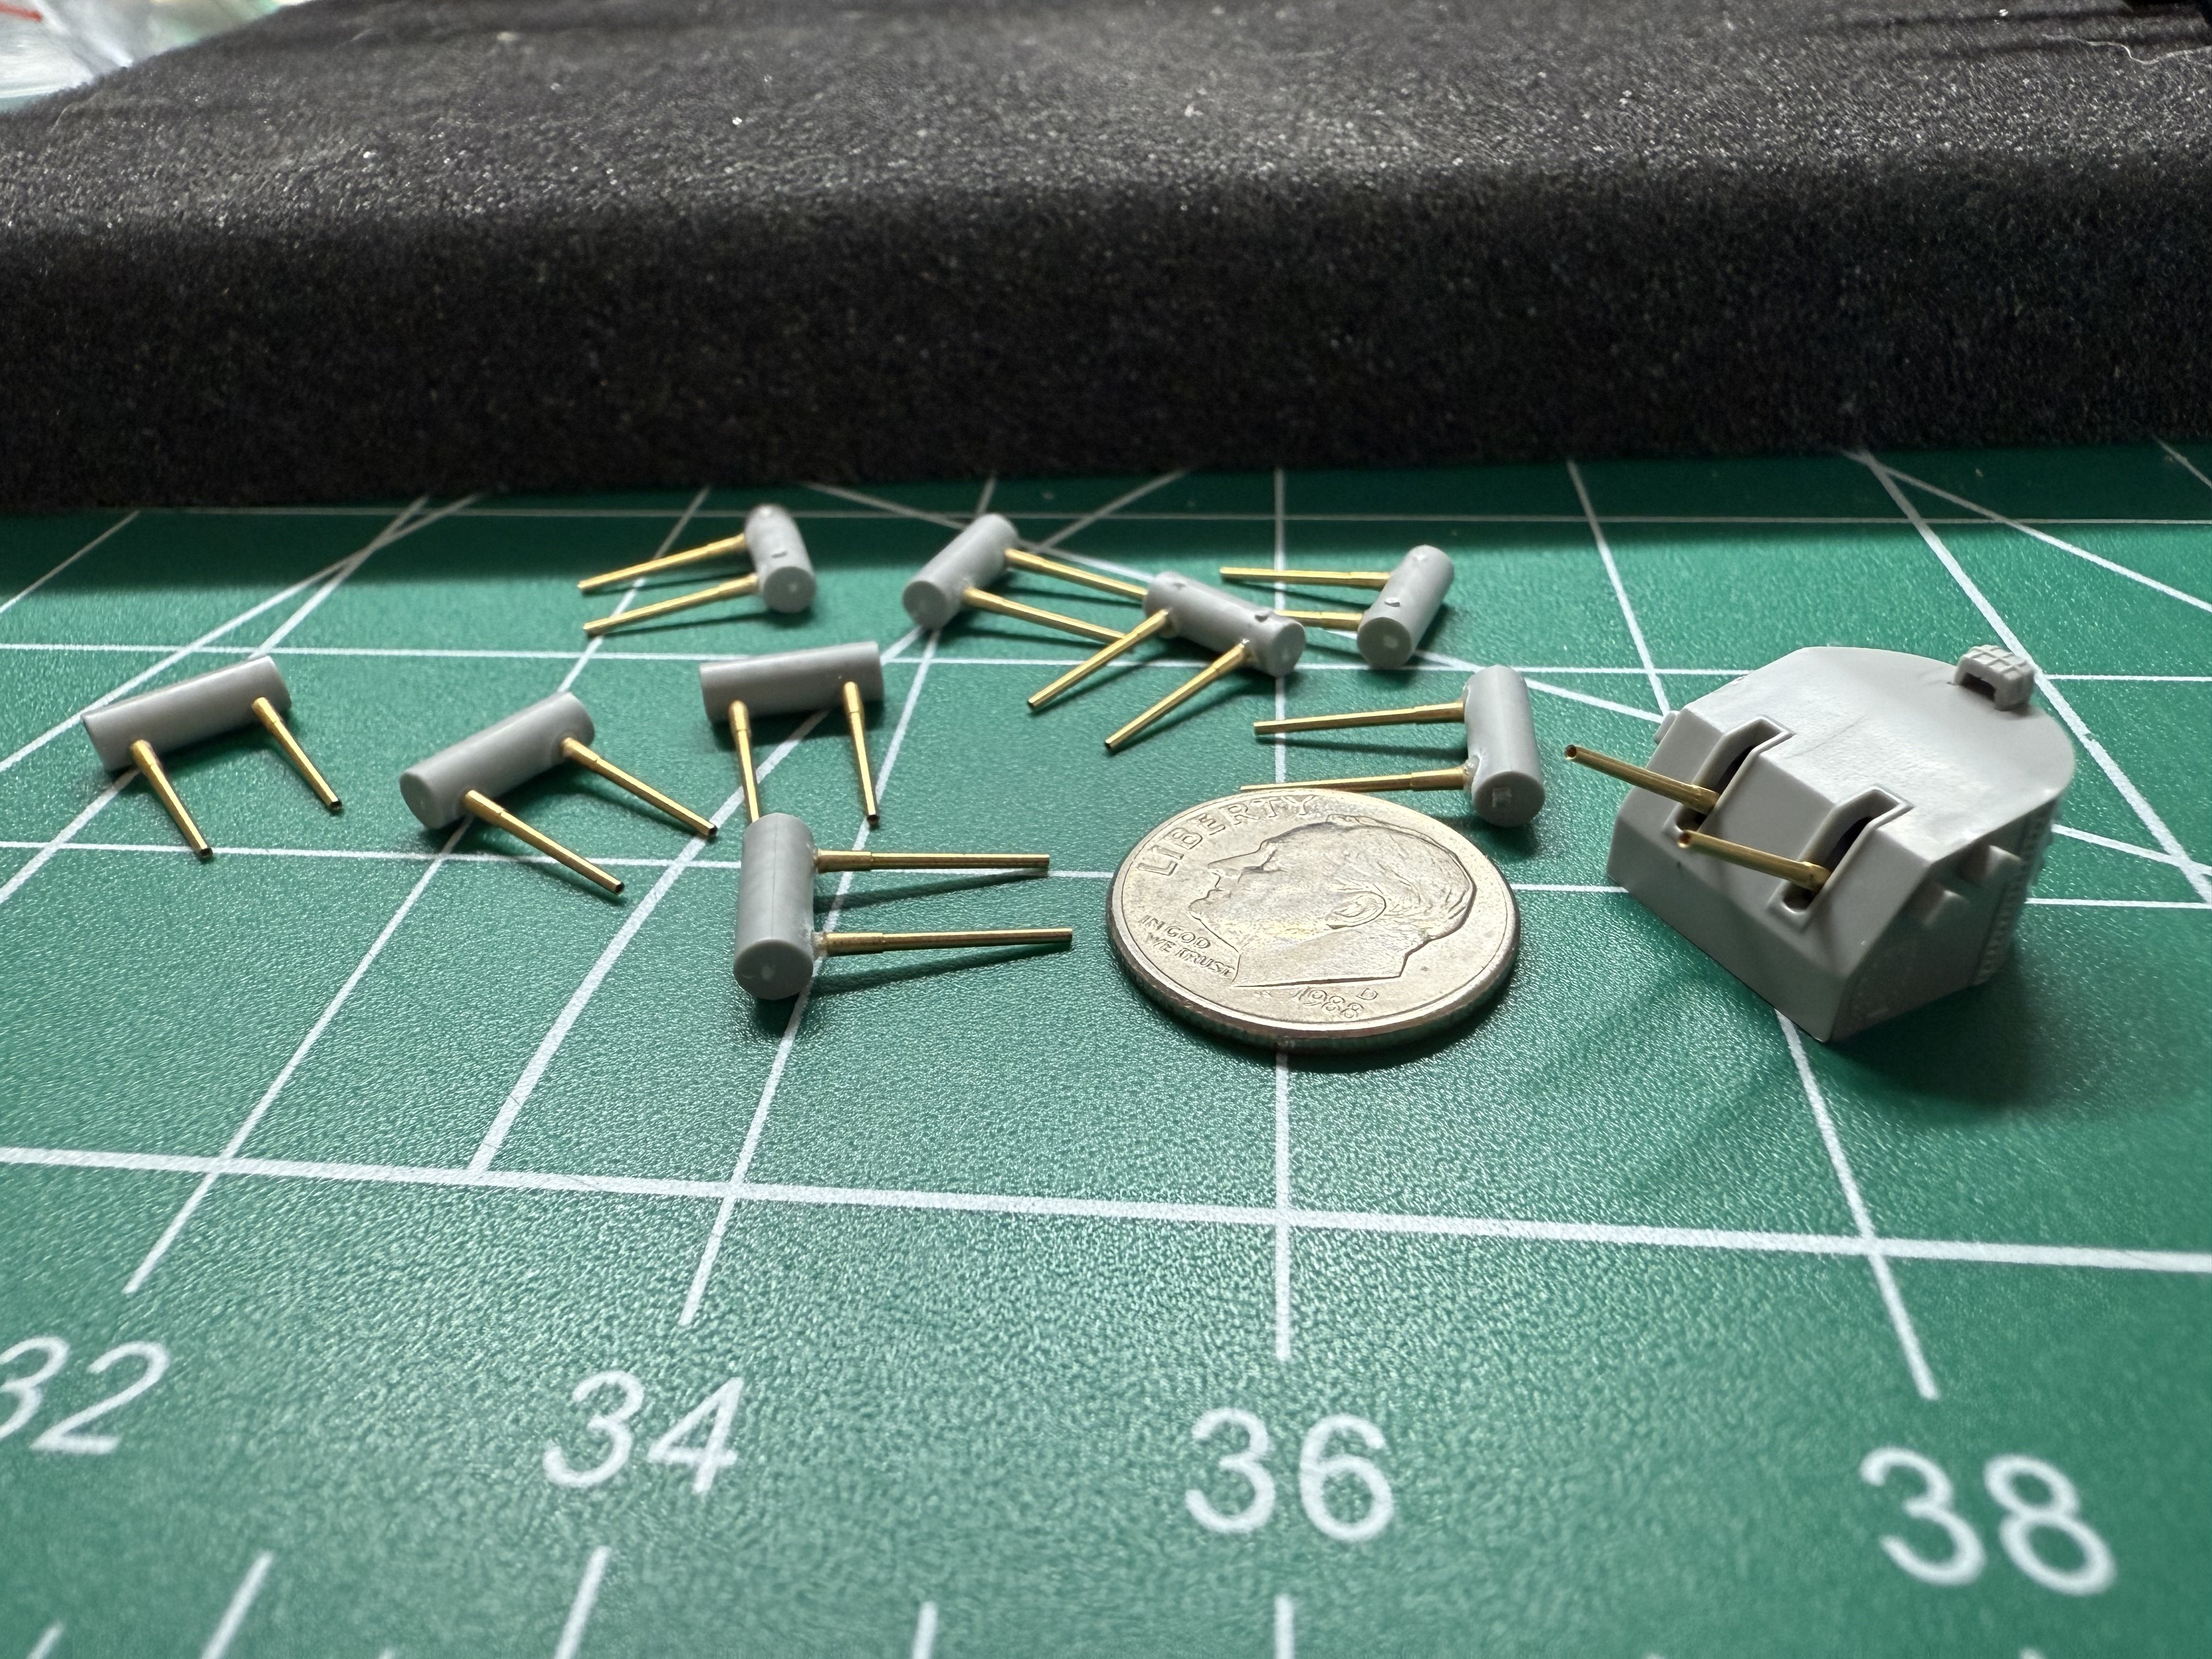
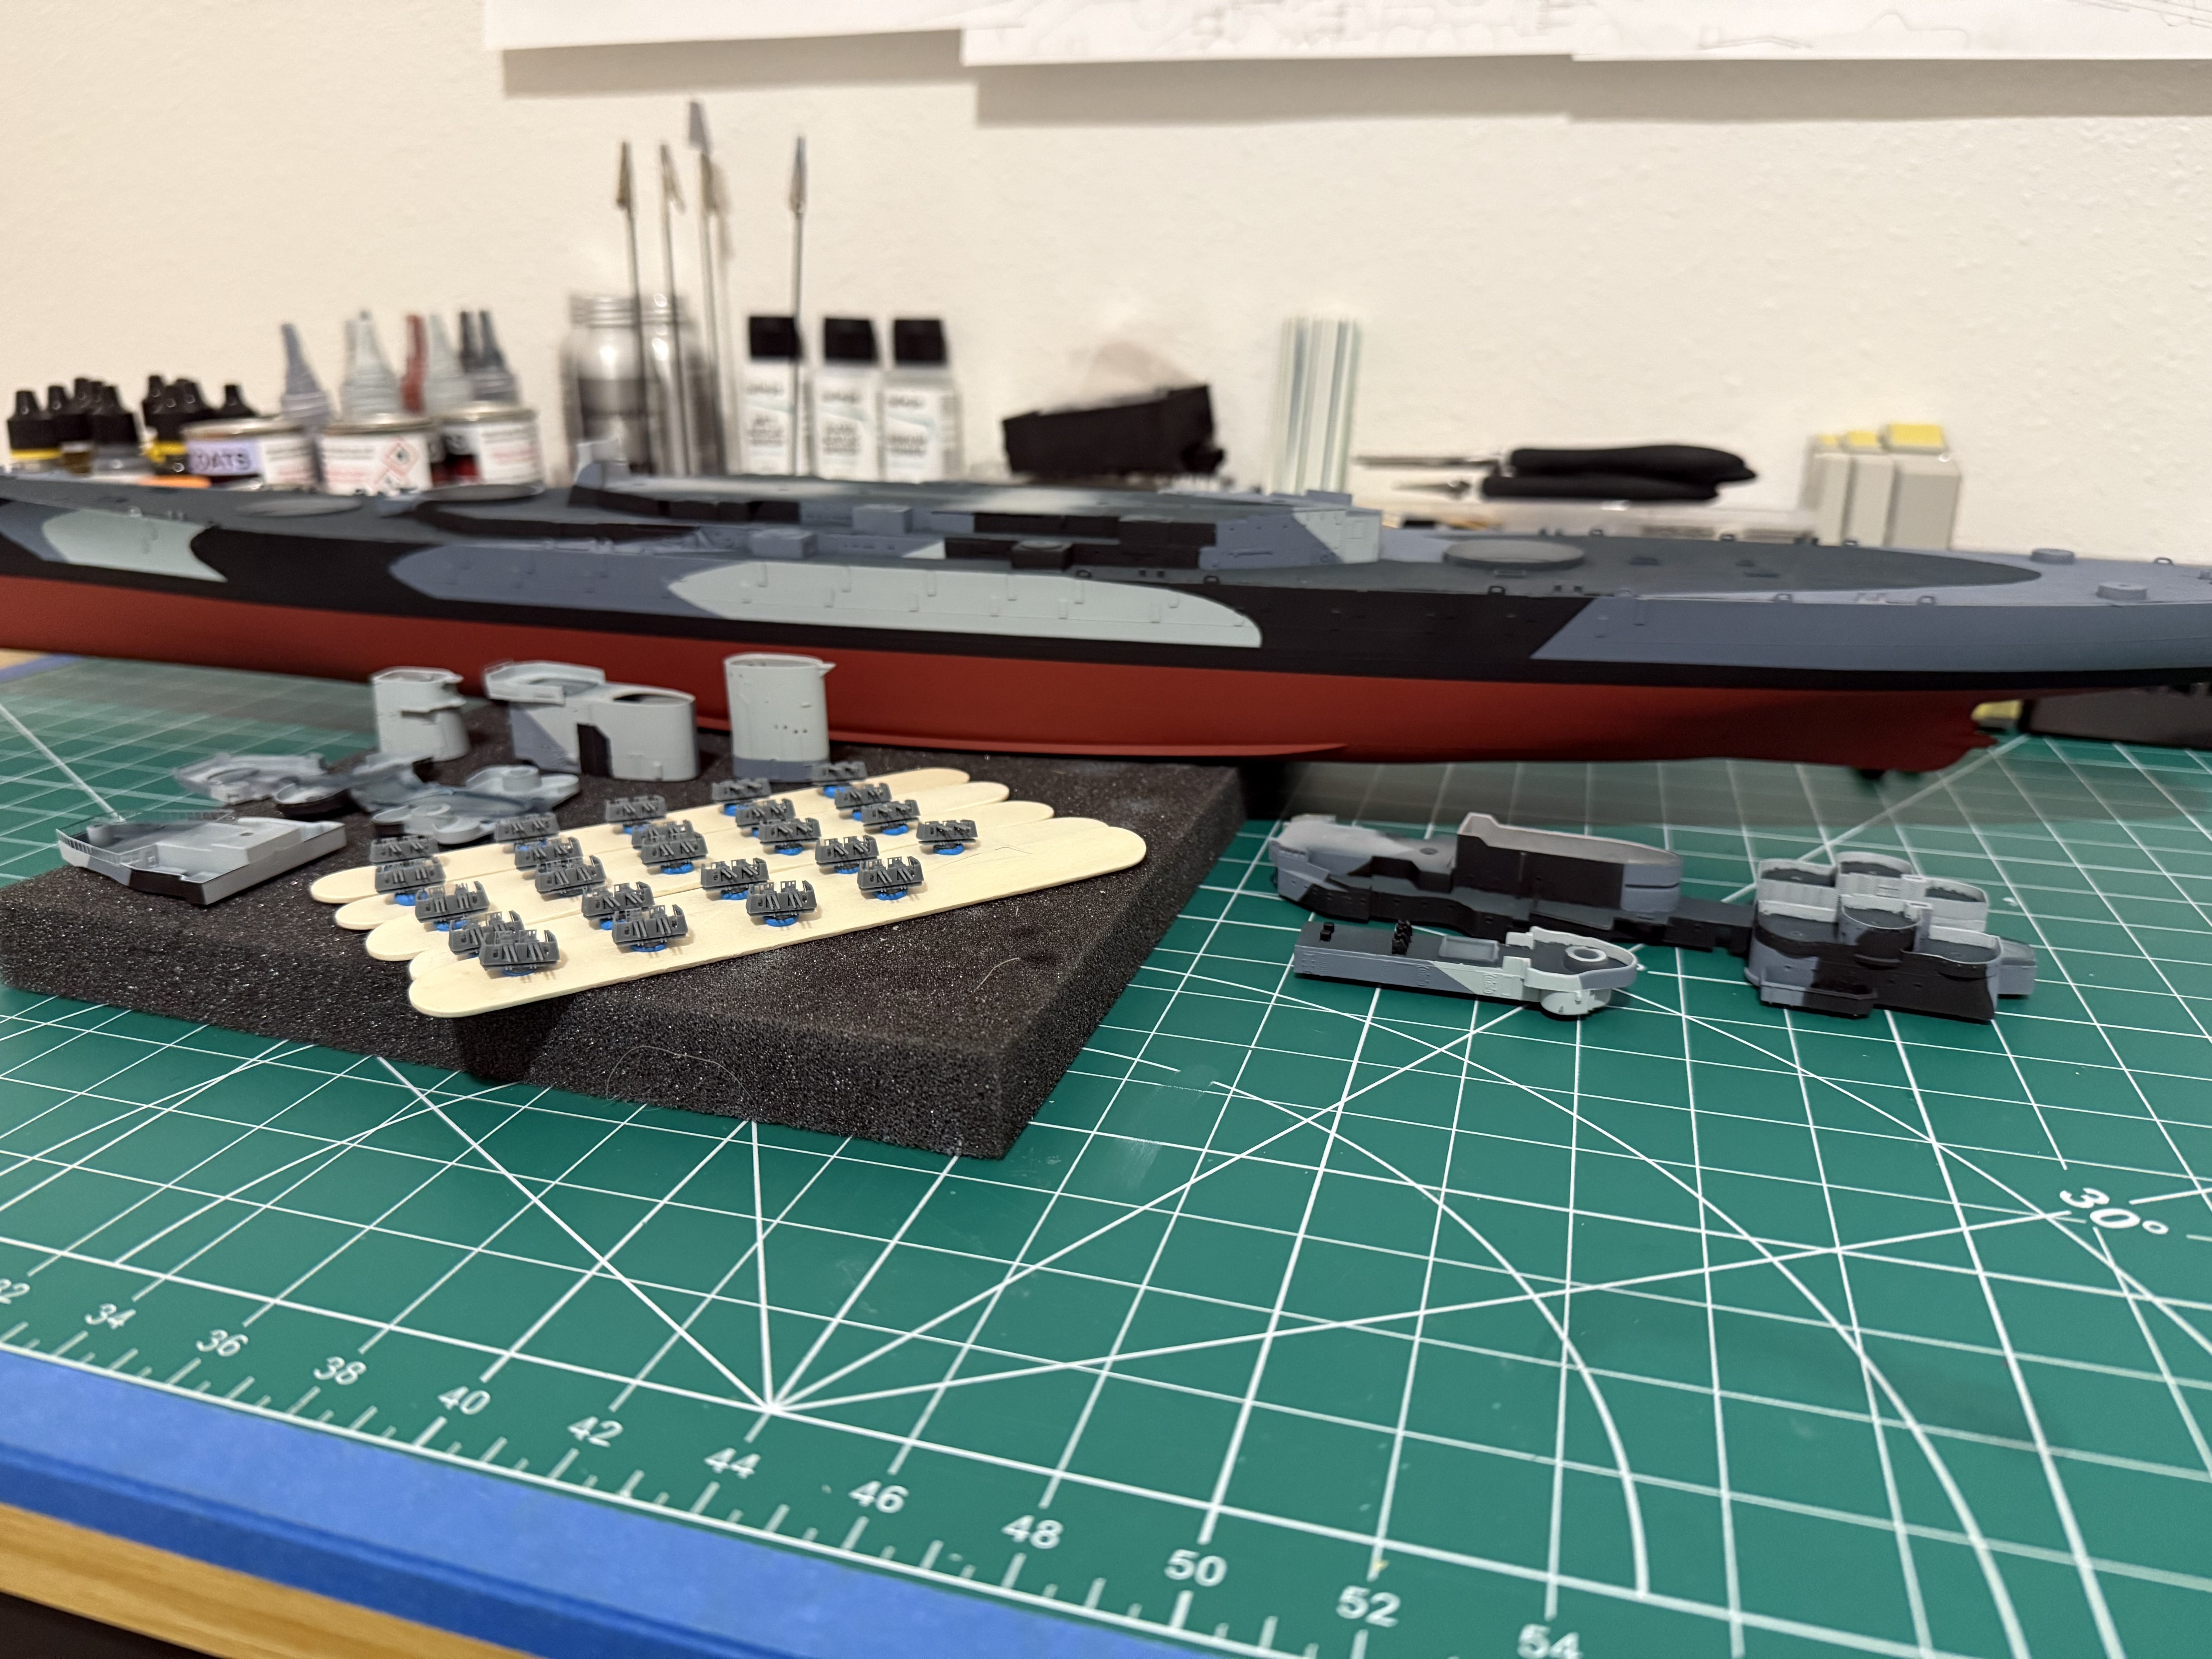
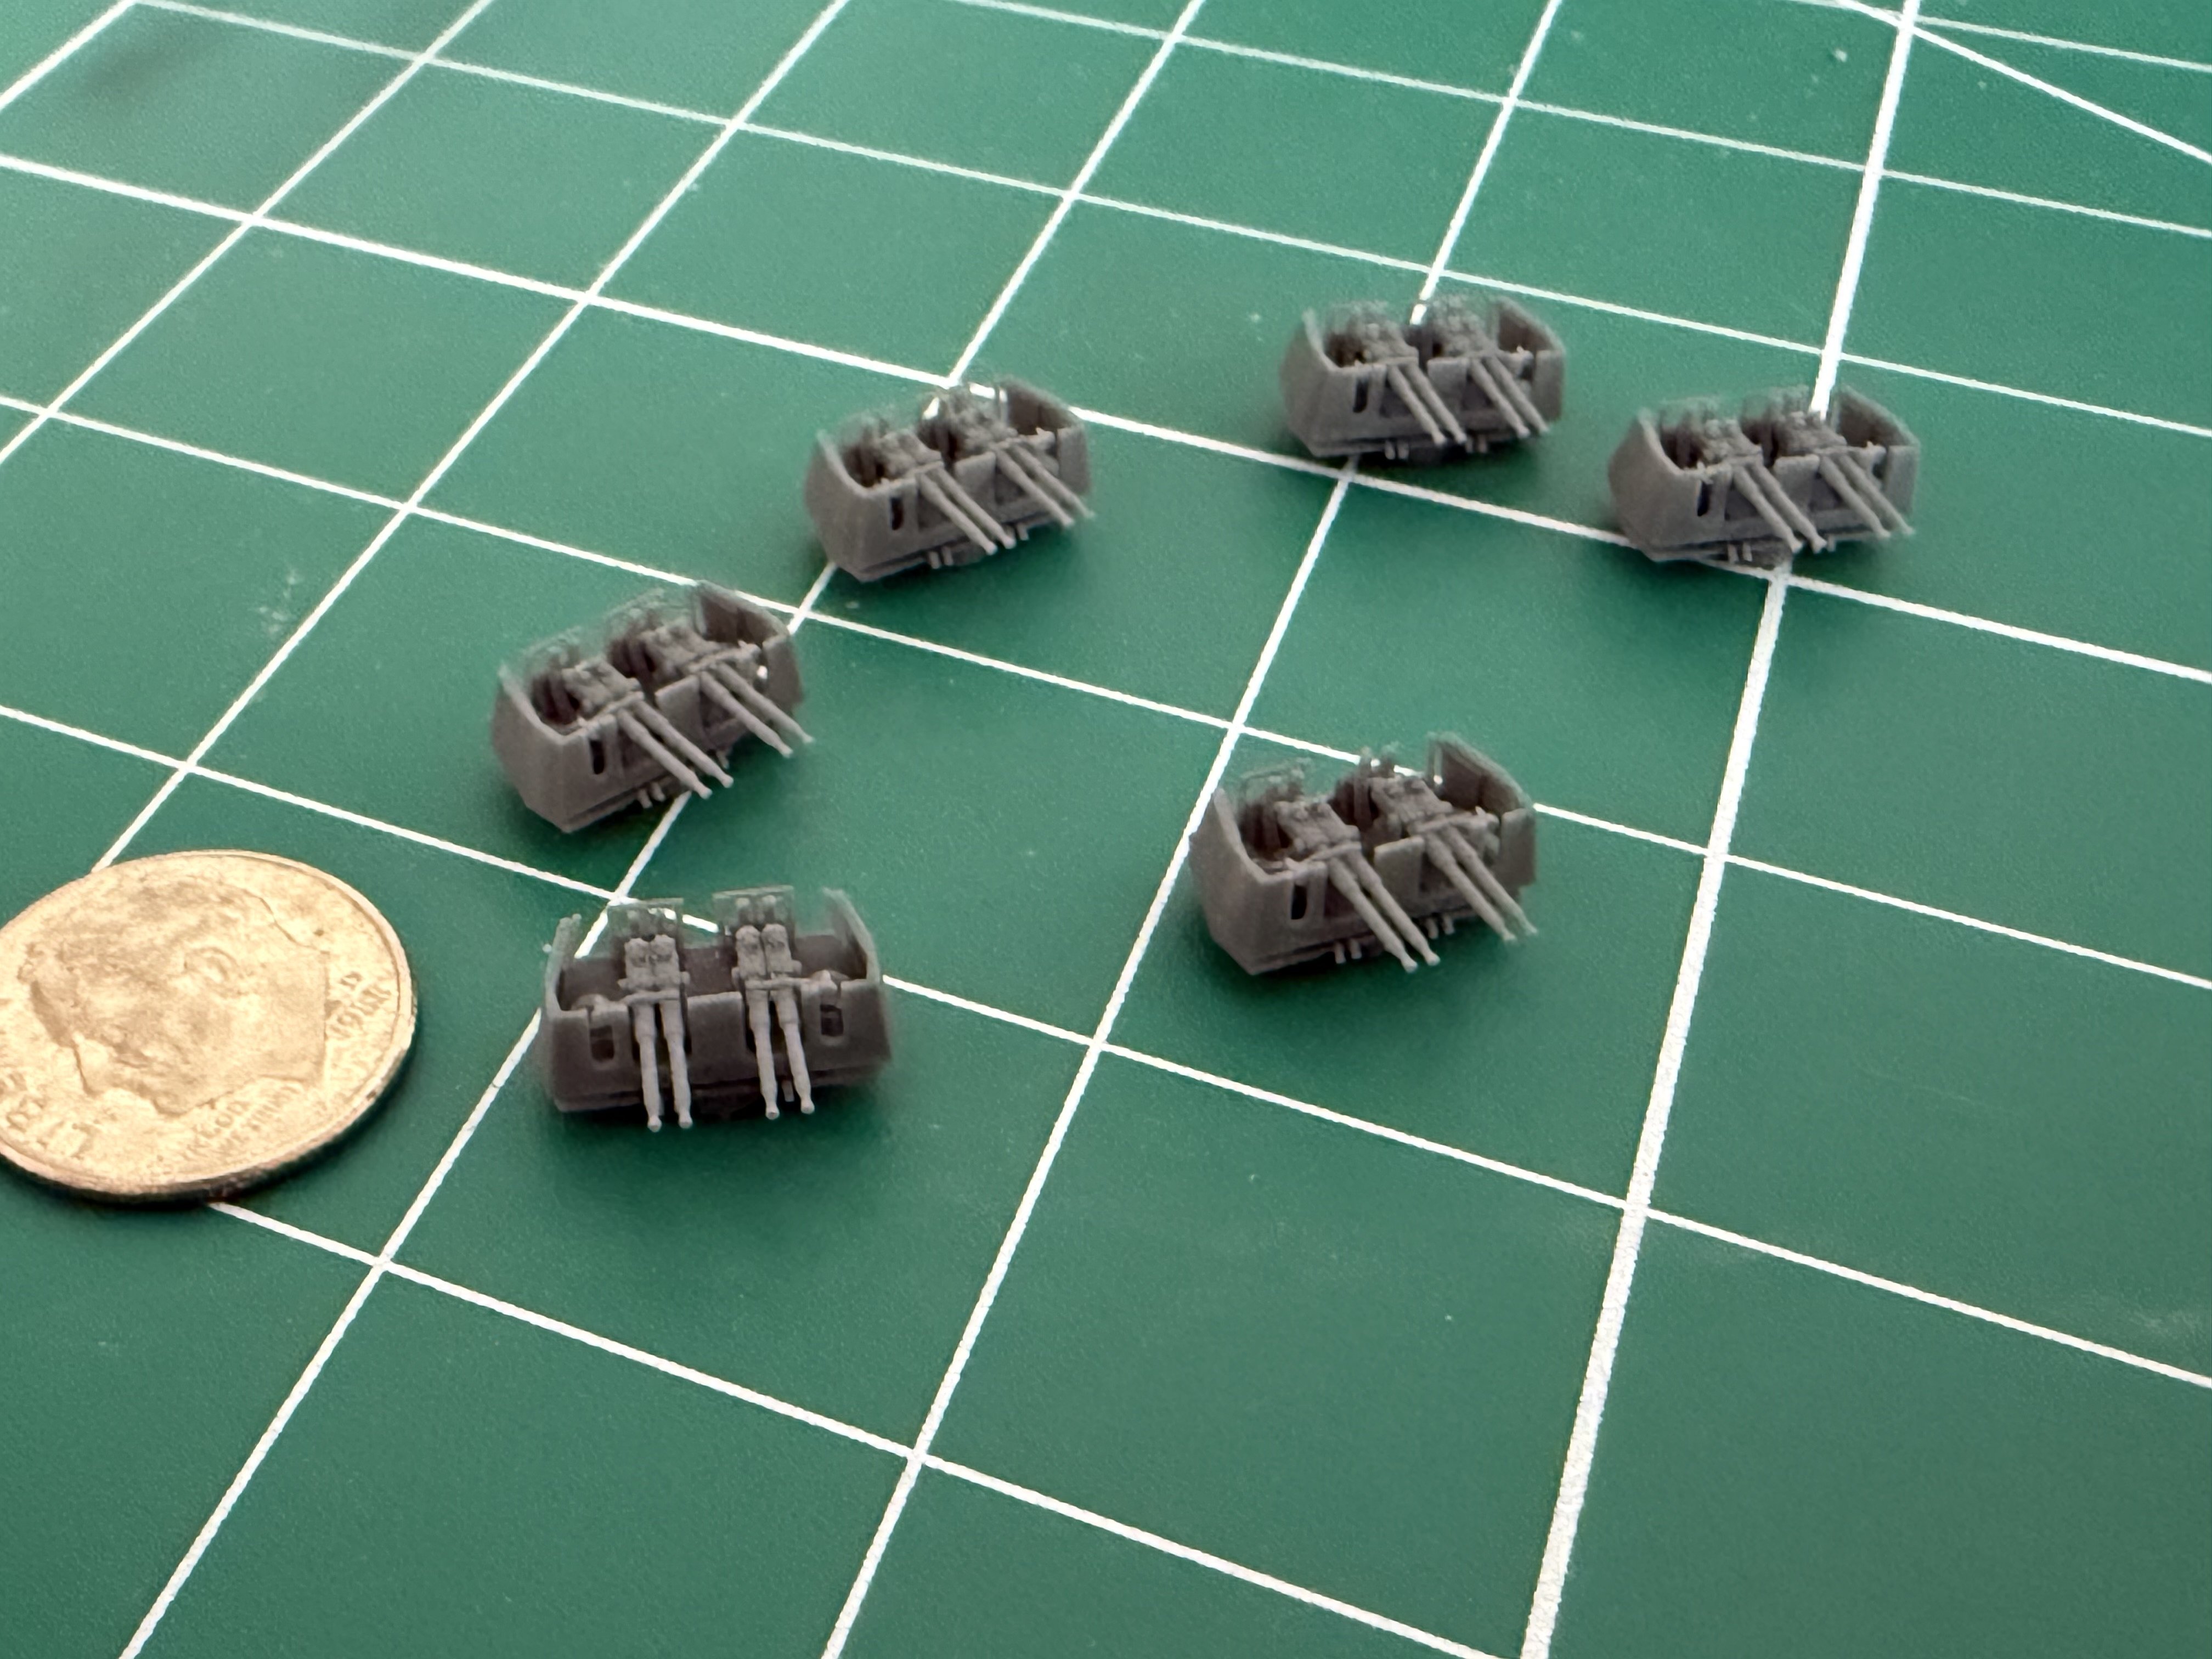
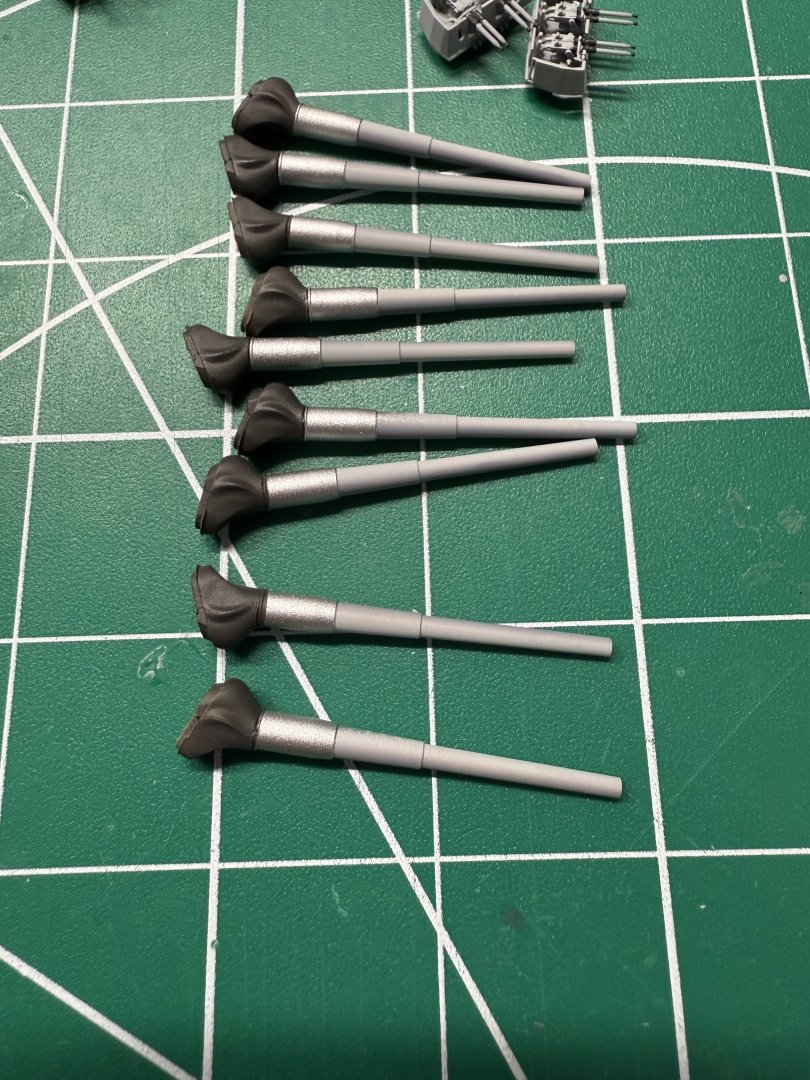
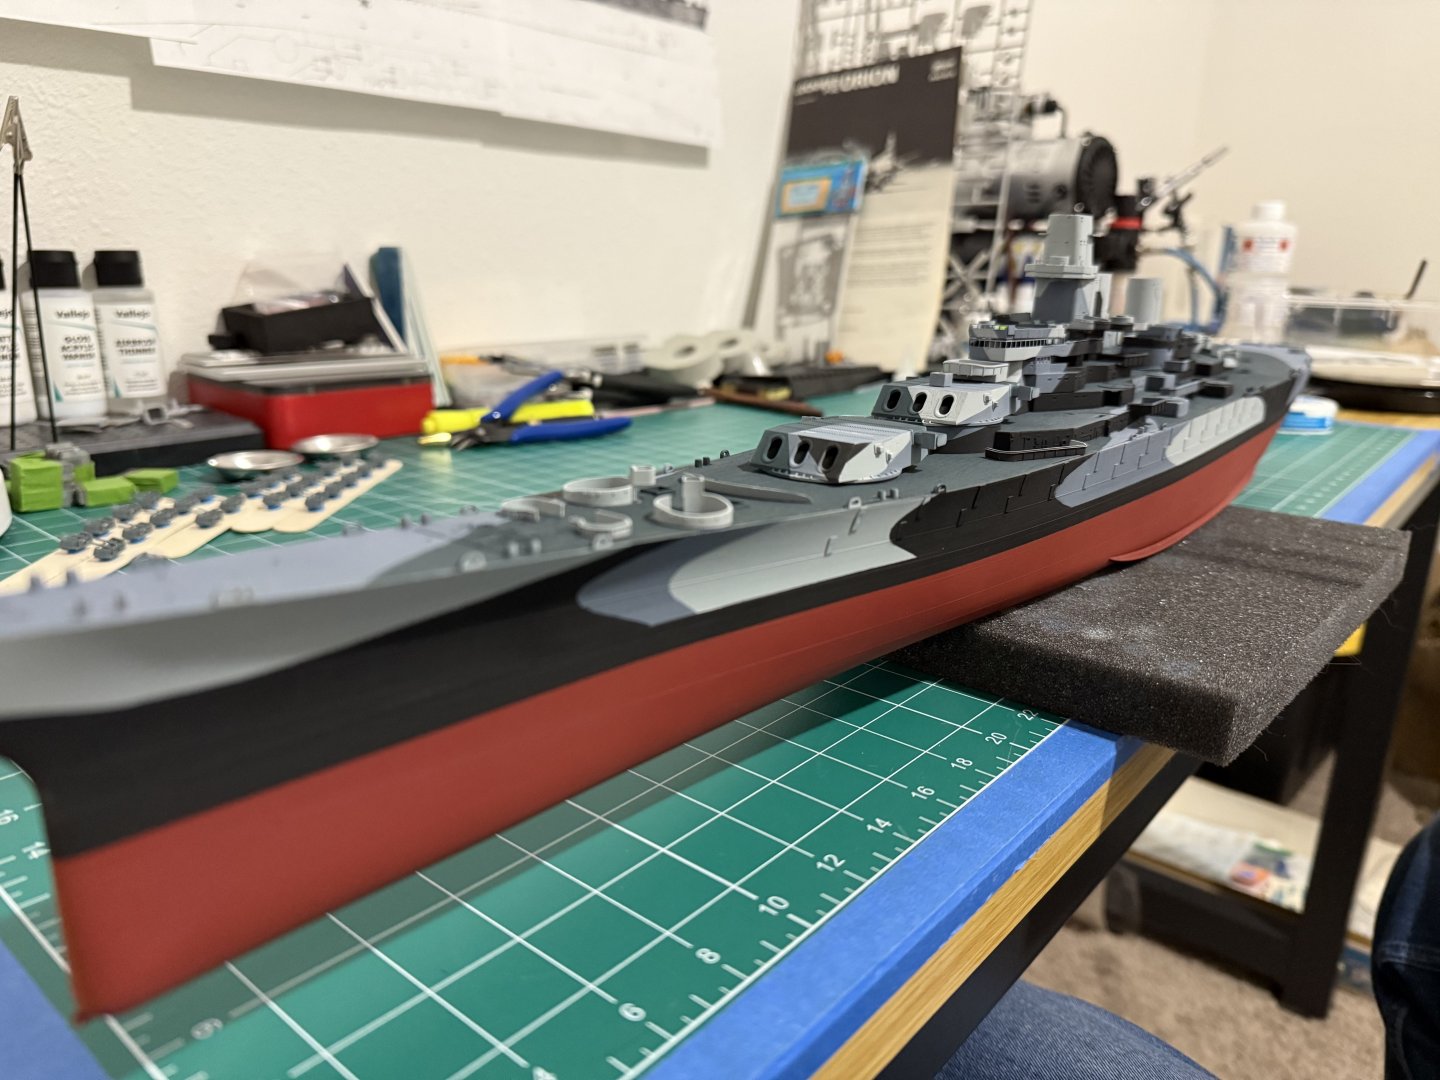
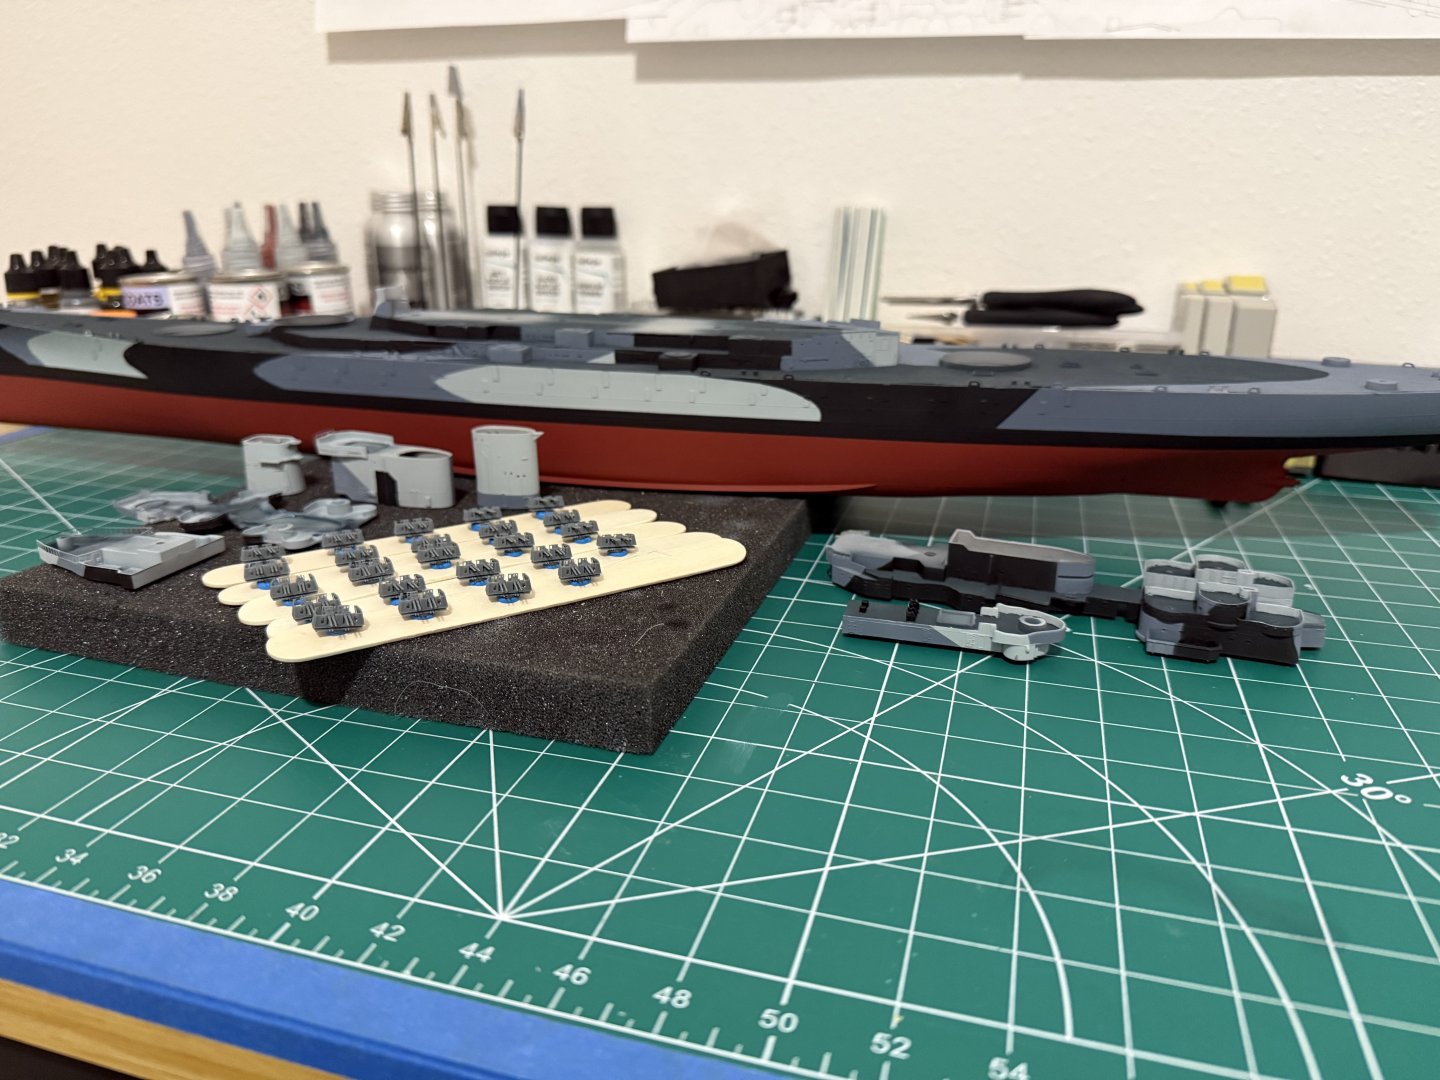
Not a whole lot done. So many parts that have to get painted multiple colors, but I did paint the 16” gun barrels, the 40mm bofors, and started on the 20mm’s. With there being 49 of them i will probably tackle a couple at a time as the bofors about burnt me out. I still need to paint the shields to match the part of the ship where they will be mounted but I’ll probably do that as I go. Once they’re all painted and dried I’ll clear coat them, give them a little wash and start getting them on the ship. i was hoping to have the 16” guns wrapped up, but the floater baskets I ordered from China are apparently being swam across the pacific and won’t be here to supposedly end of October.


-
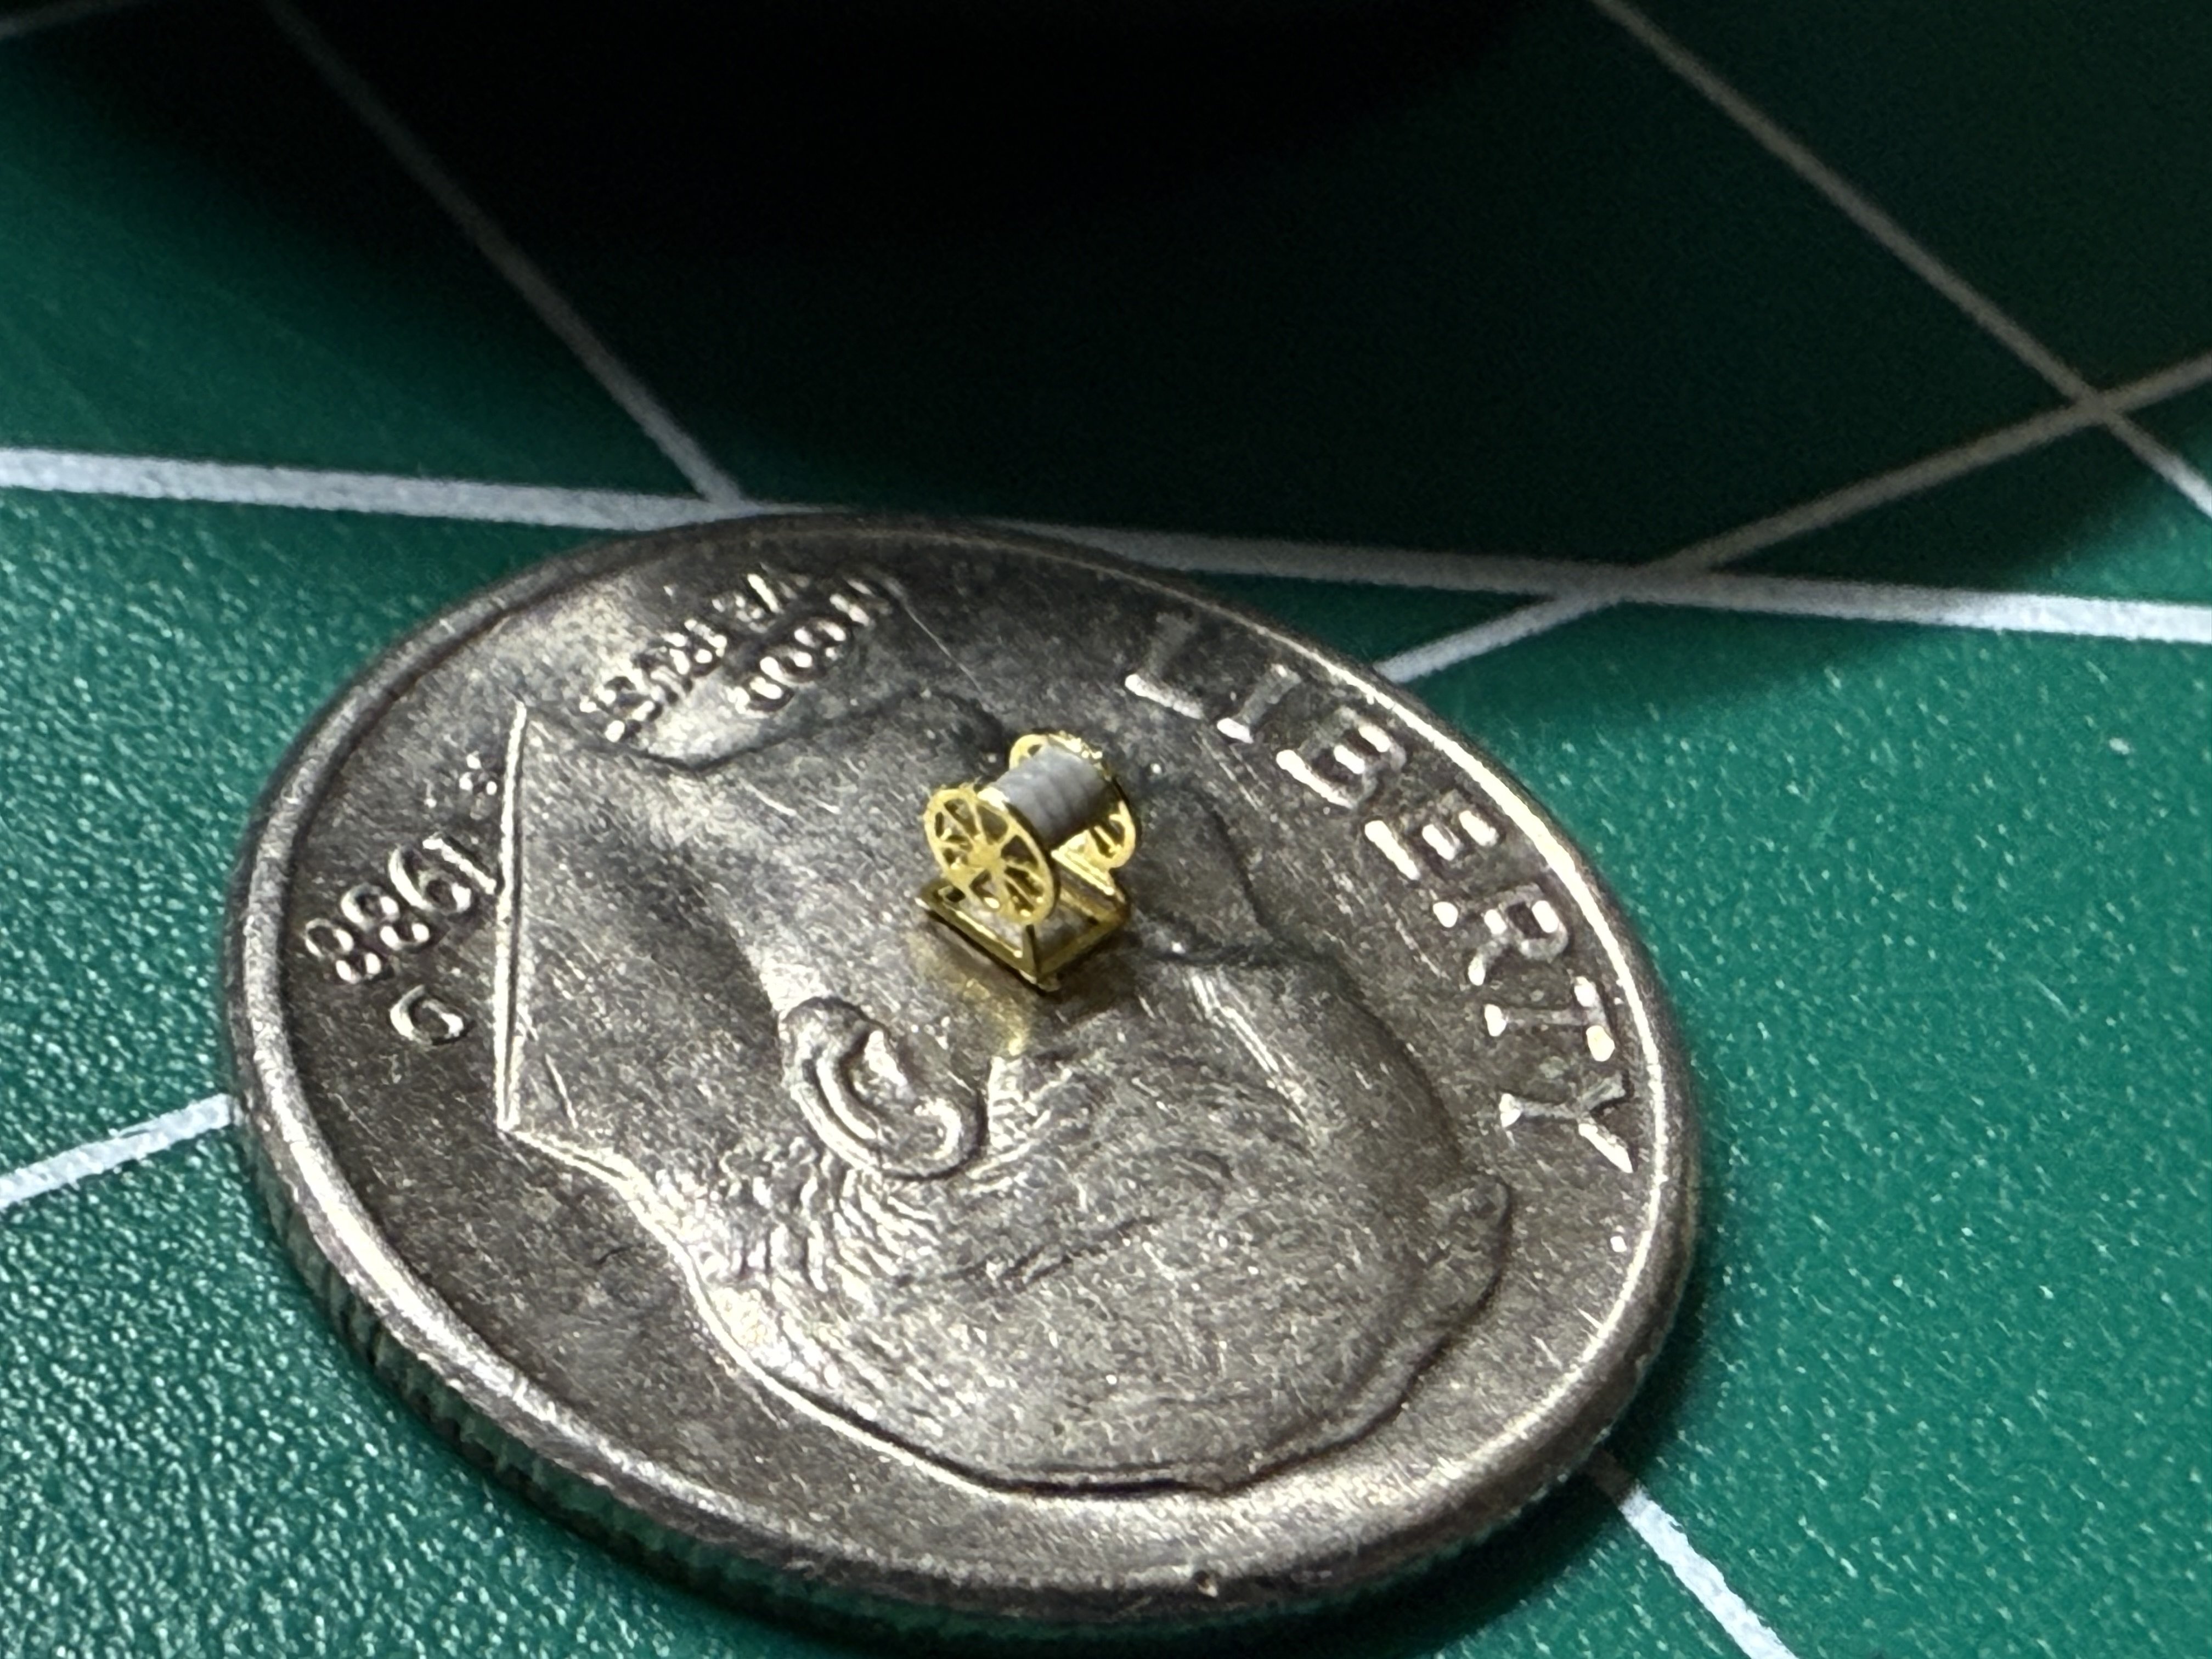
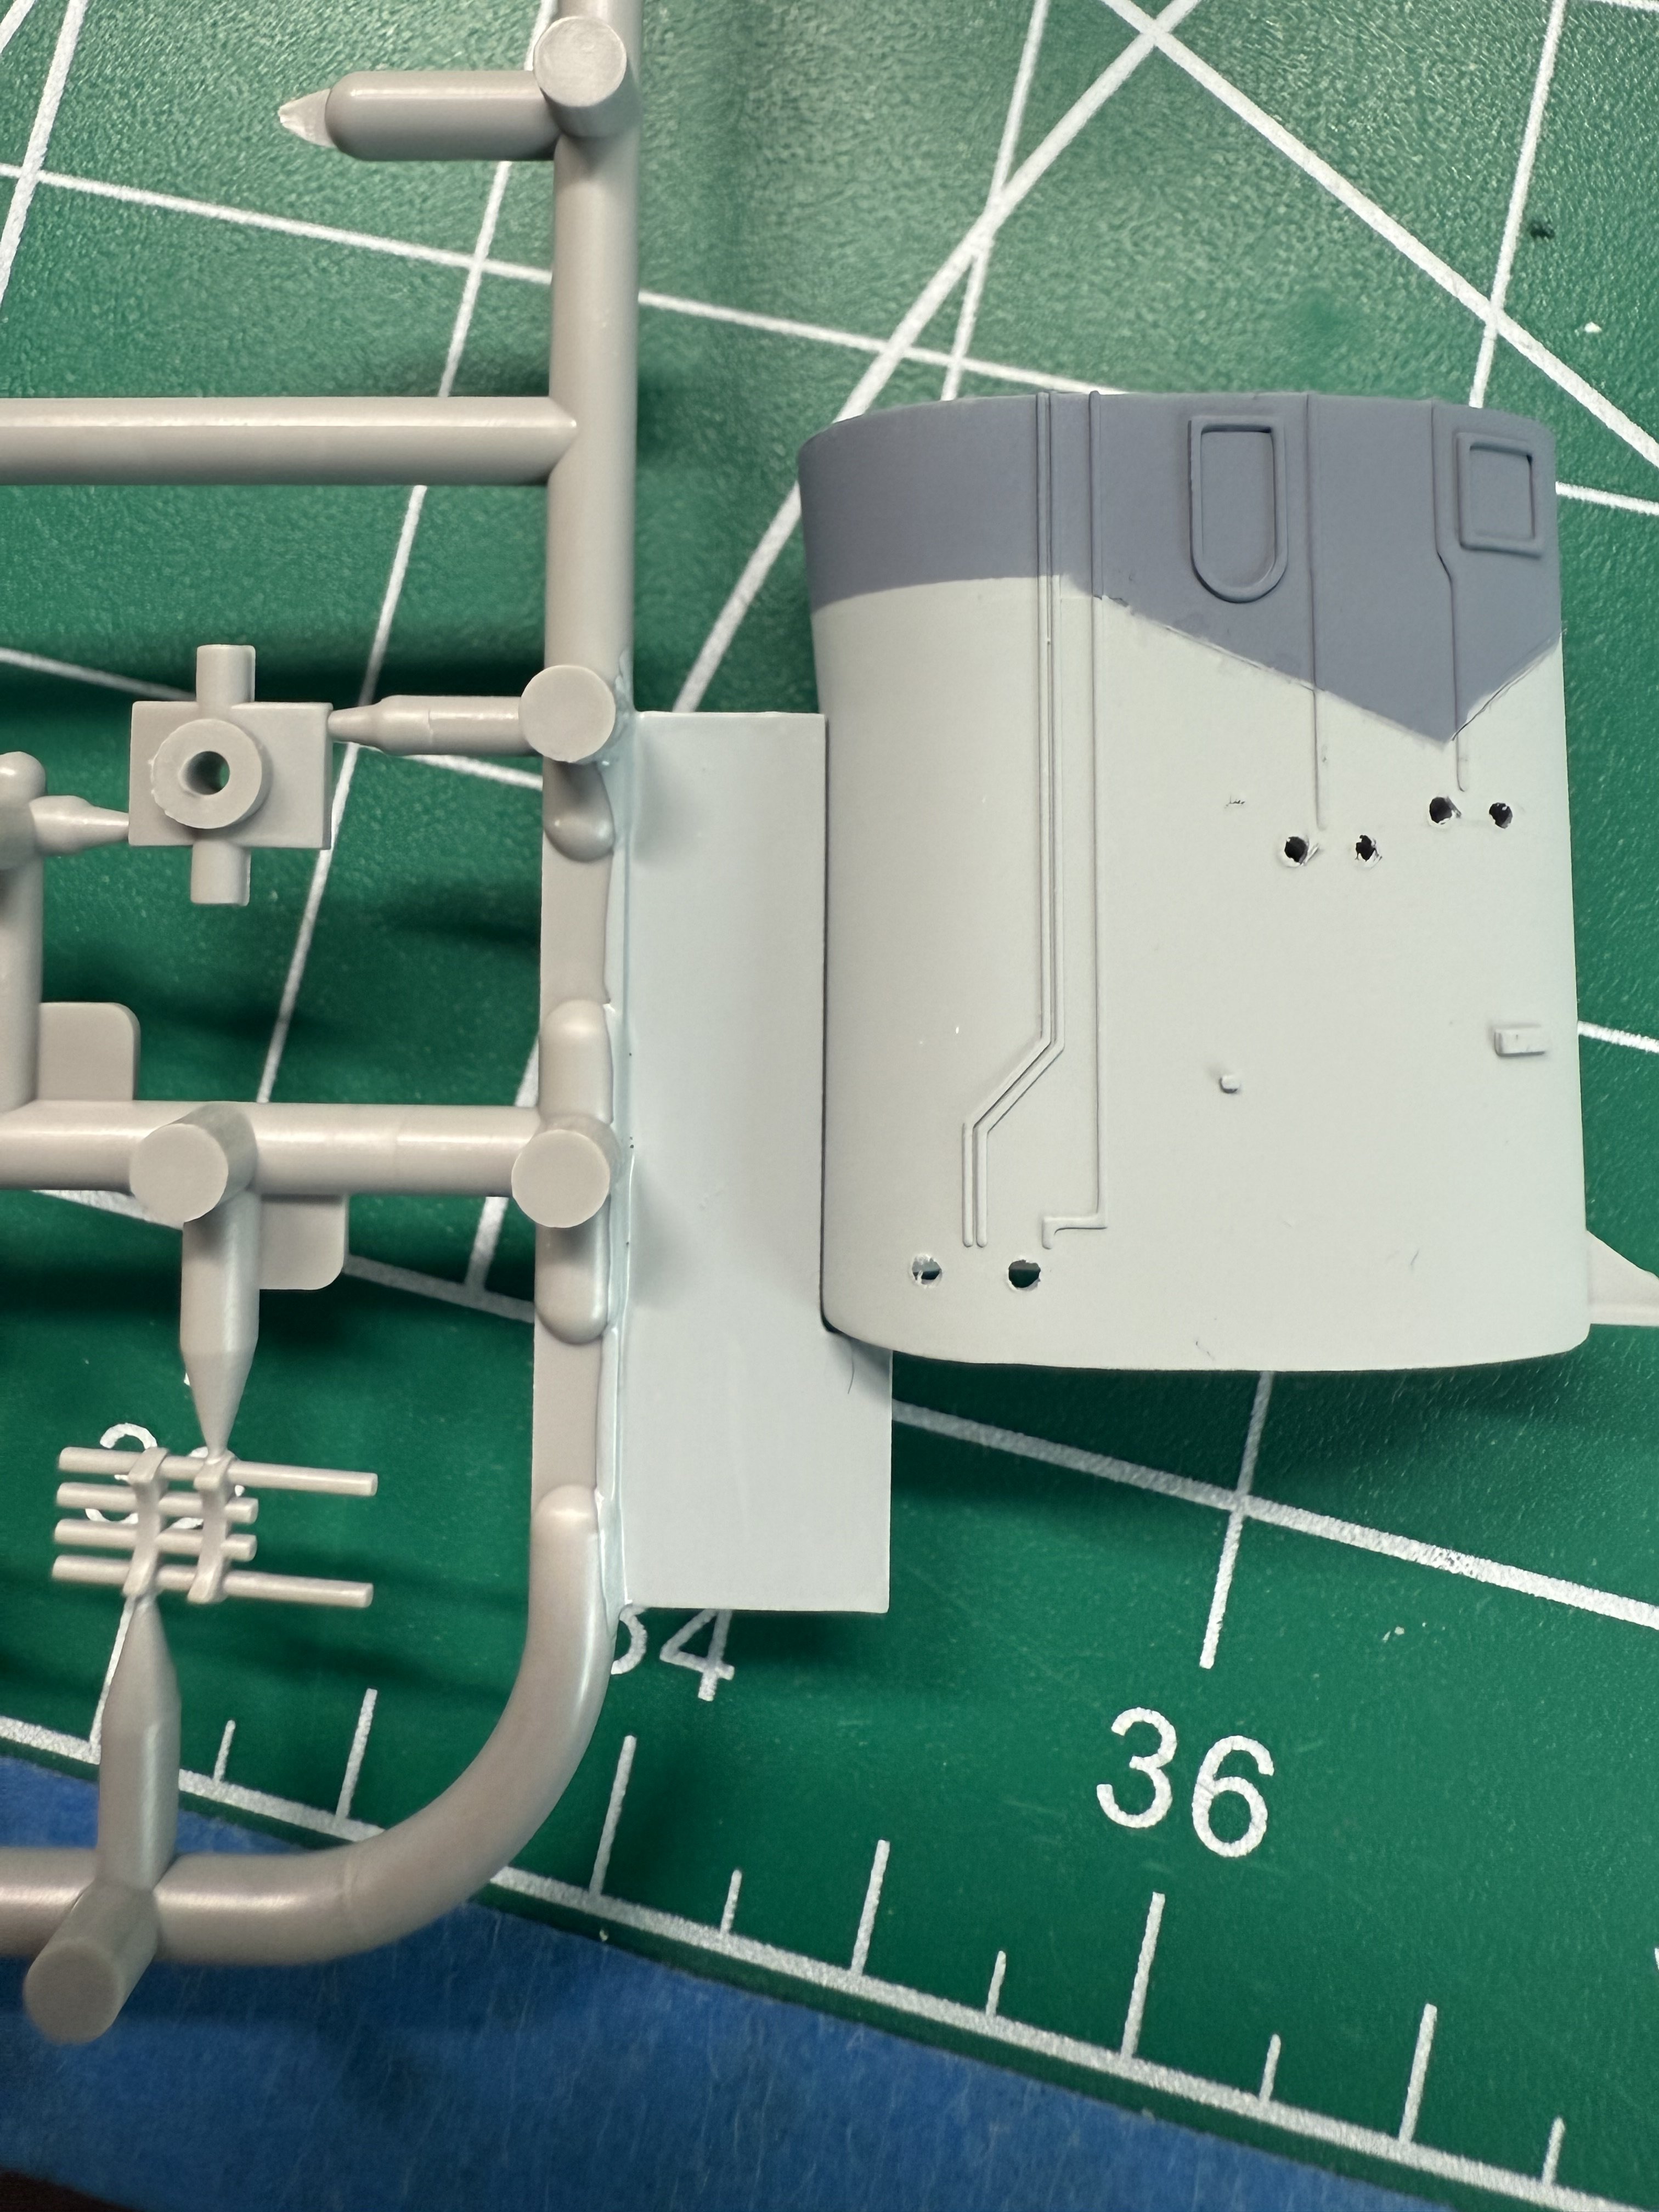
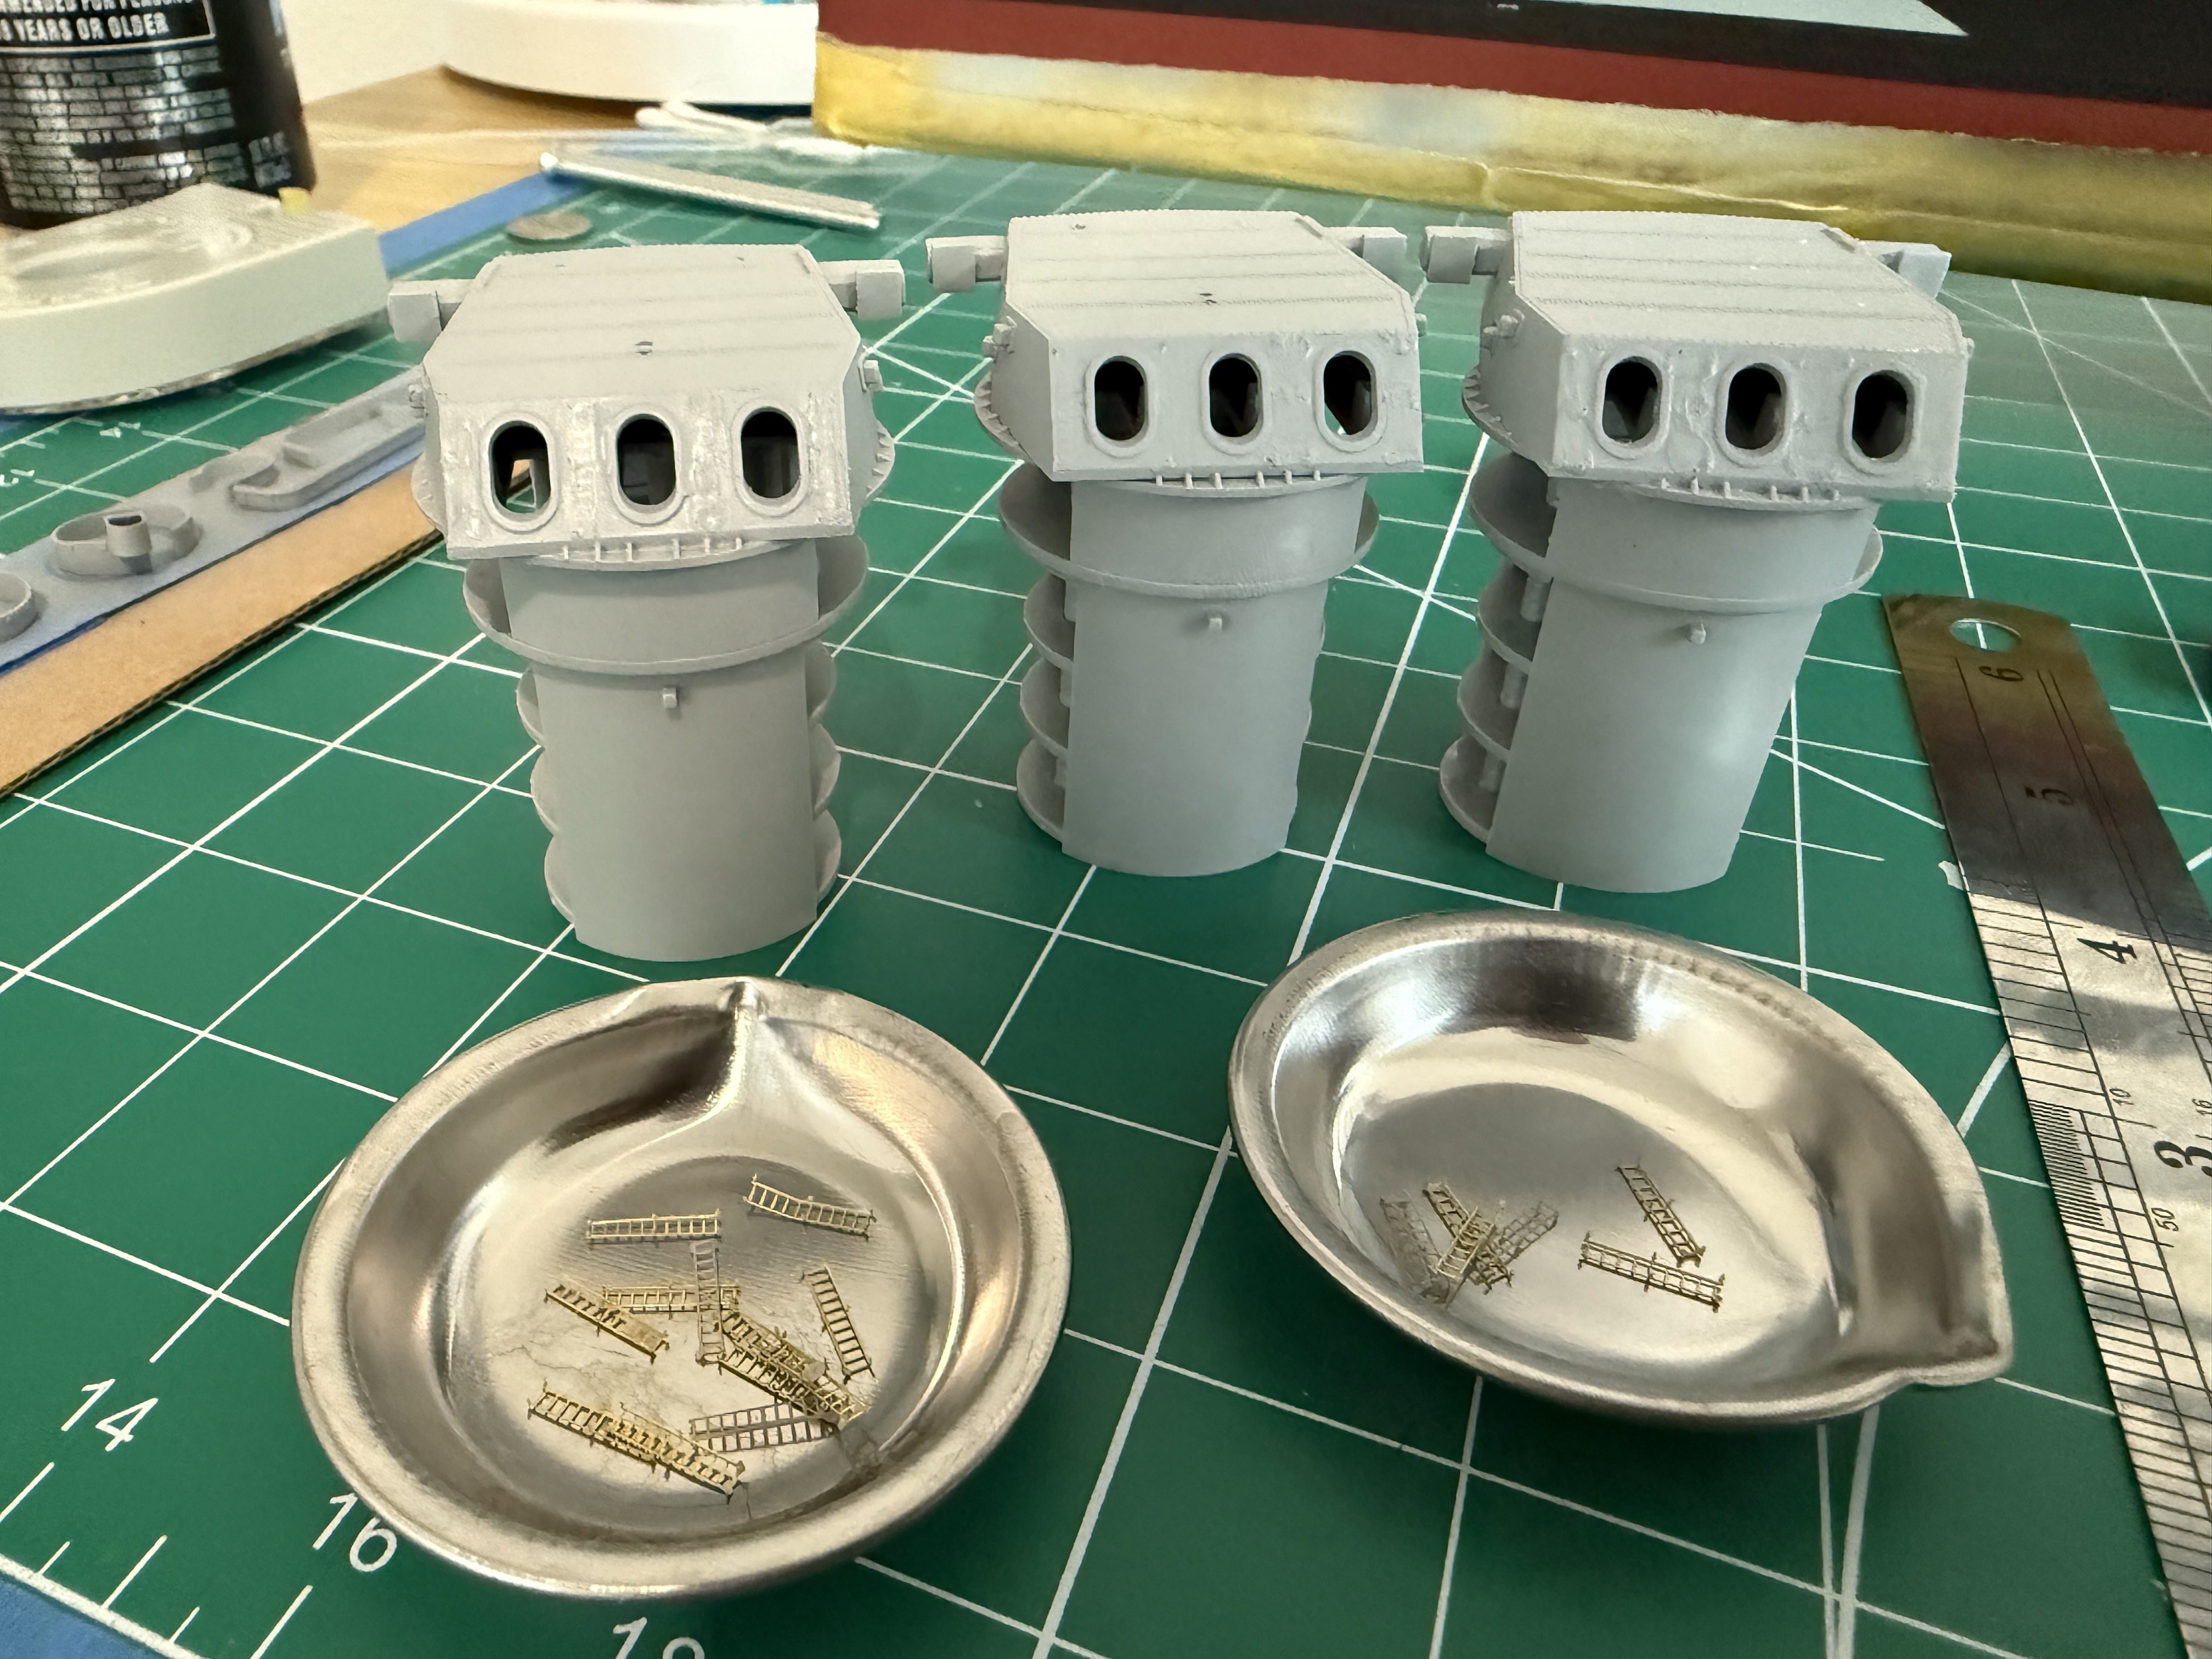
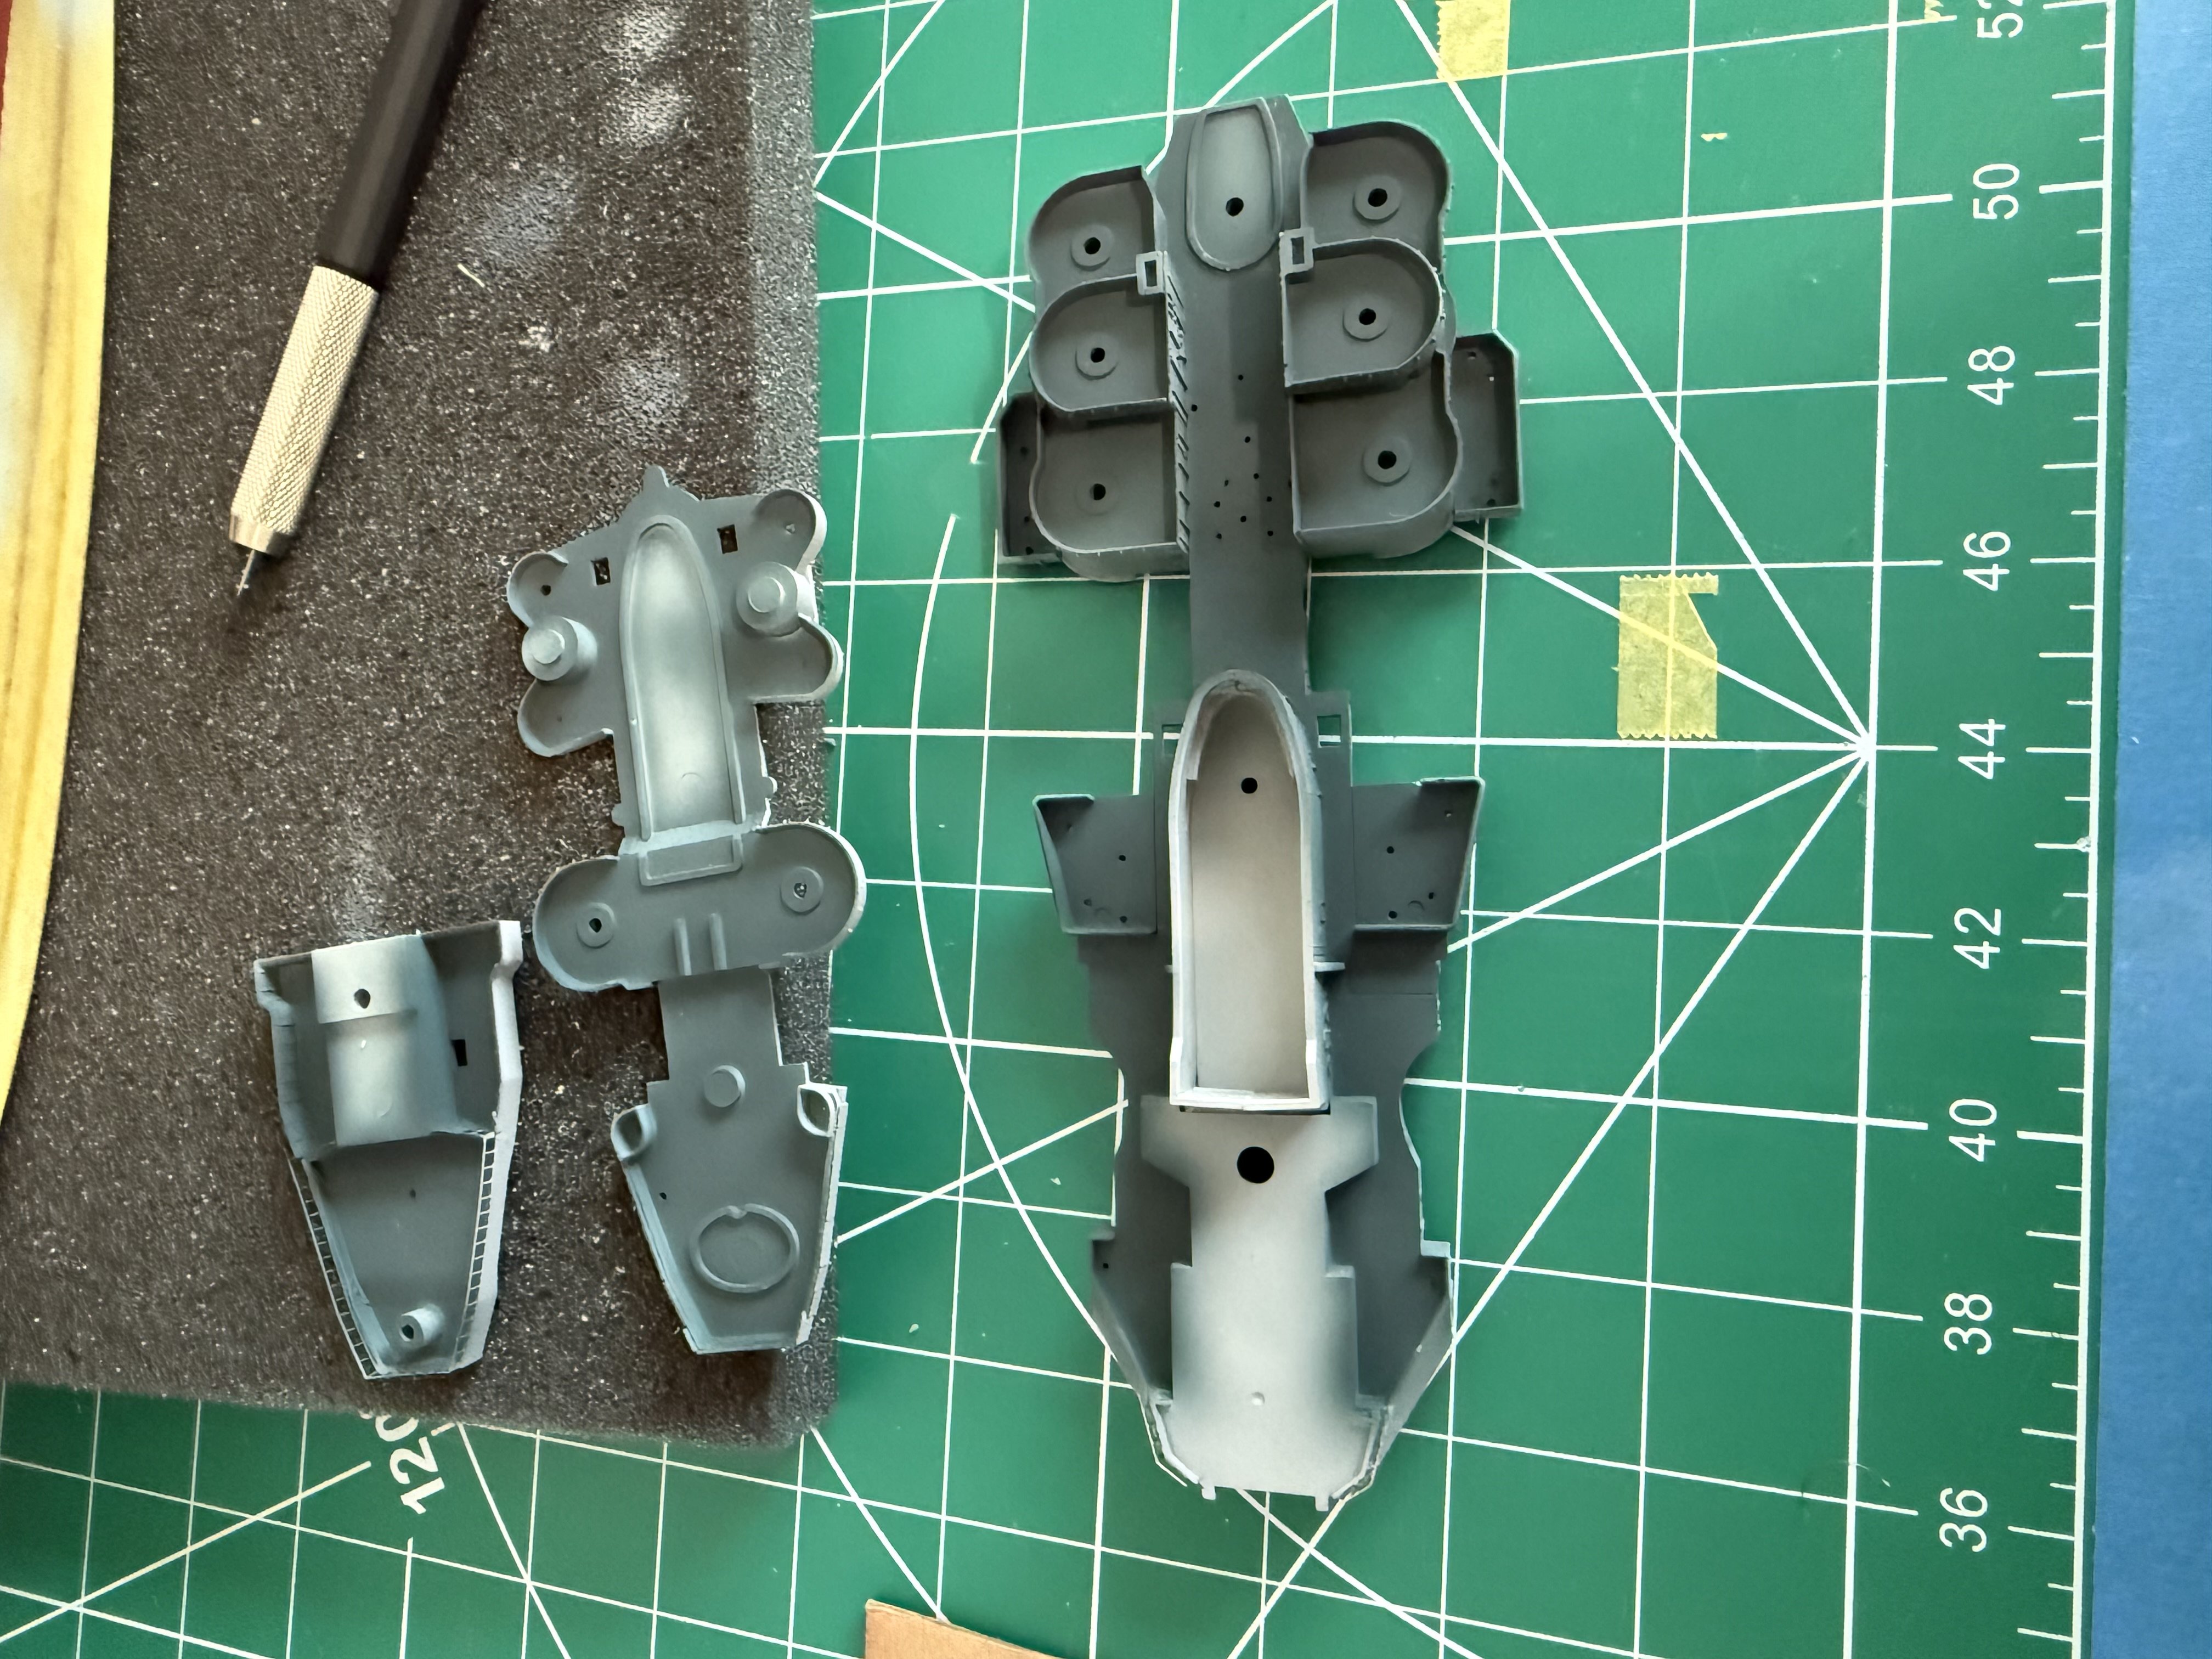
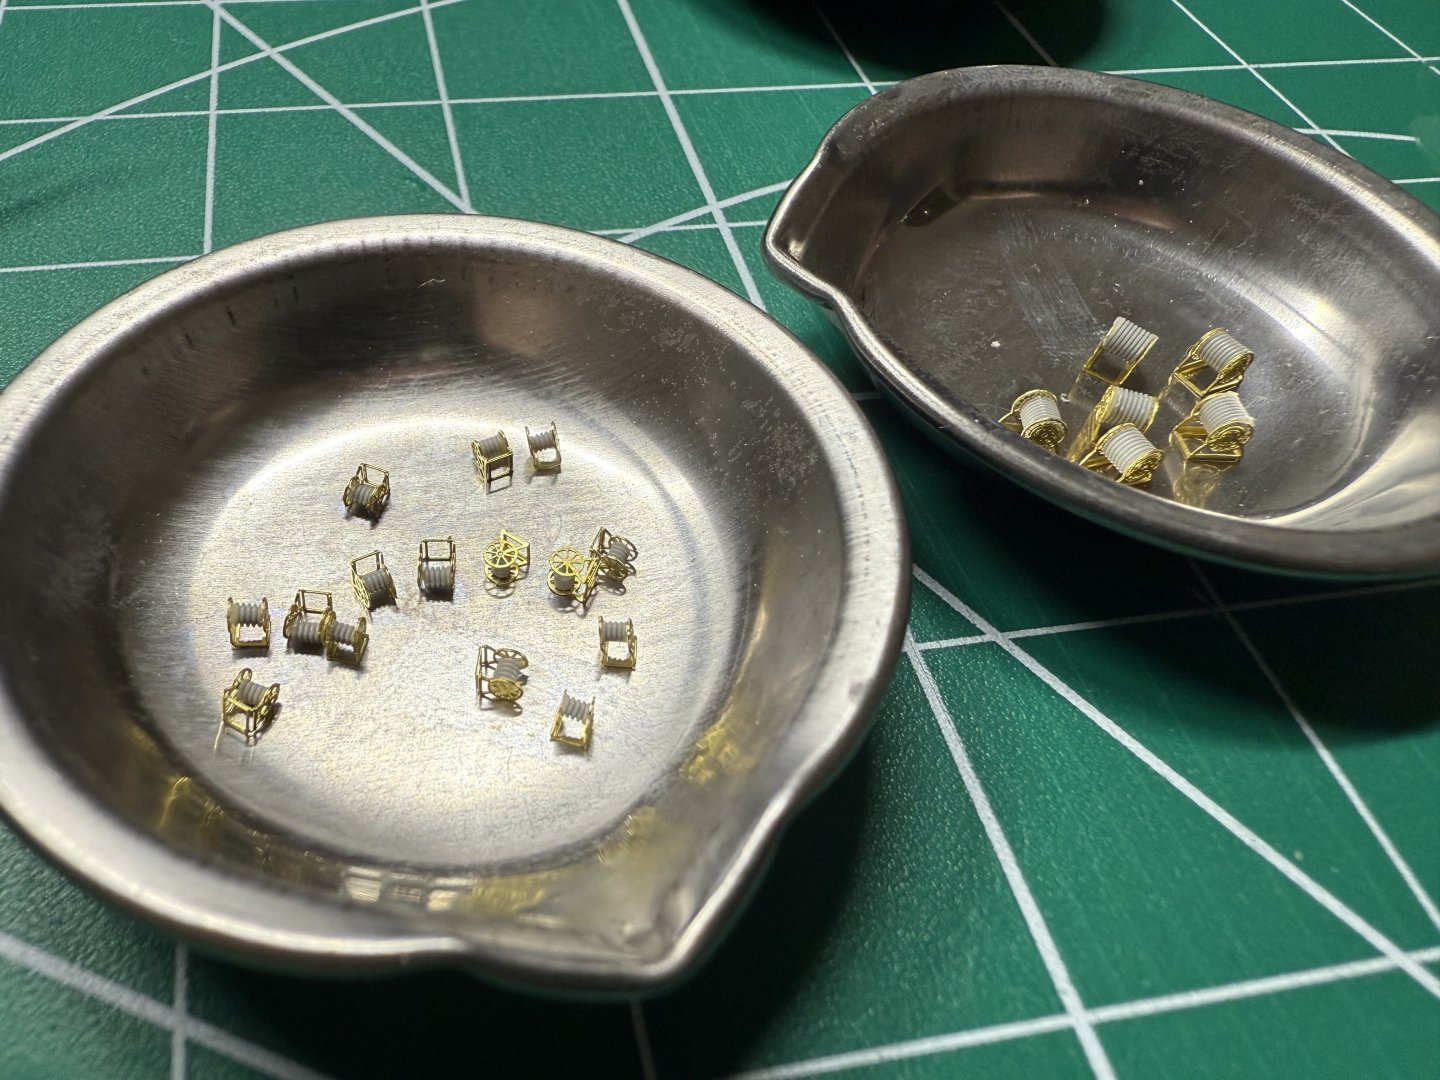
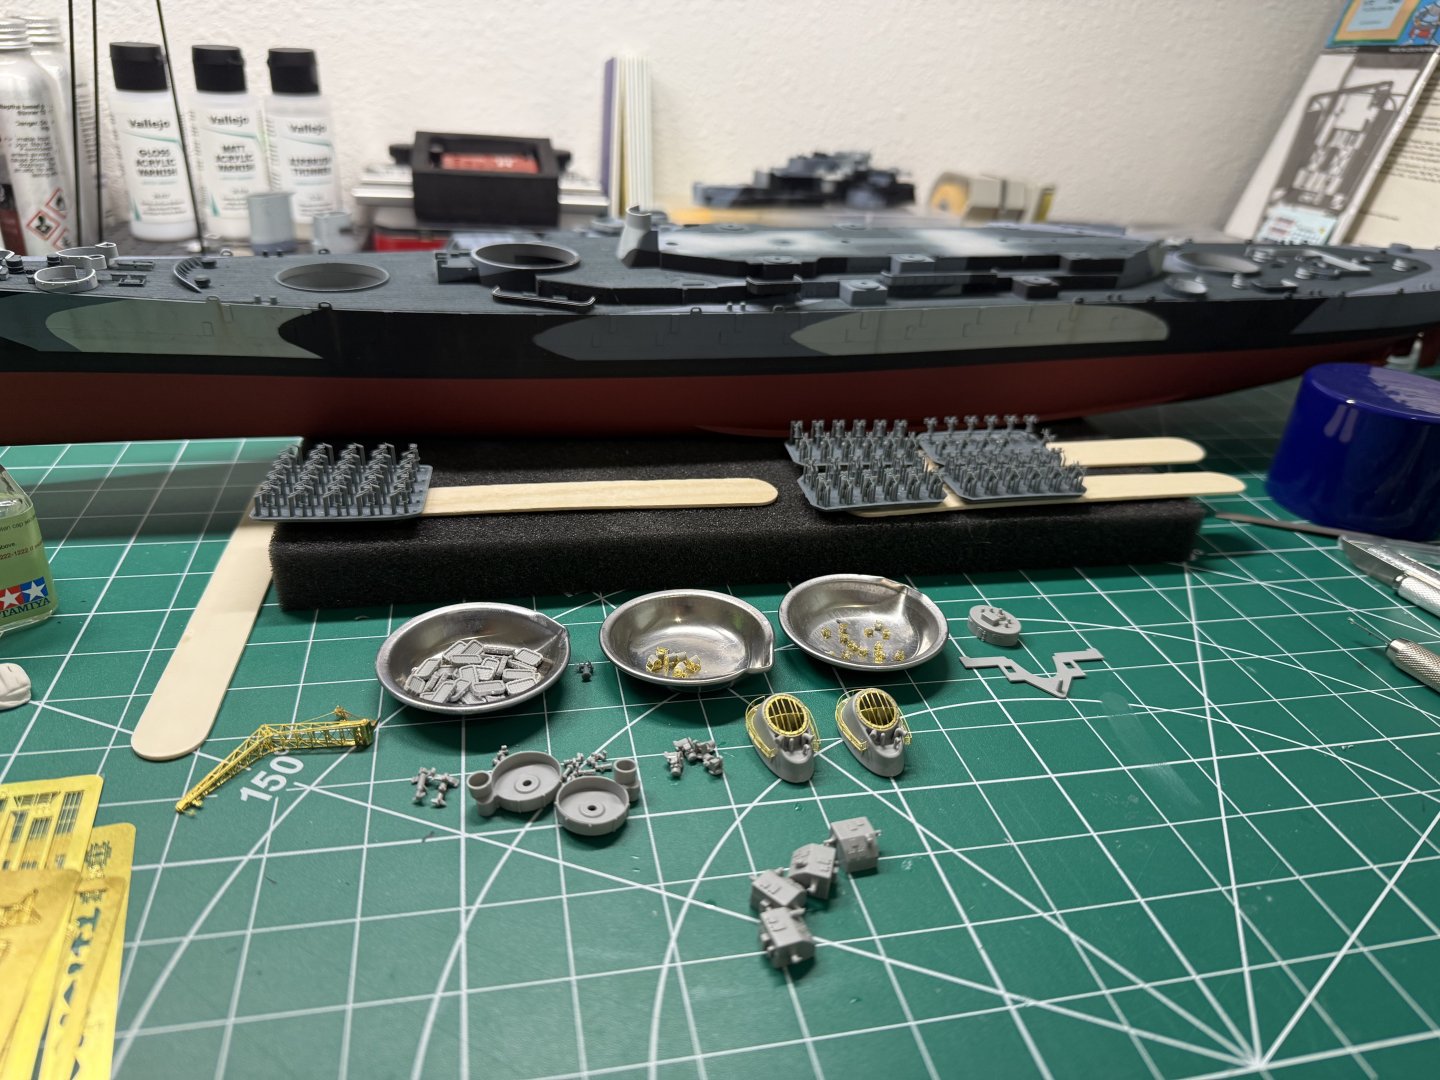
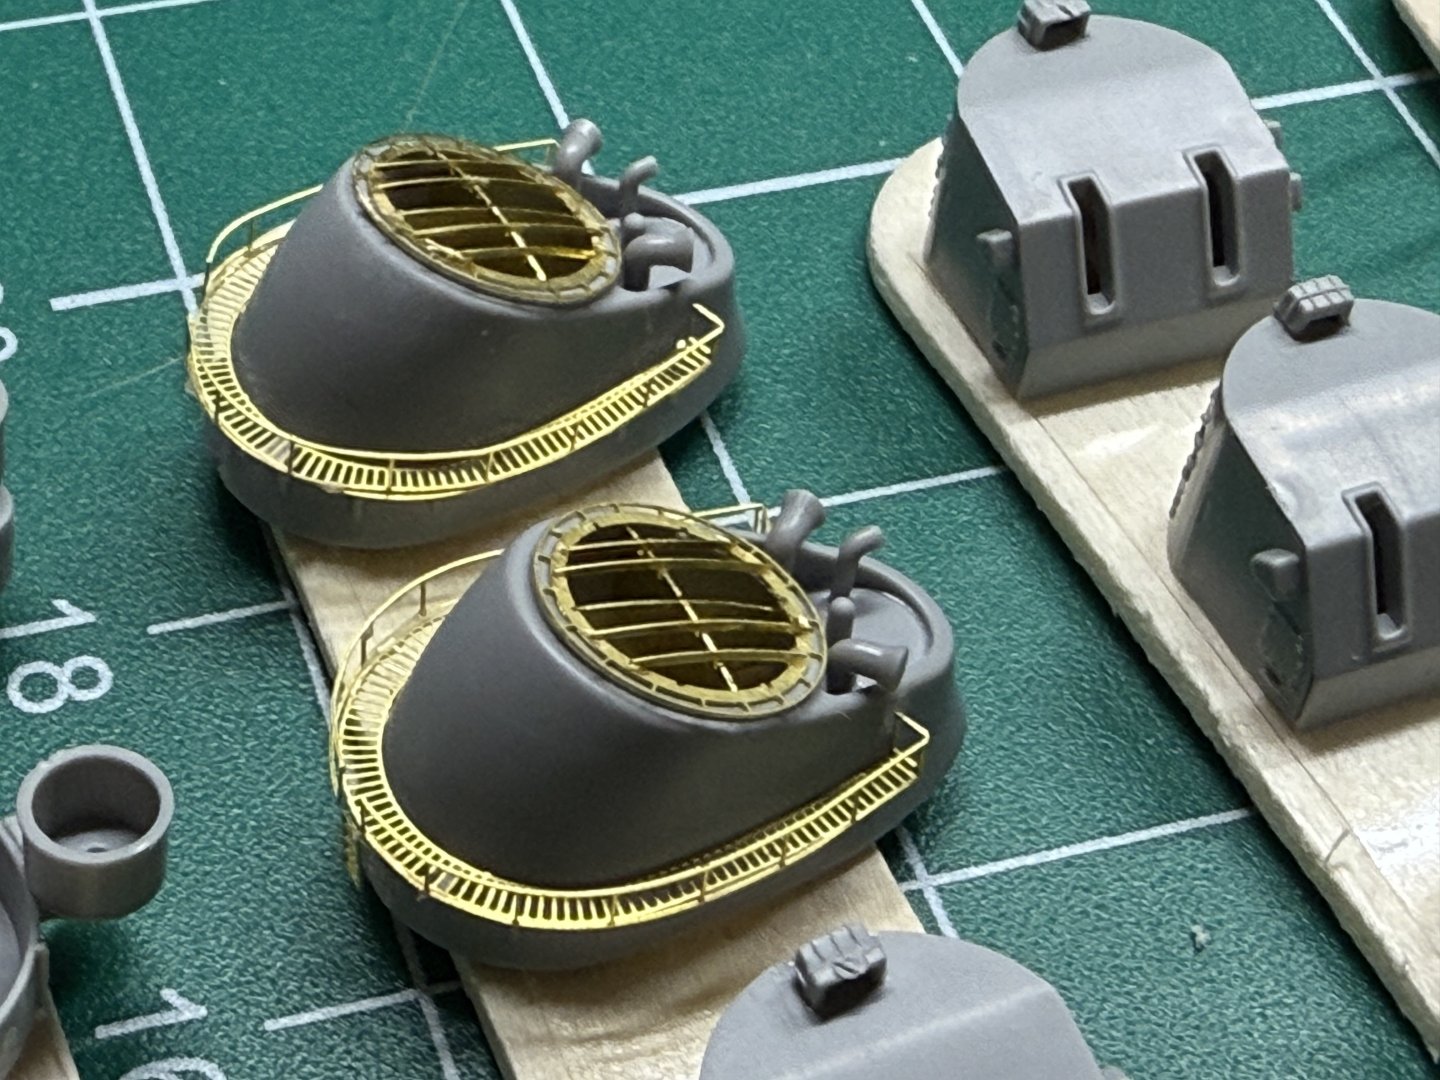
Im getting smarter! I’ll admit that I took on a project way over my head, and I didn’t have a very streamlined or effective manner in painting stuff, but hopefully I’m going to minimize that moving forward. spent the past few days putting together the wire wheels, crane, funnels, some bino’s and finally sat down to remove the million supports on the resin 20mm’s and mk51 gun directors. I made an attempt at the mk37 radars, but in the end my credit card and some resin printer out of China won that one. I then got all those parts laid out and primed.


-
Yes, but in addition to some not fitting, the wooden deck covers a large majority of the holes.
-
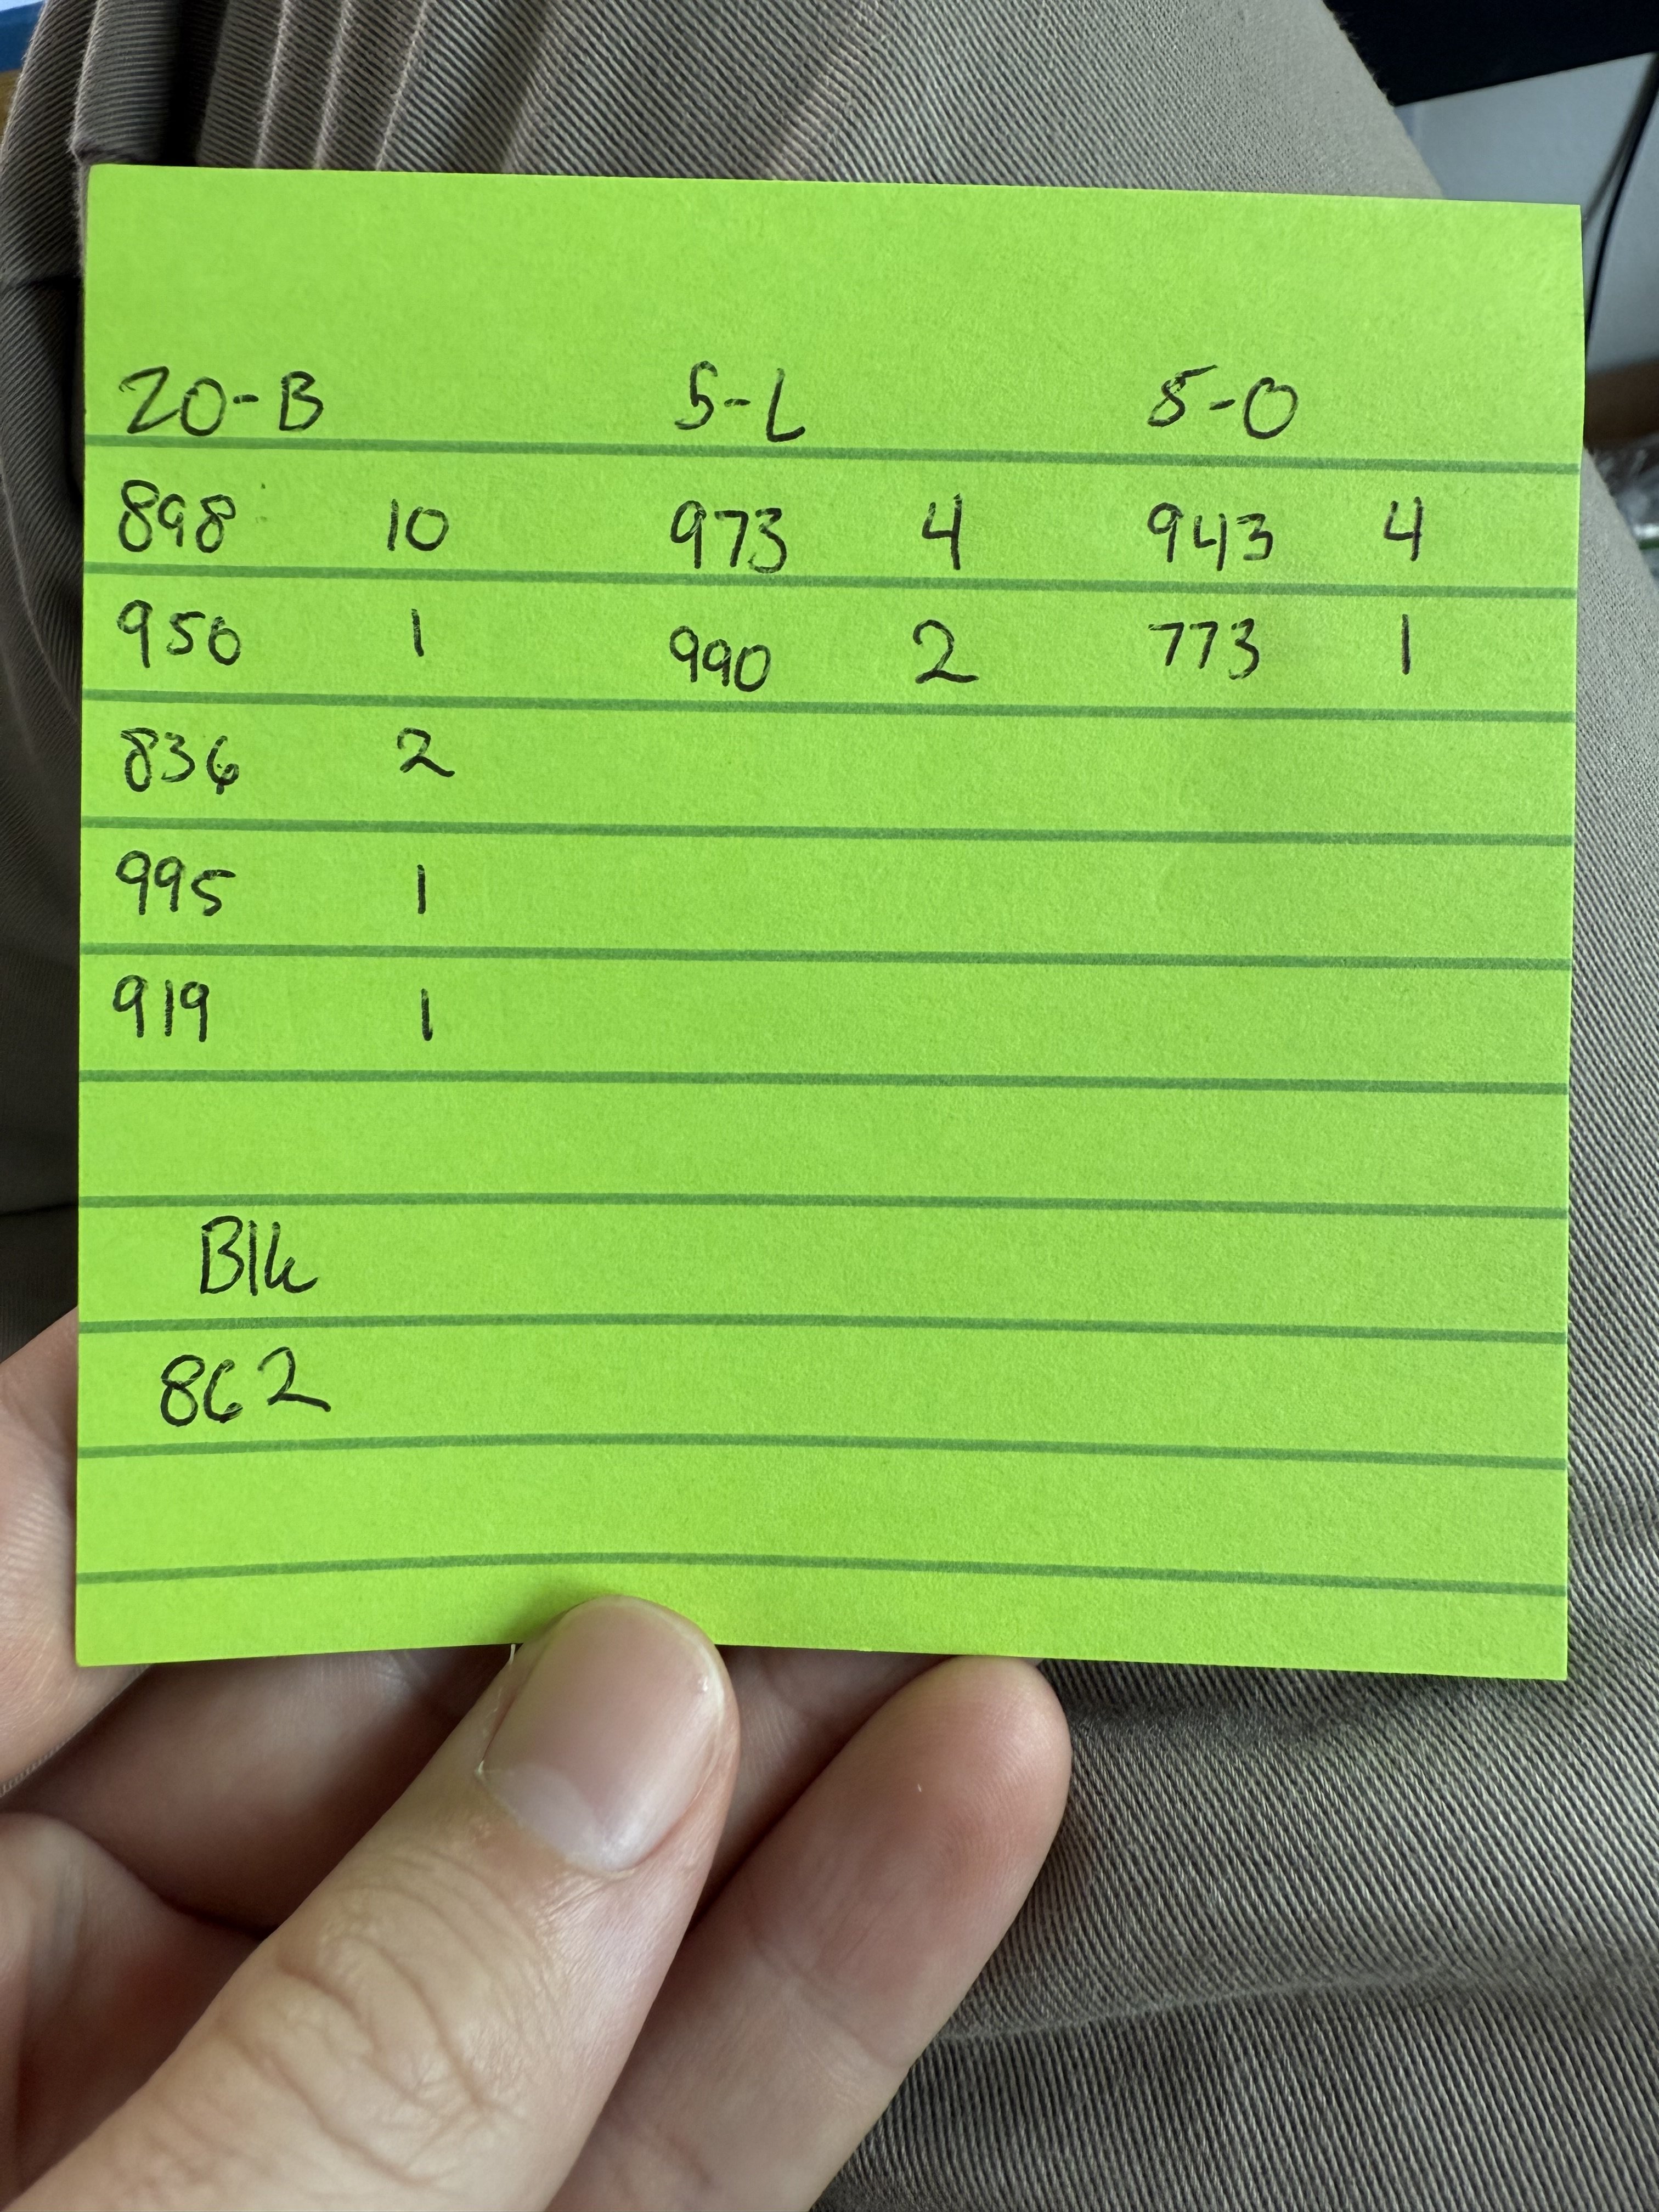
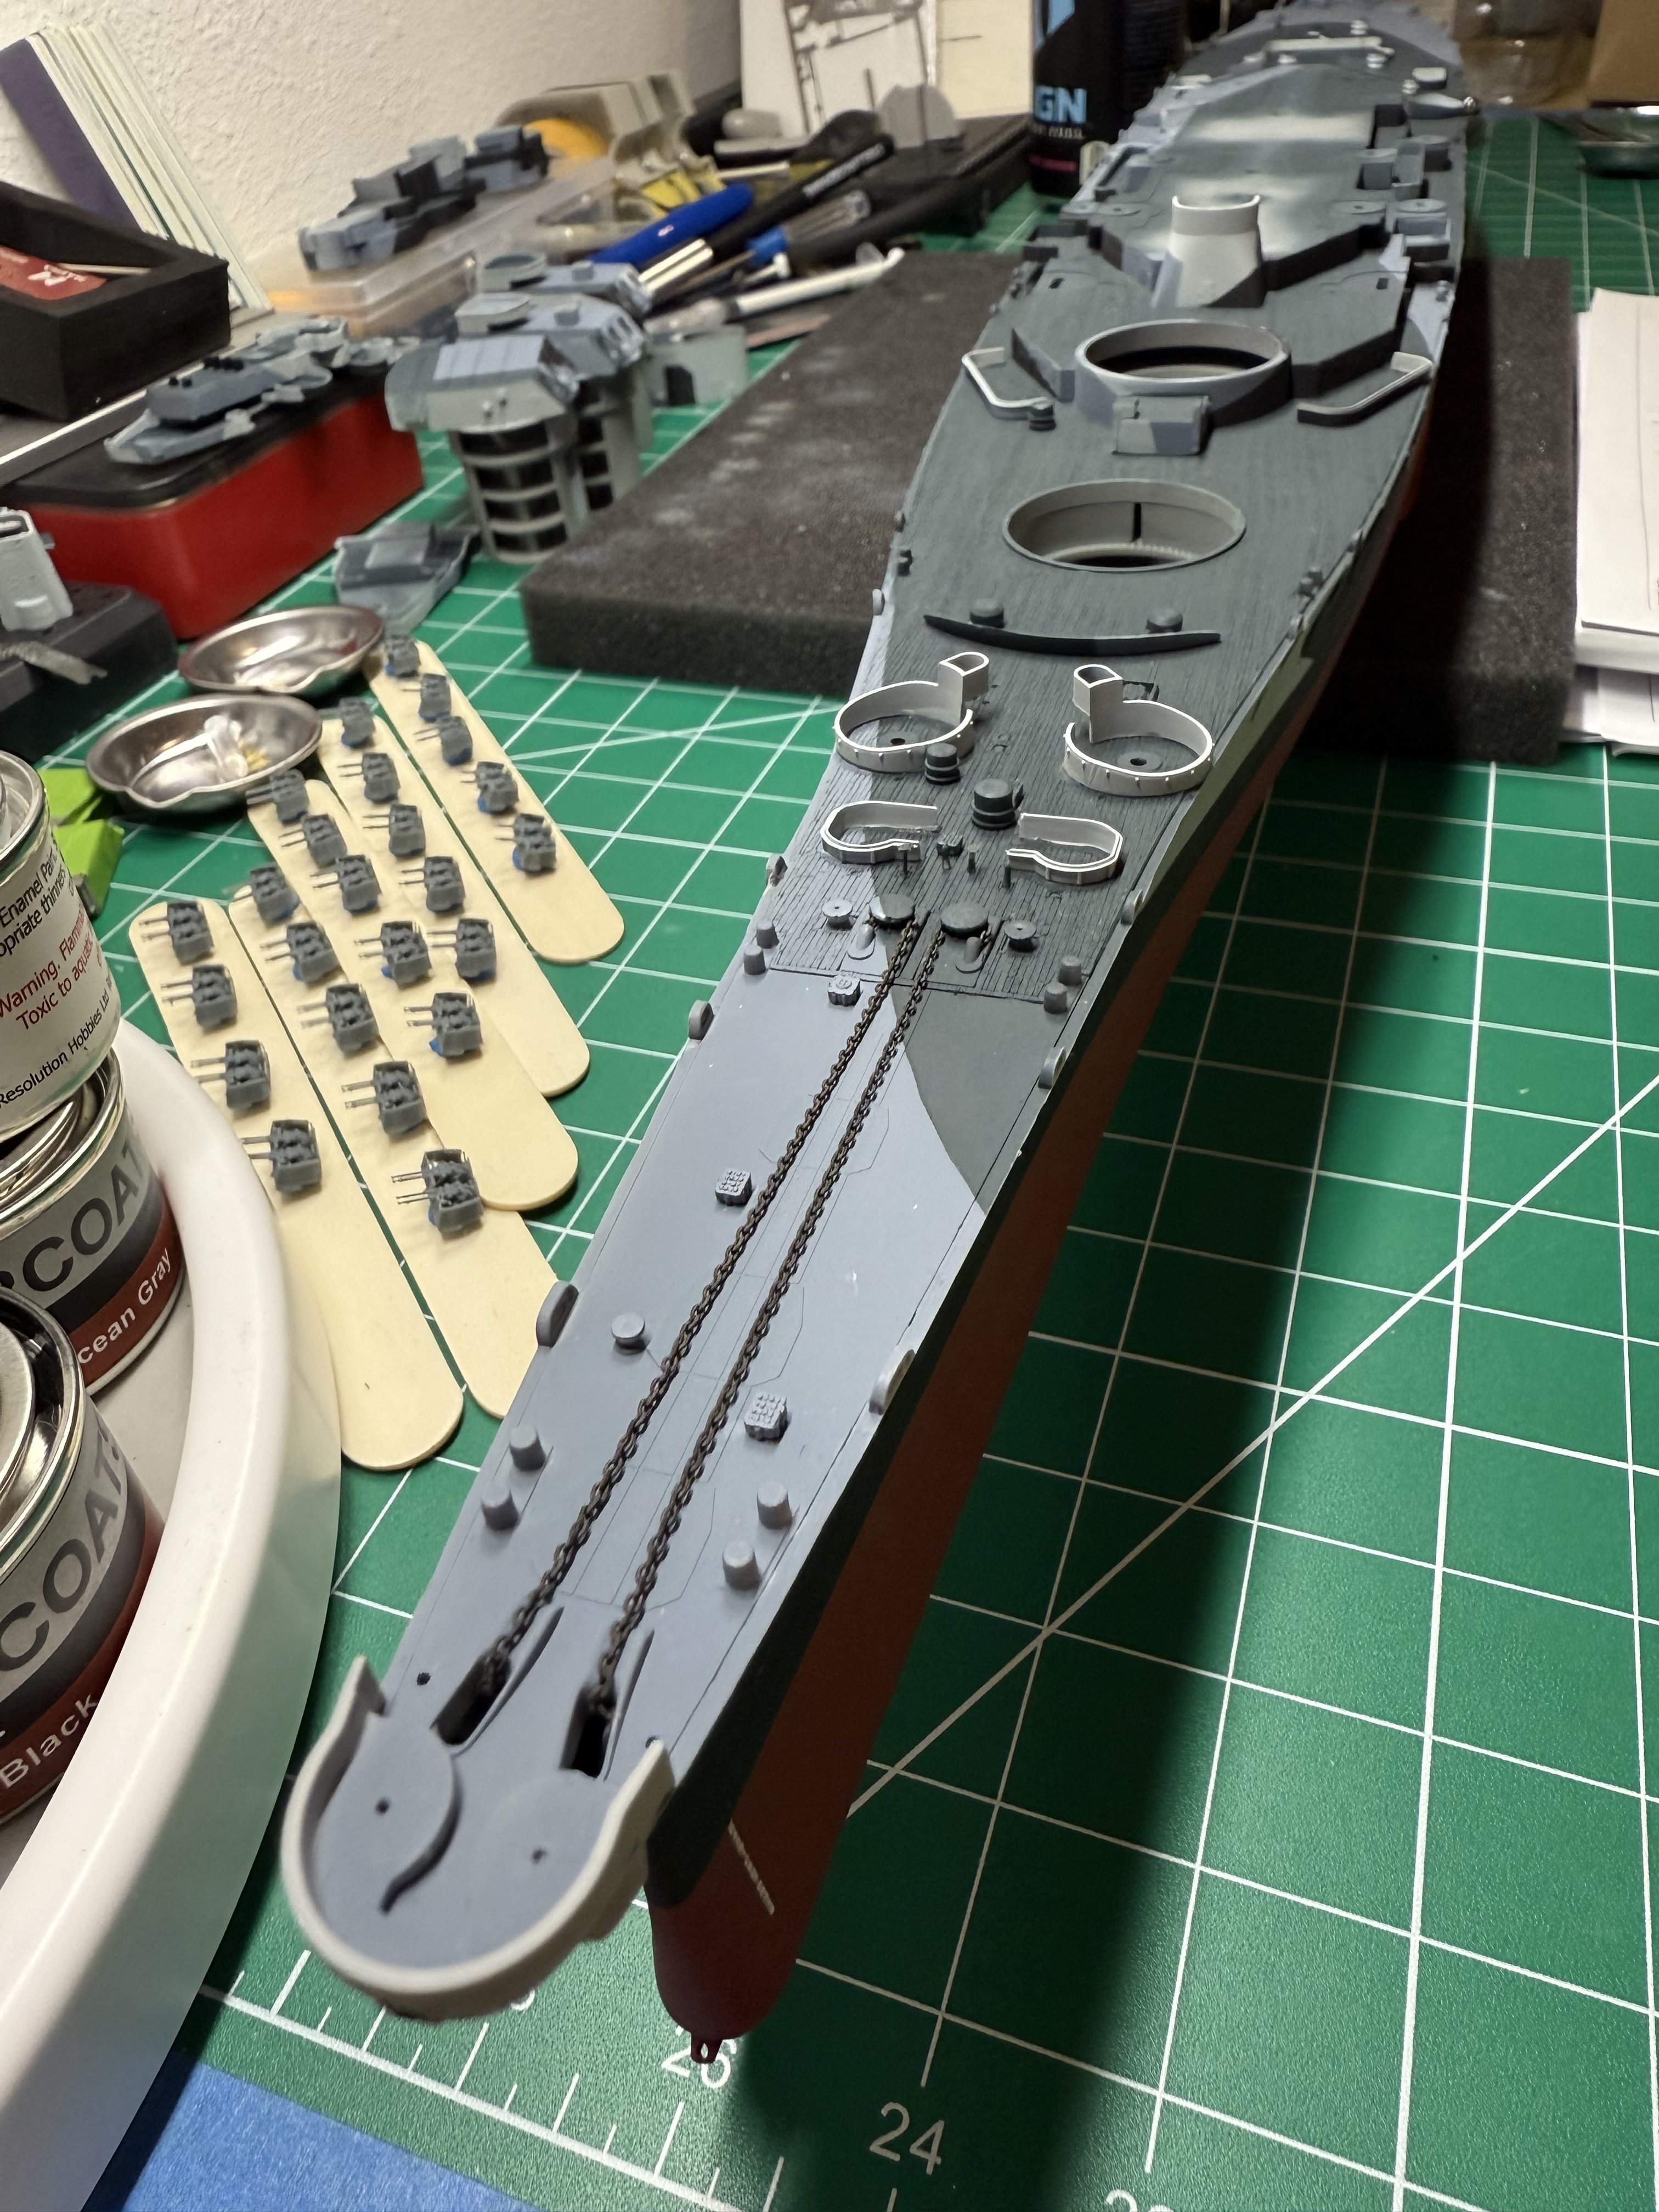
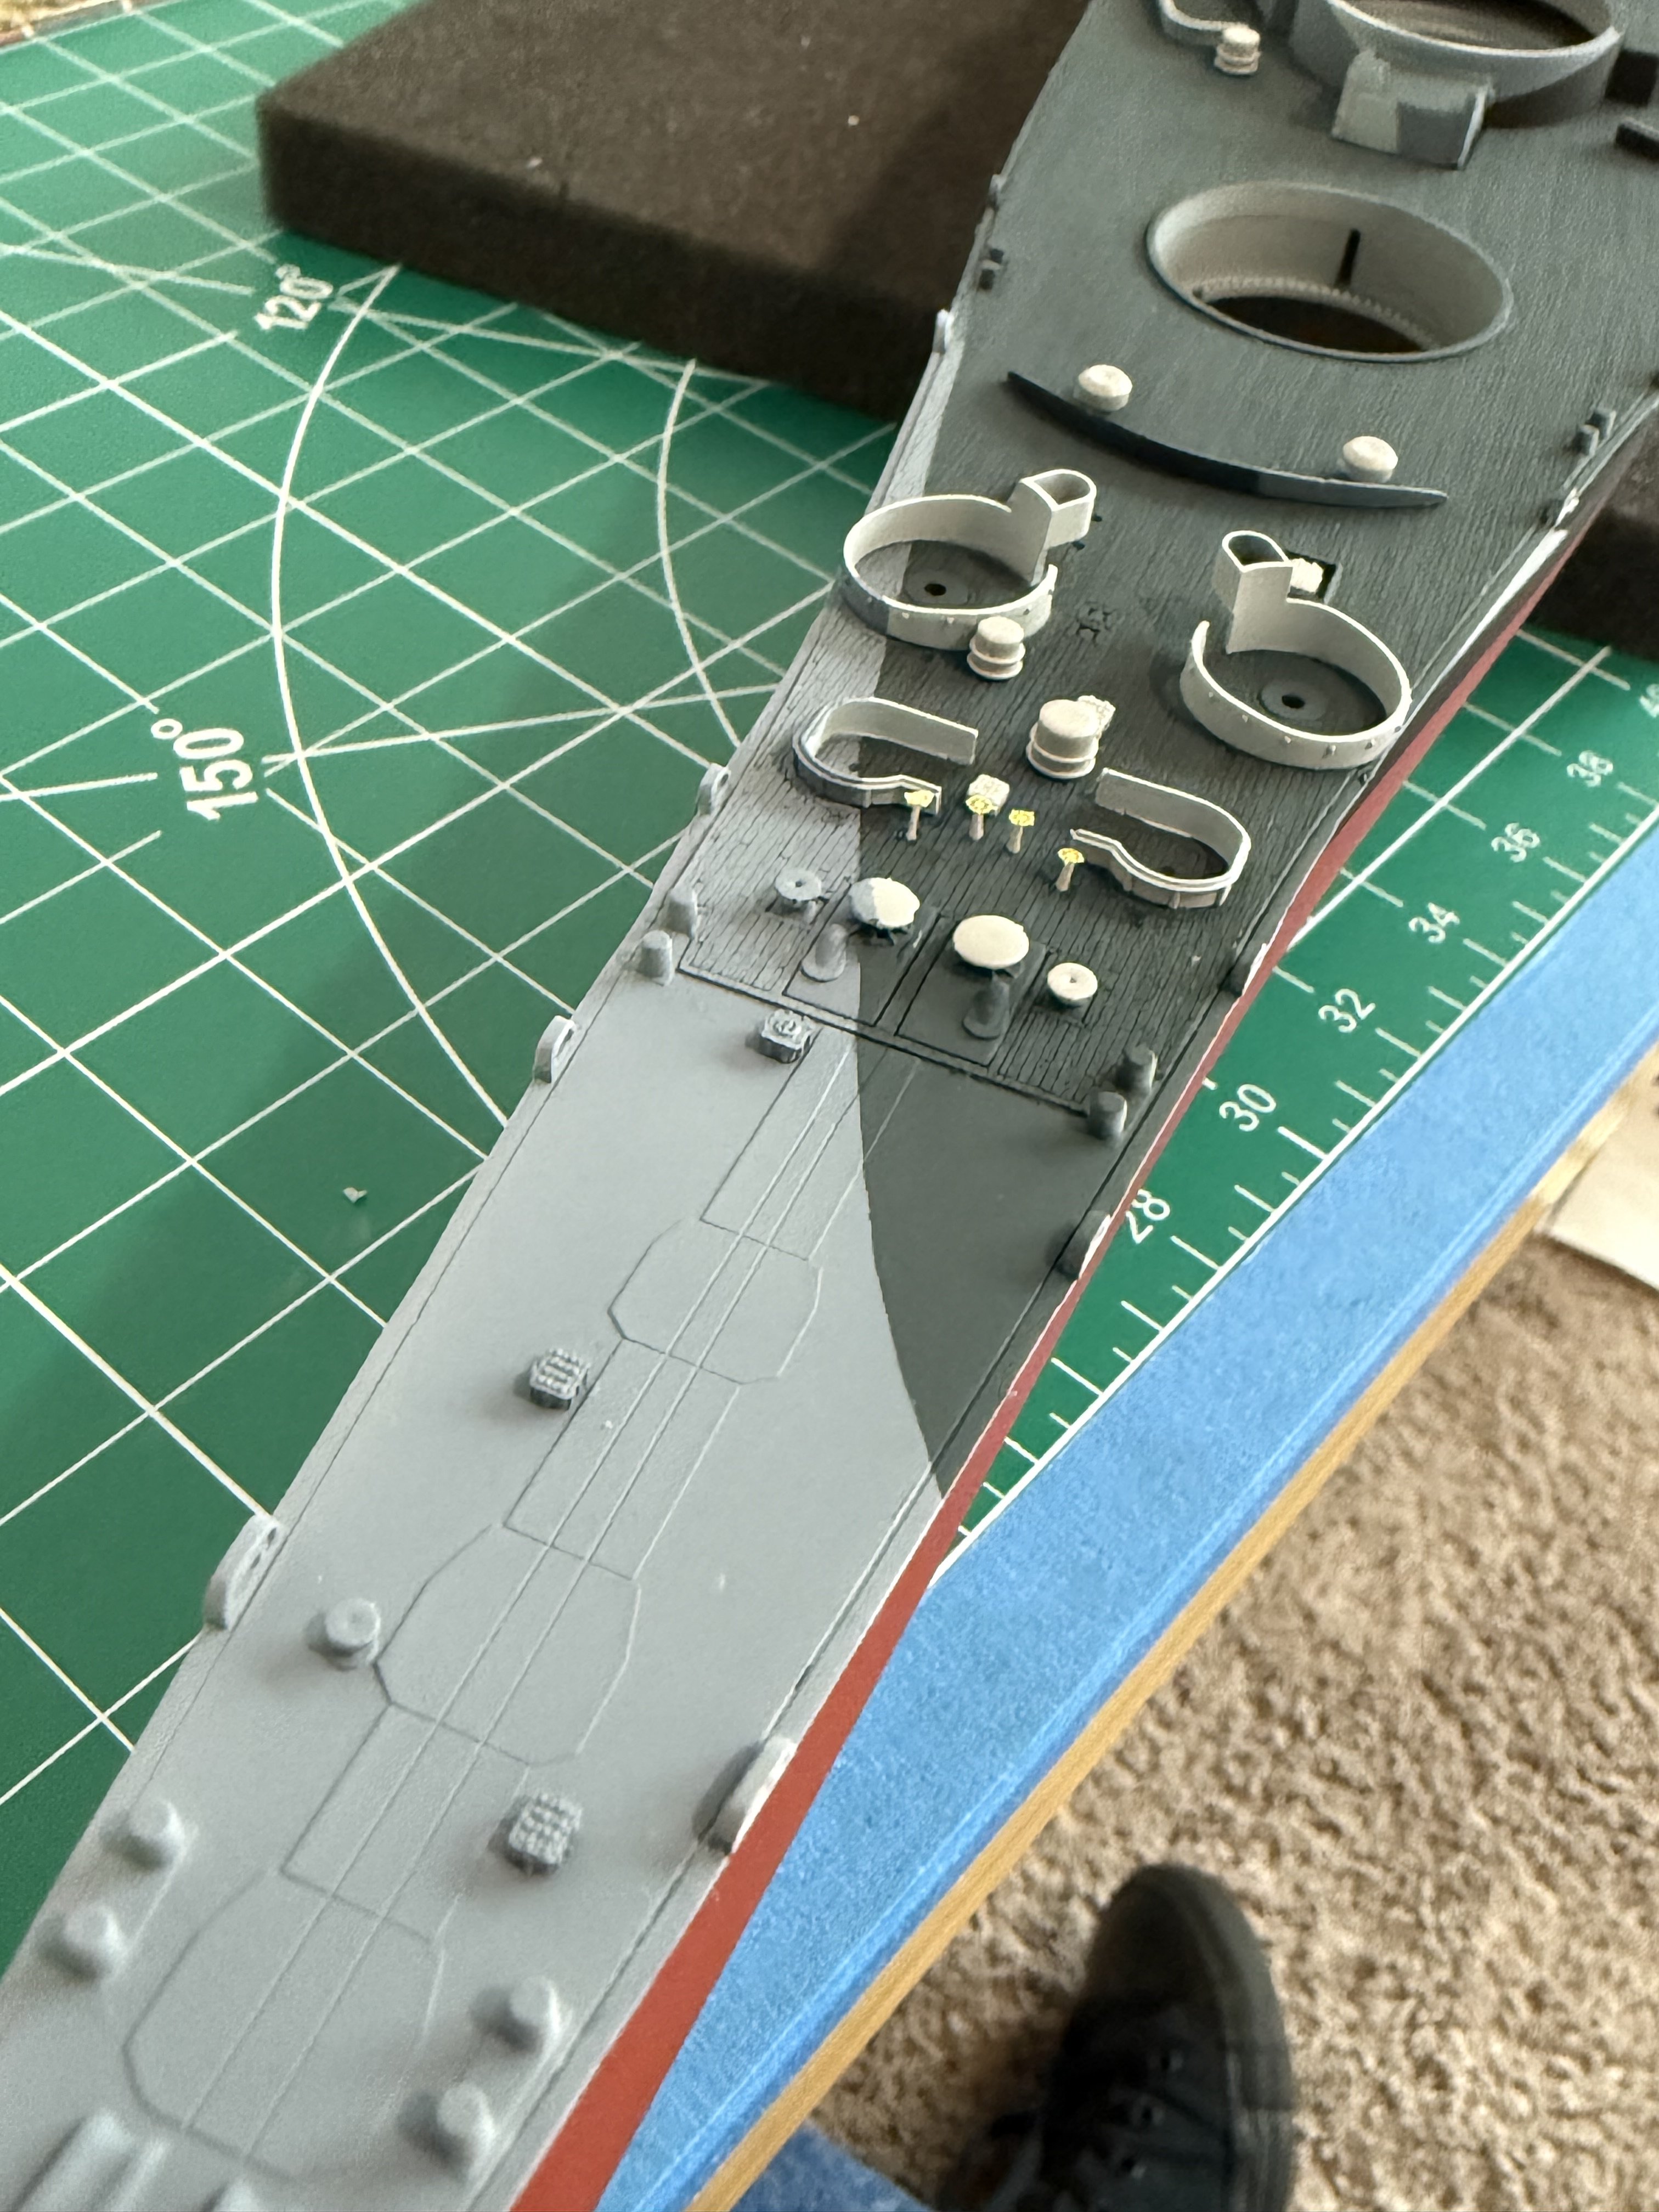
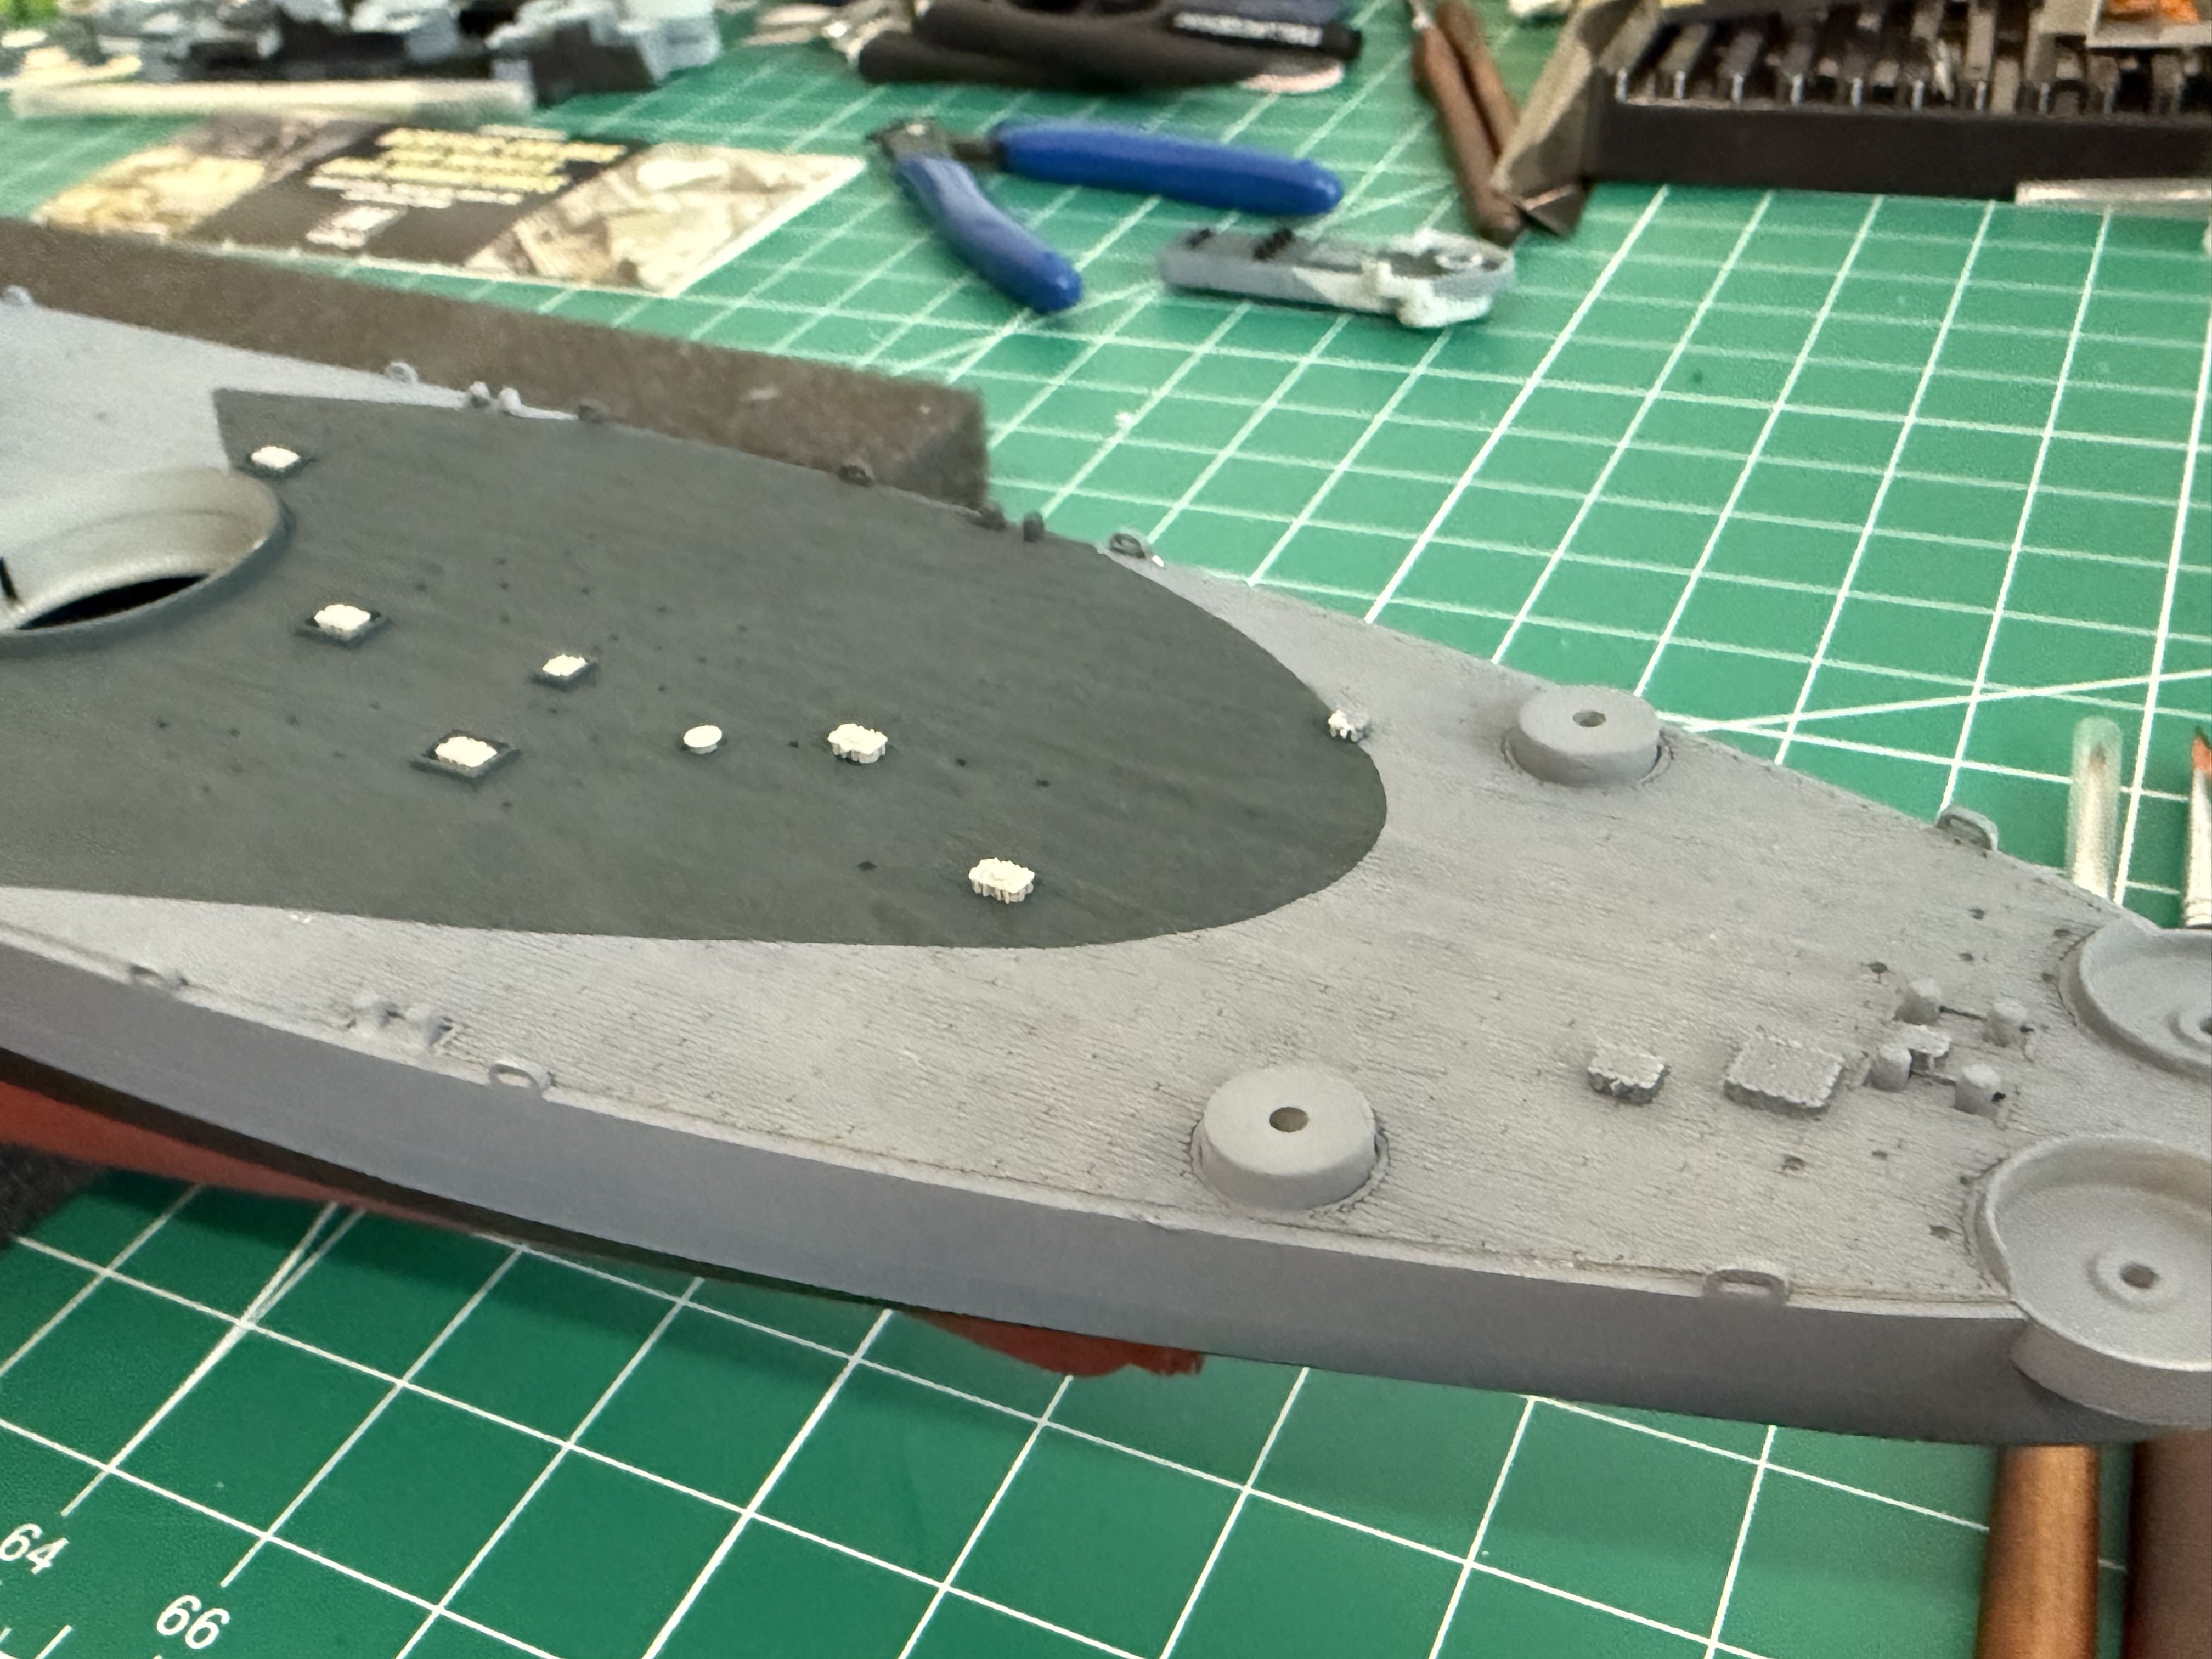
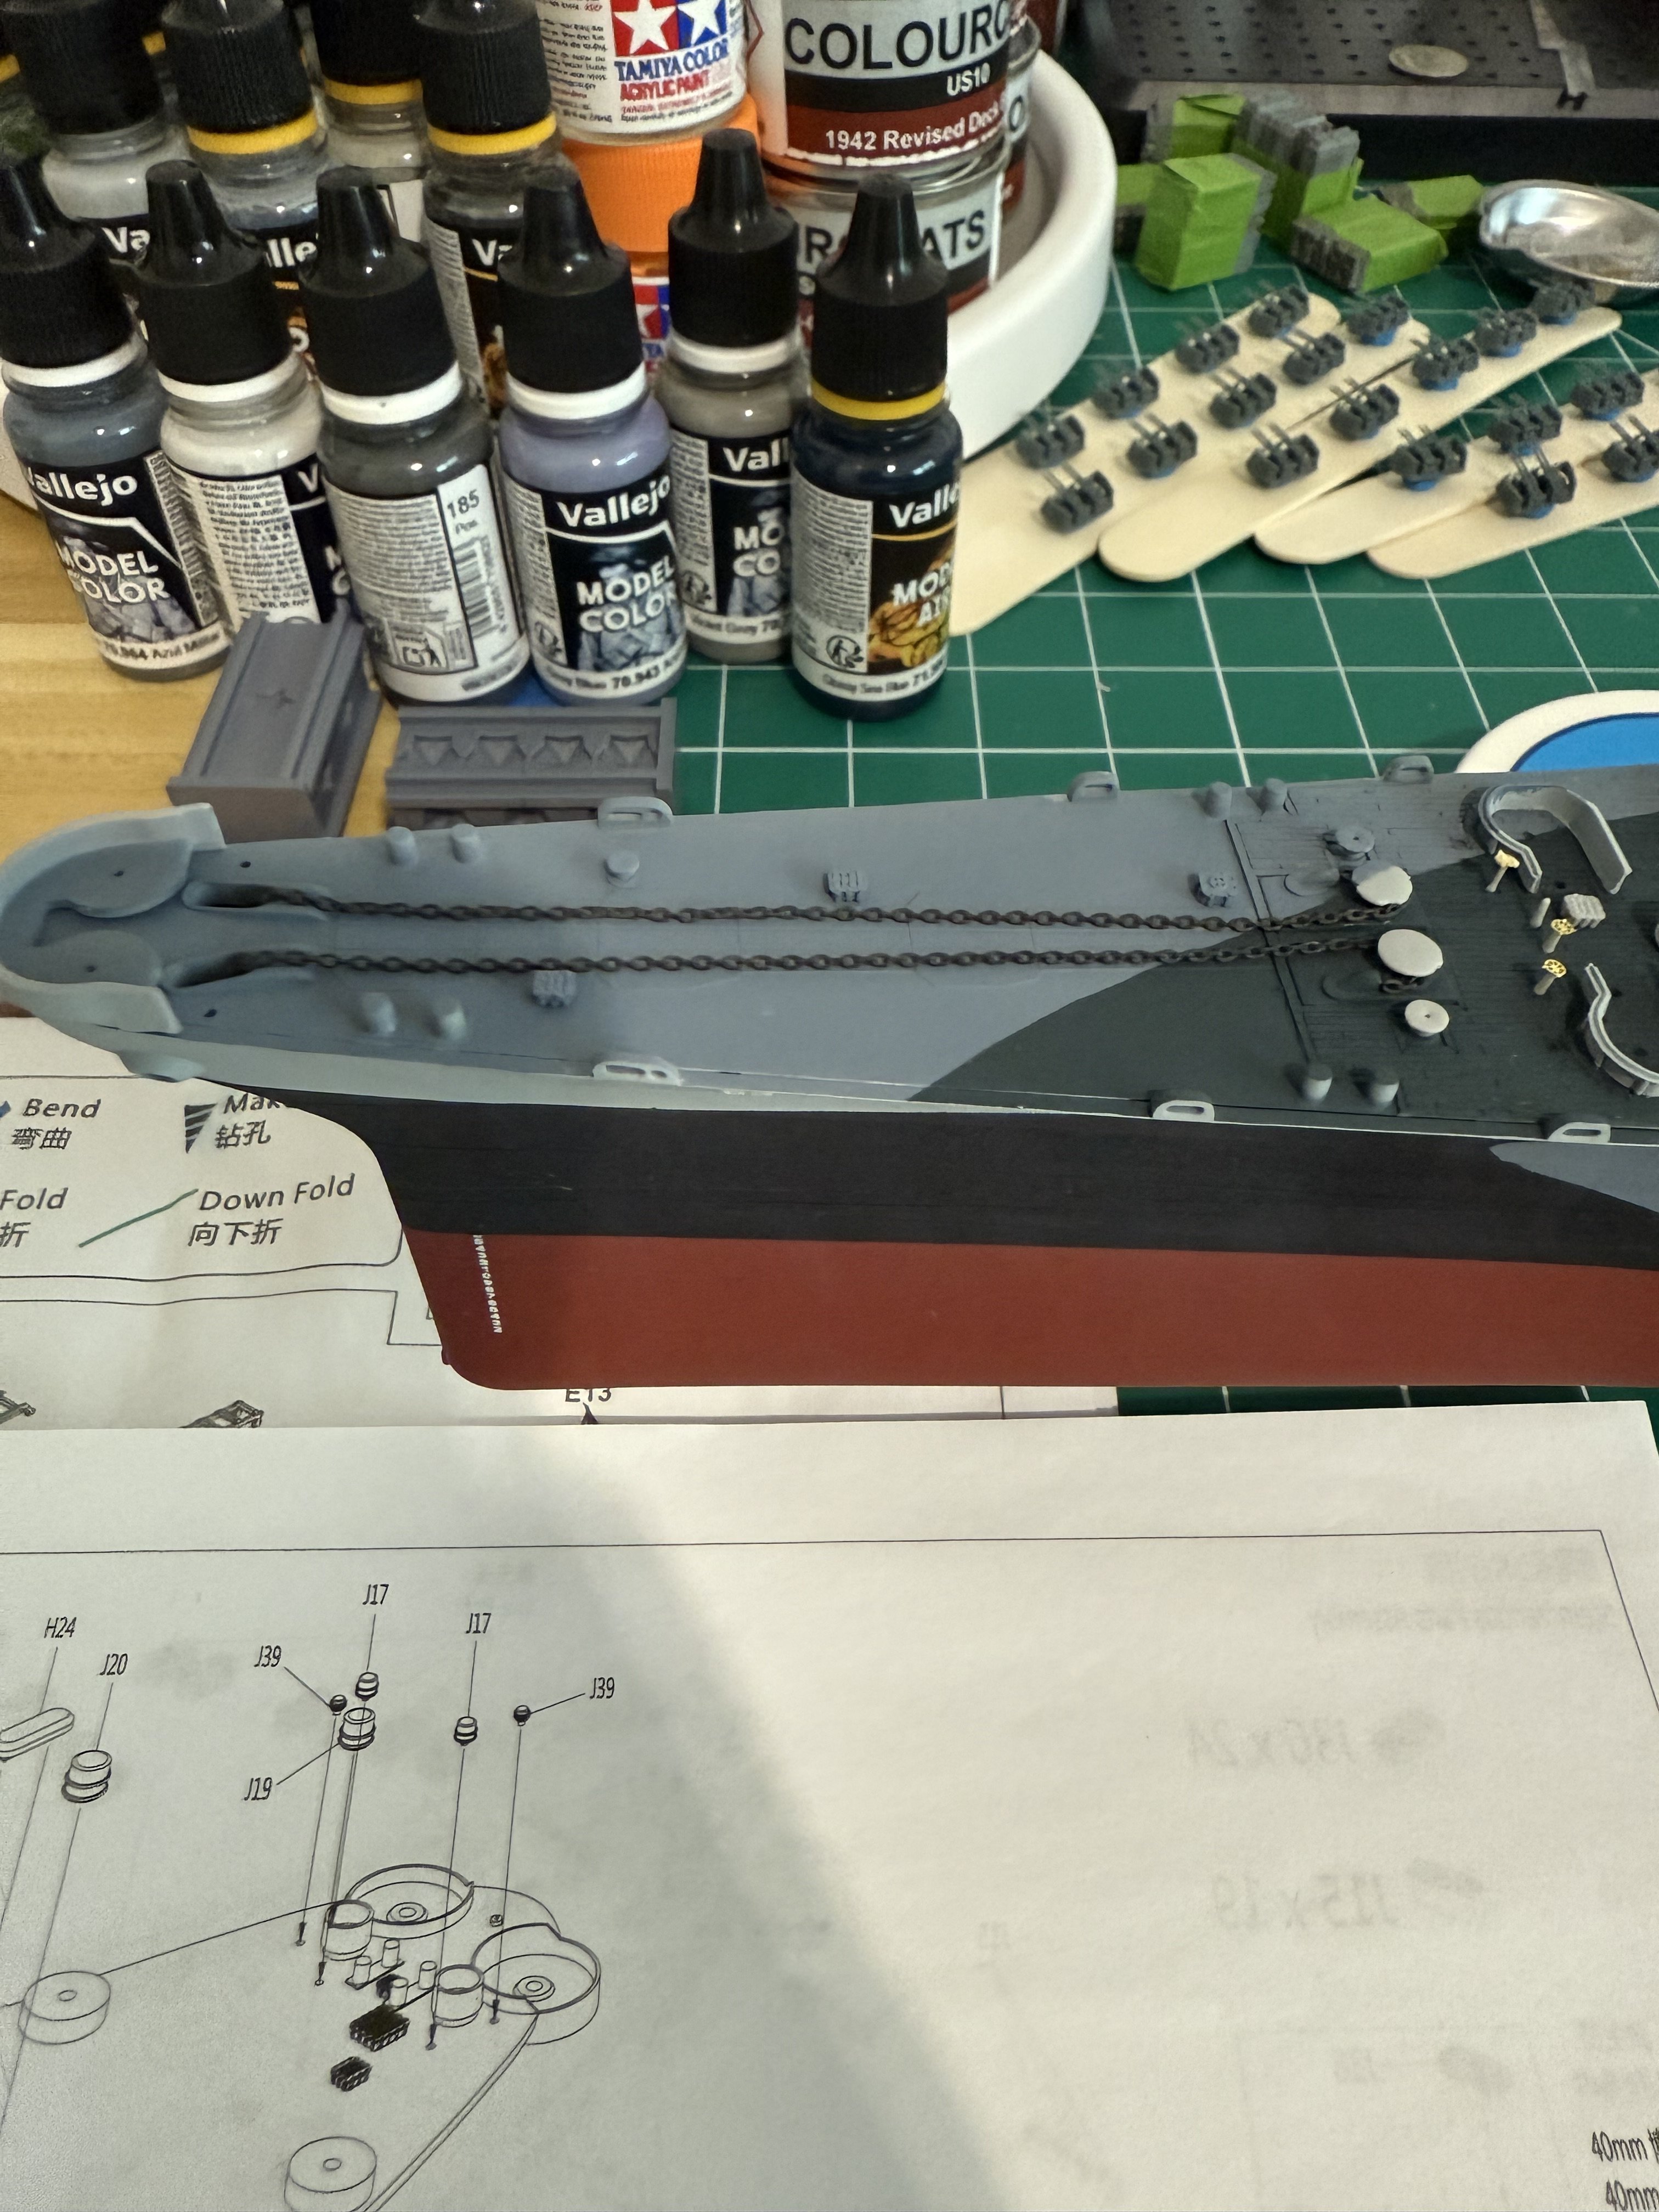
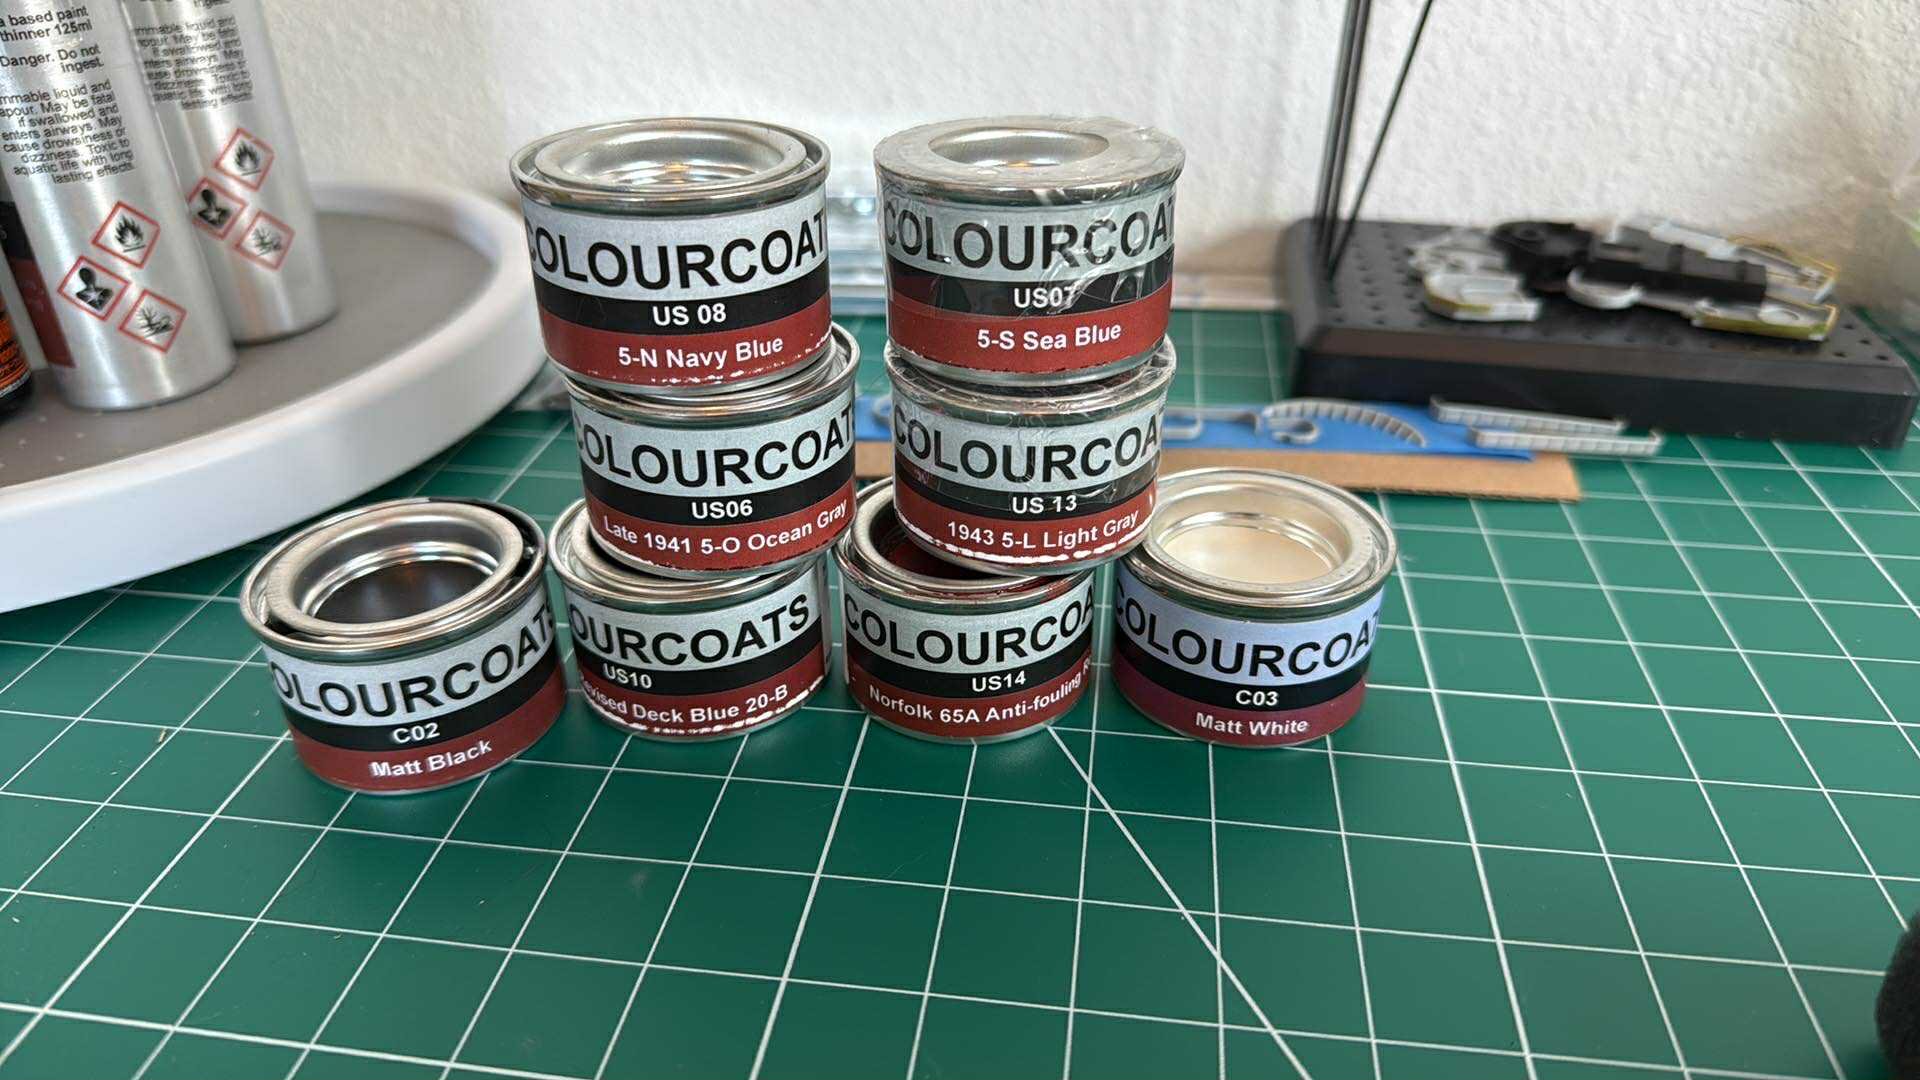
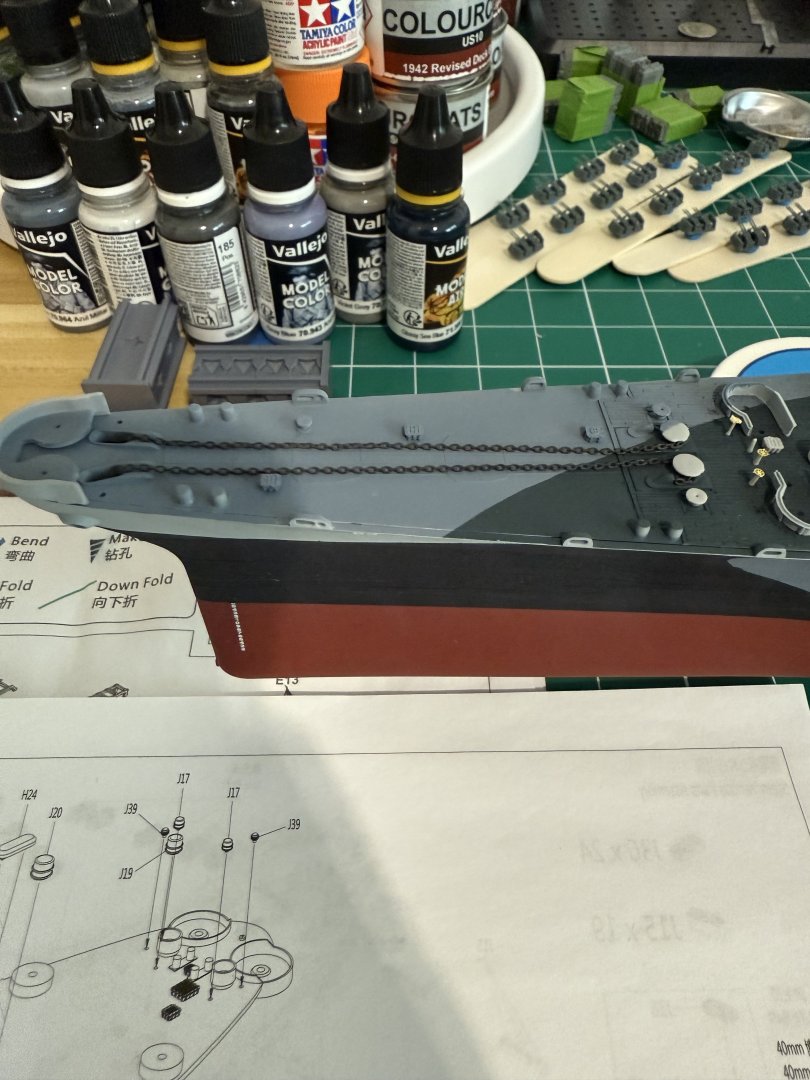
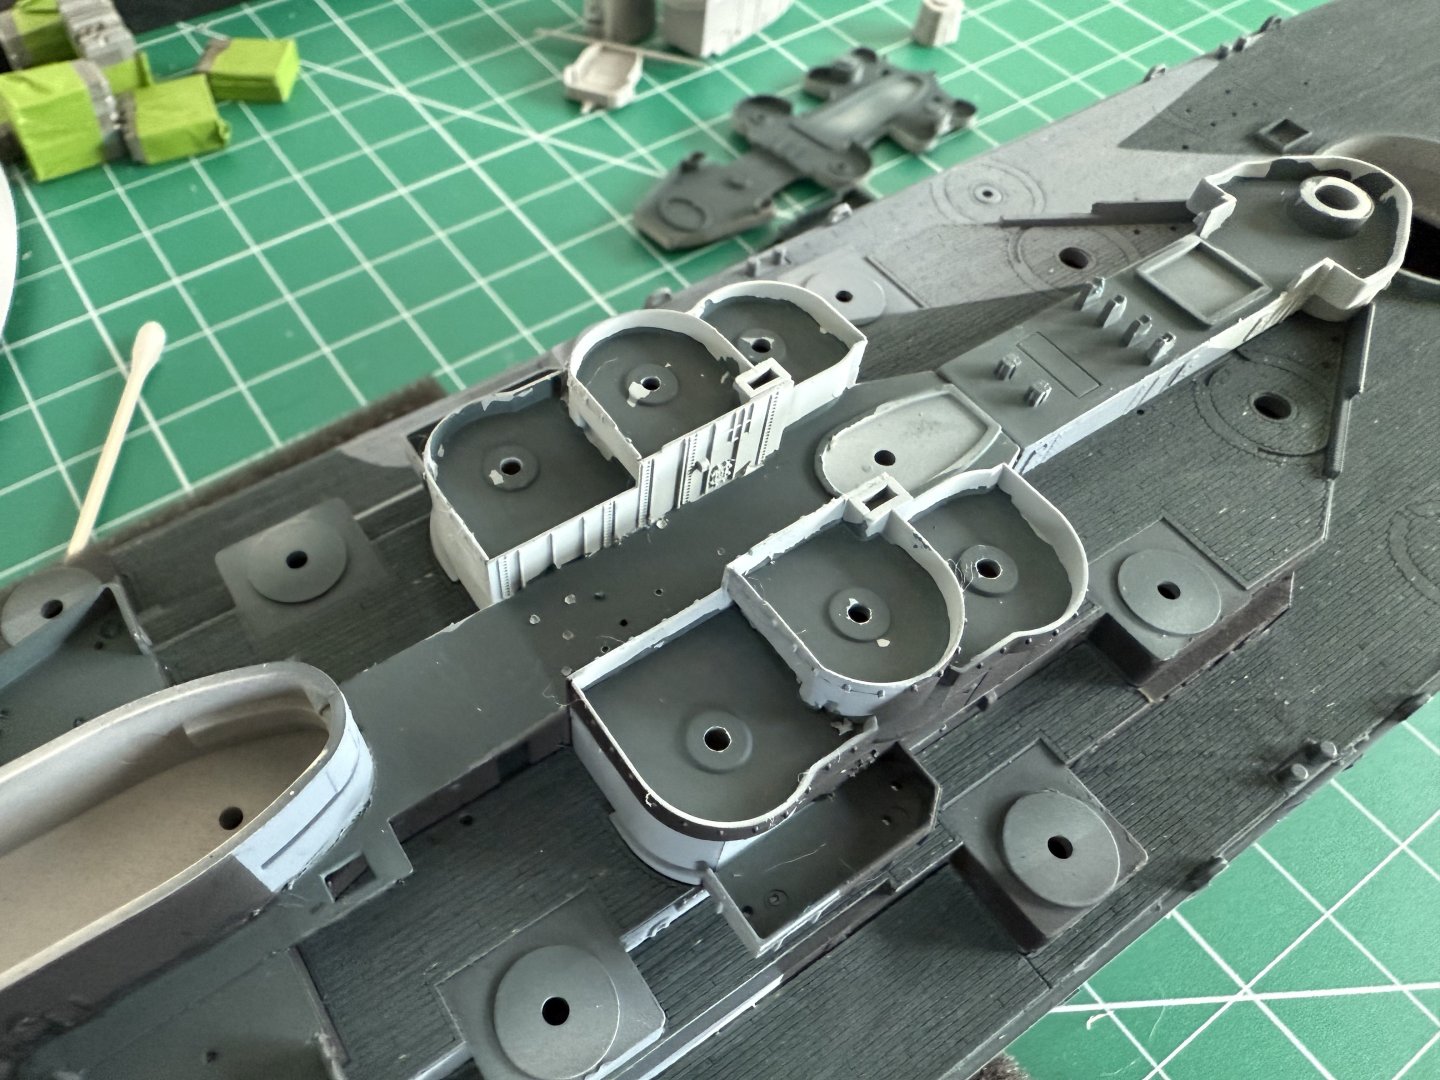
Here is what I have found as far as paint matches from Vallejo to colourcoats paints. US13 1943 5-L: Vallejo 70.907 (maybe one shade off) US06 Late 1941 5-0: 70.943 and 70.773 (4:1 ratio - spot on match) C02 matte black: 70.862 (spot on match) Still trying to work out the deck blue but I feel like I’m pretty close. Continuing the work of getting all the small deck details on. Not pictured, but I also started hand painting all the ammo ready lockers so I can get them in place. Interestingly I’ve noticed most of the holes in the deck are too small for the parts to fit into, so I’ve had to trim them and just glue the parts to the deck. A friend recommended a jeweler stick and I gotta say for $7 on Amazon, it is the bees knees!


-
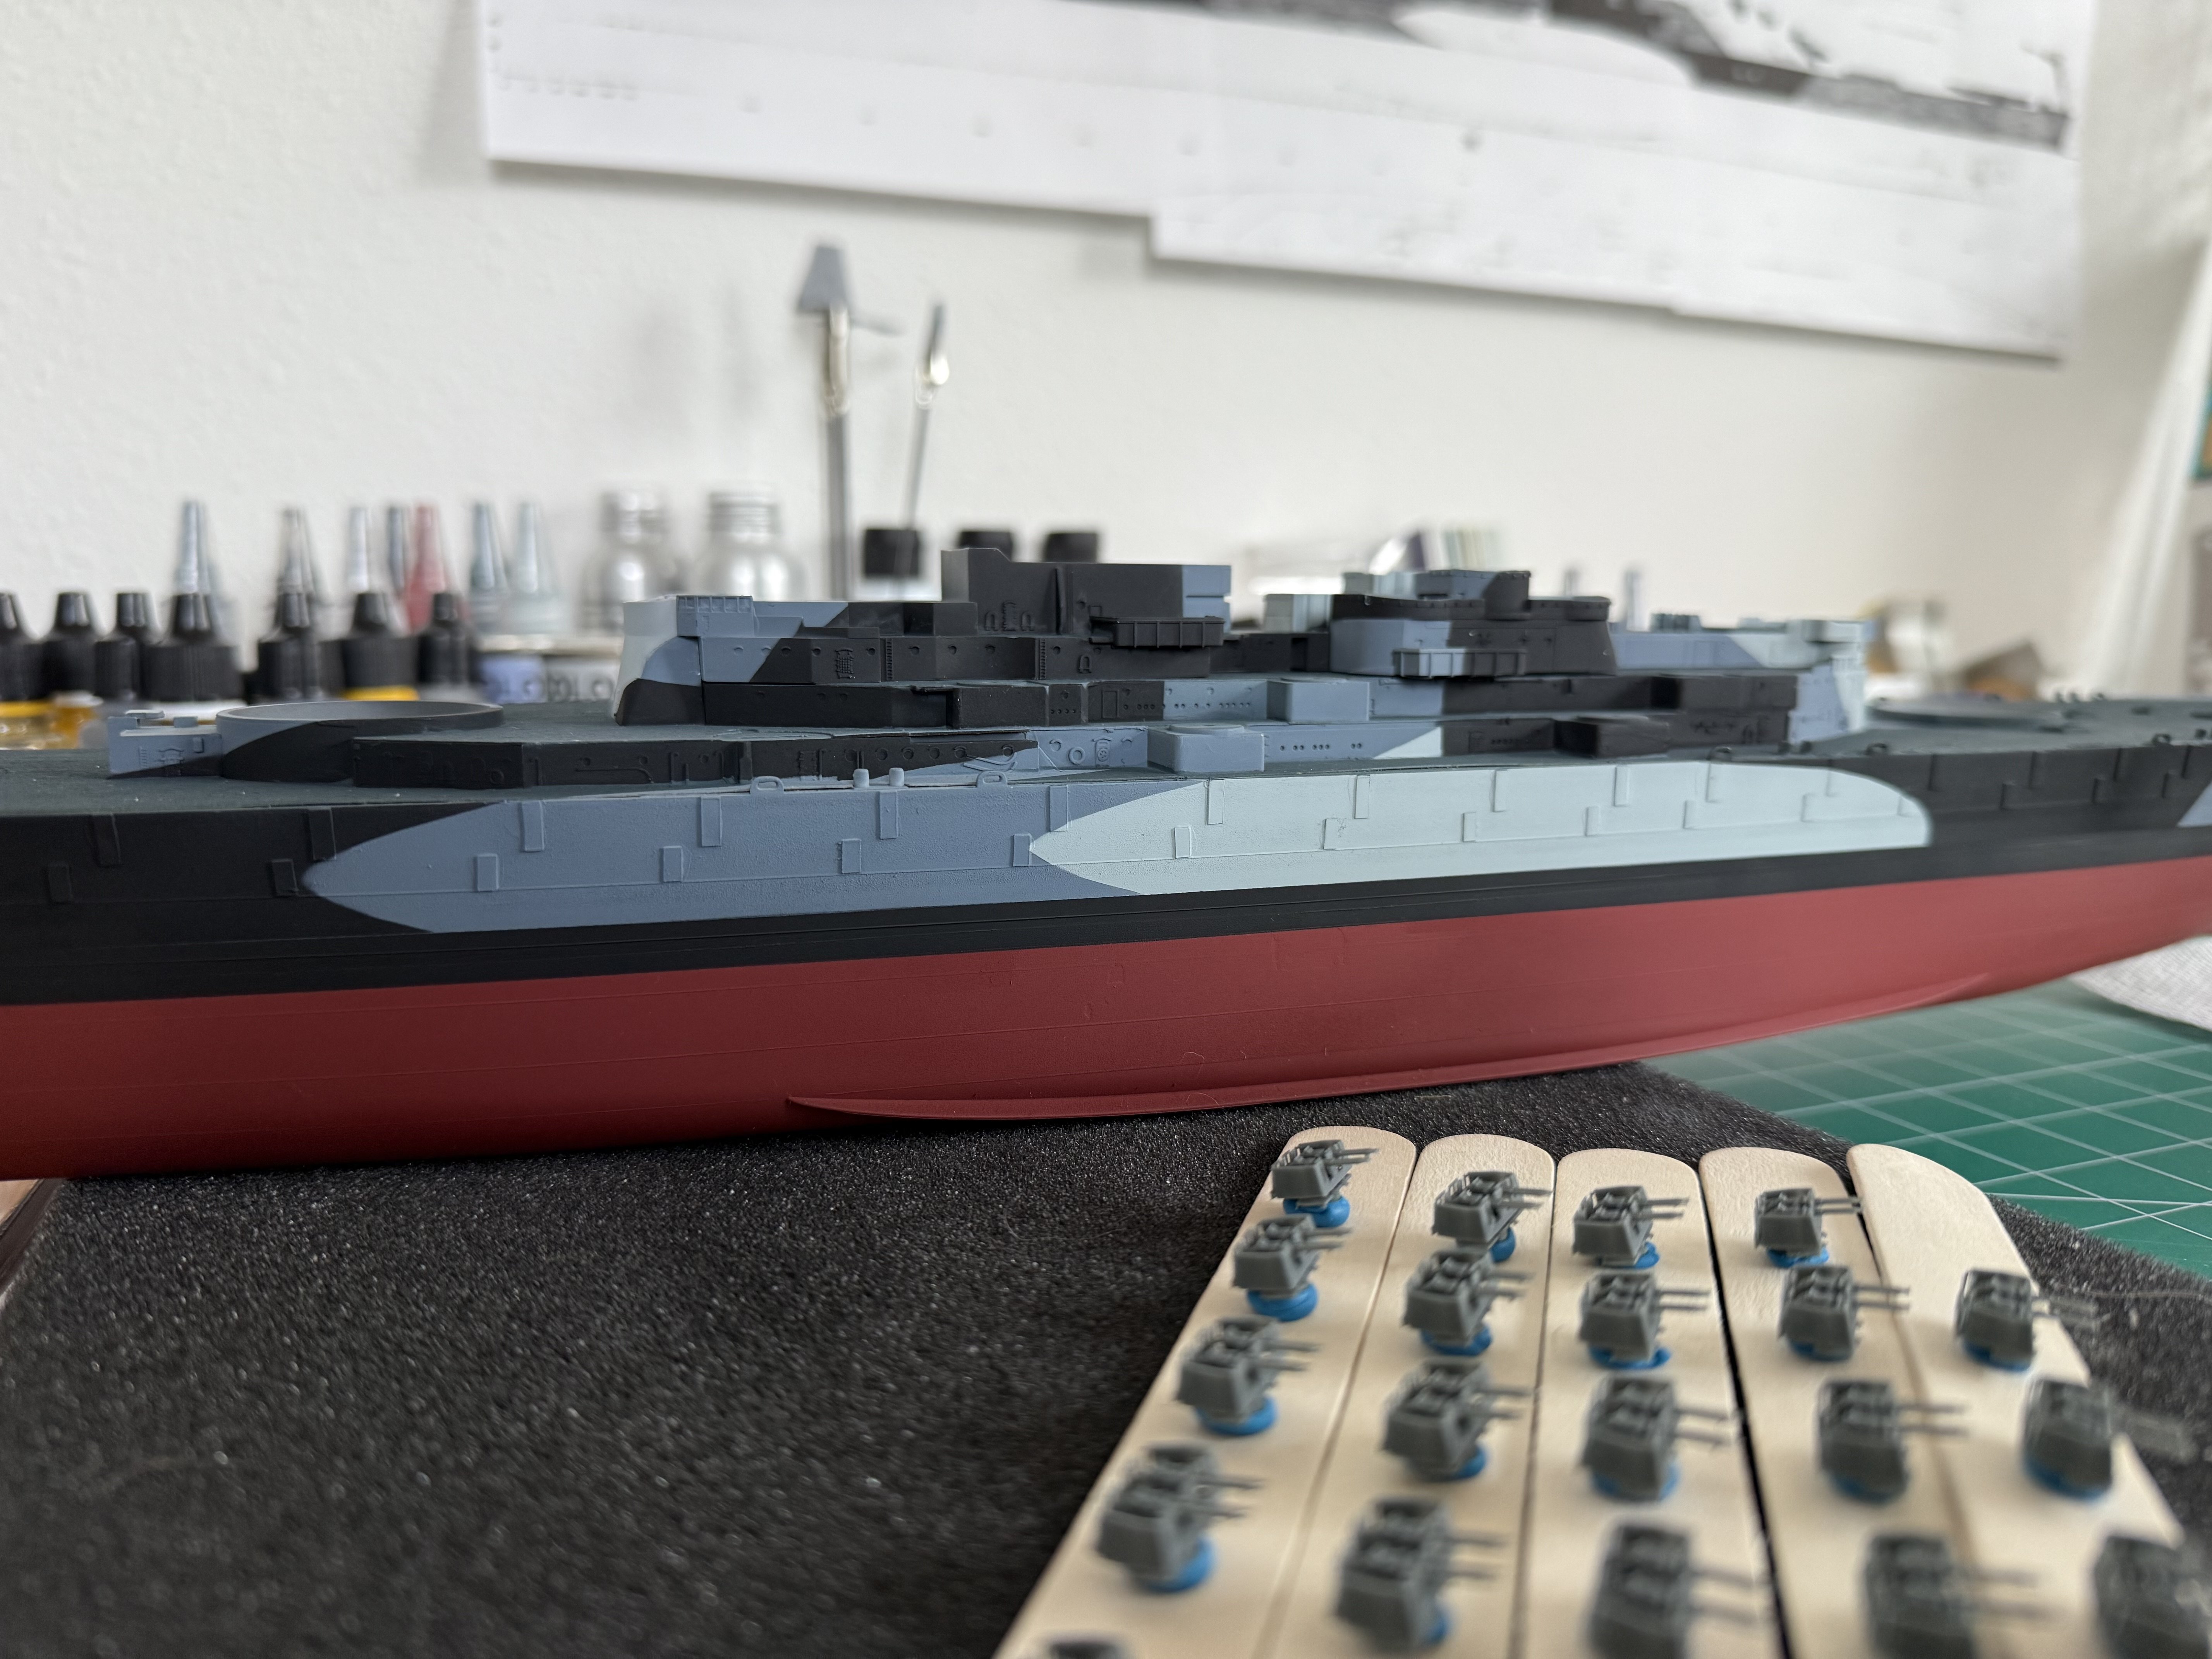
Started weathering. Since the Mo was new and didn’t wear this scheme long I went rather light on it. went ahead and started adding the small deck details. I found a 50/50 mix of two Vallejo paints matched the colourcoats 5-O perfectly. I ordered some more Vallejo paints to mix what will hopefully be a good match to 5-L and 20B. I’m all ears if anybody has a combo they think is a good match. while waiting for that I made some progress on the 5” guns.


-
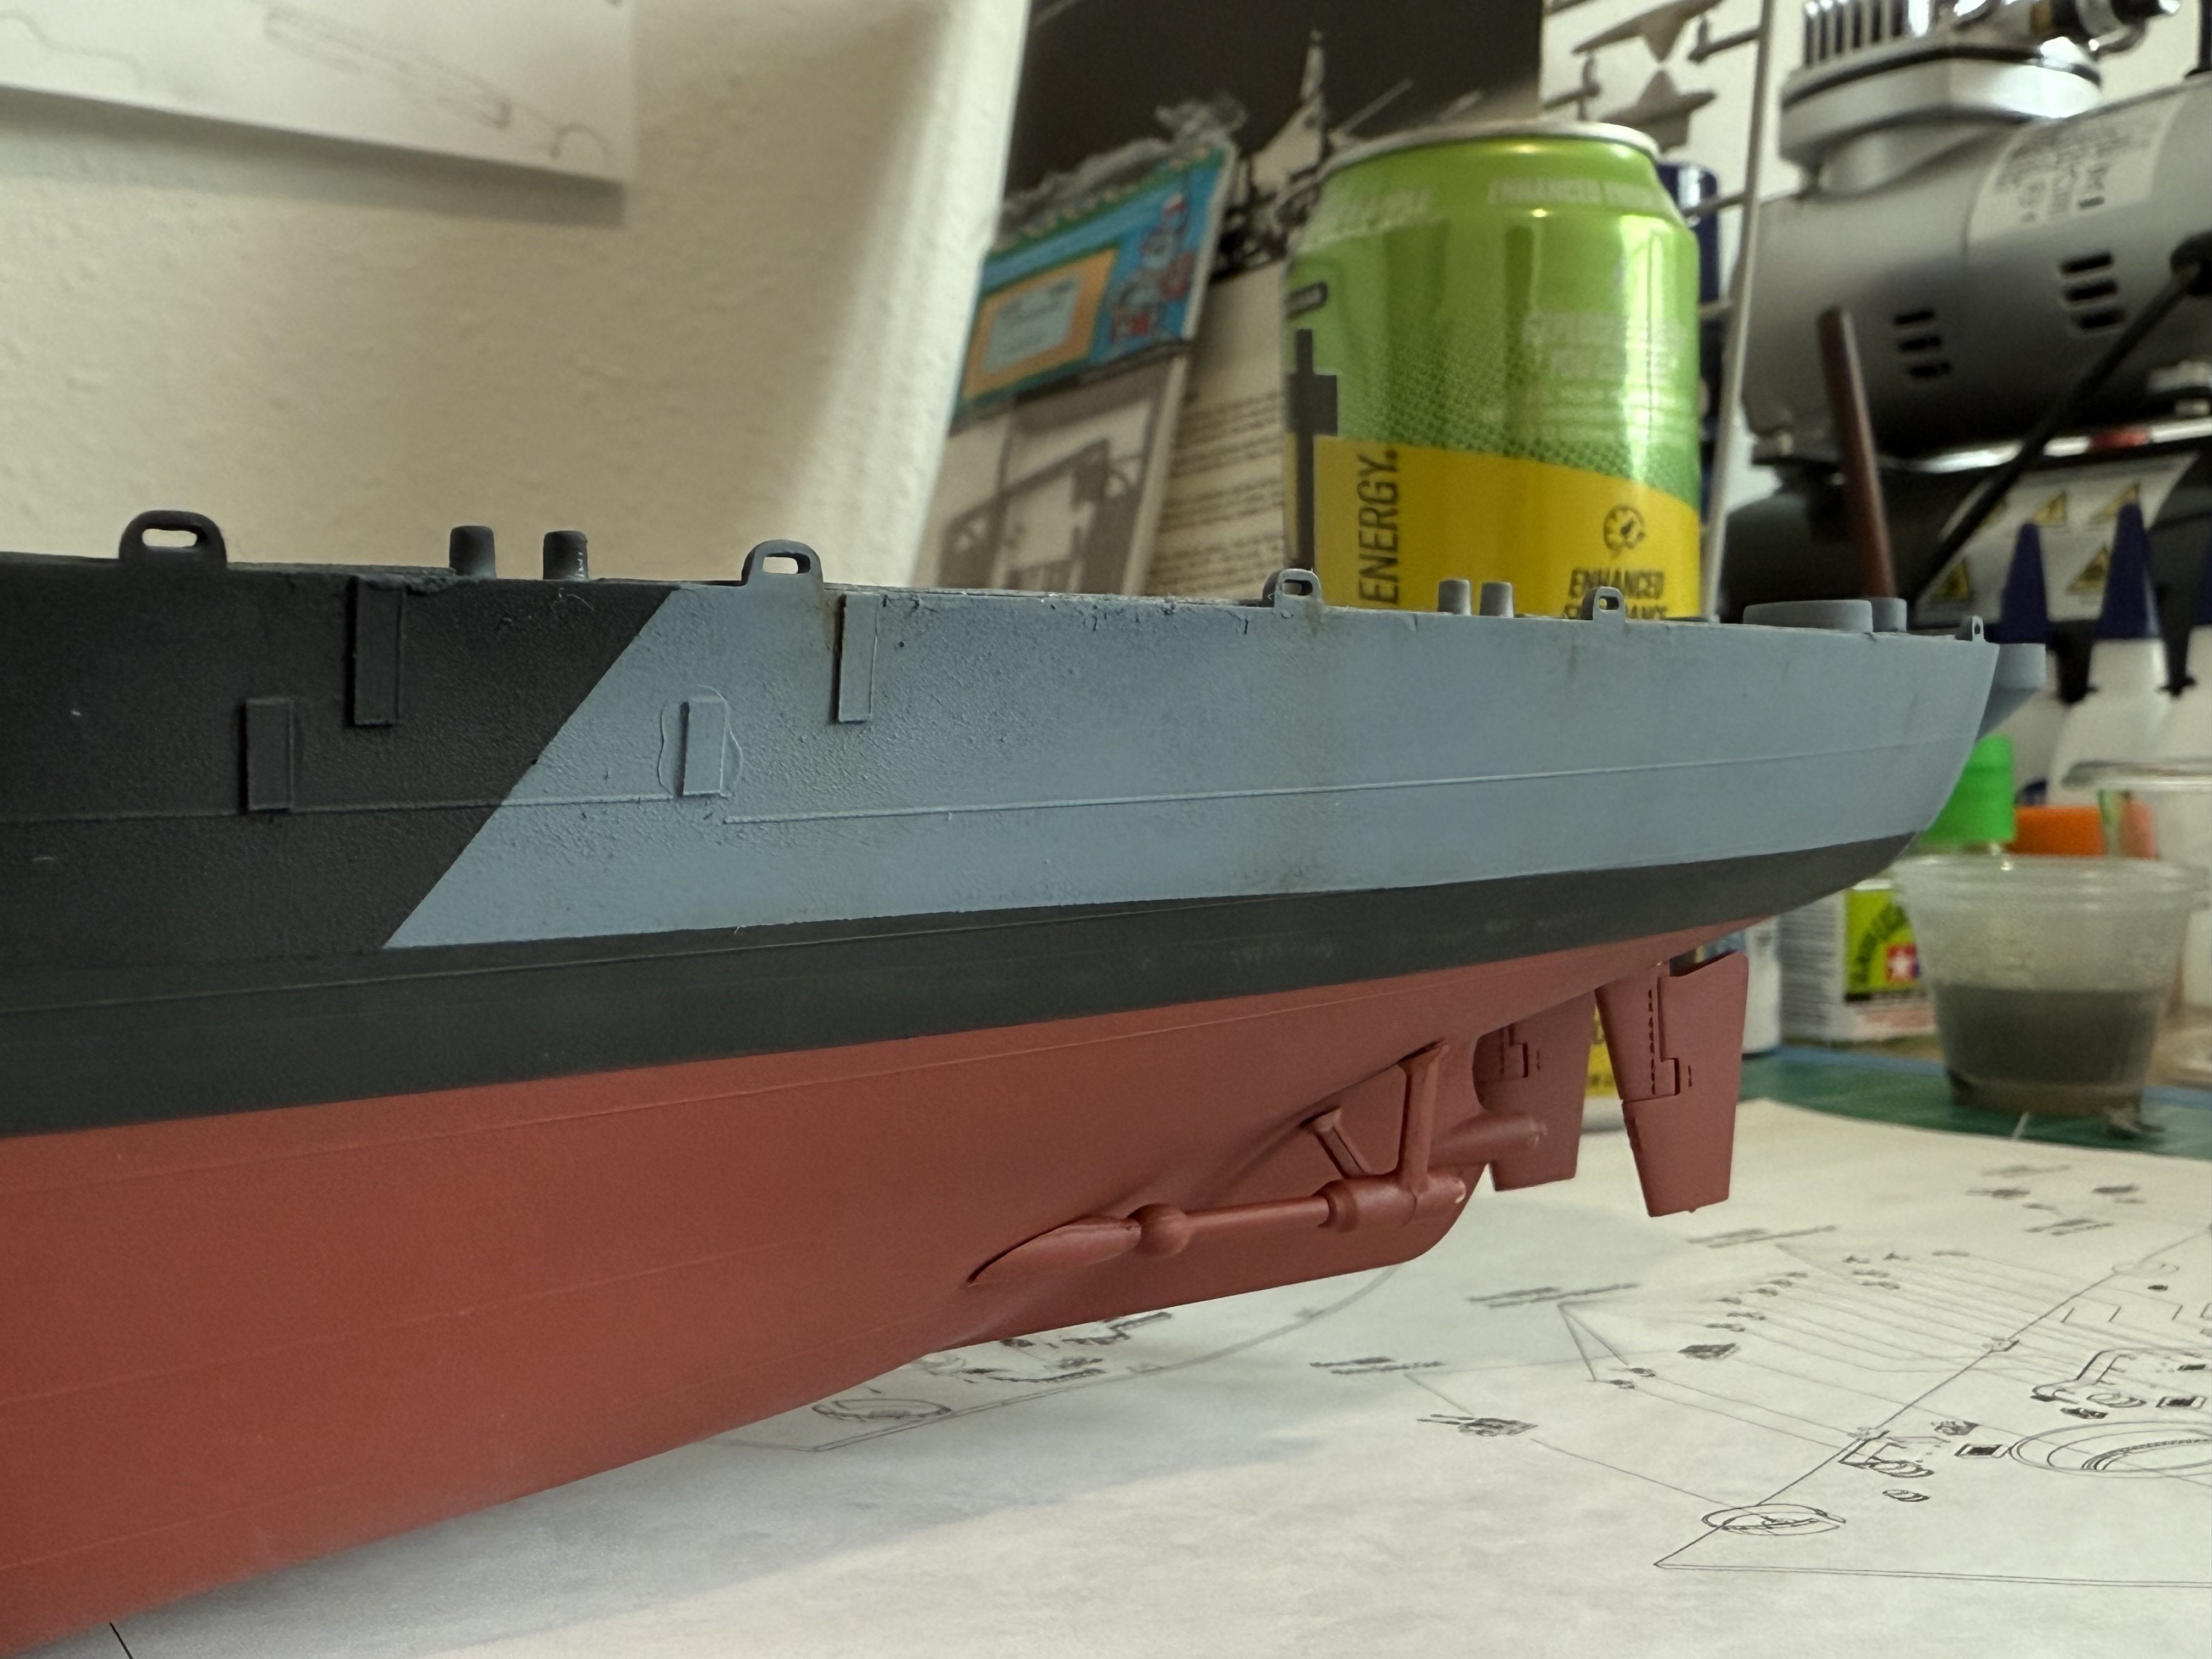
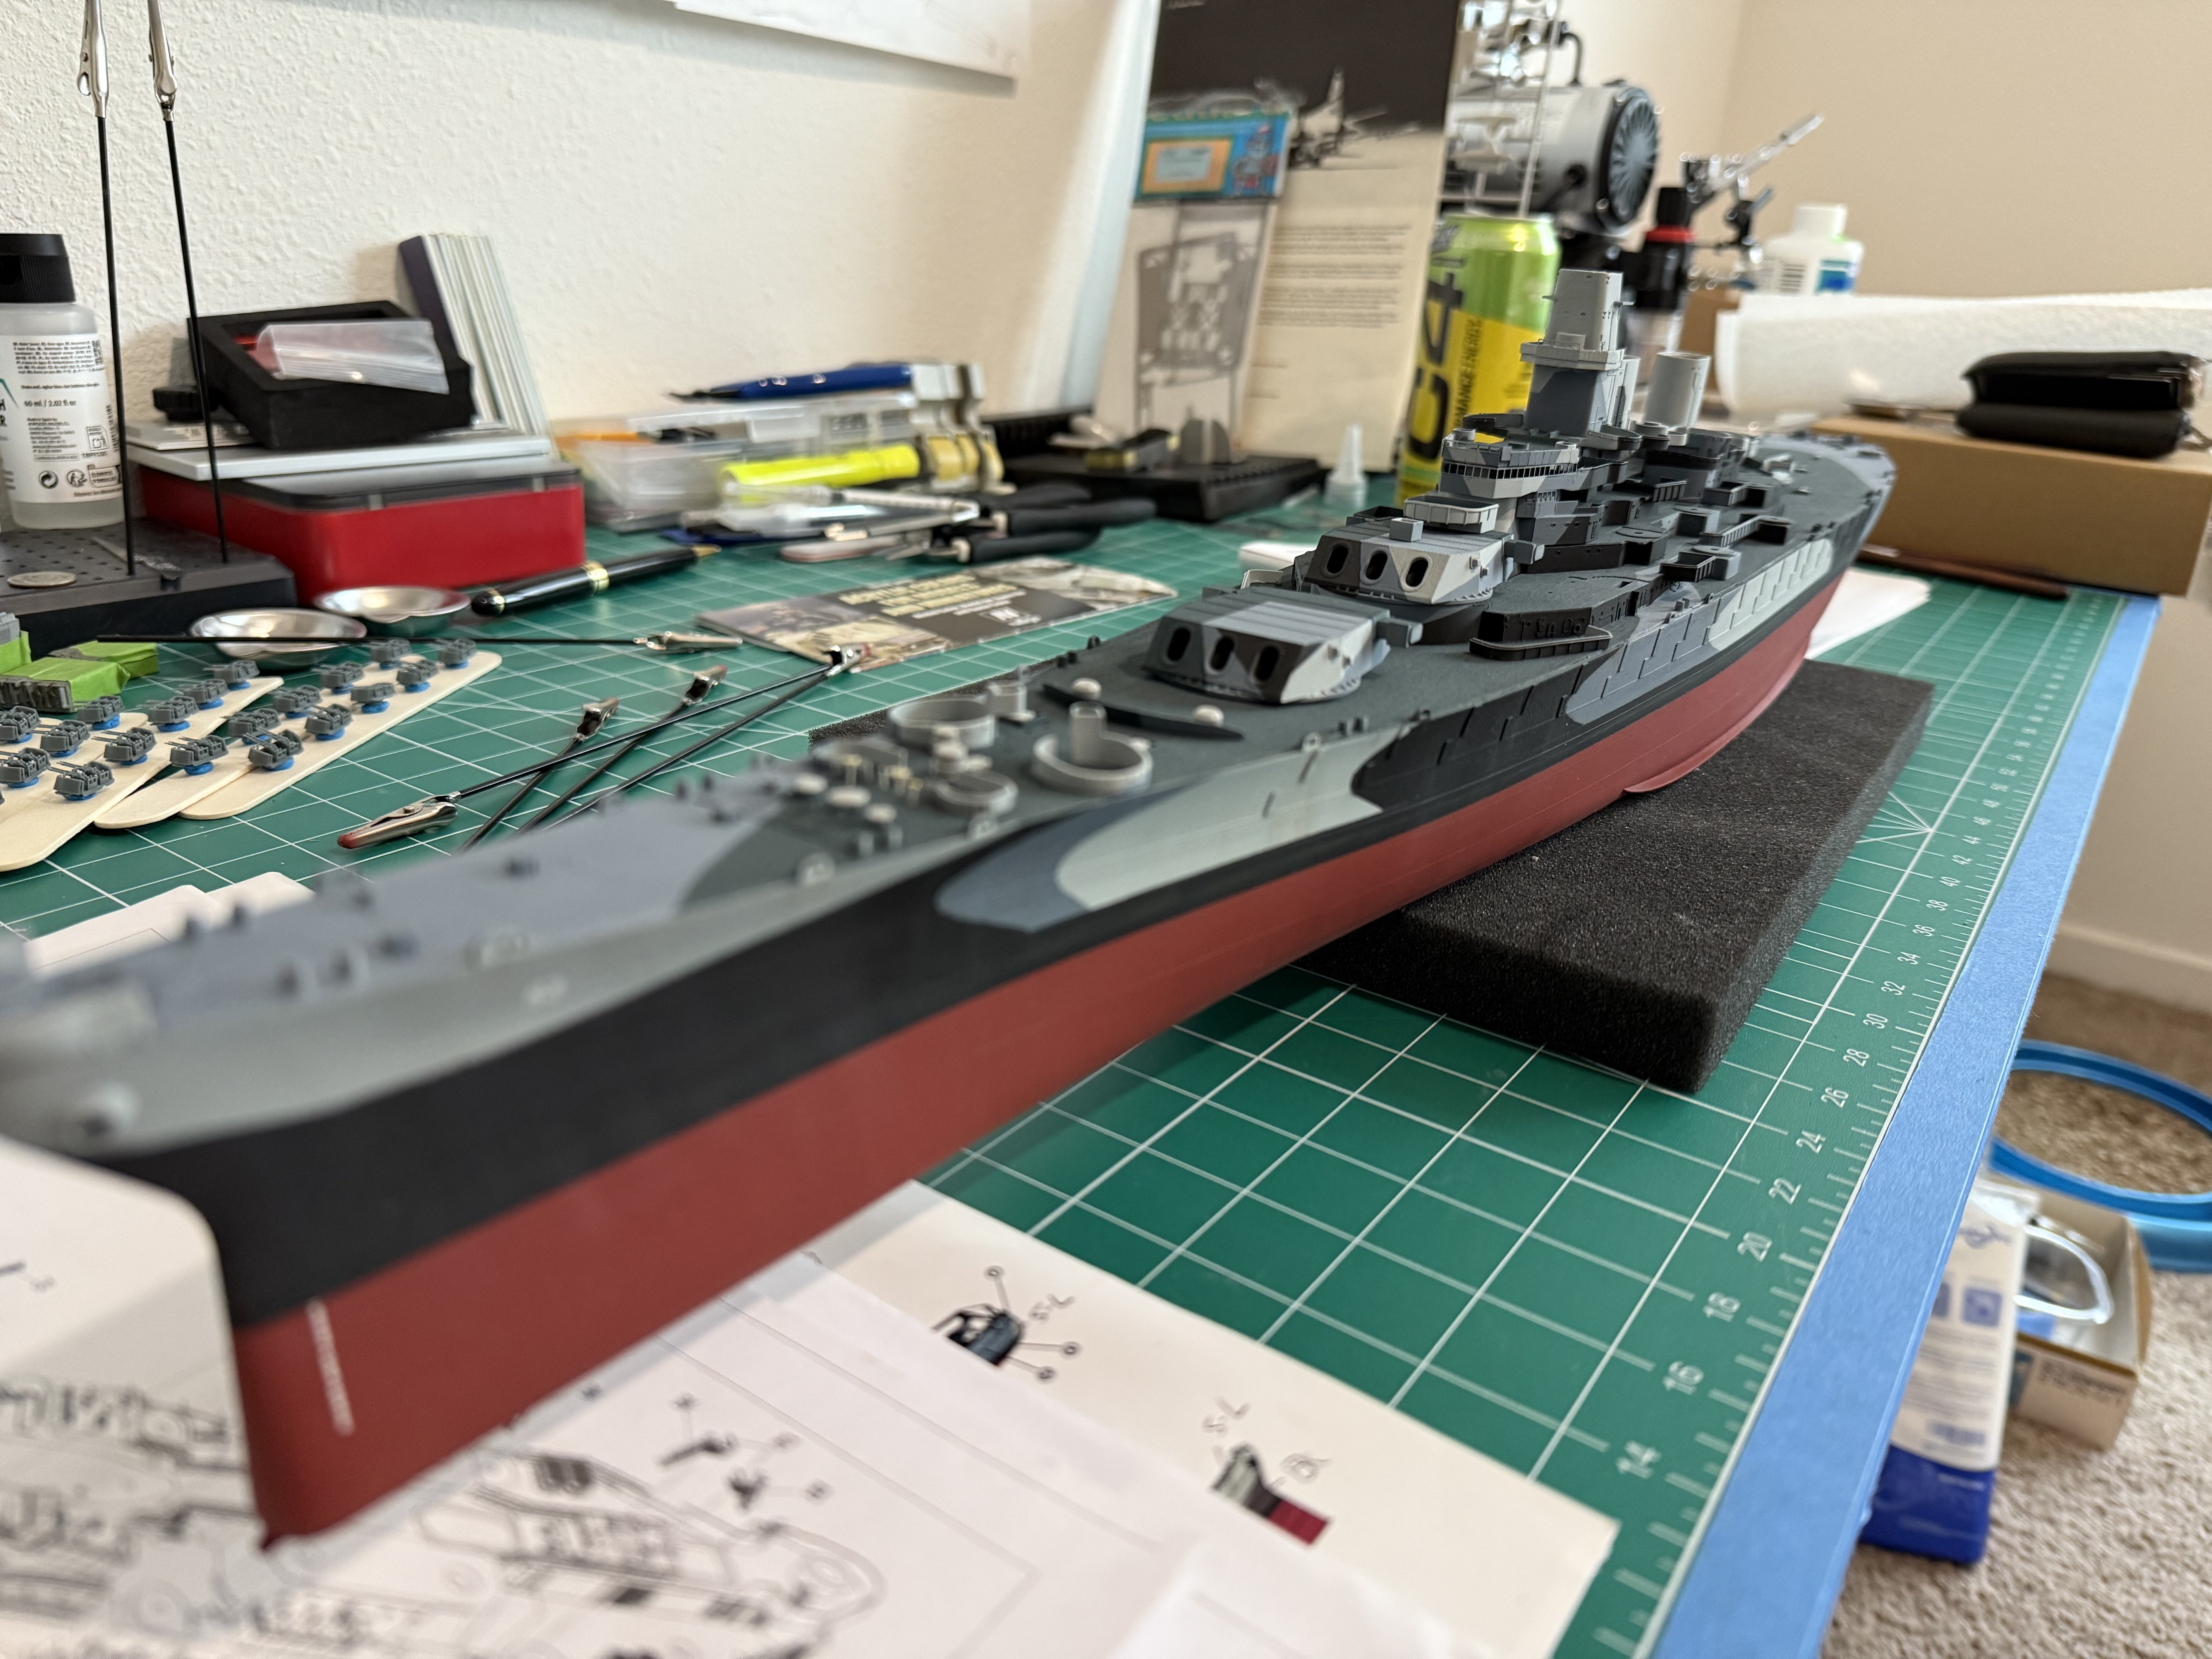
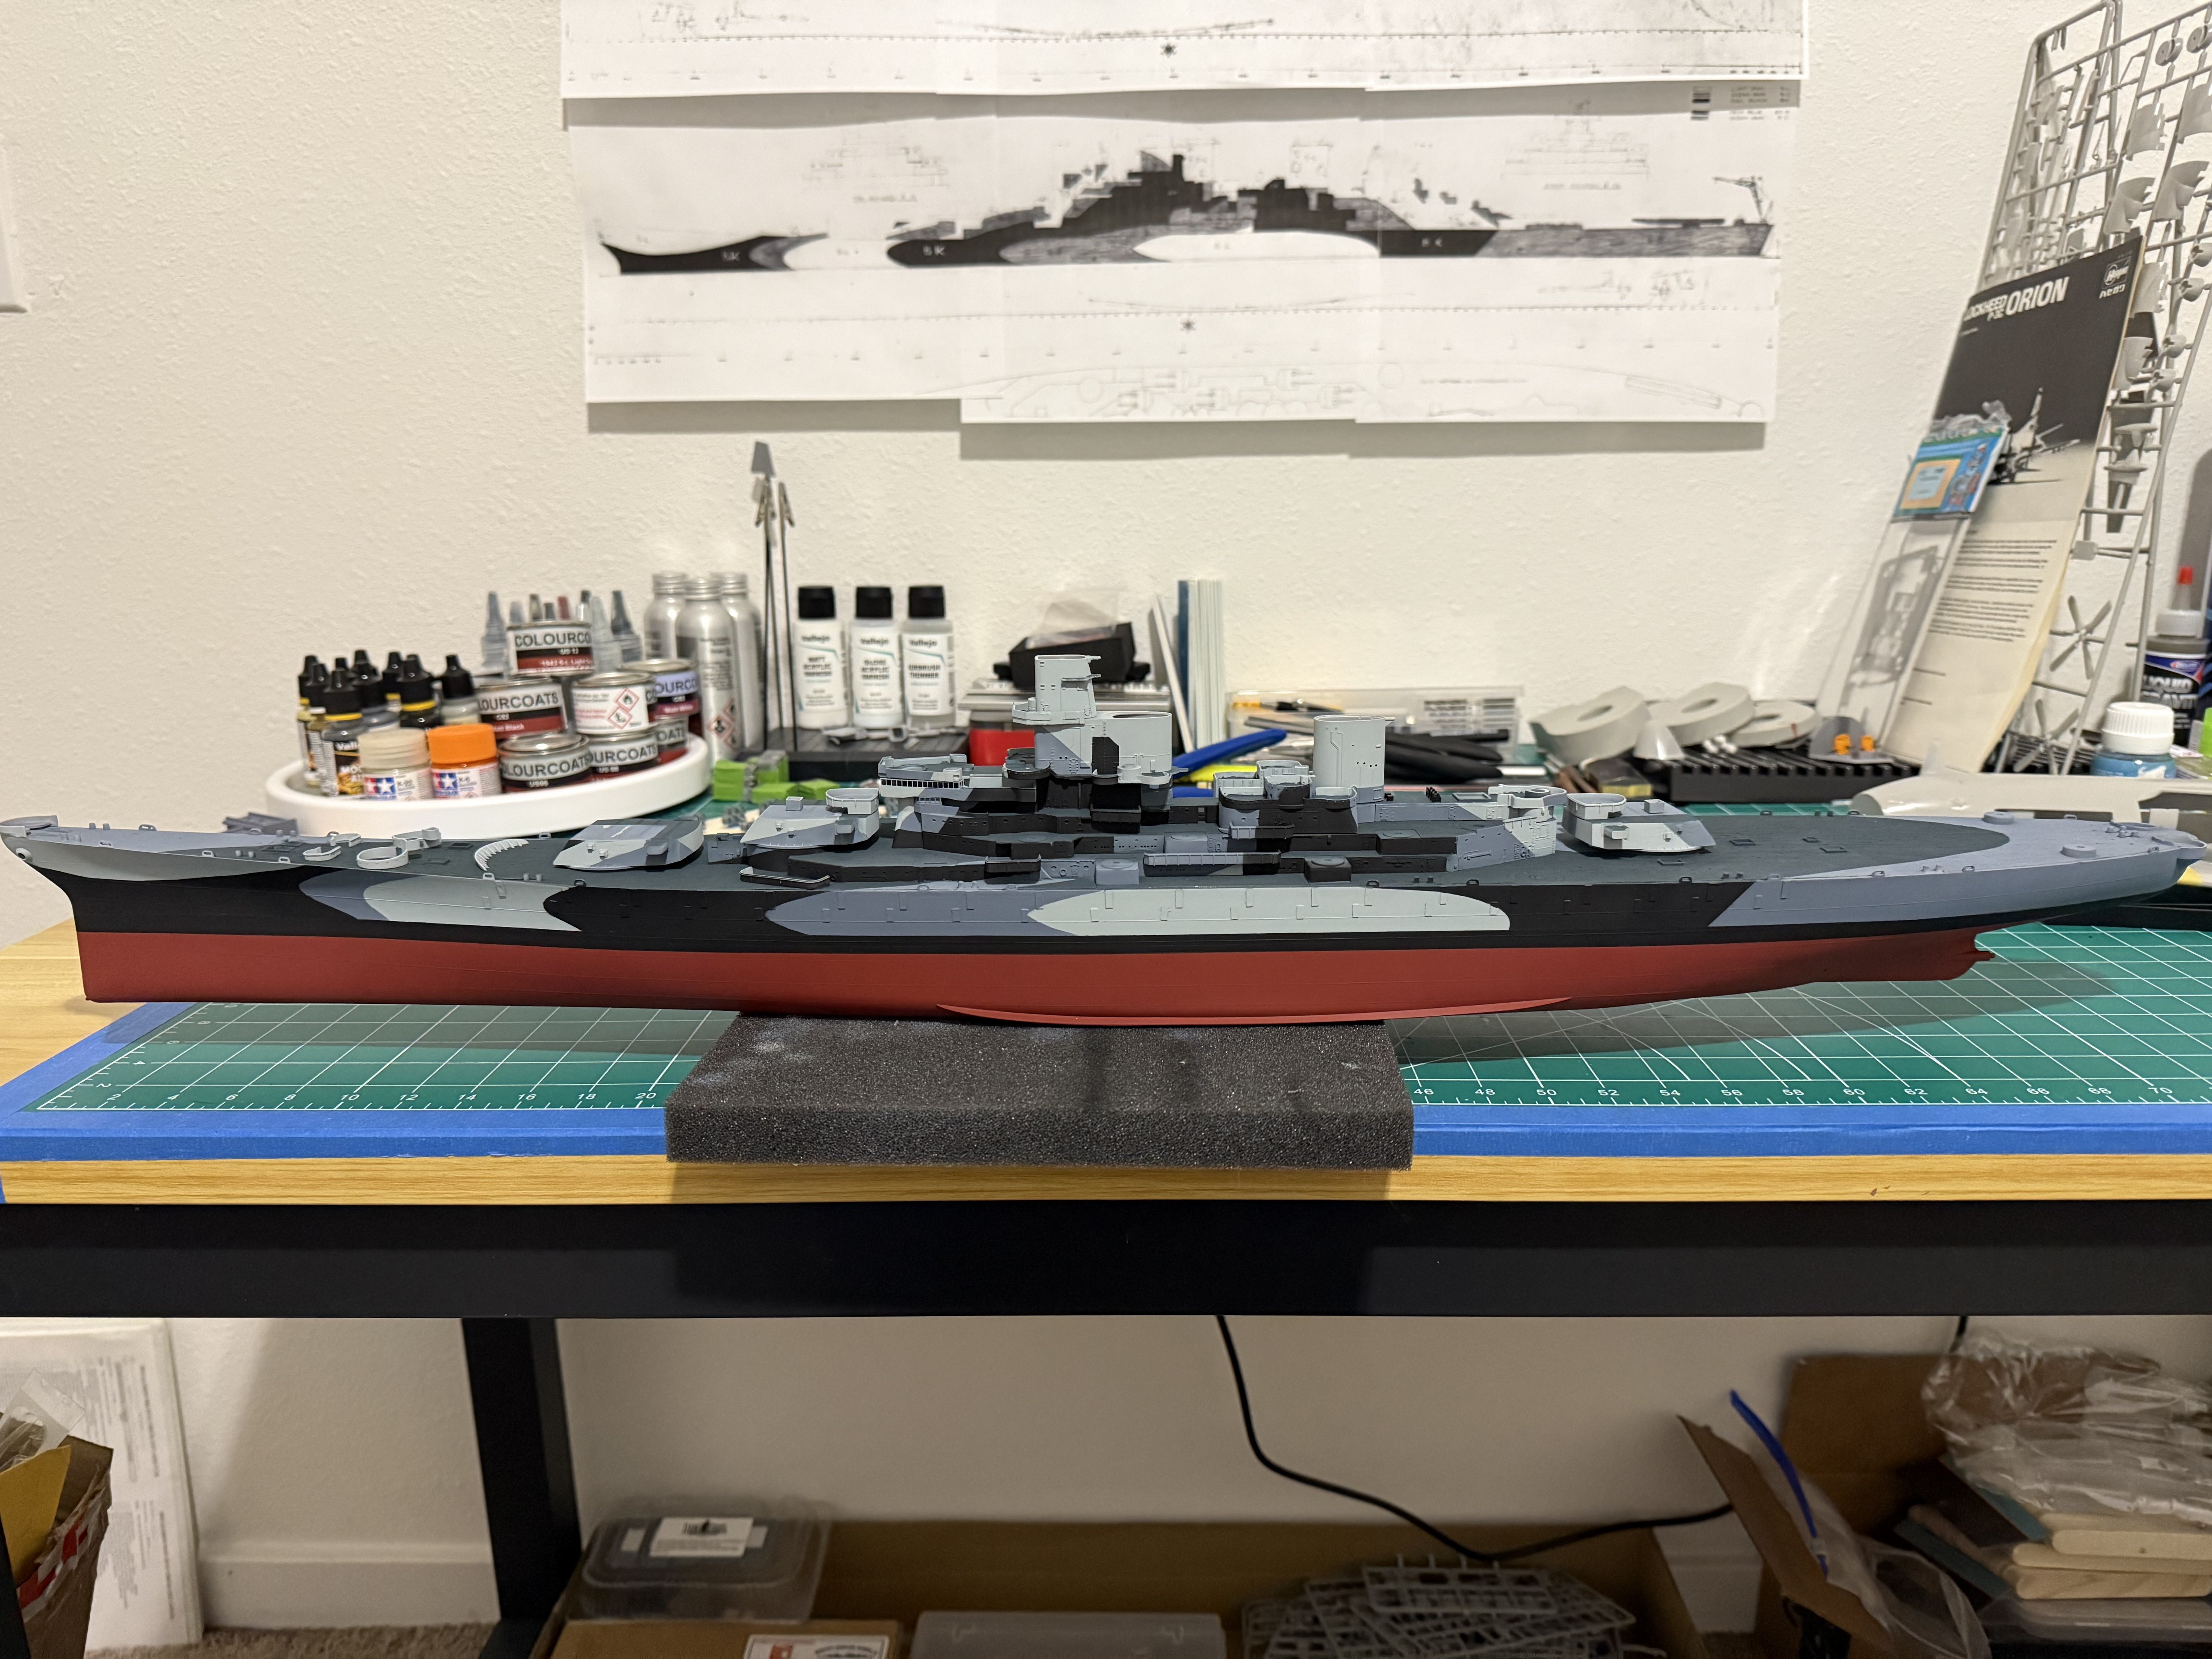
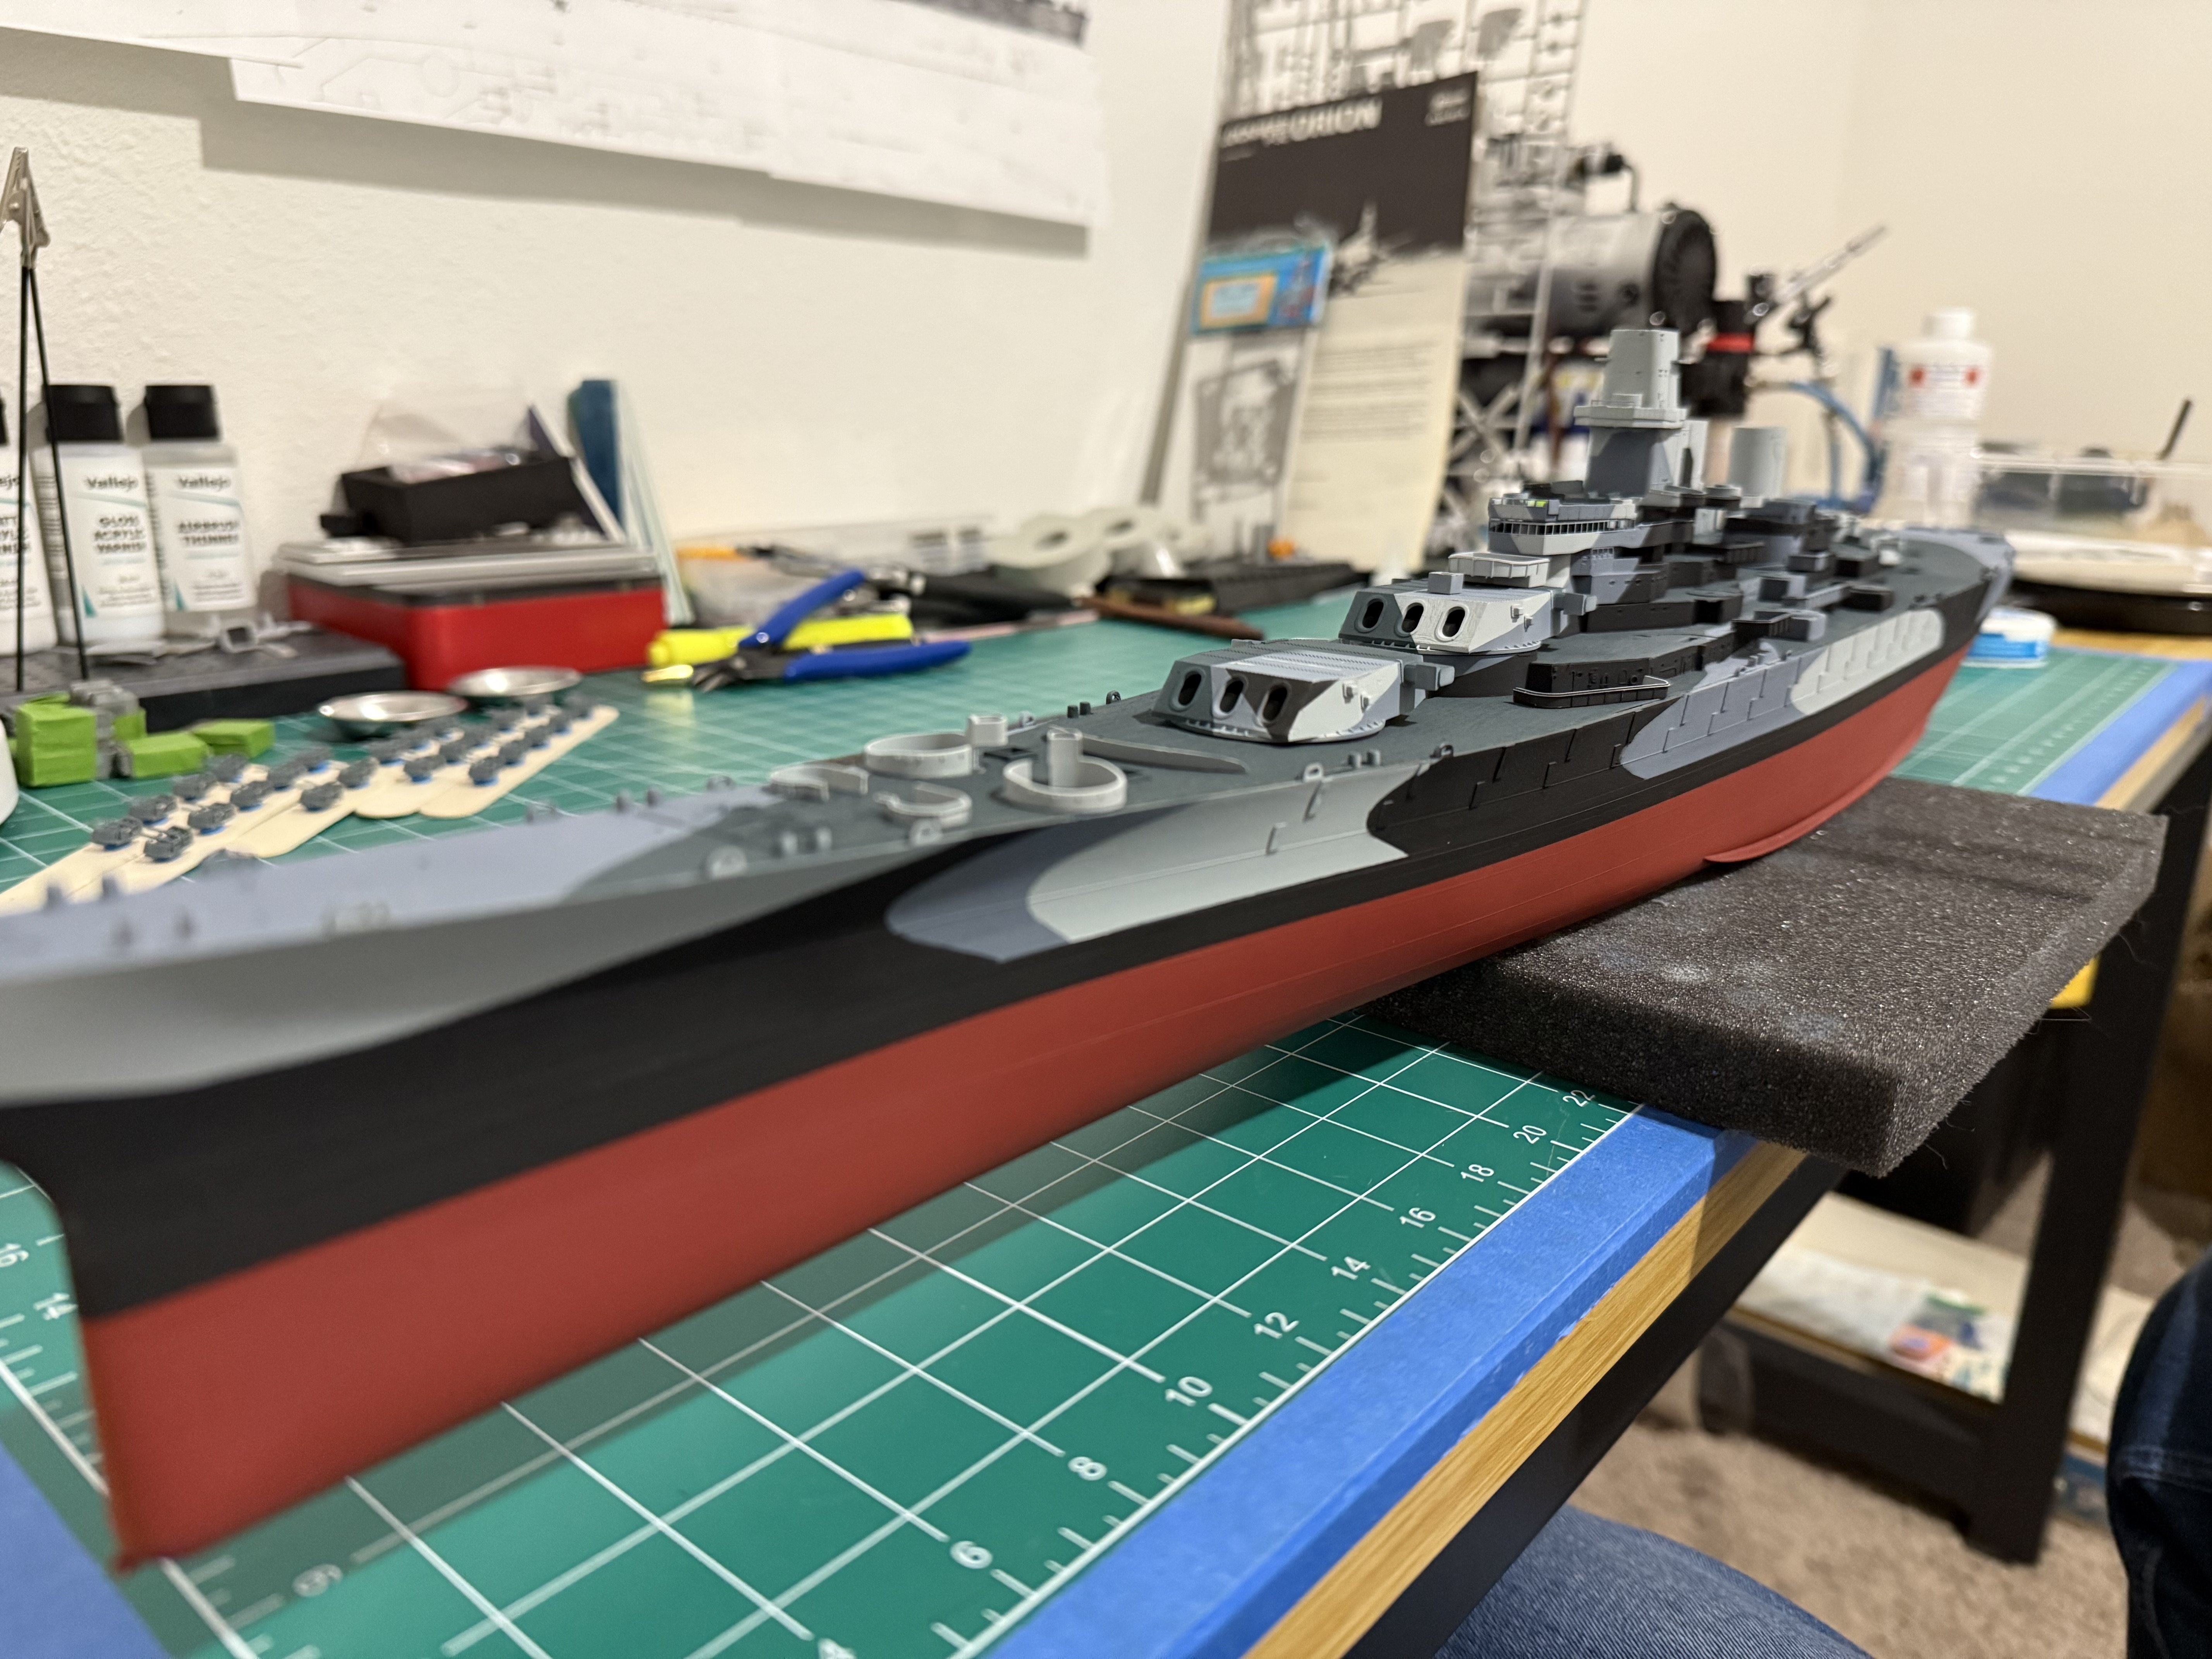
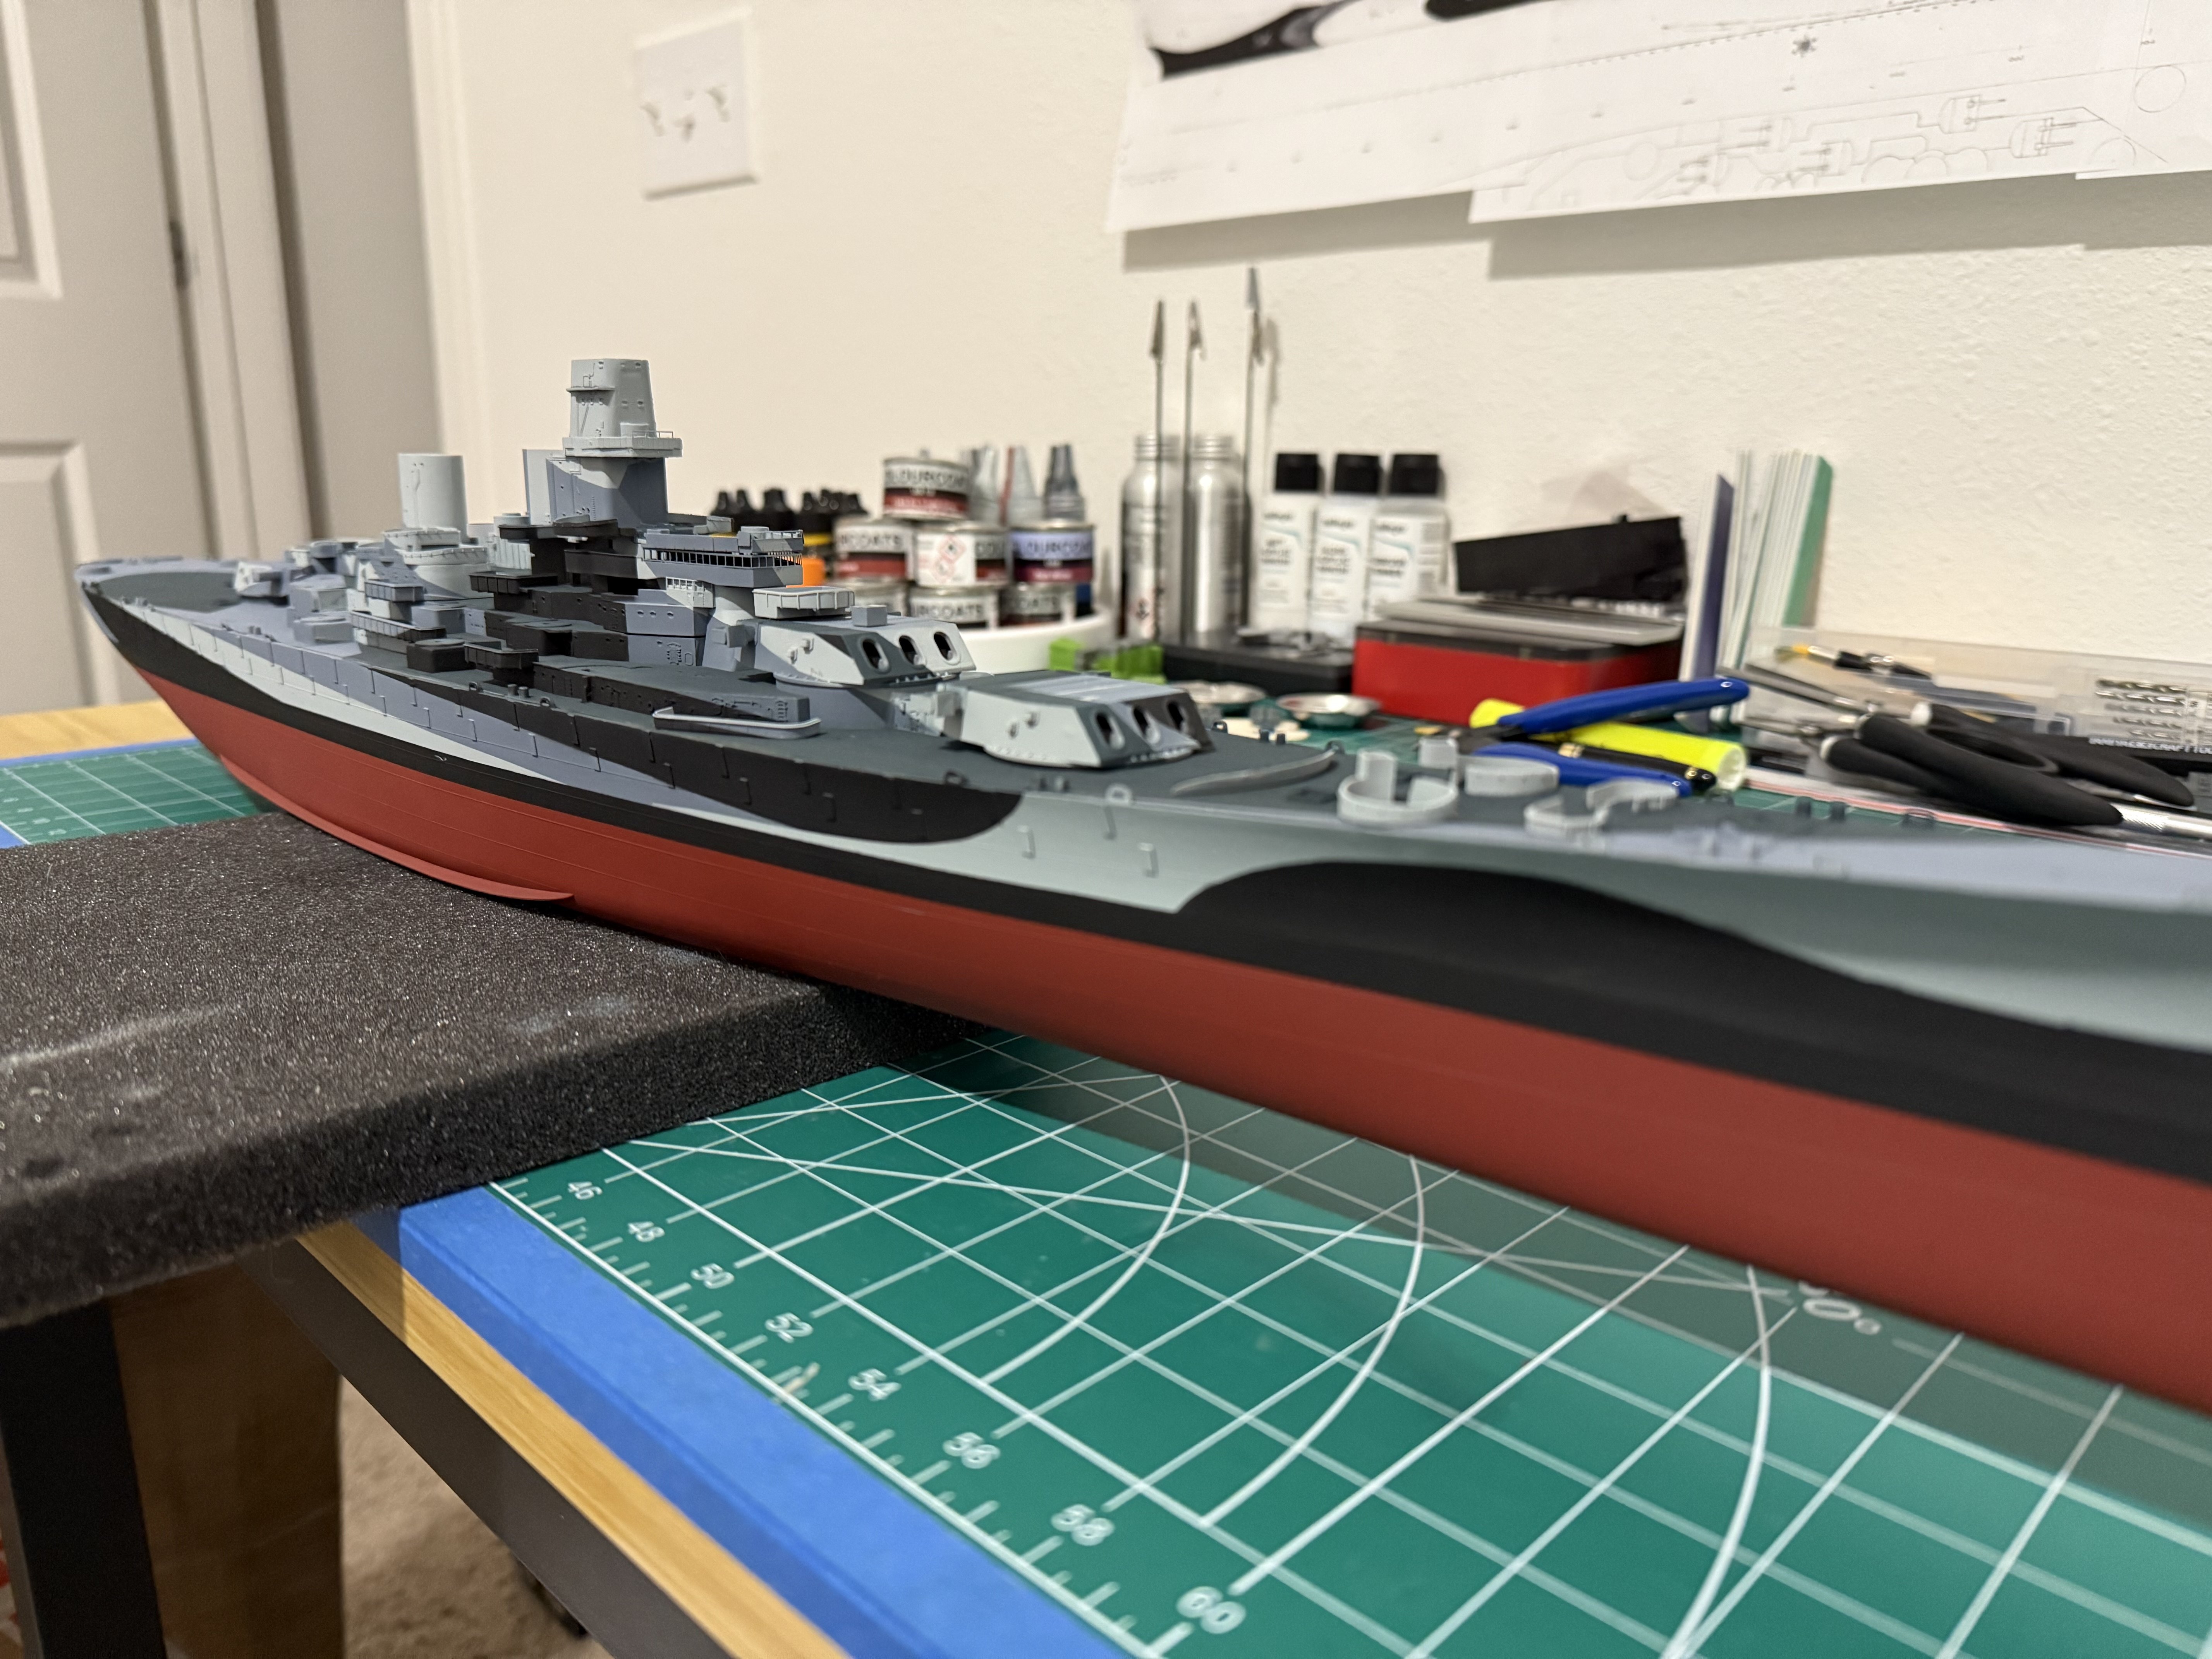
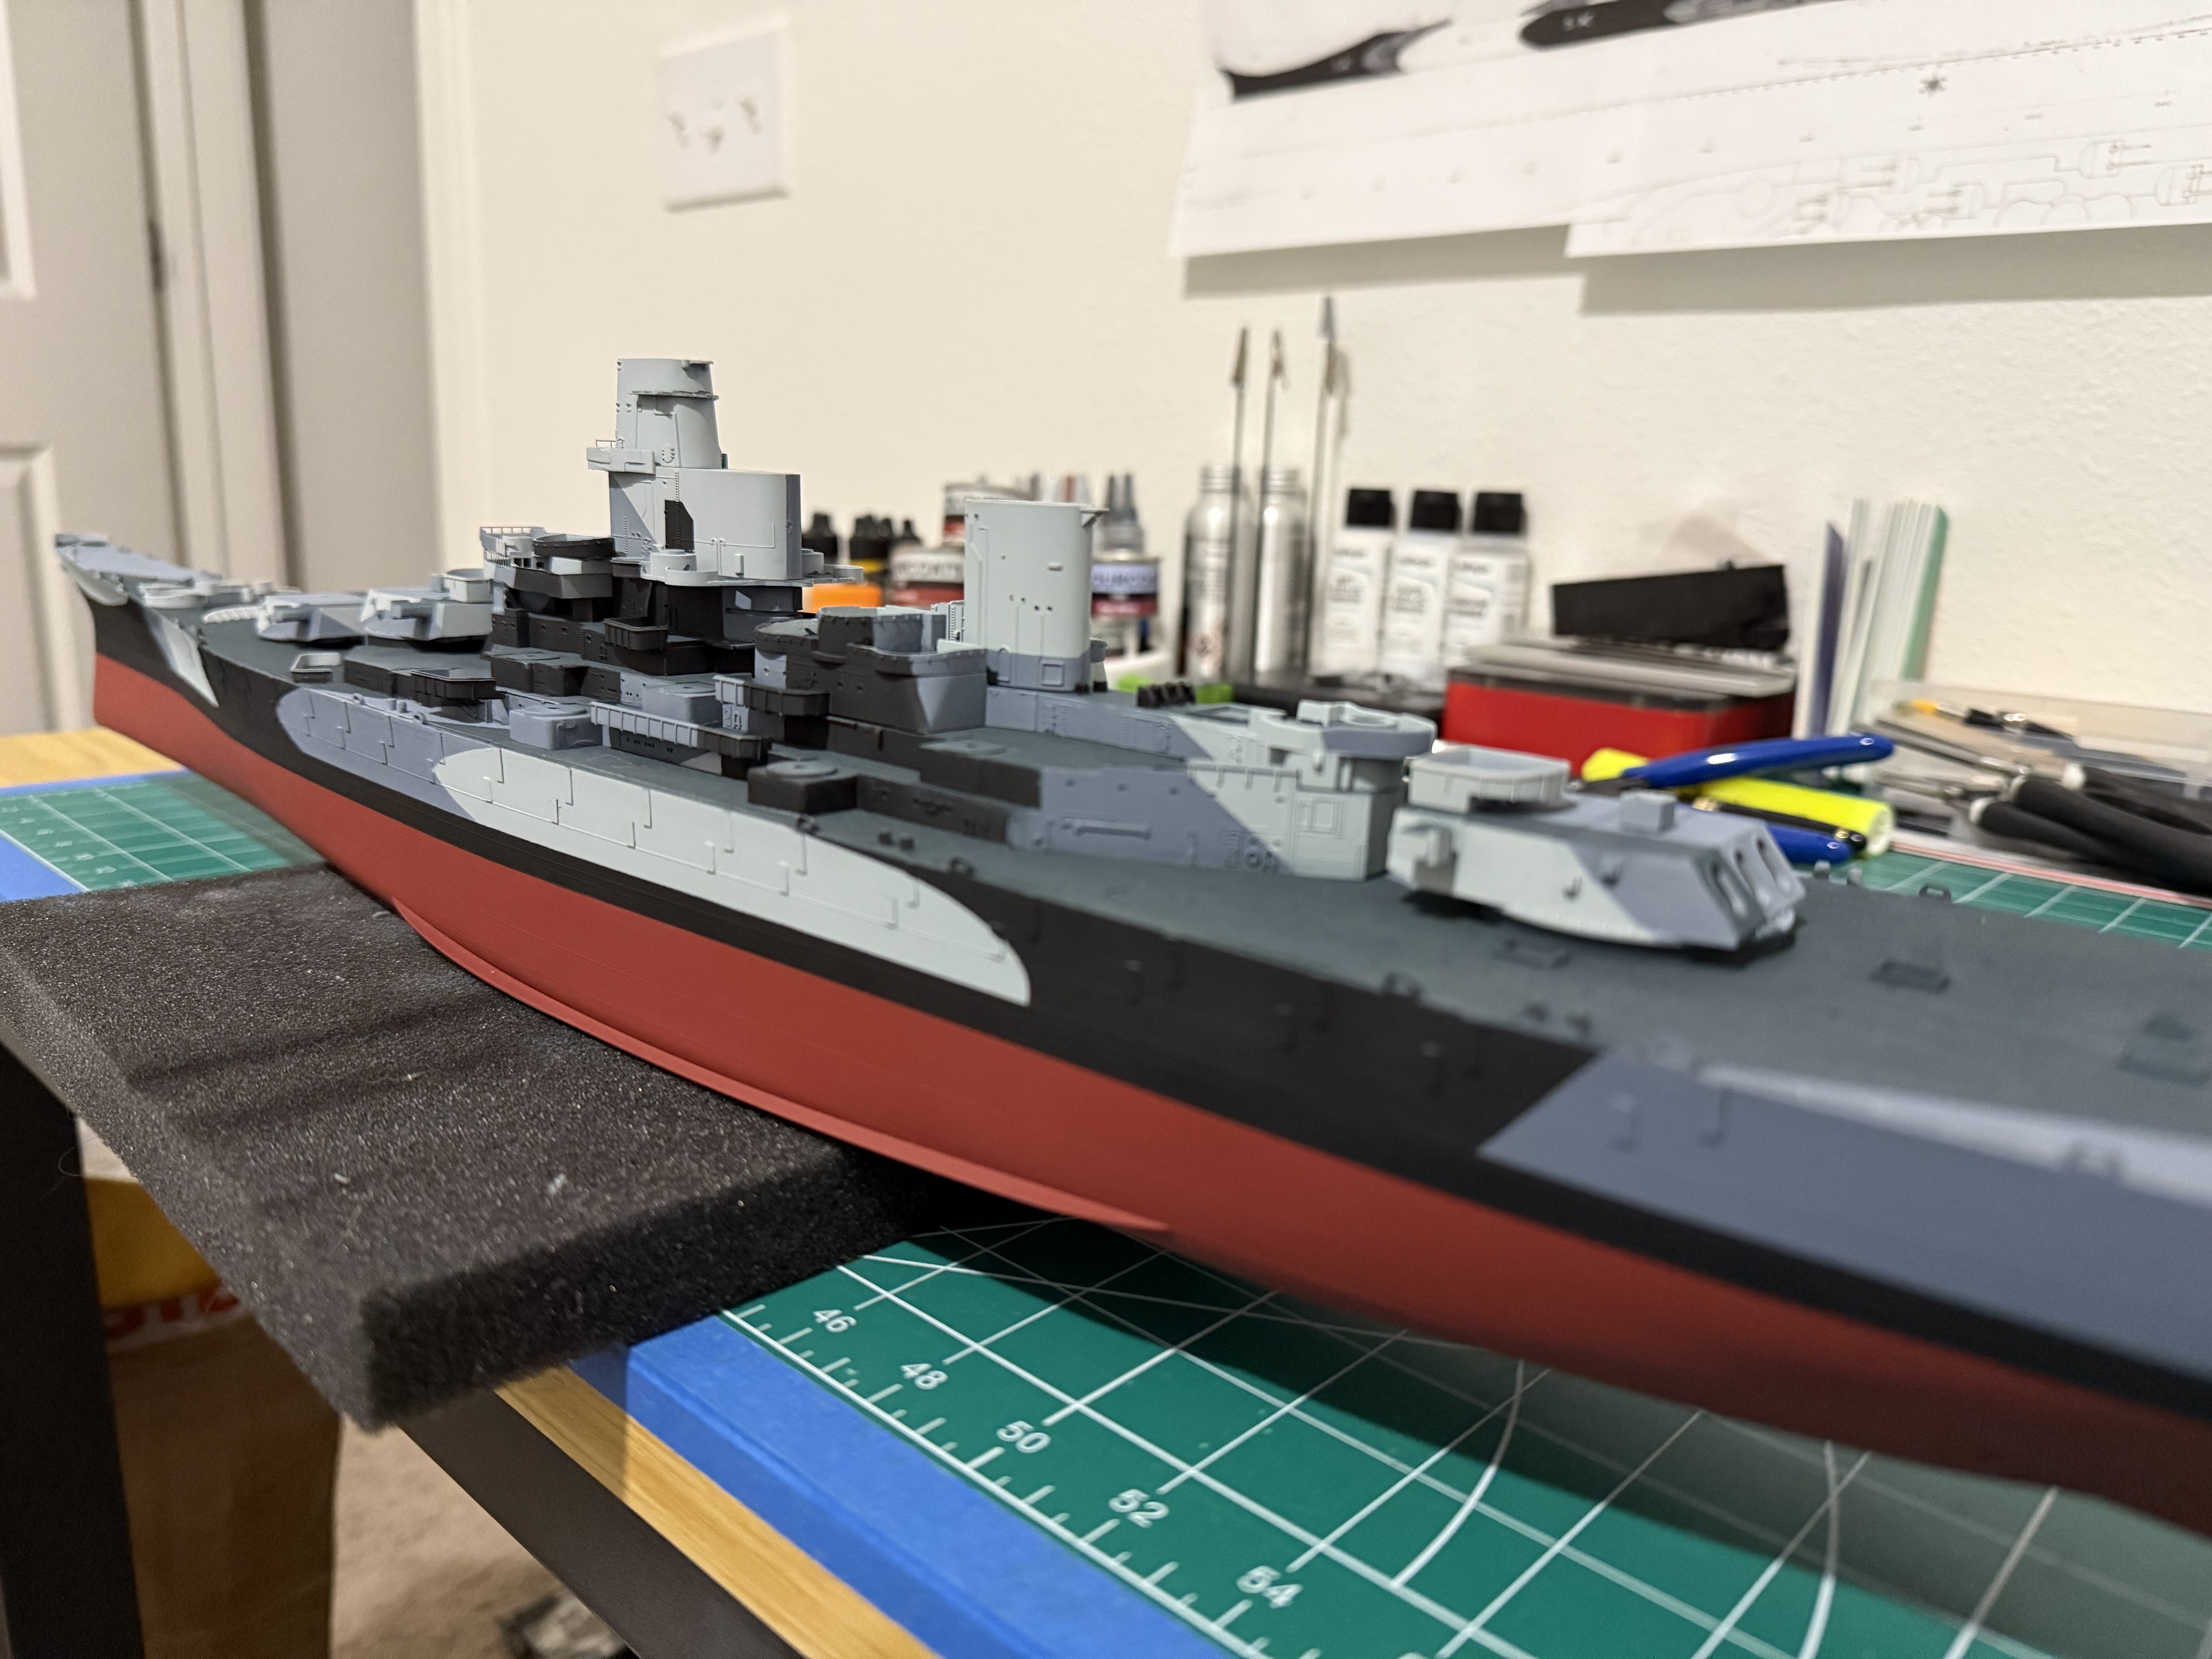
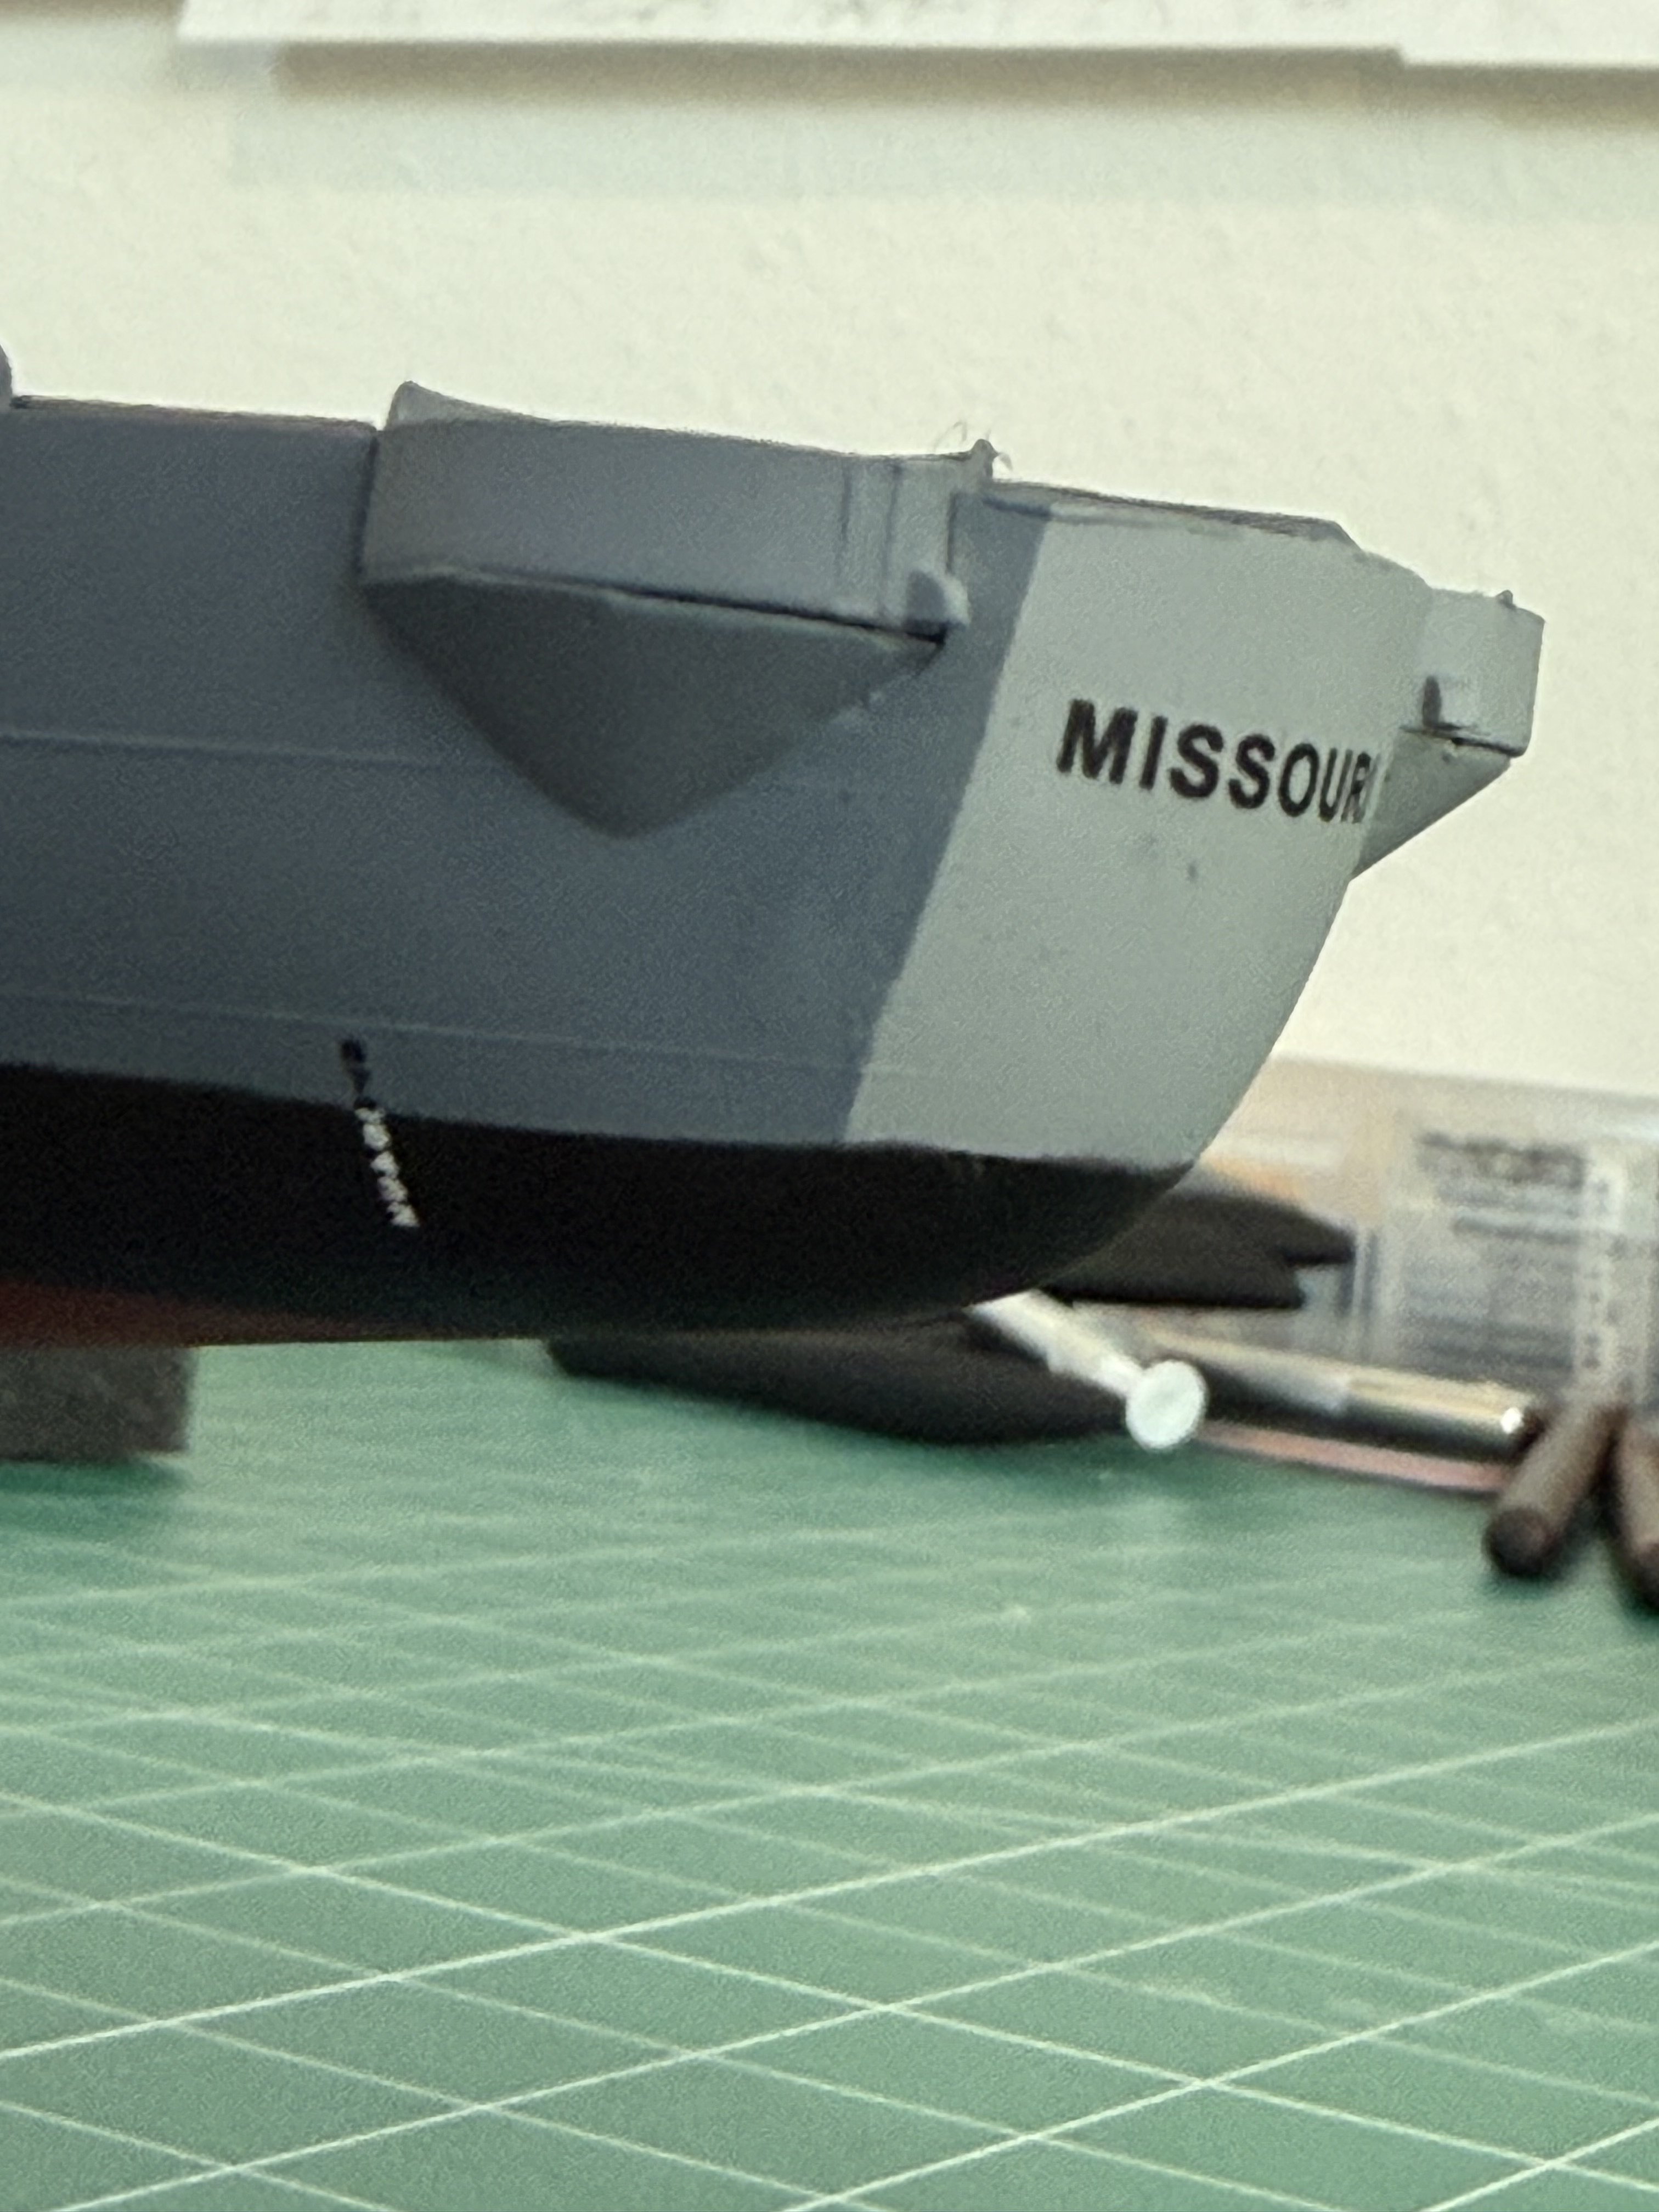
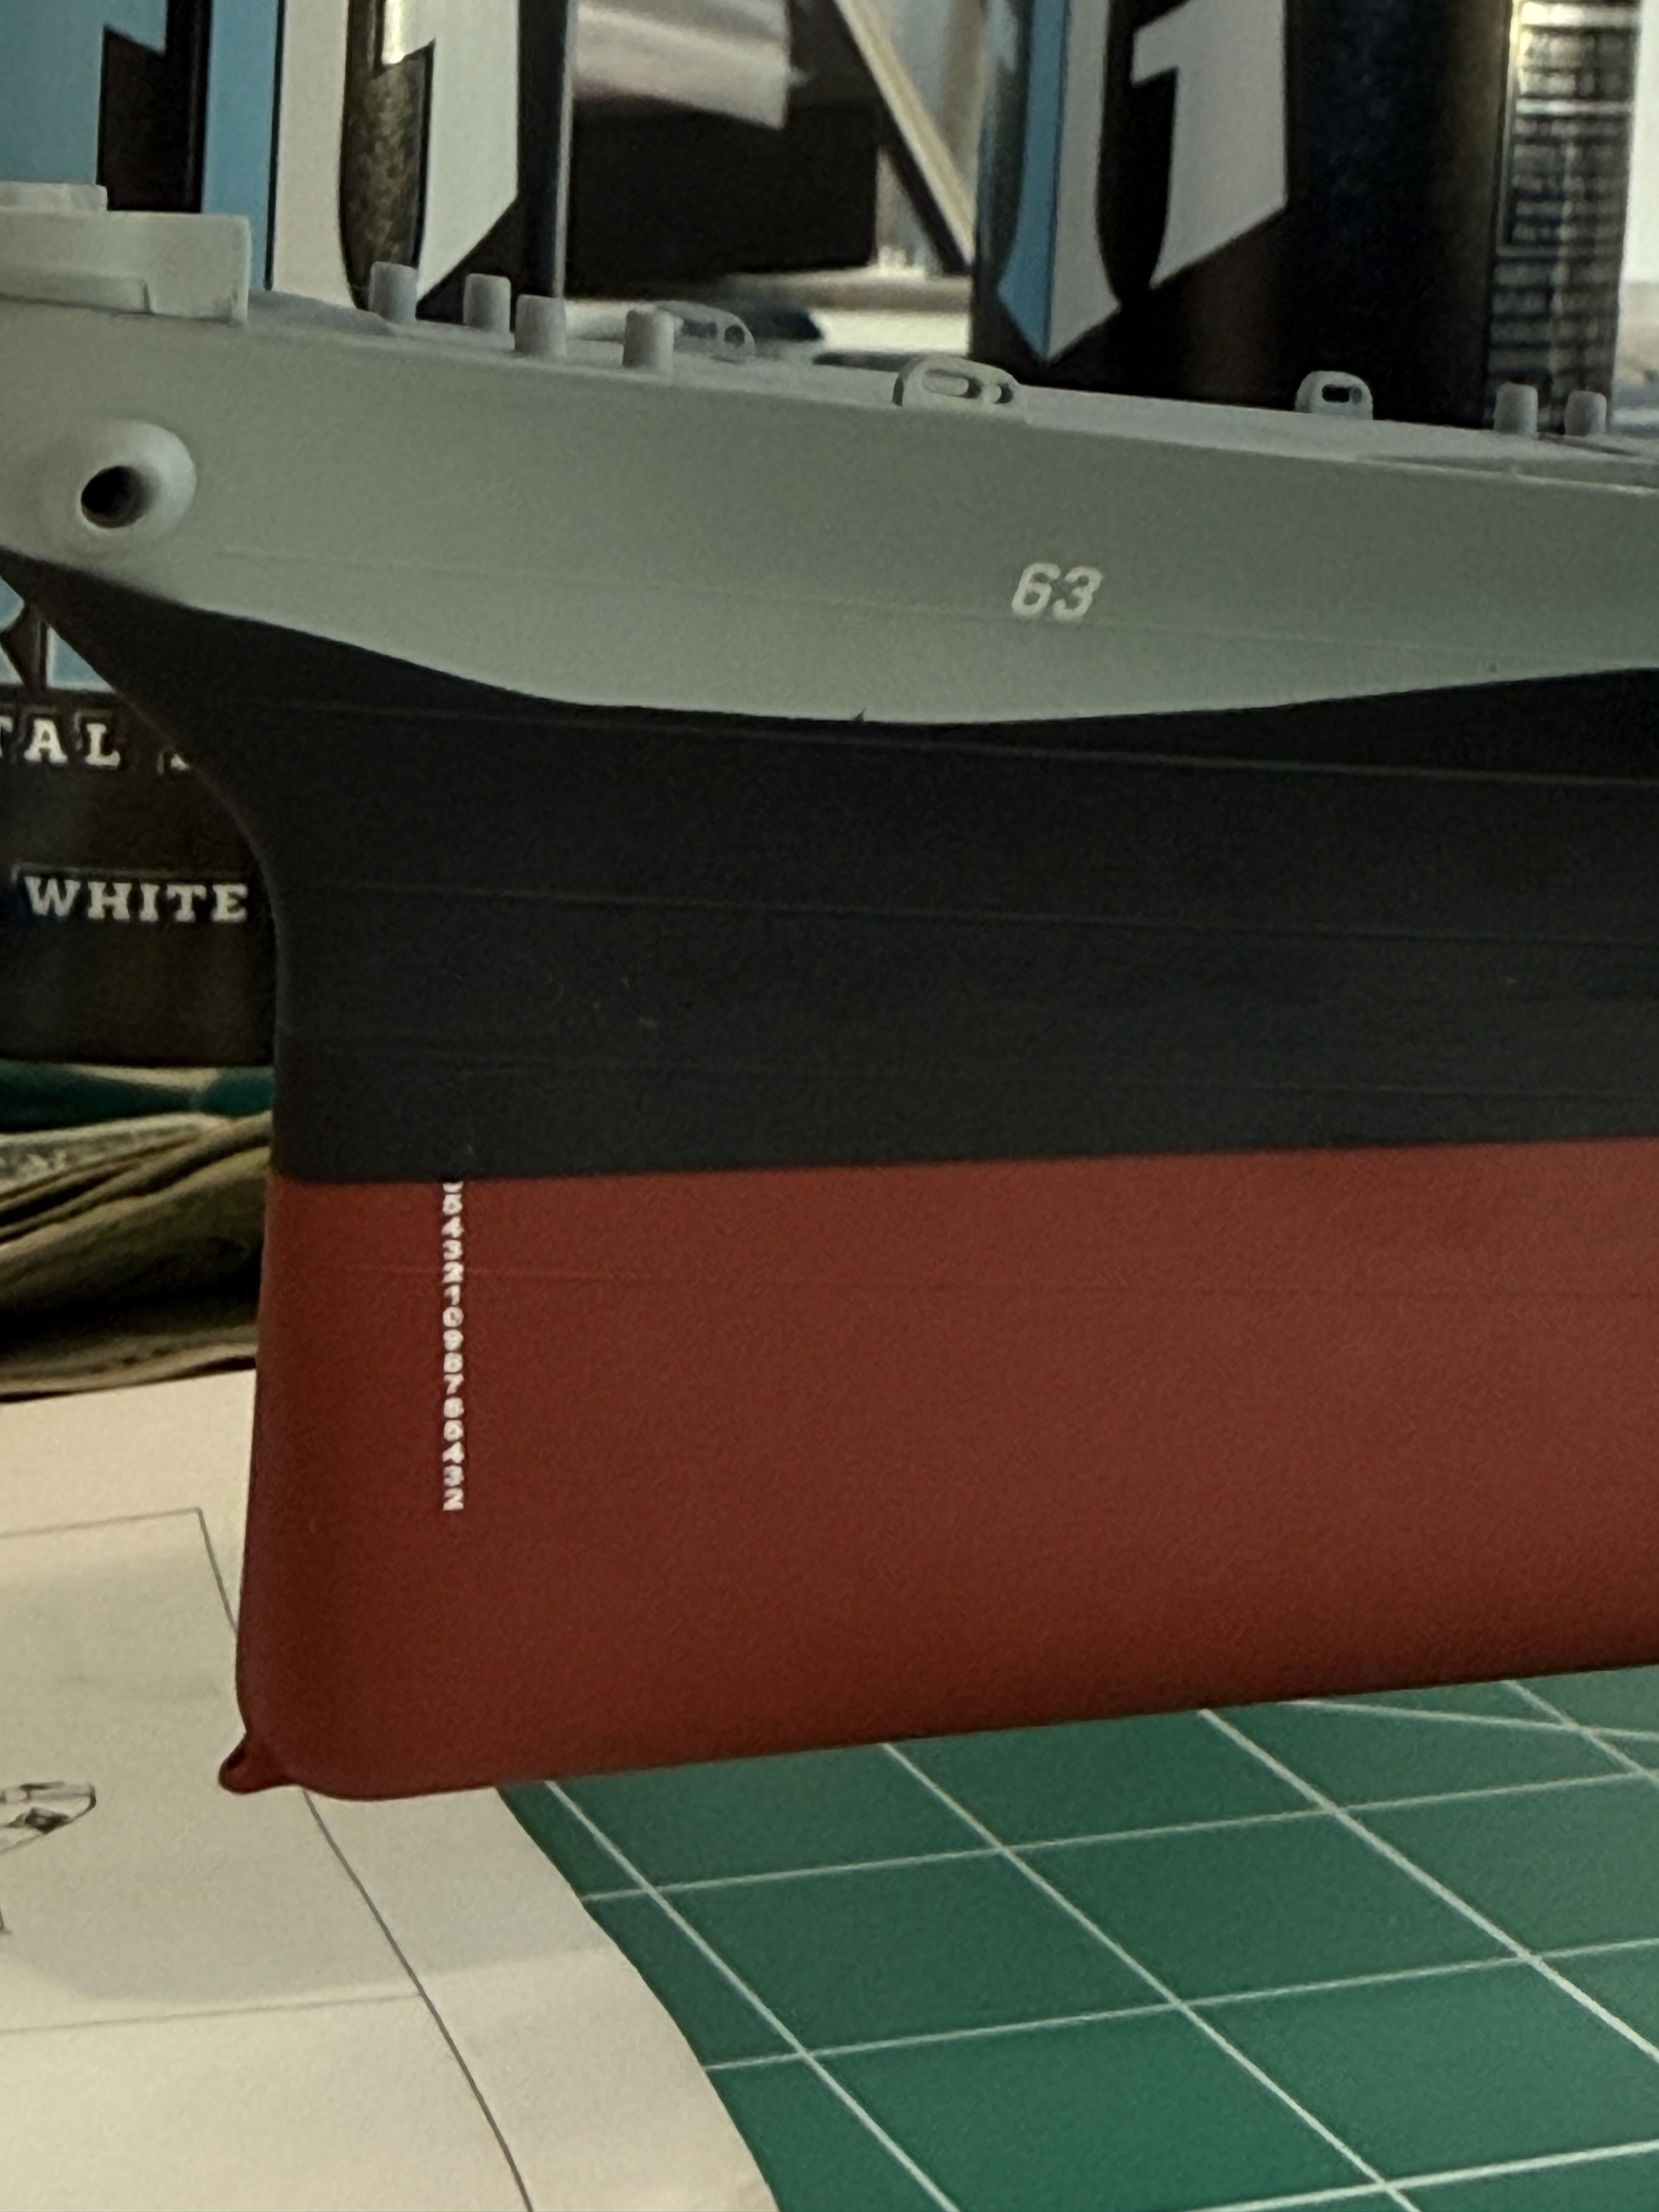
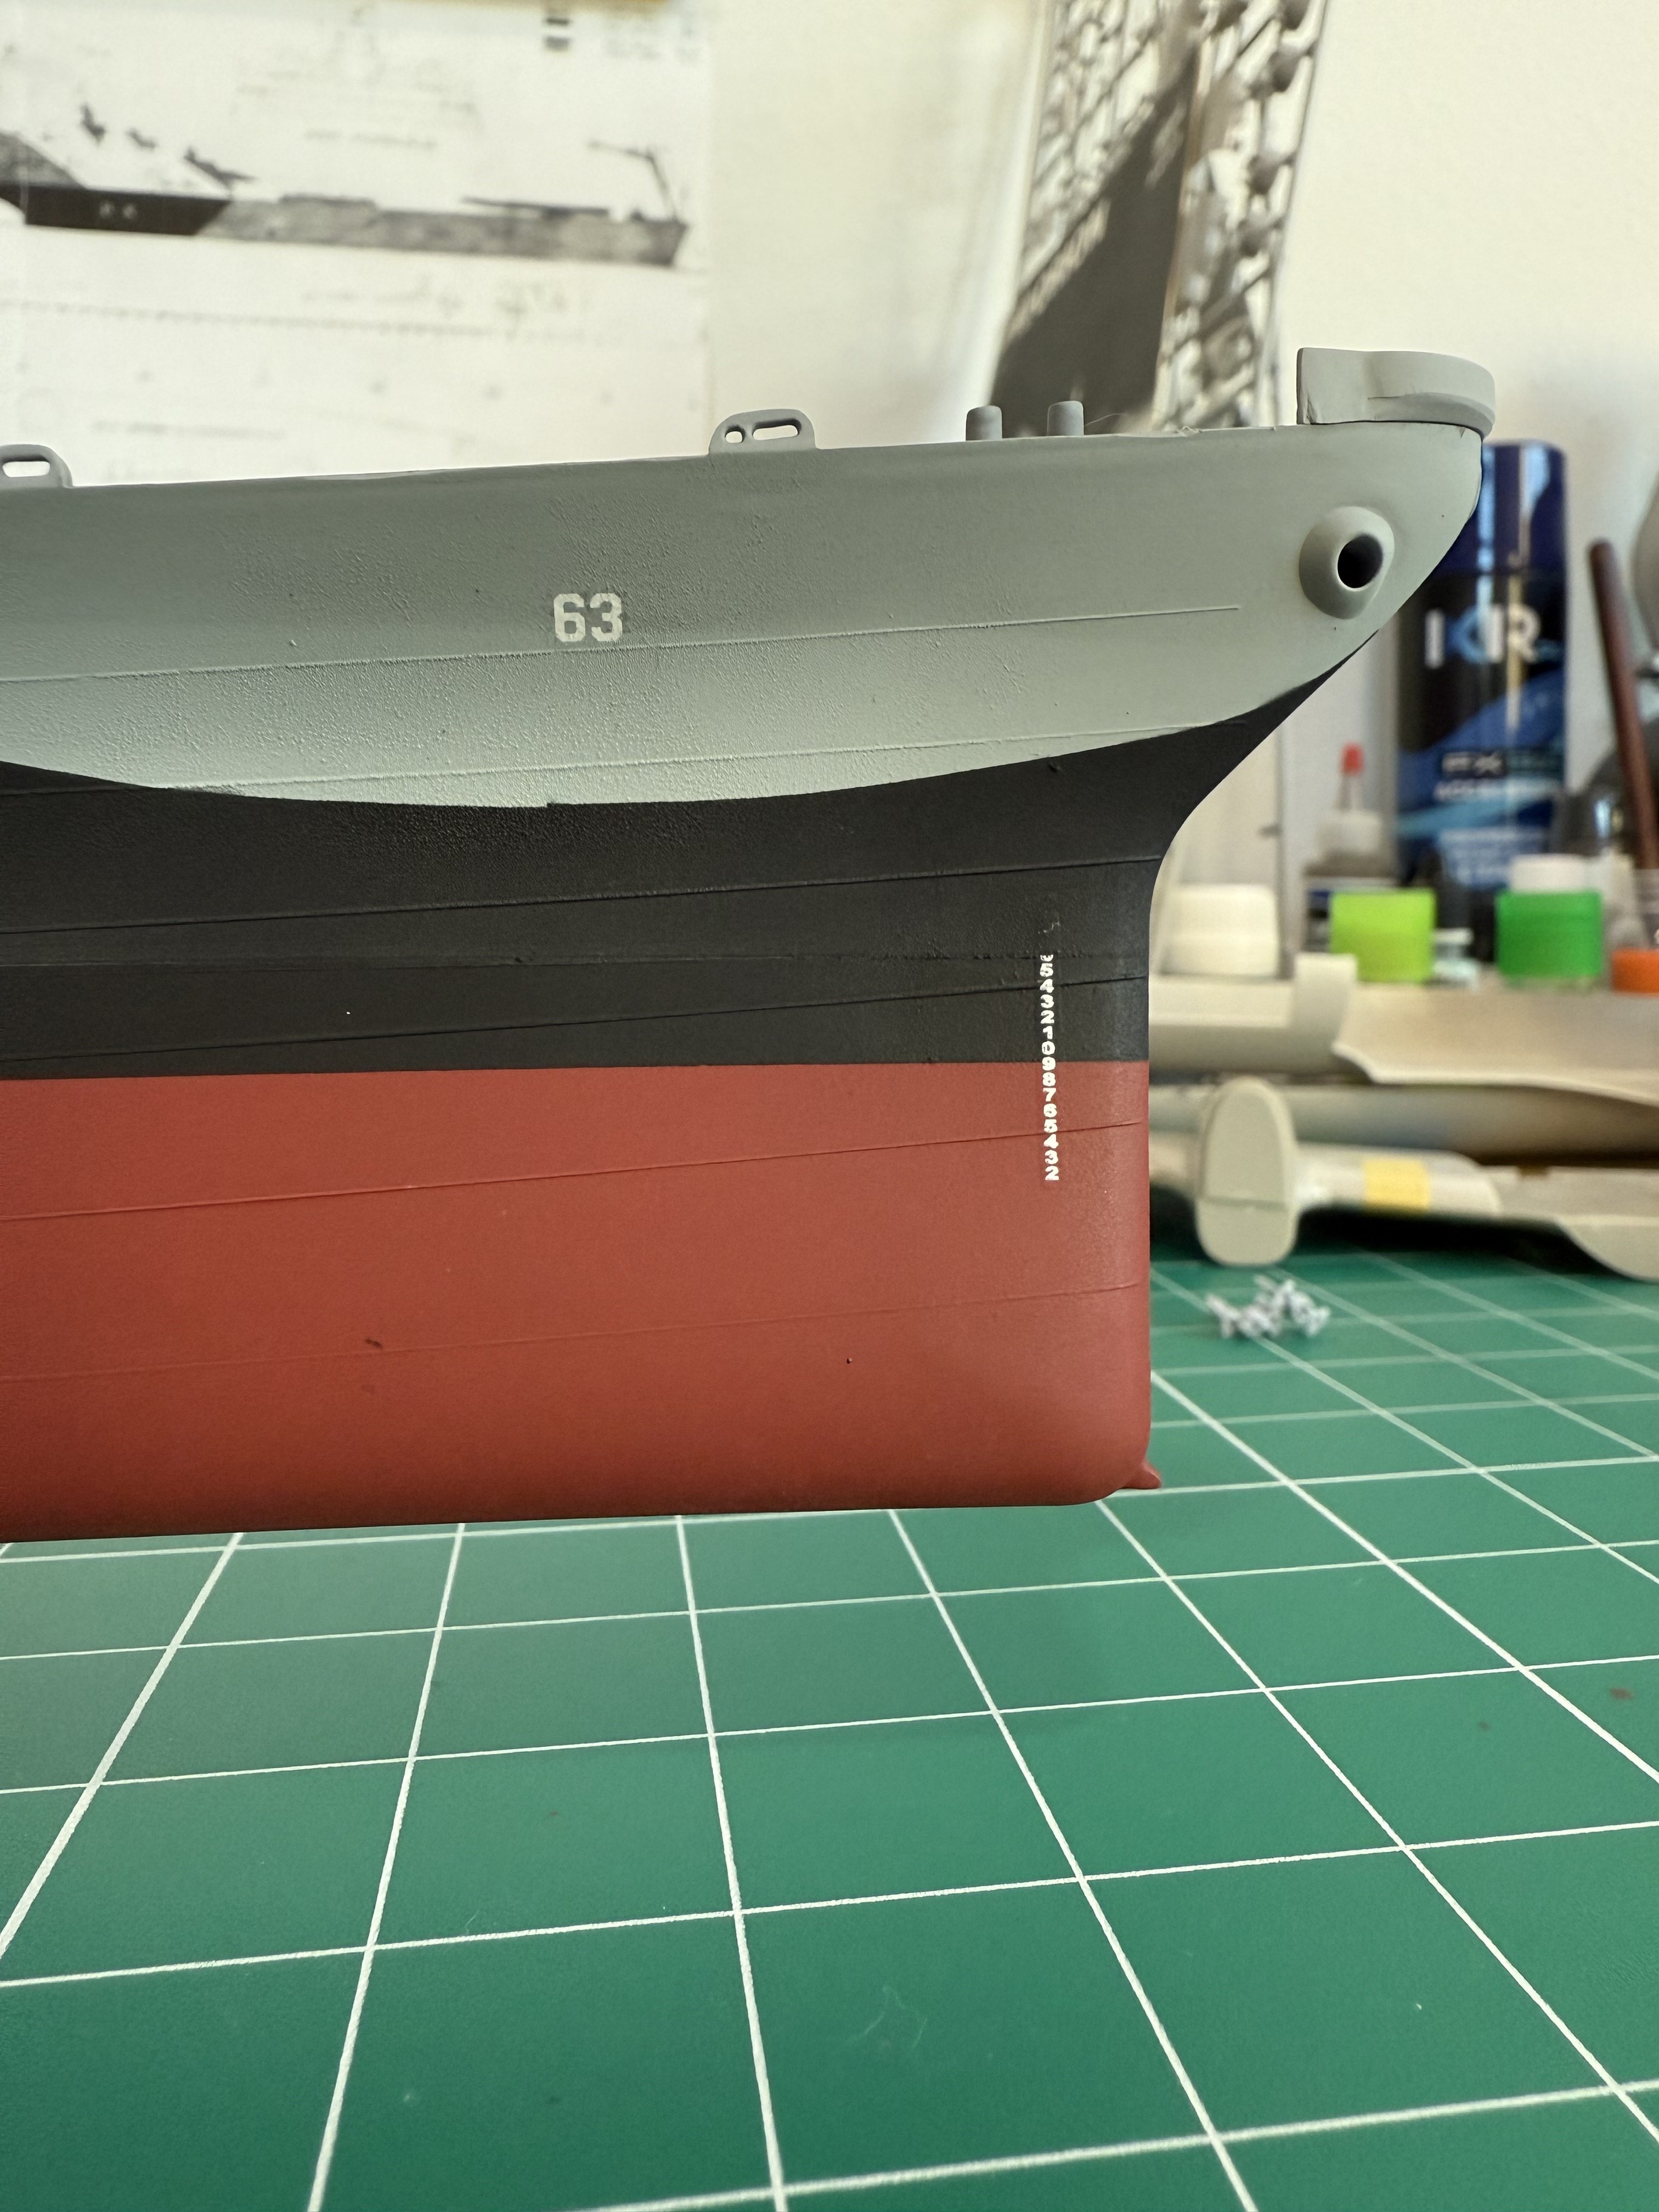
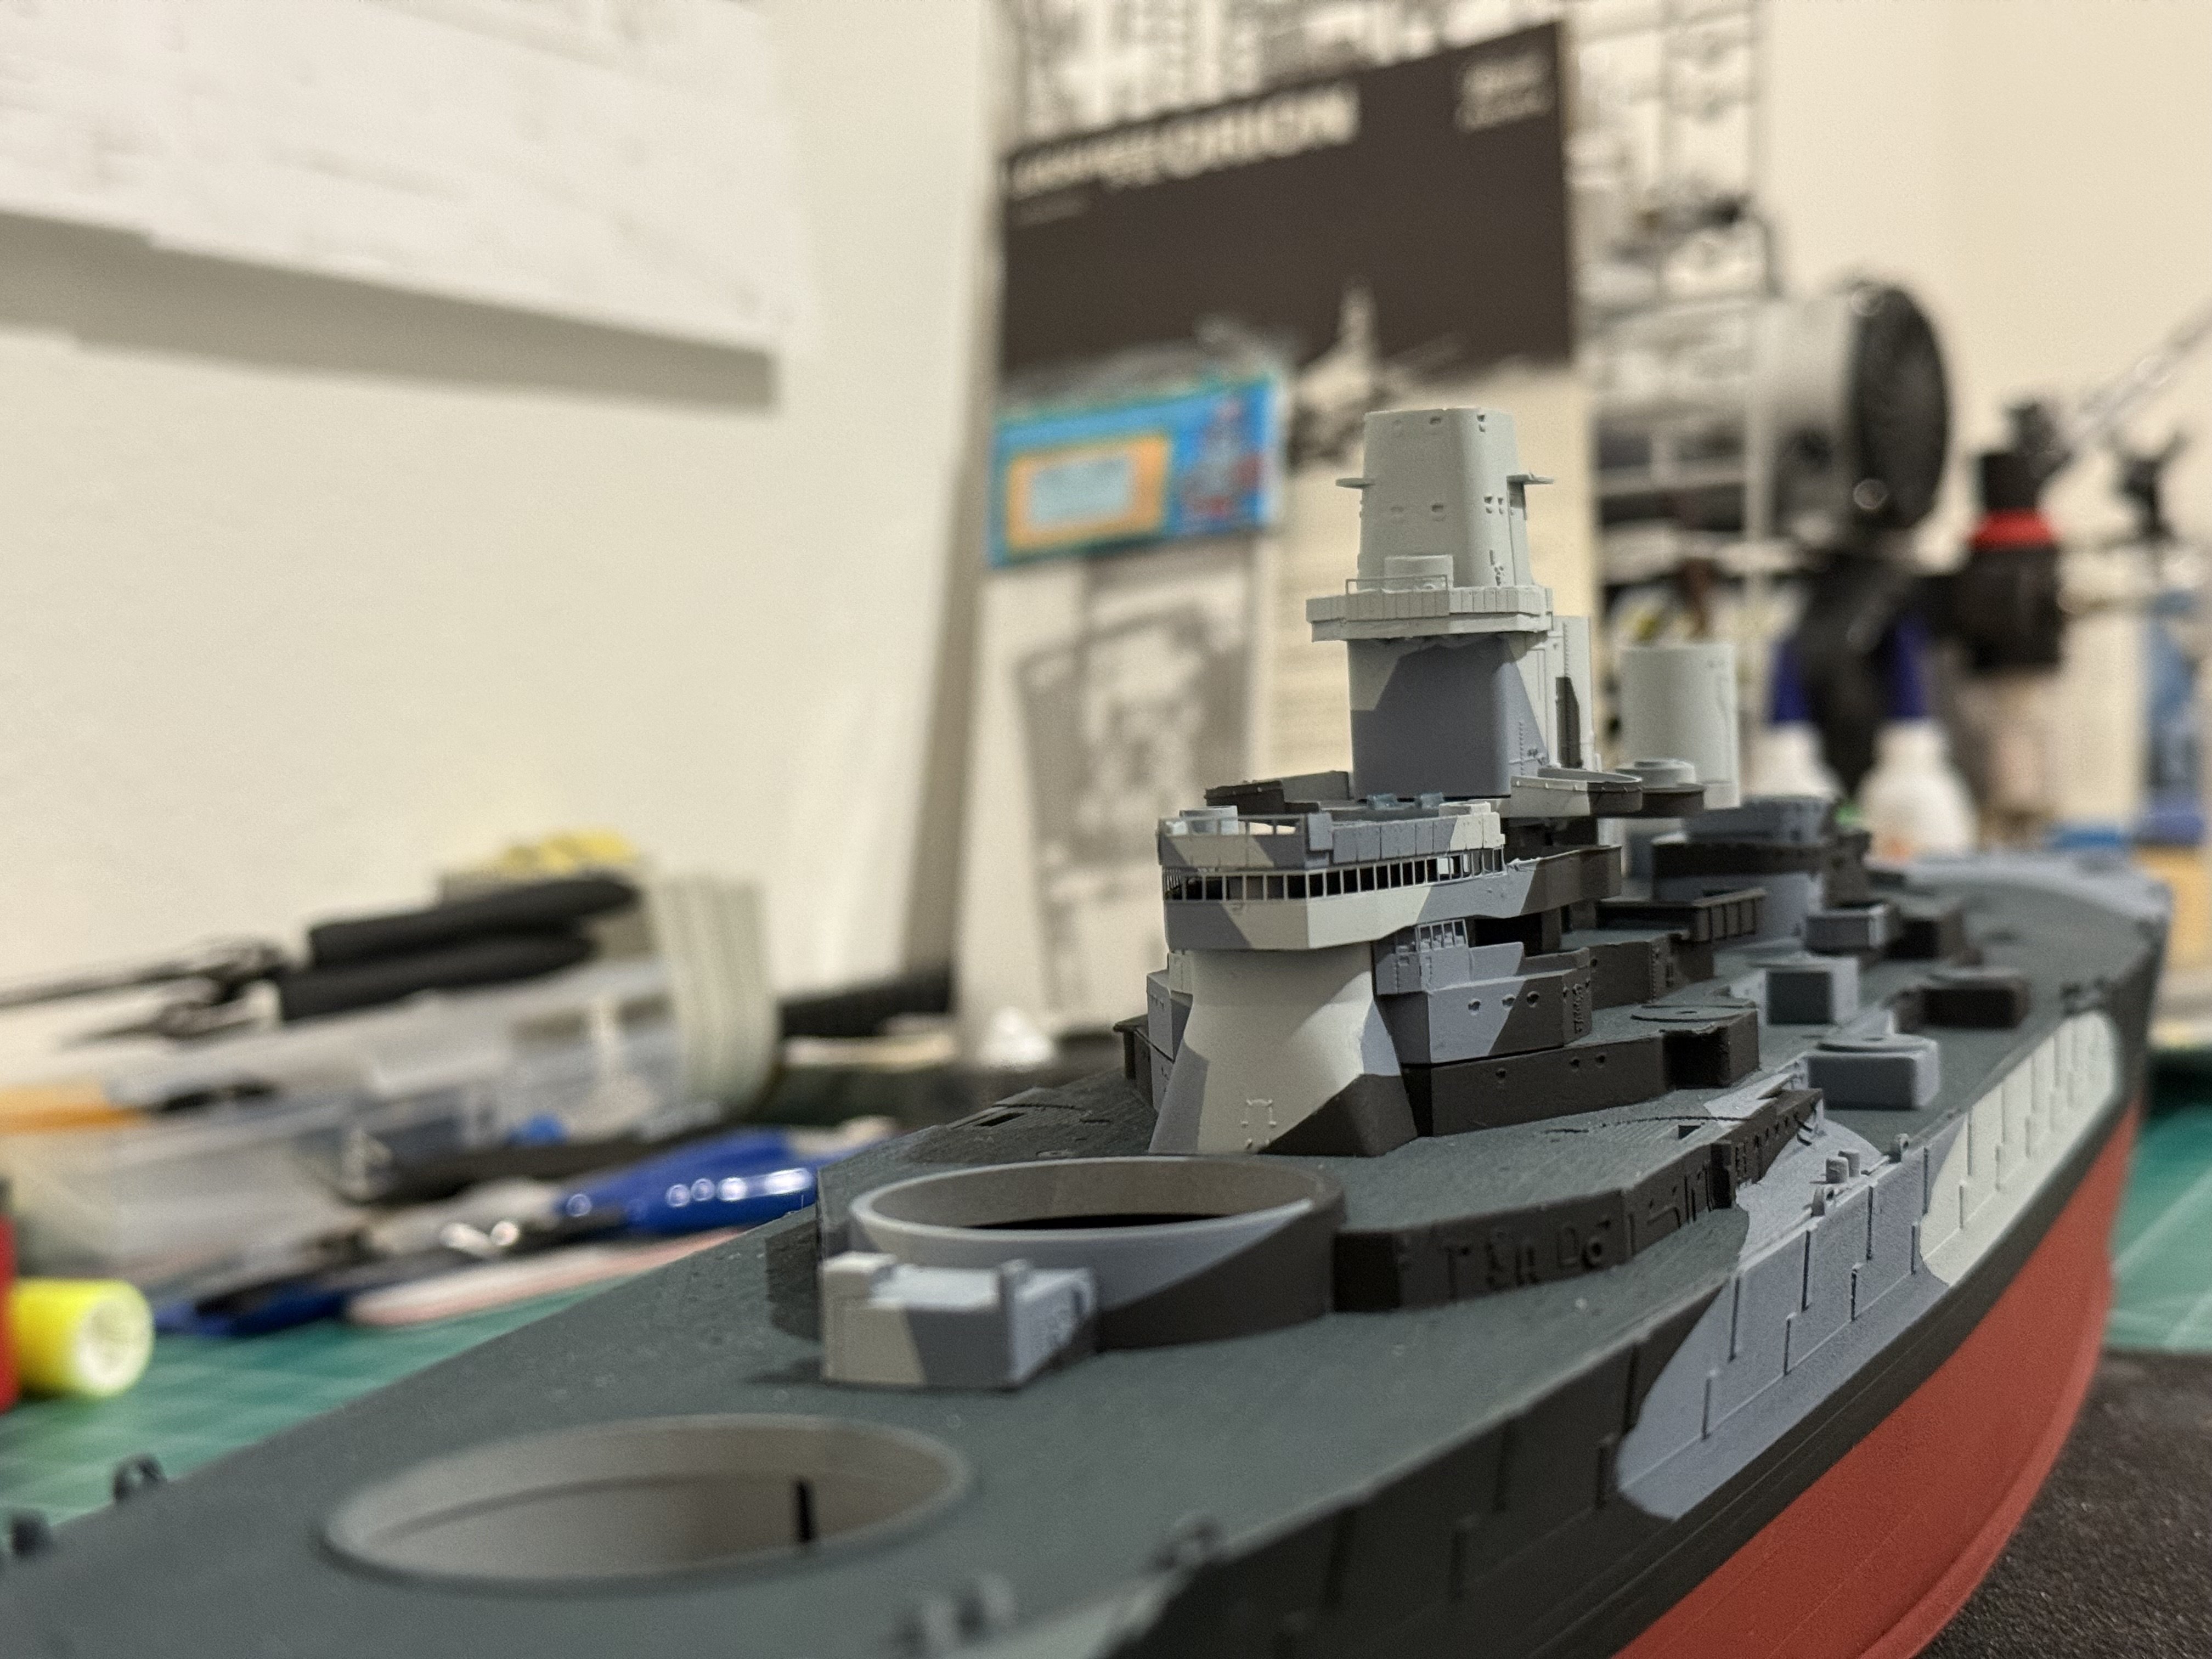
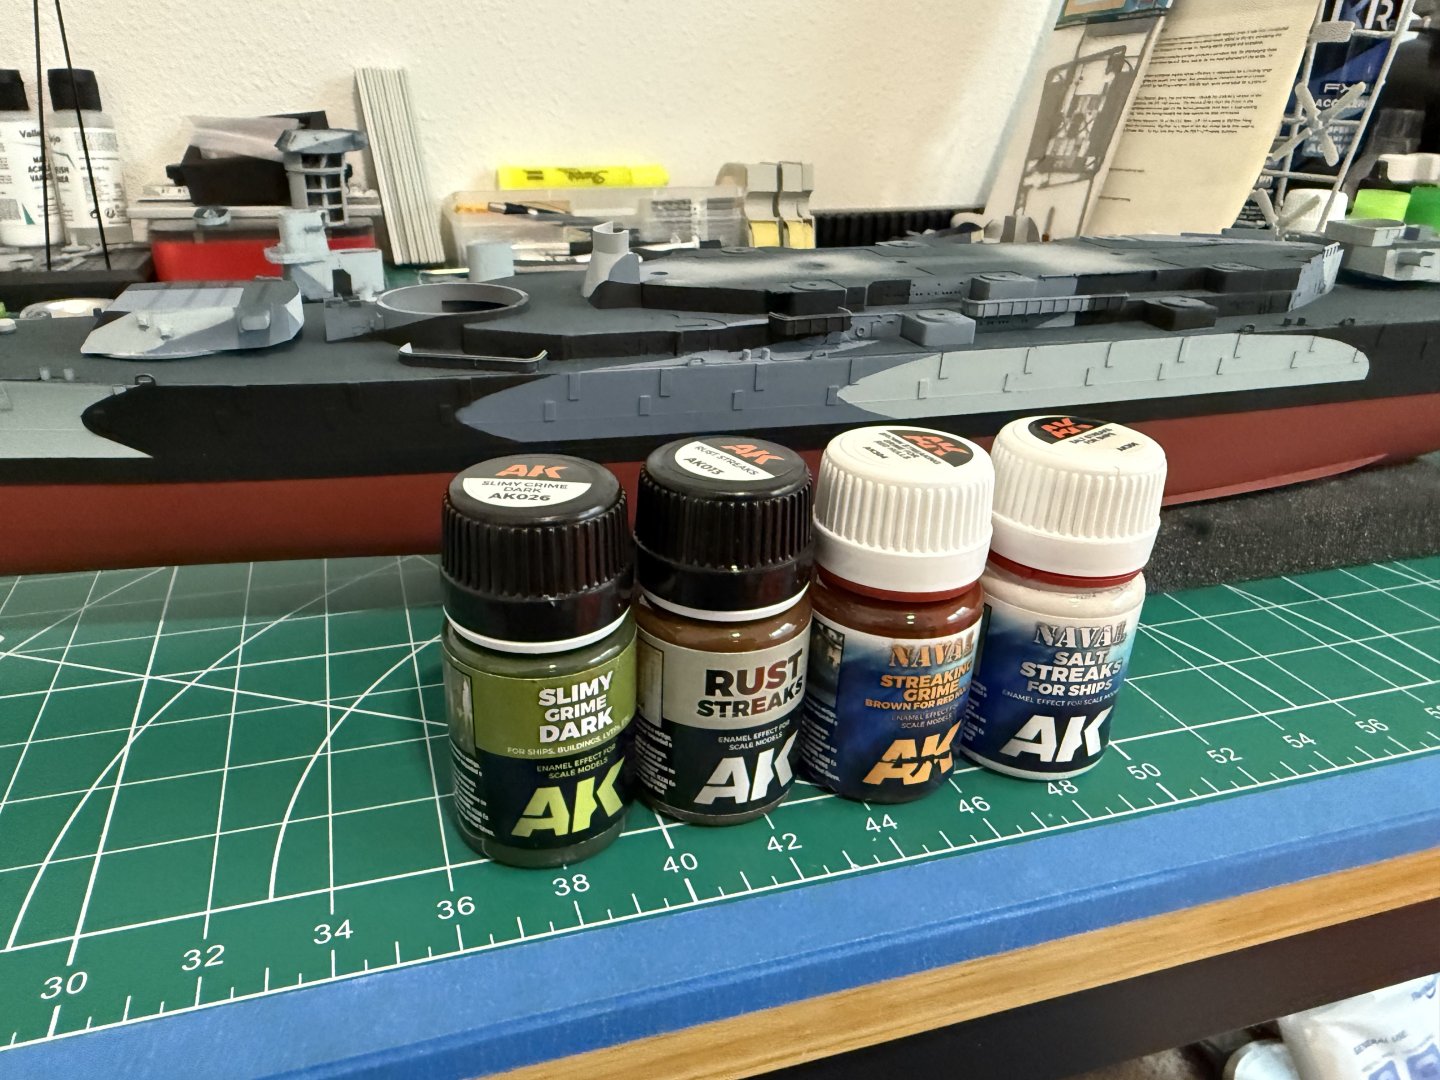
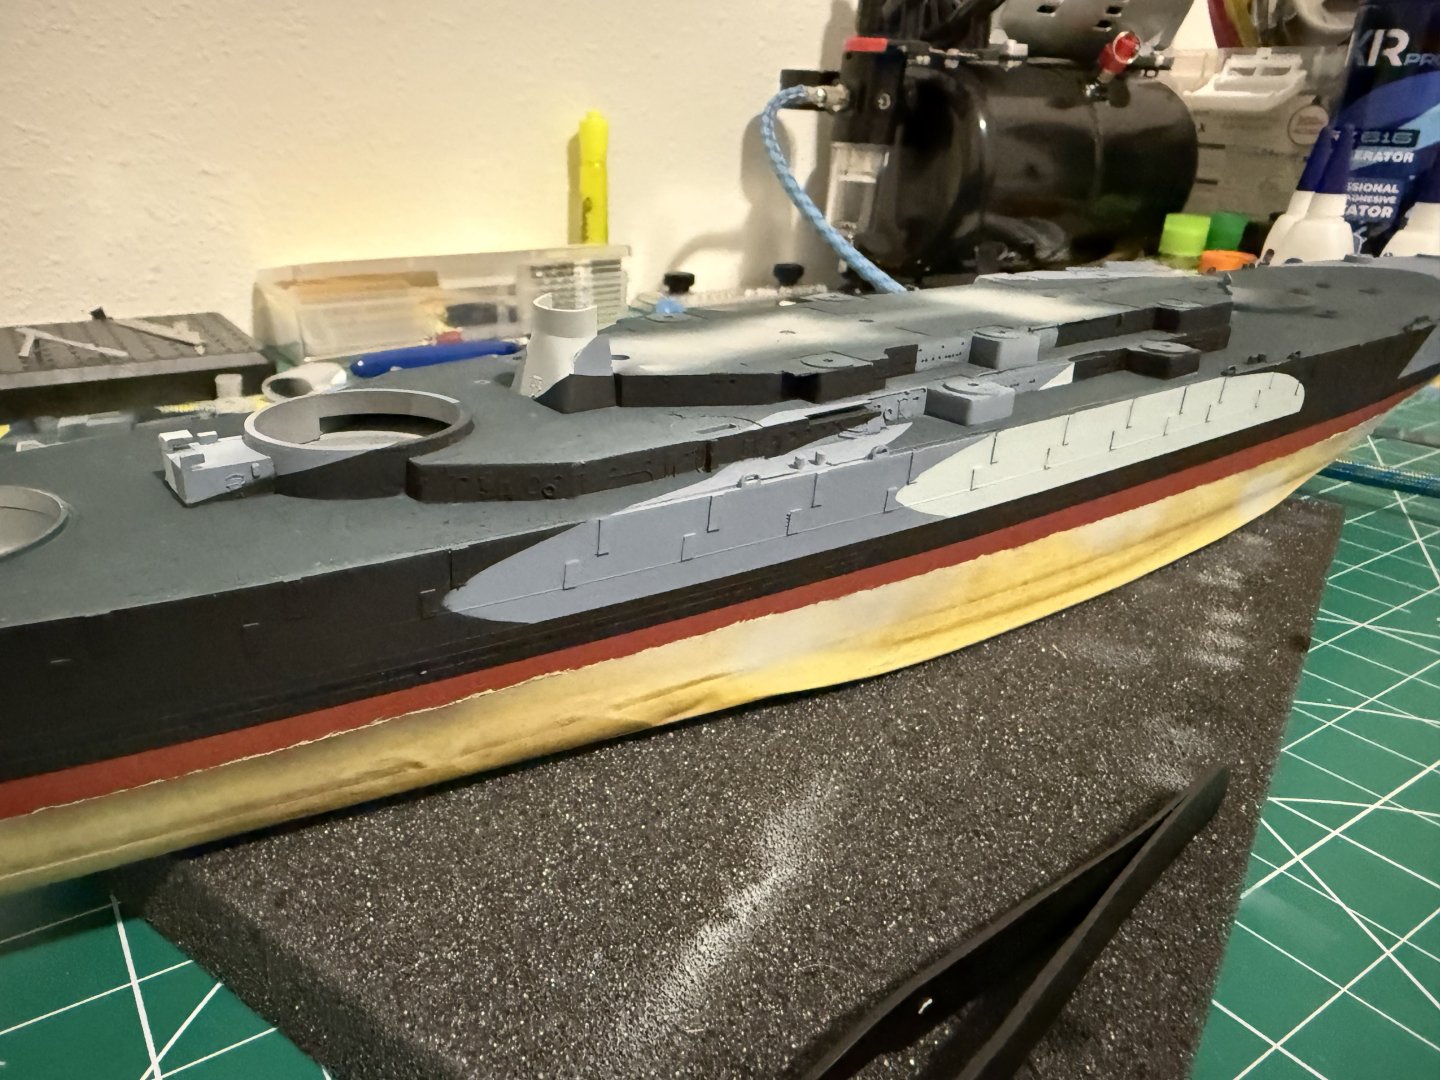
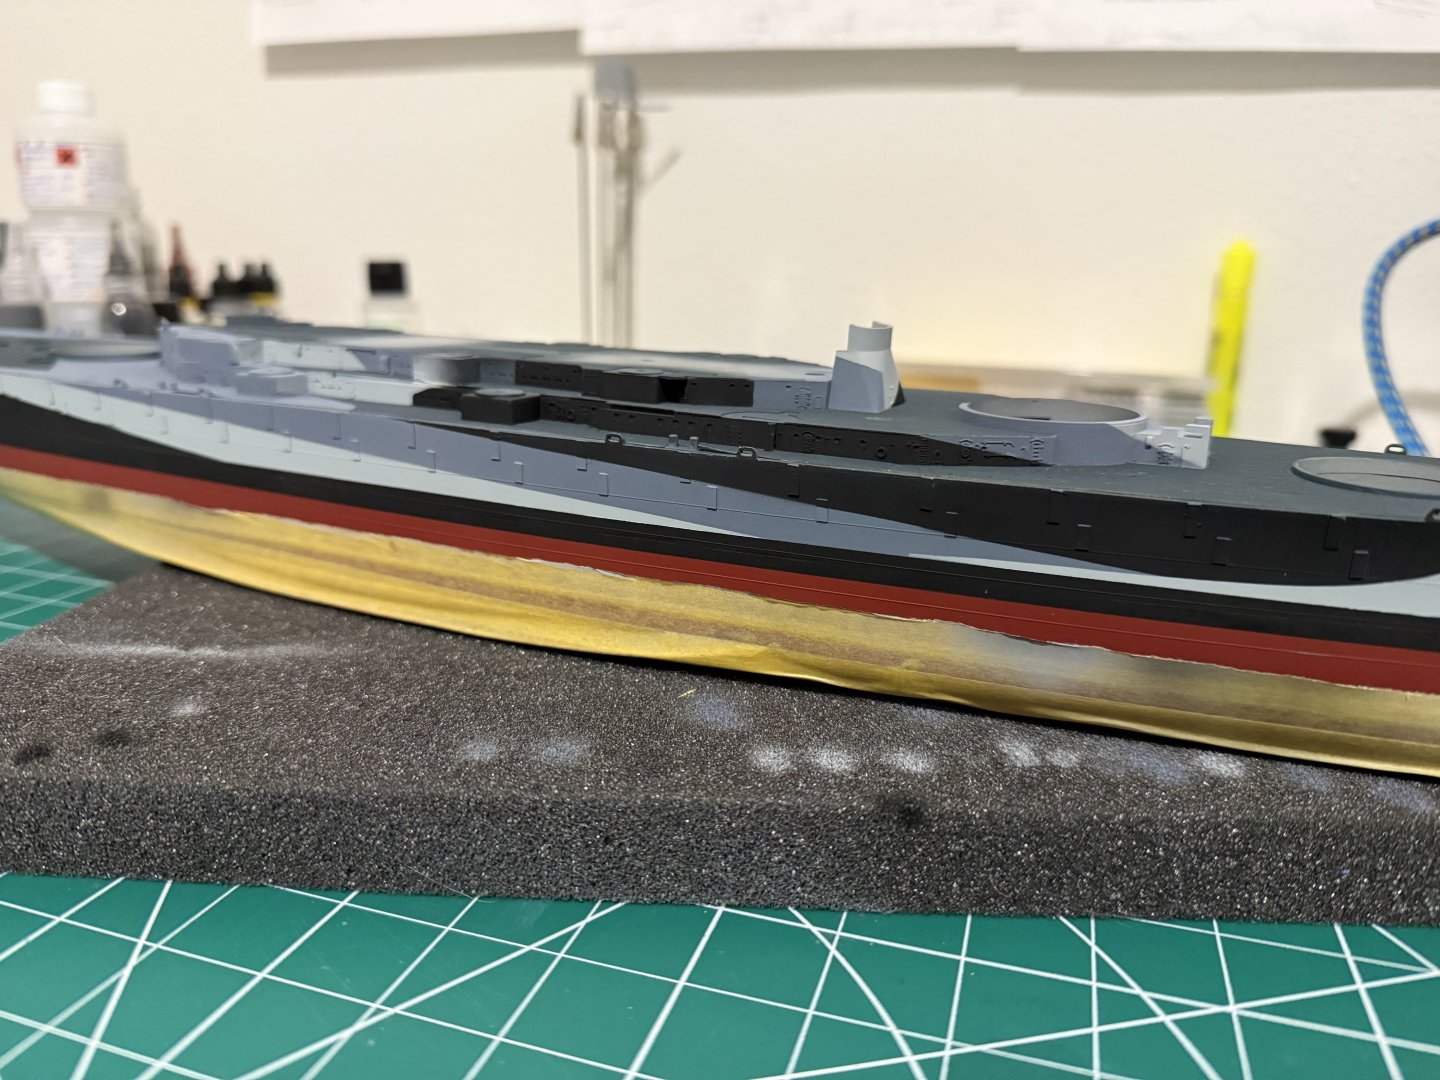
Noted, thank you for the heads up! I’ve had a productive past two days. My plan is to finish the bow and stern and then kinda work my way up, so I decided to tackle painting the 16” guns. I went back and fourth between all the reference photos and the original navy drawings to try and best match the colors and camo pattern. Of course, after I painted them I noticed I painted the front of turret #2 with 20B instead of black, so I have to correct that. I also decided now was probably a good time to weather the hull because I don’t want to start laying it on its side if I’m building up the decks, so I got on the decals and matte varnish. I accidentally aligned the starboard decal too high and in a moment of frustration over it accidentally used the black Missouri decal instead of white. Overall the decals came out great. Decals have always been something I struggled with so I was very pleased to get that painted on look with no silvering. I’ll put on the second coat of matte varnish tomorrow and start playing around with the AK interactive weathering enamels.


-
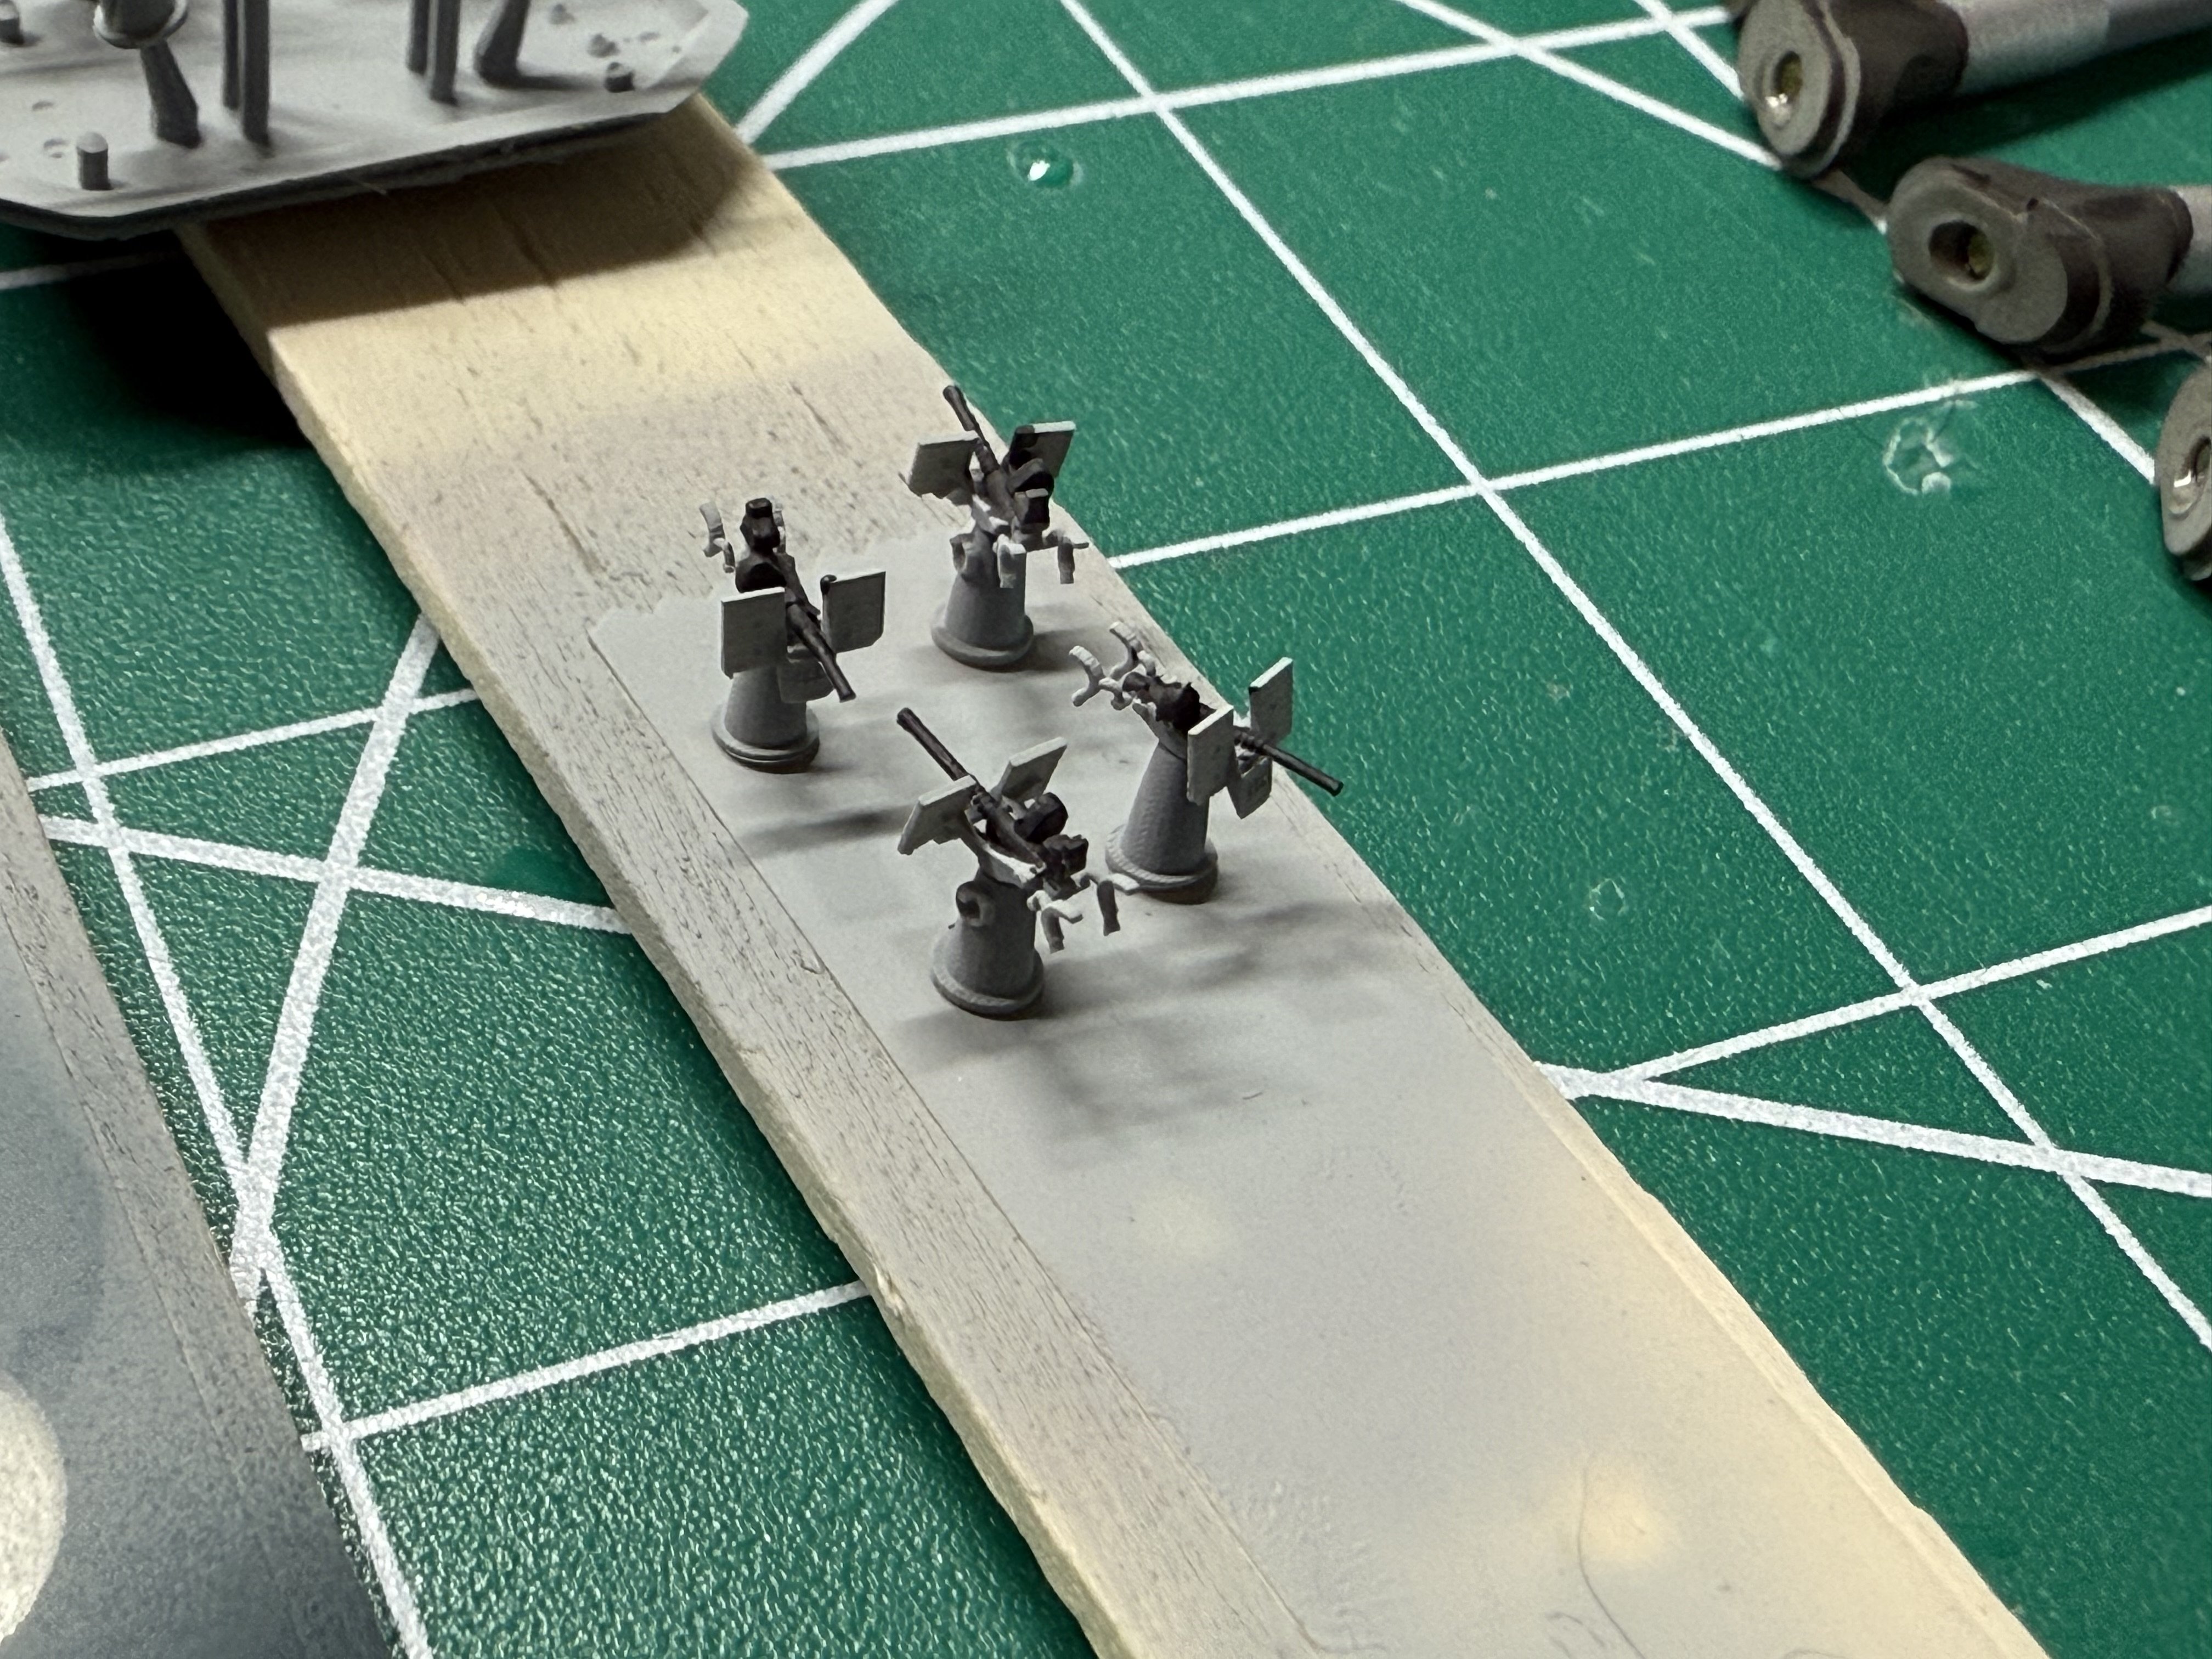
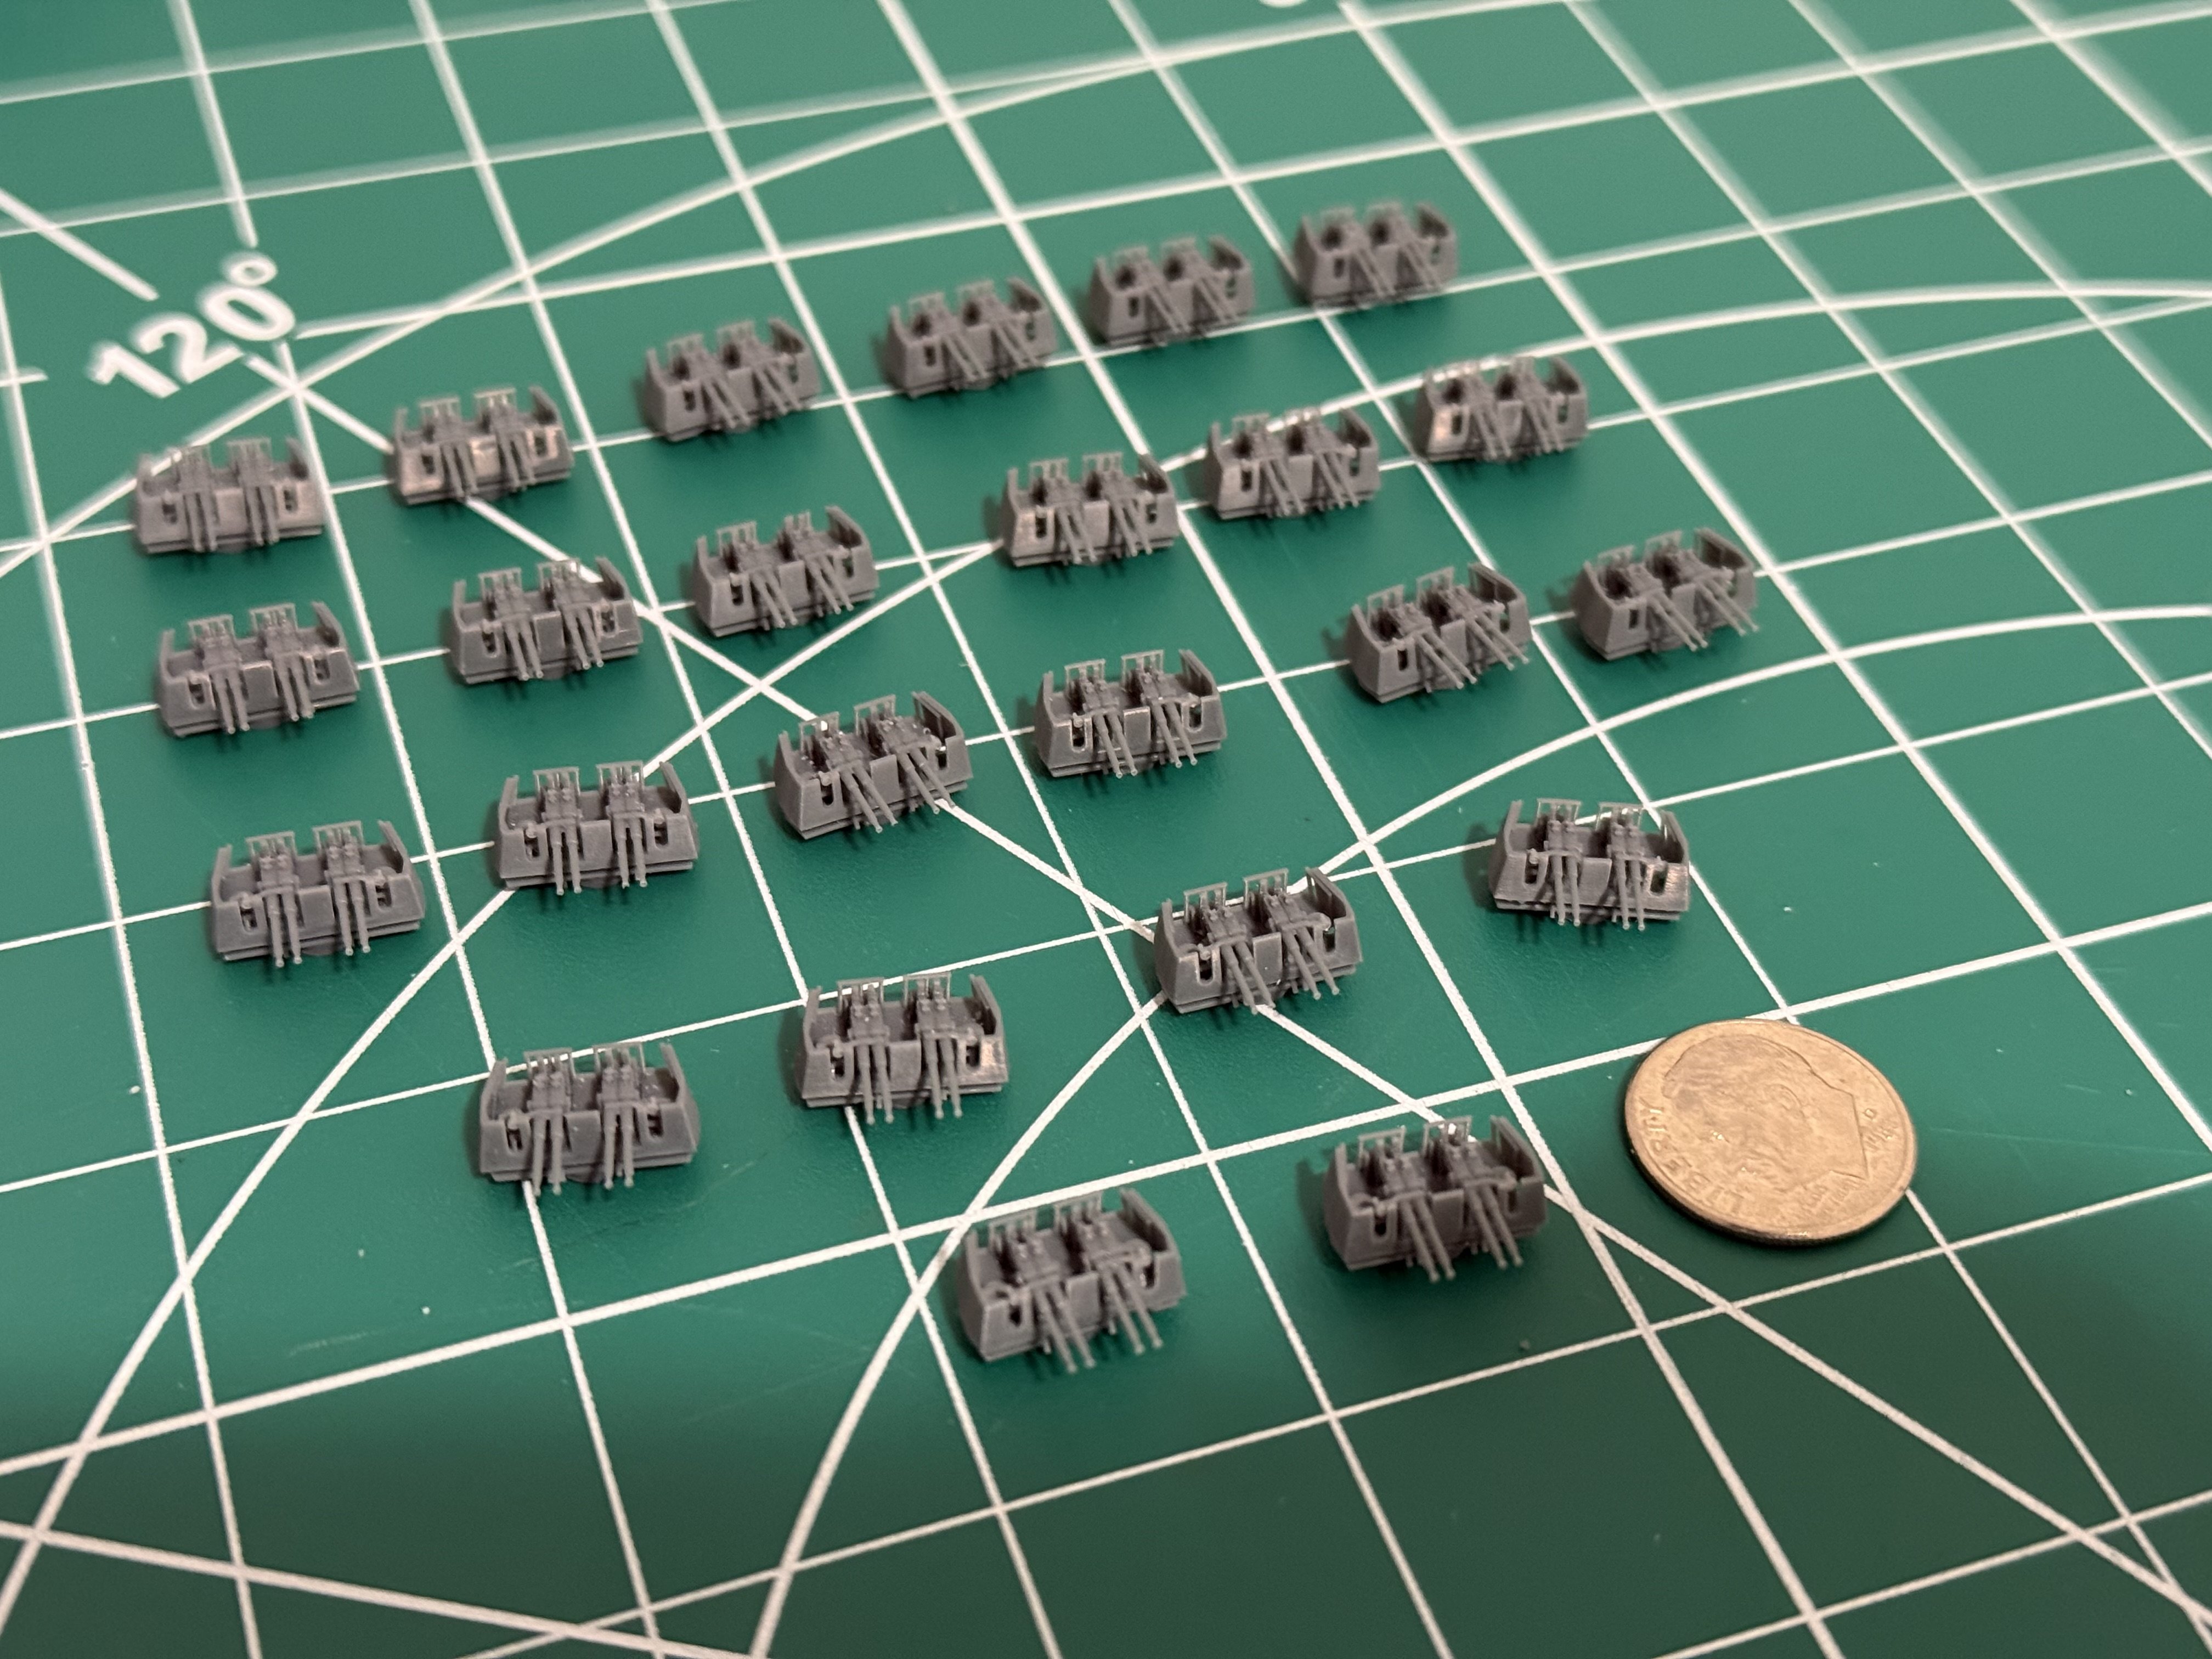
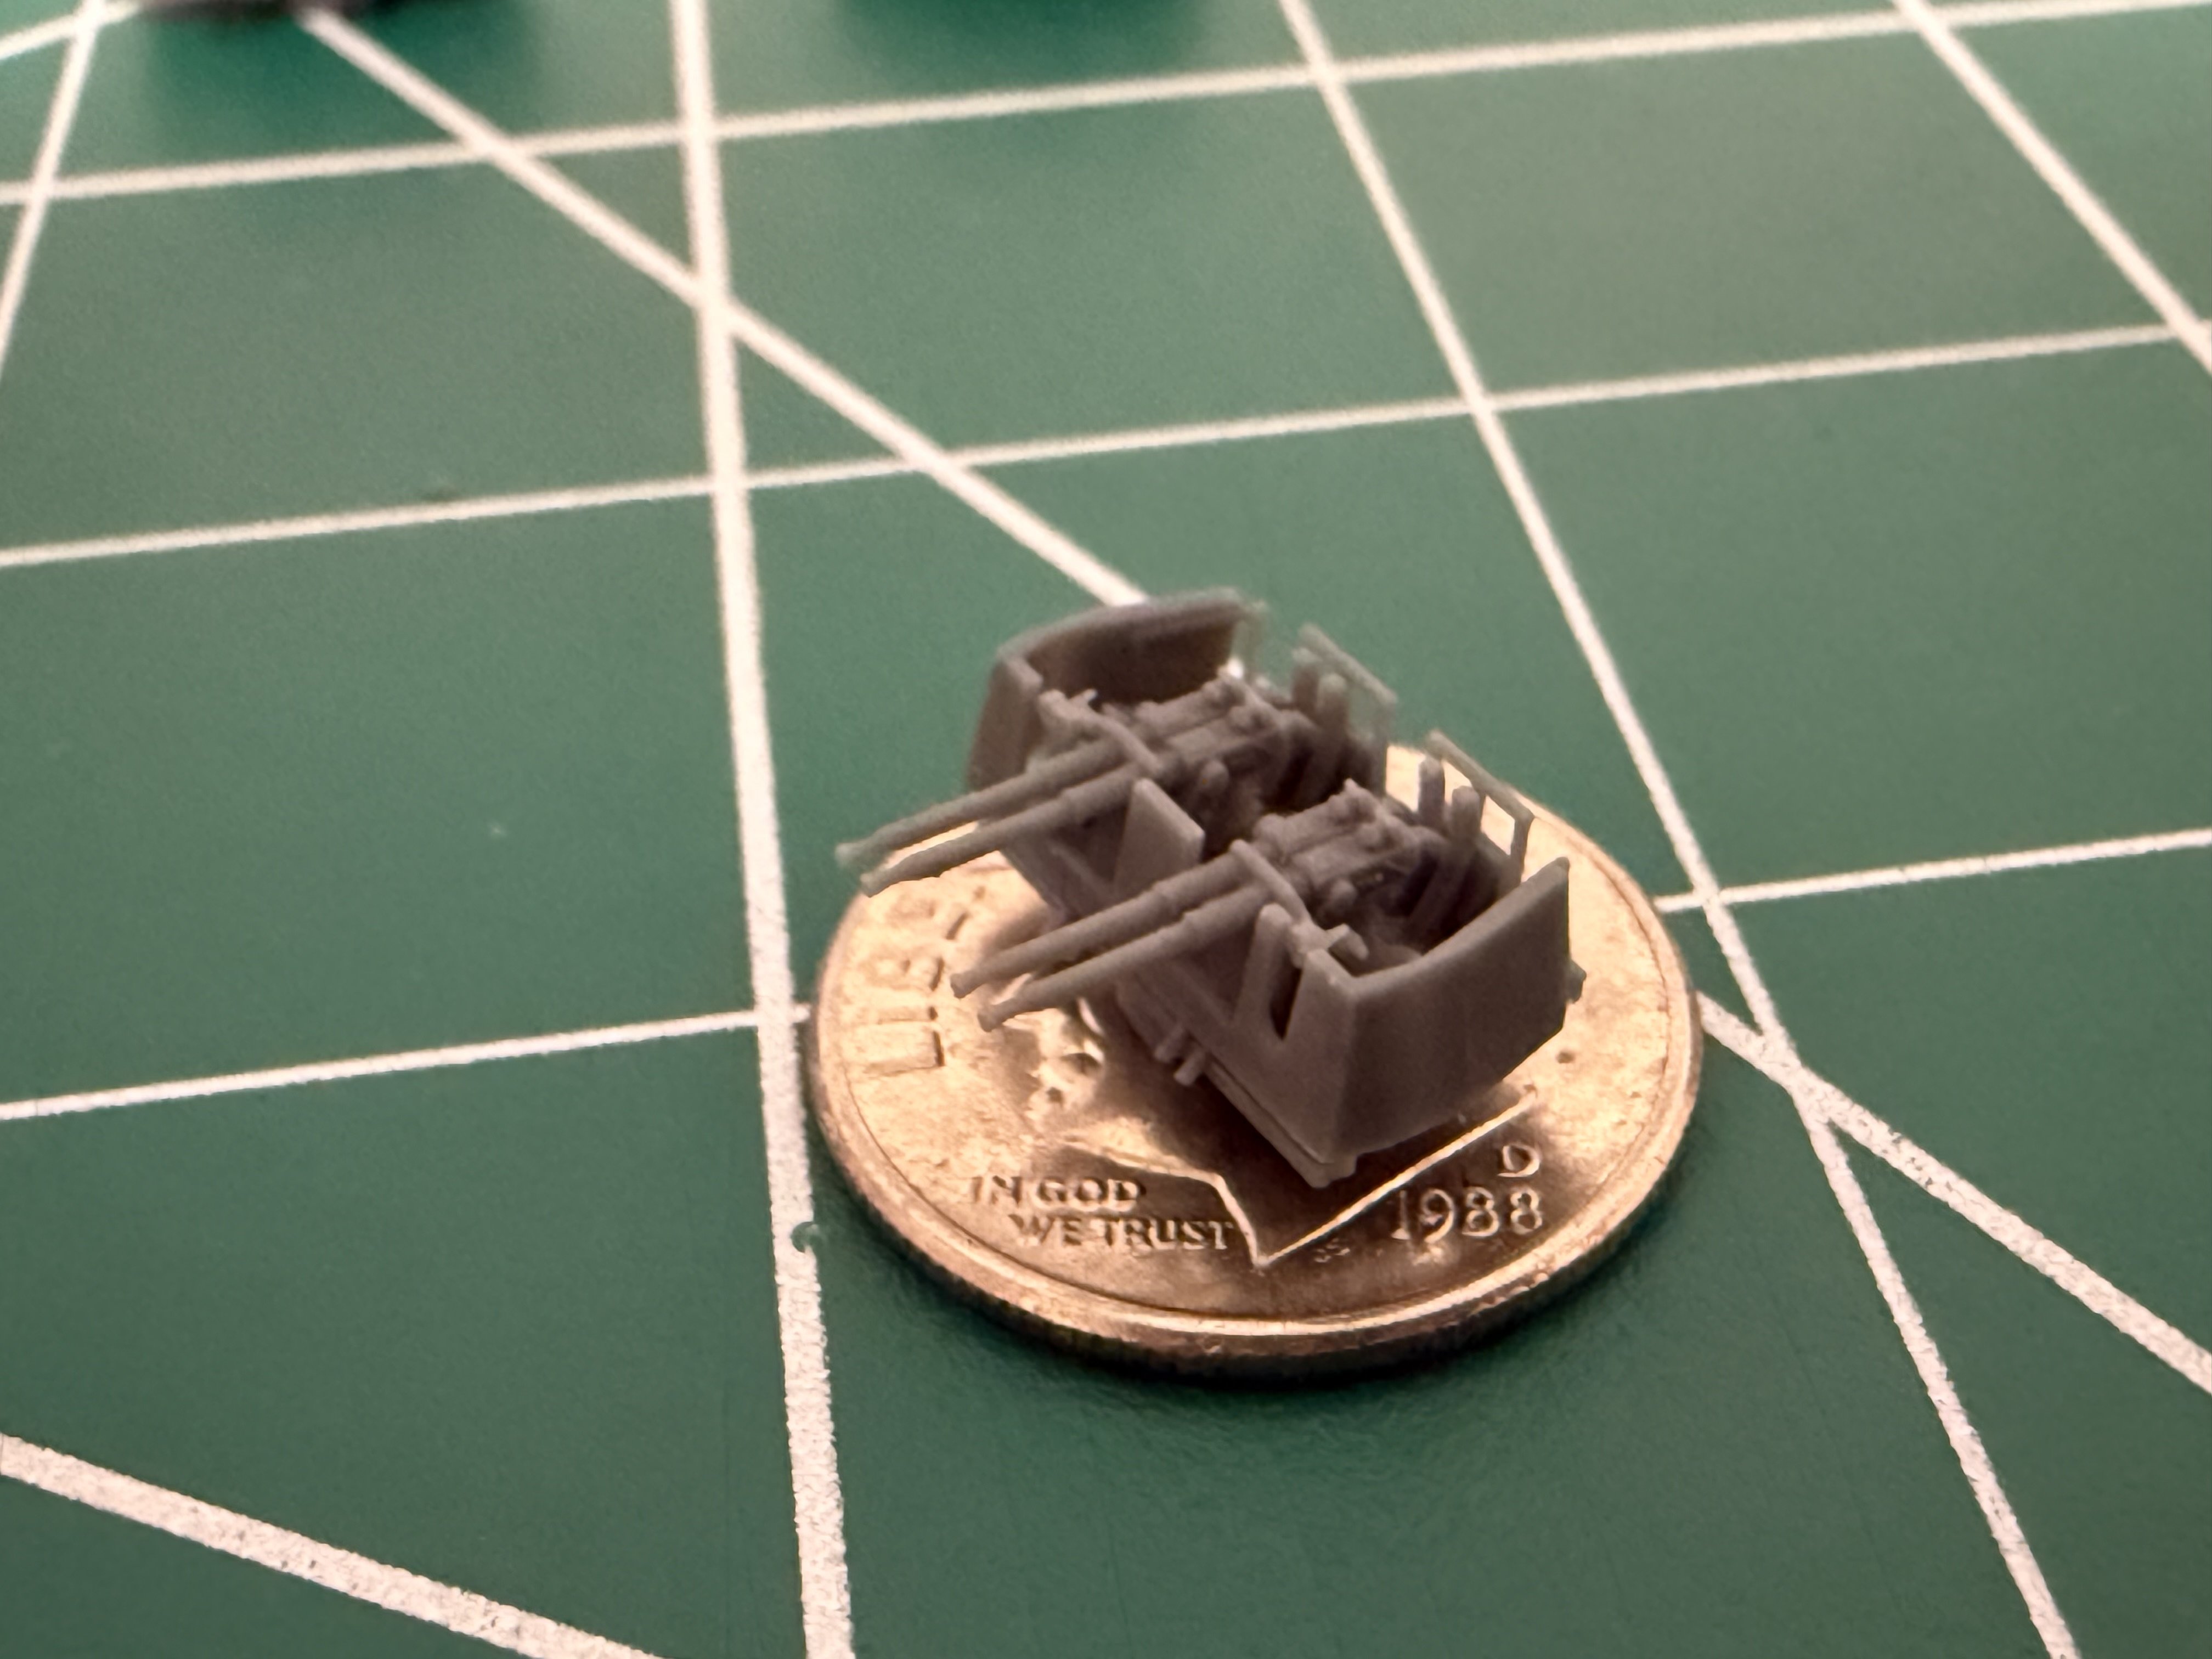
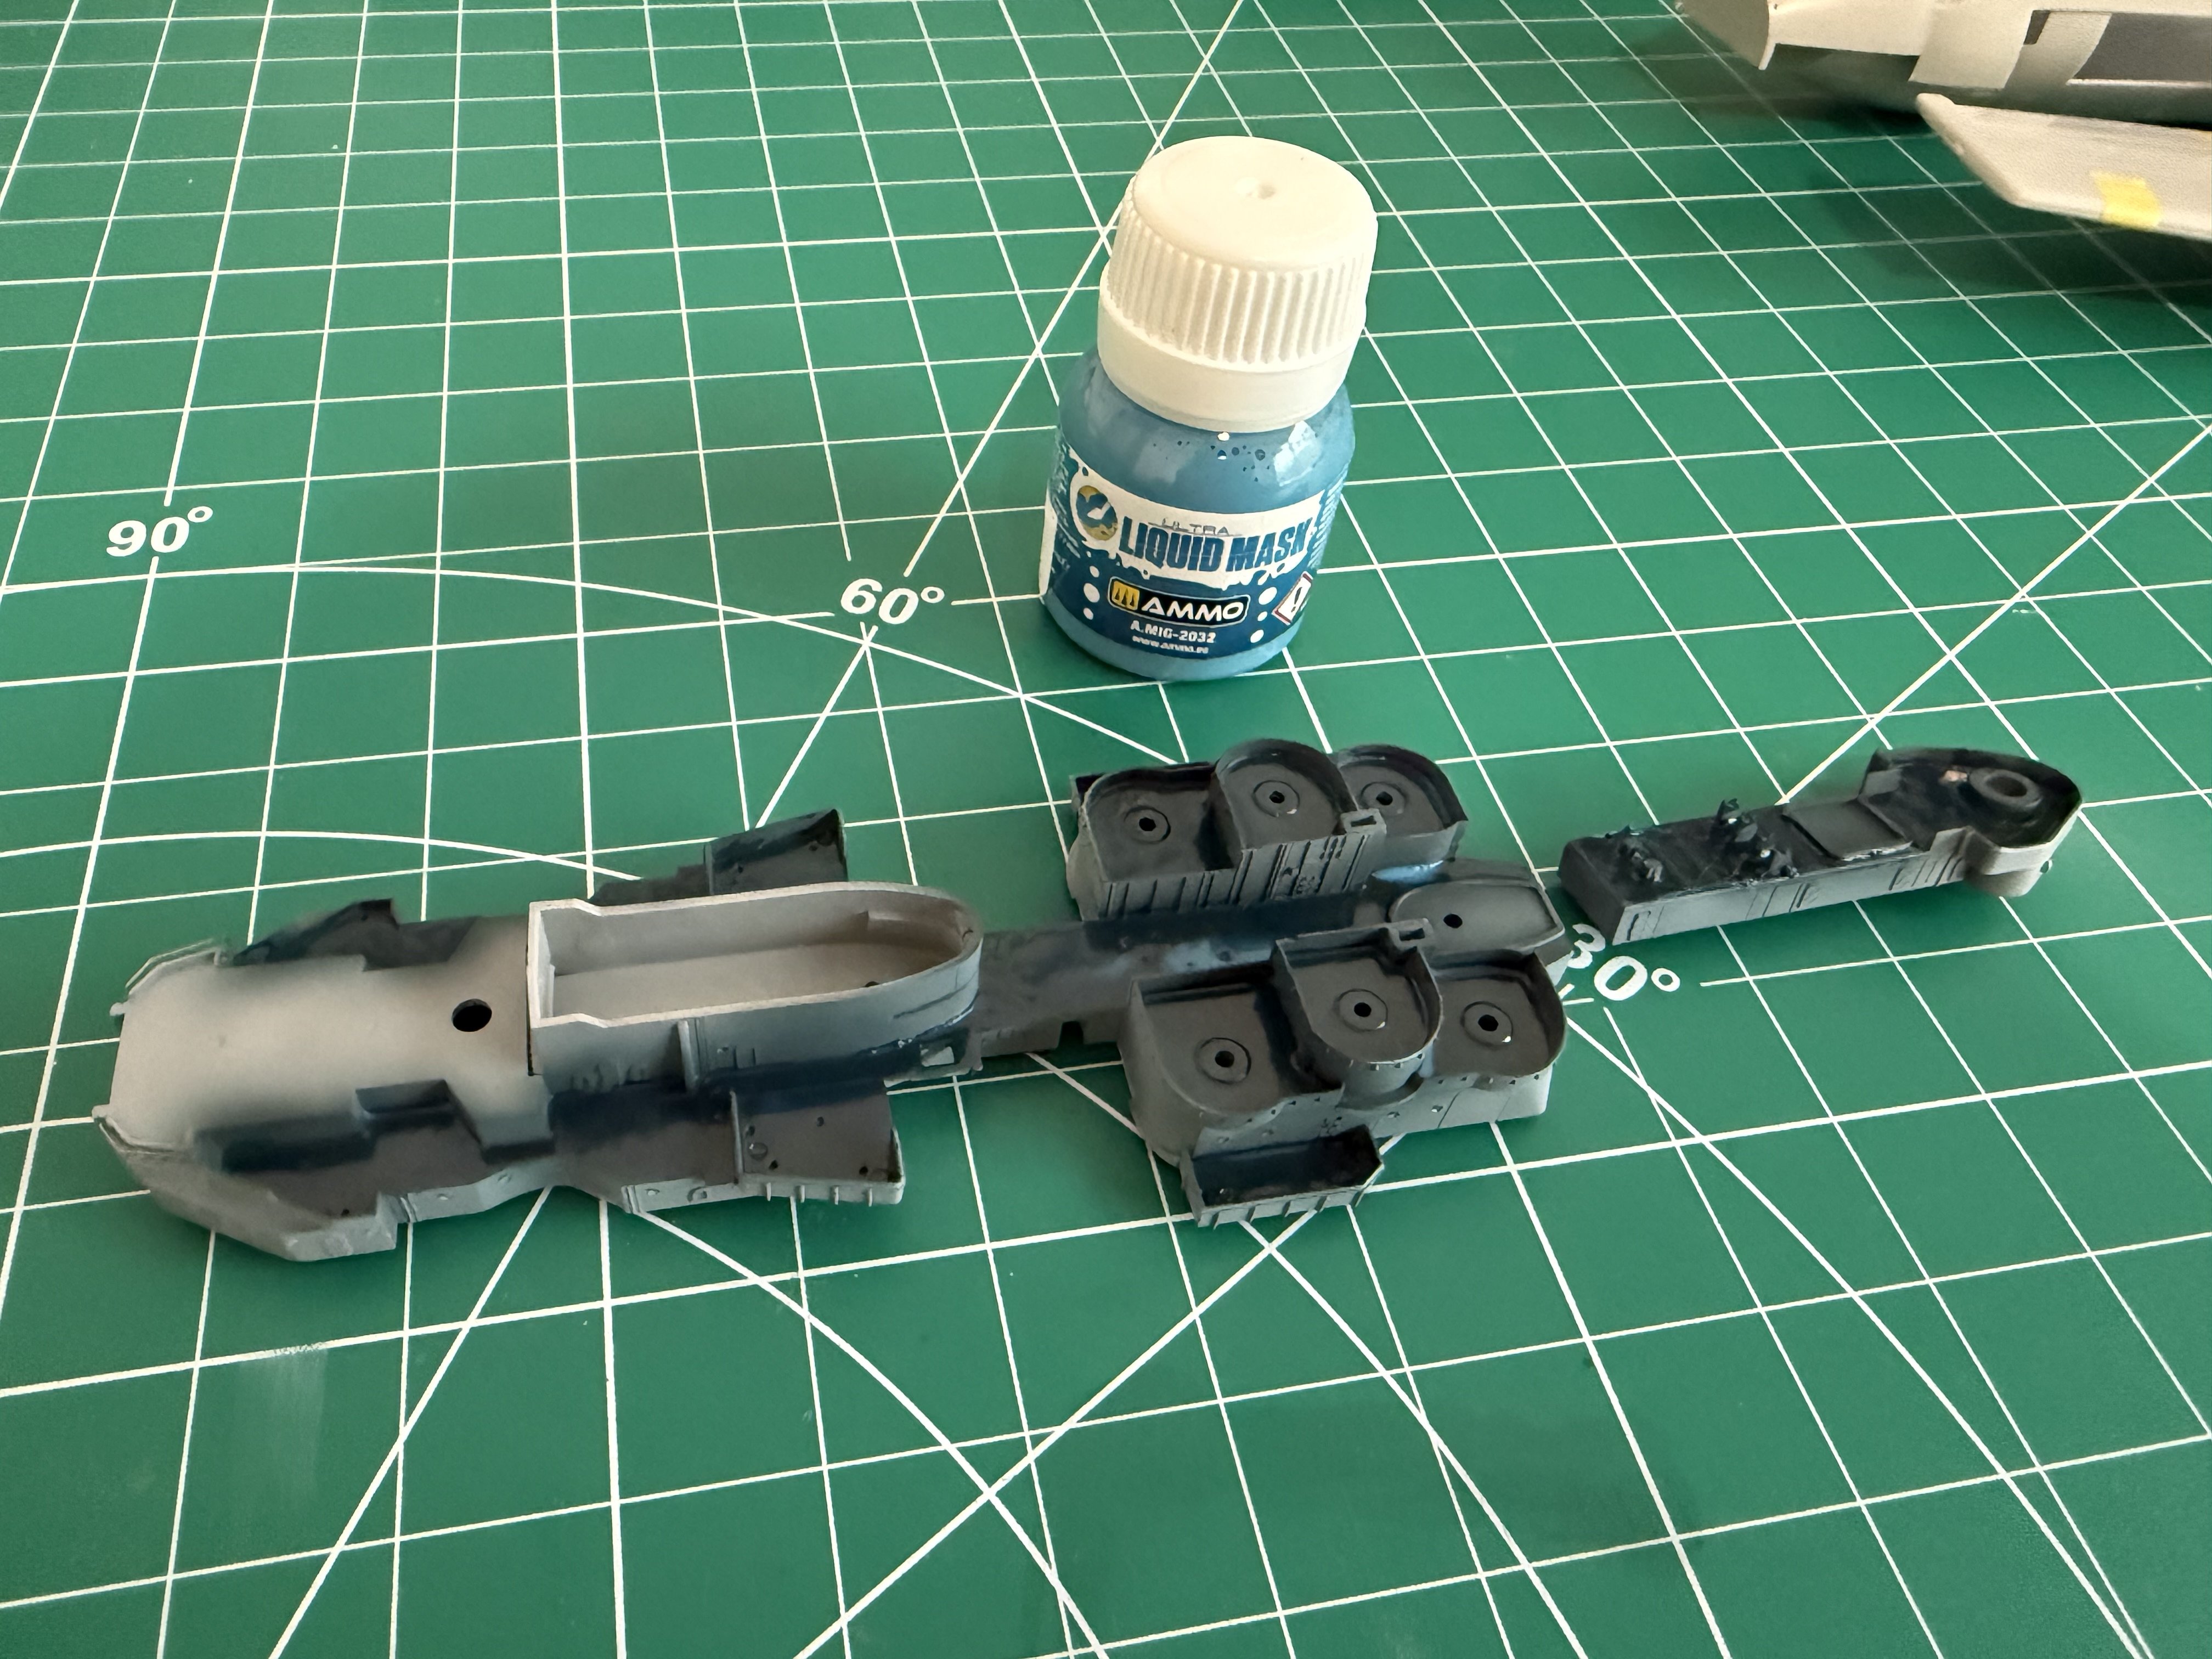
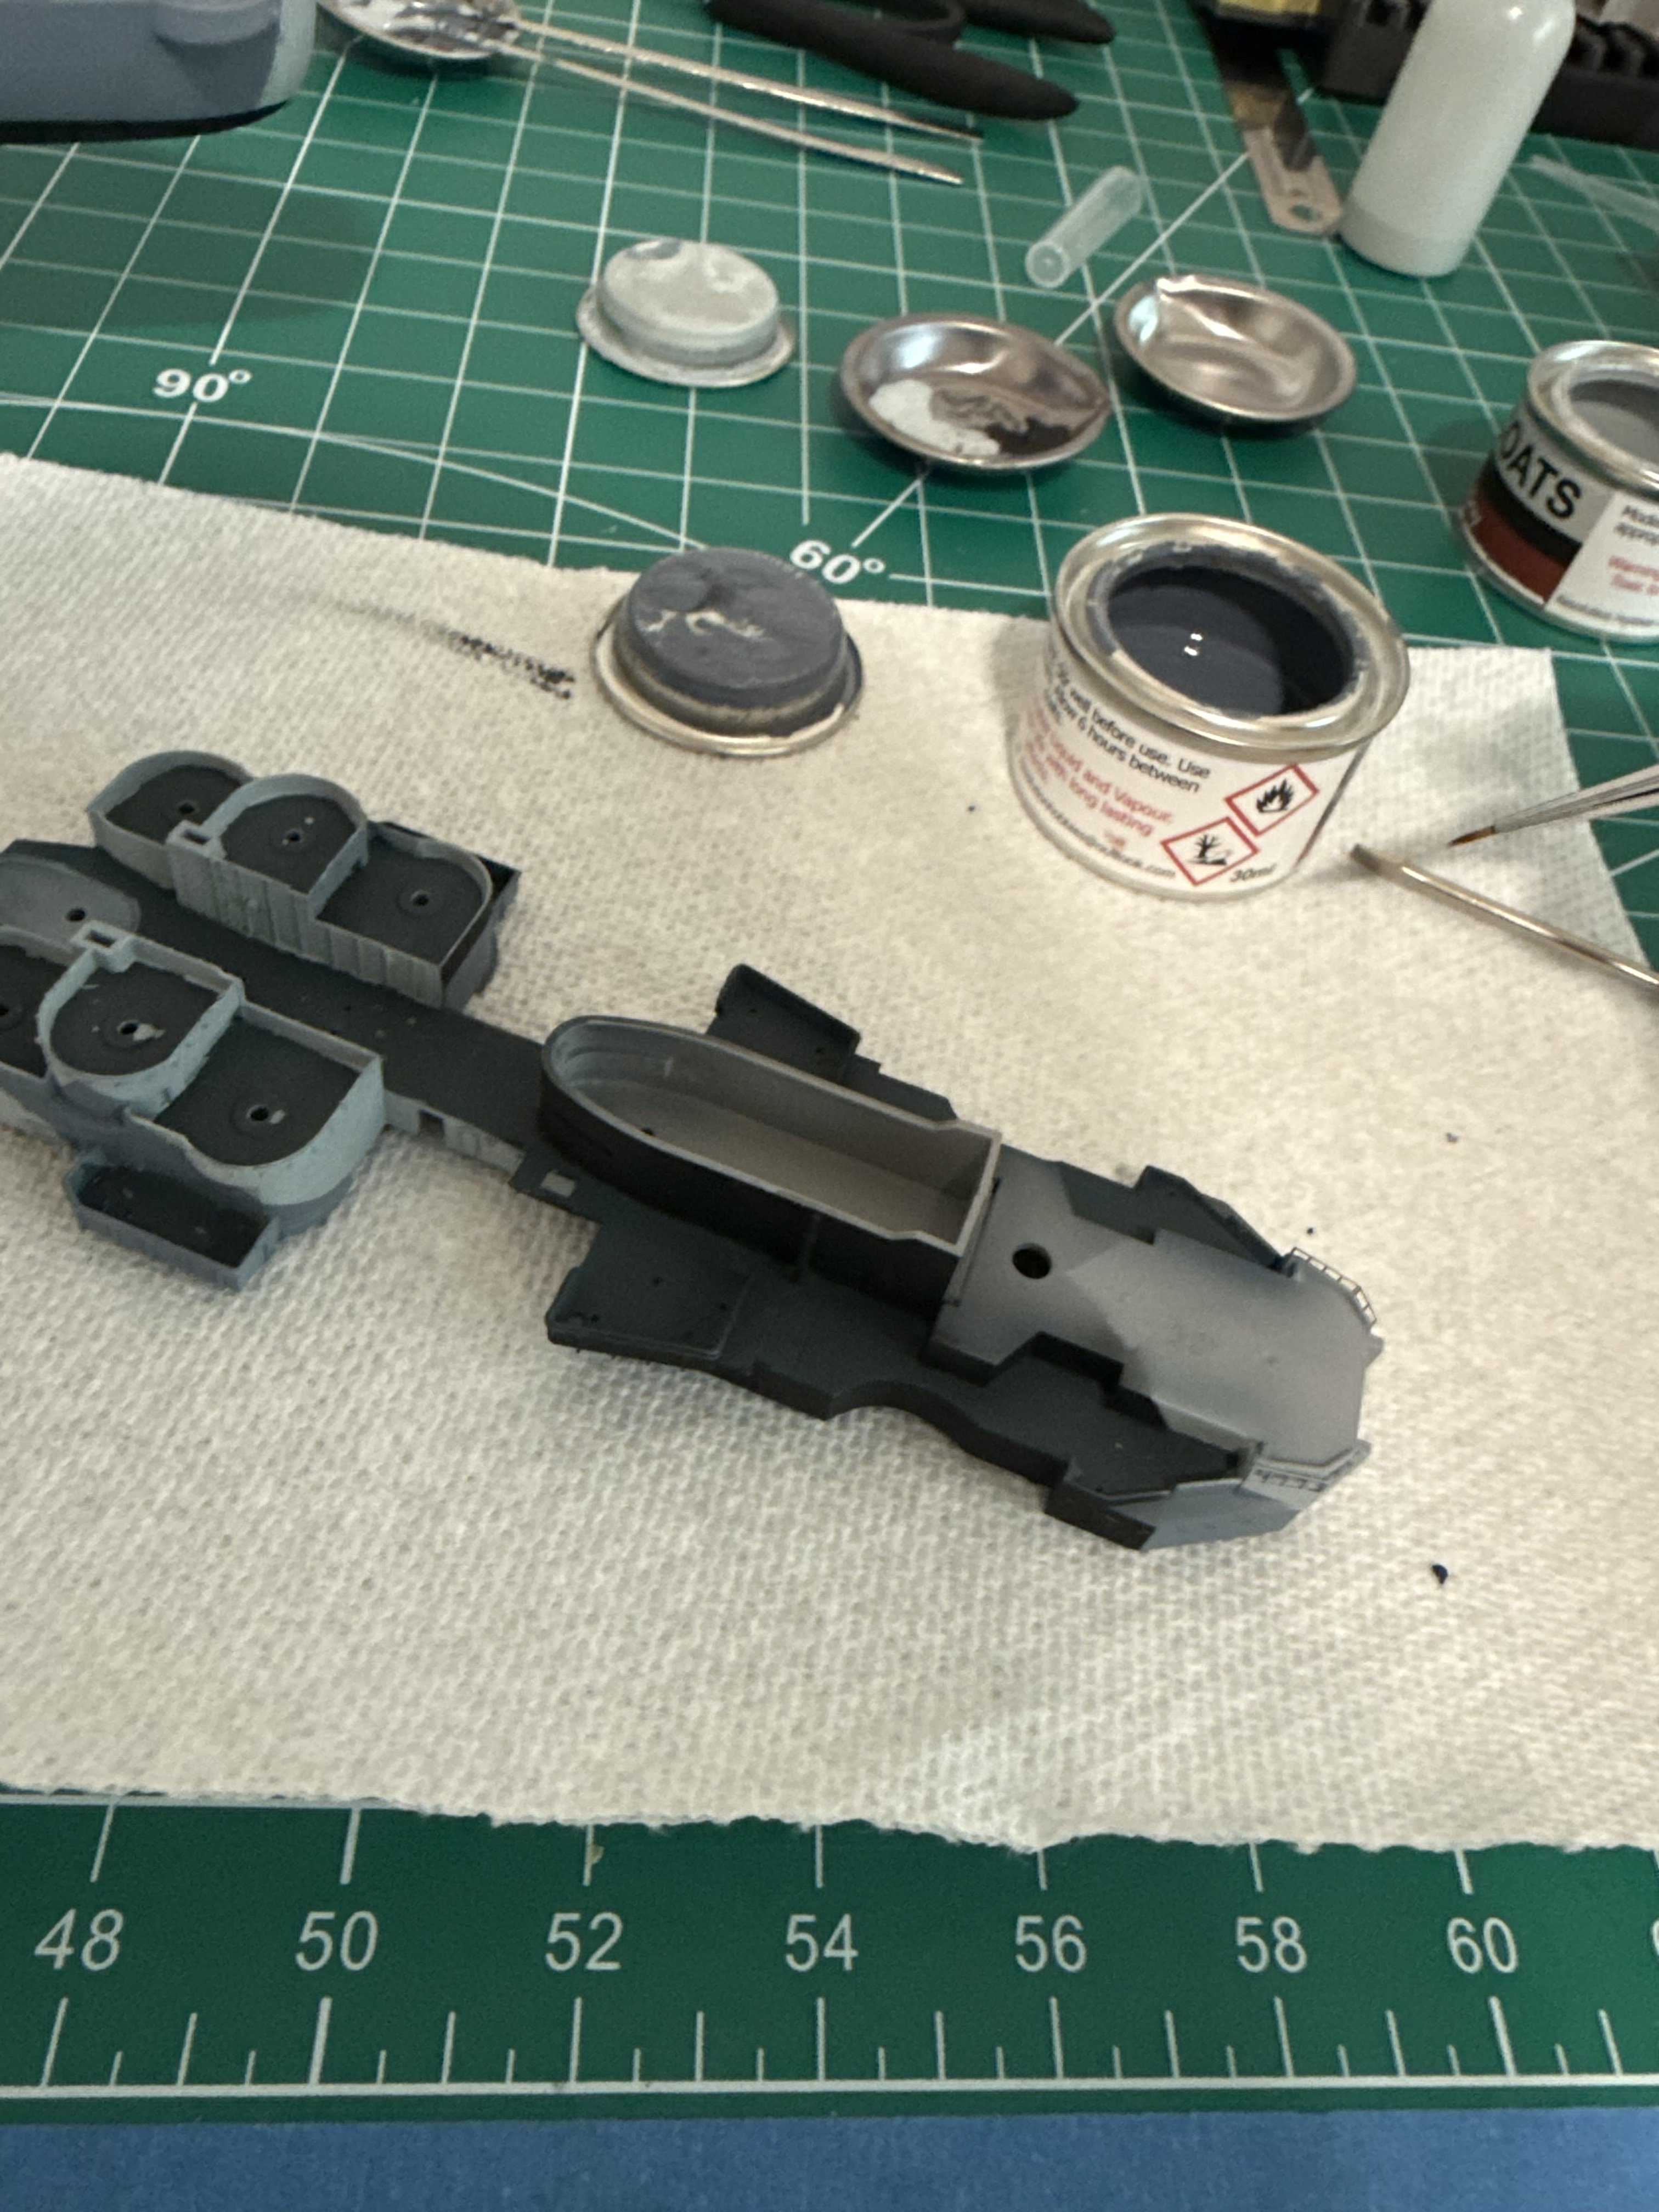
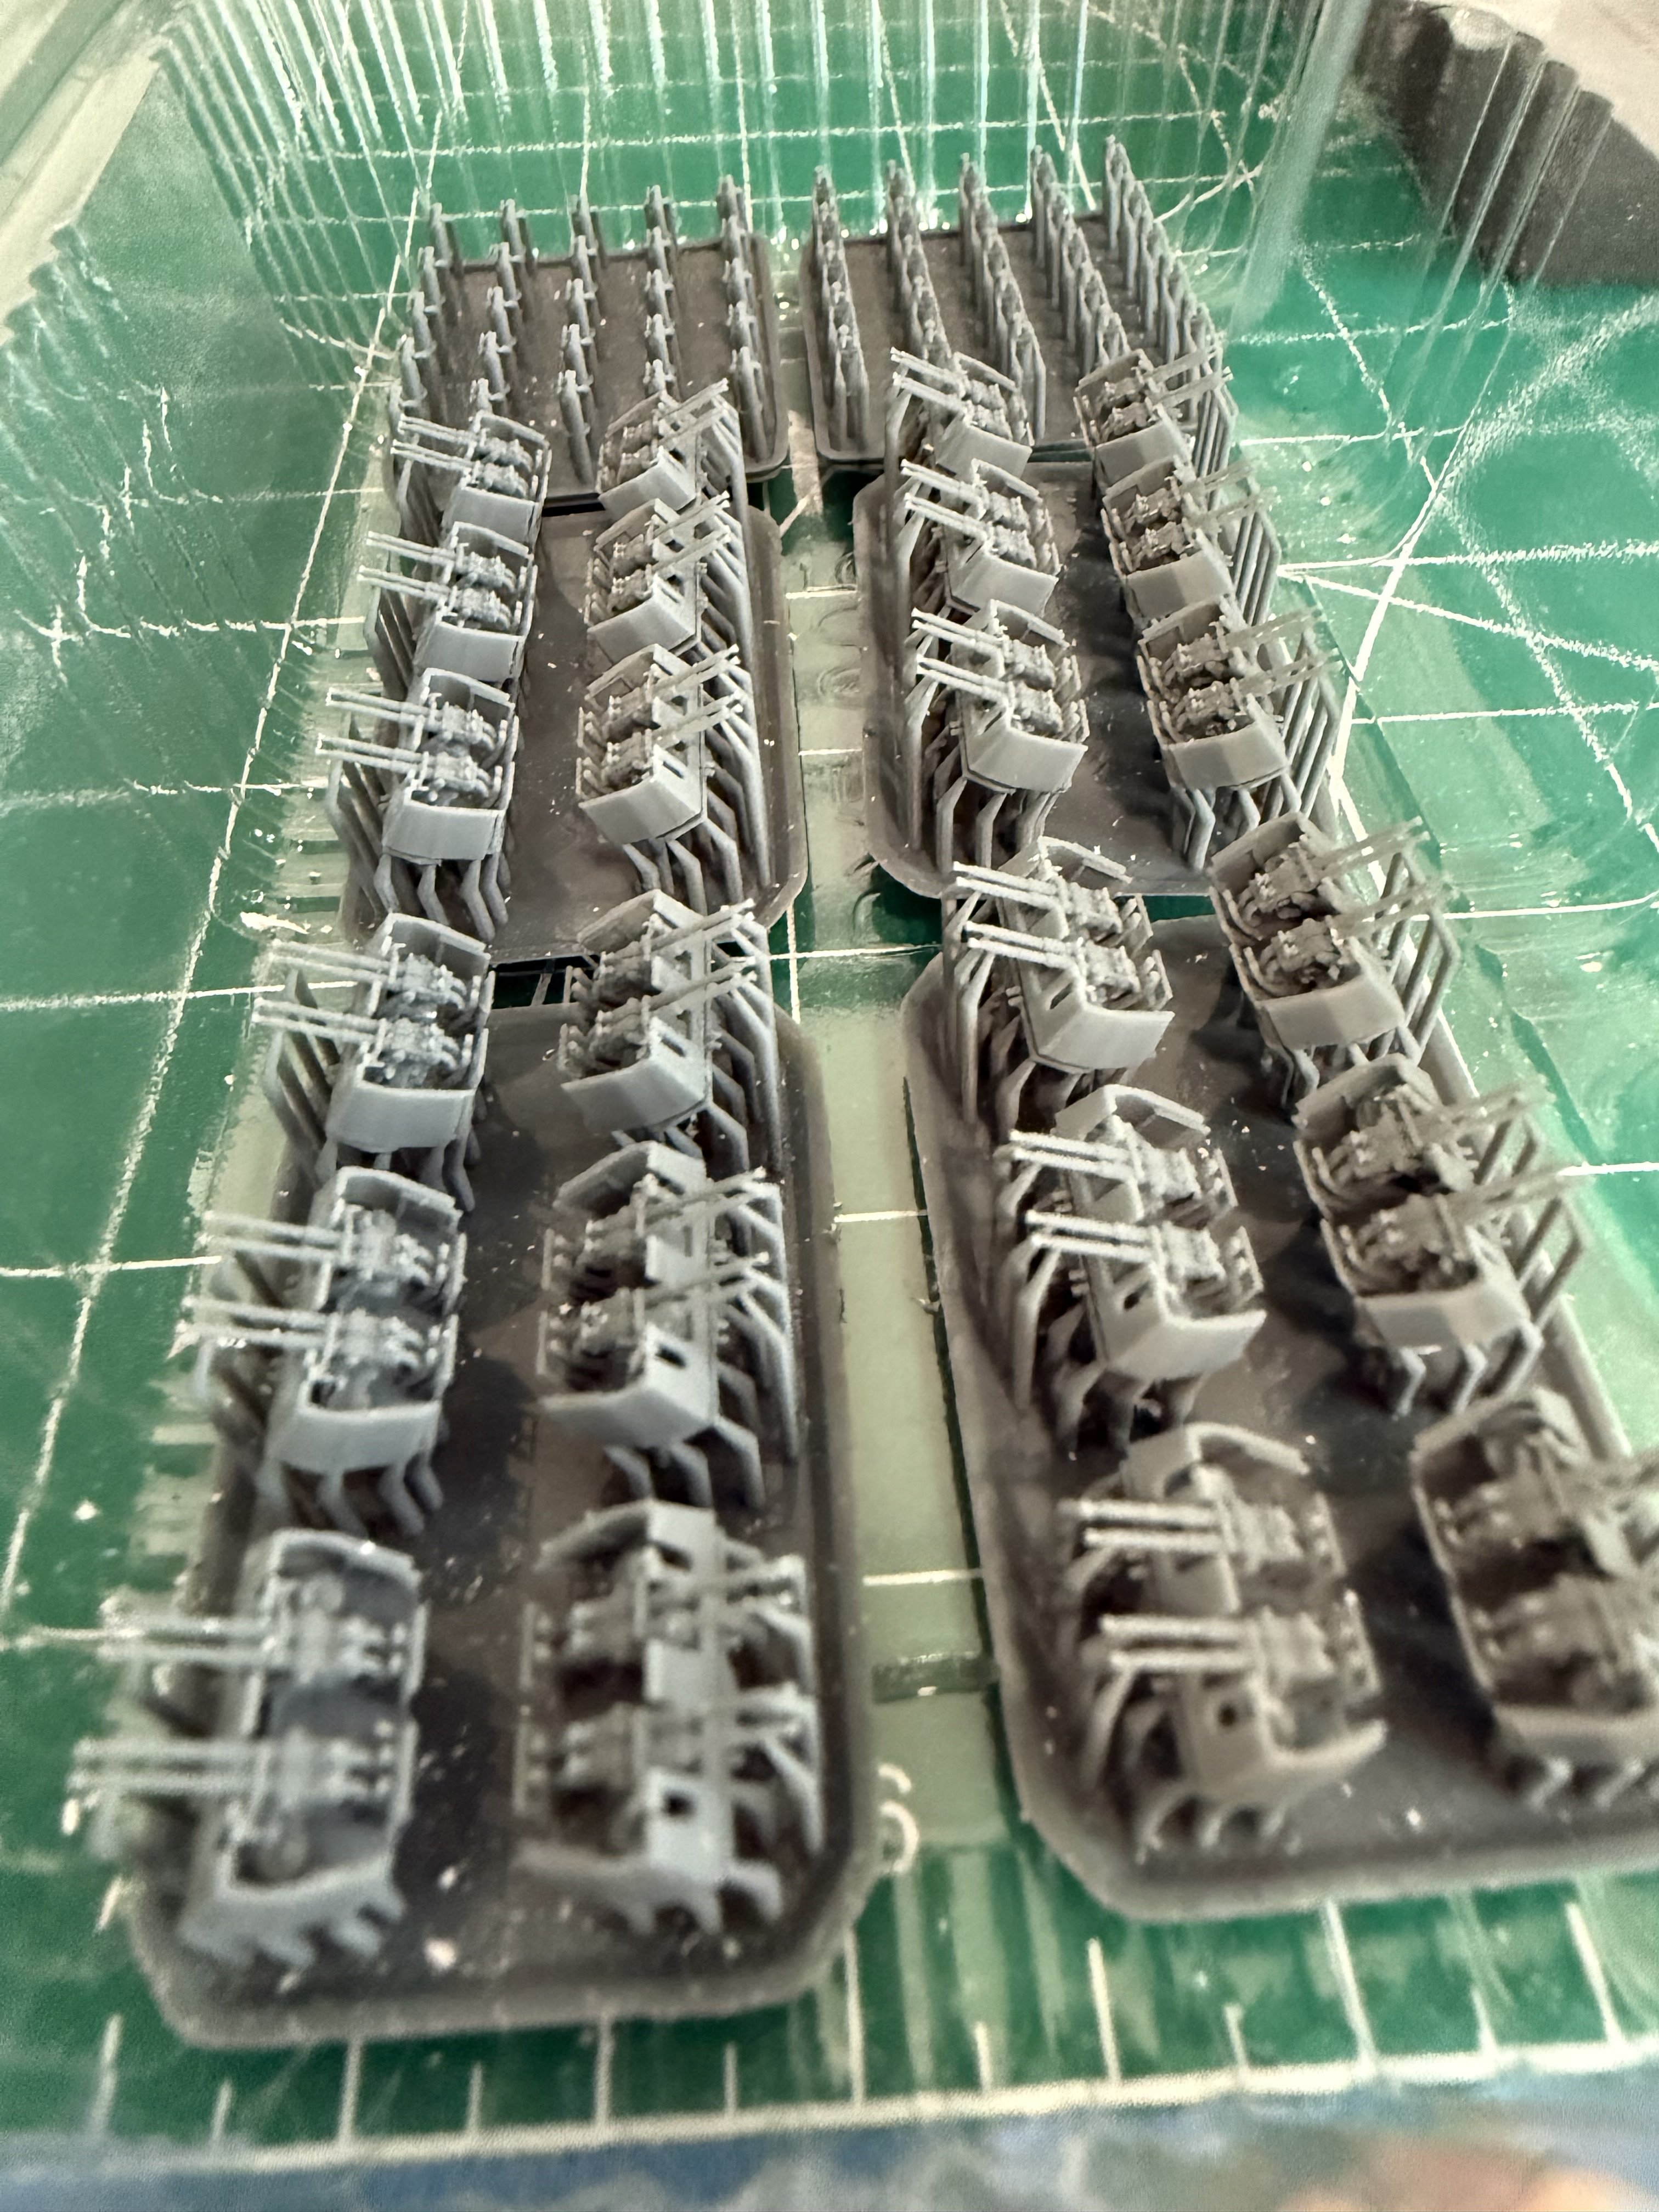
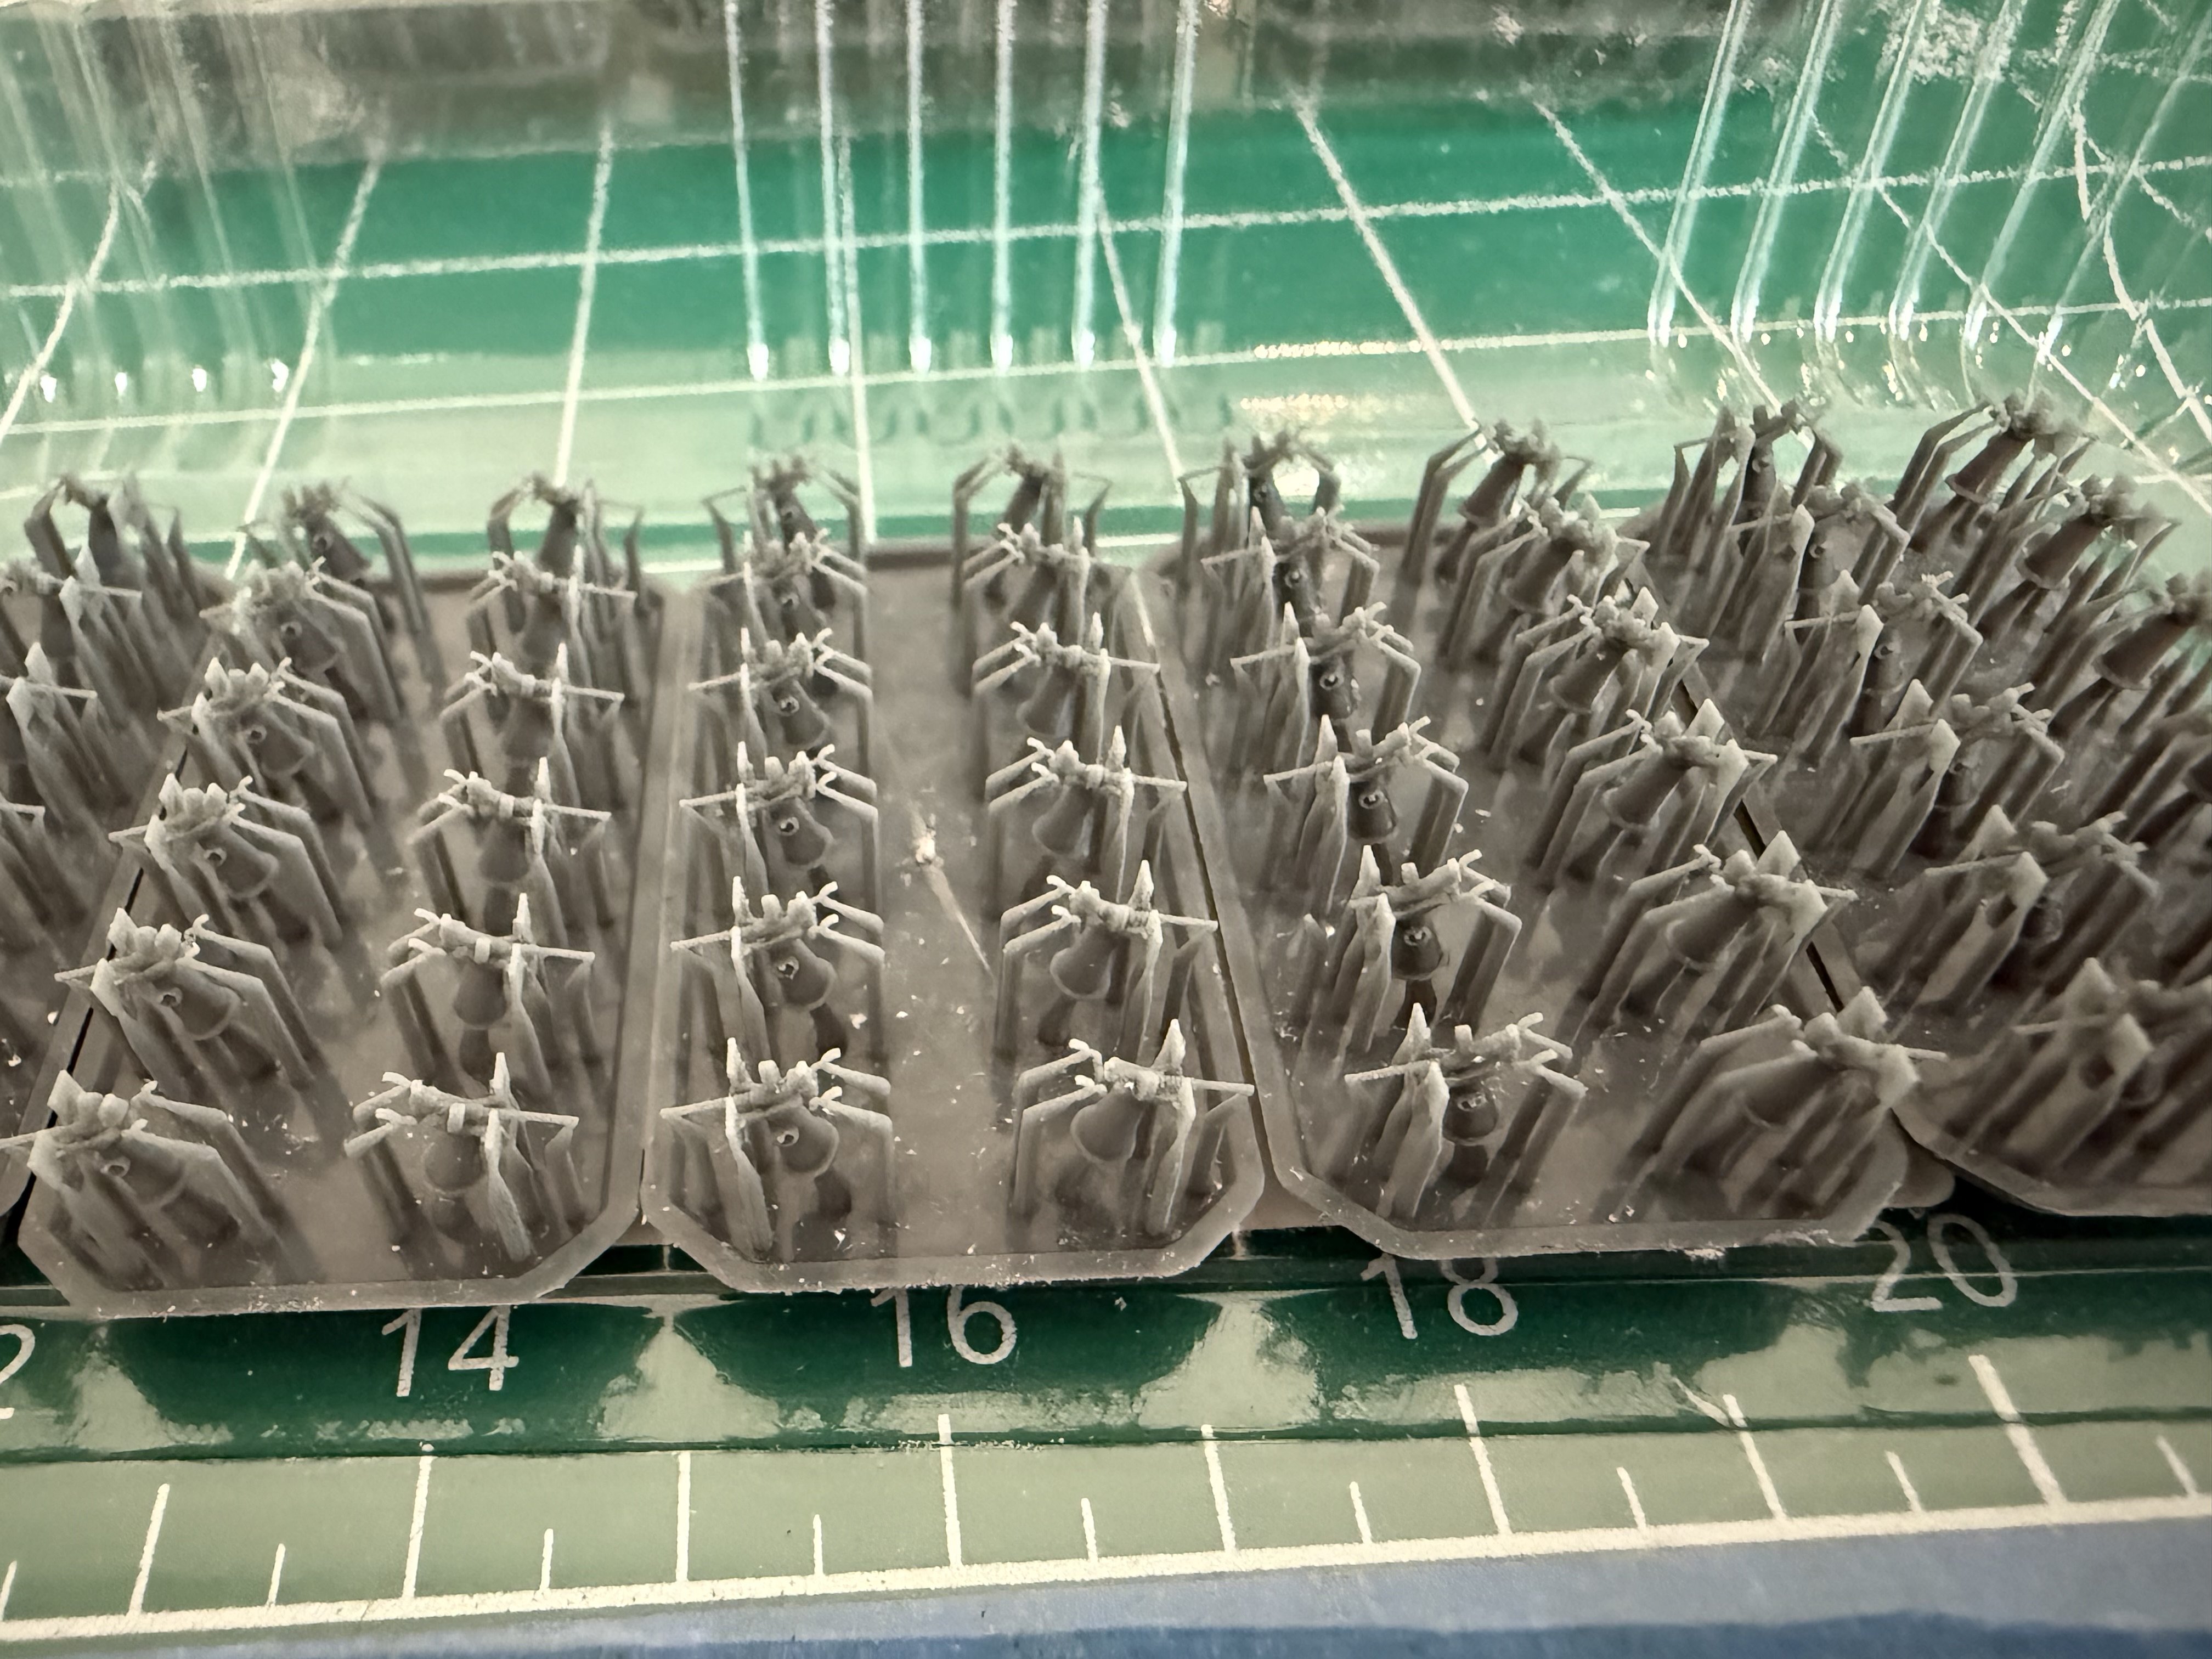
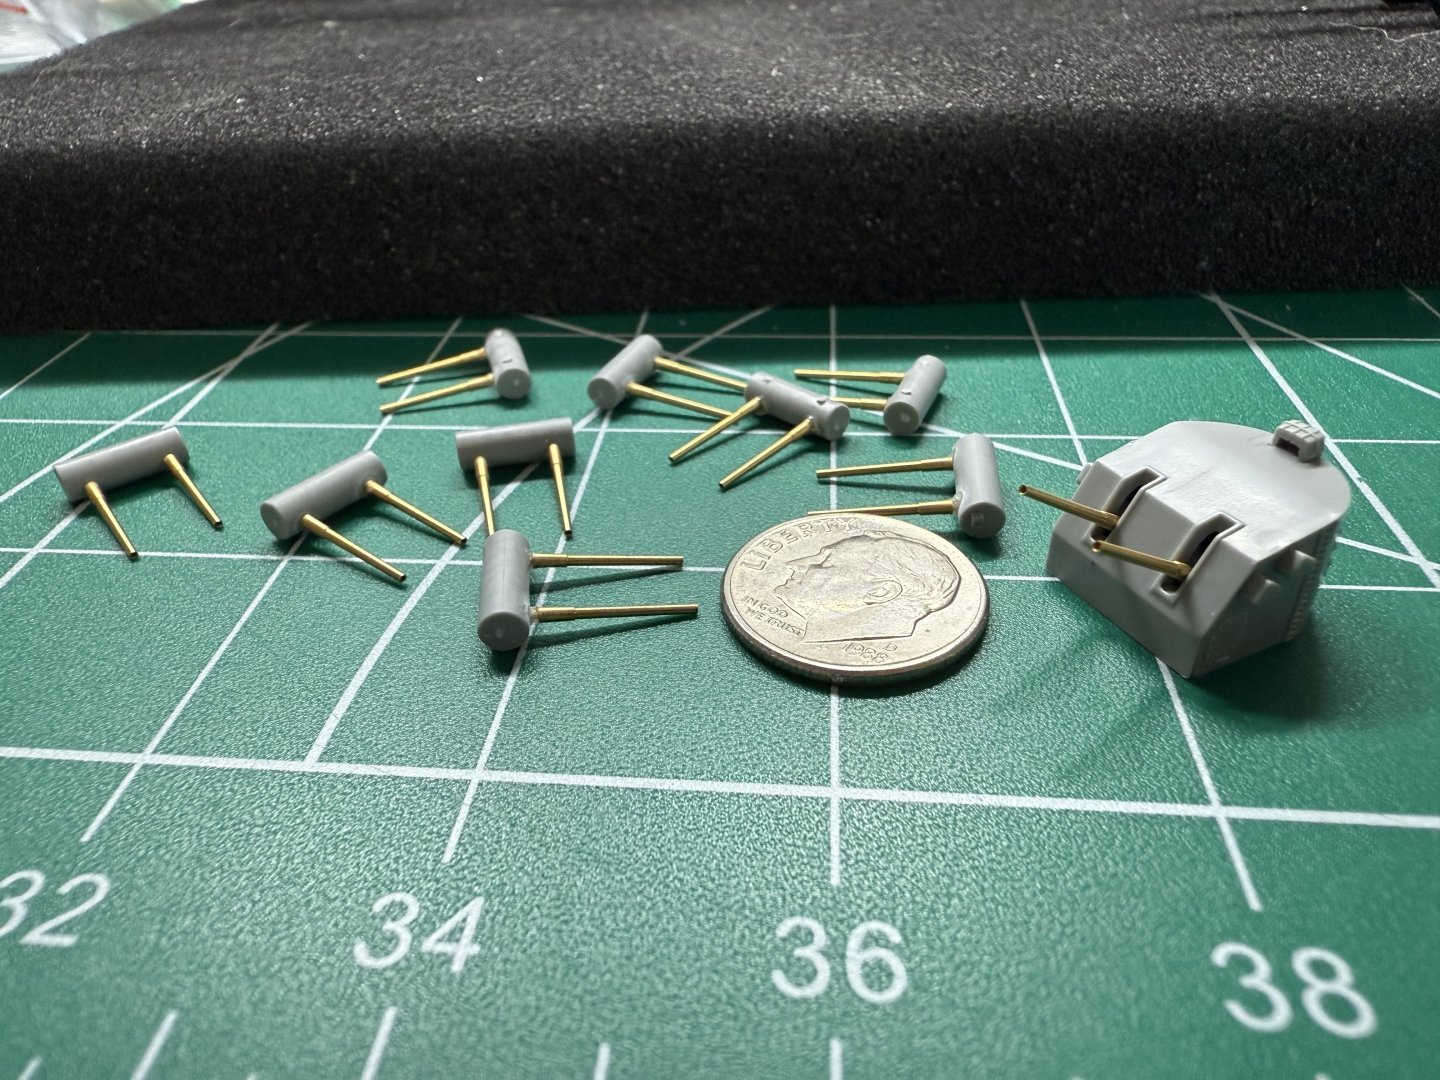
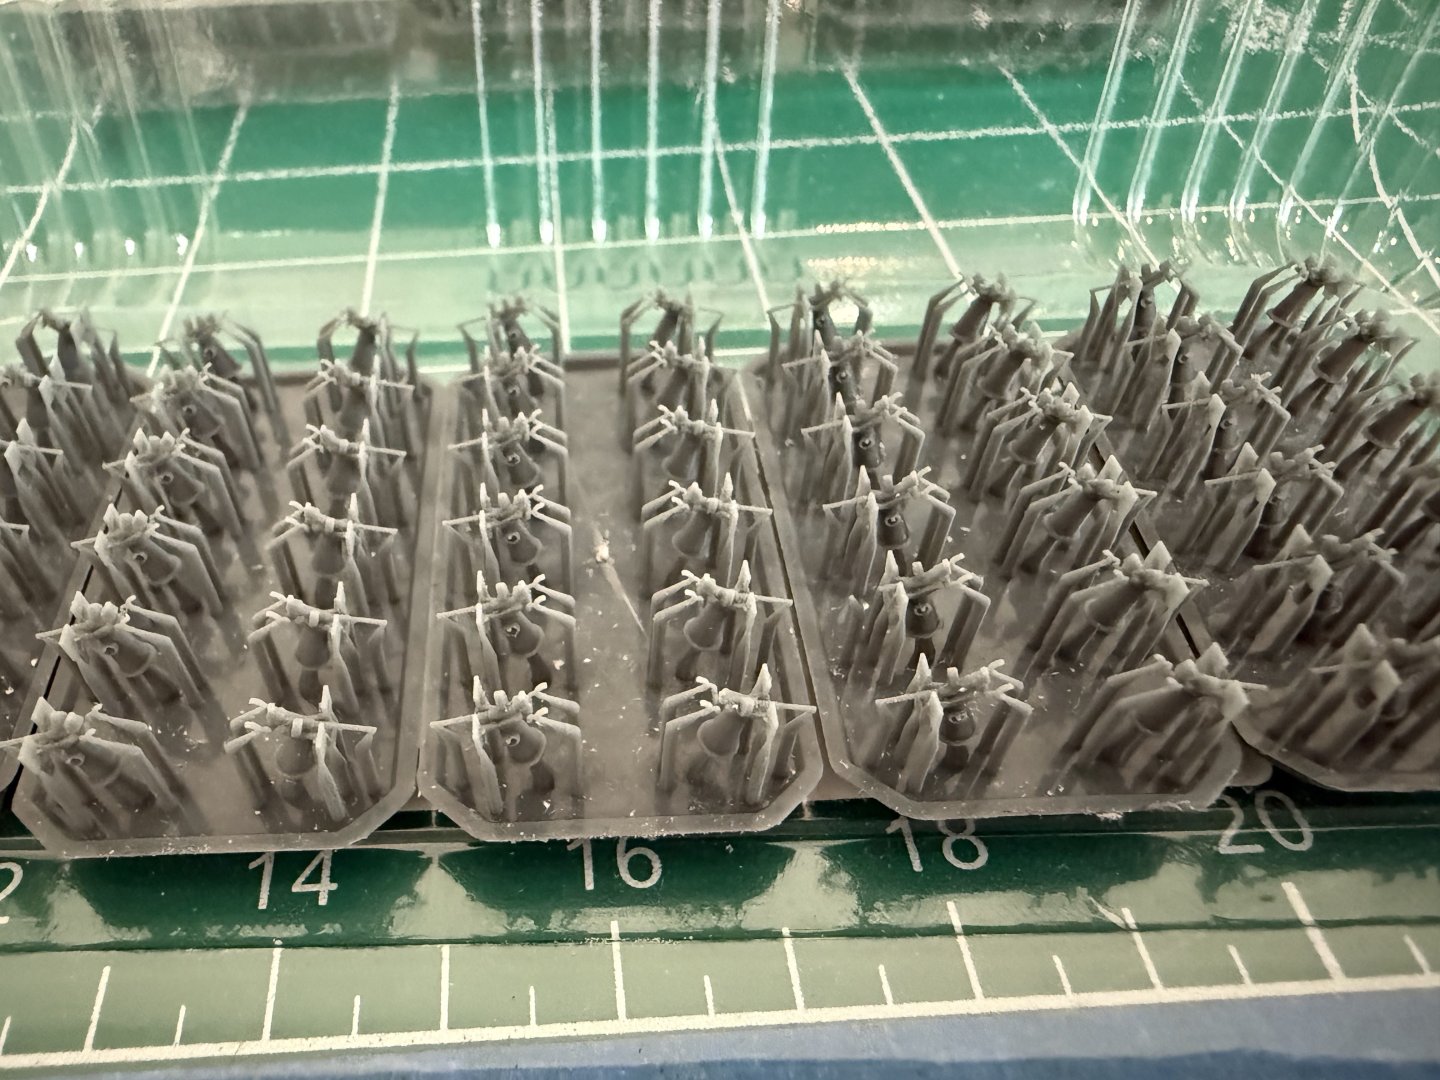
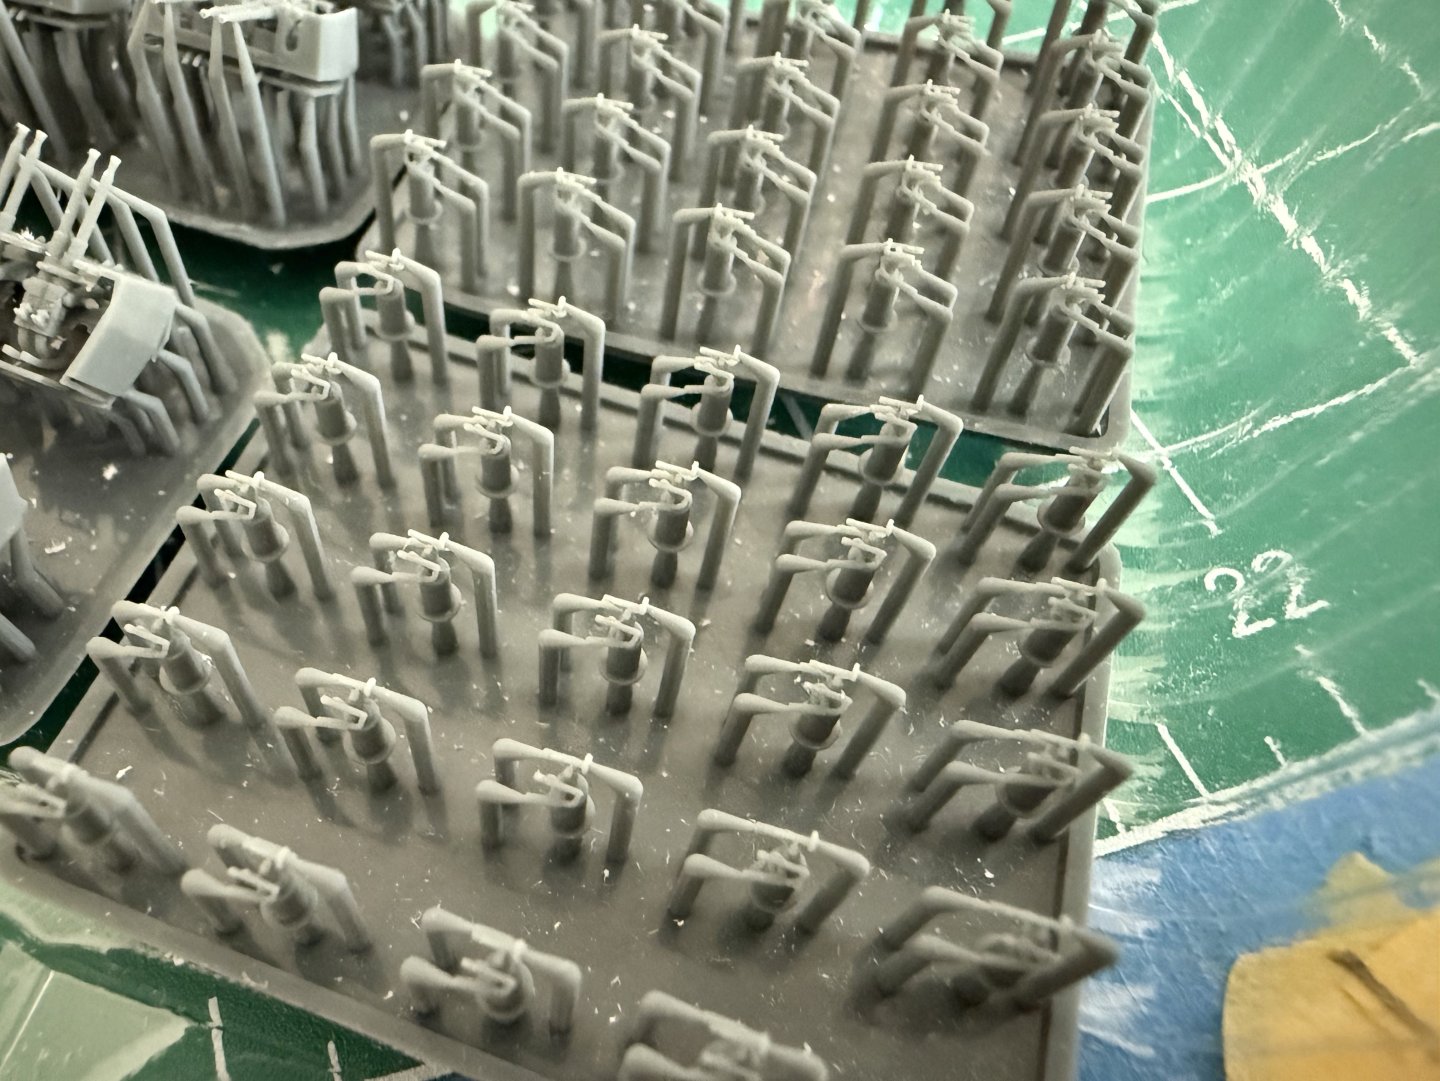
It’s been a slow 2 weeks or so. I’ve had no less than 2 trips to the ER and three follow up visits. Anyways… slowly started breaking the resin bofors from their printing sprue and getting the cleaned up and ready for paint. I’m trying to figure out what paint is best so they’re awaiting me to figure that out. these guys are seriously tiny! I never got any responses about liquid mask so I decided to roll the dice. The complaint I always hear was it was hard to get off after application… I didn’t seem to have that issue. the issue I DID have was my application. I used too large of a brush, combined with a shaky hand it got places I didn’t intend, and being that it dried transparent I didn’t notice before painting. Resulting in the need for some touch up…i decided to use this as an opportunity to work on my brushing skills. camo pattern is coming together… I also finally went back and resprayed the boot top. after banging my head into a wall cross referencing the navy drawings and every photo I could find of the Missouri, I came up with my best guess at the paint scheme for the upper decks and got them painted. dry fitted. it’s probably not winning at any model contests, but I’m pretty happy about how it came out and if anybody knows which Vallejo paint color would be accurate for a 1944/1945 bofors mount, I’m all ears.


-
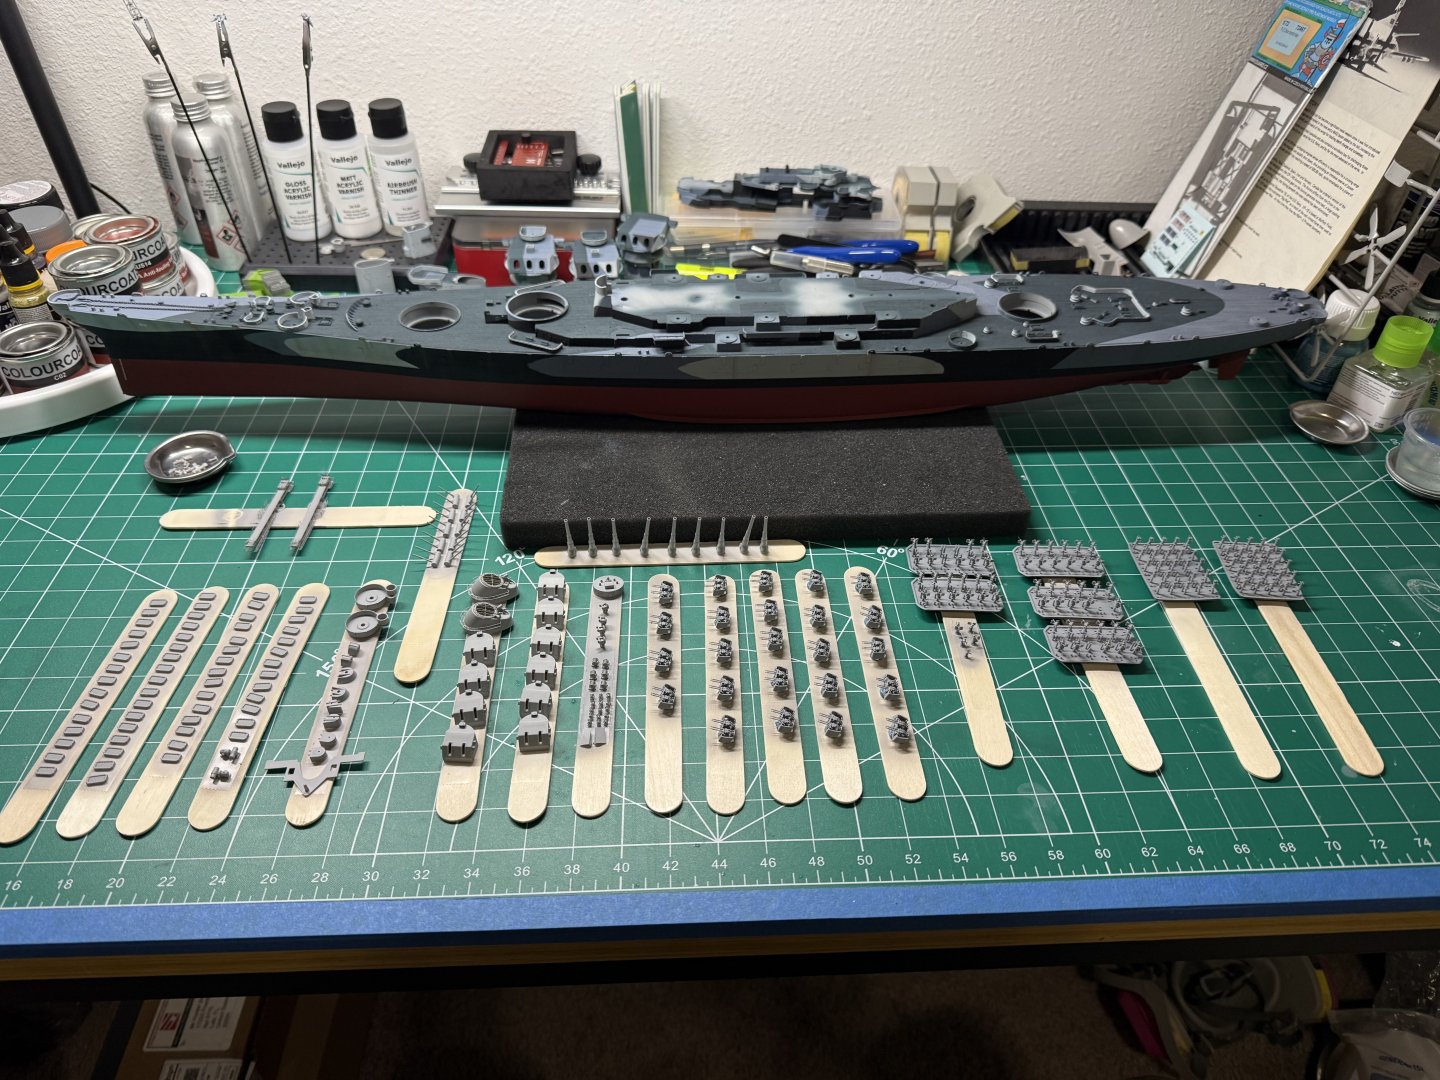
Since there are so many small guns, I’ve decided I will do a few at a time to maintain my sanity. I wasn’t happy with the glue all over the place from attaching the ladders so I made the decision and pulled them all off and Scrapped off all the glue. I’ll put them back on after painting. now I need some help here. I want to start getting the upper superstructure painted and I know there has to be a better way to tackle masking the decks than cutting 9000000 strips of tape. How does everybody feel about stuff like Mr hobby liquid masking SOL or the Vallejo liquid masks? Any of those products worth it? Maybe PVA glue would work?


-
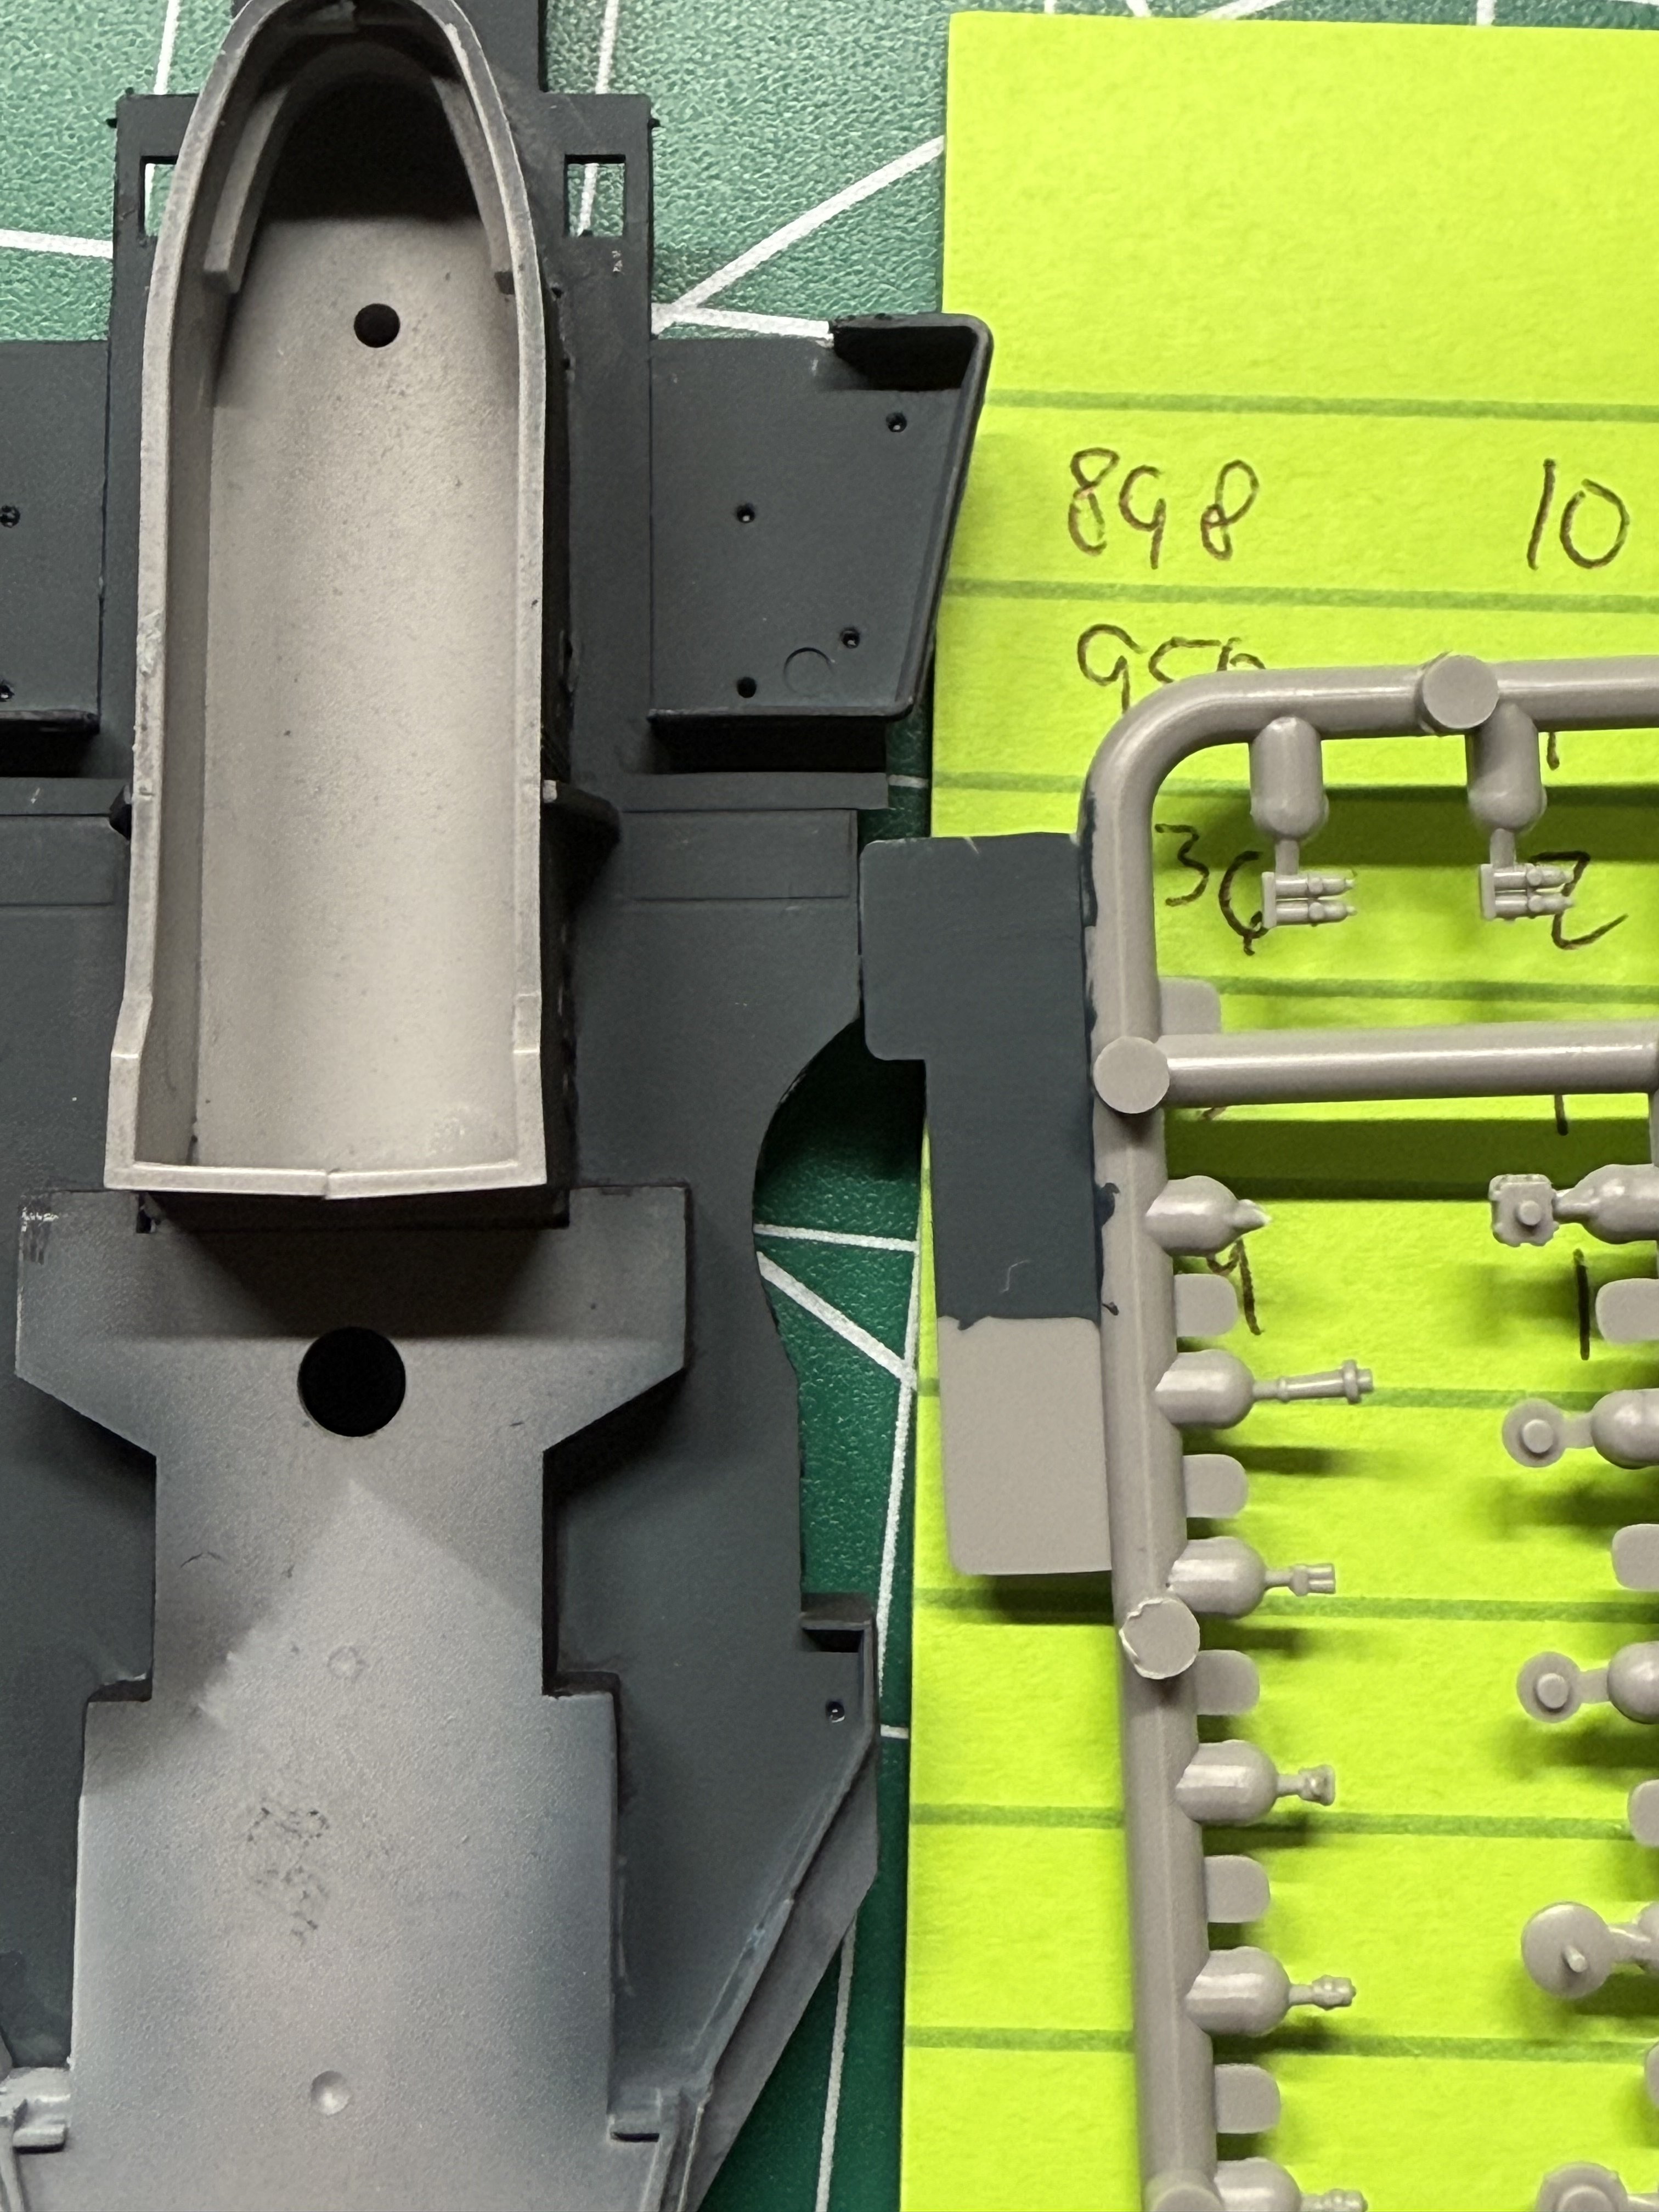
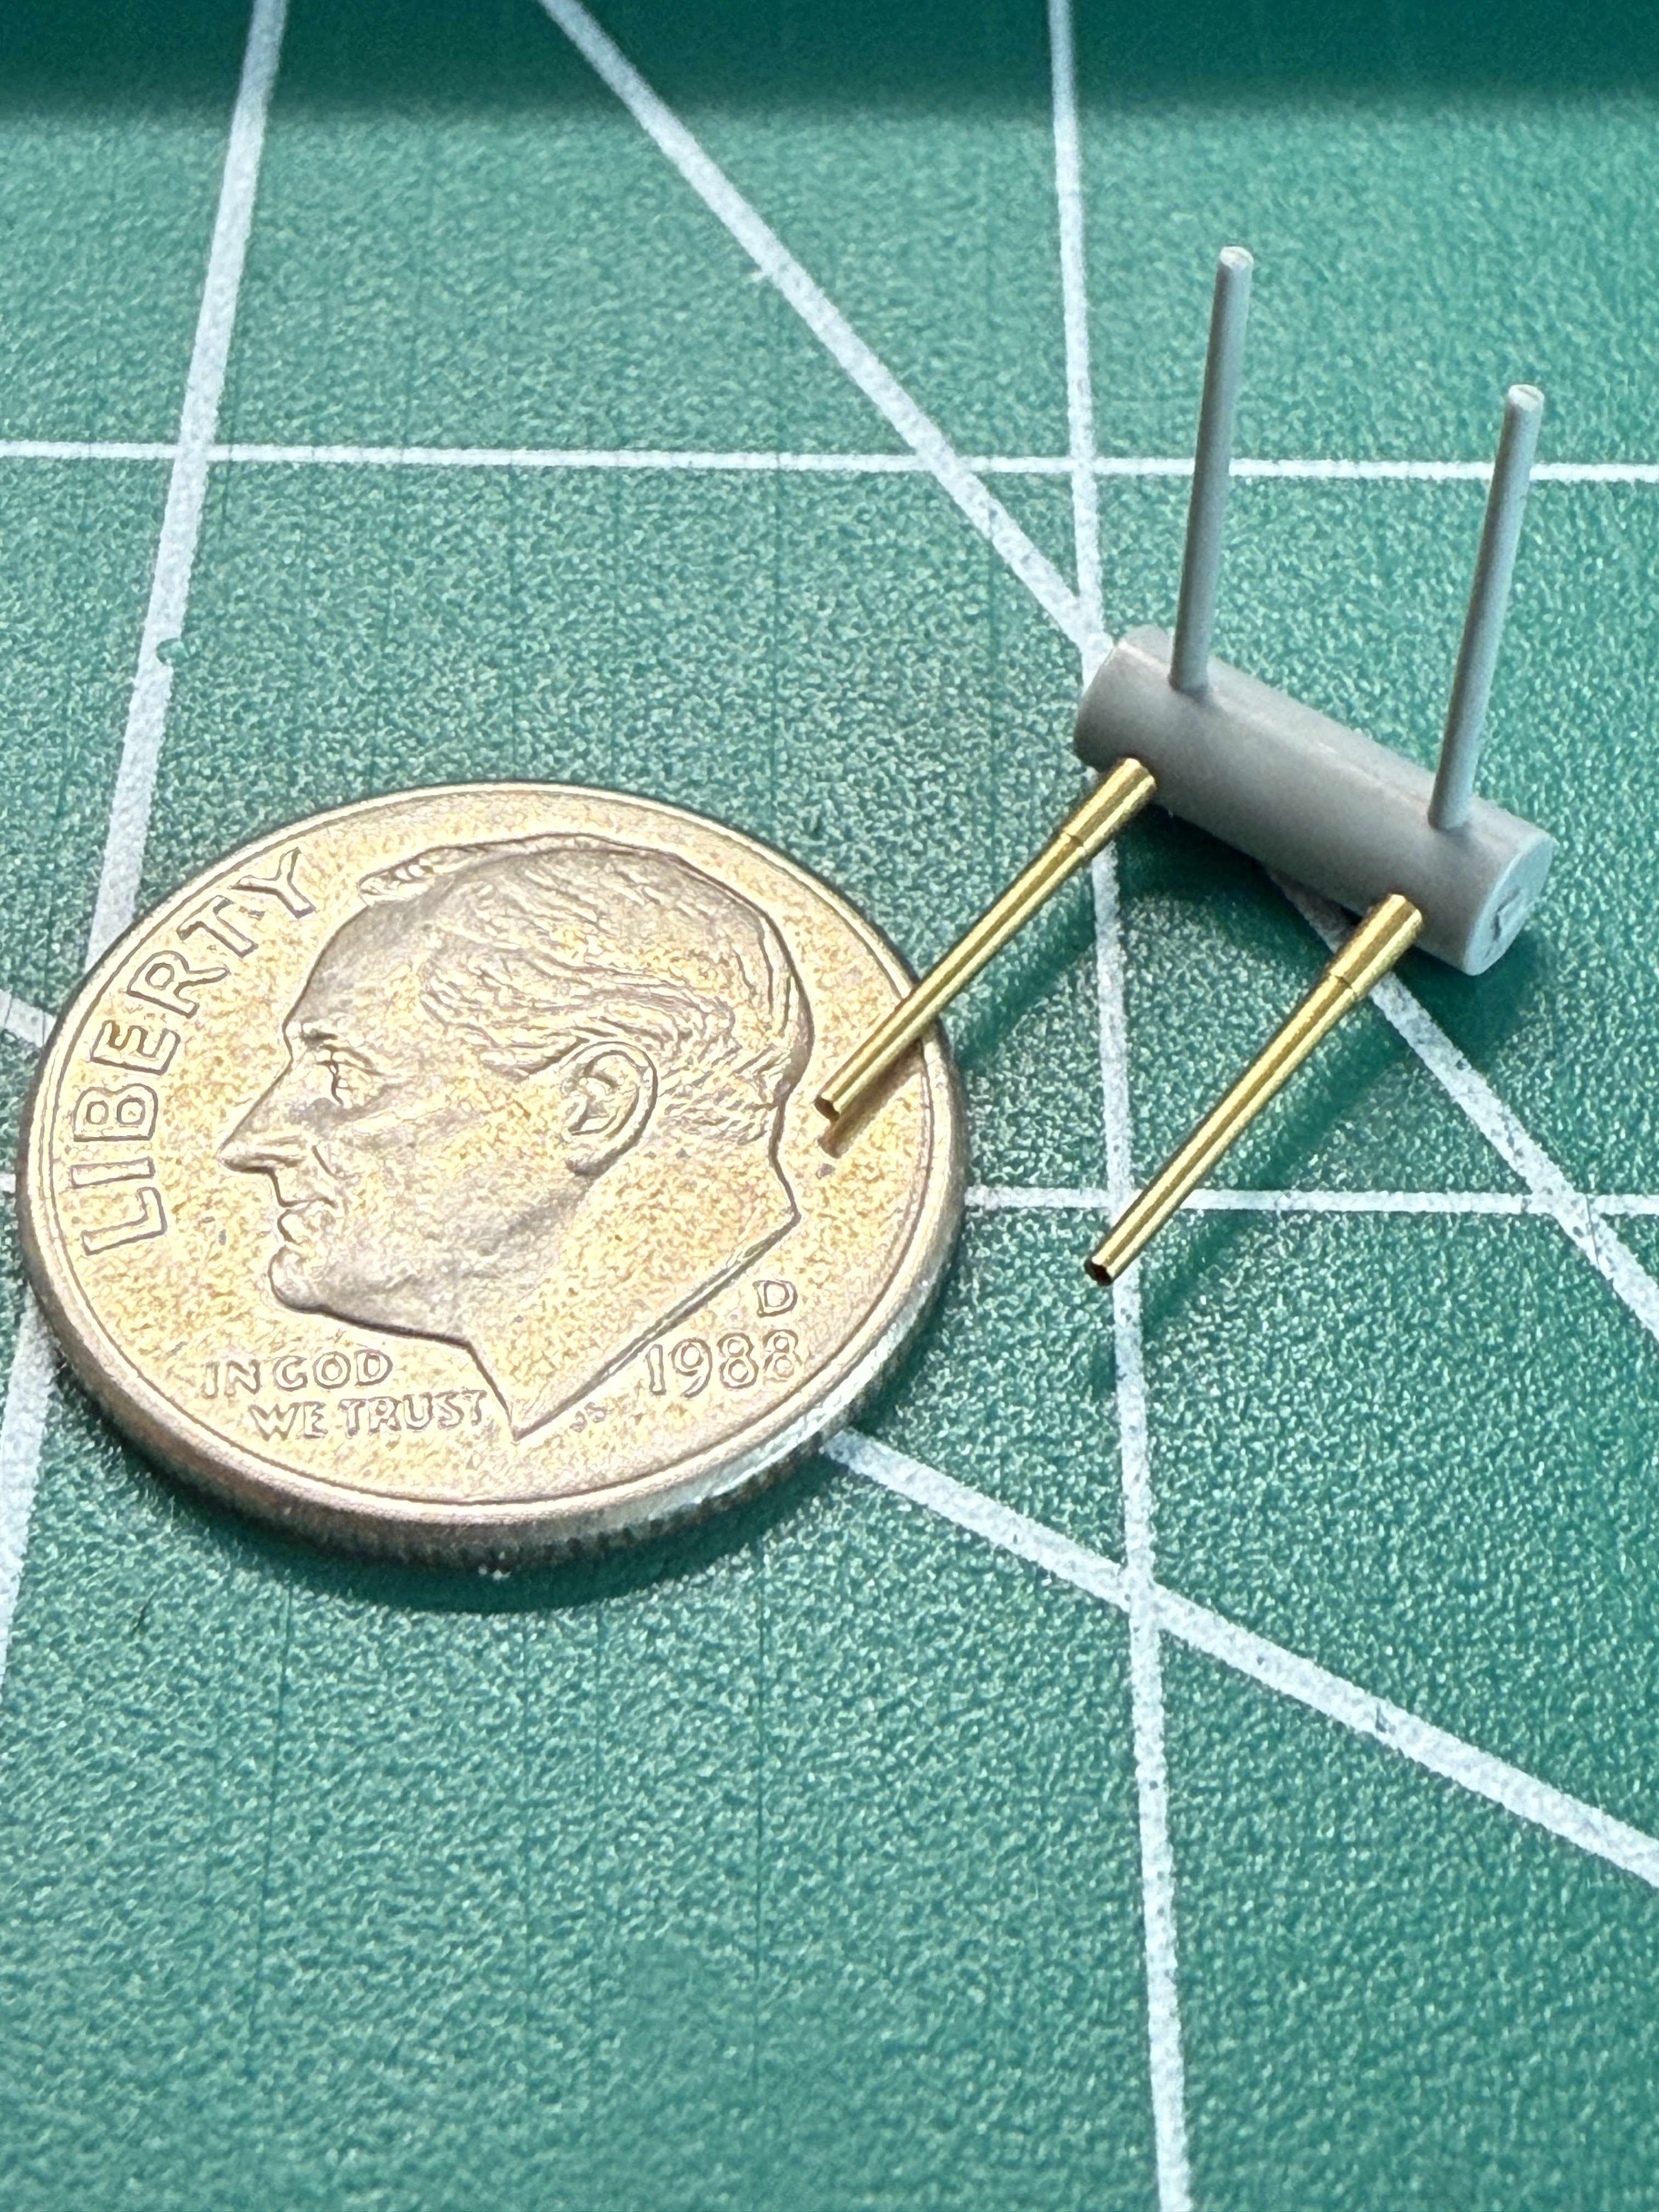
I tried my hand at making the bofors and 20mm guns out of the supplied parts and photo etch, but quickly discovered I’m not that guy and my sanity was worth more than the effort I was putting into them… so I took the easy way out. Bunker studio parts looked really nice, but I couldn’t justify the price on their resin parts. I found a guy on eBay making some really nice stuff and managed to get all this for about $85 shipped.

-
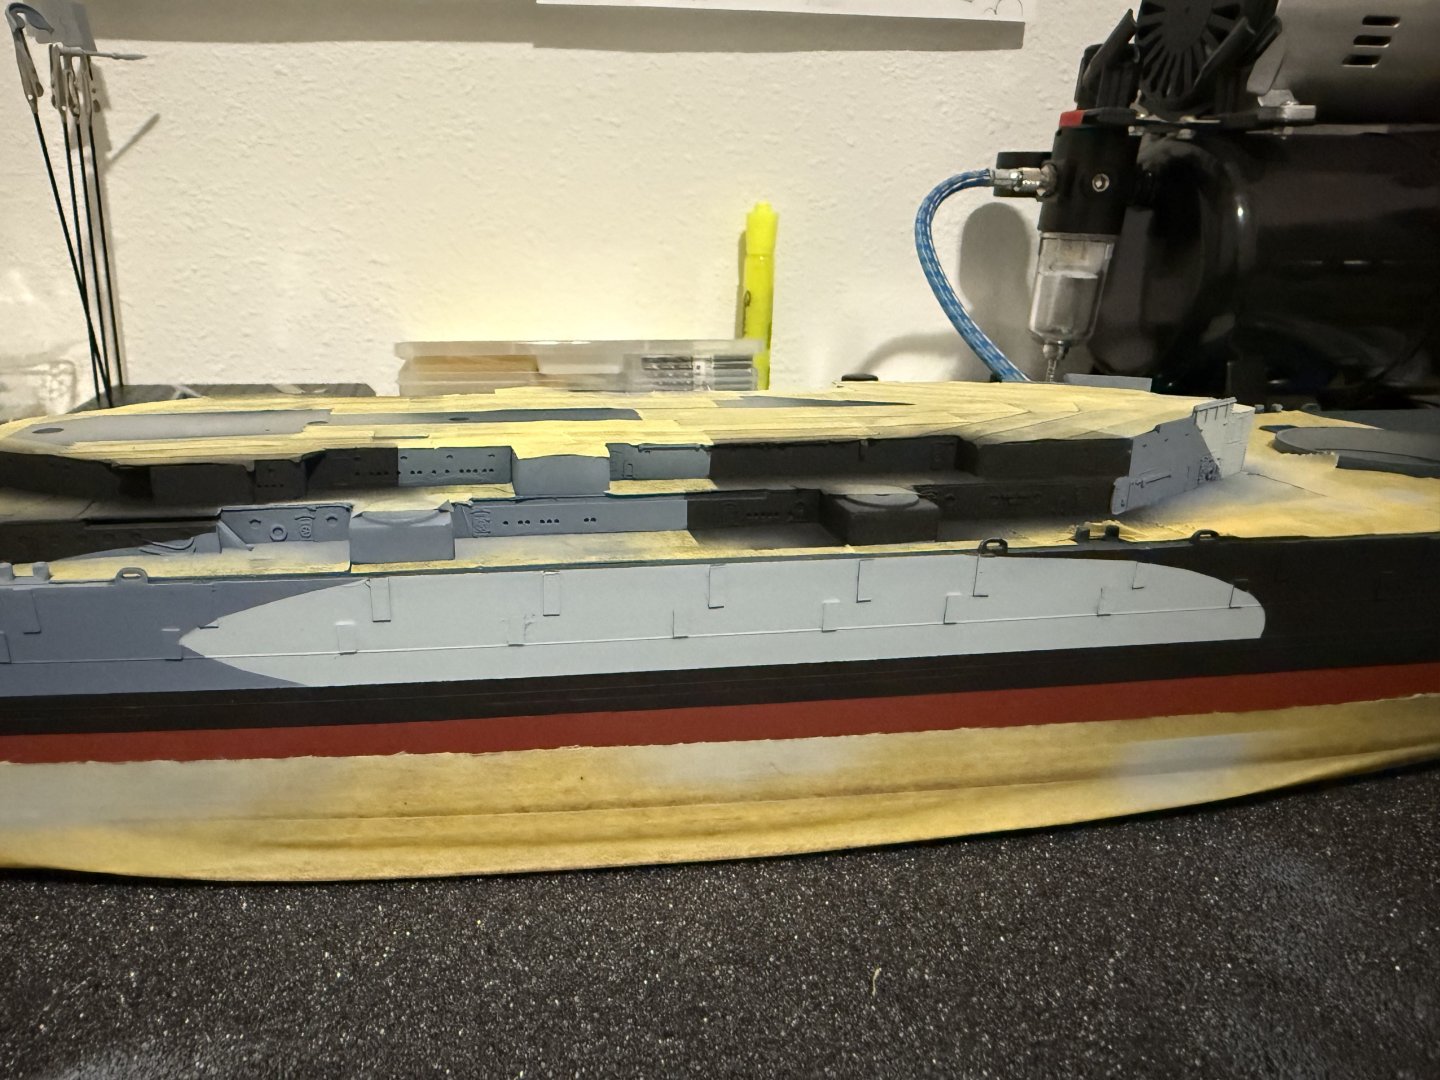
Managed to get all of the lower decks painted. Lots of putting parts in place and removing them to get everything lined up. somehow I still missed two smalls spots, but I’ll get them when I start masking the next deck.
-
My apologies for the confusion. I thought you were referencing the platform overhang this whole time and was very confused. I’ll be making extra sure when things start getting glued that I pay attention to the direction that tower faces!
-
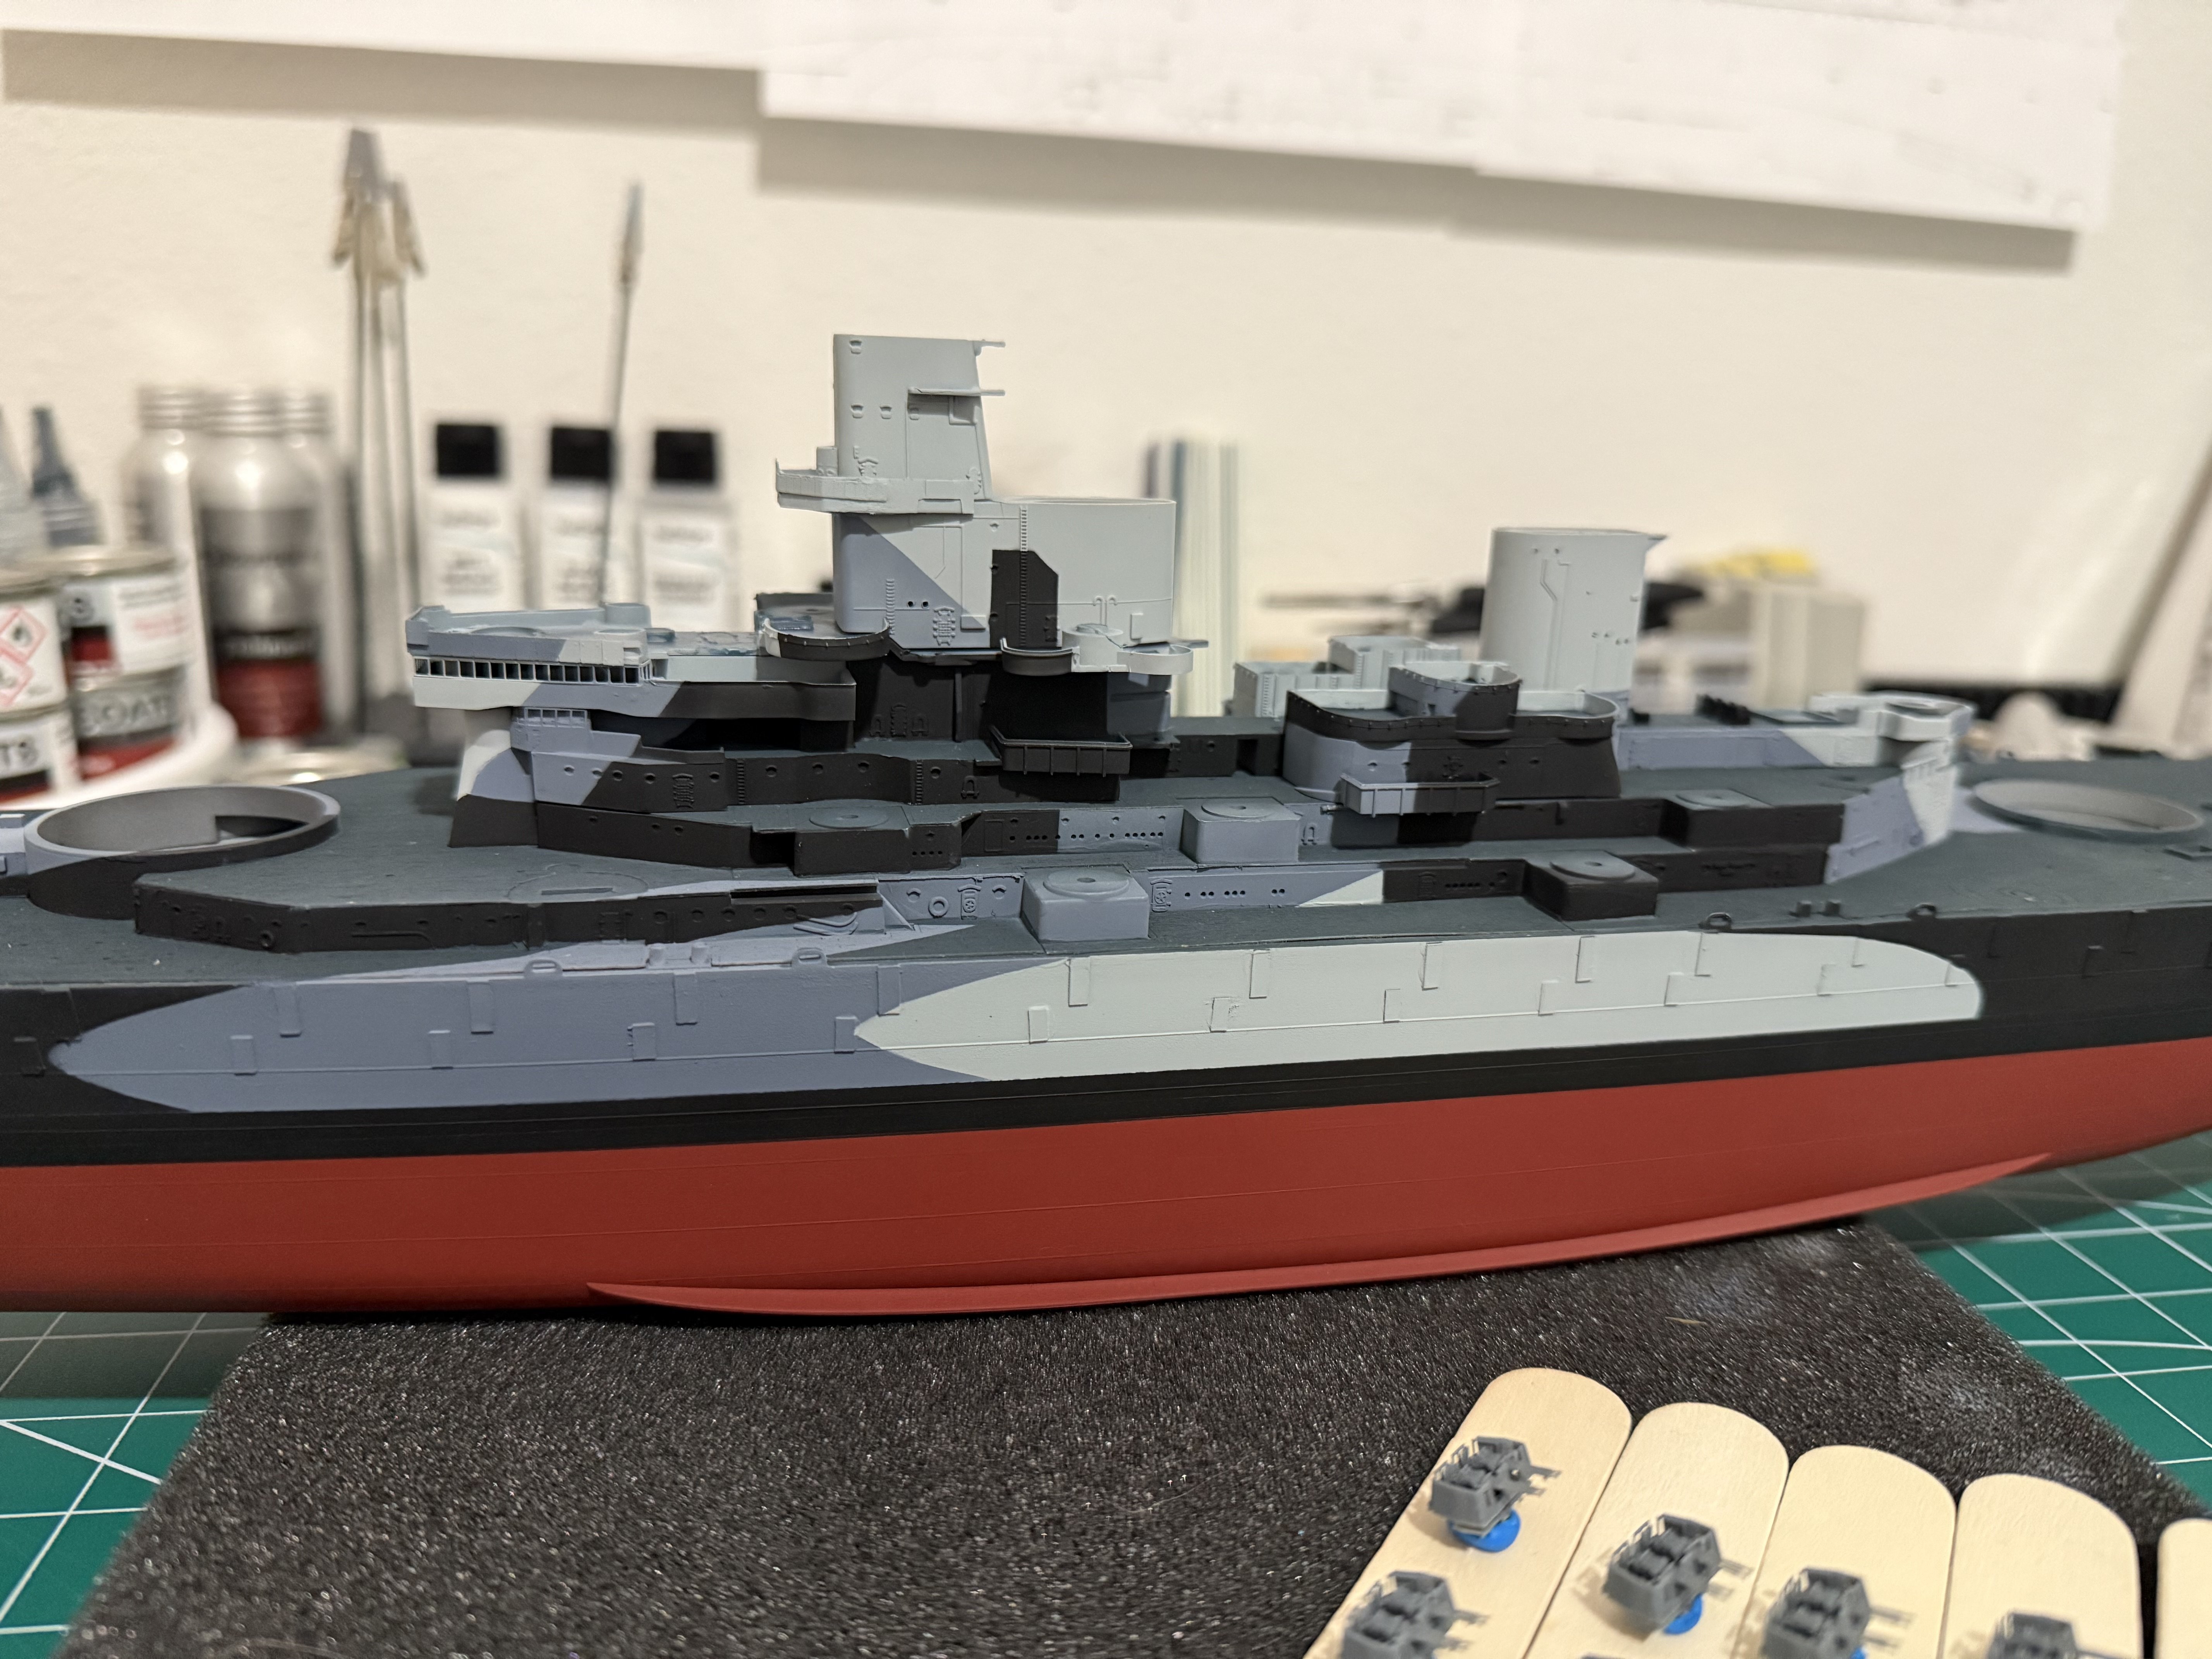
It’s just sitting there….none of the superstructure other than being painted has been assembled… it was just put in place to all fit in frame of the picture.
-
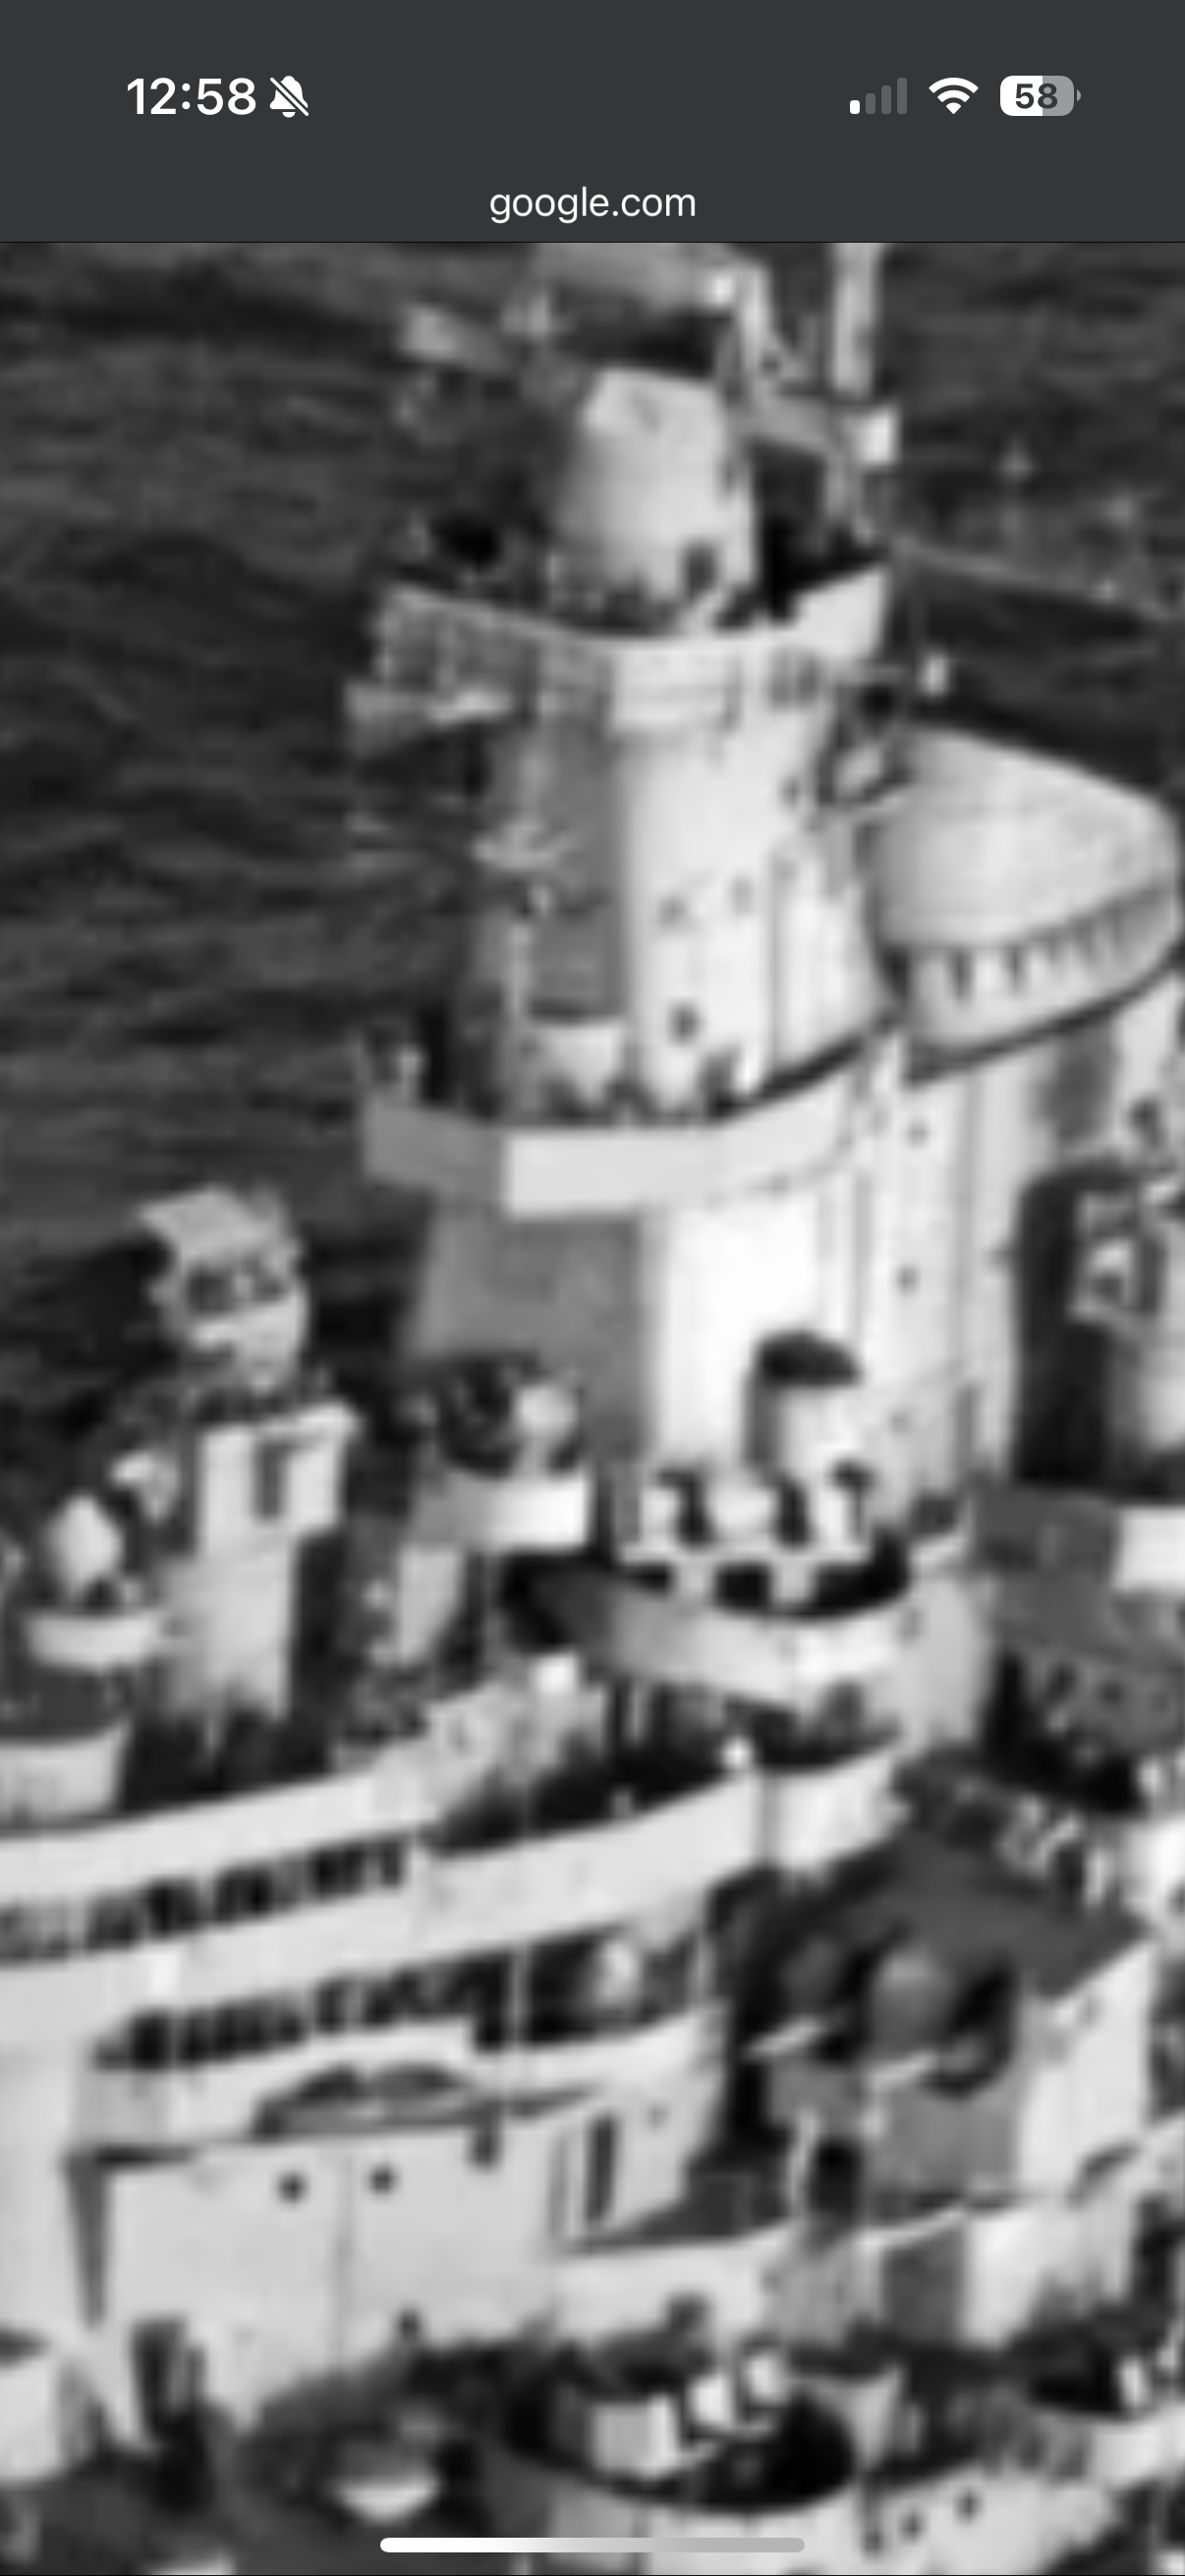
I understand the tower is backwards in my Picture. It’s just sitting there and not installed. while I see what you’re saying about the plans, all of the photos I can find of the Missouri in ‘44 show that the kit is correct in having the platform overhang.
-
I am so confused about what you guys are talking about. My model looks exactly the same as the actual Missouri in that area. I’m not following what’s “wrong” here. I also have no idea what kit bashing means.
-
The base is glued, but the tower isn’t. If it’s meant to be flush, that isn’t how the kit is set up as there was a receded section for the base to click into.
-
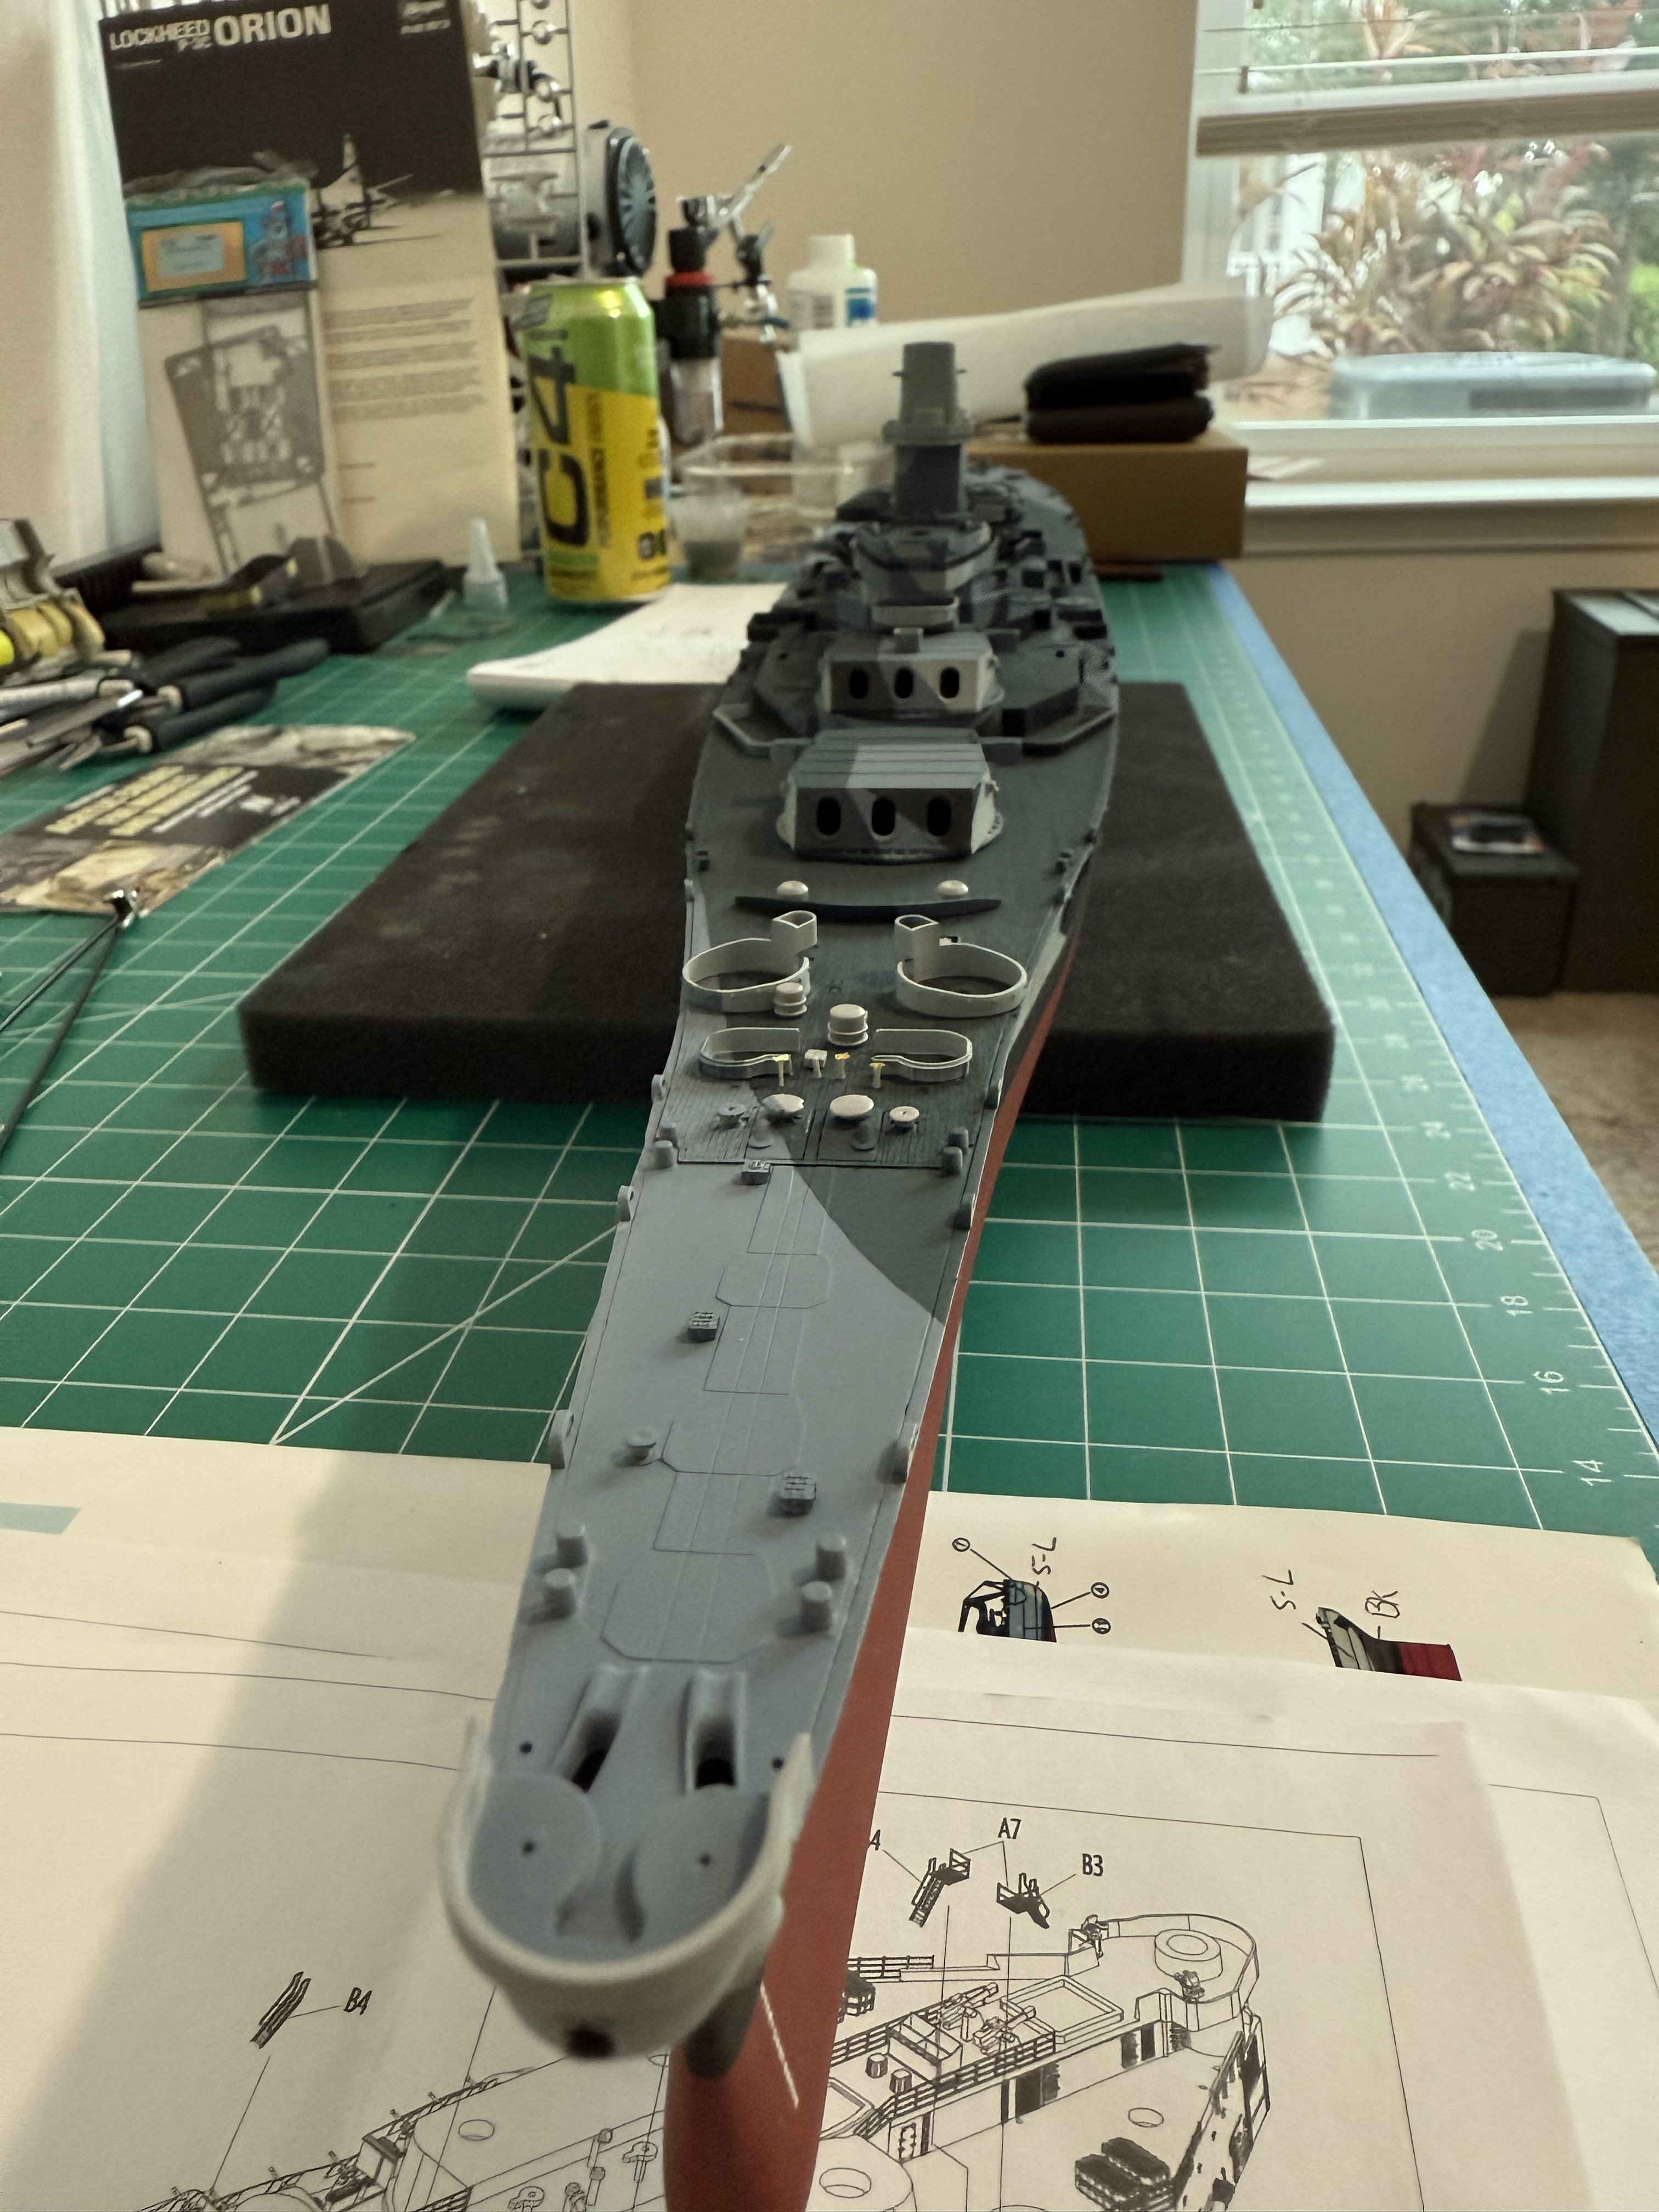
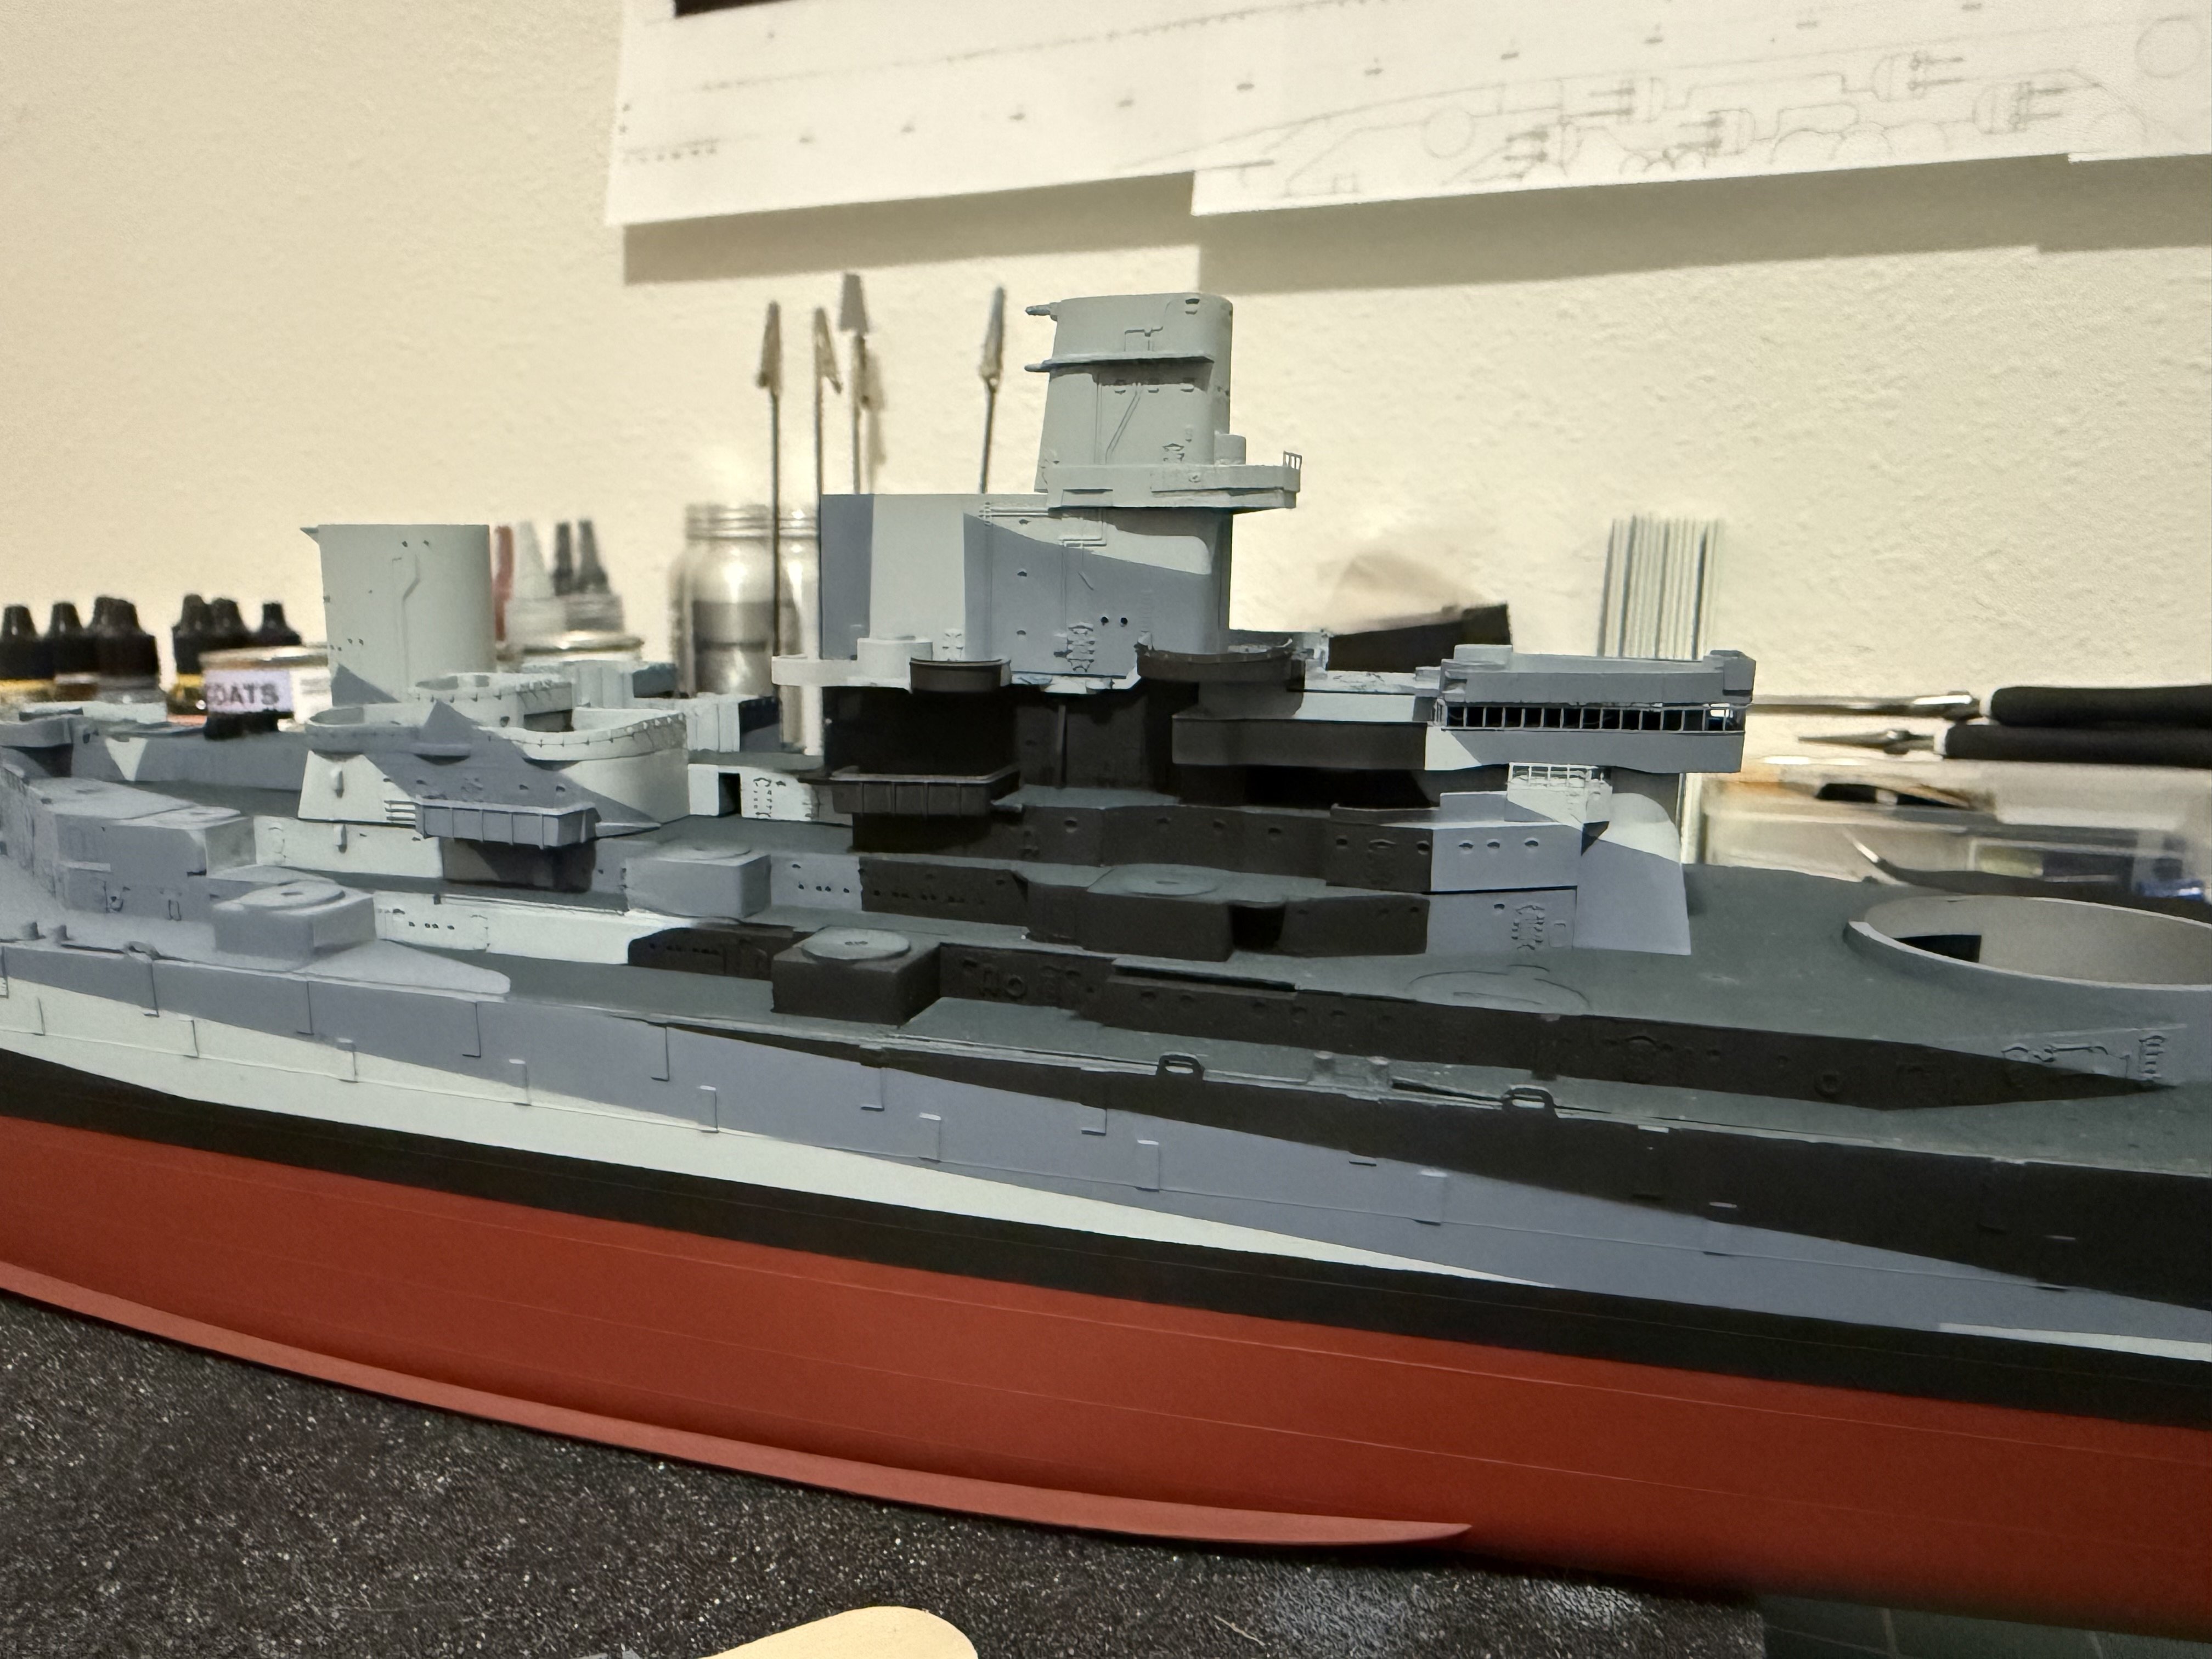
Slowly starting to work on the first two levels camo scheme. About 90% complete with these levels. I was hoping to finish them today but I threw my back out yesterday and I just can’t get comfortable in my office chair long enough to make any progress. on the bright side the resin bofors, 20mm, and gun directors shipped today.

-
I touched up the small errors in the camo on the hull. I also layed down the 20B deck blue on all the parts of the super structure so that I can start working on painting its camo. It’s all dry fit and sitting in place to make it easier to work with. i also started working on some of the smaller deck pieces as I am planning to start assembling the objects on the deck and working my way up.

-
I am using white ensign models enamels for all the painting. I believe in America they’re “color coats”. The old owner has commented on Facebook about all the official naming/ownership. I have their Norfolk hull red, 5-0, 5-L, 20B, matte black and matte white for this project, and some of their other colors for another project.