HOLIDAY DONATION DRIVE - SUPPORT MSW - DO YOUR PART TO KEEP THIS GREAT FORUM GOING!
×


altalena18
-
Posts
112 -
Joined
-
Last visited
Content Type
Profiles
Forums
Gallery
Events
Everything posted by altalena18
-
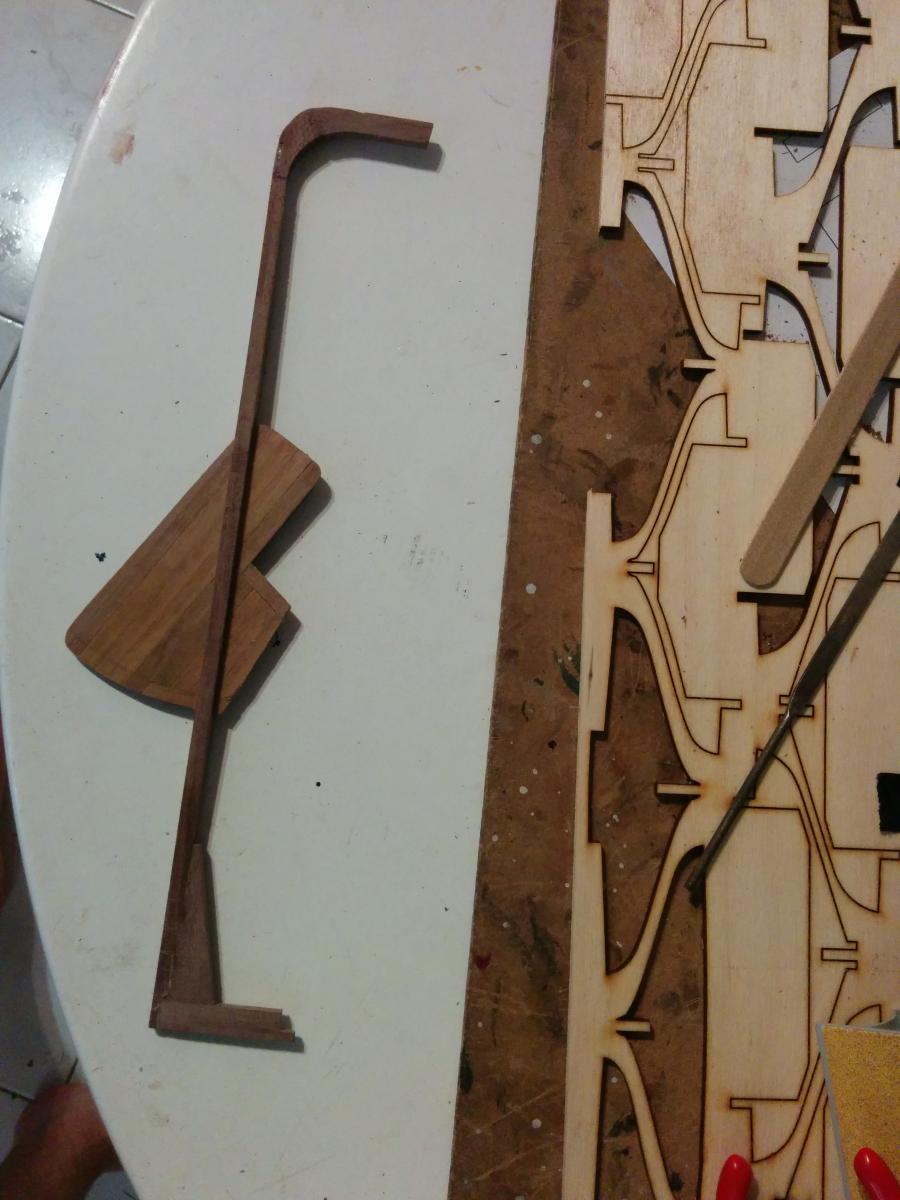
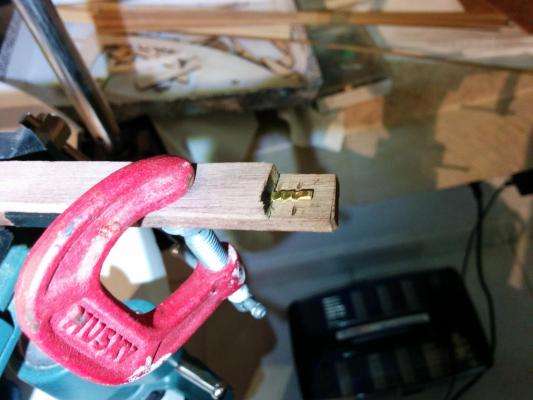
 I gotta say, I'm shamelessly proud of this little jig here. Pictures of progress on that ratchet to follow
 -
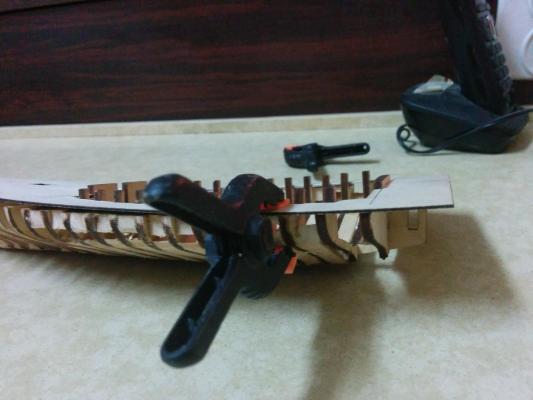
Well, grinding the part out of brass stock it is! I couldn't find any brass strips at the jewellery store, but they had some thick wire. I had someone there put it through a vise to get it a bit flattened. Once I got home, I tried carving the notches. I kept not really succeeding until I built this jig- which I'm quite proud of! Now the part is almost done...
- 103 replies
-
- 4
-

-
- annie
- sandbagger
- (and 1 more)
-
I agree- and that was the point of teaching myself scratchbuilding using a small boat- just enough detail to get enough new skills and experience, but without having to turn 36 guns and rig 25 sails or whatever. So it's off to buy some brass stock!
- 103 replies
-
- 2
-
-
- annie
- sandbagger
- (and 1 more)
-
I thought of using plastic or evergreen (i bought a whole bunch a while back and still have some) but I was trying to think of a way to make it out of brass. I guess it'll have to be the old files and brass.
-
Oh well, I was hoping to avoid that, but it looks like i'll have to nip down to the jewellery supply store and see what sorts of brass stock they have...
-
Sorry, posted in the wrong order...
-
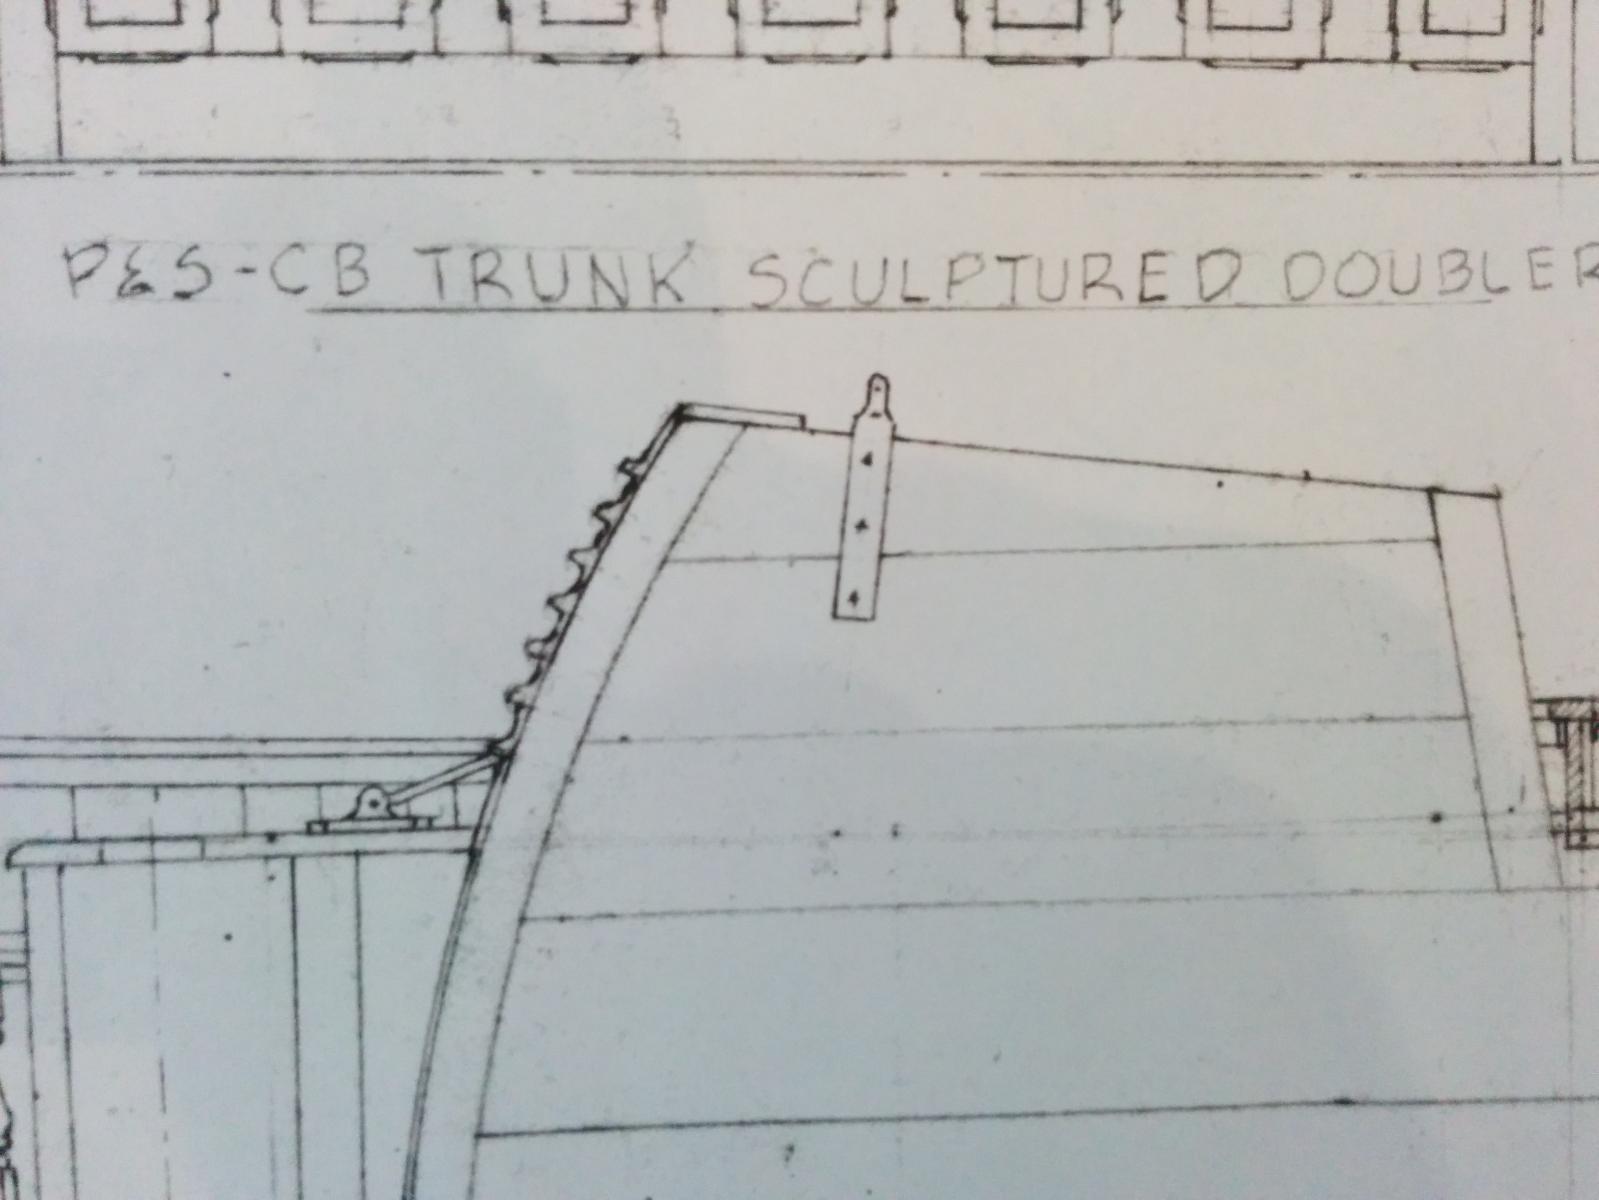
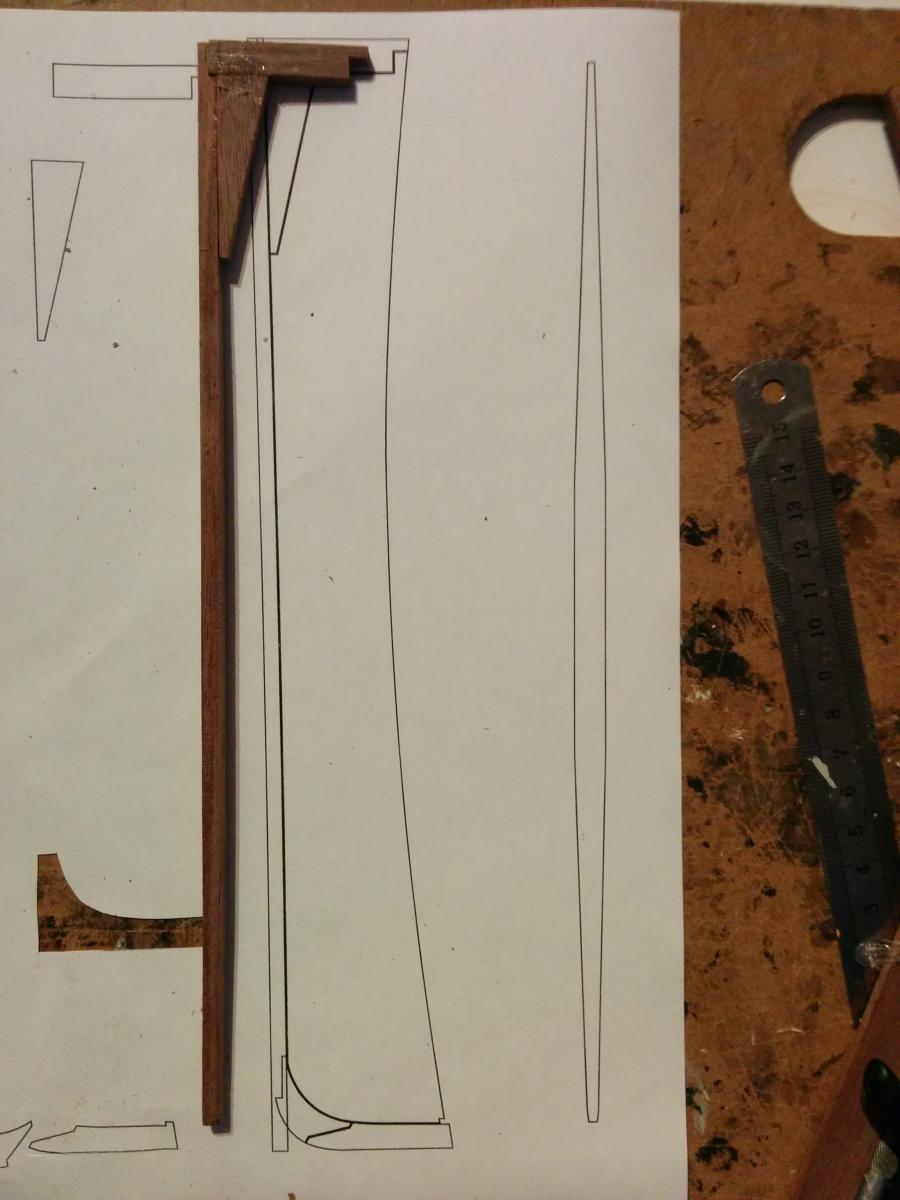
So I need some advice- the daggerboard has both a sort of ring with tongues to tie the rigging that lifts it up, and a ratchet to hold it in place. Does anyone have any idea how I can craft that ratchet? Any common parts or something, or any other method? I guess I could try to carve it out of brass stock with my Dremel but I'm nervous that it'd be difficult and messy and not look neat.


- 103 replies
-
- 2
-
-
- annie
- sandbagger
- (and 1 more)
-
Well I don't know how much time I do have, I guess that's what weekends are for. Buildin the model helps me relax, so I try to put in an hour or two as well in the evenings after work... Anyhow, anyone have any ideas for making that ratchet?
- 103 replies
-
- 1
-
-
- annie
- sandbagger
- (and 1 more)
-
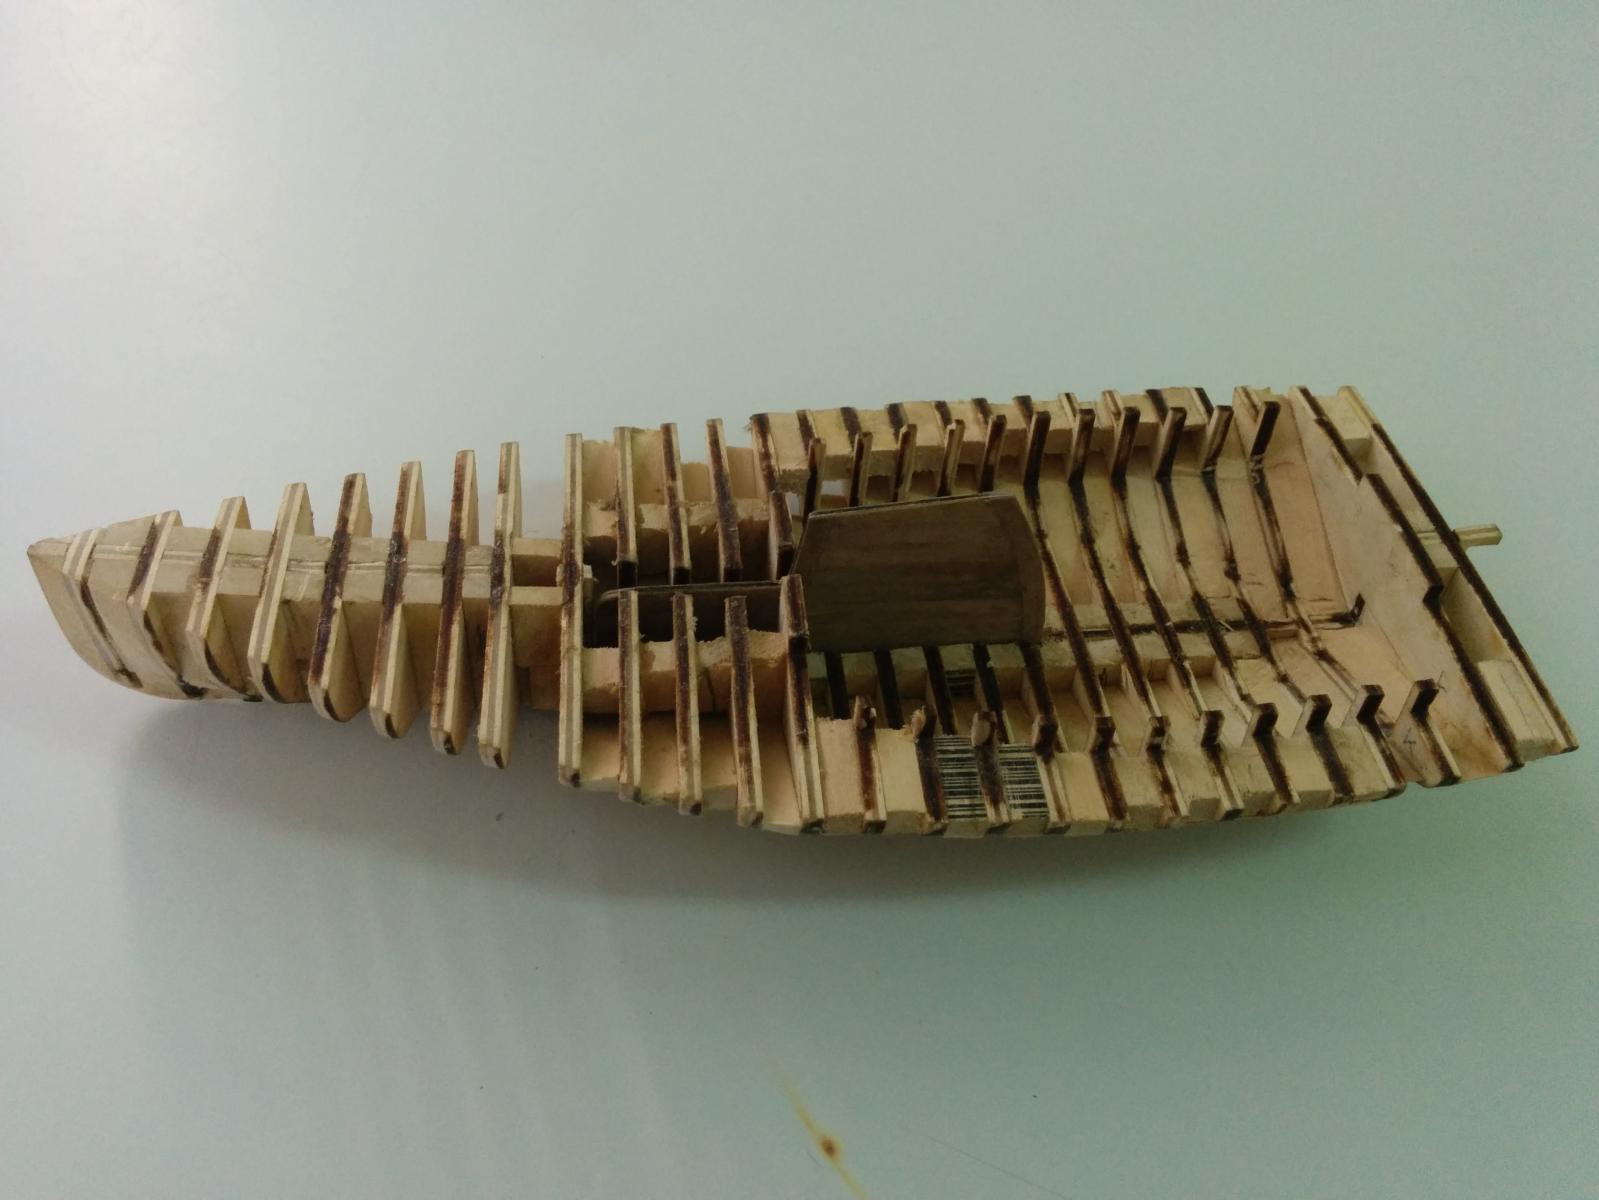
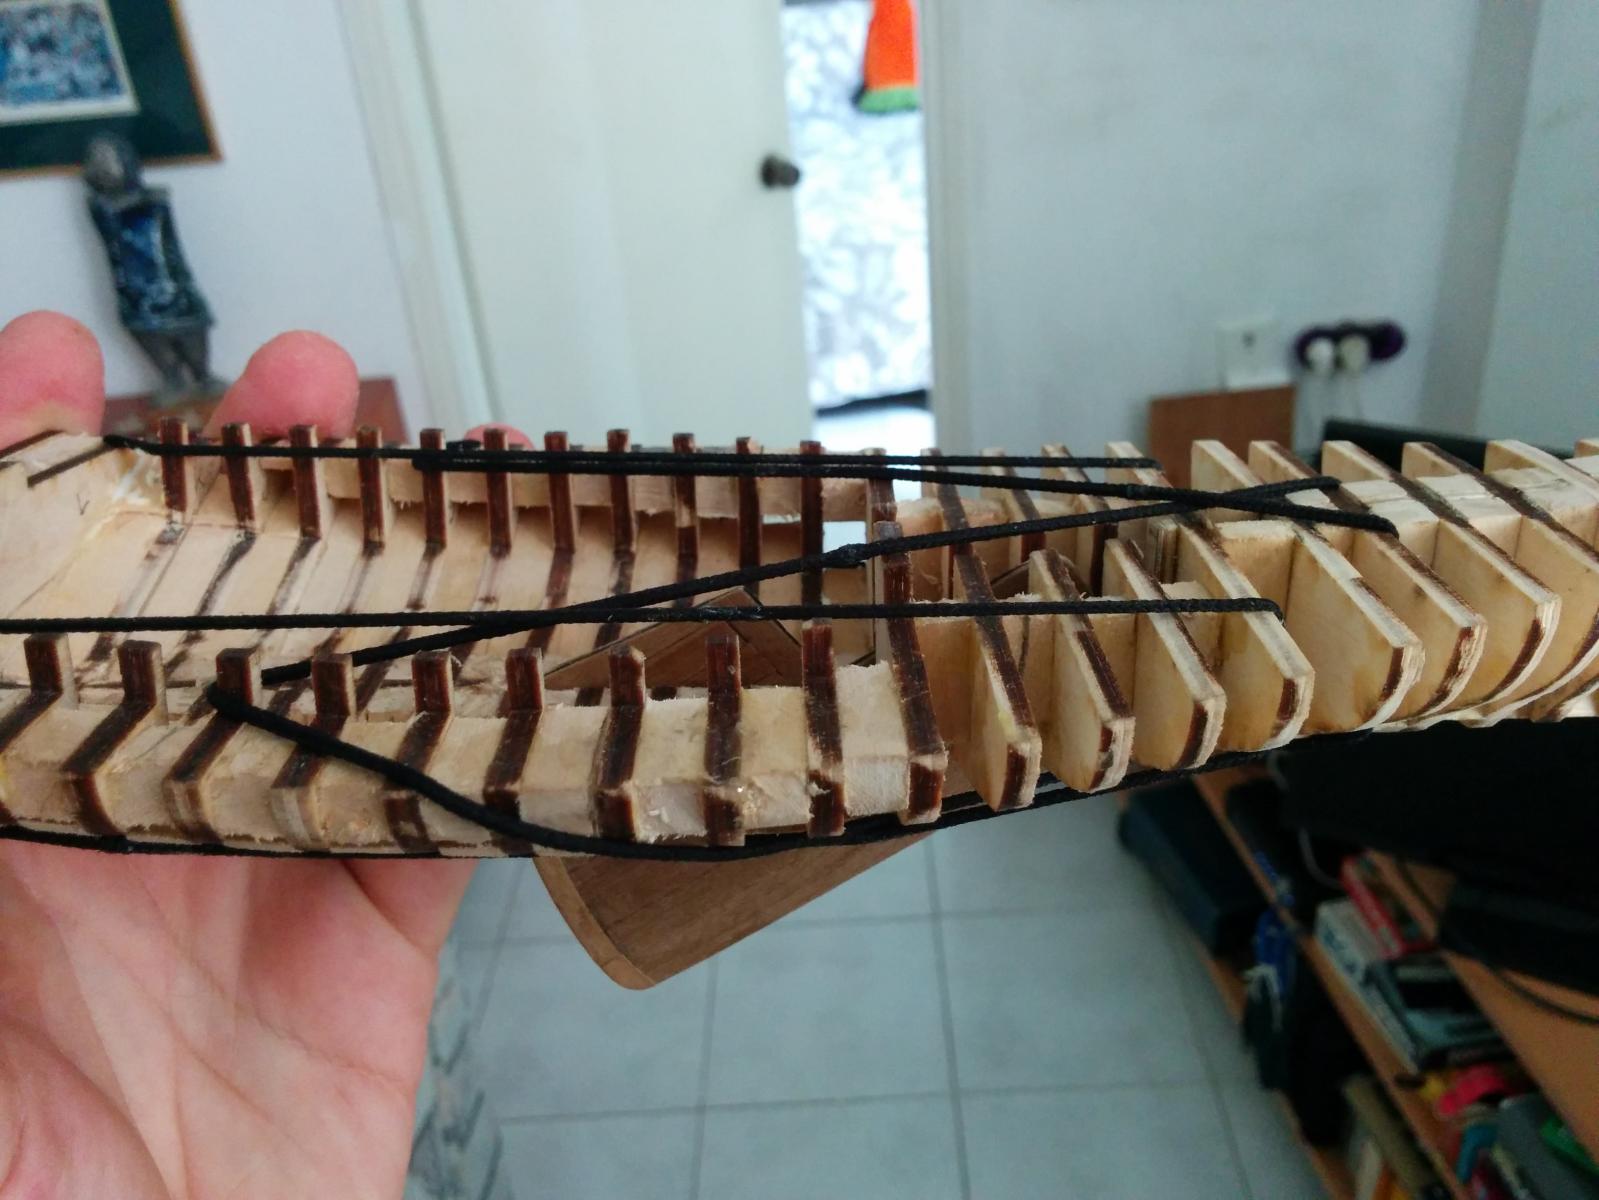
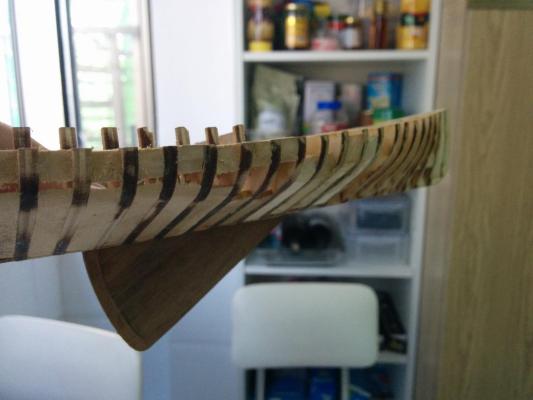
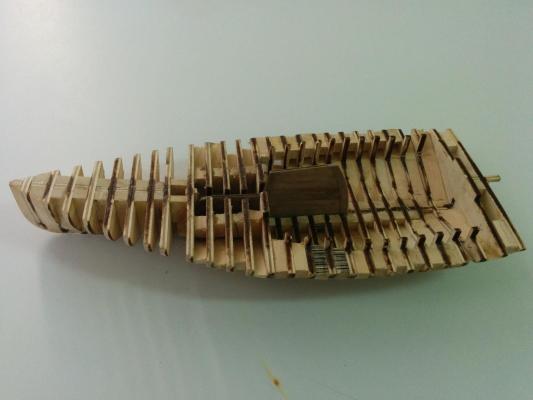
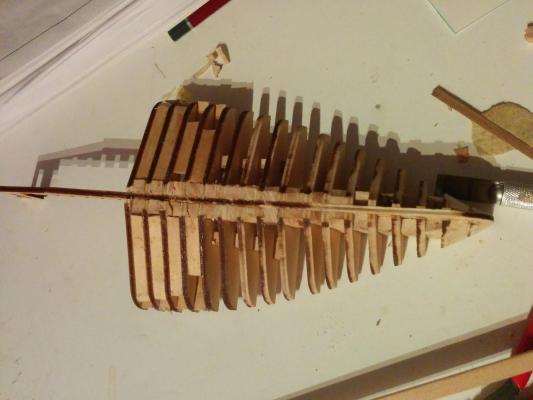
Here are some pics with the keel and the floor dry-fitted, showing the daggerboard going smoothly through all the parts.
- 103 replies
-
- 5
-
-
- annie
- sandbagger
- (and 1 more)
-
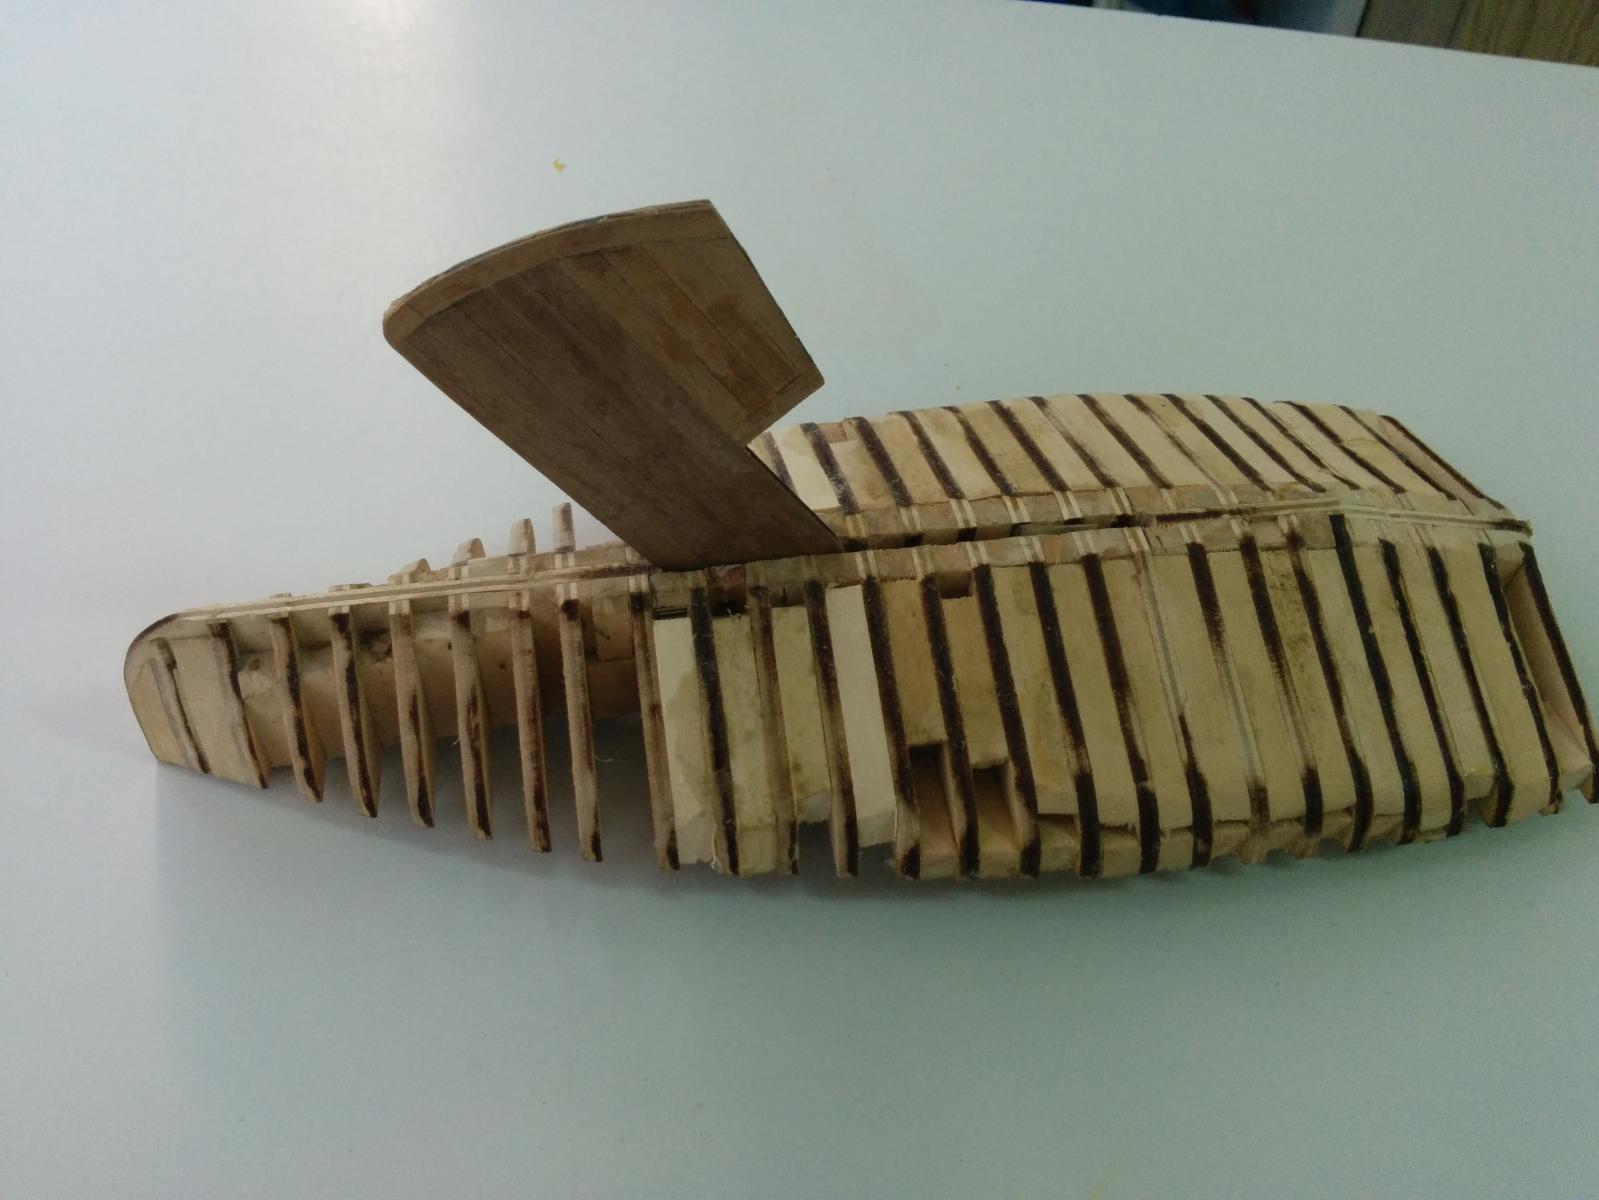
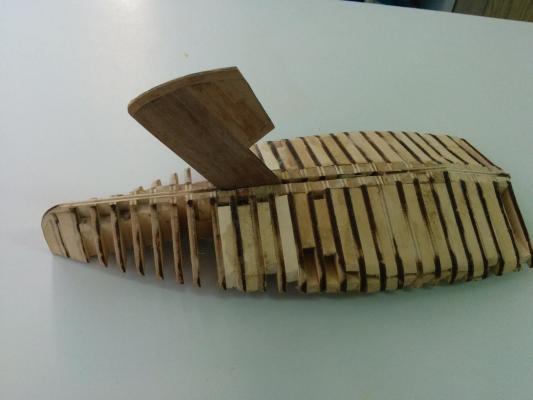
Haha that's really something! I still wonder how only 4 men could handle such an enormous sail in any kind of wind though. Anyhow everyone, here's today's progress. I've made a hinge for the dagger board by drilling through 2 pieces of wood and putting a short length of brass tube in between with the board in the middle. I think I might have installed it too early though, because i've just realized that I've forgotten to install all the daggerboard's fittings! oops...
- 103 replies
-
- 5
-
-
- annie
- sandbagger
- (and 1 more)
-
Wow Jasco, I hope you realize that your magazine is 2 months older than I am... And if you ever build a full-sized sandbagger, you'll probably need an enourmous crew, what with all that sail area and that puny hull!
- 103 replies
-
- 2
-
-
- annie
- sandbagger
- (and 1 more)
-
I used basswood stock from the hobby shop on Annie, and balsa on Fair American. I think basswood works better because it's easier to carve and not as soft, and the best thing is to find or cut billets that match the width between your bulkheads, so that they come out decently exact and don't warp the hull. Even still, it takes a lot of work and a sharp eye to ensure that everything is straight and plumb!
-
Thanks, anything helps. Honestly in my opinion, if you plank a solid hull, or, as I do, use a lot of wood as filler in between bulkheads, planking is not that difficult a chore. I planked my Fair American pretty easily, although all the work is now hidden under copper plates and paint!
-
Although luckily I don't have to buy turnbuckles, Annie has deadeyes
-
Wow, Jasco, that is mindblowing and inspiring. I hope mine looks a tenth as good!
-
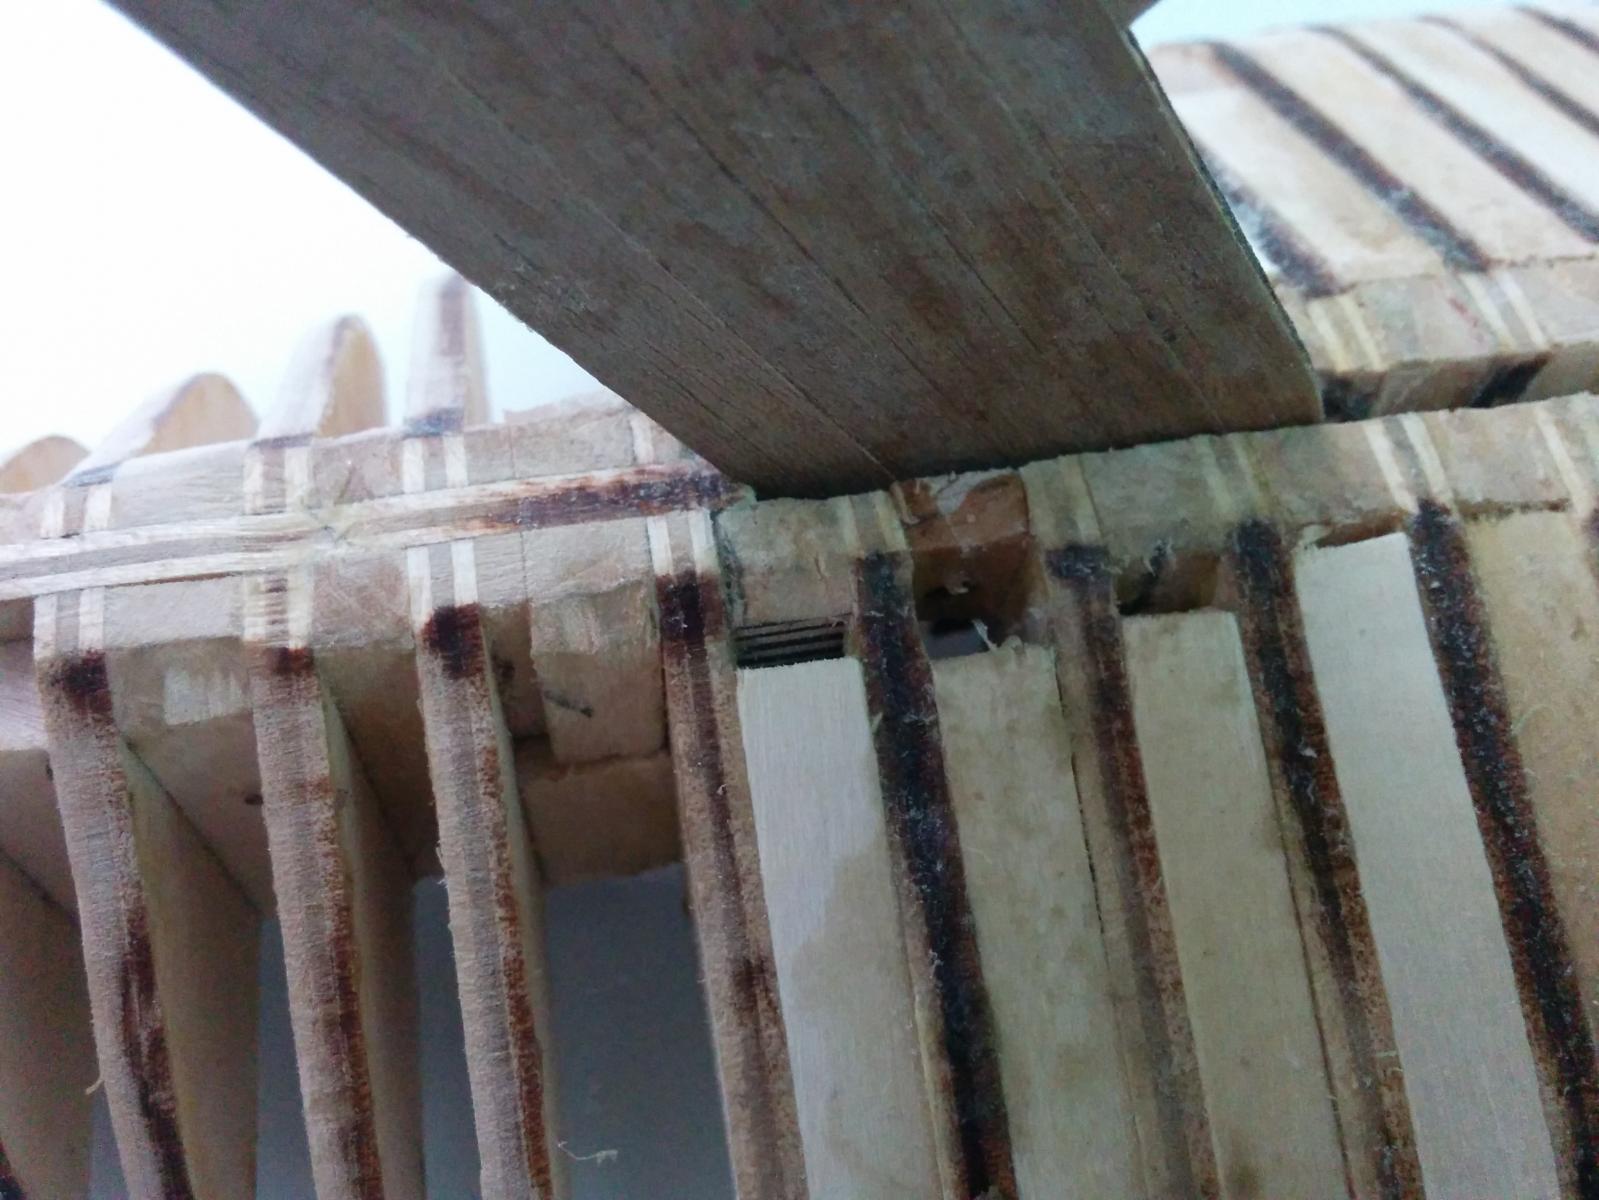
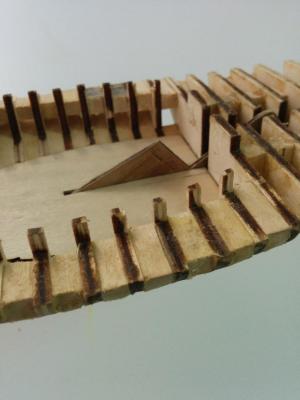
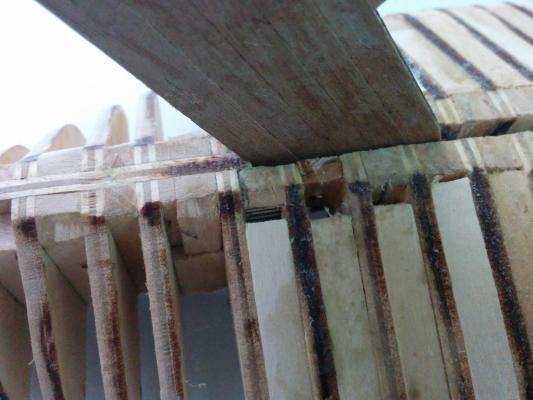
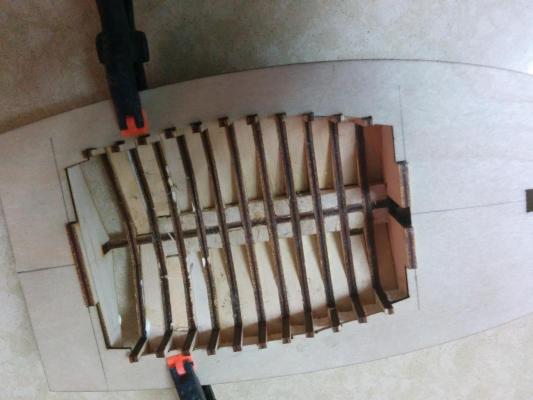
Hi all! I have just completed a very stressful and delicate operation on the model- I have cut out the boat's backbone in order to have a slot for the daggerboard!


- 103 replies
-
- 8
-
-
- annie
- sandbagger
- (and 1 more)
-
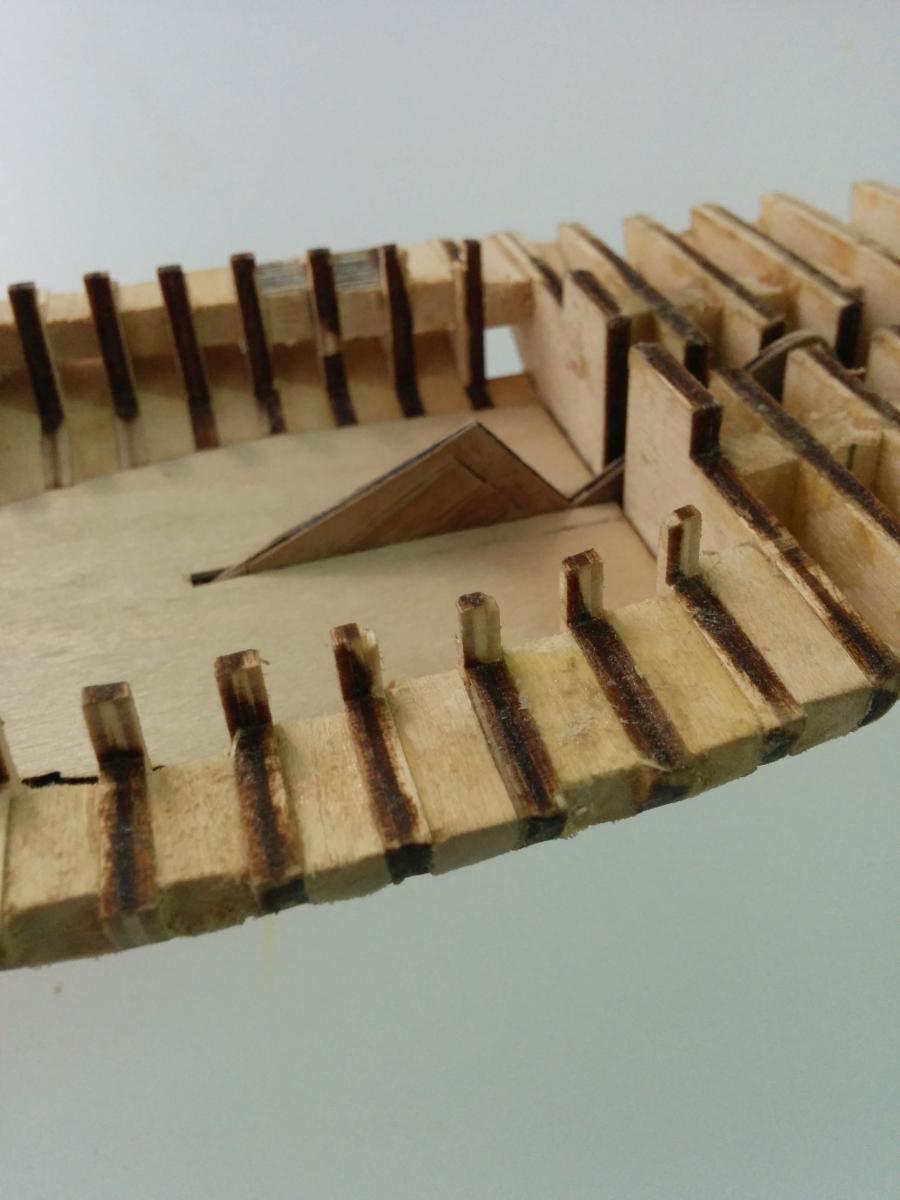
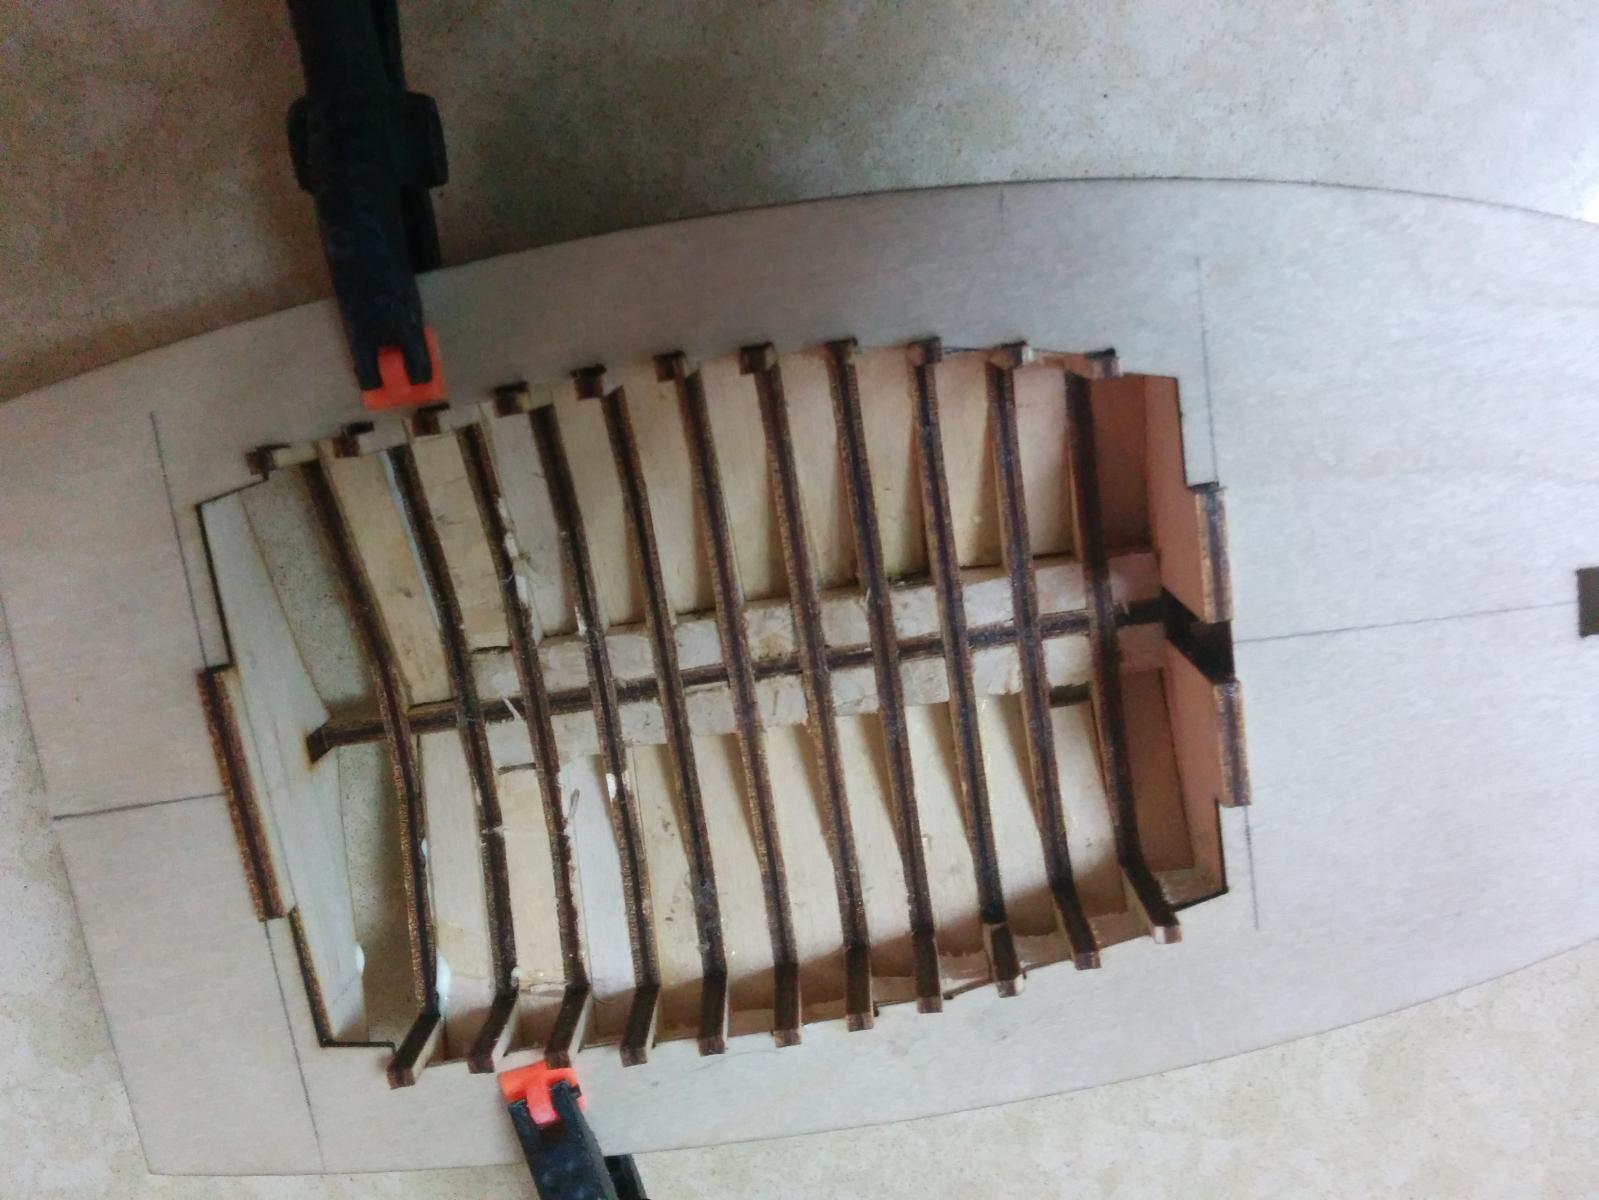
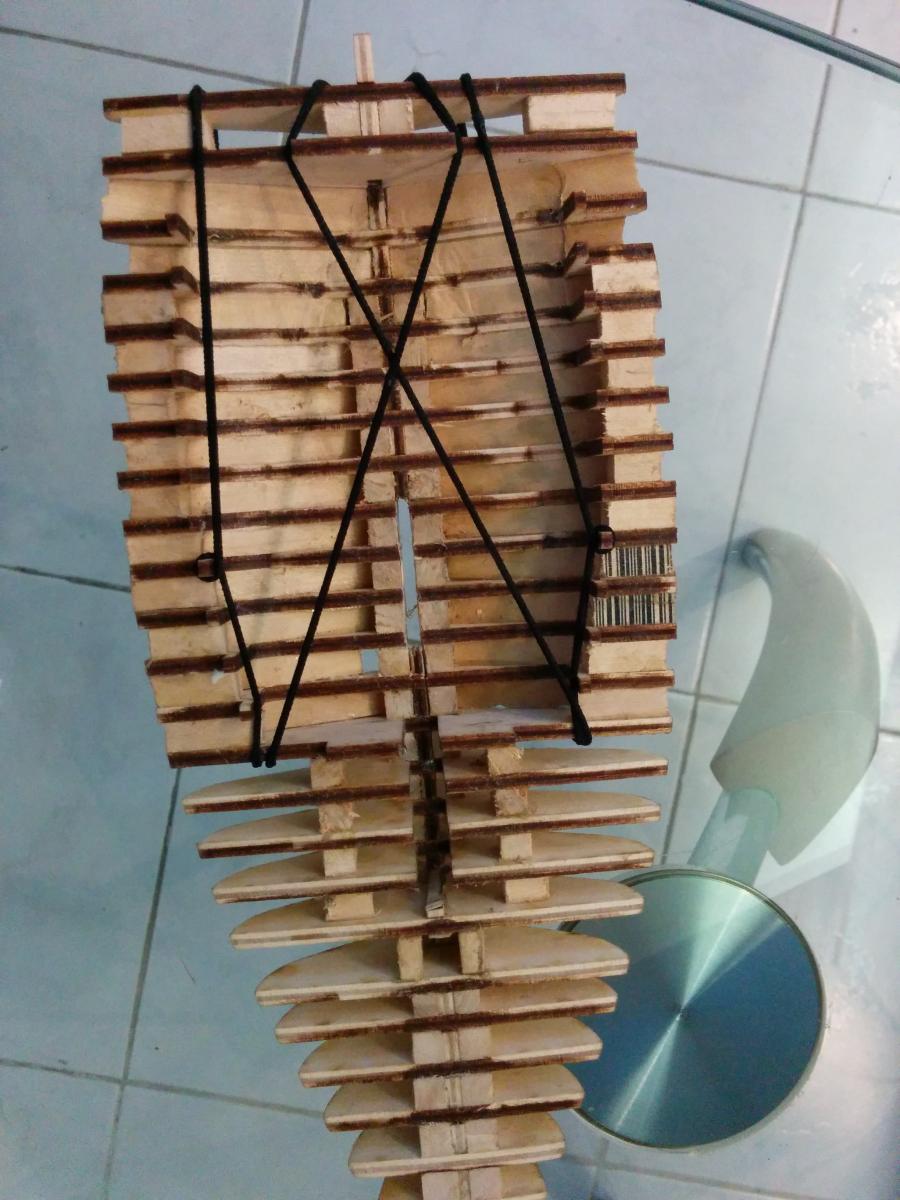
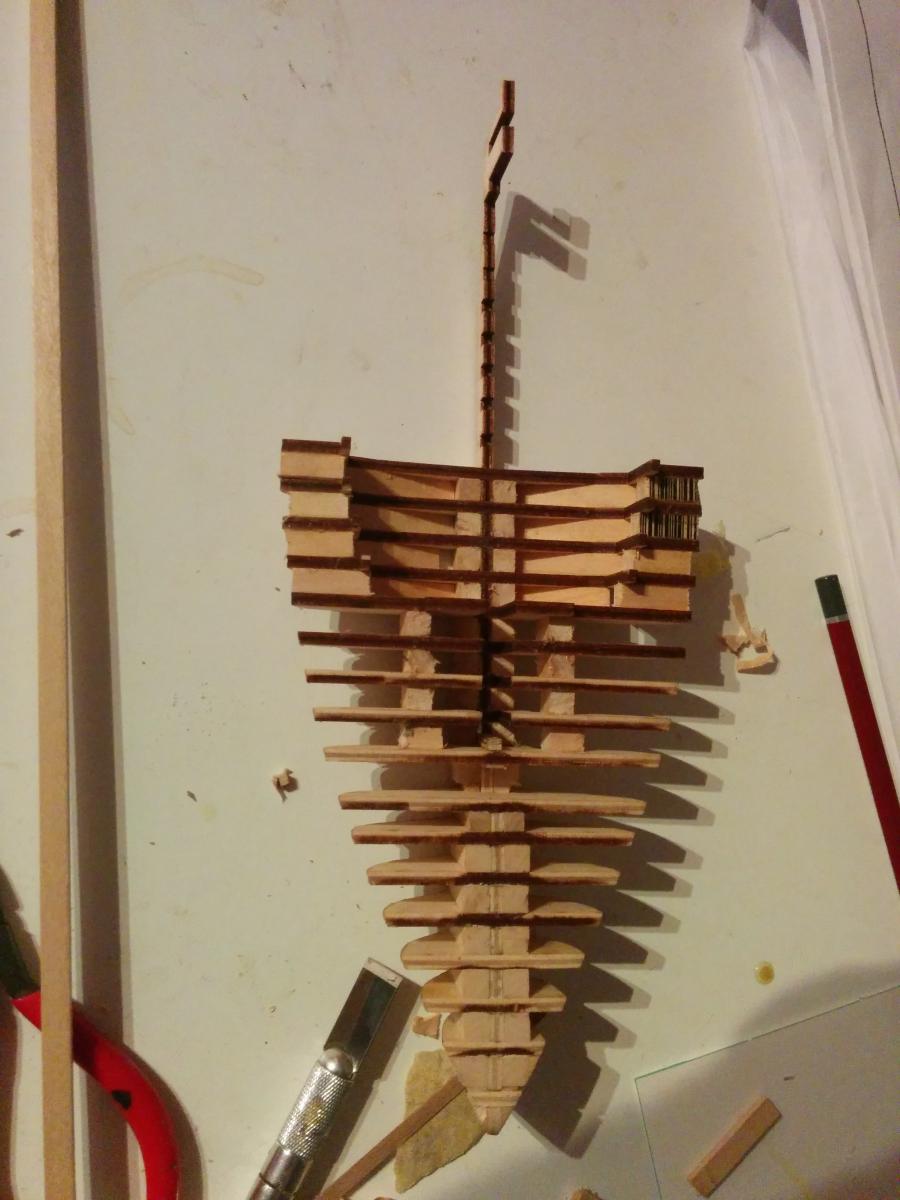
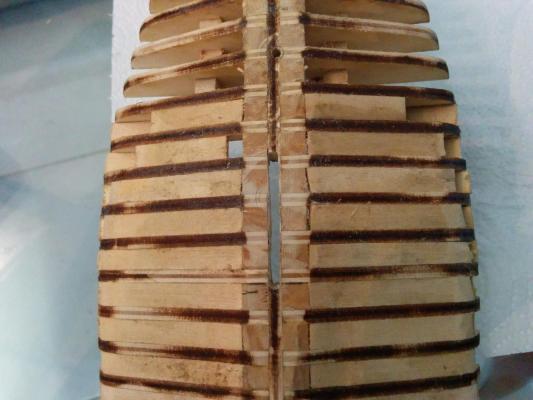
I've almost completed installing all the bulkheads. Eventually I'll get to sanding and fairing everything, but first I had to straighten out the hull. Even though I'd steamed and pressed the keel TWICE and let it dry in between two glass shelves, it still managed to warp. I'm pretty sure I've got it straight now but we'll see...
- 103 replies
-
- 7
-
-
- annie
- sandbagger
- (and 1 more)
-
Do you still have the model lying around?
-
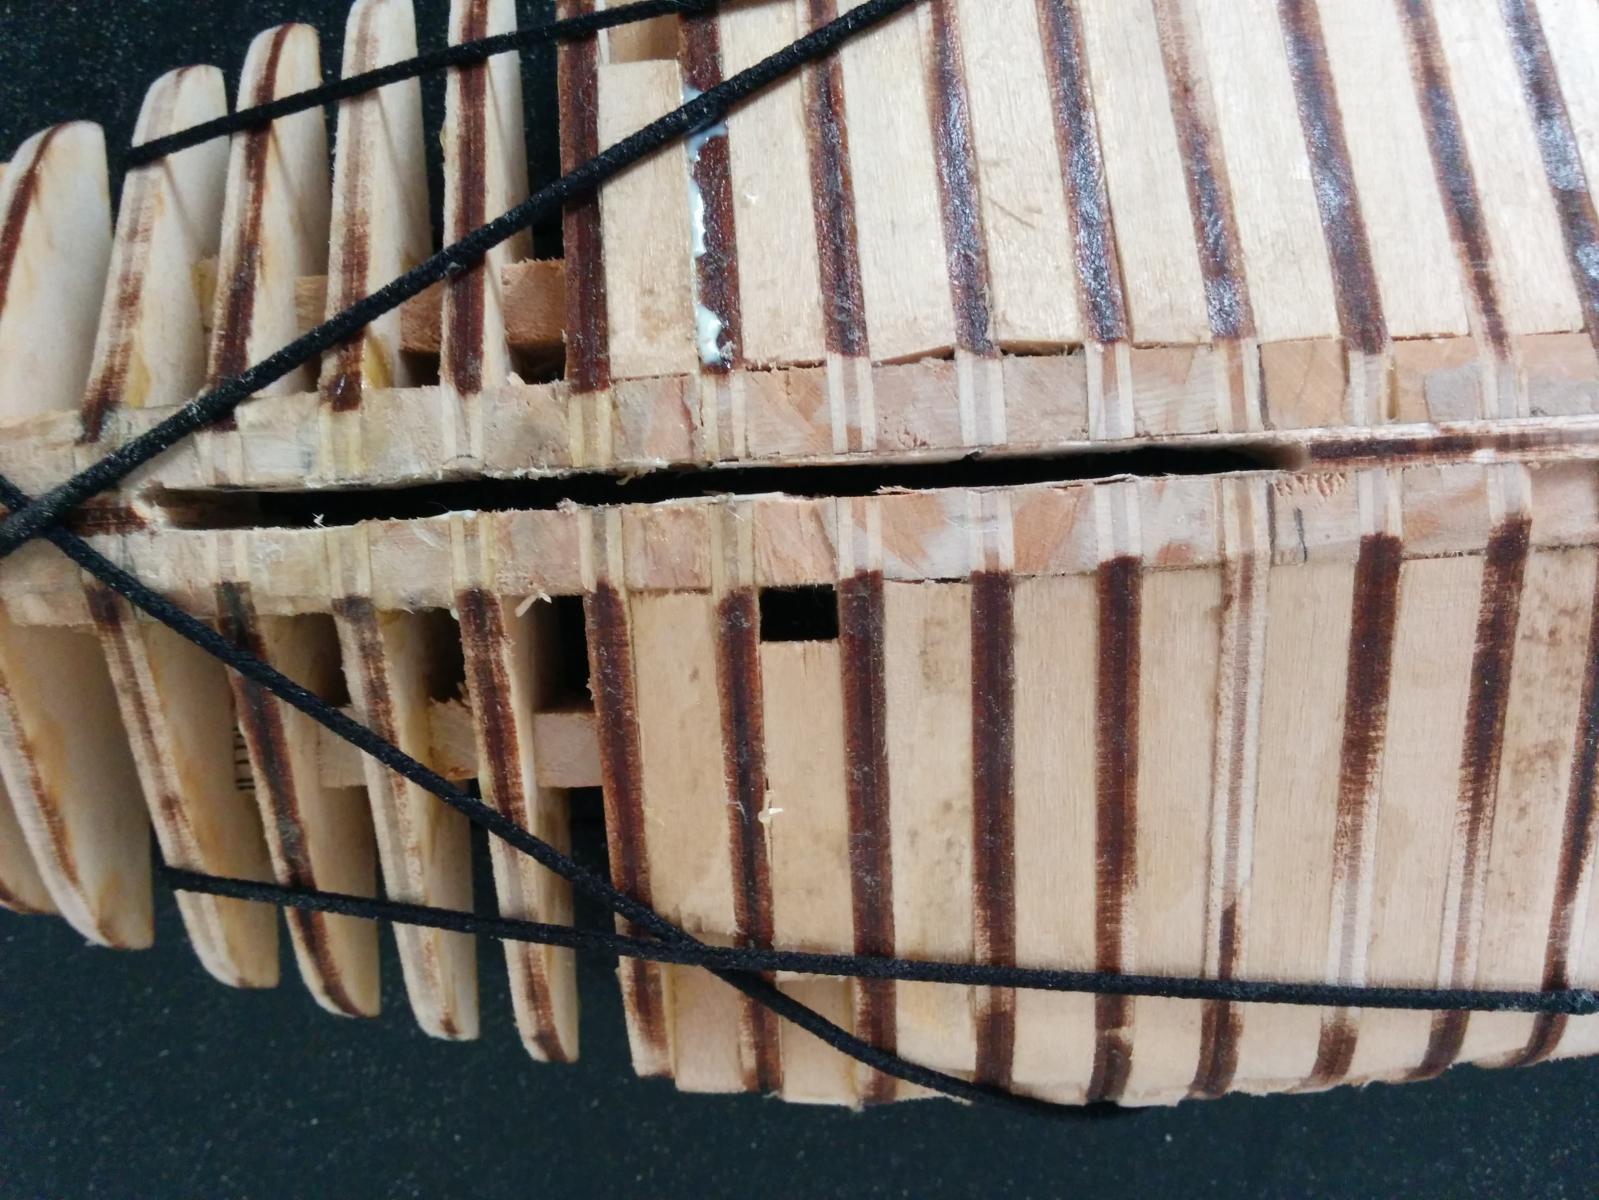
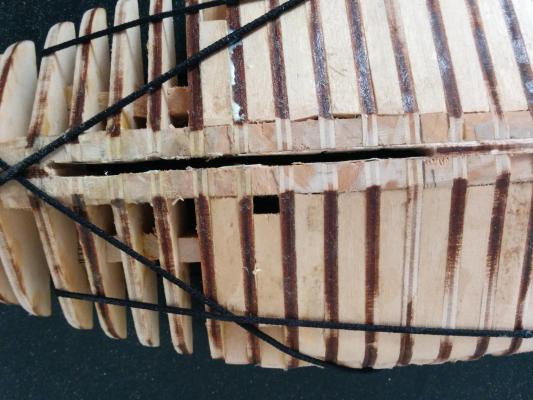
So here are some updates. I've installed more bulkheads, and reinforced them with wood to strengthen them. The bulkheads where the open deck is are particularly delicate, and I'm hoping this will help strengthen them and prevent them from cracking.

- 103 replies
-
- 6
-
-
- annie
- sandbagger
- (and 1 more)
-
Wow, I'd love to see some photos of your model! when I first started doing research, I found almost nothing on the Internet about sandbaggers, and I'm surprised that so many people even know what type of boat it is. Laser cutting wood should be pretty cheap. I paid about $40 for lasercutting.
-
Hi Rob, I'm glad to meet so many caring and helpful people! If you do go to mystic, please feel free to take pictures of Annie, especially of small details like fittings and rigging, and post them to this thread. It will certainly be helpful to other people who want to use my build to help with theirs, if they ever build Annie as well.
-
Oh how lovely, Gary! It's so nice to hear a real story like that that connects us to history. It must have been sheer joy just to speed on the Hudson on such a beautiful boat. I think a lot of what is behind our hobby is the sheer beauty and romance of these machines.
- 103 replies
-
- 1
-
-
- annie
- sandbagger
- (and 1 more)
-
Thanks!
-
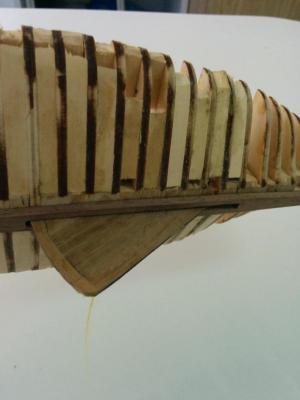
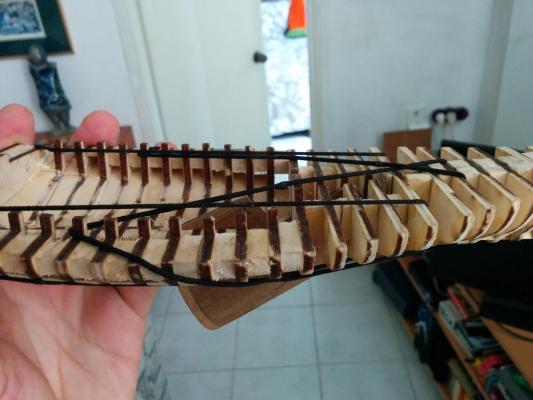
I drilled out a slot in the keel for the daggerboard. I was really nervous about this step, because it is pretty delicate work, but I maaged to make a pretty even slot without breaking anything. And the daggerboard fits with room to spare!

- 103 replies
-
- 6
-
-
- annie
- sandbagger
- (and 1 more)
-
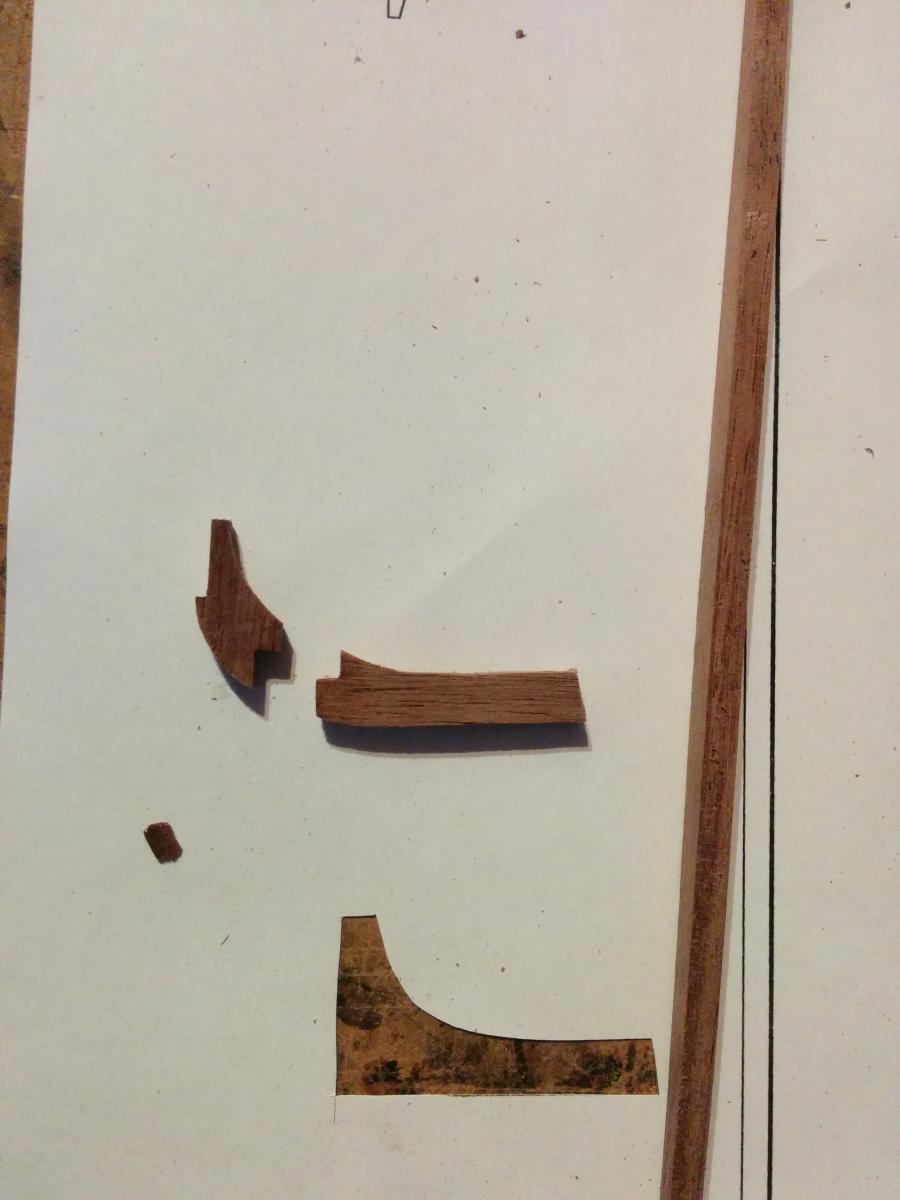
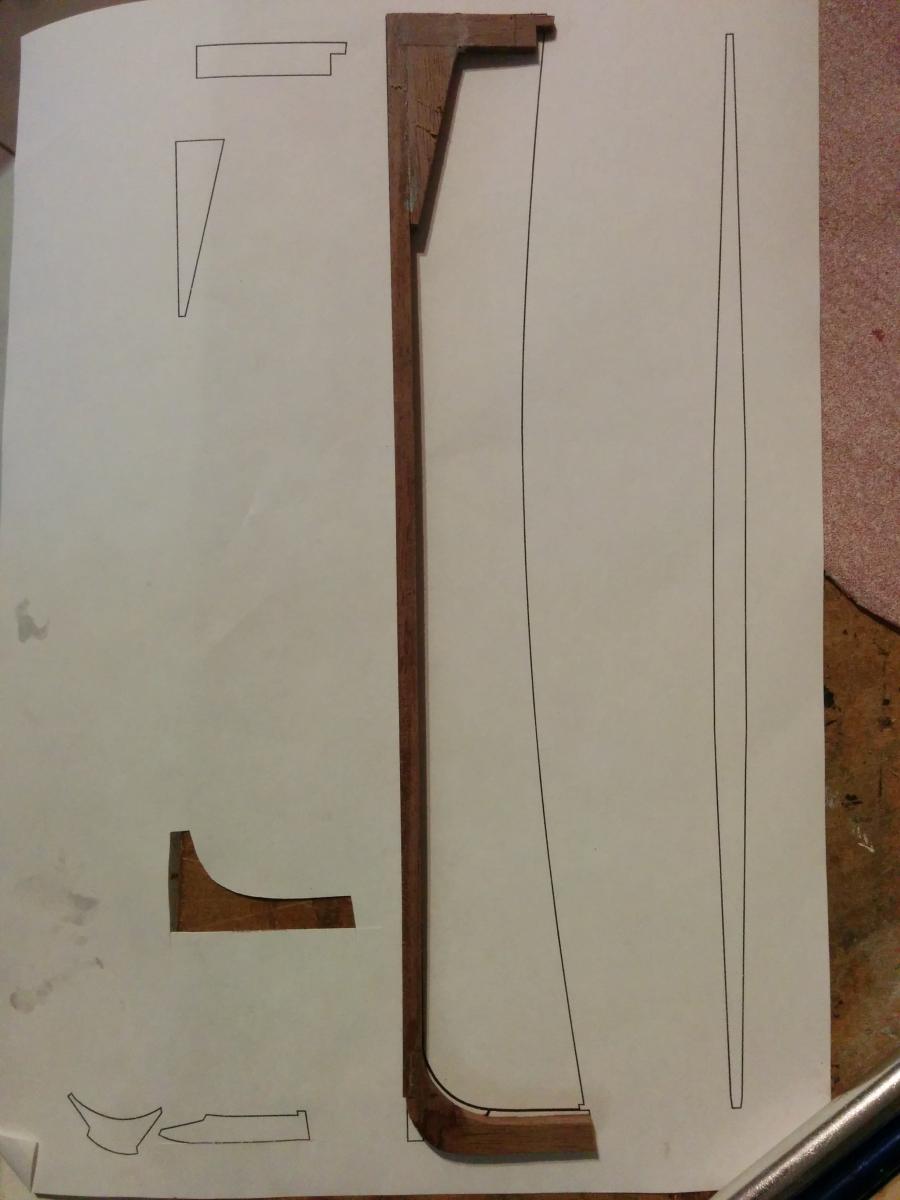
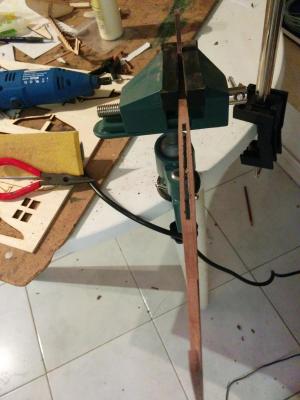
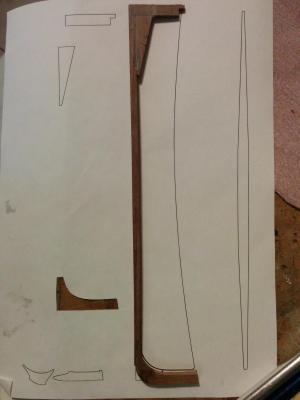
So I've worked on the keel. It was really hard to cut really exact scarphs- I don't know how all those folks building plank-on-frame build things like this by the hundred! My keel fits together fine but it is by no means perfectly accurate, and makes me appreciate all the more a lot of the more sophisticated builds I've seen on this site.


- 103 replies
-
- 5
-
-
- annie
- sandbagger
- (and 1 more)