WRed27
-
Posts
29 -
Joined
-
Last visited
Content Type
Profiles
Forums
Gallery
Events
Everything posted by WRed27
-
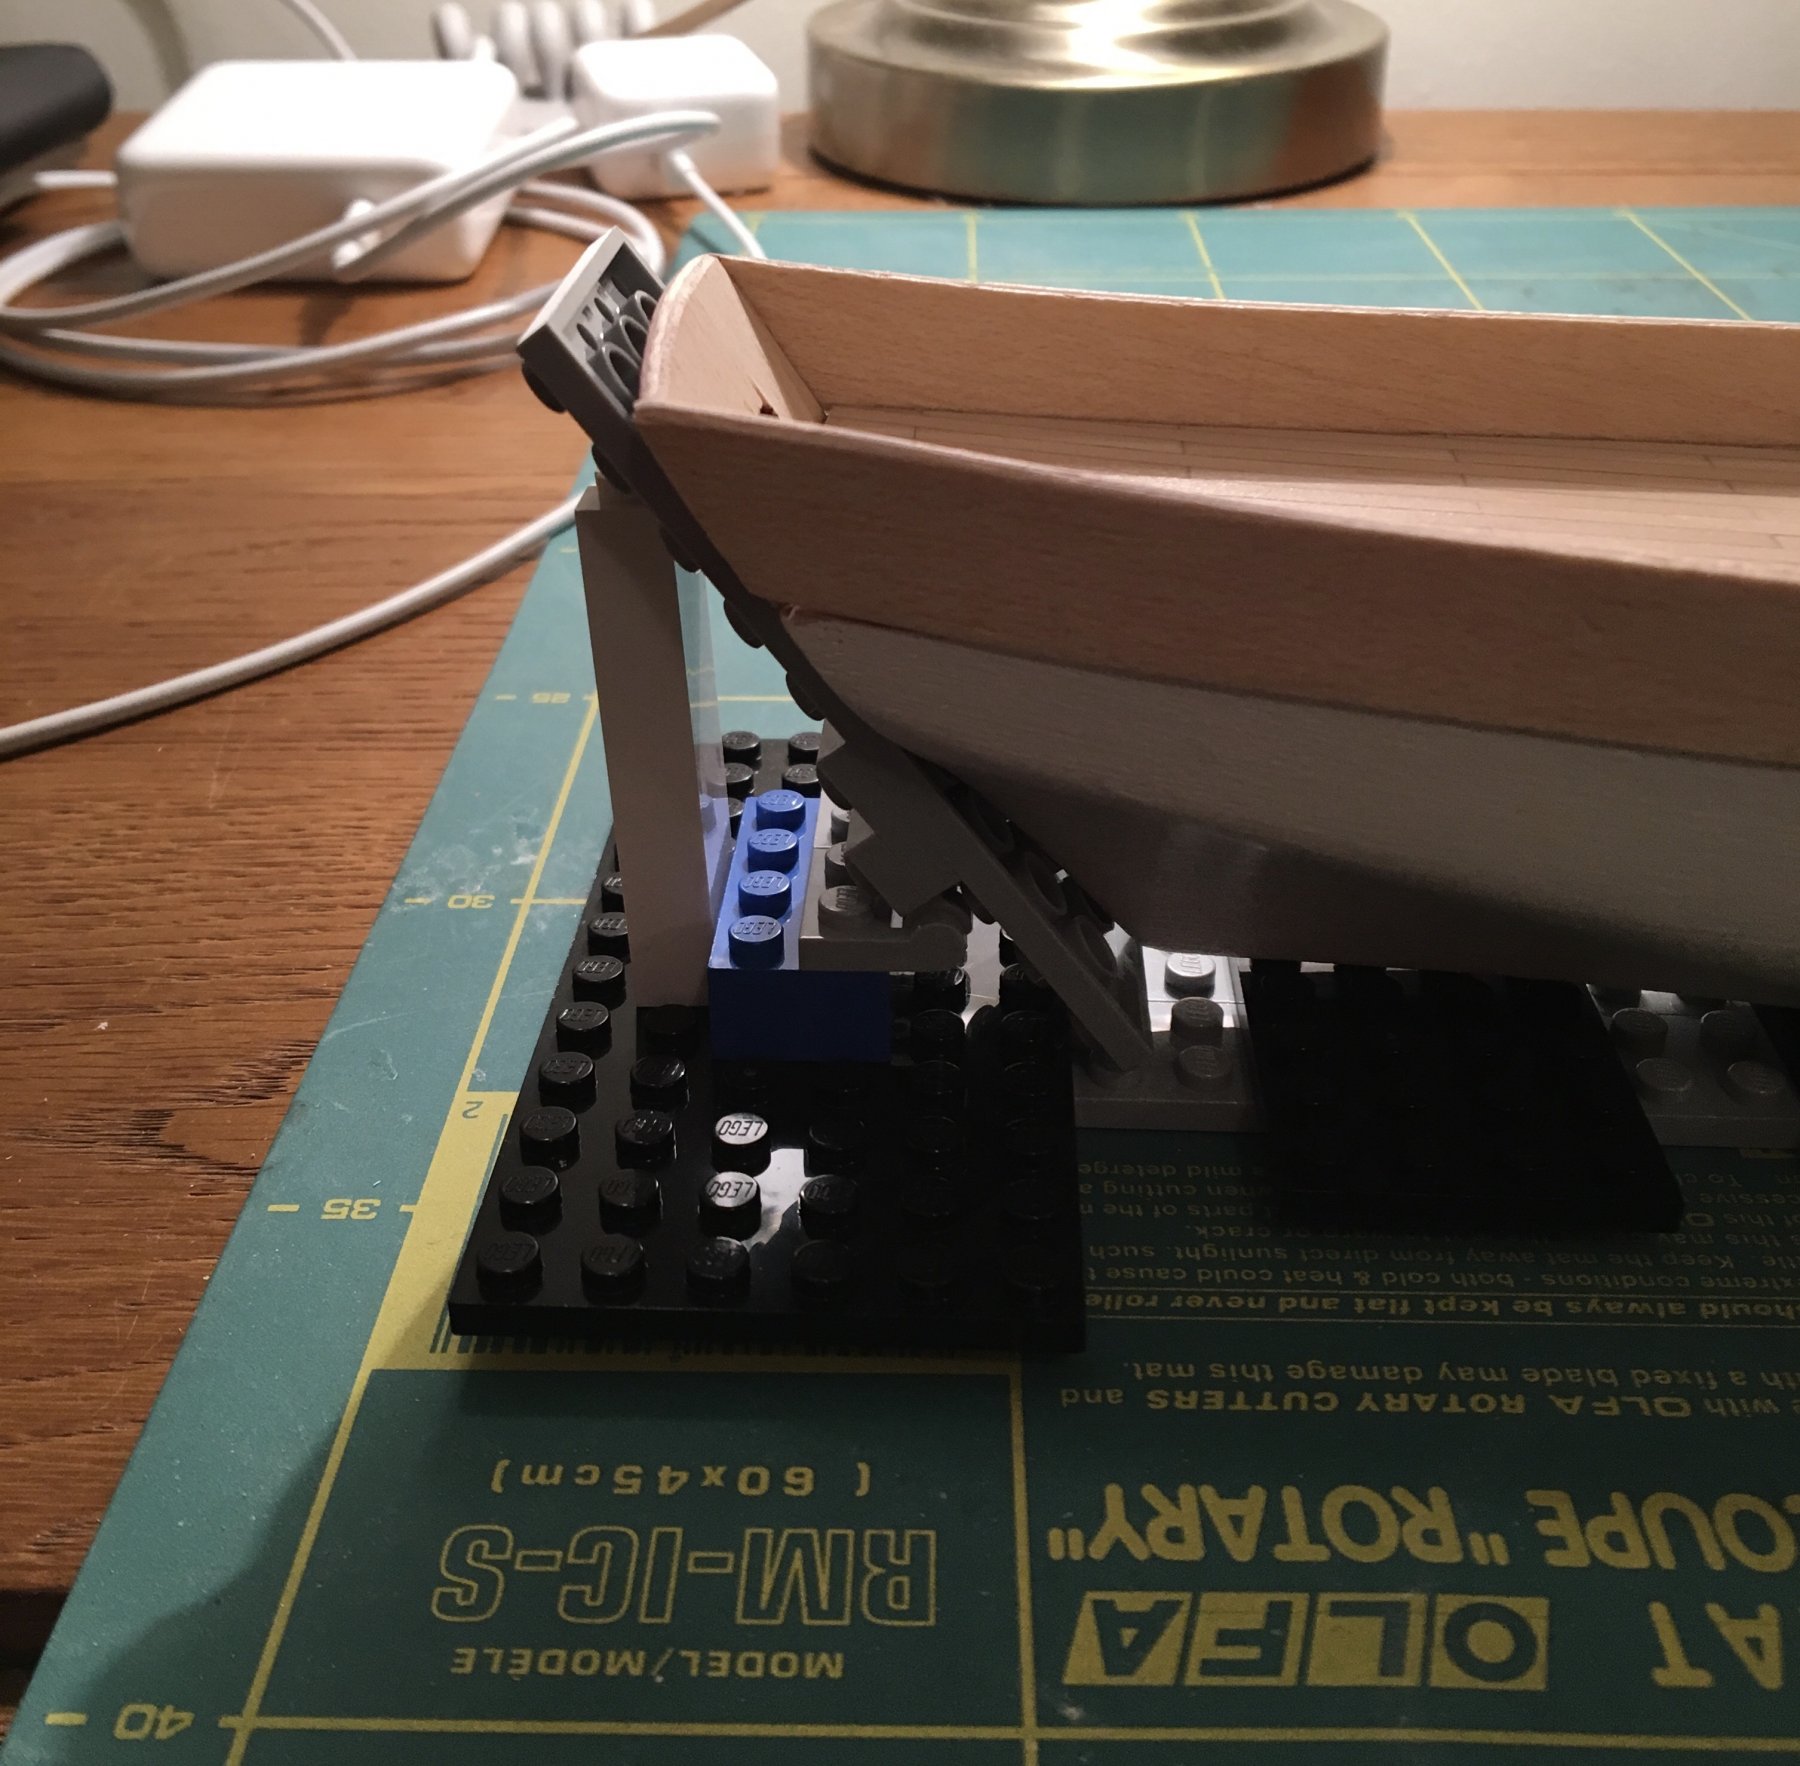
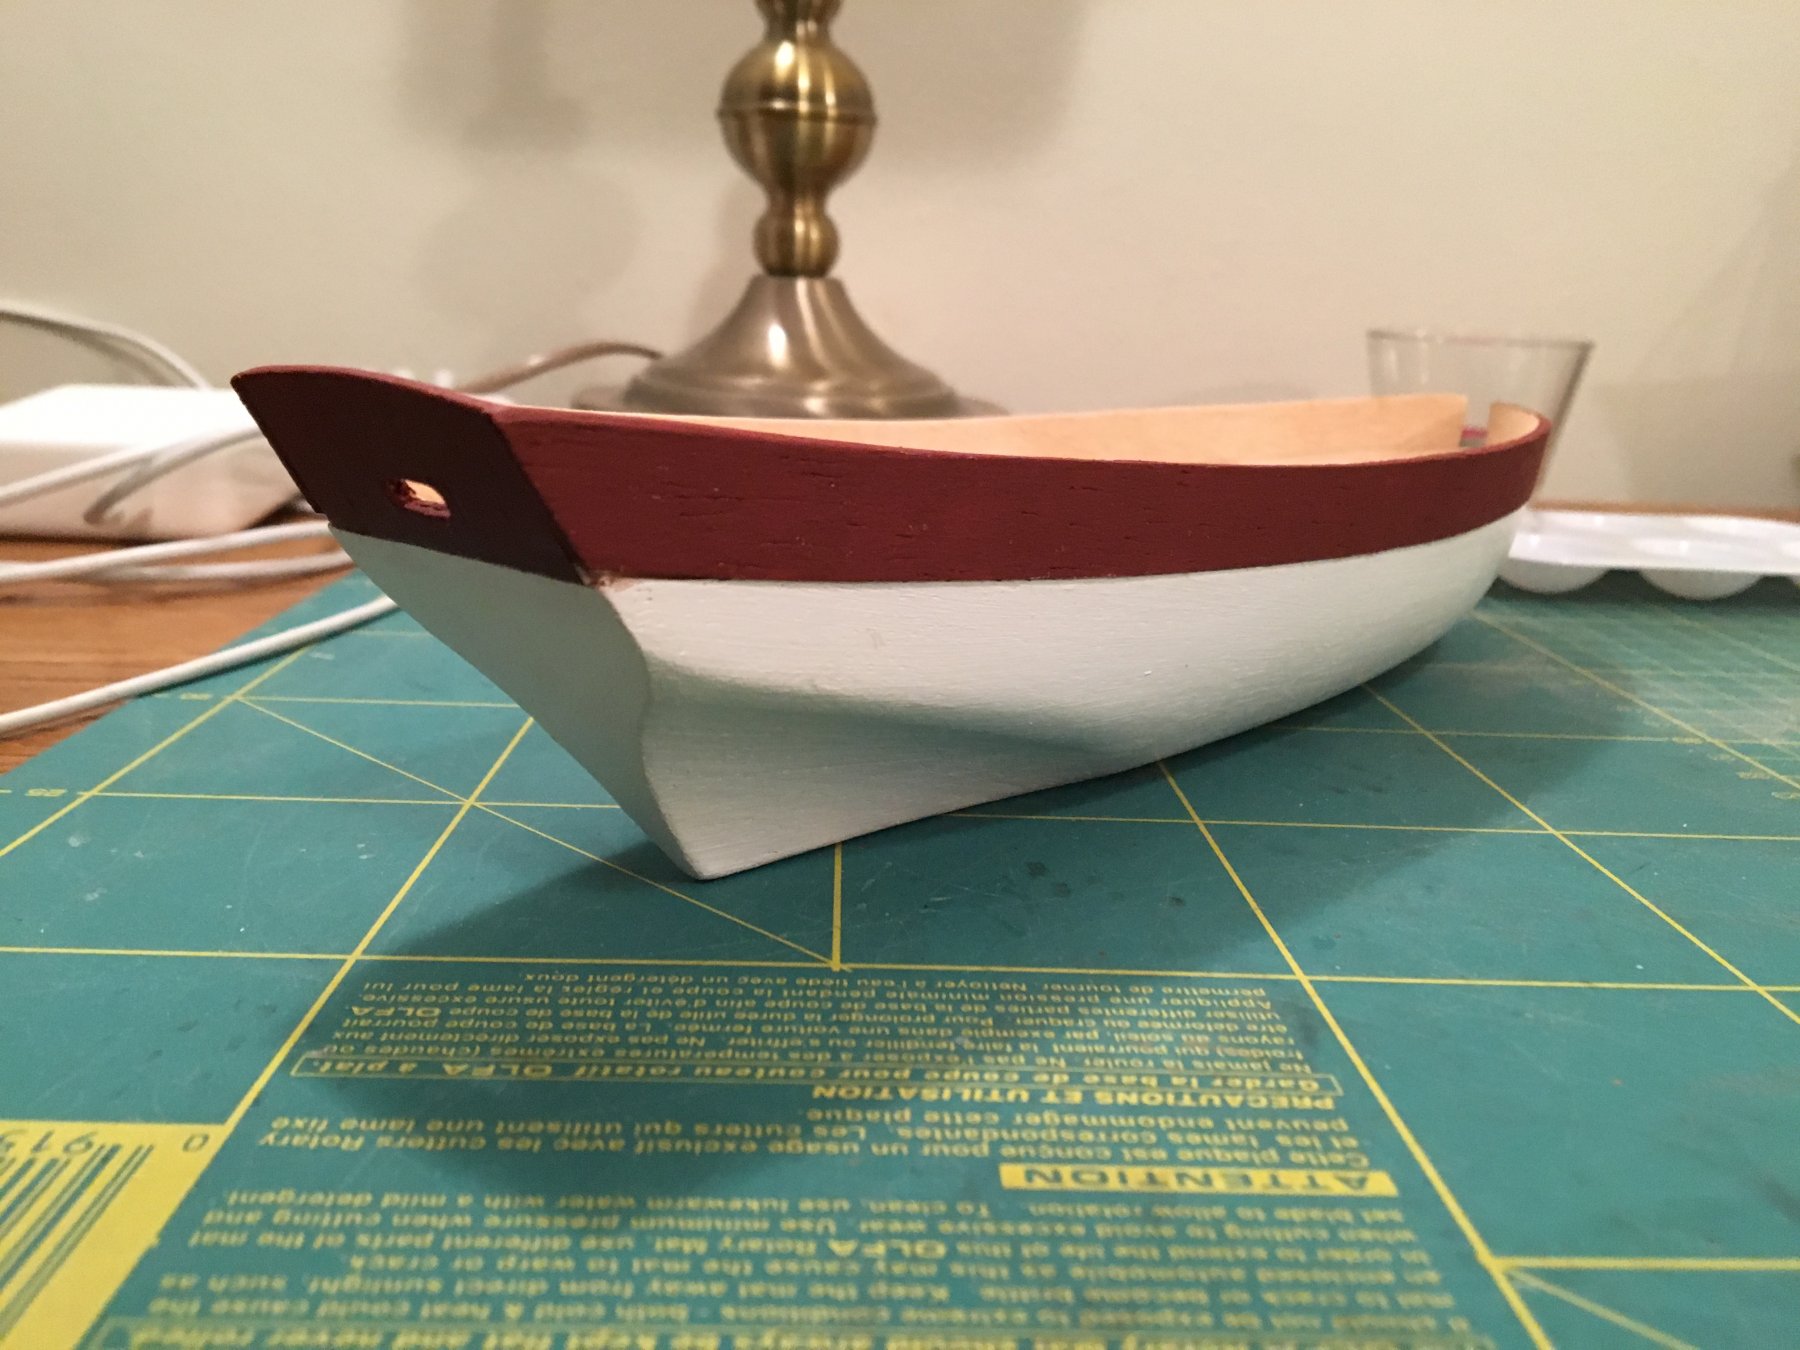
I managed to achieve a pretty decent bend on the bulwarks - at least laterally. There is a very slight mismatch at the bow, where the hull continues to curve inwards, and my bulwarks to not quite follow the same curve. I’m not sure if there is a better way but a couple of attempts using my ‘nail on board’ method got me quite close. The dry fit of bulwarks and transom is below. The hull already had a slight ridge where the transom and bulwarks would sit, but I found that I had to sand away a little extra to ensure a flush fit: Contructo recommend using glue and nails to attach both transom and bulwarks. I’m trying to avoid using nails wherever possible. The transom went on first. To try to get the correct angle flush with the stern of the hull, I raided my son’s Lego box and built a quick guide. Coupled with the dry-fit bulwarks the result looks OK. I painted before fitting to avoid mistakes as the margin for error between transom and hull is very small. Finally I painted the bulwarks and glued them on. I could not find any way of clamping them, so ended up glueing bit by bit from bow to stern, and holding them in place whilst the glue set. At the stern, the bulwarks lift slightly. I’m not sure if that was a result of my bending. However, the gap is small enough that it will be covered by the wales when they go on. I will need to fill slightly so that the gap is not visible when looking directly at the stern. A quick note on colour - I wanted to match the reddish brown of the box art for the bulwarks. The included (and subsequently binned) paint was a brighter red. Handily, Revell do a matt acrylic paint called ‘Reddish Brown’ which I think looks quite smart.


- 35 replies
-
- 4
-

-
- flyer
- constructo
- (and 1 more)
-
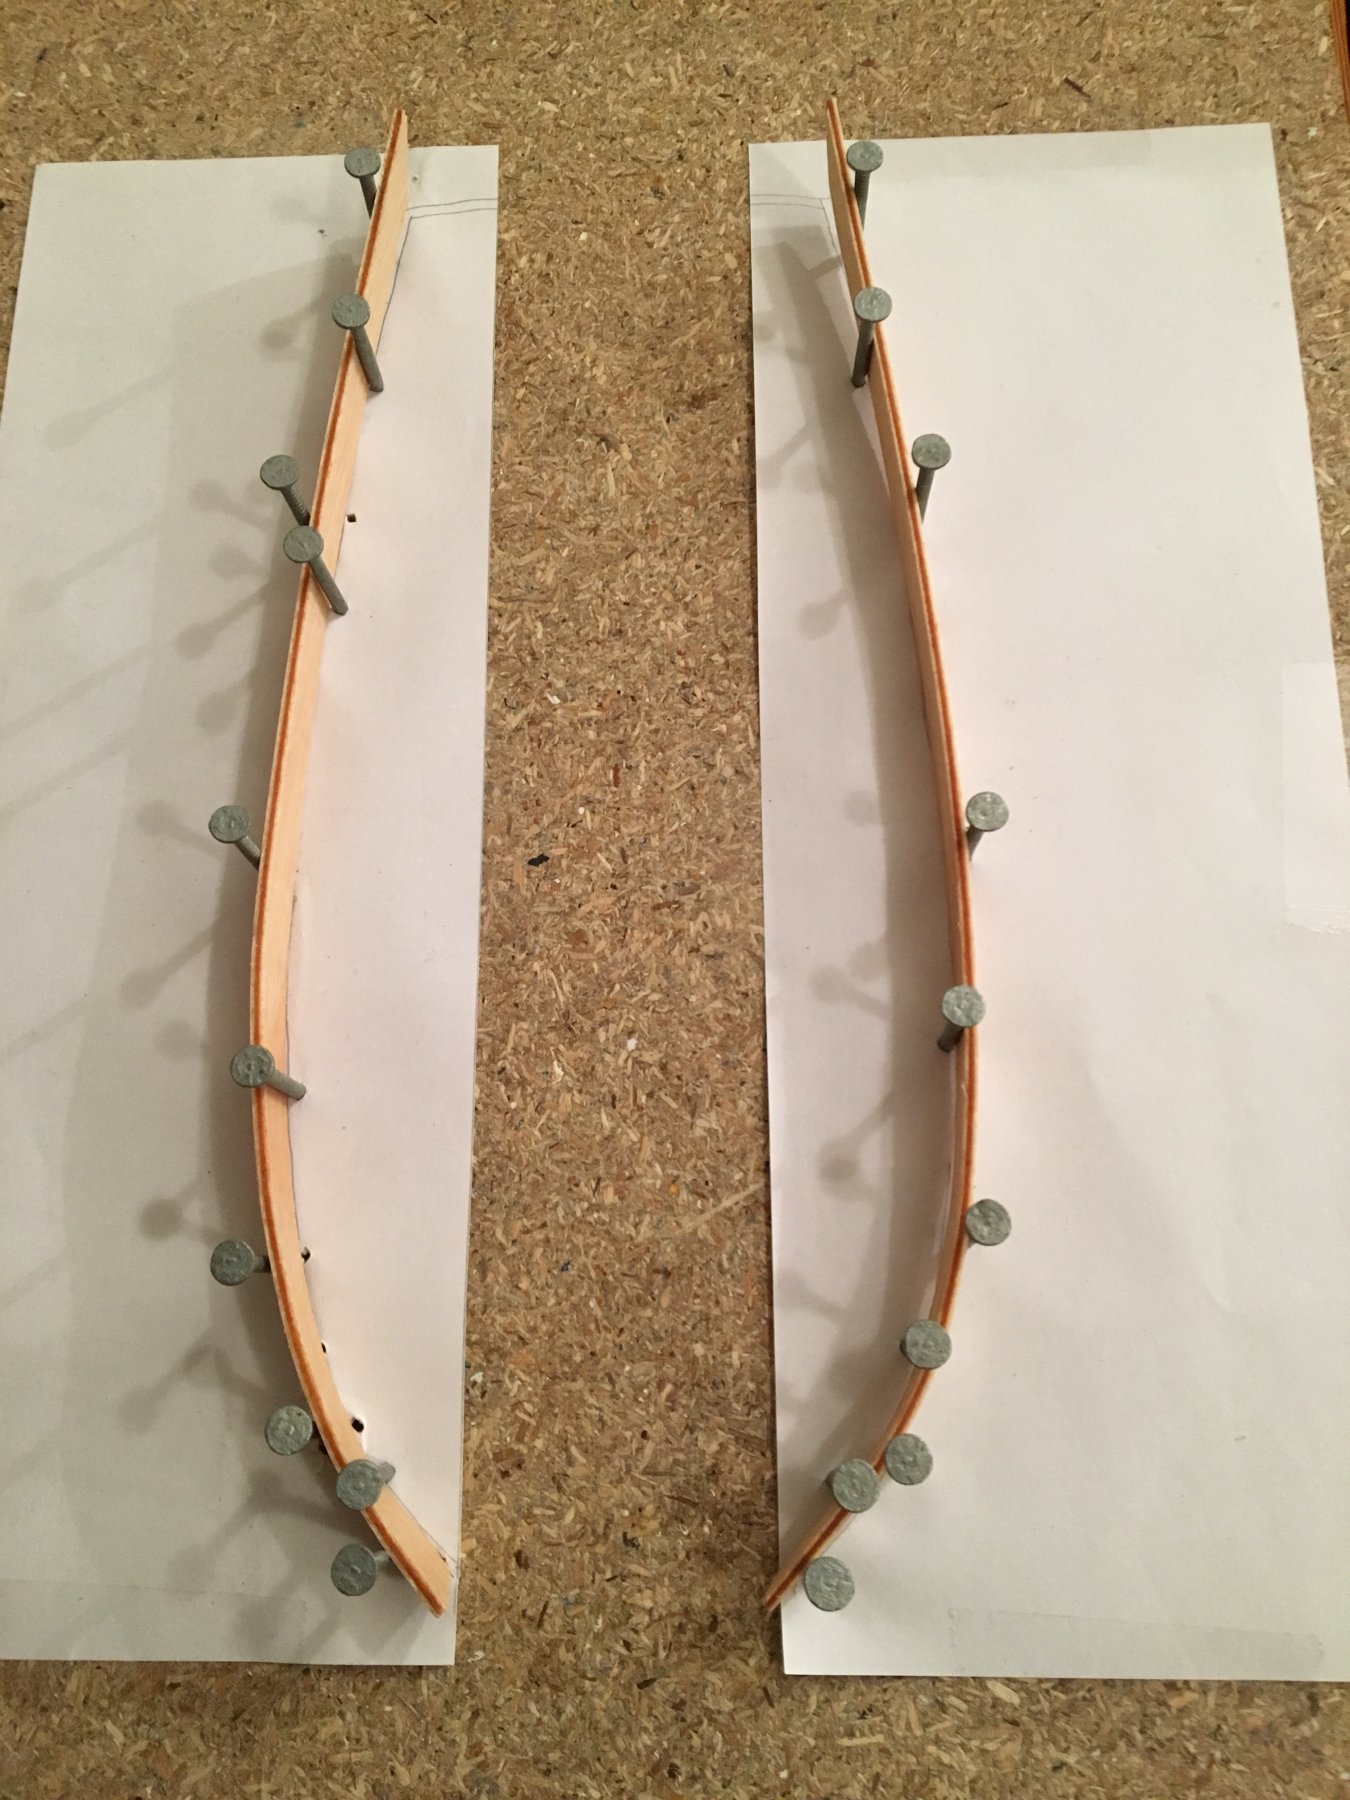
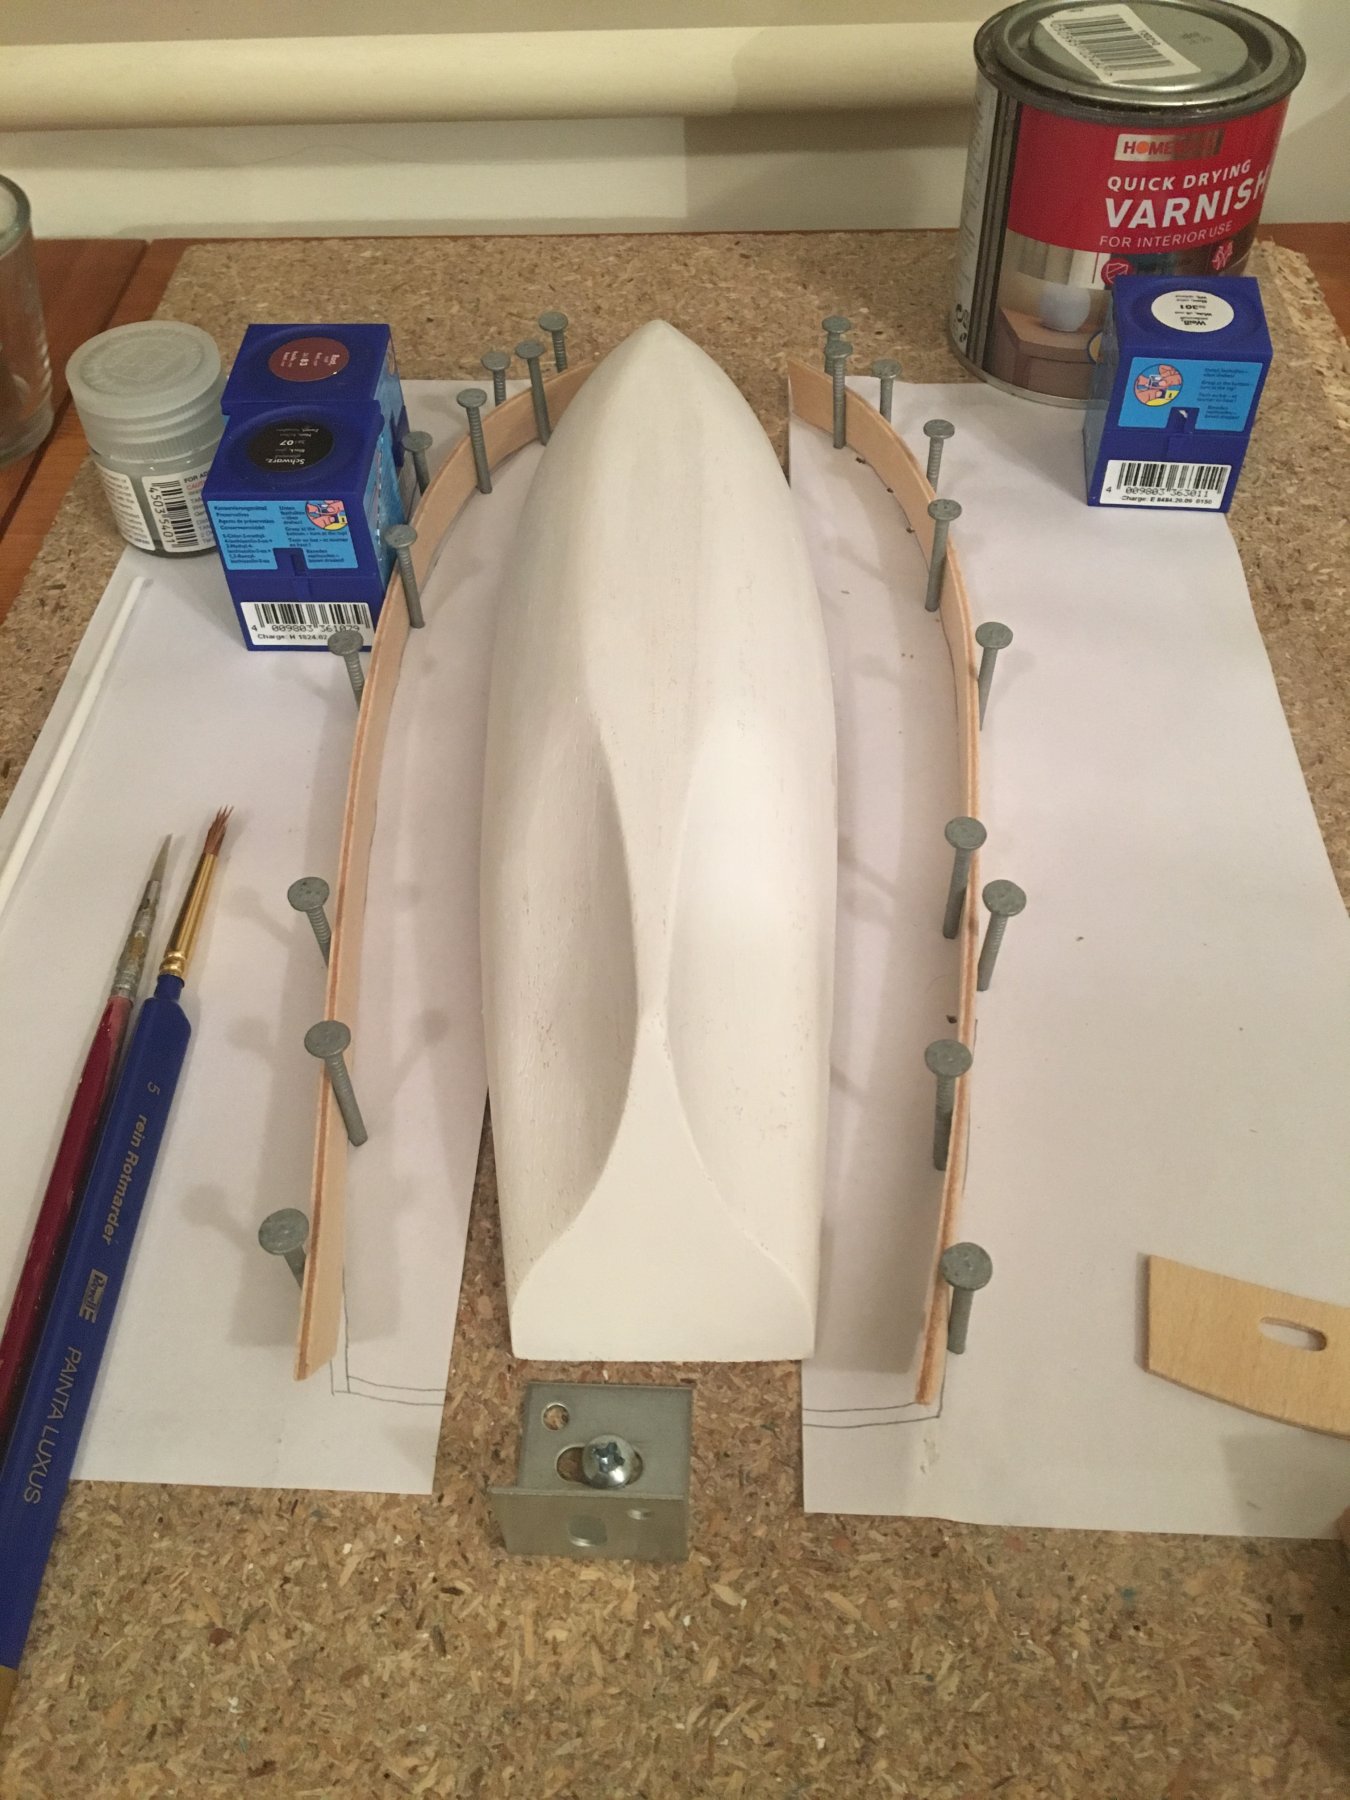
Next task was to fit the bulwarks. I soaked them in hot water, and created a crude ‘bending jig’ by tracing the hull outline from the plans and nailing either side of the bulwarks. Whilst they were drying, I decided to start painting the hull. The instructions suggest doing this much later in the process. I’m not the best painter in the world, so want to paint as much as possible before attaching. This way I can’t make clumsy mistakes and ruin the model! I sanded the hull a number of times until I was happy with the finish. It’s not perfectly smooth; I want to leave a tiny bit of texture visible close up. This is when I discovered the first problem with the kit. I’m not sure how long it had been on the shelf of the local hobby shop, but the included paints were completely dried up and useless. Into the bin they went, and out came some Revell acrylic paints from old plastic models. I tested them on some spare ply. It would need a few coats and plenty of sanding in between, but looked fine.


- 35 replies
-
- 3
-
-
- flyer
- constructo
- (and 1 more)
-
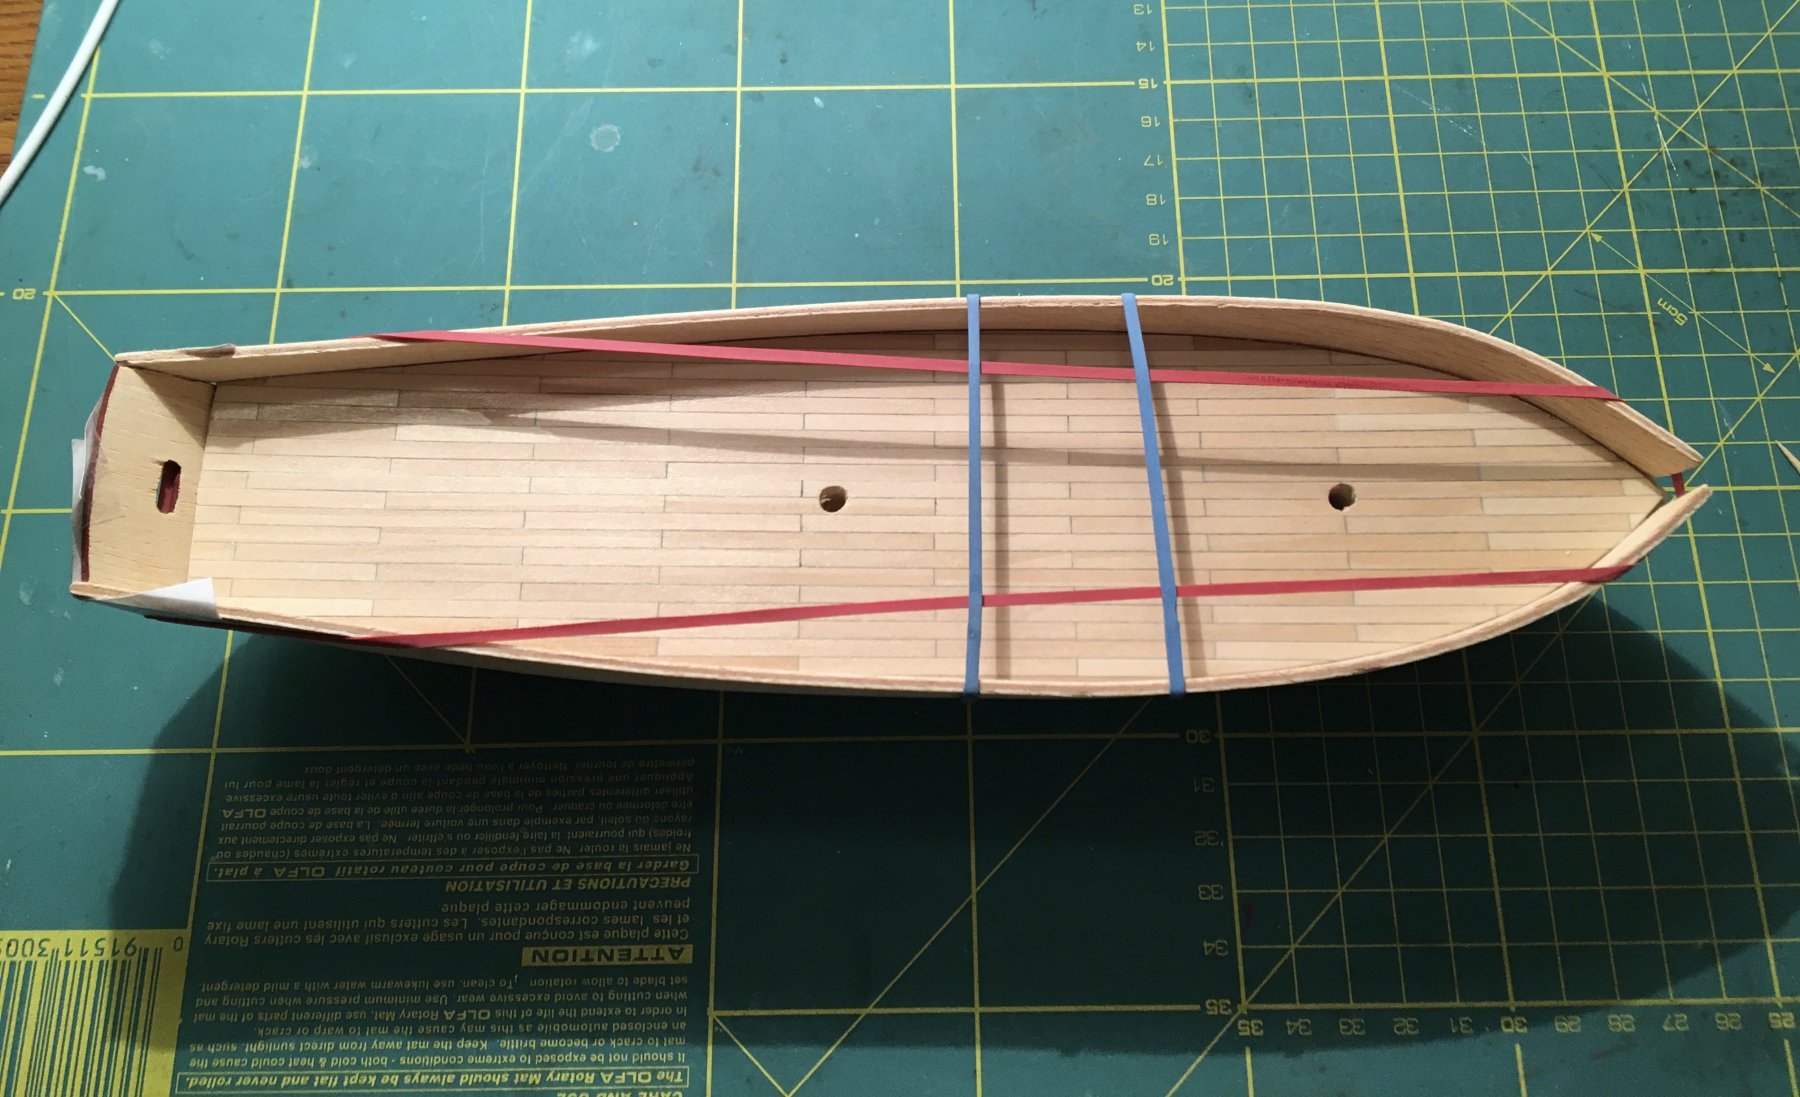
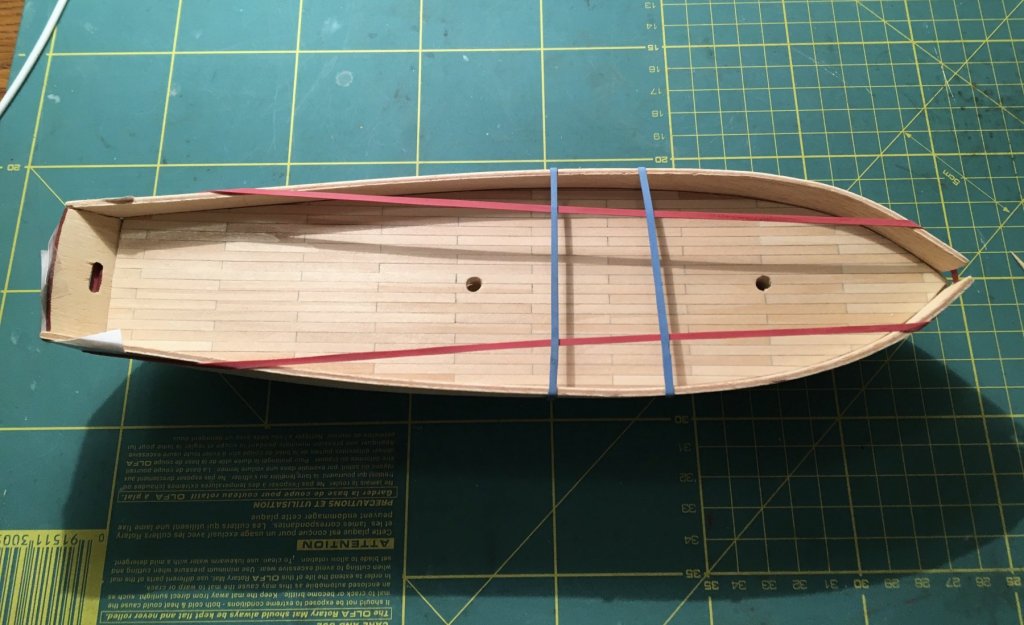
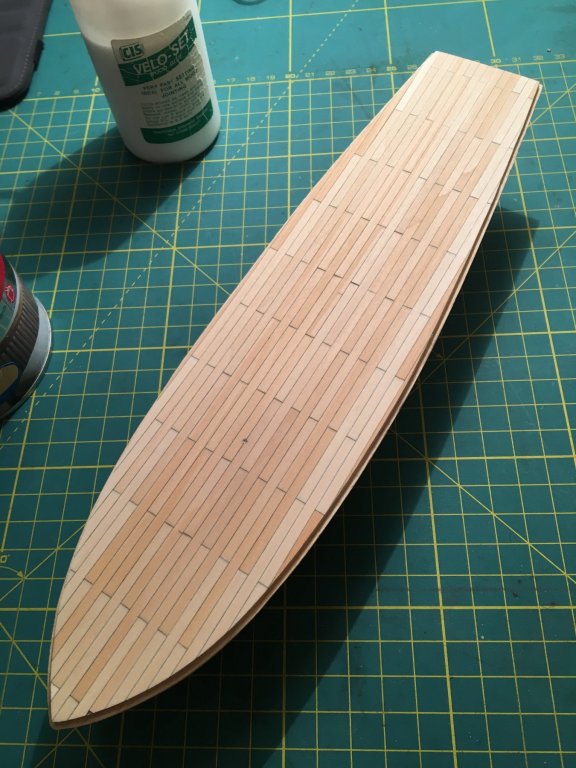
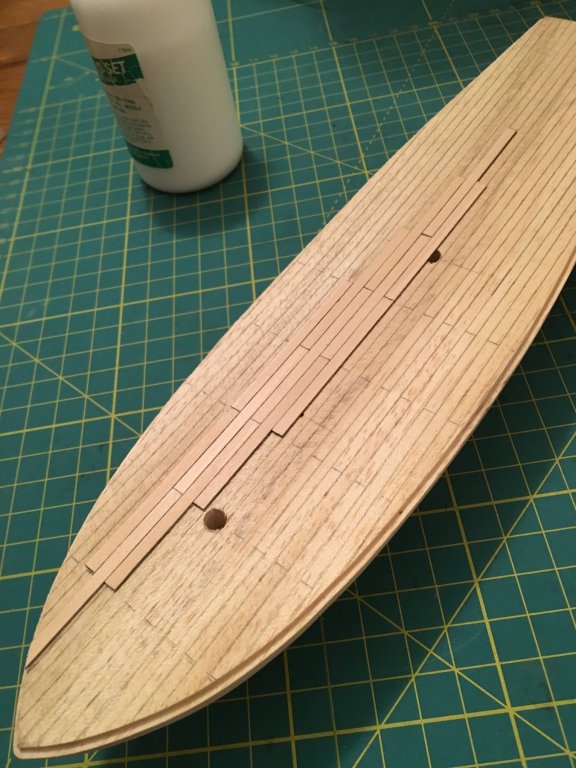
I had a good look through the box contents. To the untrained eye, the materials all look to be OK. The instructions appear clear enough; right up to the point at which they state “a detailed description of how to assemble the rigging would take too long” and advise you to refer to the pictures. Thanks Constructo. I’m not sure how typical that level of detail is, but it’s a long way off in any case! The first instruction suggested drawing pencil lines along the deck to simulate planking. I did this, and it did not look good. I therefore bought some thin lime strips and chose to plank the deck. I also referred to captgino’s log on here, and note he did the same thing. I’ve actually referred to it a lot so far - thanks captgino! I used HB pencil on each plank edge to simulate caulking, and stuck with Contructo’s recommendation on the planking pattern. I ended up with a tiny gap on the port bow, which was too small to fill. But I think once the bulwarks are on, it will not be visible. In hindsight I should have cut the plank behind the gap slightly longer and pencilled in the join. Finally it was sanded smooth (along with the rest of the hull) and I used a clear satin varnish. I didn’t realise until I was nearly finished that the lime strips are a slightly different shade front and back - so I have an unintentional pattern. However, I’m happy with the result.
- 35 replies
-
- 5
-
-
- flyer
- constructo
- (and 1 more)
-
Hello, I decided to attempt the Flyer as my first build. Actually I did build a very basic AL kit - the Barcelona - many moons ago, but it had a plastic moulded hull so I’m not sure it counts! It was also well before I stumbled across this forum. Many of the models here are truly inspirational, and I’m continually blown away by the levels of craftsmanship I see. I was heavily influenced by the fact that the Flyer has a solid hull, and I think the finished model is a nice looking boat. I just hope that my model bears at least some resemblance to the box art! I have a couple of old AL kits waiting in the wings (Marie Jeanne & Supply), but wanted to cut my teeth on something a little simpler. So this is what I’m aiming for. I’m not sure how many people might drop in and take a look, but I would welcome any and all feedback (good and bad!) Thanks, Will.

- 35 replies
-
- 3
-
-
- flyer
- constructo
- (and 1 more)