HOLIDAY DONATION DRIVE - SUPPORT MSW - DO YOUR PART TO KEEP THIS GREAT FORUM GOING! (Only 64 donations so far out of 49,000 members - C'mon guys!)
×


jiljilia
-
Posts
91 -
Joined
-
Last visited
Content Type
Profiles
Forums
Gallery
Events
Everything posted by jiljilia
-
 I know it's been a while since I have built or started a ship and I know I said on my last blog that it would be the "Thermopylae", but I have been desiring the "Harriet Lane". I have never built a solid hull ship and it does seem intimidating to even start, but sitting in the box collecting dust isn't going to get it done by no means. I see there are a couple people tackling this project? I wish them luck and desire that they build to completion and it be well done. Been studying the plans and have decided that I will change a couple of details, even change some of the materials so that it will stand out more. Not sure if I am going to follow the painting detail or not, I really think not as certain stains and varnishes would be more ideal... I believe? This ship will be challenging as to a scratch built ship as there are parts to be made. I will succeed but this isn't a ship that will go by fast. I haven't any pictures yet as I have only cut my stations out, but when the time comes I will show my progress. Happy New Year Everyone
 -
Clare, Sawdust Dave: I haven't flown my Interceptor rocket yet, actually haven't finished building yet as once the summer hits I get pretty darn busy with things around the home, so time for building is nil at the moment. I do realize the building of the Arrow was quick, but I did have the time to spend hour upon hour building the ship. I hope your going to start a ship, Dave; two year break must mean you rested up and ready to build!! Thanks for your comment, means much. Myself, am resting now from building, but come fall I'll be at it again. Won't be quick though as I am now a full time worker again. Come fall I will be starting: " The Thermopylae - 1868 English Clipper". This ship will require lots of patients and careful skill as to get it right. Thanks again for the comments on the "Arrow", have a great summer!! Jiljilia, (Dave)
-
Hey Aliluka: Thanks for the info on the Arrow, I checked that site out. I like the colors that person is using. But really there isn't much on Arrow to get a feel of what the ship was actually like in it's day, too bad!
-
aliluke, where did you find that picture? I've looked all over the internet trying to find any information on the Arrow and have found nothing and not a picture. The ideas of the oars has intrigued me, so I ordered the oars and rowing cleats. I'm going to see if the oar idea will work, which I hope, for now though I will rig in my canons and start the mast.
-
Aliluke, I did wonder why the ship didn't come with oars too as it would have had 28 of them. But no, I won't be adding any oars and to maybe show them stored, there isn't enough room on the ship itself. Your picture is quite neat, but this model doesn't show the awing at the stern. The rigging, even of the canons is intricate and will take some time. The ship is going quite fast, but there are times and processes that I have spent over 8hrs doing straight. I have discovered though, that the steps involved in building this model are not precise in what they show you to do and what it's supposed to have been. I have made some mistakes, but have managed to make it work. Learning process.
-
Tadeusz43 I like the step by step on the sails as the rope edging is exposed and that's how I have to do my sails. Thanks. Petervisser... the therapeutic lessons are coming I'm sure and sometimes my patience does were thin and sewing a thread around a rope will, I'm sure increase patience. Sherry, thank you for your ideas for gluing as I did go out and buy myself a tube of speed-sew. Mirabell61... I copied your plans for my files as there are ideas that I like in what you do with sails. Thanks to everyone as the time to do my sails is drawing nigh.
-
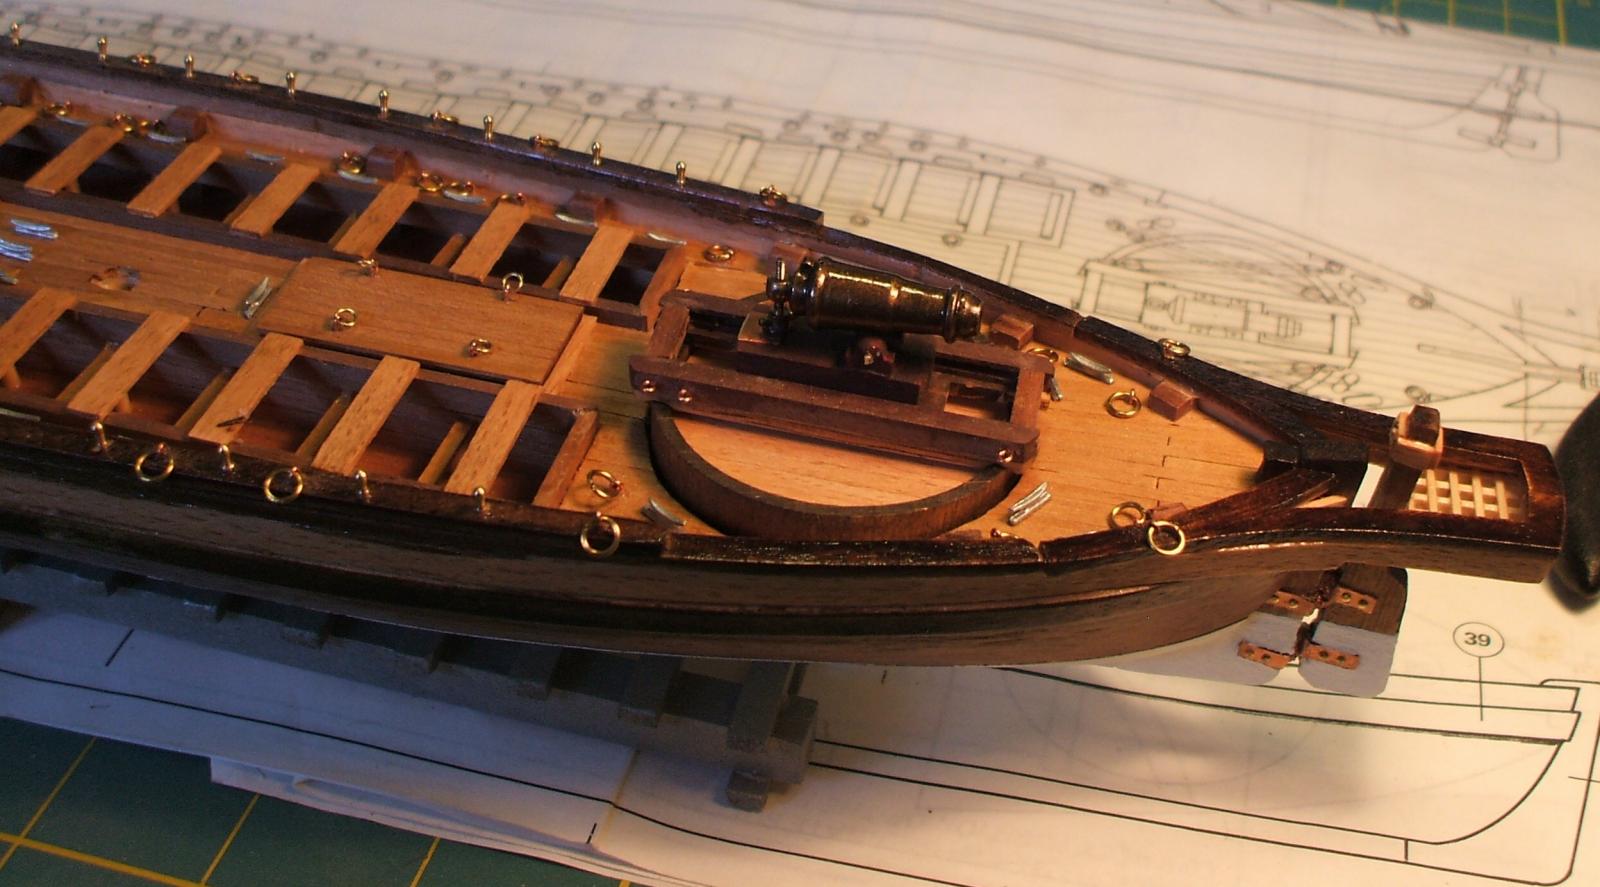
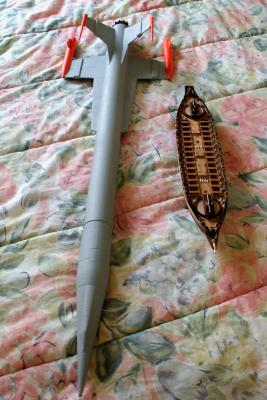
First pic showing the keel in place along with the rudder and the hull painted. The rudder copper hinges all had to be made from a thin strip of copper, bent to conform and nailed to rudder and keel. I also wanted to show the stand, painted a hammered silver. There is a company out there that will not include that stand in the kit, you have to buy it separate and the kit itself is more money than what I paid. Second pic showing both canons in place and all the kleets, pins, rings (70) all in place. The front canon shows two copper hold downs, I took them off after I shot the picture, didn't like how it looked, will do something else, maybe just paint them on? Close up of bow canon Close up of stern canon Last pic, not sure if this is allowed, shows what else I do if I get a little tired of ship building. I always do a couple of different jobs at the same time when I build a ship. The starship is a rocket called the "Interceptor" and will fly over 1000ft. If the weather would warm up I could spray paint her up and decal it.


-
Thanks for all the great ideas. This helps greatly.
-
Thanks. I kinda thought that but wasn't sure if white glue was the glue to use.
-
Could someone tell me the best way to place rope edging around the edge of sails. I really have know idea on how that is achieved as the plans of the Amati Arrow call for this edging. Thanks
-
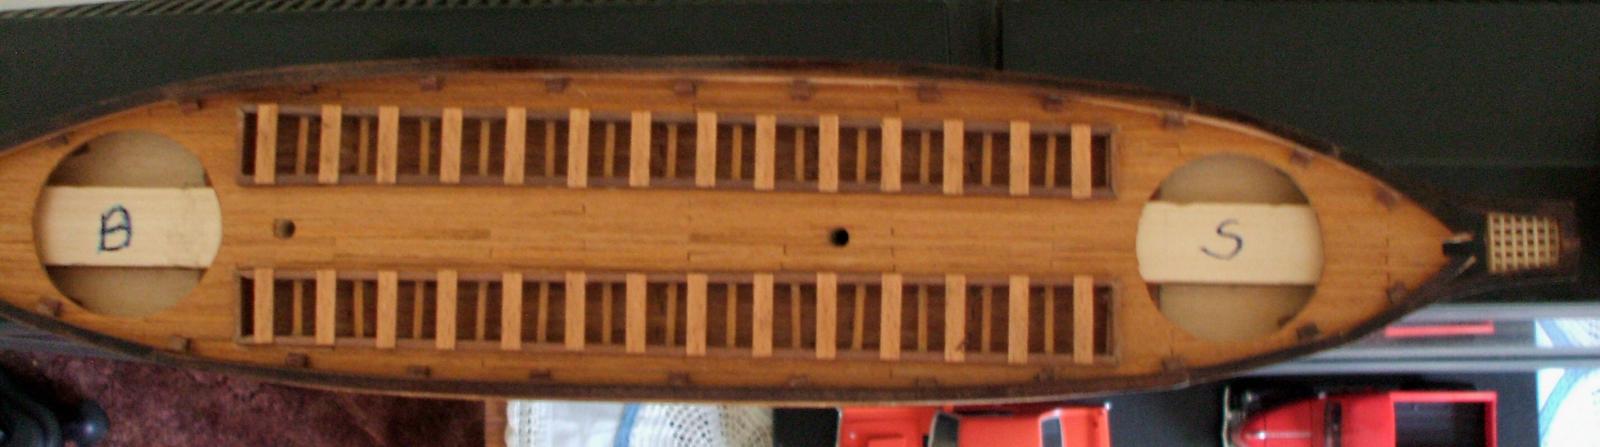
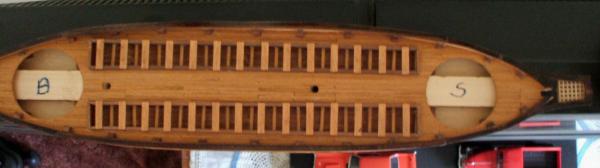
Just a shot showing that the hull from the waterline down to keel has been painted and some stain added from waterline up to certain planks of the ship Top view, showing the stern with grating; a bit of a job, but accomplished. Close up of the stern with grating, sorry the picture came out a bit fuzzy.


-
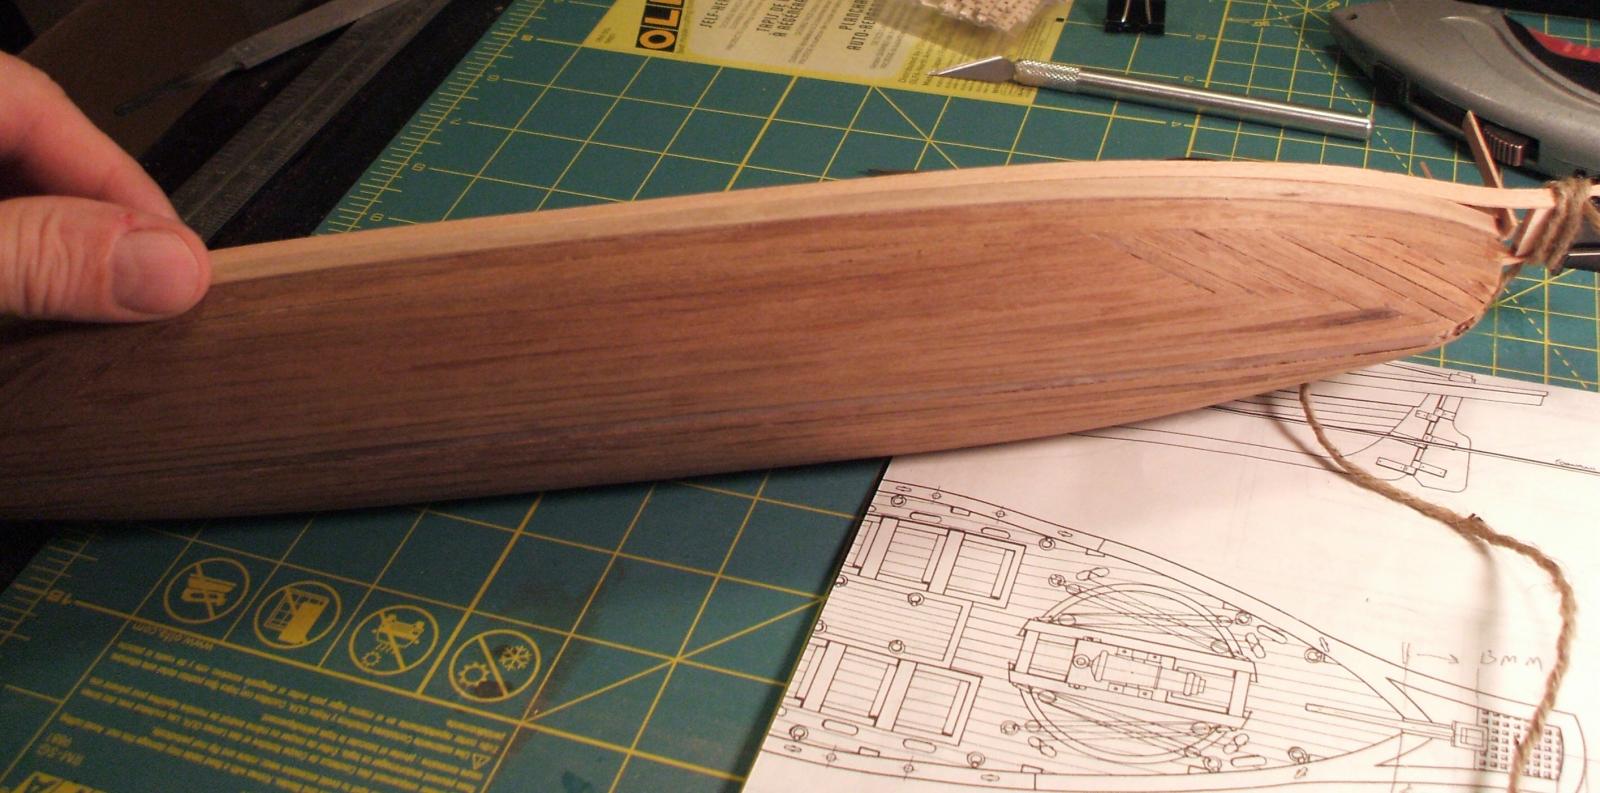
They are angled at the stern and bow and were done because I didn't like the way the veneer was sitting if I followed the ship to length. I found I was going to get a step in the veneer if I kept going, So I thought of the angle idea and making a couple of jigs so that the angles would always be the same. I did the angle, then I would do the length and so on until I felt it was enough and then carried on with ship lengths.
-
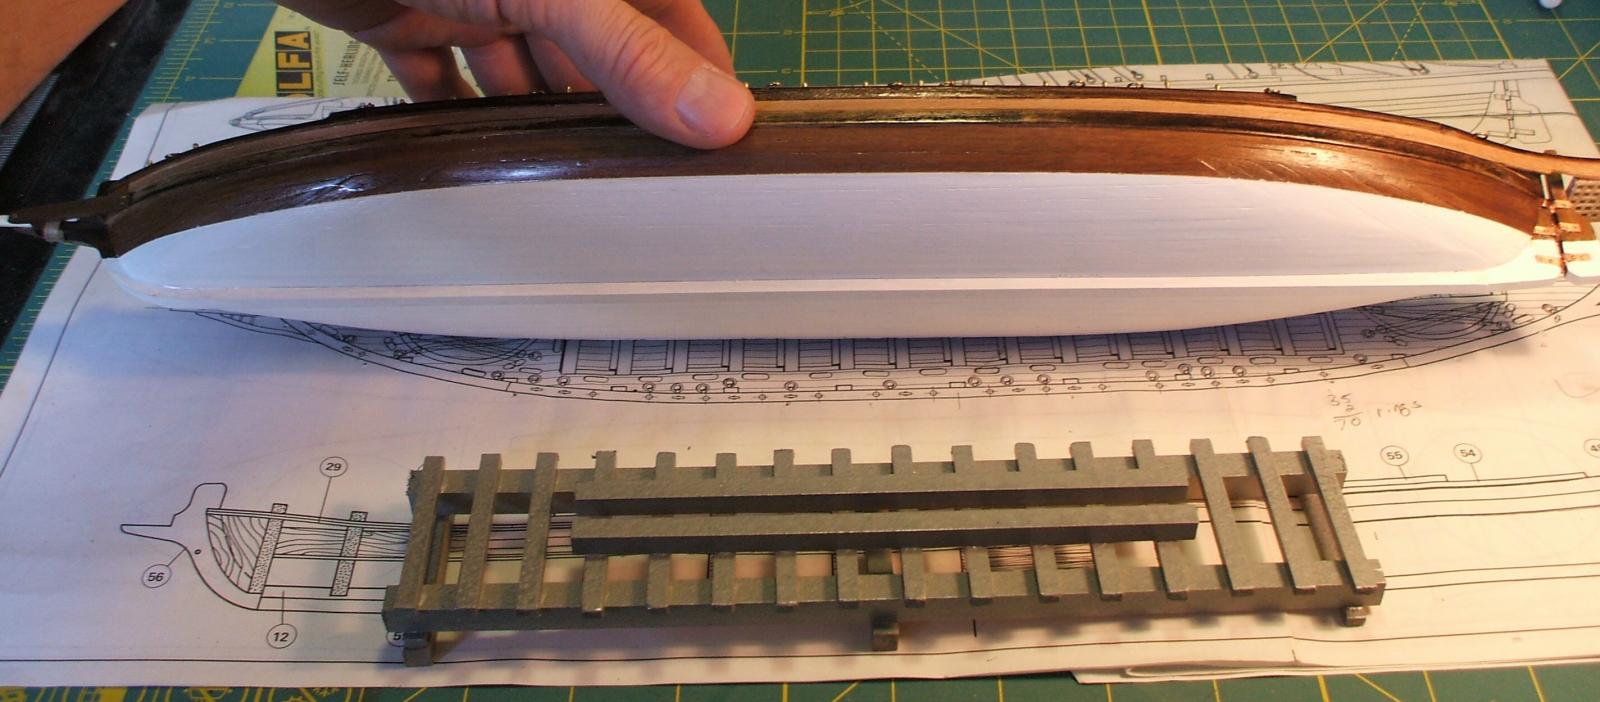
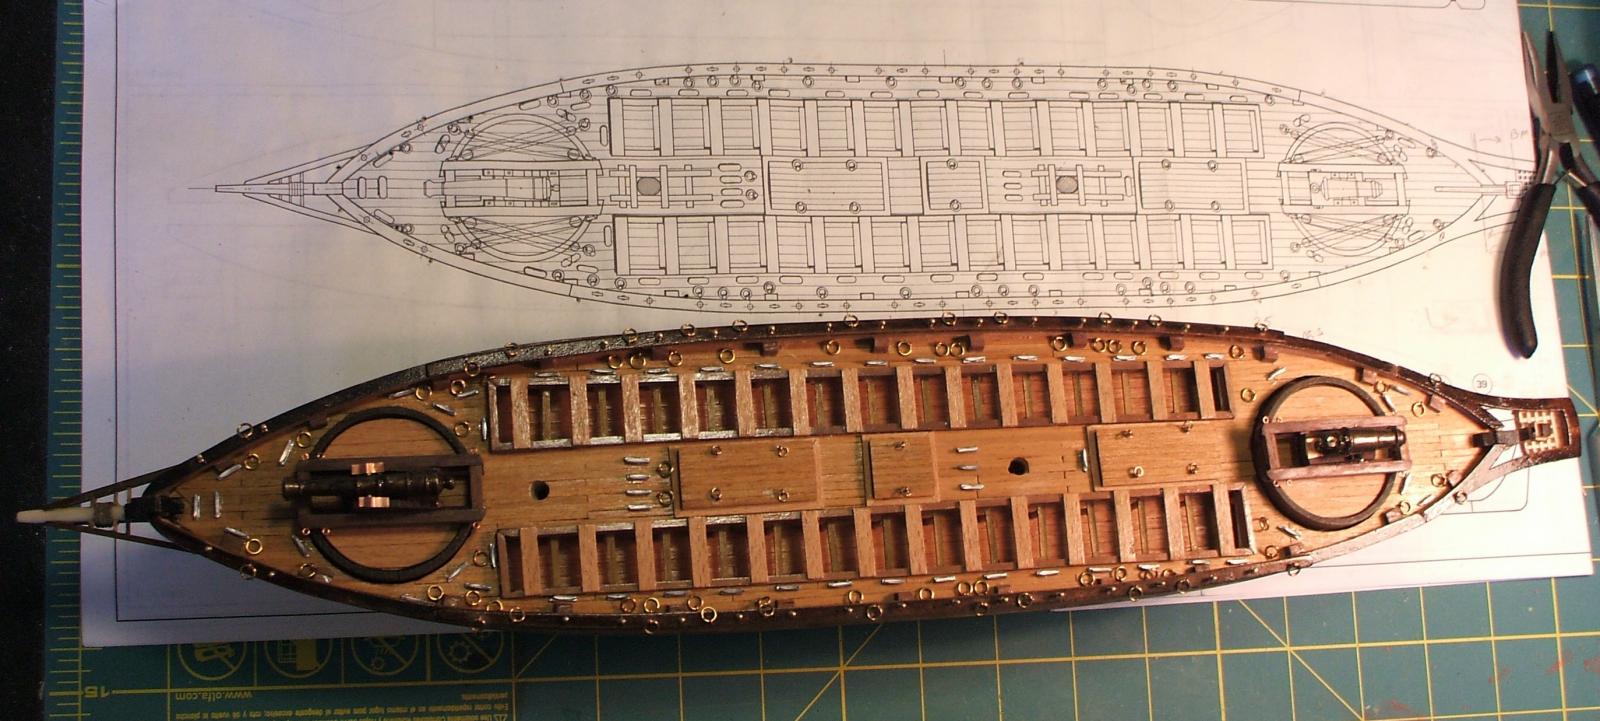
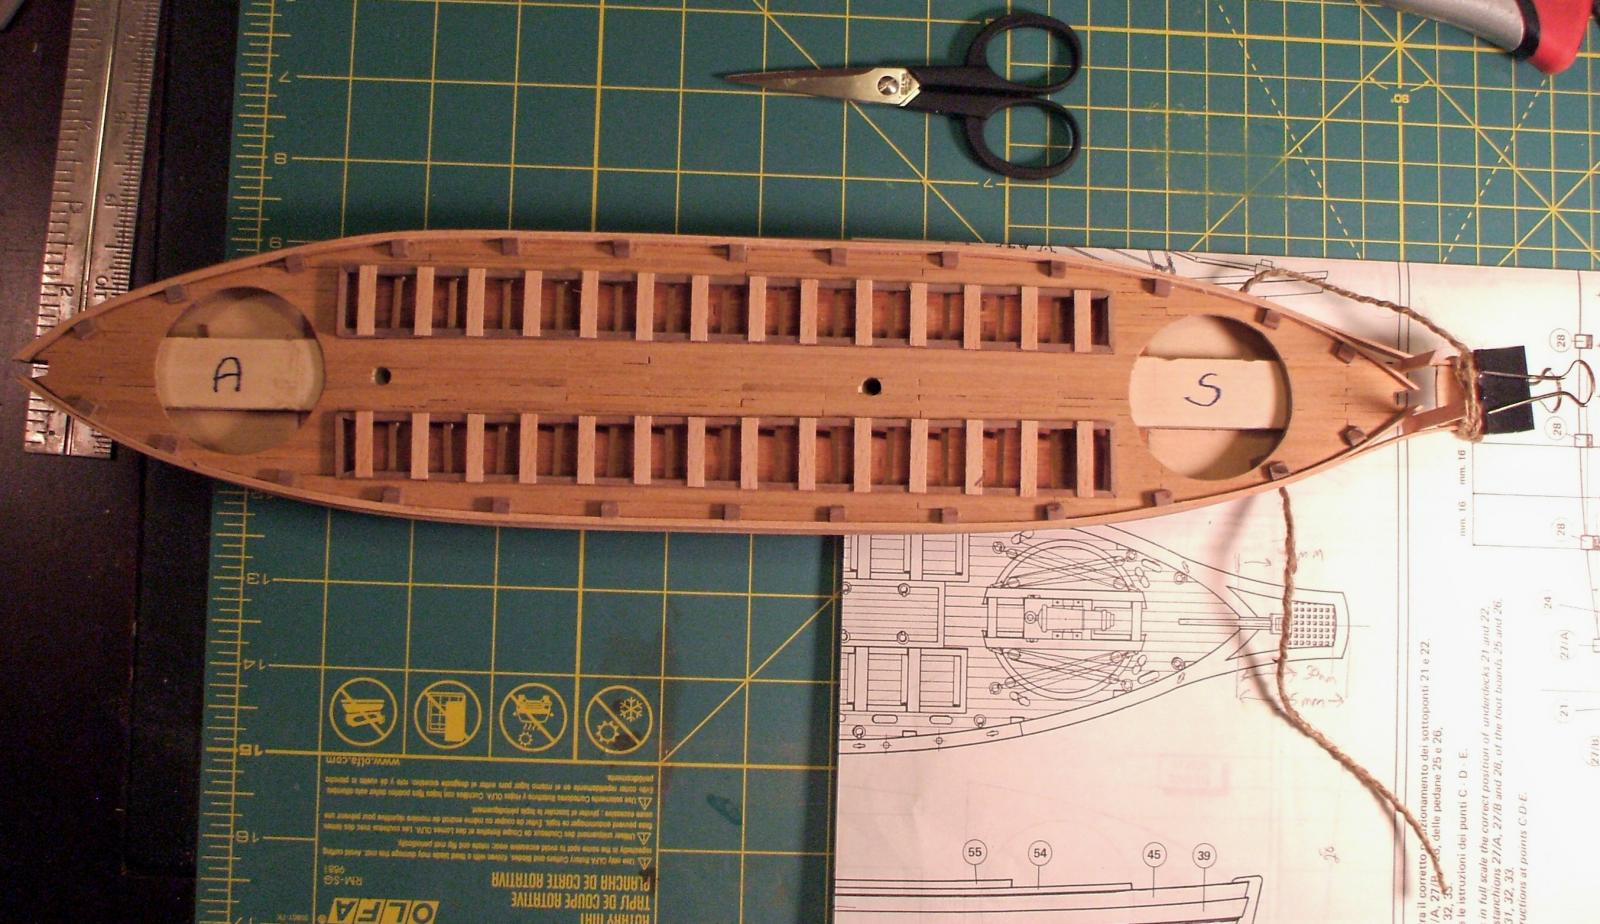
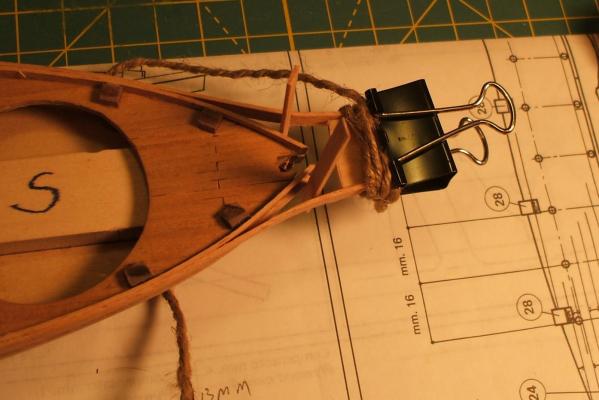
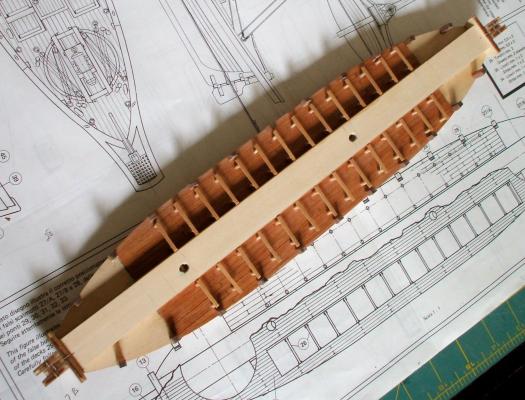
It took a while to do the deck planking as well as the hull planking as the strips being used are 3mm wide. I like to do hull planking to my own liking as my boats are only on display in my own home. I still have to touch up on the hull and then I will paint the waterline down to the keep white, lacquer the rest with a semi gloss. I still need lots of practice though when it comes to planking. I find it hard to figure out especially on this hull. The top view pic shows the rowing benches with foot bars, deck planking,2mm wide, the bulwarks and the building of the stern extension with grating as the plan in the pic shows. Not much for step by step instruction, but it will be done. A close up of the stern extension being done. I cut out a jig according to plans for where the grating will eventually go, attached the end piece to the extensions, stuck the jig into place and squeezed with my fingers so that the extensions are snug to the jig piece, soaked in water so that the extensions will conform to the jig, wrapped with twine to hold and clamped the rope so that it doesn't come undone. Letting her dry overnight.


-
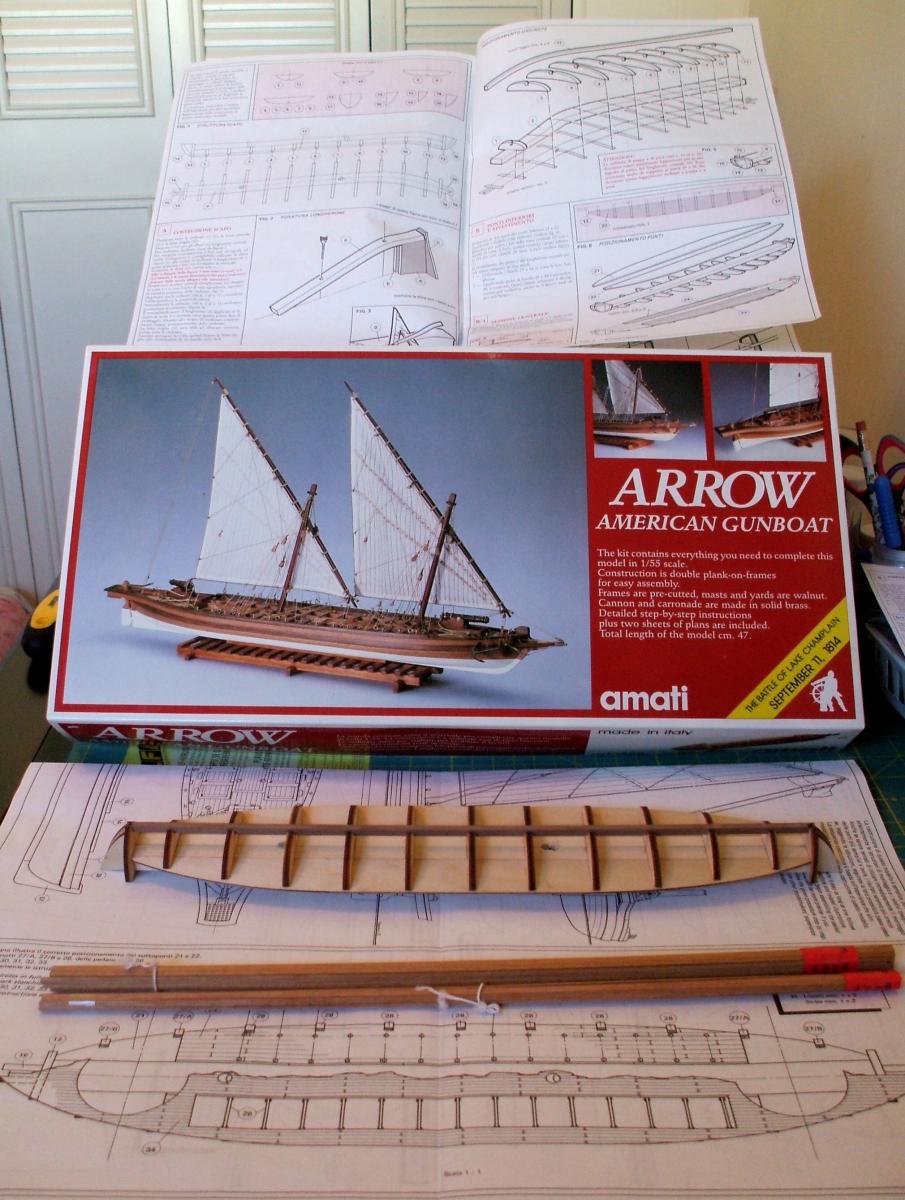
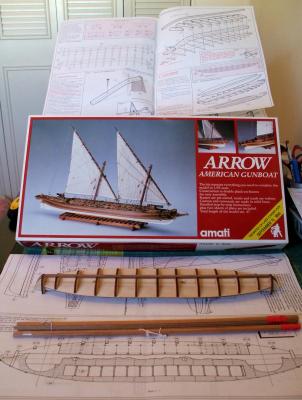
I got a photo for you Joe of the kit. It's very interesting and the directions aren't too bad. This will take a while though!
-
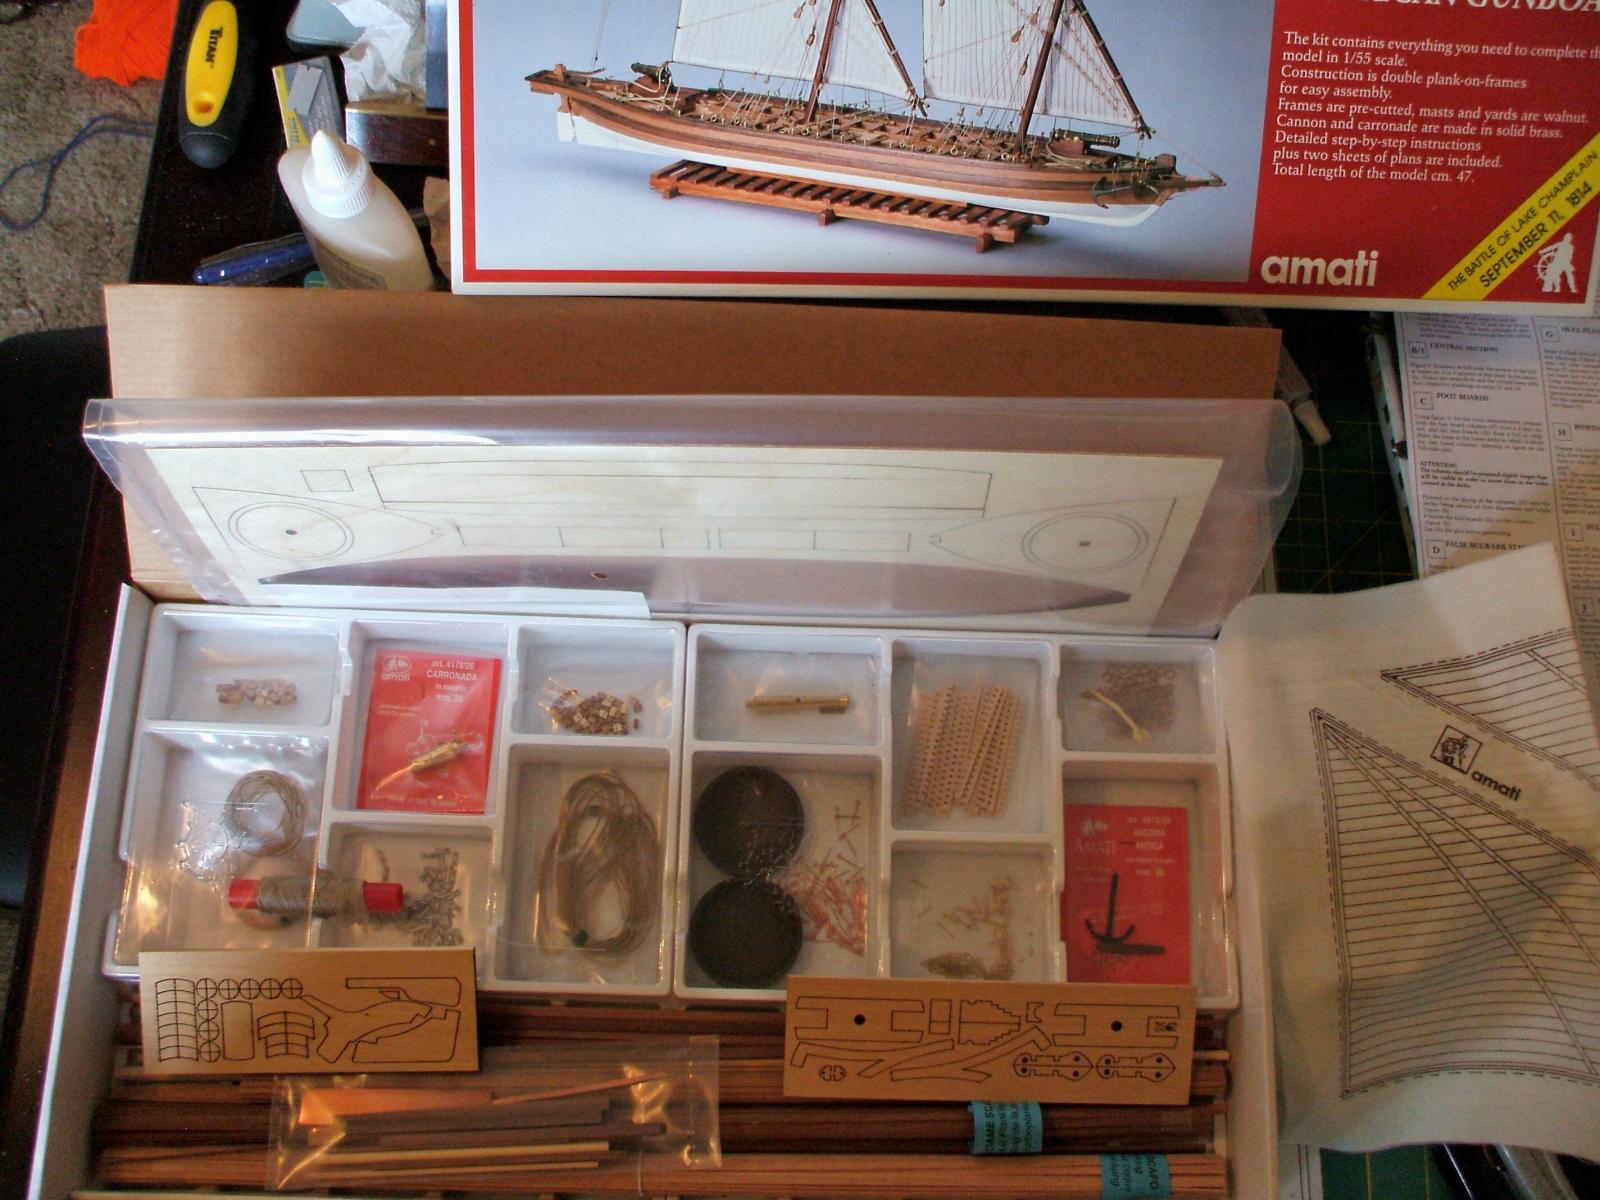
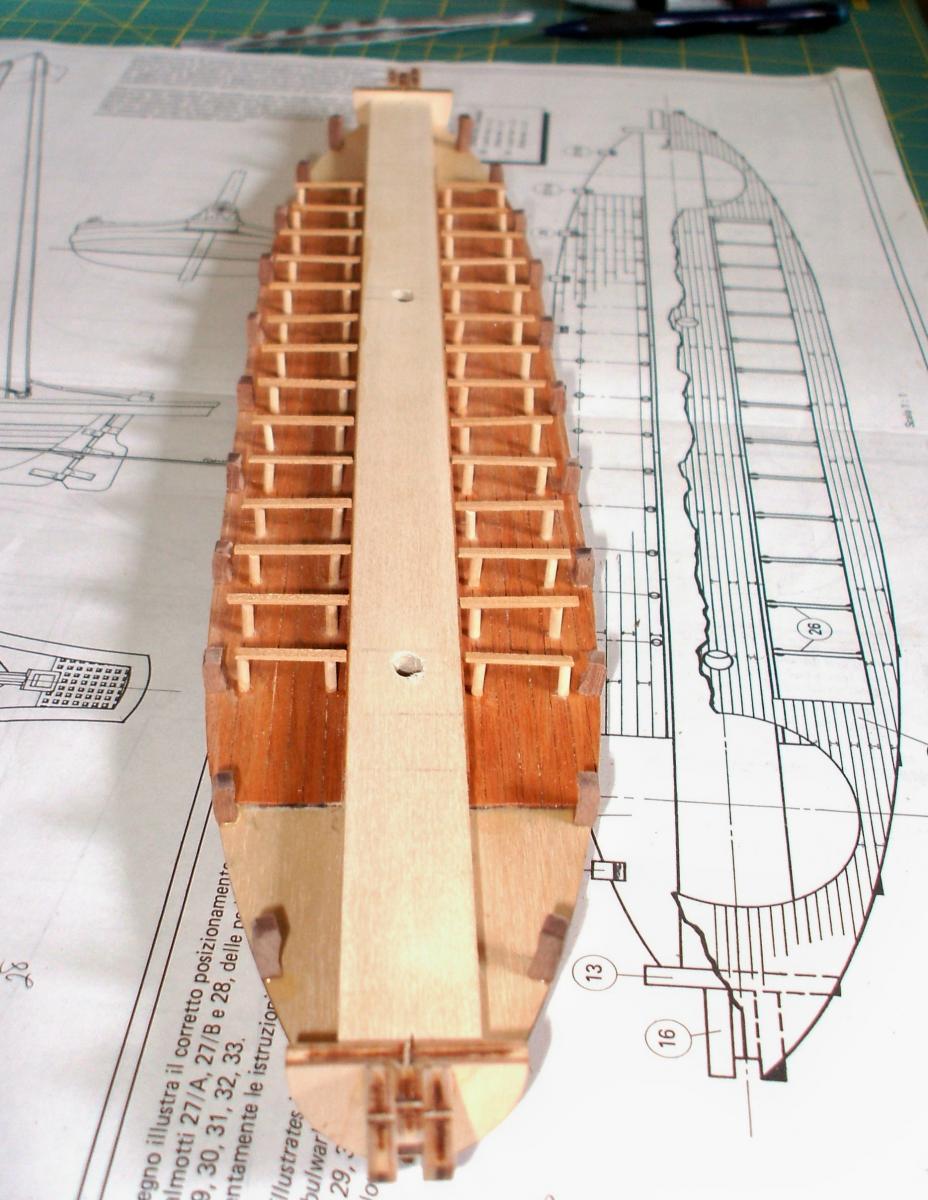
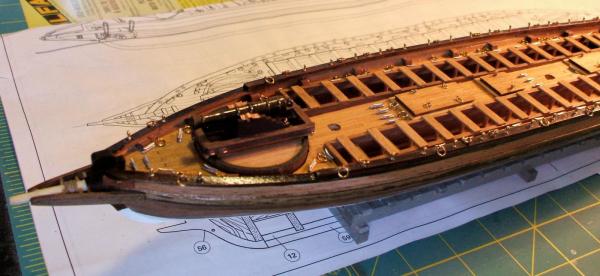
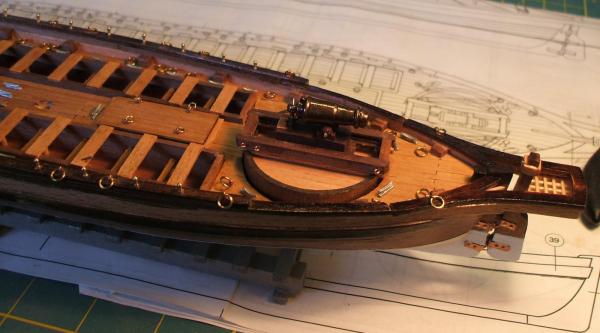
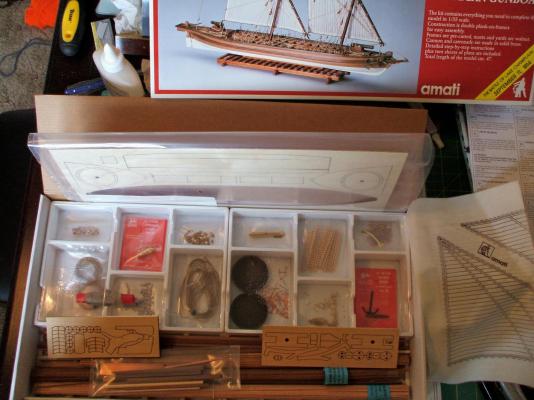
I decided to start my next ship; so far it's coming along fairly good as the instructions are in Italian, but they have English in a separate booklet. What's done is easy, coming up, very intricate and detailed. I'll show progress as I go. Slow process to this point now. Some very small pieces to cut, but so far so good. I'll be placing the deck on next. The bulwark pieces coming up to make are very small and time consuming. I've included more pics and of the kit.

-
My kit was very short on the veneer for the second planking and I did use shorter lengths. But you are right and maybe because this ship is my first I did have problems planking as well!
-
My kit came with 4 strips of mahogany and was at least 6 strips short of what they call "Sapelli" for doing the second planking of the hull. I do have some veneers coming in from "Modelers Shipyard" out of Australia. I seems the only place I could find the size I needed: 0.6 x 5mm. It's a fun kit to build though!!