shackybracky
-
Posts
11 -
Joined
-
Last visited
Content Type
Profiles
Forums
Gallery
Events
Everything posted by shackybracky
-
 Thanks for the tips. Floyd..do kits normally come with the rabbet already cut out or is that something we do ourselves? If so how do you go about it?
 -
Thanks Gary. The reason for the gap was that I was clamping a small piece of wood tight up to the planks at the bow to keep it held in until the glue had set and so I couldn't see that the plank wasn't actually touching the keel. I've planked down to the same place on the port side and it's much better. I don't think the planks are of great quality because they don't have smooth edges or surfaces and are of different thicknesses and widths so a bit of a battle but I'm looking forward to getting the first layer on and sanded smooth.
-
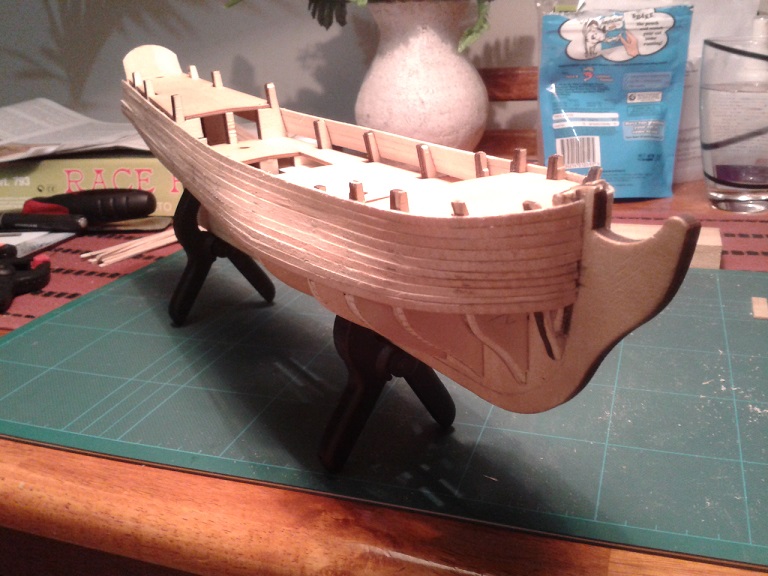
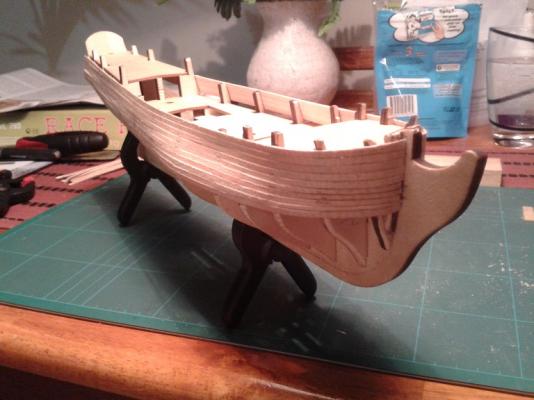
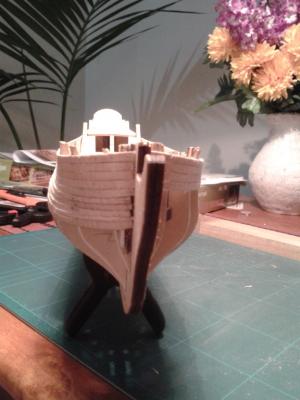
I've planked the top band on the starboard side. I put a full width plank at the bottom of what I've done so far and filled in the gap. There's a bit of clinker effect towards the bow but nothing I can't sand out. I'm gonna do the same on the port side next. I haven't worried about scribing the planks into keel at the bow but I will on the second layer. When I plank the second layer i'll have to be more accurate with plank widths at the bow because there's quite a difference as you can see on the photos. But if I can get this layer smooth i'll be happy. Any opinions and advice on how to improve would be great.
-
ok that's great help, thanks. I finished the tick strips tonight and marked each bulkhead, except for the front two and rear one because I'm not really sure how many planks will hit them as they cover a much smaller distance than at midship. I'm hoping that by using the rest of the bulkheads as a guide I'll find where the planks finish front and rear. We shall see tomorrow when I start planking. Definitely a challenge this planking business but enjoying it.
-
Thanks Floyd and garym. As this is my first attempt at planking like this i'm gonna use the first layer as a practice run in the hope it will make the second layer as good as I can make it. But once I know what i'm doing I won't focus as much on the first layer on future ships. I made a start last night on the tick strips and marked some of the bulkheads. Once I get to the stage of fitting the planks do I shape the top or bottom edge of the planks?
-
Thanks S.Coleman and Augie. I watched the dvd on how to plank a bluff bow ship, after googling what a bluff bow was, and learnt that there was a lot more fairing to do than the kit instructions said there was. So I've done the fairing and taken a couple of measurements of the bulkheads. The biggest one mid ship is 70mm and the rest around it get smaller, apart from the very last one. The planks run all the way down the keel stopping about 5mm short from the bottom. So the measurement at the rear of the ship is 79mm. I guess that means I'm gonna have to add some filler pieces at the back? The kit shows triangular pieces and so did the dvd tutorial but that would reduce the plank to less than half it's width so I think I need to add fillers with an arrow shape on the end. Does that sound right?
-
Thanks Floyd and Shihawk, very helpful. I'll leave the 8 planks on and have a go at the bands and strips. The kit plans just don't look right structurally and I want to learn how it's done properly so I will take my time and see how we go. I've just received a 2 disc planking instructional dvd tonight when I got home from work so i'll watch those tonight too before I do anything on the model. Thanks for the help so far.
-
Thanks Augie. Will it be ok to start the bands from the 4th plank down or do I need to remove all but the top plank and start there?
-
Hi mtaylor, thanks for the reply. I would prefer to build closer to historically correct so I'll go with the tutorial method. Thanks again.
-
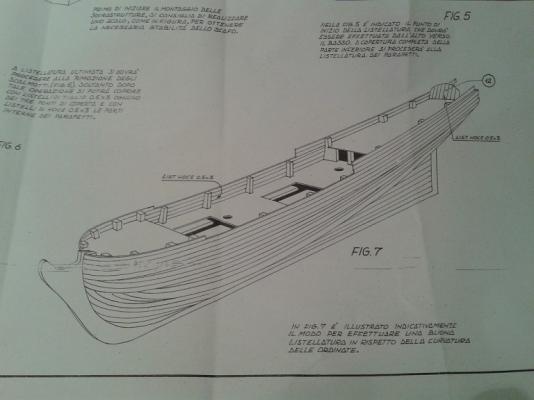
Hi everyone. This is my first attempt at planking this way so I've been doing lots of reading and trying to figure out the best way to approach the challenge and it's left me confused. Hopefully someone can help. The plans show to lay the first plank at the top and to work down towards the bottom. The first 4 planks are full length and then the 5th is supposed to curve up into the 4th plank. It says to lay each plank against the frames and let the lay of the plank guide me where to trim each plank. But online tutorials show to split the hull into bands and use tick strips. I don't know which way to go. Is the method shown in the instructions an accurate way to plank or should I ignore it and use bands and tick strips? The planks included in the pack are 3x1mm basswood and 3x0.5mm walnut for the second layer. I've attached a photo of the planking layout shown on the plans and a couple of pictures of where I'm at so far. thanks in advance Kev


-
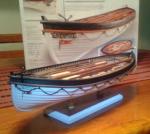
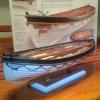
Hi Aracnan, I just finished this model yesterday. It was my first build so I'm no expert but I'm really happy with how it turned out and i'll help if I can. For the planking I used a file to taper each end of each plank over about 50mm and down to about 0.5mm at the end. I found it helped to bend the planks into shape and gave a good finish where the planks ran into the false keel (I think that's what it's called). I didn't have any kind of plank bender and I didn't soak the main planks, just filed them and then held them in place using clothes pegs until the glue dried. With the top plank I did soak that one and then clamped that against the top basswood plank, with cling film in between to keep the basswood dry, to get the shape somewhere close because there's only the 1.5mm top of the last basswood plank to glue to and it's got to be flush, ready for the sapelly 2x2mm near the end of the build. I found the materials sent to be of ok quality but there wasn't enough wood for the floor and some pieces had to be remade from scratch because the ones sent wouldn't fit. The pictorial instructions were much more useful than the written ones. The end product is worth the time spent working it out though.