HOLIDAY DONATION DRIVE - SUPPORT MSW - DO YOUR PART TO KEEP THIS GREAT FORUM GOING! (Only 44 donations so far out of 49,000 members - C'mon guys!)
×


Robert-J-M
-
Posts
31 -
Joined
-
Last visited
Content Type
Profiles
Forums
Gallery
Events
Everything posted by Robert-J-M
-
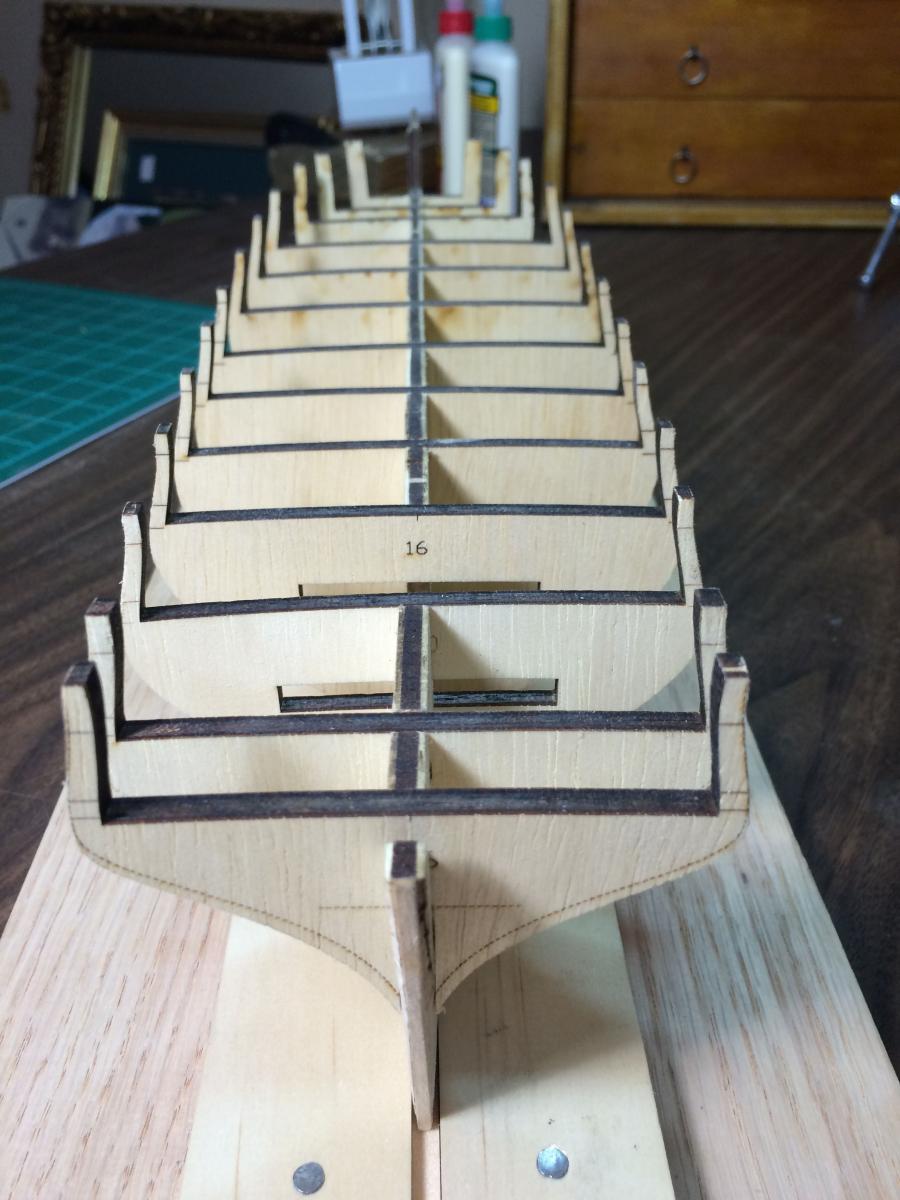
 I just really didn't want to start over so figuring it couldn't get any worse I wet the BF and back-bowed it over pieces of BF cutout scrap. I was able to get most of the bow out but not surprisingly it had some flat spots at the ends but I just persevered several more times with various clamp and scrap locations and then put it under a vase for a few days. I got it to the point it was almost straight along the top of the BF with the keel in the jig. Some of the individual tops between the bulkheads are a little cattywampus but they should straighten out, so at this point I think that I can get it finally straight with the bulkheads and filler blocks. The BF did swell a bit with all the water I put on it so all the bulkhead slots had to be filed open a little more. I did most of my bulkhead filing and sanding in a small clamp-on vice with the bulkhead held in the jaws between two pieces of BF cutout board, much stiffer for sanding off the burn marks with a bastard file, especially at the bulwarks and ironically while watching Jaws on the TV duunnn dunnn... duuuunnnn duun... duuunnnnnnnn dun dun dun dun dun dun dun dun dun dun dunnnnnnnnnnn dunnnn Now on to the beveling some of which I may do in the vice as well but some of the marks are non-existent on one side (i.e. the port side) or faint so I am going to stick on cutouts of the paper bulkhead plans provided with the kit... After running a complete second set on our 36" copier at work just in case something happens, spilled wine perhaps?
-
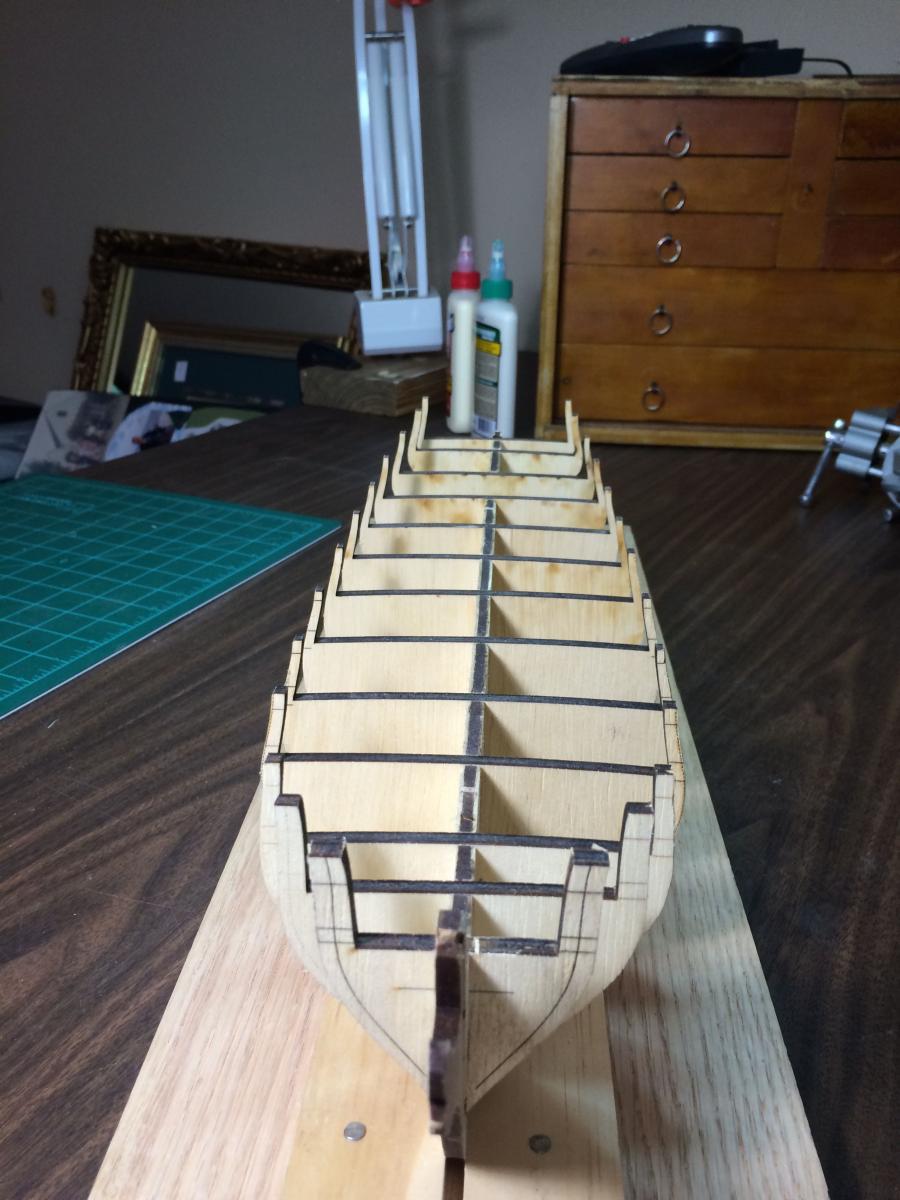
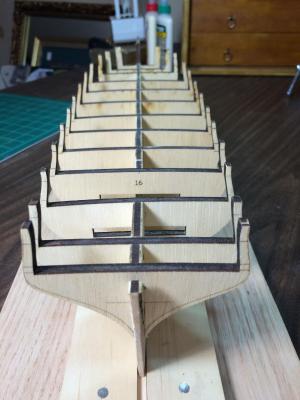
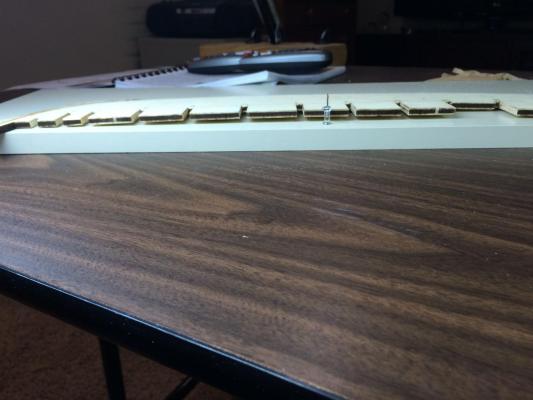
The water method did not work but with Chucks encouragement I was going to put the keel on and move ahead. Expecting that gluing the keel to a curved surface would not be practical I clamped the BF to a 24" level. Even then I had to clamp very close to the rabbet to get all the bow out indicating that the BF will be bowed at the bulkhead level even with the keel in a jig. Once I got it clamped and verified the bow was all out of the BF itself, I put the straight edge along the rabbet and, not surprisingly, I did not center the rabbet strip on the curved BF and it's 1 mm bowed. I was thinking this was the case when I was looked at the rabbet while bearding. At this point it seems the best thing to do is get another BF, stem and rabbet and start all over sinceI can't see how I can the bulkheads square if the is BF bowed. This is a part of the process but it's still a little discouraging to renew a hobby after all these years and have to start over on the very first steps.
-
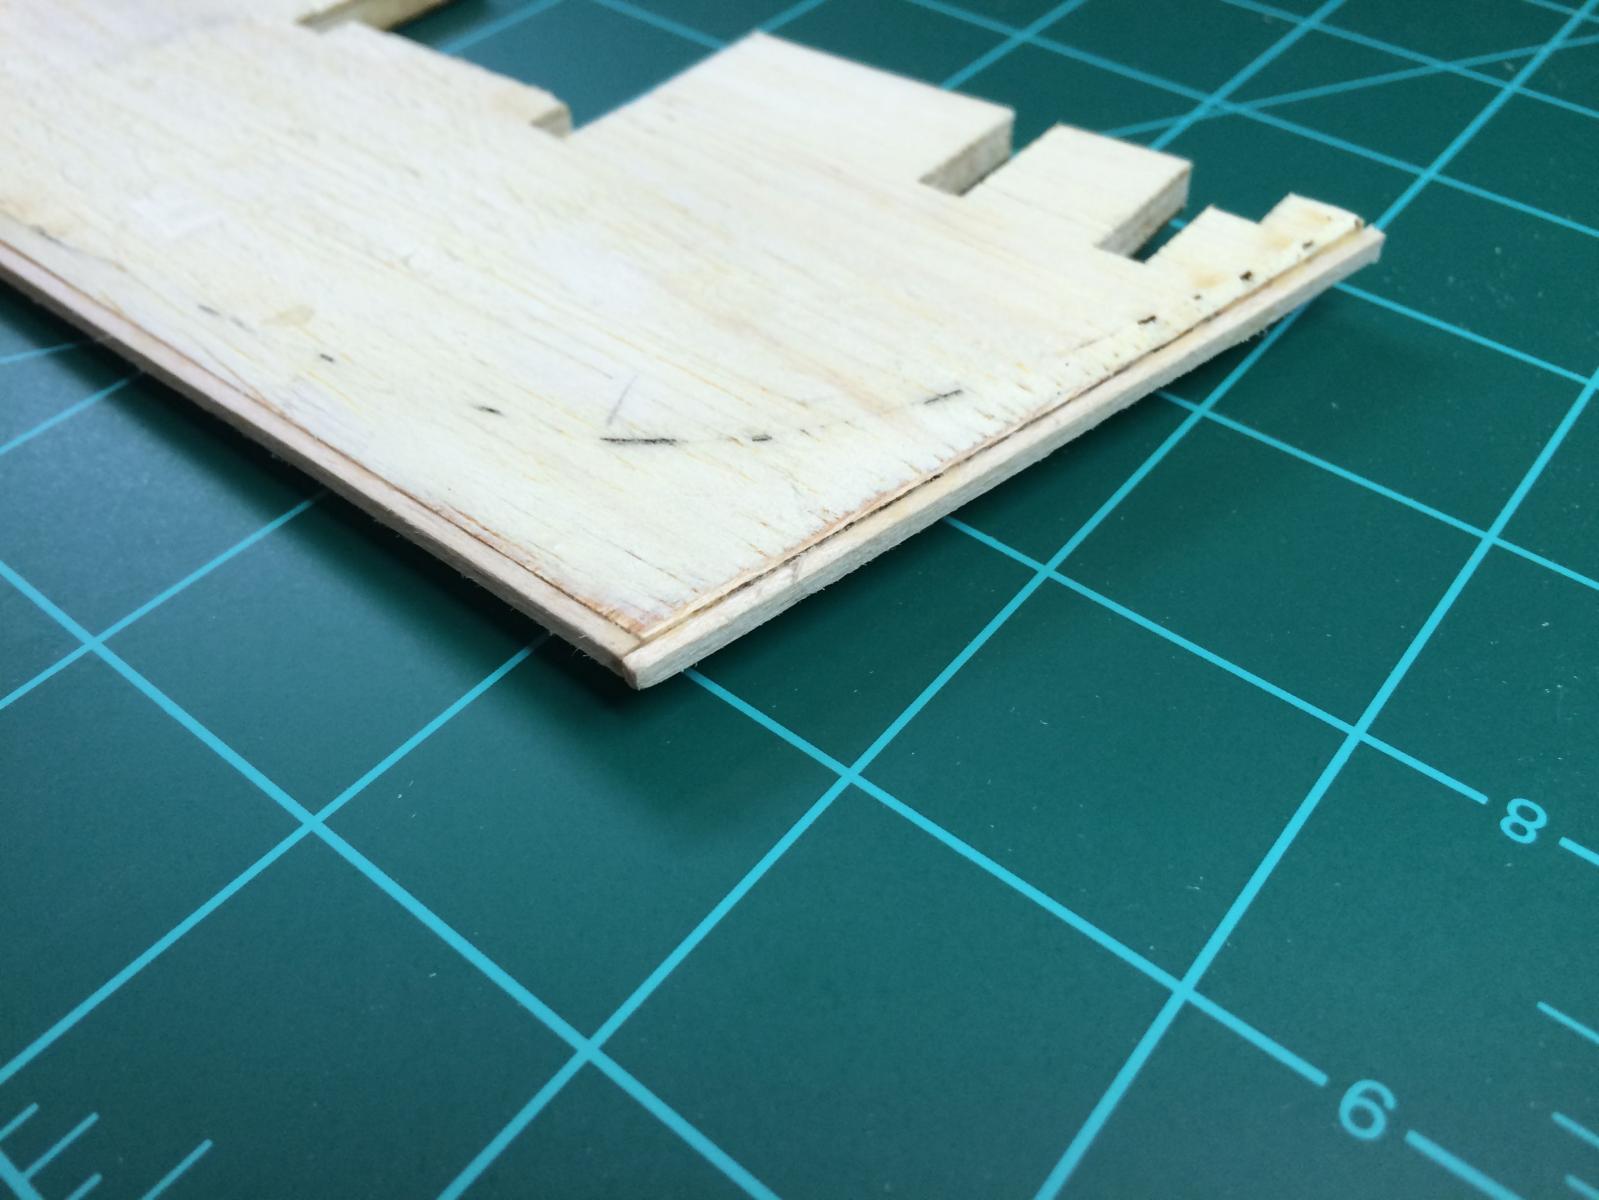
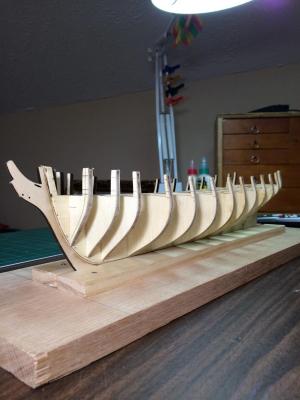
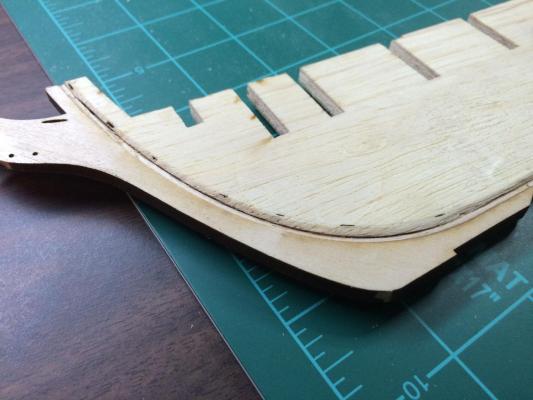
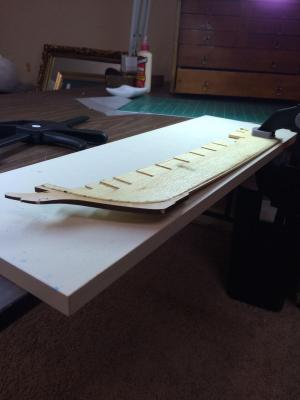
Not sure if I have the bearding right but I put allot of effort into it. The BF is so fragile on the laser scored side that it chips away at the narrowest sections, including at the stem attachment. It also gets chippy when you get thru the softer exterior wood into the core. Learned a lesson about dry fitting, completely to the planned clamping, since when I first clamped the stem piece on it bowed away from the rabbet at the keel. I'll be more careful in the future. Purchasing Titebond III helped as well with it's longer working time (10 Min). I had some bowing of the BF as I said before but b/c I wanted to get started building, I when ahead with the rabbet, bearding and stem attachment while gathering the parts for the jig and making it, although now I am worried that I'm going to have to start over. As you can see I certainly have a potential banana boat. I wet the concave side this morning and when I unclamped it it actually seemed worse and is now about 3/16" of bow. I am going to try the wet concave side/clamp process again but am I really going to have to resort to getting another BF as well as the rabbet and stem?

-
Not surprisingly my BF is bowed. I looked on a few logs and the instructions say to just build the jig and glue the bulkheads in with the BF in the jig. Would it be better to try and straighten it? The way I would do that is soak the BF for 10 minutes (or more?), fold wax paper over it and then put it on a dead flat surface with some heavy books on top. Thanks for the glue advice as well. The only very minor annoyance with the kit was the instructions were bound, with a comb binder that was too small so the book would not lay flat and the first page was torn out. Fixed that at work this morning with a 5/8 comb binder and plastic covers. More shopping today... Clamps and non critical tools from Harbor Freight, chisels and a few other tools not in Dad's stuff from Hobby Lobby and Lowe's including hopefully a small x-acto where the barrel isn't unscrewing constantly, Dad's larger one is fine. Tonite, start shaping the rabbet
-
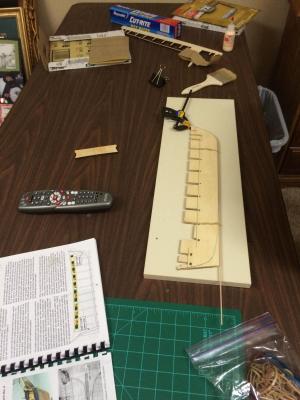
Opened the book and got started cutting out the bulkhead former and a bulkhead on my shiny new cutting mat. Started with sandpaper on the bulkhead slots but ended up with big regular files. I decided to provide just enough play in the bulkhead to ensure I could get them square without forcing or having them spring back.. Put the rabbet in the water for 10 minutes clamped it on the BF and went for a good sailboat race on the lake while it dried. When I got back I readied the SIG-BOND glue put it on the rabbet strip and started positioning in the middle of the BF only to realize the glue was already setting. I managed to get it positioned and clamped but it seems there are some gaps in the glue. I'll leave it overnight as it says in the instructions but now I'm at my first question... Is the glue supposed to set this fast? As this is my first wood model I feel like I'm going to be moving parts around to ensure they are positioned right and this glue may set a little faster than I want here at first. This was the only PVA glue I could find in town, Model-Expo only has Tite-Bond, so if there is something else that I should use I need to know where to get it? Also, do need to worry about the voids in the glue? Thanks, Robert
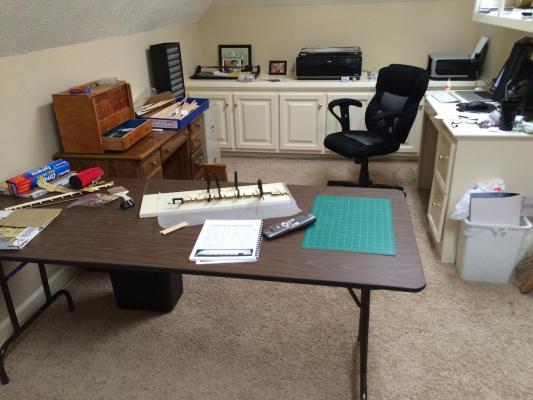
-
Yet ANOTHER Syren log! After following the advise on the newbie page, and getting a nice discount, I got my kit on Friday from Model-Expo, who were nice enough to combine two orders so I could get the free shipping. I like them already. As suggested I inventoried everything against the parts list and found everything... lots of little-bitty-parts! I confess I didn't count all the blocks and such, as I figure I'm gonna lose some anyway. Did I mention how small some of the stuff is, WOW. I decided to label the wood by wrapping each group with a sticky note, why measure everything twice (or more)? After writing the decimals next to the fractions for quick ID with the calipers, and trying not to squish some of the smaller ones, I barely bumped the 1/32x1/32 bunch and managed to bend/break a few already. With the suggested tools lists from this site, the next step was to see what tools and materials are available around town before gathering the tools from Dad, not the best time to do that since it was 3 Saturday's from Christmas. The wife was out of town and I wasn't in a hurry so no a problem, might as well practice the patience needed for the actual construction. Lowe's did't have much no balsa or hobby woods, Michael's did't have much either probably b/c it was half full of Christmas stuff, but full of shoppers. After that Hobby Town USA, which was a disappointment not much wood modeling stuff but I did get some x-acto blades and CA glues. Next, a Wal-Mart with a crafts area, again not much available. Hobby Lobby was the final stop and they had a very nice selection of woods including finally the balsa I need for the bulkhead blocks, self healing cutting mat and other stuff I needed. They had one of the rulers with handle suggested by Dirk. Here was also the only place I found some PVA wood glue (other than Elmers with the huge spouts) called SIG-BOND, more on it later. I will be going back to Hobby Lobby often I suspect.. but other than one more stop for chisels, I'll wait until AFTER Christmas. Probably the WORST afternoon to go to Hobby Lobby, 10 lines 10+ people deep. Oh well but then ended up right next to a guy from another town who worked for the company I was swapping GIS maps with for some needed survey work after the New Year. I hadn't met him before and managed to get a little work done, talk about coincidence. On to Dad's and his garage of modeling tools. He had gathered up some stuff already and we proceeded to go thru 50 years of modeling tools. Files, knives, hundreds of used blades, clamps vices, etc. many things on the list including 3 airbrushes, a scroll saw and combination disk and belt sander. I was even given the cabinet and an unused wooden machinists style toolbox. After dinner provided by the Fleet Admiral I headed home an unloaded my goodies. Something that is important to me is to have an organized workspace and plenty of room to move things around. Building something is hard enough without too little room to work and having to look for tools scattered around. I still have some organizing to do of all the stuff Dad gave me but I decided it was time to start building, not just planning and organizing to build so I cleaned up and filled the tool cabinet with some of the stuff I knew I would need right away.