


majq
-
Posts
51 -
Joined
-
Last visited
Content Type
Profiles
Forums
Gallery
Events
Posts posted by majq
-
-
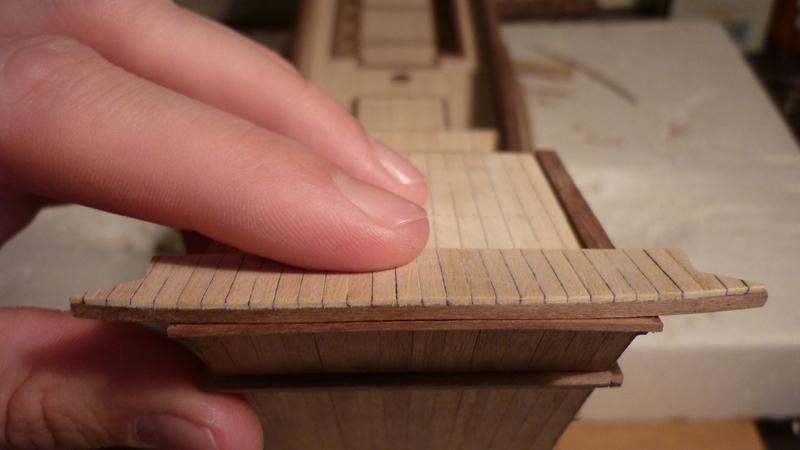
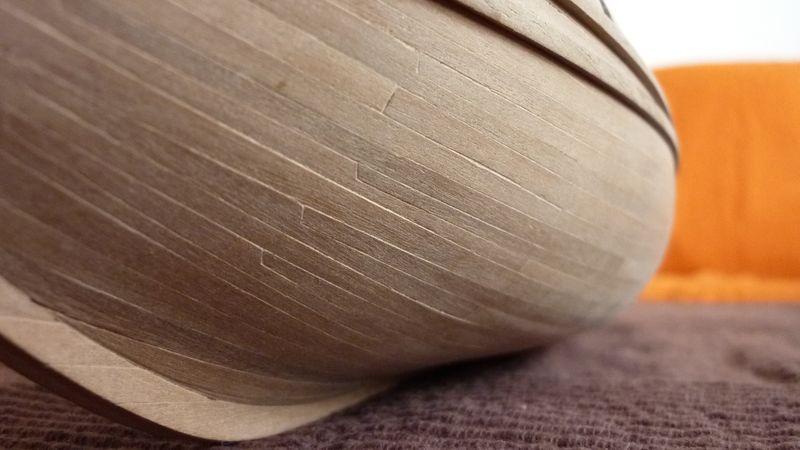
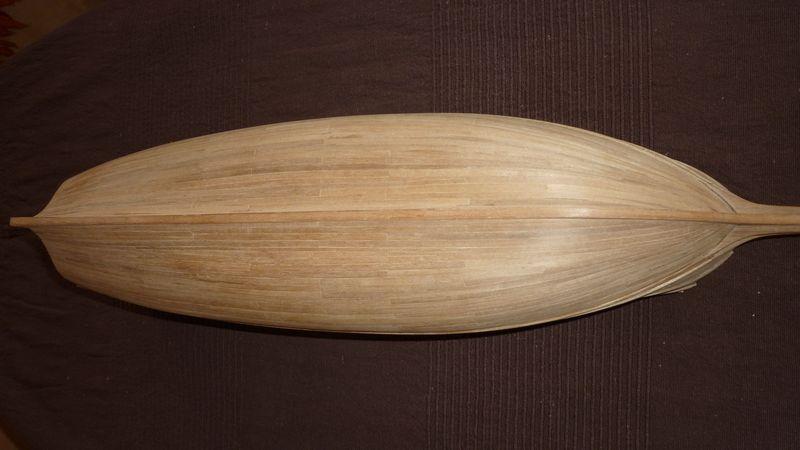
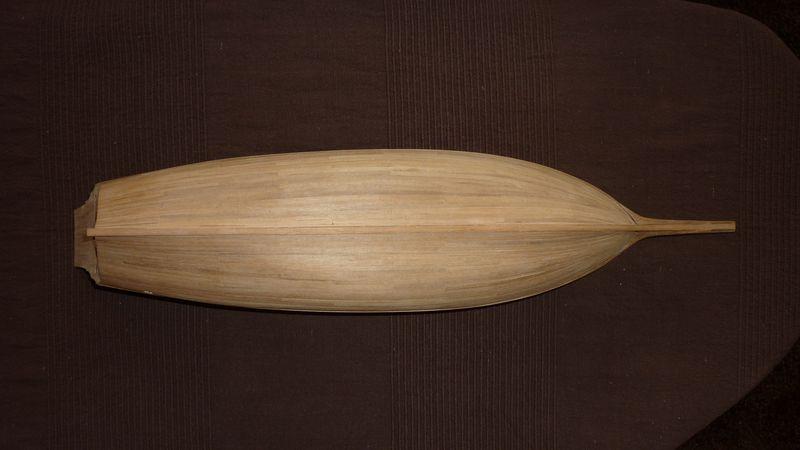
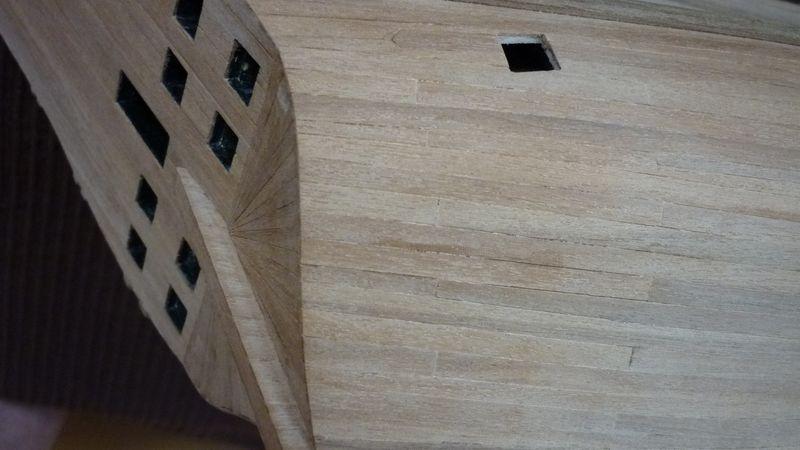
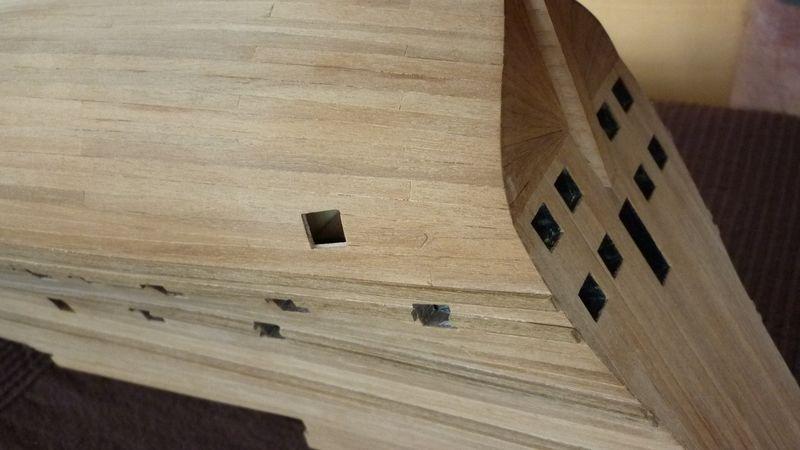
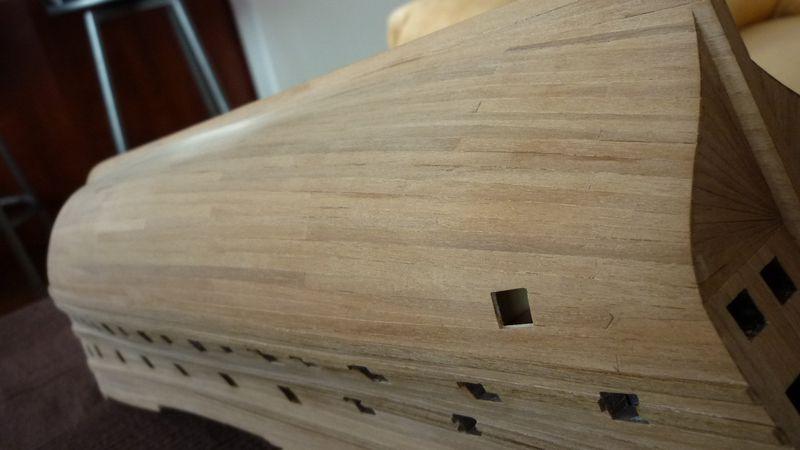
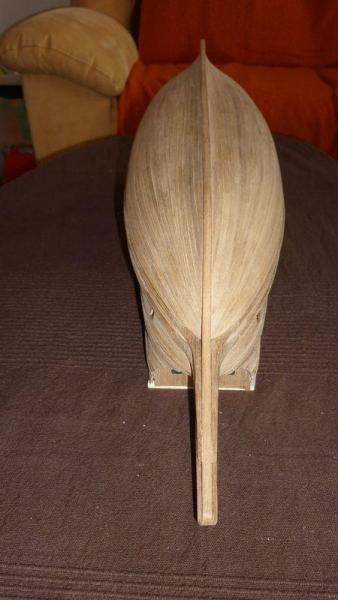
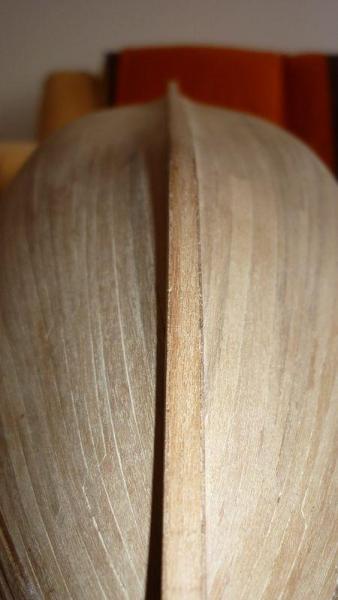
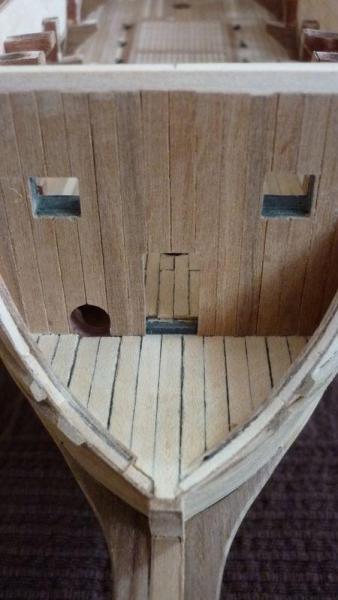
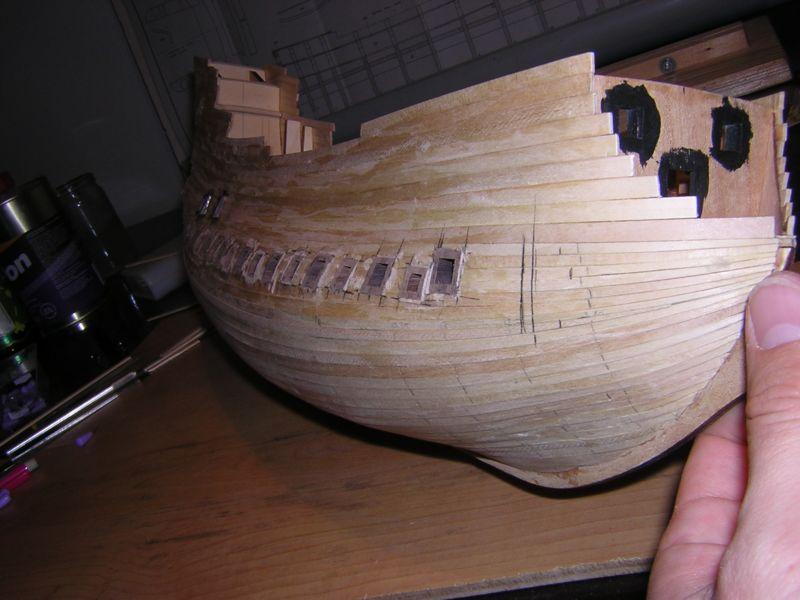
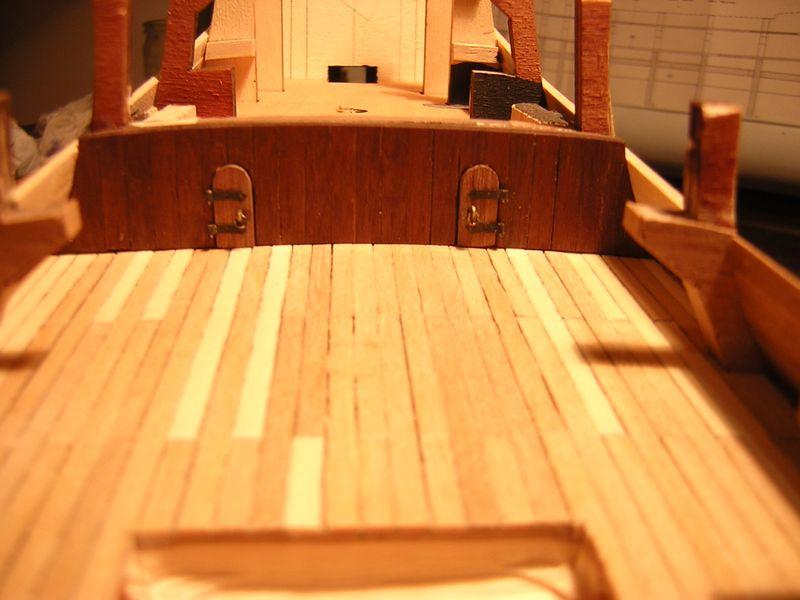
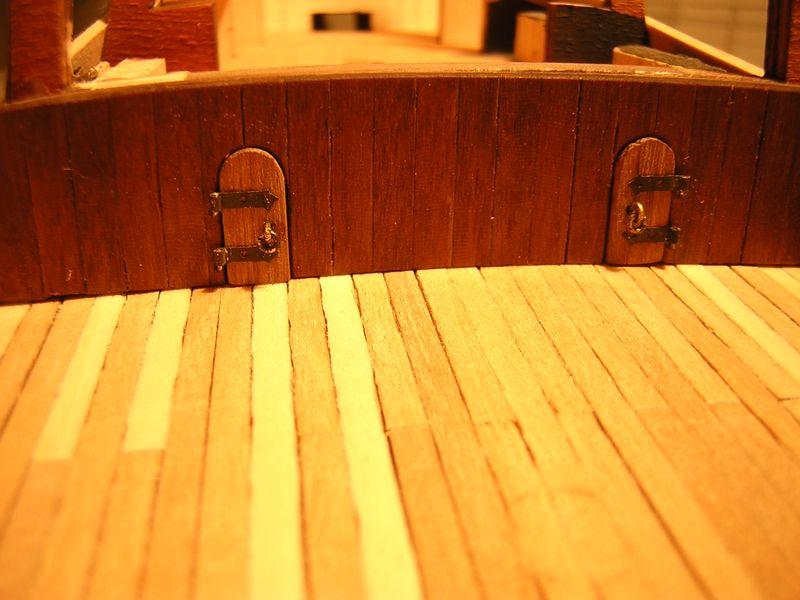
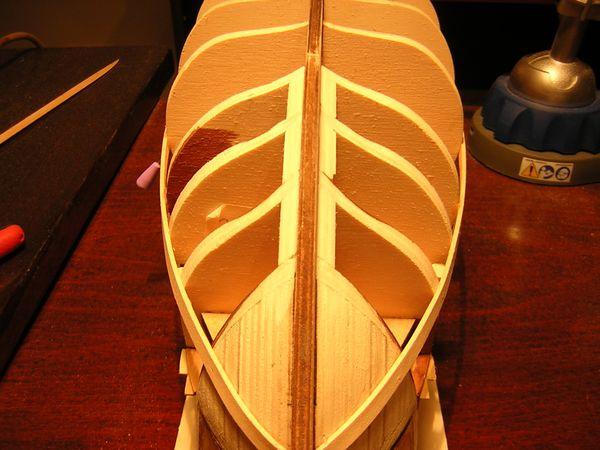
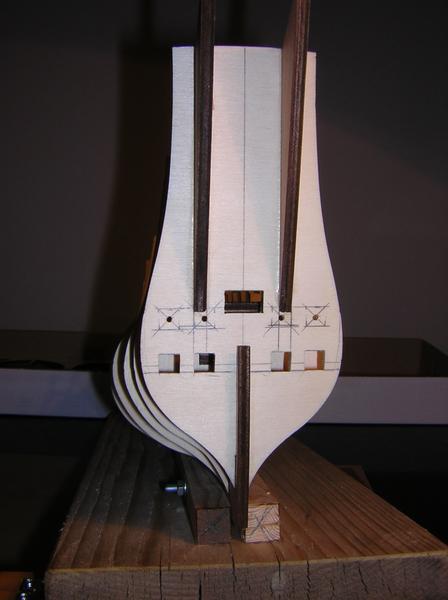
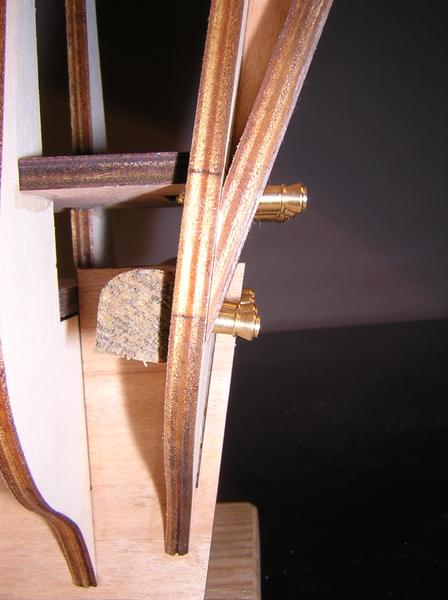
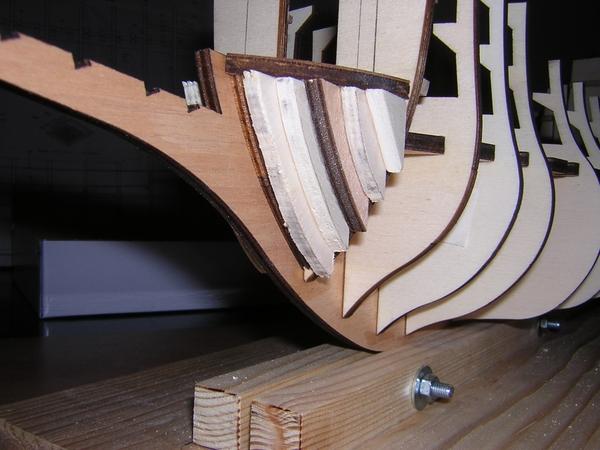
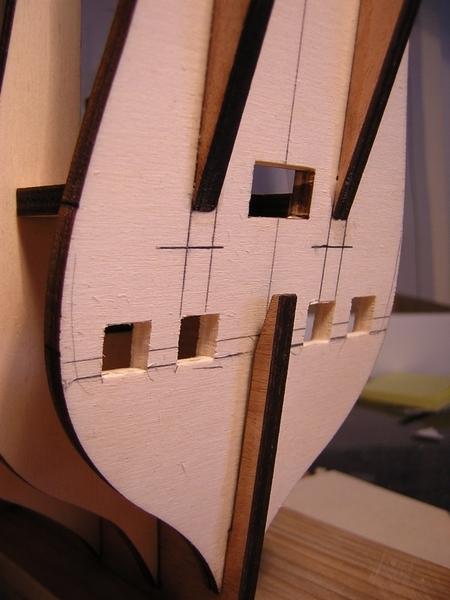
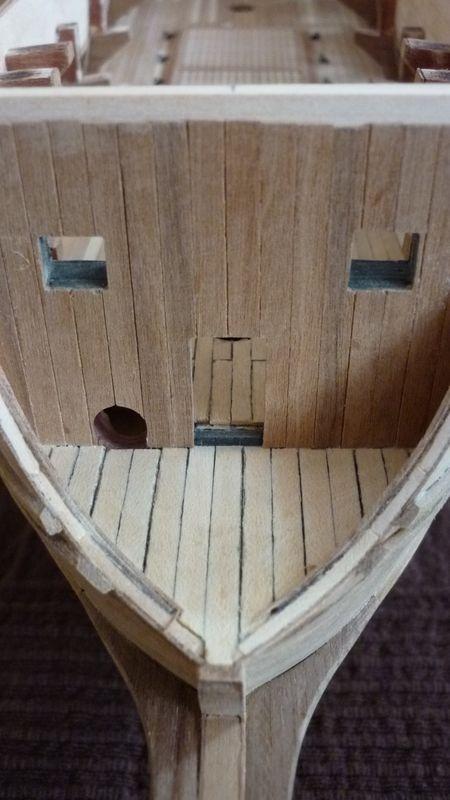
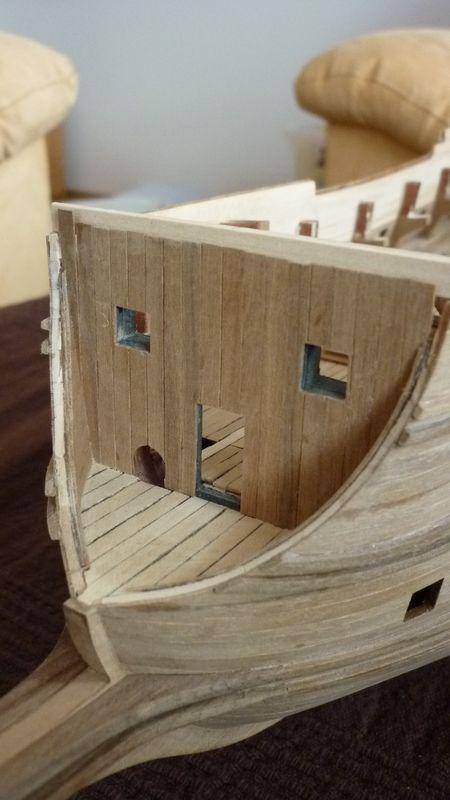
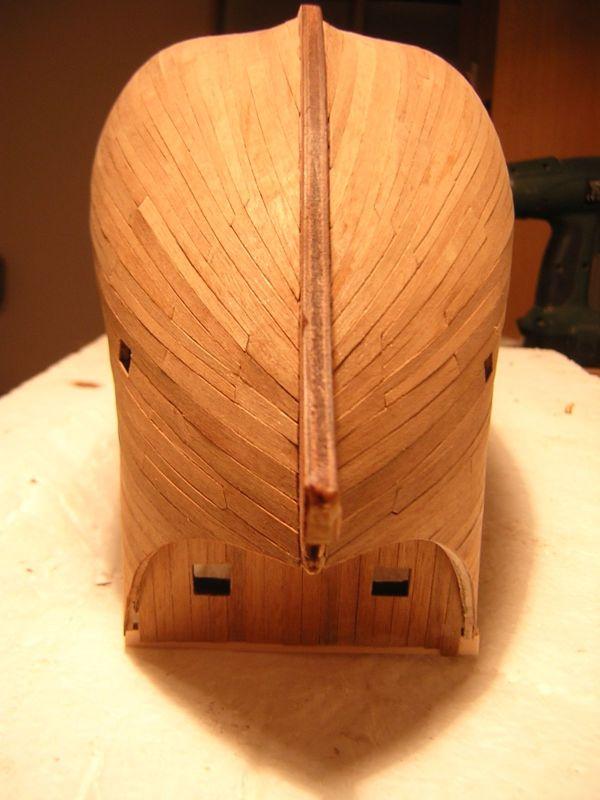
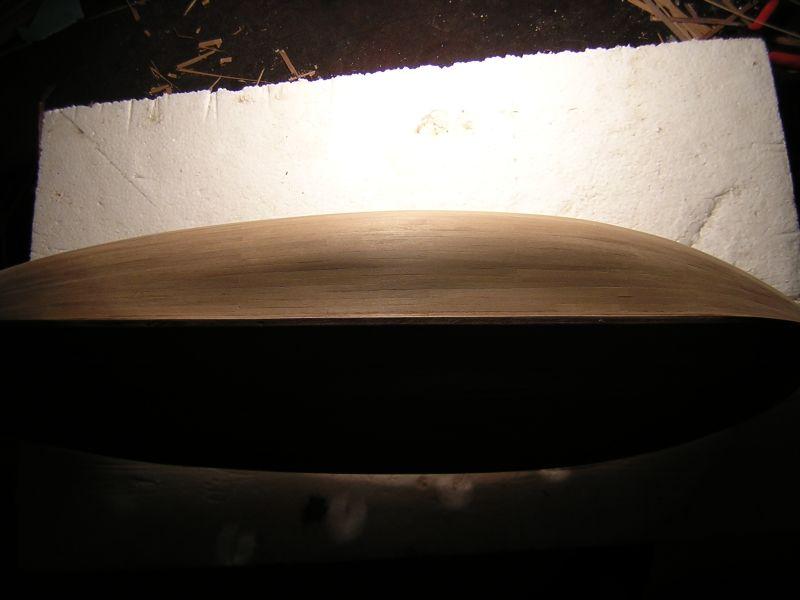
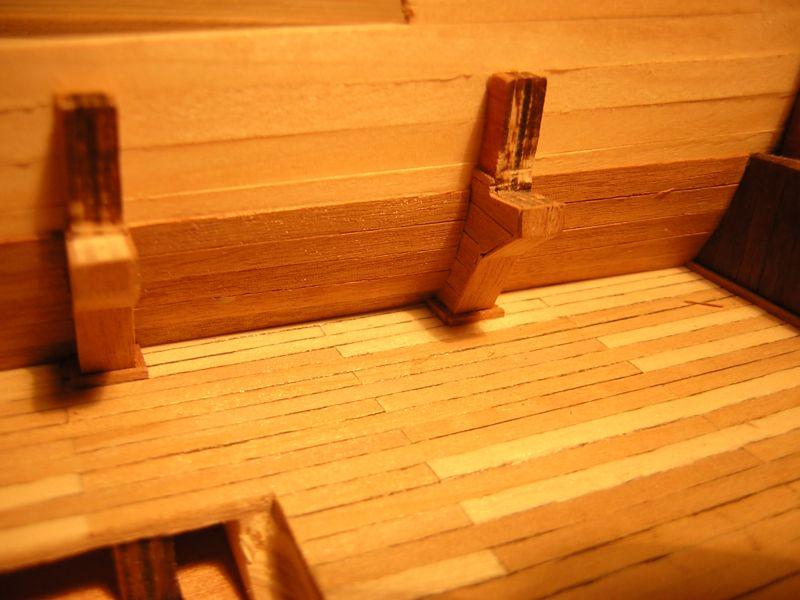
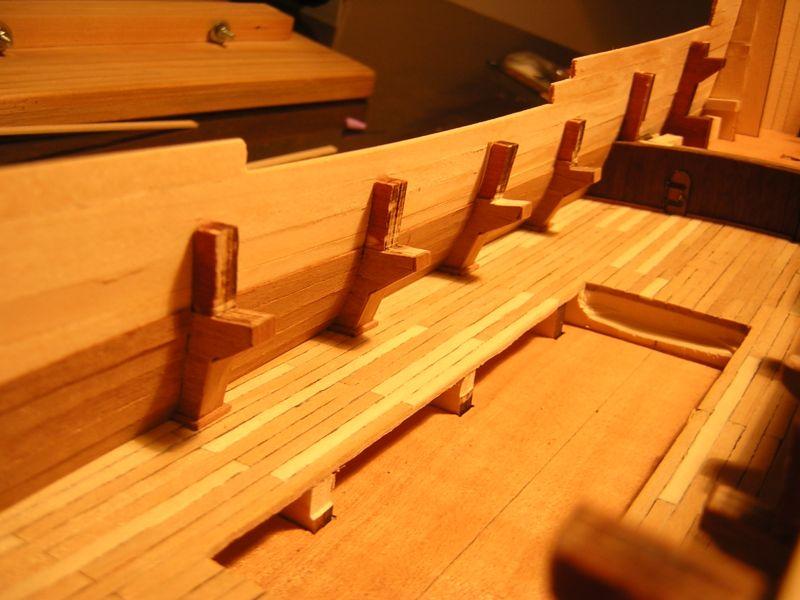
Here I re-made next piece from kit. It is deck between galleries on the stern part of ship.
On the first picture there are original piece from kit, and both sides of my piece built from scratch
(I merged then it into this one photo). Top of this piece is planked by limewood strips and
the bottom part is from walnut strips. I also bent this piece to follow shape of top most deck,
you can see it on the second photo.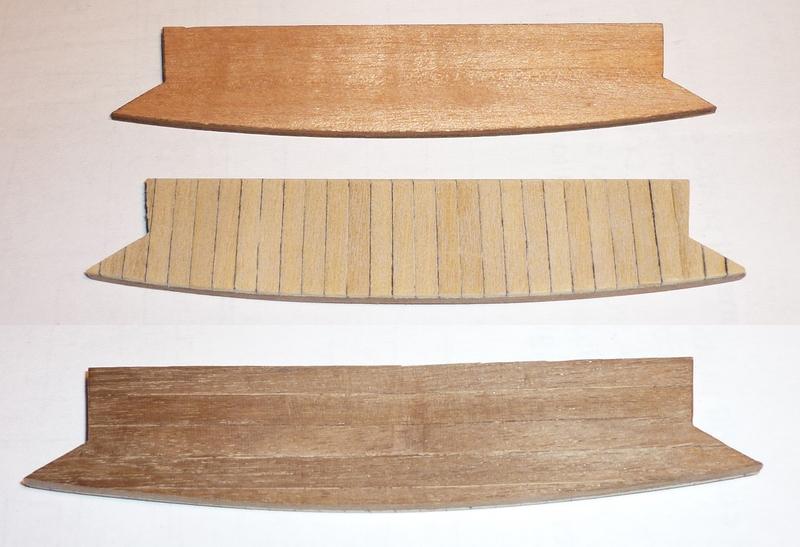
-
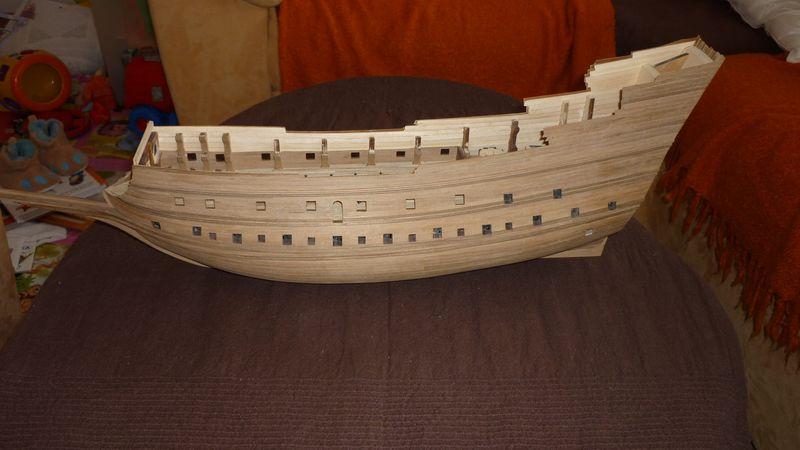
Hi all,
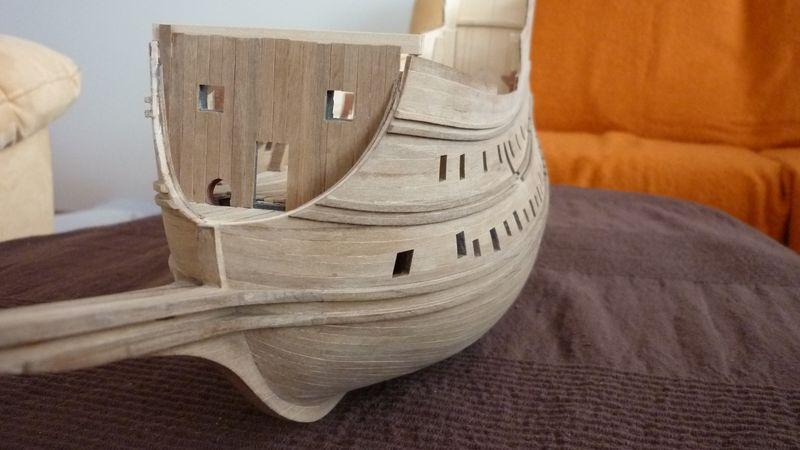
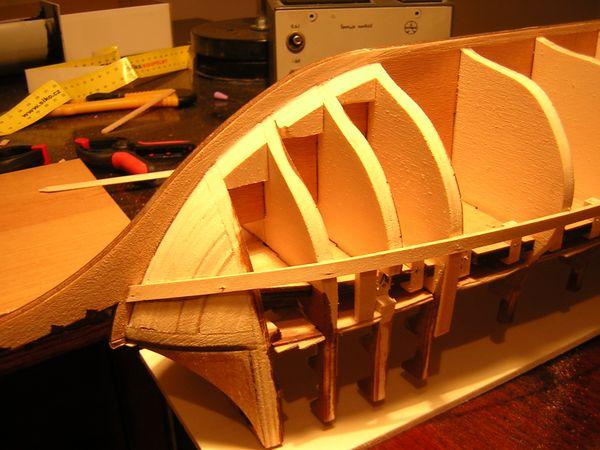
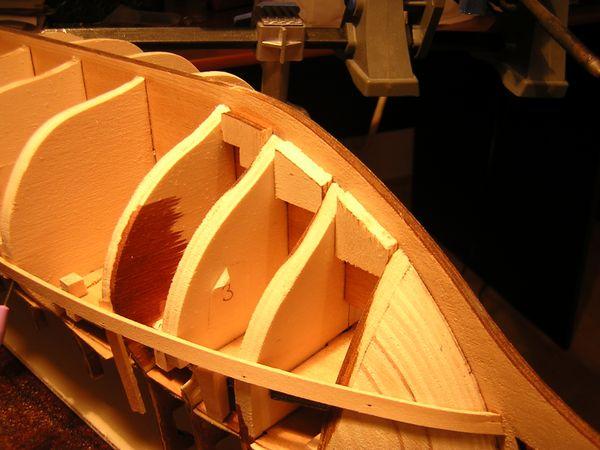
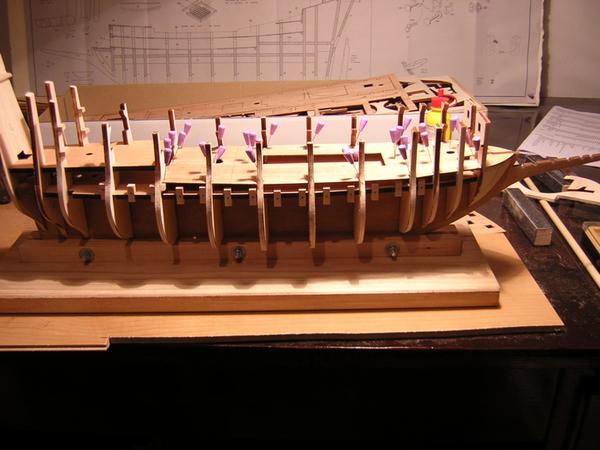
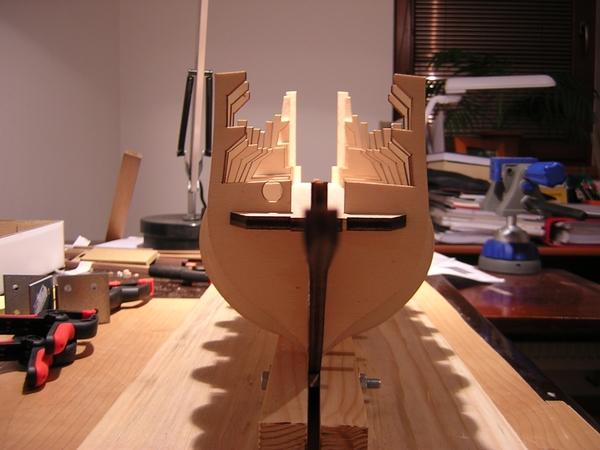
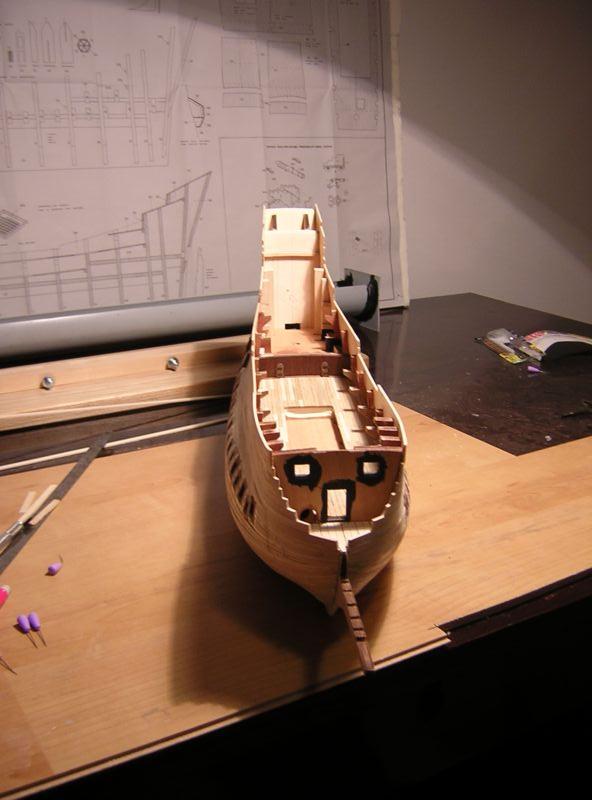
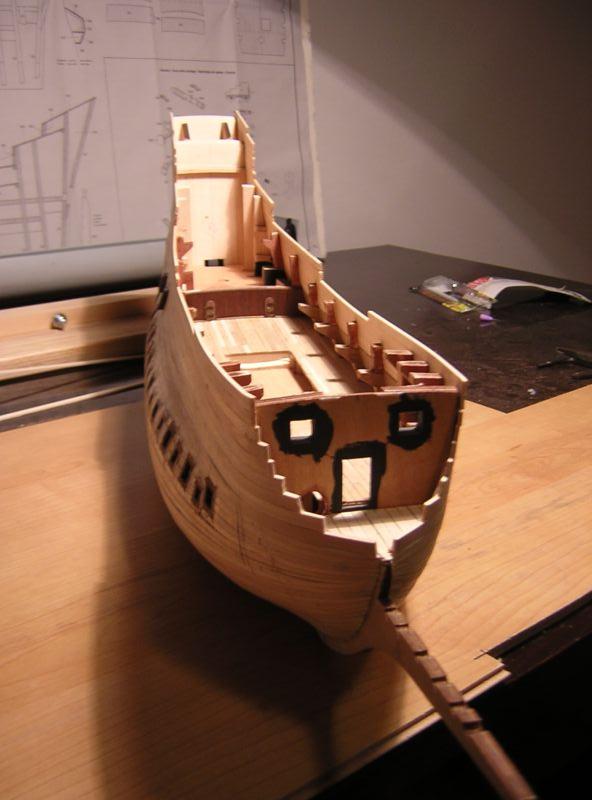
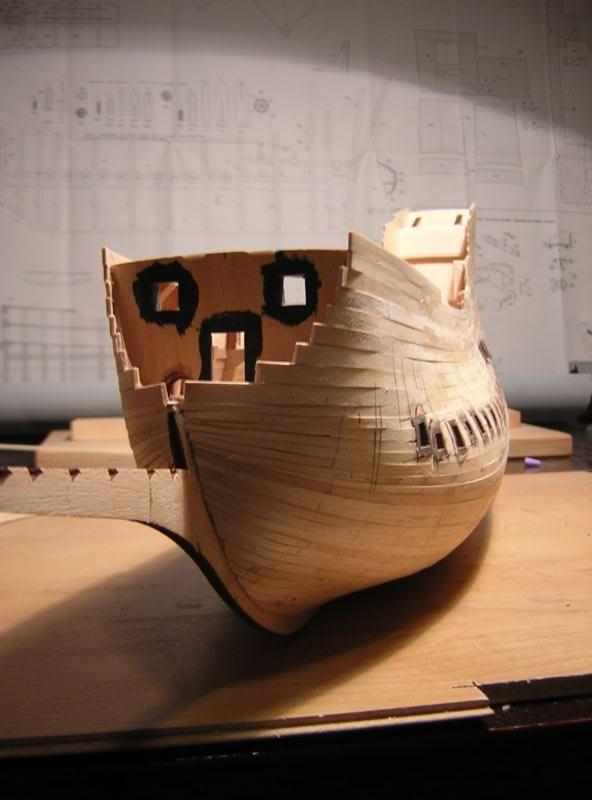
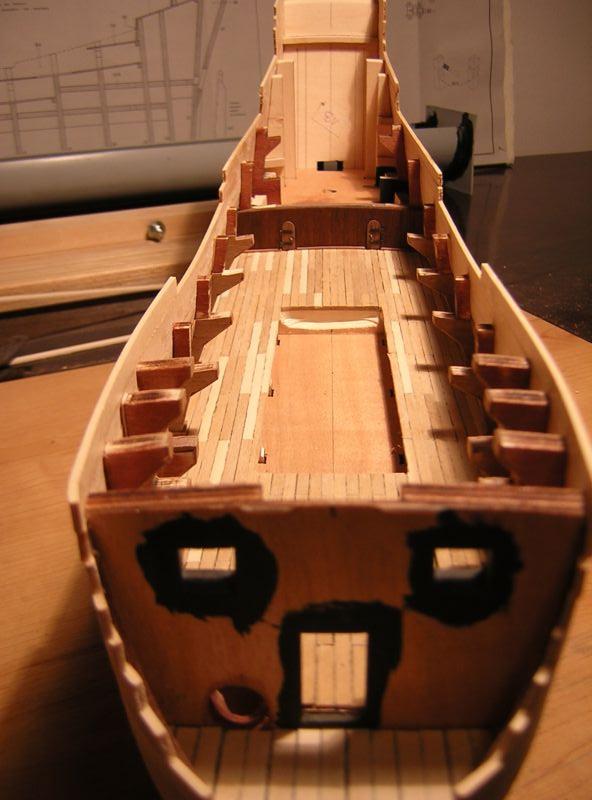
after a some time I update you with my progress on La Couronne. Currently she has all decks on place
and edges are shaped and finished by planks ready for making railings. I have also replicated some pieces
from kit - kit parts are made from plywood and I need them to look like walnut. Meantime I have not found any
method to paint/stain plywood parts by something to make them look like walnut, as hull is, so I had only 2
ways how to do it. Either coat them by walnut veneer, or fully remake them from walnut strips. So far I do
it by second method and I am satisfied with the result. I also prepared axial strips on hull to fit
brass decorations. Currently I am starting to make galleries on stern. So far I am satisfied with my work
and very enjoying every time spent with making her.
Enjoy few pictures from build.
Majk
*******************************
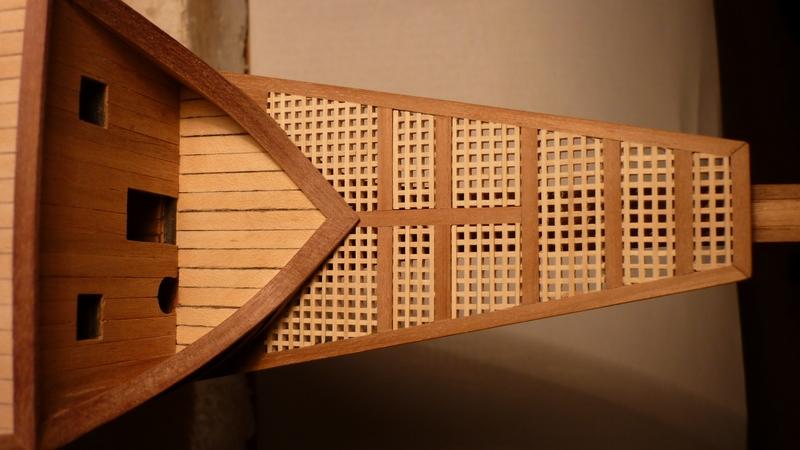
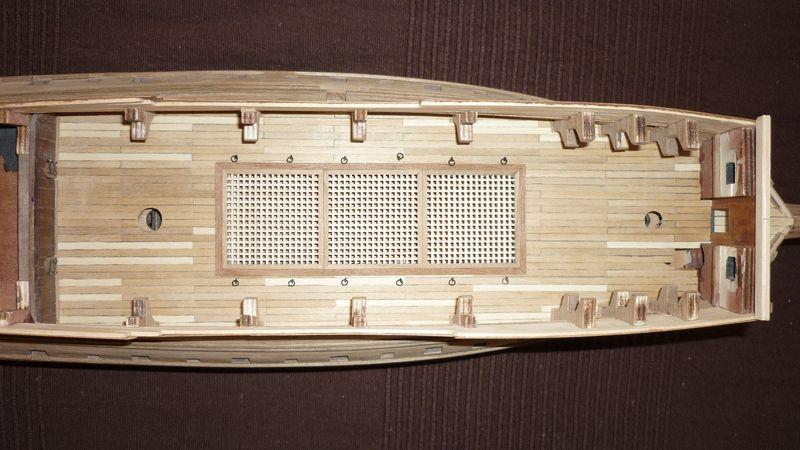
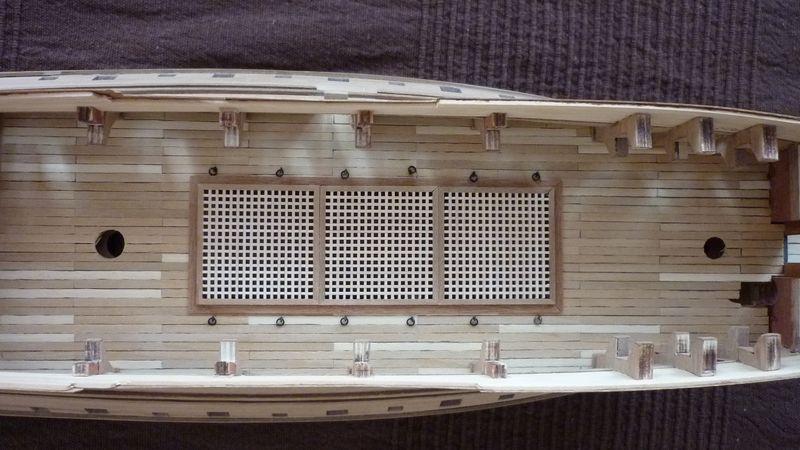
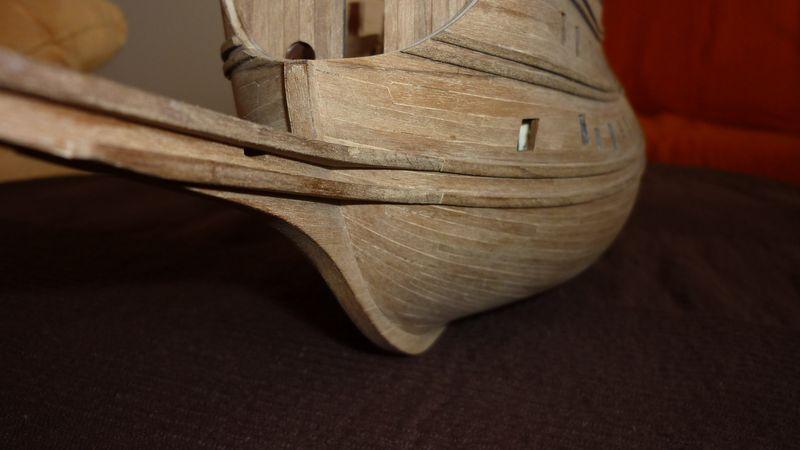
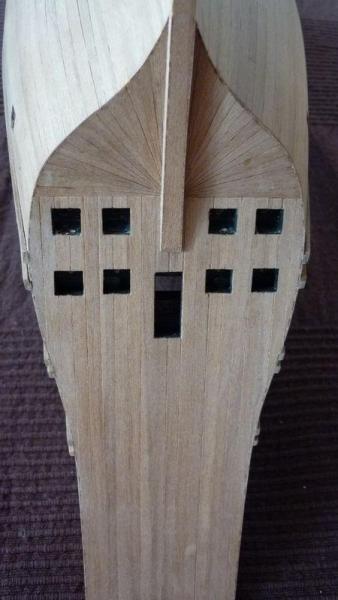
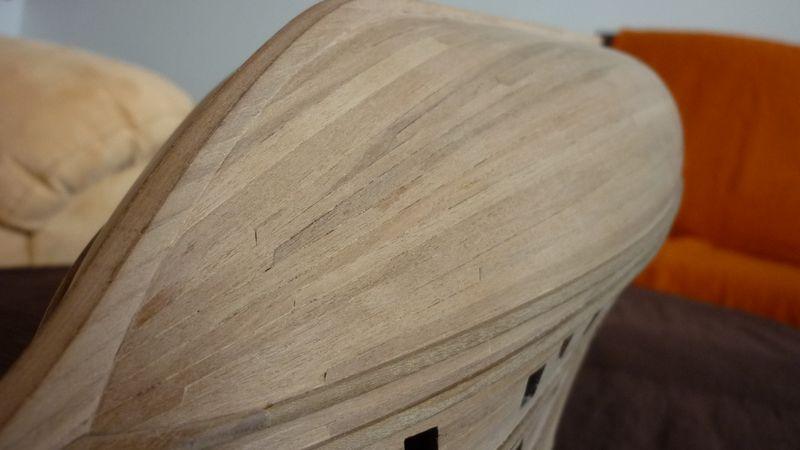
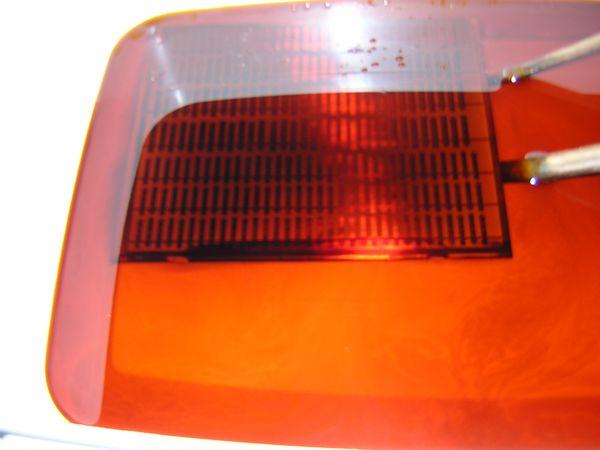
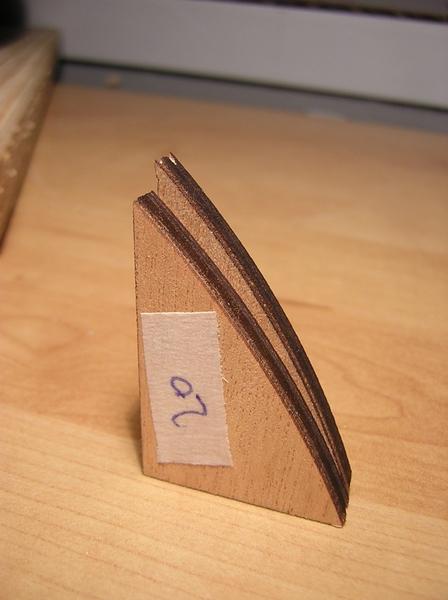
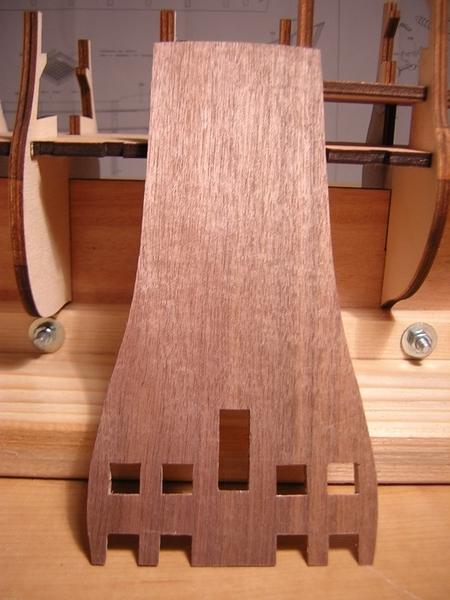
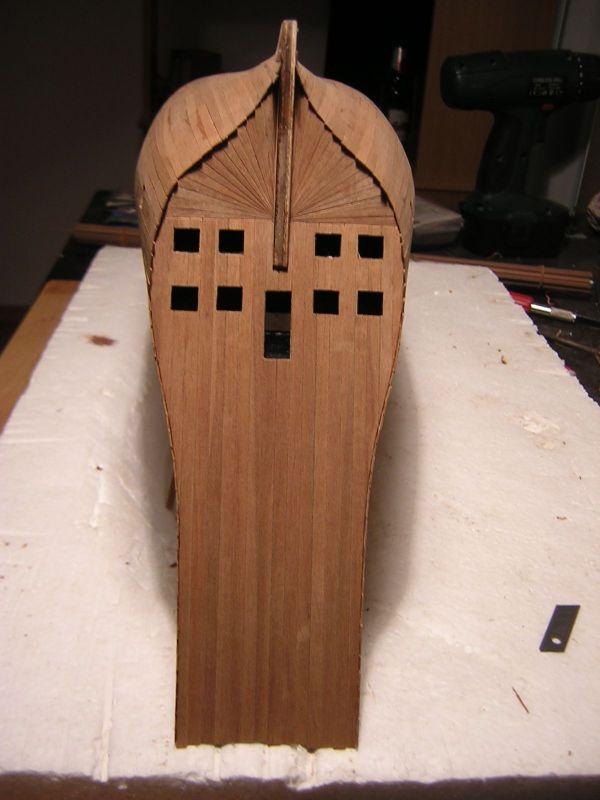
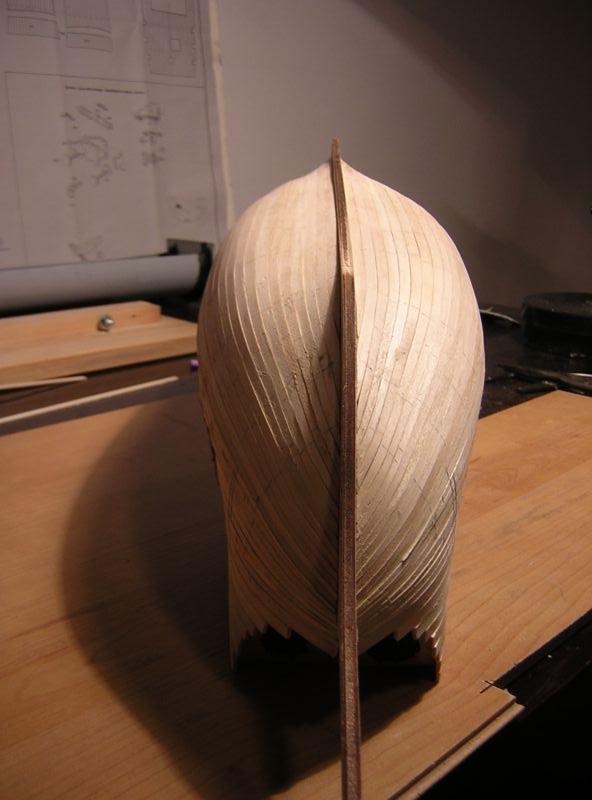
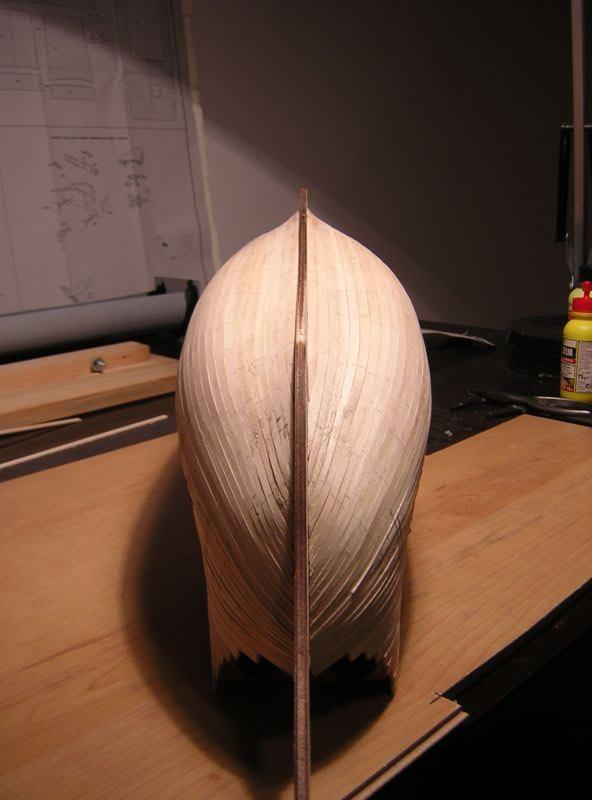
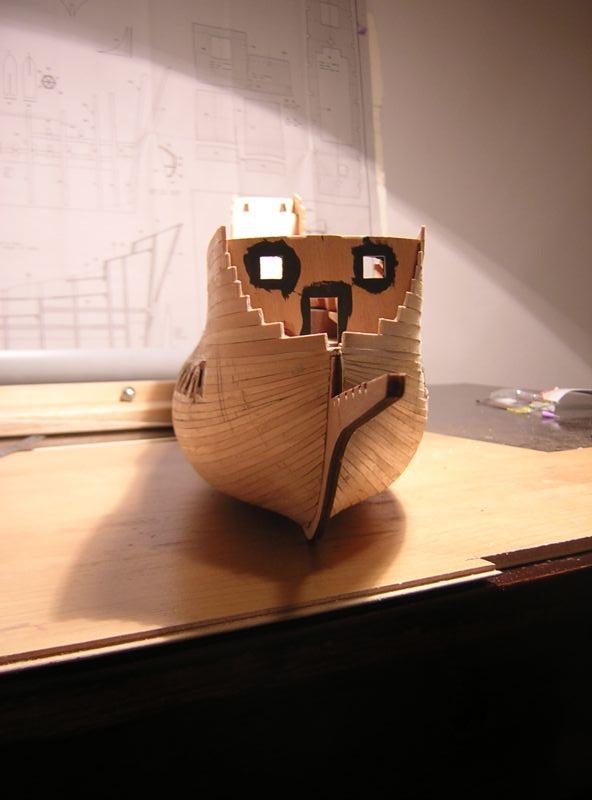
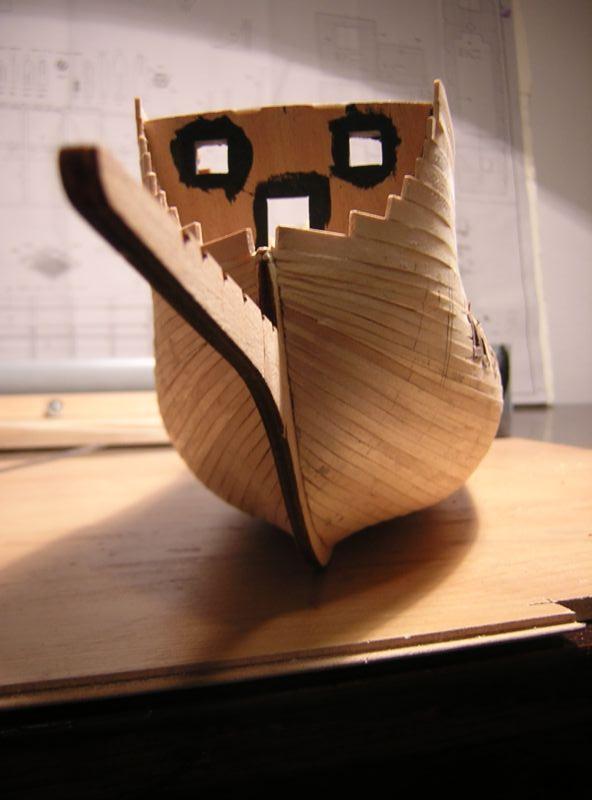
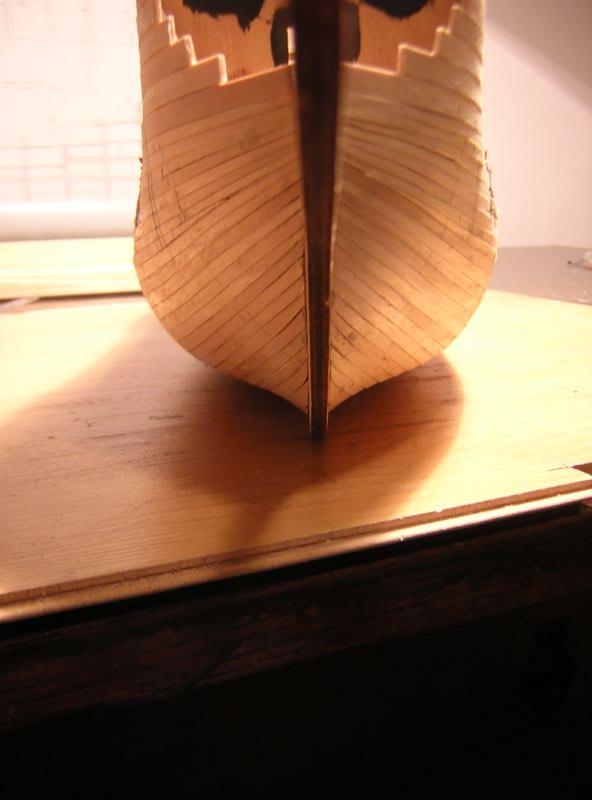
Following photo shows recasting of grating deck on the stem - I do not know what is the exact name
in sailors language, but you surely know what is it ;-)
on the left side is original piece which I tried to coat by walnut veneer, I have already finished it
and have to say that is was terrible work, but I was not satisfied with the result so I have decided
to complete rebuild this part from walnut logs. New remade piece is on the right side, it looks better I think.
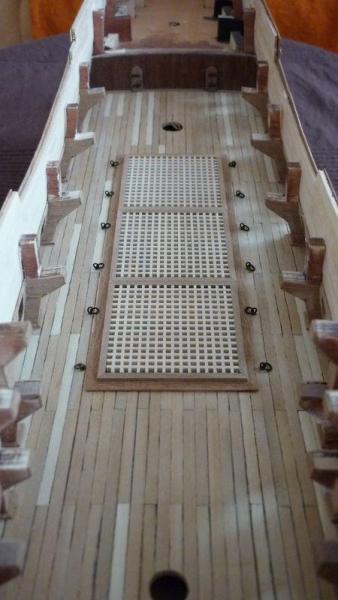
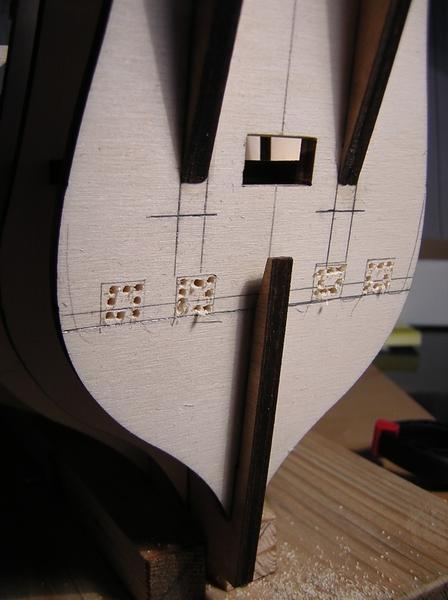
Second photo shows this piece filled by gratings and placed onto the ship.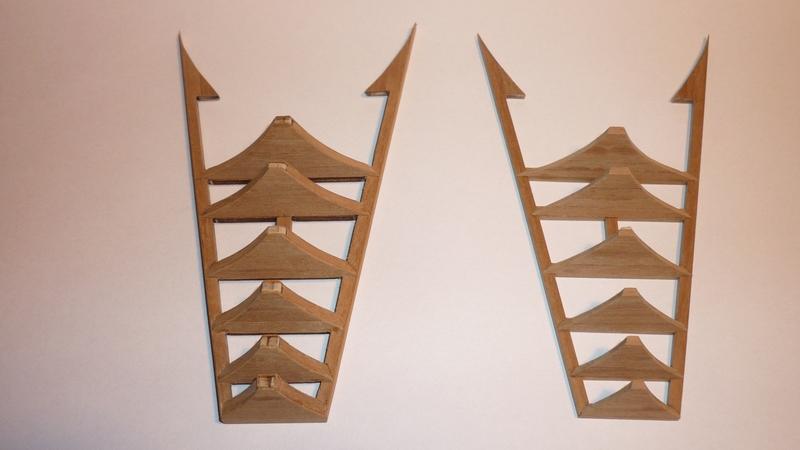
-
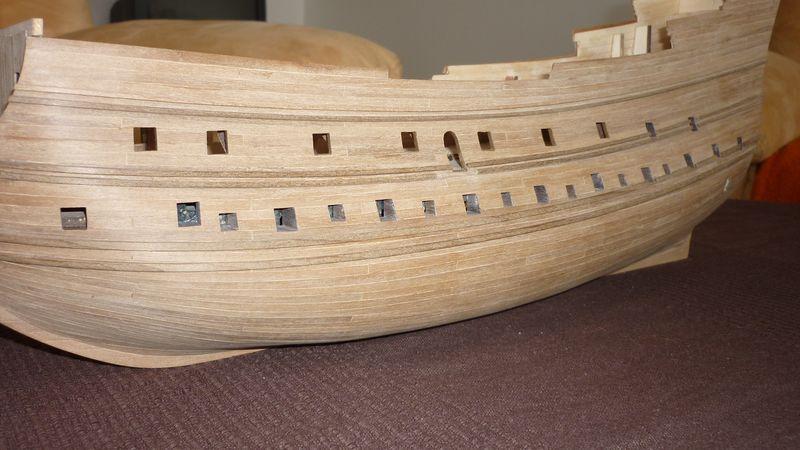
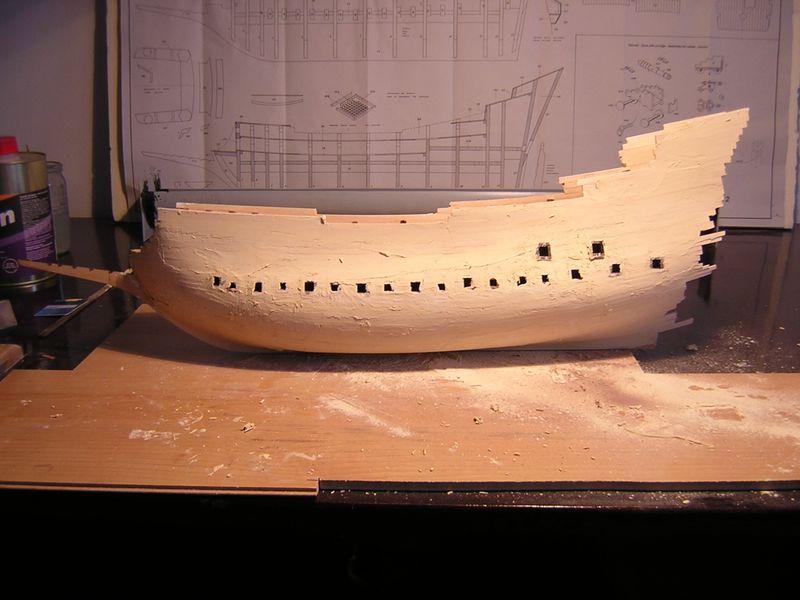
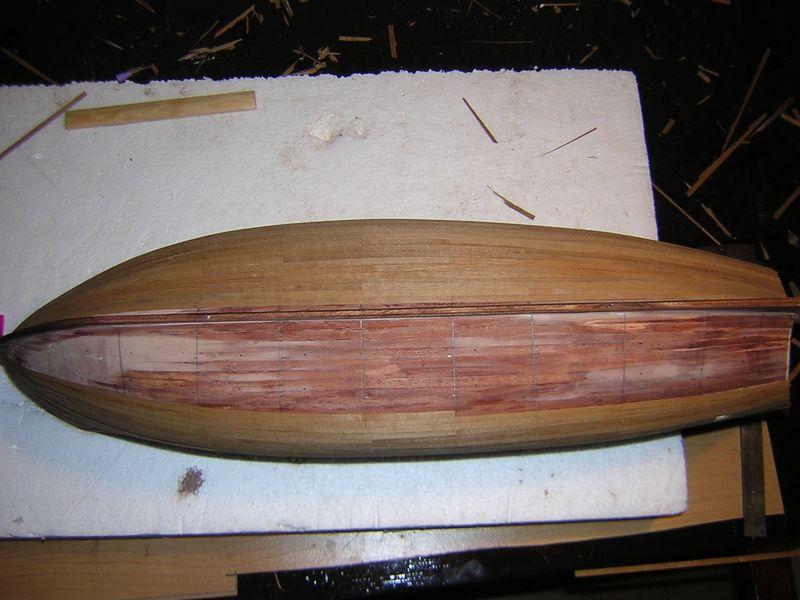
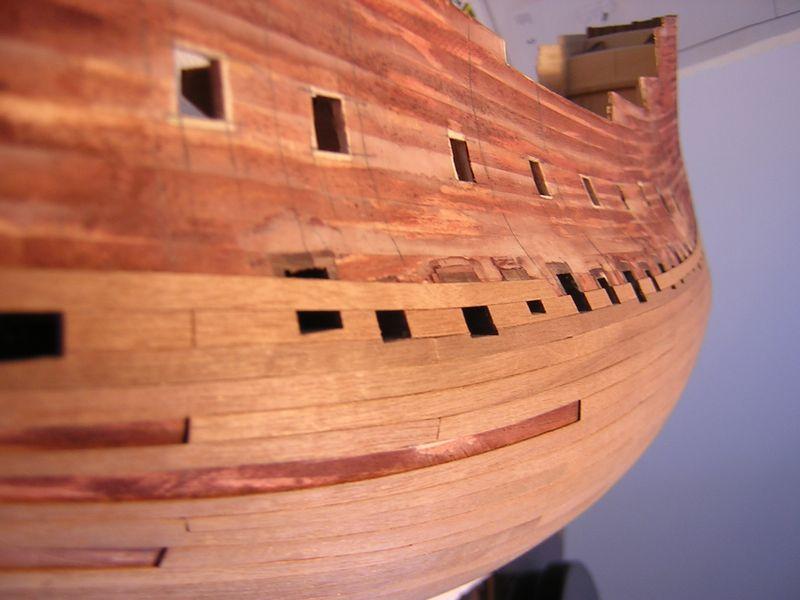
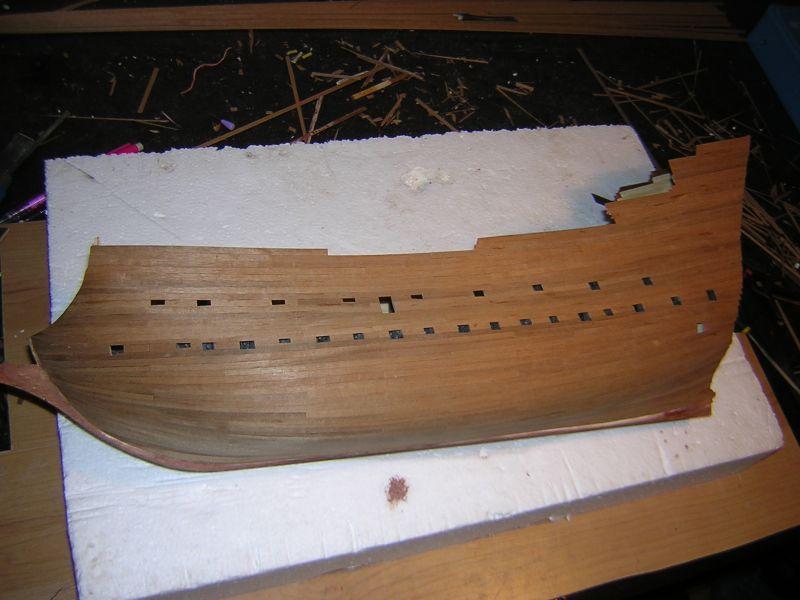
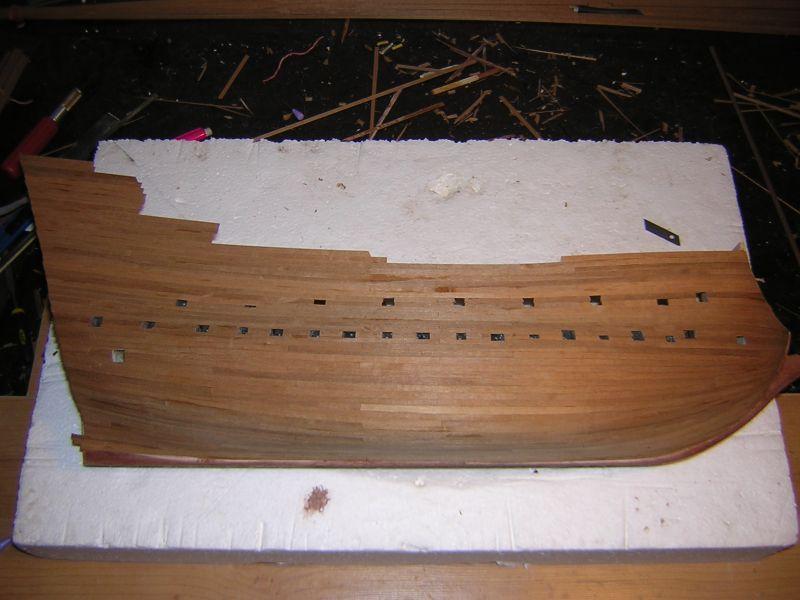
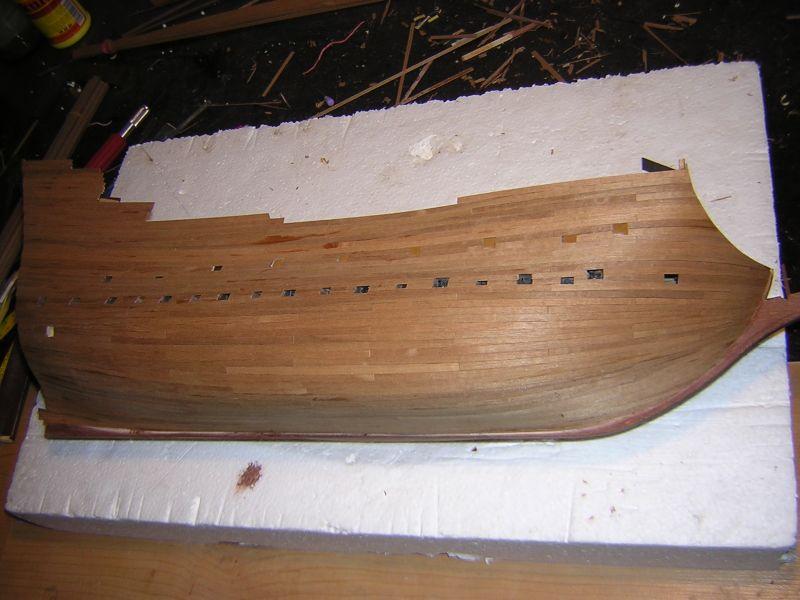
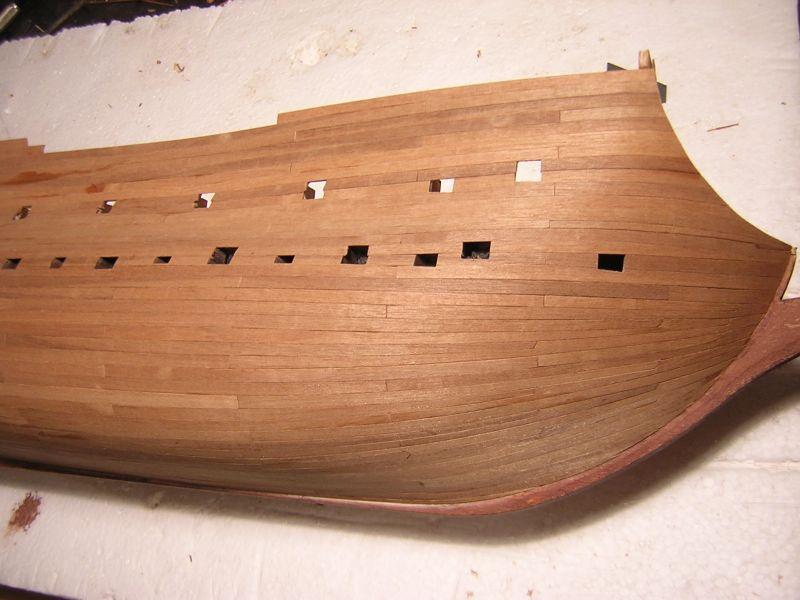
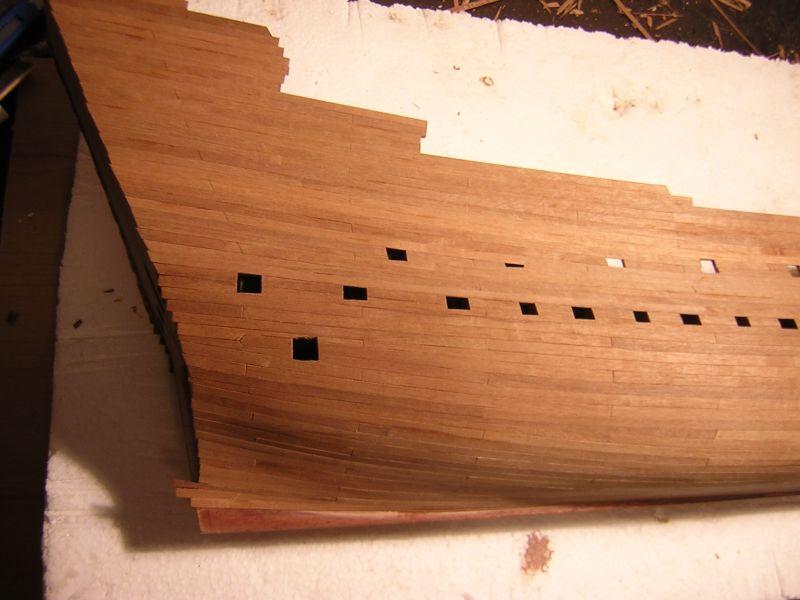
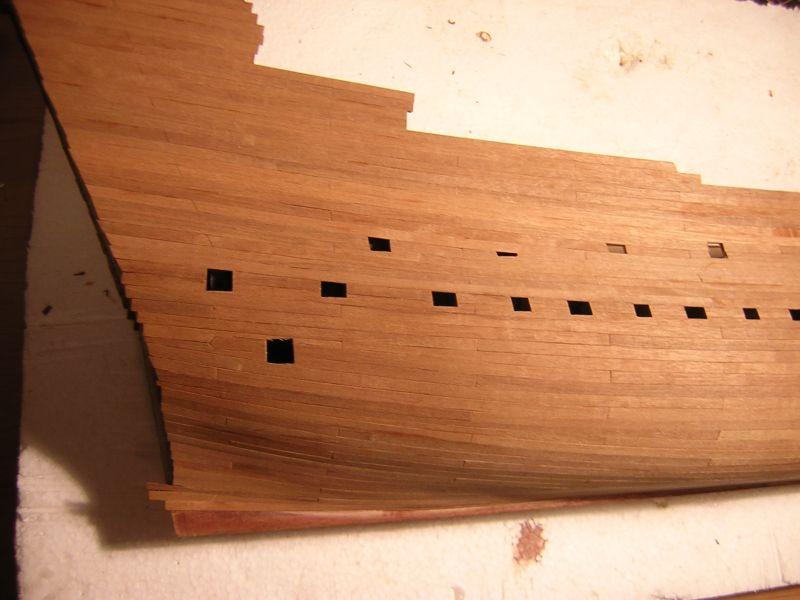
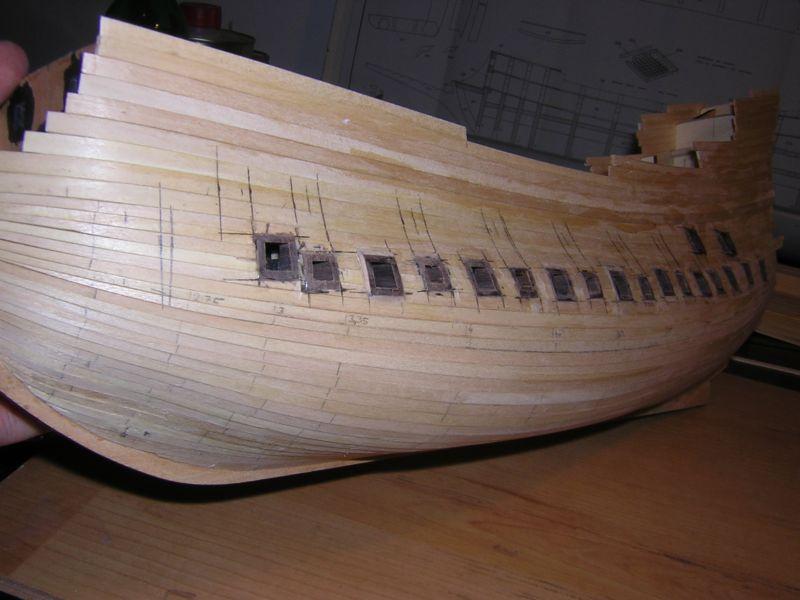
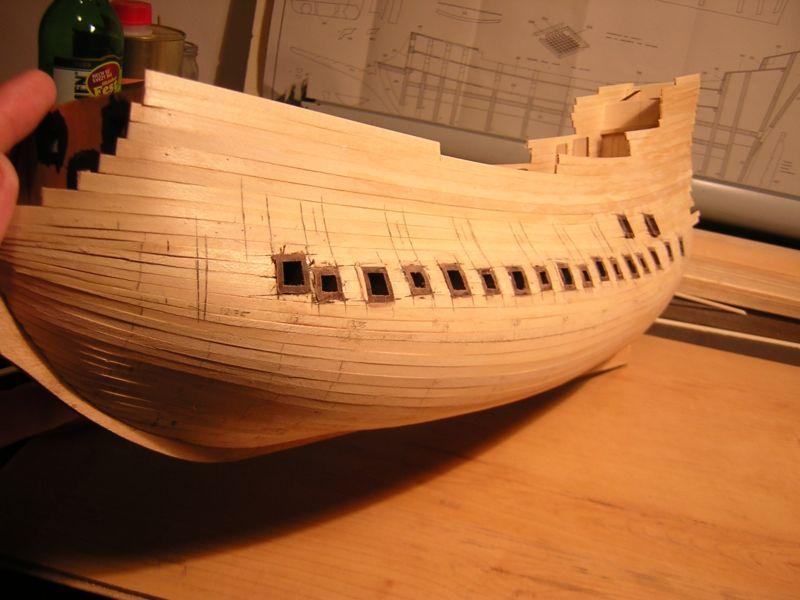
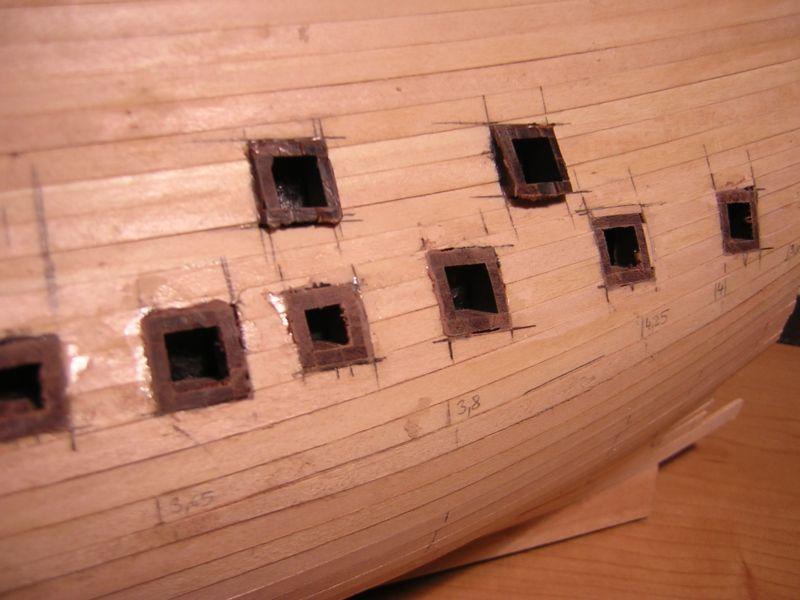
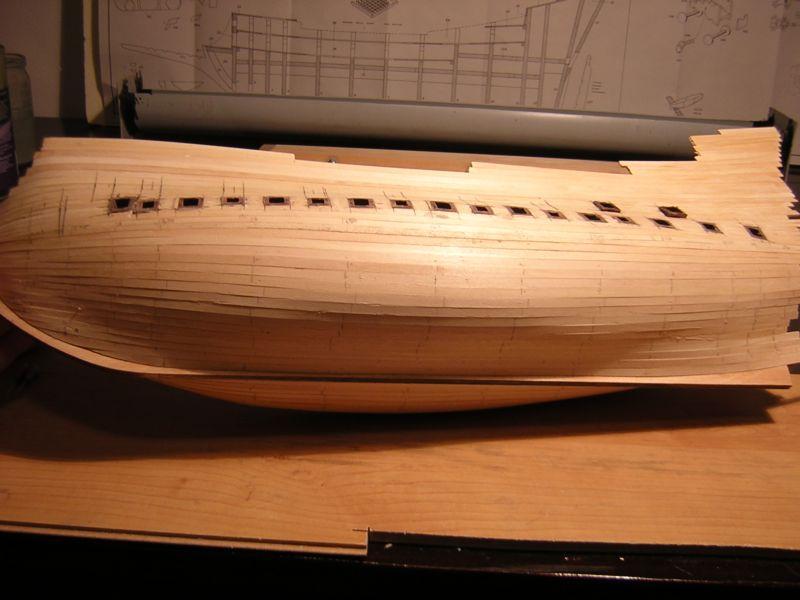
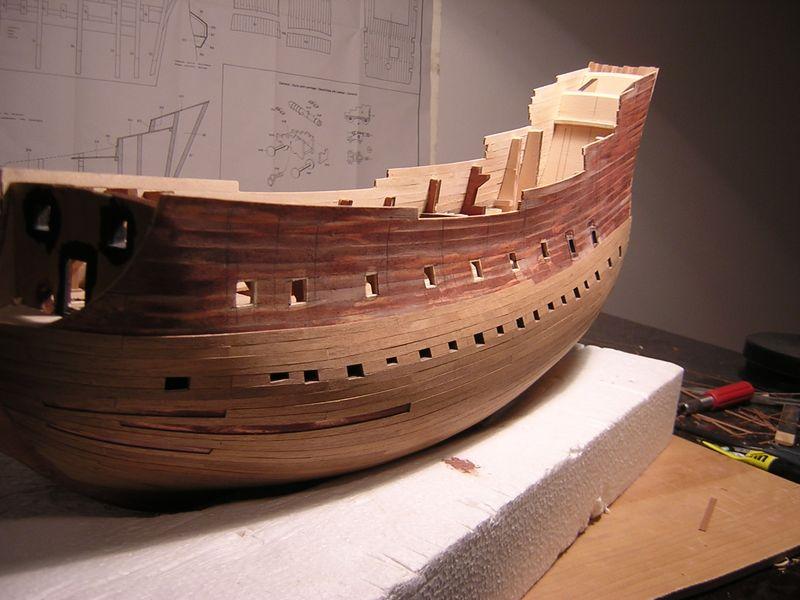
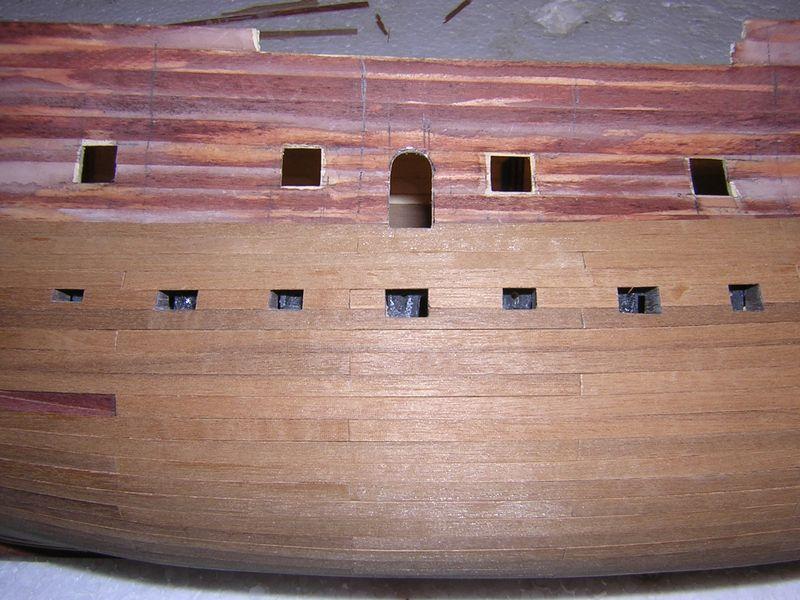
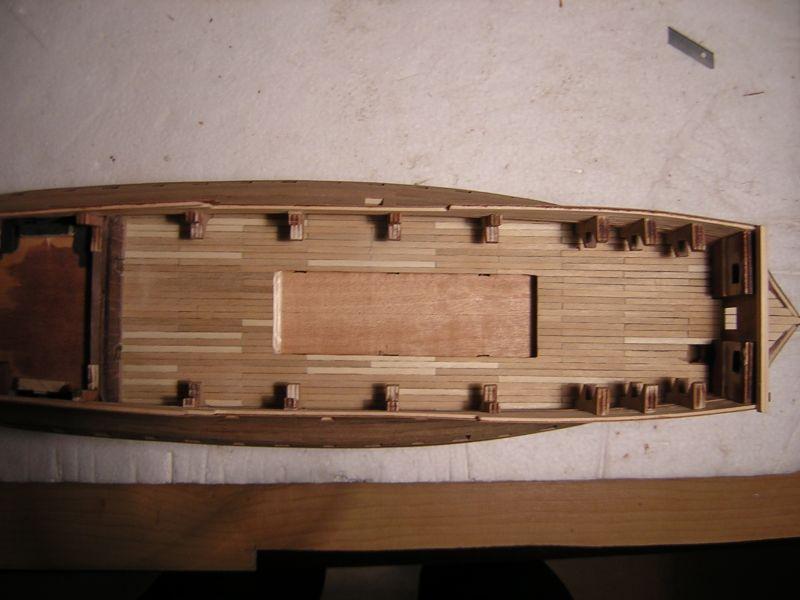
Hi,
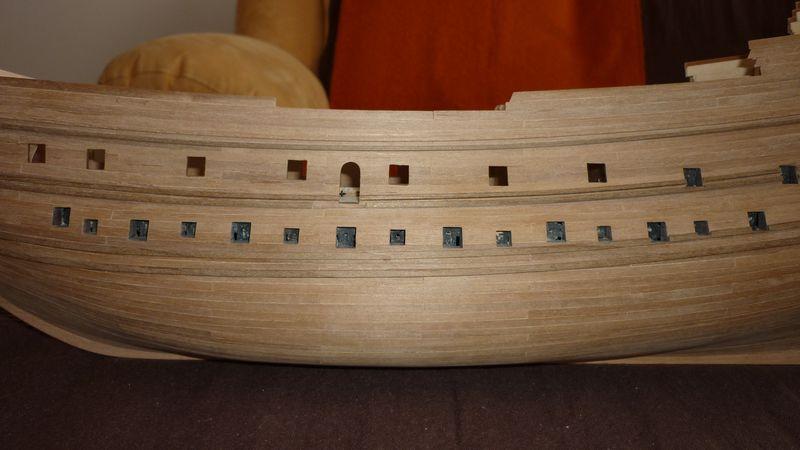
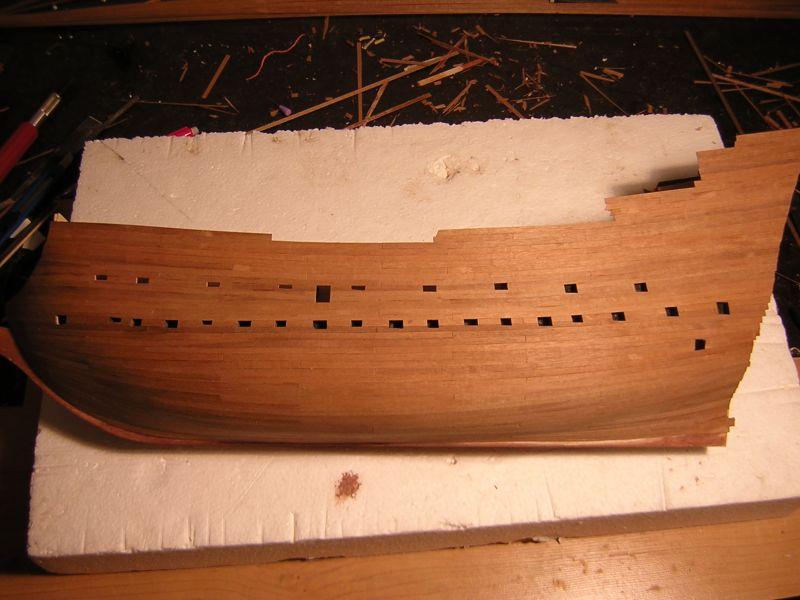
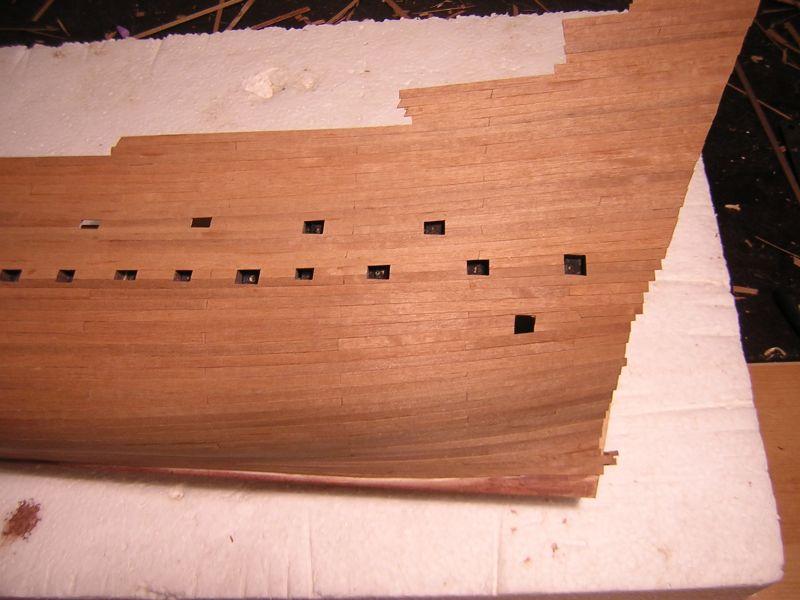
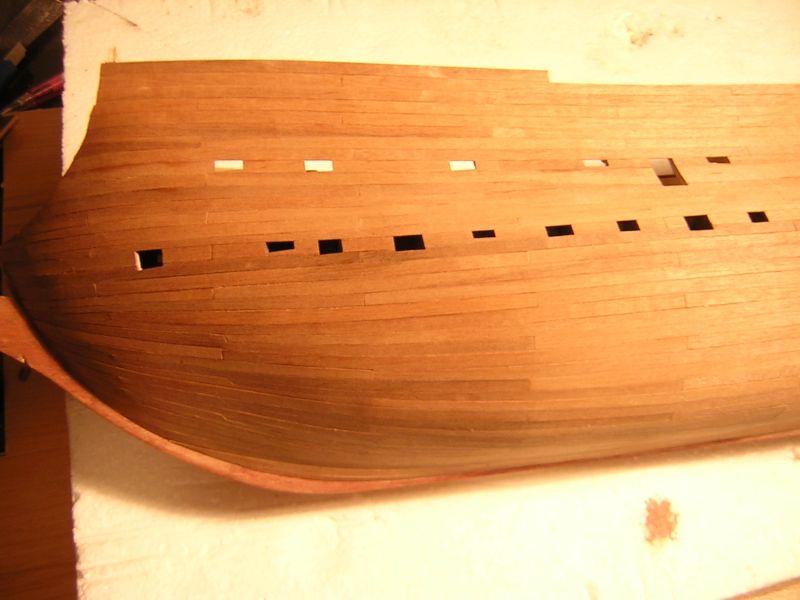
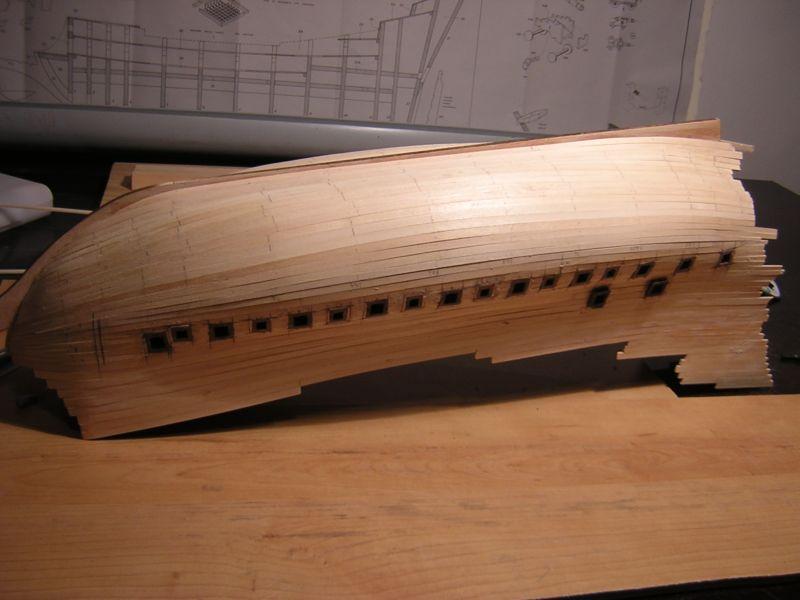
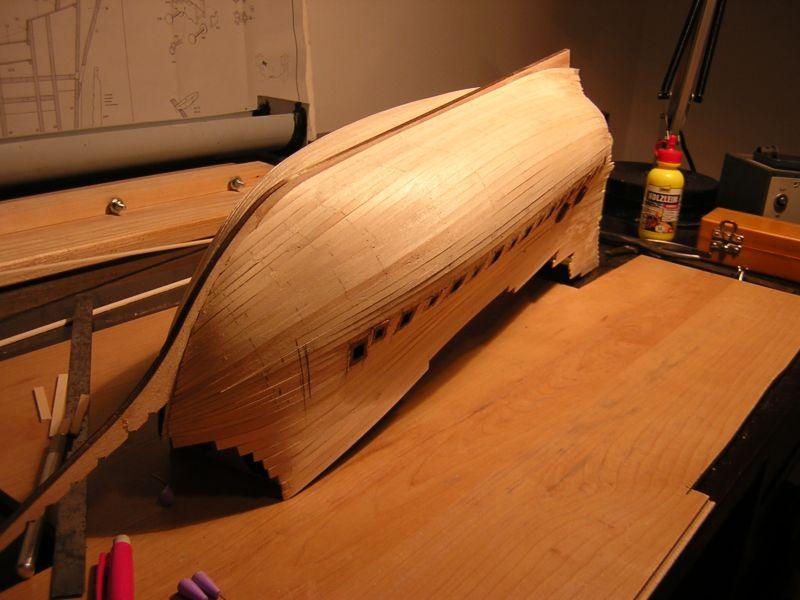
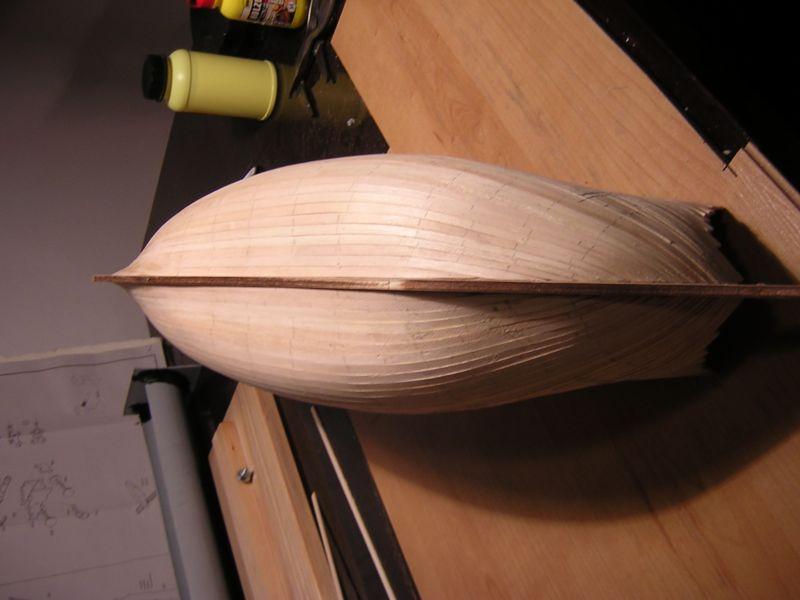
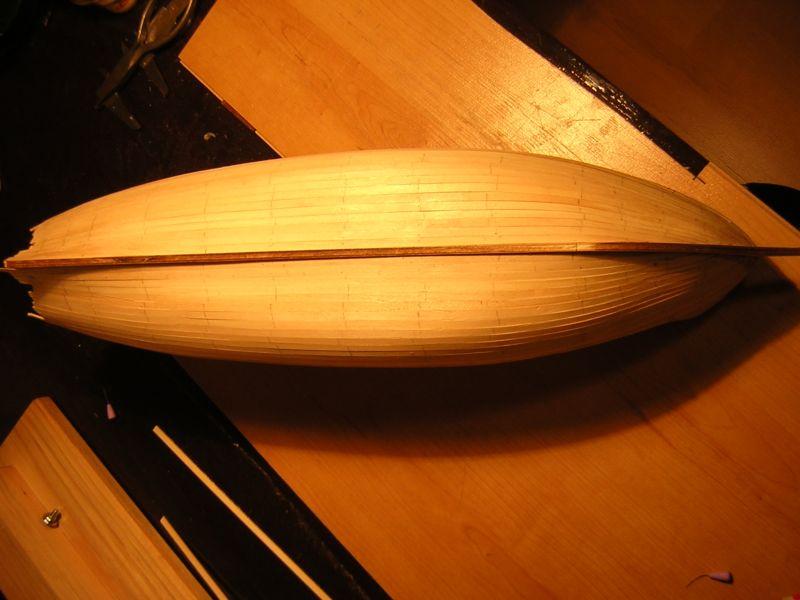
here are some pics of La Couronne, now sanded and with wales and gunports cut.
Enjoy.
Majk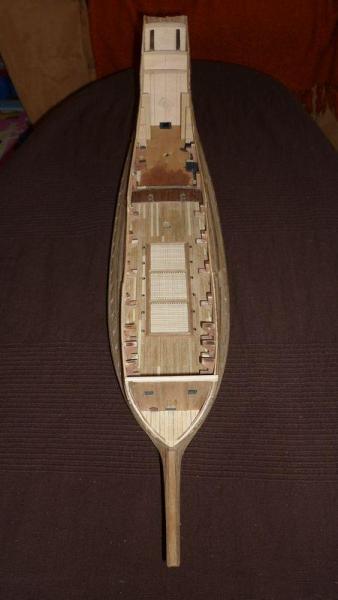


-
-
Hi ALL !
I have just found some photos from time when I planked a ship !!!
I sent here photos with planked hull but nothing about my planking process
So before I post next up-to-date screens (I am currently finishing 2nd deck) I provide you some pictures from the past.
Cheers,
Majk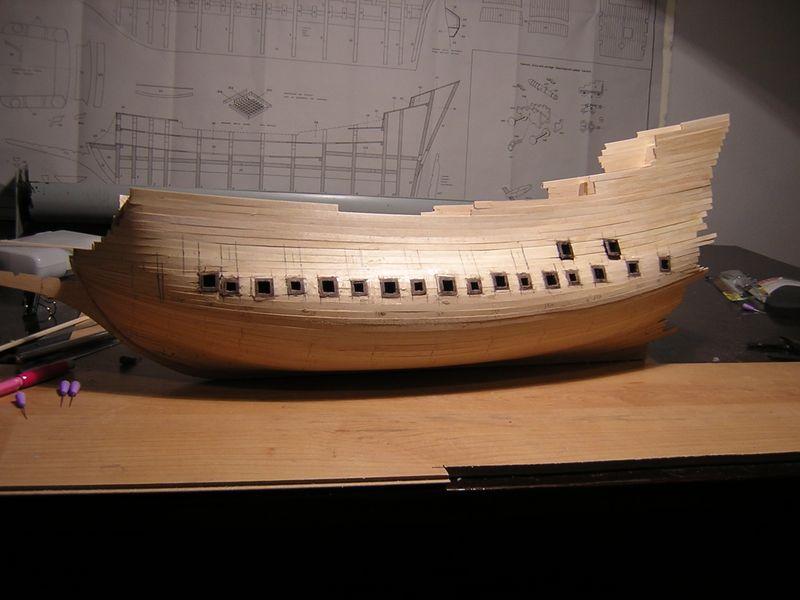


-
-
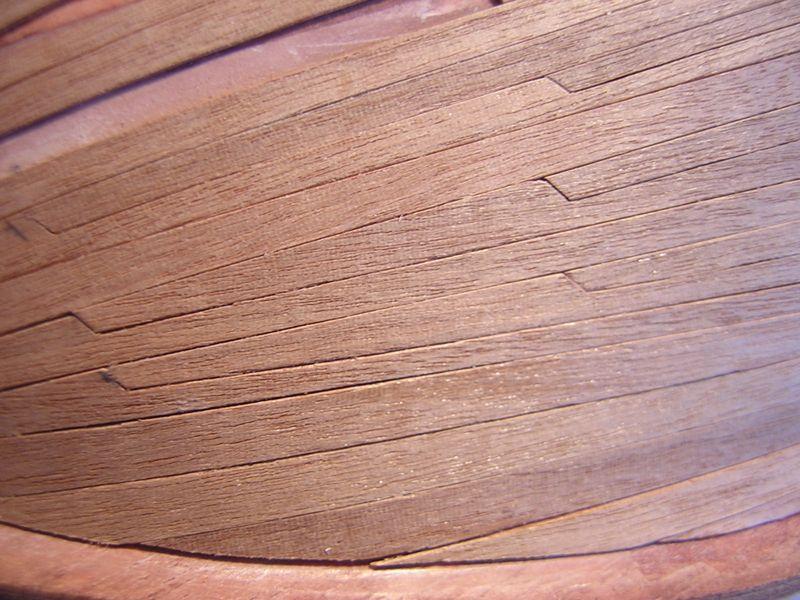
Hi folks,
for several months I did not update this thread, but I worked hardly on
my ship. I finished second planking and although I have never did it
before, I am very pleased with my job (I know, pride is not good)
The result you can see on pictures below. Firstly rough glued on hull and then sanded in contrast of unsanded half.
I will update you soon with photos with wales installed.
Regards,
Michal
-
-
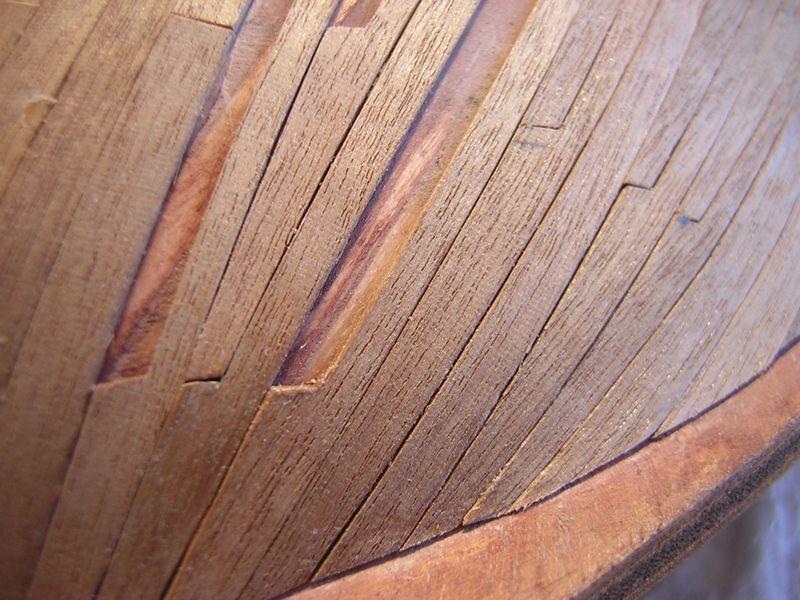
Hi all,
finally I have fnished first layer of planking. Although I am beginner and have not did it before,
I think that result is not so bad. Of course it have to be sanded before second planking, it should not be a problem.
Also I added gunports frames into hull and they will have to be refined as well.
Because I do not much like bright colours on historic ships and also I think that if anything is wooden,
it should not be covered by any paint and wooden texture should be seen, I decided to not painting interior
of ship by red color. Although some books mentioned that red interiors and guns were correct
for 17th century ships, I decided to make them from natural wood. Because I planked my 1st layer from
limewood and second planking will be from walnut, I had to imitate walnut in interior.
So I planked it by the same strips which I will use for second planking of hull. Terrible plywood supports
for other decks I planked as well. There were a little gaps between that planked supports and deck,
so I enlace them by 1x1mm walnut strip. The result is fine, I think. I believe it will be even better
once I finish it by any varnish.
Below are some photos.
I would very appreciate any response from community, otherwise I am
feeling here like lonely shipwrecked person, when I am writing build log
for myself only
Cheers !
Michal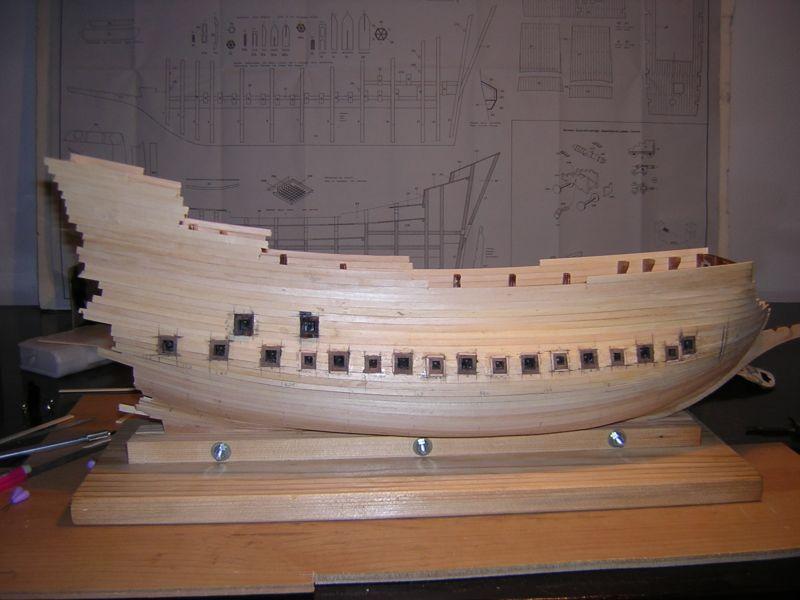

-
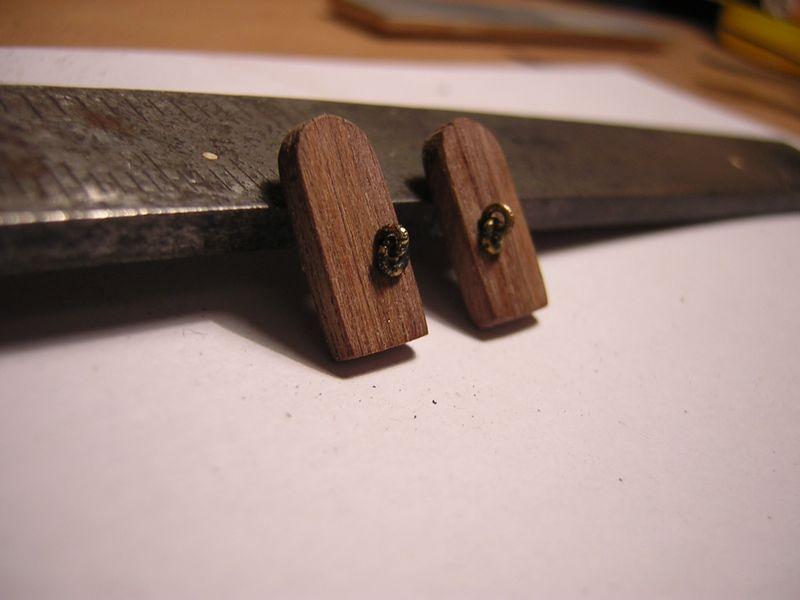
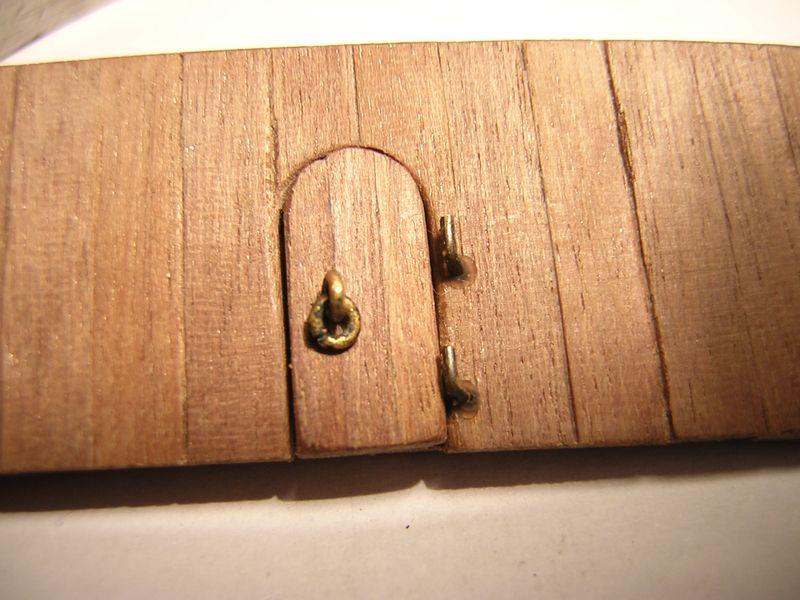
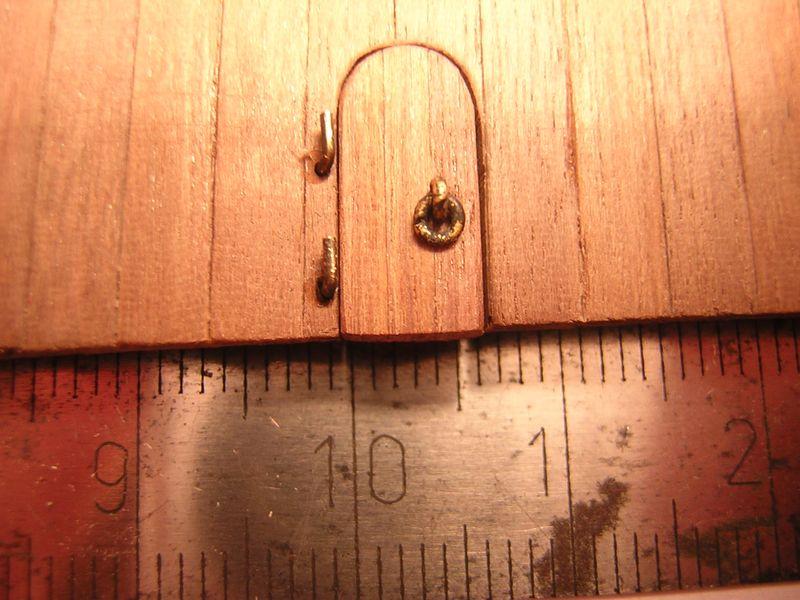
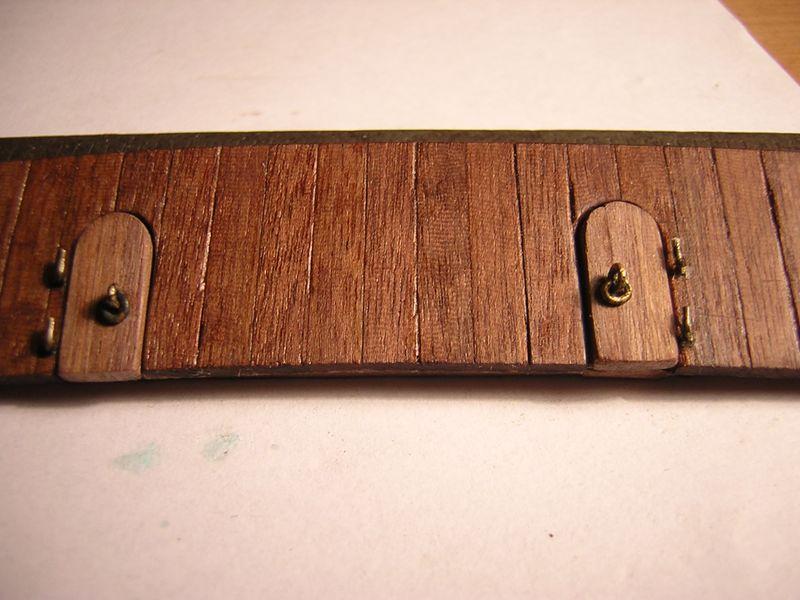
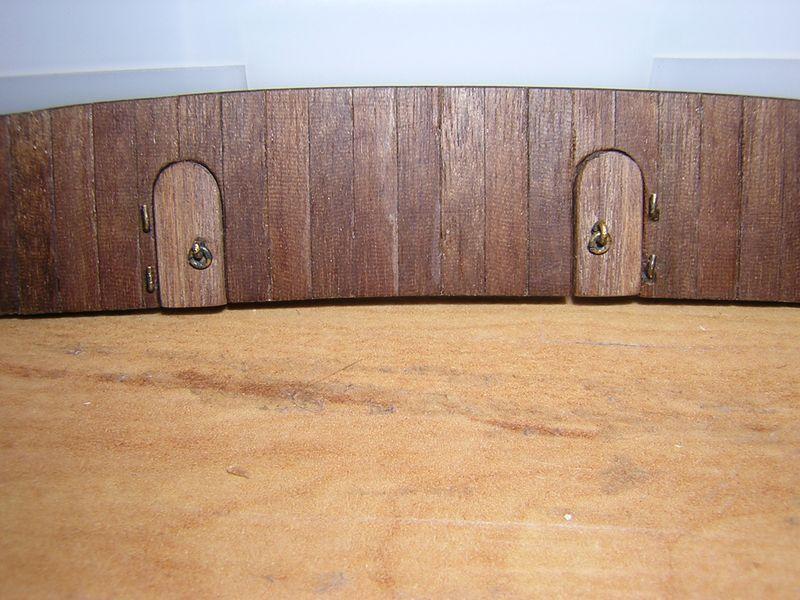
Hi,
today I happify you with some progress on my ship. It is not originally
designed by Mantua, I saw this improvement on the same ship who is
building "marcjp" who has build log on this forum as well. As it is not
provided in kit, I had to build this part from scratch. Fortunately it
was not so hard, but it was a fiddly job. I think that the result is
nice at least for me.
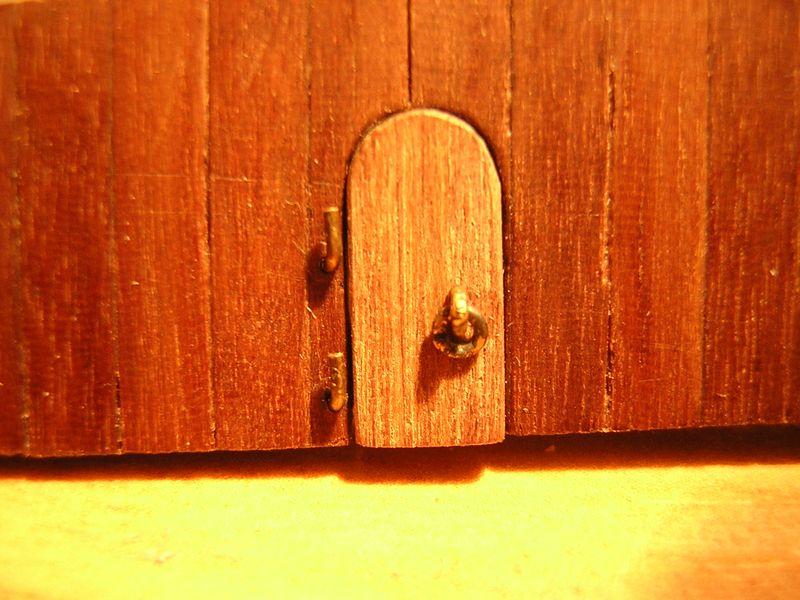
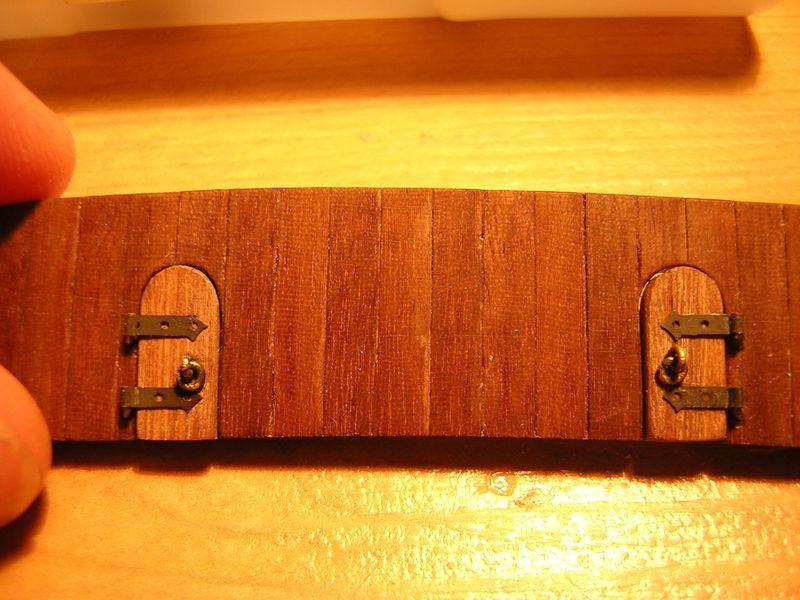
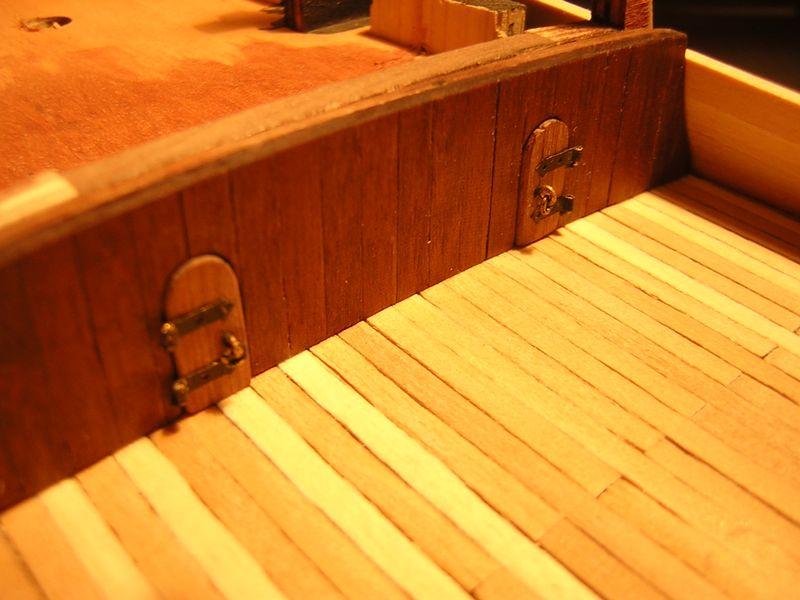
I made the wall from wallnut strips 2x4mm, doors are from 2x2mm strips,
handles and supports for hinges are made brom brass wire, and hinges are
etched brass plate. I described producing of hinges in previous post.
All brass pieces are blackened by some chemic dilution. I varnished the
wall by teak oil and I think the result is not bad. I am not able to
find any reseller of Danish oil in my country
I found only one and he wants 6$ for 10ml of Danish oil. I checked
foreign shops and it is normally price for 250ml, not for 10ml.
I am waiting for little nails which I want to use for fitting hinges on
the doors, but they are almost 10th day on the way to Europe, I hope I
will get them soon.
Enjoy my photos !
Michal

-
Hinges - the result
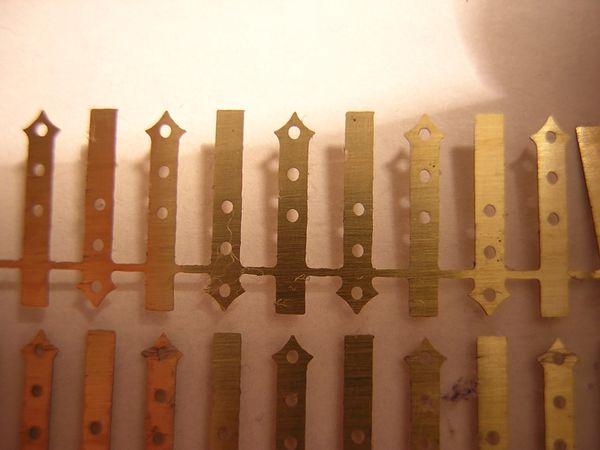
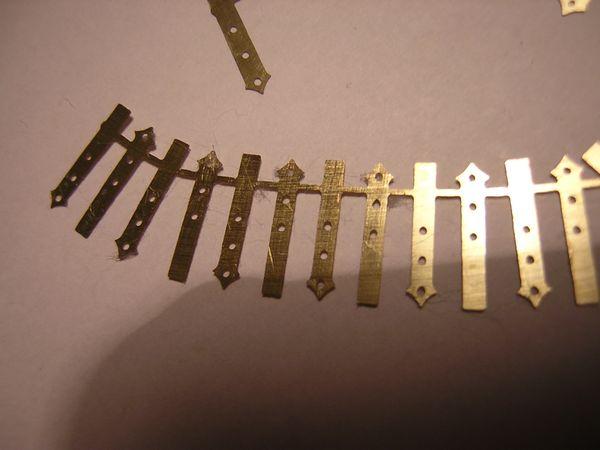
-
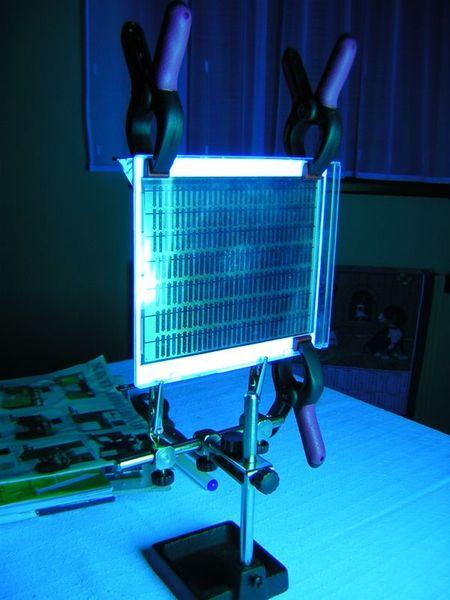
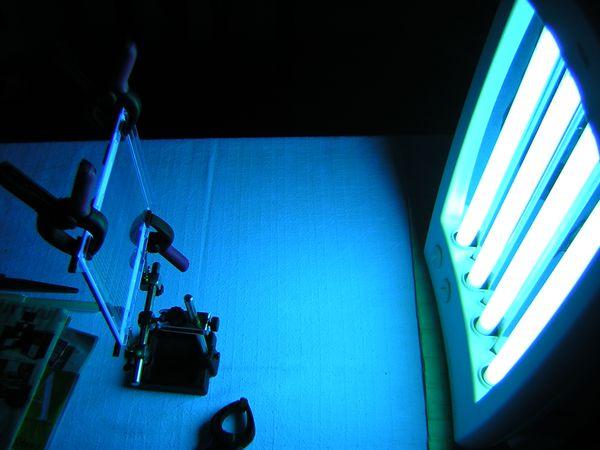
Photo Etching process

-
-
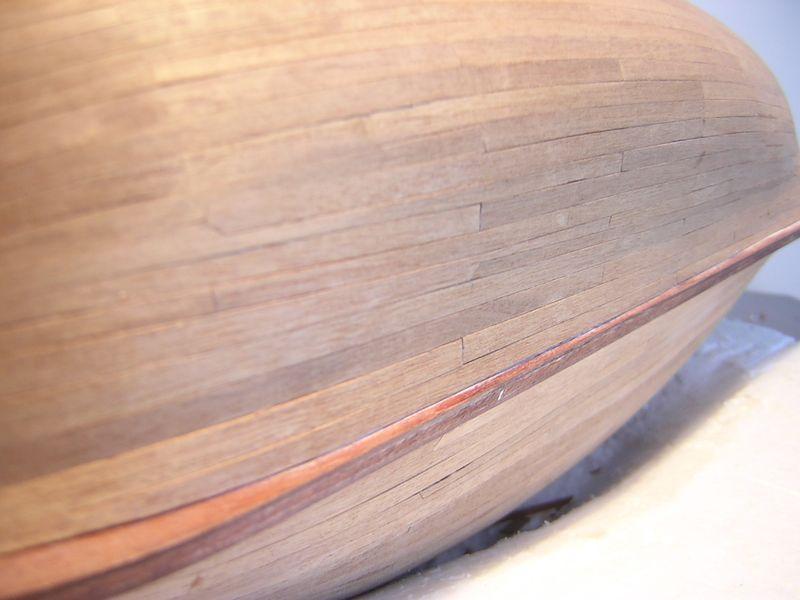
Hi all,
I have not updated you a long time about my build progress. I had not
much time for ship building, because spring and summer was time for
working on garden and around house. Of course a lot of time I spend with
my son and wife. But I was not idle in shipbuilding and now I can
update you with some photos I made during almost last half of year.
Last post was about assembed hull and main deck pinned onto it. Then I
decided to start planking lower part of hull, because in this section
was nothing to do more.
Firstly I made some fillers between foremost bulkheads near keel. It is
for support the lowest planks, they will be ended in this section and
have to be glued to something. I think I need not explain it to you,
experienced modellers, besides it can be seen on first few photos.
Then I placed firts plank and found out that shape of hull is not
accurate, it was bumpy. I removed plank and made zeppelin from my ship
I pinned few planks to bulkheads, leave gaps between them and look along
hull shape. I found gaps on few parts of bulkheads, marked them, then
removed planks and put "filler" from plank on that place. Then I sanded
that parts and repeat the whole process again. I repeated it several
times until I was satisfied with hull shape. I had to say, that it is
lengthy process, but is important for the final result of planking.
Although I will use double planking method and thus first layer can be
adjusted by sanding/filling before applying second layer, I decided to
have fine shape already on the first layer. I am adding few photos of
adjusting of frame process.
Mantua provides gun port lids made from some brown metal, with moulded
planks and hinges. It is easy to fit them to the hull without much work
and every piece have the same exact size, very comfortable I think.
But in my opinion it looks very horrible and also is not much authentic.
I think that on vessels from the first half of 17th century was not
gunport lids made from steel
Mantua should replace that crazy metal lids in kit by brass hinges and
few planks, modellers then can make more authentic lids by their own.
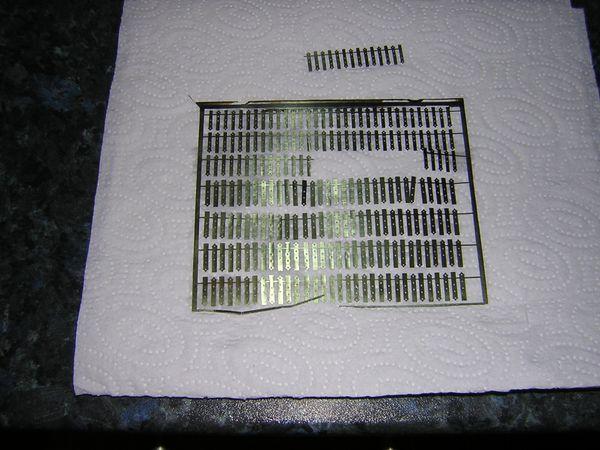
I decided to make gunport lids on my own. Fortunately on MSW web in
Tutorials, there is nice guide for making photo etching. All chemical
stuffs are available in my country and brass plates too. I decided to
use 0,01mm width brass pate for all hinges. I draw hinges in AutoCad and
print it on foil. Then I had to cover brass sheet with photosensitive
varnish.
In this step I would like to notice, that the best way is hold brass
sheet vertically and apply varnish, then hold it in vertical possition
until it dry. Otherwise the varnish make stains and cover is not
compact. In instrustions there was mentioned that drying of varnish take
24hours at 20°C and 15 minutes at 70°C. I got great idea - use owen for
drying to avoid waiting whole day for drying. In this step I had a
little bit difficult task to persuade my wife she allow me owen in our
kitchen. At last everything went fine and my brass sheet was ready in
few minutes
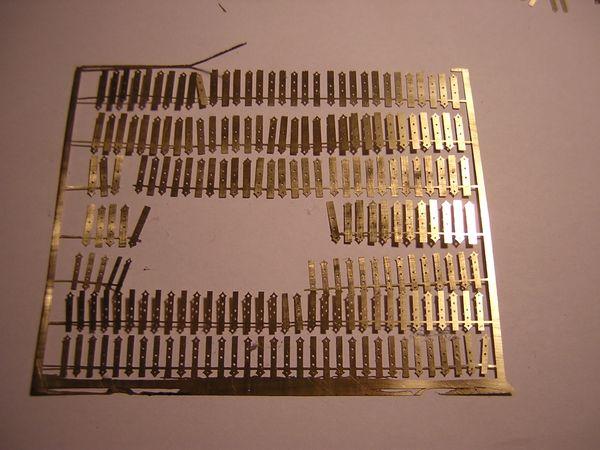
Then I lighten both sides of brass sheet by ultraviolet light through
foil and then put the sheet into solution of NaOH. I had to calculate
right concentration and can confirm that there is correct dilution 5g
NaOH/1l water in tutorial - it worked fine for me. After few minutes in
NaOH I washed brass sheet in water and put it into FeCl3. It took
several minutes and hinges were ready. I am very satisfied with the
result as I have never did it before and waited it more complicated and
more worse result.
Enjoy few photos from this stage below.
It is almost all what I can share with you now, I hope I would be able to give you more updates soon.
Cheers !
Michal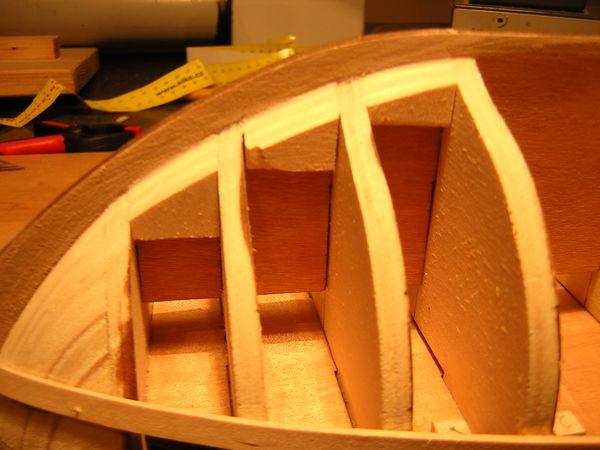
-
Hi all,
at firtst please excuse my long absence here, but 29.2. my son was born
and so I had (and still have) other worries and have not much time for
modelling. Nevertheless I made some progress even if it is not so fast
as it was.
I have sanded bulkheads to have correct shape for planking
(unfortunately I forgot get photo for you, I will send some next time).
Then I started thinking about decks, because it will be seen I started
to be more careful and thinking twice before cutting and gluing
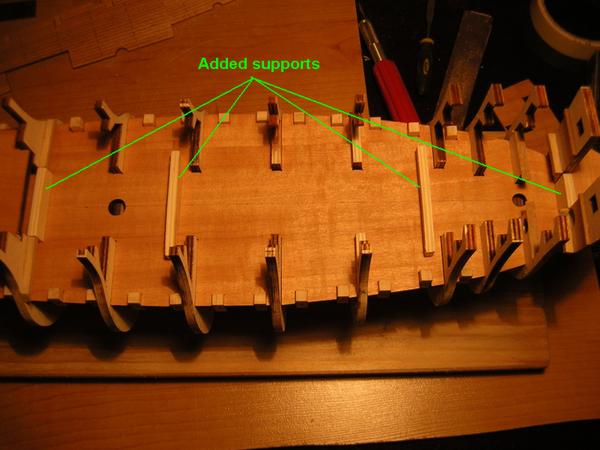
I started with the lowest deck, where gratings and lower line of cannons
are located. Unfortunately some humidity or dryness twist my deck
pieces and it looked as screw. I think that it is also caused by small
thickness of decks. To fit the deck to hull in proper shape I had to
make some additional supports.
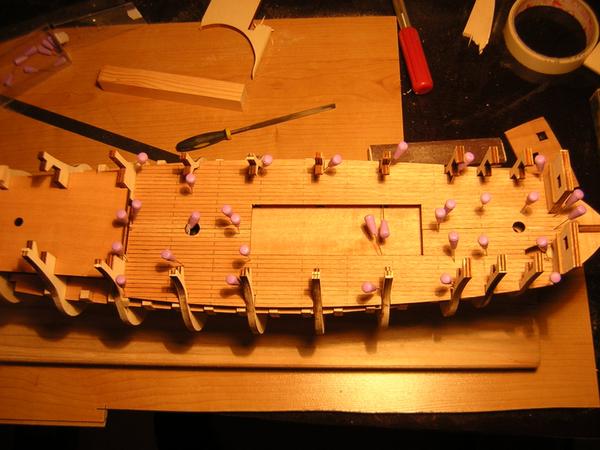
Then I drew lines for deck planks on both pieces, it will help me once I
will make deck planking. Afterwards I glued deck to the hull and fit it
by modellers pins. I will plank it and make gratings gefore start
planking the hull.
Deck planks are from limewood and it seems to me very shiny in
comparison with planks for hull, which is from walnut. Thus I decided to
paint decks (and other limewood pieces) by some varnish. I still not
have chosen any, but I would like either similar color as walnut or at
least some more yellow to make deck more old-fashined. Fresh limewood
strips looks very modern, I think
I will try make caulking by painting with pencil on one side of plank, I
think it will be well visible even if I choose walnut varnish for deck.
Though I will make some tests before start planking.
I also think about making nails on deck planks. But this deck will be
planked by 3mm wide planks and thus it would not be so easy to make
nails properly. Either I can mark them by any very thin pencil, or I can
try make tree nails, but in this case I am afraid will not be
successfull, as treenails would be very thin. Have anyone any suggestion
about this ?
Ok, stop talking and lets see any pictures.
Cheers !
Michal

-
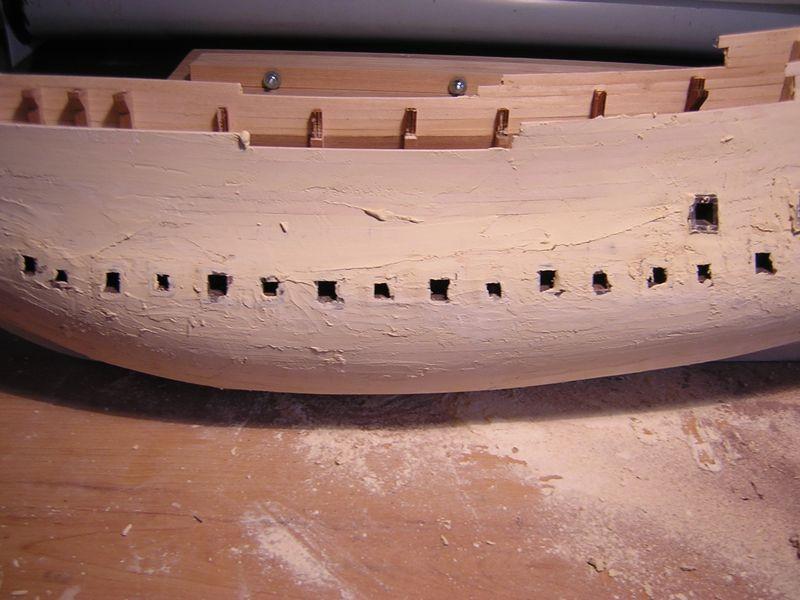
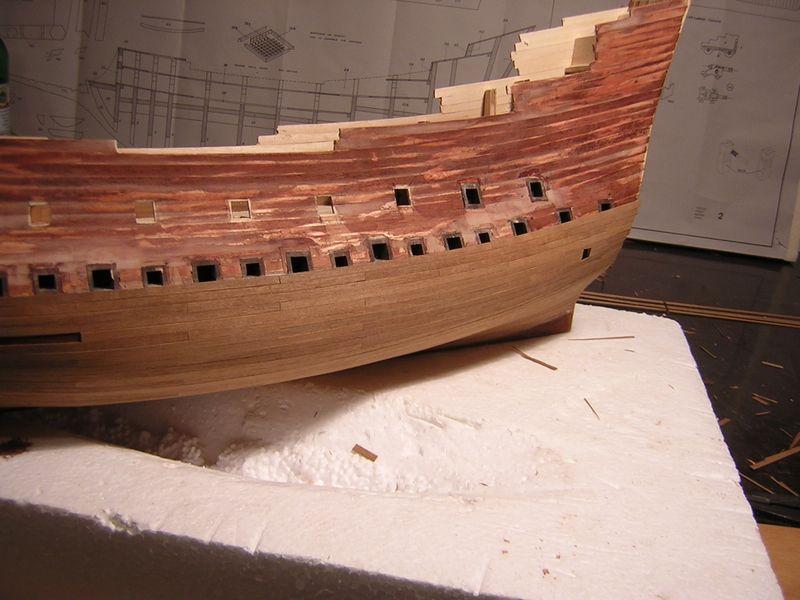
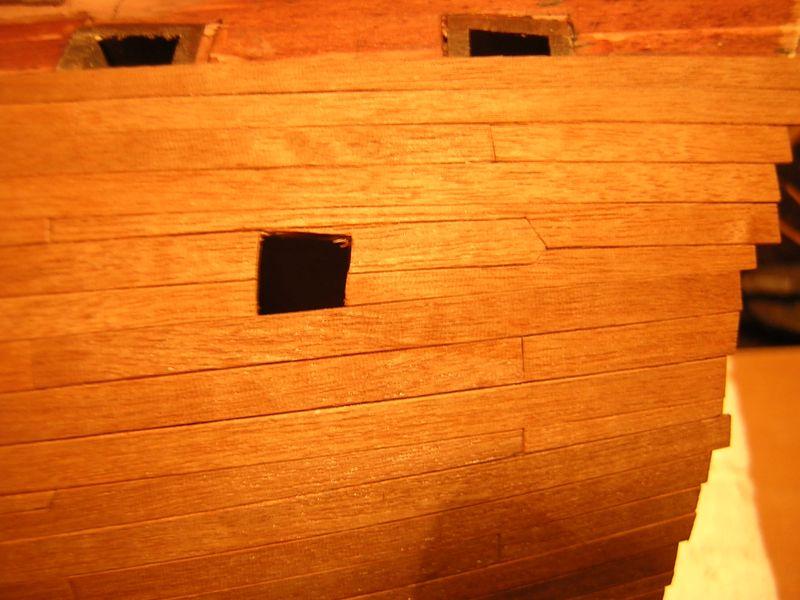
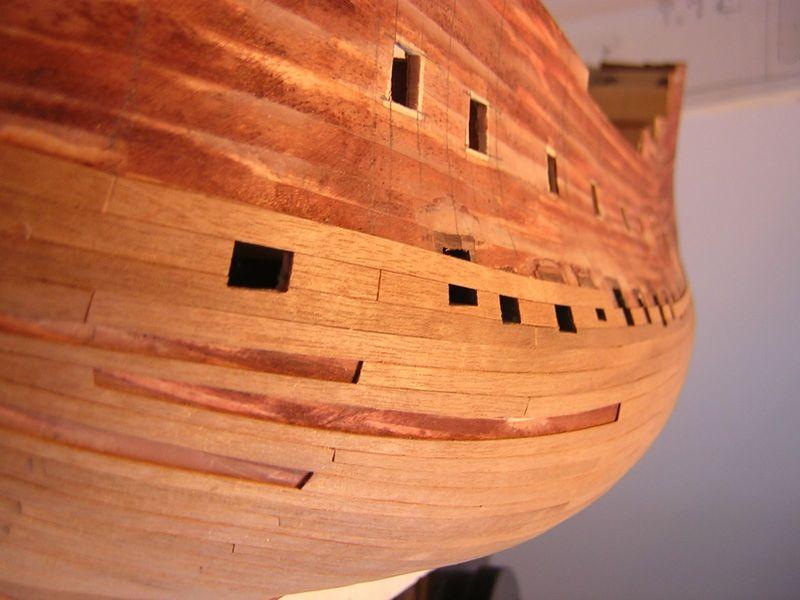
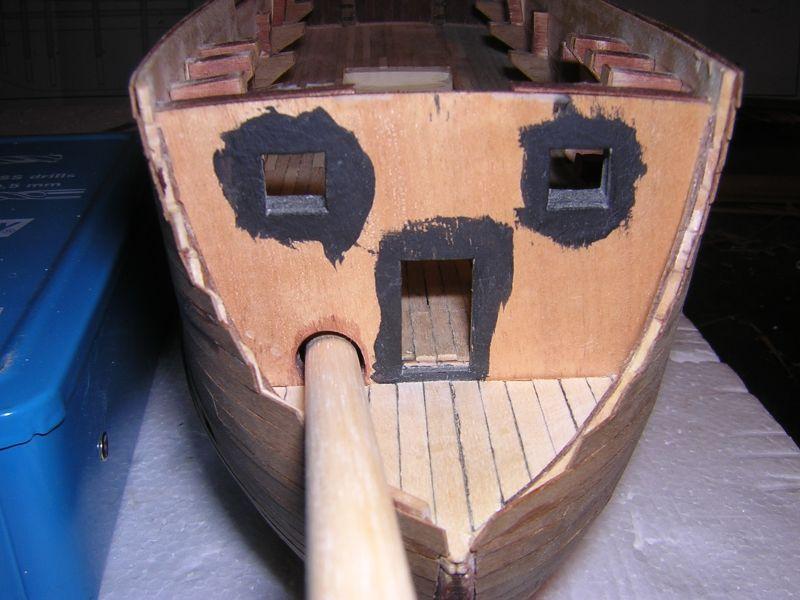
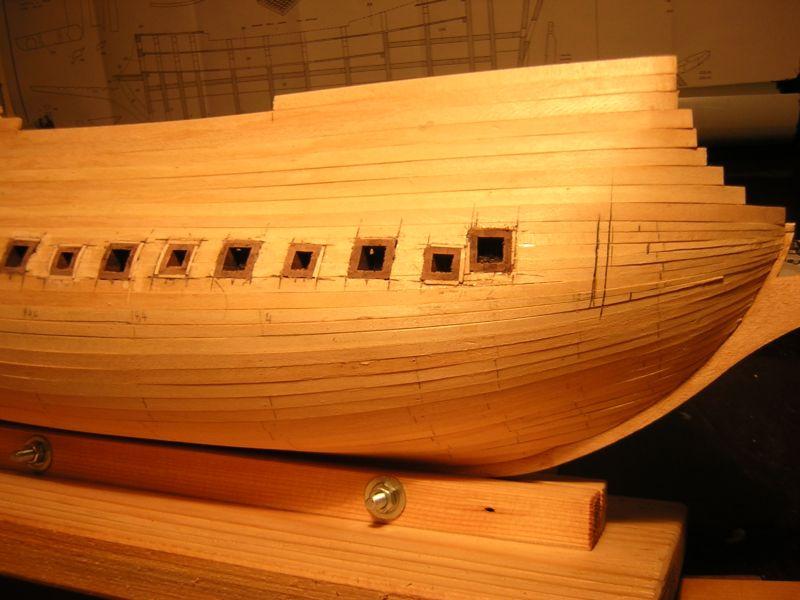
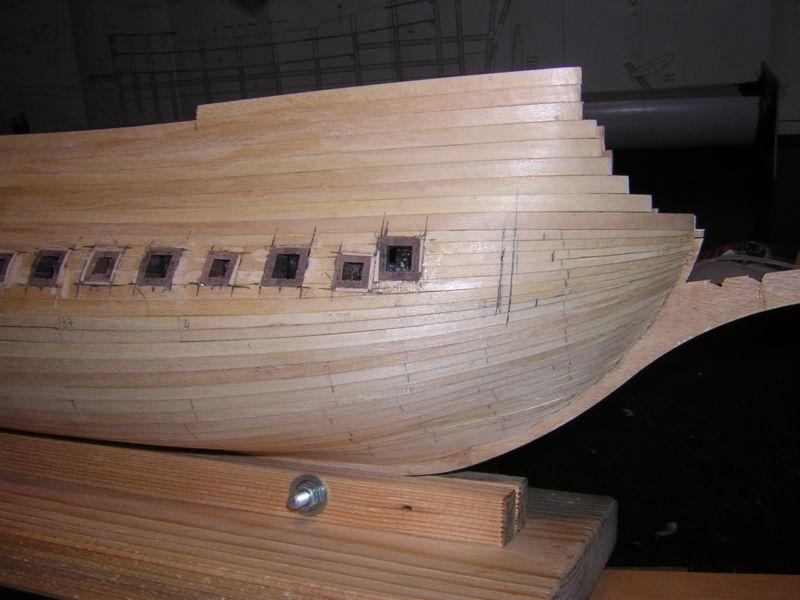
Yesterday I worked on stern part, be specific on
gunports. As I said previously, I decided to position lower line of guns
deeper by 6 milimeters into the ship. Now I proceed in this idea.
I marked centers of gunports, drilled and place support for lower line
of cannons. The result is much more better than Mantua provided
originally.
I will have to paint holes by black matt paint before I glue the last
frame covered by wallnut veneer (I avoid possible spotting veneer by
paint).
Again, some pictures from this part.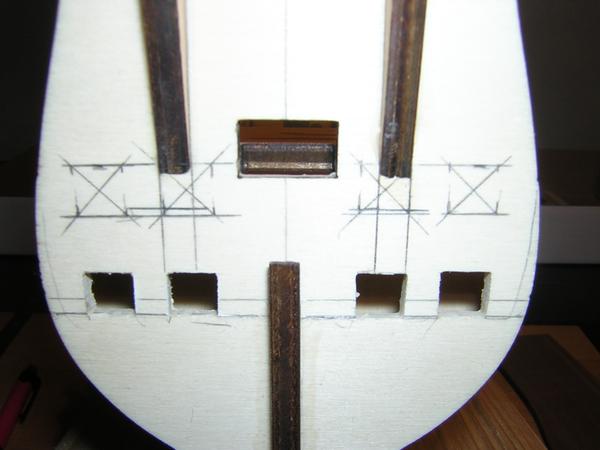
-
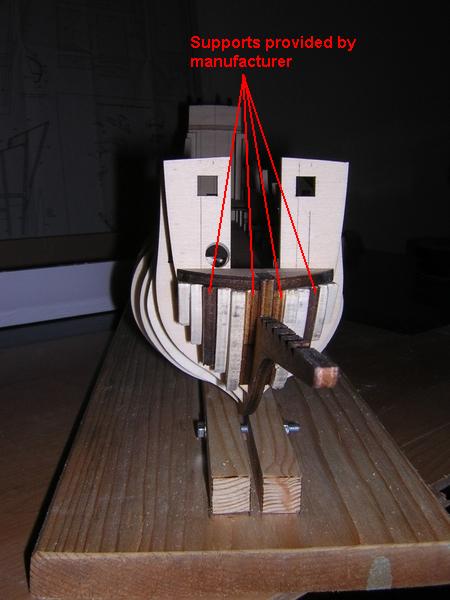
Supports for dummy barrels are created from
6x6x15 strip pieces, each barrel is possiotioned differently on the
strip and each strip is placed differently on the false deck
I cut 32 strip pieces and measured each strip on plan and made each pair
separately. It was monotonous work, but finally it is done.
Anyhow I think the installation of dummy barrels are poorly designed by
manufacturer, so I did not glued supports yet and thinking about making
full gunports as should be (box shape around cannon). It would be
important for planking support near cannon (planks would not be fixed to
anything around hole for barrel without this box).
Again very funny is placement of 1st barrel, which Mantua designers placed directly on the frame.
As the other supports are fixed to false deck and so these cannons are
a little bit deeper, the result would be that 1st barrel will protrude
from ship and others will be deeper. Also very interesting would be
planking around this cannon
Few pictures about this:

-
Thanks to all for contribution, it is very encouraging.
Chris, thank you for warning, I read your log about Victory, it was helpful.
I will contact you via PM if I will need consult anything.
Now about my progress in building. Mantua provided only 4 pices (2 for
each side of ship) for support planking on the bow. As I read some books
about ship bulding and planking, I found out that all modellers make
bow and stern parts (where planks are heavily bended) from block of wood
and sand it along with hull shape before planking. I decided to go by
the same way, I cut similar support frames and glue all of them together
at the bow. I think that on the stern it is not needed to fill gap
between frames by wood, because planks are not such bended there.
All is illustrated on following pics.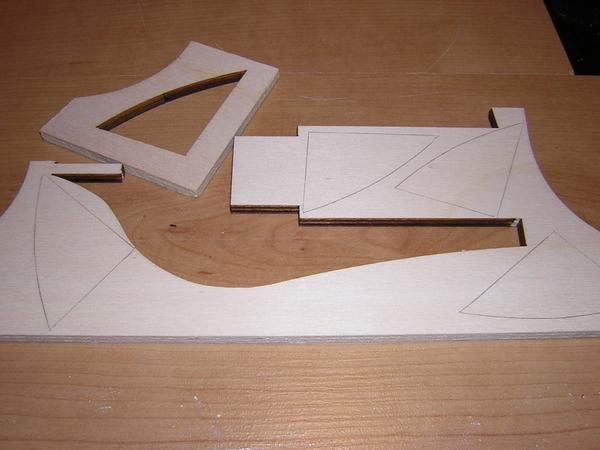
-
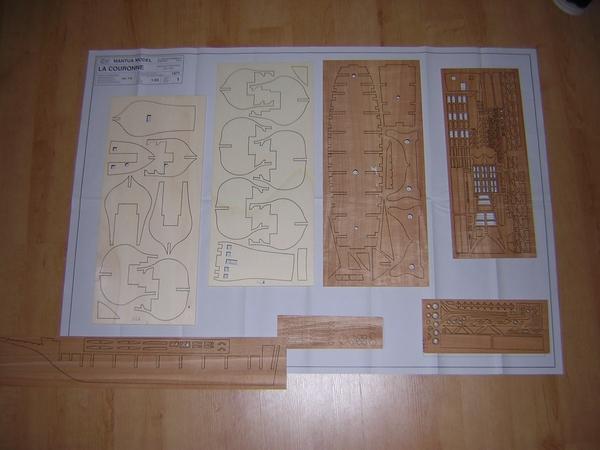
It is just for fun, the laser cutting techology by Mantua

(both pieces should have the same size)
-
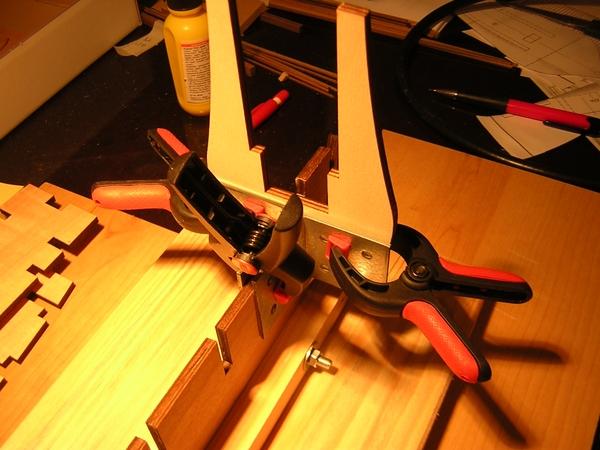
Hi Francis, thanks for compliment, I am still trying do my best

Here is described work on the last frame. Because this frame will be
visible as the stern, I was very careful with it and it is still not
glued onto the keel. The last frame had to be sanded to sharp angle.
Fortunately my dremel sanding drum made a lot of this work and the rest
has been fined by hand. I tried put the last frame on keel and found out
that dummy barrels on lower line should not be placed enough deeply
into ship. Otherwise the upper barrels will be in correct possition and
lower barrels will stick out more from ship. So I marked barrels
possitions on last but one frame and cut holes for cannons. Thus I will
put lower cannons by 5mm deeper. Fianally I glued walnut veneer on the
last frame (better to do when the frame is free than glued on the keel )
All my work is shown on following pics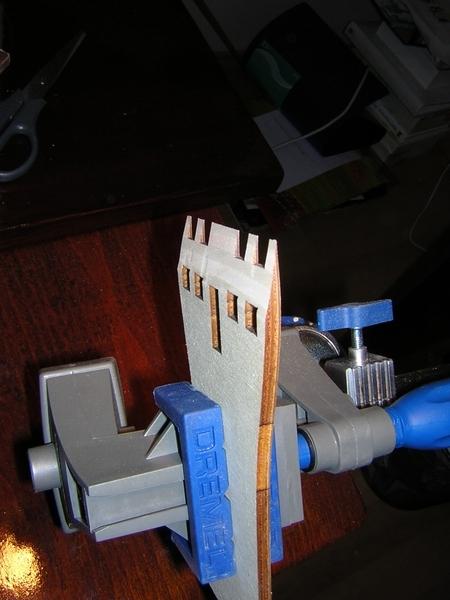

-
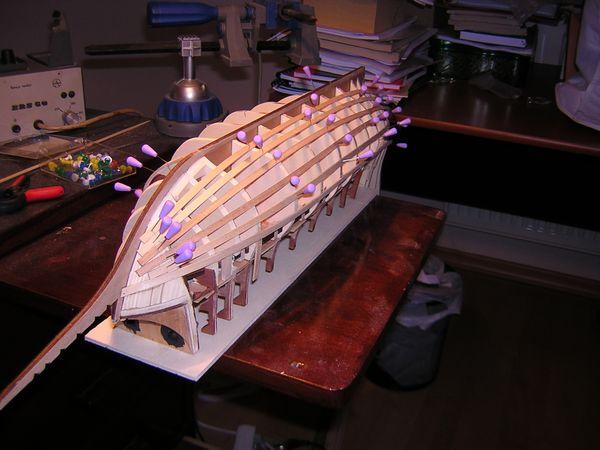
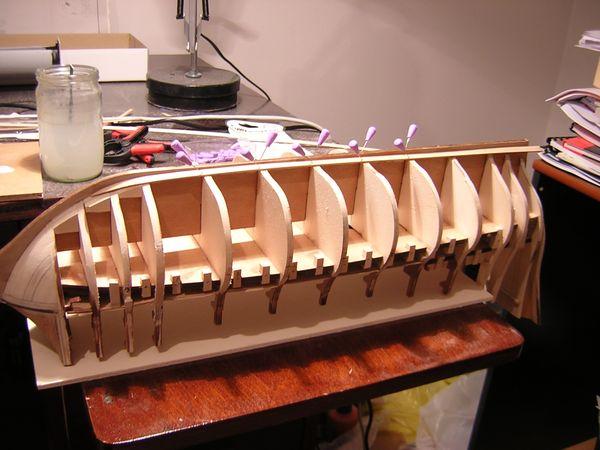
Few days are over and I am back with some update.
I glued all rest frames onto the keel and fixed them by "false decks"
(named as connecting sheets in assembling manual).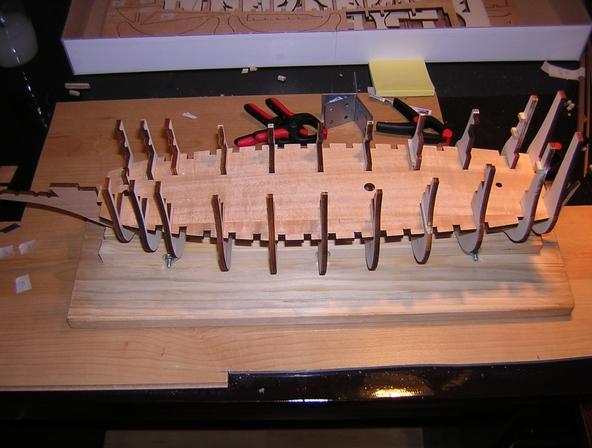
-
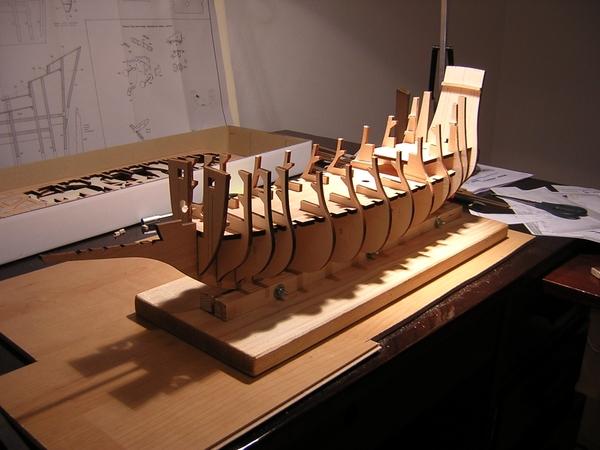
Thanks for post Ghostman, wish you the best with your build ! And a lot of patience with Mantua

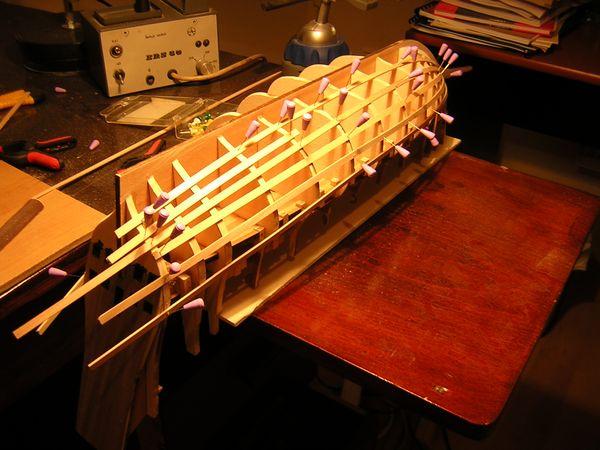
Sending some pictures where I started glue frames on keel.
I let me inspire by some posts on this forum and made keel holder by
myself from board, 2 wooden strips and 3 screws and thus saved 80$ for
original keel clamp by Amati Idea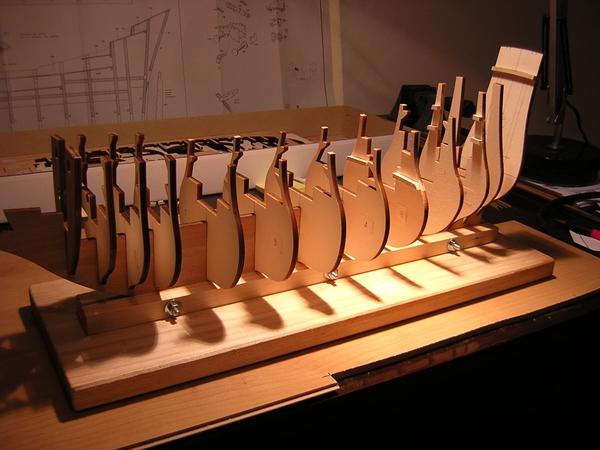

-
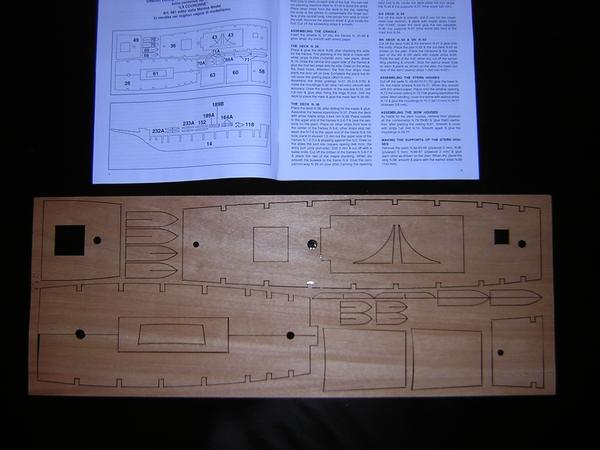
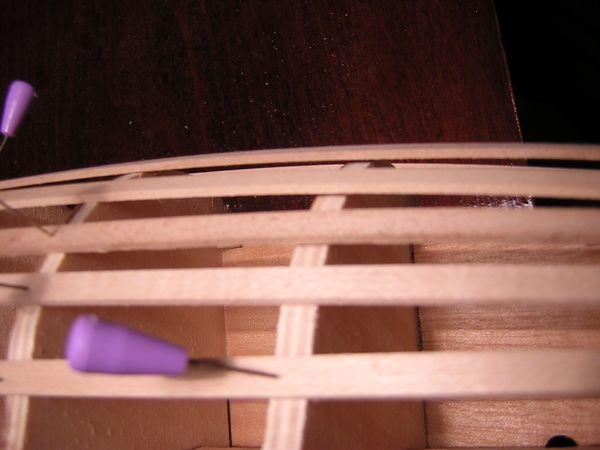
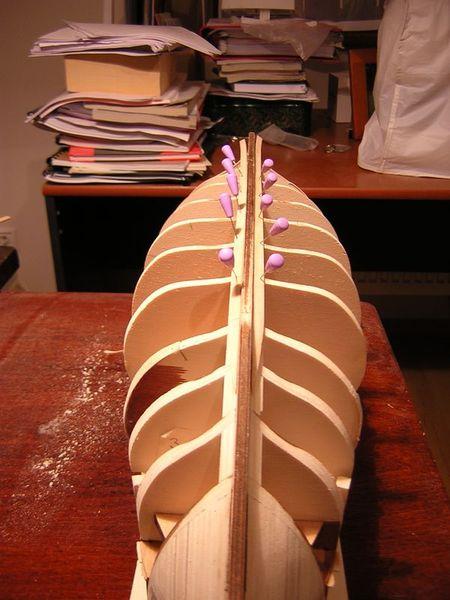
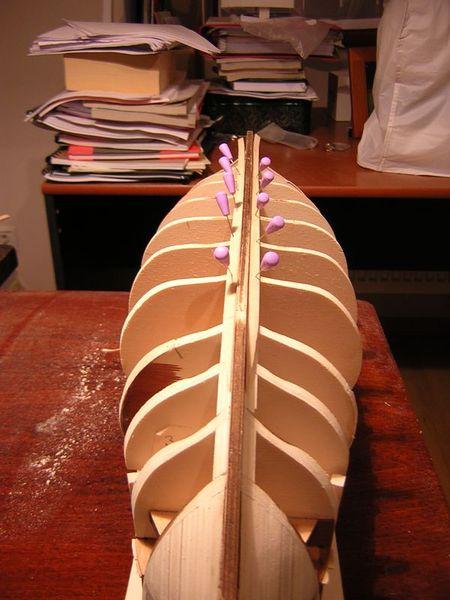
First of all I studied plans and assembly
instructions for understand parts numbering. I have to say, that
assembly instructions are very poor, only text without any guidance
picture. But it did not surprise me, I read some reviews on web and it
seems that it is any Mantua's speciality to provide poor instructions.
Adding some pictures, not much interesting at this stage

-
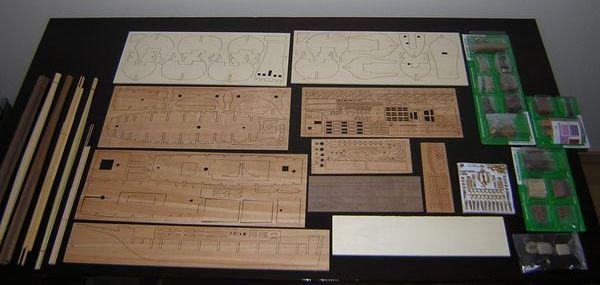
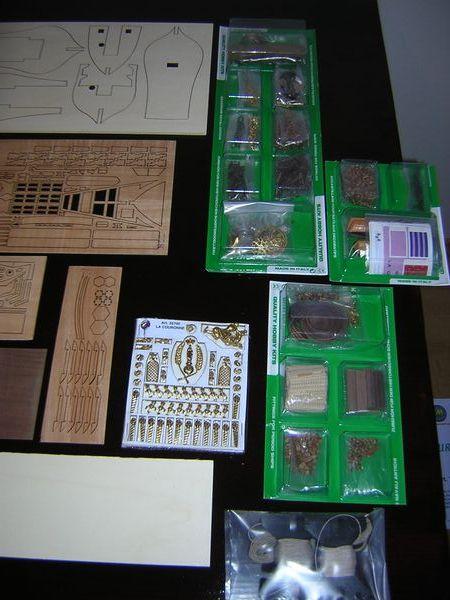
Hi all,
finally I finished my family house, refurbish my work table, bought
tools and now I can start build my 1st wooden ship. Even if I am newbie
in this hobby, I chose La Couronne which is designed for more
experienced modellers. But I like this ship, she is very nice and I did
not want to waste time with models for beginners
Almost for one year I studied books about ship modelling and also read
web stuff. I think I am well prepared now for building
I hope I will be success with this build and will very appreciate your interest, opinions and advices.
Well, lets start: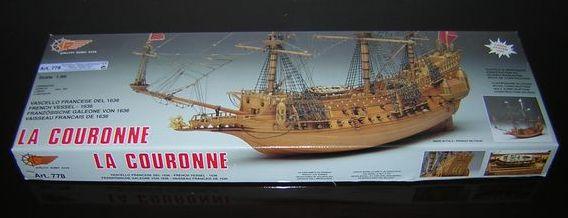


La Couronne by majq - Mantua - 1:98
in - Kit build logs for subjects built from 1501 - 1750
Posted
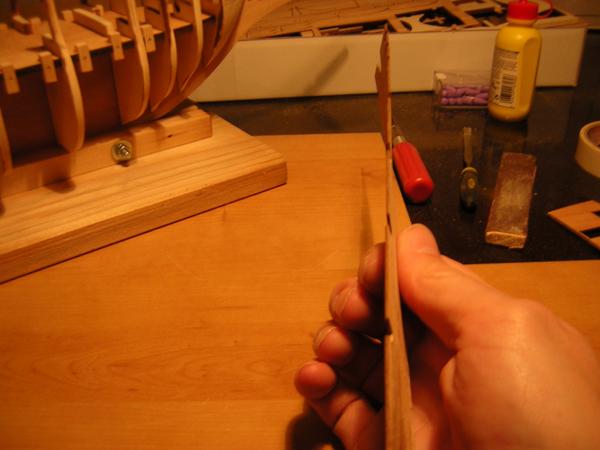
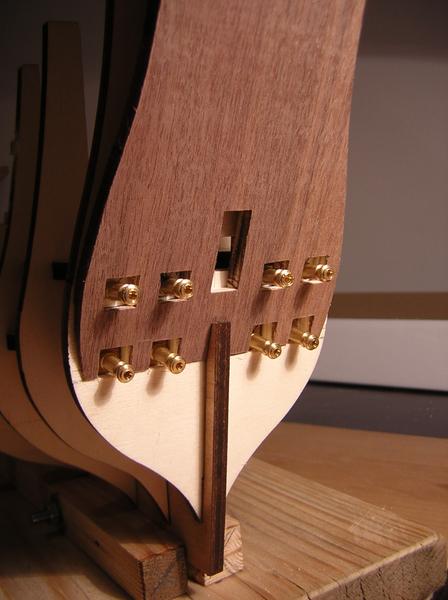
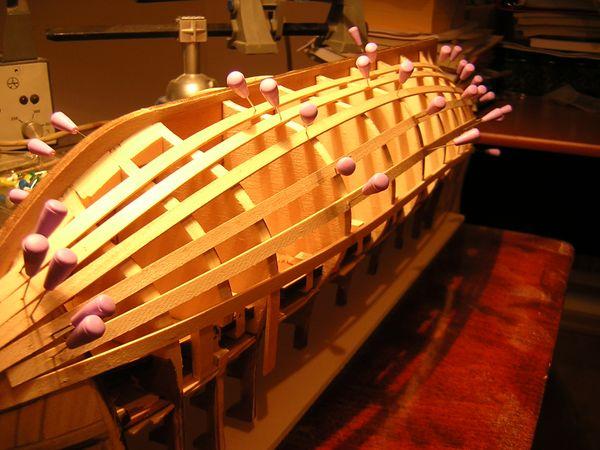
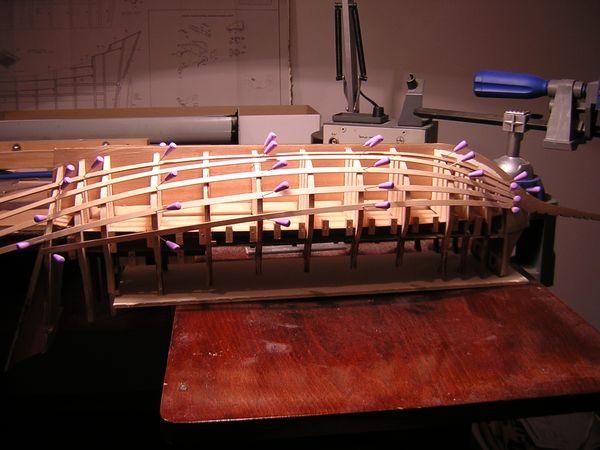
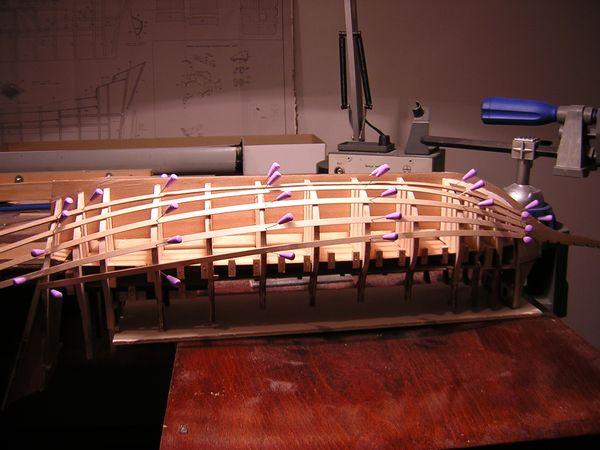
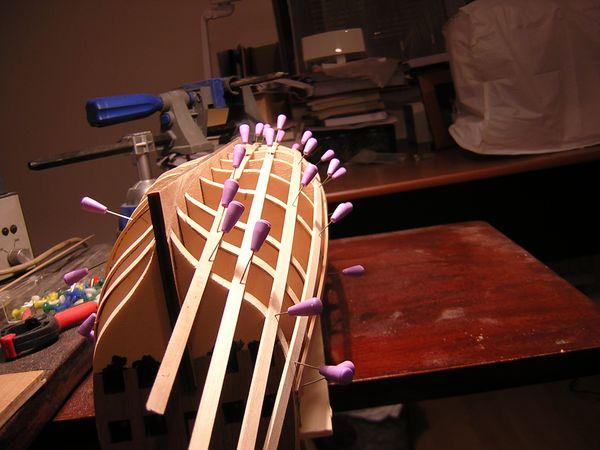
On these photos you can see my bending art :-) I bent this 1x4 mm walnut strip almost to right angle.
To be honest, I broke one strip at the beginning, this second try is better ;-) Next photo shows
this strip cut and placed on ship