HOLIDAY DONATION DRIVE - SUPPORT MSW - DO YOUR PART TO KEEP THIS GREAT FORUM GOING! (Only 72 donations so far out of 49,000 members - Can we at least get 100? C'mon guys!)
×

Gerald Spargo
-
Posts
69 -
Joined
-
Last visited
Content Type
Profiles
Forums
Gallery
Events
Everything posted by Gerald Spargo
-
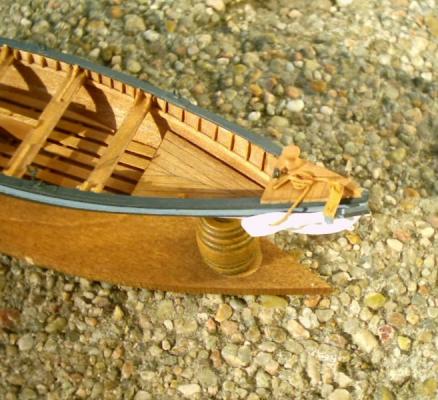
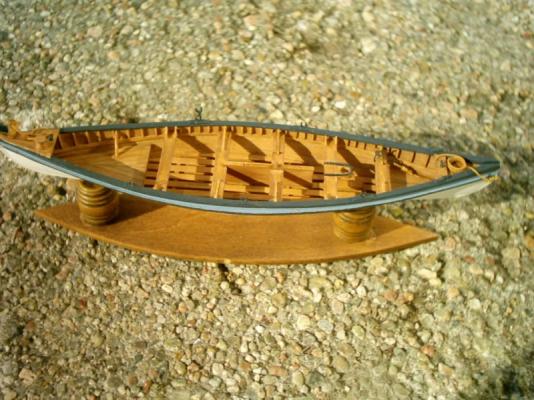
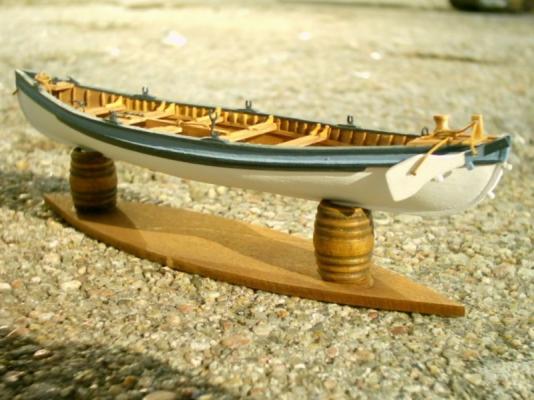
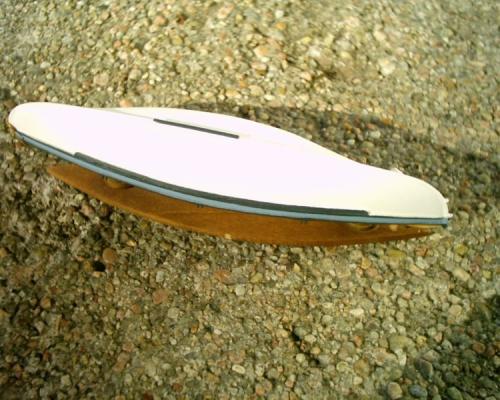
 A few more post, and I will be caught up to date. Here some pictures of whaleboat #1. This is made from the supplied bread-n-butter boats. I found it was easier,(for me anyway) to build up the hull with these, then cut them in half length ways. Shape the inside with my dremel, and glue the halves back together again.
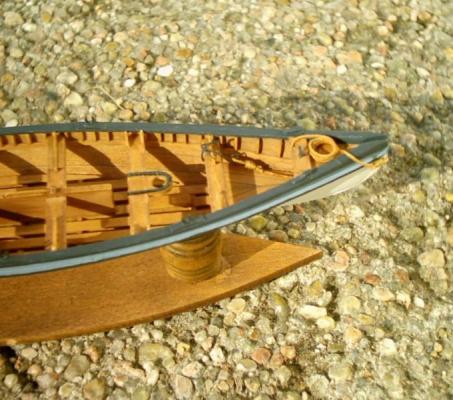
-
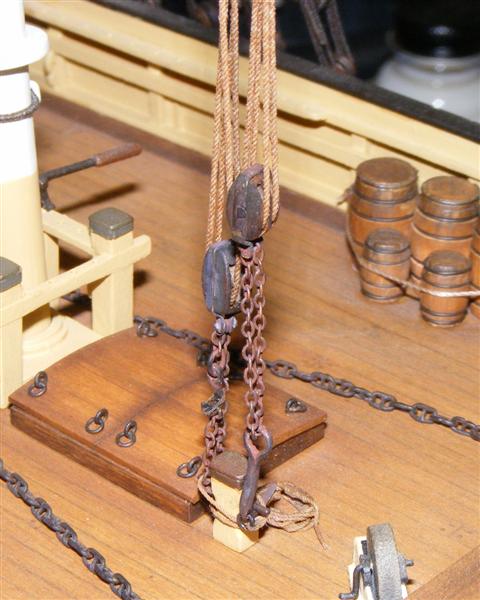
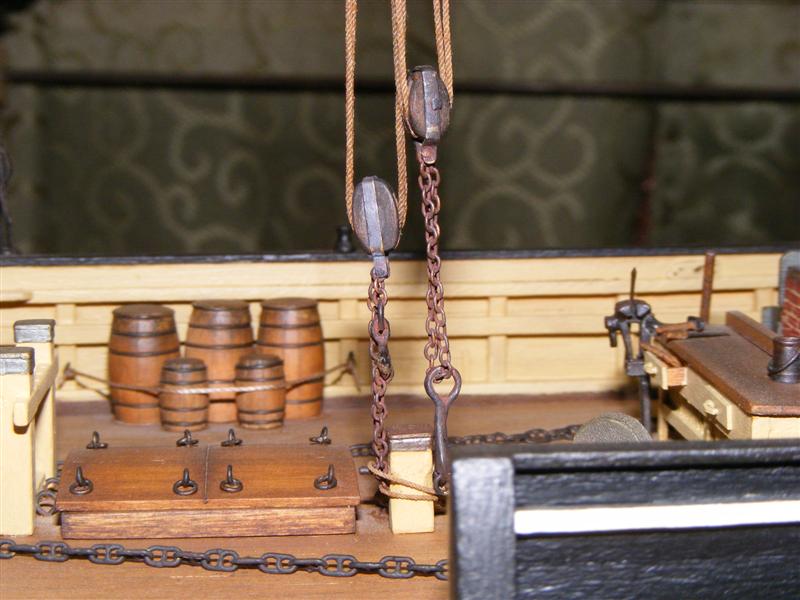
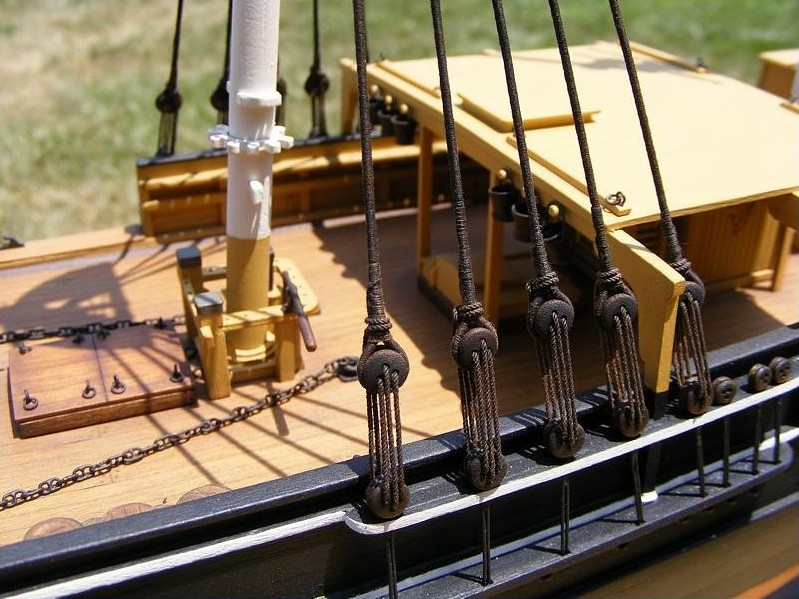
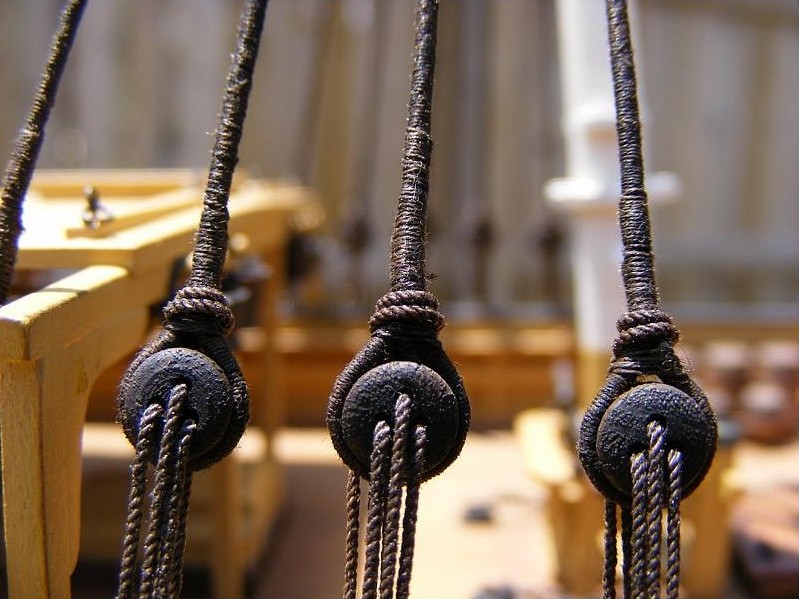
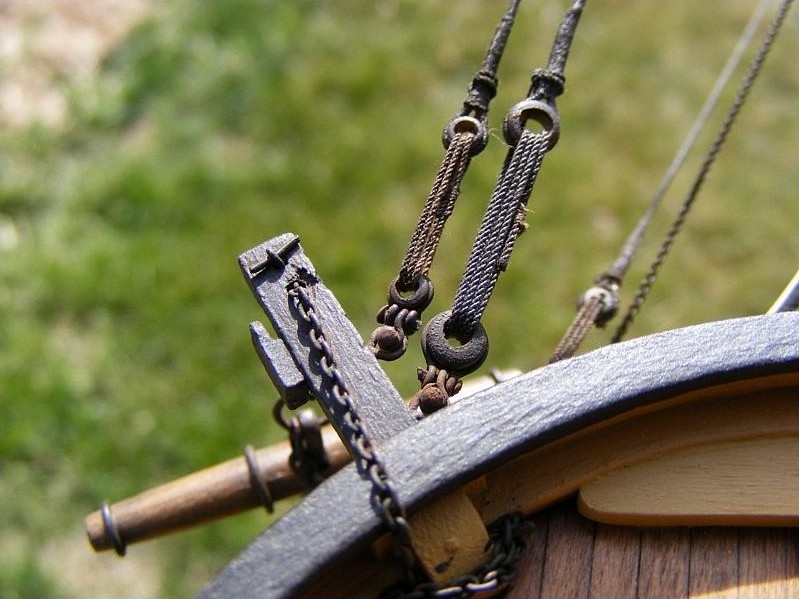
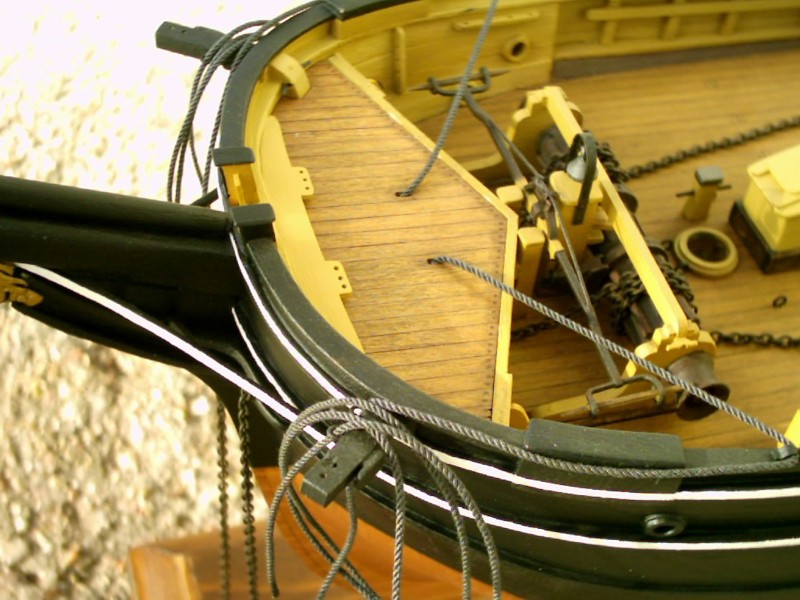
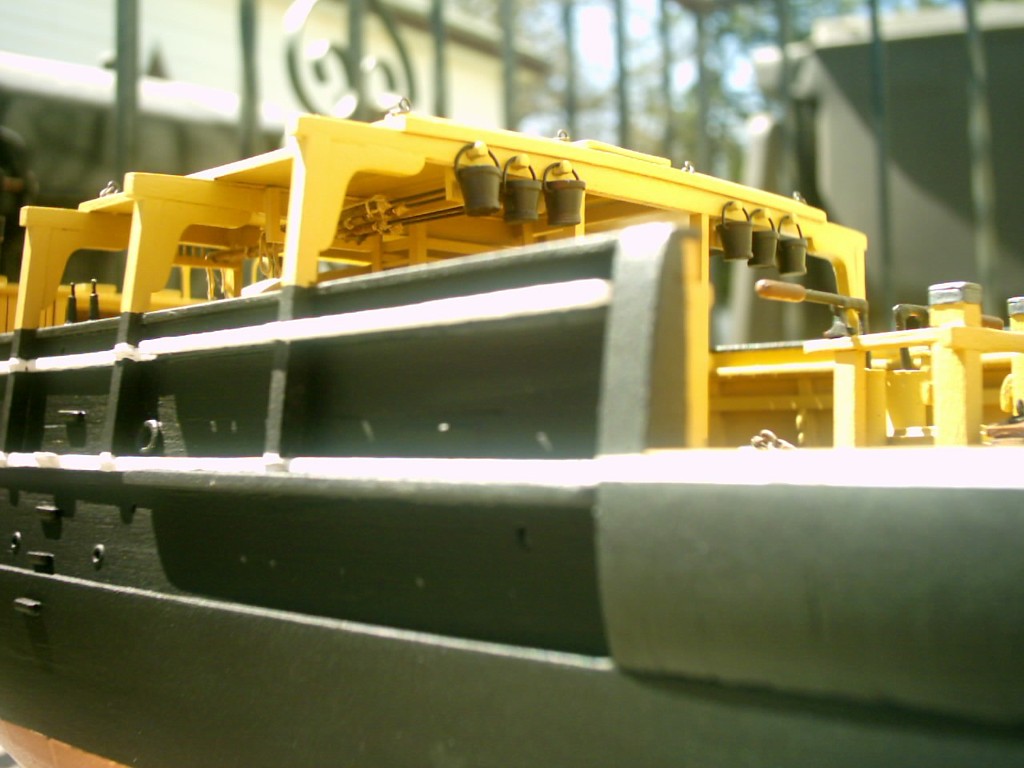
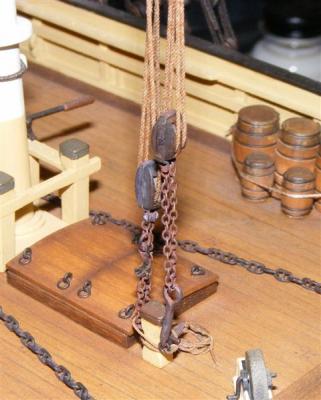
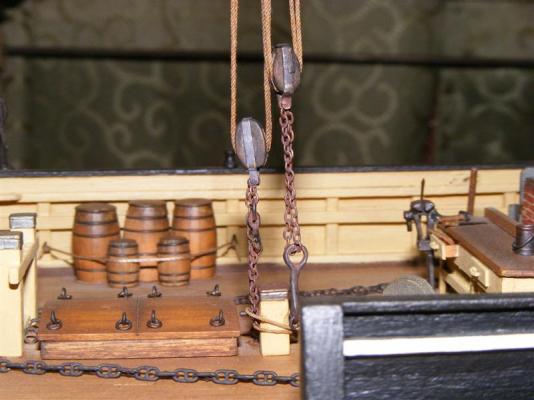
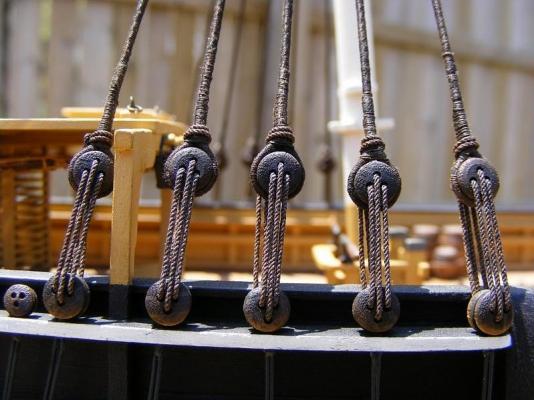
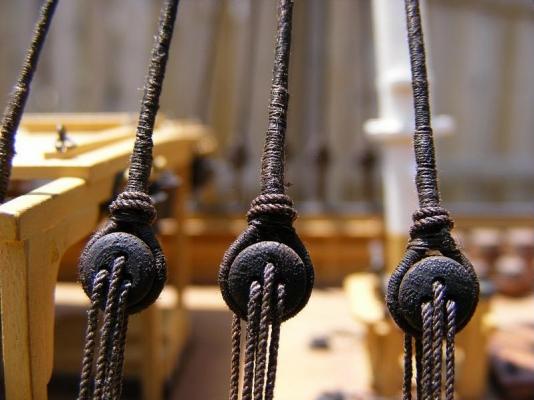
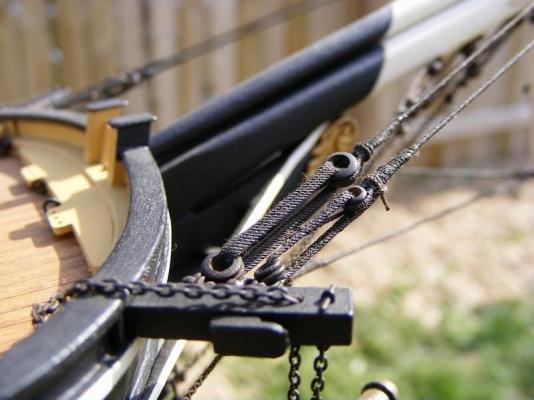
Thank Nils, and Tim, those were fun to make. Here is the rigging of the cutting tackle.

-
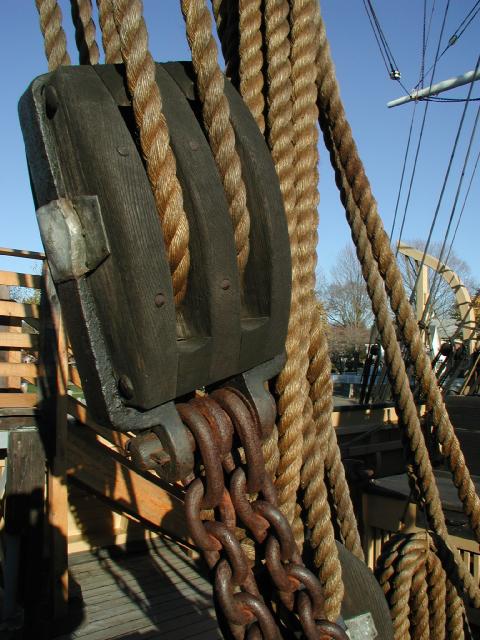
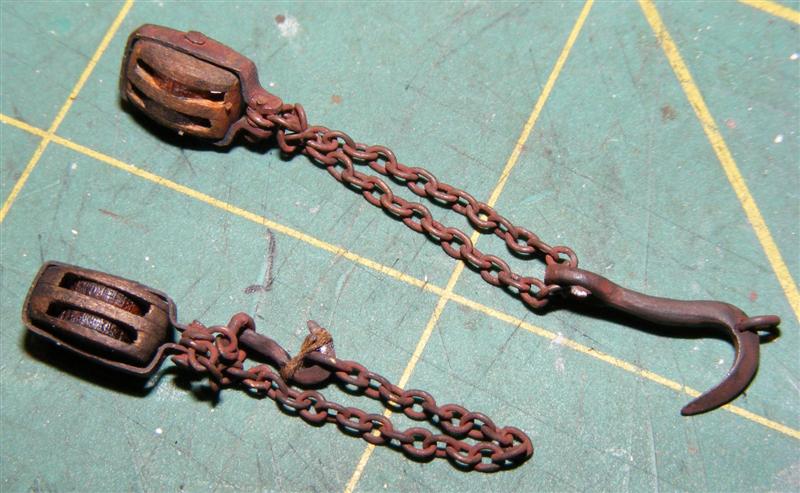
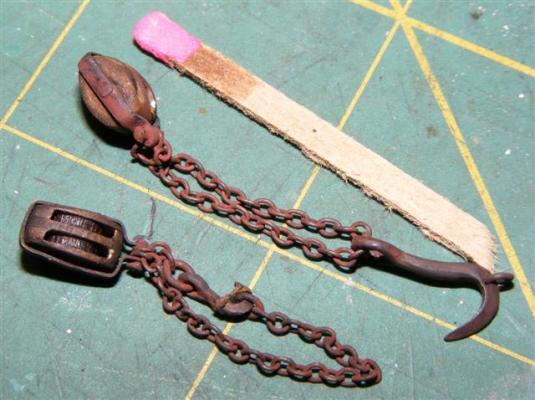
Thank you Joe. The Cutting Tackle. The kit supplies blocks for the cutting tackle, but they look nothing like real ones on the ship. So I used the small reddish colored piece of wood from the kit (cherry I think), and made blocks for this. The hooks required some cleaning, and smoothing before I could use them. Once I had these made, I put the whole works in Black-in It, blocks, too. After the black-in it did its job, I used weathering powder to simulate the rust, and to get the weathered look on the blocks.


-
Thank you John, and Elia. Tim, I found some stuff on that computer, but not the paint mixture, sorry. I did find the 2 bottles that I have mixed though. I also found the info on how I built the skylight, windlass, and how I coppered the bottom, along with a weathering guide that I made.
-
Tim, I want to say it is thinned down yellow ochre from Model Shipways, but I think it is more than just that. I have an old computer that I am going see if it will run long enough to get some info off of it tonight after work, it should have other info about the Morgan that I need to. I will get back to you on this.
-
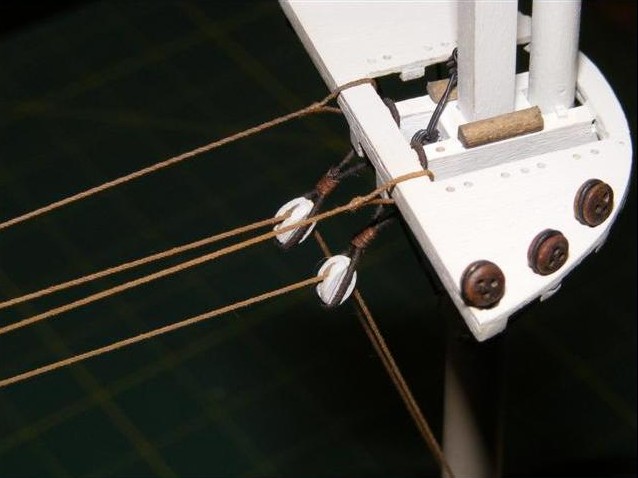
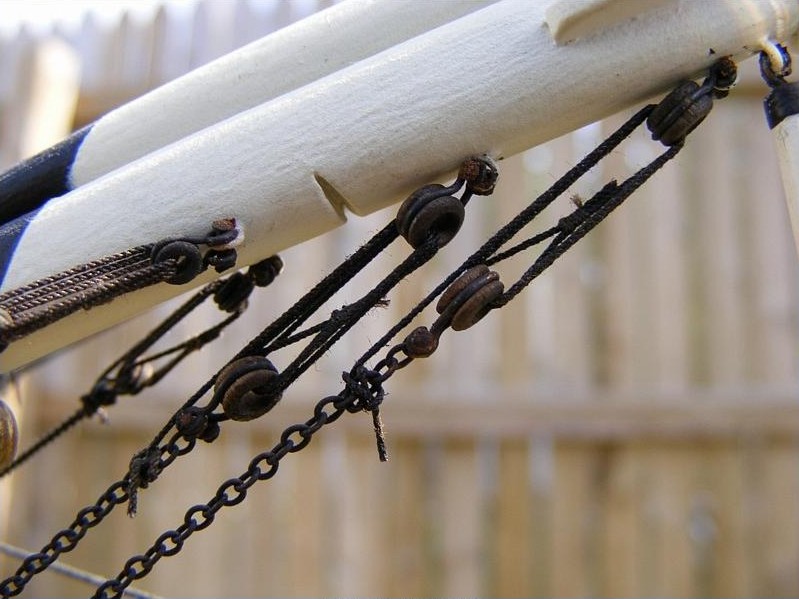
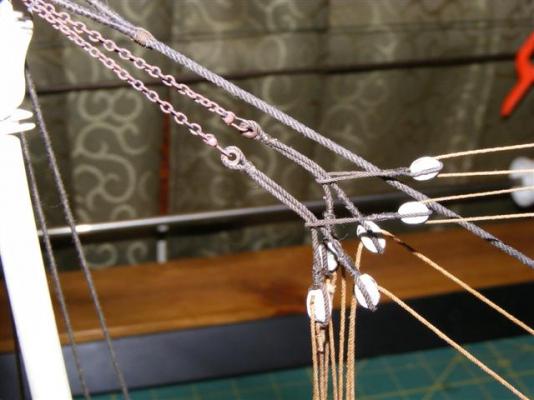
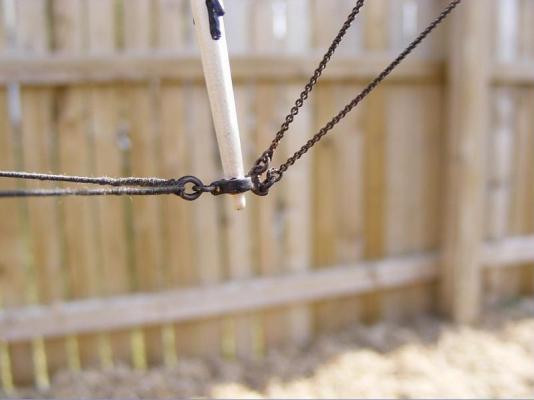
More pictures of some rigging.

-
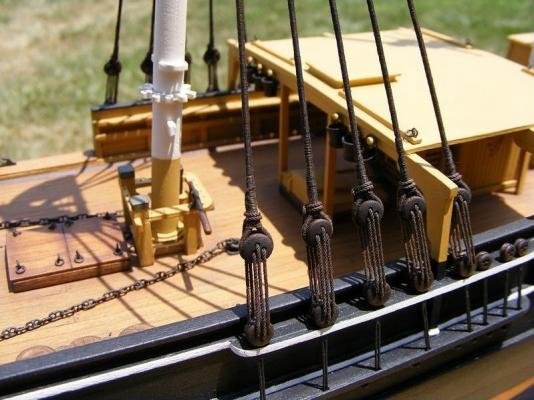
Here are some pictures of the rigging. I serve my rigging with 80wt thread.

-
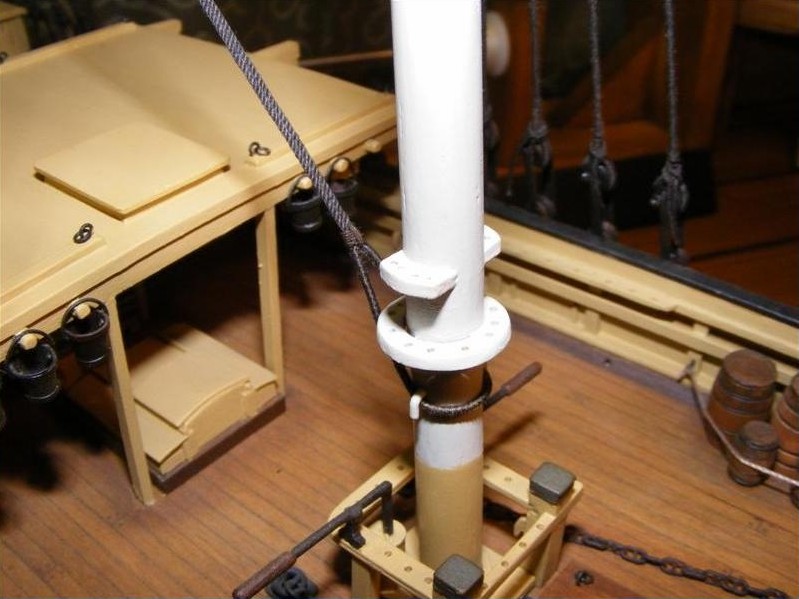
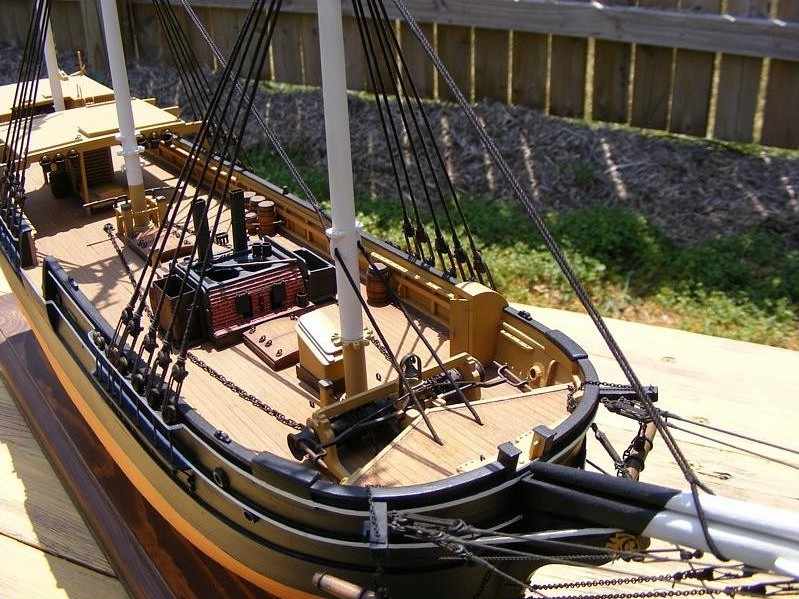
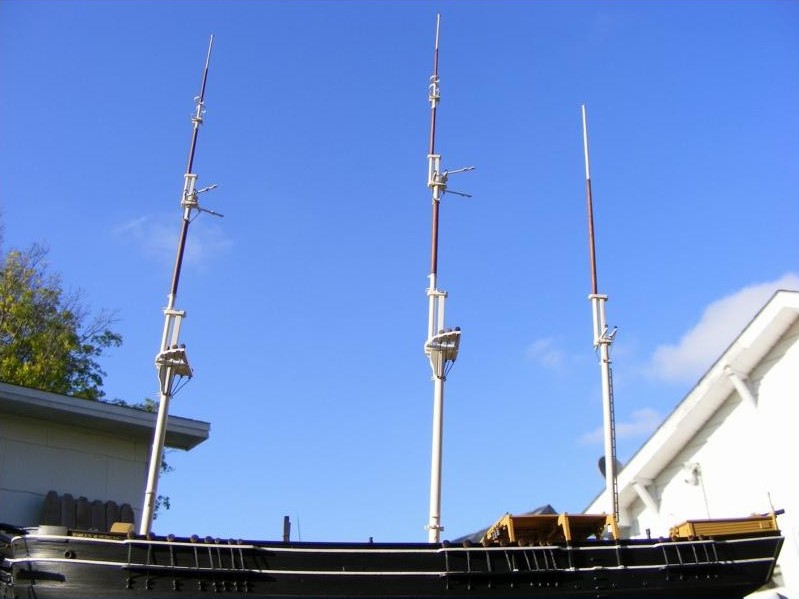
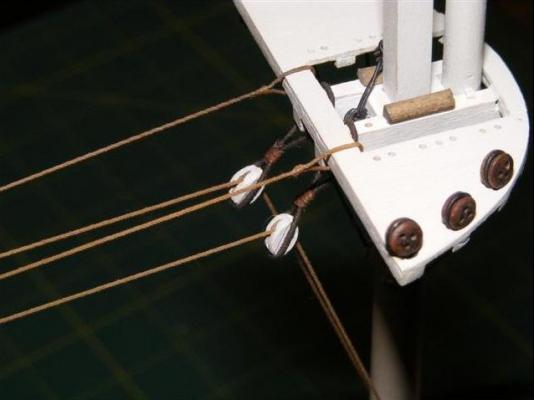
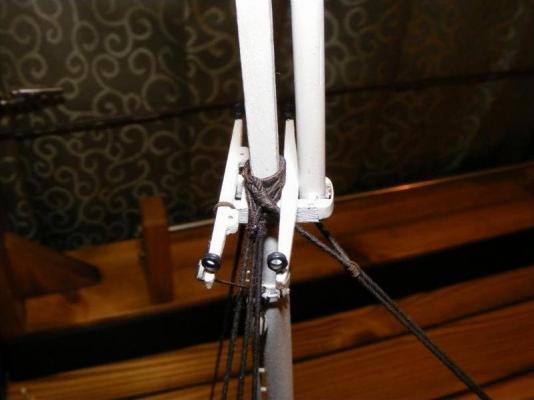
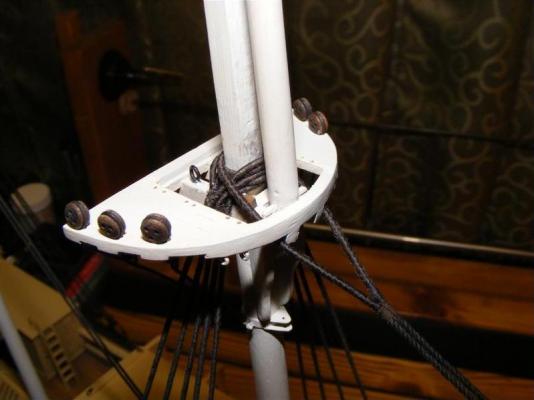
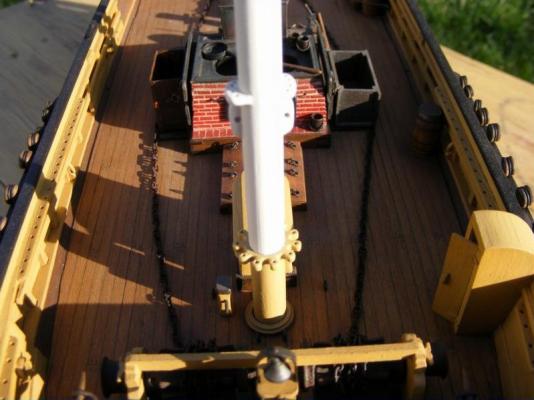
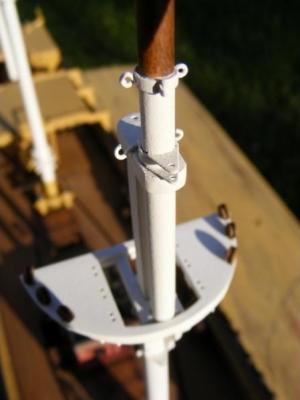
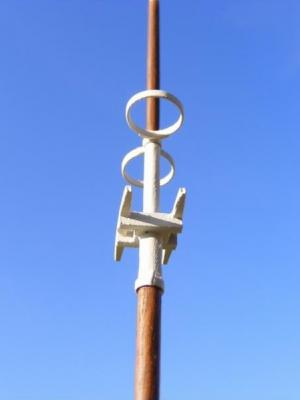
Well guys, I hope to see you working on your Morgans at some point, and I do hope to see more modelers building this kit. Here are some pics of the foremast.

-
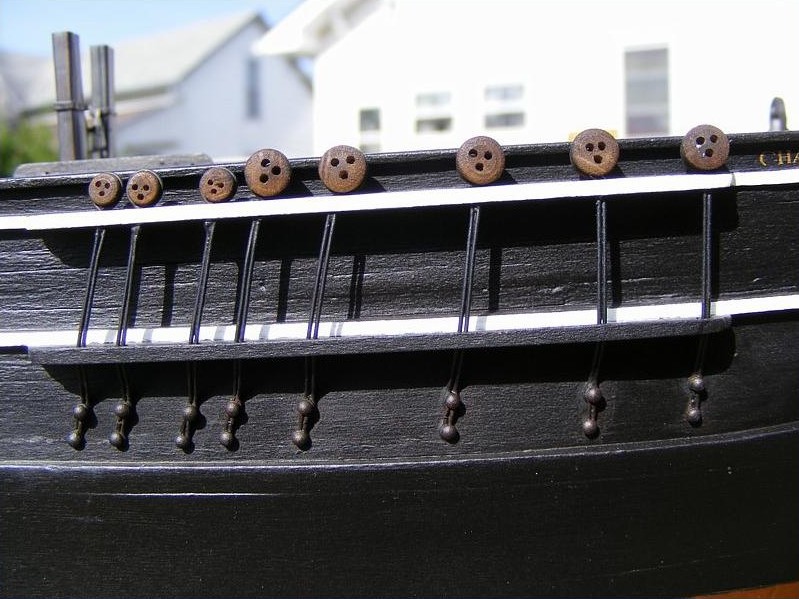
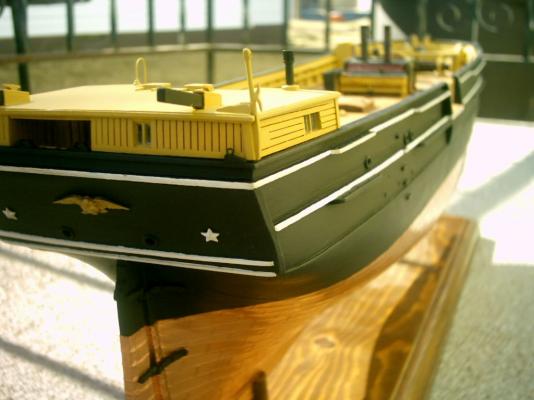
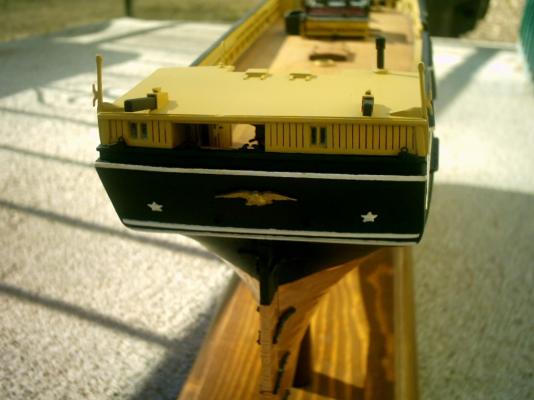
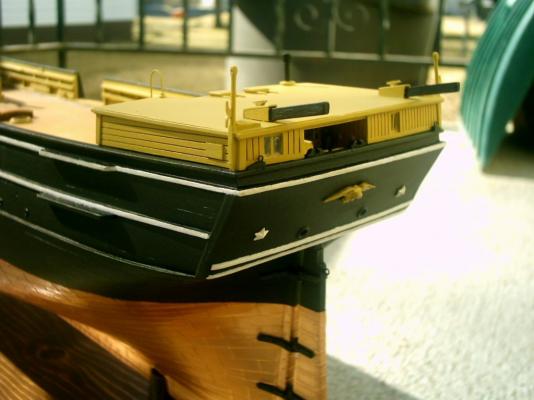
Thanks Russ, Ryland, and Peter. Some of the things I like to do, as far as weathering, and finishing, is go with some of the more obvious things. Like rust, there is always going to be rust,(iron, and water doesn't mix well). Nonperfect wood, these ships are old, so the wood is alittle softer, and more brittle than it was when the ship was first build, again...wood, and water doesn't mix well either. That's why I leave the small chips, and nicks in parts of my build, like the cathead in the last few pictures that I put up. That happened when I was putting the chain through the hole. I liked it, so I left it, and I'm glad I did. It helps to give it life. I think the wood should have rounded edges, rather than sharp ones. Plus when painting, I try to keep the wood grain showing. Moisture makes the grain in the wood swell, and since it spends its life in the water, it would just seem like a natural effect. Also you will notice that around the edges of structures, and other items on the deck are darker, simulating dirt. Many of the things you can do to a model to help give it some life, are things you see everyday, but yet never take notice of.
-
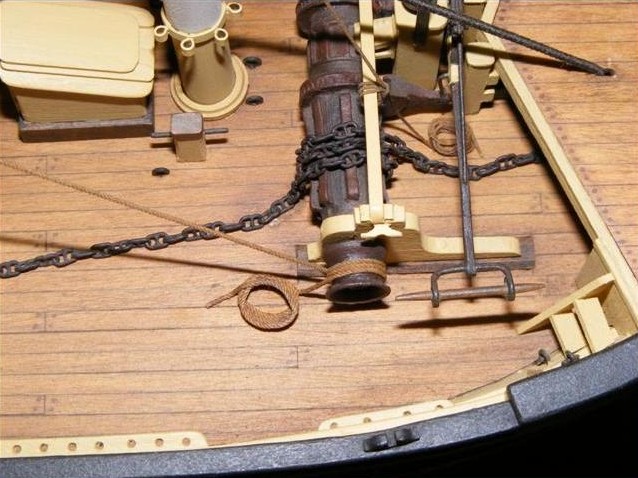
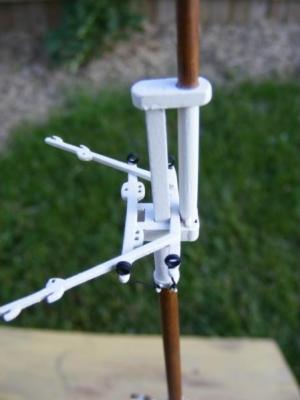
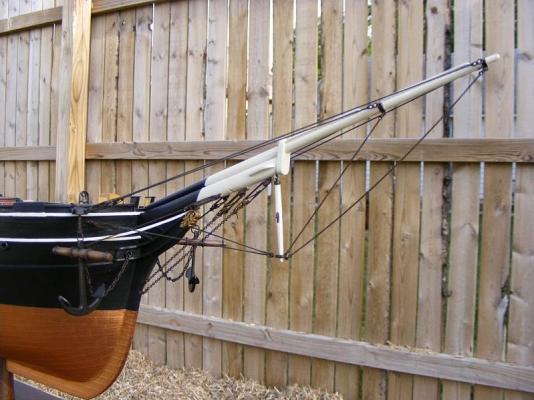
Rigging of the Bowsprit.


-
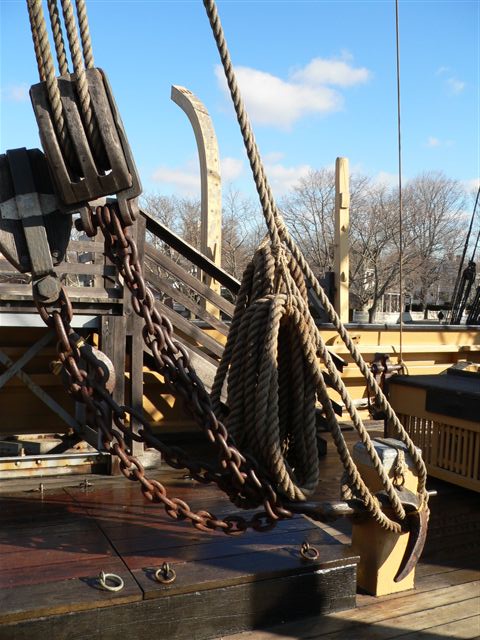
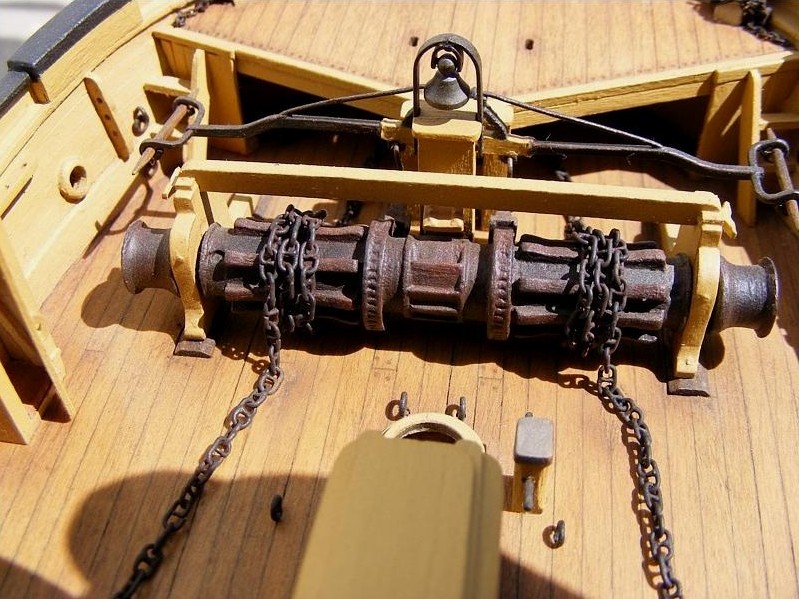
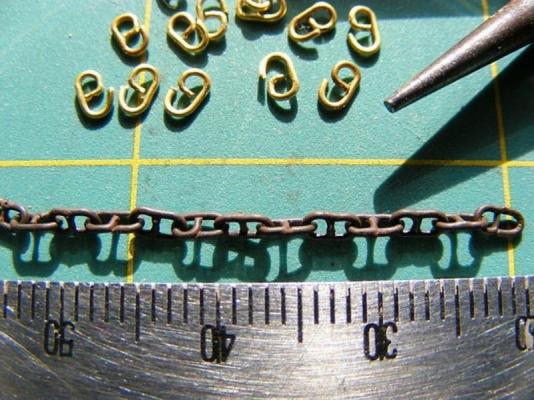
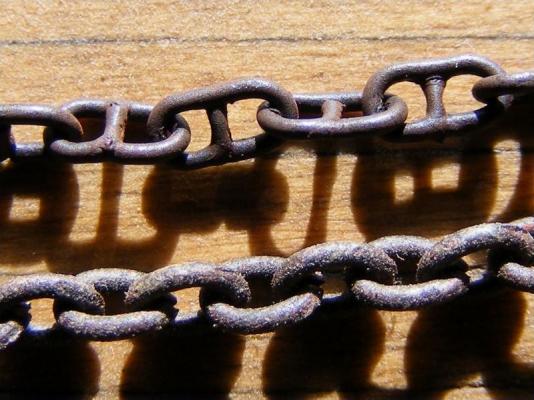
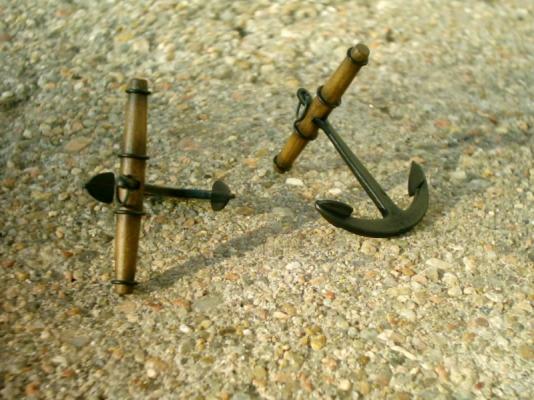
Here is the stud-link chain that replaced the other chain. I do have a PDF on how I made this chain in the Article/Download section, under Furniture and Fittings.
-
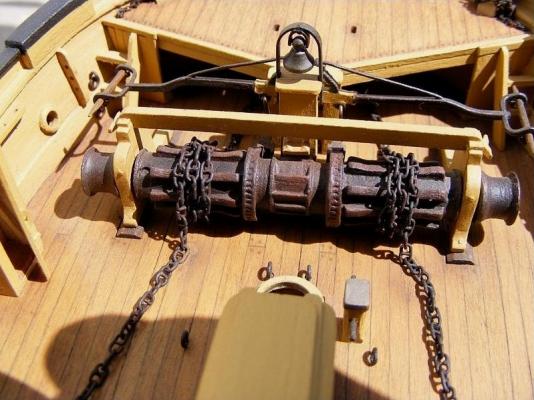
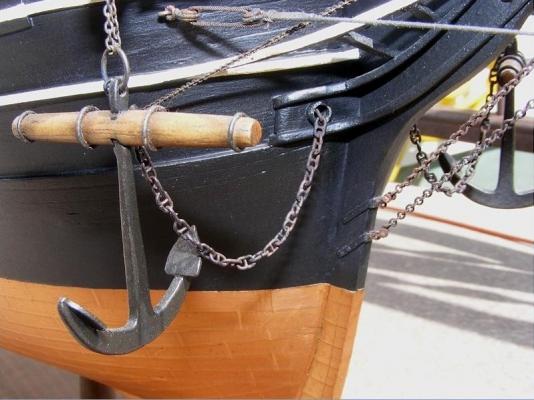
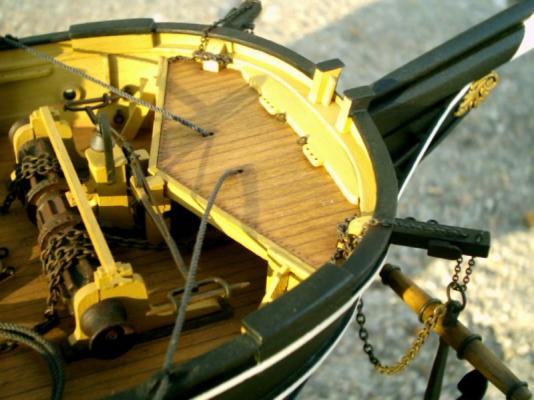
These show the anchor deck, and anchors completed. Some pictures that I had in my past log I am leaving out, because I ended up removing the anchor chains, and made stud-link chains to replace them.

-
Hi Russ, Glad to be back at it. I can't wait to actually get to working on it again. I like your signature line, T'aint a hobby if you hurry, this is definitely a hobby, can't believe I started this almost 9 yrs. ago. Like I said, I photograph at many different angles.


-
Thanks Dave, Nils, Scoot, and Pete, I still have a lot of photo to upload yet. Scoot, I've been away from modeling because I thought I would try making some extra money woodworking. Made alittle, but not enough to make it worth it. I think I live in the wrong part of the country for that. I gave it a try anyway. So back to doing what is worth the effort, Shipmodeling!!

-
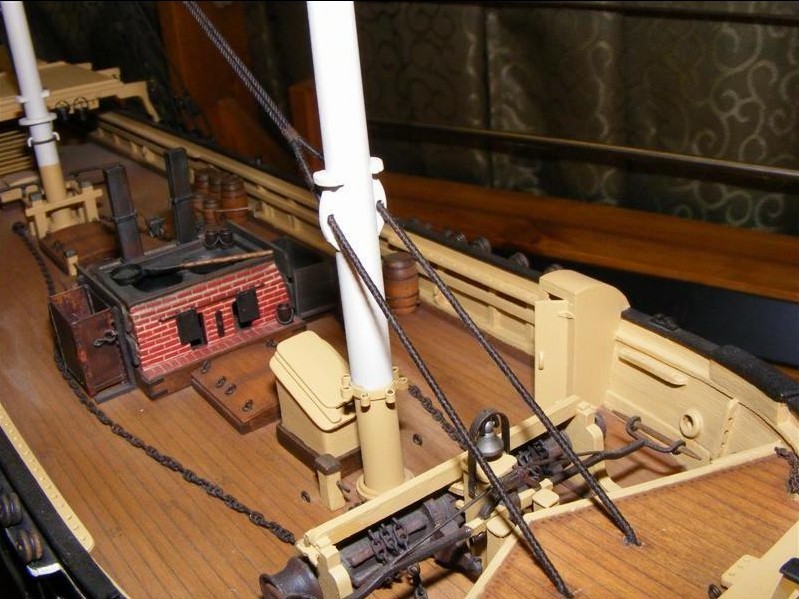
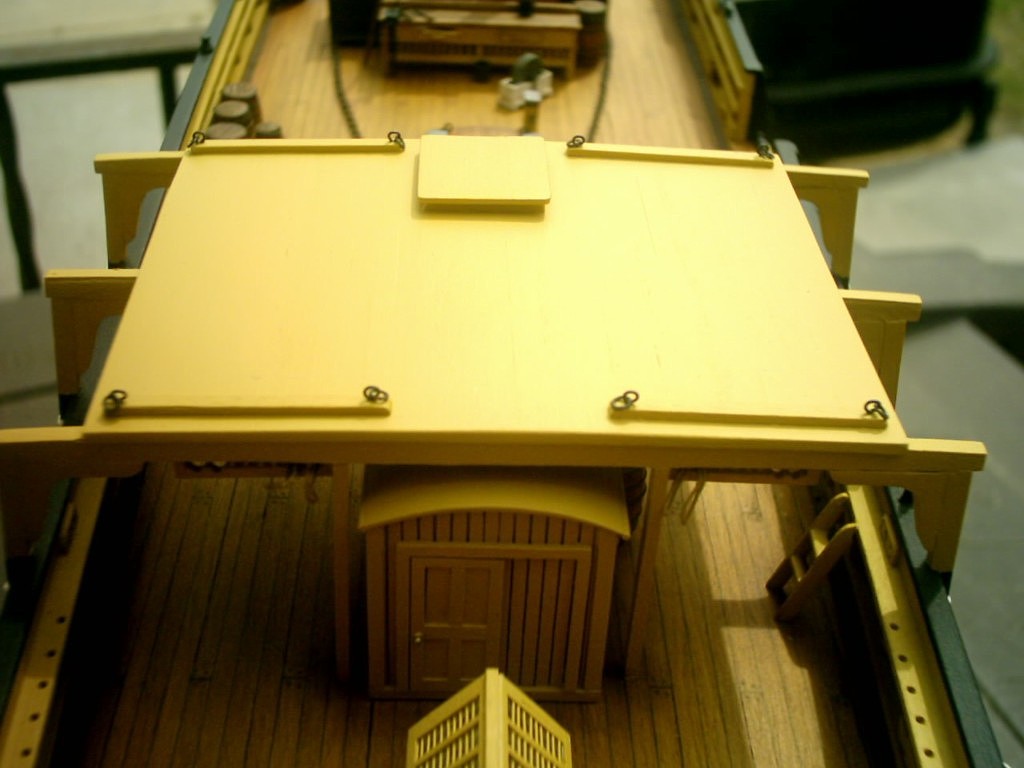
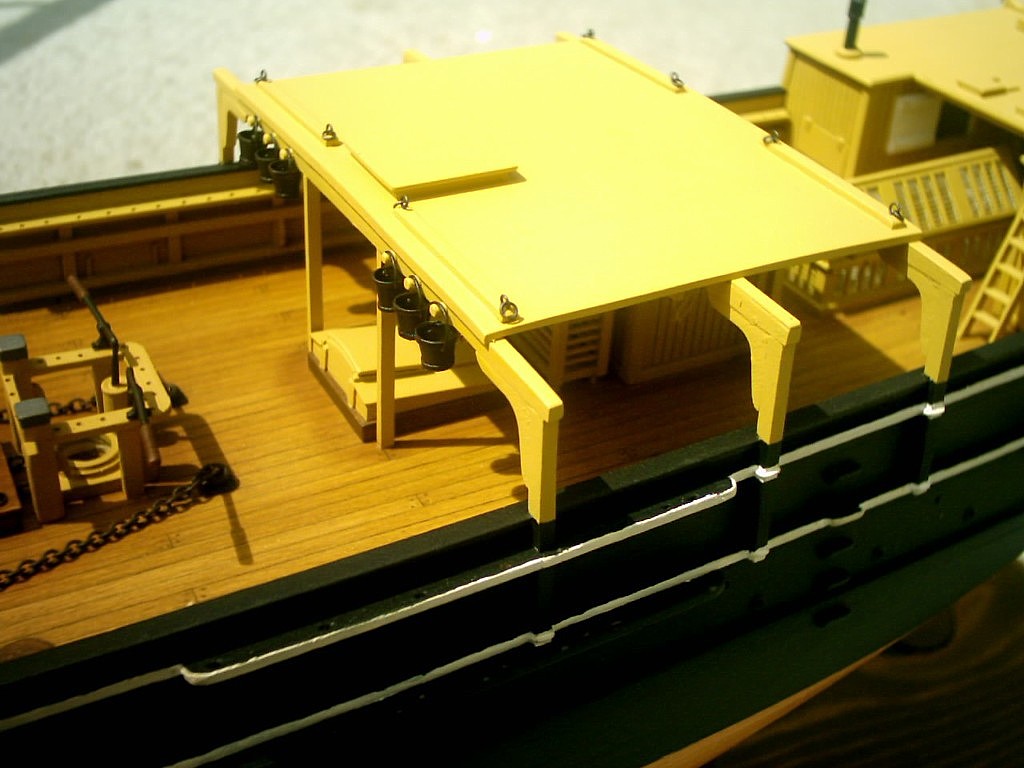
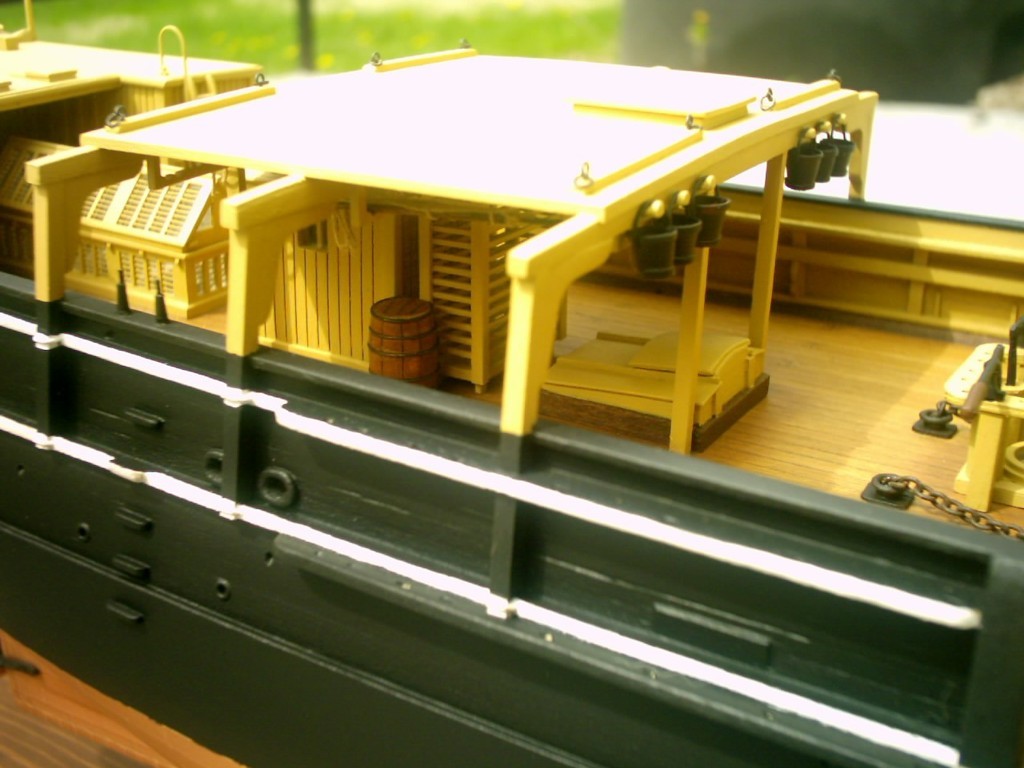
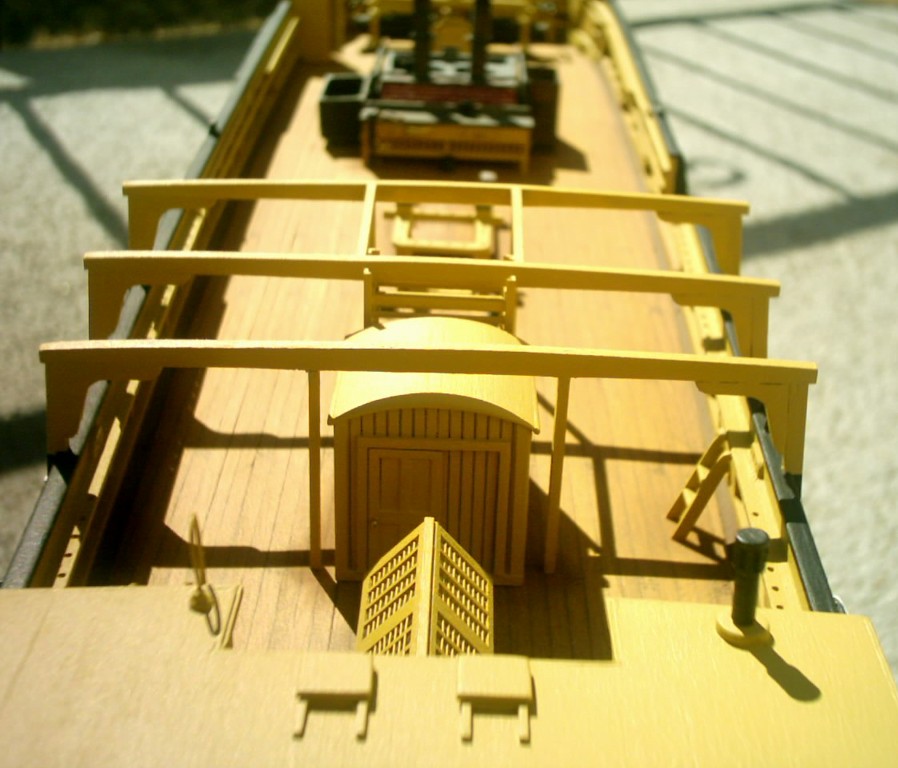
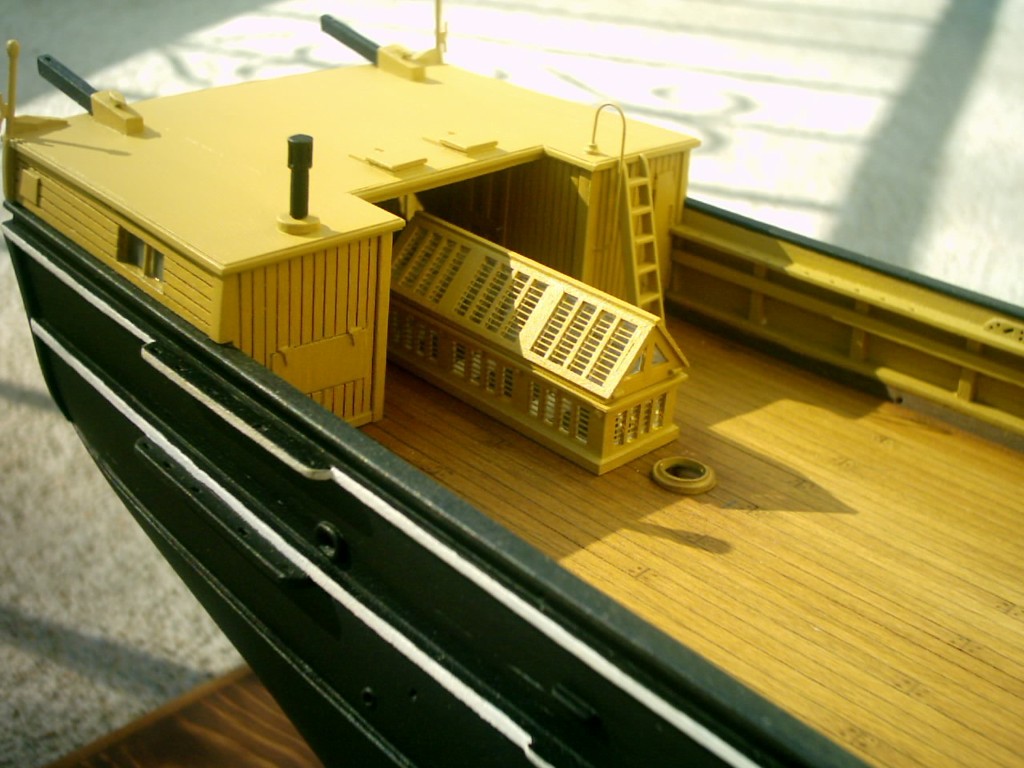
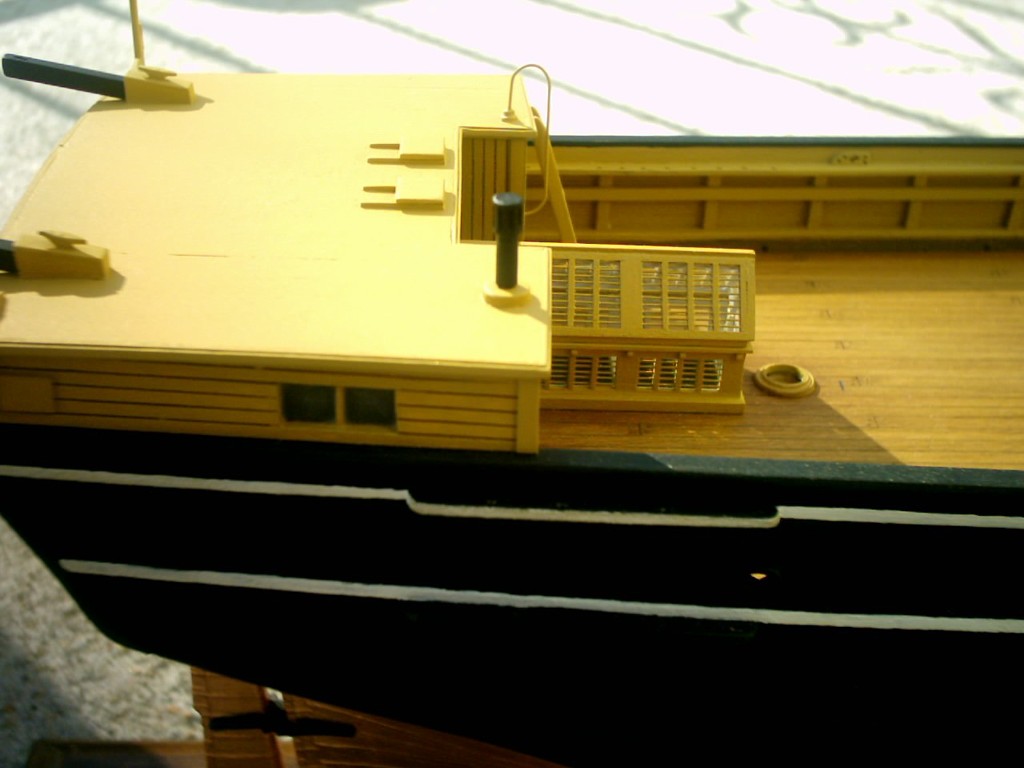
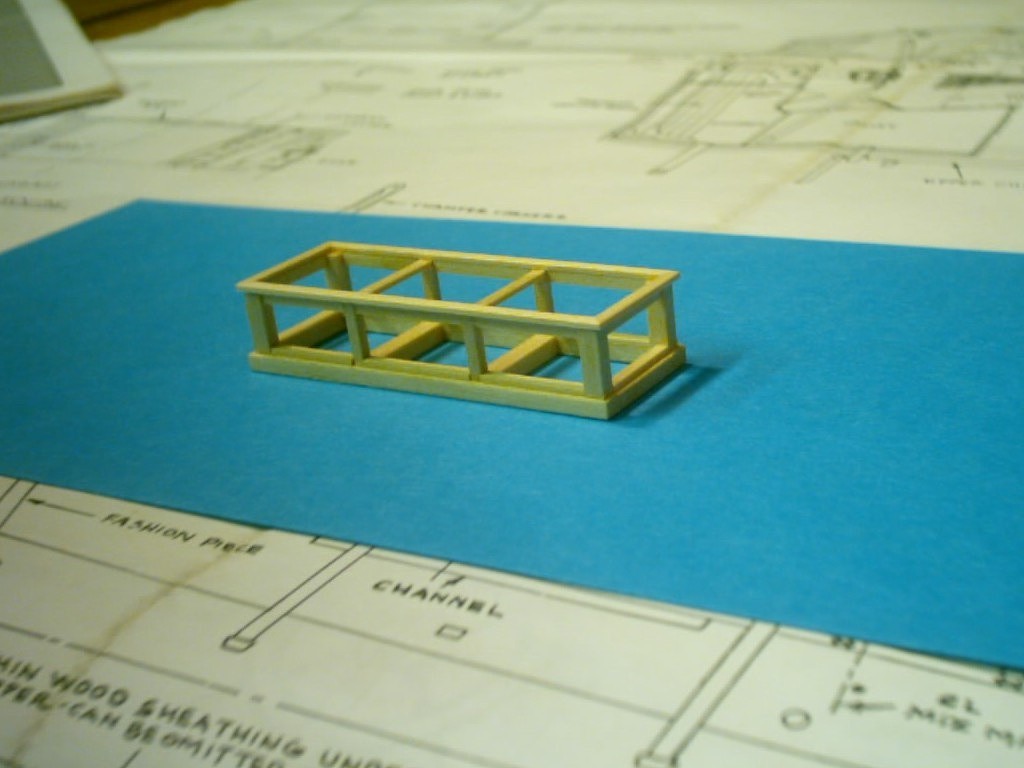
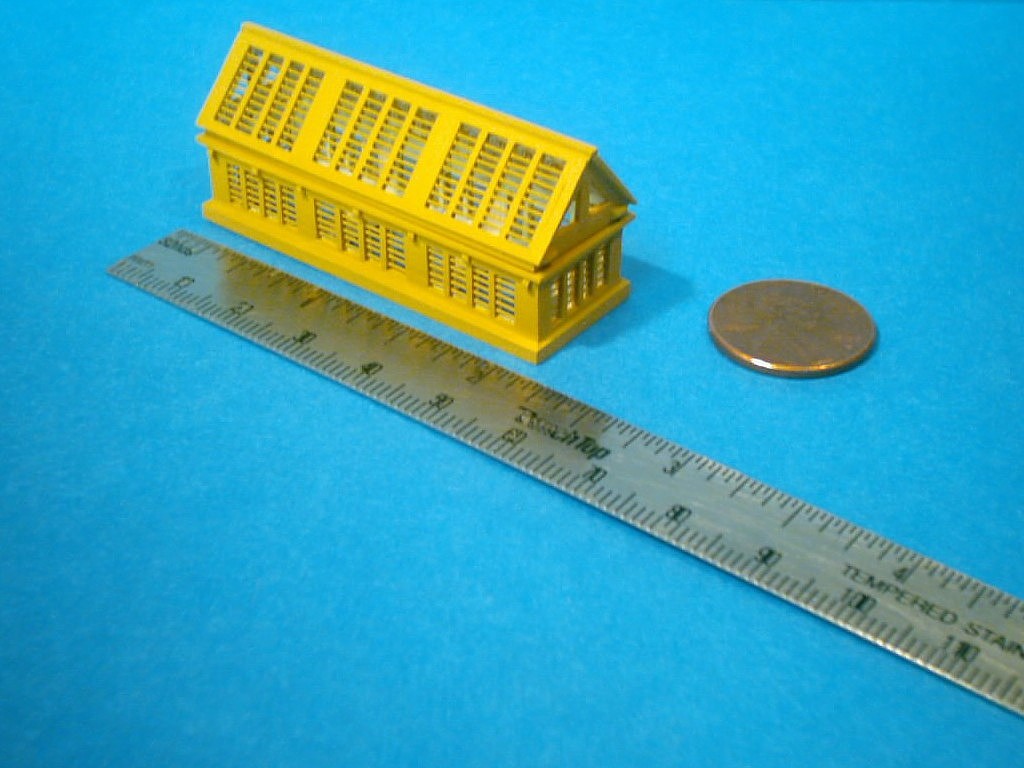
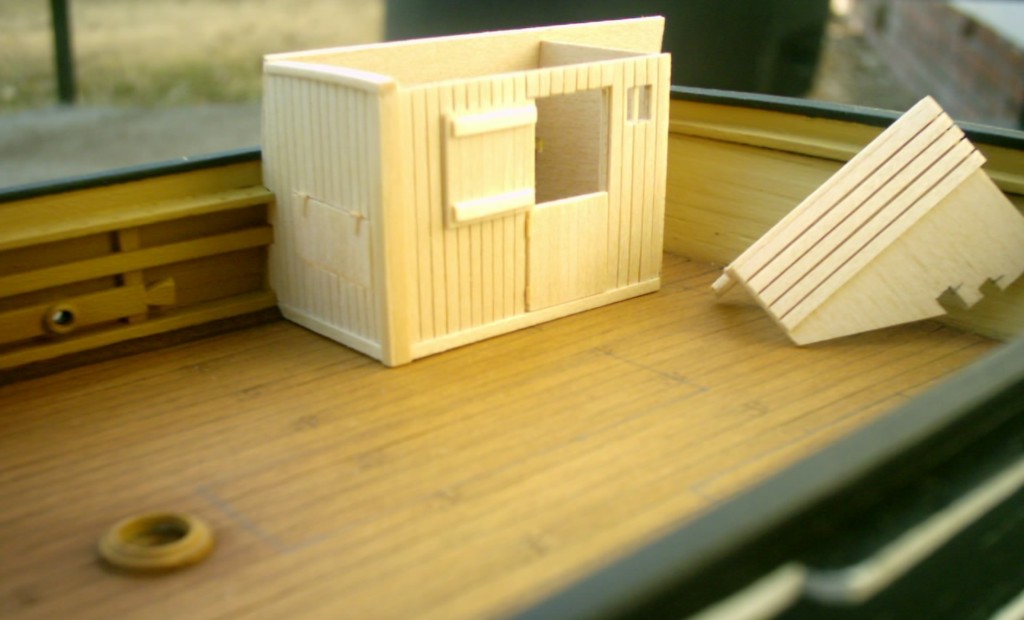
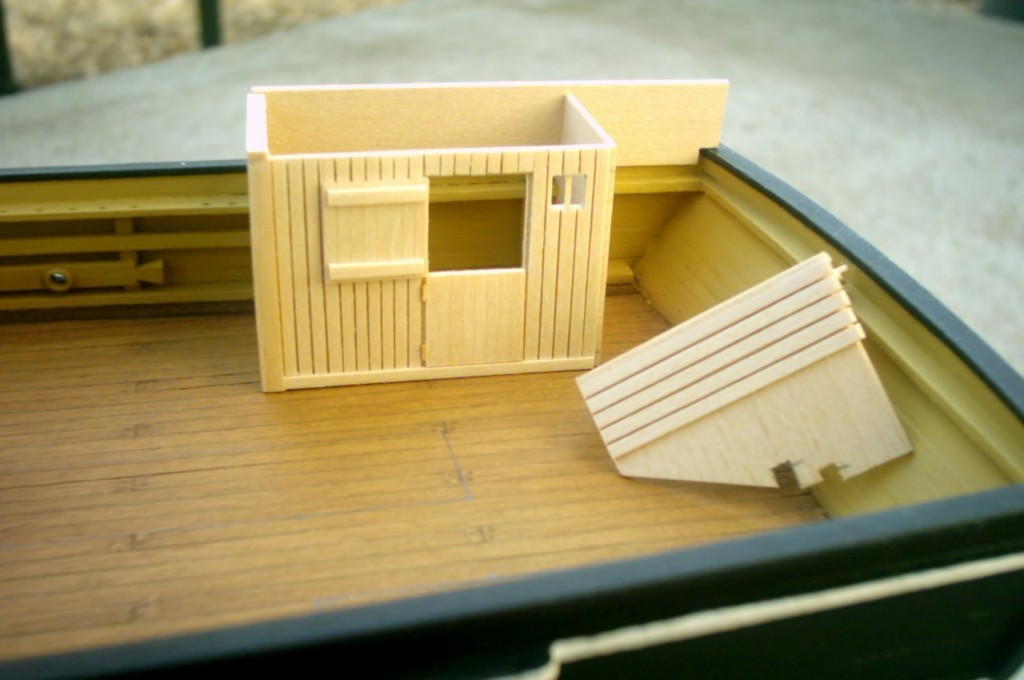
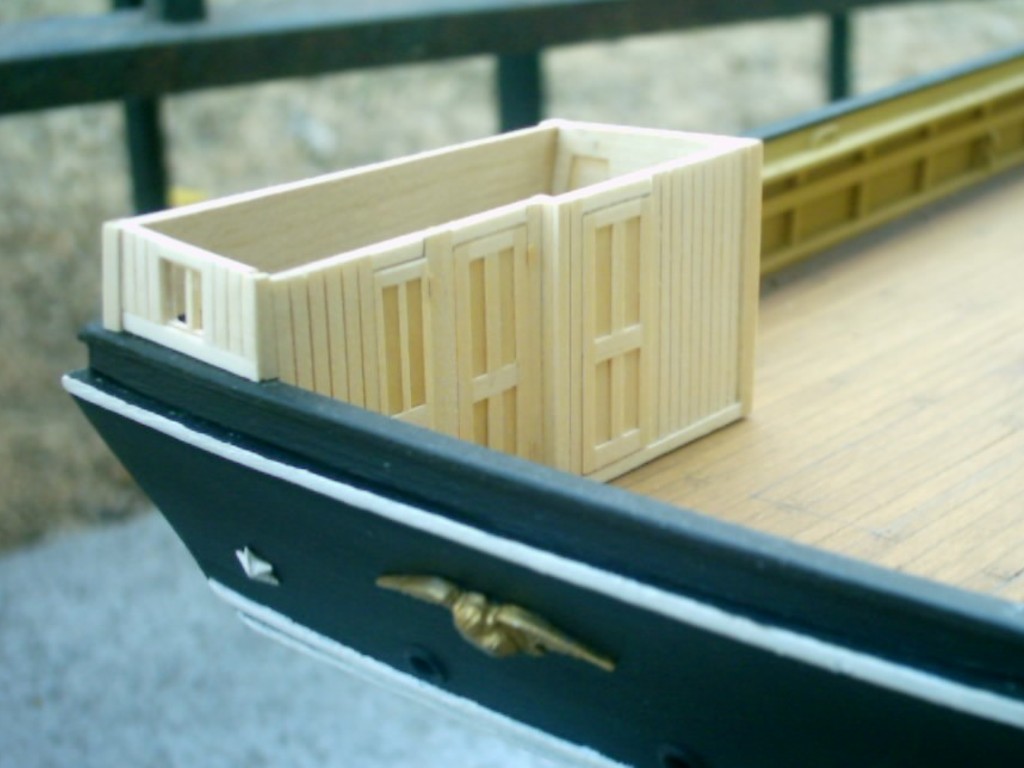
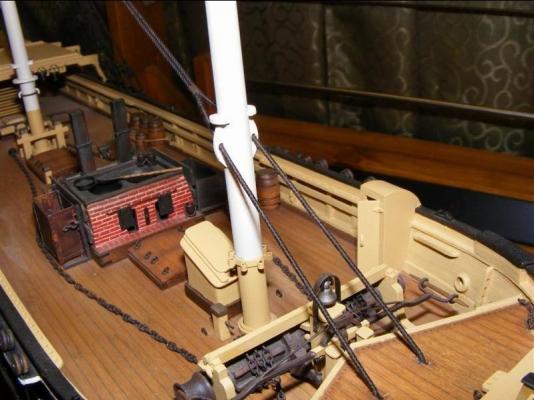
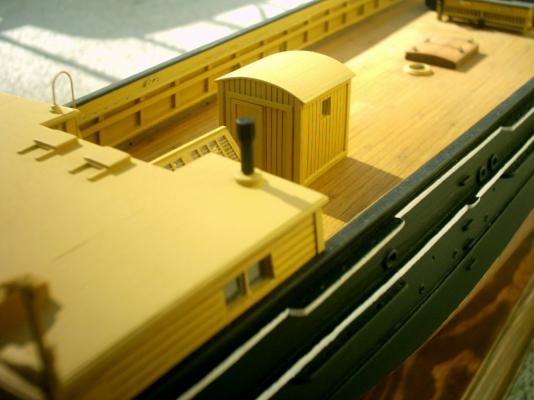
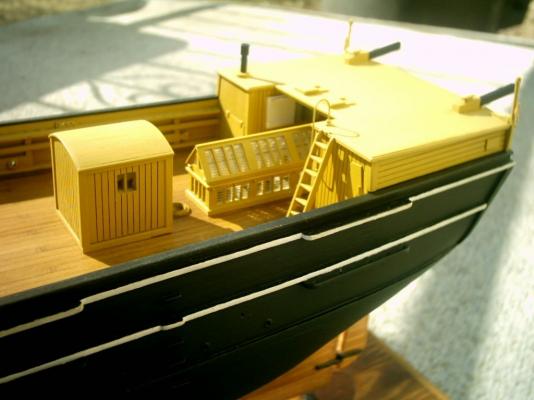
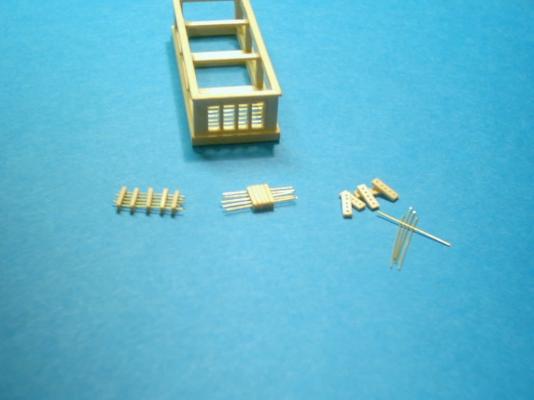
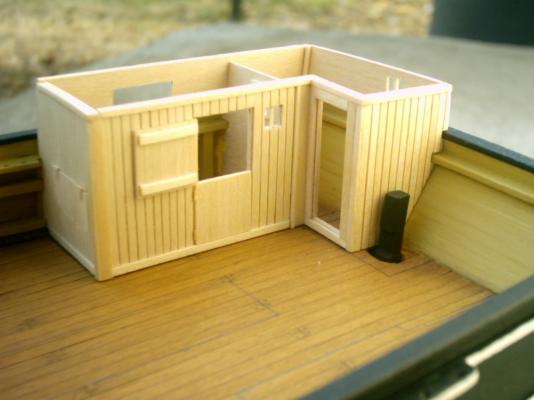
These are some pictures of the finished Hurricane House, and skylight in place on the deck.


-
Thank you Dave, and Tim. Ya, if doing a lot of fun miniature building is what you like doing, the Morgan has plenty of it. A lot of the time spent on this model, was spent building the deck features.
-
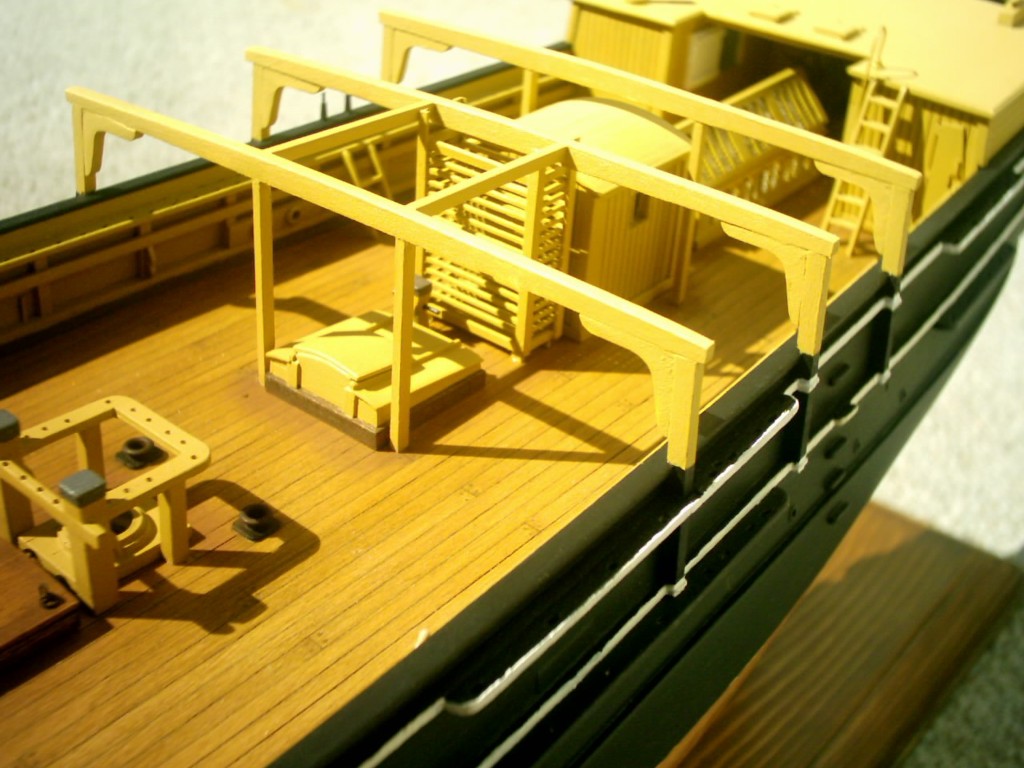
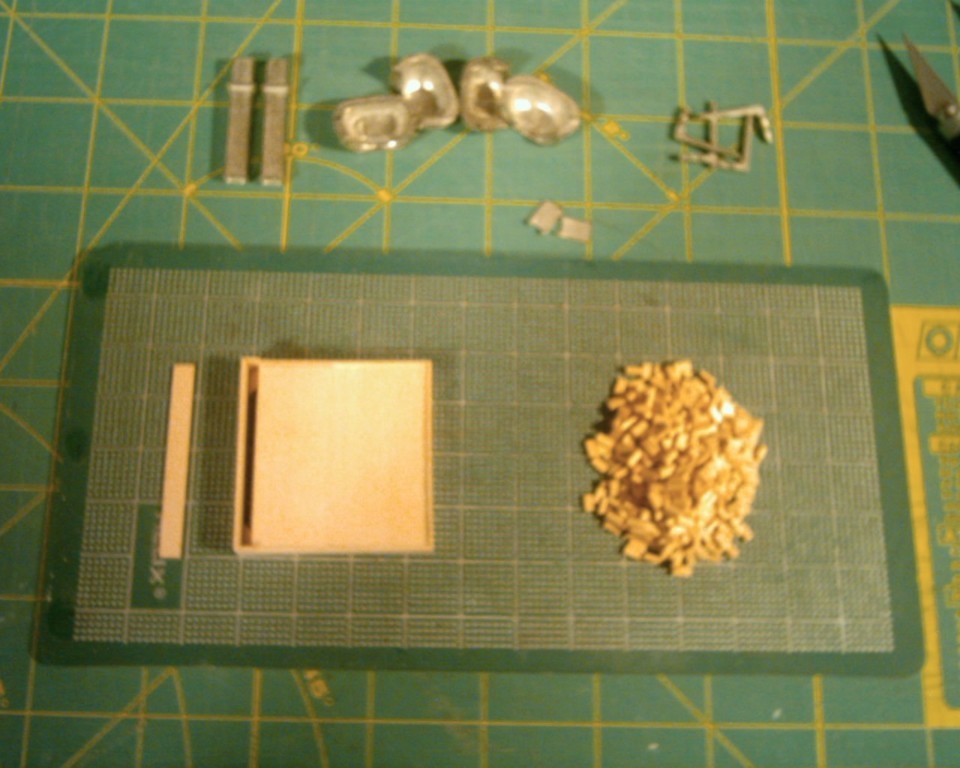
Here are some build pics of the skylight.

-
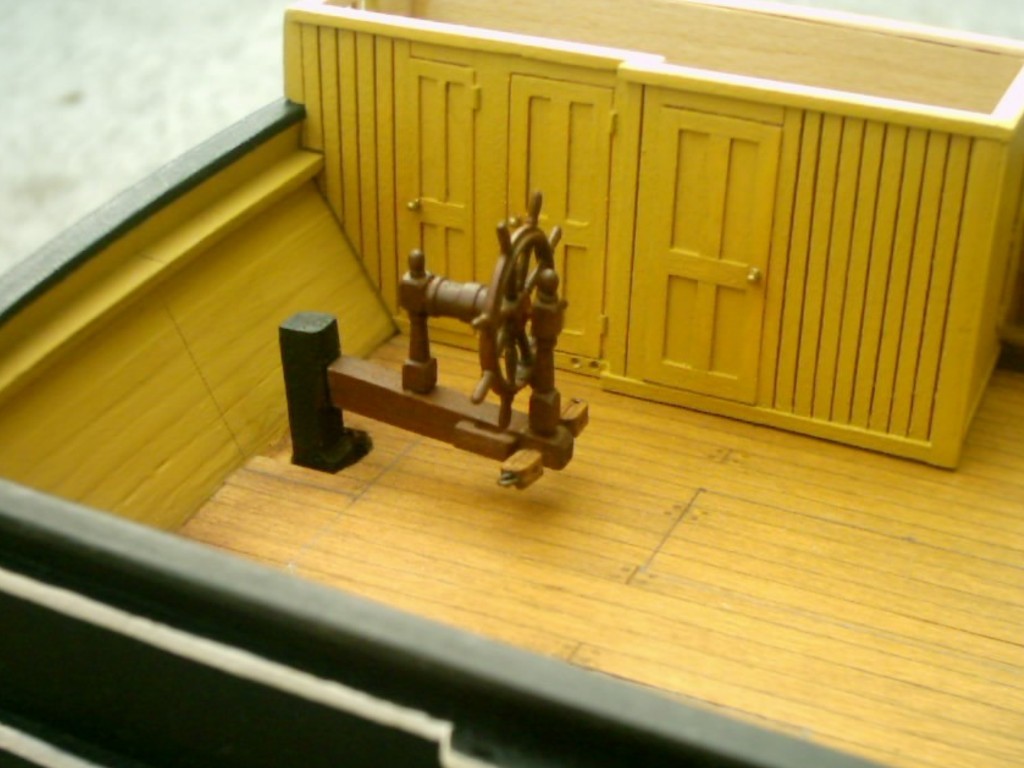
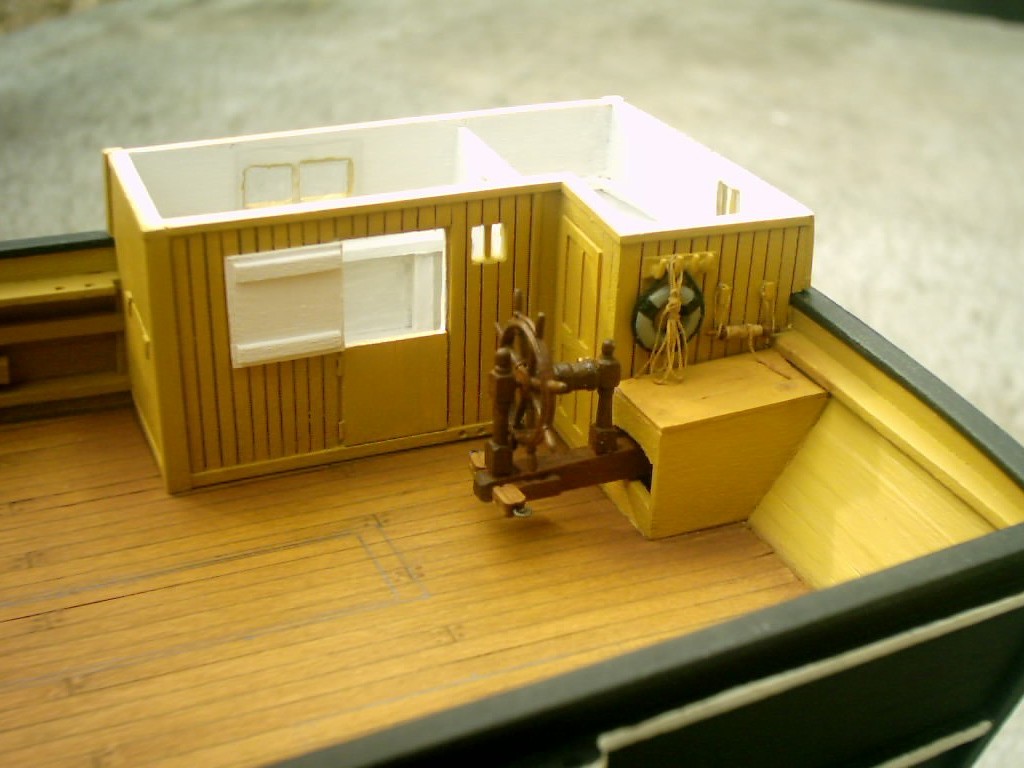
The ships wheel that came with the kit was in very poor shape, so I made my own.


-
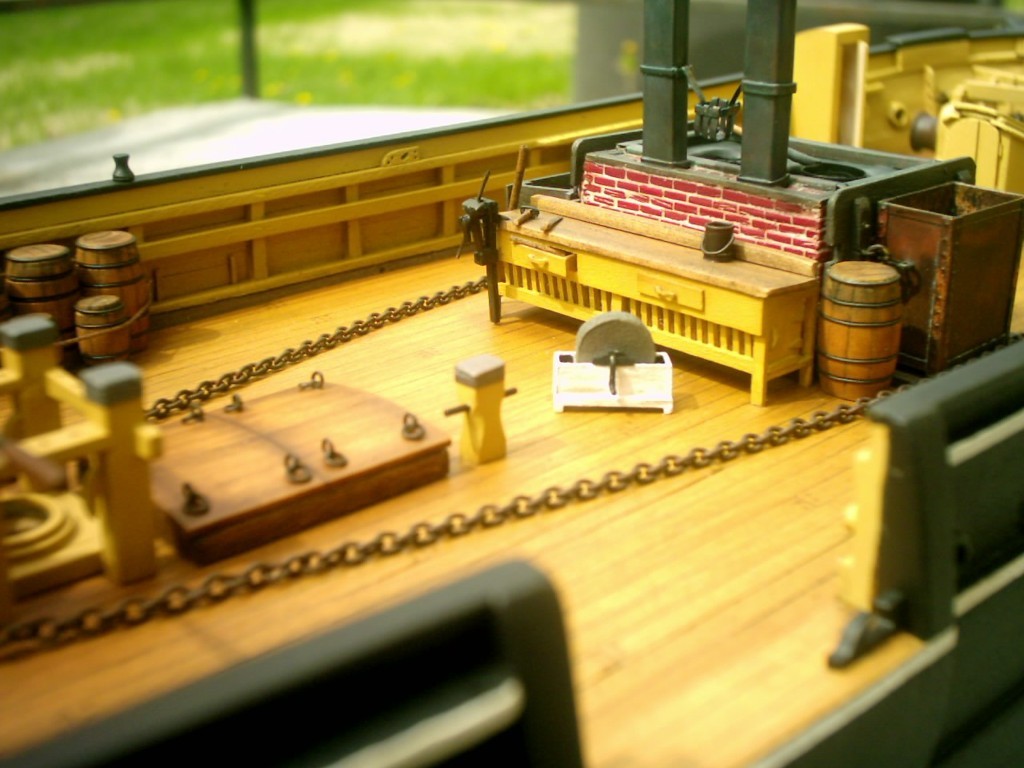
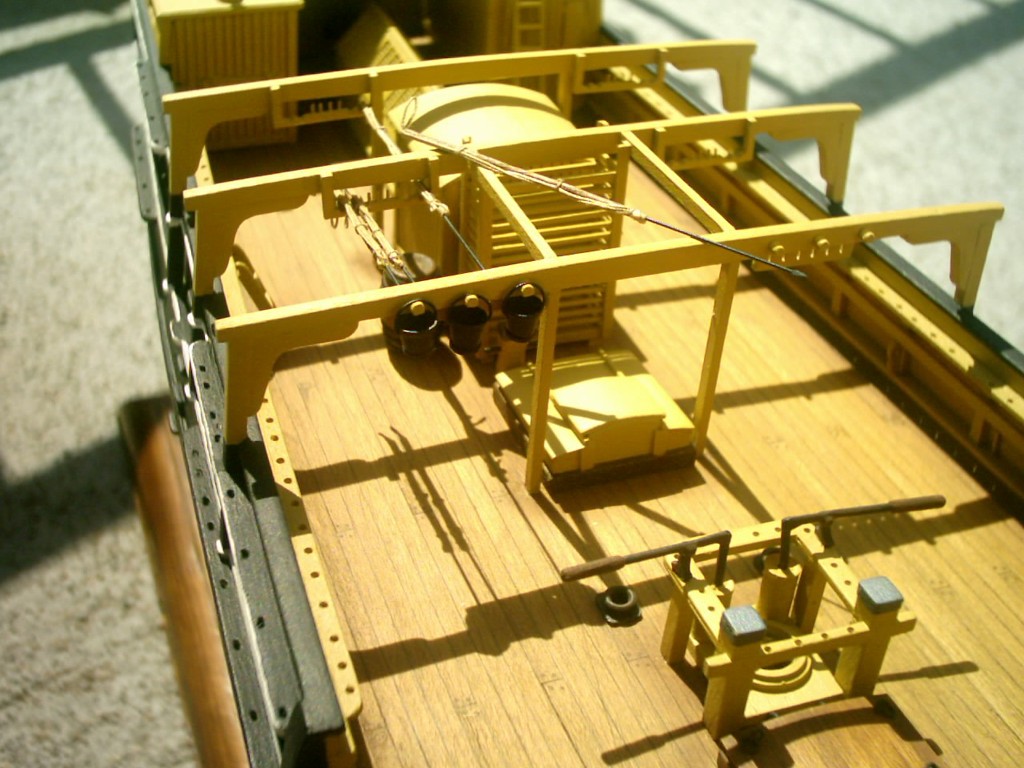
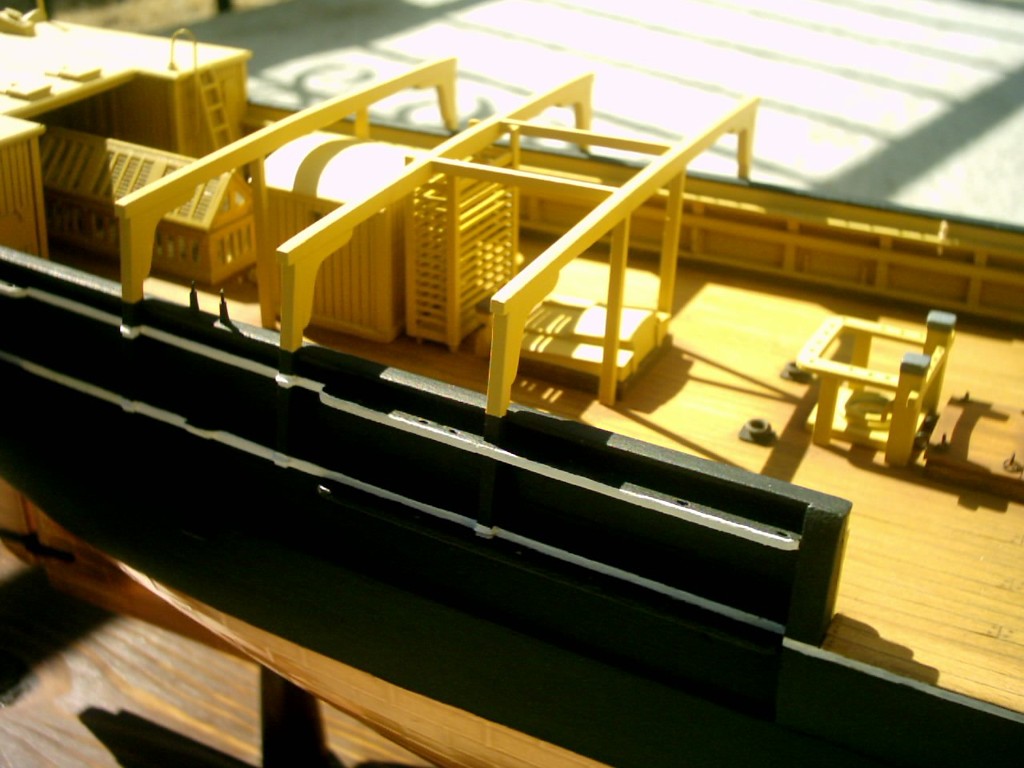
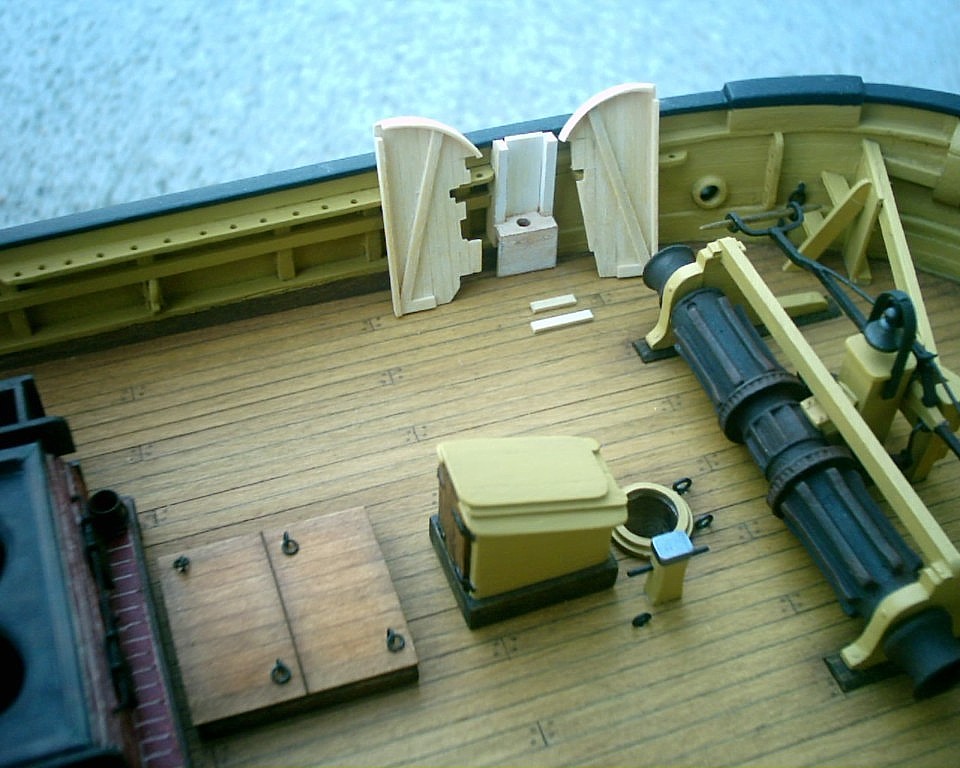
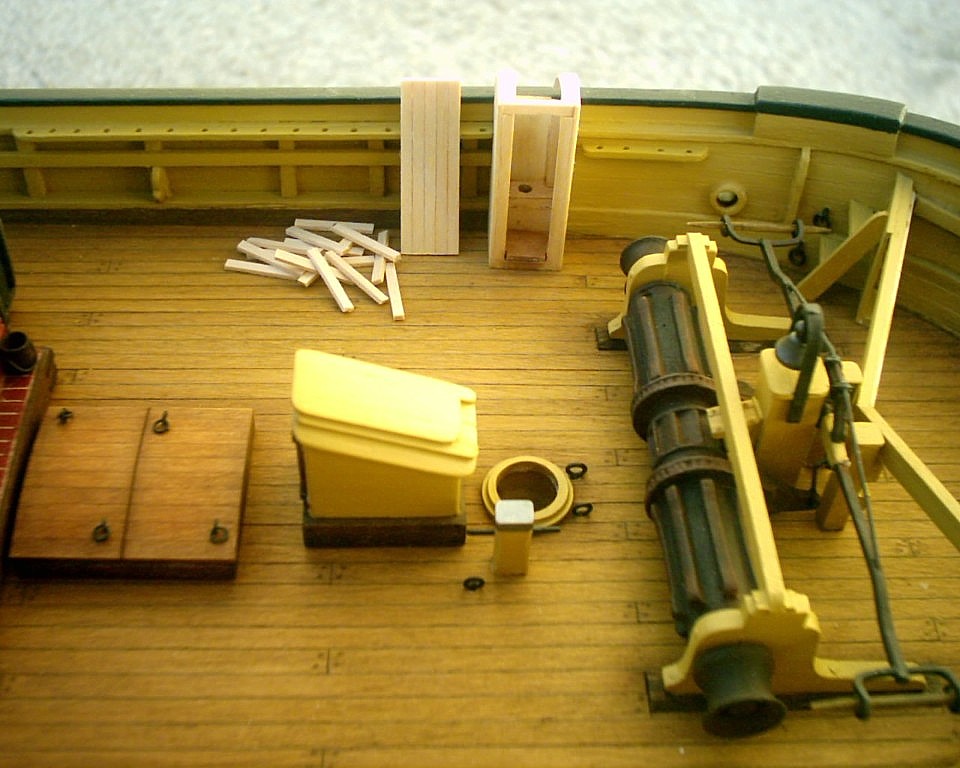
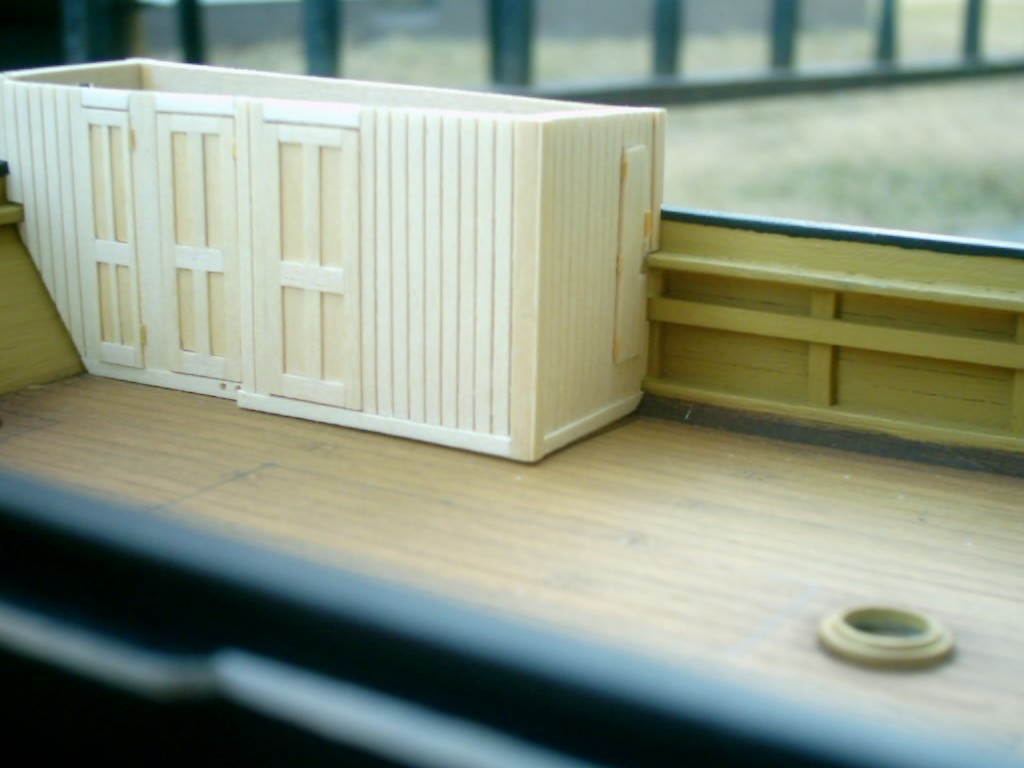
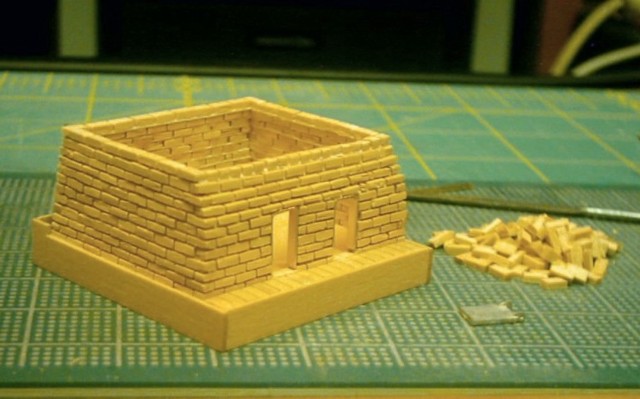
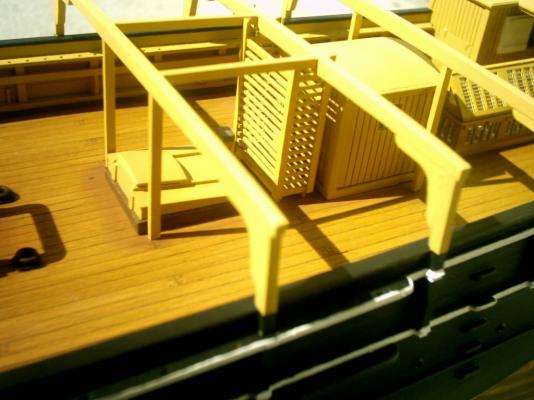
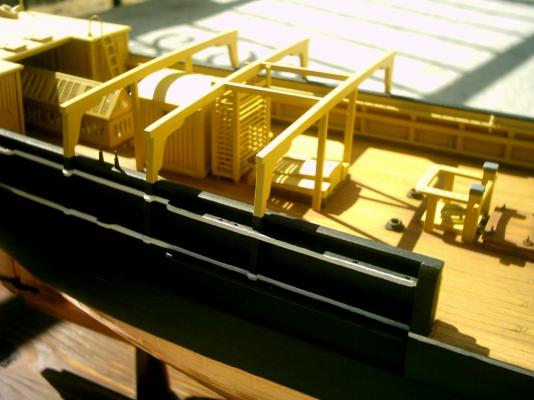
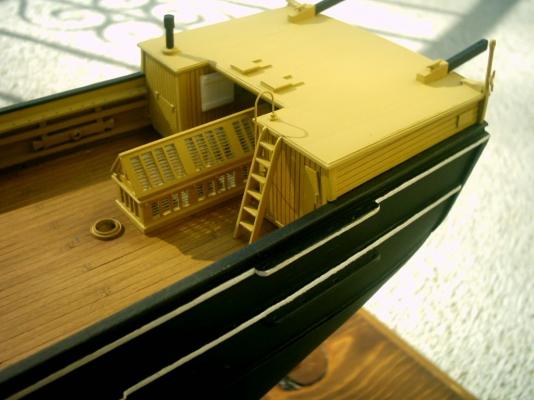
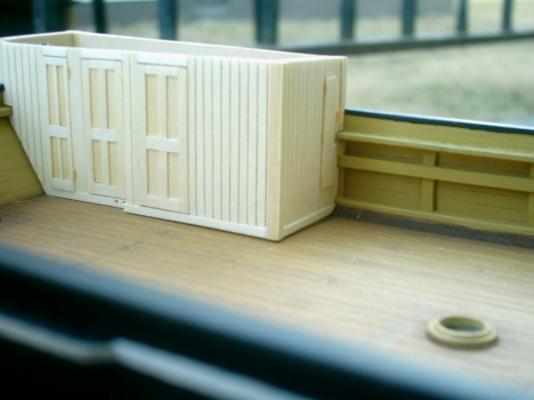
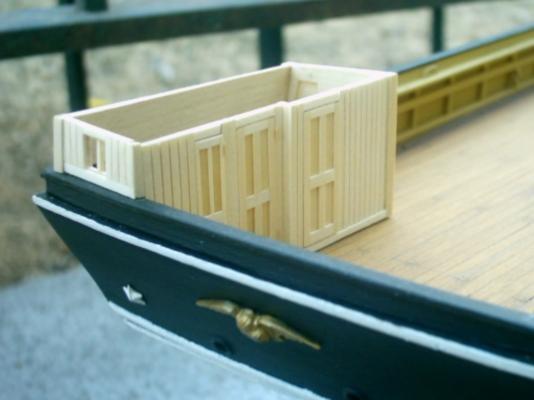
Hey Mark, it feels great to be reviving my Morgan build. My first order of business after I'm done here, is to clean the dust off of it, that's going to be a challenge in itself. This is the last of the text log I have, after this it will probably be just pictures until I get to where I can get things going again for new entries. Deck Structures: Besides the tryworks itself, building the deck structures is where a lot of building enjoyment comes in. The kit instructions give alternatives for these. You can plank the structures, or scribe the planking into the supplied sheet stock. At first I tried the scribing, figured it would be easier, and faster to do, but after putting so much work, and time into building the tryworks, I didn’t feel right about just scribing in the details, plus I didn’t like the looks of it. So, I decided to take the time, and build these as I did the tryworks. The plans that come with the kit shows a lot of construction details for the structures, and accompanied by the vast amount of actual photos of the actual ship that are available, the amount of work, and detail that one could put into these are amazing. First thing I would suggest doing, is in pencil, make a layout of all the structures on the deck. This way you will have an idea of how it all fits together, and will help with placement of the structures in their correct alignment. As an example of some things that I did. When I built the Hurricane house, and the smaller Deck House & Berth, I used the 1/32” sheet basswood provided in the kit, and planked over it using 1/32” x 1/16” strips for the siding. I did exaggerate the gaps between the planks though. I did this so the detail of the planking would standout more at a distance, and in an attempt to give it more realism. I used slightly thicker strips for the base boards, and corner trimming. The doors, I made by cutting individual pieces (frame & panel) so they would be built basically the same way as a real door. In my opinion, the plans show some very good detail for building the deck structures, and the many details that go with them. Just take your time with the structures, as they are a modeling experience all their own. If you enjoy the building part as much as I do, you’ll enjoy this part very much.


-
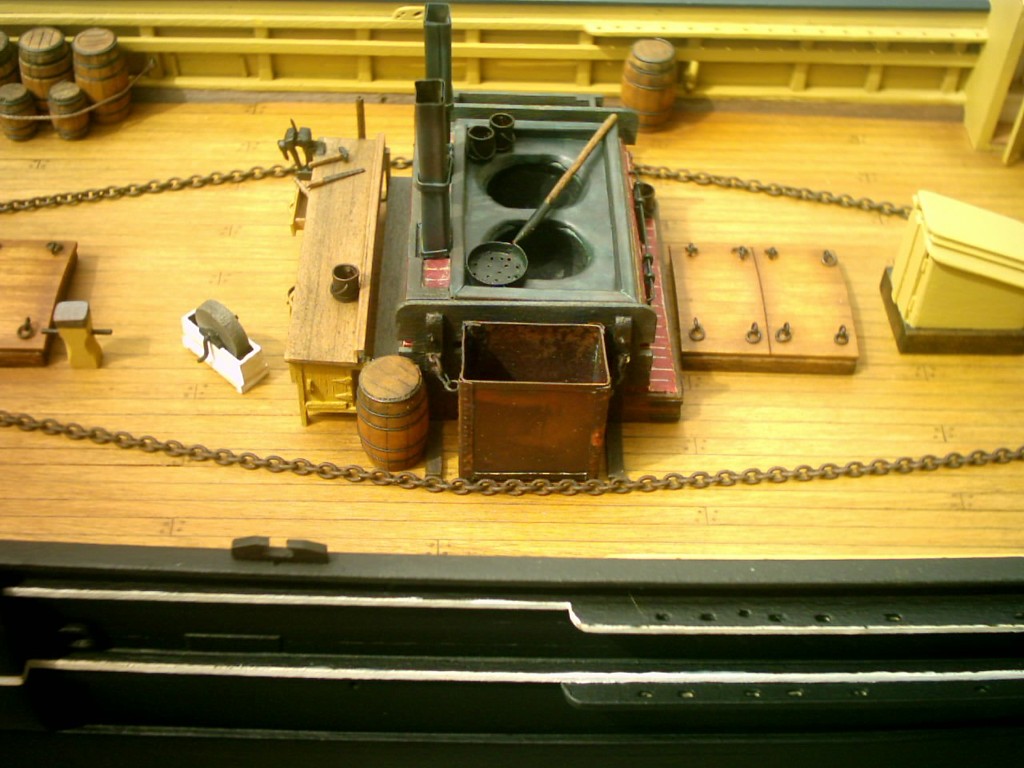
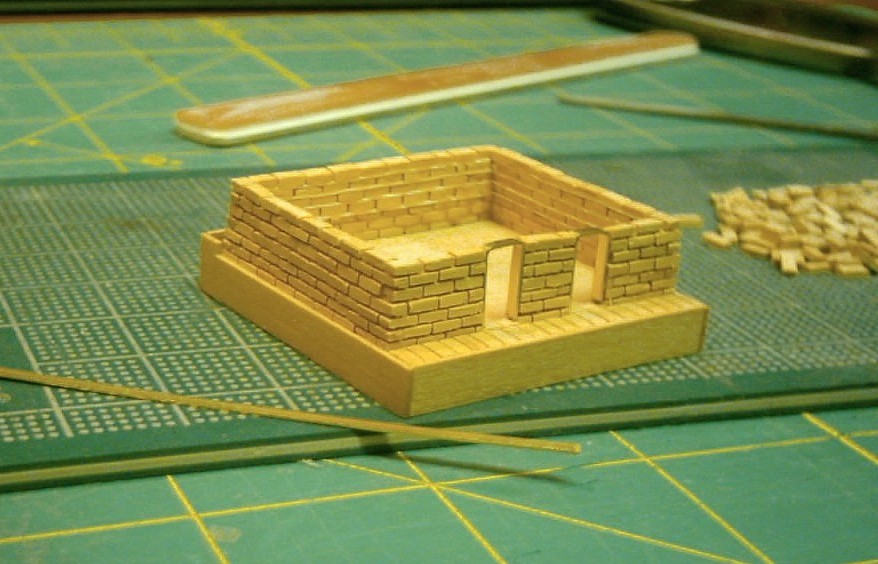
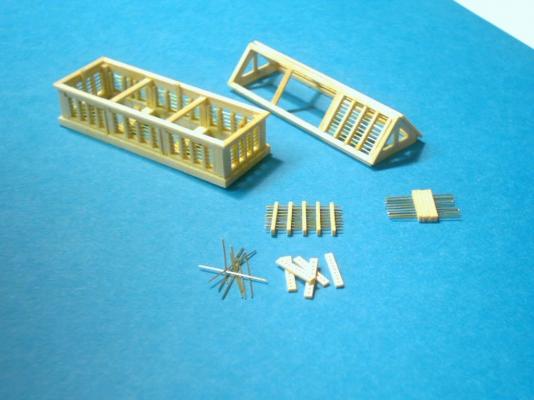
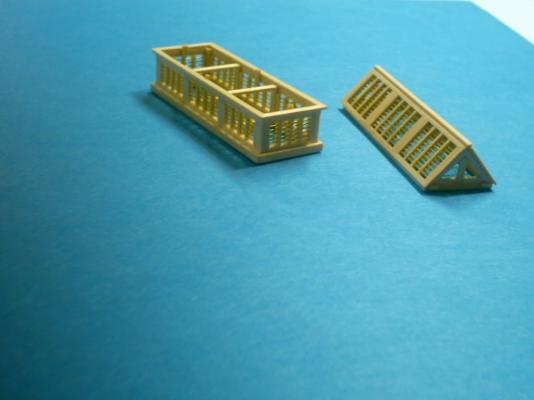
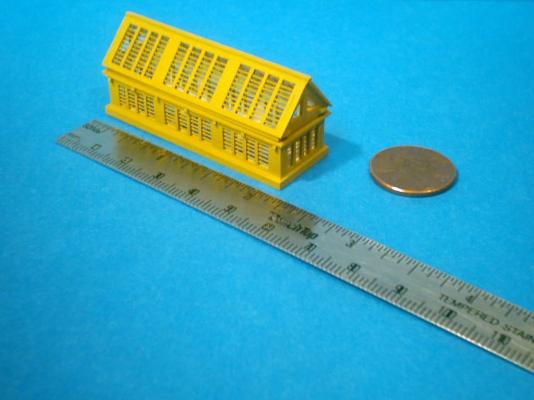
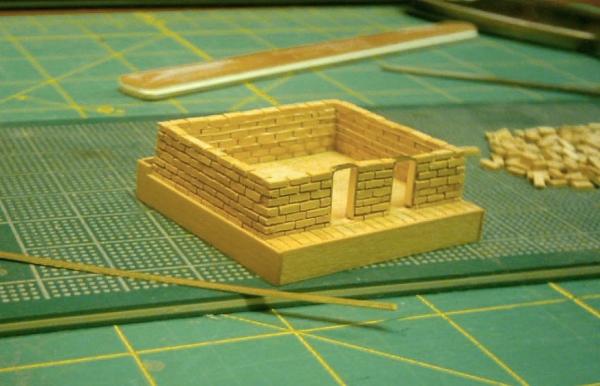
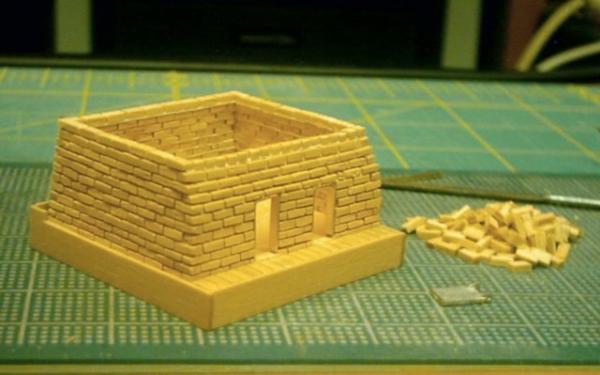
Instructions, and plans for building the tryworks, can be found in the Articles/Downloads section of the forum, under Furniture and Fittings. It is a PDF that you can download, and use. Here are some build pictures of the tryworks.


-
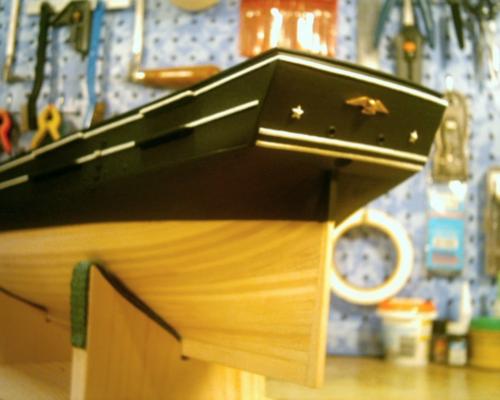
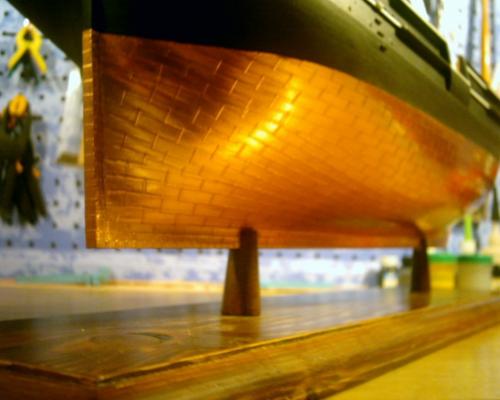
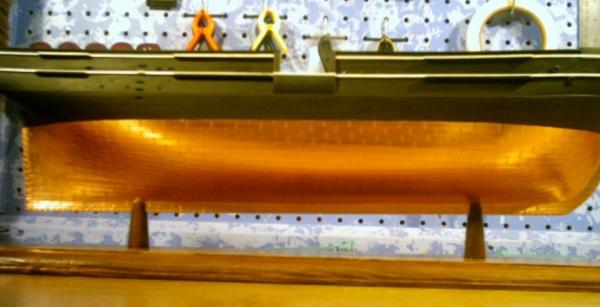
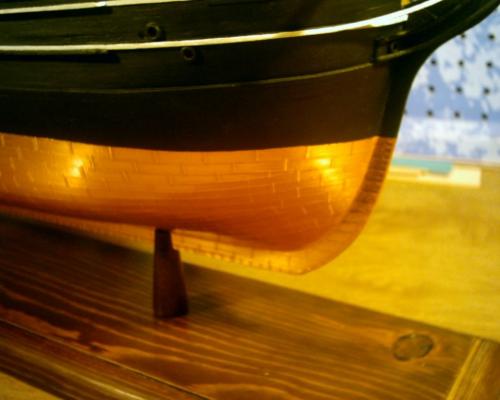
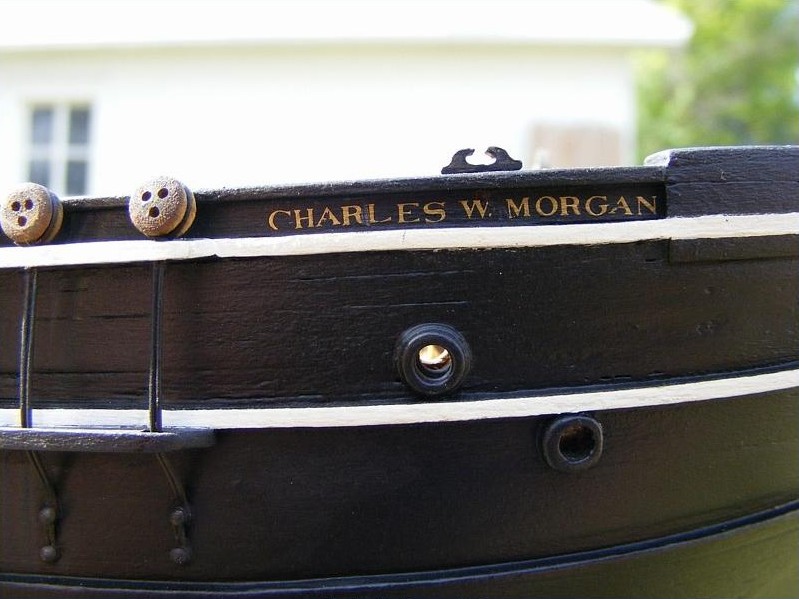
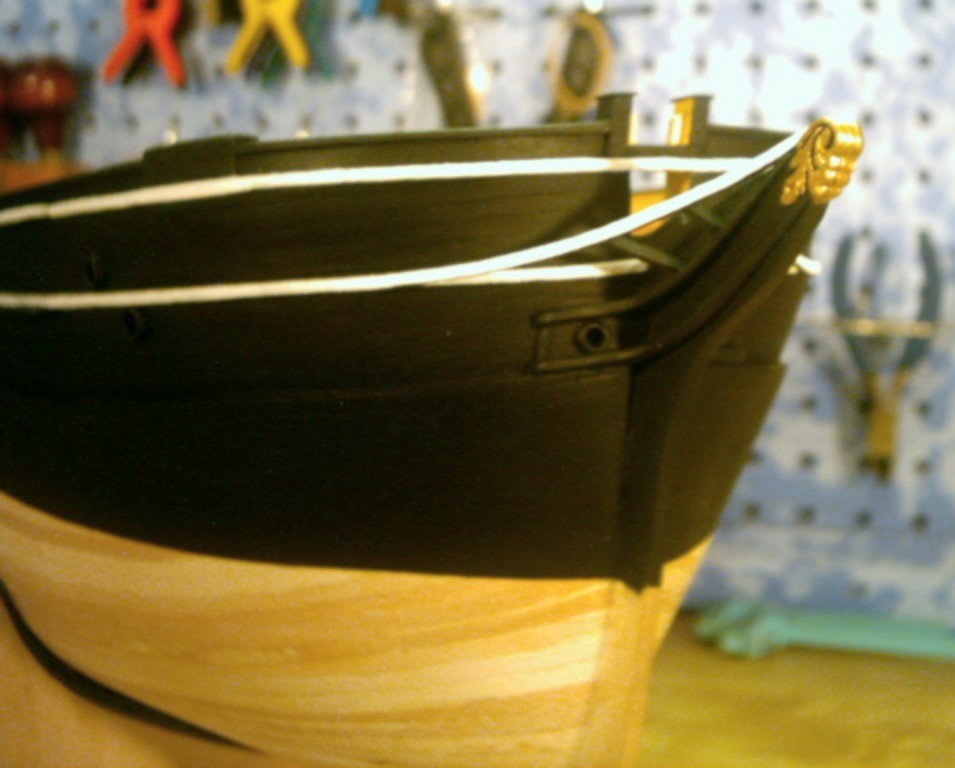
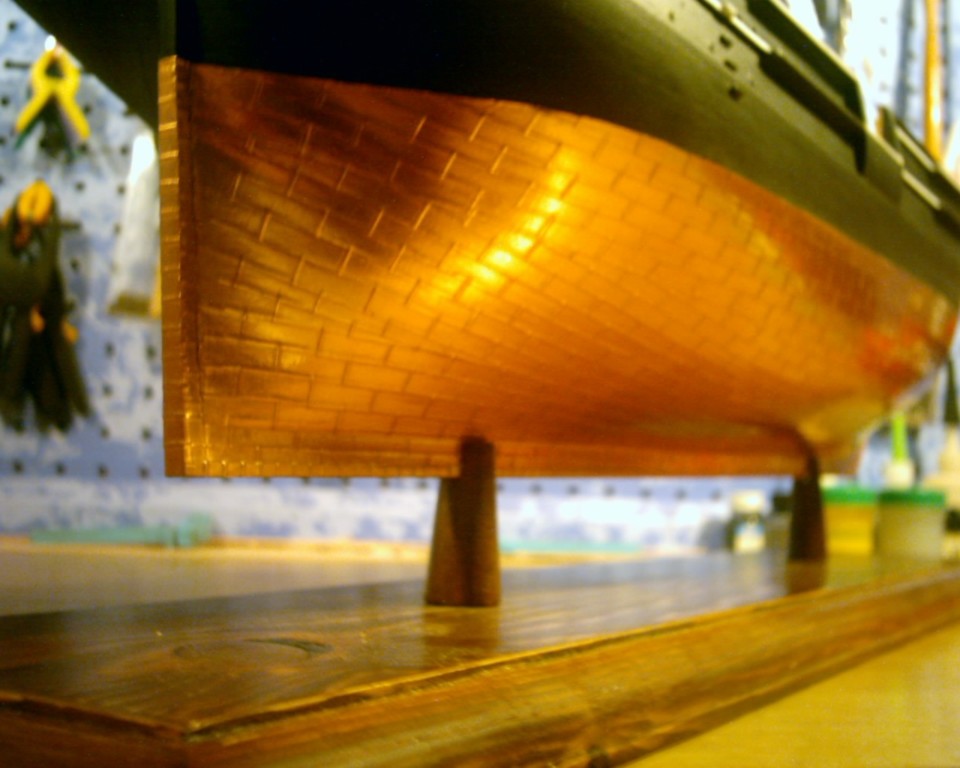
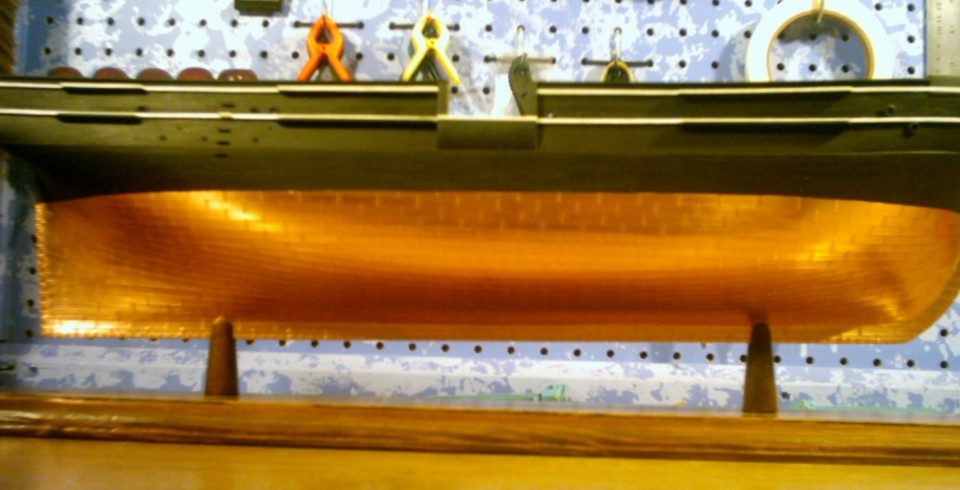
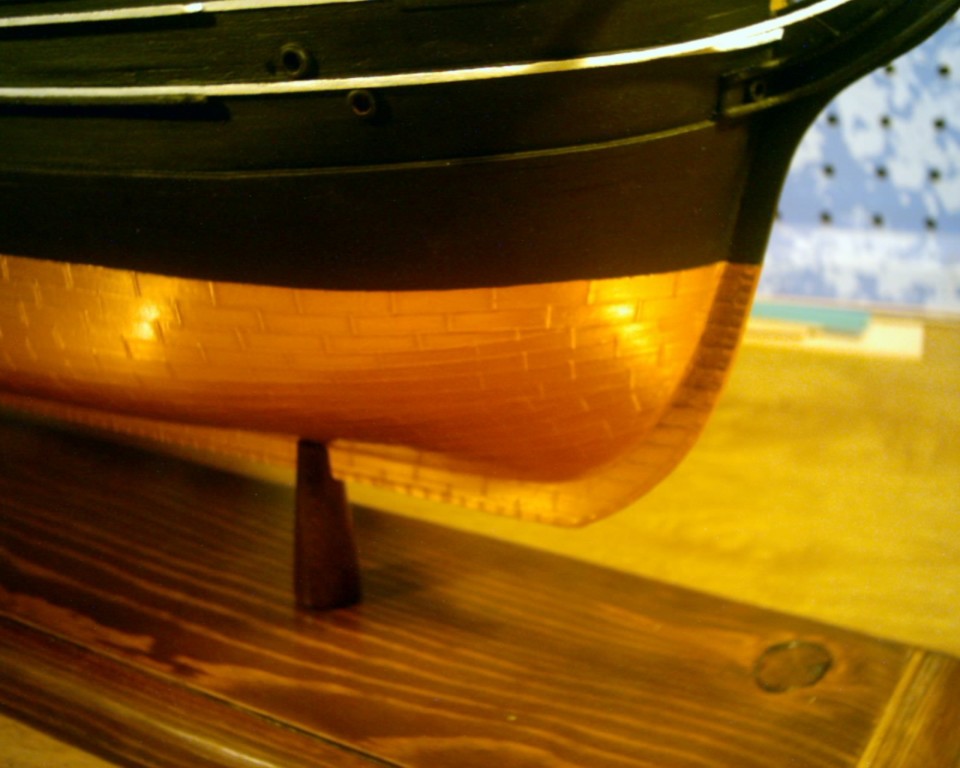
Here are some pictures of the hull after painting, and coppering.