HOLIDAY DONATION DRIVE - SUPPORT MSW - DO YOUR PART TO KEEP THIS GREAT FORUM GOING! (Only 72 donations so far out of 49,000 members - Can we at least get 100? C'mon guys!)
×


Gerald Spargo
-
Posts
69 -
Joined
-
Last visited
Content Type
Profiles
Forums
Gallery
Events
Everything posted by Gerald Spargo
-
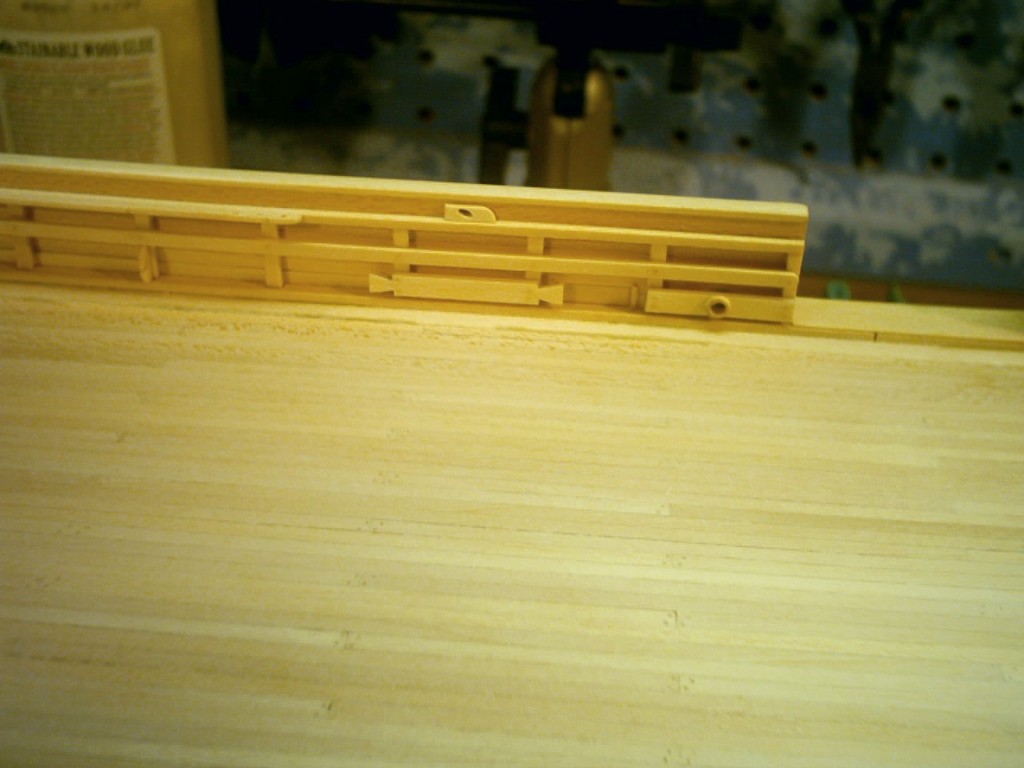
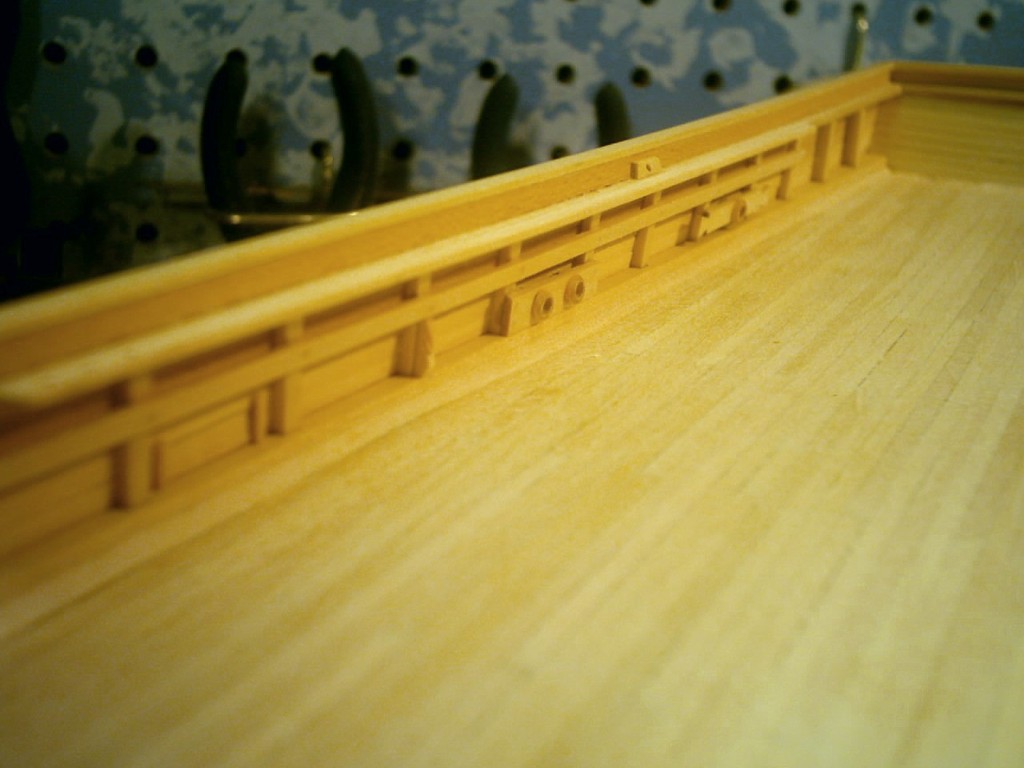
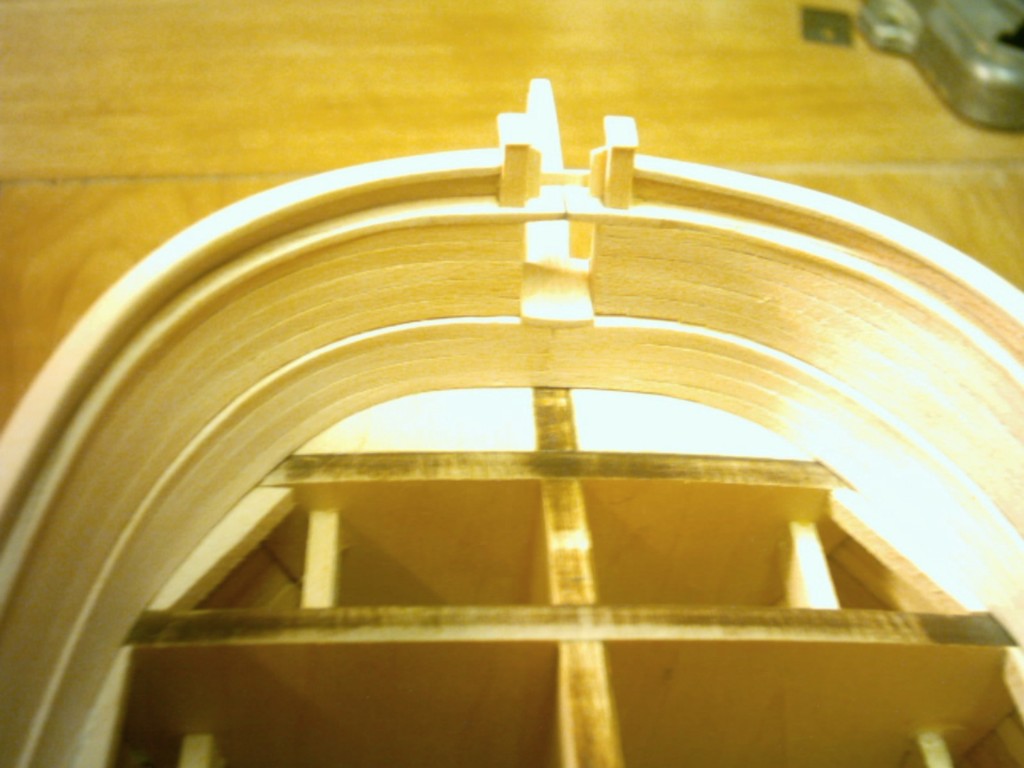
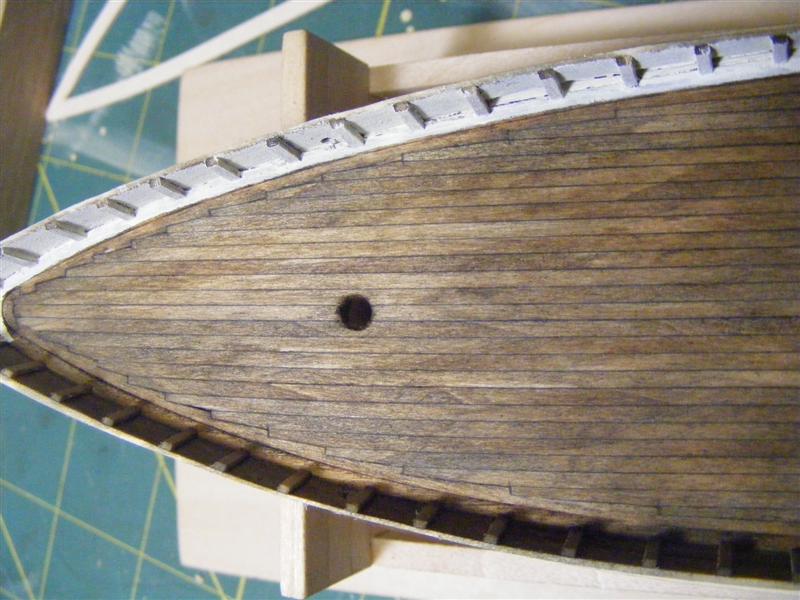
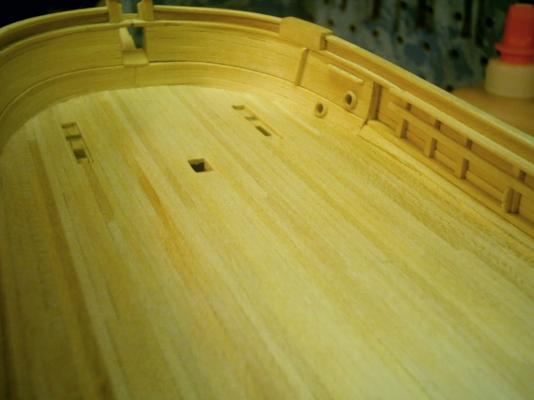
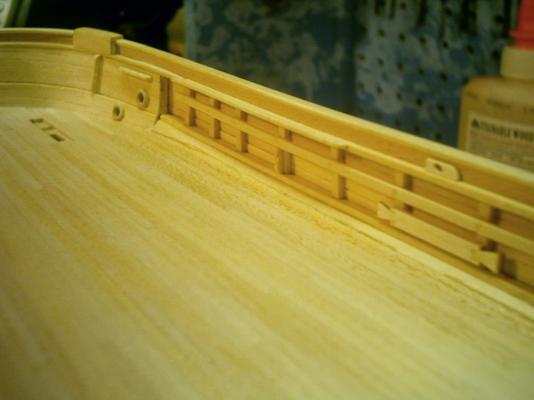
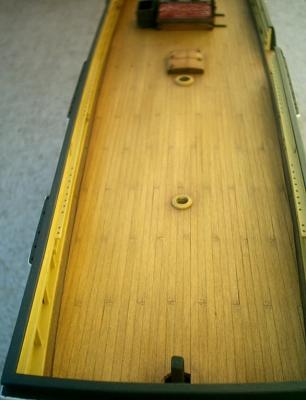
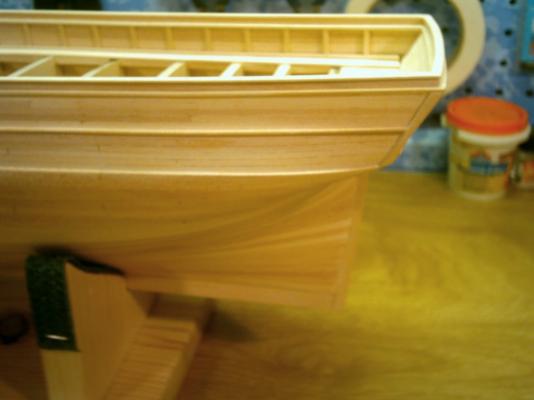
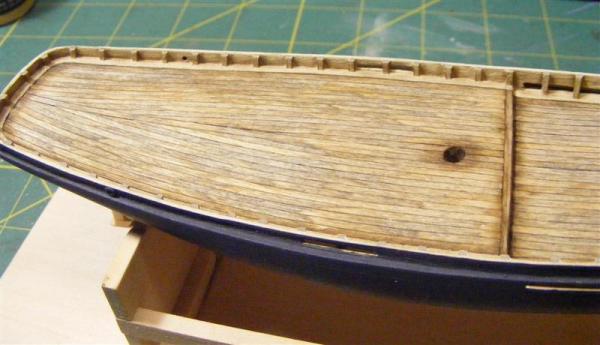
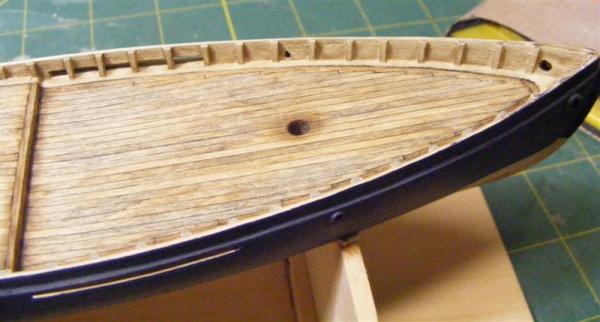
 Here are some more pics of the completed deck, and bulwarks before finishing.


-
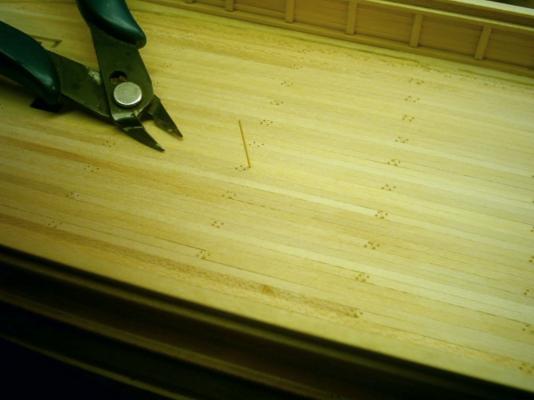
Deck Planking : Planking the deck went almost as well as the hull did. One thing that I may do differently the next time is add balsa wood in-between the bulkheads instead of just a small brace. The reason being, is that when planking the hull the curvature helps to hold the plank in the desired position because of the tension it provides, so one doesn't give it a lot of though. Planking the deck in the same manner of having nothing between the bulkheads nor a false deck, as most kits provide, is a different story. More care has to be taken to avoid low spots and to prevent the planking from running off course and becoming wavy. So therefore, I thing a solid surface for fastening the deck is the better way to go. It not only would be better for the deck, but would also provide more benefit to the hull planking as well. Another reason I say between the bulkheads is that if one were to substitute and put a false deck on top of a Model Shipways framing structure it would surely throw the scale of everything above the deck out of its scale height. Unless thinner planking were to be used on top of the false deck so the final outcome of the deck is no thicker than originally required. As such, I did eventually end up doing something similar to this, and it worked out great. I cut the planks to a length so that they would reach the distance of 5 bulkheads, starting at the transom in the center along the center keel. The shift pattern that I used, was a continental variation of a three plank shift, as I was unable to determine the actual shift pattern on the real Morgan. This shift pattern is shown on page 99 of Wolfram zu Mondfelds book Historic Ship Models. After the planks were in place, I drilled two holes at the end of each plank, using the angled pattern shown in the pictures of the real Morgan. I then inserted small treenails that I made using a draw-plate. I would tell you the size of these holes and treenails, but I really don’t know the size of them. All I can say is that they are the size of a needle. I made some mistakes the first time I planked this deck. The fist mistake I made, was I thought I could use dark carpenters glue to simulate the deck caulking, did not work. The second was the finish, the color was off (Golden Pecan Stain), and I had to much of a sheen to it, so I decided to re-plank the deck. I sanded down the original deck to get rid of the finish that I had on it, and to the point that I felt it to be safe enough to add a thin layer of planks over top the original deck. To simulate the caulking this time, I used a #4B art pencil to darken only one side edge and one end of each plank. I applied the planks to the deck the same way as before. This corrected the caulking problem. The finish was done differently than before. I applied two light coats of Drift-Wood Stain to the deck, and once dry, I lightly steel-wooled it. I then used some earth-tone pastels to get the finishing effect that I now have on the deck. Worked out very well. I used three shades of my weathering pastels to help give it the look that it has. I used a mid-tone brown on the whole deck, then added a lighter-tone (almost orange in color) though the middle of each plank. The darker shade I used around all the edges of everything that's setting on the deck, and at the ends of each plank. Before I added any structures to the deck, I sprayed the deck with two coats of a matte finish. I also stained the waterways with water based walnut stain, once that dried I blended the mid-tone brown with it. When I'm finished with everything and ready for the masting, then I'll have to give it all another coat of matte finish to make sure the pastels stay in place, and don’t smudge.


-
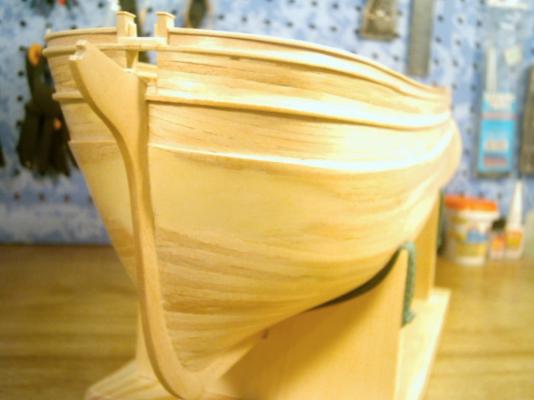
Hull Planking: Planking the hull went a lot smoother than I thought it would. Using narrow basswood strips, cut down in length, made this process a lot easier than using full-length planks. The only full-length plank I used, was the Garboard Strake: (Plank adjacent to the keel.) This was the first plank that I installed. This is the plank that fits into the rabbet along the keel and the lower part of the stem & stern. I left this plank full length for added strength in this area. From the Garboard Strake on up to the Wale: (A heavy layer of strakes below the Sheer Strake) I cut the planks to the length required by the manual. I also followed the shifting pattern, as shown in the manual. This kit (as with most) requires tapering of the planks at the bow & stern. Not quite so much tapering at the stern, this area mostly required some careful shaping in order to get the planks to lay nicely at the connection of the Counter: ( Underside of the portion overhanging the stern.) The bow area will require tapering. The way that worked for me was to dry fit the plank adjacent to the plank that it will be glued next to. I would start this at Amidships: (in or toward the middle part of a vessel.) and slowly run my fingers along the plank, making sure it was tight with the adjacent plank. It would soon come to a point that it was going to have to overlap. At this point I would mark the point of overlap with a pencil, and from that pencil line I would taper to the end, leaving the ends no smaller than 2 mil wide. I did have a little problem in this area, and had to use some filler to fix it. The wale on the Morgan is not your typical wale that protrudes outward from all the rest of the planks. This wale is actually part of the lower planks. The planks above the wale are thinner than the lower plank, therefore creating the wale. Then I planked from the wale up to the plank sheer using the thinner planks. Next came the part of adding the stanchions. I took measurements from the plans for the height of the stanchions and installed them according to the manual, and then I installed the rails. The planks between the plank sheer and the rails are even thinner than the ones between the wale and the plank-sheer, so be careful. Once done it’ll be stronger than it looks. Also at this time was the inboard planking of the ceiling planks. I ended up doing this twice. The first time I did the ceiling planks, they didn't turn out right, didn't have the curvature that it should have had. So, I sanded them down real thin and got the curvature that I wanted then re-planked over top of it. The manual gives full instructions on how to plank the hull using planking battens and belts, it just isn't the way that I did it. If anything that I write seems a little strange and out of context to the standard rules of ship modeling, then please bear with me, as these writings are based on how I built the Morgan, not on how someone else has or would have built it. I encourage everyone to search the Forum for different ways of proceeding with the various building aspects of ship modeling, as there are many number of ways explained throughout the Forum by many, many modelers.


-
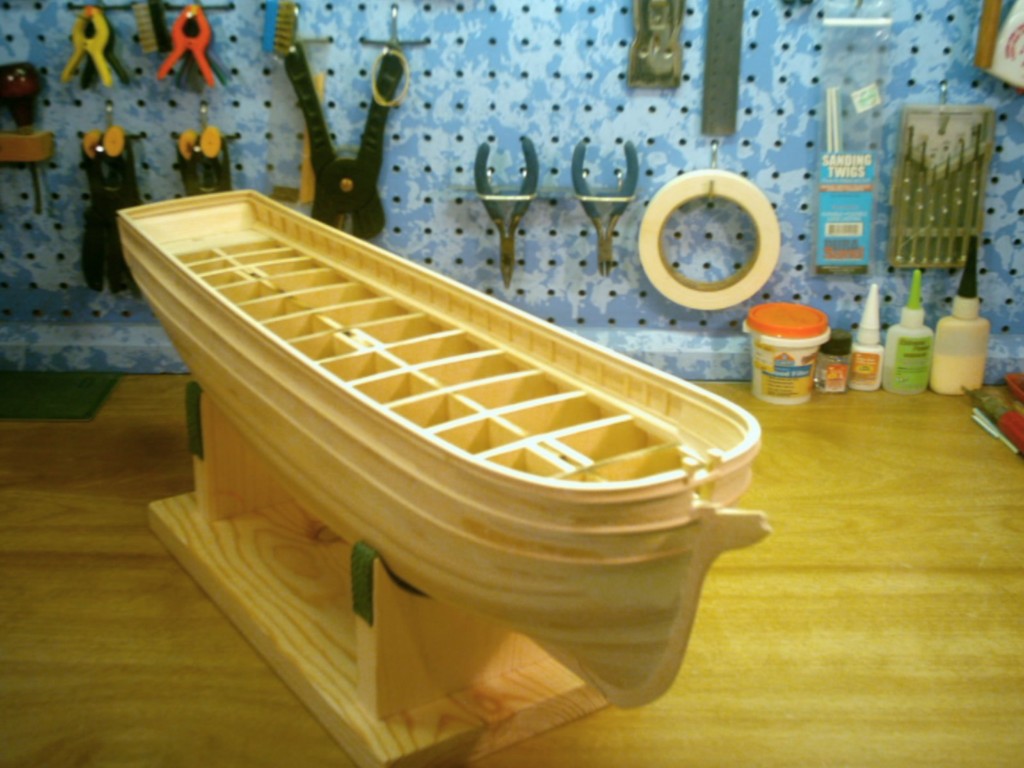
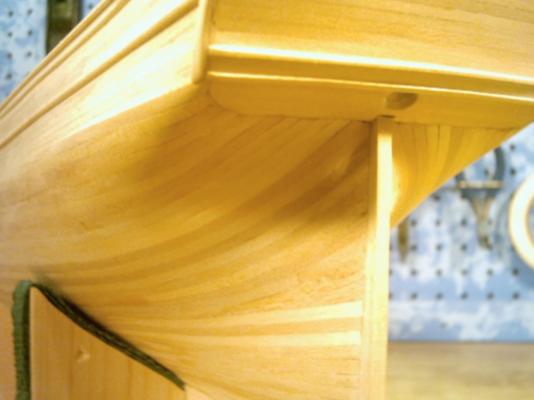
Building of the Hull Structure: Now I did not take pictures of the building of the bulkheads or the planking of the hull. It was after this point that I started taking pictures. But, I will describe that part as best I can. For the first part of the build I pretty much followed the kit instructions. Because this was going to be my first time of doing single planking on a hull, I wanted to make sure I did things right. I was a little worried, cause I was use to having a second layer to cover up my mistakes, in this kit there is no second layer. The bulkheads and center keel assembly went together quite well. Just need to do a small amount of sanding in the center slots to get some of them to fit correctly, but that was minor. I squared the bulkheads with some small squares that I have. I also placed wooden spacers in between the bulkheads for added strength and stability. I had no problem with the keel being warped so the keel and the stern post fit nicely. I tapered the stem according to the plans and it also fit on nicely. After getting the framing built, I cut the rabbet into the stem, keel, and stern-post, using a #11 blade. For being the first time of cutting in rabbet, well, that’s exactly what it looked like, my first time. But, it worked out in the end. So all in all, I was quite happy with the way the framing went together straight out of the box. Oh, don’t forget to add the covers to the mast slots, very important. Now, here is the part that gave me fits. There are 5 pieces that need to be carved and shaped. Four of them are the bow and stern filler blocks. I had to give these a few tries before coming up with an easier way of doing them. Instead of trying to shape the whole piece all at once, I cut the block wood into smaller pieces. Then piece-by-piece I got the filler blocks in place. The 5th piece is the counter block, this one wasn’t so hard, and I got lucky and succeeded my first try. I also installed the plank-sheer and waterway at this stage. The plank-sheer was easy to install, the waterway need to be shaped at an angle prior to being installed. I used my block plane to this, by clamping the plane in my bench vise. Then I carefully drug the wood strip over the blade several times until I got the required angle. These two pieces I went ahead and added at this stage because it was going to add strength to the bulkhead tabs, therefore helping to prevent them from breaking off during the planking of the hull. The instruction also wants you to add the bulwark stanchions, knight-heads, timber-heads, and railing at this stage. But, I felt it to be safer to do that after planking the lower part of the hull up to the plank-sheer. Notes: When building this kit I do a lot of referring to actual photos of the Morgan. Also, there is to be quite a bit of scratch building to this kit. If, you plan to do more scratch building than what is required by the manual and plans, then be prepared to buy more wood.
-
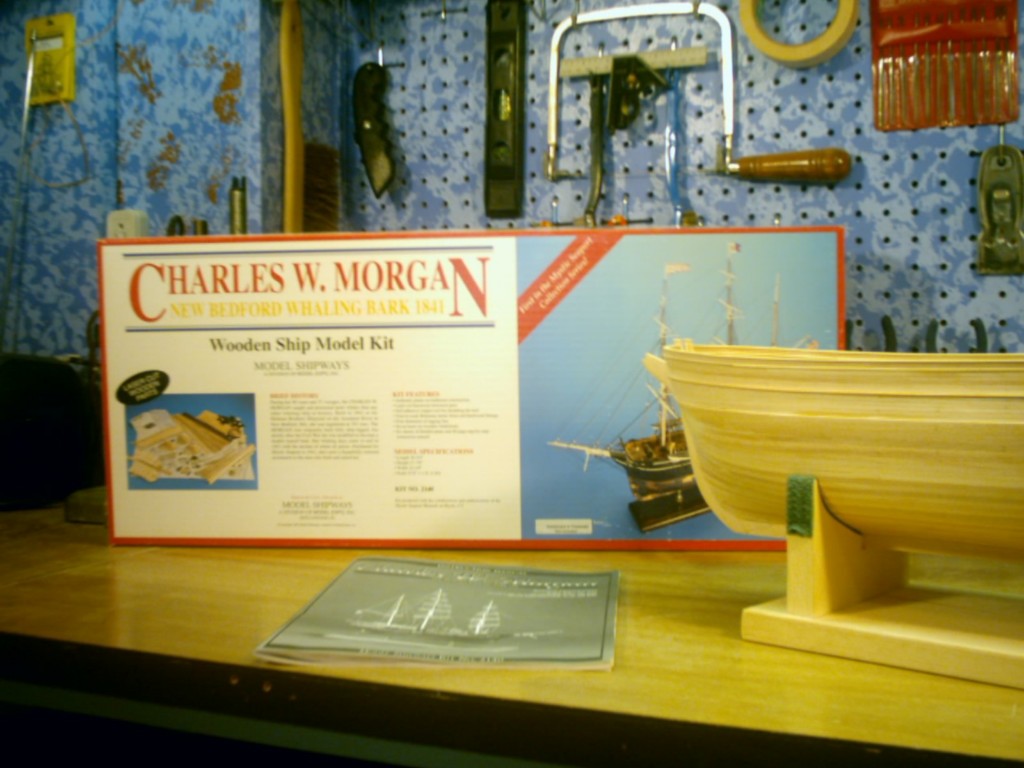
I am reposting part of my original build-log, as the rest doesn't exist anymore. After that, I'll let the pictures explain the rest, as I have taken a lot of pictures at many different angles. The Charles W. Morgan was built in 1841 at the Hillman Brothers' Shipyard on the Acushnet River in New Bedford, Massachusetts. She cost $52,000 and was registered at 351 tons. During her 80 years of service, she caught and processed more whales than any other whaler in history. Her active days ended in 1921 with the decline of whale oil prices. The Charles W. Morgan was purchased for Mystic Seaport Museum in 1941, restored, and displayed there as a monument to the men who built and sailed her. The models specifications are as follows; Model Shipways Kit No. 2140 Skill Level...Advanced Length...30-3/4" Height...27-7/8" Width...10-1/8" Scale...3/16" = 1 ft. (1:64 ) Wooden Parts: Most wood supplied with this kit is basswood, there is no plywood in this kit. The precut wooden parts are all laser cut. You will find 16 sheets of laser cut parts in various thickness. 7 of these sheets will contain the small whale boats which is built in the bread-n-butter style. 1 of these sheets is cherry, amongst its various parts are the deck gratings which are very small. There are 6 different sizes of dowels, 21 different sizes of wood strips, plus additional wood sheets. The deadeyes and blocks are made from walnut and there are 3 different sizes of each; deadeyes, singe blocks, and double blocks. The frame work of the hull consist of 15 bulkheads, a two part center keel, a two part keel, sternpost, and stem. All of which is laser cut from solid wood so care must be taken so that the frame structure doesn't warp during construction. There is no false deck so the deck planks will be applied right over the bulkhead frames, again care must be taken so as not to end up with wavy planks since there will not be a solid backing to lay the planks on. The mast and spars are not pre tapered so you will have to shape them yourself. All the deck structures are built and planked from wood strips. If you would prefer not to build the deck structures this way then wood sheets are provided so they can be cut out instead. The hull is single planked so no second planking is supplied, but if you chose to add a second layer of planking, the instructions are included to do so. Metal Fittings: All the metal fittings are either Britannia or brass. These include a lot of fittings; windlass barrel, billet head, stern eagle, bench vise, grindstone, chocks, cleats, tackle hooks, and line tubs, just to name a few. The fitting's aren't to bad, some of them will require some cleaning, also some of them will require being replaced, which for the most part, isn’t to hard to do as far as making your own. You get two different sizes of chains, bass wire, and one size of copper wire. 1/4" tape comes with the kit for coppering below the waterline, but it is to big as the correct scale is 7/32" not 1/4". You could either trim it down to size or replace it with the right size of tape. Rigging: The rigging line comes in black and manila hemp. It is made from nylon. I will give you the sizes and stock no. cause you may want to order extra. There is no sail cloth provided and there are no actual sail plans, but if you are good at making them then you could do it with what they do show. No flags are provided so they will have to be made by following the instructions. WP1218.... 0.008" Dia. Black WP1210.... 0.021" Dia. Black WP1211.... 0.028" Dia. Black WP1215.... 0.040" Dia. Black WP1241.... 0.008" Dia. Manila Hemp WP1242.... 0.021" Dia. Manila Hemp Instructions and Plans: The kit comes with a 40 page nicely detailed instruction manual. (English is the only language.) It doesn't have progress photos in it but has a lot on instructional diagrams instead. There are 6 sheets of very well done plans. Plans are as follows; 1.Laser Patterns, 2.P-O-B Hull, 3.Hull Plan, 4.Hull & Spar Details, 5.Rigging Profile, 6.Rigging Sections. The plans are designed so that you can take measurements straight from the plans and transfer them right over to the model. Details: This kit offers a lot of detail and a lot of scratch building. With all the building required for this kit, coupled with all the available pictures of the actual ship, this build offers a lot possible approaches on how to build it. I myself am going with the weathered approach. Mine is more of a combination of what the Morgan looks like today, and also the look of still being an active working ship. As far as displaying you will need to get the base and pedestals yourself cause they are not provided in the kit. This is my point of view of this kit so far. Despite all the hard work, and scratch building that it takes to build this kit, it has been the most enjoyable kit that I have ever had the pleasure of working with.

-
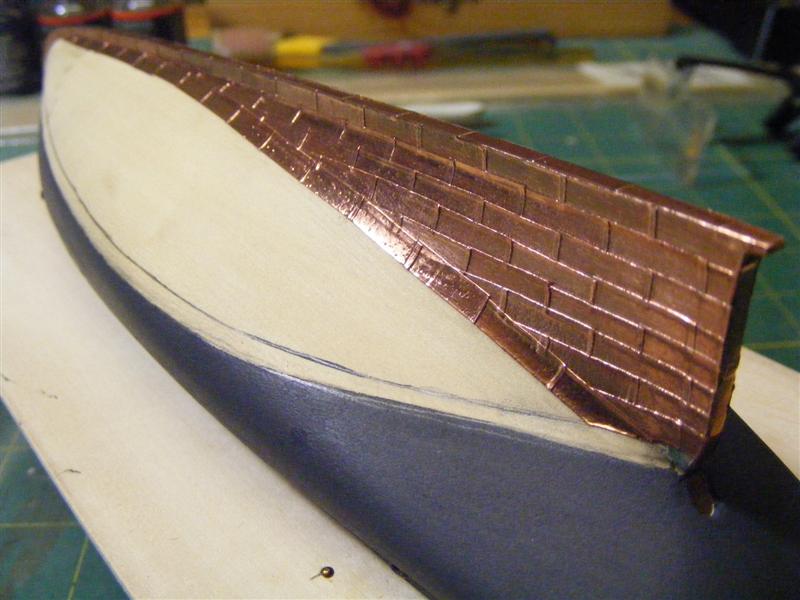
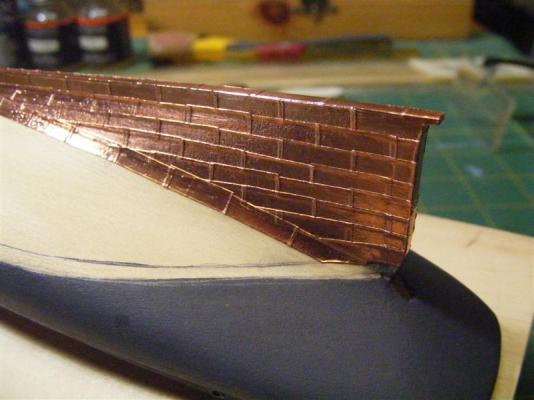
Here is some progress on my Phantom. I know some are cutting the plates at 1/8" x 1/4", but I wanted longer looking plates, so I cut mine at 1/8" x 1/2". I have the first stage of coppering done, and have the second stage started.

-
Gulfmedic1.........Yes, as Russ said, the Phantom does come with a scribed sheet for the decking. I preferred the individual planking. The actual size of planks I used is .0208 x .0625, I got these through Midwest. I didn't buy these for this purpose, they were actually going to be used for some 1/4" scale structures that I never got to. Kit bashing is what makes this hobby so enjoyable, and is what makes each model you build, more personal to your own individuality. Thank you Jack, and Russ. Jack, for a small fee, you are welcome to use any idea I use.......................................... just kidding.
-
Congradulations David, your hull has turned out very well. I agree, it is very crisp, and cleanly done. I have been watching your progress, and wil keep following your build log.
-
I finished the deck, and bulwarks this weekend. I lightened up the deck, so it isn't as dark as it was. I had done some extreme weathering to the bulwarks, but at this scale it didn't look good at all. So I painted the bulwarks, and waterways a medium cream color, then added a grungy gray weathering powder.......much better than the first attempt. I also added the powder to specific areas of the deck. The hull is painted with a lighter color of black called Graphite, I prefered this over straight black. Now I have a lot of copper plates to cut, so I can copper the bottom. Plus I want to build the launching ways.
-
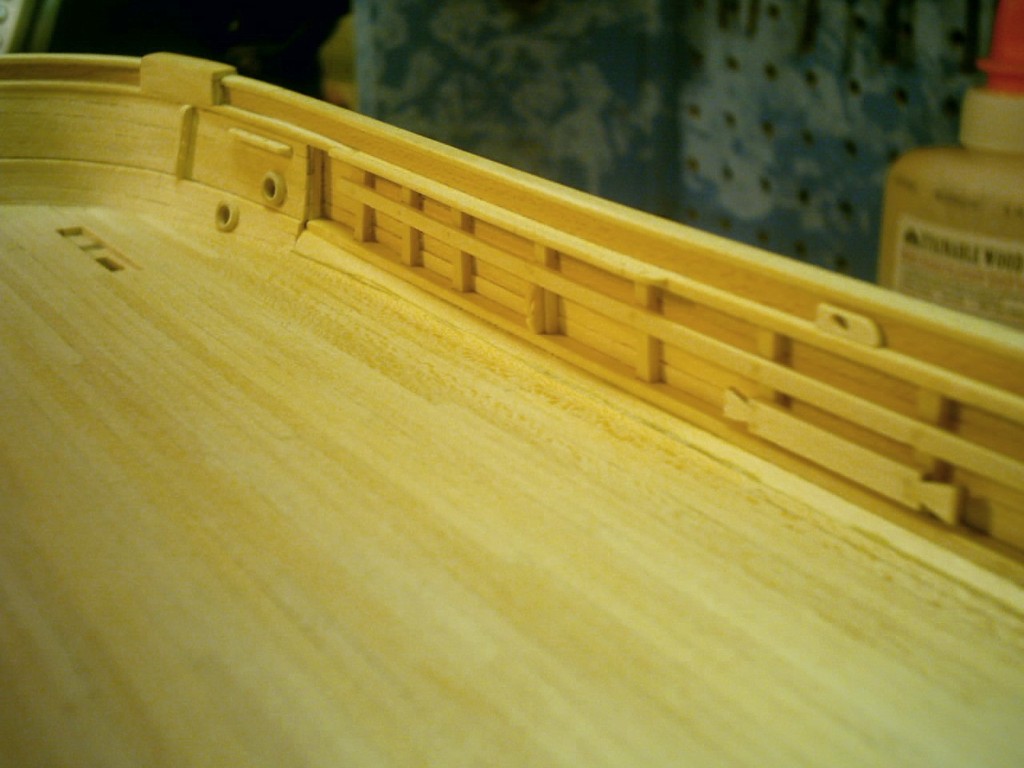
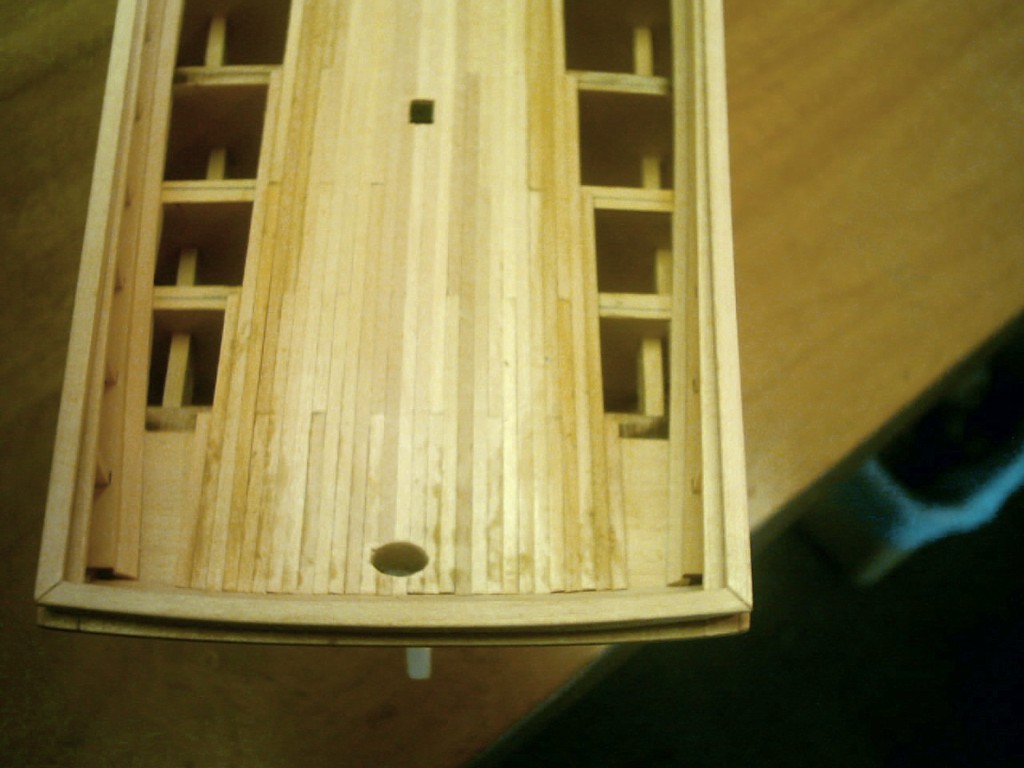
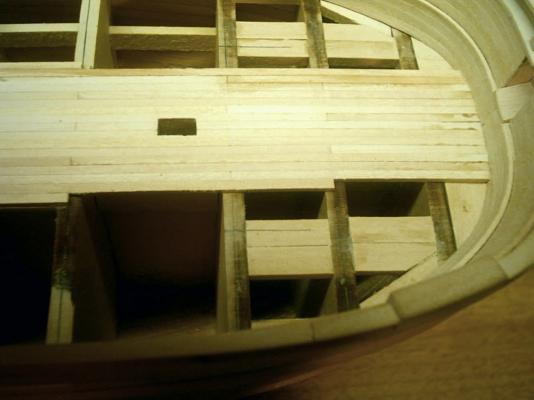
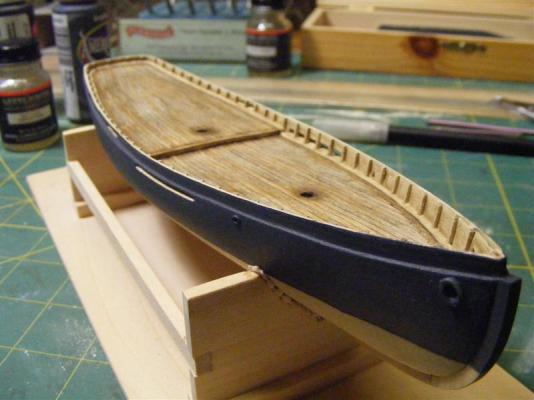
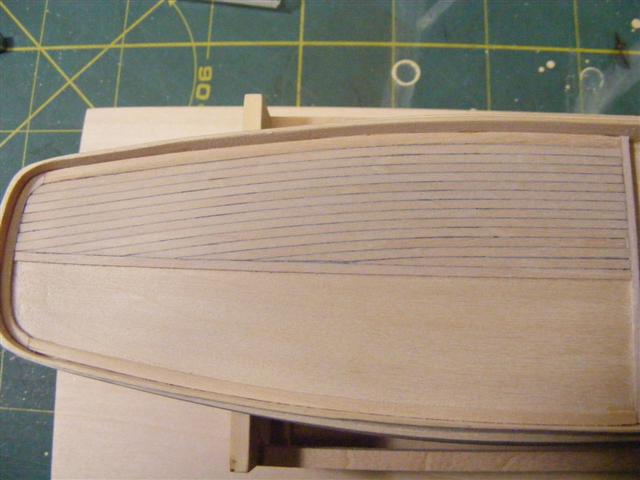
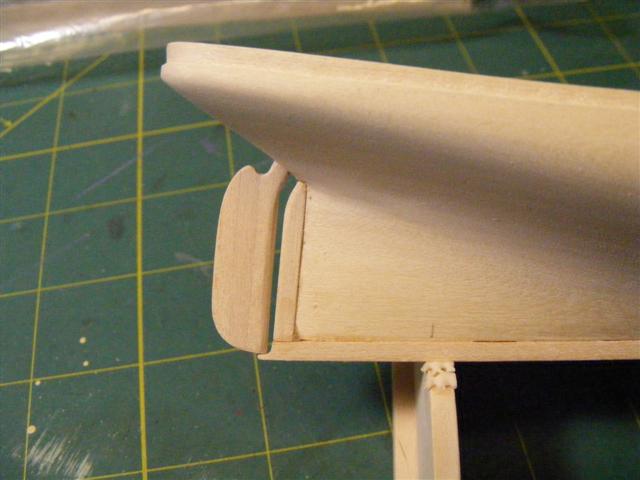
Hi Hopeful, I think it would be possible to joggle the 1/16 in. planks into a king plank that is wider. The picture here shows the planks on the foredeck joggled into another 1/16 in. margin plank. With planks this small it is kind of hard to see what you're doing. As you can see, I still have some work to do on the bulwarks. Once I am satisfied with those, I will paint the outside of the hull, and copper plate the bottom before adding the rail, I don't want to take the chance of breaking it. I do feel I made the deck rather dark, but I'm going to go with it.

-
Thanks Russ, Since this was an optional way of planking, I wish they would have showed more of it on the plans.
-
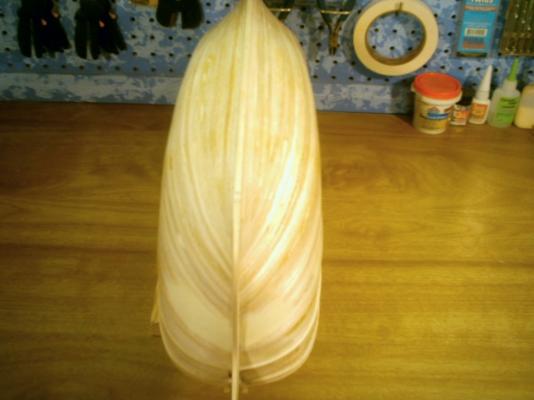
I started planking the aft deck. I planked it parallel to the bulwarks. I wasn't quite sure how to do this, and couldn't find very much information or pictures on planking this way. So I hope this is close to right. The good news is most of it in the center will be covered with deck features.
-
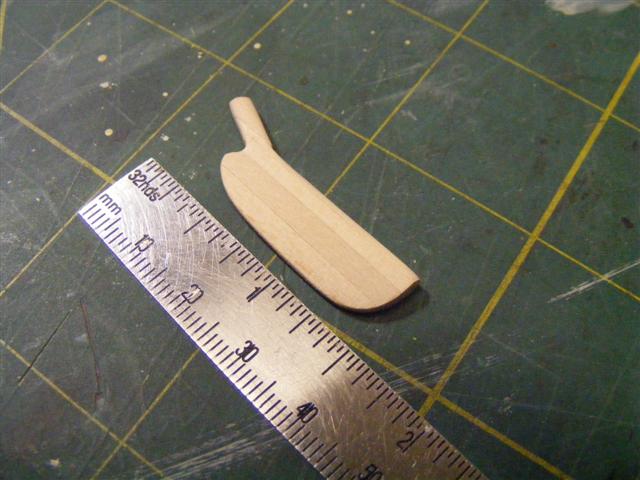
Thanks Russ, and David. I built the rudder by gluing 4_1/8"x1/8" strips of wood together, then shaping those into the rudder. The picture shows it on the Phantom, but it isn't actually attached, it's just for show.
-
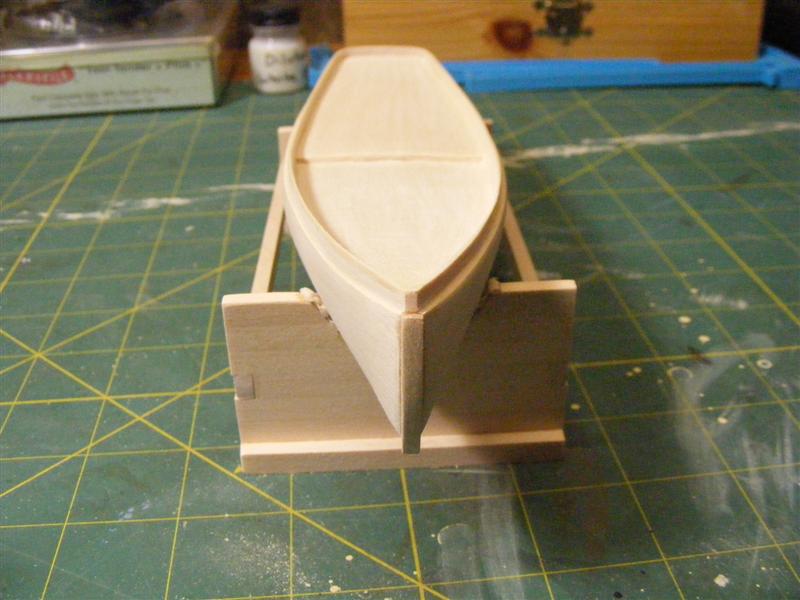
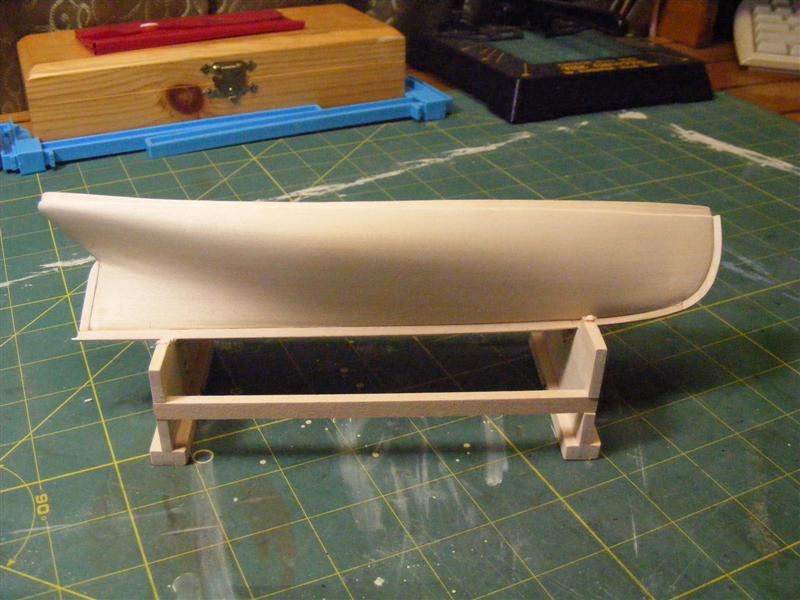
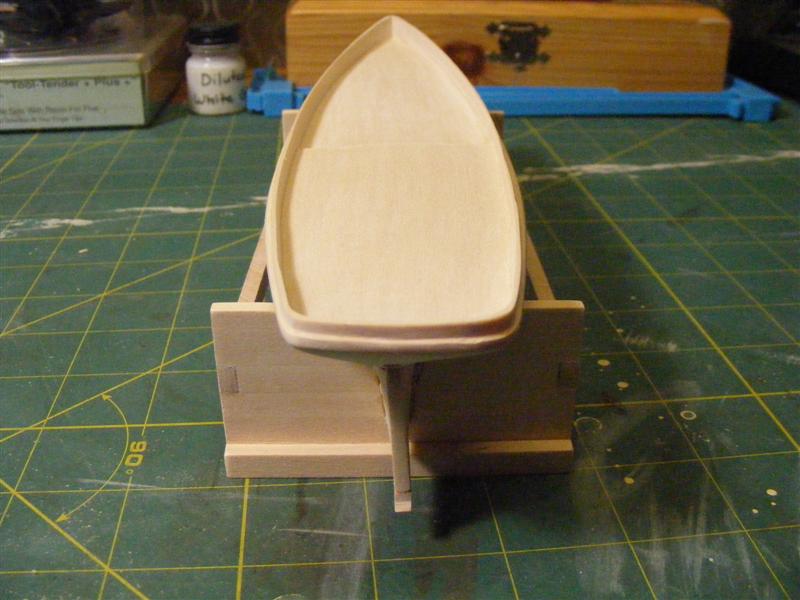
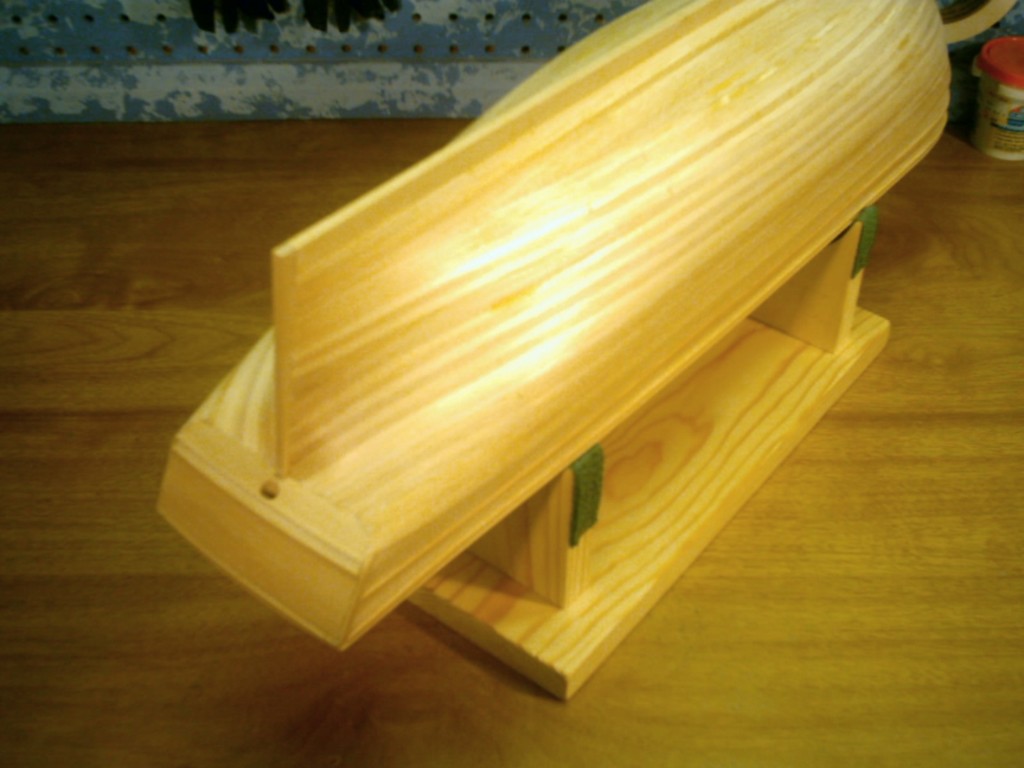
Well.......since MSW suffered this catastrophic crash (terrible thing to happen). With everyones permission, I would like to use this event as a chance to start fresh. I'm going to start with building the New York Pilot Boat “Phantom”. I will be using Chucks practicum as a guide to building the Phantom, as it is much more explanatory than the manual that came with the kit. I do plan on weathering this model, as that is what I enjoy doing. I just think it adds a bit of life, and character to the model. This will be my first solid hull model, I am use to building P.O.B models. I got through the first step of shaping the hull. At first it was a bit intimidating, but after I got a little way into it, I found it wasn't all that bad. I've added the keel, stem, and sternpost to the hull. I do still have some work to do to the deck before I plank it. I plan on planking the deck with individual strips.