CommodoreErie
-
Posts
86 -
Joined
-
Last visited
Content Type
Profiles
Forums
Gallery
Events
Everything posted by CommodoreErie
-
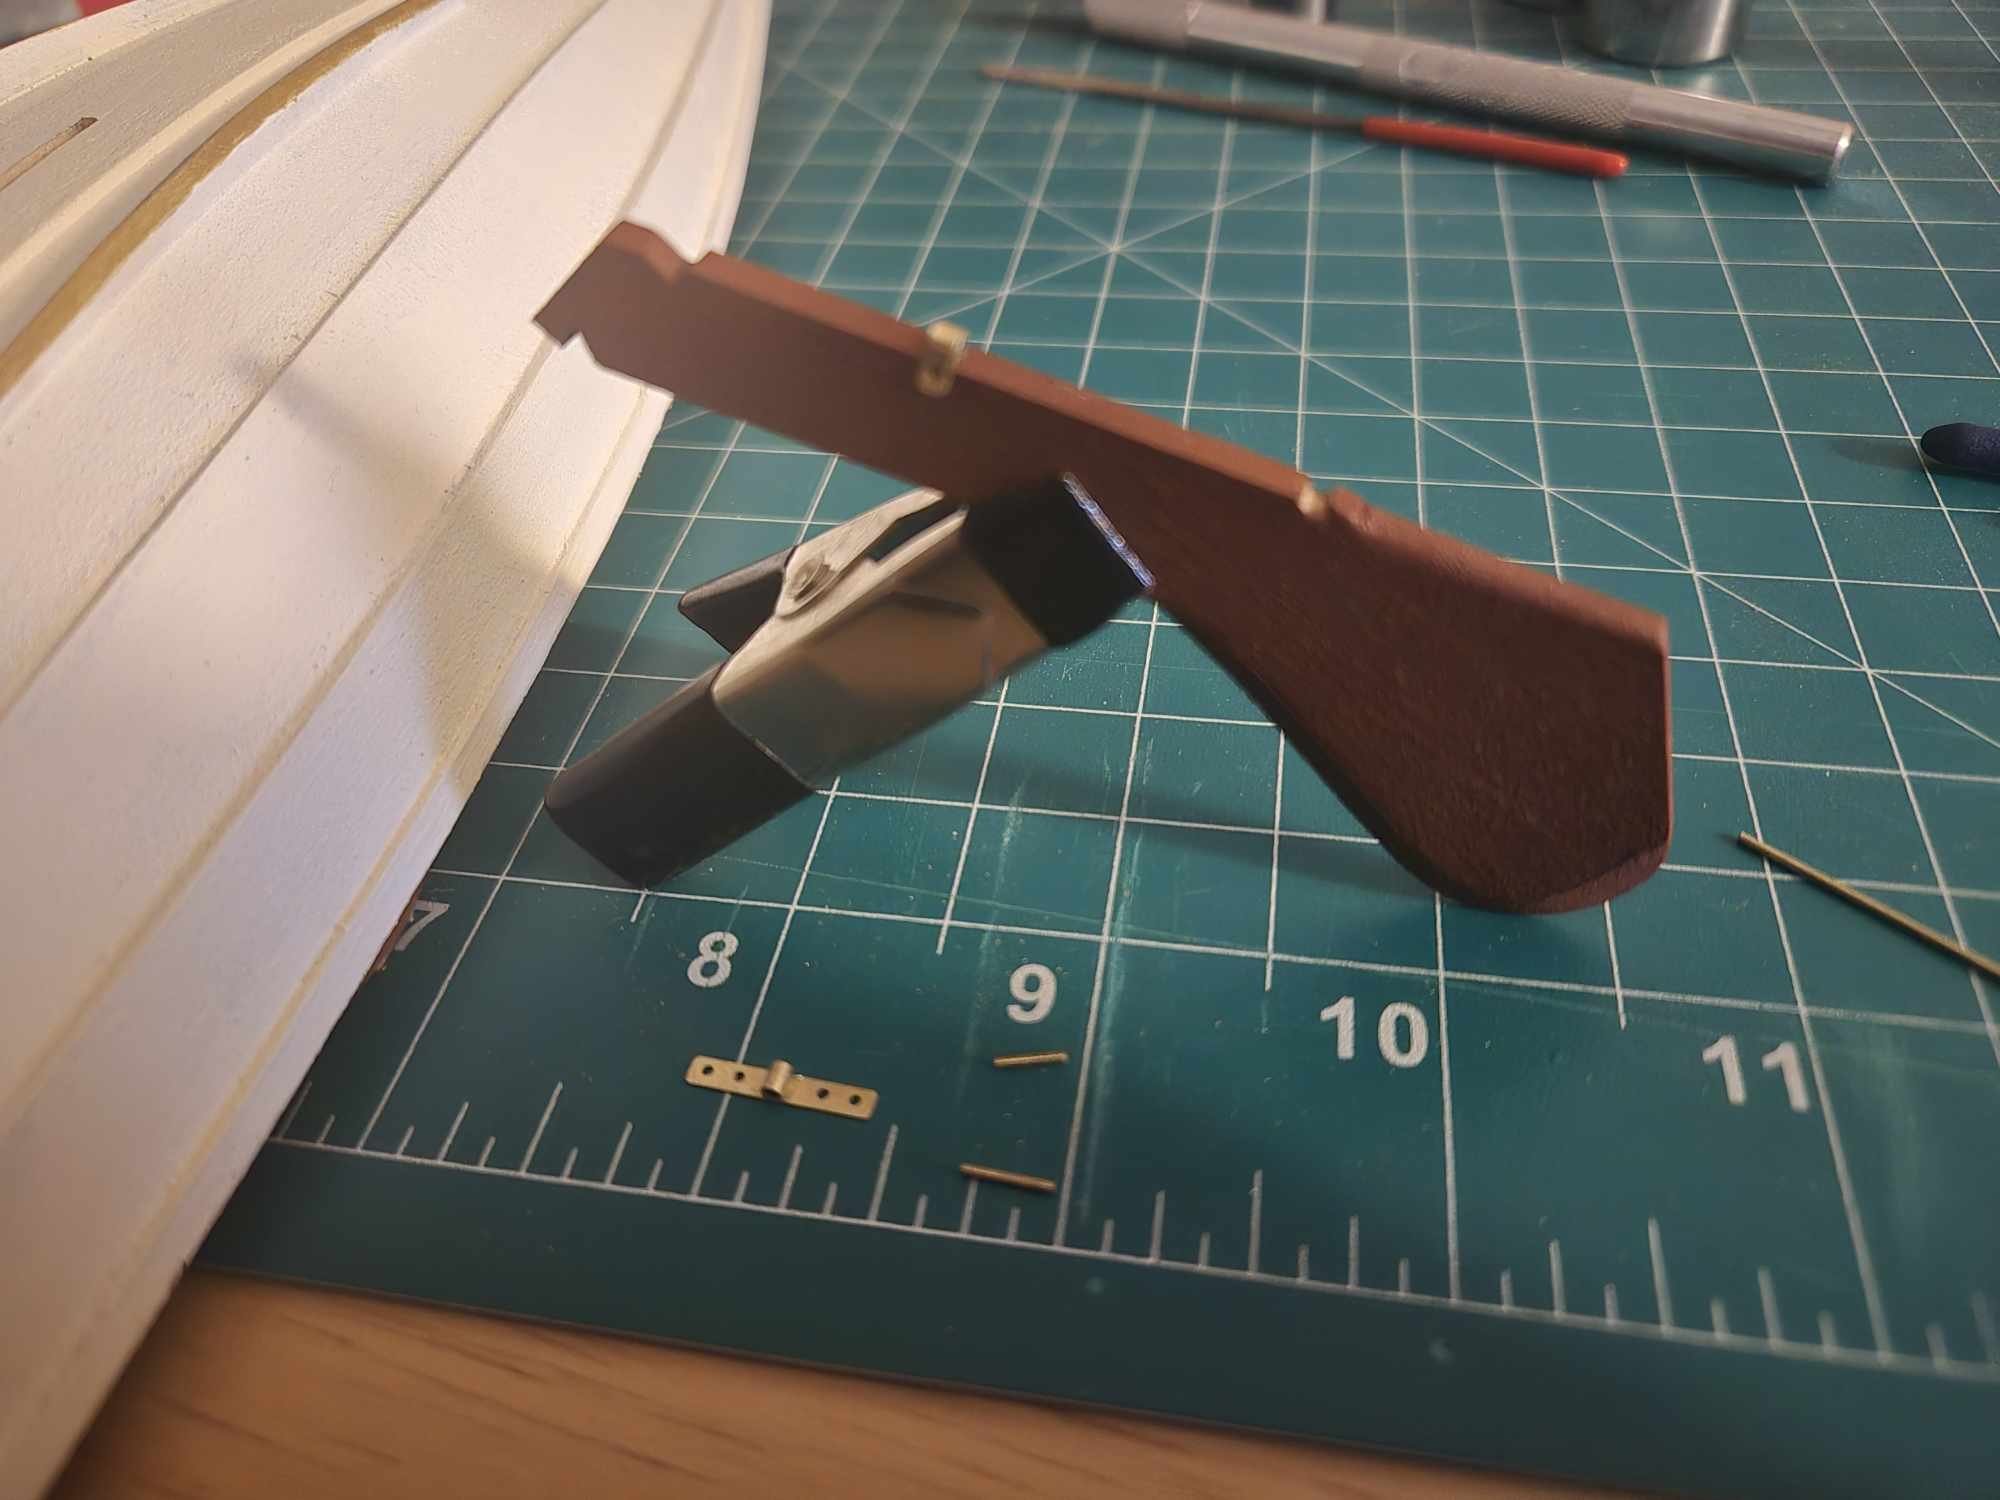
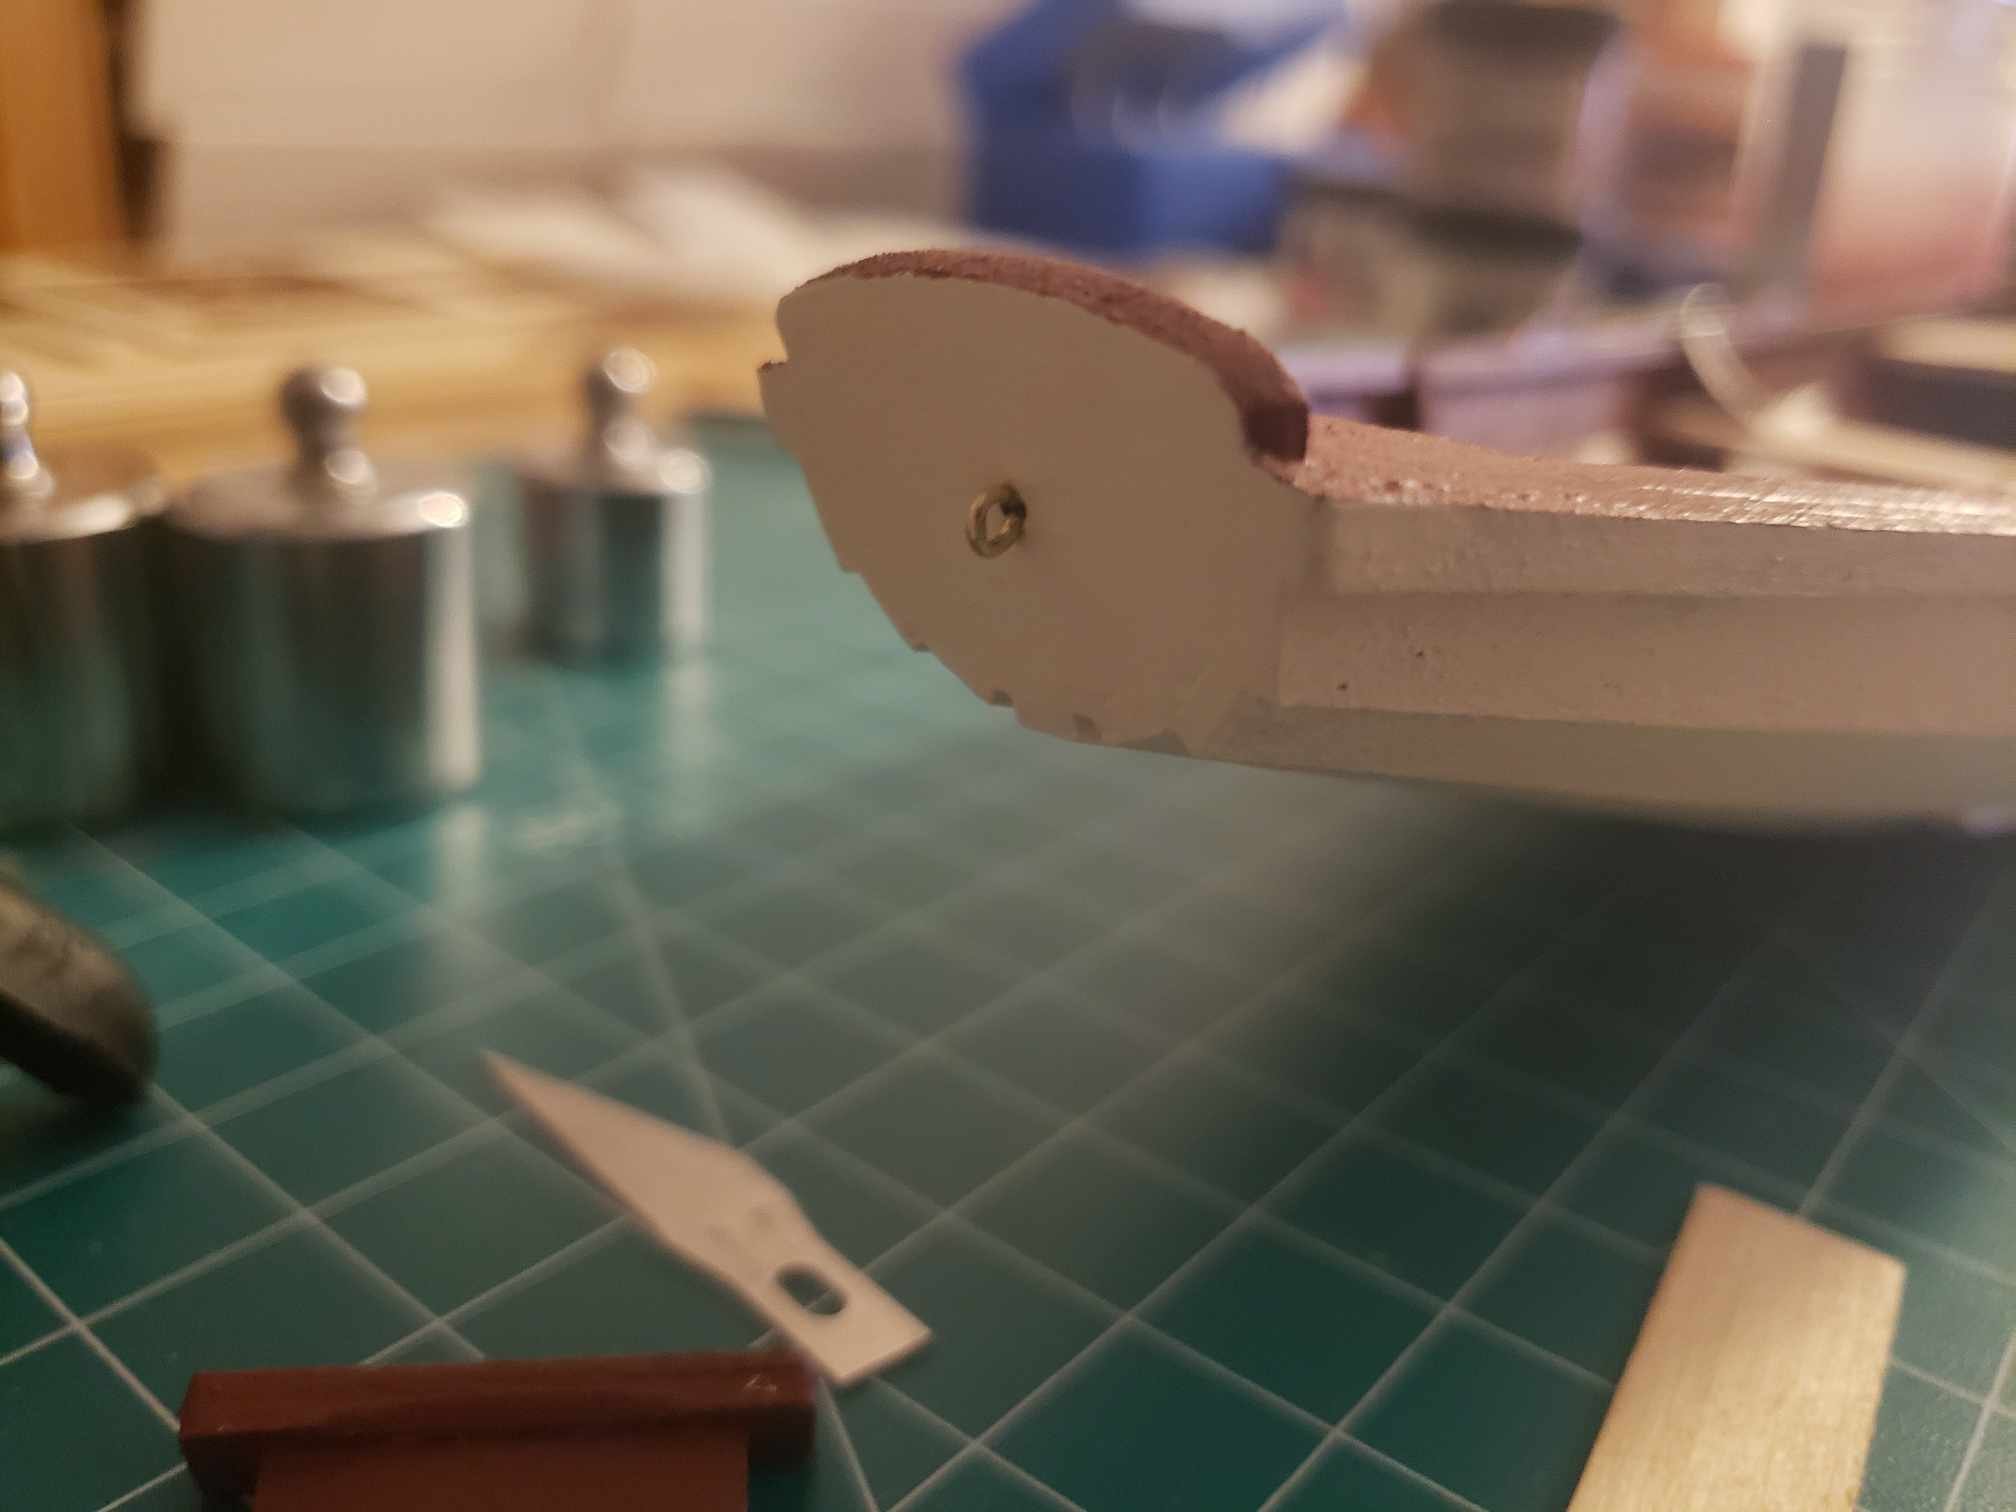
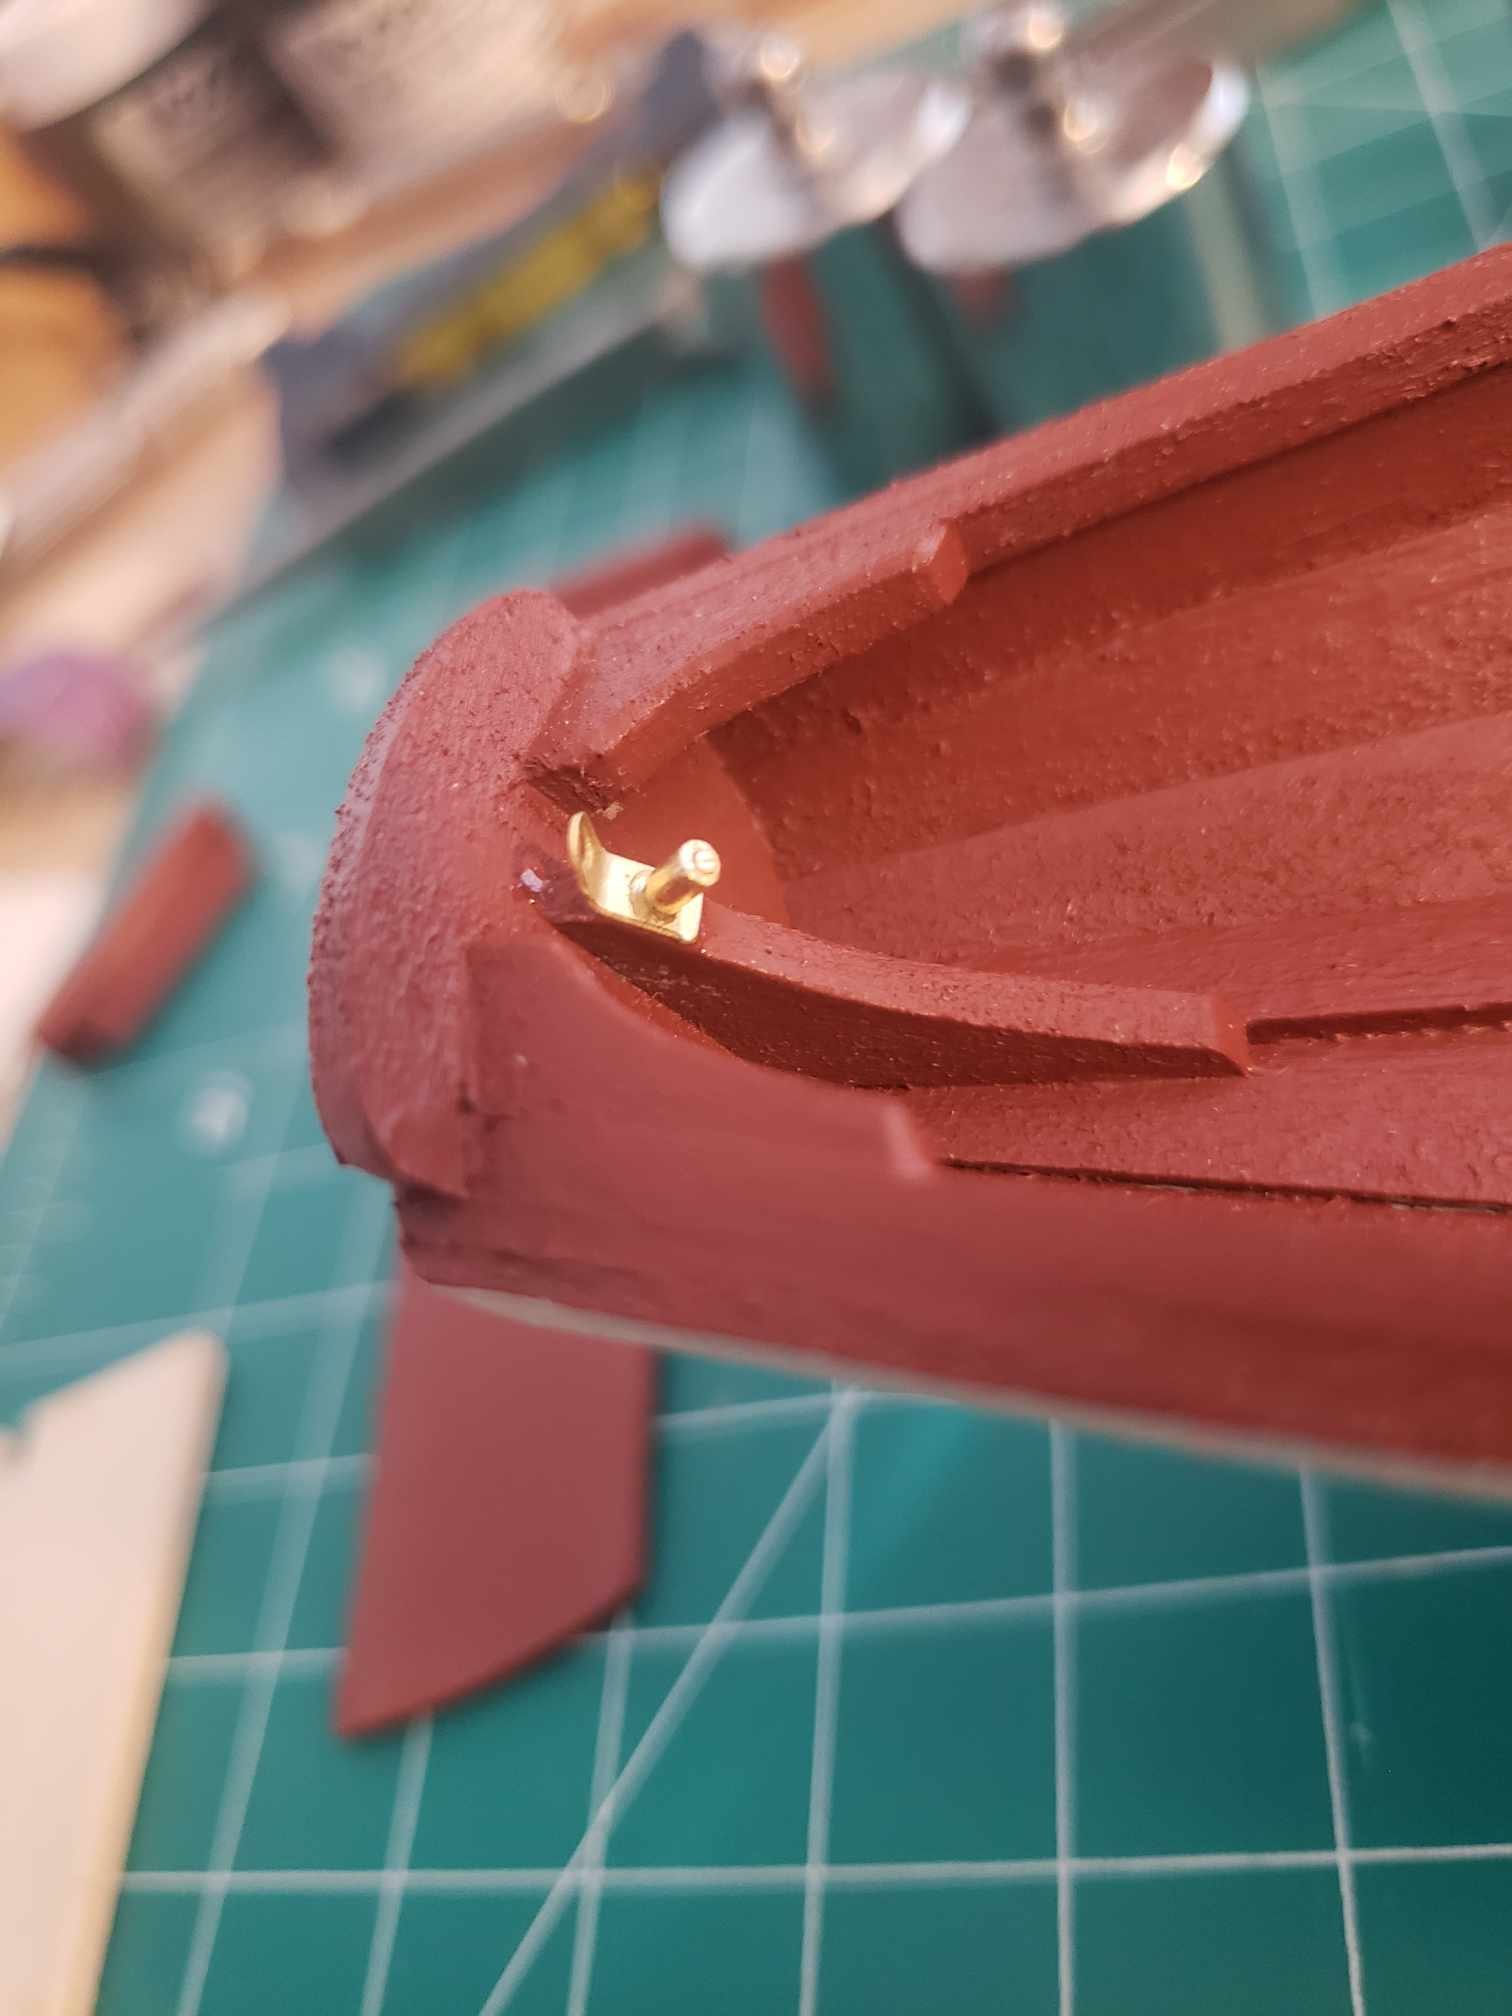
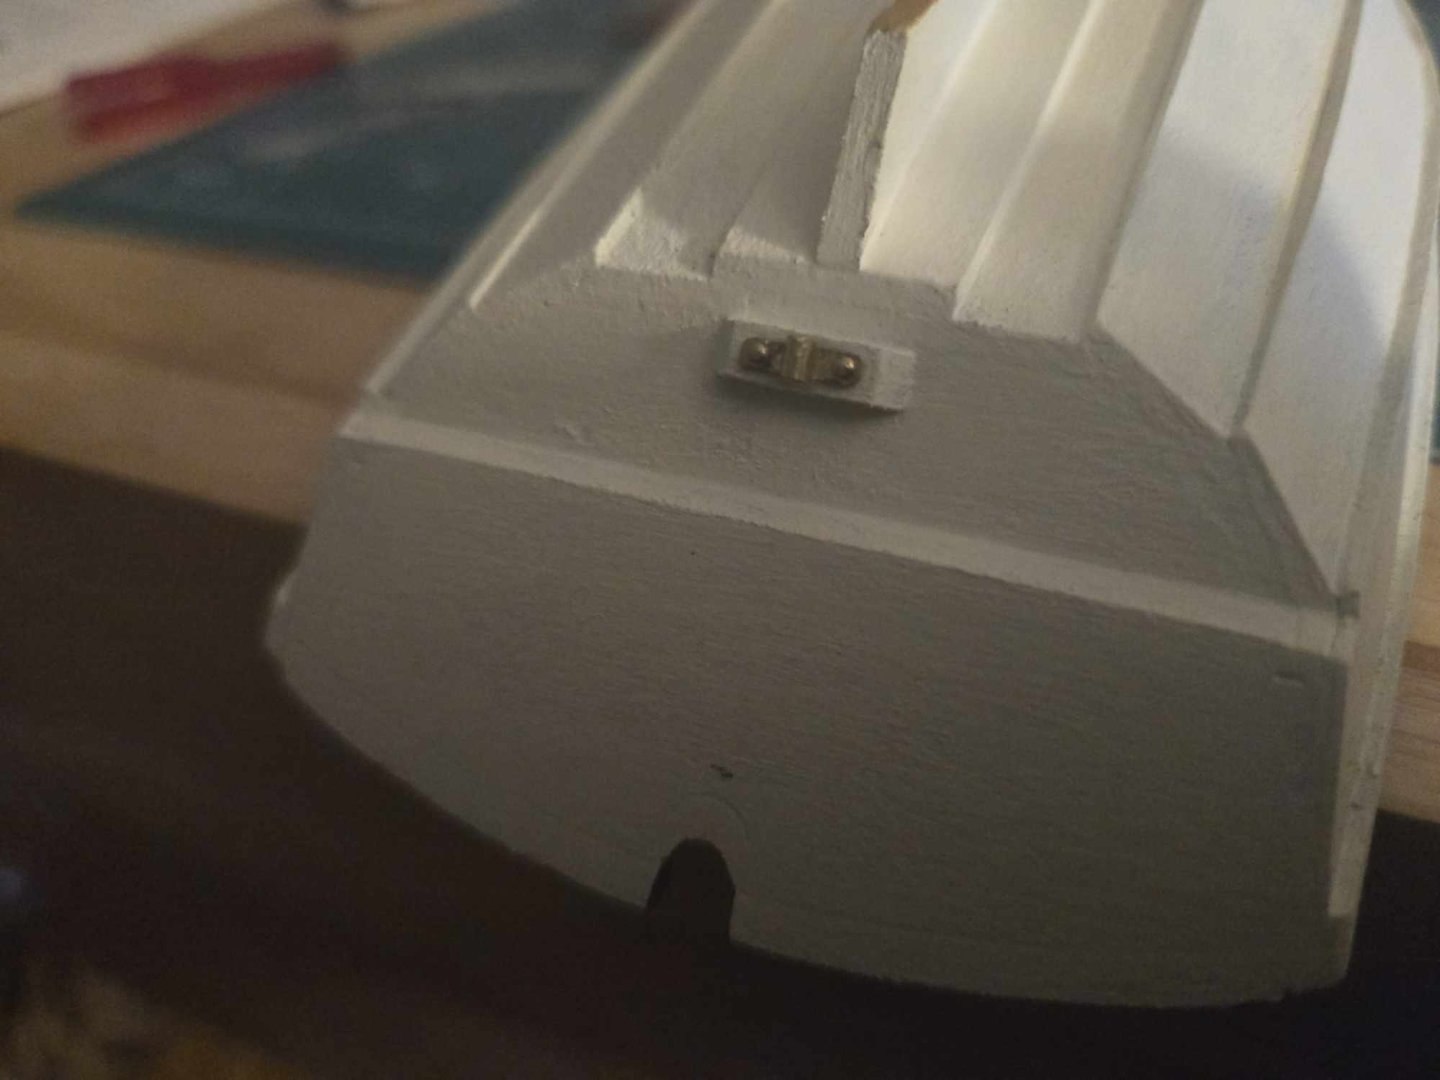
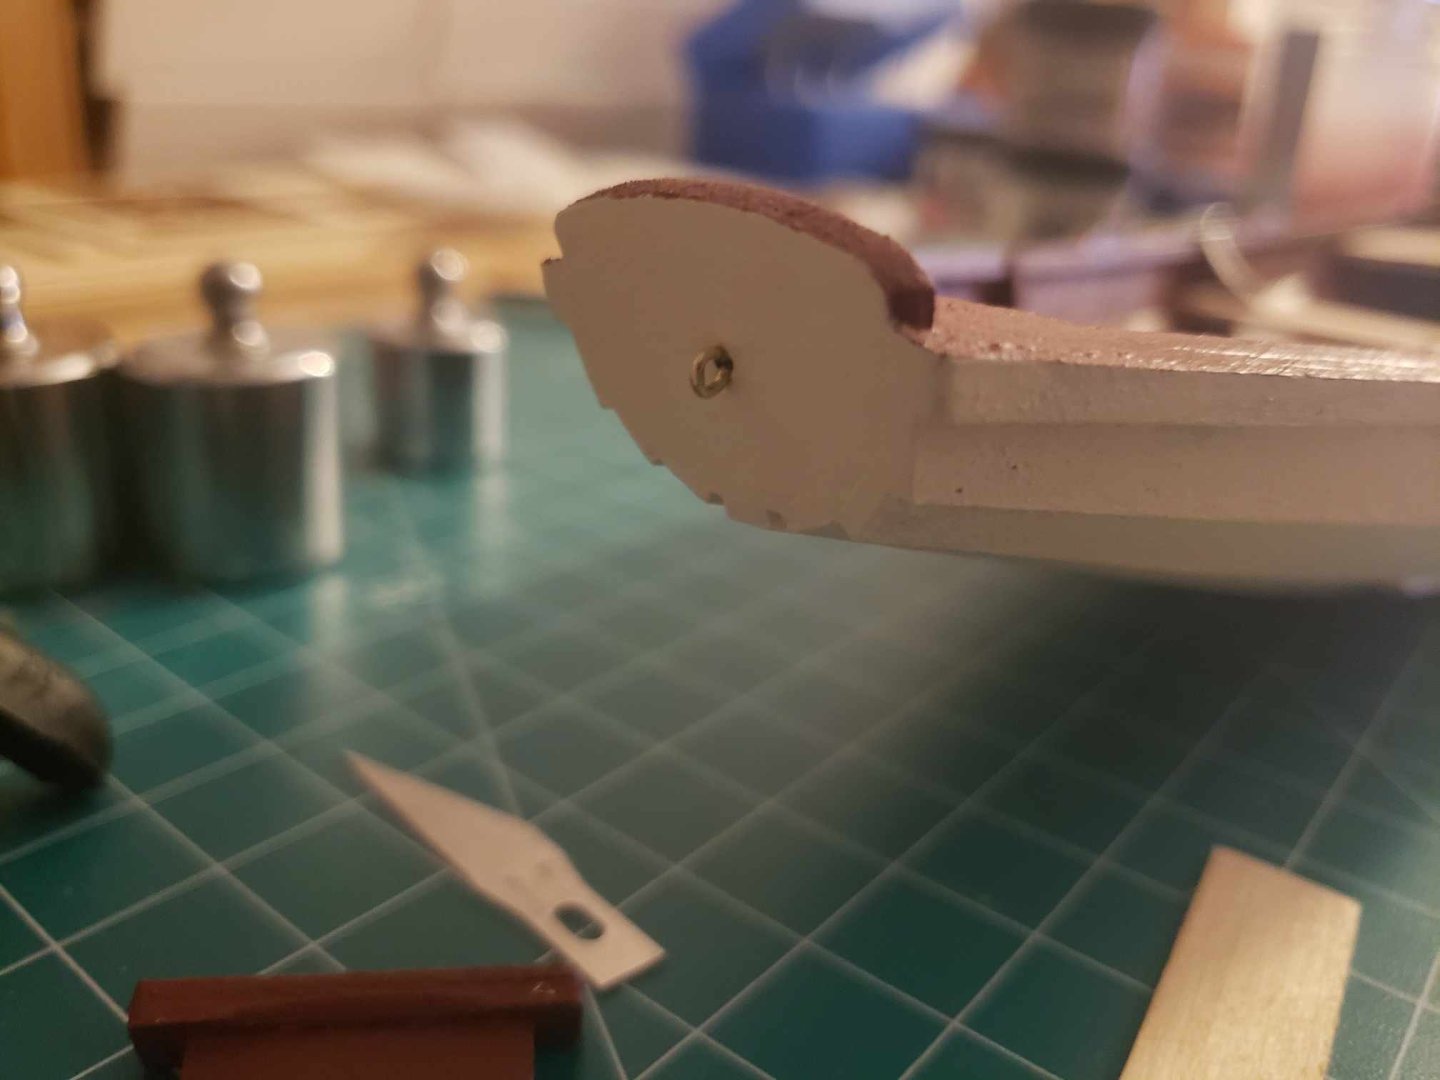
 Okay, I promise this is still being worked on. Summer was very hectic for me, and I somehow acquired an actual boat (an 18' Dunphy seagull, for the curious), so this kind of fell by the wayside. That said, I'm working on getting the rudder attached, or at least in a condition that I can attach it when ready. I found the laser etched brass straps for the pintels are a touch shorter than I would like, but I can still make them work. I did have one fly off my tweezers while I was trying to attach it, so now I'm in a waiting game for replacement parts because I doubt I'm finding a piece that small in my den. Pintel pins are cut and ready to glue, and the lower gudgeon in attached. Need to attach and drill the upper one.
-
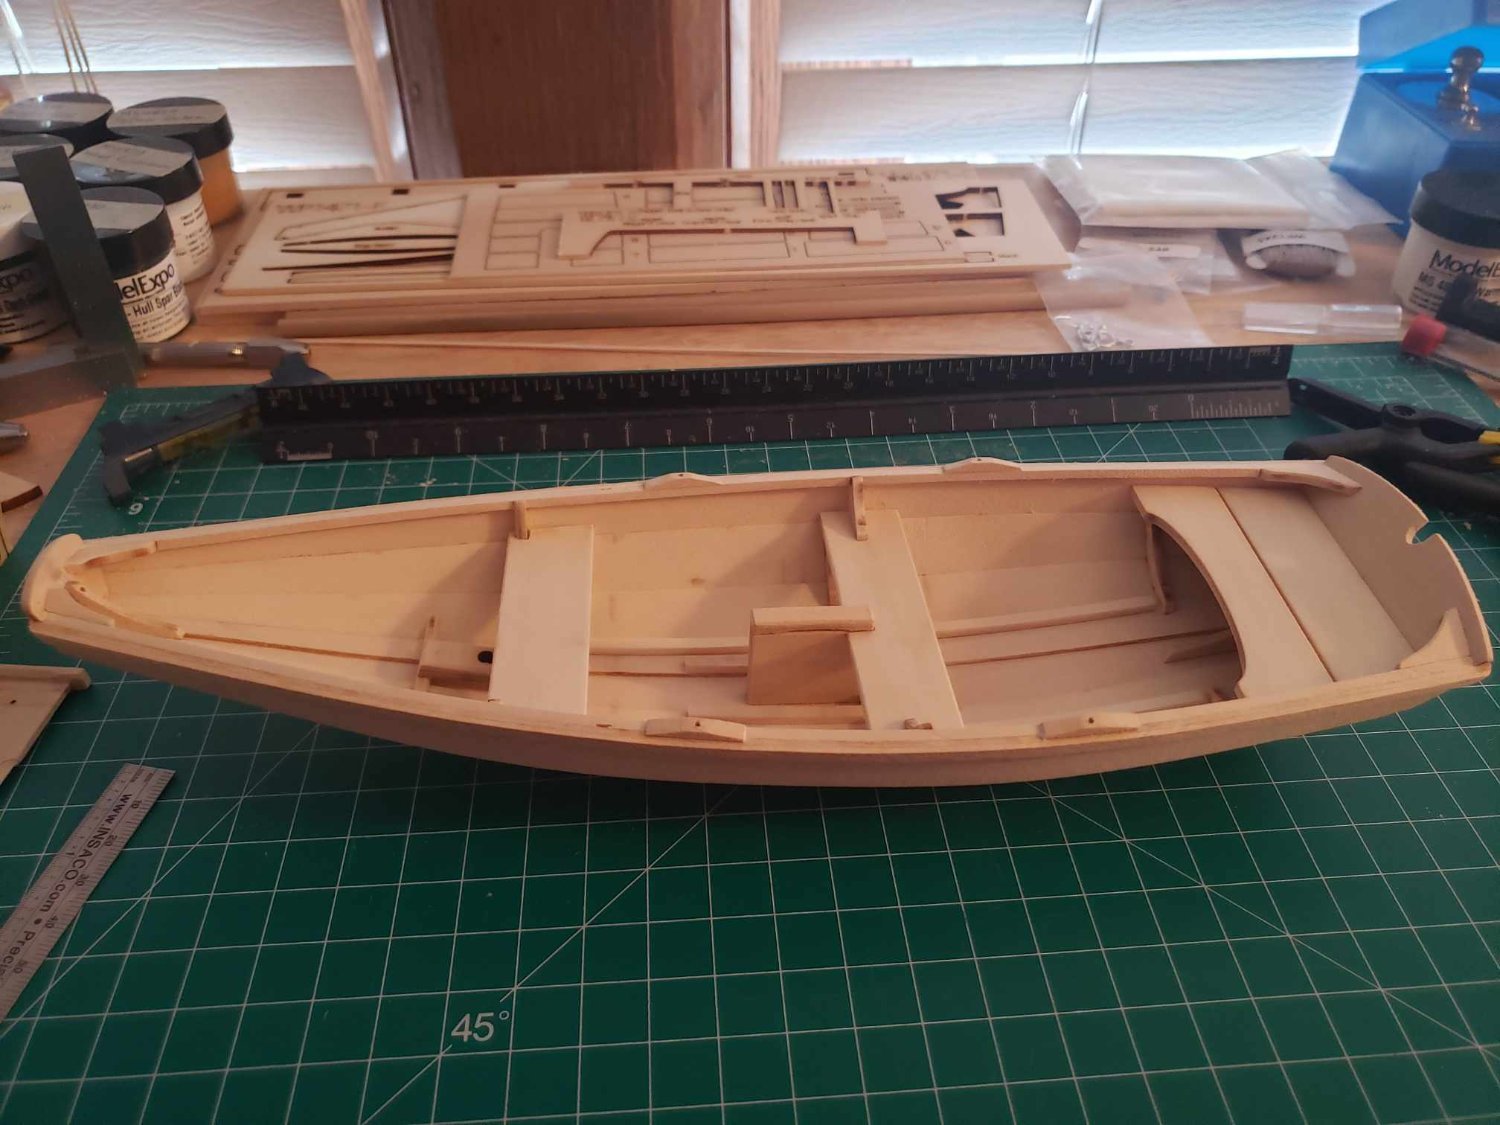
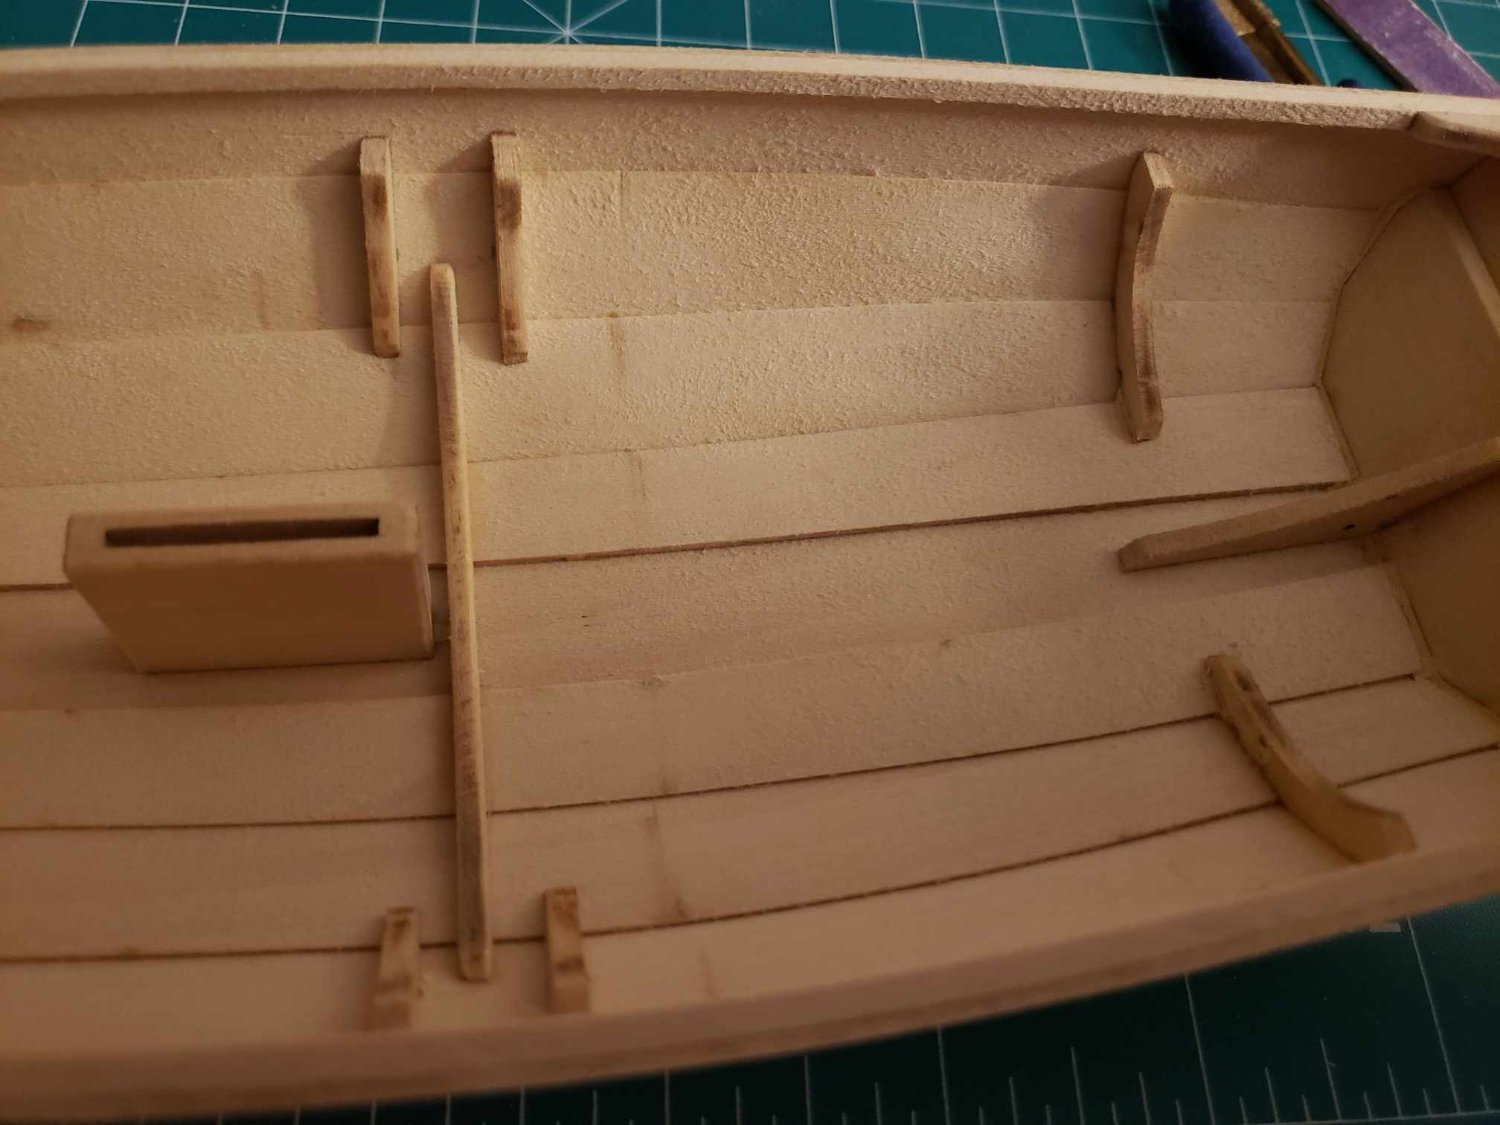
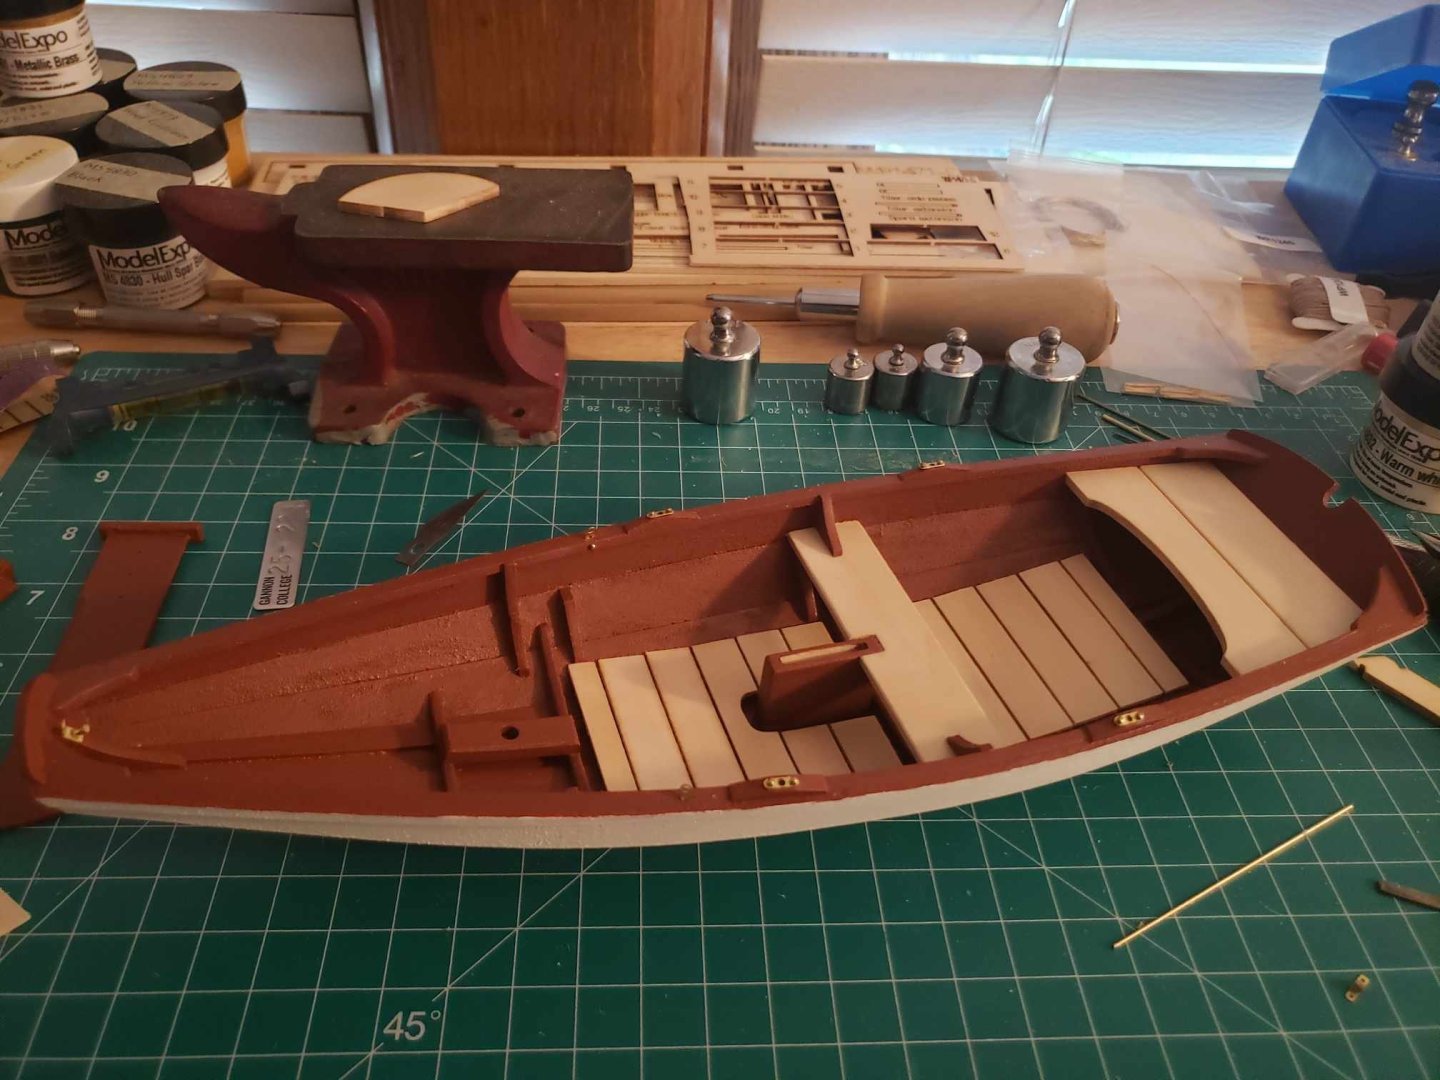
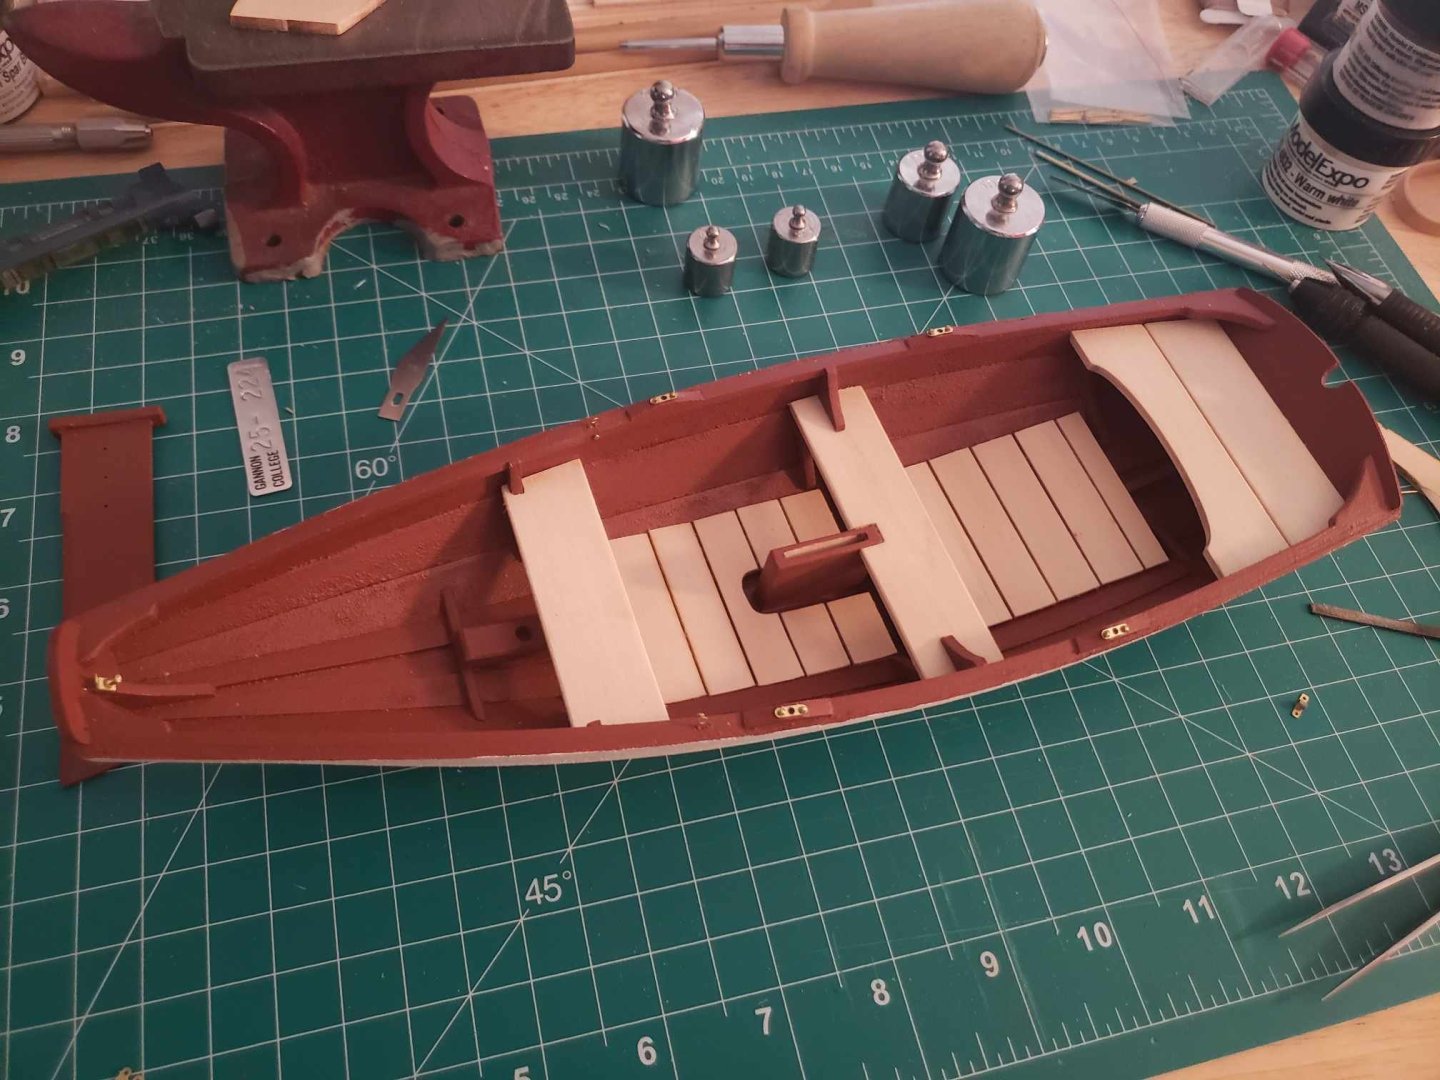
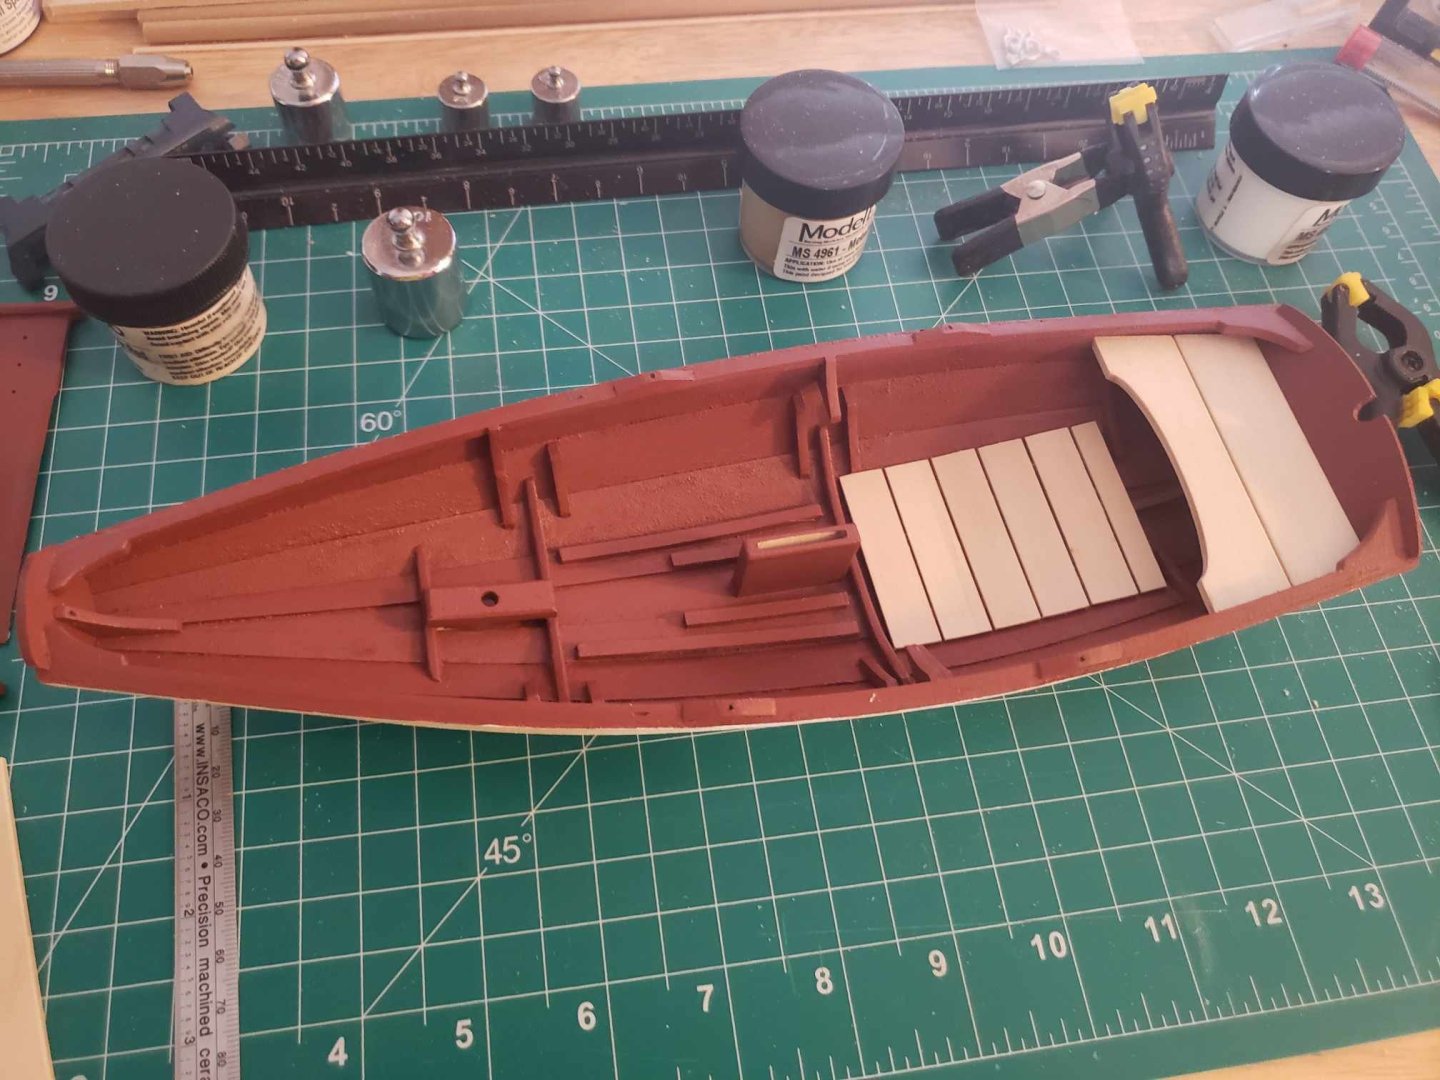
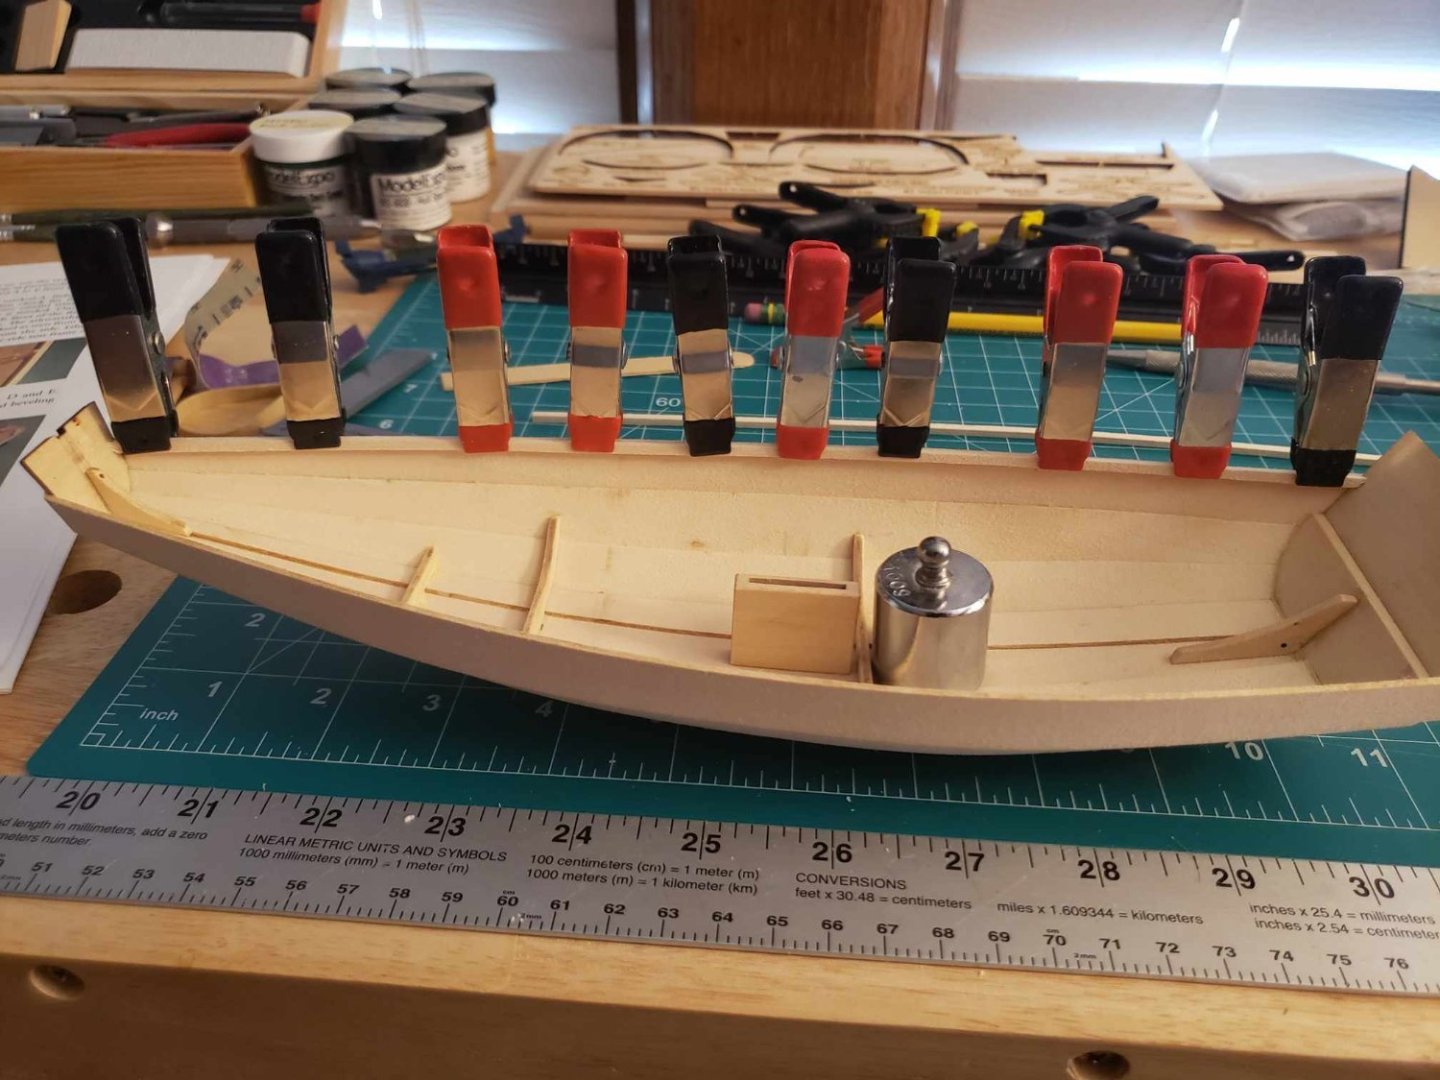
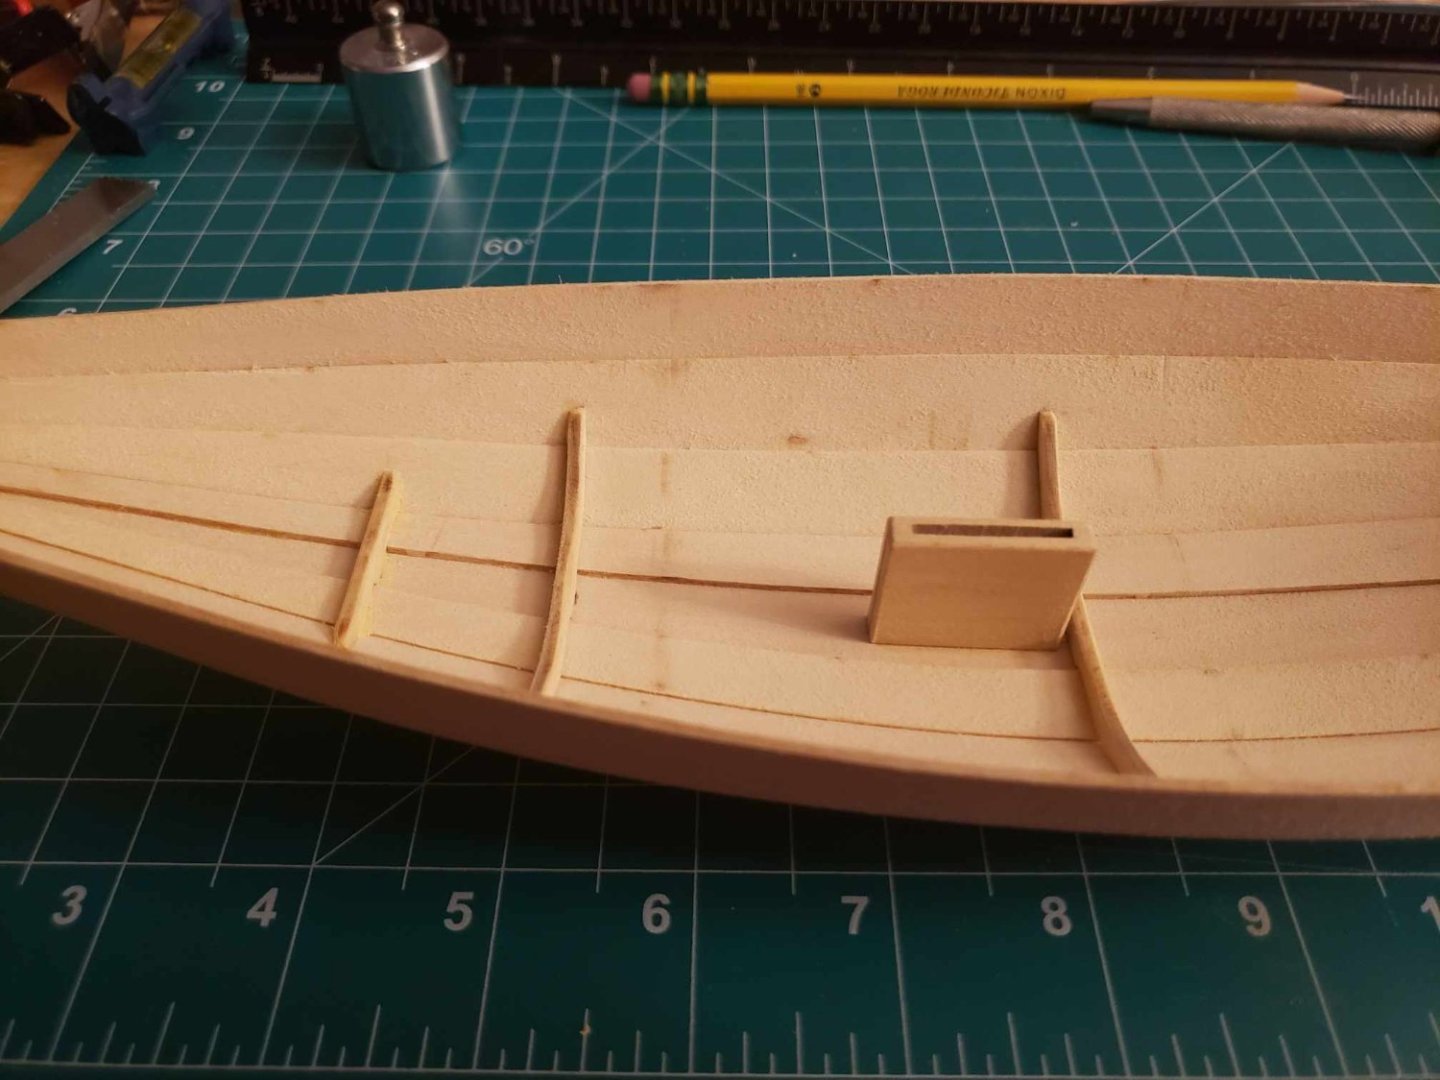
Sorry for the long wait on updates. I got the soleboards and thwarts attached. I'm not 100% happy with how the outboard edges of the soleboards panned out, but I'm satisfied enough with it.
-
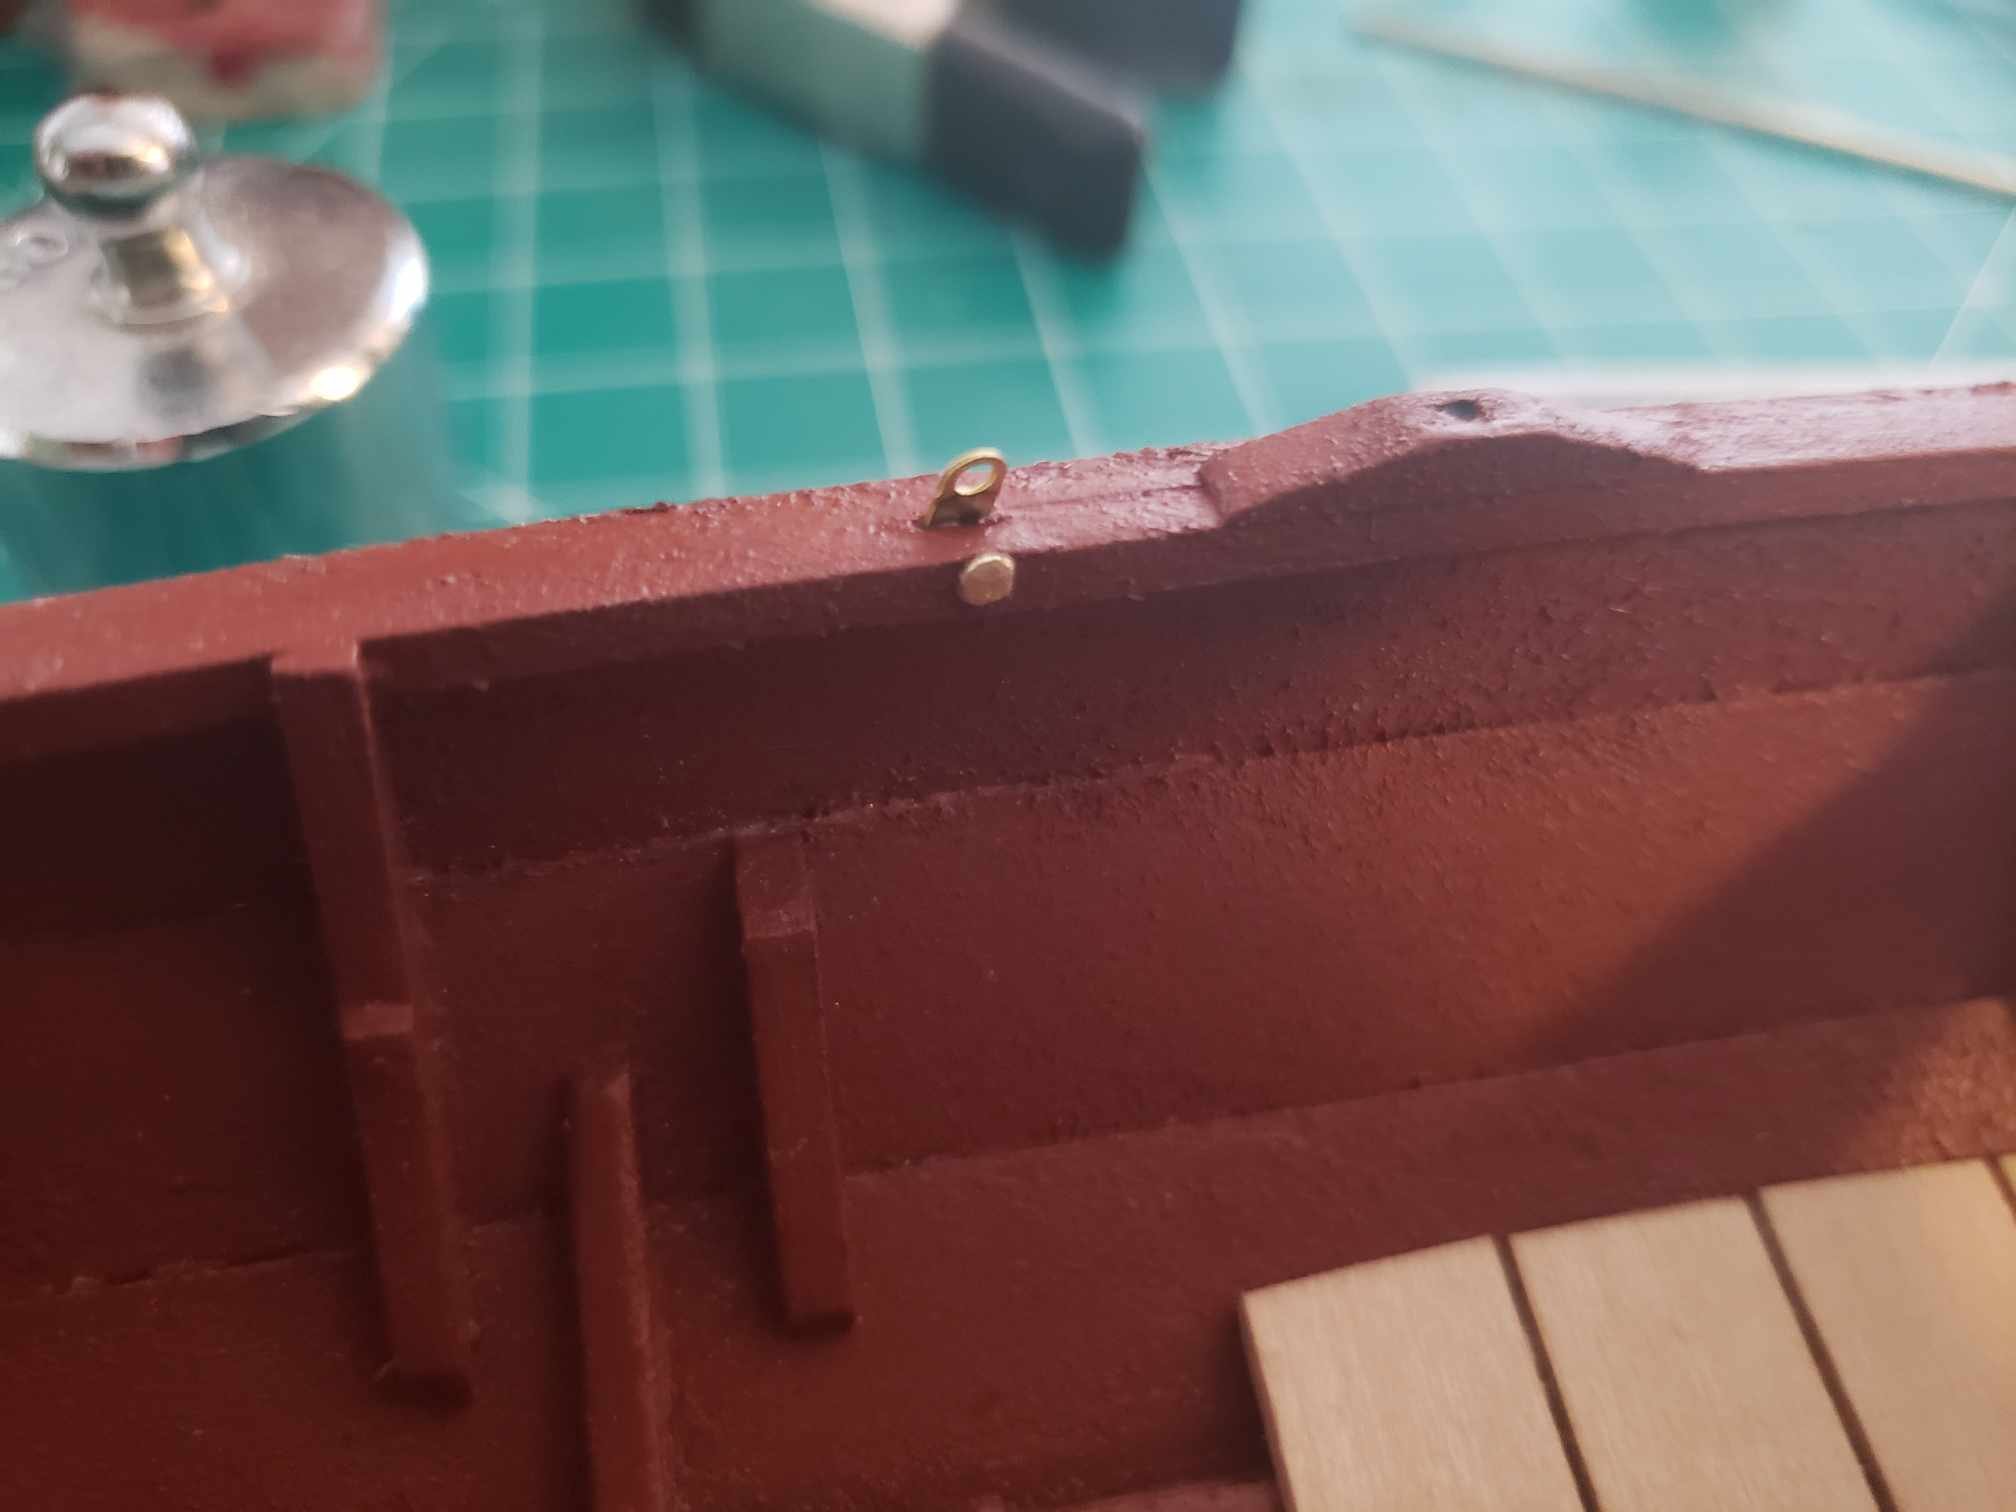
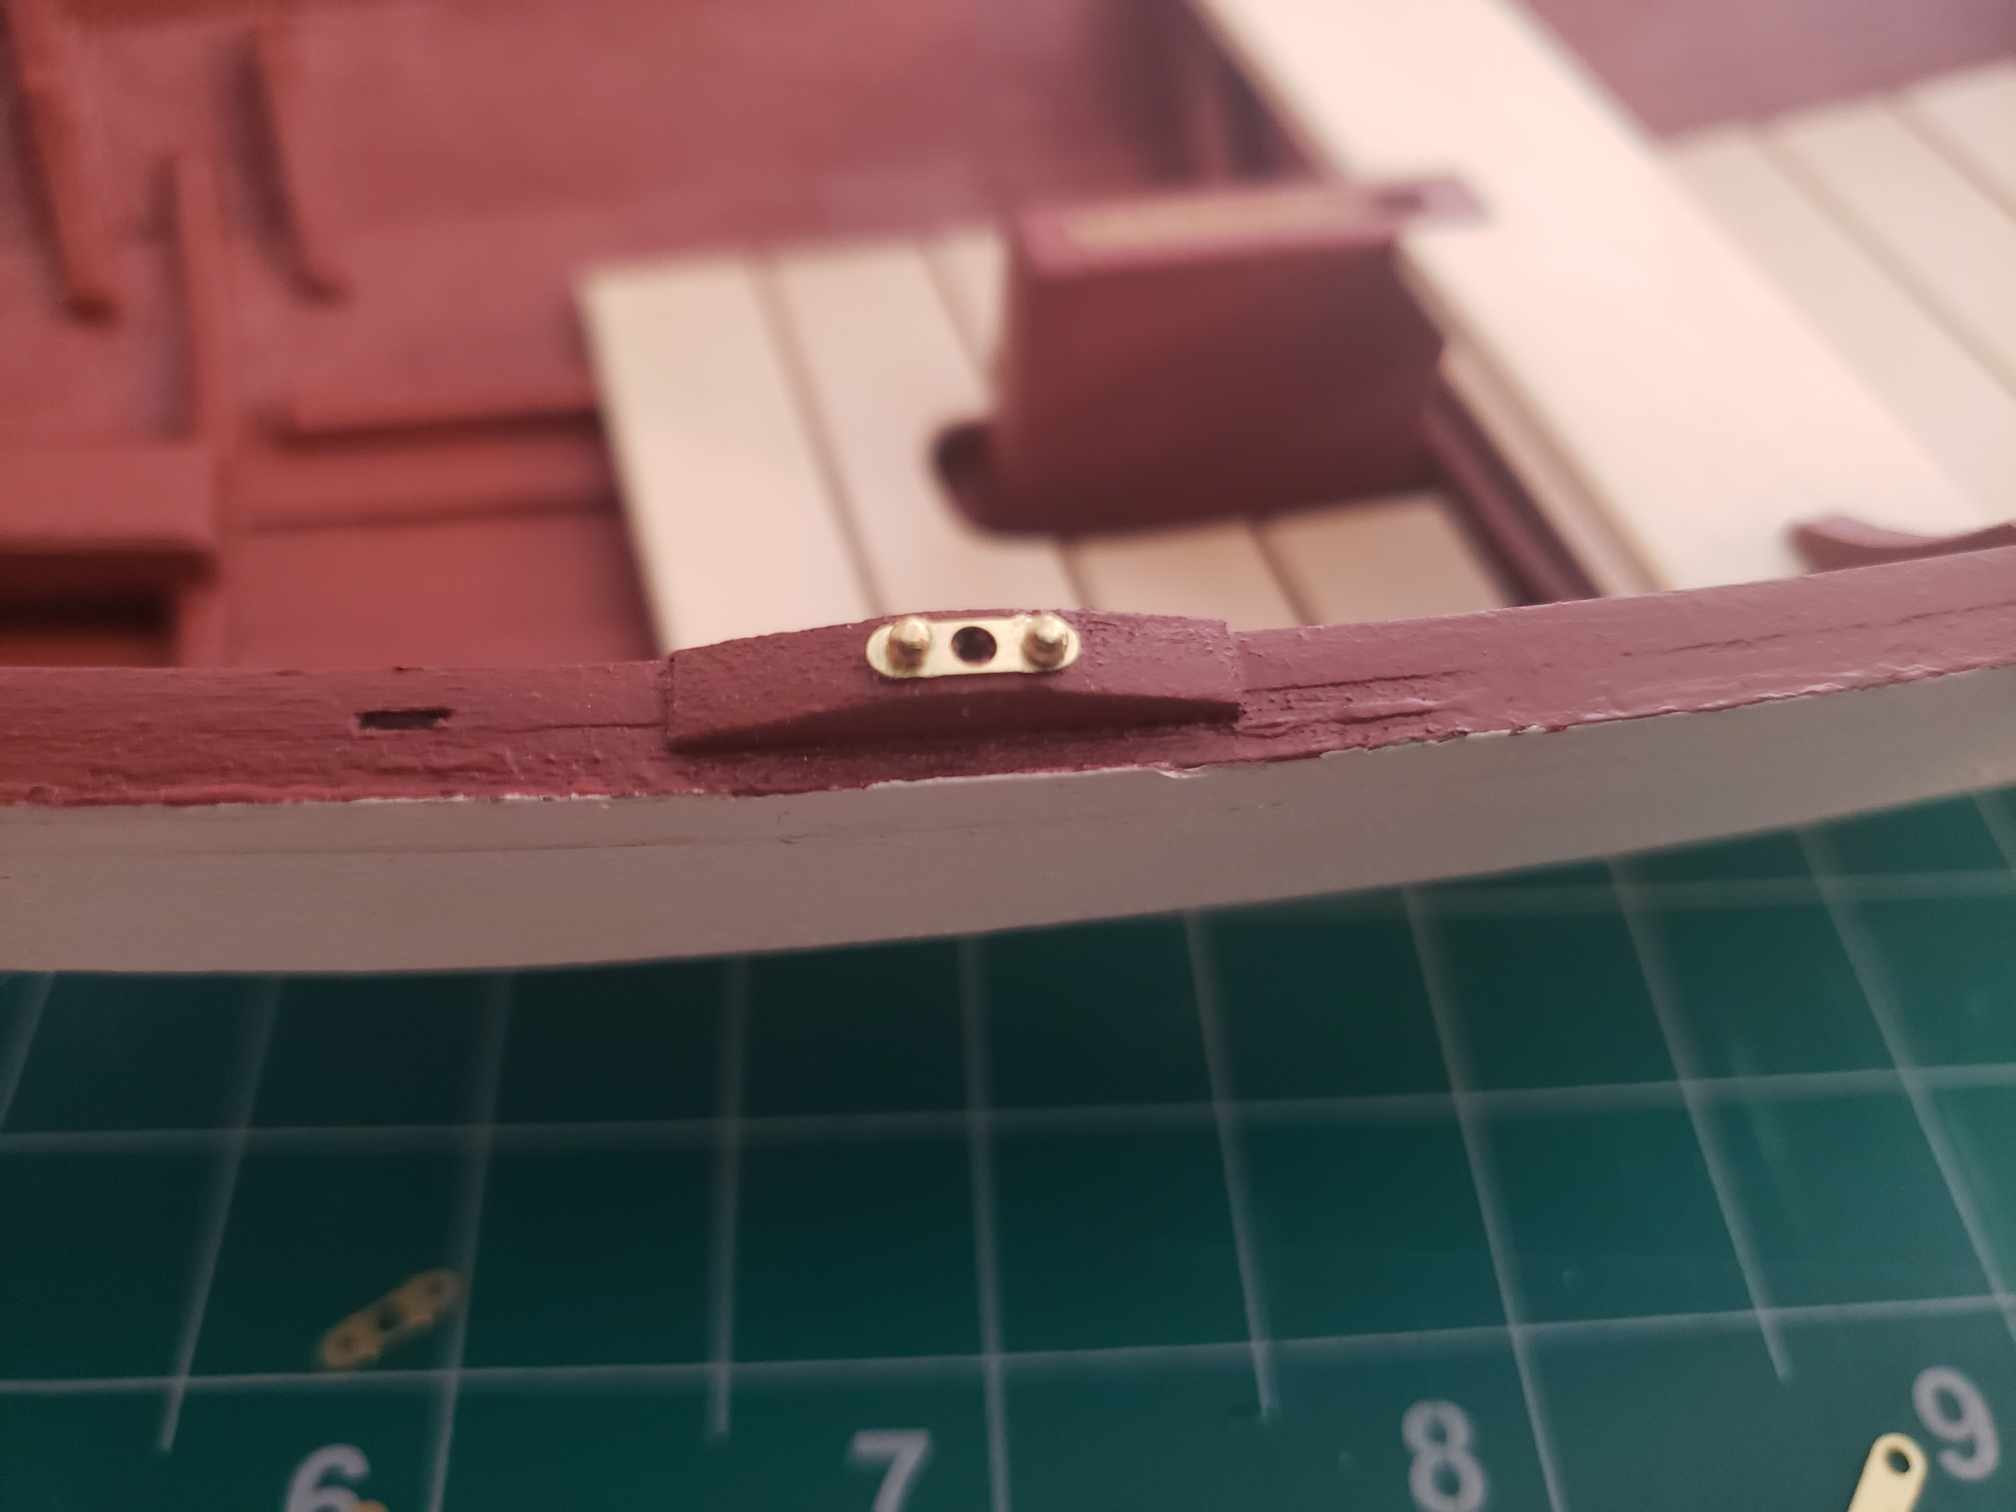
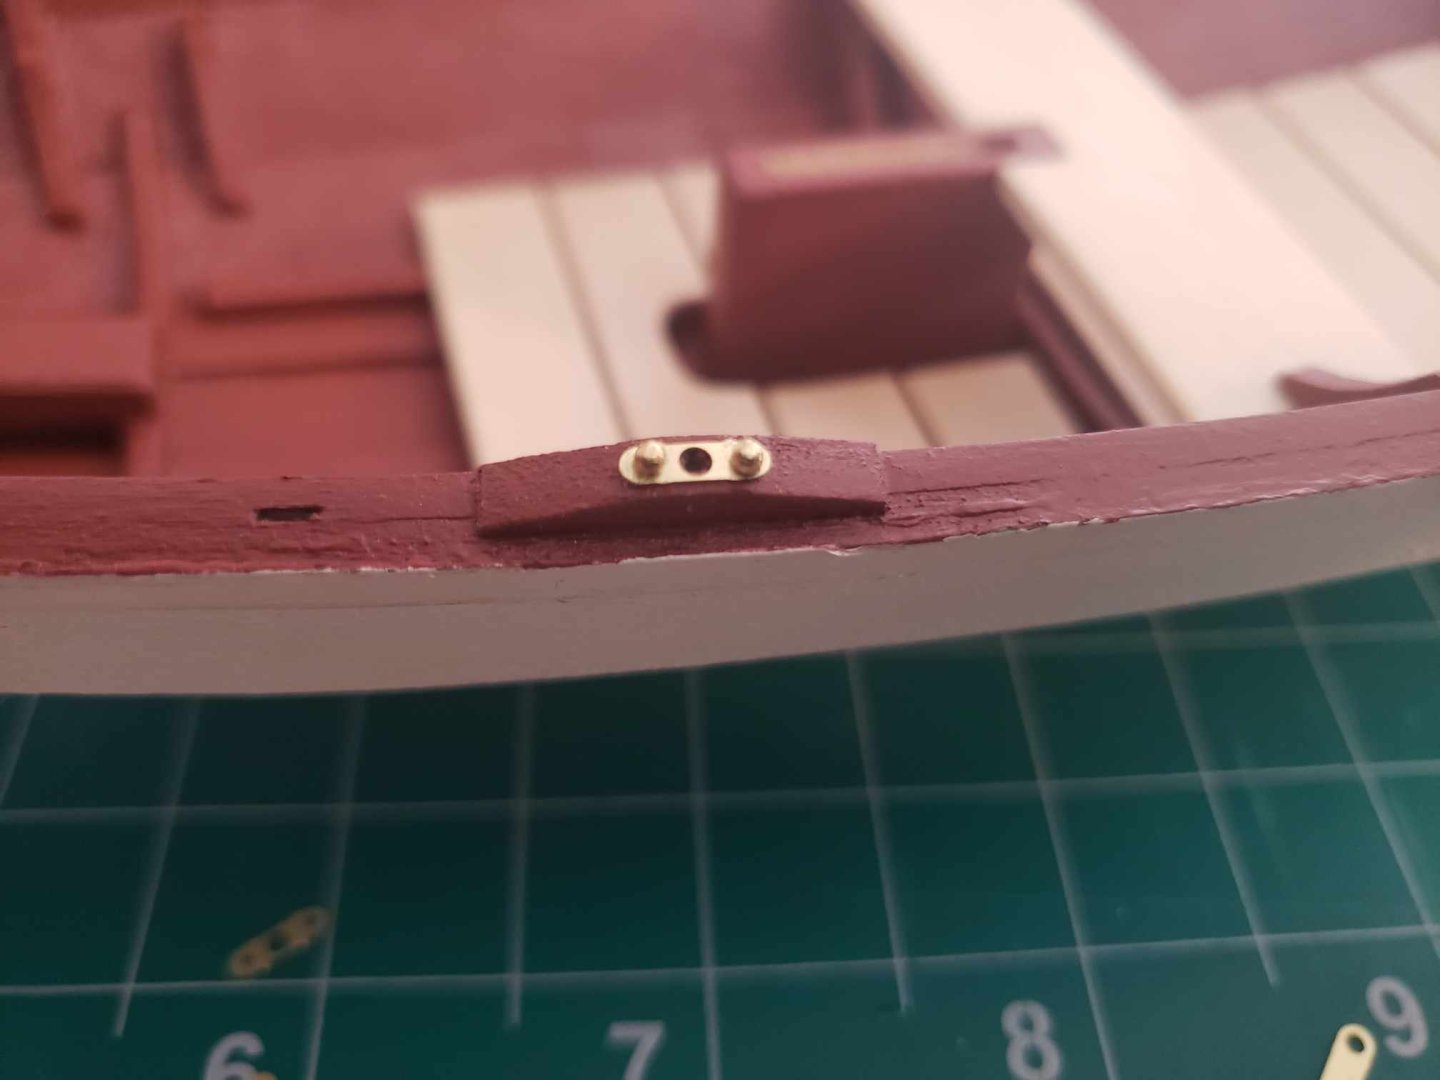
I ended up changing out the nails that were supplied with the kit, since they're a bit too large (at least to my eye). Fortunately, I had a number of smaller brass nails from a previous failed kit, so I can use those now. They work pretty well. First picture is the backstay plate secured with the supplied nails, second is secured with the replacement pins. These work out great for the oarlock pads too.


-
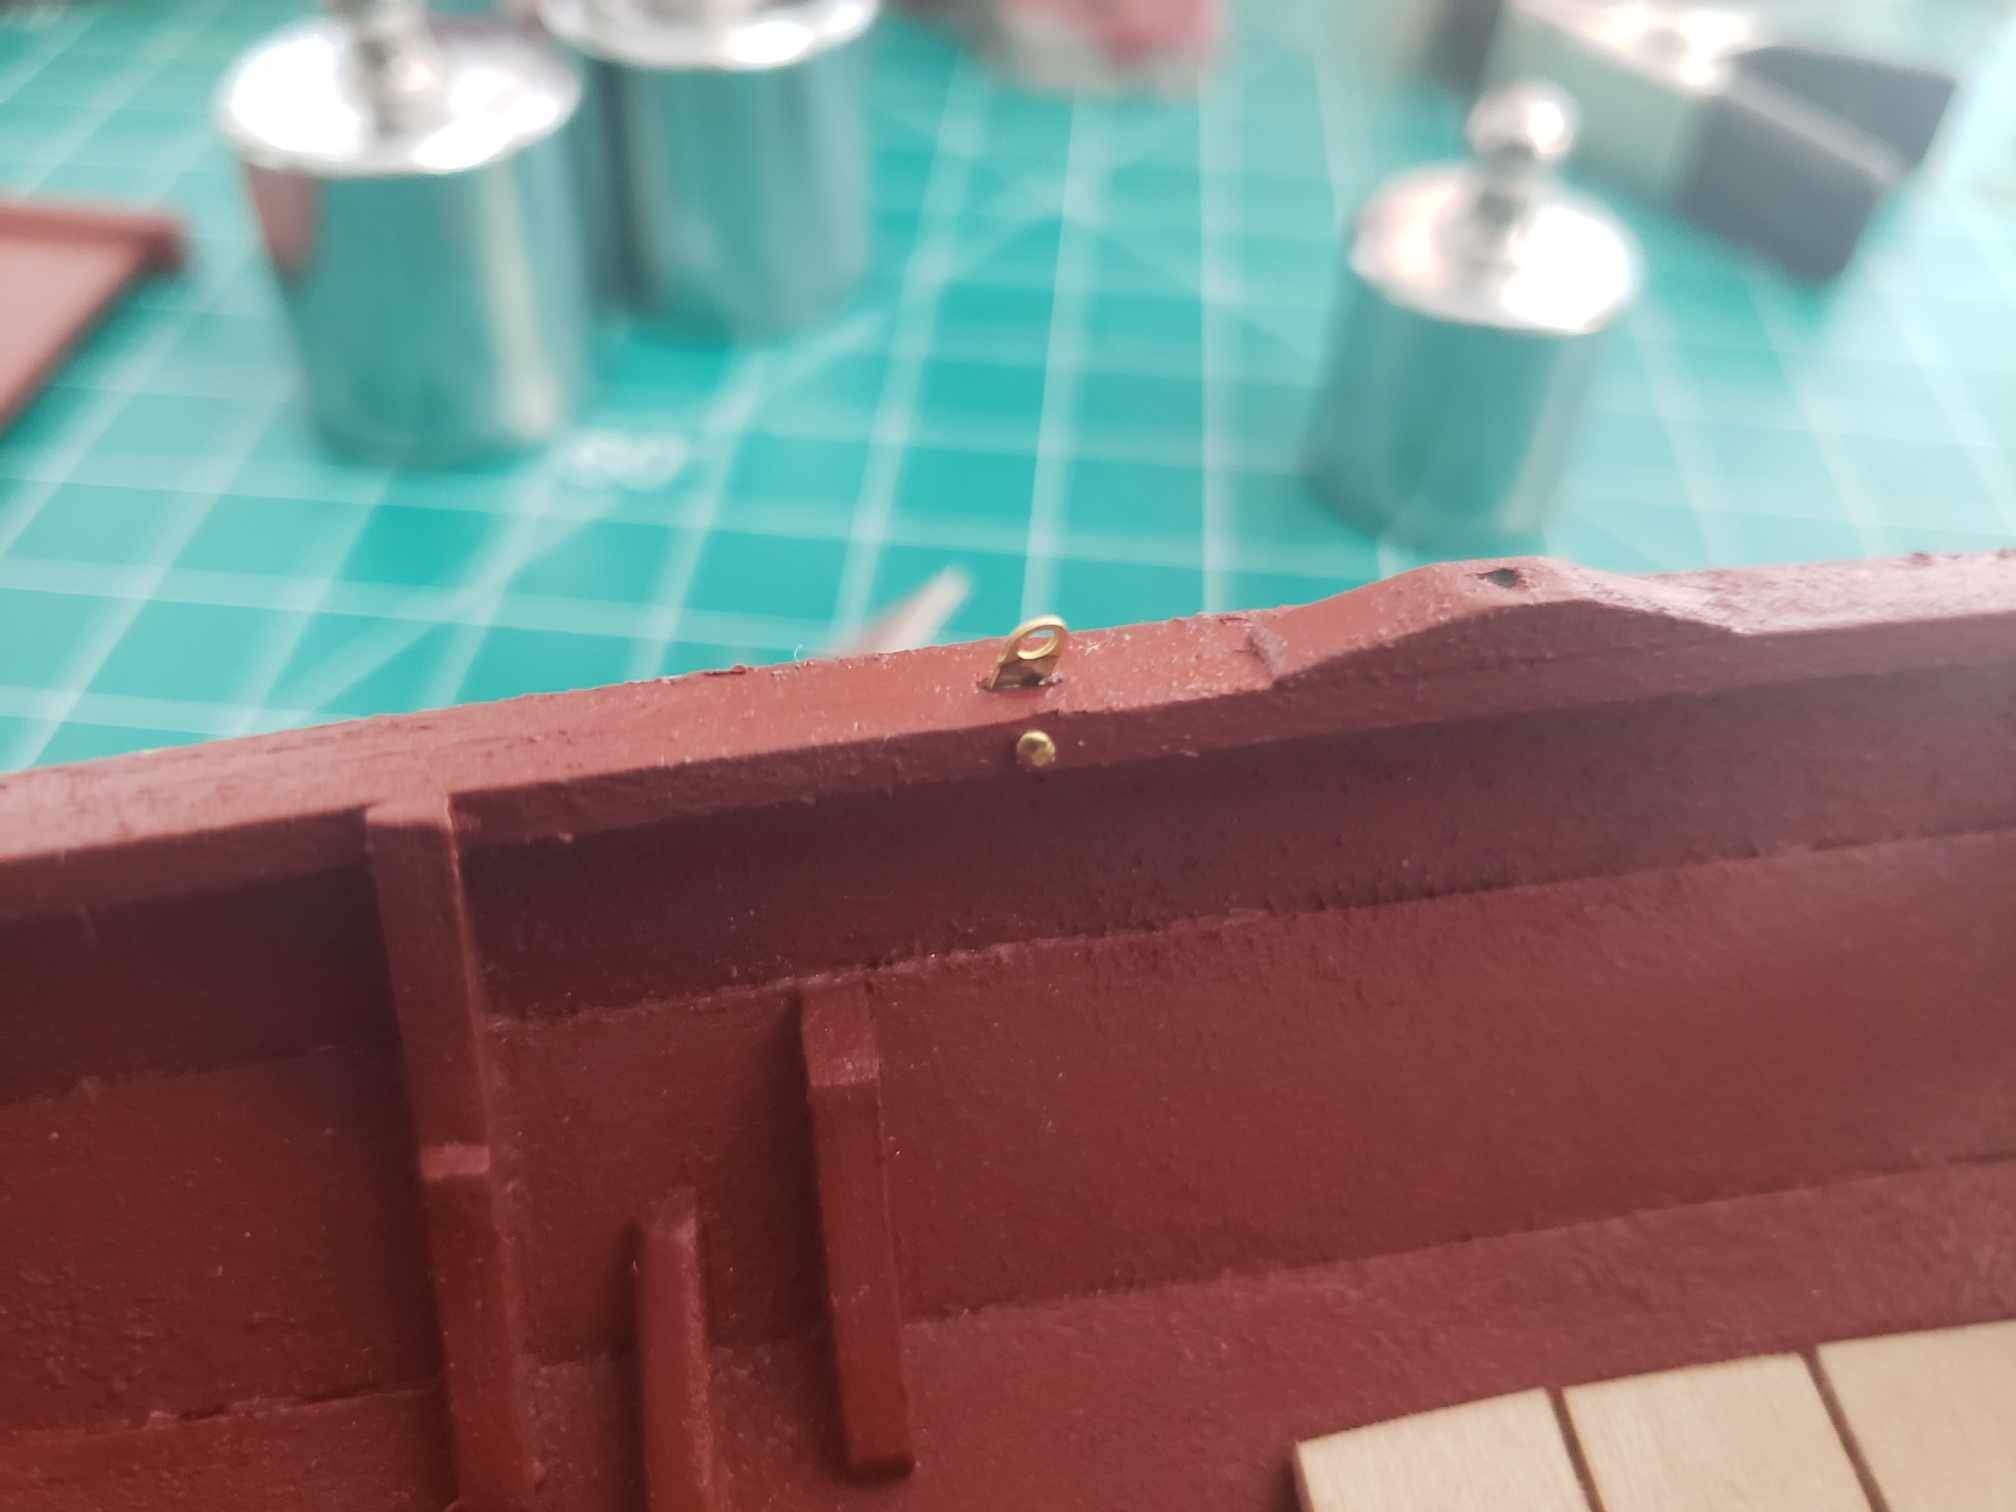
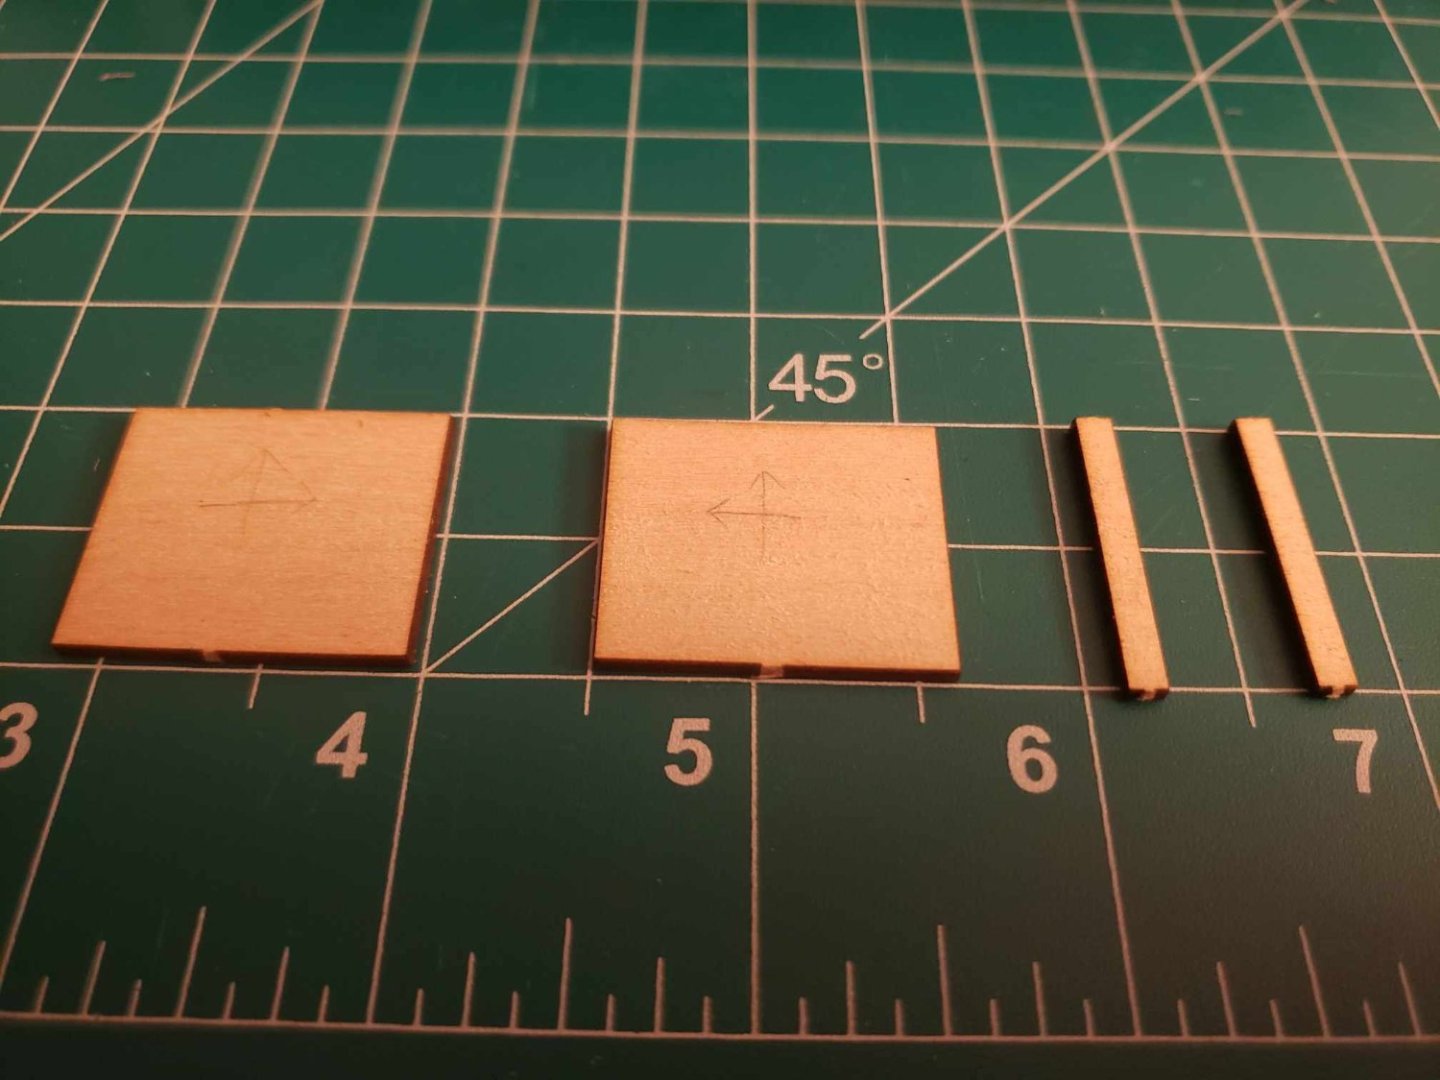
I'm still working on the sole boards, but a miscalculation led to some screw ups, and now I'm waiting on replacement parts. In the meantime, I'm moving onto some brass fittings. Currently I have the anchor point for the forestay attached. Took me four tries because I kept dropping the pipe cutoff and losing it in the carpet, so I'm happy there's so much extra. These pieces are held in place using CA glue as opposed to wood glue. Works pretty well. Semi-related pro tip, if you need to polish brass but don't have the right chemicals for it, toothpaste works in a pinch.


-
I was going to leave them unfinished as is. I kind of like the look of them that way. Obviously if I was going full scale, I'd varnish them or something, but this works for the model.
-
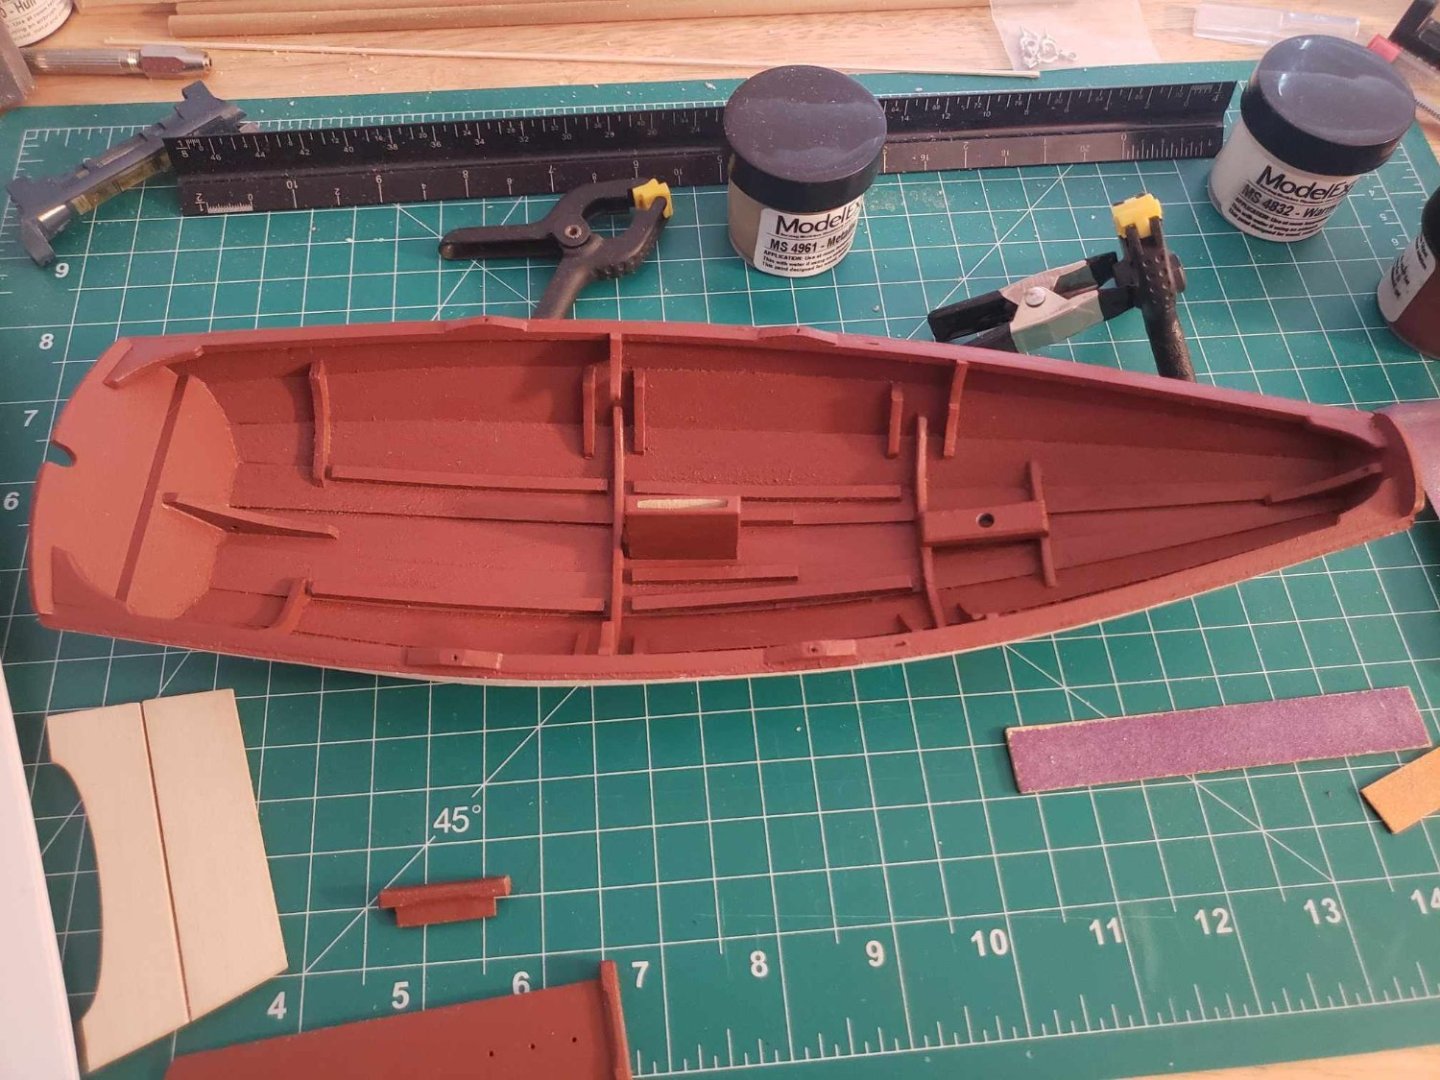
After sole boards and stern sheets installed. If you look closely enough, the sole boards aren't exactly even on the edges, but they pass well enough at first glance. Still, not terrible for shaping these by hand.

-
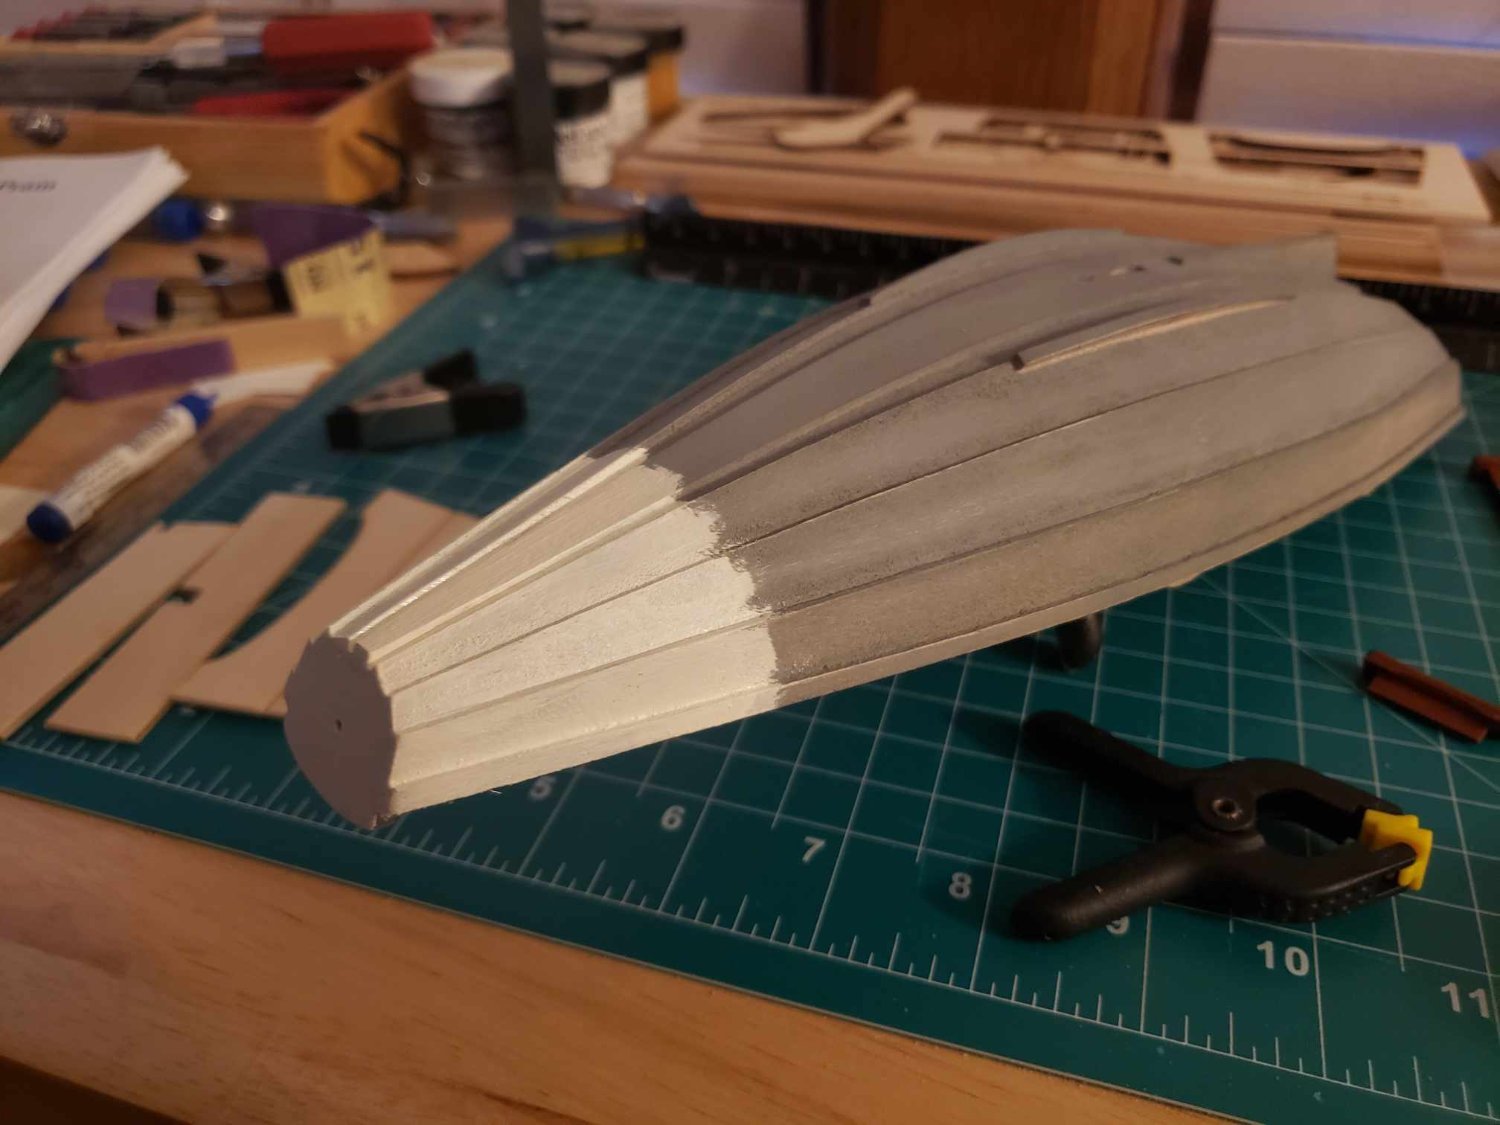
Apologies for the LONG delay in updating, I've been in California for the past two months. I got the interior painted, just need to do some touch ups on the hull. I also used some brass paint on the bottom of the skeg fin and bilge keels to mimic weather strips.
-
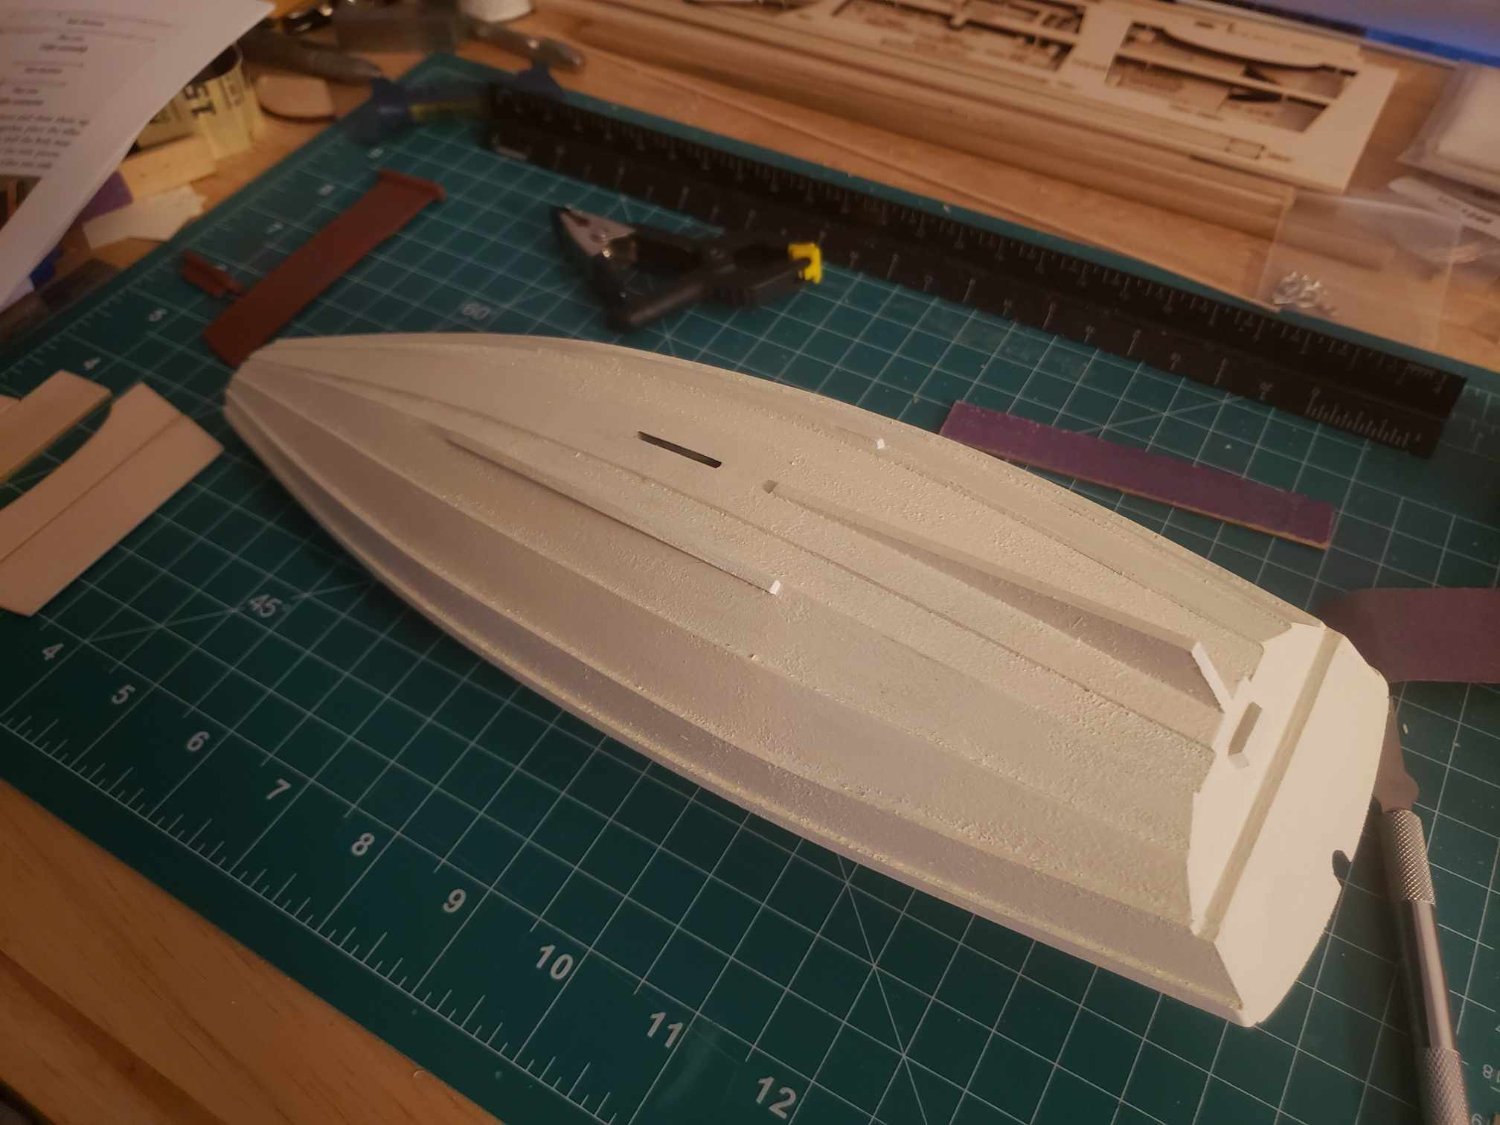
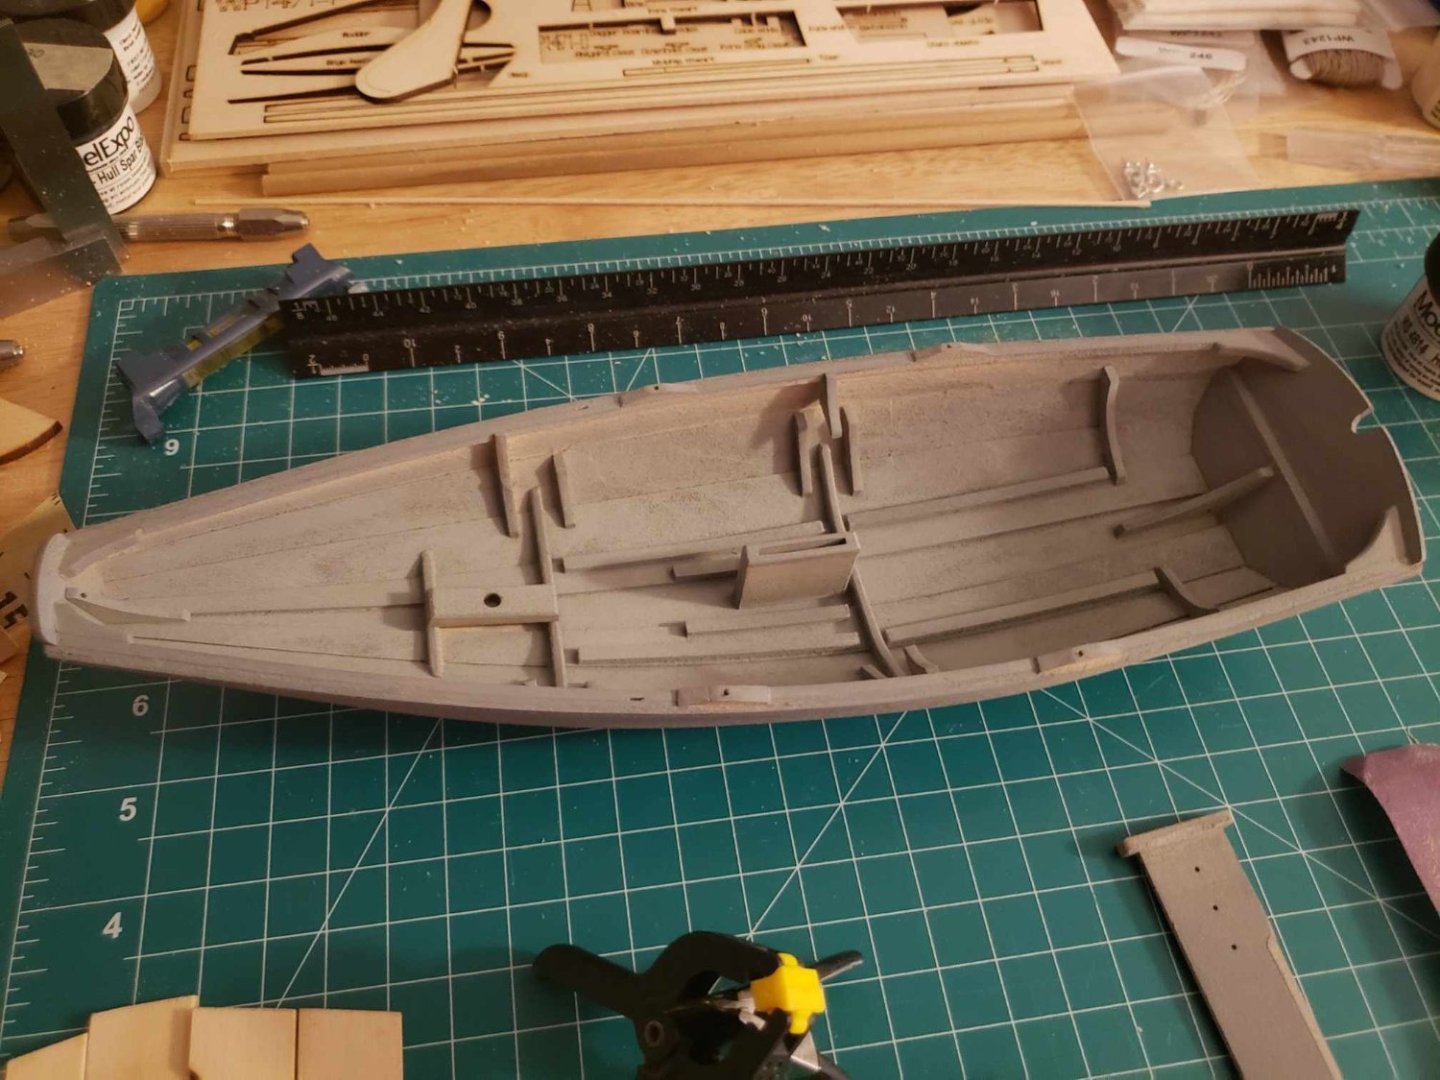
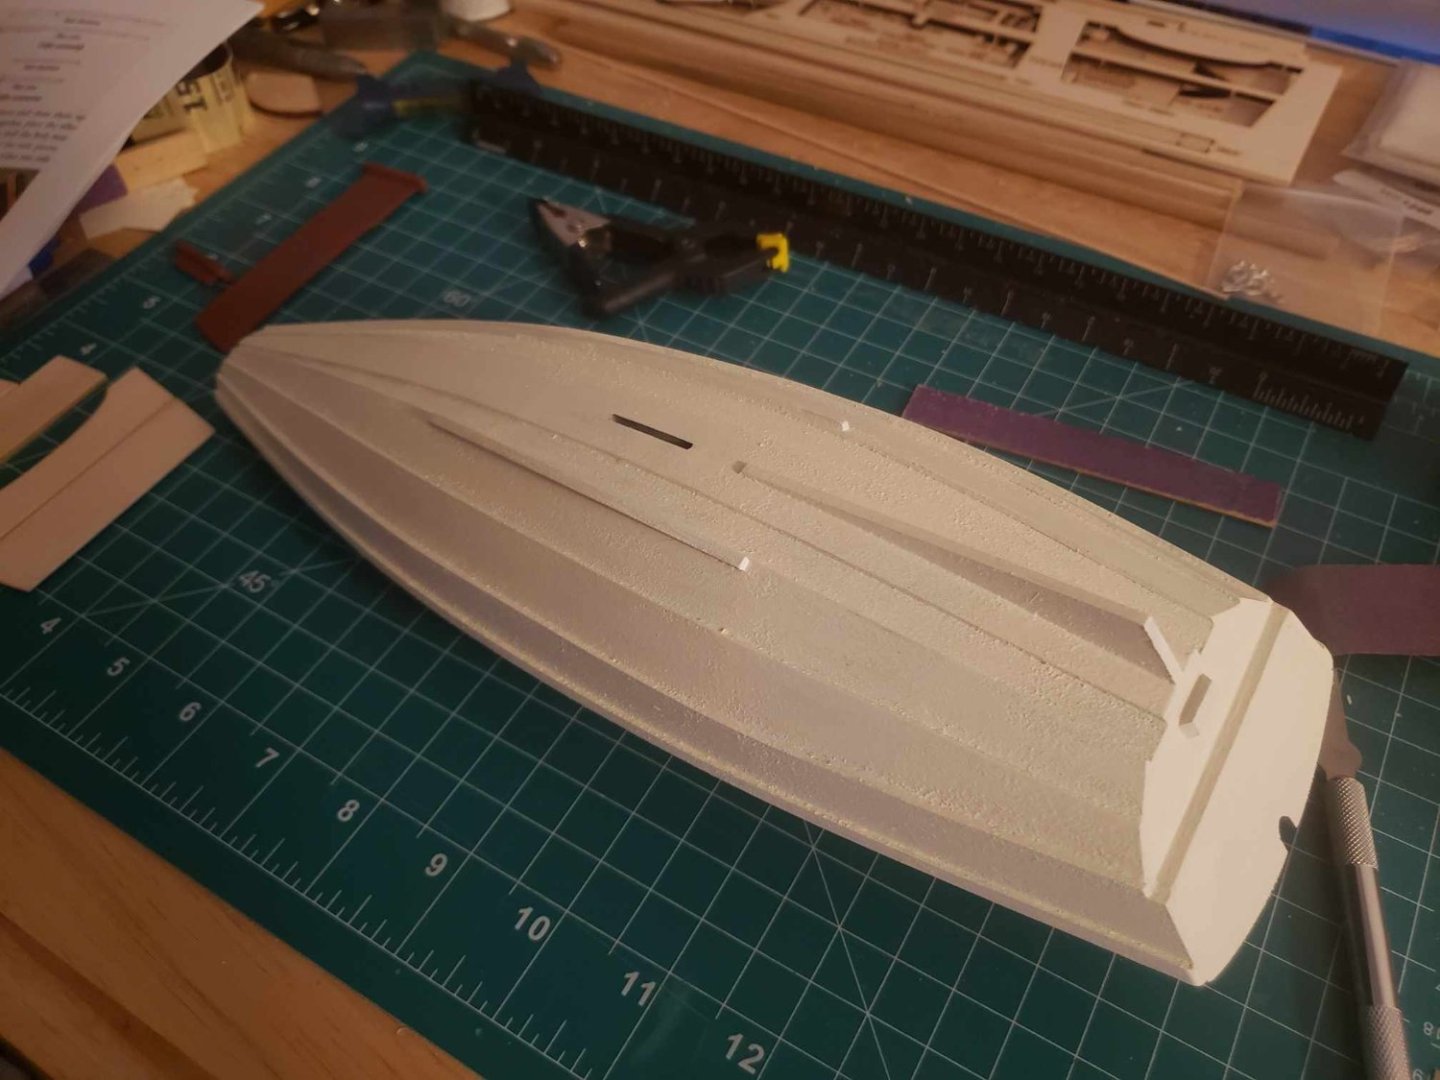
Primer applied and the outside of the hull painted. Interior will be copper red.

-
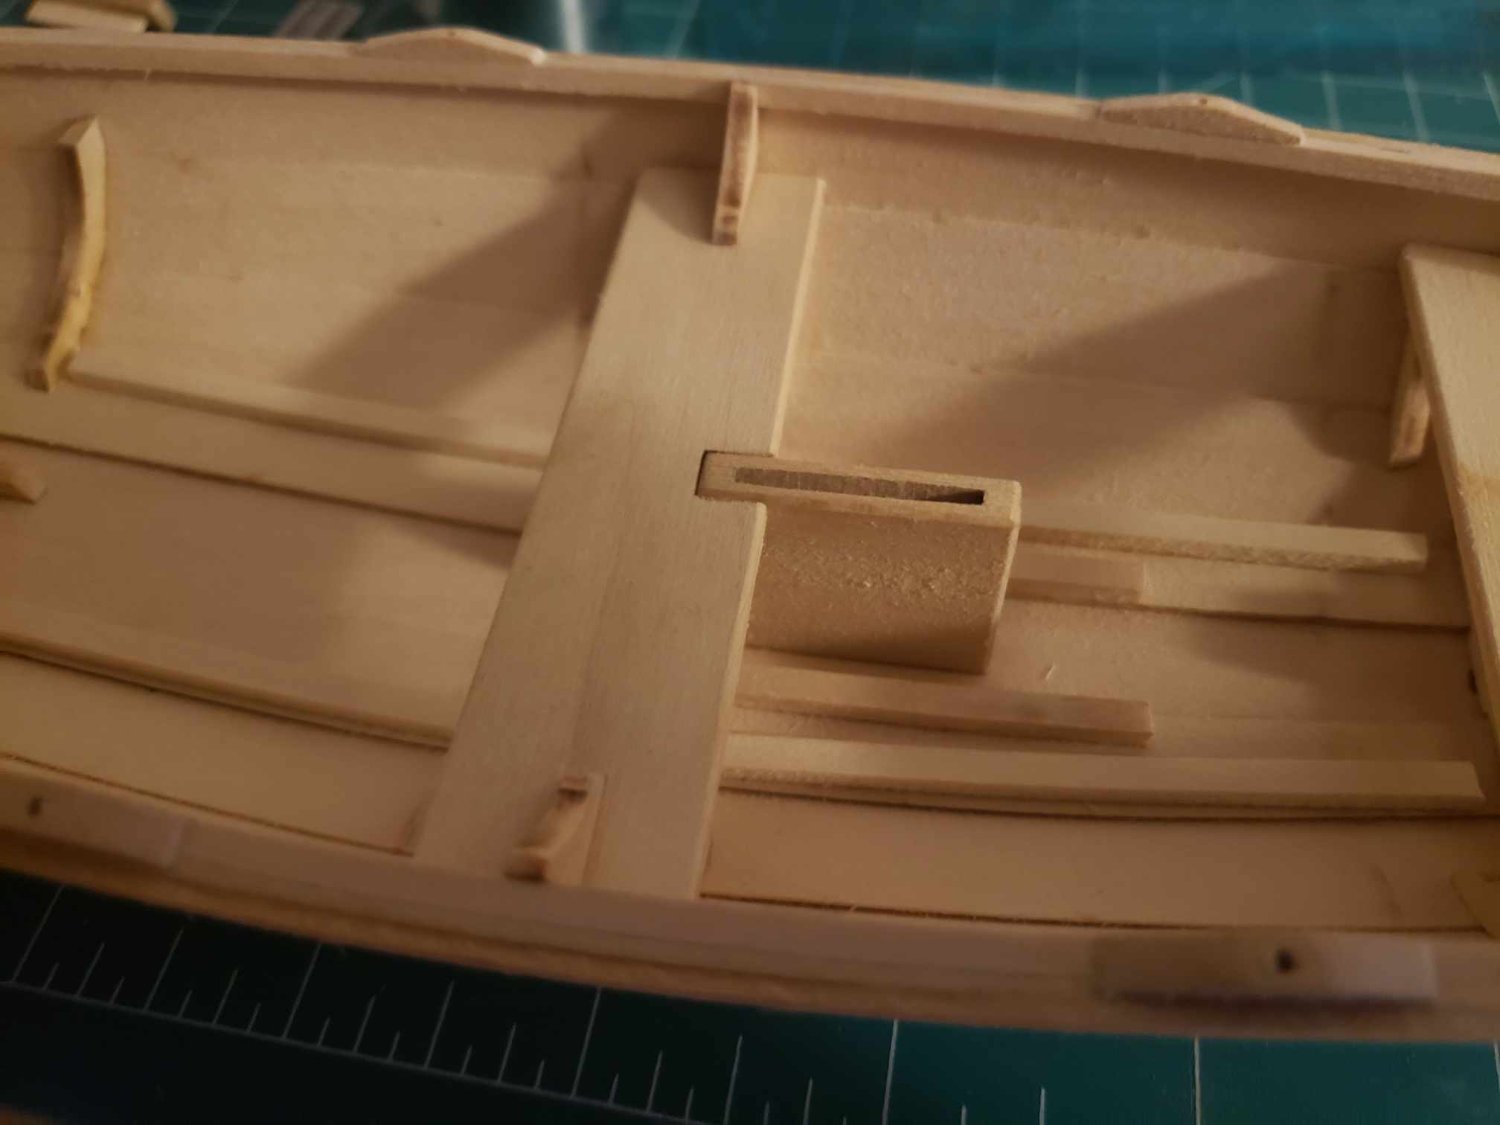
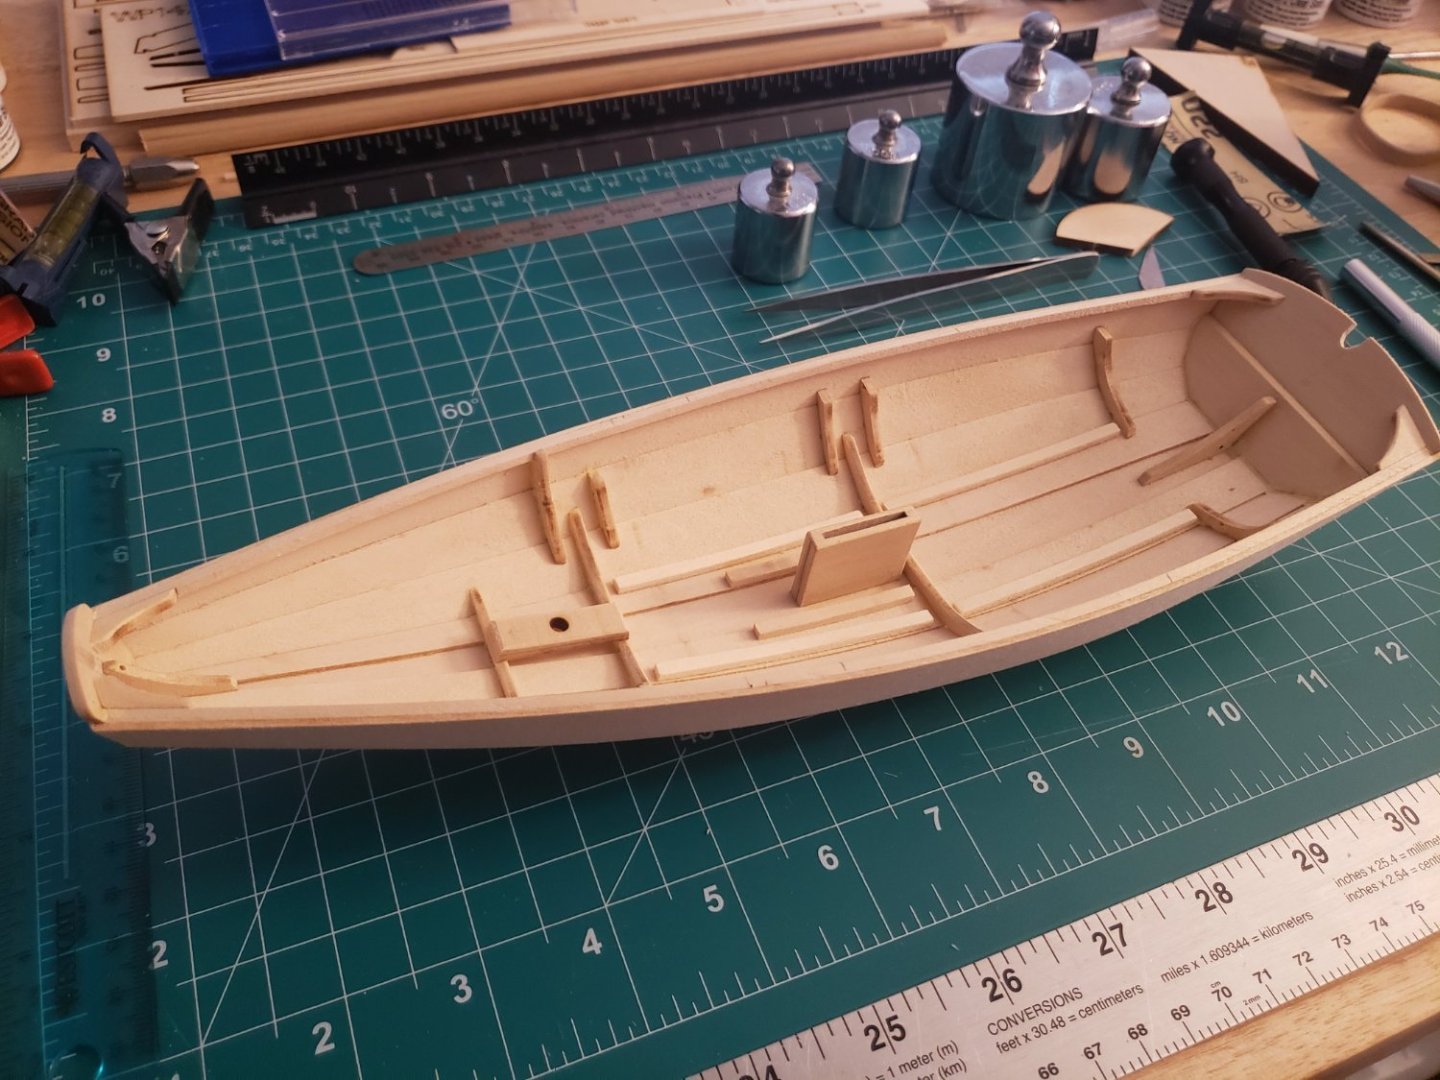
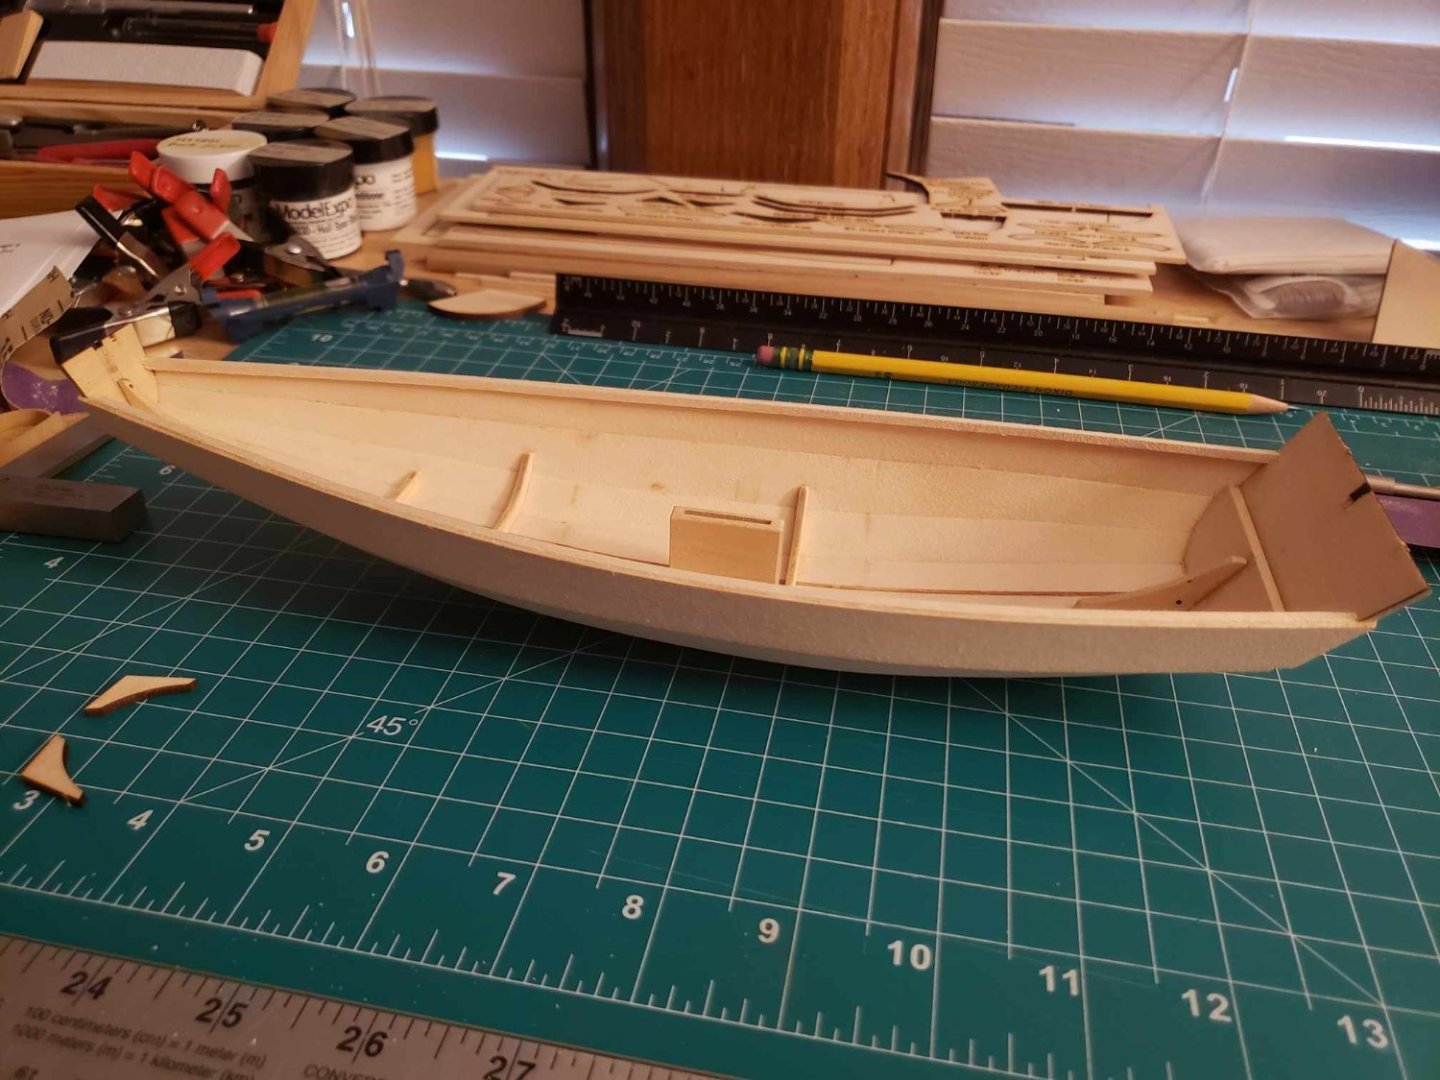
Took a while, but I got the rest of the thwarts fitted. I had to request some replacement parts from Model Expo (the knees were miscut) which took a little time. I also made a cover for the daggerboard case, which turned out rather well. Now that the thwarts are fitted, I can take them off and paint the hull. I'm doing dull red for the interior and warm white for the exterior. I also picked up some metallic brass to paint the bottom of the bilge keels, mimicking weather strips.


-
Sorry about the hiatus, I've been on the tall ship LYNX for the past month and just got home yesterday. So, back to work. I got the slots for the stay plates cut, and fit the fore thwart. I like to think I learned a trick or two from the dory build, because I wasn't entirely happy with how those turned out, but I'm MUCH more please with this one.

-
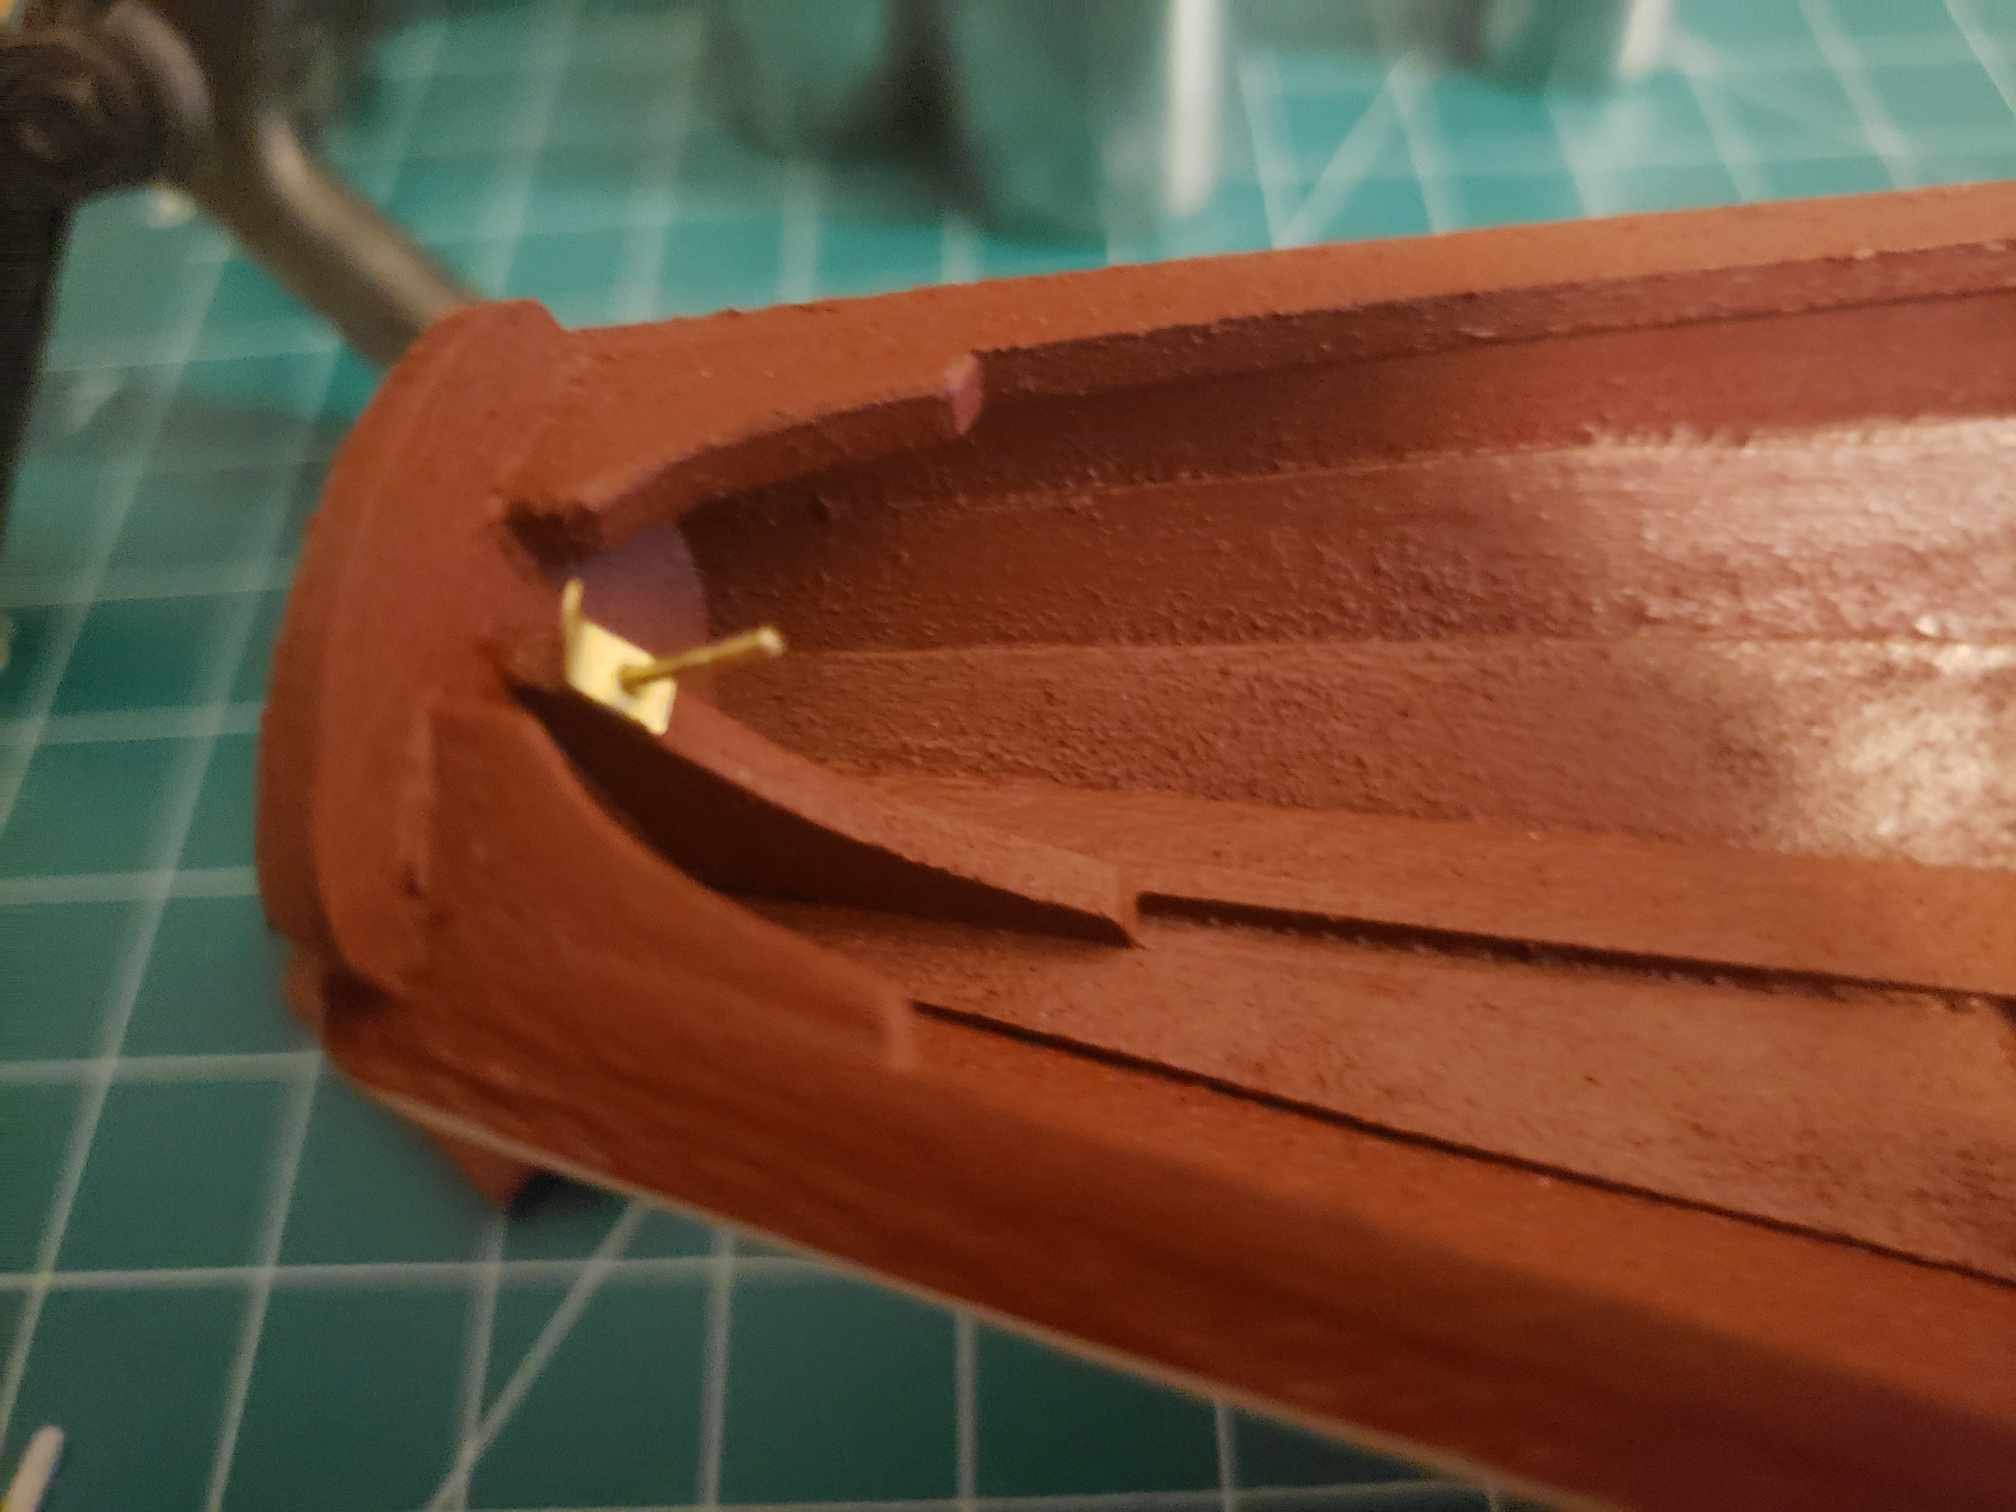
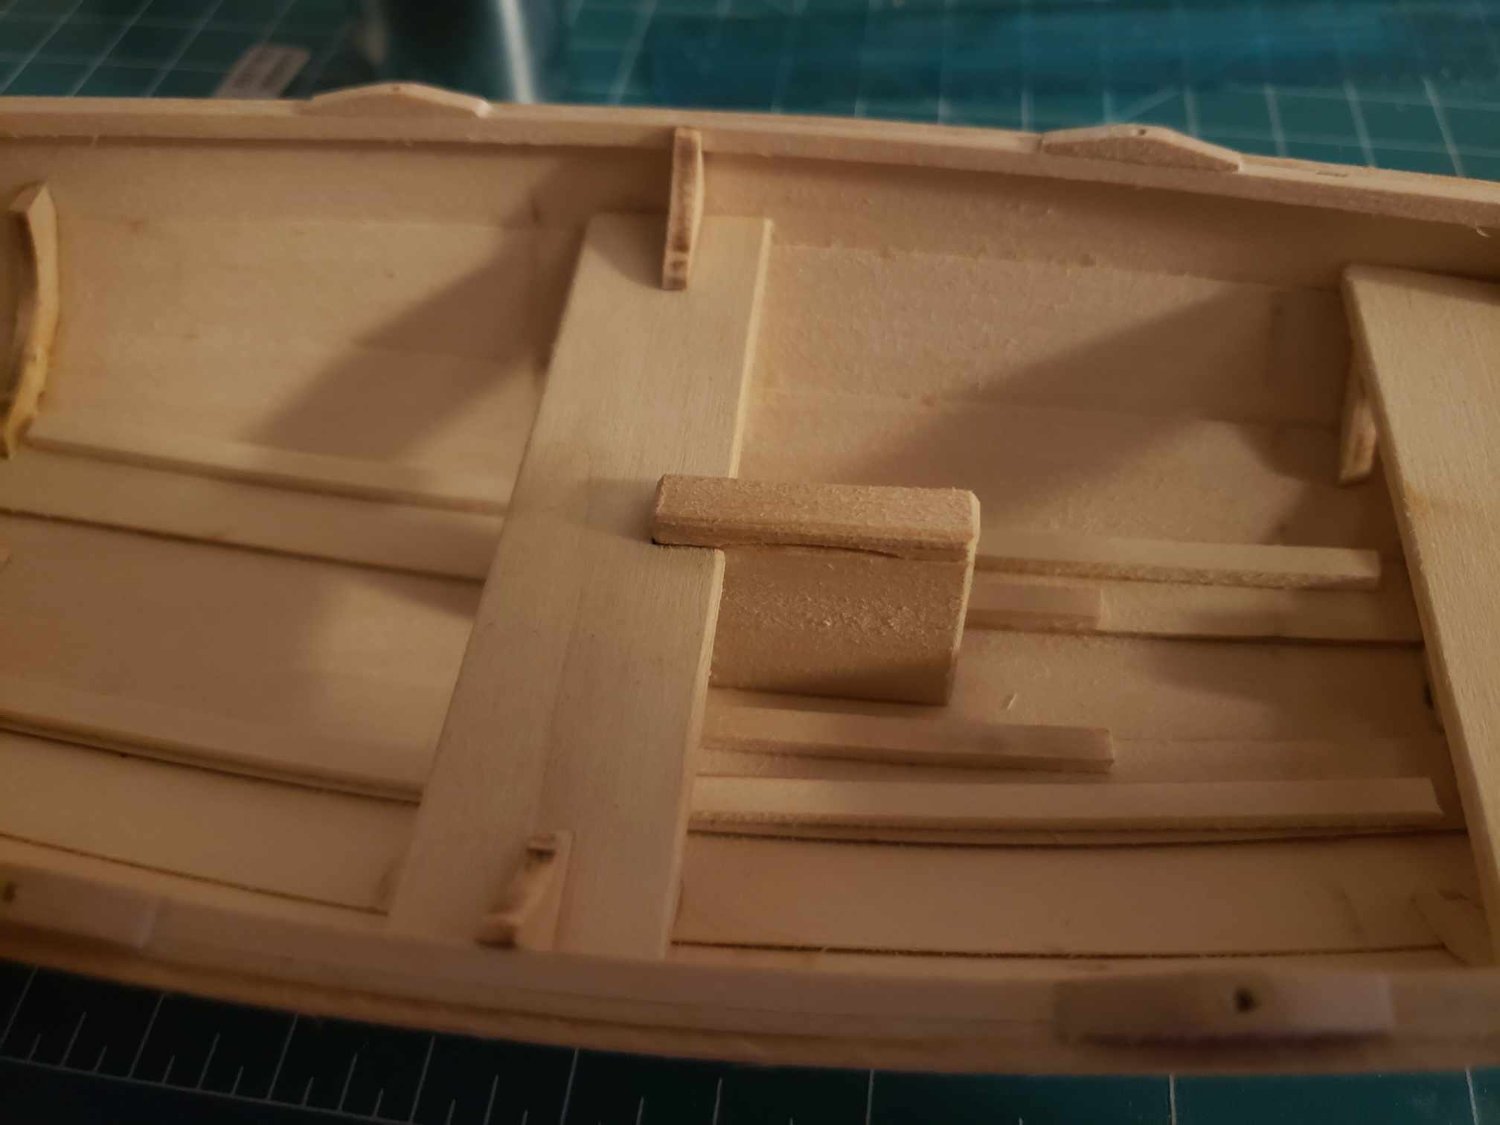
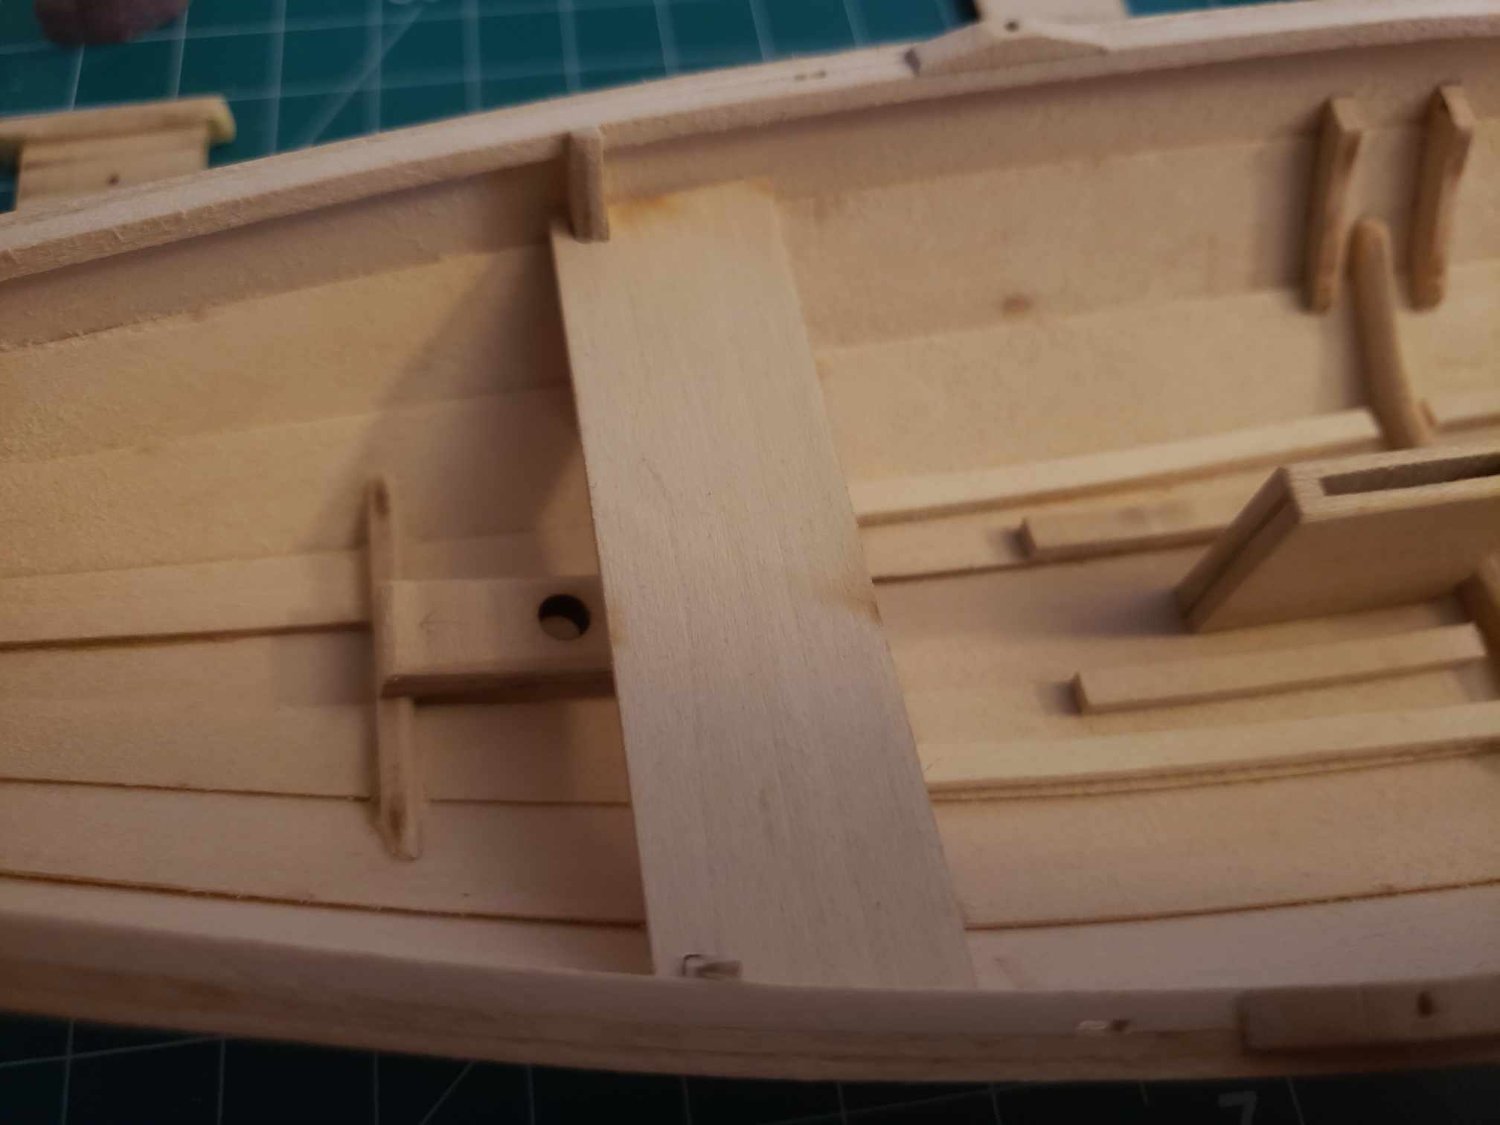
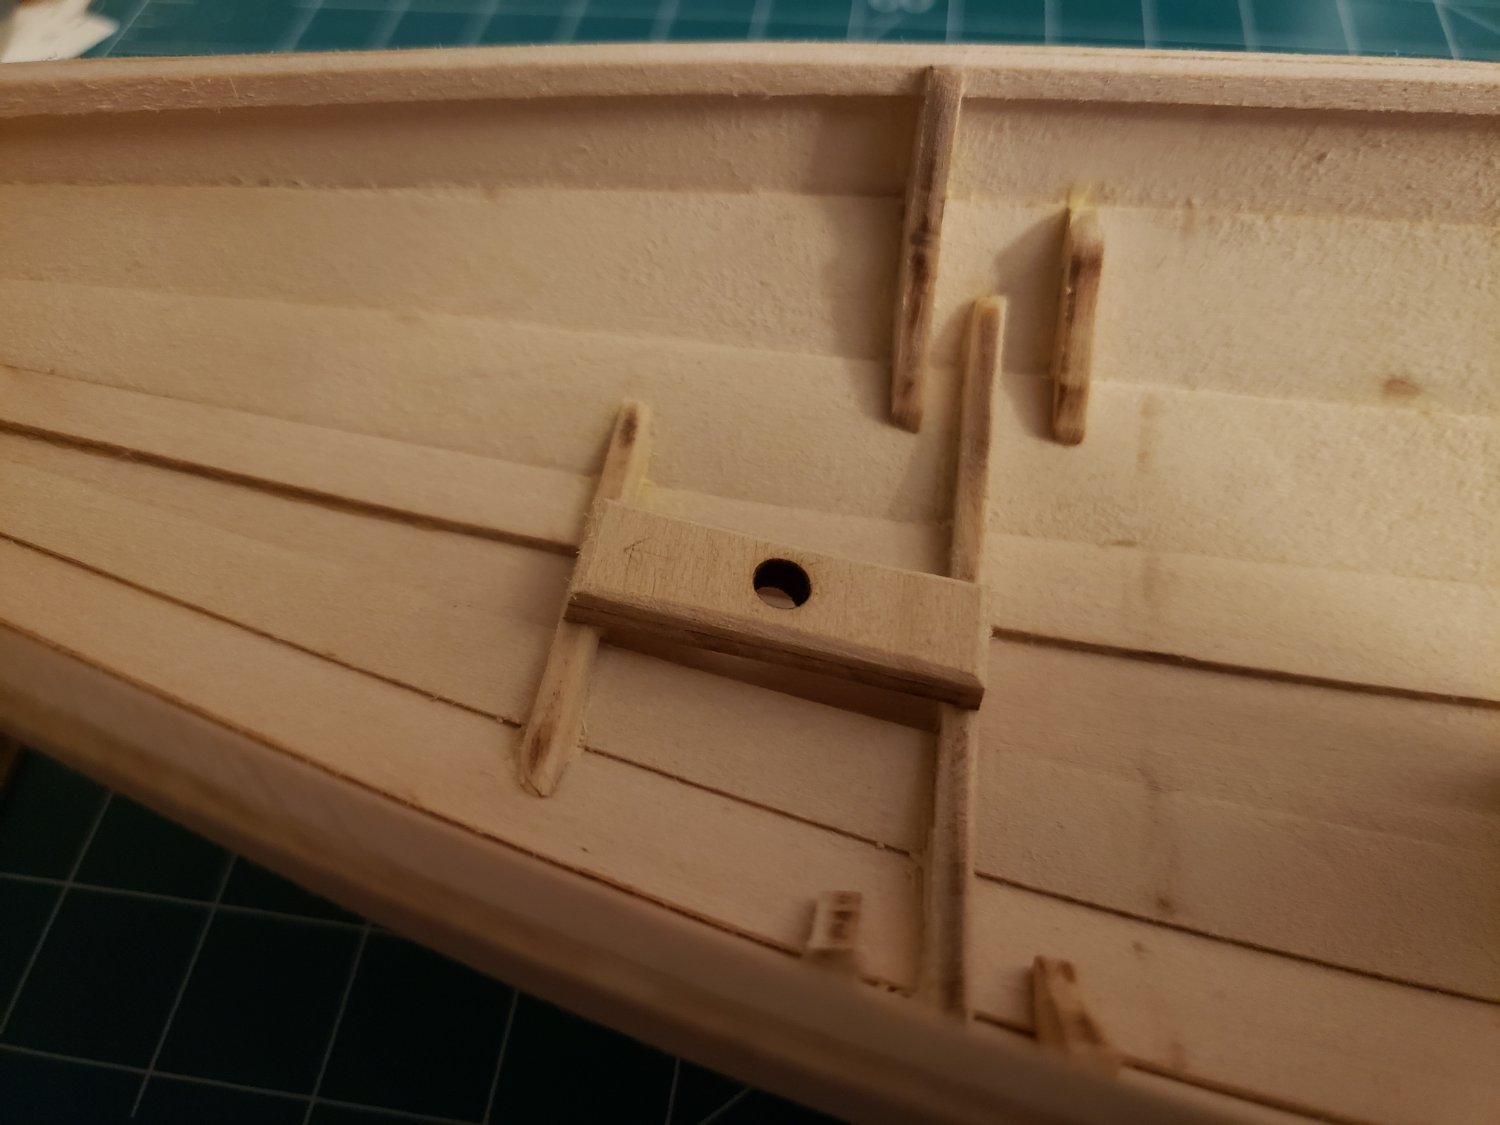
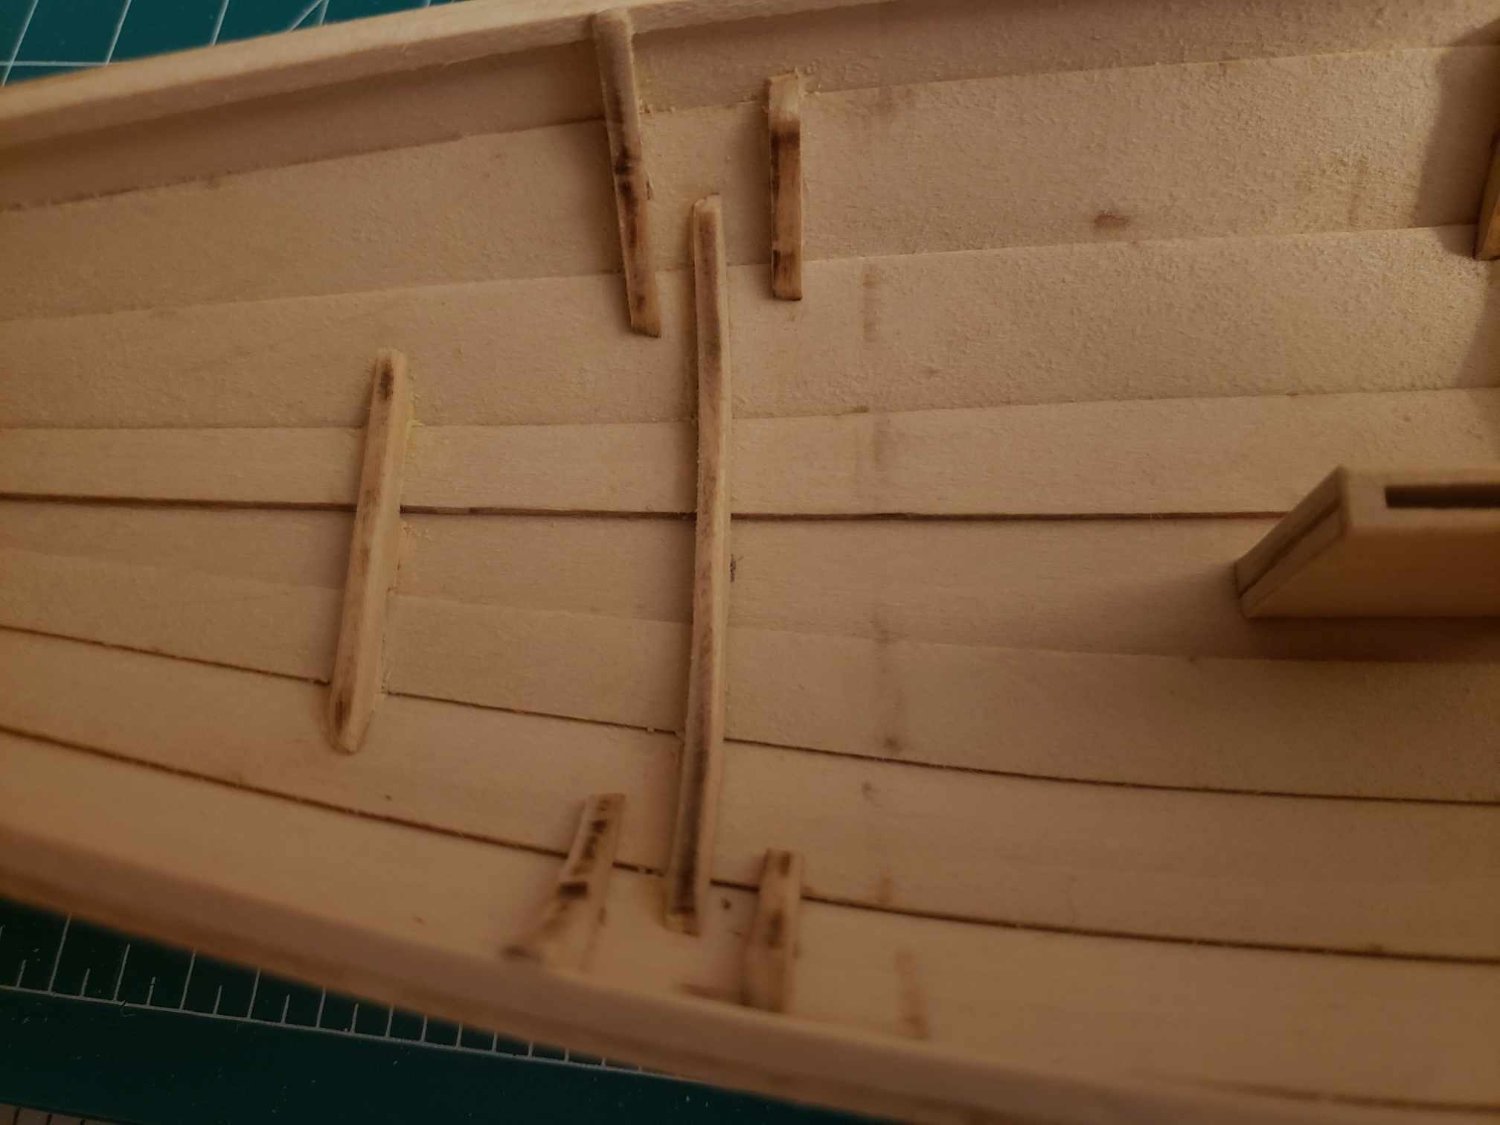
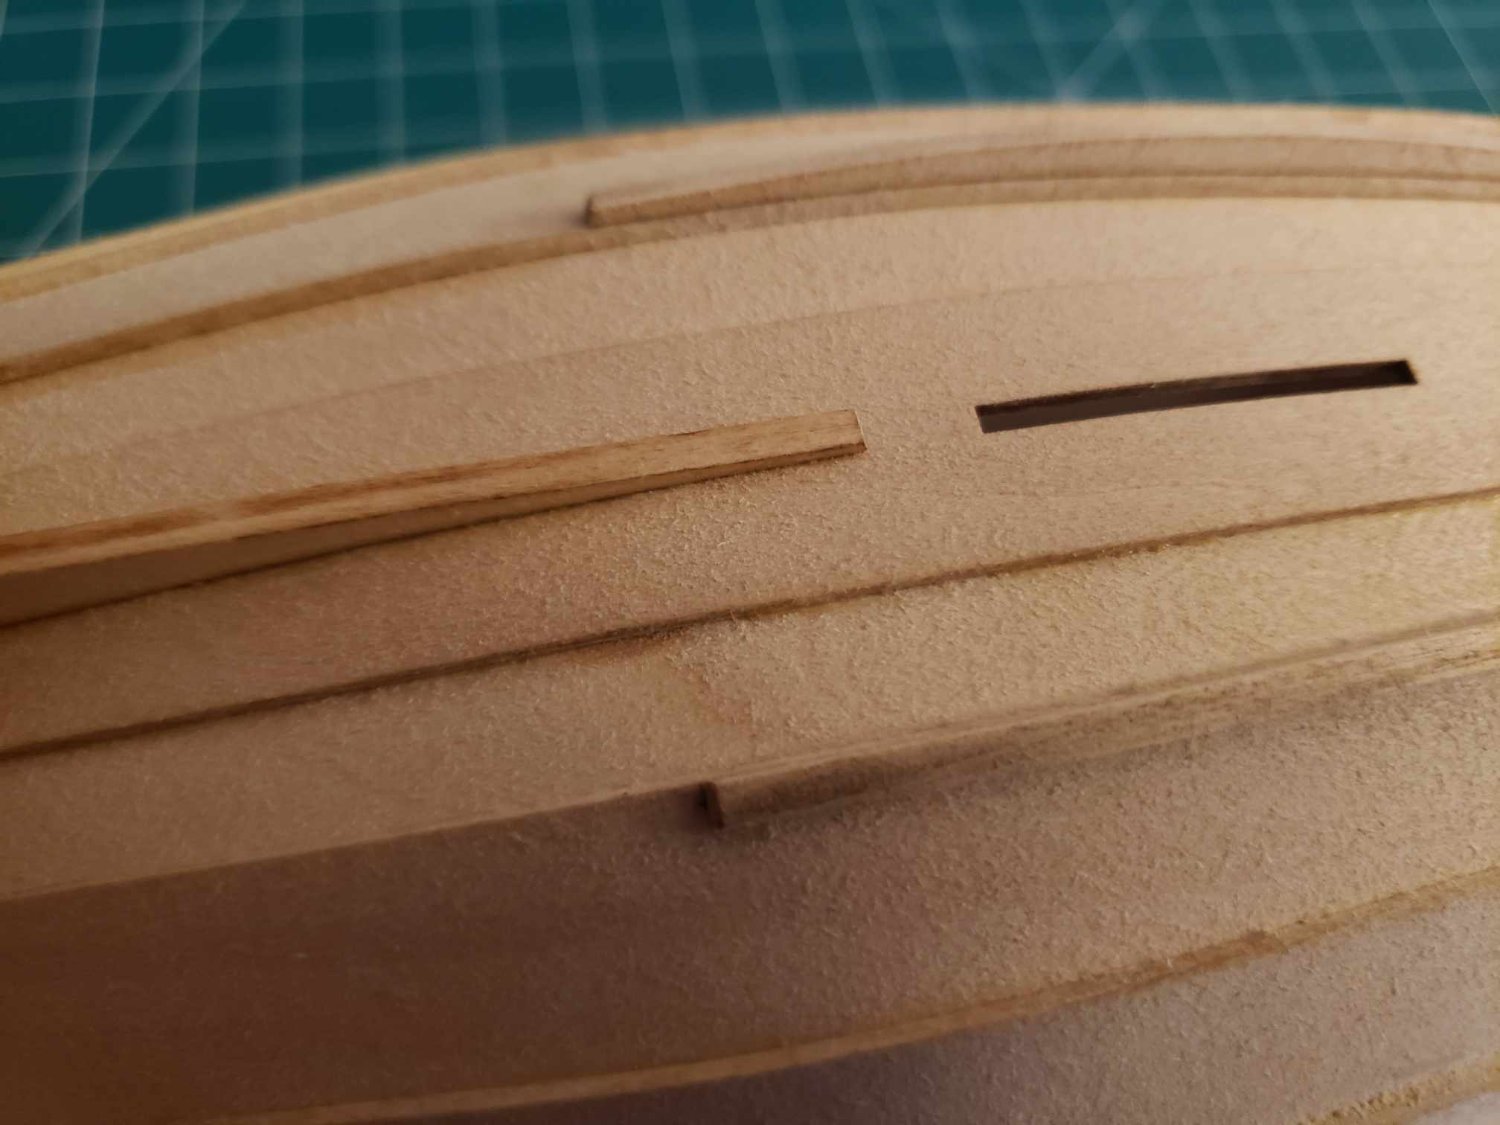
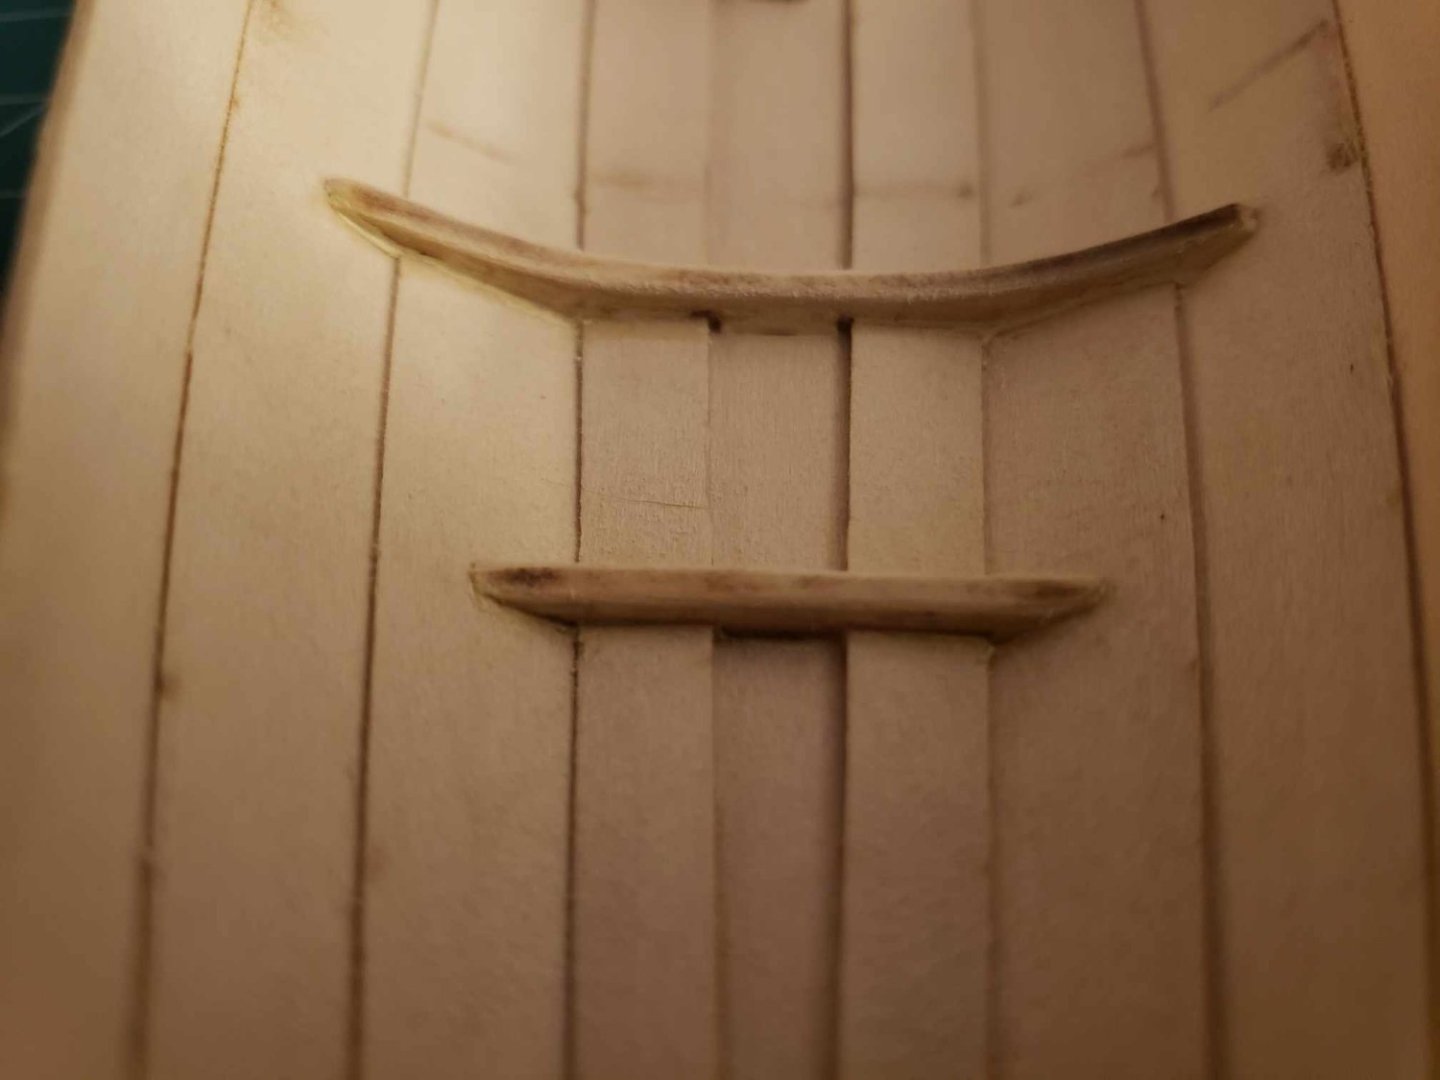
Lot of stuff in one here. I got the gudgeon cut and attached, I unglued and reglued the skeg to make it more center, I lowered thwart frames B slightly, and I attached the floorboard cleats. For the measurements for those, I started with two each of 2 7/8", 2 3/4", and 1 7/16" and filed down to size from there. I had hoped to the slots cut for the backstays before I have to set the model down for a bit (long story short, I'll be on the tall ship LYNX for a month and won't be around to work on the pram), but I didn't have the saw blade. I'm hoping I can finish the oarlock pads, and maybe the rub rail. We shall see.


-
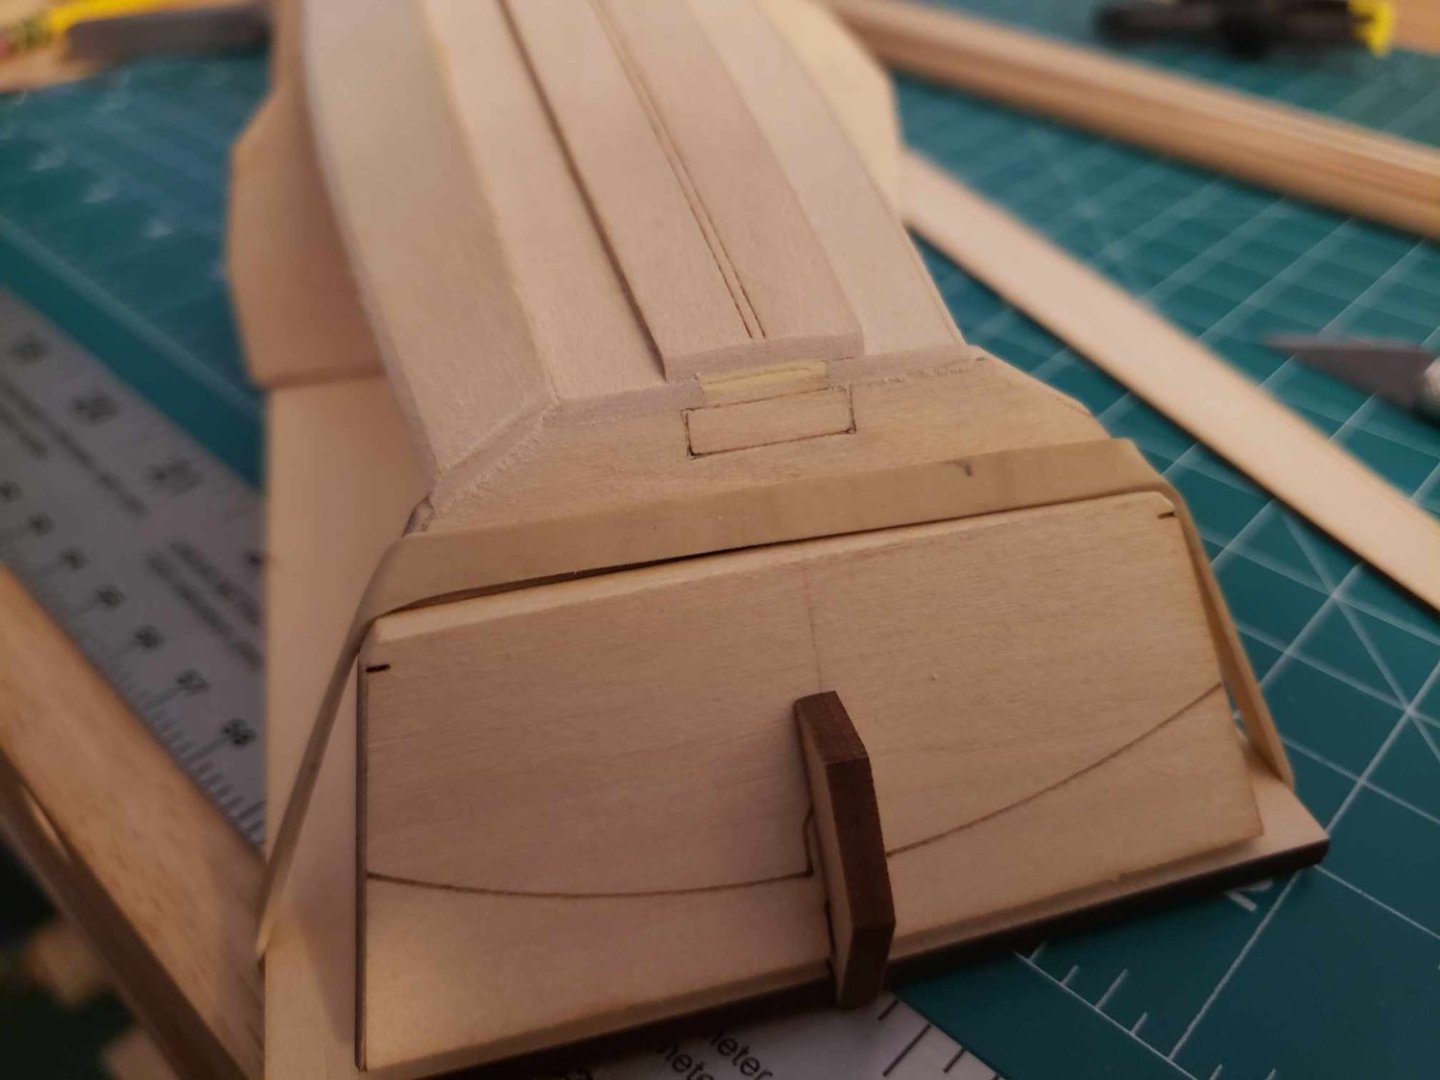
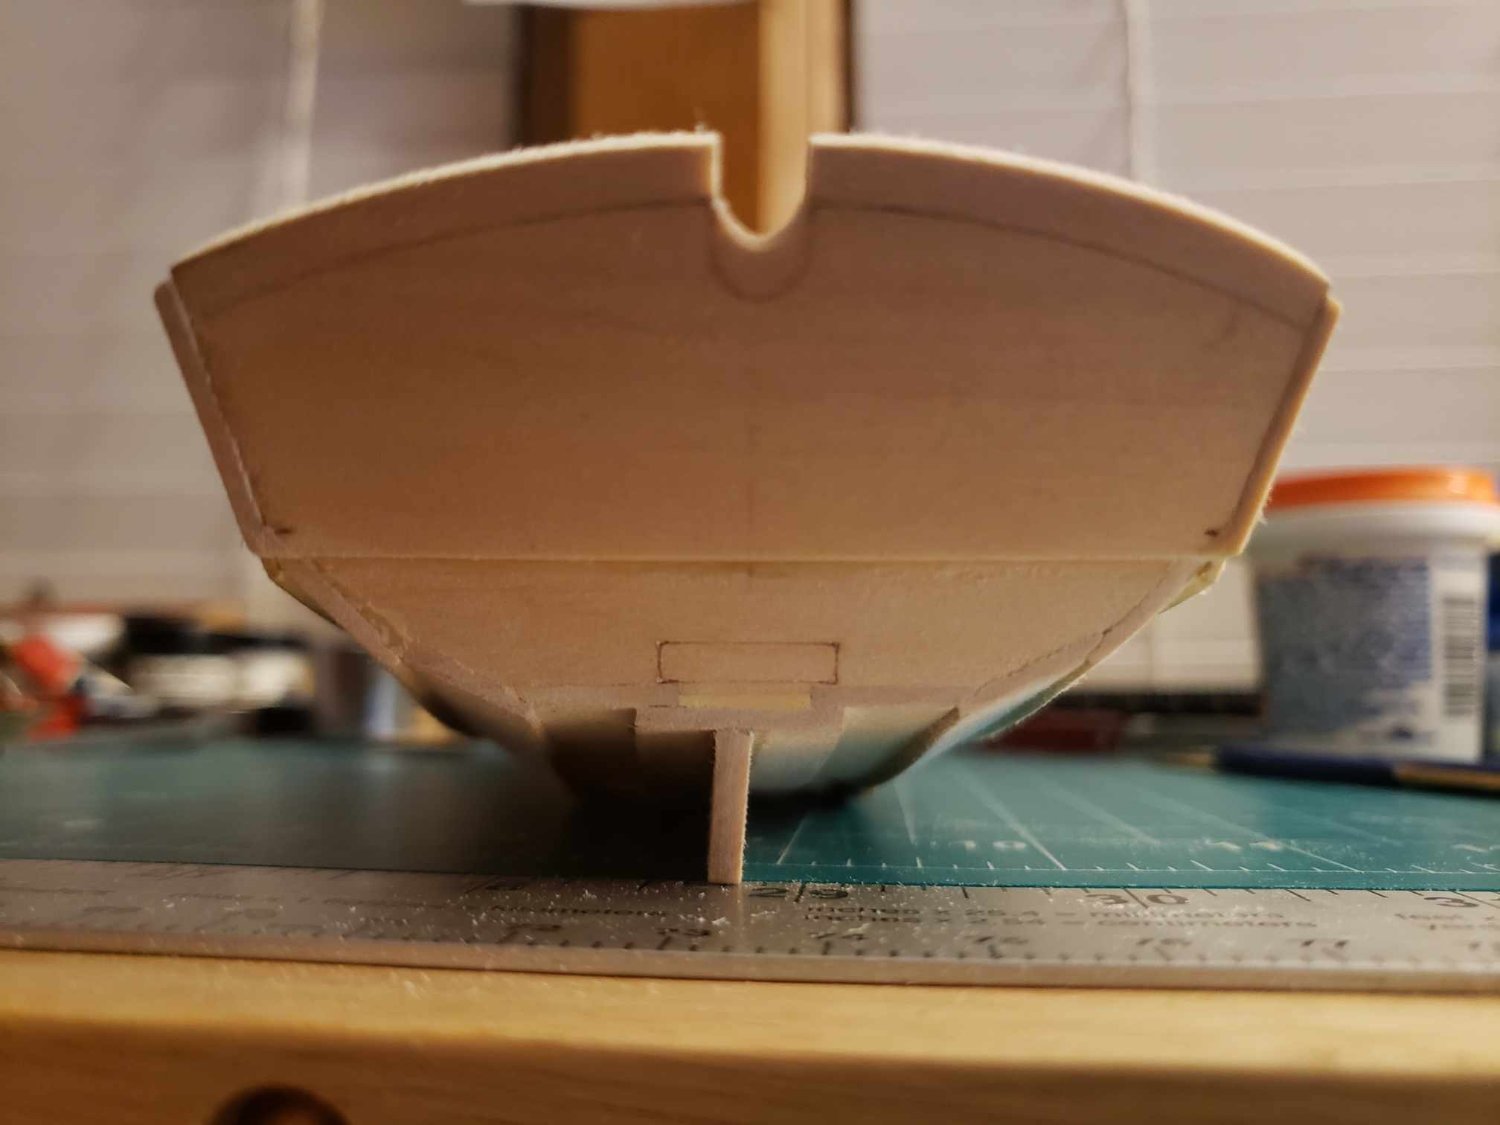
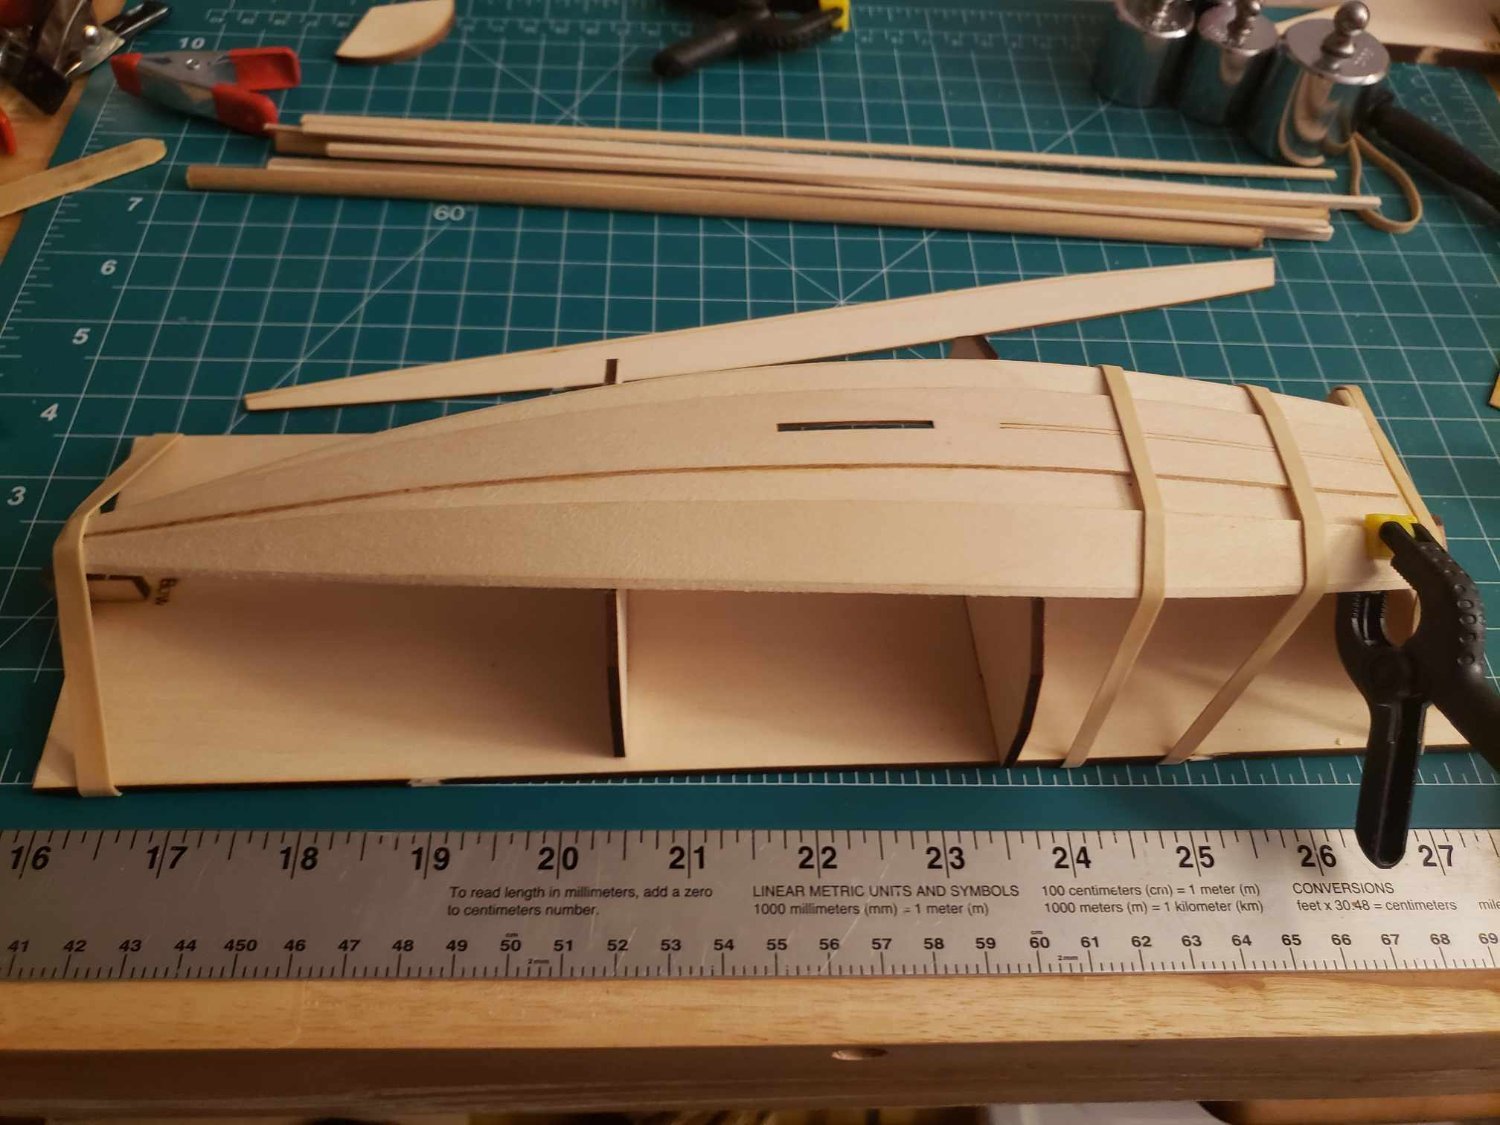
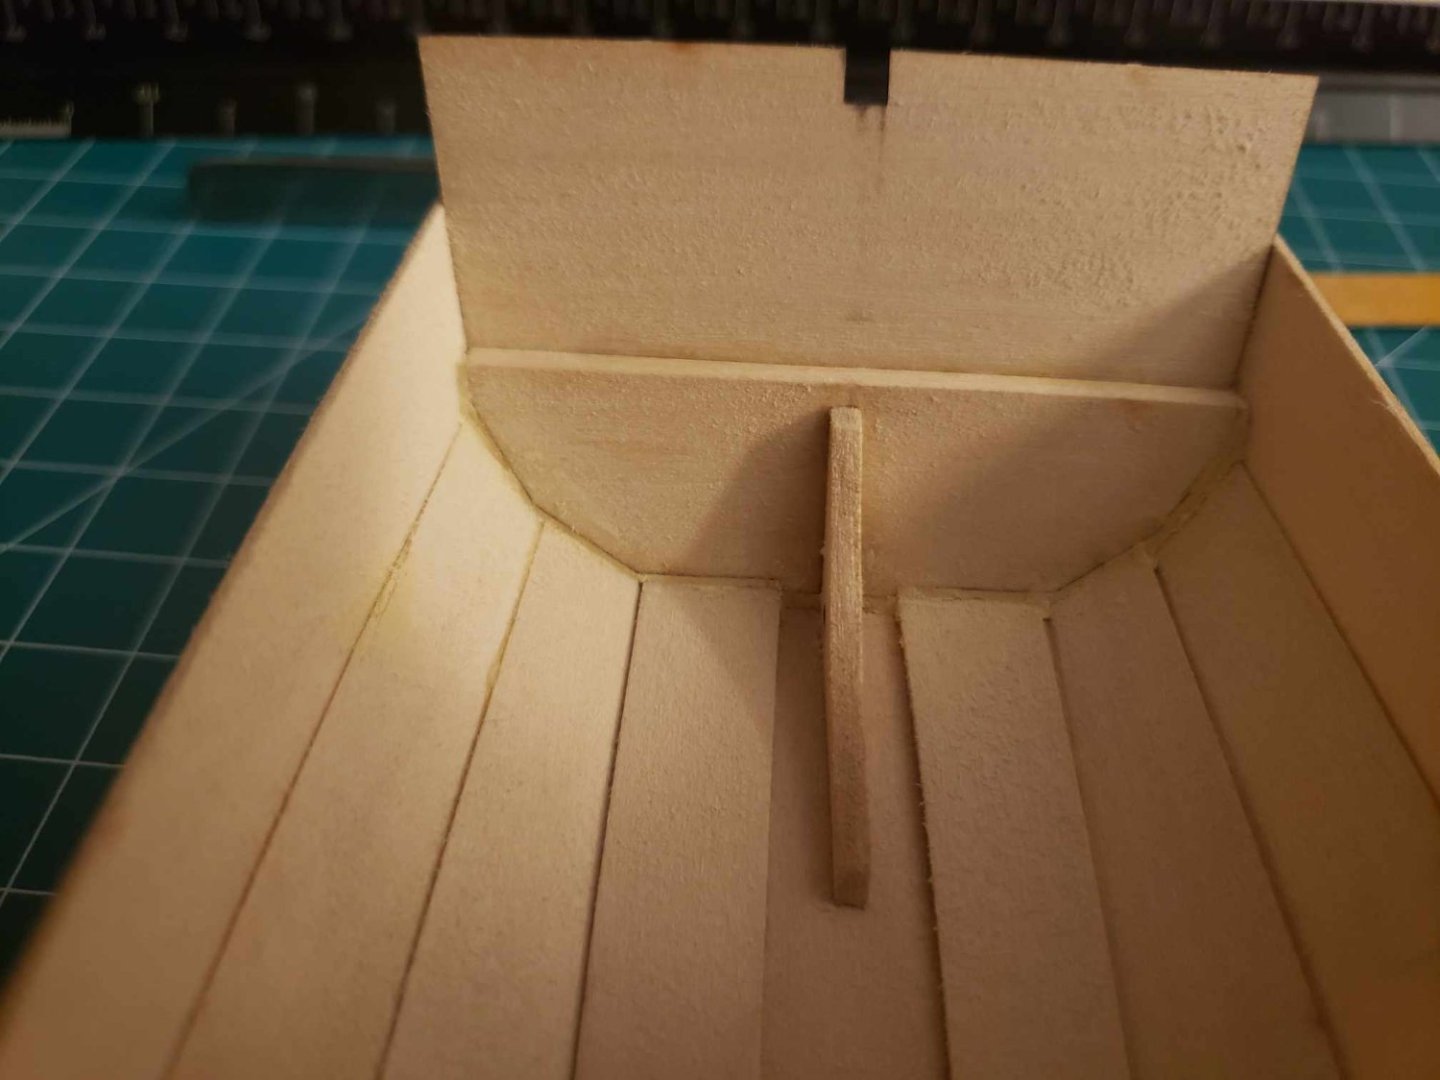
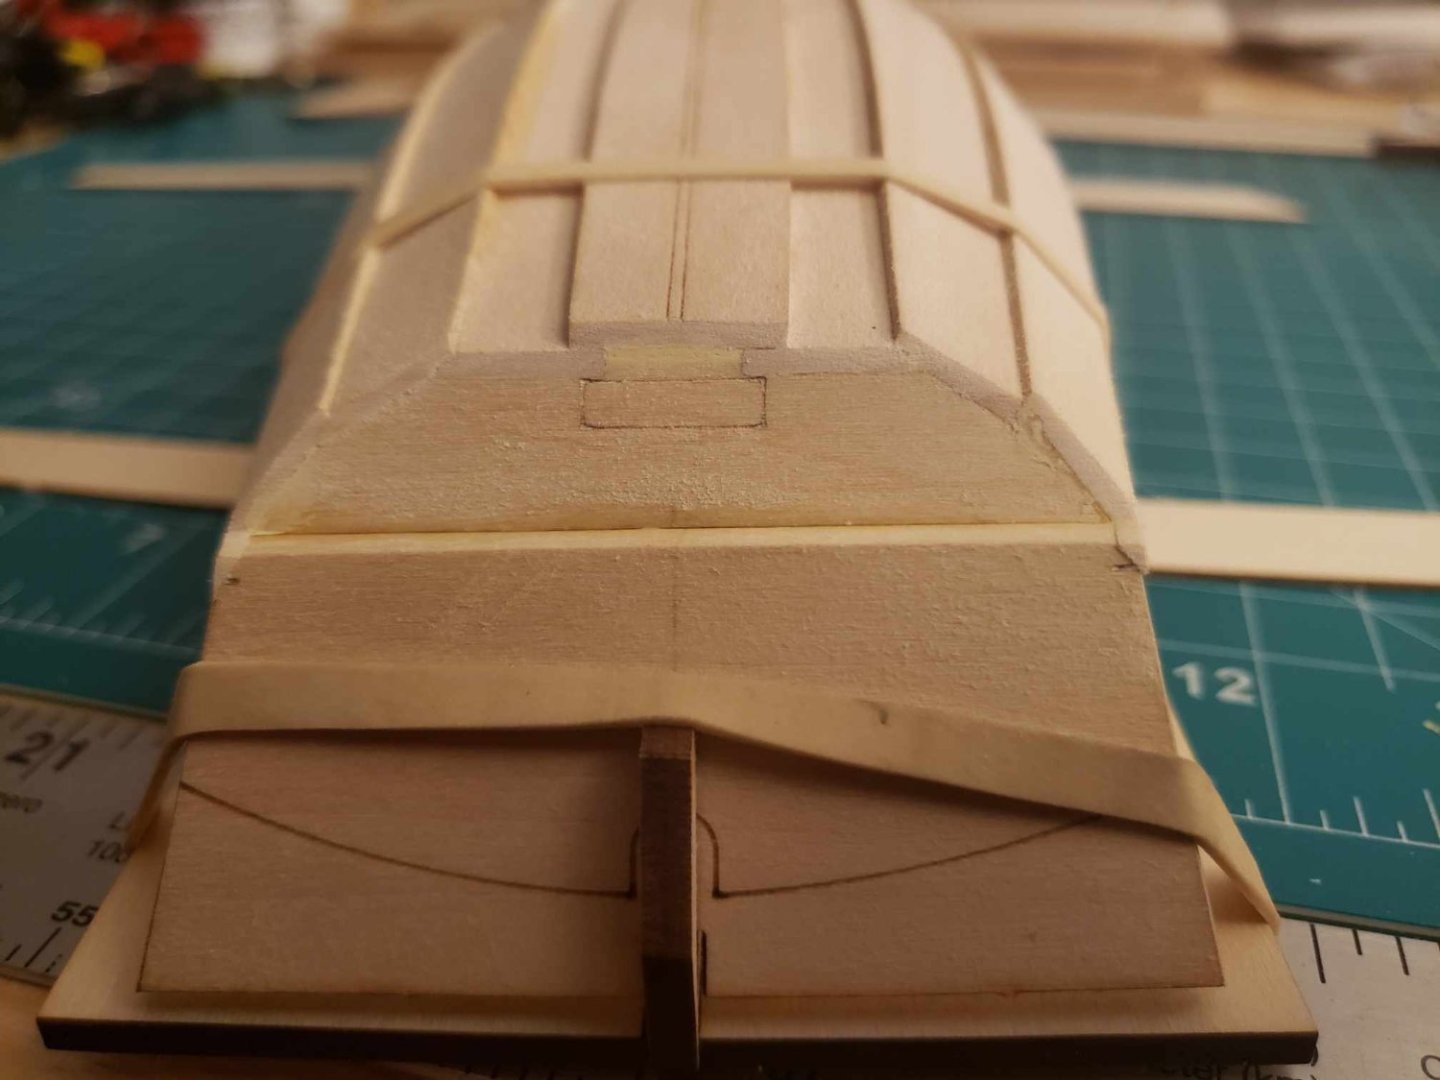
Still need to put the soleboard cleats on, but things are coming along. I had a little bit of trouble with over-beveling some of the thwart frames, and again, wood putty is my best friend. If you've been following this build, you'll know I had worries about the transom. For a freehand sketch and a LOT of sanding with dull files, I think I did pretty alright. I might see about adjusting the skeg at some point. It's off just slightly enough to bug me. I know, I know, looks right is right, but I think I can make it look better.


-
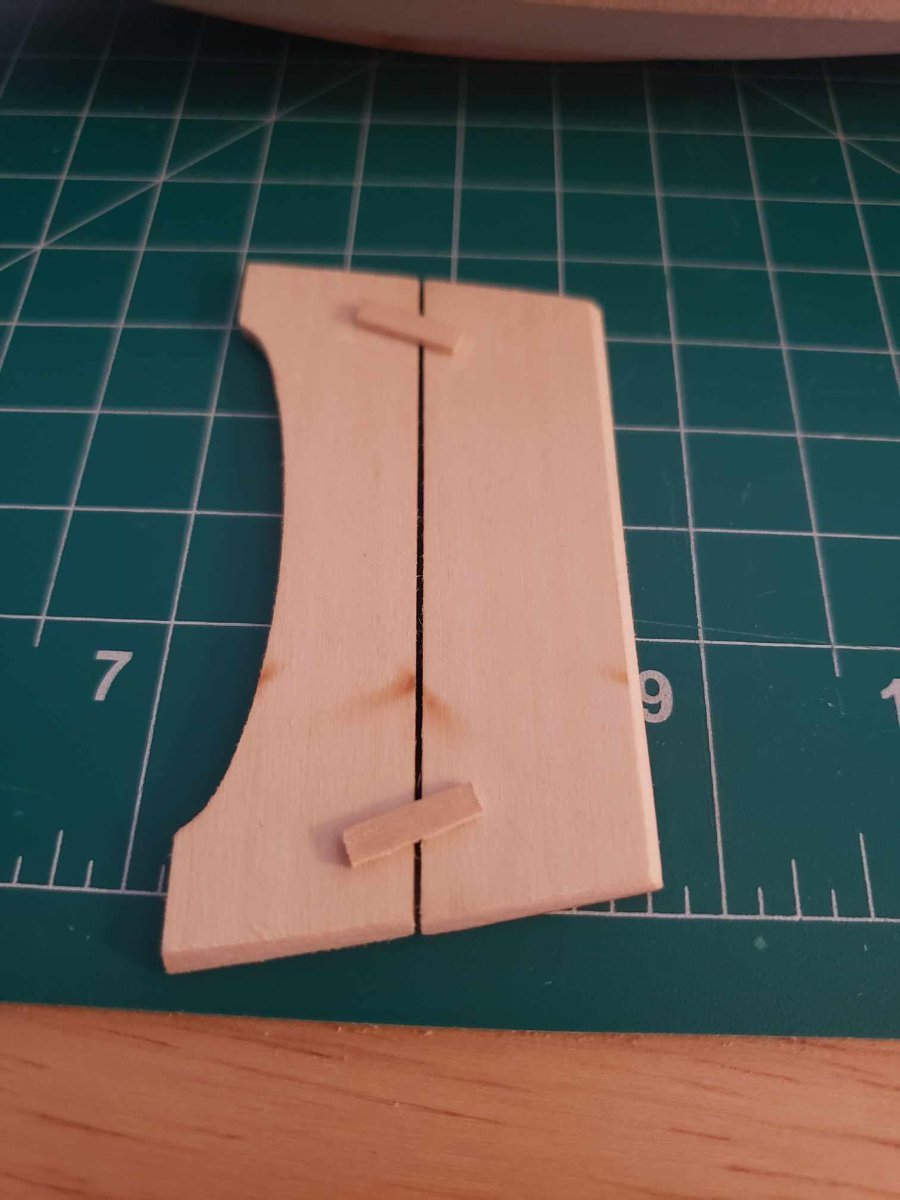
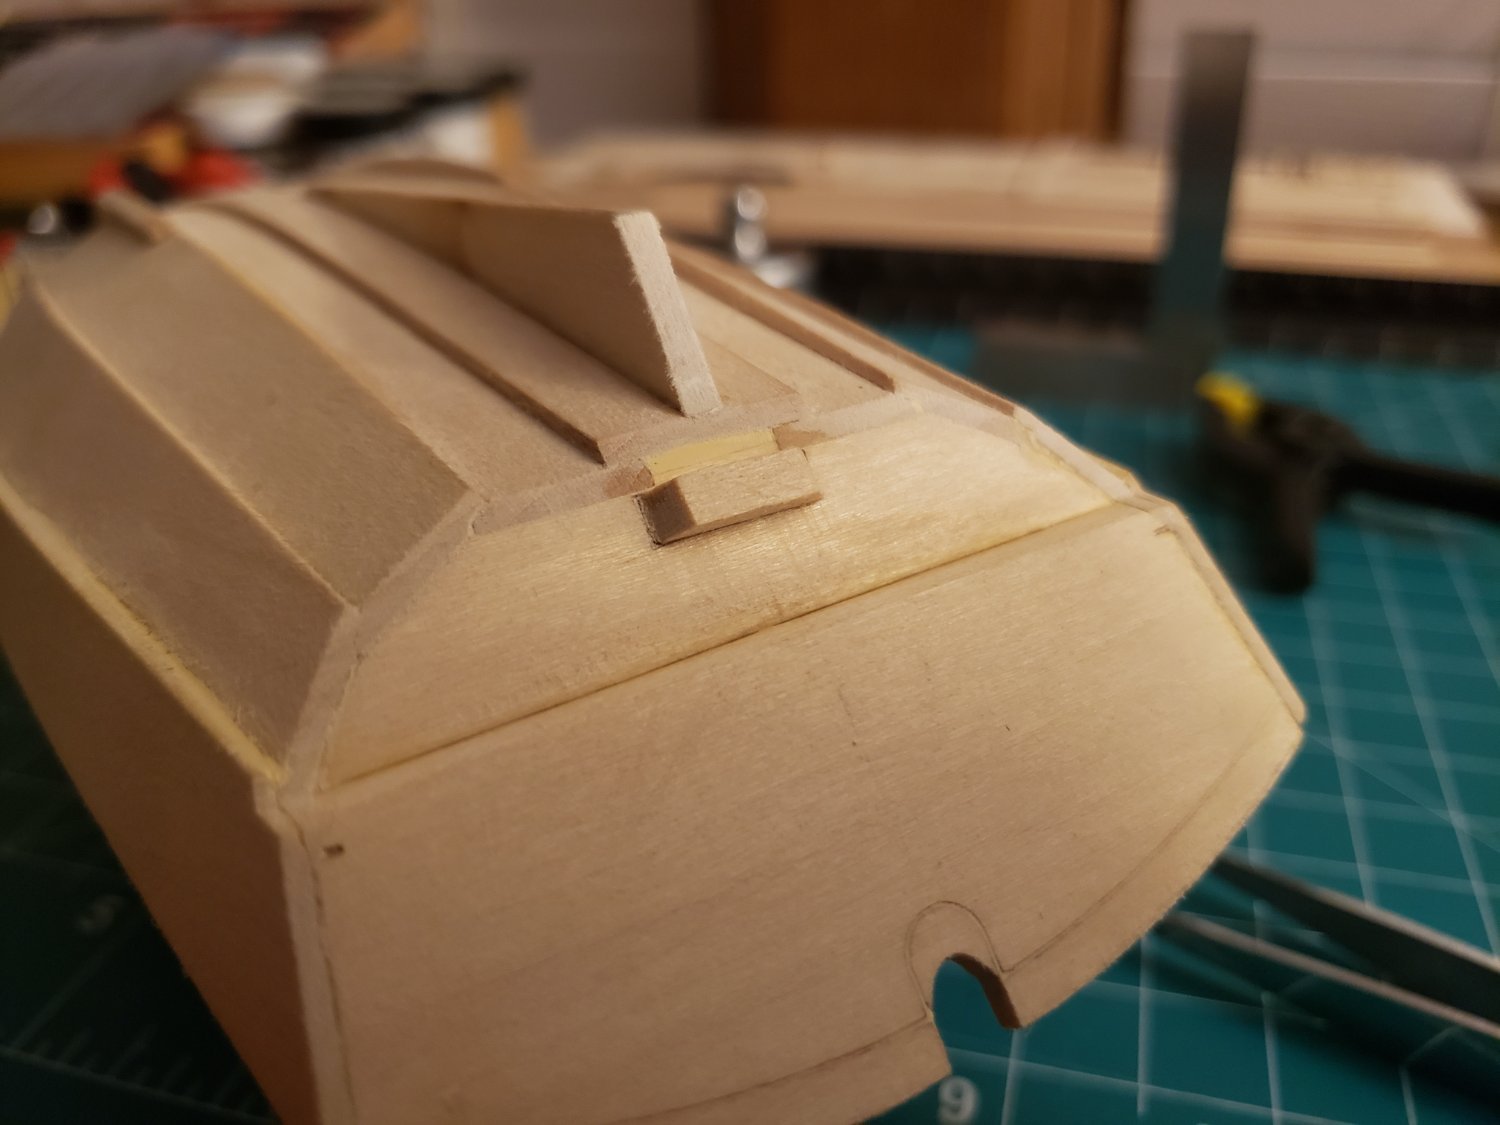
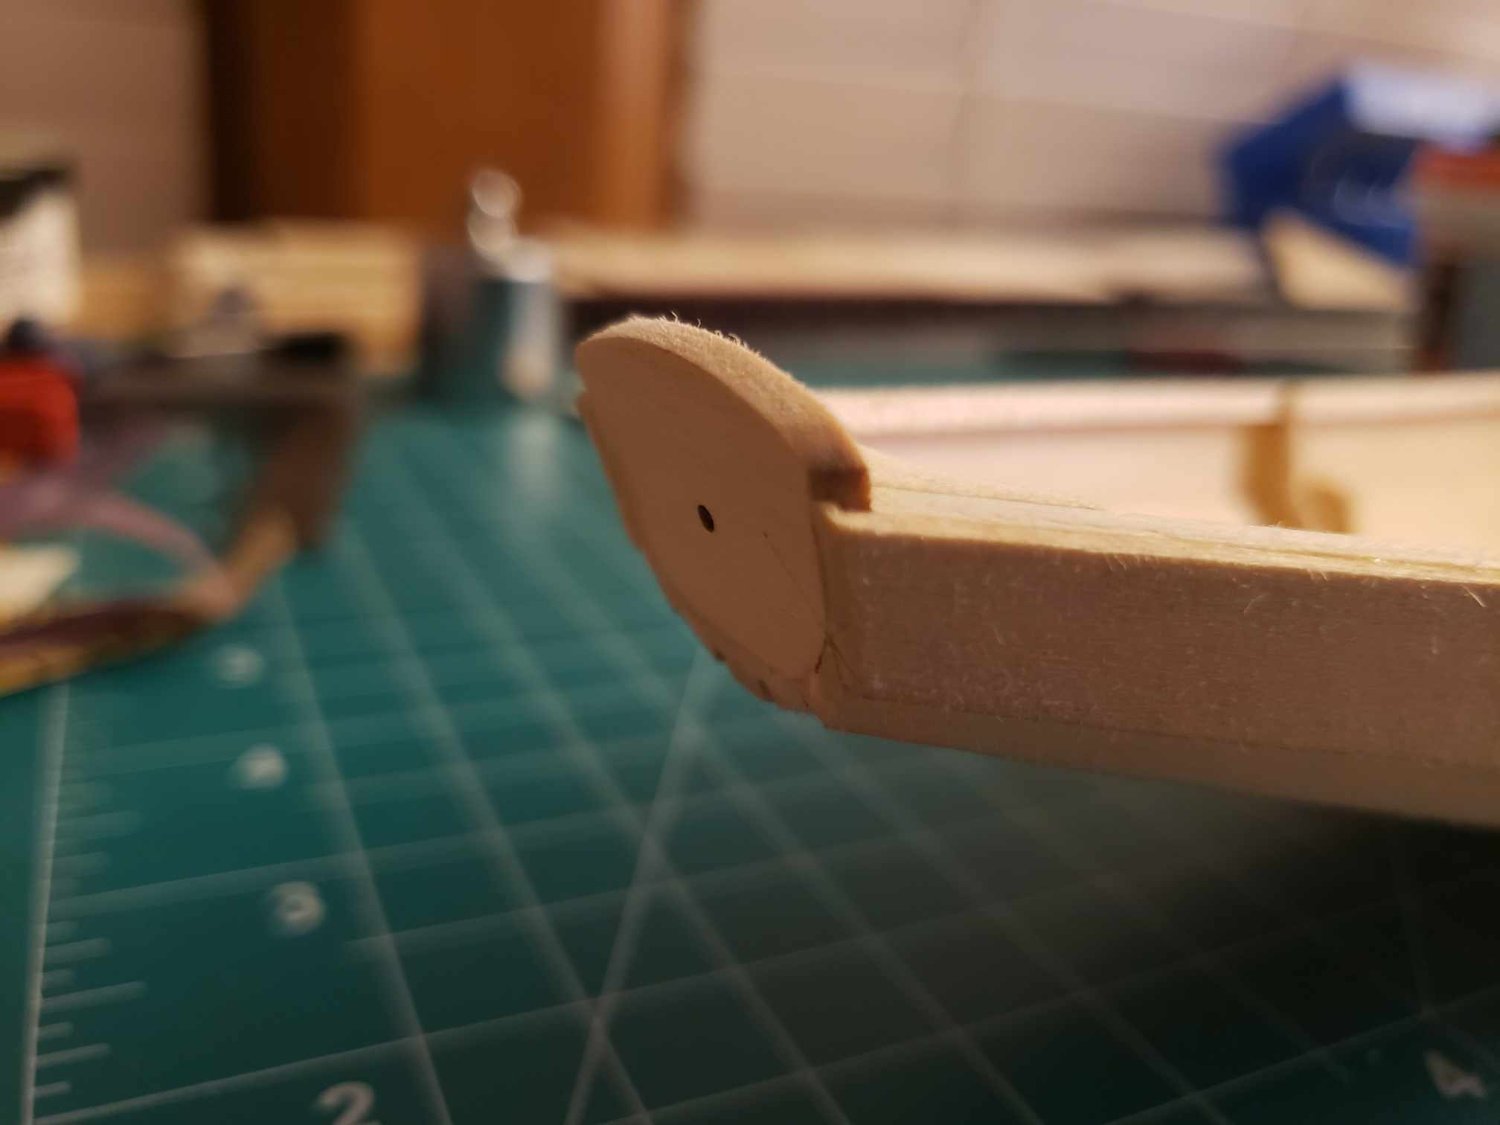
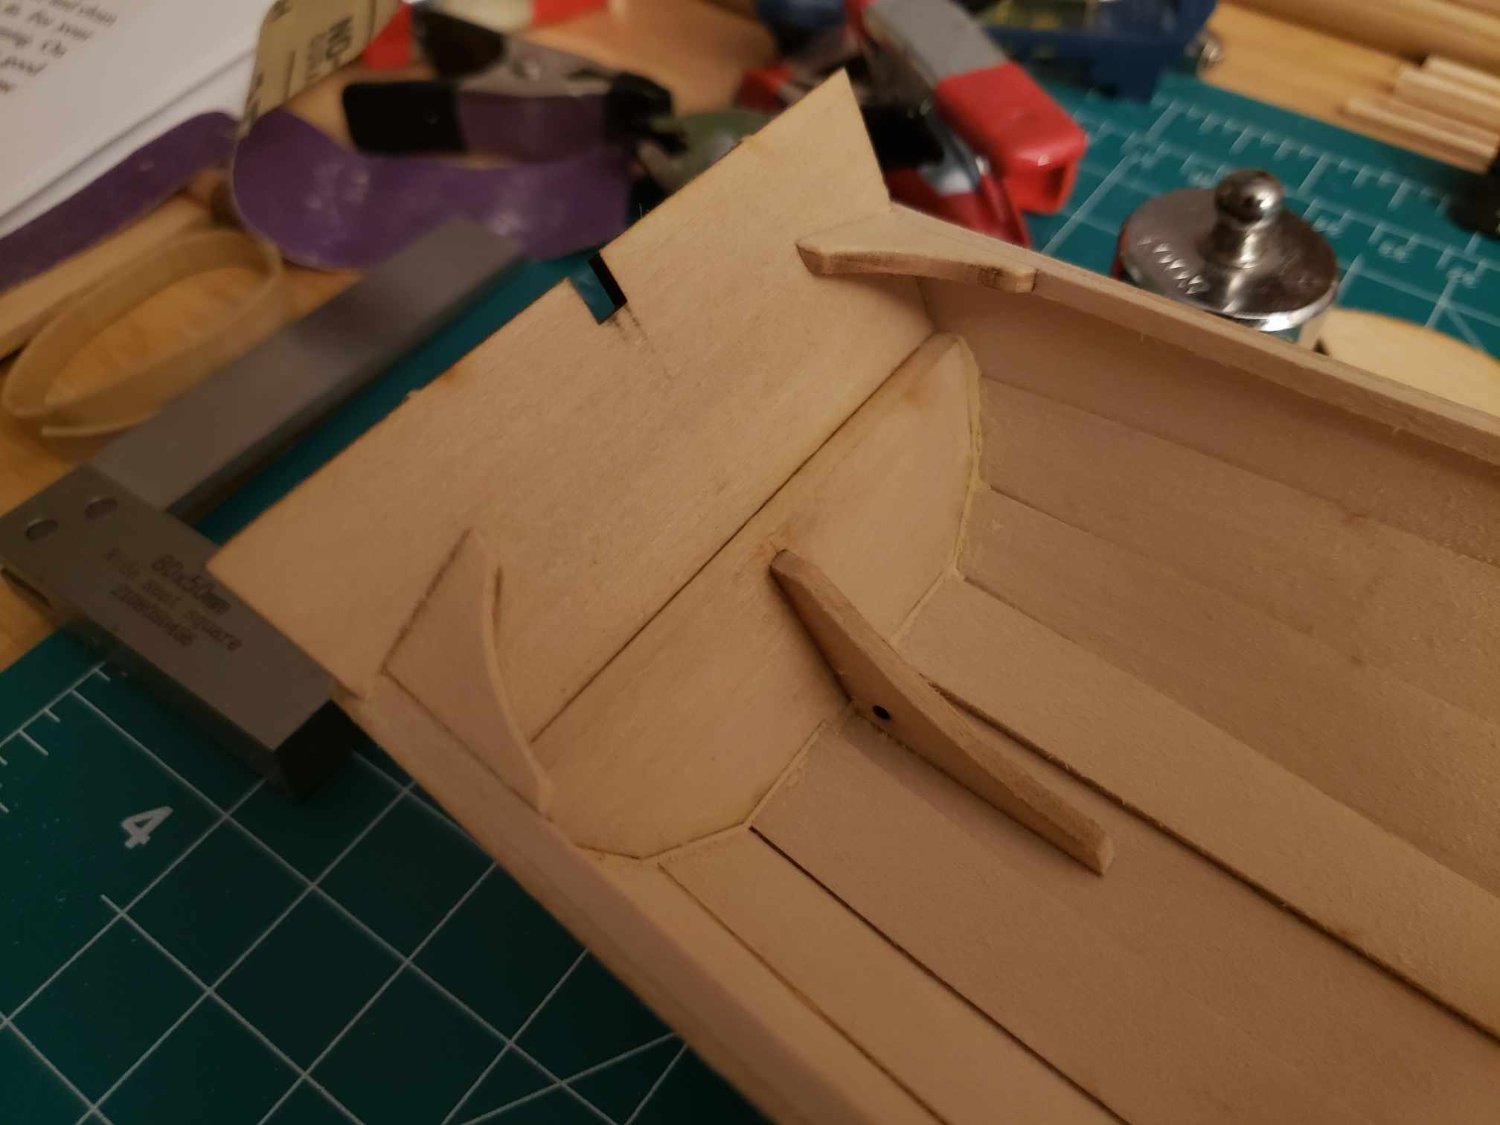
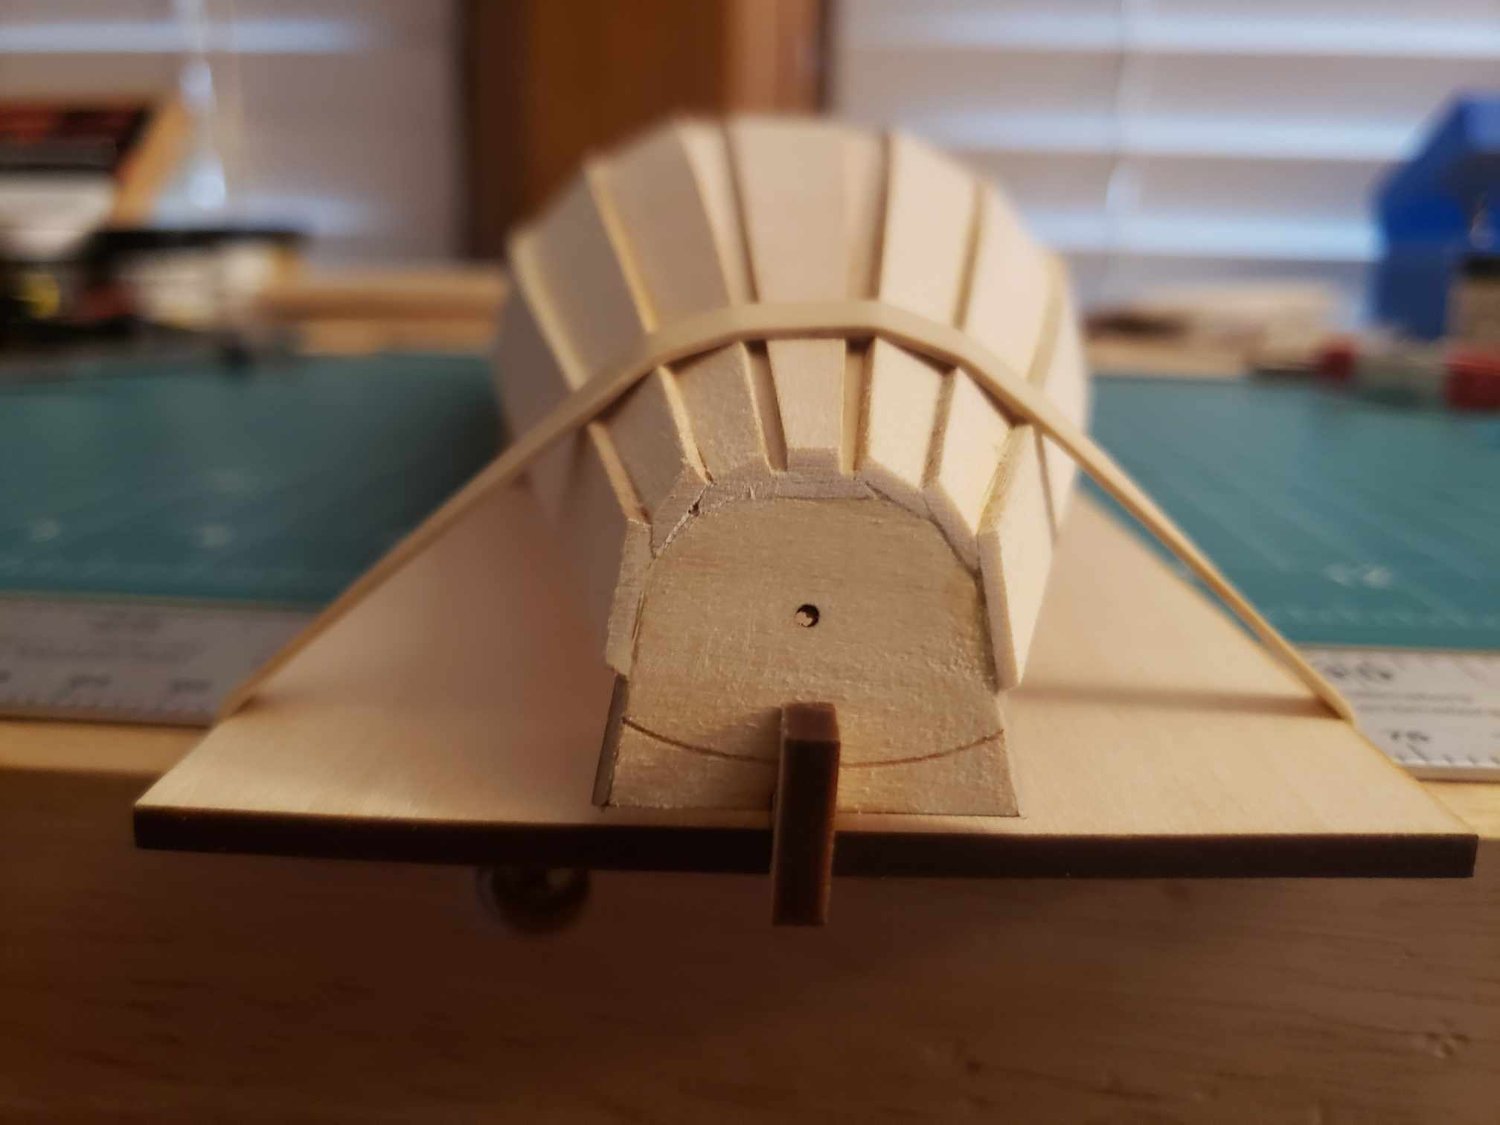
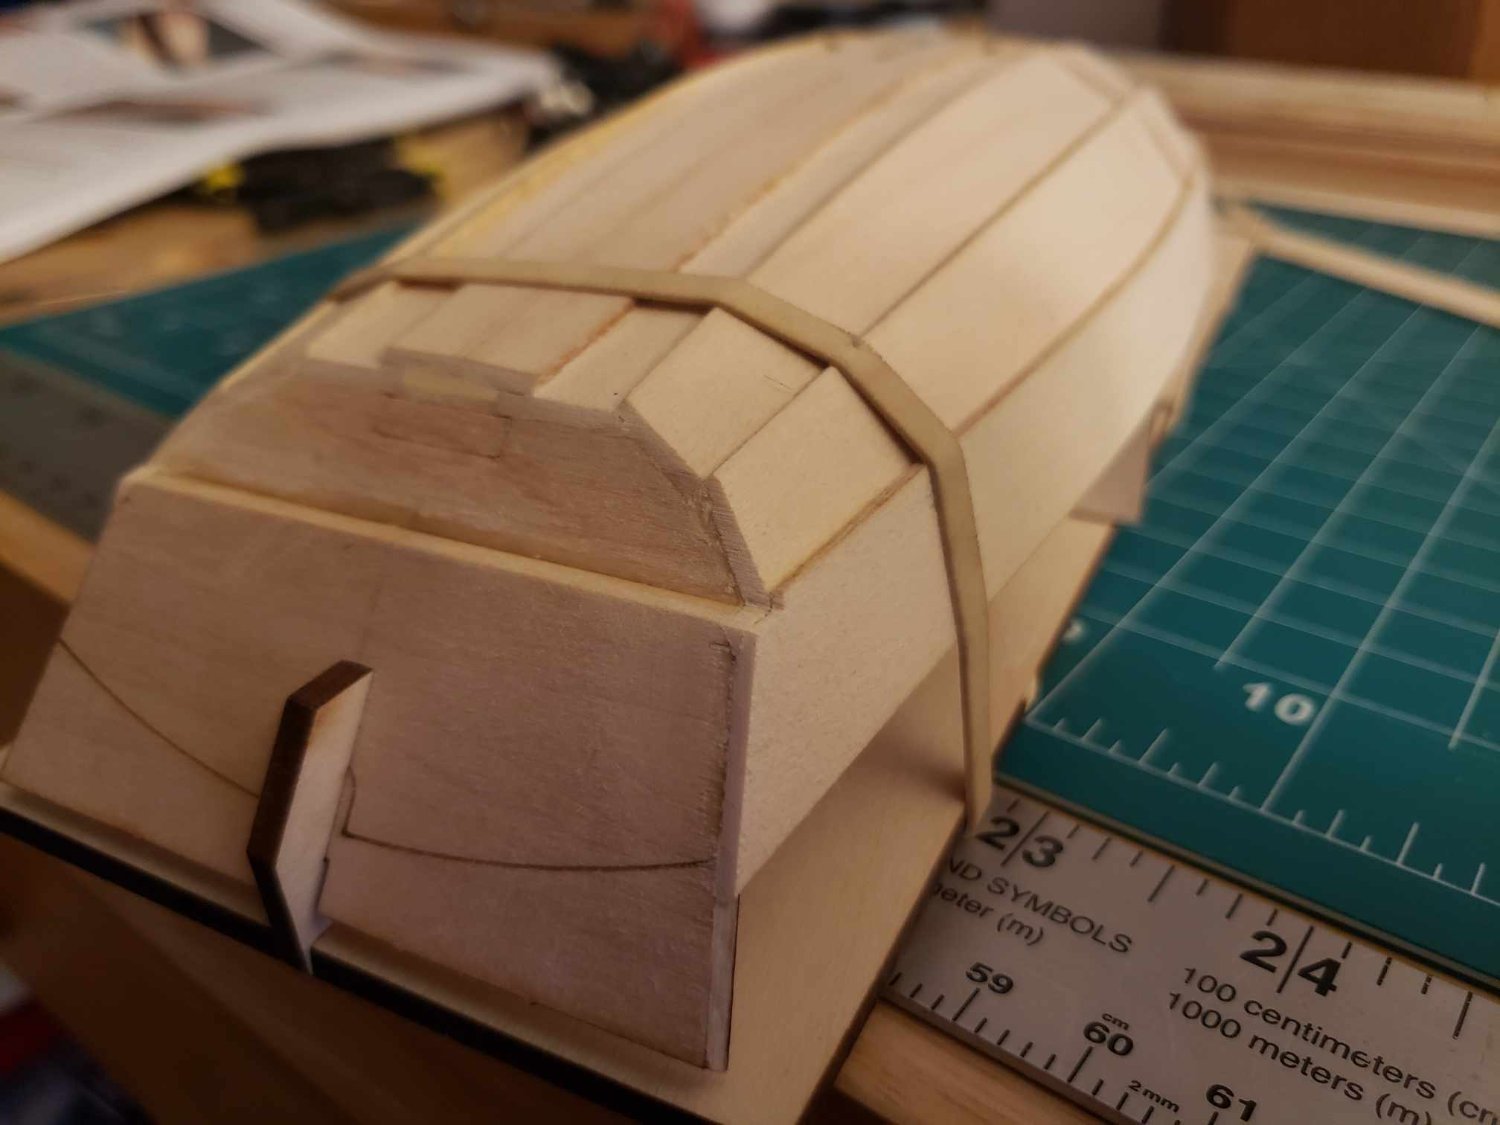
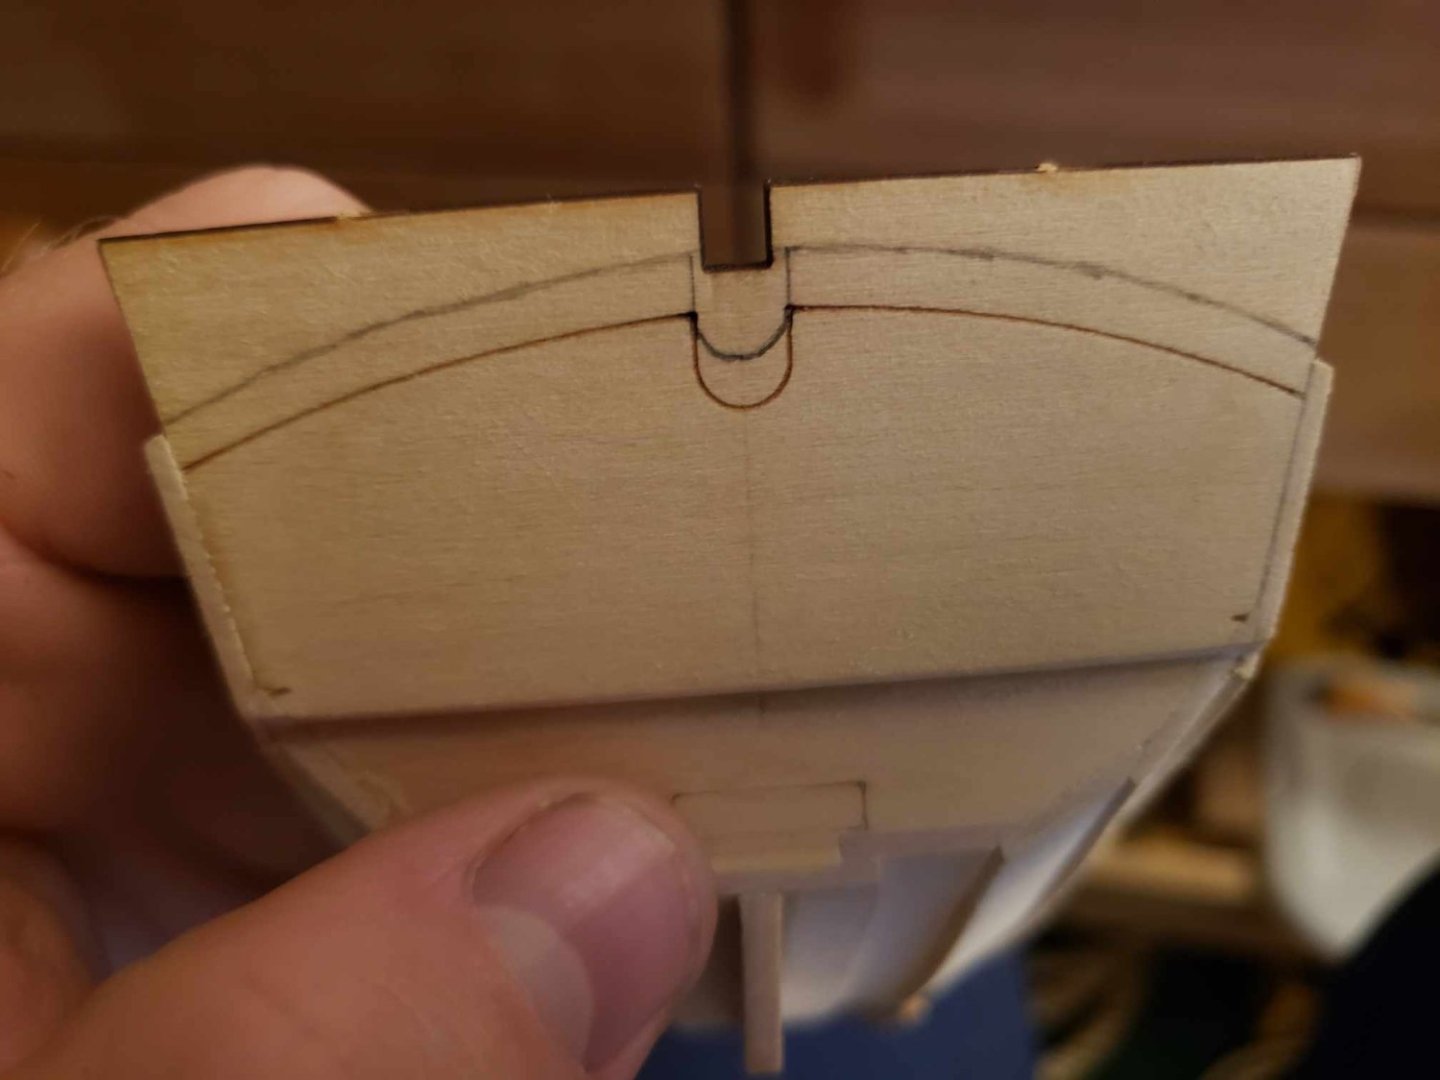
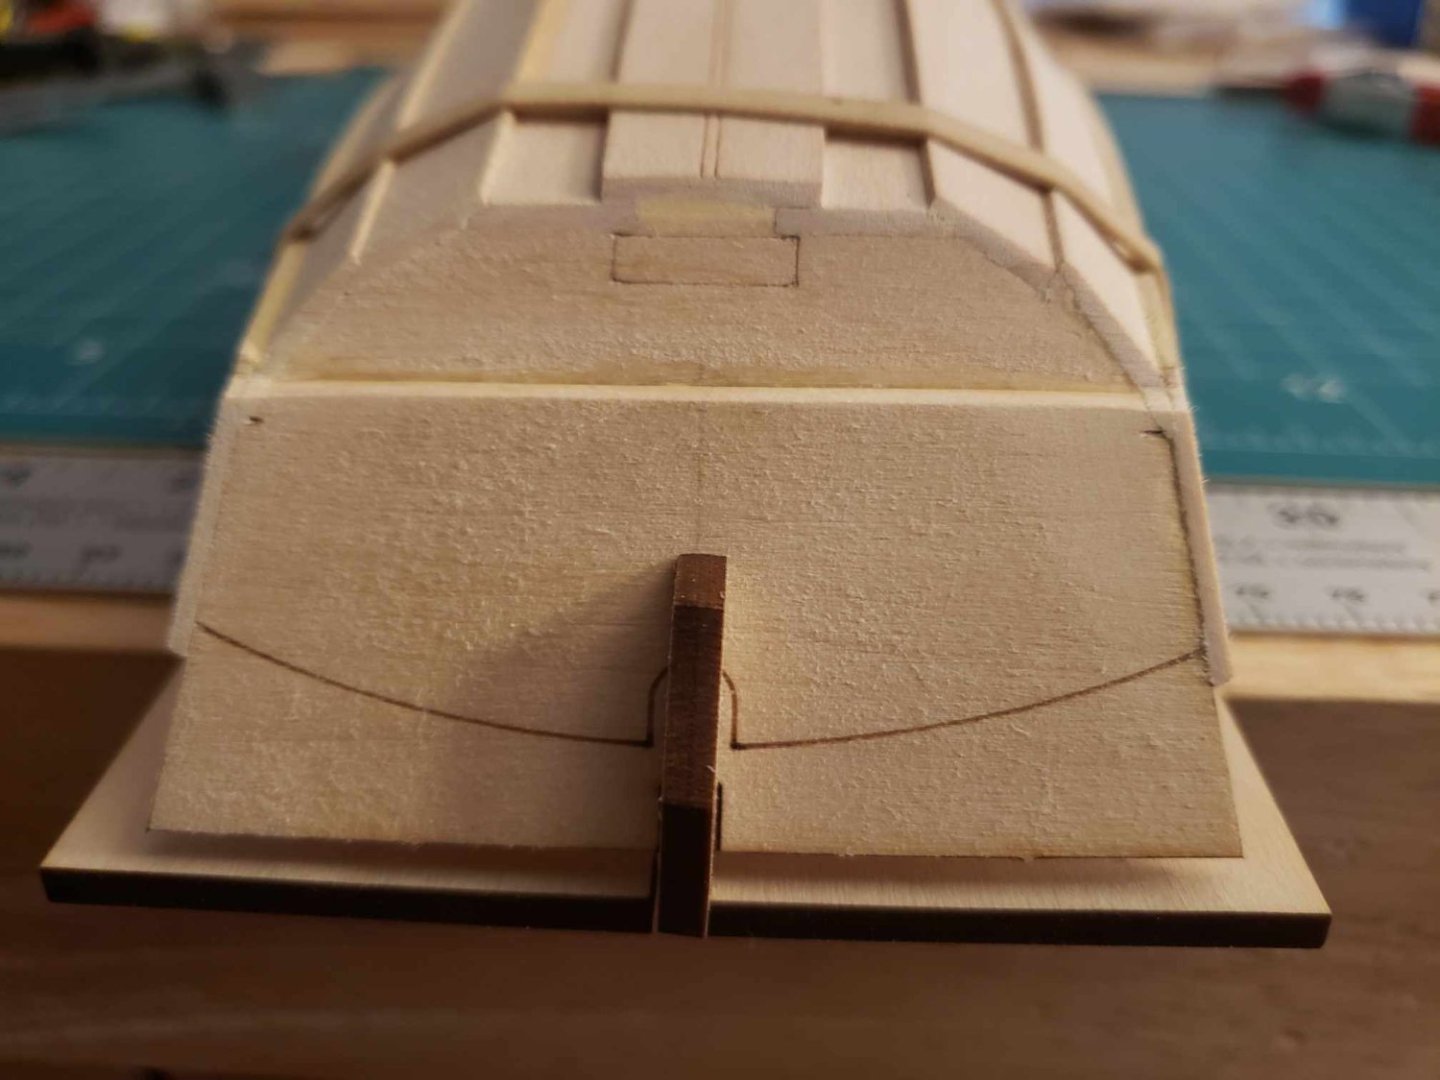
Before I put the thwart supports in, I wanted to jump ahead slightly and work on transoms, since they've been on my mind a fair bit. The bow transom went as well as I expected (that is to say, quite), but I'm hesitant on the stern. As stated earlier in my log, the planks at the stern rose above the line provided where the stern transom would be shaped by around 1/8". Now, my thought is to raise the line by that much, which if my math is correct would equate to having an extra 1.5" of transom if this were full scale, which on the real thing wouldn't matter too much I don't think, but I'm curious how it would look on the model. In any event, I'd welcome any thoughts on how yinz think this idea will work, if it will affect the rudder or anything like that, etc. before I make any cuts and shaping to the stern.

-
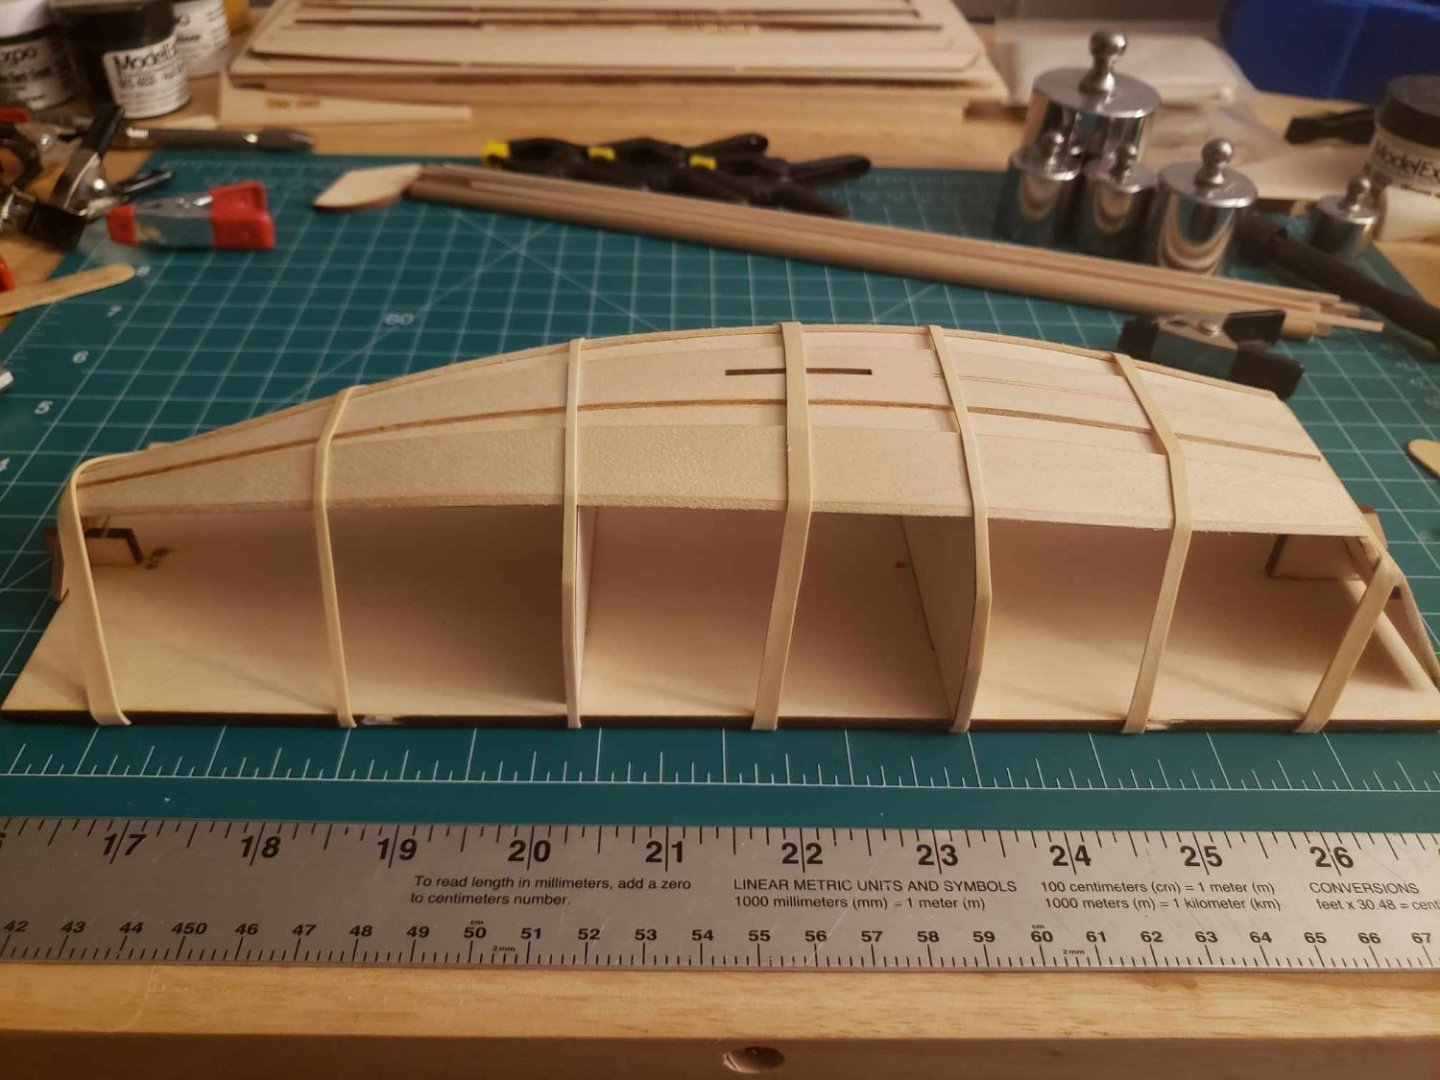
Inwales and stern cleats are installed. The stern cleats gave me a little but of trouble, but nothing too severe. Once I figured out how to clamp them, everything worked out.

-
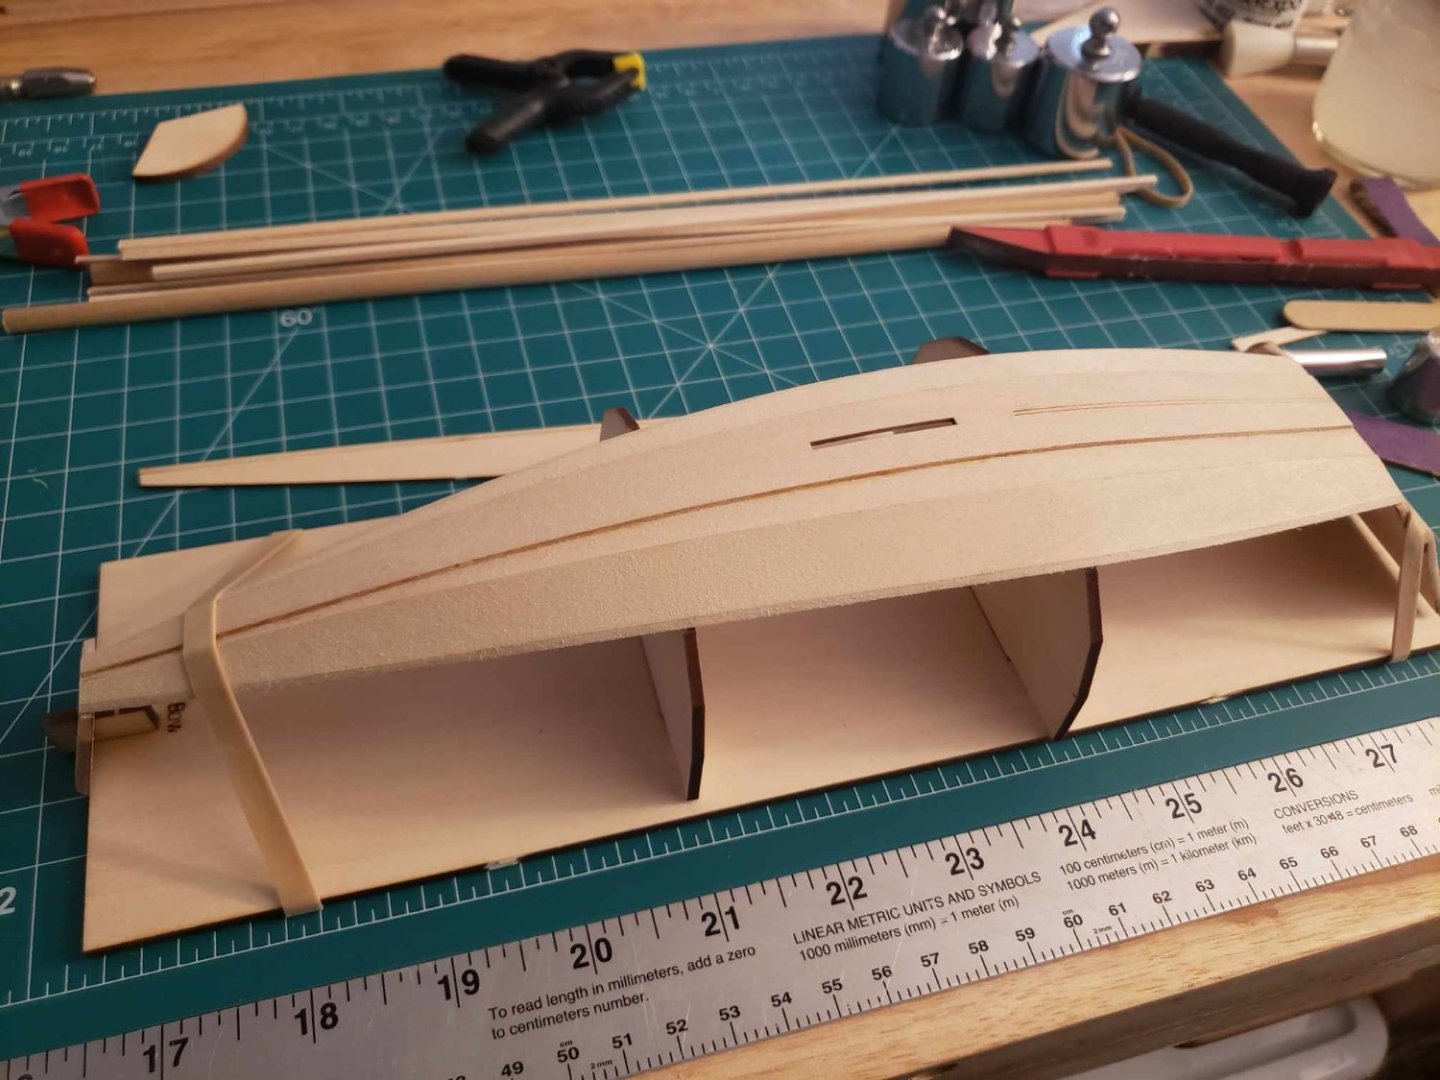
Frames installed. The midship frame went on rather smoothly, the forward two less so. Once again, wood putty is my best friend. As an aside, I need to get better at sanding.
-
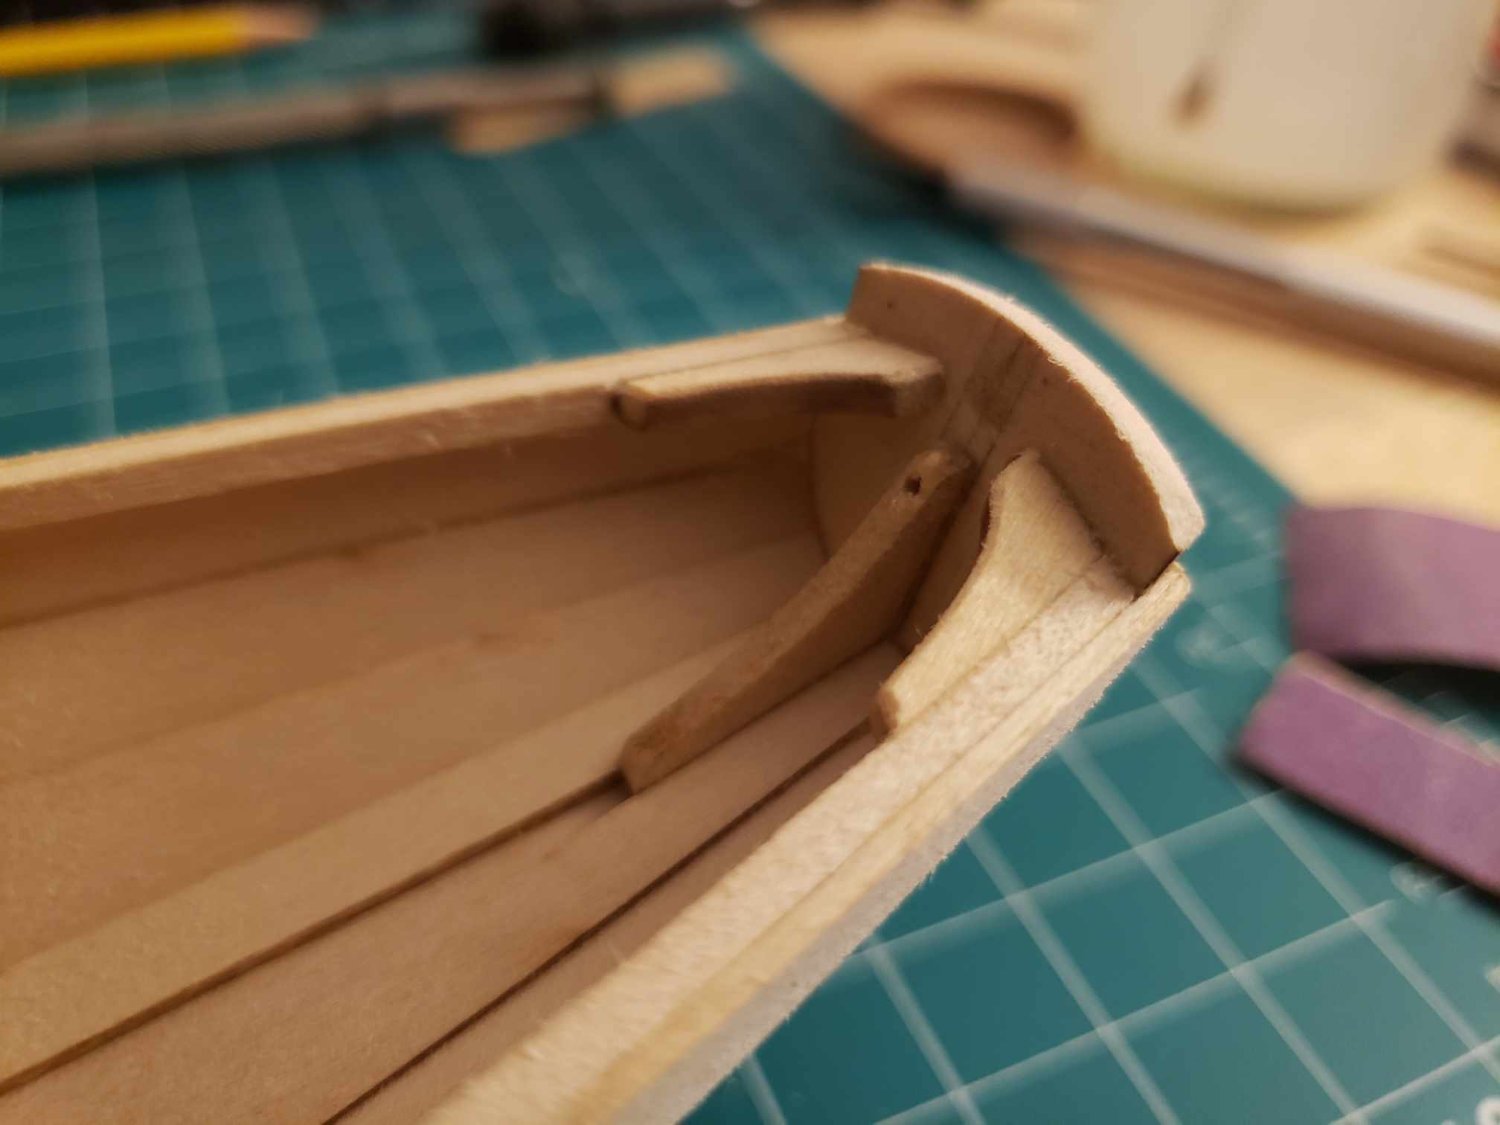
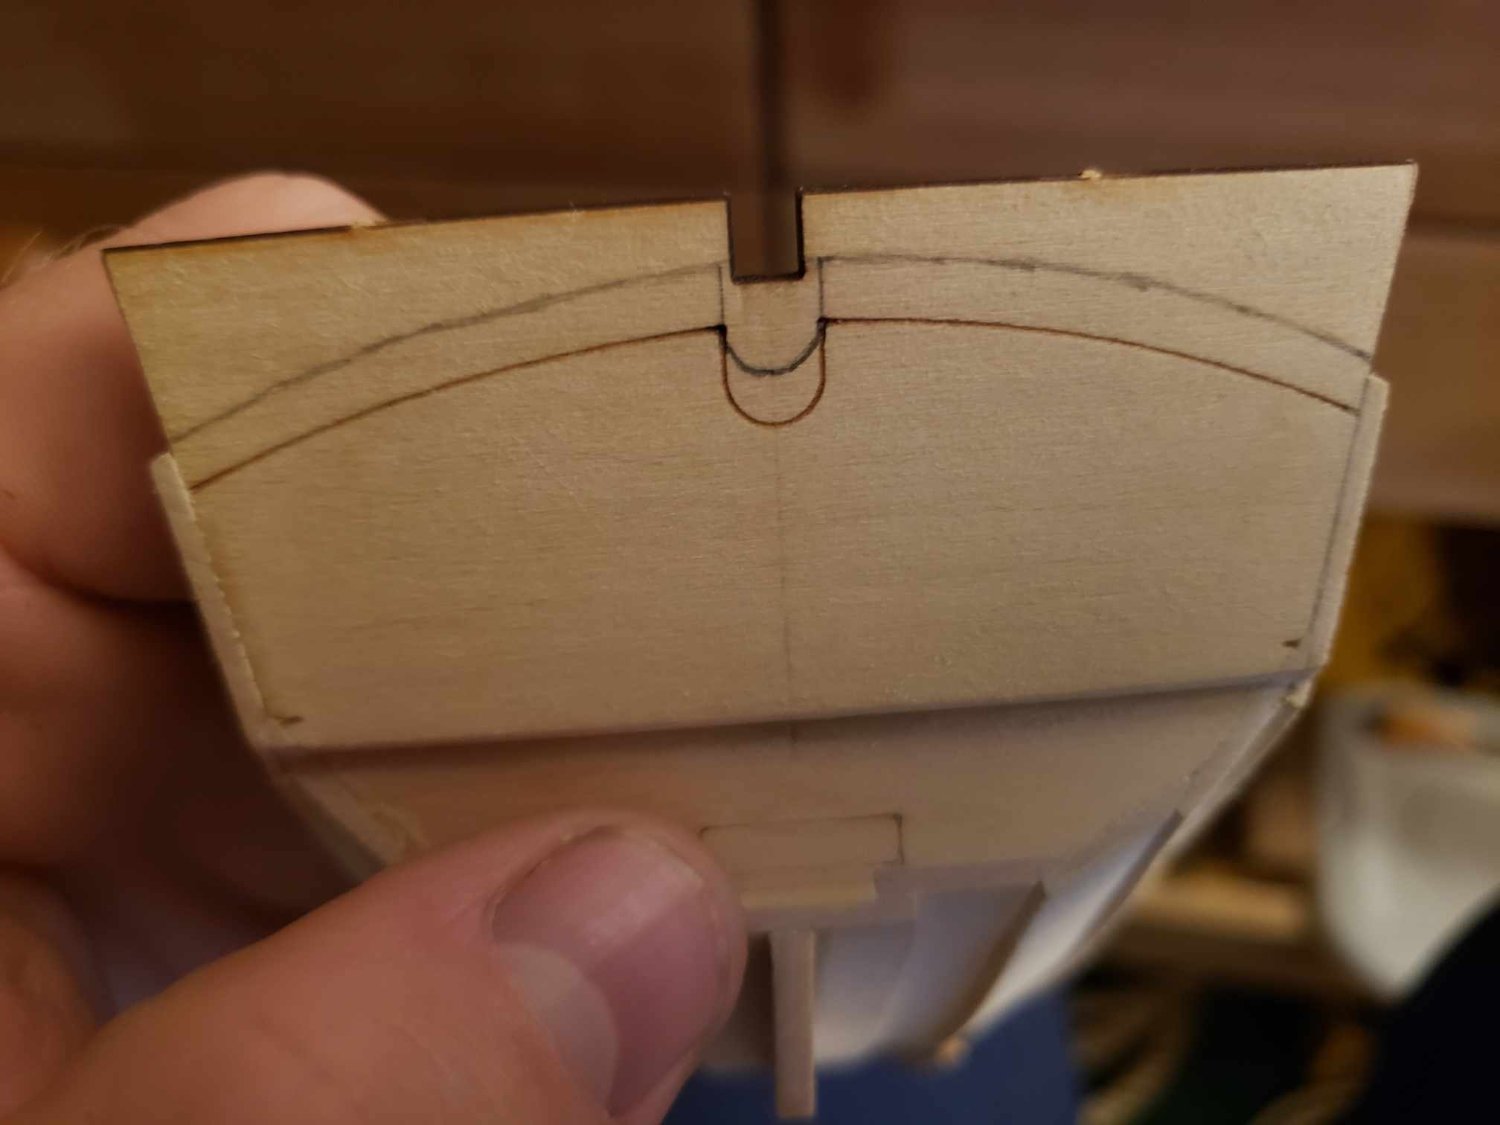
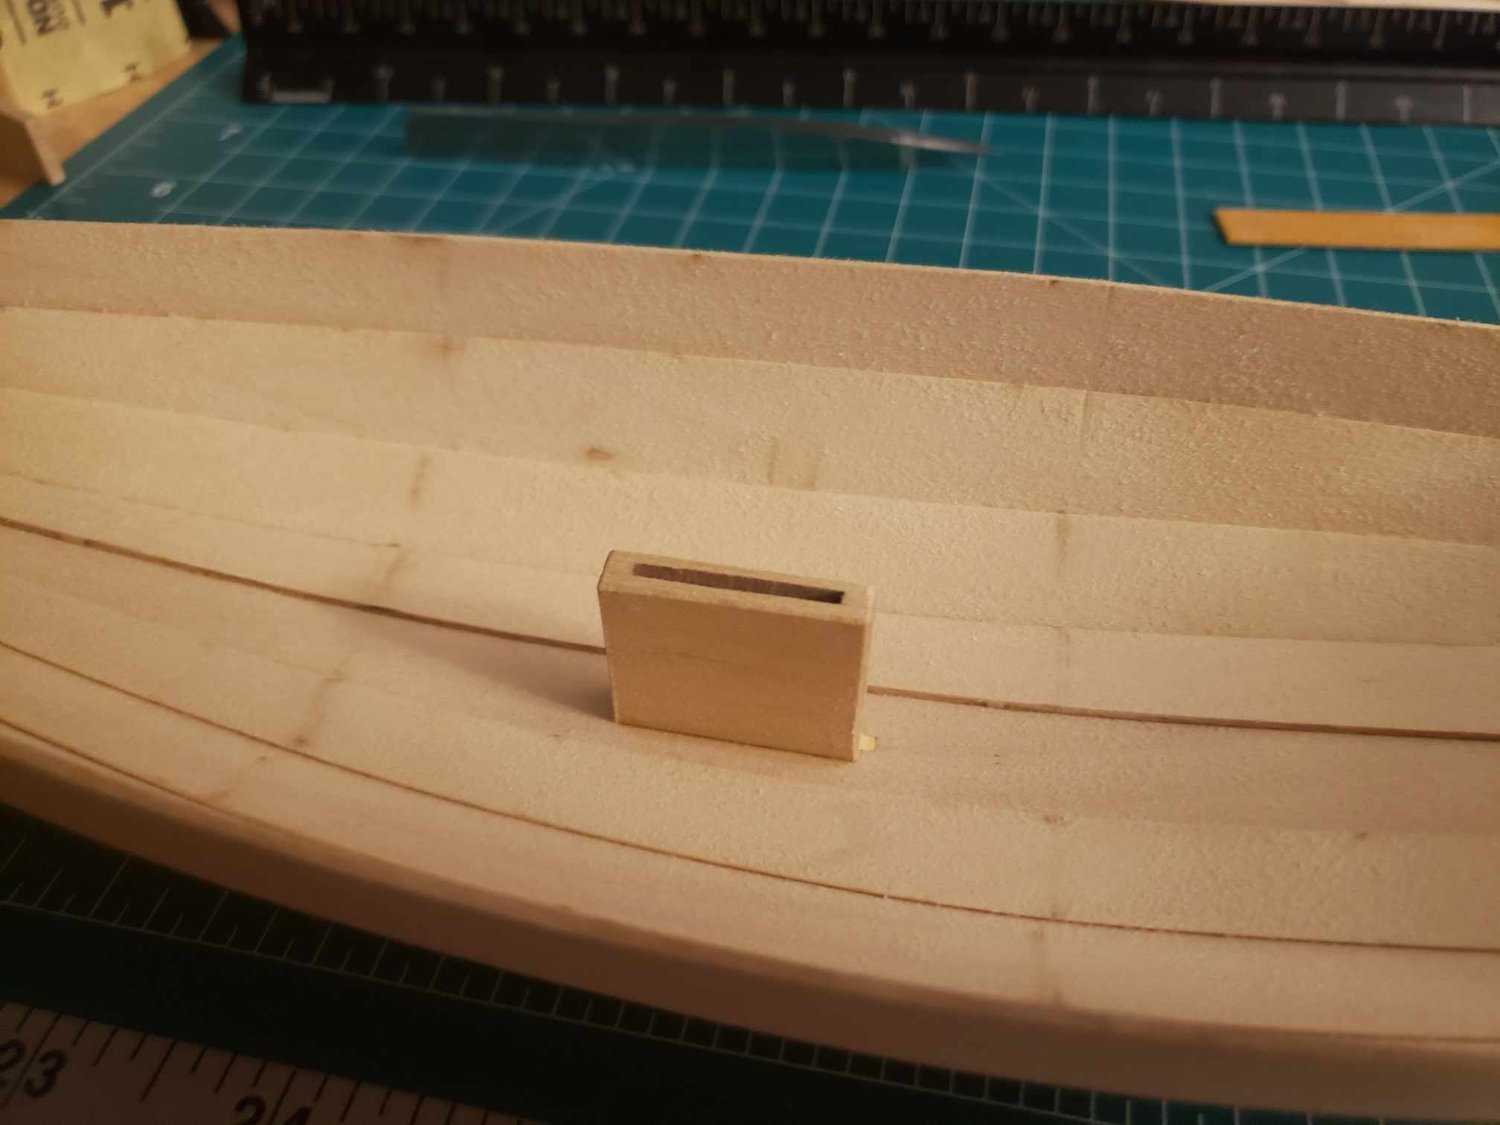
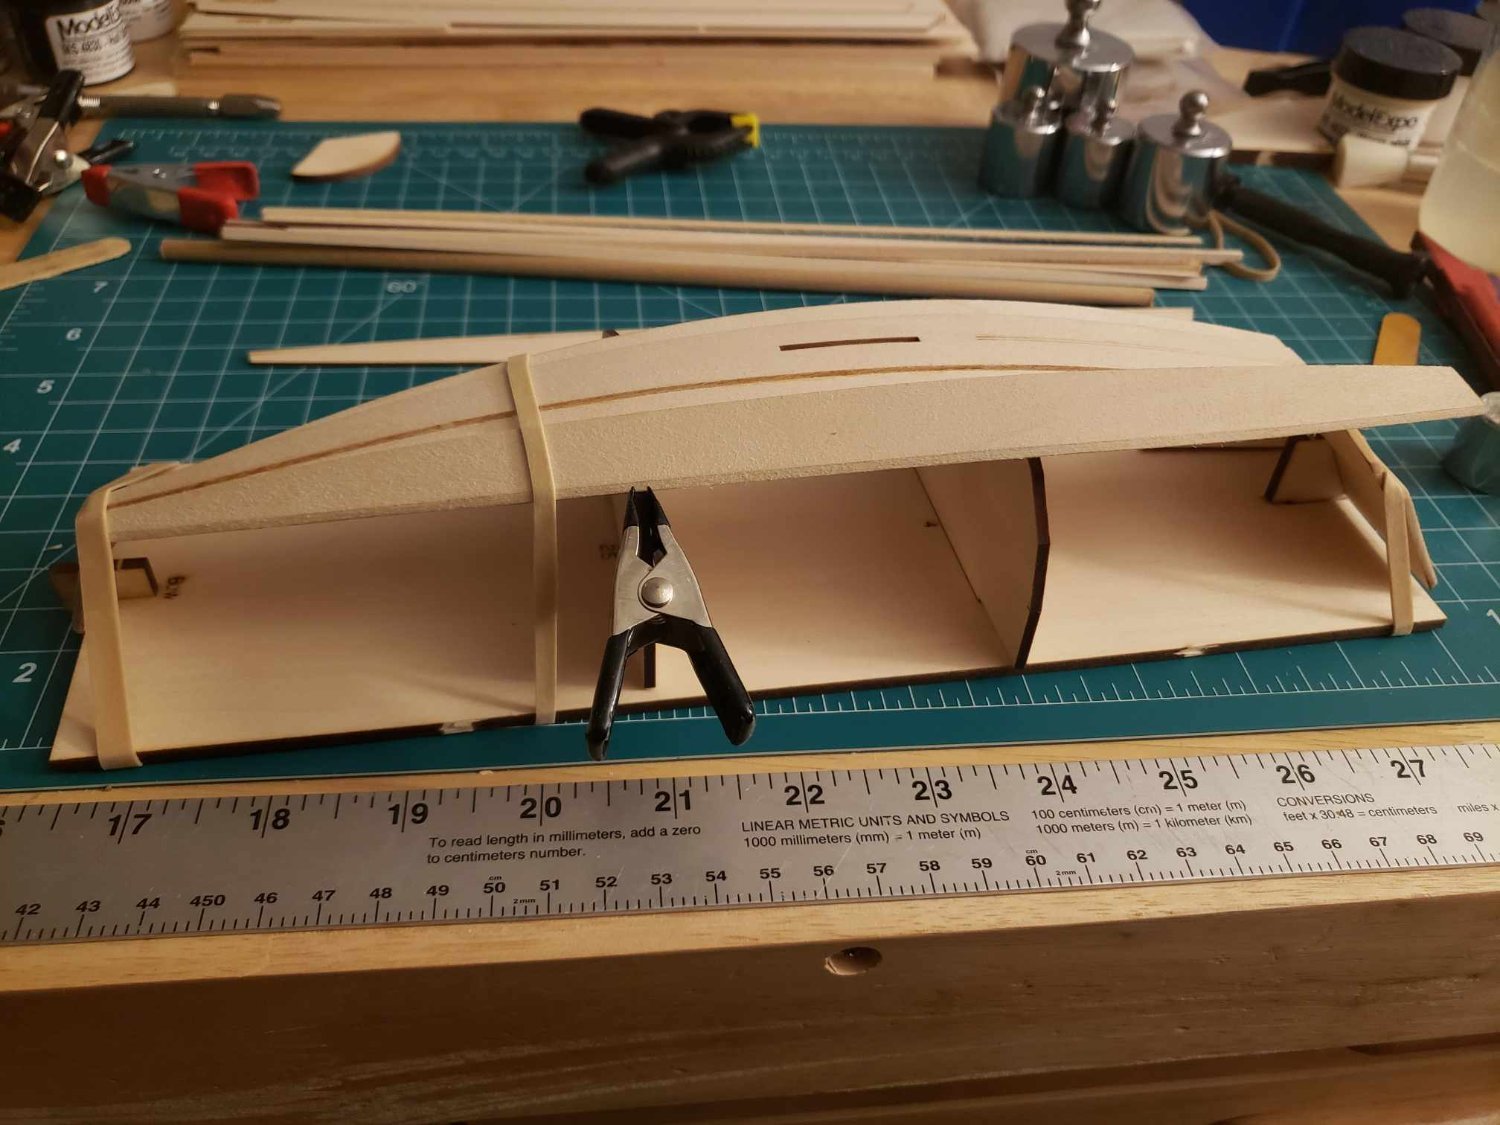
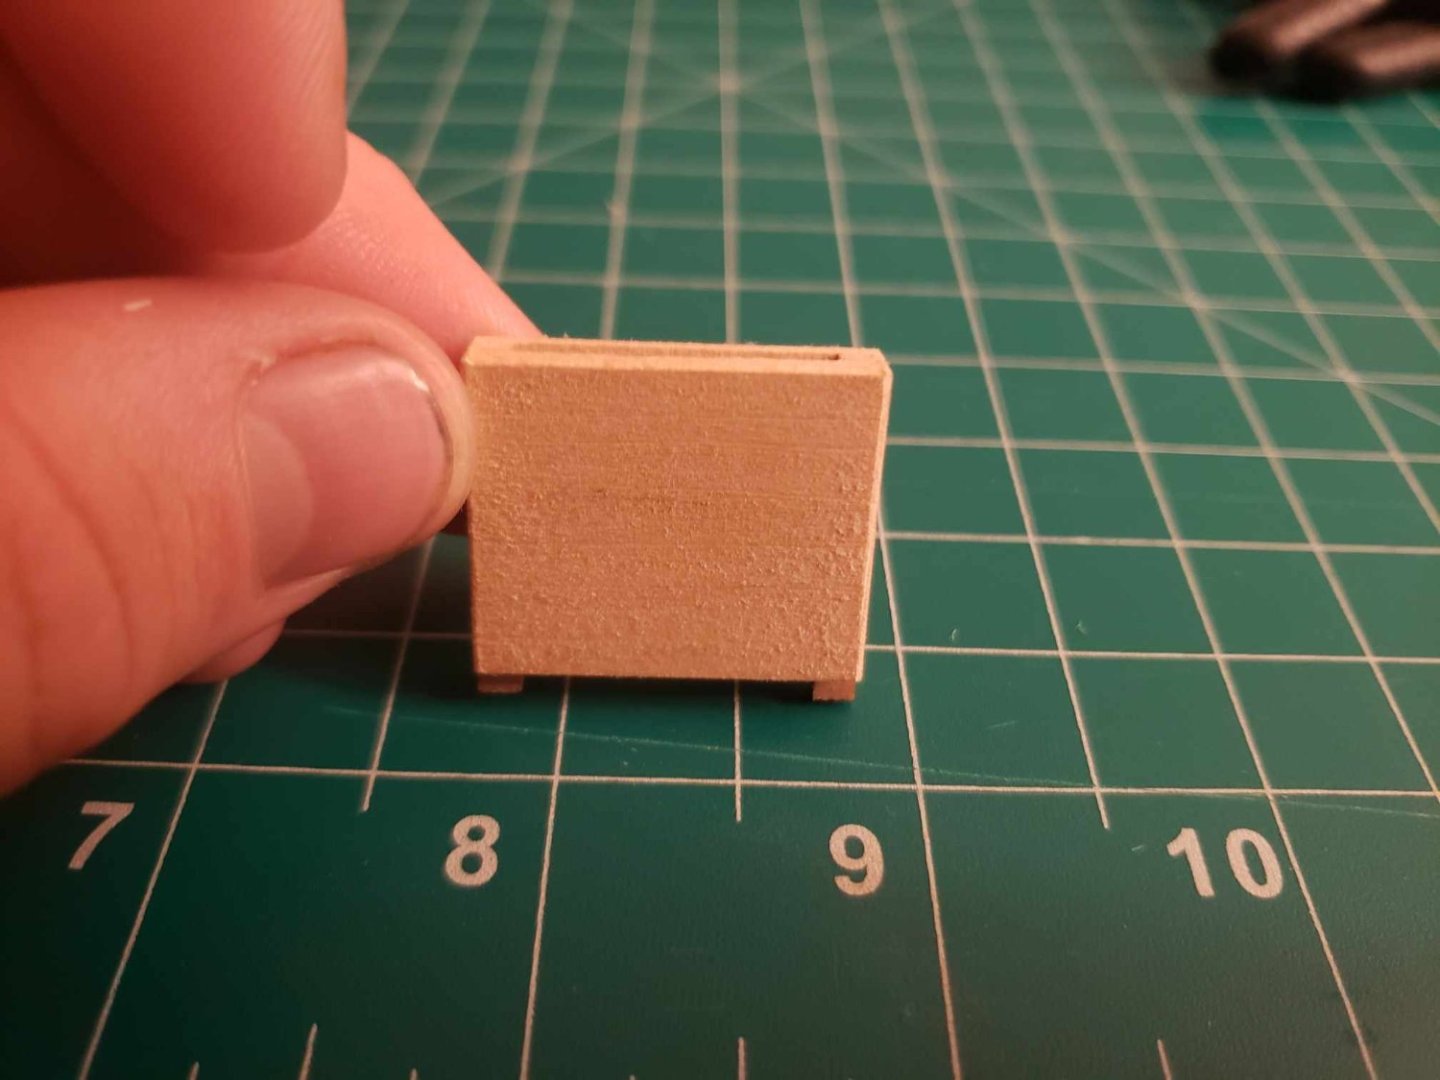
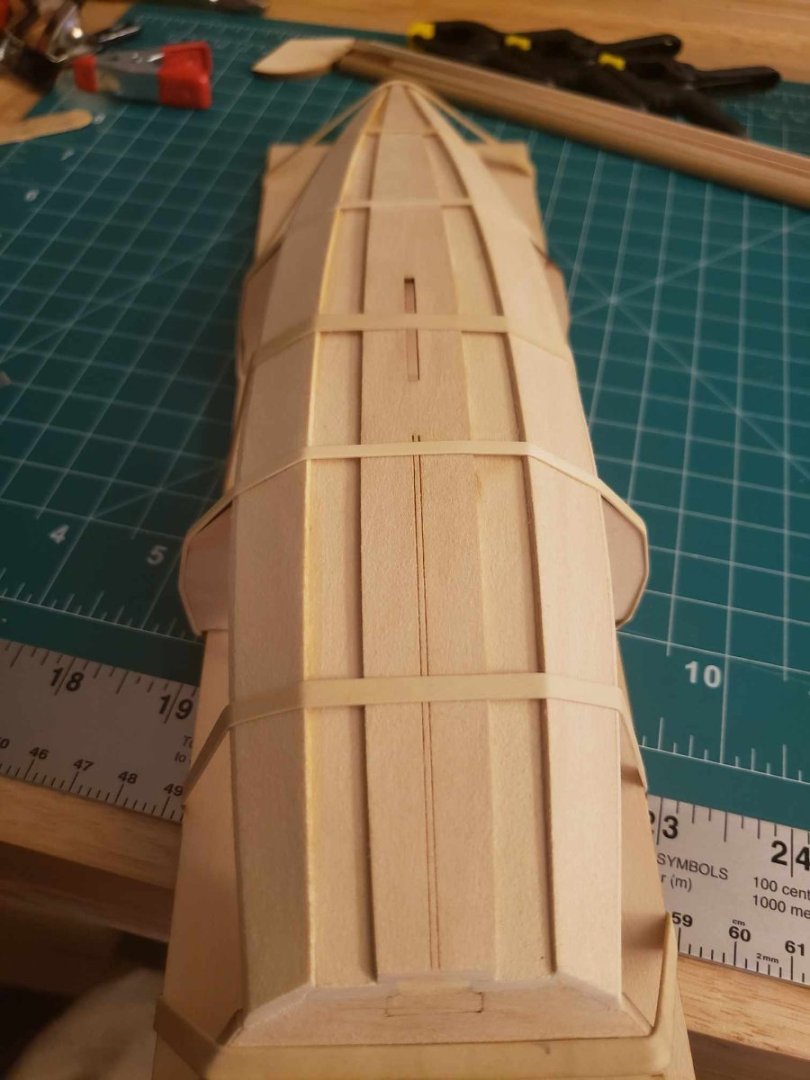
Constructed the daggerboard trunk and installed it. The slot for it was about a 1/16 of an inch longer than the pegs, so I made the decision to shift it forward in the slot rather than try to finagle it to be in the middle, banking on 1/32" not mattering all that much either direction. I then filled in the 1/16" gap with wood putty. As an aside, wood putty is my best friend in this build. I applied some at the stern transom where the planks were a little gapped away. Next up is ticking the keel where the frames go. I read ahead that the model needs to be 3 3/4" at the widest point, and a scale inch or so more will make trouble with the thwarts. My model is currently 3 5/8" wide, but I'll check again with the frame installed. I don't see it being an issue, since I can make the thwarts smaller, but can't enlarge them.

-
Hmm...they're showing up for me fine, not sure why the site is being weird. Here they are again:


-
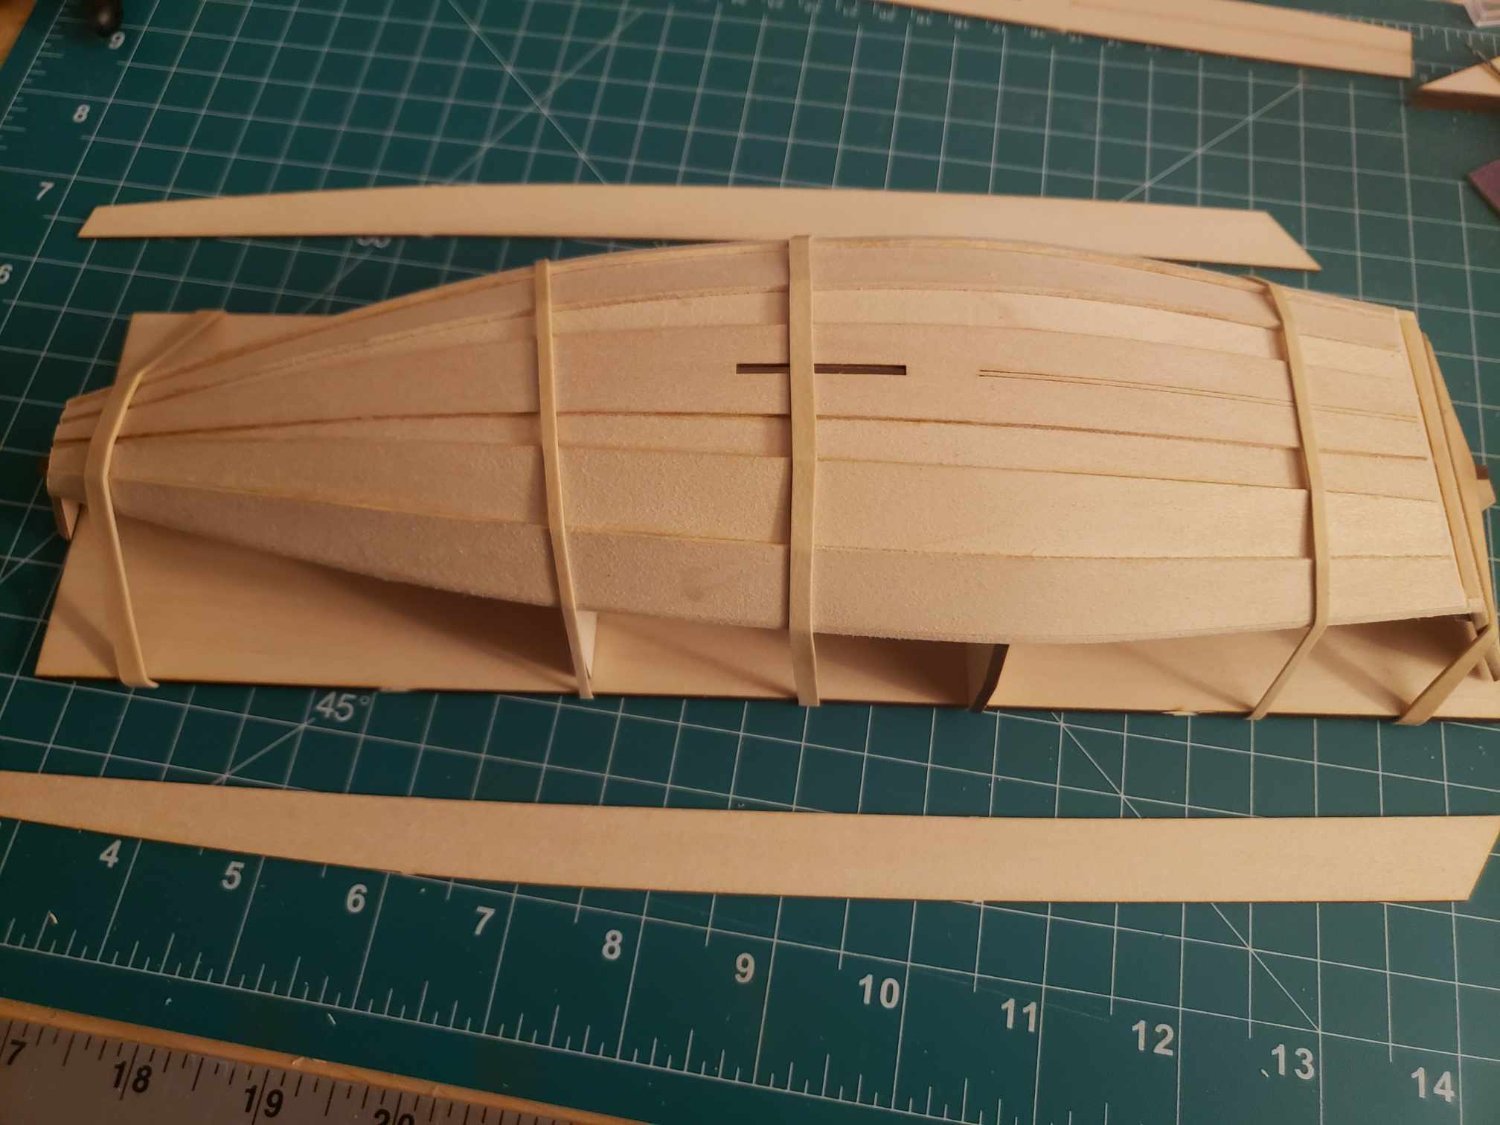
And the outer hull is finished for the time being. Attached the skeg and the bilge keels. I had a hard time deciding where to place the keels in relation to the skeg, since the instructions left that a little ambiguous (stating just "place as shown"), and after some fiddling around decided on an overlap of 6 scale inches (actual measure 1/2"). Now that this section is done, I'll be building the daggerboard case and installing the frames.
-
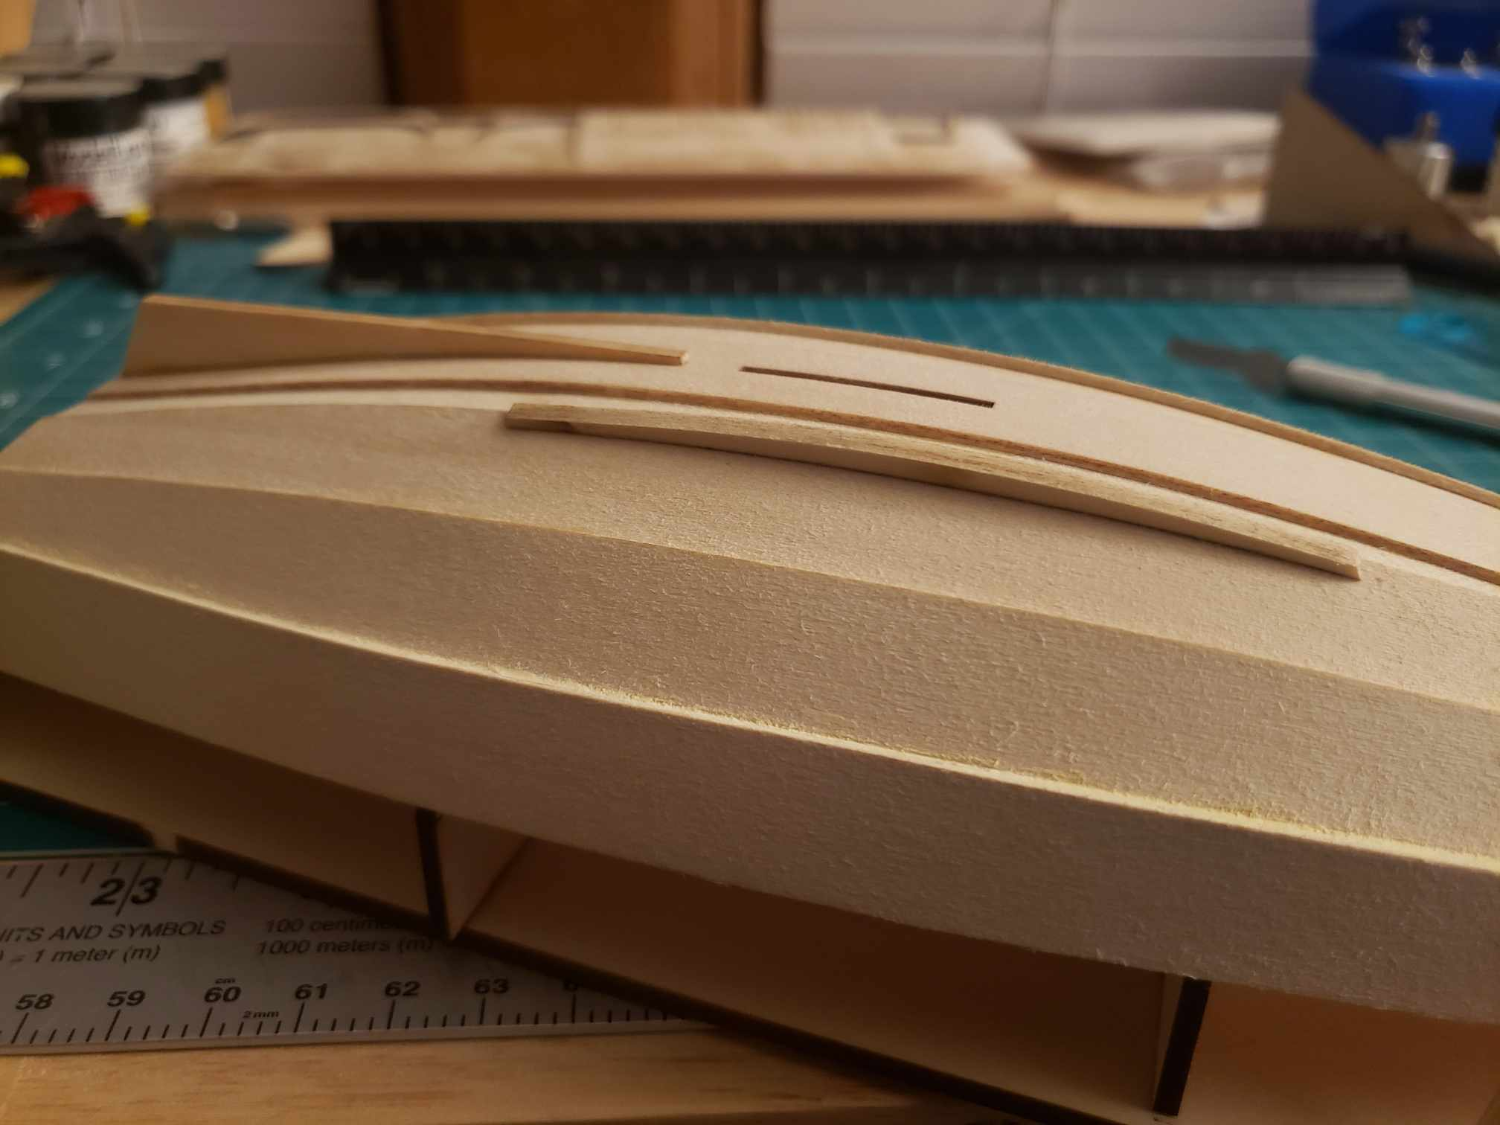
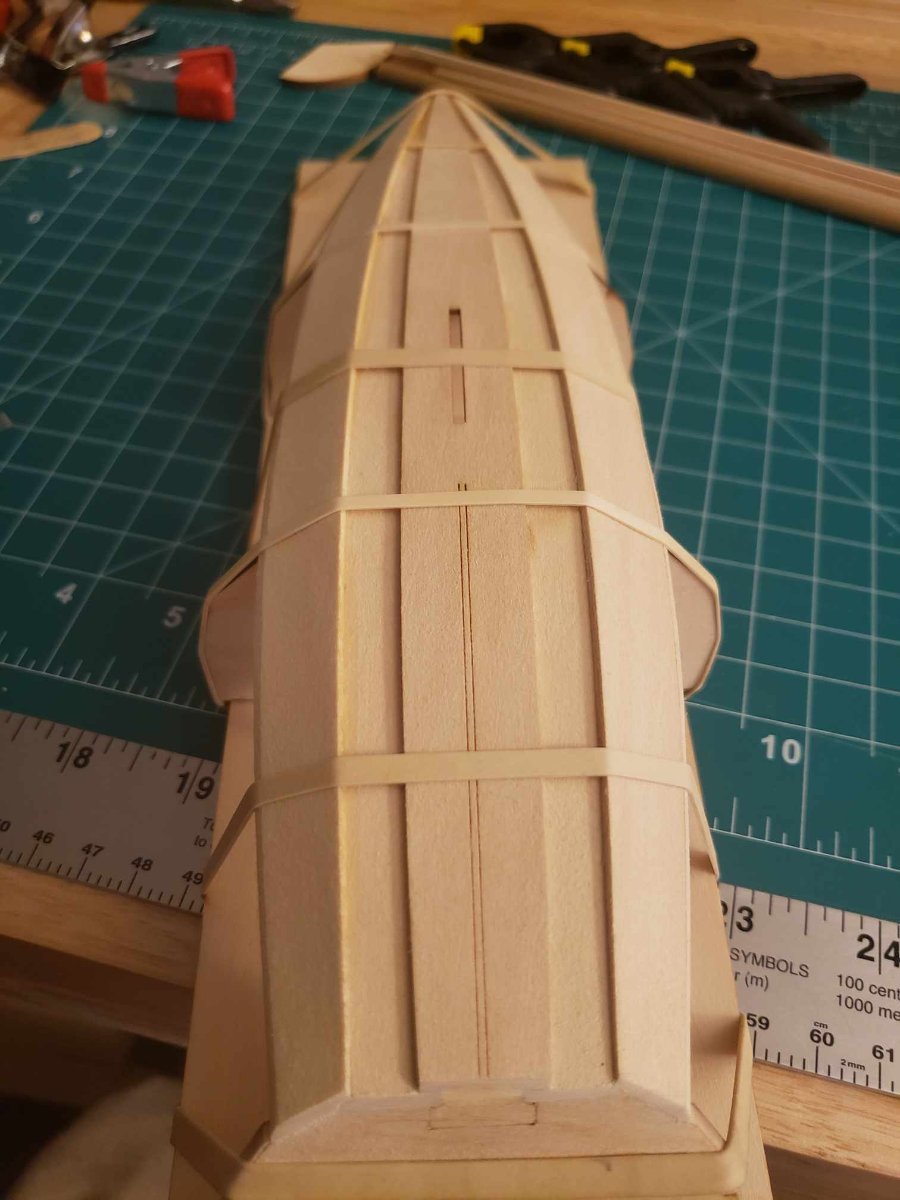
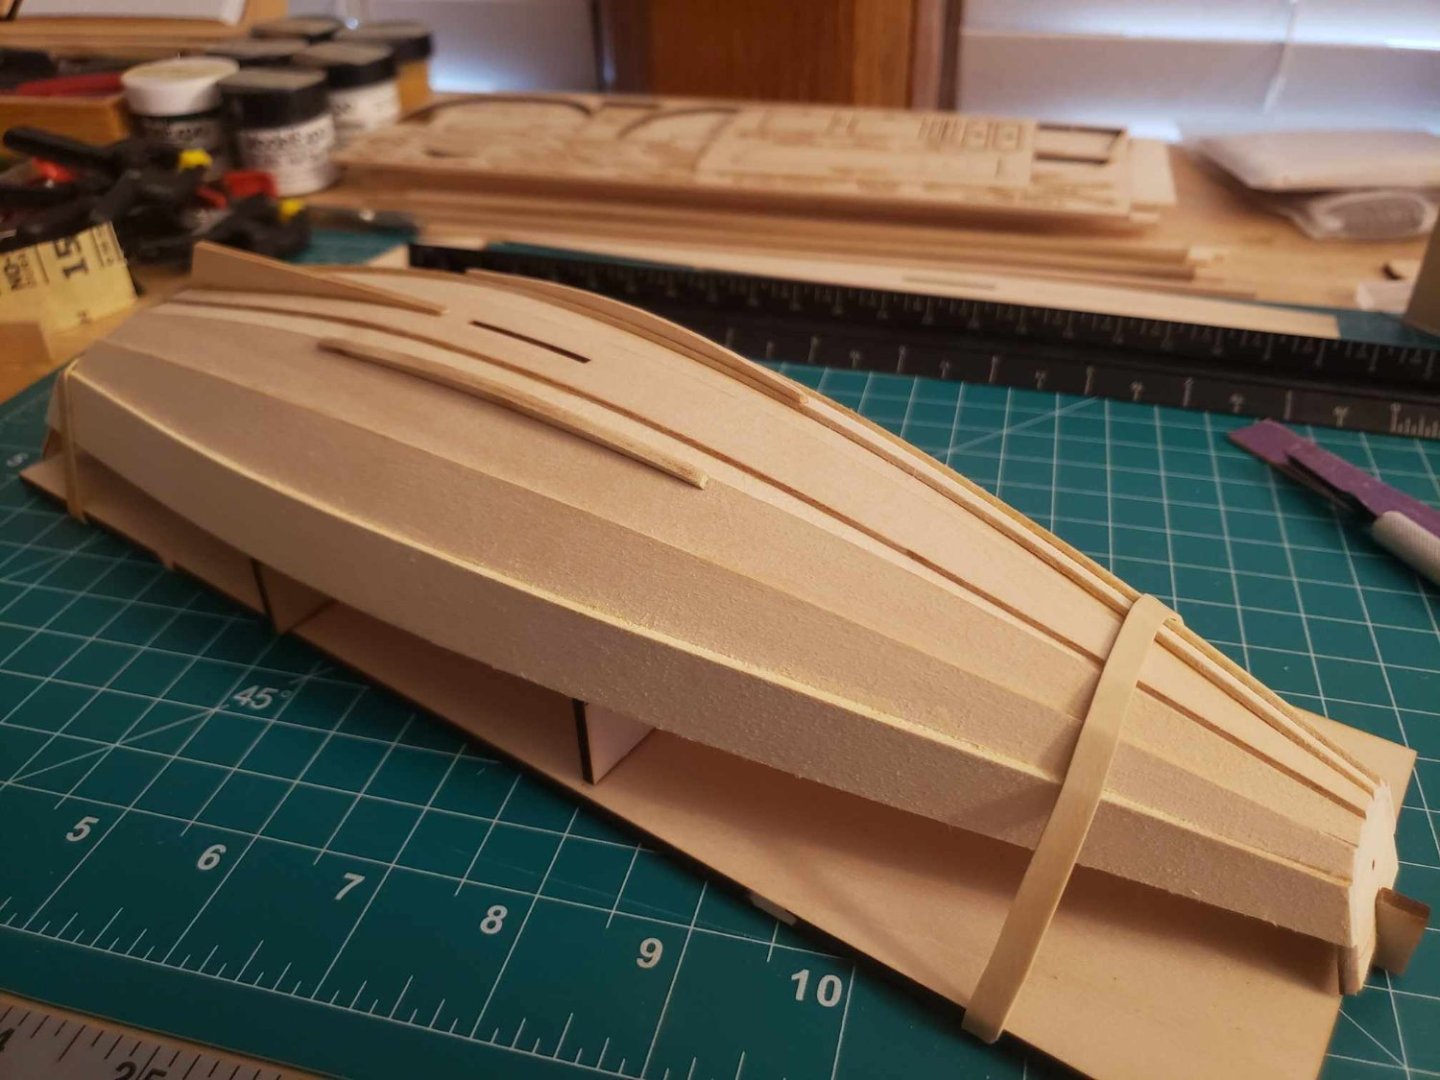
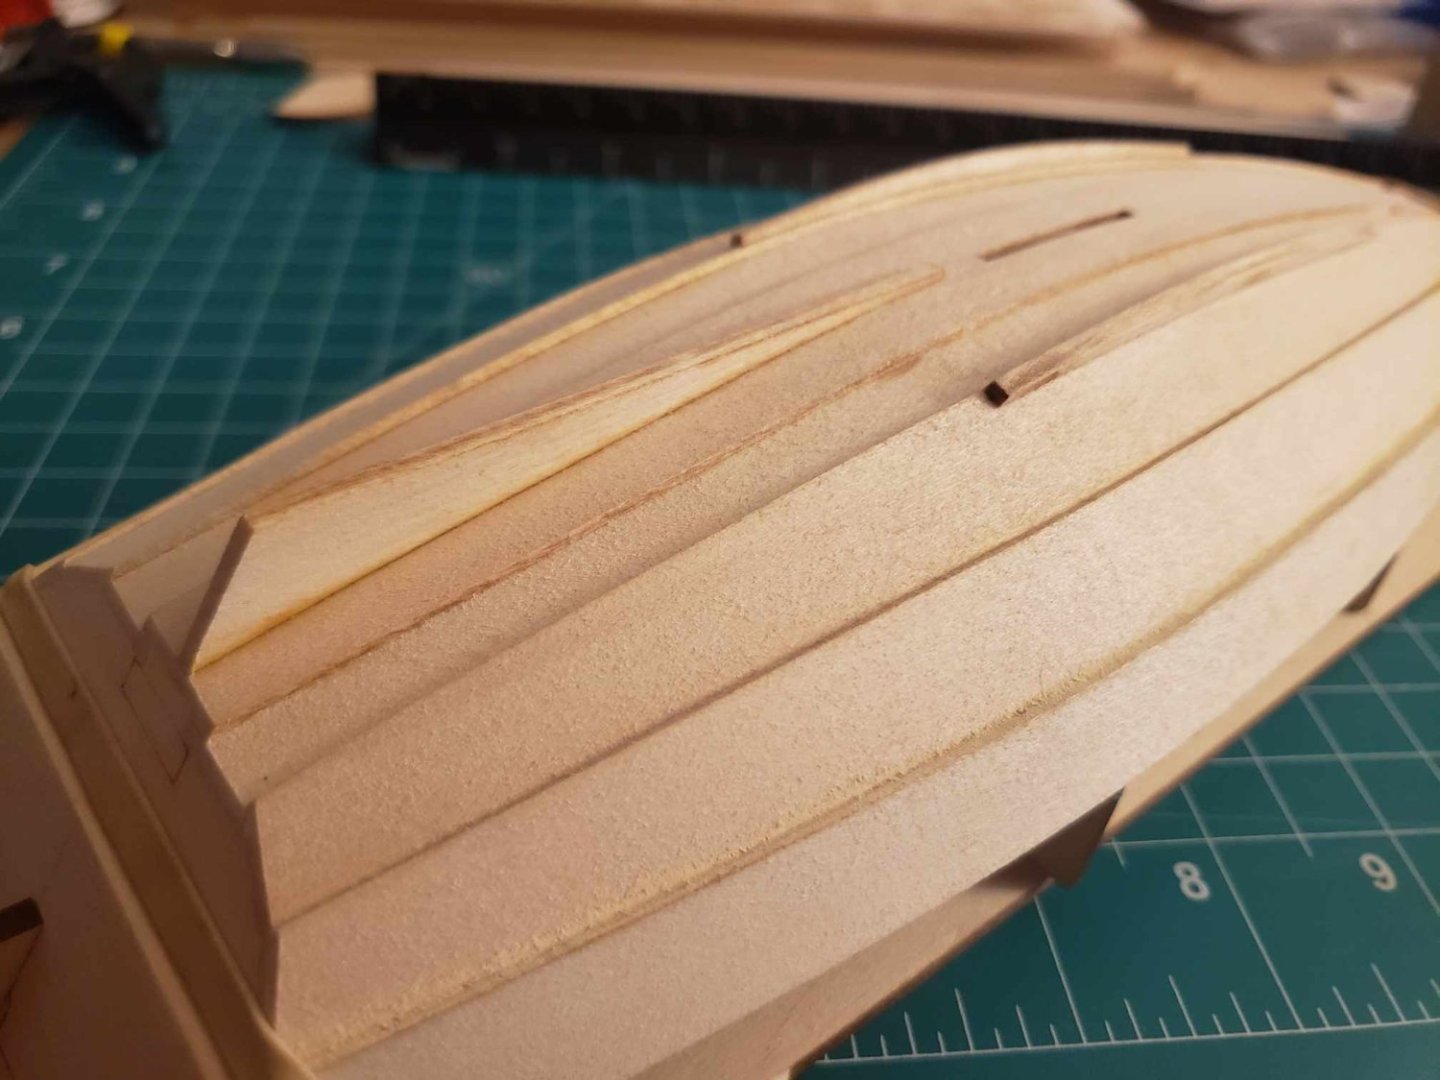
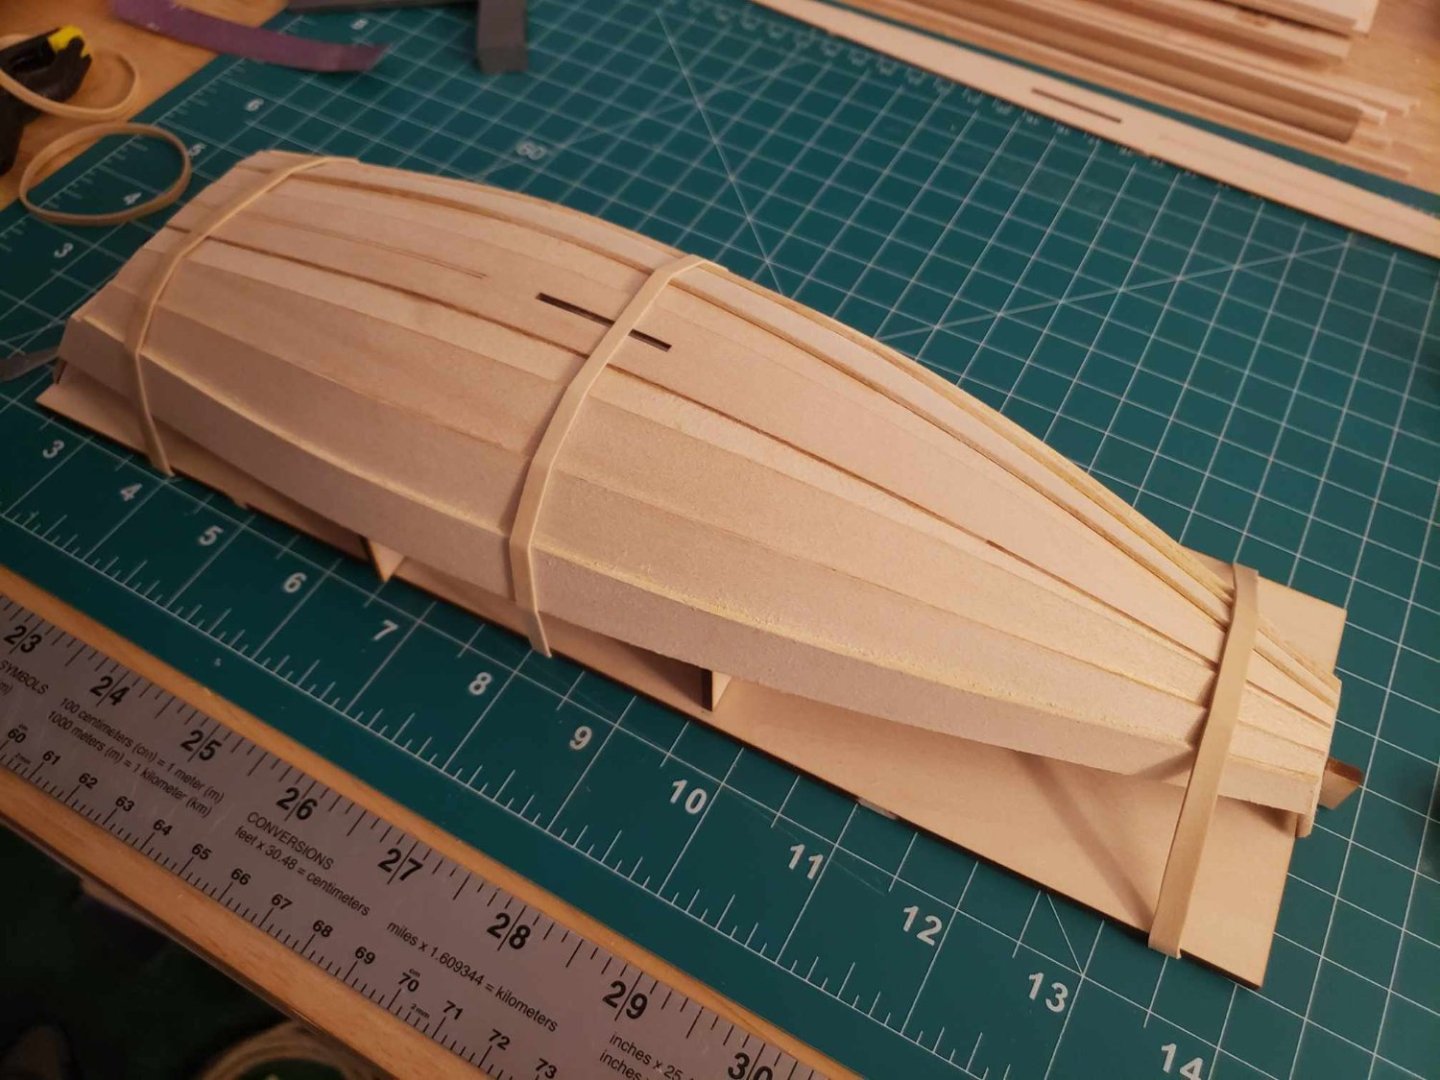
Okay, I finally got the sheer planks on. Pretty happy with how the bow came out. The sheer planks go about 2mm above the cut line for the stern transom, so I'm thinking I can raise the cut line by the same amount and be fine. I also filled in the more obvious gaps in the planking with wood putty. Next up is the skeg and bilge keels.

-
If you mean painting, I'm thinking copper red for the interior, white for the hull, and leave the soleboards and thwarts unpainted.
-
Got the first of the sheer strakes on. I have reservations on if the fact that it's resting above where the transom will eventually be cut and shaped is an issue or not. And if it is, how can I fix it from here. I thought I had been careful to line up the strakes on the bevel lines of the previous one, so I'm basically trying to decide if it's my fault or not. Or if it's even a problem. Any advice would be very welcome.

-
From the current look of things as I'm bending the sheer strakes, they're going to rest slightly above the markings where the stern transom is cut and shaped. I'm trying to decide exactly how much of a problem that is.
-
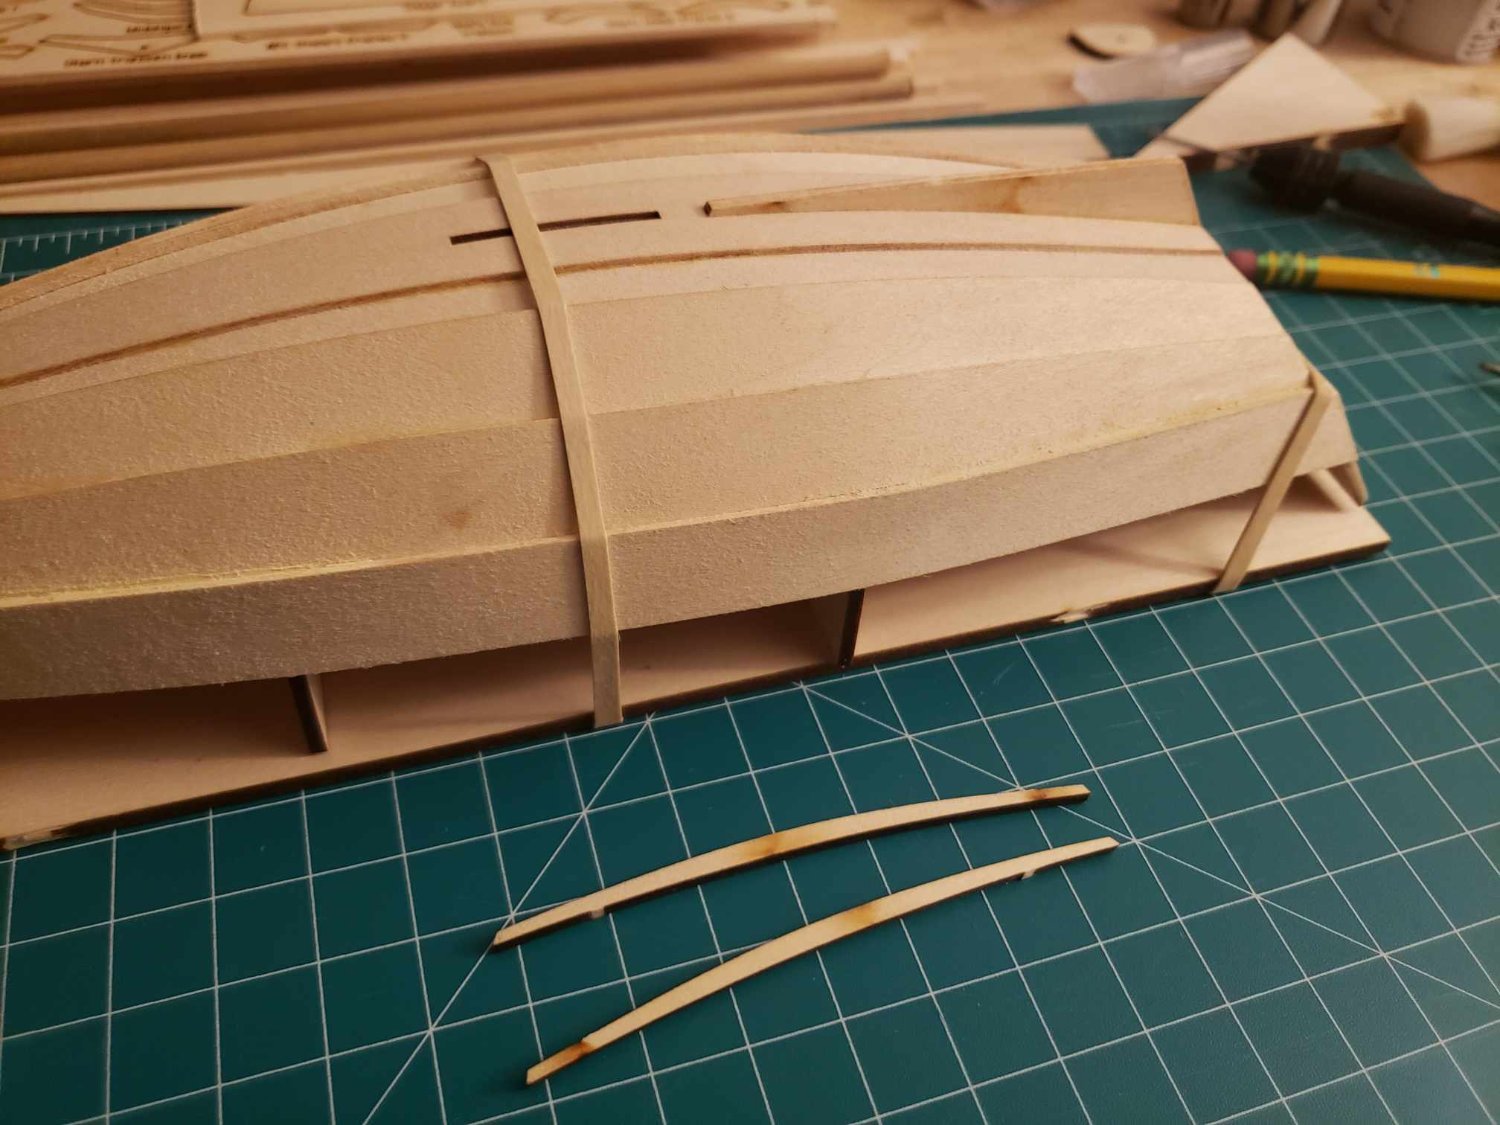
I'm a little less please with the gain on the port side this time, but any mistakes and imperfections here will be covered by paint later anyway. Second strakes are on, just the sheer strakes to go, then I can attach the skeg and bilge keels.

-
I made a slight change to one of the garboards at the bow (let perfect be the enemy of good again), and got the second garboard on. Now I'm letting the planks bend down to the molds again before I start on the broad strakes.

-
The garboard has historically been the most annoying plank for me. Was true on the dory, is still true here. I'm pretty proud of how the gain I cut turned out, and the garboard fit in place rather well. Need to repeat the process on the other side.