HOLIDAY DONATION DRIVE - SUPPORT MSW - DO YOUR PART TO KEEP THIS GREAT FORUM GOING! (89 donations so far out of 49,000 members - C'mon guys!)
×


Dgerth
-
Posts
25 -
Joined
-
Last visited
Content Type
Profiles
Forums
Gallery
Events
Everything posted by Dgerth
-
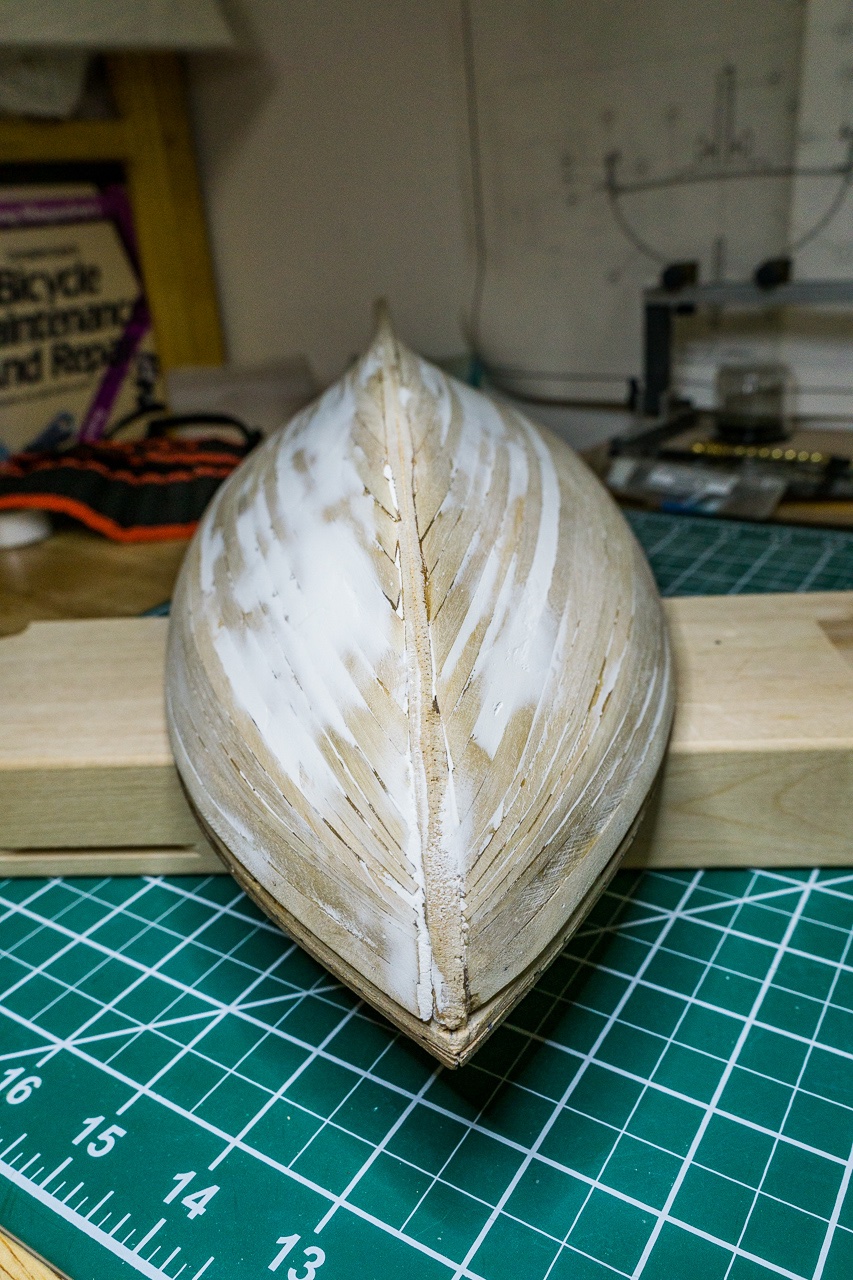
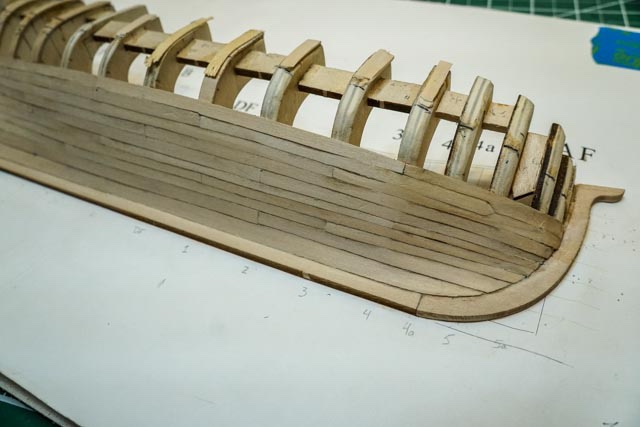
Sorry for the long delay, been otherwise occupied. I have not, literally or figuratively, given up the ship. Got the stealer and drop planks in, they weren't as hard as I had feared.After laying out the stealer, it went in per plan Next I cut the upper plank and glued it in place. Sorry, but no pics of the drop plank up front. I continued on to complete the middle planking belt. Obviously, I have some sanding to do! Ignore the upper area, I have been doing some reconstruction there after realizing what a lousy job I did fairing the bulkheads. Mostly gluing on extra wood so I can sand it down to where it should be. That's next, before I start the upper belt. After I get things straightened out, I'll lay out the upper belt, get that in, place the wale, and move on from there. I think my biggest frustration so far has been cutting the planks to the correct angle to fit into the stem rabbet. I finally settled on making a paper template for that end of each plank and carefully sanding it to fit. Too bad it took me so long to figure that out. I am seriously thinking about buying another one of these kits, and using what I've learned to make it better! To be continued... dan
-
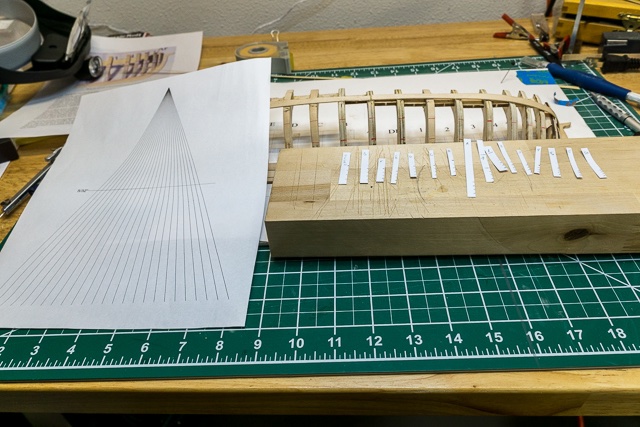
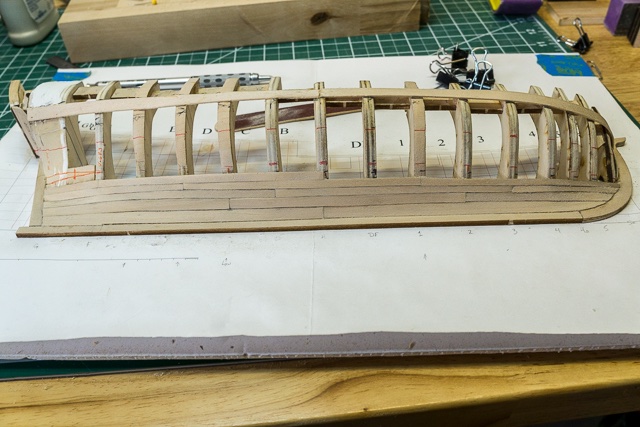
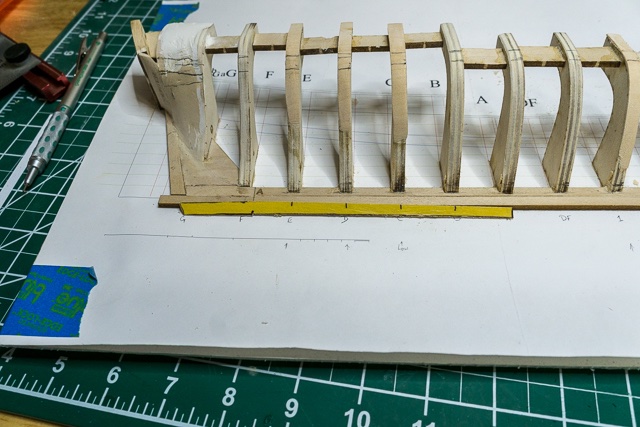
Finally back to work! I've been busy, but have been sneaking in half hour sessions every now and then. I've marked the planking belts, lined out the planks using a planking fan and tic strips, and have been planking the lower belt. It takes me about 15 - 20 minutes to make a plank. Of course, I have made some mistakes and had to redo about 20% at first, but I'm getting better! Marking the belts. The thread worked much better than the tape! My tic strips and planking fan. Plank width marked out on each bulkhead. The red marks are the belt markers. Laying out the location for the stealer. I added a brace to give some gluing surface as indicated in the instructions, then marked the half width point as the front end of the stealer. I also measured the width of the middle belt at bulkhead F and the sternpost. They were pretty close to the same width, despite all my super-accurate marking! I was also relieved to see that I have 5 rows in the lower belt, as does Toni. Getting close, one and one-half plan runs to go. Fitting pretty good at the stem. The dust is from a light pass with some sandpaper. Nowhere near finished sanding, just wanted to see how the pencil lines would show up and clean off a little glue residue. Will finish up the lower belt, then start working on the stealer. To be continued... Dan
-
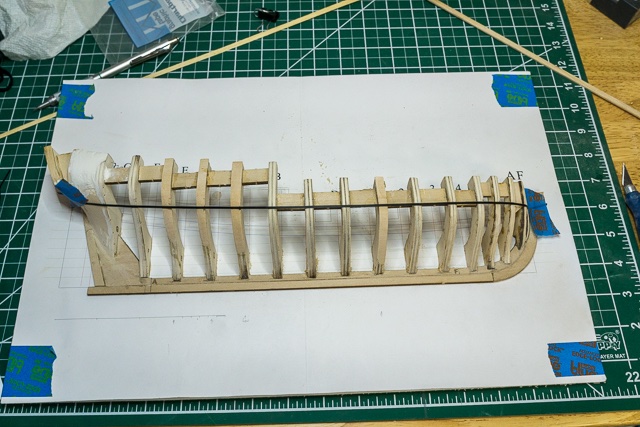
Back to work (had some honey-dos to take care of).... I removed some of the stiffeners and remarked the wale location on the bulkheads. Lesson learned - I don't think I'll worry about completely removing the laser char; the glue I used (Elmer's carpenter glue) was tenacious. Took quite a lot to remove the stiffeners! I then marked the run with black thread. Worked much better than the chart tape I had previously used. Marks are still pretty ugly, but the thread helps greatly. I transferred the bulkhead positions and marks to Tamiya tape and connected the dots with a ship's curve. My father was a draftsman and I inherited some of his drafting equipment - Never thought I'd use it! I used a compass set at the the plan width of 0.28" to mark a parallel for the upper line, cut it out, and sanded the edges. I decided to attach the wale prior to starting the planking. My rationale was that it would provide a much more clear line to work from. Since the bow is an extreme curve, I soaked it and clamped it in place overnight. I still need to do some final sanding on it, but it shouldn't take much. I'll make the stern wale next using the same procedure. I did save the tapes to make the second layer of the wale planks! Nirvana - thanks for the pencil recommendation! I found out one of the reasons mine smeared so much is that it was designed to do that when rubbed with a wet cloth - which is what I was doing to clean up some glue squeeze-out. Duh. to be continued... Dan

-
Thanks Nirvana, I can confirm that! I’m going to try some different pencils. I see a lot of folks use plain old #2 pencils, will try that as well. I know for a fact I’m not going to use a sharpie - don’t ask me how I know 😉
-
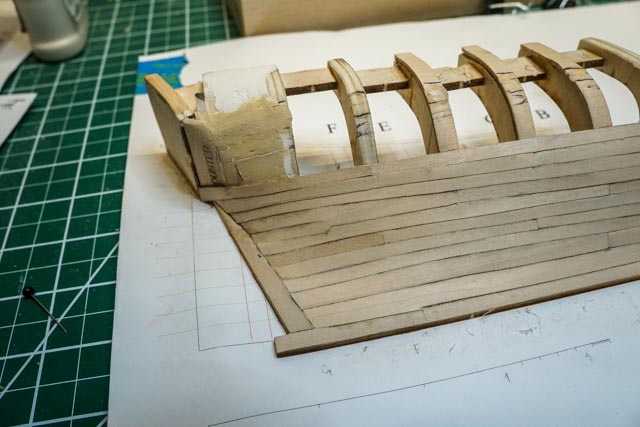
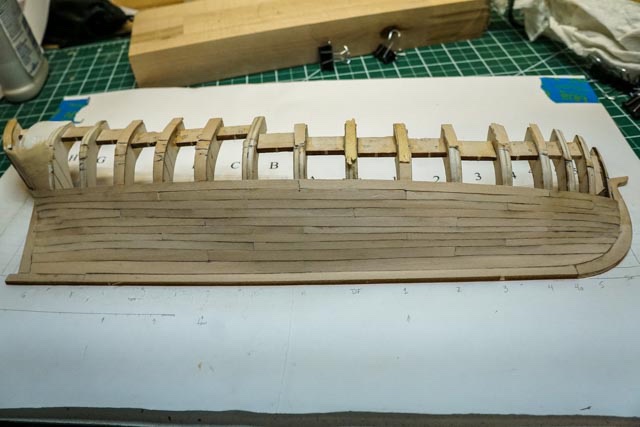
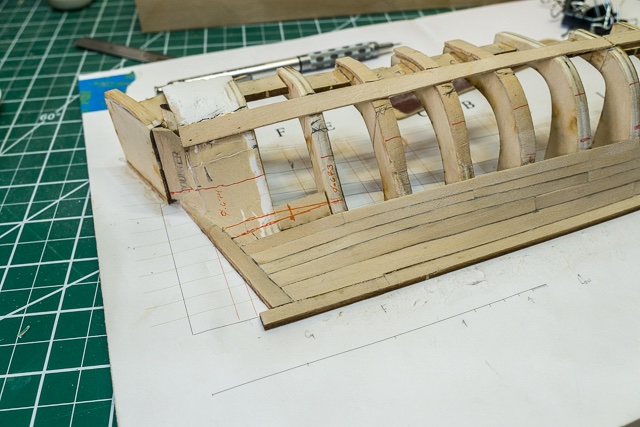
Progress tonight, finished fitting the garboard and broad strakes. It was not as bad as I feared (fairing was more difficult) Looks pretty dirty right now, should clean up after a light sanding (it looks better in person). I am planning to paint the keel, stem, sternpost, wale, trim and rails black. I'm using a graphite drawing pencil to simulate the caulk between planks, and it does tend to "spread out" a little. The planks actually fit pretty tight; I'm beveling the bottom of each new plank. As an experiment, I fit a plank before and after beveling. Beveling makes a significant improvement in the fit. Now comes the fun - laying out the planking belts. I have been using 1/16" graphic tape as a layout aid, but I don't like it. It doesn't stick, and thus my lines are sloppy. I am going to switch to black thread, remark the wale, and use it to lay out the planking bands. I'll use pins to stretch it out over the hull. to be continued... Dan
-
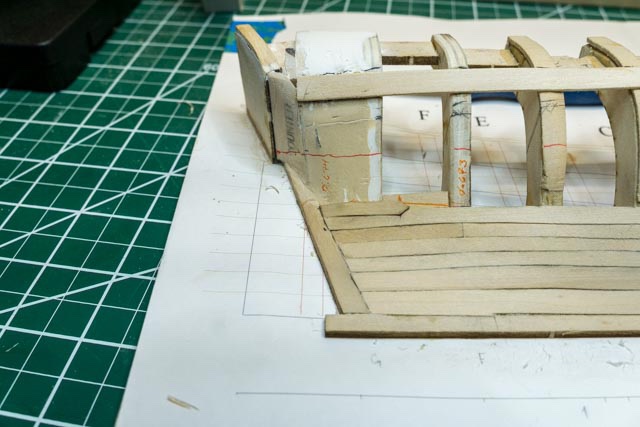
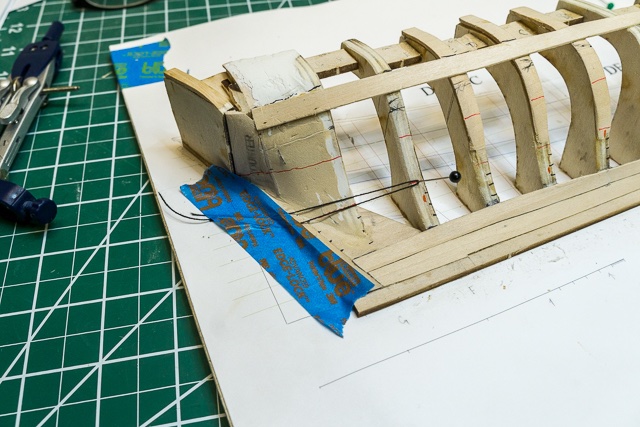
Back to work! I believe I have faired the hull pretty darned close - even though I had to rebuild a few bulwarks and use some filler at the stern. The stern area looks rough, but it's not that bad. Ugh, what a mess! I have marked the wale location, and upon closer examination, I think I have the counter angled incorrectly. The stern is one area that I wish the instructions were a little more clear: 1 Correct orientation of the Transom, 2 Correct angle for the counter After checking the anticipated plank ends, I think I can work with this. I'll check again - I'm not afraid to disassemble and reassemble if necessary. Started the garboard plank: Fits pretty well! On to the fore garboard, then the broad strake. to be continued! Dan
-
Well, no photos, just a short update. I have found out that I really stink at fairing. After several hours of sanding, I have had to repair numerous errors - mostly oversanding. I had to step away for a bit in frustration, but have gotten back on the horse and am making some progress. I have learned a lot, which is the whole point I guess! 🙄
-
Nirvana: No, I took it in the spirit it was intended, got a little laugh out of it. It is impressive that they were able to deliver it in such a short time frame. I agree, this should be up there as a must do for anyone starting out - and as a nice refresher for others! Take care, Dan
-
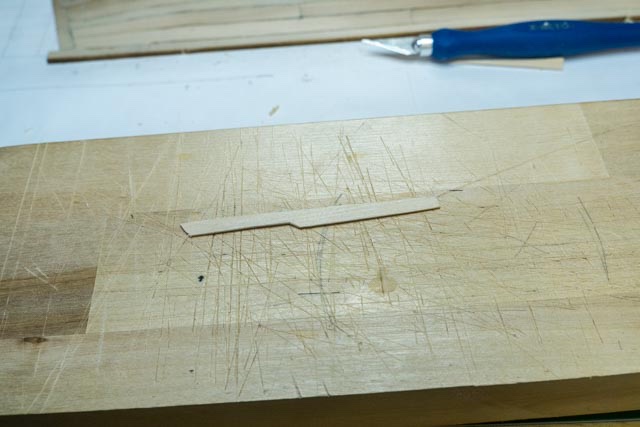
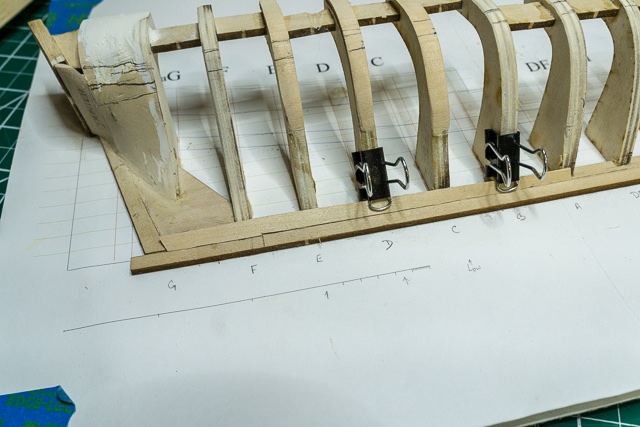
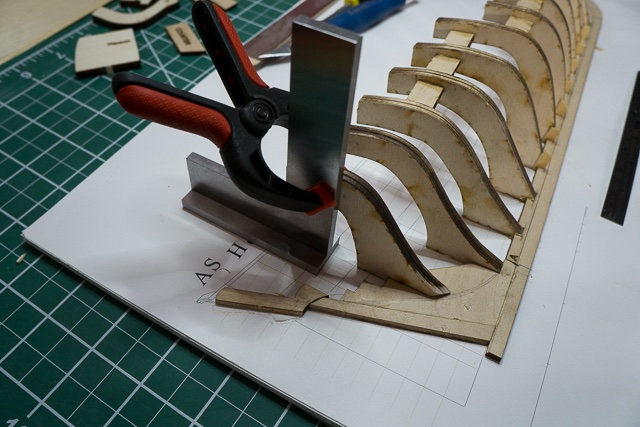
I got the sheer line sanded in and faired. For the bulk sanding I used my Dremel with a sanding drum on the flexible shaft, and worked it very carefully. I was glad I had the sheer lines on the sides of the bulkheads to act as a guide. When I got very close, I switched to a sanding stick. For final sanding, I used a sanding stick with only one-half covered in sandpaper. I could use it to check the fairing as I went, with the front half sanding the next bulkhead(s) and the back half serving as a batten to maintain the line without sanding. Bukhead "A" will need a little extending, but not a whole lot. I was thinking about the wale marking problem, and came up with an idea that should help with just about all the problem areas. It involves using two machinist's squares as follows: Bring one in from the front and align with the wale line on the plan Slide the other one in from the keel side until they meet: Keep it up against the bulkhead. The other square will ensure it stays plumb. And now mark the wale position on the bulkhead (of course, after the fairing is complete!) And now onto the fairing....sand, sand, sand, etc. Stay safe! Oh! - Nirvana - did you get your kit? Dan
-
Glad to see you pulled the trigger; you will have fun. It's not a paint-by-numbers kit, you will need to think through some steps. I recommend reading through Toni's log many times, as well as the instructions. I would probably do some steps out of order, like transferring the wale and sheer lines before adding the stiffeners. Make sure you deepen the slots for the bulkheads enough to make a smooth transition to the rabbet. Cut those slots after gluing to the base, but be very careful. They won't leave much on the keelson after you're done. Stay safe! Dan
-
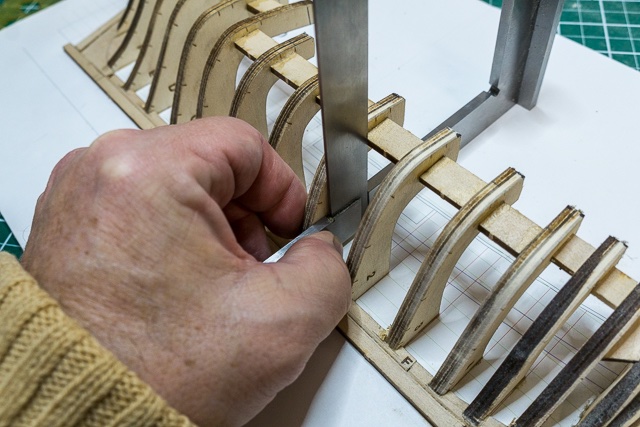
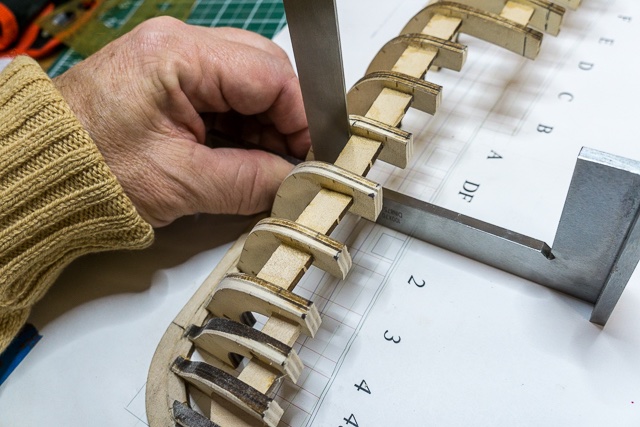
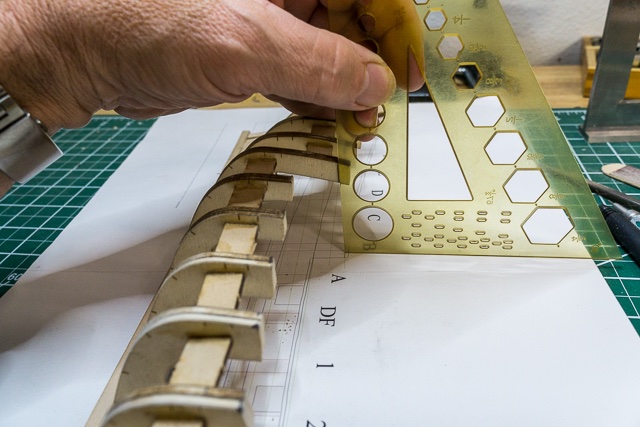
Transferring the sheer line. Instead of using the machinist's square, I used a drafting triangle. I liked it because it was easier to maneuver in the tight spaces, easier to judge the alignment with the line on the plans, and I could see through it. I'm thinking about using an Xacto #13 saw blade to cut the majority of the waste, and use a sanding stick for final adjustment. Cut down on sanding dust also! It looks like I was a little overzealous in sanding one of the bulkheads, so I will graft an extension on and sand it back a little more carefully. Then, on to fairing! To be continued... Dan
-
Thanks Bruce, and Nirvana, I understand. This is really a great little kit, and not only for the planking. The whole exercise of cutting the rabbet and seeing how it works together with the bulkheads is eye-opening for someone like me with little building experience. I’m toying with the idea of removing one of the forward stiffeners to let me get a wale location mark, then re-installing. Shouldn’t be too hard, and lesson learned. Dan to be continued...
-
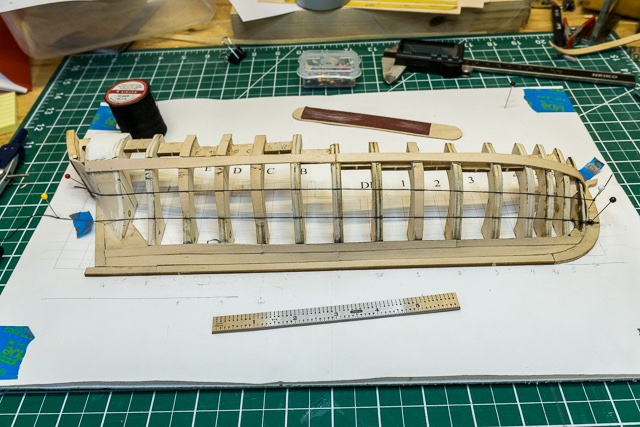
Back to work. I've actually been working on the kit, just haven't had time to post. Got the bulkheads glued in, looking pretty good so far. everything appears square. Stern bulkheads completed. I decided to attach the transom now. Will obviously need to do quite a bit of fairing at the deadwood/keel junctions. As I feared, cutting the slots in the fore keelson while glued caused some damage to the paper/foam substrate. I don't think I cut them deep enough to provide a smooth transition into the rabbet. Will work to fix that during the fairing. Here she is, ready to start the fairing. I think I will have a little trouble transferring the wales to the bulkheads as the stiffeners are directly over the lines at the bow. Should have anticipated that, will try to mark as many as I can and eyeball the line with tape. To be continued...

-
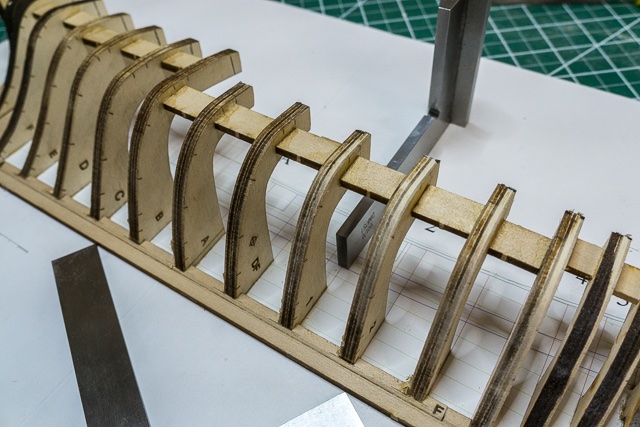
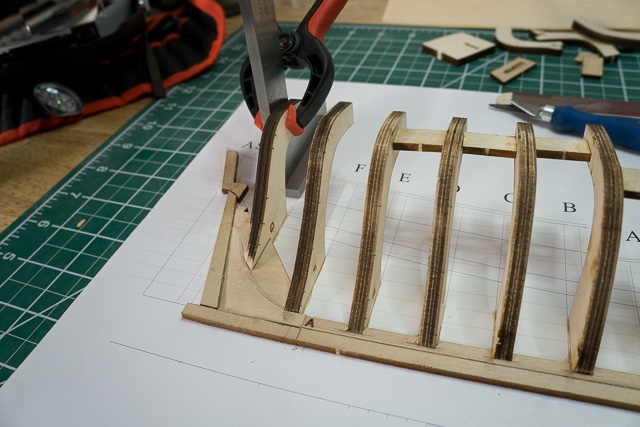
Update on the build. I've got the rabbet cut, and the parts glued together and to the paper. I used a needle file for the 45 degree sections, and a razor blade to carve the 90 degree sections. I deepened the slots by drawing a guide line 1/16th" below the end of the slot, then used an Xacto chisel to cut the sides. The bottoms I cut out with a #11 blade. I deviated from the instructions by deepening the slots prior to gluing the parts to the board. In retrospect, I probably could have done it after gluing, but having the keelson separate gave me better access for squaring the bottom. I still need to deepen the slots in the fore keelson, so I'll have both methods under my belt. I understand why the slots weren't cut to full depth - I had to be extremely careful not to break the keelson! Rabbet cut, parts ready to glue. They don't look tight, but I kept bumping them out of alignment! Parts glued, getting ready to cut out and sand the bulkheads. Bulkheads E through 4 sanded, test fitting in slots. This took me about 50 minutes. Some bulkheads are pretty loose, so I will need to shim. I'm also thinking of reinforcing the keelson by laminating a strip between the bulkheads to provide more gluing surface. That's all for now!

- 24 replies
-
- 10
-

-
Well, taking a short break from the Harvey build. I've ordered some wood, and while I wait for it to arrive I will be working on the half hull planking kit. Looks like fun!
-
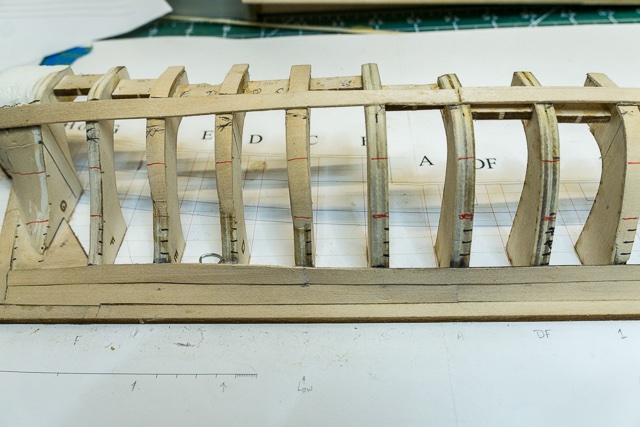
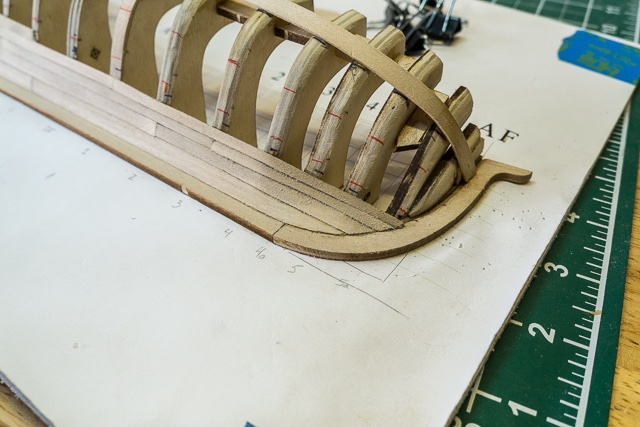
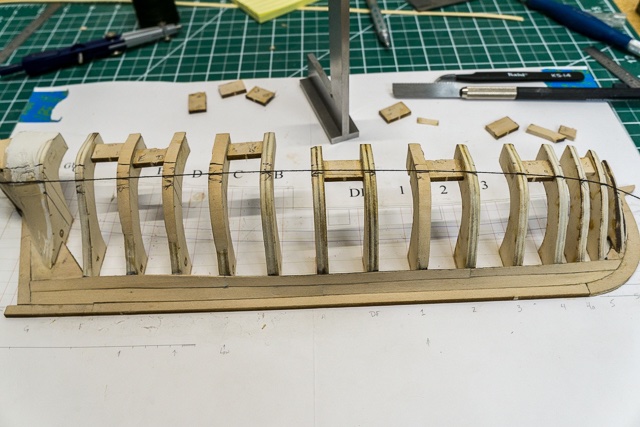
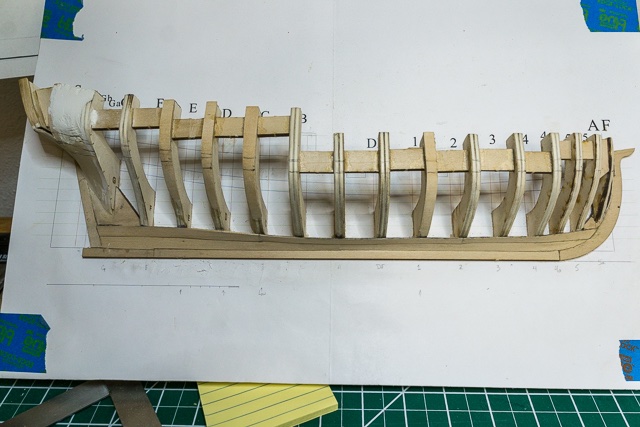
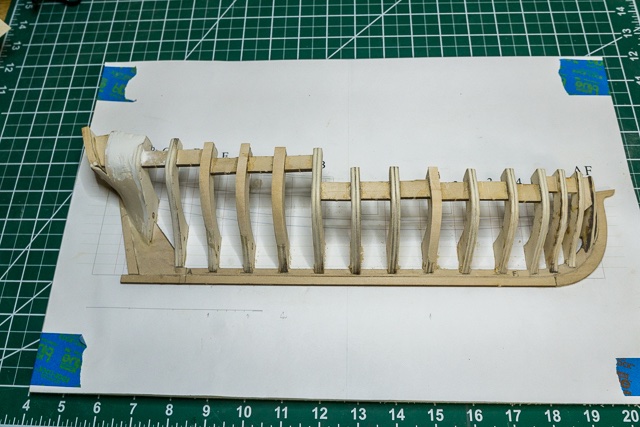
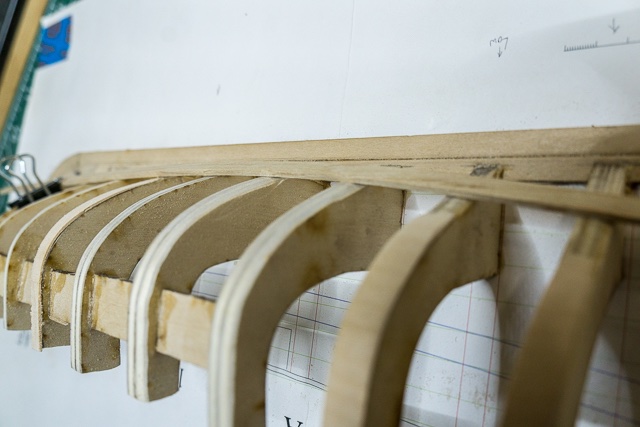
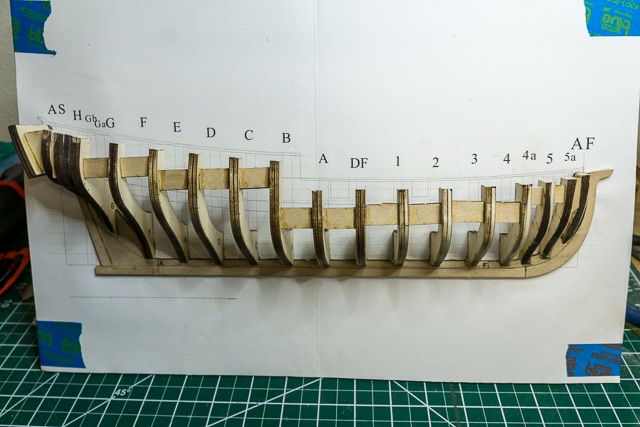
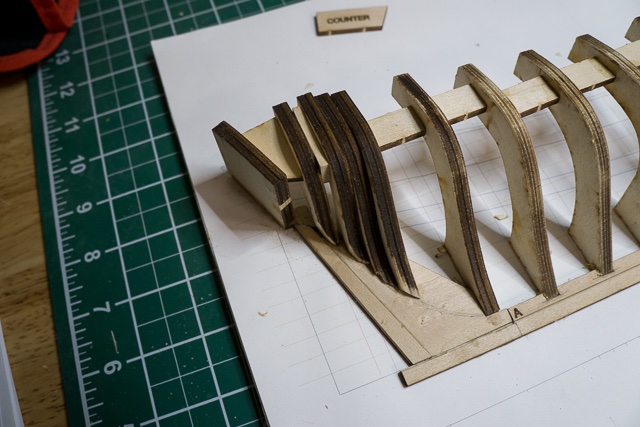
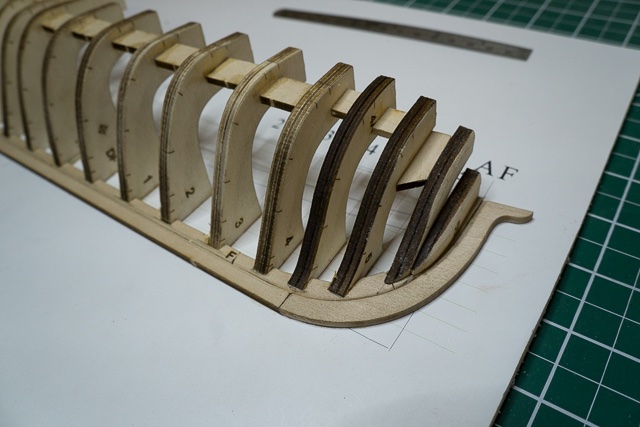
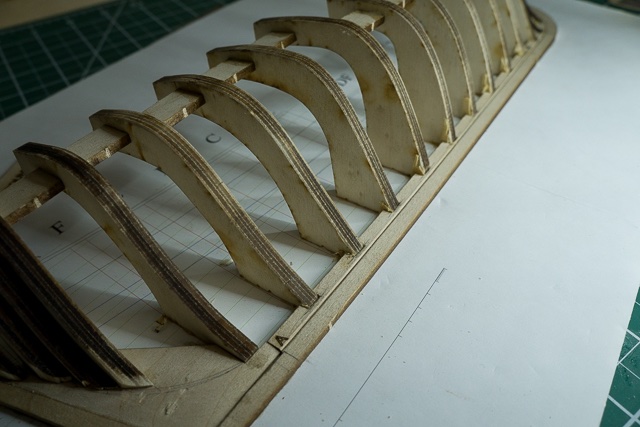
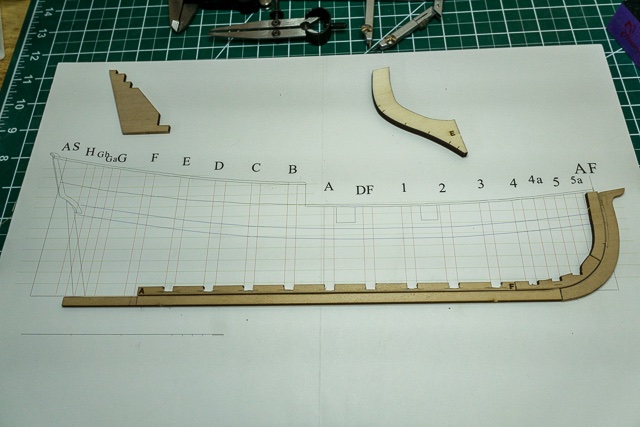
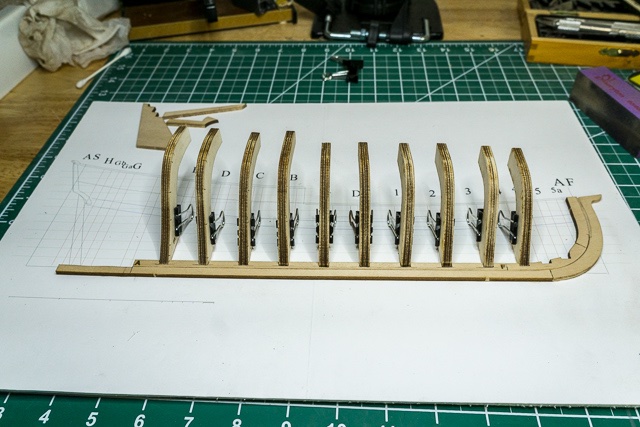
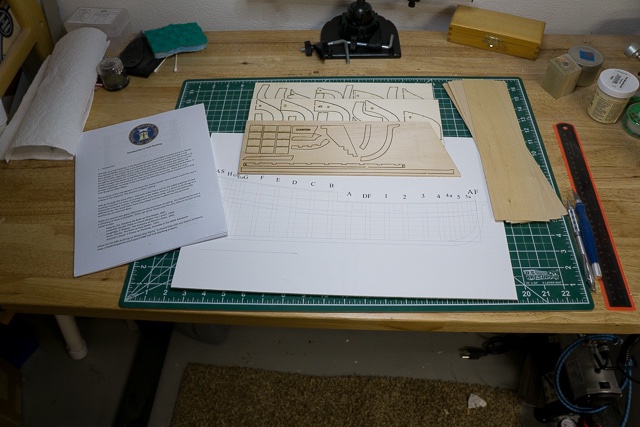
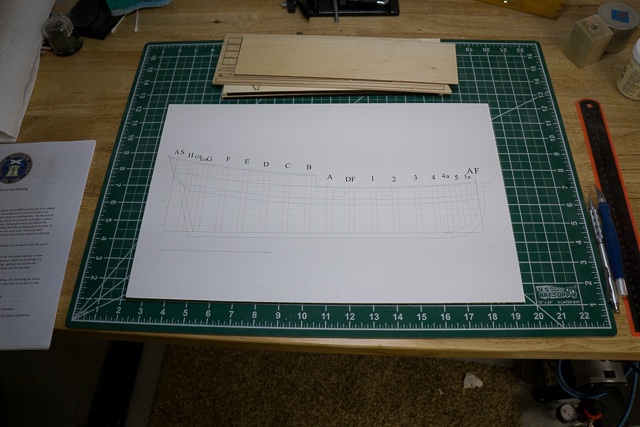
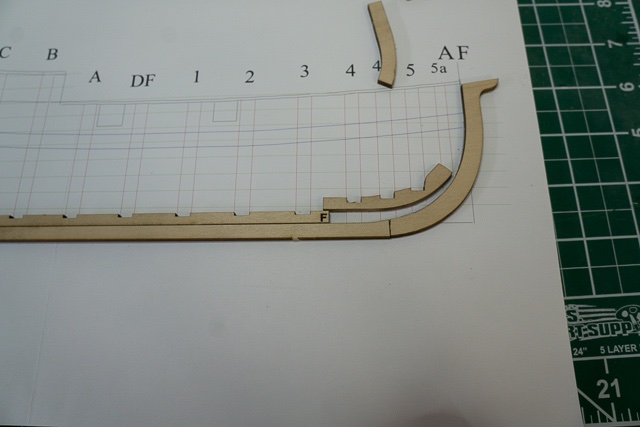
Taking a short break from the Harvey build until the wood I ordered arrives. I had planned to build the half hull before I started the second planking layer on the Harvey - I'd really like to do it right! Kit arrived in perfect shape, and I printed out the instruction manual. I've been reading through Toni's build log and think I'm ready to go. I mounted the plan sheet to the recommended foam board using Elmer's spray adhesive. No wrinkles Started sanding the laser char off of the pieces. It looks like I will need to trim the stemson to get it to align with the bulkhead locations. Has anyone else found that? Will keep on sanding... that's all for now.
-
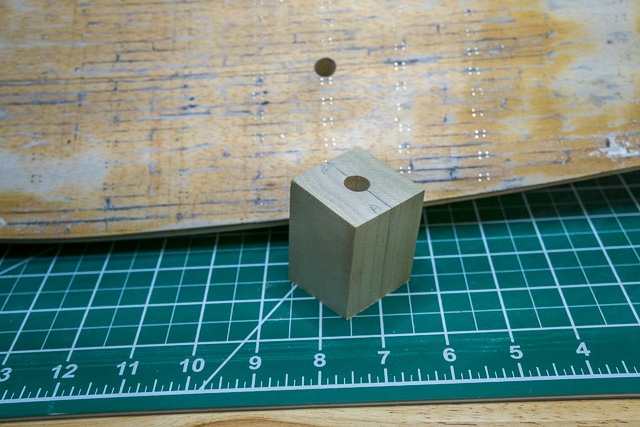
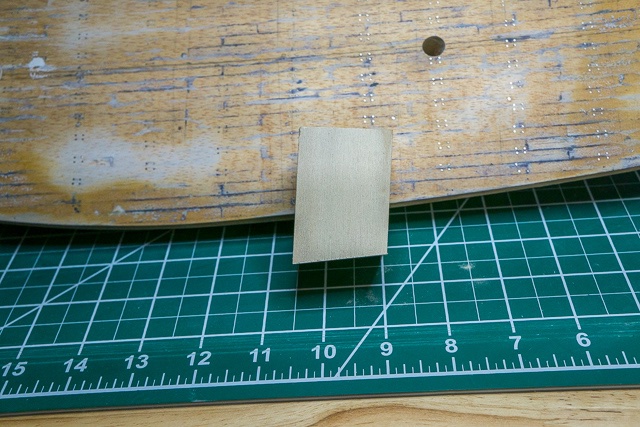
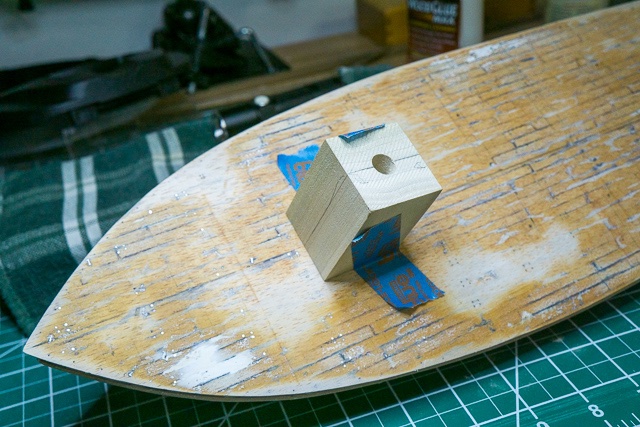
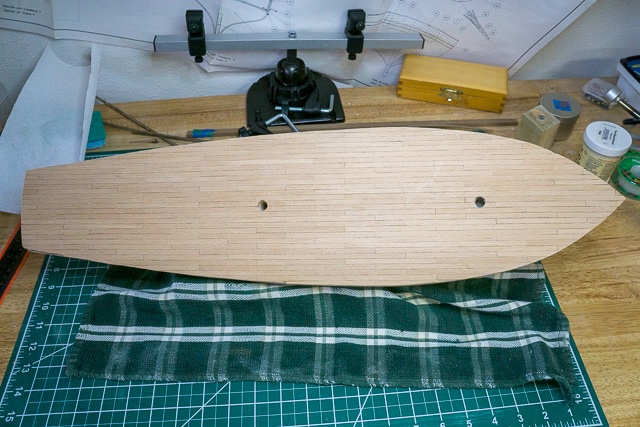
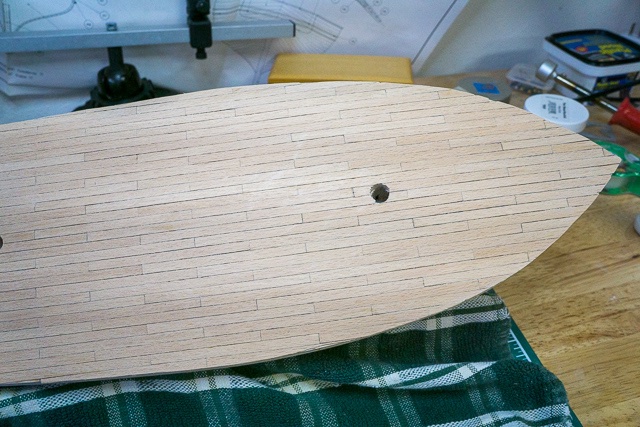
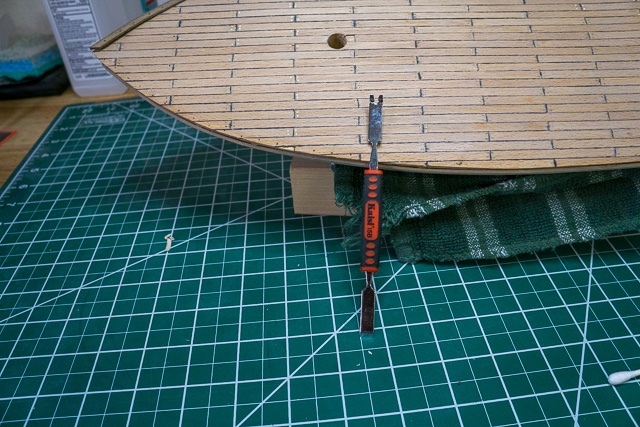
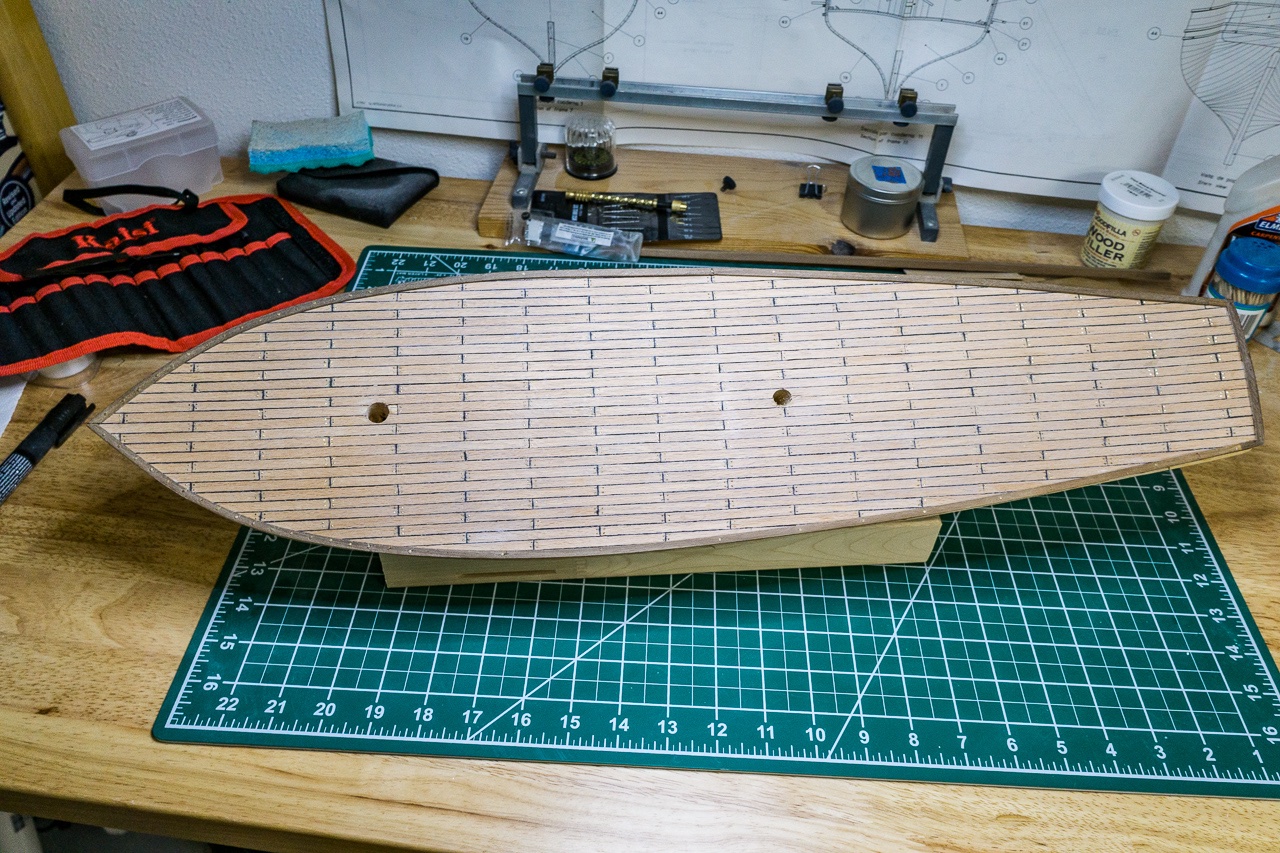
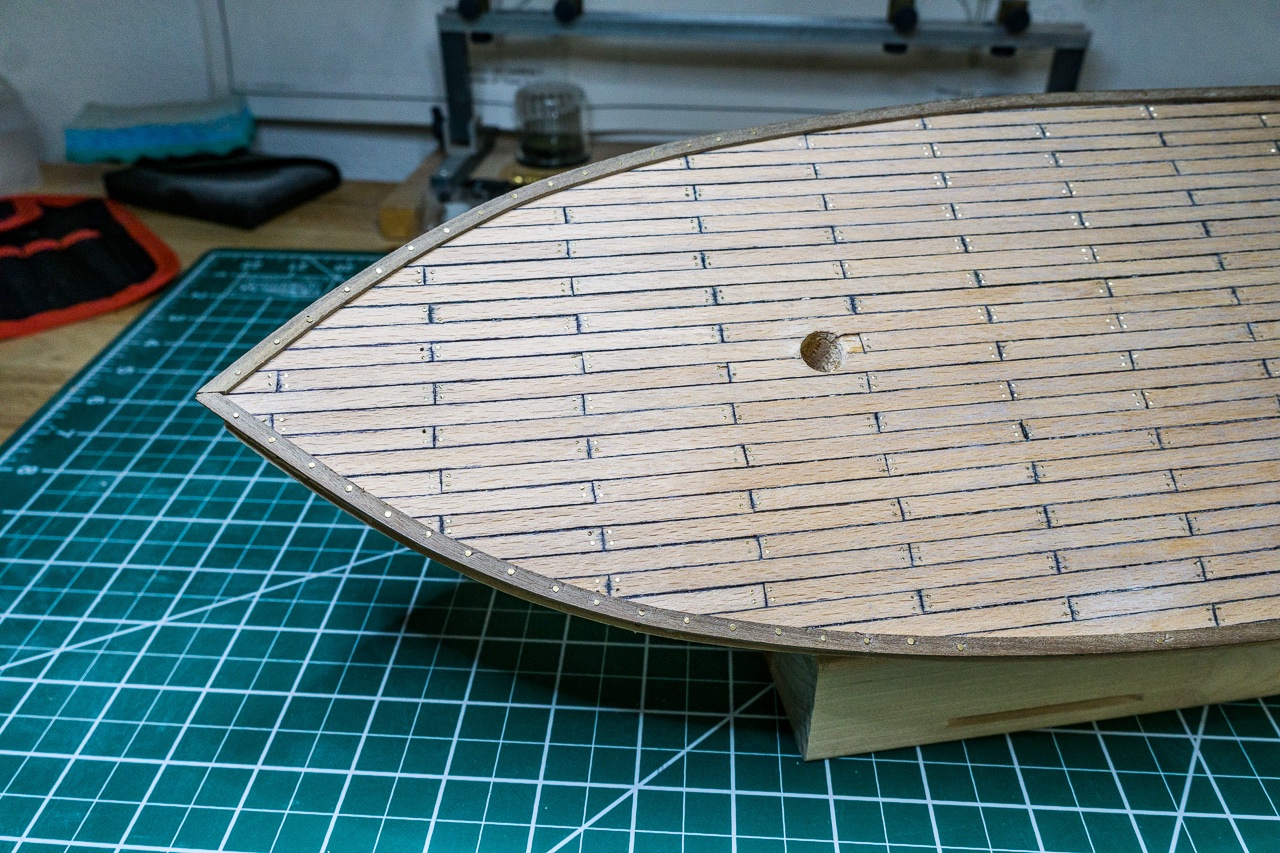
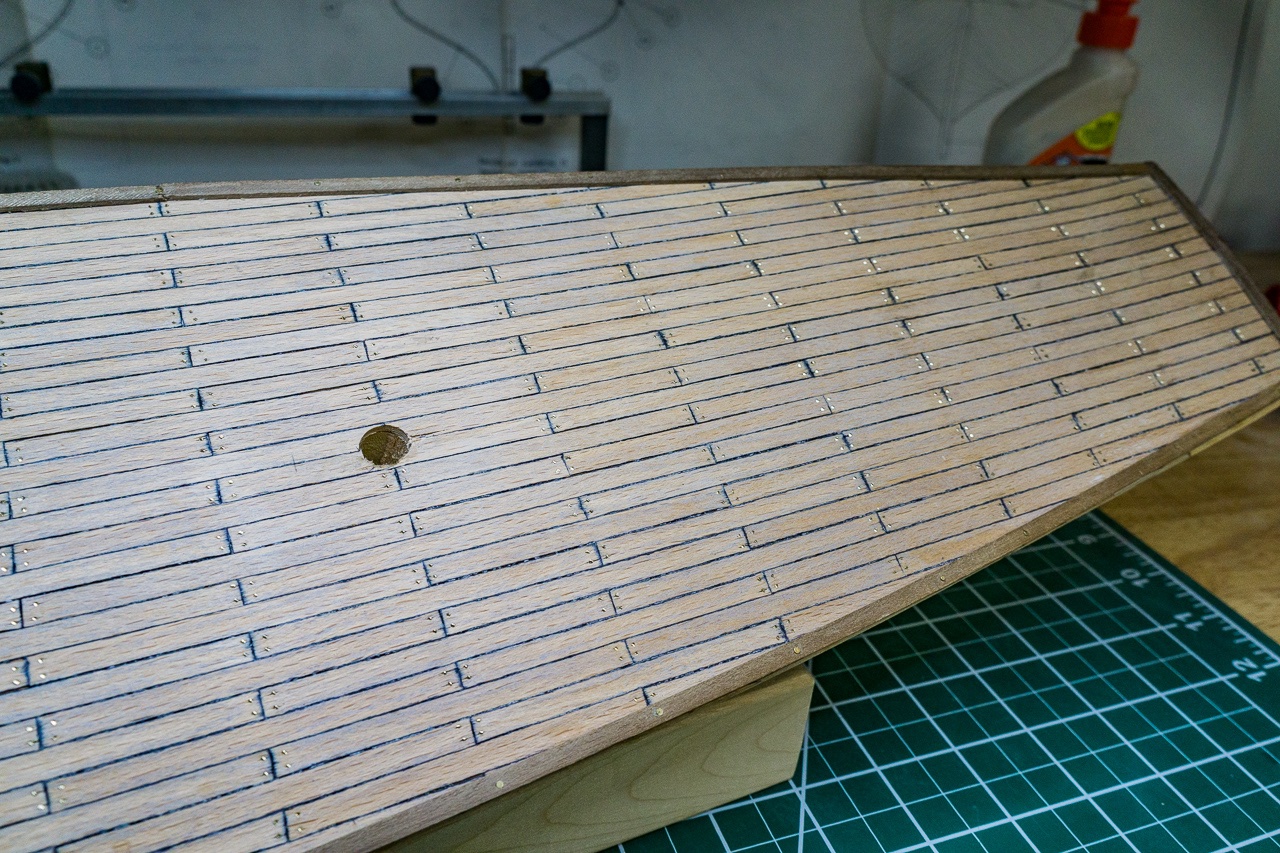
Well, had to take a small break there. Made up a drilling jig to redrill the foremast hole. Used poplar, and made it fairly tall to give the most support for the drill bit. I angled the base to give the correct mast angle. The reference lines on it allowed me to align the hole with the centerline of the deck. I used a couple of small dabs of glue to lock it into position when drilling. Came right off with a little IPA after I was finished. The lines on the false deck are bleed from the sharpie used on the previous deck planks. The IPA dissolved the ink and left the outlines of the planks. Here's the new deck, I think it looks a lot better than the previous version. I used a carpenter's pencil on one side of the planks for the caulk simulation. I've decided to do treenails instead of the brass nails, I'm playing with Chuck's putty method to get that down. Also looking at different sized holes. After I get that complete, I will cut out and install the waterways. I think I'm going to scratch them from a sheet instead of trying to edge bend them. Unfortunately, I will need to order some wood. Don't have any hobby stores within 75 miles. I've also decided to use Tung oil after I get everything in place.
-
Thanks Bob and Phil, will keep nibbling away at it! I just received the NRG half-hull planking kit, and after I get the deck back on the Harvey will probably let her rest and complete the half-hull. I would like to learn a bit about hull planking before I start the second layer of planking on the Harvey. Phil - I looked up your builders log and read through it. I have ordered a copy of Chapelle's Baltimore Clipper book. It seems like there are a lot of design variants out there, I'll probably stick with the kit design and accept the fact that it is probably not historically accurate. I'm treating it as a learning experience, my next build will be a little more involved. I did see that you are using a 1:4 deck planking pattern, I've seen several different patterns used so I'll stick with my 1:3 for this build. Still undecided about treenails vs brass nails though. Dan
-
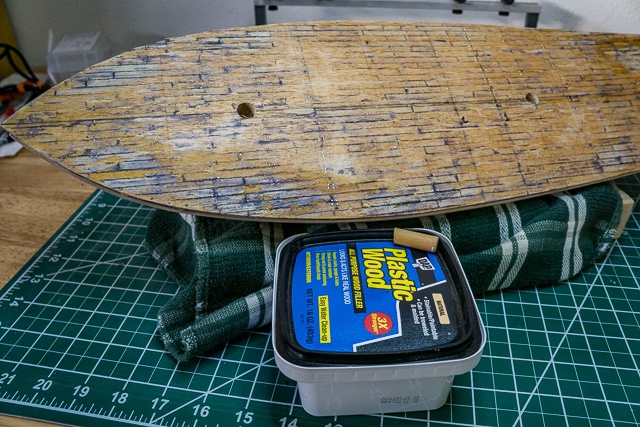
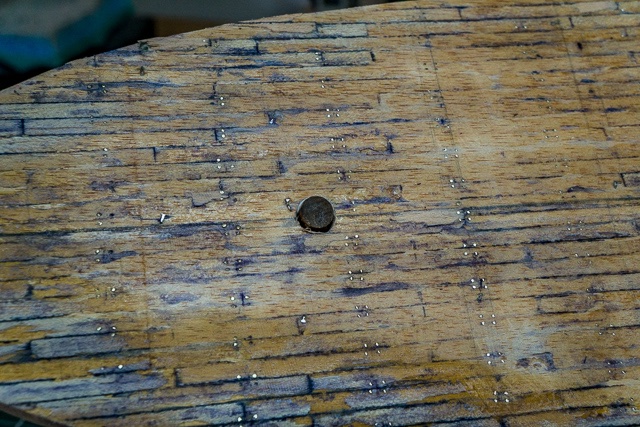
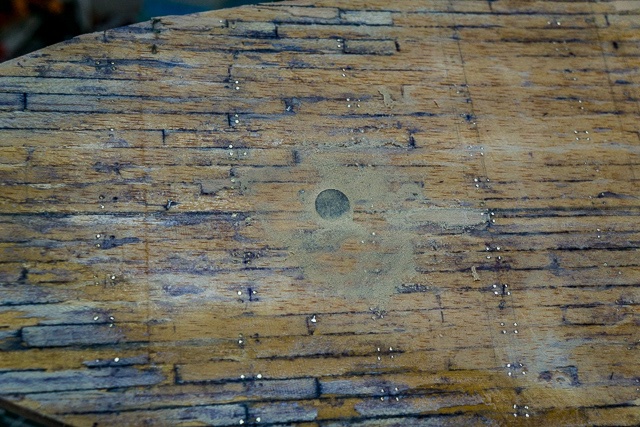
Got the errant foremast hole plugged. Cut a piece of dowel and glued it in, then stuffed the remainder of the cavity with plastic wood. Will let that dry overnight, then sand the false deck smooth. Plug installed Plastic wood filled tomorrow will sand the false deck. I am planning to use a 3 plank repeat, but am unsure if I should go with trenails or the brass nails used previously. Suggestions? If trenails, should I just place one at each plank end? Thanks, Dan
-
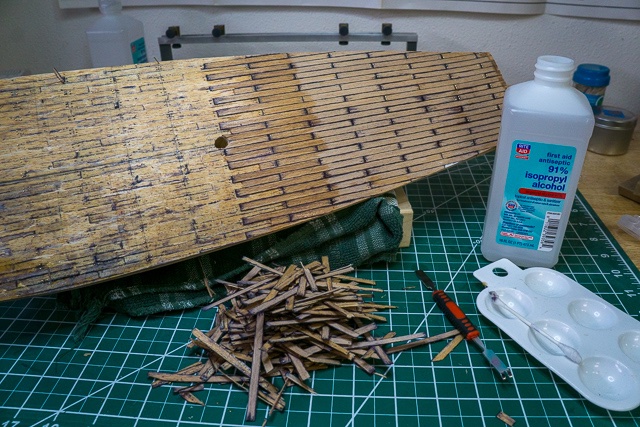
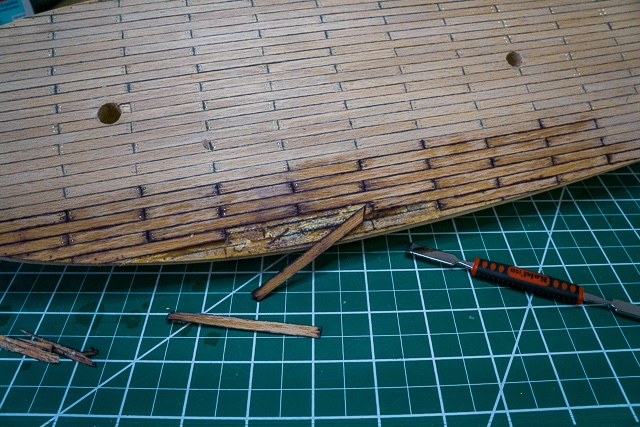
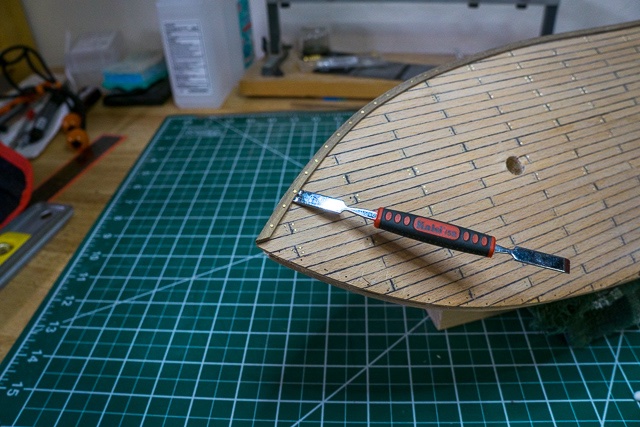
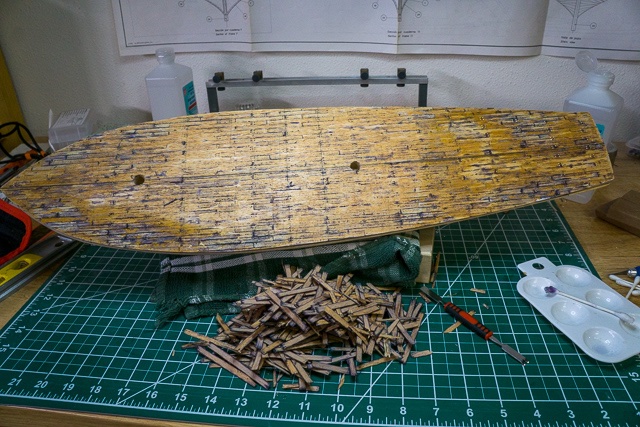
Hello all: Stripped the decking today, was easier than I thought it would be. I started out by prying off the waterways The tool you see came in a set of tweezers I bought. One end is like a cat's paw, the other a nice chisel: It was the perfect size for this. I started by swabbing the planking with IPA using a Q-tip, then let it soak in for a couple of minutes. I was surprised at how quickly it loosened the glue, and the planks peeled up fairly easily. Here we are about halfway through. Notice that the planks strip off in one piece (mostly). Finally complete. Start to finish took a little over 45 minutes. Now I'll let her dry out for a couple of hours and sand the false deck down nice and smooth. I decided to file down the brass nail stubs instead of pulling them all out. Next will be plugging the foremast hole and re-drilling.

-
Well, after looking at a few build logs, I decided that my deck planking would not pass muster. I bit the bullet, broke out the IPA, and started stripping it off. I also decided to plug the foremast hole and re-drill correctly using the technique I saw in Tgahm's SYREN build log. Will post when I have something to show. I did find the NRG deck planking pdf, which really helped, but I need to determine which pattern is correct for a Baltimore Clipper of this era. I also need to determine the correct deck plank nailing. As an aside, I purchased the NRG half hull planking kit. I also watched Chuck's edge bending videos. Between the two, I should be able to put together the second hull planking layer. I'll take a hiatus from the Harvey to complete the half hull kit before I start the final hull planking on the Harvey. I will finish the deck planking and bulwark installation on the Harvey prior to that.
-
I started working on the deck, and followed the kit plans for planking. I used a sharpie to blacken the edges of the planks. Learned two things: 1. The planking pattern suggested in the plans was incorrect, and 2. Don't use a sharpie to blacken the plank edges. I will use a #2 pencil next time. I used brass nails to simulate the deck nails. I clipped off the heads and burnished them to get them even with the deck planking.I then drilled for the masts. If I had found this forum earlier, I would have cut slots for the masts in the bulkhead former instead of drilling the holes later. I messed up the foremast hole, and had to ream it out a little. I will shim the mast as needed when I install it. I bent the waterway strips as I did the hull planks.
-
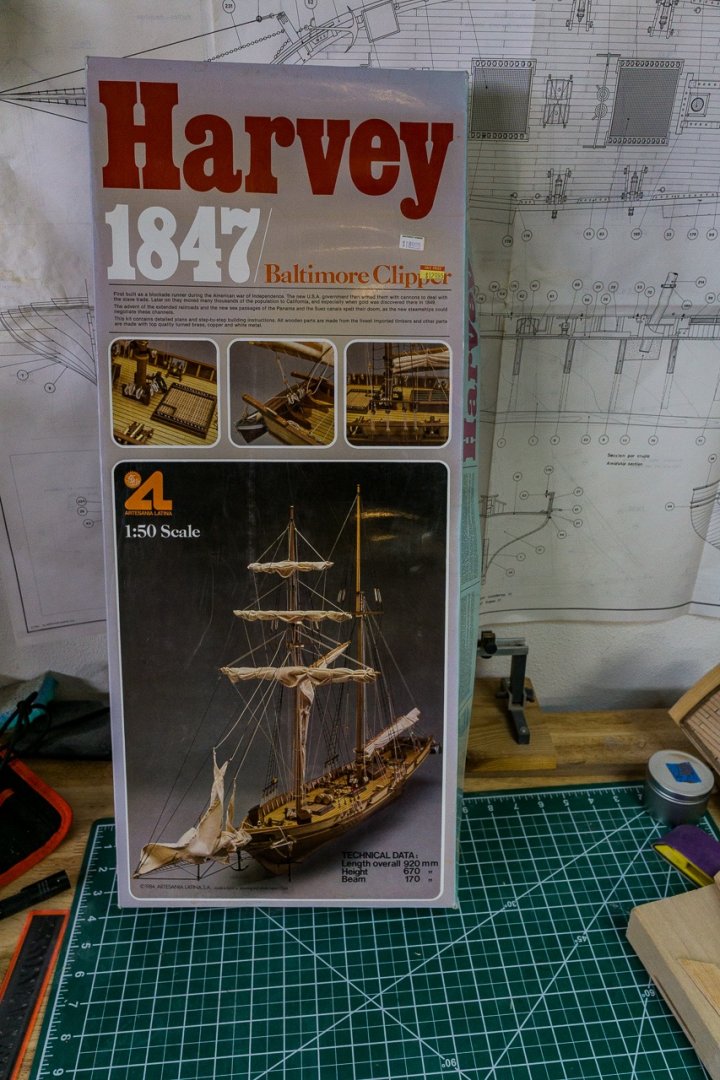
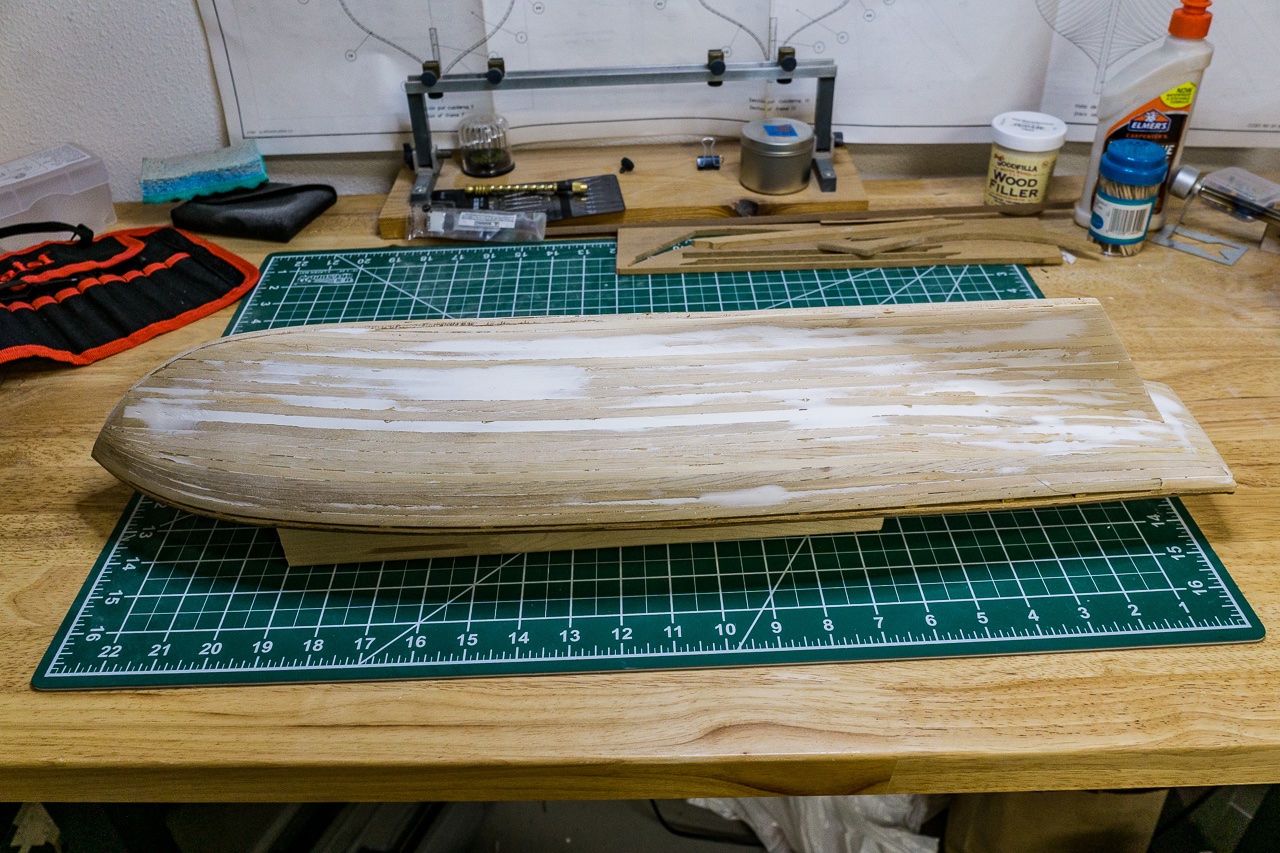
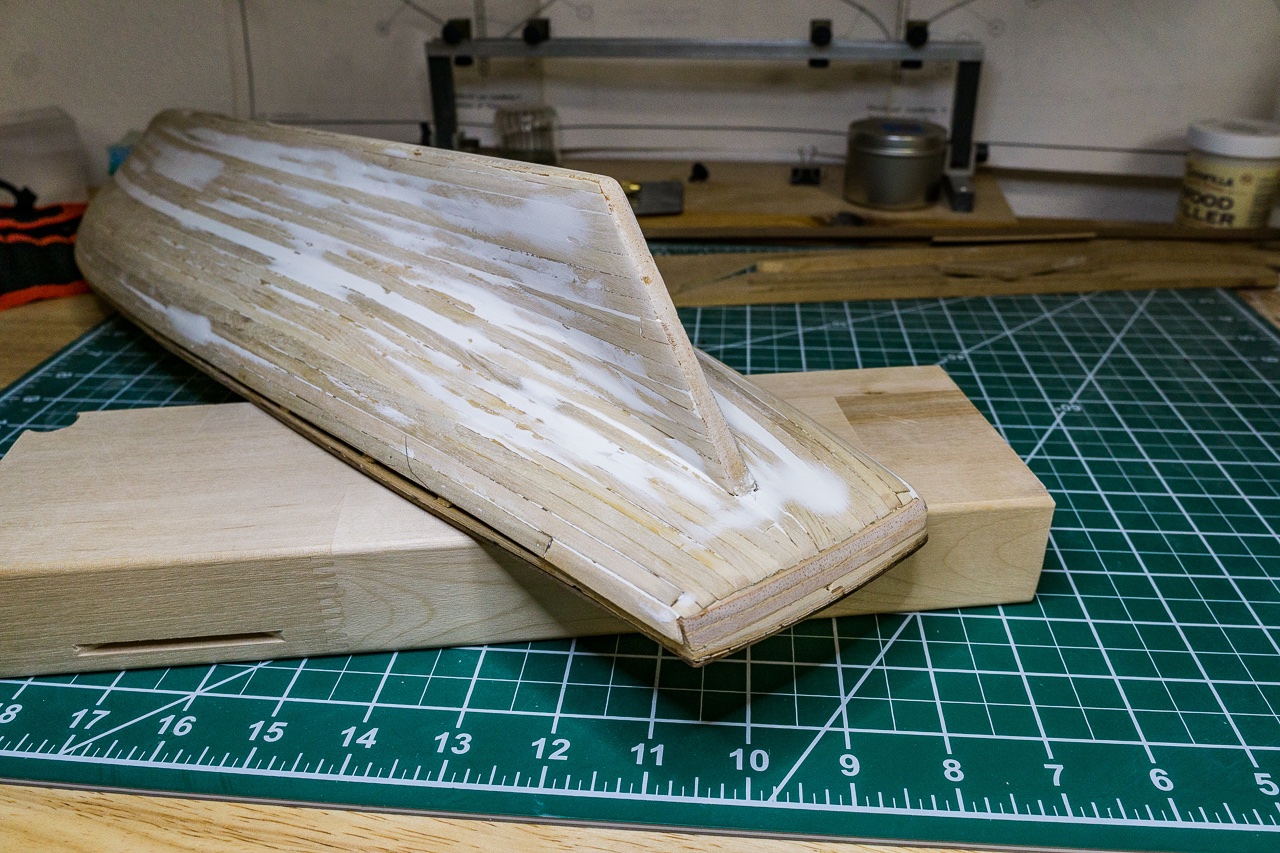
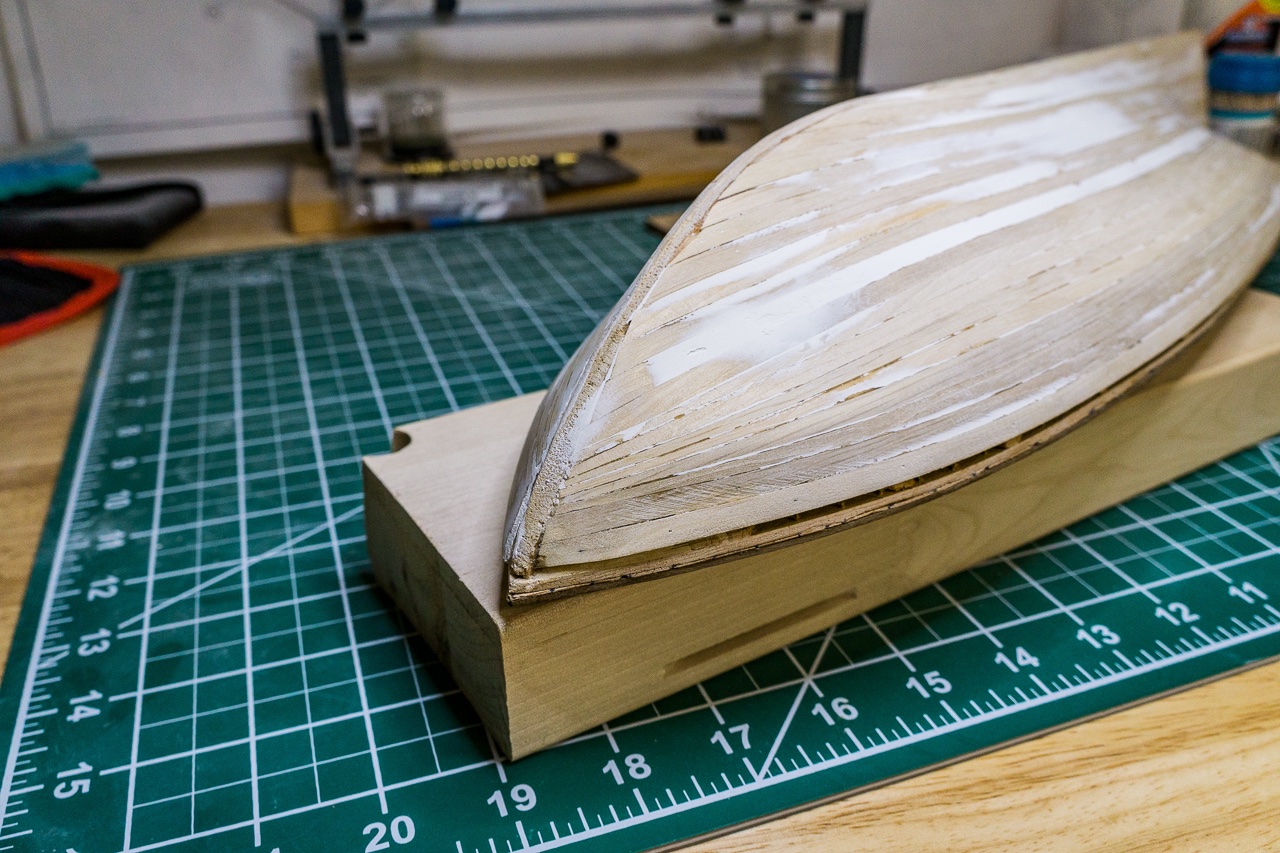
Hello all! I've recently joined the NRG, and here's my first build log as I promised in my introduction. This is a kit I purchased back in 1993 at a hobby shop that was going out of business. I thought it would be a fun winter project. Well, all good plans, etc., but I started traveling extensively for work, and the kit took up residence in the garage. Eventually, I forgot about it. Fast forward to mid 2019, when we moved to Oregon. While unpacking the garage boxes, guess what I found. I pulled it out, looked it over, and decided to finally build it. I looked up some YouTube videos, and with my newfound encyclopedic ship modeling knowledge set to work. I managed to get the bulkheads on the former straight and perpendicular, then started fairing. I used a hull plank strip to check as I went. Sorry, no pictures of this, as I didn't discover this forum until a little later on. That's also when I discovered that I didn't really know much about building wooden model ships :^). I got the first layer of planking completed by soaking the planks overnight, then temporarily clamping one on each side to the bulkheads until they were dried. I then glued them in place with carpenter's glue. I tapered the planks at the stem as needed to fit, and added a couple of wedges at the stern to fill in gaps. I then used filler to smooth out the hull, and gave it an initial sanding.

-
I will be starting a build log for the Harvey kit I have started. Just finished taking some pictures, should have the log up and going tomorrow. Thanks for all the encouragement! Dan
-
Hello! I just joined the NRG and am looking forward to (virtually) meeting everyone. I am currently working on an old kit, the Harvey, that I have had lying around for quite a few years. Just got the first layer of hull planking and the deck planking complete, and getting ready to work on the bulwarks. I've already found many great tips just from a quick browse of the forums. I'm in Gearhart, Oregon, USA which is on the coast, Northwest of Portland. If anyone is close, I'd like to meet you! Dan