


SparrowHawk7
-
Posts
61 -
Joined
-
Last visited
Content Type
Profiles
Forums
Gallery
Events
Everything posted by SparrowHawk7
-
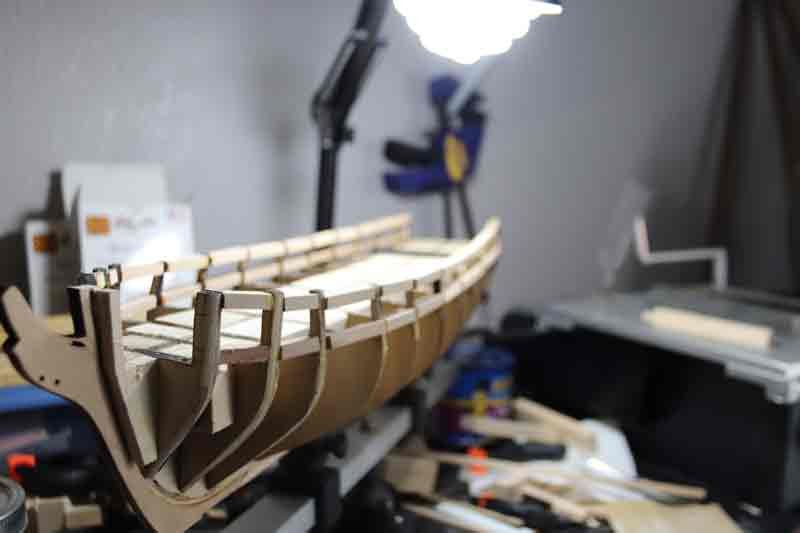
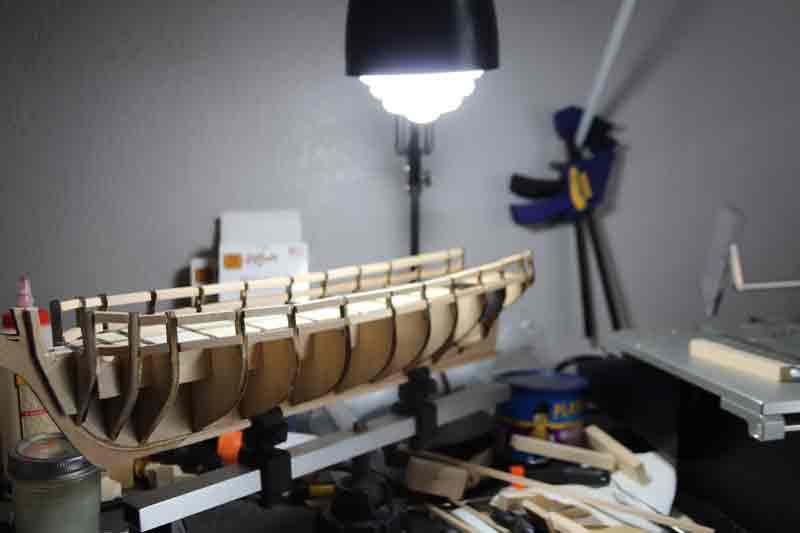
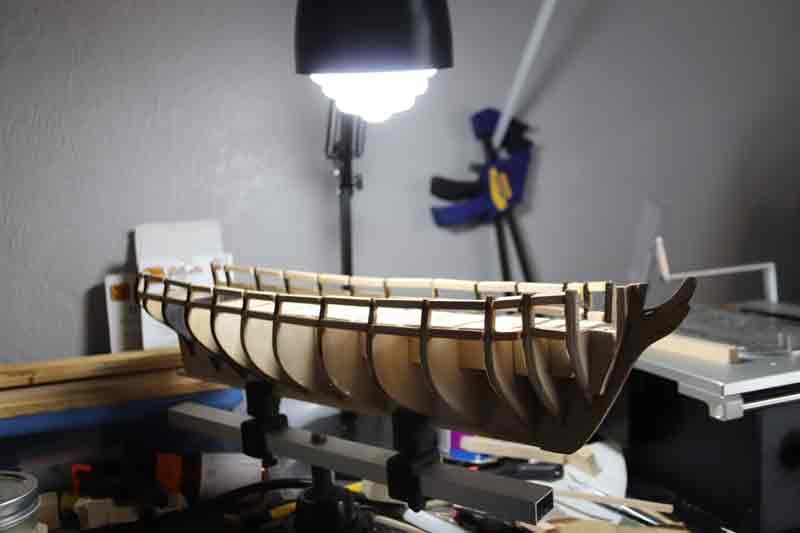
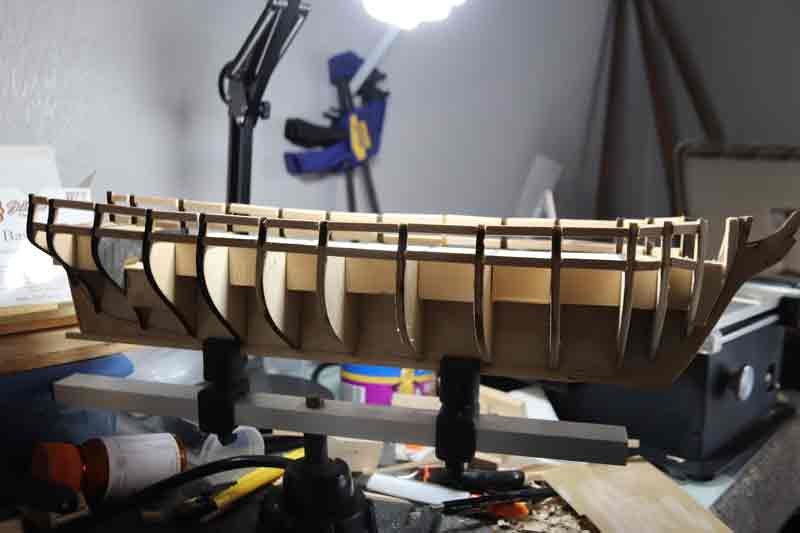
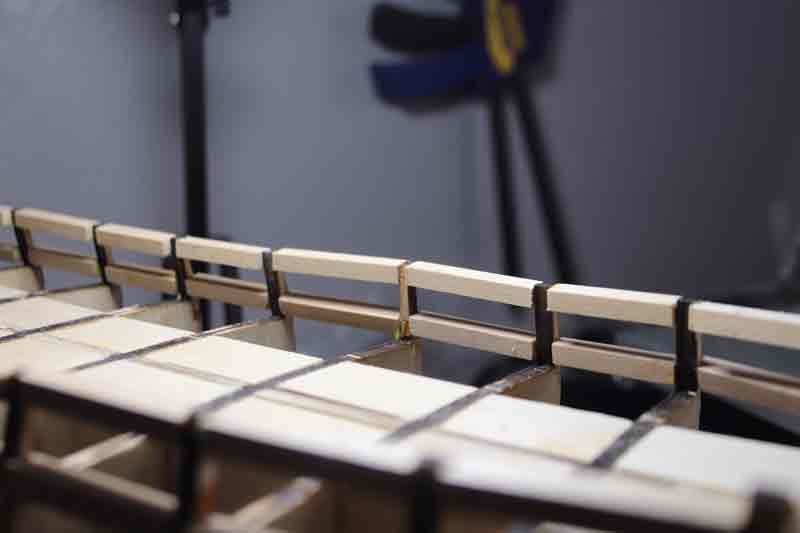
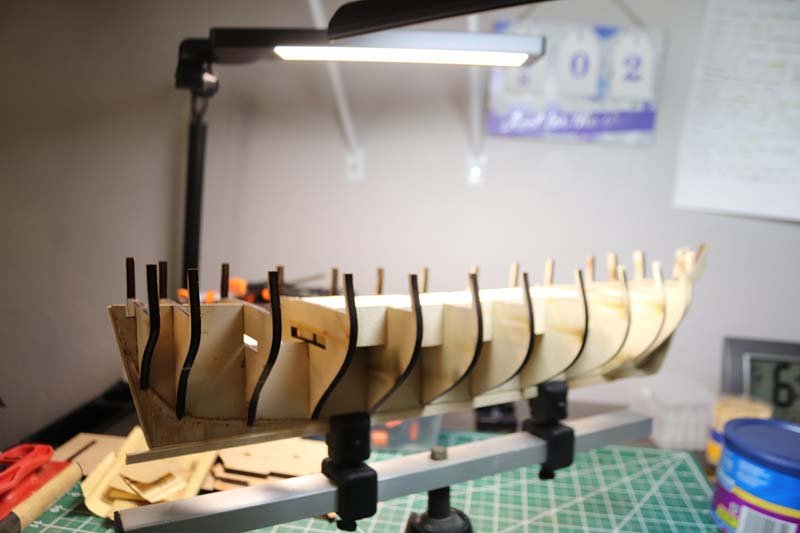
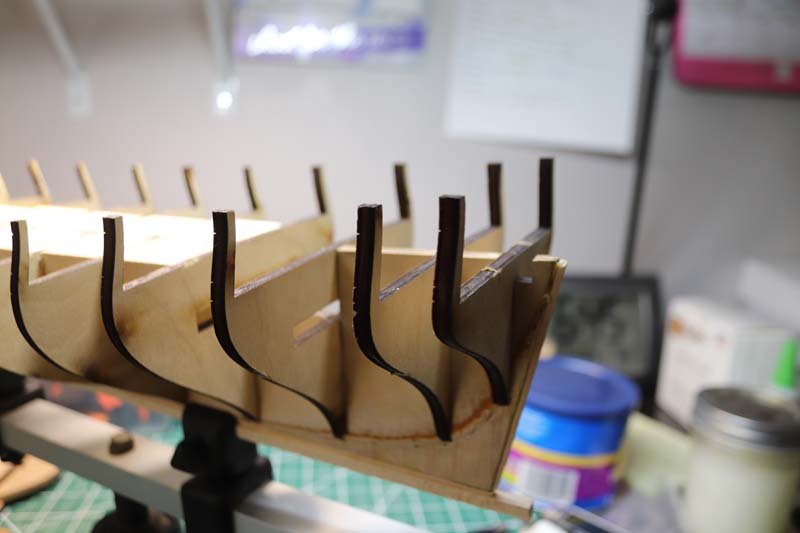
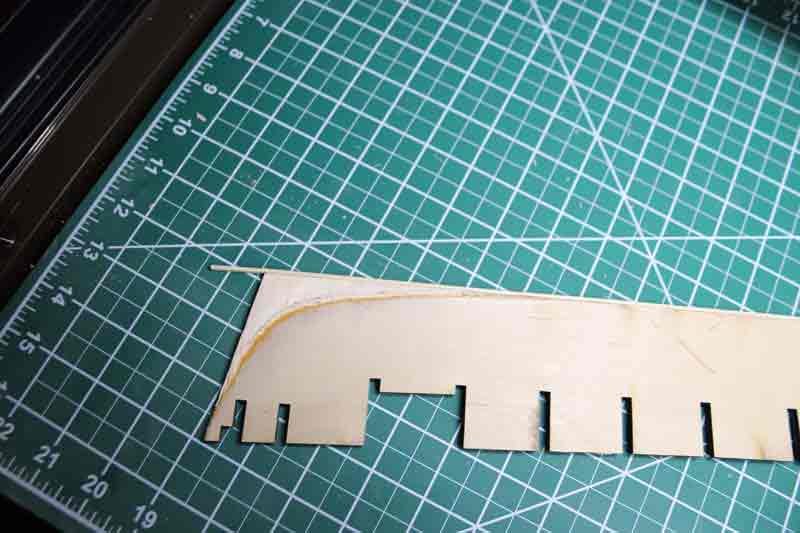
Now I have a problem I don't know how to fix.The space between the lentils and sills isn't large enough for a gun port in all places. Lentils are about at the top of the bulkhead formers and the sills are even with the deck - more or less. I can't very well raise the lentils higher without rebuilding the bulkhead formers but if I lower the sills the guns will sit too high on the deck for the ports. I cut a piece of basswood exactly the size of the gunports to facilitate the uprights (it is shown in one of the photos) but it won't fit between the tops and bottoms of all the ports. What do I do now?

- 100 replies
-
- 1
-

-
- Syren
- Model Shipways
- (and 1 more)
-
Thanks guys ... no, no pictures just now. Being in a wheelchair hampers my ability to get decent angles - although I am going to attend the workshop next weekend on photography so that should help. I have a nice lightbox but, of course, the ship won't fit in that. I'll endeavor to get some photos this weekend though. I have watched all the Occre videos with special attention to the planking so I have a bit more confidence. One of the biggest things to get right, it seems to me, is to put the first strake in the proper place. If you get that messed up the entire planking will be off to some degree. That is one reason I am having such a hard time getting the gun ports in the right place ... but perseverance is one of my stubborn parts so I will get it at least close. I seem to prefer learning the hard way but at least I do remember those lessons for next time. Thank goodness ... :} Ken
- 100 replies
-
- 1
-
-
- Syren
- Model Shipways
- (and 1 more)
-
More of the learning curve ... always the hard way it seems.I put a strake along the bottom of the sill line and then glued the filler sills even with that and let them dry. Next I cut a length of wood exactly the size of the gun ports to make gluing the lentils easier. Unfortunately the sill line was too high (AGAIN!) so I am now faced with removing the sills and replacing them at the right height. Lesson learned though ... the bulkheads were cut with a laser so presumably they are very nearly the correct height. Therefore starting at the top and working down ought to give me the correct sizes for the gun ports and associated filler blocks. It has given me a lot of practice with my table saw however so that is a plus. Anyway, slow going because I keep having to fix errors but this is a good time to make them as redoing things isn't so difficult now but accuracy will show as time goes along. Anyway, I'm still moving forward albeit slowly ... so anyone watching shouldn't lose hope with me. I do tend to dread planking the hull as I have never got that far before. In fact I've never done so much small work in fitting pieces before so it's all new. Thanks for bearing with me. Ken
- 100 replies
-
- 1
-
-
- Syren
- Model Shipways
- (and 1 more)
-
Thanks guys. I was pretty active in the art world not too long ago and found the same basic thing there. We all make mistakes - especially at first - but nearly everything is fixable and you go forward wiser (at least hopefully so). I used to try to get that into my student's brains - patience is "the secret" in art as it in with any skill. You have to have patience with the creation - it takes time and you cannot rush it. Some parts take longer than others and you have to give each part equal attention or it will show in the end. And you also have to have patience with yourself because whatever the skill may be it is going to take time to master as well as allowing yourself to make mistakes along the way. The trick is not to repeat the mistakes (too often anyway :)) But being human we all do ... Ken
- 100 replies
-
- 1
-
-
- Syren
- Model Shipways
- (and 1 more)
-
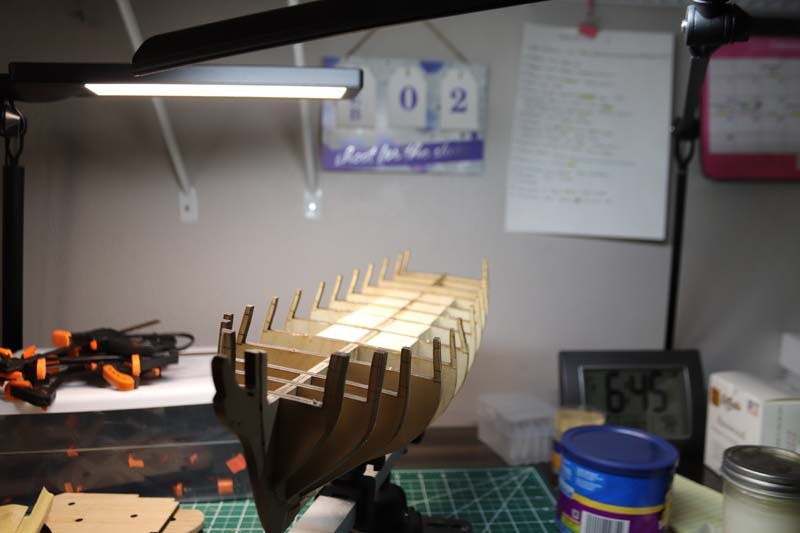
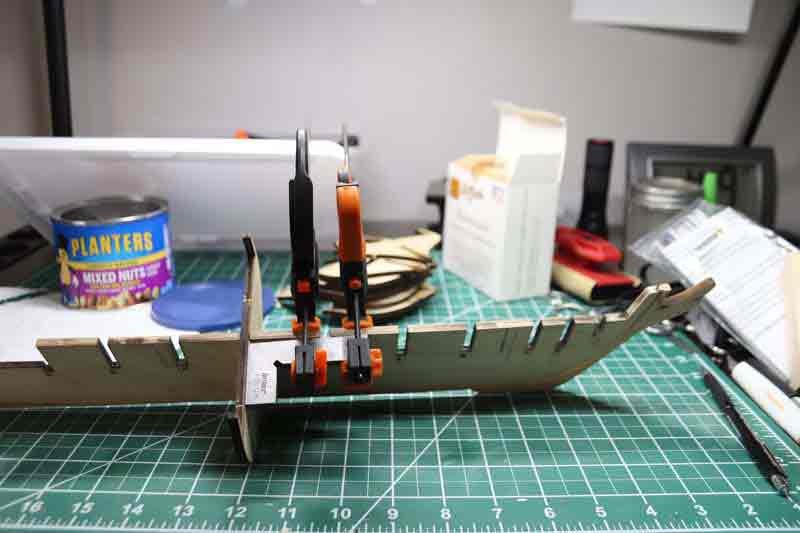
Well, my first major screwup. In fairing the hull I found the stanchions at the top of the bulkheads were so fragile that I inadvertently broke and had to re-glue two of them while sanding. So I figured it was smarter to do the sills and lentils first so as to strengthen the stanchions then fairing would be easier and somewhat safer after that. So I proceeded to fit about 8 sills on the port side before I realized I had been gluing them with their tops at deck level - not their bases. So I have to unglue those now and fix that. More of an annoyance than a mistake but it sets me back a little. Live and learn ... Ken
- 100 replies
-
- 1
-
-
- Syren
- Model Shipways
- (and 1 more)
-
Thank you Matt ... I've seen a few of the logs which give me something to strive for anyway. I expect to do my best but have it a far cry from what I've seen. they also give me a great way to see how people approach various problems in a build. Ken
-
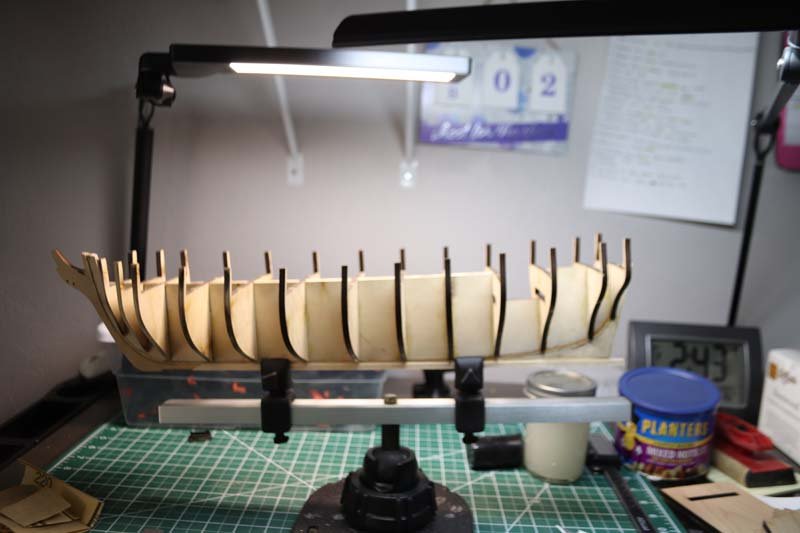
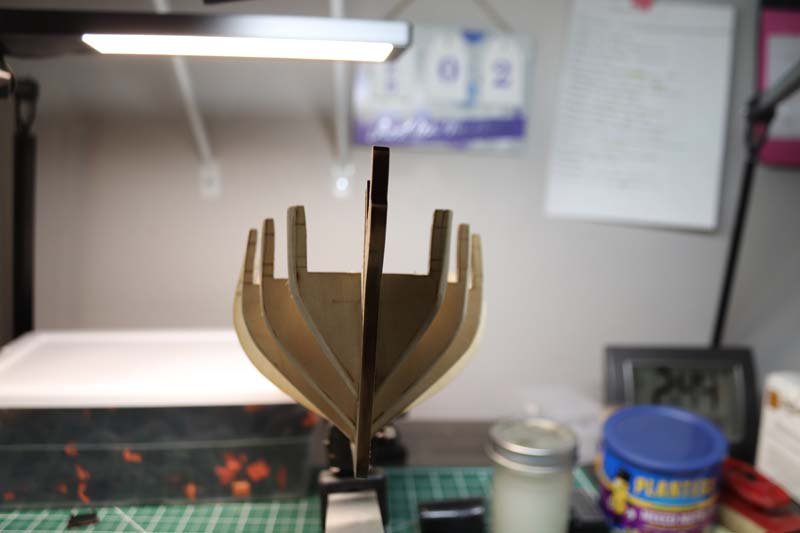
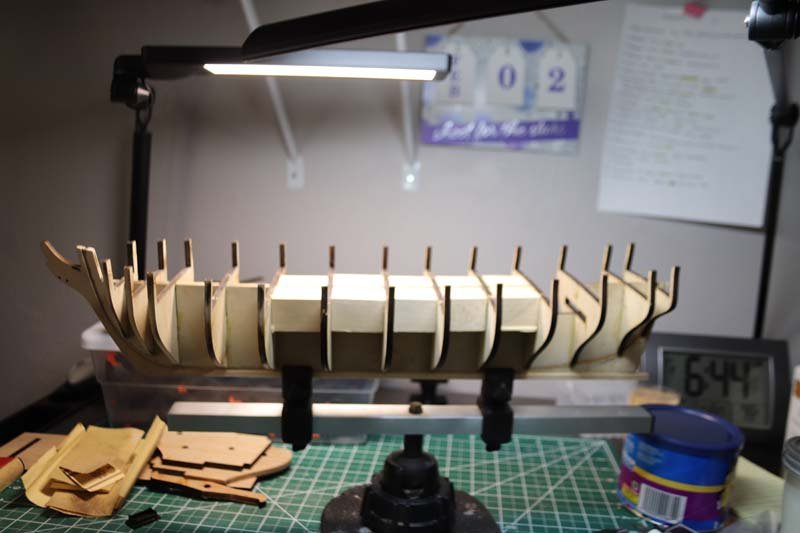
Been moving ahead with the Syren. I finished gluing in the bulkheads, making sure they were all square to the bulkhead former. I installed the keel and began fairing the bulkheads. They were a bit unstable so I determined to add the filler blocks first before fairing any further. Filler blocks are pretty simple using a mini table saw. They tend to be repeatable cuts since all bulkheads were squared to the BF upon glueup. I didn't have any particularly large pieces of filler to use - I have basswood available so I used that. That should be sufficient to stabilize the decking and the bulkheads I would think. We'll see as I progress ... if I need to add more I can do that. One area that concerns me slightly is with the deadwood ... The bulkheads extend below the bearding line that I cut slightly although this might not matter in that area - at least I hope I can work around any problems that might arise. But anyway, progress. Thanks for the likes and for looking. Ken
- 100 replies
-
- 6
-
-
- Syren
- Model Shipways
- (and 1 more)
-
Does anyone know an easier way to remove char? I have tried scraping with a razor blade, vinegar and pumice as well as sandpaper. The sandpaper seems to work best but even with a block there is the chance of rounding edges. Thanks Ken
-
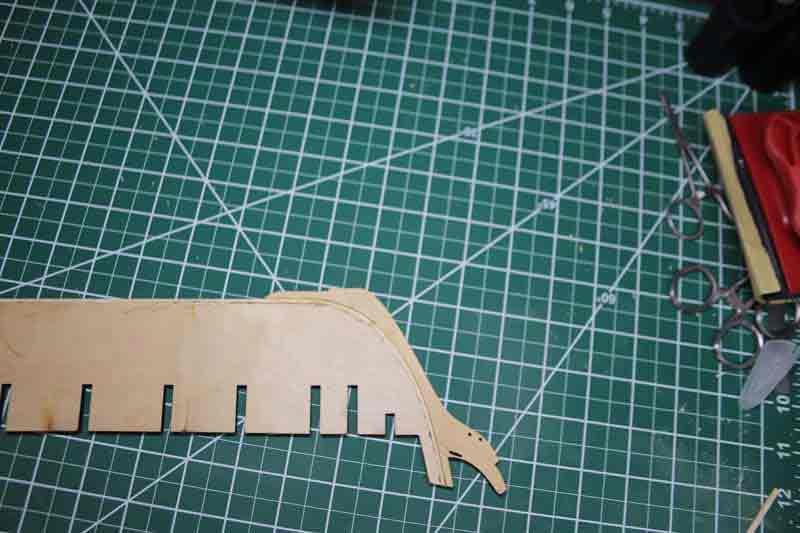
Hey guys ... I'm new here and wanted to try my hand at a wooden ship model. I cannot hope to complete anything as remarkable as the build logs I've seen but I want to try anyway and you've gotta start somewhere. I chose the Syren because I like her lines without regard for difficulty. I belonged to a yahoo group about model ship building around 20 years ago although I have no real experience building a wooden model. I did build a cross section of the USS Constitution back then but I can't say I knew what I was doing although I did learn a lot. I have started several other kits but got to hull planking and abandoned them. That was before forums (I even remember B&W TV) so I will rely on you guys for assistance in explaining things to me. I do have a fully equipped woodworking shop and experience mostly building small projects like boxes and chessboards although I have done a little furniture. I have also done some wood carving. I should apologize for the photos I will post. I lost my left leg so I am wheelchair bound now and unable to get better angles but I will do the best I can. I am retired now so time is available as long as I am not seeing that endless string of doctors. I got started by gluing the rabbet strip to the bulkhead former and then the stem. From there I cut out the rabbet. I have never done that before so I hope I did it correctly. I used my scalpel to thin the deadwood area which actually was easier for me than the smaller cuts along the bottom of the bulkhead former. Then I sanded as best I could making the transition as smooth as possible. That discoloration is a result of that sanding. I am now beginning to attach the bulkheads. With a background in engineering I know that the foundation is critical for the entire project so I was careful to get things square. I started with the center area because the bulkheads are larger there so it is a little easier to get the square in place. I have some leftover basswood blocks for carving that I intend to use for fillers. Cutting them on the tablesaw is next. I didn't see any indication of where the masts will go so I marked one side of the BF from the plans as I will undoubtedly have to drill holes somewhere along the line. I am also undecided as to the platform for the ship when completed. I have a decent pair of brass pedestals. If I use those I will have to prepare the BF for the nuts and bolt holes along with reinforcement. That is a lot more work, of course, so I don't quite know what I want to do. Any suggestions? Ken
- 100 replies
-
- 3
-
-
- Syren
- Model Shipways
- (and 1 more)
-
Thanks guys. You are a very welcoming group. I started drawing when I was about 50 or so and quickly interacted with many artists - an experience I found very daunting. In art, you find a great many people who keep their techniques close to the vest, so to speak, and are reticent to share with anyone, let alone newbies. I found initially, anyway, that I had to teach myself how to do things which ended up meaning I draw somewhat differently than most. I am not the least bit shy so I pestered those more skilled than myself and eventually discovered things I wanted to know. That is something I have noticed in reading the logs here - everyone is very open about answering questions concerning how something was done which is very refreshing. I do the same thing in my teaching elsewhere because information can be hard to come by. Drawing, for instance, is a good deal more than picking up a pencil and making marks on paper. Layering, for instance, is crucial but nobody talks much about that as if it is some great secret. It also requires tremendous patience - a typical drawing for me will take a minimum of 120 hours. Most people need to develop that skill from my experience. But the fact is that no matter how much of my techniques I might teach someone, they will still never draw exactly as I do - nor I as they do. We are all unique with our own gifts so being selfish about sharing really makes no sense to me at all. Anyway, the point of all this is that I am pleased to be here among such generous people and feel somewhat at home because you are all artists as well - just working in a different media than I am used to. I spend a lot of time playing with doctors these days so time can get away from me - and I have some trouble getting around as I lost a leg so am wheelchair bound but the intention is to make a start on the Syren shortly so I expect to start a build log. You will find I am not the least bit shy about sharing errors and mistakes - we all make them. Others may learn from mine and I've enjoyed reading logs where others went astray for whatever reasons. Thank you for your warm welcome. Ken
-
Hello. I am not all that new to modeling or woodworking for that matter, but I am now retired and decided to take up a new hobby. I have always loved tall ships and admired their models so I decided to try one myself. I have been a professional musician for decades, owned a computer repair shop for years, taught myself lampworking (solid glass work) and been a professional artist (graphite) One of my drawings is on the cover of a book at Amazon - https://www.amazon.com/dp/B01M65CKO0/ref=dp-kindle-redirect?_encoding=UTF8&btkr=1 Hopefully a link like that is allowed here ... I only share that to show I have an eye for details. I am a moderator at an art site teaching drawing so I am comfortable with WIPs (works in progress) which you call logs on this site. In any case, I am ready to start my first wooden ship model. To that end I purchased Model Shipways' USS Syren and have been carefully reading the instructions by Chuck as well as going over the logs here. Some unbelievable work!! I can only hope to complete the kit but not to have skill on the level you guys do ... I will undoubtedly need assistance along the way so I hope to interact with some of you. Ken
- 12 replies
-
- 13
-