HOLIDAY DONATION DRIVE - SUPPORT MSW - DO YOUR PART TO KEEP THIS GREAT FORUM GOING! (Only 69 donations so far out of 49,000 members - Can we at least get 100? C'mon guys!)
×


Mike Hunt
-
Posts
61 -
Joined
-
Last visited
Content Type
Profiles
Forums
Gallery
Events
Everything posted by Mike Hunt
-
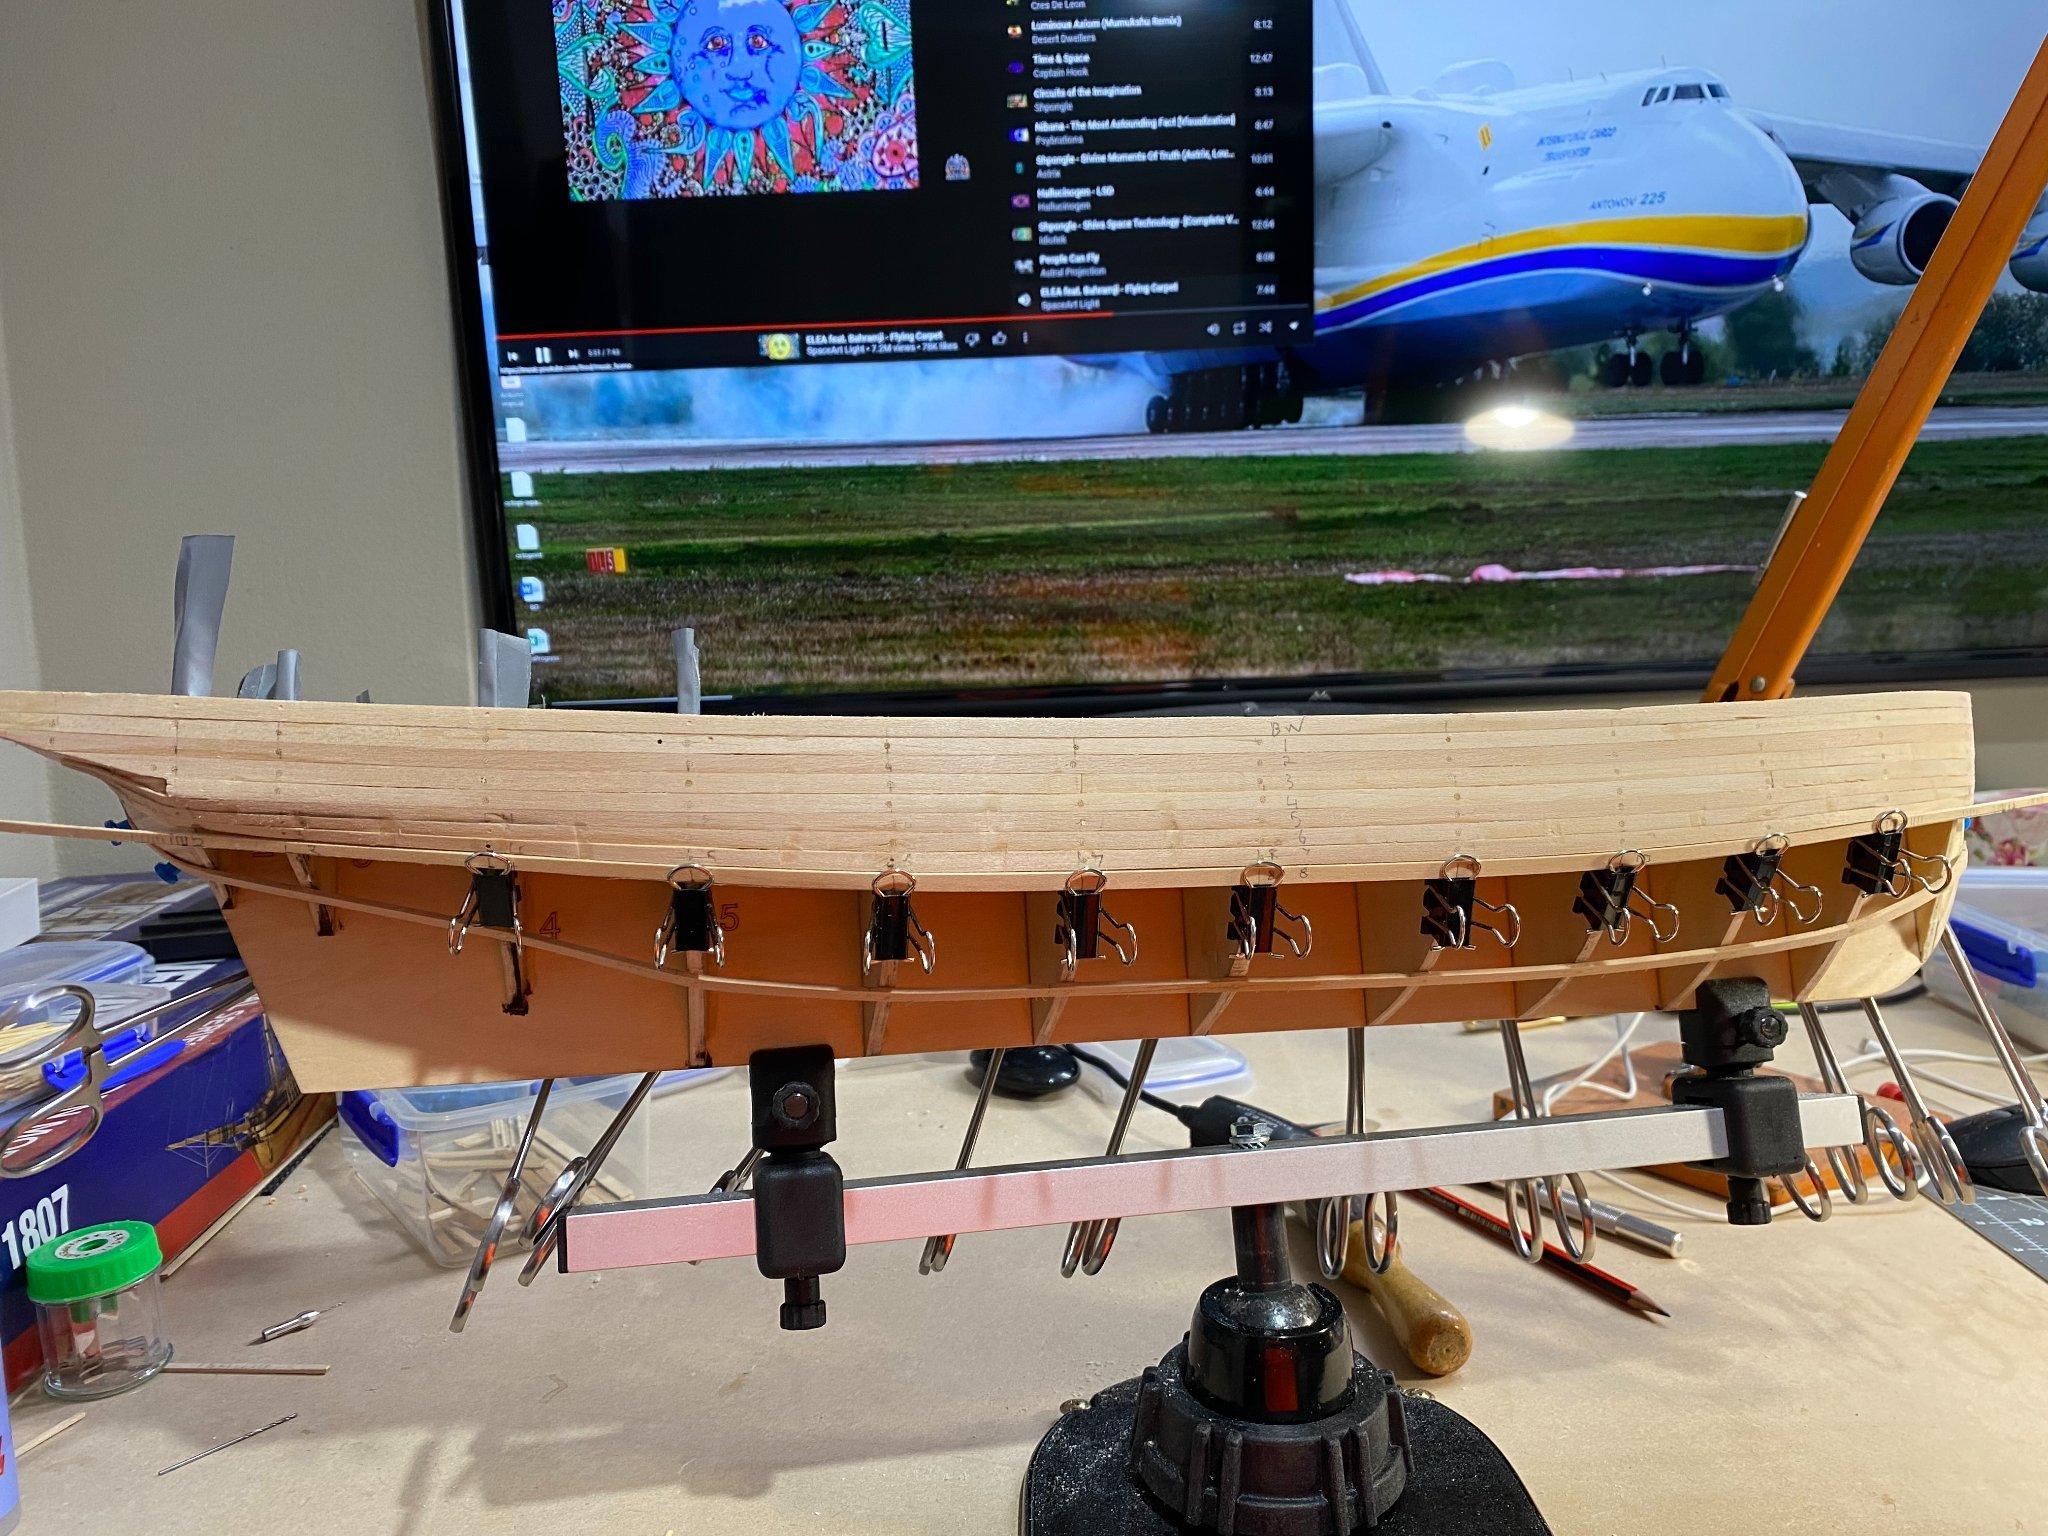
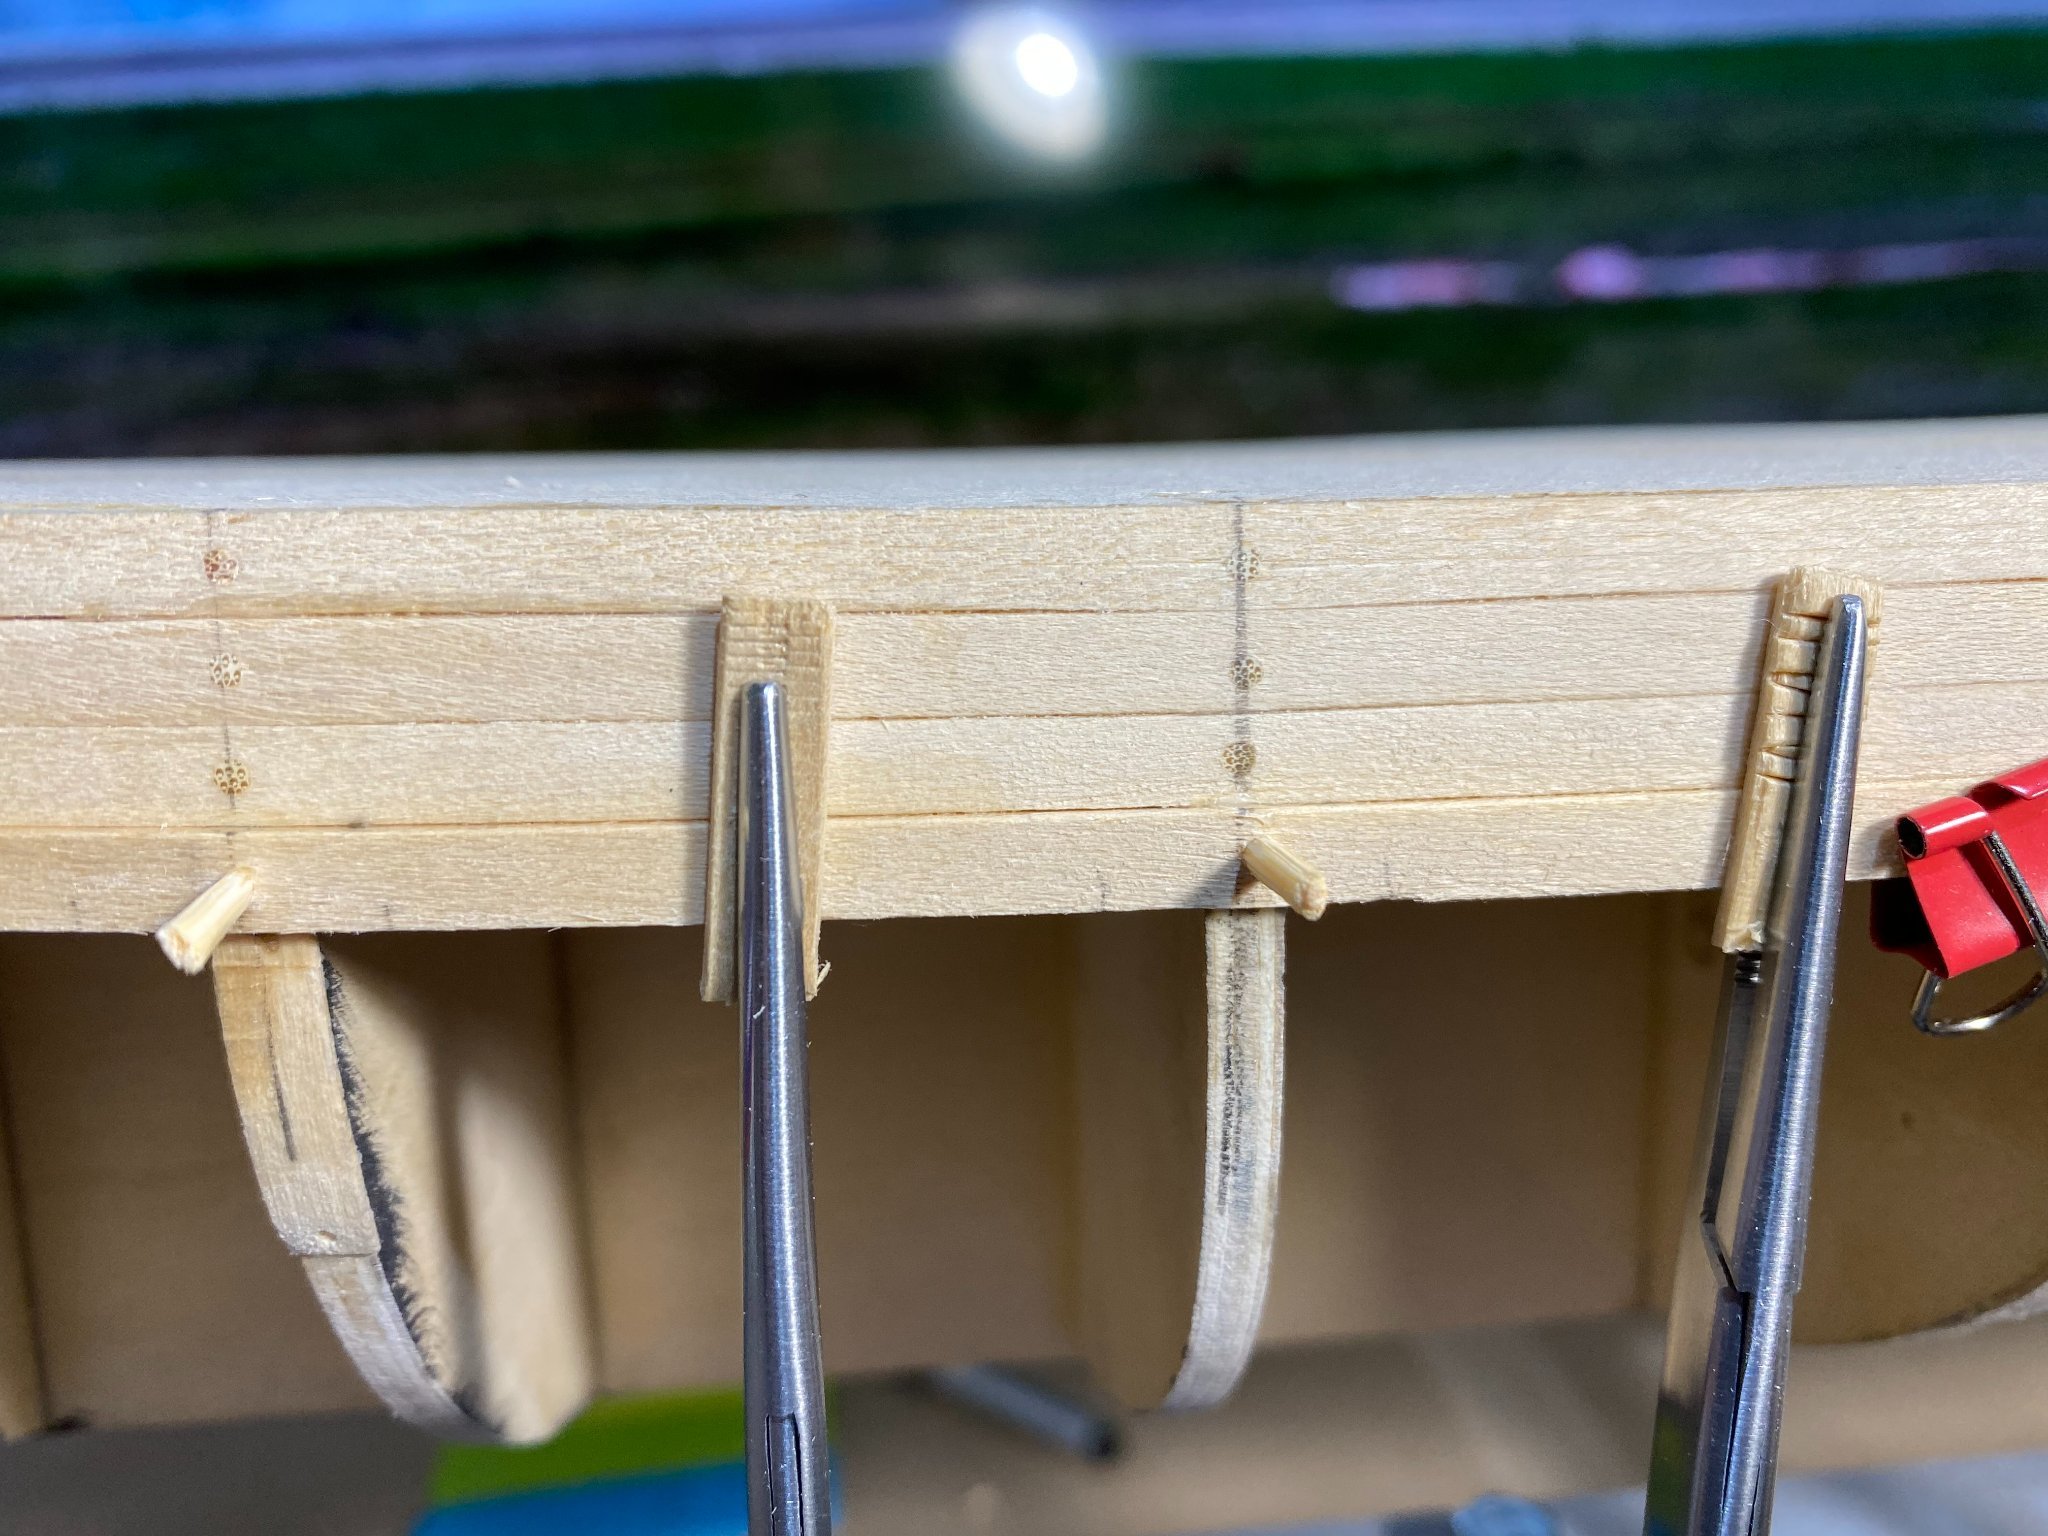
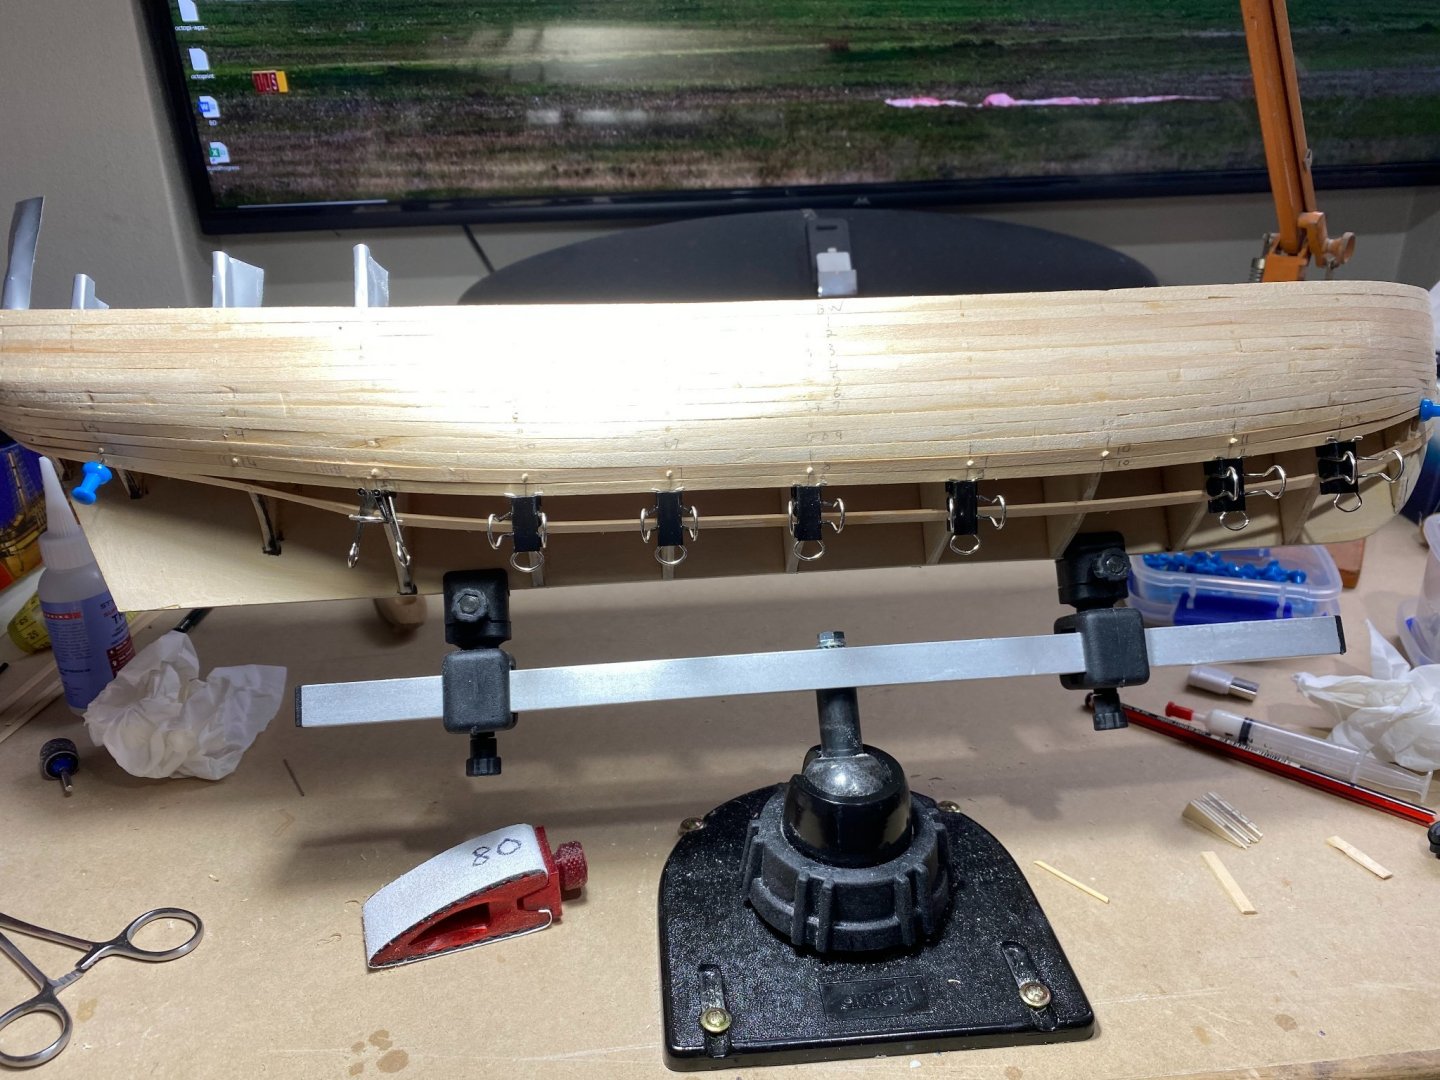
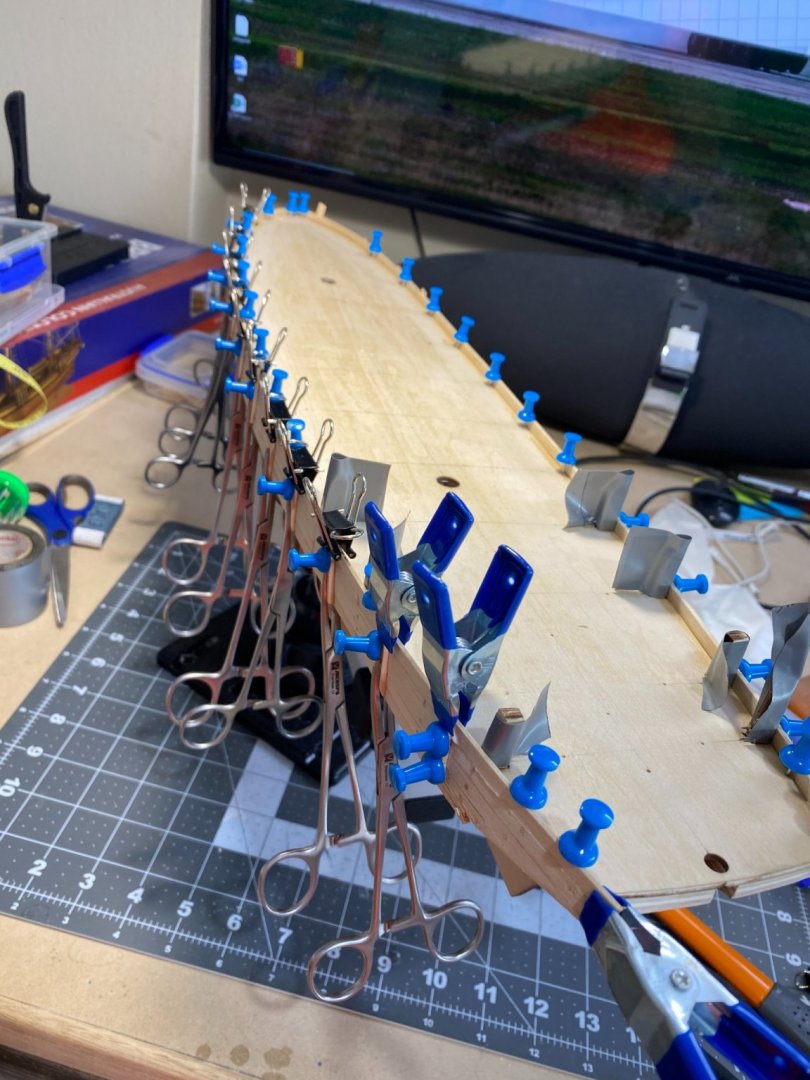
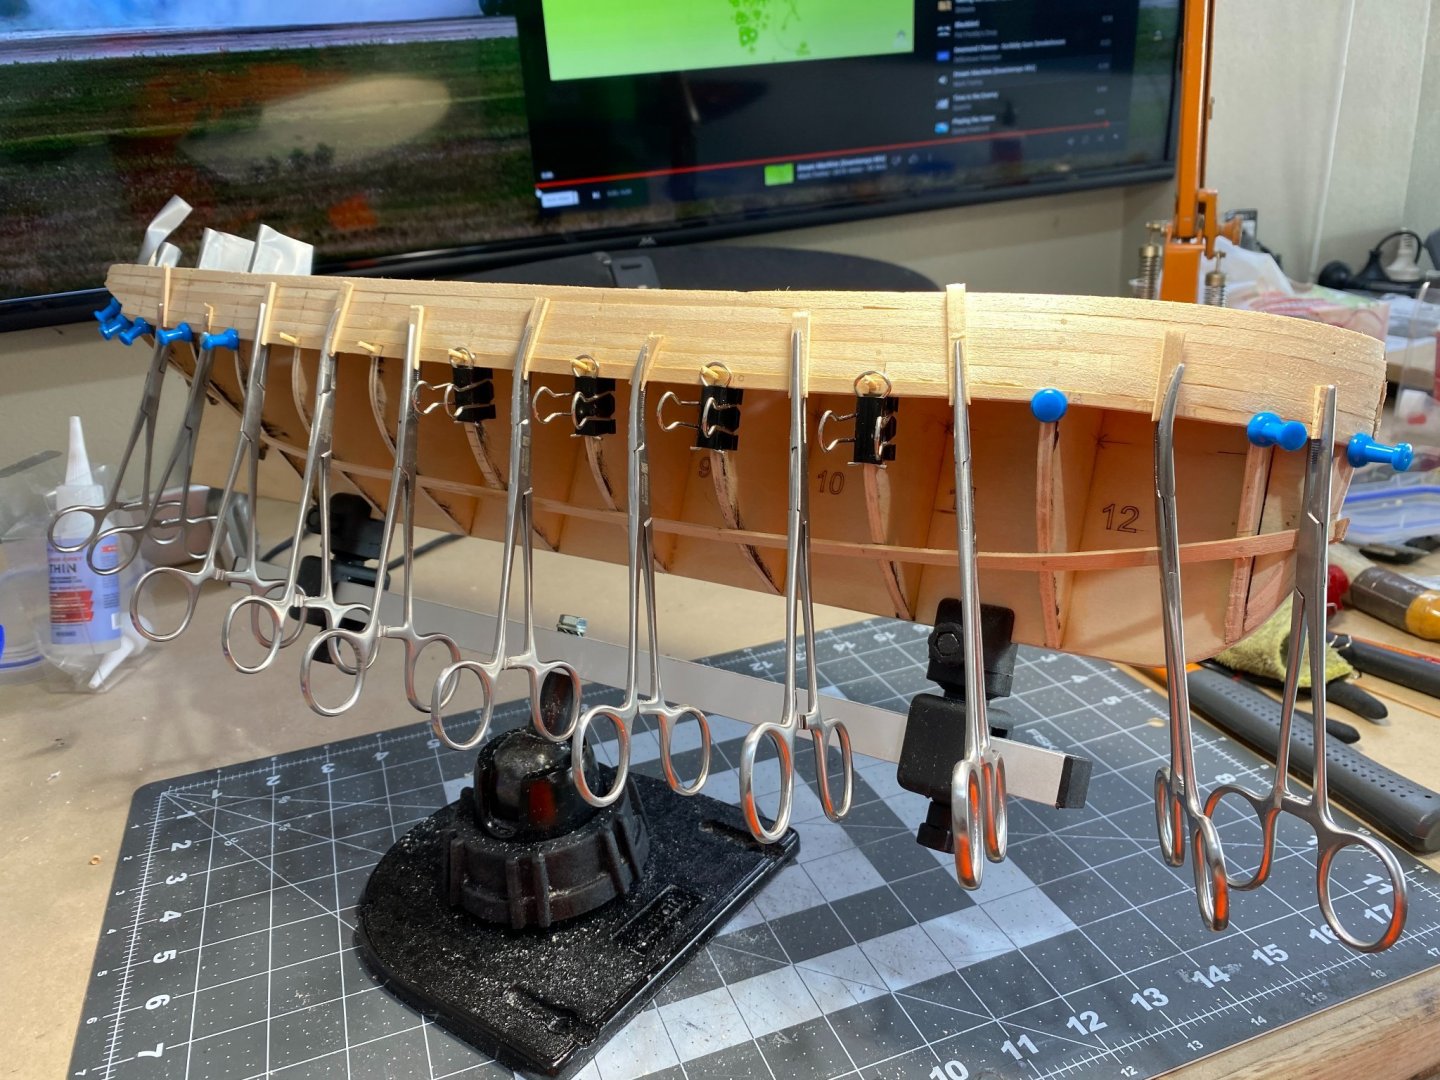
 07/04/21 - 13/04/21 You guessed it, planking :-) HTD: 95 Planking progress Planking progress More planking but you will notice I hadn't drilled quite a big enough hole for that particular toothpick on the left. Although the splits could easily be filled, the toothpick forces the wood apart thus making it that portion of the plank wider at that point and so some time was then spent trimming that bottom edge of the plank back to its uniform width. Planking progress. When I was getting down to the lower planks I was no longer able to use the forceps Band B complete I had been dreading planking but to date I haven't been too phased by it. Also haven't had too many issues with bending. I use a few methods for bending, firstly the soaking and soldering iron method, I also use the Amati crimping tool quite successfully and I saw a great little gadget from a Chinese seller on ebay. So this gadget has a crimped wheel at one end of a 7 or 8 mm aluminium channel there are big knobs which wind the plank forward through the crimped wheel and and another knob to adjust pressure. The more pressure dialed in the more acute the bend. A great little piece of kit, anyone wants to see pics of it in action let me know. I found myself using the Amati crimper but found one downside and that is when sanding those curves it was very easy to sand down to where the blade actually cuts into the wood, I had to back off quick time.

- 47 replies
-
- 3
-

-
- Modellers Shipyard
- Perseverance
- (and 1 more)
-
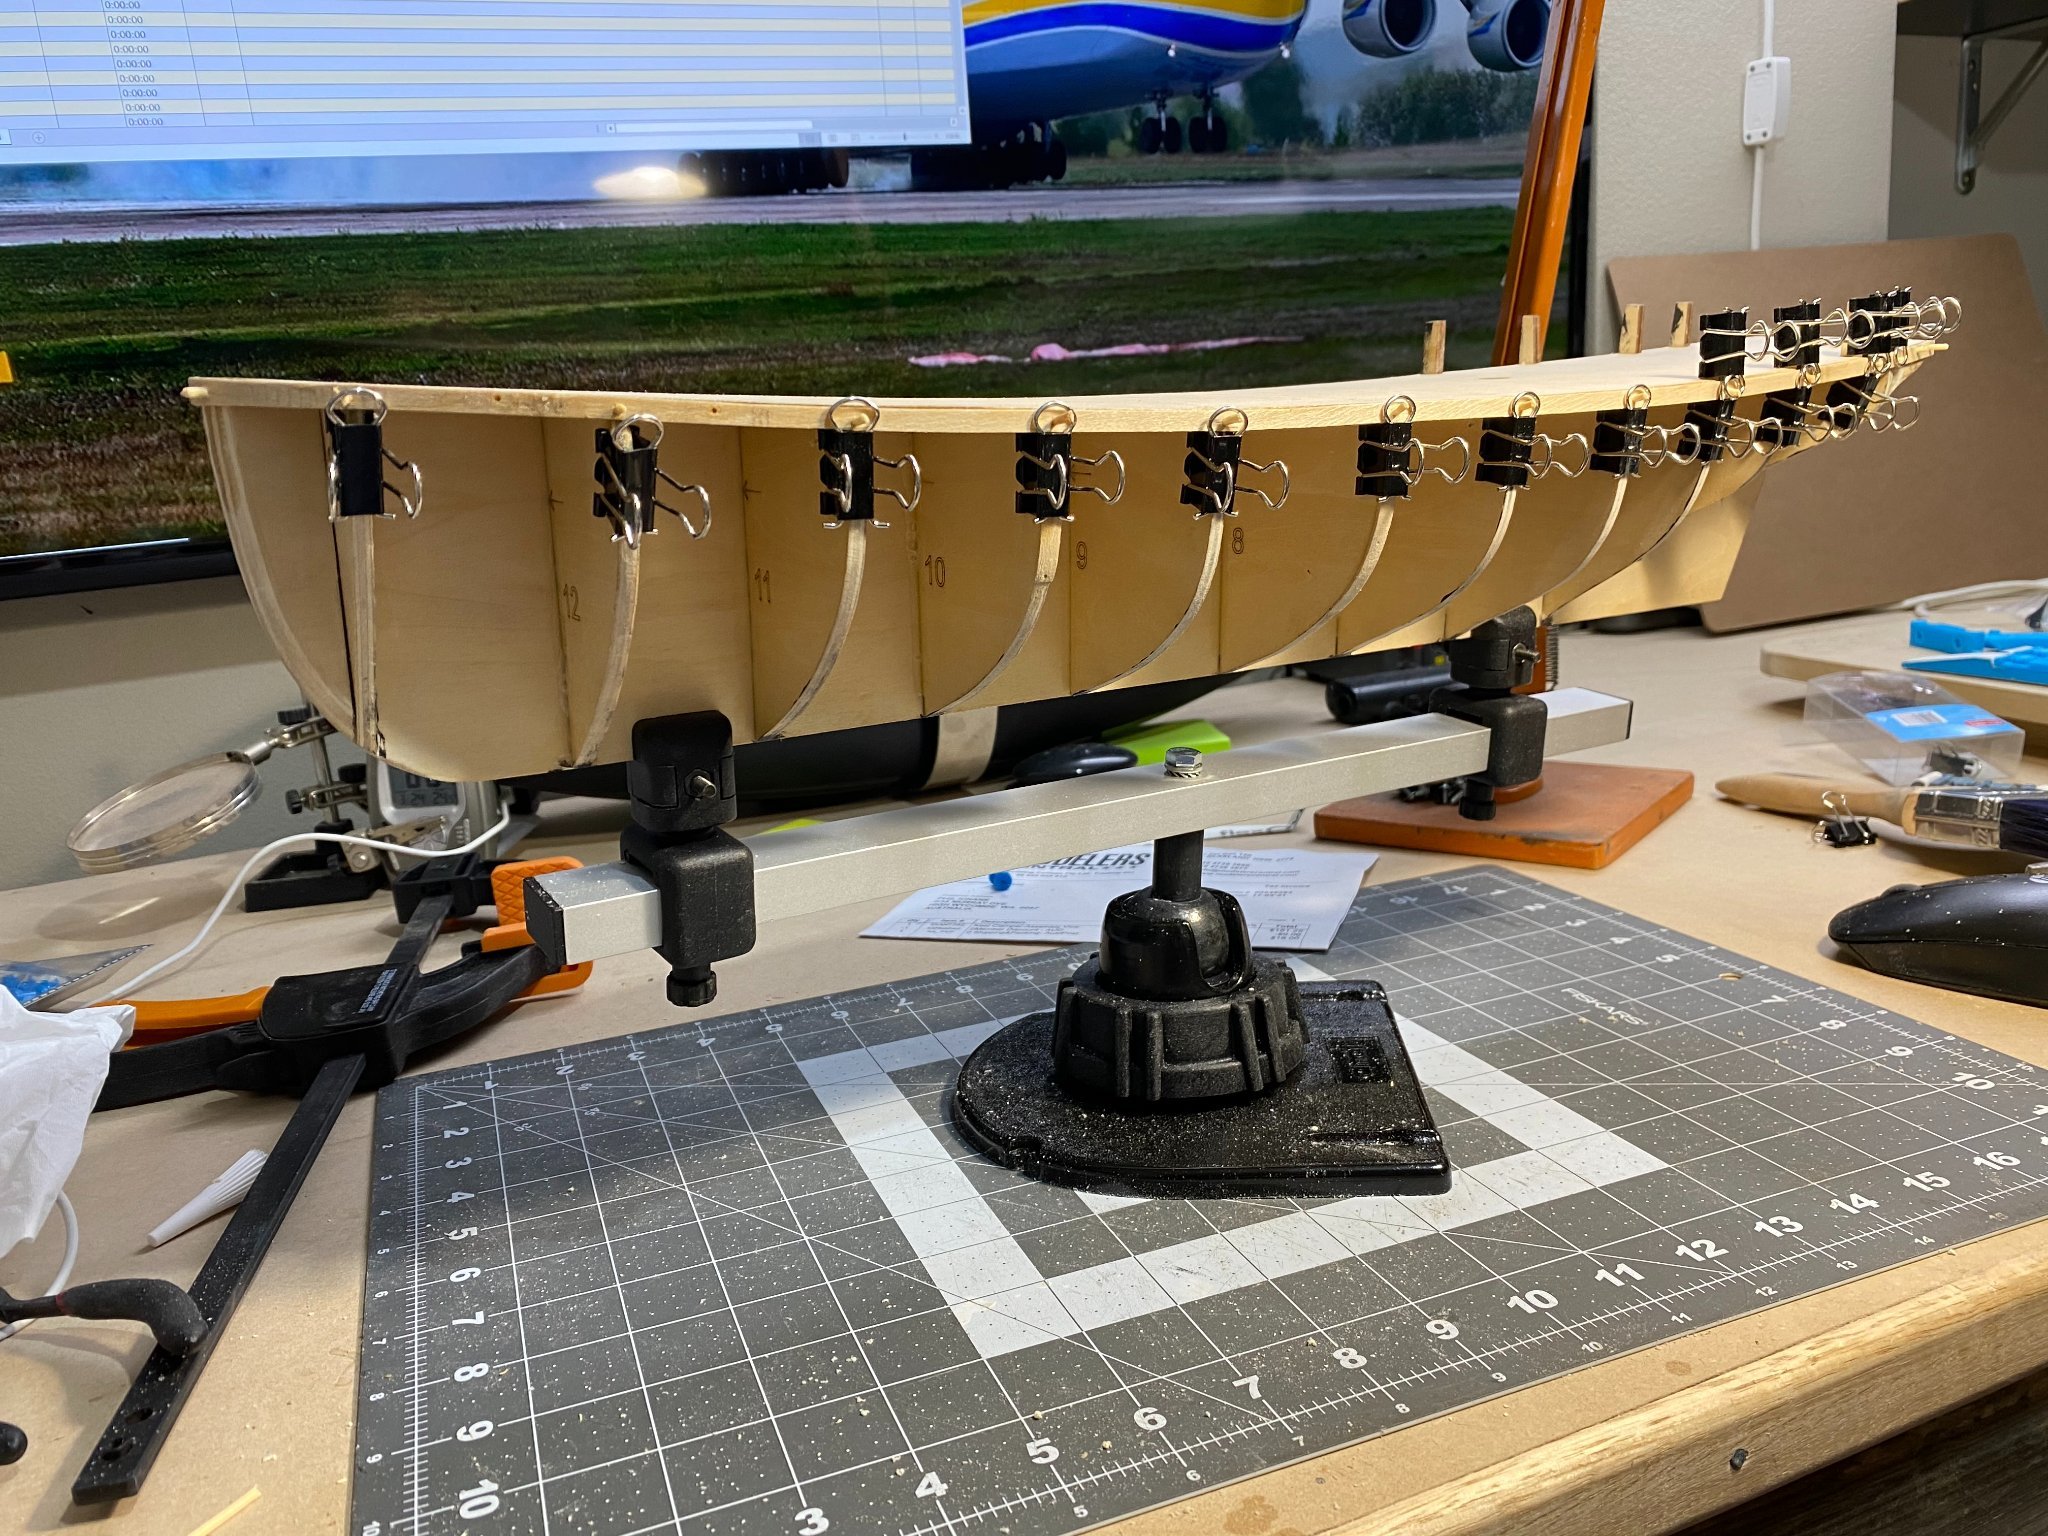
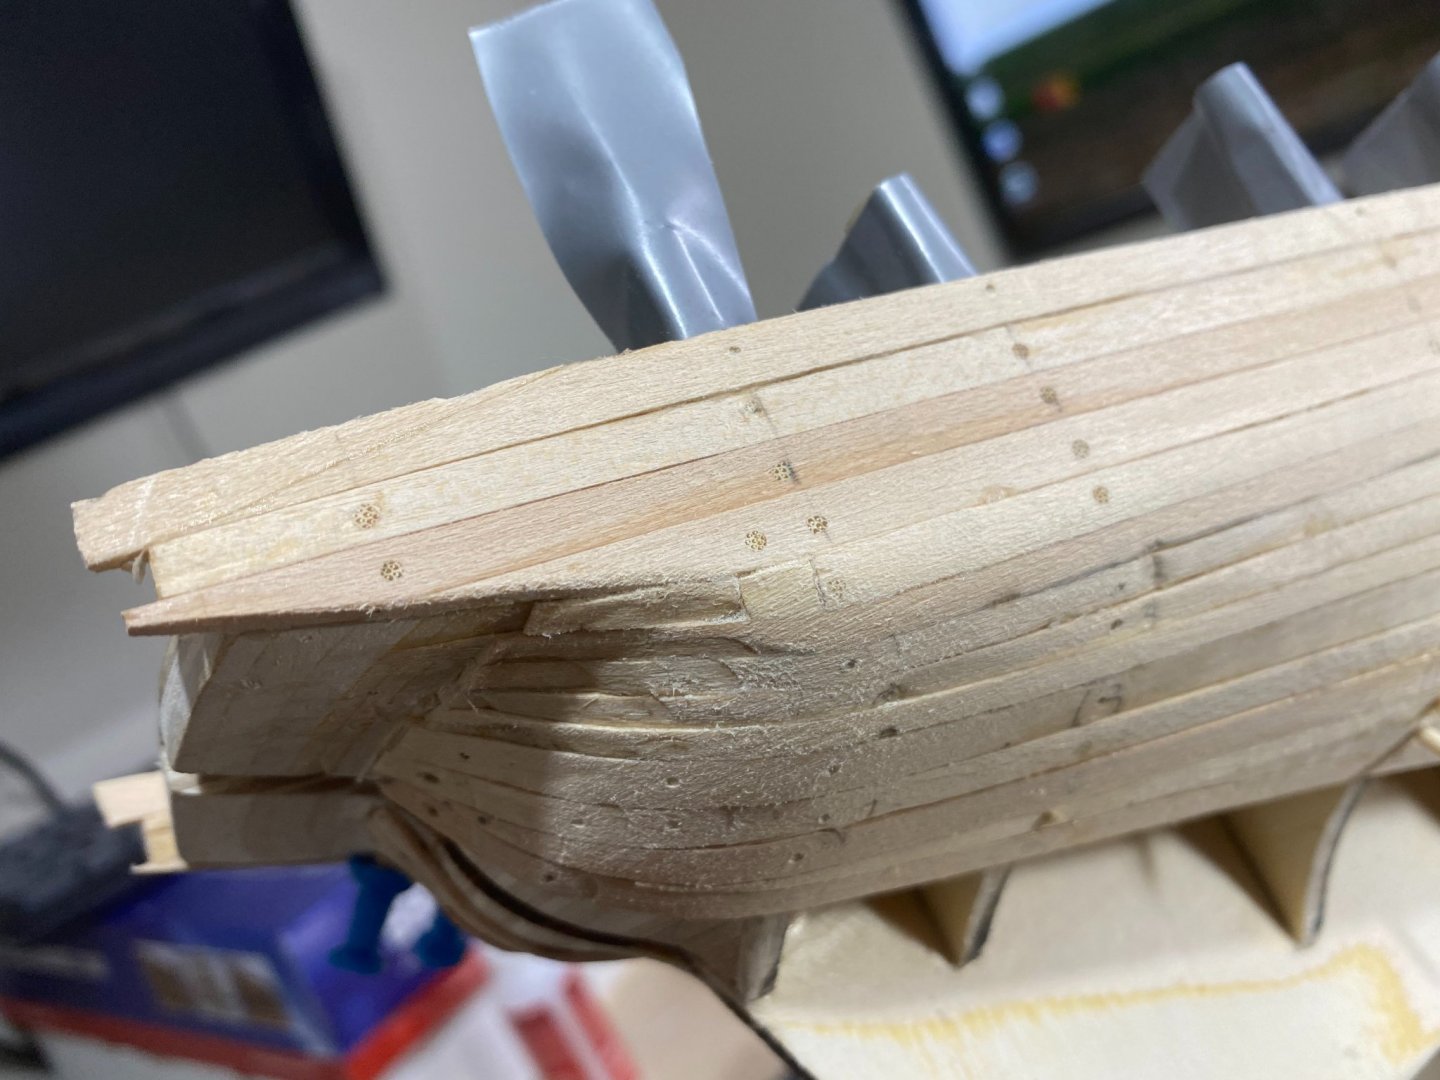
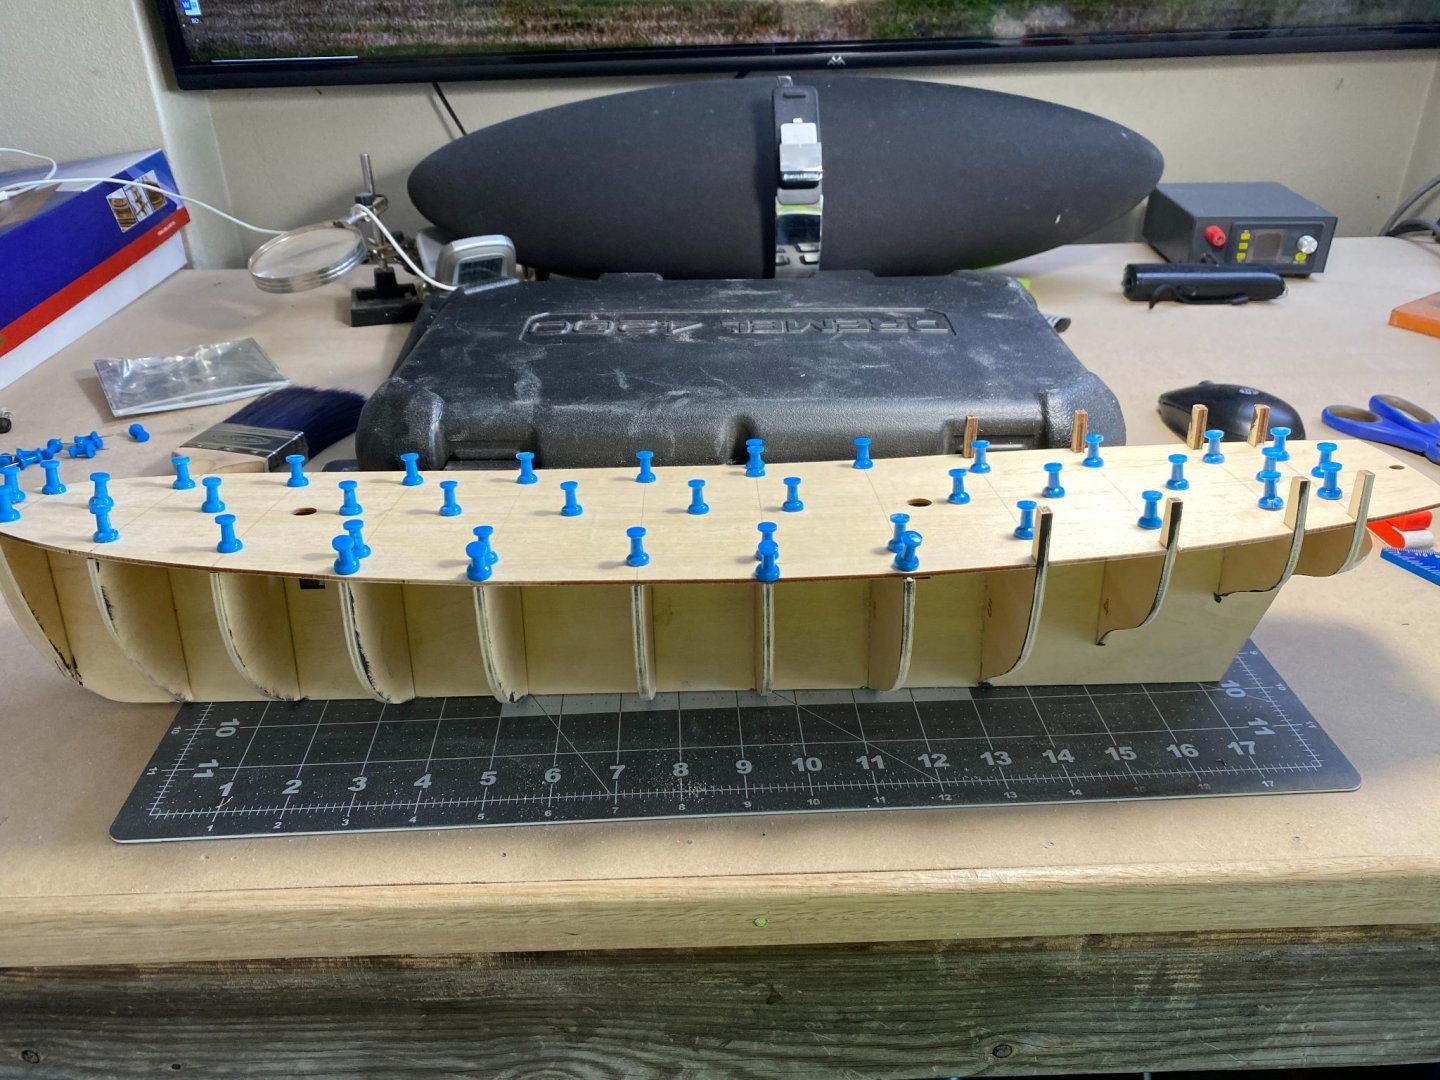
29/03/21 Planking 31/03/21 Started planking in the B band 01/04/21 - 06/04/21 Planking HTD: 63 4th plank finished 1st plank of band B 1St plank band C bow end 1St plank band C aft 1st bulwark. Planking progress. Even though there is a bottle of CA visible in the background. I only used white PVA for the planking. I might have used CA on the extreme curvy bits at the rear (correct nautical term escapes me) No further issues thus far. The other reason I chose to alternate planking PS SS was for symmetry. I felt that for me it might be easier to keep symmetry in check doing 1 plank at a time. It still eluded me on occasion.
- 47 replies
-
- 4
-
-
- Modellers Shipyard
- Perseverance
- (and 1 more)
-
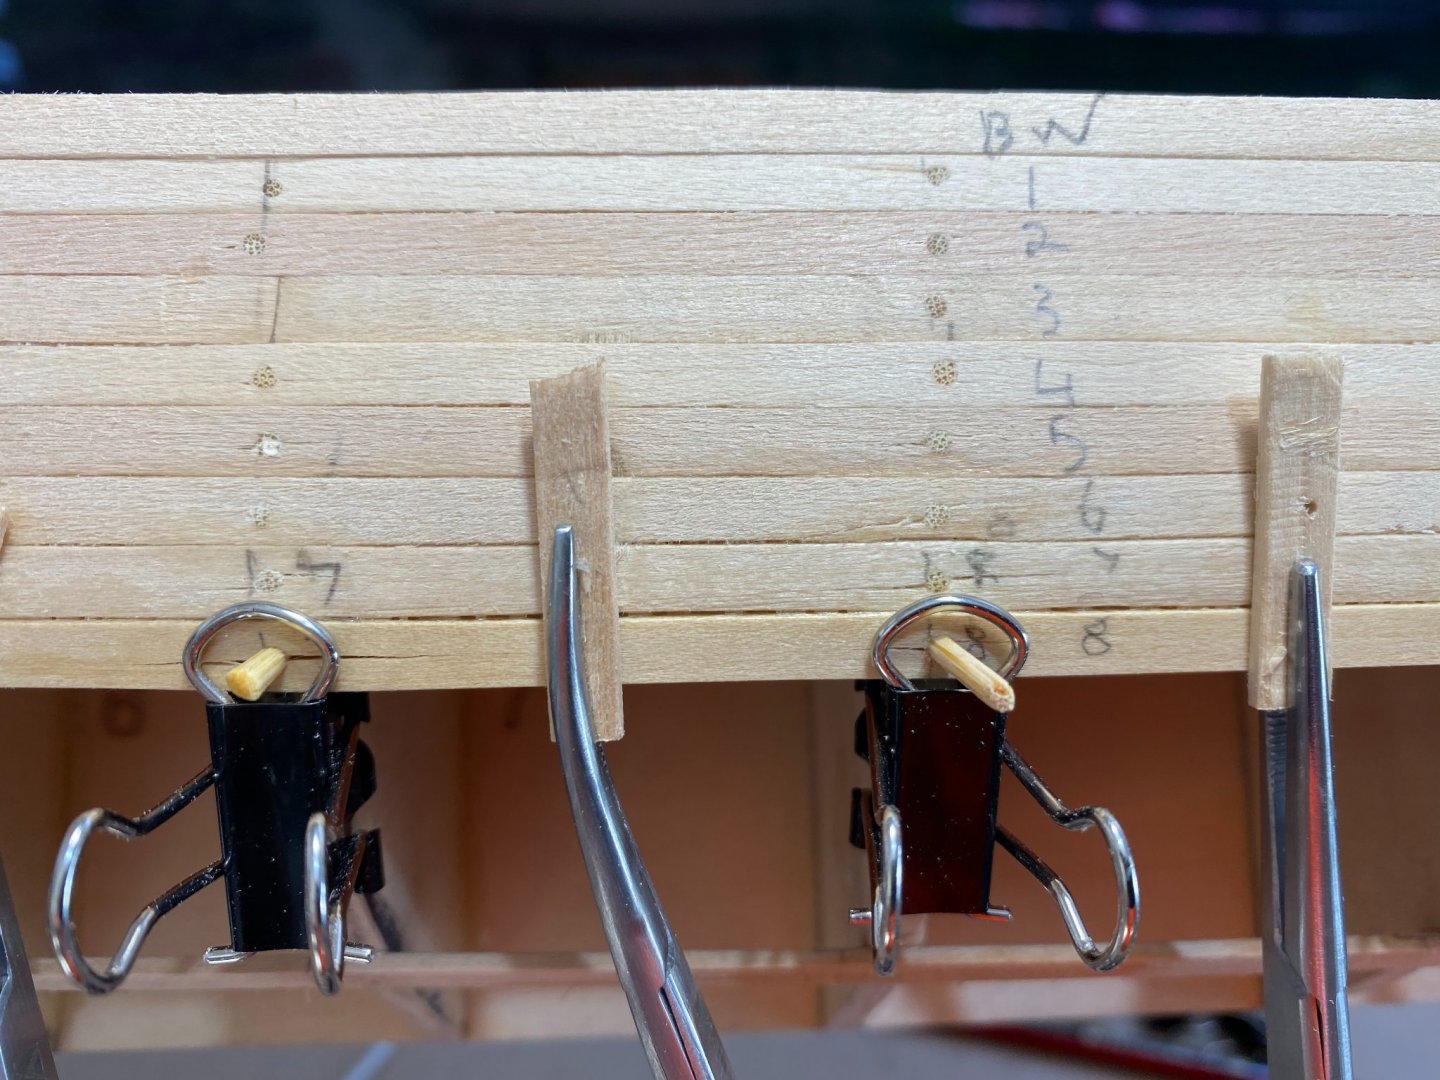
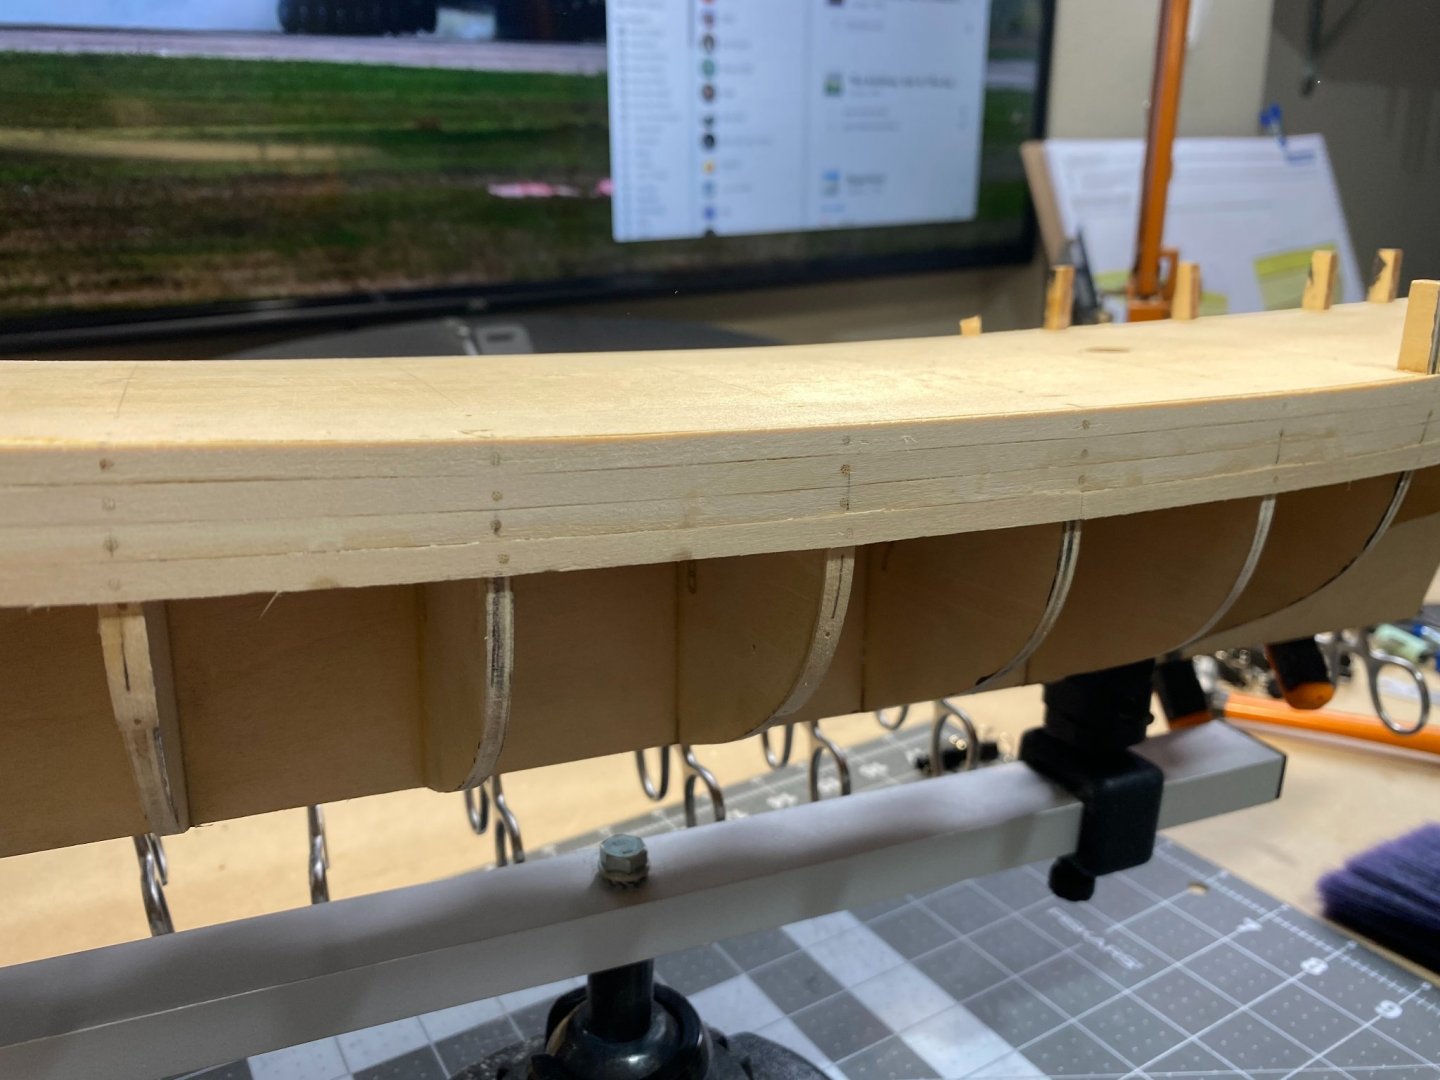
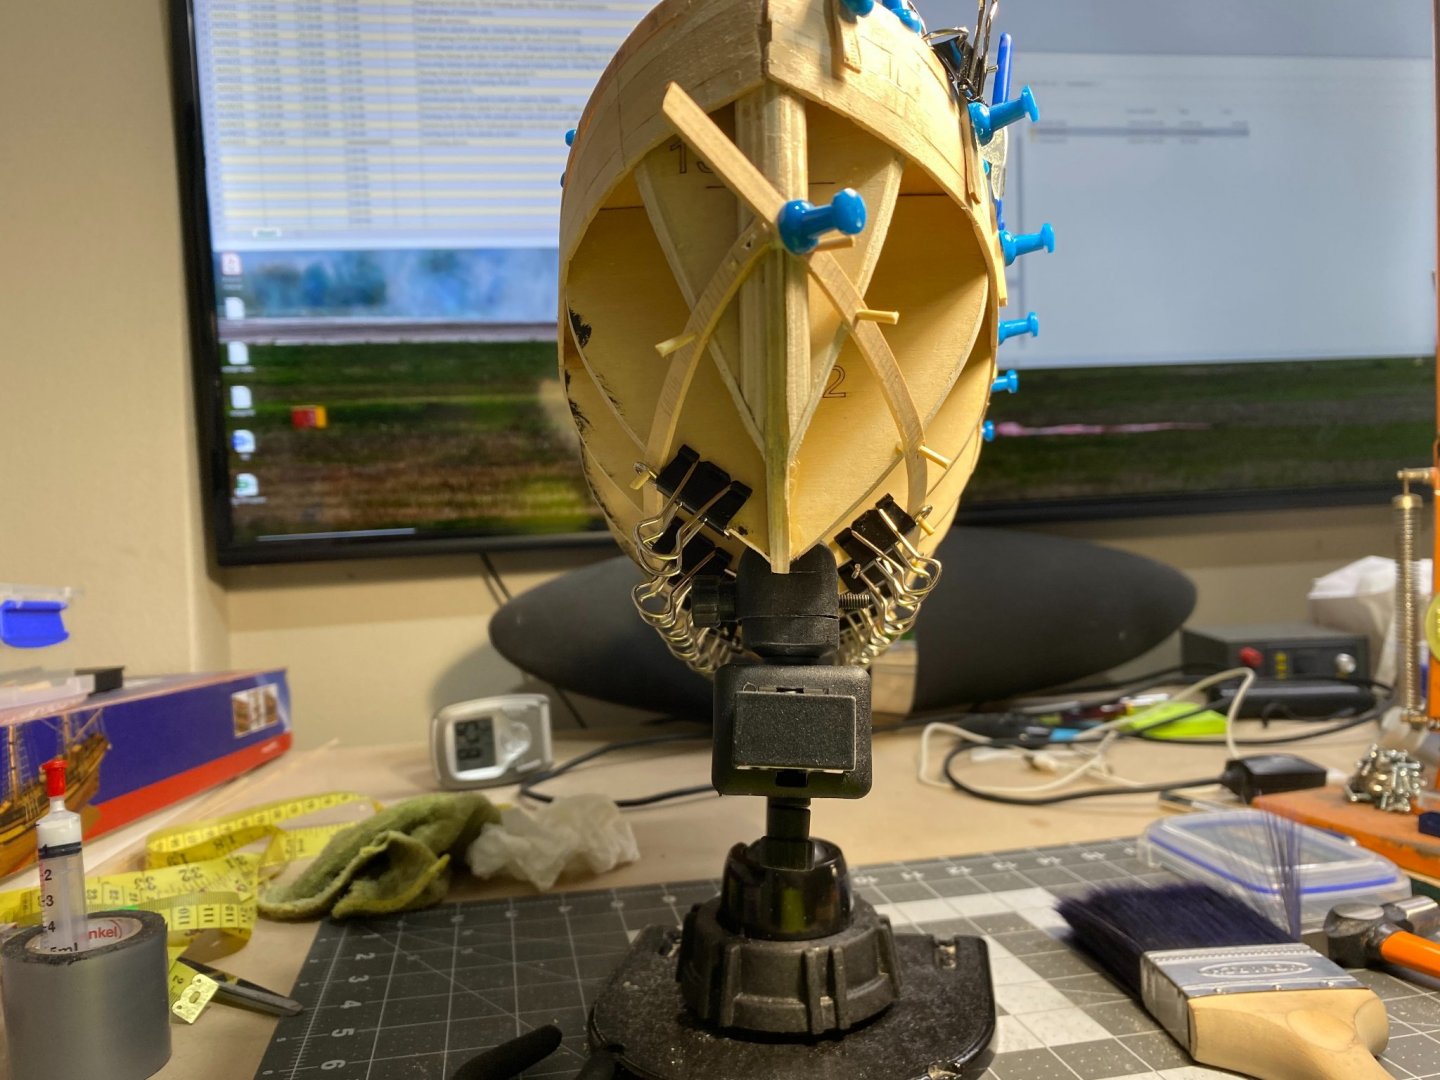
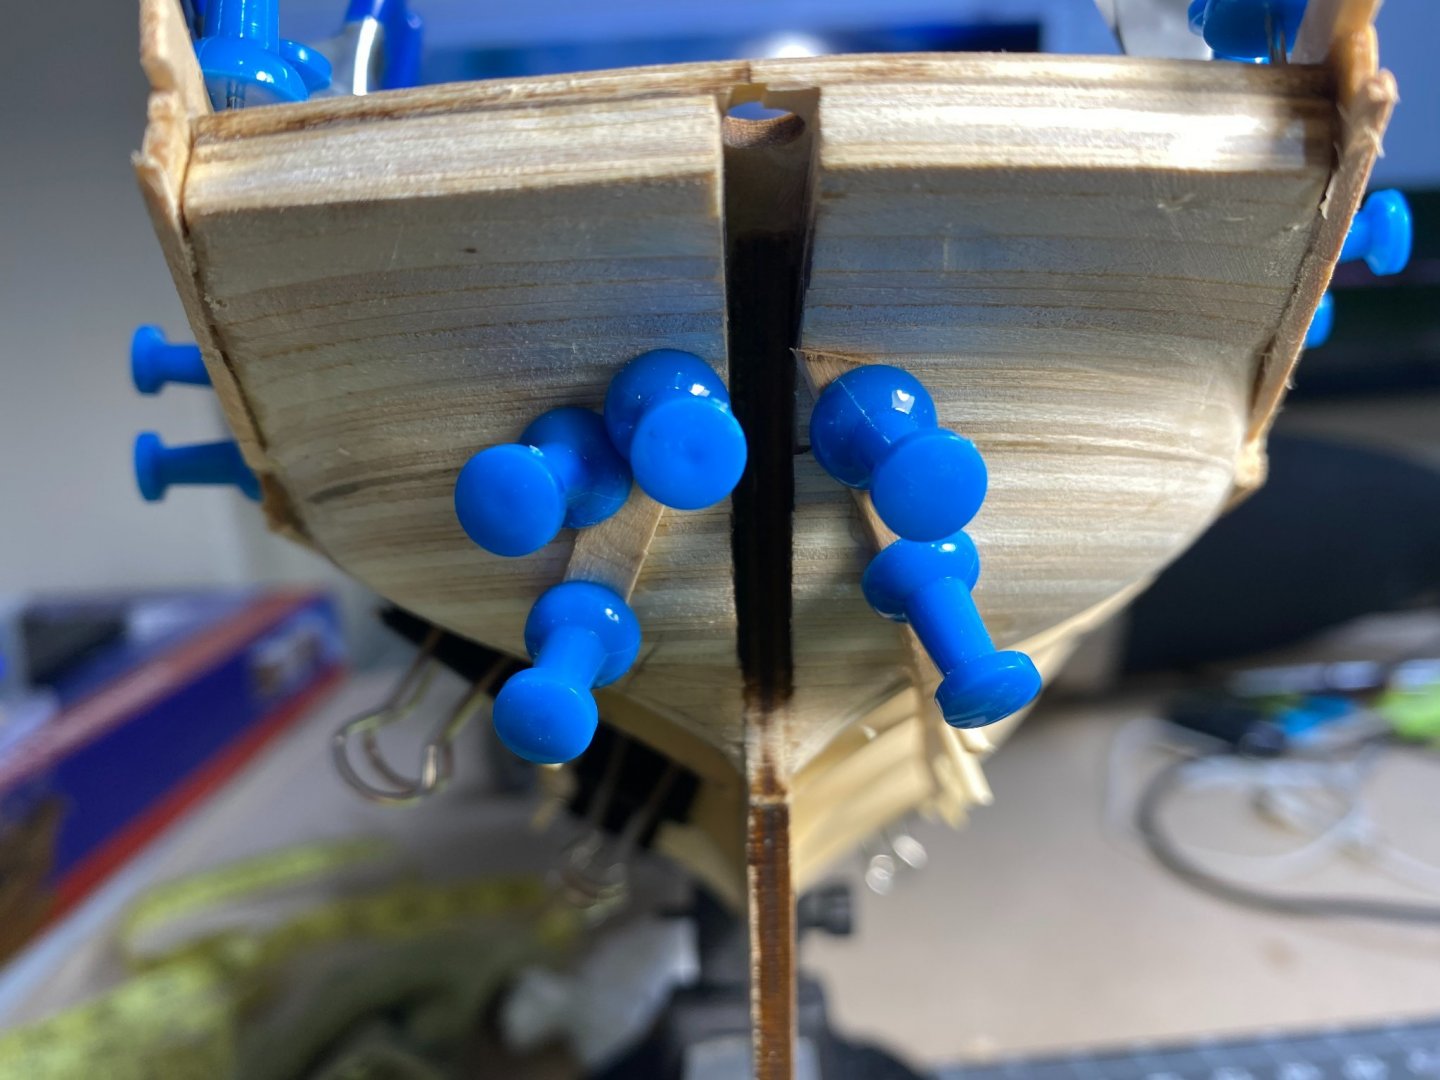
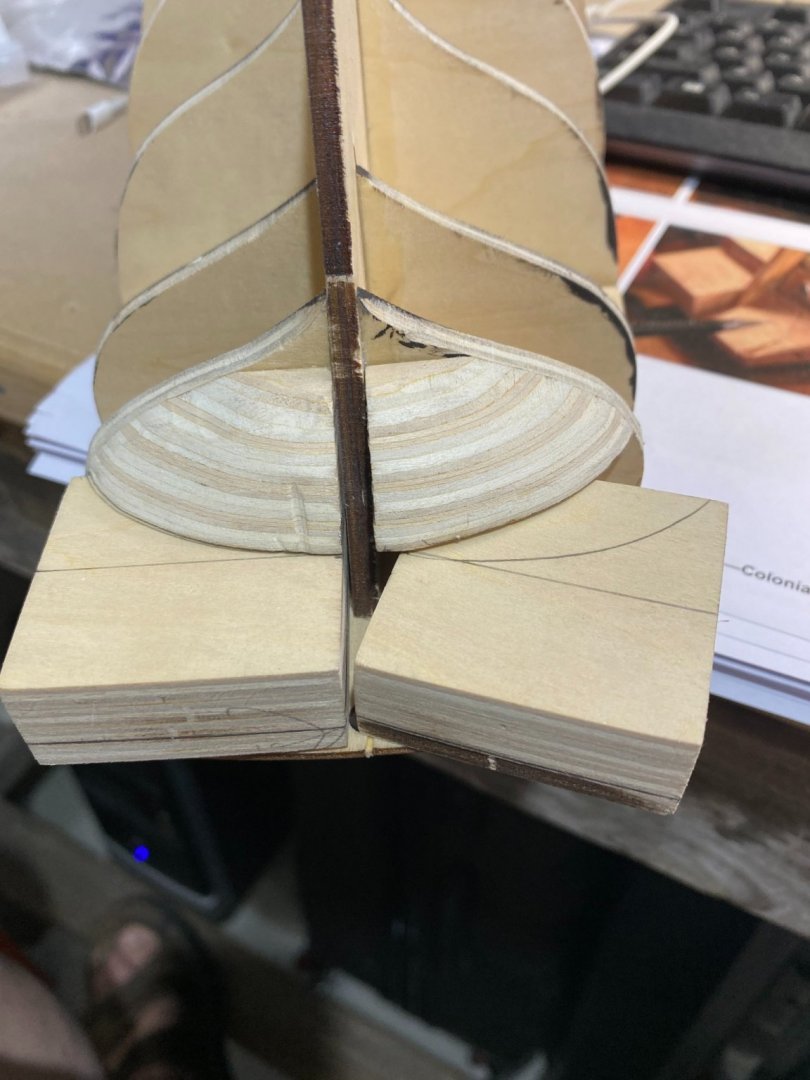
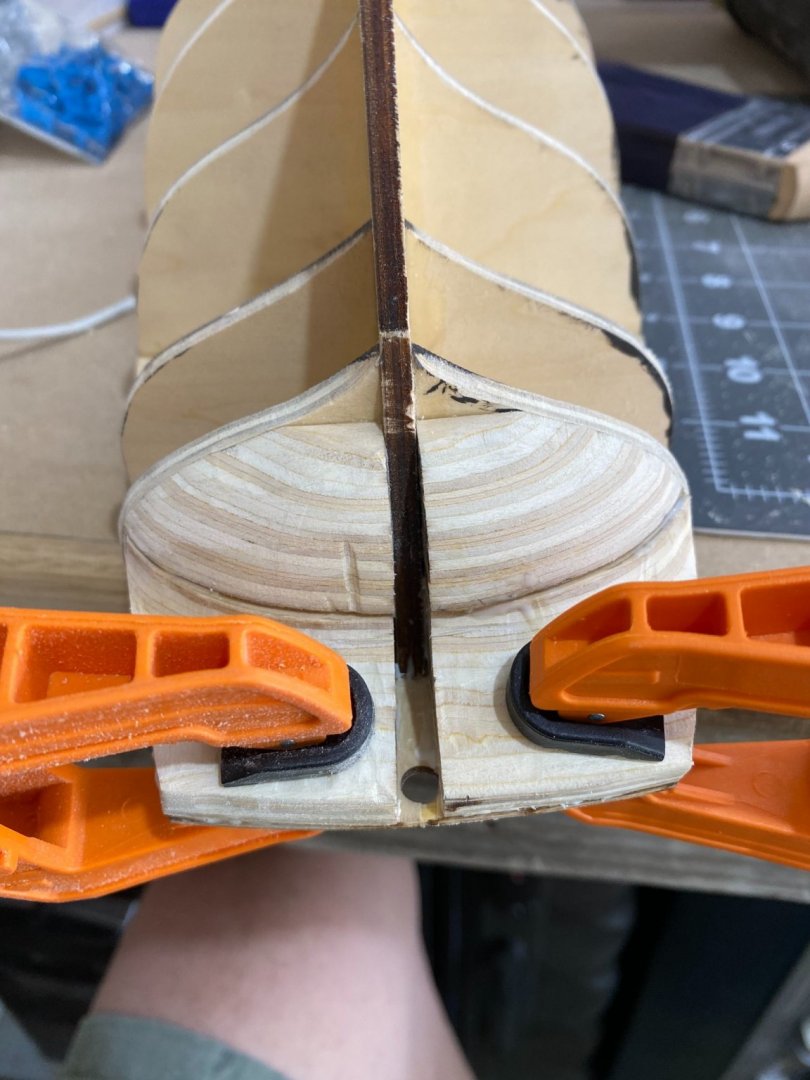
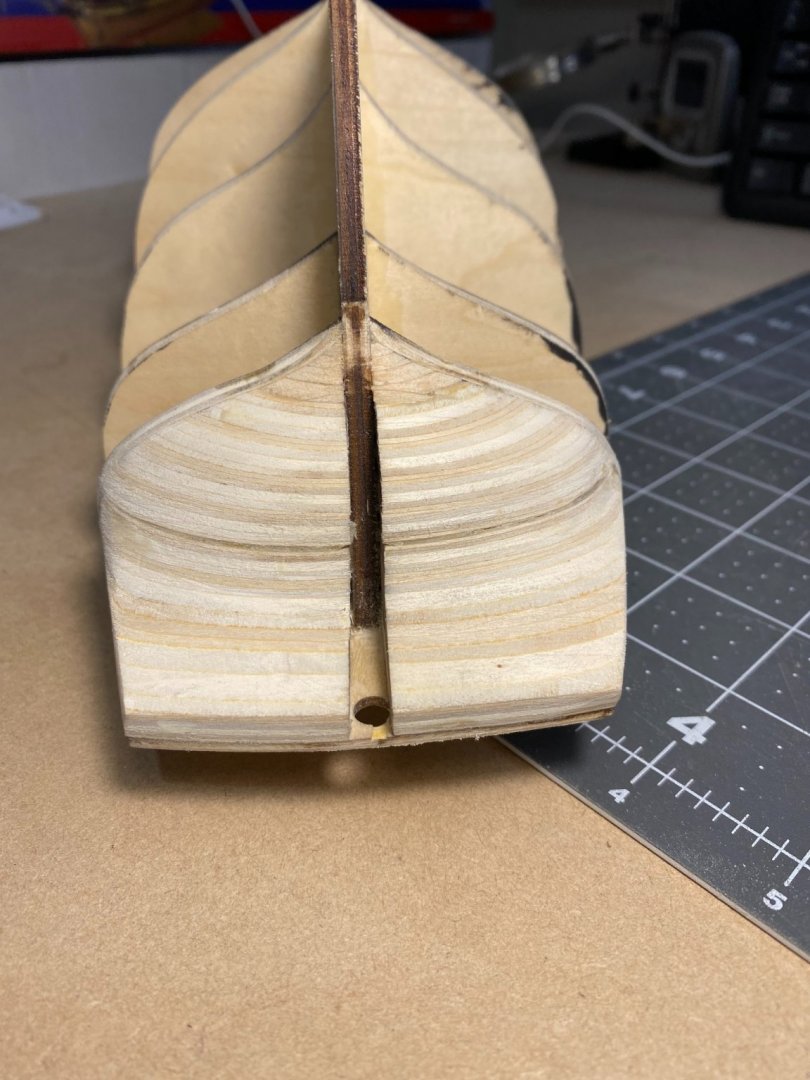
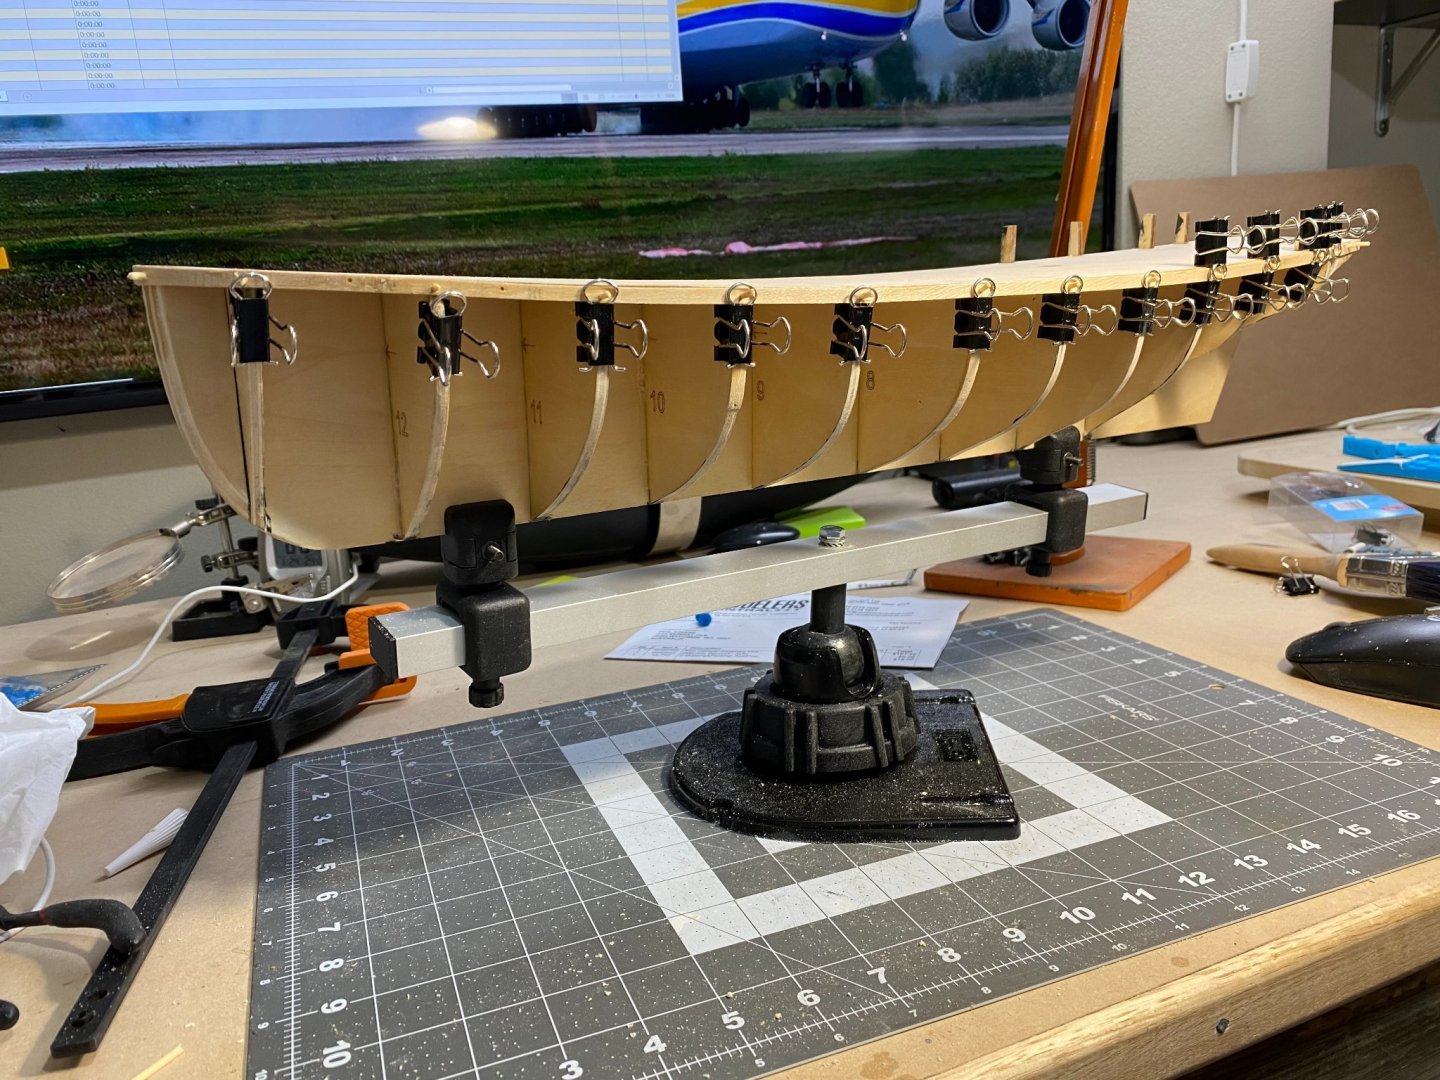
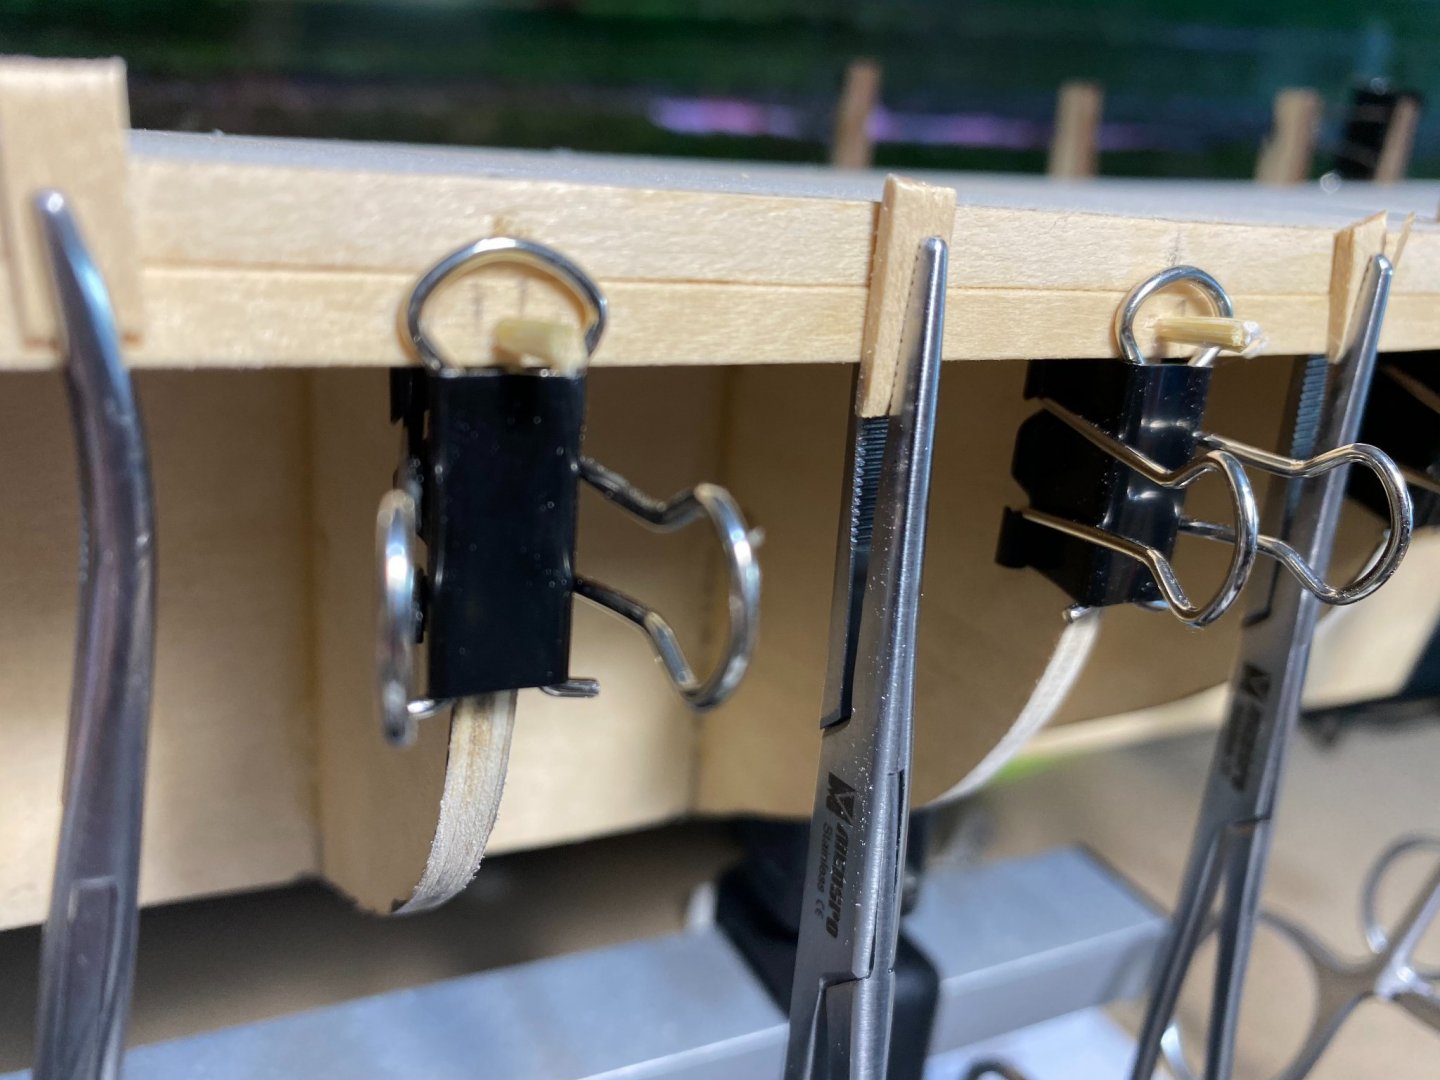
21/03/21 Finished attaching false deck and spent a little time on the "out of shape bulkheads. 22/03/21 Cutting, gluing and shaping upper transom blocks. 23/03/21 Final shaping and gap filling of transom blocks. 24/03/21 More final shaping of blocks and fitted first plank PS, yessssssss :-) 25/03/21 First plank SS fitted. 26/03/21 Planking. 27/03/21 Planking. 28/03/21 Planking HTD: 35 Building up bulkheads 8 and 10 Fitting the upper transom blocks Transom blocks glued Transom blocks finished From another angle First plank PS attached. I used a combination of techniques, the DVD's suggestion of clips and Harry Houdinis toothpick method which I enjoyed doing but it is imperative tp pre drill so as not to invoke splitting. The bull-dog clips are fine to assist in placing the planks and holding them in place but I feel they are not strong enough alone. 2nd plank in place I found forceps a great help particularly in the curvy areas to help minimise stepping A few more planks in place. I alternated with each plank PS, SS etc as I subscribed to the view that if you plank one side in its entirety the hull may be susceptible to warping or bending. So I guess I came to my second dilemma starting the planking, although I didn't realise it until the entire hull was planked. And this is another discrepancy between the video and the manual allowing this poor mere male to become confused. The manual states to start the planking with the top of the first plank flush with the false deck which I dutifully did. However, the video looks like the first plank was placed half a planks width down from the false deck. I guess this would have been to give the first bulwark plank more purchase to the hull and a better base on which to add the remaining bulwarks. This would come back to haunt me later on :-(


- 47 replies
-
- 5
-
-
- Modellers Shipyard
- Perseverance
- (and 1 more)
-
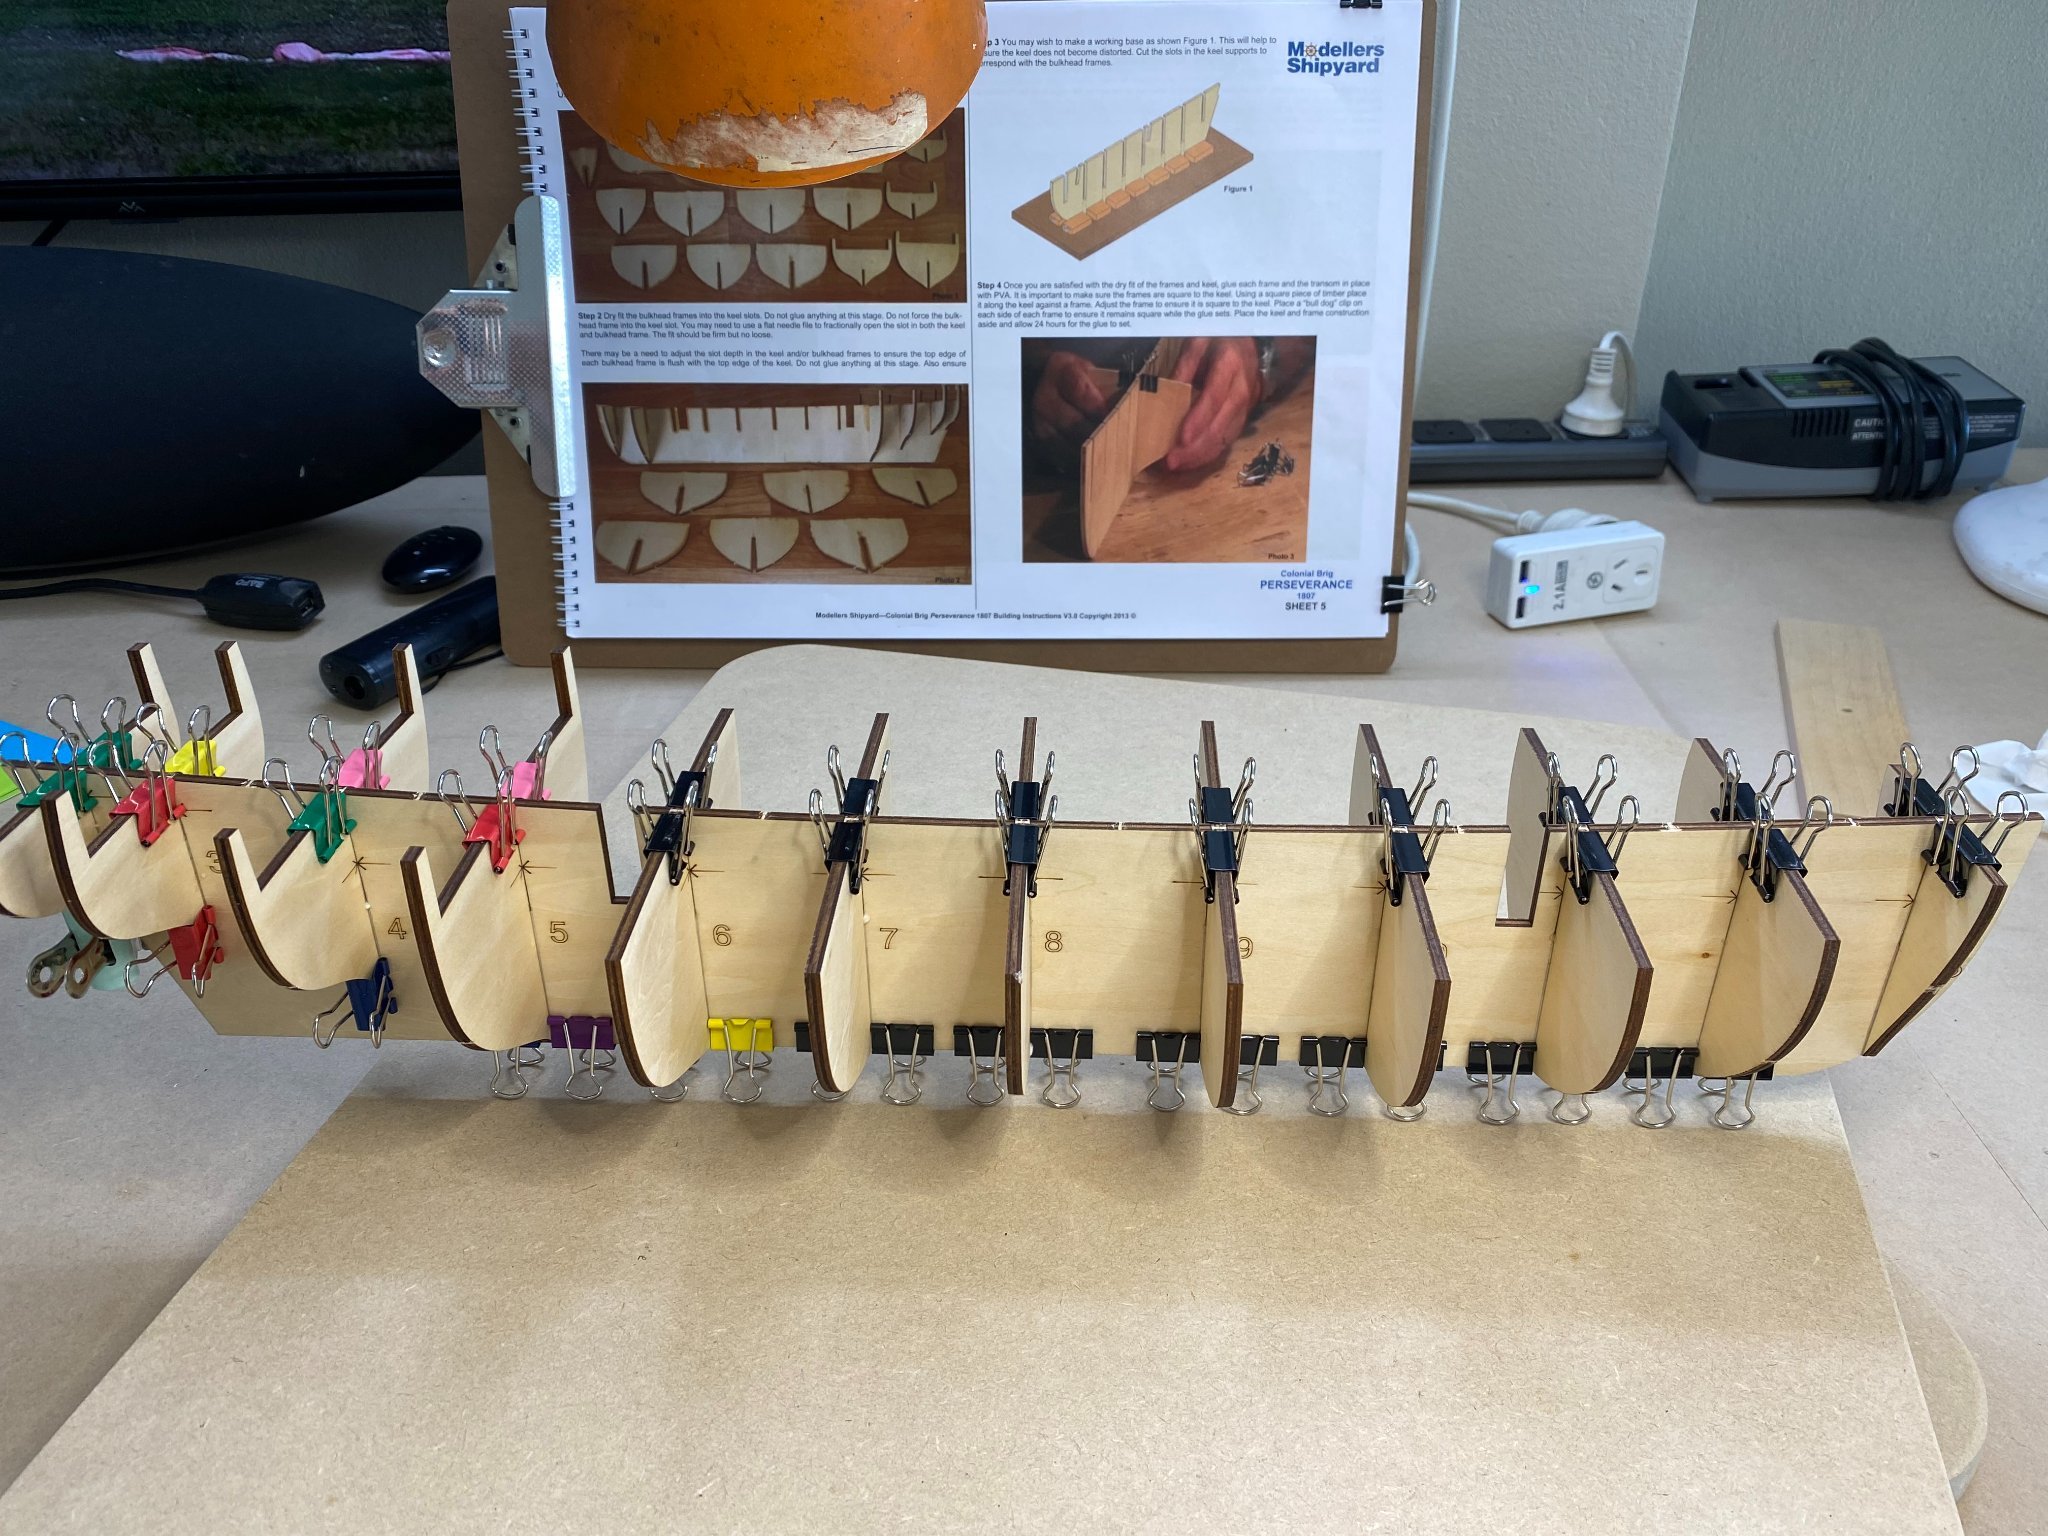
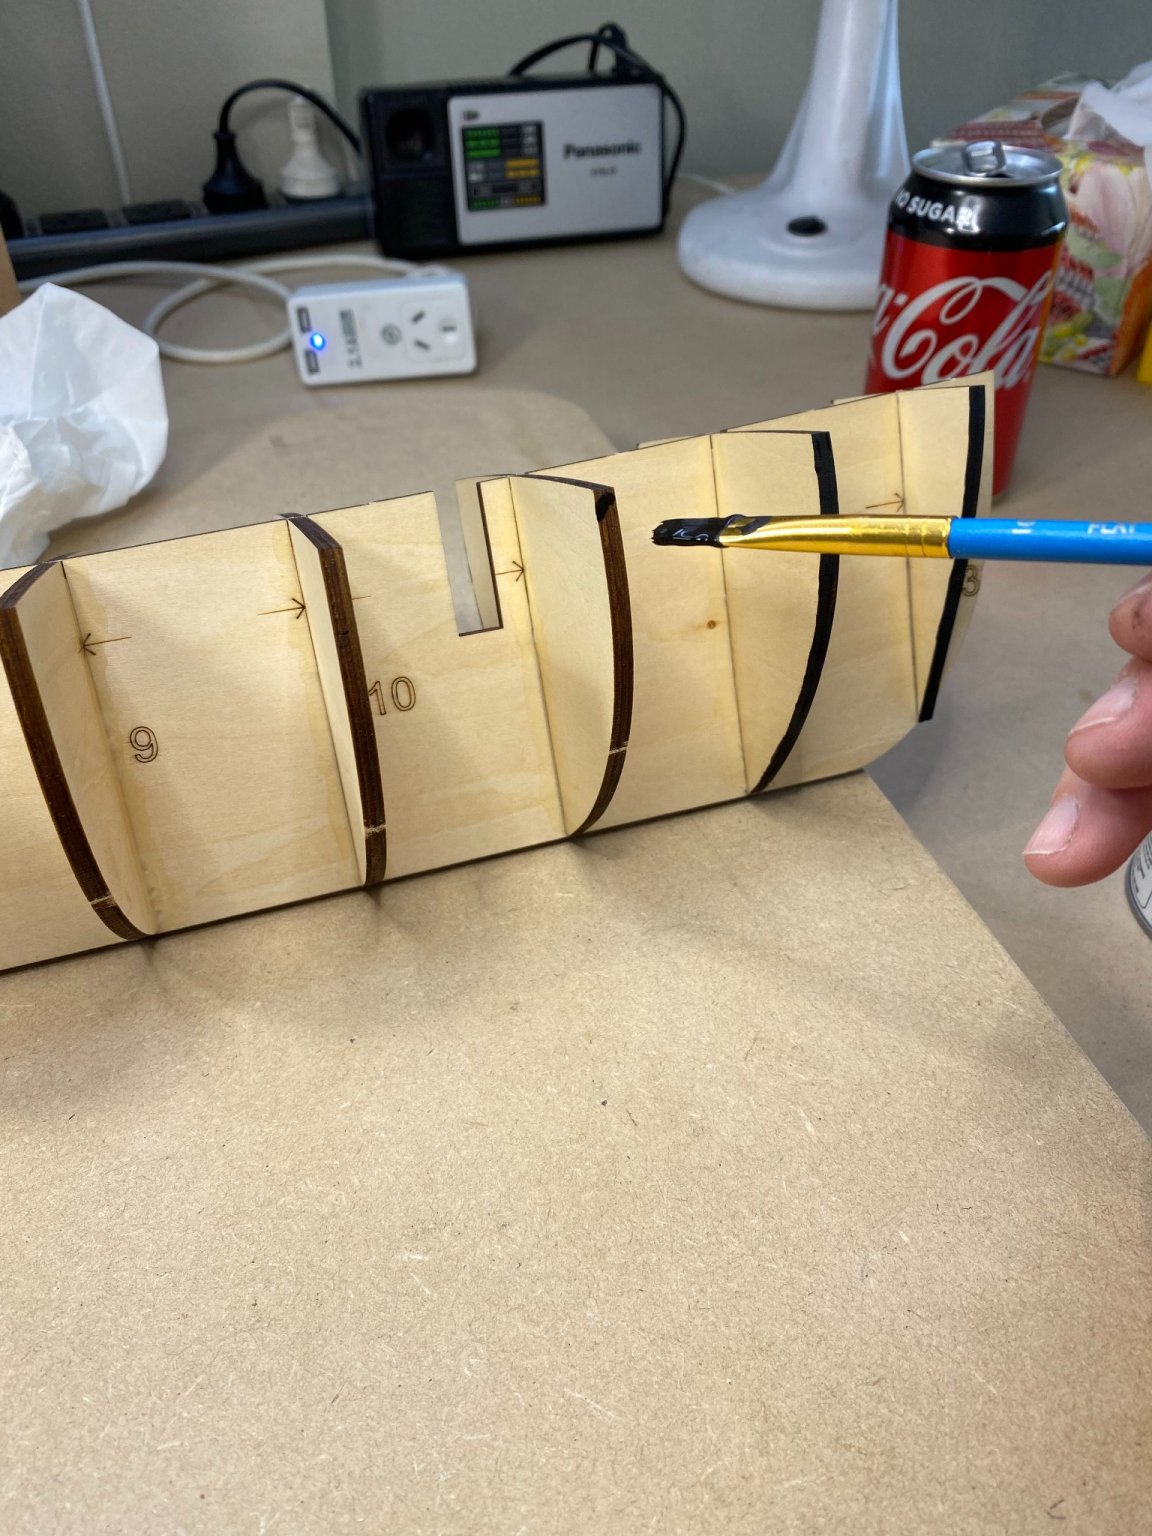
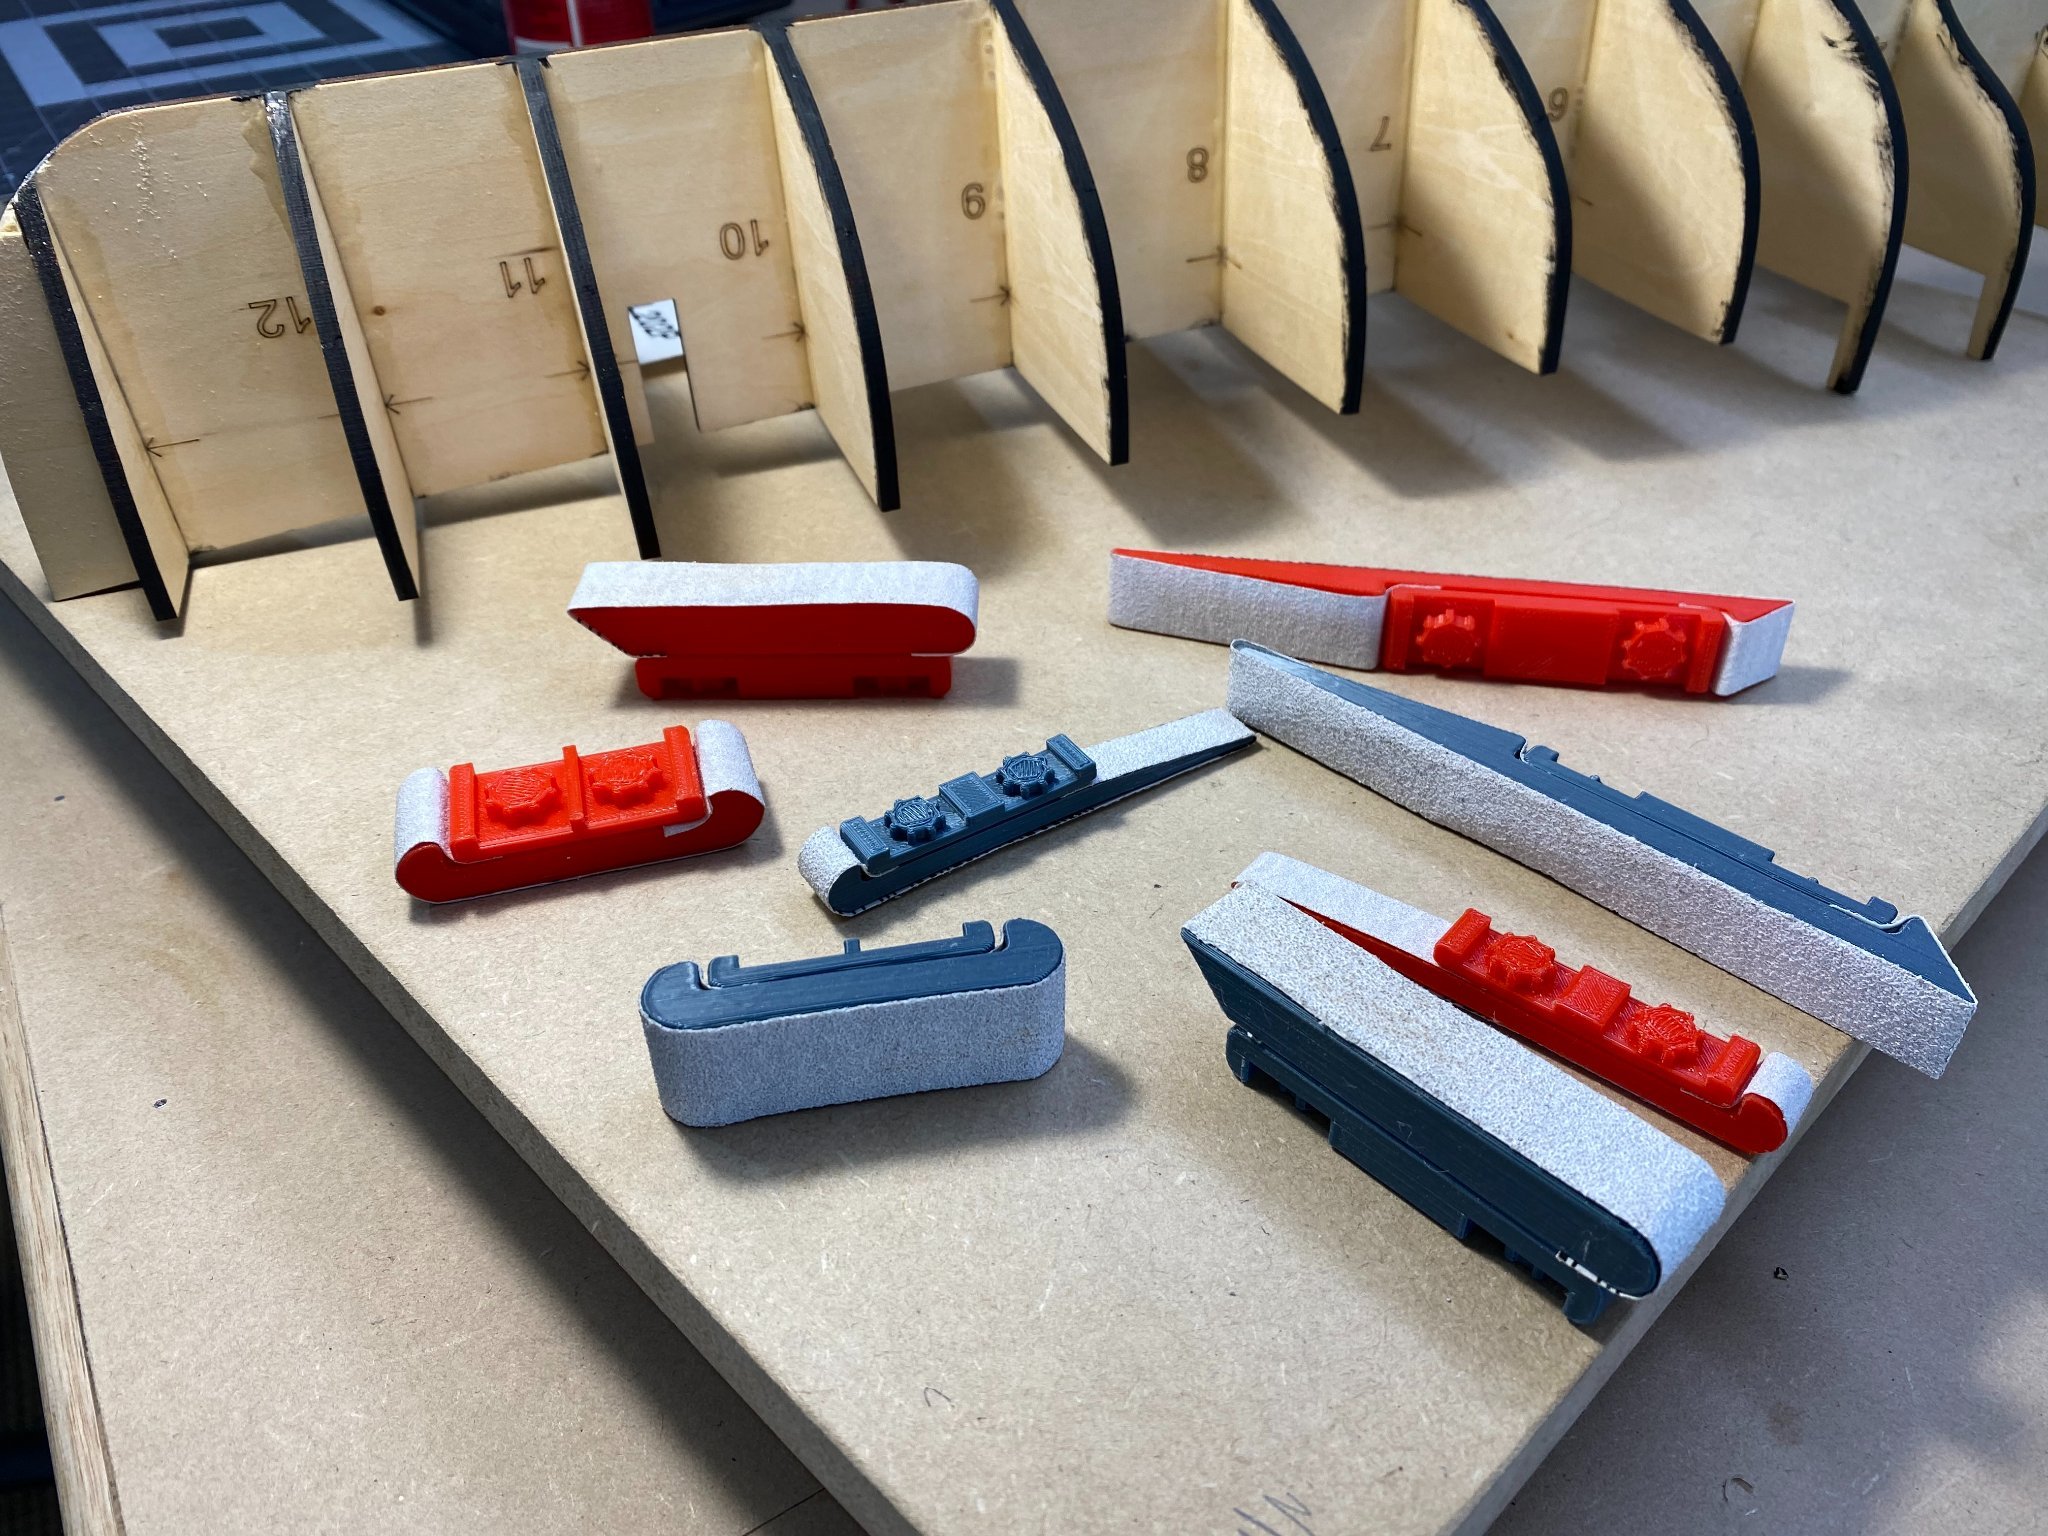
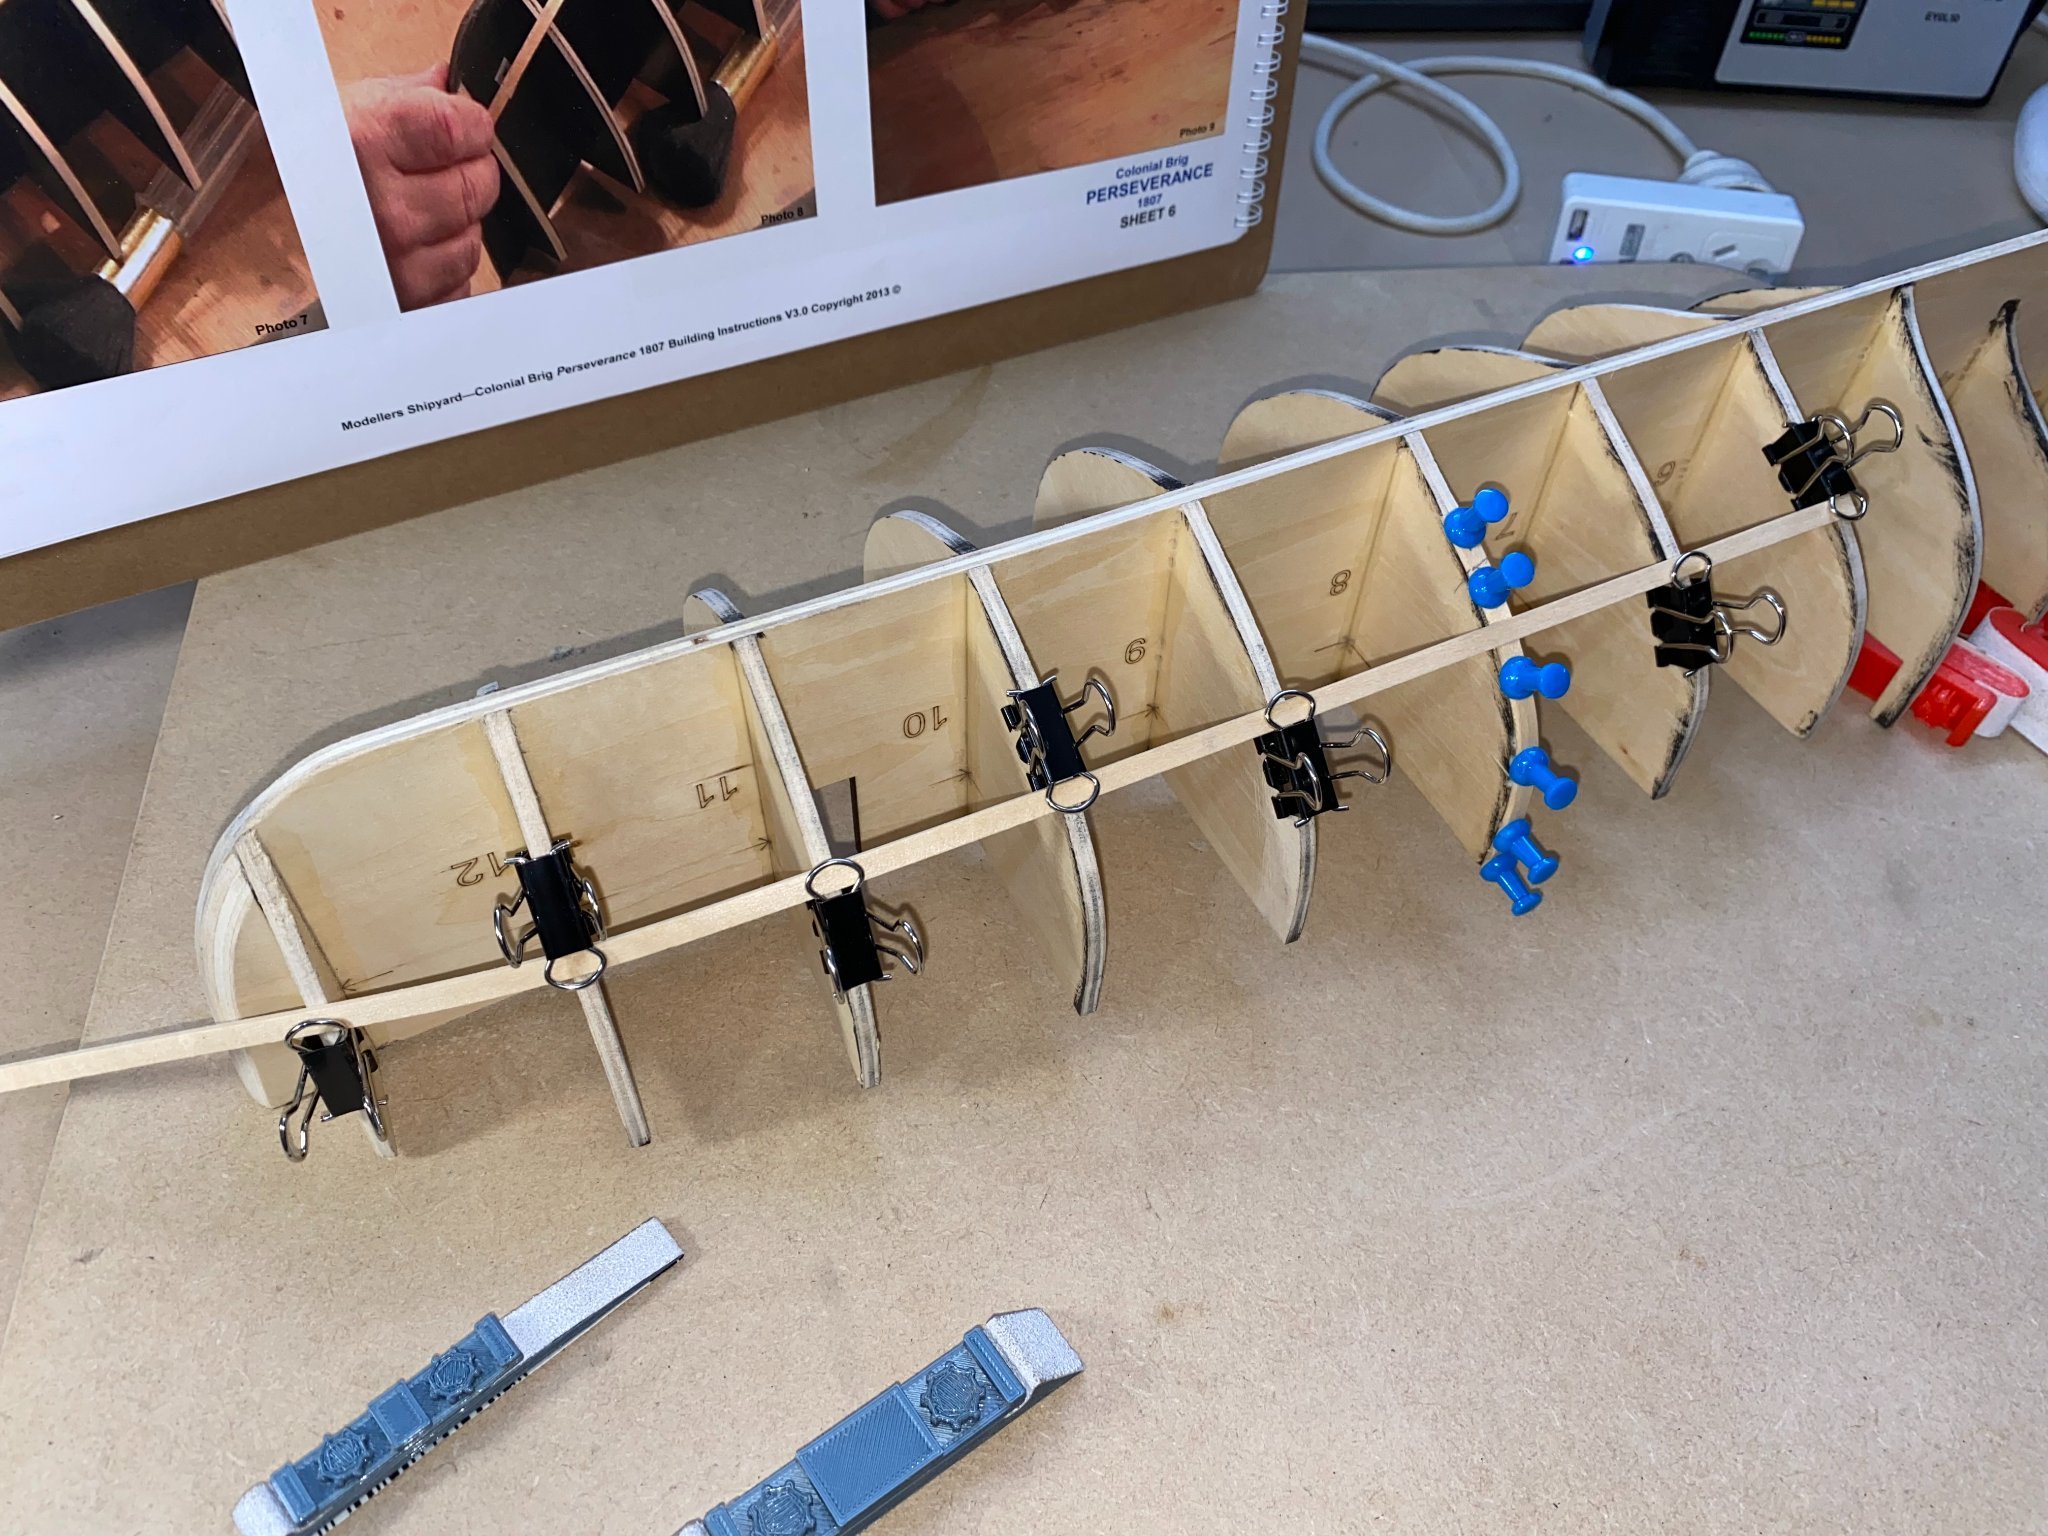
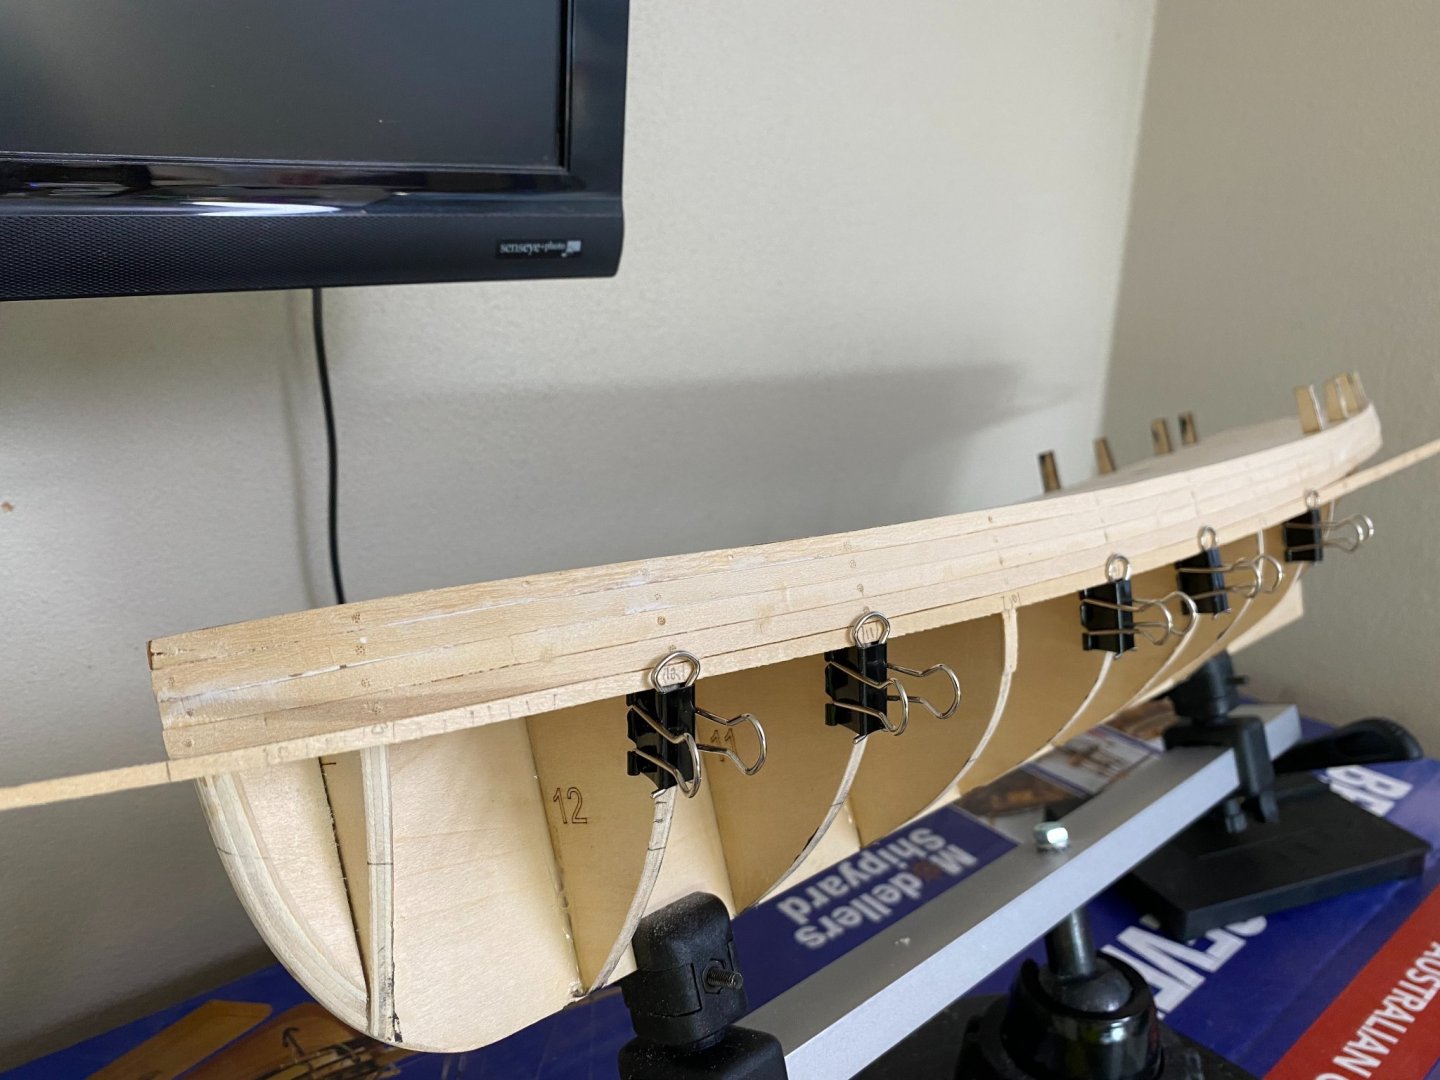
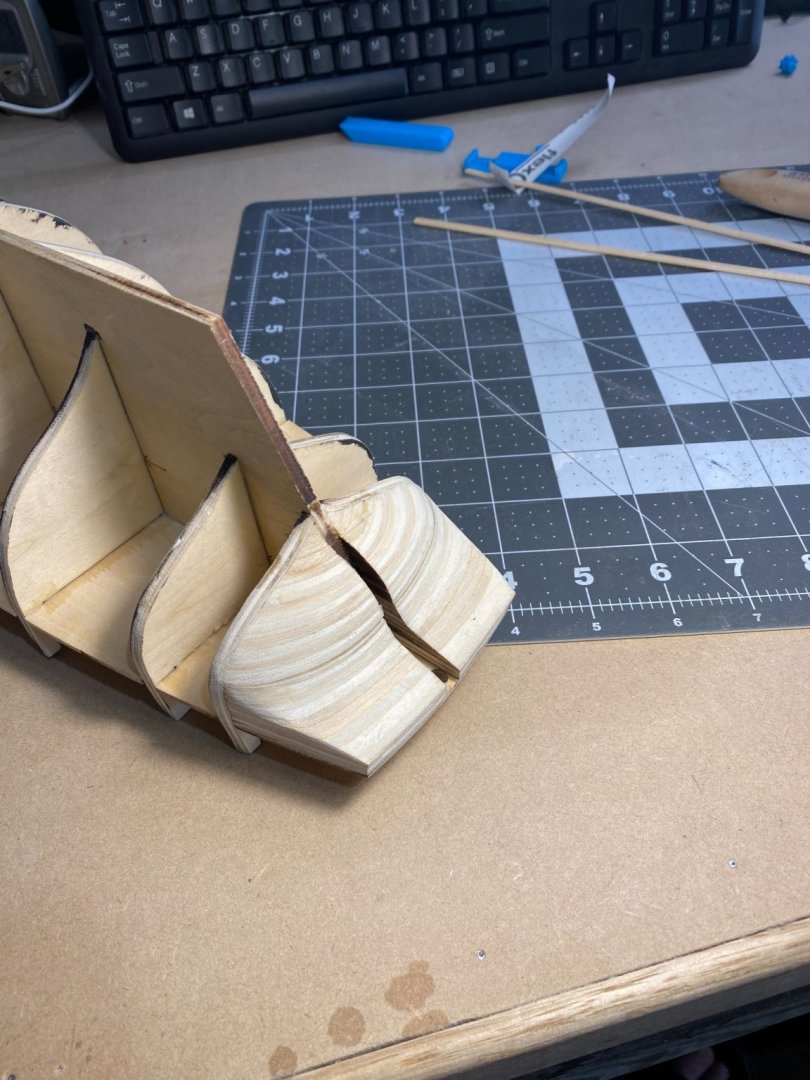
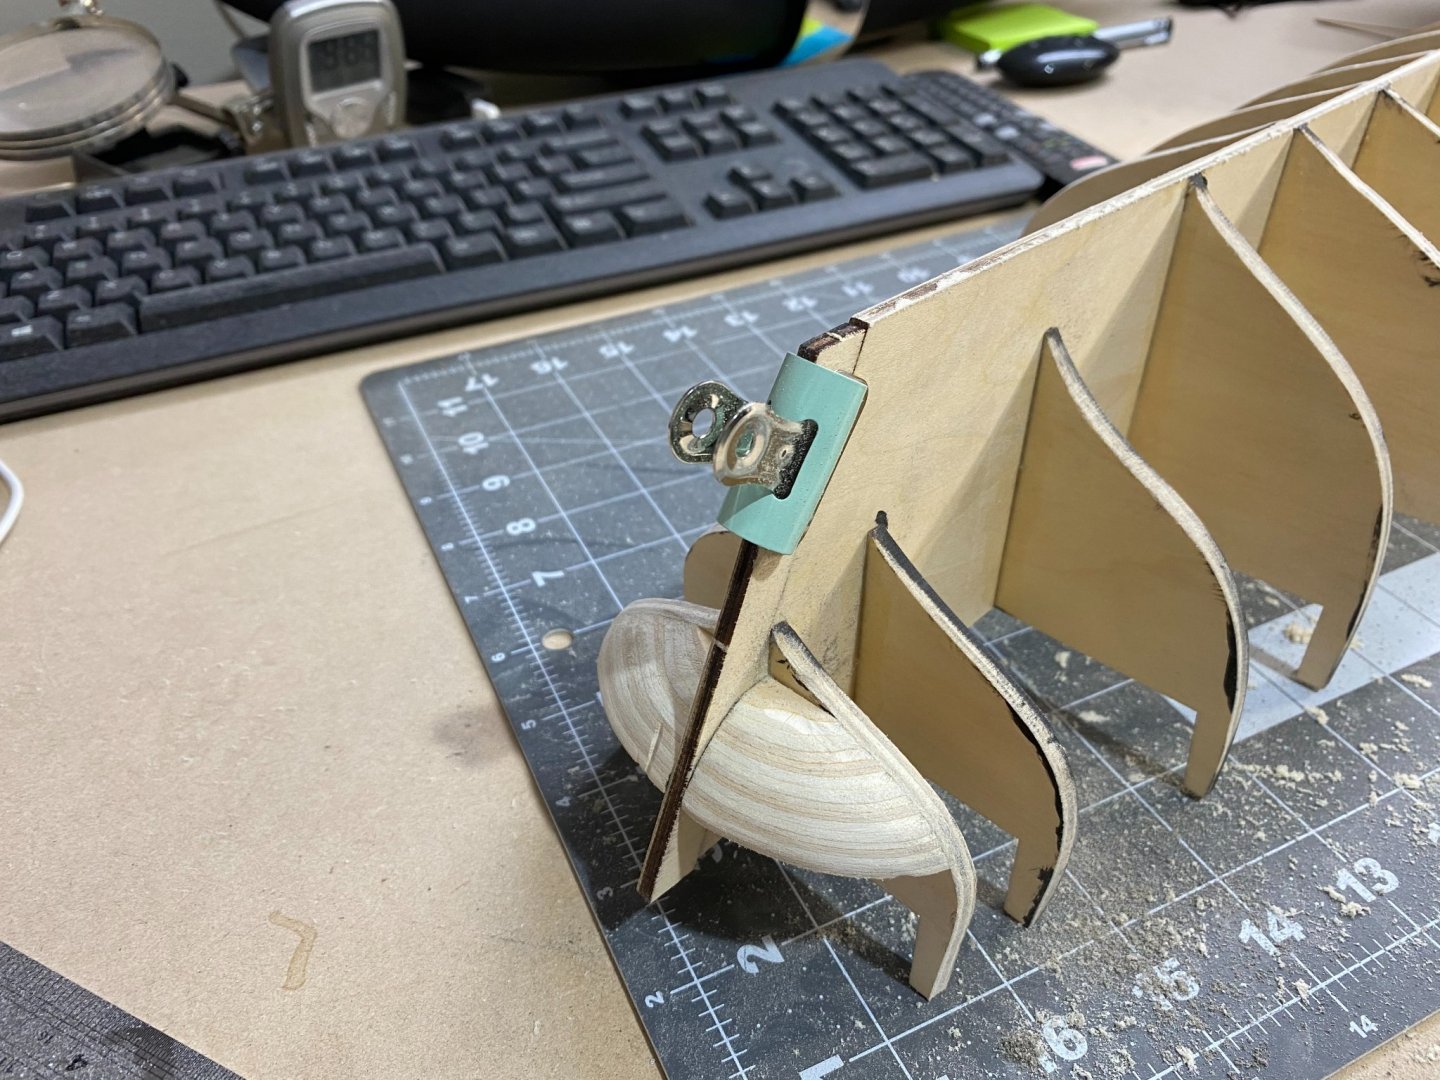
13/03/21 Assemble the keel and bulkhead frames (dry fit only) 14/03/21 Assemble the keel and bulkhead frames (glued) 15/03/21 Putting extra glue at bulkhead joints 16/03/21 Putting extra glue at bulkhead joins 16/03/21 Made and glued on bow blocks to be shaped later 17/03/21 Made and glued on transom blocks to be shaped later 18/03/21 Started fairing 19/03/21 More fairing and building up of bulkhead 8 20/03/21 Started fitting false deck HTD: 16 Bulkheads glued on and used bull-dog-clip method to keep square. Not good enough, lesson learnt, will use square aluminium stock or building jig on me next venture. Making transom and bow blocks I painted the edges of the bulkheads as suggested/demonstrated in the video to help indicate progress in the the fairing process. I found this helpful. Transom blocks glued on Printed up some 3D printed sanding blocks to help with the task Fairing in progress Shaping the lower transom blocks ( I know that's probably not what they are called bet hey.....) False deck glued in place So far loving the project and relishing every minute. Have not coma across any issues other than some of the bulkheads needed reducing and some building up. My lack of experience let me down with the assembly of the false keel and bulkheads in terms of their squareness. But you know, sometimes it's better to learn these things in the flesh so to speak rather than a YouTube clip although they are a great resource.


- 47 replies
-
- 5
-
-
- Modellers Shipyard
- Perseverance
- (and 1 more)
-
Goodness me, that's an old photo. Here is a more recent one taken from the eastern side, Kings Park would be back to the left a bit more. This pic shows the recently completed Elizabeth Quay, one of Emperor Barnett's follies. He named it after her maj in a bid to earn a knighthood perhaps, he is still waiting.

-
Wrong side of the world? Well maybe, but at least we are way way ahead of you.......... ........ time wise anyway. Thank you for the welcome
-
Hi all. First time building a wooden model boat First time on this great forum First time attempting a build log. So please be patient while I learn the ropes and make a start. Feel free to throw some horse blinders over my head if the need be. I had been looking for about six to eight months for a model to build that would satisfy my curiosity and offer me some satisfaction in the process. I didn't want to get a basic or to me, boring, starter kit, so I went for this level 2 kit that looked challenging enough to keep me stimulated without going over the top. It was also visually appealing, Australian, as was the kit manufacturer so it was a no brainer. I was sold on the Perseverance after a YouTube video by a chap in Brisbane whose channel is called Harry Houdini Models. Based out of Brisbane, Harry has a somewhat irreverent view on life which I warm to. Anyway, here is a link to the review that sold me on this kit: I hope I am allowed to put links in like this, please forgive me if not. I started the build in March 21, about a month after I received the kit. I wanted to do a stocktake, as it were, on the parts because I have read many times that there is often a shortfall but in this instance all was as it should be. I can't really comment that much on the quality as I have nothing to compare it with so don't want to be adversely critical about anything that might be ordinarily acceptable. My only observation was thus far was that I seemed to be slightly disappointed with the quality of the wood. I felt the surface of some of the timbers was a tad rough in places, I also noticed that the dimensions varied considerably on some strips varying by as much as 1 or 2 MMs which made it a little tougher when doing the deck planking etc. Again, let me say that this sort of thing may well be the norm. I parted with a few extra shekels to obtain the 3 DVD instructional video which is a tremendous help, BUT, I discovered many inconsistencies between the videos and the manual which greatly confused this old faurt and so I had to resort to emailing the company for clarification on a few things. I was rewarded with extremely prompt and helpful answers which is very endearing. I have been trawlling YouTube videos for tips and tricks for many months so much so that you can easily get confused as some experts might proclaim one methods while another completely poo poos it. In terms of first layer planking I subscribed to Harry Houdini's methodology, have a look at his channel and planking videos. Yet for the second layer I opted for a different method I found on OcCre's website in tutorial videos section. More than one way to skin a cat as they say. OK well, enough of an intro, I will over the weekend attempt to start posting progress pics and if I'm doing anything wrong please let me know.
- 47 replies
-
- 8
-
-
- Modellers Shipyard
- Perseverance
- (and 1 more)
-
Well thank you all for the warm welcome I am suitably flattered and Mr Ego says a big "hiho everyone". I have chosen an Australian company "Model Shipyard" (I think) and one of their offerings, "The Colonial Brig Perseverance" to embark upon for my first foray into the abyss. I am about 1/3 of the way through the build and while I am aware of the many mistakes I have made I am still very pleased with my progress. I have hidden the mistakes with glue, shopping bags, chook feathers and a band aid or two and in a certain light (total darkness) I think I might have gotten away with it. Anyway, on a serious note, I am bowled over by the amount of resources here and look forward to rummaging around the bowels of this forum for little nuggets and gems of information. I hope to start a build log of my progress thus far when I figure out how to do so and post pics etc. Again, thanks for the warm welcome
-
Well enjoy it while it's sunny because it doesn't happen that often. I used to live just an hour further west so know the area very well, Ballarat is just beautiful.
-
Well, rid of the wives, kids, mortgages and lovers, it's time to lay a little love on myself. Been wanting to build wooden model ships most of my life and finally the time has arrived, yesssssssss. I stumbled across this fine forum/resource and hope to tap into its wealth of information and in the process maybe contribute a build log or two, engage in some verbal intercourse and enjoy some levity from time to time along the way. Here for a good time, not a long time