HOLIDAY DONATION DRIVE - SUPPORT MSW - DO YOUR PART TO KEEP THIS GREAT FORUM GOING! (Only 69 donations so far out of 49,000 members - Can we at least get 100? C'mon guys!)
×


Mike Hunt
-
Posts
61 -
Joined
-
Last visited
Content Type
Profiles
Forums
Gallery
Events
Everything posted by Mike Hunt
-
 Well, thank you indeed for that tip, I will remember it well for my next build because as you have correctly pointed out, it catches on everything. As you know this is my first build I am so reluctant to go it alone so I am dutifully following the manual albeit somewhat naively. Your tip has also thought me to read way ahead so as to preempt things like the slip blocks you pointed out. There are no mention of these until doing the rigging and fortunately it is covered well in the video. But because you pointed these things out I discovered another glaring error I have made that I'm sure you noticed but were too polite to point out. This I will rectify next week and replace photo when I have done so. I will leave the offending pic up so as to be a badge of shame that I might not make such a silly mistake again. But thankyou very much for the heads up
 -
Thanks for that Fernando, strangely I hadn't thought of the filler particularly given I used it generously around the figure head gaps. I have a very nice porous filler in a tube from Vallejo that has a fine tip which will make it ideal for those transom cap gaps.
- 47 replies
-
- 1
-

-
- Modellers Shipyard
- Perseverance
- (and 1 more)
-
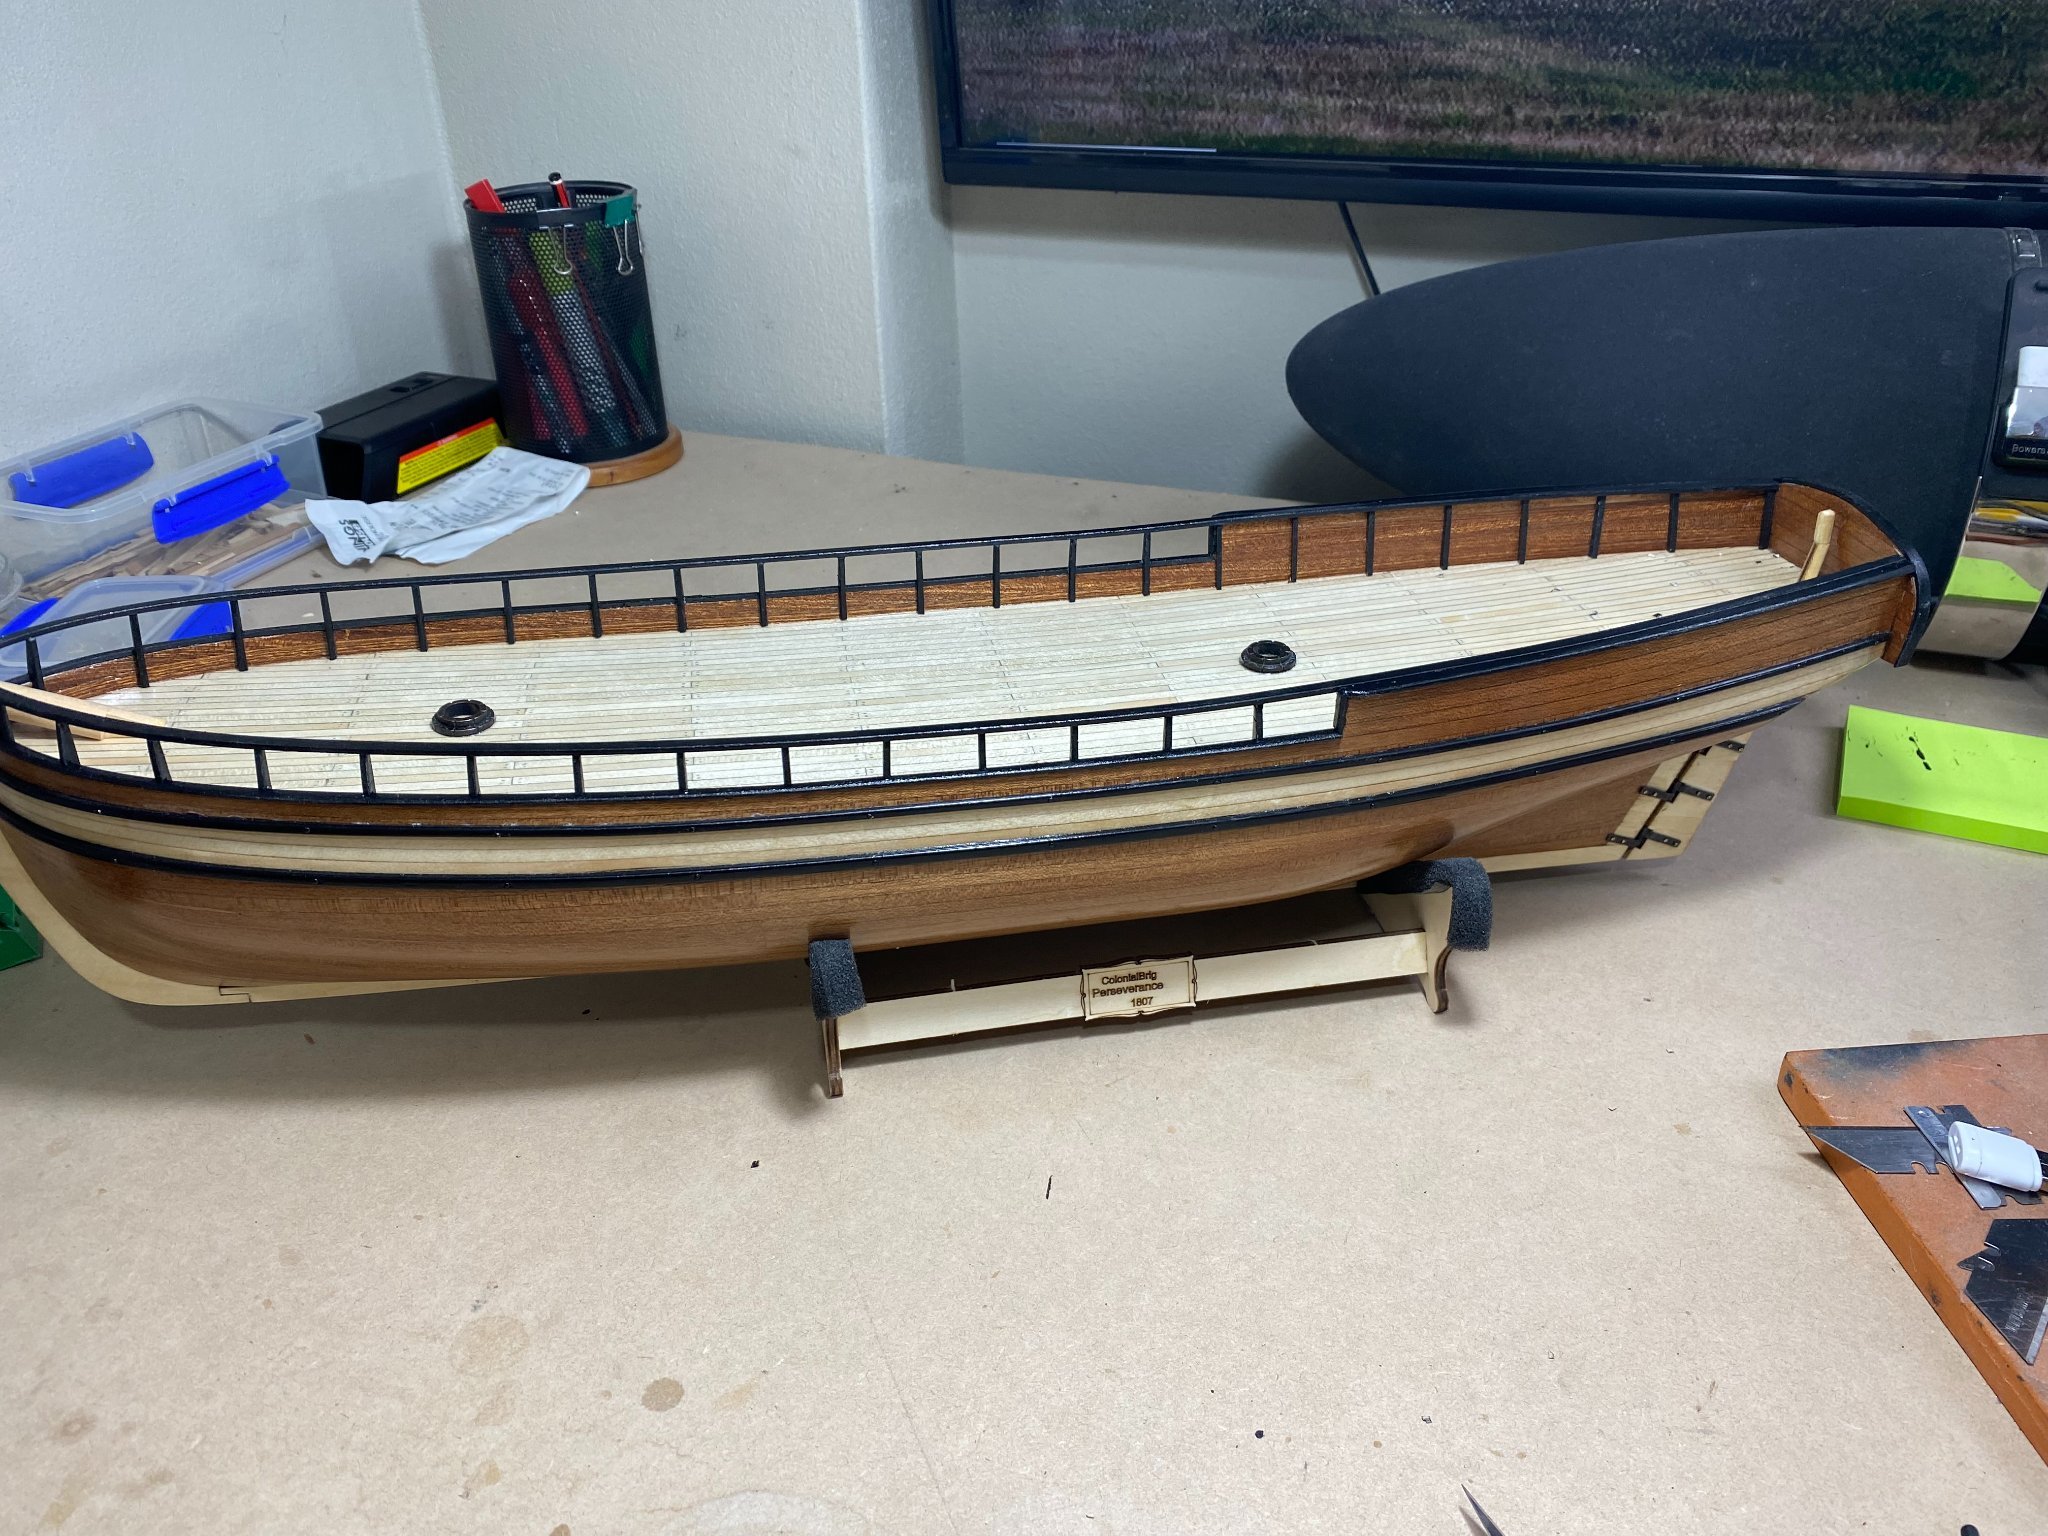
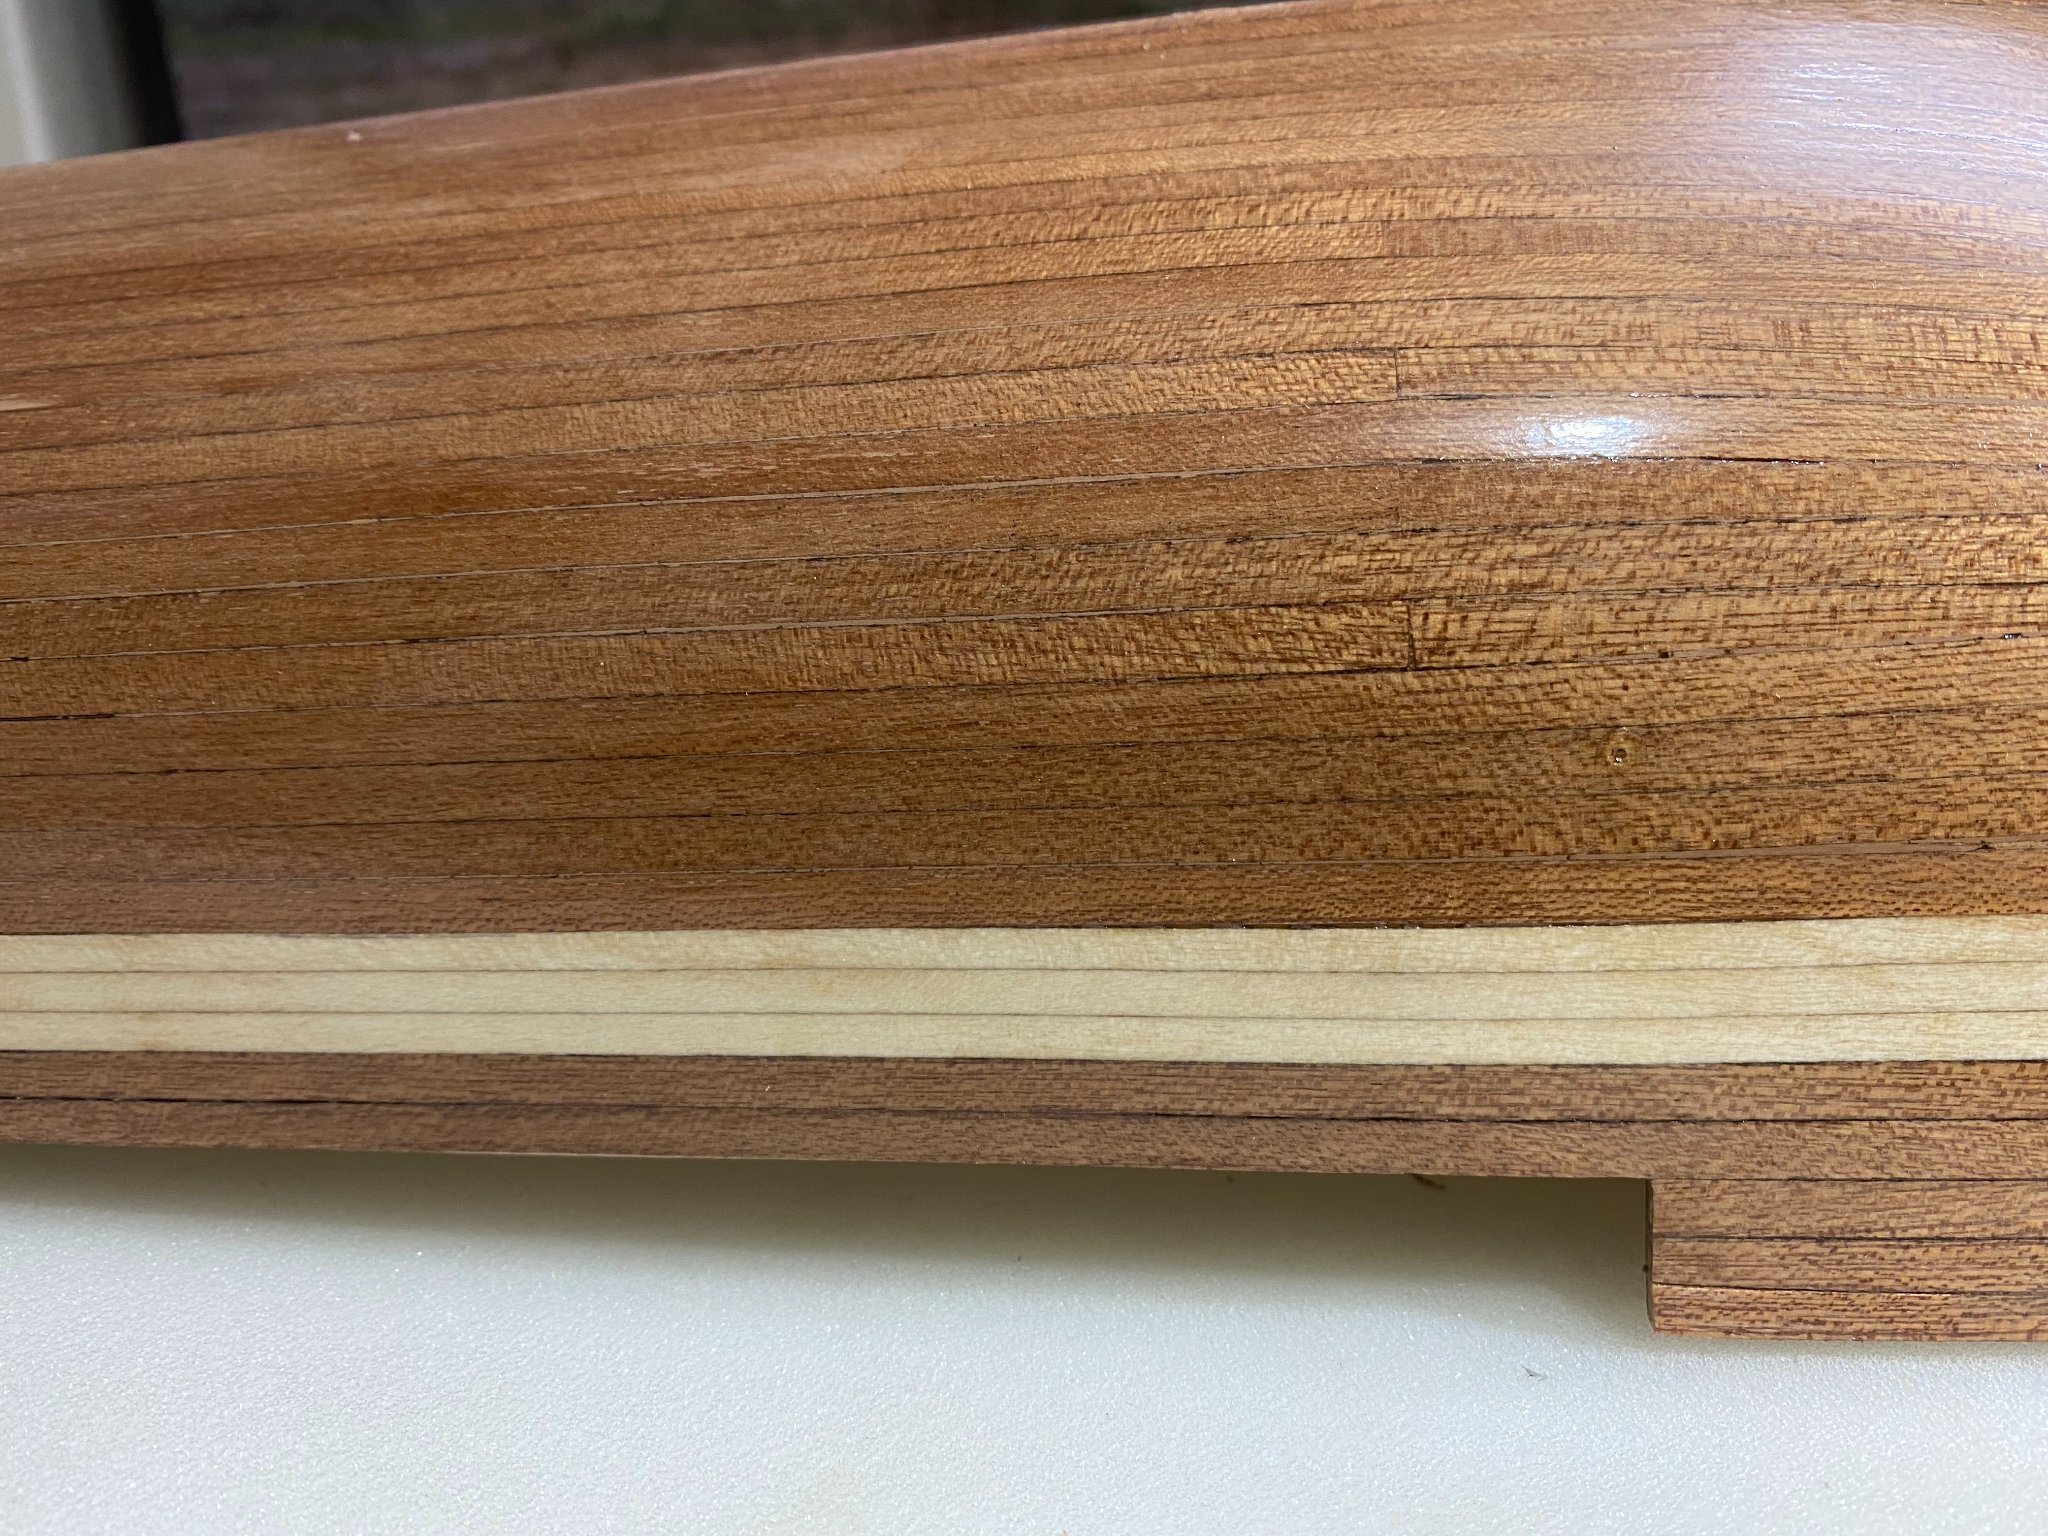
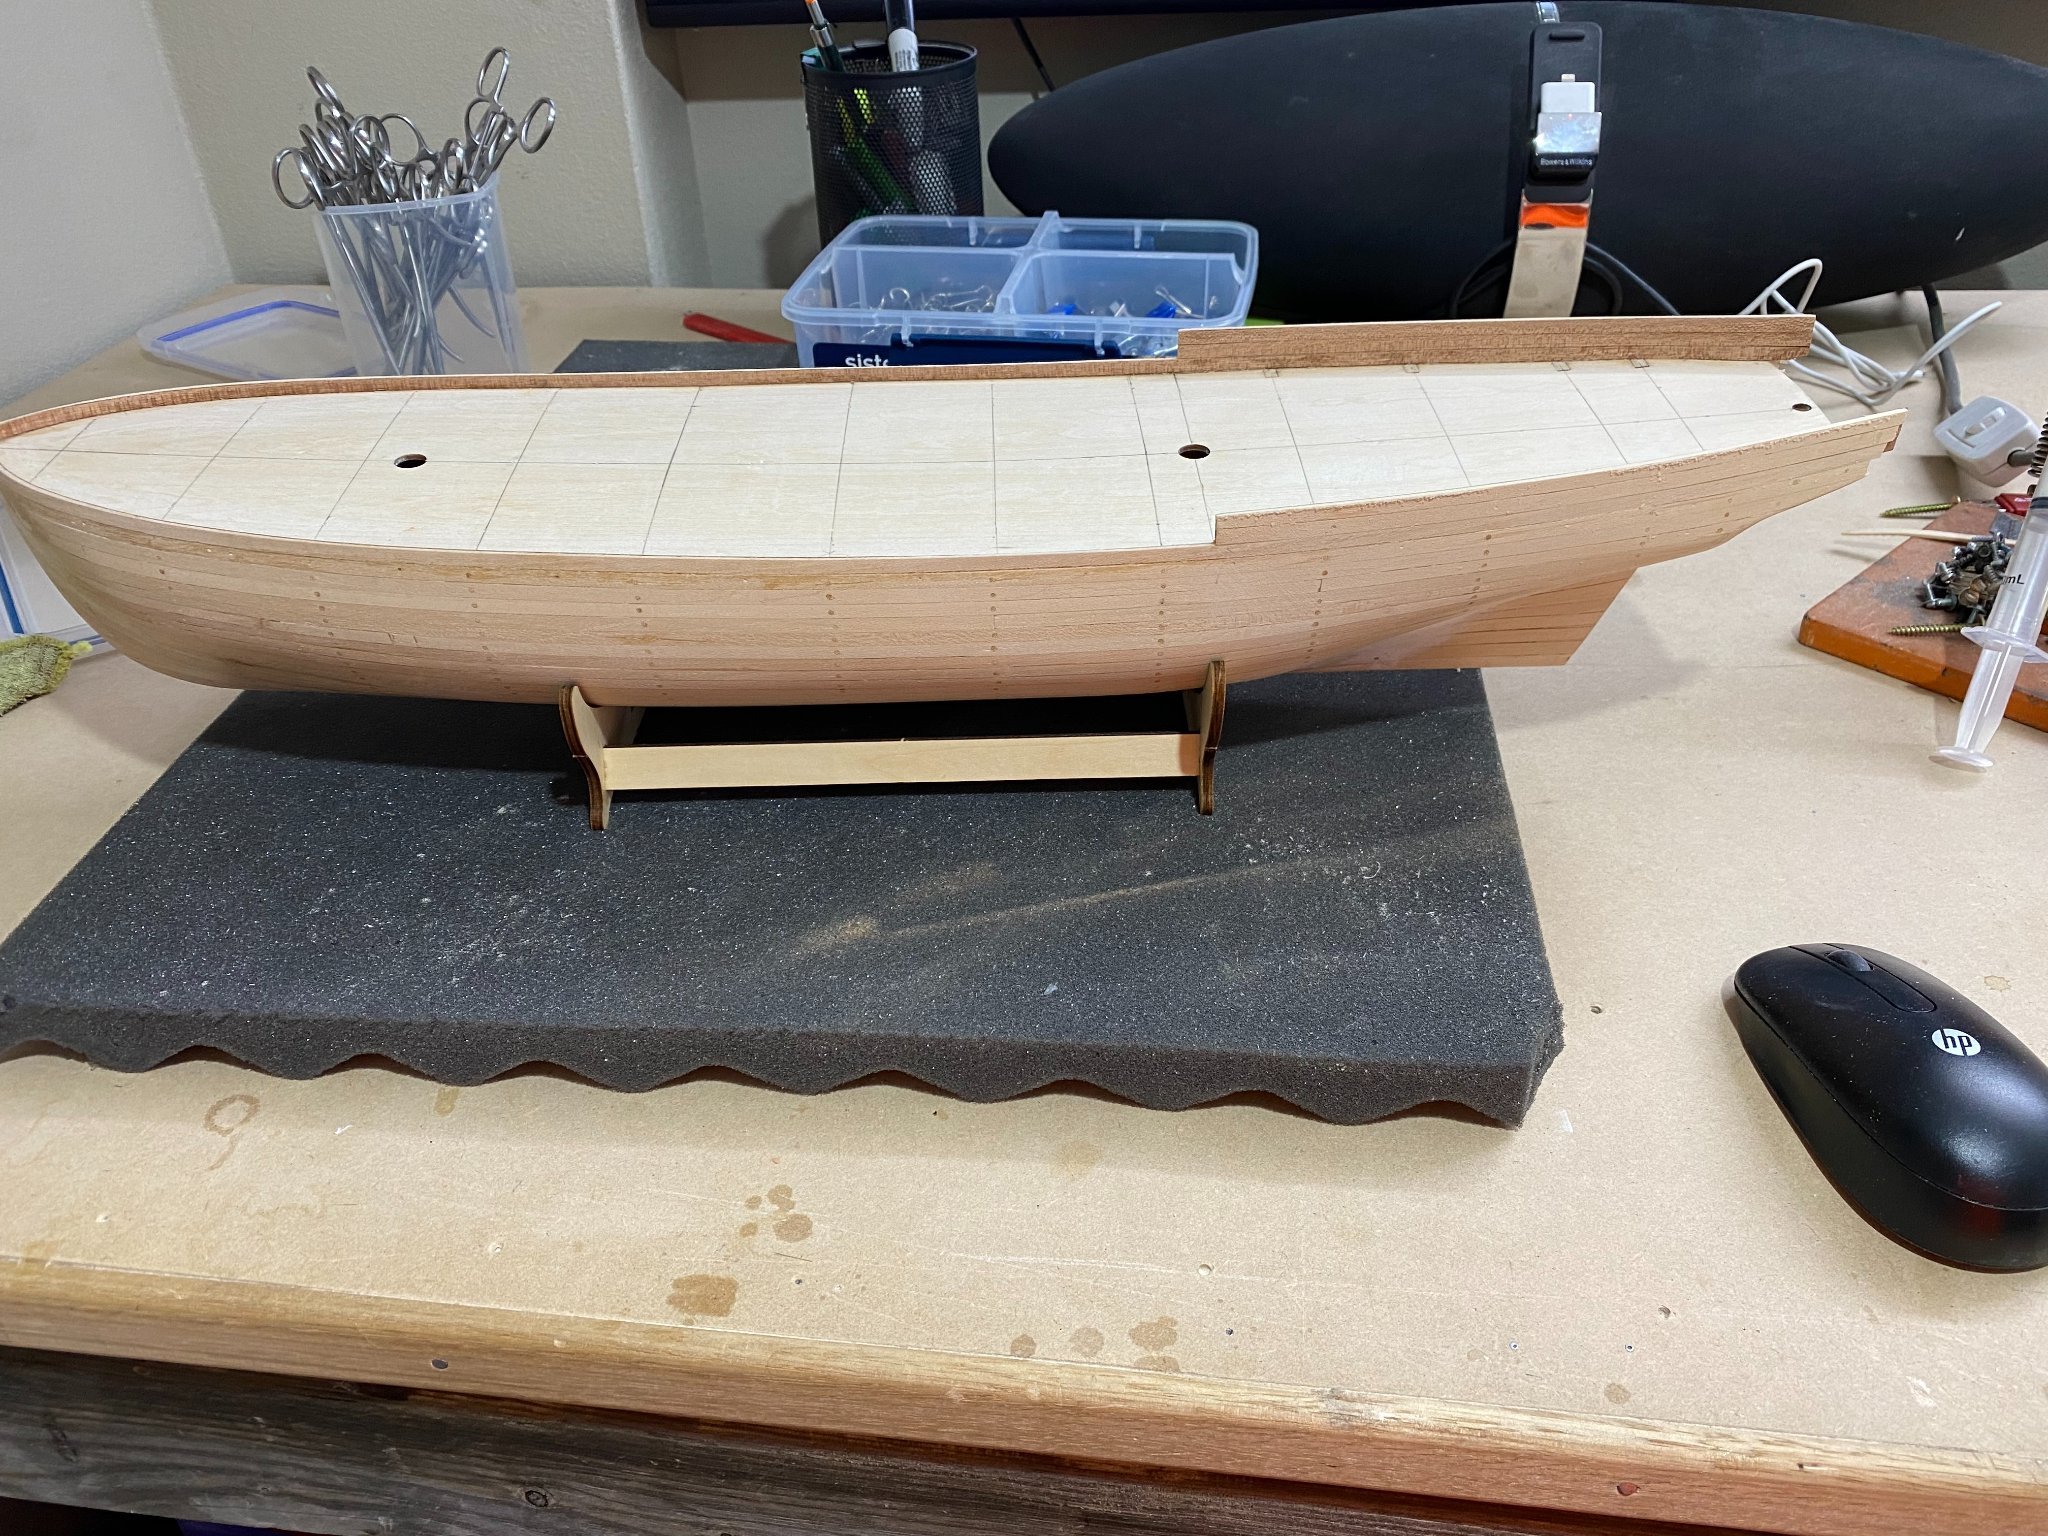
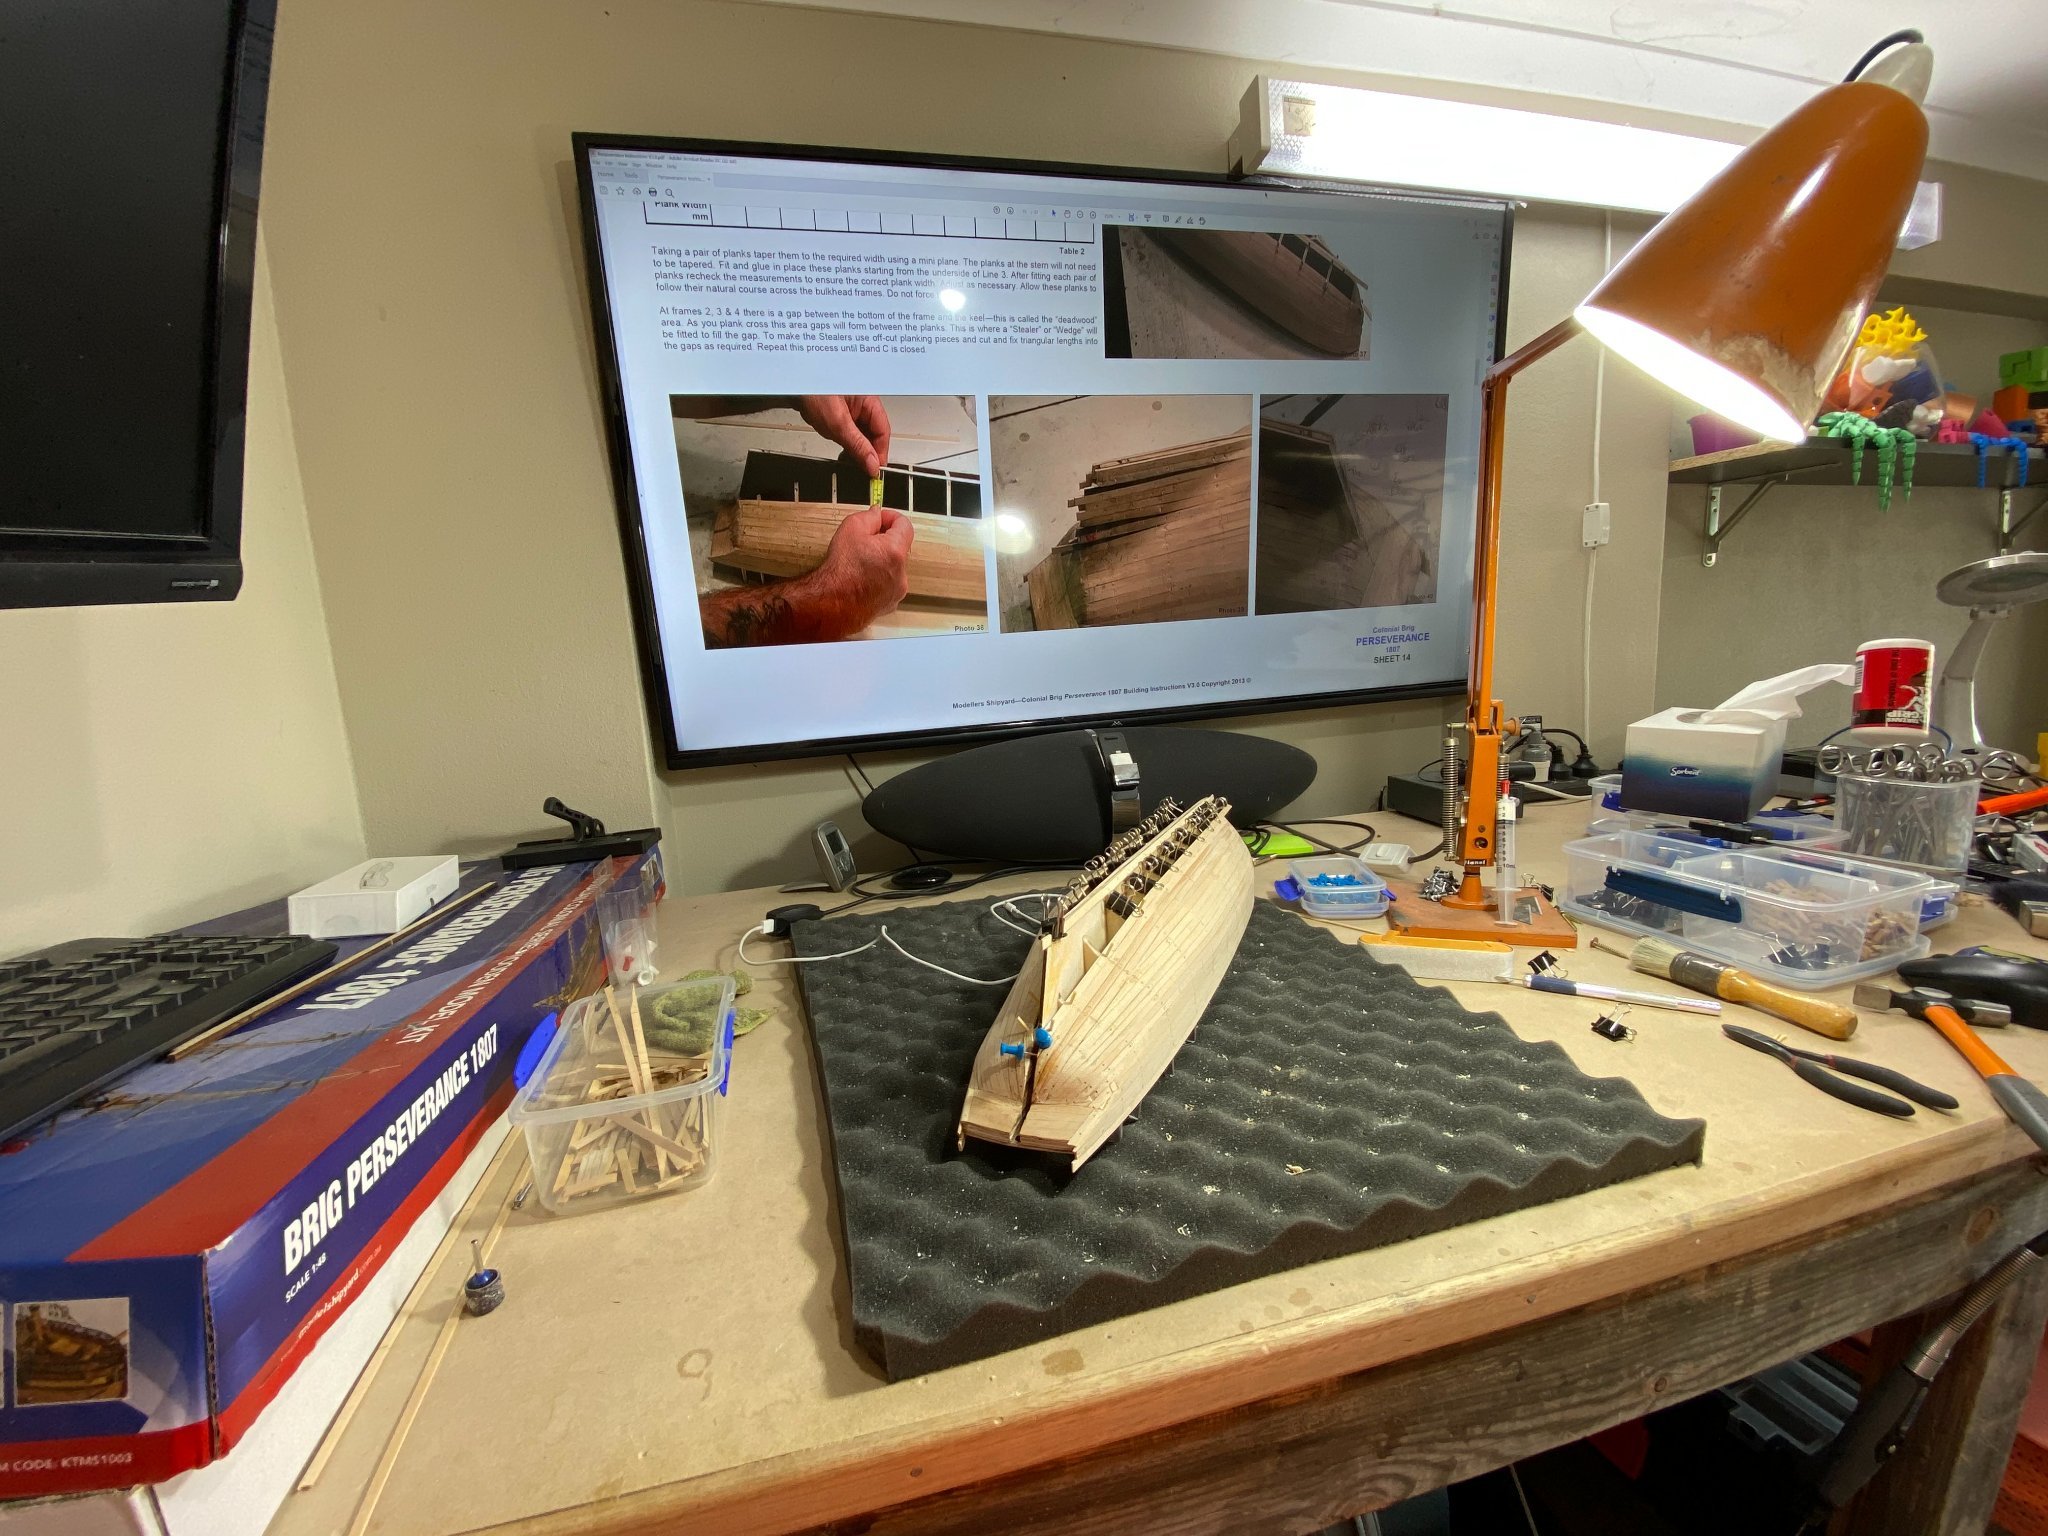
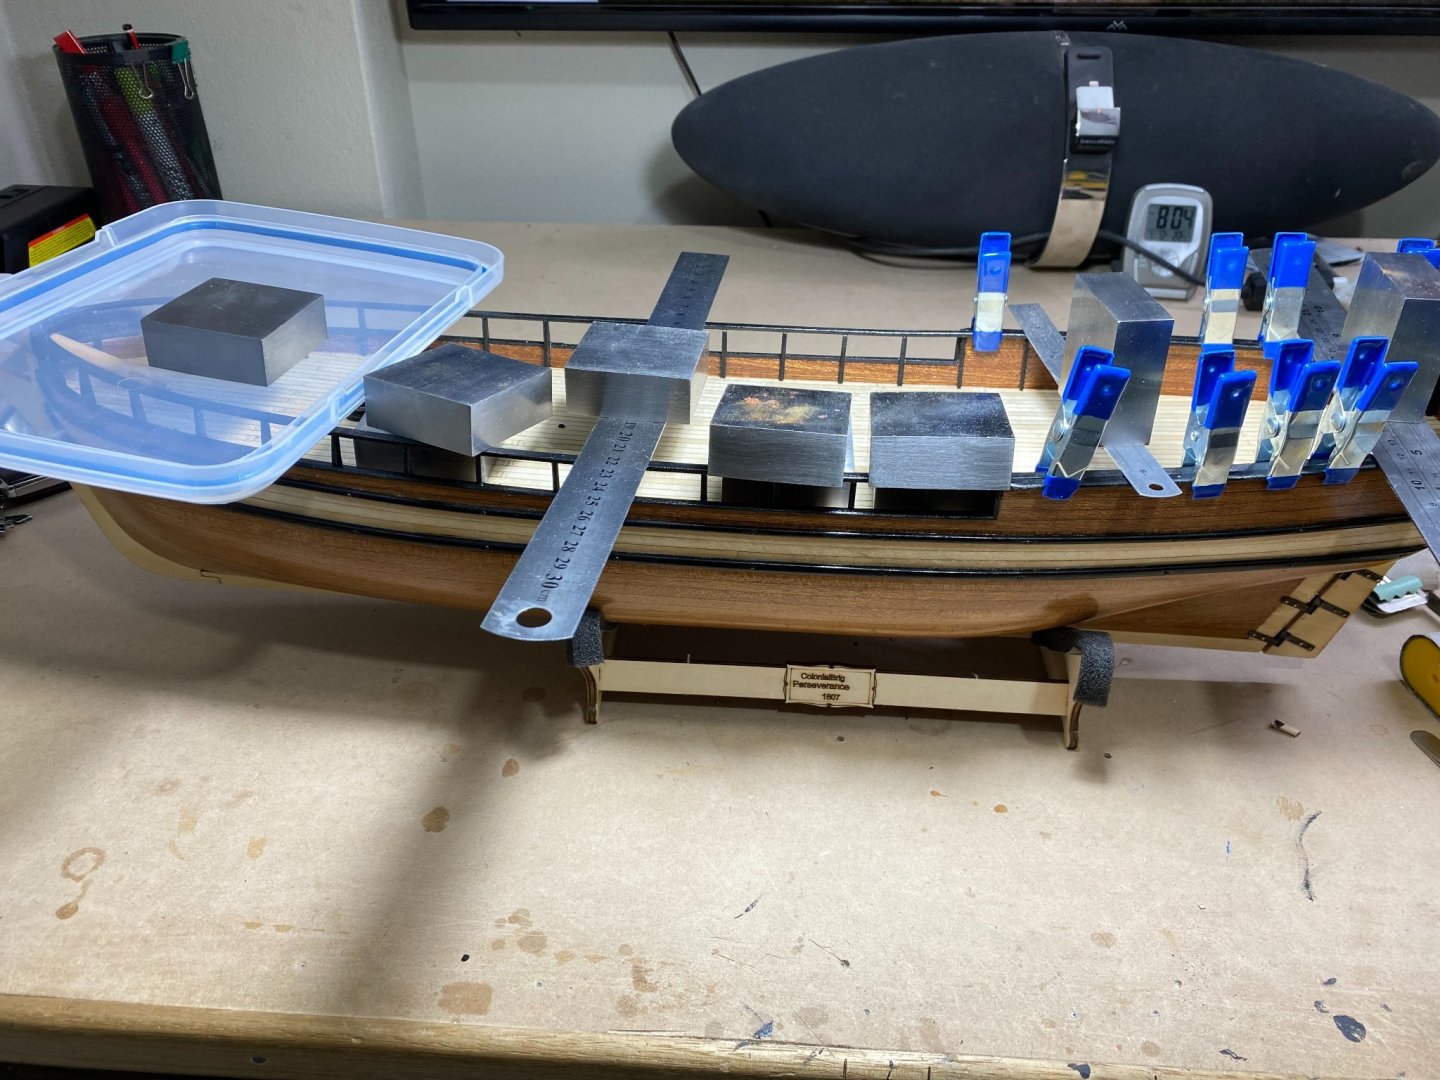
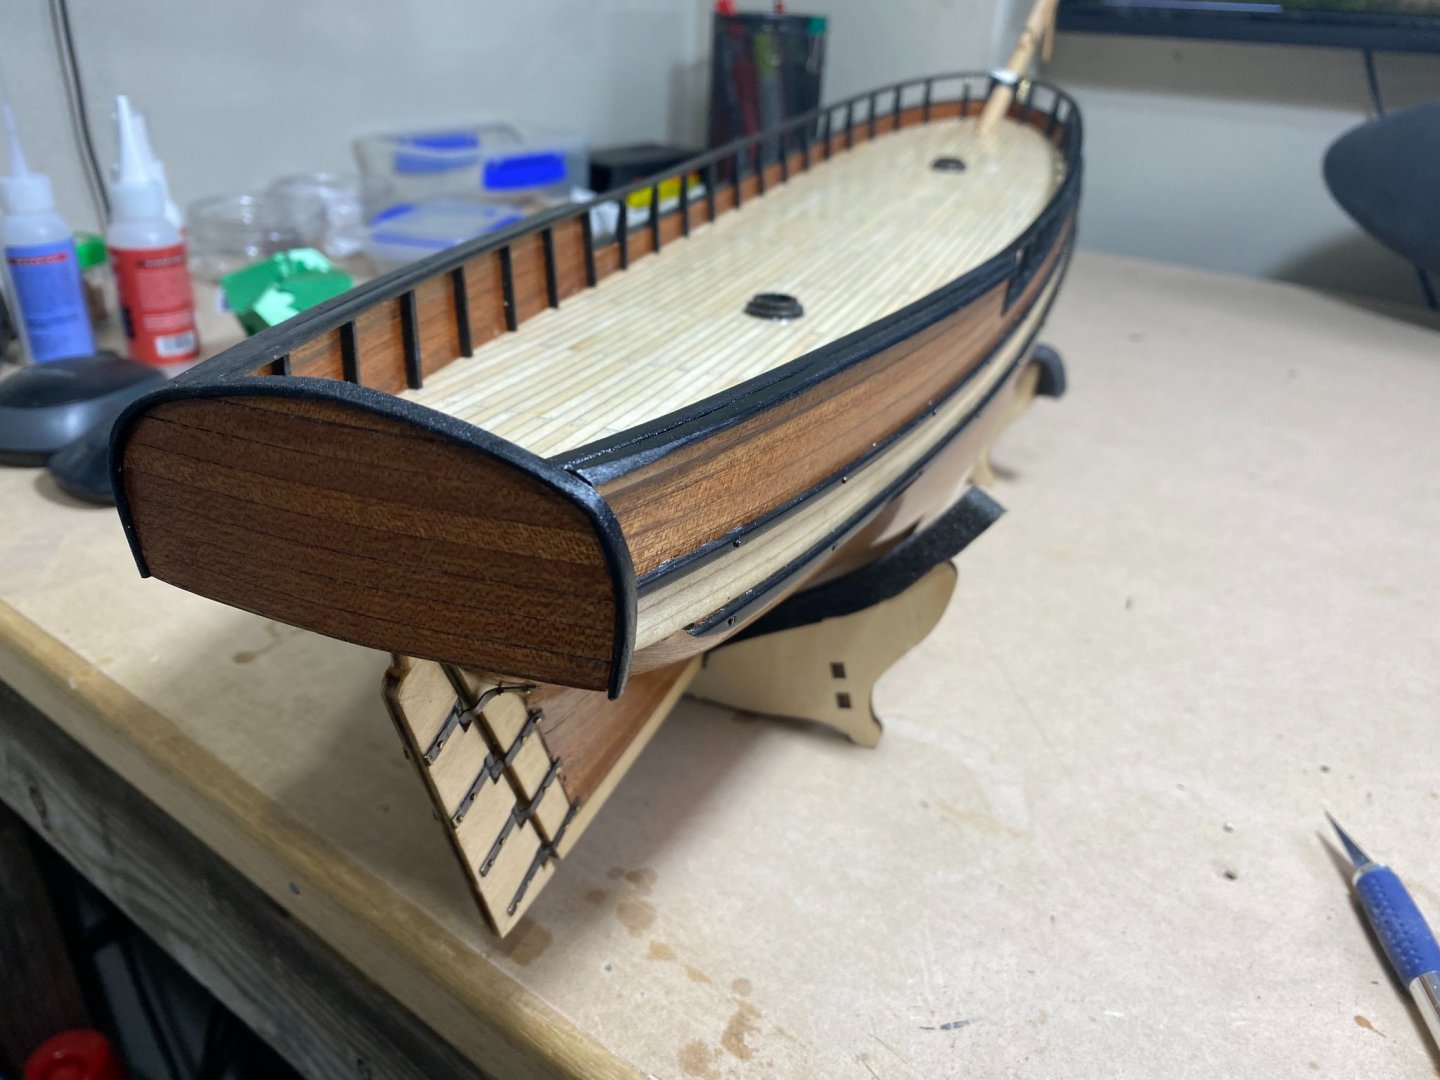
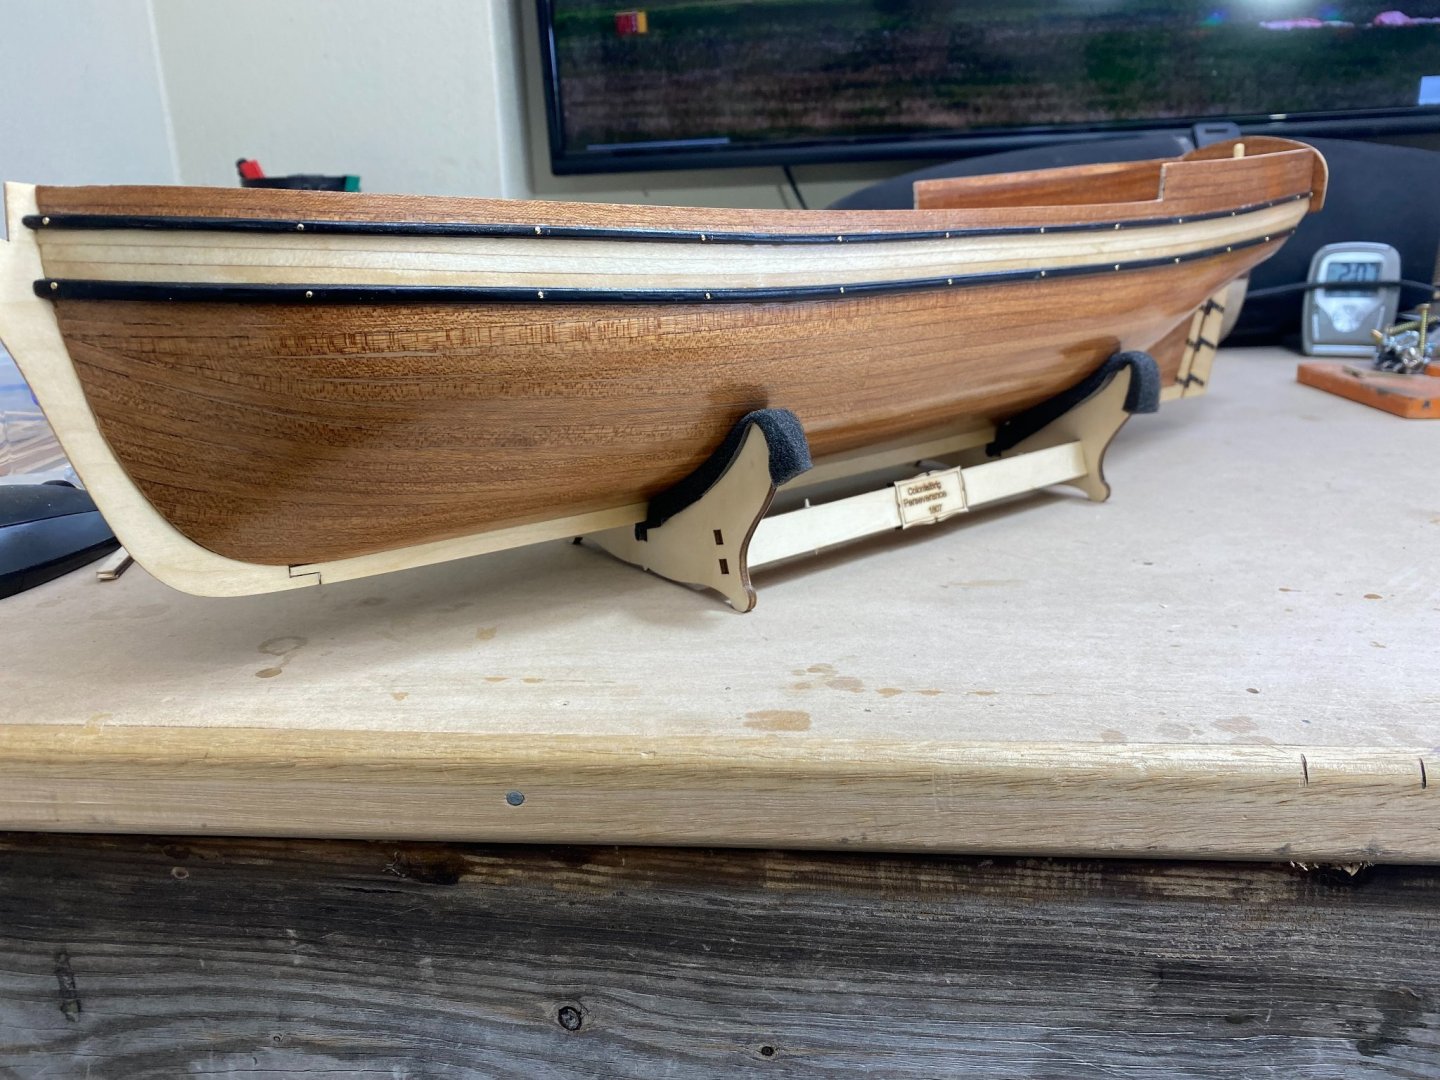
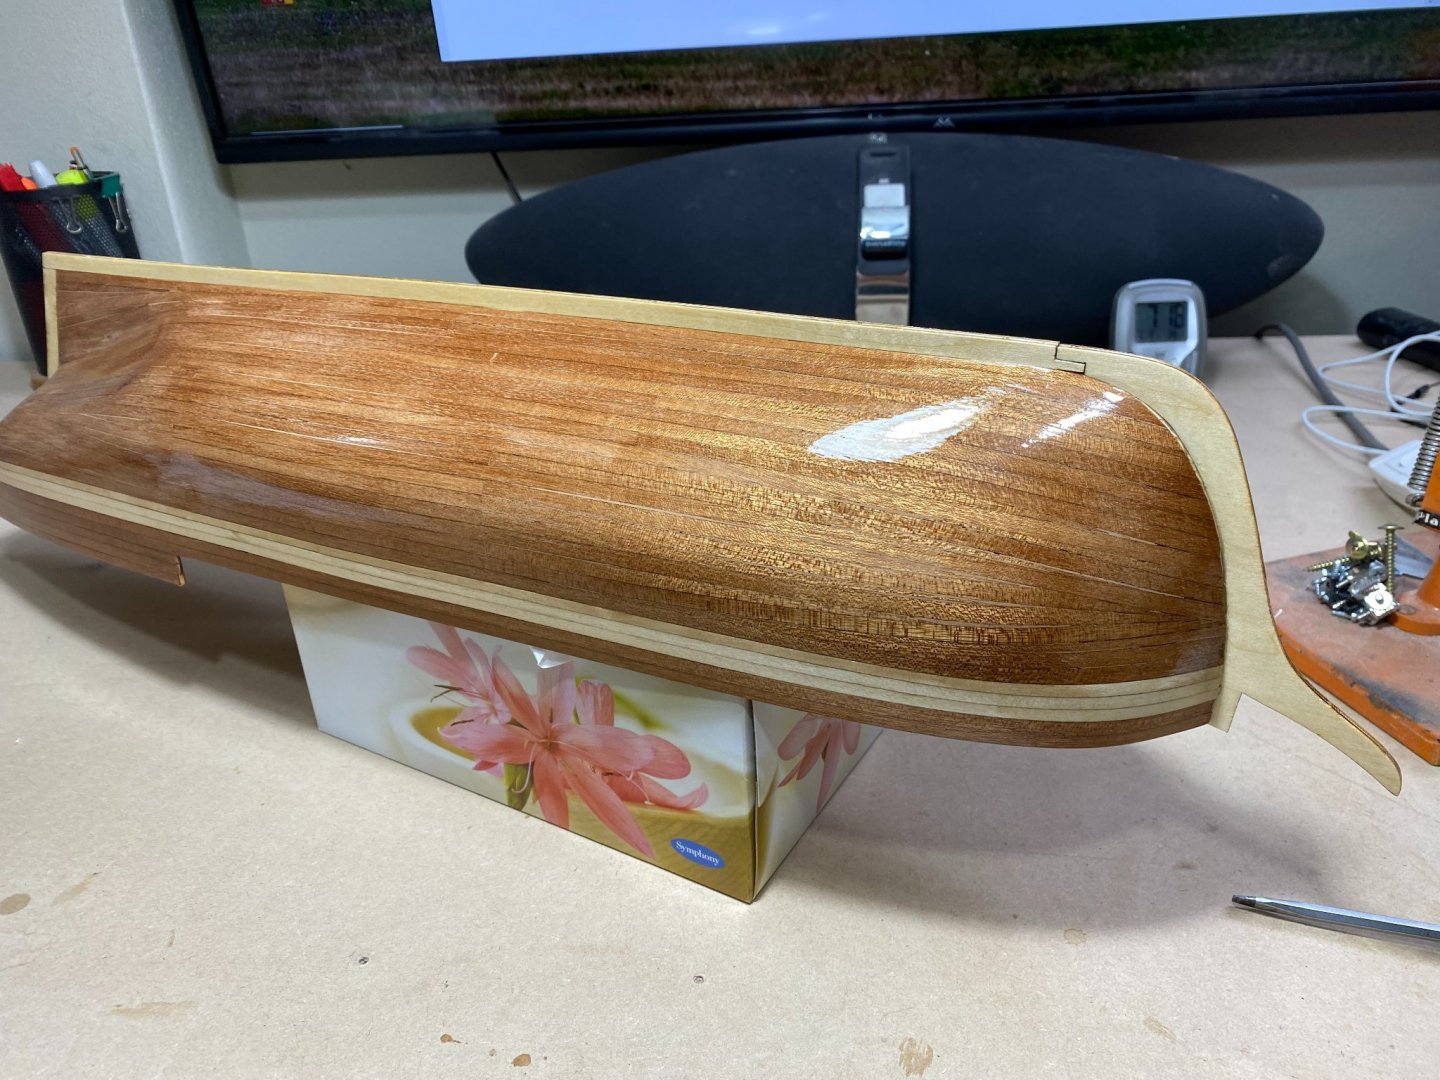
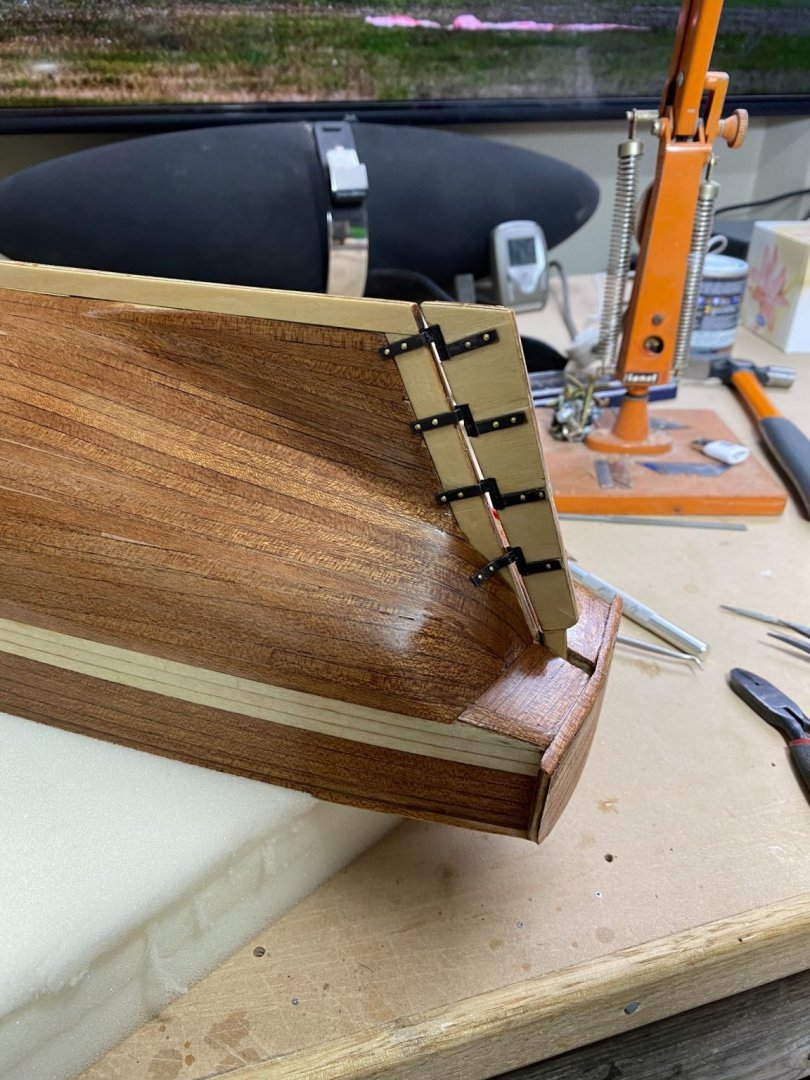
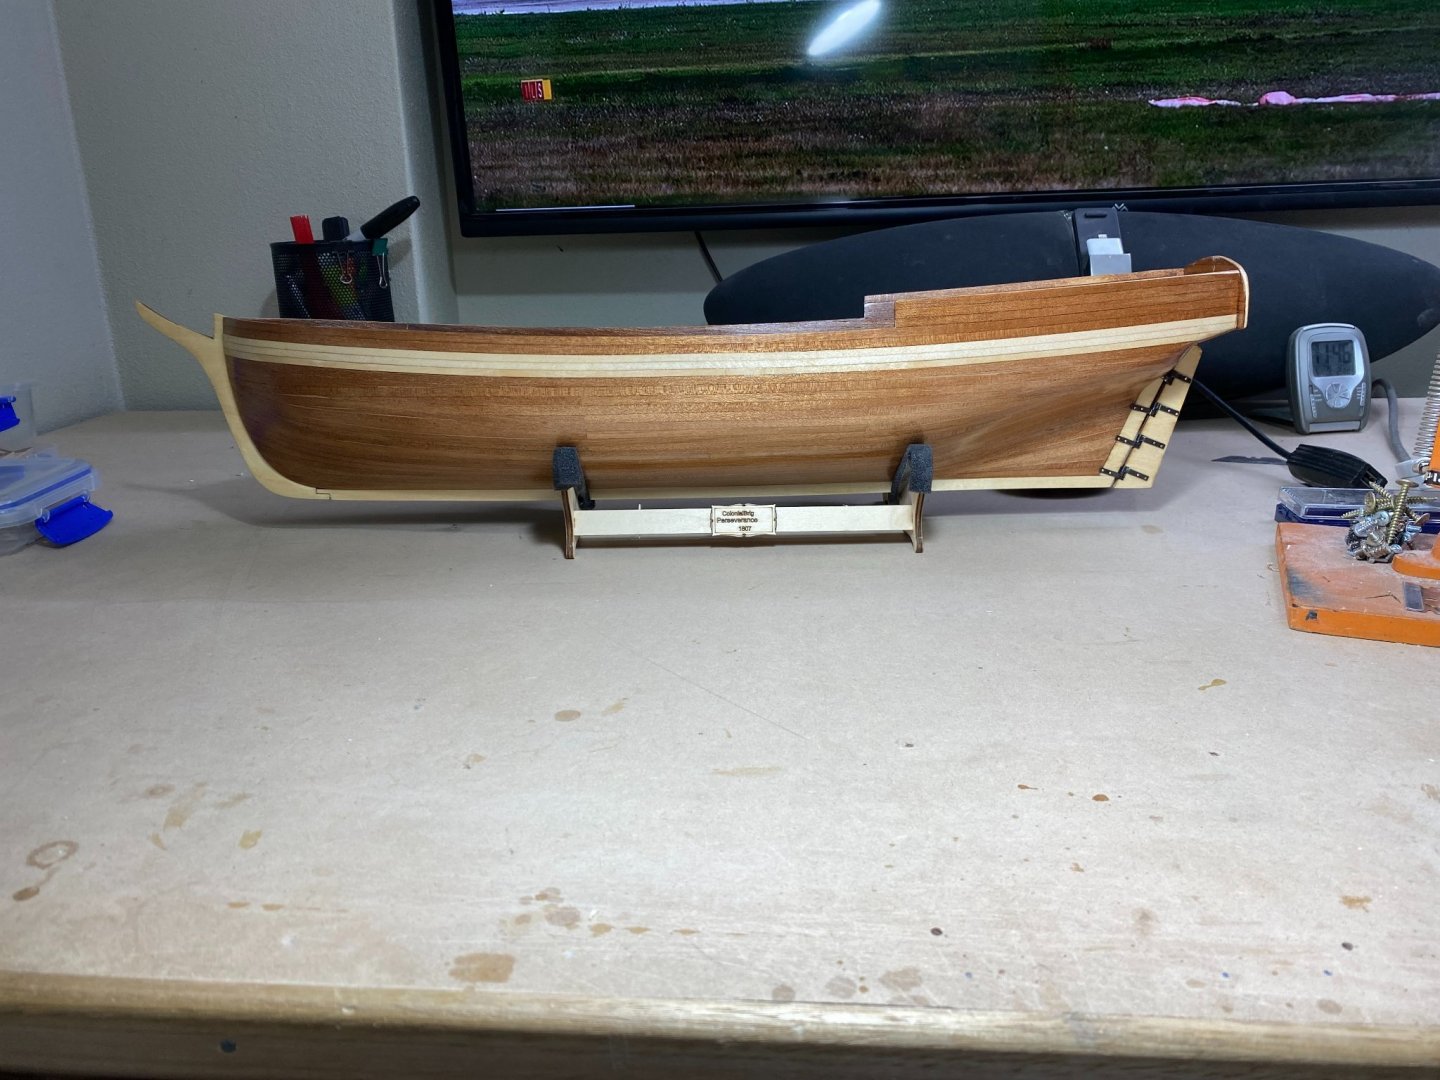
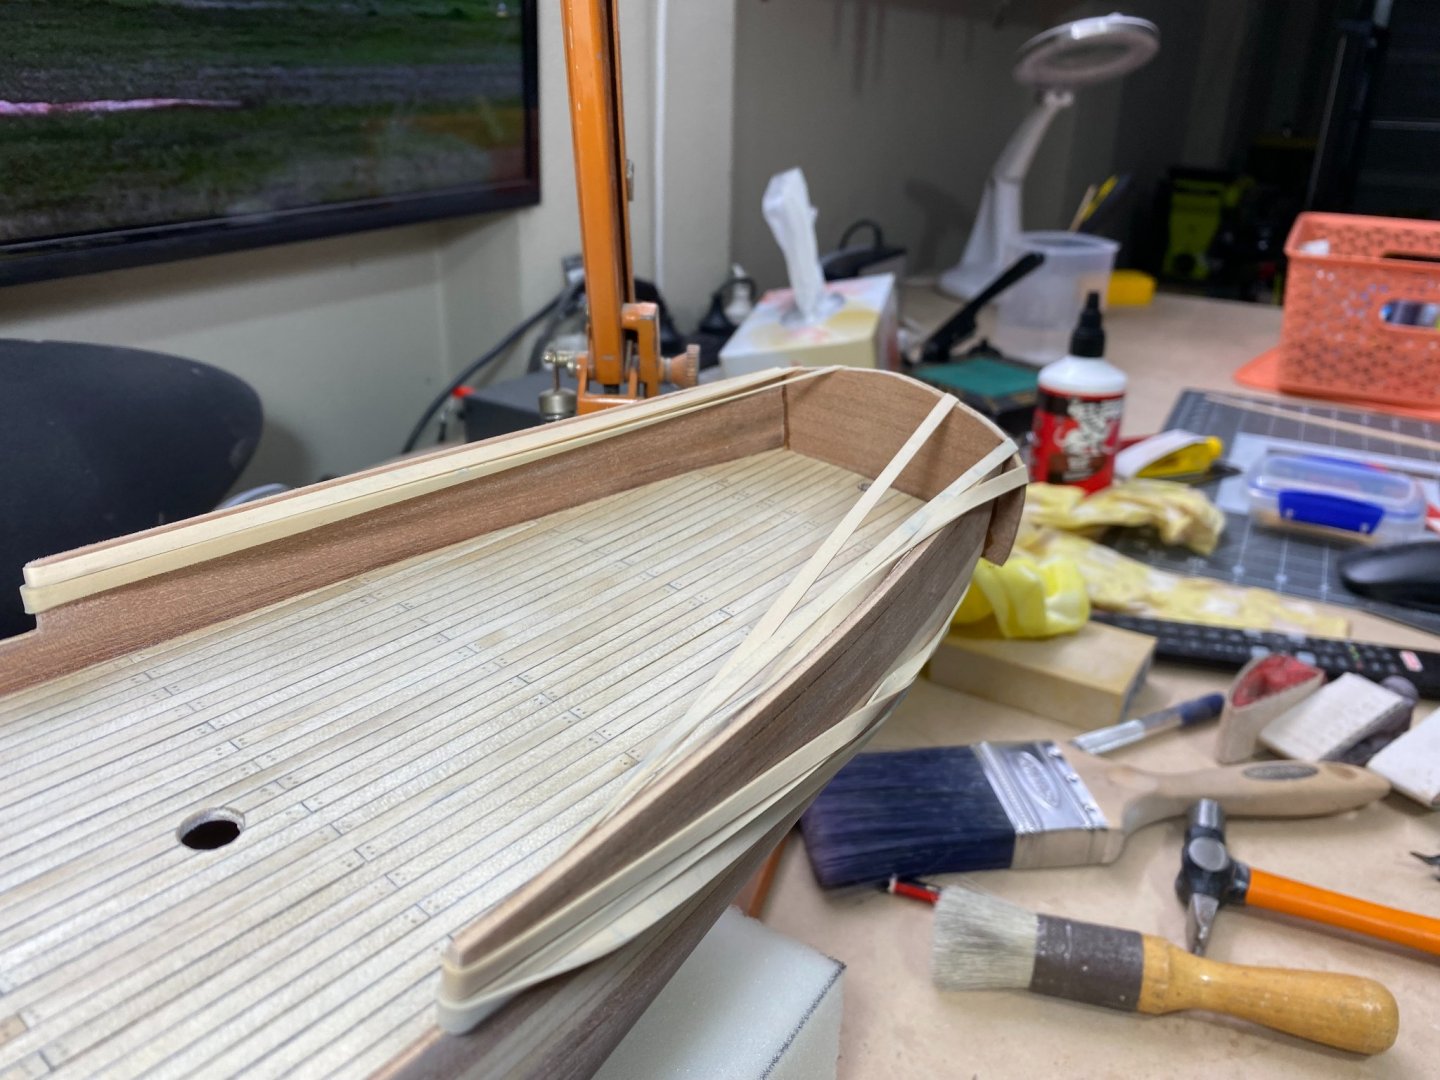
12/07/21 Gave a few more coats of paint to top rails. Glued bowsprit top cradle in place 13/07/21 Glued on top rails and painted transom cap 14/07/21 Finished cap rails. Final shaping and sanding to aft cap rails and final painting. Bent head rails and started bending head rail caps. Glued fence in place. 15/07/21 - 17/07/21 Working on head rails and head rail caps and glued in place. HTD: 275 Cap rails glued into place Cap rails and transom cap in place Head rail and net-fence in place. A fairly easy week this week. Despite what I thought was a clever idea bending the transom cap, after gluing it on I noticed a few gaps that disappointed me somewhat. Still, the casual observer will not notice and think I am brilliant regardless. I was surprised at the level of difficulty creating and placing the two head rails would prove. The two rails were precut ply, so I soaked them in boiling water and tried to shape them by clamping them to the rim of a glass. They weren't budging and so I left them soak for 24Hrs by which time they had begun to delaminate. I was going to cut new ones out of balsa or something but ended up just squirting some thin CA between the layers and clamped them down to dry. I then commenced bending again with much more success this time, probably ended up with more bend than was required. I then edge bent the caps for the head rails and glued them on. By the time I finished sanding and shaping the two rails were slightly different in many aspects but I proceeded to glue them in place none the less. The head on shot, which I have chosen not to include above, shows a lack of symmetry that is unsatisfactory to me but chose to move on regardless. As this is a stepping stone model to bigger and better things, the observation has been well noted. As I have discovered a number of other such challenges, I have decided not to go straight onto the Gorch Fock, a level 4 kit from OcCre, but instead, a Level 3 kit from the same kit manufacturer as this one called the Matthew Turner which is on it's way as I type. I think I am ready to start deck furniture/accessories next. Any constructive comments or criticisms would be most welcome, thanks.


- 47 replies
-
- 3
-
-
- Modellers Shipyard
- Perseverance
- (and 1 more)
-
Do you have a build log of it?
-
I bet you say that to all the girls
-
05/07/21 - 08/07/21 Started preparing forward stanchions, sanding, shaping, painting etc 08/07/21 Installed forward stanchions. Filled gaps and made a cap for figurehead to hide gaps 08/07/21 - 09/07/21 Preparing aft stanchions, sanding, shaping, painting etc and painted figurehead and cap. 10/07/21 Installed aft stanchions and glued bowsprit in place 11/07/21 Shaped and painted bowsprit cradle, bent transom cap, sanded and readied top rails HTD: 268 Bowsprit glued in place top rails just sitting on top waiting to be painted before gluing. Also making a top-saddle for the bowsprit. Still had the cutout for the transom so copied shape to bench and banged in a few brads to help bend transom cap, will leave it to dry for a couple of days, I think it should hold it's shape.. A relatively nice easy week with nothing too taxing on the grey matter. After top rails and transom cap painted and installed I should be making a start on the deck furnishings towards the end of the week. Looking forward to that.
- 47 replies
-
- 4
-
-
- Modellers Shipyard
- Perseverance
- (and 1 more)
-
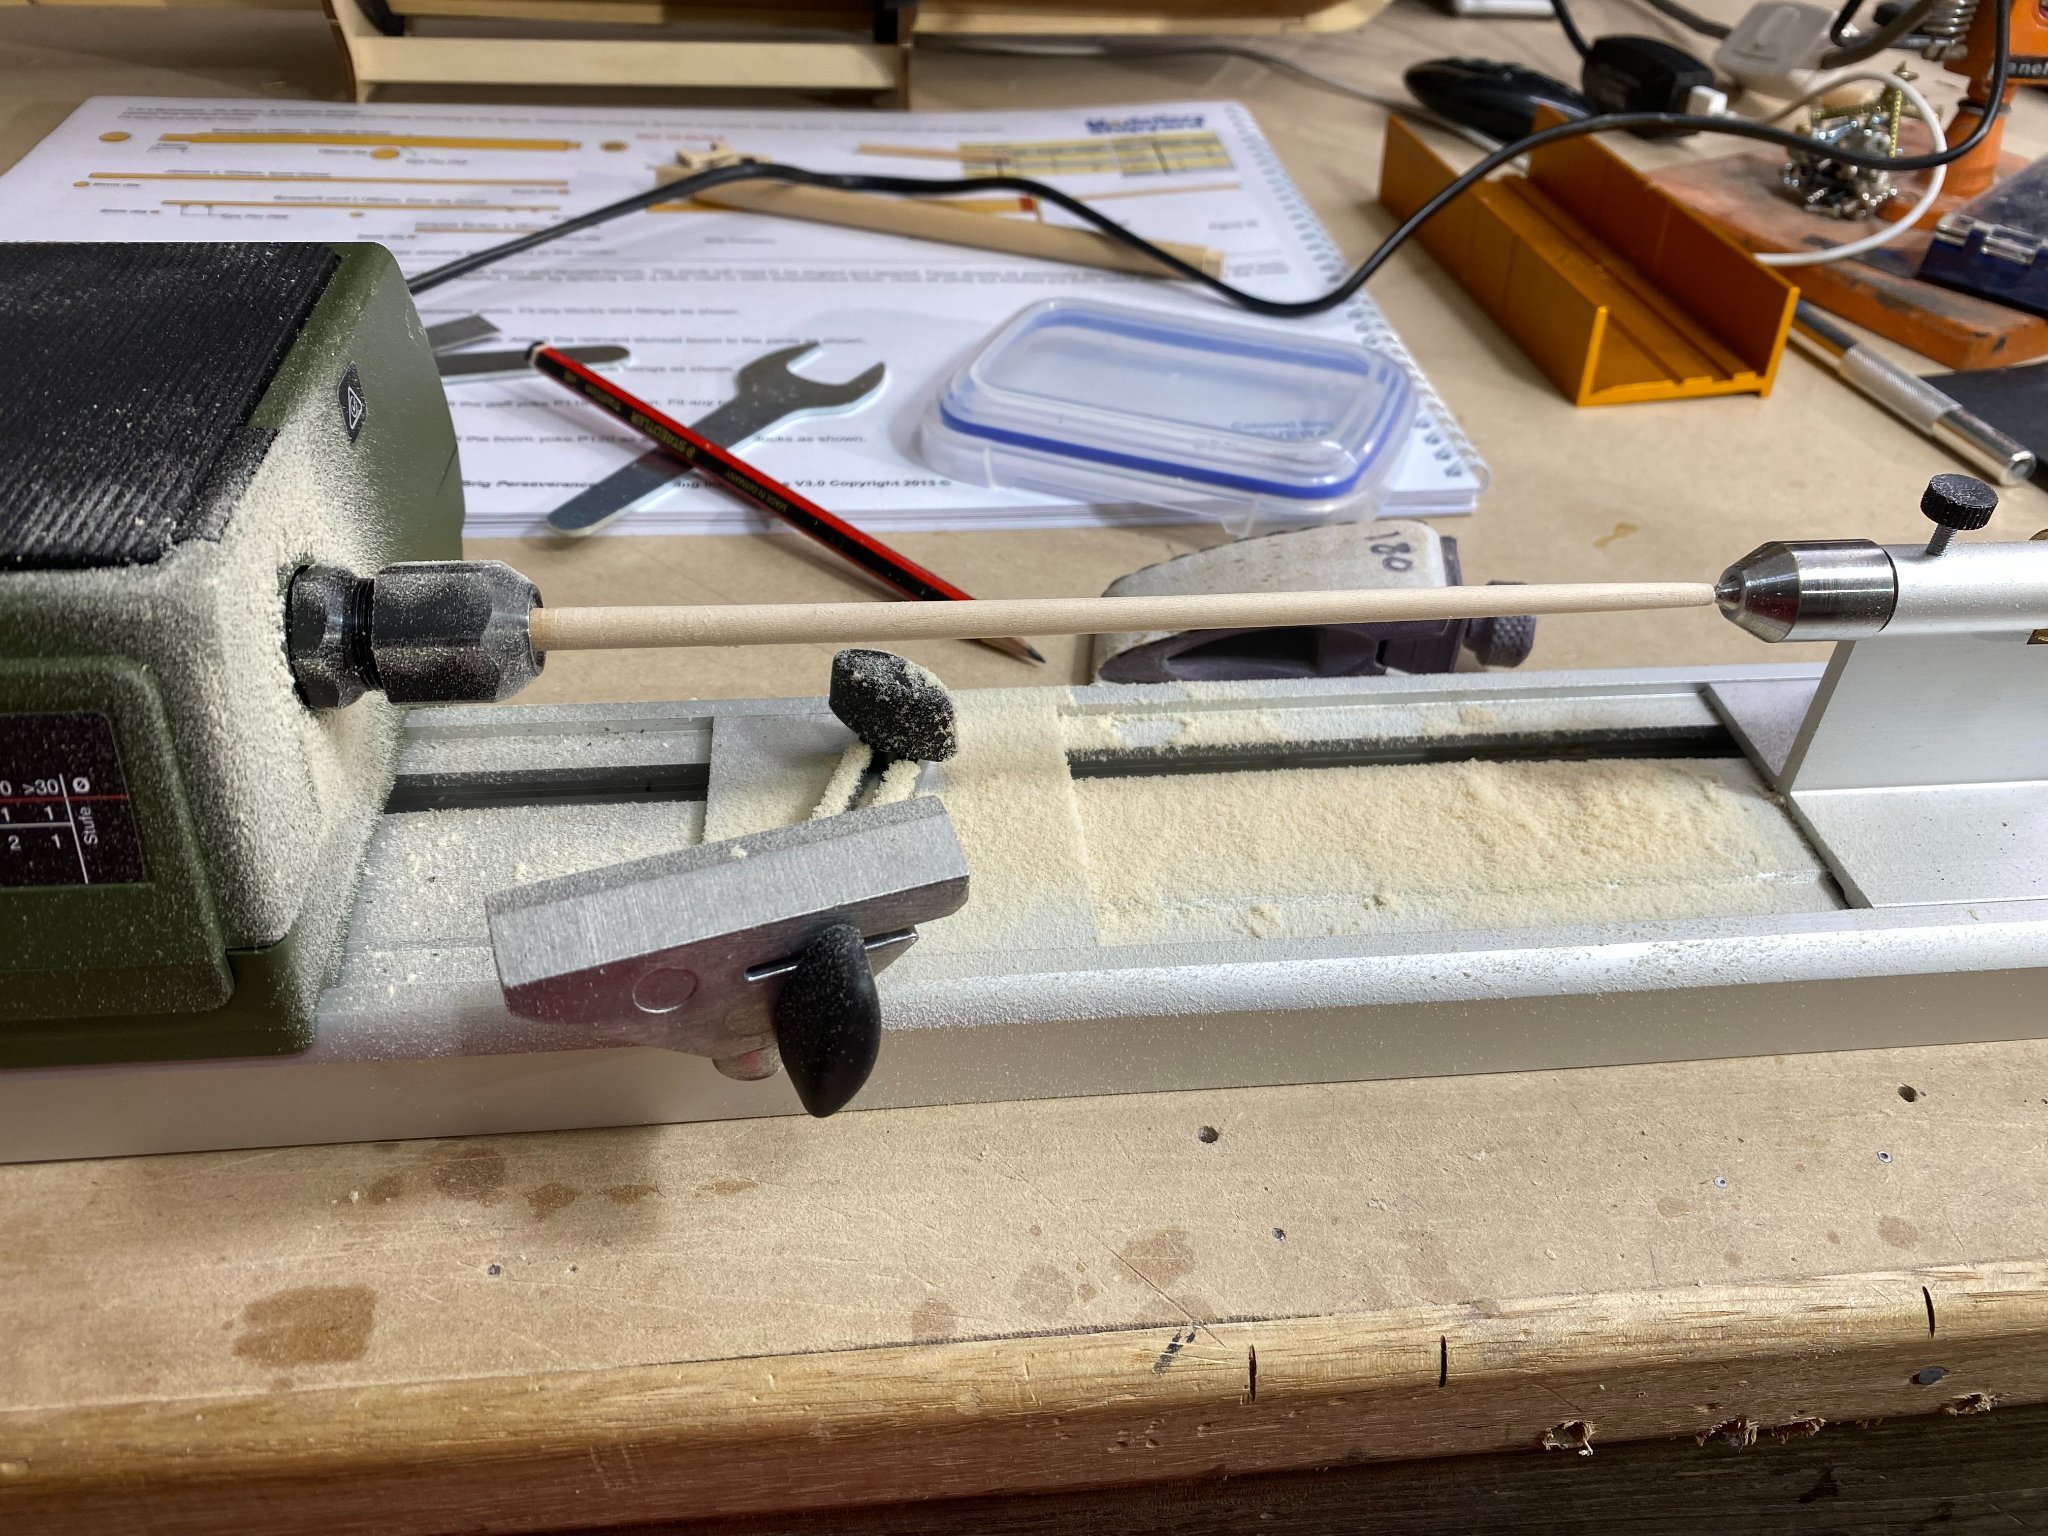
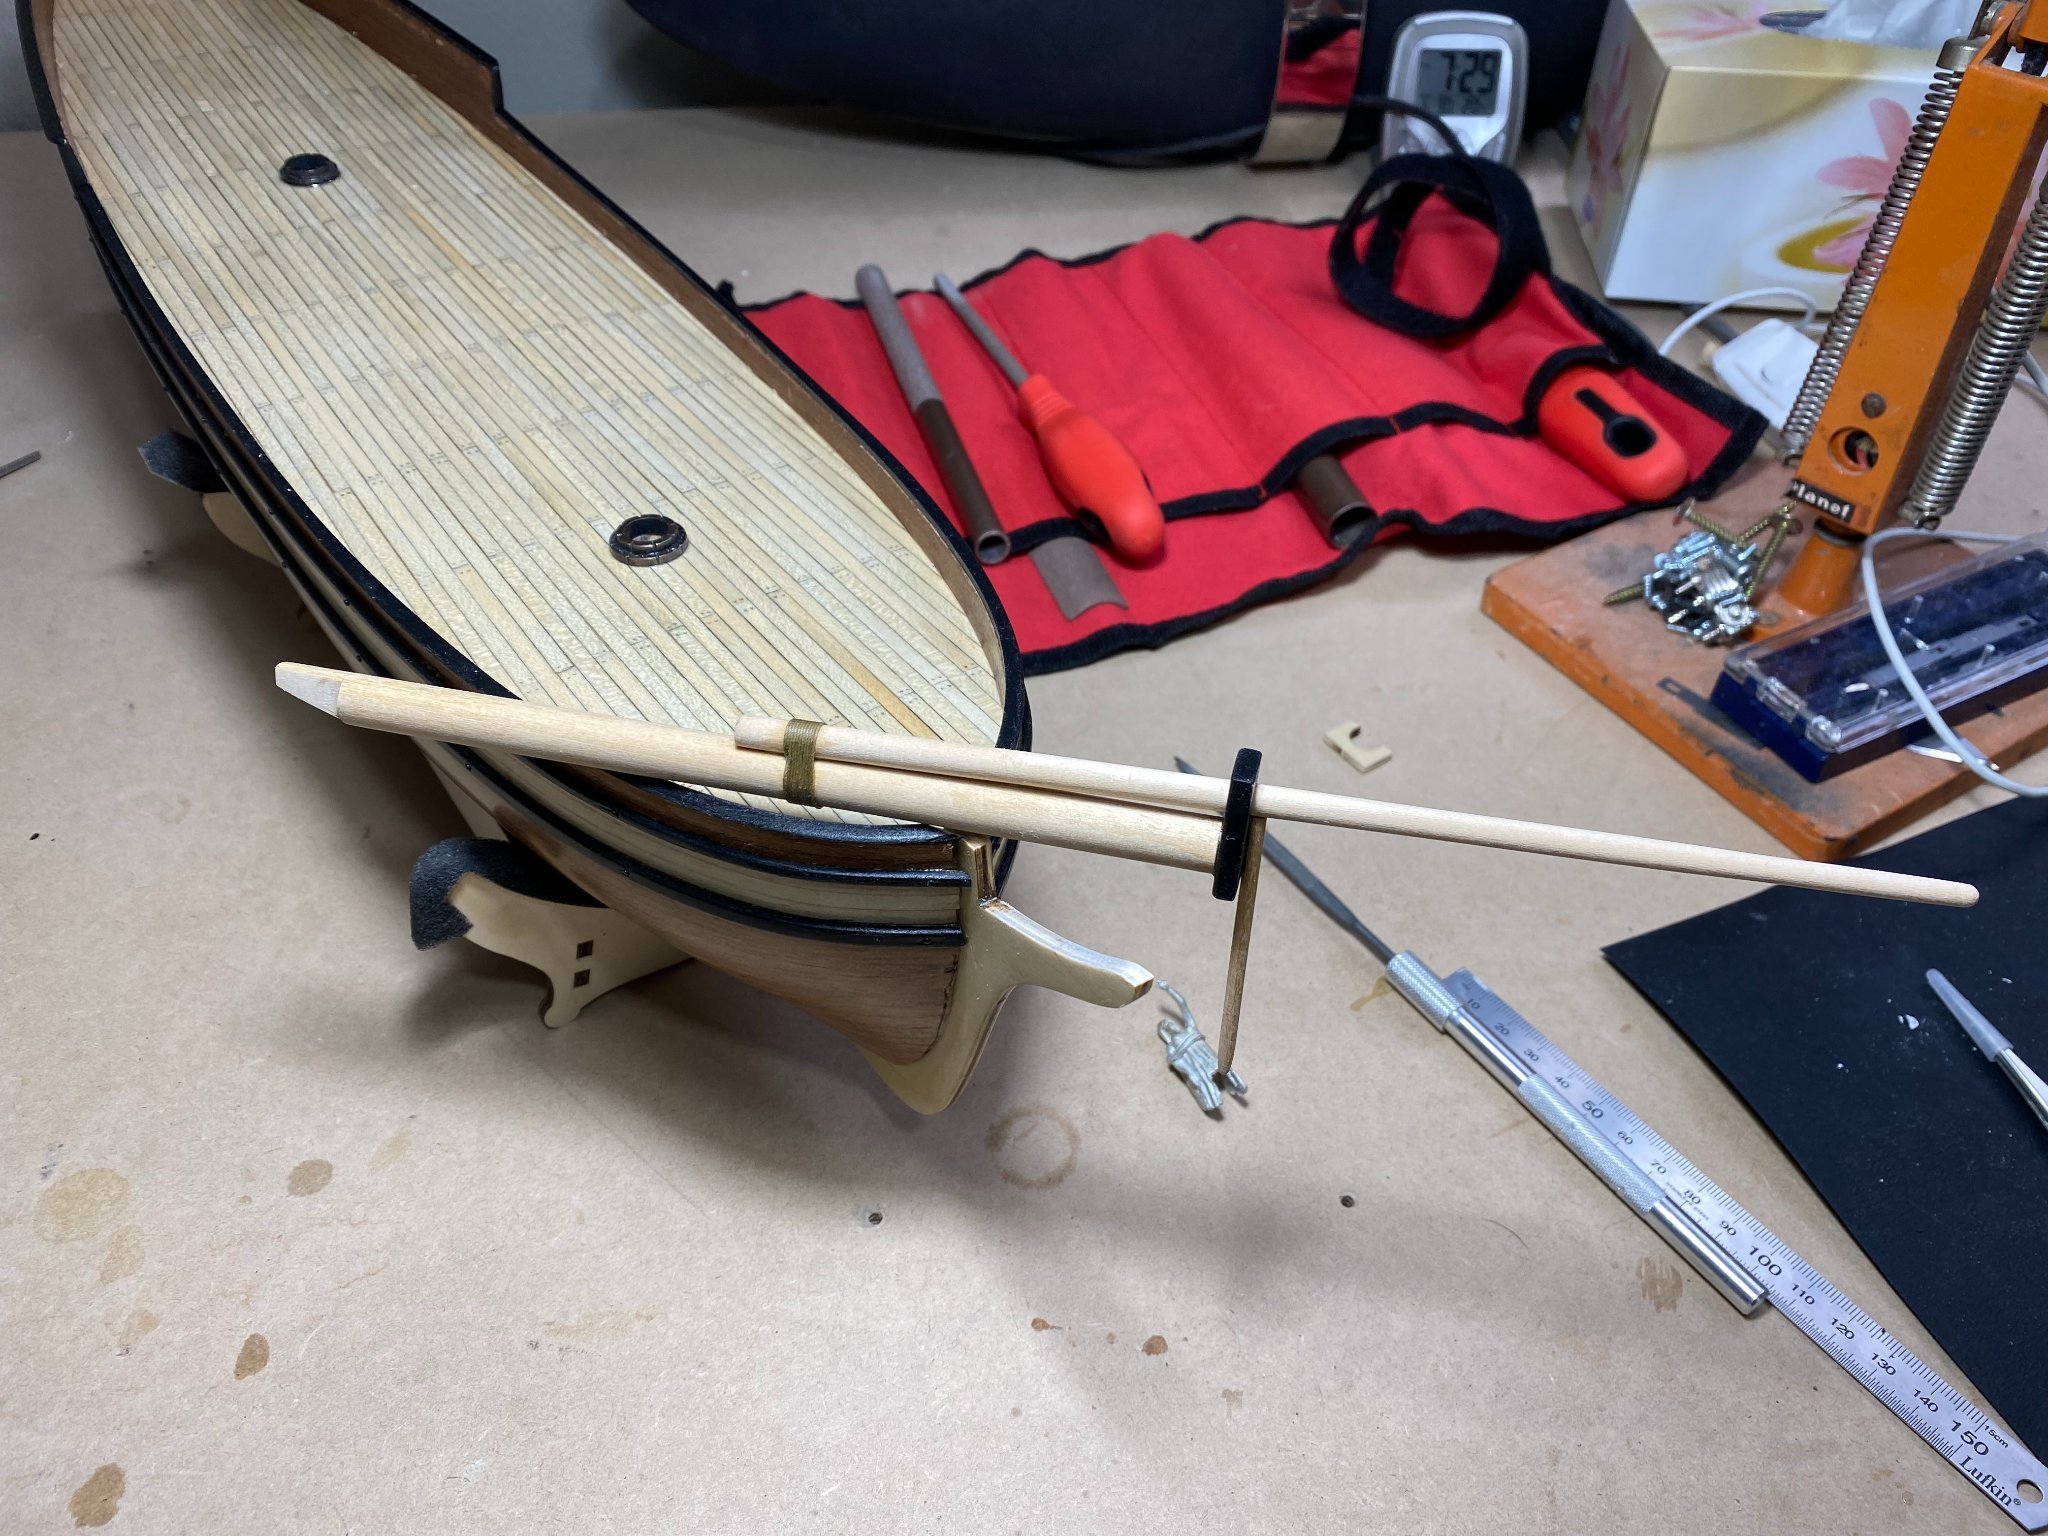
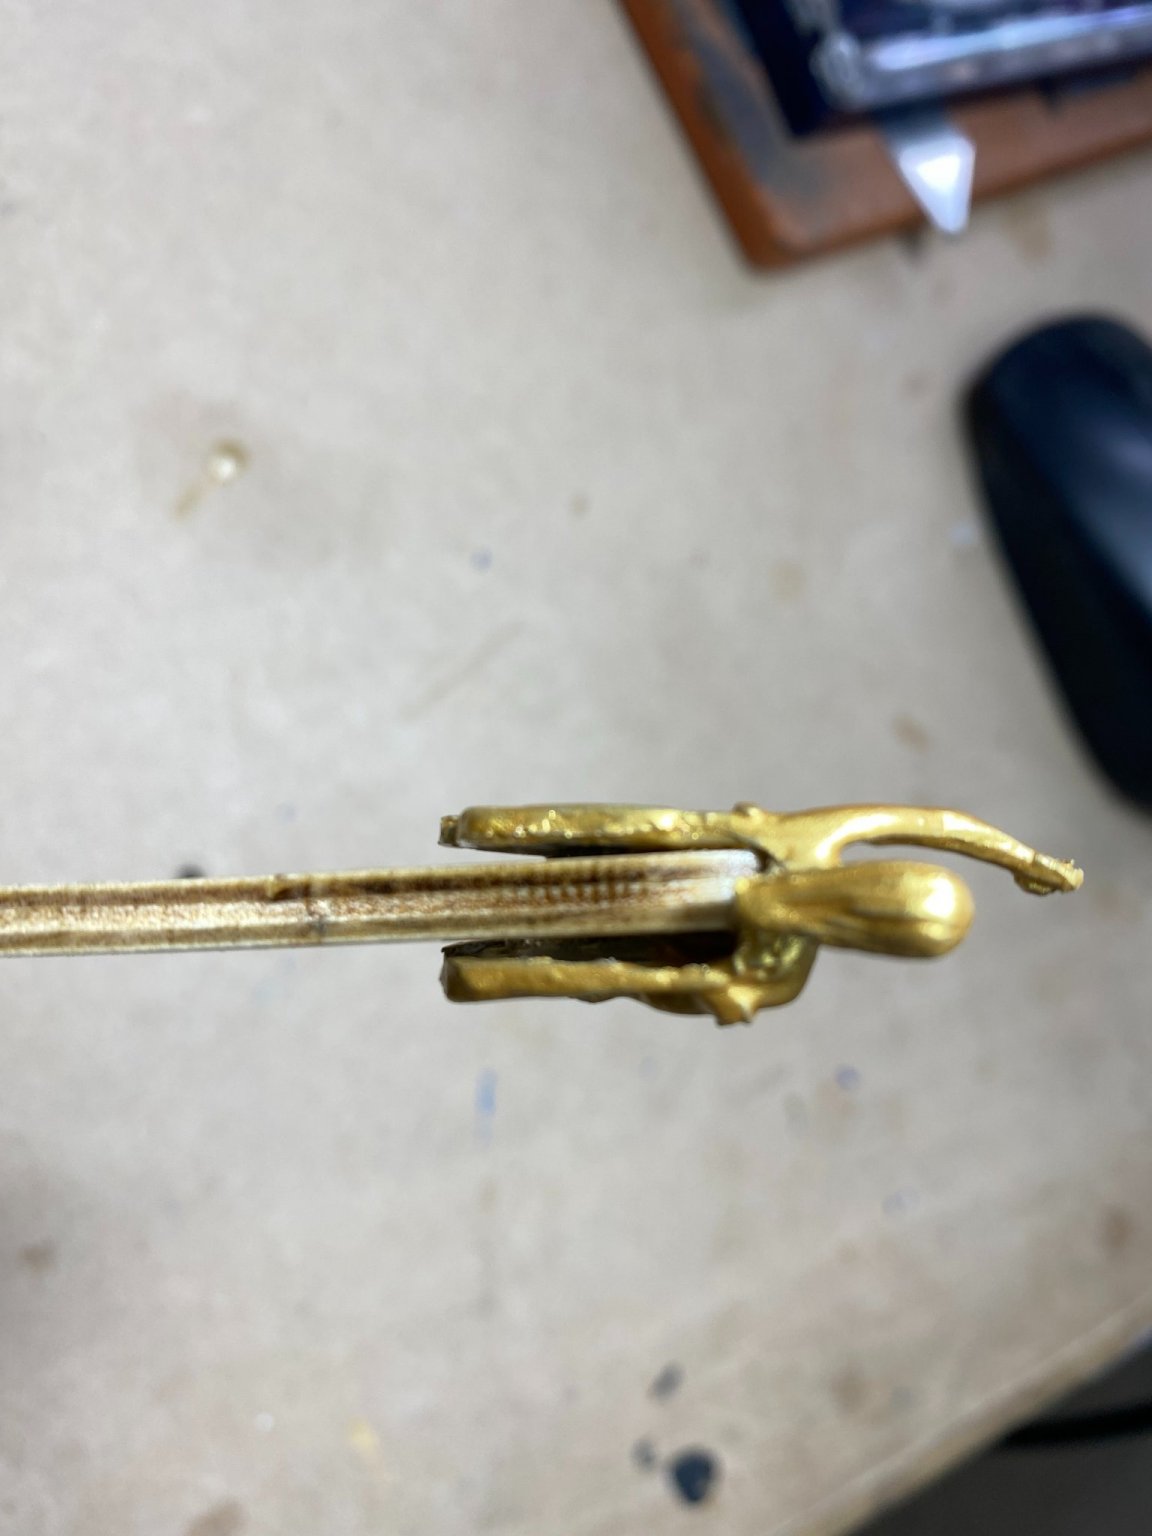
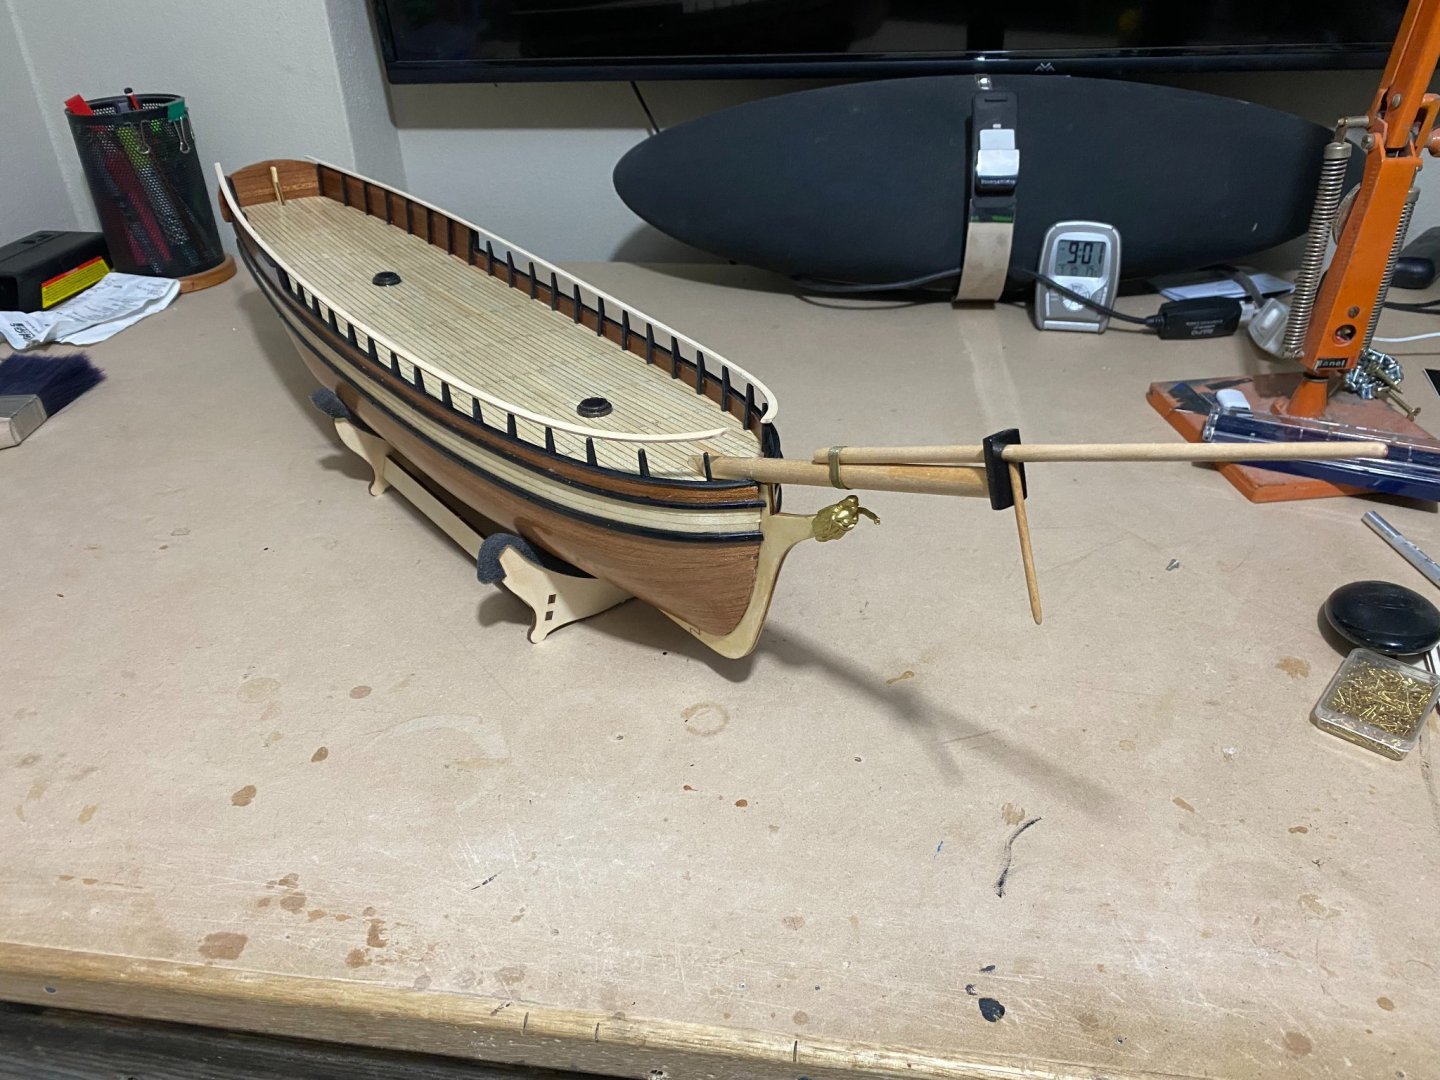
28/06/21 Started preparing bowsprit parts 29/06/21 Painted mast cap 01/07/21 Assembled bowsprit and painted figurehead 02/07/21 Several coats of varnish to bowsprit 03/07/21 Glued on figurehead HTD: 261 Shaping the jibboom Figurehead glued on. I really enjoyed making and assembling the bowsprit. I gave it three or four coats of airbrushed Vallejo satin varnish but it still looked the same as it did before I started, could easily have been my inexperience with an airbrush and thinned it too much. Anyway, I ended up hand painting it with the same satin varnish I used on the hull and much happier with the result. I shaped the top pointy bit of the bow to accept it in the morning when the varnish has dried. Not at all happy with the fitting of the figurehead. The piece was way too wide for the bow post and I dare not attempt to squeeze the gap out of it as I think the part is cast and therefore likely to break. So I think I will pop some shims into the gaps and fashion a small cap to cover the brutality.

- 47 replies
-
- 4
-
-
- Modellers Shipyard
- Perseverance
- (and 1 more)
-
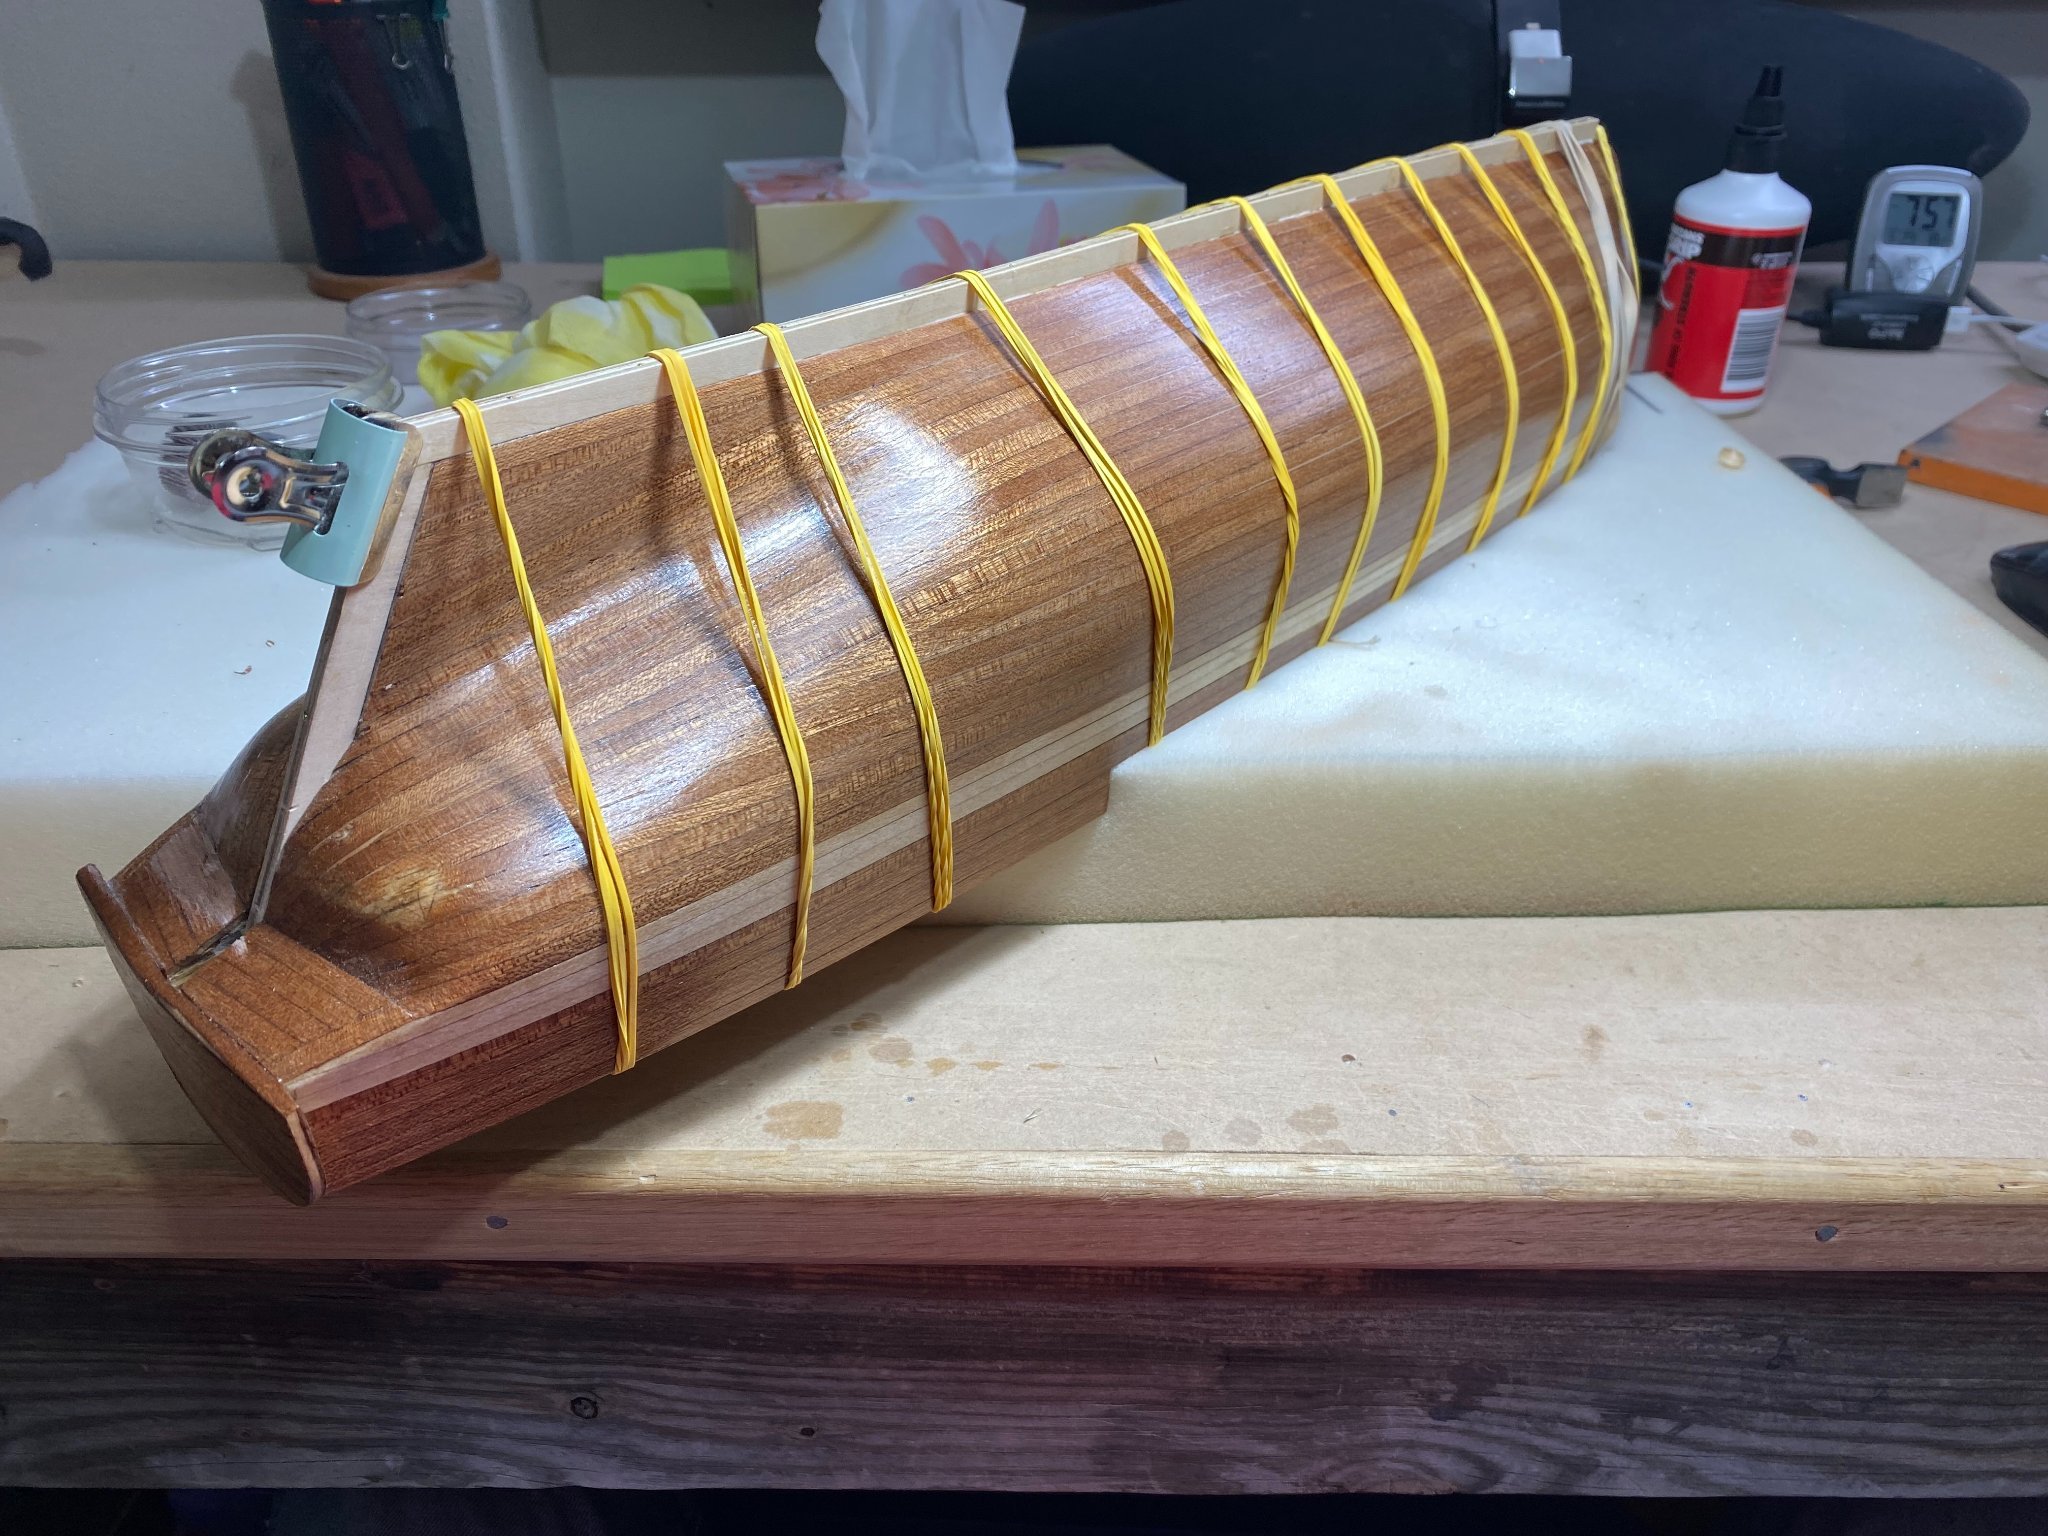
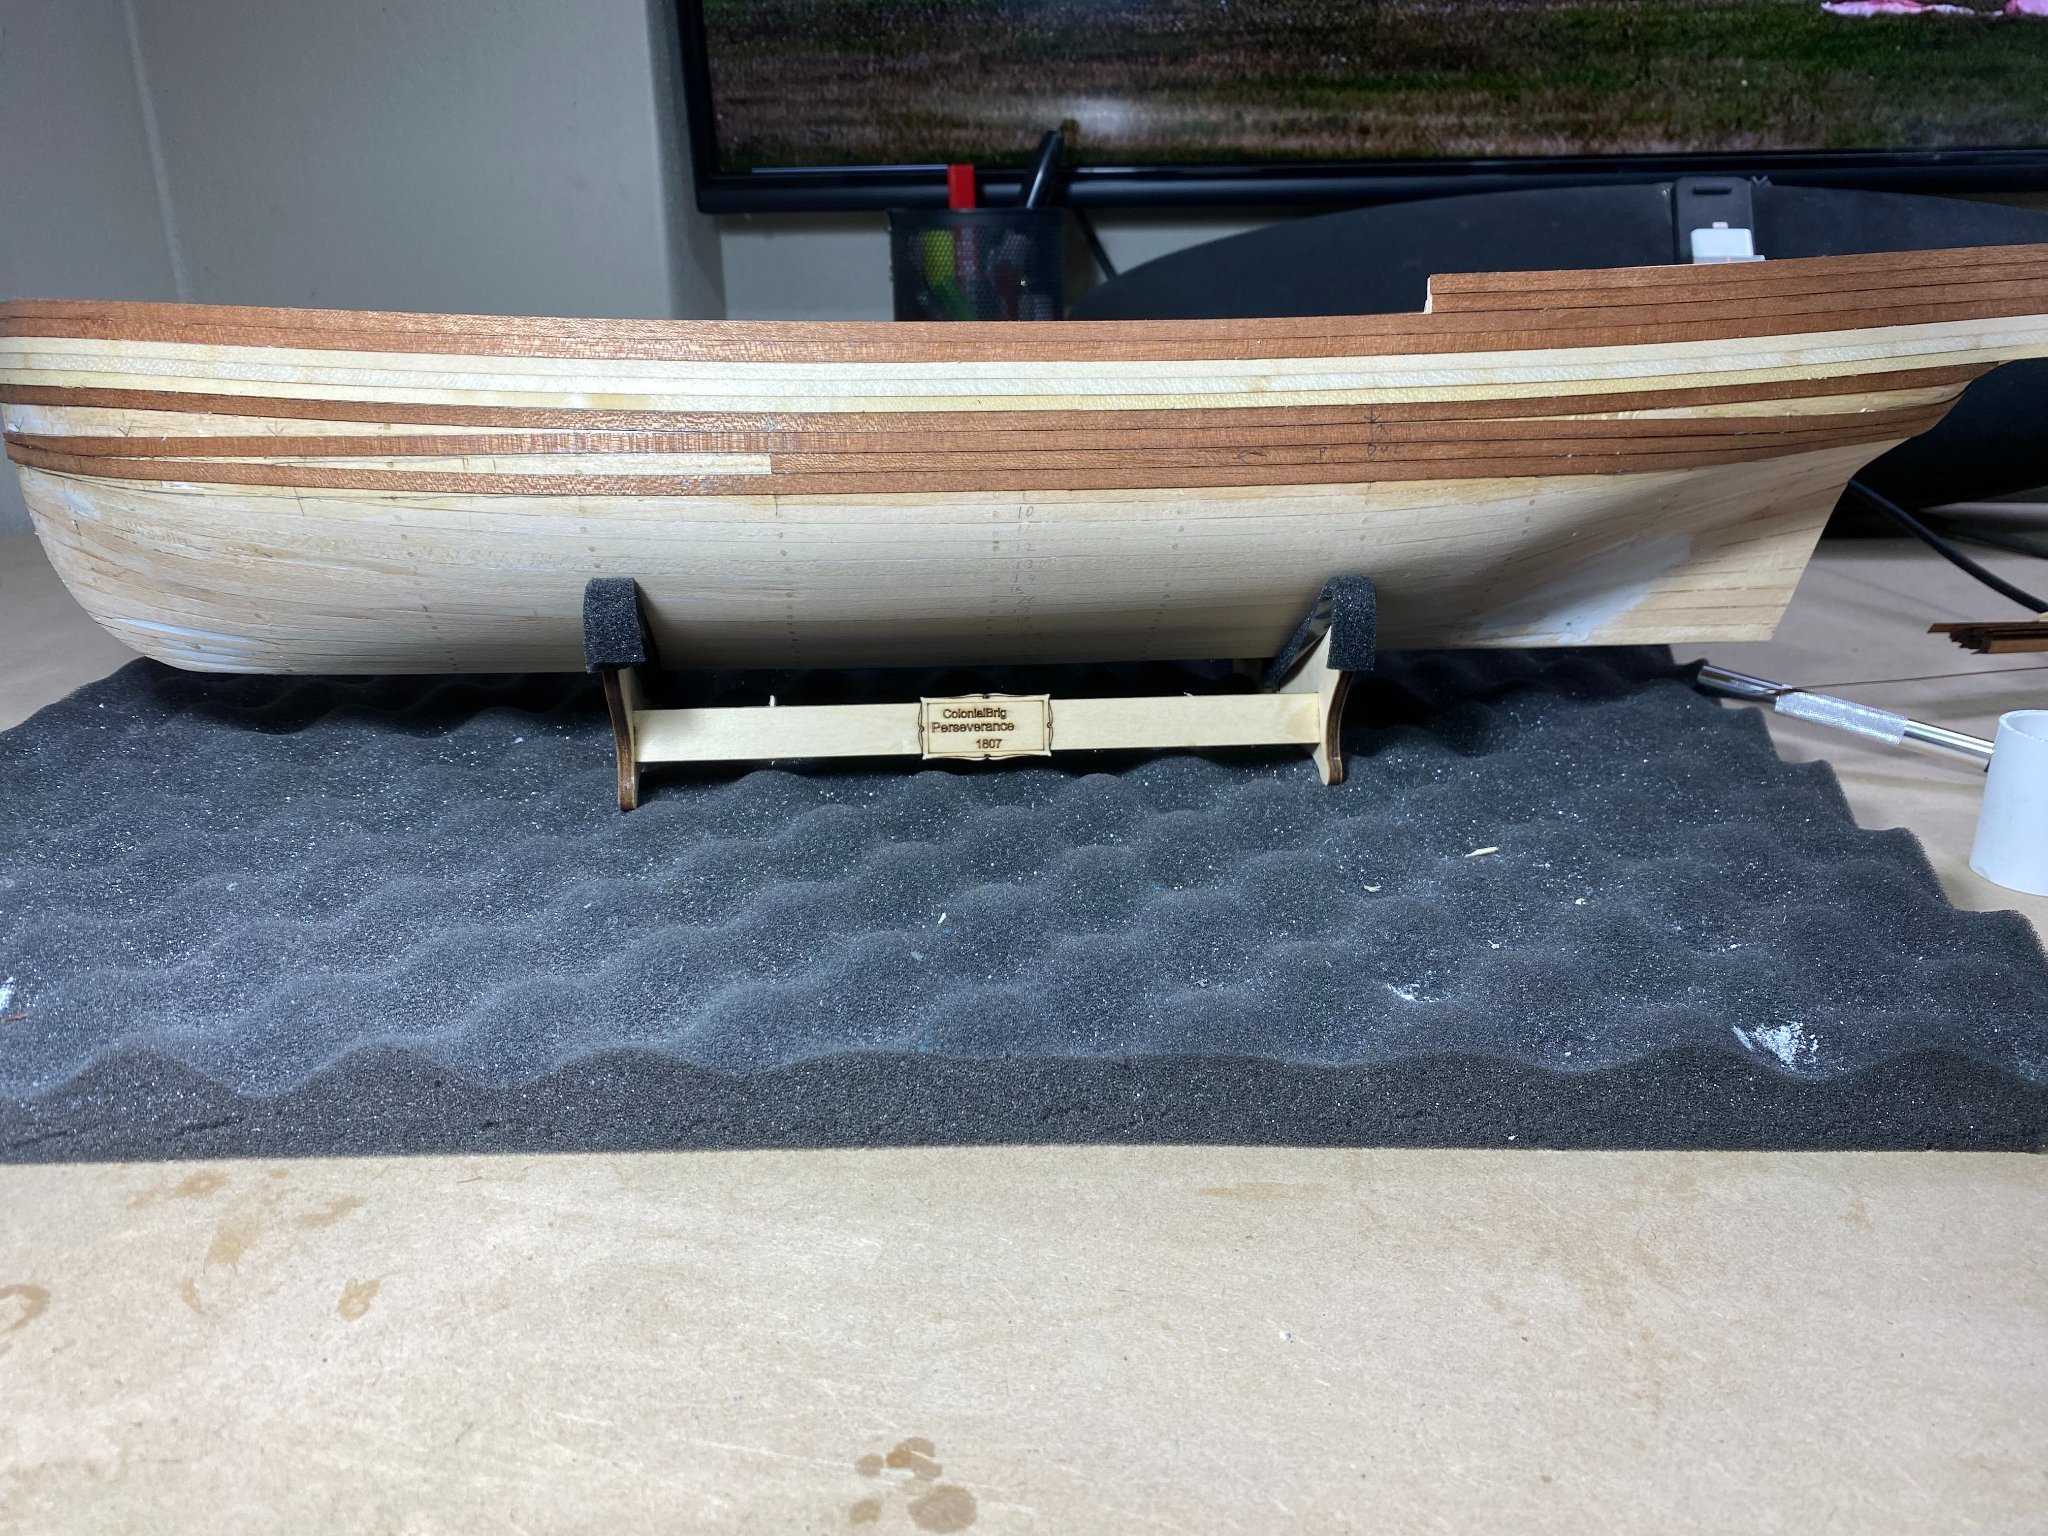
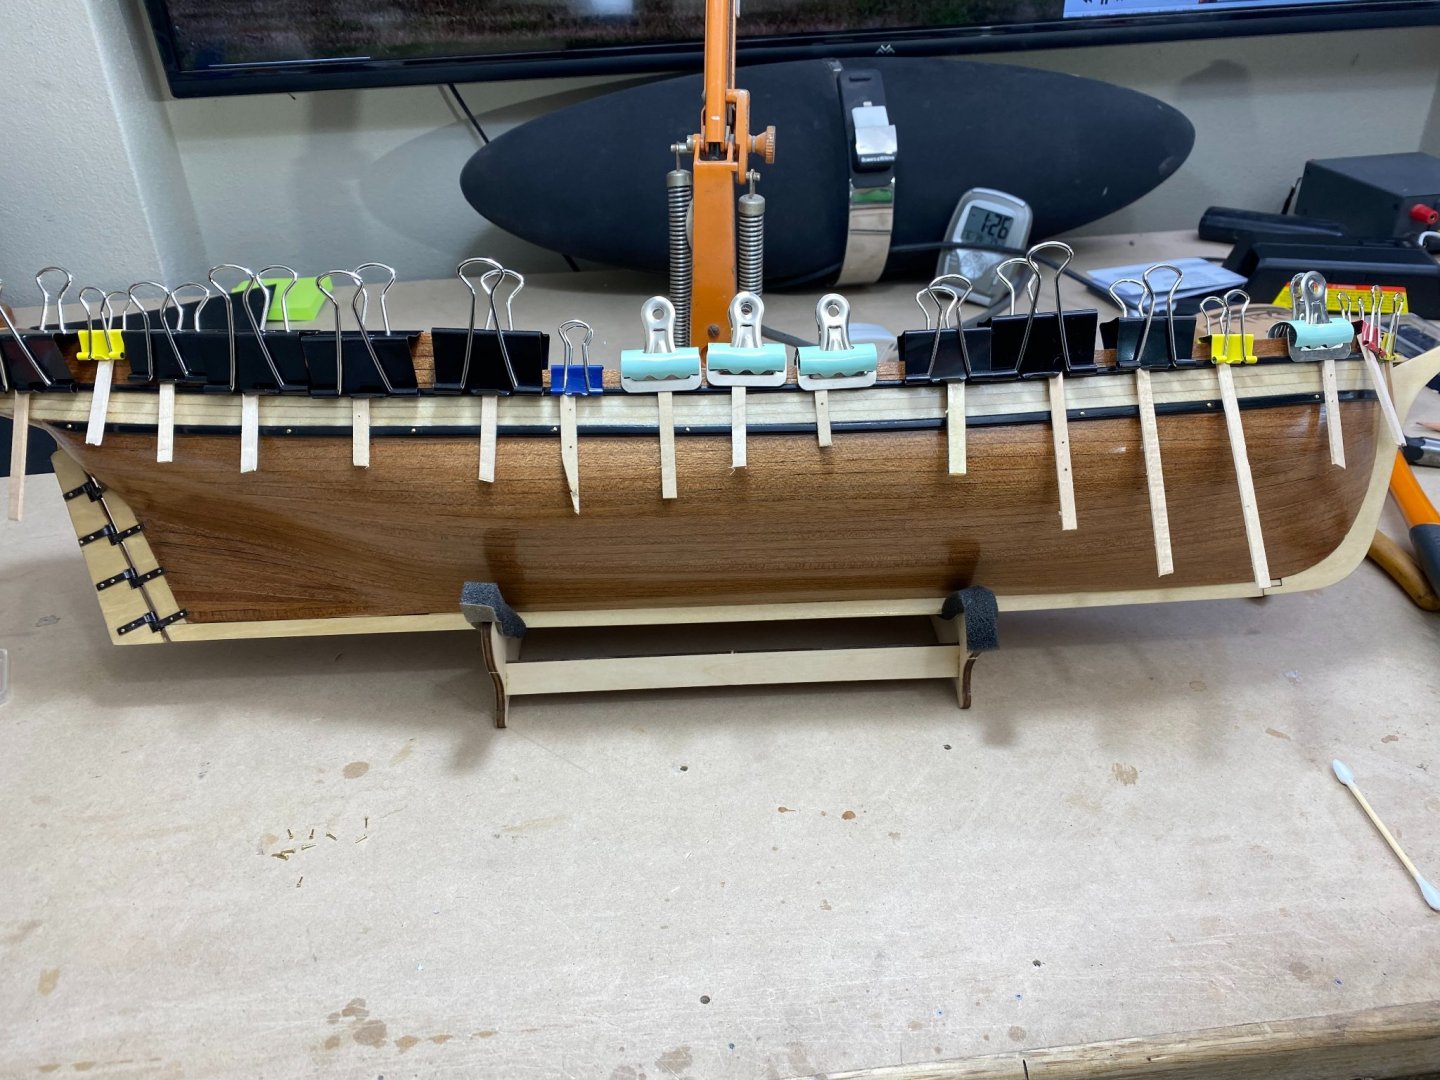
22/06/21 - 27/06/21 Cap rails HTD: 255 So I steamed and clamped the aft cap rails to the inside edge of the hull to take shape and allowed 24/48 hours to dry. Despite my best efforts to keep the inside edge of the aft cap rails flush, I failed and damaged the finish in the process of rectifying it. Scalpel too sharp, eyesight not sharp enough. Continued to struggle with cap rails but end result passable for first attempt. Of course I can now think of many alternate ways to tackle these chores next time around.
- 47 replies
-
- 2
-
-
- Modellers Shipyard
- Perseverance
- (and 1 more)
-
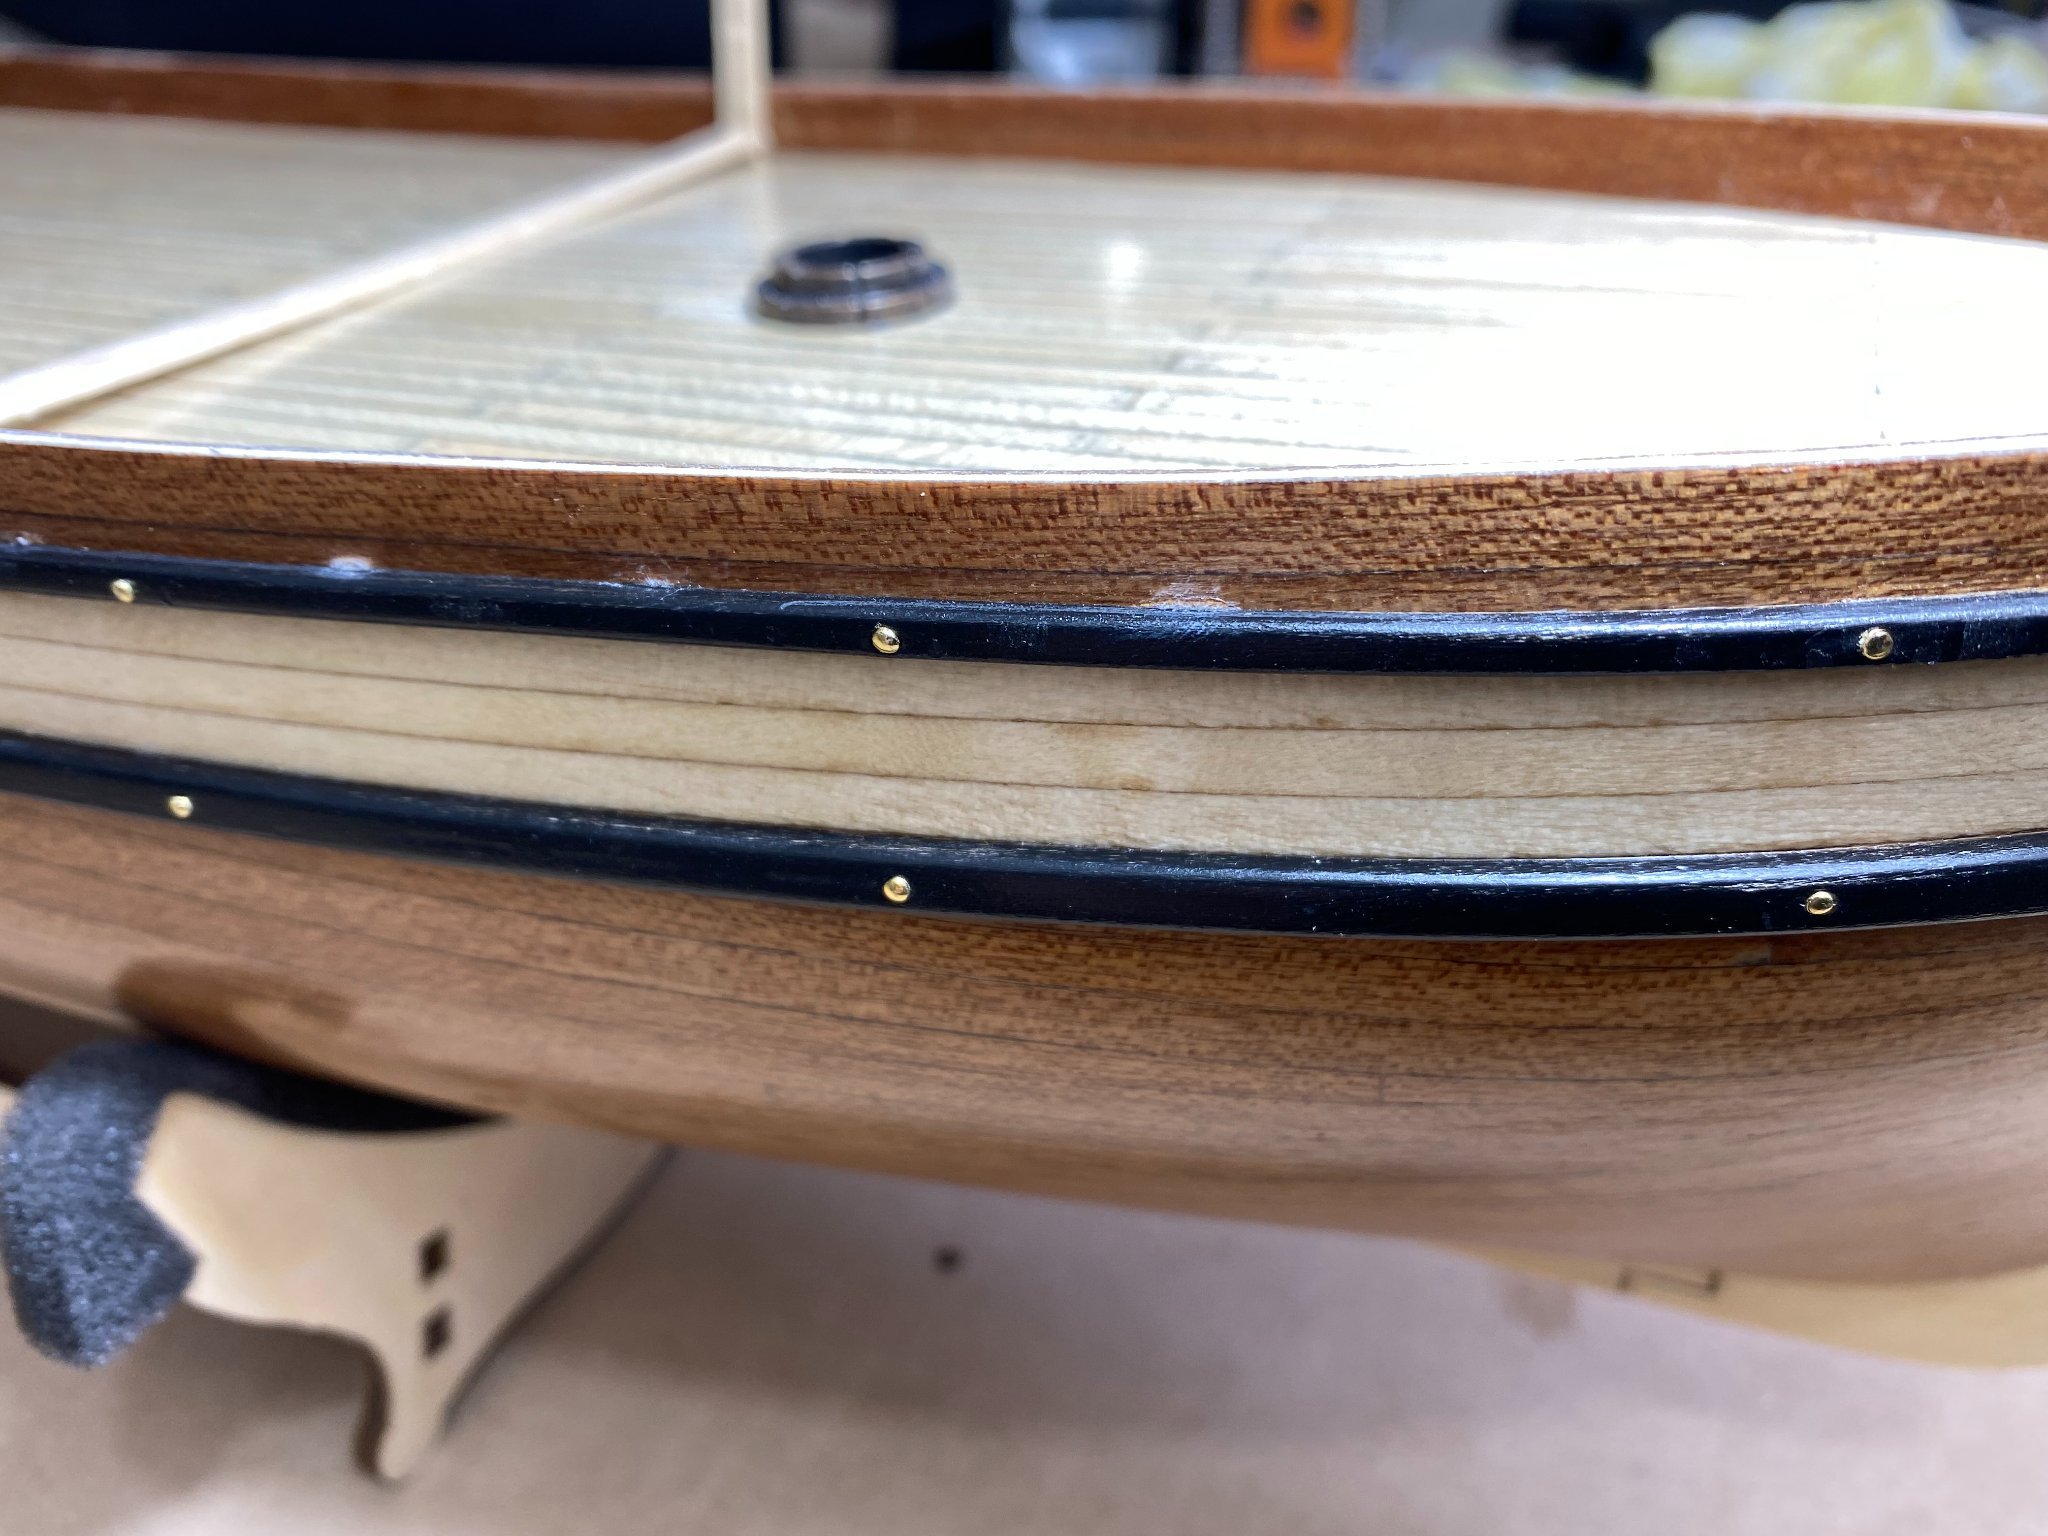
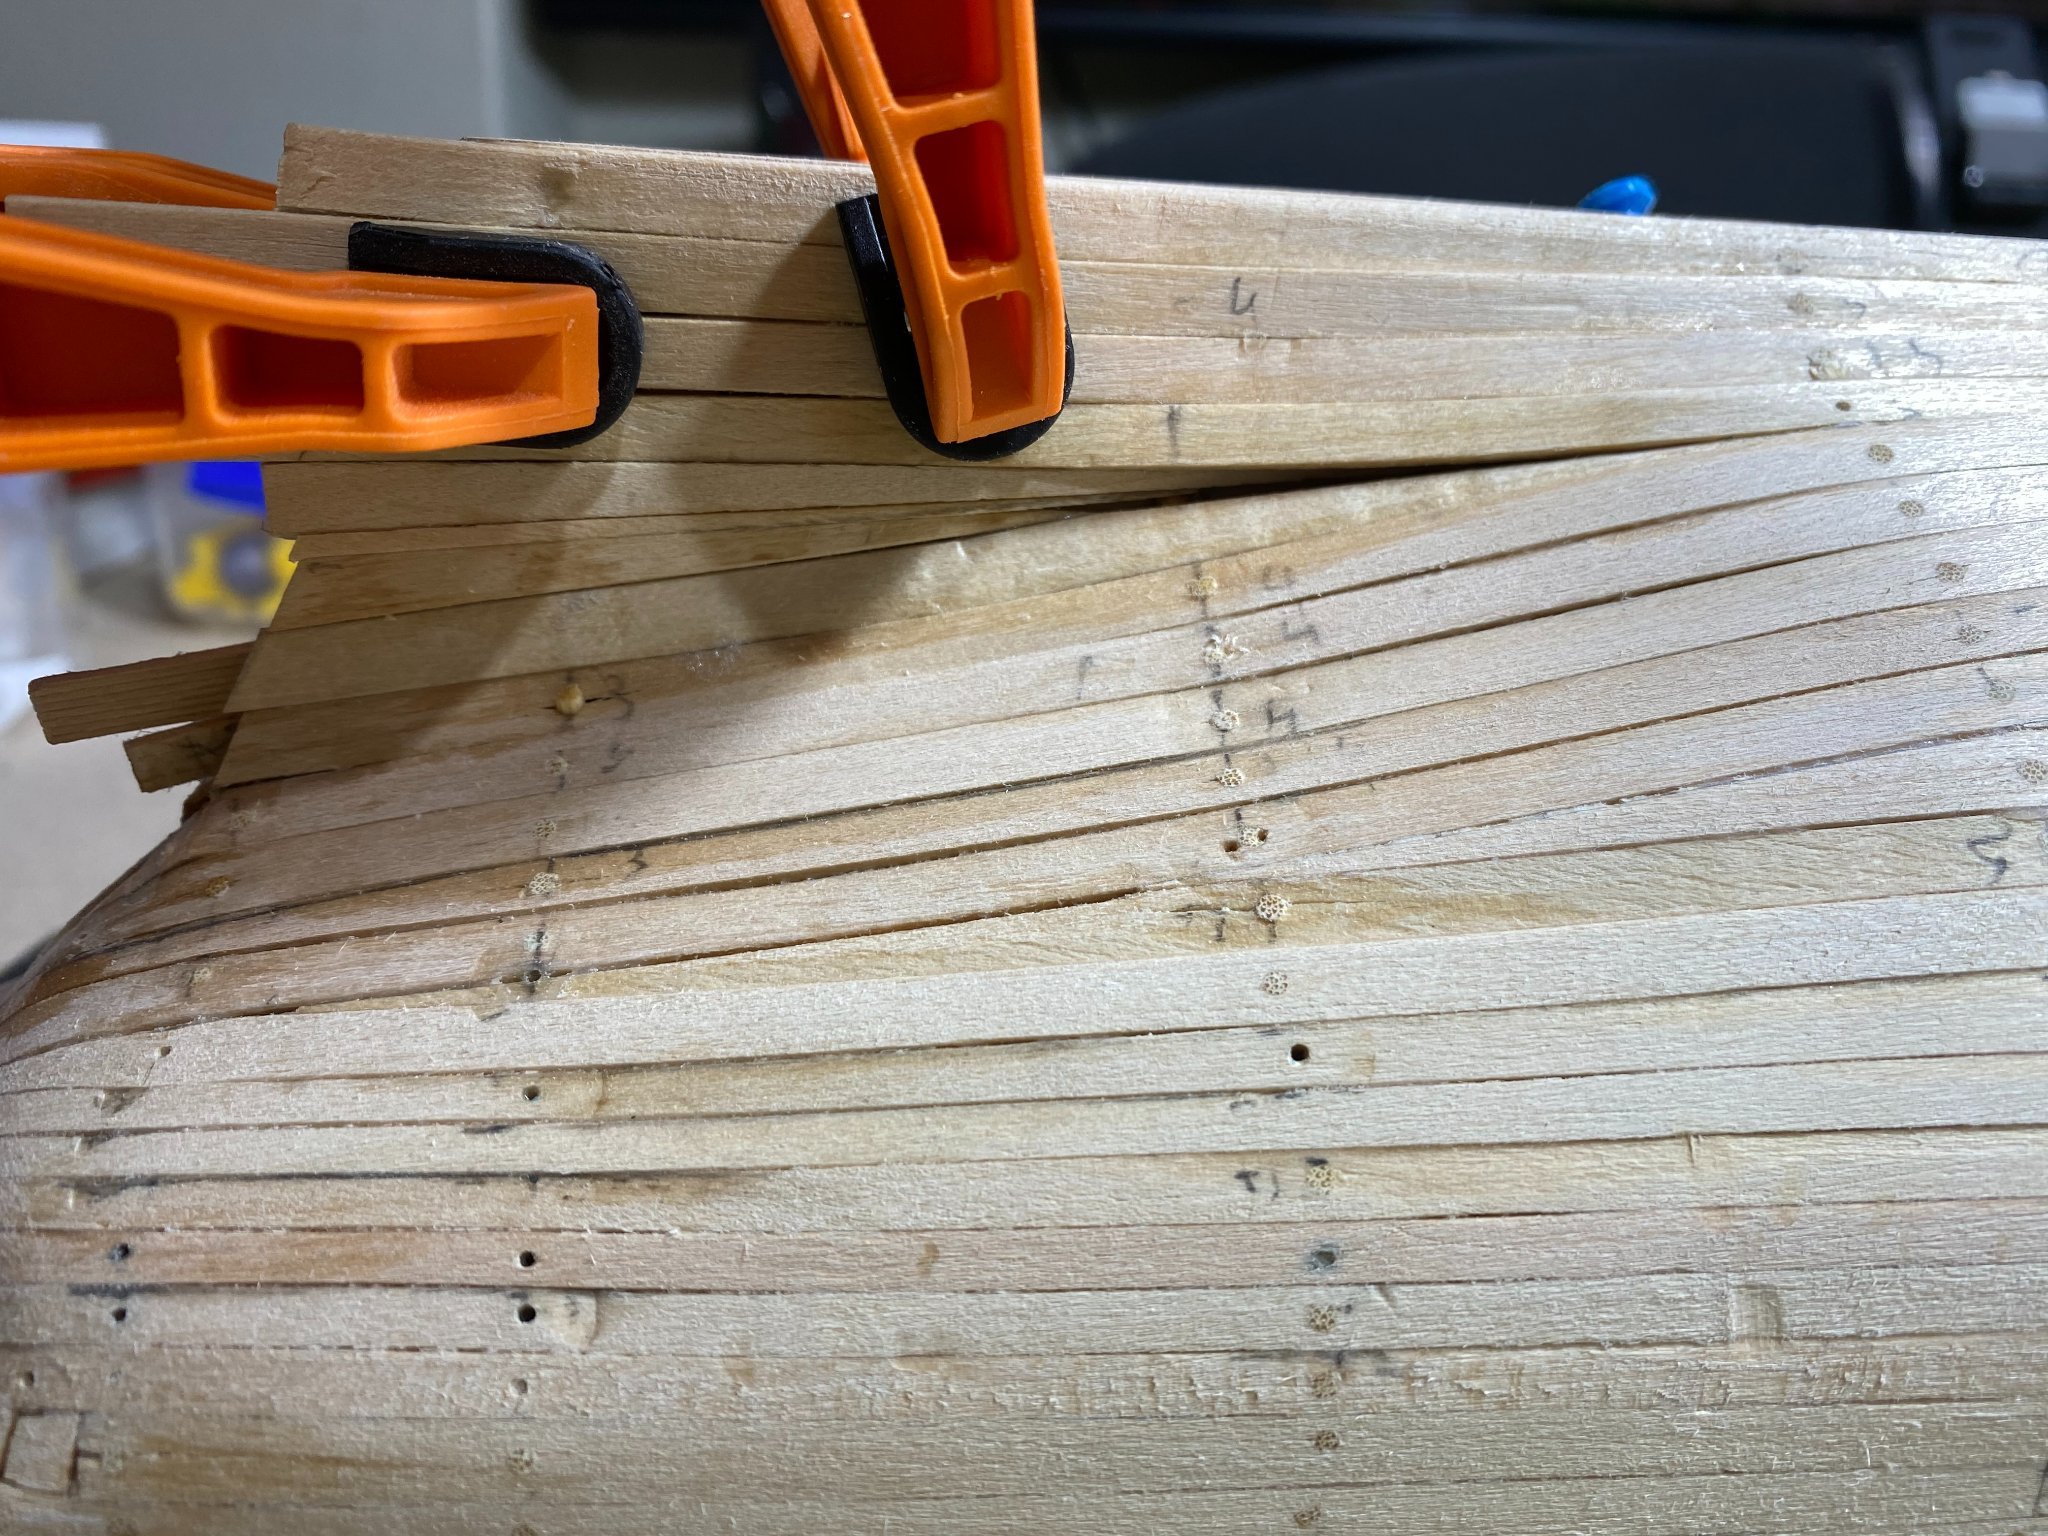
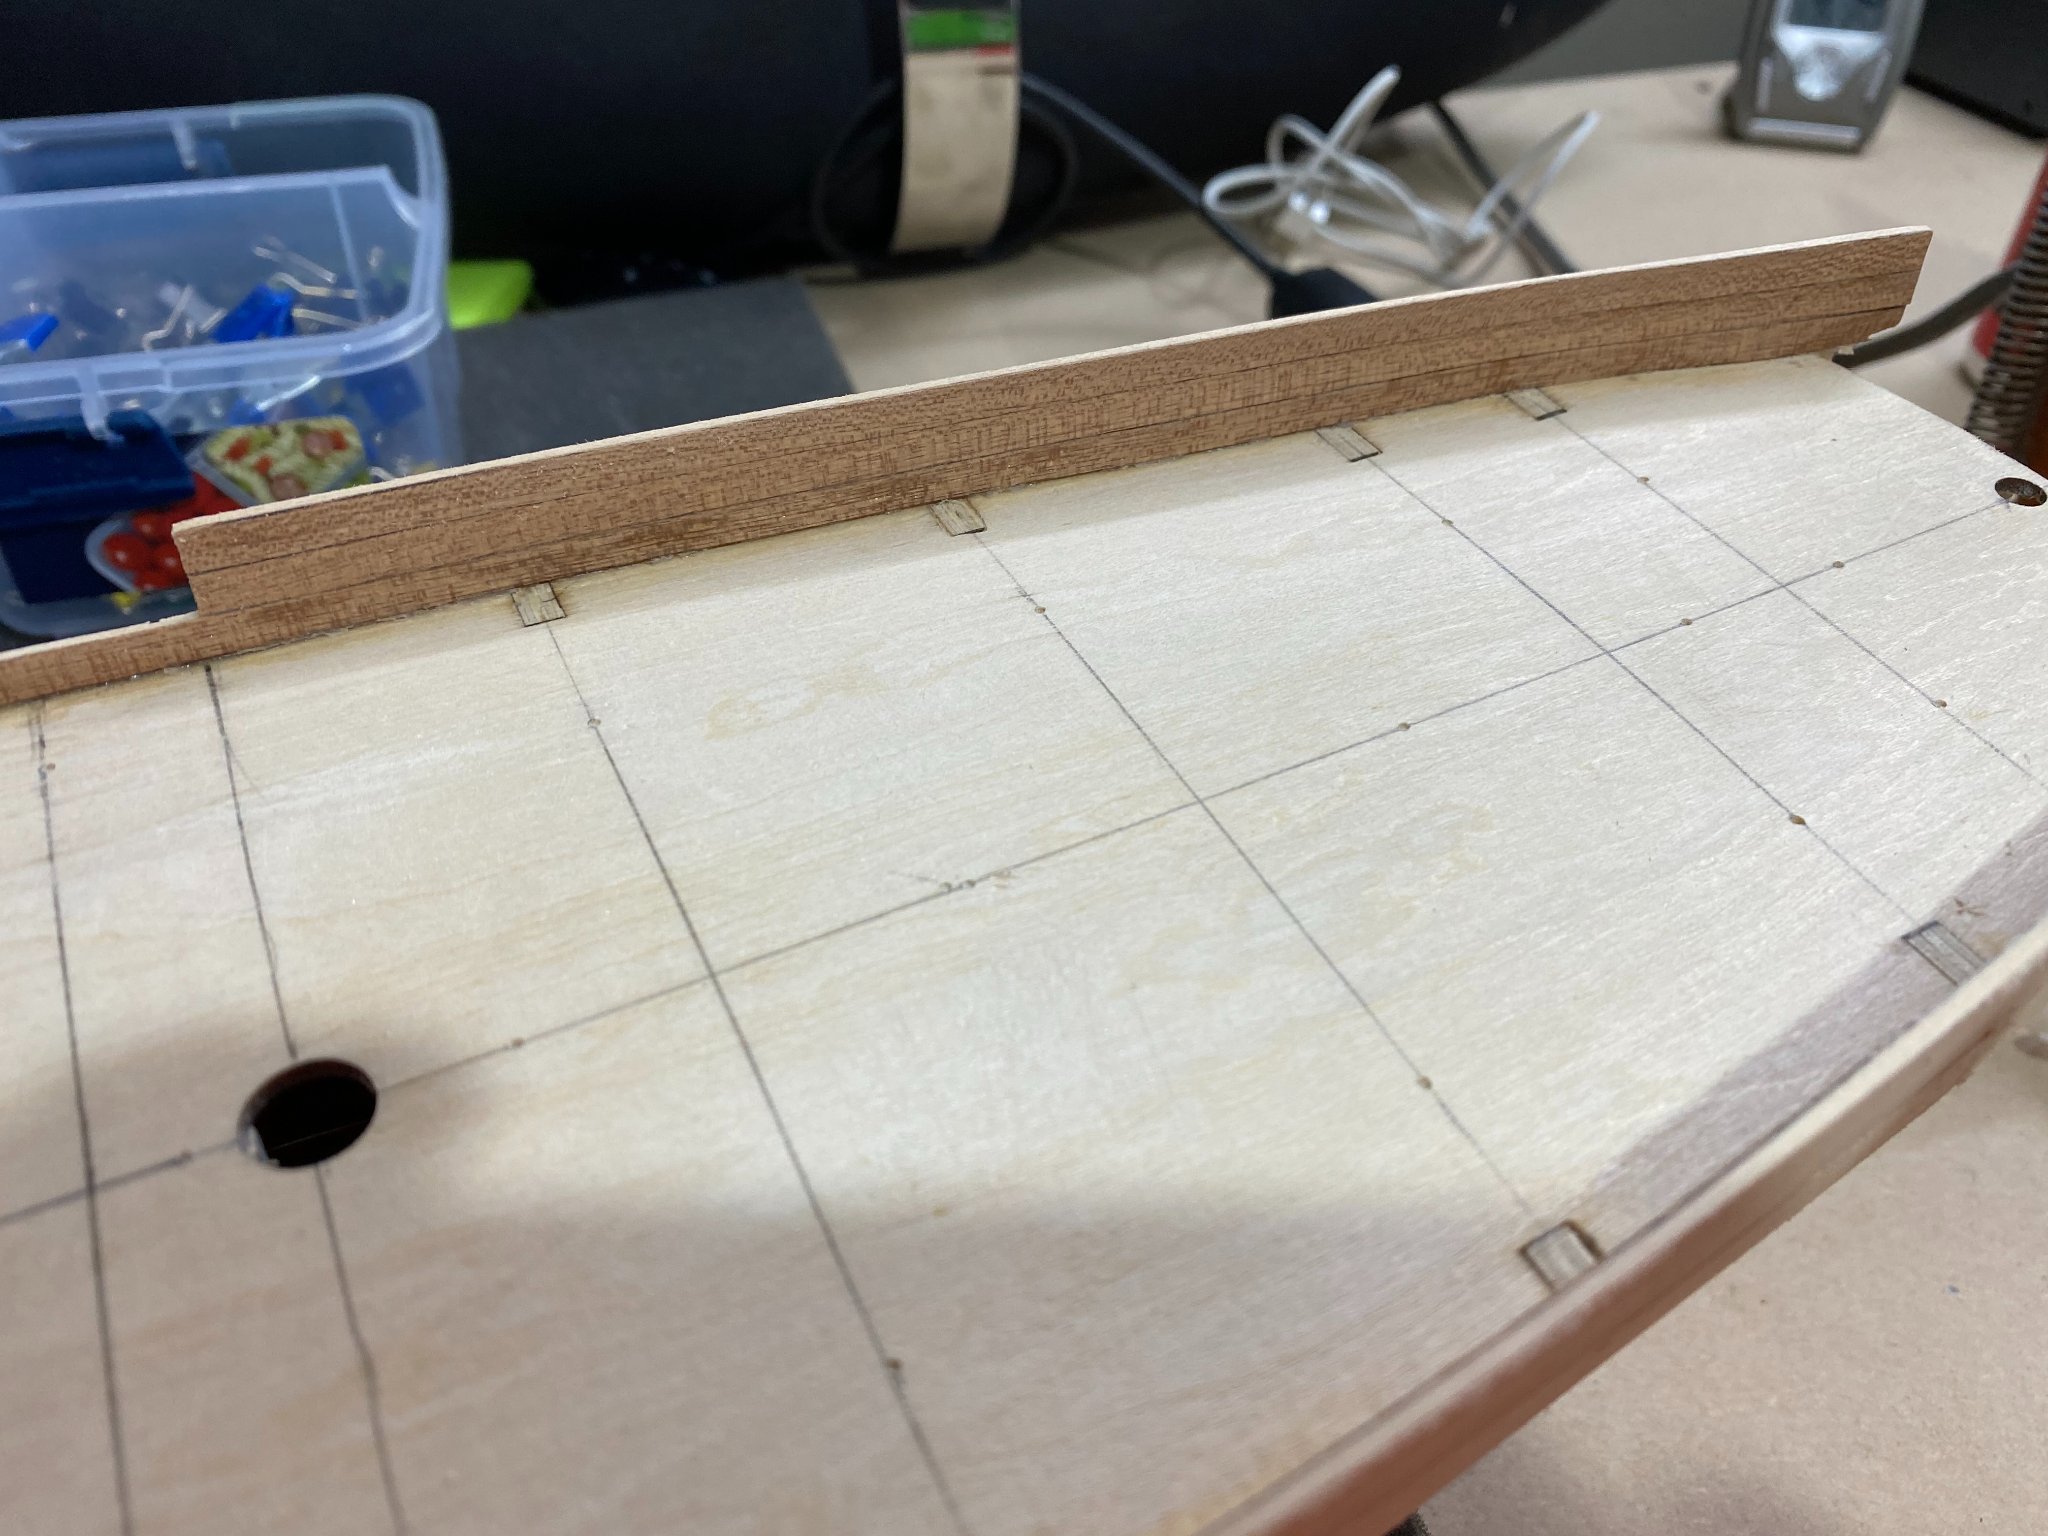
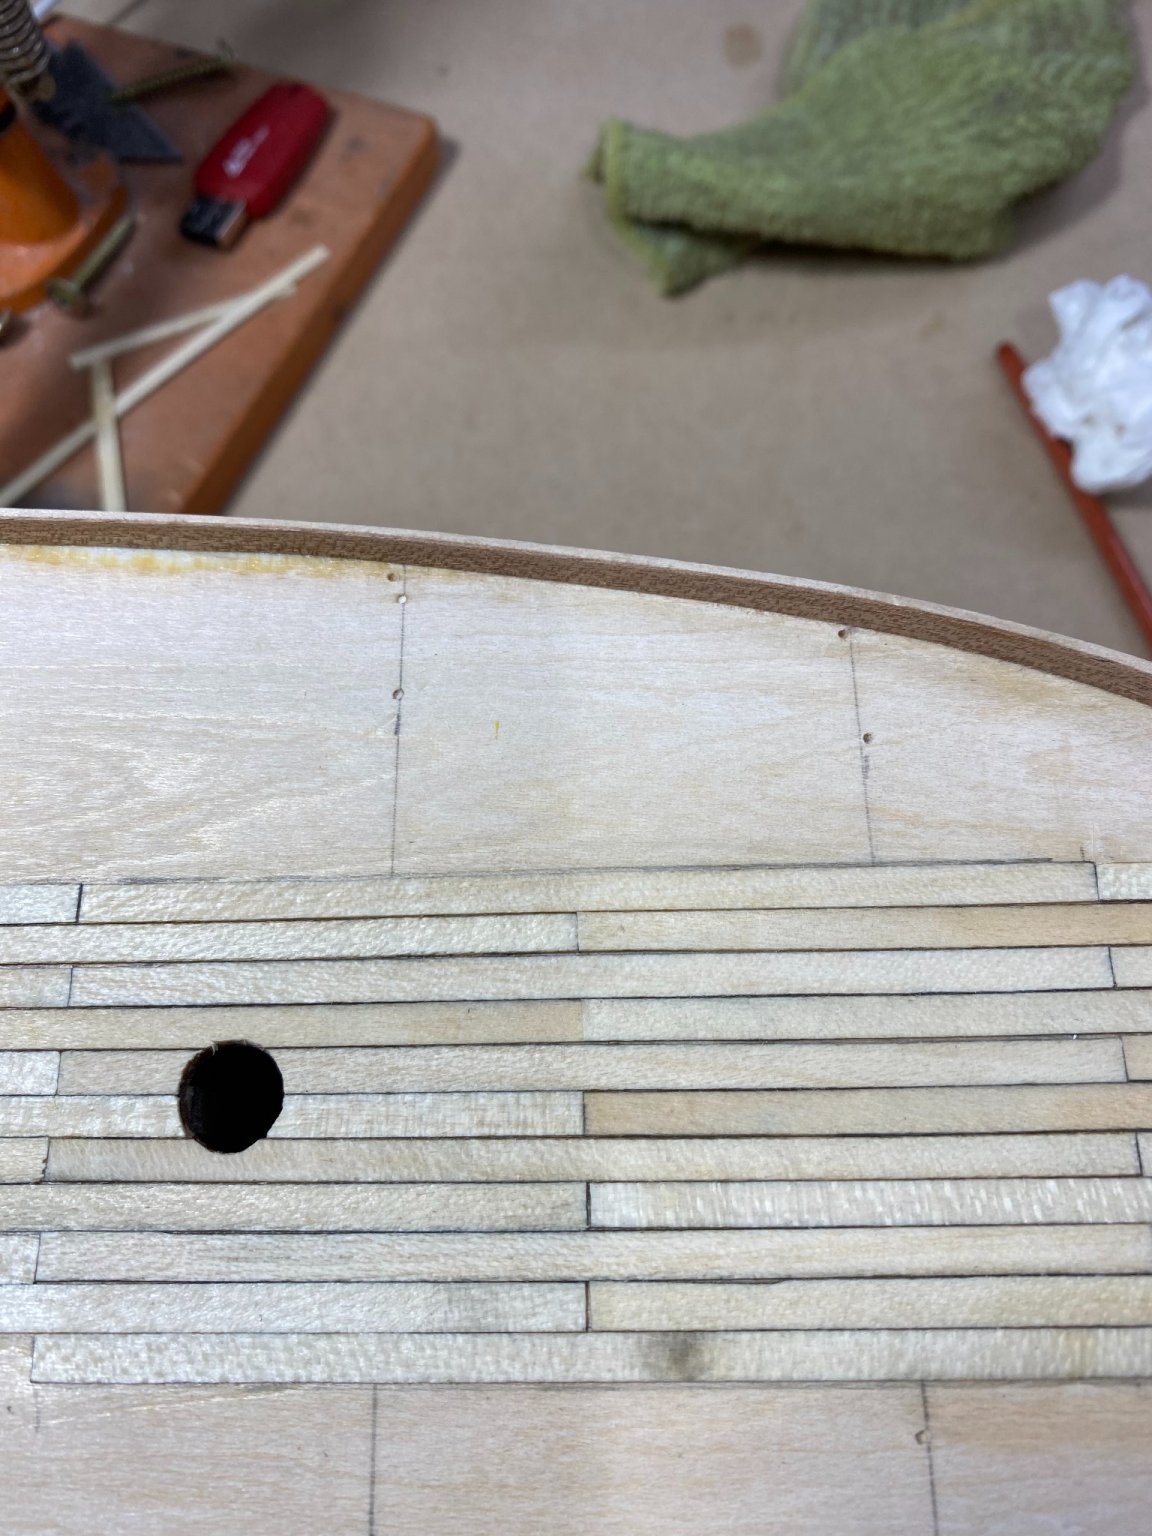
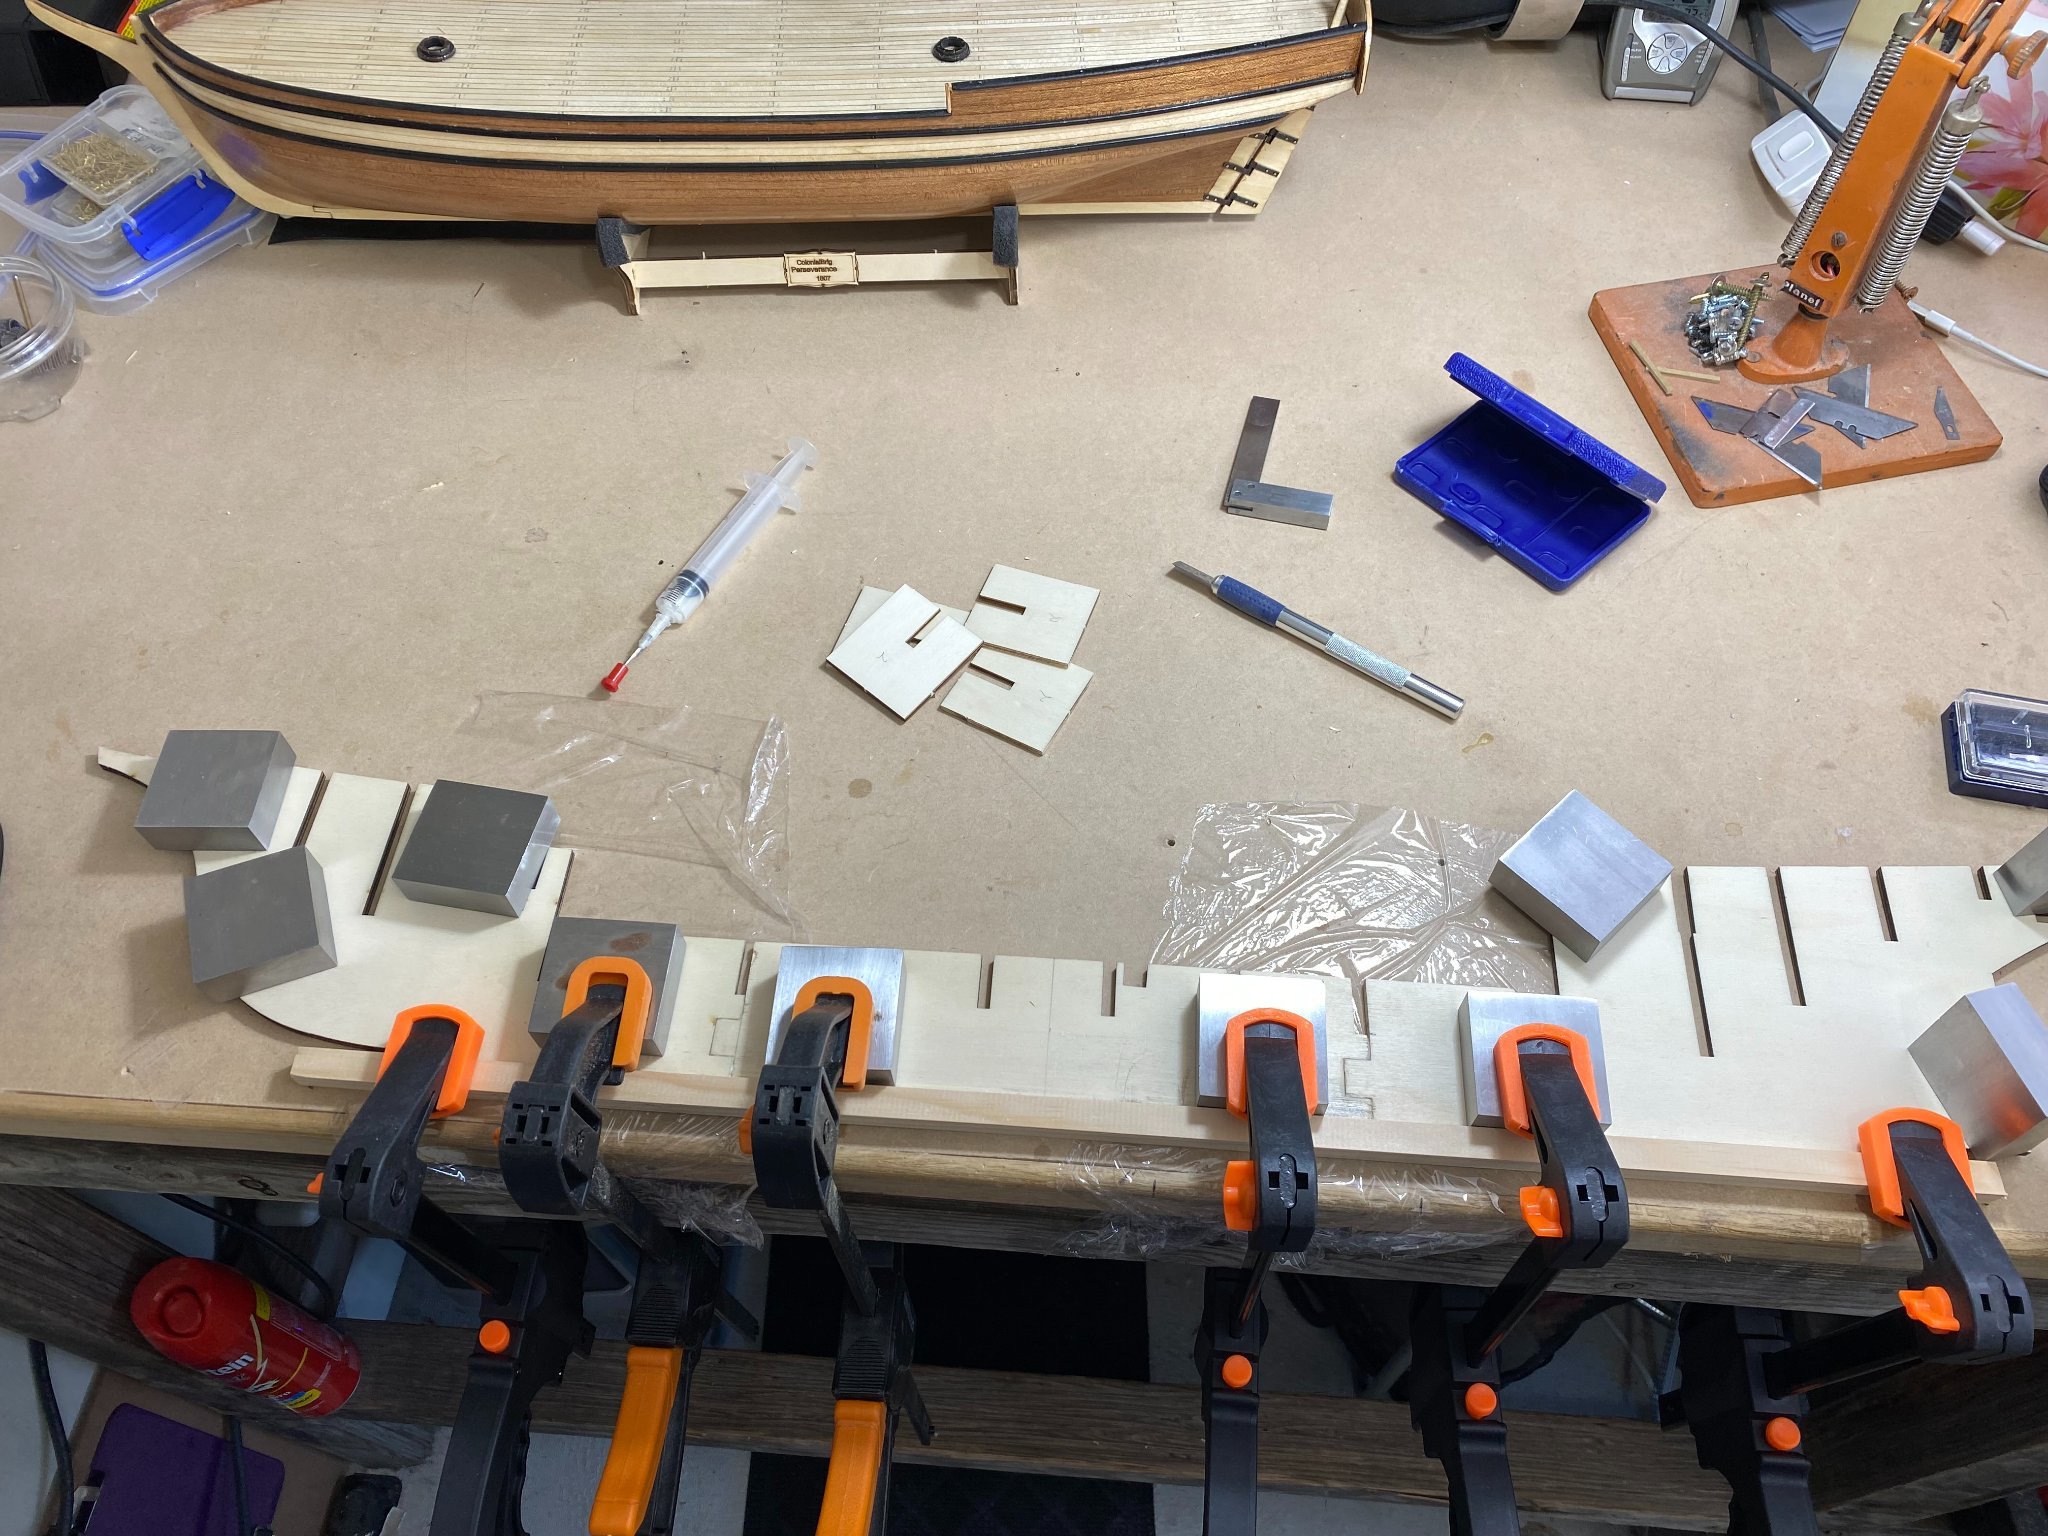
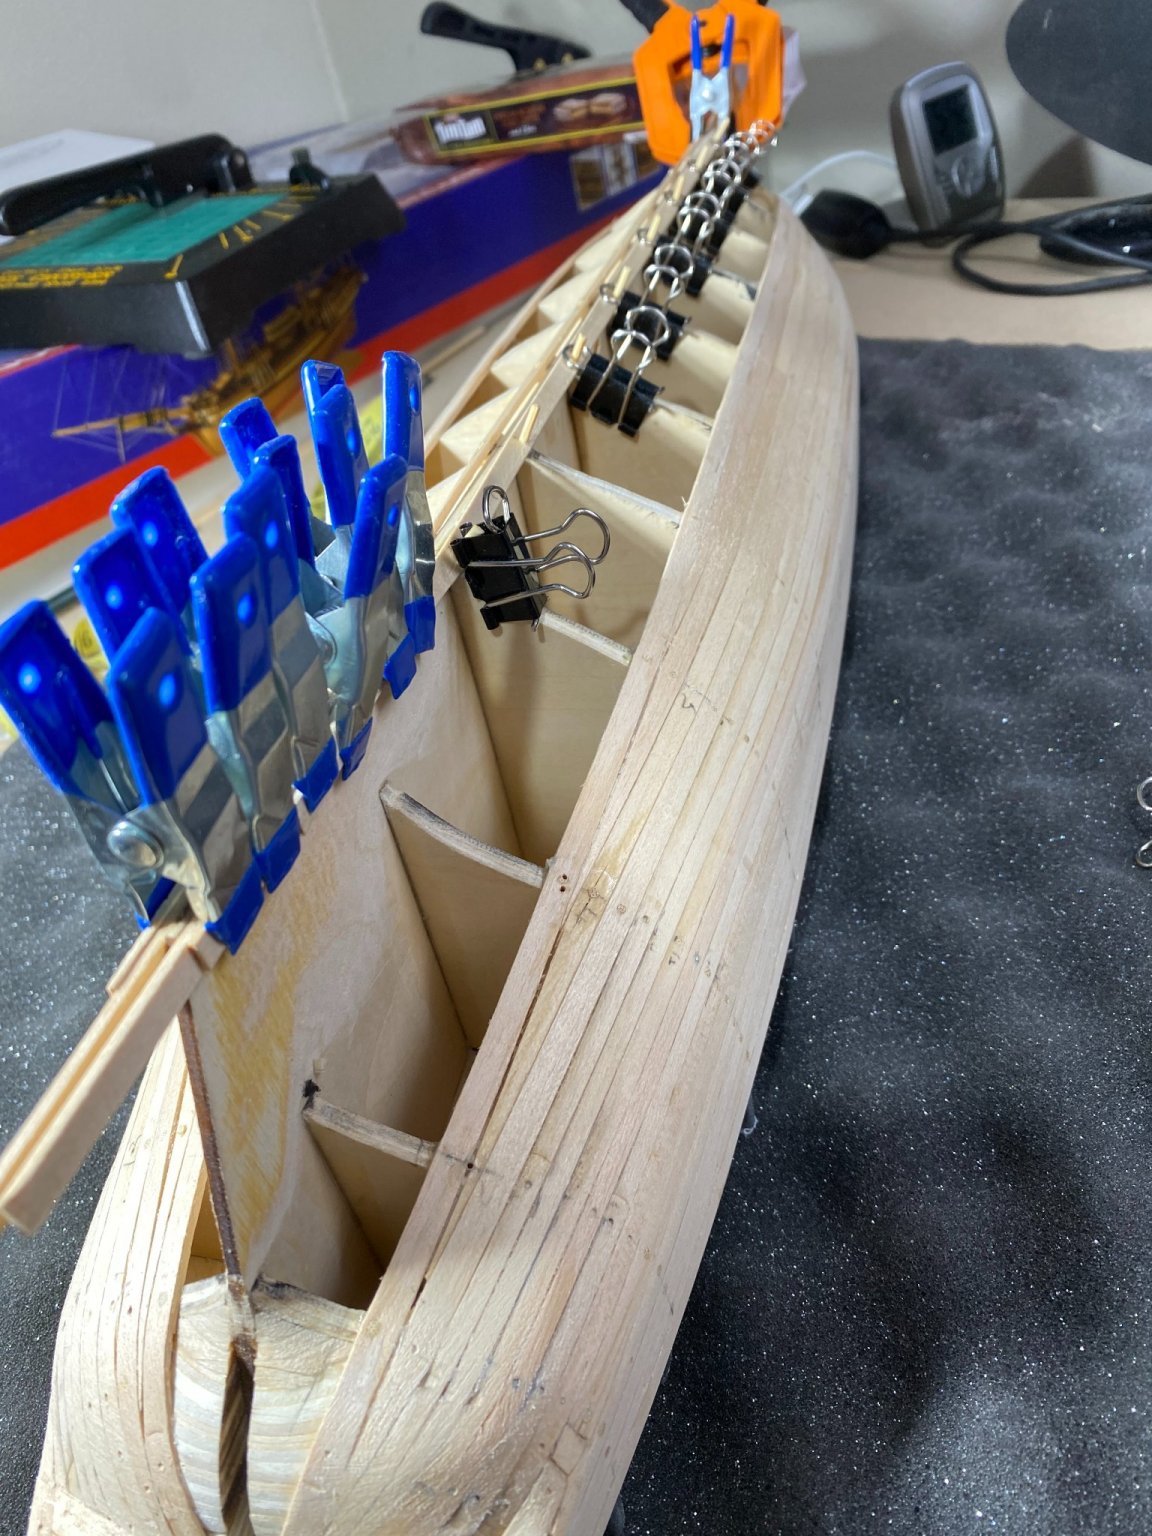
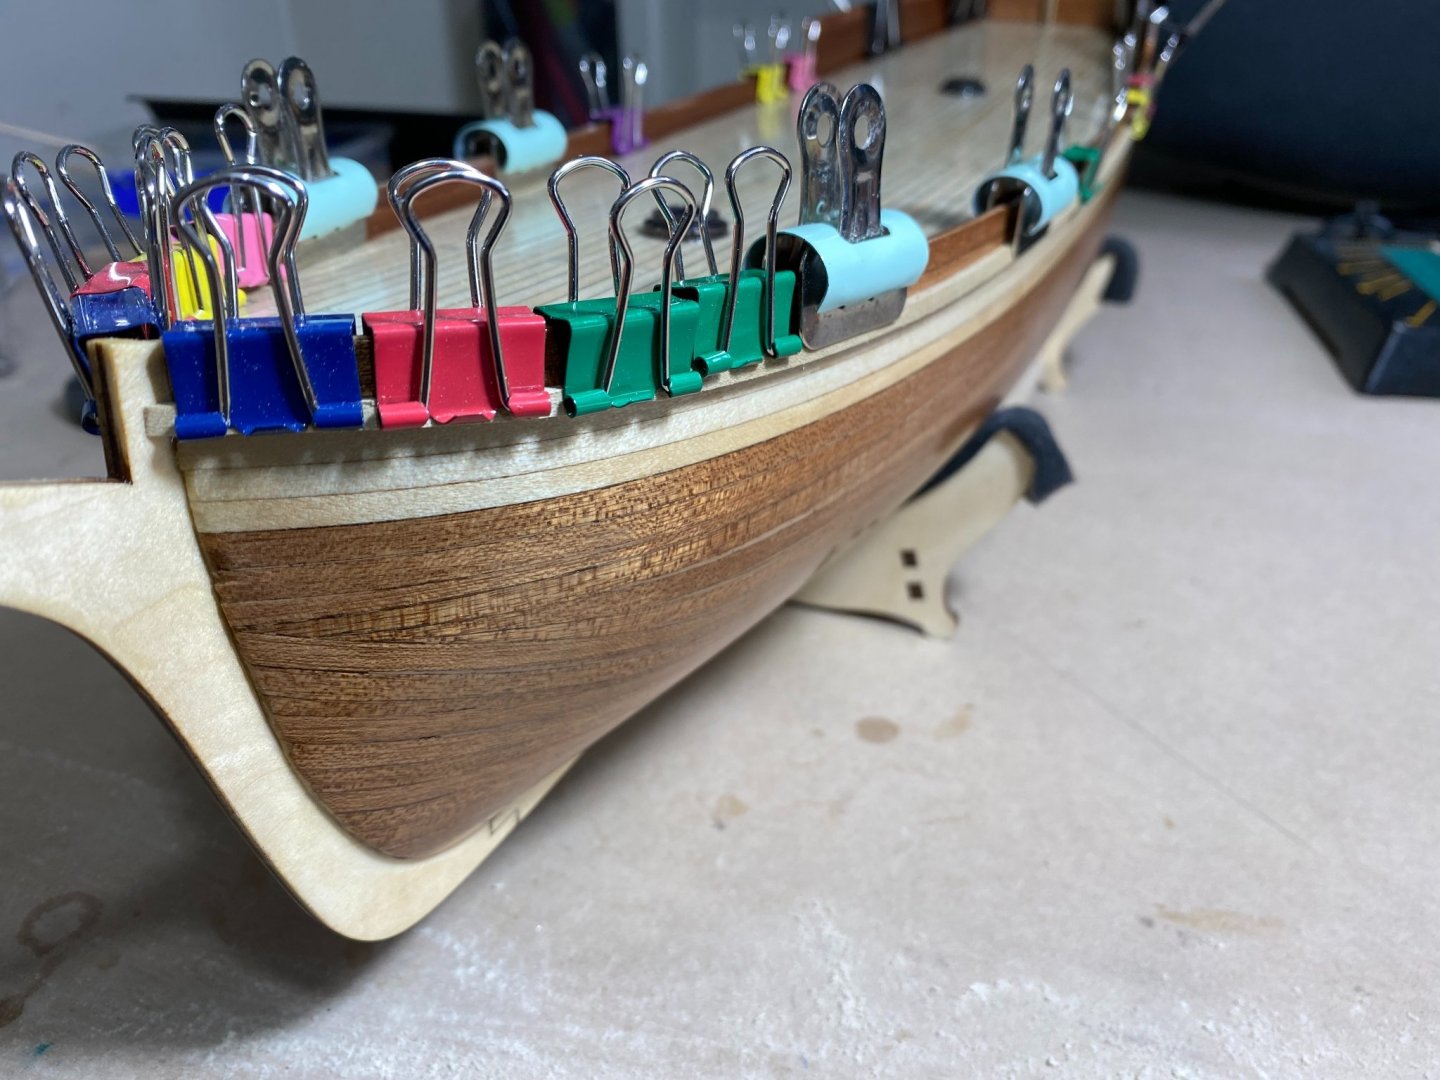
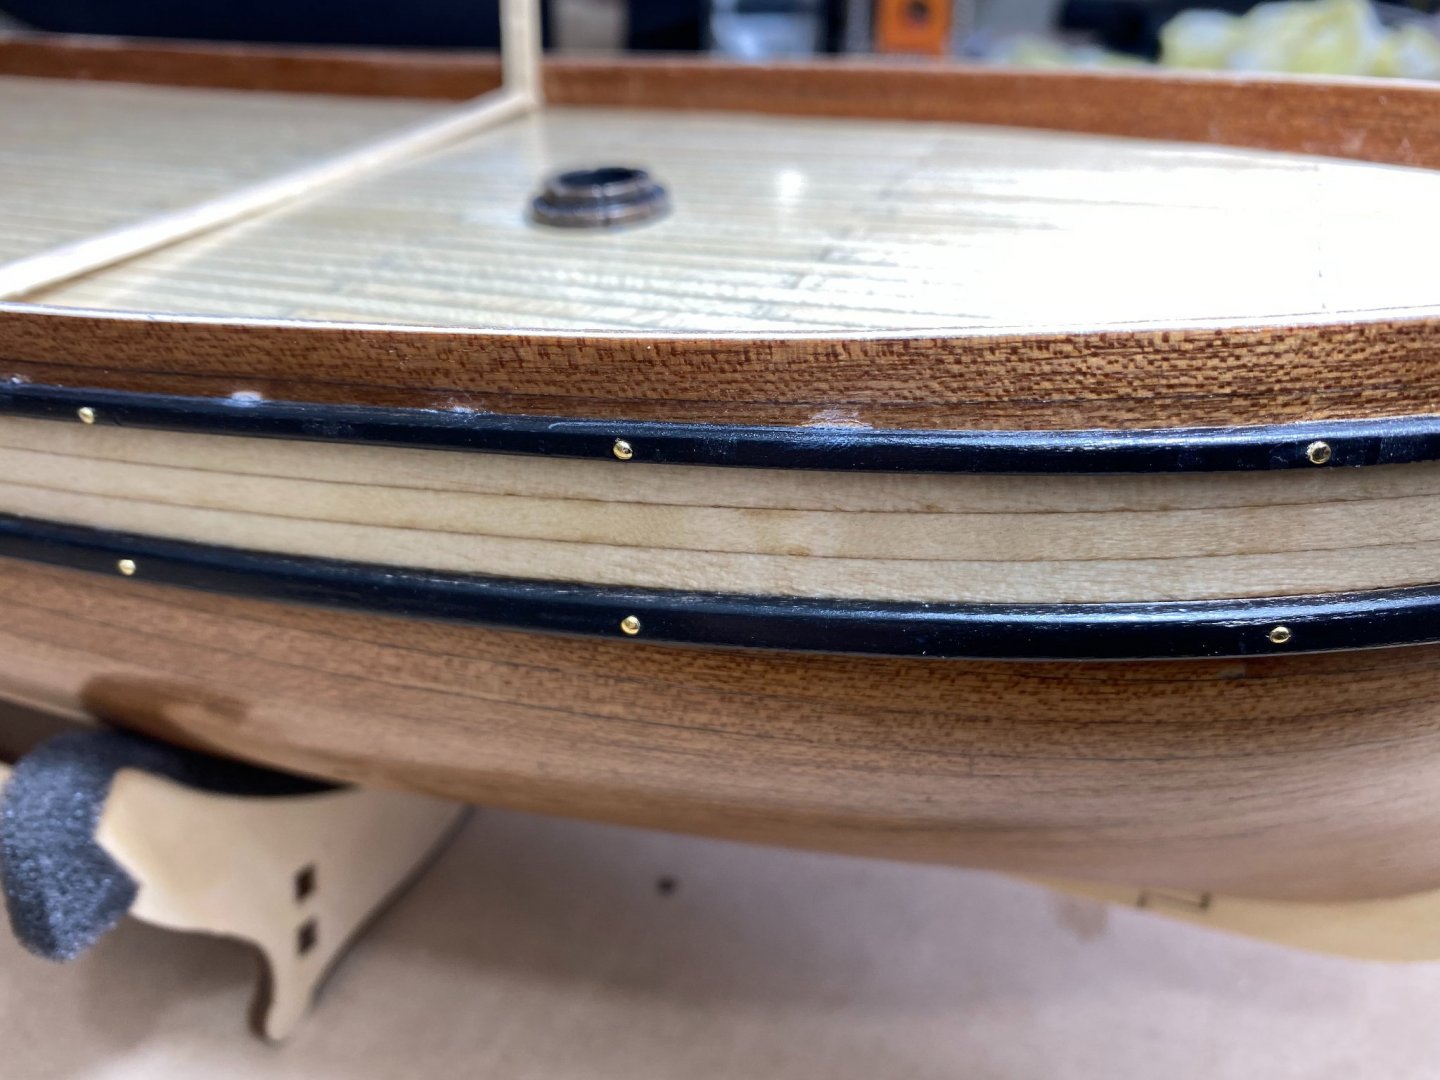
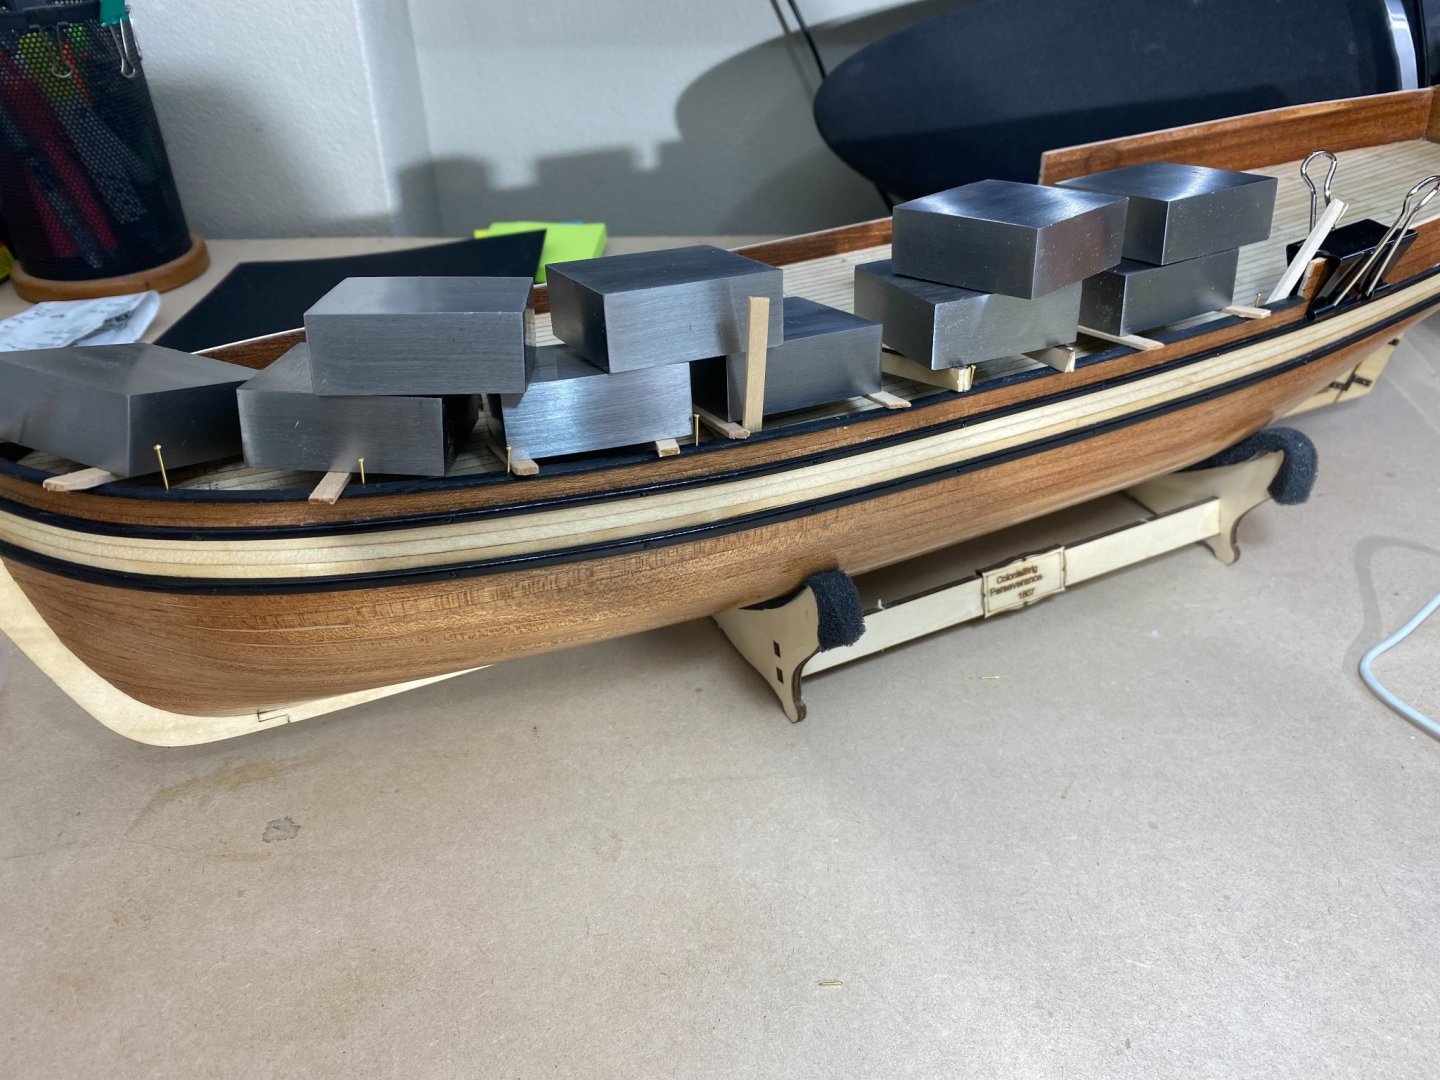
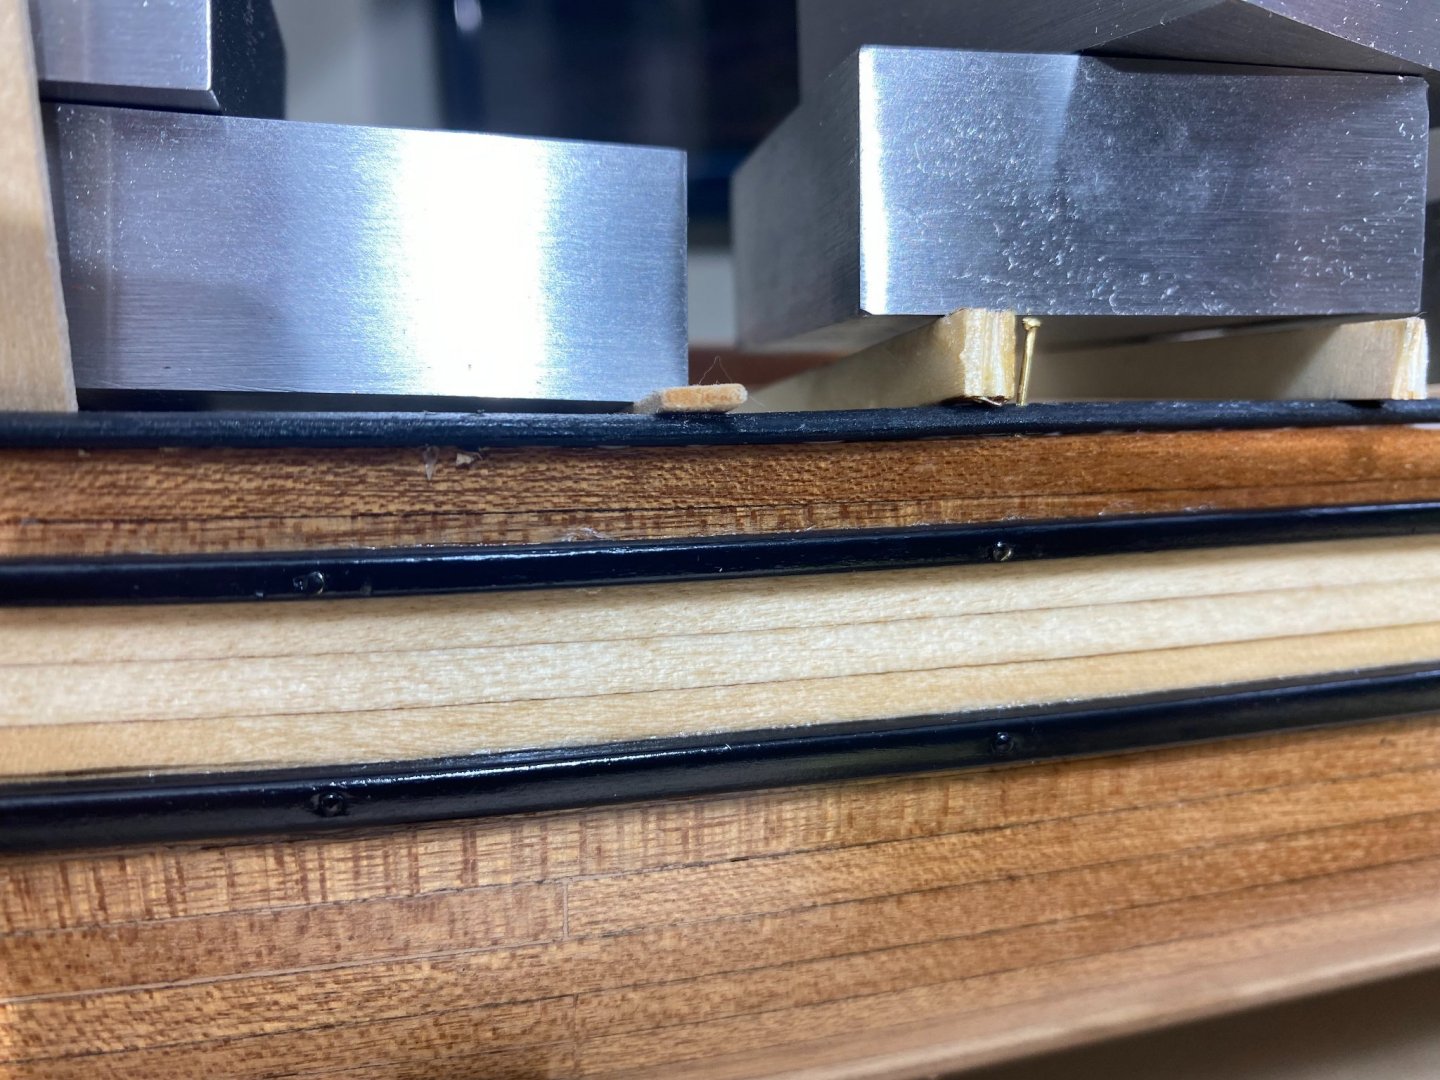
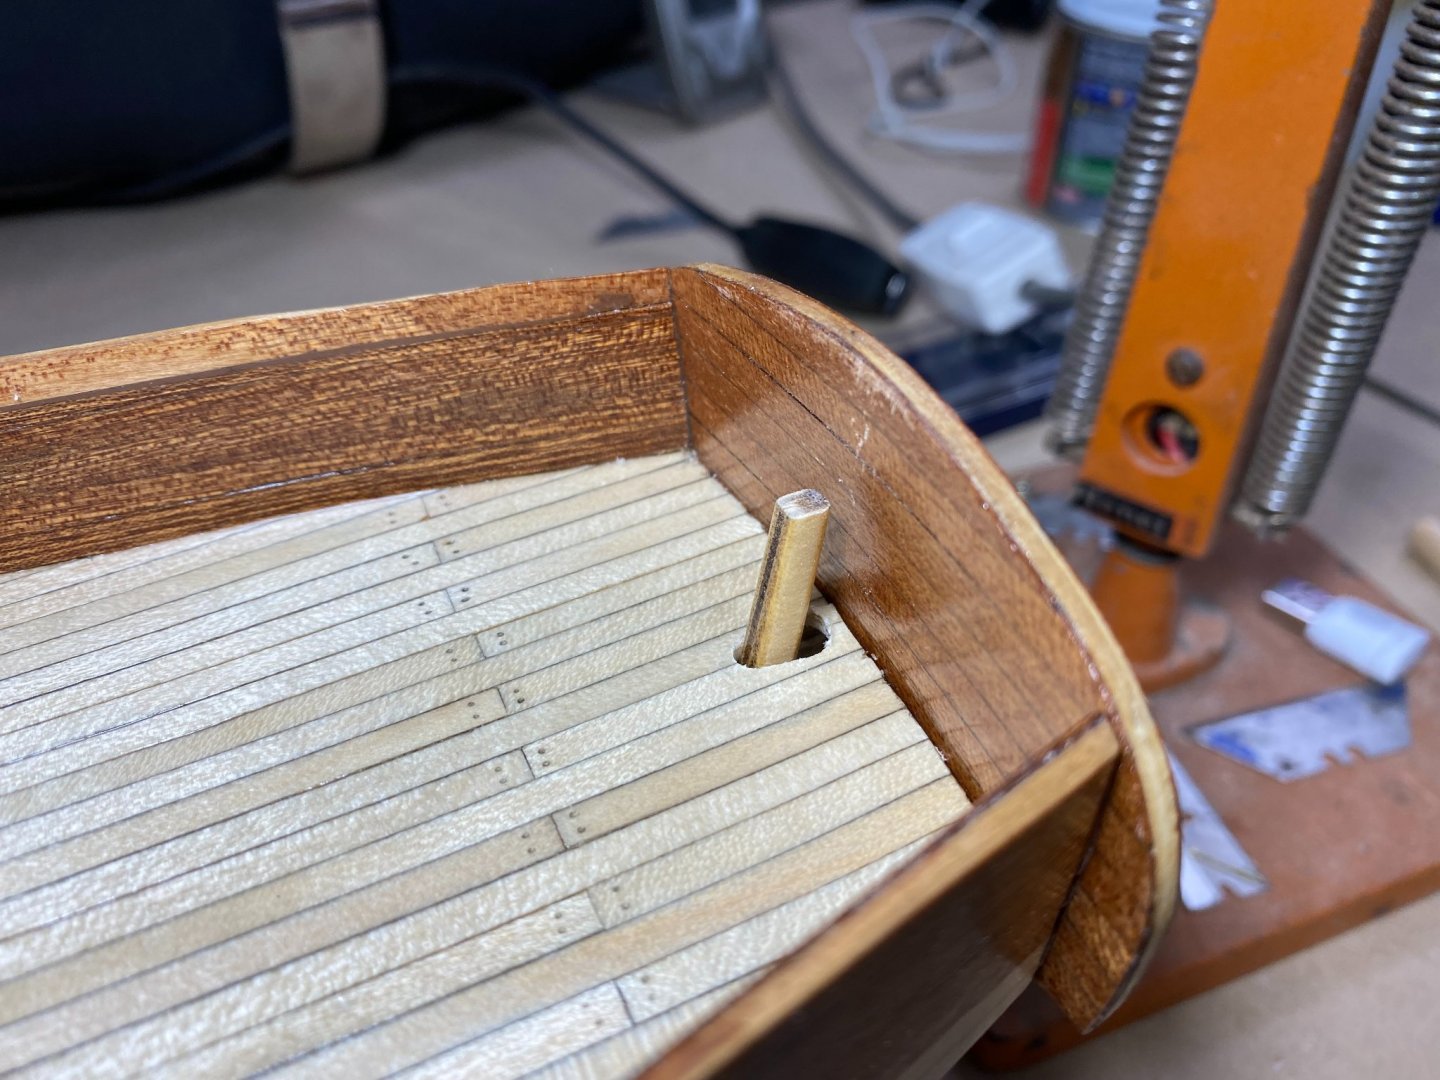
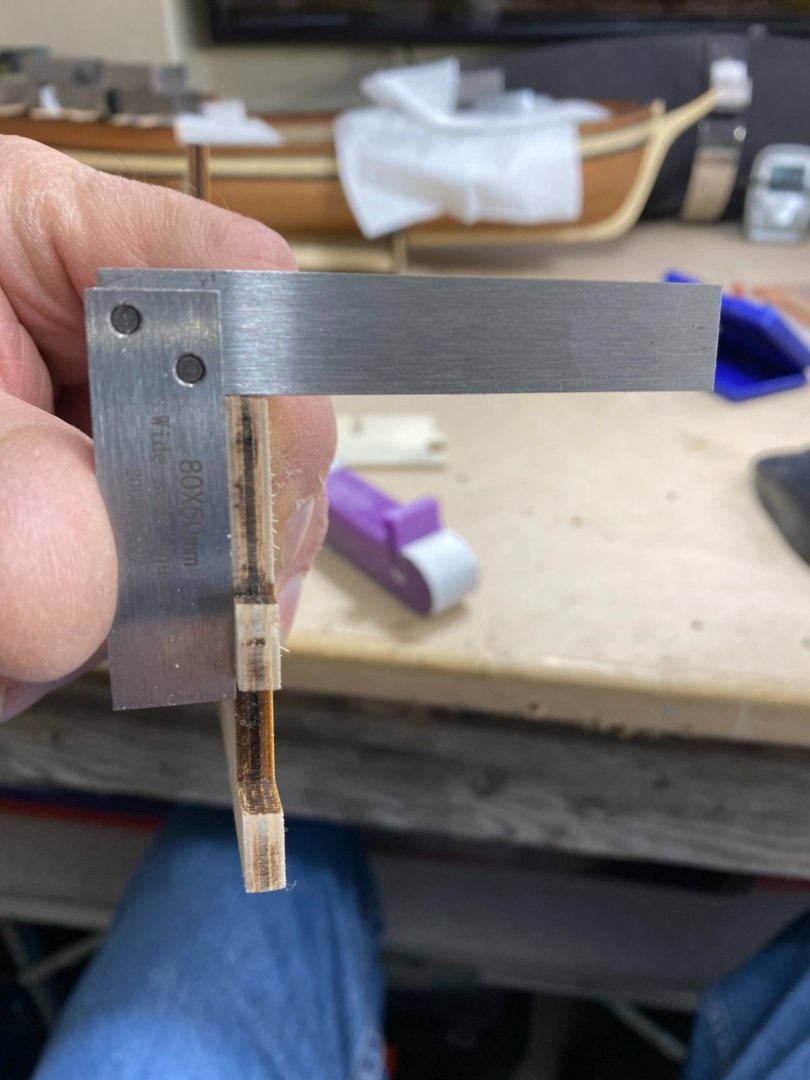
11/06/21 Added that little extension to the rudder arm 12/06/21 Started preparing the gunwales 13/06/21 - 18/06/21 continued work on gunwales. rounding edges, painting, varnishing etc 19/06/21 Started preparing cap rails 20/06/21 More cap rail prep and started gluing gunwales 21/06/21 Started fitting cap rails HTD: 248 As well as using the bending iron. I found with the gunwales I could just wet them, clamp them in position and let them dry for 24/48 hours, they held their shape for the most part. I thought that rounding the edges would make for a prettier gunwale More visible in the top gunwale are some CA glue stains :-( I also used brass pins to help hold the gunwales in place. The pins for the upper gunwale were cut to about 2/3 so as not to protrude into the deck area. I would paint these nail heads later. Clamping the lower gunwale in place was more difficult because I didn't have the depth with the deck for my clamps to reach down so this was the best method I could come up with. Fitting the cap rails. It's funny how such an innocuous task of applying gunwales and cap rails posted quite a challenge for me, up there with planking and reasoning with the fairer sex, quite tough. The top gunwale was easier in that my clamps (bulldog clips) could reach down and hold onto the gunwales without too much trouble. Although the upper GW didn't need pins, because I used pins on the lower I thought I better match them by doing same on top. I stuffed up though and realised that my eyesight is not as good as when I wore a younger mans clothes. I misjudged and in a few places drilled through the top surface of the deck :-( I am now a wiser man for it :-) The lower GW was trickier in that my clams couldn't reach down that far so I just used scrap bits of wood from the top GW to try and sandwich it in place (see pic above) and coupled with the pins thought I did a reasonable job. Cap rrails were also difficult in so much as the inside edge had to be flush with the edge of the bulwarks so that the stanchions will sit flush. In any event, my cunning plan to achieve this failed and I had quite a few spots with overhang. I had to delicately try and trim this back with my knife and then repaint which is more difficult when in place, I wish I hadn't had that fourth scotch but I think I pulled it off. Also with the CR's for some reason I found it difficult to get them to sit flush with the bulwarks and so I again used a couple of pins to help hold them in place. I would remove them after and paint over the holes. Again, my failing eyesight found me drilling off centre and popping out where they were unwelcome. Incidentally when drilling in this type of situation I use the Dremel with the flexible extension thingy. I find this very functional compared to using the pin vise to drill where I am more prone to breaking too many bits.

- 47 replies
-
- 5
-
-
- Modellers Shipyard
- Perseverance
- (and 1 more)
-
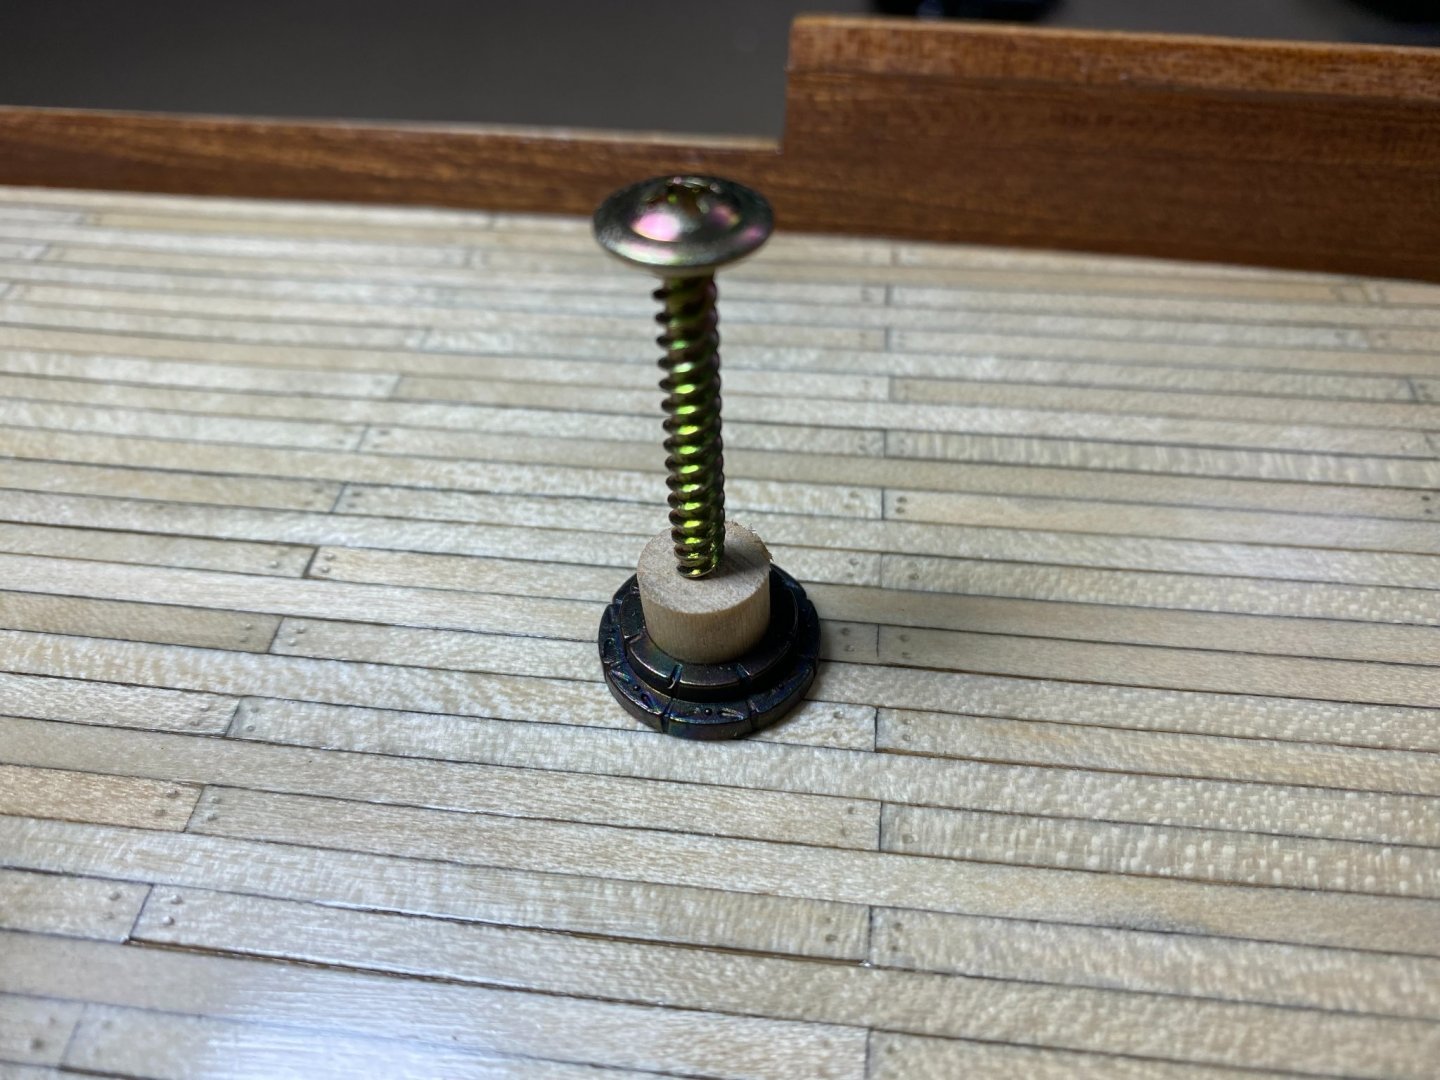
30/05/21 Fitted and glued on keel and stern post 31/05/21 Fitted and glued on bow post 01/06/21 - 05/06/21 Varnishing/sanding/varnishing/sanding of hull 06/06/21 Started on rudder 10/06/21 Fitted rudder, fitted mast heels. HTD: 231 Stern post and keel in place Bow post in place third coat of satin varnish applied Rudder attached Mast heels placed. Just used a piece of dowel to keep heel centred over hole while glue (CA gel) set. Had to cut the rudder stem short as it wanted to poke a hole in the transom otherwise. No real dramas this week. Again, I wish I had glued the keel, bow and stern pieces into place before I commences planking so that I had something to plank up to. The only issue I had was with the rudder in that when put in place the top of the arm wanted to poke through the transom. So I don't know what I did wrong to cause this but what I did to fix it was to cut it off short and glue on another piece as a sort of extension I guess at a more perpendicular angle. The mast heels in the picture are not the ones in the kit. The kit ones are just ply precut and not particularly attractive albeit functional. However, in the instructional video they used the same heels as seen in my picture. I bought them from ModdlersShipyard for about AU$8 the pair.


- 47 replies
-
- 3
-
-
- Modellers Shipyard
- Perseverance
- (and 1 more)
-
Just discovered your build and I am extremely impressed and inspired as I am building the same at the moment. If mine ends up looking even half as good as yours I'll be impressed. Eagerly awaiting your continuation
-
I ordered mine from Minyarts in Germany about four weeks ago (still at Frankfurt airport waiting for a flight down under). As of five minutes ago they have them in stock for 79Euro thingies.
-
So there are two youtube channels doing the Agora Bismarck build: John Builds Iconic Military Models & World of Wayne Wayne has two Bismarck builds on the go, the Agora one and the earlier Hachette model and for all intents and purposes, are virtually the same.
-
Now come on! That was the intention all along, wasn't it? Don't give us that virtuous nonsense about getting it for your son, we are all grown men (most of us) here and know all the excuses to garnish favour with those whom must be obeyed I've ordered mine a couple of weeks ago but still waiting for Mr DHL to come a knocking. I will be watching your progress.
-
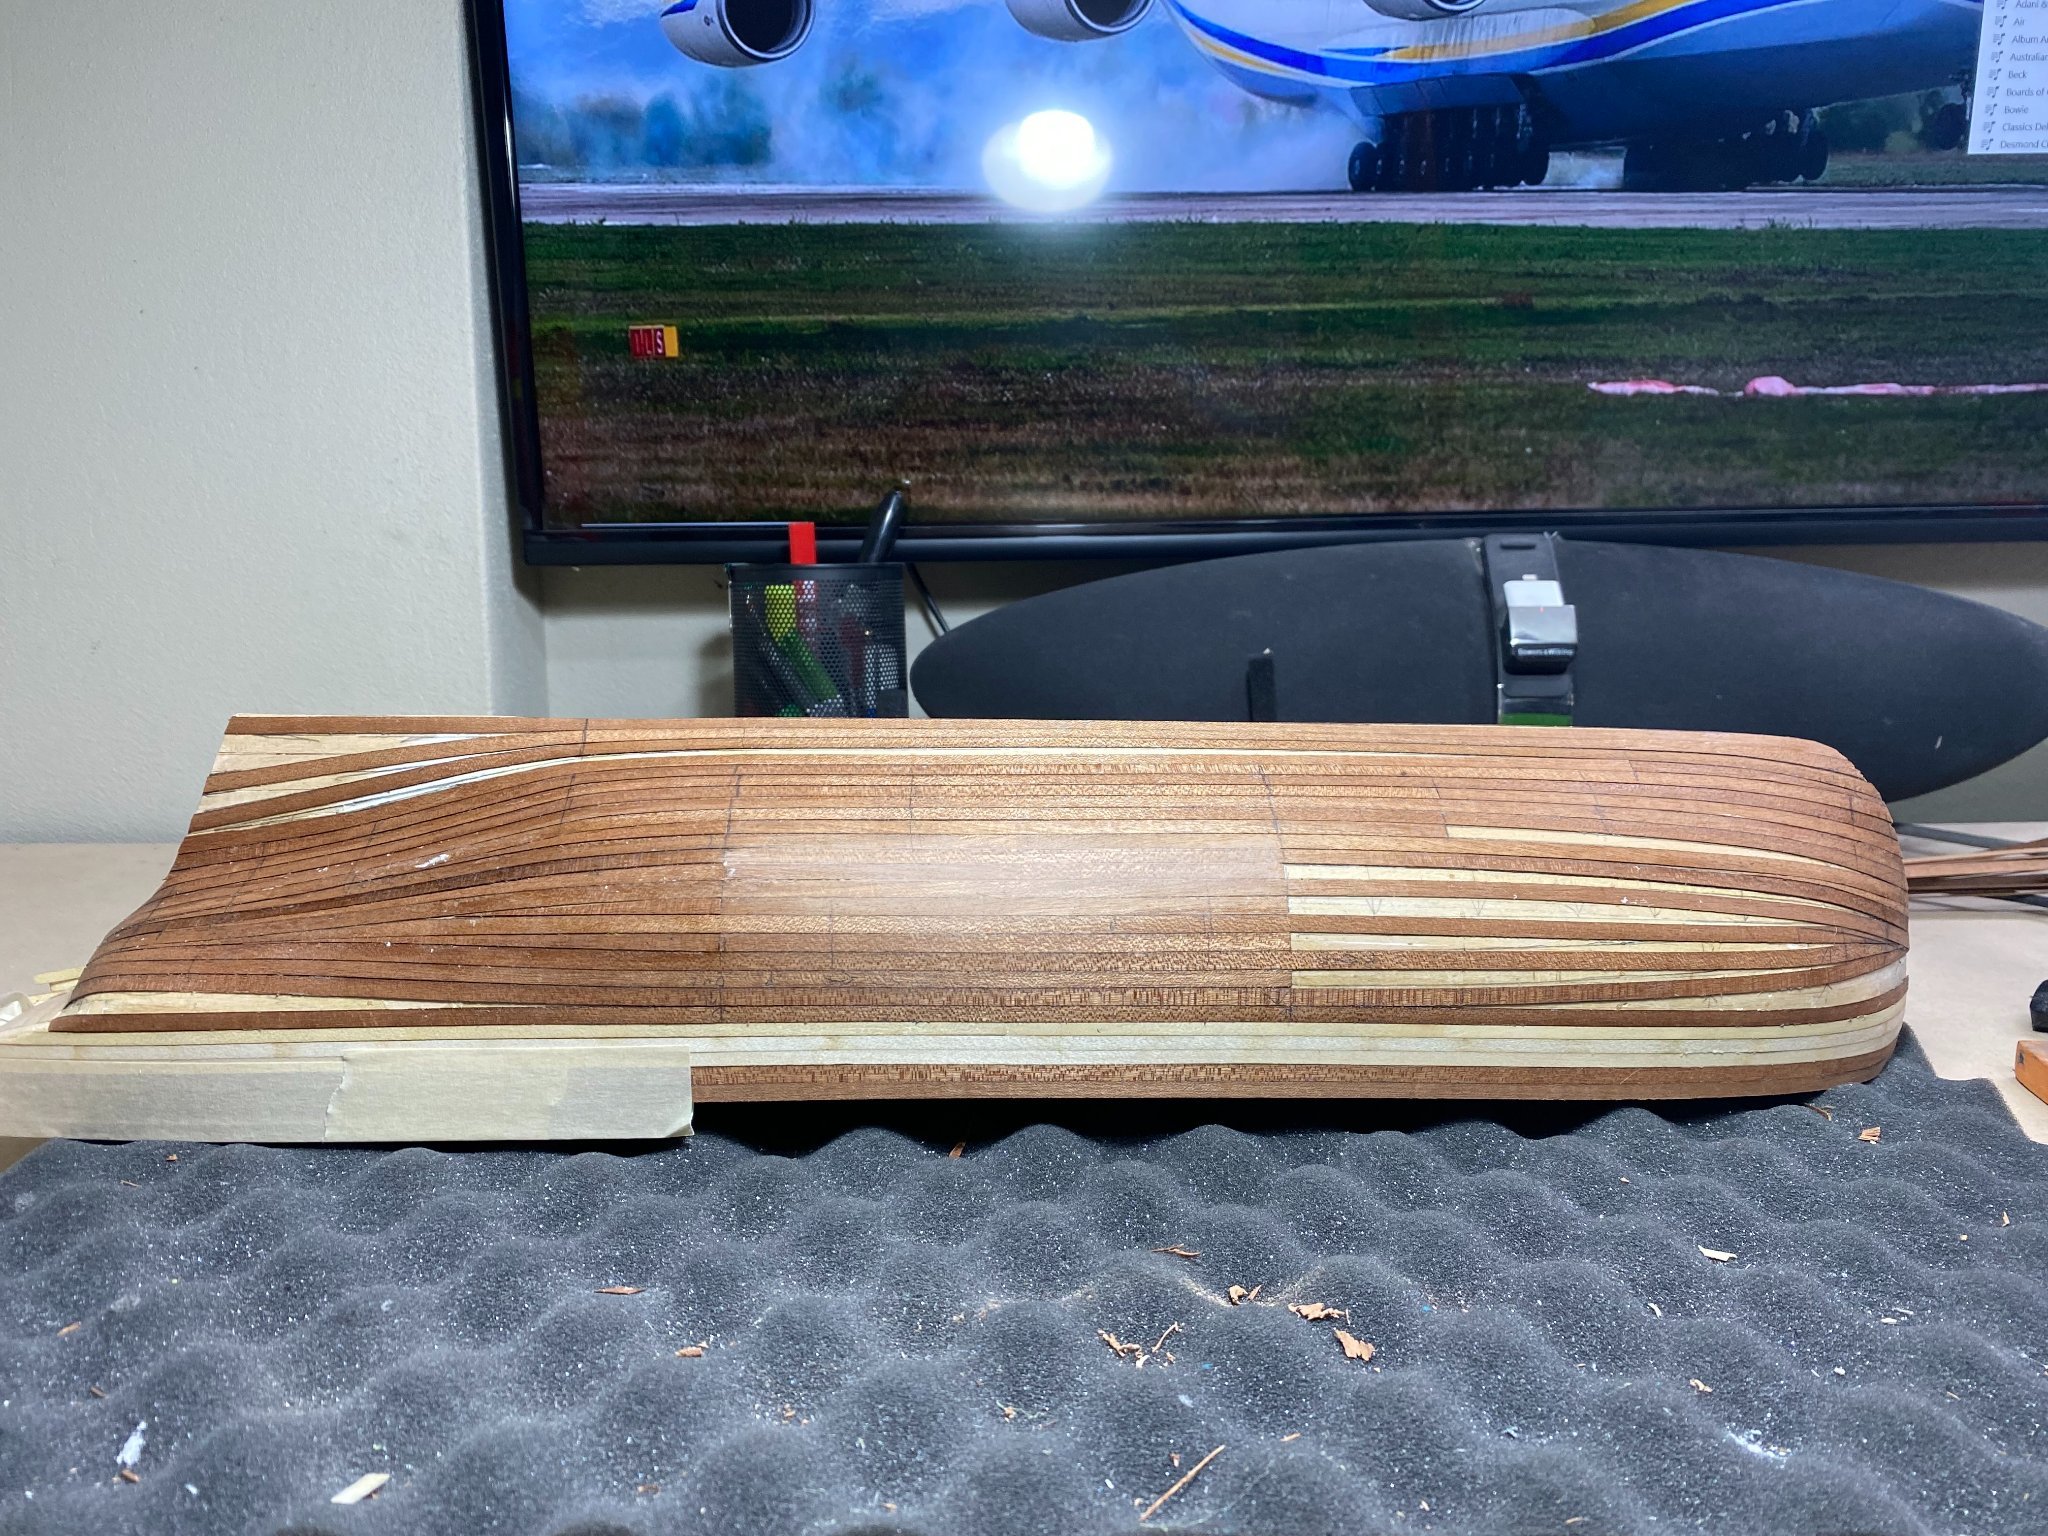
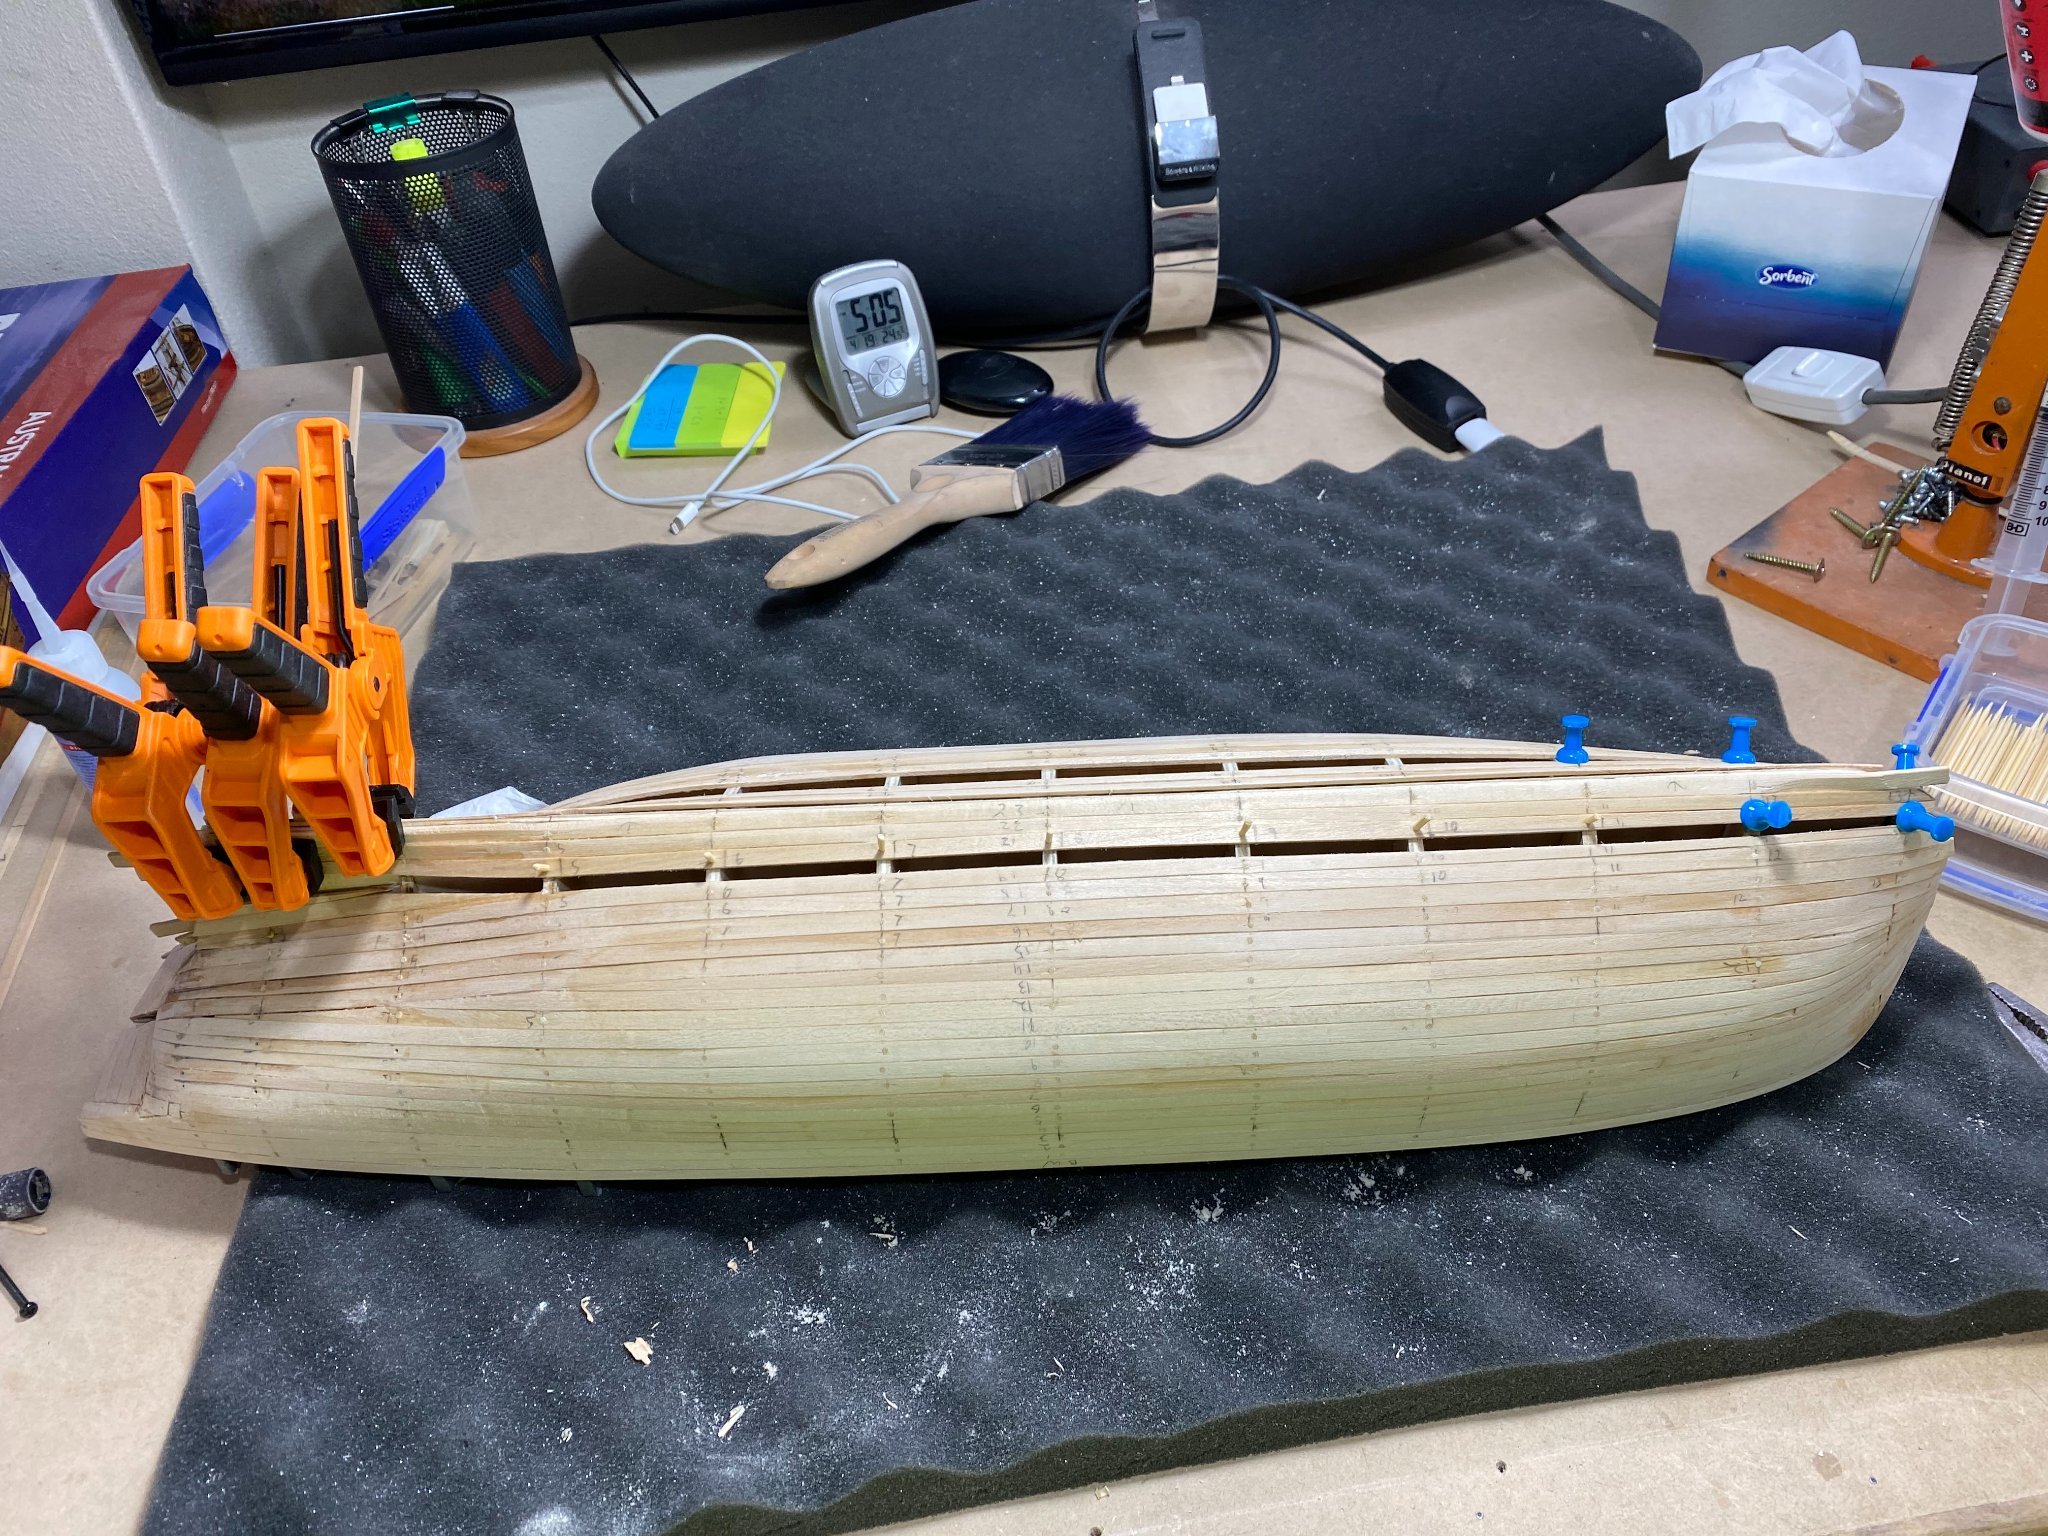
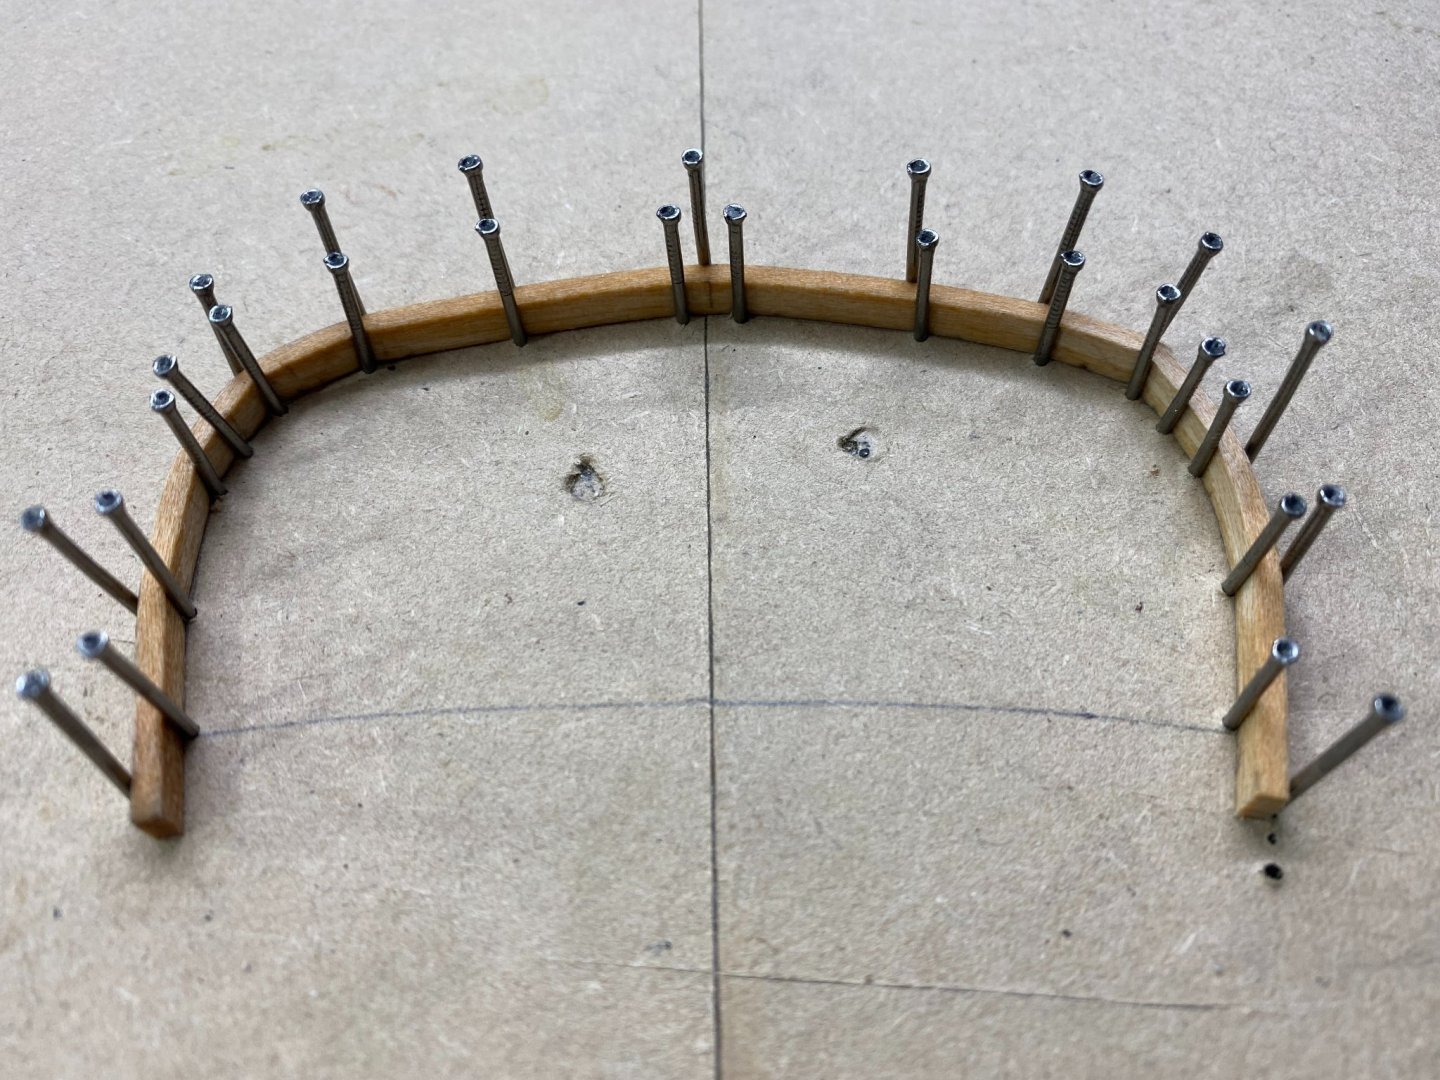
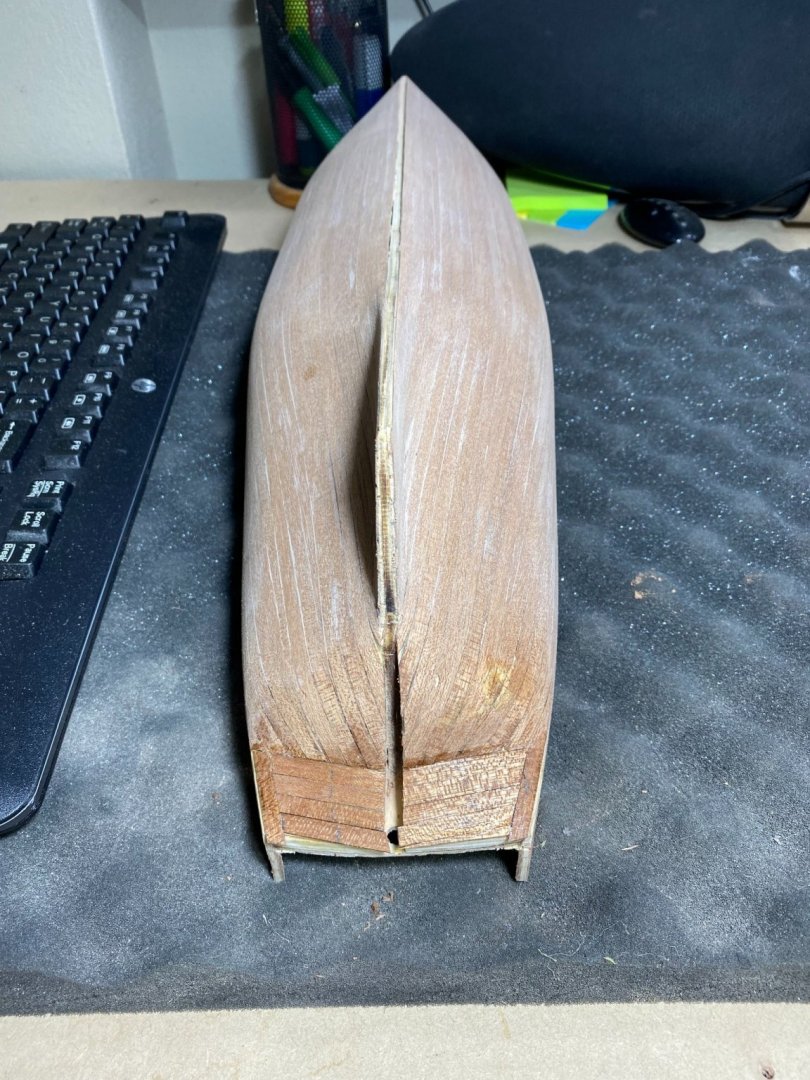
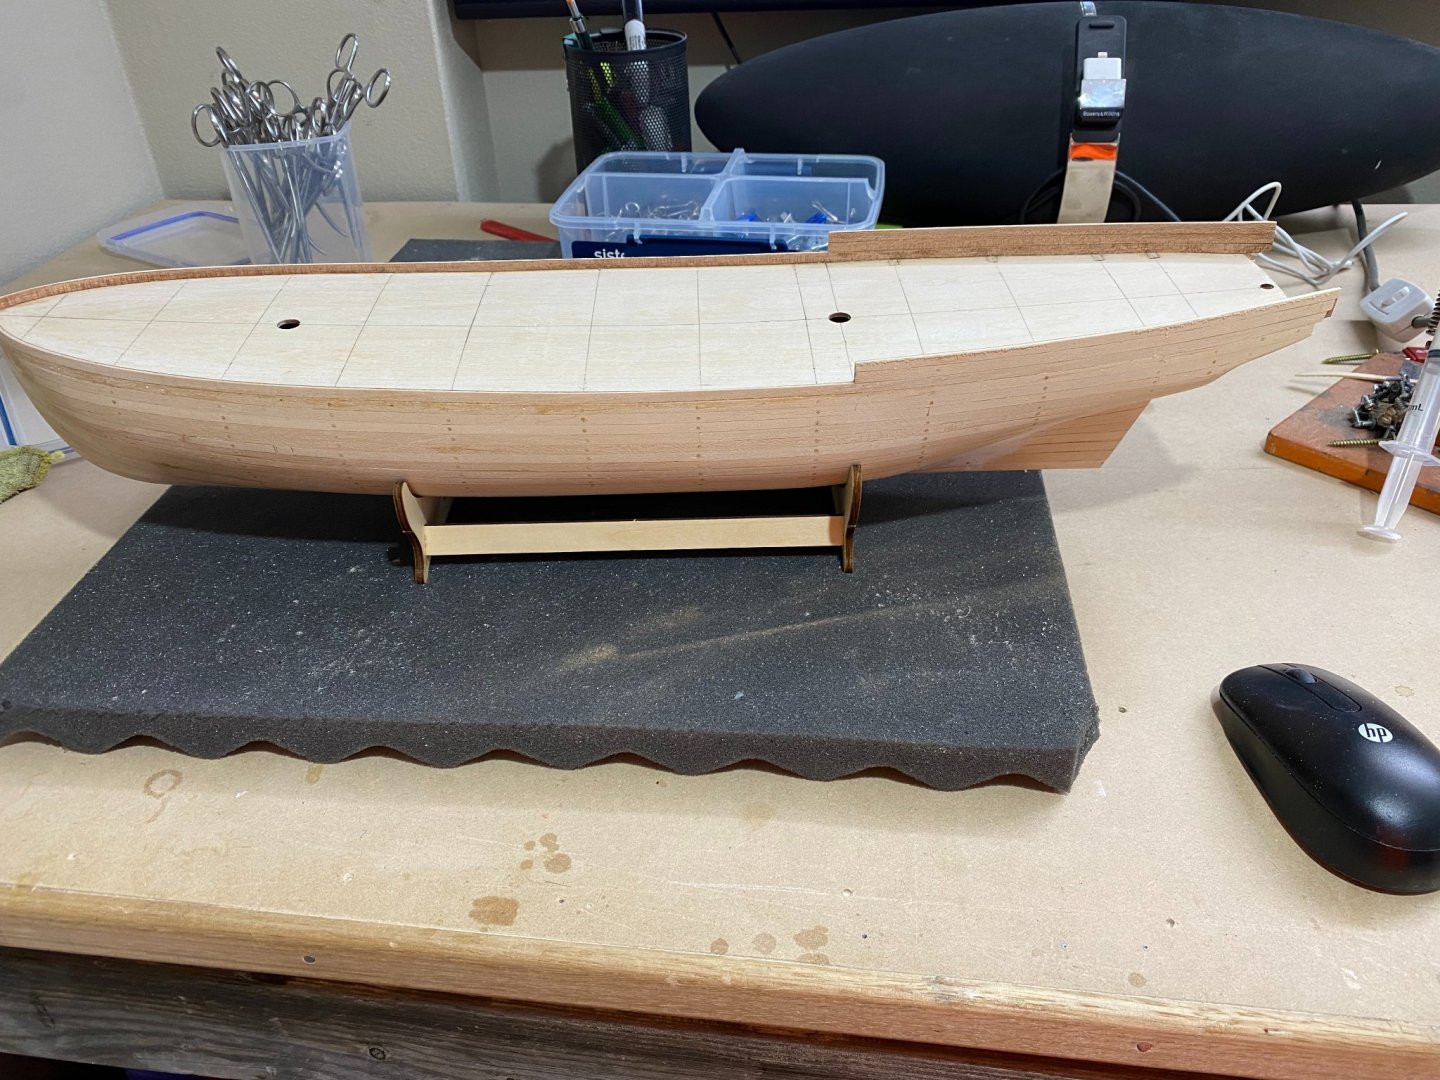
20/05/21 A generous coat of sand-n-seal was applied to hull before much sanding from 180 to 240 to 320 and up to 400 21/05/21 Applied first coat of satin varnish. Steamed and bent transom and set overnight before gluing 22/05/21 Re bending transom as not happy with initial efforts. Also made a fifth aft bulwark, pre laminated it as I thought that might make it easier to glue on. 23/05/21 Glued on 5th bulwark 24/05/21 Filled and sanded 5th bulwark and did my best to try and make it look like it wasn't just added on 25/05/21 Glued on transom 26/05/21 Removed and refitted transom as on close inspection was not symmetrical 27/05/21 Second layer planking to transom 28/05/21 Varnishing and sanding 29/05/21 Varnishing and sanding, repeat and rinse HTD: 221 Transom on, had to use a few toothpicks to get the transom to hold shape with the deck. Final coat of satin varnish, looks like gloss but only because it's still wet. Close up of the satin finish. One model ship builder I follow on YouTube insists on using full gloss for his hulls and everything else which I feel is the equivalent of SCREAMING. Each to their own I know but I prefer the gentle lustre of the satin finish. This was a pretty bad week in terms of the progress. I had difficulty with the transom which required removal, rebending and refitting. The bulwark saga revisited as I discovered I needed yet another row on the aft section. This was a lot more difficult for my lack of experience to accomplish but I kept reminding myself this was a learning curve and a mere stepping stone to bigger and better things. Nowhere in the manual or video did it specify how many planks above the deck were required. I worked it out myself in the end by skipping forward in the instructions and used the stanchions as a guide. Because the second layer planking is only .5mm thick the sanding of the curvy bits on the aft of the hull started to reveal the first layer in one spot. I patched up using a Mahogony coloured wash and end result was satisfactory for me.

- 47 replies
-
- 5
-
-
- Modellers Shipyard
- Perseverance
- (and 1 more)
-
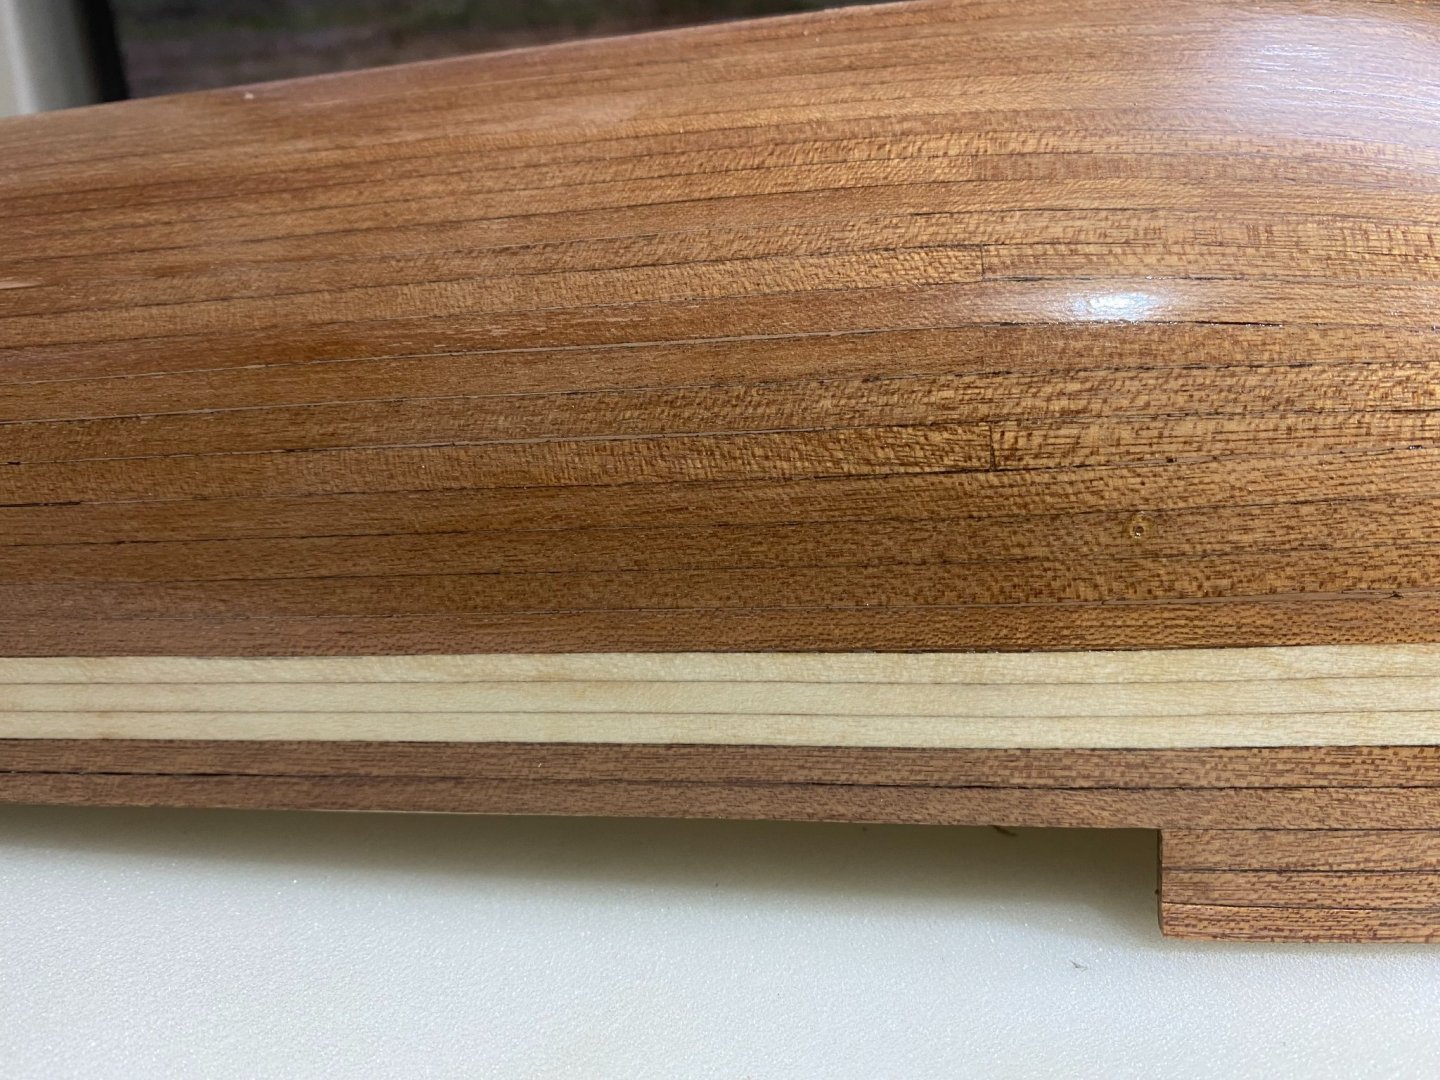
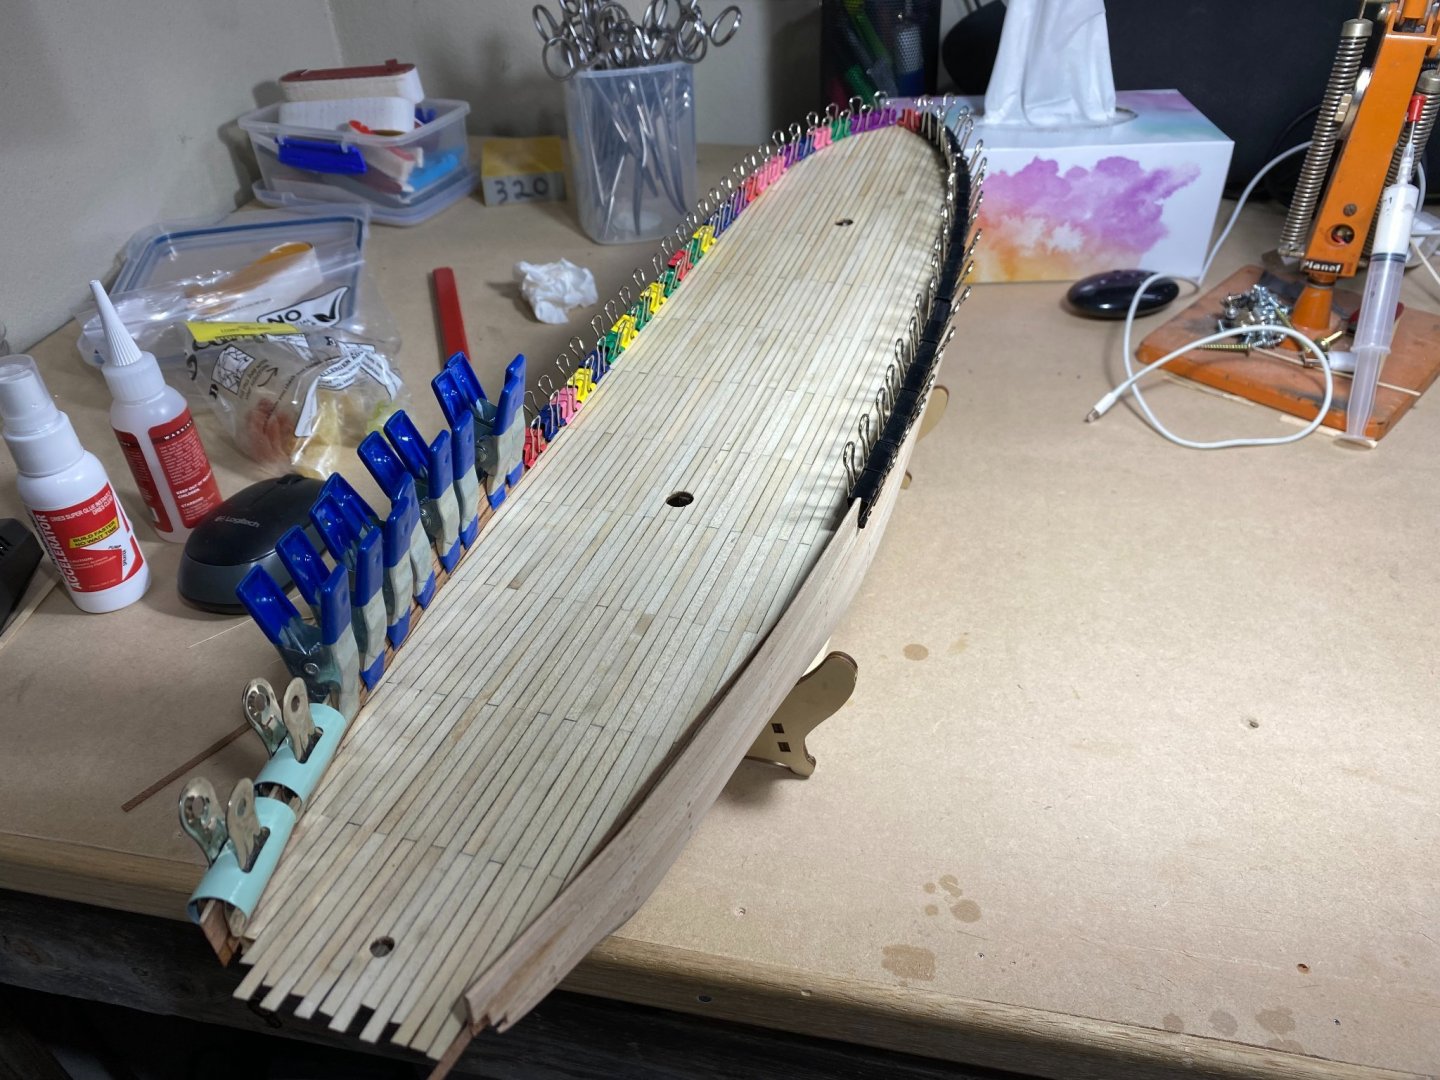
08/05/21 Second layer planking commences 09/05/21-18/05/21 Second layer planking continues HTD: 202 First five or so of the second layer planks. 9 rows down On the home straight Filling and sanding and also planked under the transom area. Second layer planking completed without too much difficulty. I used contact cement so great care was needed when laying the planks .5mm Mahogany. I tossed aside my dressmakers tape and subscribed to one of OcCre's training videos techniques, in particular the following two videos were of great help to me. I wasn't as game as the instructor doing ten or fifteen at a time, instead I plodded along one at a time. HULL 019- How to place the second hull lining 1. ENDURANCE - Naval modeling & HULL 020- How to place the second hull lining 2. ENDURANCE - Naval modeling


- 47 replies
-
- 2
-
-
- Modellers Shipyard
- Perseverance
- (and 1 more)
-
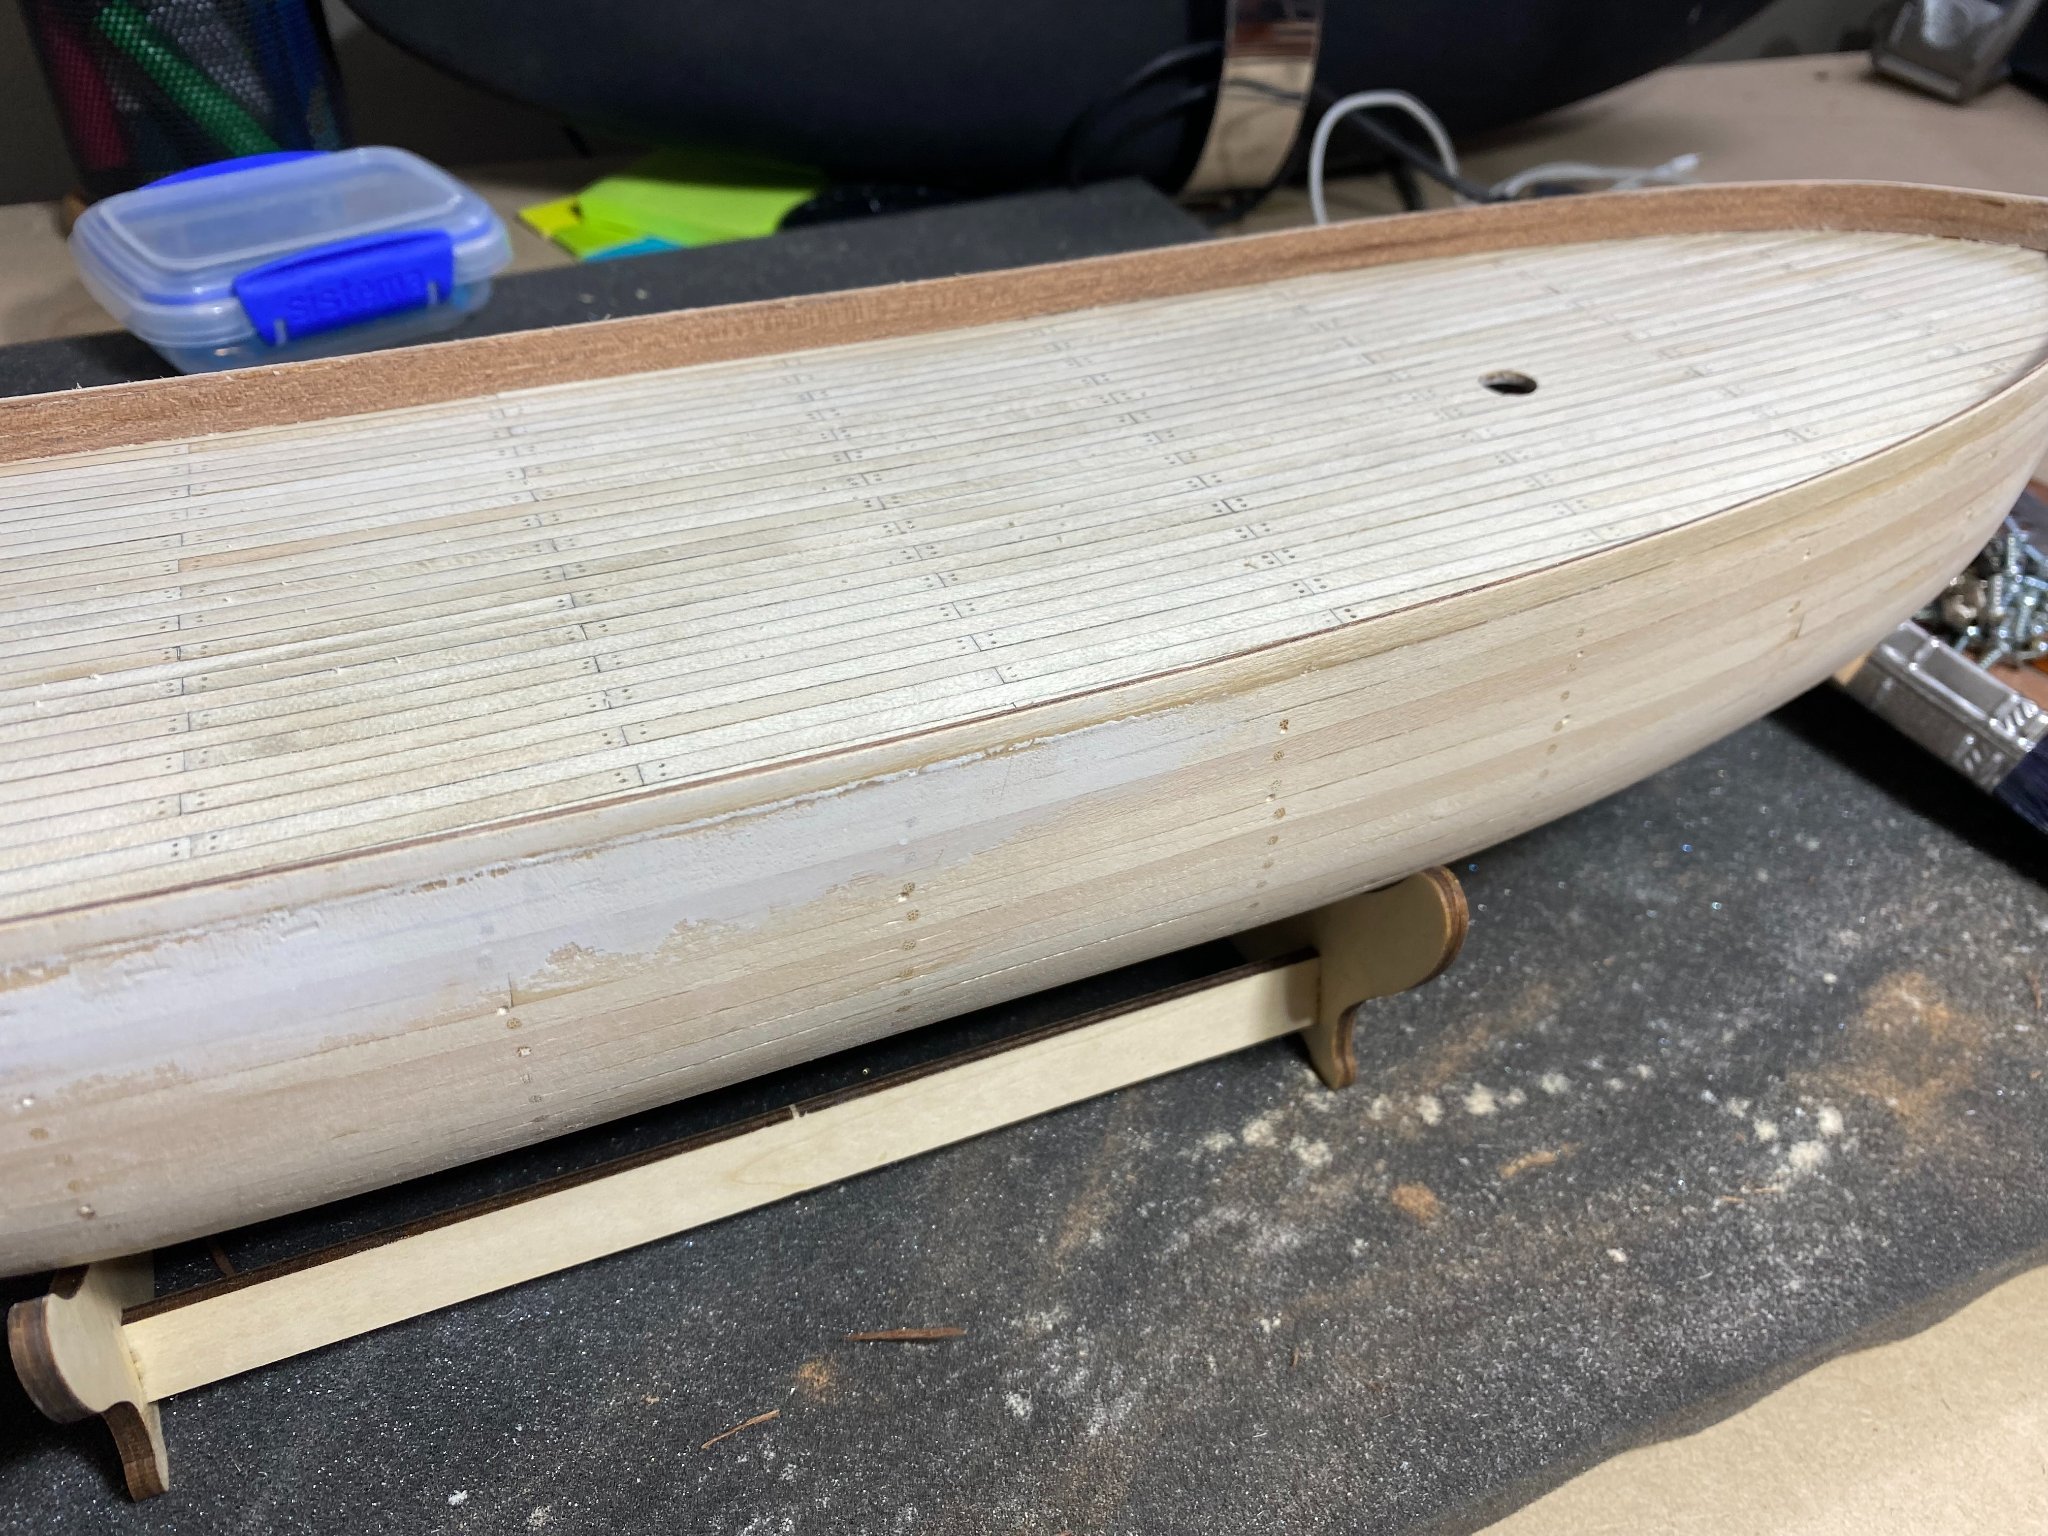
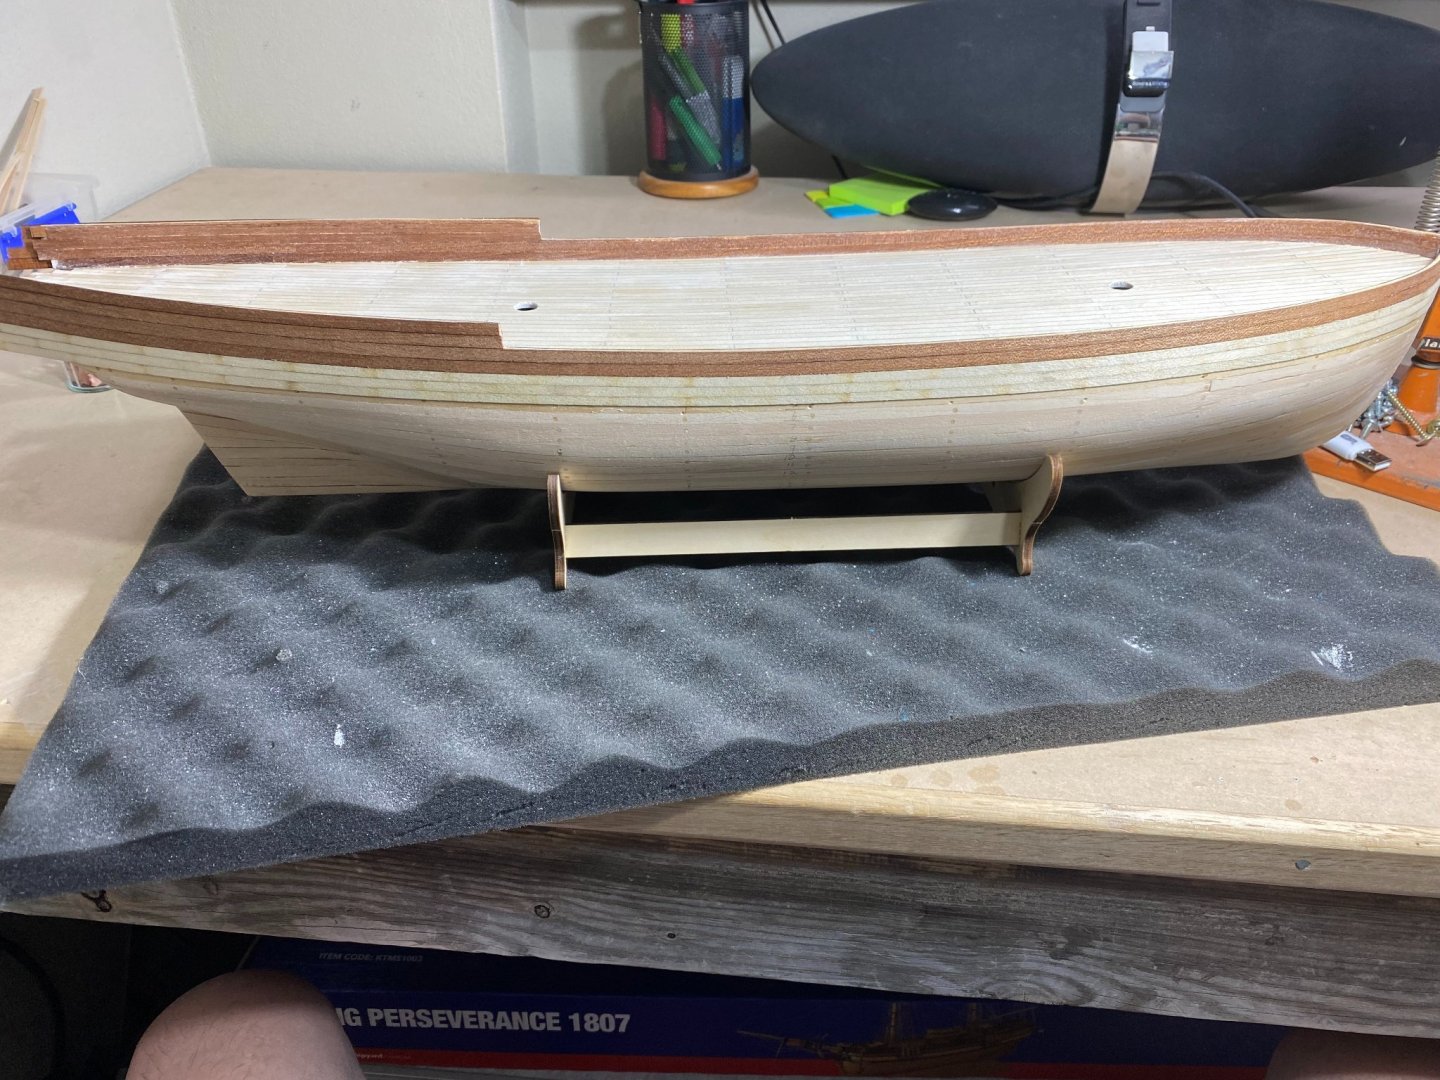
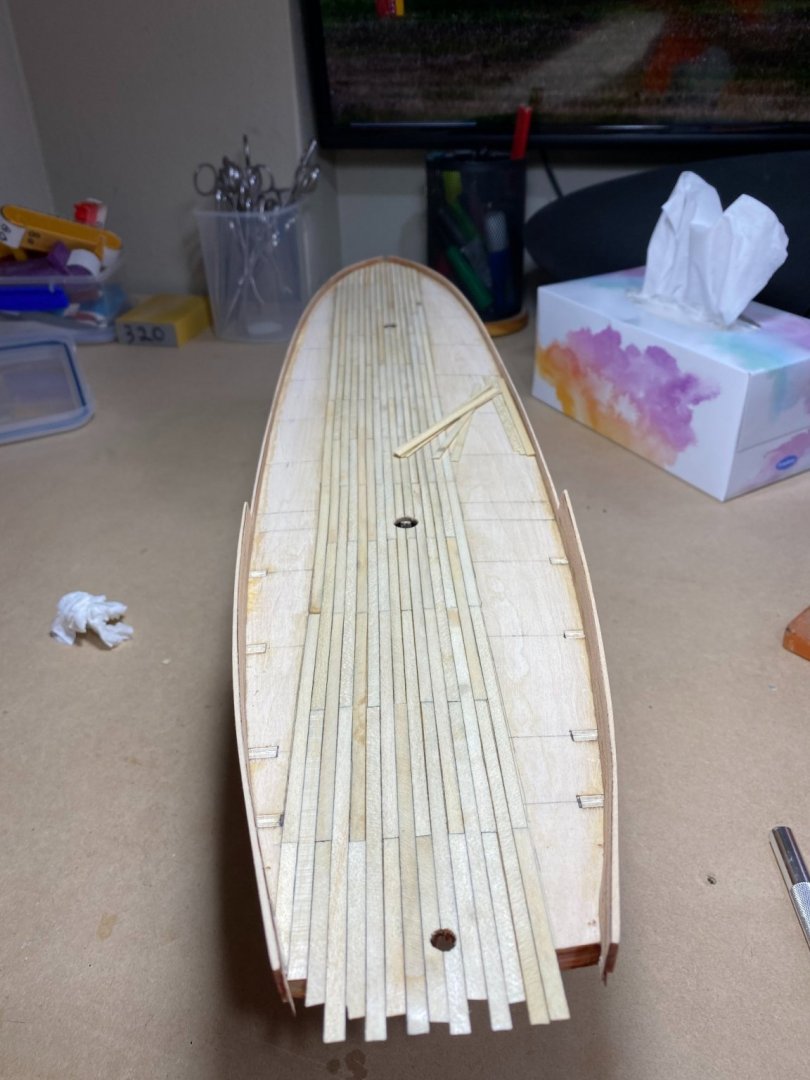
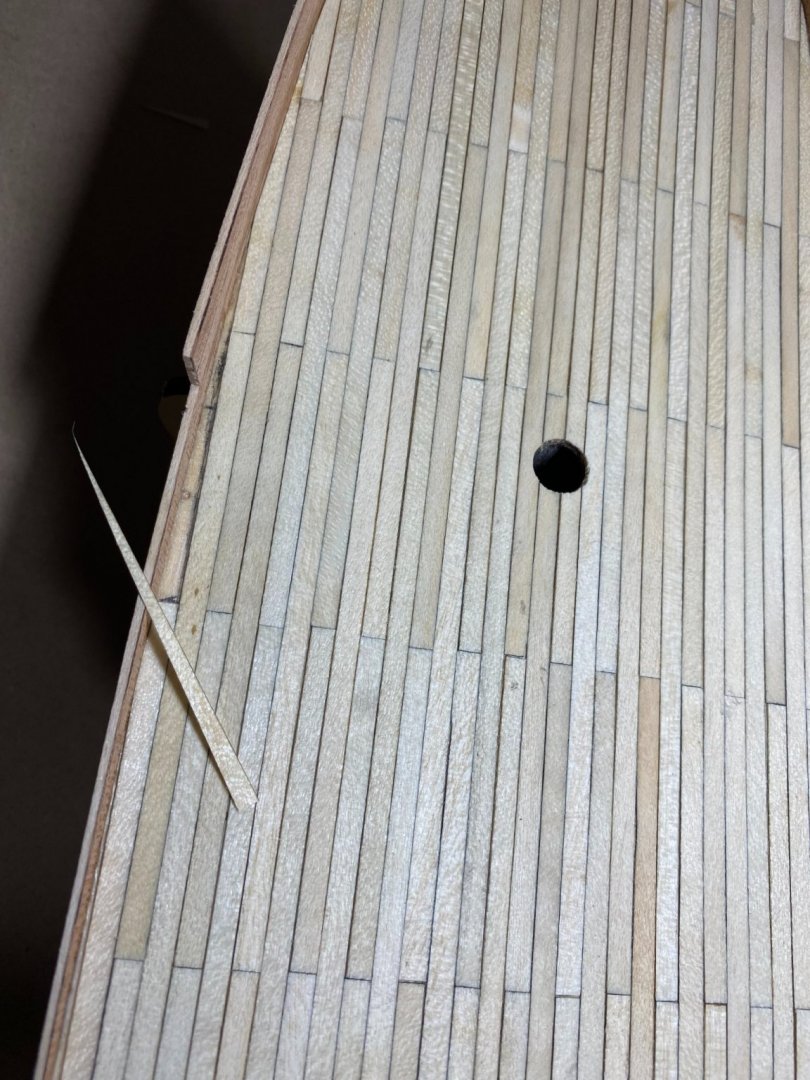
28/04/21 - 30/04/21 Deck planking 01/05/21 Put another layer of planking on inside of bulwark to help cover gaps between deck planking and bulwark 01/05/21 Placed nail details on deck planking using a soft led pencil and gave it three coats of satin varnish 02/05/21 - 08/05/21 Spent a few days adding more bulwark planks that I missed earlier HTD: 171 Deck planking continues Final deck plank Putting another layer of mahogany over the inside of the bulwarks to help cover any slight gaps where deck planking meets bulwarks That nasty harsh light exposing some gaps between planks. I found it difficult to find planks of uniform width most of them had imperfections in width, a bees dick here, a poofteenth there. Just about ready for second layer planking :-)


- 47 replies
-
- 5
-
-
- Modellers Shipyard
- Perseverance
- (and 1 more)
-
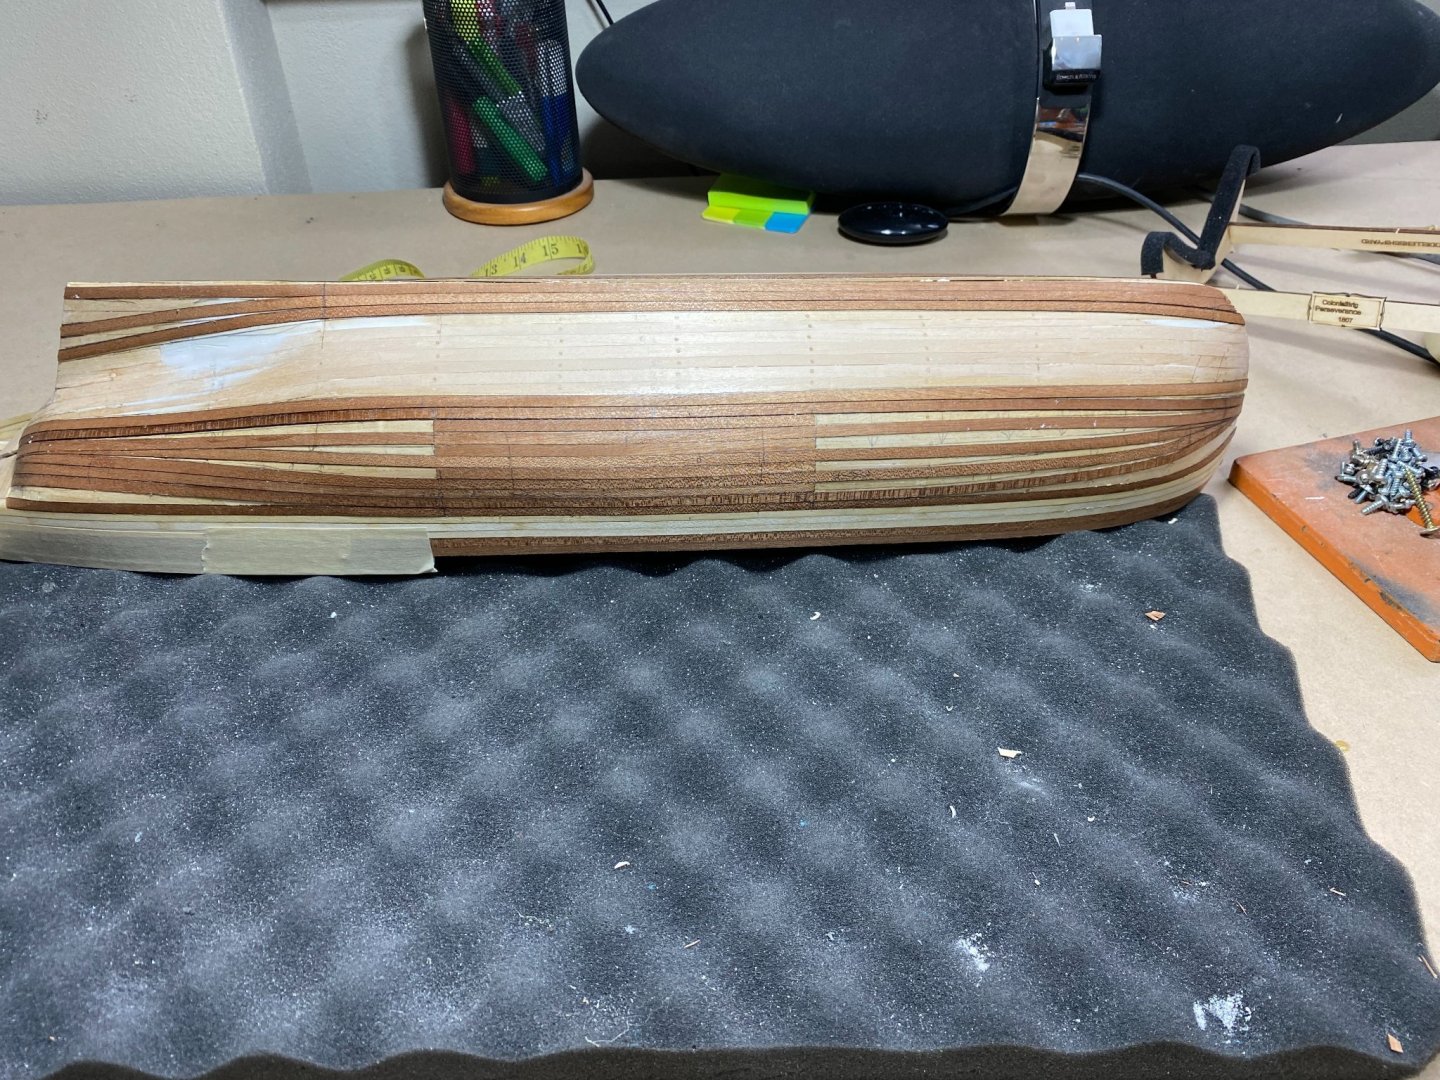
23/04/21 Finished planking, yesssssss. 24/04/21 Filling and sanding hull. 25/04/21 Added bulwarks. 26/04/21 Started preparing deck planking 27/04/21 Started deck planking HTD: 141 Ended up filling that void just to the bottom right of that right hand clamp. I used PollyFilla, I figgured if it's good enough to fill cracks and gaps on plaster walls, it's goog enough for my hull, I hope. tarting the sanding process. A combination of using a small power sander and also a lot of hand sanding. More or less finished hull sanding, added bulwarks. Ready for deck planking and as you can see I have already performed 2nd layer planking (mahogany) on inside of bulwarks. Preparing deck planking (Silver Ash) Deck planking commences. Some nice progress this week. Got the hull finished and added the bulwarks. Made a big mistake in not adding enough bulwarks owing to misinterpretation of the instructions/video-guide and visual queues. This would come back to haunt me later and take a week or so to correct. I am but a mere male after all :-( It was nice to start the deck planking, a nice change from days of sanding. I set up my cutter with a 100mm stop and cut my planks, stacked them side on in bundles of 10 or 15 and did the pencil thing. I proceeded to lay them in a two offset pattern but maybe next time I might try a 3 offset. The manual suggested the 100mm strips while the video used entire lengths and pencil in the butt joins. I noticed many people do planking with PVA, CA but I opted for the video suggestion of contact cement. I had to be very carful when laying the planks as it was unforgiving if a mistake be made. The Silver Ash has a lovely pattern and came up ticketyboo with some fine scraping (no sanding) and a few coats of satin varnish.


- 47 replies
-
- 2
-
-
- Modellers Shipyard
- Perseverance
- (and 1 more)
-
3 for a penny :-)
-
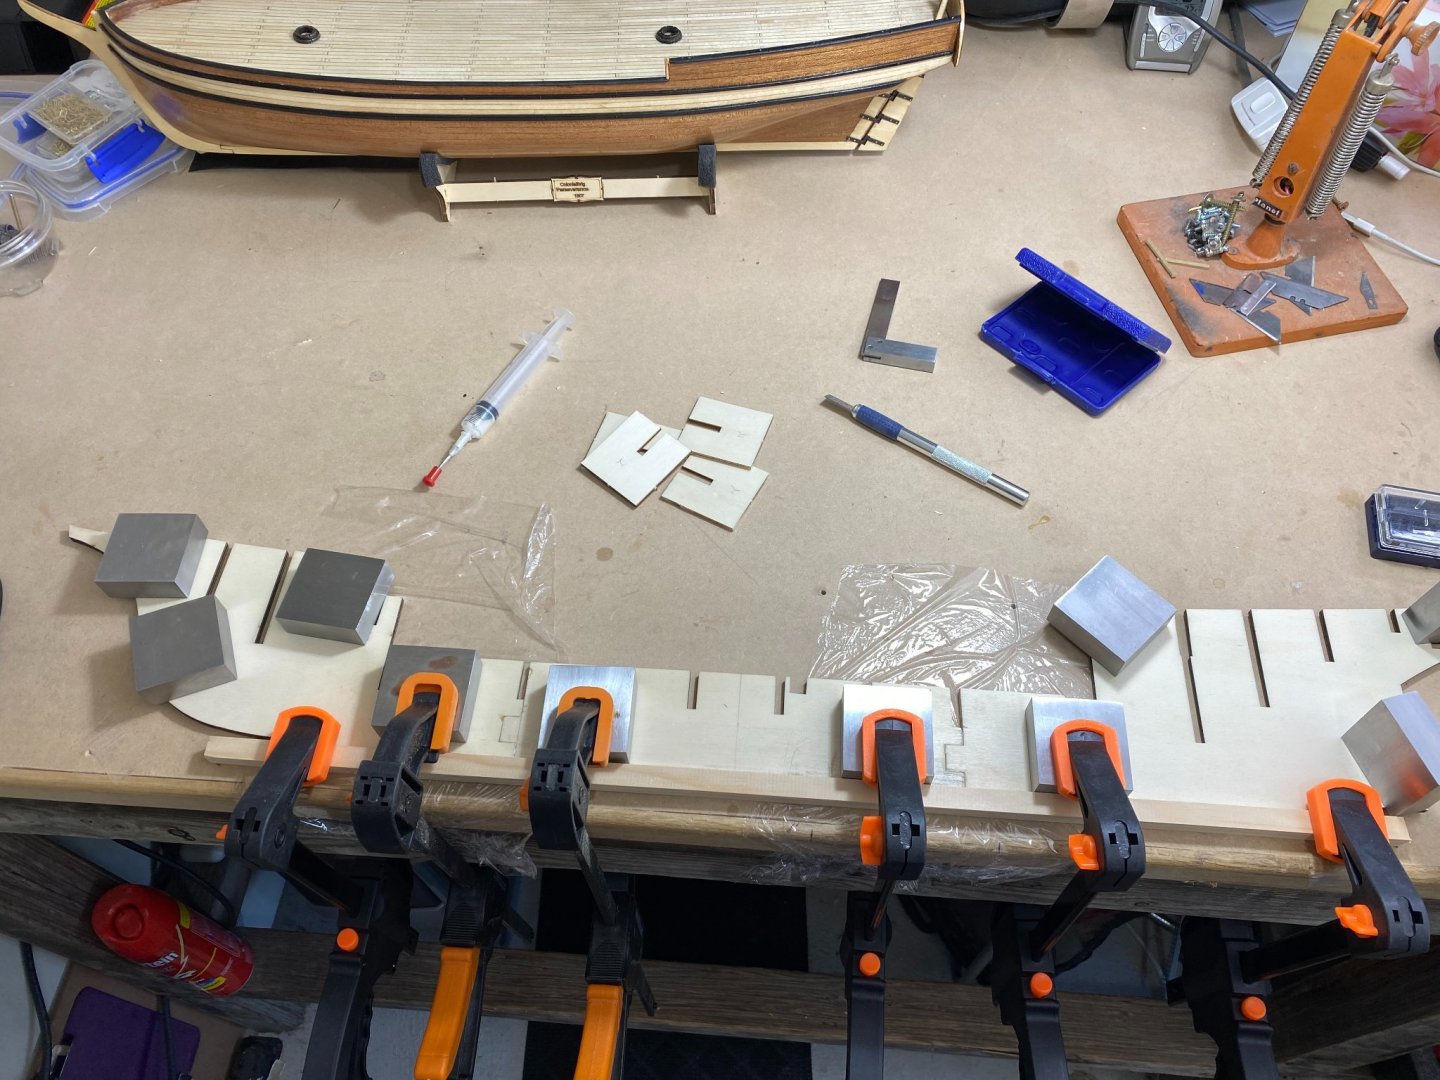
26/06/21 Laying the keel, as it were. HTD: 1.5 Laying the keel The plywood keel sections were laser cut out of square. A lot of filing and sanding in store I suspect.
-
Incidentally, if anyone knows of any books on the Gorch Fock, in English, I would be most obliged. There are countless books on the subject in German which is of no use to me and although she, with whom I occasionally watch TV is German, would get pretty fed up translating all the captions for me. It's hard enough getting her to teach me German swear words.
-
Hi there This is going to be my third build and although I have just started it today It will be a slow progress initially as my first build (and now second build 14/08/21) is still in the works but will flip from one to the other for variety. I have always had a love of training ships, I find them so majestic and alluring. So my first build, the Colonial Brig Perseverance build log is intended to be a stepping stone, as it were, to this build, learning from my mistakes along the way and in a bid to learn more before fully immersing myself in this, I am starting a new build, the brigantine Matthew Turner. The OcCre Gorch Fock was available from the mob I purchased the Brig Perseverance from at a considerable ransom of $916AU, a sizeable sum by any account. Surfing the web, I spotted one from a model shop in Europe for only $612AU plus $64AU for postage, so in a moment of complete weakness I parted with the hard-earned and dutifully sat by the mailbox in anticipation of an early arrival. I shouldn't have bothered, the $64AU bought me a six week delivery time, not good enough for that much of my hard-earned. The old "Covid" excuse was peddled to excess. Anyway, it arrived intact and I was suitably thrilled on it's arrival. I promptly started a stocktake. There was a considerable shortfall of many parts and there was one part in particular that should have had 32 pieces but had none. Anyway, I dutifully filled out the online form for the missing parts but have heard nothing from them whatsoever, no acknowledgement, no nothing, not good. Quality at first glance appears to be good, most of the timbers appeared to be uniform although some of the precut ply seemed a little fragile, surface layer on some pieces seem to easily chip away. Anyway, here I go, please feel free to comment or point me in the right direction if I appear to be veering off course.
-
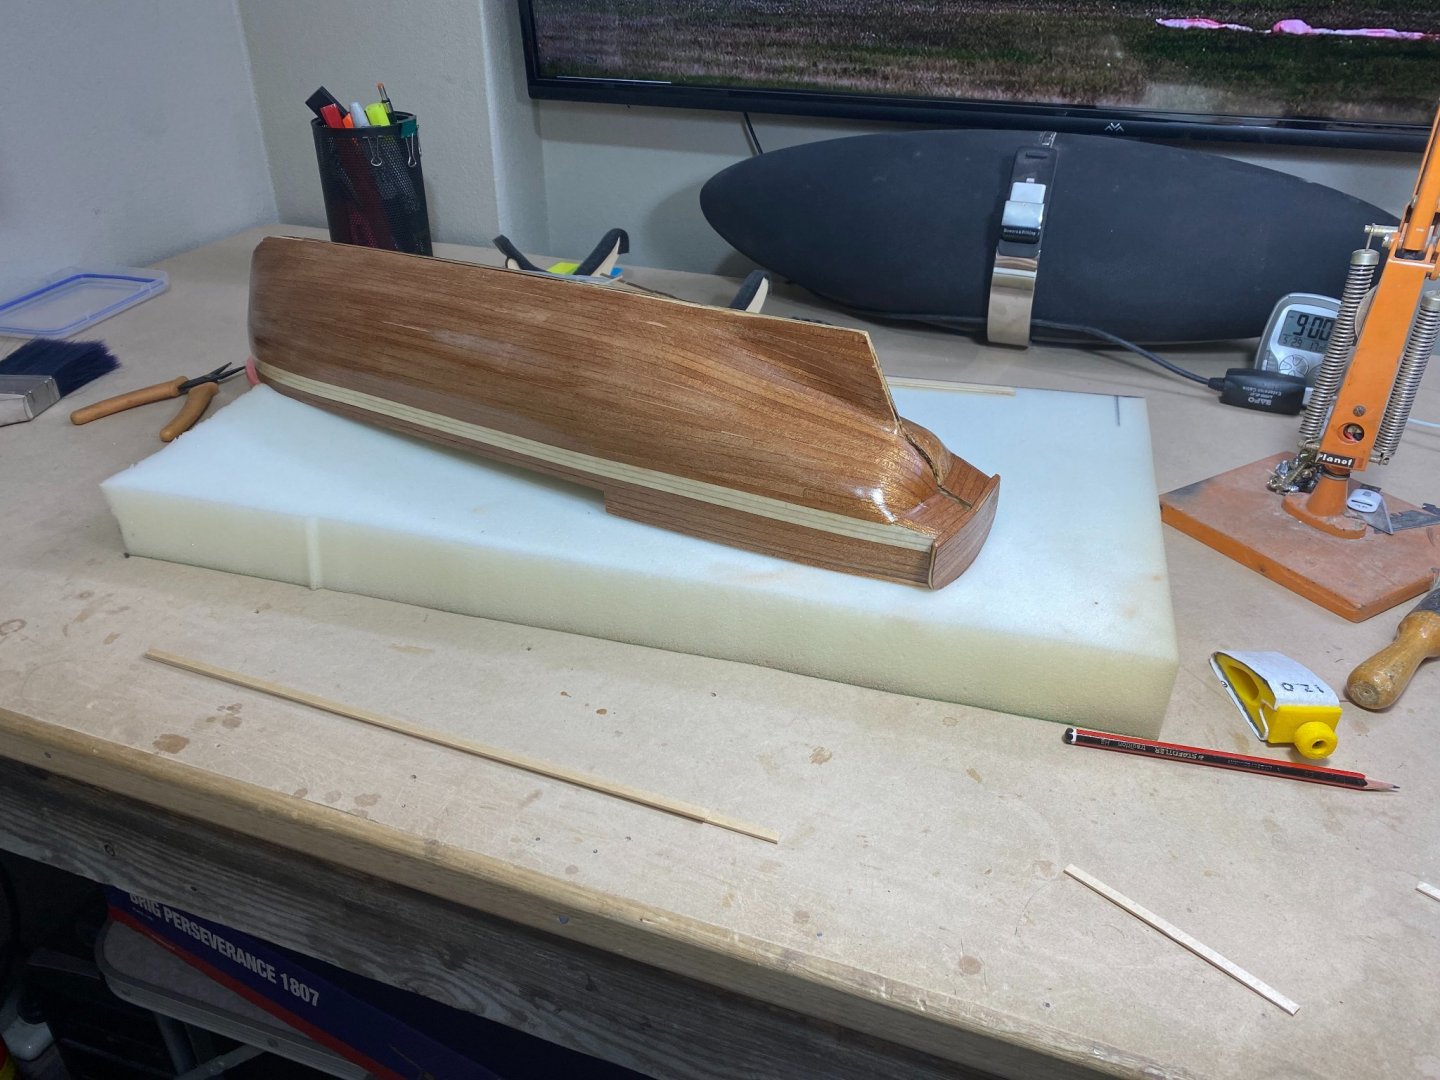
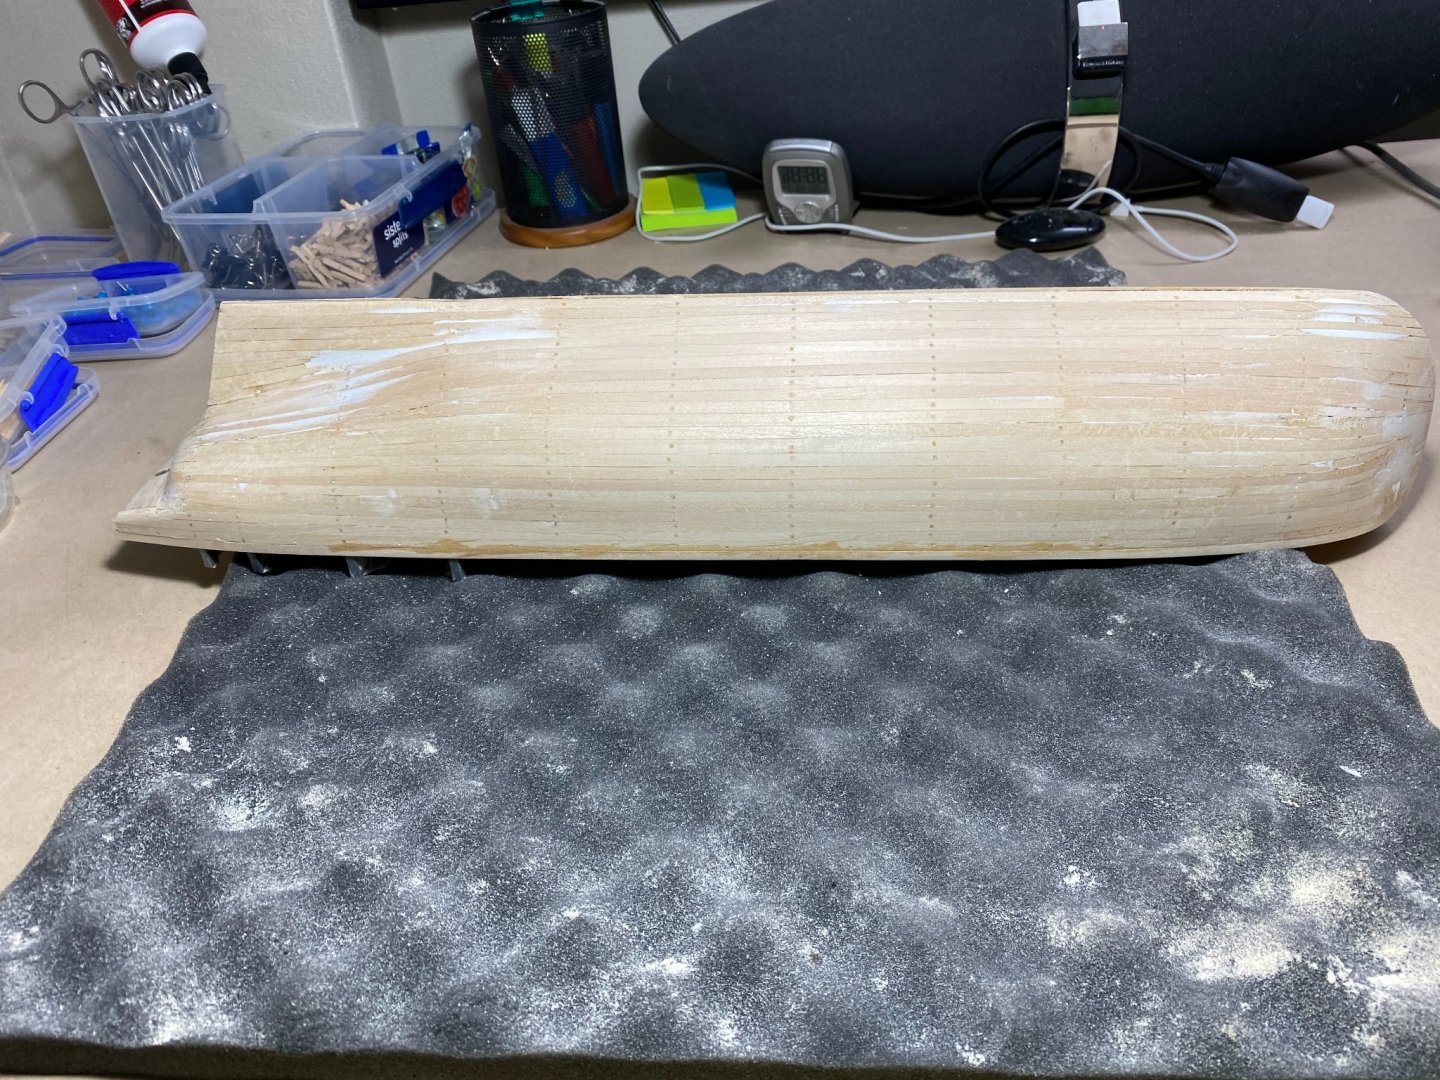
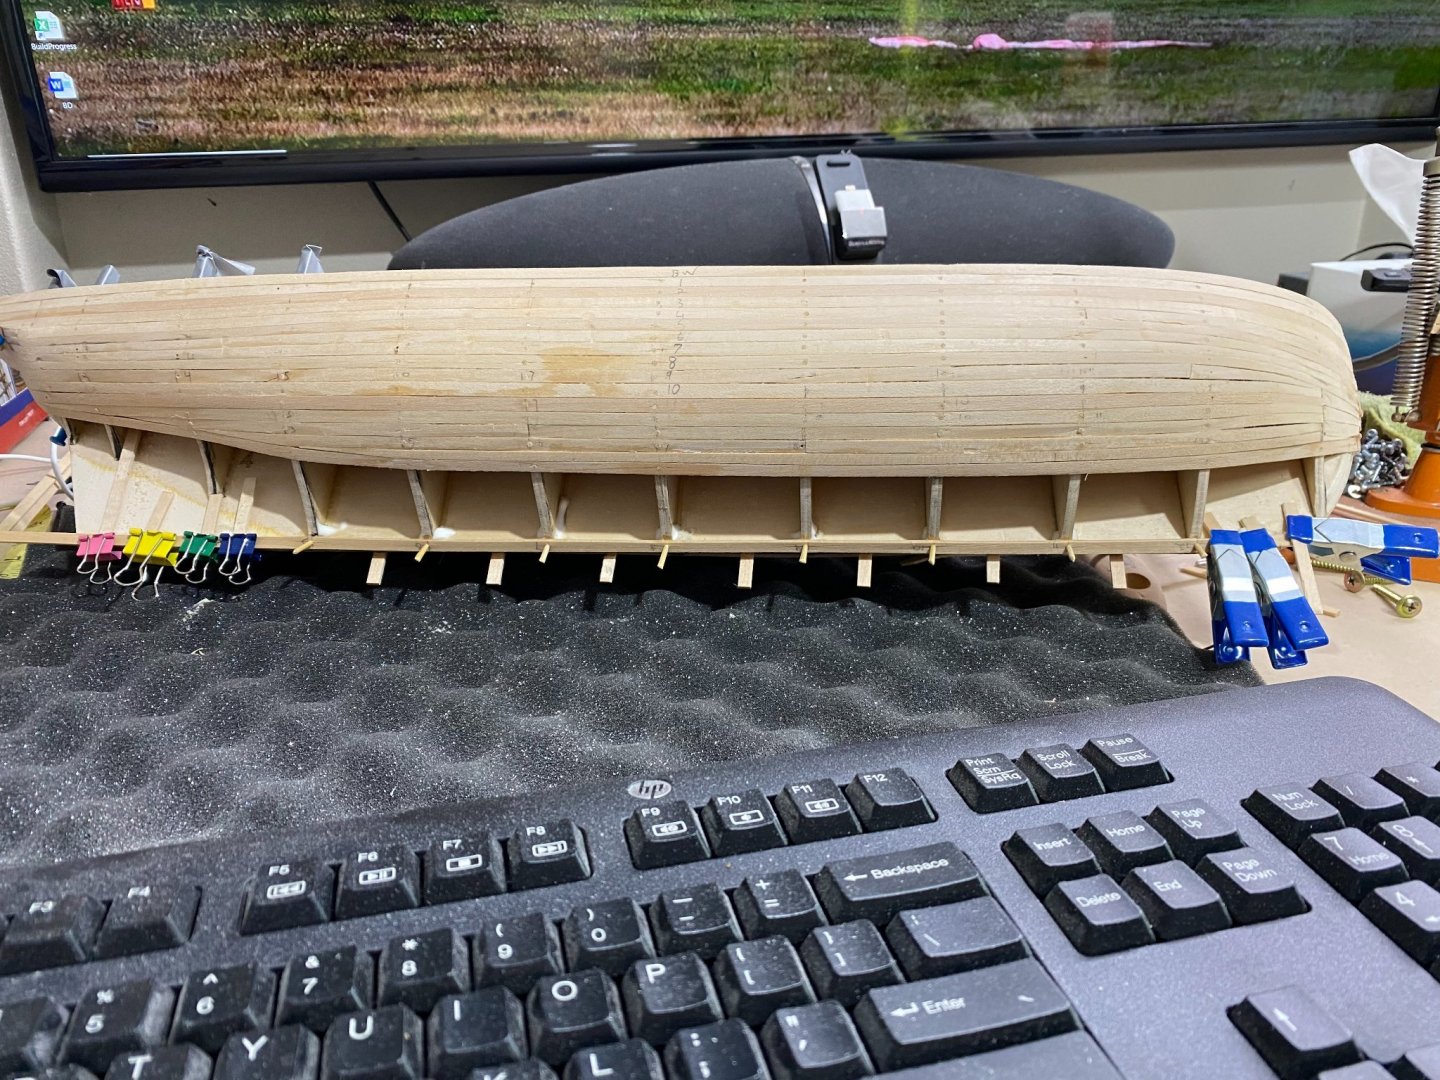
14/04/21 -20/04/21 Yeah right, planking. HTD: 120 Garboard plank in place Garbourds in place And the planking marches on On the home straight now No real dramas this week. The only thing I was uncomfortable with was laying the garbourd plank. To me, this was going to make the fitting of the keel tricky, and it was. Had the keel been placed first then I would have had something to plank the garbourd up to.


- 47 replies
-
- 5
-
-
- Modellers Shipyard
- Perseverance
- (and 1 more)